Yamaha Corporation After Touch Magazine Archive Feb 1989 Issue 02
Yamaha Corporation AfterTouch Magazine Archive Feb 1989 Issue aftertouch-1989-02 Yamaha Corporation - AfterTouch Magazine Archive - Feb 1989 Issue
Yamaha Corporation AfterTouch Magazine Archive Feb 1989 Issue aftertouch-1989-02 Yamaha Corporation - AfterTouch Magazine Archive - Feb 1989 Issue
User Manual: Pdf Yamaha Corporation AfterTouch Magazine Archive Feb 1989 Issue Yamaha Corporation - AfterTouch Magazine Archive - Feb 1989 Issue
Open the PDF directly: View PDF ![]() .
.
Page Count: 20
-
-
-- -
----
----
-
--
--
-
--
- -
--
--
- - --
- -
---
- - -TM
THE OFFICIAL PUBLICATION
OF
THE
YAMAHA USERS
GROUP
.
~
17
~·
--~~~--
----
~
FEBRUA
RY
1989
YAMAHA
®
THE
WINTER
NAMM
SHOW, held Janu-
ary 20-22
at
the
Anaheim
Convention
Center, proved to be busy for
the
people
at
the
Yamaha Corporation
of
America exhibit. In
addition to showcasing
the
complete line
of
Yamaha products, the exhibit was
the
center
for
a number
of
other
activities, including demon-
strations
by
Yamaha's
team
of
Product Special-
ists, autograph sessions with a
number
of
top
artists, three days
of
performances
by
Chick
Corea,
and
a special
Cl
giveaway.
All four
of
Yamaha's DMI Product Specialists,
Phil
Clendennin,
Danny Hoefer, Mark Santos,
and Kevin Stratton, were
on
hand
to demon-
strate
the
new DMI products. (For more
on
the
Product Specialists, see
the
interview in the
January 1989 issue
of
After Touch.)
Drummers
on
hand
for
autograph
sessions
included Bobby Blotzer
of
RATT, LA session
player Vinnie Colauita, Alex Acuna, Peter Er-
skine,
Aresnio
Hall's
drummer
Terri Lyne
Carrington,
Dave
Garibaldi
from
Wishful
Thinking, and
the
drummer in
Chick
Corea's
current band, Dave Weeki. Also
on
hand
to
sign autographs were bassists Jeff Berlin,
an
LA
session player, Verdine
White
of
Earth,
Wind
and Fire, and
the
bass player for
Mr.
Big, Billy
Sheehan.
Visitors to
the
exhibit were treated to perfor-
mances
by
The
Chick
Corea Akoustic Band.
Besides
Chick
Corea, who used a Yamaha MIDI
grand, KX88, KXS, TX16W,
and
MC2404,
the
group consisted
of
John
Patitucci, who played
an
LBS
custom-S string bass, and Dave Weeki,
who played
on
Tour Series Custom drums
in
Cobalt
Blue with
the
SD295 Metal Snare and
DSP850 double bass drum pedal. They did three
shows a day,
and
had
standing-room
only
crowds for all performances.
The
sound system
was
all Yamaha, including a PM300 mixer for
the
house sound and new
':A..ST"
loudspeaker
systems.
AST
stands for
Active
Servo
Tech-
nology, a newly-developed Yamaha technique
that
provides
exceptional
low
frequency
performance
with
a relatively small speaker
cabinet-attaining
sub-woofer-type
bass
response without
the
mass associated
with
exist-
ing sub-woofer speaker systems.
2 AFTERTOUCH!Vol. 5 No. 2
&
Yamaha also held drawings
on
Friday and Sat-
urday for a C1 Music
Computer
and accom-
panying software packages. Friday's grand prize
winner was
Scott
Zehm,
of
San
Bernardino,
California. Scott's prize was a standard
Cl
with
two disk drives, plus
an
extensive software pack-
age.
The
lucky
man
of
the
weekend might well
have
been
Saturday's grand prize winner, David
Oviatt.
The
day before, David
had
been a run-
ner-up in
the
drawing, winning a jacket instead
of
the
Cl.
Undeterred, David entered the draw-
ing
on
Saturday, and became
the
grand prize
winner
of
the
day.
He
won
a
Cl/20
(a
Cl
equipped with a 20 meg hard disk drive) plus
an
extensive software package.
Yamaha wishes to acknowledge and
thank
the
following software companies who donated
products for these drawings: Auricle
Control
Systems, Bacchus Software Systems, Computer
Business Associates,
Dr.
T's Music Software,
Dynaware,
Electronic
Courseware
Systems,
Golden
Midi Music & Software, Robert Keller,
LTA
Productions, Macaluso, Magnetic Music,
MIDiconcepts, Midisoft, Music Soft, Passport
Designs, Playroom Software, Rigamer Technol-
ogy,
Silver
Wolf Software,
SNAP
Software,
Sound
Quest, Temporal Acuity Products, Turtle
Beach Softworks, Twelve Tone Systems, and
Voyetra Technologies. -Sibyl
Darter
Soundcheck
'88
Update
The
International
Popular Music Festival
will
be
held,
as
previously
reported
in
AfterTouch,
on
February
12th,
at
the
Fuji
televison studios in Tokyo.
The
previous loca-
tion, Budokan,
on
the grounds
of
the Imperial
Palace,
was
not
available due to
the
recent pass-
ing of Japan's honored Emperor Hirohito. This
year,
the
United
States will be represented
by
the
winner of Soundcheck '88, Giraffe. This
San
Jose-based group
is
leaving for Japan
on
February
7th,
accompanied
by
Soundcheck
A&R
person Bob Stabile. Doug Buttleman, the
executive Producer of
the
Soundcheck project,
will be leaving a day later, along with a group of
celebrity judges from the USA. There are
21
finalist bands, from
15
different countries.
-
--
-
-
--
--
--
- -
--
--
---
-
--
---
--
~
February 1989 Volume 5, Number 2
Issue
#41
4 Questions & Answers
Answers to questions from readers.
By
Steve Deming
and
Torn Darter.
6 Session Notes from
"The
'burbs"
8
An
insider's look at Jerry Goldsmith's scoring sessions for
the
new Joe Dante film.
By
Tom Darter.
G10
Performances
TX81Z Performances for the G
10
MIDI guitarist.
By
Craig
Anderton.
11 Sequence
An
introduction to Yamaha's new MIDI sequencer program for
the
Cl
music computer.
By
Scott
Plunkett.
14
Hot
Tips
Reader tips for
the
MEP4, MV802, and more.
16
MIDI
Mixup
MIDI feedback
and
other
horrors.
By
Michael Babcock.
18 C 1 Users Central
Presenting a simple
Cl
program for loading voice
and
perfor~
mance data from a
Cl
disk to a DX7 II.
By
Jim Smerdel
and
Tom Darter.
©1989 Yamaha Corporation
of
America.
No
part
of
this publication may
be
reproduced, stored in a retrieval system,
or
transmitted in any form
or
by
any means,
electronically, mechanically, photocopying, recording,
or
otherwise, without
the
prior written permission
of
Yamaha Corporation of America.
Editor
Tom Darter
Operations
Sibyl Darter
Production
Sibyl Darter
Tom Darter
Editorial Board
Steve Deming
Charles Feilding
Bob
Frye
Rick Huyett
Mark Koenig
J.P. Lincoln
Phil Moon
Jim Smerdel
Steve
Thatcher
Cover Photograph
Jim Hagopian
Dee Dee Cawley
AFTERTOUCH
is
pub-
lished monthly. Third class
postage paid
at
Long
Prairie, MN and additional
points of entry.
SUBSCRIPTIONS:
Free.
Address subscription cor-
respondence to AFTER-
TOUCH,
P.O.
Box
7938,
Northridge,
CA
91327-
7938.
POSTMASTER:
Send
form 3579 to P.O.
Box 7938, Northridge,
CA
91327-7938.
Vol.
5 No.
21
AFTERTOUCH 3
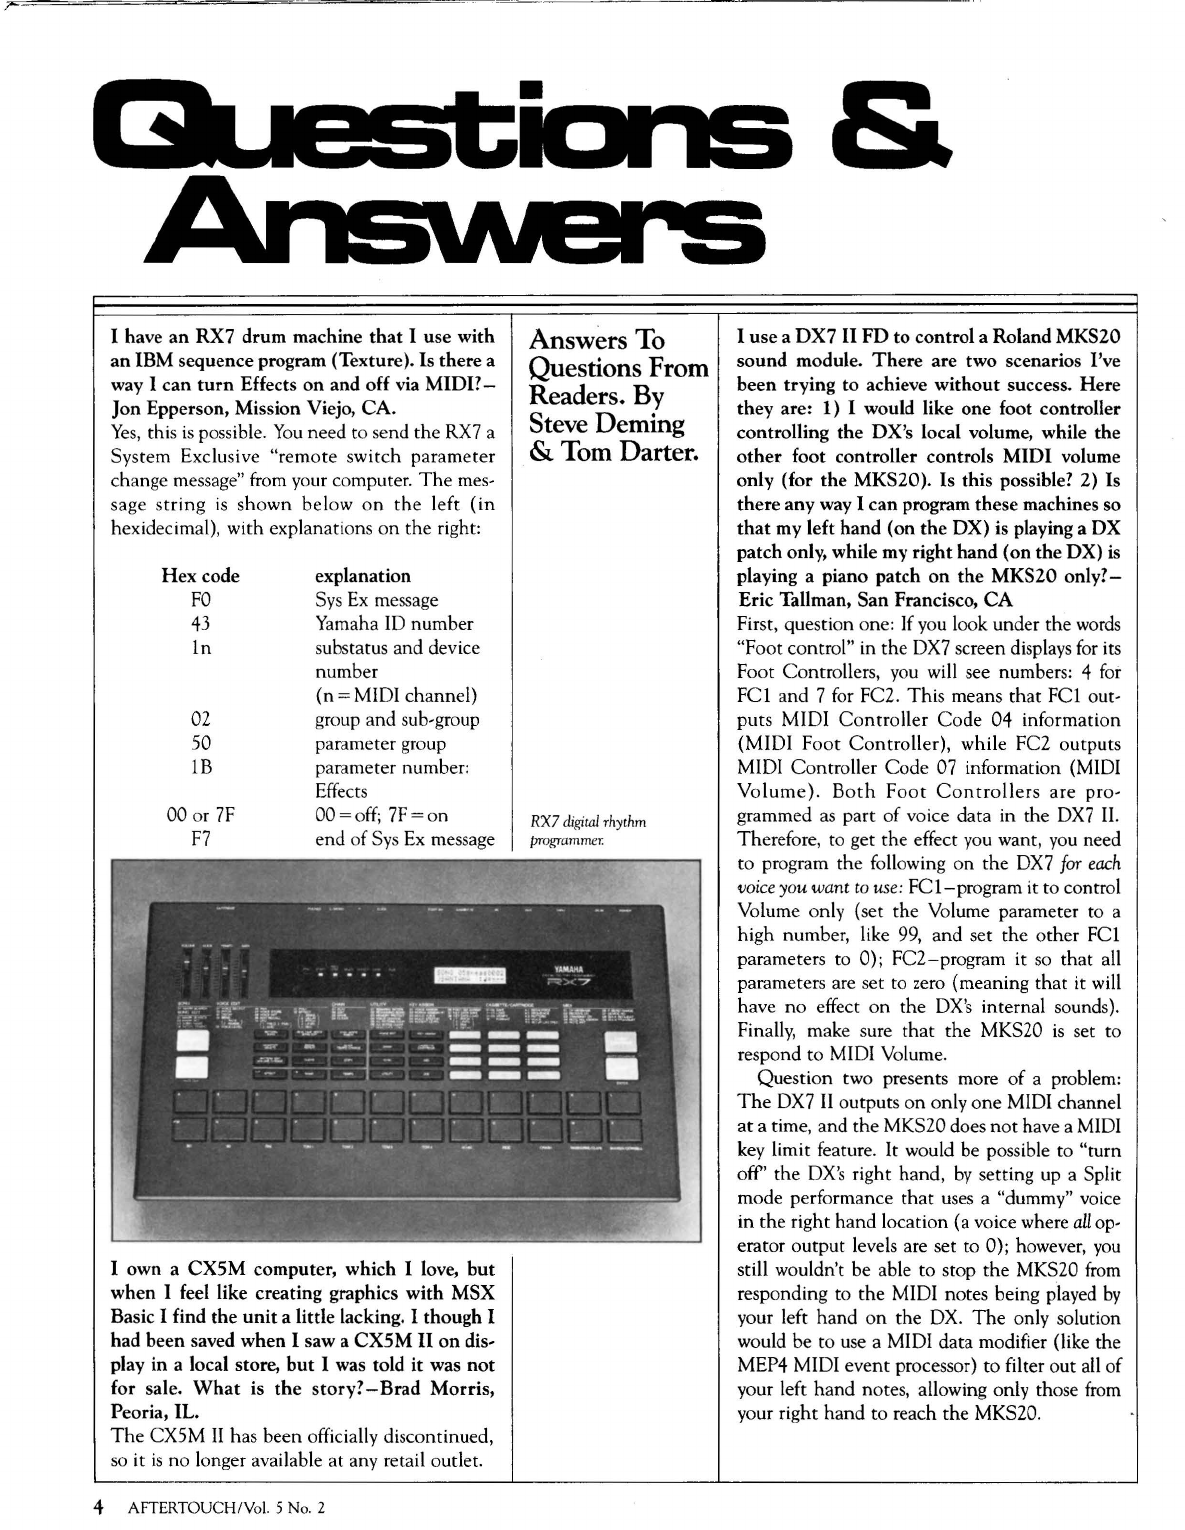
I have
an
RX7 drum machine
that
I use with
an IBM sequence program (Texture). Is there a
way I
can
turn
Effects
on
and off via
MIDI?-
Jon Epperson, Mission Viejo,
CA.
Yes,
this
is
possible.
You
need to send the RX7 a
System Exclusive
"remote
switch parameter
ch
ange message" from your computer.
The
mes-
sage
string
is
shown
below
on
the
left
(in
hexidecimal), with explanations on
the
right:
Hex
code explanation
FO
Sys
Ex
message
43
Yam
a
ha
ID number
ln
substatus and device
number
(n
=MIDI
channel)
02 group and sub-group
50 parameter group
lB
parameter number:
Effects
00 or
7F
OO=off;
7F=on
F7
end of Sys
Ex
message
I own a
CXSM
computer, which I love,
but
when I feel like creating graphics
with
MSX
Basic I find the
unit
a little lacking. I
though
I
had been saved when I saw a CXSM
II
on
dis-
play in a local store,
but
I was told it was
not
for sale.
What
is
the
story?
-Brad
Morris,
Peoria, IL.
The
CXSM
II
has been officially discontinued,
so
it
is
no longer available at any retail outlet.
4 AFTERTOUCH/Vol. 5 No. 2
Answers To
Questions From
Readers.
By
Steve Deming
& Tom Darter.
RX7
digital
rhythm
programm
e
r.
&
I use a
DX7
II
FD
to control a Roland MKS20
sound
module.
There
are two scenarios I've
been trying
to
achieve
without
success.
Here
they
are: 1) I would like one foot controller
controlling
the
OX's local volume, while the
other
foot controller controls
MIDI
volume
only (for
the
MKS20). Is this possible? 2) Is
there
any way I can program these machines so
that
my left hand (on
the
OX)
is playing a
OX
patch only, while my right hand (on
the
OX)
is
playing a piano patch
on
the
MKS20
only?-
Eric Tallman, San Francisco,
CA
First, question one:
If
you
look under the
words
"Foot control" in the DX7 screen displays
for
its
Foot Controllers,
you
will see numbers: 4
for
FCl
and 7
for
FC2. This means
that
FCl
out-
puts MIDI
Controller
Code
04 information
(MIDI
Foot
Controller),
while FC2 outputs
MIDI Controller Code 07 information (MIDI
Volume).
Both
Foot
Controllers
are pro-
grammed
as
part of voice data in the
DX7
II.
Therefore, to get the effect
you
want,
you
need
to program the following on the
DX7
for
each
voice
you want
to
use
:
FCl-program
it to control
Volume only (set the Volume parameter to a
high number, like
99,
and set the other
FCl
parameters to 0); FC2-program it
so
that
all
parameters are set to
zero
(meaning
that
it will
have
no
effect on the
OX's
internal sounds).
Finally, make sure
that
the MKS20
is
set to
respond to MIDI Volume.
Question two presents more
of
a problem:
The
DX7
II
outputs
on
only
one
MIDI channel
at
a time, and the MKS20 does
not
have a MIDI
key limit feature.
It
would be possible to "turn
off' the
OX's
right hand,
by
setting up a Split
mode performance
that
uses a "dummy" voice
in the right hand location (a voice where
all
op-
erator output levels are set to 0); however,
you
still wouldn't be able
to
stop
the
MKS20
from
responding to the MIDI notes being played
by
your left
hand
on
the
OX
.
The
only solution
would be to use a MIDI data modifier (like the
MEP4 MIDI event processor) to filter out all of
your left
hand
notes, allowing only those
from
your right hand to reach the MKS20.
I will
soon
be
working
with
my
own
G 10
MIDI
guitar controller
and
G
10C
controller
set.
What
are
your
recommendations
for a
wireless setup? My first instinct is
to
use a
standard
wireless
unit
on
the
guitar
strap.
However,
in
order
to
use a wireless
unit
be-
tween
the
G 10 and
the
G lOC, I need
to
get
some kind
of
a conversion cord for
the
multi-
pin connection between
the
two. Most
of
my
post-G lOC problems are
due
to
MIDI
DIN
5-
pin incompatibility
with
the
standard 1
/4''
plug;
Does Yamaha offer a MIDI-in, 1
/4"
signal-out
for connecting MIDI-sized equipment
to
stan-
dard
units?-
Tony Max Nance, Orange, N.J.
Well, first
of
all, it
is
impossible to convert a
MIDI-type signal to
an
electronic audio-type
signal (the kind transmitted
by
standard wire-
less
units) simply
by
using some kind of conver-
sion cable. Remember
that
the output signal
from the G 10C
is
a MIDI-type signal: It must be
connected to a MIDI-compatible tone gener-
ator (VIA MIDI) in order for the system to cre-
ate
sound-the
sounds themselves come from a
tone generator, while all
of
the MIDI data
for
controlling
the
tone generator comes from the
G10/G10C
system.
To
make a wireless connection between the
G 10C and your tone generator, you would have
to use a MIDI wireless setup, which
is
consider-
ably more expensive
than
a standard wireless
unit.
Finally,
the
multi-pin connector between the
G
10
and G 10C also carries a specialized kind of
data, which
cannot
be converted into "standard
wireless" data through the use of converter cord;
in fact, such a cord would be impossible to
make.
There
is
no
wireless
unit
that
allows
connection between the G
10
MIDI guitar and
the G
lOC
controller.
I want
to
control my Yamaha
RX5
rhythm
programmer from my Macintosh. To do this, I
need a
manual
or
pamphlet
that
gives
the
MIDI
commands for the
unit
(particularly
the
System Exclusive commands).
Where
can
I get
this
information?-
Tony Zepeda,
Oakland,
CA.
System Exclusive and other MIDI documenta-
tion can be purchased from the Yamaha Elec-
tronic Service Parts
Department.
For more
information, write to: Yamaha Corporation of
America, Electronic Service Parts Department,
P.O.
Box 6600, Buena Park,
CA
90622; or call
1-800-44 3-3548.
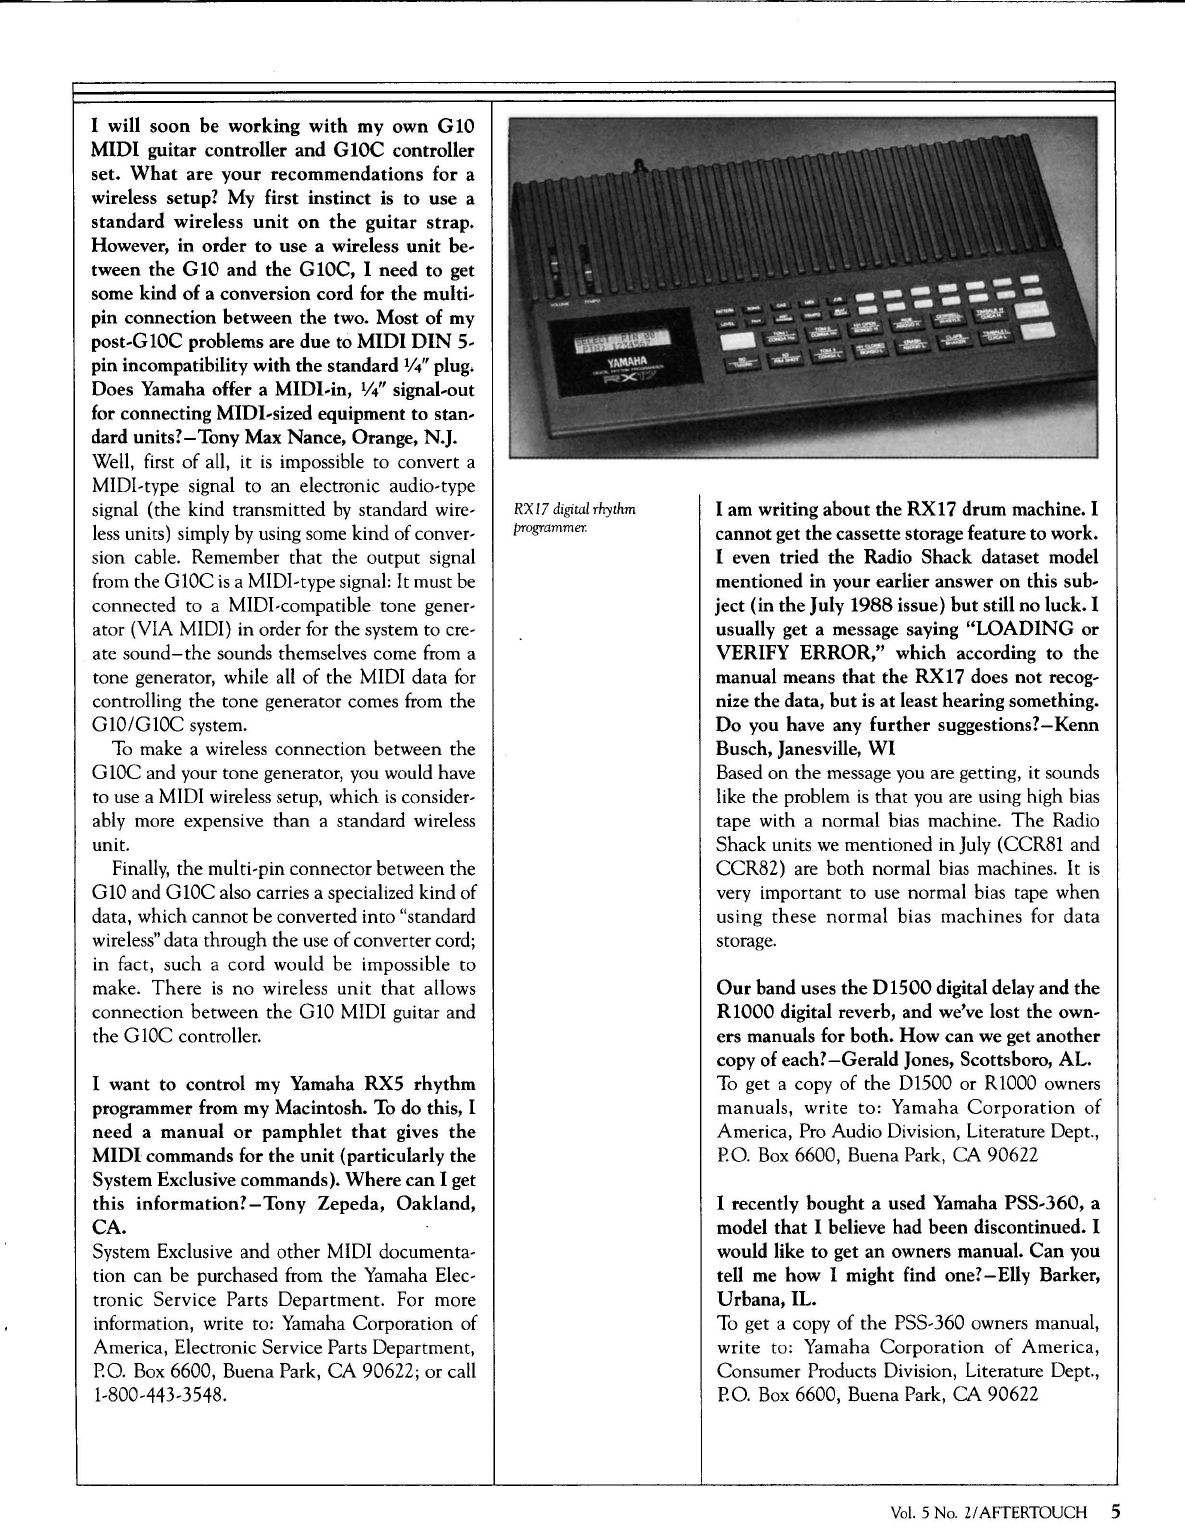
RX
17
digital
rhythm
programmer.
I am writing about
the
RX17
drum
machine. I
cannot
get
the
cassette storage feature
to
work.
I even tried
the
Radio Shack dataset model
mentioned
in
your earlier answer
on
this sub-
ject (in
the
July
1988
issue)
but
still
no
luck. I
usually get a message saying
"LOADING
or
VERIFY
ERROR,"
which according
to
the
manual means
that
the
RX17 does
not
recog-
nize the data,
but
is
at
least hearing something.
Do
you have any
further
suggestions?-Kenn
Busch, Janesville,
WI
Based
on
the
message you are getting, it sounds
like the problem
is
that
you are using high bias
tape with a normal bias machine.
The
Radio
Shack units
we
mentioned in July (CCR81 and
CCR82) are
both
normal bias machines.
It
is
very important to use normal bias tape when
using
these
normal
bias
machines
for
data
storage.
Our
band uses
the
D1500
digital delay and the
R1000
digital reverb, and we've lost the own-
ers manuals for
both.
How
can we get
another
copy of each?
-Gerald
Jones, Scottsboro, AL.
To
get a copy of
the
D1500 or R1000 owners
manuals, write to: Yamaha
Corporation
of
America, Pro Audio Division, Literature Dept.,
P.O.
Box 6600, Buena Park,
CA
90622
I recently
bought
a used Yamaha
PSS-360,
a
model
that
I believe had been discontinued. I
would like
to
get
an
owners manual.
Can
you
tell me how I might find
one?-
Elly Barker,
Urbana,
IL.
To
get a copy of
the
PSS-360 owners manual,
write to: Yamaha
Corporation
of
America,
Consumer Products Division, Literature Dept.,
P.O.
Box 6600, Buena Park,
CA
90622
Vol.
5
No.
Z/
AFTERTOUCH 5
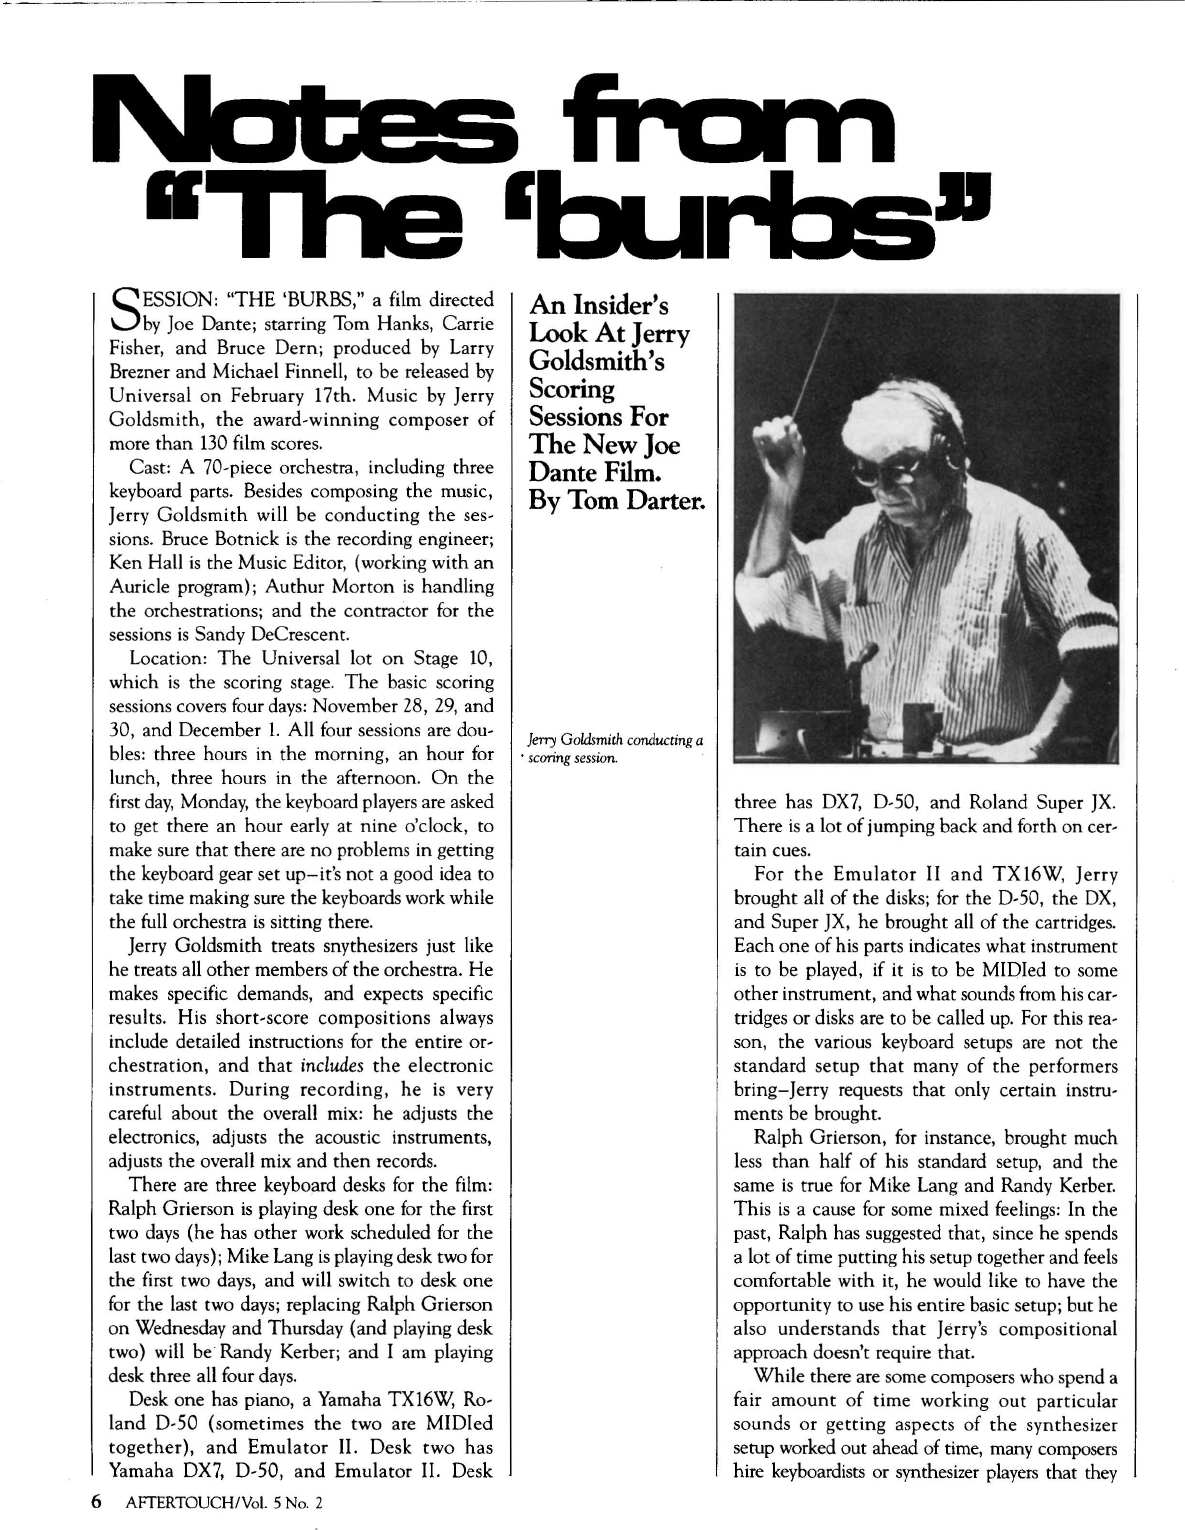
SESSION:
"THE
'BURBS," a film directed
by
Joe Dante; starring Tom Hanks, Carrie
Fisher,
and
Bruce Dern; produced
by
Larry
Brezner and Michael Finnell,
to
be released
by
Universal
on
February 17th. Music
by
Jerry
Goldsmith,
the
award-winning composer
of
more
than
130
film scores.
Cast: A 70-piece orchestra, including three
keyboard parts. Besides composing
the
music,
Jerry
Goldsmith
will be
conducting
the
ses-
sions. Bruce Botnick
is
the
recording engineer;
Ken Hall
is
the Music Editor, (working with
an
Auricle program); Authur Morton
is
handling
the
orchestrations; and the contractor
for
the
sessions
is
Sandy DeCrescent.
Location:
The
Universal lot
on
Stage
10,
which
is
the
scoring stage.
The
basic scoring
sessions covers four
days:
November 28,
29,
and
30, and December
1.
All four sessions are dou-
bles: three hours in
the
morning, an hour for
lunch, three hours in
the
afternoon.
On
the
first
day,
Monday, the keyboard players are asked
to get there
an
hour early at
nine
o'clock, to
make sure
that
there are
no
problems in getting
the keyboard gear set
up-it's
not
a good idea to
take time making sure
the
keyboards work while
the
full orchestra
is
sitting there.
Jerry Goldsmith treats snythesizers just like
he treats all other members of
the
orchestra.
He
makes specific demands, and expects specific
results. His short-score compositions always
include detailed instructions for the entire or-
chestration,
and
that
includes
the
electronic
instruments.
During
recording,
he
is
very
careful about
the
overall mix:
he
adjusts
the
electronics, adjusts the acoustic instruments,
adjusts
the
overall mix and
then
records.
There are three keyboard desks
for
the film:
Ralph Grierson
is
playing desk one for
the
first
two days (he has other work scheduled for the
last two days); Mike Lang
is
playing desk two for
the
first two days, and will switch to desk one
for the last two days; replacing Ralph Grierson
on
Wednesday and Thursday (and playing desk
two) will be Randy Kerber; and I am playing
desk three all four
days.
Desk one has piano, a Yamaha TX16W, Ro-
land D-50 (sometimes
the
two are
MIDied
together),
and
Emulator
II. Desk
two
has
Yamaha DX7, D-50,
and
Emulator II. Desk
6 AFTERTOUCH!Vol. 5 No. 2
An Insider's
Look
At
Jerry
Goldsmith's
Scoring
Sessions
For
The
New
Joe
Dante
Film.
By
Tom
Darter.
Jerry
Goldsmith
conducting
a
·
scoring
session
.
three has
DX7,
D-50, and Roland Super
JX.
There
is
a lot
of
jumping back and forth
on
cer-
tain cues.
For
the
Emulator
II
and
TX
16W,
Jerry
brought all
of
the
disks; for the D-50, the
OX,
and Super JX,
he
brought all of
the
cartridges.
Each
one
of
his parts indicates what instrument
is
to be played, if it
is
to
be MIDied to some
other
instrument, and what sounds from his car-
tridges
or
disks are to be called
up.
For this rea-
son, the various keyboard setups are
not
the
standard
setup
that
many
of
the
performers
bring-
Jerry requests
that
only certain instru-
ments be brought.
Ralph Grierson,
for
instance, brought much
less
than
half
of
his standard setup, and the
same
is
true
for
Mike Lang and Randy Kerber.
This
is
a cause for some mixed feelings: In the
past, Ralph has suggested that, since he spends
a lot of time putting his setup together and
feels
comfortable with it, he would like to have the
opportunity to use his entire basic setup; but he
also understands
that
Jerry's compositional
approach doesn't require that.
While there are some composers who spend a
fair
amount
of
time working
out
particular
sounds
or
getting
aspects of
the
synthesizer
setup worked out ahead of time, many composers
hire keyboardists or synthesizer players that they
know
well,
write the parts with general directions
as
to the kind of sounds they want, and
then
it
is
the responsibility
of
the synthesizer player to
program
the
sounds, MIDI various instruments
together, and get
the
final sound.
Jerry
Goldsmith,
on
the
other
hand,
approaches
the
instruments
as
he
does
the
rest
of
the
instruments of the orchestra: it
is
always
the case
that
he comes prepared with all
of
the
sounds
that
he
wants, and a very specific selec-
tion of instruments. That's why it
is
so
easy to
list the specific instruments being used in
the
score. This
was
no less true for
the
other scoring
sessions I have worked
on
with Jerry:
Explorers,
Poltergeist
II,
and Innerspace. Jerry really knows
his stuff.
We
only has a
few
difficulties during
the
setup
period:
Ralph
Grierson's
MIDI
patching
machine crashed
as
it
was
being set up; it might
hae been a problem with a cable, or there may
have been a problem with
AC
being plugged in
or unplugged at
the
wrong time.
In
any case,
Ralph wound up having
to
do all
of
his MIDI
patching manually. He did
say
that
it
was
lucky
that
the unit happened to blow up
at
this partic-
ular time, rather
than
at almost any
of
his
other
dates when
he's
using his full setup, because
then
he would have had a very difficult time
making
the
necessary
instrumental
changes,
particularly
in
a
TV
score, where a keyboard
player
is
often called upon to make a large num-
ber
of
changes in a very small amount of time.
A
few
anxious moments were caused
by
the
TX16W-it
was
rented,
and
showed
up
originally without
the
System disk; finally,
the
System disk showed up, and
we
loaded
the
nec-
essary sounds without further difficulty.
Also,
thank
God
for
edit/play
buffers:
we
only had
one
cartridge for each type
of
unit, and
sometimes two different keyboardists needed a
sound from a cartridge
on
same cue.
No
one
wanted
to
alter
the
internal
memory
of
the
units they were using,
but
it wasn't necessary:
One
player
would
load
a
sound
into
the
edit/play buffer from the cartridge,
then
pass it
on
to next keyboardist; if one
had
to change
sounds
on
the same instrument during a cue, he
was
the
one
who would keep
the
cartridge
plugged into his unit.
The
TX16W does
not
have a volume control
on
front panel,
so
to
pull instrument in and out
of mix during a cue,
we
had
to call up a page
with volume, and move' from 99
to
0 or vice
versa. Luckily, there
was
no
change of Perfor-
mance during any cue,
so
this
was
no
problem.
During any session, you always
learn
that
what
you
thought
would be difficult and what
actually
is
difficult are sometimes very different.
In this session, I had none
of
the those pages full
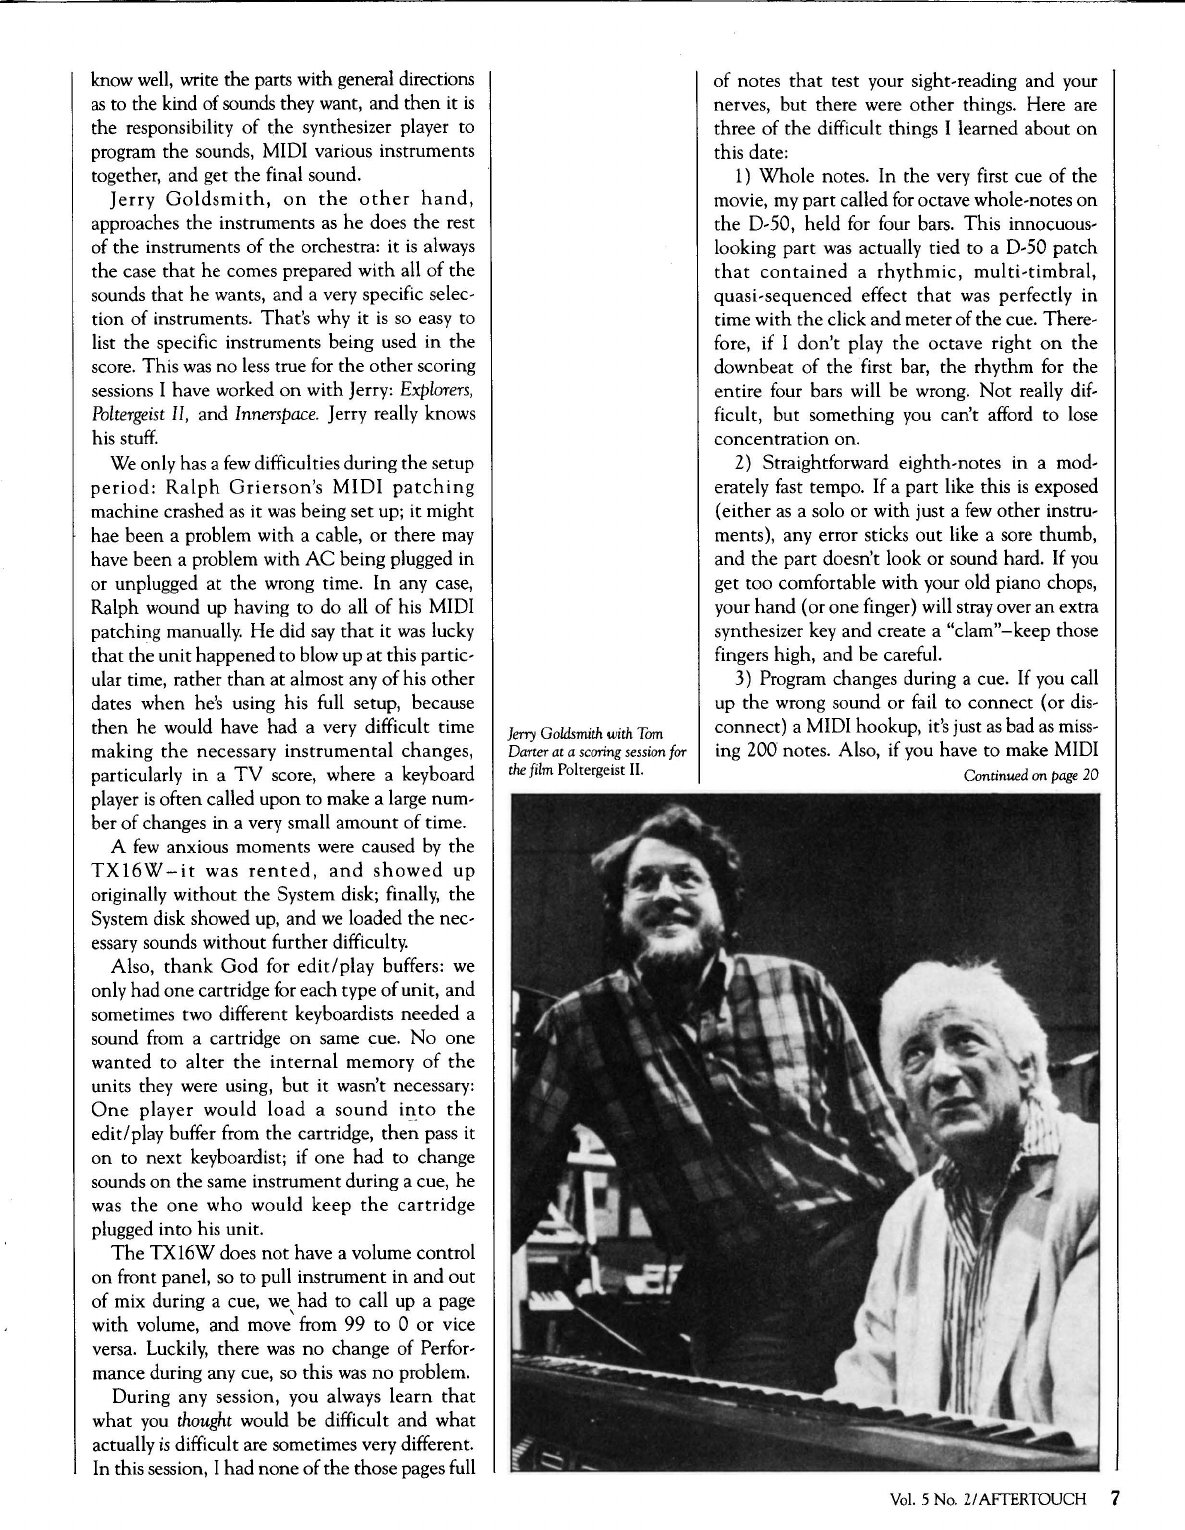
Jerry
Goldsmith
with
Tom
Darter
at
a
scoring
session
for
the
film
Poltergeist II.
of notes
that
test your sight-reading and your
nerves, but there were
other
things. Here are
three of
the
difficult things I learned about on
this date:
1) Whole notes. In the very first cue
of
the
movie,
my
part
called
for
octave whole-notes
on
the
D-50, held for four bars. This innocuous-
looking part
was
actually tied to a D-50 patch
that
contained
a
rhythmic,
multi-timbral,
quasi-sequenced effect
that
was
perfectly in
time with
the
click
and
meter of the cue. There-
fore, if I
don't
play
the
octave right
on
the
downbeat
of
the first bar,
the
rhythm for the
entire four bars will be wrong.
Not
really dif-
ficult, but something
you
can't afford to lose
concentration on.
2) Straightforward eighth-notes in a mod-
erately fast tempo. If a part like this
is
exposed
{either
as
a solo or with just a
few
other instru-
ments), any error sticks
out
like a sore thumb,
and
the
part doesn't look or sound hard. If
you
get too comfortable with your old piano chops,
your
hand
(or one finger) will stray over
an
extra
synthesizer key and create a "clam"-keep those
fingers high, and be careful.
3) Program changes during a cue.
If
you
call
up
the
wrong sound or fail
to
connect
{or
dis-
connect) a MIDI hookup, it's just
as
bad
as
miss-
ing 200 notes. Also, if you have to make MIDI
Continued
on
page
20
Vol.
5 No. 2/ AFTERTOUCH 7
G~DMIDI
TX81Z
Performances
For
The
GlOMIDI
Guitarist.
By
Craig
Anderton.
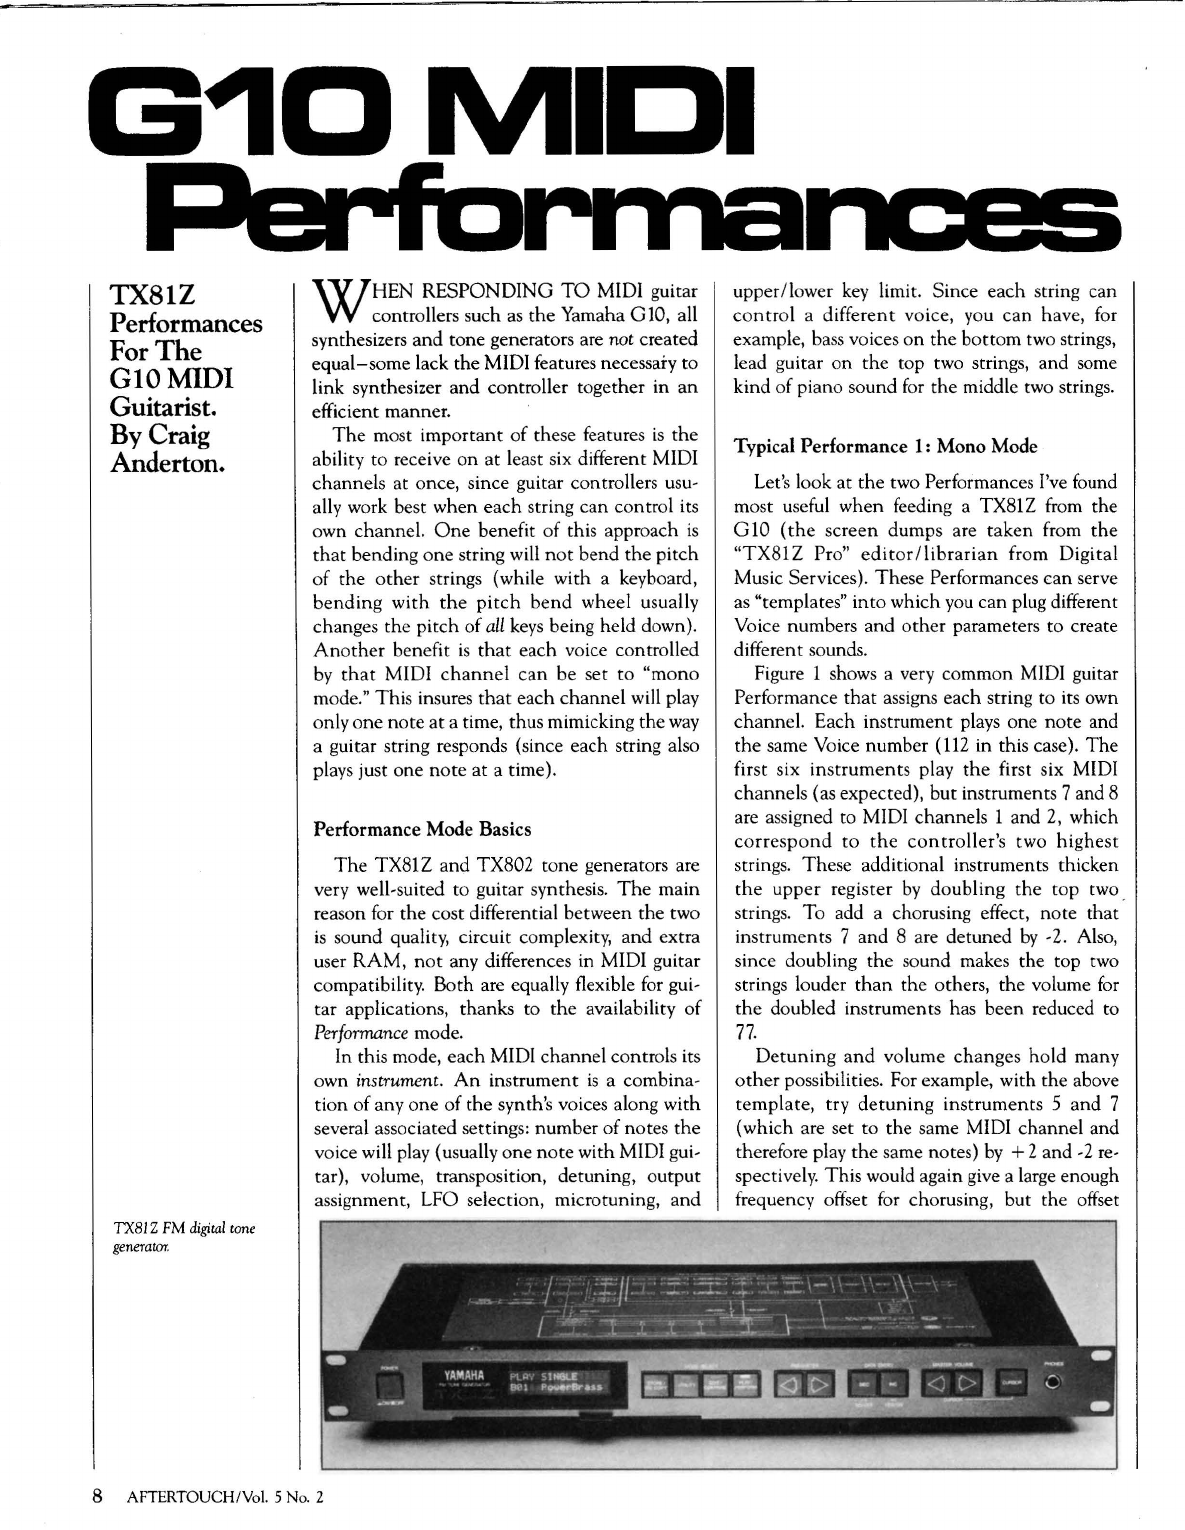
TXBl Z
FM
digital
tone
generator.
WHEN
RESPONDING
TO
MIDI guitar
controllers such
as
the
Yamaha G10, all
synthesizers
and
tone generators are not created
equal-some
lack the MIDI features necessary to
link synthesizer
and
controller together in
an
efficient manner.
The
most
important
of
these features
is
the
ability
to
receive
on
at least six different MIDI
channels at once, since guitar controllers usu-
ally work best when each string can control its
own channel.
One
benefit
of
this approach
is
that
bending
one
string will
not
bend
the
pitch
of
the
other
strings (while with a keyboard,
bending
with
the
pitch
bend
wheel usually
changes the
pitch
of
all
keys
being held down).
Another
benefit
is
that
each voice controlled
by
that
MIDI
channel
can
be
set
to
"mono
mode." This insures
that
each channel will play
only
one
note
at
a time, thus mimicking the
way
a guitar string responds (since each string also
plays just one
note
at a time}.
Performance Mode Basics
The
TX81Z and TX802 tone generators are
very well-suited to guitar synthesis.
The
main
reason for the cost differential between
the
two
is
sound quality, circuit complexity, and extra
user
RAM,
not
any differences in MIDI guitar
compatibility. Both are equally flexible
for
gui-
tar applications, thanks to the availability
of
Performance
mode.
In this mode, each MIDI channel controls its
own instrument.
An
instrument
is
a combina-
tion of any
one
of
the synth's voices along with
several associated settings: number
of
notes
the
voice will play (usually one
note
with MIDI gui-
tar), volume, transposition, detuning, output
assignment, LFO selection, microtuning, and
8 AFTERTOUCH!Vol. 5 No. 2
upper/lower
key
limit. Since each string can
control
a different voice, you
can
have, for
example, bass voices
on
the
bottom
two strings,
lead guitar
on
the
top two strings, and some
kind of piano sound
for
the
middle two strings.
Typical Performance
1:
Mono Mode
Let's look at
the
two Performances I've found
most useful when feeding a TX81Z from the
G
10
(the
screen dumps are
taken
from
the
"TX81Z
Pro"
editor/librarian
from Digital
Music Services). These Performances can serve
as
"templates"
into
which you can plug different
Voice numbers
and
other
parameters to create
different sounds.
Figure 1 shows a very common MIDI guitar
Performance
that
assigns each string to its own
channel. Each instrument plays one
note
and
the
same Voice number (
112
in this case).
The
first six
instruments
play
the
first six MIDI
channels (as expected), but instruments 7 and 8
are assigned to MIDI channels 1 and 2, which
correspond
to
the
controller's
two
highest
strings. These additional instruments thicken
the
upper
register
by
doubling
the
top two .
strings. To add a chorusing effect, note that
instruments 7 and 8 are detuned
by
-2. Also,
since doubling
the
sound makes the top two
strings louder
than
the others,
the
volume
for
the
doubled instruments has been reduced to
77.
Detuning
and
volume changes hold many
other
possibilities. For example, with
the
above
template,
try
detuning
instruments
5
and
7
(which are set to the same MIDI channel and
therefore play
the
same notes)
by
+ 2 and
-2
re-
spectively.
This
would again give a large enough
frequency offset for chorusing, but the offset

would be centered around concert pitch. In this
case, you'd probably want to set
both
instru-
ment
s to a somewhat lower but equal volume,
say
around 80.
On
some sounds, doubling
the
bottom
two
strings can add a really strong low end.
This
is
particularly effective
on
MIDified rhythm gui-
tar parts.
Another
trick
is
to transpose the dou-
bled
instruments
an
octave
higher
or lower;
adding a sub-octave to
the
bottom
two strings
works very well.
Finally, don't forg
et
to edit each single Voice
so
that
its mode
(in
the
Function
me
nu)
is
Mono, not Po
ly,
and
save
it before working with
a Performance. Mono mode insures
th
e most
guitar-like feel.
Typical Performance
#2:
Omni
Mode
Mono mode is n
ot
the
optimum choice if you
don't want a newly-played
note
to
cut
o
ff
any
previously-played notes
that
are still sounding
D
Performanfe
Editor
I
name
:
Pu
I
se
1.-Jave
I 1 :
Me
llowSqar 5 :
Me
llowSqar
assign
mode
NORM
2 :
Me
llowSqar 6 :
Me
llowSqar
micro
tune
select
OCT.
3 :
Me
llowSqar 7 :
Me
llowSqar
effect
select
OFF
4 :
Me
llowSqar 8 :
Me
llowSqar
inst.
number
1 2 3 4 5 6 7 8
number
of
notes 1 1 1 1 1 1 1 1
voice
number
129 129 129 129 129 129 129 129
receive ch. 1 2 3 4 5 6 1 2
key
limit
IL
C-2 C-2 C-2 C-2 C-2 C-2 C-2 C-2
key
limit
/H
G 8 G 8 G 8 G 8 G 8 G 8 G 8 G 8
de
tune
' +0 +0 +0 +0 +0 +0
-2 -2
(±)
note shift +12 +12 +12 +12 +12 +12 +12 +12
volume
73
73
99
99 99 99
50 50
ALL
8 out assign
LR
LR LR
LR
LR
LR
LR LR
lfo
select
1 2
VIB
VIB
VIB
VIB
VIB VIB
...
micro
tune
OFF
OFF OFF OFF
OFF OFF
OFF OFF
G
10
MIDI
guitar
sys
tem
Figure
1. A typ
ica
l
mono
mode
TXBI Z P
erformance
for
use
with
the
G
10.
Vo
l.
5 No. 2/ AFTER
TOUCH
9
G1D
Continued fram page 9
on
that
same string. Choirs, flutes, strings,
horns,
and
similar "pad" sounds (as well as
patches with long release times where you
need
to
avoid
having
notes
cut
each
other
off}
require a Performance like
the
one shown in
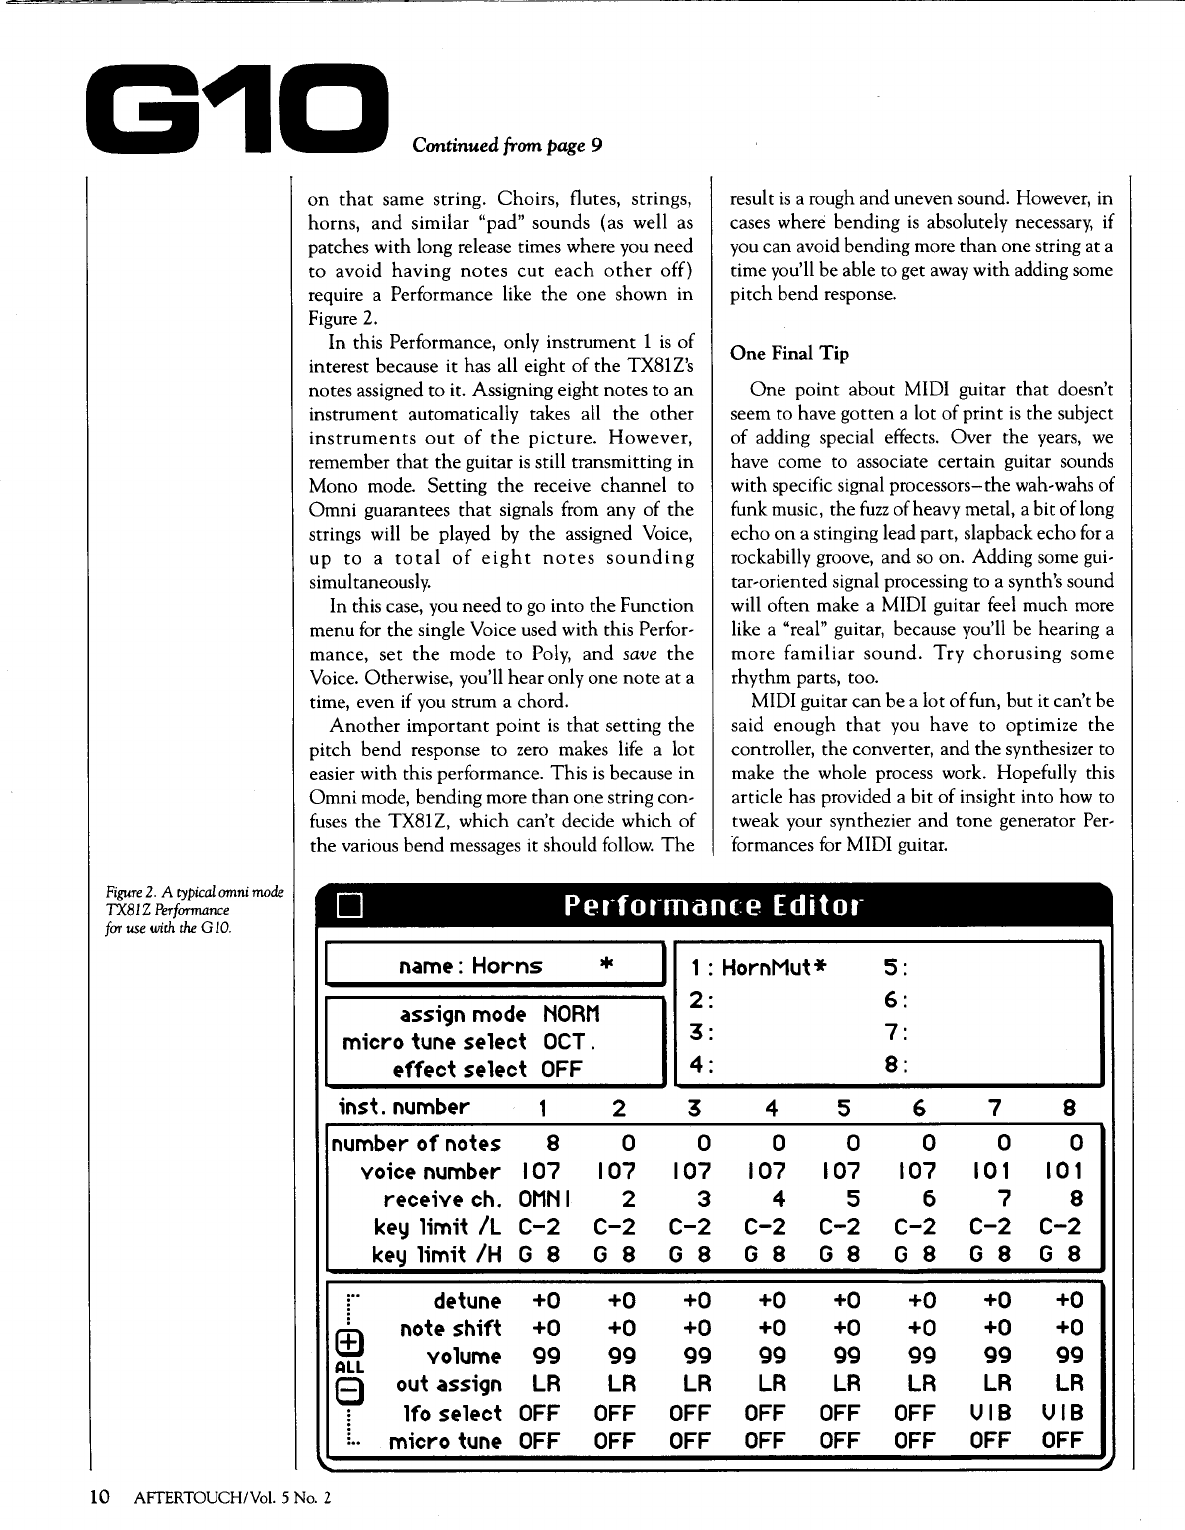
Figure 2.
In this Performance, only instrument 1
is
of
interest because it has all eight
of
the
TX81Z's
notes assigned
to
it. Assigning eight notes to
an
instrument automatically takes all
the
other
instruments
out
of
the
picture.
However,
remember
that
the
guitar
is
still transmitting in
Mono mode. Setting
the
receive
channel
to
Omni
guarantees
that
signals from any of
the
strings will be played
by
the
assigned Voice,
up
to
a
total
of
eight
notes
sounding
simultaneously.
In this case, you need
to
go
into
the
Function
menu for the single Voice used with this Perfor-
mance,
set
the
mode
to
Poly,
and
save
the
Voice. Otherwise, you'll
hear
only one
note
at
a
time, even
if
you strum a chord.
Another
important
point
is
that
setting
the
pitch
bend
response to zero makes life a
lot
easier with this performance.
This
is
because in
Omni
mode, bending more
than
one string con-
fuses
the
TX81Z, which can't decide which
of
the
various bend messages it should follow.
The
result
is
a rough
and
uneven sound. However, in
cases where bending
is
absolutely necessary, if
you can avoid bending more
than
one string at a
time you'll be able
to
get
away
with adding some
pitch
bend response.
One
Final
Tip
One
point
about MIDI guitar
that
doesn't
seem to have
gotten
a lot
of
print
is
the subject
of
adding special effects. Over
the
years,
we
have come to associate certain guitar sounds
with specific signal processors-the wah-wahs of
funk music, the
fuzz
of heavy metal, a bit of long
echo
on
a stinging lead part, slap back echo
for
a
rockabilly groove, and so on. Adding some gui-
tar-oriented signal processing to a synth's sound
will often make a MIDI guitar feel much more
like a "real" guitar, because you'll be hearing a
more
familiar
sound.
Try
chorusing
some
rhythm parts, too.
MIDI guitar
can
be
a
lot
of
fun, but it can't be
said
enough
that
you have
to
optimize
the
controller, the converter, and
the
synthesizer to
make
the
whole process work. Hopefully this
article has provided a bit
of
insight into how to
tweak your synthezier
and
tone generator Per-
formances for MIDI guitar.
Figure
2.
A
typical
omni
mode
TXBIZ
Performance
D
Performanfe
Editor
far
use
with
the
G
10.
I name:
Horns
* I
1:
HornMut*
5:
ass;gn
mode
NORM
2:
6:
m;cro tune select
OCT.
3:
7:
effect select
OFF
4:
8:
;nst. number 1 2 3 4 5 6 7 8
number
of
notes 8 0 0 0 0 0 0 0
vo;ce number
107 107 107
107 107 107 101 101
rece;ve ch.
OMNI
2 3 4 5 6 7 8
key Hm;t
/L
C-2 C-2 C-2
C-2 C-2
C-2 C-2 C-2
key Hm;t
/H
G 8 G 8 G 8 G 8 G 8 G 8 G 8 G 8
de
tune
+0 +0 +0
+0 +0
+0 +0
+0
(±)
note
sMft
+0 +0 +0
+0 +0
+0
+0 +0
volume
99 99 99
99 99
99 99
99
ALL
8 out ass;gn
LR LR LR
LR LR
LR
LR
LR
lfo select
OFF
OFF OFF
OFF OFF OFF
VIB VIB
...
m;cro tune
OFF OFF OFF
OFF OFF
OFF
OFF
OFF
10 AFTERTOUCH/Vol. 5 No. 2
For
SINCE YOU
CAN
RUN just about any kind
of
MS-DOS software
on
the Yamaha C1
Music Computer, it's easy to forget
that
those
MIDI ports,
CS
sliders
and
note-value keys
aren't just added for cosmetic value. Despite its
multi-talented
nature,
the
C1 was primarily
designed
as
a tool for music creation.
With
that
in mind, Yamaha has introduced Sequence, a
professional sequencer software package
that
is
specially designed to give musicians access to
the C1
's
unique music making capabilities.
Graphic Interface
Some popular computers have a form
of
user
interface known
as
a graphic interface.
Without
naming names, you'll probably recognize one of
these computers
by
the
presence
of
a small trash
can in the lower right corner
of
the
screen when
the computer
is
turned on. This type
of
inter-
face
has proven to be especially useful
for
music
applications. As a general rule, MS-DOS appli-
cations
don't
use a
graphic
interface,
but
Yamaha has thoughtfully included a graphic
interface package with Sequence
so
that
you
can take advantage
of
features like pull-down
menus, scroll bars,
and
graphic editing. For
those
of
you who are
addicted
to
a mouse,
Sequence also supports
both
mouse and key-
board commands.
In
addition to providing a graphic environ-
ment
to aid in music creation, Yamaha has
given a great deal
of
attention
to
the
C1
's
music
hardware. Recording can take place from either
of the two MIDI IN ports, and each track can
be assigned to play back through any
of
the
eight MIDI
OUT
ports.
The
CS 1 and CS2 slid-
ers
ar~
available for data entry (you'll appreciate
this when you want to move quickly from the
lowest to
the
highest value
in
a range)
and
tempo control during a playback.
If you happen to find yourself without a MIDI
keyboard, you can still compose
by
step record-
ing using
the
C1 keyboard.
The
notes
can
be
entered
on
the
C1 note
keys
(which are logi-
cally laid
out
to resemble a piano keyboard),
the
note values
can
be set with
the
note
value
keys,
and
the
proper
octave
can
be
set
with
the
C1
's
octave
keys.
If
you
need
to
do
long
se-
quences,
Sequence
is
also smart
about
how
An Introduction
To Yamaha's
New
Sequencer
Program For
TheCl
Music
Computer.
By
Scott Plunkett.
C1
much
extended
memory
is
available
on
the
Cl.
With
the
standard 512k
of
extended
mem-
ory,
about
39,000 notes
can
be stored. If you
need
extra memory, you
can
buy
an
EMB15
RAM
board
to
boost
your
extended
memory
to
2 meg
and
get
a
healthy
193,000
note
capacity.
If you're
the
type of composer who needs
that
193,000
note
capacity, you'll be happy to know
that
Sequence has 400 tracks. Only (!) 200 of
them
can play simultaneously,
but
you
can
use
the
others for editing or making safety copies of
tracks.
There's
also
a
handy
provision
for
converting any
part
of
a track into a pattern. A
patte~h
may
then
be inserted into any
of
the
400 tracks at any specified location.
Up
to 1024
patterns
can
be defined
at
one time,
so
fre-
quently
used phrases or repeating parts may
quickly be constructed, edited, and inserted
into empty tracks for song creation.
Master Track
You
can simply set a tempo and a meter and
begin recording or playback, or you can use the
Master Track if you want complicated meter
and tempo changes.
The
Master Track Numeric
Editor lets you see all of
the
current meter and
tempo changes and edit
them
as
single events.
The
location of each event
is
shown in Meas/
Beat/Clock
and
Hr/Min/Sec/Frm
format
so
that
you
can
make changes based
on
SMPTE
time
code
locations.
Since
you
can
record
tempo changes in real time using
the
CS
1 slider
or even record tempo changes over MIDI, the
Master Track editor gives you a convenient
way
to edit out mistakes
or
insert new data.
The
Master Track
is
also used for inserting
Rehearsal Marks.
Any
time you want to mark a
particular location for playback, you can insert
a Rehearsal Mark with a comment.
By
specify-
ing
the
proper Rehearsal Mark for playback,
you
can
jump immediately to any position
in
the
song.
Recording
With
Sequence
Both realtime and step recording are possible
with Sequence.
In
realtime record you have the
option of using replace mode, which erases what
Vol.
5 No.
21
AFTERTOUCH
11
what
was
previously
on
the
track
and
replaces
it
with
the
new
recording,
or
overdub
mode,
which adds
the
new recording
to
the
old. Loop
recording
is
available
(with
the
option
of
quantizing
during
recording) for
building
up
drum
and
rhythm
tracks quickly,
and
there are
three
punch
modes, including
an
auto
punch
mode
that
can
punch
in
and
out
to
the
preci-
sion of Sequence's 480-clocks-per-quarter-note
resolution.
Sequence
can
record
on
multiple tracks si-
multaneously,
which
can
really come
in
handy
when
you need
to
port
over a song from
another
sequencer.
In
fact, since
each
of
the
two MIDI
IN ports are active
and
each
port
supports
all16
MIDI
channels,
you
have
the
potential
of
recording up
to
32 different parts in
one
pass.
Sequence
can
recor.d while it's synchronized
to
other
sequencers
with
standard MIDI clock,
direct
SMPTE
sync (using
the
Cl's
SMPTE
ports),
or
MIDI
Time
Code.
When
you finish recording a track, Sequence
responds
by
giving you a visual representation
of
what
was
recorded
in
the
Track
Data
area
at
the
bottom
of
the screen. You'll never have
to
won-
der
anymore
about
whether
a
track
actually
contains data.
This
display
is
normally
what
you see
at
the
bottom
of
the
main
screen,
but
there are actually some powerful functions hid-
den
within
the Track
Data
area.
Clicking
the
mouse
button
beside
the
Track
Data title brings up
the
Track
Attribute
screen.
For
each
track, you
can
set a time offset
to
move
the
track forward
or
backward in time, change
the
transposition, or send
an
initial program
change,
volume,
or
pan
value
whenever
playback begins. A unique feature in
the
Track
Attribute
window
is
the individual track
tempo
LFO.
You
can
set
the
speed
and
depth
of
the
tempo LFO
on
each
track
to
give a more fluid,
human
feel to quantized tracks.
From
the
Track
Attribute
screen, you
can
go
to
the Track
Comment
screen
to
add a 32 char-
acter
comment
for
each
track.
This
is
a good
place
to
put
information about
the
tone
gener-
ators and patches you used, in case you
want
to
reconstruct a performance later.
The
last hid-
den
function, Velocity Meter,
is
the
most enter-
taining.
With
this feature you
can
watch
the
changing
note-on
velocity
of
each
track
as
it
plays back.
This
is
sort
of
like having a block
of
MIDI
VU
meters
at
your disposal, except you
never have to worry about clipping.
12 AFTERTOUCH/Vol. 5 No. 2
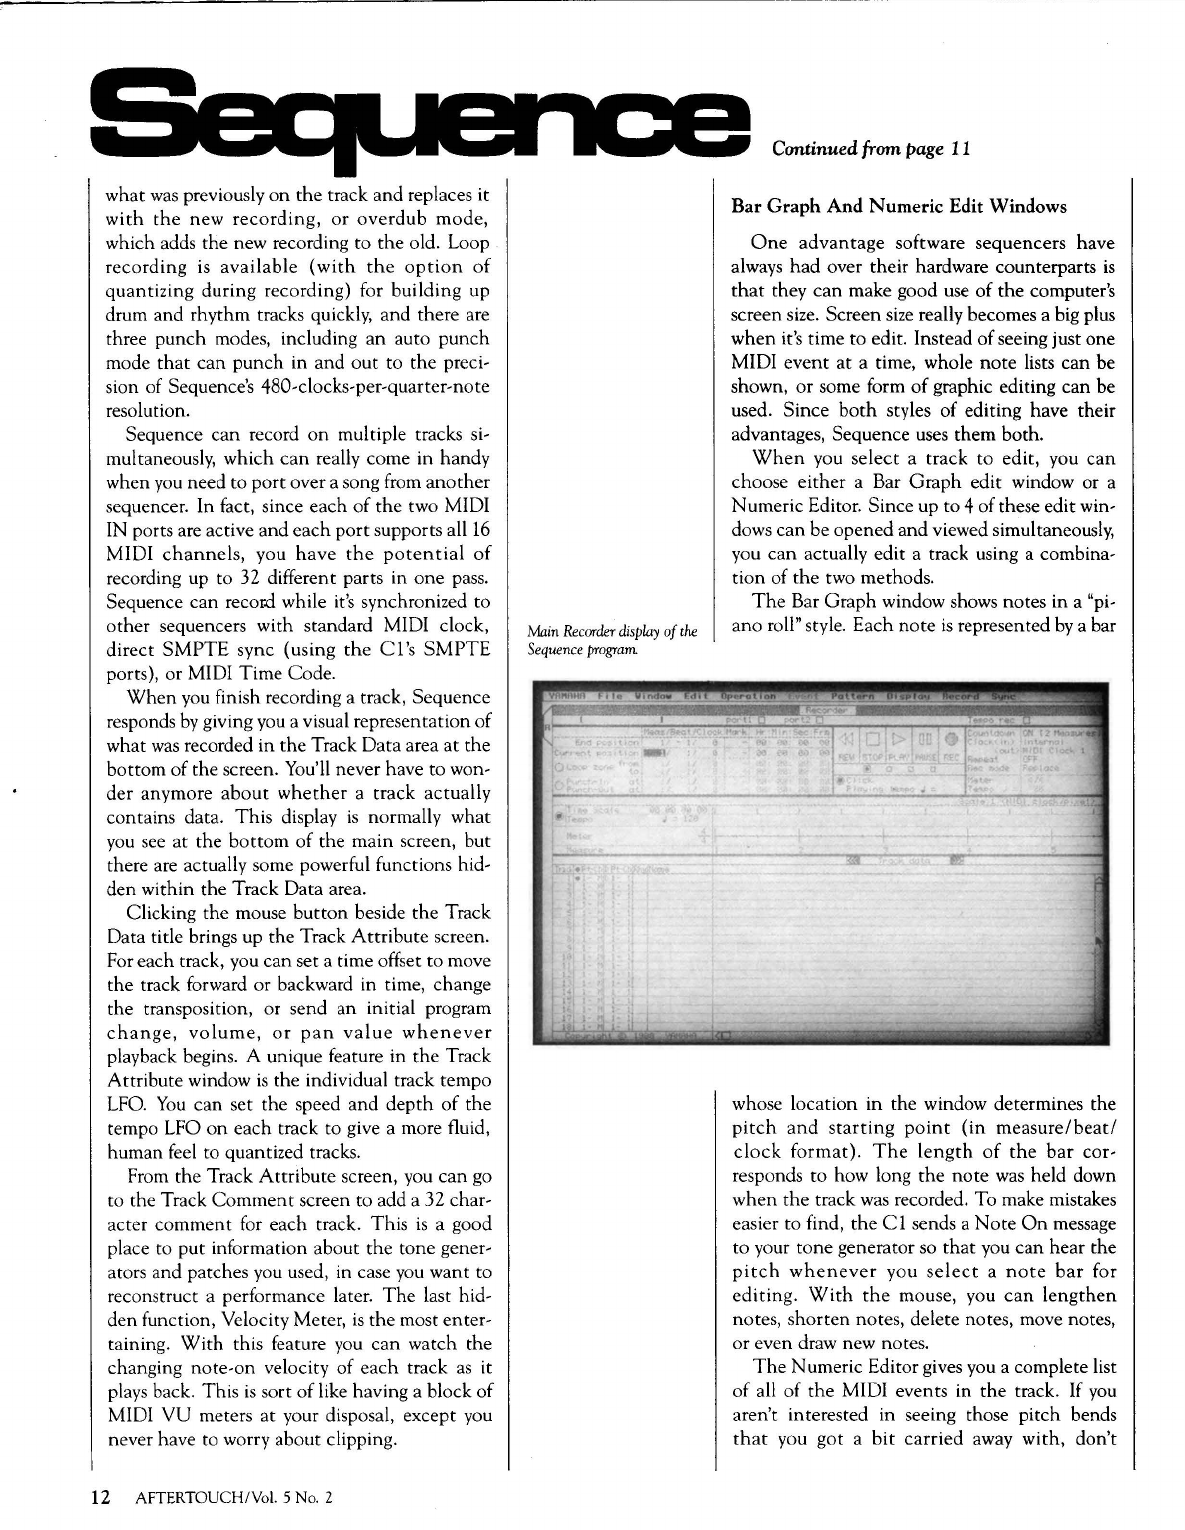
Main
Recorder
display
of
the
Sequence
program
Continued fram page
II
Bar
Graph
And
Numeric
Edit Windows
One
advantage
software
sequencers
have
always
had
over
their
hardware counterparts
is
that
they
can
make good use
of
the
computer's
screen size. Screen
size
really becomes a big plus
when
it's time
to
edit. Instead
of
seeing just one
MIDI
event
at
a time, whole
note
lists
can
be
shown,
or
some form
of
graphic editing
can
be
used.
Since
both
styles
of
editing have their
advantages, Sequence uses
them
both.
When
you
select
a track
to
edit, you
can
choose
either
a Bar
Graph
edit window or a
Numeric
Editor. Since up
to
4
of
these edit win-
dows
can
be
opened
and
viewed simultaneously,
you
can
actually edit a track using a combina-
tion
of
the
two methods.
The
Bar
Graph
window shows notes in a "pi-
ano
roll" style.
Each
note
is
represented
by
a bar
whose
location
in
the window determines the
pitch
and
starting
point
(in
measure/beat/
clock
format).
The
length
of
the
bar
cor-
responds
to
how long
the
note
was held down
when
the
track was recorded. To make mistakes
easier
to
find,
the
Cl
sends a
Note
On
message
to
your
tone
generator so
that
you
can
hear
the
pitch
whenever
you
select
a
note
bar
for
editing.
With
the
mouse, you
can
lengthen
notes,
shorten
notes, delete notes, move notes,
or
even draw new notes.
The
Numeric Editor gives you a complete list
of
all
of
the
MIDI events in
the
track.
If
you
aren't interested
in
seeing those
pitch
bends
that
you
got
a
bit
carried
away
with,
don't
worry, you
can
filter
out
any type
of
data
with
the edit filter. Like
the
Master Track editing
window,
the
Numeric Editor shows
the
starting
time
of
every
event
in
both
measure/beat/
clock
and
hour/minute/second/frame
formats.
If
you're scrolling through
and
want
to
hear
a par-
ticular note, clicking
the
mouse
on
the
note
number
will send it to your tone generators.
There's also a
PLAY
button
in
the
upper right
corner
of
the
window
that
will play all
of
the
events
that
are currently visible.
Any
of
the
data
that
appears
in
the
window
can
be
changed,
and
events
can
easily be inserted or
deleted.
Region Editing
If
you
don't
want
to
work
on
individual
events, Sequence lets you select a region
by
dragging
the
mouse over
the
desired area
in
the
Bar
Graph
or Numeric Editor window,
or
by
using
the
Set
Region
command
to
set region
start
and
end
points. Entire tracks
can
also be
selected
by
simply clicking
on
the
track
number
in
the
main
display.
In
addition
to
the
standard
Copy,
Cut,
and
Replace options, you
can
Filter
Out
specific types
of
data
from a track or use
the
"Cut
with Time" function
to
shorten
tracks
by
removing
the
selected region itself along
with
the
data
in
the
region.
As
you would expect
with
a professional se-
quencer, you
can
do
things
like
quantize
a
region
(Note
On
with
or
without
duration,
Note
Off
with
or
without
duration, etc.), trans-
pose, modify velocities
and
gate times,
or
thin
out
and modify controller data.
There
are also
some clever commands
to
create trills, tremolos
and
arpeggios from your recorded data.
And
if
you start getting tired
of
those step recorded
and
quantized tracks, there's a Bounce function
that
changes
the
feel
to
a shuffle or,
if
you like,
something more exotic.
Rhythm
Note
Assign
Tables
And
MIDI
Macros
If you've ever created a drum
part
for
one
drum
machine
and
then
decided
to
switch to
another
drum machine, you've probably
been
a
victim
of
the
"Those
Note
Assignments Don't
Live
Here"
syndrome.
Since
every
drum
machine manufacturer decides
on
a different
default
note
setting for
each
drum,
the
chances
are very slim
that
you'll actually
hear
a kick
drum playing
when
you play your kick drum
track with
the
new drum machine. Sure, you
could change all
of
the
note
assigns
on
the
new
machine,
but
you'll probably get tired
of
learn-
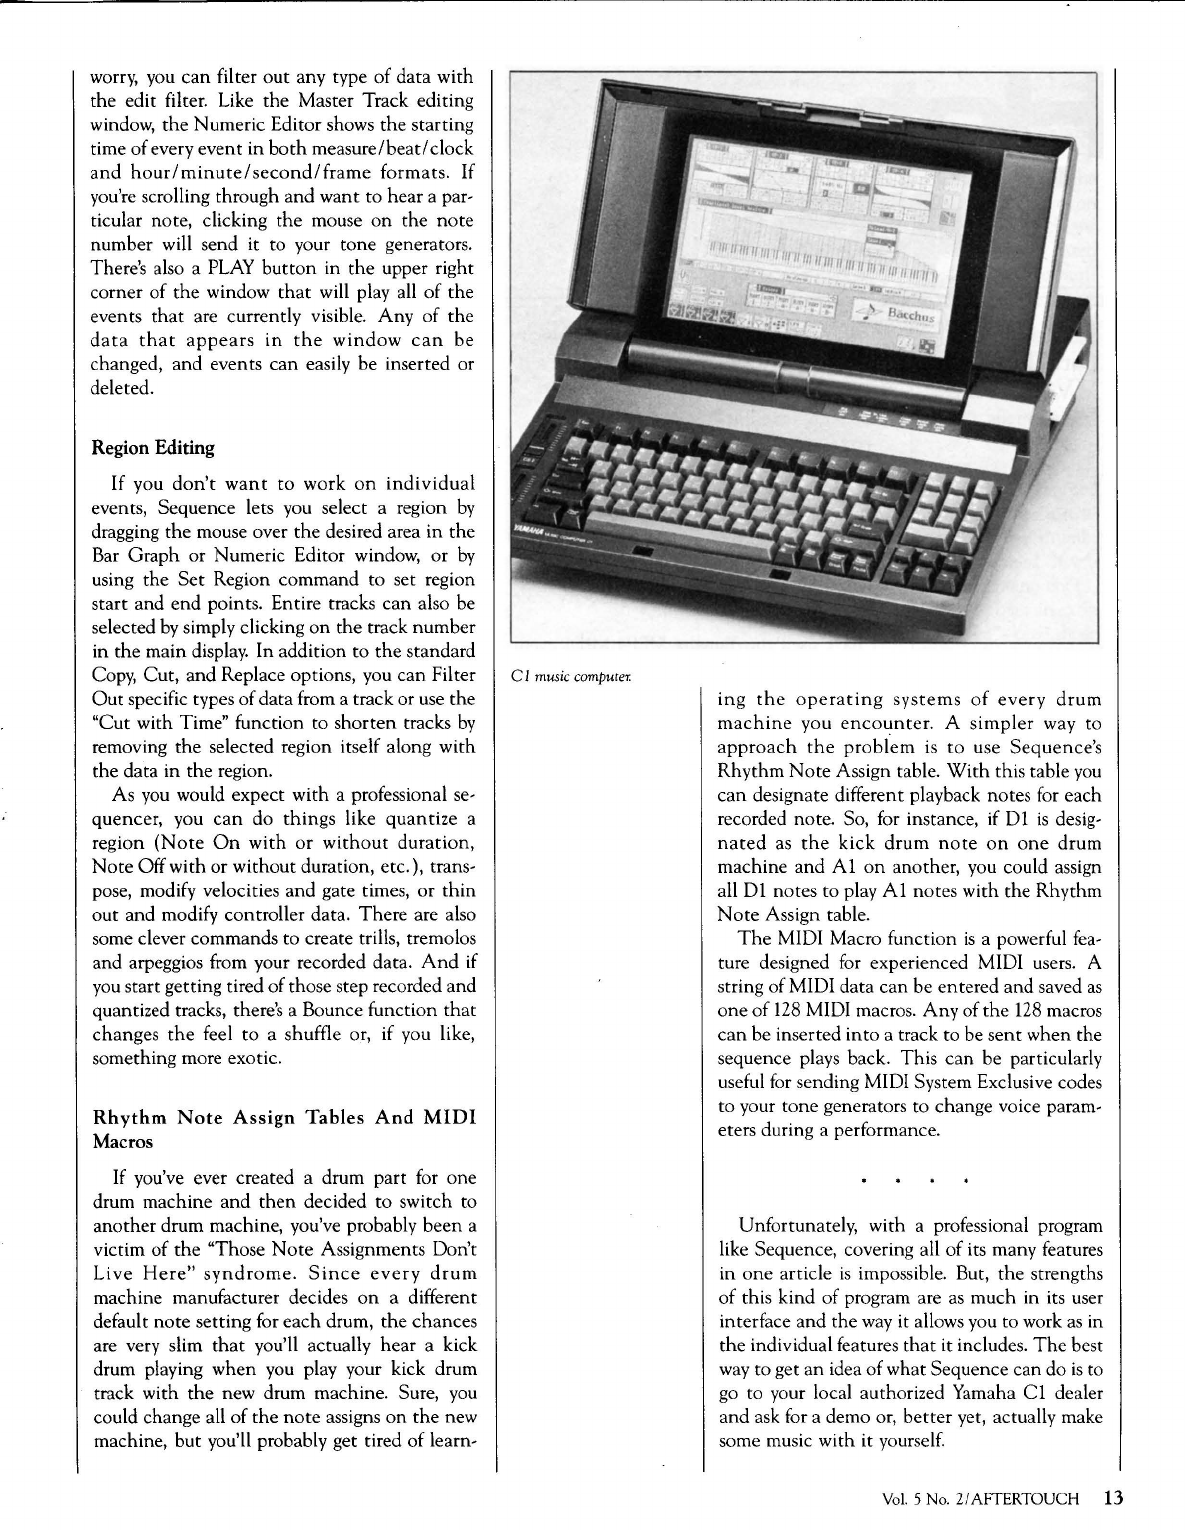
C I
music
computer.
ing
the
operating
systems
of
every
drum
machine
you
encounter.
A
simpler
way
to
approach
the
problem
is
to
use
Sequence's
Rhythm
Note
Assign table.
With
this table you
can
designate different playback notes for
each
recorded note. So, for instance, if
D1
is
desig-
nated
as
the
kick
drum
note
on
one
drum
machine
and
A1
on
another, you could assign
all
D1
notes
to
play A1
notes
with the
Rhythm
Note
Assign table.
The
MIDI Macro function
is
a powerful fea-
ture designed for experienced MIDI users. A
string
of
MIDI data
can
be
entered
and
saved
as
one
of
128
MIDI macros.
Any
of
the
128 macros
can
be inserted
into
a track
to
be
sent
when
the
sequence plays back.
This
can
be particularly
useful for sending MIDI System Exclusive codes
to
your
tone
generators
to
change voice param-
eters during a performance.
Unfortunately, with a professional program
like Sequence, covering all
of
its many features
in
one
article
is
impossible. But,
the
strengths
of
this
kind
of
program are as
much
in its user
interface
and
the
way it allows you
to
work
as
in
the
individual features
that
it includes.
The
best
way
to
get
an
idea
of
what
Sequence
can
do
is
to
go
to
your local authorized Yamaha C1 dealer
and
ask for a demo or,
better
yet, actually make
some music
with
it yourself.
Vol.
5 No.
2/
AFTER
TOUCH
13
Tips
Readers Tips
For The MEP4,
MV802, And
More.
MEP4
MIDI
event
processor.
Three
Ways To
Adjust
The
DX7's
Velocity
Range
With
An
MEP4
By
Jack
R.
McCreary
The
expressiveness
and
feel
of
the
DX7
and
PF15 (with a MIDI retrofit) make
them
excel-
lent
master keyboards. Unfortunately, however,
since
neither
keyboard puts
out
a higher MIDI
velocity
than
about 105, they are
not
very suit-
able for use
with
non-
Yamaha products
that
comply with
the
standard MIDI velocity scale
of0-127.
I have used
the
Yamaha MEP4 MIDI event
processor to change
the
velocity scale
of
the
DX7
and
PF15
in
the
following three
ways:
Velocity Shift. In its only explicit reference
to this issue,
the
MEP4 owners manual suggests
shifting
the
entire velocity scale, using settings
like this
on
one
processor:
O:MSG:9n. xx.
yy
1 :OFS:yy, V = +
22
(A
second
processor
is
also
needed
to pass
through velocity messages
of
0
in
an
unmodified
form to provide for
Note
Off commands.)
While
correcting
the
upper
end
of
the
ve-
locity scale, this solution also distorts
the
lower
end
of
the
scale so
that
extremely soft passages
can
no
longer
be
played.
3-
Way
Split
Velocity
Shift.
An
improve-
ment
over
the
above
setup
is
to
use
three
processors
to
add
extra
velocity
values
in
progressively greater amounts. {One processor
must still be dedicated to protect
the
integrity
of
14 AFTERTOUCH/Vol. 5 No. 2
Note
Off = Zero Velocity commands.)
Though
the
values should be tweaked to match different
equipment and playing styles, something along
the
following lines works welt:
Processor One:
The
message filter passes
both
Note
On
and
Note
Off
commands.
The
Data
Modifier
is
Limited (LIM) to pass through
unmodified velocity values from 0 through 40
(decimal) only.
Processors
Two
through Four:
Only
Note
On
commands pass
the
Message Filter. Using the
LIM
command,
each
processor
passes
through successive bands of
the
DX
or
PF
ve-
locity range; for example, 41-60, 61-80, and
81-105 (all decimal values). Following this,
an
offset (OFS) function adds progressively
greater amounts
of
velocity
in
each processor;
for example, V = + 4
in
Processor
Two,
fol-
lowed by V = +
12
in Three,
and
V = +
22
in
Four.
Though
the
modified velocity scale
is
not
seamless-there
is
an
abrupt break between 40
and 45, for example, and a gap
of
10
at the high-
est break
point-both
the
lowest and highest
MIDI velocity values are preserved. Further-
more,
the
breaks
that
do occur in this modified
velocity scale are effectively masked by
the
three-way split.
Under
the
Velocity Shift
for-
mula in example 1 above, a 22-point velocity
shift more
than
doubles
the
lower values. In this
setup,
10
additional units near
the
top
of
the
velocity scale represent a proportionately small
shift.
Reshaping
Upper
Velocity
Curve.
This
setup requires only two processors. Processor
One
passes both
Note
On
and
Note
Off com-
mands
through
the
Data
Filter,
and
sends
through (LIM) unmodified velocity values from
0 to 79 (decimal). Processor Two limits
the
range of modifications to
the
velocity scale from
80 to the upper
end
of the DX/PF scale.
The
velocity date (yy)
is
then
offset (OFS)
by
a
value of -40 and, finally, expanded
by
a factor
of 2 (EXP:
yy,
R = 2).
As a result of these operations, an incoming
velocity value of 80
is
still transmitted
as
80
(80-
40 = 40; 40x2 = 80). However, at higher
velocity values, the scale
is
reshaped to transmit
progressively
higher
velocity
values. For
example, 90
on
the DX/PF scale becomes 100 at
the MEP4's output
(90-
40
=50;
50x2 = 100).
The
maximum DX/PF value of
105
now be-
comes
130
(105-
40 =
75;
75x2 = 130).
Experimentation with these values suggests
that
an even lower break point
for
the begin-
ning
of
this upper velocity curve
can
be effec-
tive. Some
of
my MIDI slaves respond best
when the LIM command begins at a velocity
value
as
low
as
74
(decimal) with an OFS of
V=
-37.
For most applications, this
is
the
best solu-
tion
to
the
DX/PF velocity problem. Lower
velocity values are preserved; also, unlike the
two previous solutions,
the
maximum MIDI
velocity
of
127
is
reached
without
creating
discontinuities. In addition, this setup frees two
MEP4 processors for other assignments.
I hope other MEP4 users find these setups
useful.
Getting
More
Than
Eight
Input
Channels
From A Yamaha
MV802
Mixer
By James
A.
Laing, Jr.
I recently purchased a Yamaha MV802 to mix
my
keyboards and tone generators. I've discov-
ered that I really have more
than
eight input
channels available to me, even if the "extra"
channels don't have the same flexibility
as
the
eight "main" channels provided
by
MV802.
I have two stereo tone generators (Yamaha
TX802
and
Kurzweil
KlOOO)
plus a
drum
machine. I also like to use
the
MV802 for play-
ing CDs (using
my
portable
CD
player) while
the band
is
on
break. I only
use
one
of the two
available Effects Loops (for reverb),
so
I
use
the
MV802
rack-mount
mixer.
stereo returns from
the
unused Effects Loop
as
inputs for
my
CD
player! Using the Aux Return
controls, I effectively have volume and balance
controls
for
the
CD
player.
I
use
a Roland D-50
as
part
of
my
setup; since
I
use
its "built-in" effects only, I need to add
only its output to
the
mixer-so
I use the "Sub
In"
R/L
jacks. I simply
use
the D-50's volume
control and effects controls. This means
that
I've used four line-level sources (two for the
CD
player and two
for
the
D-50) without using any
of
the eight "main" channels.
The
eight main channels are available
for
the
TX802,
my
Kurzweil K1000,
and
my
drum
machine. Since these units use only six of
the
eight channels, channels 1 and 2 are still free for
mics!
And,
if I have a need
for
more inputs,
there's always
the
"Sub
In"
AUX 1 and AUX 2
jacks! I hadn't realized when I purchased
the
MV802
that
it would allow for such flexibility.
Maybe others could benefit from realizing
that
there
are ways to
add
extra
inputs
to
their
MV802.
Using
E! To Reduce Noise Levels
By
Mark
Nadlin
Here
is
a tip
for
E!
equipped DX7
II
users.
The
noise level
of
any
MIDI
piece
can
be
reduced
by
altering
the
velocity level in
E!'s
Track Assign map (accessed via button
#28).
Since "5"
is
the normal velocity level, levels
of
"6" or "7" work well.
On
muddy-sounding patches, increasing
the
curve to "Pos
1"
and decreasing the level to "4"
usually improves the clarity.
Altering levels here allows
you
to trim the
audio volume fader and results in "cleaner"
audio.
Vol.
5 No. Z/AFTERTOUCH
15
MIDI
Feedback
And
Other
Horrors.
By
Michael
Babcock.
STOP!STOP!STOP!STOP!STOP!STOP!STOP!
andtheregoesthatredlightagain
...
Ron can't make it stop, and he has to.
The
most
innocent
of gestures and
we
are buried
with exploding cascades of repetitious notes.
Feedback?! Shades of amateur engineering
at
a rock
concert
sound
check-the
Sorcerer's
Ap.prentice in sound,
no
brooms or buckets,
compressed to 700 milliseconds.
Click. (Ron got it
to
stop.) Blink. Stupor.
What
happened?
Welcome to
the
non-standard world
of
what
we
thought
was
a perfectly good MIDI cable.
Yeah,
folks. Feedback.
Ron
had
caught a great riff
on
the sequencer
of his Prophet VS synthesizer, and
had
decided
to do some program changing from his Atari-
ST-based sequencer. So he grabbed
the
MIDI
cords
he
bought
specially yesterday for this
occasion (on special), patched the
OUT
of
the
Atari to the IN
of
the VS, patched
the
IN of
the
Atari to the
OUT
of
the
VS, and turned
on
both
machines.
Instant sonic Sorcerer's Apprentice.
Ron
has
encountered
two standardization
sins.
One
is
on
the
Atari, the other
is
in his new
MIDI cables. Both problems arise because MIDI
doesn't use all S pins in the DIN connector.
The
MIDI specification uses a S-pin connec-
tor to do a job
that
requires only 3 pins because
at the time MIDI
was
born, S-pin DIN connec-
tors were cheap and available, and there
was
already a little experience using this type of
cable for synchronizing instruments.
So
the
specification calls for using only
the
middle
three pins
on
the
connector.
What
about
the
outside pins?
Atari's response
on
the
ST
was
to
reduce
component
count
(save money)
by
putting
the
MIDI IN and MIDI
OUT
signals
on
its two
sockets where they belong,
and
putting
the
MIDI
THRU
signals
on
the (unused) outer pins
of
the
ST's MIDI
OUT
socket-no
separate
MIDI
THRU
socket.
That
system seems safe
16 AFTERTOUCH/Vol. 5
No.2
enough, since a true MIDI cable doesn't use the
outer pins
at
all-the
THRU
signal simply goes
nowhere.
And
if
you
really want the Atari's
MIDI
THRU
signal,
an
easy,
pleasant Saturday
project builds you one. (If you're
not
into build-
ing, three audio DIN-to-RCA adapter cables
and
several RCA female-to-female adapters will
do it.)
The
manufacturer
of
Ron's new so-called
MIDI cables also did
something
contrary
to
MIDI spec. Rather
than
leave the outer pins
unconnected
to
any wires in
the
cable, this
manufacturer wired the left two pins together
and the right two pins together. (I've speculated
as
to
why and haven't come up with anything
convincing.)
The
combination of Atari
ST
MIDI
OUT
I
THRU
and
a cable
with
outer
pins wired
together
gave
Ron
a weird signal
path.
Any
MIDI signal passing from VS MIDI
OUT
to
Atari
ST
MIDI IN should stop
at
the
Atari, un-
less you have
connected
to
the
Atari
MIDI
THRU.
What
must
NOT
happen
in
this
hookup
is
to
allow a MIDI signal to flow into
the
Atari MIDI IN and get
onto
the
Atari MIDI
OUT
line.
THRU
yes;
OUT
no. But Ron's
cable has shorted the Atari MIDI
OUT
and
MIDI
THRU
together, and sent note informa-
tion back to the MIDI IN
on
the
VS.
The
VS
both
plays
the
note
and sends
that
note to the
VS's
sequencer-which
dutifully sends
it
to
MIDI OUT,
to
the
Atari
...
We now have a
feedback loop, using a MIDI hookup
that
is
en-
tirely normal and legal.
What's supposed to happen? Let's look
at
the
MIDI spec:
Cables shall have a maximum length of fifty
feet
(lS
meters), and shall be terminated
on
each
end
by
a corresponding S-pin DIN male
plug,
such
as
the
SWITCHCRAFT
OSGMSM.
The
cable
shall
be
shielded
twisted pair, with
the
shield connected to pin
2 at
both
ends.
What
pins do
we
attach
to?
What
do
we
do with
the
pins
we
don't
use?
Is
a cable
that
does
MORE
than
what
this paragraph says still a
MIDI cable? Some answers might come from
elsewhere in the MIDI spec.
The
diagrams help
some. They tell
us
that
on
both
MIDI
THRU
and MIDI OUT, pin 4
is
connected (through a
220-ohm resistor) to a + 5 volt power source in
the machine,
that
pin 5 gets the MIDI signal,
pin 2
is
grounded, and pins 1 and 3 are unused
and unconnected. (See Figure 1.)
On
MIDI IN, pins 4 and 5 go almost directly
to
a
light-emitting
diode
(contained
in
a
component called
an
opto-isolator) such
that
electrons must flow
into
pin
5,
through
the
light-emitting diode in
the
opto-isolator, and
back out of
the
machine through
pin
4. Again
there are unconnected pins: pins 1
and
3 again,
and
also
pin
2.
Repeat: pin 2
is
unconnected-it
is
not
grounded.
So what
we
have
is
a MIDI signal's electron
flow
(negative charges) passing from machine A
out
pin
5, into machine B via
pin
5, passing
through a light-emitting diode, back
out
of
machine B via pin 4, and back into maching A
via pin 5, ending up being pulled into the + 5
volt side
of
machine Ns power supply. (Interest-
ing: machine
B's
light-emitting diode
is
run
by
machine Ns
circuits-there
is
no
electrical
con-
tact!
So how does
the
signal get through?
Be-
cause inside machine
B's
MIDI IN opto-isolator,
a sensor picks up
the
emitted light from
the
diode
and
sends a
current
on
to
the
rest
of
machine
B.
For a very short distance, the signal
is
sent
by
light,
not
by
wire;
the
two machines
are
thus electrically isolated.)
And
here's a subtle detail:
the
MIDI spec
doesn't mention it,
but
it
is
important
that
the
circular metal housing
that
surrounds the 5 pins
in the cable be not
attached
to
the
shield
wire!
The
cable shielding
is
attached
to
pin 2
at
both
ends
of the cable; pin two of MIDI
OUT
and MIDI
THRU
are grounded,
so
the
cable shield will
work. This shield wire does
NOT
have to carry
a return current (unlike
the
shield in common
consumer-grade audio cables).
The
pin-S wire
sends a signal to
the
light-emitting diode, and
the pin-4 wire completes
the
circuit back
to
the
sending
machine.
Note
that
the
receiving
machine (MIDI IN) does not have
pin
2 con-
nected. So there should be no connection be-
tween
the
grounds
of
the
two machines!
But-
suppose the cable connector's metal housing
is
connected to
the
shield wire:
Then,
when
the
cable
is
inserted into
the
MIDI sockets
on
the
two
machines,
the
housings
contact
the
machines' metal chassis, creating
an
electrical
path
between
the
grounds
of
the
two machines.
And
now
the
electrical isolation
is
broken, and
the likely consequence
is
hum, maybe RFI, and
even computer
noise-noise
from the MIDI data
signal itself. But that's another MIDI Mixup.
So how do you protect yourself?
Check
your cables electrically.
You
can use a
test meter, set for resistance. If the meter jumps
to
(nearly) 0 ohms, it means "there
is
an elec-
trical path;" if
the
resistance remains high, it
means "there
is
no electrical path." (Any
other
value means you have a weird cable!)
You
might
make something out
of
some wire and a flash-
light (light means "electrical path"), or even
an
oscillator-use your ingenuity. Touch one tester
wire to one
pin
of
one connector (use
an
alliga-
tor clip if you have one.)
Now
go
the
other connector with your
other
tester wire,
and
touch
each
of
the
pins in
that
connector, and the circular metal housing.
You
should get these results::
• For the middle three pins ( 2, 4 & 5): each
pin
should be connected ONLY to
the
corresponding
pin
in
the
other
connec-
tor-2
to
2, 4
to
4,
and
5
to
5.
NO
connection to pins 1
or
3, or
the
hous-
ing. (Check especially:
no
connection
of
4
to
1,
nor
5 to 3 nor 2 to the housing.)
•
The
circular metal housing shouldn't be
connected to anything.
• Pins 1 & 3: well
...
Well, what about pins 1 &
3?
They shouldn't
be connected to 4 or 5.
If
they are unconnected
to
anything, that's
OK
for MIDI. How about 1
to
1,
and
3
to
3?
It
probably won't
hurt
any-
thing, unless some manufacturer gets nervous
about
unattached
connector
pins
(worried
about RFI noise), and grounds them.
Or
unless
somebody wants to save a nickel and puts some
strange signal
on
them, such
as
MIDI THRU.
But this
is
where
we
came in. .
..
Vol.
5 No.
2/
AFfERTOUCH
17
C1
Presenting A
Cl
Program
For
Loading
Data
From
A
Cl
Disk
To
A
DX7
II.
By
Jim
Smerdel
&
Tom
Darter.
THIS
MONTH,
we
present a simple
Cl
pro-
gram
that
can be used
to
load voice and
performance data from a
Cl
data disk to a DX7
II.
(It
is
the companion to last month's pro-
gram, which
was
designed to dump voice and
performance data from a
DX7
II
and save it to a
Cl
data disk.)
In
order to use this program, you
must first put together a disk
that
will hold
both
this program
and
the
other system files needed
to operate
the
Cl.
To
prepare the disk, follow
these steps:
1)
Boot up
the
computer with the DOS disk
in drive
A.
Put a blank disk in drive B and
format it, using
the
format command (as
follows-format b:/s).
2)
The
computer will prompt you from there,
and format the disk in drive
B.
A basic
form of
DOS
will be copied
onto
the disk.
3)
Copy
onto
the
disk
the
file
COMMAND.COM
from the DOS disk
in
drive
A
(use
this
command-copy
command.com b:).
4) Insert
the
MIDI Monitor disk
in
drive A.
5) Copy
onto
the disk
the
four BULK files
from the Monitor disk in drive A (use this
command-copy
bulk•. • b:).
At
this point,
you
still need
to
enter the pro-
gram, using
the
DOS text editor of your choice.
Type it in just
as
it looks, and save it to your disk
as
a text only file.
Be
sure to include
the
"BAT"
extension in
the
file name; this indicates
that
it
is
a
DOS
batch file.
Once
you have entered
the
program
on
the
disk, you are set. Put
the
disk in drive A (you
can
boot
the computer with this disk), and put a
data disk in drive
B.
Make MIDI connections
between the
Cl
and
the
DX7
II, and make sure
that
the
DX7's Device Number
is
set to
1.
The
program
is
expecting to see three banks
of
information from
the
DX7
II
(Voice bank
A,
Voice bank
B,
and Performance); however, you
don't have to send
or
receive all three banks. If
you
want to skip a bank or banks, use a single
"x"
as
a placeholder.
To
run
the
program, type
in the file name (LD-DX7II.BAT) followed
by
18 AFTERTOUCH!Vol. 5
No.2
the
names of
the
three files
you
want to send to
the
DX7 from your data disk (be sure to put a
single space between each of the file names);
then,
hit
RETURN.
echo
off
rem==============================
rem
After
Touch
Version
rem
LD-DX7li.BAT
SEPT
29,
1988
rem
Written
by
Jim
Smerdel,
ver
1.0
rem=====::;::=;::=:;;;==================;:;::;;
rem===========~==================
rem
Check
to
see
if
all
x's
were
entered?
rem=========:;:=================::;==
if
not%!= = x
goto
notx
if
not%2=
=x
goto
notx
if
not%3=
=x
goto
notx
goto
end!
:notx
rem
= = = = = = = = = = = =
=:;;;:;::;:
==
= = = = = = = = = = = = = =
tern
Check
to
see
if
the
files
exist
on
b:
drive?
rem==============================
if%
I = = x
goto
bank2
if
not
exist
b:%
I
goto
ckbank2
goto
bank2
:ckbank2
echo
• •
•%
I
isn't
on
drive
b,
Ctrl
+break
to
quit!,
or
to
continue
pause
:bank2
if%2
= = x
goto
perf!
if
not
ex~t
b:
%2
goto
ckperfl
goto
perf!
:ckperfl
echo
• • •
%2
isn't
on
drive
b,
Ctrl
+break
to
quit!,
or
to
continue
pause
:perf!
if%3
= = x
goto
continue
if
not
exist
b:
%3
goto
levck
goto
continue
:levck
echo·
''
%3
isn't
on
drive
b,
Ctrl
+break
to
quit!,
or
to
continue
pause
:continue
rem==========:;:::;;==================
rem
insert
file
names
into
bulk
transmit
commands
rem
and
create
temporary
file=
tempfile
rem======:;;:===============:::;::;;::;;;======
if%
I = x
go
to
bk2
echo
pause
•'
'Ready
to
send
voices
to
bank
1-32
of
the
dx7ll>tempfile
echo
tr
dx
7
_Lp_off(O),
I>
>tempfile
echo
trdx7_Lrblok(0,0), l>>tempfile
echo
tr
''b:%1",
l>>tempfile
:bk2
if%2
= = x
goto
pfl
echo
pause
• •
'Ready
to
send
voices
to
bank
32-64
of
the
dx7ll>>tempfile
echo
tr
dx
7_Lrblok(O,
I),
I>
>tempfile

L
ET
US
HEAR
FROM
YOU!
We
want
AfterTouch to be
an
information network
for
all
users
of
Yamaha professional musical
products, so please join in. We're looking for
many different kinds
of
material.
Have you created
an
incredible
patch
or
per-
formance for the DX7 II,
the
TX81Z,
or
any
of
the
other
members
of
the Yamaha family
of
FM
digital synthesizers and tone generators? How
about a patch for the SPX90
II
multi-effects
processor,
or
a great voice edit or
pattern
for
the
RX5? If so, send
them
in. If
we
use your mate-
rial, we'll give you full credit plus $25.00 for
each
item used.
Have you discovered a trick
that
increases
the
musical flexibility
of
one
of
the
Yamaha profes-
sional musical products?
Send
it
in
to our
"Hot
Tips" column. If
we
use
your tip, you'll receive
full credit plus a check for $25.00.
Have you developed a new approach to
one
of
the
Yamaha professional musical products, or
have you discovered an important secret regard-
ing their
use?
Put it
on
paper and send it to
us.
Don't
worry about your writing
style-just
get
the
information down. If
we
decide to use your
material
as
a full article
in
AfterTouch, we'll
write it up, put your name
on
it,
and
send you a
check
for
$100.00.
(An
AfterTouch
article
always covers
at
least
one
magazine
page-
which translates to
at
least four double-spaced
pages of typescript.)
C1
echo
tr
"b:%2
11
,
l>
>ternpfile
:pfl
if%3
= = x
goto
nopfl
echo
pause
'"Ready
to
send
Performance
data
to
the
dx711>
>tempfile
echo
tr
"b:%3",
1 > >tempfile
:nopfl
echo
beep
'
''
'
''
''finished'' ' ' '
''
> >tempfile
rem==============================
rem
redirect
commands
from
temporary
file
into
bulk
program.
rem==============================
By
the
way,
we
cannot
assume liability for
the
safe
return
of
unused ideas, patches, or manu-
scripts.
We
will only be able to
return
unused
material if you enclose a self-addressed, stamped
envelope with your submission.
And,
if you just have a question regarding
the
use
of
Yamaha professional musical products,
send it along too. We'll do our best to answer it
in
the
pages
of
After Touch. (We regret
that
we
won't
be able to answer questions through
the
mail,
but
we
will use all
of
your questions to
guide
us
in
our
choice
of
future topics.)
Receive
AfterTouch
Free
Every
Month!
YOU
CAN
RECEIVE
AFTERTOUCH
for
an
entire year, absolutely free, just by asking. If
you are
not
already
on
our
mailing list
and
would like to be, just send
us
a request in a letter
or
on
a postcard. Include your name and mail-
ing address,
and
be sure
to
sign your request (a
postal regulation); it lets
us
know
that
you really
want
to
receive After Touch.
When
we
receive your card
or
letter, we'll
put
you
on
our
permanent
mailing list,
and
you will
receive twelve issues
of
AfterTouch absolutely
free!
There
is
absolutely
no
obligation,
and
no
other
strings attached.
(If
you received
this
issue
in
the
mail, you are
already
on
our
permanent
mailing list, so you
don't
need to send
in
another
card.)
bulk<tempfile
del
tempfile
goto
end
Continued
rem==============================
rem
if
you
come
directly
here
you
must
have
entered
all
x's
rem==============================
:end!
echo
• • •
"you
must
enter
at
least
one
file
name!,
try
again.
:end
AFTER,
TOUCH
is
a
monthly
informational
publication from
the
DMI
Division
of
Yamaha
Vol.
5 No. 2/ AFTERTOUCH
19
AFI
'ERTOUCH
P.O. Box 7938
Northridge,
CA
91327,
79~
•
or
program
changes
a
during
cue,
it
is
very
important
to
remember to reset everything for
the
beginning
of
the
next
take-this
is
one
of
the
easiest things
to
forget
and
screw up on.
Just
as
you learn about new difficulties
at
each
session, you also learn
about
things
that
help you get through the
day.
Here are three
things
that
came
in very
handy
for me during
the
sessions:
1)
The
Yamaha
YME8.
In
simple
MIDI
setups like
the
ones used for
"The
'burbs" ses-
sions, it
is
very easy
to
turn
instruments
on
and
off
with
a YME8:
You
don't have to remember
to
reach somewhere else
to
turn
volume
on
and
off.
Also, if you are using
an
instrument
with a
"Local
Off'
MIDI feature as your master, you
can
hook
the
instrument
to
itself using YME8
and
make all MIDI changes
at
one
location-
this allows you use
one
keyboard
as
the
master,
even
when
its sound
is
not
required.
Of
course,
for more complicated MIDI setups, a more com-
plicated MIDI
patching
system
is
a necessity.
2)
More
than
one
keyboard instrument. Even
with
sophisticated
MIDI
patchers,
complex
MIDI master keyboard controllers,
and
state-of-
the-art
tone
generators, it
is
sometimes useful
to
be able
to
change sounds simply
by
moving your
hand
to
another
keyboard.
Granted,
it
is
great
to
need only two (or three)
to
get
the
job
done
20
AFTERTOUCH/Vol. 5 No. 2
• Continued from page 7
(thanks
to
rack-mount
MIDied
tone
gener-
ators),
but
it's also great
to
have an extra key-
board
when
the music
is
moving and changing
quickly.
3)
Your fellow keyboardists. A
few
of
the
cues
called for odd MIDI changes between instru-
ments
that
were parts
of
more
than
one desk;
in
every case, the players all banded together to
figure
out
a
way
to
take care of it (plug in
or
pull
out
a MIDI cable, adjust volume
on
an
instru-
ment,
and
so
on).
During
the
sessions, Jerry
Goldsmith
was
adept
at
making quick changes
to
his music
to
meet
the
changing needs
of
the
picture.
At
one'
point,
Joe
Dante
asked
him
how
he
was
able
to
do it so consistently,
and
Jerry answered, "It
comes from working in radio, which was done
live. If there are just
ten
minutes until air time,
you take care
of
it!"
Of
course,
some
things
always have
to
be
done
again, especially if
the
cut
of
the
film
changes following preview screenings.
We
had
one
final single session
on
January 3rd,
1989,
from 7:30
to
10:30 PM.
Only
a
few
cues were re-
done,
and
everything
went
smoothly.
At
the
end
of
the
session, Jerry told Joe
Dante
jokingly
that
he
couldn't make any more changes, since
he
(Jerry)
was
leaving for Italy
the
next
day,
to
begin work
on
another
film score.
