Clion Linux Setup Guide
User Manual: Pdf
Open the PDF directly: View PDF ![]() .
.
Page Count: 8

Clion Linux setup guide
Account setup:
1. Go to Clion website and create an account by clicking the “Buy” button. (The software is free for students)
2. On the next page choose “Discounted and Complimentary Licenses” and pick “For students and teachers”
3. Then on the next page click on “Apply now”
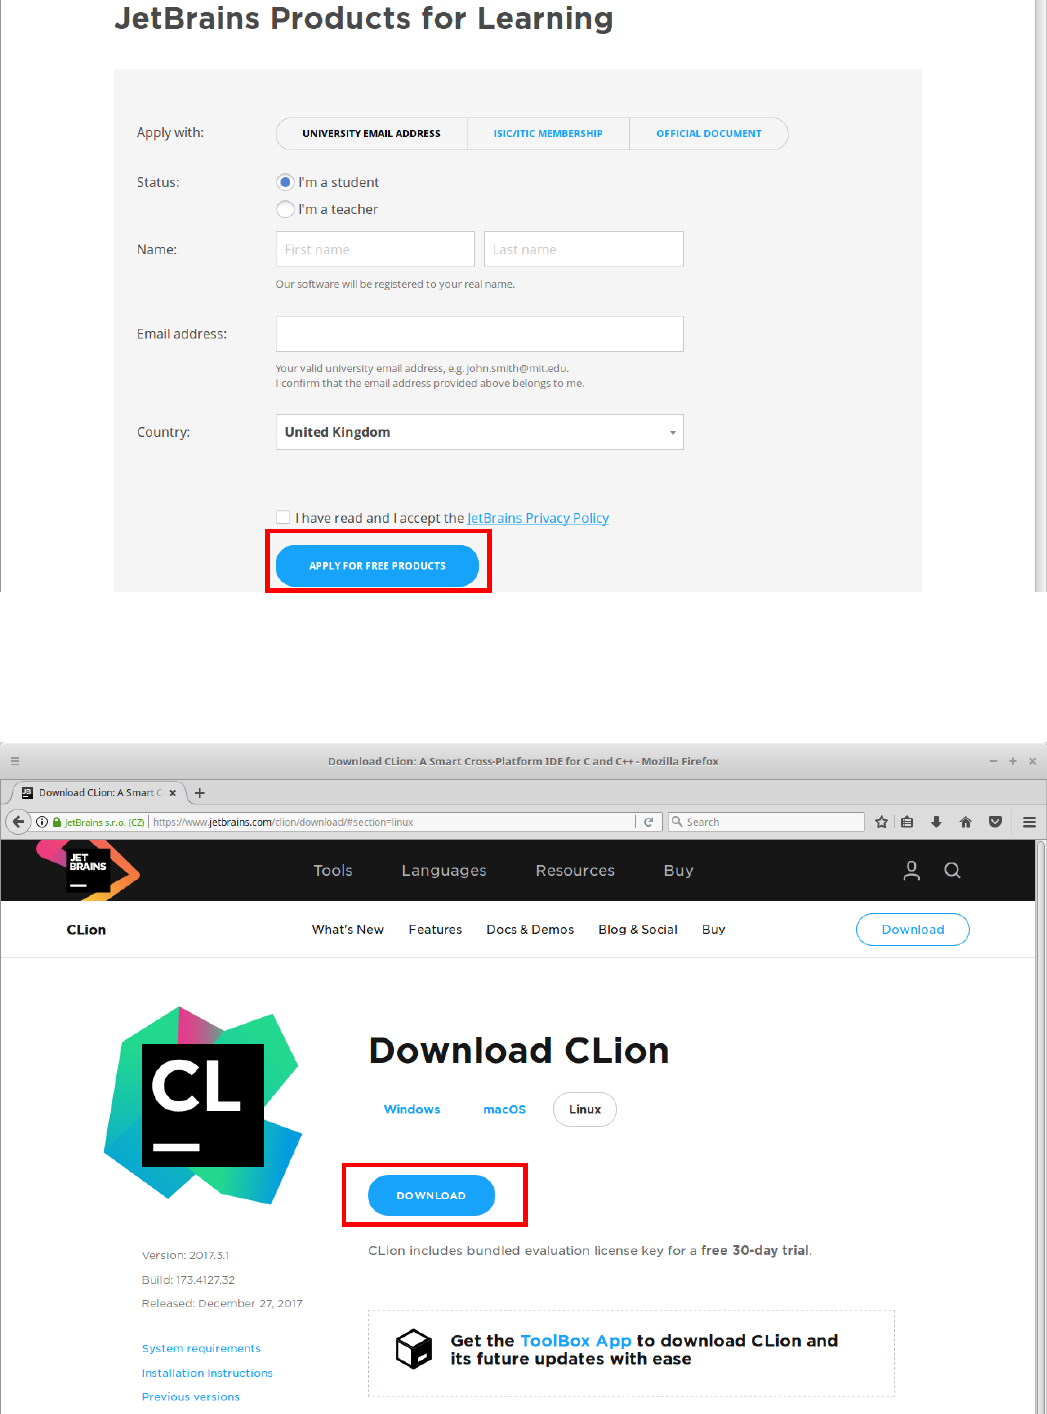
4. You will need to fill in the details, please make sure that you use your University email
(@students.southwales.ac.uk). Once done click “Apply for free products”
Download and installation:
1. Go back to Clion download page and download the installer
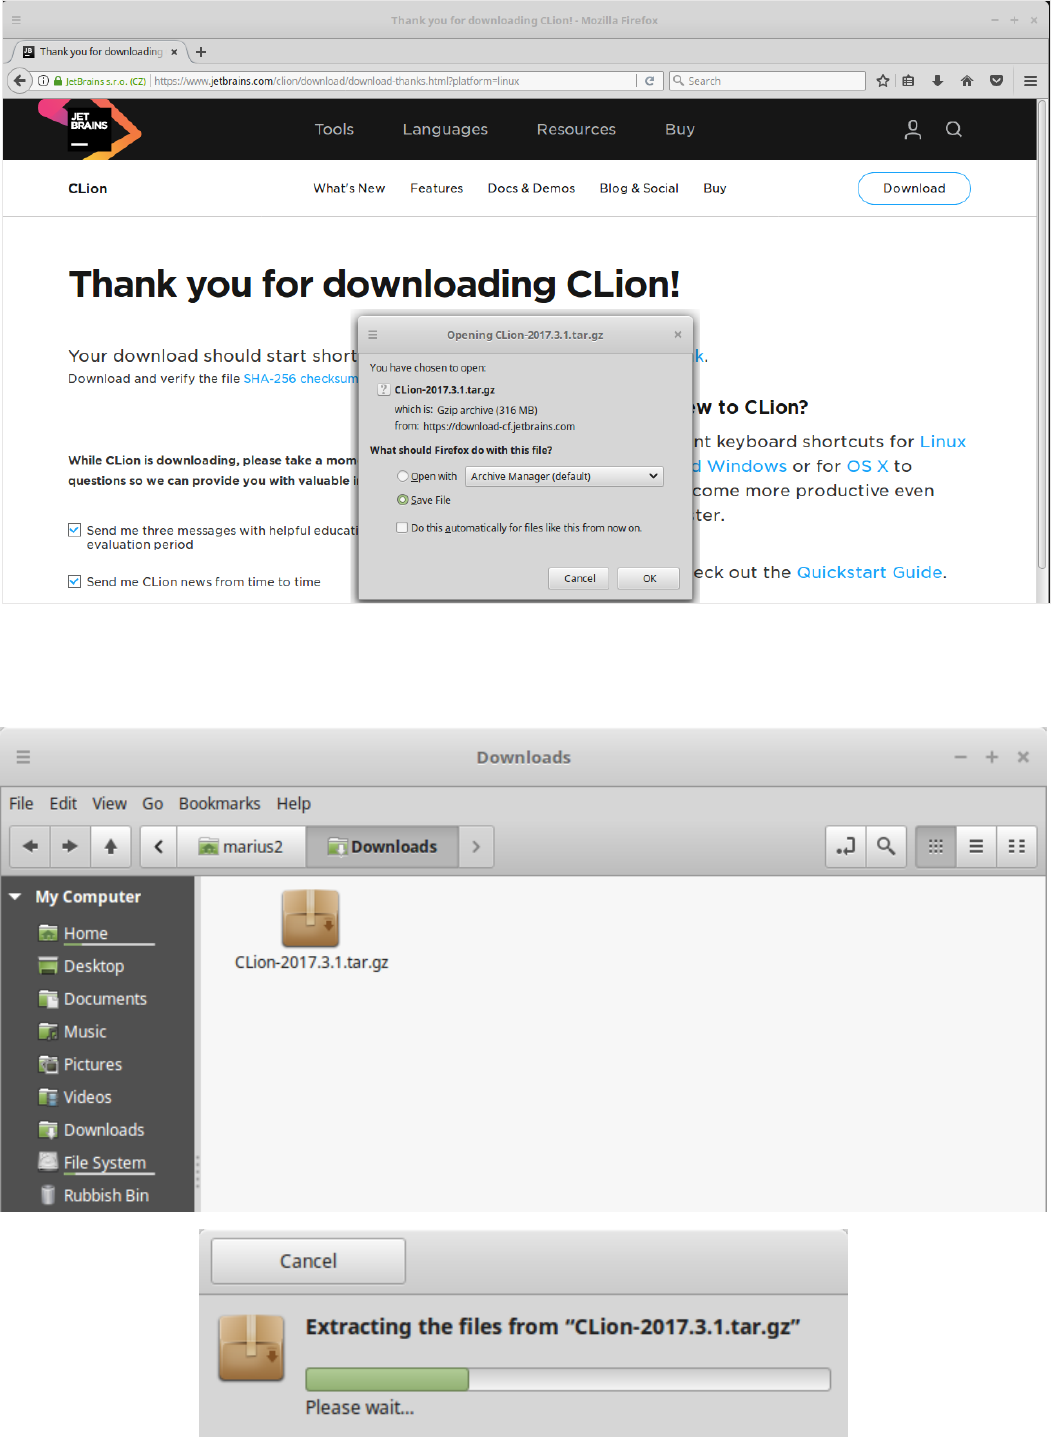
2. Save the file:
3. Once saved go to the Downloads directory and from there you will have two options: move the file to home
directory and extract it there or open the file and extract it to home directory. Whichever way you do it the
extracted Clion folder should end up in Home directory.
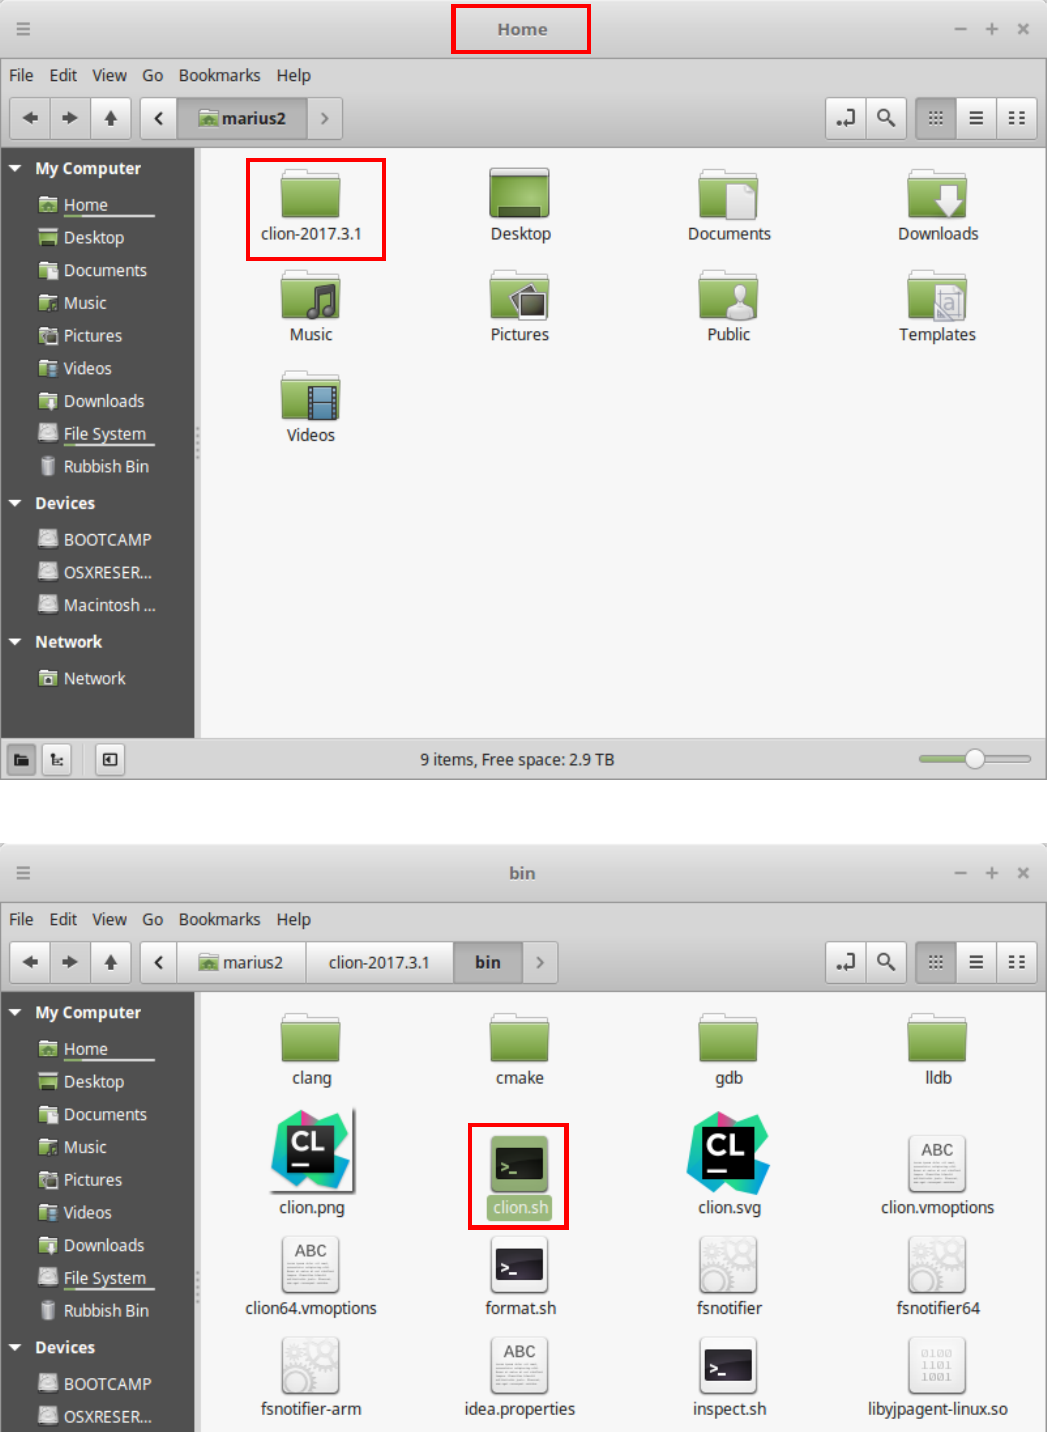
4. Make sure that the extracted Clion folder ends up in Home directory:
5. Once extracted open the Clion directory and go to bin folder and there you will see “clion.sh” file, open it
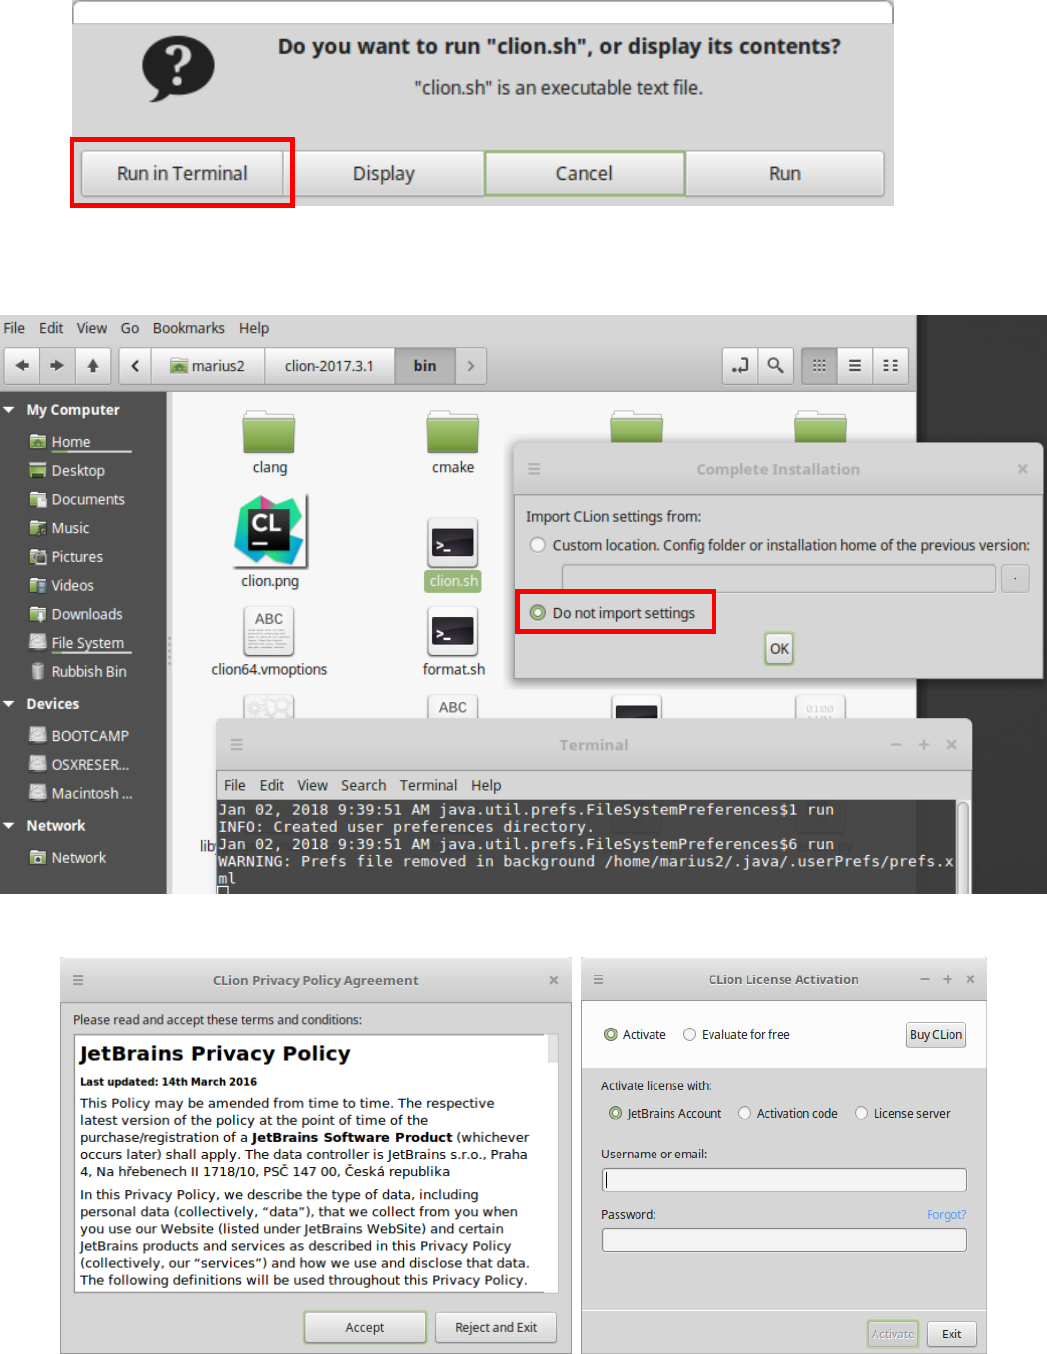
6. When the prompt pops up click on “Run in terminal”
7. Once opened you will another prompt and just click “ok” we don’t need to import any settings.
8. Accept the license agreement and login with your created account.
9. With this complete just go through he setup process which should be straight forward, all the compiler
settings should be setup automatically.
Running and creating projects:
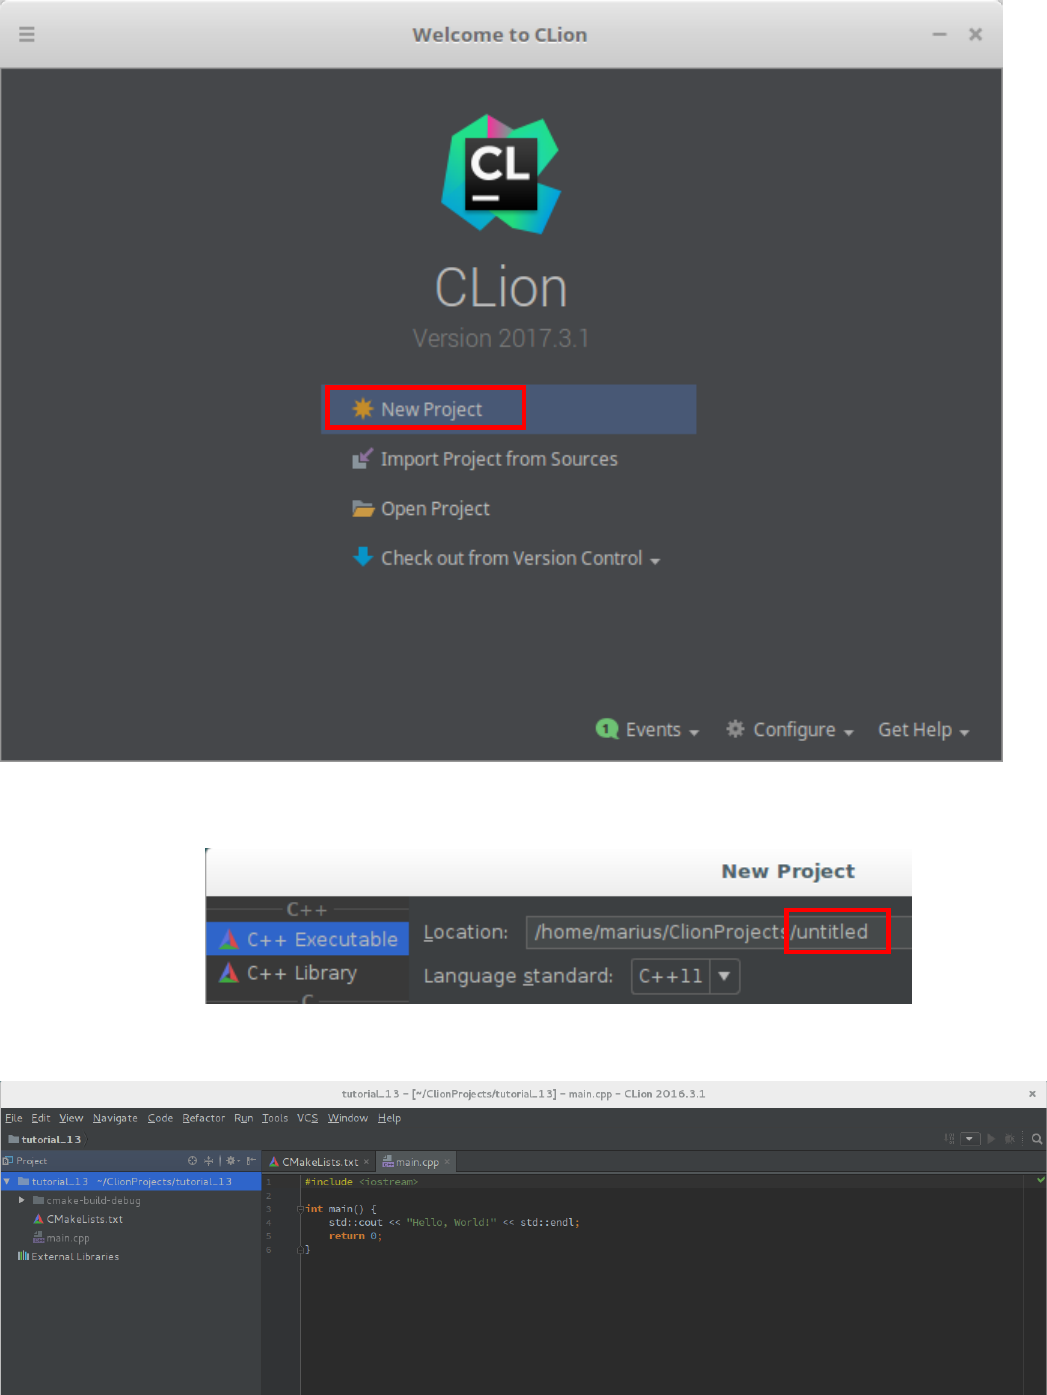
1. You should see the welcome window below at the end of the setup process:
2. Click on New Project and give it a name by changing the “untitled” part of the path. Try to stick to
“tutorial_number” naming convention e.g. ‘tutorial_13’
3. With project created you will be shown the project window:
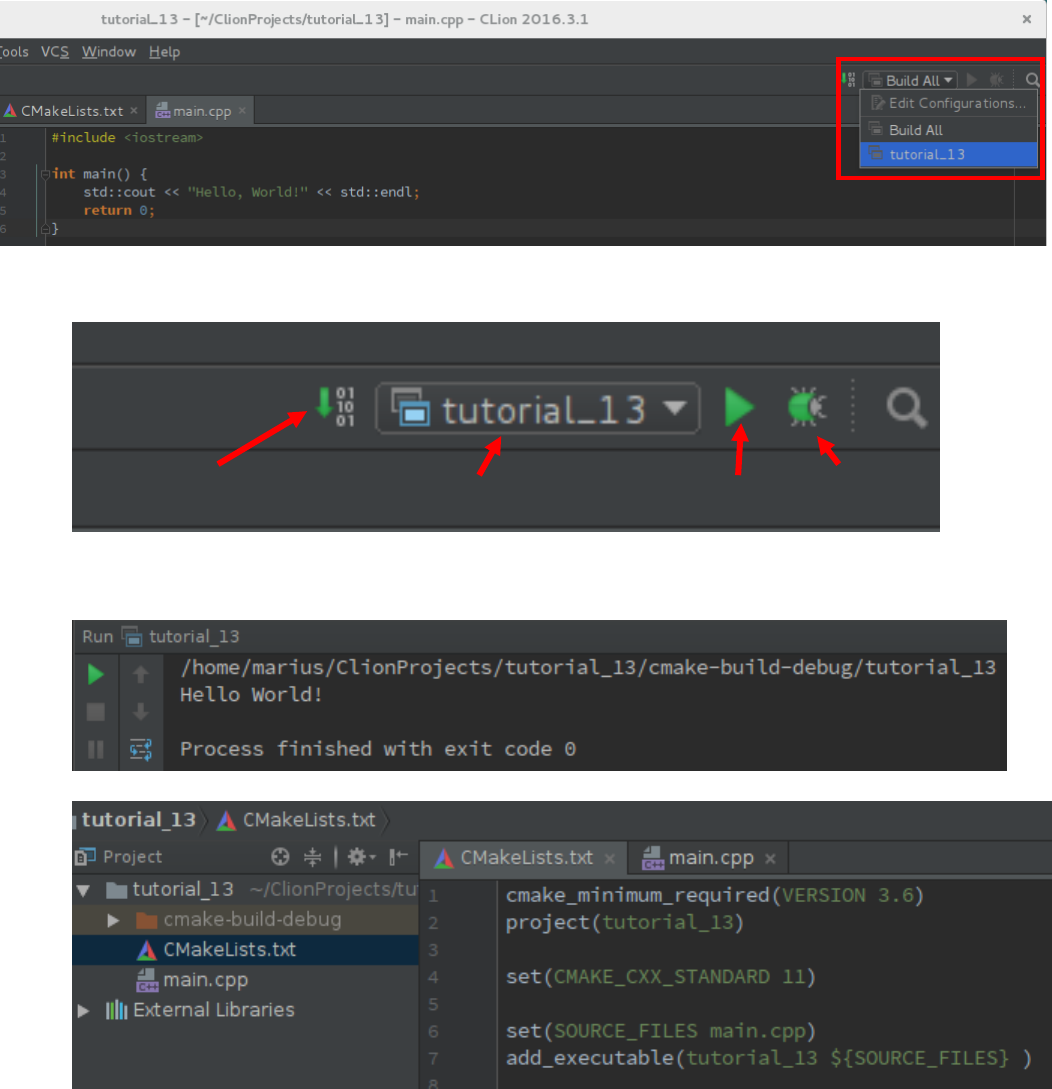
To build and run your current project from the drop down menu on the right hand side choose your project.
4. These are the following Clion options to build and run your applications:
Run the default code and you should see the “Hello word!” output panel at the bottom
5. To include additional files or libraries the CmakeLists.txt needs to be edited:
6. To add a new library you will need a target_link_libraries() command at the end of the CmakeLists.txt file in
which you set the project name and the name of the library you want to add. This command must go last.
e.g. to add pthread library to the project the command would look like this:
target_link_libraries( tutorial_13 pthread )
7. (OPTIONAL) IF you want to add any additional files use the set(SOURCE_FILES main.cpp) command.
e.g. to add exampleClass.h and exampleClass.cpp files the new set command would look like this:
set(SOURCE_FILES main.cpp exampleClass.h exampleClass.cpp)
Build
Run
Debug
Selected project to be compiled
