Cold Guide
User Manual: Pdf
Open the PDF directly: View PDF ![]() .
.
Page Count: 7
Controller-Cold-Setup
This is the advised method to setup your Masternodes. The wallet containing the
coins does not have to be exposed and can run on your local computer. It does not
have to run all the time and you are not vulnerable to someone hacking your VPS
because all he can do when he hacked your VPS is stop your MNs but not steal your
coins!
Desktop Wallet Setup
In the first steps the desktop wallet will be setup. This is the wallet you can run on
your local PC. When the masternodes are connected this wallet can be closed and the
PC does not have to run in order for the masternodes to generate rewards.
We will create an address, private key and transaction for each masternode (MN in
the following) and show the necessary steps for configuration.
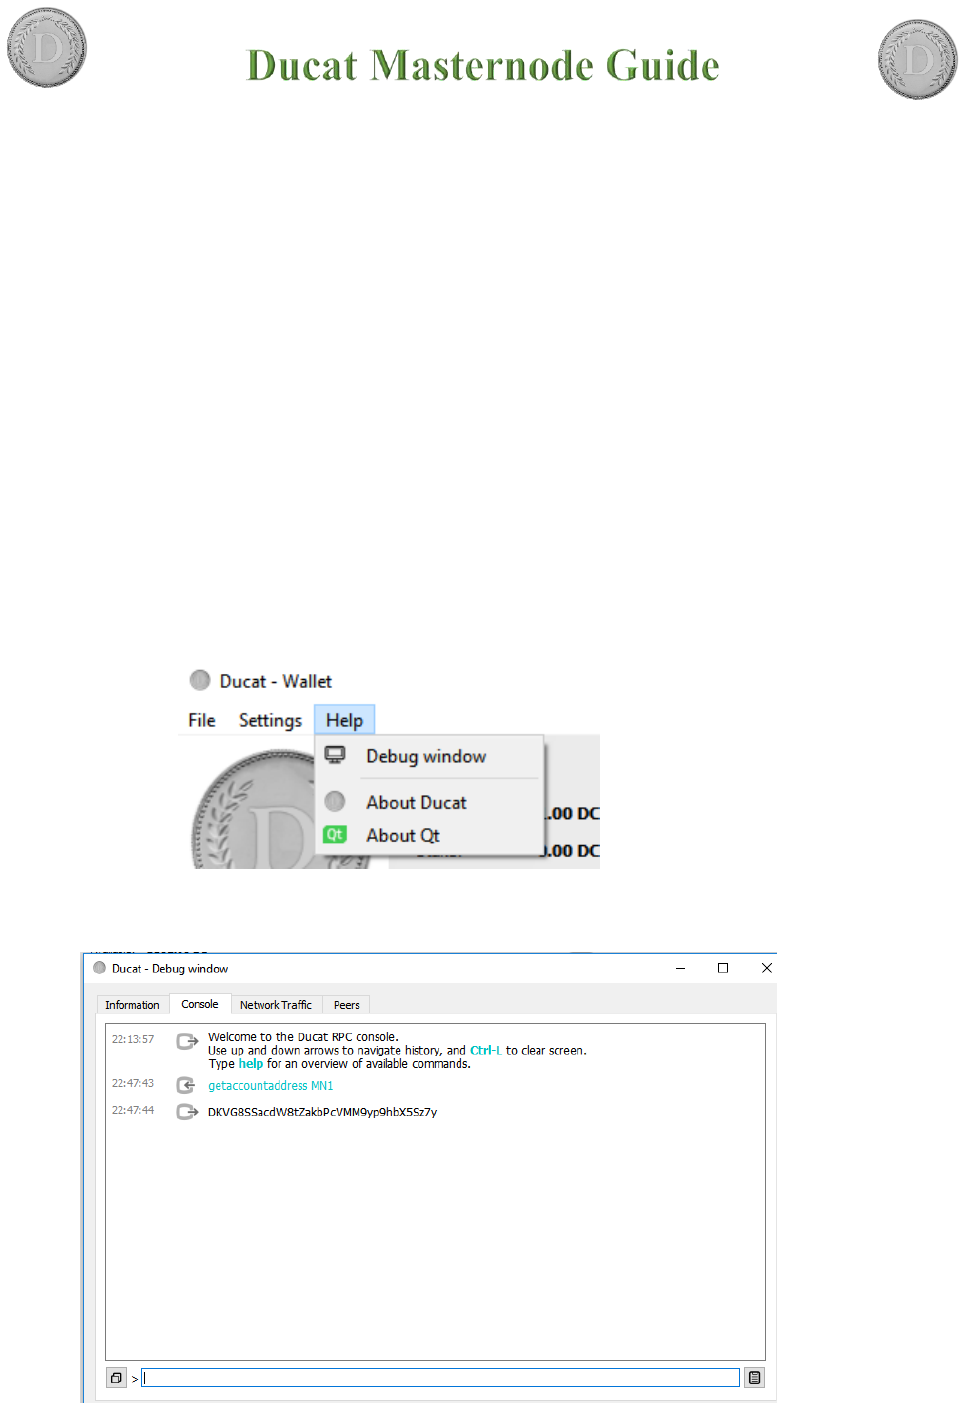
1. Open Console: Tools → Debug window
2. Type “getaccountaddress MN1” and press Enter.
Repeat this step for the amount of masternodes you want to setup as shown. Make
sure you count up (MN1, MN2 etc.)
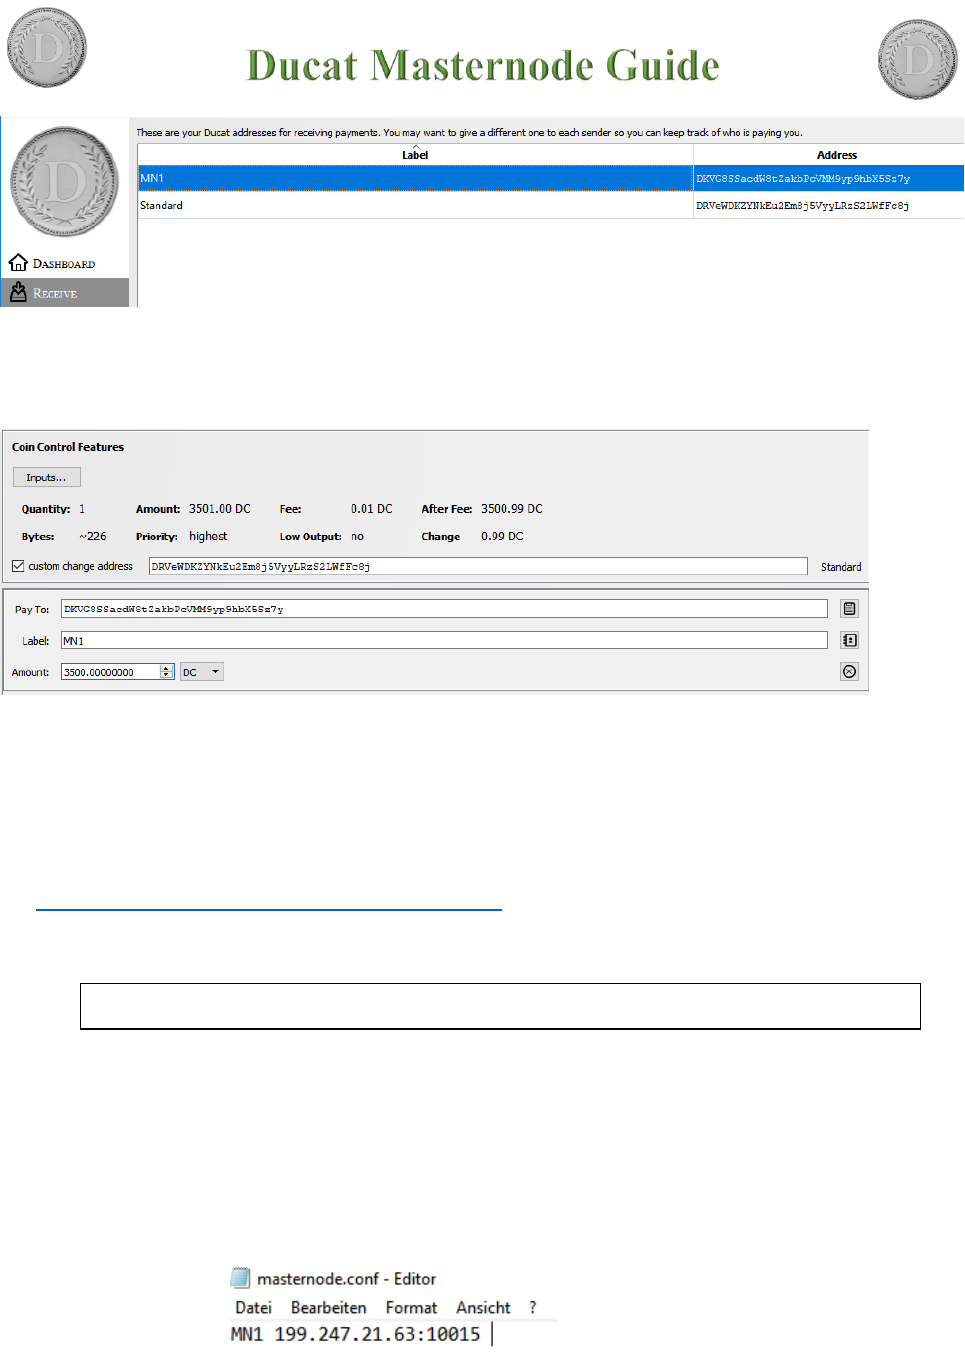
These are the addresses that will be associated with the MNs. You can view all
you created addresses under Receiving Addresses
3. Send exactly 3500 coins to the MN address
Klick on “add recipient” to add lines so you can send to all nodes in one
transaction.
4. Now create (or open) the “masternode.conf” this file is located
under %appdata%\Roaming\Ducat
Make sure you activated file extension!
We will now add a Line for each MN with the following Format:
a. Begin by entering and alias IP:port
i. Alias: the name of the MN receiving address (we named them MN1,
MN2, …)
ii. IP: The static IP of your server (If you don’t have one scroll down to find
out where to get one!)
iii. port: A port the MN will connect to. The port is not fixed and multiple
nodes can run on one server but need different ports.
You can have more than one node per IP just adjust the ports. If you don’t have a
linux VPS by now please scroll down to “Get a Linux VPS first”
b. Next we get the “masternodeprivkey “
alias IP:port masternodeprivkey txhash outputindex
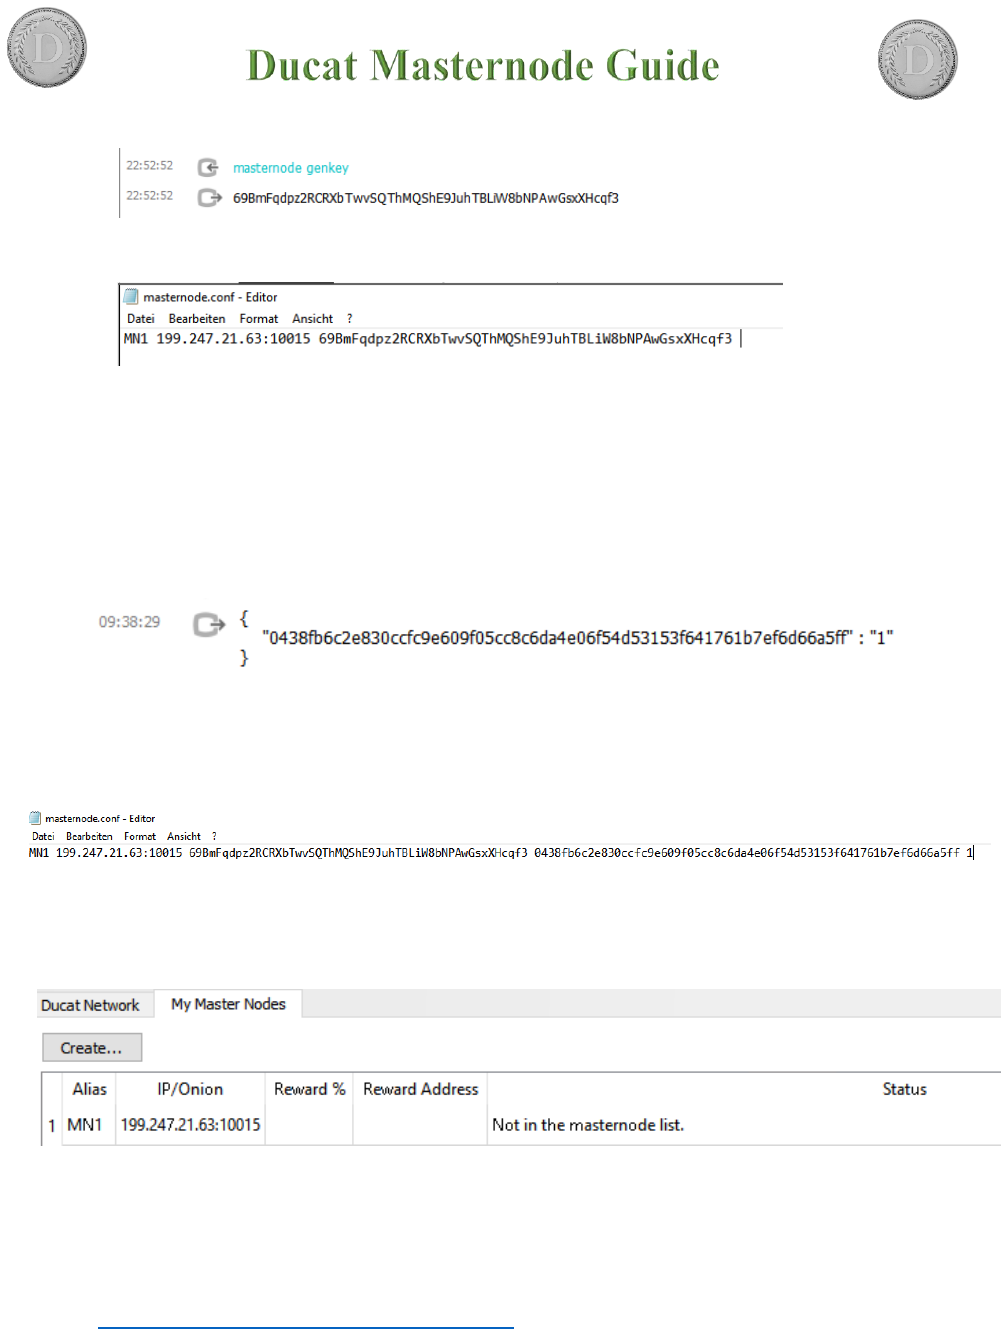
i. Open debug console again, type “masternode genkey” and press enter
ii. Repeat the line for each MN you want to setup
iii. Copy the output keys to the config
The private keys are used for voting and identify you as the real owner so don’t
share them.
c. Next we will add txhash and outputindex
i. Go to the debug console again, type “masternode outputs” and press enter
ii. If you send the coins in one transaction the “txhash” will be the same. If
you add a masternode later, another tuple will be added. So every
masternode has a unique pair of txhash and outputindex
iii. Copy the information to the config file (Make sure you don’t forget the
index!)
This is what your config should finally look like.
5. Save the file and restart the wallet.
Verify now that your MN are shown in the Masternodes tab. (Press the update
button below)
Getting a VPS
For the cold wallets you first need a Linux VPS. You can get very cheap ones for
5$ here: https://www.vultr.com/?ref=7285424. These can run around 3 different coin
masternode. The more isolation you have the less likely you are hit big by a server
outage.
After registration you get to the Dashboard. You have to do the first payment with
something else then Bitcoin. After the first payment you can pay the servers in BTC.
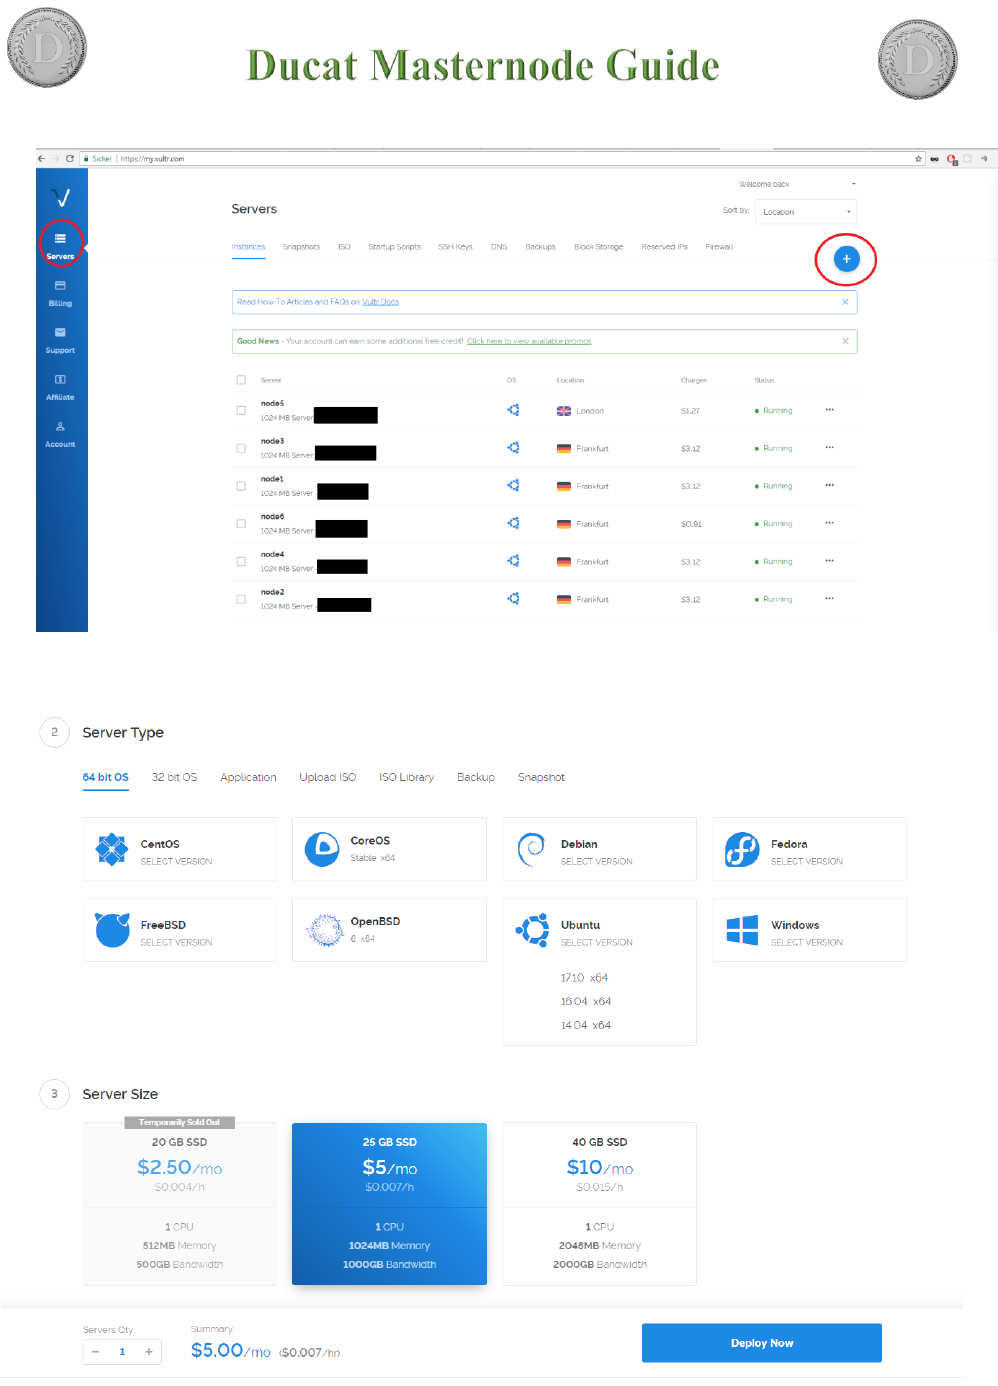
6. Deploy the server
Hit the plus top right to add new instances
7. Choose a region near you. It does not really matter.
a. As “Server Type” choose Ubuntu and klick 16.04 (Important don’t take
17.10!)
b. As Server Size choose the 5$ instance with 1GB Ram. If available you can
choose the 2.50$ one if you only want to run only one node on it.
c. Scroll down and give the node a name.
d. After that click “Deploy now” in the overview you should see this:
8. Connect to the Server.
e. You will need some SSH tool connect. I use “Royal-TS” to manage several
connections at once. It’s a bit harder getting used too but has real value.
f. To connect with “putty” a basic tool refer to this guide
g. You can find username (root) and password when you click on the newly
created instance. The installation has to finish before!
h. Note: pasting your clipboard is “right click”
Automatic server installation and setup.
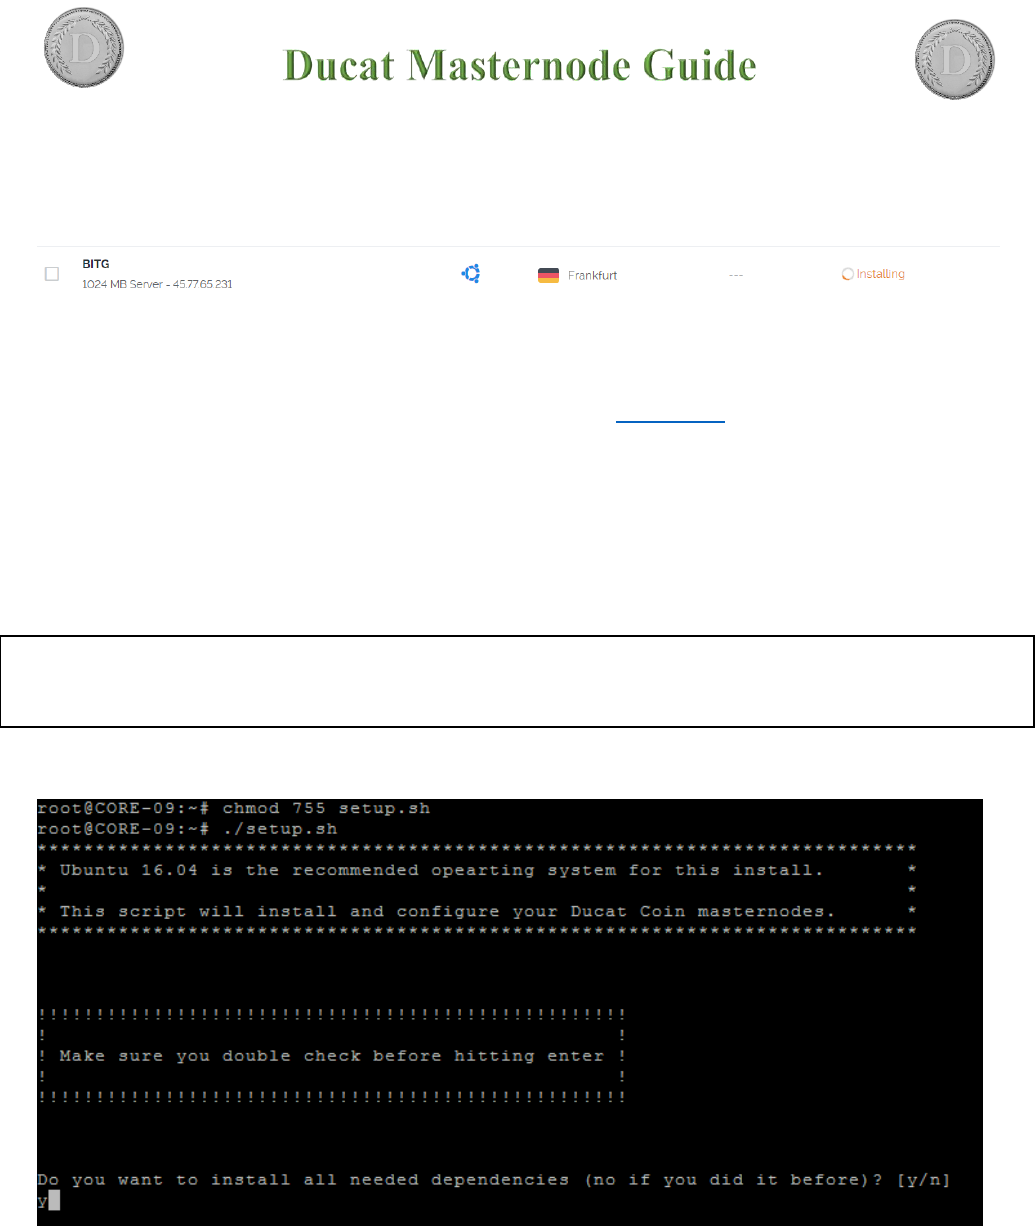
9. Download and execute script on VPS:
This process is interactive and takes several minutes.
Enter y and press enter when you first setup the server. All dependencies and
needed programs will be installed (takes ~10-30 minutes for compilation)
wget https://raw.githubusercontent.com/XeZZoR/scripts/master/Ducat/setup.sh
chmod 755 setup.sh
./setup.sh
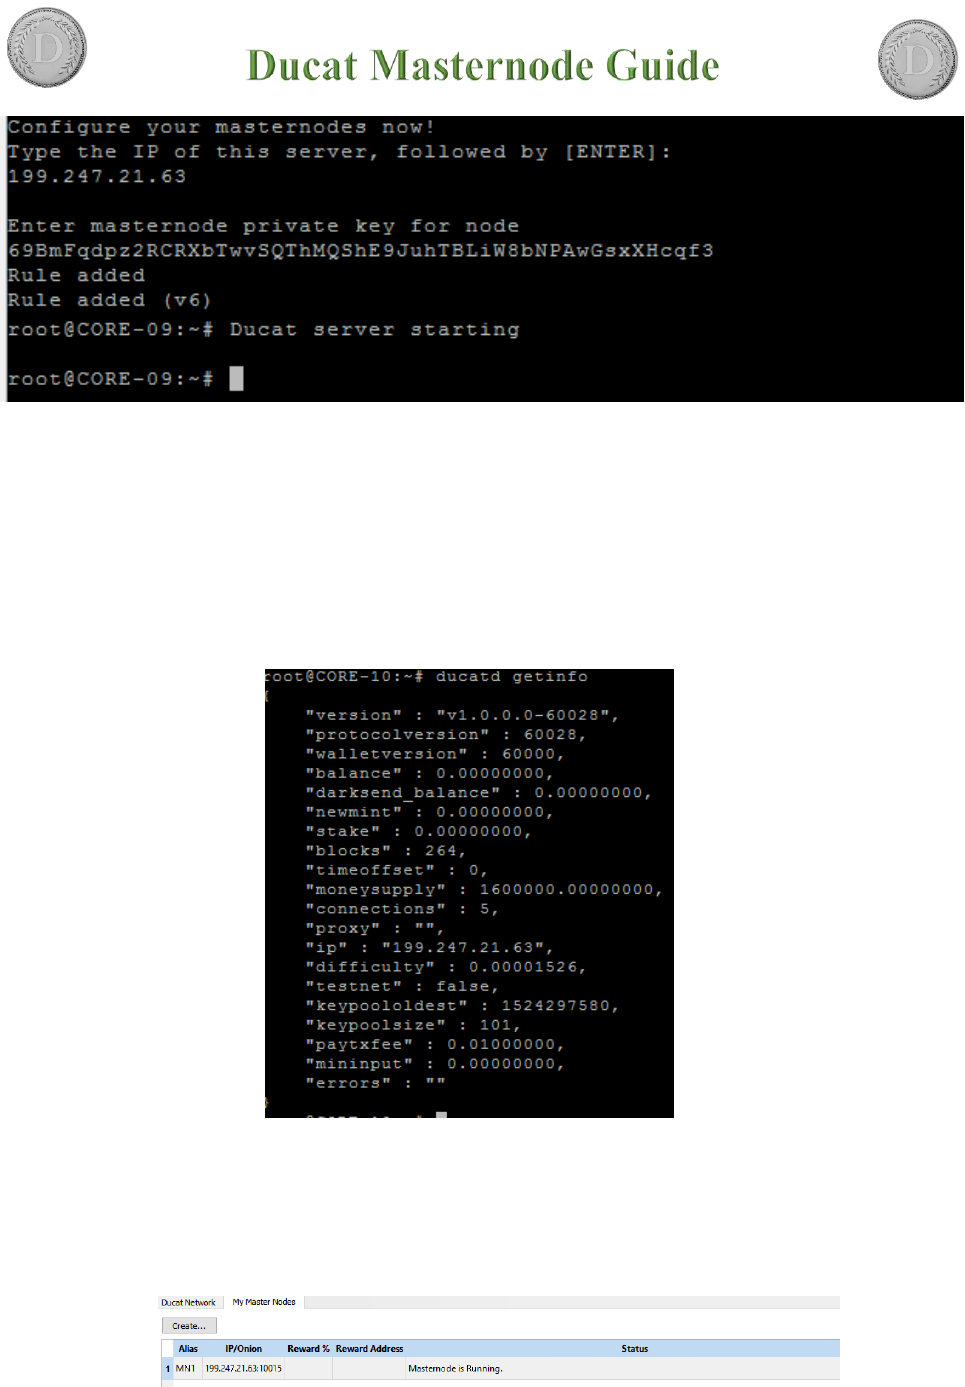
Enter the asked information and hit enter. The Daemon will automatically start
after the script finishes.
If you made an error when typing the interactive stuff: ctrl+c and restart the script
10. Controlling the masternode
a. The script from the last step already started the wallet on VPS
To see if everything works type “ducatd getinfo”
You can see the amount of blocks here. Wait till it’s fully synced till the next step.
b. If sync is finished go to your desktop wallet and start MNs in the masternode
tab (unlock wallet before).
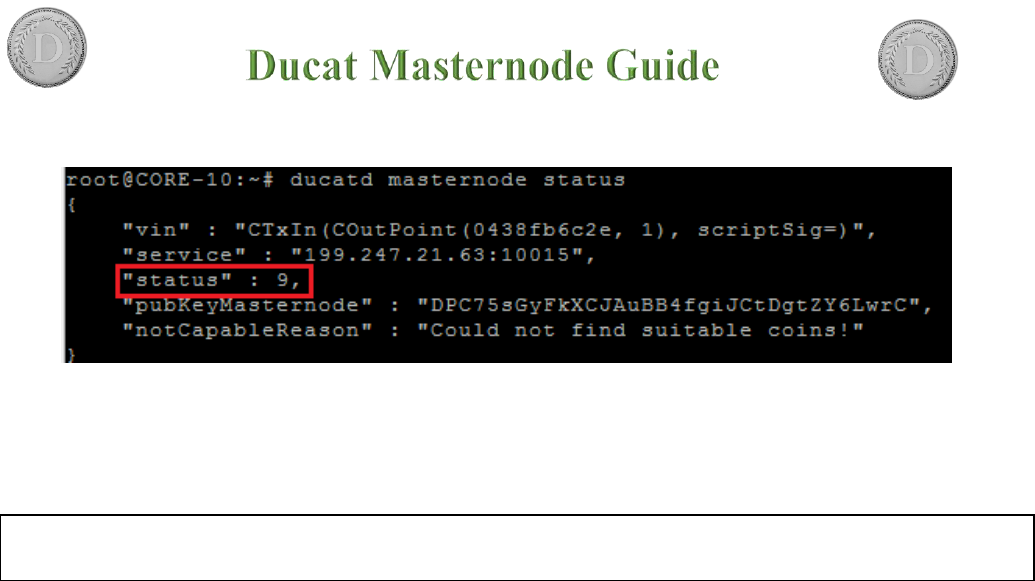
c. See if node is running: “ducatd masternode status”
If you see this status your node is successfully running and you can close the
controller wallet!
In case of status 2 follow the following steps:
After this wait for sync again and start it from the GUI like before!
ducatd stop
ducatd -reindex
