Decalicious Manual
Decalicious-Manual
User Manual: Pdf
Open the PDF directly: View PDF ![]() .
.
Page Count: 4
1
1.0 – November 20, 2016
First release
1.1 – December 10, 2016
Instanced drawing of all decals
Added HighQualityBlending option
Split shader in Deferred / Unlit
1.2 – December 16, 2016
0 Byte Garbage Collector Allocations
Fixed broken normal blending
Added ‘Mask Normals?’ option
1.3 – December 27, 2016
Limit decals to specific surfaces
Added ´Angle Limit´
Performance improvements
1.3.1 – January 14, 2017
Added ‘Use Instancing?’ option to renderer
Added fallback in case GPU does not support instancing
Restored compatibility with Unity 5.4
1.4 – April 6, 2017
Resolved flickering issue due to bad light probes
Added ‘Use Light Probes’ option
Restored compatibility with DirectX 9
1.4.1 – May 11, 2017
Restore compatibility with current patch releases
1.4.2 – July 1, 2017
Added frustum culling for LimitTo objects
Fixed LimitTo functionality in build (Unity 5.6+)
Fixed DirectX 9 compatibility
2
Thank you for choosing Decalicious, the powerful solution to all your deferred decal needs! This
manual will guide you through the initial steps of creating your first decal and provides information
on the options that Decalicious exposes.
The package you downloaded from the Unity AssetStore includes an example scene that features
some interesting uses of deferred decals. Exploring those examples can point you in new directions
when working with the system.
If you run into trouble, have suggestions or want to show off with one of your particularly sexy
decal creations, feel free to contact the e-mail address above. Have fun with Decalicious!
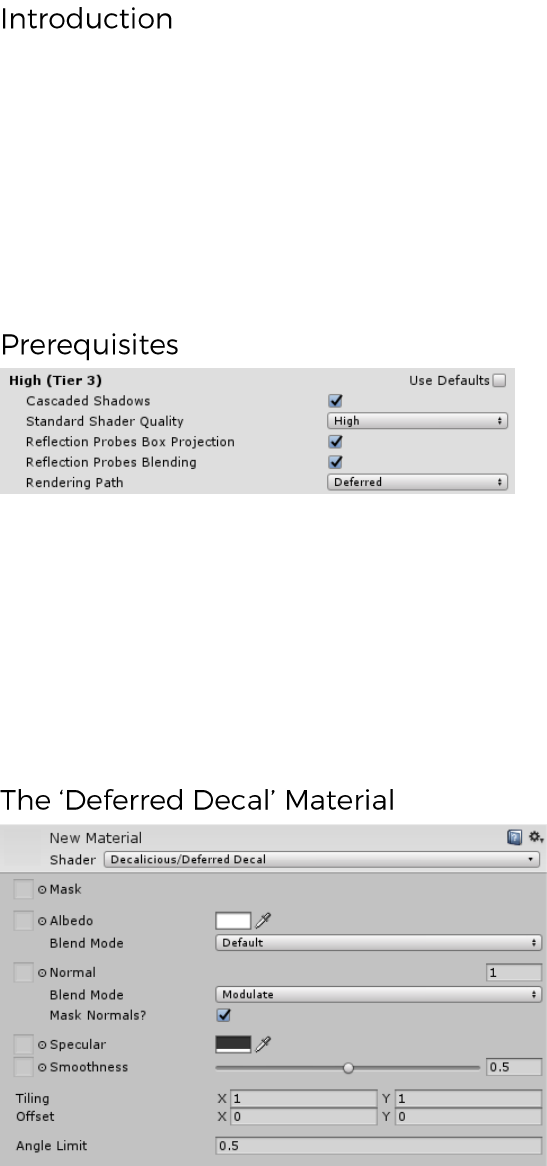
Deferred decals, as the name suggests, require deferred rendering and do not work in a forward
rendering scenario. To enable deferred rendering on an individual camera, use the ‘Rendering Path’
option directly on the Camera component. You can also set this option in the Editor by going to Edit >
Project Settings > Graphics, unchecking ‘Use Default’ for a specific tier and setting the ‘Rendering
Path’ to ‘Deferred’.
Also, please note that setting a light source’s baking mode to Mixed will not play well with
deferred rendering and decals will not be correctly displayed. Please set your light sources to either
Realtime or Baked.
Deferred decals influence the G-Buffer (i.e. albedo, normals, specular and smoothness) and receive
full lighting and reflections. Use the Unity debug views in the scene view to look at the individual
buffers. Decalicious uses special shaders that you will find under ‘Decalicious’. To create a deferred
decal, assign the ‘Deferred Decal’ shader to a material.
Mask: Greyscale textures that controls influence of the whole decal. White means full opactiy,
black means that no decal is drawn.
Albedo: Texture and / or color that the decal will draw to the albedo buffer. The color can be a
high-dynamic range value to emulate emissive materials. Use the alpha value to control the influence
3
of the albedo. The corresponding Blend Mode allows you to not just overwrite, but modify the
subsurface in a different way. Current options are Default, Additive and Multiply.
Normal: Normal map that is drawn to the normal buffer. The corresponding Blend Mode allows
you to choose how the normals are applied. Current options are Modulate and Overwrite.
Mask Normals?: If you uncheck this, the normal map will be applied to the whole surface (within
the bounds of the decal), independent of the mask texture. In Modulate normal blend mode, use
upright normals in the normal map (RGB 0.5, 0.5, 1.0 █) to not affect the underlying surface.
Specular: Texture and / or color that the decal will draw to the specular buffer. For non-metals,
keep the default value. For metals, set Albedo to black and choose a color for specular. Use the alpha
value to control influence of both the specular and the smoothness.
Smoothness: Greyscale texture and / or value that the decal will draw to the smoothness buffer.
Use the alpha value of specular to control influence.
Tiling / Offset: Control the UVs of the decal.
Angle Limit: Sets the acceptable difference between the decal normal and the underlying surface
normal. The decal is not drawn where the difference is bigger. The expected value is the cosine of the
angle. Default value is 60° (cos(60deg) = 0.5).
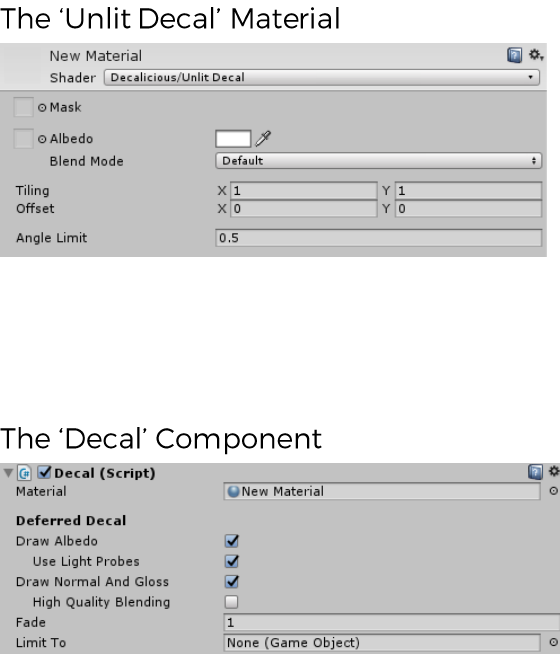
In addition to deferred decals, Decalicious also supports unlit decals. Unlit decals are applied to the
screen after all opaque objects are drawn and don’t receive lighting. The shader ‘Unlit Decal’ is a
stripped-down version of the ‘Deferred Decal’ shader and should be used for world-UI elements,
markers and special effects.
In order to put a Decal in the World, create an empty GameObject, add the ‘Decal’ component and
the material you created previously. The decal will be drawn onto every surface in the displayed
bounding box, so align your decal with the surface of choice (Decalicious decals use positive Y as
facing direction) and scale Y to the minimal suitable value.
Material: Select a material with the ‘Decalicious/Deferred Decal’ or ‘Decalicious/Unlit Decal’
shader here.
4
Draw Albedo / Normals And Gloss: Only for deferred decals, since unlit decals only draw color.
Deferred decals are drawn in two passes. Each pass comes with a performance overhead, so you can
toggle them per decal.
Use Light Probes: Enable this if you want decals to receive real-time indirect light from light
probes. If disabled, decals will only receive direct and ambient light. Please note that decals that use
this feature can not be instanced and thus can degrade performance. Disable it for decals that will be
spawned frequently, e.g. bullet holes.
High Quality Blending: When disabled, blending of normals and specular/gloss between
overlapping decals is not handled well. Enabling this will lead to proper blending at a considerable
performance cost. Use it for a few selected, artist-placed decals. Don’t use it for bullet holes,
footprints or everything that is spammed massively. Please note that albedo is properly blended in
any case, so the imperfect normal and specular/gloss blending might not be noticeable.
Fade: Use this property to control the influence of the decal, where 1 is default and 0 means that
the decal won’t have any influence at all. Values greater than 1 will exaggerate your decal, which can
lead to interesting effects. The value is driven per component, rather than per material, to fade out
individual decals without affecting others (e.g. footprints, bullet holes etc.).
Removing decals using Unity’s Destroy function can mess up the render order, which leads to
artifacts with overlapping decals. Instead, try setting the Fade value to 0. Decals with Fade <= 0
will not be drawn and produce very little overhead.
Limit To: Set a Game Object to limit the drawing of this decal to the Game Object’s surfaces. This
works by drawing all MeshRenderers found in the GameObject (recursively, i.e. including children) to
a special buffer which is then used for clipping the decal in screen space.
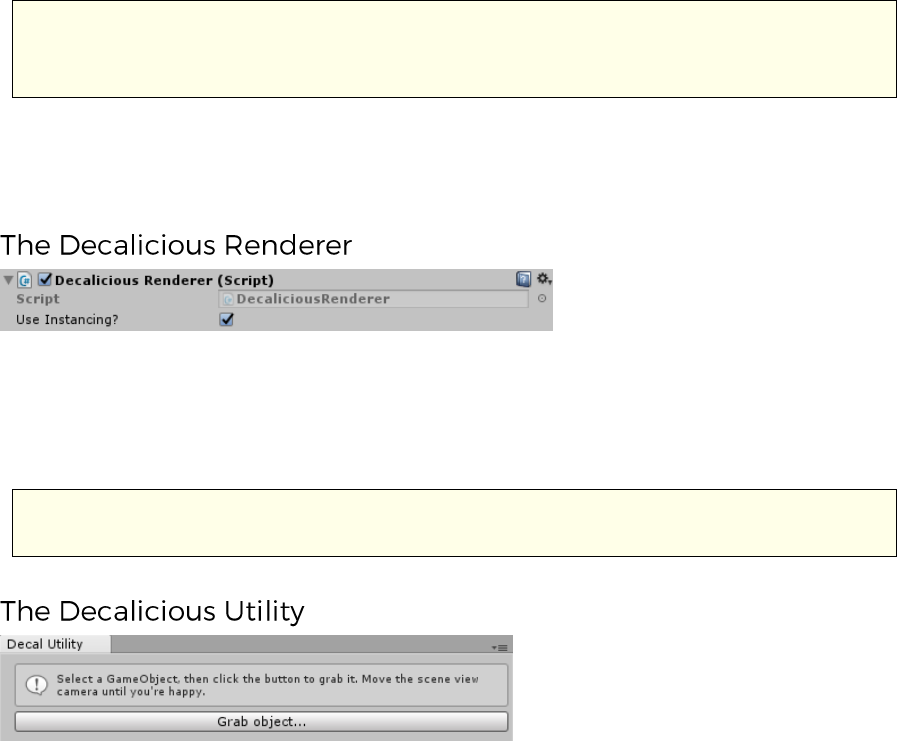
This component is automatically added to ever active camera in the scene and takes care of actually
rendering both deferred and unlit decals.
Use Instancing?: Instanced rendering groups decals with the same material together to render
them in one batch, increasing performance. If the graphics adapter used to render the camera does
not support instancing, this feature is automatically disabled.
Instanced decals require Unity 5.5 or newer. Consider updating your Unity version if
performance is bad.
Decalicious includes a little helper utility that allows you to easily position decals in the Editor. You
will find it under ‘Window/Decalicious Utility’. Simply select a GameObject in the scene view, click
the [Grab object...] button and move the camera until you are happy with the position of the decal.
Click [I’m happy] and adjust the decal’s rotation around local Y as desired.
