Game Guru Getting Started Guide
GameGuru%20-%20Getting%20Started%20Guide
User Manual: Pdf
Open the PDF directly: View PDF ![]() .
.
Page Count: 36
GameGuru – Getting Started Guide
INTRODUCTION
Congratulations and thank you for choosing GameGuru as your development engine. We at
TheGameCreators love working in the games industry and especially enjoy creating game
making tools. We aim for GameGuru to be game development application everyone can use,
helping to create high quality games with the minimum of fuss.
This guide aims to take new users through the basics of creating a game with GameGuru, as
well as explaining the basics of game making and offering tips and advice on how to get the
best out of the software.
We'll also delve a little deeper into the more advanced features of GameGuru, helping you to
understand how, with a little knowledge and effort, you can turn a good game into a great
one!
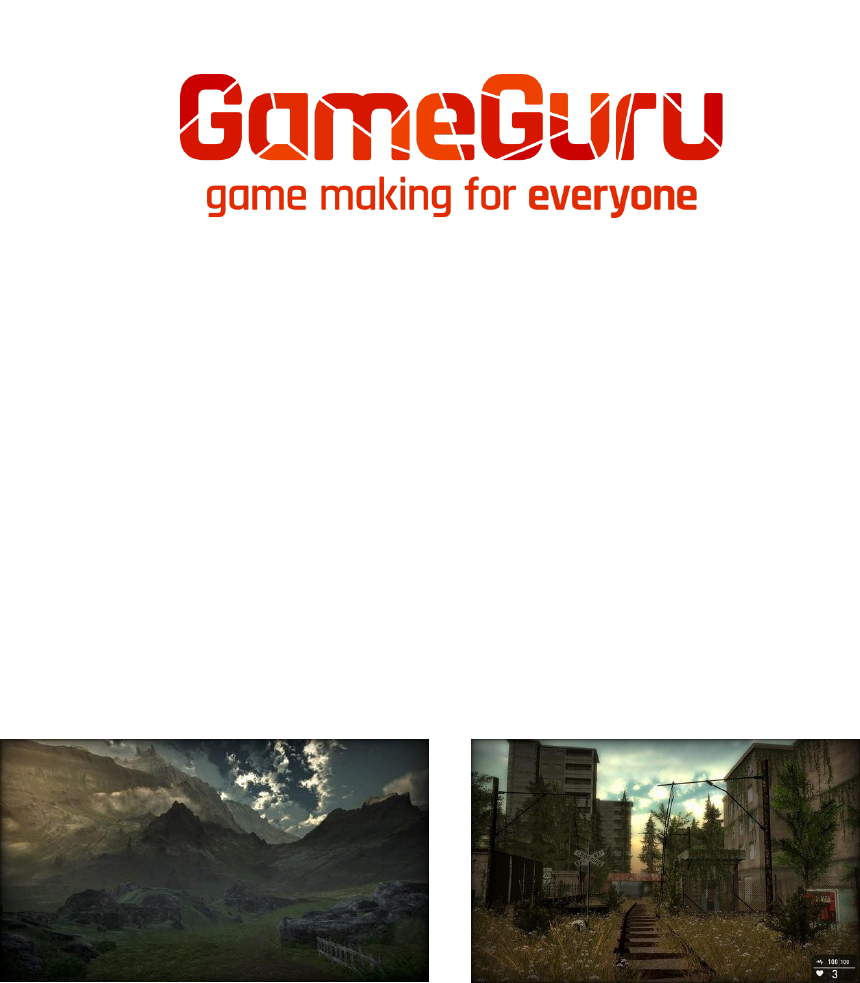
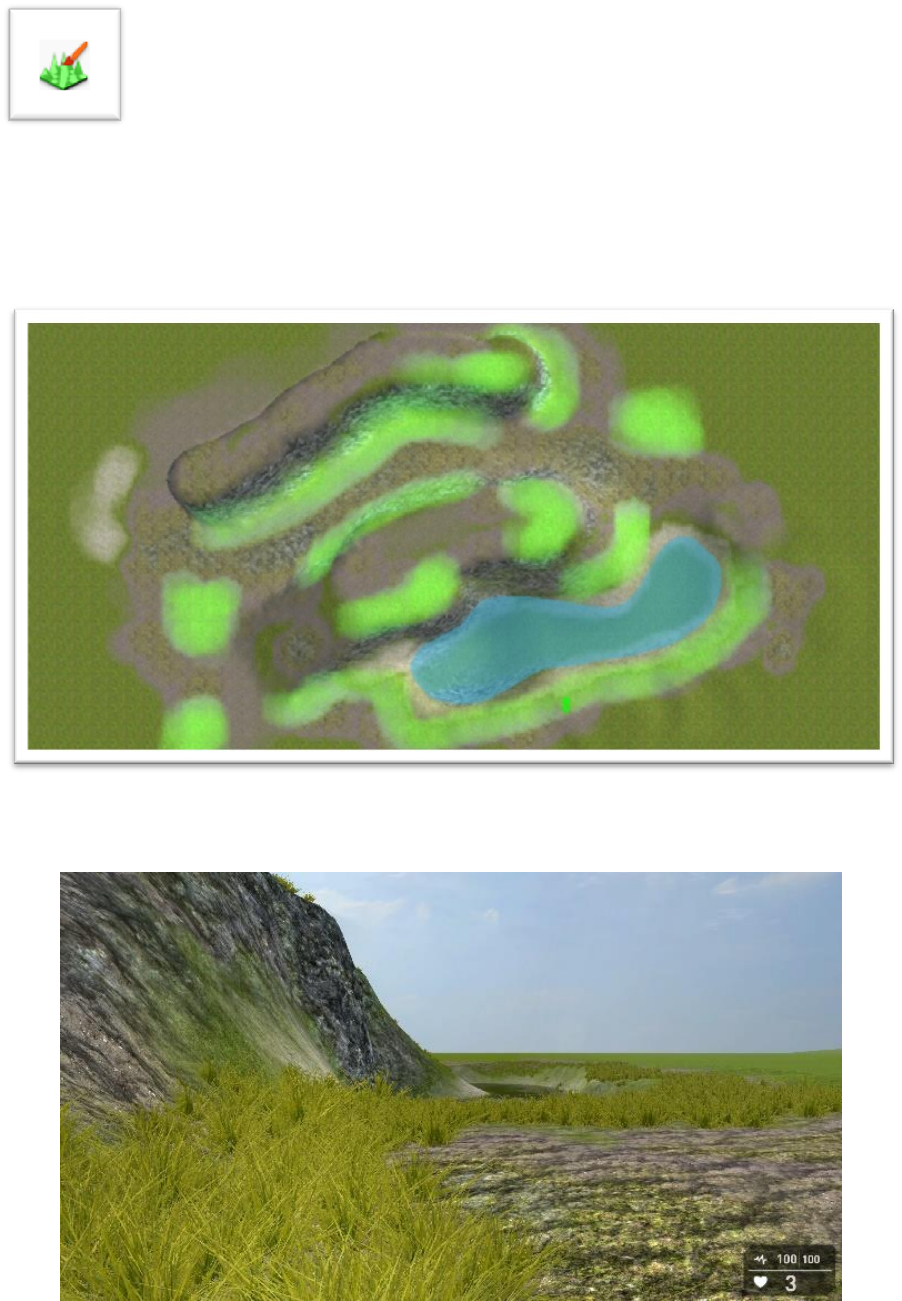
These screenshots from GameGuru users Rolfy (Left) and GetsFile (Right) are just two of the
excellent games being developed by community members, and we're sure you will soon be
able to start producing your own amazing looking games to sell or share with your friends.
So, what is GameGuru? Well, in short it is an incredibly easy to use first and third person
game creation tool. At its simplest, you can drag and drop elements (called entities) onto a
large sculptable terrain and very quickly create your first game. Of, course, it doesn't stop
there. If you're a more advanced user you can combine these simple tools with the inbuilt
LUA based scripting language to create almost anything your imagination can conjure.
GameGuru – Getting Started Guide
Getting Started
We know that you would love to jump right in and start creating your latest masterpiece and
while we've made it as easy for you to get started as possible, there are still one or two things
you'll need to know before you get going.
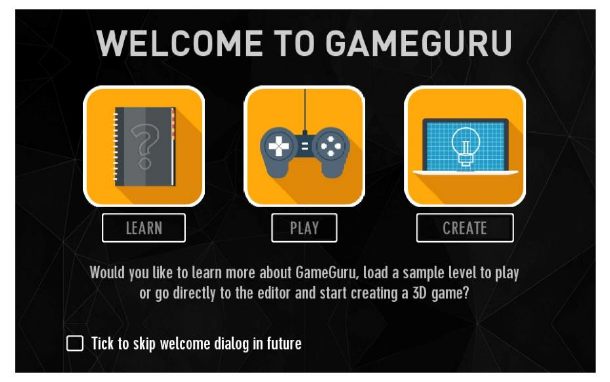
When you first run GameGuru you'll be presented with this screen.
From here you'll be able to access the GameGuru manual, play an example game level or
jump right into the editor to create your game.
Later, from the Getting Started menu, you’ll be able to watch a range of Development
Broadcasts which cover lots of the questions raised by our community and demonstrates how
to take advantage of many of the more advanced features of GameGuru.
Lastly, now we've whetted your appetite, we encourage you to try out some of the sample
demo game levels, most of these only took a few days to make and show what you can do
with a little effort. You will find these by selecting FILE > Open and choosing the
‘legacymaps’ folder and the selection ranges from single player levels to multiplayer maps.
We do recommend that the first demo game level you try is the Big Escape, which you can
load by selecting the PLAY button from the Welcome dialog. This level demonstrates high
quality PBR assets and a small mission for the player to complete, and gives you some idea
of the kind of games you can make if you exploit the more advanced features of model
importing and scripting available in GameGuru.
GameGuru – Getting Started Guide
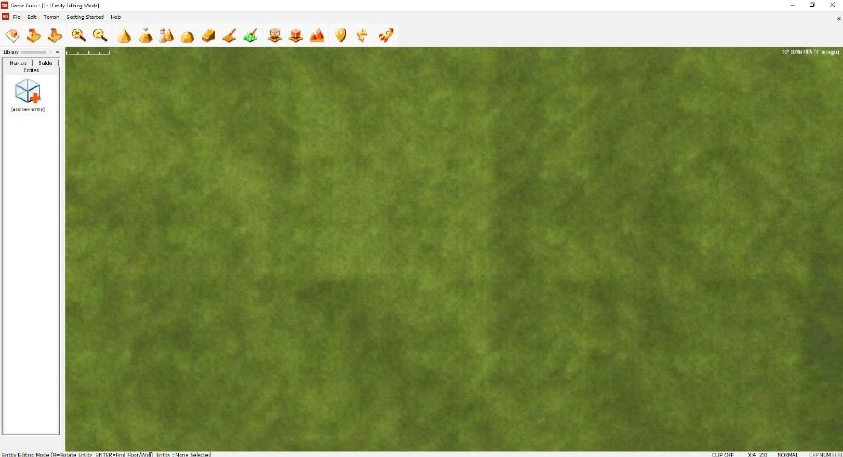
The Editor User Interface
Now we've taken a quick look at the Welcome dialog and sample levels you can try, let's look
at the Editor UI in more depth. We've tried to make this as easy to use as possible and we're
sure you'll get to grips with the tools in no time.
Tool bar
Icons in this bar provide quick access to all
of the important editor functions, from here
you can raise and lower terrain, paint ground
textures and grass, add waypoints, test your
game and host or join in some multiplayer
mayhem.
The Drop-Down Menus
Access further options by selecting the various
drop-down menu items including all of the
editor functions, saving and loading, building a
standalone game, view the development
broadcasts or load in demo games.
Library
This window displays thumbnails of the Entities
(Our name for 3D Models) used when making
your games. You can quickly access Entities
you've already used in your level or add new
ones.
Library Tabs
The Library is split up into three sections:
Entities, Markers and Builder. Click a tab to
select which area of the Library you are
currently viewing.
Editor window
Displayed within this area is a top down or free
flight view of the game level you are currently
editing. To make the process of level editing as
easy as possible we provide a range of editing
styles to suit all users.
You can navigate around the windows using
WASD keys, Arrow Keys and Mouselook.
Memory Bar
You can place thousands of entities in a
GameGuru level, but each one takes a little
editor memory. This bar shows you how much
space you have left to build your level.
Editor Brush
When editing the terrain or painting ground
textures or grass, this brush defines the area to
be edited. You can change the size of the brush
at any point using the [+] and [–] keys.
Editor Mode
When you open the editor, you start in the
default Top Down mode. You can choose
between Free Flight or Top Down modes when
editing and can easily swap between these by
pressing F to enter free flight or G to return to
top down mode.

GameGuru – Getting Started Guide
Status Bar
Here you can see exactly what modes you're in, and where the cursor is on the world map.
From left to right:
Name
Notes
Terrain Painting Mode
(Terrain mode only)
Indicates terrain sculpting or terrain painting.
Terrain
(Terrain mode only)
Describes the type of tool, E.G. Shape mode or Ramp mode
for terrain editing, or Rock or Grass for paint mode.
Entity Editing Mode (Entity
mode only)
Visible if you are in Entity editing mode. You can change
between entity mode and terrain mode from the tool bar.
Usseful tip: R rotates an entity and ENTER finds the nearest
surface.
Entity
This will either show "None Selected" or the Entity number,
Entity Name and the current status (Static – meaning it is
just scenery, or Dynamic – Meaning it does something in
game.
Clip
Indicates the current clip mode, this can be Off or shows the
clip level. Use CTRL+Wheel to adjust the clipping height.
X
This is the current brush X position. X is left and right
Z
This is the current brush Z position. Z can be thought of as
up or down the map.
Normal
Default grid mode. Pressing B changes the mode.
Normal (Pixel placement),
Snap (Snaps to the nearest entity),
Grid (Snaps to the 100x100 grid position for equal placing
of entities).
CAP, NUM, SCR
Indicates if Caps lock, Num lock or Scroll lock is set. These
will be light grey if not and black if set.
GameGuru – Getting Started Guide
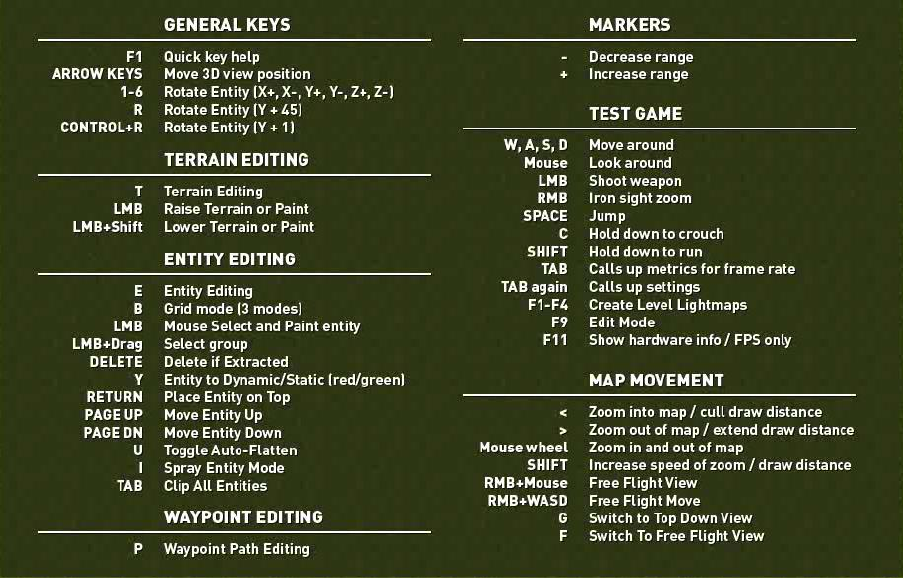
F1 Help Mode.
This lists all the keyboard shortcuts aimed at speeding up the development process.
Making Your First FPS Game
Ok, now we've had an overview of the editor, let’s create our first game by following the
steps below. Remember that if you make a mistake while editing you can use the Undo menu
item (Edit > Undo) or by pressing ‘CTRL’ and ‘Z’ and this will reverse the last action.
As this is very likely your first game created in GameGuru we advise saving several copies of
your map in case you make a mistake that Undo can't rectify, as Undo only reverses the last
action taken.
GameGuru – Getting Started Guide
Saving A Map
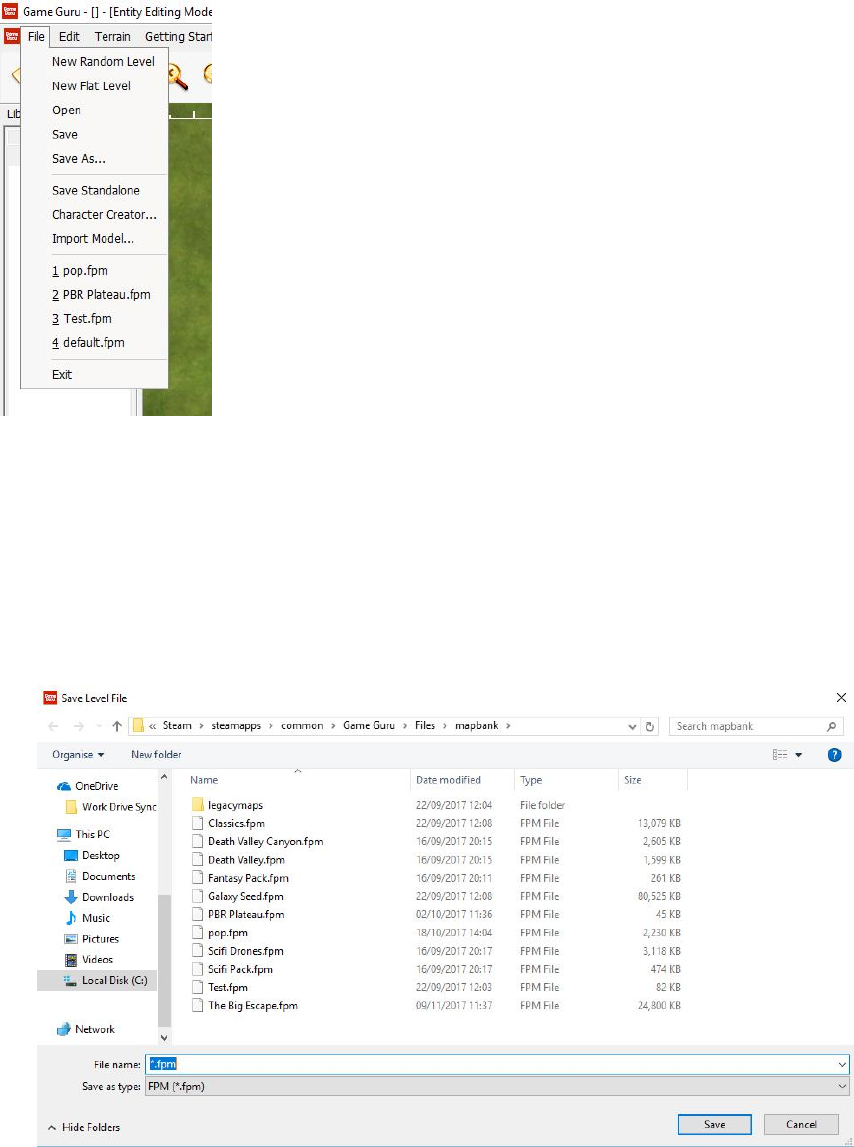
Clicking on File at the top right of the menu bar will produce a drop-
down menu. We'll discuss each of these in more detail as we work
through the process of making our own game, but for now, all we're
interested are the ‘Save’ and ‘Save As’ options menus.
As with most application, ‘Save’ will either save the map using the
last name, or prompt for a new name if this is the first save.
‘Save As’ will always prompt for a new name. To ensure that you
have plenty of backups of your map, it's a good idea to get into the
habit of occasionally using ‘Save As’ to make copies of your hard
work.
Let's test this by saving the default map under the name ‘MyFirstMap’. Open the file menu if
you've not already done so and click ‘Save’.
This will take you to the GameGuru mapbank folder where all map files are stored. The
maps are called FPMs which stands for First Person Maps. This is a legacy term, and applies
to all maps, regardless of whether they are First Person or Third Person.
If you've more maps than the box will display, you can use the slider on the right to move up
and down the list.
Click on the box called file name and enter the name ‘MyFirstMap’ and click ‘Save’. This
might take a few seconds depending on your system.
GameGuru – Getting Started Guide
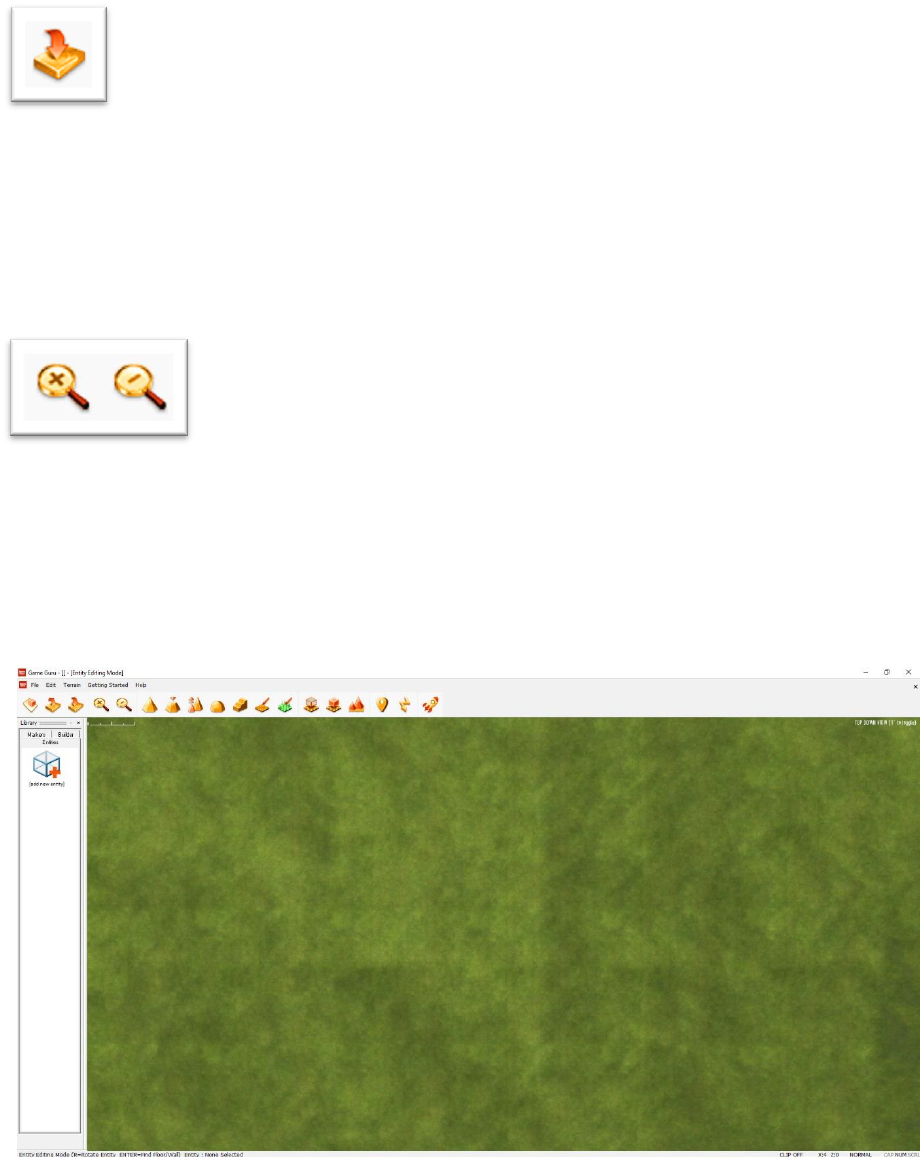
You can also quickly save your maps from the tool bar by simply clicking on
this icon.
Ok, so we've saved our first map and are ready to start editing but before we do, let's just
have a quick play with the navigation keys so you can move around your map.
You can do this using W to move up the map, S to move down, A to move left and D to
move right; you can also use the arrow keys. Give this a try now so you're comfortable with
navigating the map.
You can also zoom in and out of your map using the mouse wheel or by
using the magnifying glass icons on the tool bar.
If you take a peek at the status bar, you'll notice the X and Z values changing. You will find
this very useful when your map becomes full and you have a lot of different sections to it.
Once you're happy, you can move around the map freely we can move on and start editing.
Your screen should look something like this:
However, as you've been navigating your map, you may have changed the view. To make
sure we've a similar view, and to learn a little more, we're going to reload MyFirstMap.fpm.
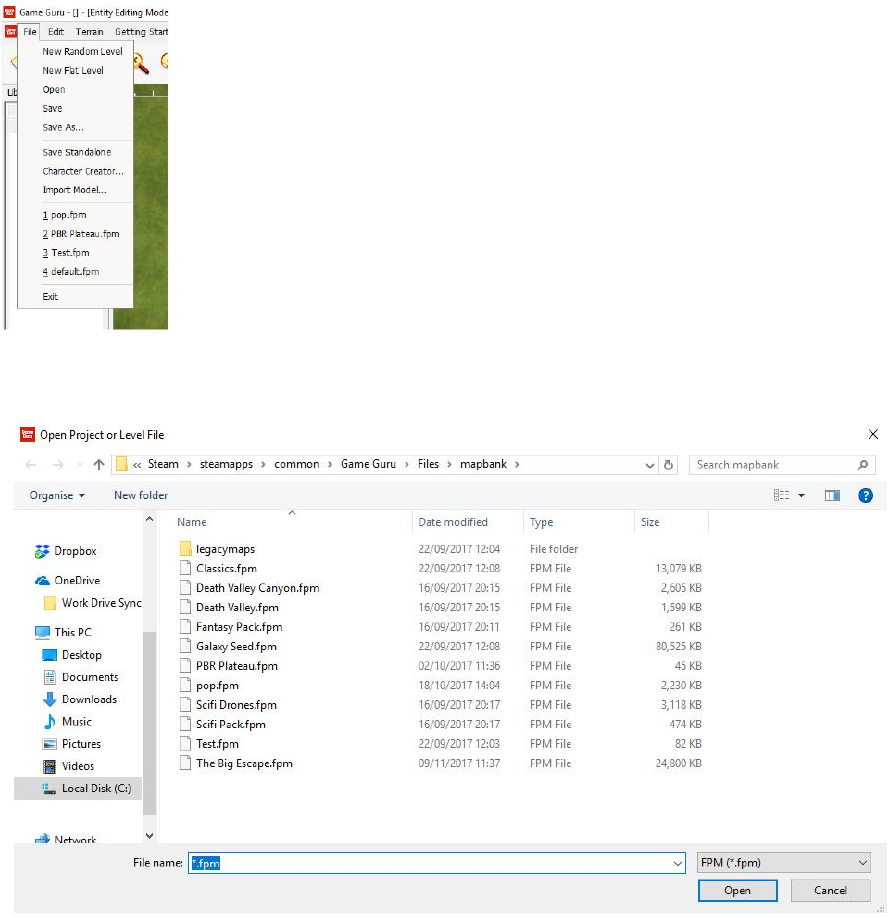
Click File once again to open up the file menu.
GameGuru – Getting Started Guide
Click Open to be taken back into the mapbank folder, but this time to
reopen the map.
Just like saving you can also use a shortcut icon located on the tool bar to
open a previously saved project.
Either method will open this menu:
Remember that this will overwrite any unsaved work, so when at a later date you’re
developing your own games, stick to the golden rule of always backing up your work and
saving often.
Using the slider bar on the right, navigate down the list until your reach MyFirstMap.fpm.
You can open this by double clicking on it.
Opening a map can take a few minutes on large maps as the entity library is rebuilt for all
maps for ease of access later on, however as this is a simple, empty map it should only be a
matter of seconds.
GameGuru – Getting Started Guide
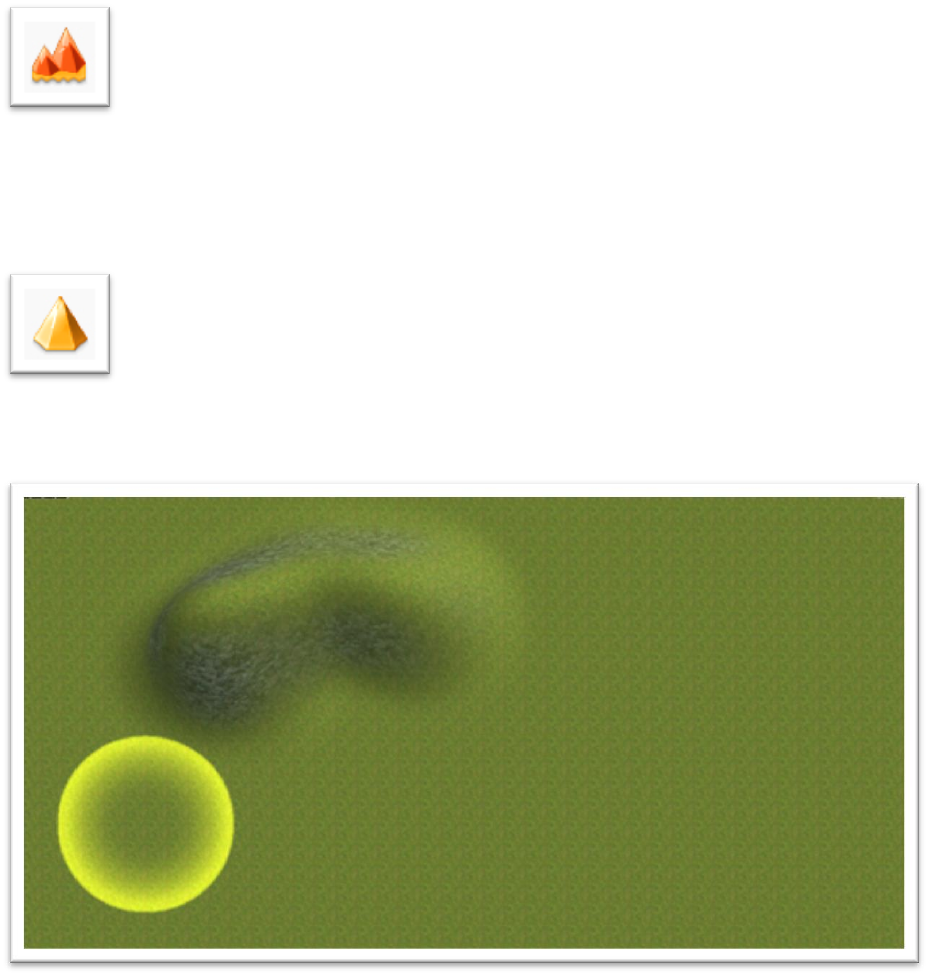
Now that we've opened the map, let's start by adding some simple hills. You
can click this icon to enter terrain editing mode.
Alternatively, you can choose one of the toolbar icons associated with terrain editing, so we'll
use that method for now.
Click on this icon to enter Terrain Sculpting mode.
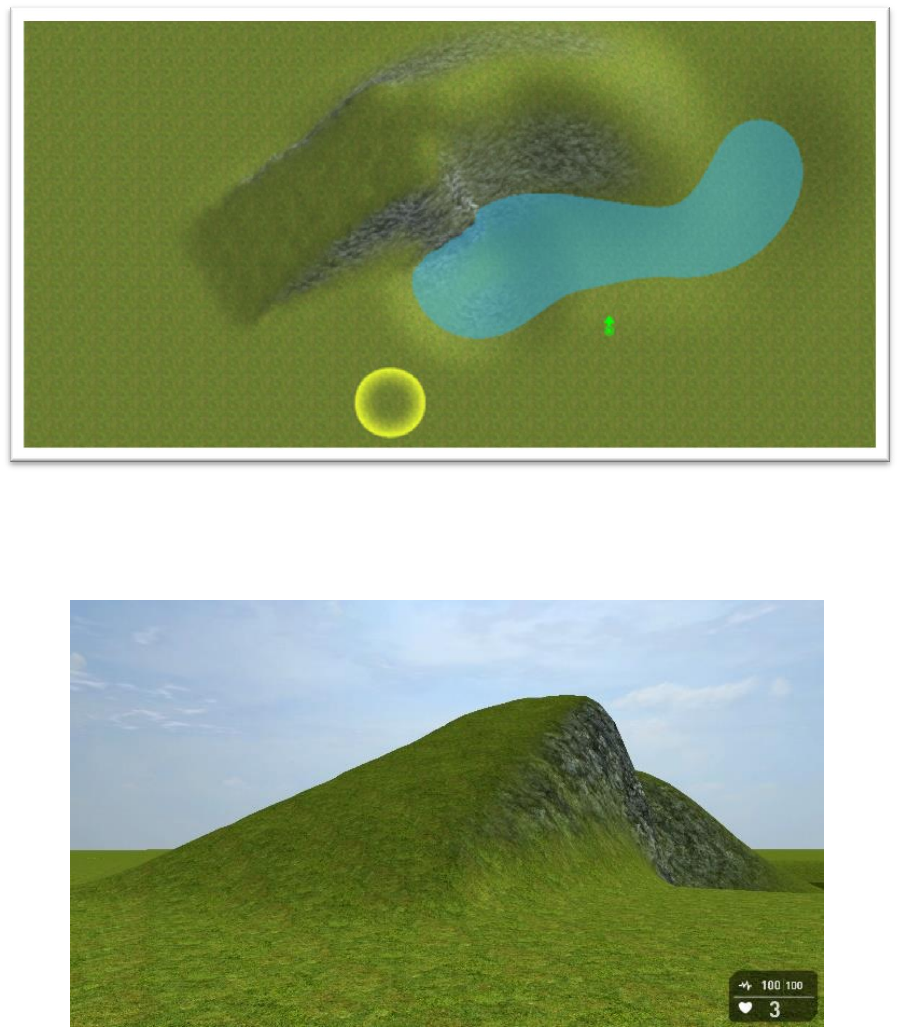
Now, move the mouse to the editor window so you can see the Editor Brush,
hold down the Left Mouse Button and move the brush about. You will see that the terrain is
rising. Do this for a few seconds until you've got something that looks a little like this:
Congratulations, you've made your first hill! Now, let's look at lowering some terrain. You
use the same tool for this, but instead of just using the Left Mouse Button you now also hold
down Shift and then start carving a few holes with the Left Mouse Button.
Remember that the water table for all levels is at a height of 500 by default, so if you have
chosen a random terrain, the hills and mountains of the randomly generated terrain may be
much higher than the 500 height of the water. Keep digging and you will eventually find the
water!
GameGuru – Getting Started Guide
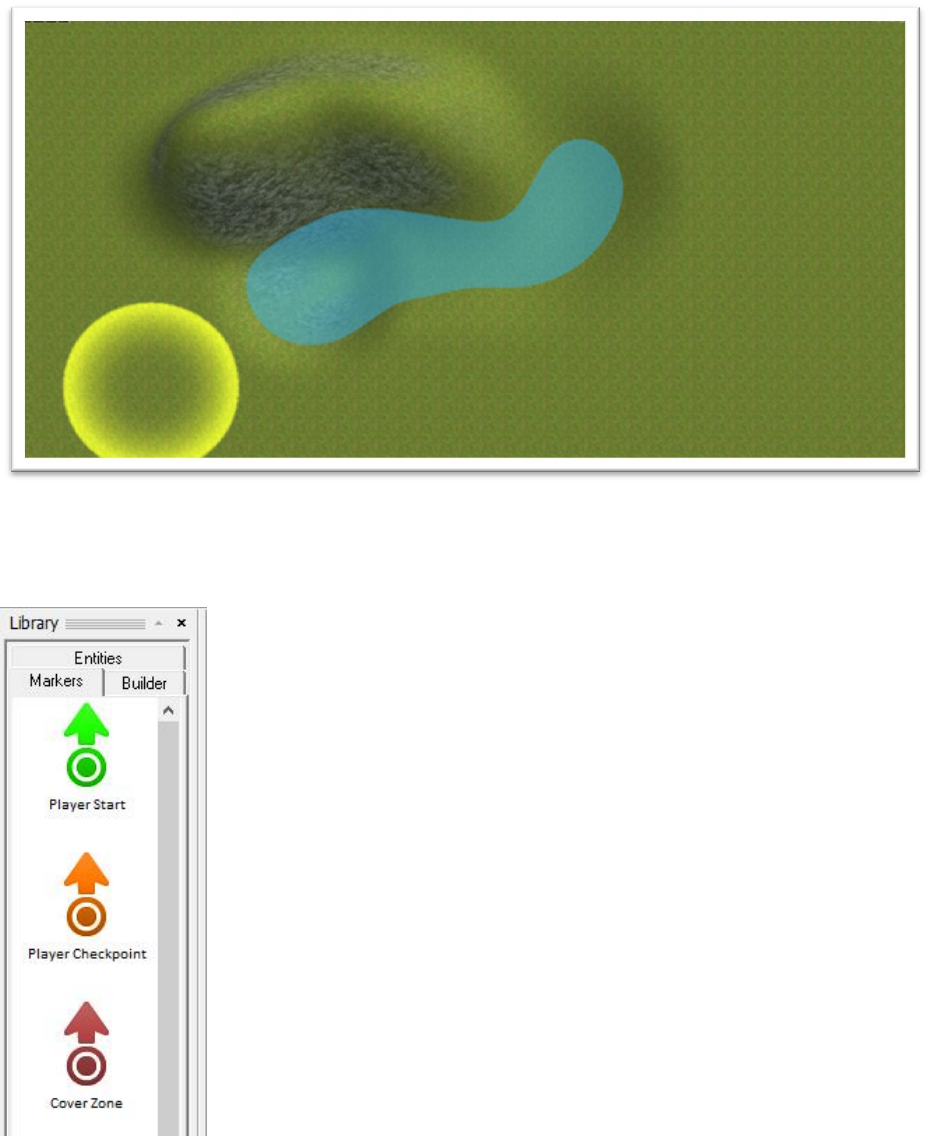
Once the level of the terrain is low enough, you'll see the water plane (if you like this could
be thought of as sea level). So, let's add some water. Place the editor brush in front of your
new hill, hold Shift and Left Mouse Button to sculpt the terrain downwards. If everything
has gone well, you should now see something similar to this:
Well done, you've created your first simple terrain. Now we're sure you'd like to take a look
at it, but before you do, let's place a player start position.
Move the mouse pointer over to the library and click Markers. You will
see a sub menu like this.
There are several different types of Markers and we'll be covering them
all as we move on, but for now the only one that interests us in the
Player Start.

GameGuru – Getting Started Guide
Not surprisingly, this Marker represents the position and direction the player will start from
in your map. To select a Marker from the library, simply Left click on it and move the mouse
to the main map and Left click again when you're happy with the position.
At this point, it's always good practice to save your work, so you should do that now just as
you did before but using Save As from the file menu. We're saving our map under the new
name MyFirstMap2.fpm, you can of course use any name you want, but for this tutorial, we
recommend using the same names as we are.
So, we're ready to take a look at our very first level. You can launch test game
from the toolbar by Left clicking on the rocket icon.
You can watch the game build process at the base of the screen which can take a few
moments as certain things are prepared for your new game world.

GameGuru – Getting Started Guide
The eagle eyed among you will also notice that this screen summarises all of the in-game
controls so you'll be able to explore your map.
Like many games, you can move around using WASD or the Arrow Keys and by moving the
mouse around to look.
Try this for a little while to get comfortable with the controls and then you can return to the
editor by pressing Escape (ESC)
Here we are back in the editor, so let's take a look at some more of the terrain editing tools.
Don't forget, if you go wrong you can go back one Undo level from the Edit menu.
Let's move along the toolbar a little to the slope tool.
This, as the name suggests allows you to quickly and easily add terrain ramps to
your games. The tool is easy to use so let's have a go now.
GameGuru – Getting Started Guide
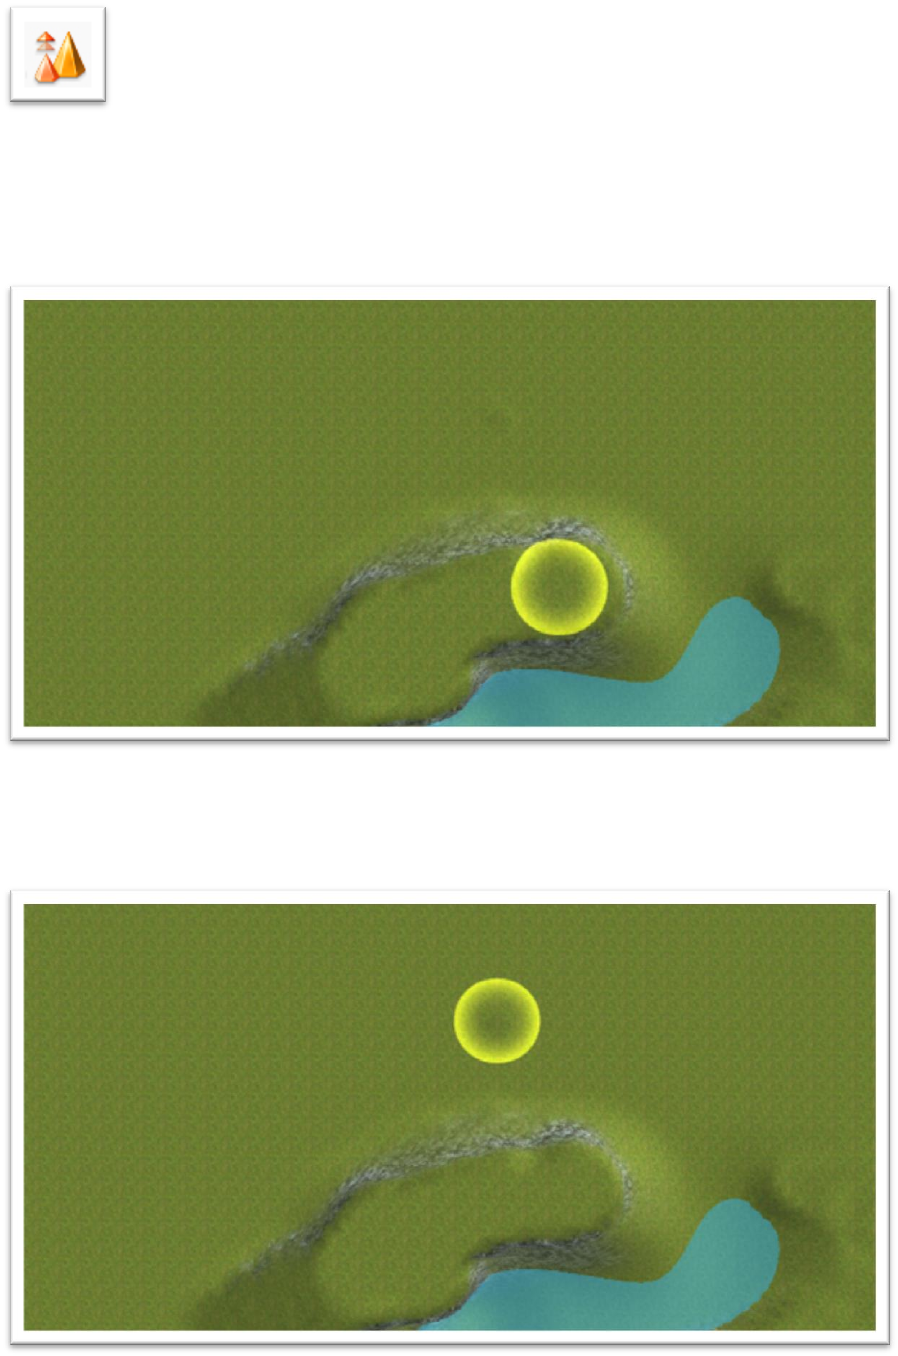
Click on this icon now and then Left Click on a lower area in the Editor Window, and while
holding down the left mouse button drag the Editor Brush to the top of the hill. If all has gone
well you will see something similar to this:
Now, you'll almost instantly notice that the sides of this ramp could be smoother,
but don't worry, there's a tool for that too:
We'll need a smaller brush for this, so it's time to try out some more keyboard shortcuts. This
time, it's the + and – keys.
Play around with them until you've a brush of approximately this size:
GameGuru – Getting Started Guide
Click on the Blend Tool icon and as before, hold down the Left Mouse Button and brush any
areas you feel need to be smoother, don't forget you can zoom in and out for a better view
using the Middle Mouse Wheel or the Magnifying Glass Icons. You can also play around
with different brush sizes if you find it easier.
Once blended your ramp should look like this (if you want it smooth of course).
This is another great time to save what we've done so far and click the test game icon to run
around your map to see your ramp in action.
Now you've got your very useful ramp, you may have found that it's a little higher than the
terrain, possibly because, if like us, you sculpted the terrain to be different heights.

GameGuru – Getting Started Guide
Once again, the tool bar comes to the rescue with the levelling tool.
This has two functions, both similar but with varying results. Used on its own as
you can move all terrain up or down to a single height. Let's try this now by levelling our hill.
Click on the icon shown above. For this demonstration, we've increased the size of the brush
slightly and we will be starting at the opposite end of the hill like this:
Holding down the Left Mouse Button move the brush along the top of the hill towards the
ramp. You can also use the Blend tool again here to smooth over the areas where the new flat
terrain meets the ramp.
If all has gone well, you will have a map that looks like this.
GameGuru – Getting Started Guide
Once again, this is a great time to save and then click Test Game again and have a look at
your nice new flat terrain.
Of course, flat terrain is all well and good, but may not be the natural look you're looking for.
This brings us to the second function of the level tool which adds a little randomness to the
smoothness giving a more natural feel.
You can access this mode simply by holding down Shift as you level the terrain. Let's do this
now around the water line.
As you can see, the terrain along the edge of the water is now rougher, but still kind of level.
Take a look at this in test game now.
GameGuru – Getting Started Guide
So, already we can see our level taking shape but it needs some more detail.
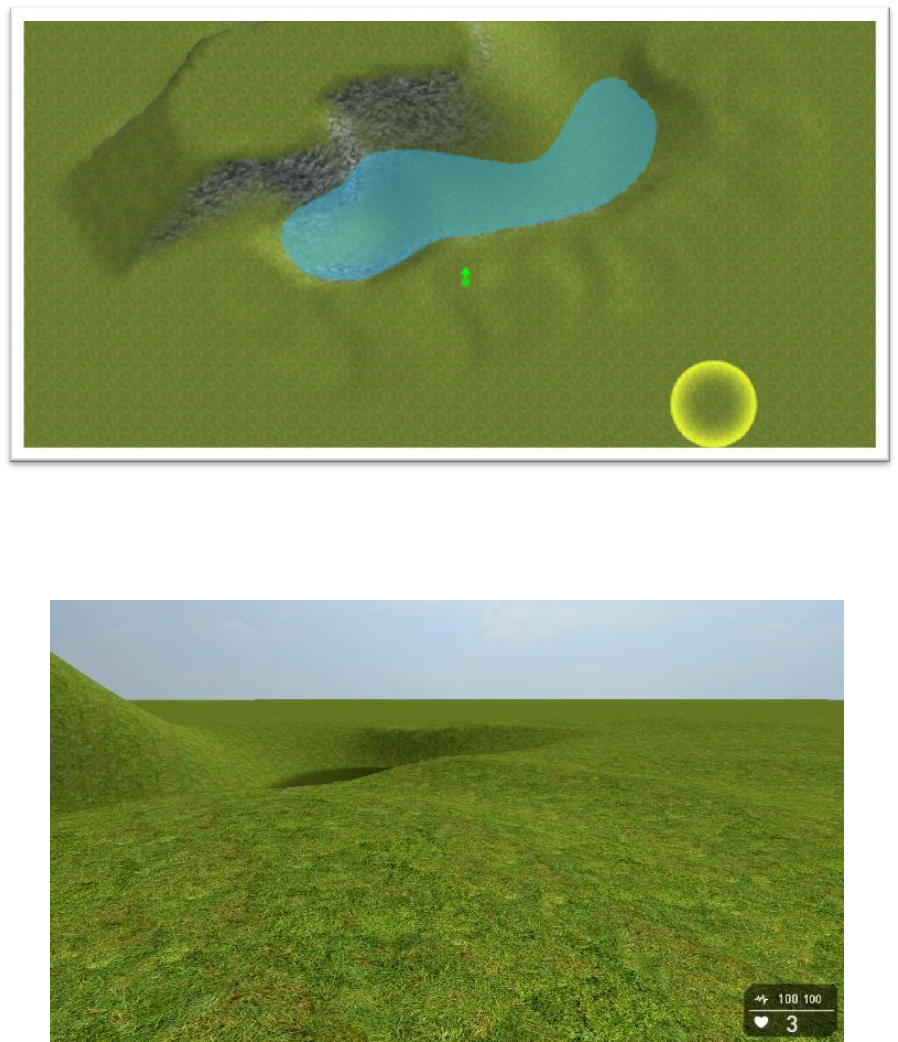
We've one more terrain sculpting tool to look at before we can start adding some
different textures to our terrain and that's the stored level tool.
This niffy little tool allows you to start fresh terrain on your map at the same height as some
previously created. So, let us say that you want to make a valley with two equal sides.
Firstly, to make sure we've got the level we want. Click on the Blend tool and click on the
end of our flat plateau, like this:
This will then store the last level used for future reference. Now click on the Stored Level
icon and move the Editor Brush just up from the plateau.
GameGuru – Getting Started Guide
As before, we hold down the Left Mouse Button to paint. As we are now in stored level
mode, all sculpting will automatically be at the same height as our stored level, like this:
This is another ideal time to save, before you go back into test game to check out your
masterpiece.
By now we expect your valley will look a little like this, still pretty basic, but we hope you
can see where we're going.
GameGuru – Getting Started Guide
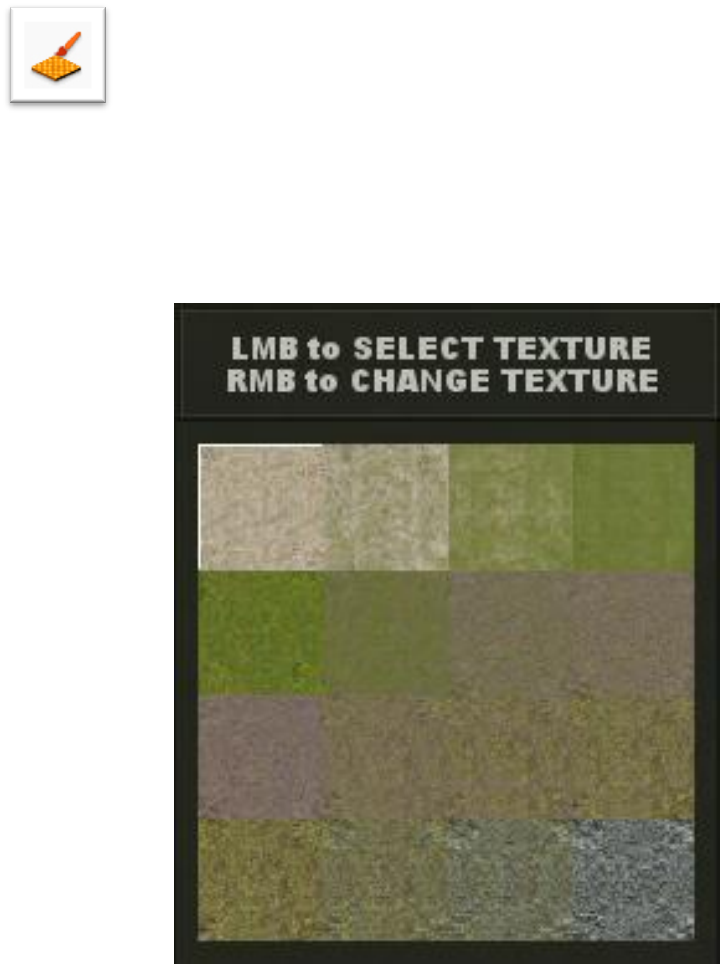
So, it's time to look at varying some of the terrain textures
By default there are 16 to choose from and these can be freely painted. You can also change
your terrain completely, so you can have desert, snow, lush, wasteland, etc. We'll take a look
at how to do that a little later.
You'll notice the short cut icons on the lower right of your screen and clicking on any of there
will allow you to paint a mix of textures onto your terrain.
Let's do this now. We're going to add several textures to our map to add extra depth and
quality to the appearance. Just as before you can alter the size of the Editor Brush using the +
and – keys.
GameGuru – Getting Started Guide
You can see what we've created below, feel free to add your own style to your map. This is
also another great time to save your map again.
GameGuru – Getting Started Guide
Now we're starting to get somewhere, but as you can see we're still missing a
few things, so let's now look at our 5th painting option and add some grass.
Click on this icon on your tool bar and paint grass in the same way as you
painted the other textures. Grass will appear as a green area on your map, the thicker and less
patchy the grass appears in editor the more grass will appear on your map in test game. You
can also make the grass thinner if you over paint by holding down Shift at the same time as
you're painting.
Let's save our map once again, and take a look at the grass in test game.
GameGuru – Getting Started Guide
As we're sure you'll agree our map is starting to take on quite a natural feel.
So, it's time to think about a new type of object, the entity. An Entity is anything that isn't
terrain or a marker, this can be as simple as a brick or a box, it could be a tree swaying in the
wind or as complex as a fully-fledged character.
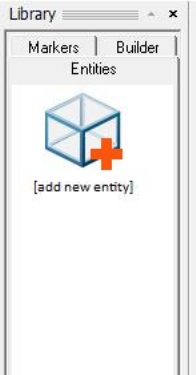
You access entities from the library tab in a similar way to placing a Marker. Let's start by
adding some rocks and some trees from the library.
As you can see from the library, all you need to do to add an entity is click [add new entity]
and you'll be taken to your full entity library.
Your assets library will very likely be different from ours as we've a lot of store media, but
for demonstration purposes we'll only be using the default media so there's no need to worry
that you'll be missing anything.
GameGuru itself comes with over 6GB of free models covering Barrels, Boxes, Buildings,
Characters, Decals, Fixtures, Foliage, Medieval, Scenery and Weapons. In addition, you can
find 100's of items on the Game Creator Store and optional DLCs, so even if you're starting
out you should have plenty to work with.
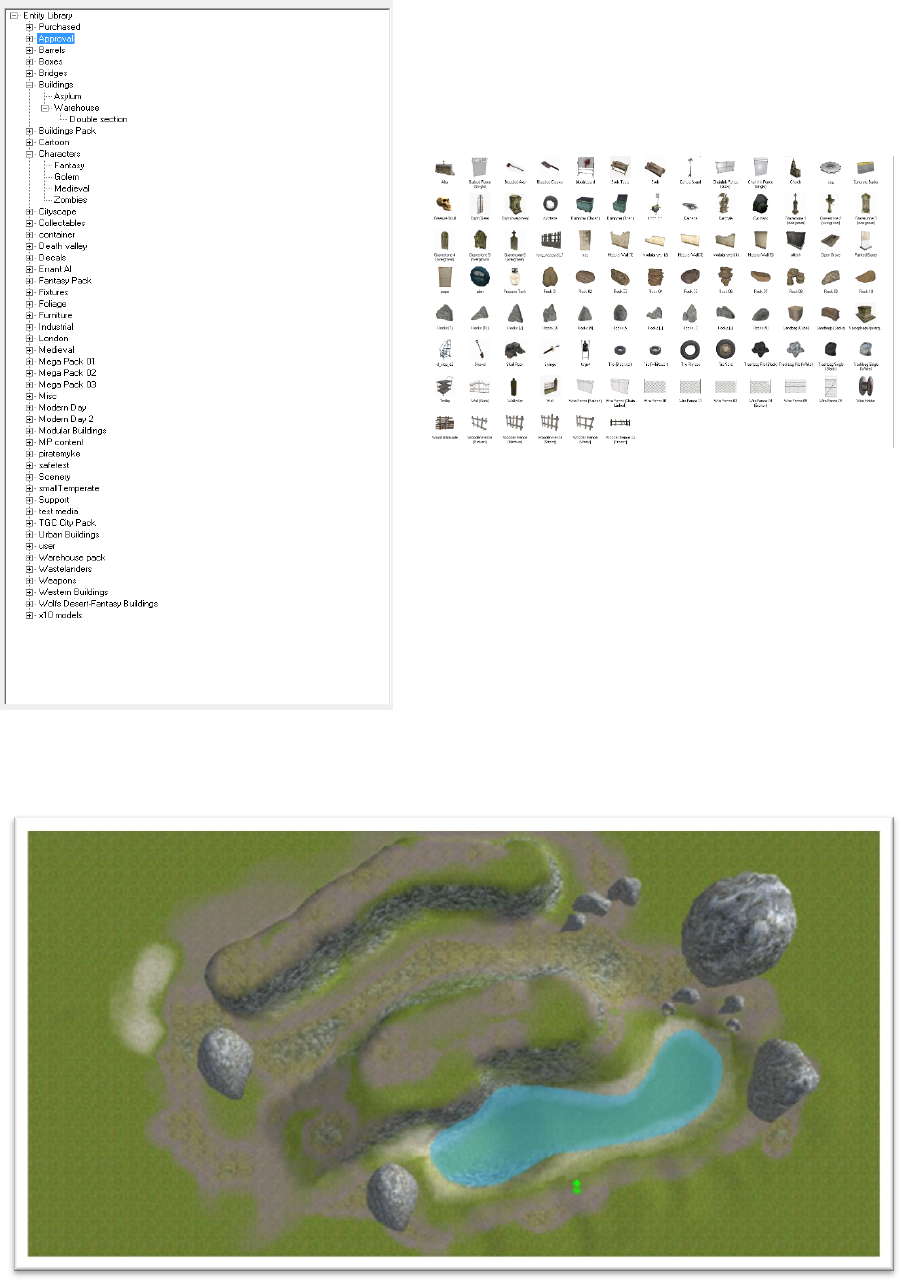
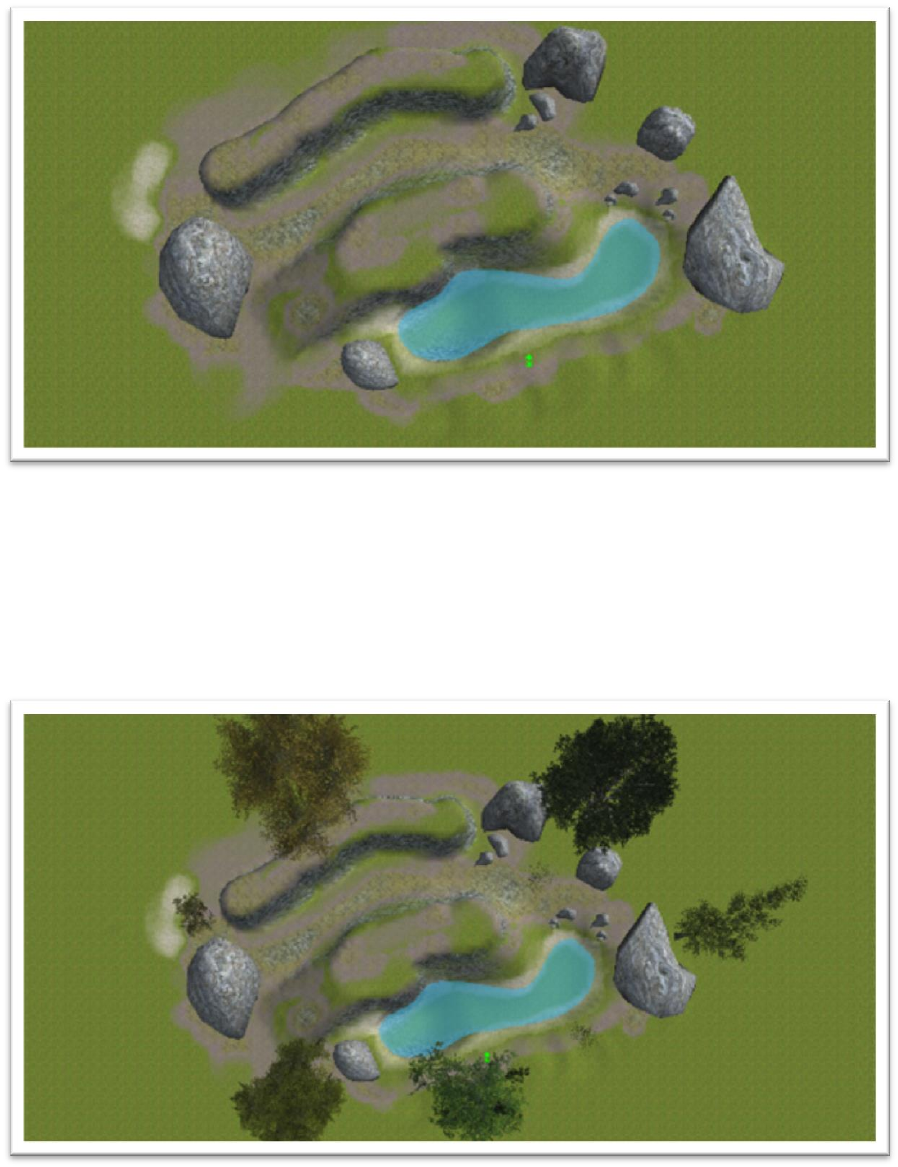
For now, we're going to look at adding a little extra beauty to our level in the shape of trees
and rocks. There's plenty to choose from in the default library, so let's start by adding a few
rocks which can be found in the Scenery folder. Click on Scenery in the library list and the
folder will open in the right hand window and will look like this:
GameGuru – Getting Started Guide
To select an entity all you need to do is click on
the model you want to add and move it into the
Editor Window, as you'll see the model is attached
to the pointer.
We'll add a mix of rocks between Rocks (1) and
Rocks (10). The grey rocks about half way down
the list.
Always remember that all important Save before moving on. Now let's place a few around
our map.

GameGuru – Getting Started Guide
TIP: A single mouse click will place 1 model. If you want to place more, simply hold down
Shift at the same time as press Left Mouse Button and you can place a lot of entities of the
same type.
Let's Save As once again and take a look at this in test game.
Things are taking shape nicely now, but all of the rocks are facing in the default direction and
size, so if would be good if we could add a little variation to each one.
This is where the widget tool come in handy.
So, what's the Widget?
The Widget tool enable you to fine tune entities in your level, you can make tiny adjustments
to the entities position, rotate around the x,y and z axis, scale the entity up and down, change
it's properties (more on that later), extract it completely and reposition it, delete it if you no
longer need it or lock it in place so you don't accidently move it.
GameGuru – Getting Started Guide
You can select any of these options simply by clicking on the sub menu.
Description
Notes
POSITION
This is the entities position in the game world, you can make fine
adjustments to the entity position using the red, green and blue
arrows of the widget.
ROTATE
Use the widget wheel to turn the entity on the x,y and z axis. Click
the wheel and drag to rotate.
SCALE
Click and drag the arrows to scale on the x,y and z axis or click and
drag on the white box to scale equally.
PROPERTIES
Changes many facets of the entities properties.
EXTRACT
This attaches the entity to the cursor and allows you to move it to a
new location by clicking the Left Mouse Button. Holding Shift will
allow multiple copies of the object to be placed.
DELETE
Completely removes the entity from the map.
LOCK
Locks the entity preventing any changes. Hold SPACEBAR and
hover over the entity to unlock it.
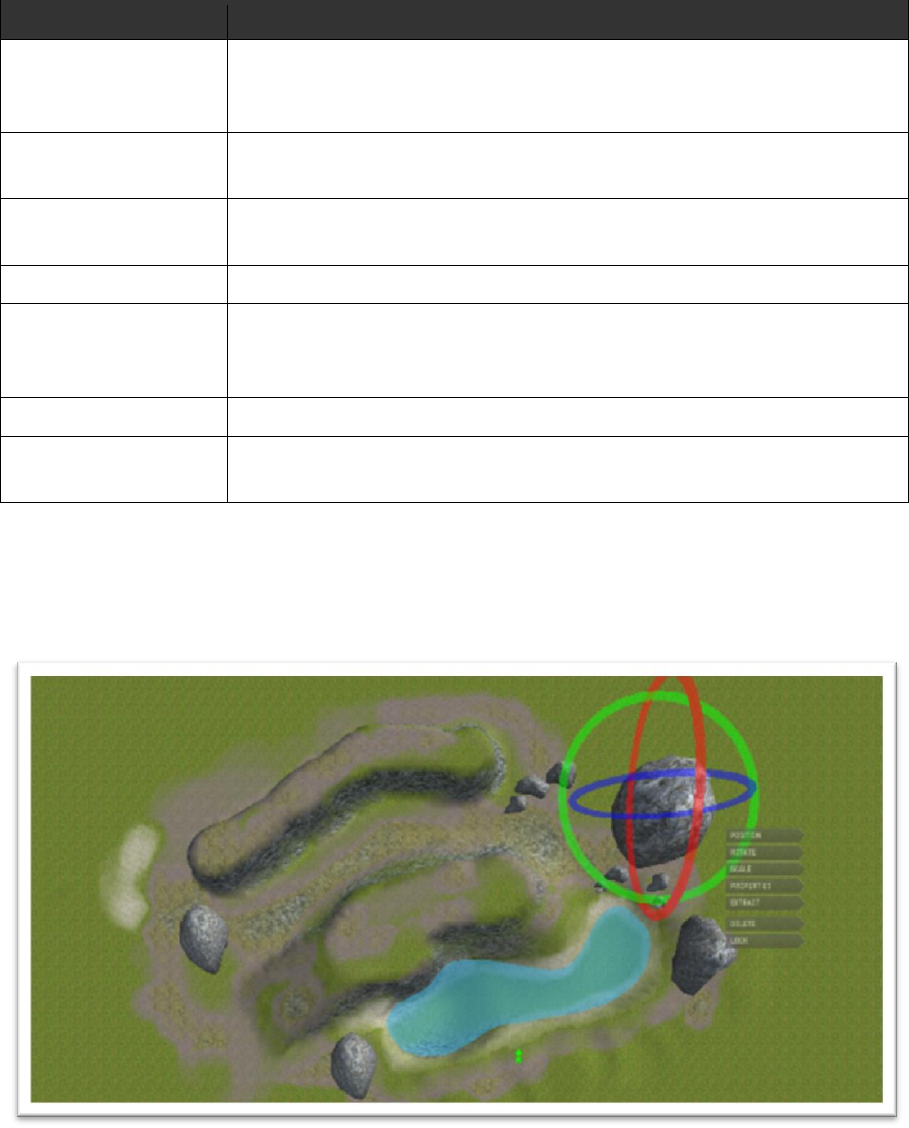
So, let's take a more in-depth look at scaling and rotation.
Left Click on one of your rocks and select Rotate, we're using a large one as an example, but
this will work for any of them.
You'll notice the three rings surrounding the entity, one for each of the three axis.
In the example below we've rotated a few rocks, you can do this yourself by holding down
the Left Mouse Button while over any of the rings and dragging the mouse. Try this yourself
and take a look in test game!

GameGuru – Getting Started Guide
Ok, let's save our changes once again, and take a look at scaling. You can access the scale
menu in the same way as rotation.
You can scale along any of the 3 axis by hovering over the pointers, holding down the Left
Mouse Button and dragging. You can also scale equally by hovering over and dragging the
white box.
GameGuru – Getting Started Guide
We've scaled a few rocks in our test map.
Give this a go yourself, play around a little more with scaling and rotation to get a feel for it.
You might need to occasionally extract the model to better position it on your map. Why not
go back through some of the areas we've discussed and try adding a few plants and trees from
the foliage folders in the entity library. When happy, save your level once more and we'll
move on.
We've added a few trees to our level and of course saved it again. We're sure you've been in
and out of test game to look at your level in all of its 3D glory, but let's go in and look at the
level we're developing for the demonstration.
GameGuru – Getting Started Guide
We're sure you'll agree that this is coming along nicely and is starting to look a little like a
game now. Games of course need game play and as GameGuru is ideally suited to First
Person Shooter (FPS) games, we'll make one of those.
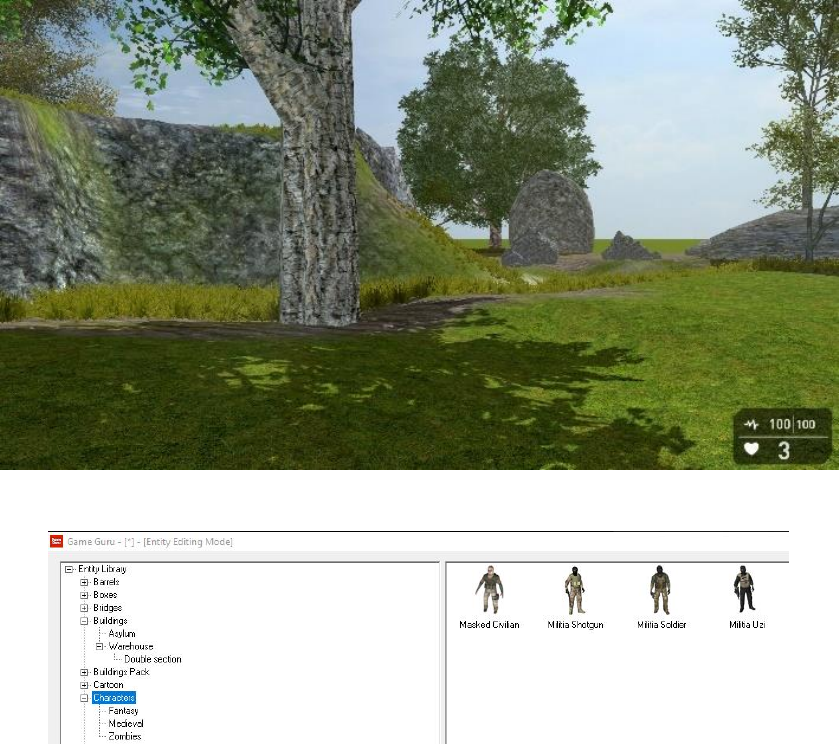
FPS games need opponents, so let's place a few of those. You can find a selection of these in
the Character folder, by default GameGuru comes with a few different characters armed with
various weapons and we'll choose a small selection.
GameGuru – Getting Started Guide
We've placed 5 characters on our map, a combat solider, 2 shotgun soldiers and 2 uzi
soldiers, this should be enough for a small skirmish and help you to understand a little more
about character as a whole.
It's time for you to place a few characters of your own and try another test game. Don't forget
to save your map!
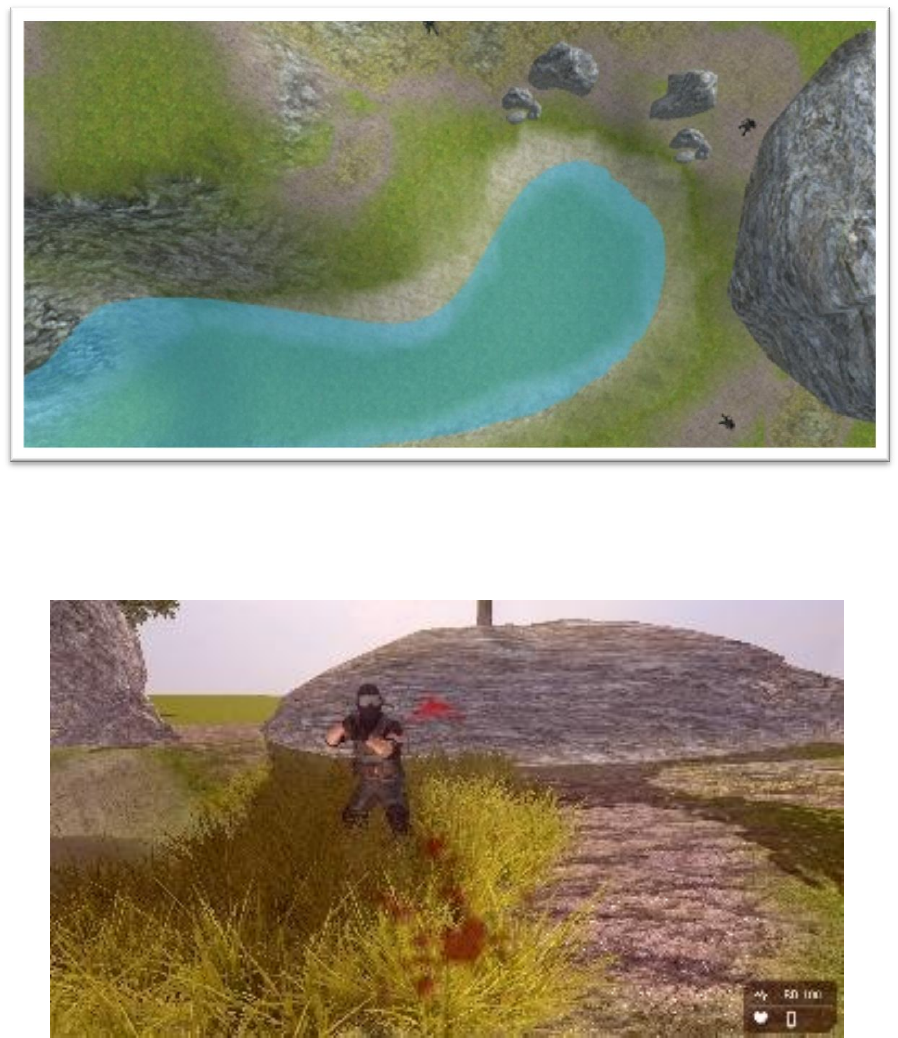
Well, we're fairly sure you found that pretty one sided. It wasn't really fair pitting us against a
group of heavily armed soldiers with no weapon to fight back with.
GameGuru – Getting Started Guide
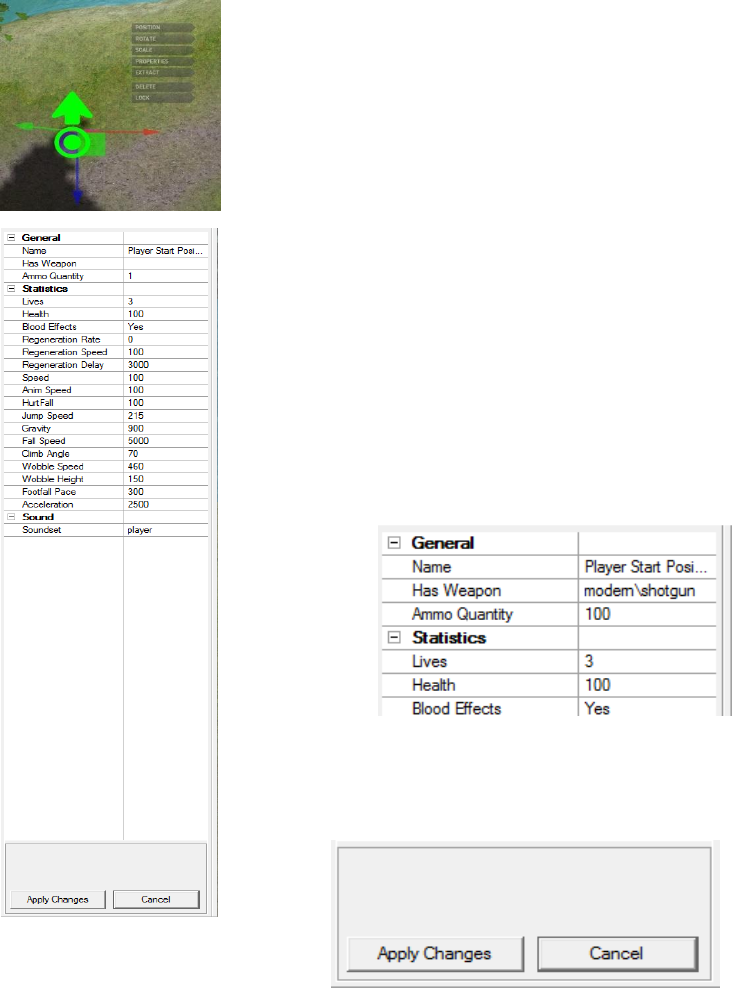
Let's take a look at the player properties and see if we can't even the
odds a little.
Find your start maker and Left Click on it to bring up the start marker
widget menu. This is identical to the entity menu and every menu
that works for the entities will also work for the start maker.
We'll look at these options in more depth in a moment, but for now
we're interested in Has Weapon and Ammo Quantity. Click on the
box Has Weapon and select Modern/Shotgun from the dropdown list.
Next we'll need to give our player some ammo, so click on the box
Ammo Quantity and type 100 (That's 100 shells for the shotgun) and
press Enter/Return.
So, the top few properties should look like this;
Ok, if you're happy with this you can make the changes, clicking the
Apply Changes button at the bottom of the properties panel.
It's best to Save As again, just in case, and now let's take a look at our character now the
playing field has been levelled a little.
GameGuru – Getting Started Guide
Well, that's better, now we actually have a small, but playable game, but the characters aren't
doing much. Just chasing you and shooting so let's take a quick look at Waypoints.
A waypoint is a path laid down in your level that characters will follow if they've nothing else
to do. You could think of them as patrol routes if you like.

GameGuru – Getting Started Guide
To start with let's move the Editor Window so we're near to a character we'd like to follow
some waypoints.
We've zoomed in a little so we can see the character clearly. You can place the
start of a waypoint by clicking on this icon.
You'll notice that a star has appeared on your map, this is the first part of the waypoint, we
call these nodes.
You can move any node in a waypoint by simple Left Clicking and dragging the node
around. Try this now to move the node closer to the character.
Right, now we've repositioned the start node, let's add a few more points.
This is a simple matter of holding down Shift and Left Clicking to create a new linked node.
This node can be dragged around like the first starting node. You can see that these are linked
by a coloured line showing the path the character will take.
If you make a mistake, don't worry, you can delete any node by holding Shift and Right
Clicking.
GameGuru – Getting Started Guide
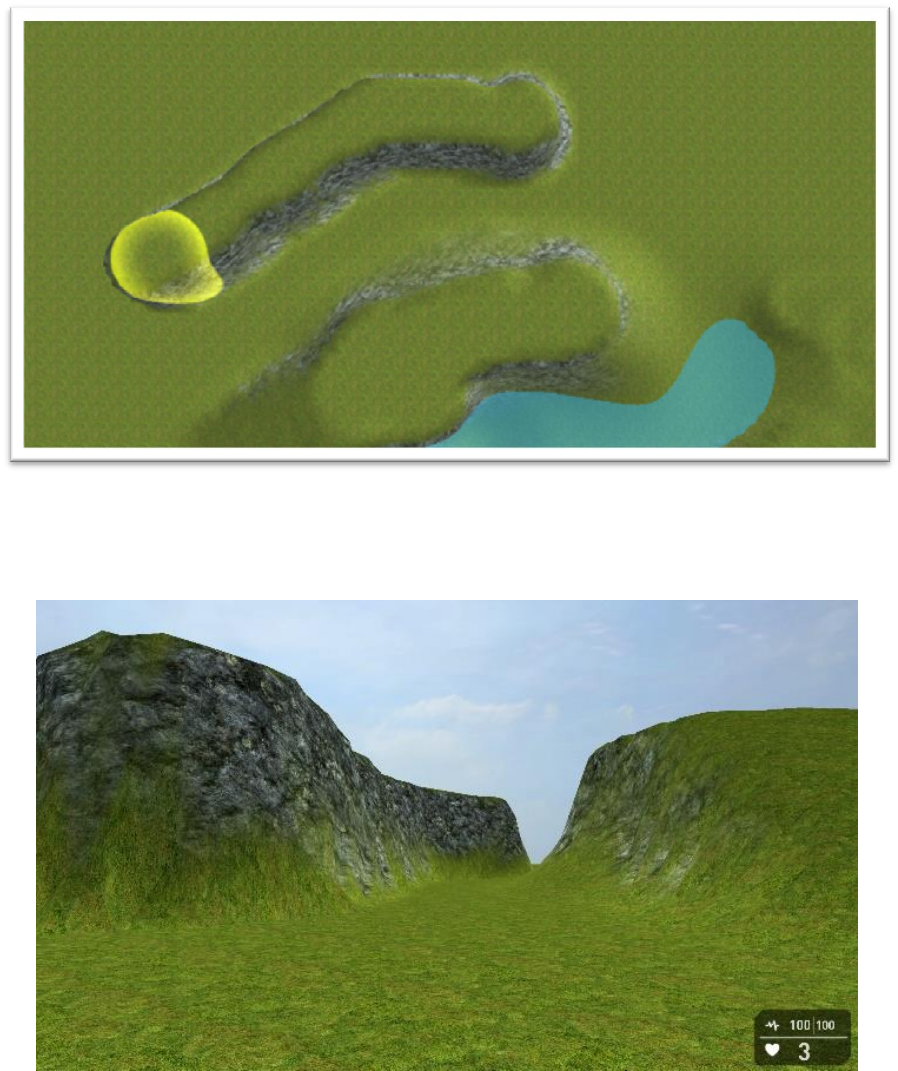
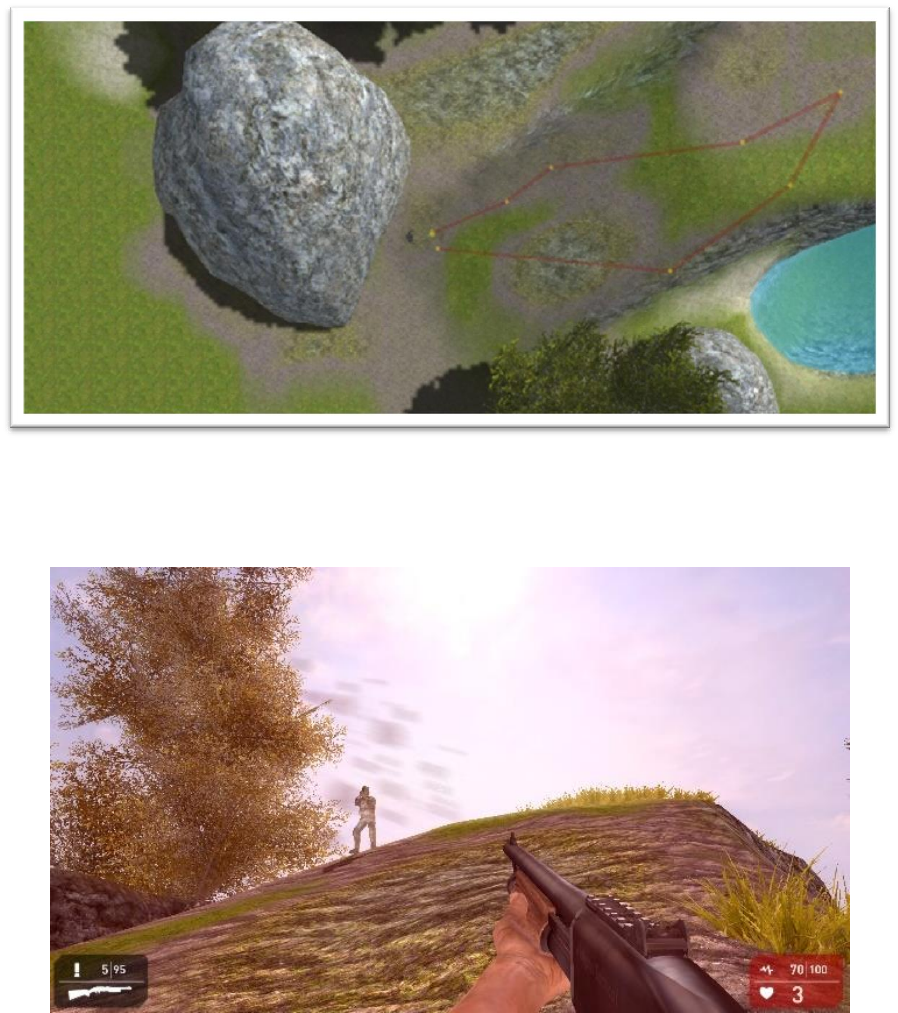
Try adding a few more nodes and creating a path. We've made a circular route for our
character, so he will climb the hill and then walk back down, but yours can be any shape you
like.
It's time to Save As again, and test out your new waypoint. If all goes well, your character
should walk around until they spot you.
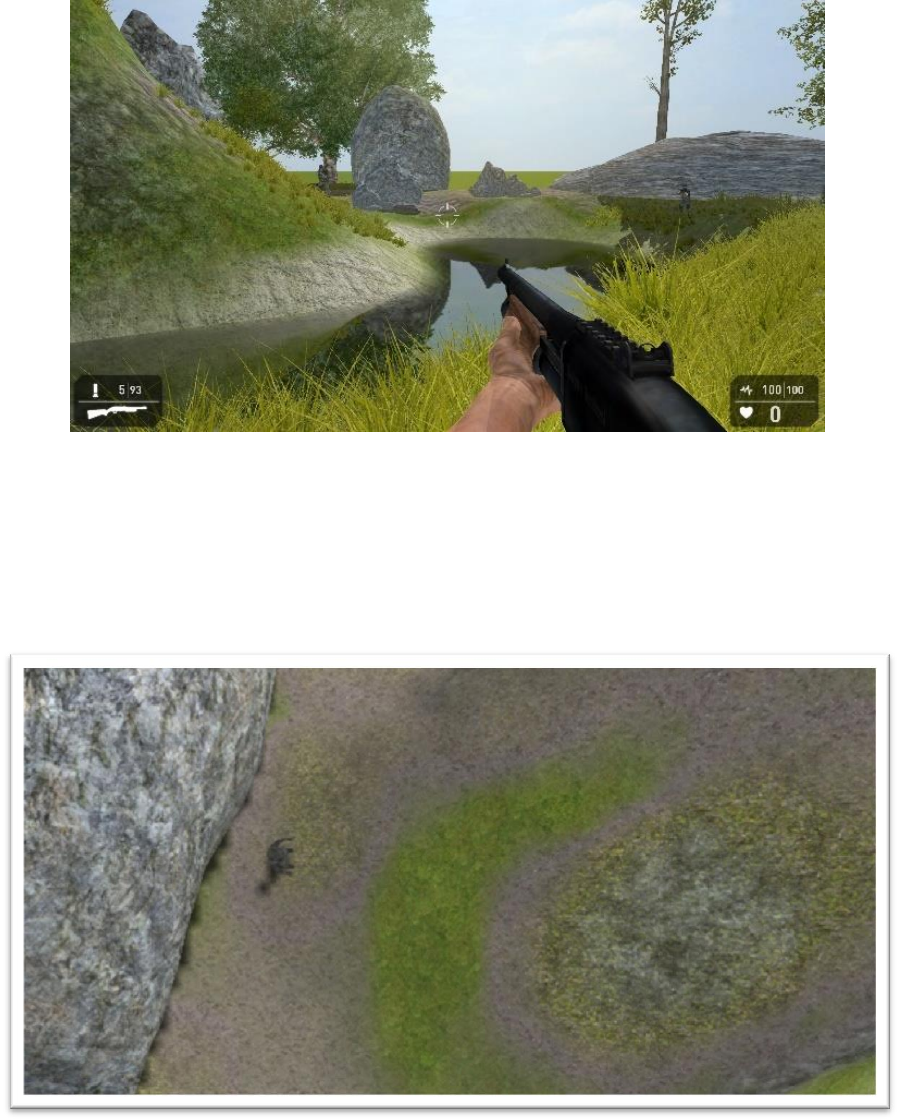
As you can see, in our example the character has climbed the hill but has stopped to engage
the player the moment we were seen.
Well, this is all good, but we've one more thing to look at before we can consider this a game.
We need to be able to win.
GameGuru – Getting Started Guide
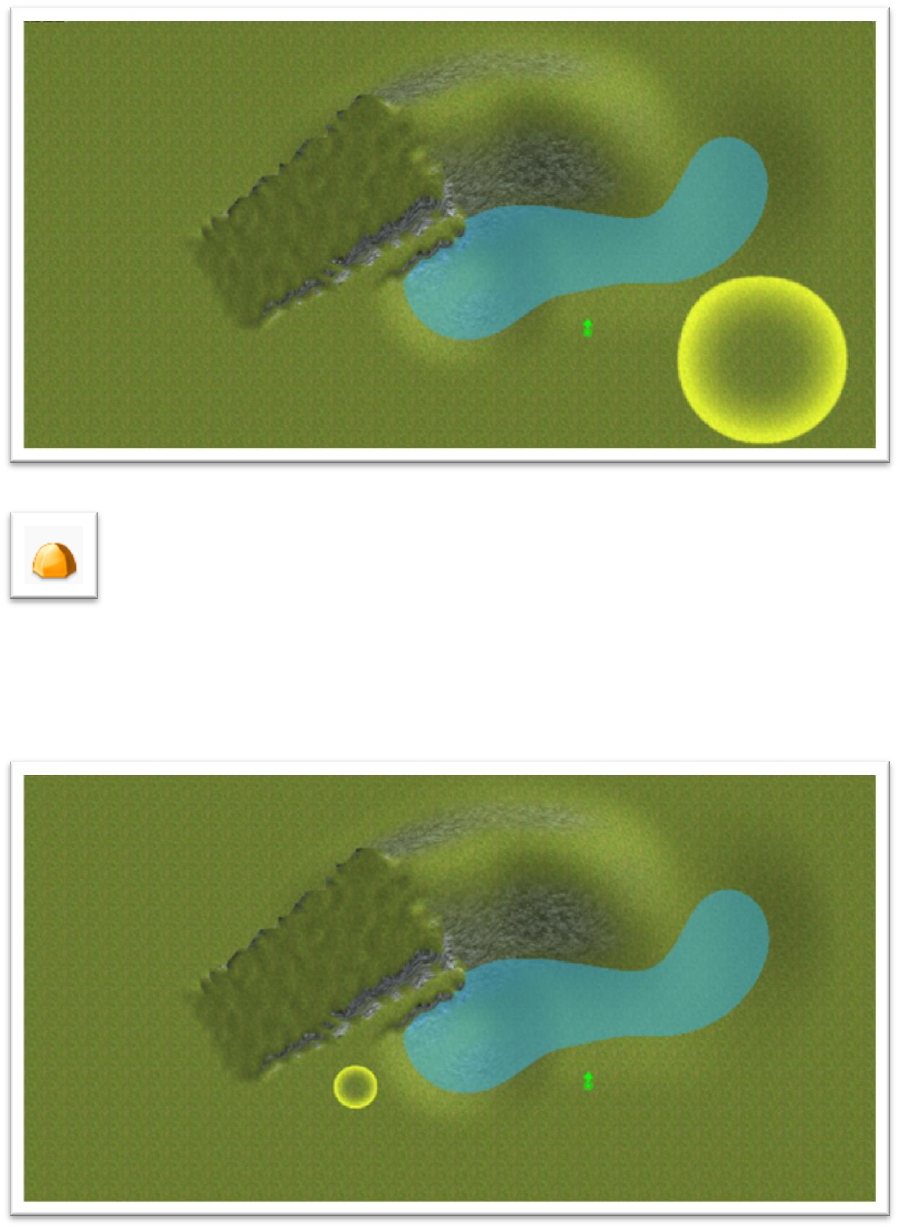
There are many ways we can achieve a win in a GameGuru level, but for this demonstration
we'll look at the standard Win Zone. A zone is a type of Marker that triggers an event, in this
case the end of the level.
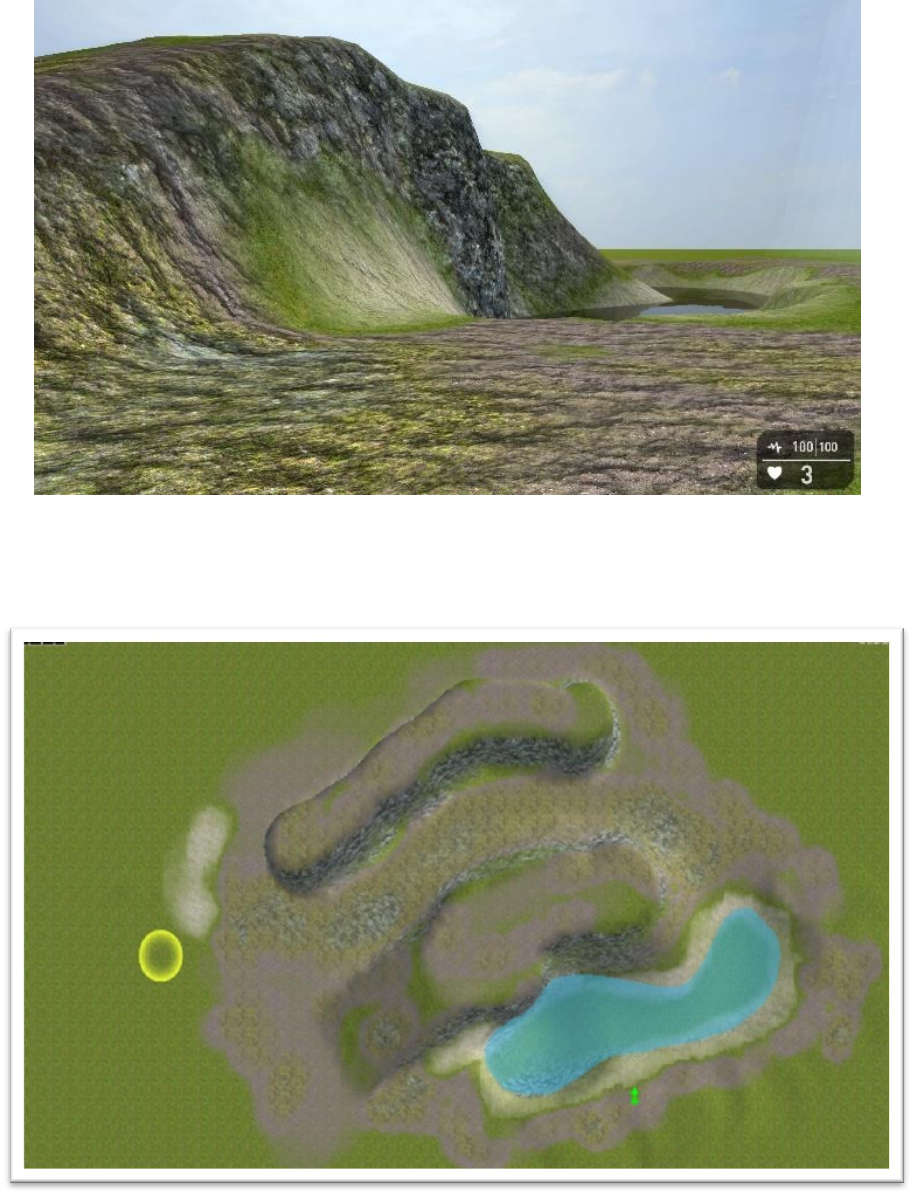
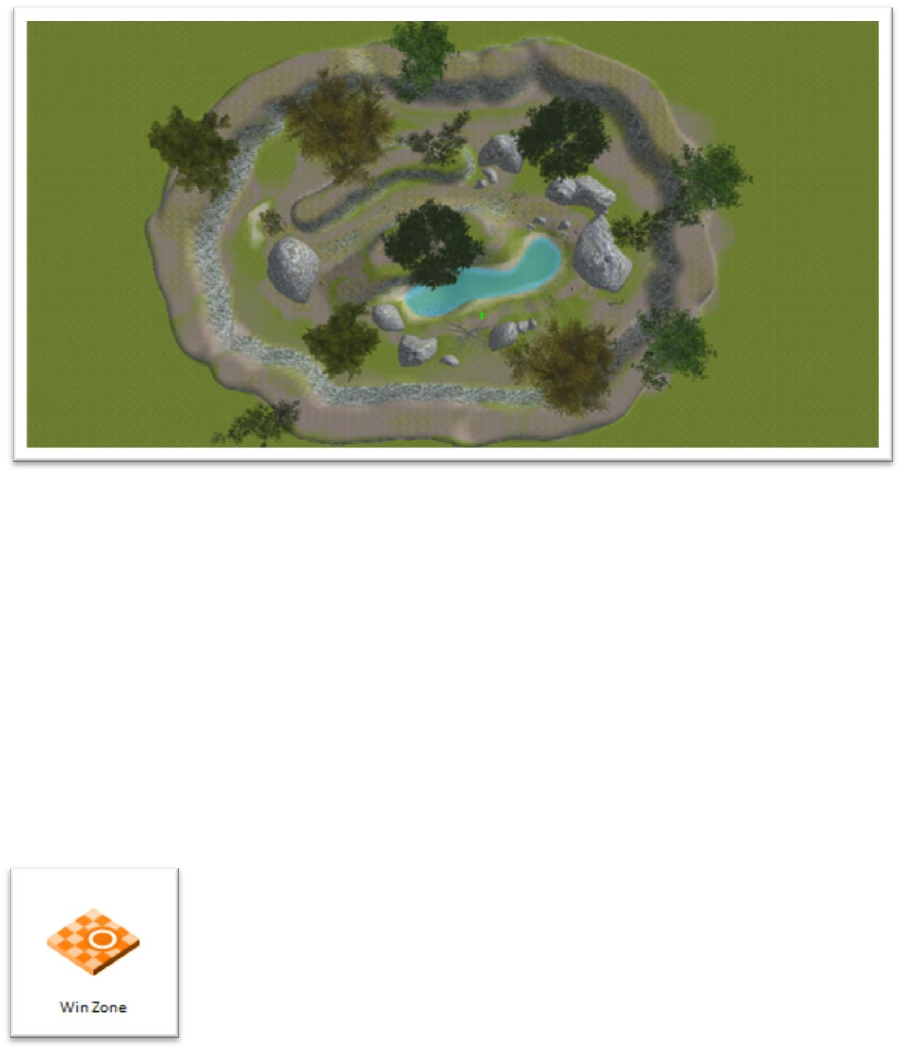
So, let's return to our map, and add a few more rocks and trees to give the player a route to
the end and a little more of a challenge. We've also decided to surround the playing area with
an unclimbable wall to prevent the player leaving apart from the Win Zone. You'll notice that
we've also painted a little more onto the terrain to add to the feel of the level.
Now for the final part of adding our Win Zone. We've decided for our level that the player
simply has to cross the map and enter the Win Zone to escape, to let's place one.
As we mentioned the Win Zone is just another type of marker. Move your Editor Window
view to where you want to place your Win Zone.
Click Markers and select Win Zone from the Library Window. (You will
need to scroll down the list a little to find it).
GameGuru – Getting Started Guide
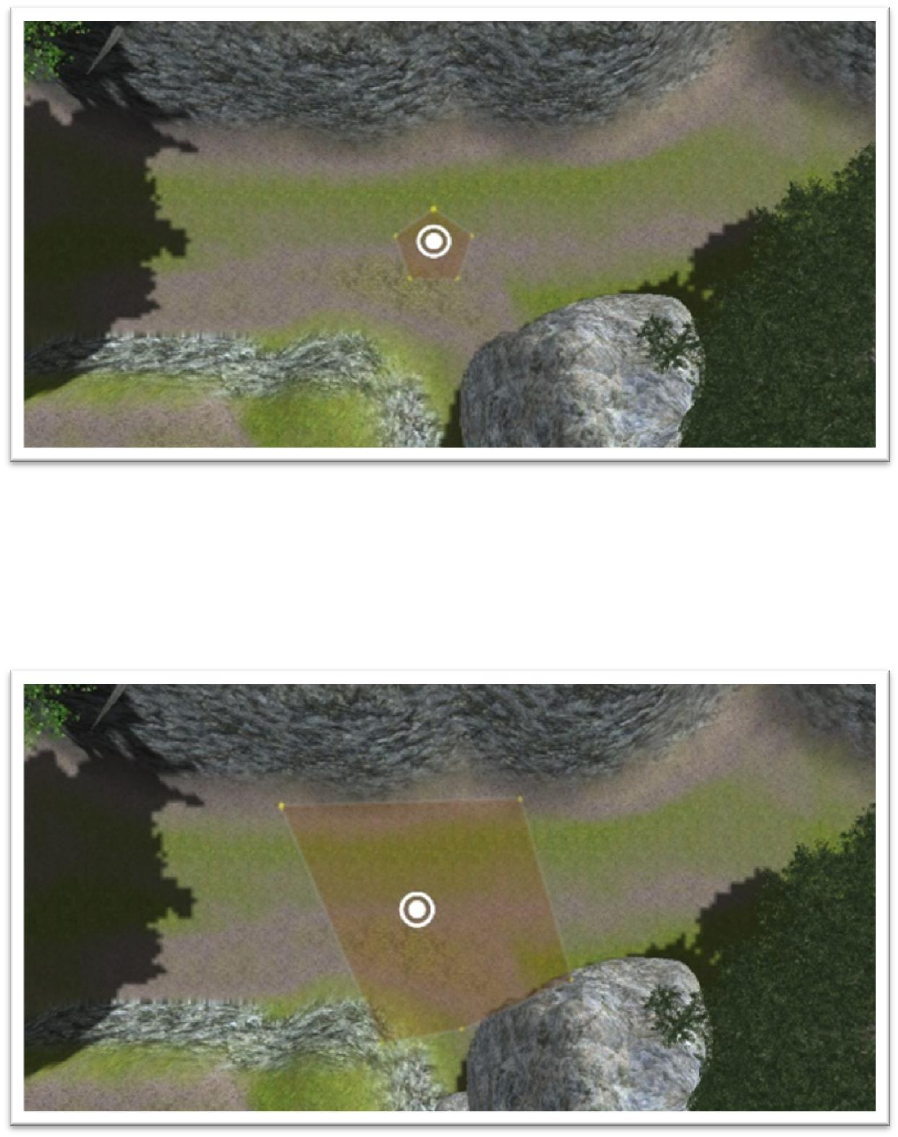
The zone will attach to your pointer and can be placed manually with the Left Mouse Button
You'll notice that the Win Zone has stars similar to the Way Point Nodes and all zone nodes
can be moved and edited in the same way.
We want our Win Zone to cover an area large enough so the player can win by entering it
from several directions, so we're going to move our node to increase the size of the zone.
We've saved our map one last time and now we can test out our final, small but complete
level.
GameGuru – Getting Started Guide
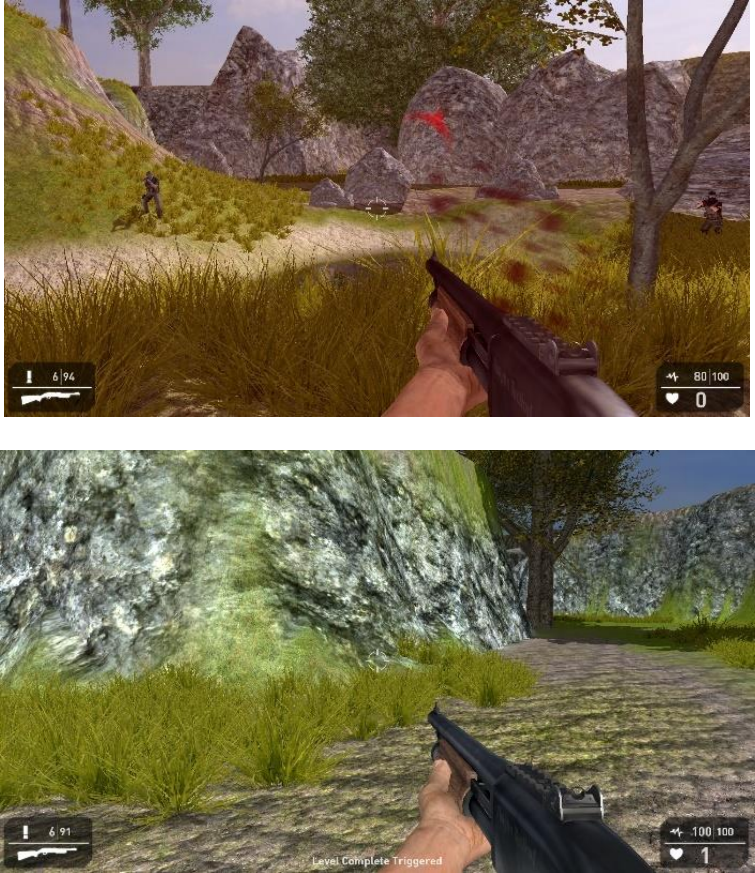
Our characters are putting up a brave defence, but our players superior training has won the
day and we've reached the Win Zone!
If you take a look at the bottom of the screen you'll see the message Level Complete
Triggered. In test game this indicates that the level is over, but you'll still be able to move
around and try other things.
If you've build a Standalone game your game will either end if this is the last level, or load in
the next level.
Hopefully this getting started guide has managed to get you up and running with GameGuru.
You can find much more help and advice in the development broadcasts that we have online
(see the link in the Getting Started menu).
Don't forget you can join our very active GameGuru Community for advice on a wide variety
of areas or for technical support contact our support service at www.thegamecreators.com
