Guide
User Manual: Pdf
Open the PDF directly: View PDF ![]() .
.
Page Count: 7

Justin Friedman & Jordan Gonen
User Guide:
Non-Technical Users
MagicMirror is an internet-connected mirror that displays your weather forecast. It comes with a
compatible iOS application that you can use to set your current Zip Code, toggle views (simple,
advanced) and dictate units to display.
To get set up, simply power on your mirror (via usb connection) and power on your PhoneGap
application. Never used PhoneGap?
Simply download from app store and enter this url: ask us on demo day for the current link
From there, you can login to your device’s account. For our sample, we are using the account
associated with justinfriedman22@gmail.com.
1
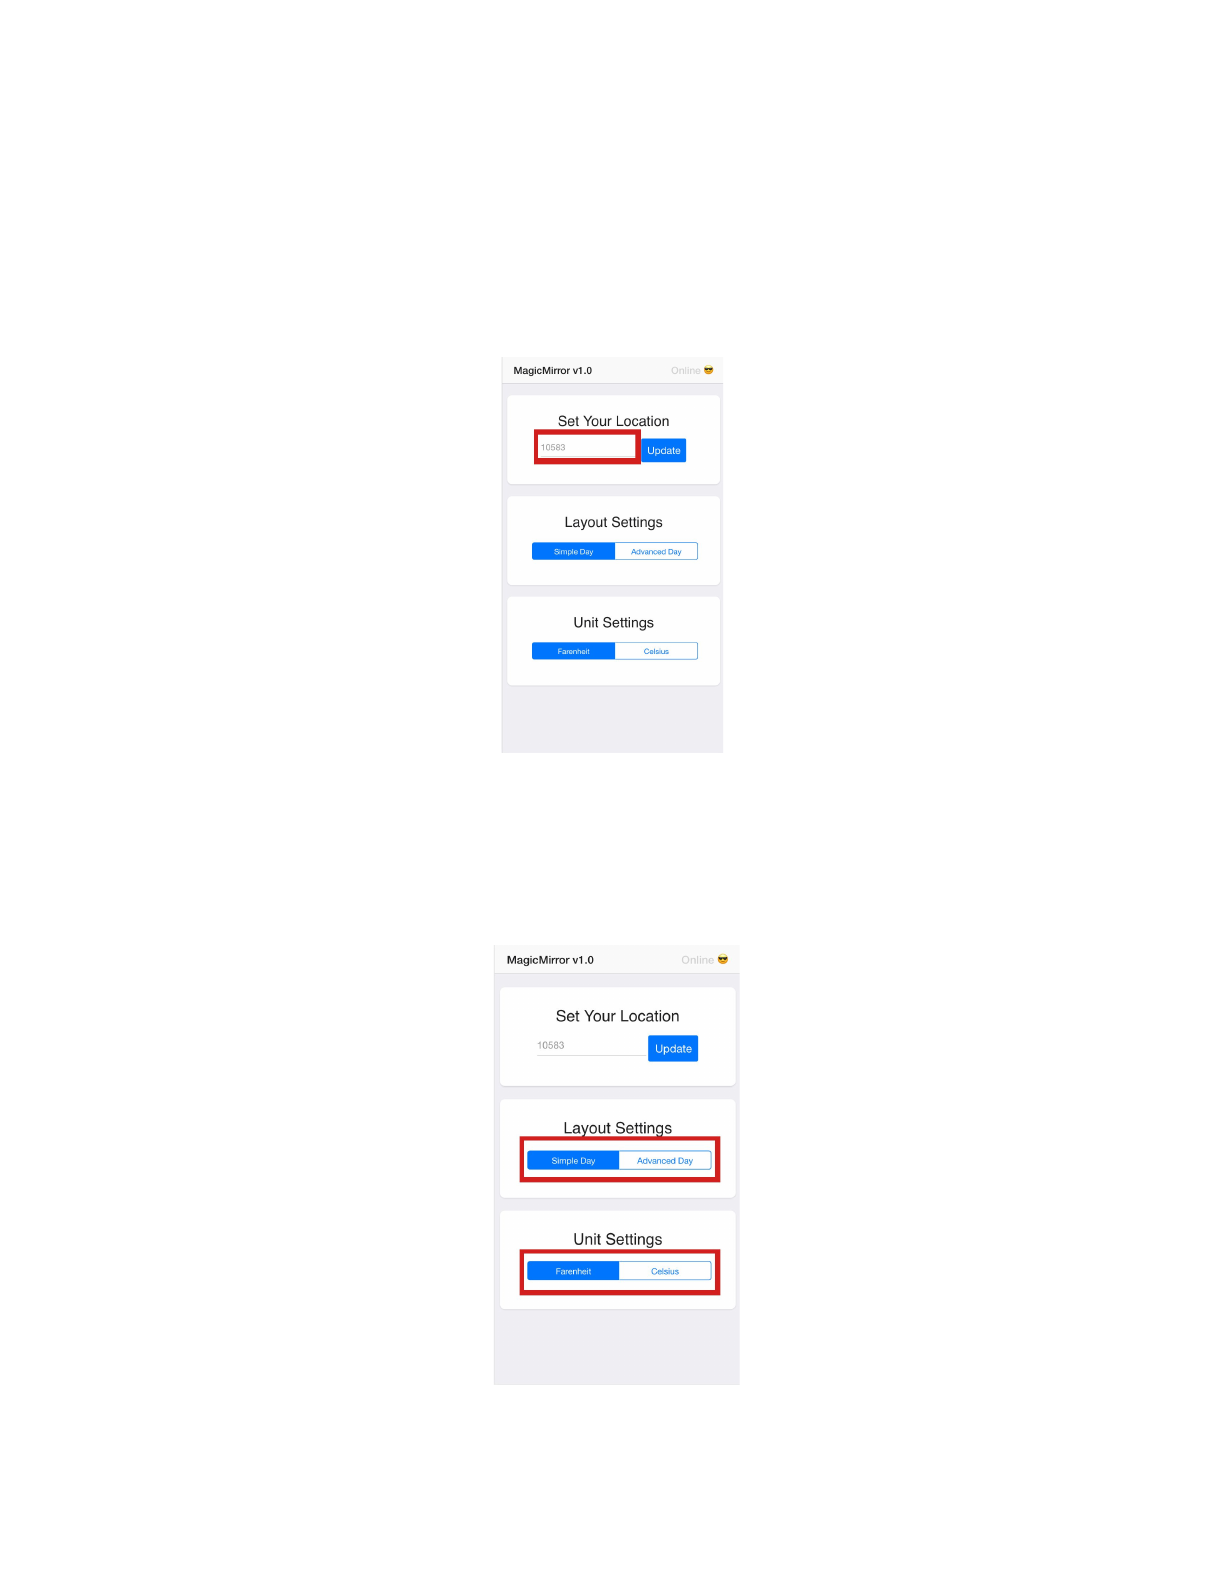
Once inside, the UI is very intuitive as you can very easily input and update your zip code,
switch views, and units.
To get weather for a specific US location, enter the zip code in the box highlighted in the image
below.
To swap between simple and advanced views or to change reporting units, select the
corresponding option, highlighted in the image below.
2
Student Tutorial:
A guide for how another student could set it up and things they'd need to know to update /
modify it.
There are three moving parts to this build: front end, particle cloud and particle photon. There is
a phonegap IOS application for the settings panel and zip code setter. We ensure that when you
log on to the application, you wait for the particle to come online so that you can push updates
accurately.
There is no knowledge outside of the 222 curriculum required to implement this section of the
build.
he second part is the integration feature on particle cloud, specifically web hooks. We have
briefly explored webhooks in class and this project builds upon that learning. To implement a
webhook inspired by those used in our build, students must first sign up for a free
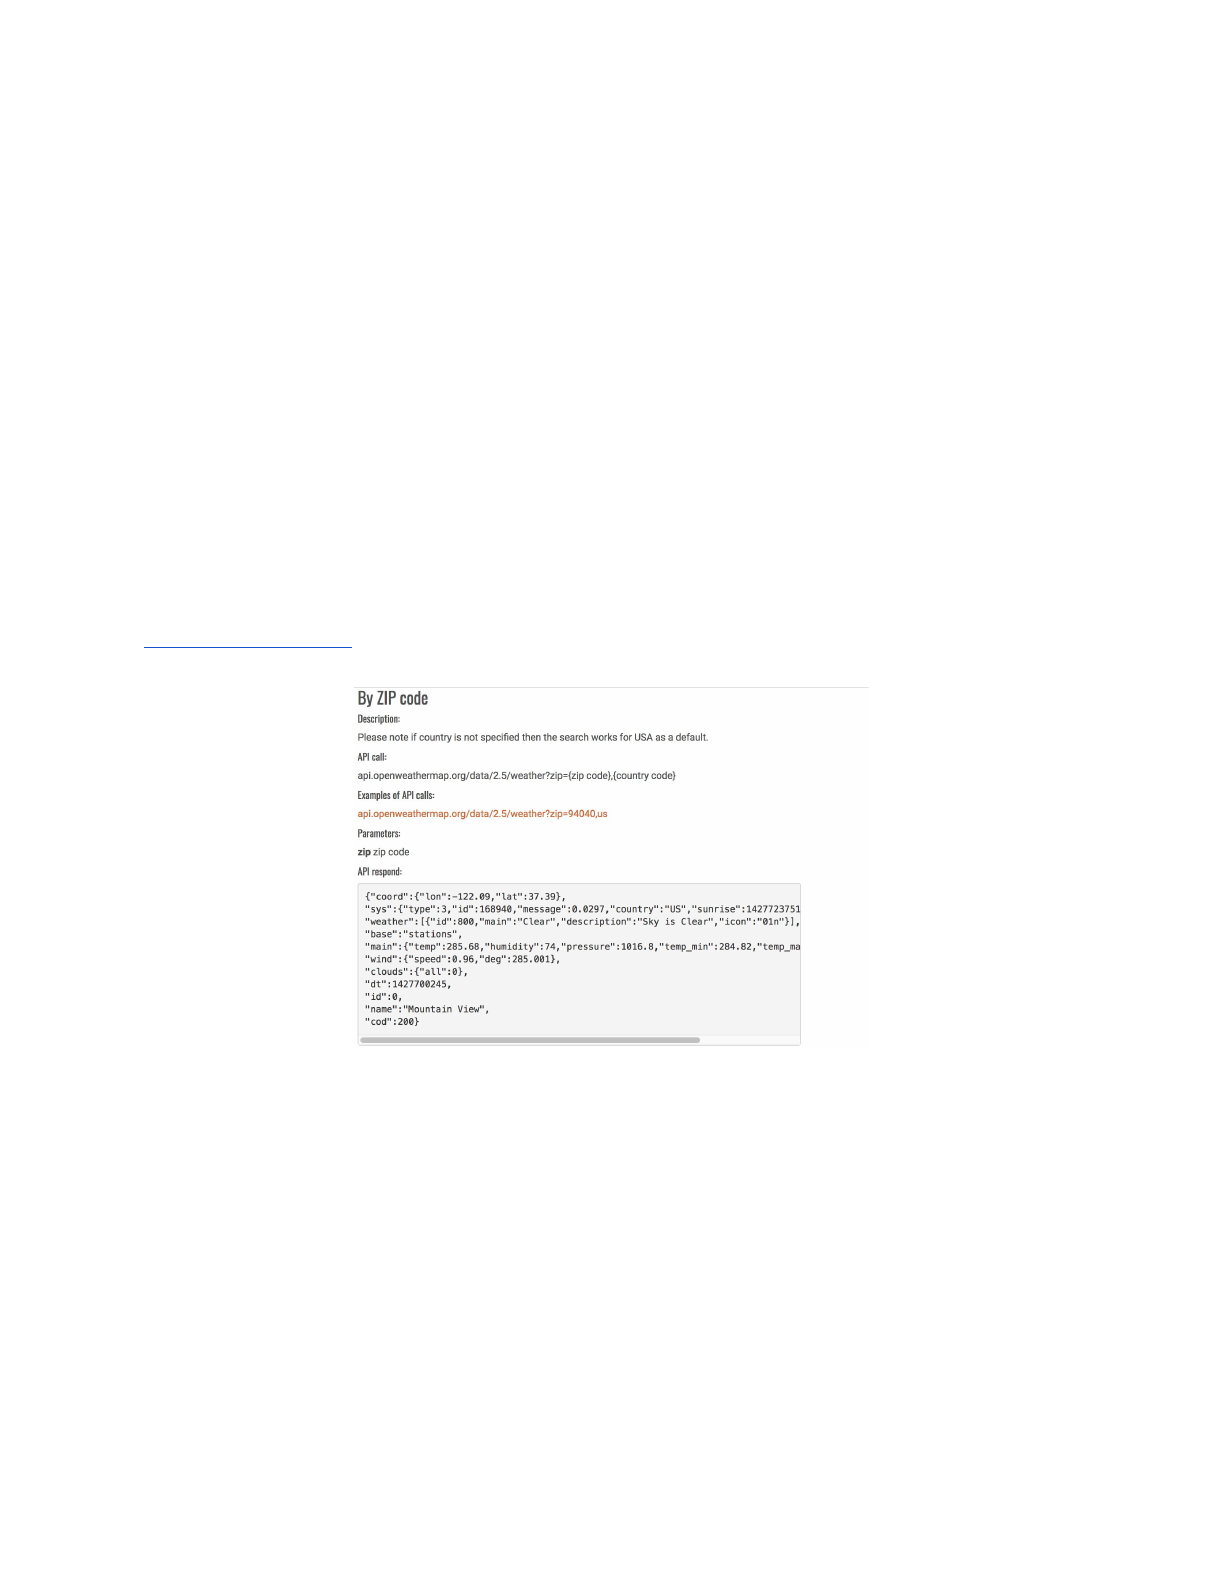
openweathermap.org API account.
3
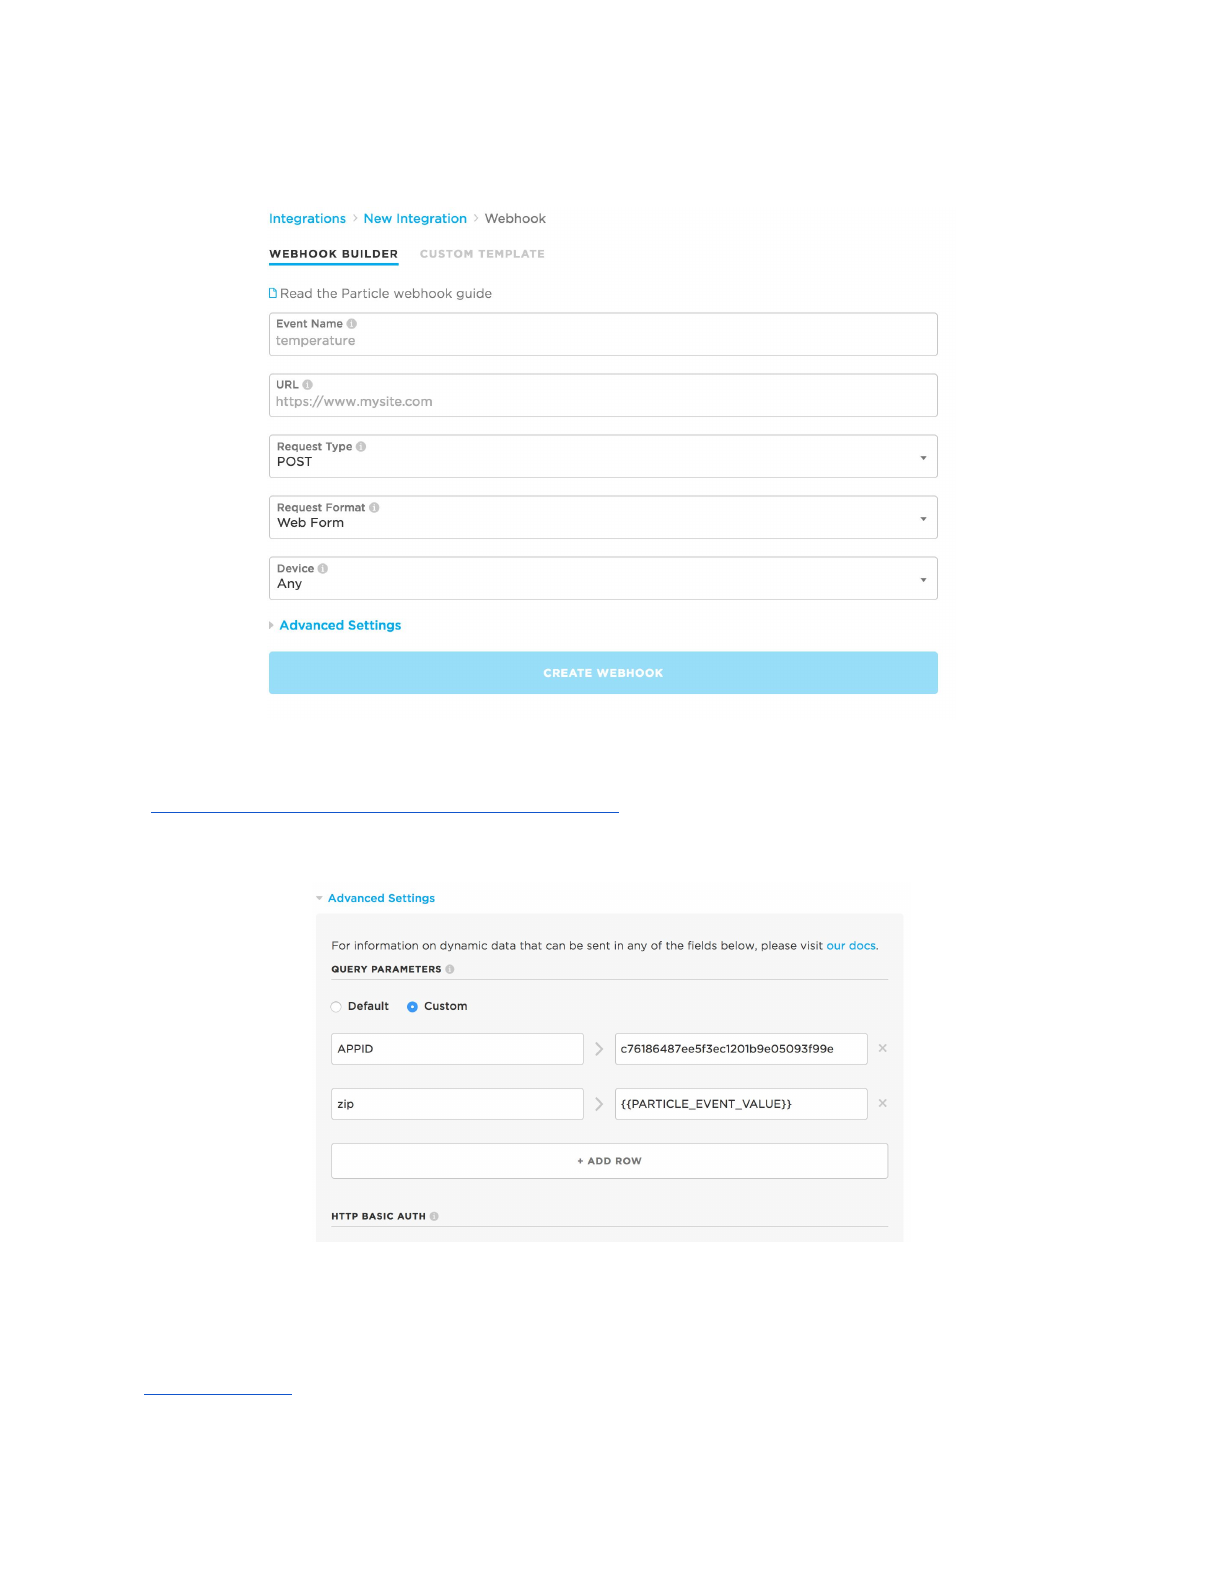
From the particle console website, navigate to the integrations view on the lower left corner and
then select new integration. The integration type should be set as a webhook.
The above form will then appear. Enter your desired event name that will trigger the webhook.
For our case we used getCurrentWeather. For the URL enter
“http://api.openweathermap.org/data/2.5/weather” for the current weather. The request format
should be GET and the request format should be query parameters. Then click on advanced
settings.
The above form will appear. Select the custom radio button if it is not defaultly selected. The first
GET parameter we will send is our APPID, this is what openweathermap.com calls an api key.
The second parameter is zip as we are retrieving data by zip code. This value is something that
comes from the event that triggers the webhook so rather than hard coding it we can use
mustache case to define that zip should equal the event data sent over. In our case the correct
4
name was {{PARTICLE_EVENT_VALUE}}. Then scroll down the page until you see the form
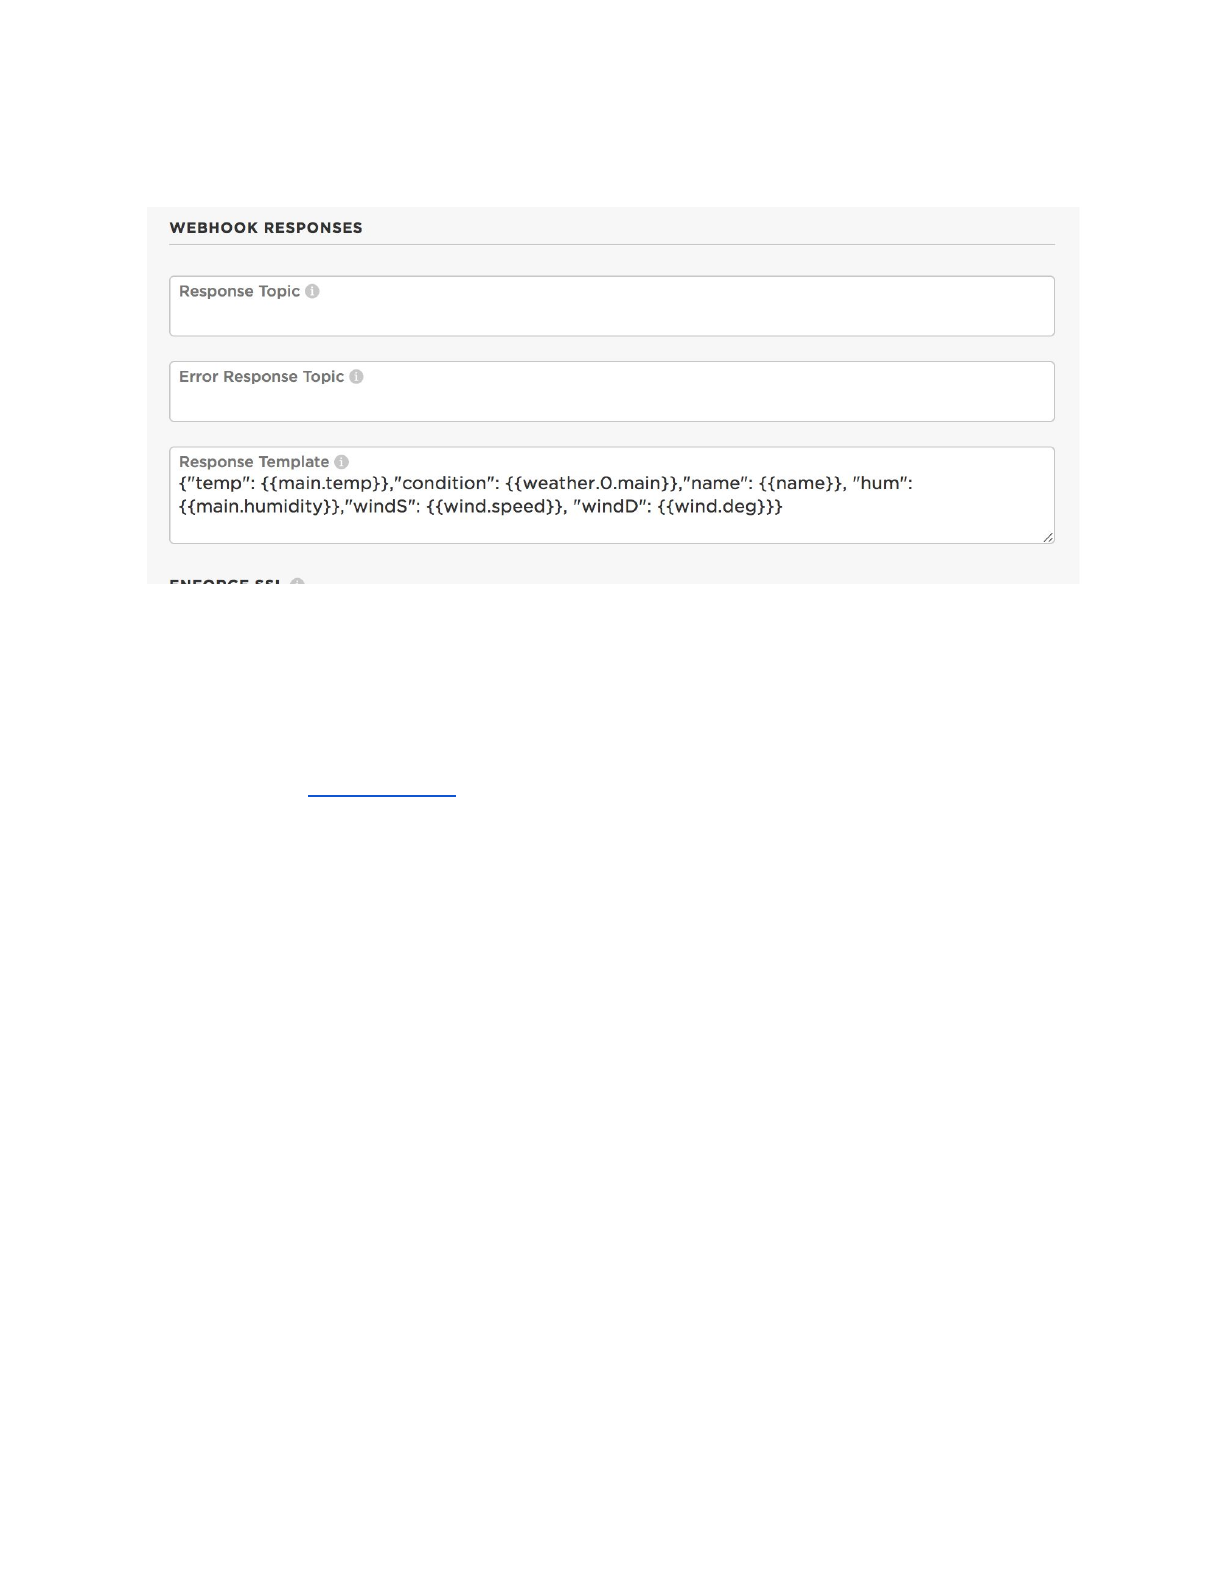
area illustrated below.
The response template can be thought of as a filter that allows the webhook to only transmit the
data you want from the API and omit the rest from the response. For our application, this was
essential as the object coming back from the weather API is complex and has significant
superfluous data that would increase parsing complexity on the particle side. Response
templates utilize mustache case and custom delimiters. In our case, we wanted to reconstruct
the response as a json like object when it was received by the particle so we used commas as
delimiters and added “{}” around the whole message to make parsing easier. To define the
value of a specific feature in the response object an object traversal syntax that is common
throughout most programming languages can be user ie. object.subobject.value. The only
difference is that to access the ith index of the object you treat that index like a sub object and
not like an array ie. object.0.value vs object[0].value.
Once you have defined the response template, navigate to the bottom of the form and create
your new webhook. Testing within the webhook info page will always fail because we defined
the webhook to require a parameter zip that the test function does not provide. Instead, to test,
go to the events console and publish a new public event with the same event name that will
trigger the webhook and compare the response to your desired return. Common reasons that
GET webhooks with parameters will fail are incorrectly ordered parameters and over requesting.
5

The third component of our build is the particle photon. The wiring is described in the below
table.
Adafruit_HX8357 3.5” TFT Breakout (SPI)
Particle Photon
CS
A2
CLK
A3
MISO
A4
MOSI
A5
D/C
DAC
GND
GND
3v
3v
The main functionality that our particle build has that is outside of the scope of the 222
curriculum is webhook parsing/object reconstruction. The webhook detailed earlier sends a
const char array with the json object content. We utilized the standard string methods to convert
the webhook const char to a dysfunctional string which was then inserted into an array of chars
allowing the data to become functional again. At that point we used the static json buffer
functionality in the ArduinoJson library to read the json into an object like array. At that point we
were able to transfer the data to individual, local, variables. Our final parsing implementation is
quite light at about 15 lines but multiple hours and countless other methods were utilized and
tested in development of our final solution.
Illustrated below is the code used to parse the response template data utilized in the webhook
portion of this tutorial.
6

There are a few things you can do to expand upon the product features. A few ideas we had on
our roadmap that could be implemented if validated by user demand:
- Battery pack attached to the mirror so it did not need to be plugged in
- Integrations with more relevant services to show more data to the user (stocks, traffic,
etc.)
- Launch iOS application on the Apple Store
- Upgrade the screen to be a higher quality and display more detailed pictures of the
weather
7
