Head First Learn To Code A Learner's Guide Coding And Computational Thinking
Head%20First%20Learn%20to%20Code%20-%20A%20Learner's%20Guide%20to%20Coding%20and%20Computational%20Thinking
Head%20First%20Learn%20to%20Code%20-%20A%20Learner's%20Guide%20to%20Coding%20and%20Computational%20Thinking
Head%20First%20Learn%20to%20Code%20-%20A%20Learner's%20Guide%20to%20Coding%20and%20Computational%20Thinking
Head%20First%20Learn%20to%20Code%20-%20A%20Learner's%20Guide%20to%20Coding%20and%20Computational%20Thinking
Head%20First%20Learn%20to%20Code%20-%20A%20Learner's%20Guide%20to%20Coding%20and%20Computational%20Thinking
User Manual: Pdf
Open the PDF directly: View PDF ![]() .
.
Page Count: 641 [warning: Documents this large are best viewed by clicking the View PDF Link!]
- Praise
- Copyright
- Table of Contents
- Intro: How to use this book
- Chapter 1: Getting Started: Thinking computationally
- Breaking it down
- How coding works
- Are we even speaking the same language?
- The world of programming languages
- How you'll write and run code with Python
- A very brief history of Python
- Putting Python through its paces
- Saving your work
- Congrats on coding your first Python program!
- Phrase-O-Matic
- Getting the code in the machine
- Chapter 2: Know Your Value: Simple values, variables, and types
- Chapter 3: Decisive Code: Booleans, decisions, and loops
- Would you like to play a game?
- First, a high-level design
- The computer's choice
- How to use the random number
- True? Or False?
- Introducing the Boolean type
- Making decisions
- Decisions and more decisions
- Back to Rock, Paper, Scissors
- Getting the user's choice
- Taking a look at the user's choice
- Adding the code to detect a tie
- Who won?
- How to implement the game logic
- More about Boolean operators
- Display the winner
- Got documentation?
- How to add comments to your code
- We need to finish that game!
- How do we know if the user's choice is invalid?
- Checking out and cleaning up the expression
- How to continually prompt the user
- Doing things more than once
- How the while loop works
- How to use while to prompt the user until you get a valid choice
- Congratulations on coding your first game!
- Beware of the Dreaded Infinite Loop
- Chapter 4: Providing Some Structure: Lists and iteration
- Can you help Bubbles-R-Us?
- How to represent multiple values in Python
- How lists work
- How to access a list item
- How big is that list, anyway?
- Accessing the last item in the list
- Python makes this even easier
- Using Python's negative indices
- Meanwhile, back at Bubbles-R-Us...
- How to iterate over a list
- Fixing the output glitch
- Really fixing the output glitch
- The for loop, the preferred way to iterate over a list
- How the for loop works
- How the for loop works on a range of numbers
- Doing more with ranges
- Putting it all together
- Test drive the bubble report
- Building your own list, from scratch
- Doing even more with lists
- Test drive the final report
- Testing the most cost-effective solution
- Chapter 5: Getting Functional: Functions and abstraction
- What's wrong with the code, anyway?
- Turning a block of code into a FUNCTION
- We created a function, so how do we use it?
- But how does all this actually work?
- Functions can RETURN things too
- How to call a function that has a return value
- Getting a little refactoring under our belts
- Running the code
- How to abstract the avatar code
- Writing the get_attribute function body
- Calling get_attribute
- Let's talk about variables a little more...
- Understanding variable scope
- When variables get passed to functions
- Making the drink_me function call
- What about using global variables in functions?
- Going further with parameters: default values and keywords
- Always list your required parameters first!
- Using arguments with keywords
- How to think about all these options
- Chapter 4, part 2: Putting Some Order in Your Data: Sorting and nested iteration
- Chapter 6: Putting It All Together: Text, strings, and heuristics
- Welcome to the data sciences
- How do you compute something like readability?
- The game plan
- Writing some pseudocode
- We need some text to analyze
- Setting up the function
- First up: we need the total number of words in our text
- Computing the total number of sentences
- Writing the count_sentences function
- Computing the number of syllables, or, learning to love heuristics
- Setting up the heuristic
- Writing the heuristic
- How to count vowels
- Ignoring consecutive vowels
- Writing the code to ignore consecutive vowels
- Removing final e's, y's, and punctuation
- Putting slicing (substrings) to work
- Finishing off the heuristic
- Implementing the reading ease formula
- Taking it even further
- Chapter 7: Getting Modular: Modules, methods, classes, and objects
- A quick module review
- The __name__ global review
- Using analyze.py as a module
- Adding docstrings to analyze.py
- Exploring other Python modules
- Wait, did someone say "turtles"?!
- Creating your very own turtle
- Turtle lab
- Adding a second turtle
- What are turtles, anyway?
- What are objects?
- Okay, what's a class then?
- A class tells us what an object knows and what an object can do
- How to use objects and classes
- What about those methods and attributes?
- Seeing classes and objects everywhere
- Get ready for some turtle races
- Planning the game
- Let's start coding
- Setting up the game
- Writing the setup code
- Not so fast!
- Starting the race
- Chapter 8: Beyond Iteration and Indices: Recursion and dictionaries
- A different way to compute
- And now the different way...
- Now let's write some code for our two cases
- Let's get some more practice
- Using recursion to detect palindromes
- Writing a recursive palindrome detector
- The Anti-Social Network
- Introducing the dictionary
- What about iterating through a dictionary?
- Leveraging dictionaries at the Anti-Social Network
- But how do we add more attributes?
- Remember the Anti-Social Network's killer feature?
- Finding the most anti-social user
- Now, it's all you!
- Can we just remember function call results?
- We might as well use the $5 words: Memoization
- Some more brain building
- A closer look at the koch function
- Truly exploring the koch fractal
- Chapter 9: Persistence: Saving and retrieving files
- Ready for some Crazy Libs?
- How Crazy Libs is going to work
- Step 1: Read the text of the story from a file
- To read a file in Python, you first have to open it
- How to use file paths
- Relative paths
- Absolute paths
- Oh, and don't forget to clean up when you're done!
- Reading a file into your Python code
- Using the file object to read a file
- Oh, give it a break already...
- Hey, we've got a Crazy Lib game to finish!
- Using the readline method of the file object
- How do we know when we've read the last line?
- Reading in a Crazy Lib template
- Processing the template text
- Now let's process the text
- Using a new string method to fix the bug
- Actually fixing the bug
- Some code has real problems
- Handling exceptions
- Explicitly handling exceptions
- Updating Crazy Libs to handle exceptions
- Our last step: storing the Crazy Lib
- Updating the rest of the code
- Chapter 10: You Really Should Get Out More: Using web APIs
- Extending your reach with Web APIs
- How Web APIs work
- All Web APIs have a web address
- Time for a quick upgrade
- Doing the upgrade
- All we need now is a good Web API...
- A closer look at the API
- Web APIs provide data using JSON
- Now let's look at that request module again
- Putting it all together: making a request to Open Notify
- How to use JSON in Python
- Using the JSON module on our ISS data
- Meet the screen object
- Let's add a turtle to represent the ISS
- Turtles can look like space stations too
- Forget the ISS—where are we?
- Finishing off the ISS code
- Chapter 11: Getting Interactive: Widgets, events, and emergent behavior
- A closer look at the Game of Life
- What we're going to build
- Do we have the right design?
- How we're going to build the simulator
- Building the data model
- Computing a generation of the Game of Life
- Completing the model code
- Where are we?
- Building the view
- Creating your first widget
- Adding the rest of the widgets
- Correcting the layout
- Placing the widgets into a grid layout
- Translating the grid layout to code
- Moving on to the controller
- Ready for another new style of computation?
- Let's add a click handler
- How the start/pause button is going to work
- Implementing the start/pause button
- Another kind of event
- We have the technology: the after method
- Are we there yet?
- How to enter and edit cells directly
- Writing the grid_view handler
- Now it's time to add some patterns
- Writing a handler for the OptionMenu
- How to define your patterns
- Writing the pattern loader
- Chapter 12: A Trip to Objectville: Object-oriented programming
- Breaking it down, a different way
- What's the point of object-oriented programming, anyway?
- Designing your first class
- Writing your first class
- Writing the bark method
- How methods work
- Adding some inheritance
- Implementing the ServiceDog class
- A closer look at subclassing
- A ServiceDog IS-A Dog
- Testing IS-A in code
- How would you describe yourself?
- Overriding and extending behavior
- Welcome to Jargon City
- Object can HAS-Another object
- Designing a Doggie Hotel
- Implementing the Doggie Hotel
- Renovating the Doggie Hotel
- Adding some hotel activities
- I can do anything you can, or Polymorphism
- It's about time we teach the other dogs to walk
- The power and responsibility of inheritance
- Creating a Doggie Hotel walking service
- How are we going to hire a person to walk our dogs if we don't even have people objects?
- Have you considered a career in coding?
- Appendix: The Top Ten Topics (We Didn't Cover): Leftovers
- Index

Elisabeth Robson & Eric Freeman
Launch your
programming
career in
one chapter
A learner’s guide
to coding and
computational
thinking
Avoid embarrassing
syntax errors
Learn why everything
your friends know about
computer science is
probably wrong
Watch out for
common traps
and pitfalls
Head First
Bend your mind
around 130 puzzles
& exercises
Learn to Code
Eric Freeman
A Brain-Friendly Guide
Praise for
Head First Learn to Code
“This is one of the most surprising, entertaining and brilliantly-planned software books I’ve ever read.
It’s more interesting and better thought-out than all other beginning programming books I know put
together. I run into people all the time who need to learn programming and want to know what course
to take; I plan to tell them to forget about courses and get this book instead.”
— David Gelernter, Professor of Computer Science, Yale University
“Head First Learn to Code has humor, emotions, and step by step instructions. This book turns on your
brain, makes you laugh and teaches you to be a code master—it’s a keeper.”
— Smore Magazine, a science magazine to know more and be more
“The book is a great read, even for an experienced programmer, with new perspectives on how to teach
difficult concepts we take for granted. Whether your just starting out or trying to figure out ways to
bring more people to code, this book will serve you well. Eric has made learning to code accessible and
approachable without dumbing anything down and setting the expectations of effort and difficulty that
actually exist.”
— Avi Flombaum, Dean and Chief Product Ocer of the Flatiron School
“As a high school computer science teacher, Head First Learn to Code is my new primary resource for
introducing topics to students. It has an immensely personal touch and its conversational nature, humor,
and general style make it feel as if you are learning from another human rather than merely reading a
piece of text.”
— Brandon Shuebarger, Regents School of Austin
“This is the book I wish would have been around when I first started learning to code. Unlike other beginner’s
programming books, Freeman strikes a perfect balance of humor, concise tutorials, and helpful background
information—without sounding condescending or overly technical. Head First Learn to Code will certainly be a
valuable resource for beginning coders at our school fablab.”
— Patrick Beneld, Innovation Director, The Magellan International School
“It takes talent and creativity to write in such an accessible manner. I am looking forward to using the
book next school year in an introductory course. I became enthralled with the relevant and accessible
examples that were substantive rather than the typical irrelevant and superficial examples presented to
the reader of a typical text on the subject.”
— Josh Sharfman, Teacher, Shalhevet Advanced Studies, Computer Science
“In keeping with a book about a language named for Monty Python, there’s a lot of meta-humor here
about the software industry, about programmer culture, and about tutorial books themselves. It’s nice to be
reminded that coding takes place in the (sometimes illogical) world of humans.”
— Adjunct Professor of Music Technology at NYU
and Montclair State University
Praise for other books by Eric Freeman
“I feel like a thousand pounds of books have just been lifted off of my head.”
— Ward Cunningham, inventor of the Wiki
“The admirable clarity, humor and substantial doses of clever make it the sort of book that helps even
non-programmers think well about problem-solving.”
— Cory Doctorow, co-editor of Boing Boing, Science Fiction author
“Freeman continues to use innovative teaching methods for communicating complex concepts to basic
principles.”
— Mark Arana, Strategy & Innovation, The Walt Disney Studios
“I can think of no better tour guide than Eric.”
— Miko Matsumura, VP of Marketing and Developer Relations at Hazelcast
Former Chief Java Evangelist, Sun Microsystems
“The definitive book on HTML5 for everyone from beginners to experienced developers.”
— Aaron LaBerge, CTO, ESPN
“The highly graphic and incremental approach precisely mimics the best way to learn this stuff...”
— Danny Goodman, author of Dynamic HTML: The Denitive Guide
“Eric clearly knows his stuff. As the Internet becomes more complex, inspired construction of web pages
becomes increasingly critical. Elegant design is at the core of every chapter here, each concept conveyed
with equal doses of pragmatism and wit.”
— Ken Goldstein, former CEO of Shop.com and author of
This is Rage: A Novel of Silicon Valley and Other Madness
“As a National Champion Rock Band Coach, I understand that students must feel inspired by a subject
in order to consistently practice and enjoy themselves in the process. Without inspiration and joy, people
eventually lose focus and enthusiasm. That’s why good teachers are so valuable to our society. They
can break a potentially boring complex subject, like learning code, down into easily digestible, delicious
nuggets of fun. As and educator, Eric Freeman is masterful. He shows us how learning can be simple,
enjoyable and easily retainable.”
— James Mays, Director, Band Aid School of Music
“HFL2C is a pleasurable, entertaining and eective way to learn computational thinking and python
basics. The book has strong pedagogical underpinnings, an exciting array of learning activities
and is well written in a fun and conversational tone that is approachable and breaks down complex
computational concepts in an easy, digestible way.”
— Troy Welch, Coordinator, Innovations, Thompson Rivers University
Make it Stick
Other O’Reilly books by Eric Freeman
Head First HTML and CSS
Head First JavaScript Programming
Head First HTML5 Programming
Head First Design Patterns
Other books in O’Reilly’s Head First series
Head First HTML and CSS
Head First JavaScript Programming
Head First HTML5 Programming
Head First Design Patterns
Head First Servlets and JSP
Head First Java
Head First Python
Eric Freeman
Head First
Learn to Code
Wouldn’t it be dreamy if there was
a book for learning to code that was
more fun than going to the dentist and
more revealing than an IRS form? It’s
probably just a fantasy...
Boston
Head First Learn to Code
by Eric Freeman
Copyright © 2018 Eric Freeman. All rights reserved.
Printed in the United States of America.
Published by O’Reilly Media, Inc., 1005 Gravenstein Highway North, Sebastopol, CA 95472.
O’Reilly Media books may be purchased for educational, business, or sales promotional use. Online editions are
also available for most titles (http://oreilly.com/safari). For more information, contact our corporate/institutional
sales department: (800) 998-9938 or corporate@oreilly.com.
Editors: Jeff Bleiel, Dawn Schanafelt, Meghan Blanchette
Cover Designer: Randy Comer
Production Editor: Melanie Yarbrough
Indexer: Lucie Haskins
Proofreader: Rachel Monaghan
Printing History:
January 2018: First Edition.
Nutshell Handbook, the Nutshell Handbook logo, and the O’Reilly logo are registered trademarks of O’Reilly
Media, Inc. The Head First series designations, Head First Learn to Code, and related trade dress are trademarks of
O’Reilly Media, Inc.
Many of the designations used by manufacturers and sellers to distinguish their products are claimed as
trademarks. Where those designations appear in this book, and O’Reilly Media, Inc., was aware of a trademark
claim, the designations have been printed in caps or initial caps.
While every precaution has been taken in the preparation of this book, the publisher and the author assume no
responsibility for errors or omissions, or for damages resulting from the use of the information contained herein.
In other words, if you use anything in Head First Learn to Code to, say, run a nuclear power plant, you’re on your
own.
No turtles were harmed in the making of this book.
ISBN: 978-1-491-95886-5
[M]
table of contents
Before KISS I had zero experience playing in a rock band
that wears makeup. —Gene Simmons

viii
the author
Eric Freeman
Eric is described by Head First series co-creator Kathy Sierra as “one of those rare
individuals uent in the language, practice, and culture of multiple domains from
hipster hacker, corporate VP, engineer, think tank.” And his background matches that
description well. By training, Eric is a computer scientist, having studied with industry
luminary David Gelernter during his Ph.D. work at Yale University. Professionally,
Eric is a former media company executive—having held the position of CTO of
Disney.com at The Walt Disney Company. Eric has also held positions at O’Reilly
Media, NASA, and several startups, and his IP is licensed and in use on every Mac
and PC. Over the last 15 years Eric has been one of the top-selling technical authors
on topics from beginning web development to high-level software design.
Eric is currently is a Principal at WickedlySmart, LLC, and lives with his wife and
young daughter in Austin, Texas.
Write to Eric at eric@wickedlysmart.com or visit http://wickedlysmart.com.

table of contents
ix
Intro
Your brain on coding. Here you are trying to learn something, while here your
brain is doing you a favor by making sure the learning doesn’t stick. Your brain’s thinking,
“Better leave room for more important things, like which wild animals to avoid and whether
naked snowboarding is a bad idea.” So how do you trick your brain into thinking that your
life depends on knowing how to code?
Table of Contents (summary)
Intro xxv
1 Getting started: Thinking computationally 1
2 Know your value: Simple values, variables, and types 33
3 Decisive code: Booleans, decisions, and loops 73
4 Providing some structure: Lists and iteration 125
5 Getting functional: Functions and abstraction 179
4b Putting some order in your data: Sorting and nested iteration 225
6 Putting it all together: Text, strings, and heuristics 245
7 Getting modular: Modules, methods, classes, and objects 291
8 Beyond iteration and indices: Recursion and dictionaries 341
9 Persistence: Saving and retrieving les 393
10 You really should get out more: Using web APIs 435
11 Getting interactive: Widgets, events, and emergent behavior 467
12 A trip to Objectville: Object-oriented programming 523
Appendix: The Top Ten Topics (we didn’t cover): Leftovers 575
Table of Contents (the real thing)
table of contents
Who is this book for? xxvi
We know what you’re thinking xxvii
We think of a “Head First” reader as a learner xxviii
Metacognition: thinking about thinking xxix
Here’s what WE did xxx
Here’s what YOU can do to bend your brain into submission xxxi
Read Me xxxii
Acknowledgments xxxvii
The Review Team xxxviii
x
table of contents
thinking computationally
1Getting Started
Breaking it down 2
How coding works 6
Are we even speaking the same language? 7
The world of programming languages 8
How you’ll write and run code with Python 13
A very brief history of Python 15
Putting Python through its paces 18
Saving your work 20
Congrats on coding your first Python program! 21
Phrase-O-Matic 25
Getting the code in the machine 26
Knowing how to think computationally puts you in control.
It’s no secret the world around you is becoming more connected, more configurable,
more programmable, and more, well, computational. You can remain a passive
participant, or you can learn to code. When you can code, you’re the director, the
creator—you’re telling all those computers what they should be doing for you. When
you can code, you control your own destiny (or at least you’ll be able to program
your internet-connected lawn sprinker system). But how do you learn to code? First,
learn to think computationally. Next, you grab a programming language so you
can speak the same lingo as your computer, mobile device, or anything with a CPU.
What’s in it for you? More time, more power, and more creative possibilities to do the
things you really want to do.

table of contents
xi
Know Your Value
simple values, variables, and types
Coding the Dog Age Calculator 34
Going from pseudocode to code 36
Step 1: Getting some input 37
How the input function works 38
Using variables to remember and store values 38
Assigning the user’s input to a variable 39
Step 2: Getting more input 39
It’s time to run some code 40
Getting some code entered 43
A deep dive on variables 44
Adding some expression 45
Variables are called VARY-ables for a reason 46
Better living through operator precedence 47
Computing with operator precedence 48
Back away from that keyboard! 51
Step 3: Computing the dog’s age 52
Houston, we’ve got a problem! 53
To err is human to code 54
A little more debugging... 56
What are Python types, anyway? 58
Fixing our code 59
Houston, we have liftoff 60
Step 4: User-friendly output 61
2
Computers really only do two things well: store values and perform
operations on those values. You might think they’re doing a whole lot more, as you send
texts, shop online, use Photoshop, or rely on your phone to navigate in your car; however,
everything computers do can be broken down into simple operations that are performed on
simple values. Now, part of computational thinking is learning to use these operations and
values to build something that is much more sophisticated, complex, and meaningful—and
we’re going to get to that. First, though, we’re going to take a look at what these values are,
the operations you can perform on them, and just what role variables play in all this.

table of contents
xii
Would you like to play a game? 74
First, a high-level design 76
The computer’s choice 77
How to use the random number 78
Introducing the Boolean type 81
Making decisions 82
Decisions and more decisions 83
Back to Rock, Paper, Scissors 84
Getting the user’s choice 85
Taking a look at the user’s choice 88
Adding the code to detect a tie 89
Who won? 90
How to implement the game logic 92
More about Boolean operators 93
Got documentation? 98
How to add comments to your code 99
We need to finish that game! 100
How do we know if the user’s choice is invalid? 101
How to continually prompt the user 104
Doing things more than once 105
How the while loop works 106
How to use while to prompt the user until you get a valid choice 110
Congratulations on coding your first game! 112
3
booleans, decisions, and loops
Decisive Code
Have you noticed how, so far, our programs aren’t
very, well, interesting? That is, all our code has strictly been a set of
statements the interpreter evaluates from top to bottom—no twists in the plot,
no sudden turns, no surprises, no independent thinking. For code to be more
interesting, it needs to make decisions, to control its own destiny, and to do
things more than once straight through. And in this chapter that’s exactly what
we’re going to learn to do. Along the way we’ll learn about the mysterious game
called shoushiling, meet a character named Boole, and see how a data type
with only two values could be worth our time. We’re even going to learn how to
deal with the dreaded infinite loop.

table of contents
xiii
lists and iteration
4Providing Some Structure
Can you help Bubbles-R-Us? 126
How to represent multiple values in Python 127
How lists work 128
How big is that list, anyway? 131
Accessing the last item in the list 132
Python makes this even easier 132
Using Python’s negative indices 133
Meanwhile, back at Bubbles-R-Us... 135
How to iterate over a list 138
Fixing the output glitch 139
Really fixing the output glitch 140
The for loop, the preferred way to iterate over a list 142
How the for loop works on a range of numbers 145
Doing more with ranges 146
Putting it all together 148
Building your own list, from scratch 156
Doing even more with lists 157
Test drive the final report 161
And the winners are... 161
Testing the most cost-effective solution 165
There’s more to data types than numbers, strings, and Booleans.
So far you’ve been writing Python code using primitive types—those floats, integers, strings,
and of course Booleans—with values like 3.14, 42, “hey, it’s my turn”, and True. And
you can do a lot with primitives, but at some point you’ll want to write code that deals with lots
of data—say, all the items in a shopping cart, the names of all the notable stars, or an entire
product catalog. For that we need a little more ummph. In this chapter we’re going to look at a
new type, called a list, which can hold a collection of values. With lists, you’ll be able to provide
some structure for your data, rather than just having a zillion variables floating around your code
holding values. You’re also going to learn how to treat all those values as a whole as well as how
to iterate over each item in a list using that for loop we mentioned in the last chapter. After this
chapter, your ability to deal with data is going to grow and expand.

table of contents
xiv
functions and abstraction
5Getting Functional
What’s wrong with the code, anyway? 181
Turning a block of code into a FUNCTION 183
We created a function, so how do we use it? 184
But how does all this actually work? 184
Functions can RETURN things too 192
How to call a function that has a return value 193
Getting a little refactoring under our belts 195
Running the code 196
How to abstract the avatar code 197
Writing the get attribute function body 198
Calling get attribute 199
Let’s talk about variables a little more... 201
Understanding variable scope 202
When variables get passed to functions 203
Making the drink me function call 204
What about using global variables in functions? 207
Going further with parameters: default values and keywords 210
How default parameter values work 210
Always list your required parameters first! 211
Using arguments with keywords 212
How to think about all these options 212
You already know a lot. Variables and data types and conditionals and
iteration—that’s enough to write basically any program you’d ever want to. In fact,
a computer scientist would tell you it’s enough to write any program that anyone
could ever conceive of. But you don’t want to stop now, because your next step
in computational thinking is learning how to create abstractions in your code.
That may sound complex, but it’s actually going to make your coding life simpler.
Creating abstractions gives you leverage; with abstraction, you can more easily
create programs of increasing complexity and power. You can put your code in neat
little packages that you can reuse over and over. And you can forget all the nitty-
gritty details of your code and to start thinking at a higher level.
table of contents
xv
sorting and nested iteration
Putting Some Order
in Your Data
Top Bubble
Software Maker
Built-in
sort! Maybe
you could have let
us know 10 pages
back?
Understanding bubble sort 228
Starting with pass 1 228
Some bubble sort pseudocode 231
Implementing bubble sort in Python 234
Computing bubble solution numbers 236
Sometimes the default ordering of your data doesn’t cut it.
You’ve got that list of high scores on 80s arcade games, but you really need it sorted
alphabetically by game name. Then there’s that list of the number of times your coworkers
have stabbed you in the back—it would be nice to know who’s at the top of that list. To do
that, though, we need to learn how to sort data, and to do that we’ll need to explore some
algorithms that are a little more involved than the ones we’ve seen so far. We’re also going
to have to explore how nested loops work as well as think a little about the efficiency of the
code we’re writing.
4
part 2

table of contents
xvi
Definitely some
sophisticated writing in
this book.
text, strings, and heuristics
6Putting It All Together
Welcome to the data sciences 246
How do you compute something like readability? 247
The game plan 248
Writing some pseudocode 249
We need some text to analyze 250
Setting up the function 252
First up: we need the total number of words in our text 253
Computing the total number of sentences 257
Writing the count sentences function 258
Computing the number of syllables, or, learning to love heuristics 264
Setting up the heuristic 267
Writing the heuristic 268
How to count vowels 269
Ignoring consecutive vowels 269
Writing the code to ignore consecutive vowels 270
Removing final e’s, y’s, and punctuation 272
Putting slicing (substrings) to work 274
Finishing off the heuristic code 276
Implementing the reading ease formula 278
Taking it even further 283
You’ve already got a lot of superpowers. Now it’s time to use
them. In this chapter we’re going to integrate what we’ve learned so far, bringing
it all together to build some increasingy cool code. We’re also going to keep
adding to your knowledge and coding skills. More specifically, in this chapter
we’ll explore how to write code that grabs some text, slices it, dices it, and then
does a little data analysis on it. We’re going to find out what a heuristic is too,
and implement one. Get ready—this is an all-out, heads-down, pedal-to-the-
metal, serious coding chapter!

table of contents
xvii
modules, methods, classes, and objects
7Getting Modular
Nice job, I was quickly
able to use the analyze
module, especially with the help
of the great documentation!
A quick module review 294
The __name__ global variable 296
Updating analyze.py 297
Using analyze.py as a module 299
Adding docstrings to analyze.py 301
Exploring other Python modules 305
Wait, did someone say “turtles”?! 306
Creating your very own turtle 308
Turtle lab 309
Adding a second turtle 311
What are turtles, anyway? 314
What are objects? 315
Okay, what’s a class then? 316
How to use objects and classes 318
What about those methods and attributes? 319
Seeing classes and objects everywhere 320
Get ready for some turtle races 322
Planning the game 323
Let’s start coding 324
Setting up the game 324
Writing the setup code 325
Not so fast! 326
Starting the race 328
Your code is growing in size and complexity. As that happens you need better ways
to abstract, to modularize, to organize your code. You’ve seen that functions can be used to group lines
of code together into bundles you can reuse over and over. And you’ve also seen that collections of
functions and variables can be placed into modules so that they can be more easily shared and reused.
In this chaper we’ll revisit modules and learn how to use them even more effectively (so you’re all ready
to share your code with others) and then we’re going to look at the ultimate in code reuse: objects.
You’re going to see that Python objects are all around you, just waiting to be used.

table of contents
xviii
recursion and dictionaries
8Beyond Iteration and Indices
A different way to compute 342
And now the different way... 343
Now let’s write some code for our two cases 344
Let’s get some more practice 347
Using recursion to detect palindromes 348
Writing a recursive palindrome detector 349
The Anti-Social Network 360
Introducing the dictionary 362
Let’s see how to create a dictionary 362
Keys and values do not have to be strings 363
Of course you can remove keys as well 363
But you might want to test to see if it exists first 363
What about iterating through a dictionary? 364
Leveraging dictionaries at the Anti-Social Network 366
But how do we add more attributes? 368
Remember the Anti-Social Network’s killer feature? 370
Finding the most anti-social user 371
Can we just remember function call results? 376
Using a dictionary to remember our Fibonacci results 376
Memoization 377
A closer look at the koch function 380
Truly exploring the koch fractal 382
It’s time to take your computational thinking up a notch. And
this is the chapter to do it: we’ve been happily coding along with an iterative style of
programming—we’ve created data structures like lists and strings and ranges of numbers,
and we’ve written code to compute by iterating over them. In this chapter we’re going to look
at the world differently, first in terms of computation, and then in terms of data structures.
Computationally we’ll look at a style of computing that involves writing code that recurs,
or calls itself. We’ll expand the kinds of data structures we can work with by looking at a
dictionary-like data type that is more like an associative map than a list. We’ll then put them
together and cause all kinds of trouble. Be forewarned: these topics take a while to settle
into your brain, but the effort is going to pay off in spades.

table of contents
xix
saving and retrieving files
9Persistence
Ready for some Crazy Libs? 394
How Crazy Libs is going to work 396
Step 1: Read the text of the story from a file 399
How to use file paths 400
Absolute paths 401
Oh, and don’t forget to clean up when you’re done! 402
Reading a file into your Python code 403
Oh, give it a break already... 406
Using the readline method of the file object 407
How do we know when we’ve read the last line? 409
Reading in a Crazy Lib template 410
Processing the template text 411
Using a new string method to fix the bug 413
Actually fixing the bug 414
Some code has real problems 415
Handling exceptions 417
Explicitly handling exceptions 418
Updating Crazy Libs to handle exceptions 420
Our last step: storing the Crazy Lib 421
Updating the rest of the code 421
You know you can save values in variables, but once your program ends
poof!—they’re gone forever. That’s where persistent storage comes in—storage that allows
your values and data to stick around a while. Most of the devices you’re going to run Python on also have
persisistent storage, like hard drives and flash cards, or they may have access to storage in the cloud as
well. In this chapter you’ll see how to write code to store and retrieve data from files. What good is that?
Oh, anytime you want to save a user’s configuration, store the results of your big analysis for the boss,
read an image into your code to process it, write some code to search a decade’s worth of email messages,
reformat some data to be used in your spreadsheet app—we could go on and on.

table of contents
xx
You Really Should Get Out More
using web apis
Extending your reach with Web APIs 436
How Web APIs work 437
All Web APIs have a web address 438
Time for a quick upgrade 441
Doing the upgrade 442
All we need now is a good Web API... 443
A closer look at the API 444
Web APIs provide data using JSON 445
Now let’s look at that request module again 447
Putting it all together: making a request to Open Notify 449
How to use JSON in Python 450
Using the JSON module on our ISS data 451
Let’s add some graphics 452
Meet the screen object 453
Let’s add a turtle to represent the ISS 455
Turtles can look like space stations too 456
Forget the ISS—where are we? 457
Finishing off the ISS code 458
You’ve been writing some great code, but you really need to get out
more. There’s a whole world of data just waiting for you on the web: Need weather data? Or
how about access to a huge database of recipes? Or are sports scores more your thing? Maybe
a music database of artists, albums, and songs? They’re all out there for the taking from Web
APIs. To use them all you need is to learn a bit more about how the web works, how to speak the
local web lingo, and how to use a couple of new Python modules: requests and json. In this
chapter we’re going to explore Web APIs and take your Python skills to new heights; in fact, we’re
going to take them all the way to outer space and back.
10

table of contents
xxi
Getting Interactive
widgets, events, and emergent behavior
Enter the WONDERFUL WORLD of Artifical Life 468
A closer look at the Game of Life 469
What we’re going to build 472
Do we have the right design? 473
Building the data model 477
Representing the grid 477
Computing a generation of the Game of Life 478
Computing each cell’s fate 478
Completing the model code 482
Building the view 485
Creating your first widget 486
Adding the rest of the widgets 487
Correcting the layout 488
Placing the widgets into a grid layout 489
Translating the grid layout to code 489
Moving on to the controller 491
Adding an update function 491
Ready for another new style of computation? 494
How the start/pause button is going to work 497
Another kind of event 499
We have the technology: the after method 501
How to enter and edit cells directly 504
Writing the grid view handler 505
Now it’s time to add some patterns 506
Writing a handler for the OptionMenu 507
Writing the pattern loader 510
Taking it Even Further! 517
You’ve certainly written some graphical applications, but you haven’t
created a real user interface yet. That is, you haven’t written anything that lets the user
interact with a graphical user interface (otherwise known as a GUI). To do that you need to adopt a
new way of thinking about how a program executes, one that is more reactive. Wait, did the user just
click on that button? Your code better know how to react and what to do next. Coding for interfaces is
quite different from the typical procedural method we’ve been using, and it requires a different way of
thinking about the problem. In this chapter you’re going to write your first real GUI, and no, we’re not
going to write a simple to-do list manager or height/weight calculator, we’re going to do something far
more interesting. We’re going to write an artificial life simulator with emergent behavior.
11

table of contents
xxii
12
object-oriented programming
A Trip to Objectville
Breaking it down, a different way 524
What’s the point of object-oriented programming, anyway? 525
Designing your first class 527
Writing your first class 528
How the constructor works 528
Writing the bark method 531
How methods work 532
Adding some inheritance 534
Implementing the ServiceDog class 535
A closer look at subclassing 536
A ServiceDog IS-A Dog 537
Testing IS-A in code 538
Overriding and extending behavior 542
Welcome to Jargon City 544
Object can HAS-Another object 546
Designing a Doggie Hotel 549
Implementing the Doggie Hotel 550
Adding some hotel activities 554
I can do anything you can, or Polymorphism 555
It’s about time we teach the other dogs to walk 556
The power of inheritance 558
In this book you’ve used functions to abstract your code. And you’ve
approached coding in a procedural manner using simple statements, conditionals, and for/while
loops with functions—none of this is exactly object-oriented. In fact, it’s not object-oriented at all! We
have looked at objects and how to use them in our code, but you haven’t created any objects of your
own yet, and you haven’t really approached designing your code in an object-oriented way. So, the time
has come to leave this boring procedural town behind. In this chapter, you’re going to find out why using
objects is going to make your life so much better—well, better in a programming sense (we can’t really
help you with other areas of your life and your coding skills, all in one book).
table of contents
xxiii
appendix: leftovers
The Top Ten Topics
(We Didn’t Cover)
Client-side code executes
on the client—that is, on
your computer.
Server-side code
executes on a server on
the internet.
request
#1 List comprehensions 576
#2 Dates and times 577
#3 Regular expressions 578
#4 Other data types: tuples 579
#5 Other data types: sets 580
#6 Server-side coding 581
#7 Lazy evaluation 582
#8 Decorators 583
#9 Higher-order and first-class functions 584
#10 A lot of libraries 585
We’ve covered a lot of ground, and you’re almost finished with this book.
We’ll miss you, but before we let you go, we wouldn’t feel right about sending you out into the world
without a little more preparation. We can’t possibly fit everything you’ll need to know into this relatively
small chapter. Actually, we did originally include everything you need to know about Python programming
(not already covered by the other chapters), by reducing the type point size to .00004. It all fit, but nobody
could read it. So we threw most of it away, and kept the best bits for this Top Ten appendix.

xxv
Intro
how to use this book
I can’t believe they
put
that
in a book on
learning to code!
In this section, we answer the burning question:
“So, why DID they put that in a book on learning to code?”
how to use this book
xxvi intro
Who is this book for?
1
2
Do you want to learn, understand, and remember how
to program?
this book is for you.
Who should probably back away from this book?
1Are you completely new to computers?
If you don’t know your way around your computer,
how to manage files and folders, how to install apps,
or how to use a word processor, you should probably
learn those first.
3
this book is not for you.
Are you afraid to try something different? Would you
rather have a root canal than mix stripes with plaid? Do
you believe that a technical book can’t be serious if we
have fun learning to code?
If you can answer “yes” to all of these:
If you can answer “yes” to any one of these:
2Are you a kick-butt programmer looking for a
reference
book?
[Note from marketing: this book is
for anyone with a credit card.]
Do you prefer stimulating dinner party conversation
to dry, dull, academic lectures?
This is NOT a
reference book.
Head First Learn
to Code is a
book designed
for learning to
code. It’s not an
encyclopedia of
programming facts
(you have Google
for that, right?).
the intro
you are here�xxvii
“How can this be a serious book?”
“What’s with all the graphics?”
“Can I actually learn it this way?”
We know what you’re thinking.
Your brain craves novelty. It’s always searching, scanning, waiting for
something unusual. It was built that way, and it helps you stay alive.
Today, you’re less likely to be a tiger snack. But your brain’s still looking.
You just never know.
So what does your brain do with all the routine, ordinary, normal things
you encounter? Everything it can to stop them from interfering with the
brain’s real job—recording things that matter. It doesn’t bother saving the
boring things; they never make it past the “this is obviously not important”
filter.
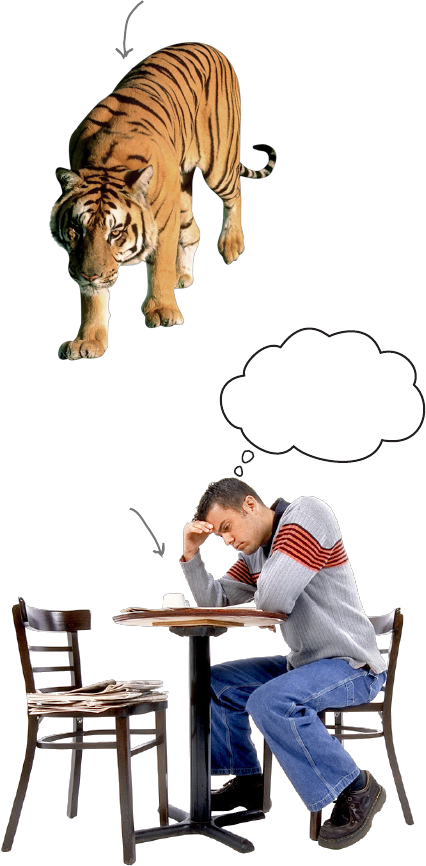
How does your brain know what’s important? Suppose you’re out for a day
hike and a tiger jumps in front of you. What happens inside your head
and body?
Neurons fire. Emotions crank up. Chemicals surge.
And that’s how your brain knows…
This must be important! Don’t forget it!
But imagine you’re at home, or in a library. It’s a safe, warm, tiger-
free zone. You’re studying. Getting ready for an exam. Or trying to
learn some tough technical topic your boss thinks will take a week,
10 days at the most.
Just one problem. Your brain’s trying to do you a big favor. It’s
trying to make sure that this obviously non-important content doesn’t
clutter up scarce resources. Resources that are better spent storing
the really big things. Like tigers. Like the danger of fire. Like how
you should never again snowboard in shorts.
And there’s no simple way to tell your brain, “Hey brain, thank
you very much, but no matter how dull this book is, and how little
I’m registering on the emotional Richter scale right now, I really do
want you to keep this stuff around.”
And we know what your brain is thinking.
Your brain thinks
THIS is important.
Your brain thinks
THIS isn’t worth
saving.
Great. Only 600
more dull, dry,
boring pages.
how to use this book
xxviii intro
We think of a “Head First” reader as a learner.
I really think you’ll
want to abstract that
code into a function.
Now that I have your
attention, you should be
more careful using global
variables.
So what does it take to
learn
something? First, you have to
get
it, then make
sure you don’t
forget
it. It’s not about pushing facts into your head. Based
on the latest research in cognitive science, neurobiology, and educational
psychology,
learning
takes a lot more than text on a page. We know what
turns your brain on.
Some of the Head First learning principles:
Make it visual. Images are far more memorable than words alone,
and make learning much more effective (up to 89% improvement in
recall and transfer studies). It also makes things more understandable.
Put the words within or near the graphics they relate to, rather than
on the bottom or on another page, and learners will be up to twice as likely to
solve problems related to the content.
Use a conversational and personalized style. In recent
studies, students performed up to 40% better on post-learning tests
if the content spoke directly to the reader, using a first-person, conversational
style rather than taking a formal tone. Tell stories instead of lecturing. Use casual
language. Don’t take yourself too seriously. Which would you pay more attention
to: a stimulating dinner party companion, or a lecture?
Get the learner to think more deeply. In other words,
unless you actively flex your neurons, nothing much happens in
your head. A reader has to be motivated, engaged, curious, and
inspired to solve problems, draw conclusions, and generate new
knowledge. And for that, you need challenges, exercises and
thought-provoking questions, and activities that involve
both sides of the brain and multiple senses.
Get—and keep—the reader’s attention. We’ve all
had the “I really want to learn this, but I can’t stay awake past
page one” experience. Your brain pays attention to things that are out
of the ordinary, interesting, strange, eye-catching, unexpected. Learning a new,
tough, technical topic doesn’t have to be boring. Your brain will learn much more quickly if it’s not.
Touch their emotions. We now know that your ability to remember something is largely
dependent on its emotional content. You remember what you care about. You remember when you
feel something. No, we’re not talking heart-wrenching stories about a boy and his dog. We’re talking
emotions like surprise, curiosity, fun, “what the…?” , and the feeling of “I rule!” that comes when you
solve a puzzle, learn something everybody else thinks is hard, or realize you know something that
“I’m more technical than thou” Bob from Engineering doesn’t.
Don’t just learn to
code—learn to think
computationally.
Your code
The Python
Intepreter
the intro
you are here�xxix
If you really want to learn, and you want to learn more quickly and more deeply,
pay attention to how you pay attention. Think about how you think. Learn how you
learn.
Most of us did not take courses on metacognition or learning theory when we were
growing up. We were expected to learn, but rarely taught how to learn.
But we assume that if you’re holding this book, you really want to learn
how to code to create programs and apps. And you probably don’t want
to spend a lot of time. And you want to remember what you read, and be
able to apply it. And for that, you’ve got to understand it. To get the most
from this book, or any book or learning experience, take responsibility for
your brain.
The trick is to get your brain to see the new material you’re learning as
Really Important. Crucial to your well-being. As important as a tiger.
Otherwise, you’re in for a constant battle, with your brain doing its best
to keep the new content from sticking.
Metacognition: thinking about thinking
I wonder how I
can trick my brain
into remembering
this stuff...
So how
DO
you get your brain to think coding is as
important as a tiger?
There’s the slow, tedious way, or the faster, more effective way. The
slow way is about sheer repetition. You obviously know that you are
able to learn and remember even the dullest of topics, if you keep pounding on the same
thing. With enough repetition, your brain says, “This doesn’t feel important to him, but he
keeps looking at the same thing over and over and over, so I suppose it must be.”
The faster way is to do anything that increases brain activity, especially different
types of brain activity. The things on the previous page are a big part of the solution,
and they’re all things that have been proven to help your brain work in your favor. For
example, studies show that putting words within the pictures they describe (as opposed to
somewhere else in the page, like a caption or in the body text) causes your brain to try
to make sense of how the words and picture relate, and this causes more neurons to fire.
More neurons firing = more chances for your brain to get that this is something worth
paying attention to, and possibly recording.
A conversational style helps because people tend to pay more attention when they
perceive that they’re in a conversation, since they’re expected to follow along and hold up
their end. The amazing thing is, your brain doesn’t necessarily care that the “conversation”
is between you and a book! On the other hand, if the writing style is formal and dry, your
brain perceives it the same way you experience being lectured to while sitting in a roomful
of passive attendees. No need to stay awake.
But pictures and conversational style are just the beginning.

xxx intro
how to use this book
We used pictures, because your brain is tuned for visuals, not text. As far as your brain’s
concerned, a picture really is worth 1,024 words. And when text and pictures work together, we
embedded the text in the pictures because your brain works more effectively when the text is
within the thing the text refers to, as opposed to in a caption or buried in the text somewhere.
We used redundancy, saying the same thing in different ways and with different media types,
and multiple senses, to increase the chance that the content gets coded into more than one area of
your brain.
We used concepts and pictures in unexpected ways because your brain is tuned for novelty,
and we used pictures and ideas with at least some emotional content, because your brain is
tuned to pay attention to the biochemistry of emotions. That which causes you to feel something
is more likely to be remembered, even if that feeling is nothing more than a little humor,
surprise, or interest.
We used a personalized, conversational style, because your brain is tuned to pay more
attention when it believes you’re in a conversation than if it thinks you’re passively listening to a
presentation. Your brain does this even when you’re reading.
We included more than 120 activities, because your brain is tuned to learn and remember
more when you do things than when you read about things. And we made the exercises
challenging-yet-doable, because that’s what most people prefer.
We used multiple learning styles, because you might prefer step-by-step procedures, while
someone else wants to understand the big picture first, while someone else just wants to see a
code example. But regardless of your own learning preference, everyone benefits from seeing the
same content represented in multiple ways.
We include content for both sides of your brain, because the more of your brain you
engage, the more likely you are to learn and remember, and the longer you can stay focused.
Since working one side of the brain often means giving the other side a chance to rest, you can
be more productive at learning for a longer period of time.
And we included stories and exercises that present more than one point of view, because
your brain is tuned to learn more deeply when it’s forced to make evaluations and judgments.
We included challenges, by providing exercises and by asking questions that don’t always
have a straight answer, because your brain is tuned to learn and remember when it has to work
at something. Think about it—you can’t get your body in shape just by watching people at the
gym. But we did our best to make sure that when you’re working hard, it’s on the right things.
That you’re not spending one extra dendrite processing a hard-to-understand example,
or parsing difficult, jargon-laden, or overly terse text.
We used people. In stories, examples, pictures, and so on, because, well, you’re a person. And
your brain pays more attention to people than it does to things.
We used an 80/20 approach. We assume that if you’re going to be a kick-butt programmer,
this won’t be your only book. So we don’t talk about everything. Just the stuff you’ll actually need.
Here’s what WE did:
BULLET POINTS
Puzzles
Be the Python
interpreter
They’re coming
along with us.
the intro
you are here�xxxi
So, we did our part. The rest is up to you. These tips are a
starting point; listen to your brain and figure out what works
for you and what doesn’t. Try new things.
Here’s what YOU can do to bend
your brain into submission
1Slow down. The more you understand,
the less you have to memorize.
Don’t just read. Stop and think. When the
book asks you a question, don’t just skip to the
answer. Imagine that someone really is asking
the question. The more deeply you force your
brain to think, the better chance you have of
learning and remembering.
2Do the exercises. Write your own notes.
We put them in, but if we did them for you,
that would be like having someone else do
your workouts for you. And don’t just look at
the exercises. Use a pencil. There’s plenty of
evidence that physical activity
while
learning
can increase the learning.
3Read the “There Are No Dumb Questions”
That means all of them. They’re not optional
sidebars—they’re part of the core content!
Don’t skip them.
4Make this the last thing you read before
bed. Or at least the last
challenging
thing.
Part of the learning (especially the transfer to
long-term memory) happens after
you put the
book down. Your brain needs time on its own, to
do more processing. If you put in something new
during that processing time, some of what you
just learned will be lost.
5Drink water. Lots of it.
Your brain works best in a nice bath of fluid.
Dehydration (which can happen before you ever
feel thirsty) decreases cognitive function.
6Talk about it. Out loud.
Speaking activates a different part of the brain.
If you’re trying to understand something, or
increase your chance of remembering it later, say
it out loud. Better still, try to explain it out loud
to someone else. You’ll learn more quickly, and
you might uncover ideas you hadn’t known were
there when you were reading about it.
7Listen to your brain.
Pay attention to whether your brain is getting
overloaded. If you find yourself starting to skim the
surface or forget what you just read, it’s time for a
break. Once you go past a certain point, you won’t
learn faster by trying to shove more in, and you
might even hurt the process.
9
Create
something!
Apply this to something new you’re designing, or
rework an older project. Just do something to get some
experience beyond the exercises and activities in
this book. All you need is a pencil and a problem
to solve…a problem that might benefit from
programming.
Cut this out and stick it
on your refrigerator.
8
Feel
something!
Your brain needs to know that this matters. Get
involved with the stories. Make up your own
captions for the photos. Groaning over a bad joke is
still better than feeling nothing at all.
10
Get sleep.
You’ve got to create a lot of new brain connections
to learn to program. Sleep often; it helps.

xxxii intro
Read Me
how to use this book
This is a learning experience, not a reference book. We deliberately stripped out everything
that might get in the way of learning whatever it is we’re working on at that point in the
book. And the first time through, you need to begin at the beginning, because the book
makes assumptions about what you’ve already seen and learned.
We want you to learn the thinking process behind programming.
Some might call that computer science, but here’s a little secret: computer science isn’t a
science and it’s not even all that much about computers (any more than astronomy is about
telescopes). It’s a way of thinking, otherwise known these days as computational thinking,
and once you learn to think computationally, you’ll be in a good position to apply that to any
problem, environment, or programming language.
In this book we use Python.
Learning to drive without a vehicle is a little academic. And learning to think
computationally without a programming language is more of a thought experiment than
a marketable skill. So, in this book we use the very popular Python language. We’ll tell you
more about its accolades in Chapter 1, but whether you’re a hobbyist or hoping to land a six-
figure software development position, Python is a good place to start (and maybe end).
We don’t exhaustively cover every aspect of the Python language.
Not even close. There’s a lot you can learn about Python. This book is not a reference book,
it’s a learning book, so it doesn’t cover everything there is to know about Python. Our goal is
to teach you the fundamentals of coding and computational thinking so that you can pick up
a book on any programming language and not feel totally lost.
You can use a Mac or PC, or Linux for that matter.
As Python is our primary vehicle used in this book and it is cross-platform, you can use
whatever operating system you’re used to. Most of the screenshots in this book are from a
Mac, but they should look similar on your PC or Linux box.
This book advocates well-structured and readable code based
on best practices. You want to write code that you and other people can read and
understand, code that will still work in next year’s version of Python. In this book we’re going
to teach you to write clear, well-organized code from the get-go—code you can be proud of,
code you’ll want to frame and put on the wall (just take it down before you bring your date
over). The only thing that differs from what we’d write as professional code is that this book
uses handwritten annotations next to code to explain what the code is doing. We found this
works better in a learning book than traditional comments in code (if you have no idea what
we’re talking about, you will; just give it a few chapters). But don’t worry because we’ll teach
you how to document your code and we’ll show you examples of how we’d document our
own code. All that said, we’re interested in teaching you to write code in the most straight-
forward way so you can get the job done and move on to better things.
Annotations
like this

the intro
you are here�xxxiii
Programming is serious business. You’re going to have to work,
sometimes hard. A programmer has a different mindset, a different way of thinking
about the world. At times you’re going to find coding very logical, while at other times it
can be very abstract, if not downright mind bending. Some programming concepts take
time to sink into your brain—you actually do have to sleep on them before you’ll get it. But
no worries; we’re going to do all that in a brain-friendly way. Just take your time, give the
concepts time to sink in, and go over the material multiple times if needed.
The activities are NOT optional.
The exercises and activities in this book are not add-ons; they’re part of the core content of
the book. Some of them are to help with memory, some are for understanding, and some
will help you apply what you’ve learned. If you skip them you will be missing large parts of
the book (and you’ll probably be very confused). The crossword puzzles are the only things
you don’t have to do, but they’re good for giving your brain a chance to think about the
words in a different context.
The redundancy is intentional and important.
One distinct difference in a Head First book is that we want you to really get it. And we
want you to finish the book remembering what you’ve learned. Most reference books don’t
have retention and recall as a goal, but this book is about learning, so you’ll see some of the
same concepts come up more than once.
The examples are as lean as possible.
Our readers tell us that it’s frustrating to wade through 200 lines of an example looking for
the two lines they need to understand. Most examples in this book are shown within the
smallest possible context, so that the part you’re trying to learn is clear and simple. Don’t
expect all of the examples to be robust—they are written specifically for learning, and aren’t
always fully functional. That said, for the larger examples we also try to make them fun,
fascinating, and downright cool—something you’d want to show your friends and family.
We’ve placed all the example files on the web so you can download them. You’ll find them
at http://wickedlysmart.com/hflearntocode.
The Brain Power exercises don’t usually have answers.
For some of them, there is no right answer, and for others, part of the learning experience
of the Brain Power activities is for you to decide if and when your answers are right. In
some of the Brain Power exercises, you will find hints to point you in the right direction.
Get the code examples, help, and discussion online.
You’ll find everything you need for this book online at http://wickedlysmart.com/
hflearntocode, including code sample files and additional support material.
Operators are NOT
standing by, but you can
get all the code and
samples files you’ll need at
http://wickedlysmart.com/
hflearntocode.
how to use this book
xxxiv intro
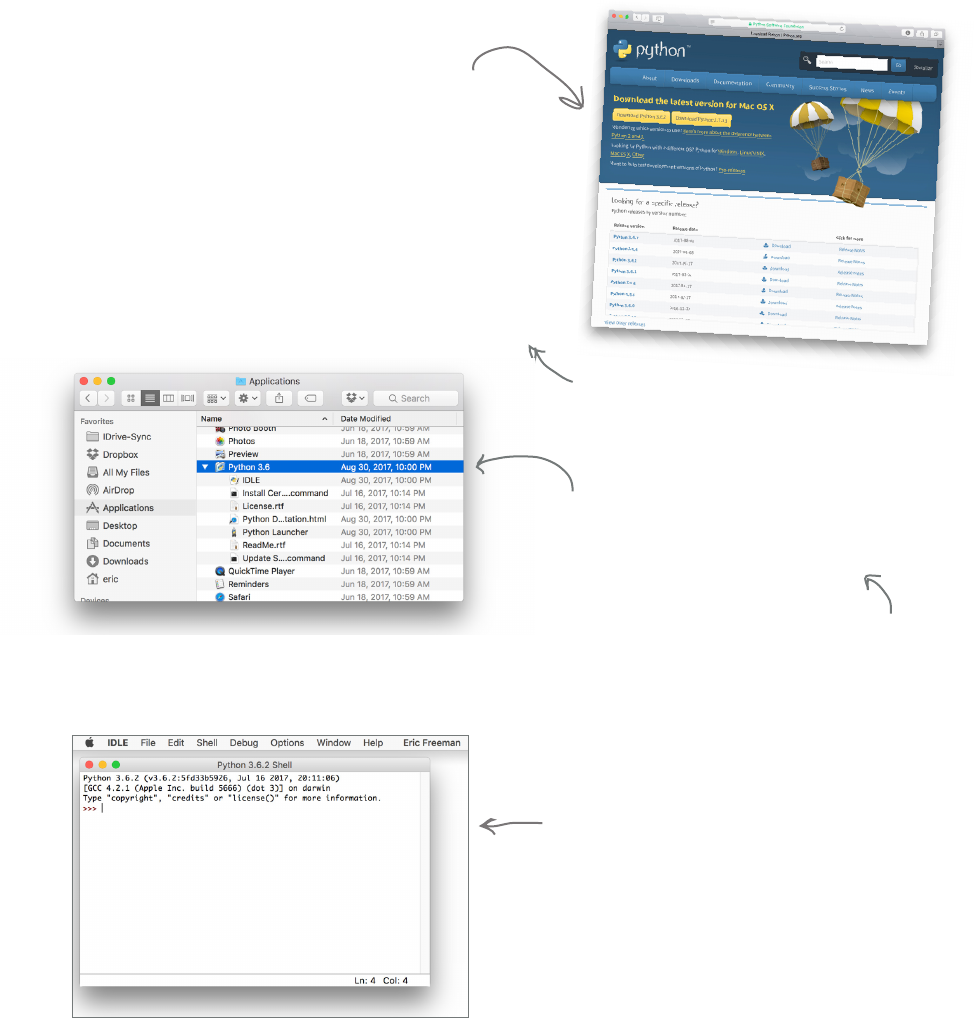
More than likely your computer is either not going to have Python installed, or it’s not going
to have the right version of Python installed. In this book we use Python 3, which at the
time of writing was version 3.6. So, you’ll need to install version 3.6 or later. Here’s how:
• For macOS, open your browser and enter:
https://www.python.org/downloads
On this page you should see the macOS download links. If not, look
under the Downloads menu on the page.
1. Click the Download button for Python 3.x (where x is the latest
version). Do not download version 2.7.
2. Once the installer is downloaded, open the installation package in
your downloads folder and follow the installation instructions.
3. After you’ve completed the install, navigate to your Applications
folder, under which you’ll find the Python 3.x folder. To test your
installation, double click the IDLE application in the Python 3.x
folder:
4. When the IDLE application appears on your screen, you should
see something similar to the screenshot below. If not, recheck your
installation for any errors that might have occurred.
The IDLE app is located in the Python 3.x
folder, which you’ll find in the Applications
folder. We’ll talk more about what IDLE is in
the first chapter.
It’s a good idea to add IDLE to your dock if
you haven’t already, as we’ll be using it a fair
bit in this book. To do that control-click the
icon in the dock and choose Options > Keep in
Dock from the pop-up menu.
You can choose the IDLE > Quit IDLE
menu option to exit the application.
You’re going to have to install Python
Note that you’ll need administrator privileges
to install Python—if you commonly install
apps, you should be fine; otherwise, ask your
administrator for help.
the intro
you are here�xxxv
Note to Linux users: We’re not
worried about you; let’s be real,
you know what you’re doing. Just
grab the approriate distribution
from python.org
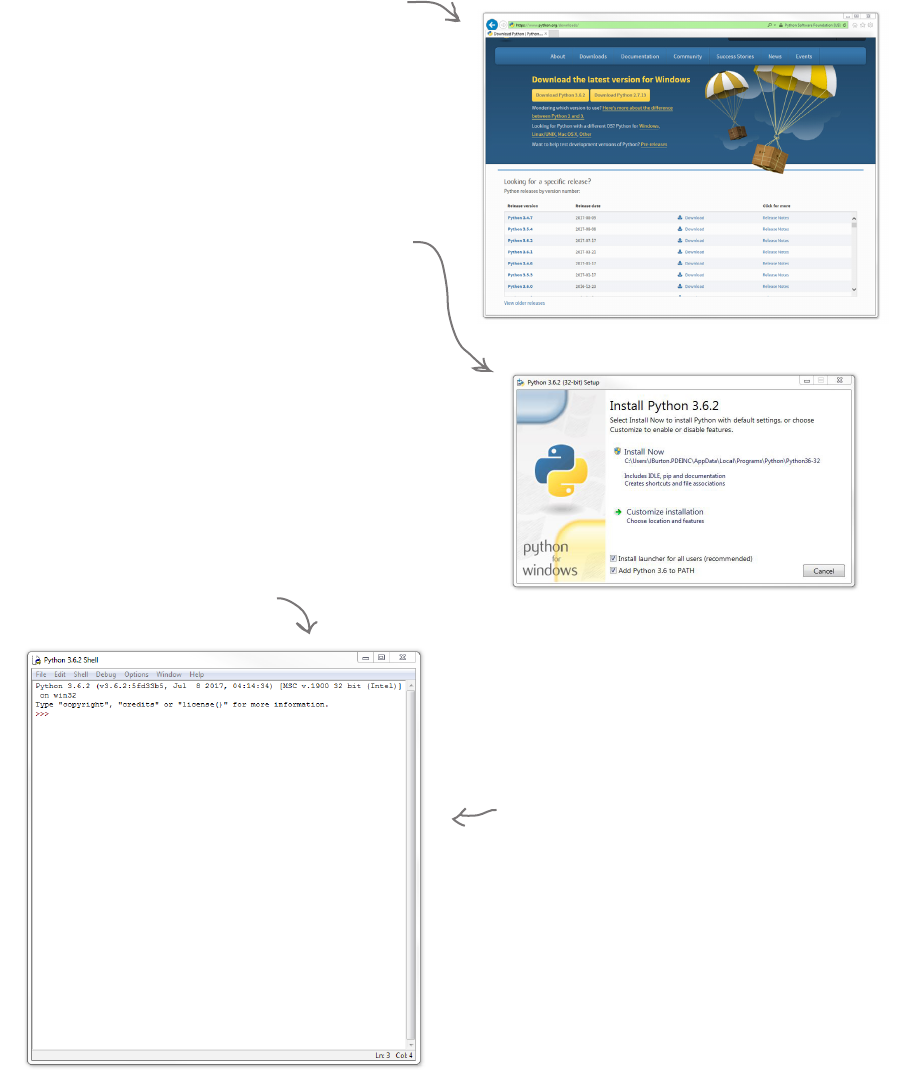
• For Windows, open your browser and enter:
https://www.python.org/downloads
1. Click the Download button for Python 3.x (where x is
the latest version). Do not download version 2.7.
2. Choose to either save or run the executable installer.
If the latter, click to run the installer after you’ve
downloaded it.
3. When you see the installer window appear on your
screen, make sure the “Add Python to PATH”
checkbox is checked at the bottom of the installer, then
click “Install Now.”
4. After you’ve completed the install, navigate using
the Start button to All Programs, and in your list of
apps you should see a menu option for Python 3.x
(with your version number in place of the x). Under
the Python menu you’ll see choices for Python 3.x,
documentation, and IDLE, which is an editor we will
also be using in this book.
5. To test, click the IDLE menu item; when the IDLE
application appears on your screen, you should see
something similar to the screenshot below. If not,
recheck your installation and any errors that might
have occurred.
You can choose the IDLE
> Quit IDLE menu option
to exit the application.
how to use this book
xxxvi intro
Your source code is all the code you’ll be writing with this book. We
recommend keeping your code organized on a per-chapter basis and
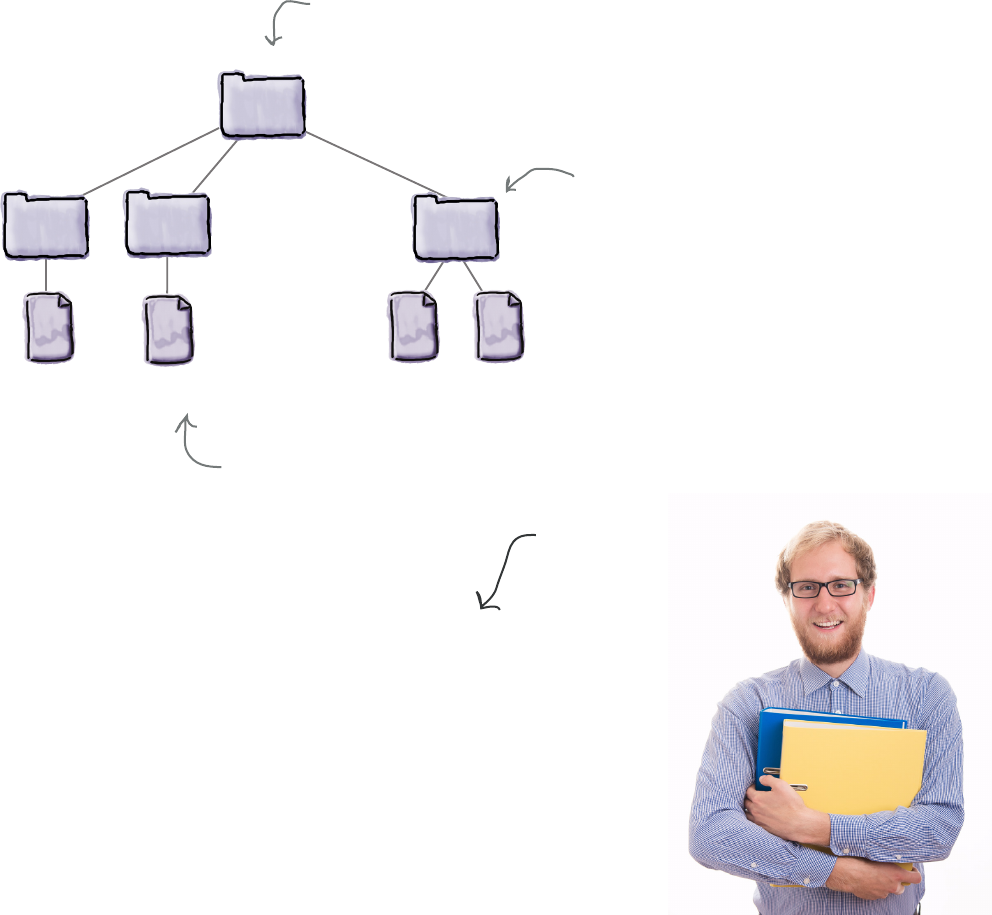
throughout the book we’ve assumed that you’ll be creating one folder
per chapter, like this:
A word on organizing your code
You should also visit:
http://wickedlysmart.com/hflearntocode
The first thing
that stands
between you and
VERB_ING your
first, real,
piece of NOUN,
is VERB_ING
the skill of
breaking
dogcalc.py
code
ch12
ch2 ...
my_file =
my_text = my
print(my_text
my_file.
close(
phraseomatic.py
ch1
The first thing
that stands
between you and
VERB_ING your
first, real,
piece of NOUN,
is VERB_ING
the skill of
breaking
dog.py
The first thing
that stands
between you and
VERB_ING your
first, real,
piece of NOUN,
is VERB_ING
the skill of
breaking
palindrome.py
There you’ll find instructions for downloading the complete source
code for the book. In this code you’ll find our versions of the programs
you’re going to write as well as a few data files and images you’ll need.
We do ask that you take the time to type in the programs yourself (this
will help you develop your muscle memory for coding and help things
sink into your brain), but if you run into any issues you just can’t figure
out, you can always compare your code with ours to see where you
might have made a mistake.
We created a top-level
folder for all the code
in the book.
And a folder for each
chapter named ch1, ch2,
and so on, up to ch12.
Thoughout the book we’ll
guide you on what to call
your folders and files.
While you’re there don’t
forget to sign up for
the Head First Learn to
Code newsletter, where
we’ll do our best to keep
your brain engaged in
learning to code!

the intro
you are here�xxxvii
A huge thanks goes out first
to my esteemed technical
reviewers: Elisabeth
Robson carefully and
expertly reviewed the
manuscript with a keen Head
First and computer science
eye. Josh Sharfman was
the MVP reviewer who added
depth and quality to every
corner of the book. David Powers, in his usual style,
rigorously scoured the technical text (his Harry Potter knowledge ain’t
too shabby either). And veteran Head First author Paul Barry provided a
much-needed Python critical eye. In addition, my review team (listed on the next
page) was invaluable across every aspect of reviewing the book.
My biggest thanks to my editors, Jeff Bleiel, Dawn Schanafelt, and Meghan Blanchette. Meghan was
instrumental in getting this book off the ground, Dawn carefully saw it through its early developmental stages, and Jeff
drove the book through to its publication.
Also a big thanks to the entire O’Reilly team including Susan Conant, Rachel Roumeliotis, and Melanie
Yarbrough. At WickedlySmart, thanks to Jamie Burton for all her help, including early reader surveys and
managing the review team forum. And as always, thanks to Bert Bates and Kathy Sierra for inspiration,
interesting discussion, and all their help solving writing conundrums. Thanks to Cory Doctorow for his support and
for lending his writing to Chapter 7.
Finally, a number of individuals and organizations unknowingly inspired aspects of
this book, including Daniel P. Friedman, Nathan Bergey, the Raspberry Pi
Foundation, and Socratica.
Dawn Schanafelt
Meghan Blanchette
Jeff Bleiel
Paul Barry
Kathy Sierra
Bert Bates
Jamie Burton
Acknowledgments*
*The large number of acknowledgments is because we’re testing the theory
that everyone mentioned in a book acknowledgment will buy at least one copy,
probably more, what with relatives and everything. If you’d like to be in the
acknowledgment of our next book, and you have a large family, write to us.
Dawn Schanafelt
Elisabeth Robson
Josh Sharfman
David Powers
Paul Barry
how to use this book
xxxviii intro
The Review Team
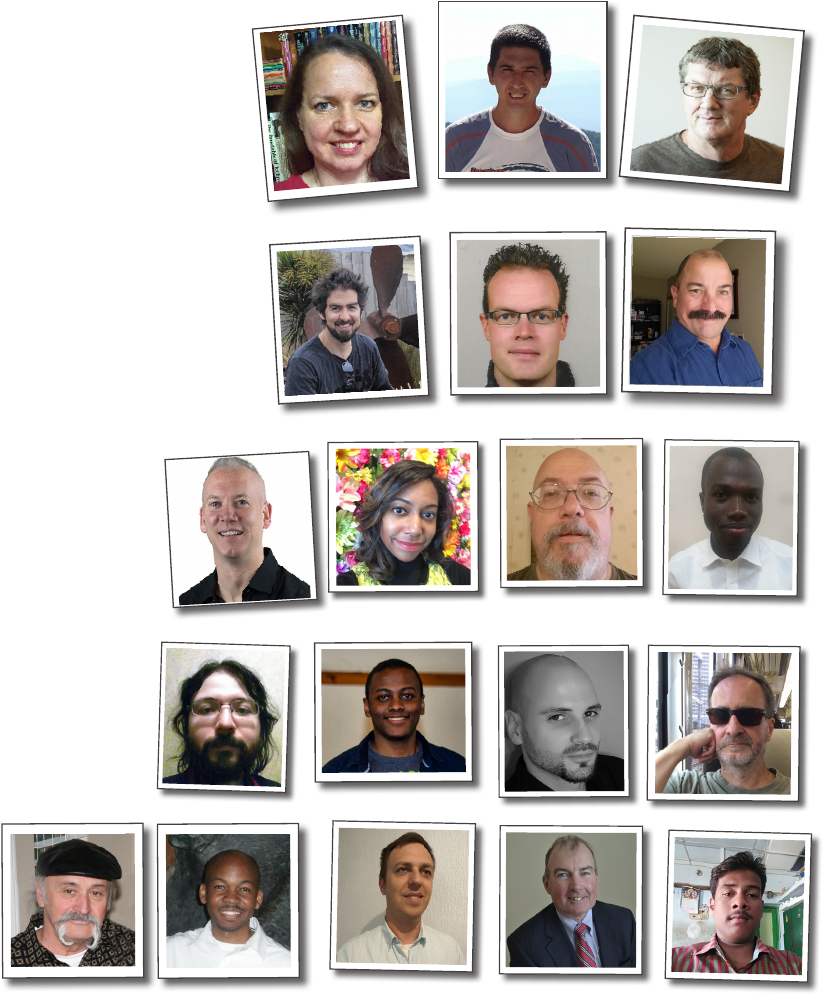
Meet the review team!
An amazing group of people took on
reviewing this book. With backgrounds
from newbie to expert, and professions as
diverse as architect, dentist, elementary
school teacher, real estate agent, and
AP computer science teacher, they
participated across the globe from Albania
to Australia, from Kenya to Kosovo,
from the Netherlands to Nigeria to New
Zealand.
This group read every page, did every
exercise, and entered and executed every
line of code, providing feedback and
encouragement over 600 pages.
They also, on their own, worked as
a team, helping each other through
new concepts, double-checking
errors, and locating problems in the
text and code.
Every reviewer here made
significant contributions
to this book and vastly
improved its quality.
Thank you!
Also a big thanks to Christopher Davies, Constance Mallon, and Wanda Hernandez for their
significant contributions to this book.
Abdul Rahman Shaik
Alfred J. Speller
Tiron Andric
Hudson Read
Mitch Johnson
Mark S. van der Linden
Ridvan Bunjaku
Crystal Gilmore Rodriguez
Troy Welch
Mauro Caser
David Kinoti
David Oparanti
Chris Talent
Chris Griggs
Andrea Toston
Michael Peck
Johnny Rivera
Dennis Fitzgerald
Benjamin E. Hall

this is a new chapter 1
thinking computationally
Knowing how to think computationally puts you in
control. It’s no secret the world around you is becoming more connected,
more configurable, more programmable, and more, well, computational. You
can remain a passive participant, or you can learn to code. When you can code,
you’re the director, the creator—you’re telling all those computers what they
should be doing for you. When you can code, you control your own destiny (or
at least you’ll be able to program your internet-connected lawn sprinker system).
But how do you learn to code? First, learn to think computationally. Next,
you grab a programming language so you can speak the same lingo as your
computer, mobile device, or anything with a CPU. What’s in it for you? More
time, more power, and more creative possibilities to do the things you really
want to do. Come on, let’s get started...
1
Getting Started
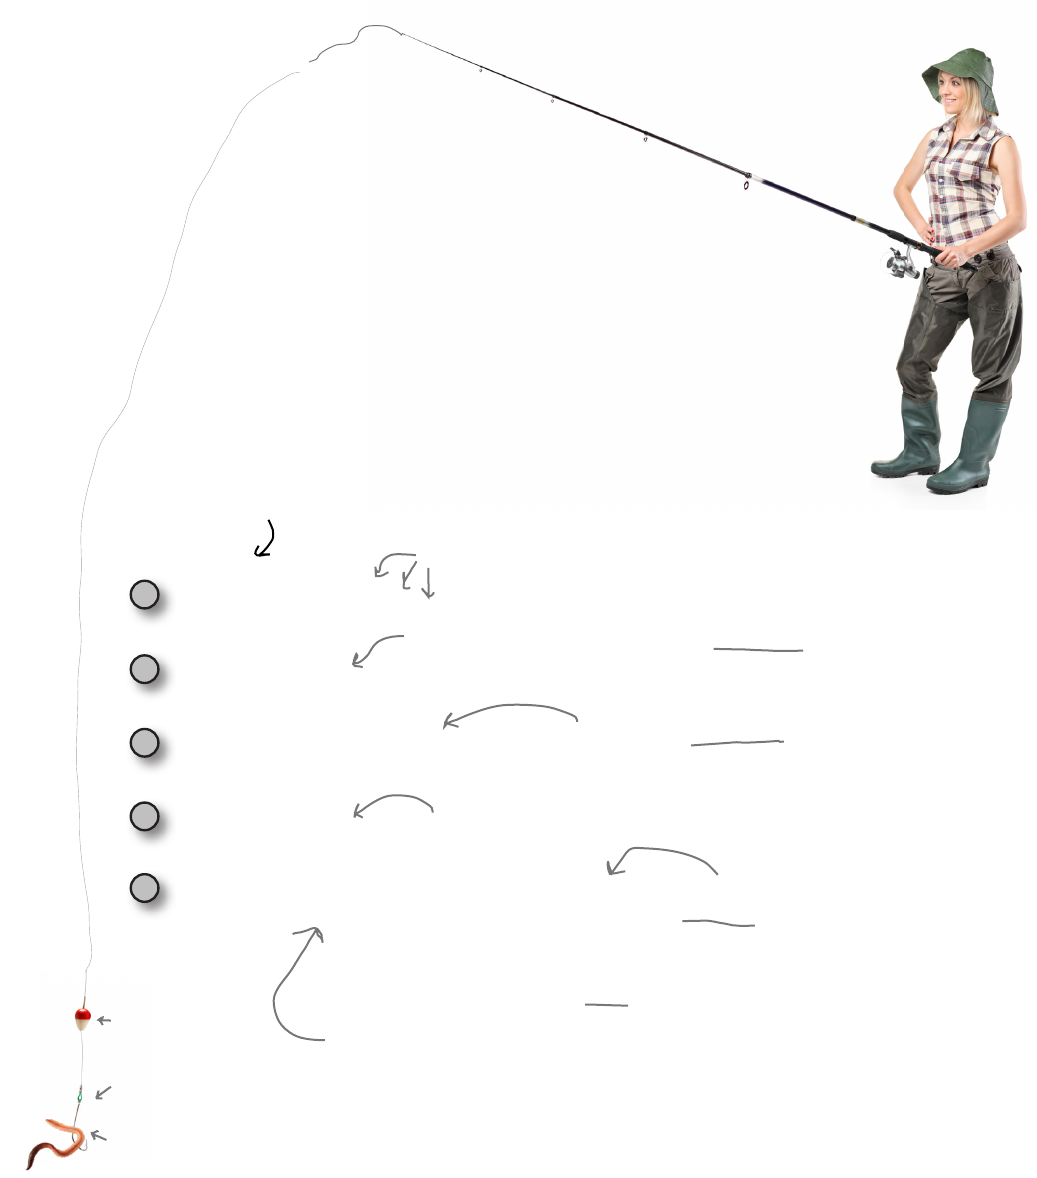
2 Chapter 1
breaking it down
Breaking it down
The first thing that stands between you and writing your first
real piece of code is learning the skill of breaking problems
down into achievable little actions that a computer can do for
you. Of course, you and the computer will also need to be
speaking a common language, but we’ll get to that topic in
just a bit.
Now breaking problems down into a number of steps may
sound like a new skill, but it’s actually something you do
every day. Let’s look at a simple example: say you wanted
to break the activity of fishing down into a simple set of
instructions that you could hand to a robot, who would do
your fishing for you. Here’s our first attempt to do that:
1Put worm on hook.
2Cast line into pond.
3Watch the bobber until it goes underwater.
4Hook and pull in fish.
5If done fishing, then go home; otherwise,
go back to step 1.
Let’s break the process of catching
fish down into a number of easily
understood steps.
Some steps are simple instructions, or statements
if you will, like “cast line into pond.”
A statement might conditionally wait
before proceeding.
We follow the steps in order.
Notice that often statements repeat, like
here: if we don’t go home, we instead
go back to the beginning and repeat the
instructions to catch another fish.
Statements can also make
decisions, like is it time to go
home or should we keep fishing?
This statement only happens after the bobber has
gone underwater in the previous statement.
The bobber
The hook
The worm
you are here 4 3
thinking computationally
You can think of these statements as a nice recipe for fishing.
Like any recipe, this one provides a set of steps that, when
followed in order, will produce some result or outcome (in our
case, hopefully, catching some fish).
Notice that most steps consist of a simple instruction, like
“cast line into pond,” or “pull in the fish.” But also notice that
other instructions are a bit different because they depend
on a condition, like “is the bobber above or below water?”
Instructions might also direct the flow of the recipe, like “if
you haven’t finished fishing, then cycle back to the beginning
and put another worm on the hook.” Or, how about a
condition for stopping, as in “if you’re done, then go home”?
You’re going to find that these simple statements or
instructions are the foundation of coding. In fact, every app
or software program you’ve ever used has been nothing more
than a (sometimes large) set of simple instructions to the
computer that tell it what to do.
Real recipes don’t just tell you what to do, they
also include objects that are used in making
a particular dish (like measuring cups, whisks,
food processors, and of course ingredients).
What objects are used in our fishing recipe?
Circle all the objects in the fishing recipe on
the previous page, and check your answer at
the end of the chapter before moving on.
This is a workbook.
You can write in it; in
fact, we encourage it.
One thing to understand right up front is that computers do exactly what
you tell them—nothing more, nothing less. Look at our recipe for fishing on
the previous page. If you were the robot and you followed these instructions
precisely, what problems might you encounter? Do you think we would really
be successful using this recipe?
A. If there are no fish, you’re
going to be fishing for a very
long time (like, forever).
B. If the worm falls off the
hook, you’ll never know about
it or replace it.
C. What happens if we run
out of worms?
D. Did we specify what
to do with a fish when we
pulled it in?
E. What happened to the
fishing rod?
F. _______________
__________________
__________________
__________________
__________________
Can you think
of more issues?
In case you are
not familiar with
fishing, this is a
bobber, otherwise
known as a fishing
float. When a
fish bites, it goes
underwater.
You’ll find the
answers to
Sharpen Your
Pencil exercises
at the end of
the chapter.

4 Chapter 1
recipes, algorithms, and pseudocode
I bought this
expensive technical book
to learn to code and you’re starting by
telling me about recipes? That doesn’t
sound very promising or, well,
technical
.
Actually, a recipe is a perfectly good way
to describe a set of instructions to a computer. You might
even run into that term loosely used here and there in
more advanced programming books. Heck, you’ll even
find books on common software development techniques
that are called cookbooks. That said, if you want to
get technical we can—a computer scientist or serious
software developer would commonly call a recipe an
algorithm. What’s an algorithm? Well, not much more
than a recipe—it’s a sequence of instructions that solves
some problem. Often you’ll find algorithms are first
written in an informal form of code called pseudocode.
One thing to keep in mind is that, whether you’re talking
about a recipe, pseudocode, or an algorithm, the whole
point is to work out a high-level description of how to
solve a problem before you get into the nitty-gritty details
of writing code that the computer can understand and
execute.
In this book, you’ll hear us interchange all these terms,
where appropriate—and, oh, in your next job interview
you might want to use the term algorithm or even
pseudocode to ensure that larger signing bonus (but there’s
still nothing wrong with the word recipe).
As you’ll see,
this can make
the task of
coding more
straightforward
and less error-
prone.
More on
pseudocode in
a bit...
Just as there are many
recipes for the same dish,
with algorithms, you'll find
there are many ways to solve
the same problem. Some
more tasty than others.

you are here 4 5
thinking computationally
Code Magnets
Let’s get a little practice with recipes algorithms. We put the Head First Diner’s algorithm for
making an three-egg omelet on the fridge to remember it, but someone came along and
messed it up. Can you put the magnets back in the right order to make our algorithm work?
Note that the Head First Diner makes two kinds of omelets: plain and cheese. Make sure you
check your answer at the end of the chapter.
Rearrange these magnets here
to make the algorithm work.
Remove pan from heat
Stir eggs
While eggs aren’t fully cooked:
while eggs aren’t fully mixed:
Crack three eggs into bowl
Heat saute pan
Transfer eggs to plate
Serve
Add cheese on top
Transfer eggs to pan
Whip eggs
If the customer ordered cheese:
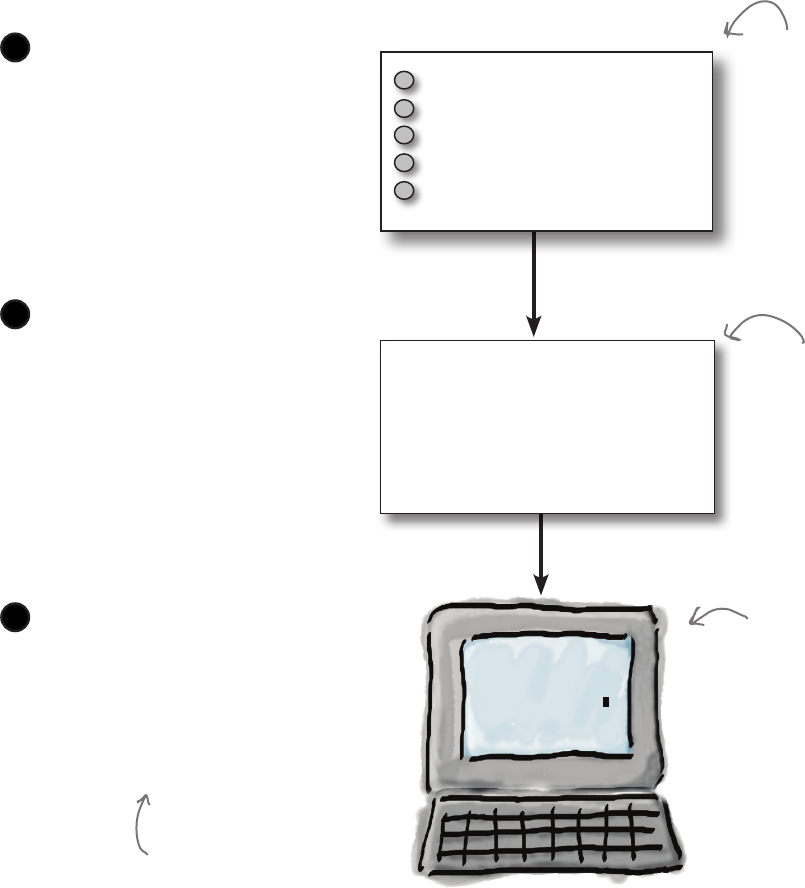
6 Chapter 1
the process of coding
How coding works
So you’ve got a task you want the computer to do for you, and you know
you’ll need to break that task down into a number of instructions the
computer can understand, but how are you going to actually tell the computer
to do something? That’s where a programming language comes in—with a
programming language you can describe your task in terms that you and the
computer both understand. But before we take a deep dive into programming
languages, let’s look at the steps you’ll take to actually write code:
This is where you take the problem or
task you want solved and turn it into
a high-level recipe, pseudocode, or
algorithm that describes the steps
that need to be performed by the
computer to achieve whatever result
you are after.
Craft your algorithm
1
Finally, you take your source
code and hand it to the computer,
which will start carrying out your
instructions. Depending on the
language you’re using, this process
might be called interpreting ,
running, evaluating, or executing
your code.
Run your program
Next, you take that recipe and
translate it into a specific set of
instructions that are written in a
programming language. This is the
coding stage, and we call the result a
program or just “your code” (or, more
formally, the source code).
Write your program
1Put worm on hook.
2Cast line into pond.
3Watch the bobber until it goes underwater.
4Hook and pull in fish.
5If done fishing, then go home; otherwise, go back to
step 1.
def hook_sh():
print('I got a sh!')
def wait():
print('Waiting...')
print('Get worm')
print('Put worm on hook')
print('Throw in lure')
while True:
response = input('Is bobber underwater? ')
if response == 'yes':
is_moving = True
print('I got a bite!')
hook_sh()
else:
wait()
This is the “coding” step
where you turn your
algorithm into code
(which is shorthand for
source code) that is
ready to execute in the
next step.
This is the step where
we map out our solution
before doing the hard
work of translating it into
a programming language.
When your source code is
complete, you’re ready to
execute it. If all goes well,
and you designed your code
well, you’ll get the result from
the computer you were looking
for.
2
3
Get worm
Put worm on hook
Throw in lure
Is bobber underwater?
We often use some of these
terms interchangeably as well.
you are here 4 7
thinking computationally
Are we even speaking
the same language?
On the left you’ll find some statements written in English, and on the right you’ll find statements written in a
programming language. Draw a line from each English statement to its corresponding code translation. We did the
first one for you. Make sure you check your work with the solution at the end of the chapter before proceeding.
Think of a programming language as a special-purpose language
created expressly for specifying tasks to a computer. Programming
languages give you a way to describe your recipes in a manner that is
clear and precise enough that a computer can understand it.
To learn a programming language there are two things you need to
nail down two things: what things can you say using the language, and
what do those things mean? A computer scientist would call these the
syntax and semantics of the language. Just stash those terms in the
back of your brain for now; we’ll be getting you up to speed on both
as the book progresses.
Now, as it turns out, just like spoken languages, there are many
programming languages, and, as you may already have figured out, in
this book we’re going to use the Python programming language. Let’s
get a little better feel for languages and Python...
YOU SAY TOMATO
YOU SAY TOMATO
print('Hi there')
name = input('What is your name? ')
for num in range(0, 5):
pour_drink()
grocery_list = ['bread', 'milk', 'eggs']
if temperature > 72:
print('Wear shorts')
Print “Hi there” on the screen.
Ask the user, “What is your name?”
Pouring five drinks.
A grocery list with bread,
milk, and eggs on it.
If the temperature is more
than 72, then print “Wear
shorts” on the screen.
You’ll find that the techniques you’re
learning in this book can be applied to
just about any programming language
you might encounter in the future.
Relax
Don’t worry; at
this point we don’t
expect you to read
or write code. For gosh
sakes, you’ve got the whole book
ahead of you—for now we’re just
getting familiar with code, what it
looks like, and how it works. The
important thing in this chapter is
just to take it all in.

8 Chapter 1
a quick survey of programming languages
I’m for Objective-C all
the way. I build iPhone apps
all day long, and I love the way
Objective-C is like C, but is much
more dynamic and object-oriented.
I’m also learning Apple’s new
language called Swift.
Java keeps me thinking at
the level of objects, not low-level
code, and it takes care of a lot of low-
level things, like memory management
and threading, for me.
I live in the world of
WordPress, which is written in
PHP, so PHP is my go-to language.
Some people call it a scripting language,
but it does everything I need.
The world of programming languages
If you’re reading this book you may have, in passing, heard about various programming languages.
Just walking through the programming section of your local bookstore you might encounter Java,
C, C++, LISP, Scheme, Objective-C, Perl, PHP, Swift, Clojure, Haskell, COBOL, Ruby, Fortran,
Smalltalk, BASIC, Algol, JavaScript, and of course Python, to name just a few. You might also be
wondering where all these names came from. The truth is, programming language names are a lot
like the names of rock bands—they’re names that meant something to the people who created the
language. Take Java, for instance: it was named, not surprisingly, after coffee (the preferred name
Oak was already taken). Haskell was named after a mathematician, and the name C was chosen
because C was the successor of the languages A and B at Bell Labs. But why are there so many
languages and what are they all about? Let’s see what a few folks have to say about the languages
they use:
you are here 4 9
thinking computationally
Call me academic, but I
love Scheme- and LISP-style
languages. For me it is all about high-order
functions and abstraction. I’m glad to see
functional languages like Clojure getting
real industry use.
I’m a web developer
and JavaScript is my main
language. It’s the de facto language of
all browsers, and it’s being used to write
backend web services as well.
I’m a system administrator. I
use Perl quite a bit to write various
system scripts. It’s terse, but also very
expressive. Just a little code gets a lot
done.
I mostly use the
C programming language. I
write parts of operating systems
that have to be super efficient. In
my job, every CPU cycle and every
memory location counts.

10 Chapter 1
why we chose python
We love Python.
It’s known for being a
very readable, clean language with
great library support that lets you
write code for all kinds of domains;
it also has a great community of
people involved in it.
Choices, choices...
As you can see, there are a lot of languages and opinions out there, and we’ve barely scratched
the surface of modern languages. You can also see there’s a lot of terminology that comes along
with these languages, and, as you progress, those terms are going to make a lot more sense to
you. For now, just know there’s a wide variety of languages out there, with more being created
every day.
So, in this book, what should we use? Here’s the thing: first and foremost, we want to learn how
to think computationally—that way, no matter what language you run across in the future, you’ll
be in a good position to learn it. But, that said, we have to start with some language, and, as you
already know, we’re going to use Python. Why? Our friends above said it well: it’s considered
one of the best languages for beginners because it’s such a readable and consistent language.
It’s also a powerful language in that no matter what you want to do with it (now or beyond this
book), you can find support in terms of code extensions (we call them modules or libraries) and a
supportive community of developers to give you a hand. Finally, some developers will even tell
you Python is just more fun than other languages. So how can we go wrong?
Python’s
known as one of the best languages
for beginners, but it also grows with you
as your skills mature. And it’s a real language
too, with folks like Google, Disney, and NASA
using it to build serious systems.

you are here 4 11
thinking computationally
Make a list of customers.
customers = ['Jimmy', 'Kim', 'John', 'Stacie']
winner = random.choice(customers)
flavor = 'vanilla'
print('Congratulations ' + winner +
' you have won an ice cream sundae!')
prompt = 'Would you like a cherry on top? '
wants_cherry = input(prompt)
order = flavor + ' sundae '
if (wants_cherry == 'yes'):
order = order + ' with a cherry on top'
print('One ' + order + ' for ' + winner +
' coming right up...')
Python Output
Congratulations Stacie you have won an ice cream sundae!
Would you like a cherry on top? yes
One vanilla sundae with a cherry on top for Stacie coming
right up...
This should help; it’s the output of this
code. Do you think this code has the
same output every time you run it?
Look how easy it is
to write Python
You don’t know Python yet, but we bet you can make some good guesses about how
Python code works. Take a look at each line of code below and see if you can guess
what it does. Write in your answers below. If you get stuck, the answers are on the
next page. We did the first one for you.

12 Chapter 1
your first exposure to python
You don’t know Python yet, but we bet you can make some good guesses about how
Python code works. Take a look at each line of code below and see if you can guess
what it does. Write in your answers below. If you get stuck, the answers are on the
next page. We did the first one for you.
Make a list of customers.
Randomly choose one of those customers.
Set the name or variable called flavor to the text ‘vanilla'.
Print out a congratulations message to the screen that includes
the winning customer’s name. For instance, if Kim is the winner
this code prints “Congratulations Kim you have won an ice cream
sundae!”
Set the name or variable called prompt to the text “Would you
like a cherry on top? ”
Ask the user to type in some text, and assign it to wants_
cherry. Notice that when the user is asked for input, the
prompt is first displayed (as seen in the Python output).
Set order to the text ‘vanilla' followed by ‘sundae'.
If the user answered yes to ‘Would you like a cherry on top?',
then add the text “ with a cherry on top” to the order.
Print out that the winner’s order is coming right up.
customers = ['Jimmy', 'Kim', 'John', 'Stacie']
winner = random.choice(customers)
flavor = 'vanilla'
print('Congratulations ' + winner +
' you have won an ice cream sundae!')
prompt = 'Would you like a cherry on top? '
wants_cherry = input(prompt)
order = flavor + ' sundae '
if (wants_cherry == 'yes'):
order = order + ' with a cherry on top'
print('One ' + order + ' for ' + winner +
' coming right up...')
P.S. If you can’t help yourself and you have to type
this code in, add
import random
at the very top of
the file before running it. We’ll get to what that does
later, but note that running the code at this point is
not required or all that useful. That said, we just know
someone’s going to have to try it. You know who you are!
Look how easy it is
to write Python
Solution
Python Output
Congratulations Stacie you have won an ice cream sundae!
Would you like a cherry on top? yes
One vanilla sundae with a cherry on top for Stacie coming
right up...
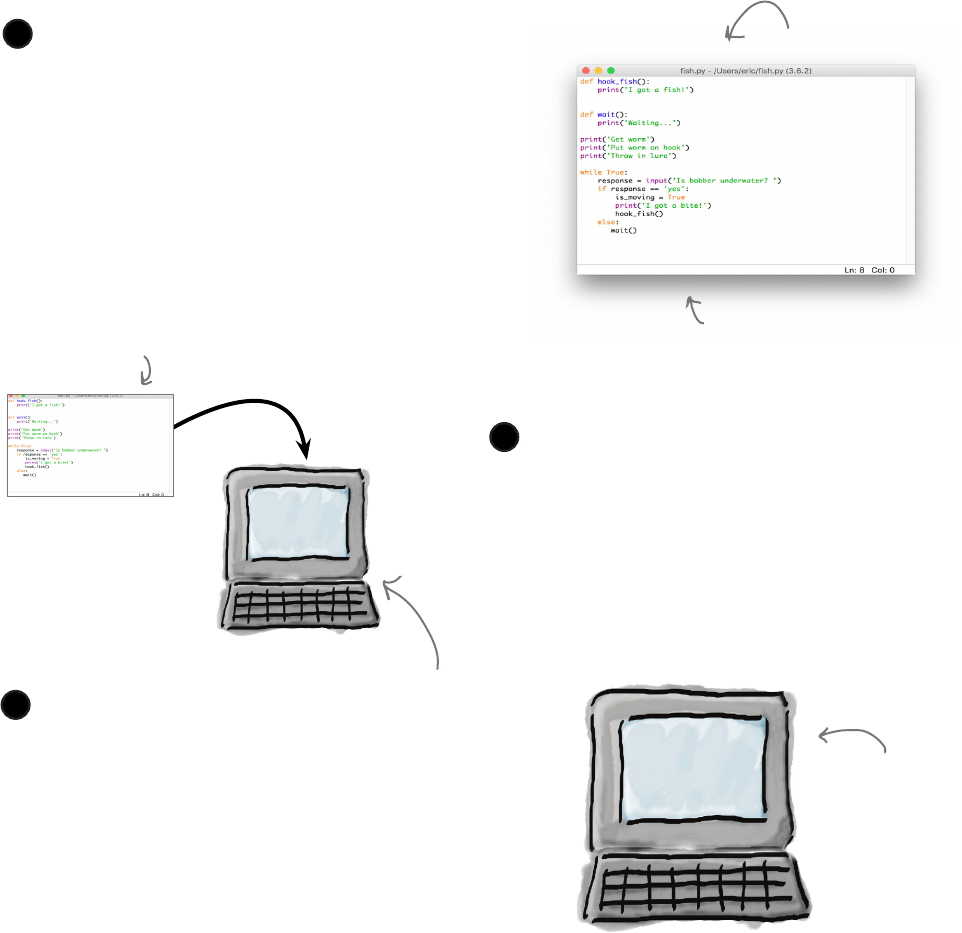
you are here 4 13
thinking computationally
How you’ll write and run code with Python
Now that we’ve talked about and even looked at some code, it’s time to start thinking about how
you’d actually write and execute some real code. As we mentioned, depending on the language
and environment, there are a lot of different models for how you do that. Let’s get a sense for
how you’re going to be writing and running your Python code:
First you get your code typed into an editor and
saved. You can use any text editor, like Notepad on
Windows or TextEdit on the Mac, to write your Python
code. That said, most developers use specialized
editors known as IDEs (or Integrated Development
Environments) to write their code. Why? IDEs are a
bit like word processors—they give you lots of nice
features like autocompletion of common Python
keywords, highlighting of the language syntax (or of
errors), as well as built-in testing facilities. Python also
conveniently includes an IDE called IDLE, which we’ll
be looking at shortly.
Writing your code
1
Running your code is as easy as handing it to
the Python interpreter, a program that takes
care of everything needed to execute the code
you’ve written. We’ll step through the details of
this in a bit, but you can access the intepreter
through IDLE, or directly from your computer’s
command line.
Running your code
2
We’ve been describing Python as a language that
you and the computer both understand. And,
as we’ve learned, an interpreter does the job of
reading your code and executing it. To do this, the
interpreter actually translates your code behind the
scenes into a lower-level machine code that can
be directly executed by your computer hardware.
You won’t need to worry about how it does this;
just know that the interpreter will do the job of
executing each statement of your Python code.
How your code is interpreted
3
Get worm
Put worm on hook
Throw in lure
Is bobber underwater?
Your code
Your code
The Python intepreter
The
interpreter
running your
code
This is Python’s
IDLE editor.
14 Chapter 1
more about python and programming languages
Q: Why not use English to program computers? Then we
wouldn’t need to learn these special-purpose programming
languages.
A: Yes, wouldn’t that be nice. As it turns out, English is full of
ambiguity, which makes creating such a translator extremely difficult.
Reseachers have made small inroads in this area, but we’re a
long way from using English, or any other spoken language as
a programming language. Also, in the few languages, that have
tried to be more English-like, we’ve found that programmers prefer
languages that are less like a spoken language and that are more
streamlined for coding.
Q: Why isn’t there just one programming language?
A: Technically all modern programming languages are equivalent
in that they can all compute the same things, so, in theory, we
could use one programming language to serve all our needs. Like
spoken languages, however, programming languages differ in their
expressive power—that is, you’ll find some types of programming
tasks (say, building websites) are easier in some languages than
others. Other times the choice of a programming language just
comes down to taste, using a particular methodology, or even the
need to use the language that your employer has adopted. Count
on one thing, though: there will be even more languages, as
programming languages continue to evolve.
Q: Is Python just a toy language for beginners? If I wanted to
be a software developer, is learning Python going to help me?
A: Python is a serious language and used in many products
you probably know and love. In addition, Python’s one of the
few professional languages that is also considered an excellent
language for beginners. Why? Compared to many existing languages,
Python approaches things in a straightforward and consistent way
(something you’ll have a better understanding of over time, and as
you gain experience with Python and other languages).
Q: What’s the difference between learning to code and
thinking computationally? Is the latter just a computer science
thing?
A: Computational thinking is a way of thinking about problem
solving that grew out of computer science. With computational
thinking we learn how to break problems down, to create algorithms
to solve them, and to generalize those solutions so we can solve
even bigger problems. Often, though, we want to teach a computer
to execute those algorithms for us, and that’s where coding comes
in. Coding is the means by which we specify an algorithm to a
computer (or any computational device, like your smartphone). So
the two really go hand in hand—computational thinking gives us a
way to create solutions to problems that we want to code, and coding
provides a means of specifying our solutions to a computer. That said,
computational thinking can be valuable even if you aren’t coding.
Where do you think the name Python most likely came from?
Check the most likely answer below:
A. Python’s creator loved snakes,
and had previously created the less
successful Cobra language.
B. The creator of Python loved pie…
thus, Pie-thon.
C. The Python name is inspired by the name of
a British surreal comedy group.
D. Python is an acronym for Programming Your
Things, Hosted On the Network
E. The Python name was inspired by the
Anaconda runtime system, on which it is built.
C. Monty Python is the British comedy group who created the show Monty Python’s Flying Circus. Feel free to watch a few of their
shows as homework—whether it is your cup of tea or not, you’ll often see Monty Python references in the Python community.
you are here 4 15
thinking computationally
A very brief history of Python
Python 1.0 Python 2.0
Over in the Netherlands, at the
National Research Institute for
Mathematics and Computer
Science, they had a big problem:
their scientists found programming
languages difficult to learn. Yes,
even to these highly educated,
skilled scientists, the most current
programming languages were
confusing and inconsistent. To the
rescue, the Institute developed a new
language called “ABC” (you thought
we were going to say “Python,”
didn’t you?), which was designed
to be much easier to learn. While
ABC was somewhat successful, an
enterprising young developer named
Guido van Rossum, after a weekend
of binge-watching Monty Python
reruns, thought he could take things
further—so, using what he’d learned
from ABC, Guido created Python.
And the rest is history.
Python came of age with version
2.0 and a whole new set of features
aimed at supporting its growing
community of developers. For
instance, in recognition that Python
was truly now a global language, 2.0
was extended to handle character
sets from languages far beyond
the typical English letters. Python
also also improved many technical
aspects of the language, like better
handling of computer memory as
well as better support for common
types of data like lists and character
strings.
The Python development crew also
worked hard to make Python open
to a whole community of developers
who could help improve the
language and implementation.
Nobody’s perfect, and there
came a time when Python’s
creators looked back and saw a
few things in Python they wanted
to improve. While Python was
known for its adherence to
keeping things straightforward,
experience with the language had
revealed a few parts of its design
that could be improved, and a
few things that hadn’t aged well
that needed to be removed.
All these changes meant that
some aspects of Python 2 would
no longer be supported. That
said, Python’s creators made sure
there were ways to keep the 2.0
code running. So, if you have
code written in Python 2, don’t
worry—Python 2 is still alive and
well, but know that Python 3 is
the future of the language.
Python 3.0
1994 2000 2008
Actually, we just made up the part
about the binge weekend.
Note from editor: umm, “the rest” is
actually in the next few paragraphs.
The Future!
We fully expect our
flying car is going to
be Python enabled.
16 Chapter 1
the versions of python
So, it sounds like there are two versions of
Python out there, version 2 and version 3. Which
are we going to use and how different are they?
Good question. And you’re right, there are two
versions of Python—to be a little more specifc, at
the time this book was printed, the current versions
are 3.6 and 2.7.
Here’s how we’re going to think about the versions.
As it turns out, when you view the two languages,
from, say, 10,000 feet, they are remarkably similar,
and in fact you might not even be able to see any
differences. That said, there are differences, and
if you aren’t paying attention to the version you
are using, they could trip you up. We’ll be using
the newest version of Python in this book—that
is, version 3. We’d rather get you started with the
version that is going to carry on into the future.
Now there is a lot of code in the world already
written in Python 2, and you certainly might
encounter it in a module you’ve downloaded online
or, if you happen to become a software developer,
as part of some old code you become responsible
for. After this book you’ll be in a good position to
study the small differences between Python 3 and 2,
should you need to.
When we say Python 3 or 2, we
mean in each case, the latest
version of 3 or 2 (at the time of
writing, 3.6 and 2.7).

you are here 4 17
thinking computationally
Got Python?
We’re not going to get much further if you haven’t
installed Python yet. If you haven’t taken the time to install Python,
now is the time. Check out the “You’re going to have to install Python”
section in the introduction to get started. Remember, if you’re using a Mac
or Linux there’s a good chance you already have Python installed; however,
there’s also a good chance you have version 2, not version 3. So whether
you’re on a Mac, a Windows, or a Linux machine, at this point you may
need to install version 3 of Python.
So, go do that and once you’ve got Python up and running, you’re ready to
dive into some real code.
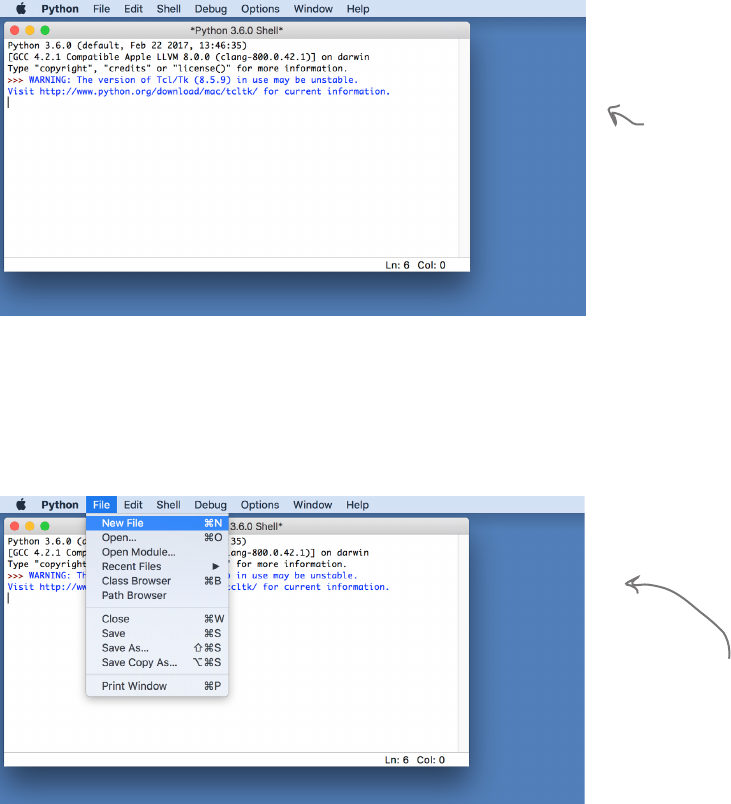
18 Chapter 1
a small test program
Putting Python through its paces
Now that you’ve got Python installed, let’s put it to work. We’re going to
start with a small test program just to make sure everything is up and
running. To do that, you need to use an editor to enter your program
before you can execute it; that’s where IDLE, the Python editor (or
Integrated Development Environment if you prefer), comes in. Go ahead
and open IDLE like we did in the introduction. As a reminder, on the Mac
you’ll find IDLE under the Applications > Python 3.x folder. On
Windows navigate using the Start button to All Programs, and you’ll find
IDLE under the Python 3.x menu option.
When you first run IDLE it displays an interactive window, called the
Python Shell, that you can type Python statements directly into. You can
also use an editor to type your code into; to do that, choose File > New
File from the IDLE menu. You’ll see a new, empty editor window appear.
When you first open IDLE, it
displays an interactive interpreter
called the Python Shell. If you’re
really curious, type 1+1 (that’s
one plus one) into it and hit return.
More on this in the next chapter.
Use the File > New File menu
option to get a new window
ready for entering Python code.
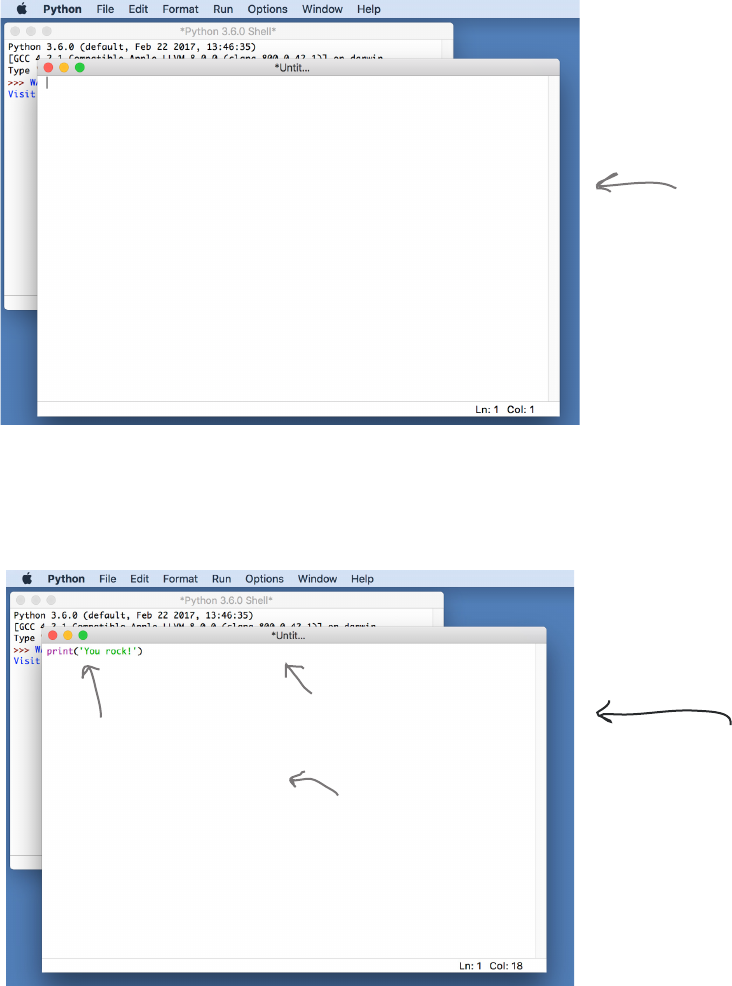
you are here 4 19
thinking computationally
IDLE works just like a word processor, only it knows about Python code
and assists you by highlighting Python language keywords, helping you with
formatting, and even, when appropriate, autocompleting common Python
keywords to make code entry even easier.
After creating a new file and getting a new blank editing window, you’re going to
type in one line of code to test things out; go ahead and enter this code:
After choosing New
File, you should see a
new, empty window
on top of the Python
Shell window.
Notice your file won’t
have a meaningful name
until you save it.
IDLE uses color
to highlight the
different aspects
of your Python code.
You will not be able
to see this if you’re
viewing this page in
black and white.
Pay careful attention to
every detail of spelling and
punctuation, as Python and
other programming languages
are quite intolerant of
mistakes.
print('You rock!')
Also, depending on your
version and configuration
of IDLE, you may see
different colors, font
sizes, and so on than you
see here.
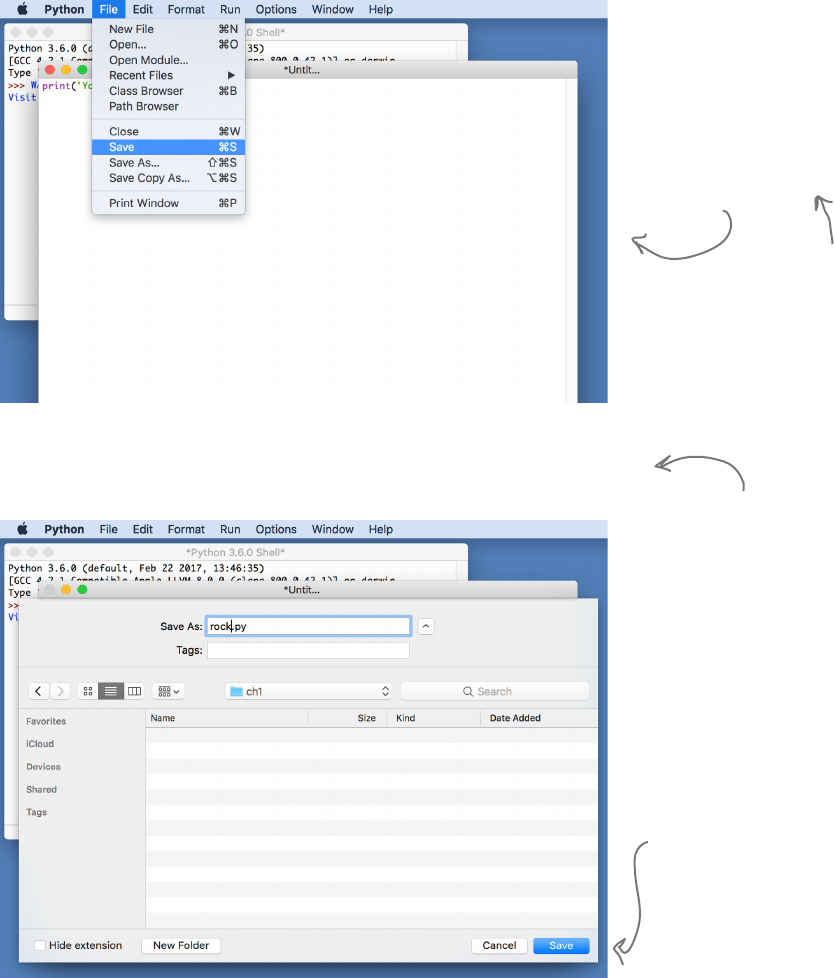
20 Chapter 1
how to save your programs
Saving your work
Now that you’ve typed in your first line of code, let’s save it. To do that just
choose File > Save from the IDLE menu:
Before we execute our code we need to
save it. In IDLE, the Save menu item is
under the File menu. Simply choose this
option and give your source code a name.
When we’re writing Python code, we use
an extenion of “.py” on the end of the
filename.
You’ll want to follow the same code
organization scheme we do in this
book. If you haven’t done so already,
take a look at page xxxvi in the
book’s introduction.
And then give your code a name with a .py extension. We chose the name
rock.py. Note that, although we didn’t show it, we also created a folder for
Chapter 1 code, called ch1, and we recommend you do too.
Finally, when you have a folder for
your code and a name, click Save.
Source code, source file,
code, and program are all
common names for your
files with code in them.
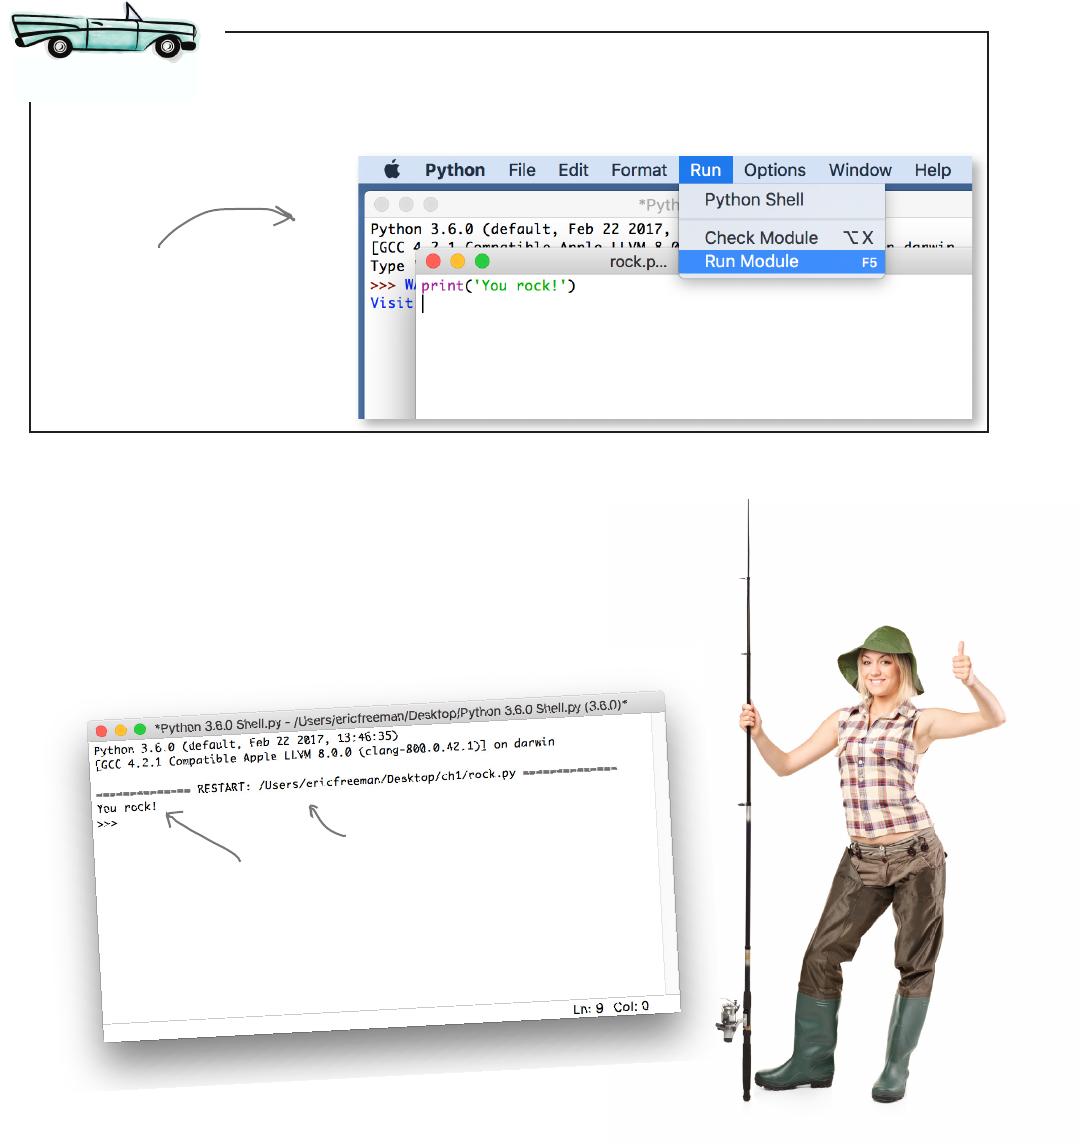
you are here 4 21
thinking computationally
This is where it all comes together. After you’ve got the code saved,
choose the Run > Run Module menu item. After that, look at the
Python Shell window and you should see your program’s output there.
A Test Drive
Execute your code by using
the Run Module menu item
in the Run menu. If you
haven’t saved your code,
IDLE will ask you to.
Congrats on coding your first Python program!
You’ve installed Python, you’ve entered a short bit of real Python code using IDLE,
and you’ve even executed your first Python program. Now it’s not a very complex bit
of code, but you’ve gotta start somewhere. And the good news is, we’re all set up and
ready to move on to a serious business application!
And here's the output,
just as we expected!
Every time you run your code,
IDLE will restart the Python
interpreter and then execute
your code.
22 Chapter 1
more about python and output
Did you get something other than “You rock!”?
The process of writing and testing code can be error-prone. If you
weren’t successful on your first try, get used to it: all of us developers
are constantly fixing errors in our code. Here are a few things to try:
• If Python reported an error like invalid syntax check your code for incorrect
punctuation, like missing parentheses. If you look at the code highlighting in IDLE,
usually you can quickly determine where these errors are.
• If Python reported an error like Python NameError: name 'prin' is not
defined check your code for typos, like a name that isn’t spelled correctly—in
this case, the word print.
• If Python reported an error like EOL while scanning that typically means you
left out a single quote on one of the 'You rock' string of characters—make
sure you’ve surrounded it with two single quotes, like 'You rock!'.
• If you’re really stuck, try the book’s community page on wickedlysmart.com.
Q: Why do we use Run Module to execute our code?
A: Python calls a file of Python code a module. So, all this means
is “run all the Python code in my file.” Modules are also a way to
further organize code that we’ll get to later.
Q: What exactly do you mean by input and output?
A: Right now we’re just dealing with simple kinds of input and
output. Our output is the text that is generated from your program
and displayed in the Python Shell window. Likewise, input is any text
your program gets from you in the shell window. More generally, all
kinds of input and output are possible, such as mouse input, touch
input, graphics and sound output, and so on.
Q: I’ve figured out that print gives you a way to print text
to the user, but why the name print? When I first saw that, I
thought it was something for the printer.
A: Think way, way back to when computers were more likely
to output to a printer than a screen. Back in those days, the name
print made a lot more sense than it does now. Of course, Python is
young enough to not have an excuse for using the name print, but
print has traditionally been the way to output to the screen in a lot
of languages. So, print outputs to the screen (by way of the Python
Shell window), and on a related note, you saw an example earlier of
input, which gets user input from the Python Shell.
Q: Is print the only way to output from Python?
A: No, it’s just the most basic way. Computers and programming
languages excel at output (and input), and Python is no exception.
Using Python (or most languages), you can output to web pages, the
network, files on storage devices, graphics devices, audio devices,
and many other things.
Q: Okay, well, when I use print, I type something like print('hi
there'). What exactly is going on there?
A: What you’re doing is using some functionality built into Python
to print. More specifically, you’re asking a function called print to
take your text in quotes and output it to the Python Shell. Now, we’re
going to be getting more into exactly what functions are, what text
is, and so on later, but, for now, just know you can use this function
anytime you want to print to the shell.

you are here 4 23
thinking computationally
Head First: Welcome, Python! We’re looking forward to
digging in and finding out what you’re all about.
Python: Glad to be here.
Head First: Let’s see, you’re named after a comedy
troupe, and you’re known for being a beginner’s language;
honestly, should anyone take you seriously?
Python: Well, let’s see, I’m used for everything from
running silicon chip production lines to applications that
help create major motion pictures (you didn’t hear it
from me, but can you say, “George Lucas”?) to powering
interfaces for air traffic control systems. I could go on...
does that sound serious?
Head First: Well, then, if you’re such a serious language,
how on earth can newbies easily use you? I mean, the
projects you’re describing sound quite complex. Would
you have us believe it doesn’t take a hardcore, complex
language to pull all that off ?
Python: One of the reasons newbies and professionals
appreciate me is because my code is quite straightforward
and readable. Ever look at a language like, say, Java?
Blech. My gosh, the effort you have to go to just to say,
“Hello World!” That takes a single line of Python code.
Head First: Okay, you’re readable, great, but what
exactly does that mean, anyway?
Python: Given I mentioned Java, let me just give you a
little example. Let’s say you want to tell your user “Hello!”
Here’s how you do it with Java:
class HelloWorldApp {
public static void main(String[] args) {
System.out.println("Hello!");
}
}
That’s a lot to take in. I’d call it totally unreadable,
especially to someone just learning to program. What
the heck does all that mean, anyway? Is all that really
necessary? Now let’s look at my version, which I’ve written
in Python of course:
print('Hello!')
I think you’d have to agree that is more straightforward
and readable—anyone can look at that line and have
a decent idea of what it does. But that’s just a simple
example. Overall, Python strikes people as clear, almost
English-like, and consistent...
Head First: Consistent? What does that mean?
Python: One way to think about consistency is that
there aren’t a lot of surprises in the language. In other
words, once you understand a bit of the language, other
things tend to work as you might guess, or expect. Not all
languages are like that.
Head First: I want to go back to something you said
earlier—you mentioned some rather esoteric examples,
like air traffic control, chip manufacturing, being the main
software for the space shuttle, and so on. That all sounds
very industrial and special purpose. I’m not sure Python is
going to be the best language for our readers.
Python: The space shuttle? You made that up. For
the others, I was giving you examples of things you
might consider serious, given that you claimed Python was
otherwise. Some of the most common uses of Python are
for things like creating websites, writing games, and even
creating desktop apps.
Head First: Can we switch gears? Someone just handed
me a note: our sources tell us that there are actually two
versions of Python, and what’s more, they are actually…
gosh, how do I say it, incompatible with each other. How on
earth is that being consistent?
Python: Like anything, languages tend to grow and
evolve, and yes, there are two version of Python, version
2 and version 3. Version 3 has new things in it that
were not part of version 2, but there are ways to make
things backward compatible. Let me walk your readers
through…
Head First: ...on that note, we’re out of time. We look
forward to our next ambush, er, I mean opportunity, to
speak with you.
Python: Thanks, my pleasure…I think.
Python Exposed
This week’s interview: are you serious?
24 Chapter 1
writing a serious application
Try my new Phrase-O-Matic
and you’ll be a slick talker just like
the boss or those guys in marketing...
Okay, it’s time to get serious and
to write a real-world business
application using Python. Check out
this Phrase-O-Matic code—you’re
going to be impressed.
# let python know we’ll be using some random
# functionality by importing the random module
import random
# make three lists, one of verbs, one of adjectives,
# and one of nouns
verbs = ['Leverage', 'Sync', 'Target',
'Gamify', 'Offline', 'Crowd-sourced',
'24/7', 'Lean-in', '30,000 foot']
adjectives = ['A/B Tested', 'Freemium',
'Hyperlocal', 'Siloed', 'B-to-B',
'Oriented', 'Cloud-based',
'API-based']
nouns = ['Early Adopter', 'Low-hanging Fruit',
'Pipeline', 'Splash Page', 'Productivity',
'Process', 'Tipping Point', 'Paradigm']
# choose one verb, adjective, and noun from each list
verb = random.choice(verbs)
adjective = random.choice(adjectives)
noun = random.choice(nouns)
# now build the phrase by "adding" the words together
phrase = verb + ' ' + adjective + ' ' + noun
# output the phrase
print(phrase)
1
2
3
4
5
Relax
Yes, we mean
it! Your job right
now is to take it all
in by osmosis. Take a
look at every line of code,
read the description of what
it does, and let it register in
your brain. We’ve added some
Python comments, which are
just notes after the # marks,
so you have a better idea of
what this code does. Think of
those comments as helpful
pseudocode if you want. We’ll
talk about comments a bit
later in the book. When you
think you’ve made some
sense of the code, move on to
the next page and we’ll walk
through it in more detail.
you are here 4 25
thinking computationally
Phrase-O-Matic
In a nutshell this program takes three lists of words, randomly picks one
word from each list, combines the words into a phrase (suitable for your
next startup’s slogan), and then prints out the phrase. Don’t worry if
you don’t understand every aspect of this program; after all, you’re on
page 25 of a 600-page book. The point here is just to start to get some
familiarity with code:
1
2
3
4
5
The import statement tells Python we’re going to be using
some additional built-in functionality that’s in Python’s random
module. Think of this as extending what your code can do—in
this case, by adding the ability to randomly choose things. We’ll
get into the details of how import works later in the book.
Next we need to set up three lists. Declaring a list is
straightforward—just place each item in the list within quotes
and surround it by square brackets, like this:
Finally, we output the phrase to the Python Shell with the print
statement and...voila! We’re in marketing.
Slogans for Your Next
Python-based Startup
24/7 Freemium Productivity
Lean-in Hyperlocal Splash Page
Gamify Siloed Early Adopter
Offline API-based Process
Crowd-sourced Cloud-based
Pipeline
verbs = ['Leverage', 'Sync', 'Target',
'Gamify', 'Offline', 'Crowd-sourced',
'24/7', 'Lean in', '30,000 foot']
Notice we’re assigning each list to a name, like verbs, so we can
refer to it later in the code.
Next we need to choose one word randomly from each list. To
do that we’re using random.choice, which takes a list and
randomly chooses one item. We then take that item, and assign it
to the corresponding name (verb, adjective, or noun) so we
can refer to it later.
We then need to create the phrase, and we do this by gluing the
three items together (the verb, adjective, and noun)—in Python
we can glue these together using the plus sign. Notice also that
we have to insert spaces between the words; otherwise, we’d end
up with phrases like “Lean-inCloud-basedPipeline.”
Computer scientists like to
call gluing text together
“concatenation.” It’s a pretty
handy word, so you’ll see it more
in this book.
random.choice is another built-in
function from Python. We'll learn
more about these later in the book.

26 Chapter 1
how to enter the phrase-o-matic code
Getting the code in the machine
You’ve entered one program into IDLE, but let’s step through it again—we’re going to
create a new Python file by choosing File > New File from the menu. Go ahead and
do that, and then type the code from two pages back into the editor.
Now that you’ve typed in all the code, let’s save it. Remember, to do that just choose
File > Save from the IDLE menu and then save your code as phraseomatic.py.
Pay special attention to the words
and punctuation that are being used.
We’ll get to all this detail in later
chapters, but for now it’s great to
get accustomed to it.
Remember, IDLE
will color your code
according to its function.
Note that IDLE highlights common
errors. You might see errors
highlighted while you’re typing your
code or when you run your code,
depending on the error. Here a
missing quote error is highlighted.
If you see any errors, you'll want to
double-check the code and fix them.
Here’s an
example of a
typo; notice
how it is
highlighted.
If you get
this, double-
check that
your code is
correct.
IDLE will also insert indenting
when appropriate after you hit
the Return key.
Notice that extra whitespace—that is,
spaces and return characters—can be used
to make your code more readable; Python
largely ignores whitespace (we’ll talk about
an exception to that later).
We purposefully added
an error here to show
what IDLE does; as long
as you faithfully type in
the code from two pages
back, you should not see
this error.

you are here 4 27
thinking computationally
Now it’s time to run the Phrase-O-Matic. Let’s explicitly go through this once
more to really set it in—after you’ve got the code saved, choose the Run >
Run Module menu item. After that, look for the output in the shell window, and
get ready for your next startup’s slogan!
A Test Drive
Remember, to execute your
code, use the Run Module
menu item in the Run menu.
If you haven’t saved your
code, IDLE will ask you to.
We ran Phrase-O-Matic a few
times; check out what we got.
We’re going to Gamify A/B
Tested Splash Pages!
To re-run Phrase-O-Matic, first click on your code window, then
choose Run > Run Module again.
28 Chapter 1
a review of computational thinking and coding
To write code, you rst have to break a
problem down into a simple set of actions
that solves the problem.
We call this set of actions an algorithm, or
less formally a recipe for solving a problem.
Actions are in the form of statements that
can carry out very simple tasks, make
decisions, or control the ow of an algorithm
by repeating parts of the code.
Computational thinking is a way of thinking
about problem solving that grew out of
computer science.
Coding is the act of taking an algorithm and
translating its steps into a programming
language that can be executed on a
computer.
Algorithms are sometimes expressed in a
more human-readable pseudocode before
being translated to an actual programming
language.
Programming languages are special-purpose
languages created expressly for describing
tasks to computers.
English makes for a poor programming
language because it is quite ambiguous.
There are many programming languages,
each created with inherent advantages
and disadvantages, but all have the same
computational power.
The Python name doesn’t come from a
snake, but from the creator’s love of the
Monty Python comedy troupe.
New and experienced programmers
appreciate Python’s clean and consistent
design.
There are two versions of Python, 2 and 3,
and this book focuses on Python 3 (although
the differences are minor in a lot of cases).
Python code is executed by an interpreter,
which translates high-level Python code into
low-level machine code that your computer
can execute directly.
Python provides an editor called IDLE that is
tailored to writing Python code.
You can use whitespace in a Python program
to increase readability.
input and print are two functions provided
by Python for simple, shell-based input and
output.
you are here 4 29
thinking computationally
Coding Crossword
Let’s give your right brain something to do.
It’s your standard crossword, but all of the
solution words are from Chapter 1.
1 2
3
4 5
6
7 8
9 10
11
12 13
14 15
16
17
Across
1. Layman term for algorithm.
5. Python IDE
6. Input to interpreter or compiler.
7. Language named for coffee.
8. Human readable code.
10. Flying __________.
11. Technical name for recipe.
12. One of best beginner languages.
14. Low level code.
16. Python is this type of language
17. Python is one of them.
Down
2. Running a program.
3. Another word for source code.
4. Kind of thinking this book teaches.
9. Too ambiguous for code.
10. Supportive side of Python.
13. Head First Diner serves them.
15. One company using Python.
Across
1. Layman’s term for algorithm.
5. Python IDE.
6. Input to interpreter or compiler.
7. Language named for coffee.
8. Human-readable code.
10. Flying _______.
11. Technical name for recipe.
12. One of best beginner languages.
14. Low-level code.
16. Python is this type of language.
17. Python is one of them.
Down
2. Running a program.
3. Another word for source code.
4. Kind of thinking this book teaches.
9. Too ambiguous for code.
10. Supportive side of Python.
13. Head First Diner serves them.
15. One company using Python
30 Chapter 1
exercise solutions
Real recipes don’t just tell you what to do, they also include objects that are used in
making a particular food (like utensils, appliances, and ingredients). What objects are
used in our fishing recipe?
1Put worm on hook.
2Cast line into pond.
3Watch the bobber until it goes underwater.
4Hook and pull in fish.
5If done fishing, then go home; otherwise, go back to step 1.
It looks like the
answer was “all
of the above.”
One thing to understand right up front is that computers do exactly what you tell them—nothing more,
nothing less. Look at our recipe for fishing on page 2. If you were the robot and you followed these
instuctions precisely, what problems might you encounter? Do you think we would really be successful using
this recipe?
A. If there are no fish, you’re
going to be fishing for a very
long time (like, forever).
B. If the worm falls off the
hook, you’ll never know about
it or replace it.
C. What happens if we run
out of worms?
D. Did we specify what to do with a fish when we pulled it in?
E. What happened to the fishing rod?
F. Are there any specifics of what a good cast is? If the worm
lands on a lily pad, do we need to redo the cast?
Typically when the bobber goes underwater, you try to “hook” the
fish before pulling it in. This doesn’t say anything about that.
How do we know if we’re done fishing? By the time? When we’re
out of worms? Something else?
There’s a lot we assumed in our recipe; we’re sure you probably
thought of a lot of other instructions that were unspecificed in
addition to these.
you are here 4 31
thinking computationally
Here are the unscrambled magnets!
Code Magnets Solution
We put the Head First Dinner’s recipe algorithm for making an three-egg omelet on the fridge
to remember it, but someone came along and messed it up. Can you put the magnets back in
the right order to make our algorithm work? Note that the Head First Dinner makes two kinds
of omelets: plain and cheese.
Remove pan from heat
Whip eggs
Stir eggs
While eggs aren’t fully cooked:
while eggs aren’t fully mixed:
Crack three eggs into bowl
Heat saute pan
Transfer eggs to plate
Serve
If the customer ordered cheese:
Add cheese on top
Transfer eggs to pan
We start by setting everything up:
heating the pan, cracking the eggs.
Then we whip the eggs until they
are thoroughly mixed.
Next we move the eggs to
the preheated pan.
And cook them until they are done.
If the customer wanted cheese,
then add it.
And in either case, remove the pan
from the heat, and transfer it to
a plate.
Finally, we serve the omelet.
Notice we just indented stirring the eggs to indicate
the eggs are stirred as long as they aren’t done. If
you indicated this in another way, that is fine.
Notice we indented whipping the eggs to indicate this
is done as long as the eggs aren’t yet whipped. If you
indicated this in another way, that is fine.
We also indented adding cheese, because that is only
done if the customer ordered cheese.
There are several correct variations you
could come up with; just make sure you
understand our solution, and that yours,
if different, makes logical sense.
32 Chapter 1
exercise solutions
Coding
Crossword
Solution
R
1E C I P E
2
P
3X
R C
4I
5D L E
S
6O U R C E C O D E C
G M U
R P T
J
7A V A P
8S E U D O C O D E
M T
E
9A C
10 I R C U S
N A
11 L G O R I T H M O
G I M
L O M
I P
12 Y T H O
13 N U
S M
14 A C H I N E C O D
15 E
H
16 I G H L E V E L I I
L T S
E Y N
I
17 N T E R P R E T E R E
S Y
Across
1. Layman term for algorithm. [RECIPE]
5. Python IDE [IDLE]
6. Input to interpreter or compiler.
[SOURCECODE]
7. Language named for coffee. [JAVA]
8. Human readable code. [PSEUDOCODE]
10. Flying __________. [CIRCUS]
11. Technical name for recipe. [ALGORITHM]
12. One of best beginner languages. [PYTHON]
14. Low level code. [MACHINECODE]
16. Python is this type of language [HIGHLEVEL]
17. Python is one of them. [INTERPRETER]
Down
2. Running a program. [EXECUTE]
3. Another word for source code. [PROGRAM]
4. Kind of thinking this book teaches.
[COMPUTATIONAL]
9. Too ambiguous for code. [ENGLISH]
10. Supportive side of Python. [COMMUNITY]
13. Head First Diner serves them. [OMELETS]
15. One company using Python. [DISNEY]
On the left you’ll find some statements written in English, and on the right you’ll find statements written in a
programming language. Draw a line from each English statement to its corresponding code translation. We did
the first one for you.
YOU SAY TOMATO
YOU SAY TOMATO
Print “Hi there” on the screen.
Ask the user, “What’s your name?”
Pouring five drinks.
A grocery list with bread,
milk, and eggs on it.
If the temperature is more
than 72, then print “Wear
shorts” on the screen.
solutioN
print('Hi there')
name = input('What is your name? ')
for num in range(0,5):
pour_drink();
grocery_list = ['bread', 'milk', 'eggs']
if temperature > 72:
print('Wear shorts')
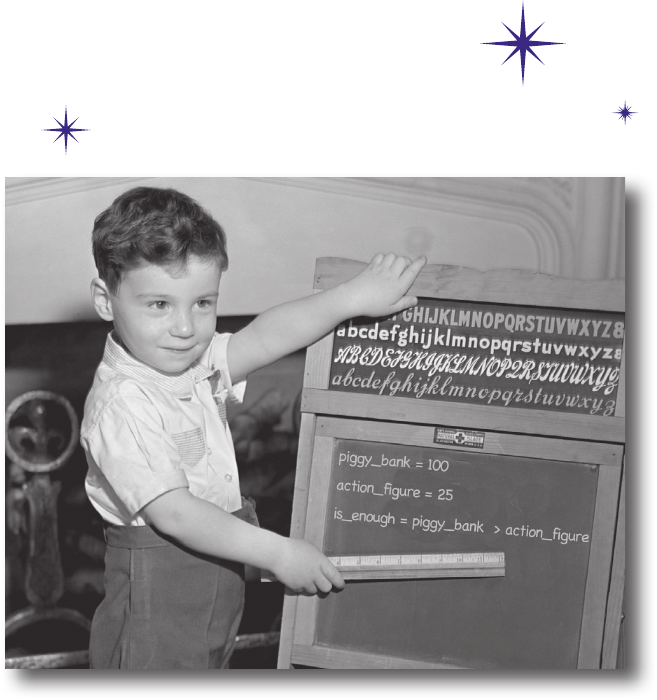
this is a new chapter 33
Know Your Value
2
simple values, variables, and types
Computers really only do two things well: store values and
perform operations on those values. You might think they’re doing a whole lot
more, as you send texts, shop online, use Photoshop, or rely on your phone to
navigate in your car; however, everything computers do can be broken down
into simple operations that are performed on simple values. Now, part of
computational thinking is learning to use these operations and values to build
something that is much more sophisticated, complex, and meaningful—and
we’re going to get to that. First, though, we’re going to take a look at what
these values are, the operations you can perform on them, and just what role
variables play in all this.
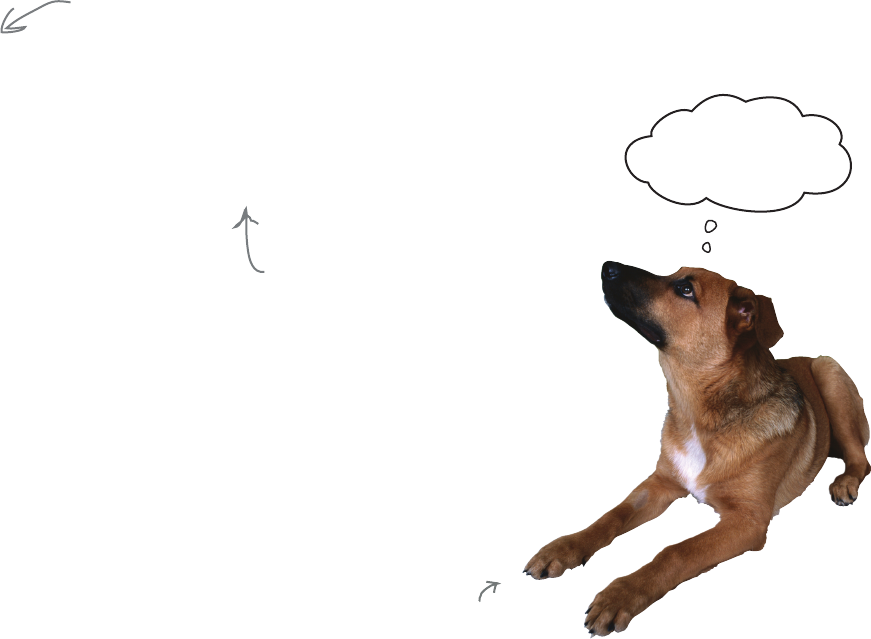
34 Chapter 2
coding a dog age calculator
Coding the Dog Age Calculator
You didn’t think we were going to take you through 50 pages of
Python specifications on values and operations before writing some
real code, did you? Of course not—we’ve got real work to do!
Up next, the Dog Age Calculator. You already know what
the calculator does: you enter a dog’s chronological age and the
calculator tells you the dog’s age in relative human years. To perform
that calcuation you simply multiply the dog’s chronological age by
the number 7. Or, is it that simple? We shall see...
But where do we even start? Do we just start trying to write some
code? Well, remember the concept of pseudocode, which we briefly
discussed in the last chapter? Recall that pseudocode allows you to
work out a high-level solution of your problem before you have to
get into all the specifics required to write code. That’s a good place
to start.
So what exactly is pseudocode? Think of it as nothing more than
your algorithm written in human-readable form. With pseudocode,
you typically spell out, step by step, everything your solution needs
to do to solve your problem (in our case, figuring out a dog’s age in
human years). They say 12 is
the new 9...
Especially given
you don’t know
how to code yet!
Codie, 12
Remember, you’ve already seen
one example of pseudocode in
the fishing recipe on page 2
of Chapter 1.
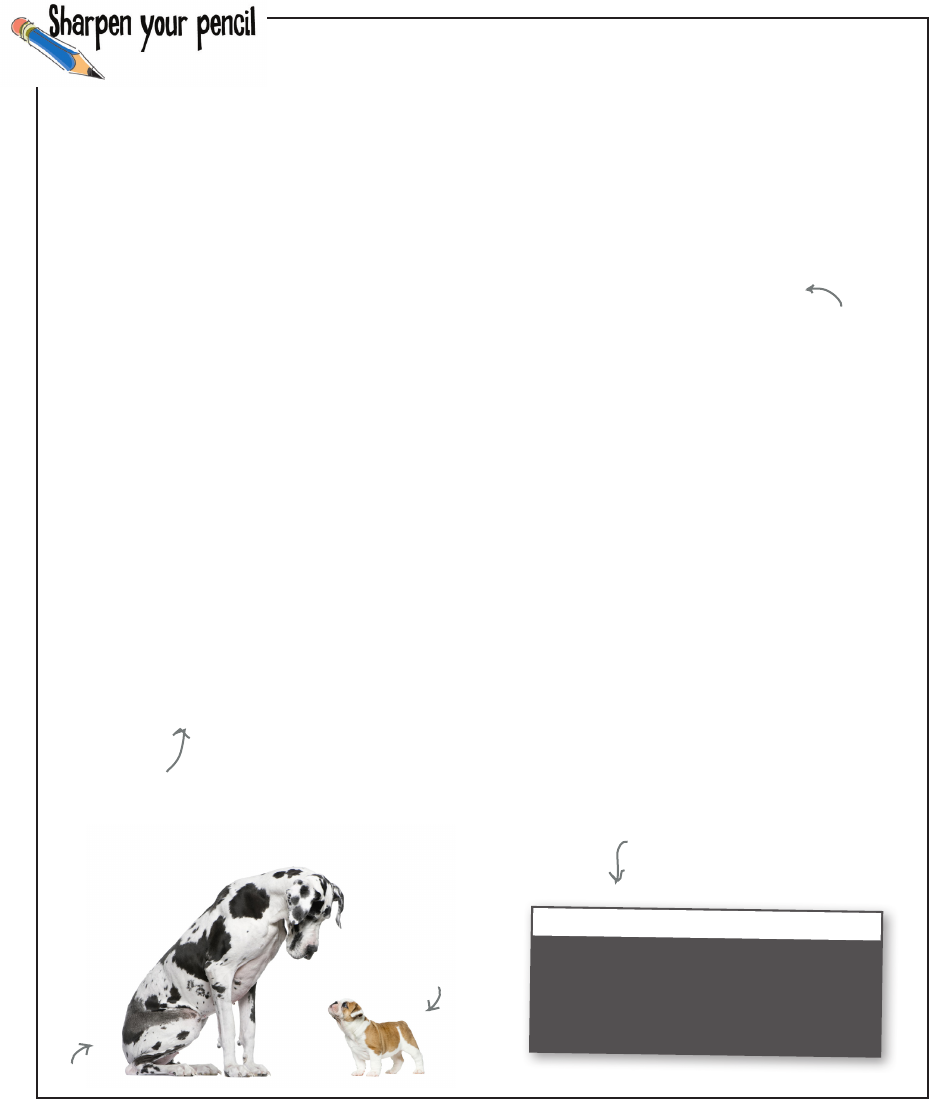
you are here 4 35
simple values, variables, and types
ars
We’re going to write some pseudocode. First, think about how you’d write an
algorithm or recipe that computes a dog’s age in human years. Once you have
an idea, write it down as a set of steps in plain English (or your chosen language).
Make your solution user-friendly by asking the user for the dog’s name and age.
You’ll also want to generate some nice output at the end, like “Your dog, Rover, is
72 years old in human years.”
Again, just write your pseudocode in English. Important: make sure that you
compare your answer with ours at the end of the chapter before you move on.
Or, if you get
stuck, feel free
to peek ahead.
Write your
pseudocode here.
Python 3.6.0 Shell
What is your dog's name? Codie
What is your dog's age? 12
Your dog Codie is 84 years old in human years
>>>
Here is an example of how the
Dog Age Calculator will work.
Fido, 5
Sparky, 1

36 Chapter 2
from pseudocode to code
Going from pseudocode to code
Now that we’ve written our pseudocode, we have a good sense of the steps our code
will need to take to implement the Dog Age Calculator—of course the pseudocode
doesn’t provide every detail, but it will provide us with a nice guide to follow as we
implement each step in code.
So let’s do just that: we’ll take our pseudocode step by step, and implement as we go.
1. Ask the user for the dog’s name.
2. Ask the user for the dog’s age.
3. Multiply the dog’s age by the number 7 to get
the dog’s age in human years.
4. Output to the user:
“Your dog”
the dog’s name
“is”
the dog’s age in human years
“years old in human years”
Dog Age Calculator Pseudocode
As a first step to transforming our pseudocode into code, step through
each line of your pseudocode and make some notes about what you think
the code will have to do. Just keep it high level. Make sure and check your
answers with ours before you move on. We did the first one for you.
As always, if you get stuck,
feel free to peek ahead,
but try not to until you’ve
made a first pass through
every line.
1.
2.
3.
4.
Put your notes for
each step here.
Prompt the user to get the dog’s name
and then have the user type it in. We’ll
presumably need to save the name somewhere
so we can use it in step 4.
When we translate our
ideas, algorithms, or
pseudocode to real
code, we often say we’re
implementing them.
you are here 4 37
simple values, variables, and types
input ("What is your dog's name?" )
Q: Why bother with something English-like when the
computer only understands a programming language?
A: Working out things in pseudocode gives you the
opportunity to think about your algorithm without the burden
and complexity of actual computer code. It also gives you the
opportunity to study your solution, possibly improving it, before
committing it to code.
Q: Do experienced software developers use
pseudocode?
A: Yes. Planning out how you are going to attack a problem
before committing it to more complex coding is always a
good idea. Some developers are good enough to do a lot of
that in their head, but many still use pseudocode or similar
techniques to map out things before they code. Pseudocode is
also commonly used for communicating coding ideas to other
developers.
1. Ask the user for the dog’s name.
2. Ask the user for the dog’s age.
3. Multiply the dog’s age by the number 7 to get
the dog’s age in human years.
4. Output to the user:
“Your dog”
the dog’s name
“is”
the dog’s age in human years
“years old in human years”
Dog Age Calculator Pseudocode
Step 1: Getting some input
Now we’re ready to tackle step 1—asking the user for the dog’s
name. As we’ve indicated in our notes, we’re going to need to
prompt the user to give us their dog’s name, and then remember
that name so we can use it in step 4 (when we print out the name
and dog’s age in human years). So there’s really two things we
need to do here: prompt the user to get the dog’s name, and then
store that name for later use. Let’s focus on prompting the user
and getting the name first.
You may have already noticed in a couple of the code exercises
from Chapter 1 that we used a Python function named input
to solicit input from the user. While a function may sound like
something from math class, think of it as just a way to call upon
built-in functionality provided by Python.
Let’s look at the syntax for calling the input function and then
we’ll look at how it works:
We’re going to spend a lot of time on
functions in this book, and before long
you’ll understand exactly how they work,
but for now just think of them as a way
of asking Python to do some work for
us and don’t worry too much about the
details.
Remember, the syntax tells us how we
write things in a computer language.
Follow it
with a left
parenthesis.
Start with the name of the
function, input.
Then place the text you’d
like to prompt the user with
between quotes. And end the statement with a
right parenthesis.
You are here.
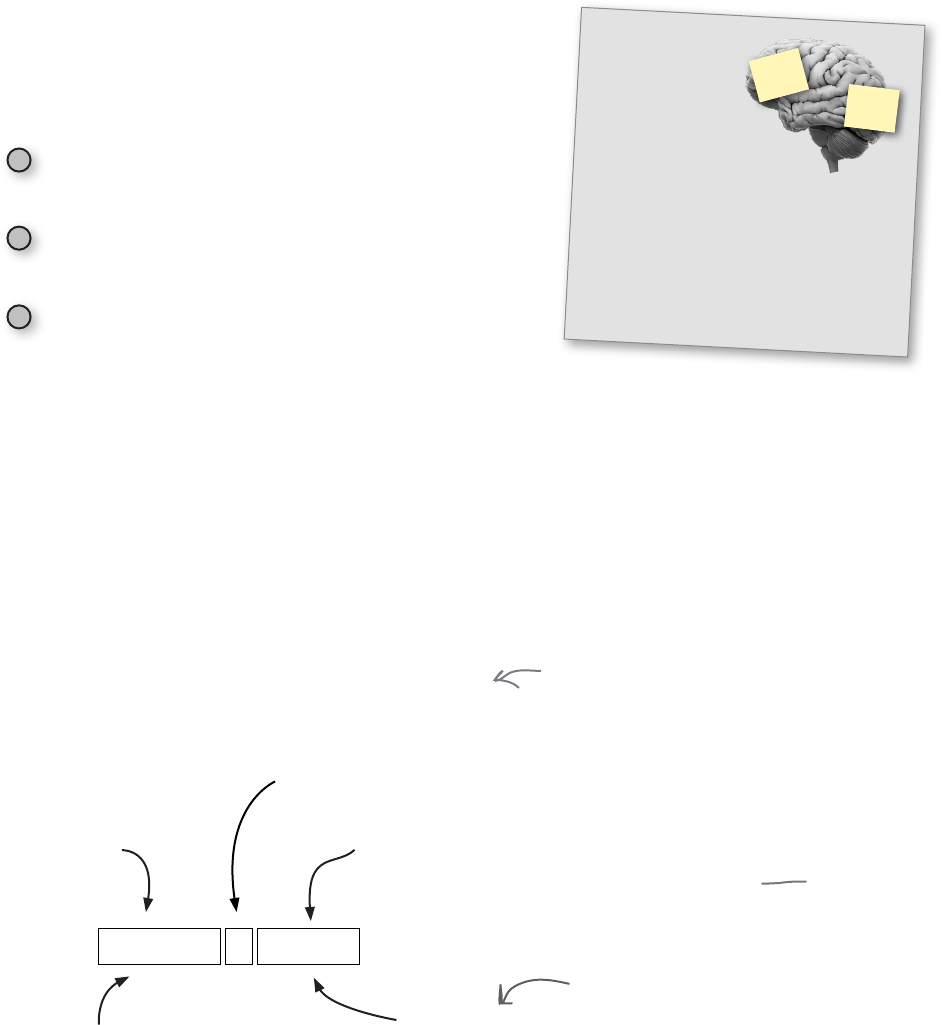
38 Chapter 2
the input function
How the input function works
Alright, we now know how to type in the input function (in other
words we know the syntax), but how does it actually work? Like this:
When the interpreter sees your call to the input
function, it takes your prompt text and displays
it for the user in the Python Shell.
The interpreter then waits for the user to type in
a response, which the user completes by pressing
the Return key.
Finally, the text the user typed in is passed back to
your code.
3
1
2
Okay, so the text the user typed in is passed back to our code, but
what does that mean? Well, when you call the input function, it goes
off and gets text from the user and then, as a result of calling the
function, returns that text for your code to make use of.
Now, that text isn’t going to be too useful if we can’t remember it
for later, because we’ll need it in step 4 when we print out our user-
friendly output. So, how do we remember things with Python?
Using variables to remember and store values
One of the most common things you’ll do when programming
is to store a value so you can use it later. To do that, we use a
variable. Think of a variable as a name you can always use to
retrieve a value you’ve previously stored. Here’s how we store, or
assign, a value to a variable:
Pretty much every programming
language you’re ever going to
encounter works this way too.
We refer to text as a string.
Think of this like a string of
characters. You’ll find this
terminology is common across
practically every programming
language. There are a lot of
other types of values you can use
in Python too, such as numbers,
which we’ll talk about soon.
First name your variable. Almost
any name will do, but we’ll talk
more about legal names in a bit...
Next add an equals sign, followed
by the value you want stored and
assigned to your variable.
And on the righthand side
we have the value—in this
case, the text ‘Codie’.
dog_name = 'Codie'
Again, on the lefthand side we
have a variable, which you can
think of as a name you can refer
to over and over to recall a value.
Make it stick
Python is an
interpreter
Buy Millk
Semantics tell us what
Python statements mean.
Syntax tells us how to write
Python statements.
you are here 4 39
simple values, variables, and types
Assigning the user’s input to a variable
Now that you know a little bit about variables (don’t worry, we’re going
to dive in deep in a few pages), let’s store the user’s input in a variable.
To do that we simply call the input function and assign its return value
to a variable. Here’s how we do that:
dog_name = input("What is your dog's name? ")
Then we call the input function,
which prompts the user with
“What is your dog’s name?”
And that return value is then
assigned to the variable dog_name.
Let’s use the
variable dog_name.
When the user finishes entering a name, the
input function then passes that name back to
your code in the form of a return value.
Step 2: Getting more input
We also need to get the dog age from the user. How? We’ll do this
just like we did with the dog name: first we make use of the input
function and supply it with a prompt like “What is your dog’s age?”
Then we will take the age the user types in and store this in a variable
called, say, dog_age. When we say “we will” we actually mean YOU
will, in this next exercise:
It’s your turn. Write the code to get the dog’s age using the input function, just as we did with the
dog’s name. Prompt the user with “What is your dog’s age?” and store the result in a variable called
dog_age. Make some notes as well about what each piece of your code does. Check your answer in
the back of the chapter before moving on.
We’re moving on to step 2.
Wondering about how to name
variables? Or how to correctly use
single and double quotes? Hang on,
we'll discuss both shortly.
1. Ask the user for the dog’s name.
2. Ask the user for the dog’s age.
3. Multiply the dog’s age by the number 7 to get
the dog’s age in human years.
4. Output to the user:
“Your dog”
the dog’s name
“is”
the dog’s age in human years
“years old in human years”
Dog Age Calculator Pseudocode
40 Chapter 2
using the python shell
It’s time to run some code
It’s one thing to look at code on paper, and it’s another to actually execute real code. Let’s take the
code from the last couple of pages and get some experience executing it in a different way—rather
than entering code into IDLE’s editor, we’re going to use the Python Shell instead. Why? Well, you’re
going to see that the shell is a great way to experiment with and test small pieces of code. Don’t
worry: when we get to writing longer programs, we’ll be right back in the editor.
To use the shell, run idle3 as usual, only this time we’ll be typing into the Python Shell window:
Your version numbers and
startup messages may differ
slightly depending on your
version and operating system,
as may your window’s look
and feel and color.
After you’ve located the shell, click in the window and locate the prompt, which looks like >>>. Type
1 + 1 and hit return; Python will evaluate your expression and print its value (in this case 2) before
displaying another prompt. Congrats, you’ve successfully used the Python Shell! Now let’s try some of
our code:
Let’s start by entering the code to get the dog’s name and then hitting return.
1
Python 3.6.0 Shell
Python 3.6.0 (default, Feb 22 2017, 13:46:35)
[GCC 4.2.1 Compatible Apple LLVM 8.0.0] on darwin
Type "copyright", "credits" or "license()" for more information.
>>>
Python 3.6.0 Shell
>>> dog_name = input("What is your dog's name? ")
What is your dog's name?
Type this in
and hit return.
Python will
display this.
This is the shell prompt; it’s waiting
for you to type something.
Using the shell is a
great way to test
out small pieces of
code to see how it
works.
you are here 4 41
simple values, variables, and types
Next, enter your favorite dog name and press return again.
2
The variable dog_name should now hold the value 'Rover', or
whatever dog name you entered. How can you show it does?
We’ve looked at print a few times; let’s use print to see the value of the
variable dog_name. You can also determine the value of dog_name more
directly in the shell by just entering the variable name.
3
Python 3.6.0 Shell
>>> dog_name = input("What is your dog's name? ")
What is your dog's name? Rover
>>>
Behind the scenes Python takes your dog's name and
stores it, and assigns it to the dog_name variable.
After that, you’ll get another command prompt.
Python 3.6.0 Shell
>>> dog_name = input("What is your dog's name? ")
What is your dog's name? Rover
>>> print(dog_name)
Rover
>>> dog_name
'Rover'
>>>
We can use print to display the
current value of the variable
dog_name, which is Rover.
Type a dog’s name here
and hit return.
Notice that an
assignment statement
doesn’t evaluate to a
value like, say, 1 + 1
does. Rather, as you
already know, the
assignment statement
takes the value on
the righthand side
and assigns it to
the variable on the
lefthand side.
Or enter any variable and
the shell will evaluate it,
displaying its value.
Note that print
does not display
quotes around
a string value,
while evaluating
it directly in the
shell does.

42 Chapter 2
dealing with single and double quotes
I noticed you can’t keep your single and
double quotes straight—sometimes you use text
surrounded by single quotes and sometimes by double
quotes. What’s the deal?
Good catch. First of all, remember we call text
in quotes strings, like a string of characters. And you
are exactly right: we have mostly used single quotes but
then changed to double quotes with the input function.
As it turns out, Python doesn’t care—either single or
double quotes are just fine, as long as you are consistent.
In other words, if you start a string with a single quote,
then you have to end it with a single quote. Likewise, if
you start a string with a double quote, then be sure to
end it with a double quote.
So, why did we choose one over the other? In general a
lot of Python developers prefer to use single quotes, and
so do we; however, there is a case where you’ll be forced
to use double quotes, and that is when you need to use a
single quote as part of your string.
Notice that our prompt needs to use a single quote in
the word dog's:
To use a single quote as part of
your string, just surround the
text with double quotes.
The same is true if you need to use a double quote in
your string’s text, in which case you’ll need to surround
your string by single quotes.
dog_name = input("What is your dog's name? ")
you are here 4 43
simple values, variables, and types
Getting some code entered
Alright, enough playing around in the shell; we’ve got a real app to build here!
Next, we’ll enter the existing two lines of code (the ones that prompt the user for
the dog’s name and age), then give that code a quick test before moving on to
finish converting our pseudocode to code.
So, in IDLE, choose File > New File and let’s get our first two lines of the
dog calculator typed in. Here’s the code:
After you’ve entered and double-checked the code, choose File > Save and
save your work in a new folder ch2 with the filename dogcalc.py.
We’re not done with the calculator yet, but it’s a good idea to test code
as you go to make sure everything is working as you’d expect. After
you’ve saved the code, choose the Run > Run Module menu item.
Look for the output in your shell window. Remember, the code is going
to ask you to enter your dog’s name and age.
A Test Drive
Keep in mind at this point
all your code will do is ask
you for your dog’s name
and age, and then display
another prompt.
dog_name = input("What is your dog's name? ")
dog_age = input("What is your dog's age? ")
Python 3.6.0 Shell
What is your dog's name? Rover
What is your dog's age? 12
>>>
The Test Drive is where we’ll
ask you to stop what you’re
doing, make sure all the new
code is up to date, and then
execute and test your new
code.
If you get a “SyntaxError: EOL while scanning string literal” when
executing this code, double-check your use of single and double quotes with
the code above.
Note the extra space, so there
is space between the prompt
and where the user types.

44 Chapter 2
a closer look at variables
'Codie'
A deep dive on variables
We’ve gotten a little experience by creating a variable name and assigning a value
to it, but how do these variables really work and how can you make use of them?
Let’s take a little time over the next few pages to better understand variables. After
that, we’ll finish off our Dog Age Calculator. Let’s start by looking at what is
happening behind the scenes when we assign a value to a variable.
Next, a label, dog_name,
is made and associated
with the value’s location
in memory.
dog_name
The first thing Python does is evaluate the
righthand side of the assignment, which evaluates
to the string 'Codie', and then it finds a free spot
in your computer’s memory where it stores the
string. You can think of this like taking an empty
cup and throwing the text 'Codie' in it.
1
With the string 'Codie' stored, Python then
creates a label—think of it as a sticky note if you
want—with the name dog_name, and puts it on
the cup.
2
Python creates a spot
in your device’s memory
for a string, and places
a ‘Codie' there.
We can create as many values assigned to
variables as we need, which will be stored in
memory for us until we need them.
'Codie'
"Your dog's name is"
phrase
dog_name
12
dog_age
phrase = "Your dog's name is "
dog_age = 12
Of course we can create and store as many values
as we need. How about two more:
3
'Codie'
Note we can store numbers
as well as strings.
Anytime we need to retrieve the stored values, we
can use the variables:
4
print(phrase)
print(dog_name)
This retrieves the value for
phrase and dog_name, and
then prints...
Python
Your dog’s name is
Codie
dog_name = 'Codie'
We often just call
this “assignment.”

you are here 4 45
simple values, variables, and types
Adding some expression
This evaluates to a
single value, 13.
dog_age = 12 + 1
13
dog_age
So far our values have been pretty simple, but there’s no need for them to be—instead of using
simple values, you can use expressions to compute values. If you’ve ever seen any form of mathematical
expression, Python’s expressions should look familiar to you: they just consist of simple values
combined with operators like +, -, *, and /. For instance, what if it is Codie’s birthday?
Here’s the expression.
After the expression is evaluated, the
variable dog_age is assigned the value 13.
Or we need to compute Codie’s weight in kilograms?
weight = 38 * 0.454
17.252
weight
After this statement completes, weight
has been assigned the value 17.252.
Or we need to compute the average age of Codie, Fido, and Sparky?
avg = (12 + 5 + 1) / 3
6.0
avg
We can group operations
together using parentheses.
In these expressions we can use variables anywhere you’d use a value. As
an example, let’s rewrite the average of Codie, Fido, and Sparky’s age:
codie = 12
fido = 5
sparky = 1
avg = (codie + fido + sparky) / 3
6.0
avg
We call + the operator,
and 12 and 1 the operands.
Here we’re using the
multiplication operator.
Anywhere we put a variable, it
is replaced with its value to
compute the expression.
Almost without
exception,
programming
languages use an
asterisk for the
multiplication
symbol.
46 Chapter 2
changing a variable’s value
Of course we aren’t limited to simple math and numbers in our expressions. Remember
concatenation from Chapter 1? We use concatenation to add strings together.
greeting = 'Hi'
name = 'Codie'
message = greeting + ' ' + name
'Hi Codie'
message
And add (or rather,
concatenate) them
together.
Let’s create a
couple strings.
Variables are called VARY-ables for a reason
Variables are called variables because their values usually vary over time. Let’s take Codie’s height
for example, which we start at 22:
dog_height = 22
Let’s say Codie has grown and we need to update his height by one inch, which changes the value
that dog_height is holding.
dog_height = 22 + 1
22
dog_height
23
dog_height
But there’s a better way to update Codie’s height. Let’s do that when Codie grows another two
inches:
dog_height = dog_height + 2
25
dog_height
As usual we evaluate the righthand
side, which evaluates to 23, and then
assign that value to dog_height. So,
dog_height changes from 22 to 23.
Remember we can use a variable anywhere
we use a value, so on the righthand side we
add 2 to the current value of dog_height,
or, 23 + 2 = 25.
We then take 25 and make it
the new value of dog_height.
1
2
Here we’re creating a new variable
and assigning it the value 22.
This expression
evaulates to ‘Hi Codie’,
which is assigned to
the variable message.

you are here 4 47
simple values, variables, and types
We need to talk about your
operator precedence...
Better living through
operator precedence
Evalute this expression:
mystery_number = 3 + 4 * 5
Is mystery_number 35? Or is it 23? Well, it depends on whether you added three
to four first, or if you multiplied four time five first. What’s the right answer? 23.
How did we know the right order of evaluation? Operator precedence. Operator
precedence tells you the order in which operations should be applied. This isn’t
a computer programming thing, mind you, it’s a mathematics thing, and in your
algebra class you most likely covered precedence at some point (either recently or
long ago). If you’ve forgotten it, no worries—we’re going to cover it n o w.
To understand operator precedence, think of operators being listed from highest to
lowest precedence, like this:
**
* / %
+ -
-
Highest
Lowest
Two asterisks give us
exponentiation, which has the
highest precedence.
If you remember your math,
2**3 is the same as 2.
3
Next highest is negation (in other words, just
putting a negative sign in front of a value).
Followed by multiplication, division, and modulus.
And then addition and subtraction.
The % is the modulus operator—modulus
gives you the remainder of a division.
For instance, 7 % 3 is 1 because
3 divides into 7 twice, leaving a
remainder of 1.
48 Chapter 2
what is operator precedence
Computing with operator precedence
Let’s evaluate an expression to understand how operator precedence is
applied. Here’s an expression to evalute:
3 / 1 + 2 * 3 ** 2
You can determine how any Python numeric expression is evaluated by simply applying its operations in
the order of their precedence (highest first). In these examples we’re using numbers to keep things simple,
but of course we could replace any of these numbers with variables and the same rules apply.
But what if this isn’t the way you wanted to evaluate this expression? What if you really wanted to add 1 to
2 before the division and multiplication occurred? That’s where parentheses come in. With parentheses you
can dictate the order:
9
318
21
The highest precedence
in this expression is
exponentiation. 3 is 9.
2
Next we have a division and a
multiplication. They have equal
precedence, so do them in whatever
order you like (the result will be
the same).
Finally, the lowest precedence
operator we have is addition. So
let’s add 3 plus 18, giving us 21.
If you try this in the Python
Shell, you’ll actually get 21.0;
more on that in a bit.
3 / (1 + 2) * 3 ** 2
9
3
1
9
Next we have to take care of the addition in
parens before we can divide or multiply: 1+2 = 3
We can then choose division or
multiplication in any order because
they have the same precedence. We
chose division. 3/3 = 1
Finally we multiply 1 * 9,
resulting in 9.
The highest precedence in this
expression is exponentiation. 3 is 9.
2
You can add as many parentheses as you need to evaluate your expression in the
appropriate order. For instance:
(((3 / 1) + 2) * 3) ** 2
This expression first does division,
then addition, then multiplication,
then exponentiation, and evaluates to
225.
You can also add parens that
don’t necessarily change
evaluation order, but improve
your code’s readability.
Make it stick
Python is an
interpreter
Buy Millk
Remember the mnemonic PEMDAS
for Parentheses, Exponents,
Multiplication, Division, Addition, and
Subtraction. If you follow that order of
evaluation, left to right, you’ll always
evaluate expressions correctly. If you
have trouble remembering PEMDAS, you
could always try “Please Excuse My Dear
Aunt Sally.”
you are here 4 49
simple values, variables, and types
Who am I?
'kit e' + ' ' + 'cat'
(14 - 9) * 3
3.14159265 * 3**2
42
'h' + 'e' + 'l' + 'l' + 'o'
8 % 3
7 - 2 * 3
(7 - 2) * 3
A bunch of Python expressions lost their values. Can you help
them get back together? For each expression on the left, draw a
line to the value it evaluates to on the right. Careful—there may
be an impostor hanging out too.
Expressions Values
123
Get ready for the classic shell game, usually played with cups and balls; in this game we’re going
to use variables and values. Using what you know about variables, values, and assignment, see
if you can beat the cup game. Work through the code and see which cup has the number 1 in it at
the end of the game. Will it be in cup 1, cup 2, or cup 3? Place your bet now!
cup1 = 0
cup2 = 1
cup3 = 0
cup1 = cup1 + 1
cup2 = cup1 - 1
cup3 = cup1
cup1 = cup1 * 0
cup2 = cup3
cup3 = cup1
cup1 = cup2 % 1
cup3 = cup2
cup2 = cup3 - cup3
Use your brain to evaluate this code and see, when it
completes, which cup has the 1 in it. When you’re done,
check your answer at the end of the chapter (you can
type the code in as well, but only to check yourself).
1
2
15
21
28.27433385
42
-13
'kit e cat'
'hello'
Here’s modulus again—it
may seem esoteric, but it
has a lot of uses in coding.
Some folks like to call this
remainder.
Who’s the
impostor?
50 Chapter 2
an exercise with variables
What does this expression evaluate to? Or do you think this is an error in Python
because we’re multiplying a number times a string?
3 * 'ice cream'
You’re all ready for your first spy assignment, but to get started you need your all-
important passcode. You’ll find the passcode below in code—that is, literally, in code.
Work through the code in your head to figure out the passcode, but be careful—get it
wrong, and it may be the last code you’ll ever look at. We wish you luck.
word1 = 'ox'
word2 = 'owl'
word3 = 'cow'
word4 = 'sheep'
word5 = 'flies'
word6 = 'trots'
word7 = 'runs'
word8 = 'blue'
word9 = 'red'
word10 = 'yellow'
word9 = 'The ' + word9
passcode = word8
passcode = word9
passcode = passcode + ' f'
passcode = passcode + word1
passcode = passcode + ' '
passcode = passcode + word6
print(passcode)
Here’s your passcode; all you
have to do is work through
the code to get it.
This prints your passcode.
Crack the Code Challenge
You might want to
try typing it into
the Python Shell.
you are here 4 51
simple values, variables, and types
Back away from that keyboard!
You know variables have a name, and you know they have a value.
But what can you call your variables? Is any name okay? Well, no, but the
rules around creating variable names are simple: just follow the two rules below to
create valid variable names:
1
2
Start your variables with a letter or an underscore.
Oh, and one more thing: we really don’t want to confuse Python by using any
of the built-in keywords, like False or while or if, so consider those off-limits
for your own variable names. We’ll get to these keywords and what they mean
throughout the rest of the book, but here’s a list just to take a quick look at:
Q: What’s a keyword?
A: A keyword is basically a word that
Python reserves for its own use. Keywords
are part of the core Python language, and so
using them as variables in code would result
in confusion.
Q: What if I used a keyword as part
of my variable name? For instance, can I
have a variable named if_only (that is, a
variable that contains the keyword if)?
A: You sure can—just don’t match the
keyword exactly. It’s also good to write clear
code, so in general you wouldn’t want to
use something like elze, which might be
confused with else. Again, we’ll look at what
these keywords mean throughout the book.
Q: Does Python consider myvariable
and MyVariable the same thing?
A: Python treats these as two different
variables names. More technically, Python is
said to be case sensitive, meaning it treats
upper- and lowercase letters differently.
Today, most common programming
languages are case sensitive, but not all are.
Q: Are there any conventions for
naming variables? Do I use myVar, MyVar,
or my_var, or does it matter?
A: There are conventions that Python
programmers follow. Python programmers
prefer to use lowercase letters for variables.
If a variable name has multiple words, then
put underscores between the words, like
max_speed, height, or super_turbo_mode.
As we’ll see later, there are some additional
conventions for naming other things in
Python. Also, these conventions are specific
to Python; you’ll find each language has its
own conventions.
Q: Okay, but what makes a good
variable name? Or does it matter?
A: To Python it doesn’t matter at all, as
long as your variable names follow the rules.
To you, your variable names could matter
a lot. When you choose names that are
clear and meaningful, your code becomes
more readable and understandable. Short,
terse names can be hard to read, as can
long, cumbersome names. In general, call
variables what they are; for instance, don’t
name your variable num when you should
have named it number_of_hotdogs.
After that, use as many letters, numeric digits, or
underscores as you like.
Expect Python to complain or at least
be confused if you use any of these
reserved keywords as variable names.
These rules are specific to
Python; other programming
languages have their own rules,
which can be quite different.
False as continue else from in not return
None assert def except global is or try
True break del nally if lambda pass while
and class elif for import nonlocal raise with
yield
52 Chapter 2
the dog age calculation
Step 3: Computing the dog’s age
We’ve got the first two steps in our pseudocode out of the
way, so let’s move on to step 3. In this step we simply need to
multiply the dog’s age by 7 to get the dog’s age in human years.
It seems like that would be straightforward, so let’s do a little
experimentation back in the shell:
Python 3.6.0 Shell
>>> dog_age = 12
>>> human_age = dog_age * 7
>>> print(human_age)
84
>>>
First let’s define our
variable dog_age and set
it to the number 12.
Now let’s just try to multiply
it by 7 and assign it to a
new variable, human_age.
And then let’s print human_age.
then Below you’ll find the Dog Age Calculator code so far. Using the experiment above as
a guide, add the code to compute the dog age in human years.
dog_name = input("What is your dog's name? ")
dog_age = input("What is your dog's age? ")
We get 84. Perfect, just what we wanted!
Add your new
code here, then
check your
answer before
moving on.
Could we
get back to more
pressing matters,
namely the dog age
code?
Jackson, 9
We’re here now in the
pseudocode.
1. Ask the user for the dog’s name.
2. Ask the user for the dog’s age.
3. Multiply the dog’s age by the number 7 to get
the dog’s age in human years.
4. Output to the user:
“Your dog”
the dog’s name
“is”
the dog’s age in human years
“years old in human years”
Dog Age Calculator Pseudocode
you are here 4 53
simple values, variables, and types
Let’s test drive our code now that we’ve got step 3 coded. Go ahead and
get the new code into your dogcalc.py file, save your code, and choose
the Run > Run Module menu item. After that, head to the shell and enter
your dog’s name and age, and then check the output to see that we’re
calculating the human age correctly.
Here’s the code again:
A Test Drive
dog_name = input("What is your dog's name? ")
dog_age = input("What is your dog's age? ")
human_age = dog_age * 7
print(human_age)
Houston, we’ve got a problem!
Did you get what we got? We entered that Codie was
12 and expected to see an output of 84, but we got
12121212121212! What on earth! Where did we go
wrong? We’ve double-checked our code, and everything
looks good. Why would this output be different than our
test run in the command-line interpreter?
Python 3.6.0 Shell
What is your dog's name? Codie
What is your dog's age? 12
12121212121212
>>>
Okay, that’s not right!
Think about the number 12121212121212. Is there anything
you can think of that explains how Python got this number?
Hint: how many 12s are in 12121212121212?
Add this new code
to your file.
Could you have printed dog_age * 7
directly? Like print(dog_age * 7)?
Give it a try.
Throughout the book you’ll find the gray
background signifies new code additions.

54 Chapter 2
different kinds of errors
To err is human to code
Finding and fixing errors is part of coding. No matter how well you plan
your pseudocode and how diligent you are writing your code, errors are a
part of coding life; in fact, most programmers view debugging as a natural
part of the coding process. What’s debugging? Debugging is the process of
removing errors from the software you’re writing. We formally call these
errors defects, and informally everyone just calls them bugs.
As you code you’ll actually encounter three different kinds of errors. Let’s
have a look at them:
They’re called bugs
because one of the first
programming errors was
caused by a moth that
became stuck in an early
computer relay. So, we
ended up calling the
process of removing errors
debugging. More at: https://
en.wikipedia.org/wiki/
Software_bug.
You’ll know quickly if you have a syntax error in Python when you get the
dreaded
'Syntax Error'
message from the interpreter. Syntax errors
are the equivalent of making grammatical errors—in other words,
you’ve typed something that violates the conventions for writing correct
Python. The good news is syntax errors are usually easy to fix—just find the
offending line of code and double-check your syntax.
syntax errors
Semantic errors are also known as logic errors. With a semantic error
your program will appear to operate normally—the interpreter won’t
complain that you’ve made a syntax error and at runtime you won’t
encounter any issues, but your program won’t give you the results you
expected. These always occur because what you think you’ve told
your program to do isn’t actually what you’re telling it to do. Semantic
errors can be some of the toughest errors to debug.
semantic errors
runtime errors
Runtime errors occur when you’ve written a syntactically correct program, but
Python encounters a problem running your program. An example of a runtime
error would be if at some point in your code you accidentally divided a number
by zero (an invalid mathematical operation in any language). To fix runtime errors,
look at the specific error you received and then track down where in your code
you’re causing the runtime condition to occur.
you are here 4 55
simple values, variables, and types
A. Runtime error
B. Syntax error
C. Semantic error
D. Calculation error
E. None of the above
F. All of the above
We currently have a bug in our Dog Age Calculator because we’re getting
121212121212 instead of 84. What kind of error is this?
Great debugging. The reason you got the
result 12121212121212 instead of 84 is that Python,
as you guessed, treated the dog age as a string and not a
number. Why does that matter? Well, let’s take a closer
look at how Python deals with multiplication...
I noticed there are seven 12s,
so somehow when we multiplied 12 by 7,
Python didn’t use multiplication, but rather just repeated
the 12 seven times. I did a little experimenting in the Python
Shell and I discovered if I multiply the string "12" by 7, I get the
result of 12121212121212, but if I multiply the number 12 by
7, I get 84 like we’d expect.
Answer C because there are no syntax or runtime errors.
56 Chapter 2
doing some debugging
So why is Python treating the number we entered using the input function as a string? After all, we
clearly typed in a number when prompted. The reason is because the input function always returns
a string. How do we know? Well, while our experiment seems to bear this out, there are actually more
direct ways to know. First of all, we could just look at the Python specification, which says:
A little more debugging...
Let’s do a little investigative debugging and see exactly what is happening. Using our
handy Python Shell let’s try a few things:
input(prompt) After the prompt argument is written to output, the function then
reads a line from input, converts it to a string, and returns that.
This definition is
from the Python
specification (we
abbreviated it
slightly).
There are also ways, in code, we could examine the value and determine it is a string. Both of
these topics, specifications and examining values, are something we’ll be getting to later, but for
now just know that we’ve uncovered the problem: input is returning a string when we need a number.
Python 3.6.0 Shell
>>> '3' * 7
'3333333'
>>> 3 * 7
21
>>> 'ice cream ' * 3
'ice cream ice cream ice cream'
>>> num = input('input a number: ')
input a number: 12
>>> num
'12'
>>> num * 7
'12121212121212'
>>>
As reported, if Python multiplies a string and a
number, it just repeats the string that many times.
If Python multiplies two numbers, it works as you’d expect.
And it looks like we can multiply ANY string by
a number and it evaluates to a string that is the
repetition of that string.
This evaluates to a string that contains
‘ice cream' three times.
Note this is
a string.
And this is
a number.
Let's get a number from the user
using the input function.
And multiply by 7.
Yes, it looks like we're getting a string back from input.
As suspected.

you are here 4 57
simple values, variables, and types
Aren’t these
computers? Python can’t even figure
out that when I’m multiplying a number
with a number in a string, I want to do
real multiplication rather than just
repeat the string over and over? How
dumb is that?
Careful what you ask for...
It certainly feels like Python could just figure this
out and decide our string is actually a number, but
that might lead to surprises down the road when
you really meant for a number to be a string. That’s
the thing: it’s hard for an interpreter to decide the
right thing every time, and that is why Python tries
NOT to make any assumptions. Python, as we said
early on, tries to avoid surprises by taking you at your
word (er, code)—if you say something is a string, then
Python treats it as a string. If you instead represent
something as a number, then Python’s good with that
too. What Python doesn’t like to do is start guessing
what you intend, because it’s going to get it wrong a
lot of the time, leading to more debugging by you.
What this all means is that as a programmer you’re
better served by understanding the type of data
you’re using and operating on. So, maybe we need to
take a closer look at types and what they’re all about.

58 Chapter 2
introducing python types
What are Python types, anyway?
Every piece of data in Python has a type. Types are important
because they determine how Python operates on our data. As
we’ve seen with multiplication, it makes a big difference if we’re
multiplying a number by a string or a number by a number. So,
as you code, you want to be very conscious of the types you’re
using and operating on.
We’ve already seen a few examples of different data types. We
have strings, which, as you already know, you can think of as
a sequence of characters, like “What is your dog’s age?” We’ve
also seen a few number types in passing. When it comes to
numbers, Python supports two main types: integers and oats.
Let’s take a closer look:
Serious Coding
In need of some rocket-scientist-style
numbers? Python has you covered
there too; with Python you can use
scientic notation or imaginary
numbers should you need to.
Python has other types too, like booleans, lists, dictionaries,
and objects, that we’ll be getting to later in the book.
Has no decimal point.
Has a decimal point.
Whole numbers like
–3, –2, –1, 0, 1, 2, 3, ...
Also known as an int.
Notice we don’t
use commas with
Python numbers
greater than 999.
Also known as a float.
Fractional numbers
like 3.1415, 42.0,
and 1.6667.
Supports scientific
notation.
Integer Numbers
1
2
-1
-2
342
10001
-452
999
1200000
0
Floating-Point Numbers
3.1415
10.3+e4
0.0
-2.1
50.919103
-4.e10
Q: I get that a string is a sequence of
characters, but what can I do with them other than
concatenate them and print them out?
A: Don’t be fooled by our simple beginnings: string
processing is an important part of our computational
world—just think of all the text being processed by
Google or Facebook as an example. We’re going to
explore strings a lot more as the book progresses
and find out how we can search them, change them,
format them, and create all kinds of interesting
algorithms that operate on them.
Q: Do I have to worry about mixing integers
and floats like I do with integers and strings?
A: Not really. Anytime you use ints and floats
together in an expression, Python will typically
convert everything to a floating-point value.
Q: What if a variable is assigned to an int
value and then I switch it to be assigned to a
string value?
A: Python is totally fine with that. Remember the
value has a type, not the variable. So you can assign
variables to values and change those values over
time, even if it means the type changes as well. Note,
however, that this is not considered a good practice,
as code quickly becomes confusing when variables
change types in a piece of code.
you are here 4 59
simple values, variables, and types
Fixing our code
Well, it looks like our little bug was caused by an assumption we
made about types: we assumed that if we supplied a number when
prompted by the input function, then we’d have a number returned
to us. But, as we’ve discovered, the input function always returns
a string. No worries, though—this is exactly why we test as we go, to
uncover bugs like this. And, as it turns out, Python has a handy way
to convert a string to a numeric value.
Here’s how it works:
First, let’s create a string representation of a number.
1
answer = '42'
Next, call the int function and pass it the string.
2
answer = int('42')
Here the string ‘42’
is assigned to the
variable answer.
Here the string ‘42’ is
converted to an integer and
assigned to the variable answer.
So we know that the bug is caused by our assumption that dog_age is a number,
when in fact Python is treating it as a string. Take the code below and add an int
function to fix this problem.
dog_name = input("What is your dog's name? ")
dog_age = input("What is your dog's age? ")
human_age = dog_age * 7
print(human_age)
Q: What happens if my string
doesn’t have a number in it and I call
the int function? Like int('hi')?
A: If you call the int function and
pass it a string that does not contain a
number, then you’ll get a runtime error that
indicates your value is not a number.
Q: Does the int function work only
with integers values; for instance,
could I use int('3.14')?
A: The int function only works for
integers (or rather, strings that represent
integers), but if you need to convert a
string that contains a float value, like
'3.14', you can use the float function, like
float('3.14'), to convert it to a floating-
point value.
There’s a few ways to approach this, so be sure and check
your work with the answer at the end of the chapter.
Look,
Ma, I’m an int!
60 Chapter 2
testing the calculator
_
dog_name = input("What is your dog's name? ")
dog_age = input("What is your dog's age? ")
human_age = int(dog_age) * 7
print(human_age)
So now that we’ve figured out the code to convert the string to an int (in the
last exercise), let’s get it added. First make the changes below to update
your code to handle the conversion of the dog age to an integer, then save
your code and choose the Run > Run Module menu item. After that, head
to the console and enter your dog’s name and age, and check the output to
see that we’re finally calculating the human age correctly.
Here’s the code (changes are highlighted):
A Test Drive
Python 3.6.0 Shell
What is your dog's name? Codie
What is your dog's age? 12
84
>>>
Houston, we have liftoff
Much better this time! Now our calculation works; we got
84 just as we’d expect. Give this version a few more test
runs with some different values. After that, we’re ready to
implement the last step of our pseudocode and finish the
Dog Age Calculator.
Here’s what we got.
If your code isn’t working as expected...
As you already know, errors, whether they are runtime, syntactic, or semantic, can
get in the way of your Dog Age Calculator working correctly. If Python is complaining
about
invalid syntax
check your code for incorrect punctuation, like missing
parentheses. If you’re still not seeing the issue, many people read the code backward
to look for typos they aren’t seeing, or do some peer review by having their friends look at the code
and compare it with the book’s source code. Also make sure you’ve got the int type conversion
function and its parentheses. You can always download the source code as well and directly
compare it with yours. Remember the code can be found at http://wickedlysmart.com/hflearntocode.
We added the int function
here so that the dog_age
value is converted to an
integer just before it is
multiplied by 7.
you are here 4 61
simple values, variables, and types
Step 4: User-friendly output
Well, we’ve made it to the last step of our pseudocode—we have input
from the user, we’ve computed the dog’s age in human years, and now
all we need to do is provide some nice output. To do that, we just need
to survey our current variables, which hold all the values we need, and to
use some print statements to output them as specified by our algorithm:
12
dog_age
'Codie'
dog_name
84
human_age
We’ve got all the values
we need to finish the last
step of our pseudocode.
Our pseudocode already does a nice job of specifying the exact output
we need to code. Before we write the code, though, let’s look at another
way you can use the print function that will make your job easier. So far
we’ve just been providing print with one argument, like:
print('Hi there')
print(42)
or:
But you can actually pass multiple arguments to print, like:
print('Hi there', 42, 3.7, 'Goodbye')
Until now we've only been
passing single values to
print, either strings or
numbers.
You can pass as many arguments to print
as you like, separated by commas.
An argument is just a fancy name for the values you pass
to a function. More on this topic as we progress...
or:
print('Good' + 'bye')
We've also used string
concatenation to build up
strings in the print function,
but that still, ultimately,
evaluates to just one argument.
When you pass multiple
arguments, print will display
each one with a one-space
separator in between.
Python 3.6.0 Shell
Hi there 42 3.7 Goodbye
>>>
We refer to the values we provide
to a function as its arguments. We
also typically say that we pass
those arguments to a function.
1. Ask the user for the dog’s name.
2. Ask the user for the dog’s age.
3. Multiply the dog’s age by the number 7 to get
the dog’s age in human years.
4. Output to the user:
“Your dog”
the dog’s name
“is”
the dog’s age in human years
“years old in human years”
Dog Age Calculator Pseudocode
62 Chapter 2
testing the calculator output
dog_name = input("What is your dog's name? ")
dog_age = input("What is your dog's age? ")
human_age = int(dog_age) * 7
print(human_age)
print('Your dog',
dog_name,
'is',
human_age,
'years old in human years')
Okay, we’ve got the step 4 code sketched out in the Sharpen exercise, which we’ve
reproduced below. Go ahead and make the changes, then save your code and
choose the Run > Run Module menu item. After that, head to the shell and give
your Dog Age Calculator a try!
Here’s the code:
A FinalTest Drive
Python 3.6.0 Shell
What is your dog's name? Codie
What is your dog's age? 12
Your dog Codie is 84 years old in human years
>>>
Just what we’d
planned for!
Our final output
Add this
code to your
dogcalc.py file.
Remove this
code.
With your newfound print functionality, write the code to call to
the print function that will produce the user-friendly output:
Output to the user:
“Your dog”
the dog’s name
“is”
the dog’s age in human years
“years old in human years”
Here's what you
need to output.
you are here 4 63
simple values, variables, and types
Well, the chapter is almost over; you’ve got just the bullet points and a
crossword to go. Why not do a few extra reps for that brain before you go?
Here’s one for you: say you have two variables, first and last, like below.
Can you swap their values? See if you can write the code. As usual, you’ll find
our solution at the end of the chapter.
Brain Building
first = 'somewhere'
last = 'over the rainbow'
print(first, last)
print(first, last)
Write your
code here.
Here's the output
you should get
when you tune
this code.
Python 3.6.0 Shell
somewhere over the rainbow
over the rainbow somewhere
>>>
64 Chapter 2
review of values, variables, and types
Computers do two things well: store values
and perform operations on those values.
Using pseudocode is a great way to start the
design of your program.
Syntax tells us how to form Python
statements; semantics tells us what they
mean.
A le containing Python code is also called a
module.
You can use the Python Shell to enter and
evaluate one statement or expression at a
time.
The input function prompts the user, gets a
line of input, and returns it as a string.
We call functions and they can return values
as a result.
We can store a value for later use by
assigning it to a variable.
When you assign a value to a variable, Python
stores the value in memory, and labels it with
the variable name for later use.
A variable can vary, with its value changing
over time.
Python provides simple rules for naming
variables and doesn’t allow them to be named
the same name as a keyword.
Keywords are reserved words in a
programming language.
A string is a Python type that consists of a
sequence of characters.
Python supports two numeric types, integers
and oating-point numbers, in addition to a
couple other types indended for scientic
computation.
The int function will convert a string to an
integer value. The oat function converts a
string to a oating-point value.
We test our code often to detect issues early
on.
There are three kinds of errors: syntax,
runtime, and semantic.
If you multiply a string times a number, n,
Python will repeat the string n times.
You can combine strings with the
concatenation operator.
Concatenation just means adding strings
together.
For strings, Python uses + as the
concatenation operator.
When we pass values to functions, we call
those values arguments.
What if you left the quotes off of Codie’s name? What would this evaluate to?
dog_name = Codie
you are here 4 65
simple values, variables, and types
Coding Crossword
It’s time for something completely different. It’s
your standard crossword, but all of the solution
words are from Chapter 2.
1 2
3 4 5
6
7
8
9 10
11
12 13
14 15
16
17 18
19 20
21
Across
3. What we're coding.
6. Can't name a variable after one of these.
7. Determines how we write statements in
Python.
8. Stores a value for later use.
9. The other numeric type.
11. 12 years old.
13. Name of values passed to a function.
14. Input returns this.
17. Special character you can use in your
variable names.
19. Another dog.
20. Another name for a file of Python.
21. Assign a variable to a value with this.
Down
1. Has a decimal point.
2. The value of a variable can do this.
4. Adding strings together.
5. What statements mean.
10. Input shows this to the user.
12. Function to convert strings to integers.
15. Evaluates your code line by line.
16. Values are stored in this.
18. Error encountered before your code is run.
Across
3. What we’re coding.
6. Can’t name a variable after one of these.
7. Determines how we write statements in
Python.
8. Stores a value for later use.
9. The other numeric type.
11. 12 years old.
13. Name of values passed to a function.
14. Input returns this.
17. Special character you can use in your
variable names.
19. Another dog.
20. Another name for a file of Python.
21. Assign a variable to a value with this.
Down
1. Has a decimal point.
2. The value of a variable can do this.
4. Adding strings together.
5. What statements mean.
10. Input shows this to the user.
12. Function to convert strings to integers.
15. Evaluates your code line by line.
16. Values are stored in this.
18. Error encountered before your code is
run.
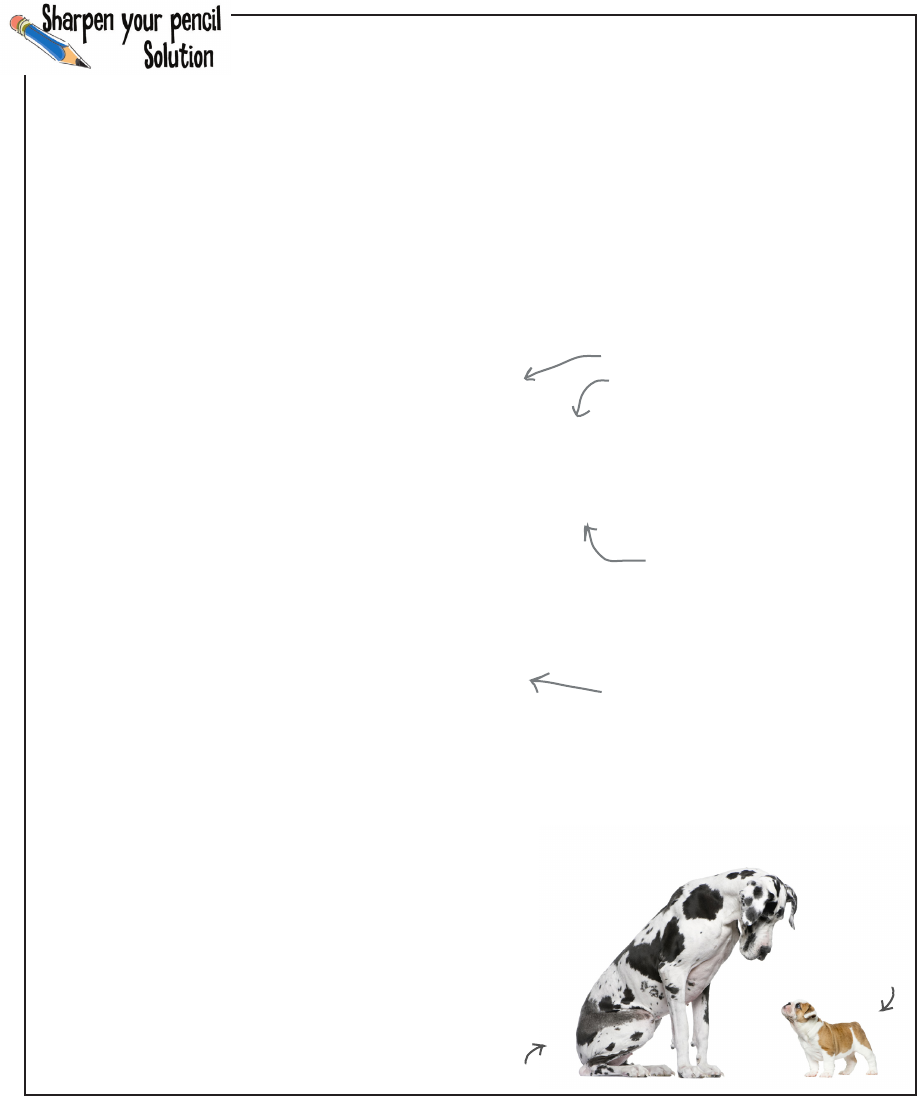
66 Chapter 2
exercise solutions
ars
Ask the user for the dog’s name.
Ask the user for the dog’s age (in dog years).
Multiply the dog’s age by the number 7 to get the dog age in human years.
Output to the user:
“Your dog”
then the dog’s name
“is”
then the dog’s age in human years
“years old in human years”
We’re going to write some pseudocode. First, think about how you’d write
an algorithm or recipe that computes a dog’s age in human years. Once you
have an idea, write it down as a set of steps in plain English (or your chosen
language). Make your solution user-friendly by asking the user for the dog’s
name and age. You’ll also want to generate some nice output, like “Your dog,
Rover, is 72 years old in human years.”
Again, just write your pseudocode in English.
Fido, 5
Sparky, 1
First we need to get some
information from the user.
Next we'll need to
calculate the dog's age in
human terms.
Finally, we need to output
our results in a user-friendly
manner.
you are here 4 67
simple values, variables, and types
1. Ask the user for the dog’s name.
2. Ask the user for the dog’s age.
3. Multiply the dog’s age by the number 7 to get
the dog’s age in human years.
4. Output to the user:
“Your dog”
the dog’s name
“is”
the dog’s age in human years
“years old in human years”
Dog Age Calculator Pseudocode
As a first step to transforming our pseudocode into code, step through each line of your pseudocode
and make some notes about what you think the code will have to do. Just keep it high level.
1.
2.
3.
4.
Prompt the user to get the dog’s name
and then have the user type it in. We'll
presumably need to save the name
somewhere so we can use it in step 4.
Prompt the user to get the dog's age and
then have the user type it in. We'll also
need to save this somewhere so we can use
it in step 4.
Take the age from step 2 and multiply it
by the number 7. We'll also need to store
this somewhere for use in step 4.
First print to the console “Your dog”,
then print the value from step 1, then
print “is”, then print the value from step
3, then print “years old in human years”.
dog_age = input("What is your dog's age? ")
Here’s our new
variable, dog_age.
And here’s the call to input, which
will prompt the user with “What is
your dog’s age?” and then return
the input to be stored in dog_age.
It’s your turn. Write the code to get the dog’s age using the input function, just as
we did with the dog’s name. Prompt the user with “What is your dog’s age?” and
store the result in a variable called dog_age. Make some notes as well about what
each piece of your code does.
68 Chapter 2
exercise solutions
Who am I?
Solution
'kit e' + ' ' + 'cat'
(14 - 9) * 3
3.14159265 * 3**2
42
'h' + 'e' + 'l' + 'l' + 'o'
8 % 3
7 - 2 * 3
(7 - 2) * 3
A bunch of Python expressions lost their values.
Can you help them get back together? For each
expression on the right, draw a line to the value it
evaluates to. Careful—there may be some impostors
hanging out too.
1
2
15
21
28.27433385
42
-13
'kit e cat'
'hello'
Expressions Values
Impostor!
3
cup1 = 0
cup2 = 1
cup3 = 0
cup1 = cup1 + 1
cup2 = cup1 - 1
cup3 = cup1
cup1 = cup1 * 0
cup2 = cup3
cup3 = cup1
cup1 = cup2 % 1
cup3 = cup2
cup2 = cup3 - cup3
cup1 is 0
cup1 is 0, cup2 is 1
cup1 is 0, cup2 is 1, cup3 is 0
cup1 is 1, cup2 is 1, cup3 is 0
cup1 is 1, cup2 is 0, cup3 is 0
cup1 is 1, cup2 is 0, cup3 is 1
cup1 is 0, cup2 is 0, cup3 is 1
cup1 is 0, cup2 is 1, cup3 is 1
cup1 is 0, cup2 is 1, cup3 is 0
cup1 is 0, cup2 is 1, cup3 is 0
cup1 is 0, cup2 is 1, cup3 is 1
cup1 is 0, cup2 is 0, cup3 is 1
Winner!
Get ready for the classic shell game, usually played with cups and balls; in this game we’re
going to use variables and values. Using what you know about variables, values, and
assignment, see if you can beat the cup game. Work through the code and see which cup has
the number 1 in it at the end of the game. Will it be in 1, 2, or 3? Place your bet now!
you are here 4 69
simple values, variables, and types
word9 is 'The red'
passcode is 'blue'
passcode is 'The red'
passcode is 'The red f'
passcode is 'The red fox'
passcode is 'The red fox '
password is 'The red fox trots'
You’re all ready for your first spy assignment, but to get started you need your all-
important passcode. You’ll find the passcode below in code—that is, literally in code. Work
through the code in your head to figure out the passcode, but be careful—get it wrong,
and it may be the last code you’ll ever look at. We wish you luck.
word1 = 'ox'
word2 = 'owl'
word3 = 'cow'
word4 = 'sheep'
word5 = 'flies'
word6 = 'trots'
word7 = 'runs'
word8 = 'blue'
word9 = 'red'
word10 = 'yellow'
word9 = 'The ' + word9
passcode = word8
passcode = word9
passcode = passcode + ' f'
passcode = passcode + word1
passcode = passcode + ' '
passcode = passcode + word6
print(passcode)
Crack the Code Challenge SOLUTION
The red fox trots
The passcode!
Python 3.6.0 Shell
The red fox trots
>>>
If you type the code in
and run it, you’ll get this.
Below you’ll find the Dog Age Calculator code so far. Using the experiment above as
a guide, add the code to compute the dog age in human years.
dog_name = input("What is your dog's name? ")
dog_age = input("What is your dog's age? ")
human_age = dog_age * 7
print(human_age)
Let’s take the dog_age the user
entered and mulitply it by 7. We’ll
then take the result and assign it
to the variable human_age.
Let’s also print the human age
when we’re done so we can see the
final value.
Throughout the
book you’ll find the
gray background
signifies new code
additions.
70 Chapter 2
exercise solutions
So we know that our bug is caused by our assumption that dog_age is a number,
when in fact Python is treating it as a string. Take the code below and add an int
function to fix this problem.
dog_name = input("What is your dog's name? ")
dog_age = input("What is your dog's age? ")
dog_age = int(dog_age)
human_age = dog_age * 7
print(human_age)
There are quite a few ways to add
the int function. Here’s a few:
dog_name = input("What is your dog's name? ")
dog_age = int(input("What is your dog's age? "))
human_age = dog_age * 7
print(human_age)
dog_name = input("What is your dog's name? ")
dog_age = int(input("What is your dog's age? "))
human_age = int(dog_age) * 7
print(human_age)
First get dog_age as a string and then call the
int function on it, and then reassign the result to
the dog_age variable.
Just wait until you are going to use dog_age as an
integer and call int there.
Or finally, use int around the call to input. This
way, dog_age is always assigned to an integer.
If you find these confusing, we’ll be getting into how to use and call
functions later in the book. For now, just know you can pass a string to
the int function and have it convert the string to an integer.
you are here 4 71
simple values, variables, and types
Note you can add vertical space to your
code like this for readability.
Here we have each part of the output we need,
separated in the print function by commas.
print('Your dog',
dog_name,
'is',
human_age,
'years old in human years')
Output to the user:
“Your dog”
the dog’s name
“is”
the dog’s age in human years
“years old in human years”
Here's what you
need to output.
With your newfound print functionality, write the call to the
print function that will produce the user-friendly output:
Well, the chapter is almost over; you’ve just got the bullet points and a crossword to go. Why not do a few
extra reps for that brain before you go?
Here’s one for you: say you have two variables, first and last, like below. Can you swap their values?
See if you can write the code:
Brain Building Solution
first = 'somewhere'
last = 'over the rainbow'
print(first, last)
temp = first
first = last
last = temp
print(first, last)
A common technique is to use a temporary variable to store the first
item while you set it to the second item. Then you set the second item
to the temporary variable.
Trace through this until you understand how it works.
72 Chapter 2
crossword solutions
F
1V
2
C
3A L C
4U L A T O R S
5A
O O K
6E Y W O R D
S
7Y N T A X M Y
C T V
8A R I A B L E
A N
F
9L O A T I N G P
10 O I N T
E R I
N O C
11 O D I E
I
12 A
13 R G U M E N T S
N T P
S
14 T R I N G T S
15
O M
16 H
U
17 N D E R S
18 C O R E E
Y M L
J
19 A C K S O N M
20 O D U L E
T R
E
21 Q U A L S Y
X
Across
3. What we're coding. [CALCULATOR]
6. Can't name a variable after one of these.
[KEYWORD]
7. Determines how we write statements in
Python. [SYNTAX]
8. Stores a value for later use. [VARIABLE]
9. The other numeric type. [FLOATINGPOINT]
11. 12 years old. [CODIE]
13. Name of values passed to a function.
[ARGUMENTS]
14. Input returns this. [STRING]
17. Special character you can use in your
variable names. [UNDERSCORE]
19. Another dog. [JACKSON]
Down
1. Has a decimal point. [FLOAT]
2. The value of a variable can do this. [VARY]
4. Adding strings together. [CONCATENATION]
5. What statements mean. [SEMANTICS]
10. Input shows this to the user. [PROMPT]
12. Function to convert strings to integers. [INT]
15. Evaluates your code line by line. [SHELL]
16. Values are stored in this. [MEMORY]
18. Error encountered before your code is run.
[SYNTAX]
Coding Crossword Solution
this is a new chapter 73
booleans, decisions, and loops
Have you noticed how, so far, our programs aren’t
very, well, interesting? That is, all our code has strictly been
a set of statements the interpreter evaluates from top to bottom—
no twists in the plot, no sudden turns, no surprises, no independent
thinking. For code to be more interesting, it needs to make decisions,
to control its own destiny, and to do things more than once straight
through. And in this chapter that’s exactly what we’re going to learn
to do. Along the way we’ll learn about the mysterious game called
shoushiling, meet a character named Boole, and see how a data type
with only two values could be worth our time. We’re even going to learn
how to deal with the dreaded infinite loop. Let’s get started!
3
Decisive Code
We may even
create one just
for the fun of it!
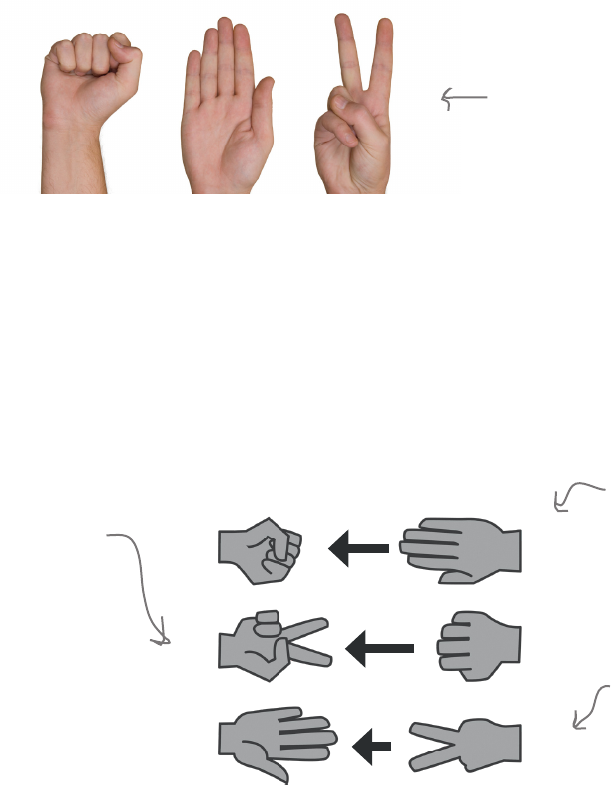
74 Chapter 3
the rock, paper, scissors game
PAPER ROCK SCISSORS
PAPER
ROCK SCISSORS
WINLOSE
WRAPS
BLUNTS
CUTS
PAPER
ROCK SCISSORS
Would you like to play a game?
Passed down from the ancient Chinese Han dynasty, the game shoushiling has been used
to settle court case decisions, to decide multimillion-dollar deals, and perhaps most
importantly, to determine who gets to sit in the front seat of the car.
Today you know the game as Rock, Paper, Scissors, and we’re going to implement it so that
you can play the game against a rather tough opponent: your computer.
How Rock, Paper, Scissors works
If you’re never heard of Rock, Paper, Scissors we’re going to go over its simple rules now;
and if you do know the game, this will be a good review for you. The game is played by two
players, who each, upfront, secretly choose either rock, paper, or scissors. The two players
then typically count out loud to three (or shout “rock-paper-scissors!”) and then show their
choice through their hand position, which is either, you guessed it, a rock, paper, or scissors.
The winner can be determined by this chart:
There are three possible hand
positions in the game Rock,
Paper, Scissors.
If one player
chooses paper
and the other
chooses rock,
the paper wraps
the rock, and
paper wins.
If one player chooses
scissors and the other
chooses rock, the rock
blunts the scissors, and
rock wins.
If one player
chooses paper and
the other chooses
scissors, the scissors
cut the paper, and
scissors wins.
If both players make
the same choice, then
the game is a tie.
you are here 4 75
booleans, decisions, and loops
How you’re going to play against the computer
Given the computer doesn’t have hands, we’ll have to change the way the game works,
at least a little—what we’ll do is have the computer preselect its choice of rock, paper,
or scissors, but not tell us. We’ll then enter our choice, and the computer will compare
the two before revealing the winner.
It helps to see an example of how the game is going to be played. Below in the Python
Shell you’ll find a few rounds of Rock, Paper, Scissors being played that show each
possible outcome: the user wins, the computer wins, and a draw.
Python 3.6.0 Shell
rock, paper or scissors? rock
User won, I chose scissors.
rock, paper or scissors? rock
We both chose rock, play again.
rock, paper or scissors? paper
Computer won, I chose scissors.
Computer prompts you for rock, paper,
or scissors and you respond with rock.
Computer determines you’ve won.
Let's run it again.
Looks like a tie, so try again.
Computer wins this time.
If you’ve never played Rock, Paper, Scissors before, grab a
friend and play a few games. Even if you know the game,
grab a friend and refresh your memory.
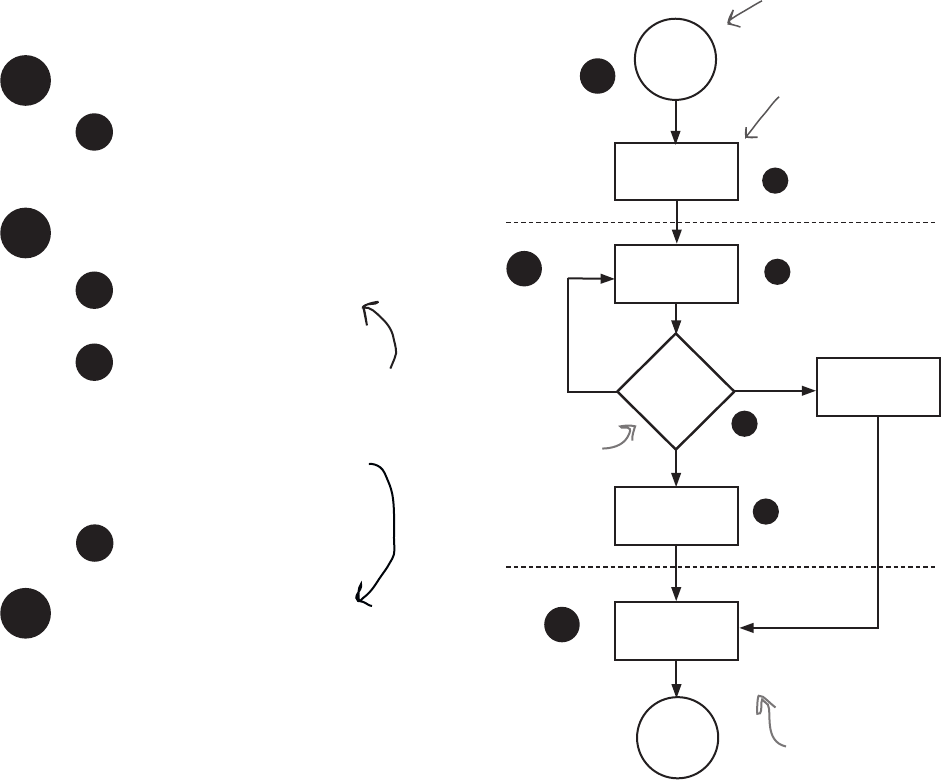
76 Chapter 3
designing the game
First, a high-level design
The first thing we need to do is figure out the flow of the
game. Let’s put our pseudocode skills to use by reviewing
this high-level design for the game. Notice we’ve added
something new this time too: a diagram that helps map
out the flow of the game in the form of a flowchart.
Here’s the basic idea:
1User starts the game.
2Game play begins.
A
AThe computer determines what
its choice is going to be: rock,
paper, or scissors.
Get the user’s choice.
BExamine the user’s choice. If
it is invalid (not rock, paper,
or scissors), go back to step
2A.
If it is the same as the
computer’s, set the winner to
a tie and move on to step 3.
3Game nishes.
Tell the user who won along with
what the computer’s choice was.
Start
Computer
makes
its choice
Get user
choice
Examine
choice
same
invalid Set winner
to tie
different
Determine
winner by rules
Display winner
Game
over
Whoa! A real owchart.
Now we have a high-level idea of the kinds of
things the program needs to do. Next we’ll dig into
each step and figure out a few more details.
1
A
2
B
3
A circle means
start or finish.
A rectangle is
used to represent
an action.
A diamond
represents a
decision point.
A
C
CDetermine who wins by the
rules of the game.
Think of the
flowchart as an
alternative way
to get a feel for
the flow of your
algorithm.
you are here 4 77
booleans, decisions, and loops
random.randint(0,2)
The computer’s choice
Looking at our high-level design, the first thing we need to do is have the
computer make its choice in the game; that is, it needs to choose rock,
paper, or scissors. To make the game interesting, that choice should be
random and not predictable by the user.
Making random choices is a task many programs need to perform, and
you’ll find practically every programming language provides a way to
generate random numbers. Let’s see how we can get a random number in
Python, and how we turn that into a choice of rock, paper, or scissors.
We’ll be looking much more
seriously at functions (and
modules) later in the book,
but for now, think of them as
a way to make use of built-in
functionality in Python.
Typically we place import statements
at the top of the code file so that
you can easily keep track of all the
modules you’re importing.
How to generate a random number
Python ships with a lot of prebuilt code—that is, code you don’t have to
write yourself. You’ll often find prebuilt code supplied in the form of a module
(sometimes called a library), and we’ll be discussing modules in detail later in
the book. But for now, we’d like to use the random module, and to do that we
import it into our code using Python’s import statement.
Here’s how we do that:
import random
Use the import
keyword first.
Follow that by the name of the
module you want to use—in this
case, the random module.
Remember, a module is just another
file with Python code in it.
After you’ve imported the random module, you’re all ready to make use
of the many random functions it provides. We’re going to use just one of
them for now:
We start with the
name of the module—
in this case random.
Then we add a period
(otherwise known to
coders as a dot).
Then comes the
function name, randint.
We pass randint
two numbers....
...this is a range, so randint
will give us random integers
between 0 and 2.
So randint will return 0, ,1 or 2.
We’re going to dive into all the specifics
of this notation later in the book, but
for now, just take it all in.
78 Chapter 3
using random numbers
See for yourself. Get into the Python Shell, import the
random module, and then generate some random
integers with random.randint(0.2).
Keep calling
randint to see
what you get!
Python 3.6.0 Shell
>>> import random
>>> random.randint(0, 2)
What will you get?
How to use the random number
Alright, we know how to generate a random number of either 0, 1,
or 2, and we’re going to use that number to represent the computer’s
game choice. So, if we generate a 0, then the computer’s choice is
rock; if it’s a 1, it will be paper; and if it’s 2, the choice is scissors.
Let’s write that code:
Q: How are random numbers going to help?
A: Think of generating a random number like
throwing the dice. In this case we have three
choices (rock, paper, scissors), so generating a
random number of 0, 1, or 2 is sort of like having a
dice with three sides. Once we generate a random
number, we’ll then associate that number with our
choices, so 0 = rock, 1 = paper, and 2 = scissors.
Q: Why do you start with 0 for the random
numbers? Why not generate the numbers 1, 2,
and 3? That makes more sense.
A: Ah, not to a computer scientist.
Programmers usually think of sequences of
numbers starting at zero. This will start to feel
more natural (and sensical) as you see it used in
a variety of ways in code. For now, just go with
the flow.
Q: Are random numbers truly random?
A: No, random numbers generated by a digital
computer are pseudorandom, meaning not truly
random. Pseudorandom numbers, at some level,
have patterns that are predictable, whereas
truly random numbers do not. To generate true
random numbers, we have to make use of natural
phenomena like radioactive decay—not a very
convenient method for everyday use. For most
programming applications, though, pseudorandom
numbers are generally sufficient.
Q: So import gives me a way to access
Python code written by someone else?
A: Python developers take useful code and
make it available in modules. By using import,
you can make use of their code and use it along
with your own. For instance, the random module
includes many functions you can use to generate
random numbers. Right now we’re just making
use of the randint function, but we’ll be seeing
more of this module as the book progresses.
import random
random_choice = random.randint(0,2)
We added an extra line (also
known as “whitespace”) just to
separate the imported module
from the actual code we’re
writing. That should help with
readability as our code grows.
Remember to import the
random module.
Here’s where we
generate the
random number
to represent the
computer’s choice.
And we can’t forget to
assign our random number
to a variable so we can
actually make use of it
later in code.

you are here 4 79
booleans, decisions, and loops
Just to get things rolling, go ahead and get this code into a file called rock.py,
save your code, and choose the Run > Run Module menu item to make sure
everything’s working.
Here’s the code so far:
A Test Drive
Add this new
code to your file.
import random
random_choice = random.randint(0, 2)
print('The computer chooses', random_choice)
We added an extra
line just to provide
some output.
Python 3.6.0 Shell
The computer chooses 2
>>>
Here's what we got.
You might want to
try it a few times
to see the choices
are random.
Taking things further...
By using the random module we’ve now implemented a way for the computer to randomly
make its choice, but it’s a little unsatisfying. Why? Well, our goal was to have the computer
choose rock, paper, or scissors, and we’ve done that by mapping those choices to the integers
0, 1, and 2, but wouldn’t it be nicer if we had a variable that was set to a string "rock",
"paper", or "scissors" instead? Let’s make that happen. But to do that we’re going to
have to step back and learn about how to make decisions in Python.
Assume random_choice is already set to 0, 1, or 2 and write some pseudocode to set the variable
computer_choice to "rock", "paper", or "scissors" based on random_choice’s value.
You don’t know how to code
this in Python yet, but
remember pseudocode uses
English-like language. Don’t
overthink it.
Start
Computer
makes
its choice
We’re still
here.
80 Chapter 3
true and false values
True? Or False?
Python makes decisions by asking questions with yes or no answers, only in
Python we call those true or false answers. The questions themselves are just
expressions, similar to the expressions you’ve already learned, but instead of
evaluating to strings or integers or floating-point numbers, they evaluate to True
or False. Here’s an example:
False
decision
bank_balance > ferrari_cost
Here’s an expression
comparing the values of two
variables that hold numbers.
The decision variable holds
the (True or False) value
of the comparison.
We call this a relational operator;
in this case it's the greater than
operator, which is True if the
first operand is greater than the
second, and False if not.
The result of this expression is
either True or False depending on
whether the bank balance is greater
than the cost of the ferrari.
You can assign the result of this expression to a variable as well, and you can
even print it if you want.
decision = bank_balance > ferrari_cost
print(decision)
Python 3.6.0 Shell
False
>>>
No Ferrari today.
You can read this as
“is the bank_balance
greater than the
ferrari_cost?”
We’re going to look at other
relational operators like “less
than,” “equal to,” and so on
in a bit.
The values True and False belong to their own data type, the Boolean type.
Let’s take a look at it...
Here’s the
output.
Again, this is the expression.
you are here 4 81
booleans, decisions, and loops
Q: Boolean?
A: Right, pronounced Boo-lee-an.
Strange name, huh? Unlike numbers
and strings, Booleans are named
after a person, George Boole, a
19th-century mathematician who
formalized much of the logic we
use with computers today. While it
may sound overly formal, you’ll find
the word Boolean in common use
amongst programmers today. We’re
sure in no time it will be rolling right
off your tongue as well.
True
Uses no quotes around values.
Has only two values, True or False.
Expressions can evaluate to
True or False.
Always capitalized.
Booleans
False
Oh, forgive us, we’ve been talking about a brand new data type, but we haven’t
formally introduced you. The Boolean data type is a simple one; it has only
two values, and, as you can guess, they are True and False.
You can treat Booleans like any other type in that you can store them in a
variable, print them, or use them in expressions. Let’s get some practice in
with them, and then we’re going to see how to use them to make decisions.
True
Introducing the Boolean type
your_level > 5
color == "orange"
color != "orange"
When your_level is 2, what does this evaluate to? ________
When your_level is 5, what does this evaluate to? ________
When your_level is 7, what does this evaluate to? ________
Is this expression True or False when color has the value
"pink"? __________
Or has the value "orange"? __________
Is this expression True or False when color has the value
"pink"? __________
Get out your pencil and put some Boolean expressions through their paces. For each expression below,
compute its value and write in your answer. Be sure to check your answers at the end of the chapter.
Remember, Boolean expressions always evaluate to either True or False.
This tests if the first value is greater than the second. You can also use
>= to test if the first value is greater than or equal to the second.
The != operator tests if two values
are NOT equal to each other.
The == operator tests if two
values are equal to each other. It's
True if they are and False if not.

82 Chapter 3
how to make decisions with code
Then we have a Boolean
expression, sometimes called a
conditional expression, that
evaluates to True or False.
Making decisions
Now that we know about Boolean expressions and relational operators, like > and
< and ==, we can use them to make decisions in code. To do that we use the if
keyword combined with a Boolean expression. Here’s an example:
if bank_balance >= ferrari_cost:
print('Why not?')
print('Go ahead, buy it')
But we don’t have to stop there: we can supply an alternative set of statements to
execute if the conditional expression is False.
if bank_balance >= ferrari_cost:
print('Why not?')
print('Go ahead, buy it')
else:
print('Sorry')
print('Try again next week')
Serious Coding
Did you notice in the last exercise that the == operator tests for equality, while
we’ve been using = for assignment? That is, we use one equals sign to assign
values to variables, and we use two equals signs to test if two values are equal to
each other. Accidentally substituting one for the other is a common coding mistake
for beginners (and sometimes the more experienced).
That's two equals signs put together.
Start with the keyword if.
Next we have a colon.
Next we have a colon.
Then we have one or more
statements that will be executed
if the condition is True.
Then we have one or more
statements that will be executed
if the condition is False.
Notice that all the statements we want executed
when the conditional is True are indented.
Notice that all the statements we want executed when
the conditional is False are indented four spaces too.
We add an
else keyword.
The convention in Python is
to indent four spaces.
You'll find anytime we have a colon
in Python, it is followed by an
indented set of statements.
you are here 4 83
booleans, decisions, and loops
Decisions and more decisions
But there’s more: we can even set up a whole series of conditions, by using
the elif keyword. Admittedly, elif is a strange keyword, but it’s just a
contraction of “else if,” so don’t let it throw you. Let’s see how elif works:
if number_of_scoops == 0:
print("You didn't want any ice cream?")
print('We have lots of flavors.')
elif number_of_scoops == 1:
print('A single scoop for you, coming up.')
elif number_of_scoops == 2:
print('Oh, two scoops for you!')
elif number_of_scoops >= 3:
print("Wow, that's a lot of scoops!")
else:
print("I'm sorry I can't give you negative scoops.")
Start with your first condition,
using an if keyword.
Follow that with an elif
keyword and a second condition.
And then add any number of
other elifs with their own
conditions.
And finally, you can supply a final else, which
acts as a catch-all if all previous conditions fail.
Remember, for each
if, elif, and else,
we can supply as
many statements to
execute as we like.
number_of_scoops = 0
number_of_scoops = 4
number_of_scoops = 1
number_of_scoops = 3
number_of_scoops = 2
number_of_scoops = -1
Below you’ll find several potential values for the number_of_scoops
variable. Using each value, write down what the output of the code above
would be with number_of_scoops set to the indicated value. We did the
first one for you.
You didn’t want any ice cream?
We have lots of flavors.
When number_of_scoops has this value, the output is...
Take a moment and READ the
code above out loud to yourself in
English (or your chosen language).
After you’ve gotten comfortable
speaking the code, jot down the
words you use.
Note that only the code of the first True
condition will be executed, or if no conditions
are True, the else’s code will be executed.
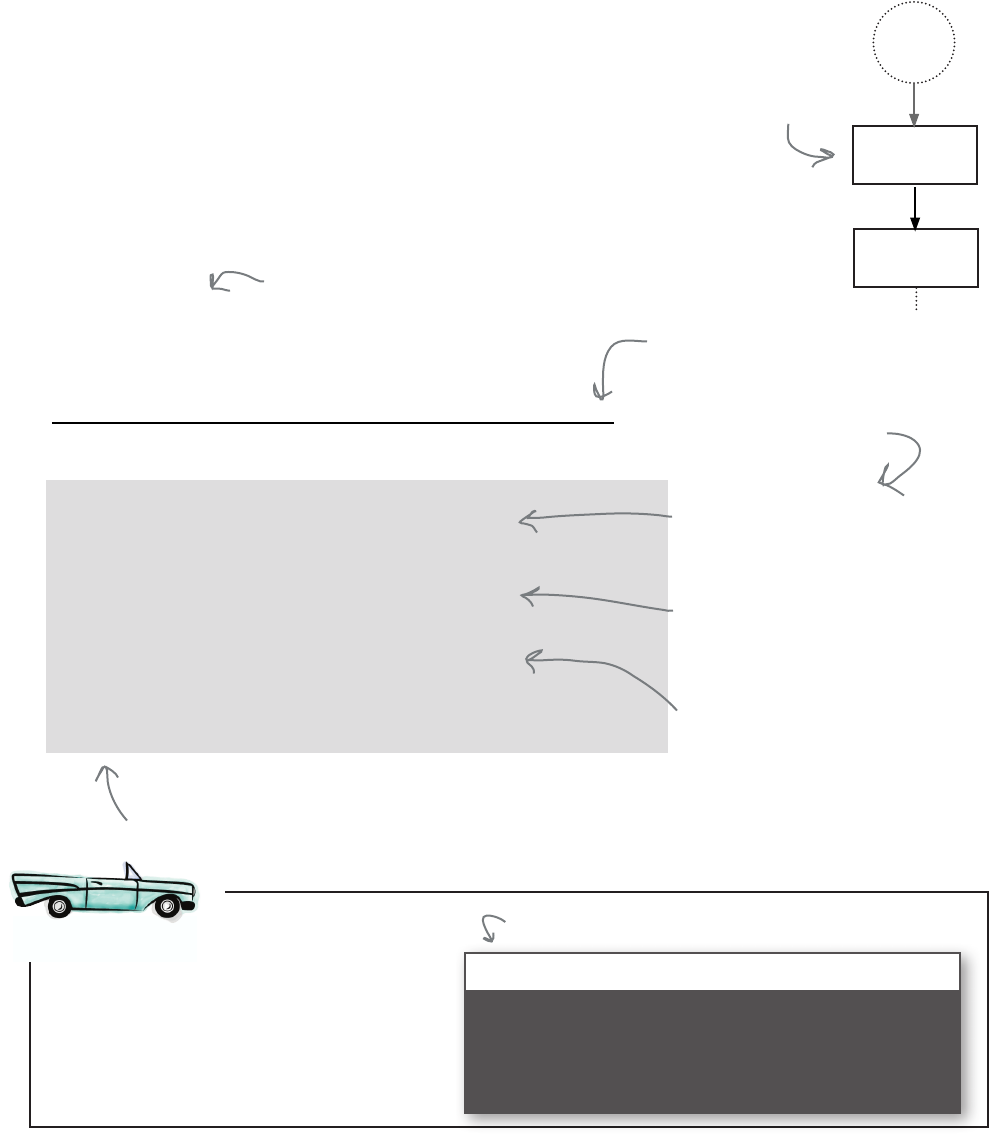
84 Chapter 3
determining the computer’s choice
Get user
choice
Back to Rock, Paper, Scissors
We’re still finishing up the first stage of our Rock, Paper, Scissors game.
Remember, before our Boolean diversion, we wanted to improve our code so
that the computer could pick a string, "rock", "paper", or "scissors",
instead of a number 0, 1, or 2. Now that you’ve learned how to use Python’s
if statement, you’re all set to do that. What we’re going to do now is write
some code that, depending on the value of random_choice, sets a new
variable, computer_choice, to one of those three strings.
We’re still here.
import random
random_choice = random.randint(0,2)
print('The computer chooses', random_choice)
if random_choice == 0:
computer_choice = 'rock'
elif random_choice == 1:
computer_choice = 'paper'
else:
computer_choice = 'scissors'
print('The computer chooses', computer_choice)
Here’s our code so far.
We don’t need this anymore, so
you can delete it.
Add this new code to
your file rock.py.
Check to see if random_choice is
0 and if so, set the computer’s
choice to the string “rock”.
Otherwise, check to see if
random_choice is 1 and if so, set
the computer’s choice to the
string “paper”.
Otherwise, the only choice left
is “scissors”.
And just to test things, let’s
print out computer_choice.
Make sure you have this new
code added to your file, and
then give it a test run.
A Test Drive
Python 3.6.0 Shell
The computer chooses scissors
>>>
Here’s our first run; remember to try it a few times.
Start
Computer
makes
its choice
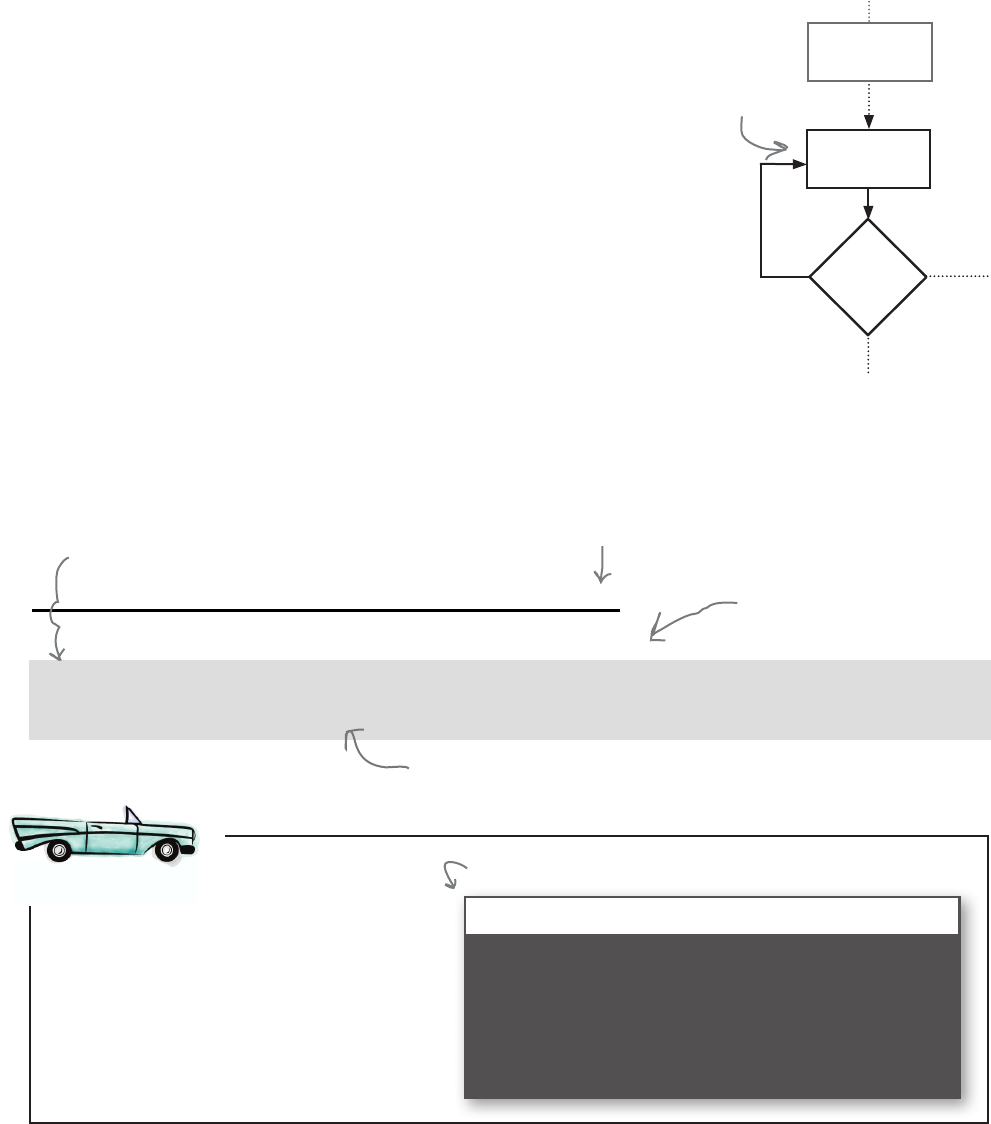
you are here 4 85
booleans, decisions, and loops
import random
random_choice = random.randint(0, 2)
if random_choice == 0:
computer_choice = 'rock'
elif random_choice == 1:
computer_choice = 'paper'
else:
computer_choice = 'scissors'
print('The computer chooses', computer_choice)
user_choice = input('rock, paper or scissors? ')
print('You chose', user_choice, 'and the computer chose', computer_choice)
Get user
choice
Examine
choices
same
invalid
different
Now we’re here.
Getting the user’s choice
Now that we have the computer’s choice, it’s time to get the user’s choice. After
Chapter 2, you’re a pro at getting user input. Let’s start by prompting the user
and storing the response in a variable called user_choice.
We’re using the input function
again, and prompting for the
user’s choice in the game.
We don’t need this debugging
print statement anymore.
Let's add a print statement just to keep
track of things as we’re coding this.
Can you say quick turnaround?
Make sure you have this even
newer code added to your rock.py
file, and then give it a test run too.
A Test Drive
Python 3.6.0 Shell
rock, paper or scissors? rock
You chose rock and the computer chose paper
>>>
Here’s our first run; remember to try this a few times.
Computer
makes
its choice
We're assigning the string returned from the input
function to the variable user_choice.

86 Chapter 3
a question on making a random choice
Good eye.
We said there were a lot of other useful functions in the
random module, and there are. One of those is the function
choice, and here’s how it works:
In Chapter 1 we used this random.choice
function in one of the examples. Would that
have been useful in picking the computer’s
choice?
choices = ['rock', 'paper', 'scissors']
computer_choice = random.choice(choices)
First create a list of choices,
which is just a list of strings.
Dont’ be confused by the
square brackets; we'll be
learning about lists in the
next chapter.
Then we pass our list to the
choice function, which will
randomly choose one item for us.
So now that you mention it, this is exactly what we’d want to
use if we were to implement this again because this approach
uses less code and is more readable. That said, if we’d used
this from the beginning of this chapter, we would have had no
reason to talk about decisions, or Boolean values, or relational
operators, or conditionals, or data types...well, you see the point.
But we’re glad you asked because choice is a great function to
use to do just this kind of thing, especially after the next chapter
when you totally understand lists.
NOTE: for those Type A’s out
there dying to update their code
to use random.choice, go for it,
if you must. All you need to do
is replace every line between the
import and the input statement
with the code above. That said,
this isn’t necessary at this point,
but you know how you are, so
we’re letting you know.

you are here 4 87
booleans, decisions, and loops
Head First: Welcome Boolean. We know
you’re super-busy out there, working in all those
Python programs, so we’re glad you could take
time out to talk to us.
Boolean: No problem. It’s true, I am busier
than ever these days. People are using Boolean
values all over the place. It’s nuts!
Head First: That’s amazing given you are, well,
just two values, yes or no.
Boolean: I’m actually the two values True or
False, not yes or no.
Head First: Right, of course, but either way,
you’re two values. Hardly enough to call you a
data type, no?
Boolean: Actually, Boolean values are pretty
core to any algorithm or program. Every
language has them, not just Python. I’m
everywhere.
Head First: Okay, big guy, you tell us then—
what’s the big deal?
Boolean: Think of a Boolean value
representing any current condition in your
code: Is the temperature above 98.6? Is the data
fully loaded? Is the list sorted yet? Did your
credit card charge go through? All of those are
Boolean values, True or False, that determine
where you code goes from there.
Head First: You’re talking about conditional
expressions. We test those conditions to
determine the code that we should evaluate next.
Boolean: The official term is Boolean expression,
and that is part of it, sure. You can test a
condition and then, using something like the if
statement, specify what is to come next. We call
it controlling the flow of the program.
Head First: Well, if that is just part of it, what’s
the rest of it?
Boolean: As your readers are going to see
you can also repeat code over and over while
a Boolean expression is True. Say you want to
keep prompting for a password while the user
is entering it incorrectly; say you want to keep
retrieving data while you haven’t reached the end
of it; say you want to keep updating the screen as
long as a game’s player is moving.
Head First: Okay, but I’m still not over the two
values thing. It’s hard to take you seriously.
Boolean: I’m a lot more than two simple
values. There’s a whole algebra named after
me—Boolean Algebra, maybe you’ve heard of
it?
Head First: No.
Boolean: Oh boy. Boolean Algebra is a whole
branch of mathematics that studies how we deal
with Boolean values.
Head First: Again, just the values True and
False?!
Boolean: Here’s an example: take the game
your audience is working on. Now there’s a
whole bit of logic that needs to determine who
wins. How do you take that graph of rock versus
paper versus scissors and translate that to code
that figures out the winner?
Head First: You got me.
Boolean: Okay, to solve that we need to...
Head First: Well, thank you so much, Boolean;
as always it’s been a pleasure to have you, but
it looks like we’re out of time. We’re looking
forward to the next time we can have you on.
Boolean: Yeah, I can, uh, barely wait.
Booleans Exposed
This week’s interview:
Getting to know Booleans
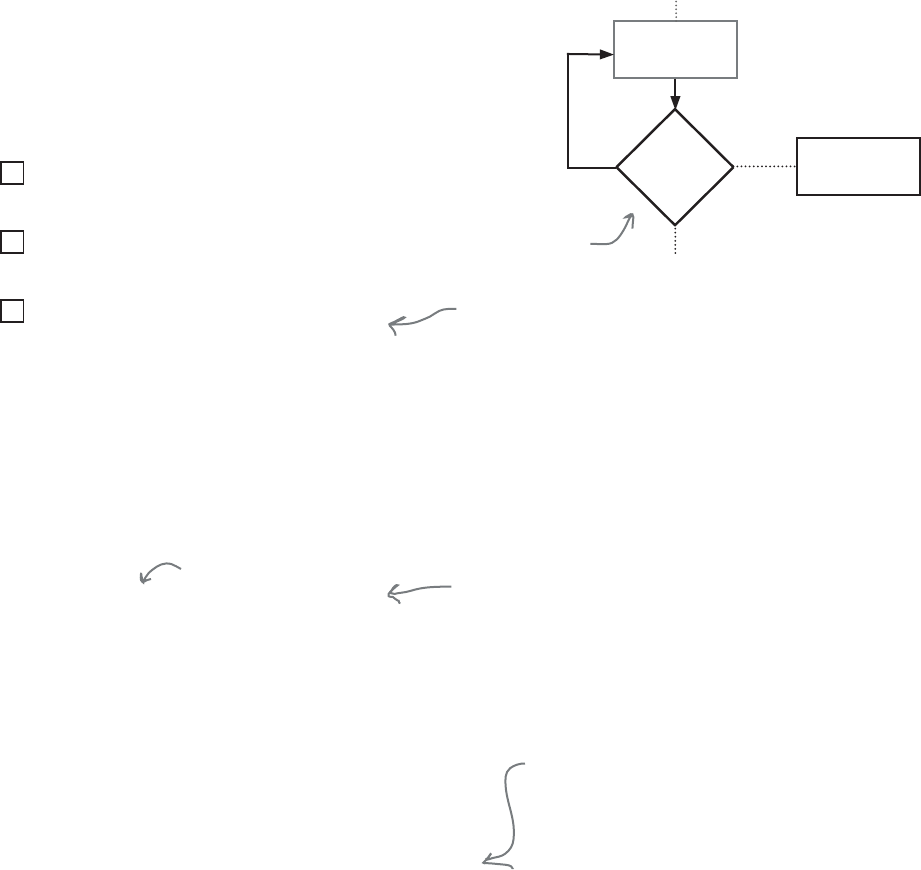
88 Chapter 3
examining the user’s choice
Now we’re
here.
Get user
choice
Examine
choices
same
invalid
different
Taking a look at the user’s choice
Now that we’ve got the user’s choice, let’s examine it.
According to our flowchart, we’ve got three possibilities:
The user and the computer made the same
choice, and we have a tie.
The user and the computer made different
choices, and we need to determine who won.
The user entered an invalid choice, and
needs to enter another choice.
This possibility is where the user
enters a word that isn’t rock, paper,
or scissors; we’re going to come back
and handle this case a bit later.
We’ll tackle these in order (saving the last one for a bit later in
the chapter), but first, let’s observe that no matter who wins,
or if there is a tie, we need some kind of variable to hold that
information. So let’s use a variable, winner, that will hold the
outcome of the game, which will be either 'Tie', 'User', or
'Computer'. Create that variable and give it an initial value
like this:
winner = ''
Here we’ve assigned the empty string to the new variable
winner as an initial value. An empty string is a string that has
no characters in it (yet it’s still a string). You might think of it like
this: a laundry basket is still a laundry basket even if it currently
has no laundry in it. Right? You’ll find this kind of thing pops
up all over programming languages: empty strings, empty lists,
empty files, and so on. For us, setting winner to an empty
string gives us a way to indicate that winner is going to be a
string, even if we’re not yet in a position to put any meaningful
characters in it (because we haven’t computed the outcome).
Now that we’ve created the winner variable to hold the
outcome of the game, let’s proceed with implementing the
possibilities at the top of the page. Looking at the first item
above, where the user and the computer make the same choice,
we’ll need to set winner to 'Tie'. To do that, we need to first
write the code to compare the user’s and computer’s choices,
and, again, if they are the same, then we’ll set our new winner
variable to 'Tie'.
We’ll add this to our
code in just a sec...
Although there's nothing wrong with this
approach, later in the book we'll see an
alternative, that, for Python, is a better
way to provide an initial value for winner.
This is an empty string;
there is no space
between the two quotes.
Set winner
to tie
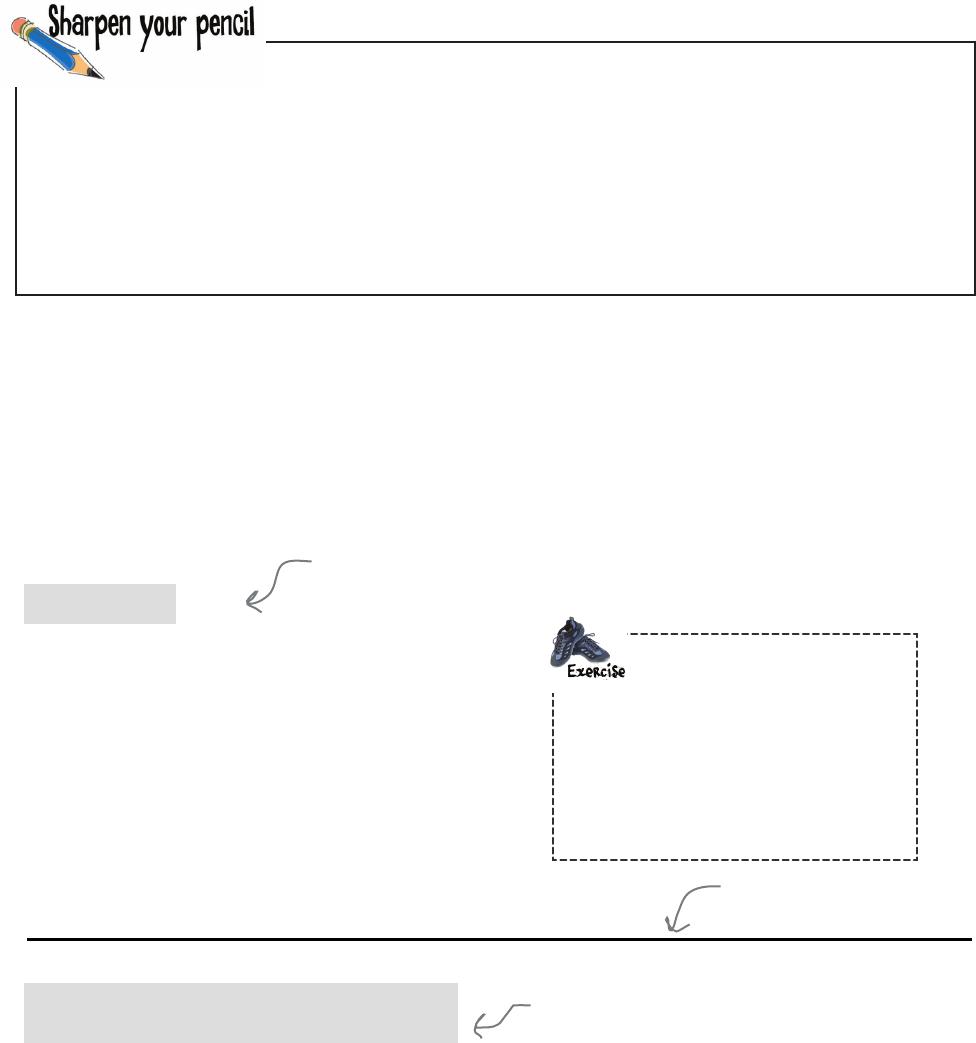
you are here 4 89
booleans, decisions, and loops
import random
winner = ''
random_choice = random.randint(0,2)
if random_choice == 0:
computer_choice = 'rock'
elif random_choice == 1:
computer_choice = 'paper'
else:
computer_choice = 'scissors'
user_choice = input('rock, paper or scissors? ')
print('You chose', user_choice, 'and the computer chose', computer_choice)
if computer_choice == user_choice:
winner = 'Tie'
Here's our new variable, winner.
Right now it's just going to be set
to an empty string, but later it
will be set to the winner, which
will be either ‘User’, ‘Computer’, or
‘Tie’.
And if the computer and the user make the same
choice, we're going to set the winner to 'Tie'.
You can go ahead and
remove this code.
Go ahead and make these changes to
rock.py. We’ll test things thoroughly in
a bit when we’ve added more code. For
now, just run the code to make sure
you don’t have any syntax errors. Note,
because we’ve removed the print
statements, you won’t currently see any
output when you run your code.
Your turn again. Based on our plan on the previous page, finish the code fragment below. Your code
should determine if there is a tie, and if so, set the winner variable to 'Tie'. After you’ve completed
this exercise, we’ll get this code into the rock.py file in the next step.
if ___________ == ___________:
winner = _______
Adding the code to detect a tie
We’ve got a new variable to add, winner, and we’ve got some new
code that compares the user’s and computer’s choice to see if they
are the same, in which case we have a tie. Let’s take a look at all the
code together:
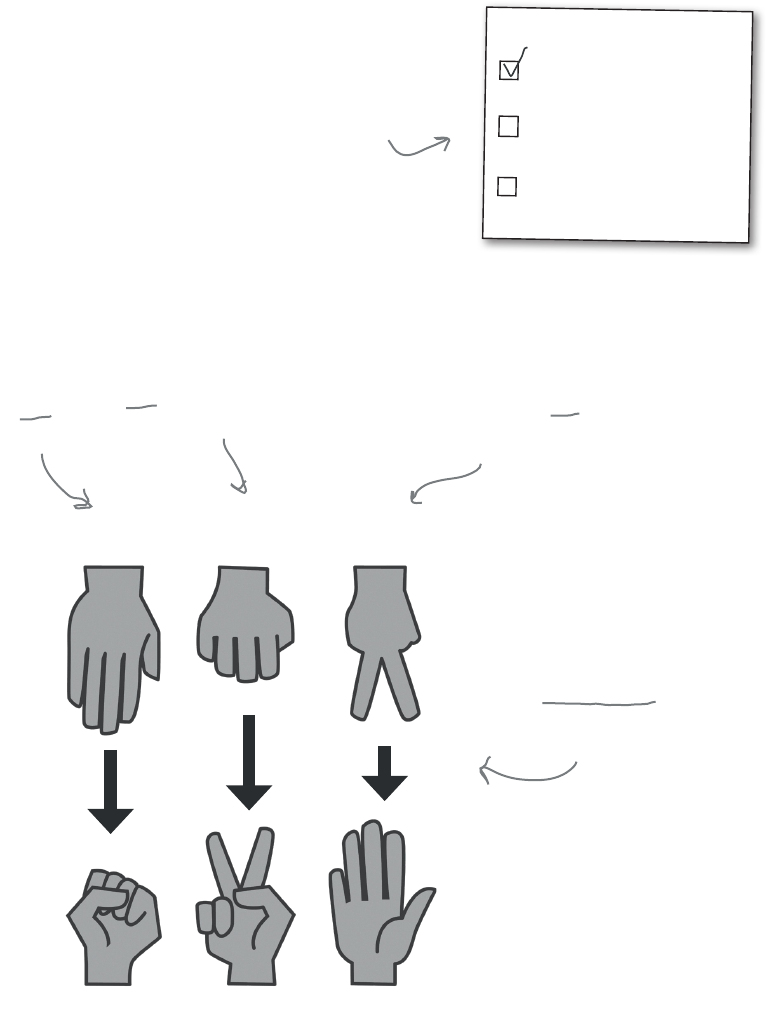
90 Chapter 3
determining who won
The user and the computer
made the same choice, and we
have a draw or tie.
The user and the computer
made different choices, and we
need to determine who won.
The user entered an invalid
choice, and needs to enter
another choice.
To Do:
Who won?
So now that we’ve written the code to deal with a tie, we’re
ready for the interesting part of the code: guring out who won. We
already have everything we need to decide a winner—we’ve got
the computer’s choice in the variable computer_choice, and
we’ve got the user’s choice in the variable user_choice. So
what we need at this point is to figure out the logic of determining
who won. To do that it really pays to study our Rock, Paper,
Scissors diagram to see if we can break the process of
determining the winner down into a simple set of rules. Here’s
another insight too: if we pick a side, say, by figuring out the ways
the computer can win, then we know if the computer doesn’t win,
the user does. That can really simplify our logic because we only
need to look at one set of cases.
So with that in mind, let’s take a look at all the cases where the
computer wins:
PAPER ROCK SCISSORS
PAPER
ROCK SCISSORS
WRAPS
BLUNTS
CUTS
If the computer
chooses paper and the
user chooses rock, the
computer wins.
If the computer chooses rock
and the user chooses scissors,
the computer wins.
If the computer
chooses scissors and
the user chooses paper,
the computer wins.
In all other cases
the user wins or we
have a tie.
User
Computer
Now we need
to tackle this.
you are here 4 91
booleans, decisions, and loops
Right.
Let’s step through this in more detail. We’ve already
determined if there is a tie, so we can rule out that case.
So, assuming there isn’t a tie, who won? The computer or
the user? Well, let’s start by looking at the cases where the
computer wins:
• The computer wins if it chooses paper and the user chooses rock.
• The computer wins if it chooses rock and the user chooses scissors.
• The computer wins if it chooses scissors and the user chooses paper.
In all other cases the computer does not win.
So what about the user? What are the cases where the user
wins? Well, we could enumerate those just like we did with
the computer, but do we really need to? We’ve assumed
there isn’t a tie (and our code already takes care of that),
and we’ve gone through the cases where the computer is
going to win, and if none of those applies, guess what: the
user wins. So we don’t need to write any code to determine
if the user wins, we just need to know the computer doesn’t
win in order to call the user a winner.
Let’s work through the actual logic to bring this all together.
So you’re saying we only need to
consider the cases where the computer
wins because if the computer doesn’t
win, we know the user wins?
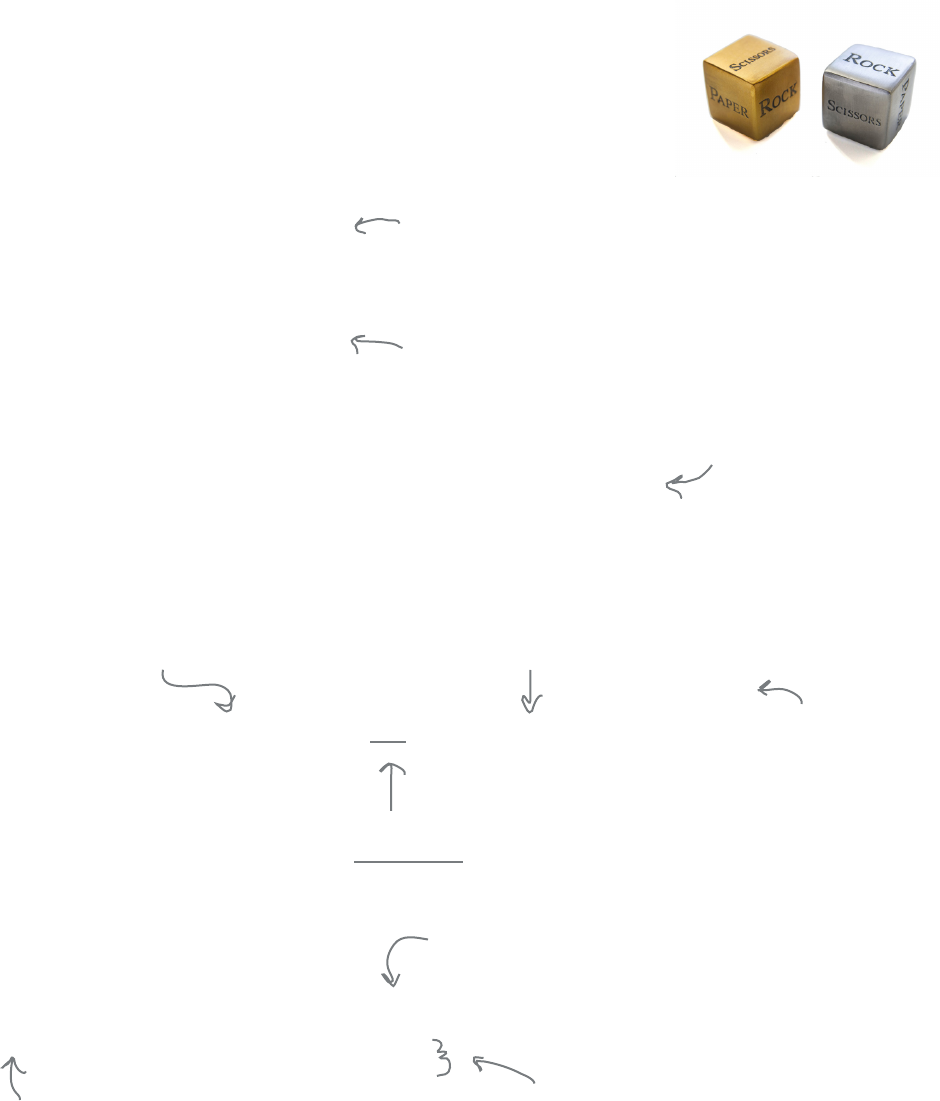
92 Chapter 3
implementing the game logic
How to implement the game logic
As you can see there are three ways the computer can win, and for each way we have to
test two conditions, like “did the computer choose paper?” AND “did the user choose
rock?” But, so far, in our coding, we’ve never had to test two conditions at once. That said,
we do know how to test for a single condition, like, if the computer chose paper:
computer_choice == 'paper'
user_choice == 'rock'
And if the user chose rock:
But how do we test for both conditions?
To do that we can use a Boolean operator. It sounds fancy, but Boolean operators are
just a way to combine Boolean expressions together, and, for now, there are only three of
them to know about: and, or, and not.
To test if the computer chose paper AND the user chose rock, we can use the and Boolean
operator and combine our expressions, like this:
computer_choice == 'paper' and user_choice == 'rock'
Here’s our first condition.
Here’s our second condition.
Placing an and operator between them means this entire
expression will be True if and only if both conditions are True.
And we can use this Boolean expression with an if statement:
if computer_choice == 'paper' and user_choice == 'rock':
winner = 'Computer'
Now the if statement's conditional expression is
the entire combined Boolean expression.
If the expression is True, then
we execute the if's code block.
A simple Boolean expression
that we’re familiar with at
this point, which asks if the
computer’s choice is paper
And another expression asking
if the user’s choice is rock
This entire phrase
is a Boolean
expression and will
evaluate to either
True or False.
So this code handles one of the three
cases where the computer wins.
We’ll see one
additional Boolean
operator in a bit.
you are here 4 93
booleans, decisions, and loops
More about Boolean operators
As you’ve already seen, the and operator is True if, and only if, both of its
conditions (or we can call them operands) are True. But what about or
and not; how do they work? Like and, or is used to combine two Boolean
values or expressions, and is True if either of those values or expressions
evaluates to True.
The not operator, on the other hand, when placed before any single Boolean value
or expression, gives you the opposite of the Boolean value—in other words, if not’s
operand evaluates to True then not evaluates to False, and if its operand is False
then not evaluates to True. We like to say that not negates its operand.
if bank_balance > ferrari_cost or loan = = ferrari_cost:
print('Buy it!')
You've got the money for the Ferrari
if you have enough money in the bank
balance...
OR, you have a loan that is equal
to the cost of the Ferrari.
Note that only one of these conditions needs to be True
to get the Ferrari, but both can be True as well. If both
are False, then you'll have to wait for the Ferrari.
if not bank_balance < ferrari_cost:
print('Buy it!')
You can read this as “if the bank account is
NOT less than the Ferrari cost,” then buy it.
Here we’ve put a not in front of a
Boolean expression.
age > 5 and age < 10 When age is 6, what does this evaluate to? ________
When age is 11, what does this evaluate to? ________
When age is 5, what does this evaluate to? ________
Take out your pencil and put some more Boolean expressions through their paces.
For each expression below, compute its value and write in your answer.
When age is 6, what does this evaluate to? ________
When age is 2, what does this evaluate to? ________
When age is 3, what does this evaluate to? ________
age > 5 or age == 3
not (age > 5) When age is 6, what does this evaluate to? ________
When age is 2, what does this evaluate to? ________
First we evaluate this relational operator to
True or False, and then the not operator is
applied, evaluting to the opposite Boolean value.
Notice we added parens here, which
makes this more readable.
Serious Coding
Wondering about precedence
with Boolean operators? The
relational operators (>, <,
==, and so on) are highest,
followed by not, or, and
then and. You can also add
parentheses to your Boolean
expressions to override the
default precedence or to add
clarity to your expression.
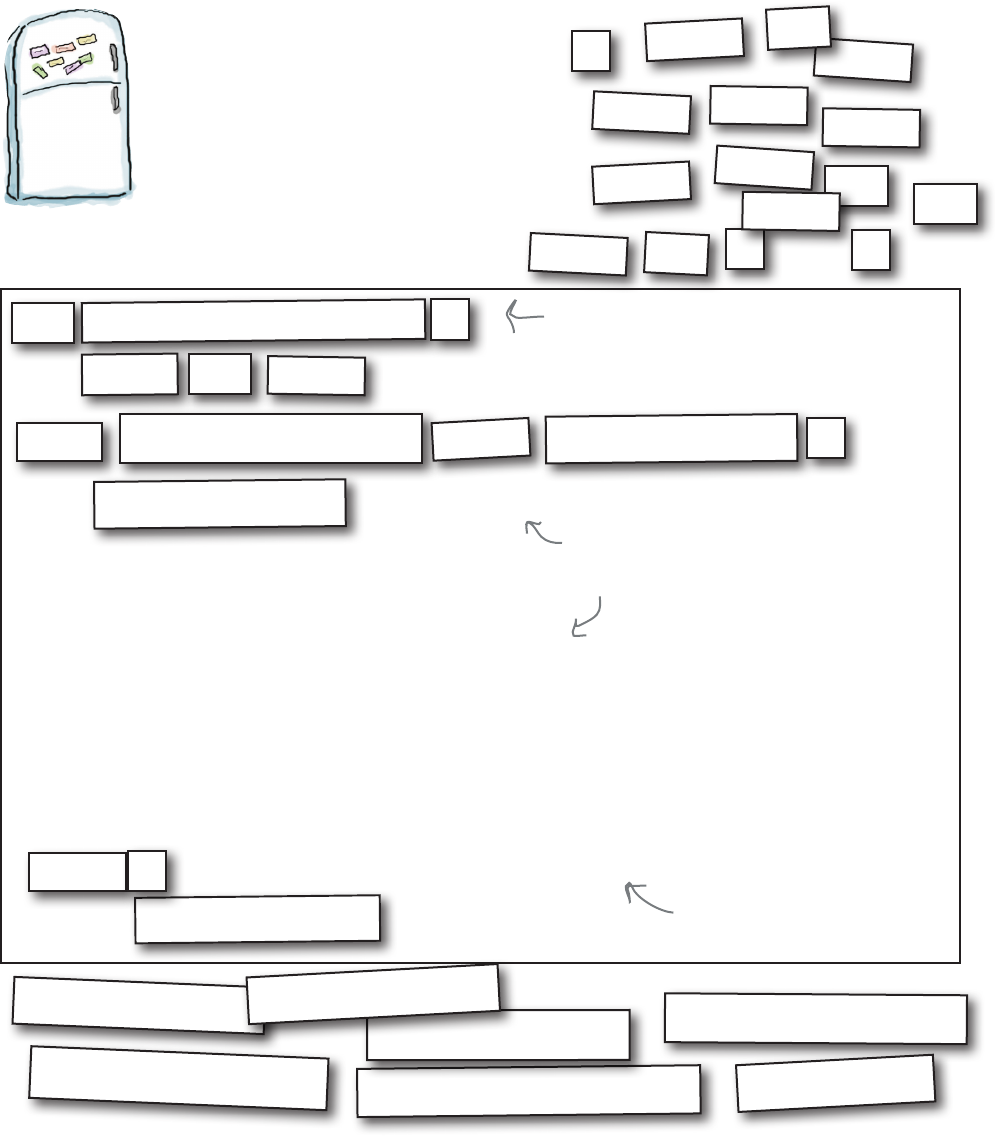
94 Chapter 3
figuring out the game logic
Code Magnets
We’d already worked out the code for the game
logic on the fridge with code magnets, but someone
came along and knocked most of it on the floor. Can
you reconstruct the code snippets so that we can
determine the winner? Notice, there may be some
extra code magnets, so you may not use all of them.
Check your answer at the end of the chapter.
and
computer_choice == 'paper'
and
and
and
and
or
or
computer_choice == 'rock'
computer_choice == 'scissors'
user_choice == 'rock'
user_choice == 'scissors'
if
computer_choice == user_choice
if
if
if
:
:
winner
=
=
:
:
:
'Tie'
elif
elif
elif
else
elif
winner = 'Computer'
winner = 'Computer'
winner = 'User'
Place your magnets here.
This is the first case, where the
computer and user made the same choice,
so we have a tie.
winner == 'User'
user_choice == 'paper'
You’re lucky they didn’t knock off the
first test to see if the computer won, and
the very last part where the user wins.
:
winner = 'Computer'
you are here 4 95
booleans, decisions, and loops
import random
winner = ''
random_choice = random.randint(0,2)
if random_choice == 0:
computer_choice = 'rock'
elif random_choice == 1:
computer_choice = 'paper'
else:
computer_choice = 'scissors'
user_choice = input('rock, paper or scissors? ')
if computer_choice == user_choice:
winner = 'Tie'
elif computer_choice == 'paper' and user_choice == 'rock':
winner = 'Computer'
elif computer_choice == 'rock' and user_choice == 'scissors':
winner = 'Computer'
elif computer_choice == 'scissors' and user_choice == 'paper':
winner = 'Computer'
else:
winner = 'User'
print('The', winner, 'wins!')
Alright, we’ve got our game logic all figured out. Let’s get it typed into rock.py and
then give the game a few tries. Of course we haven’t added our user-friendly output
yet, so we’re just going to find out who wins, not what the computer’s choice was.
That’s next on our list.
A Test Drive
Python 3.6.0 Shell
rock, paper or scissors? rock
The Computer wins!
>>>
Play it a few times and make sure
it appears to be working. We'll add
more user-friendly output next!
Here's the code for the
game logic. Go ahead and
enter this code.
Examine
choice
Determine
winner by rules
You are here.
You may even see “The
Tie wins!” but we’ll fix
that in a sec.
96 Chapter 3
displaying the winner
Display winner
Game
over
Now we’re
here.
Display the winner
Now it’s time to display the winner. If you look at the sample output again,
either the user or the computer wins, or there’s a tie.
Python 3.6.0 Shell
rock, paper or scissors? rock
User won, I chose scissors.
rock, paper or scissors? rock
We both chose rock, play again.
rock, paper or scissors? paper
Computer won, I chose scissors.
Let’s first take care of the code to handle the tie. Looking at our existing code,
if there’s a tie then the winner variable will be assigned to the value 'Tie'.
So, let’s set up a condition for this case:
if winner == 'Tie':
print('We both chose', computer_choice + ', play again.')
If winner has been
set to ‘Tie' then...
Print the message along with
the choice both players made.
Note we could have used user_choice here
too. Because there is a tie, they both
have the same value.
If there isn’t a tie, we need to announce the winner, which is conveniently
stored in the winner variable.
else:
print(winner, 'won, I chose', computer_choice + '.')
This code will be run,
only if there isn't a tie.
We announce the winner.
And then report what the
computer's choice was.
Remember that print adds a space
betweens values separated by commas.
So, sometimes we’ll use string
concatenation if we don’t want
spaces (like if we need to follow a
word immediately by punctuation).

you are here 4 97
booleans, decisions, and loops
import random
winner = ''
random_choice = random.randint(0,2)
if random_choice == 0:
computer_choice = 'rock'
elif random_choice == 1:
computer_choice = 'paper'
else:
computer_choice = 'scissors'
user_choice = input('rock, paper or scissors? ')
if computer_choice == user_choice:
winner = 'Tie'
elif computer_choice == 'paper' and user_choice == 'rock':
winner = 'Computer'
elif computer_choice == 'rock' and user_choice == 'scissors':
winner = 'Computer'
elif computer_choice == 'scissors' and user_choice == 'paper':
winner = 'Computer'
else:
winner = 'User'
print('The', winner, 'wins!')
if winner == 'Tie':
print('We both chose', computer_choice + ', play again.')
else:
print(winner, 'won. The computer chose', computer_choice + '.'
We should have a fully functioning game now! Let’s get the new
code typed into rock.py and then give it a spin.
A Test Drive
Python 3.6.0 Shell
rock, paper or scissors? rock
Computer won. The computer chose paper.
>>>
Alright, we have a fully
functioning game! Give it a whirl.
Here's the code for game
output. Go ahead and
enter this code.
Remove this.
98 Chapter 3
documenting code
Got documentation?
It’s a good time to step back and look at all the code you’ve written. There’s actually
enough code that if you revisited it in the future you might have to remind yourself
of what each piece does and how it all fits together. You might also have to study the
code to remember the design decisions you made and why you made them.
Also notice that the code has an inherent structure and is pretty well organized in
that it’s divided into pieces that handle the parts of our algorithm (or the actions in
the corresponding flowchart). Let’s mark these sections and also add some notes to
remind us in the future of how all this works.
import random
winner = ''
random_choice = random.randint(0,2)
if random_choice == 0:
computer_choice = 'rock'
elif random_choice == 1:
computer_choice = 'paper'
else:
computer_choice = 'scissors'
user_choice = input('rock, paper or scissors? ')
if computer_choice == user_choice:
winner = 'Tie'
elif computer_choice == 'paper' and user_choice == 'rock':
winner = 'Computer'
elif computer_choice == 'rock' and user_choice == 'scissors':
winner = 'Computer'
elif computer_choice == 'scissors' and user_choice == 'paper':
winner = 'Computer'
else:
winner = 'User'
if winner == 'Tie':
print('We both chose', computer_choice + ', play again.')
else:
print(winner, 'won, I chose', computer_choice + '.')
Here we’re doing some setup
by importing the random
module and setting up the
winner variable.
The computer randomly
chooses rock, paper, scissors
by generating a random
number from 0 to 2 and
then mapping that to a
corresponding string.
Get the user’s choice with
a simple input statement.
Here’s our game logic,
which checks to see if
the computer wins (or
not), and makes the
appropriate change to
the winner variable.
Here we announce the game
was a tie, or the winner along
with the computer's choice.
It’s also handy to document
your code for anyone else who
might want to take a look at
it, like another programmer.
But isn’t this silly that we’re documenting this code in a book? After all, you’ve got real,
live code on your computer. Why don’t we document the actual code so the documentation
is right there when you need it? Let’s see how to do that.
you are here 4 99
booleans, decisions, and loops
How to add comments to your code
With Python, and pretty much any programming language, you can add human-readable
comments right into your code. To add a comment with Python, type a hash character
(#) on any line, and then your comment. Python will conveniently ignore anything you
type after the hash. With comments, the general idea is to add remarks to your code that
are going to be read by you, or other programmers, with the goal of providing additional
information about the design, structure, or approach you used in the code. Let’s look at
an example:
# This code supports my weekly habit of seeing if I can
# afford a ferrari. The general algorithm is to compare
# my bank account amount to the current cost of a ferrari.
if bank_balance >= ferrari_cost:
# If it's greater I can finally buy one.
print('Why not?')
print('Go ahead, buy it')
else:
print('Sorry')
print('Try again next week') # bummer
Start your comment with a hash character and then type your
human-readable text after it. Each new line needs its own hash.
Comments can start
anywhere on the line.
They can even start
after code on a line.
In the IDLE editor add comments to your
rock.py file. Feel free to use our comments
on the previous page as a starter, but also
make your own comments. You’ll want your
comments to be meaningful to anyone who,
in the future, might read your code (including
you!). Check our solution at the end of the
chapter to see how we did it.
Do as we say, not as we do.
Documenting code is an important part of
coding, but you’re going to notice in this
book we don’t do a lot of it. That’s because
our method of using handwritten code
annotations is more effective in Head First
book form (and all those comments tend
to kill lots of trees when we have to include
them in every code listing).
Annotations like these.
Comments are one form
of documentation; later
in the book we’ll look
at help documentation,
which is meant for
coders who just want
to use your code, not
necessarily understand it.
100 Chapter 3
dealing with invalid input
We need to finish that game!
You realize that we haven’t quite finished our game, right? Check
out the To Do list: we haven’t dealt with that possibility of invalid
user input. Now the user is supposed to enter “rock” or “scissors”
or “paper,” but they might not; they might mistype, like “scisors,”
or they might just be troublemakers who decide to enter “dog,”
“hammer,” or “no.” So, when you’re creating an app or program
that’s going to be used by actual people, you want to keep in mind
that they often make mistakes, and your code needs to deal with
that.
So, let’s deal with it.
But first we have to figure out how we want the game to behave
when the user enters an invalid answer. Looking back at the
flowchart, our original intent was to have the program reprompt the
user if the input was invalid.
Perhaps something like this:
Get user
choice
Examine
choices
same
invalid
Remember
this part we
left out?
The user and the computer
made the same choice, and we
have a tie.
The user and the computer
made different choices, and
we need to determine who won.
The user entered an invalid
choice, and needs to enter
another choice.
To Do:
We forgot
something.
Thinking about the Rock, Paper, Scissors game again, what happens if you don’t enter rock, paper, or
scissors correctly? Say you enter “rack” instead of “rock”: How does your program behave? Do you think
that behavior is correct?
Python 3.6.0 Shell
rock, paper or scissors? rack
rock, paper or scissors? papper
rock, paper or scissors? rock
User won, I chose scissors.
>>>
If we get
invalid input, we
can just keep
prompting until
we get valid
input.
We can always make it more elaborate later, but for now we’ll just reprompt
the user until we get a valid input.
Are you ready to get this coded and finish this game? We just need to make
sure we know how to approach coding two aspects of this:
1. How do we detect invalid input?
2. How do we continually prompt the user until we get a valid answer?
Users often make
mistakes. Make sure
your code anticipates
and handles these
mistakes—even if the
only user is you.
you are here 4 101
booleans, decisions, and loops
How do we know if the user’s choice is invalid?
How do we detect if the user’s input is invalid? Well, you probably know we’re going to make
use of our new Boolean logic skills, but what does an expression that detects invalid answers look
like? Sometimes it’s good to just talk things out: we know if the user’s choice is invalid if:
user_choice != 'rock' and
Convert the spoken English above into its Boolean expression equivalent. We’ve done the
first part for you.
The user’s choice is NOT
EQUAL TO ‘rock’ AND...
The user’s choice is NOT
EQUAL TO ‘paper’ AND...
The user’s choice is NOT
EQUAL TO ‘scissors’
Complete the Boolean expression.
102 Chapter 3
improving readability
if user_choice != 'rock' and user_choice != 'paper' and user_choice != 'scissors':
if (user_choice != 'rock' and
user_choice != 'paper' and
user_choice != 'scissors'):
Checking out and cleaning up the expression
Hopefully your Boolean expression in the last Sharpen exercise was close to
our solution. Here it is again, this time as part of an if statement:
That looks like a perfectly acceptable statement. But sometimes really long
lines like this are quite unwieldy once we start typing them into an editor,
or if we have to go back and read them later. It would be nice if we could
reformat the statement a bit and make it look more like:
Wow, long and hard to read!
Ah, much better and
easier on the eyes!
And Python is just fine with the reformatting of the code.
Okay, now that we know how to detect an invalid user choice, we still
need to figure out how to reprompt the user.. Let’s spend a little time
thinking through how that might work....
Python 3.6.0 Shell
if user_choice != 'rock' and
^
SyntaxError: invalid syntax
>>>
Wrap parens around your expression and
then you can break it into multiple lines.
if user_choice != 'rock' and
user_choice != 'paper' and
user_choice != 'scissors':
The only problem is when we try to break the code into more than one
line, Python complains about our syntax.
There is another way—we can wrap a set of parentheses around the
expression, like this:
Uh oh, not
good
This statement says, basically, if
the user’s input is invalid...
Get user
choice
Examine
choices
same
invalid
We’re here now:
if the input is
invalid, we need to
reprompt the user.
you are here 4 103
booleans, decisions, and loops
No, but we could, and you bring up a good
point. First of all, what is the issue here? Well, the strings
'rock' and 'ROCK', for example, are different strings because
Python treats strings as case sensitive. In other words, in Python
(and almost every programming language), the following
equality test would evaluate to False:
'rock' == 'ROCK'
So if the user enters Rock instead of rock, right now our code
would say that entry was invalid (and our logic code, for that
matter, wouldn’t know what to do with Rock).
That said, the suggestion does seem very reasonable—after
all, if you enter the word rock no matter the capitalization, it
should count as a valid answer.
So what do we do? Well, we could just add in additional logic
to test all permutations of upper- and lowercase letters for the
words rock, paper, and scissors, and that would work.
However, it would make our code very complex, and there are
better ways to approach this problem that we’re going to learn
about later in the book.
But right now, let’s just assume that the user needs to enter an
answer in lowercase, and we’ll point out how this could have
been more easily solved when we get to it later in the book.
Before you go on to solve the
reprompting problem, I had a question
about the user input. Are we considering
'ROCK' or 'Rock' or other variations of
'rock' as valid entries too?
False
104 Chapter 3
how to reprompt the user
user_choice = input('rock, paper or scissors? ')
if (user_choice != 'rock' and
user_choice != 'paper' and
user_choice != 'scissors'):
user_choice = input('rock, paper or scissors? ')
print('User chose', user_choice)
First we get the
user’s choice.
Then we test to see
if the input was valid.
If not, then we get the
user’s choice again.
We thought we were on the
right track, but what do you
think we’re missing?
While you were discussing upper- and lowercase strings, we went ahead and wrote
the code to reprompt the user, only our approach was flawed. Can you take a look
and see what you think the flaw might be? You’ll find the code, some notes, and a
sample run of the code below.
Python 3.6.0 Shell
rock, paper or scissors? rack
rock, paper or scissors? papper
User chose papper
>>>
We're getting
reprompted.
But then we can
just enter invalid
input again.
Ugh!
How to continually prompt the user
Our first attempt failed. We tried to test the user input and then if it wasn’t
valid, prompt again. The problem is, this solution only works once. If the user
enters “rocknroll” on the second try, then that string will be accepted as the
valid user input.
Now we could keep adding if statements for a second and third and fourth try,
but that would lead to a coding mess, and our requirements are to reprompt
the user as many times as it takes.
The problem is, given our Python knowledge, we only know how to do things
once. What we really need to be able to do is write code in a way that it can
repeat over and over, as many times as needed. We need a way to do things
more than once.
Get user
choice
Examine
choice
invalid
We’re here; we need to keep
getting the user’s choice
until it’s valid.

you are here 4 105
booleans, decisions, and loops
A while statement starts
with the keyword while.
while scoops > 0:
print('Another scoop!')
scoops = scoops - 1
Doing things more than once
You do a lot of things more than once:
Lather, rinse, repeat…
Wax on, wax off…
Keep turning the pages of the book, until it’s done.
Of course you’ll often need to do things in code more than once, and Python
gives you a couple of ways to repeatedly execute code in a loop using its
while and for statements. We’ll look at both of these ways of looping, but
let’s focus on while for now.
We’ve talked a lot about expressions that evaluate to Boolean values, like
scoops > 0, and these kinds of expressions are the key to the while
statement. Here’s how the while statement works:
while juggling:
keep_balls_in_air()
while uses a Boolean
expression as a conditional
test (just like the if
statement).
If the conditional is true,
everything in the code block
is executed.
What’s a code block? We haven’t
introduced the term formally, but it’s
everything indented after the colon
After we execute the code block, we loop back around
and do the conditional test again. If the conditional is
still True, we execute the code block again. When the
conditional is False, we’re done executing the block.
While Python uses indenting to identify
a block of code, this is actually a bit
unusual, as most programming languages
use matched pairs of curly braces or
parentheses.
106 Chapter 3
understanding the while loop
Seeing as this is your first while loop, let’s trace through a round of its
execution to see exactly how it works. Notice we’ve added a declaration for the
variable scoops at the top of the code, and initialized it to the value 5.
How the while loop works
scoops = 5
while scoops > 0:
print('Another scoop!')
scoops = scoops - 1
print("Life without ice cream isn't the same.")
scoops = 5
while scoops > 0:
print('Another scoop!')
scoops = scoops - 1
print("Life without ice cream isn't the same.")
After that we encounter the while statement. When we evaluate a
while statement, the first thing we do is evaluate the conditional to
see if it’s True or False.
Is scoops greater
than zero? Looks
like it to us!
Now let’s start executing this code. First we set scoops to 5.
Because the conditional is True, we start executing the block of code.
The first statement in the body prints the string "Another scoop!" to
the shell.
scoops = 5
while scoops > 0:
print('Another scoop!')
scoops = scoops - 1
print("Life without ice cream isn't the same.")
Python 3.6.0 Shell
Another scoop!
A note from readers who
have read this before you:
read the next several pages
slowly and carefully. There’s
a lot to take in and you
really want to get how this
works into your brain.
you are here 4 107
booleans, decisions, and loops
scoops = 5
while scoops > 0:
print('Another scoop!')
scoops = scoops - 1
print("Life without ice cream isn't the same.")
The next statement subtracts one from the number of
scoops and then sets scoops to that new value, 4.
1 scoop gone,
4 left!
That’s the last statement in the block, so we loop back up
to the conditional and start over again.
scoops = 5
while scoops > 0:
print('Another scoop!')
scoops = scoops - 1
print("Life without ice cream isn't the same.")
scoops = 5
while scoops > 0:
print('Another scoop!')
scoops = scoops - 1
print("Life without ice cream isn't the same.")
Evaluating our conditional again, this time scoops is 4. But that’s
still more than zero.
Still plenty left!
Once again we write the string "Another scoop!" to the shell.
scoops = 5
while scoops > 0:
print('Another scoop!')
scoops = scoops - 1
print("Life without ice cream isn't the same.")
Python 3.6.0 Shell
Another scoop!
Another scoop!
Observe that our code never
changes. But the variables
in our code, like scoop, are
changing throughout the
computation. At this stage,
scoops is equal to 4.
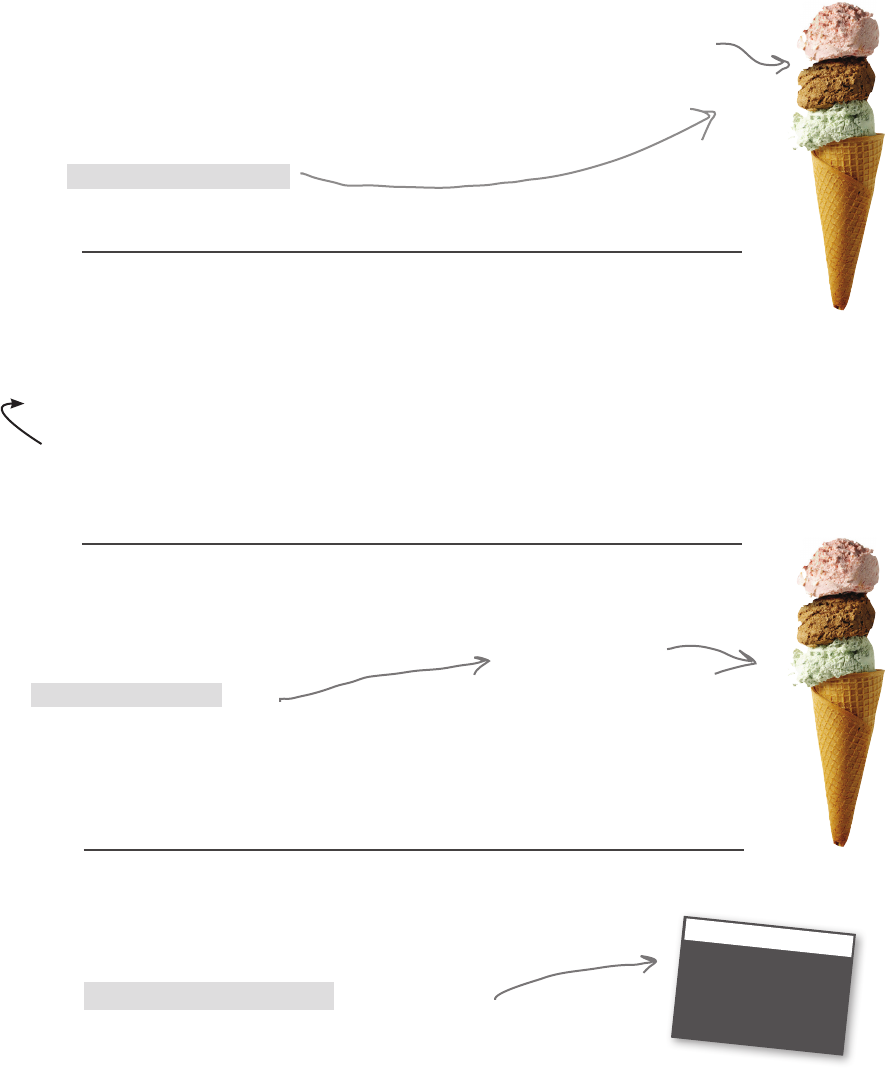
108 Chapter 3
understanding the while loop, continued
scoops = 5
while scoops > 0:
print('Another scoop!')
scoops = scoops - 1
print("Life without ice cream isn't the same.")
The next statement subtracts one from the number of
scoops and sets scoops to that new value, which is 3.
2 scoops gone,
3 left!
That’s the last statement in the block, so we loop back up
to the conditional and start over again.
scoops = 5
while scoops > 0:
print('Another scoop!')
scoops = scoops - 1
print("Life without ice cream isn't the same")
scoops = 5
while scoops > 0:
print('Another scoop!')
scoops = scoops - 1
print("Life without ice cream isn't the same.")
Evaluating our conditional again, this time scoops is 3. But that’s
still more than zero.
Still plenty left!
Once again we write the string "Another scoop!" to the shell.
scoops = 5
while scoops > 0:
print('Another scoop!')
scoops = scoops - 1
print("Life without ice cream isn't the same.")
Python 3.6.0 Shell
Another scoop!
Another scoop!
Another scoop!
you are here 4 109
booleans, decisions, and loops
scoops = 5
while scoops > 0:
print('Another scoop!')
scoops = scoops - 1
print("Life without ice cream isn't the same.")
And as you can see, this continues. Each time we loop,
we decrement (reduce scoops by 1), write another
string to the browser, and keep going.
3 scoops gone,
2 left!
scoops = 5
while scoops > 0:
print('Another scoop!')
scoops = scoops - 1
print("Life without ice cream isn't the same.")
And continues...
4 scoops gone, 1 left!
scoops = 5
while scoops > 0:
print('Another scoop!')
scoops = scoops - 1
print("Life without ice cream isn't the same.")
Until the last time...this time something’s different. scoops is
0, and so our conditional evaluates to False. That’s it, folks;
we’re not going to go through the loop anymore, and we’re
not going to execute the block. This time, we bypass the
block and execute the statement that follows it.
5 scoops gone, 0 left!
Now we execute the other print statement, and write the
string "Life without ice cream isn't the same". We’re done!
scoops = 5
while scoops > 0:
print('Another scoop!')
scoops = scoops - 1
print("Life without ice cream isn't the same.")
Python 3.6.0 Shell
Another scoop!
Another scoop!
Another scoop!
Another scoop!
Python 3.6.0 Shell
Another scoop!
Another scoop!
Another scoop!
Another scoop!
Another scoop!
Python 3.6.0 Shell
Another scoop!
Another scoop!
Another scoop!
Another scoop!
Another scoop!
Life without ice cream isn't the same.
110 Chapter 3
using while to reprompt the user
How to use while to prompt the
user until you get a valid choice
Now that you know how to use while, you’re all ready to get this
code reprompting the user. To do that we just need to make a
couple simple changes to the previous attempt: we’re going to start
by initializing user_choice to the empty string, and then we’re
going to replace the if keyword with while.
Like this:
user_choice = ''
while (user_choice != 'rock' and
user_choice != 'paper' and
user_choice != 'scissors'):
user_choice = input('rock, paper or scissors? ')
While the user_choice isn’t
valid, we’ll keep executing the
code body.
Each time through the loop, our code
prompts the user for a choice, and assigns
the input to the user_choice variable.
w it Write a quick game. Here’s how it works: you prompt the
player with “What color am I thinking of?” and you see
how many guesses it takes the player to guess it.
color = 'blue'
guess = ''
guesses = 0
while :
guess = input('What color am I thinking of? ')
guesses = guesses + 1
print('You got it! It took you', guesses, 'guesses')
So, when we finally get a valid choice,
the while loop stops and we have that
choice in the user_choice variable.
First set user_choice to the empty string.
We’re setting user_choice to
the empty string because when
it first enters the while loop
it needs a value.
you are here 4 111
booleans, decisions, and loops
A Test Drive
Python 3.6.0 Shell
rock, paper or scissors? scisors
rock, paper or scissors? rock
User won. The computer chose scissors.
RESTART: /ch3/rock.py
rock, paper or scissors? papper
rock, paper or scissors? rocker
rock, paper or scissors? paper
Computer won. The computer chose scissors.
In your rock.py file, replace the input statement with
the new while loop, and then give it a final test run.
At this point, the game should be complete!
Here’s our new code to
handle the user input. This
code will keep prompting
the user until they enter
rock, paper, or scissors.
Now we have a fully functional game. Our
game randomly picks a computer choice,
prompts the user until it receives a valid
choice, and then figures out the winner (or
if the game is a tie)!
import random
winner = ''
random_choice = random.randint(0,2)
if random_choice == 0:
computer_choice = 'rock'
elif random_choice == 1:
computer_choice = 'paper'
else:
computer_choice = 'scissors'
user_choice = input('rock, paper or scissors? ')
user_choice = ''
while (user_choice != 'rock' and
user_choice != 'paper' and
user_choice != 'scissors'):
user_choice = input('rock, paper or scissors? ')
if computer_choice == user_choice:
winner = 'Tie'
elif computer_choice == 'paper' and user_choice == 'rock':
winner = 'Computer'
elif computer_choice == 'rock' and user_choice == 'scissors':
winner = 'Computer'
elif computer_choice == 'scissors' and user_choice == 'paper':
winner = 'Computer'
else:
winner = 'User'
if winner == 'Tie':
print('We both chose', computer_choice + ', play again.')
else:
print(winner, 'won. The computer chose', computer_choice + '.')
Delete the old input
statement.

112 Chapter 3
some extra credit
Congratulations on coding your first game!
What’s the best thing to do after coding your new game? Play a few rounds,
of course! Sit back, relax, and let everything in this chapter sink in as you try
to defeat the computer at Rock, Paper, Scissors. Of course, you’re not quite
done yet—you’ve still got the extra credit, the bullet points, and a crossword
to do, but take some time and enjoy the game first.
w it
Remember the color guessing game? It has a bug. Have you
noticed if you guess the color correctly on the first try, it prints:
"You got it! It took you 1 guesses". Can you fix
the bug so that it prints “guess” for one guess and “guesses” for
multiple guesses?
color = 'blue'
guess = ''
guesses = 0
while guess != color:
guess = input('What color am I thinking of? ')
guesses = guesses + 1
print('You got it! It took you', guesses, 'guesses')
extra credit
Your code
fixes here

you are here 4 113
booleans, decisions, and loops
The Dreaded Infinite Loop
Beware of the
counter = 10
while counter > 0:
print('Counter is', counter)
counter = counter + 1
print('Liftoff!')
Before we wrap up this chapter we need to talk about infinite
loops. You see, when you write code without loops it just goes
straight through—you know it’s going to end, someday. But with
loops, things get more interesting.
Let’s say you’ve just written your latest code, you feel good
about it, and you confidently run it. What happens next? Nothing.
Any output slows to a crawl. Your program seems to be doing
something, but what, you’re not quite sure. Whatever it is, it’s
taking a long time.
You just encountered an infinite loop—that is, a loop that is
looping and looping and is never going to end, ever.
It’s easier to get into this situation than it sounds. In fact, sooner
or later you’re going to encounter one, so it might as well be
now. Let’s create one:
Python 3.6.0 Shell
Counter is 814304
Counter is 814305
Counter is 814306
Counter is 814307
Counter is 814308
Counter is 814309
Counter is 814310
Uh oh, this is
out of control.
Be our guest: type it
in and run it.
So what do you do when you have an out-of-control program
running on your computer? If you’re using IDLE, simply close
the shell window to terminate the program. If you’re using your
computer’s command line, then typically a tap of Control+C
(Ctrl+C on some keyboards) will terminate the program as well.
And what do you do with your code? Well, infinite loops are
logic errors. You’ve create some logic that never lets the loop
end, so examine the conditional of your loop (or loops) and
trace through the execution of your code until you determine
what about the conditional logic is wrong. In our case, we
simply need to rewrite the counter + 1 as counter - 1, so
that the code counts down.
114 Chapter 3
review of booleans, decisions, and loops
Many programs make use of random
numbers.
Practically all languages provide a means of
generating random numbers.
Python provides a random module for
generating random numbers.
Use the import statement to include
Python’s random functionality in your code.
The Boolean data type has two values,
True and False.
Boolean or conditional expressions evalute
to True or False.
Relational operators, like ==, >, and <,
compare two values.
Relational operators are provided for
numbers and strings.
Boolean expressions provide the foundation
of the if statement.
The if statement evaluates a Boolean
expression and then, if True, executes a
code block.
A code block is a set of Python statements
that are executed together.
Code blocks are indented sections of code.
The elif keyword can be used to test
additional conditionals in an if statement.
The elif keyword is a contraction of “else if.”
The else keyword can be used to provide
a nal alternative or catch-all for an if
statement.
Boolean expressions can be combined with
the Boolean operators and and or.
The Boolean operator not can be used to
negate a Boolean expression or value.
The while statement evaluates a Boolean
expression and executes a code block while
the expression remains True.
We call a string without any characters an
empty string.
You use = for assignment and == for
equality testing.
You can add comments to your code by
using the hash character (#) followed by
arbitrary text.
It’s a good idea to use comments to add
documentation to your code so you can
remember your design decisions later (or so
others can understand your code).
Anticipating user error is an important part
of designing a user-centered program, like
a game.
Logic errors can lead to innite loops.
you are here 4 115
booleans, decisions, and loops
Coding Crossword
Let’s give your right brain something to do.
It’s your standard crossword, but all of the
solution words are from Chapter 3.
1
2
3
4 5
6 7
8 9
10 11 12
13 14
15
16 17
18 19
20
21 22
23
Across
2. == is for.
4. >, <, and == are for.
6. Keeps executing as long as True.
7. Has two values.
8. If its Boolean expresssion is True it executes
a code block.
10. Character for comments.
11. = is for.
13. Boolean is another one of these.
14. Cuts paper.
15. A string with nothing in it.
19. Many programs need to generate these.
20. Paper wraps ______.
21. Rock blunts.
22. Alternative for if.
Down
1. Can't afford.
3. Foundation of if and while.
5. Ancient Chinese game.
9. True or _____.
12. Catch-all.
16. How you include the random module.
17. Boole's first name.
18. We often say repeating code is in one of
these.
116 Chapter 3
exercise solution
See for yourself. Get into the Python Shell, import the random module, and then
generate some random integers with random.randint(0.2):
Python 3.6.0 Shell
>>> import random
>>> random.randint(0,2)
1
>>> random.randint(0,2)
0
>>> random.randint(0,2)
1
>>> random.randint(0,2)
2
>>>
Your output should look slightly
different because these are
random numbers! Perhaps you’ll
see 2, 2, 0, 0, or maybe 1, 2,
0, 1, or maybe 1, 1, 1, 1 (it could
happen!) or who knows—that’s the
fun of random numbers!
Assume random_choice is already set to 0, 1, or 2 and write some pseudocode to
set the variable computer_choice to "rock", "paper", or "scissors" based on
random_choice’s value.
if random_choice equals 0, then set computer_choice to “rock”
otherwise, if random_choice equals 1, then set computer_choice to “paper”
otherwise, set computer_choice to “scissors”
you are here 4 117
booleans, decisions, and loops
your_level > 5
color == "orange"
color != "orange"
When your_level is 2, what does this evaluate to? ________
When your_level is 5, what does this evaluate to? ________
When your_level is 7, what does this evaluate to? ________
Is this expression True or False when color has the value
"pink"? __________
Or has the value "orange"? __________
Is this expression True or False when color has the value
"pink"? __________
Get out your pencil and put some Boolean expressions through their paces. For each
expression below, compute its value and write in your answer.
This tests if the first value is greater than the second. You can also use
>= to test if the first value is greater than or equal to the second.
The != operator tests if two values
are NOT equal to each other.
This is a Boolean expression. The
== operator tests if two values
are equal to each other.
True
False
False
True
True
False
number_of_scoops = 0
number_of_scoops = 4
number_of_scoops = 1
number_of_scoops = 3
number_of_scoops = 2
number_of_scoops = -1
You didn’t want any ice cream?
We have lots of flavors.
When number_of_scoops has this value, the output is...
A single scoop for you, coming up.
Oh, two scoops for you!
Wow, that’s a lot of scoops!
Wow, that’s a lot of scoops!
I’m sorry I can’t give you negative scoops
Below you’ll find several values of number_of_scoops. Using each value, write down what
the output of the code above would be when run with the given value. We did the first one for
you.
118 Chapter 3
exercise solution
age > 5 and age < 10 When age is 6, what does this evaluate to? ________
When age is 11, what does this evaluate to? ________
When age is 5, what does this evaluate to? ________
Get out your pencil and put some more Boolean expressions through their paces. For
each expression below, compute its value and write in your answer.
When age is 6, what does this evaluate to? ________
When age is 2, what does this evaluate to? ________
When age is 3, what does this evaluate to? ________
age > 5 or age == 3
not age > 5 When age is 6, what does this evaluate to? ________
When age is 2, what does this evaluate to? ________
True
False
False
True
True
False
False
True
if ___________ == ___________:
winner = _______
Your turn again. Based on our plan on the previous page, finish the code fragment below. Your code
should determine if there is a tie, and if so, set the winner variable accordingly. After you’ve done this
we’ll get this code into the rock.py file.
user_choicecomputer_choice
‘Tie’
if the number of scoops is zero, then print ‘You didn’t want
any ice cream? We have lots of flavors.’
Else if the number of scoops is one, then print ‘A single scoop
for you, coming up.’
Else if the number of scoops is two, then print ‘Oh, two scoops
for you!’
Else if the number of scoops is greater than or equal to three,
then print ‘Wow, that’s a lot of scoops!’
Else, print “I’m sorry I can’t give you negative scoops.”
Take a moment and READ the
code above out loud to yourself in
English (or your chosen language).
After you’ve gotten comfortable
speaking the code, jot it down
using your pencil.
you are here 4 119
booleans, decisions, and loops
Code Magnets Solution
We'd already worked out the code for the game logic on the fridge with code magnets, but someone
came along and knocked most of it on the floor. Can you reconstruct the code snippets so that we can
determine the winner? Notice, there may be some extra code magnets, so you may not use all of them.
and
computer_choice == 'paper'
and
and
computer_choice == 'rock'
computer_choice == 'scissors'
user_choice == 'paper'
user_choice == 'rock'
user_choice == 'scissors'
if
computer_choice == user_choice
:
:
winner
=
:
:
'Tie'
else
elif
elif
elif
winner = 'Computer'
winner = 'Computer'
winner = 'Computer'
winner = 'User'
:

120 Chapter 3
exercise solution
# ROCK, PAPER, SCISSORS
# Passed down from the ancient Chinese Han dynasty, the game
# shoushiling is now better known as Rock, Paper, Scissors.
# This code implements a version of the game that is you against
# the computer.
# Here we're doing some setup by importing the random module
# and setting up the winner variable.
import random
winner = ''
# The computer randomly chooses rock, paper, scissors by
# generating a random number from 0 to 2 and then mapping that
# to a corresponding string.
random_choice = random.randint(0,2)
if random_choice == 0:
computer_choice = 'rock'
elif random_choice == 1:
computer_choice = 'paper'
else:
computer_choice = 'scissors'
# Get the user's choice with a simple input statement.
user_choice = input('rock, paper or scissors? ')
# Here's our game logic, which checks to see if the computer wins
# (or not), and makes the appropriate change to the winner variable.
if computer_choice == user_choice:
winner = 'Tie'
elif computer_choice == 'paper' and user_choice == 'rock':
winner = 'Computer'
elif computer_choice == 'rock' and user_choice == 'scissors':
winner = 'Computer'
elif computer_choice == 'scissors' and user_choice == 'paper':
winner = 'Computer'
else:
winner = 'User'
# Here we announce the game was a tie, or the winner along
# with the computer's choice.
if winner == 'Tie':
print('We both chose', computer_choice + ', play again.')
else:
print(winner, 'won. The computer chose', computer_choice + '.')
In the IDLE editor add
comments to your rock.py
file. Feel free to use our
comments on the previous
page as a starter, but
make the comments your
own; that is, make sure
they are meaningful to you.
Here’s our attempt
to document Rock,
Paper, Scissors.

you are here 4 121
booleans, decisions, and loops
user_choice != 'rock' and user_choice != 'paper' and user_choice != 'scissors'
Convert the spoken English above into its Boolean expression equivalent. We’ve
done the first part for you.
user_choice = input('rock, paper or scissors? ')
if (user_choice != 'rock' and
user_choice != 'paper' and
user_choice != 'scissors'):
user_choice = input('rock, paper or scissors? ')
print('User chose', user_choice)
First we get the
user’s choice.
Then we test to see
if the input was valid.
If not, then we get the
user’s choice again.
We thought we were on the
right track, but what do you
think we’re missing?
While you were turning the page we went ahead and wrote the code to reprompt the user,
only our approach was flawed. Can you take a look and see what you think the flaw might
be? You’ll find the code, some notes, and a sample run of the code below.
Python 3.6.0 Shell
rock, paper or scissors? rack
rock, paper or scissors? papper
User chose papper
>>>
We're getting
reprompted.
But then we can
just enter invalid
input again.
Ugh!
ANALYSIS: On the good side, the code to detect invalid input is working great. However, the
attempt to reprompt the user, while it works, only works the first time. We really need a way
for this to work as many times as the user enters invalid input.
122 Chapter 3
exercise solution
w it Write a quick game. Here’s how it works: you prompt the player with
“What color am I thinking?” and you see how many guesses it takes the
player to guess it.
color = 'blue'
guess = ''
guesses = 0
while guess != color:
guess = input('What color am I thinking of? ')
guesses = guesses + 1
print('You got it! It took you', guesses, 'guesses')
w it
Remember the color guessing game? It has a bug. Have you noticed if you guess the color
correctly on the first try, it prints: "You got it! It took you 1 guesses". Can you fix
the bug so that it prints “guess” for one guesses and “guesses” for multiple guesses?
color = 'blue'
guess = ''
guesses = 0
while guess != color:
guess = input('What color am I thinking of? ')
guesses = guesses + 1
if guesses == 1:
print('You got it! It took you 1 guess')
else:
print('You got it! It took you', guesses, 'guesses')
extra credit
you are here 4 123
booleans, decisions, and loops
Coding
Cross
Solution
F
1
E
2Q U A L I T Y
B
3R
C
4O M P A R I S
5O N
O R H
W
6H I L E R B
7O O L E A N
E I
8F
9U
H
10 A S H A
11 S S I G N M E
12 N T
N L H L
T
13 Y P E S
14 C I S S O R S
X E L E
15 M P T Y
P I I
16 G
17
L
18 R
19 A N D O M N U M B E R S
O E G P O
O S O R
20 O C K
P S R G
S
21 C I S S O R S T E
22 L I F
O
I
23 N D E N T E D
Across
2. == is for. [EQUALITY]
4. >, <, and == are for. [COMPARISON]
6. Keeps executing as long as True. [WHILE]
7. Has two values. [BOOLEAN]
8. If its Boolean expresssion is True it executes
a code block. [IF]
10. Character for comments. [HASH]
11. = is for. [ASSIGNMENT]
13. Boolean is another one of these. [TYPE]
14. Cuts paper. [SCISSORS]
15. A string with nothing in it. [EMPTY]
19. Many programs need to generate these.
[RANDOMNUMBERS]
20. Paper wraps ______. [ROCK]
21. Rock blunts. [SCISSORS]
Down
1. Can't afford. [FERARRI]
3. Foundation of if and while.
[BOOLEANEXPRESSION]
5. Ancient Chinese game. [SHOUSHILING]
9. True or _____. [FALSE]
12. Catch-all. [ELSE]
16. How you include the random module.
[IMPORT]
17. Boole's first name. [GEORGE]
18. We often say repeating code is in one of
these. [LOOPS]
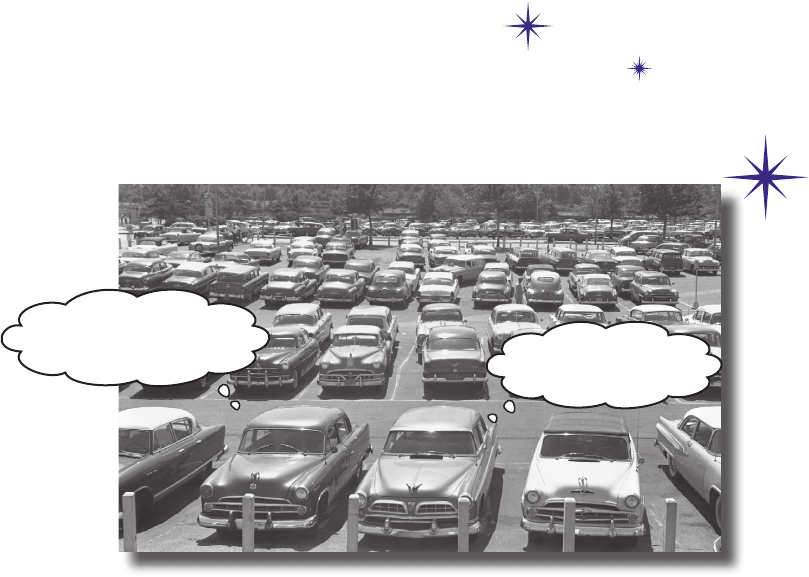
this is a new chapter 125
lists and iteration
4
Providing Some Structure
There’s more to data types than numbers, strings, and
Booleans. So far you’ve been writing Python code using primitive types—
those floats, integers, strings, and of course Booleans—with values like 3.14,
42, "hey, it’s my turn", and True. And you can do a lot with primitives,
but at some point you’ll want to write code that deals with lots of data—say, all
the items in a shopping cart, the names of all the notable stars, or an entire
product catalog. For that we need a little more ummph. In this chapter we’re
going to look at a new type, called a list, which can hold a collection of values.
With lists, you’ll be able to provide some structure for your data, rather than
just having a zillion variables floating around your code holding values. You’re
also going to learn how to treat all those values as a whole as well as how to
iterate over each item in a list using that for loop we mentioned in the last
chapter. After this chapter, your ability to deal with data is going to grow and
expand.
You come here often?
Only when pushed.
126 Chapter 4
the bubbles-r-us company
Can you help Bubbles-R-Us?
Check out the Bubbles-R-Us company. Their tireless research
makes sure bubble wands and machines everywhere blow the best
bubbles. Today they’re testing the “bubble factor” of several different
formulations of their new bubble solution—that is, they’re testing how
many bubbles can be blown with a given solution. Here’s their data:
Each bubble solution was tested for the number of
bubbles it can create.
Each test tube
is labeled 0 to
9 and contains a
different bubble
solution.
And here’s the
bubble factor
score for each
solution.
60 50 60 58 54 54 58 50 52 54
0 1 2 3 4 5 6 7 8 9
Of course you want to get all this data into Python so you can write
code to help analyze it. But that’s a lot of values. How are you going
to construct your code to handle all these values?

you are here 4 127
lists and iteration
My
bubble solution #3
is definitely going to be
the best.
How to represent multiple values in Python
You know how to represent single values like strings, numbers, and Booleans with Python,
but how do you represent multiple values, like all the bubble factor scores from the 10
bubble solutions? To do that we use Python lists. A list is a Python data type that can hold
many values. Here’s a Python list that holds all the bubble factor scores:
scores = [60, 50, 60, 58, 54, 54, 58, 50, 52, 54]
Here’s all 10 values, grouped together into a
list, and assigned to the scores variable.
Once you have your data in a list, you can access the individual scores when you need
to. Each individual score, or item, has an index. Computer scientists like to number things
starting at zero, so the first item has an index of 0. You can retrieve any item in the list
using its index, like this:
score = scores[3]
print('Solution #3 produced', score, 'bubbles.')
The index is zero-based, so the first
item in the list is at index 0, the
second items is index 1, and so on.
To access an item in the list we use
this syntax: the variable name of the
list followed by the index of the item,
surrounded by square brackets.
One of the
Bubbles-R-Us
bubbleologists
Python 3.6.0 Shell
Solution #3 produced 58 bubbles.
>>>
Remember we said
computer scientists
like to start things
from zero.
We placed numbers in
this list, but you can put
whatever values you want.
Many programming
languages call their
ordered data type an
array instead of a list.
We also often call
types like lists a data
structure because
they provide a way to
organize values or data.
128 Chapter 4
understanding lists
0 1 2 3 4
'coconut'
'strawberry'
'banana'
'pineapple'
'acai berry'
How lists work
smoothies
It looks like we might have some interesting
work to do for Bubbles-R-Us, but before we
start, let’s make sure we’ve got lists down, and
rather than using bubble factor scores, let’s put another kind
of value in our lists: strings, or even better, smoothie flavors! After we understand
lists a bit better, we’ll get right back to helping Bubbles-R-Us.
So, once you have a bunch of values you want to group together, you can create a list that holds
them, and then access those values in the list whenever you need them. Most often you’ll use lists
when you want to group together similar things, like bubble factor scores, ice cream flavors, daytime
temperatures, or even the answers to a set of true/false questions. Let’s look again at how to create
a list, paying a little more attention to the syntax this time.
smoothies = ['coconut', 'strawberry', 'banana', 'pineapple', 'acai berry']
Each value has
an index number,
starting at 0.
The list collects
all these values
together.
Every index in the list
holds a value.
The list is assigned to
a variable.
How to create a list
Let’s say you wanted to create a list that holds the name of a bunch
of smoothies. Here’s how you’d do that:
Notice that each item
in the list is separated
by a comma.
Let’s assign the list
to a variable named
smoothies.
To begin the list, use the
[ character, otherwise
known as an opening
square bracket.
...and we end the list
with a closing square
bracket.
As we already said, every item in a list resides at a location, or index. With the smoothies list, the
first item, “coconut,” is at index 0; the second, “strawberry,” is at index 1; and so on. Here’s a
conceptual look at how lists are stored:
And then we have
each item of the
list...
smoothies
you are here 4 129
lists and iteration
How to access a list item
Each item in the list has an index, and that’s your key to both accessing and changing the
values in a list. We’ve already seen how to access an item by starting with the list’s variable
name and then adding on an index, surrounded by square brackets. You can use that
notation anywhere you’d use a variable:
favorite = smoothies[2]
This evaluates to the value of the smoothies list at
index 2 (which is ‘banana’), which is then assigned
to the variable favorite.
Updating a value in the list
You can also change the value of an item in a list using its index:
smoothies[3] = 'tropical'
This sets the value of the item at index 3
(previously ‘pineapple’) to a new value, ‘tropical’.
So, after this line of code, the smoothie list will look like this:
0 1 2 3 4
'coconut'
'stawberry'
'banana'
'tropical'
'acai berry'
The value of the item at
index 3 has been changed.
To get an element from a list,
you need both the variable name
of the list, and the index of
the value you want.
0 1 2 3 4
'coconut'
'strawberry'
'banana'
'pineapple'
'acai berry'
'banana'
favorite is assigned the value in smoothies[2].
And remember, because the index starts at 0,
smoothies[2] is the third item in the list.
favorite
smoothies
smoothies
130 Chapter 4
an exercise with lists
eighties = ['', 'duran duran', 'B-52s', 'muse']
newwave = ['flock of seagulls', 'postal service']
remember = eighties[1]
eighties[1] = 'culture club'
band = newwave[0]
eighties[3] = band
eighties[0] = eighties[2]
eighties[2] = remember
print(eighties)
It’s a good time to get some practice with lists. Pretend you’re the
Python interpreter and trace though this code, figuring out what
the final output is. After you’ve completed the exercise, we’ll take
our list knowledge a little further.

you are here 4 131
lists and iteration
0 1 2 3 4
'coconut'
'strawberry'
'banana'
'tropical'
'acai berry'
avors
How big is that list, anyway?
Say someone hands you a nice big list with important data in it. You know how to
get what’s in the list, but you have no idea exactly how big it is (in other words, how
many items it has). Luckily, Python provides a built-in function to tell you, called
len. Here’s how you use the len function:
length = len(smoothies)
Use the len function to tell you
the number of items currently
in the list.
Just pass the len function
the list you'd like to know
the length of.
After this statement
is executed, the length
variable will hold the
number of items in the list,
in this case 5.
Notice that because we start numbering the
indices of the list at 0, the length of the list
will always be one greater than the last index.
The length is 5 because there are five items.
smoothies
Now that you know how to get the length of a list, how can you use the length’s value to obtain the
last item of a list?
This important fact
crops up in a lot of
other programming
languages as well.
132 Chapter 4
how to access the last item
Accessing the last item in the list
This is a common technique
in most languages: figure out
the length of the list and
then subtract one to get
the index of the last item.
Accessing the last item of a list is something you’ll do often when
coding. Say you’ve got a list that holds the most recent scores of a
sports game and you need to display the latest score. Or say you have
a list of current wind speeds of an approaching hurricane, and you
need to report the lastest speeds. You get the point: lists often have data
arranged with the latest, and often most important, values at the end
(that is, at the largest index), so accessing the last item of the list is a
common task.
The conventional way to do this, across many programming languages,
is to use the length of the list as an index. But remember, lists are
indexed starting at zero, so the index of the last item is actually one less
than the length of the list. To get the last item of our smoothies list, we
do this:
length = len(smoothies)
last = smoothies[length-1]
print(last)
Finding the last item of a list is such a common task that Python actually
provides an easier way to do it. Here’s how it works: you can use a
negative index, starting at –1, to specify the items in a list in reverse
order. So an index of –1 is the last item in the list, an index of –2 is the
second to last, and so on.
Python makes this even easier
Python 3.6.0 Shell
acai berry
>>>
-5 -4 -3 -2 -1
'coconut'
'strawberry'
'banana'
'tropical'
'acai berry'
avors
Python supports negative indices as
offsets from the END of the list. So, -1
is the last item, -2 is the item before
that, -3 is the third to the last item,
and so on. Note that a lot of languages
don't offer the convenient negative indices
syntax like Python does.
Here’s what negative
indices look like,
which start from
the end of the list.
smoothies
you are here 4 133
lists and iteration
last = smoothies[-1]
second_last = smoothies[-2]
third_last = smoothies[-3]
print(last)
print(second_last)
print(third_last)
Python 3.6.0 Shell
acai berry
tropical
banana
>>>
Using Python’s negative indices
Let’s give Python’s negative indices a try. Let’s say we want to take the
last three smoothies on our list and print them:
With an index of -1 we
get the last item.
And -2 gets us the
second to the last item.
Likewise -3 gets us the
third to the last item.
Now let’s print them.
The Thing-A-Ma-Jig
The Thing-A-Ma-Jig is quite a contraption—it clanks and clunks and even thunks,
but what it really does, well, you’ve got us stumped. Coders claim they know how it
works. Can you uncrack the code and find its quirks?
The Thing-A-Ma-Jig
Try these as an alternative for the characters list above:
characters = [‘a’, ‘m’, ‘a’, ‘n’, ‘a’, ‘p’, ‘l’, ‘a’, ‘n’, ‘a’, ‘c’]
or
characters = [‘w’, ‘a’, ‘s’, ‘i’, ‘t’, ‘a’, ‘r’]
characters = ['t', 'a', 'c', 'o']
output = ''
length = len(characters)
i = 0
while (i < length):
output = output + characters[i]
i = i + 1
length = length * -1
i = -2
while (i >= length):
output = output + characters[i]
i = i - 1
print(output)
View this as a character-building
exercise—spend some real time on
this and make your brain work; it
will thank you later.
When you think you know what this code
does, write your answer here and check
the solution at the end of the chapter.
If you need hints, look at
the code comments at the
end of the chapter.
134 Chapter 4
more about lists
Q: Does the order of items in a list
matter?
A: The list is an ordered data type.So,
most of the time, it matters, but not always.
In the Bubbles-R-Us scores list, the ordering
matters a lot, because the index of the score
in the list tells us which bubble solution got
that score—bubble solution 0 got score 60,
and that score is stored at index 0. If we
mixed up the scores in the list, then we’d
ruin the experiment! However, in other cases,
the order may not matter. For instance, if
you’re using a list just to keep track of
grocery items you need to pick up, the order
probably doesn’t matter much. So it really
depends on how you’re using the list. You’ll
probably find that ordering matters more
often than not when you use a list. Python
also has other data types—for instance,
dictionaries and sets—that are unordered.
More on those later in the book.
Q: How many things can you put into
a list?
A: Theoretically, as many as you
want. Practically, however, the number is
limited by things like the memory on your
computer. Each list item takes up a little
bit of space in memory and if you keep
adding items to a list, eventually you’ll run
out of memory. However, depending on the
kind of items you’re putting in your list, the
maximum number of items you can put into
a list is probably in the many thousands or
hundreds of thousands. Once you get into
the millions there are other solutions (like
databases) that are probably going to be
more appropriate.
Q: Can you have a list without any
elements?
A: Remember when we talked about
empty strings? Yes, you can have empty lists
too. In fact, you’ll see an example of using
an empty list in this chapter. To create an
empty list, just write:
empty_list = []
If you start with an empty list, you can add
things to it later. We’ll see how shortly.
Q: So far we’ve seen strings and
numbers in a list; can you put other
things in lists too?
A: You can; in fact, you can put values
from any Python type (including ones you
haven’t seen yet) into a list.
Q: Can values in a list have different
types, or do they all have to be the same?
A: There is no requirement in Python that
all the values in a list be of the same type.
We call lists with items of different types
heterogeneous lists. Here’s one:
heterogenous = ['blue', True, 13.5]
Q: What happens if I try to access an
item in a list that doesn’t exist?
A: You mean like you have a list of 10
items and you try to access item at index
99? If you do that you’ll get a runtime error,
like this:
IndexError: list index out of
range
Q: Okay, well, can I assign a new value
to a list index that doesn’t exist?
A: No, you can reassign an item to a new
value, but you can’t assign a value to an item
that doesn’t exist—if you do you’ll get a runtime
“out of bounds” error. Note that some languages
do allow this, but not Python. In Python we
have to first add a new item to the list instead.
smoothies = ['coconut', 'strawberry', 'banana', 'pineapple', 'acai berry']
most_recent = ________________
recent = smoothies[most_recent]
The smoothie flavors below were added to the list in the order
of their creation. Finish the code to determine the most recent
smoothie flavor created.
There are two ways to do this;
one uses len, the other doesn’t.
Can you get them both?
Or even another list!
you are here 4 135
lists and iteration
Meanwhile, back at Bubbles-R-Us...
Hey, glad you guys
are here. We just got a lot of
new bubble tests run. Check out all
the new bubble scores! I really need
some help understanding this data. I’d
love for you to code up what I
sketched below.
The Bubbles-R-Us CEO
scores = [60, 50, 60, 58, 54, 54,
58, 50, 52, 54, 48, 69,
34, 55, 51, 52, 44, 51,
69, 64, 66, 55, 52, 61,
46, 31, 57, 52, 44, 18,
41, 53, 55, 61, 51, 44]
New bubble scores
Hey, I really need this report to be able to make quick decisions
about which bubble solution to produce! Can you get this coded?
- Bubbles-R-Us CEO
Bubbles-R-Us
Bubble solution #0 score: 60
Bubble solution #1 score: 50
Bubble solution #2 score: 60
Bubbles tests: 36
Highest bubble score: 69
Solutions with highest score: [11, 18]
rest of scores here...
What we need to build
136 Chapter 4
understanding the report
We need to start
by listing all the
solutions and their
corresponding scores.
Time once again to put your pseudocoding skills to use! Go ahead and write some
pseudocode that will create the bubble score report. Take each item in the report
separately and think of how you’d break it down and generate the right output. Put any
notes and your pseudocode here.
Then we need to print
the total number of
bubble scores…
Let’s take a closer look at what the CEO is looking for:
Hey, I really need this report to be able to make quick decisions
about which bubble solution to produce! Can you get this coded?
- Bubbles-R-Us CEO
Bubbles-R-Us
Bubble solution #0 score: 60
Bubble solution #1 score: 50
Bubble solution #2 score: 60
Bubbles tests: 36
Highest bubble score: 69
Solutions with highest score: [11, 18]
rest of scores here...
…followed by the
highest score and
each solution that
has that score.
Do your best and take this as far
as you can, and then we’ll work
through the entire bubble score
report together.

you are here 4 137
lists and iteration
Cubicle conversation
Judy: The first thing we need to do is display every score
along with its solution number.
Joe: And the solution number is just the index of the score
in the list, right?
Judy: Oh, yeah, that’s totally right.
Frank: Slow down a sec. So we need to take each score,
print its index, which is the bubble solution number, and
then print the corresponding score.
Judy: You’ve got it, and the score is just the corresponding
item in the list.
Joe: So, for bubble solution #10, its score is just
scores[10].
Judy: Right.
Frank: Okay, but there are a lot of scores. How do we write code to output all of them?
Judy: Iteration, my friend.
Frank: Oh, you mean like a while loop?
Judy: Right, we loop through all the values from zero to the length...oh, I mean the length
minus one, of course.
Joe: This is starting to sound very doable. Let’s write some code; I think we know what we’re
doing.
Judy: That works for me! Let’s do it, and then we’ll come back to the rest of the report.
Let’s take a look at the
CEO’s mockup and see how
we can tackle coding it...
Frank
Judy
Joe
138 Chapter 4
iterating over a list
scores = [60, 50, 60, 58, 54, 54, 58, 50, 52, 54, 48, 69,
34, 55, 51, 52, 44, 51, 69, 64, 66, 55, 52, 61,
46, 31, 57, 52, 44, 18, 41, 53, 55, 61, 51, 44]
i = 0
length = len(scores)
while i < length:
print('Bubble solution #', i, 'score:', scores[i])
i = i + 1
Create a variable to keep track of the
current index, which we'll start at 0.
60 50 60 58 54 54 58 50 52 54
0 1 2 3 4 5 6 7 8 9
Your goal is to produce some output that looks like this:
Bubble solution #0 score: 60
Bubble solution #1 score: 50
Bubble solution #2 score: 60
.
.
.
Bubble solution #35 score: 44
Scores 3 through 34 will be
here...we’re saving some trees
(or electrons depending on which
version of the book you have).
We’ll do that by outputting the score at index 0, and then we’ll do the
same for index 1, 2, 3, and so on, until we reach the last index in the list.
You already know how to use a while loop; let’s see how we can use that
to output all the scores:
And then we’ll show you a
better way in a sec...
Loop over the items while our index is
less than the length of the list.
Here we create the report output
by using the variable i to represent
our solution #. The variable i is
also being used as the index into
the scores list.
And finally, increment the index i
by one before looping again.
How to iterate over a list
Get the length of the scores list.
Note we didn’t need
length-1 here because
we’re using < (less than
length).
you are here 4 139
lists and iteration
A quick Test Drive
It’s about time we get some real code written. Go ahead
and get the code on the previous page into a file called
bubbles.py before running it.
Python 3.6.0 Shell
Bubble solution # 0 score: 60
Bubble solution # 1 score: 50
Bubble solution # 2 score: 60
...
Bubble solution # 34 score: 51
Bubble solution # 35 score: 44
>>>
Bubbles-R-Us
Bubble solution #0 score: 60
Bubble solution #1 score: 50
Bubble solution #2 score: 60
Here’s what we got; not bad!
Just one small nit:
did you notice how
the output has an
extra space after
the hash character?
The CEO’s version
doesn’t have that.
Hmm, we have
an extra space
here.
Let’s look at the print statement to identify where the extra space is
coming from:
Fixing the output glitch
print('Bubble solution #', i, 'score:', scores[i])
As you know, when we provide multiple values
to print, separated by commas, by default
behavior is to add a space between each one.
To fix this we could just do something like:
bubble_string = 'Bubble solution #' + i
print(bubble_string, 'score:', scores[i])
Concatenate the string
“Bubble solution#” to i
first, then hand it to
the print function.
It looks like by just concatenating "Bubble solution #" to the i variable we can easily
get rid of the extra space, but this isn’t going to work. Can you spot where we went
wrong?
140 Chapter 4
a quick fix
scores = [60, 50, 60, 58, 54, 54, 58, 50, 52, 54, 48, 69,
34, 55, 51, 52, 44, 51, 69, 64, 66, 55, 52, 61,
46, 31, 57, 52, 44, 18, 41, 53, 55, 61, 51, 44]
i = 0
length = len(scores)
while i < length:
print('Bubble solution #' + str(i), 'score:', scores[i])
i = i + 1
A quick fix Test Drive
Let’s make a quick update to the code and then you’ll have
the CEO’s spec implement, so far, just like he wanted it.
Python 3.6.0 Shell
Bubble solution #0 score: 60
Bubble solution #1 score: 50
Bubble solution #2 score: 60
...
Bubble solution #34 score: 51
Bubble solution #35 score: 44
>>>
Much better
Did you figure out where we went wrong? Well, you can’t concatenate a string to an
integer. D’oh! But how do we change an integer into a string? Well, remember when we
did the opposite? We changed a string into an integer using the int function. As it turns
out, there is also a str function that does the opposite: give it an integer, and it will give
you back a string representation of that integer.
Given that, we can rework our code like this:
Really fixing the output glitch
bubble_string = 'Bubble solution #' + str(i)
print(bubble_string, 'score:', scores[i])
All we need to do is
pass the integer i to
the str function and it
will convert it into a
string representation.
Let’s get that into our code, only we’ll do it without the extra bubble_string variable.
Instead, we’ll make our code more concise and add the call to str right in with the print
arguments. Check out the Test Drive below for the changes.
Here we just concatenate “Bubble solution #” with i before it is
passed to print. And we make sure to use the str function so we
have a string representation of i.
you are here 4 141
lists and iteration
while i < len(has_coconut)
i = i + 1
has_coconut = [True,
False,
False,
True,
False]
i = 0
i = i + 2
:
:
:
Code Magnets
while i > len(has_coconut)
Rearrange the magnets here.
Time for a quick exercise. We wrote some
code to see which smoothies have coconut
in them. We had all the code nicely laid out
on our fridge using fridge magnets, but the
magnets fell on the floor. It’s your job to put
them back together. Be careful; a few extra
magnets got mixed in. Check your answer at
the end of the chapter before you go on.
Here’s the output
we’re expecting.
Python 3.6.0 Shell
coconut contains coconut
tropical contains coconut
>>>
smoothies = ['coconut',
'strawberry',
'banana',
'tropical',
'acai berry']
if has_coconut[i]
print(smoothies[i],'contains coconut')
142 Chapter 4
iterating with a for loop
So, you can use a while loop to iterate over your lists, but the preferred method is actually using a for
loop. Think of the for loop as the while loop’s cousin—the two basically do about the same thing,
except we typically use a while loop when we’re looping over some condition, and a for loop when
we’re iterating over a sequence of values (like a list). Let’s return to our smoothies to see how we loop, or
iterate, over a list with the for loop. After we’ve done that, we’ll nail down the Bubbles-R-Us code.
A for loop
starts with the
keyword for.
Next we have a variable that is going
to be assigned to each item in our list
as we iterate through it.
for smoothie in smoothies:
output = 'We serve ' + smoothie
print(output)
The for loop, the preferred way to iterate over a list
The code block is
executed once for
each item in the list.
You can use the smoothie variable anywhere in the
block to access the value of the current item.
Next we have
the in keyword.
And as always with Python we have a colon
before the code block below.
Here's the smoothies list
we're going to iterate over.
0 1 2 3 4
'coconut'
'stawberry'
'banana'
'tropical'
'acai berry'
smoothies
'coconut'
smoothie
How the for loop works
Let’s execute the code above. The first time through the loop, the first item in the list smoothies is
assigned to the variable smoothie. After that the body of the for loop is executed.
Python 3.6.0 Shell
We serve coconut
The smoothie variable (not to be
confused with smoothies) is assigned
to the first item in the list.
Then we execute the
code block of the for
statement.
Notice the convention of
using a plural variable name
for the list and a singular
name for the variable.
you are here 4 143
lists and iteration
0 1 2 3 4
'coconut'
'stawberry'
'banana'
'tropical'
'acai berry'
smoothies
'strawberry'
smoothie
Python 3.6.0 Shell
We serve coconut
We serve strawberry
Next time through the loop, the next item, “strawberry,” in the list smoothies is assigned
to the variable smoothie. After that the code block is executed.
The third time through the loop, the next item, “banana,” in the list smoothies is assigned
to the variable smoothie. After that the code block of the for loop is executed.
Python 3.6.0 Shell
We serve coconut
We serve strawberry
We serve banana
0 1 2 3 4
'coconut'
'stawberry'
'banana'
'tropical'
'acai berry'
smoothies
'banana'
smoothie
0 1 2 3 4
'coconut'
'stawberry'
'banana'
'tropical'
'acai berry'
smoothies
'tropical'
smoothie
Python 3.6.0 Shell
We serve coconut
We serve strawberry
We serve banana
We serve tropical
And by now you can see the pattern—the fourth time through the loop, the next item,
“tropical,” is assigned to the variable smoothie before we execute the code block.
Because smoothie now is set to
strawberry, we now get the output
“We serve strawberry”.
This time we
get banana.
Tropical, anyone?
Next, ‘strawberry’ is then assigned
to the smoothies variable.
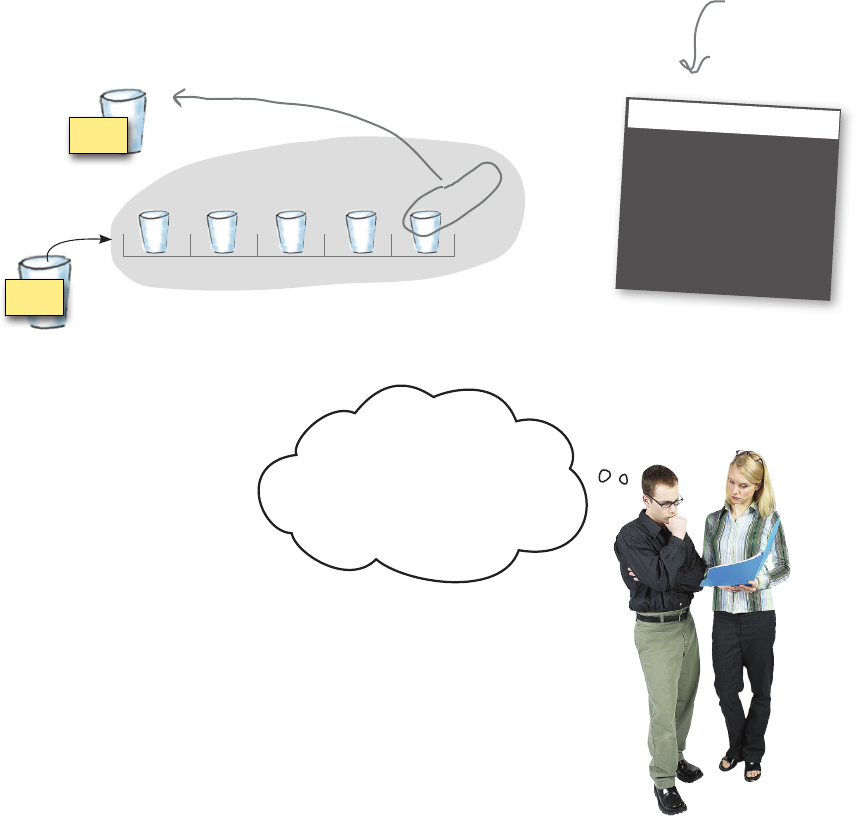
144 Chapter 4
understanding the for loop
0 1 2 3 4
'coconut'
'stawberry'
'banana'
'tropical'
'acai berry'
smoothies
'acai berry'
smoothie
And as you can guess at this point, the fifth, or last time, through the loop, the next
item, “acai berry,” in the list smoothies is assigned to the variable smoothie. After
that the code bock of the for loop is executed for the last time.
Python 3.6.0 Shell
We serve coconut
We serve strawberry
We serve banana
We serve tropical
We serve acai berry
We’ve now iterated
through every item in
the smoothies list.
I like the for
loop; that’s nice. But how
do we print the score num-
bers—it looks like we just
have the actual scores?
Judy: Oh, you’re saying when we used a while loop we had the
counter i, which we used for the score number and as an index
to get the scores.
Frank: Exactly, and when we’re using a for statement, we just
seem to have the item of the list. Where’s the index?
Judy: Uh, good question.
Joe (shouting from across the room): Guys, I did some research,
there’s another way to use for. The way you’re talking about
is great for sequences when you don’t care about an index, but
you can use for with a range of indices to iterate through the
bubble solutions.
Frank: Say what?
Joe: It’s almost easier to show you...
you are here 4 145
lists and iteration
There’s another kind of sequence the for loop works on: a range of numbers. In fact,
Python gives you a built-in function called range that you can use to generate different
sequences of numbers. After you’ve generated a sequence of numbers, you can use the
for loop to iterate through them.
Here’s how you generate a range from 0 to 4:
How the for loop works on a range of numbers
range(5)
The range starts at
0 and gives you a
sequence of 5 numbers.
Creates the sequence 0, 1, 2, 3, 4.
You can combine range with for like this:
for i in range(5):
print('Iterating through', i)
Python 3.6.0 Shell
Iterating through 0
Iterating through 1
Iterating through 2
Iterating through 3
Iterating through 4
>>>
range makes the sequence 0, 1, 2, 3, 4.
The i variable is assigned to each item of the
sequence before the body is executed.
So say you want to iterate through our smoothies and print the index of each. Here’s
how you can do that:
length = len(smoothies)
for i in range(length):
print('Smoothie #', i, smoothies[i])
Python 3.6.0 Shell
Smoothie # 0 coconut
Smoothie # 1 strawberry
Smoothie # 2 banana
Smoothie # 3 tropical
Smoothie # 4 acai
>>>
Create a range from zero to
the length of smoothies.
Each time we iterate, we print
“Smoothie#", the index, and the
smoothie at that index.
146 Chapter 4
exploring ranges
With a range you don’t have to create sequences from
zero to some number; you can create all kinds of ranges
of numbers. Here’s a few examples:
Doing more with ranges
range(5, 10)
Creates a sequence
starting at 5 and
going up to 10, so:
5, 6, 7, 8, 9
Start of range
Up to end of range
(but not including
this number)
range(3, 10, 2)
Creates a sequence starting
at 3 and going up to 10,
but counting by steps of 2,
so: 3, 5, 7, 9
You can add a “step size”
as well, which tells Python
to count by increments.
range(10, 0, -1)
Creates a sequence
starting at 10 and going
down to 0, but by steps
of -1, so: 10, 9, 8, 7, 6, 5,
4, 3, 2, 1
We can even count backward by making the first argument
larger than the second, and using a negative step size.
range(-10, 2)
Creates a sequence starting at -10
counting to 2, so: -10, -9, -8, -7,
-6, -5, -4, -3, -2, -1, 0, 1
You can start at a negative number too.
Try a starting and ending number
Add a step size
Count backward
Or start from negative numbers
Q: Does range(5) just create a list,
like [0, 1, 2, 3, 4]?
A: No, it doesn’t, although we can
easily see how you’d think that. The
reason it doesn’t is Python actually
creates something a lot more efficient
than a list. For now, though, it is fine to
think of it that way; just know you can’t
substitute range for a list in your code.
Oh, and if you ever want to use range to
create a list, you can do that like this:
list(range(5))
to create the list you mentioned in your
question.
Q: You used a variable name
called i. That doesn’t seem very
good for readability. Why not index
or smoothie_index or something like
that?
A: Good catch. You’re right, the
variable i may not be the most readable
variable name, but when a variable is
used as an index in a iteration, there is
a long history of using variables like i, j,
and k—so much so, it is almost blindly
followed by programmers and in fact it
might strike them as odd to use a longer
variable name. So, we encourage you,
for this exception, to use short variable
names, and before long it will feel like
second nature to you.

you are here 4 147
lists and iteration
We had our range function calls figured out, and then they got all mixed
up. Can you help us figure out who does what? Be careful, we’re not sure
if each range matches zero, one, or more sequences. We’ve already figured
one out, which is marked below:
range(8)
range(3, 8)
range(3, 8, 2)
range(3, 8, 3)
range(-3, 1)
range(0, 7)
range(0, 8)
range(0, 8, 1)
range(0, 8, 2)
3, 6
0, 1, 2, 3, 4, 5, 6, 7
3, 4, 5, 6, 7
3, 5, 7
-3, -2, -1, 0
0, 1, 2, 3, 4, 5, 6
0, 2, 4, 6
1, 2, 3, 4
148 Chapter 4
implementing the report
I think we’ve got all the
pieces we need for the rst
part of the report, so let’s put this
all together...
Let’s now use our knowledge of ranges and the for loop to rework the
while loop we previously wrote to generate the bubble solution numbers
plus their scores.
Putting it all together
scores = [60, 50, 60, 58, 54, 54, 58, 50, 52, 54, 48, 69,
34, 55, 51, 52, 44, 51, 69, 64, 66, 55, 52, 61,
46, 31, 57, 52, 44, 18, 41, 53, 55, 61, 51, 44]
length = len(scores)
while i < length:
for i in range(length):
print('Bubble solution #' + str(i), 'score:', scores[i])
First, get length of
the scores list, as
before.
Then create a range from the scores
length, and iterate over those values from
zero to the length of scores minus one.
Then we create our output. Notice this is
exactly the same print statement we used
with the while loop—nothing changed!
Here’s our bubble scores list.
You can delete the while loop.
you are here 4 149
lists and iteration
Test drive the bubble report
Type the new code in and save it in the file bubbles.py, and
then give it a test run. Check out the brilliant report you
just generated for the Bubbles-R-Us CEO.
Just what the CEO ordered
Python 3.6.0 Shell
Bubble solution #0 score: 60
Bubble solution #1 score: 50
Bubble solution #2 score: 60
Bubble solution #3 score: 58
Bubble solution #4 score: 54
Bubble solution #5 score: 54
Bubble solution #6 score: 58
Bubble solution #7 score: 50
Bubble solution #8 score: 52
Bubble solution #9 score: 54
Bubble solution #10 score: 48
Bubble solution #11 score: 69
Bubble solution #12 score: 34
Bubble solution #13 score: 55
Bubble solution #14 score: 51
Bubble solution #15 score: 52
Bubble solution #16 score: 44
Bubble solution #17 score: 51
Bubble solution #18 score: 69
Bubble solution #19 score: 64
Bubble solution #20 score: 66
Bubble solution #21 score: 55
Bubble solution #22 score: 52
Bubble solution #23 score: 61
Bubble solution #24 score: 46
Bubble solution #25 score: 31
Bubble solution #26 score: 57
Bubble solution #27 score: 52
Bubble solution #28 score: 44
Bubble solution #29 score: 18
Bubble solution #30 score: 41
Bubble solution #31 score: 53
Bubble solution #32 score: 55
Bubble solution #33 score: 61
Bubble solution #34 score: 51
Bubble solution #35 score: 44
It's nice to see all the bubble
scores in a report, but it's
still hard to find the highest
scores. We need to work
on the rest of the report
requirements to make it a
little easier to find the winner.
150 Chapter 4
more with loops and lists
Another quick exercise. Remember the fridge
magnet code from a few pages back? Update
that code so that it uses a for loop instead of a
while loop. If you need a hint, revisit the way we
reworked the while loop for Bubbles-R-Us.
Your code goes here.
i = i + 1
i = 0
print(smoothies[i],
'contains coconut')
smoothies = ['coconut',
'strawberry',
'banana',
'tropical',
'acai berry']
if has_coconut[i] :
while i < len(has_coconut) :
has_coconut = [True,
False,
False,
True,
False]
You don’t need to turn back a few pages
because we’ve reproduced the solution
for you here.

you are here 4 151
lists and iteration
Tonight’s talk: The WHILE and
FOR loop answer the question
“Who’s more important?”
The WHILE loop
What, are you kidding me? Hello? I’m the general
looping construct in Python. I don’t need a
sequence or a range, as I can be used with any type
of conditional. Did anyone notice I was taught first
in this book?
And that’s another thing: have you noticed that the
FOR loop has no sense of humor? I mean if we all
had to do skull-numbing iteration all day, I guess
we’d all be that way.
Oh, I don’t think that could possibly be true.
This book just said that FOR and WHILE loops are
pretty much the same thing, so how could that be?
The FOR loop
I don’t appreciate that tone.
Cute. But have you noticed that 9 times out of 10,
coders use FOR loops?
Not to mention, doing iteration over, say, a list that
has a fixed number of items with a WHILE loop is
just a bad, clumsy practice.
Ah, so you admit we’re more equal than you let on,
huh?
I’ll tell you why...
When you use a WHILE loop you have to
initialize your counter and increment it in separate
statements. If, after lots of code changes, you
accidentally moved or deleted one of these
statements, well, then things could get ugly. But with
a FOR loop, everything is packaged right in the
FOR statement for all to see and with no chance of
things getting changed or lost.
152 Chapter 4
comparing while and for
The WHILE loop
Well, isn’t that nice and neat of you. Hey, most of
the iteration I see doesn’t even include counters; it’s
stuff like:
while (input != ''):
try that with a FOR loop!
Not only better, prettier.
Hey, I can iterate over a sequence too.
Like what?
I’m sure I can work with them too.
Oh sure, you’re the tough guy. Next time you need
to iterate while a condition is True, don’t call me,
and then we’ll see how heavy duty you are.
The FOR loop
So that’s all you got? You’re only better when you’ve
got a condition to loop over?
Oh, I didn’t realize this was a beauty contest. I’d
argue people iterate over sequences way more than
they write loops over general conditionals.
I think we’ve already covered that ground. Sure
you can, but it’s, well, it ain’t pretty. Don’t forget I’m
quite general too, I don’t just work on lists.
There are lots of sequences in Python. We’ve seen
lists and ranges and strings, but there’s even more
you can iterate over, like files, and quite a few other
more advanced data types the readers haven’t even
looked at it in this book.
Perhaps, but, again, wouldn’t be pretty. Face it,
when it comes to heavy-duty iteration, I’m designed
for it.
Likewise, don’t call me when you need to iterate
over a sequence!
you are here 4 153
lists and iteration
Cubicle conversation
continued...
Judy: Right, and the first
thing we need to do is
determine the total number of
bubble tests. That’s easy; it’s
just the length of the scores list.
Joe: Oh, right. We’ve got to
find the highest score too, and
then the solutions that have the
highest score.
Judy: Yeah, that last one is going to be the toughest. Let’s work out
finding the highest score first.
Joe: Sounds like a good place to start.
Judy: To do that I think we just need to maintain a highest score variable that keeps
track as we interate through the list. Here, let me write some Python-like pseudocode:
We’ve got all
the bubble solution
scores displaying, so now we
just need to generate the
rest of the report.
Hey, I really need this report to be able to make quick decisions
about which bubble solution to produce! Can you get this coded?
- Bubbles-R-Us CEO
Bubbles-R-Us
Bubble solution #0 score: 60
Bubble solution #1 score: 50
Bubble solution #2 score: 60
Bubbles tests: 36
Highest bubble score: 69
Solutions with highest score: [11, 18]
rest of scores here...
DECLARE a variable high_score and set to 0.
FOR i in range(length)
PRINT i and the bubble solution score[i]
IF scores[i] > high_score:
high_score = scores[i];
PRINT high_score
Joe: Oh nice; you did it with just a few lines added to our existing code.
Judy: Each time through the list we look to see if the current score is greater than
high_score, and if so, that’s our new high score. Then, after the loop ends we just
display the high score.
Add a variable to hold the high score.
Check each time through the loop to see if we have
a higher score, and if so that's our new high score.
After the loop we just display the high score.
If we have a new high score, then assign it to high_score.
154 Chapter 4
taking the implementation further
scores = [60, 50, 60, 58, 54, 54,
58, 50, 52, 54, 48, 69,
34, 55, 51, 52, 44, 51,
69, 64, 66, 55, 52, 61,
46, 31, 57, 52, 44, 18,
41, 53, 55, 61, 51, 44]
high_score = ______
length = len(scores)
for i in range(length):
print('Bubble solution #' + str(i), 'score:', scores[i])
if _____________ > high_score:
_____________ = scores[i]
print('Bubbles tests:', ____________)
print('Highest bubble score:', _____________)
Go ahead and implement the pseudocode on the previous page to find the
highest score by filling in the blanks in the code below. Once you’re done,
add the code to bubbles.py and give your code a test. Check the results in the
shell, and fill in the blanks in our shell below with the number of bubble tests
and the highest score. As always, check your answer at the end of the chapter
before you go on.
Fill in the blanks to complete the code here...
...and then fill in the blanks showing the
output you get in the console.
Python 3.6.0 Shell
Bubble solution #0 score: 60
Bubble solution #1 score: 50
Bubble solution #2 score: 60
...
Bubble solution #34 score: 51
Bubble solution #35 score: 44
Bubbles tests: ________
Highest bubble score: _______
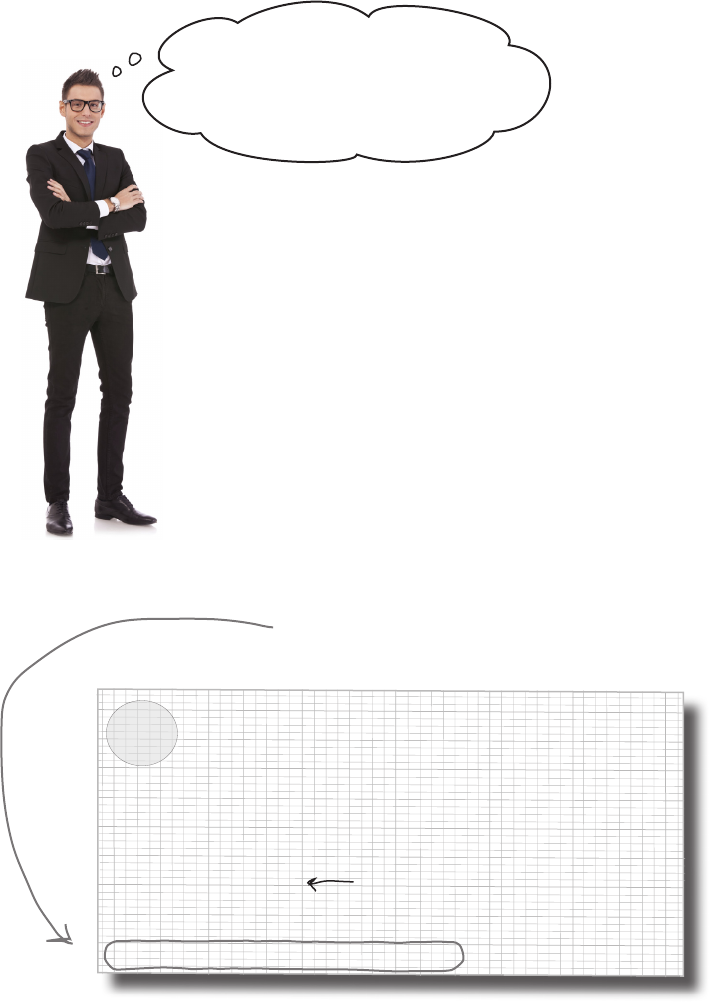
you are here 4 155
lists and iteration
Hey, I really need this report to be able to make quick decisions
about which bubble solution to produce! Can you get this coded?
- Bubbles-R-Us CEO
Bubbles-R-Us
Bubble solution #0 score: 60
Bubble solution #1 score: 50
Bubble solution #2 score: 60
Bubbles tests: 36
Highest bubble score: 69
Solutions with highest score: [11, 18]
rest of scores here...
Hey, you guys are almost
there! All you’ve got left is collecting
up all the solutions with the highest score
and printing them. Remember, there
might be more than one.
Remember here's
what we have left.
More than one? When we need to store
more than one thing, what do we use? A list, of
course. So, can we iterate through our existing
scores list looking for scores that only match
the highest score, and then add those to a new
list that we can later display in the report? You
bet we can, but to do that we’ll have to learn
how to create a brand new, empty list, and then
understand how to add new elements to it.
156 Chapter 4
how to create and add to lists
Before we take on finishing this code, let’s get a sense for how to create a
new list, and how to add items to it. You already know how to explicitly
create a list with values, like this:
menu = ['Pizza', 'Pasta', 'Soup', 'Salad']
But you can also omit the initial items and just create an empty list:
menu = []
A new list, all ready to go with no
items and a length of zero.
Once you’ve created an empty list you can add new items with append,
like this:
menu = []
menu.append('Burger')
menu.append('Sushi')
print(menu)
As before, a new list item is created.
And a second item is created that
holds the string ‘Sushi'.
Building your own list, from scratch
The string ‘Burger' is added to the list.
Python 3.6.0 Shell
['Burger', 'Sushi']
>>>
You can also
create a new,
empty list in
Python by calling
list(), but more on
this later in the
book. Just tuck
that in the back
of your brain for
now.
mystery = ['secret'] * 5
You’ve seen how to create an empty list with two square backets,
but what do you think the code below does? Feel free to type the
code into the shell to experiment. Record your observations here.
mystery = 'secret' * 5
How is it different
from this?
Multiplication of a
number and a list? What
on earth does this do?

you are here 4 157
lists and iteration
There’s a lot more you can do with lists, like insert new items, delete items, add
lists together, and search for items in a list—here are a few examples to whet
your appetite.
Doing even more with lists
del menu[0]
print(menu)
Python 3.6.0 Shell
['Sushi']
>>>
Delete the item at
index 0. The item at index 0 is
removed, leaving only one
item, ‘Sushi’, which is now
at index 0.
Delete an item from a list
Need to get rid of an item in a list? Python provides a built-in
function called del to do just that. Here’s how it works:
Add one list to another
Let’s say you have a list, and someone hands you another list and
you want to add all those items to your list. No worries, here’s
how you do that:
menu.extend(['BBQ', 'Tacos'])
print(menu)
Extend our menu with the
items in another list. Our current list, menu, is
extended with the items
that are in the supplied list.
Python 3.6.0 Shell
['Sushi', 'BBQ', 'Tacos']
>>>
After you’ve deleted an item from a list, all the items with greater
indices move down one. So if you delete the item at index 2, then
the item previously at index 3 takes its place. The item at index 4
becomes 3, and so on.
What is the difference
between using append
and using extend on
lists?
158 Chapter 4
doing more with lists
Q: What happens if I insert an item after an index that
doesn’t exist, like menu.insert(100, 'French Fries')?
A: If you try to insert an item beyond the end of your list, it will
simply add the item in the last position in your list.
Q: What does the syntax mylist.append(value) actually
mean? It looks similar to the random.randint(0,2) syntax we
used in the last chapter.
A: Yes, they are related; both are an example of something we’ll
get to later in the book: the use of functions and objects (actually
we’ll make our use of terminology even more precise at that stage
of the book). Now that all won’t mean a lot to you right now, but
we’re going to see how data types, like lists, can provide their own
special behavior to do things like append items. So, mylist.append
is using the behavior append, which is provided by the list. For now,
go with the syntax, and down the road you’ll better understand the
true meaning behind it as we explore objects and functions.
Q: Well, why do we have menu.append and menu.insert, but
del menu[0]? Why isn’t it menu.delete(0) or something similar?
I thought Python was consistent?
A: It’s a very good question. It turns out the designers of Python
thought common operations, like len and del, deserved a bit of
special treatment. They also thought that, for example, len(menu)
was more readable than menu.length(). The reasoning behind this
has been debated at great length, but that’s the way it is in Python.
And, as in the last question, you’re asking all the right things, and
the madness behind the method will be clearer once we get to
talking about functions and objects.
menu.insert(1, 'Stir Fry')
print(menu)
Python 3.6.0 Shell
['Sushi', 'Stir Fry', 'BBQ', 'Tacos']
>>>
insert adds a new
item at the supplied
index, in this case 1.
Here’s the index where we
want an item inserted.
And here’s
the item.
As we said, we’ll be seeing even more list operations as the book progresses, but
these are some good operations to get you started.
There’s another way to combine lists as well—you can just add the
lists together using the + operator, like this:
menu = menu + ['BBQ', 'Tacos']
If we execute this
instead of our
previous use of the
extend function, we
get the same result.
Python 3.6.0 Shell
['Sushi', 'BBQ', 'Tacos']
>>>
Or insert items into your list
Let’s say you really need to add an item in the middle of your list.
Use the insert function to do that.
Note: extend extends an existing list. When you use + you get a
brand new list with the items of both lists in it.

you are here 4 159
lists and iteration
Judy: Yes, we’ll start with an empty list to hold
the solutions with the highest scores, and add each
solution that has that high score one at a time to it
as we iterate through the scores list.
Frank: Great, let’s get started.
Judy: But hold on a second…I think we might
need another loop.
Frank: We do? It seems like there should be a way
to do that in our existing loop.
Judy: Actually, I’m sure we do. Here’s why: we
have to know what the highest score is before we can
find all the solutions that have that highest score.
So we need two loops: one to find the highest score,
which we’ve already written, and then a second one
to find all the solutions that have that score.
Frank: Oh, I see. And in the second loop, we’ll
compare each score to the highest score, and if it
matches, we’ll add the index of the bubble solution
score to the new list we’re creating for the solutions
with the highest scores.
Judy: Exactly! Let’s do it.
Now that we know how to
add items to a list, we can finish up this
report. We can just create the list of the
solutions with the highest score as we iterate
through the scores list to find the highest
bubble score, right?
160 Chapter 4
finding the high scores
Can you help write the loop to find all the scores that match the high score?
You’ll find all the code up until now listed below. Give it a real shot below before
you check the solution.
Here’s the new list you'll use to store the bubble
solutions with the highest score.
Remember, the variable
high_score has the highest
score in it; you can use that
in your code.
scores = [60, 50, 60, 58, 54, 54,
58, 50, 52, 54, 48, 69,
34, 55, 51, 52, 44, 51,
69, 64, 66, 55, 52, 61,
46, 31, 57, 52, 44, 18,
41, 53, 55, 61, 51, 44]
high_score = 0
length = len(scores)
for i in range(length):
print('Bubble solution #' + str(i), 'score:', scores[i])
if scores[i] > high_score:
high_score = scores[i]
print('Bubbles tests:', length
print('Highest bubble score:', high_score)
best_solutions = []
________________________
_________________________
_________________________
Write your code here, using
more lines if necessary.
Here's all the
code so far.
you are here 4 161
lists and iteration
scores = [60, 50, 60, 58, 54, 54,
58, 50, 52, 54, 48, 69,
34, 55, 51, 52, 44, 51,
69, 64, 66, 55, 52, 61,
46, 31, 57, 52, 44, 18,
41, 53, 55, 61, 51, 44]
high_score = 0
length = len(scores)
for i in range(length):
print('Bubble solution #' + str(i), 'score:', scores[i])
if scores[i] > high_score:
high_score = scores[i]
print('Bubbles tests:', length)
print('Highest bubble score:', high_score)
best_solutions = []
for i in range(length):
if high_score == scores[i]:
best_solutions.append(i)
print('Solutions with the highest score:', best_solutions)
Go ahead and add your code to generate the bubble solutions with the highest score to your
code in bubbles.py and run another test drive. All of our code is shown below:
Python 3.6.0 Shell
Bubble solution #0 score: 60
Bubble solution #1 score: 50
...
Bubble solution #34 score: 51
Bubbles tests: 36
Highest bubble score: 69
Solutions with the highest score: [11,18]
And the winners are...
Bubble solutions #11 and #18 both have a high score of 69, so
they are the best bubble solutions in this batch of test solutions!
Test drive the final report
If this code looks new to
you, then you may not have
studied the solution to the
last Sharpen your pencil
exercise. You’ll want to do
that now.
162 Chapter 4
finding the most cost-effective solution
costs = [.25, .27, .25, .25, .25, .25,
.33, .31, .25, .29, .27, .22,
.31, .25, .25, .33, .21, .25,
.25, .25, .28, .25, .24, .22,
.20, .25, .30, .25, .24, .25,
.25, .25, .27, .25, .26, .29]
scores = [60, 50, 60, 58, 54, 54, 58, 50, 52, 54, 48, 69, ..., 44]
costs = [.25, .27, .25, .25, .25, .25, .33, .31, .25, .29, .27, .22, ..., .29]
So, what’s the job here? It’s to take the leading bubble solutions—that is, the ones
with the highest bubble scores—and choose the lowest-cost one. Now, luckily, we’ve
been given a costs list that mirrors the scores list. That is, the bubble solution
score at index 0 in the scores list has the cost at index 0 in the costs list (.25), the
bubble solution at index 1 in the scores list has a cost at index 1 in the costs list
(.27), and so on. So, for any score you’ll find its cost in the costs list at the same index.
Sometimes we call these parallel lists:
The cost at 0 is the cost of
the bubble solution at 0...
And likewise for the other cost
and score values in the lists.
Great job! Just one more thing...
can you figure out the most cost-effective
bubble solution? With that final bit of data,
we’ll definitely take over the entire bubble
solution market. Here’s a list with the cost of
each solution you can use to figure it out.
Here’s the new cost list. Notice that it has a
cost for each of the corresponding solutions in
the scores list.
Scores and costs are parallel lists because
for each score there is a corresponding
cost at the same index.

you are here 4 163
lists and iteration
This seems a little tricky. How do
we determine not only the scores
that are highest, but then pick the one
with the lowest cost?
Judy: Well, we know the highest score already.
Frank: Right, but how do we use that? And we have these two lists, but
how do we get those to work together?
Judy: I’m pretty sure either of us could write a simple for loop that
goes through the scores list again and picks up the items that match
the highest score.
Frank: Yeah, I could do that. But then what?
Judy: Anytime we hit a score that matches the highest score, we need
to see if its cost is the lowest we’ve seen.
Frank: Oh, I see, so we’ll have a variable that keeps track of the index of the “lowest cost
high score.” Wow, that’s a mouthful.
Judy: Exactly. And once we get through the entire list, whatever index is in that variable
is the index of the item that not only matches the highest score, but has the lowest cost as
well.
Frank: What if two items match in cost?
Judy: Hmm, we have to decide how to handle that. I’d say, whatever one we see first is the
winner. Of course we could do something more complex, but let’s stick with that unless
the CEO says differently.
Frank: This is complicated enough I think I want to sketch out some pseudocode before
writing anything.
Judy: I agree; whenever you are managing indices of multiple lists things can get tricky.
Let’s do that; in the long run I’m sure it will be faster to plan it first.
Frank: Okay, I’ll take a first stab at it…
164 Chapter 4
understanding the pseudocode
DECLARE a variable cost and set to 100.0
DECLARE a variable most_effective
FOR i in range(length):
IF the bubble solution at scores[i] equals high_score AND bubble solution at costs[i] is less than cost:
SET the value of most_effective to the value of i
SET the value of cost to the cost of the bubble solution
I’m pretty sure I nailed the pseudocode.
Check it out below. Make sure you’ve got
it down, and then we’ll go ahead and translate
it into real code.
At the end of the loop most_effective holds
the index of the solution with the highest score
and lowest cost. And the variable cost holds
the cost of that solution. Note, if there is a
tie between one or more solutions, this code will
always pick the solution it sees first in the list.
Create a variable to hold the cost of
the most cost-effective solution. We'll
make it larger than any item in costs
and also make it a float to match the
type of each item in the costs list. Create a variable to hold the index
of the most cost-effective solution.
Iterate over every solution, and if
a solution has the highest score...
…and a lower cost than
previous solutions…
…then record the index
and cost of current
solution.
As Judy suggested in the cubicle conversation, if there are multiple high score solutions with the
same cost, this code favors the first solution it finds. But why is that? What aspect of the code
makes that happen? What if you wanted to favor the last solution you found instead; how would
you do that?
Answer: Because this code is always comparing the current low cost by using less than, so once a low cost is
established, it takes an even lower cost (not an equal cost) to pick a new winner. You could favor the last solution it
sees by changing the less than comparison to a less than or equal to, <=, comparison.

you are here 4 165
lists and iteration
scores = [60, 50, 60, 58, 54, 54,
58, 50, 52, 54, 48, 69,
34, 55, 51, 52, 44, 51,
69, 64, 66, 55, 52, 61,
46, 31, 57, 52, 44, 18,
41, 53, 55, 61, 51, 44]
costs = [.25, .27, .25, .25, .25, .25,
.33, .31, .25, .29, .27, .22,
.31, .25, .25, .33, .21, .25,
.25, .25, .28, .25, .24, .22,
.20, .25, .30, .25, .24, .25,
.25, .25, .27, .25, .26, .29]
high_score = 0
length = len(scores)
for i in range(length):
print('Bubble solution #' + str(i), 'score:', scores[i])
if scores[i] > high_score:
high_score = scores[i]
print('Bubbles tests:', length)
print('Highest bubble score:', high_score)
best_solutions = []
for i in range(length):
if high_score == scores[i]:
best_solutions.append(i)
print('Solutions with the highest score:', best_solutions)
cost = 100.0
most_effective = 0
for i in range(length):
if scores[i] == high_score and costs[i] < cost:
most_effective = i
cost = costs[i]
print('Solution', most_effective,
'is the most effective with a cost of', costs[most_effective])
Testing the most cost-effective
solution
We should have everything coded below for the Bubbles-R-Us CEO.
Check out the code and see how it matches the pseudocode, and
then enter the new code into bubbles.py and give it another test run.
All the code is shown below. When you’ve got a winning solution,
turn to page to see if it matches ours.
We also added some
output to add the most
cost-effective solution
to the report.
We translated Frank's
Python-like pseudocode
directly to Python.
Don’t forget the new
costs list.
166 Chapter 4
the winning solution
The last bit of code you wrote really helped determine the TRUE
winner; that is, the solution that produces the most bubbles at the
lowest cost. Congrats on taking a lot of data and crunching it down
to something Bubbles-R-Us can make real business decisions with.
Now, if you’re like us, you’re dying to know what is in Bubble
Solution #11. Look no further: the Bubbles-R-Us CEO said he’d be
delighted to give you the recipe after all your unpaid work.
So, you’ll find the recipe for Bubble Solution #11 below. Take some
time to let your brain process lists by making a batch, getting out,
and blowing some bubbles before you begin the next chapter. Oh,
but don’t forget the bullet points and the crossword before you go!
The WINNER: SOLUTION #11
2/3 cup dishwashing soap
1 gallon water
2 to 3 tablespoons of glycerine (available at the
pharmacy or chemical supply house)
INSTRUCTIONS: Mix ingredients together in a
large bowl and have fun!
Bubble Solution #11
DO try this at HOME!
#11
Python 3.6.0 Shell
...
Bubble solution #34 score: 51
Bubbles tests: 36
Highest bubble score: 69
Solutions with the highest score: [11,18]
Solution 11 is the most effective with a cost of 0.22
>>>

you are here 4 167
lists and iteration
You’re right: we didn't need to.
We could have found the lowest-cost solution from just the list in
best_solutions, because that list is the result of already figuring
out one or more solutions with the highest bubble scores. The only
reason we didn’t was to keep things simple on our first attempt.
Others might be asking, though: what’s the difference? Who cares?
It works! Well, it is all about the efficiency of the code. How much
work is your code doing? And, for a list as small as ours, there really
isn’t much of a difference; however, if you had a huge list of data
you’d want to avoid iterating over it multiple times if you had a more
efficient way. And we do.
To determine the lowest-cost solution (with the highest score), all
we need to do is consider the solutions in the best_solutions list.
Doing that is a little more complex, but not much.
I have to ask:
we already knew the highest
score solutions, they are in the
best_solutions list, so why did
we need to go through EVERY
score again?
cost = 100.0
most_effective = 0
for i in range(len(best_solutions)):
index = best_solutions[i]
if cost > costs[index]:
most_effective = index
cost = costs[index]
print('Solution', most_effective,
'is the most efftive with a cost of',
costs[most_effective])
We're rewritten the
code to compute the
most cost-effective
solution.
This time we'll iterate over
the best_solutions list instead
of the scores lists
And we use each best_solutions
item as an index into the cost list.
We examine the cost of each
solution in the best_solutions
list, and look for the lowest.
So, in this code we're using
the values in best_solutions as
our indices.
And as before we
print the results.
COMPARE this code to
the previous version; can
you see the differences?
Think through how each
executes; can you see how
much less work this version
does to compute the most
cost-effective solution?
It's worth some time to
see the difference.
168 Chapter 4
review of lists and iteration
Lists are a data structure for ordered data.
A list holds a set of items, each with its own index.
Lists use a zero-based index, where the rst item is
at index 0.
You can use the len function to get the number of
items in a list.
You can access any item using its index. For
example, use my_list[1] to access the second item
in the list.
You can also use negative indices to identify items
starting at the end of the list.
Trying to access an item beyond the end of the list
will result in a runtime index error.
Assigning a value to an existing item will change its
value.
Assigning a value to an item that doesn’t exist in
the list results in an index “out of bounds” runtime
error.
List items can hold values of any type.
Not all the values in a list need to be the same type.
Lists that hold values of different types are called
heterogeneous.
You can create an empty list with
my_list = [ ].
You can add a new value to a list using append.
You can extend a list with the items in another list
with extend.
You can create a new list from two existing lists by
simply adding them together with +.
Use insert to add a new item at an index in an
existing list.
The for loop is commonly used to iterate through
sequences, like lists.
The while loop is most often used when you don’t
know how many times you need to loop, and you’re
looping until a condition is met. The for loop is most
often used when you know the number of times the
loop needs to execute.
The range function creates a range of integers.
You can iterate over ranges with the for loop.
The str function converts a number to a string.
you are here 4 169
lists and iteration
Coding cross
Let lists sink into your brain as you do the crossword.
1 2
3 4
5 6
7 8
9
10
11
12 13
14 15
16
17
18
Across
4. Author probably likes this kind of music.
5. Another word for loop.
7. Gets the length.
8. Creates a sequence of numbers.
9. Computer scientists like to start lists at this
index.
10. Accessing an item that doesn't exist results
in this error.
11. Best bubble company.
14. We made a lot of these drinks.
16. Makes numbers into strings.
17. Every item has one.
18. Adds an item to a list.
Down
1. An ordered data structure.
2. A list with values of different types.
3. Iterates over a condition.
5. Puts an item into a list.
6. How to delete an item.
12. A list with no items.
13. Iterates over a sequence or range.
15. Adds items of one list to another.
170 Chapter 4
exercise solution
eighties = ['', 'duran duran', 'B-52s', 'muse']
newwave = ['flock of seagulls', 'postal service']
remember = eighties[1]
eighties[1] = 'culture club'
band = newwave[0]
eighties[3] = band
eighties[0] = eighties[2]
eighties[2] = remember
print(eighties)
It’s a good time to get some practice with lists. Pretend you’re the
Python interpreter and trace though this code, figuring out what
the final output is. After you finish, we’ll take our list knowledge a
little further.
Let’s keep track of the eighties and other
variables as we trace through this code. The
newwave list never changes throughout this code.
[‘ ’, ‘duran duran', ‘B-52s', ‘muse'] ‘duran duran'
[‘ ’, ‘culture club', ‘B-52s', ‘muse'] ‘duran duran'
[‘ ’, ‘culture club', ‘B-52s', ‘muse'] ‘duran duran' ‘flock of seagulls'
[‘ ’, ‘culture club', ‘B-52s', ‘flock of seagulls'] ‘duran duran' ‘flock of seagulls'
[‘B-52s’, 'culture club', ‘B-52s', ‘flock of seagulls'] ‘duran duran' ‘flock of seagulls'
[‘B-52s', 'culture club', ‘duran duran', ‘flock of seagulls'] ‘duran duran' ‘flock of seagulls'
eighties remember band
Python 3.6.0 Shell
['B-52s', 'culture club', 'duran duran', 'flock of seagulls']
>>>
The final output
you are here 4 171
lists and iteration
The Thing-A-Ma-Jig
The Thing-A-Ma-Jig is quite a contraption—it clanks and clunks and even thunks,
but what it really does, well, you’ve got us stumped. Coders claim they know how it
works. Can you uncrack the code and find its quirks?
The Thing-A-Ma-Jig
We’ll start with output as the empty string.
characters = ['t', 'a', 'c', 'o']
output = ''
length = len(characters)
i = 0
while (i < length):
output = output + characters[i]
i = i + 1
length = length * -1
i = -2
while (i >= length):
output = output + characters[i]
i = i - 1
print(output)
What does it all mean? The Thing-A-Ma-Jig takes a sequence of characters and
it creates and prints out a palindrome. You might remember that a palindrome is a
word that reads the same forward as it does backward, like “tacocat”. So if we give
the Thing-A-Ma-Jig a sequence of t-a-c-o, it will turn that into the palindrome
tacocat for us. For a lot of sequences, like t-a-r, the results aren’t so interesting:
‘tarat’. But for others, like a-m-a-n-a-p-l-a-n-a-c, they are quite impressive: a
manaplanacanalpanama (or, “a man a plan a canal panama”).
The important thing, though, is how does this code take half a palindrome and create
a full one. Let’s study the code:
Let’s get the length of the characters list.
And set i to 0. Now we’ll start at 0 and
go through each item in
the list, adding it to the
output list.
Now let’s reset things a bit, setting the length
to its corresponding negative value (so, for
example, a length of 8 would become -8).
And we’ll set i to -2; you’ll see how this is used
in the code block.
Now we’re looping over the characters
backward! We’re also skipping the very last
character so it doesn’t get repeated in the
middle of the string.
Finally, we print the results. Study this until you understand it! Go through
each pass of the loop and write down the values
of the variables and lists that are changing if
necessary (and it may be!).
Why backward? Because
our indices are now
negative, not positive.
We’ll be seeing more of
palindromes in Chapter 8.
172 Chapter 4
exercise solution
smoothies = ['coconut', 'strawberry', 'banana', 'pineapple', 'acai berry']
most_recent = ________________
recent = smoothies[most_recent]
smoothies = ['coconut', 'strawberry', 'banana', 'pineapple', 'acai berry']
most_recent = ________________
recent = smoothies[most_recent]
-1
len(smoothies) - 1
The smoothie flavors were added to this list in the order of their
creation. Finish the code to determine the most recent smoothie
flavor created.
We can make use of Python negative
indexes to grab the last item in the
list with -1.
Or we can get the length of the list,
and subtract one.
Note that while breaking down things into clear
steps can often help with the clarity of our code,
for simple, common operations more succinct code
can actually be more readable. Let’s take the first
attempt at the code above and make it more succinct:
smoothies = ['coconut', 'strawberry', 'banana', 'pineapple', 'acai berry']
most_recent = ________________
recent = smoothies[-1]
We can just get rid of the most_recent
variable and use the -1 value directly in
the list index.
-1
smoothies = ['coconut', 'strawberry', 'banana', 'pineapple', 'acai berry']
most_recent = ________________
recent = smoothies[len(smoothies)-1]
len(smoothies) - 1
We can do this with the second
code attempt as well.
Here we’ve also gotten rid of the intermediate most_recent variable and just moved the
len(smoothies)-1 calcuation into the index of the list. This is arguably not as readable, but to an
experienced programmer it most likely would be. Code clarity is more an art than a science, so go
with what you find most clear and readable—and keep in mind that may change over time!
You can take this a little further.
you are here 4 173
lists and iteration
while i > len(has_coconut)
i = i + 1
i = 0
i = i + 2
:
print(smoothies[i],'contains coconut')
while i < len(has_coconut)
Rearrange the magnets here.
We’ve got code for testing to see which
smoothies have coconut in them. We had all
the code nicely laid out on our fridge using
fridge magnets, but the magnets fell on the
floor. It’s your job to put them back together.
Be careful; a few extra magnets got mixed in.
Here’s the output
we’re expecting.
Python 3.6.0 Shell
coconut contains coconut
tropical contains coconut
>>>
smoothies = ['coconut',
'strawberry',
'banana',
'tropical',
'acai berry']
if has_coconut[i]
Solution
Code Magnets
:
:
has_coconut = [True,
False,
False,
True,
False]
174 Chapter 4
exercise solution
range(8)
We had our range function calls figured out, and then they got all mixed
up. Can you help us figure out who does what? Be careful, we’re not sure
if each range matches zero, one, or more sequences. We’ve already figured
one out, which is marked below:
range(3, 8)
range(3, 8, 2)
range(3, 8, 3)
range(-3, 1)
range(0, 7)
range(0, 8)
range(0, 8, 1)
range(0, 8, 2)
3, 6
0, 1, 2, 3, 4, 5, 6, 7
3, 4, 5, 6, 7
3, 5, 7
-3, -2, -1, 0
0, 1, 2, 3, 4, 5, 6
0, 2, 4, 6
SOlUTion
1, 2, 3, 4
you are here 4 175
lists and iteration
Your code goes here.
i = i + 1
i = 0
print(smoothies[i],
'contains coconut')
smoothies = ['coconut',
'strawberry',
'banana',
'tropical',
'acai berry']
if has_coconut[i] :
while i < len(has_coconut) :
has_coconut = [True,
False,
False,
True,
False] smoothies = ['coconut',
'strawberry',
'banana',
'tropical',
'acai berry']
has_coconut = [True,
False,
False,
True,
False]
length = len(has_coconut)
for i in range(length):
if has_coconut[i]:
print(smoothies[i], 'contains coconut')
Rewrite your fridge magnet code (from a few
pages back) so that it uses a for loop instead of a
while loop. If you need a hint, revisit the way we
reworked the while loop for Bubbles-R-Us.
Let’s get the length
of the list.
And iterate from 0 to the
length of the list (minus 1).
Test the has_coconut list at index i to see if the item has coconut
and if so, print its name from the smoothies’ list at i.
Notice we could have written “if has_coconut[i] == True”, but
has_coconut[i] evaluates to a Boolean value, so it isn’t really necessary.

176 Chapter 4
exercise solution
scores = [60, 50, 60, 58, 54, 54,
58, 50, 52, 54, 48, 69,
34, 55, 51, 52, 44, 51,
69, 64, 66, 55, 52, 61,
46, 31, 57, 52, 44, 18,
41, 53, 55, 61, 51, 44]
high_score = ______
length = len(scores)
for i in range(length):
print('Bubble solution #' + str(i), 'score:', scores[i])
if _____________ > high_score:
_____________ = scores[i]
print('Bubbles tests:', ____________)
print('Highest bubble score:', _____________)
0
high_score
scores[i]
length
Fill in the blanks to complete the code here...
Here’s what we got.
Python 3.6.0 Shell
Bubble solution #0 score: 60
Bubble solution #1 score: 50
Bubble solution #2 score: 60
...
Bubble solution #34 score: 51
Bubble solution #35 score: 44
Bubbles tests: 36
Highest bubble score: 69
high_score
Go ahead and implement the pseudocode on the previous page to find the
highest score by filling in the blanks in the code below. Once you’re done,
add the code to bubbles.py and give your code a test. Check the results in the
shell, and fill in the blanks in our shell below with the number of bubble tests
and the highest score.
you are here 4 177
lists and iteration
best_solutions = []
for i in range(length):
if high_score == scores[i]:
best_solutions.append(i)
print('Solutions with the highest score:', best_solutions)
Again, we're starting by creating a
new list that will hold all the bubble
solutions that match the highest score.
Each time through the loop,
we compare the score at
index i with the high_score
and if they are equal, then
we add the score at that
index to the best_solutions
list using append.
And finally, we can display the bubble solutions with the highest scores. Notice we’re
using print to display the best_solutions list. We could have created another loop to
display the list items one by one, but, luckily, print will do this for us (and, if you look
at the output, it also adds commas between the list values; just what we need).
Next, we iterate through the entire
scores list, looking for those items
with the highest score.
mystery = ['secret'] * 5
mystery = 'secret' * 5
Can you help write the loop to find all the scores that match the high score?
You’ll find all the code up until now listed below. Give it a real shot below before
you check the solution.
We're just
showing you the
new code. You
know, saving
trees and all
that.
This syntax creates a list with ‘secret' as an item repeated
five times: [‘secret', ‘secret', ‘secret', ‘secret', ‘secret']. This
is a Python special feature, so you won't find it in too many
other programming languages. It does come in handy at times
(for instance, in Chapter 11).
Multiplication and strings? Well, we saw this already when
Codie's “12” was repeated seven times, remember? So if you
multiply a number by a string, you get a new string with the
original string repeated.
You’ve seen how to create an empty list with two square backets,
but what do you think the code below does? Feel free to type the
code into the shell to experiment. Record your observations here.
178 Chapter 4
exercise solution
Coding cross Solution
Let lists sink into your brain as you do the crossword.
L
1H
2
W
3E
4I G H T I E S
H S T
I I
5T E R A T E D
6
L
7E N R
8A N G E
E S Z
9E R O L
E G
R
10 U N T I M E
T N
B
11 U B B L E S R U S
O
E
12 F
13 U
S
14 M O O T H I E
15 S
P R X
S
16 T R T
Y I
17 N D E X
N
A
18 P P E N D
Across
4. Author probably likes this kind of music.
[EIGHTIES]
5. Another word for loop. [ITERATE]
7. Gets the length. [LEN]
8. Creates a sequence of numbers. [RANGE]
9. Computer scientists like to start lists at this
index. [ZERO]
10. Accessing an item that doesn't exist results
in this error. [RUNTIME]
11. Best bubble company. [BUBBLESRUS]
14. We made a lot of these drinks. [SMOOTHIES]
16. Makes numbers into strings. [STR]
17. Every item has one. [INDEX]
18. Adds an item to a list. [APPEND]
Down
1. An ordered data structure. [LIST]
2. A list with values of different types.
[HETEROGENEOUS]
3. Iterates over a condition. [WHILE]
5. Puts an item into a list. [INSERT]
6. How to delete an item. [DEL]
12. A list with no items. [EMPTY]
13. Iterates over a sequence or range. [FOR]
15. Adds items of one list to another. [EXTEND]
this is a new chapter 179
functions and abstraction
5
Getting Functional
You already know a lot. Variables and data types and
conditionals and iteration—that’s enough to write basically any program
you’d ever want to. In fact, a computer scientist would tell you it’s enough
to write any program that anyone could ever conceive of. But you don’t
want to stop now, because your next step in computational thinking is
learning how to create abstractions in your code. That may sound
complex, but it’s actually going to make your coding life simpler. Creating
abstractions gives you leverage; with abstraction, you can more easily
create programs of increasing complexity and power. You can put your
code in neat little packages that you can reuse over and over. And you
can forget all the nitty-gritty details of your code and to start thinking at a
higher level.
Now that we
know how to abstract
our code, the future’s
so bright we gotta wear
shades.
180 Chapter 5
some code analysis
A. It’s the same code over and
over, so it seems very redundant.
B. It looks tedious to type in!
C. It doesn’t seem to do a lot for
that much code.
D. Not the most readable code I’ve
ever seen.
E. If we wanted to change how the
dogs bark, that would be a lot of
changes to make!
F. ___________________________
_____________________________
dog_name = "Codie";
dog_weight = 40
if dog_weight > 20:
print(dog_name, 'says WOOF WOOF')
else:
print(dog_name, 'says woof woof')
dog_name = "Sparky"
dog_weight = 9
if dog_weight > 20:
print(dog_name, 'says WOOF WOOF')
else:
print(dog_name, 'says woof woof')
dog_name = "Jackson"
dog_weight = 12
if dog_weight > 20:
print(dog_name, 'says WOOF WOOF')
else:
print(dog_name, 'says woof woof')
dog_name = "Fido"
dog_weight = 65
if dog_weight > 20:
print(dog_name, 'says WOOF WOOF')
else:
print(dog_name, 'says woof woof')
Do a little analysis of the code below. How does it look? Choose as many of
the options below as you like, or write in your own analysis:
Discussing my
age wasn’t enough?
Codie,
you are here 4 181
functions and abstraction
dog_name = "Codie"
dog_weight = 40
if dog_weight > 20:
print(dog_name, 'says WOOF WOOF')
else:
print(dog_name, 'says woof woof')
dog_name = "Sparky"
dog_weight = 9
if dog_weight > 20:
print(dog_name, 'says WOOF WOOF')
else:
print(dog_name, 'says woof woof')
Okay, so we have some code that is repeated over and over. What’s wrong
with that? Well, at face value, nothing. After all, it works, right? Let’s
have a closer look at the code in question:
What we're doing here is comparing
the dog’s weight to 20, and if it's
greater than 20, we're outputting a
big WOOF WOOF. If it's less than 20
or equal to 20, we’re outputting a
smaller woof woof.
And this code is...wait, it's
doing EXACTLY the same
thing! And the same is true of
the rest of the code.
Sure, this code looks innocent enough, but it’s tedious to write, it’s
hard to read, and it will be problematic if your code needs to change
over time. That last point will become more and more clear as you
gain experience in programming—almost all code does change over
time, and the code above is a nightmare waiting to happen because
we’ve got the same logic repeated over and over.
Say you need to add a new bark called “yip yip,”for tiny dogs that are
less than 2 lb. How many places do you need to make that change in
the existing code?
Oh boy, so what do we do?
How can you improve this code? Take a few
minutes to think of a few possibilities.
dog_name = "Jackson"
dog_weight = 12
if dog_weight > 20:
print(dog_name, 'says WOOF WOOF')
else:
print(dog_name, 'says woof woof')
dog_name = "Fido"
dog_weight = 65
if dog_weight > 20:
print(dog_name, 'says WOOF WOOF')
else:
print(dog_name, 'says woof woof')
What’s wrong with the code, anyway?
Again, only
the details
of the dog
are different.
And again,
different
dog, same
code.

182 Chapter 5
reusing code
If only I could find a way to
reuse code so that anytime I needed it,
I could just use it rather than retyping it. And
a way to give it a nice memorable name so that I
could remember it. And a way to make edits in just
one place instead of many if something changes. That
would be dreamy. But I know it’s just a fantasy...

you are here 4 183
functions and abstraction
What if we told you that you could take a block of code, put a name on it, and then use and
reuse that code anytime you like? You’d probably say, “What took you so long?!”
Python gives us a way to do exactly that, and it’s called defining a function. You’ve already used a
few functions, like, print, str, int, and range. Let’s look at how they work again:
Turning a block of code into a FUNCTION
def bark(name, weight):
if weight > 20:
print(name, 'says WOOF WOOF')
else:
print(name, 'says woof woof')
Run your Program
}
print("I'm a function")
We call or invoke a
function by using
its name in code.
The name is
followed by a
parenthesis.
And then we provide
zero or more
arguments we pass
along to the function.
And then finally we have
an ending parenthesis.
When we call a function, we’ve assumed the function goes off and does a
bunch of work (like printing the values we passed it) and then at some point
returns and our code resumes where it left off. And that’s exactly what a
function does.
You don’t have to be satisfied calling prebuilt functions; you can create your
own. Here's how you do that:
To create a function, start
with the def keyword, and
follow it with a name to
remember the function by.
Next you can have zero or
more parameters. Think of
these like variables that hold
values that you will pass into
the function when you call it.
Here’s the block of code
we are going to reuse.
And then we have a colon, which, as you
know, starts a block of code in Python.
When the Python interpreter sees this code, it simply defines
the function and stashes the code away for later use—the body
of the function is not executed at this point. The body is only
executed when the function is called.
So now that you know how to define a function, let’s see how you use it.
You'll find all
programming languages
(at least languages that
you'd want to use) give
you a way to define
functions.
In Python and pretty
much all languages, we call
this code block the body
of the function.
You might have also
noticed that sometimes
a function returns
something to us, like with
the str function, which
returns a string that
represents an integer.
184 Chapter 5
how to call functions
Now that you’ve created a function by taking a block of code, giving it a
name, and defining some parameters (the dog’s name and weight) that
you’ll be supplying when you call it, you’re all ready to use your new
function.
And given your experience with functions like print, str, random, and
range, you already know what to do. Let’s call bark a few times to see
how it works:
bark('Codie', 40)
bark('Sparky', 9)
bark('Jackson', 12)
bark('Fido', 65)
Python 3.6.0 Shell
Codie says WOOF WOOF
Sparky says woof woof
Jackson says woof woof
Fido says WOOF WOOF
>>>
We created a function, so how do we use it?
But how does all this actually work?
print('Get those dogs ready')
def bark(name, weight):
if weight > 20:
print(name, 'says WOOF WOOF')
else:
print(name, 'says woof woof')
bark('Codie', 40)
print("Okay, we're all done")
Let’s test bark
with all the dogs
we know about.
Great, that’s the output
we were expecting!
We’ve created a function and we’ve put it to work, and everything seems
like it is working as expected, but what is really going on behind the
scenes? How does this all really work? Let’s take things step by step and
see. To do that, let’s step through the following code:
Here we start with a print
statement, just to get things going.
And then we have
our bark function
definition.
And then we’re
going to call the
bark function with
the arguments
Codie and 40.
And finally we use a
print statement to
say we’re done.
Pretend you are the Python
interpreter. Start at the top of
the code and mentally step
through and execute each
line. Are there any steps that
are unclear to you?

you are here 4 185
functions and abstraction
Behind
the Scenes
Like any good interpreter, let's
start at the beginning. So our
first line of code is a print statement. This
executes as you’d expect and outputs ‘Get those
dogs ready’ to the Python Shell.
print('Get those dogs ready')
def bark(name, weight):
if weight > 20:
print(name, 'says WOOF WOOF')
else:
print(name, 'says woof woof')
bark('Codie', 40)
print("Okay, we're all done")
We start here.
Python 3.6.0 Shell
Get those dogs ready
Up next: the function definition.
After executing the print statement, the interpreter
encounters the function definition for the bark
function. At this point, the Python interpreter
doesn’t execute the code in the function; rather, it
creates a name, bark, and stores away the function
parameters and body (after giving the body a quick
syntax scan) for later use. After the definition is
processed by the interpreter, we can use the name
bark to invoke the function any time we want.
print('Get those dogs ready')
def bark(name, weight):
if weight > 20:
print(name, 'says WOOF WOOF')
else:
print(name, 'says woof woof')
bark('Codie', 40)
print("Okay, we're all done")
The whole point of this bit of code is
to create the function, not to invoke it.
So after this code is evaluated, we’re
all ready to invoke this function at any
time with the function’s name, bark.
So far we just have a print statement,
which sends its output to the shell.
186 Chapter 5
closer look at calling functions
Behind
the Scenes
Next we have a call to the bark
function. After the function definition is complete,
the interpreter next encounters a function call.
This time it’s a call to the bark function with two
arguments: the string ‘Codie’ and the number 40.
The interpreter retrieves the function definition named
bark from memory, and assigns the arguments ‘Codie’
and 40 to the parameters name and weight, respectively.
print('Get those dogs ready')
def bark(name, weight):
if weight > 20:
print(name, 'says WOOF WOOF')
else:
print(name, 'says woof woof')
bark('Codie', 40)
print("Okay, we're all done")
It’s time to invoke
our function.
def function bark(name, weight)
...
bark('Codie', 40)
'Codie'
40
...which are assigned
to the parameters
name and weight.
You can think of name and weight as brand new
variables that are around as long as your function
body is being executed. Anytime you refer to them in
your function body, you can count on them to hold the
values of the arguments you passed into your function.
Next, after the parameters have been set, the
interpreter takes bark’s code and begins executing it.
Here we’re passing two
arguments, which are
‘Codie’ and 40...
Make it stick
Python is an
interpreter
Buy Millk
We call, or invoke, a function.
You pass arguments into
your function calls.
A function has zero or more
parameters that accept values from
your function call.
you are here 4 187
functions and abstraction
After the values of your arguments have been
assigned to each parameter, then it’s time to
start executing the body of your function.
Behind
the Scenes
Now we execute the function
body. An important thing to notice here is that
the flow of the program has now gone from the
call to the bark function to the body of the bark
function—we’re no longer proceeding straight
through our code, but rather, we’ve jumped to the
code in the function body. Keep that in mind.
In the function body we first have a conditional test
to see if the weight parameter is greater than 20,
and given we passed in 40, it is, so we execute the
code block of the conditional.
The block of the conditional prints the parameter
name, which has the value of ‘Codie’ and then
‘says WOOF WOOF’.
print('Get those dogs ready')
def bark(name, weight):
if weight > 20:
print(name, 'says WOOF WOOF')
else:
print(name, 'says woof woof')
bark('Codie', 40)
print("Okay, we're all done")
Python 3.6.0 Shell
Get those dogs ready
Codie says WOOF WOOF.
And with that, we complete the code in the body of
the bark function. So where do we go from here?
Well, when a function completes, the control of the
program returns back to where the function was
called, and the interpreter resumes execution there.
print('Get those dogs ready')
def bark(name, weight):
if weight > 20:
print(name, 'says WOOF WOOF')
else:
print(name, 'says woof woof')
bark('Codie', 40)
print("Okay, we're all done")
With the call to bark finished, the interpreter
resumes execution right after the call to the
bark function. So, we’ll pick back up here.
Remember, when a
function completes, the
control of the program
returns back to where the
function was called, and
the interpreter resumes
execution there.
188 Chapter 5
testing the bark function
Finally we reach the last line of our program.
Behind
the Scenes
Now we execute the code after
the function call. Finally, we return
from the call to the bark function and the only
code remaining is a simple print statement that
outputs Okay, we’re all done to the Python
Shell.
print('Get those dogs ready')
def bark(name, weight):
if weight > 20:
print(name, 'says WOOF WOOF')
else:
print(name, 'says woof woof')
bark('Codie', 40)
print("Okay, we're all done")
Python 3.6.0 Shell
Get those dogs ready
Codie says WOOF WOOF.
Okay, we’re all done
def bark(name, weight):
if weight > 20:
print(name, 'says WOOF WOOF')
else:
print(name, 'says woof woof')
bark('Codie', 40)
bark('Sparky', 9)
bark('Jackson', 12)
bark('Fido', 65)
That’s a lot to take in. Take a deep breath, and then get this code into a file called
bark.py, save your code, and choose the Run > Run Module menu item to make sure
everything’s good.
Here’s the code:
A Test Drive
Add all this new
code to your file.
Python 3.6.0 Shell
Codie says WOOF WOOF
Sparky says woof woof
Jackson says woof woof
Fido says WOOF WOOF
>>>
Here's what we
got when we
tested the code.
WOW, look how much more
readable and clear this code is!
you are here 4 189
functions and abstraction
Here’s a little connect-the-dots exercise for you. Using your
pencil, start at step 1 and draw a line from each step to the next
as the program executes. Feel free to annotate your lines where
necessary to explain what is happening in the code’s execution. We
already drew the first couple lines for you.
print('Get those dogs ready')
def bark(name, weight):
if weight > 20:
print(name, 'says WOOF WOOF')
else:
print(name, 'says woof woof')
bark('Codie', 40)
print("Okay, we're all done")
1
2
3
4
a
b
We start here.
Print, and then
proceed to the
next line.
bark('Speedy', 20)
bark('Barnaby', -1)
bark('Scottie', 0, 0)
We’ve got some more calls to bark below. Next to each call, write what you think the
output should be, or if you think the code will cause an error. Check your answer at the
end of the chapter before you go on.
Write what you
think the shell
will display here.
Hmm, any ideas
what these do?
bark('Lady', "20")
bark('Spot', 10)
bark('Rover', 21)

190 Chapter 5
functions and abstraction
I thought you
said we were going to
learn about abstraction? So
far it seems this chapter is
just about functions.
Functions are a way to abstract your code.
Think about the first dog example in this chapter. We had
a lot of messy code, and if you looked at that code it was a
bit hard, at least at first, to figure out what its purpose was.
But after some study, it was pretty obvious: we wanted each
dog to bark. And we wanted it to bark in a way that was
representative of the dog’s size—WOOF WOOF for big
dogs, and woof woof for small dogs.
So, what we did was pull the code that does the barking
out and abstracted it into a function. Once we did that, we
could simply write code like this:
bark('Codie', 40)
We no longer had to worry about how the code barks (as
we did with every single case of barking before we had this
function), we just need to use the bark function. And, two
months from now when you need to make some more dogs
bark, you can reuse this function with very little knowledge
of how it works. That allows you to focus on what you’re
coding (say, a dog show simulator), not the low-level details
of barking.
So we are taking code, abstracting it into a function, and
then making use of that abstraction in our code.
Or your
coworker
does.
you are here 4 191
functions and abstraction
Python 3.6.0 Shell
Take a plane
Take a car
Walk
Code Magnets
This working code is all scrambled up on the fridge.
Can you reconstruct the code snippets to make a
working program that produces the output listed
below? Notice, there may be some extra code on the
fridge, so you may not use all the magnets. Check
your answer at the end of the chapter.
def
,
,
,
}
}
}
{
(
)
how_should_I_get_there
how_should_I_get_there(2.0)
how_should_I_get_there(800.3)
how_should_I_get_there(.5)
else:
print('Walk')
elif miles >= 2.0:
print('Take a car')
if miles > 120.0:
print('Take a plane')
kilometer
miles
:
:

192 Chapter 5
more about functions
Q: Do I need to define my function
before the code that calls it? Or can I put
my functions at the end of the file?
A: Yes, you need to define functions
before they are called in your code. One
thing to consider: say we have two functions,
f1 and f2, where f1 calls f2 in its body. In this
case, it is perfectly fine to define f2 after f1 in
your code, so long as f1 does not get called
before f2 is defined. That’s because defining
the function body of f1 does not invoke
f2, until f1 is actually called. In terms of
where to put functions, we suggest defining
functions at the top of your file for better
organization and clarity.
Q: What kind of values can I pass to a
function?
A: In Python you can pass any of the
data types you’ve learned (as well as all the
ones you will learn) to a function: Booleans,
strings, numbers, and lists. Believe it or not,
you can even pass a function to another
function—we will get to why you’d want to
and what it gets you later in the book (in the
Appendix).
Q: Sorry, I’m still confused on the
whole argument versus parameter thing.
A: Don’t overthink it. They are both terms
for simple things. Arguments are the values
you pass to a function when you make a
function call. Parameters are part of the
function definition, and get initialized to the
arguments passed to the function call.
Q: What happens if I mix up the
order of my arguments, so that I’m
passing the wrong arguments into the
parameters?
A: All bets are off; in fact, we’d guess
you’re pretty much guaranteed either an
error at runtime or incorrectly behaving code.
Always take a careful look at a function’s
parameters, so you know what arguments
the function expects to be passed and in
what order.
That said, there are some other ways to
approach passing arguments that we’ll look
at before the chapter is over.
Q: What are the rules for function
names?
A: The rules for naming a function are
the same as the rules for naming a variable,
which we saw in Chapter 2. Just start with
an underscore or letter, and continue with
letters, underscores, or numbers. Most
Python programmers, by convention, keep
their function names all lowercase with
undescores between words, like get_name
or fire_cannon.
Q: Can functions call other functions?
A: Yes, happens all the time. Note you’re
already doing this when you call the print
function within the bark function code. Your
own functions are no different; you can call
them from your other functions.
So far you’ve only passed things to a function; that is, you know how to call a function and pass
arguments to it. But you can also get a value back from a function, with the return statement:
Functions can RETURN things too
def get_bark(weight):
if weight > 20:
return 'WOOF WOOF'
else:
return 'woof woof'
Here's a new function, get_bark, that returns
the appropriate bark, given a dog's weight.
If the weight is greater than 20 we
return the string ‘WOOF WOOF'.
Otherwise, we return the string ‘woof woof'.
A function can have zero, one,
or more return statements.
But only one will be
executed, because
as soon as a return
statement is
executed, the code
immediately returns
from the function.
you are here 4 193
functions and abstraction
Python 3.6.0 Shell
Codie's bark is WOOF WOOF
>>>
codies_bark = get_bark(40)
print("Codie's bark is", codies_bark)
So we’ve got a function, get_bark, that we just need to pass the weight of our dog, and it
returns the appropriate bark for that dog. Let’s see how to use it:
How to call a function that has a return value
You call the function like any other function,
only this function returns a value, so let's
set that value to a variable, codies_bark.
Get some practice to make return values sink in. Compute the
return value of each function call.
make_greeting('Speedy')
compute(2, 3)
compute(11, 3)
allow_access('Codie')
allow_access('Dr Evil')
def make_greeting(name):
return 'Hi ' + name + '!'
def compute(x, y):
total = x + y
if (total > 10):
total = 10
return total
def allow_access(person):
if person == 'Dr Evil':
answer = True
else:
answer = False
return answer
get_bark(20)
Write what
each call
returns here.
Defined on the
previous page

194 Chapter 5
understanding local variables
Good catch.
We sure did. You can declare new
variables right inside of your function,
just as we did. It’s often handy to have
variables that hold the result of an
intermediate calculation that you’ll
need in your function. We call these
local variables, because they are local to
the function and only exist as long as
the function execution does. That’s in
comparison to the global variables we’ve
been using so far, which exist as long as
your entire program does.
But hold that thought. Given our new
knowledge of functions, parameters,
return values, and so on, we’ve just
received a request to help “refactor”
some code. We never turn down a
chance to do real coding, so we’re going
to do that and then circle back and
dig into variables (local, global, and
otherwise) some more.
I noticed in that last exercise
that you declared some new
variables right inside your
functions, like total and answer.
you are here 4 195
functions and abstraction
Getting a little refactoring under our belts
A new startup around the corner has been working on some code to help
their users choose an avatar—you know, an onscreen representation, real or
imagined. They’ve just started, and so far all their code does is ask for the
user’s preferences for hair color, eye color, gender, and so on—once they get
this all working, they’ll presumably take all these preferences and generate a
nice avatar image for each user.
But they feel like their code is already getting too complex for such a simple
task. You’ll find the code below; notice that they’ve tried to make this easy on
the user by supplying some default values—the user can either type in a value,
or just hit return to accept the default.
hair = input("What color hair [brown]? ")
if hair == '':
hair = 'brown'
print('You chose', hair)
hair_length = input("What hair length [short]? ")
if hair_length == '':
hair_length = 'short'
print('You chose', hair_length)
eyes = input("What eye color [blue]? ")
if eyes == '':
eyes = 'blue'
print('You chose', eyes)
gender = input("What gender [female]? ")
if gender == '':
gender = 'female'
print('You chose', gender)
has_glasses = input("Has glasses [no]? ")
if has_glasses == '':
has_glasses = 'no'
print('You chose', has_glasses)
has_beard = input("Has beard [no]? ")
if has_beard == '':
has_beard = 'no'
print('You chose', has_beard)
For each attribute of the avatar, we
prompt the user, including a default
choice, like brown hair.
If the user simply hits the Return key, then
we assign the variable to the default value.
Otherwise, we use what they typed in.
We do this over and over for
each attribute.
We also print each user's choice.
196 Chapter 5
testing the avatar code
Python 3.6.0 Shell
What color hair [brown]? blonde
You chose blonde
What hair length [short]?
You chose short
What color eyes [blue]? brown
You chose brown
What gender [female]? male
You chose male
Has glasses [no]?
You chose no
Has beard [no]? yes
You chose yes
Running the code
Let’s do a little run-through of the code so far to see how it
works. Before we do, though, make sure you’ve studied the
code a bit so you get the gist of it.
The program prompts us for
each attribute. We either
type out an attribute, or
accept the default (like short
hair length and no glasses) by
hitting return.
And for each attribute, the
program confirms the user's
choice by printing it back out.
Obviously our avatar code is in need of some abstraction. Use this space to work
out how you think this code should be abstracted into a function (or functions) and
what your function calls might look like. When you’re done, we’ll walk through it
together on the next page (but make sure you do your own work first!).
you are here 4 197
functions and abstraction
hair = input("What color hair [brown]? ")
if hair == '':
hair = 'brown'
print('You chose', hair)
hair_length = input("What hair length [short]? ")
if hair_length == '':
hair_length = 'short'
print('You chose', hair_length)
eyes = input("What eye color [blue]? ")
if eyes == '':
eyes = 'blue'
print('You chose', eyes)
.
.
.
For each attribute we're prompting
the user and getting their response.
And we have a different default
value, like brown, short, blue.
And we print the
attribute back to
the user.
Each attribute is also
assigned to a variable, like
hair or eyes.
For every
attribute we do
exactly the same
thing.
We're just showing
the code for three
attributes to save
a little paper.
How to abstract the avatar code
Now that you’ve done your own thinking, let’s take a look and find
the commonality in the code that we can abstract into a function:
Each time we prompt we
ask a different question.
There are two things that vary over each bit of code, and that’s the
question and the default value. Those are going to be our parameters
because each time we call our function they will be different. Let’s
start there:
def get_attribute(question, default):
Let’s call our function get_attribute.
And we’ll use two parameters, question
for the question to ask, like “What
color hair”, and default, to supply the
default value, like “brown”.

198 Chapter 5
writing the get_attribute function
def get_attribute(query, default):
question = query + ' [' + default + ']? '
answer = input(question)
Now let’s work on the function body. Based on the original code, the
first thing we need to do is create a string that acts as a question, so
that we can prompt and get input from the user.
Let’s put together the question for
the user by using the query parameter
along with the default parameter, and
we’ll format the string just like the
previous code did.
Then we’ll prompt the user and get
their input. We’ll assign the answer
variable to their input.
Now, just as the previous code did, we need to check to see if the user
chose the default value by hitting return (in which case, the answer
will be the empty string). Then we need to print out their choice:
def get_attribute(query, default):
question = query + ' [' + default + ']? '
answer = input(question)
if (answer == ''):
answer = default
print('You chose', answer)
Finally, we just have one thing left to do: we need to get the answer
back to the code that called get_attribute. How do we do that?
With the return statement, of course:
Check the answer against the empty
string, and if it is the empty string, set
the answer to the default parameter.
def get_attribute(query, default):
question = query + ' [' + default + ']? '
answer = input(question)
if (answer == ''):
answer = default
print('You chose', answer)
return answer
We’ve got the user’s answer, so the only
thing left to do is return it.
Writing the get attribute function body

you are here 4 199
functions and abstraction
Get this code above into a file called avatar.py, save your code, and choose the
Run > Run Module menu item to give the avatar code a try.
Now, for each attribute, we just need to write the appropriate call to
the get_attribute function.
Calling get attribute
def get_attribute(query, default):
question = query + ' [' + default + ']? '
answer = input(question)
if (answer == ''):
answer = default
print('You chose', answer)
return answer
hair = get_attribute('What hair color', 'brown')
hair_length = get_attribute('What hair length', 'short')
eye = get_attribute('What eye color', 'blue')
gender = get_attribute('What gender', 'female')
glasses = get_attribute('Has glasses', 'no')
beard = get_attribute('Has beard', 'no')
We’ve taken each of the original
attributes and created a call to
get_attribute for each one.
A Test Drive
Python 3.6.0 Shell
What color hair [brown]? blonde
You chose blonde
What hair length [short]?
You chose short
What color eyes [blue]? brown
You chose brown
What gender [female]? male
You chose male
Has glasses [no]?
You chose no
Has beard [no]? yes
You chose yes
Exactly as it looked and
operated before our rework
Make sure you take another look at
the code above; look at how much
more concise and understandable
it is! Not to mention it’s more
maintainable if you need to change
something in the future.
Serious Coding
Reworking code to make it more concise, readable, and well structured is a
common activity of good coders. Often this activity is called refactoring code.

200 Chapter 5
understanding more about local variables
Head First: Welcome, Local Variable. We’re glad you
joined us.
Local Variable: Glad to be here.
Head First: So, we really don’t know a lot about you.
Maybe you could fill us in.
Local Variable: Ever declare a variable inside a
function? That’s me.
Head First: And so how is that any different than any
other time we declare a variable?
Local Variable: I’m meant to be used only within the
function body; in fact, that’s the only place you can use
me!
Head First: What do you mean?
Local Variable: Say you’re writing a function and you
need a variable to hold something you’re calculating in
that function, say a variable called position. You declare
position within the function and use it anywhere in
the function body. Now, that variable doesn’t exist until
the function is invoked, and then it exists as long as the
function body is being evaluated, but as soon as your
function returns, the variable disappears.
Head First: What about the next time the function is
invoked?
Local Variable: You get a fresh new local variable
called position, which is around as long as the function
invocation is, and then it goes away again.
Head First: So what good are you if you’re just around
for a bit and you keep disappearing as soon as the
function ends?
Local Variable: Oh, I’m hugely useful. I’m hugely
useful. In a function you need variables to hold the
temporary results as you compute something. So you have
me to do that. And when the function is done, I take care
of all the cleanup; you don’t even have to worry about me
cluttering up your program with unneeded variables.
Head First: So, I don’t think this audience has heard
her, but we’ve also had Parameters in for an interview in
the past; how are you different from her?
Local Variable: Oh, Parameters! She’s like a sister to
me. Parameters are essentially local variables, but special
ones that get set up when the function is called. Basically
each parameter is created and set to the value of the
corresponding incoming arguments. And, like a local
variable, a parameter is available to you throughout the
function body, but then it goes away when the function
ends.
Head First: Ah, I didn’t know you knew each other.
Well, the other interviewee that comes to mind is Global
Variable.
Local Variable: Ah yes, overrated if you ask me; that
guy’s a pain.
Head First: Come again?
Local Variable: A global variable is a variable you
declare outside a function. It has global scope.
Head First: Scope?
Local Variable: Scope is the extent of where your
variables are visible. It’s an area of the program where
you can access a variable, to read or change its value. A
global variable is visible everywhere in your code.
Head First: Well, what’s your scope?
Local Variable: Like I said, just the function body, same
as Parameters.
Head First: Well, what’s the issue with Global Variable
being, well, global scope?
Local Variable: It’s not considered the best design
decision to use lots of global variables.
Head First: Why, they sound like a convenient thing to
me.
Local Variable: I think your readers will hear more
about this later, but it can lead to some issues with large
programs.
Head First: Maybe next time we can have you and
Globals in for a fireside chat?
Local Variable: Oh, I can hardly wait.
Functions Exposed
This week’s interview:
Sitting down with a Local Variable
you are here 4 201
functions and abstraction
What does this code output? Are you sure?
Maybe you better test it for real. Why did you
get that result? Was it what you expected?
def drink_me(param):
msg = 'Drinking ' + param + ' glass'
print(msg)
param = 'empty'
glass = 'full'
drink_me(glass)
print('The glass is', glass)
Let’s talk about variables a little more...
We’re finding out there’s more to variables than just declaring them, setting their values, and changing them.
By adding functions into the mix, we’ve introduced a bunch of new concepts like local variables and, by
contrast, global variables. And don’t forget parameters, which act like local variables (except they are set up
for us when the function is invoked). And then we have this concept of scope as well.
def drink_me(param):
msg = 'Drinking ' + param + ' glass'
print(msg)
param = 'empty'
glass = 'full'
drink_me(glass)
print('The glass is', glass)
Make sure we can recognize each type of variable. Annotate this code by identifying
local and global variables as well as any parameters. Check your answers.
Don’t even think about
skipping this one!
202 Chapter 5
overview of variable scope
Understanding variable scope
The term scope describes where a variable is visible, or accessible, within your code. The rules
are pretty straightforward:
• Global variable: visible anywhere in your program, although we’ll see one minor
exception to this in just a sec.
• Local variable: only visible within the function body where it is declared.
• Parameter: only visible within the function body where it is declared.
Let’s check out this idea of variable scope with some code we’re already familiar with:
The local variables question and
answer have local scope within
the get_attribute function.
The parameters query and default
also have local scope within the
get_attribute function.
The variables hair, hair_length, eye, gender,
glasses, and beard are all global variables and are
visible anywhere in this code.
def get_attribute(query, default):
question = query + ' [' + default + ']? '
answer = input(question)
if (answer == ''):
answer = default
print('You chose', answer)
return answer
hair = get_attribute('What hair color', 'brown')
hair_length = get_attribute('What hair length', 'short')
eye = get_attribute('What eye color', 'blue')
gender = get_attribute('What gender', 'female')
glasses = get_attribute('Has glasses', 'no')
beard = get_attribute('Has beard', 'no')
Notice we return
the value in a local
variable, answer,
just before the
function ends.
Notice local
variables are
created only
within functions.
you are here 4 203
functions and abstraction
Q: How can you return a local variable
from a function if it goes away when the
function completes?
A: When you return a local variable from
a function, you are returning the value of
the local variable, not the local variable
itself. Think of it like this: if you’re running a
relay race, you pass the baton (value), not
yourself (the variable holding the value), to
the next runner. So given only the value is
being returned, this is not a problem when
the function ends and the variable goes
away (because the value the variable held is
still around).
Q: What happens if I name a
parameter the same name as a global
variable, or is that even allowed?
A: It is allowed. What happens is that
within your function body any references to
that variable will refer to the local version
(the parameter), not that global one. So
effectively, that particular global variable
won’t be visible within that function. When
this happens we call it shadowing a
variable (because the local parameter is
overshadowing the global variable). This
is quite common and isn’t necessarily
something to avoid as long as your code
is well structured. If a parameter name
makes sense, go for it—your function really
shouldn’t be referring to global variables in
the function body anyway (more on that topic
later).
Q: I get why we might want local
variables to hold temporary parts of
things we’re computing in a function, but
why do we need parameters. Can’t we
just always refer to global variables with
the values we want?
A: Technically that could be done,
but it would lead to code that is difficult
to understand and error prone. Using
parameters allows us to write general
functions that don’t need to depend on
specific global variables; instead, they are
parameterized, allowing the calling code
to determine the arguments to pass to the
function.
Take our bark function, for example; if it
relied on globals, how would you make it
work for various dogs?
When variables get passed to functions
Are you still wondering about the output for the drink_me code? Or,
wondering more specifically why the glass didn’t get emptied? Most
people do. The reason has to do with how variables and values are
treated when they are passed to a function. Let’s take a look:
def drink_me(param):
msg = 'Drinking ' + param + ' glass'
print(msg)
param = 'empty'
glass = 'full'
drink_me(glass)
print('The glass is', glass)
'full'
glass
In this code, after the function is
defined, we assign the string value
‘full' to the variable glass.
Here's our drink_me code again.
Let's step through it and see
how the glass remains full after
drink_me is called.
Python 3.6.0 Shell
Drinking full glass
The glass is full
>>>
Spoiler alert: here's what the
drink_me code outputs.
The same is true of local variables;
they can shadow globals within a
function.
204 Chapter 5
understanding the drink_me function
Making the drink me function call
Now let’s call the drink_me function and see what happens with our
variables and parameters.
def drink_me(param):
msg = 'Drinking ' + param + ' glass'
print(msg)
param = 'empty'
glass = 'full'
drink_me(glass)
print('The glass is', glass)
'full'
When drink_me is called, the value of the argument
glass is evaluated, and its value ‘full’ is passed along,
and assigned to the parameter param.
param
def drink_me(param):
msg = 'Drinking ' + param + ' glass'
print(msg)
param = 'empty'
glass = 'full'
drink_me(glass)
print('The glass is', glass)
Next we construct the msg using the
value of the parameter param.
Python 3.6.0 Shell
Drinking full glass
And then we print it.
The value of param at
this point is ‘full'.
NOTE: the way Python handles passing arguments
is a little more complex than this, in particular
when we start talking about objects, but for now
this is a good working model for us.
'full'
glass
The value ‘full’ is assigned
to the parameter param.
'full'
param
'full'
glass
Remember from Chapter 2, when we assign a value to a
variable (and you can think of param as a variable), we
create a location for the value, and then we label the
location (a cup in our diagram) with the variable name.
you are here 4 205
functions and abstraction
def drink_me(param):
msg = 'Drinking ' + param + ' glass'
print(msg)
param = 'empty'
glass = 'full'
drink_me(glass)
print('The glass is', glass)
'full'
glass
Now for the important part. We're going
to assign ‘empty' to param.
'empty'
param
Nothing about the glass
variable has changed; it is
still labeling the value ‘full'.
def drink_me(param):
msg = 'Drinking ' + param + ' glass'
print(msg)
param = 'empty'
glass = 'full'
drink_me(glass)
print('The glass is', glass)
'full'
glass
Finally we return from the
function call to drink_me, and we
execute the print statement. Our parameter param no longer
exists because the function call
has completed. Sad.
Again, nothing about the glass
variable has changed; it is still
labeling the value ‘full'.
Python 3.6.0 Shell
Drinking full glass
The glass is full
>>>
The print statement prints
the value of the glass variable,
which is ‘full'.
Now we’ve changed the
value of the param
parameter to ‘empty’.

206 Chapter 5
passing values to functions
So, when we pass a variable to a function, we’re
actually passing the value of that variable, not the
variable itself.
You got it. It’s common for coders to say, “When
I pass the variable x to the do_it function,” but that
is a coder colloquialism, and what they really mean
is “When I pass the value of the variable x to the do_it
function.” Think about it this way—when you make
a function call, each argument is evaluated before it is
passed to the function, so if we have:
x = 10
do_it('secret', 2.31, x)
The string 'secret' evaluates to the string
'secret' and is passed along, the number 2.31
evaluates to the floating-point number 2.31 and is
passed along, and finally, the variable x is evaluated
to the value 10 before it is passed along. So your
function doesn’t even know there is a variable x, it
just gets the value 10 and sets its corresponding
parameter to that value.
Now, we’re going to see that things get slightly more
complicated when we start working with objects, but
think of your arguments as always being passed to
your functions, not your variables.
you are here 4 207
functions and abstraction
What about using global variables in functions?
Global variables are global, right? So they should be visible both inside and outside
functions, and they are. To use a global variable in a Python function, we first let
Python know we’re going to use a global variable with the global keyword.
greeting = 'Greetings'
def greet(name, message):
global greeting
print(greeting, name + '.', message)
greet('June', 'See you soon!')
Python 3.6.0 Shell
Greetings June. See you soon!
>>>
Create a global variable greeting.
Tell our function we're
going to use a global.
And use it.
Of course you can change the value of a global variable in
your function if you want to:
greeting = 'Greetings'
def greet(name, message):
global greeting
greeting = 'Hi'
print(greeting, name + '.', message)
greet('June', 'See you soon!')
print(greeting)
Python 3.6.0 Shell
Hi June. See you soon!
Hi
>>>
Change the global
greeting to ‘Hi’.
Print the value of greeting after
the call to greet.
We changed the value of
the global greeting within
our function to ‘Hi'.
Make sure you use the global keyword as a best practice
This all seems simple enough: to use a global variable in a function, just use the global keyword
to state your intent and use it at will. But watch out—this one has bitten many coders before you. If
you don’t use the global keyword you will still be able to read the values of global variables in your
functions, but if you try to change the value of this global, one of two things will happen: either it
will have been the first time you’ve used the variable in your function, and Python will assume it is a local variable
instead of a global, or you will have already read the value once, and Python will throw an UnboundLocalError.
Whenever you see this, look for cases where you are unintentionally mixing local and global variables.

208 Chapter 5
local versus global variables
Tonight’s talk: LOCAL and GLOBAL variables answer
the question “Just what is GLOBAL’s problem,
anyway?”
The LOCAL variable
Look, I get I don’t have as big a job as Global, but
it’s a nice job—anytime I’m needed to hold a value
inside a function, I’m there. And as soon as that
function is done, I clean up and get out of the way.
Just because you’re everywhere doesn’t mean folks
should go out of their way to use you.
What I mean is, folks shouldn’t jump right into a
global variable when they don’t really need one.
I don’t disagree with that for simple code, but
for more complex code apparently you haven’t
spent much time on the top coder discussion site
stackoverflow.com, because people say, “Avoid
globals!” all the time.
One problem is that if you use a lot of globals,
sooner or later you’re going to accidentally reuse the
same global name. Or imagine giving someone else
your code—they won’t even know without a lot of
study what globals you’re using. In fact, they might
already have code using the same global names.
The GLOBAL variable
I’ve got global scope. I’m everywhere; enough said.
No one needs to go out of their way. Just declare a
variable outside a function, I’m there.
What are you talking about—who doesn’t like a
global variable? Especially for simple programs,
they are actually one of the clearest and most
straightforward ways to store important values.
Oh, you can’t be serious; I’m like a basic part of
almost every programming language. You think all
those smart computer scientists would have put me
in if I wasn’t totally useful?
Oh sure, blame people being sloppy in their code
on me. Who are you going to blame next, the for
loop?
you are here 4 209
functions and abstraction
The LOCAL variable
Another issue is when you’re looking at a piece of
code that uses a global variable, you have no idea
what other parts of the code could be using and
changing that value, especially in a large program.
At least with a local variable you can typically see
all the code that deals with it; after all, it’s all right
there in the function.
Say you’re building some code for a chocolate
factory.
You’ve got a global Boolean variable controlling
whether the boiling vat’s drain is closed, and you
always want set it to True before pouring chocolate
into the vat.
Ah, but then in all your hundreds of lines of
chocolate factory code, a new hire comes along
and sets the variable to False, without checking
to see if there is chocolate in the vat. Can you say
inherently dangerous?
Actually, a really good solution to that problem is
objects. Which I think the readers will learn about
much later in the book.
And guess what, you still use local variables within
objects as well.
Have you considered looking for another line of
work? Once these readers get more advanced, they
may not need you anymore.
The GLOBAL variable
What’s the big deal? I don’t see the issue.
Okaaaaaay...
Exactly; see how well that works? You have a global
variable and you just look to see if it is closed or not.
It’s in one place, easy to find.
Well, you just need to train people better. And how
does a local variable solve that?
Objects, so I’ve heard.
Oh, well good for you.
Oh, I’m pretty sure they’ll be using me for quite a
while, at least until they learn...oh, nevermind.
210 Chapter 5
using default values and keywords
Going further with parameters:
default values and keywords
Earlier we’d said you need to be careful about argument
order: if you don’t pass the correct arguments, in the
correct order, then all bets are off in terms of how a
function is going to operate. If you’ve got a function that
has speed and altitude parameters and you switch the
order when you pass your arguments, watch out!
You’ll find this is true across most programming languages;
to alleviate this potential ordering problem, Python
provides another, more flexible way to provide parameters.
With Python, parameters can have default values and
keywords, which allows you to pick and choose your
arguments and the order you want to supply them. You’ll
find parameter keywords and default values used in many
Python modules and libraries (not to mention you might
want to use keywords and default values in your own code).
You want a speed of 35,000 and
an altitude of 580? That could be
a bit of a problem. You might want
to check your argument order.
We’ll be seeing them used in
practice, later in the book,
as we explore more Python
modules.
How default parameter values work
Your function parameters can have default values. Let’s use a simpler version
of our greet function, without the global variable:
def greet(name, message='You rule!'):
print('Hi', name + '.', message)
Here’s a normal,
everyday parameter
waiting for an argument.
And here’s a parameter that
doesn’t really care if it gets a
corresponding argument or not
because it has a default value.
This is the default value for
message if the calling code
doesn’t pass an argument for
message.
greet('John')
greet('Jennifer', 'How are you today?')
Now that we’ve got a parameter with a default value, let’s
see how we use this:
If we call greet without an
argument for message, then the
greet function will use the default
value for the message parameter.
And if we supply an argument for message,
then our greet function will gladly accept
that as the message argument.
Python 3.6.0 Shell
Hi John. You rule!
Hi Jennifer. How are you today?
>>>
you are here 4 211
functions and abstraction
Python 3.6.0 Shell
File "defaults.py", line 1
def greet(name, message='You
rule!', emoticon):
^
SyntaxError: non-default argument
follows default argument
Always list your required
parameters first!
If you’re providing defaults for some of your parameters, you
need to be careful and put all your required parameters first. What’s
a required parameter? Well, if your function has a parameter
without a default value, then when your function is called, it must
supply an argument for that parameter, so it’s required. So say we
were to expand our greet function like this:
def greet(name, message='You rule!', emoticon):
print('Hi', name + '.', message, emoticon)
Here's a new parameter,
but it's required because
there is no default value.
Our new function definition is not
allowed. Python is complaining that
a required (non-default as Python
calls it) argument follows a default
argument.
If you've been keeping track of
the parameter versus argument
definitions, you might be
asking why the interpreter is
calling these arguments and
not parameters. We have the
same question, but who are
we to argue with the Python
interpreter?
So what’s the big deal? Why can’t we do this? The short story: if you
work through more complex examples, you’ll see the interpreter can
easily get into a situation where it has no idea which arguments go
with which parameters. While we encourage you to think through
such a situation, for now just remember to list all your required
(non-default in Python lingo) parameters before the parameters with
defaults. So, fixing our code above, we get:
def greet(name, emoticon, message='You rule!'):
print('Hi', name + '.', message, emoticon)
Now the non-defaults
(required) parameters are first…
…followed by the
optional ones.
What not to do!

212 Chapter 5
more on keywords and default values
Using arguments with keywords
So far every time we’ve called a function, the arguments have
been positional. That is, the first argument is mapped to the first
parameter, the second argument to the second parameter, and so
on. You can also use the parameter names as keywords and specify
the arguments in a different order if you like.
To understand how this works, let’s take our newly expanded greet
function and call it with some keywords:
greet(message='Where have you been?', name='Jill', emoticon='thumbs up')
Python 3.6.0 Shell
Hi Jill. Where have you been? thumbs up
>>>
To use a keyword, use the
parameter name, followed by
an equals sign and the value for
that argument.
Using keywords we can mix and match the
order of our arguments and even omit them if
they have defaults. Just make sure your calls
provide any required arguments before the
keywords arguments.
You can mix and match positional and keyword arguments as well.
greet('Betty', message='Yo!', emoticon=':)')
Python 3.6.0 Shell
Hi Betty. Yo! :)
>>>
Here we're positionally specifying
the name parameter, but using
keywords for the others.
Parameter defaults and argument keywords are fairly specific to the
Python language. In some cases you’ll find that when you have a
function with many parameters, they are quite convenient in allowing
you to specify common default values for those who might use your
code. We’re not going to focus heavily on the use of either in this book,
but if you’re going to continue Python programming you will come
across them, and as we said, we’ll need knowldege of them later in the
book for some of Python’s modules we make use of.
How to think about all these options
you are here 4 213
functions and abstraction
def make_sundae(ice_cream='vanilla', sauce='chocolate', nuts=True,
banana=True, brownies=False, whipped_cream=True):
recipe = ice_cream + ' ice cream and ' + sauce + ' sauce '
if nuts:
recipe = recipe + 'with nuts and '
if banana:
recipe = recipe + 'a banana and '
if brownies:
recipe = recipe + 'a brownie and '
if not whipped_cream:
recipe = recipe + 'no '
recipe = recipe + 'whipped cream on top.'
return recipe
sundae = make_sundae()
print('One sundae coming up with', sundae)
sundae = make_sundae('chocolate')
print('One sundae coming up with', sundae)
sundae = make_sundae(sauce='caramel', whipped_cream=False, banana=False)
print('One sundae coming up with', sundae)
sundae = make_sundae(whipped_cream=False, banana=True,
brownies=True, ice_cream='peanut butter')
print('One sundae coming up with', sundae)
Cement how those keyword arguments work into your brain before this chapter
ends by working through the code below and figuring out what it outputs. Write your
answer in the Python Shell window below.
Python 3.6.0 Shell
Output goes here.
214 Chapter 5
the none data type
I know the chapter is about to end, but I
just have one more question about functions.
If a function doesn’t have a return statement,
does it return anything?
It returns None. This is a bit of a can of worms to open
up right before the chapter ends, but it’s our fault for not
bringing it up sooner.
When you have a function that doesn’t explictly return
a value with a return statement, it returns the value
None. Not the string "None", but the value None. If you’re
saying “what on earth is that?” it’s one of those strange
computational objects, sort of like the empty string or an
empty list, or maybe more like True or False. In this case
it’s just a value that means no value or perhaps undefined.
You might also be asking if None is a value, what’s its type?
The type of None is NoneType. We know, now it all makes
sense, right? Here’s the trick: don’t think too hard about
None; it’s a value that signifies the lack of a value, and we’ll
see a bit here and there how this can be used. For now, here’s
more about the type:
True
Uses no quotes around None.
Has a single value None.
Expressions can evaluate to
None.
First letter always
capitalized.
NoneType
None
So add that to the stack of things you’ve got in the back of
your brain and we’ll return to this topic later.
You can file NoneType under
“truly weird types.”
You'll find many programming languages have
similar values with names like NULL, null, and nil.
you are here 4 215
functions and abstraction
The case of the attempted robbery not worth investigating
Sherlock finished his phone call with the bumbling chief of police, Lestrade, and sat
down in front of the fireplace to resume reading the newspaper. Watson looked at him
expectantly.
“What?” said Sherlock, not looking up from the paper.
“Well? What did Lestrade have to say?” Watson asked.
“Oh, he said they found a bit of rogue code in the bank account where the
suspicious activity was taking place.”
“And?” Watson said, trying to hide his frustration.
“Lestrade emailed me the code, and I told him it wasn’t worth pursuing. The
criminal made a fatal flaw and will never be able to actually steal the money,”
Sherlock said.
“How do you know?” Watson asked.
“It’s obvious if you know where to look,” Sherlock exclaimed. “Now stop bothering me
with questions and let me finish this paper.”
With Sherlock absorbed in the latest news, Watson snuck a peek at Sherlock’s phone and
pulled up Lestrade’s email to look at the code.
Five Minute
Mystery
balance = 10500
camera_on = True
def steal(balance, amount):
global camera_on
camera_on = False
if (amount < balance):
balance = balance - amount
return amount
camera_on = True
proceeds = steal(balance, 1250)
print('Criminal: you stole', proceeds)
Why did Sherlock decide not to investigate the case? How could he
know that the criminal would never be able to steal the money just by
looking at the code? Is there one problem with the code? Or more?
This is the real, actual bank
balance in the account.
216 Chapter 5
review of functions and abstraction
Functions give us a way to package up,
abstract, and reuse code.
A function has a name, zero or more
parameters, and a body.
You call or invoke a function and pass it
zero or more arguments.
You can pass a Python function any valid
Python value.
The number and order of arguments
in a function call needs to match the
parameters in the function. You can use
keyword arguments to specify a subset of
arguments in an arbitrary order.
When a function is invoked, it assigns the
arguments to parameter variables and
then executes its code block.
A function’s code block is also known as
the body of the function.
Functions can return values by using the
return statement.
To capture the value returned from a
function, simply assign the result of the
call to a variable.
Functions can themselves call built-
in functions or other functions you’ve
dened.
You can declare functions in any order as
long as they are dened before they are
called.
You can create local variables within a
function.
Local variables exist only as long as the
function execution does.
The places in your code where a variable
is visible dene its scope.
Variables that aren’t created inside
functions are called global variables.
A function’s parameters are treated as
local variables in the function body.
When we name a parameter the same
name as a global variable, we say that
parameter is shadowing the global
variable.
The global keyword is used within a
function to signify you’d like to refer to a
global variable in the function body.
Abstracting code often makes your code
more readable, well structured, and
maintainable.
Abstracting code also allows you to focus
at a higher level, and to forget about the
low-level details a function implements.
Reworking code is often called refactoring.
You can use parameter defaults to provide
default values for missing arguments.
You can use parameter names as keyword
arguments when calling a function.

you are here 4 217
functions and abstraction
Coding cross
Get more functional as you do the crossword.
1 2
3 4
5
6
7
8 9
10
11
12
13
14
15
16
17
18
Across
3. Solved the case.
5. Parameters can do this to global variables.
6. An online representation.
9. Another name for the function's block of
code.
10. When you call a function, you supply these.
11. Arguments are passed to these.
13. Reworking your code.
14. Functions are great for this.
16. Keyword for using globals in function.
17. Parameter names can be used as these.
18. Another word for calling a function.
Down
1. Parameters are also these.
2. How long a variable lasts.
4. All functions have one.
5. We made some of these with lots of default
values.
7. You can use functions to do this.
8. We usually use this to match arguments to
parameters.
12. Variables declared in a function.
13. How you pass values back.
15. When we pass a variable to a function, we
really pass its ______.
218 Chapter 5
exercise solution
D. Not the most readable code I’ve
ever seen.
E. If we wanted to change how the
dogs bark, that would be a lot of
changes to make!
F. ___________________________
_____________________________
Should we be reusing the same
variables over and over for
different dogs?
Do a little analysis of the code below. How does it look? Choose as
many of the options below as you like, or write in your own analysis:
A. It’s the same code over and
over, so it seems very redundant.
B. It looks tedious to type in!
C. It doesn’t seem to do a lot for
that much code.
Here’s a little connect-the-dots exercise for you. Using your
pencil, start at step 1 and draw a line from each step to the
next as the program executes. Feel free to annotate your lines
where necessary to explain what is happening in the code’s
execution. We already drew the first couple lines for you.
print('Get those dogs ready')
def bark(name, weight):
if weight > 20:
print(name, 'says WOOF WOOF')
else:
print(name, 'says woof woof') bark('Codie', 40)
bark('Codie', 40)
print("Okay, we're all done")
1
2
3
4
a
b
We start here.
Print, and then
proceed to the
next line.
We process the function
definition, but we don't
execute it.
SOLUTION CONTINUES ON NEXT PAGE...
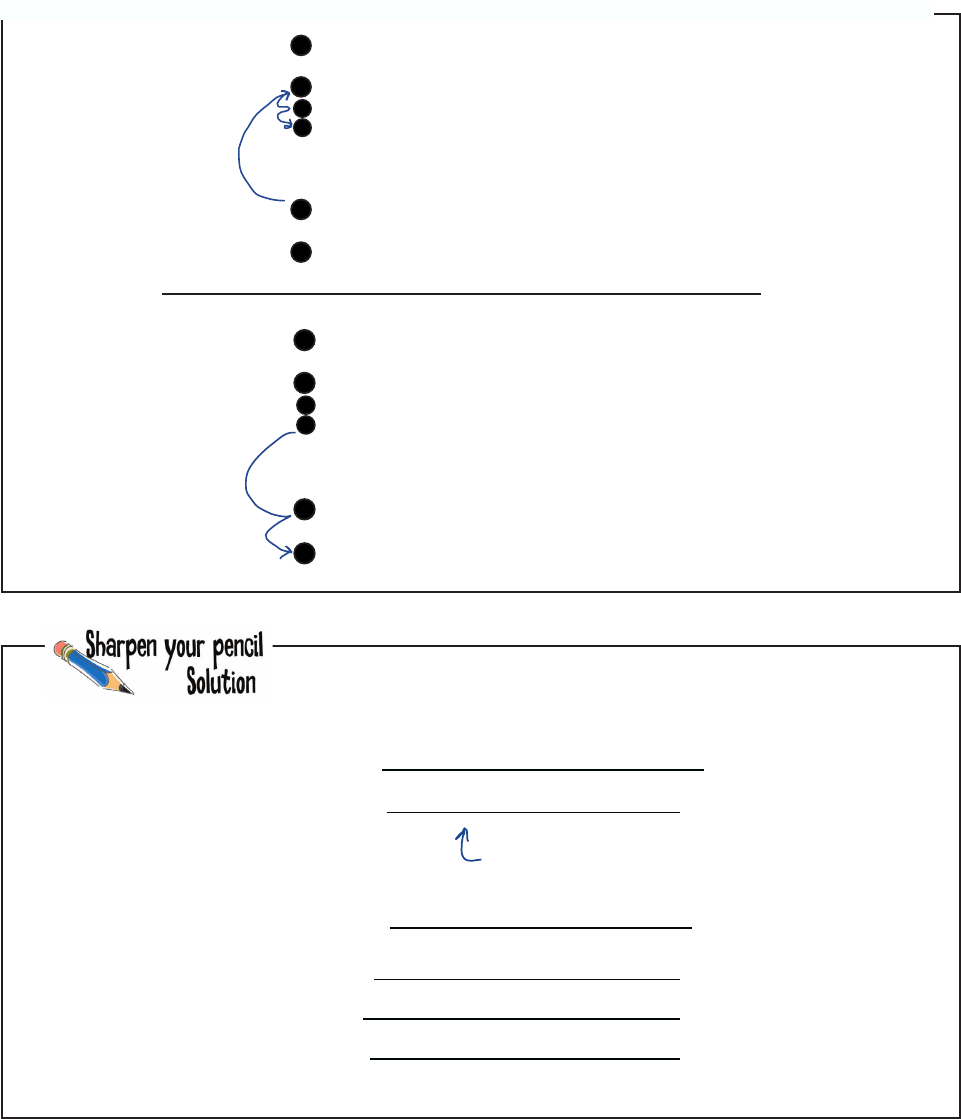
you are here 4 219
functions and abstraction
print('Get those dogs ready')
def bark(name, weight):
if weight > 20:
print(name, 'says WOOF WOOF')
else:
print(name, 'says woof woof') bark('Codie', 40)
bark('Codie', 40)
print("Okay, we're all done")
1
2
3
4
a
b
Then we call bark, so
we're back to step 2.
print('Get those dogs ready')
def bark(name, weight):
if weight > 20:
print(name, 'says WOOF WOOF')
else:
print(name, 'says woof woof') bark('Codie', 40)
bark('Codie', 40)
print("Okay, we're all done")
1
2
3
4
a
b
…before returning
from the function at
3 and then executing
step 4.
Then we execute the
function’s body with
steps 2a and 2b…
bark('Speedy', 20)
bark("Barnaby", -1)
We’ve got some more calls to bark below. Next to each call, write what you think
the output should be, or if you think the code will cause an error. Here’s our solution.
Our bark function doesn’t check to make sure dog weights are
greater than 0. So this works because -1 is less than 20.
bark('Lady', "20")
bark('Spot', 10)
bark('Rover', 21)
Speedy says woof woof
Barnaby says woof woof
ERROR, bark() takes 2 positional arguments but 3 were given.
ERROR, ‘>' not supported between instances of ‘str' and ‘int'
Spot says woof woof
Rover says WOOF WOOF
bark('Scottie', 0, 0)

220 Chapter 5
exercise solution
Python 3.6.0 Shell
Take a plane
Take a car
Walk
Code Magnets Solution
This working code is all scrambled up on the fridge.
Can you reconstruct the code snippets to make a
working program that produces the output listed
below? Notice, there may be some extra code on the
fridge, so you may not use all the magnets.
def
,
,
,
,
(
(
how_should_I_get_there
how_should_I_get_there(800.3)
else:
print('Walk')
elif miles >= 2.0:
print('Take a car')
if miles > 120.0:
print('Take a plane')
kilometer
miles )
:
The function takes miles
as a parameter and
then...
…checks the distance to
see if a plane, a car, or
walking is appropriate.
:
how_should_I_get_there(2.0)
how_should_I_get_there(.5)
you are here 4 221
functions and abstraction
Get some practice to make return values sink in. Compute the
return value of each function call.
make_greeting('Speedy')
compute(2, 3)
compute(11, 3)
allow_access('Codie')
allow_access('Dr Evil')
‘Hi Speedy!’
5
10
False
True
get_bark(20) ‘woof woof’
def drink_me(param):
msg = 'Drinking ' + param + ' glass'
print(msg)
param = 'empty'
glass = 'full'
drink_me(glass)
print('The glass is', glass)
Let’s make sure we can recognize each type of variable. Annotate this code by
identifying local and global variables as well as any parameters. Here’s our solution.
global variable
local variable
parameter
parameter local variable
global variable

222 Chapter 5
exercise solution
def make_sundae(ice_cream='vanilla', sauce='chocolate', nuts=True,
banana=True, brownies=False, whipped_cream=True):
recipe = ice_cream + ' ice cream and ' + sauce + ' sauce '
if nuts:
recipe = recipe + 'with nuts and '
if banana:
recipe = recipe + 'a banana and '
if brownies:
recipe = recipe + 'a brownie and '
if not whipped_cream:
recipe = recipe + 'no '
recipe = recipe + 'whipped cream on top.'
return recipe
sundae = make_sundae()
print('One sundae coming up with', sundae)
sundae = make_sundae('chocolate')
print('One sundae coming up with', sundae)
sundae = make_sundae(sauce='caramel', whipped_cream=False, banana=False)
print('One sundae coming up with', sundae)
sundae = make_sundae(whipped_cream=False, banana=True,
brownies=True, ice_cream='peanut butter')
print('One sundae coming up with', sundae)
Cement how those keyword arguments work into your brain before this chapter
ends by working through the code below and figuring out what it outputs. Write your
answer in the Python Shell window below.
Python 3.6.0 Shell
One sundae coming up with vanilla ice cream and chocolate sauce with nuts and a banana and whipped
cream on top.
One sundae coming up with chocolate ice cream and chocolate sauce with nuts and a banana and whipped
cream on top.
One sundae coming up with vanilla ice cream and caramel sauce with nuts and no whipped cream on top.
One sundae coming up with peanut butter ice cream and chocolate sauce with nuts and a banana and a
brownie and no whipped cream on top.
>>>
Here’s our output.
Did you notice this
code has a bug if
there are no nuts?

you are here 4 223
functions and abstraction
And, in addition to not actually stealing any money, the criminal forgets to turn the camera back on,
which is a dead giveaway to the police that something nefarious is going on. Remember, when you return
from a function, the function stops executing, so any lines of code after the return are ignored!
balance = 10500
camera_on = True
def steal(balance, amount):
global camera_on
camera_on = False
if (amount < balance):
balance = balance - amount
return amount
camera_on = True
proceeds = steal(balance, 1250)
print('Criminal: you stole', proceeds)
Five Minute
Mystery
Solution
balance is a global variable...
...but it’s shadowed by
this parameter.
So when you change the
balance in the function steal,
you’re not changing the actual
bank balance!
We’re returning the
amount stolen...
...but we’re not using it to
update the real balance in
the account. So the balance
of the bank account is the
same as it was originally.
The criminal thinks he stole
the money, but he didn’t!
Coding
Cross
Solution
L
1S
2
S
3H E R L O C K N
4C
C S
5H A D O W
A
6V A T A R U M P
L N E E
V D A
7
P
8A A B
9O D Y
O A
10 R G U M E N T S
S I T
I P
11 A R A M E T E R S
T B A L
12
I L R
13 E F A C T O R
C
14 O D E R E U S E T C
N S T A V
15
U G
16 L O B A L
K
17 E Y W O R D S L
N U
I
18 N V O K E
Across
3. Solved the case. [SHERLOCK]
5. Parameters can do this to global variables.
[SHADOW]
6. An online representation. [AVATAR]
9. Another name for the function's block of
code. [BODY]
10. When you call a function, you supply these.
[ARGUMENTS]
11. Arguments are passed to these.
[PARAMETERS]
13. Reworking your code. [REFACTOR]
14. Functions are great for this. [CODEREUSE]
16. Keyword for using globals in function.
[GLOBAL]
Down
1. Parameters are also these.
[LOCALVARIABLES]
2. How long a variable lasts. [SCOPE]
4. All functions have one. [NAME]
5. We made some of these with lots of default
values. [SUNDAE]
7. You can use functions to do this.
[ABSTRACT]
8. We usually use this to match arguments to
parameters. [POSITION]
12. Variables declared in a function. [LOCAL]
13. How you pass values back. [RETURN]
15. When we pass a variable to a function, we
really pass its ______. [VALUE]
this is a new chapter 225
sorting and nested iteration
4, part 2,
in which we return to the lists and add some superpowers
Putting Some Order
in Your Data
Sometimes the default ordering of your data
doesn’t cut it. You’ve got that list of high scores on 80s arcade
games, but you really need it sorted alphabetically by game name. Then
there’s that list of the number of times your coworkers have stabbed you
in the back—it would be nice to know who’s at the top of that list. To do
that, though, we need to learn how to sort data, and to do that we’ll need
to explore some algorithms that are a little more involved than the ones
we’ve seen so far. We’re also going to have to explore how nested loops
work as well as think a little about the efficiency of the code we’re writing.
Come on, let’s take that computational thinking up a level!

226 Chapter 4B
another bubbles-r-us challenge
I’m back! My bubbleologists did
such a great job in Chapter 4 that I’d love to
give out some awards. Check out my idea below; I
just need for you to write some code to generate one
more report. After all the code you’ve written, I’m
sure this will be a walk in the park for you.
I just need one more thing, I’d love to give awards to the
inventors of the top solutions. Can you give me a list of the
top five best bubble solutions in descending order by their
bubble score? Something like the report below.
- Bubbles-R-Us CEO
Bubbles-R-Us
Top Bubble Solutions
1) Bubble solution #10 score: 68
2) Bubble solution #12 score: 60
3) Bubble solution #2 score: 57
4) Bubble solution #31 score: 50
5) Bubble solution #3 score: 34
Note these aren't real scores; this is
just an illustration of what I want.
Thanks!!

you are here 4 227
sorting and nested iteration
Cubicle conversation
Frank: Well, it doesn’t sound bad, but how do we do it?
Judy: We’ve been coming up with some great algorithms, so
I’m sure we can tackle sorting.
Joe: Actually, sorting algorithms are a topic some computer
scientists spend their entire careers researching. They’re not
something we should “come up with,” but rather we need
to research the existing algorithms and choose one that is
appropriate for our problem.
Frank: It sounds like we’re going to be researching for a
while. Should we postpone the softball game this afternoon?
Joe: I don’t think so, Frank. I saw this coming and I’ve already taken a look.
Frank: Oh, why didn’t you say so? What kind of sort are we going to use?
Joe: Bubble sort.
Judy, Frank (chuckling): Very funny, Joe. We know we’re sorting bubbles. Do you have a sort
that is appropriate or not?
Joe: I’m actually being completely serious. We’re going to use a bubble sort. It’s not the most
efficient sorting algorithm ever invented, but it is one of the easiest to understand.
Frank: I don’t get it; was it invented by one of our competitors?
Joe: Oh, you mean the name. It’s called bubble sort because as you run the algorithm, the larger
(or smaller) items in the list tend to “bubble up” to one end. You’ll see how that looks when we
start implementing it.
Judy: Joe, you seem to have done your homework, so we’ll take your lead on this.
Joe: Okay, let’s do it.
Judy: That reminds me, I told Greg to get on this too. I didn’t realize you’d already done all this
research. I need to remember to tell him not to bother. Don’t let me forget!
We just need to sort
them? That doesn’t
sound too bad.
Frank
Judy
Joe
228 Chapter 4B
how bubble sort works
We’re going to look at some pseudocode for bubble sort shortly, but before we
do, let’s get an intuitive feel for how this algorithm works. To do that, let’s sort a
list of numbers:
Understanding bubble sort
[6, 2, 5, 3, 9]
We typically think of sorting lists into ascending order, so we’re expecting our list
to look like this after the bubble sort algorithm has finished:
[2, 3, 5, 6, 9]
Here’s our
unsorted list.
The same list sorted in
ascending order.
One thing to know up front: bubble sort works by making a number of passes over a
list. As you’ll see, in each pass, if we end up swapping any values in the list, we’ll need
to make another pass. When no values are swapped in a pass, we’re done. Keep that in
mind, as it’s key to how the algorithm works.
[6, 2, 5, 3, 9]
Compare these. The
first is larger, so we
need to swap them.
[2, 6, 5, 3, 9]
We begin by comparing the first and second items (the items at index
0 and 1). If the first item is larger than the second, we swap them:
Starting with pass 1
[2, 5, 6, 3, 9]
Notice the value 6 used to be the first in the list, and it is
slowly making its way (bubbling) toward the end of the list.
[2, 5, 3, 6, 9]
Next we compare the values of index 1 and index 2. If the first value,
6, is larger than the second value, 5 (and it is), we swap them.
Moving along, we compare the next values at index 2 and index 3,
and once again, the first is larger. So we swap.
Next we compare the value at index 3 to the value at index 4, and it is
not larger. So, we do nothing and pass 1 is complete.
At this point we’re done with pass 1, but we swapped some values, so
we need to do another pass. On to pass 2!
[2, 5, 3, 6, 9]
No change.
Swap.
Swap.

you are here 4 229
sorting and nested iteration
[2, 5, 3, 6, 9]
[2, 3, 5, 6, 9]
Moving on, we compare the values of index 1 and index 2; in this case,
the index 2 value is larger than index 3, so we swap values.
Pass 2
You’re staring to understand the method now: we now compare the
values of index 2 and index 3, and the value 5 is not larger than 6, so
we do not swap values.
[2, 3, 5, 6, 9]
No change.
[2, 3, 5, 6, 9]
No change.
Swap.
Moving on, we compare the 3rd and 4th index values, and the 4th
value is larger, so we do not need to swap.
Now pass 2 is over, but we swapped index 2 and 3 during this pass, so
we need to do another pass. On to pass 3.
[2, 3, 5, 6, 9]
On pass 3 we start over once again, comparing index 0’s value to
index 1’s; index 1 has a larger value, so we don’t need to swap values.
Pass 3
Moving on we compare the values of index 2 and 3; index 3’s value is
larger, so we don’t need to swap.
[2, 3, 5, 6, 9]
No change.
[2, 3, 5, 6, 9]
No change.
Likewise, we compare the values of index 3 and 4; index 4’s value is
larger, so we don’t need to swap.
Now pass 3 is over, and we didn’t swap any values. So our
algorithm is complete and we have a sorted list!
[2, 5, 3, 6, 9]
On pass 2 we start over, comparing the values of index 0 and index 1;
index 1 has a larger value, so we don’t need to swap values.
[2, 3, 5, 6, 9]
No change.
[2, 3, 5, 6, 9]
Now we compare the values of index 1 and 2; index 2’s value is larger,
so we don’t need to swap.
No change.
230 Chapter 4B
some practice with bubble sort
Hopefully you now have a good feel for how to apply bubble sort’s
algorithm. Let’s practice. Take the list below and bubble sort it, showing
your work just like we did on the previous two pages. This will help to lock
in your understanding. If you get stuck, take a peek at our solution at the
end of the chapter.
['coconut', 'strawberry', 'banana', 'pineapple']
Here's the list. Don't
let the strings throw
you; just compare them
alphabetically (what a
computer scientist would
call lexicographically,
otherwise known as
dictionary order).
Pass 1
Start pass 1 here.
We’re not asking you to write
any code, we’re just asking
you to use the bubble sort
algorithm to sort this list.
you are here 4 231
sorting and nested iteration
DECLARE a variable swapped and set to True.
WHILE swapped:
SET swapped to False.
FOR variable i in range(0, len(list)-1)
IF list[i] > list[i+1]:
DECLARE a variable temp and set to list[i].
SET list[i] to list[i+1]
SET list[i+1] to temp
SET swapped to True.
DEFINE a function bubble_sort(list):
Pseudocode can take many
forms. This form is closer to
code, but still not quite code,
at least not Python.
Now that you have an intutive feel for the bubble sort, let’s actually look at some
pseudocode for the algorithm. You’ve already got all the knowledge you need
to understand this code; it uses basic Boolean logic and some loops. However,
it does use loops in a more complex way than you’ve seen before by using two
loops together—what we call a nested loop.
Nested loops can make you stop and think the first time you see one, but here’s
the trick: you just mentally did a nested loop when you worked through the last
Sharpen exercise (as well as when we walked through sorting the list of numbers
together). The outer loop represents each pass in the algorithm. The inner
loop goes through each item in the list and performs the comparisons (and any
needed swapping). So with that in mind, let’s have a look:
Some bubble sort pseudocode
We’re going to have a function, bubble_sort,
which takes a list as a parameter.
And we’re going to have a
variable to track if we’ve
swapped any values in the
current pass. We set this
to True initially to kick off
the first pass.
We’re going to use a
while loop that loops as
long as swapped is True.
Think of the while loop
as performing each pass.
Each time through the
loop is another pass.
In the for loop, you
iterate through each
item in the list (except
the last item) and
compare it to the next.
If it’s greater, then you
swap the values.
The first thing we
do in the loop is set
swapped to False.
If we ever swap any values, we set swapped
to True, meaning we’re going to have to do
another pass when the for loop finishes.
This pseudocode sorts a list in ascending order. What change would you need to make to sort in
descending order?
Let’s put all that
Chapter 5 function
knowledge to work!

232 Chapter 4B
understanding the pseudocode
Cubicle conversation
continued...
Judy: I think so, if I understand the two
loops.
Joe: Right, so there is a while loop and a
for loop that runs within it.
Judy: Okay, so stepping through this—the
outer while statement loops until the
swapped variable has the value False.
Joe: Yes, we go one time through the
while loop for each pass we need to make
over the list.
Judy: But in all our examples wasn’t that
always three times?
What do you
think of the pseudocode;
does it make sense?
Joe: Oh, that was a total coincidence; the algorithm can have any number of passes. Actually, that
isn’t quite accurate—in the worst case, it has the same number of passes as there are items in the list.
Judy: So if I have 100 items, the while loop could loop 100 times?
Joe: Yup.
Judy: Why so many?
Joe: That’s the worst case; if the list is in totally backward order, it takes that many passes.
Judy: Got it. Okay, now the inner loop, the for loop. What’s happening there?
Joe: The for loop walks through every item and compares it to the next item. If the first item is of
greater value, then we swap the two.
Judy: So the for loop is also iterating through all items in the list as well, only not in the worst case,
but always.
Joe: Technically the number of items minus one, but yes.
Judy: For a big list that is a lot of iterating.
Joe: It sure is. If you use your example of 100 items, the worst case is roughly 100 passes comparing
100 items in each pass. So we’re talking 100 * 100 = 10,000 comparisons.
Judy: Whoa!
Joe: Yes, bubble sort is known more for its simplicity than its efficiency. Why do you think so many
people spend their time trying to create fast sorting algorithms? But our lists are very small, so it’s
really not a problem in our case, and a perfectly acceptable way for us to sort.
Judy: Okay, and the only other thing happening in the for loop is that if we swapped some values,
we have to set the swapped variable back to True, which means we’ll do another pass.
Joe: Bingo.
you are here 4 233
sorting and nested iteration
for word in ['ox', 'cat', 'lion', 'tiger', 'bobcat']:
for i in range(2, 7):
letters = len(word)
if (letters % i) == 0:
print(i, word)
For these bits of code, your job is to
play like you’re the Python interpreter.
Step through each bit of code and evaluate
it (in your brain). After you’ve done the
exercises, look at the end of the chapter to
see if you got it right.
BE the
Interpreter
for i in range(0,4):
for j in range(0,4):
print(i * j)
full = False
donations = []
full_load = 45
toys = ['robot', 'doll', 'ball', 'slinky']
while not full:
for toy in toys:
donations.append(toy)
size = len(donations)
if (size >= full_load):
full = True
print('Full with', len(donations), 'toys')
print(donations)
Remember modulus is like
finding the remainder of a
division. So, 4%2 would be 0,
while 4%3 would be 1.
234 Chapter 4B
implementing bubble sort
def bubble_sort(scores):
swapped = True
while swapped:
swapped = False
for i in range(0, len(scores)-1):
if scores[i] > scores[i+1]:
temp = scores[i]
scores[i] = scores[i+1]
scores[i+1] = temp
swapped = True
Our pseudocode is fairly close to code, and translating it into Python is
straightforward. Let’s take a look:
Implementing bubble sort in Python
Just like the variable swap code
we looked at in Chapter 2!
Here’s our function,
which takes a
Python list.
We set the swapped variable to True
to kick off the first pass.
Our nested loop: a
for loop within a
while loop
We make our passes with the while
loop as long as swapped is True…
…and then step through the entire list
comparing and swapping values where needed.
Note there is nothing to return because
we've swapped the actual values of the list.
In other words, we've changed the original
list to be in sorted order.
scores = [60, 50, 60, 58, 54, 54,
58, 50, 52, 54, 48, 69,
34, 55, 51, 52, 44, 51,
69, 64, 66, 55, 52, 61,
46, 31, 57, 52, 44, 18,
41, 53, 55, 61, 51, 44]
bubble_sort(scores)
print(scores)
smoothies = ['coconut', 'strawberry', 'banana', 'pineapple']
bubble_sort(smoothies)
print(smoothies)
Python 3.6.0 Shell
[18, 31, 34, 41, 44, 44, 44, 46, 48, 50,
50, 51, 51, 51, 52, 52, 52, 52, 53, 54,
54, 54, 55, 55, 55, 57, 58, 58, 60, 60,
61, 61, 64, 66, 69, 69]
['banana', 'coconut', 'pineapple',
'strawberry']
>>>
Nice, those look
sorted!
Python's > comparison works with
strings too, so we can also have the
sort function sort our smoothies.
Let’s start a new file called sort.py. Copy the code above into it, and add the test
code below:
A Test Drive
you are here 4 235
sorting and nested iteration
def bubble_sort(scores):
swapped = True
while swapped:
swapped = False
for i in range(0, len(scores)-1):
if scores[i] < scores[i+1]:
temp = scores[i]
scores[i] = scores[i+1]
scores[i+1] = temp
swapped = True
This is all you need to change
to have a descending sort.
Why does this work?
Python 3.6.0 Shell
[69, 69, 66, 64, 61, 61, 60, 60, 58, 58,
57, 55, 55, 55, 54, 54, 54, 53, 52, 52,
52, 52, 51, 51, 51, 50, 50, 48, 46, 44,
44, 44, 41, 34, 31, 18]
['strawberry', 'pineapple', 'coconut',
'banana']
>>>
There we go; sort in
descending bubble score
order.
I think we’re almost there; we just
need to generate the report with
the top 5 solutions, scores along with
their number.
Frank: Yay, Joe wrote all the sort code! But something is missing. We’re sorting the
list of scores, but we have no idea what the original index of the score was, so how do
we know the score number? We need that for the report.
Judy: That’s a good point. How can we do that?
Frank: Well, Joe may be the rock star here, but I had an idea. What if we make
another list, a parallel list called solutions_numbers, where each value in the list
is the same as its index, like [0, 1, 2, 3, ..., 35]? Then, when we sort the
scores, we sort this list exactly the same way. So, at the end, each score number will
be in the same relative position as its corresponding score.
Judy: How do we create a list like that where the values match the indices?
Frank: Remember, you can use range and list together to do that. Like this:
Judy: Interesting. Okay, I think I sort of understand your direction.
Frank: Some things are actually easier to explain over code. Here, check this out...
We’d like to have the solutions with the highest bubble scores first (in other words
we want descending order, not ascending). We can do that by simply changing the
comparison in the sort function from a > to a < comparison. Make the change
and do another test drive.
A Test Drive
number_of_scores = len(scores)
solution_numbers = list(range(number_of_scores))
Get the length of the list.
Create a range from 0 to the
length of the list (minus 1) and then
use the list function to convert the
range into a list [0, 1, 2, ... ].
236 Chapter 4B
sorting the bubble solution numbers too
def bubble_sort(scores, numbers):
swapped = True
while swapped:
swapped = False
for i in range(0, len(scores)-1):
if scores[i] < scores[i+1]:
temp = scores[i]
scores[i] = scores[i+1]
scores[i+1] = temp
temp = numbers[i]
numbers[i] = numbers[i+1]
numbers[i+1] = temp
swapped = True
scores = [60, 50, 60, 58, 54, 54,
58, 50, 52, 54, 48, 69,
34, 55, 51, 52, 44, 51,
69, 64, 66, 55, 52, 61,
46, 31, 57, 52, 44, 18,
41, 53, 55, 61, 51, 44]
number_of_scores = len(scores)
solution_numbers = list(range(number_of_scores))
bubble_sort(scores, solution_numbers)
Frank was right. We have a way to sort the bubble scores, but
when we do sort them we lose the identifying number of that
score (because we’ve always used the index of the solution
as the bubble number). So what we’re going to do is create
a second list that contains each solution’s corresponding
bubble number, and then, when we sort the solution’s scores,
we’re going to, in sync, sort the bubble numbers list the same
exact way. Let’s check out his code:
Computing bubble solution numbers
…except, when we swap two values of
the score list, we swap the same two
values in the numbers list.
Everything else works
exactly the same as
before...
First, we’re going to accept two lists
in our bubble_sort function, the scores
and the corresponding bubble numbers.
If you think this looks like
duplicated code, it is. We’ll find out
in the next chapter how to remove
duplicate code.
Here we’re just creating the
solution_numbers list, which holds
the number of each solution (and
corresponds to its original index in
the scores list).
Now when we call sort, we pass both lists.
Serious Coding
How do you go about evaluating an
expression like the one below? Evaluate
from the inside out:
list(range(number_of_scores))
Evalutes to the integer
length of scores: 36
Evaluates to the range 0
through 35
Evaluates to the list
containing the numbers 0
through 35
you are here 4 237
sorting and nested iteration
print('Top Bubble Solutions')
for i in range(0,5):
print(str(i+1) + ')',
'Bubble solution #' + str(solution_numbers[i]),
'score:', scores[i])
Python 3.6.0 Shell
Top Bubble Solutions
1) Bubble solution #11 score: 69
2) Bubble solution #18 score: 69
3) Bubble solution #20 score: 66
4) Bubble solution #19 score: 64
5) Bubble solution #23 score: 61
>>>
Take the code from the last Sharpen exercise (repeated below) and add to your
sort.py file, replacing the previous test code. Give it a test drive.
A Test Drive
Exactly like the CEO requested. Boy,
is he going to be happy!
Now our code produces two lists, one with the
scores sorted and another with the corresponding
solution numbers. Write the code to generate the
report given these two lists.
Bubbles-R-Us
Top Bubble Solutions
1) Bubble solution #10 score: 68
2) Bubble solution #12 score: 60
3) Bubble solution #2 score: 57
4) Bubble solution #31 score: 50
5) Bubble solution #3 score: 34
Remember the report looks like this;
also remember this is not the actual
data your report will generate, just a
mockup from the CEO.
238 Chapter 4B
review of sorting
Top Bubble
Software Maker
Not only am I giving my top
five bubble solution engineers awards,
I’m giving YOU an award. We could not
have made Bubbles-R-Us successful without
all the business intelligence your code
provided!
Nice job.
It’s been a short but challenging
chapter. You’ve had to wrap your head
around lots of new concepts. Give
your brain some time to let it all sink
in. Of course make some more of that
bubble solution #11; that’s a great way
to relax and do something completely
different. Get some rest too, and after
that, maybe even quickly review this
chapter before you move on.
Of course you aren’t quite done yet.
You’ve got a brain twister ahead, and
the bullet points and the crossword...
There are many sorting algorithms with
various tradeoffs in complexity and space/
time considerations.
Bubble sort is a simple algorithm that
makes passes through a list, comparing
and swapping values as it goes.
Bubble sort is complete when a pass
through the list nds no items that are out
of order.
Most languages and libraries provide sort
functionality.
When we have a loop within a loop, we call
it a nested loop.
Nested loops often increase the runtime
and complexity of an algorithm.
It’s worth studying sorting algorithms
and the sort algorithms provided by your
language’s libraries, which, speaking of...
you are here 4 239
sorting and nested iteration
Uh, you’re not going to believe
this. I just went to tell Greg we
had solved the problem and he’d
beat us to it. In fact he hardly had to
write any code; he did it using Python’s
built-in sort!
Built-in
sort! Maybe
you could have let
us know 10 pages
back?
You’ll find sort provided by most languages.
Yes, you’ll find many modern languages and many libraries
provide sort functionality. Given that, there’s ususally no
reason to write your own sort—not only would you be
reinventing the wheel, but off-the-shelf sort algorithms tend
to be more sophisticated (and more efficient) than bubble
sort and take significant time and effort to implement.
So, unless your passion turns out to be sorting algorithms,
wouldn’t you rather be working on your probem at hand?
Our time on the last 10 pages is not wasted, though,
because the techniques you just learned in implementing
bubble sort, like using nested loops, are core to
implementing many algorithms. And, should you need to
study sorting or a related algorithm, bubble sort is where
most folks start.
Back to Python, you can sort a list by simply calling sort:
scores.sort()
And there are lots of ways to customize Python’s sort to your
needs, but you’ll want to learn a few more programming
concepts to make full use of that.
Finally, if you’re interested in sorting, you’ll want to study up
on the many sorting algorithms and their advantages and
disadvantages. With every algorithm you’ll encounter, there
are tradeoffs in time (how long it takes) and space (the amount
of memory or resources it uses). Some rather well-known
sorts are insertion sort, merge sort, and quicksort, just to
name a few. Oh, and Python interally uses Timsort, a hybrid
of merge and insertion sort. Here’s a good place to start your
studies: https://en.wikipedia.org/wiki/Sorting_algorithm.

240 Chapter 4B
a deep thinking exercise
The Thing-A-Ma-Jig
The Thing-A-Ma-Jig is a crazy contraption—it clanks and clunks and even thunks,
Whether you give it lists or strings, it still does things. But how exactly does it
work? Can you uncrack the code and find its quirks?
The Thing-A-Ma-Jig
Try these as a replacement for characters’ value above:
characters = ‘amanaplanac’
or
characters = ‘wasitar'
characters = 'taco'
output = ''
length = len(characters)
i = 0
while (i < length):
output = output + characters[i]
i = i + 1
length = length * -1
i = -2
while (i >= length):
output = output + characters[i]
i = i - 1
print(output)
All we changed was the
list—now it's a string. But
the code still works. How?
How does this code work on lists AND strings?
We'll leave you with that deep question, and we'll
uncover some answers in Chapter 6 (and beyond).
2
Try a deep thinking exercise before you finish off Chapter 4, part 2...
you are here 4 241
sorting and nested iteration
['coconut', 'strawberry', 'banana', 'pineapple']
Here's the list. Don't
let the strings throw
you; just compare them
alphabetically (what a
computer scientist would
call lexicographically,
otherwise known as
dictionary order).
Pass 1
['coconut', 'strawberry', 'banana', 'pineapple']
['coconut', 'strawberry', 'banana', 'pineapple']
['coconut', 'banana', 'strawberry', 'pineapple']
['coconut', 'banana', 'pineapple', 'strawberry']
Pass 2
['coconut', 'banana', 'pineapple', 'strawberry']
['banana', 'coconut', 'pineapple', 'strawberry']
['banana', 'coconut', 'pineapple', 'strawberry']
['banana', 'coconut', 'pineapple', 'strawberry']
Pass 3
['banana', 'coconut', 'pineapple', 'strawberry']
['banana', 'coconut', 'pineapple', 'strawberry']
['banana', 'coconut', 'pineapple', 'strawberry']
['banana', 'coconut', 'pineapple', 'strawberry']
Swap.
Swap.
No change.
No change.
No change.
Swap.
No change.
No change.
No change.
Compare each index to the
next, iterating through the list.
Swap if the first value is > the
second.
We had swaps in pass 1, so
we need to do a pass 2.
We had no swaps in pass 3,
so we're done and the list
is sorted.
We had swaps in pass 2, so
we need to do a pass 3.
Hopefully you now have a good feel for how to apply bubble sort’s
algorithm. Let’s practice. Take the list below and bubble sort it, showing
your work just like we did on the previous two pages. This will help to lock
in your understanding.
242 Chapter 4B
exercise solution
for word in ['ox', 'cat', 'lion', 'tiger', 'bobcat']:
for i in range(2, 7):
letters = len(word)
if (letters % i) == 0:
print(i, word)
For these bits of code, your job is to
play like you’re the Python interpreter.
Step through each bit of code and evaluate
it (in your brain). After you’ve done the
exercises, look at the end of the chapter to
see if you got it right.
BE the Interpreter
SOLUTION
for i in range(0,4):
for j in range(0,4):
print(i * j)
full = False
donations = []
full_load = 45
toys = ['robot', 'doll', 'ball', 'slinky']
while not full:
for toy in toys:
donations.append(toy)
size = len(donations)
if (size >= full_load):
full = True
print('Full with', len(donations), 'toys')
print(donations)
Python 3.6.0 Shell
2 ox
3 cat
2 lion
4 lion
5 tiger
2 bobcat
3 bobcat
6 bobcat
>>>
Python 3.6.0 Shell
0
0
0
0
0
1
2
3
0
2
4
6
0
3
6
9
>>>
Python 3.6.0 Shell
Full with 48 toys
['robot', 'doll', 'ball', 'slinky', 'robot', 'doll',
'ball', 'slinky', 'robot', 'doll', 'ball', 'slinky',
'robot', 'doll', 'ball', 'slinky', 'robot', 'doll',
'ball', 'slinky', 'robot', 'doll', 'ball', 'slinky',
'robot', 'doll', 'ball', 'slinky', 'robot', 'doll',
'ball', 'slinky', 'robot', 'doll', 'ball', 'slinky',
'robot', 'doll', 'ball', 'slinky', 'robot', 'doll', 'ball',
'slinky', 'robot', 'doll', 'ball', 'slinky']
>>>
you are here 4 243
sorting and nested iteration
Now our code produces two lists, one
with the scores sorted and another with
the corresponding solution numbers.
Write the code to generate the report
given these two lists.
Bubbles-R-Us
Top Bubble Solutions
1) Bubble solution #10 score: 68
2) Bubble solution #12 score: 60
3) Bubble solution #2 score: 57
4) Bubble solution #31 score: 50
5) Bubble solution #3 score: 34
print('Top Bubble Solutions')
for i in range(0,5):
print(str(i+1) + ')',
'Bubble solution #' + str(solution_numbers[i]),
'score:', scores[i])
Print the heading.
Iterate through five times
for the top five scores.
For each line of output, print the final standing of
the solution with the value i plus 1,the solution number
from the solution_numbers list, and the score from the
scores list.

this is a new chapter 245
text, strings, and heuristics
6
Putting It All Together
You’ve already got a lot of superpowers. Now it’s time to
use them. In this chapter we’re going to integrate what we’ve learned so far,
bringing it all together to build some increasingy cool code. We’re also going
to keep adding to your knowledge and coding skills. More specifically, in this
chapter we’ll explore how to write code that grabs some text, slices it, dices
it, and then does a little data analysis on it. We’re going to find out what a
heuristic is too, and implement one. Get ready—this is an all-out, heads-down,
pedal-to-the-metal, serious coding chapter!
Not so fast.
Sure, you know variables
and data types and
iteration and functions,
but can you put it all
together?
And by the end of the chapter
you'll realize how much you've
learned about coding!

246 Chapter 6
intro to data sciences
Heard of data science? It’s all about extracting insight and
knowledge from data, and we’re about to get into the business. Our
data? Any text: news articles, blog posts, books, anything written by
an author. And what we’re going to do with all that text is tell the
world how readable it is. That is, could a 5th grader read it, or does it
take a Ph.D.? With our app, we’ll soon know.
Now to perform such an analysis, we’re going to have to dig deep;
we’re going to examine, as you’ll soon discover:
every sentence…
and every word…
and every syllable...
not to mention every single character of the text in question!
With all that analysis, we’re going to come up with a score that
maps to a reading level, from 5th grade all the way up to a college
graduate. Let’s dig in and see more precisely how this is going to
work...
Welcome to the data sciences
Definitely
some sophisticated
writing in this book.
you are here 4 247
text, strings, and heuristics
Luckily someone else has already answered this question—namely,
the US Navy and Army, who have been testing a key formula for
years in the military to assess the readability of things like (we’re
assuming) tank training manuals. Here’s how it works: take the text
you want to analyze and run it through the following formula to get
back a reading ease score. We’ll talk in a second about what that score
means. Here’s the formula:
How do you compute
something like readability?
We’re not kidding; you can read up on
it here: https://en.wikipedia.org/wiki/
Flesch–Kincaid_readability_tests.
total words
total wordstotal sentences
total syllables
( () )
– 84.6206.835 – 1.015
The formula makes use of three
different numbers we’re going
to need to compute.
We start with the total number
of words in the text, which is
used in two places in the formula.
We also need to compute the total
number of syllables in the text.
We also need to compute the
total number of sentences.
Once we’ve computed those values, the
formula just consists of standard
multiplication, division, and subtraction,
with a few floating-point values like 84.6.
After we’ve used this formula to compute a score, we map the score to
the reading ease of the text using this chart:
Score School Level Notes
100.00–90.00 5th grade Very easy to read. Easily understood by an average 11-year-old student.
90.0–80.0 6th grade Easy to read. Conversational English for consumers.
80.0–70.0 7th grade Fairly easy to read.
70.0–60.0 8th & 9th grade Plain English. Easily understood by 13- to 15-year-olds.
60.0–50.0 10th–12th grade Fairly dicult to read.
50.0–30.0 College Dicult to read.
30.0–0.0 College Graduate Very dicult to read. Best understood by university graduates.
Say you were writing some text
for advertising; how would you
want it to score?
The higher the score, the easier your text is to read.
You'll find the original chart at
the Wikipedia URL above.
If you're wondering where numbers like 206.835
come from, all we can say is years of research (see
the Wikipedia article above).
To give due credit, the formula
was originally developed by
Rudolph Flesch in 1948. Dr.
Flesch was an author who
earned a Ph.D. in English at
Columbia University.
248 Chapter 6
planning the implementation
Can you come up with an algorithm to compute the number of syllables in an
arbitrary word? Assume you don’t have a large dictionary at your disposal. Write
your algorithm here in pseudocode.
At first glance computing readability just comes down to computing a
formula. But, if we look closer, it’s the key values that we need for that
formula where the computing comes in. That’s because, to complete
the formula, we need:
The game plan
1To compute the total number of words in our text: that
means we’ll have to take our text and break it down into
words and count them.
2To compute the total number of sentences in our text: that
means we’ll have to take our text and break it down into its
individual sentences and count them.
3To compute the total number of syllables in our text: that
means we’ll have to take each word, figure out how many
syllables it has, and then add up all the syllables in the
entire text.
to irritating differences of
open quarrels, and a coolness
by dropping the distasteful
opinion arose. It is but one
differences, with candor and
One of the first rules for a guide in polite conversation, is to avoid
political or religious discussions in general society. Such discussions
lead almost invariably to irritating differences of opinion, often to
open quarrels, and a coolness of feeling which might have been avoided
by dropping the distasteful subject as soon as marked differences of
opinion arose. It is but one out of many that can discuss either
political or religious differences, with candor and judgment, and yet so
far control his language and temper as to avoid either giving or taking
offence.
This is a difficult task, but do your best and think through the
problem. Come up with the best answer you can in five minutes or so.
you are here 4 249
text, strings, and heuristics
DECLARE a variable total_words and set to 0.
DECLARE a variable total_sentences and set to 0.
DECLARE a variable total_syllables and set to 0.
DECLARE a variable score and set to 0.
ASSIGN variable total_words to result of calling the function count_words(text)
ASSIGN variable total_sentences to result of calling the function count_sentences(text)
ASSIGN variable total_syllables to result of calling the function count_syllables(text)
ASSIGN variable score to
206.835 - 1.015 * (total_words / total_sentences) - 84.6 * (total_syllables / total_words)
IF score >= 90.0:
PRINT ‘Reading level of 5th Grade’
ELIF scores >= 80.0:
PRINT ‘Reading level of 6th Grade’
ELIF scores >= 70.0:
PRINT ‘Reading level of 7th Grade’
ELIF scores >= 60.0:
PRINT ‘Reading level of 8-9th Grade’
ELIF scores >= 50.0:
PRINT ‘Reading level of 10-12th Grade’
ELIF scores >= 30.0:
PRINT ‘Reading level of College Student’
ELSE:
PRINT ‘Reading level of College Graduate’
We’re going to write some pseudocode to drive our implementation. For now, we’re going to keep the pseudocode
high level, and we’ll fill in a lot of the details as we progress. There isn’t a lot of tricky logic in this code (like a
game); rather, our task will be computing the numbers we need for the readability formula (which will nonetheless
give us plenty to do). Follow along with our thinking as we write the pseudocode. As we’ve said, there are many
forms of pseudocode; you’ll find this one a little more formal and closer to code.
Writing some pseudocode
SETUP: here we’re
declaring all the local
variables we’ll be using
throughout the function.
This function expects to be passed the
text of the book or article...we’ll have
to figure out how to do that.
ANALYSIS: we compute all
the values we need, and we’ll
be diving into each one of
these separately.
FORMULA: we have all the
values, so we can now use
the formula to compute the
score.
RESULTS: we’ve got a
score and we’re mapping
that to a reading level by
using the table two pages
back.
We’ll probably put this code in its own function.
This is a big if/elif/else
statement that prints the
appropriate reading level based
on the computed score.
DEFINE a function compute_readability(text):
Let’s start out right and
put this code in a function. We already know of quite a few
important values we’re going
to need to compute for our
formula. Let’s go ahead and
create local variables for those.
We’ll also create a variable,
score, to hold the final score.
We need to compute those
values next, so let’s rely on a
function to compute each one.
With all the values
computed, we can evaluate
the reading ease score…
…and then figure out the
reading level.
Computing readability
seems like a generally
useful piece of code,
so let’s put it in a
function—we may be able
to reuse it later!

250 Chapter 6
inputting multiline text
Before we get coding, we’re going to need some interesting text
to put through our analysis. Now the truth is, you can analyze any
text you want: blog posts, your own writing, news articles, books,
whatever—and half the fun of creating this code is analyzing your
favorite news outlets and writers. That said, as we build and test this
code, it’ll help if you use the same text we use, so we’re seeing the same
results. So let’s find some text we can all test together.
And why not put ourselves to the test? We’re going to use the first
couple pages of this book, which you’ll find in the file ch6/text.txt.
We need some text to analyze
Remember, instructions for the book downloads are also in
the introduction section of this book, but this is Chapter
6, so of course you’ve already downloaded the files.
If you look at the file ch6/text.txt, you’ll see we have a big text file, but
how do we get that into Python? Well, you already know how to add text
to your code with strings:
How to get multiline text into Python
For testing purposes we’ll
put ourselves to the test
by using the text from
Chapter 1 of this book.
text = 'The first thing that stands between you'
And we’re going to do the same with the text in ch6/text.txt. To do that,
we’re going to use a Python convention for entering strings that span
multiple lines by using triple quotes, like this:
text = """The first thing that stands between you and writing your first, real,
piece of code, is learning the skill of breaking problems down into
achievable little actions that a computer can do for you."""
Start your string with three quote characters,
either single (') or double (") will do.
Obviously make sure your text
within the string doesn't have
any triple quotes, as unlikely
as that is.
And then end your string
with triple quotes as well.
Then enter your entire string,
including new lines.
After you’ve done this, use the string as you would any other; it’s just a
normal string with a bit more text in it. Now let’s get the text from the
first couple of pages of Chapter 1 into a string.
Don't enter anything into
IDLE yet. We'll enter it
on the next page.
you are here 4 251
text, strings, and heuristics
text = """The first thing that stands between you and writing your first, real,
piece of code, is learning the skill of breaking problems down into
achievable little actions that a computer can do for you. Of course,
you and the computer will also need to be speaking a common language,
but we'll get to that topic in just a bit.
Now breaking problems down into a number of steps may sound a new
skill, but its actually something you do every day. Let’s look at an
example, a simple one: say you wanted to break the activity of fishing
down into a simple set of instructions that you could hand to a robot,
who would do your fishing for you. Here’s our first attempt to do that,
check it out:
.
.
.
You’re going to find these simple statements or instructions are the
first key to coding, in fact every App or software program you’ve ever
used has been nothing more than a (sometimes large) set of simple
instructions to the computer that tell it what to do."""
print(text)
We're saving a few trees and omitting
some of the text here in the book.
Don’t forget the
final triple quotes.
Start with the string’s variable name and follow it with an equals sign, and then with
triple quotes. Next, paste in the text from the text.txt file.
Let’s print the text just to make sure
everything is working.
Take the text in the ch6/text.txt file and get it into a Python file. To do that, in IDLE,
create a new file and add the code below. For the Chapter 1 text, you’ll want to
open the text.txt file in IDLE as well, and then copy and paste the text into your
new file. When you’re done, save your file as ch1text.py.
Finally, run your code, and you should see the entire article printed to the shell.
Remember, a
Python file is also
known as a module.
252 Chapter 6
setting up the compute readability function
To get started let’s go ahead and set up the compute_readability
function. Let’s then translate the setup portion of the pseudocode
into Python:
Setting up the function
def compute_readability(text):
total_words = 0
total_sentences = 0
total_syllables = 0
score = 0
Just like in our pseudocode,
we have a function that takes
text as a parameter.
We also set up four
local variables that are
going to hold important
values in this function.
Go ahead and enter this code in a file called analyze.py.
Now let’s call compute_readability and pass it that text in ch1text.py.
But how? After all, it’s in another file. Well, remember any file with a .py
extension is a Python module, and also remember that in the past we’ve
imported Python modules into our code using the import statement.
So let’s import the ch1text.py file into our analyze.py file. Once we’ve done
that, we can access the variables and functions within the module by
prepending their names with the module name. Take a look:
Remember, a Python module is
just a file with a .py extension
and Python code inside.
import ch1text
def compute_readability(text):
total_words = 0
total_sentences = 0
total_syllables = 0
score = 0
compute_readability(ch1text.text)
We call compute_readability and pass it the
text string from the ch1text file.
We use import to include
the ch1text.py file.
To access the variable named
text in the ch1text file, we
prepend it with the module
name, ch1text.
And just as a bit of review,
note we’ve defined a function
called compute_readability
that has a parameter, text,
and sets up some local variables
And we’re calling that
function and passing it the
text variable from the
ch1txt module (in other
words, the ch1text.py file).
We'll go into a lot more
detail on how modules
work in the next chapter.

you are here 4 253
text, strings, and heuristics
Let’s give this a quick test to make sure
everything is working. To do that, move the
print statement from your ch1text.py file
to your analyze file. You’ll want to place it
in the compute_readablility function.
The output should be exactly the same as
the test run of the ch1text.py file.
A Test Drive
You should again see the
Chapter 1 text printed in
the shell.
import ch1text
def compute_readability(text):
total_words = 0
total_sentences = 0
total_syllables = 0
score = 0
print(text)
compute_readability(ch1text.text)
Python 3.6.0 Shell
into pond", or "pull in the fish." But also notice that other
instructions are a bit different because they depend on a condition,
like “is the bobber above or below water?". Instructions might also
direct the flow of the recipe, like "if you haven’t finished fishing,
then cycle back to the beginning and put another worm on the hook."
Or, how about a condition for stopping, as in “if you’re done” then go
home.
You’re going to find these simple statements or instructions are the
first key to coding, in fact every App or software program you’ve ever
used has been nothing more than a (sometimes large) set of simple
instructions to the computer that tell it what to do.
>>>
Add this to your
compute_readability
function.
DON’T FORGET to remove the print
statement from your ch1text.py file.
Referring to our pseudocode, the first number we need to compute for
our readability formula is the total number of words in our text, and
to compute that you need to extend your coding knowledge a little bit.
You already know how to combine strings with concatenation, but what
you don’t know how to do is break them apart. Strings provide a handy
function called split that will split a string into words (which we
usually call substrings) and then place those substrings into a list.
Here’s how to use split:
First up: we need the total
number of words in our text
lyrics = 'I heard you on the wireless back in fifty two'
words = lyrics.split()
print(words)
Python 3.6.0 Shell
['I', 'heard', 'you', 'on',
'the', 'wireless', 'back',
'in', 'fifty', 'two']
>>>
Take any string with some
text and whitespace.
Using whitespace (spaces, tabs, newlines) as a
separator, split breaks the string up into a number
of substrings, and places each one in the list.
The list holds all the words
(or substrings), each from
the original string.
Let's print the list to see
what split did.
And then call the
string’s split function.
It looks like split does a good job
of separating our text into its
individual words.
1
2
3
4

254 Chapter 6
figuring out the number of words
Cubicle conversation
Frank: I’m already lost. We want to count the number of
words, but we’re going to split up our text into a list first?
Joe: It’s a two-step process, Frank. We’re going to
essentially extract all the words into a list. After that we’ll
count how many words are in the list.
Frank: I understand the counting part, but how is the
split function giving us back words?
Judy: Frank, that’s what split does—it breaks a string up
into words, using whitespace as a separator.
Frank: Oh, so anytime it sees a space or tab or return, it
uses that to figure out how to break out the words.
Judy: Exactly.
Joe: And once we’ve split our string up into words and put
them in a list, we can easily count them.
Frank: Oh right, we can just use the len function for that,
correct?
Joe: That’s what I’m thinking.
Judy: Okay, guys, I think we have a plan: we’ll use the
split function to break the Chapter 1 text into words,
which we’ll get back in a list, and then we’ll call the built-in
len function to count how many words there are.
Frank: I like it!
Well, it looks like
we’re going to use the split
function to help gure out the
number of words?
Frank
Judy
Joe
you are here 4 255
text, strings, and heuristics
Q: So split takes a string and breaks it up into words?
A: Close. Split takes a string and breaks it up into a number of
substrings. The way it knows how to break the string up is by treating
whitespace as a separator, or as a computer scientist would say, a
delimiter. In other words, if it sees a delimiter, like a space, a tab, or
a newline in your string, it knows that is a place it can split the string.
Note the resulting substrings don’t have to technically be words; they
could be dates, tabular formatted data, numbers, and so on.
Q: What if my string has, say, commas rather than
whitespace separating the items?
A: split allows you to specify a set of characters you want to use
to delimit your substrings. So you could set the comma character
as your delimiter. That said, split is not flexible enough to combine,
say, whitespace and commas. You’ll find all the details in the
documentation for the split function. A bit later we’ll be looking at how
to make use of Python’s documentation. You can also find a more
sophisticated way to match words in text using what are known as
regular expressions, which are discussed in the Appendix.
Q: Help me with the syntax again: how does lyrics.split()
work exactly?
A: For now just know that you can attach functions to data types,
and the string data type has a function called split. When you see
lyrics.split(), that’s saying use the function split that is associated with
strings. We’re going to be taking a close look at exactly how this
works later in the book.
import ch1text
def compute_readability(text):
total_words = 0
total_sentences = 0
total_syllables = 0
score = 0
words = text.split()
total_words = __________________
print(words)
print(total_words, 'words')
print(text)
compute_readability(ch1text.text)
Let’s take our text
and split it into words.
Now that you know how to use the split function, let’s return to the compute_readability function
and take it a little further. In our pseudocode we were going to write a function count_words, but as it
turns out, with split we can handle the job of computing the total number of words with only two lines
of code, so let’s forgo the function. Go ahead and complete that code below, and then check with our
version in the solution at the end of the chapter. After that, give it a test run.
Computing the total number of
words is one line of code. Finish
this one up.
Let’s print all the words, and
then the total count. And
let’s also remove the old print
statement.
Hint: Frank, Joe, and
Judy already figured
out how to do this.
256 Chapter 6
more about split
Right. The split function, by default, splits up text only
using whitespace as a separator. And, while you can also pass
split a custom separator as a second parameter, unfortunately
split isn’t implemented in a way where you can easily tell it to
use “whitepace and commas and periods and semicolons and
exclamation points and question marks.” The result: we have
punctuation at the end of some of our words in the words list.
That’s okay, though, as it doesn’t really affect our count of
words. That said, it may cause some issues later in our coding,
but nothing we can’t handle. You’ll see in a bit...
Python 3.6.0 Shell
['The', 'first', 'thing', 'that', 'stands', 'between', 'you', 'and', 'writing', 'your',
'first,', 'real,', 'piece', 'of', 'code,', 'is', 'learning', 'the', 'skill', 'of', 'breaking',
'problems', 'down', 'into', 'achievable', 'little', 'actions', 'that', 'a', 'computer',
'can', 'do', 'for', 'you.', 'Of', 'course,', 'you', 'and', 'the', 'computer', 'will', 'also',
'need', 'to', 'be', 'speaking', 'a', 'common', 'language,', 'but', "we'll", 'get', 'to',
'that', 'topic', 'in', 'just', 'a', 'bit.', 'Now', 'breaking', 'problems', 'down', 'into',
'a', 'number', 'of', 'steps', 'may', 'sound', 'a', 'new', 'skill,', 'but', 'its', 'actually',
'something', 'you', 'do', 'every', 'day.', 'Let’s', 'look', 'at', 'an', 'example,', 'a',
'simple', 'one:', 'say', 'you', 'wanted', 'to', 'break', 'the', 'activity', 'of', 'fishing',
'down', 'into', 'a', 'simple', 'set', 'of', 'instructions', 'that', 'you', 'could', 'hand',
'to', 'a', 'robot,', 'who', 'would', 'do', 'your', 'fishing', 'for', 'you.', 'Here’s', 'our',
'first', 'attempt', 'to', 'do', 'that,', 'check', 'it', 'out:', 'You', 'can', 'think',
'of', 'these', 'statements', 'as', 'a', 'nice', 'recipe', 'for', 'fishing.', 'Like', 'any',
'recipe,', 'this', 'one', 'provides', 'a', 'set', 'of', 'steps,', 'that', 'when', 'followed',
'in', 'order,', 'will', 'produce', 'some', 'result', 'or', 'outcome', 'in', 'our', 'case,',
'hopefully,', 'catching', 'some', 'fish.', 'Notice', 'that', 'most', 'steps', 'consists',
'of', 'simple', 'instruction,', 'like', '"cast', 'line', 'into', 'pond",', 'or', '"pull',
'in', 'the', 'fish."', 'But', 'also', 'notice', 'that', 'other', 'instructions', 'are',
'a', 'bit', 'different', 'because', 'they', 'depend', 'on', 'a', 'condition,', 'like',
'“is', 'the', 'bobber', 'above', 'or', 'below', 'water?".', 'Instructions', 'might', 'also',
'direct', 'the', 'flow', 'of', 'the', 'recipe,', 'like', '"if', 'you', 'haven’t', 'finished',
'fishing,', 'then', 'cycle', 'back', 'to', 'the', 'beginning', 'and', 'put', 'another',
'worm', 'on', 'the', 'hook."', 'Or,', 'how', 'about', 'a', 'condition', 'for', 'stopping,',
'as', 'in', '“if', 'you’re', 'done”', 'then', 'go', 'home.', 'You’re', 'going', 'to', 'find',
'these', 'simple', 'statements', 'or', 'instructions', 'are', 'the', 'first', 'key', 'to',
'coding,', 'in', 'fact', 'every', 'App', 'or', 'software', 'program', 'you’ve', 'ever',
'used', 'has', 'been', 'nothing', 'more', 'than', 'a', '(sometimes', 'large)', 'set', 'of',
'simple', 'instructions', 'to', 'the', 'computer', 'that', 'tell', 'it', 'what', 'to', 'do.']
300 words
>>>
I noticed in the shell output that we’re
not doing a perfect job of extracting
words. I have words like ‘book!,’ and
‘re.’ and 'is,'.
Do you see what he's talking
about? The way this was split
up, some words have periods,
commas, and double quotes at
the end of them. We could
potentially have exclamation
points, colons, question marks,
and semicolons as well.
you are here 4 257
text, strings, and heuristics
The next step in our pseudocode is computing the number of sentences in the text.
It would be great if there was a built-in function for counting sentences, but there
isn’t, so it’s going to be up to us to figure out how to do this.
Here’s a suggestion: if we count the number of periods, semicolons, question
marks, and exclamation points in the text, that should provide a good
approximation of the number of sentences. Now it might not be perfect if, say,
an author uses punctuation in a non-standard way, but it should provide a close
approximation of the number of sentences. And often when working with messy
data like text, we can’t be perfect, at least not without considerable effort—more
on this topic in a bit.
So how do we figure out the number of terminal characters (that is “.”, “;”, “?”, or “!”)
in the text? Well, why don’t we just iterate through every character in the text and
keep a running count of the terminal characters we encounter? Sounds like a plan.
But we don’t know how to iterate through the characters of a string, or do we?
Remember we said that you can use the for statement on sequences? Well, as
it turns out, a string is just a sequence of characters. So, you can use the for
statement to iterate through all the characters in a string. Here’s an example:
Computing the total number of sentences
If you wanted to go through all the words to remove any extraneous characters
like periods and commas, how might you write the code to do that?
lyrics = 'I heard you on the wireless back in fifty two'
for char in lyrics:
print(char)
Python 3.6.0 Shell
I
h
e
a
r
d
y
o
u
o
n
t
h
e
w
i
r
e
l
e
s
s
b
a
c
k
i
n
f
i
f
t
y
t
w
o
>>>
Take any Python string…
…and iterate over each
character in the string.
Each time through the loop, the next
character in the string will be assigned
to the variable char.
Let’s print the character so
we can see how this works.
Even if you don’t have any
idea how to write the code,
think about what the process
might be like.
258 Chapter 6
writing some skeleton code
def count_sentences(text):
count = 0
for char in text:
return count
Now that we know how to iterate through a string, let’s get a skeleton of
the count_sentences function down before we write the code to count
the terminal characters:
Writing the count sentences function
Just like in the
pseudocode, we're
expecting text to be
passed to us.
Here's our count local
variable.
And we need to figure out the code
for this part. Is the character a
terminal character? If so, we increase
the count.
Finally, we return the
count as the result of
the function.
Here we’re iterating over each
character in the text.
Can you write the code to test each character to see if it is a period, semicolon, question mark, or
exclamation point, and then, if it is, increase the value of the count variable by one?
def count_sentences(text):
count = 0
for char in text:
return count
Your code goes here.
Serious Coding
Skeleton code is a style of
coding where you lay down
the major parts of your code
without yet lling in all the
details. It’s sort of a step
between pseudocode and
completed code. Writing
skeleton code can help you
rough in a code idea before
you’ve gured out all the
actual low-level code.
you are here 4 259
text, strings, and heuristics
We’re overdue for a test drive. Let’s get all this code together, get it in our analyze.py
file, and give it a run.
A Test Drive
import ch1text
def count_sentences(text):
count = 0
for char in text:
if char == '.' or char == ';' or char == '?' or char == '!':
count = count + 1
return count
def compute_readability(text):
total_words = 0
total_sentences = 0
total_syllables = 0
score = 0
words = text.split()
total_words = len(words)
total_sentences = count_sentences(text)
print(words)
print(total_words, 'words')
print(total_sentences, 'sentences')
compute_readability(ch1text.text)
Python 3.6.0 Shell
300 words
12 sentences
>>>
Here's our new
function for counting
sentences.
We'll add some output to show us
the number of sentences.
Let's make sure we
call our new function,
passing it the text.
Here's the output
we got on the
Chapter 1 text.
Make sure you’ve
changed this since the
last Test Drive.
Make sure you’ve
changed this since the
last Test Drive.
Just a reminder that we need to define functions before we
call them. Given that, think through where you could define
count_sentences (and where you couldn’t).
260 Chapter 6
using the in operator
You know, you could be
a lot more concise in the
way you’re testing those
terminal characters.
It’s true.
While the way we wrote our test for terminal characters is perfectly acceptable,
there’s a more concise way to compare each character to the set of terrminal
characters, and it relies on a Boolean operator we haven’t seen yet: the in
operator. Using the in operator, you can test to see if a value is contained in a
sequence. For instance, if you remember the smoothies from Chapter 4, we could
test to see if a specific smoothie is in our list. Like this:
smoothies = ['coconut', 'strawberry', 'banana', 'pineapple', 'acai berry']
if 'coconut' in smoothies:
print('Yes, they have coconut!')
else:
print('Oh well, no coconut today.')
Python 3.6.0 Shell
Yes, they have coconut!
>>>
Here's our
sequence, a list.
And here we're testing if ‘coconut'
is in the list of smoothies.
And here’s what we get.
you are here 4 261
text, strings, and heuristics
But as we just saw, a string is a sequence as well, and given Python tries to keep things
consistent, we can use the in operator with a string. Like this:
lyrics = 'I heard you on the wireless back in fifty two'
if 'wireless' in lyrics:
print('Yes, they have wireless!')
else:
print('Oh well, no wireless today.')
Python 3.6.0 Shell
Yes, they have wireless!
>>>
Here's our
sequence, a string.
And here we're testing
if ‘wireless' is in the
lyrics string.
Let’s see if we can make the count_sentences function more concise (and readable) by using
the in operator. Below we’ve removed the existing code that checks for terminal characters.
We’ve also added a new local variable, terminals, that holds a string containing all the terminal
characters. Complete the if statement, using the in operator, so that it determines if the current
character is a terminal.
def count_sentences(text):
count = 0
terminals = '.;?!'
for char in text:
if ____________________________
count = count + 1
return count
Add the code using the in
operator here.
Do you remember the
Thing-A-Ma-Jig mystery
at the end of Chapter 4?
That used a for loop to
iterate over a string too.
262 Chapter 6
a question on strings and characters
Update your code before we implement the next part of the pseudocode. The only
change you need to make is to the count_sentences function, shown below. Get
the change in and give it a test drive; your output should be the same as the last
test drive.
A Test Drive
def count_sentences(text):
count = 0
terminals = '.;?!'
for char in text:
if char in terminals:
if char == '.' or char == ';' or char == '?' or char == '!':
count = count + 1
return count
Python 3.6.0 Shell
300 words
12 sentences
>>>
You should still see this
as output.
In many languages, yes.
But not in Python. It’s a good question
because many languages do treat characters
as their own data type. Python, however, treats
everything as a string. So, the character ‘A’
in Python is just a string of length one that
happens to hold an A.
Given that you say a string is a
sequence of characters, does that mean
characters are another data type?
Add these two
lines of code.
And get rid of the old comparison.
you are here 4 263
text, strings, and heuristics
You sure can.
Only remember my_string[1] would
get you the second character of a string
because indices start at 0. You can also use
my_string[-1] to get the last character
in the string. As you’ll soon see, you can
even use a similar syntax to access substrings
of a string, but more on that in a bit.
Given a string is a sequence, can I use
the index syntax on a string? Like my_
string[1] to get the rst character?
Nice! And I assume I can change
the string too, like with a
mystring[1] = 'e' statement?
Not so fast.
You can’t actually alter a string. One difference between lists
and strings as sequences is that lists are mutable, and strings
are immutable. That is, you can change the items in a list, but
you can’t change the characters in a string—as it turns out,
this is the case with almost every modern programming
language. You’re probably wondering why. Well, as you’ll
see as you gain more experience, being able to alter strings
can lead to unreliable code; it can also makes implementing
efficient interpreters quite difficult. That said, you can
effectively “change” a string any time just by creating a
new, altered string, and that is the common practice across
almost every modern programming language.
264 Chapter 6
understanding heuristics
Are you ready to implement your algorithm for finding syllables?
Remember, the one you tried to write back at the beginning
of the chapter in the BRAIN POWER exercise? We should
probably apologize, as that exercise is a bit tricky—you see, it
isn’t easy to write an algorithm for finding syllables; in fact,
we can’t claim there is a definitive algorithm, short of using a
large database of words.
Finding syllables is a messy business because the English language is messy. For instance, why does “walked” have
one syllable while “loaded” is two? English is full of such inconsistencies.
For problems like this we don’t write algorithms, we write heuristics. A heuristic is a lot like an algorithm, only it’s
not a 100% solution. It might, for instance, solve a problem with a good answer, but not necessarily a perfect
answer.
So what good is a heuristic? Why not just write an algorithm with a perfect answer? For many reasons—in our
case it is because there may be no method of finding syllables that is perfect given the inconsistencies of the
English language (again, outside of using a very large database of words). In other cases, it may be that providing
a 100% solution requires so much computing time (or memory) that it makes an algorithm impractical, while
providing only a good answer requires much less time (or memory). Or, it may be because not all aspects of the
problem are known to the implementors, and so the best they can do is to provide a partial solution.
Back to our problem, though...because computing syllables is messy, our goal will be to do enough work to get a
decent estimate of syllables in our text. It won’t be perfect, but it will be close, and if you’re interested, there are
plenty of ways you can improve our heuristic further on your own (and we’ll give you some ideas for that).
Computing the number of syllables, or,
learning to love heuristics
Here’s your second chance: can you come up with some ideas for how to count
the syllables of an arbitrary word? Study the words in our text as a test case.
See if you can develop some general rules for determining how many syllables
a word has. Make your notes here. We’ll get you started...
If a word has three characters or fewer it typically has only one syllable.
We came up with this:
can you come up with
some more possible rules?

you are here 4 265
text, strings, and heuristics
I don’t get why
this is so hard...why don’t you
just use a dictionary? It has all the
syllables spelled out for any word.
You have a point, but... loading
an entire English dictionary so that
words can be quickly retrieved is
actually a pretty big undertaking. It
requires not only a lot of data and
storage, but also additional technologies
like a database or a search engine in
order to have quick enough response
time to make the program usable. It
probably would require you to license
the dictionary data as well at some non-
trivial cost.
Compare that to implementing a few
simple rules, which may get us up to
80–90% or greater accuracy, and the
heuristic starts to look pretty attractive
as a technology direction.
At least for the
purposes of this book!

266 Chapter 6
brainstorming how to count syllables
Cubicle conversation
continued...
Joe: That’s what I thought too. I did
notice that if a word has fewer than
three characters, you might as well go
ahead and call it one syllable.
Judy: I’m sure there’s an exception
to that rule, but sounds good. I also
noticed that if you just look at the
number of vowels in a word, it’s a
pretty good indicator of the number of
syllables it has.
Joe: So, take “chocolate”...
Judy: I don’t mind if I do!
Joe: ...take the WORD “chocolate”—it has
three vowels and three syllables.
Judy: Well, I think you skipped the silent e? I see a few other caveats too.
Joe: Like what?
Judy: Well, take the word “looker.” It has consecutive vowels, like oo, and we just need to count
the first vowel we see in those cases.
Joe: Oh, so we count the first o and then the e, giving us two syllables.
Joe: ...and, like you said, a lot of words have a silent e at the end as well. Like “home.”
Judy: Right, so we count the o in “home” but not the final e. So one syllable.
Judy: And related to that, a y at the end of a word often adds a syllable, like “proxy,” so we
need to consider that perhaps as a vowel as well?
Joe: Or at least that it adds a syllable to our count.
Judy: Sure. The other cases I came up with are really just special cases, like “walked” is only
one syllable, but “loaded” is two.
Joe: Right, we could build a word list of special cases and then scan all our words for them.
Judy: We could, but we only have so much time, so let’s go with the general rules we have and
then come back to the special cases if we need to.
Joe: Sounds like a plan.
Alright, syllables look a
little more challenging
than counting words.
you are here 4 267
text, strings, and heuristics
We’re then going to call another function
called count_syllables_in_word that we’ll
going to write next. It returns the number
of syllables in a single word.
def count_syllables(words):
count = 0
for word in words:
word_count = count_syllables_in_word(word)
count = count + word_count
return count
Here’s our new function,
which takes a list of words.
We’ll use a count local variable to
hold the total number of syllables.
We’re going to iterate over every word in our words list.
Finally, we’ll return the total number
of syllables across all words.
And then we’ll add the
current word’s syllable
count to the total.
It looks like we’ve got some good ideas for developing our syllable counting heuristic.
Of course, we’re sure you came up with even more. Let’s summarize the ideas
before we start implementing them:
Setting up the heuristic
If a word has few than three characters, then count it as one syllable.
Otherwise, count the number of vowels and let that represent the number of syllables.
To make the previous step more accurate, remove any consecutive vowels in a word.
Remove the nal e from words, in order to account for silent e’s.
Treat the character y as a vowel if it’s the last character.
Let’s also set up the count_syllables function so that we are all ready to code
these. Here’s how we’re going to do that:
While we’re at it, let’s set up the count_syllables_in_word function too:
def count_syllables_in_word(word):
count = 0
return count
The count_syllables_in_word function takes a single
string, a word, as a parameter.
Once again, we’ll use a local count variable to keep
track of the number of syllables.
And we’ll return it when we’re done.
All our heuristic code will be going here.
The local variable word_count holds the number
of syllables for the current word. Perhaps not
the clearest variable name, but syllable_count as a
choice would be too similar to the function name.
This is a place where you’d want to document your
choice to avoid confusion.
268 Chapter 6
writing the code to count syllables
The first thing on our heurstic punch list is that we need to treat any word
with fewer than three characters as having one syllable. But how do we get
the length of a string? It turns out, you already know the way: with the len
function. Previously we’ve used len on a list to get its length, but it can be
applied to any sequence in Python, and a string is a sequence of characters.
Let’s try it:
def count_syllables_in_word(word):
count = 0
if len(word) <= 3:
return 1
return count
If the word has a length of three
or less, then we've finished the
computation and we can go ahead and
return 1 from the function.
Go ahead and add the new code in your analyze.py file. At this point, just make sure
you don’t have any syntax errors. You’ll get the same output as the previous run.
A Test Drive
def count_syllables(words):
count = 0
for word in words:
word_count = count_syllables_in_word(word)
count = count + word_count
return count
def count_syllables_in_word(word):
count = 0
return count
You can add this code at the top of your
file, right below the import statement.
Writing the heuristic
A common theme in
this chapter
We use the len function to get the length of the word,
which is a string. If it is less than or equal to three,
then we execute the code block of the if statement.
If a word has fewer than three characters,
then count it as one syllable.
Otherwise, count the number of vowels and
let that represent the number of syllables.
To make the previous step more accurate,
remove any consecutive vowels in a word.
Remove the nal e from words, in order to
account for silent e’s.
Treat the character y as a vowel if it’s the
last character.
We’re here.
you are here 4 269
text, strings, and heuristics
Next, we need to count the vowels in each word. To do that, we’re
going to do something quite similar to when we looked for terminal
characters in a string: define a string containing all the vowels, and
then use the in operator to see if a character from our word is in that
string of vowels. We’ll compare to both lower- and uppercase vowels
in case someone typed in words in all uppercase:
How to count vowels
def count_syllables_in_word(word):
count = 0
if len(word) <= 3:
return 1
vowels = "aeiouAEIOU"
for char in word:
if char in vowels:
count = count + 1
return count
Then let's step through every character in the word.
First we're going to create a local
variable, vowels, that holds all the vowels,
lower- and uppercase.
And if that character is
in the vowel string, then
we have a vowel. Let's
update our count by one.
But we’re not done, because we need to take into account two
or more consecutive vowels. For instance, if you have the word
“book,” then you want to count the first o and ignore the second, for
a total of one syllable. Or if you have the word “roomful,” then
you want to count the first o, ignore the second, and then count the
u for a total of two syllables.
So our goal will be to scan each character of each word for vowels,
just like our code does now, but after we encounter a vowel, we
need to make sure we ignore any vowels that follow it, until we see
another consonant. After that we can repeat the process, until we
reach the end of the word.
Ignoring consecutive vowels
If a word has fewer than three characters,
then count it as one syllable.
Otherwise, count the number of vowels and
let that represent the number of syllables.
To make the previous step more accurate,
remove any consecutive vowels in a word.
Remove the nal e from words, in order to
account for silent e’s.
Treat the character y as a vowel if it’s the
last character.
We then use the in operator to see if the character
currently in the char variable matches any of the
characters in the vowels string.
If a word has fewer than three characters,
then count it as one syllable.
Otherwise, count the number of vowels and
let that represent the number of syllables.
To make the previous step more accurate,
remove any consecutive vowels in a word.
Remove the nal e from words, in order to
account for silent e’s.
Treat the character y as a vowel if it’s the
last character.
270 Chapter 6
ignoring consecutive vowels
Alright, let’s implement our consecutive vowel code. Here’s how we’re going to approach this:
we’ll use a Boolean variable to track if the previous character was a vowel, and if so, we know not
to count the current character if it’s a vowel. Let’s take a look:
Writing the code to ignore consecutive vowels
def count_syllables_in_word(word):
count = 0
if len(word) <= 3:
return 1
vowels = "aeiouAEIOU"
prev_char_was_vowel = False
for char in word:
if char in vowels:
if not prev_char_was_vowel:
count = count + 1
prev_char_was_vowel = True
else:
prev_char_was_vowel = False
return count
First, we’re going to add
a new local variable called
prev_char_was_vowel, and
set it to False.
Our code is going to iterate over each
character in a word, just as before.
And we’re going to test if the current
character is in the vowels string.
If the current character is a vowel, and
the previous character wasn’t, then
increment the syllable count.
In either case, we then set the prev_char_
was_vowel to True before we process the
next character.
If the current character isn’t a vowel, then
we just set prev_char_was_vowel to False
before we process the next character.
char prev_char_was_vowel count
r False 0
o
o
m
f
u
l
Using the count_
syllables_in_word function
above, your job is to play like you’re
the interpreter. The function is being
called with the argument “roomful”.
Step through each iteration of the loop
and fill in the local variable values
as they change. After you’ve done the
exercise, look at the end of the chapter
to see if you got it right.
BE the
Interpreter
Record changes
to the local
variables at the
end of each step
through the
iteration.
There’s a lot going on here.
Give this code some quality
time and make sure you
understand exactly how it
operates.
you are here 4 271
text, strings, and heuristics
A Test Drive
def count_syllables_in_word(word):
count = 0
if len(word) <= 3:
return 1
vowels = "aeiouAEIOU"
prev_char_was_vowel = False
for char in word:
if char in vowels:
if not prev_char_was_vowel:
count = count + 1
prev_char_was_vowel = True
else:
prev_char_was_vowel = False
return count
We need to update two functions at this point, the count_syllables_in_word
function to add our new code, and the compute_readability function to call
the count_syllables function. We’re only showing the new code here, which is
highlighted below. Go ahead and make the changes and give it a test drive.
def compute_readability(text):
total_words = 0
total_sentences = 0
total_syllables = 0
score = 0
words = text.split()
total_words = len(words)
total_sentences = count_sentences(text)
total_syllables = count_syllables(words)
print(total_words, 'words')
print(total_sentences, 'sentences')
print(total_syllables, 'syllables')
Python 3.6.0 Shell
300 words
12 sentences
450 syllables
>>>
Double-check to make sure you’re
getting the same number of words,
sentences, and syllables. If not,
double-check your code, and you
can also compare it to the book’s
source code to find any mistakes.
272 Chapter 6
count syllables finishing touches
If a word has fewer than three characters,
then count it as one syllable.
Otherwise, count the number of vowels and
let that represent the number of syllables.
To make the previous step more accurate,
remove any consecutive vowels in a word.
Remove the nal e from words, in order to
account for silent e’s.
Treat the character y as a vowel if it’s the
last character.
Now we just have two more tasks left: removing final e’s and counting final y’s.
Actually, we’re forgetting another issue as well—that we still have some words
with punctuation at their ends, which may complicate testing for final e’s and
y’s. Let’s deal with removing the punctuation first.
Looking at our words in the words list, you can see words like “first,”, “you.”,
and “out:”. What we need to do is replace them with “first”, “you”, and
“out”, and to do that we need to get the substring of each word, excluding the
punctuation. With Python we can do that by slicing. Let’s see how that works.
Removing final e’s, y’s, and punctuation
We’ve talked about substrings, but let’s talk for a moment about exactly what
one is. A substring is just a string that occurs in another string. So if I have a
string:
lyrics = 'I heard you on the wireless back in fifty two'
then 'I' is a substring, as is 'I heard', as is 'on the wire', as is 'o',
and so on. Given a string, Python gives us a way to extract substrings from a
string using its slice syntax, which works like this:
He who controls the slice, controls the...
Python 3.6.0 Shell
heard
>>>
my_substring = lyrics[2:7]
print(my_substring)
Slice the string starting
at this index.
And stop at this index,
BUT don’t include it.
That means this evaluates to a string
containing the characters at index 2
through 6, or ‘heard’.
Let’s look for a few other ways you can use slice as well. If you omit the
beginning index, then slice assumes you mean to start at the beginning of
the list:
my_substring = lyrics[:6]
print(my_substring)
Python 3.6.0 Shell
I hear
>>>
Omitting the first index
means you want to start at
the beginning of the string.
Note this is a colon,
not a comma!
you are here 4 273
text, strings, and heuristics
my_substring = lyrics[28:-1]
print(my_substring)
This says end just before the
last character in the string.
Python 3.6.0 Shell
back in fifty tw
>>>
my_substring = lyrics[28:]
print(my_substring)
Python 3.6.0 Shell
back in fifty two
>>>
Omitting the last index means
you want to end at the end of
the string.
Or, likewise, if you omit the ending index, then slice assumes you mean to
stop the end of the list:
You can even use the negative indices like you did with lists, like this:
Or, you can even use a negative index in the first index:
Python 3.6.0 Shell
back in fifty two
>>>
my_substring = lyrics[-17:]
print(my_substring)
Start 17 characters
from the end of the
string, and then go all
the way to the end of
the string.
We said Python tries to be consistent, and consistent it is—you can use slice on your lists too!
smoothies = ['coconut', 'strawberry', 'banana', 'pineapple', 'acai berry']
smoothies[2:4] ['banana', 'pineapple']
smoothies[:2] ['coconut', 'strawberry']
smoothies[3:-1] ['pineapple']
evaluates to
evaluates to
evaluates to
Here's a familiar list. And here's a few examples of slicing your lists. The
indexing works as it does on strings.
Surprise, slice isn't just for strings!
274 Chapter 6
more about slicing strings
We had our slice operation and substrings all figured out, and then they
got all mixed up. Can you help us figure out who does what? Be careful,
we’re not sure if each slice has zero, one, or more matches. We’ve already
figured one out, which is marked below:
'a man a plan panam'
'a '
'a ma'
' man a'
'man a plan panama'
'a man a plan panama'
'an a plan panam'
str[:]
str[0:-1]
str[0:4]
str[-2:-1]
str[3:-1]
str[:2]
str[2:]
str[1:7]
So with slicing we can take a word like “out:” and easily produce the substring
"out". In fact, based on all our slicing training over the last few pages, we know
exactly what that code would look like:
Putting slicing (substrings) to work
str = 'a man a plan panama'
'm'
process_word = word[0:-1]
Get the substring that starts at index
0 (the beginning of the string) and
go until, but not including, the last
character.
Note we could have written
this as word[:-1] too!
This variable will hold a new string
containing only the string without the
ending character.
you are here 4 275
text, strings, and heuristics
But we still need the logic of knowing when to remove the final character of a word. We want
to remove the final character if it is a period, comma, semicolon, exclamation point, or question
mark, and based on our work in this chapter, we have all the pieces we need to do ths:
def count_syllables_in_word(word):
count = 0
endings = '.,;!?:'
last_char = word[-1]
if last_char in endings:
processed_word = word[0:-1]
else:
processed_word = word
if len(processed_word) <= 3:
return 1
vowels = "aeiouAEIOU"
prev_char_was_vowel = False
for char in processed_word:
if char in vowels:
if not prev_char_was_vowel:
count = count + 1
prev_char_was_vowel = True
else:
prev_char_was_vowel = False
return count
Let's set up a string that contains
all the word endings.
And get the last character of the
current word.
Then check to see if the last
character is one of the endings.
If so, we'll set the processed_word to be
the word, without the last character.
If not, we're going to set the
processed_word to the entire word.
And then we're going to use
processed_word rather than word in
the rest of the code.
Assuming the variable process_word already has any punctuation removed from the last
character, can you write a couple lines of code (or so) to remove a final e character, if it has one?
Just write the code fragment here.
Don’t worry about entering this code
yet:; we'll do it on the next page.
276 Chapter 6
testing count syllables
def count_syllables_in_word(word):
count = 0
endings = '.,;!?:'
last_char = word[-1]
if last_char in endings:
processed_word = word[0:-1]
else:
processed_word = word
if len(processed_word) <= 3:
return 1
if processed_word[-1] in 'eE':
processed_word = processed_word[0:-1]
vowels = "aeiouAEIOU"
prev_char_was_vowel = False
for char in processed_word:
if char in vowels:
if not prev_char_was_vowel:
count = count + 1
prev_char_was_vowel = True
else:
prev_char_was_vowel = False
return count
Let’s get all these additions based on slicing into the code. You’ll find all the
new code from the last few pages highlighted here. Go ahead and get it entered
and try a test run to see your syllable count change.
A Test Drive
Make sure
you've made
these additions
we covered on
the previous
page.
We've put the code to
remove silent e characters
here, after the test for
words that are length
three or less.
Python 3.6.0 Shell
300 words
12 sentences
410 syllables
>>>
Notice the number of syllables
calcuation has changed with
those code changes!
If a word has fewer than three characters,
then count it as one syllable.
Otherwise, count the number of vowels and
let that represent the number of syllables.
To make the previous step more accurate,
remove any consecutive vowels in a word.
Remove the nal e from words, in order to
account for silent e’s.
Treat the character y as a vowel if it’s the
last character.
We’re on the last step of implementing the heuristic—all we need to do
now is count the y’s at the end of words as syllables. At this point we know
how to examine the end of a word, and we know that if we see a y at the
end, we just need to increment our count local variable by one. Let’s put
it all together and test the final version of count_syllables_in_word,
not to mention count_syllables.
Finishing off the heuristic code

you are here 4 277
text, strings, and heuristics
def count_syllables_in_word(word):
count = 0
endings = '.,;!?:'
last_char = word[-1]
if last_char in endings:
processed_word = word[0:-1]
else:
processed_word = word
if len(processed_word) <= 3:
return 1
if processed_word[-1] in 'eE':
processed_word = processed_word[0:-1]
vowels = "aeiouAEIOU"
prev_char_was_vowel = False
for char in processed_word:
if char in vowels:
if not prev_char_was_vowel:
count = count + 1
prev_char_was_vowel = True
else:
prev_char_was_vowel = False
if processed_word[-1] in 'yY':
count = count + 1
return count
It's time to finish off the count_syllables_in_word function. Below you’ll find
the code to increase the syllable count if there is a y at the end of the word.
Give it a test run and check out the final syllable number.
A Test Drive
Check the word to see if
it ends in y or Y, and if
so, increase the syllable
count.
Python 3.6.0 Shell
300 words
12 sentences
416 syllables
>>>
Looks like we found some
words ending in y, so our
syllable count increased.
You’ll notice we’ve written quite a long function here, which
is perfectly acceptable. A bit like a paragraph, you’ll find a
function is probably too long when it becomes hard to understand
and keep in your head as you study it.
278 Chapter 6
the reading ease formula
We’re getting near the end; all we have left is to implement the formula
to get a reading ease score, and then to provide some output to report the
results. In terms of the formula, we have all the pieces we need: a count
of words, a count of sentences, and a count of syllables. Let’s look at the
original formula:
Implementing the reading ease formula
total words
total wordstotal sentences
total syllables
( () )
– 84.6206.835 – 1.015
and let’s translate it into Python:
score = (206.835 - 1.015 * (total_words / total_sentences)
- 84.6 * (total_syllables / total_words))
Remember we can wrap the
formula in parentheses so we can
write it across multiple lines.
def compute_readability(text):
total_words = 0
total_sentences = 0
total_syllables = 0
score = 0
words = text.split()
total_words = len(words)
total_sentences = count_sentences(text)
total_syllables = count_syllables(words)
score = (206.835 - 1.015 * (total_words / total_sentences)
- 84.6 * (total_syllables / total_words))
print(total_words, 'words')
print(total_sentences, 'sentences')
print(total_syllables, 'syllables')
print(score, 'reading ease score')
And now let’s get the formula in our compute_readability function. Go ahead
and add the formula as well as the new print statement and give it a try.
A Test Drive
Add the formula below
to our word, sentence,
and syllable count code.
And add a print
statement so you can
see the results.
Python 3.6.0 Shell
300 words
12 sentences
416 syllables
64.14800000000001 reading ease score
>>>
Nice, we have
a reading ease
score!
you are here 4 279
text, strings, and heuristics
IF score >= 90.0:
PRINT ‘Reading level of 5th Grade’
ELIF score >= 80.0:
PRINT ‘Reading level of 6th Grade’
ELIF score >= 70.0:
PRINT ‘Reading level of 7th Grade’
ELIF score >= 60.0:
PRINT ‘Reading level of 8-9th Grade’
ELIF score >= 50.0:
PRINT ‘Reading level of 10-12th Grade’
ELIF score >= 30.0:
PRINT ‘Reading level of College Student’
ELSE:
PRINT ‘Reading level of College Graduate’
Here’s the pseudocode.
Write your Python code here.
You have the reading ease score, so all you need to do is output the results. Define a
function, output_results, that takes a score as a parameter and outputs the reading
level as specified in the pseudocode. We’ve reproduced pseudocode below to make
things easier.
280 Chapter 6
the finished code
A Test Drive This is it—we just need to add in the output_results function and we should
have everything we need to complete the code! Go ahead and make the additions
and changes below. You’ll find the complete code over the next two pages.
import ch1text
def count_syllables(words):
count = 0
for word in words:
word_count = count_syllables_in_word(word)
count = count + word_count
return count
def count_syllables_in_word(word):
count = 0
endings = '.,;!?:'
last_char = word[-1]
if last_char in endings:
processed_word = word[0:-1]
else:
processed_word = word
if len(processed_word) <= 3:
return 1
if processed_word[-1] in 'eE':
processed_word = processed_word[0:-1]
vowels = "aeiouAEIOU"
prev_char_was_vowel = False
for char in processed_word:
if char in vowels:
if not prev_char_was_vowel:
count = count + 1
prev_char_was_vowel = True
else:
prev_char_was_vowel = False
if processed_word[-1] in 'yY':
count = count + 1
return count
Here’s all the code we’ve already
written. This should be in your
analyze.py file already.
There's more code on
the next page.
you are here 4 281
text, strings, and heuristics
def count_sentences(text):
count = 0
terminals = '.;?!'
for char in text:
if char in terminals:
count = count + 1
return count
def output_results(score):
if score >= 90:
print('Reading level of 5th Grade')
elif score >= 80:
print('Reading level of 6th Grade')
elif score >= 70:
print('Reading level of 7th Grade')
elif score >= 60:
print('Reading level of 8-9th Grade')
elif score >= 50:
print('Reading level of 10-12th Grade')
elif score >= 30:
print('Reading level of College Student')
else:
print('Reading level of College Graduate')
def compute_readability(text):
total_words = 0
total_sentences = 0
total_syllables = 0
score = 0
words = text.split()
total_words = len(words)
total_sentences = count_sentences(text)
total_syllables = count_syllables(words)
score = (206.835 - 1.015 * (total_words / total_sentences)
- 84.6 * (total_syllables / total_words))
print(total_words, 'words')
print(total_sentences, 'sentences')
print(total_syllables, 'syllables')
print(score, 'readability score')
output_results(score)
compute_readability(ch1text.text)
Python 3.6.0 Shell
Reading level of 8-9th Grade
>>>
So our writing is at the
8th- to 9th-grade level.
Scores in that range are
considered acceptable for
most books and articles, so
we’re not doing too bad!
Add the new
output_results
code.
And make sure we’re
calling our new function,
passing it the score.

282 Chapter 6
explaining scores
Are you trying to tell
me an 8th- or 9th-grade reading
level is good? Doesn’t the author of
this book have a Ph.D. or something?
The goal is not to get a really high
or really low score. A low score on
Flesch’s readability test indicates that the text is quite
challenging to read. For example, a score in the 30–50
range would indicate that the text is written like an
advanced college textbook or research paper in a
scientific field. Not exactly the score you’d want for
the opening text of a Head First book; in fact, it’s just
the opposite of what you’d want.
Hopefully this book is accessible to those entering high
school, so this score doesn’t seem too off the mark. In
fact, think of another example: say you wrote a novel
for the young adult market. You’d probably want a
score that indicates an even lower reading level (say,
7th grade) and higher score (say, 70–80) so that it is
accessible to those, say, in junior high school.
Score School Level Notes
100.00–90.00 5th grade Very easy to read. Easily understood by an average 11-year-old student.
90.0–80.0 6th grade Easy to read. Conversational English for consumers.
80.0–70.0 7th grade Fairly easy to read.
70.0–60.0 8th & 9th grade Plain English. Easily understood by 13- to 15-year-olds.
60.0–50.0 10th–12th grade Fairly dicult to read.
50.0–30.0 College Dicult to read.
30.0–0.0 College Graduate Very dicult to read. Best understood by university graduates.
you are here 4 283
text, strings, and heuristics
You can include multiline text in your code
using Python’s three-quote syntax.
You can determine the length of a string
using the len function, just like you can
with lists.
The string split function uses a separator
to split a string into words that are placed
into a list.
A delimiter is another word for a separator.
Strings are immutable. Lists are mutable.
Mutable means you can change it;
immutable means you can’t.
Almost all modern languages have
immutable strings.
We can iterate through the characters of a
string using the for statement.
We can also use the index notation to
access characters in a string.
The Boolean operator in allows you to
check for inclusion of values in lists or
strings.
A heuristic provides a best estimate or
good answer but not necessarily a perfect
one.
Heuristics are often used when an
algorithm isn’t computationally practical,
or known.
Strings support a slice notation that
returns a substring. You can use this
notation on lists as well.
In Python there is no separate character
type as there is in some programming
languages. In Python all text is a string.
Are you all ready to test the writing of your favorite author,
news sources, or even your own writing? Here’s instructions
for how to do that:
Taking it even further
And don’t forget our heuristic code could still be improved.
Just take a look at words in the word list; there’s still some
issues, like the use of double quotes that show up in words,
that could be cleaned up. Also, we could still build that
special-case word list, right?
As you can see, a coder’s job is never truly done. But in terms
of this chapter you are done—oh, except for the bullet points
and the crossword. Anyway, congrats, this was a tough chapter
that really demonstrates the coding chops you’re developing!
Create a new le of your own, with a name ending in .py.
Using the three-quote syntax, add your own multiline text
and assign it to a variable—we recommend naming it
text for consistency.
In your analyze.py le, import your new le (otherwise
known as a module).
Call the compute_readability function and pass it
your module name followed by the variable name text.
Nice job!
We'll see
an even
better way
in the next
chapter.
284 Chapter 6
coding crossword
Coding cross
This was a character-building chapter. Relax
with a little crossword.
1
2 3 4
5
6
7
8 9
10 11
12
13
14
15 16
Across
2. We removed these.
3. What test text was from.
5. The in operator works on these.
6. At the end of some words.
7. Another name for separator.
10. We ignored these vowels.
12. Subset of a string.
13. Heard you on this in 52.
15. Came up with the formula.
16. We needed a heuristic for this.
Down
1. Our new business.
4. A solution that's not 100%.
8. Means you can't change it.
9. May have made computing syllables easier.
11. Python's way to get substrings.
14. Breaking a string apart.
you are here 4 285
text, strings, and heuristics
The code printed the entire
article; here’s the tail end.
import ch1text
def compute_readability(text):
total_words = 0
total_sentences = 0
total_syllables = 0
score = 0
words = text.split()
total_words = len(words)
print(words)
print('total words', total_words)
print(text)
compute_readability(ch1text.text)
To get the total number
of words we use the len
function on the list of
words.
Now that you know how to use the split function, let’s return to the compute_readability
function and take it a little further. In our pseudocode we were going to write a function count_words,
but as it turns out, with split we can handle the job of computing the total number of words with only
two lines of code, so let’s forgo the function. Go ahead and complete that code below.
We’re going to take the text in the ch6/text.txt file and get it into a Python file. To
do that, in IDLE, create a new file and add the code below. For the Chapter 1 text,
you’ll want to open the text.txt file in IDLE as well, and then copy and paste the
text into your new file. When you’re done, save your file as ch1text.py.
Finally, run your code, and you should see the entire article printed to the shell.
Python 3.6.0 Shell
into pond", or "pull in the fish." But also notice that other
instructions are a bit different because they depend on a condition,
like “is the bobber above or below water?". Instructions might also
direct the flow of the recipe, like "if you haven’t finished fishing,
then cycle back to the beginning and put another worm on the hook."
Or, how about a condition for stopping, as in “if you’re done” then go
home.
You’re going to find these simple statements or instructions are the
first key to coding, in fact every App or software program you’ve ever
used has been nothing more than a (sometimes large) set of simple
instructions to the computer that tell it what to do.
>>>
Python 3.6.0 Shell
['The', 'first', 'thing', 'that', 'stands', 'between', 'you', 'and', 'writing', 'your',
'first,', 'real,', 'piece', 'of', 'code,', 'is', 'learning', 'the', 'skill', 'of', 'breaking',
'problems', 'down', 'into', 'achievable', 'little', 'actions', 'that', 'a', 'computer',
'can', 'do', 'for', 'you.', 'Of', 'course,', 'you', 'and', 'the', 'computer', 'will', 'also',
'need', 'to', 'be', 'speaking', 'a', 'common', 'language,', 'but', "we'll", 'get', 'to',
'that', 'topic', 'in', 'just', 'a', 'bit.', 'Now', 'breaking', 'problems', 'down', 'into',
'a', 'number', 'of', 'steps', 'may', 'sound', 'a', 'new', 'skill,', 'but', 'its', 'actually',
'something', 'you', 'do', 'every', 'day.', 'Let’s', 'look', 'at', 'an', 'example,', 'a',
'simple', 'one:', 'say', 'you', 'wanted', 'to', 'break', 'the', 'activity', 'of', 'fishing',
'down', 'into', 'a', 'simple', 'set', 'of', 'instructions', 'that', 'you', 'could', 'hand',
'to', 'a', 'robot,', 'who', 'would', 'do', 'your', 'fishing', 'for', 'you.', 'Here’s',
'our', 'first', 'attempt', 'to', 'do', 'that,', 'check', 'it', 'out:', 'You', 'can', 'think',
'of', 'these', 'statements', 'as', 'a', 'nice', 'recipe', 'for', 'fishing.', 'Like', 'any',
'recipe,', 'this', 'one', 'provides', 'a', 'set', 'of', 'steps,', 'that', 'when', 'followed',
'in', 'order,', 'will', 'produce', 'some', 'result', 'or', 'outcome', 'in', 'our', 'case,',
'hopefully,', 'catching', 'some', 'fish.', 'Notice', 'that', 'most', 'steps', 'consists',
'of', 'simple', 'instruction,', 'like', '"cast', 'line', 'into', 'pond",', 'or', '"pull',
'in', 'the', 'fish."', 'But', 'also', 'notice', 'that', 'other', 'instructions', 'are',
'a', 'bit', 'different', 'because', 'they', 'depend', 'on', 'a', 'condition,', 'like',
'“is', 'the', 'bobber', 'above', 'or', 'below', 'water?".', 'Instructions', 'might', 'also',
'direct', 'the', 'flow', 'of', 'the', 'recipe,', 'like', '"if', 'you', 'haven’t', 'finished',
'fishing,', 'then', 'cycle', 'back', 'to', 'the', 'beginning', 'and', 'put', 'another',
'worm', 'on', 'the', 'hook."', 'Or,', 'how', 'about', 'a', 'condition', 'for', 'stopping,',
'as', 'in', '“if', 'you’re', 'done”', 'then', 'go', 'home.', 'You’re', 'going', 'to', 'find',
'these', 'simple', 'statements', 'or', 'instructions', 'are', 'the', 'first', 'key', 'to',
'coding,', 'in', 'fact', 'every', 'App', 'or', 'software', 'program', 'you’ve', 'ever',
'used', 'has', 'been', 'nothing', 'more', 'than', 'a', '(sometimes', 'large)', 'set', 'of',
'simple', 'instructions', 'to', 'the', 'computer', 'that', 'tell', 'it', 'what', 'to', 'do.']
300 words
>>>
286 Chapter 6
exercise solution
Can you write the code to test each character to see if it is a period, semicolon, question mark, or
exclamation point, and then, if so, increase the value of the count variable by one?
def count_sentences(text):
count = 0
for char in text:
if char == '.' or char == ';' or char == '?' or char == '!':
count = count + 1
return count
Check if char is
any of the terminal
characters, and if so,
increment count by one.
Let’s see if we can make the count_sentences function more concise (and readable) by using
the in operator. Below we’ve removed the existing code that checks for terminal characters. We’ve
also added a new local variable called terminals, which holds a string containing all the terminal
characters. Complete the if statement, using the in operator, so that it determines if the current
character is a terminal.
def count_sentences(text):
count = 0
terminals = '.;?!'
for char in text:
if char in terminals:
count = count + 1
return count
Wow, that is a lot more
concise and readable!
you are here 4 287
text, strings, and heuristics
char prev_char_was_vowel count
r False 0
oTr u e 1
oTr u e
m False
f False
uTr u e 2
l False
Using the
count_syllables_in_word
function above, your job is to
play like you’re the interpreter.
The function is being called with
the argument “roomful”.
BE the Interpreter
SOLUTION
We had our slice operation and substrings all figured out, and then they
got all mixed up. Can you help us figure out who does what? Be careful,
we’re not sure if each slice matches zero, one, or more substrings. We’ve
already figured one out, which is marked below:
'a man a plan panam'
'a '
'a ma'
' man a'
'man a plan panama'
'a man a plan panama'
'an a plan panam'
str[:]
str[0:-1]
str[0:4]
str[-2:-1]
str[3:-1]
str[:2]
str[2:]
str[1:7]
SOlUTion
'm'
288 Chapter 6
exercise solution
Assuming the variable process_word alread has any punctuation removed from the last character,
can you write the code to remove a final e character, if it has one?
if processed_word[-1] in 'eE':
processed_word = processed_word[0:-1]
If the last character of process_word is either ‘e' or ‘E' then...
…set processed_word to itself, without the last character.
def output_results(score):
if score >= 90:
print('Reading level of 5th Grade')
elif score >= 80:
print('Reading level of 6th Grade')
elif score >= 70:
print('Reading level of 7th Grade')
elif score >= 60:
print('Reading level of 8-9th Grade')
elif score >= 50:
print('Reading level of 10-12th Grade')
elif score >= 30:
print('Reading level of College Student')
else:
print('Reading level of College Graduate')
You have the reading ease score, so all you need to do is output the results.
Define a function, output_results, that takes a score as a parameter and
outputs the reading level as specified in the pseudocode.
you are here 4 289
text, strings, and heuristics
Coding
Cross
Solution
D
1
F
2I N A L E C
3H
4A P T E R 1
T E
A S
5E Q U E N C E S
S R
P
6U N C T U A T I O N
I S
D
7E L I M I T E R
I
8N I D
9
M C
10 O N S
11 E C U T I V E
M E L C
S
12 U B S T R I N G T
T C W
13 I R E L E S S
A E S
14 O
B P N
F
15 L E S C H S
16 Y L L A B L E S
E I R
T Y
Across
2. We removed these. [FINALE]
3. What test text was from. [CHAPTER1]
5. The in operator works on these.
[SEQUENCES]
6. At the end of some words. [PUNCTUATION]
7. Another name for separator. [DELIMITER]
10. We ignored these vowels. [CONSECUTIVE]
12. Subset of a string. [SUBSTRING]
13. Heard you on this in 52. [WIRELESS]
15. Came up with the formula. [FLESCH]
16. We needed a heuristic for this. [SYLLABLES]
Down
1. Our new business. [DATASCIENCES]
4. A solution that's not 100%. [HEURISTIC]
8. Means you can't change it. [IMMUTABLE]
9. May have made computing syllables easier.
[DICTIONARY]
11. Python's way to get substrings. [SLICE]
14. Breaking a string apart. [SPLIT]

this is a new chapter 291
modules, methods, classes, and objects
7
Getting Modular
Your code is growing in size and complexity. As that
happens you need better ways to abstract, to modularize, to organize
your code. You’ve seen that functions can be used to group lines of code
together into bundles you can reuse over and over. And you’ve also seen
that collections of functions and variables can be placed into modules
so that they can be more easily shared and reused. In this chaper we’ll
revisit modules and learn how to use them even more effectively (so
you’re all ready to share your code with others) and then we’re going
to look at the ultimate in code reuse: objects. You’re going to see that
Python objects are all around you, just waiting to be used.
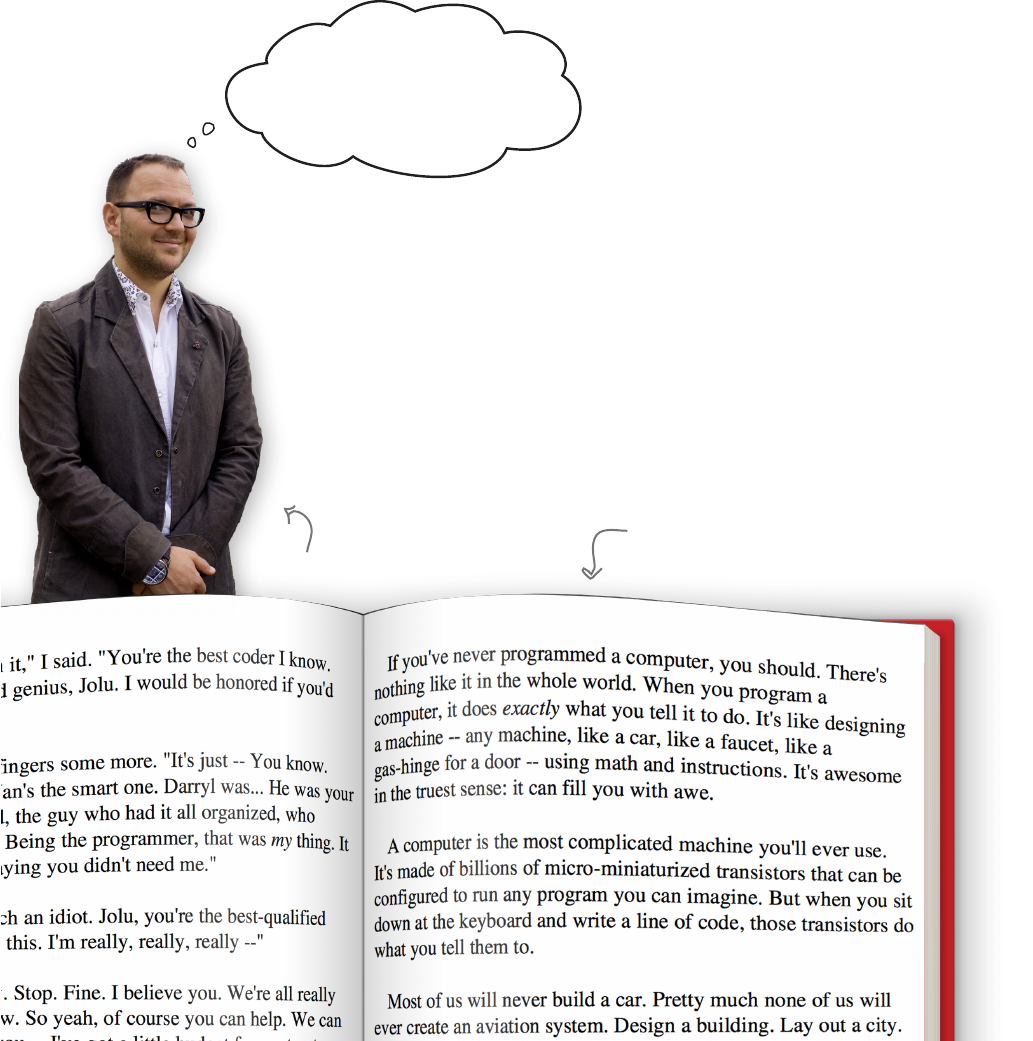
292 Chapter 7
reusing the readability analyzer
Hey guys, I’d love to use your
readability analyzer on my book.
How can I reuse your code
from the previous chapter?
Cory Doctorow
Text from his book
“Little Brother"
you are here 4 293
modules, methods, classes, and objects
Cubicle conversation
Greg: That’s easy; just ship him analyze.py. He can just import
it and call the compute_readability function. Done!
Frank: Totally. Modules are just Python files; just ship it.
Joe: I don’t think that is quite right. I know we’ve said a file is
just a module and all that, and we’ve certainly used import,
but I think there is more to it than that.
Greg: Like what?
Joe: Well, for instance, right now, if you’ll remember, our
analyze.py file has the code to compute the readability of the
Chapter 1 text.
Frank: That was great for testing out the analyzer, but Cory
will need to rewrite that to use his text.
Joe: Right, but anyone should be able to use our code without
having to open the code and edit it; and I’d love to leave in
our test in case we want to improve our heuristic in the future.
There’s gotta be a better way.
Greg: What do you have in mind?
Joe: I’ve been doing some research. There’s a convention for
organizing modules so that we can still have our test code, and
Cory can use it for his own analysis.
Greg: I’d love to hear more.
Frank: Wait, is this going to be a lot of work?
Joe: Frank, this isn’t difficult, and I think you’re going to like
the end result. These changes are going to make our code
more reusable by other people and us.
Whoa! Someone wants
to use our code?
Frank
Greg
Joe
294 Chapter 7
a review of python modules
import random
And then you can refer to any of that module’s functions or variables by
prepending their name with the module name, like this:
num = random.randint(0,9)
We would like to invoke the randint function,
which is found in the random module.
Import the random module.
Q: How does Python know where to
look for a module when I import it?
A: Good question, because when you
import a module you specify only the
module’s name and not, say, a directory path.
So how does Python find modules? Python
starts by looking at its internal list of built-in
modules (random is a built-in module) and if
it doesn’t find the module in that list, it looks
in the local file directory where you ran your
code from. There are more advanced ways
to tell Python to look in other directories too,
should you need that functionality.
Q: I’ve seen the term “Python library”;
is that related to a module?
A: A library is a generic term sometimes
used with Python modules (or collections of
Python modules). Typically the term library
just means that the modules have been
published for others to use. You’ll hear the
term package too, which often means a set
of Python modules that work together.
Q: What happens if I import, say, the
random module into my code, but I also
import another module that already
imports random? Is there going to be a
problem or conflict?
A: No, Python keeps track of the modules
that have been imported so that it doesn’t
have to reimport modules over and over. It’s
also perfectly fine for your code and another
module to both import the same module.
Now, as you also already know, to import a module, we use the import
statement, like this:
A quick module review
We start with
the module name…
…followed by the
dot operator…
…and then the function or
variable name in the module.
Notice that we’ve already used the dot operator quite few times in this book
without really talking about it—think of the dot operator as just a way of
saying “look for randint in the module random.”
We’re going to see that
the dot operator has a
few more tricks up its
sleeve when it comes to
objects; more on that later.
you are here 4 295
modules, methods, classes, and objects
Cubicle conversation continued...
Frank: We are; we just have to make sure we have it in a form that
other people can use.
Joe: Right now we still have our test of the Chapter 1 text in the
code.
Judy: Can’t you just pull it out?
Joe: We could, but we really want to keep it around for testing as we
improve our own heuristic.
Judy: Oh, well, how are you going to do that?
Frank: Joe’s been studying Python modules. You can structure a
module file so that it knows if it is running as the main program, or
if it has been imported by another Python file.
Judy: What does that get us?
Joe: Think about it like this, Judy: if someone is running analyze.py
directly, then it’s probably us and we’ll want to execute our test code.
If not, then someone is importing analyze.py, so they’d want to skip
the test code.
Judy: Oh, that makes a lot of sense. We can do that?
Joe: Yes, we use a convention that allows us to check if analyze.py is
being executed directly as the main program, and, if so, we’ll invoke
the test code; otherwise, we’ll ignore it. Let me show you...
So are we gonna ship
this analyze code?
296 Chapter 7
using the __name__ variable
Whenever a Python file is executed, behind the scenes the Python interpreter
creates a global variable __name__, which consists of two underscores, the
word “name,” and two more underscores. After it creates the variable, Python
then sets this variable to one of two things: if the Python file is being executed
directly as the main program, the variable is set to the string "__main__".
Otherwise, __name__ is set to the name of your module, like "analyze".
Given how __name__ works, there is a long-standing Python convention of
using the following code to test if your code is running as the main program:
if __name__ == '__main__':
print("Look, I'm the main program y'all.")
Test to see if this is the main
program, and if so, supply
whatever code you want here.
The important thing to note is this
print statement will be ignored if this
file is being imported.
A Test Drive
if __name__ == '__main__':
print("Look, I'm the main program y'all.")
else:
print("Oh, I'm just a module.")
import just_a_module
print('Greetings from main.py')
just_a_module.py main.py
Python 3.6.0 Shell
Look, I’m the main program y’all.
>>>
Python 3.6.0 Shell
Oh, I’m just a module.
Greetings from main.py
>>>
Here’s what we got
executing these two files.
Here just_a_module knows
it’s the main program. Here main.py does an import, and just_a_module
knows it’s being executed from an import.
Serious Coding
Python coders pronounce
the __name__ variable as
dunder name, which is short
for “double underscore name,
double underscore.”
Let’s put __name__ to the test. Below you’ll find two Python files; type them both
into IDLE, store them in the same folder, and run them both. Check your output.
The name global variable
you are here 4 297
modules, methods, classes, and objects
Cubicle conversation continued...
Greg: Yeah, we just need to test to see if the __name__
variable is set to "__main__", and if so, we’ll run our test
code; otherwise, we’ll do nothing. After we’ve done that, we
can give it to Cory.
Frank: Let’s do it... Wait, how is Cory going to know which
functions to use?
Greg: One problem at a time, Frank; we’ll come back to that
one. Let’s get the code in there first.
Frank: Fair enough!
Okay, I think I got it.
At this point copy the analyze.py file from your Chapter 6 folder to your
Chapter 7 folder and open it. You’ll want to make these changes:
Updating analyze.py
import ch1text
def count_syllables(words):
count = 0
for word in words:
word_count = count_syllables_in_word(word)
count = count + word_count
return count
def count_syllables_in_word(word):
count = 0
endings = '.,;!?:'
last_char = word[-1]
At the top of the file, delete
the import of the ch1text file.
We’re going to move this to the
bottom of the file.
Here’s the top of
your analyze.py file.
Go ahead and make a copy of
ch1text.py from the Chapter 6
folder as well and place it in your
Chapter 7 folder.
298 Chapter 7
running as the main program
def compute_readability(text):
total_words = 0
total_sentences = 0
total_syllables = 0
score = 0
words = text.split()
total_words = len(words)
total_sentences = count_sentences(text)
total_syllables = count_syllables(words)
score = (206.835 - 1.015 * (total_words / total_sentences)
- 84.6 * (total_syllables / total_words))
output_results(score)
if __name__ == "__main__":
import ch1text
print('Chapter1 Text:')
compute_readability(ch1test.text)
Here’s the bottom of
your analyze.py file.
Here’s the conditional test for the
__main__ value in the __name__ variable.
If true we’re going to import the ch1text
file, and compute its readability.
Don’t forget to indent the compute_readability
line four spaces under the if statement.
Get the changes made to analyze.py and then give it a test drive. Because we’re
running it as the main program, you should get the same output you did in Chapter 6.
Don’t forget to make sure you have a copy of ch1text.py in the same folder.
A Test Drive
Python 3.6.0 Shell
Chapter 1 Text:
Reading level of 8-9th Grade
>>>
Works as advertised. We’re running
analyze.py as the main program, so
it goes ahead and does a test of
the text in ch1text.py.
We added a print statement too.
Yes, you can use the
import statement
anywhere in your code!
you are here 4 299
modules, methods, classes, and objects
So how are others going to reuse our code? Well, they’re first going to import the
analyze module into their own code, and then they’ll call compute_readability
in the analyze module with a text string. Let’s create a new file called cory_analyze.py
and write the code to do that:
Using analyze.py as a module
import analyze
analyze.compute_readability("""
If you've never programmed a computer, you should. There's nothing like it in the
whole world. When you program a computer, it does exactly what you tell it to do.
It's like designing a machine: any machine, like a car, like a faucet, like a gas
hinge for a door using math and instructions. It's awesome in the truest sense it
can fill you with awe.
A computer is the most complicated machine you'll ever use. It's made of billions
of micro miniaturized transistors that can be configured to run any program you
can imagine. But when you sit down at the keyboard and write a line of code, those
transistors do what you tell them to.
Most of us will never build a car. Pretty much none of us will ever create an
aviation system. Design a building. Lay out a city.""")
Remember, you can use
three double quotes to
create a multiline string.
Import the module.
And call analyze.compute_readability with the text.
Get cory_analyze.py typed in and then give it a test drive as well. Because we’re
running analyze.py as a module now, our test code is not going to be run. Give it a try
and see what you get.
A Test Drive
Python 3.6.0 Shell
Reading level of 7th Grade
>>>
Cory's text gets a 7th-grade
rating. That seems perfect for a
book with teen subject matter!
You don’t actually
have to type in
Cory’s text; you
can find it in the
Chapter 7 source
files under cory.txt.

300 Chapter 7
the python help function
Okay, I’d still love
to know how Cory is going to
know what functions to call in
the analyze module?
Frank
That’s where Python help comes in.
With Python you can add help documentation right
into your source code. Of course, you’ve already
seen how to add comments to your code—those
are for the purpose of documenting your low-level
code—but Python also allows you to add docstrings to
provide higher-level documentation for programmers
who are using your modules (but aren’t interested in
digging through your code).
The docstring format is simple: you just add a string
at the top of your module as a general description,
and a string after each function definition (as well as
object definitions, which you haven’t learned about
yet).
So how do you use these docstrings? Do they require
others to open your module file and read them?
No, there’s a better way: Python provides a help
function, which anyone can use in the interpreter to
see the documentation.
Let’s add some docstrings to analyze.py and see how
this works.
You’ll find
most modern
programming
languages
provide some
form of
docstrings.
you are here 4 301
modules, methods, classes, and objects
"""The analyze module uses the Flesch–Kincaid readability test to analyze text and
produce a readability score. This score is then converted into a
grade-based readability category.
"""
def count_syllables(words):
"""This function takes a list of words and returns a total
count of syllables across all words in the list.
"""
count = 0
for word in words:
word_count = count_syllables_in_word(word)
count = count + word_count
return count
def count_syllables_in_word(word):
"""This function takes a word in the form of a string
and returns the number of syllables. Note this function is
a heuristic and may not be 100% accurate.
"""
count = 0
endings = '.,;!?:' # these are the word terminals we care about
last_char = word[-1]
if last_char in endings:
processed_word = word[0:-1]
else:
processed_word = word
if len(processed_word) <= 3:
return 1
if processed_word[-1] in 'eE':
processed_word = processed_word[0:-1]
vowels = "aeiouAEIOU"
prev_char_was_vowel = False
for char in processed_word:
if char in vowels:
if not prev_char_was_vowel:
count = count + 1
prev_char_was_vowel = True
else:
prev_char_was_vowel = False
if processed_word[-1] in 'yY':
count = count + 1
return count
Adding docstrings to analyze.py
Let’s add in some docstrings so other coders can make use of Python’s help
system to learn how to use our module.
You can add a multiline
string at the top of
your module...
…and below any definition.
Continued on next page...
Only docstrings are included in
Python help. Comments added to the
code, like this one, are not included.
302 Chapter 7
adding docstrings
def count_sentences(text):
"""This function counts the number of sentences in a string of text
using period, semicolon, question mark and exclamation mark as
terminals.
"""
count = 0
terminals = '.;?!'
for char in text:
if char in terminals:
count = count + 1
return count
def output_results(score):
"""This function takes a Flesch-Kincaid score and prints the
corresponding reading level.
"""
if score >= 90:
print('Reading level of 5th Grade')
elif score >= 80:
print('Reading level of 6th Grade')
elif score >= 70:
print('Reading level of 7th Grade')
elif score >= 60:
print('Reading level of 8-9th Grade')
elif score >= 50:
print('Reading level of 10-12th Grade')
elif score >= 30:
print('Reading level of College Student')
else:
print('Reading level of College Graduate')
def compute_readability(text):
"""This function takes a text string of any length and prints out a
grade-based readability score.
"""
total_words = 0
total_sentences = 0
total_syllables = 0
score = 0
words = text.split()
total_words = len(words)
total_sentences = count_sentences(text)
total_syllables = count_syllables(words)
score = (206.835 - 1.015 * (total_words / total_sentences)
- 84.6 * (total_syllables / total_words))
output_results(score)
if __name__ == "__main__":
import ch1text
print('Chapter 1 Text:')
compute_readability(ch1text.text)
Even more docstrings!
Note that you can make
your documentation as
elaborate as you like or as
is needed. Python allows
you to do this in a free-
form manner. Some other
programming languages have
quite sophisticated systems
for specifying docstrings
that are more standardized
and less free-form.
you are here 4 303
modules, methods, classes, and objects
Python 3.6.0 Shell
>>> help(analyze)
Help on module analyze:
NAME
analyze
DESCRIPTION
The analyze module uses the Flesch–Kincaid readability test to analyze text and
produce a readability score. This score is then converted into a
grade-based readability category.
FUNCTIONS
compute_readability(text)
This function takes a text string of any length and prints out a
grade-based readability score.
count_sentences(text)
This function counts the number of sentences in a string of text
using period, semicolon, question mark and exclamation mark as
terminals.
count_syllables(words)
This function takes a list of words and returns a total
count of syllables across all words in the list.
count_syllables_in_word(word)
This function takes a word in the form of a string
and returns the number of syllables. Note this function is
a heuristic and may not be 100% accurate.
output_results(score)
This function takes a Flesh-Kincaid score and prints the
corresponding reading level.
Here's how you import
and call help on the
analyze module.
Here we're asking for help on
the entire analyze module.
Python 3.6.0 Shell
>>> help(analyze.compute_readability)
Help on function compute_readability in module analyze:
compute_readability(text)
This function takes a text string of any length and prints out a
grade-based readability score.
You can also ask for help on a
specific function in a module.
Go ahead and document the analyze.py file; get creative if you like and expand
your documentation. After you’ve done that, you need to follow some very specific
instructions. Remember we said that Python, for efficiency reasons, won’t import the
same module over and over? Instead, it keeps a cached version around in memory.
So you’ve changed your analyze module, but Python is still going to rely on the
cached version (the one without docstrings). To get around that, you need to exit
IDLE. Quit all the way out. Then, run IDLE again, open your cory_analyze.py file
and run it to ensure you didn’t introduce any errors when you documented the code.
After that, locate IDLE’s shell window and follow the instructions below to test your
new help documentation:
A Test Drive
Don’t skip running cory_analyze.py,
as it imports your new analyze.py
file and ensures IDLE is using the
right directory paths.
Don’t skip the test of
running cory_analyze.py,
as it imports your new
analyze.py file.
Depending on your
operating system
and version of
Python

304 Chapter 7
further thinking on the analyze code
Nice job! I was quickly
able to use the analyze
module, especially with the help
of the great documentation!
If you think about how another programmer might want to use the analyze
module, are there ways you might restructure it? For instance, might another
programmer want to get direct access to the score value? Think through how you
might refactor the code.

you are here 4 305
modules, methods, classes, and objects
Now that you have a better understanding of modules and how to use Python’s help system,
there are plenty of interesting modules out there for you to explore. We’ll be tackling some of
the more interesting ones throughout the rest of the book, and you’ll find a few discussed in the
appendix as well. Here’s a few that are popular just to get your creative juices flowing...
Exploring other Python modules
We use
Python’s datetime
module in everything we do;
we’re a shipping company, and the
datetime module gives us all the tools
we need to create, manipulate, and
compare dates and times.
In my computational
physics group, we rely
on the math module heavily!
In our
health care app,
the entire interface
is written using the
Tkinter module, which
gives you everything you
need to build desktop
user interfaces.
We use the requests
module to connect to
and retrieve web pages
that we monitor.
I like programming
turtles with Python.
I love Python’s turtle module. I
teach children and beginners, and
it gives them a great way to create and play
with graphics on the screen. It’s inspired
by Seymour Papert’s work at MIT.
306 Chapter 7
the turtle module
Every turtle has a heading
or direction it is pointing.
On the grid every turtle has
a location, or x, y coordinate.
Wait, did someone say “turtles”?!
Ah, one of our favorite topics, because, as you’ll see, they’re a great way to play with
computation, and they are built right into Python. All you need to do is import the turtle
module and then you’re all ready to create your own turtles. But, before you start creating
turtles, let’s take a look at what a turtle living in Python-land looks like:
In Python, turtles live on a grid. The center
of the grid is at coordinate 0,0.
Turtles in Python
also have a pen
they can draw with.
Their pen can be up or
down, and have a color
and size (thickness).
Think of these as the
turtle's attributes.
A turtle can
move forward,
back, or to a
specific grid
location. A turtle can also
turn right or left,
which changes a
turtle's heading.
If the turtle's pen
is down, then it
leaves a mark when
it moves.
Think of these as the
turtle's behaviors.
Turtles can also
take on different
shapes, like this
turtle shape, or a
circle, or an arrow
and so on.

you are here 4 307
modules, methods, classes, and objects
Turtles,
really? You started
the book with recipes and
now we’re learning about
turtles?
Sorry, were you expecting an
MIT-level treatment? Well, guess
what? That’s exactly what you’re getting!
Turtle graphics were invented at MIT (the
Massachusetts Institute of Technology) by
pioneering computer scientist Seymour
Papert in the 1960s. Since that time, turtle
graphics have had a big influence on many
programming languages that followed and
they’ve also helped to educate computer
scientists and mathematicians alike (not
to mention lots of kids). We’ll ask you to
withhold judgment until you’ve finished
this chapter (and a few other chapters in
this book), when we think you’ll be quite
pleased with what you’ve accomplished
using turtles.
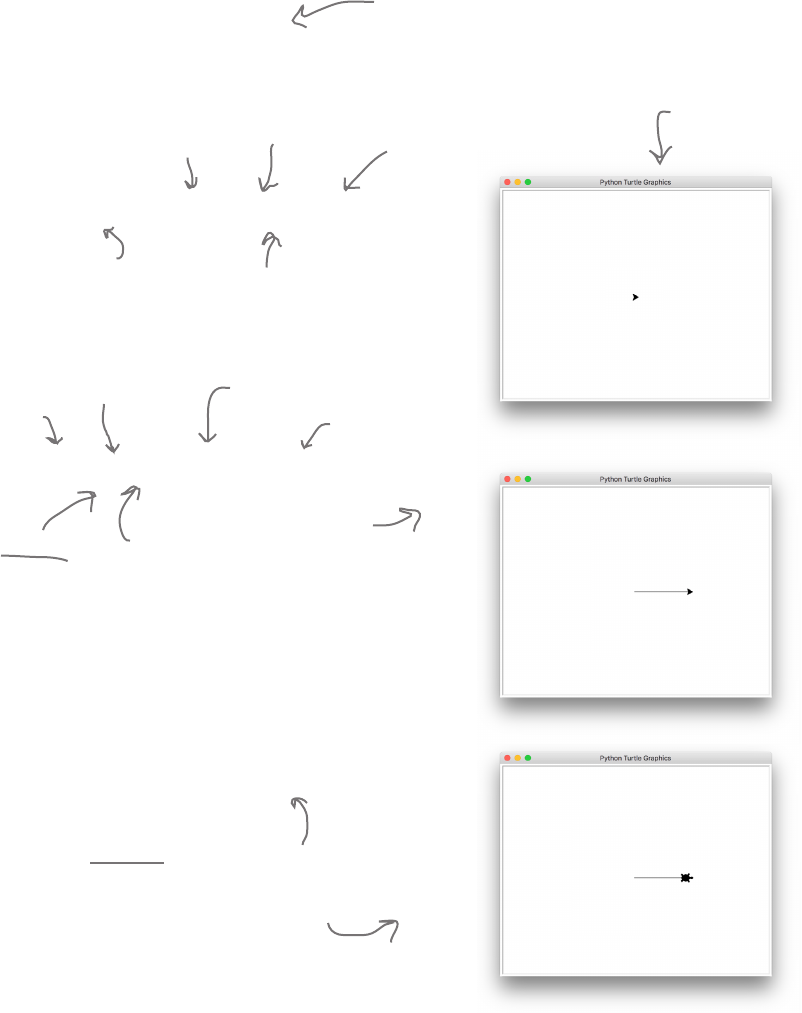
308 Chapter 7
how to create a turtle
Creating your very own turtle
What are we waiting for? Let’s create a turtle (or two). First
we’re going to need to import the turtle module.
slowpoke = turtle.Turtle()
turtle
module
The dot
operator
What looks like a function
call, only we usually don’t name
functions with uppercase letters
import turtle
And then we can create a turtle like this:
And let’s assign the new turtle
to the variable slowpoke.
Now let’s make slowpoke do something:
slowpoke.forward(100)
This tells our slowpoke turtle
to move forward 100 units.
When you create a
turtle, this window
will pop up.
Don’t start entering
code yet; we’ll do
that in just a bit.
So slowpoke moved straight 100 units and drew a line
with its pen as it did. But did you notice slowpoke doesn’t
look much like a turtle? Let’s fix that by setting one of its
attributes and rerunning the code.
slowpoke.shape('turtle')
This sets the slowpoke turtle's
shape attribute to be ‘turtle'.
That's better!
This is one of
slowpoke's behaviors.
This creates a new turtle.
A variable referencing
our new turtle
The dot
operator
One of the turtle's
behaviors An argument, like
when making a
function call
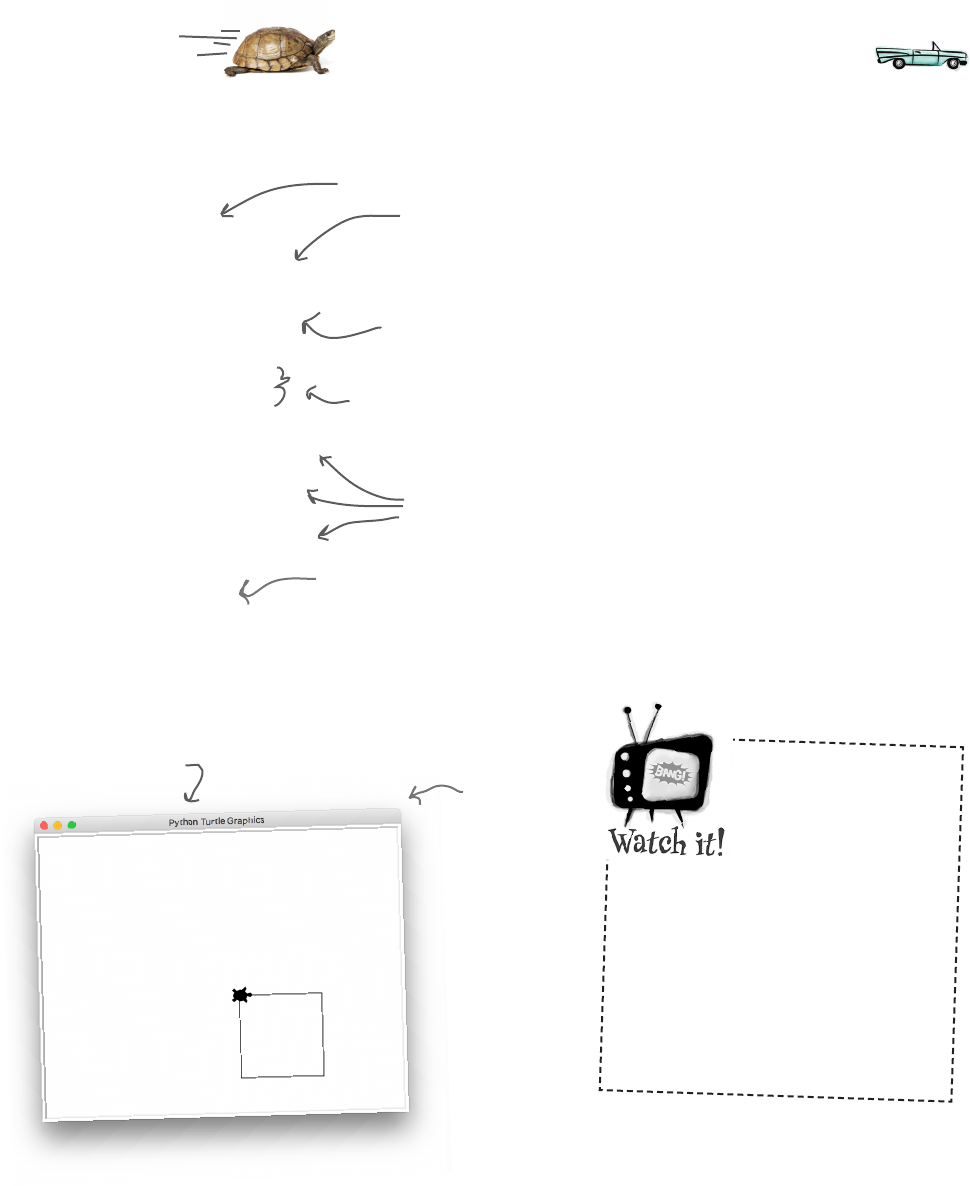
you are here 4 309
modules, methods, classes, and objects
Turtle lab
Okay, now it’s time for you to join in: let’s write a little code to see if we can do something
interesting with Python turtles. Go ahead and put this code in a file called turtle_test.py:
import turtle
slowpoke = turtle.Turtle()
slowpoke.shape('turtle')
slowpoke.forward(100)
slowpoke.right(90)
slowpoke.forward(100)
slowpoke.right(90)
slowpoke.forward(100)
slowpoke.right(90)
slowpoke.forward(100)
slowpoke.right(90)
turtle.mainloop()
Don’t name your
file turtle.py
Careful, if you name
your test file the same
name as a module
you’re importing, then you’re going to
run into trouble: when Python goes
looking for the turtle module it’s
going to find your file first. So, just
make sure you don’t name your
Python files the same names as
common modules, especially ones
you’re importing.
Again, first we import the turtle module.
Next let's create slowpoke as we did before. We're
going to talk more about how turtles get created in a
bit, but for now just know that this line of code gives
you your very own turtle to play with.
Next we make sure the turtle’s shape is that of a turtle,
and not the default triangle shape we saw earlier.
Then let’s tell the turtle to go forward 100 steps using
its forward function, and then use the right function to
have it turn right 90 degrees.
Then let’s make it go forward and
turn three more times.
With that, go ahead and give this a test run and you’ll see your
turtle move forward and turn right four times, each time leaving
a trail behind it to form the shape of a square.
Here’s what we got!
We're going to talk more about this line later in the book, but it basically
allows the turtle module to monitor everything going on in the window, including
shutting everything down when you click the close button. You just need to put
it at the end of your code.
If you’re not
seeing this window
and you have no
errors in the shell,
look behind your
Python windows.
On some systems
the turtle
window does not
automatically
appear on top of
the others.
310 Chapter 7
more about turtles
Q: So when we tell a turtle to
turn, we do it with degrees?
A: Correct. For instance, turning
right 360 degrees would mean it would
turn all the way around clockwise.
Turning 90 degrees would turn a
quarter of a turn, and so on.
Q: When the turtle is going
forward, what does the argument
100 mean?
A: 100 units. What’s a unit? A pixel
on your screen. So turtle.forward(50)
would move a turtle 50 pixels in the
direction it is heading.
Q: Why did we have to set the
shape to be a turtle? I thought it
was a turtle!
A: For historical reasons, by default
the turtle displays a shape similar to a
triangle. You can also set it to shapes
like a square, a circle, an arrow, or
even your own images. But what could
be more fun than the shape of a real
turtle?
Hey, it’s Chapter 7 already, so we’re confident you’re in good shape to
take the turtle square code (on the previous page) and get it wrapped up
in a nice function; call it make_square, which will take one parameter, a
turtle. Write your code here and see how much you can clean things up by
removing any duplicated code. Of course you’ll find our version at the end
of the chapter if you need any hints.
Make sure you take a look at
our version, because that’s
what we’ll work from on the
next few pages.

you are here 4 311
modules, methods, classes, and objects
Here’s the nice new code
we generalized in the last
Sharpen exercise.
import turtle
slowpoke = turtle.Turtle()
slowpoke.shape('turtle')
pokey = turtle.Turtle()
pokey.shape('turtle')
pokey.color('red')
def make_square(the_turtle):
for i in range(0,4):
the_turtle.forward(100)
the_turtle.right(90)
make_square(slowpoke)
pokey.right(45)
make_square(pokey)
turtle.mainloop()
Adding a second turtle
How about we give slowpoke a friend? Let’s add another turtle
to our code:
Create a second turtle
and assign it to the
variable pokey. We're
going to set pokey's shape
attribute to a turtle as
well, and also set its color
attribute to red.
Then let's turn pokey slightly, 45
degrees to the right.
And then pass pokey to make_square.
If the make_square function looks
new to you, make sure you go through
the answer to the last Sharpen your
pencil on the previous page.
In this code, slowpoke draws a square
as before, but pokey turns slightly
and then draws its own red square.
Let’s use your newfound superpower of creating and using
functions to take this further. Let’s write a function that uses
make_square and see what kind of interesting graphic we can
generate:
import turtle
slowpoke = turtle.Turtle()
slowpoke.shape('turtle')
slowpoke.color('blue')
pokey = turtle.Turtle()
pokey.shape('turtle')
pokey.color('red')
To make it interesting, let's change
slowpokes’ pen color to blue. Rest of the code continued
on the next page...
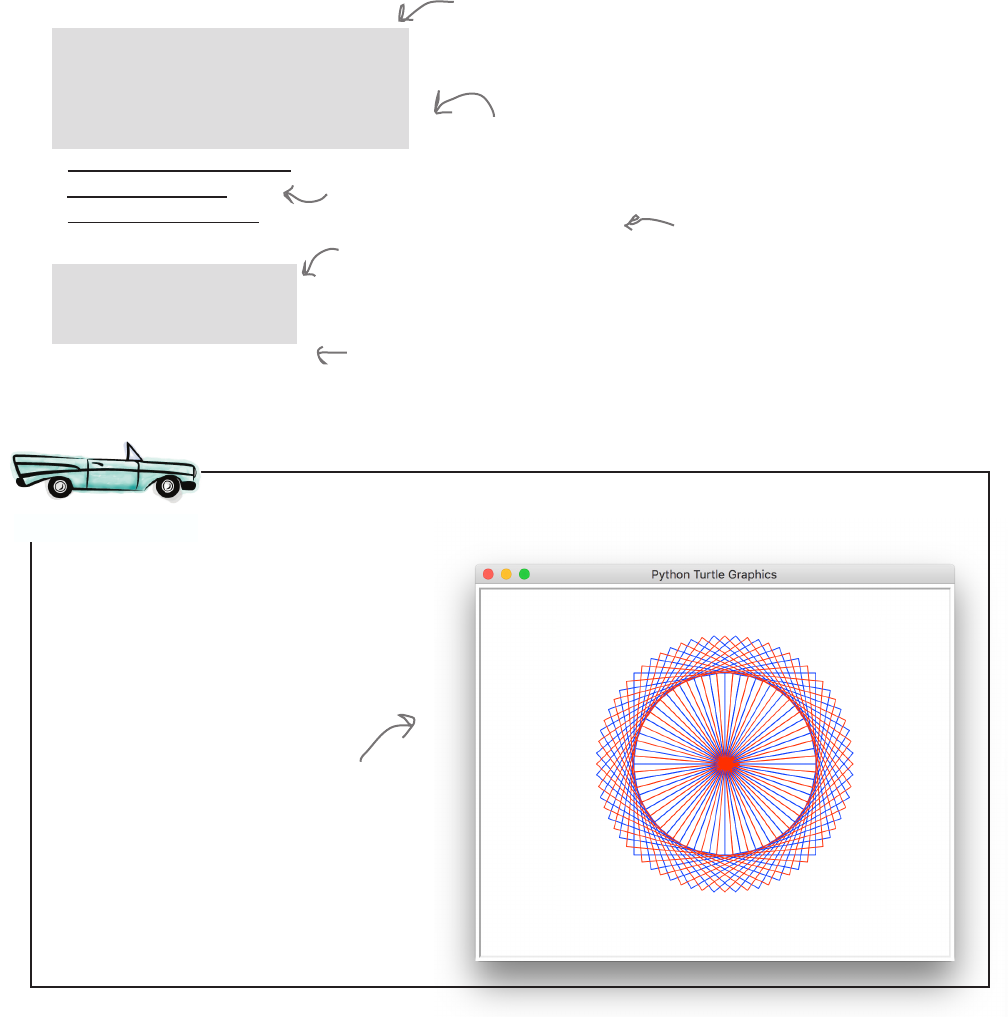
312 Chapter 7
creating graphics with a turtle
make_spiral is going to call make_square
36 times, and then, each time, have the
turtle turn an additional 10 degrees.
def make_square(the_turtle):
for i in range(0,4):
the_turtle.forward(100)
the_turtle.right(90)
def make_spiral(the_turtle):
for i in range(0, 36):
make_square(the_turtle)
the_turtle.right(10)
make_square(slowpoke)
pokey.right(45)
make_square(pokey)
make_spiral(slowpoke)
pokey.right(5)
make_spiral(pokey)
turtle.mainloop()
Now we’re going to call
make_spiral intead of
make_square.
Let’s add a new function
called make_spiral.
Here’s what we got! Are you
having Spirograph flashbacks?
pokey is going to turn right 5
degrees before making a spiral.
Get rid of these calls
to make_square.
Update turtle_test.py and give it a test drive. Is this the output
you expected?
A Test Drive
Feel free to play with all the attributes
and parameters and see what you can come
up with. We’ve also got some more turtle
experiments for you on the next page.
Notice that each turtle
has its own position, heading,
color, and so on.
you are here 4 313
modules, methods, classes, and objects
for i in range(5):
slowpoke.forward(100)
slowpoke.right(144)
Experiment #1
We’ve got even more turtle experiments for you below. Take a look at each one, guess what it
does, and then run it to see if you were right. Change a few values; how does the output change?
MORE TURTLE EXPERIMENTS
Draw your output here.
Just take your
turtle_test.py
file and delete
everything but
the first three
lines (and the
final mainloop
line), then add
in this code in
the middle.
What happens if you
change this number?
Or this one?
Experiment #2
slowpoke.pencolor('blue')
slowpoke.penup()
slowpoke.setposition(-120, 0)
slowpoke.pendown()
slowpoke.circle(50)
slowpoke.pencolor('red')
slowpoke.penup()
slowpoke.setposition(120, 0)
slowpoke.pendown()
slowpoke.circle(50)
We’re using some new
turtle functions
here: we’re setting
the color of the
pen, lifting it up,
moving to a position,
and putting it down
before drawing a
circle.
Experiment #3
def make_shape(t, sides):
angle = 360/sides
for i in range(0, sides):
t.forward(100)
t.right(angle)
make_shape(slowpoke, 3)
make_shape(slowpoke, 5)
make_shape(slowpoke, 8)
make_shape(slowpoke, 10)
Try some more
values, like 1, 2?
50?
What happens if
you remove the
calls to penup?
As usual, you’ll find our
answers in the back of
the chapter.
314 Chapter 7
understanding turtles
slowpoke = turtle.Turtle()
What are turtles, anyway?
Let’s return to the code where we first created our turtle. At first glance it looks like
we called a function named Turtle that is located in the turtle module:
turtle
module
The dot
operator
What looks like a
function call
So does the turtle module have a function that creates turtles? And what is a turtle,
anyway? We know about integers and strings and lists and booleans, but what’s a
turtle? Is it a new type? To dig a little deeper, we could always ask Python for help:
So reading this not-so-clear docstring, you’d think that Turtle is either a class or
an object, or both (whatever those are), and it has something called methods. And
you’d be right. But is it a class or an object? Well, although we haven’t made much
of a point of it yet, we should tell you that Python is a very object-oriented language—
as are most modern languages—and given how far you’ve come in your coding,
it’s about time you learn what objects, classes, and methods are.
Python 3.6.0 Shell
>>> import turtle
>>> help(turtle.Turtle)
Help on class Turtle in module turtle:
class Turtle()
|
| When a Turtle object is created or a function derived from some
| Turtle method is called a TurtleScreen object is automatically created.
|
|
|
|
|
|
|
|
| Methods defined here:
|
| __init__(self, shape='classic', undobuffersize=1000, visible=True)
| Initialize self. See help(type(self)) for accurate signature.
Ask for help on the
turtle.Turtle function.
This doesn’t look a
function.
Relax, because this isn't the
clearest description in the
world for us, either.
Object?
Class?
Methods?
We trimmed this down to
save some trees (or electrons
if you’re reading the digital
copy).
you are here 4 315
modules, methods, classes, and objects
What are objects?
Of course you intutively know about objects; they’re all
around you. Cars, iPhones, radios, toasters, kitchen appliances,
you name it. And one thing that all these objects have in
common is they have some internal state and they have some
behavior. Take a car, for example—it has state:
• Make
• Model
• Fuel level
• Speed
• Mileage
• Engine state (on/off)
And it has behavior. A car can:
• Start
• Turn Off
• Drive
• Brake
With programming, objects are no different. The whole point
of software objects is that we can bundle state and behavior together.
Think about a Boolean value: it has state but no behavior.
Think about a Python function: it has behavior but no state.
With Python objects, we can have both working together. For
example, when you start the car, the engine state is
changed from off to on. Likewise, if the brake behavior is
applied, then the speed state will naturally decrease.
So what’s the big deal? We could do all that with functions
and variables, right? But when you start thinking in terms of
objects, you can approach solving computational problems at
an even higher level—you can think about programming as
composing a set of objects and managing their interactions,
instead of herding a large number of variables and functions.
Our turtles are a good example—we could write code to
manage locations and colors and coordinates to draw graphics
(always a difficult task). Or we can use our turtle objects, which
inherently keep track of much of this state internally, freeing
us to just think about the larger issues, like how to get two
turtles to draw a spiral together. It’s a simplistic example, but
you have to start somewhere when thinking about objects.
Just a few off the top
of our heads; we’re sure
you can think of even
better ones.
Objects aren't
unique to Python;
practically all
modern languages
provide objects.
DeLorean
make: 'DeLorean'
model: 'DMC-12'
fuel: 6
speed: 88
mileage: 10125
engine_on: True
def start():
def turn_off():
def brake():
’57 Chevy
make: 'Chevy'
model: 'Bel Air'
fuel: 8
speed: 0
mileage: 1211
engine_on: False
def start():
def turn_off():
def brake():
Mini
make: 'Mini'
model: 'Cooper'
fuel: 2
speed: 14
mileage: 43190
engine_on: True
def start():
def turn_off():
def brake():
Fiero
make: 'Pontiac'
model: 'Fiero'
fuel: 10
speed: 56
mileage: 196101
engine_on: True
def start():
def turn_off():
def brake():
State and
behavior bundled
together in an
object
316 Chapter 7
understanding classes
Turtle
color
xcor
ycor
heading
forward()
backward()
turn()
penup()
pendown()
shape()
A class is not an object, it’s
used to construct them.
A class is a blueprint for making objects. A
class tells Python how to make an object of that
particular type. Each object made from that class
can have its own values for its state; for example,
you might use the Turtle class to make dozens of
different turtles, and each turtle has its own color,
size, shape, location and pen settings (up or down),
and so on.
That said, all turtles created from the same class
share the same behaviors, like turning, going
forward and backwards, and controlling the pen.
From one class we can
create many different
objects, with each having
its own state.
Turtles have different
state, but share common
behaviors.
Q: Okay, but what is the point of
creating all these objects from classes?
A: Without classes and objects you’ll
always be stuck solving any problem in
terms of the Python basic types, like strings
or numbers or lists, and so on. With classes
and objects, you can use types that are
higher level and closer to the problem you’re
trying to solve. For example, if you were
creating a fishing game, having fish objects
and a pond object would be a lot easier than
managing a whole collection of variables and
functions.
Q:Is a class like a type?
A: Exactly. Think of each class as a
Python type, just like the string and list and
number types that you already know.
Q: So a class is a blueprint for making
many objects. Can I make my own class?
A: You sure can, and that is the beauty
of object-oriented programming: you can
extend Python (or any language) with
your very own classes, or even extend the
functionality of anyone else’s classes.
In this chapter we’ll be looking at how to use
pre-existing classes, and in Chapter 12 we’ll
start making our own.
Q: Objects have a lot in them (data
and functions). How does a variable like
slowpoke actually hold an object?
A: Remember when we talked about how
a variable is assigned to a list? We said that
a variable holds a reference to where the list
is stored, like a pointer to the list. Objects
are assigned to variables in the same way;
the variable holds a reference to the object
in Python’s memory, not the object itself.
Okay, what’s a class then?
If we’re going to have lots of objects, say lots of turtles, we want all our turtles to share common behaviors
(after all, who wants to reinvent the wheel every time we need a turtle to move forward), but we also want
each turtle to have its own state (because if every turtle was in the same location, had the same heading,
and had the same color, we couldn’t get much interesting work out of them). A class gives us a template or
blueprint for creating objects of the same type.
State
Behavior
Here’s a handy way
to diagram a class.
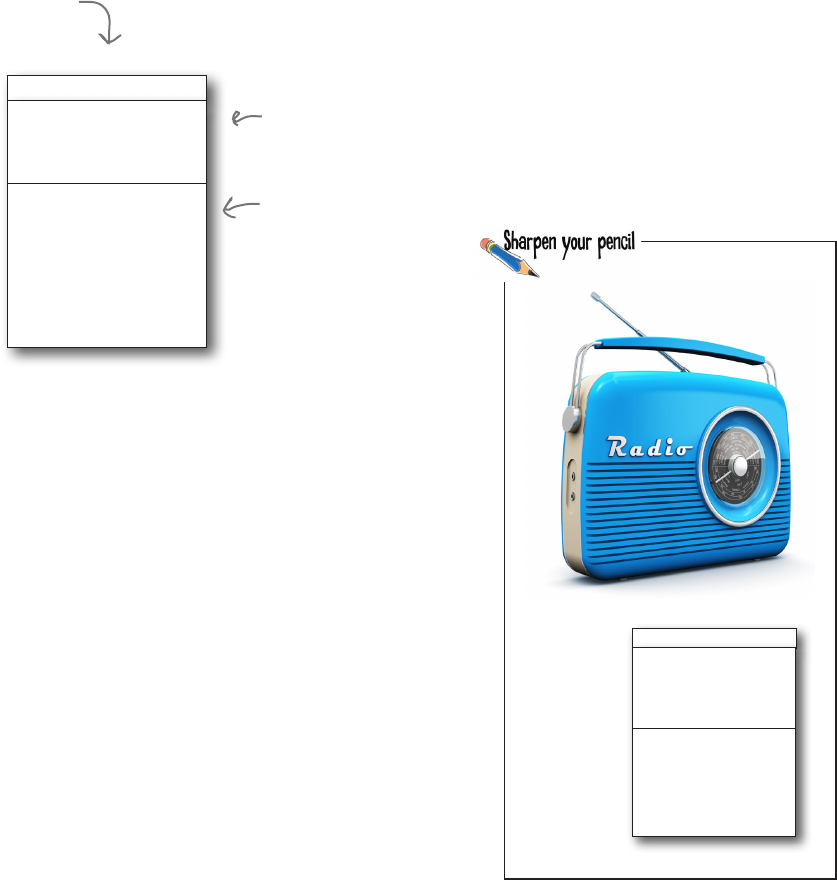
you are here 4 317
modules, methods, classes, and objects
Radio
attributes
methods
Fill in what a radio
object might need to
know and do.
A class tells us what an object knows
and what an object can do
The things the object knows about itself are called its:
• attributes
The things the object can do are called:
• methods
Turtle
color
xcor
ycor
heading
forward()
backward()
turn()
penup()
pendown()
shape()
The things the
Turtle object knows
(the state).
The things the
Turtle object does
(the behavior).
Attributes represent an object’s state (its data), and each object has its own
attribute values. Attributes are similar to local variables, only they
live in an object. Also like variables, attributes can be assigned
to any of the Python types you’re already familiar with. You’ll
also hear the term instance variable around coding circles. An
instance variable is the same as a Python object attribute. In fact,
anytime you hear the word instance, just substitute the word object.
So, an instance variable is the same as an object variable, which
is the same as a Python attribute.
Things an object can do are called methods. Think of methods as
functions that belong to an object. The difference between a
method and a function is that methods are typically getting,
setting, altering, and making decisions based on an object’s
attributes.
On the previous page we saw a diagram for sketching out a class.
Let’s take a little closer look at what it provides. A class diagram
tells you two things (for starters): what a object knows and what
a object can do.
Here’s our Turtle
class diagram again.
318 Chapter 7
python classes and objects
How to use objects and classes
In this chapter we’re learning how to use objects and classes. As it turns out, there
are lots of classes out there, written by other developers, all ready for you to use.
To use them all you really have to know is what an object can do (in other words,
its methods) along with any attributes you might want to make use of. Of course
you also need to know how to create an object (otherwise known as an instance)
before you can use one. We’ve created a couple Turtle objects, but let’s take
another look at how to do this:
In Chapter 12 you’re going to
learn how to make your own
classes and objects.
slowpoke = turtle.Turtle()
turtle
module
The dot
operator
The Turtle
class name
And this calls the Turtle class’s
internal initialization method, which
creates the new object and gets any
initial values set up for you.
The result of calling the initialization method is a brand new
Turtle object created from the Turtle class blueprint. The new
Turtle object is assigned to the variable slowpoke.
In the object-oriented world,
we call these initialization
methods constructors. Any
time you hear “constructor,”
just think “the method that
initializes the object.”
So there’s a lot going on here in this little line of code. Let’s talk through it. The
first thing to know is that we’re accessing the Turtle class from the turtle
module. That’s the reason for the dot notation here: the dot has nothing to do with
attributes or methods in this statement.
turtle.Turtle
Here’s where we’re getting the Turtle
CLASS from the turtle module.
Next, we’re invoking the class like it was a function. What’s going on here?
turtle.Turtle()
Invoking the class like a function?
Here’s what’s going on: every class has a special method known as its constructor. The
constructor gets the object all set up with whatever default attribute values it needs
(among other things it might do). The constructor always has another important role:
it always returns the newly created object (again, we call it the instance) to you.
So when the object is created, initalized, and returned, it is assigned to the variable
slowpoke.
slowpoke = turtle.Turtle()
Returns a new object that
is instantiated from the
Turtle blueprint
In the object-oriented
world, we don’t just
create new objects, we
instantiate them. And
we call each object an
instance.
Notice that, by convention, class names start
with an uppercase letter. We’ll see some
exceptions to this later in the chapter.
Constructors can take
arguments too, although we’ll
see these a bit later
you are here 4 319
modules, methods, classes, and objects
What about those methods and attributes?
As you’ve already seen, once you have an object in hand, you are free to call its
methods:
We can call the shape method to change
slowpoke's internal shape attribute to a circle.
slowpoke.turn(90)
slowpoke.forward(100)
To call a method, start with the name of an object,
followed by a dot, and then the method name—in other
words, you call them just like you call functions, only you
precede the function with an object name (and a dot).
You always need an object to call a method
on. Calling a method without an object
doesn’t compute (which object’s state is the
method supposed to act on?).
So what about attributes? We haven’t seen any code where we’re getting or
setting an attribute’s value. To access an attribute in an object, you use dot
notation. Say the Turtle class had an attribute named shape (it doesn’t, but
hold that thought). Then you’d access or set the value of the shape attribute like
this:
slowpoke.shape = 'turtle'
print(slowpoke.shape)
You can set or get the value of an
object's attribute using dot notation
(it's the same syntax as accessing a
variable in a module).
If this were valid code,
this would print ‘turtle’.
Okay, but as you’ve already seen we’ve been using the shape method to set a turtle’s
shape. So why doesn’t the Turtle object have a shape attribute? Well, it could, but
there is a common strategy used in object-oriented programming where we rely on
a method to get or set an attribute’s value. The reason stems from an idea called
encapsulation that we’ll talk more about in Chapter 12. Encapsulation often gives the
object developer more control over an object (than just letting any code change an
attribute’s value). Again, we’ll return to this point in Chapter 12.
For now just know that many of the attributes you’ll want to get your hands on are
accessed through methods, rather than directly. Here’s an example: to get or set the
state of the shape attribute, we use a method, shape, instead:
slowpoke.shape('circle')
print(slowpoke.shape())
And we can call the shape method without
arguments to get its current value.
320 Chapter 7
other classes and objects in python
With that background behind us, let’s take a new look at the Python world—we
did say Python was a very object-oriented language, and in fact objects are all
around you. Check this out:
Seeing classes and objects everywhere
my_list = list()
my_list.append('first')
my_list.append('second')
my_list.reverse()
print(my_list)
Python 3.6.0 Shell
['second', 'first']
>>>
A list is
actually a
Python class.
Here we're calling the list
constructor to instantiate a new,
empty list.
Remember we said class names
start with an uppercase letter?
Unfortunately, this isn’t the case
for some Python built-in classes
(for historical reasons). So just know
that some built-in classes start with
a lowercase letter, and any other
classes you run into should begin with
an uppercase letter.
Here we're calling
the append method…
…and the reverse
method, which you
haven't seen before.
All these methods change the
list object's internal state.
Here’s another class that may look familiar. Check this one out:
pi = float(3.1415)
is_int = pi.is_integer()
print(pi, is_int)
Python 3.6.0 Shell
HELLO READER
>>>
That’s right,
another class…
…and another
method.
What about this one?
greeting = str('hello reader')
shout = greeting.upper()
print(shout)
Python 3.6.0 Shell
3.1415 False
>>>
It turns out strings are really classes. Here's how
you'd instantiate one with the constructor.
Because lists and strings
and floats are built into
Python, you don’t need
to explicitly call the
classes' constructor like
we’re doing here. Python
handles it for you behind
the scenes.
Calling one of the
string methods.
Notice this constructor
takes an argument; we’ll
see more as the book
progresses.

you are here 4 321
modules, methods, classes, and objects
Are you telling
me we’ve been using objects
the whole time and you’re just now
telling us?
Pretty much... if you forget about
modules for a moment, anytime you see a
variable followed by dot notation, you can
bet that what follows the dot is either an
object attribute or a method. Not only that,
but almost everything in Python, including
the built-in types, is actually a class. The
reason it didn’t initially appear so was
because Python goes to a lot of trouble to
make things easy—for instance, when you
type:
my_list = []
to create an empty list. Behind the scenes,
Python is effectively rewriting that as:
my_list = list()
So until you start using methods on your
lists, like:
my_list.append(42)
you really have no reason to think you’re
dealing with an object.
But now that you know the truth, objects
are all around you in Python. So, it’s
probably time we get back to using them.
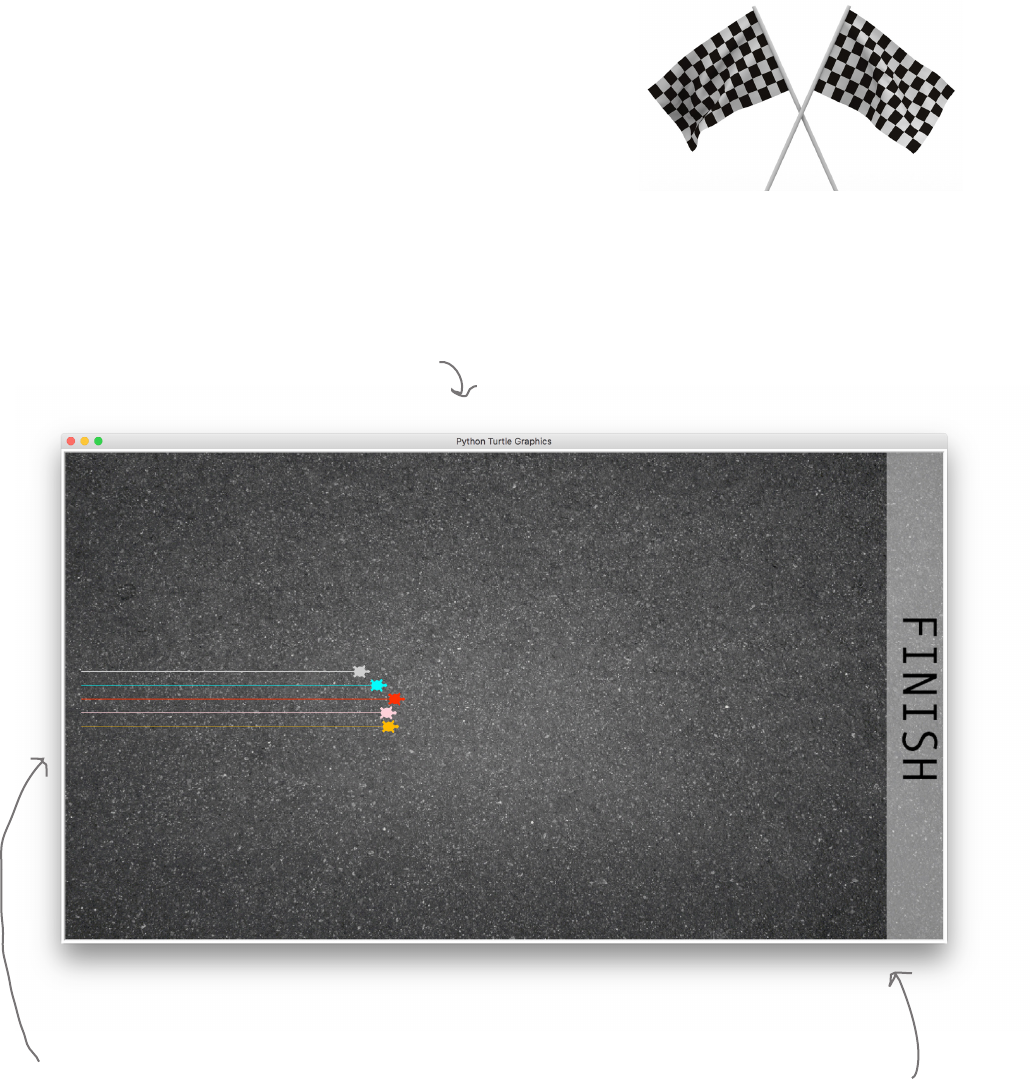
322 Chapter 7
building a turtle game
We’ve seen that the selling point of an object is that each object maintains
its own state, but objects also benefit from sharing their behavior (their
methods) with all other objects of the same class.
You already know that each turtle is its very own object—its very own
independent instance, complete with its own set of attributes. That means
each turtle has its own color, position, heading, and shape (to name a few
attributes). Let’s leverage that by creating a little game. Would you believe
racing turtles?
Get ready for some turtle races
We’re going to create a bunch of turtles, each with
its own color and position, and then let them duke
it out, racing across the screen. Place your bets!
The starting line for the
turtles is going to be on the
left side the screen.
And they’ll race toward the right
side of the screen. The first
turtle across the finish line wins.
you are here 4 323
modules, methods, classes, and objects
You’re going to see that treating our turtles as objects will make this game a lot easier to
implement. Without them we’d presumably have to create and update a lot of variables
to track the turtles and their positions, which would be messy business. But with turtle
objects, we’re just going to use the turtle’s methods to move them on the screen, relying
on each turtle to track its own state.
So, let’s hash out a little pseudocode for how this racing game is going to work:
Planning the game
First we need to create our
turtles, and assign each one
to a different color and
position on the starting line.
Each turtle is a different
instance of a Turtle, so we
can do this!
We’re going to let the race run until a turtle wins by
crossing the finish line. But we need a way to know if
a turtle has won. Let’s create a variable called winner
that is initially set to False, and then set it to True
when a turtle crosses the line.
Now we’re just going to cycle over each
turtle, over and over, letting it make a
move—that is, until one of them wins.
To make a move, we’ll generate a random
number between 0 and 2 and move the
turtle by that amount—and we’ll do this
for each turtle.
Each time we move we need to check
to see if the turtle crossed the
finish line. And if so, we’ll set winner
to True.
Once winner is set to
True, the loop stops and
we’ll announce a winner.
1Set up game.
2Start the race.
A
Create a few turtles, each with
its own color and position on the
starting line.
For each turtle:
iPick a random amount to move
forward, say between 0 and
2 pixels.
Move forward.
3Game nishes.
Announce the winner’s name!
ii Check to see if turtle’s
position is across nish line.
If so:
aSet winner to True.
Set a variable winner to False.
While winner is false:
324 Chapter 7
writing some setup code
import turtle
import random
turtles = list()
Let’s first set up the game board and all the turtles, and then we’ll move on
to implementing the game logic. And, just to get the coding kicked off, we
already know two modules we’re going to need, namely the turtle module
and the random module, so let’s import those into our code. We’re also going
to use one global variable to hold the turtle racers, so let’s add that too. Go
ahead and create a new file called race.py and enter this code:
Let’s start coding
We’ll need these modules.
And we’ll use a list to hold all our turtles.
Just to rub in the constructor syntax,
we’re creating an empty list by calling the
list constructor. We could have used the
shorthand [] like we have in the past.
Referring to our pseudocode, most of the setup consists of creating the set
of turtles, each with its own attributes. To do that we need some idea of the
turtles we want to create. How about these turtle objects:
Setting up the game
color: 'orange'
ycor: -40
color: 'gray'
ycor: 40
Each turtle has a name, a color, and a ycor, which is its vertical
position on the start line. You'll see how this is used in a bit. Of
course the turtle has all its other attributes too, but these are
the ones we want to set up.
These are objects
instantiated from
the Turtle class.
color: 'red'
ycor: 0
Red Turtle
color: 'pink'
ycor: -20
Pink Turtle
color: 'cyan'
ycor: 20
Cyan Turtle
Orange Turtle Gray Turtle
Turtle
color
shape
xcor
ycor
heading
forward()
backward()
turn()
penup()
pendown()
Note, xcor and ycor are the
x and y coordinates of the
turtle in the window.
you are here 4 325
modules, methods, classes, and objects
Now let’s write the code to instantiate and set up those turtles. If
you look at the turtle attributes on the previous page, we need a
place to store those so we can intialize our turtles with those values.
To do that, let’s create a list that contains the values of each turtle’s
attributes—actually we’ll need two lists, one for the y positions
and one for color. Then we’ll instantiate each turtle, and set its
attributes to the appropriate values. Of course, let’s put all this in a
setup function like this:
Writing the setup code
import turtle
import random
turtles = list()
def setup():
global turtles
startline = -480
turtle_ycor = [-40, -20, 0, 20, 40]
turtle_color = ['blue', 'red', 'purple', 'brown', 'green']
for i in range(0, len(turtle_ycor)):
new_turtle = turtle.Turtle()
new_turtle.shape('turtle')
new_turtle.setpos(startline, turtle_ycor[i])
new_turtle.color(turtle_color[i])
turtles.append(new_turtle)
setup()
turtle.mainloop()
Let's define a function called
setup to create and position our
turtles.
The startline variable just holds the
x coordinate of the starting line;
you'll see how this is used below.
Here are the initial
values we need for
each turtles attribute,
stored in two separate
parallel lists.
Let's iterate over the number of turtles.
And for each we'll instantiate
a new turtle, make its shape a
turtle, and set its position on the
grid from our list.
We'll also set its color.
Then let's add this new turtle
to the global list of turtles.
Don't forget to call
the setup function, and
remember we need our
turtle.mainloop.
1Set up game.
Create a few turtles, each
with its own color and position
on the starting line.
In the next chapter we’re going
to discover a data structure
that would work better than
two lists for storing these values.
A reminder that the
setpos method sets the
x and y position for
a turtle. Here we’re
moving the turtle to
the starting line.
Remember the append method from
Chapter 4? It adds an item to an
existing list, in this case the list
turtles. We of course weren’t calling
them methods yet in Chapter 4.
326 Chapter 7
testing the setup code
Update your code and let’s give this a test drive to see how it is progressing
before going further.
A Test Drive
Our turtles are the right color and
seem to be in the right position. But
remember, they start life at coordinate
0,0, in the center of the window; so it
looks like they drew lines on their way
from the center to the start position,
which isn't what we wanted. Let's add
some code to pull their pen up on their
way to the new position.
And while we're talking about the look and feel
of the game, let's make the window a little
bigger and add a nice background too.
A step in the right direction, but this
looks a little weird. What happened?
Not so fast!
It would be easy to blow through that code on the last page. And,
on the other hand, we could step you through every single line, but this
is Chapter 7, and you’re definitely up to the task of studying a little code.
So, given there’s a lot happening on the previous page, go back and
make sure you understand every line until you know exacty what the
code does. Then proceed...
You may find the default window size on
your machine is smaller than shown here. If
you see the turtles fly off the left side
of your window, adjust the width of your
window until you can see them.
you are here 4 327
modules, methods, classes, and objects
import turtle
import random
turtles = list()
def setup():
global turtles
startline = -620
screen = turtle.Screen()
screen.setup(1290,720)
screen.bgpic('pavement.gif')
turtle_ycor = [-40, -20, 0, 20, 40]
turtle_color = ['blue', 'red', 'purple', 'brown', 'green']
for i in range(0, len(turtle_ycor)):
new_turtle = turtle.Turtle()
new_turtle.shape('turtle')
new_turtle.penup()
new_turtle.setpos(startline, turtle_ycor[i])
new_turtle.color(turtle_color[i])
new_turtle.pendown()
turtles.append(new_turtle)
setup()
turtle.mainloop()
Check out the updated fixes: we’re lifting up the turtle pen so it doesn’t draw on the way
to the starting position; we’re also enlarging the window and adding a background image.
Make these changes and try again. You’ll want to grab the file pavement.gif from the
chapter source files and place it in the same folder as race.py.
A Test Drive
Don't miss this tiny change; we're going to move the turtles
more to the left. Remember the center is at 0,0, so an x
coordinate of -620 is far left on the screen.
These three lines use another object we haven't
seen yet, the Screen object. With the Screen
object we can make the window bigger and add
a background image.
For now you can probably
tell what this code is doing,
but we're going to explore
the Screen object more in
Chapter 11.
Let's pull up the
pen before we move.
And put it back down when
we're done moving the turtle
to the starting line.
Here's what we got! Now
we're talkin’. We've got
each turtle lined up on
the starting line ready
to go. Looks like we're in
great shape to start on
the actual game now.
Think about what's going on here:
you've got five Turtle objects, all
with their own internal state,
including color and position.
Note the finish line is just part of
the background image graphic.
328 Chapter 7
implementing the game
2Start the race.
AFor each turtle:
iPick a random amount to move
forward, say between 0 and
2 pixels.
Move forward.
ii Check to see if turtle’s
position is across nish line.
If so:
aSet winner to True.
Set a variable winner to False.
While winner is false:
Now it’s time to get these turtles racing. We’ve got some nice
pseudocode to guide us, so let’s just work through it:
Starting the race
def race():
global turtles
winner = False
2First we need to get the winner variable set up. To
do that let’s create a new function called race. The winner
variable is easily implemented as a Boolean initially set to
False. We’ll also be using the global turtles variable in this
function too, so let’s remember that in this code.
We’re also going to add a local variable that holds the x
position of the finish line:
def race():
global turtles
winner = False
finishline = 590
The x value of 590 is located
about here on the grid.
A
Now we are going to keep the game going until
there is a winner. To do that we’re going to start with a
while statement, which will loop until the variable winner is
set to True.
def race():
global turtles
winner = False
finishline = 590
while not winner:
Next we need to give the turtles a chance to move
forward. To do that we simply use a for/in statement over
our global turtles lists.
def race():
global turtles
winner = False
finishline = 590
while not winner:
for current_turtle in turtles:
We’re going to endlessly
loop until the winner
variable is set to True.
And each time through
the while loop we’re going
to iterate through every
turtle, giving it a chance
to move forward across
the screen.
you are here 4 329
modules, methods, classes, and objects
iNow we use random numbers to move the turtles
forward. So let’s compute a number between 0 and 2 and
move the turtle forward that many units.
def race():
global turtles
winner = False
finishline = 590
while not winner:
for current_turtle in turtles:
move = random.randint(0,2)
current_turtle.forward(move)
Compute a random number
between 0 and 2 and move
the turtle forward that
many units.
Let’s get the turtle's x coordinate to
see if it’s crossed the finish line. To do
that, we use the xcor method, which
returns a turtle’s x coordinate.
ii Finally we just need to check for a winner. Note that
we have a winner if a turtle’s xcor attribute is greater than
or equal to finishline, which is set to 590. So, let’s get the
turtle’s xcor attribute and do the comparison. If the turtle is
over the finish line, we set winner to True and announce the
winner.
def race():
global turtles
winner = False
finishline = 590
while not winner:
for current_turtle in turtles:
move = random.randint(0,2)
current_turtle.forward(move)
xcor = current_turtle.xcor()
if (xcor >= finishline):
winner = True
winner_color = current_turtle.color()
print('The winner is', winner_color[0])
Compare it to the finish line.
And if greater we
have a winner.
Set the winner
to True.
Use the color method
to get the winning
turtle's color.
Note the color method
returns two values, a pen
color and a fill color.
We're interested in the
first one, the pen color,
so we use the index 0 to
get it.
3Game nishes
Announce the winner’s name!
330 Chapter 7
testing the game
We should be ready to race now. Get all the code additions made to your
race.py file. You’ll find the complete code below. So, place your bets and
give it a true test drive.
A Test Drive
import turtle
import random
turtles = list()
def setup():
global turtles
startline = -620
screen = turtle.Screen()
screen.setup(1290,720)
screen.bgpic('pavement.gif')
turtle_ycor = [-40, -20, 0, 20, 40]
turtle_color = ['blue', 'red', 'purple', 'brown', 'green']
for i in range(0, len(turtle_ycor)):
new_turtle = turtle.Turtle()
new_turtle.shape('turtle')
new_turtle.penup()
new_turtle.setpos(startline, turtle_ycor[i])
new_turtle.color(turtle_color[i])
new_turtle.pendown()
turtles.append(new_turtle)
def race():
global turtles
winner = False
finishline = 590
while not winner:
for current_turtle in turtles:
move = random.randint(0,2)
current_turtle.forward(move)
xcor = current_turtle.xcor()
if (xcor >= finishline):
winner = True
winner_color = current_turtle.color()
print('The winner is', winner_color[0])
setup()
race()
turtle.mainloop()
Python 3.6.0 Shell
The winner is brown
>>>
Brown wins!
Don’t forget to
call race!
Remember the
amount each
turtle moves is
random, so your
mileage may vary.
you are here 4 331
modules, methods, classes, and objects
Blueprint for an object.
With object-oriented programming there’s a lot of new jargon flying around. In this game of
who does what, match each piece of jargon to its description.
The behavior an object can do.
Things an object knows about.
Act of creating an object from a class.
class
object
methods
instantiate
attributes
instance
Created from the blueprint.
Another name for an object.
Look at the code on the previous page. Say there is a photo
finish and two or more turtles cross the finish line during
the same iteration of the while loop. What happens? Who
wins? Do you think this is the correct behavior?
332 Chapter 7
more about objects
I feel like we’ve just only
started and the chapter’s
already over.
Don’t worry, this isn’t
the end of objects.
You’re right, we’ve barely scratched the surface.
Object-oriented programming is a huge topic, one
that would fill this entire book, and this chapter
is just the beginning. Next time you encounter a
class in a module you’re going to know that you
can instantiate it using its constructor. You’re
going to know it has methods and attributes
that are accessible to you. And you’re going to
understand that each instance of any object you
create has its own attributes.
You’ve also gained a general awareness now that
all Python types are, in fact, classes, which is great
because in the remaining chapters we’re going
to meet a lot of new classes and objects. And in
Chapter 12 we’ll break the surface and explore
object-oriented programming, including topics like
how to create your own classes. We’ll see you when
you get there.
Oh, and this chapter’s not really over, anyway.
You’ve got a mystery to solve, some bullet points to
read, a crossword to do. But then you really should
move on—we don’t want things to get awkward.
Remember you can use Python’s help on
a class, like help(Turtle). Or even on a
module, like help(turtle). Don’t forget to
import the turtle module first! We’ll be
getting experience with more classes and
objects ahead in the book as well.
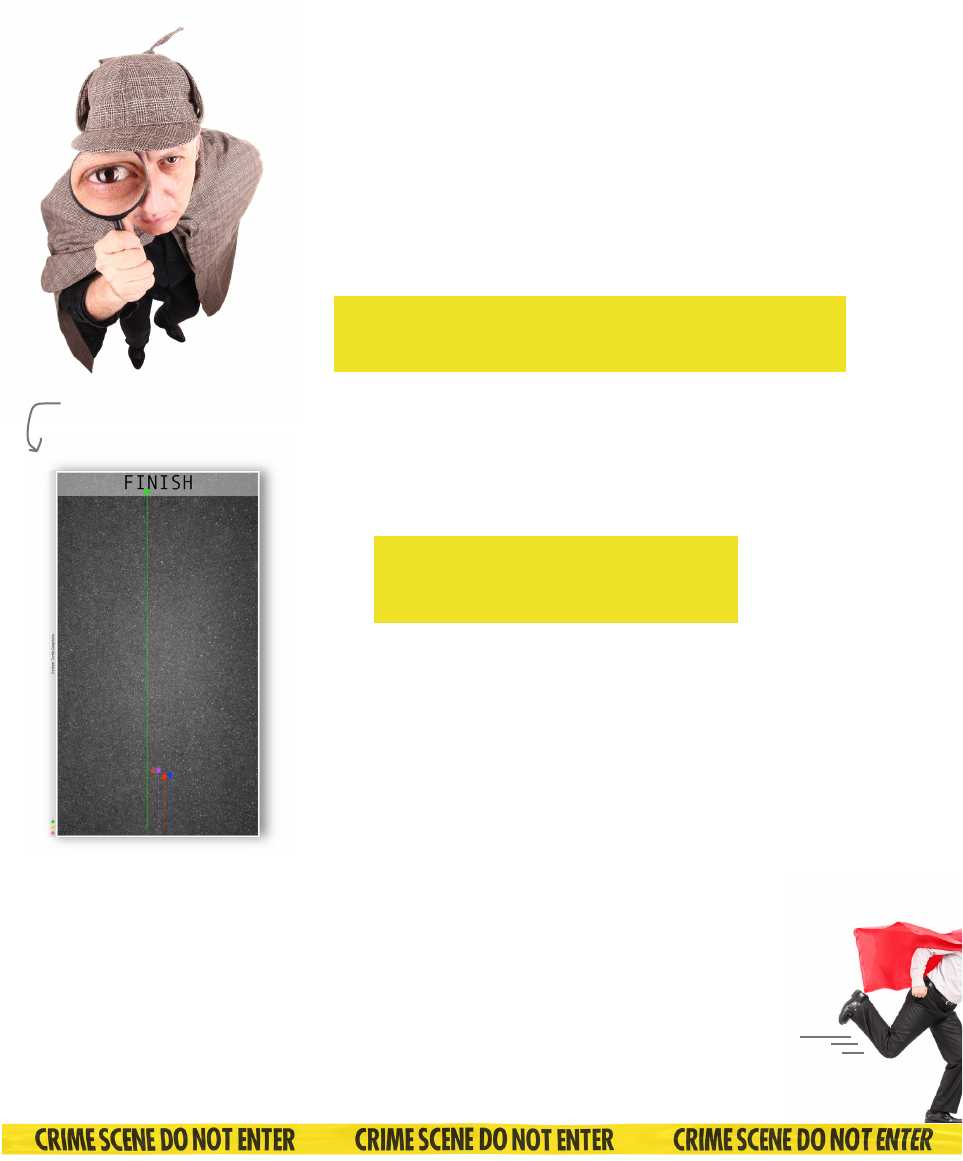
you are here 4 333
modules, methods, classes, and objects
Odd goings-on at the turtle races.
Since you’ve released your turtle racing code, something strange has
started to happen: the green turtle is always winning, and by a large
margin. The police are thinking someone has hacked the code. Can
you take a look and see what is going on?
Study the code carefully;
what has changed? What
does this new code do? You
won’t be able to fully solve
this mystery until Chapter
12, but do your best and
think through what this
code might be doing.
import turtle
import random
turtles = list()
class SuperTurtle(turtle.Turtle):
def forward(self, distance):
cheat_distance = distance + 5
turtle.Turtle.forward(self, cheat_distance)
def setup():
global turtles
startline = -620
screen = turtle.Screen()
screen.setup(1290,720)
screen.bgpic('pavement.gif')
turtle_ycor = [-40, -20, 0, 20, 40]
turtle_color = ['blue', 'red', 'purple', 'brown', 'green']
for i in range(0, len(turtle_ycor)):
if i == 4:
new_turtle = SuperTurtle()
else:
new_turtle = turtle.Turtle()
new_turtle.shape('turtle')
new_turtle.penup()
new_turtle.setpos(startline, turtle_ycor[i])
new_turtle.color(turtle_color[i])
new_turtle.pendown()
turtles.append(new_turtle)
def race():
global turtles
winner = False
finishline = 590
while not winner:
for current_turtle in turtles:
move = random.randint(0,2)
current_turtle.forward(move)
xcor = current_turtle.xcor()
if (xcor >= finishline):
winner = True
winner_color = current_turtle.color()
print('The winner is', winner_color[0])
setup()
race()
turtle.mainloop()
Whoa! Green is
really fast!
334 Chapter 7
review of modules, methods, classes, and objects
Modules are collections of Python
variables, functions, and classes.
Using the __name__ variable you can
determine if your code is being imported or
being run as the main program (by looking
for a value of "__main__").
In the Python Shell you can use the help
function to see documentation on functions,
modules, and classes.
In your own code, add docstrings to supply
help for programmers using your code.
You’ll nd plenty of Python modules
to explore in the areas of math, user
interfaces, interacting with web services,
dates and time, and pedagogy, to name a
few.
The turtle module provides an
implementation of a turtle graphics system,
originally developed at MIT for teaching.
With turtle graphics, turtle objects live on a
grid and can move and draw.
Turtles are Python objects and include data
and behavior.
We call the data in Python objects
attributes.
Some languages use the name instance
variables or properties for object attributes.
An attribute can be assigned any valid
Python value.
The behavior in Python objects is known as
methods.
A method is a Python function that belongs
to an object.
You can access attributes and methods by
using the dot notation on an object.
Objects are created from classes. Classes
supply a blueprint to create objects from.
When we create a new object, we say that
we instantiate it.
An object instantiated from a class is known
as an instance.
An object is instantiated using a constructor
method, dened in the class.
Constructors do all the setup and
initialization needed for an object.
All types in Python are classes, including
numbers, strings, lists, and so on.
you are here 4 335
modules, methods, classes, and objects
Mod coding cross
Get more modular as you do the crossword.
1 2 3 4
5
6 7
8
9
10 11
12
13
14
15 16
17
Across
1. Behavior of object.
3. Who won the first race?
6. Another name for instance variable.
8. Unit of turning a turtle.
11. Method that sets up object.
12. Data of object.
14. Command to move ahead.
16. Function to get documentation.
17. Another word for object.
Down
2. Graphics system from MIT.
4. Another word for instance.
5. Every type in Python is one.
7. Creating an object.
8. Famous science fiction author.
9. Type of string used in help.
10. Blueprint.
13. Which turtle did the hacker hack?
15. Value of __name__ when main program is
run (excluding underscores).
336 Chapter 7
exercise solution
And make sure you call
the function.
import turtle
slowpoke = turtle.Turtle()
slowpoke.shape('turtle')
def make_square(the_turtle):
the_turtle.forward(100)
the_turtle.right(90)
the_turtle.forward(100)
the_turtle.right(90)
the_turtle.forward(100)
the_turtle.right(90)
the_turtle.forward(100)
the_turtle.right(90)
make_square(slowpoke)
turtle.mainloop()
import turtle
slowpoke = turtle.Turtle()
slowpoke.shape('turtle')
def make_square(the_turtle):
for i in range(0,4):
the_turtle.forward(100)
the_turtle.right(90)
make_square(slowpoke)
turtle.mainloop()
Step 1: get the
code in a function
and use it.
Step 2: look at all that
duplicated code in our function
let’s just iterate over the
forward/right calls four times.
Define a make_square
function. We don’t
need
all that
duplicate
code, we
can just
iterate
over it
four times.
Notice we can pass
any turtle into
make_square, not just
slow_poke.
Hey, it’s Chapter 7 already, so we’re confident you’re in good shape to
take the turtle square code (on the previous page) and get it wrapped up
in a nice function; call it make_square, which will take one parameter, a
turtle. Write your code here and see how much you can clean things up by
removing any duplicated code.
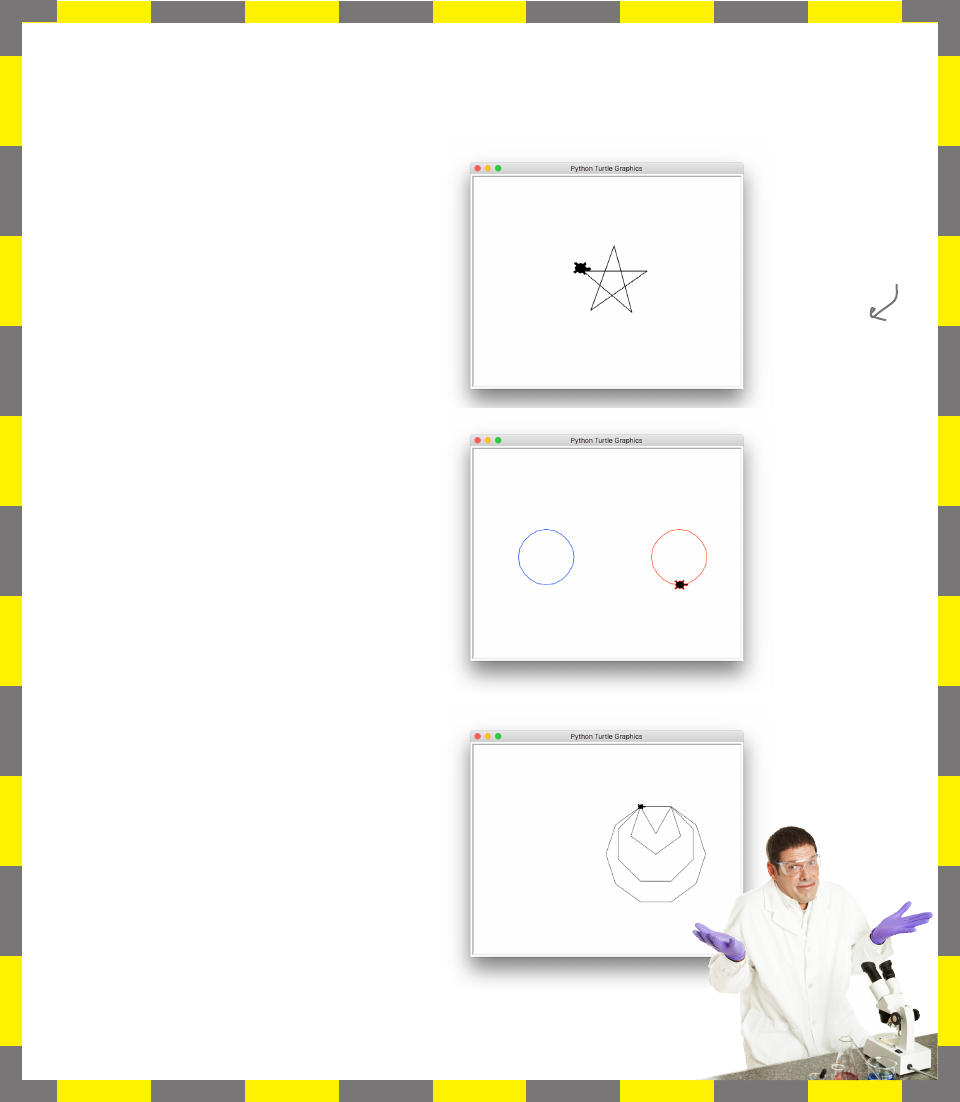
you are here 4 337
modules, methods, classes, and objects
for i in range(5):
slowpoke.forward(100)
slowpoke.right(144)
Experiment #1
We’ve got even more turtle experiments for you below. Take a look at each one, guess what it
does, and then run it to see if you were right. Change a few values; how does the output change?
MORE TURTLE EXPERIMENTS SOLUTIONS
Experiment #2
slowpoke.pencolor('blue')
slowpoke.penup()
slowpoke.setposition(-120, 0)
slowpoke.pendown()
slowpoke.circle(50)
slowpoke.pencolor('red')
slowpoke.penup()
slowpoke.setposition(120, 0)
slowpoke.pendown()
slowpoke.circle(50)
Experiment #3
def make_shape(t, sides):
angle = 360/sides
for i in range(0, sides):
t.forward(100)
t.right(angle)
make_shape(slowpoke, 3)
make_shape(slowpoke, 5)
make_shape(slowpoke, 8)
make_shape(slowpoke, 10)
Here’s what we
got. Did you get
anything cool by
tweaking the various
variable values?
338 Chapter 7
exercise solution
There are many reasonable
answers for this. Here’s
what we came up with.
Blueprint for an object.
With object-oriented programming, there’s a lot of new jargon flying around. In this game of
who does what, match each piece of jargon to its description.
The behavior an object can do.
Things an object knows about.
Act of creating an object from a class.
class
object
methods
instantiate
attributes
instance
Created from the blueprint.
Another name for an object.
SOlUTion
Radio
frequency
volume
power
attributes
methods
turn_on()
turn_off()
tune()
set_volume()
Fill in what a radio object might need to know and do.
you are here 4 339
modules, methods, classes, and objects
Mod cross Solution
M
1E T
2H O D B
3R O
4W N
U B C
5
R J L
A
6T T R I
7B U T E A
L N C S
E S T D
8E G R E E S
D
9T O
O A C
C
10 C
11 O N S T R U C T O R
L S T O
A
12 T T R I B U T E R
S R A O G
13
S I T F
14 O R W A R D
N I E
G O M
15 H
16 E L P
I
17 N S T A N C E N
I
N
Across
1. Behavior of object. [METHOD]
3. Who won the first race? [BROWN]
6. Another name for instance variable.
[ATTRIBUTE]
8. Unit of turning a turtle. [DEGREES]
11. Method that sets up object.
[CONSTRUCTOR]
12. Data of object. [ATTRIBUTE]
14. Command to move ahead. [FORWARD]
16. Function to get documentation. [HELP]
17. Another word for object. [INSTANCE]
Down
2. Graphics system from MIT. [TURTLE]
4. Another word for instance. [OBJECT]
5. Every type in Python is one. [CLASS]
7. Creating an object. [INSTANTIATION]
8. Famous science fiction author.
[DOCTOROW]
9. Type of string used in help. [DOCSTRING]
10. Blueprint. [CLASS]
13. Which turtle did the hacker hack? [GREEN]
15. Value of __name__ when main program is
run (excluding underscores). [MAIN]
this is a new chapter 341
recursion and dictionaries
8
Beyond Iteration and Indices
It’s time to take your computational thinking up a notch.
And this is the chapter to do it: we’ve been happily coding along with an iterative
style of programming—we’ve created data structures like lists and strings and
ranges of numbers, and we’ve written code to compute by iterating over them. In this
chapter we’re going to look at the world differently, first in terms of computation, and
then in terms of data structures. Computationally we’ll look at a style of computing
that involves writing code that recurs, or calls itself. We’ll expand the kinds of data
structures we can work with by looking at a dictionary-like data type that is more like
an associative map than a list. We’ll then put them together and cause all kinds of
trouble. Be forewarned: these topics take a while to settle into your brain, but the
effort is going to pay off in spades.
It’s time for a
few new tools in
that toolbelt.

342 Chapter 8
thinking about computing differently
A different way to compute
def compute_sum(list):
sum = 0
for number in list:
sum = sum + number
return sum
print('The total is', compute_sum(marbles))
We’ve got a list with each friend’s
count of marbles.
Then we iterate through the list, and
add each number to sum.
To compute the sum of a list of numbers, we start with a local
variable, sum, set to zero, which will hold the running total.
Finally, we return the sum.
Let’s test this by calling
compute_sum on our marbles list.
Let’s define a function to compute a sum of numbers.
Python 3.6.0 Shell
The total is 129
>>>
marbles = [10, 13, 39, 14, 41, 9, 3]
print('The total is', sum(marbles))
Python 3.6.0 Shell
The total is 129
>>>
Here we use Python's built-in sum
function to tally up the marbles.
But we’re still learning about computation, so let’s compute the sum the
old-fashioned way (again, using what we’ve learned so far in this book) by
writing code that uses iteration to tally the list. Like this:
It’s time for some mind-bending activity—you’ve been thinking
about the same, iterative style of programming for too long. So
let’s expose your brain to a totally different way of thinking about
solving problems.
Before we get there, though, let’s take a simple problem and think
it through the way we have throughout this book. For instance,
take a handy list of numbers you want to sum up; it could be
any numbers, say the number of marbles you and each of your
friends has in his or her pockets. Now, Python does have a sum
function that can be used to sum a list of numbers:
Good, we got the
same result.
you are here 4 343
functions and abstraction
Pretend the folks who developed the Python language decided to
remove any form of iteration (like the for and while loops). But
you still needed to sum a list of numbers, so could you do it without
iteration?
No! You can’t use
the built-in sum
function either.
And now the different way...
There’s another approach that computer scientists (and some in-the-know coders) use to break down
problems. At first, this approach may seem a little like magic (or sleight of hand), but let’s get a feel for
it by revisiting our problem of summing our marbles. Here’s how the approach works: we come up with
two cases for summing our list of numbers: a base case, and a recursive case.
The base case is the simplest case you can think of. So what is the simplest
list of numbers you can take the sum of ? How about an empty list? What
is its sum? Zero, of course!
An empty list
Now for the recursive case. With the recursive case we’re going to solve a
smaller version of the same problem. Here’s how: we take the first item in the
list, and add it to the sum of the rest of the list...
[10, 13, 39, 14, 41, 9, 3]
10 + compute_sum([13, 39, 14, 41, 9, 3])
compute_sum([]) Here’s the simplest case: if we
have an empty list, then we know
the sum is going to be 0.
We’ve made our problem a little smaller: to compute the sum of the list, we’re
going to add 10 to the sum of a slightly smaller list.
How can we reduce the problem a
little? How about we just worry
about the sum of a list that is one
item smaller?
base
case
recursive
case
344 Chapter 8
our first recursive function
Now let’s write some code for our two cases
For the base case our job is easy: we just need to see if the list is empty, and if so,
return 0 as the sum of the list:
def recursive_compute_sum(list):
if len(list) == 0:
return 0
def recursive_compute_sum(list):
if len(list) == 0:
return 0
else:
first = list[0]
rest = list[1:]
Here we check to see if the list is
empty (in other words, if its size is
0), and if so, we return 0.
The recursive case is less obvious. Let’s take it a step at a time. We know that we’re
going to take the first item of the list and add it to the sum of the rest of the list. For
clarity, let’s first set up some variables to hold the first item and the remainder of the
list (without the first item):
Here’s our base case again.
The sum is the first
item plus the sum of
the rest of the list.
Now that we have our base case and our recursive case, we’re ready to code this new way of
computing a sum. As we said up front, doing so is a little mind-bending for most, at least at first.
So let’s very slowly step through coding our new recursive sum function.
Remember your list notation? This
returns a list starting at index 1
through the last element in the list.
Let’s set a variable to the first
item in the list, and another one to
the rest of the list.
Now we need to add the first item to the sum of the remainder of the list:
def recursive_compute_sum(list):
if len(list) == 0:
return 0
else:
first = list[0]
rest = list[1:]
sum = first + Sum of rest of list
But how do we code this?
We need to sum the rest
of the list, but isn’t that
exactly what we’re coding?
A way to sum lists? It feels
like a conundrum.
base
case
recursive
case
What is the value
of rest if the list
only has one item?
It’s the empty list.
you are here 4 345
functions and abstraction
def recursive_compute_sum(list):
if len(list) == 0:
return 0
else:
first = list[0]
rest = list[1:]
sum = first + recursive_compute_sum(rest)
return sum
Our assumption up front was that the
recursive_compute_sum computes the sum
of lists, so let’s call it to finish the job
on the slightly smaller list.
If only we knew how to compute the sum of the rest of the list, we’d be set. But
how? Well, do you know of any good functions sitting around ready to compute the
sum of a list? How about recursive_compute_sum?
Whether you believe this code will work or not, go ahead and get the recursive_
compute_sum code (repeated below, including some test code) into a file called sum.
py. Save your code and choose the Run > Run Module menu item. After that, head to
the console to see the sum magically computed.
A Test Drive
marbles = [10, 13, 39, 14, 41, 9, 3]
def recursive_compute_sum(list):
if len(list) == 0:
return 0
else:
first = list[0]
rest = list[1:]
sum = first + recursive_compute_sum(rest)
return sum
sum = recursive_compute_sum(marbles)
print('The total is', sum)
Python 3.6.0 Shell
The total is 129
>>>
We got the same
result we did from
iteration!
Let’s not forget to
return the sum after
we’ve computed it!

346 Chapter 8
calling a function within a function
Aren’t we violating
that “define your functions before
you call them” rule we talked about?
After all, the recursive_compute_
sum function is called from within its
own definition!
No. Remember a function body is not evaluated
until the function is called. So, in this code, the
function recursive_compute_sum is first defined.
Then, when the recursive_compute_sum function
is called with:
sum = recursive_compute_sum(marbles)
the function’s body is then evaluated and calls itself
to recur. When that happens, the recursive_
compute_sum function is already defined, so we are
not violating that rule.
If you’re finding this takes a bit to wrap your head
around, that’s normal. The trick is deliberate
practice: write as many recursive functions as you
can. Trace through the execution and understand
how and why recursive functions work.
On that topic, let’s get some more practice...
We’ll be tracing through
some recursive code in
just a bit.
you are here 4 347
functions and abstraction
Let’s get some more practice
Have no fear: getting your brain to think recursively takes a little extra effort, but
it’s well worth the blood, sweat, and tears (you think we’re kidding). Now, we could
stop at this point and analyze the recursive_compute_sum to death, but the
best way to get your brain thinking more recursively is deliberate practice: take
problems and solve them recursively, and, of course, write the code.
Let’s practice on another problem. Remember those palindromes from Chapter
4? You’ll recall that palindromes are words that read the same forward as they do
backward, like “tacocat”:
tacocat
Reads the same forward...
…as it does backward.
Want some more examples? How about “madam” or “radar” or “kayak,” or
there are even whole phrases (assuming you remove the punctutation and
whitespace), like “a nut for a jar of tuna” or “a man, a plan, a canal: panama” or
even more impressive, “a man, a plan, a cat, a ham, a yak, a yam, a hat, a canal:
panama.” Don’t believe the last few? Try them; they’re palindromes, alright.
Forget recursion for a bit, and think through how you might write a function to check if a word
is a palindrome. Do that using the skills you learned in Chapters 1 through 7. Write some
simple pseudocode to summarize your thoughts. Or, if you just had that cup of java and feel
like writing some code, don’t let us get in your way.
348 Chapter 8
a recursive palindrome detector
Check the outermost characters
to see if they are the same.
Using recursion to detect palindromes
So can we write a recursive function to detect palindromes? And if so, will we have gained anything?
Let’s give it a try and find out. Do you remember what to do? To write a recursive function we need
a base case, and then we need a case that recurs by reducing the problem and then calling the same
function recursively. Let’s figure out the base and recursive cases:
The base case is the simplest case we can think of. We can actually think
of two simple cases. First, how about an empty string? Is the empty string
a palindrome? It reads the same front and backward, so yes.
The empty string
Now for the recursive case. This is where things always get interesting.
Remember, we want to reduce the problem size a little before asking our
is_palindrome function to finish the job for us. How about we compare the
outer two characters and if they are the same, we can then check to see if the
middle of the word (which is a little smaller) is a palindrome?
'tacocat'
is_palindrome('') Here’s the simplest case: if we
have an empty string, then we
know it’s a palindrome.
And let our is_palindrome function
worry about whether the middle
is a palindrome.
But there’s another really simple case to consider: the case of a single letter. Is a
single letter a palindrome? It’s the same forward and backward, so yes.
is_palindrome('a')
A single letter is a palindrome
too; after all, it is the same read
forward and backward.
'acoca'
base
case
recursive
case
you are here 4 349
functions and abstraction
def is_palindrome(word):
if len(word) <= 1:
return True
else:
if word[0] == word[-1]:
return is_palindrome(word[1:-1])
else:
return False
Writing a recursive palindrome detector
For the base case our job is easy: we just need to see if the word is the empty
string or has one character:
def is_palindrome(word):
if len(word) <= 1:
return True
def is_palindrome(word):
if len(word) <= 1:
return True
else:
if word[0] == word[-1]:
else:
return False
Let’s check our base case to see if
the word is the empty string (len
is 0) or has one character (len is 1),
and if so, return True.
Now for the recursive case. First we’re going reduce the problem by checking the
outer two characters. If they match, we have a palindrome if all the rest of the
letters (inside the two characters) make a word that is a palindrome. If not, we’re
going to return False:
Here’s our base case again.
We’ve got our base case and our recursive case, so once again we’re ready to write our
recursive code. As is typical, our base case is going to be fairly trivial to implement. Then we
just need to wrap our minds around the recursive case. As with computing sums, the trick is
always to reduce the problem a little and to rely on a recursive call to solve the problem.
Compare the first character to the
last character to make sure they
are equal. If not, we’ll return False.
Now we need to finish the recursive case. At this point the code has determined the
two outer characters are equal, so we have a palindrome if the middle of the word is a
palindrome, and that’s exactly what we need to code.
If the two ends match, then we need to see if the
middle of the word is a palindrome. Good thing we
have a function to do that—let’s call it.
We’ll think through the
recursive call in the next step.
Note that we need to return the result
of calling is_palindrome, which will
ultimately return True or False.
base
case
recursive
case
350 Chapter 8
more about recursive functions
def is_palindrome(word):
if len(word) <= 1:
return True
else:
if word[0] == word[-1]:
return is_palindrome(word[1:-1])
else:
return False
words = ['tacocat', 'radar', 'yak', 'rader', 'kayjak']
for word in words:
print(word, is_palindrome(word))
Go ahead and get the is_palindrome code (repeated below, including some test code)
into a file called palindrome.py; save your code and choose the Run > Run Module menu
item. After that head to the console to see if it is correctly detecting palindromes. Feel
free to add your own palindrome candidates to the test as well.
A Test Drive
Python 3.6.0 Shell
tacocat True
radar True
yak False
rader False
kayjak False
>>>
Take a look through the code again.
Is this clearer than the iterative
version? What do you think?
Looks like it works!
Q: How do you know a recursive function will ever end?
A: In other words, if a function keeps calling itself, over and over,
how does it ever stop? That’s where the base condition comes in.
The base condition acts as a piece of the problem we know we can
solve directly, without the help of recursively calling the function
again. So, when we hit the base condition, we know we’ve reached
the point where the recursive calls stop.
Q: Okay, but how do we know if we’ll ever get to the base
case?
A: Remember each time we call the recursive case, we make
the problem a little smaller before calling the function again. So, if
you designed your code correctly, you can see that at some point,
by making the problem repeatedly smaller, you will eventually
reach the base case.
Q: I kinda get how we could call a function from itself—after
all, it is just like any other function call—but how do all the
parameters not get messed up? That is, each time I recursively
call the function, the parameters are reassigned to a new set of
arguments, right?
A: This is a very good question. You are right; each time you
call a function, the parameters are bound to a set of arguments.
To make matters worse, if it is a recursive call, we’re calling the
same function, and so those parameters are going to get rebound
to other arguments—you’d think the whole thing would go haywire
when those parameter values get overridden, right? Ah, but that
isn’t what happens. You see, Python and all modern languages
keep track of every call to a function along with its corresponding
set of parameters (and local variables). Hang tight; we’re going to
look at this in a sec.
you are here 4 351
functions and abstraction
Behind
the Scenes
The first thing Python (or practically any
language) does when it sees a function call is
to create a data structure to hold its parameters
and local variables. This is typically called a frame.
Python first puts the value for the parameter
word in the frame.
Next we see if the word has a length of 1 or less,
which it doesn’t.
Next we have three local variables that are
created and set to the first, last, and middle
portions of the word passed in. These values are
added to the frame as well.
Next we check to make sure the first and last
characters are equal, which they are, so we then
recursively call is_palindrome:
is_palindrome('radar')
word = 'radar'
frame 1
return is_palindrome(middle)
def is_palindrome(word):
if len(word) <= 1:
return True
else:
first = word[0]
last = word[-1]
middle = word[1:-1]
if first == last:
return is_palindrome(middle)
else:
return False
How is Python handling recursion and keeping track
of all those calls to the same function? Let’s take a look
behind the scenes and see how is_palindrome is
being computed by the Python interpreter.
Here's the code again. Notice that we
added some local variables that make the
code a bit clearer. It also allows us to see
how the variables work behind the scenes.
Let's evaluate this statement.
word = 'radar'
first = 'r'
last = 'r'
middle = 'ada'
frame 1
1
2
3
4
1
2
3
4
We’re back to another function call, so we need
a new frame to hold the parameters and local
variables. Python stores the multiple frames like
a stack of plates, putting one on top of the other.
We refer to the set of frames as a stack or call stack.
That name kinda makes sense, doesn’t it?
Okay, next we can see this word is not <= 1
characters, so we move on to the else statement.
1
frame 1
word = 'ada'
frame 2
word = 'radar'
first = 'r'
last = 'r'
middle = 'ada'
Referring to frame 1,
middle is ‘ada'.
5
2
352 Chapter 8
understanding the call stack
frame 1
word = 'ada'
first = 'a'
last = 'a'
middle = 'd'
frame 2
word = 'radar'
first = 'r'
last = 'r'
middle = 'ada'
word = 'd'
first = 'd'
last = 'd'
middle = 'd'
frame 1
word = 'ada'
first = 'a'
last = 'a'
middle = 'd'
frame 2
word = 'radar'
first = 'r'
last = 'r'
middle = 'ada'
word = 'd'
frame 3
Once again, we compute our local variables and
add them to the frame.
And we can see that the first and last characters
are equal.
So, all that remains is to call is_palindrome
again.
3
4
return is_palindrome(middle)
Referring to frame 2,
middle is ‘d'.
Now we need to return the result of calling
is_palindrome, which is True. So we pop
another frame off the stack as we return True.
5
frame 1
word = 'ada'
first = 'a'
last = 'a'
middle = 'd'
frame 2
word = 'radar'
first = 'r'
last = 'r'
middle = 'ada'
When we
return from
the function
its frame is
popped off
the stack.
Again, now we need to return the result of calling
is_palindrome, which is True. Note this is the only
remaining frame that resulted from calls to is_
palindrome, so we’re done (again, with a result of True).
5frame 1
word = 'radar'
first = 'r'
last = 'r'
middle = 'ada'
Again, we pop
a frame off
the stack.
is_palindrome('radar')
When we return from the initial call to is_
palindrome, we return the value True.The stack is
now clear of
all calls to
is_palindrome.
Evaluates to True!
We’re back to another function call, so we need
a new frame to hold the parameters and local
variables. At this point the word parameter is just
the string 'd'.
Finally, the length of the word parameter is finally
less than or equal to 1, meaning we return True.
When the call returns, we remove, or pop, the top
frame off the stack.
1
2
When we
return from
the function
its frame is
popped off
the stack.
you are here 4 353
functions and abstraction
frame 1
list = [1, 2, 3]
first = 1
rest = [2, 3]
Try evaluating some recursive code yourself. How about using our
recursive_compute_sum function?
def recursive_compute_sum(list):
if len(list) == 0:
return 0
else:
first = list[0]
rest = list[1:]
sum = first + recursive_compute_sum(rest)
return sum
recursive_compute_sum([1, 2, 3])
recursive_compute_sum([1, 2, 3])
frame 1
list = [1, 2, 3]
first = 1
rest = [2, 3]
recursive_compute_sum([2, 3]) frame 2
list =
first =
rest =
recursive_compute_sum([3])
frame 1
frame 2
list =
first =
rest =
frame 3
list =
first =
rest =
Here’s the code again.
And here we’re calling
the function.
We did the first one for you. The
parameter list is bound to the list
[1,2,3] and then the local variables
first and rest get computed and
added to the frame.
Trace through the rest of the
computation and fill in the stack
details.
list = [1, 2, 3]
first = 1
rest = [2, 3]
354 Chapter 8
practice with call stacks
recursive_compute_sum([])
frame 1
frame 2
list =
first =
rest =
frame 3
list =
first =
rest =
frame 4
list =
frame 1
frame 2
list =
first =
rest =
frame 3
list =
first =
rest =
sum =
frame 1
frame 2
list =
first =
rest =
sum =
frame 1
sum =
recursive_compute_sum([3])
recursive_compute_sum([2, 3])
recursive_compute_sum([1, 2, 3])
list = [1, 2, 3]
first = 1
rest = [2, 3]
list = [1, 2, 3]
first = 1
rest = [2, 3]
list = [1, 2, 3]
first = 1
rest = [2, 3]
list = [1, 2, 3]
first = 1
rest = [2, 3]

you are here 4 355
functions and abstraction
Tonight’s talk: Iteration and
Recursion answer the question
“Who’s better?”
Iteration
To know I’m better, all you have to do is look at how
many times coders use iteration over recursion.
What do you mean? Any modern language supports
recursion, and yet coders opt to use me.
Last time I looked, this book was in Python.
Hah! Efficient? Ever heard of a call stack?
Every time a function calls itself, the Python
interpreter has to create a little data structure
to hold all the parameters and local variables of
the current function. As the function gets called
recursively, it has to maintain a whole stack of those
data structures, which goes on and on as you keep
calling the function over and over. Call it enough
times and that adds up to a lot of memory, and then
BOOM, your program goes bye bye.
Recursion
I think that depends on the language you’re talking
about.
Take a language like LISP or Scheme or Clojure, for
instance—way more recursion is used than iteration.
That’s not the point. The point is, some
programmers know and understand recursion very
well, and see the beauty and efficiency of using it.
Well, yes, and so have the readers, but please, do
educate us.
356 Chapter 8
iteration versus recursion
Iteration
Right, but as I said, when you do it recursively, it’s
like abusing the system, and sooner or later there’s
going to be trouble.
Hasn’t stopped millions of coders from writing
palindromes iteratively.
Sure, for those brainiacs who get recursion.
You have to admit, for a lot of problems, iterative
solutions are better.
I say why bother for a little clarity?
Oh, you mean for those Earth-Shattering-Grand-
Challenge-type problems like finding palindromes?
You think talking about talking about the book in
the book is...oh dear.
Recursion
That’s actually the way any modern (or ancient,
for that matter) language, including Python, works.
Anytime you call a function, that is happening.
Not true. For many recursive algorithms, that isn’t
an issue and there are techniques for dealing with
that, anyway. The point is, look at the clarity of
using a recursive solution. Palindromes were a good
example; look how ugly and unclear the iterative
code was.
My point is, for some algorithms the recursive one is
easier to think about and code.
Oh please, as we’ve seen it just takes a little practice.
I wouldn’t say better, I’d say more natural, but
I’d also say for some problems recursion is more
natural.
It’s not just that the code is more readable, it’s
that there are algorithms that are downright hard
to code iteratively, but that work out easily and
naturally with recursion.
Of course not; however, maybe we’ll see one before
the end of this book.
By the way, you don’t find the fact we’re talking
about the book in the book slightly recursive?
Recursion is everywhere.
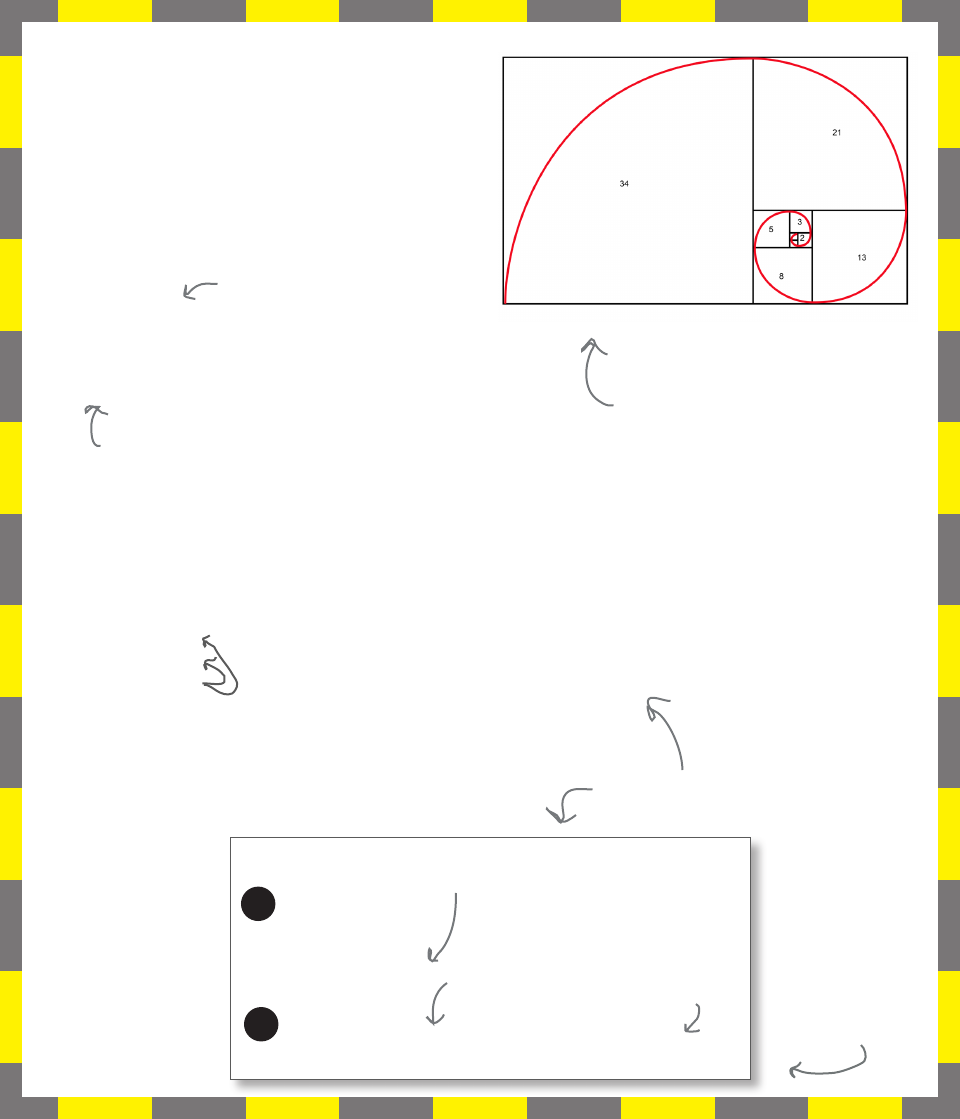
you are here 4 357
functions and abstraction
Today we’re testing the code for a recursive
algorithm that computes the Fibonacci sequence.
The sequence produces a set of numbers that
appear often in nature and can describe shapes,
like the pattern of seeds in a sunflower or the
shape of galaxies.
It works like this:
fibonacci(0) = 0
fibonacci(1) = 1
fibonacci(n) = fibonacci(n-1) + fibonacci(n-2)
If you evaluate the function with
0 you get 0, and if you evaluate
it with 1 you get 1.
And for any other number, n, we
produce the Fibonacci number by adding
fibonacci(n-1) to fibonacci(n-2).
RECURSION LAB
Here are a few values from the sequence:
fibonacci(0) is 0
fibonacci(1) is 1
fibonacci(2) is 1
fibonacci(3) is 2
fibonacci(4) is 3
fibonacci(5) is 5
fibonacci(6) is 8
and continuing from there... 13, 21, 34, 55, 89, 144, 233,
377, 610, 987, 1597, 2584, 4181...and so on.
In the lab we’ve developed an algorithm to compute
Fibonacci numbers. Let’s take a look:
Every number in the sequence
is computed by adding the two
Fibonacci numbers before it.
The Fibonacci sequence is related
to the Golden Ratio, which
appears often in nature and is
considered by many artists to be
related to good design.
def fibonacci(n):
if n = = 0:
return 0
elif n = = 1:
return 1
else:
return fibonacci(n-1) + fibonacci(n-2)
If n is 0 or 1, we just
return that number.
Working from the
definition above...
Otherwise, we return the sum
of the two previous Fibonacci
numbers in the sequence, by
recursively calling fibonacci.
base
case
recursive
case
Did you notice the
recursive case calls
fibonacci not once
but twice!

358 Chapter 8
testing fibonacci
Number Answer Time to compute
Fibonacci Test Data
20 6765 .002 seconds
Now it’s time to test the code. Here in the Recursion Lab we need it to be
correct and fast. To do that we’ve developed a little test code using a new
module, time, which is going to help us time our code’s execution.
import time
def fibonacci(n):
if n = = 0:
return 0
elif n = = 1:
return 1
else:
return fibonacci(n-1) + fibonacci(n-2)
for i in range(20, 55, 5):
start = time.time()
result = fibonacci(i)
end = time.time()
duration = end - start
print(i, result, duration)
As a test we’re going to compute the Fibonacci
numbers 20 through 50, counting by fives. If that
goes well, we’ll compute all 100.
Start timer.
End timer.
Compute duration.
Here’s the recursive
Fibonacci code.
Test code.
Here’s what we got
for the first test,
n=20. Your timings
may differ depending
on the speed of your
computer.
We’re also going to time each
computation of Fibonacci. To do
that we’re going to use a module
called time. See Appendix A for
more on date and time modules.
We’re going to use Python’s time module to
time our code execution; see below.
Compute the Fibonacci.
Print results.
You job is to get this code entered and to perform the test run.
When you get the data, record it below, including the value
of n, the Fibonacci number, and how long it took to compute,
in seconds. For this code to be used in production, it has to
compute the first 100 Fibonacci numbers in less than 5 seconds.
Based on this test run, would we pass?
So far it
looks nice
and fast!
Our results are on the next page;
compare them with yours!
If this program is taking too long to
execute, you can always stop it by closing
the shell window it’s running in.
you are here 4 359
functions and abstraction
Number Answer Time to compute
Fibonacci Test Data
RECURSION LAB FAIL
20 6765 0.002 seconds
25 75025 0.04 seconds
30 832040 0.4 seconds
35 9227465 4.8 seconds
40 102334155 56.7 seconds
45 1134903170 10.5 minutes
50 12586269025 1.85 hours
To meet Recusion Lab standards, this code has to compute the first 100
Fibonacci numbers in less than 5 seconds. How did you do? What? You
had lunch and they are still computing? No worries—we went ahead
and computed the results. Our numbers are below, but they don’t look
encouraging at all.
But while the execution time started very
fast, it is getting slower and slower the larger
n is. At 50 we’re taking almost 111 minutes to
compute just that one Fibonacci number!
The code is working
great in that we’re
getting the right
answers.
Uh oh. It doesn't look good. We're hoping we
could really nail this Fibonacci code so that
we could compute the first 100 numbers in
the sequence in less than 5 seconds, but our
sample test run shows the 50th number on its
own takes over an hour!
Are we doomed? What on earth is taking so
long? Give it some thought, and we'll come
back to this after learning about an interesting
data structure (maybe it will help us?).
Your own results
may vary
depending on the
speed of your
machine.
360 Chapter 8
working on your next startup
The Anti-Social Network
You’ve really started to develop some coding chops. In fact, we think you’ve got the skills to
create a prototype to launch your first startup. And we even have an idea for the startup: a new
social network. Wait, what? Oh, you’ve had quite enough of Facebook and its competitors? No
worries—actually the Anti-Social Network is just what you’ve been looking for. With the Anti-
Social Network it’s easy to communicate sentiments like “turn that smile upside down” or “if
you’re happy and you know it, then get away from me” to your network of, umm, friends.
The Anti-Social Network also has this killer feature where you can see the top anti-social user
at any time. Sounds like a billion-dollar idea to us; all you need to do is get started.
Let’s start simple: the first thing we need is to maintain a list of users. For each user we’ll store
a name and an email address.
To store a name and an email address for a set of users, let’s use what we know: let’s have
one list that holds the names, and another list that holds an email address for each name.
These are parallel lists (remember parallel lists from Chapter 4). In other words, if we store
a name at index 42 in the name list, you’ll find the matching email address at index 42 in
the email list.
Inserting new names and
addresses requires keeping
things consistent between
two lists.
We have to search the entire
list to find someone.
What if we need to add
another attribute, say, their
gender or phone number? It
gets more complex.
No issues; this totally
works.
As written, it is hard to see
how data relates to each
other because the name
and address are on two
different lists.
Deleting users requires we
keep our lists in sync.
__________________
__________________
__________________
__________________
Can you think
of more issues?
names = ['Kim', 'John', 'Josh']
emails = ['kim@oreilly.com', 'john@abc.com', 'josh@wickedlysmart.com']
Can you think of any disadvantages of this approach?
This is very similar to our approach
for storing the racing turtles’ color
and locations in the last chapter.
you are here 4 361
functions and abstraction
If only I could find a data
structure that actually allowed me to give
each item a nice memorable name without having to
deal with indices in a list. And a data structure I could
just add to without having to worry about where in
a list I’m putting it. And a data structure in which I
could look up values quickly, without having to search the
whole list. That would be dreamy. But I know it’s just a
fantasy...

362 Chapter 8
the dictionary data type
Introducing the dictionary
Meet Python’s dictionary data type. A dictionary, often called a map or an associative array (by those
computer science types), is a powerful and versatile data structure. Given its versatility, we’re
going to cover a few different ways you can use one, including using one to solve our Anti-Social
Network problems (that is, finding a better way to store and retrieve our users). Before that,
though, let’s first get acquainted with the dictionary and how it works.
The first thing to know is that, unlike Python lists, dictionaries are an unordered data type. With a
list each value is stored in order according to its index. If we want the third value in the list, we
can ask for it by its index. Dictionary items don’t have an inherent order; rather, each value stored
in a dictionary is accessed by a key. To access a value in a dictionary, we present its key.
my_dictionary = {}
my_dictionary['jenny'] = '867-5309'
Let’s see how to create a dictionary
Use two curly braces to create an empty dictionary
that is all ready to hold keys and values.
And then add items
A dictionary stores items as key/value pairs. Say we have a phone number 867-5309
that we need to store for our friend Jenny:
Here we're storing this value, a phone
number in the form of a string, under
the key ‘jenny', also a string.
And you can store any number of key/value pairs. Let’s store a few more:
my_dictionary['paul'] = '555-1201'
my_dictionary['david'] = '321-6617'
my_dictionary['jamie'] = '771-0091'
my_dictionary['paul'] = '443-0000'
And then retrieve values by their keys
To retrieve a value from a dictionary, we just use the key:
phone_number = my_dictionary['jenny']
print("Jenny's number is", phone_number)
Python 3.6.0 Shell
Jenny's number is 867-5309
>>>
We can store as many key/
value pairs as we like.
Storing a value at a key that already
exist, overwrites its previous value.
Remember, use curly braces
for dictionaries and square
brackets for lists.
you are here 4 363
functions and abstraction
if 'jenny' in my_dictionary:
print('Found her', my_dictionary['jenny'])
else:
print('I need to get her number')
So we should have
written the code to
delete an item above as:
if 'david' in my_dictionary:
del(my_dictionary['david'])
Use the in operator to check to see if
the key exists in the dictionary.
my_dictionary['age'] = 27
my_dictionary[42] = 'answer'
my_dictionary['scores'] = [92, 87, 99]
Keys and values do not have to be strings
Of course you can remove keys as well
For keys you can use numbers, strings, or Booleans. For dictionary values you can
use any valid Python value. Here are some examples:
We can have a string key and an integer value, an integer
key and a string value, a string key and a list value, and so
on, using any of Python's data types as a value.
But you might want to test to see if it exists first
Python is quite consistent in how you test to see if an item is part of a set of things
(which coders often call a collection), like a list or string, and the same holds for dictionaries.
You can test to see if a key is in a dictionary like this:
del my_dictionary['david'] This removes the key ‘david'
along with its value from
the dictionary.
Q: What happens if I try to delete a key
that doesn’t exist??
A: Python will raise a runtime exception
known as a KeyError. We’ll be talking about
how to handle exceptions later in the book,
but you can avoid them by testing to see if
the key exists first.
Q: So there’s only one of every key in
a dictionary?
A: Right. In other words, each key is
unique within a dictionary. For instance,
there is only one key 'Kim' in my_dictionary;
if you were to assign a value to that key a
second time, it would overwrite the previous
value.
Q: I can see the convenience of using
a dictionary, but I’m guessing that not
having indices is going to make things
less efficient. Am I going to have to
worry about performance when I use
dictionaries for a lot of data?
A: Remember how we promised this
chapter would be a little mind-bending?
Well, as it turns out, for many applications,
dictionaries are way more efficient than
using a list to store the same data. Hold on
to that thought; we’re going to get to it soon.
Q: Given we can use the built-in
operator del on a dictionary, can we use
len too?
A: You sure can. The len operator will tell
you the total number of keys in the dictionary.
Remember, we can use the
del statement on other
things too, like Python lists.
There are a few other types
that can act as keys as well, but
we haven’t covered them yet.
You can also use the pop
method on a dictionary,
which removes the key and
returns the value to you.
364 Chapter 8
iteration and literal syntax
You can also print a dictionary to see its literal form:
for key in my_dictionary:
print(key, ':', my_dictionary[key])
What about iterating through a dictionary?
The one thing to remember about dictionaries is they are unordered.
You can iterate through the keys, just don’t expect them to be in any
particular order.
Never count
on dictionary
order
Even if you find
the keys in your dictionary are
always in the same order, you
won’t be able to count on that
fact across different operating
systems and implementations
of Python. Just remember, if
you’re counting on the order of
a dictionary, you’re going to run
into trouble sooner or later.
As with lists and strings, use
the for/in statement to iterate
through the keys of a dictionary.
…followed by its value
in the dictionary.
Okay, but can we get literal for a sec?
As with lists, there’s also a literal notation for creating dictionaries,
which looks like this:
Python 3.6.0 Shell
jenny : 867-5309
paul : 443-0000
jamie : 771-0091
age : 27
42 : answer
scores : [92, 87, 99]
>>>
harry = {'firstname': 'Harry',
'lastname': 'Potter',
'house': 'Gryffindor',
'friends': ['Ron', 'Hermione'],
'born': 1980}
Your order may be different
and that's just fine.
print(my_dictionary)
Python 3.6.0 Shell
{'jenny': '867-5309', 'paul': '443-
0000', 'jamie': '771-0091', 'age':
27, 42: 'answer', 'scores': [92,
87, 99]}
>>>
Each key/value is separated by a colon,
and followed by a comma (except for the
final pair).
This creates a full-fledged
dictionary.
Let’s print the key…
you are here 4 365
functions and abstraction
Now that you’ve got some book
knowledge of dictionaries, it’s time
to put that knowledge to work. Work
through the code below to see what it
computes.
movies = []
movie = {}
movie['name'] = 'Forbidden Planet'
movie['year'] = 1957
movie['rating'] = '*****'
movie['year'] = 1956
movies.append(movie)
movie2 = {'name': 'I Was a Teenage Werewolf',
'year': 1957, 'rating': '****'}
movie2['rating'] = '***'
movies.append(movie2)
movies.append({'name': 'Viking Women and the Sea Serpent',
'year': 1957,
'rating': '**'})
movies.append({'name': 'Vertigo',
'year': 1958,
'rating': '*****'})
print('Head First Movie Recommendations')
print('--------------------------------')
for movie in movies:
if len(movie['rating']) >= 4:
print(movie['name'], '(' + movie['rating'] + ')', movie['year'])
List
Dictionary
366 Chapter 8
applying dictionaries to the anti-social network
Leveraging dictionaries at the Anti-Social Network
Having read the last few pages, you know 95% of everything there is to know
about using Python dictionaries, except, well, how to actually use them. Sure, you
can store and retrieve values, but there has to be more to it than that, right? Yes,
simplicity can be deceptive. Let’s look at how you might use dictionaries at the
Anti-Social Network.
Recall that when we last left off, we needed to store a set of names with email
addresses. We started by using two lists, which turned out to be rather clumsy
because adding new names required adding to both lists, as did deleting names;
looking up a name meant we had to search over the entire list; and adding more
properties, like say the user’s gender, was going to require an entirely new list to
manage. Yuck. Well, let’s see if we can do better with dictionaries.
names = ['Kim', 'John', 'Josh']
emails = ['kim@oreilly.com', 'john@abc.com', 'josh@wickedlysmart.com']
Let’s see if a dictionary can help us.
Here are some users and their
emails stored in two lists.
users = {'Kim' : 'kim@oreilly.com',
'John': 'john@abc.com',
'Josh': 'josh@wickedlysmart.com'}
Well, that is certainly
more readable!
What about adding new users, or removing them?
users['Avary'] = 'avary@gmail.com'
del users['John']
Okay, that was easy—no worrying
about having two lists to keep in sync.
Adding
Removing
What about quickly getting a user’s email address? Let’s say
we’re after Josh’s email address:
if 'Josh' in users:
print("Josh's email address is:", users['Josh'])
Python 3.6.0 Shell
Josh's email address is: josh@wickedlysmart.com
>>>
Let's first check to make sure the
key ‘Josh' exists, and if it does, we
grab the email address.

you are here 4 367
functions and abstraction
I’ve gotta admit, from a coding
perspective this is so much nicer than
dealing with two lists. But is this really as
efficient as using explicit indices?
The dictionary is more efficient, by a long shot.
To understand why, you have to understand how dictionaries
actually work behind the scenes. Let’s start with a list as an
example: if you looked up “Josh” in a list of users, you’d have to
go through every single user in the list until you found Josh. In the
worst case, that means you’d have to go through the entire list.
Dictionaries use a data structure behind the scenes that’s known as
a hash map. With a hash map the dictionary stores all the values in a
list or array-like data structure, but it uses a special function, known
as a hash function, to compute where the value is in that list, based
on the key. So, rather than brute-force searching the entire list, a
dictionary, by way of the hash function, can go right to the index
where the value is located. Lucky for you, the dictionary does all
this for you.
Now hash functions aren’t perfect, and sometimes multiple values
may be mapped to one location (the dictionary knows how to deal
with this case), but this isn’t likely to happen often, so the average
time to look up a value based on a key is constant time (you can think
of constant time as the time it takes to perform a single operation).
So, when searching for keys, dictionaries are blindingly fast.
A computer
science term
368 Chapter 8
dictionaries within dictionaries
But how do we add more attributes?
Managing the Anti-Social Network usernames and email addresses with a
dictionary seems like a real win, but remember we also wanted to potentially add
some attributes, like a user’s gender. Now, we know if we’re using parallel lists then
we’d need another list to hold the genders, but with dictionaries, don’t we need to
use another dictionary too? Something like:
email = {'Kim' : 'kim@oreilly.com',
'John': 'john@abc.com',
'Josh': 'josh@wickedlysmart.com'}
genders = {'Kim' : 'f',
'John': 'm',
'Josh': 'm'}
Sure, that would work, but then we’re back to managing two data structures—
that’s obviously not what we want. To solve this problem, we need to think a little
deeper about how to use dictionaries. What if we use a dictionary to hold all the
attributes for each user, like this:
We could do it this way, but now
we’re back to managing two data
structures anytime we add, delete,
or look up a user. Yuck again.
attributes = {
'email' : 'kim@oreilly.com',
'gender': 'f',
'age': 27,
'friends': ['John', 'Josh']
}
Here's a dictionary holding the
attributes for Kim. We can create a
dictionary like this for every user.
With this new scheme, let’s start over, create a brand new users dictionary, and
store Kim’s attributes:
users = {}
users['Kim'] = attributes
Let’s add John and Josh too:
users['John'] = {'email' : 'john@abc.com','gender': 'm', 'age': 24, 'friends': ['Kim', 'Josh']}
users['Josh'] = {'email' : 'josh@wickedlysmart.com','gender': 'm', 'age': 32, 'friends': ['Kim']}
We’re assigning dictionaries to the keys
‘John’ and ‘Josh’. We’re specifying those
dictionaries with the literal syntax.
We're setting the users
variable to an empty
dictionary, and then adding
the attributes dictionary
under the key ‘Kim'.
Notice we’ve added a new list to each
user as well, a list of friends. This will
play into our killer feature.
Don’t move too quickly and
overlook what is going on in
this code. We’re making the
value of the ‘Kim’ key another
dictionary, the attributes
dictionary.
Same here: don’t move too quickly
and overlook what is going on in this
code. We’re assigning dictionaries to
‘John’ and ‘Josh’ as well.

you are here 4 369
functions and abstraction
Dictionaries in dictionaries—it’s a
common arrangement. See how it plays
out at the cinema by using your brain to
execute the code below.
movies = {}
movie = {}
movie['name'] = 'Forbidden Planet'
movie['year'] = 1957
movie['rating'] = '*****'
movie['year'] = 1956
movies['Forbidden Planet'] = movie
movie2 = {'name': 'I Was a Teenage Werewolf',
'year': 1957, 'rating': '****'}
movie2['rating'] = '***'
movies[movie2['name']] = movie2
movies['Viking Women and the Sea Serpent'] = {'name': 'Viking Women and the Sea Serpent',
'year': 1957,
'rating': '**'}
movies['Vertigo'] = {'name': 'Vertigo',
'year': 1958,
'rating': '*****'}
print('Head First Movie Recommendations')
print('--------------------------------')
for name in movies:
movie = movies[name]
if len(movie['rating']) >= 4:
print(movie['name'], '(' + movie['rating'] + ')', movie['year'])
print('Head First Movie Staff Pick')
print('---------------------------')
movie = movies['I Was a Teenage Werewolf']
print(movie['name'], '(' + movie['rating'] + ')', movie['year'])
370 Chapter 8
implementing the killer feature
users = {}
users['Kim'] = {'email' : 'kim@oreilly.com','gender': 'f', 'age': 27, 'friends': ['John', 'Josh']}
users['John'] = {'email' : 'john@abc.com','gender': 'm', 'age': 24, 'friends': ['Kim', 'Josh']}
users['Josh'] = {'email' : 'josh@wickedlysmart.com','gender': 'm', 'age': 32, 'friends': ['Kim']}
average_age('Kim')
average_age('John')
average_age('Josh')
Now that we know how we’re going to store our users on the Anti-Social Network, it’s
time to write a little code. Let’s create a function we might need for the startup, called
average_age, that takes a name and returns the average age of that user’s friends.
We’re letting you tackle this on your own—after all, it is Chapter 8—although don’t
forget to write some some pseudocode or do similar planning, as it goes a long ways
toward writing correct code the first time.
Write your
average_age
function here.
Python 3.6.0 Shell
Kim’s friends have an average age of 28.0
John’s friends have an average age of 29.5
Josh’s friends have an average age of 27.0
>>>
Remember the Anti-Social
Network’s killer feature?
You didn’t forget, did you? It’s going to be the crucial feature to demo
when raising your seed round of investor cash. The killer feature for the
Anti-Social Network is finding the least social person at any time—that is,
the user with the fewest friends. All we need to do is write the code.
So let’s take stock: we’ve got a dictionary of users, and each entry in that
dictionary consists of a key, which is the user’s name, and a value, which
is another dictionary full of the user’s attributes. One of those attributes
is a list of friends. So, we’re going to have to iterate through all the users
and keep track of who has the least friends. Let’s give it a shot.
Who will it be?
Here’s the
output you
should get with
this test code.
Brain Building
you are here 4 371
functions and abstraction
1Set max to large number
2For each name in users
AGet the user attribute
dictionary.
BGet the list of friends from
the attribute dictionary.
3Print user with key most_anti_social
CIf number of friends is less
than max
iset variable most_anti_
social to name.
Finding the most anti-social user
The code for finding the most anti-social user isn’t going to be the most complex we’ve written, but
let’s just hash it out in a little pseudocode so we have a clear picture of what we’re doing:
We’re going to create a variable to hold the
current most anti-social count. We’ll call it max
and initialize it to something large for starters.
Iterate through every key in
the users dictionary.
For each user, grab the dictionary of attributes
associated with the name.
Use the ‘friends’ key to grab the list of friends.
If the number of friends is less than any we’ve seen so far
(max), then that’s our current least candidate.
Set a variable most_anti_social to the name…
When we’ve been through all the keys in names, we then
have the most_anti_social user. Let’s print it, and so on.
max = 1000
for name in ___________:
user = ______[________]
friends = user[_________]
if len(_________) < max:
most_anti_social = _______
max = len(________)
print('The most_anti_social user is', __________________)
Now that we have some pseudocode, use your new knowledge of dictionaries to
complete this code. After that we’ll get it running.
ii set variable max to number of
friends
…and max to the new number of friends.
372 Chapter 8
testing the anti-social network
Let’s get this code in and test it (it's been a few pages since we ran real code).
Put the code below in a file called antisocial.py. Give it a run, and double-check
your output.
A Test Drive
Python 3.6.0 Shell
The most_anti_social user is Josh
>>>
users = {}
users['Kim'] = {'email' : 'kim@oreilly.com','gender': 'f', 'age': 27, 'friends': ['John', 'Josh']}
users['John'] = {'email' : 'john@abc.com','gender': 'm', 'age': 24, 'friends': ['Kim', 'Josh']}
users['Josh'] = {'email' : 'josh@wickedlysmart.com','gender': 'm', 'age': 32, 'friends': ['Kim']}
max = 1000
for name in users:
user = users[name]
friends = user['friends']
if len(friends) < max:
most_anti_social = name
max = len(friends)
print('The most_anti_social user is', most_anti_social)
That Josh!
Now, it’s all you!
That’s about as far as we’re going to take the Anti-Social Network because we
think you’re in a good position to take it forward on your own. The idea and
the code are yours, so run with it and send us a postcard when you’re rich and
famous (although maybe postcard is a little too social for the founders of the
Anti-Social Network).
We’re not quite done with dictionaries, though, as we’ve got another hoop we’re
going to make them jump through...
you are here 4 373
functions and abstraction
RECURSION LAB
We last left the Recursion Lab in a bit of a demoralized state. While we
needed to compute the first 100 Fibonacci numbers in less than 5 seconds,
it took us much longer. So long, in fact, that the 50th alone took over an
hour. Given that, is there any hope? Of course.
But we can’t make progress if we don’t figure out why our computation is
so slow. Let’s start by looking at the recursive calls that are made when we
compute, say, fibonacci(50):
Meanwhile, back at the...
fibonacci(50)
fibonacci(49) fibonacci(48)
fibonacci(48) fibonacci(47) fibonacci(47) fibonacci(46)
fibonacci(46) fibonacci(45) fibonacci(45) fibonacci(44)fibonacci(47) fibonacci(46) fibonacci(46) fibonacci(45)
To compute fibonacci(50), we need to
compute fibonacci(49) and fibonacci(48).
But computing fibonacci of
49 itself has to compute
fibonacci(48) too.
And notice at each level of
recursion, we’re computing the
same Fibonacci numbers over
and over!
We stopped here,
but obviously we
could have gone
on and on...
So while our code is logically correct and clear, it is very inefficient. For
any number, the algorithm has to compute all the Fibonacci numbers
less than that number. That leads to a lot of unnecessary computation
because we’re repeatedly computing the same Fibonacci numbers
over and over again. Every time we need fibonacci(5), we have to
recompute fibonacci(4), fibonacci(3), and fibonacci(2) as
well.
By only the third level of our
graph we’re computing 48
twice, 47 three times, 46
four times, 45 three times,
and it’s only going to get
worse.
374 Chapter 8
understanding fibonacci’s inefficiency
We’re computing the same Fibonacci numbers over and over
again. Without drastically changing the code, think about how we
might make this code way more efficient. Put your ideas here.
Try drawing a graph of all the function calls it takes to compute fibonacci(7). When
you’re done, total up how many duplicated calls you find for each value 0 through 7.
fibonacci(7)
fibonacci(6) fibonacci(5)
fibonacci(7): _____ fibonacci(6): _____ fibonacci(5): _____
fibonacci(4): _____ fibonacci(3): _____ fibonacci(2): _____
fibonacci(1): _____ fibonacci(0): _____
1 time 1 time
Put your totals here. We’ve
already filled in the answer to
fibonacci(7), which is called
one time, as is fibonacci(6).
Any guess how many times fibonacci(50) has to compute fibonacci(3)? ___________
Warning: you may find
the answer shocking.
you are here 4 375
functions and abstraction
If only there was a way
to store previous function call results
so that if the function gets called with
the same value again, we just remember
its previous result rather than having to
recompute it every time. I know it’s just
a fantasy...

376 Chapter 8
remembering the results of function calls
Can we just remember function call results?
It’s not a bad idea. So, for instance, if bonacci is called with the argument 49,
the result is computed and stored, so the next time bonacci is called with 49, the
function can look up the result, rather than recomputing it.
With the Fibonacci code recomputing so many function calls, if we could just store
the results rather than recomputing them, we’d probably shave a lot of time off the
execution. But can we really save hours of computation time? We shall see.
So what would we need to store the results of the calls to the bonacci function?
We need a way to store the value of the n argument, and also the result that
gets computed for fibonacci(n). Oh, and we’d need to be able to access the
computed result quickly, for a given value of n.
Any ideas? Is this sounding familiar?
Using a dictionary to remember our Fibonacci results
Does this sound like a job made for a dictionary? Let’s take a look at how it might
work.
1Create a dictionary, and name it cache.
2Every time bonacci is called with a number n:
ACheck if there is a key, n, in the cache.
iIf so, return the value of key n.
BOtherwise, compute the Fibonacci number of n.
A cache is a common name
for a place to store data you
need quick access to.
CStore the result in the cache under the key n.
DReturn the value of the Fibonacci number.
So each time the Fibonacci code function is called with a value n, we first check
our dictionary, cache, to see if a key n is already in the cache. If it is, great, that’s
the Fibonacci number for n, so just return it as the result of calling the function.
If not, we compute the Fibonacci number as we always do, but before we return
the result, we first stash it in the cache for the key n.
you are here 4 377
functions and abstraction
We might as well use the $5 words: memoization
If you thought we just made up this brilliant idea of storing function call results, well, we
wish we did, but we didn’t. In fact, it’s a simple but powerful technique called memoization.
Memoization can be thought of as a way to optimize a program by storing the results
of expensive function calls. What’s expensive? Well, how much you got? Just kidding. In
computer science terms, expensive typically means a computation takes a lot of time or
consumes a lot of space (typically memory). Whether you’re trying to optimize time or
space really depends on what your code does, but in our case it’s mostly time we’re trying to
optimize.
So how does memoization work? You already know, becasue the pseudocode we wrote on
the previous page is an implementation of memoization.
To understand it better, let’s rework our existing code using the pseudocode as a guide.
Doing so is pretty straightforward:
import time
cache = {}
def fibonacci(n):
global cache
if n in cache:
return cache[n]
if n == 0:
result = 0
elif n == 1:
result = 1
else:
result = fibonacci(n-1) + fibonacci(n-2)
cache[n] = result
return result
start = time.time()
for i in range(0, 101):
result = fibonacci(i)
print(i, result)
finish = time.time()
duration = finish - start
print('Computed all 100 in', duration, 'seconds')
Here’s the dictionary we’re
going to use as a cache.
Now the first thing we do is check to see if n is a
key in the cache dictionary. If it is, then we return
the value stored for that key.
Now rather than returning immediately if n equals 0 or 1, we
assign n to a local variable named result.
If we end up recursively computing
the result, we then assign that to the
result local variable as well.
Before we return the result, we
store it in the cache under the key n.
Remember in Python a dictionary key
can be any value, including integers.
We must be confident because we’ve changed the
timing code to capture the duration of computing
the entire first 100 Fibonacci numbers.

378 Chapter 8
testing the optimized fibonacci
RECURSION LAB Success
What are you waiting for? Are you skeptical a couple lines of code using a
dictionary could cut hours of computation down to less than 5 seconds?
Well, get these code updates made and give it a run!
Python 3.6.0 Shell
46 1836311903
47 2971215073
48 4807526976
49 7778742049
50 12586269025
51 20365011074
52 32951280099
53 53316291173
54 86267571272
55 139583862445
56 225851433717
57 365435296162
58 591286729879
59 956722026041
60 1548008755920
61 2504730781961
62 4052739537881
63 6557470319842
64 10610209857723
65 17167680177565
66 27777890035288
67 44945570212853
68 72723460248141
69 117669030460994
70 190392490709135
71 308061521170129
72 498454011879264
73 806515533049393
74 1304969544928657
75 2111485077978050
76 3416454622906707
77 5527939700884757
78 8944394323791464
79 14472334024676221
80 23416728348467685
81 37889062373143906
82 61305790721611591
83 99194853094755497
84 160500643816367088
85 259695496911122585
86 420196140727489673
87 679891637638612258
88 1100087778366101931
89 1779979416004714189
90 2880067194370816120
91 4660046610375530309
92 7540113804746346429
93 12200160415121876738
94 19740274219868223167
95 31940434634990099905
96 51680708854858323072
97 83621143489848422977
98 135301852344706746049
99 218922995834555169026
100 354224848179261915075
Computed all 100 in 0.0005749298095703125 seconds
>>>
Impressive! You got
it computed in way
under 1 second!
Optimizing your
code can affect its
runtime behavior in a
HUGE way.
you are here 4 379
functions and abstraction
Some more brain building
Hopefully this has been the mind-bending chapter we promised, but before you
go we wanted to show you that recursive code isn’t just for computing Fibonacci
numbers and palindromes. In fact, we’re going to apply recursion to generating
some computer graphics, more specifically fractals. Now everyone’s familiar
with the term, but what does it actually mean? Think of a fractal as a geometry
shape that is similar at any scale. So if you zoom out and look at a fractal, you
see the same general shape as when you zoom way in. The best way to get the
feel for fractals is to make some. To do that let’s look at some code.
import turtle
def setup(pencil):
pencil.color('blue')
pencil.penup()
pencil.goto(-200,100)
pencil.pendown()
def koch(pencil, size, order):
if order == 0:
pencil.forward(size)
else:
for angle in [60, -120, 60, 0]:
koch(pencil, size/3, order-1)
pencil.left(angle)
def main():
pencil = turtle.Turtle()
setup(pencil)
order = 0
size = 400
koch(pencil, size, order)
if __name__ == '__main__':
main()
turtle.tracer(100)
turtle.mainloop()
Our turtles are back.
All this setup function does is set the turtle
(we're calling it a pencil in this code) color and
move it to a location that will make the drawing
more centered.
This is the recursive function; we'll
come back to this and study it.
The main function creates a turtle (the
pencil); defines two variables, order and
size; and then calls the recursive function,
sending it all three arguments.
About what we'd expect in this bit of
code. We call main and then make sure
the turtle mainloop is running. We also
use a function we haven't seen before,
tracer, which accelerates the speed on
the turtle.
Notice the order starts at 0, and size
starts at 400. You’ll see how these are
used in a bit.
380 Chapter 8
the koch recursive function
def koch(pencil, size, order):
if order == 0:
pencil.forward(size)
else:
for angle in [60, -120, 60, 0]:
koch(pencil, size/3, order-1)
pencil.left(angle)
Our code (on the previous page) is pretty basic: it creates a turtle, repositions
it, and sets its color. Other than that, it just calls the koch function. But what
does this koch function do? Let’s look at it again, here:
A closer look at the koch function
base
case
recursive
case
koch takes a pencil, a size, and an order.
Our base case: if order equals
0 we draw a straight line of
length size.
After each call to koch, we adjust
the angle of the turtle.
The best way to understand this
is to see some examples.
We have some abstract idea of what this function does, but we have no idea
what it really does. We do know that the order parameter seems to play a big
role. Let’s start with order equal to 0 and see what this draws. Given 0 is the
base case, it should just draw a line.
Type in the code and give it a test drive. Here’s what we got:
Otherwise, call koch four times,
passing it the size parameter divided
by three and reducing order by one.
A Test Drive
The base case, a line of 400 pixels
(because we’re passing it a size of 400)
If we increase order to 1, then we should see the recursive case used. Just
change the order local variable to 1 and test it again. A Test Drive
When order is 1, we use the recursive case in
the code. In the recursive case we draw four
segments at different angles. The drawing
is actually done calling the koch function
recursively, where for each segment koch hits
the base case and draws a line of size 400/3
We’ve pulled out the koch
function to take a look, so
for the entire context refer
to the previous page.
Niels Fabian Helge von Koch was a Swedish
mathematician who gave his name to the fractal
known as the Koch snowflake. See more at:
https://en.wikipedia.org/wiki/Helge_von_Koch.
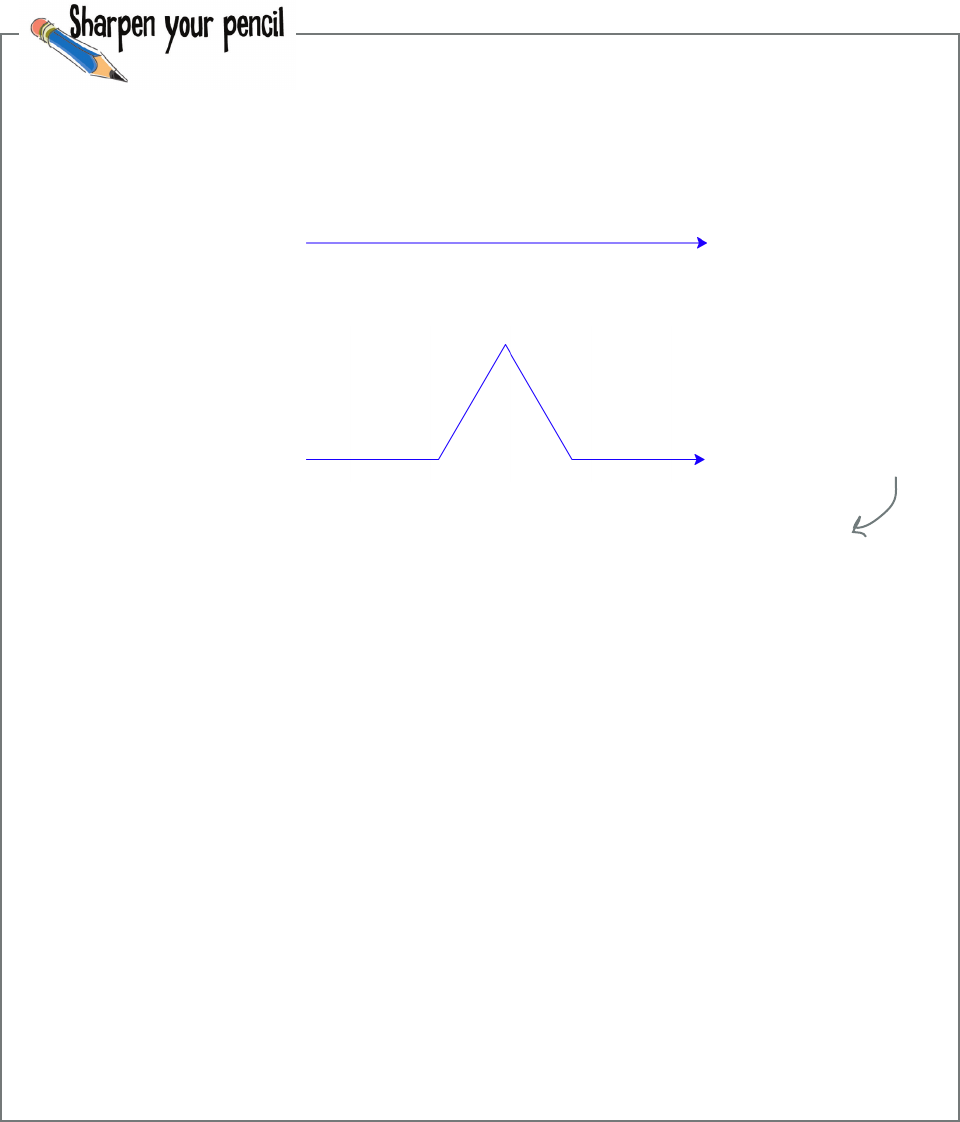
you are here 4 381
functions and abstraction
If you can see what koch does from order 0 to order 1, can you imagine what it might do
when we increase the order to 2? Or 3? Remember, at every scale a fractal is the same. See
if you can try to work out how the graphic at order 1 will change for order 2, and order 3.
We didn’t say it was easy to think about, but it’s great brain building.
Order 1:
Order 0:
Order 2:
Draw your best
guesses here.
Order 3:
Hint: look at what
happened between
order 0 and 1.
What if you did
that to each small
segment of order 1
to get order 2?
Hint: can you take
that one step
further on order 3?
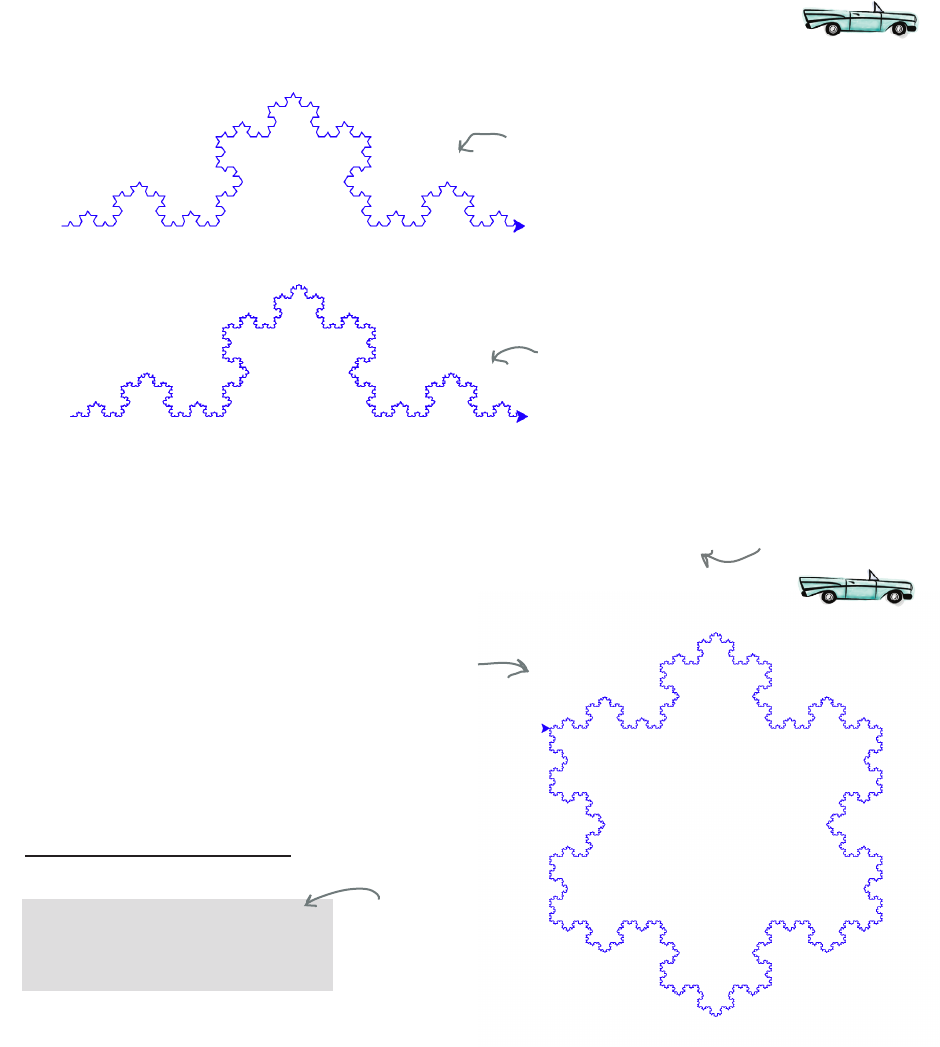
382 Chapter 8
creating a snowflake with koch
Order 5
Did that exercise help you think a little more recursively, or fractally? Let’s take
this all the way and run the code at orders 4 and 5. Go ahead and change your
order and do a test drive for each.
Truly exploring the koch fractal
A Test Drive
Order 4
def main():
pencil = turtle.Turtle()
setup(pencil)
turtle.tracer(100)
order = 5
size = 400
koch(pencil, size, order)
for i in range(3):
koch(pencil, size, order)
pencil.right(120)
Here’s one last tweak for you. Edit your main function to call the koch function three
times, rotating 120 degrees between each call.
They don’t call it the Koch snowflake for nothin’
Call koch three
times, and rotate
120 degrees in
between.
A Test Drive
Not bad for a
six-line recursive
function. That’s a
superpower!
Learn more about the
Koch snowflake at
https://en.wikipedia.org/
wiki/Koch_snowflake.
you are here 4 383
functions and abstraction
Iteration and recursion can both be
used to solve problems.
Recursion denes a solution in terms
of itself.
Recursion typically consists of a base
case and a recursive case.
With the recursive case we make the
problem a little smaller and then make
a recursive function call.
Programming languages handle
recursive calls by putting parameters
and local variables on a call stack.
Recursion can sometimes lead to
problems with the size of the call stack
growing too large.
Some solutions are more natural using
a recursive style, and some solutions
are more natural with iteration.
For some problems recursion can
produce very clear and straightforward
solutions.
Python dictionaries are a type of
associative array or map.
Dictionaries store key/value pairs.
In Python, dictionary keys can be
strings, numbers, or Booleans;
dictionary values can be any type of
Python value.
Keys within a dictionary are unique.
Assigning a value to an existing key
overwrites the previous value.
You can programmatically create
dictionaries or specify them with a
literal syntax.
Keys and their associated values may
be deleted from a dictionary.
Key lookup in a dictionary happens in
constant time.
Dictionaries can be used with
memoization as an optimization
technique.
Memoization is a technique used to
remember previous function calls.
By not recomputing expensive function
calls, we can sometimes signicantly
speed up computations.
Fractals are shapes that have similar
structure at every scale.
With that we’ll leave you to ponder the
power of recursion and fractals, not
to mention dictionaries. Great job—
you’ve done some mind bending and
growing in this chapter. Now it’s time to
go let your brain do something else for
a while, but only after the bullets and
crossword.

384 Chapter 8
coding crossword
Coding cross
Don’t worry: it’s not a recursive crossword,
just a normal one.
1 2 3 4
5
6 7
8
9
10
11
12 13
14
15
16
17
Across
1. And another name for a dictionary.
4. Snowflake.
5. Functions calling themselves.
6. Another name for dictionary.
8. Just typing a dictionary in.
9. Shape same at every level of scale.
10. Our idea is this kind of social.
11. Keys are this.
12. Makes a dictionary lookup fast.
14. Tacocat is one.
15. Easiest case.
16. Call stack is made up of.
17. Computes a sequence seen in nature.
Down
2. Dictionaries store key/value _____.
3. Remembering function calls.
4. Used to look up a value.
7. Alternative to recursion.
11. Dictionaries are ________.
13. Parameters are stored on it.
.
you are here 4 385
functions and abstraction
Forget recursion for a bit, and think through how you might write a function to
check if a word is a palindrome. Do that using the skills you learned in Chapters 1
through 7. Write some simple pseudocode to summarize your thoughts. Or, if you
just had that cup of java and feel like writing some code, don’t let us get in your
way.
tacocat
In general we’d want to compare the
outside characters and move inward until
we find a character that doesn’t match,
or if we get to the middle and they all
match, then we have a palindrome.
We could have an index called i
that starts at position 0…
…and another called j
that starts at the end.
def is_palindrome(word):
i = 0
j = len(word) - 1
while i < j:
if word[i] != word[j]:
return False
i = i + 1
j = j - 1
return True
Study this until you’ve convinced yourself it works.
is_palindrome(word):
set i to 0
set j to length of word (minus 1)
while i < j:
if characters at i and j are not equal then return False
increment i
decrement j
if the loop completes, return True
We start at each end of
the word and compare
pairs of letters from the
outside in.
If at any point our outer
characters aren’t equal,
then the word is not a
palindrome.
When i >= j, then we’ve reached the middle of
the string and we’ve compared everything.
This probably works great, but
it requires a lot of thinking
about indices. It’s also not the
clearest code in the world. We
can probably do better.
Okay, we just had to
write the code. Did you?

386 Chapter 8
exercise solution
Try evaluting some recursive code yourself. How about using our
recursive_compute_sum function?
def recursive_compute_sum(list):
if len(list) == 0:
return 0
else:
first = list[0]
rest = list[1:]
sum = first + recursive_compute_sum(rest)
return sum
recursive_compute_sum([1, 2, 3])
recursive_compute_sum([1, 2, 3])
frame 1
list = [1, 2, 3]
first = 1
rest = [2, 3]
recursive_compute_sum([2, 3])
frame 1
list = [1, 2, 3]
first = 1
rest = [2, 3]
frame 2
list = [2, 3]
first = 2
rest = [3]
recursive_compute_sum([3])
frame 1
list = [1, 2, 3]
first = 1
rest = [2, 3]
frame 2
list = [2, 3]
first = 2
rest = [3]
frame 3
list = [3]
first = 3
rest = []
Here’s the code again.
And here we’re calling
the function.
We did the first one for you. The
parameter list is bound to the list
[1,2,3] and then the local variables
first and rest get computed and
added to the frame.
Now we’re recursing by calling
recursive_compute_sum again, so we
add a new frame and add list as a
parameter. This time it has the value
[2, 3].
Like before, we have to compute first
and rest.
Again, we’re recursing by calling
recursive_compute_sum, so we add
a third frame and add list as a
parameter. This time it has the value
[3].
Like before, we have to compute first
and rest.
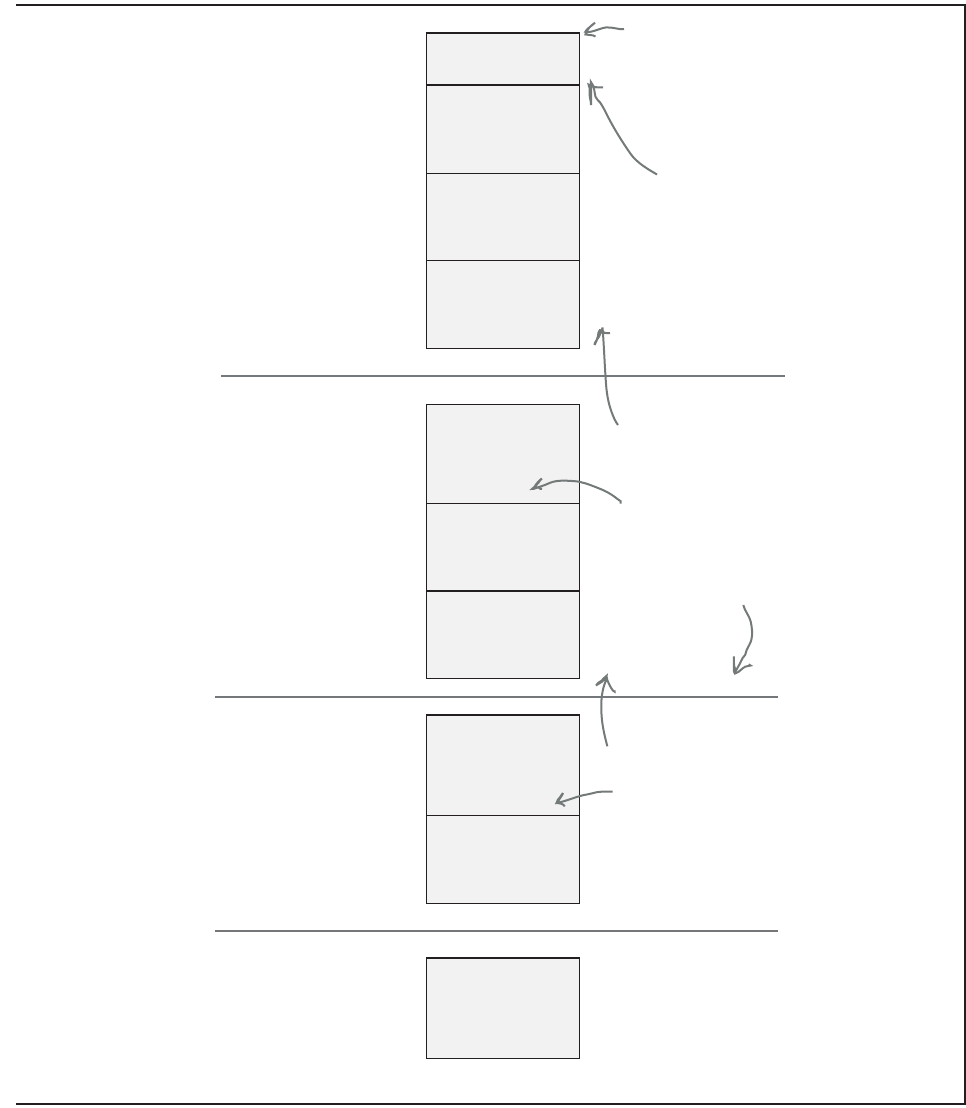
you are here 4 387
functions and abstraction
recursive_compute_sum([])
frame 1
list = [1, 2, 3]
first = 1
rest = [2, 3]
frame 2
list = [2, 3]
first = 2
rest = [3]
frame 3
list = [3]
first = 3
rest = []
frame 4
list = []
frame 1
list = [1, 2, 3]
first = 1
rest = [2, 3]
frame 2
list = [2, 3]
first = 2
rest = [3]
frame 3
list = [3]
first = 3
rest = []
sum = 3
frame 1
list = [1, 2, 3]
first = 1
rest = [2, 3]
frame 2
list = [2, 3]
first = 2
rest = [3]
sum = 5
frame 1
list = [1, 2, 3]
first = 1
rest = [2, 3]
sum = 6
recursive_compute_sum([3])
recursive_compute_sum([2, 3])
recursive_compute_sum([1, 2, 3])
This will be our last time calling
recursive_compute_sum. We’ll hit our
base case because list is the empty list.
The function just returns, so we never
compute first or rest.
In the last step we hit the base case
and returned 0. So we pop that frame
off the stack.
Our code takes this and adds it to
first and then stores the result in sum.
Our code then returns the value of sum.
In the last step the value 3 was
returned, so that is added to first,
which is 2 and stored in sum.
We then return the sum of 5 and the
stack is popped again.
Finally we get back the value 5 and
add it to first, which is 1, resulting
in 6, so the stack is popped and 6
is returned as the result of calling
recursive_compute_sum([1, 2, 3]).
388 Chapter 8
exercise solution
Now that you’ve got some book
knowledge of dictionaries, it’s time
to put that knowledge to work. Work
through the code below to see what it
computes.
Python 3.6.0 Shell
Head First Movie Recommendations
--------------------------------
Forbidden Planet (*****) 1956
Vertigo (*****) 1958
>>>
Is this what you got?
Dictionaries in dictionaries—it’s a
common arrangement. See how it plays
out at the cinema by using your brain to
execute the code below.
Python 3.6.0 Shell
Head First Movie Recommendations
--------------------------------
Forbidden Planet (*****) 1956
Vertigo (*****) 1958
Head First Movie Staff Pick
---------------------------
I Was a Teenage Werewolf (***) 1957
>>>
A little trickier with
two dictionaries?
you are here 4 389
functions and abstraction
users = {}
users['Kim'] = {'email' : 'kim@oreilly.com','gender': 'f', 'age': 27, 'friends': ['John', 'Josh']}
users['John'] = {'email' : 'john@abc.com','gender': 'm', 'age': 24, 'friends': ['Kim', 'Josh']}
users['Josh'] = {'email' : 'josh@wickedlysmart.com','gender': 'm', 'age': 32, 'friends': ['Kim']}
def average_age(username):
global users
user = users[username]
friends = user['friends']
sum = 0
for name in friends:
friend = users[name]
sum = sum + friend['age']
average = sum/len(friends)
print(username + "'s friends have an average age of", average)
average_age('Kim')
average_age('John')
average_age('Josh')
Now that we know how we’re going to store our users on the Anti-Social
Network, it’s time to write a little code. Let’s create a function we might
need for the startup, called average_age, that takes a name and returns
the average age of that user’s friends.
Brain Building Solution
Python 3.6.0 Shell
Kim’s friends have an average age of 28.0
John’s friends have an average age of 29.5
Josh’s friends have an average age of 27.0
>>>
Here’s the
output you
should get with
this test code.
Here’s our function, which takes a
username in the form of a string.
Let’s grab the user’s attributes
dictionary from the users dictionary.
And then let’s grab the friends list
from the user’s attributes dictionary.
Here’s a local variable to keep track of
the sum of the friend’s ages.
Now we need to take the friend’s name and
grab their attributes dictionary out of the
users dictionary.
And then we can get their age from the attributes
dictionary. Here we add it to the sum.
With the ages totaled up, let’s compute the
average…
…and print the result.
And here’s our test code again.
Now let’s iterate through all the friends.
390 Chapter 8
exercise solution
fibonacci(7): _____ fibonacci(6): _____ fibonacci(5): _____
fibonacci(4): _____ fibonacci(3): _____ fibonacci(2): _____
fibonacci(1): _____ fibonacci(0): _____
1 time 1 time
2 times
3 times 5 times 8 times
8 times13 times
fibonacci(0)fibonacci(1)
fibonacci(0)fibonacci(1)
fibonacci(7)
fibonacci(6) fibonacci(5)
fibonacci(5) fibonacci(4) fibonacci(3)fibonacci(4)
fibonacci(3)fibonacci(4) fibonacci(2)fibonacci(3) fibonacci(2)fibonacci(3) fibonacci(1)fibonacci(2)
fibonacci(2)fibonacci(3) fibonacci(1)fibonacci(2)
fibonacci(1)fibonacci(2) fibonacci(0)fibonacci(1) fibonacci(1)fibonacci(2) fibonacci(0)fibonacci(1)
fibonacci(0)fibonacci(1)
fibonacci(1)fibonacci(2) fibonacci(0)fibonacci(1) fibonacci(0)fibonacci(1)fibonacci(0)fibonacci(1)
Put your totals here. We’ve
already filled in the answer to
fibonacci(7), which is called
one time, as is fibonacci(6).
max = 1000
for name in ___________:
user = ______[________]
friends = user[_________]
if len(_________) < max:
most_anti_social = _______
max = len(________)
print('The most_anti_social user is', ________________)
Now that we have some pseudocode, use your new knowledge of dictionaries to
complete this code. After that we’ll get it running.
users
users name
'f r ie nds'
friends
name
friends
most_anti_social
Try drawing a graph of all the function calls it takes to compute fibonacci(7). When
you’re done, total up how many duplicated calls you find for each value 0 through 7.
Any guess how many times fibonacci(50) has to compute fibonacci(3)? _________________
4,807,526,976 times
Okay, that
is shocking!

you are here 4 391
functions and abstraction
Order 1:
Order 0:
Order 2:
In this step we drew
a shape like this…
…to each side (there
was only one side).
Order 3:
Same thing; for
each straight side in
the previous round,
we added another.
And as the sides
get smaller, we keep
adding…
…reducing the scale
each time.
If you can see what koch does from order 0 to order 1, can you imagine what
it might do when we increase the order to 2? Or 3? Remember, at every scale a
fractal is the same. See if you can try to work out how the graphic at order 1 will
change for order 2, and order 3. We didn’t say it was easy to think about, but it’s
great brain building.
392 Chapter 8
exercise solution
Coding
Cross
Solution
M
1A P
2M
3K
4O C H
A R
5E C U R S I V E
I M Y
R O
A
6S S O C I A T I
7VEARRAY
Z T
L
8I T E R A L E
T F
9R A C T A L
A
10 N T I A
O T U
11 N I Q U E
H
12 A S H F U N C
13 T I O N
A O O
P
14 A L I N D R O M E
L D
B
15 ASECASE E
T F
16 R A M E S
A E
F
17 I B O N A C C I D
K
Across
1. And another name for a dictionary. [MAP]
4. Snowflake. [KOCH]
5. Functions calling themselves. [RECURSIVE]
6. Another name for dictionary.
[ASSOCIATIVEARRAY]
8. Just typing a dictionary in. [LITERAL]
9. Shape same at every level of scale.
[FRACTAL]
10. Our idea is this kind of social. [ANTI]
11. Keys are this. [UNIQUE]
12. Makes a dictionary lookup fast.
[HASHFUNCTION]
14. Tacocat is one. [PALINDROME]
15. Easiest case. [BASECASE]
16. Call stack is made up of. [FRAMES]
Down
2. Dictionaries store key/value _____. [PAIRS]
3. Remembering function calls.
[MEMOIZATION]
4. Used to look up a value. [KEY]
7. Alternative to recursion. [ITERATION]
11. Dictionaries are ________. [UNORDERED]
13. Parameters are stored on it. [CALLSTACK]
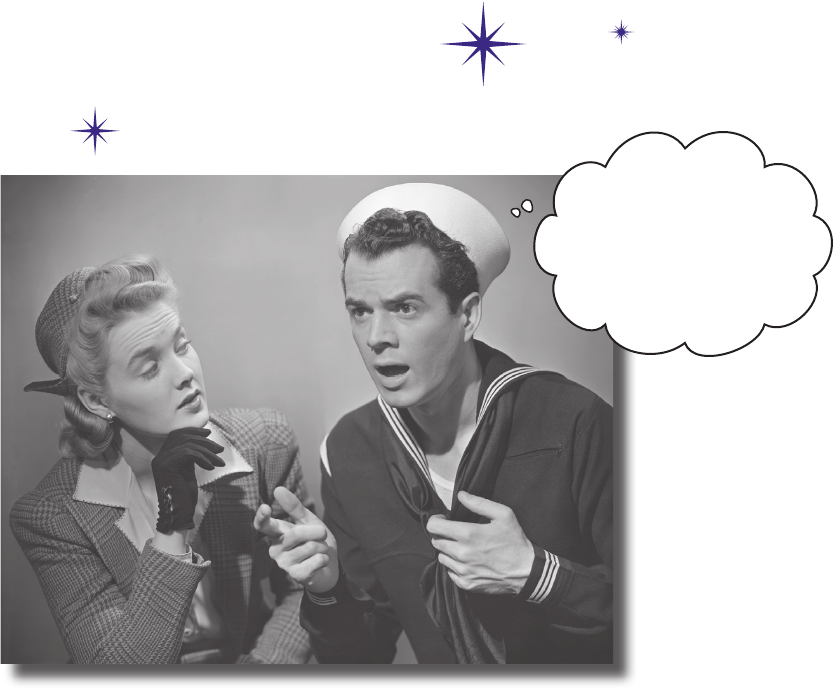
this is a new chapter 393
saving and retrieving files
9
Persistence
You know you can save values in variables, but once
your program ends poof!—they’re gone forever. That’s
where persistent storage comes in—storage that allows your values and data to
stick around a while. Most of the devices you’re going to run Python on also have
persisistent storage, like hard drives and flash cards, or they may have access to
storage in the cloud as well. In this chapter you’ll see how to write code to store
and retrieve data from files. What good is that? Oh, anytime you want to save a
user’s configuration, store the results of your big analysis for the boss, read an
image into your code to process it, write some code to search a decade’s worth
of email messages, reformat some data to be used in your spreadsheet app—we
could go on and on, but we should probably start the chapter now.
He was right
behind me and then
poof!—he was gone.
If we’d only saved him
out to storage before
everything ended.

394 Chapter 9
the crazy libs game
No, that’s not a political statement! We’re being serious here. We’re talking about
creating our own version of a game that is in the spirit of the popular Mad
Libs™ games—we’ll call our version Crazy Libs.
If you didn’t play a Mad Libs–style game as a kid, here’s how it works:
Ready for some Crazy Libs?
Crazy Libs
The first thing that stands between you and _______________ your
first, real, piece of ________, is _______________ the skill of
breaking problems down into achievable _______ actions that a
____________ can do for you. Of course, you and the computer will
also need to be _________________ a common ___________, but
we’ll get to that topic in just a bit.
NOUN
VERB ENDING IN ‘ING’
NOUN
ADJECTIVE
VERB ENDING IN 'ING'
VERB ENDING IN 'ING' NOUN
The text from the
first paragraph of
Chapter 1
Ask a friend to give you a word for
each blank noun, verb, and adjective,
but don’t show your friend the story.
Read the story back to your friend,
adding in your friend’s words.
Hilarity ensues.
3
1
2
How to Play
You can create a Crazy Lib
from any text story you
want. We used some text we
just had lying around.
To create a Crazy Lib, just
remove arbitrary words and
replace them with blanks
that indicate their parts of
speech (noun, verb, etc.).

you are here 4 395
saving and retrieving files
So, “The first thing that stands
between you and buying your first real piece of
pudding is forgetting the skill of breaking problems down
into achievable crazy actions that a monkey can do for you. Of
course, you and the computer will also need to be eating a common
pizza, but we’ll get to that topic in just a bit.”
Nice!
Okay, I’m going with
VERB ENDING IN ING: buying, NOUN:
pudding, VERB ENDING IN ING: forgetting,
ADJECTIVE: crazy, NOUN: monkey, VERB
ENDING IN ING: eating, NOUN: pizza.
396 Chapter 9
how the game works
To turn Crazy Libs into a computer game, we’re going to have the computer
retrieve a story stored in a text file, prompt the user for all the missing words,
and then create a new text file that contains the completed Crazy Libs. Let’s go
through that in a little more detail:
How Crazy Libs is going to work
Game code
The Python intepreter
We need a template that has all the
text of the story, with placeholders for
the words that need to be provided by
the user; we also need some indication
of each placeholder’s part of speech.
To signify a placeholder, we’ll just use
uppercase words like NOUN, VERB, and
ADJECTIVE right in the text.
Let’s start with a template
1
A template is just a text
file on your computer that
contains a story along with
placeholders for nouns, verbs,
verbs with ‘ing’ endings,
adjectives, and so on.
The first thing that stands between you
and VERB_ING your first, real, piece of NOUN,
is VERB_ING the skill of breaking
problems down into achievable ADJECTIVE
actions that a NOUN can do for you. Of
course, you and the computer will also
need to be VERB_ING a common NOUN, but
we’ll get to that topic in just a bit.
lib.txt
You’ll find lib.txt in the ch9
folder in the book’s source code.
Feel free to take
your favorite story
and create your own!
1
Here’s an example template.
By text file, we just mean a
file containing text that is
stored on your device.
you are here 4 397
saving and retrieving files
The first thing that stands between you
and buying your first, real, piece of pudding,
is forgetting the skill of breaking
problems down into achievable crazy
actions that a monkey can do for you. Of
course, you and the computer will also
need to be eating a common pizza, but
we’ll get to that topic in just a bit.
Next, when you run the game, the code is going
to read in the template from the disk and then
locate all the placeholders—remember the
placeholders are just the uppercase words, like
NOUN, VERB, and so on, embedded in the text.
Reading the template
2
After all the placeholders have been collected from
the user, we’re going to create a new file and then
write the completed Crazy Lib to it.
Finally, we’ll write out a new file that
contains the completed Crazy Lib.
4
For each placeholder your code is going to
prompt the user to provide a word that matches
the needed part of speech. Your code will then
take their word, and substitute it into the text in
place of the placeholder.
Prompting the user
3
lib.txt
Give me a VERB: buying
Give me a NOUN: pudding
Give me a VERB_WITH_ING:
Give me a ADJECTIVE: cra
Give me a NOUN: monkey
Giveme a VERB_WITH_ING:
Give me a NOUN: pizza
crazy_lib.txt
Here’s the completed
Crazy Lib, which has each
placeholder replaced by the
user’s input.
After getting all
the user input, our
code creates a new
file and writes out
the updated crazy
version of the story.
4
3
2
For the output filename,
we’ll just prepend “crazy_”
to the original filename.
The first thing that stands between you
and VERB_ING your first, real, piece of NOUN,
is VERB_ING the skill of breaking
problems down into achievable ADJECTIVE
actions that a NOUN can do for you. Of
course, you and the computer will also
need to be VERB_ING a common NOUN, but
we’ll get to that topic in just a bit.
398 Chapter 9
writing the pseudocode
Hey, it’s Chapter 9 already, so we have no doubt you can tackle the task
of creating a little pseudocode based on the previous two pages. Writing
up a little pseudocode now is going to give you a clearer idea of how to
approach writing the Crazy Libs game. Don’t skip this! But of course you’ll
find our version at the end of the chapter.
Write your pseudocode
here. Remember the story
is in a file, so you’ll need
to read it, figure out
where the placeholders are,
prompt the user for the
placeholder replacements,
and then write it all out
to a new file.
P.S. We know you don’t
know how to read or
write data from files yet,
so just focus on the logic
of the code, and don’t
worry about the specifics
(which is the point of
pseudocode!).

you are here 4 399
saving and retrieving files
The first thing that stands between you
and VERB_ING your first, real, piece of NOUN,
is VERB_ING the skill of breaking
problems down into achievable ADJECTIVE
actions that a NOUN can do for you. Of
course, you and the computer will also
need to be VERB_ING a common NOUN, but
we’ll get to that topic in just a bit.
Step 1: Read the text of the story from a file
The first thing you need to do is get your hands on the text file that contains the
example story. You’ll find this file, lib.txt, in the book source files under the ch9 folder.
Take a quick look at it. We also encourage you to create your own story files, but for
testing let’s use lib.txt so we’re testing the same thing.
1Read the text for the story
from le.
2Process text.
For each word in text
AIf word is a placeholder (NOUN
or VERB or VERB_WITH_ING or
ADJECTIVE):
BOtherwise, the word is ne;
keep it in the story.
3Store results.
Take the processed text with
the placeholders lled, and write
it out to a le with the lename
prepended by “crazy_”.
1
2
Prompt user for placeholder
part of speech.
Substitute user’s word for
the placeholder.
lib.txt
Our test story
file, complete with
placeholders
To read a file in Python, you first have to open it
If we’re going to grab the data out of a file, we first need to open it. What
does opening a file actually do? From your perspective, not much, but
behind the scenes, Python has to locate your file, make sure it exists, and
ask the operating system for access to the file—after all, you might not have
permission to access it.
To open a file you use Python’s built-in open function, which takes a
filename and a mode as arguments.
my_file = open('lib.txt', 'r')
We use the Python's open
function to open a file.
It takes a filename
to be opened…
…and a mode.
The mode can either be
‘r' for reading or ‘w' for
writing to the file.
The filename can be a simple filename in
the same directory as your code, or a
more explicit path to a file. Right now
we're using a simple filename. More on
paths on the next page.
The open function returns a file
object, which we're assigning to
the variable my_file.
You’ll find this is the
case with practically
every programming
language—to read or
write to a file, you
have to open it first.
We use the terms “folder” and
“directory” interchangeably in this
chapter, although when we’re talking
about files and file paths, we tend
to use the word “directory.”
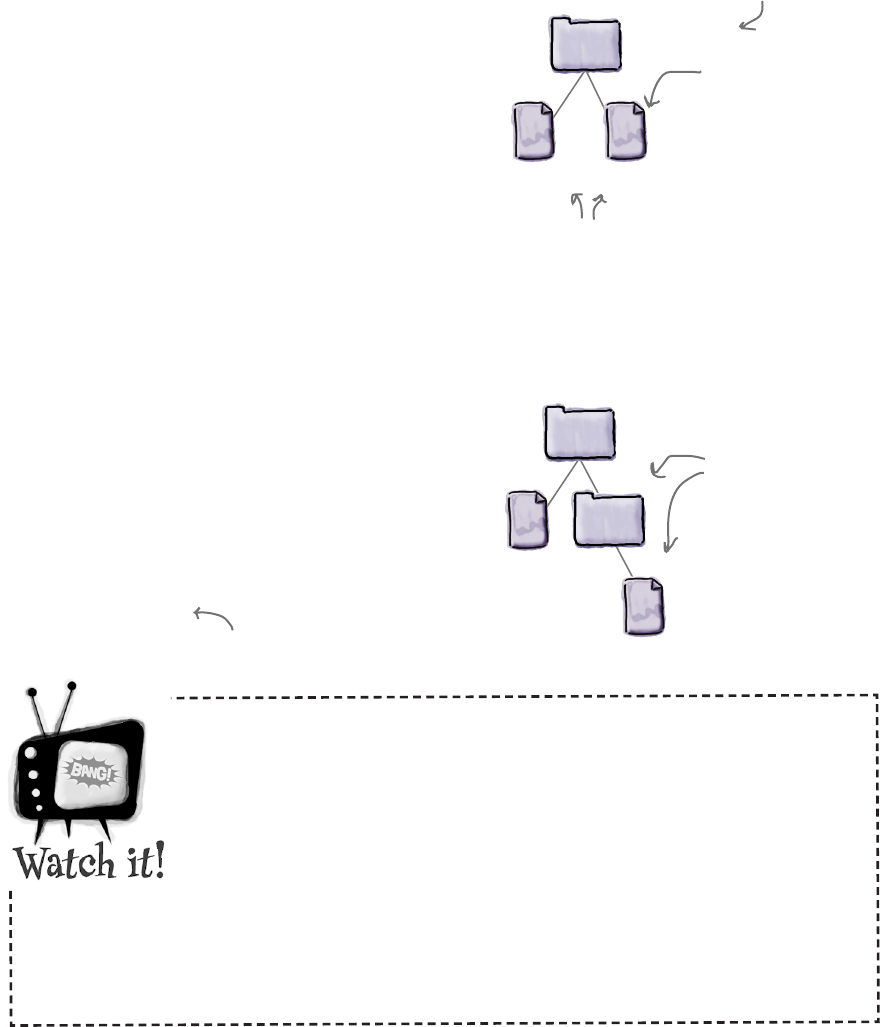
400 Chapter 9
learning about file paths
How to use file paths
When we used the open function on the previous page, we
specified a filename of 'lib.txt', and, because we didn’t
indicate where the file was located, we were assuming the file
was located in the current directory. But what if the file you
want to open is located somewhere else? How do you then
open it? To do that we add a path to our filename, which tells
open where to look for the file. There are actually two kinds
of paths: a relative path or an absolute one. A relative path is a
description of the file’s location that is relative to the folder
(we usually say directory instead when we talk about paths)
you ran your Python code from.
When you supply a
filename, you’re counting
on that file being in the
same directory as the
directory you ran your
main Python file from.
We’ll assume that is our
ch9 directory.
my_file =
my_text = my
print(my_text
my_file.
close(
crazy.py
ch9
The first thing
that stands
between you and
VERB_ING your
first, real,
piece of NOUN,
is VERB_ING
the skill of
breaking
lib.txt
Same directory.
my_file = open('lib.txt', 'r')
my_file =
my_text = my
print(my_text
my_file.
close(
crazy.py
ch9
The first thing
that stands
between you and
VERB_ING your
first, real,
piece of NOUN,
is VERB_ING
the skill of
breaking
lib.txt
my_file = open('libs/lib.txt', 'r')
libs
Relative to our ch9
folder, you first go to
the libs directory and
then you’ll find lib.txt.
Let’s look at relative paths first, which are always specified in
relation to your current directory (the directory you ran your
program from). Let’s say you put the file lib.txt in a subfolder
(again, we typically say subdirectory) called libs; well, you
can prepend your filename with the path to the file, like this:
'libs/lib.txt'. So the open function will first go to the libs
subdirectory before looking for the file lib.txt.
You can list as many subdirectories as you need, separating
each one with a path separator, otherwise known as the
forward slash character, /.
Mac and Windows use different separators.
Mac (and Linux) machines use a forward slash / as a separator,
while Windows uses a backslash, \. That said, Python allows you
to enter path separators uniformly using a forward slash. So if you
have a Windows path of:
C:\Users\eric\code\hfcode\ch9\lib.txt
then, instead, use:
C:/Users/eric/code/hfcode/ch9/lib.txt
Relative paths
Windows users, check out
the Watch it! below.
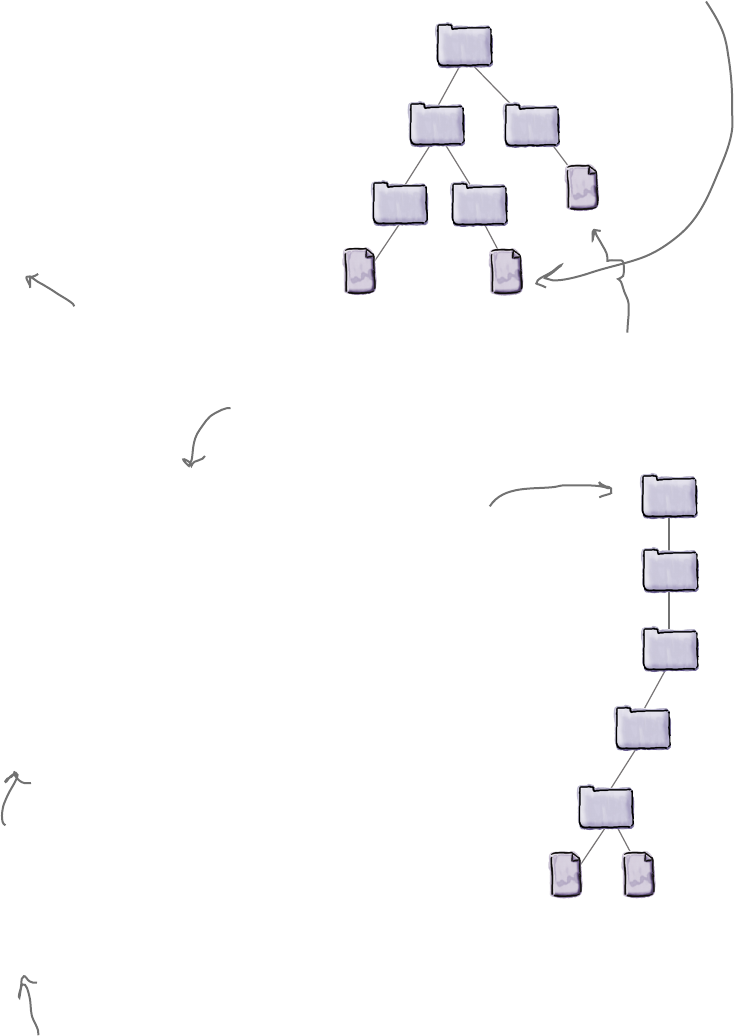
you are here 4 401
saving and retrieving files
So, what if you want to open a file in a directory that’s in an
adjacent folder (like ch9 and libs are adjacent folders), or a
directory higher in your filesystem (like hfcode is higher than
libs in the filesystem)? No problem. You can use the .. (two
periods) notation to specify a directory one level higher. If
you’re running your code from the ch9 directory and you
want to get to the lib.txt file in the adjacent libs directory, then
you can use a path of '../libs/lib.txt'. So we go up
one directory and then down in to the libs directory before
finding lib.txt.
Or, if you’re after the lib.txt in the directory oldlibs, you can
use the path '../../oldlibs/lib.txt'.
my_file =
my_text = my
print(my_text
my_file.
close(
crazy.py
ch9
The first thing
that stands
between you and
VERB_ING your
first, real,
piece of NOUN,
is VERB_ING
the skill of
breaking
lib.txt
libs
hfcode
code
oldlibs
The first thing
that stands
between you and
VERB_ING your
first, real,
piece of NOUN,
is VERB_ING
the skill of
breaking
lib.txt
my_file = open('../libs/lib.txt', 'r')
my_file = open('../../oldlibs/lib.txt', 'r')
Absolute paths
An absolute path is a path that always starts from the root of
your filesystem. Absolute paths tell you exactly where a file is in
a filesystem. Now, while that may sound like a more definitive
way to identify your files, and it is, often absolute paths are less
flexible because if you move all your code and files to another
machine, you have to update the absolute paths in your code.
That said, you’ll find times when using an absolute path is more
convenient than a relative path.
Let’s say we want to specify an absolute path to the lib.txt file.
That looks like this on our machine:
my_file =
my_text = my
print(my_text
my_file.
close(
crazy.py
ch9
The first thing
that stands
between you and
VERB_ING your
first, real,
piece of NOUN,
is VERB_ING
the skill of
breaking
lib.txt
eric
hfcode
code
usr
Here's my top-
level folder. Note
this is on a macOS
X filesystem.
my_file = open('/usr/eric/code/hfcode/ch9/lib.txt', 'r')
And on a Windows machine, assuming you have your
code on the C: drive, your path would look like this:
my_file = open('C:/Users/eric/code/hfcode/ch9/lib.txt', 'r')
On the Mac and Linux systems, start at the root
with a forward slash, and then add the rest of the
file path separated by forward slashes.
On Windows systems, start with the drive and then a colon
and then a forward slash. Then add the rest of the file path
separated by forward slashes.
Here we go up two directories, before going
down into the oldlibs directory and finally,
finding the lib.txt we’re after.
The root of a filesystem is, perhaps
counterintuitively, the very top level of
your filesystem.
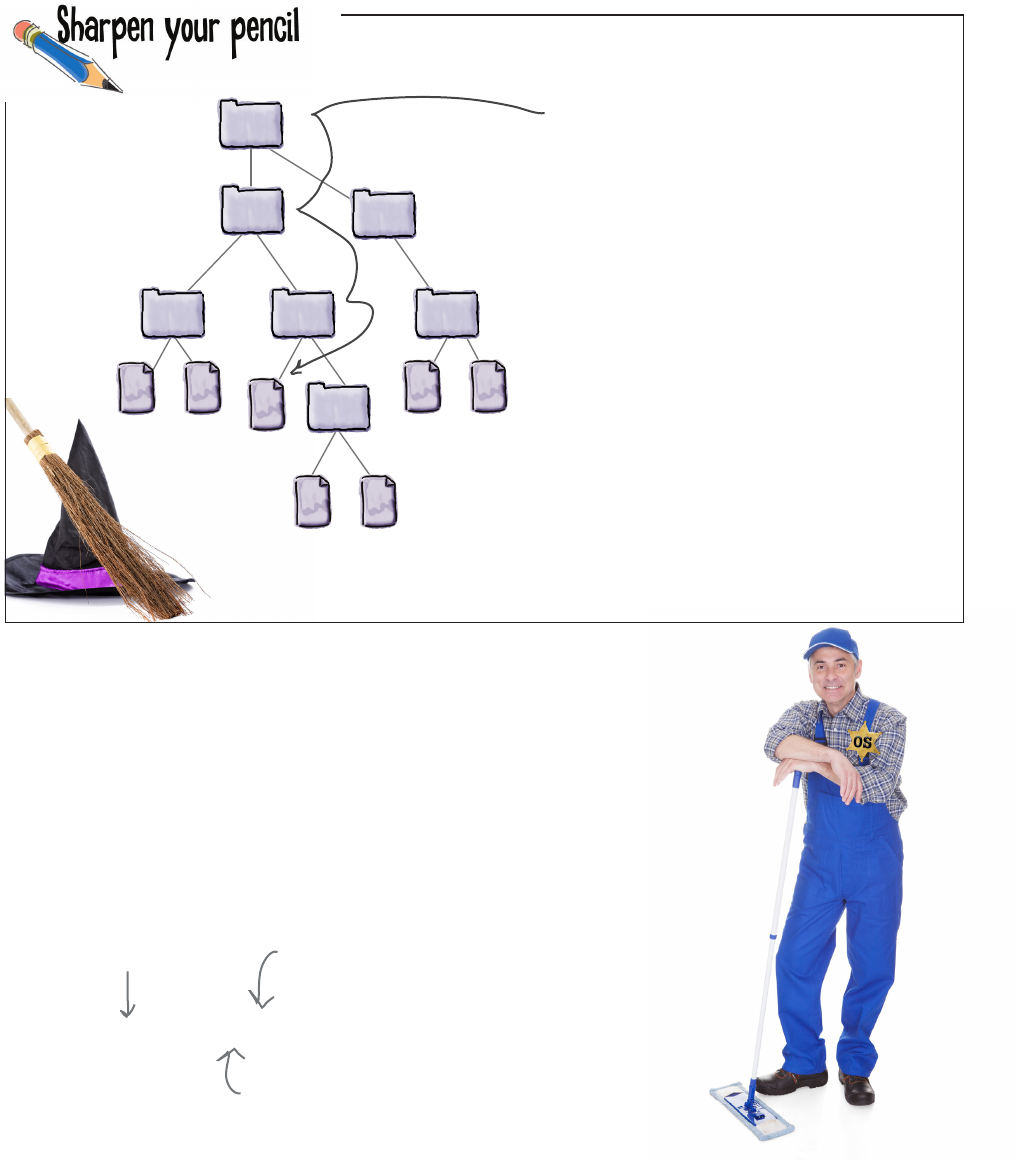
402 Chapter 9
how to close a file
Before we go on, one point of etiquette: if you’re going to open a file, when you’re
done with it, you need to close it. Why? Open files take up resources in your machine’s
operating system, and, especially for long-running programs, leaving files open that
you aren’t using can lead to code that eventually crashes and burns. So, if you’re
going to open a file, just make sure you close it too. Here’s how:
Oh, and don’t forget to clean up when you’re done!
my_file.close()
Here’s our my_file variable,
which is set to a file object.
Just call the file object’s close
method to close the file.
Keep this method in mind, as we’ll use it in a bit...
Trace out each path to find the file it identifies. For any relative paths, start
in the code directory. We’ve done one for you already.
/usr/harry/code/find.py
../inventory/map.pdf
../../hermione/spells/leviosa.txt
find.py
data/students.txt
nd.py
oculus.txt leviosa.txt
spells
data
harry hermione
code
usr
inventory
cloak.gif map.pdf
horcrux.db students.txt
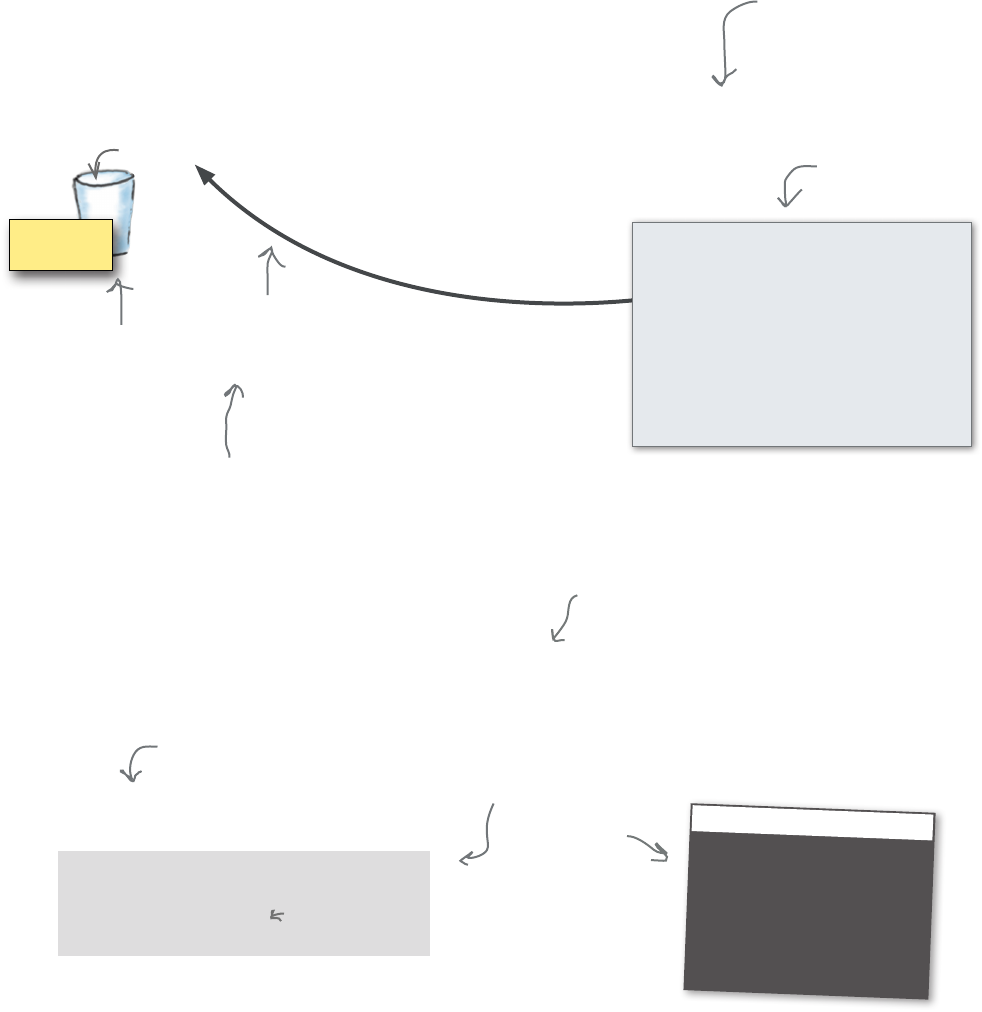
you are here 4 403
saving and retrieving files
First of all, what does it mean to read a file into Python? Well, with Python, the
contents of the file are taken and placed into a Python string, which you can
examine or process as you wish using standard Python string operations.
Reading a file into your Python code
There are actually two ways to read the contents of your file into
a string: you can read the entire file all at once, or you can read
the file a line at a time. Let’s start by reading the entire file all at
once; to do that we’re going to use the file object’s read method:
When reading a file,
Python takes the
contents and places it
into a string.
‘The rst thing that stands between you\nand VERB_ING your rst real piece of NOUN\n is VERB_ING the skill of...’
my_text
Here’s our sample
text file.
my_file = open('lib.txt', 'r')
my_text = my_file.read()
print(my_text)
my_file.close()
Python 3.6.0 Shell
The first thing that stands between you
and VERB_ING your first, real, piece of NOUN,
is VERB_ING the skill of breaking
problems down into achievable ADJECTIVE
actions that a NOUN can do for you. Of
course, you and the computer will also
need to be VERB_ING a common NOUN, but
we’ll get to that topic in just a bit.
>>>
...which we’ll assign to
the string my_text.
Then we print
the string out,
which displays
everything in
the file to the
Python Shell.
Did you notice those weird
\n characters in the string?
More on those in a sec...
Here’s a standard
Python string holding
the contents of the
file lib.txt.
Let’s use the read method to get the
entire contents of the lib file...
We couldn’t fit the
whole thing on the page:
but you get the point,
this string contains all
the text in lib.txt.
Using the file object to read a file
Don’t forget to
close the file!
Technically there are a few other ways
too, but we’re going to focus on the
most common methods of reading files.
The first thing that stands between you
and VERB_ING your first, real, piece of NOUN,
is VERB_ING the skill of breaking
problems down into achievable ADJECTIVE
actions that a NOUN can do for you. Of
course, you and the computer will also
need to be VERB_ING a common NOUN, but
we’ll get to that topic in just a bit.
404 Chapter 9
searching over files
Code Magnets
Can you help find the needle in the haystack? We’ve been given a directory of 1,000 files with
the filenames 0.txt through 999.txt, and only one has the word needle in it. We had the code to
find the needle all written on the refrigerator, but then someone came along and messed it all
up. Can you help us put it back together? Notice, there may be some extra code magnets, so
you may not use all of them. Check your answer at the end of the chapter.
Rearrange the
magnets here.
for i in range(0, 999):
filename = str(i) + '.txt'
file = open(filename, 'r')
text = file.read()
if 'needle' in text:
file.close()
print('Found needle in file ' + str(i) + '.txt')
for i in range(0, 1000):

you are here 4 405
saving and retrieving files
Good catch. You’re right; say the file
with the needle is 512.txt. With this code we’d
unnecessarily check files 513 through 999 before
the code completed. Opening files can be a
relatively time-consuming activity, so this isn’t an
optimal way to do things.
The problem is, if you look at the code again,
we’re iterating with a for loop, so we can’t just
stop checking files in the middle. Or can we?
This does bring up something we haven’t
discussed yet, which is a way to break out of
an iteration, in the middle, if we decide we
don’t need to complete it. If we had something
like that, we could easily fix this code so that it
stopped the search after finding the needle. Of
course we do have something: Python and most
programming languages have a break statement
for just this purpose. Let’s take a look at how it
works...
I was looking at the
code in the previous
exercise and something is bothering
me. Even when we find a file with the
needle string in it, the code continues on,
reading every remaining file. I guess that
would be good if we wanted to check every
file, but we said it was only in one file.
406 Chapter 9
the break statement
When we use a for statement, say a for statement that is
iterating over a range of numbers, we know that the for
statement will iterate over every number in the range before
it completes. But there are times when in a computation
you’ll decide partway through that continuing is pointless,
and there is no reason to complete the iteration—our
needle in a haystack code is a good example, because once
we find the needle, there is no reason to continue the for
loop to open the remaining files.
The break statement gives you a way out. With the break
statement we can push the eject button and stop the for
loop at any time. Let’s have a look:
Oh, give it a break already...
for i in range(0, 1000):
filename = str(i) + '.txt'
file = open(filename, 'r')
text = file.read()
if 'needle' in text:
print('Found needle in file ' + str(i) + '.txt')
break
file.close()
print('Scan complete')
while loop
Don’t forget us while
loops! The break statement
works with us too!
Uh oh. By adding the break statement to the code above we
actually introduced a small bug. Can you find it? Can you
determine what it is? How would you fix it?
Hint: is every file still being closed?
Here’s our code to find
the needle again.
So now, when we find the needle, we’re going to
use the break statement and bypass the rest of
the code block as well as breaking out of the loop
altogether.
When we hit the
break statement
we immediately
jump out of the
for loop.
you are here 4 407
saving and retrieving files
Short excursions are great for learning new things about coding, but we’ve got a game
to finish here. When we last left off, we were reading the entire contents of a file at once,
which is certainly easy, but it has a drawback: for large files it can consume significant
resources. Think about processing a file with, say, hundreds of thousands of lines—you
probably don’t want to read all that into memory at once, or the result could be out-of-
memory errors for your program or even your operating system.
A more common approach is to read the contents one line at a time. But what is a line?
Exactly what you’d think: it is all the text on each line, up until you encounter a new line.
In fact, if we could open our lib.txt file in a special editor that showed us all the characters
in the file, we’d see something like this:
Hey, we’ve got a Crazy Lib game to finish!
The first thing that stands between you\n
and VERB your first, real, piece of NOUN,\n
is VERB_WITH_ING the skill of breaking\n
problems down into acheivable ADJECTIVE\n
actions that a NOUN can do for you. Of\n
course, you and the computer will also\n
need to be VERB_WITH_ING a common NOUN, but\n
we’ll get to that topic in just a bit.
lib.txt
Each line ends with
an actual new line
character, otherwise
known as a newline,
which is represented by
the escape character
sequence ‘\n’.
You never see newlines
in editors because
rather than show them,
editors just treat
them as a directive to
display the next bit of
text on the next line.
To read one line from a file, we use the readline method of the file object. Let’s try
reading the lib.txt file again using readline:
Python 3.6.0 Shell
The first thing that stands between you
and VERB_ING your first, real, piece of NOUN,
my_file = open('lib.txt', 'r')
line1 = my_file.readline()
print(line1)
line2 = my_file.readline()
print(line2)
This time we’re using the readline method
and reading the first two lines into the
variables line1 and line2, respectively.
Using the readline method of the file object
The file object tracks its position as
it reads the file. So each time you call
the readline method, it picks up where
it last left off.
Think of an old-style
typewriter with a
carriage return. Every
time you hit the
carriage return, that’s
like a new line.

408 Chapter 9
escape sequences
Newlines, of course, aren’t the only
escape sequence. There’s \t for
tabs, \b for backspace, and \v for a
vertical tab.
Back up the bus.
A page back you used the term
“escape sequence.” Excuse me?
You didn’t really define it.
Fancy name, simple concept.
When you want to create a string with a newline in it, there’s no way to
directly type in that newline character. Think about it: when you’re typing in
a string, you type a quote and then some text and if you typed a newline by
hitting the Return key, the editor would just go to the next line. So, instead we
use a sequence of characters that represents a newline character, and those
characters happen to be \n. So when you see the characters \n don’t think
of them as two characters, a backslash and the letter n, but rather as a way to
represent a newline character. So, for example, if you want to print some text
followed by five new lines, you’d do this:
print('Get ready for new lines:\n\n\n\n\n')
Python 3.6.0 Shell
Get ready for new lines:
>>>
You might also hear some
coders refer to ‘\n’ as a
line feed.
Here we have the text “Get
ready for new lines:” followed by
how many new lines? Five? Nope!
Six! We get five from the string,
but, as it turns out, the print
function adds a newline to its
output by default.
Why do you think the output from the code on the
previous page has an extra newline between the two
lines “The first thing that stands between you” and
“and VERB your first, real, piece of NOUN,”?
Python 3.6.0 Shell
The first thing that stands between you
and VERB_ING your first, real, piece of NOUN,
Do you see the
extra newline?
This explains the
answer to the
Brain Power above.
you are here 4 409
saving and retrieving files
Think of readline as keeping a pointer to the position it last read. Each time you
read another line, readline picks up where it last left off, and then reads the next line.
When there are no more lines to read, readline then returns the empty string. Here’s
how you can use that to read all the lines in a file a line at a time:
How do we know when we’ve read the last line?
my_file = open('lib.txt', 'r')
while True:
line = my_file.readline()
if line != '':
print(line)
else:
break
my_file.close()
We’re glad you’ve adapted so quickly to using the break statement,
but in this case there’s a nicer and cleaner way to iterate over the
lines in a file. Remember how we’ve used the for statement to iterate
over sequences? We’ve used it to iterate over the items in a list, and
we’ve used it to iterate over the items in a string. Well, isn’t a file just a
sequence of lines? Ah, so can we use for to iterate over the lines of a
file as well? You bet. Let’s rewrite the code above using for:
Ah, but there's a easier way using the
power of Python sequences
my_file = open('lib.txt', 'r')
for line in my_file:
print(line)
my_file.close()
Wow, not only shorter,
but much more readable!
When we use a while True,
that means we’re iterating
FOREVER.
Each time we loop we read the next line, and
if it isn’t the end of the file (signified by an
empty string), then we print it.
If it is the end of the file, well, then we
use our handy break statement to break
out of the while loop. Thank goodness—
forever is a long time.
Serious Coding
Anytime you’re using for with the
in keyword, whether it’s on a list
or a string or a le or a dictionary,
we’re using a concept called an
iterator.
With an iterator we assume the
data type we’re iterating over
gives us a standard way to iterate
through its sequence of values. We
don’t worry about how—the for
loop does that—we just know we
can step through each value until
we’re out of values.
You’ll nd iterators in many
modern languages—they’re
based on a high-level software
design practice called Design
Patterns.
Note a blank line
would have a newline
chararacter in it, while
the end of file sets
line to an empty string.
410 Chapter 9
reading a template
You now know just about everything there is to know about opening and reading a text file, line
by line. Let’s put that knowledge to use to write the first part of our Crazy Lib code. Let’s start
by defining a function, make_crazy_lib, that is going to take a filename and return the text
of the Crazy Lib in a string, complete with the user’s word choices already substituted.
We’re also going to create a helper function, process_line, which is going to process each
line for any placeholders. The process_line function will also be responsible for getting each
replacement word from the user, and substituting it into the text.
Reading in a Crazy Lib template
def make_crazy_lib(filename):
file = open(filename, 'r')
text = ''
for line in file:
text = text + process_line(line)
file.close()
return text
def process_line(line):
return line
def main():
lib = make_crazy_lib('lib.txt')
print(lib)
if __name__ == '__main__':
main()
Here's our function; it takes a filename and
then opens it for reading. We're going to use a variable, text, to build
up the text as we process it.
For each line in the file we’re going
to process it with the process_line
function, and then add it to the text
we’re building up.
After we've gone through each line
of the file, we just need to close
the file and return the text.
A helper function
is just a common
name for a function
that takes on a
subtask for another
function. In this case
our make_crazy_lib
function is going to
rely on process_line
to look at a single
line and process it
for placeholders.
For testing, let’s have process_line return the text we
pass it. That way we can test that all the file reading and
string concatenation is working correctly in make_crazy_lib.
Get the code above into a file called crazy.py,
save your code and choose the Run > Run
Module menu item. Double-check your output.
A Test Drive
Once again you should just see the entire file,
complete with placeholders. Remember, all we did
was process the entire file, line by line, putting
everything back together into the variable, text,
but without any real processing.
Make sure the file “lib.txt” is in
the same directory as your code.
Python 3.6.0 Shell
The first thing that stands between you
and VERB_ING your first, real, piece of NOUN,
is VERB_ING the skill of breaking
problems down into achievable ADJECTIVE
actions that a NOUN can do for you. Of
course, you and the computer will also
need to be VERB_ING a common NOUN, but
we’ll get to that topic in just a bit.
>>>
And of course we need to call the make_crazy_lib
function. Let's add the main function to do that.
you are here 4 411
saving and retrieving files
1Read the text for the story
from le.
2Process text.
For each word in text
AIf word is a placeholder (NOUN
or VERB or VERB_WITH_ING or
ADJECTIVE):
BOtherwise, the word is ne;
keep it in the story.
3Store results.
Take the processed text with
the placeholders lled, and write
it out to a le with the lename
prepended by “crazy_”.
1
2
Prompt user for placeholder
part of speech.
Substitute user’s word for
the placeholder.
So, moving on in our pseudocode, we now need to process the text, which
means we need to get the process_line function actually doing something.
For starters, in step 2A, we need to iterate through each word in each line.
Luckily we learned how to do that back in Chapter 6, when implementing
the readability app. Let’s give the same technique a try; here’s a first cut at the
structure of the process_line function:
Processing the template text
placeholders = ['NOUN', 'ADJECTIVE', 'VERB_ING', 'VERB']
def process_line(line):
global placeholders
processed_line = ''
words = line.split()
for word in words:
if word in placeholders:
answer = input('Enter a ' + word + ":")
processed_line = processed_line + answer + ' '
else:
processed_line = processed_line + word + ' '
return processed_line + '\n'
def process_line(line):
processed_line = ''
words = line.split()
for word in words:
return processed_line
Okay, the processed line
takes a line of the text.
And we’ll probably need another string to
hold the processed version of the line.
Let’s split the line into a list of words…
…and then iterate over the list.
All our processing code
is going to go here.
And when we’re all
done, we’ll return the
processed line.
Okay, that’s some good skeleton code, but now what? Following on with our
pseudocode, now we need to check for our placeholders, and if we have one
prompt the user for a replacement word.
Now let’s process the text
Let’s just make a list
of the placeholders.
We will make it global
in case it is needed in
more than one function.
Then we can check each word to
see if it is a placeholder.
If it is, let’s
prompt the user.
And add their answer
to the processed line.
Otherwise, just add the word
(which isn’t a placeholder) to
the processed line.
We also need to put a newline back on
the line because split removes them.
412 Chapter 9
testing our code
It’s time to test Crazy Libs. Other than writing the text back to a file, we
should almost have everything working. Get the changes to the code in crazy.
py and choose the Run > Run Module menu item. We’ve reproduced all the
code below. Double-check your output.
A Test Drive
def make_crazy_lib(filename):
file = open(filename, 'r')
text = ''
for line in file:
text = text + process_line(line) + '\n'
file.close()
return text
placeholders = ['NOUN', 'ADJECTIVE', 'VERB_ING', 'VERB']
def process_line(line):
global placeholders
processed_line = ''
words = line.split()
for word in words:
if word in placeholders:
answer = input('Enter a ' + word + ":")
processed_line = processed_line + answer + ' '
else:
processed_line = processed_line + word + ' '
return processed_line + '\n'
def main():
lib = make_crazy_lib('lib.txt')
print(lib)
if __name__ == '__main__':
main()
Python 3.6.0 Shell
Enter a VERB_ING:buying
Enter a VERB_ING:pudding
Enter a ADJECTIVE:forgetting
Enter a NOUN:monkey
Enter a VERB_ING:eating
The first thing that stands between you
and buying your first, real, piece of NOUN,
is pudding the skill of breaking
problems down into achievable forgetting
actions that a monkey can do for you. Of
course, you and the computer will also
need to be eating a common NOUN, but
we’ll get to that topic in just a bit.
>>>
Here’s what we got.
Hmm, the code seems to
be skipping some of our
placeholders.
We have a problem!
It’s worth one more look at the
structure of this code. The for
loop is stepping through every word
in a single line. And for each word
we see if the word is a placeholder,
and if so, ask the user for a word
to substitute in the processed line.
you are here 4 413
saving and retrieving files
Python 3.6.0 Shell
Enter a VERB_ING:buying
Enter a VERB_ING:pudding
Enter a ADJECTIVE:forgetting
Enter a NOUN:monkey
Enter a VERB_ING:eating
The first thing that stands between you
and buying your first, real, piece of NOUN,
is pudding the skill of breaking
problems down into achievable forgetting
actions that a monkey can do for you. Of
course, you and the computer will also
need to be eating a common NOUN, but
we'll get to that topic in just a bit.
>>>
Why is the code mysteriously skipping some of the nouns? Is it something
to do with the nouns or something more systemic? Take a look at the input
and output (and of course the code) and see if you can figure out the
problem. Write your observations here.
We have three noun
placeholders, but we’re only
being asked for one.
Is there anything different
about the noun placeholders?
Or is something wrong
in the code?
We’re going to solve this problem a bit differently than we did in Chapter 6 by
making use of a string method: strip. The strip method returns a new string
that has characters stripped off the beginning and ending of the string. Let’s see
how the strip method works:
Using a new string method to fix the bug
hello = '!?are you there?!'
goodbye = '?fine be that !way!?!!'
hello = hello.strip('!?')
goodbye = goodbye.strip('!?')
print(hello)
print(goodbye)
Python 3.6.0 Shell
are you there
fine be that !way
Let's create a
couple strings.
The strip method takes a string of characters, and
removes any occurrence of each character from
the beginning and ending of the string.
All occurrences of !
and ? are stripped
from the beginning
and ending of the
strings hello and
goodbye.
Note that goodbye
still has a !
character in it
because it wasn't
at the end of the
string, so it wasn’t
stripped.
414 Chapter 9
using strip to fix the bug
def process_line(line):
global placeholders
processed_line = ''
words = line.split()
for word in words:
stripped = word.strip('.,;?!')
if stripped in placeholders:
answer = input('Enter a ' + stripped + ":")
processed_line = processed_line + answer
if word[-1] in '.,;?!':
processed_line = processed_line + word[-1] + ' '
else:
processed_line = processed_line + ' '
else:
processed_line = processed_line + word + ' '
return processed_line + '\n'
def process_line(line):
global placeholders
processed_line = ''
words = line.split()
for word in words:
if word in placeholders:
answer = input('Enter a ' + word + ":")
processed_line = processed_line + answer + ' '
else:
processed_line = processed_line + word + ' '
return processed_line + '\n'
Fixing this bug requires a few tweaks to our code. This is a great example of how a small
change to the functionality of your code, whether that is fixing a bug or adding a new feature,
can introduce a lot of changes to your code. We would have been more effective if we’d
caught this issue when we were writing our pseudocode.
In terms of tweaks, we’re going to strip each word of all punctuation, and then compare the
stripped version of the word against the placeholder. We also have to be careful to add any
punctuation back on to the user’s chosen word when we’re done. Here’s how you do that:
Actually fixing the bug
Using the strip method, spend some time reworking the process_
line function to correctly handle placeholders that end in punctuation
(commas, periods, semicolons, question marks, and so on). You not
only need to recognize placeholders correctly, but you also need to
preserve the punctuation in the output. Give your brain a real chance to
work on this, and then we’ll solve it together. No peeking ahead!
Here's the code
we need to
improve.
You'll find anytime
you are making
lots of changes to
existing code, you're
introducing the
possibility of even
more bugs.
First let’s strip the word of all periods,
commas, semicolons, and so on.
We want to display the stripped placeholder
text, not the one with punctuation.
If there was punctuation,
add it back, and then add
the space. Otherwise, just
add the space.
We’ll test the stripped version against the placeholders.
you are here 4 415
saving and retrieving files
Give this a try: open your crazy.py file and change the filename from 'lib.txt' to
'lib2.txt', and then execute your code.
Some code has real problems
Did our last bug fixes
really
take care of all issues
we might encounter with
punctuation? Or can you
think of other ways the code
still is a bit buggy?
Hint: One issue—would ‘VERB!!!’ be
handled correctly in the output, or would
only one ! be added? How would you fix
that?
Make the changes from the previous page to your crazy.py file and then
choose the Run > Run Module menu item. Double-check your output.
A Test Drive
Python 3.6.0 Shell
Enter a VERB_ING:buying
Enter a NOUN:pudding
Enter a VERB_ING:forgetting
Enter a ADJECTIVE:crazy
Enter a NOUN:monkey
Enter a VERB_ING:eating
Enter a NOUN:pizza
The first thing that stands between you
and buying your first, real, piece of pudding,
is forgetting the skill of breaking
problems down into achievable crazy
actions that a monkey can do for you. Of
course, you and the computer will also
need to be eating a common pizza, but
we’ll get to that topic in just a bit.
>>>
Finally, this is what
we’re looking for! We
hope you tried your
own set of verbs,
nouns, and adjectives.
Try your own story
now and see how it
works as well.
To test your own
story, just call
make_crazy_lib and
pass it the name of
your story’s file.
Python 3.6.0 Shell
Traceback (most recent call last):
File "crazy.py", line 45, in <module>
main()
File "crazy.py", line 41, in main
crazy_lib = make_crazy_lib(filename)
File "crazy.py", line 2, in make_crazy_lib
file = open(filename, 'r')
FileNotFoundError: [Errno 2] No such file or directory: 'lib2.txt'
>>>
If you try to open a file for reading
and it doesn't exist, you'll get a
FileNotFoundError exception.
416 Chapter 9
exploring exception
list = [1, 2, 3, 4]
item = list[5]
filename = 'document' + 1 + '.txt'
firstname = 'Beethoven'
print('First name: ' + name)
int('1')
int('2')
int('E')
int('4')
int('5')
int('6')
msg = 'hello'
def hi():
print(msg)
msg = 'hi'
hi()
Be the Python
Interpreter
.
Python 3.6.0 Shell
Python 3.6.0 Shell
Python 3.6.0 Shell
Python 3.6.0 Shell
Python 3.6.0 Shell
Write your
results here.
Actually executing
the code might help
too. A lot.
Let’s take a moment for a little exercise that is going to show you some
of the problems the Python interpreter has to deal with on a daily basis.
Then we’ll see what we can do about them with code. Your job is to act
like you’re the Python interpreter. You need to parse each piece of code
and execute it. Write any output or errors in the Python Shell window.
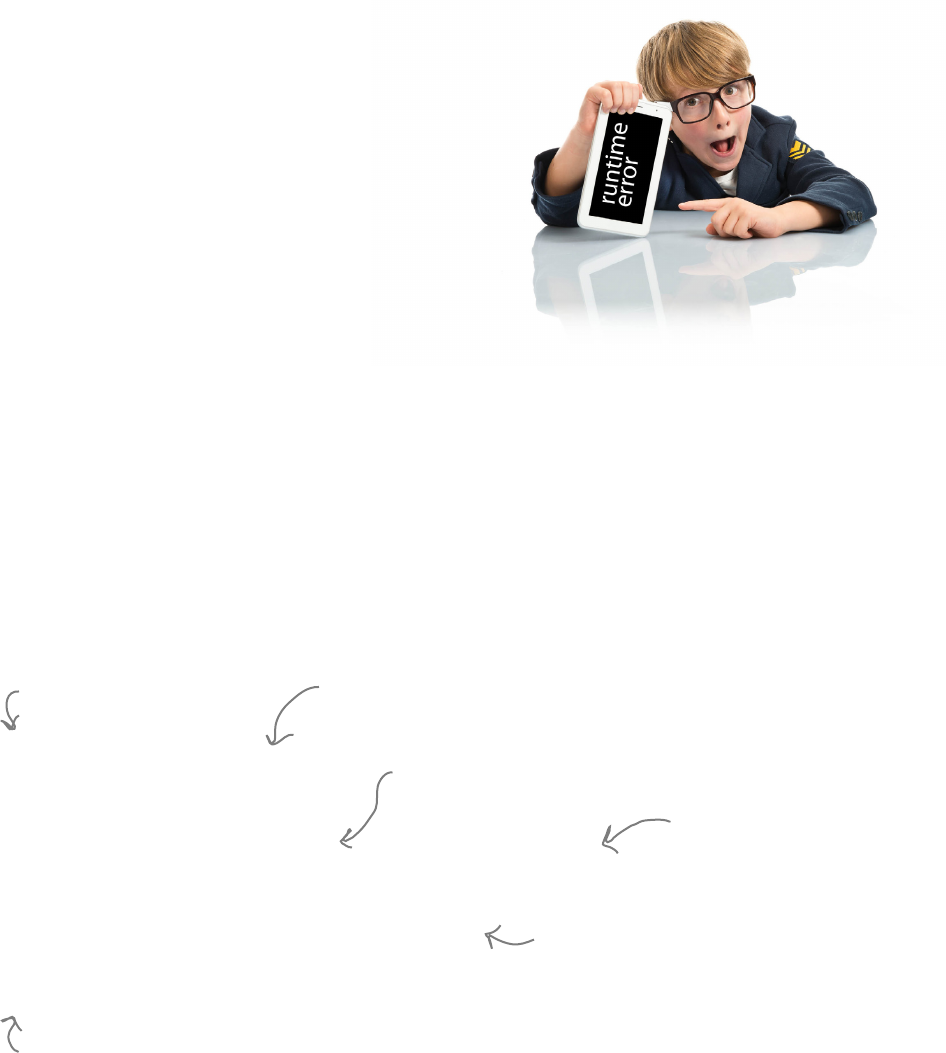
you are here 4 417
saving and retrieving files
We’ve discussed errors before: they can be syntax errors (essentially,
typos in your code), semantic errors (logic problems with your
code), or runtime errors (things that go wrong during the execution
of your code). For runtime errors, so far we’ve just let them fall on
the floor with the Python interpreter spitting out an error and your
program coming to a grinding halt. But it doesn’t have to end this
way, especially when a runtime error occurs naturally in the course of
running your code—say that file you’re trying to open for reading just
isn’t there anymore. We’ll see how we can handle that in a sec.
Let’s talk a little more about what a runtime error, or exception,
actually is. An exception is an event that occurs during the execution
of your code when the Python interpreter encounters something it
can’t handle. When that happens, the interpreter stops the execution
of your code and creates an exception object that has information about
the error that occurred. By default this information is then displayed in
the form of a traceback error message, which you’re already familiar
with from the Python Shell.
As we said, there is a way to deal with these errors when they arise
without having the interepter just give up; in fact, in your code you can
tell the interpreter you’d like to take over when certain exceptions occur,
and handle them your own way. To do this wrap any code at risk in a
try/except block, like this:
Handling exceptions
try:
filename = 'notthere.txt'
file = open(filename, 'r')
except:
print('Sorry, an error occured opening', filename)
else:
print('Glad we got that file open')
file.close()
Start with a try keyword… …then the block of code
where the error could
occur…
…then the except keyword.
Next, add a block
of code to execute
if an exception
occurs.
And then add an
optional else block,
with code that will
execute only if no
exceptions occurred.
You can also add an optional finally
block that runs whether an exception
occurs or not. More on that in a sec.
418 Chapter 9
how to handle expectations
try:
filename = 'notthere.txt'
file = open(filename, 'r')
except FileNotFoundError:
print('Sorry,', filename, 'could not be found.')
except IsADirectoryError:
print("That's a directory not a file!")
else:
print("It's a good thing we could open that file.")
file.close()
finally:
print("I'm running no matter what happens")
When we use the except keyword followed by a code block, you get a exception catch-
all—that is, the except code block will catch any exception that occurs in the try block.
You can be more precise by giving a specific exception name, like this:
Explicitly handling exceptions
Here’s our try
block again.
This time we’ve added a specific
exception to the except statement.
So this block will
execute only if a
FileNotFoundError
occurs.
We can add more exceptions too;
this one executes only if you try to
open a directory instead of a file.
As before, if all is good, this
block will execute.
Here’s where you can add a
finally block; this block will
execute whether there is
an exception or not!
Q: Is there a limit on the number of
open files I can have?
A: Python does not place a limit on the
number of open files, but your operating
system does—that’s another reason you
should close files as you finish with them.
If is often possible to increase this limit,
although you’ll need to reconfigure your
operating system’s process limits to do so
(and you should ask yourself if you
really
need to).
Q: Is there a list of all the exceptions
I can get?
A: Of course. As always, check out
python.org. Or, more specifically, https://
docs.python.org/3/library/exceptions.html.
Q: Is it possible to create your own
exception types?
A: Yes. Exceptions are just objects, so
you can extend Python by creating your
own, new exception objects. That’s a litte
beyond the scope of this chapter, but you’ll
find plenty on this online and at python.org.
You’ll want to read Chapter 11 too.
Q: Can I catch multiple exceptions
using a single block? How do I do that?
A: After your except keyword, you can
have one or more exceptions separated by
commas within parentheses, like:
except (FileNotFoundError, IOError):
As you already know, you can also omit the
exception name and your except clause will
catch any exception that occurs.

you are here 4 419
saving and retrieving files
try:
num = input('Got a number? ')
result = 42 / int(num)
except ZeroDivisionError:
print("You can't divide by zero!")
except ValueError:
print("Excuse me, we asked for a number.")
else:
print('Your answer is', result)
finally:
print('Thanks for stopping by.')
Trace through the code below three times. The first time enter any number
except 0. The next time, enter 0. The last time, enter the string "zero".
Write in the output you expect.
Python 3.6.0 Shell
Input a number other than 0
Input 0
Python 3.6.0 Shell
Input the string "zero"
Python 3.6.0 Shell
420 Chapter 9
adding exception handling
With your new knowledge of exceptions, let’s update the code that opens a file to
handle some file exceptions:
Updating Crazy Libs to handle exceptions
def make_crazy_lib(filename):
try:
file = open(filename, 'r')
text = ''
for line in file:
text = text + process_line(line)
file.close()
return text
except FileNotFoundError:
print("Sorry, couldn't find", filename + '.')
except IsADirectoryError:
print("Sorry", filename, 'is a directory.')
except:
print("Sorry, could not read", filename)
Most of this code is making
use of a file, so let's put it
all in a try block.
Let's see if we have a
file not found error or if
the user tried to open a
directory (assuming they
changed the filename in
the code).
And then let's catch any
other exceptions that
happen when processing
the file.
Notice we don't have an else or finally clause.
That takes care of the make_crazy_lib function, but there’s something
important to notice in this code: what gets returned from the function if we get an
exception? Because we are not explicitly returning anything, the value None will
get returned. Keep this in mind, because you’re going to need to remember this when we
write the code to save the Crazy Libs.
Get the code above into the file crazy.py and save
your code. Give it a run and double-check your
output. Change the template filename to a file
that doesn’t exist or a directory name and see
how it works.
A Test Drive
You should see the same output as before.
Feel free to change the filename in
crazy.py to test out the exceptions.
Python 3.6.0 Shell
Enter a VERB_ING:buying
Enter a NOUN:pudding
Enter a VERB_ING:forgetting
Enter a ADJECTIVE:crazy
Enter a NOUN:monkey
Enter a VERB_ING:eating
Enter a NOUN:pizza
The first thing that stands between you
and buying your first, real, piece of pudding,
is forgetting the skill of breaking
problems down into achievable crazy
actions that a monkey can do for you. Of
course, you and the computer will also
need to be eating a common pizza, but
we’ll get to that topic in just a bit.
>>>
We told you we’d be
bumping into the None
value now and then.
Your errors
here may differ
depending on your
operating system.
you are here 4 421
saving and retrieving files
def save_crazy_lib(filename, text):
file = open(filename, "w")
file.write(text)
file.close()
Be careful
opening files
in 'w' mode.
When you open
an existing file
using 'w' mode, its contents
will be erased and replaced by
whatever you write to the file. So
be careful!
Saving your Crazy Lib or any text to a file is straightforward with
the file object’s write method. To use it we need to first open a file
in write mode. Let’s write a function save_crazy_lib, which takes a
filename and a string as parameters. When called, save_crazy_lib
will create the file, save the string to it, and then close the file. Check
out this code:
Our last step: storing the Crazy Lib
Our save function expects a filename and some text
in the form of a string.
First we open the file in ‘w’ mode so we can
write to it. Python will create this file if
it doesn't already exist.
Then we use the file object write
method, and pass it the text string to
save to the file.
def main():
filename = 'lib.txt'
lib = make_crazy_lib(filename)
print(lib)
if (lib != None):
save_crazy_lib('crazy_' + filename, lib)
Finally, we close
the file. With a lot of programming languages,
if you don’t close a file you’ve written
to, then you can’t guarantee that the
data will be fully written to the file.
Now that we have save_crazy_lib written, we need to call it
from the main function, and to do that we need to check to make
sure make_crazy_lib returned a Crazy Lib—remember, if it
encounters a file exception it will return None.
Updating the rest of the code
The filename we're going to save
the lib under is going to be “crazy_"
prepended to the original filename.
Let's store the crazy lib
filename in a variable to
make things more convenient. If an exception occurs when opening
or reading the file, then lib will
have the value None. So, we need
to test lib to see if it has a value
before passing it to save_crazy_lib.
1Read the text for the story
from le.
2Process text.
For each word in text
AIf word is a placeholder (NOUN
or VERB or VERB_WITH_ING or
ADJECTIVE):
BOtherwise, the word is ne;
keep it in the story.
3Store results.
Take the processed text with
the placeholders lled, and write
it out to a le with the lename
prepended by “crazy_”.
1
2
Prompt user for placeholder
part of speech.
Substitute user’s word for
the placeholder.
422 Chapter 9
testing crazy libs
It’s time to get a little crazy with
Crazy Libs, because we’re all
done; we just need to get these
last changes into the crazy.py file.
We’ve reproduced the entire game
on this page, and we’ve even
added in some exception code for
you as well. Go ahead and update
your code and give Crazy Libs a
try.
A Test Drive
def make_crazy_lib(filename):
try:
file = open(filename, 'r')
text = ''
for line in file:
text = text + process_line(line)
file.close()
return text
except FileNotFoundError:
print("Sorry, couldn't find", filename + '.')
except IsADirectoryError:
print("Sorry", filename, 'is a directory.')
except:
print("Sorry, could not read", filename)
placeholders = ['NOUN', 'ADJECTIVE', 'VERB_ING', 'VERB']
def process_line(line):
global placeholders
processed_line = ''
words = line.split()
for word in words:
stripped = word.strip('.,;?!')
if stripped in placeholders:
answer = input('Enter a ' + stripped + ":")
processed_line = processed_line + answer
if word[-1] in '.,;?!':
processed_line = processed_line + word[-1] + ' '
else:
processed_line = processed_line + ' '
else:
processed_line = processed_line + word + ' '
return processed_line + '\n'
def save_crazy_lib(filename, text):
try:
file = open(filename, 'w')
file.write(text)
file.close()
except:
print("Sorry, couldn’t write file.", filename)
def main():
filename = 'lib.txt'
lib = make_crazy_lib(filename)
print(lib)
if (lib != None):
save_crazy_lib('crazy_' + filename, lib)
if __name__ == '__main__':
main()
We went ahead and added the
exception code to the save_crazy_
lib for you. Check it out.

you are here 4 423
saving and retrieving files
Ah, yes, that would polish this off nicely.
We haven’t used Python on the command line, but
if you open your command line and change your
directory to the location of your crazy.py file, then you
can run your code like this on the Mac:
python3 crazy.py
and like this on your Windows machine:
python crazy.py
Let’s add a command-line argument to specify the
Crazy Libs template, like this:
python3 crazy.py lib.txt
To get the lib.txt argument from the command line, we’ll
use Python’s sys module that includes an attribute
called argv. The argv attribute is a list that holds the
terms you typed into the command line (excluding the
Python command). For instance, if you type:
python3 crazy.py lib.txt
then item 0 of argv will hold crazy.py and item 1 will
hold lib.txt. Let’s see if we can use this, and polish off
our Crazy Lib game.
I’d love to use this
on different templates without
having to open the Python source
file to change the filename. Could I
supply a template filename using my
command line?
Run the program crazy.py
and use the lib.txt template.
def make_crazy_lib(filename):
try:
file = open(filename, 'r')
text = ''
for line in file:
text = text + process_line(line)
file.close()
return text
except FileNotFoundError:
print("Sorry, couldn't find", filename + '.')
except IsADirectoryError:
print("Sorry", filename, 'is a directory.')
except:
print("Sorry, could not read", filename)
placeholders = ['NOUN', 'ADJECTIVE', 'VERB_ING', 'VERB']
def process_line(line):
global placeholders
processed_line = ''
words = line.split()
for word in words:
stripped = word.strip('.,;?!')
if stripped in placeholders:
answer = input('Enter a ' + stripped + ":")
processed_line = processed_line + answer
if word[-1] in '.,;?!':
processed_line = processed_line + word[-1] + ' '
else:
processed_line = processed_line + ' '
else:
processed_line = processed_line + word + ' '
return processed_line + '\n'
def save_crazy_lib(filename, text):
try:
file = open(filename, 'w')
file.write(text)
file.close()
except:
print("Sorry, couldn’t write file.", filename)
def main():
filename = 'lib.txt'
lib = make_crazy_lib(filename)
print(lib)
if (lib != None):
save_crazy_lib('crazy_' + filename, lib)
if __name__ == '__main__':
main()
424 Chapter 9
adding command line arguments
Let’s add that final piece of polish and allow your user to specify a filename on the
command line. You’ll do that with two simple additions; go ahead and work through
the two additions and then give your code another, final, test drive.
A Test Drive
1
2
First import the sys module by adding an import sys to the top
of your crazy.py file.
Then let’s make a few changes to the main function in crazy.py.
import sys
def main():
if len(sys.argv) != 2:
print("crazy.py <filename>")
else:
filename = sys.argv[1]
lib = make_crazy_lib(filename)
if (lib != None):
save_crazy_lib('crazy_' + filename, lib)
We want there to be two arguments
or the user hasn’t provided a
filename. So let them know if there
aren’t two arguments.
Otherwise, the filename is the
command-line argument at
item index 1.
Terminal
$ cd /Users/eric/code/ch9
$ python3 crazy.py lib.txt
Enter a VERB_ING:running
Enter a NOUN:hotdog
Enter a VERB_ING:eating
Enter a ADJECTIVE:spicy
Enter a NOUN:taco
Enter a VERB_ING:breaking
Enter a NOUN:glass
$ cat lib.txt
The first thing that stands between you
and running your first, real, piece of hotdog,
is eating the skill of breaking
problems down into achievable spicy
actions that a taco can do for you. Of
course, you and the computer will also
need to be breaking a common glass, but
we'll get to that topic in just a bit.
$
Here's our command line on a Mac.
Here's what's in the file
crazy_lib.txt.
This time we'll need to
run our Python from the
command line. If you're
using a Mac, it’s called
the Terminal, which
you can find in the
Applications > Utilities
folder.
If you’re on a PC, it’s
called the command
prompt, which you can
find by clicking the Start
button, typing “cmd”, and
then choosing Command
Prompt.
Add this to the top
of your file.
Remember to use the “python”
command on a Windows machine.
You'll need to navigate to the correct directory that
contains your crazy.py file using your operating system's
cd (short for change directory) command.
On Windows you’ll
need to run python,
not python3.
you are here 4 425
saving and retrieving files
You have to open a le to access it from
Python.
To open a le use Python’s open function.
When you open a le you supply a mode:
'r' for reading or 'w' for writing.
The open function can take either a
relative path or an absolute one.
Call the le object’s close method when
you are done reading it or writing to it.
The open function supports several forms
of reading standard text les.
Use the read method to read the entire
contents of the le at once.
Reading an entire le may be resource
intensive for large les.
Use the readline method to read a single
line at a time.
The empty string signies when readline
has read the last line.
Or you can treat the le as a sequence
and use it in a for statement, as in for
line in le:
An iterator lets us iterate over a sequence
with the for/in statement.
The break statement prematurely stops
the execution of a for or while loop.
Most text les have a newline character
between lines of text.
The escape sequence \n represents a
newline character.
The strip method removes zero or more
occurrences of the specied characters
from the beginning and end of a string. If
no character is specied, strip defaults to
removing whitespace.
Use try/except to capture exceptions.
Place the code that may generate an
error in the try block and then one or
more except statements to catch the
exceptions.
An except without an explicit exception
acts as a catch-all.
The nally statement is always executed,
whether or not an exception occurs.
The sys module has an attribute argv that
contains your program’s command-line
arguments.
The argv attribute holds a list that contains
each word used on the command line.

426 Chapter 9
coding crossword
Coding cross
Let les sink into your brain as you do the crossword.
1 2
3
4 5
6
7 8
9
10
11
12
13 14
15 16
17
18
19
Across
3. Gets you the entire file.
4. Use try/except to catch these.
9. Windows and Mac disagree.
10. If your path isn't relative it must be.
11. A huge file might lead to these errors.
12. End of file when you hit this.
13. Holds your command line arguments.
14. Another name for \n.
15. How to access a file.
17. Our new game.
18. You can 'r' or 'w'.
19. Cleans up the ends of strings.
Down
1. Type of argv
2. An except without an explicit exception.
5. What's \n?
6. Always do this when you're done.
7. A design pattern.
8. Just need one line?
9. Module with argv.
13. When a finally statement is executed.
16. When you're done.
you are here 4 427
saving and retrieving files
Here’s what we came up with; depending
on the level of detail you went into, your
pseudocode may differ, but just make
sure we’re aligned on the general logic
before moving on.
1Read the text for the story
from le.
2Process text.
For each word in text
AIf word is a placeholder (NOUN
or VERB or VERB_ING or
ADJECTIVE):
BOtherwise, the word is ne;
keep it in the story.
3Store results.
Take the processed text with
the placeholders lled, and write
it out to a le with the lename
prepended by “crazy_”.
1
2
Prompt user for placeholder
part of speech.
Substitute user’s word for
the placeholder in text.
Somehow we’re going to read the
contents of the story into Python.
Then we’re going to start processing the
text by examining each word.
If we find a word that is
a placeholder, we need to
ask the user for a word
to replace it with.
And then we need to
substitute that word for
the placeholder in the
story text.
And if the word isn’t a
placeholder, then we just keep
the original word.
Finally, when we’re done
processing every word, we write
all the text of the story into
a new file.
Hey, it’s Chapter 9 already, so we have no doubt you can tackle the task
of creating a little pseudocode based on the previous two pages. Writing
up a little pseudocode now is going to give you a clearer idea of how to
approach writing the Crazy Libs game.
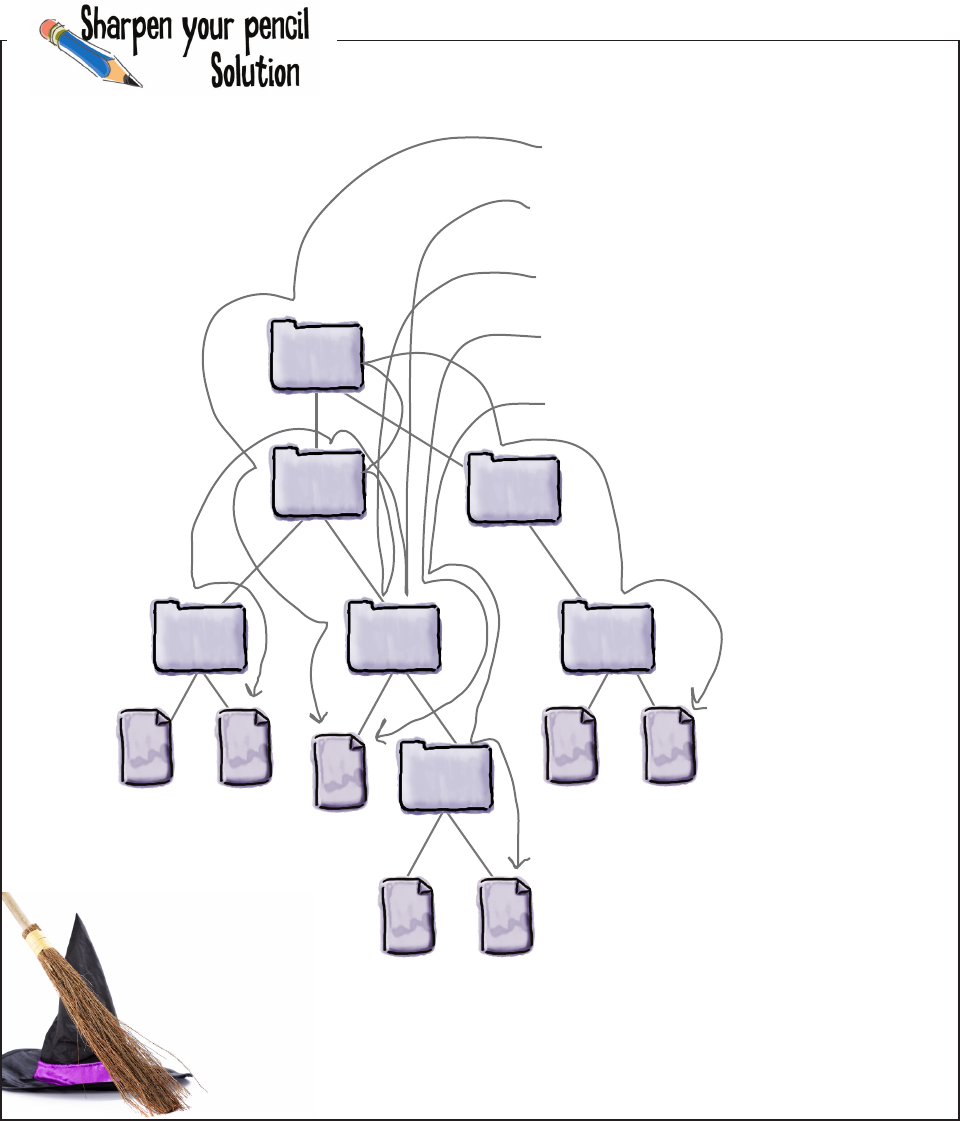
428 Chapter 9
exercise solution
Draw a line from each file path to the file it identifies. For any relative paths,
all code is run from the code directory.
/usr/harry/code/find.py
../inventory/map.pdf
../../hermione/spells/leviosa.txt
find.py
data/students.txt
nd.py
oculus.txt leviosa.txt
spells
data
harry hermione
code
usr
inventory
cloak.gif map.pdf
horcrux.db students.txt
you are here 4 429
saving and retrieving files
Code Magnets Solution
Can you help find the needle in the haystack? You’ve been given a directory of 1,000 files with the
filenames 0.txt through 999.txt, and only one has the word needle in it. Can you find the needle? We had
the code all written and on the refrigerator, but then someone came along and messed it all up. Can you
help us put it back together? Notice, there may be some extra code magnets, so you may not use all of
them.
for i in range(0, 1000):
filename = str(i) + '.txt'
file = open(filename, 'r')
text = file.read()
if 'needle' in text:
file.close()
Rearrange the
magnets here.
Iterate over all 1,000 files, constructing a
filename for each one of 0.txt, 1.txt, 2.txt...
Open the file for reading.
Read in the entire file, which
returns a string, assigned to text.
Check to see if the needle
in the string, and...
…if found, print out
the filename.
And don’t forget to
close each file.
print('Found needle in file ' + str(i) + '.txt')
Give it a try; look at the needle
directory in the ch9 source code
directory for the files 0.txt through
999.txt. Which file has the needle?
430 Chapter 9
exercise solution
Why is the code mysteriously skipping some of the nouns? Is it something
to do with the nouns or something more systemic? Take a look at the input
and output (and of course the code) and see if you can figure out the
problem.
Python 3.6.0 Shell
Enter a VERB_ING:buying
Enter a VERB_ING:pudding
Enter a ADJECTIVE:forgetting
Enter a NOUN:monkey
Enter a VERB_ING:eating
The first thing that stands between you
and buying your first, real, piece of NOUN,
is pudding the skill of breaking
problems down into achievable forgetting
actions that a monkey can do for you. Of
course, you and the computer will also
need to be eating a common NOUN, but
we’ll get to that topic in just a bit.
>>>
It looks like we’re skipping the
first noun, and the last.
The first thing that stands between you
and VERB_ING your first, real, piece of NOUN,
is VERB_ING the skill of breaking
problems down into achievable ADJECTIVE
actions that a NOUN can do for you. Of
course, you and the computer will also
need to be VERB_ING a common NOUN, but
we’ll get to that topic in just a bit.
If we look at the skipped noun
placeholders in the input (or
output) file, we can see what
is different is that they have
punctuation at the end of them. Argh! It’s the same old bug we saw
in Chapter 6 with the text analysis.
We need to account for the comma
(and we’ll assume period as well)
when comparing text against these
placeholders.
you are here 4 431
saving and retrieving files
Python 3.6.0 Shell
Traceback (most recent call last):
File "/Users/eric/code/ch8/errors/list.py", line 2, in <module>
item = list[5]
IndexError: list index out of range
>>>
list = [1, 2, 3, 4]
item = list[5]
Python 3.6.0 Shell
Traceback (most recent call last):
File "/Users/eric/code/ch8/errors/filename.py", line 1, in <module>
filename = "document" + 1 + ".txt"
TypeError: must be str, not int
>>>
filename = 'document' + 1 + '.txt'
Python 3.6.0 Shell
Traceback (most recent call last):
File "/Users/eric/code/ch8/errors/print.py", line 2, in <module>
print('First name: ' + name)
NameError: name 'name' is not defined
>>>
firstname = 'Beethoven'
print('First name: ' + name)
Python 3.6.0 Shell
Traceback (most recent call last):
File "/Users/eric/code/ch8/errors/ints.py", line 3, in <module>
int('E')
ValueError: invalid literal for int() with base 10: 'E'
>>>
int('1')
int('2')
int('E')
int('4')
int('5')
int('6')
Python 3.6.0 Shell
Traceback (most recent call last):
File "/Users/eric/code/ch8/errors/function.py", line 7, in <module>
hi()
File "/Users/eric/Documents/code/ch8/errors/function.py", line 4, in hi
print(msg)
UnboundLocalError: local variable 'msg' referenced before assignment
>>>
msg = 'hello'
def hi():
print(msg)
msg = 'hi'
hi()
Solution
Be the Python
Interpreter
Let’s take a moment for a little exercise that is going to show you some
of the problems the Python interpreter has to deal with on a daily basis.
Then we’ll see what we can do about them with code. Your job is to act
like you’re the Python interpreter. You need to parse each piece of code
and execute it. Write any output or errors in the Python Shell window.
432 Chapter 9
exercise solution
Python 3.6.0 Shell
Got a number? 0
You can’t divide by zero!
Thanks for stopping by.
>>>
Python 3.6.0 Shell
Got a number? zero
Excuse me, we asked for a number.
Thanks for stopping by.
>>>
try:
num = input('Got a number? ')
result = 42 / int(num)
except ZeroDivisionError:
print("You can't divide by zero!")
except ValueError:
print("Excuse me, we asked for a number.")
else:
print('Your answer is', result)
finally:
print('Thanks for stopping by.')
Python 3.6.0 Shell
Got a number? 2
Your answer is 21.0
Thanks for stopping by.
>>>
Trace through the code below three times. The first time, enter any number
except 0. The next time, enter 0. The last time, enter the string "zero".
Write in the output you expect.
Input a number other than 0
Input 0
Input the string "zero"
you are here 4 433
saving and retrieving files
File i/o cross Solution
L
1C
2
I R
3E A D
E
4X C E
5P T I O N S T
S T C
6C
C I
7R
8L H
S
9E P A R A T O R E O A
Y P E A
10 B S O L U T E
S M
11 E M O R Y D E L
S A L
E
12 M P T Y S T R I N G
Q O N
U A
13 R G V N
14 E W L I N E
E L
O
15 P E N W C
16
C
17 R A Z Y L I B S
M
18 O D E Y O
S S
19 T R I P
E
Across
3. Gets you the entire file. [READ]
4. Use try/except to catch these. [EXCEPTIONS]
9. Windows and Mac disagree. [SEPARATOR]
10. If your path isn't relative it must be.
[ABSOLUTE]
11. A huge file might lead to these errors.
[MEMORY]
12. End of file when you hit this.
[EMPTYSTRING]
13. Holds your command line arguments.
[ARGV]
14. Another name for \n. [NEWLINE]
15. How to access a file. [OPEN]
17. Our new game. [CRAZYLIBS]
Down
1. Type of argv [LIST]
2. An except without an explicit exception.
[CATCHALL]
5. What's \n? [ESCAPESEQUENCE]
6. Always do this when you're done. [CLOSE]
7. A design pattern. [ITERATOR]
8. Just need one line? [READLINE]
9. Module with argv. [SYS]
13. When a finally statement is executed.
[ALWAYS]
16. When you're done. [CLOSE]
try:
num = input('Got a number? ')
result = 42 / int(num)
except ZeroDivisionError:
print("You can't divide by zero!")
except ValueError:
print("Excuse me, we asked for a number.")
else:
print('Your answer is', result)
finally:
print('Thanks for stopping by.')

this is a new chapter 435
You Really Should
Get Out More
10
using web apis
You’ve been writing some great code, but you really
need to get out more. There’s a whole world of data just waiting for
you on the web: Need weather data? Or how about access to a huge database
of recipes? Or are sports scores more your thing? Maybe a music database of
artists, albums, and songs? They’re all out there for the taking from Web APIs.
To use them all you need is to learn a bit more about how the web works, how
to speak the local web lingo, and how to use a couple of new Python modules:
requests and json. In this chapter we’re going to explore Web APIs and take
your Python skills to new heights; in fact, we’re going to take them all the way to
outer space and back.
Yes, please do bring the
car around; we really should
get out and see some of these
Web APIs we’ve been hearing so
much about.
You think we’re kidding!

436 Chapter 10
using web apis
Extending your reach with Web APIs
You’ve seen a recurring pattern in this book: first you took your code and abstracted it
away into functions. Once you did that, you could make use of the functionality in a
function without having to worry about all the details of how the function does what
it does. This allowed you to elevate your thinking above the level of simple statements.
Next you packaged things up into modules that contained a whole set of functions
and values. Remember the code you handed to Cory? He was able to quickly look at
your documentation, see what functions were available, and make use of them. That’s
an API. Think of an API, otherwise known as an application programming interface, as a set
of documented functions that anyone can use in their code.
You’ve also seen there are modules created by other developers, which you can
think of as APIs, available to you in Python. These modules—modules for math
and random numbers and graphics and turtles and a lot more—really allow you to
expand the capabilities of your own code.
And now we’re going to take abstraction one step further by considering code on the
internet that you can use to extend the capabilities of your code. Only this code isn’t
necessarily written in Python, it’s code that runs on the web and it’s accessible through
a Web API.
You might be asking, though, what kind of API would we find on the web? How
about an API that computes and returns weather current conditions, or information
about songs and music artists? Or how about an API that gives you the actual
location of objects in outer space?
Though are all actual Web APIs and they’re just a few examples from a vast catalog
of information available to your code over the internet.
Pretend your boss just walked in and asked you to quickly write an
application that shows the current local weather conditions—and he
needs it for a demo tomorrow. How much would it help to use a Web
API that gives you the actual current weather conditions? How would
you write the app without such a service? How long do you think it
would take to write your app in each case?
We’ve seen another
example of abstraction
with object-oriented
programming. We’ll be seeing
even more of that coming
up in Chapter 12 when we
learn how to create our
own objects.

you are here 4 437
web services
How Web APIs work
With Web APIs we don’t call a function in a module or library; instead, we
issue a request over the web. So, rather than looking at a set of functions that
a module provides, we look at the different web requests we can issue to a
web server to understand its Web API.
Issuing a web request is something you already know how to do if you
know how to use a web browser. And who doesn’t? You do it every time
you request a web page.The main difference with a Web API is that your
code makes the request to a web server, and that server sends back data,
rather than a page, to your code.
In this chapter we’re going to take a close look at how all this works, and
where Python fits into it—but for now, let’s take a look at how an actual
Web API request works:
Think of a Web API as just a web server, only it serves
up data rather than pages. To make use of a Web API,
your code sends a request to a web server. The web
server in turn generates a response, and sends it
back to your code.
To use a Web API, send it a request
Your Python code
request
Can I get the weather
conditions for London?
Sure!
67.2 degrees with
a 40% chance of rain
{
"temperature": 67.2,
"precip_prob": "40%",
"location": {
"city": "London",
"country": "UK"
}
}
Here's the
response; more
on this in a sec.
A web server,
waiting for API
requests
response
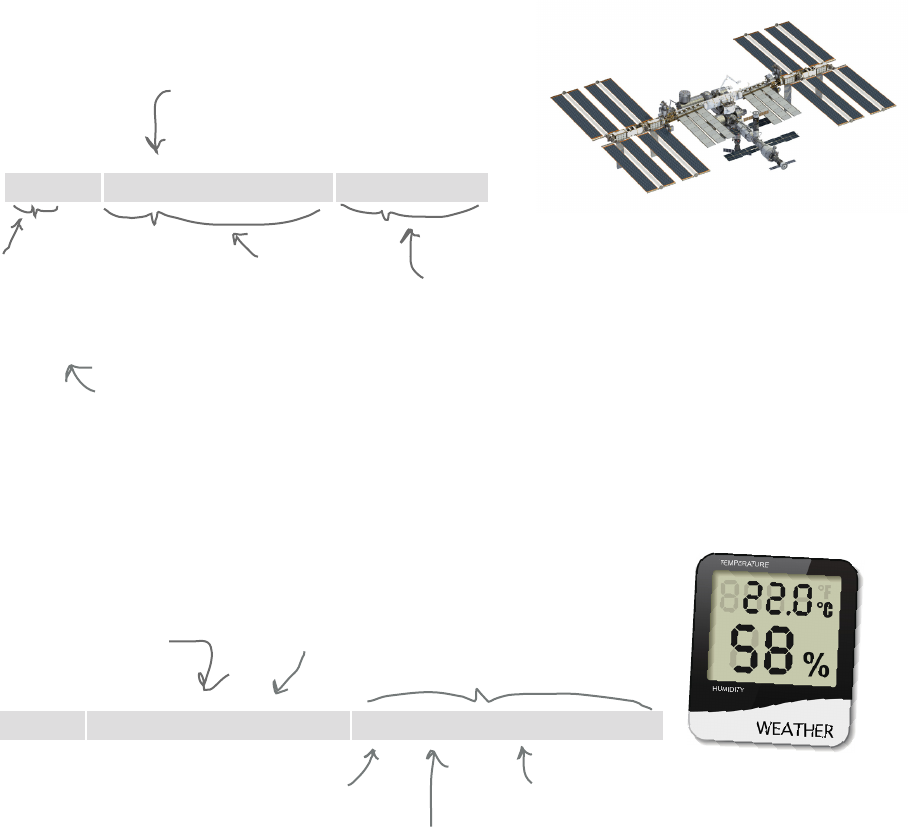
438 Chapter 10
web apis and web addresses
http://api.openweathermap.org/data/2.5/weather?q=London
http://api.open-notify.org/iss-now.json
They always start with the
communication protocol, in
this case HTTP. This is
the same protocol used by
your browser.
First of all, we call web addresses
“Uniform Resource Locators,” or URL
for short. URL is pronounced “Earl”
or “U-R-L.”
Next we have
the actual
server’s name
on the internet.
Then we have a description
of the resource we’re after.
Here we’re interested in
the current location of the
International Space Station.
Here’s another
URL to a web
service for
weather data.
For this Web API
we start by telling
it we want data… …using version 2.5
of their API…
…and we’d like
the weather for
London.
Once again we
have the server
for the API. And a very different-
looking description of
the resource we’re after.
All Web APIs have a web address
With Web APIs we use web addresses similar to the ones you type into
your browser—they contain a server name along with a description of
a resource. With a web browser, that resource is typically a web page.
With a Web API, the resource is data, which can vary greatly. The
way we specify the resource for a Web API can also vary quite a bit,
depending on the Web API. Let’s take a look at a few examples:
Let’s look at another example, this time weather data for the
city of London from the Open Weather Map organization:
HTTP stands for the Hyptertext Transfer Protocol. Find out more about it at
https://en.wikipedia.org/wiki/Hypertext_Transfer_Protocol.
you are here 4 439
web services
http://api.spotify.com/v1/artists/43ZHCT0cAZBISjO8DG9PnE/related-artists
Here we’re using version 1
of the API. We’re asking for data for
a particular artist.
Here’s the ID of
the artist we’re
interested in.
As always we have our
server name. Any idea what
artist this
is? Would the
nickname “The
King” help?
And we’d like data
on related artists.
And one more example: how about looking up some
related artist information on Spotify?
All of those
web addresses look
completely different, so how
are we supposed to know how
to make a request?
Consult the API documentation.
We’re serious. And it’s not as bad as it sounds. All Web APIs follow the
standard syntax for a web URL (and you can look that up if you’re
interested), but they expose very different APIs for very different types
of data. So, the way you request that data often looks quite different.
Look at our examples: the Open Notify URL is quite simple, while the
Spotify URL is more complex.
You’ll find that most Web APIs provide adequate documentation
for knowing how to form a request URL to access whatever type of
information you’re looking for. Hang tight, because we’re going to
explore Open Notify API in just a bit.
440 Chapter 10
accessing web apis
Good point.
Making a Web API request through a browser is often
a great way to explore an API firsthand. That said,
many Web APIs require that you register (usually free)
as a developer before using their services. Registering
usually gets you an authorization token or an access key,
which you pass along when you’re making your requests.
Without the access token, many of these APIs will send
back an error, such as your “no token” error.
So, the best thing to do is to review the Web API’s
documentation for any access tokens it requires.
In our examples so far, the Spotify and Open Weather
Web APIs require access tokens. The Open Notify API,
however, doesn’t currently require a token.
I typed the
Spotify URL into my
browser and I got a “no
token” error.
Enter the following URL in your browser. What do you get?
http://api.open-notify.org/iss-now.json
Try retrieving this URL multiple times. You can also try entering the longitude and
latitude, like “-0.2609, 118.8982,” directly into Google Maps (latitude first).
you are here 4 441
web services
Time for a quick upgrade
Before we start making requests to Web APIs, we’re going to
quickly add a new package to Python that will help us make those
requests. What’s a Python package? As we mentioned in Chapter
7, a package is just a formal name for a set of related Python
modules—you could also informally call it a library.
To add a new package we’re going to use the pip utility, which is
an acronym for “Pip Installs Packages.” Using pip, you can add
packages (or remove them later) to your local installation.
With pip, we’re going to add a handy package called requests,
which allows us to make requests to Web APIs. More specically,
we’ll be using the requests module, which comes as part of the
requests package (not to be too confusing). Now we should tell
you that Python does have its own built-in module for making web
requests, but a lot of coders nd requests easier to use and more
functional than the built-in module. Using the requests package
also gives us an excuse to gain some experience using pip.
Let’s get requests installed and then we’ll see what this package
is all about.
Can you say
“recursive acronym”?
You can read more about the
requests package and module at:
http://docs.python-requests.org.
Who might we be referring
to? Oh, just Twitter, Spotify,
Microsoft, Amazon, Lyft,
BuzzFeed, Reddit, the NSA, and
we could go on, and on, and on...
We often call packages
written by other developers
and organizations (outside of
Python’s core development team)
third-party packages.
442 Chapter 10
installing the requests package
Terminal
$ python3 -m pip install requests
Use your operating system’s command line like
we did in Chapter 9. If you’re using a Mac you’ll
want the terminal app, on a Windows machine use
the command prompt, and on Linux-oh, who are
we kidding? If you are using Linux, you live in the
command line.
Terminal
$ python3 -m pip install requests
Collecting requests
Downloading requests-2.18.1-py2.py3-none-any.whl (88kB)
100% |████████████████████████████████| 92kB 1.4MB/s
Collecting idna<2.6,>=2.5 (from requests)
Downloading idna-2.5-py2.py3-none-any.whl (55kB)
100% |████████████████████████████████| 61kB 2.5MB/s
Collecting urllib3<1.22,>=1.21.1 (from requests)
Downloading urllib3-1.21.1-py2.py3-none-any.whl (131kB)
100% |████████████████████████████████| 133kB 2.5MB/s
Collecting certifi>=2017.4.17 (from requests)
Downloading certifi-2017.4.17-py2.py3-none-any.whl (375kB)
100% |████████████████████████████████| 378kB 2.2MB/s
Collecting chardet<3.1.0,>=3.0.2 (from requests)
Downloading chardet-3.0.4-py2.py3-none-any.whl (133kB)
100% |████████████████████████████████| 143kB 4.1MB/s
Installing collected packages: idna, urllib3, certifi, chardet, requests
$
Q: Why do you prefer the requests module
over something built into Python? Wouldn’t
Python’s built-in module always be the way
to go?
A: The creators of the requests package
created a library for making web requests that
is arguably more straightforward and provides
better functionality than what Python gives you
out of the box, so much so that it is in everyday
use by many online products and services. That
said, there is nothing wrong with Python’s built-in
requests module (which, by the way, is called
urllib, or is it urllib2? See, it’s already confusing!),
if you want to use that.
That’s one great thing about being able to
extend Python or most programming languages:
developers are free to create their own
extensions and share them with others.
Q: That’s cool I can add new packages to
Python. How do I find out all the packages I
can add?
A: You can search for new packages right
from the command line, like this:
python3 -m pip search hue
which will search for packages that match the
‘hue’ keyword. Another great way to find Python
packages is to search for them with Google using
search terms like “python3 request module” or
“python3 hue lighting,” as an example. Also, check
out http://pypi.org, a repository of software for
Python.
Q: I’m running Python 3, but it doesn’t
seem to support pip.
A: pip was added to Python with release 3.4;
double-check your version number and upgrade
to the latest version. Check with https://www.
python.org for the latest release.
Doing the upgrade
The pip utility is built into Python, so get yourself into the
appropriate command line for your operating system and
let’s get the requests package installed.
Go ahead and enter the command above to start the installation.
Note, you need to be connected to the internet for pip to
retrieve and install packages. Also note this is installing in
Python’s library directory, not your current working directory.
If you encounter any permission errors, make sure your user
account has sufficient privileges to install new packages.
Here you can see pip retrieving the requests module, as well
as related packages it depends on. Note this is the macOS
X install, so your installation may look slightly different.
[Note from editor:
apparently, you love
this Linux joke.]
Windows users
should use “python”
and not “python3”.
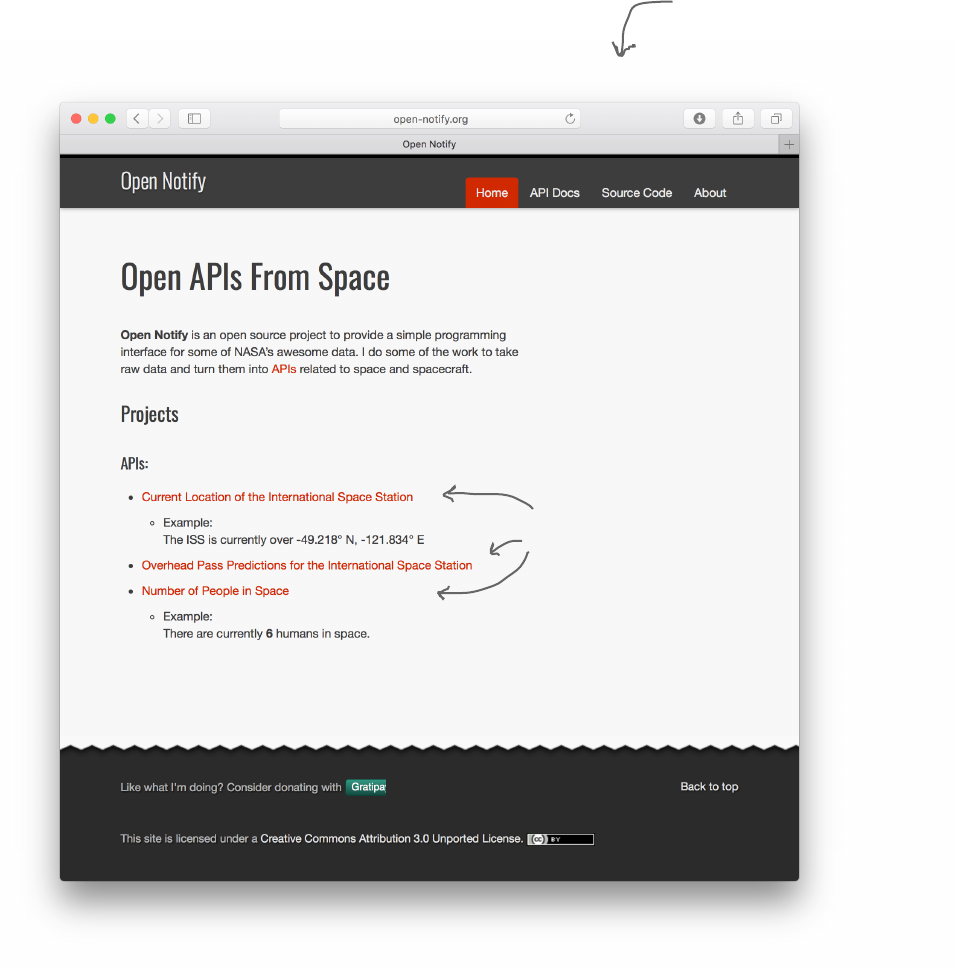
you are here 4 443
web services
All we need now is a good Web API...
Now that you have the requests package installed, you’re nally ready
to make your rst web request from Python. Of course to do that, you
need an interesting Web API to make a request of. If you’ll remember in
the beginning of this chapter we promised to take you to outer space and
back, and we’re going to do that using a Web API that provides the current
location of the International Space Station (ISS). You’ll nd it at open-notify.
org. Let’s take a look at what Open Notify oers:
Open Notify
supplies three
different services.
Visit open-notify.org
to check out more
documentation for the
ISS API. You’ll find the
highlights here.
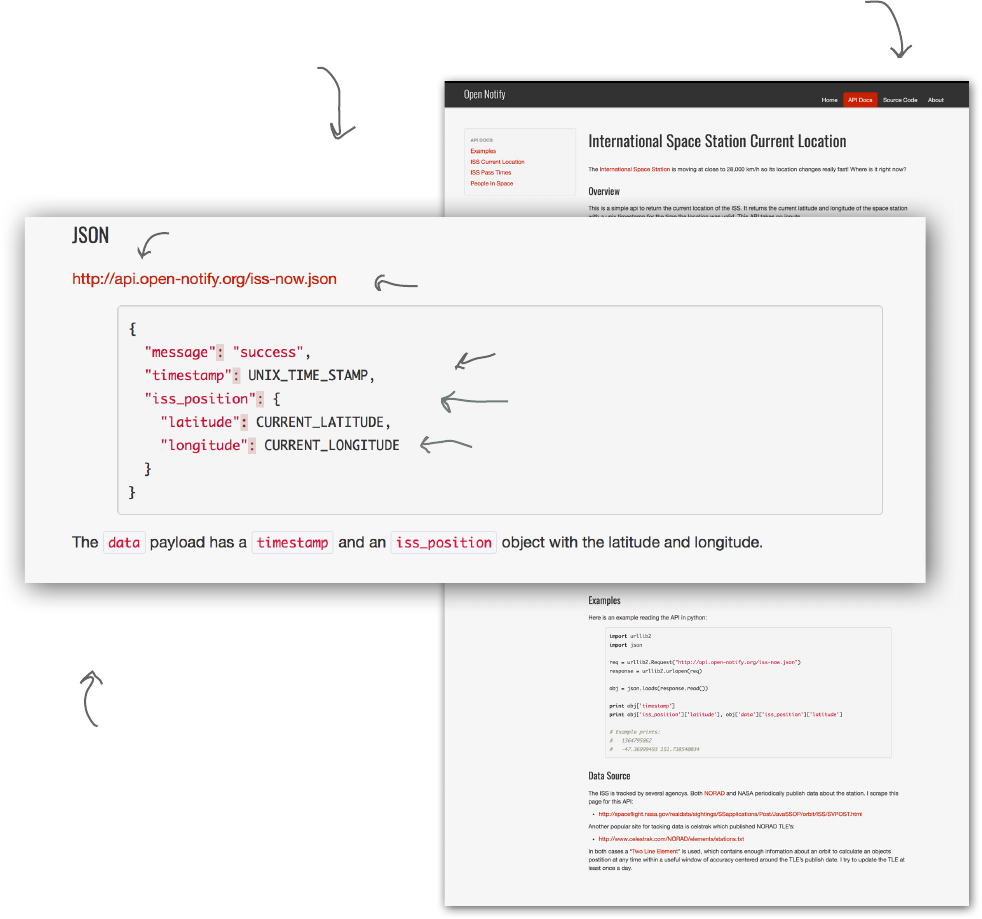
444 Chapter 10
how web apis are documented
A closer look at the API
As you can see on open-notify.org’s front page, there are three “Open APIs from
space”: an API for getting the ISS’s current location, an API for making overpass
projections, and an API for getting the number of people in space. We’re going to
start by looking at the current location API, which you can see more detail on by
clicking on the “Current Location of...” link:
The Open Space APIs were written
and are maintained by Nathan
Bergey, a rocketeer in Portland,
Oregon. You’ll find him on twitter
at @natronics.
Here are the docs for the ISS
Current Location API.
If you were paying attention
earlier in the chapter, you’ve
already seen that this API
returns the current latitude and
longitude of the International
Space Station.
Here’s how to form the request URL to get
the current location.
Here’s the request URL.
And here’s an example of a
response from the API.
We’re interested in the iss_position key, which
has a value that is another set of key/value pairs
holding the latitude and longitude.
This looks like a set of key/value pairs.
Sound familiar? More on that in a bit.
you are here 4 445
web services
{
"temperature": 67.2,
"precip_prob": "40%",
"location": {
"city": "London",
"country": "UK"
}
}
The JSON
format wraps a
set of key/value
pairs in curly
braces.
Each pair consists of
a string that acts as
a key, and a value...
...values can be
strings or numbers.
Pronounced Jason, usually with
an emphasis on the “on.”
When used with a Web API, this entire
definition is placed into a text string
and sent back as a response.
request
{
"temperature": 67.2,
"precip_prob": "40%",
"location": {
"city": "London",
"country": "UK"
}
}
response
JSON being
returned
Note you can also
specify lists, or, what
JSON calls an array,
with JSON.
Values can even be
another, nested set
of key/value pairs.
There are other
formats for
exchanging data
over the web, but
you’ll find JSON is
the most popular.
All keys are
strings in JSON.
Web APIs provide data using JSON
Who’s JSON, you say? JSON is actually an object notation that most Web APIs use to
deliver their data. You’re going to find this notation familiar, because it is syntactically
quite similar to Python dictionaries.
Think of JSON as a set of key/value pairs specified as text. For example, say a weather
Web API wants to send you the current conditions for London. It would create JSON
that looks something like this and ship it your way:
The data returned from the Open Notify Web API should look a bit
familiar. Is there a Python data type it reminds you of?
446 Chapter 10
more on json and dictionaries
Q: So are Python dictionaries and
JSON the same thing?
A: It is easy to confuse the two given
how much they look alike. Think of it like
this: in Python when you specify code for
a dictionary, at some point the interpreter
reads that code and translates it to an
internal data structure, which your code
makes use of. But with JSON, we’re
specifying a set of key/value pairs that we
can send over the network purely in a text
format to another program or service. So
JSON isn’t Python; rather, it’s meant to be
a general-purpose format than can be read
and interpreted by any language.
That said, it is rather nice the two are so
much alike.
Q: So if I’m going to receive JSON as
just text, how can my code use that?
A: Hang tight—you’re asking the right
question, and we’ll get to that in just a bit.
Q: Why is it called JSON?
A: While JSON is meant to be a format
independent of any programming language,
it did grow out of one language in particular:
JavaScript. So JSON stands for JavaScript
Object Notation.
Q: I’m still confused. How do I know
what Web APIs are out there and how I
can use them?
A: You’ll find clearinghouses for
web-based APIs on sites such as www.
programmableweb.com. Most companies
with APIs also provide documentation, like
dev.twitter.com, or developer.spotify.com, to
name a couple.
Take the JSON on the previous page and convert it, by hand, into a Python
dictionary in the space below. After you’ve done that, complete the code
below. You’ll need to look at the output to know what it does.
current =
loc = _________________________
print('In',
loc['city'] + ', ' + ____________,
'it is',
___________________,'degrees')
Python 3.6.0 Shell
In London, UK it is 67.2 degrees
>>>
______________________________________
______________________________________
______________________________________
______________________________________
______________________________________
______________________________________
______________________________________
Soon you’ll ask
your code to do
this for you.
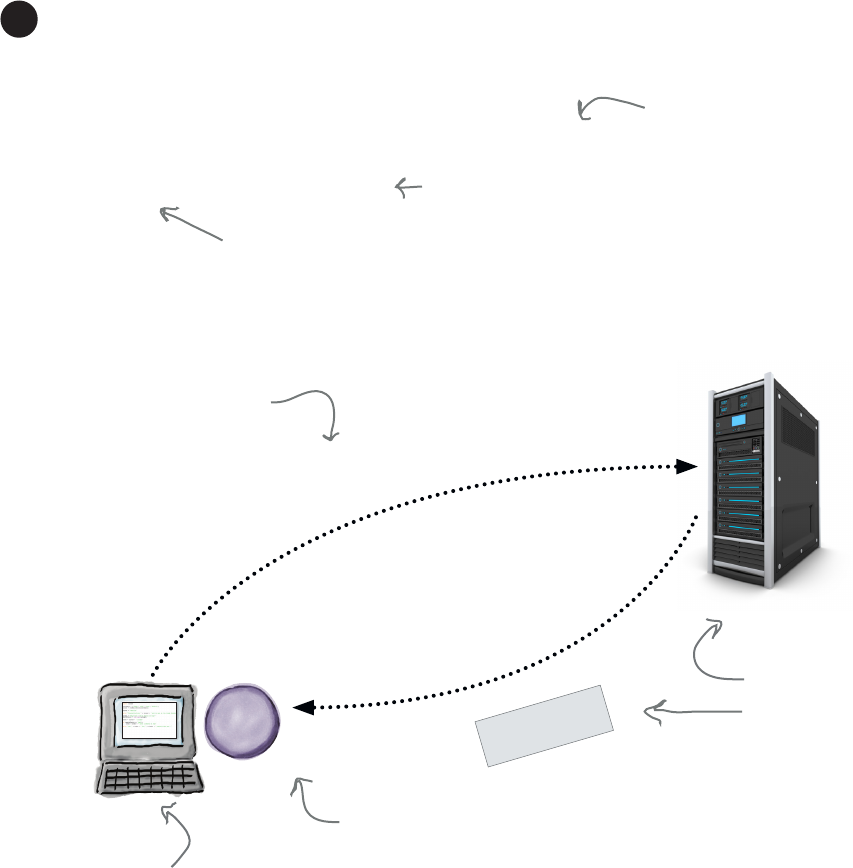
you are here 4 447
web services
Now let’s look at that request module again
To make a web request we’re going to use the requests module’s get
function. Here’s how it works:
Your Python code
request.get(url)
The open-notify.org
web server receives the
request and sends back a
response in JSON format.
url = 'http://api.open-notify.org/iss-now.json'
response = requests.get(url)
First we call the requests module’s get function to make the
actual request to the remote web server.
Use get to make the request.
1
Here’s the URL we got from the
Open Notify documentation.
We pass the URL to the get
function, upon which the function
contacts the remote web server.
When a response is received from the
remote server, the function first
packages it up in a nice response object,
and then returns it.
Response object
text
status_code
headers
When the get function receives
the response it packages it up
into a response object. We’ll look
at this object next and see how
to use it.
When you call the get function,
a request is sent to the web
server at the supplied URL.
{
"temperature": 67.2,
"precip_prob": "40%",
"location": {
"city": "London",
"country": "UK"
}
}
response
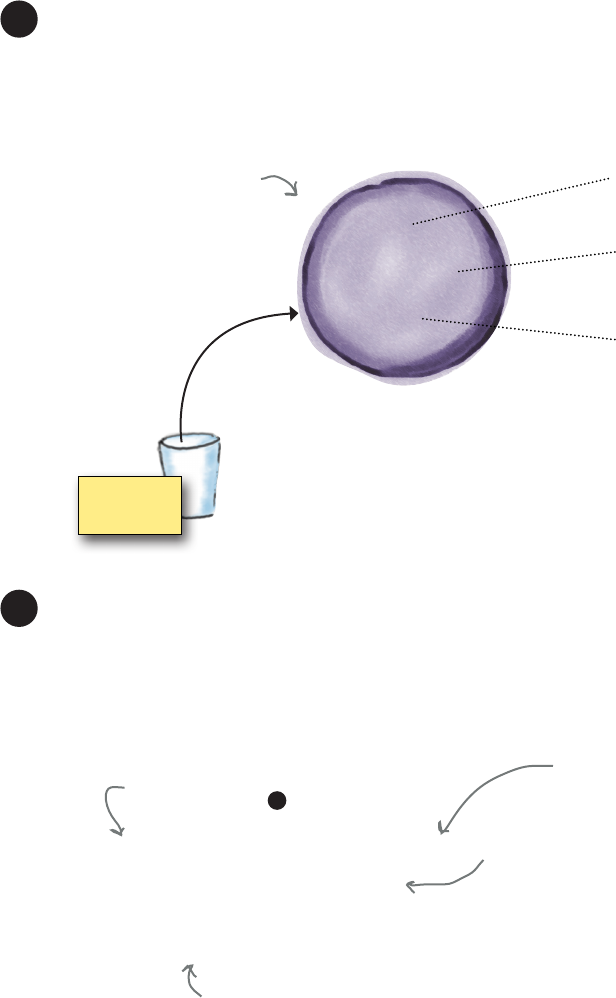
448 Chapter 10
the response object
As we said, after the get function receives a response from the
server it packages it up in a response object. Let’s take a look:
Examine the response object.
2
Response object
text
status_code
headers
The text property holds the real data of
the response, typically in JSON format.
The status code holds a diagnostic code
for the request. A code of 200 means the
request was fulfilled without errors.
The headers are used to supply other
information about the response, such
as the content type of the response. For
instance, the JSON encoding is called
application/json.
Here are some of the more
important attributes in
the response object. For
our purposes the text and
status_code attributes are
the ones to pay attention to.
response
When we get a response from the web server, we need to first check
its status code. A code of 200 means that the request was satifised. Of
course other codes are possible as well, such as error codes. Assuming
we get a 200 status code, we then use the text attribute to obtain the
data returned from the Web API. Here’s another little code fragment to
do that. Check it out and we’ll put it all together on the next page.
Check the status_code and grab the text data.
3
if (response.status_code == 200):
print(response.text)
else:
print("Houston, we have a problem:", response.status_code)
Otherwise, we've got an issue. For now we'll print
the error. Remember, you can find a complete list
of common status codes at https://en.wikipedia.org/
wiki/List_of_HTTP_status_codes.
If the status code was 200, we should
have some data in the text attribute.
Let’s check the status code
and make sure we got a
code of 200, for success.
We’re using the response
object we got in .
1
you are here 4 449
web services
Putting it all together: making a request to Open Notify
Let’s set a variable url to the URL
address of the ISS web service.
Alright, we truly have all we need to make a request, so let’s do that. You know how to call the get
function with a URL to make an actual request to a Web API, and we know from the open-notify.org page
what URL we need. You also know that the response object has a status_code you should check (and
make sure we get a code of 200, meaning success) before you use the response object’s text attribute.
So, let’s now put it all together and reach out and touch the Open Notify Web API:
import requests
url = 'http://api.open-notify.org/iss-now.json'
response = requests.get(url)
if (response.status_code == 200):
print(response.text)
else:
print("Houston, we have a problem:", response.status_code)
First, import the
requests module.
Then we use the get function, passing it
the URL we’d like to get data from.
And then let’s print the
response to see what we got.
Remember, we’re printing
the text property of the
response, which holds the
data sent back to us from
the Web API.
Here’s the
response
object.
Let's check the status code to make sure
everything was okay (that is, code 200).
If the response code wasn't 200,
we've got some kind of issue, so let's
print out what it is. You can find a
full list of status code on Wikipedia:
https://en.wikipedia.org/wiki/List_
of_HTTP_status_codes.
Let’s do a quick sanity check before proceeding...
At the time of writing, the ISS location service is a working, healthy
service. Of course there are no guarantees in the future; so if for some
reason the ISS location service is not operating as you’re reading this
book in 2036, we have a backup plan for you—check out the page http://
wickedlysmart.com/hflearntocode to see if you need to alter anything in
the rest of this chapter; most likely you won’t, but it never hurts to check
first!
450 Chapter 10
json and python
How to use JSON in Python
So we’ve got our response from the ISS location service, and we’re seeing JSON in the response,
but right now it’s just a text string, which isn’t of much use, other than the fact we can print it. That’s
where Python’s json module comes in; the json module gives us a function, loads, which takes a
string containing JSON and translates it into a Python dictionary. How convenient is that? Here’s an
example of how the json module’s load function works:
Get the code on the previous page into a file called iss.py, save your
code, and choose the Run > Run Module menu item to make sure
everything’s good.
A Test Drive Flight
Python 3.6.0 Shell
{"iss_position": {"longitude": "-146.2862", "latitude":
"-51.0667"}, "message": "success", "timestamp": 1507904011}
>>>
Here's what we got.
Problems?
If you aren't seeing this output,
first check to see if there is
a status code other than 200
being reported (and look it up to see what it
signifies). Not seeing a status code? Paste
the URL into your browser to make sure you
have connectivity and the service is up and
running. Next, double-check your code, and
double-check that the request package really
got installed. Check any exceptions reported to
the shell as well. If it appears as if something is
wrong with the Open Notify service, then revisit
the Watch it! on the previous page.
Any idea where this
location is?
import json
json_string = '{"rst": "Emmett", "last": "Brown", "prex": "Dr."}'
name = json.loads(json_string)
print(name['prex'], name['rst'], name['last'])
You need a live internet
connection for this test drive!
First we need to import
the json module.
And here’s a string containing JSON.
Note, to Python, this is just a string
with some text it.
So let’s call json.loads on the string, and assign the resulting
dictionary to the variable name.
And finally let’s use the
Python dictionary to
access the first and last
name attributes along with
the prefix attribute.
Python 3.6.0 Shell
Dr. Emmett Brown
>>>
Just a reminder: if you go
testing this code, do not call it
json.py (the same name as the
module json). We discussed that
issue in Chapter 7.
you are here 4 451
web services
Using the JSON module on our ISS data
With the json module now on our toolbelt, let’s get it into our code and
get access to the space station’s latitude and longitude. Doing that is pretty
straightforward: we already have the JSON from the Open Notify servers
in our response object, so we just need to use the loads function from
the json module to convert that to a Python dictionary.
Make the updates above in your iss.py file, save your code, and give
it another test run.
A Test Drive Flight
Python 3.6.0 Shell
International Space Station at -51.5770, -108.2028
>>>
Here's what we got. Looking nice!
What about this
location? Any idea
where it is?
import requests, json
url = 'http://api.open-notify.org/iss-now.json'
response = requests.get(url)
if (response.status_code == 200):
response_dictionary = json.loads(response.text)
print(response.text)
position = response_dictionary['iss_position']
print('International Space Station at ' +
position['latitude'] + ', ' + position['longitude'])
else:
print("Houston, we have a problem:", response.status_code)
Add an import for the json module. We’re
separating module names by commas so we
can put them on the same line.
Now let’s use json.loads to take the
JSON response, in string form, and
convert it to a Python dictionary.
Now let’s grab the
iss_position value, which is
itself another dictionary.
And then print
the lat and
long values from
the position
dictionary.
It’s unlikely the ISS
will be in exactly the
same location when
you run your code, so
your results will be
slightly different.

452 Chapter 10
adding a graphical display
“If I see one
more Python
Shell app,
you’re
fired!”
Let’s add some graphics
Displaying the ISS location in text is, well,
just not acceptable. After all, this is Chapter
10, so we should be displaying the ISS’s
location on a nice map, or something. Well,
we have the technology—we’re going to dust
o our Python turtles and have a nice ISS
display in no time. We kid you not.
you are here 4 453
web services
import requests, json, turtle
screen = turtle.Screen()
screen.setup(1000,500)
screen.bgpic('earth.gif')
screen.setworldcoordinates(-180, -90, 180, 90)
url = 'http://api.open-notify.org/iss-now.json'
response = requests.get(url)
if (response.status_code == 200):
response_dictionary = json.loads(response.text)
position = response_dictionary['iss_position']
print('International Space Station at ' +
position['latitude'] + ', ' + position['longitude'])
else:
print("Houston, we have a problem:", response.status_code)
turtle.mainloop()
earth.gif
You'll find this image in the
book's ch10 folde;, grab it and
place it in your own folder.
Meet the screen object
Like we said, dust off those turtle skills. We’re actually going to
take those skills a little further by once again using the screen
object we saw in Chapter 7. Recall that the screen object lets you
change a few properties associated with the turtle window.
So let’s add the turtle module to this code, and see how we’re
going to use the screen object. You can go ahead and make these
additions to your iss.py file.
We still say “window” would
have been a better name
than screen for this object,
but they didn’t really ask
for our opinion.
Add the turtle module.
This sets the entire window’s
background to an image.
We’re going to increase the size of the window to 1000 by 500
pixels, which matches the size of the image we’re about to add.
This first line just gets a reference
to the turtle’s screen object.
This resets the coordinate system
of the turtle window; we talk
about this on the next page.
Just some housekeeping to
display the turtle window,
like in Chapter 7
Get the “earth.gif”
image from the book’s
source code ch10 folder.

454 Chapter 10
adjusting the coordinate system
Turtle Coordinates & Earth Coordinates
0,0
180,–90
180,90–180,90
–180,–90
As you already know, the turtles live on a grid that
is centered on the x and y-coordinate 0,0. We’ve set
the grid to be 1000×500, so our grid ranges from
–500,–250 in the bottom-left corner to 500,250 in the
upper-right corner.
The Earth has its own grid system with latititude
lines running west and east and longitude lines
running north and south. Longitude runs from
–180 to 180, with 0 being at the Prime Meridian.
For latitude, the equator is at 0, running to 90 at
the North Pole and –90 and at the south-most
point.
180,–90
180,90
–180,90
–180,–90
0,0
Prime Meridian
We can easily reset the grid system of the turtles, and
have our turtle grid match the earth coordinates with
the statement:
screen.setworldcoordinates(-180, -90, 180, 90)
which resets the turtle grid so the lower-left
coordinate is –180, –90 and the upper-right
coordinate is 180, 90. Our screen will retain its shape
and size, but all turtle movement will be mapped
using the new coordinate system.
0,0
500,–250
500,250–500,250
–500,–250
Center of turtle world
Using the setworldcoordinates method
we’ve set the coordinate system of the
turtles to match that of the Earth.
Let’s take a closer look at the call to the setworldcoordinates method, which you’ll see
plays a big role in determining how we locate the ISS’s position on our graphical map.
This means we can now use common longitude and latitude
coordinates to position the turtles on the screen.

you are here 4 455
web services
Python 3.6.0 Shell
International Space Station at -47.8777, -177.6666
>>>
Let’s do a quick test before going further. Make the code additions
from the past few pages, and then make sure you have the image
earth.gif (again, you’ll find it in the ch10 folder in the book’s source
code) in the same directory as your code. Then give it a run.
A Test Drive Flight
If you see this, you’re in business.
All we’re doing so far is changing
the windows resolution, displaying
a background image, changing the
shape and color of the turtle, and
changing the coordinate system.
Let’s add a turtle to represent the ISS
Have you figured out how we’re going to use a turtle to track the location of the ISS on the map? Well, let’s
add a turtle and find out. Make sure you add the code below to your iss.py file:
import requests, json, turtle
screen = turtle.Screen()
screen.setup(1000,500)
screen.bgpic('earth.gif')
screen.setworldcoordinates(-180, -90, 180, 90)
iss = turtle.Turtle()
iss.shape('circle')
iss.color('red')
url = 'http://api.open-notify.org/iss-now.json'
response = requests.get(url)
if (response.status_code == 200):
response_dictionary = json.loads(response.text)
position = response_dictionary['iss_position']
print('International Space Station at ' +
position['latitude'] + ', ' + position['longitude'])
else:
print("Houston, we have a problem:", response.status_code)
turtle.mainloop()
Let's instantiate a turtle,
change its shape to a circle,
and make its color red.
On the map, this circle is
going to represent (for
now) the location of the
ISS over the earth.
You should see a red circle, which is
really a turtle, positioned at its default
starting place at 0,0, only this time
that’s a longitude and latitude.
Oh, is
that all?
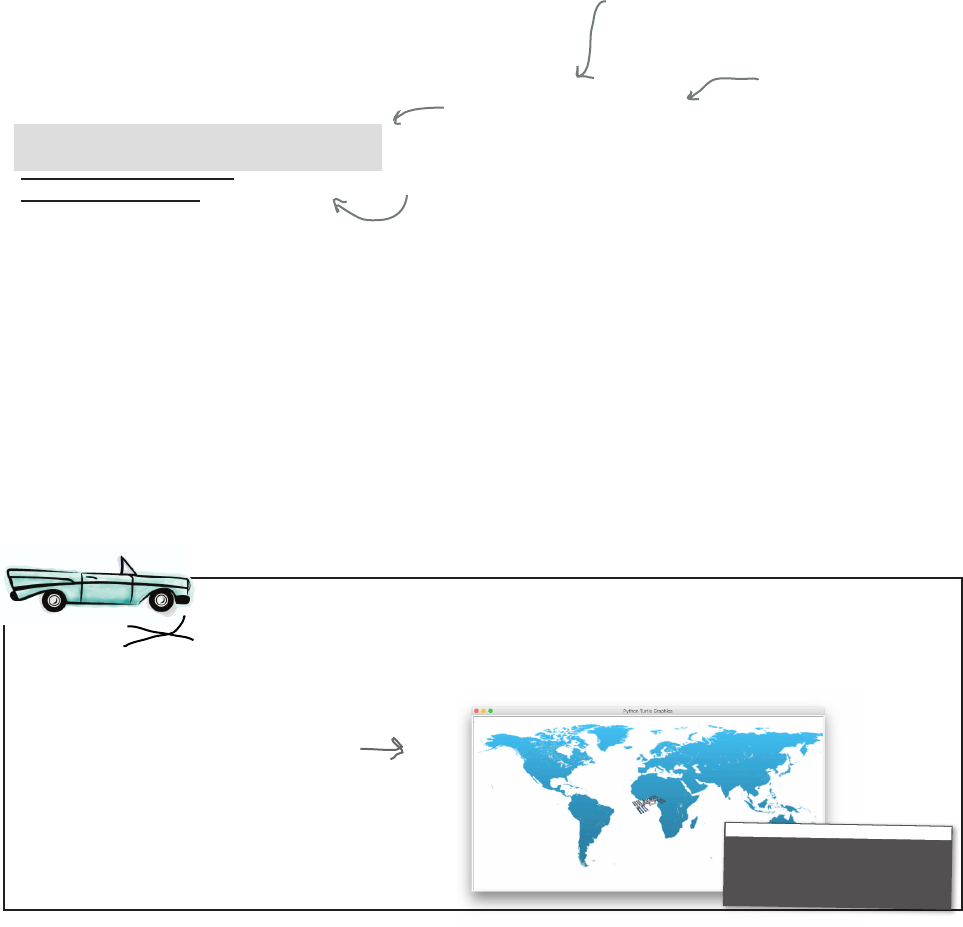
456 Chapter 10
using turtles to display the iss
Turtles can look like space stations too
Although it isn’t essential to building an app that uses a Web API, making our
turtle look like a space station on screen certainly adds to the realism and fun.
Here’s a quick piece of code to do just that:
import requests, json, turtle
screen = turtle.Screen()
screen.setup(1000,500)
screen.bgpic('earth.gif')
screen.setworldcoordinates(-180, -90, 180, 90)
iss = turtle.Turtle()
turtle.register_shape("iss.gif")
iss.shape("iss.gif")
iss.shape('circle')
iss.color('red')
url = 'http://api.open-notify.org/iss-now.json'
response = requests.get(url)
if (response.status_code == 200):
response_dictionary = json.loads(response.text)
position = response_dictionary['iss_position']
print('International Space Station at ' +
position['latitude'] + ', ' + position['longitude'])
else:
print("Houston, we have a problem:", response.status_code)
turtle.mainloop()
Let the turtle module know we
want to use an image as a shape.
Then set the shape of the turtle
to be the “iss.gif" image.
Note this step of
registering a shape
is an oddity of the
turtle module. In
other words, that’s
just the way it works.
Many image-based
libraries don't require
a registration step
like this.
Okay, make the code changes above and make sure the image iss.gif
is in the same folder as your code. You’ll find this image as well in the
book’s source code under the folder ch10.
A Test Drive Flight
Nice! We have a space
station image now!
Python 3.6.0 Shell
International Space Station at -47.8777, -177.6666
>>>
You’ll find “iss.gif”
also in the ch10
source code folder.
you are here 4 457
web services
Forget the ISS—where are we?
We’re close! We’ve got everything in place and we’ve got a location back from
the Open Notify service, so all we need to do is put it all together. For starters
we need to actually get the latitude and longitude assigned to variables so we
can instruct our iss turtle where to move on the screen. One note, though:
did you notice that in Open Notify’s JSON those values are being represented
by strings, not numeric values? We’ll have to fix that. In fact, let’s look at how
to do that now:
if (response.status_code == 200):
response_dictionary = json.loads(response.text)
position = response_dictionary['iss_position']
print('International Space Station at ' +
position['latitude'] + ', ' + position['longitude'])
lat = oat(position['latitude'])
long = oat(position['longitude'])
else:
print("Houston, we have a problem:", response.status_code)
Let's get the latitude and longitude from
the position dictionary. Given they are both
strings, we'll convert them to floats first.
Here's just a code fragment for now, the
part of the code that checks the response
and gets the latitude and longitude.
You don't need to enter this code yet; we'll
make all the changes at once in a couple pages.
The next step is moving the ISS on the screen. You’re an old pro at this point
with turtles. All we need to do here is write a simple function—let’s call it
move_iss—that takes a numeric latitude and longitude and moves the turtle.
Let’s make sure and lift up the pen before we move.
def move_iss(lat, long):
global iss
iss.penup()
iss.goto(long, lat)
iss.pendown()
The move_iss function takes a
latitude and longitude.
If we don't lift the pen, we're going to draw a
line across the display.
Let's move to the right coordinate. Note that
longitude is first, given the turtle takes its
x-coordinate parameter first.
Now let's return the pen to its default down
position and make the turtle visible.
Note we don't
technically have to put
the pen back down, but
we're just being a good
citizen given that is
the default position
of the pen. After all,
another developer may
be confused by this if
they expect you to not
change the pen in your
function.
458 Chapter 10
completing the implementation
import requests, json, turtle
def move_iss(lat, long):
global iss
iss.penup()
iss.goto(long, lat)
iss.pendown()
screen = turtle.Screen()
screen.setup(1000,500)
screen.bgpic('earth.gif')
screen.setworldcoordinates(-180, -90, 180, 90)
iss = turtle.Turtle()
turtle.register_shape("iss.gif")
iss.shape("iss.gif")
url = 'http://api.open-notify.org/iss-now.json'
response = requests.get(url)
if (response.status_code == 200):
response_dictionary = json.loads(response.text)
position = response_dictionary['iss_position']
print('International Space Station at ' +
position['latitude'] + ', ' + position['longitude'])
lat = oat(position['latitude'])
long = oat(position['longitude'])
move_iss(lat, long)
else:
print("Houston, we have a problem:", response.status_code)
turtle.mainloop()
Finishing off the ISS code
Let’s add the function move_iss to our code, as well as the code to get the latitude
and longitude from the position dictionary, and then we’ll call move_iss with
those values:
We're just adding move_iss near
the top of the file.
We no longer need a print
statement for the location—we've
got graphics now!
Let's take the latitude and longitude strings,
convert them to floats, and pass them to
move_iss along with our iss turtle.

you are here 4 459
web services
Alright, make sure you’ve got your code all entered and cleaned up
and then you should be ready to finally see the ISS location on your
map. Give it a test run!
A Test Drive Flight
Nice! When we ran our test
the ISS was somewhere over
the Indian Ocean.
The ISS circles the earth every 92
minutes, so run your code a few times
to see the position change.
Congrats! Mission
accomplished!
The ISS is also traveling at
4.75 miles per second.
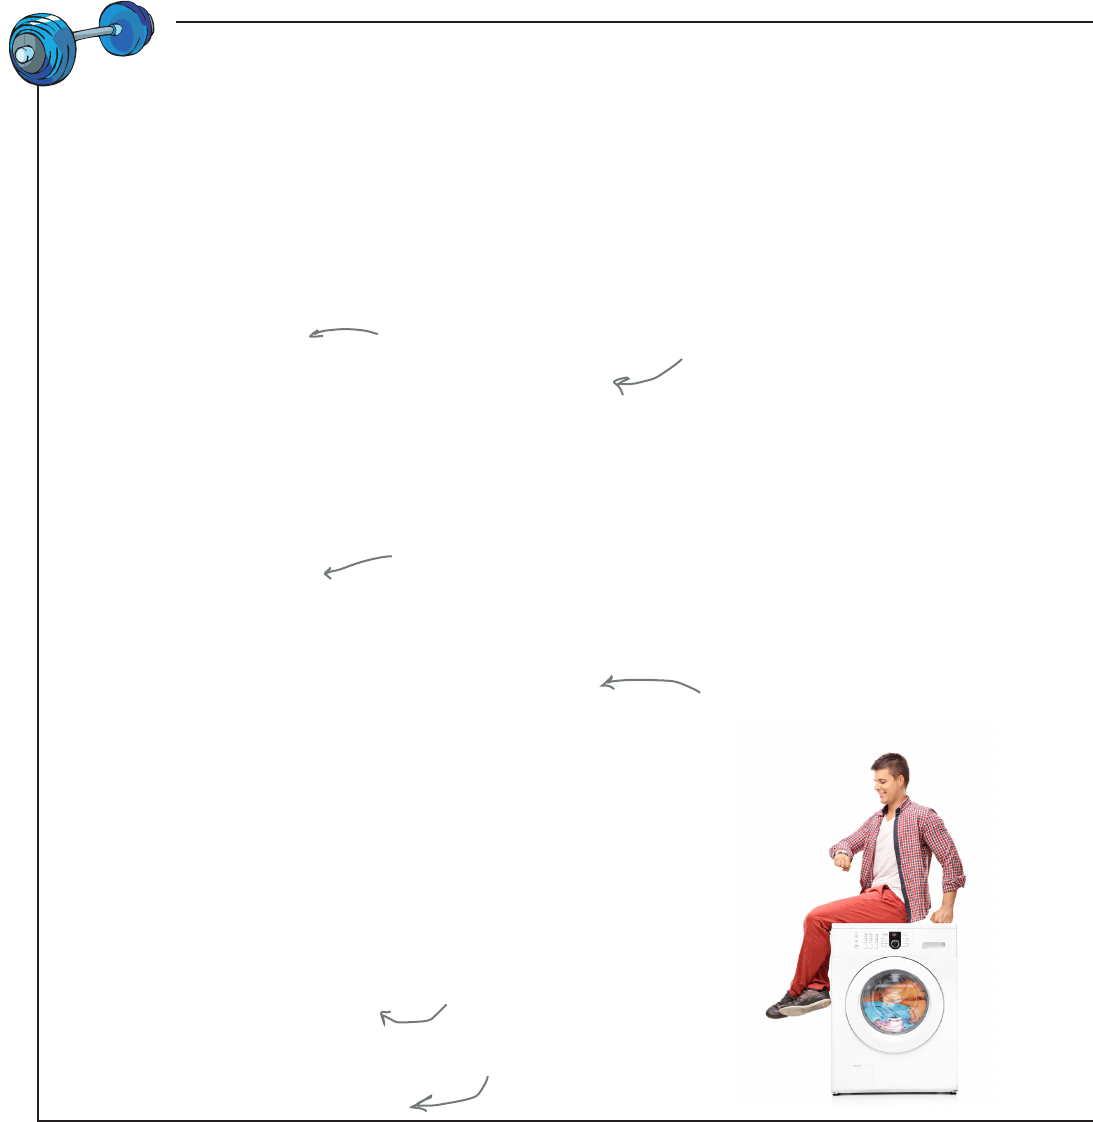
460 Chapter 10
tracking the iss over time
Well, that was fanstastic: with a bit of code we’ve located the ISS and created a cool graphical display. But you
know what would make this code even cooler is if it tracked the ISS over time, rather than just tracking it one time.
Let’s do that, but before we do, this code could really use some cleanup. After all, we aren’t using all those great
abstraction muscles we’ve been building. Here’s our attempt to refactor this code a bit. See if it isn’t a lot more
readable (which you’re going to want on the next page):
Brain Building
import requests, json, turtle
iss = turtle.Turtle()
def setup(window):
global iss
window.setup(1000,500)
window.bgpic('earth.gif')
window.setworldcoordinates(-180, -90, 180, 90)
turtle.register_shape("iss.gif")
iss.shape("iss.gif")
def move_iss(lat, long):
global iss
iss.penup()
iss.goto(long, lat)
iss.pendown()
def track_iss():
url = 'http://api.open-notify.org/iss-now.json'
response = requests.get(url)
if (response.status_code == 200):
response_dictionary = json.loads(response.text)
position = response_dictionary['iss_position']
lat = float(position['latitude'])
long = float(position['longitude'])
move_iss(lat, long)
else:
print("Houston, we have a problem:", response.status_code)
def main():
global iss
screen = turtle.Screen()
setup(screen)
track_iss()
if __name__ == "__main__":
main()
turtle.mainloop()
Let's put all the window and
turtle setup in a setup function.
We didn't make
any changes to the
move_iss function.
We took the code
that talks to the
Web API and put
it in a function
called track_iss.
And finally we're being
good coders by providing
a main function.
Notice we used “window” as the
parameter name here (which is
technically going to be passed
as a screen object). This might
or might not have been a good
variable naming idea, but we
couldn’t help ourselves. We
should probably add a real code
comment to alert others.

you are here 4 461
web services
import requests, json, turtle
iss = turtle.Turtle()
def setup(window):
global iss
window.setup(1000,500)
window.bgpic('earth.gif')
window.setworldcoordinates(-180, -90, 180, 90)
turtle.register_shape("iss.gif")
iss.shape("iss.gif")
def move_iss(lat, long):
global iss
iss.hideturtle()
iss.penup()
iss.goto(long, lat)
iss.pendown()
iss.showturtle()
def track_iss():
url = 'http://api.open-notify.org/iss-now.json'
response = requests.get(url)
if (response.status_code == 200):
response_dictionary = json.loads(response.text)
position = response_dictionary['iss_position']
lat = float(position['latitude'])
long = float(position['longitude'])
move_iss(lat, long)
else:
print("Houston, we have a problem:", response.status_code)
widget = turtle.getcanvas()
widget.after(5000, track_iss)
def main():
global iss
screen = turtle.Screen()
setup(screen)
track_iss()
if __name__ == "__main__":
main()
turtle.mainloop()
We've added only two lines of code.
With this code you'll see
the ISS location update
every 5 seconds.
Alright, here’s the code to track the ISS in real time. With this code you’ll see the location of the ISS change
every 5 seconds. This being a Brain Building exercise, your job is to figure out how it works. Read the code
and see if you can guess, and then in the next chapter we’ll find out exactly how it does what it does.
462 Chapter 10
review of web apis
Using Python you can communicate
with Web APIs and incorporate their
data and services into your application.
A Web API typically provides a
documented Application Programming
Interface (API) that describes the
data it can provide and services it has
available.
Often you’ll need to register and obtain
a key or authorization token to use a
Web API.
To use a Web API from Python, you
make a request to it using the web’s
HTTP protocol, just like your browser
does.
Web services respond to requests,
sending data, often using the JSON
notation.
JSON stands for JavaScript Object
Notation, and was created to provide
a standard way of data exchange
between any languages.
JSON’s syntax is very similar to Python
dictionaries.
The requests package is freely available
and comes from an open source effort
to make web requests in Python easier.
A package is a collection of Python
modules.
You can install the requests package
using the pip utility.
pip stands for “pip installs packages”
Using the requests library we issued a
request using the get method.
The get method returns a response
object, which includes a status code,
the text of the response (often in
JSON), and the headers of the request.
The status code is 200 when the
request was satised.
The built-in json module provides
methods to take a JSON string and
translate it to a Python dictionary or list.
The screen object of the turtle library
allows us to set a background image as
well as reset the coordinate system of
the turtle grid.
you are here 4 463
web services
Coding Crossword
Welcome back to earth. Let’s give your right brain something
different to do.
As always, it’s your standard crossword, but all of the solution
words are from this chapter.
1
2
3 4 5 6
7
8 9
10
11
12
13
14 15
16 17
18
Across
2. We had to register one of these with the
turtle module.
3. What you are when you get a 200 status
code.
7. To access a Web API you may need this.
8. Our code needed this.
10. Format for data exchange.
11. Run north and south.
12. 200 is a good value.
15. Data attribute of the response object.
16. Language JSON was originally from.
18. What's in a package?
Down
1. He wrote the ISS location service.
4. Which space station?
5. Open source package.
6. What does pip install?
9. Minutes per orbit.
13. Protocol used for web requests.
14. Turtles live on this.
17. Documented functions of a Web API.
1
2
3 4 5 6
7
8 9
10
11
12
13
14 15
16 17
18
Across
2. We had to register one of these with the
turtle module.
3. What you are when you get a 200 status
code.
7. To access a Web API you may need this.
8. Our code needed this.
10. Format for data exchange.
11. Run north and south.
12. 200 is a good value.
15. Data attribute of the response object.
16. Language JSON was originally from.
18. What's in a package?
Down
1. He wrote the ISS location service.
4. Which space station?
5. Open source package.
6. What does pip install?
9. Minutes per orbit.
13. Protocol used for web requests.
14. Turtles live on this.
17.
Documented functions of a Web API.
464 Chapter 10
exercise solution
http://api.open-notify.org/iss-now.json
Enter the following URL in your browser. What do you get?
{
"message": "success",
"timestamp": 1500664795,
"iss_position":
{
"longitude": "-110.6066",
"latitude": "-50.4185"
}
}
Here's what
we got.
The formatting will depend on
your browser. Some browsers
may even download this into a
file, which you can then open
as a text file.
Take the JSON on the previous page and convert it, by hand, into a Python
dictionary in the space below. After you’ve done that, complete the code
below. If you need a hint, look at the output.
current = {'temperature': 67.2,
'precip_prob': '40%',
'location': {
'city': 'London',
'country': 'UK'
}
}
loc = current['location']
print('In',
loc['city'] + ', ' + loc['country'],
'it is',
current['temperature'],'degrees')
Python 3.6.0 Shell
In London, UK it is 67.2 degrees
Note that the longitude and latitude are being represented
as strings. We'll have to convert them to floats when the time
comes to use them.
Very cool, we just got the current location of the space station.
Note it contains a few keys and that the iss_position key holds
another set of key/value pairs (the longitude and latitude).
you are here 4 465
web services
Coding
Cross
Solution
N
1
I
2M A G E
T
S
3A T I
4S F I E D H R
5P
6
N A E A
A
7U T H O R I Z A T I O N Q C
E U K
R
8E F A C T O R I N
9G E A
J
10 S O N I S G
A L
11 O N G I T U D E
S
12 T A T U S C O D E E S S
I T
O H
13 Y
N G
14 T
15 E X T
J
16 A
17 V A S C R I P T W
P L I P M
18 O D U L E S
I D
Across
2. We had to register one of these with the
turtle module. [IMAGE]
3. What you are when you get a 200 status
code. [SATISFIED]
7. To access a Web API you may need this.
[AUTHORIZATION]
8. Our code needed this. [REFACTORING]
10. Format for data exchange. [JSON]
11. Run north and south. [LONGITUDE]
12. 200 is a good value. [STATUSCODE]
15. Data attribute of the response object. [TEXT]
16. Language JSON was originally from.
[JAVASCRIPT]
18. What's in a package? [MODULES]
Down
1. He wrote the ISS location service. [NATHAN]
4. Which space station? [INTERNATIONAL]
5. Open source package. [REQUESTS]
6. What does pip install? [PACKAGES]
9. Minutes per orbit. [NINETYTWO]
13. Protocol used for web requests. [HTTP]
14. Turtles live on this. [GRID]
17. Documented functions of a Web API. [API]
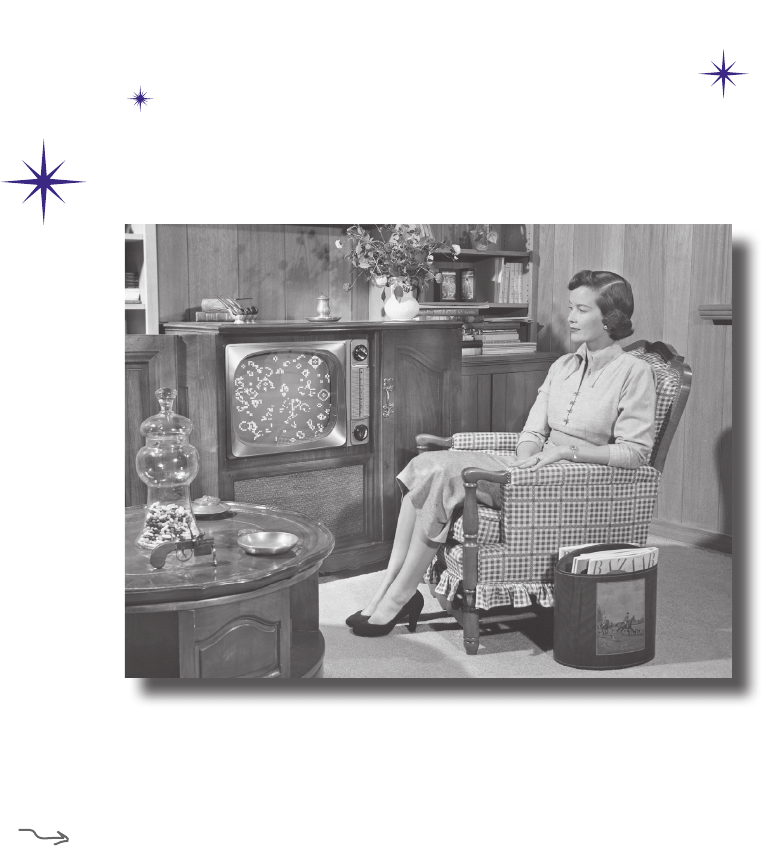
this is a new chapter 467
Getting Interactive
You’ve certainly written some graphical applications,
but you haven’t created a real user interface yet. That
is, you haven’t written anything that lets the user interact with a graphical user
interface (otherwise known as a GUI). To do that you need to adopt a new way of
thinking about how a program executes, one that is more reactive. Wait, did the
user just click on that button? Your code better know how to react and what to do
next. Coding for interfaces is quite different from the typical procedural method
we’ve been using, and it requires a different way of thinking about the problem.
In this chapter you’re going to write your first real GUI, and no, we’re not going
to write a simple to-do list manager or height/weight calculator, we’re going to do
something far more interesting. We’re going to write an artificial life simulator with
emergent behavior. What does that mean? Well, turn the page to find out.
11
widgets, events, and emergent behavior
Pronounce GUI
like “gooey.”
This is a hardcore
programming chapter.
Work hard, get sleep,
drink water, have
patience, stick with
it—you’ll come out
the other side having
unlocked the next level!
THE RULES
BIRTH: a new cell is born if it is
surrounded by exactly three live cells.
LIFE: a cell lives on as long as it is
surrounded by two or three live cells.
DEATH: a cell dies of loneliness if it
is surrounded by fewer than two live
cells.
A cell dies of overcrowding if it is
surrounded by four or more live cells.
3
4
468 Chapter 11
We compute the next generation of cells
according to four simple rules.
ARTIFICIAL LIFE
the game of life
ARTIFICIAL LIFE
Enter the WONDERFUL WORLD of Amazing
Just ADD CODE—that’s ALL! By using our incredibly simple algorithm, with only four rules,
you’ll be viewing real artificial life with emergent behavior in no time. Here’s how it works:
At each square of the grid a cell
can be alive or dead.
Our artificial life consists of a set of
cells that live on a grid.
If a cell is alive, it is colored black.
These simple rules are actually known as the Game of Life. To play
the game, start by placing living cells on the grid and then start
computing generations by following the rules. While the rules
may seem quite simple, you’re going to see that the only way to
know how life is going to play out is to play the game. That’s right;
such interesting behavior emerges from these simple rules that
we can’t even tell you if the game will ever stop evolving without
actually running the computation—more on that deep topic in a
bit —but, for now, it sounds like if we’re going to play, we’re going
to have to write our own Game of Life simulator. Let’s do that!
1
2
The Game of Life was discovered by
British mathematician John Conway. More
at https://en.wikipedia.org/wiki/John_
Horton_Conway.

Ever heard of sea monkeys?
I think we’ve got a real business
opportunity here, even better than
Phrase-O-Matic!
you are here 4 469
widgets, events, and emergent behavior
sadf
A closer look at the Game of Life
Okay, you’ve seen the four simple rules, so let’s step through the game in a
little more detail so we understand how it works. You know that the Game
of Life happens on a grid, and at each location on the grid we can have a
cell that is either alive or dead. If it’s alive, we color it so we can see it. If it’s
dead, it’s just transparent.
Our Game of Life universe successively computes new generations of cells,
and to do that it applies the four rules to every location in the grid, after
which it updates all the cells at once, based on the outcome. It then does this
over and over and over, computing new generations. Let’s look at how the
rules apply to a few cases.
Let focus on the center
cell in each example.
neighbor count = 0 neighbor count = 1neighbor count = 2
neighbor count = 3neighbor count = 4
neighbor count = 3
For all cells we count the
number of neighbors it has.
By the rules,
zero neighbors
means our cell
dies of loneliness.
By the rules, one
neighbor means
our cell dies of
loneliness.
By the rules,
two neighbors
means our cell
lives on.
By the rules,
three neighbors
means our cell
lives on.
By the rules, four
neighbors means
overcrowding and
death. And so
on for five, six,
seven...
By the rules,
a dead cell
surrounded by
three live cells
means birth!
Note the center cell
here is dead, unlike
the other examples.

470 Chapter 11
more on generative systems
Seriously? Four rules?
How interesting could
this really be?
Oh, you’d be surprised...
The Game of Life is a generative system. A
generative system has a predetermined, often simple,
set of rules, but generates behavior that you could not
have guessed, or would not have expected. Generative
systems have been used for art, music, as the basis of
philosophical arguments about the universe, and in
fields like machine learning. And there is no better
example of a generative system than Conway’s Game
of Life. From those four simple rules, here are a few
behaviors you might see in the simulator you’re about
to build...
Stable structures that
live forever if they
aren’t disturbed
“Gliders” moving
through the grid
Patterns that
oscillate between
two states
Chaotic states
evolving into
something else
How will it end?
Or will it ever
end? The only
way to know
is to let it
compute.

you are here 4 471
widgets, events, and emergent behavior
Generation 1 Generation 3
This is your starting point.
Apply the rules of the Game of Life, and
mark the results in generation 2.
And then continue on applying the
rules to generation 2 and so on.
Before you get started coding, work through a few generations of the Game of Life.
Use generation 1 as the starting point and then compute generations 2 through 6, by
applying the Game of Life rules. Here are the rules again:
• If a dead cell has three living neighbors, it becomes alive in the next generation.
• If a live cell has two or three living neighbors, it lives on in the next generation.
• If a live cell has fewer than two living neighbors, it dies in the next generation.
• If a live cell has more than three neighbors, it dies in the next generation.
Don’t forget to compute the
dead cells around the lives ones:
you may have a birth!
• If a live cell has two or three living
neighbors it lives on in the next
generation.
Generation 2
Generation 4 Generation 6
Generation 5
472 Chapter 11
overview of the simulator
What we’re going to build
The Game of Life
Start/Pause Clear
You should be able
to click in this
area to turn on
and off cells.
At the bottom
we’re going
to put three
buttons.
The start button starts the
computation and then morphs into a
pause button. The pause button stops
the computation and morphs back
into a start button.
This actually isn’t a button but
a set of options. Clicking this
button pops down a list of pre-
defined patterns you can load the
game with. It also first stops the
computation if it is running.
The clear button stops
the computation and
turns all the cells to off
or dead.
This is going to be
the main display
area, displaying
the Game of Life
as it evolves.
Choose a Pattern
Well, as you can see from the graph paper exercise, it’s a little hard to get a feel for how the Game
of Life is a “generative system with emergent properties” without the help of a computer. So, what
we’re going to do now is build a Game of Life simulator. Our simulator will display the grid of
cells, let users interact by clicking in the grid to enter cells, and provide a few buttons we can use to
control the actions of the simulator. For starters we want to be able to start and stop the simulator.
We also might want to clear the grid and start over, or even load it up with a few pre-congured
patterns. So, we’re talking about building a full-edged user interface.
Now, a great thing to do when creating a user interface is to, literally, sketch it out on a napkin.
We’re not kidding; it’s a great technique. Let’s make a sketch:
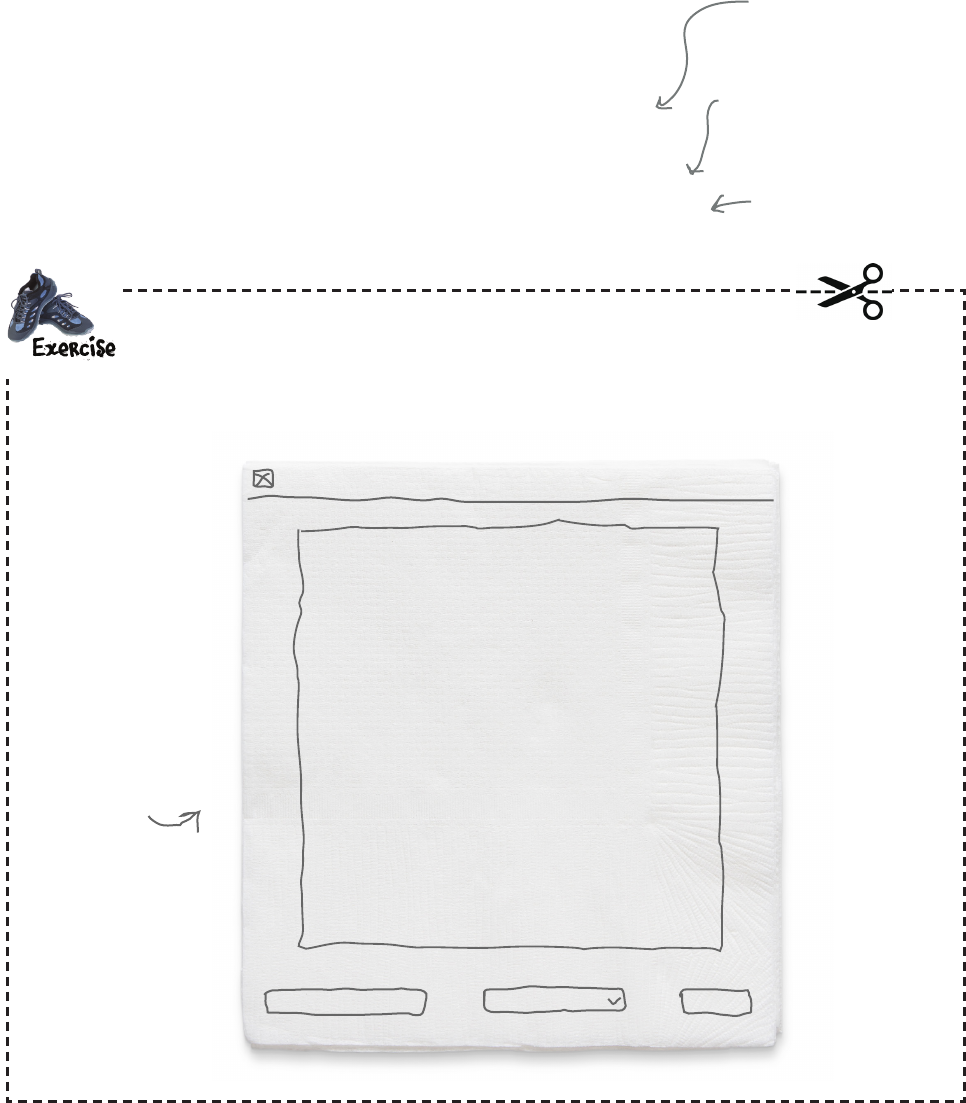
you are here 4 473
widgets, events, and emergent behavior
Do we have the right design?
Interface design and testing is an entire subeld in itself—there are people who
spend their whole careers designing, testing, and perfecting interfaces. That
said, there are simple and eective techniques you can use to improve your own
interfaces, even if you don’t have a six-gure usability budget. One of those is called
paper prototyping. With paper prototyping, we mock up a user interface on paper
(we’ve already done that), and then have candidate users go through a set of use cases,
using the paper mockup as if it were a real interface. Doing so allows you to observe
real users and the mistakes and misunderstandings about your design.
Usability testing entails
testing products on
actual users to see how
well they work (or don’t).
It’s time to do some paper protype testing. Photocopy this page, and the next one (or print a
copy from http://wickedlysmart.com/hflearntocode), and cut out the pieces where indicated.
Next, find a few friends, put the prototype down in front of them, and then ask them a few
questions (we’ll give you a little script of questions in two pages).
The Game of Life
Start Choose a Pattern Clear
Usability gurus claim you
can uncover about 85%
of usability problems
with this technique.
Cut this out,
as it’s going to
be your paper
interface.
Main Interface
Think of use cases as a set
of actions or scenarios the
typical user would go through.
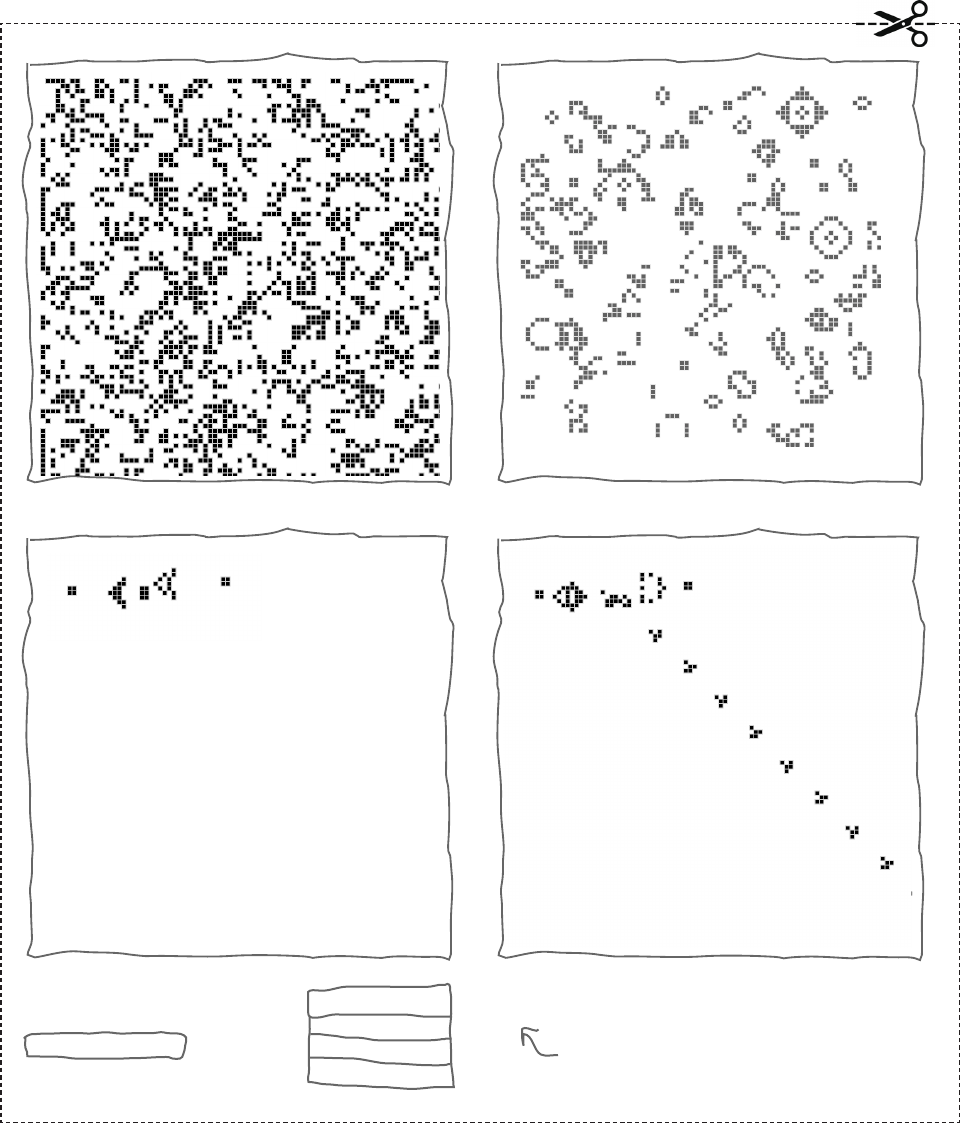
474 Chapter 11
paper prototype testing
Glider
Choose a Pattern
Random
Glider Gun
Pause
Random Random Running
Glider Gun Glider Gun Running
Pause Button
Option Button
Cut out each item separately; so you
should have six pieces of paper (seven
including the item on the previous page)
after you finish.

you are here 4 475
widgets, events, and emergent behavior
Wd Here’s a script to take each user (your tester) through; ask your tester to say out loud what they are
thinking as they go through the exercise. Make notes about the mistakes they make along with any
interface misconceptions. Of course, you want to make note of the things that are working well too.
1. Place the Main Interface in front of your tester.
2. Give your tester a brief explanation of the Game of Life and what the simulator does.
3. Tell the tester an easy way to start is to load a random pattern into the grid. Ask them if
they can figure out how to do that.
4. Ask the tester if they can figure out how to start computing new generations.
5. Ask the tester if they can now clear the grid. If they can’t find the clear button, then
give them hints until they do. When they click on the clear button, remove the Random
Running and the Pause Button cutouts.
6. Ask the tester to directly enter some live cells. If necessary help the tester until they click
in the grid. Use a pen to drawn in points on the grid.
7. Ask the tester to generate some new generations of cells. Again, the tester should click
the start button. When they do, place the Random Running cutout over the grid; also
place the Pause Button cutout over the start button. Explain to them that they are
watching an evolving scene of living and dying cells.
8. Ask the tester to pause the cell generation. They should find the pause button; when they
do, remove the Pause Button cutout.
9. Ask them to now load the glider gun pattern. When they click “Choose a Pattern,” place
the Option Button cutout on top of the “Choose a Pattern” button. When they click on
“glider gun,” place the Glider Gun cutout on the grid and remove the Option Button
cutout.
10. Ask them to start the simulator again. When they click the start button, place the Glider
Gun Running cutout over the grid; also place the Pause Button cutout over the start
button. Explain they are watching the simulator generate an endless stream of gliders
crawling down the grid.
11. Tell the tester that concludes the test and thank them for participating.
When they say they are clicking on “Choose a Pattern,” place the Option Button cutout
on top of the “Choose a Pattern” button.
When they say they are clicking on the “Random” option, place the Random cutout over
the grid, and remove the Option Button cutout.
Tell them they have now loaded the grid with a random selection of live cells.
Wait for the tester to click on Start. If they don’t, give your tester some hints. When Start
is clicked, place the Random Running cutout over the grid; also place the Pause Button
cutout over the start button. Explain to them that they are watching an evolving scene of
living and dying cells.
It never hurts
to have a few
cookies on hand
as a thank you.
NOTE: If you find major problems in your testing, well,
we’d like to stop and address them, but this is a book in
print, so we unfortunately don’t have that luxury. But
keep those issues in mind as we proceed through the
chapter and think about how you’d do things differently.
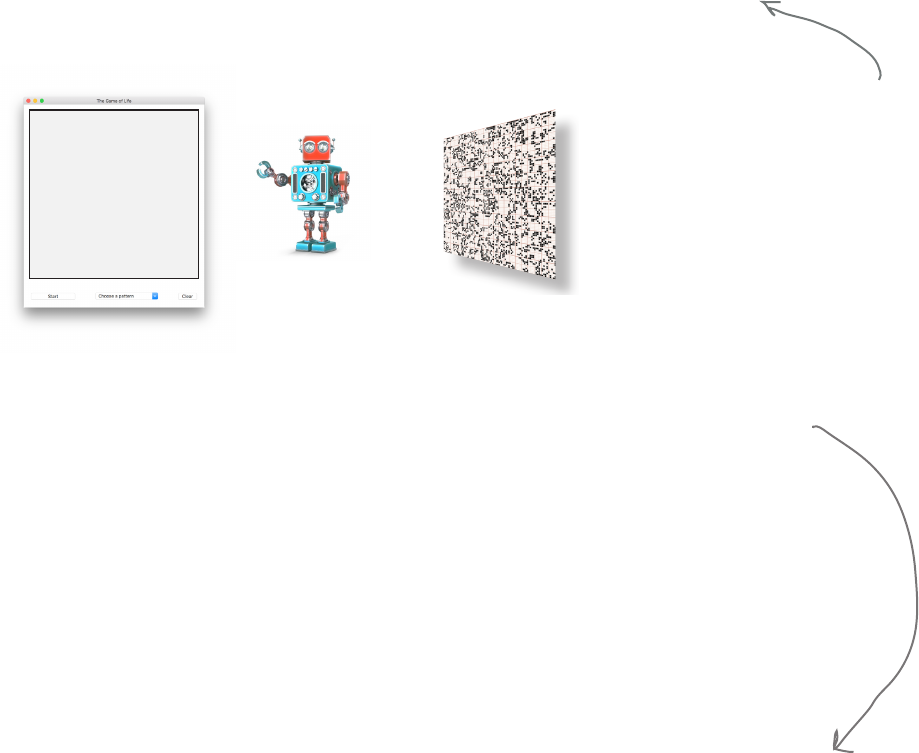
476 Chapter 11
how to approach the implementation
How we’re going to build the simulator
Now that we’ve got the interface designed on paper and we’ve also done a bit of paper prototype testing, we can
feel pretty good about moving forward on the implementation. We do need some idea of how we’re going to
tackle implementing all this, though.
To do that we’re going to use a tried-and-true design that is used across the industry for building user interfaces,
and it involves thinking about our code in three conceptual pieces: the underlying data model, the view, and the
controller, otherwise known as MVC.
Now, separating things into a discrete model, view, and controller typically requires that we use object-oriented
techniques—something we’re not even going to talk about until the next chapter, but we are going to follow this
design conceptually. In other words, we’re not going to go crazy following the MVC pattern, but we are going to
take some inspiration from it, while keeping things as simple as we can.
Here’s how we’re going to think about the design:
The View The ModelThe Controller
You’ll often hear this
design referred to as the
MVC design pattern, or as
model-view-controller.
The view code is
concerned with what is
displayed on the interface.
It does not care about the
specifics of what is being
computed other than
knowing it has to display
data on a grid.
The model code only cares
about the data for the
grid and cells, and how to
compute new generations.
It doesn’t care or know
about the view.
The controller takes
any user requests
coming through the
interface (like to start
the game) and maps
them to requests that
need to be made of the
model or the view.
So we have three distinct pieces to code: a view that only worries about how to display things; a model
that only cares about computing a grid of cells and doesn’t want to know anything about how it is being
displayed; and a controller, which manages user interaction and relays commands to the view and model
as necessary.
So why all the trouble? Why do we need MVC? Well, history has taught developers that apps built with
user interfaces can all too quickly become a pile of unmanageable spaghetti code (yes, that is a technical
term; Google it). MVC allows us to avoid that by keeping each piece focused on one responsibility
(among other reasons).
At this point you don’t need to fully understand MVC, but at least now you’ve had some exposure to the
idea, and as you’ll see, it’s going to give us a good way to approach building our simulator. So, with that,
let’s get started!
An entire subfield of study
called “software design
patterns” concerns how
these designs emerged over
time and how they work.
you are here 4 477
widgets, events, and emergent behavior
Building the data model
Even though we just did all that interface design work, we’re actually going to set it aside
for a bit and work on the data model for the simulator. As we’ve discussed, by the model we
mean that we need a way to represent all the cells on the grid, and then a way to compute
each generation of the game on that grid. Let’s dive right in.
my_grid = [[0, 1, 2, 3],
[4, 5, 6, 7],
[8, 9, 10, 11]]
We can model a two-dimensional
grid of values with a list of lists.
This represents a two-
dimensional grid three
high and four wide.
Python makes this even easier by giving us a syntax for
accessing two-dimensioned lists:
To represent the simulator grid we’re going to store a grid of integer cell values, with a
value of 0 meaning a dead cell and a value of 1 meaning a live one.
Now you’ve written plenty of code that uses a one-dimensional list of items, but a grid is
2D—it has a width and a height. So how do we create a 2D list? By using a technique of
lists within lists. Here’s how it works: say you want a grid that is three items high and four
items wide. You can do it like this:
Representing the grid
value = my_grid[2][3]
print(value)
Python 3.6.0 Shell
11
>>>
Remember the indices
are still zero-based!
So let’s create a list to hold the cells of our grid:
height = 100
width = 100
grid_model = [0] * height
for i in range(height):
grid_model[i] = [0] * width
These two globals are going to hold
the width and height of the grid.
Remember list multiplication from Chapter
4? This creates a list that has height
number of zeros.
And now let’s iterate through
each item in the grid_model list
and replace it with a list that has
width number of zeros.
Study this code and convince
yourself that it actually creates a
list of lists representing a grid that
is height-by-width items.
Get the value of the location at
height = 2 and a width = 3.
You might have assumed we'd
have used a Boolean for our grid
values (because they represent
live/dead well). While that would
have been a reasonable choice,
representing cells as integers will
reduce our code complexity when
we count a cell's live neighbors.
478 Chapter 11
how to compute a generation
Now that we have a place to store our cells, we need some code to compute each
generation of the Game of Life as it evolves. To do that we’re going to have to
examine every single cell and to gure out whether it lives, dies, or is born in the
next round. Let’s rst just check out how to iterate through each cell in the list:
Computing a generation of the Game of Life
def next_gen():
global grid_model
for i in range(0, height):
for j in range(0, width):
We’ll iterate through every single
cell in our two-dimensional list…
…and figure out if
grid_model[i][j]
lives, dies, or is born
in the next round.
We’ll compute this
for every single cell.
Let’s create a function
called next_gen to do this.
Remember this is a nested for
loop; for each value of i we
iterate through every value of j.
Each cell’s fate is controlled by the Game of Life rules. Let’s take another look:
Computing each cell’s fate
• If a dead cell has three living neighbors, it becomes alive in the next generation.
• If a live cell has two or three living neighbors, it lives on in the next generation.
• If a live cell has fewer than two living neighbors, it dies in the next generation.
• If a live cell has more than three neighbors, it dies in the next generation.
So for each cell we iterate over we’re going to have to apply these rules, and follow our
logic here. If the cell is dead, then we need to check if it has three neighbors; if it does,
it is born. If the cell is already alive, then it has to have either two or three neighbors to
continue living. In all other cases, the cell is dead in the next round. So even though we
have four rules, it really comes down to those two conditions to determine if the cell is
alive or dead. We’ll apply that logic in a bit. First, though, there’s one crucial piece of
information we need before we can begin computing any of this: the number of live
neighbors each cell has. As you might imagine, to do that we’re going to have to look at all
the adjacent cells around any given cell to know how many neighors it has living.
Let’s see how to do that.
you are here 4 479
widgets, events, and emergent behavior
def count_neighbors(grid, row, col):
count = 0
if row-1 >= 0:
count = count + grid[row-1][col]
if (row-1 >= 0) and (col-1 >= 0):
count = count + grid[row-1][col-1]
if (row-1 >= 0) and (col+1 < width):
count = count + grid[row-1][col+1]
if col-1 >= 0:
count = count + grid[row][col-1]
if col + 1 < width:
count = count + grid[row][col+1]
if row + 1 < height:
count = count + grid[row+1][col]
if (row + 1 < height) and (col-1 >= 0):
count = count + grid[row+1][col-1]
if (row + 1 < height) and (col+1 < width):
count = count + grid[row+1][col+1]
return count
grid_model[row+1][col]
grid_model[row+1][col-1]
grid_model[row+1][col+1]
grid_model[row][col-1]
grid_model[row][col+1]
grid_model[row-1][col-1]
grid_model[row-1][col]
grid_model[row-1][ col+1]
Ready
Bake
Here’s how you access each
neighbor around a cell.
This is Ready Bake code. All you need to do is
type it in (or grab it out of the book’s source code
folder). While we think you’re fully up to the task
of writing this code (at this point, we know you
have your conditionals down), going through this
code in detail is not the real focus of this chapter.
That said, it is great exercise for your brain to
go through this code and understand it. The
difficulty of this code isn’t so much that it has
to check every neighbor, but it also has to take
into account the edge conditions of cells near
the edge of the grid. So at a minimum, take the
time to understand this code. And if you want to
take it further, when you’ve finished the chapter,
come back and write a new count_neighbors
function from scatch.
So here’s our Ready Bake code just for you.
Enjoy.
Here’s the count_neighbors function; it
takes a grid and a row and column in
the grid and returns the number of live
neighbors for that location.
Conceptually, this code, for a
given cell, adds the number of
live cells to the neighbor count.
The code becomes more complex,
though, because we have to check
for edge conditions of the cells
on the edge of the grid.
480 Chapter 11
completing the next_gen code
Lucky you. While you were reading about Ready Bake code,
we went ahead and wrote the next_gen function and put it
on the refrigerator. But as is always the case in the Head First
books, someone came along and messed it up. Can you help
us get it back together? Careful, there are extra magnets you
don’t need.
Code Magnets
THE RULES
BIRTH: a new cell is born if it is
surrounded by three live cells.
LIFE: a cell lives on as long as it is
surrounded by two or three live cells.
DEATH: a cell dies of loneliness if
it is surrounded by fewer than two
live cells.
A cell dies of overcrowding if it is
surrounded by four or more live cells.
Here’s the
rules again.
count = count_neighbors(grid_model, i, j)
else:
if grid_model[i][j] == 0:
elif grid_model[i][j] == 1:
cell = 1
cell = 0
cell = 0
cell = 1
if count == 2 or count == 3:
if count == 3:
def next_gen():
global grid_model
for i in range(0, height):
for j in range(0, width):
if count > 4
count < 2:
and
or
We put these
up for you
already.
you are here 4 481
widgets, events, and emergent behavior
height = 100
width = 100
grid_model = [0] * height
for i in range(height):
grid_model[i] = [0] * width
def next_gen():
global grid_model
for i in range(0, height):
for j in range(0, width):
cell = 0
print('Checking cell', i, j)
count = count_neighbors(grid_model, i, j)
if grid_model[i][j] == 0:
if count == 3:
cell = 1
elif grid_model[i][j] == 1:
if count == 2 or count == 3:
cell = 1
def count_neighbors(grid, row, col):
if __name__ == '__main__':
next_gen()
Before we get too far along, let’s get this code organized and give it a test drive just
to make sure we’re on the same page. Copy the code below into a file called model.py.
Make sure you include the Ready Bake code as well. Although this code won’t do much
(yet), go ahead and give it a test drive and fix any errors.
A Test Drive
Python 3.6.0 Shell
Checking cell 99 76
Checking cell 99 77
Checking cell 99 78
Checking cell 99 79
Checking cell 99 80
Checking cell 99 81
Checking cell 99 82
Checking cell 99 83
Checking cell 99 84
Checking cell 99 85
Checking cell 99 86
Checking cell 99 87
Checking cell 99 88
Checking cell 99 89
Checking cell 99 90
Checking cell 99 91
Checking cell 99 92
Checking cell 99 93
Checking cell 99 94
Checking cell 99 95
Checking cell 99 96
Checking cell 99 97
Checking cell 99 98
Checking cell 99 99
>>>
Let's pull together the code
from the last few pages.
Here's what we got—
not much yet, but
it's a start.
Ready
Bake
Put the entire function
body here from the Ready
Bake code two pages back.
You should see all the cells being checked
if things are running correctly.
Don't miss this line
that we put in just
for testing.
If printing takes a
while on your machine,
you can always choose
the Shell > Interrupt
Execution menu item
to stop the program.
482 Chapter 11
finishing the model code
We’re not quite there yet. Oh, the logic of our code is just ne, but right now we’re just
computing the value of a cell in the next generation; we aren’t actually doing anything with
it. Here’s the problem, though, if we were to store the next-generation cell values in the
current grid (as we’re computing them), we’d throw o all the count_neighbor calculations
because we’d be computing with a mix of current and next-generation values at the same
time. So, to solve this problem we’re going to need two grids, one to hold the current values
and one to hold the next generation. Then, when we’ve completely computed the next
generation, we’ll have to make it the current generation. Here’s how we do that:
Completing the model code
grid_model = [0] * height
next_grid_model = [0] * height
for i in range(height):
grid_model[i] = [0] * width
next_grid_model[i] = [0] * width
def next_gen():
global grid_model, next_grid_model
for i in range(0, height):
for j in range(0, width):
cell = 0
print('Checking cell', i, j)
count = count_neighbors(grid_model, i, j)
if grid_model[i][j] == 0:
if count == 3:
cell = 1
elif grid_model[i][j] == 1:
if count == 2 or count == 3:
cell = 1
next_grid_model[i][j] = cell
temp = grid_model
grid_model = next_grid_model
next_grid_model = temp
Let’s create a
second grid, called
next_grid_model.
After we’ve computed
a cell, we’ll store it in
the correct position in
next_grid_model.
Once next_grid_model is completely
computed, we need to make it the
grid_model. To do that we swap the
two so that grid_model now points to
the data in next_grid_model’s grid,
and vice versa.
Rather than show the
entire file, we're only
showing the code with
changes; go ahead and
make these additions to
your code.
Add a global
declaration.
Q: Why do we have to swap
grid_model and next_grid_model?
Isn’t it enough to assign next_grid_
model to grid_model?
A: That will work fine until you start
computing another generation, and
then you’ll have grid_model and next_
grid_model assigned to the same list,
which means you’ll be counting cell
neighbors and changing them in the
same list. Not good. So, we go ahead
and swap the two lists so that when
we do compute the next generation,
grid_model will be assigned to the
current generation and next_grid_
model will have the next-generation
values written to it.

you are here 4 483
widgets, events, and emergent behavior
We’re not really exercising the next_gen code if we’re testing with a grid full of
zeros. Write a function, randomize, which takes a grid, a width, and a height and
places random ones and zeros at each cell location:
import random
def randomize(grid, width, height):
Your code here
Let’s do another test run. While we have no way to view our model yet—that’s the whole
point of building a user interface—this is another good time to test things out. Just to be
clear, here’s all the code.
A Test Drive
import random
height = 100
width = 100
def randomize(grid, width, height):
for i in range(0, height):
for j in range(0, width):
grid[i][j] = random.randint(0,1)
grid_model = [0] * height
next_grid_model = [0] * height
for i in range(height):
grid_model[i] = [0] * width
next_grid_model[i] = [0] * width
randomize(grid_model, width, height)
Add your randomize
function at the top…
…and call it once the
grid is created. Continued on
next page...
We'll be using the
random module.
484 Chapter 11
testing the model
def next_gen():
global grid_model, next_grid_model
for i in range(0, height):
for j in range(0, width):
cell = 0
print('Checking cell', i, j)
count = count_neighbors(grid_model, i, j)
if grid_model[i][j] == 0:
if count == 3:
cell = 1
elif grid_model[i][j] == 1:
if count == 2 or count == 3:
cell = 1
next_grid_model[i][j] = cell
print('New value is', next_grid_model[i][j])
temp = grid_model
grid_model = next_grid_model
next_grid_model = temp
def count_neighbors(grid, row, col):
if __name__ == '__main__':
next_gen()
Ready
Bake
Python 3.6.0 Shell
New value is 1
Checking cell 99 91
New value is 0
Checking cell 99 92
New value is 0
Checking cell 99 93
New value is 0
Checking cell 99 94
New value is 1
Checking cell 99 95
New value is 0
Checking cell 99 96
New value is 0
Checking cell 99 97
New value is 1
Checking cell 99 98
New value is 1
Checking cell 99 99
New value is 1
>>>
Here's what we got;
your results will differ
of course because the
cell values are random.
Add another
print statement
just for testing.
Well, that was a nice chunk of code. For the most part, we’ve now
completed the code representing the model of the simulator. And,
while we can’t visualize the grid in any way yet, we’ve built a way
to store and compute each generation of our generative game.
Now we’re going to treat model.py like a module and move on to
code the user interface, which is going to visualize and control the
model.
Let’s get started.
Where are we?
Before we move on, make sure
you remove the two print
statements from the next_gen
function, as you’ll no longer be
needing them.
Make sure
you do this!
If printing takes a while on
your machine, you can always
choose the Shell > Interrupt
Execution menu item to stop
the program.
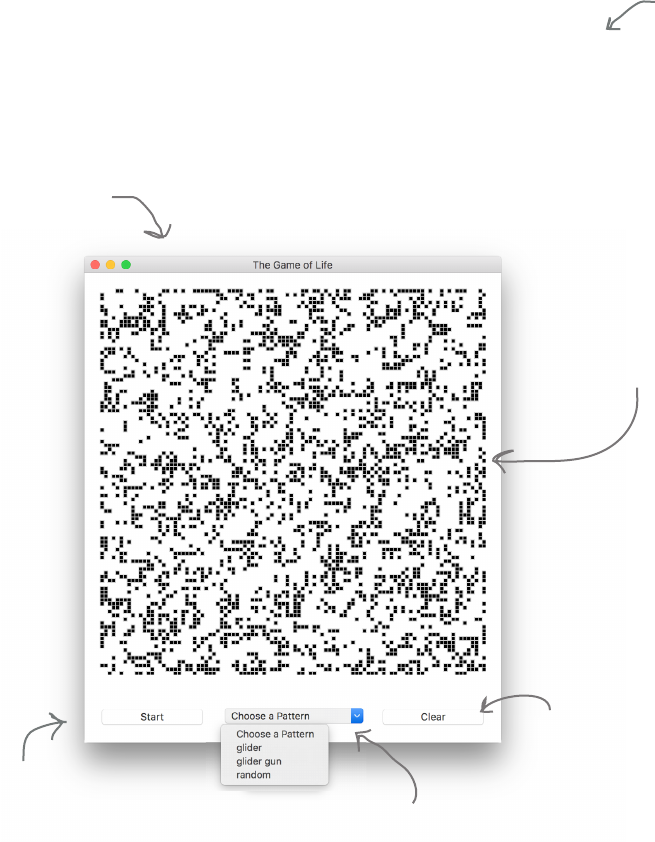
you are here 4 485
widgets, events, and emergent behavior
Ready to actually see something on the screen? Us too. This is where we start building
the view, the onscreen representation of our simulator. To build the view we’re going
to use the built-in Python Tkinter module, which allows us to create GUIs using
many of the common components you typically see in user interfaces, like buttons,
text entry boxes, menus, and a canvas you can draw on programmatically. In Tkinter
we call those components widgets. Here are some of the widgets we’re going to use:
Building the view
The outer window is a
widget that holds all
the other widgets.
Clear is a
button widget.
Start is a
button widget. This is known as an option menu
widget; it allows you to choose
from a set of options.
The simulator grid is a
canvas widget, which allows
you to draw geometric
shapes (we’ll be drawing
lots of little squares to
represent live cells).
That’s just a small sampling of the widgets available in Tkinter; if interested, you’ll
find a lot more information at https://en.wikipedia.org/wiki/Tkinter.
While there doesn't
seem to be a definitive
pronunciation of Tkinter,
most folks call it “Tea
Kay inter” or “Tea Kin
Ter.”
486 Chapter 11
using widgets
You have some idea of what a widget is going to look
like on your screen, but what does a widget look like in
code, and how does it relate to Python? From a coding
perspective, widgets are just objects. Typically we
instantiate a window widget rst (which will appear on
your screen as soon as you instantiate it), and then we
instantiate and add other widgets to the window. So let’s
start by creating a new window widget and then we’ll
add a start button to it. One note, in Tkinter, the class
that represents a window is called Tk.
Creating your first widget
from tkinter import *
root = Tk()
root.title('The Game of Life')
start_button = Button(root, text='Start', width=12)
start_button.pack()
mainloop()
And then let’s instantiate a new window; remember
we do that with the Tk class.
And let’s set the title attribute, which
will appear at the top of the window.
Next we instantiate a Button object,
giving it a couple of arguments to control
the text on the button and the width of
the button (in characters) on the screen.
This line tells the Tkinter module to place the
button in the window wherever it can. This is called a
layout manager, and we’ll talk more about it in a bit.
Basically, if you have a bunch of widgets in a window,
you need a layout manager to help you position them.
And finally, just like we did with
our turtles, we need to turn over
control to Tkinter and allow it to
monitor the window for clicks and
similar events.
Place the code above in a file named view.py and give it a test drive.
A Test Drive
You should see a window on the screen similar to this one.
However, depending on your operating system, operating system
version, and so on, you may see something slightly different.
Click the button; what happens?
It’s customary to call
the top-level window
the “root.” So we named
our variable root.
Notice that when we
create a widget, we pass
it the root window it’s
going to be part of.
Serious Coding
There’s another way to import a
module you haven’t seen yet. When
we use the from keyword, like:
from tkinter import *
We no longer have to prepend every
function, variable, and class name with the
module name. So, for instance, we can use
Tk() rather than tkinter.Tk().
Let’s start by importing the tkinter module, only
we’ll do it in a slightly different way.
If you don't see the full title, you can
manually resize the window a bit.
This is a function from the Tkinter module, and again, we don’t have to prepend the
module name because of the way we imported Tkinter.
Don’t forget to pay attention to case sensitivity;
we have lowercase tkinter, Tk (uppercase T,
lowercase k), and so on.

you are here 4 487
widgets, events, and emergent behavior
Let’s add the rest of the widgets we need for the simulator. We’ve got a start
button, but we still need a canvas, a clear button, and an option button (otherwise
known as an OptionMenu). We’re going to go ahead and add a few other things
too and put it all in a setup function. Feel free to re-enter all this code from
scratch in view.py if it’s easier than editing the previous version.
Adding the rest of the widgets
from tkinter import *
import model
cell_size = 5
def setup():
global root, grid_view, cell_size, start_button, clear_button, choice
root = Tk()
root.title('The Game of Life')
grid_view = Canvas(root, width=model.width*cell_size,
height=model.height*cell_size,
borderwidth=0,
highlightthickness=0,
bg='white')
start_button = Button(root, text='Start', width=12)
clear_button = Button(root, text='Clear', width=12)
choice = StringVar(root)
choice.set('Choose a Pattern')
option = OptionMenu(root, choice, 'Choose a Pattern', 'glider', 'glider gun', 'random')
option.config(width=20)
grid_view.pack()
start_button.pack()
option.pack()
clear_button.pack()
if __name__ == '__main__':
setup()
mainloop()
The Game of Life
Start/Pause Clear
The view is going to need access to the model module (the
one we wrote), so let’s go ahead and import it.
You’ll see what this is used for in a bit. Our
cells on the screen are going to be bigger
than one pixel, so we need to adjust the
screen size to accommodate this.
Here’s our setup function. Let’s get
the global variables we need out of
the way and get to the widgets.
Here’s the Tk top-level window as before.
First up we need a canvas to
draw all those cells on. You’ll
note we’re supplying a fair
number of arguments, like the
width, height, border thickness,
and background color.
Here’s our start button from before.
We need a clear button too.
And this is the option menu widget, which
we had in our original design. You’ll see we
instaniate an Option Menu object just like
the other widgets, but this widget has a
few other things we need to discuss as well.
We’ll come back to this.
Remember we need a layout
manager to place the widgets
in the window. So let’s call
pack on each widget to make
that happen.
And let’s not forget
to call setup!
And notice we’re
using keyword
arguments. The
tkinter module is
full of them.
This works with the option menu;
we'll come back to this shortly.
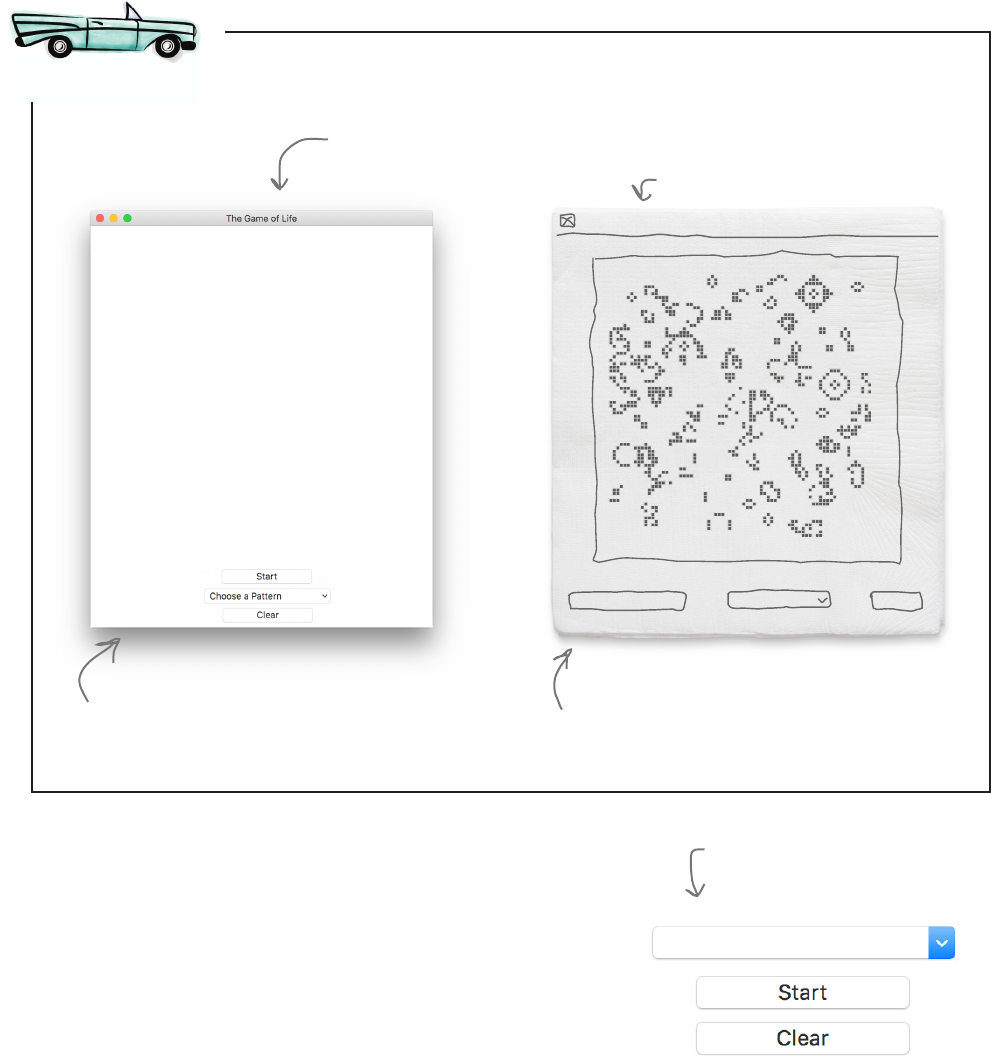
488 Chapter 11
testing the layout
The Game of Life
Start/Pause Clear
Get all that new code on the previous page in view.py and give it a test drive.
A Test Drive
Do you see this? The layout manager isn’t
doing such a great job. We don’t want these
buttons to stack on top of each other.
Here’s our output. Remember, yours
may look different depending on your
environment.
We want our buttons like this. Note, we’re
not going to worry about the border
around the canvas, as you’ll see it looks fine
without the border in the actual interface.
For comparison, here’s our design.
The Tkinter layout manager, which packs our widgets into the window as
best it can, isn’t giving us the layout we want. We could spend some time
tweaking the pack layout manager, but, as it turns out, Tkinter has a few
layout managers, and we’re going to use another manager that is better
suited for our layout: the grid layout manager. The name is coincidental, in
that it has nothing to do with the simulator grid. Rather, the grid layout
manager allows us to place our widgets into a grid structure within the
main window. Doing that is pretty straightforward if we know where we
want things placed.
Correcting the layout
Vertically stacked is
not what we want.
Choose a Pattern
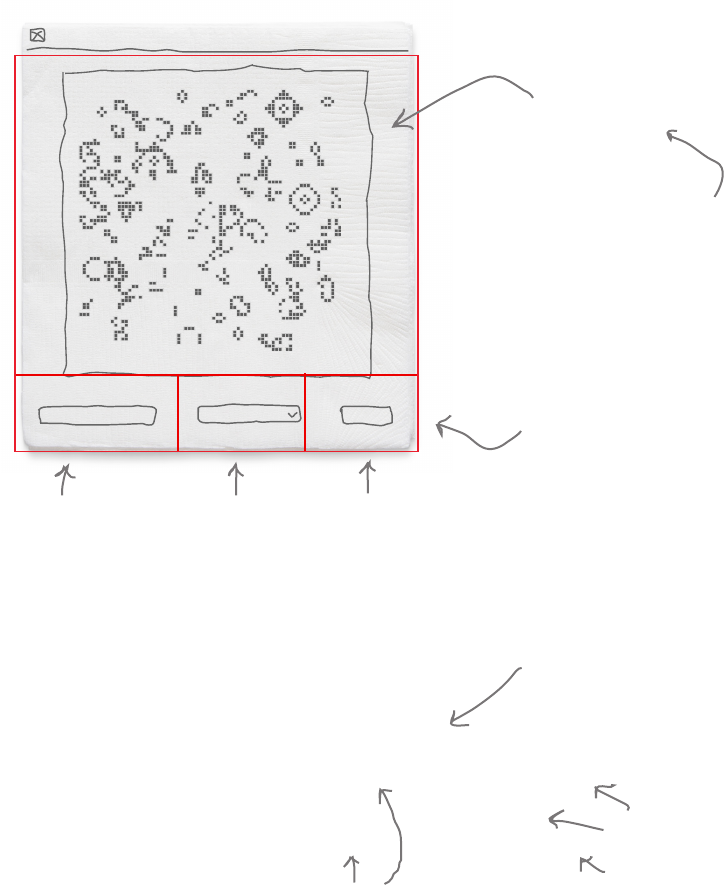
you are here 4 489
widgets, events, and emergent behavior
The Game of Life
Start/Pause Clear
Let’s take our design and think about it as if it were being placed into a
grid. Here’s what it looks like:
Placing the widgets into a grid layout
Think of this as row 0,
which has a widget, the
canvas widget, spanning
three columns.
Think of this as row
1, with three columns,
each holding a widget.
The start
button is in row
1, column 0.
The option menu
widget is in row
1, column 1.
The clear
button is in row
1, column 2.
Do we even need to
mention that when it
comes to computer science,
and coding everything
starts with 0?
Now that we know where each widget goes, here’s how we tell the grid
manager to place the widgets into the grid:
Translating the grid layout to code
grid_view.grid(row=0, columnspan=3, padx=20, pady=20)
start_button.grid(row=1, column=0, sticky=W, padx=20, pady=20)
option.grid(row=1, column=1, padx=20)
clear_button.grid(row=1, column=2, sticky=E, padx=20, pady=20)
Put the grid_view canvas in a grid
at row 0, spanning three columns.
We also added some visual padding
to make it look nicer.
Put the buttons and the option
menu widget in row 1, in their
respective columns, also with a
little padding.
Note the sticky parameter tells the layout manager to keep the buttons, essentially,
stuck to the west (left) and east (right) sides, instead of being centered. This just
helps the buttons stay in a good position for different window sizes.
Choose a Pattern
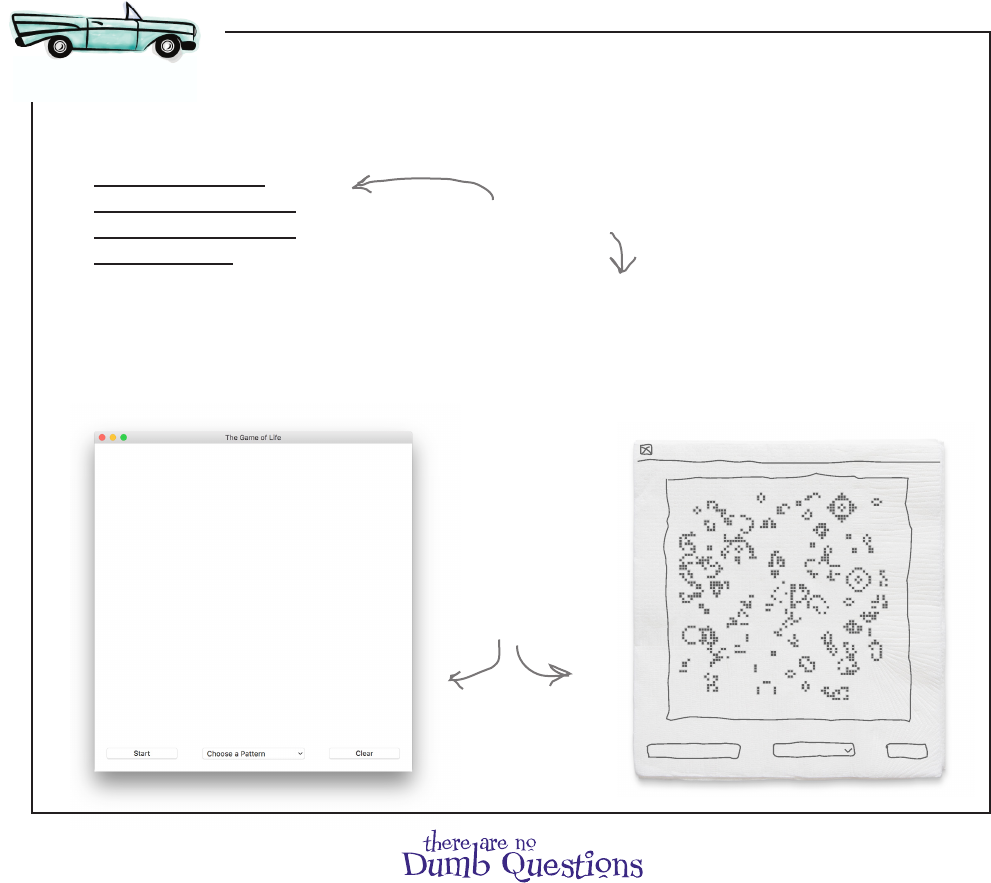
490 Chapter 11
using a grid layout
grid_view.pack()
start_button.pack()
clear_button.pack()
option.pack()
grid_view.grid(row=0, columnspan=3, padx=20, pady=20)
start_button.grid(row=1, column=0, sticky=W, padx=20, pady=20)
option.grid(row=1, column=1, padx=20)
clear_button.grid(row=1, column=2, sticky=E, padx=20, pady=20)
Open view.py and replace the existing layout manager code
with our new grid-based code. After that give it a test drive and
see if things look better. Also, if you haven’t already, remove
both print statements from your model.py file.
A Test Drive
The Game of Life
Start/Pause Clear
Much better! Short of
displaying cells, we’ve
pretty much got the view
looking like we want.
Q: Why is it customary to call the top-level window the
“root”? Like the root of a tree?
A: It’s a computer science term, and you’re not too far off
on the tree analogy. Think of a root system with the big thick
root at the top branching off into smaller roots. In the same
way, the big top window branches off into smaller components.
For instance, an OptionMenu widget has a pop-up menu, and
in that you’ll find a number of options to choose, and each of
those has a string it displays, and so on, smaller and smaller,
like roots. You’ll find tree and root analogies all over computer
science: the root of a file directory, the root of a complex data
structure, and so on.
Q: How come our buttons don’t do anything when we
click them?
A: Because we haven’t told them what to do yet. Hang on!
Find this code in view.py, and
replace it with this code.
Choose a Pattern
you are here 4 491
widgets, events, and emergent behavior
We’re getting there. We’ve got our model all ready to hold cells and
compute new generations, and we’ve got a view that looks like our
paper prototype. Now our job is to wire all this up and get this interface
actually doing something—in other words, we need to start implementing
the controller aspects of our simulator. To do that we’re going to take your
brain on another mind-bending trip into a slightly dierent way of thinking
about computation—don’t worry, this is nothing like the detour we took on
recursive functions; it’s much more straightforward, yet dierent than what
you’re used to.
First, though, let’s quickly connect the view to the model. Doing that is our
rst real step toward having a functional simulator. After we’ve connected
the two, we’ll start writing our controller code and start incrementally
implementing the functionality behind each component in our interface.
Moving on to the controller
To get the view and model connected, we’re going to write a function,
update, that we’ll use over and over. The update function will be
responsible for calling the model’s next_gen function and then using
the view to draw the model’s cells on the screen, or more precisely, on the
canvas we created in the interface.
Let’s write a little pseudocode to understand the update function:
Adding an update function
FOR variable i in range(0, height):
FOR variable j in range(0, width):
cell = model.grid_model[i][j]
IF cell == 1:
DRAW black cell at location i, j on grid_view
DEF update():
CALL next_gen()
The only dierence between this pseudocode and the code we’re going to
write is that on the canvas we’ll draw small rectangles rather than individual
pixels. Why? Small pixels are very hard to see, so we’ll draw a 5×5 pixel
square on the canvas instead. You might remember the global variable
cell_size, which controls this. You’ll see how this works in just a bit. Oh,
one more thing: we’re only going to draw cells that are living. So, to get rid of
any cells that have died since the last generation, we’ll need to erase the entire
canvas rst before redrawing any cells. Let’s look at the code...
Then iterate
through every
cell in the model.
If the cell is alive, then
we’ll color in a pixel at that
location in the view.
Q: If I use tkinter import * won't it clash
with my own variable, function, and class
names?
A: The from/import statement imports
a module such that all its variable, function,
and class names are defined at your top
level, meaning you don’t have to prepend
their module name when you use them. The
advantage is that this saves you having to
always use a module name. The disadvantage
is that your own variable, function, and class
names may accidentally clash with those in
the imported module. So why risk it? Well, if
you think it is unlikely that you’re going to
define names in your own code that are going
to clash with the module (in the case of Tkinter
that would mean clashing with names like
Button, or Tk, or other widget names), then it
can often make your code more readable.
Why do you think we’re only
drawing live cells instead of
live and dead cells?
First, compute a new
generation.
Relax
This is a long chapter
with a lot of code and
concepts. Take breaks,
get sleep, give your brain
time to absorb the material. You
might want to take a break now.
492 Chapter 11
completing the update function
def update():
global grid_view
grid_view.delete(ALL)
model.next_gen()
for i in range(0, model.height):
for j in range(0, model.width):
if model.grid_model[i][j] == 1:
draw_cell(i, j, 'black')
Delete anything drawn on the canvas using
the canvas object’s delete method.
Compute the next generation
of cells in the model. Following the
pseudocode...
If a cell at i, j is live, we then
draw a small, black rectangle.
Upper-left coordinate
of rectangle
Bottom-right
coordinate of
rectangle
def draw_cell(row, col, color):
global grid_view, cell_size
if color == 'black':
outline = 'grey'
else:
outline = 'white'
grid_view.create_rectangle(row*cell_size,
col*cell_size,
row*cell_size+cell_size,
col*cell_size+cell_size,
fill=color, outline=outline)
This is our function, not Tkinter’s, so we
will still need to write this function.
The draw_cell function
takes a row and column
position and a color.
And it draws a
small rectangle to
represent the cell.
That implements all the logic of our update function, but we left one thing
unimplemented: the function to draw a rectangle, draw_cell. Let’s do that now:
Think of the draw_cell function as just a helper function that uses Tkinter’s
canvas method create_rectangle to draw a rectangle. This function
“helps” by handling the arithmetic of guring out the top-left and bottom-right
coordinates of the rectangle we need given the value of cell_size.
This code picks an outline color for rectangles. For
black rectangles it chooses grey outlines, which gives
the rectangles a nice look. You'll see.
Then we have the fill color of the
rectangle as well as the outline color.
Note, this first bit of code is
a purely aesthetic addition.
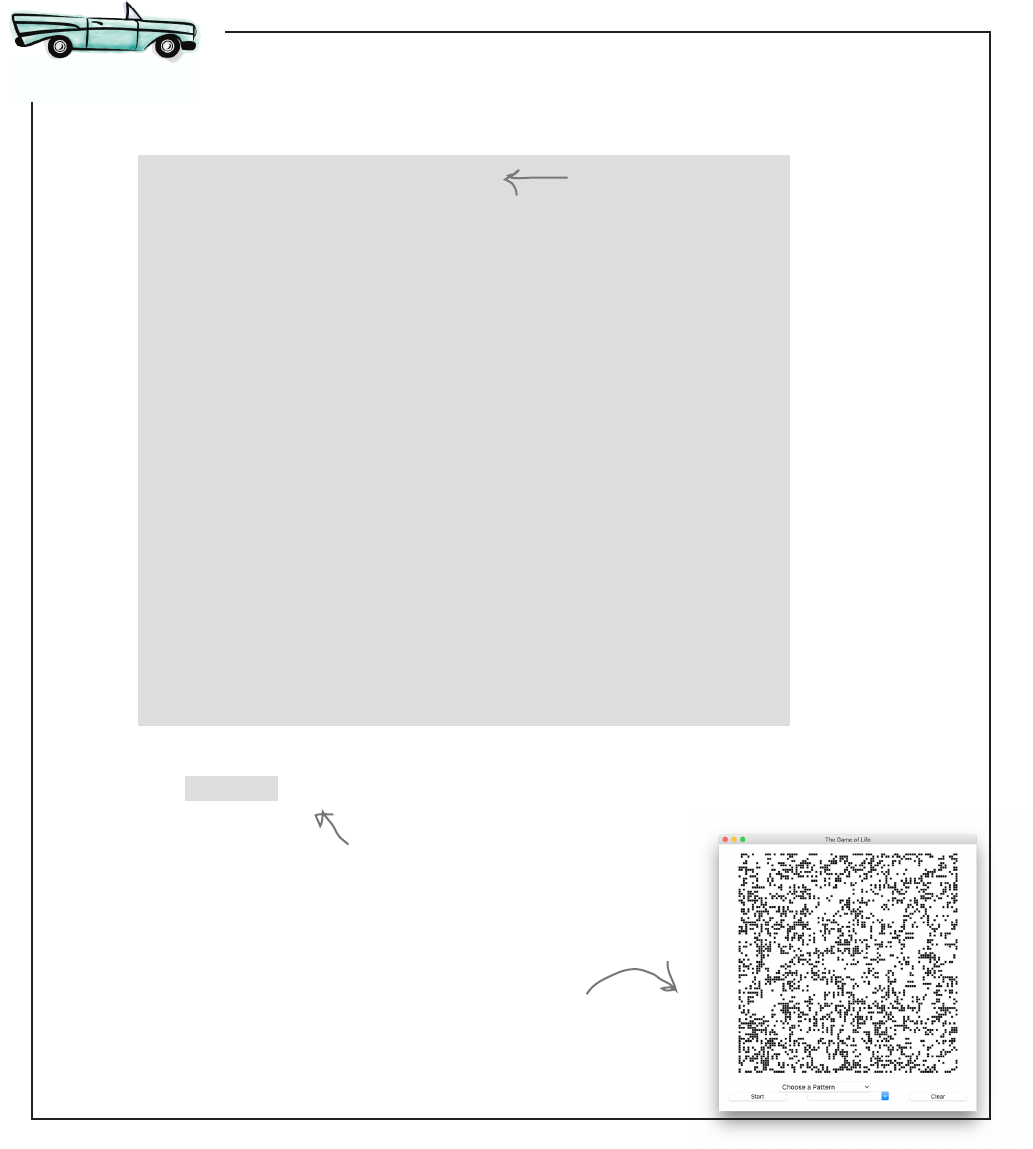
you are here 4 493
widgets, events, and emergent behavior
def update():
global grid_view
grid_view.delete(ALL)
model.next_gen()
for i in range(0, model.height):
for j in range(0, model.width):
if model.grid_model[i][j] == 1:
draw_cell(i, j, 'black')
def draw_cell(row, col, color):
global grid_view, cell_size
if color == 'black':
outline = 'grey'
else:
outline = 'white'
grid_view.create_rectangle(row*cell_size,
col*cell_size,
row*cell_size+cell_size,
col*cell_size+cell_size,
fill=color, outline=outline)
if __name__ == '__main__':
setup()
update()
mainloop()
Place update below your
setup function, just above
the check for __main__.
Let’s put in our call to update.
Things should start to get interesting. Open view.py and add
the update and draw_cell functions. Also add a call to
update to test things out. Give it a whirl.
A Test Drive
Here's what we got. Now we're
getting somewhere!
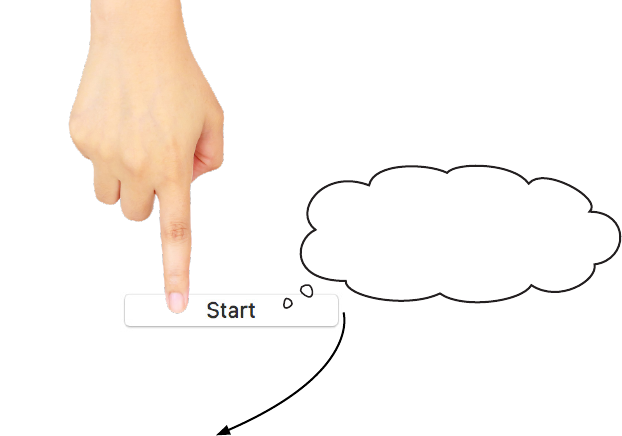
494 Chapter 11
event-driven programming
If you think about all the code you’ve written, you’re in the driver’s seat in that the
computation is always proceeding according to your direction. At every point in the
computation, you’ve got code that says what to do next. For a lot of code, though, this isn’t
the case. A lot of code follows a more reactive style of computation.
To understand what that means, imagine your start button just sitting there doing nothing.
Suddenly a user comes along and clicks on it, and then what? Well, some piece of code is
going to have to wake up and start doing something. In other words, you need code that
reacts to events that occur in your app. Often those events will be a user clicking on a button,
choosing a menu item, typing into a text box, and so on. But they could be other things
too, like, say, a timer going o, data arriving over a network, and so on. Often we call this
event-based or event-driven programming.
Ready for another new style of computation?
Someone clicked on me, now
what? Oh right, I have this
function I’m supposed to call.
def start_handler():
print("Yup, you clicked on the start button alright.")
print("Thanks for stopping by.")
The code that handles an event, like a button click, has dierent names in dierent
languages: event handlers, observers, and callbacks, to name a few. We’ll stick with
event handlers because we’re writing code that handles an event that occurs in our
code. No matter what you call these bits of code, the way you construct them is
similar: we tell the object that generates the event, like our button, the function
we want it to call when the event occurs. One other thing to know: often event
handlers are also passed a special event object when they are called. More on that
in a bit. For now, let’s see if we can get an event handler written and working.
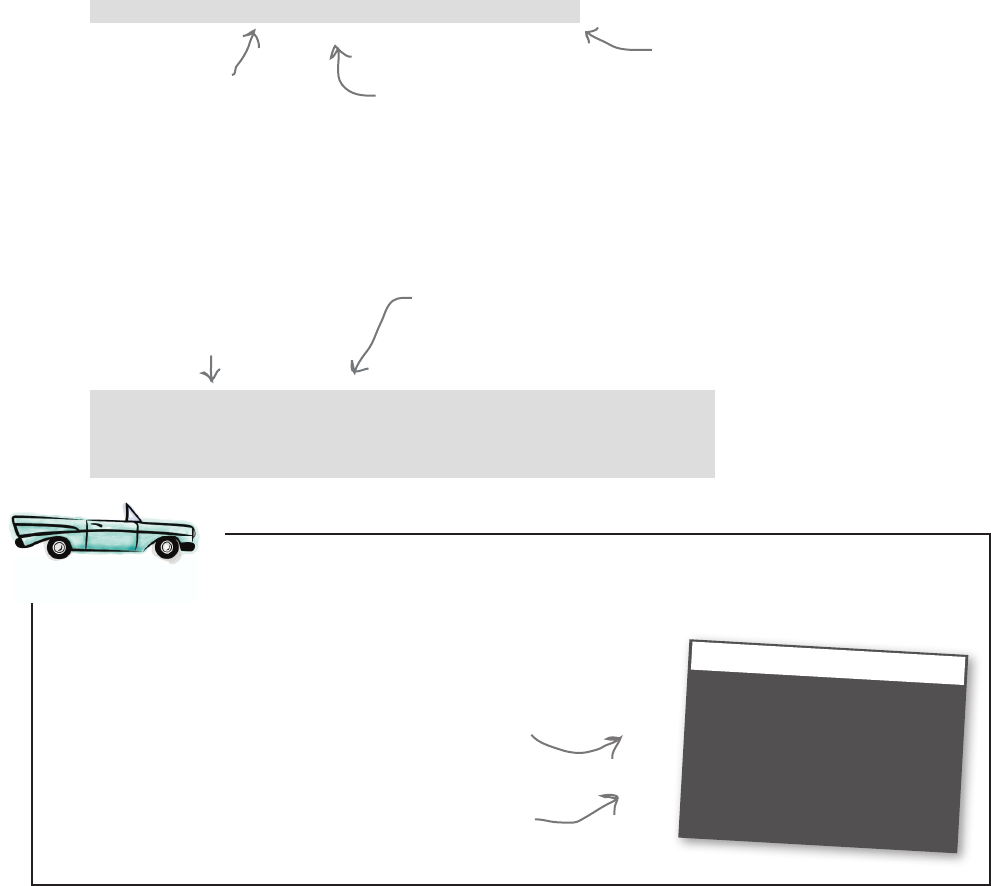
you are here 4 495
widgets, events, and emergent behavior
Make those two updates to view.py and take the code for a test drive. Click on the
start button and then check your Python Shell for any output.
A Test Drive
def start_handler(event):
print("Yup, you clicked on the start button alright.")
print("Thanks for stopping by.")
We clicked the start
button a few times.
start_button = Button(root, text='Start', width=12)
start_button.bind('<Button-1>', start_handler)
Our controller code isn’t going to require writing all that much code, so we’re just
going to put the controller code in with the view.py le (instead of creating a new
controller.py le). Go ahead and open view.py again. Add this line just below the line
that instantiates the start button object:
Let's add a click handler
You can call bind on any
widget to associate an event
with a function to call when
that event occurs.
The event we're interested in is a
click from the left button of a mouse
(which works on Mac or Windows
machines, or just about any machine
with a mouse, for that matter).
Now below your setup function and above the update function, add a new
function, start_handler.
This is the function we told the start
button to call when it gets clicked on.
Python 3.6.0 Shell
Yup, you clicked on the start button
alright.
Thanks for stopping by.
Yup, you clicked on the start button
alright.
Thanks for stopping by.
Notice how each time you click the function
start_hander is immediately called.
Handlers get passed an event object that contains
information about the event, like which button was clicked.
Here we don't really need any of that information, but we'll
be making use of it later in the chapter.
And we want to call the function
start_handler whenever the
button is clicked.
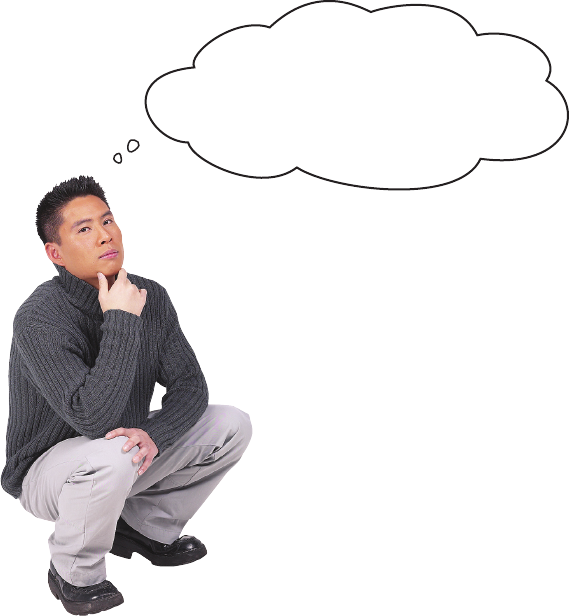
496 Chapter 11
more thoughts on event-driven programming
That’s right. Whether the user clicks on a button,
chooses an option from a menu, clicks on the canvas to
perhaps add a live cell (yes, we’re going to do that), or
some other event occurs, a common style of coding is to
register functions that will be called (that’s where the name
callback came from) when the event occurs. As you get used
to this style of coding, you’ll find it is a natural way to
program.
You might be wondering, though, if none of my code is
executing and I’m just waiting for events, how come the
program doesn’t just end? And is there any code that
is being executed as my code waits? That’s where the
mainloop function fits in. You’ll notice in this code and in
the turtle examples in the book we always call mainloop
as the last thing our code does. When you do that, the
code in mainloop takes over monitoring everything that
is happening in the interface, and when it sees a user
interaction it then calls out to your code. So, there is always
code running, and in this case it is the code in mainloop.
So in this style of
programming, my code is sitting
around waiting to be called as different
actions or events happen in the user
interface?
you are here 4 497
widgets, events, and emergent behavior
How the start/pause button is going to work
Here’s some code you’ve never seen before. What do you think it does?
Hint: this code also calls a handler function when an event occurs.
root.after(100,update)
Yes, this is the same root
assigned to the Tk object.
This is a method in the Tk object.
This is a time in milliseconds
(1 sec = 1,000 milliseconds).
This is the update function
we wrote already.
The start button is an important button because, when clicked, it needs to tell the simulator to
start computing new generations. If you remember the paper prototype, it also needs to morph
into a pause button. Let’s work up a little state diagram showing how the start button works before
we jump into code. In this diagram we’re going to use new global variable, is_running, which is
True if the start button has been clicked and the simulator is generating new generations. If the
game hasn’t started or is paused, then is_running is False.
user clicks
user clicks
set is_running to False
set is_running to True
call update()
If the user clicks on the
start button, then we set
is_running to True and we’re
going to call update(). We’re
also going to change the text
on the button to “Pause.”
If the user clicks on the
pause button, then we set
is_running to False. We’re also
going to change the text on
the button to “Start.”
You can do this over and
over, toggling the state
between the start and
the pause button.
You might be having a déjà
vu moment after that ISS
code we looked at in the
previous chapter.
498 Chapter 11
starting and stopping in the simulator
def start_handler(event):
print("Yup, you clicked on the start button alright.")
print("Thanks for stopping by.")
global is_running, start_button
if is_running:
is_running = False
start_button.configure(text='Start')
else:
is_running = True
start_button.configure(text='Pause')
update()
from tkinter import *
import model
cell_size = 5
is_running = False
Implementing the start/pause button
First we need a global is_running variable. Let’s add that to the
top of the view.py le:
Let’s add this global,
initially set to False.
Now we just need to follow the state diagram. Find the start_handler
function you just wrote, and we’re going to make some changes:
user clicks
user clicks
set is_running to False
set is_running to True
call update()
Let’s get rid of this
old code.
If we’re already running (meaning the
button is in the paused state), then we set
is_running to False and change the button
name to “Start.”
Otherwise, we set is_running to True, set
the button text to “Pause,” and call update
to compute a generation.
Make those two updates to view.py and take the code for a test drive. Try clicking
on the start and pause buttons over and over. Do you see generations being
computed?
A Test Drive
Make sure the start
button toggles between
Start and Pause.
When you click the start/pause
button repeatedly, you should see
generations being computed!
Another example of a
small bit of code making
a huge difference, but
there’s an even bigger
moment coming.

you are here 4 499
widgets, events, and emergent behavior
Another kind of event
If you click fast enough, you can actually see generations of cells
being computed by your next_gen function. That’s not too bad,
but your ngers are going to get tired, and these being computers,
you’d probably like to compute them a little faster than you are
capable of clicking. To make that happen, we’re going to use
another kind of event, one not based on what the user does (like
clicking a button), but one based on time.
The Python Tk object provides an interesting method named
after. Let’s take a look at how it works:
You’ll find similiar
functionality in most
programming languages.
root.after(100, update)
You can call the after
method on the root
Tk object.
The first argument is a
time in milliseconds. The second argument is
a function to call after
that time has elapsed.
Okay, but what does it do exactly? Let’s drop in on some code
invoking the after method.
Hey, root object, I’ve got
a function I need run after
100 milliseconds.
Got it—in 100 milliseconds
I’ll let the update function know
it is time to run. Don’t you worry,
it will happen.
def update():
global grid_view
grid_view.delete(ALL)
model.next_gen()
for i in range(0, model.height):
for j in range(0, model.width):
if model.grid_model[i][j] == 1:
draw_cell(i, j, 'black')
Your code The root Tk object’s
after function
There are 1,000
milliseconds in a second.
500 Chapter 11
the after method
Trace through this code; can you tell what it outputs? How does it work? Check
your answer at the end of the chapter.
from tkinter import *
root = Tk()
count = 10
def countdown():
global root, count
if count > 0:
print(count)
count = count - 1
root.after(1000, countdown)
else:
print('Blastoff')
countdown()
mainloop()
Do you think this
qualifies as a recursive
function?
Hey, update
function, it’s been 100
milliseconds, so you’re up:
get running.
Perfect, it worked
just as advertised. When 100
milliseconds had elapsed, my
update function ran. Just what I
wanted. Thanks, root!
Brain Building
you are here 4 501
widgets, events, and emergent behavior
If only we had a way to
call the update method over
and over so that we’d see new
generations of cells computed
without all that clicking. That
would be dreamy. But I know
it’s just a fantasy...
We have the technology: the after method
The after method is just what we need to get our simulator computing at
regular intervals. In fact, we hope you spent a little time understanding that
last Sharpen exercise because we’re going to use a similar technique here in
our update method:
def update():
global grid_view, root, is_running
grid_view.delete(ALL)
model.next_gen()
for i in range(0, model.height):
for j in range(0, model.width):
if model.grid_model[i][j] == 1:
draw_cell(i, j, 'black')
if (is_running):
root.after(100,update)
We’ll need to add the root
and is_running globals, as
we’ll be using them.
Okay, now, when update is called, if is_running is
True, then this call will schedule another call to
update in 100 milliseconds (1/10 of a second).
502 Chapter 11
testing the after method
There are those times when one line of code makes all the difference. Guess
what? This is one of those times. Get those last changes into view.py and get
ready to see your app transformed into a Game of Life simulator.
A Test Drive
(1) Click the start button and
watch the simulator run.
(2) Click the pause button to
temporarily suspend it.
This is starting
to look like more
than just a random
selection of cells.
Well, we’ve certainly come a long way. In fact, we have all the big
stu working. We just need to nish up a few interface details. Up
rst, we have the clear button to implement—it’s going to clear
the screen and set all the cells to dead. With a clear screen we’ll
want the ability to click and add our own live cells to the canvas.
And nally, we have our option menu, which is going to let us
preload some patterns into the grid. We’re going to tackle these
one at a time, starting with the clear button.
Are we there yet?
Did you see any
oscillating patterns?
Gliders going across the
screen? Areas of chaos
that come and go?
(3) Repeat as often as you like
and restart the simulator to get a
new round of random starting cells.
you are here 4 503
widgets, events, and emergent behavior
How about the clear button? It needs to set is_running to False and then set
each cell’s value to 0. It also needs to set the start button’s text to “Start” again.
And, it should call update to update the display before ending (with every cell in
the model set to 0, the screen should clear).
Use the start button as an example and write the code for the clear button:
start_button.bind('<Button-1>', start_handler)
def start_handler(event):
global is_running, start_button
if is_running:
is_running = False
start_button.configure(text='Start')
else:
is_running = True
start_button.configure(text='Pause')
update()
You’ll need to let the clear
button know about your
handler, just like we did with
the start button.
And here’s the start_handler
again, which should serve as a
good example.
When you’ve written the code, double-check it with ours at the end of the chapter and then
get it in your view.py file. Give it a try.
Your code here!
If you’re stumped on zeroing out
the cells in the model, refresh
your memory by looking at how
the update function iterates
over the cells.
504 Chapter 11
manually editing cells
Right now the game works by randomly choosing a bunch of live
cells and then when we click the start button it begins computing
new generations. What would be nice, though, is to be able to click
and draw our own live cells on the grid before we click Start. To
do that, we’re going to use a technique similar to the one we used
to handle button clicks. That is, when the user clicks on the canvas,
we’ll use an event handler (in other words, a function) that takes that
click and translates it into a live cell onscreen and in the model.
How to enter and edit cells directly
def grid_handler(event):
global grid_view, cell_size
x = int(event.x / cell_size)
y = int(event.y / cell_size)
if (model.grid_model[x][y] == 1):
model.grid_model[x][y] = 0
draw_cell(x, y, 'white')
else:
model.grid_model[x][y] = 1
draw_cell(x, y, 'black')
event
x: 315
y: 134
event_handler
The user is going to
click on the canvas...
...which is going to generate
an event and send along an
event object with the x-
and y-position of the click.
And that event object is
going to get passed to our
click handler function.
We’ll begin building this code by binding a left button click to the
canvas just as we did with the start and clear buttons.
grid_view.bind('<Button-1>', grid_handler)
When the user clicks the left button
on the grid_view canvas, call the
grid_handler function.
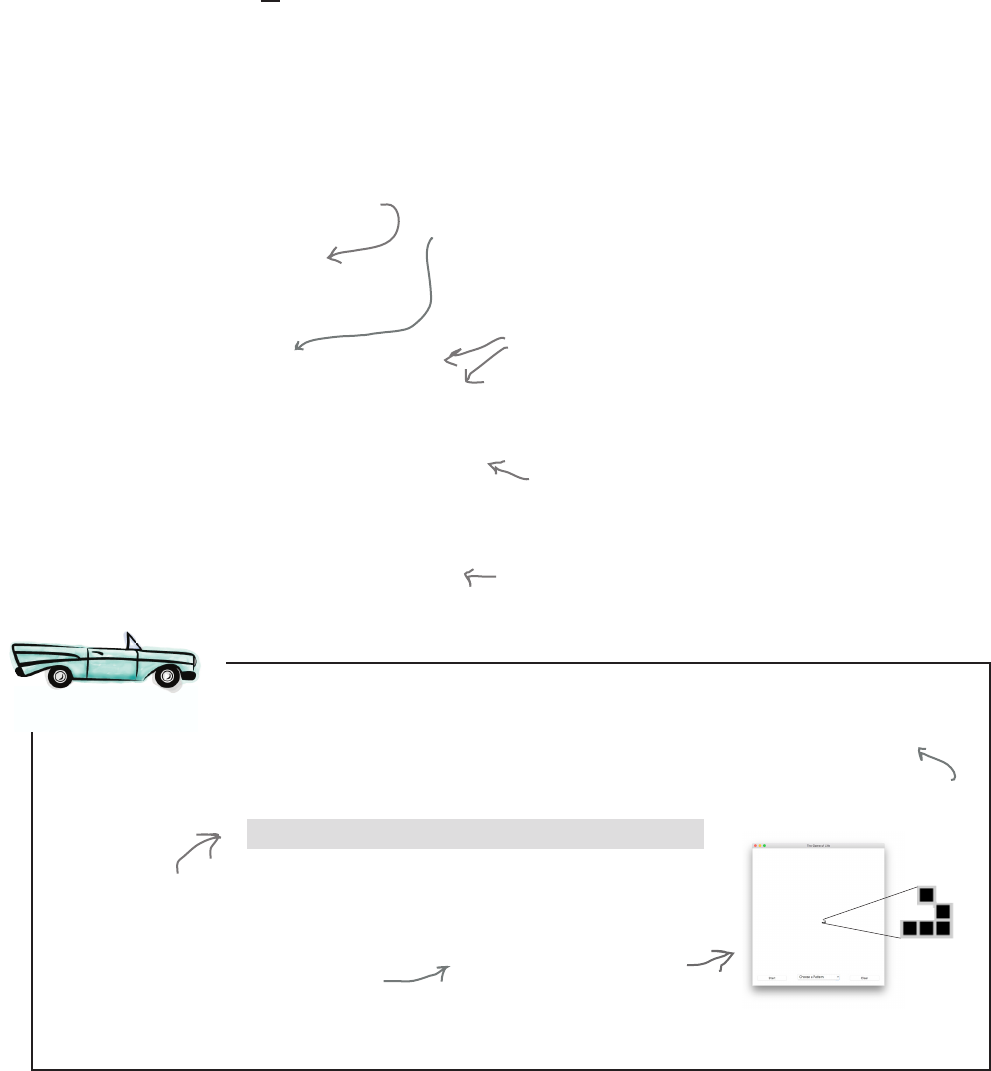
you are here 4 505
widgets, events, and emergent behavior
Let’s think through how we want the grid_handler function to work. How about this: if the user
clicks on a white (dead) cell in the grid, then we make it a live cell and turn it black. And, if the cell is
black already, we’ll change its state to dead and turn it back to white. Of course, the cell also needs to
change visually in the view, and we need to update its value in the model.
Let’s look at how to do this in code:
Writing the grid view handler
def grid_handler(event):
global grid_view, cell_size
x = int(event.x / cell_size)
y = int(event.y / cell_size)
if (model.grid_model[x][y] == 1):
model.grid_model[x][y] = 0
draw_cell(x, y, 'white')
else:
model.grid_model[x][y] = 1
draw_cell(x, y, 'black')
Remember the grid handler function
takes an event as a argument.
We can get the x- and y-position of
the click from the event object. You’ll
find there is an attribute for each.
Remember our grid is scaled by the cell size, so we need to
find out the true x and y (row and column, if you like) in
the grid model. To do this we divide by the cell size. We
use the int function to make sure the result is an int and
not a floating-point number.
If the current cell in the model is 1,
we set it to 0 and call our draw_cell
function to color in the cell white.
Otherwise, we set the model to 1 and
call our draw_cell function to color in
the cell black.
Add the grid_handler function above to view.py, just below the setup function.
And also remember to put the call to the bind method in your code (see below).
Finally, it’s time to delete that call to randomize in model.py; that way you’ll start with a
clear grid.
A Test Drive
grid_view.grid(row=0, columnspan=3, padx=20, pady=20)
grid_view.bind('<Button-1>', grid_handler)
Place the call to bind just below where
you set the grid for the grid_view. We recommend drawing a
glider pattern and clicking
Start. If you mess up, just
click again to erase the cell.
Don’t miss this step.
Now, when you run the simulator you
could see a nice blank screen. Click
in the screen to add live cells before
clicking the start button.
If clicks aren’t working, make
sure you’re clicking in the
middle of the window.
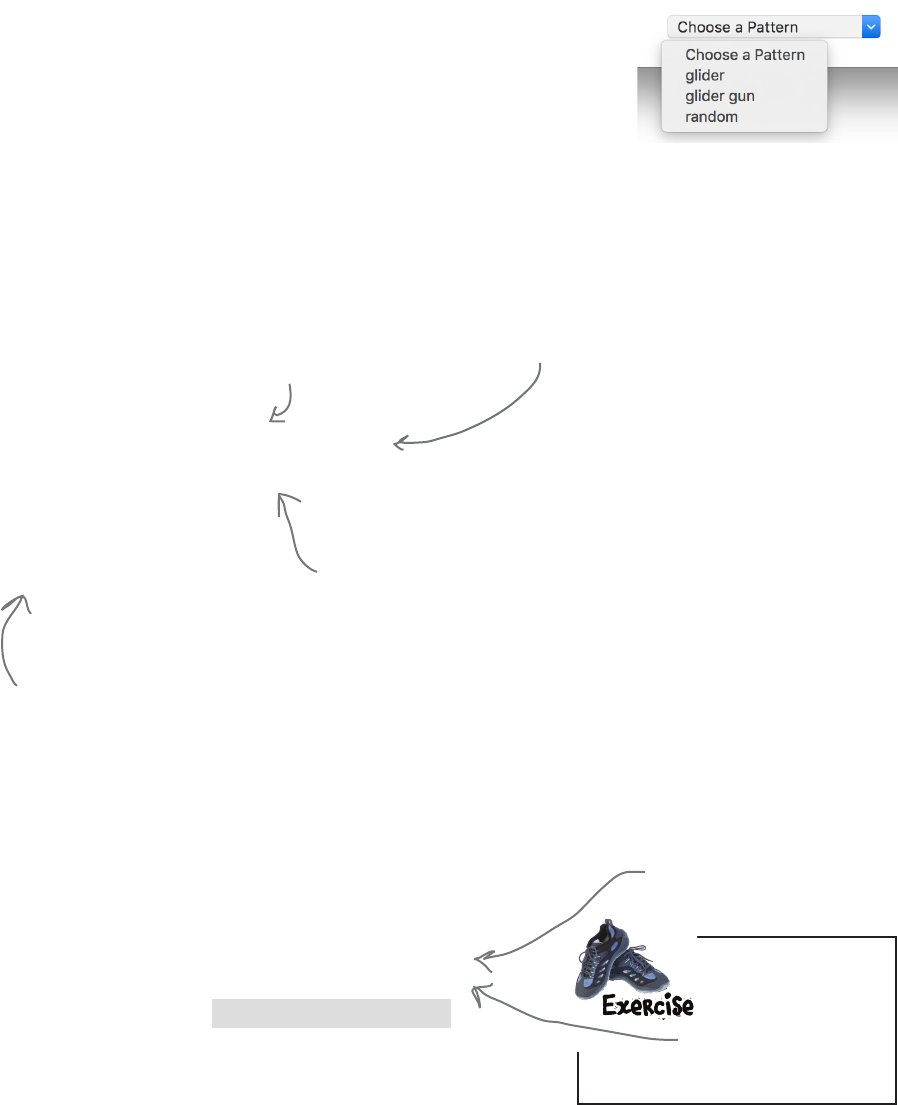
506 Chapter 11
adding pre-built patterns
choice = StringVar(root)
choice.set('Choose a Pattern')
option = OptionMenu(root, choice, "Choose a Pattern",
"glider",
"glider gun",
"random")
option.config(width=20)
We’re going to put one more bit of polish on this app by providing an option
menu to allow users to choose from a list of preexisting patterns. Our design
supplies three patterns, but you should feel free to add your own.
Remember that you’ve already instantiated an option menu in your code, but
we purposely put o discussing that code because the option menu widget
works a little dierently than the button and canvas widgets. Let’s look at the
code we have so far to create the option menu:
Now it’s time to add some patterns
choice = StringVar(root)
choice.set('Choose a Pattern')
option = OptionMenu(root, choice, "Choose a Pattern",
"glider",
"glider gun",
"random",
command=option_handler)
option.config(width=20)
The Tkinter module provides an object that stores values.
Here we’re creating an object to hold a string and assigning
it to the variable choice. You'll see how this is used in a sec.
We then instantiate the option menu and
pass it the root window (as is always
the case with widgets), our variable
for holding a string value, and a set of
options that appear in the menu.
To make things look better,
we also widened the widget
by giving it a width of 20.
As you can see in the interface this all looks great, but it doesn’t do anything.
As with the buttons and the canvas, we need to add an event binding to the
option menu, but the way we do that is a little dierent than we’re used to.
Here’s how we add a binding for the option menu:
We then set the value of the
choice object to ‘Choose a
Pattern,’ which is the initial
choice we want selected in
the widget.
We add one more argument to the
OptionMenu constructor, which is the
command (think “handler”) to invoke
when a user chooses an option.
Add this small
bit of code to
your view.py file
before we forget
to do it!
you are here 4 507
widgets, events, and emergent behavior
Writing an option menu handler is a bit dierent as well, because we aren’t
just reacting to a simple button click. Instead the user has chosen an option in
the menu, and we need to gure out what that option is and then act on it.
As you might have gured out, the rst item in our menu, “Choose a Pattern,”
is an instruction to the user; it isn’t meant to do anything. For the rest of the
options, let’s write some code to see how we’re going to handle them:
Writing a handler for the OptionMenu
def option_handler(event):
global is_running, start_button, choice
is_running = False
start_button.configure(text='Start')
selection = choice.get()
if selection == 'glider':
model.load_pattern(model.glider_pattern, 10, 10)
elif selection == 'glider gun':
model.load_pattern(model.glider_gun_pattern, 10, 10)
elif selection == 'random':
model.randomize(model.grid_model, model.width, model.height)
update()
Let's stop the simulator
from running and reset
the start button.
The choice variable holds a StringVar
object with the value the user selected in
the option menu. A StringVar provides a
get method to get the value it holds.
Once we have the user's
selection we can test
to see which option
it was, and either
load a pattern or call
randomize.
Note that we need to write
the load_pattern function
as well as define what the
patterns look like.
This handler gets an event too, although
we won’t need to make use of it.
If the user chooses
random, we conveniently
have already written a
randomize function, so
we just need to call it!
Go ahead and place this code
into your view.py file above
your start_handler function.
We can’t run it yet, because
we haven’t written the model’s
load_pattern method or
defined the patterns. We’ll do
that next, and then come back
and give it all a test drive.
We’re going to be using the Tkinter
StringVar object we saw earlier.
After we change the
model, we need to
update the display for
the user.
508 Chapter 11
the stringvar object
It is a little confusing. After all, we’re happily coding
along, using everyday Python variables, and out of nowhere
Tkinter throws in its own variables in the form of an object. Why?
There are a couple reasons we need to use Tkinter variables here.
The first is that the Tk graphics library (which Tkinter is built
on) is actually a cross-platform library (meaning it works with lots of
languages, not just Python). As you gain experience with Tkinter,
you’ll see a few things that don’t feel Python-like because Tkinter
was not designed specifically for Python.
The other reason is that the StringVar class allows you to do a bit
more than just store and retrieve values; using a StringVar you
can track the changes to a variable’s value. For instance, say you’re
building a weather monitor and you want to update your display
anytime the temperature changes. Well, with a StringVar you can
use its trace method to be notified anytime its value changes, like
this:
Okay, you threw me
with that StringVar object. So,
it’s an object that holds the choice we made
with the option menu? Is it like a special object
that acts like a variable? Given we have variables
already, why do we need it?
temperature = StringVar()
temperature.trace("w", my_handler)
Anytime temperature is changed (written to in
Tk terminology), our my_handler gets called.
We won’t be making use of this additional functionality of
StringVar in our code, but it’s handy to know about for future
reference, and is a great example of another form of event-based
programming.
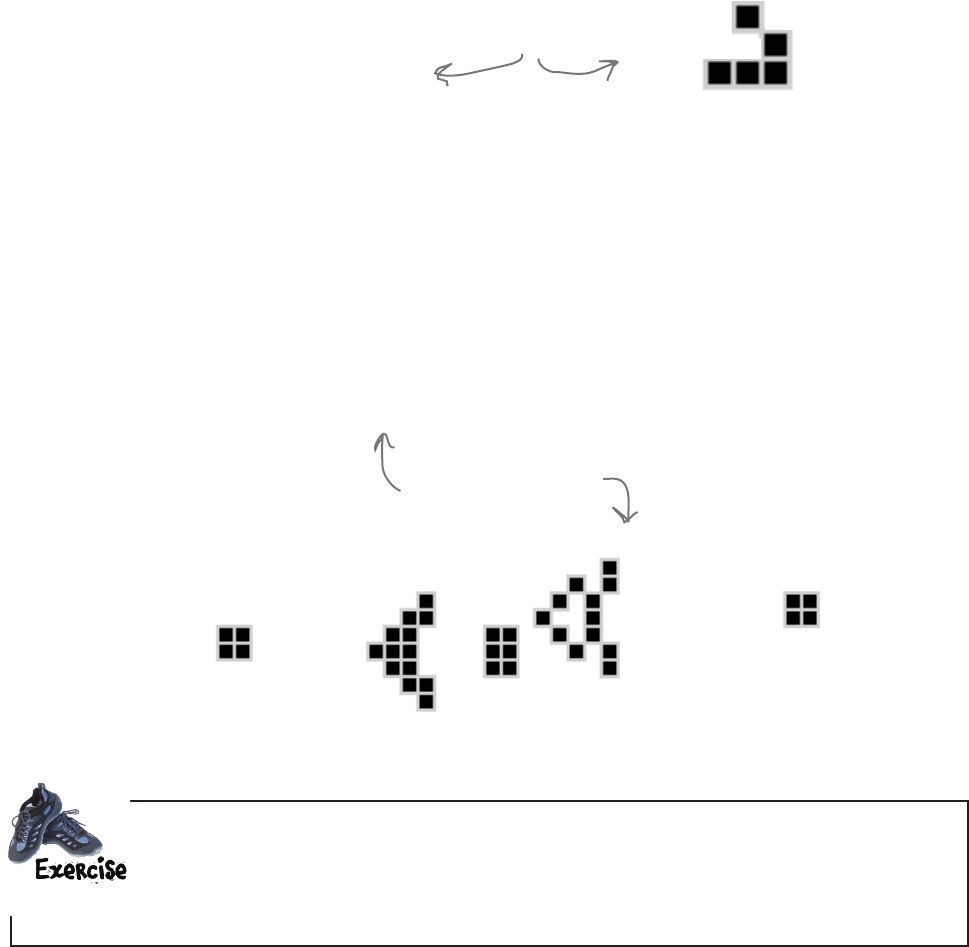
you are here 4 509
widgets, events, and emergent behavior
Let’s dene our patterns in the form of a two-dimensional list, like our grid
model. So a pattern for a glider would look like this:
How to define your patterns
= [[0, 0, 0, 0, 0],
[0, 0, 1, 0, 0],
[0, 0, 0, 1, 0],
[0, 1, 1, 1, 0],
[0, 0, 0, 0, 0]]
Can you see the resemblance?
And the glider gun is a little more complicated:
[[0, 0, 0, 0, 0, 0, 0, 0, 0, 0, 0, 0, 0, 0, 0, 0, 0, 0, 0, 0, 0, 0, 0, 0, 0, 0, 0, 0, 0, 0, 0, 0, 0, 0, 0, 0, 0, 0],
[0, 0, 0, 0, 0, 0, 0, 0, 0, 0, 0, 0, 0, 0, 0, 0, 0, 0, 0, 0, 0, 0, 0, 0, 0, 1, 0, 0, 0, 0, 0, 0, 0, 0, 0, 0, 0, 0],
[0, 0, 0, 0, 0, 0, 0, 0, 0, 0, 0, 0, 0, 0, 0, 0, 0, 0, 0, 0, 0, 0, 0, 1, 0, 1, 0, 0, 0, 0, 0, 0, 0, 0, 0, 0, 0, 0],
[0, 0, 0, 0, 0, 0, 0, 0, 0, 0, 0, 0, 0, 1, 1, 0, 0, 0, 0, 0, 0, 1, 1, 0, 0, 0, 0, 0, 0, 0, 0, 0, 0, 0, 0, 1, 1, 0],
[0, 0, 0, 0, 0, 0, 0, 0, 0, 0, 0, 0, 1, 0, 0, 0, 1, 0, 0, 0, 0, 1, 1, 0, 0, 0, 0, 0, 0, 0, 0, 0, 0, 0, 0, 1, 1, 0],
[0, 1, 1, 0, 0, 0, 0, 0, 0, 0, 0, 1, 0, 0, 0, 0, 0, 1, 0, 0, 0, 1, 1, 0, 0, 0, 0, 0, 0, 0, 0, 0, 0, 0, 0, 0, 0, 0],
[0, 1, 1, 0, 0, 0, 0, 0, 0, 0, 0, 1, 0, 0, 0, 1, 0, 1, 1, 0, 0, 0, 0, 1, 0, 1, 0, 0, 0, 0, 0, 0, 0, 0, 0, 0, 0, 0],
[0, 0, 0, 0, 0, 0, 0, 0, 0, 0, 0, 1, 0, 0, 0, 0, 0, 1, 0, 0, 0, 0, 0, 0, 0, 1, 0, 0, 0, 0, 0, 0, 0, 0, 0, 0, 0, 0],
[0, 0, 0, 0, 0, 0, 0, 0, 0, 0, 0, 0, 1, 0, 0, 0, 1, 0, 0, 0, 0, 0, 0, 0, 0, 0, 0, 0, 0, 0, 0, 0, 0, 0, 0, 0, 0, 0],
[0, 0, 0, 0, 0, 0, 0, 0, 0, 0, 0, 0, 0, 1, 1, 0, 0, 0, 0, 0, 0, 0, 0, 0, 0, 0, 0, 0, 0, 0, 0, 0, 0, 0, 0, 0, 0, 0],
[0, 0, 0, 0, 0, 0, 0, 0, 0, 0, 0, 0, 0, 0, 0, 0, 0, 0, 0, 0, 0, 0, 0, 0, 0, 0, 0, 0, 0, 0, 0, 0, 0, 0, 0, 0, 0, 0]]
glider_gun_pattern =
Can you see the
resemblance here too?
You don’t need to type these in. Just look in your Chapter 11 source code and you’ll find
glider.py and glider_gun.py. Open them and copy these two assignment statements to
the bottom of your model.py file (just below the count_neighbors function). No need to
test yet, other than making sure you don’t have any syntax errors.
glider_pattern

510 Chapter 11
writing the pattern code
def load_pattern(pattern, x_offset=0, y_offset=0):
global grid_model
for i in range(0, height):
for j in range(0, width):
grid_model[i][j] = 0
j = y_offset
for row in pattern:
i = x_offset
for value in row:
grid_model[i][j] = value
i = i + 1
j = j + 1
Our function takes a
pattern (like glider or
glider_gun) in the form of
a two-dimensional list.
It also takes two other arguments, an x-
and y-position to locate the top-left
cell of the pattern on the grid.
Let's set i and j to the
offsets.
Now we just iterate through each value
in the pattern and assign it to the
corresponding point on the grid_model.
Writing the pattern loader
Now we need to write the code to load a pattern into the grid mode. All the pattern
loader needs to do is take a list and copy its ones and zeros into the grid model. Actually,
before it does that, it should clear out the grid model and write zeros into all its cells.
We should also allow the pattern to be oset on the grid, so it can be placed, say, in the
middle of the grid. We’ll do that by taking an x-oset and a y-oset as arguments, and
rather than copying the pattern starting at the top of the grid (location 0, 0), we’ll place
the pattern at the oset location. Here’s the code:
And zero out
all the cells.
Alert: there's duplicated code
here (look at the clear_handler);
there's an opportunity for
refactoring this code later (a
homework assignment).
We’re going
to load our
patterns by
copying them
into the
grid_model.
We’ll also support
an optional x- and
y-offset for the
pattern.
You’ll remember of course
parameter defaults from
Chapter 5.
you are here 4 511
widgets, events, and emergent behavior
Add the load_pattern function from the previous page to your model.py file,
just below your patterns, and you should be all ready for an exhaustive test of
the Game of Life simulator! Given all the code and code changes in this chapter,
you’ll find the complete source code for the simulator over the next several pages.
A Test Drive
model.py
import random
height = 100
width = 100
def randomize(grid, width, height):
for i in range(0, height):
for j in range(0, width):
grid[i][j] = random.randint(0,1)
grid_model = [0] * height
next_grid_model = [0] * height
for i in range(height):
grid_model[i] = [0] * width
next_grid_model[i] = [1] * width
def next_gen():
global grid_model, next_grid_model
for i in range(0, height):
for j in range(0, width):
cell = 0
count = count_neighbors(grid_model, i, j)
if grid_model[i][j] == 0:
if count == 3:
cell = 1
elif grid_model[i][j] == 1:
if count == 2 or count == 3:
cell = 1
next_grid_model[i][j] = cell
temp = grid_model
grid_model = next_grid_model
next_grid_model = temp

512 Chapter 11
the complete code and test
def count_neighbors(grid, row, col):
count = 0
if row-1 >= 0:
count = count + grid[row-1][col]
if (row-1 >= 0) and (col-1 >= 0):
count = count + grid[row-1][col-1]
if (row-1 >= 0) and (col+1 < width):
count = count + grid[row-1][col+1]
if col-1 >= 0:
count = count + grid[row][col-1]
if col + 1 < width:
count = count + grid[row][col+1]
if row + 1 < height:
count = count + grid[row+1][col]
if (row + 1 < height) and (col-1 >= 0):
count = count + grid[row+1][col-1]
if (row + 1 < height) and (col+1 < width):
count = count + grid[row+1][col+1]
return count
glider_pattern = [[0, 0, 0, 0, 0],
[0, 0, 1, 0, 0],
[0, 0, 0, 1, 0],
[0, 1, 1, 1, 0],
[0, 0, 0, 0, 0]]
glider_gun_pattern = [[0, 0, 0, 0, 0, 0, 0, 0, 0, 0, 0, 0, 0, 0, 0, 0, 0, 0, 0, 0, 0, 0, 0, 0, 0,
0, 0, 0, 0, 0, 0, 0, 0, 0, 0, 0, 0, 0],
[0, 0, 0, 0, 0, 0, 0, 0, 0, 0, 0, 0, 0, 0, 0, 0, 0, 0, 0, 0, 0, 0, 0, 0, 0, 1, 0, 0,
0, 0, 0, 0, 0, 0, 0, 0, 0, 0],
[0, 0, 0, 0, 0, 0, 0, 0, 0, 0, 0, 0, 0, 0, 0, 0, 0, 0, 0, 0, 0, 0, 0, 1, 0, 1, 0, 0,
0, 0, 0, 0, 0, 0, 0, 0, 0, 0],
[0, 0, 0, 0, 0, 0, 0, 0, 0, 0, 0, 0, 0, 1, 1, 0, 0, 0, 0, 0, 0, 1, 1, 0, 0, 0, 0, 0,
0, 0, 0, 0, 0, 0, 0, 1, 1, 0],
[0, 0, 0, 0, 0, 0, 0, 0, 0, 0, 0, 0, 1, 0, 0, 0, 1, 0, 0, 0, 0, 1, 1, 0, 0, 0, 0, 0,
0, 0, 0, 0, 0, 0, 0, 1, 1, 0],
[0, 1, 1, 0, 0, 0, 0, 0, 0, 0, 0, 1, 0, 0, 0, 0, 0, 1, 0, 0, 0, 1, 1, 0, 0, 0, 0, 0,
0, 0, 0, 0, 0, 0, 0, 0, 0, 0],
[0, 1, 1, 0, 0, 0, 0, 0, 0, 0, 0, 1, 0, 0, 0, 1, 0, 1, 1, 0, 0, 0, 0, 1, 0, 1, 0, 0,
0, 0, 0, 0, 0, 0, 0, 0, 0, 0],
[0, 0, 0, 0, 0, 0, 0, 0, 0, 0, 0, 1, 0, 0, 0, 0, 0, 1, 0, 0, 0, 0, 0, 0, 0, 1, 0, 0,
0, 0, 0, 0, 0, 0, 0, 0, 0, 0],
[0, 0, 0, 0, 0, 0, 0, 0, 0, 0, 0, 0, 1, 0, 0, 0, 1, 0, 0, 0, 0, 0, 0, 0, 0, 0, 0, 0,
0, 0, 0, 0, 0, 0, 0, 0, 0, 0],
[0, 0, 0, 0, 0, 0, 0, 0, 0, 0, 0, 0, 0, 1, 1, 0, 0, 0, 0, 0, 0, 0, 0, 0, 0, 0, 0, 0,
0, 0, 0, 0, 0, 0, 0, 0, 0, 0],
[0, 0, 0, 0, 0, 0, 0, 0, 0, 0, 0, 0, 0, 0, 0, 0, 0, 0, 0, 0, 0, 0, 0, 0, 0, 0, 0, 0,
0, 0, 0, 0, 0, 0, 0, 0, 0, 0]]

you are here 4 513
widgets, events, and emergent behavior
def load_pattern(pattern, x_offset=0, y_offset=0):
global grid_model
for i in range(0, height):
for j in range(0, width):
grid_model[i][j] = 0
j = y_offset
for row in pattern:
i = x_offset
for value in row:
grid_model[i][j] = value
i = i + 1
j = j + 1
if __name__ == '__main__':
next_gen()
from tkinter import *
import model
cell_size = 5
is_running = False
def setup():
global root, grid_view, cell_size, start_button, clear_button, choice
root = Tk()
root.title('The Game of Life')
grid_view = Canvas(root, width=model.width*cell_size,
height=model.height*cell_size,
borderwidth=0,
highlightthickness=0,
bg='white')
start_button = Button(root, text='Start', width=12)
clear_button = Button(root, text='Clear', width=12)
choice = StringVar(root)
choice.set('Choose a Pattern')
option = OptionMenu(root, choice, 'Choose a Pattern', 'glider', 'glider gun', 'random',
command=option_handler)
option.config(width=20)
view.py
514 Chapter 11
the complete code and test, continued
grid_view.grid(row=0, columnspan=3, padx=20, pady=20)
grid_view.bind('<Button-1>', grid_handler)
start_button.grid(row=1, column=0, sticky=W,padx=20, pady=20)
start_button.bind('<Button-1>', start_handler)
option.grid(row=1, column=1, padx=20)
clear_button.grid(row=1, column=2, sticky=E, padx=20, pady=20)
clear_button.bind('<Button-1>', clear_handler)
def option_handler(event):
global is_running, start_button, choice
is_running = False
start_button.configure(text='Start')
selection = choice.get()
if selection == 'glider':
model.load_pattern(model.glider_pattern, 10, 10)
elif selection == 'glider gun':
model.load_pattern(model.glider_gun_pattern, 10, 10)
elif selection == 'random':
model.randomize(model.grid_model, model.width, model.height)
update()
def start_handler(event):
global is_running, start_button
if is_running:
is_running = False
start_button.configure(text='Start')
else:
is_running = True
start_button.configure(text='Pause')
update()
def clear_handler(event):
global is_running, start_button
is_running = False
for i in range(0, model.height):
for j in range(0, model.width):
model.grid_model[i][j] = 0
start_button.configure(text='Start')
update()
def grid_handler(event):
global grid_view, cell_size
x = int(event.x / cell_size)
y = int(event.y / cell_size)
if (model.grid_model[x][y] == 1):
model.grid_model[x][y] = 0
draw_cell(x, y, 'white')
else:
model.grid_model[x][y] = 1
draw_cell(x, y, 'black')
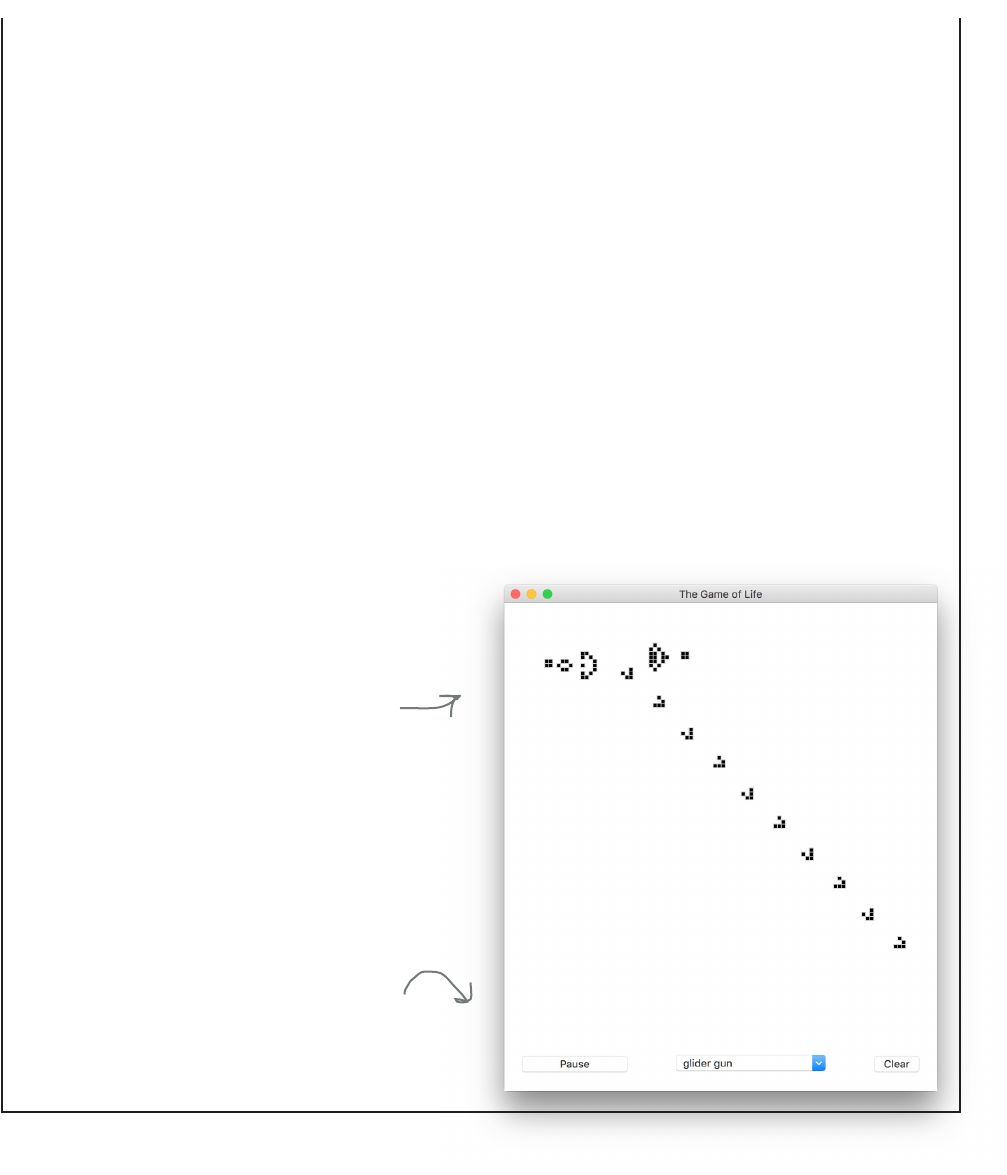
you are here 4 515
widgets, events, and emergent behavior
def update():
global grid_view, root, is_running
grid_view.delete(ALL)
model.next_gen()
for i in range(0, model.height):
for j in range(0, model.width):
if model.grid_model[i][j] == 1:
draw_cell(i, j, 'black')
if (is_running):
root.after(100,update)
def draw_cell(row, col, color):
global grid_view, cell_size
if color == 'black':
outline = 'grey'
else:
outline = 'white'
grid_view.create_rectangle(row*cell_size,
col*cell_size,
row*cell_size+cell_size,
col*cell_size+cell_size,
fill=color, outline=outline)
if __name__ == '__main__':
setup()
update()
mainloop()
Nice! Here’s what we got
playing with the ever-
fascinating glider gun.
To replicate this, choose the “glider gun”
option and click the start button.
516 Chapter 11
review of widgets, events, and emergent behavior
Generative code produces
output you could not have
guessed by looking at the code.
The Game of Life was
discovered by mathematician
John Conway.
GUIs are graphical user
interfaces.
Paper prototyping is a method of
testing a GUI before coding it.
We designed our app
by separating code into
model, view, and controller
responsibilities.
Tkinter is a Python module for
building user interfaces.
Tkinter provides widgets that are
presented in code as objects
and onscreen as common user
interface components.
The Tk object represents a main
window.
Tkinter provides several layout
managers, which organize
widgets within a window.
We used the grid layout
manager to place our widgets.
A reactive or event-based style
of computation is often used
when creating user interfaces.
In this model we supply handlers
in the form of functions that
are called when certain events
occur.
We use the bind method on
Tkinter widgets to register a
function to handle an event.
Most handlers are passed an
event object, which contains
more information about an event.
Most programming languages
also provide a method of
registering a handler to be called
after a duration of time has
elapsed.
Tkinter provides the after
method on the Tk object to
schedule code to be executed at
a later time.
The OptionMenu keeps the
user’s selection in a StringVar
object.
The Tkinter mainloop monitors
the interface for user interaction.
Nice job! The Game of Life
simulator is spectacular! Let me know
when you want to discuss marketing this.
I’m thinking comic book classified ads.
you are here 4 517
widgets, events, and emergent behavior
Even Further
Even Further!
Taking your Game of Life Simulator
You’ve built a great little simulator! And it’s just the beginning because there’s so much
more you can do with it. In lieu of a crossword, here are some ideas to consider.
Start by learning more: http://web.stanford.
edu/~cdebs/GameOfLife/
Google “Game of Life” along with “Maze,”
“Night/Day,” “Walled City,” or “Reverse,”
to see some other examples of interesting
alternative rules.
Research Cellular Automata to nd out
more about the Game of Life and its
mathematical basis: https://en.wikipedia.
org/wiki/Cellular_automaton
LEARN MORE
Tweak the rules. Here’s another set of
rules:
1. If a cell is alive, it stays alive in the
next generation.
2. If a dead cell has two live cells
adjacent to it, the dead cell changes
state to live.
Write code to save and load your patterns
from a le.
Implement a torus: our implementation
uses a rectangle that ends at the borders.
Change your code so that the lefthand
side wraps around to the right, and the
top to the bottom so the entire grid is one
continuous surface (it’s not that hard with
a little thought).
Add color: how about basing the color on
how long a cell lives?
Add “ghosting”: if a cell has been alive,
give it a light grey color. Have it fade over
time.
Find ways to optimize the code and make
it super fast.
CODE MORE
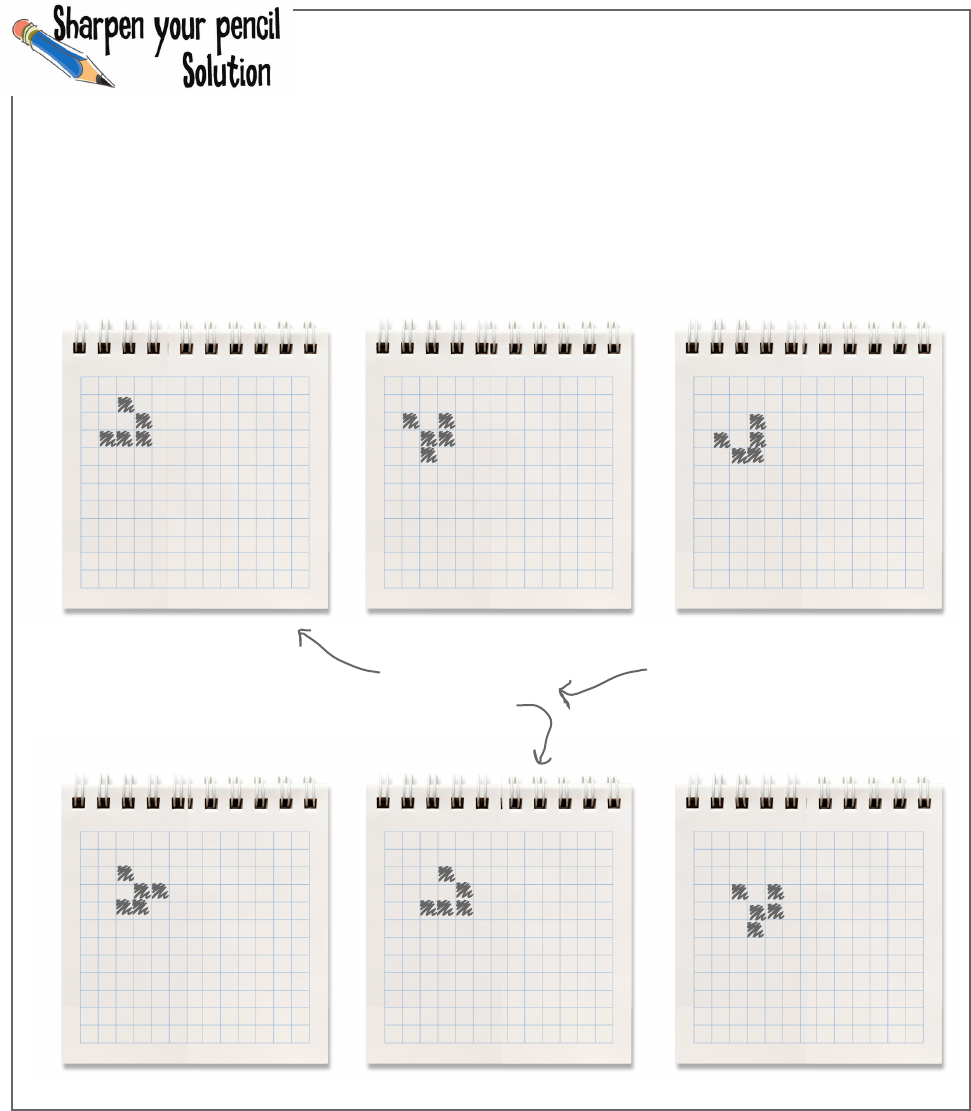
518 Chapter 11
exercise solution
What do you notice
about these two?
In four generations it repeated
itself and moved one square down
and across. If we keep computing
this, it will move across the grid!
Generation 1 Generation 3
Generation 2
Generation 4 Generation 6
Generation 5
Before you get started coding, work through a few generations of the Game of Life.
Use generation 1 as the starting point and then compute generations 2 through 6, by
applying the Game of Life rules. Here are the rules again:
• If a dead cell has three living neighbors, it becomes alive in the next generation.
• If a live cell has two or three living neighbors, it lives on in the next generation.
• If a live cell has fewer than two living neighbors, it dies in the next generation.
• If a live cell has more than three neighbors, it dies in the next generation.
you are here 4 519
widgets, events, and emergent behavior
THE RULES
BIRTH: a new cell is born if it is
surrounded by three live cells.
LIFE: a cell lives on as long as it is
surrounded by two or three live cells.
DEATH: a cell dies of loneliness if
it is surrounded by fewer than two
live cells.
A cell dies of overcrowding if it is
surrounded by four or more live cells.
count = count_neighbors(grid_model, i, j)
else:
elif grid_model[i][j] == 1:
cell = 1
cell = 0
cell = 0
cell = 1
if count == 2 or count == 3:
if count == 3:
def next_gen():
global grid_model
for i in range(0, height):
for j in range(0, width):
if count > 4
count < 2:
and
or
if grid_model[i][j] == 0:
This implements the
BIRTH rule.
This implements the
LIFE rule.
Most cases result in the cell
being dead in the next gen,
so we'll just set it to that.
We didn’t need all
these.
Code Magnets Solution
Lucky you. While you were reading about Ready Bake code,
we went ahead and wrote the next_gen function and put it
on the refrigerator. But as is always the case in the Head First
books, someone came along and messed it up. Can you help
us get it back together? Careful, there are extra magnets you
don’t need.
520 Chapter 11
exercise solution
We’re not really exercising this code if we’re testing with a grid of all zeros. Write a
function, randomize, which takes a grid, a width, and a height and places random
ones and zeros at each cell location:
import random
def randomize(grid, width, height):
for i in range(0, height):
for j in range(0, width):
grid[i][j] = random.randint(0,1)
Iterate over the grid,
and assign a random
int to each location.
Trace through this code; can you tell what it outputs? How does it work?
from tkinter import *
root = Tk()
count = 10
def countdown():
global root, count
if count > 0:
print(count)
count = count - 1
root.after(1000, countdown)
else:
print('Blastoff')
countdown()
mainloop()
Python 3.6.0 Shell
10
9
8
7
6
5
4
3
2
1
Blastoff
We explicitly call countdown the first time, which
schedules the first “after” call of countdown.
Each time countdown is then called, it keeps
scheduling more invocations of countdown 1 second
later—that is, until count == 0, when the
function ends without scheduling another call.
Technically the function
countdown never calls itself;
instead, it is asking the root
Tk object to call it at some
point in the future (1 second
in this case). But it certainly
has a recursive feel!
Do you think this
qualifies as a recursive
function?
Brain Building
Because you’re instantiating a Tk widget, you’ll
see a new window pop up when you run this code.
you are here 4 521
widgets, events, and emergent behavior
clear_button.bind('<Button-1>', clear_handler)
def clear_handler(event):
global is_running, start_button
is_running = False
for i in range(0, model.height):
for j in range(0, model.width):
model.grid_model[i][j] = 0
start_button.configure(text='Start')
update()
When you’ve written the code, double-check it with ours at the end of the chapter and then
get it in your view.py file. Give it a try.
Clear’s working great! But,
boy, we really need a way to
click and add our own cells.
Here’s the code to add the
clear_handler.
First we set is_running to False.
Then we zero out the cells in the
model.
Now reset the button text to ‘Start’.
Finally, update the display.
start_button.bind('<Button-1>', start_handler)
def start_handler(event):
global is_running, start_button
if is_running:
is_running = False
start_button.configure(text='Start')
else:
is_running = True
start_button.configure(text='Pause')
update()
You’ll need to let the clear
button know about your
handler, just like we did with
the start button.
And here’s the start_handler
again, which should serve as a
good example.
How about the clear button? It needs to set is_running to False and then set
each cell’s value to 0. It also needs to set the start button’s text to “Start” again.
And it should call update to update the display before ending (with every cell in
the model set to 0, the screen should clear).
Use the start button as an example and write the code for the clear button:

this is a new chapter 523
object-oriented programming
12
A Trip to Objectville
In this book you’ve used functions to abstract your code.
And you’ve approached coding in a procedural manner using simple statements,
conditionals, and for/while loops with functions—none of this is exactly object-
oriented. In fact, it’s not object-oriented at all! We have looked at objects and how to use
them in our code, but you haven’t created any objects of your own yet, and you haven’t
really approached designing your code in an object-oriented way. So, the time has come
to leave this boring procedural town behind. In this chapter, you’re going to find out why
using objects is going to make your life so much better—well, better in a programming
sense (we can’t really help you with other areas of your life and your coding skills, all
in one book). Just a warning: once you’ve discovered objects you’ll never want to come
back. Send us a postcard when you get there.
We’re
leaving this dusty
old procedural town
behind. We’ll send you
a postcard!
524 Chapter 12
object-oriented programming
Breaking it down, a different way
Remember back in Chapter 1 when we said there were two
skills that you needed to learn to code? The first was breaking a
problem into a small set of actions, and the second was learning
a programming language so that you can describe those actions
to a computer. At this point, you’ve learned a good deal of both
those skills.
And that’s good, because those skills are the foundation of any
coding you (or anyone) will ever do. However, there is another
perspective on breaking problems down, one that almost every
modern language encourages and one that most professional
programmers favor: it’s known as object-oriented programming, with
which we had our first encounter in Chapter 7.
With object-oriented programming, rather than writing an
algorithm using the techniques we’ve learned for abstraction,
conditional logic, and so on, we instead model a set of
objects and how they interact. In some ways object-oriented
programming is an advanced technique that is full of its own
jargon, techniques, and best practices. But in other ways it’s
often an intuitive way to break problems down, as you’ll soon
see.
Now object-oriented programming (otherwise known as OOP),
is a topic that could (and has) filled many books. In this chapter
we’re going to try to get the gist of OOP down so you’re in a
good position to read and understand code written in object-
oriented style. We’re also going to get you to the point where
you can use object-oriented techniques in your own code, which
includes creating your own classes. And, after this chapter,
you’ll also be in a great position to continue your object-
oriented studies.
Remember classes
from Chapter 7?
you are here 4 525
object-oriented programming
What’s the point of object-oriented
programming, anyway?
OOP allows you to design your code at a higher level. It allows
you to focus on the big picture.
You’ve heard that before—remember when you learned how to
take a piece of code and abstract it into a function? That freed
you to start thinking of your code as a set of functions that could
be called to solve your problem rather than having to mentally
track the spaghetti code of low-level ifs, elifs, for/ins, and
assignments. OOP takes all that to the next level—with OOP
you model real (or virtual) objects, including their state and
behavior, and we let them interact to solve problems.
For example, take the difference between having to:
1. Create a heating coil out of wire,
2. Hook it to electricity,
3. Turn the electricity on,
4. Get a piece of bread,
5. Hold it 2 cm from the coil,
6. Keep holding bread until done,
7. Remove bread,
8. Turn off electricity.
and just using some objects:
1. Place toast in toaster.
2. Push toast_button on toaster.
3. Remove toast when toaster finished.
The first way is procedural, while the second way is object-
oriented: you have a set of objects (bread, a toaster, and a toaster
button), so you’re thinking at the level of the problem (my bread’s
in the toaster, so now I just need to push the toast button), not
down in the nitty-gritty of every step that needs to occur (while
the heating coil is at 240 degrees and toast is 2 cm away and the
toasting time hasn’t elapsed).
Procedural way to think
about toasting bread
Object-oriented way to
think about toasting bread
Button
is_pressed
push()
Toast
kind
eat()
Toaster
temperature
elapsed_time
button
load()
toast_it()
Remember from
Chapter 7 all objects
are instantiated
from classes and
have attributes
(state) and methods
(behavior).
State
Behavior

526 Chapter 12
more on object-oriented programming
“It’s easier to understand how to use
an object than a random bunch of
functions and data in a module.”
—Joy, 27, software architect
“I like that the data and the
functions that operate on that data
are together in one object.”
—Brad, 19, coder
“It helps me code in a more natural
way. My coding feels closer to the
real problem.”
—Chris, 39, project manager
“I can’t believe Chris just said that.
He hasn’t written a line of code in
ve years.”
—Daryl, 44, works for Chris
“Other than turtles?”
—Avary, 7, junior coder
What do you like about
object-oriented languages?
Say you were implementing a classic
ping-pong–style video arcade game. What
would you choose as objects? What state
and behavior do you think they’d have?
Pong!
Ball object
Paddle object
Player object
Player object
Paddle object
you are here 4 527
object-oriented programming
Designing your first class
In Chapter 7 you saw how to use classes to instantiate objects, and since that
chapter you’ve seen quite a few objects: the built-in types (string, floats, and
so on), turtles, widgets, and the HTTP requests object, to name a few. But
you’ve never created a class of your own. We’re going to do that now.
Like using pseudocode to plan out your procedural code, it helps to plan out
your objects (or more specifically the classes that create them) before jumping
into code. Let’s start simple and plan out a Dog class:
Dog
name
age
weight
bark()
Now you’re going
to objectify me?
Remember Codie?
A class has a name, Dog…
…and some state in the form
of attributes…
…and some behavior, a
method called bark.
Before we write the code for this class, let’s think about how it is going to
be used. Here’s some code that uses our yet-to-be-implemented Dog class:
Python 3.6.0 Shell
Codie says "WOOF WOOF"
Jackson says "woof woof"
>>>
codie = Dog('Codie', 12, 38)
jackson = Dog('Jackson', 9, 12)
codie.bark()
jackson.bark()
First we
instantiate
two dogs with
different
attributes.
Then we make use of
the bark method to
have each dog make a
sound.
* Did you notice each dog has a
different bark? Hmm, how'd that happen?
*
Based on this code example, we need to have a constructor in the Dog
class that takes a name, age, and weight and then creates a new dog
object for us. We also have a bark method that differs in its output based
on some aspect of the dog—if we had to guess, we’d say big dogs say
“WOOF WOOF” and smaller dogs say “woof woof.” Sound familiar?
Let’s write some code to do this.
Remember this is called
calling the constructor.
Here's the output.
There’s no need to
type in or run this
code yet.
528 Chapter 12
how to create a class
Writing your first class
We’re going to start with what we’ve been referring to as the constructor;
in other words, we’re going to write the code that initializes our dog
objects. After that we’ll implement the bark method.
So study this code, and then let’s talk about it:
class Dog:
def __init__(self, name, age, weight):
self.name = name
self.age = age
self.weight = weight
We’re creating a class
named Dog. In Python the constructor is a function named __init__.
Actually we say it is a method, not a function, because it is
defined within a class.
In the body of the constructor we’re
setting up each of the object’s
attributes; name, age, and weight.
Okay, but inquiring minds want to know
why is there a “self” in the parameter
list and why are the attributes
prepended with “self”?
How the constructor works
The key to understanding how the constructor (and other methods) works
is understanding the role of the self parameter. Let’s walk through what
happens when the constructor is called. Pay close attention; if you blink
you’ll miss it.
codie = Dog('Codie', 12, 38)
Dog object
When the constructor is called, which happens
when we use the class name along with parentheses
and some arguments, the first thing Python does is
create a new, empty Dog object.
1
Here’s our brand new Dog object, only
right now it doesn’t have any attributes.
you are here 4 529
object-oriented programming
Next, your arguments are passed along to the __init__
function. Something else happens too: Python takes the
newly created object and passes it as the first argument,
which we named self.
2
__init__( , 'Codie', 12, 38)
Dog object
def __init__(self, name, age, weight):
Next, the class’s
constructor is invoked
with the supplied
arguments, and one
addition...
...and the newly created
object is passed as the
first argument.
self
Dog object
After step 2 the newly created
Dog object is assigned to the
parameter self.
The body of the constructor is then executed.
We assign each parameter (name, age, and
weight) to an attribute of the same name
in the instance of the Dog object using dot
notation.
3
def __init__(self, name, age, weight):
self.name = name
self.age = age
self.weight = weight
Because self is the new Dog
object, we’re assigning the
values name, age, and weight
to attributes in the Dog
object.
self
Dog object
name = ‘Codie’
weight = 38
age = 12
After step 3, all the
arguments we passed to
the constructor have been
assigned to attributes in
the Dog object.
Again, our brand new Dog object is
passed as the first argument.
When the constructor completes, Python takes the
Dog object and returns it as a result of calling the
constructor. In this case, when the Dog object is
returned, it is assigned to the variable codie.
4
Dog object
name = ‘Codie’
weight = 38
age = 12
Returns
Assigned to
codie
Dog object
name = ‘Codie’
weight = 38
age = 12
After step 4, the new Dog
object, complete with the
attributes name, age and
weight, is assigned to the
variable codie.
codie = Dog('Codie', 12, 38)
530 Chapter 12
more on self and __init__
Q: How does __init__ get away without
returning a value, yet one is returned
from calling the constructor?
A: There are all kinds of things happening
behind the scenes with constructors. When
you call the constructor it first creates a new
object for you, then it takes care of passing
that object as the first argument to __init__,
and finally it handles returning that object for
you. In other words, it’s all built into the way
Python works.
Q: Is there something special about
the name “self”?
A: No, anytime a constructor is called
it passes a copy of the new object as the
first argument to the __init__ method. By
convention we name this parameter self. But
we don’t have to. That said, this is such a
widely adopted convention that if you don’t
call the first parameter self you’ll get strange
looks from your fellow developers.
Also avoid using self as the name of a local
or global variable, as it will cause mass
confusion.
Q: So object attributes are just
variables that hold normal Python
values?
A: Pretty much. An attribute can be
assigned any valid Python value, just like
a variable. And, before you ask, methods
are just like Python functions, only they are
defined within an object instead of globally.
There actually is one other difference too:
methods also have a self parameter, which
we’ll look at shortly.
class Dog:
def __init__(self, name, age, weight):
self.name = name
self.age = age
self.weight = weight
def print_dog(dog):
print(dog.name + "'s", 'age is', dog.age,
'and weight is', dog.weight)
codie = Dog('Codie', 12, 38)
jackson = Dog('Jackson', 9, 12)
print_dog(codie)
print_dog(jackson)
We haven’t written the bark method yet, but let’s test what we have. Copy the code
below into dog.py and then give it a test drive.
A Test Drive
Python 3.6.0 Shell
Codie's age is 12 and weight is 38
Jackson's age is 9 and weight is 12
>>>
Notice as long as we pass our
print_dog function a dog,
things work as expected!
Here's our
new class…
…and a
function for
printing dogs.
Let's create
two instances
of Dog objects
and pass them to
print_dog.
This isn't a very
object-oriented way
to print our dogs, but
we'll see how to improve
it in a few pages.
You’ll find many object-oriented
languages have a concept like self with a
different name, like “this” for instance.
you are here 4 531
object-oriented programming
Writing the bark method
Before we actually write the bark method, let’s talk about the difference
between a method and a function. Sure, methods are defined in a class, but
there’s more to it than that. Think about how a method is called: it is always
invoked with respect to an object. Like this:
class Dog:
def __init__(self, name, age, weight):
self.name = name
self.age = age
self.weight = weight
def bark(self):
if self.weight > 29:
print(self.name, 'says "WOOF WOOF"')
else:
print(self.name, 'says "woof woof"')
bark is passed the object it is being
invoked on as its first argument (it
doesn’t have any other parameters).
codie.bark()
Or:
jackson.bark()
Objects
And, as you’ll see, methods typically operate on the attributes of that
specific object. Given that, methods are always passed the object they are
being invoked on as their first argument.
Let’s write the bark method now and you’ll see how this works:
We defined a method
with the same syntax
as a function.
Here we check the
weight of the dog,
and if it is over
29 we print WOOF
WOOF; otherwise, we
print woof woof.
We also print out
the dog’s name in
each case.
Because we’re always passed
the instance the method
was invoked on as the first
argument, we can access its
attributes through the self
parameter.
Similar to how __init__ is passed the
object as its first argument.
Notice how
we always use
self to access
the object's
attributes.
Remember when we call
a method, we often say
we “invoke” it.
532 Chapter 12
understanding methods
How methods work
Let’s walk through how the method invocation works to make sure we
understand it.
codie.bark()
When we call a method on an object, in this case
the codie object, Python takes that object and
passes it to the method as the first argument,
along with any other arguments you supply (bark
obviously doesn’t have any others).
1
codie
When the bark method is
invoked on the Codie object,
Python passes that object
as the first argument,
which gets bound to the
parameter self.
Dog object
name = ‘Codie’
weight = 38
age = 12
def bark()
codie
Dog object
name = ‘Codie’
weight = 38
age = 12
def bark()
self
def bark(self):
if self.weight > 29:
print(self.name, 'says "WOOF WOOF"')
else:
print(self.name, 'says "woof woof"')
Next we evaluate the body of the method. The first
line compares self.weight to 29. In this case
the object assigned to self is Codie’s Dog object,
and the value of self.weight is 38, so this
condition is True and the first clause is executed.
2
self is set to Codie’s
object, so self.weight
is 38 and greater
than 29. So we invoke
the first clause.
print(self.name, 'says "WOOF WOOF"')
We execute the print statement, which first prints
the value of self.name. Again, self is set to the
object that the bark method was invoked on, so
that’s Codie’s object, which has the name Codie,
so we print Codie says WOOF WOOF.
3
Python 3.6.0 Shell
Codie says WOOF WOOF
>>>
The print statement first
prints the name attribute of
the object assigned to self.
With that, the method completes. As we coded it
the bark method doesn’t return a value, although,
like a function, it could have.
4
Let’s see how the bark
method works when it is
invoked on the Codie object.
Dog object
name = ‘Codie’
weight = 38
age = 12
def bark()
you are here 4 533
object-oriented programming
In Chapter 2 we wrote some code to compute a dog’s age in
human years. Add a method to our Dog’s class to compute its
age in human years. You can call the method human_years; it
takes no arguments and returns the result as an integer.
class Dog:
def __init__(self, name, age, weight):
self.name = name
self.age = age
self.weight = weight
def bark(self):
if self.weight > 29:
print(self.name, 'says "WOOF WOOF"')
else:
print(self.name, 'says "woof woof"')
def print_dog(dog):
print(dog.name + "'s", 'age is', dog.age,
'and weight is', dog.weight)
codie = Dog('Codie', 12, 38)
jackson = Dog('Jackson', 9, 12)
print(codie.name + "'s age in human years is ", codie.human_years())
print(jackson.name + "'s age in human years is ", jackson.human_years())
Add the new method here.
dog_name = input("What is your dog's name? ")
dog_age = input("What is your dog's age? ")
human_age = int(dog_age) * 7
print('Your dog',
dog_name,
'is',
human_age,
'years old in human years')
Here's our code from way
back in Chapter 2. Oh, the
memories...
Here's our code so far. Add
a method, human_years,
that returns the dog's age
in human years.

534 Chapter 12
understanding inheritance
Adding some inheritance
Let’s say we have the need for a new kind of dog in
our code: a service dog, those trusty companions
who have been well trained to help those needing
assistance. They’re dogs, but they’re dogs with skills.
So, do we need to start over and define a totally new
class ServiceDog from scratch? That would be a
shame because we’ve put a fair bit of time into our
existing Dog class (work with us here), and it would be
great if we could reuse that work. Well, we can.
You’ll find almost every modern programming
language provides the ability for classes to inherit
attributes and behavior from another class. We call
this capablity inheritance and it is a cornerstone of
object-oriented programming.
Returning to our service dog, we can define the
ServiceDog class so that it inherits the attributes
(a name, age, and weight) and the ability to bark
from our original Dog class. But going further, our
ServiceDog class can add new attributes, like a
handler (the person the dog is assisting, not to be
confused with a event handler in the last chapter) and,
say, a walk method to help their handler with walking.
Let’s see how to define the ServiceDog class...
Dog
name
age
weight
bark()
ServiceDog
handler
walk()
This is how we draw a class diagram
showing ServiceDog inheriting from
the Dog class.
What other dogs can you imagine inheriting from the Dog class? What new attributes might
they have? What new methods?
you are here 4 535
object-oriented programming
Rody, a service dog
class ServiceDog(Dog):
def __init__(self, name, age, weight, handler):
Dog.__init__(self, name, age, weight)
self.handler = handler
def walk(self):
print(self.name,'is helping its handler', self.handler, 'walk')
This syntax says we're declaring a new class
ServiceDog that inherits from the Dog class.
Here’s the ServiceDog
constructor.
Implementing the ServiceDog class
Let’s implement the ServiceDog class and walk through its syntax and
semantics:
Remember, syntax is all
about how we can type it
in, and semantics is all about
what it means.
Our new
class name
The class we’re
inheriting from
Notice it has the same parameters as the Dog
class, but also has a new, extra parameter.
The ServiceDog
constructor also expects
to receive an extra
handler argument.
We also have a new
method, walk.
This adds a new attribute,
handler, to self.
The walk method uses attributes from the Dog and the ServiceDog classes.
This line calls the constructor
of the Dog class and passes
it all the arguments it needs,
including self.
Alright, that’s a mouthful, so let’s see how this code works.
rody = ServiceDog('Rody', 8, 38, 'Joseph')
print("This dog's name is", rody.name)
print("This dog's handler is", rody.handler)
print_dog(rody)
rody.bark()
rody.walk()
Python 3.6.0 Shell
This dog's name is Rody
This dog's handler is Joseph
Rody's age is 8 and weight is 38
Rody says "WOOF WOOF"
Rody is helping its handler Joseph walk
>>>
Uh oh, service
dogs should
not be barking
loudly...
Let's create a ServiceDog object
with a handler named ‘Joseph’.
We can access inherited attributes, like name…
…or attributes from ServiceDog, like handler.
A ServiceDog is a type of Dog, so we can
still call print_dog and have it work fine.
We can also call
inherited methods,
like bark.
…or methods just
ServiceDogs can do,
like walk…

536 Chapter 12
subclassing another class
A closer look at subclassing
When we create a class that inherits from another class, we say that class is a subclass of the other. We
also commonly use subclass in the form of a verb and say that we’re subclassing another class. In this
case when we defined the ServiceDog class, we were subclassing the Dog class.
But let’s take a closer look at the syntax and semantics we used creating the ServiceDog subclass,
starting with the class statement:
class ServiceDog(Dog):
When you define a new class you can either
define it from scratch, or you can supply a
class in the parentheses that you want to
subclass.
It's also common to call this class
the superclass. So here Dog is the
superclass of ServiceDog.
Now let’s look at the constructor method, __init___:
def __init__(self, name, age, weight, handler):
Dog.__init__(self, name, age, weight)
self.handler = handler
The declaration of the parameters is nothing out
of the ordinary, just notice that we've added
additional parameters (well, one in this case,
handler, but you could add as many as you want).
This next line may look a little
different. Here we're calling the
constructor of the Dog class. This
sets up all attributes that are
common to all dogs. If we didn't do
this, then the name, age, and weight
would not be set up in the object
we're instantiating.
Typically this should be
the very first thing you
do in a constructor when
subclassing.
And the last line is assigning
the handler parameter to the
attribute of the same name.
Note that only ServiceDogs
will have this attribute
because only ServiceDogs will
execute this _init__ method.
def walk(self):
print(self.name,'is helping its handler', self.handler, 'walk')
Finally we have the new method, walk:
In a subclass you can define a method just as you would in
a base class. Notice that this method is available only in
objects instantiated from the ServiceDog, not any old Dog.
More terminology: often Dog is called
the base class, because it is the base of
all the classes that derive from it (right
now we just have one, ServiceDog, but
we'll make some more).
We told you OOP had
a lot of terminology!

you are here 4 537
object-oriented programming
A ServiceDog IS-A Dog
When we have an inheritance relationship between two classes we say we have an IS-A
relationship—a ServiceDog IS-A Dog. The concept doesn’t just apply to direct descendants: for
example, below you’ll see that SeeingEyeDog inherits from ServiceDog, which, again, inherits from
Dog, so a SeeingEyeDog IS-A ServiceDog, but a SeeingEyeDog IS-A Dog as well. On the other
hand, while ServiceDog IS-A Dog, it’s not a SeeingEyeDog (because SeeingEyeDog inherits from
ServiceDog and can do things that ServiceDog doesn’t know how to do).
Dog
name
age
weight
bark()
FrisbeeDog
frisbee
catch()
HotDog
calories
cook()
eat()
ServiceDog
handler
walk()
ShowDog
handler
trot()
jump()
SeeingEyeDog
handler
listen()
A HotDog
IS-NOT-A
Dog.
We can have any number
of subclasses of Dog.
And we don't have to stop
there, we can subclass our
subclasses, for instance a
SeeingEyeDog here inherits
from ServiceDog.
A ServiceDog
inherits from Dog,
so a ServiceDog
IS-A Dog.
A FrisbeeDog
IS-A Dog
too.
And even a ShowDog
IS-A Dog
A SeeingEyeDog
IS-A ServiceDog.
A SeeingEyeDog
is also a Dog.
Dog is our
base class.
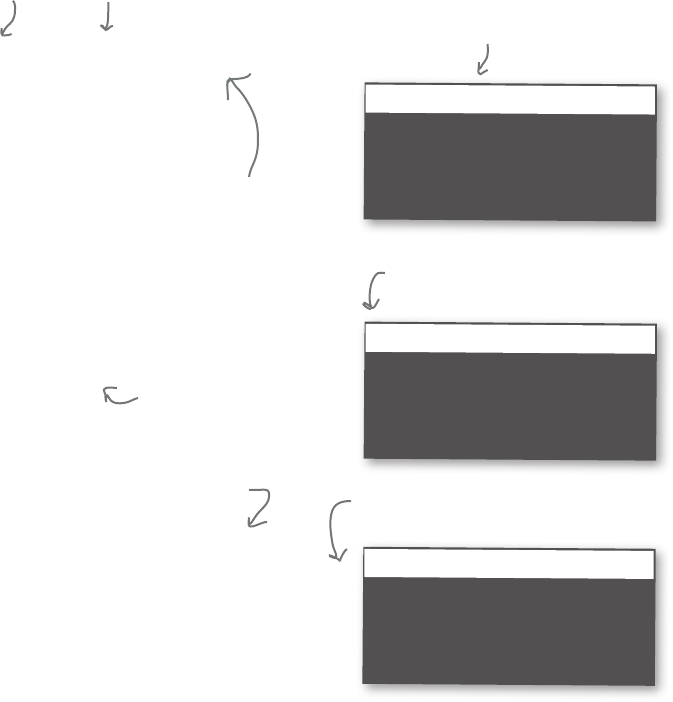
538 Chapter 12
the isinstance function
Testing IS-A in code
If we have an arbitary object, can we tell if it IS-A certain class? For
instance, let’s say someone instantiates this object:
mystery_dog = ServiceDog('Mystery', 5, 13, 'Helen')
They then hand you the object. Is it a Dog? ServiceDog? Something
else? How can we tell?
That’s where the isinstance built-in function comes in. Here’s how
it works:
if isinstance(mystery_dog, ServiceDog):
print("Yup, it's a ServiceDog")
else:
print('That is no ServiceDog')
Python 3.6.0 Shell
Yup, it's a ServiceDog
>>>
isinstance takes an
object and a class as arguments.
isinstance is True if the object is
the same class, or inherits from
the class—in other words, if the
object IS-A class.
In this example isinstance evaluates
to True because mystery_dog is a
ServiceDog.
Let’s try another:
if isinstance(mystery_dog, Dog):
print("Yup, it's a Dog")
else:
print('That is no Dog')
Now isinstance is True if
the object IS-A Dog.
Python 3.6.0 Shell
Yup, it's a Dog
>>>
In this example isinstance is
still True because mystery_dog
inherits from Dog.
And one more:
if isinstance(mystery_dog, SeeingEyeDog):
print("Yup, it's a SeeingEyeDog")
else:
print('That is no SeeingEyeDog')
Python 3.6.0 Shell
That is no SeeingEyeDog
>>>
Not this time: isinstance evaluates to
False because our ServiceDog is not a
SeeingEyeDog.
Now isinstance is True if the
object IS-A SeeingEyeDog.
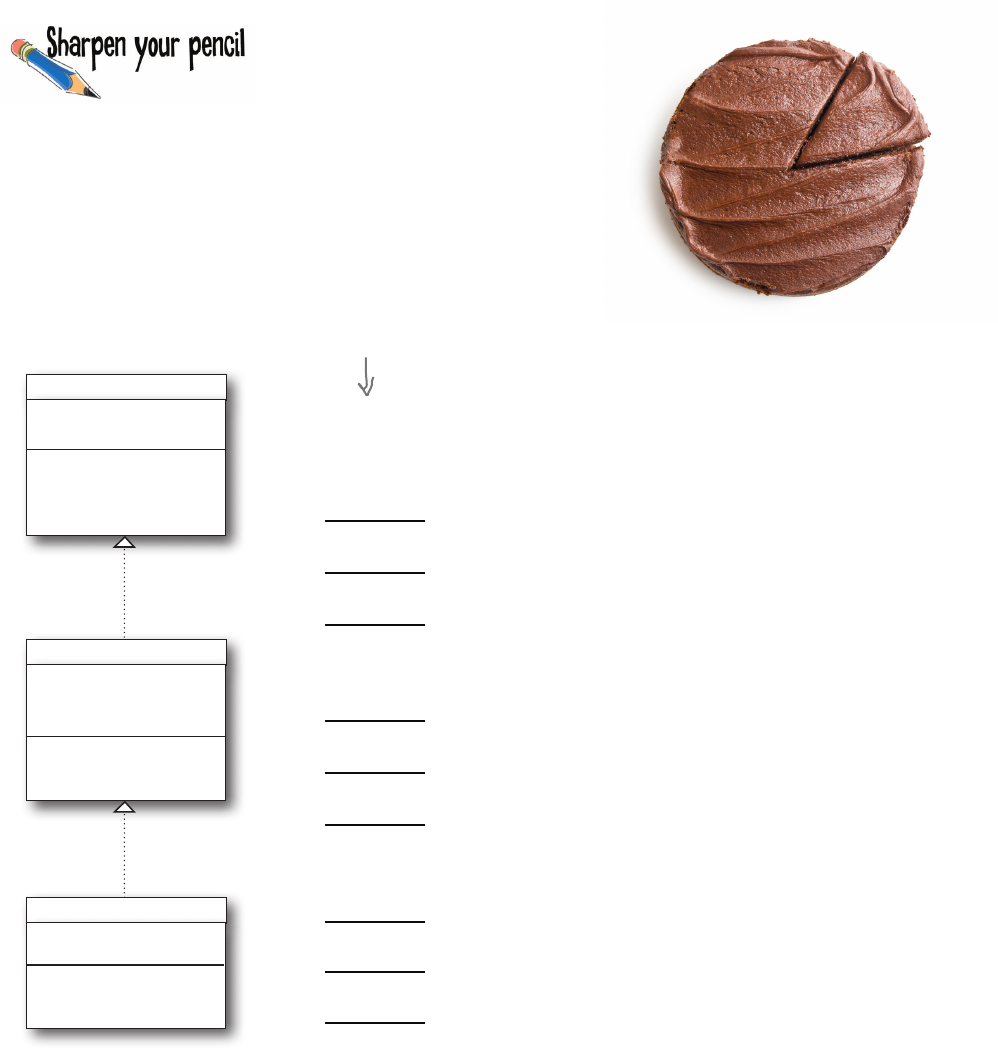
you are here 4 539
object-oriented programming
Given the class diagram on the left, fill in the values that isinstance
evaluates to on the right. Remember isinstance always evaluates to
True or False. We did the first one for you.
FrostedCake
frosting
frost()
BirthdayCake
add_name()
add_candles()
Cake
avor
bake()
cut()
eat()
name_on_cake
simple_cake = Cake()
chocolate_cake = FrostedCake()
bills_birthday_cake = BirthdayCake()
isinstance(simple_cake, BirthdayCake)
isinstance(simple_cake, FrostedCake)
isinstance(simple_cake, Cake)
isinstance(chocolate_cake, Cake)
isinstance(chocolate_cake, FrostedCake)
isinstance(chocolate_cake, BirthdayCake)
isinstance(bills_birthday_cake, FrostedCake)
isinstance(bills_birthday_cake, Cake)
isinstance(bills_birthday_cake, BirthdayCake)
Your answer,
True or False
False
540 Chapter 12
how to subclass str
Subclasses aren’t just for your own classes; you can subclass Python’s built-in classes too. How
about we subclass the Python string class (otherwise known as the str class)? We’re going to
create a subclass called PalindromeString, which includes the method is_palindrome.
Study the code below and then give it a try. Can you think of another method you’d like to add to
str? There’s no solution at the end of the chapter; everything is on this page:
class PalindromeString(str):
def is_palindrome(self):
i = 0
j = len(self) - 1
while i < j:
if self[i] != self[j]:
return False
i = i + 1
j = j - 1
return True
word = PalindromeString('radar')
word2 = PalindromeString('rader')
print(word, 'length is', len(word), 'and uppercase is', word.upper())
print(word, word.is_palindrome())
print(word2, 'length is', len(word2), 'and uppercase is', word2.upper())
print(word2, word2.is_palindrome())
We're going to create a new class
PalindromeString, which is a subclass of Python's
built-in str class (otherwise known as string).
We're just going to add a new method
to our subclass, so we don't need to
implement a constructor.
If you don't supply a constructor,
then when this class is instantiated
the superclass's constructor is used
(which is str's constructor).
Here's our new
method. Remember
the iterative version
of is_palindrome? Notice the use of self throughout.
In this case, self is the str object
itself, so we can do anything with it
we'd do with a string.
Now let's put our subclass to the test. Remember a
PalindromeString IS-A str, so we can do anything with it we do
with a string, and it inherits a lot of functionality from str.
Python 3.6.0 Shell
radar length is 5 and uppercase is RADAR
radar True
rader length is 5 and uppercase is RADER
rader False
>>>
Here's the output. Can you think of other ways you
could use your new ability to subclass the str class?
By the way, do you remember in Chapter 9 we were looking
for a way to match Verb, VERB, VeRB, verb, and so on? You
can use the upper (or lower) method to convert it to all
uppercase (or lowercase) before the comparison.
you are here 4 541
object-oriented programming
Q: So when I have a class like
ServiceDog and I create a ServiceDog
object, behind the scenes are there
actually two objects, one with the Dog
attributes and methods and one with the
ServiceDog attributes and methods?
A: No, there’s just one object with all
the attributes. For methods, the objects
refer to their definitions in the classes, so
they don’t really live in the objects. But
conceptually, just think of an object you
instantiate as a single ServiceDog object.
Q: I heard Python has something
called multiple inheritance?
A: Yes, that’s where you don’t inherit
from just one class, but more than one.
Like a flying car might inherit from both
an automobile and an airplane class. It’s
good you know multiple inheritance exists,
but not all experts agree that it’s a good
idea. Some languages consider multiple
inheritance such a horrible, error-prone
practice they forbid it. Put it on your list of
things to look into as you become more
experienced in OOP, but remember, there
are often better ways to approach your
object-oriented designs.
How would you describe yourself?
How would you describe yourself ? Using the __str__ method, of
course! It’s time to replace that print_dog function with something
more object-oriented. Here’s a quick Python convention: if you add
a method to your class named __str__ and in that method return a
description in the form of a string, then when you print out any object
from that class, print will use your description.
class Dog:
def __init__(self, name, age, weight):
self.name = name
self.age = age
self.weight = weight
def bark(self):
if self.weight > 29:
print(self.name, 'says "WOOF WOOF"')
else:
print(self.name, 'says "woof woof"')
def human_years(self):
human_age = self.age * 7
return human_age
def __str__(self):
return "I'm a dog named " + self.name
Add a __str__ method to the Dog
class to craft a custom string for
print to use.
codie = Dog('Codie', 12, 38)
jackson = Dog('Jackson', 9, 12)
rody = ServiceDog('Rody', 8, 38, 'Joseph')
print(codie)
print(jackson)
print(rody)
Let's test this out by calling
print on a few objects.
Python 3.6.0 Shell
I'm a dog named Codie
I'm a dog named Jackson
I'm a dog named Rody
>>>
Wow, it even worked for Rody,
who is a ServiceDog.
Note we're in no way changing
how print works; we're just
changing how any instance of
the Dog class prints.
542 Chapter 12
overriding methods
Overriding and extending behavior
A few pages back, did you notice that Rody barked a big “WOOF WOOF”? That behavior
would probably be frowned upon while Rody is working as a service dog. If you look at the Dog
class, that’s how the behavior is implemented for dogs over 29 lbs. So, are service dogs stuck
with that behavior for good? Actually, no, we can always override and extend the behavior of
classes we inherit from. Here’s how:
class Dog:
def __init__(self, name, age, weight):
self.name = name
self.age = age
self.weight = weight
def bark(self):
if self.weight > 29:
print(self.name, 'says "WOOF WOOF"')
else:
print(self.name, 'says "woof woof"')
def human_years(self):
human_age = self.age * 7
return human_age
def __str__(self):
return "I'm a dog named " + self.name
class ServiceDog(Dog):
def __init__(self, name, age, weight, handler):
Dog.__init__(self, name, age, weight)
self.handler = handler
self.is_working = False
def walk(self):
print(self.name,'is helping its handler', self.handler, 'walk')
def bark(self):
if self.is_working:
print(self.name, 'says, "I can\'t bark, I\'m working"')
else:
Dog.bark(self)
Let's add a new attribute to the
ServiceDog, a Boolean attribute named
is_working that’s initially set to False.
Note that you can add
any attributes you want
to a class in the __init__
method. The __init__
method is your chance
to set up any attributes
needed to model the
internal stage of your
object. Attributes don't
have to mirror the
parameters of the method.
Now we're going to redefine the bark method in ServiceDog.
Whenever we call bark on a dog of type ServiceDog, this
method will be executed rather than the one in Dog. We say
we’re overriding the bark method.
If is_working is True, then the dog says that it is working
and it can't bark. Otherwise, we call the bark method in
the Dog class, passing it self. In this latter case, the bark
method will end up doing what it normally does (barking).
Notice in this string we need both double and
single quotes. So we escape the single quotes.
you are here 4 543
object-oriented programming
Let’s give this code a try. Replace the contents of your file
dog.py with the code on the previous page. Then add the
code below at the bottom to test it out.
A Test Drive
rody = ServiceDog('Rody', 8, 38, 'Joseph')
rody.bark()
rody.is_working = True
rody.bark()
Python 3.6.0 Shell
Rody says "WOOF WOOF"
Rody says "I can't bark, I'm working"
>>>
Create our dog Rody.
Have him bark
(remember is_working
is initialized to False).
Now set is_working to
True and try again.
The ServiceDog has now
extended the behavior of
Dog, yet when is_working
is False it still has the
same behavior as Dog.
We haven't seen a lot
of this, but remember
to change an object's
attribute value you just
assign it as you would a
variable to another value.
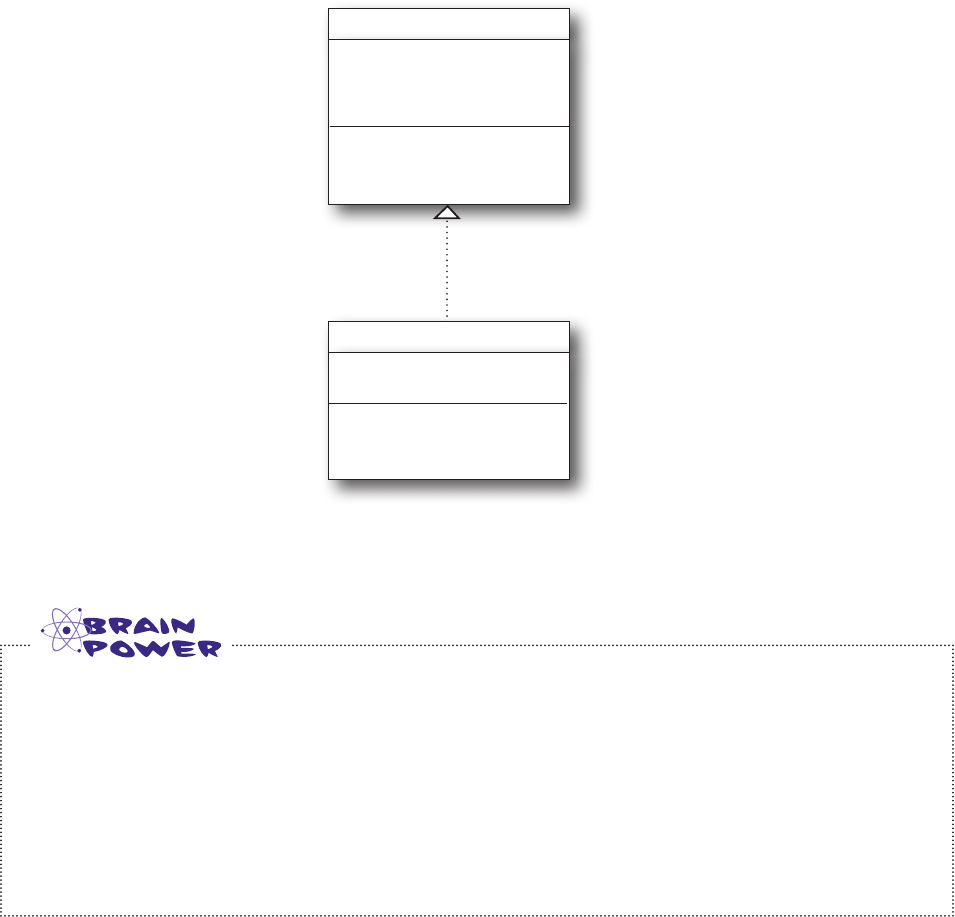
544 Chapter 12
review of object-oriented terms
Answer: True.
True or false? All ServiceDogs are Dogs but not all Dogs are ServiceDogs.
Welcome to Jargon City
Remember we mentioned OOP has a lot of jargon?
Let’s cover some of that jargon before we get too far
down the road. Welcome to Jargon City.
Dog
name
age
weight
bark()
ServiceDog
handler
walk()
bark()
Both Dog and Service
Dog are classes.
We say that Dog is
the superclass of
ServiceDog. We also
often call Dog a base
class.
We say that ServiceDog
is the subclass of Dog.
We also call it a derived
class, because it is based
on Dog.
We say that
ServiceDog
inherits from Dog.
We say that ServiceDog
overrides the bark
method in Dog.
We can instantiate Dog or ServiceDog
objects by calling their constructors.
Classes can have
attributes and
methods.
you are here 4 545
object-oriented programming
class Car():
def __init__(self):
self.speed = 0
self.running = False
def start(self):
self.running = True
def drive(self):
if self.running:
print('Car is moving')
else:
print('Start the car first')
class Taxi(Car):
def __init__(self):
Car.__init__(self)
self.passenger = None
self.balance = 0.0
def drive(self):
print('Honk honk, out of the way')
Car.drive(self)
def hire(self, passenger):
print('Hired by', passenger)
self.passenger = passenger
def pay(self, amount):
print('Paid', amount)
self.balance = self.balance + amount
self.passenger = None
class Limo(Taxi):
def __init__(self):
Taxi.__init__(self)
self.sunroof = 'closed'
def drive(self):
print('Limo driving in luxury')
Car.drive(self)
def pay(self, amount, big_tip):
print('Paid', amount, 'Tip', big_tip)
Taxi.pay(self, amount + big_tip)
def pour_drink(self):
print('Pouring drink')
def open_sunroof(self):
print('Opening sunroof')
self.sunroof = 'open'
def close_sunroof(self):
print('Closing sunroof')
self.sunroof = 'closed'
Take a look at the class definitions on the left, which contain a few
overridden methods. Execute the code below (in your head) and write
down the output here. As always, you’ll find the solution at the end of
the chapter.
car = Car()
taxi = Taxi()
limo = Limo()
car.start()
car.drive()
taxi.start()
taxi.hire('Kim')
taxi.drive()
taxi.pay(5.0)
limo.start()
limo.hire('Jenn')
taxi.drive()
limo.pour_drink()
limo.pay(10.0, 5.0)
Trace through this
code in your head,
writing the output you
expect below.
Careful,
this one
is a little
tricky.
Your output here
Python 3.6.0 Shell
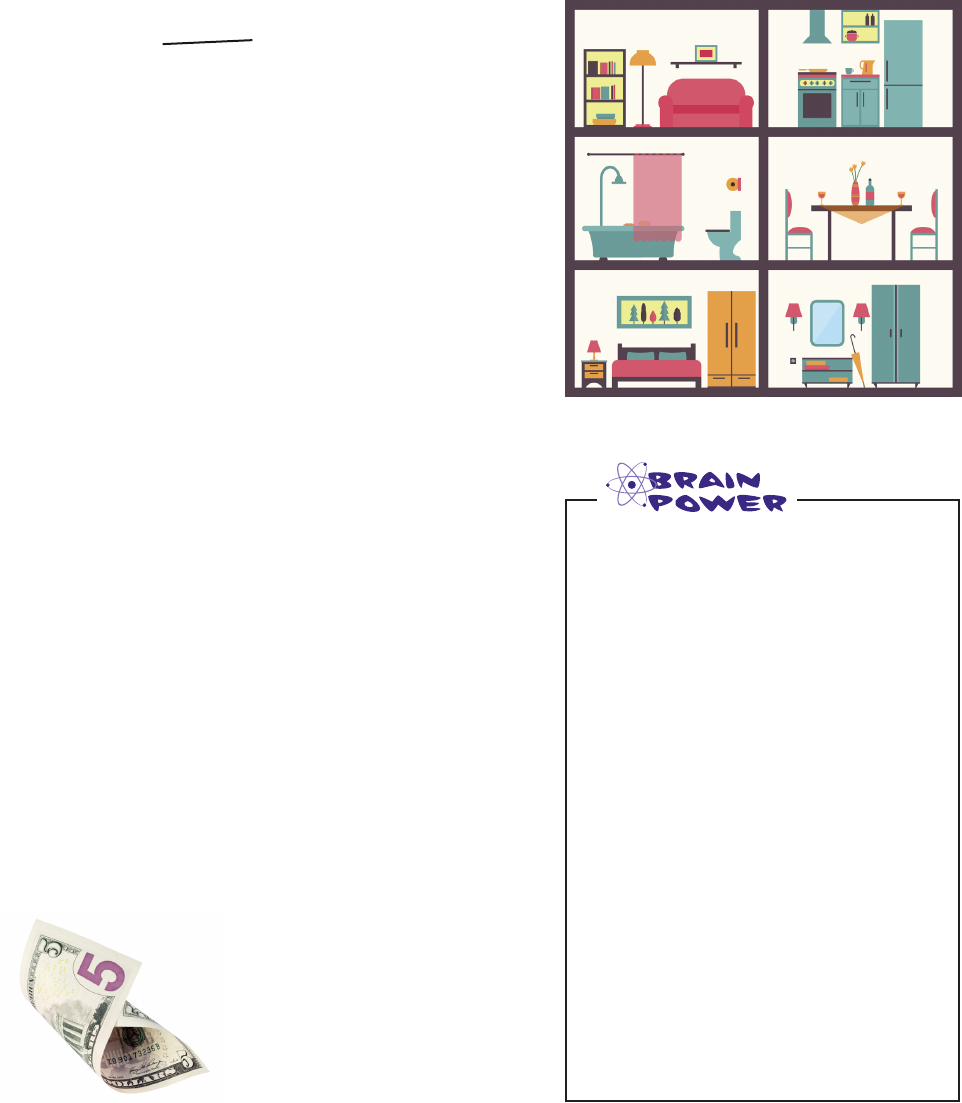
546 Chapter 12
understanding the has-a relationship
Object can HAS-Another object
Object attributes aren’t limited to just simple types like
numbers and strings, they can be assigned to lists and
dictionaries as well. They can even be assigned to other
objects. When an attribute is set to another object, we say
there is a HAS-A relationship. If we have a class named
House and its objects have an attribute set to a Kitchen
object, for example, we say the House HAS-A Kitchen.
When there is a HAS-A relationship between objects, we
say that one object is composed with another object (a
House is composed with a Kitchen). Object-oriented
experts get even more precise as to whether both objects
can stand on their own or not (a kitchen doesn’t make
much sense without a house, but a person, who owns
a house, makes sense without the house) and they have
specific terms for those. We’ll let you explore these
relationships as you gain experience.
But you’re probably wondering, what’s the big deal? So
what? An object can have another object as an attribute—
that’s sort of what I’d expect, so why the big production?
You’ve seen that an object can inherit behavior—for
instance, a ServiceDog gets its human_years behavior,
as well as some of its bark behavior, from the Dog class.
Well, another common way to give an object additional
behavior is to compose it with another object. Think
about that House object—when you use composition, or
compose the House object with a Kitchen object, all of
a sudden you have the new ability to cook.
Let’s look at how to compose objects and then we’ll see
how we can add new behavior (and even delegate some
responsibility) to another object.
How would you define a set of
classes to build a object-oriented
house?
How many $5 words can
you find in this chapter?

you are here 4 547
object-oriented programming
class FrisbeeDog(Dog):
def __init__(self, name, age, weight):
Dog.__init__(self, name, age, weight)
self.frisbee = None
def bark(self):
def catch(self, frisbee):
def give(self):
def __str__(self):
Your turn to create a new class. How about a frisbee-catching dog? We’ve
already created a Frisbee class for you:
class Frisbee:
def __init__(self, color):
self.color = color
def __str__(self):
return "I'm a " + self.color + ' frisbee'
A Frisbee can't do much;
it just has a color and
a __str__ method so it
prints well.
Your job is to help us finish the FrisbeeDog. It needs to catch a frisbee
and give it back. It should have a __str__ method as well. Oh, and the
dog can’t bark if it has a frisbee in its mouth, so you’d better override the
bark method.
You’ll want the
FrisbeeDog to bark
like other dogs, unless
it has a frisbee in its
mouth, in which case
say “I can’t bark, I
have a frisbee in my
mouth”.
If catch gets called,
take the frisbee
passed to you and
store it in the
frisbee attribute.
When give is called,
set the attribute to
None and return the
frisbee.
If the dog has a
frisbee, then return
the string “I’m a dog
named <name here>
and I have a frisbee”;
otherwise, return
what all Dogs return.
This is a challenging exercise.
Give yourself the time to work
through it. Use the solution at
the end of the chapter to the
extent you need to. Be patient
with yourself.
548 Chapter 12
testing the frisbee dog
Dude, a
frisbee-
catching dog.
Double-checking your answer to the previous exercise with our solution, add your
new code to the dog.py file. Remove the previous test code and add the test code
below to the bottom of your file.
A Test Drive
def test_code():
dude = FrisbeeDog('Dude', 5, 20)
blue_frisbee = Frisbee('blue')
print(dude)
dude.bark()
dude.catch(blue_frisbee)
dude.bark()
print(dude)
frisbee = dude.give()
print(frisbee)
print(dude)
test_code()
Python 3.6.0 Shell
I'm a dog named Dude
Dude says "woof woof"
Dude caught a blue frisbee
Dude says, "I can't bark, I have a frisbee
in my mouth"
I'm a dog named Dude and I have a frisbee
Dude gives back blue frisbee
I'm a blue frisbee
I'm a dog named Dude
>>>
Create a frisbeeDog
and a Frisbee.
Print the dog and make it
bark, and then have it catch
the frisbee again.
Print the dog (now that it
has the frisbee) and then
have it give back the frisbee.
And then print the frisbee
that was given back by the
dog, and print the dog again
(now that it's given up the
frisbee).
Here's the output we got.
Notice how this code
is looking a lot more
object-oriented than
procedural? Then have it bark with the frisbee in its mouth.
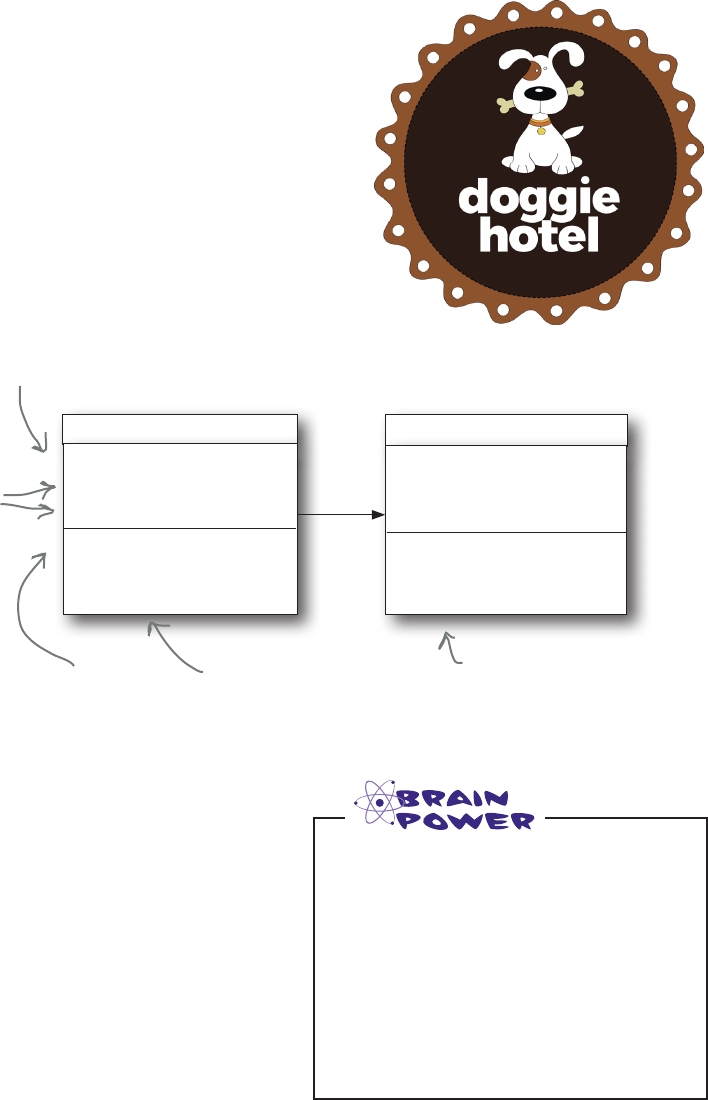
you are here 4 549
object-oriented programming
Designing a Doggie Hotel
As you know we’re never one to pass up a
good business opportunity, and we hear dog
boarding is a real growth industry. All we
need to do is keep a few dogs, allow them to
be checked in and checked out, and of course
give them all a chance to bark every once in a
while. Let’s create some code to do that. Let’s
do some planning for the hotel by creating a
class diagram for it.
Hotel
name
names
dogs
check_in()
check_out()
Dog
name
age
weight
bark()
Every hotel has a name attribute, to
hold a name like “Doggie Hotel” or
“Doggie Ranch” or “Puppy Playground”.
A Hotel also has two
attributes that are parallel
lists. The lists hold the names
of the dogs along with a
corresponding dog object.
And we have two methods...
The check_in method
takes a name and a dog,
and checks the dog into
the hotel.
The check_out method
takes a name and returns
the dog if the dog is
staying at the hotel.
We can say our Hotel
is composed with a set
of Dog objects, the
ones stored in the dogs
attribute list.
When it comes to writing some code for
the Hotel class, there are a few things to
consider. First, we should only check objects
into the hotel if they are truly dogs. To be a
dog an object should either be an instance of
the Dog class, or a subclass of Dog. And we
can only check dogs out of the hotel if they
were checked in, so we need to check that
condition as well.
Can you think of a better way to
store dogs in the hotel than using
two parallel lists?
550 Chapter 12
implementing the hotel class
class Hotel:
def __init__(self, name):
self.name = name
self.kennel_names = []
self.kennel_dogs = []
def check_in(self, dog):
if isinstance(dog, Dog):
self.kennel_names.append(dog.name)
self.kennel_dogs.append(dog)
print(dog.name, 'is checked into', self.name)
else:
print('Sorry only Dogs are allowed in', self.name)
def check_out(self, name):
for i in range(0, len(self.kennel_names)):
if name == self.kennel_names[i]:
dog = self.kennel_dogs[i]
del self.kennel_names[i]
del self.kennel_dogs[i]
print(dog.name, 'is checked out of', self.name)
return dog
print('Sorry,', name, 'is not boarding at', self.name)
return None
When we instantiate the
Hotel class, we give it a name,
like “Doggie Hotel".
And we'll use two lists, one to hold the
dog names and another to hold the
corresponding Dog objects.
We've got a method to check dogs into the hotel.
The method takes a Dog object.
When we check in, add the
dog's name and the Dog
object to the respective lists…
…and just a little
output for testing.
To check a dog out of the hotel,
we just need to supply its name.
First check to make sure
the dog is in the kennel...
...and if it is, get the Dog object
from the list and then delete
the name and object from the
kennel lists.
We also return the Dog object at the end of checkout.
After all, you should get your dog back, right?
If the dog isn't in the kennel, we
let the user know this is the wrong
kennel and return None.
First make sure this is
a Dog; no Cats or other
objects allowed.
If the value passed
to check_in isn't a
Dog, we don't check
it in. Sorry, cats.
Implementing the Doggie Hotel
Now that we’ve created a diagram for the Hotel class, let’s work through
implementing it. We’ll start by implementing the constructor and then work
through implementing the two methods, check_in and check_out.
you are here 4 551
object-oriented programming
Add the Hotel class on the previous page to your dog.py file. Remove the
previous test code and add the test code below to the bottom of your file. Oh, and
don’t forget the Cat class too.
A Test Drive
class Cat():
def __init__(self, name):
self.name = name
def meow(self):
print(self.name, 'Says, "Meow"')
def test_code():
codie = Dog('Codie', 12, 38)
jackson = Dog('Jackson', 9, 12)
sparky = Dog('Sparky', 2, 14)
rody = ServiceDog('Rody', 8, 38, 'Joseph')
dude = FrisbeeDog('Dude', 5, 20)
kitty = Cat('Kitty')
hotel = Hotel('Doggie Hotel')
hotel.check_in(codie)
hotel.check_in(jackson)
hotel.check_in(rody)
hotel.check_in(dude)
hotel.check_in(kitty)
dog = hotel.check_out(codie.name)
print('Checked out', dog.name, 'who is', dog.age, 'and', dog.weight, 'lbs')
dog = hotel.check_out(jackson.name)
print('Checked out', dog.name, 'who is', dog.age, 'and', dog.weight, 'lbs')
dog = hotel.check_out(rody.name)
print('Checked out', dog.name, 'who is', dog.age, 'and', dog.weight, 'lbs')
dog = hotel.check_out(dude.name)
print('Checked out', dog.name, 'who is', dog.age, 'and', dog.weight, 'lbs')
dog = hotel.check_out(sparky.name)
test_code()
Let's create a bunch of Dogs, and dogs of
different types, like ServiceDogs and FrisbeeDogs.
Output on the
next page.
Check out our
new Cat class!
We’ll try a Cat too—you never know!
Create a hotel and get all
these pets checked in.
Now let's check them all out
and make sure they're giving
us back the right dog.
And let's keep the Doggie Hotel on
their toes—we never checked in Sparky.
552 Chapter 12
understanding encapsulation
Fine, be that way.
Here's the output!
Everyone got
checked in...
...except the cat.
And the Doggie
Hotel gave us all the
right dogs back.
And they figured
out we didn't drop
off Sparky.
Python 3.6.0 Shell
Codie is checked into Doggie Hotel
Jackson is checked into Doggie Hotel
Rody is checked into Doggie Hotel
Dude is checked into Doggie Hotel
Sorry only Dogs are allowed in Doggie Hotel
Codie is checked out of Doggie Hotel
Checked out Codie who is 12 and 38 lbs
Jackson is checked out of Doggie Hotel
Checked out Jackson who is 9 and 12 lbs
Rody is checked out of Doggie Hotel
Checked out Rody who is 8 and 38 lbs
Dude is checked out of Doggie Hotel
Checked out Dude who is 5 and 20 lbs
Sorry, Sparky is not boarding at Doggie Hotel
>>>
Using lists seems very clunky in
the hotel. After all that work understanding
dictionaries, that would seem a better way to
implement the kennel, right?
Good call. You beat us to it—we were thinking
the same thing. Of course a natural reservation is
that once we start changing lists to dictionaries, those
changes are going to propagate into the rest of the
code, and then next thing you know we’ll be changing
everything.
Ah, but not so! After all, this is object-oriented
programming and one of the benefits is
encapsulation. Think about encapsulation like this:
our objects are keeping internal state and behavior
together, and as long as from the outside everything
works as expected, the method we use to implement
the inside of that object is our business. It shouldn’t
have any effect on the code using our object.
Let’s fix the hotel and you’ll see what we mean.
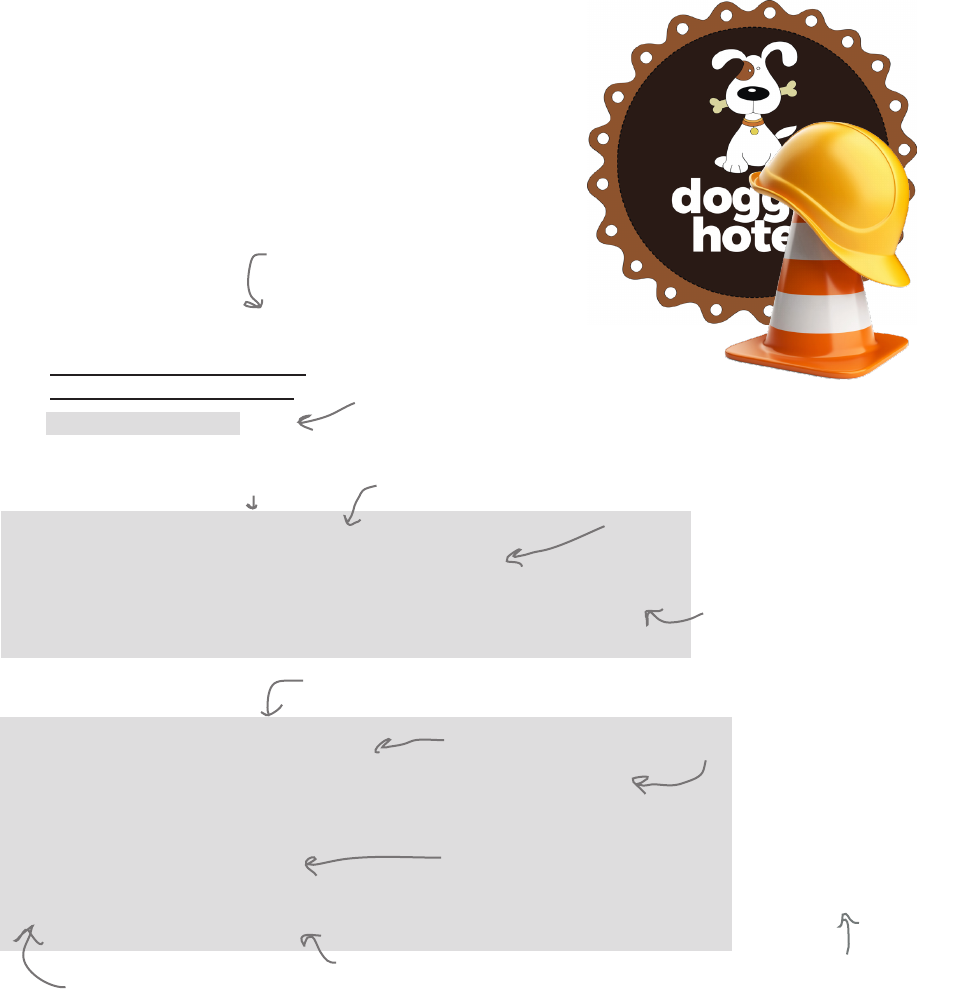
you are here 4 553
object-oriented programming
Renovating the Doggie Hotel
Get out the jackhammer; it’s time to rework this
hotel. Let’s just rework check_in and check_out
from scratch without showing each change; in this
case, it’s easy to look at:
When we instantiate the
Hotel class, we give it a name,
like “Doggie Hotel".
And we're now going to use a
dictionary to hold the dogs;
let's call it kennel.
We've still got a method to check dogs into the
hotel. The method takes a Dog object. When we check in, we add the
dog to the dictionary, using
the dog's name as the key…
…and just a little
output for testing.
To check a dog out of the hotel,
we just need to supply its name.
First check to make sure
the dog is in the kennel...
...and if it is, get the
Dog object from the
dictionary and then
delete the dog from the
dictionary.
We also return the Dog object at the end of checkout.
After all, you should get your dog back, right?
If the dog isn't in the
kennel, we let the user
know this is the wrong
kennel.
First make sure this is
a Dog; no Cats or other
objects allowed.
Nice! Much clearer code!
Remember from Chapter 8
that dictionaries are more
efficient than lists when we
need to find an item.
class Hotel:
def __init__(self, name):
self.name = name
self.kennel_names = []
self.kennel_dogs = []
self.kennel = {}
def check_in(self, dog):
if isinstance(dog, Dog):
self.kennel[dog.name] = dog
print(dog.name, 'is checked into', self.name)
else:
print('Sorry only Dogs are allowed in', self.name)
def check_out(self, name):
if name in self.kennel:
dog = self.kennel[name]
print(dog.name, 'is checked out of', self.name)
del self.kennel[dog.name]
return dog
else:
print('Sorry,', name, 'is not boarding at', self.name)
return None
554 Chapter 12
testing and expanding the hotel
Adding some hotel activities
Any guess what the favorite dog activity is at a dog hotel? Barking, of course. Let’s add a barktime
method to the hotel and let all the dogs get a chance to bark.
def barktime(self):
for dog_name in self.kennel:
dog = self.kennel[dog_name]
dog.bark()
Go through each dog name in the
kennel and use it as a key to grab
the Dog object.
And let the dog bark.
Add the barktime method to your dog.py file. Remove the previous test code and
add the test code below to the bottom of your file. Give it a spin.
A Test Drive
def test_code():
codie = Dog('Codie', 12, 38)
jackson = Dog('Jackson', 9, 12)
rody =
ServiceDog('Rody', 8, 38, 'Joseph')
frisbee = Frisbee('red')
dude = FrisbeeDog('Dude', 5, 20)
dude.catch(frisbee)
hotel = Hotel('Doggie Hotel')
hotel.check_in(codie)
hotel.check_in(jackson)
hotel.check_in(rody)
hotel.check_in(dude)
hotel.barktime()
test_code()
Python 3.6.0 Shell
Dude caught a red frisbee
Codie is checked into Doggie Hotel
Jackson is checked into Doggie Hotel
Rody is checked into Doggie Hotel
Dude is checked into Doggie Hotel
Codie says "WOOF WOOF"
Jackson says "woof woof"
Rody says "WOOF WOOF"
Dude says, "I can't bark, I have a frisbee in my mouth"
>>>
Looks like all the dogs are barking.
Replace your check_in and check_out methods in dog.py file. And give it
another test drive.
A Test Drive
Python 3.6.0 Shell
Codie is checked into Doggie Hotel
Jackson is checked into Doggie Hotel
Rody is checked into Doggie Hotel
Dude is checked into Doggie Hotel
Sorry only Dogs are allowed in Doggie Hotel
Codie is checked out of Doggie Hotel
Checked out Codie who is 12 and 38 lbs
Jackson is checked out of Doggie Hotel
Checked out Jackson who is 9 and 12 lbs
Rody is checked out of Doggie Hotel
Checked out Rody who is 8 and 38 lbs
Dude is checked out of Doggie Hotel
Checked out Dude who is 5 and 20 lbs
Sorry, Sparky is not boarding at Doggie Hotel
>>>
Notice we didn’t change any other code! And
we totally changed the way our dogs are
stored and accessed. That’s encapsulation
at work; your other code doesn’t need to
know or care how you implemented the dogs,
as long as you’re providing the same object
interface (in other words, the methods you
can call on a Dog).
you are here 4 555
object-oriented programming
Let’s take a look at the output from our barktime test again:
Codie says "WOOF WOOF"
Jackson says "woof woof"
Rody says "WOOF WOOF"
Dude says, "I can't bark, I have a frisbee in my mouth"
Codie is a Dog.
Jackson is a Dog too.
Rody is a ServiceDog.
And Dude is a FrisbeeDog.
Technically, all the dogs were different types (with the exception of Codie and Jackson, who
are both Dogs). Yet, we were able to write code that iterated over all of them, treat them
uniformly, and call the bark method.
for dog_name in self.kennel:
dog = self.kennel[dog_name]
dog.bark()
What if ServiceDog or FrisbeeDog doesn’t have a bark method? Ah, we know they
are guaranteed to have a bark method because they are subsclasses of Dog (said another
way, they inherit from the Dog class), and the Dog class has a bark method. Now, in
our case, ServiceDogs and FrisbeeDogs override the bark method, but it doesn’t
matter—one way or another, they have a bark method.
Why is this a big deal? Because we can count on this quality in our objects, we can write
code that operates without worrying about how those objects do what they do, even if
down the road we change how those objects work, or we create totally new dog types
we never anticipated (like a ShowDog or a PoliceDog). In fact, all Dog types, current
and future, can participate in the Doggie Hotel’s barktime without any changes to the
Doggie Hotel code.
This quality we’re discussing has a technical name: polymorphism. It’s another one
of those $5 words from the object-oriented crowd. Polymorphism means that you can
have different objects with different underlying implementations (like a FrisbeeDog
and a ServiceDog) that present the same programming interface (that is, they
both have a bark method). This quality plays out in several ways in object-oriented
programming and is a deep topic to explore that is related to inheritance. For now, just
remember it is possible to write code that can be applied to many different objects as
long as they have the set of methods you’re expecting.
No matter what kind of dog it is,
we can call bark, guaranteed.
The more experienced you
become with coding, the
more you’re going to see
this last bit as a huge
advantage.
I can do anything you can, or Polymorphism
Relax
This is a
chapter with a
lot of new concepts. Take
breaks, get sleep, give
your brain time to absorb
the material. You might
want to take a break now.
556 Chapter 12
using polymorphism
It's about time we teach the other dogs to walk
The only dogs in our implementation that know how to walk are service dogs. That’s not right; all
dogs walk. We’ve got the main Dog class and we have the FrisbeeDog class, which inherits from
Dog, and both need to be able to walk. Do we need to add a walk method to both? Well, as we saw
with the __str__ method, given that FrisbeeDog inherits from Dog, if we add a walk method to
Dog, then FrisbeeDogs will inherit that behavior. Given that, let’s do a little reworking of the code
to take advantage of that. We can even improve the ServiceDog in the process. Let’s see how.
class Dog:
def __init__(self, name, age, weight):
self.name = name
self.age = age
self.weight = weight
def bark(self):
if self.weight > 29:
print(self.name, 'says "WOOF WOOF"')
else:
print(self.name, 'says "woof woof"')
def human_years(self):
human_age = self.age * 7
return human_age
def walk(self):
print(self.name, 'is walking')
def __str__(self):
return "I'm a dog named " + self.name
class ServiceDog(Dog):
def __init__(self, name, age, weight, handler):
Dog.__init__(self, name, age, weight)
self.handler = handler
self.is_working = False
def walk(self):
if self.is_working:
print(self.name,'is helping its handler',
self.handler, 'walk')
else:
Dog.walk(self)
def bark(self):
if self.is_working:
print(self.name, 'says, "I can\'t bark, I\'m working"')
else:
Dog.bark(self)
Let's add a simple
walk method to Dog.
And for the ServiceDog, if it's
working, we’ll show a special
message. Otherwise, we'll just do
what all other dogs do.
We’re showing only the
classes that changed.
you are here 4 557
object-oriented programming
Add the walk code additions and changes from the previous page to your dog.py file.
Remove the previous test code and add the test code below to the bottom of your file.
Then take this code for a walk.
A Test Drive
def test_code():
codie = Dog('Codie', 12, 38)
jackson = Dog('Jackson', 9, 12)
rody =
ServiceDog('Rody', 8, 38, 'Joseph')
frisbee = Frisbee('red')
dude = FrisbeeDog('Dude', 5, 20)
dude.catch(frisbee)
codie.walk()
jackson.walk()
rody.walk()
dude.walk()
test_code()
Python 3.6.0 Shell
Dude caught a red frisbee
Codie is walking
Jackson is walking
Rody is walking
Dude is walking
>>>
Looks like all the dogs are walking.
Override walk here.
Override the FrisbeeDog’s walk method so that if a dog has a frisbee he says, “I can’t
walk, I’m playing Frisbee!” Otherwise FrisbeeDog acts like a normal Dog. Go ahead and
add the code to your dog.py file. Use the same test code as the last Test Drive.
class FrisbeeDog(Dog):
def __init__(self, name, age, weight):
Dog.__init__(self, name, age, weight)
self.frisbee = None
def bark(self):
if self.frisbee != None:
print(self.name,
'says, "I can\'t bark, I have a frisbee in my mouth"')
else:
Dog.bark(self)
def walk():
def catch(self, frisbee):
self.frisbee = frisbee
print(self.name, 'caught a', frisbee.color, 'frisbee')
.
.
.
The rest of the FrisbeeDog class
goes here.
558 Chapter 12
using inheritance
The power of inheritance
All we had to do is add a new method, walk, to the Dog base class
and magically our dogs (the ServiceDog and the FrisbeeDog)
that didn’t walk before began walking. That’s the power of
inheritance. We can add, change, and extend the behavior of a
whole set of classes by simply changing a class they inherit from.
Now, in general that is a powerful tool in your hands, but as with
any tool, it can be misused if you aren’t careful. With inheritance
we can also cause unintended consequences when we add new
behaviors—what if we added a chase_squirrel method to
the Dog class without thinking about the consequences for our
ServiceDog?
You can also overuse inheritance to extend the functionality of
your classes. There are other ways too, and we’ve mentioned one
of them: composition. By putting classes together—or composing
them—we often come up with object-oriented designs that are
more flexible than using inheritance alone.
Using inheritence properly and not overusing it requires good
object-oriented design and analysis skills (something you’ll learn as
you continue to develop your OOP skills). Now we’re talking about
some subtle aspects of OOP and object-oriented design, but it’s
good to be aware of these concepts in the beginning—too many
coders get far into their coding careers before they become aware
of topics like the power of composing classes.
So, again, these are subtleties you’ll learn as you gain experience
with OOP. For now let’s take our hotel just a little further, and
maybe we’ll use composition in the process.
There is still an issue with our new dictionary-based implementation of the Hotel class. For
example, what if two dogs are checked in with the same name? What happens? How would you fix
this issue?
and responsibility
Room
entrance
width
height
enter()
leave()
Kitchen
cook()
clean()
description
House
kitchen
lock()
unlock()
sell()
You know how to draw
inheritance with a class diagram.
Here a Kitchen is inheriting
from a Room class, or, as we
say, a Kitchen IS-A Room.
Here’s how you draw composition.
Here a House HAS-A Kitchen.
HAS-A means composition.

you are here 4 559
object-oriented programming
Creating a Doggie Hotel walking service
The Doggie Hotel is looking for extra revenue opportunities, so what about
providing a dog walking service to the dogs staying in the kennel? Sounds like a
winner to us. Let’s implement that:
class Hotel:
def __init__(self, name):
self.name = name
self.kennel = {}
def check_in(self, dog):
if isinstance(dog, Dog):
self.kennel[dog.name] = dog
print(dog.name, 'is checked into', self.name)
else:
print('Sorry only Dogs are allowed in', self.name)
def check_out(self, name):
if name in self.kennel:
dog = self.kennel[name]
print(dog.name, 'is checked out of', self.name)
del self.kennel[dog.name]
return dog
else:
print('Sorry,', name, 'is not boarding at', self.name)
return None
def barktime(self):
for dog_name in self.kennel:
dog = self.kennel[dog_name]
dog.bark()
def walking_service(self):
for dog_name in self.kennel:
dog = self.kennel[dog_name]
dog.walk()
Adding a walking service is pretty
straightforward; in fact, it looks
almost exactly like our hotel
barktime method, except the dogs
walk instead of bark.
Okay, that was easy enough, but let’s say we don’t have time to walk
a zillion dogs; after all, we’re busy running this hotel! What we’d love
to do is delegate the responsibility to someone else.
Iterate through every dog in the kennel
and call each dog's walk method.
560 Chapter 12
adding a person object
How are we going to hire a
person to walk our dogs if we
don’t even have people objects?
Good point. Let’s fix that. How about we create a
simple Person class, and then create a subclass called
DogWalker who knows how to walk dogs?
Otherwise known
as “subclassing”
Serious Coding
In OOP, when an object
asks another object to
perform a task, it’s called
delegation. Delegation
is a way to give an object
extra behavior without
having to inherit it or
implement it directly.
class Person:
def __init__(self, name):
self.name = name
def __str__(self):
return "I'm a person and my name is " + self.name
class DogWalker(Person):
def __init__(self, name):
Person.__init__(self, name)
def walk_the_dogs(self, dogs):
for dog_name in dogs:
dogs[dog_name].walk()
Just a simple Person class with a name.
We could also add more later.
A DogWalker is just a Person, but it
has a walk_the_dogs method.
This method just iterates through the
dogs and calls each dog’s walk method.
Great, now let’s rework the Hotel class so that we can hire a
DogWalker and then delegate the dog walking through the
walking_service method:
def hire_walker(self, walker):
if isinstance(walker, DogWalker):
self.walker = walker
else:
print('Sorry,', walker.name, ' is not a Dog Walker')
def walking_service(self):
if self.walker != None:
self.walker.walk_the_dogs(self.kennel)
In our hire_walker method we make
sure the object is a DogWalker, and
if so hire them by adding them as an
attribute.
Now in walking_service, if there is
a walker attribute, then we ask the
walker to walk the dogs.
These methods go in the Hotel class.

you are here 4 561
object-oriented programming
Good question. It is true that the walker knows
the dogs are being stored in a dictionary, or rather a set of
nested dictionaries. That said, a dictionary is a common
data structure and provides a perfectly reasonable way of
passing the walker a set of dogs. Hypothetically, the hotel
could use a complex internal data structure to store the
dogs, and when it comes time to pass them to the walker,
it could package them up in a nice dictionary.
You are right, though: if we do change our existing
internal implementation of the hotel, we will have
to keep in mind that walkers are expecting to get a
dictionary of dogs. So we haven’t fully encapsulated this
aspect of the hotel.
All that said, if you really wanted to encapsulate this
aspect of the hotel, and further separate the hotel and
the walker (so that the walker doesn’t have or rely on
knowledge of the hotel’s implementation), you could
improve the implementation with the iterable pattern
that we mentioned much earlier in the book. This pattern
allows you to iterate over sequences of values without
knowing anything about how they are implemented.
Doing so is a bit beyond the scope of this book, but,
again, it’s a great question and something to continue to
exploring in your own designs.
If you look at the
DogWalker class, it
knows that the Dogs are stored in
a dictionary. If we change the code
back to lists, then DogWalker will break.
With encapsulation I thought we weren’t
supposed to know how things in an object
were implemented?
562 Chapter 12
testing the dog walker
Looks like delegating
the dog walking is off
to a flying start!
At this point you want to add the Person and DogWalker classes from two
pages back, as well as add the hire_walker and walking_service
methods to the Hotel class. Then use the test code below (replace your existing
test code):
A Test Drive
def test_code():
codie = Dog('Codie', 12, 38)
jackson = Dog('Jackson', 9, 12)
sparky = Dog('Sparky', 2, 14)
rody = ServiceDog('Rody', 8, 38, 'Joseph')
rody.is_working = True
dude = FrisbeeDog('Dude', 5, 20)
hotel = Hotel('Doggie Hotel')
hotel.check_in(codie)
hotel.check_in(jackson)
hotel.check_in(rody)
hotel.check_in(dude)
joe = DogWalker('joe')
hotel.hire_walker(joe)
hotel.walking_service()
test_code()
Rody wouldn't be
working at the hotel,
but let's try it out
anyway.
Let's create and hire
our walker…
…and delegate the
responsibility to Joe.
Python 3.6.0 Shell
Codie is checked into Doggie Hotel
Jackson is checked into Doggie Hotel
Rody is checked into Doggie Hotel
Dude is checked into Doggie Hotel
Codie is walking
Jackson is walking
Rody is helping its handler Joseph walk
Dude is walking
>>>
you are here 4 563
object-oriented programming
Meanwhile, back at the turtle races…
Remember back in Chapter 7 when something went awry with the green
turtle? If you’ll recall the green turtle was mysteriously winning by large
margins. The police are still stumped. With your new OOP knowledge, can
you take another look and see what is going on?
Study the code again
carefully; it definitely looks
like someone has hacked
the program and added
some new code. What does
the new code do? What
object-oriented concepts
does the hack depend on?
import turtle
import random
turtles = []
class SuperTurtle(turtle.Turtle):
def forward(self, distance):
cheat_distance = distance + 5
turtle.Turtle.forward(self, cheat_distance)
def setup():
global turtles
startline = -620
screen = turtle.Screen()
screen.setup(1290,720)
screen.bgpic('pavement.gif')
turtle_ycor = [-40, -20, 0, 20, 40]
turtle_color = ['blue', 'red', 'purple', 'brown', 'green']
for i in range(0, len(turtle_ycor)):
if i == 4:
new_turtle = SuperTurtle()
else:
new_turtle = turtle.Turtle()
new_turtle.shape('turtle')
new_turtle.penup()
new_turtle.setpos(startline, turtle_ycor[i])
new_turtle.color(turtle_color[i])
new_turtle.pendown()
turtles.append(new_turtle)
def race():
global turtles
winner = False
finishline = 560
while not winner:
for current_turtle in turtles:
move = random.randint(0,2)
current_turtle.forward(move)
xcor = current_turtle.xcor()
if (xcor >= finishline):
winner = True
winner_color = current_turtle.color()
print('The winner is', winner_color[0])
setup()
race()
turtle.mainloop()
You’ll find the
solution in two pages!

564 Chapter 12
a guide for using objects
Welcome to Objectville
A guide for better living through objects.
Welcome, new Objectville resident! Please accept our handy guide with tips &
tricks for better living in Objectville. We hope you enjoy your stay.
)Get yourself acquainted. Take the time to explore the objects (and classes)
around you. Look at other object-oriented Python code to get a feel for how it’s
been constructed and how objects are being used.
)Don’t be shy about extending Python’s built-in classes, which you can do just
as with your own classes.
)Know up front that learning your way around Objectville is a life-long pursuit.
)Continue learning. You know the basics; now you need the experience. The only
way to gain experience is to study and to practice deliberately, otherwise known
as “build stuff!”
)Spend more time on the object-oriented basics, like inheritence and making
use of polymorphism in your designs.
)Keep your objects simple and focused, and work your way up to complex object
designs; practice building small houses before you design skyscrapers.
)Learn more about building with composition and using delegation in your
code. You’ll find this may make your design more flexible.
)Don’t stop. You’ve got the momentum going, so keep learning.
you are here 4 565
object-oriented programming
The turtle races case SOLVED
Did you figure out what went awry? It looks like our sneaky hacker has used his
subclassing skills to create a subclass of Turtle called SuperTurtle. Then in
SuperTurtle he overrode the forward method so that 5 units get added onto the
distance parameter before the call is made to the base class’s (Turtle, in this case)
forward method. The hacker obviously has a good knowledge of polymorphism
because he knew that the game’s race method would call forward on any kind of
object, as long as it IS-A Turtle. See, a little OOP knowledge CAN be a dangerous
thing!
The hacker has created
a subclass of Turtle that
overrides the forward
method and adds 5 more
units anytime forward is
called.
import turtle
import random
turtles = []
class SuperTurtle(turtle.Turtle):
def forward(self, distance):
cheat_distance = distance + 5
turtle.Turtle.forward(self, cheat_distance)
def setup():
global turtles
startline = -620
screen = turtle.Screen()
screen.setup(1290,720)
screen.bgpic('pavement.gif')
turtle_ycor = [-40, -20, 0, 20, 40]
turtle_color = ['blue', 'red', 'purple', 'brown', 'green']
for i in range(0, len(turtle_ycor)):
if i == 4:
new_turtle = SuperTurtle()
else:
new_turtle = turtle.Turtle()
new_turtle.shape('turtle')
new_turtle.penup()
new_turtle.setpos(startline, turtle_ycor[i])
new_turtle.color(turtle_color[i])
new_turtle.pendown()
turtles.append(new_turtle)
def race():
global turtles
winner = False
finishline = 560
while not winner:
for current_turtle in turtles:
move = random.randint(0,2)
current_turtle.forward(move)
xcor = current_turtle.xcor()
if (xcor >= finishline):
winner = True
winner_color = current_turtle.color()
print('The winner is', winner_color[0])
setup()
race()
turtle.mainloop()
Nice job!
You got him!
A subclass of Turtle is defined!
A SuperTurtle object
is being instantiated
every time for turtle
#4, the green turtle.
Polymorphism at
work: this code calls
forward on any
object that IS-A
Turtle, even if it is a
SuperTurtle.
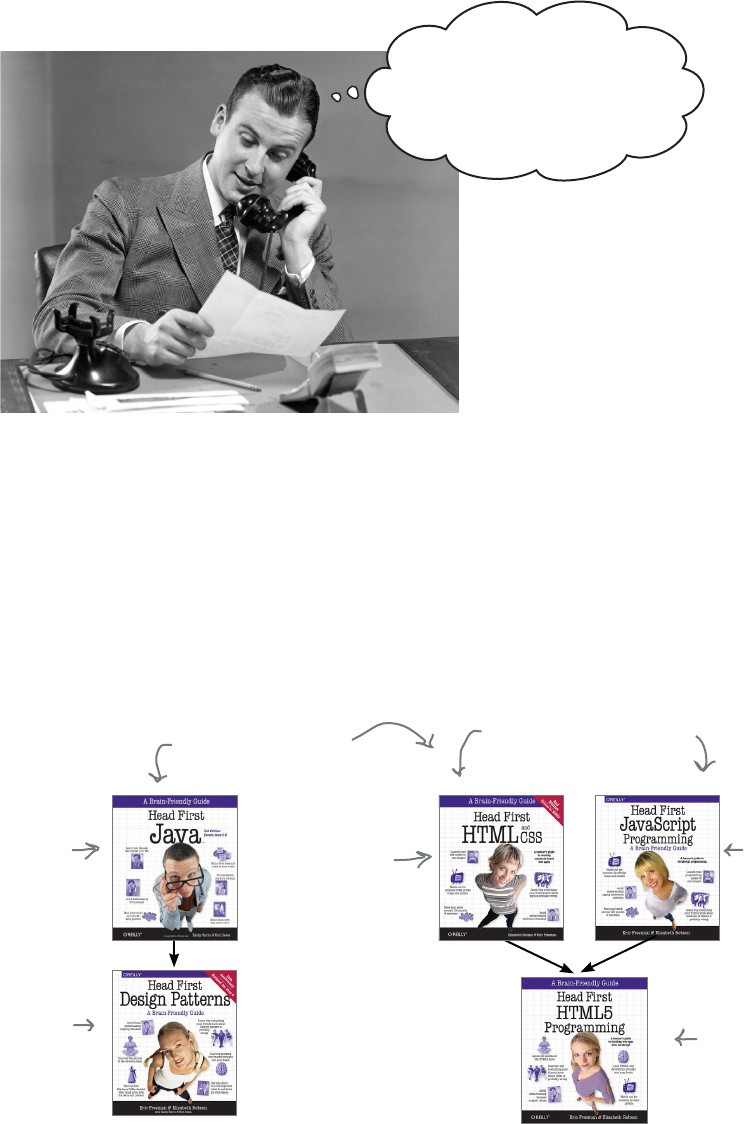
566 Chapter 12
congratulations
Got through the
entire book? Including the
OOP part? Well, I think
we may have found our
candidate.
Have you considered a career in coding?
If you’re reading this page, assuming you didn’t just skip to the end,
congratulations! And you should really ask yourself how far you could take this!
In case you haven’t noticed, you’ve covered a huge distance in this book. The
exciting and daunting thing is that this book just scratches the surface of software
development. If nothing else, we hope you’ll consider our suggestion, as you
clearly have the right stuff to take this even further.
Here are a few suggestions for what’s next:
Jump in head first to
OOP and an industry-
standard language,
Java.
Follow it with
learning high-level
object design with
design patterns and
principles.
Learn browser-based web
development by reading
these books in parallel.
Learn the languages
that provide the
structure and style
of the web…
…and the
language that
provides the
behavior
Follow it up
with even more
sophisticated
browser coding.
Start on either path.
you are here 4 567
object-oriented programming
Object-oriented programming (OOP for
short) focuses on solving problems by
modeling real (or virtual) objects.
Objects have state and behavior.
Objects are created from classes, which
act as blueprints.
When we create a new object, we say we
instantiate it.
A constructor is a method that initializes a
class.
In Python the constructor is named
__init__.
The constructor is passed the object being
created as the rst argument.
By convention we call the rst parameter of
a constructor self.
Attributes are like variables within an object
and can be assigned to any Python value.
Methods are like functions, except they are
passed the self argument.
We can inherit the attributes and methods
of another class by subclassing.
The class we’re subclassing is often called
the superclass or supertype.
We can override the methods of a
superclass by dening methods of the
same name in the subclass.
We say we have an IS-A relationship when
we subclass.
We can test for IS-A relationships with the
isinstance function in Python.
The isinstance method returns True if an
object is an instance of a class (or any of
its superclasses).
Override the str method to return the string
you’d like displayed when your object is
printed by print.
When we write code that works for objects
that expose the same interface we’re
taking advantage of polymorphism.
We think of an object’s interface as the
methods we can call on an object.
We compose objects by assigning another
object to the attribute of an object.
Composition is a common technique to
extend a class’s behavior.
When we rely on another class to do work,
we’re delegating work to that class.
Multiple inheritance occurs when you
inherit behavior and state from more than
one class.
568 Chapter 12
coding crossword
Coding Crossword
This is it, the nal crossword, and it’s object
oriented. Well, at least all the words are.
1
2
3
4
5 6
7
8 9
10 11
12 13
14 15
16
17
18
Across
4. Creates an object and initializes it.
6. Built-in function to check IS-A.
10. Dog that helps humans.
12. Code that works over objects with the same
interface.
14. Convention for the first parameter of a
method.
17. Holds state of object.
18. Has a lot of jargon.
Down
1. Not allowed in the hotel.
2. Type of inheritence that inherits from two
or more classes.
3. Class from which others are subclassed or
derived.
5. IS-A relationship.
7. Hiding implementation details.
8. Redefining the behavior of a method in a
subclass.
9. HAS-A relationship.
11. Asking another object to do the work.

you are here 4 569
object-oriented programming
In Chapter 2 we wrote some code to compute a dog’s age in
human years. Add a method to our Dog’s class to compute its
age in human years. You can call the method human_years; it
takes no arguments and returns the result as an integer.
class Dog:
def __init__(self, name, age, weight):
self.name = name
self.age = age
self.weight = weight
def print_dog(dog):
print(dog.name + "'s", 'age is', dog.age,
'and weight is', dog.weight)
def bark(self):
if self.weight > 29:
print(self.name, 'says "WOOF WOOF"')
else:
print(self.name, 'says "woof woof"')
def human_years(self):
years = self.age * 7
return years
codie = Dog('Codie', 12, 38)
jackson = Dog('Jackson', 9, 12)
print(codie.name + "'s age in human years is ", codie.human_years())
print(jackson.name + "'s age in human years is ", jackson.human_years())
To compute the dog's age
in human years we use the
dog's age attribute, multiply
it by 7, and return it.
Here's our code so far. Add
a method, human_years,
that returns the dog's age
in human years.
Python 3.6.0 Shell
Codie's age in human years is 84
Jackson's age in human years is 63
>>>
Here's the output.
570 Chapter 12
exercise solution
FrostedCake
frosting
frost()
BirthdayCake
add_name()
add_candles()
Cake
avor
bake()
cut()
eat()
name_on_cake
simple_cake = Cake()
chocolate_cake = FrostedCake()
bills_birthday_cake = BirthdayCake()
isinstance(simple_cake, BirthdayCake)
isinstance(simple_cake, FrostedCake)
isinstance(simple_cake, Cake)
isinstance(chocolate_cake, Cake)
isinstance(chocolate_cake, FrostedCake)
isinstance(chocolate_cake, BirthdayCake)
isinstance(bills_birthday_cake, FrostedCake)
isinstance(bills_birthday_cake, Cake)
isinstance(bills_birthday_cake, BirthdayCake)
Your answer,
True or False
False
False
False
Tr u e
Tr u e
Tr u e
Tr u e
Tr u e
Tr u e
Given the class diagram on the left, fill in the values that isinstance
evaluates to on the right. Remember isinstance always evaluates to
True or False.

you are here 4 571
object-oriented programming
class Car():
def __init__(self):
self.speed = 0
self.running = False
def start(self):
self.running = True
def drive(self):
if self.running:
print('Car is moving')
else:
print('Start the car first')
class Taxi(Car):
def __init__(self):
Car.__init__(self)
self.passenger = None
self.balance = 0.0
def drive(self):
print('Honk honk, out of the way')
Car.drive(self)
def hire(self, passenger):
print('Hired by', passenger)
self.passenger = passenger
def pay(self, amount):
print('Paid', amount)
self.balance = self.balance + amount
self.passenger = None
class Limo(Taxi):
def __init__(self):
Taxi.__init__(self)
self.sunroof = 'closed'
def drive(self):
print('Limo driving in luxury')
Car.drive(self)
def pay(self, amount, big_tip):
print('Paid', amount, 'Tip', big_tip)
Taxi.pay(self, amount + big_tip)
def pour_drink(self):
print('Pouring drink')
def open_sunroof(self):
print('Opening sunroof')
self.sunroof = 'open'
def close_sunroof(self):
print('Closing sunroof')
self.sunroof = 'closed'
Take a look at the class definitions on the left, which contain a few
overridden methods. Execute the code below (in your head) and write
the output here.
Trace through this
code in your head,
writing the output you
expect below.
Careful,
this one
is a little
tricky.
Python 3.6.0 Shell
Your output here
Car is moving
Hired by Kim
Honk honk, out of the way
Car is moving
Paid 5.0
Hired by Jenn
Honk honk, out of the way
Car is moving
Pouring drink
Paid 10.0 Tip 5.0
Paid 15.0
>>>
car = Car()
taxi = Taxi()
limo = Limo()
car.start()
car.drive()
taxi.start()
taxi.hire('Kim')
taxi.drive()
taxi.pay(5.0)
limo.start()
limo.hire('Jenn')
taxi.drive()
limo.pour_drink()
limo.pay(10.0, 5.0)
572 Chapter 12
exercise solution
class FrisbeeDog(Dog):
def __init__(self, name, age, weight):
Dog.__init__(self, name, age, weight)
self.frisbee = None
def bark(self):
if self.frisbee != None:
print(self.name,
'says, "I can\'t bark, I have a frisbee in my mouth"')
else:
Dog.bark(self)
def catch(self, frisbee):
self.frisbee = frisbee
print(self.name, 'caught a', frisbee.color, 'frisbee')
def give(self):
if self.frisbee != None:
frisbee = self.frisbee
self.frisbee = None
print(self.name, 'gives back', frisbee.color, 'frisbee')
return frisbee
else:
print(self.name, "doesn't have a frisbee")
return None
def __str__(self):
str = "I'm a dog named " + self.name
if self.frisbee != None:
str = str + ' and I have a frisbee'
return str
Your turn to create a new class. How about a frisbee-catching dog? We’ve
already created a Frisbee class for you:
class Frisbee:
def __init__(self, color):
self.color = color
def __str__(self):
return "I'm a " + self.color + ' frisbee'
A Frisbee can't do much;
it just has a color and
a __str__ method so it
prints well.
Your job is to help us finish the FrisbeeDog. It needs to catch a frisbee
and give it back. It should have a __str__ method as well.
We have a simple
constructor; it just
sets a frisbee attribute.
Notice frisbee here is
another object, so some
composition going on.
We're overriding the bark method. If the frisbee dog
currently has a frisbee, then it can't bark; otherwise, it
barks like any other dog.
The catch method takes a frisbee and assigns
it to the object’s frisbee attribute.
The give method sets
the frisbee attribute
to None, and then
returns the frisbee.
And here's the str method, which
conditionally prints based on whether
the dog has a frisbee or not.
you are here 4 573
object-oriented programming
class FrisbeeDog(Dog):
def __init__(self, name, age, weight):
Dog.__init__(self, name, age, weight)
self.frisbee = None
def bark(self):
if self.frisbee != None:
print(self.name,
'says, "I can\'t bark, I have a frisbee in my mouth"')
else:
Dog.bark(self)
def walk(self):
if self.frisbee != None:
print(self.name, 'says, "I can\'t walk, I'm playing Frisbee!"')
else:
Dog.walk(self)
def catch(self, frisbee):
self.frisbee = frisbee
print(self.name, 'caught a', frisbee.color, 'frisbee')
def give(self):
if self.frisbee != None:
frisbee = self.frisbee
self.frisbee = None
print(self.name, 'gives back', frisbee.color, 'frisbee')
return frisbee
else:
print(self.name, "doesn't have a frisbee")
return None
def __str__(self):
str = "I'm a dog named " + self.name
if self.frisbee != None:
str = str + ' and I have a frisbee'
return str
If the dog has a frisbee, then output that the
dog is playing. Otherwise, do what all Dogs do by
calling the superclass's walk method.
Dog has a frisbee if self.frisbee
is not equal to None.
Override the FrisbeeDog’s walk method so that if a dog has a frisbee he says, “I can’t
walk, I’m playing Frisbee!” Otherwise, FrisbeeDog acts like a normal Dog. Go ahead and
add the code to your dog.py file. Use the same test code as the last Test Drive.
Python 3.6.0 Shell
Dude caught a red frisbee
Codie is walking
Jackson is walking
Rody is walking
Dude says, "I can't walk, I'm playing Frisbee!"
>>>
574 Chapter 12
crossword solution
Coding
Cross
Solution
C
1
A M
2
T S
3U
C
4O N S T R U C T O R
P I
I
5I
6S I N S T A N C E P
N E
7R L
H O
8N C
9C E
S
10 E R V I C E D
11 O G O L
R E A E M A
I R P
12 O L Y M O R P H I S M
13
T R S E O S
14 E L F
15
A I U G S
16 S T R
N D L A U I H I
C E A
17 T T R I B U T E O S
E T E C I D B
I L O
18 O P E
O A N E
N S D
S O
G
Across
4. Creates an object and initializes it.
[CONSTRUCTOR]
6. Built-in function to check IS-A. [ISINSTANCE]
10. Dog that helps humans. [SERVICEDOG]
12. Code that works over objects with the same
interface. [POLYMORPHISM]
14. Convention for the first parameter of a
method. [SELF]
17. Holds state of object. [ATTRIBUTE]
18. Has a lot of jargon. [OOP]
Down
1. Not allowed in the hotel. [CATS]
2. Type of inheritence that inherits from two
or more classes. [MUTIPLE]
3. Class from which others are subclassed or
derived. [SUPERCLASS]
5. IS-A relationship. [INHERITANCE]
7. Hiding implementation details.
[ENCAPSULATION]
8. Redefining the behavior of a method in a
subclass. [OVERRIDE]
9. HAS-A relationship. [COMPOSITION]
this is a new chapter 575
appendix: leftovers
The Top Ten Topics
(We Didn’t Cover)
We’ve covered a lot of ground, and you’re almost
finished with this book. We’ll miss you, but before we let you go,
we wouldn’t feel right about sending you out into the world without a little
more preparation. We can’t possibly fit everything you’ll need to know into this
relatively small chapter. Actually, we did originally include everything you need to
know about Python programming (not already covered by the other chapters), by
reducing the type point size to .00004. It all fit, but nobody could read it. So we
threw most of it away, and kept the best bits for this Top Ten appendix.
This really is the end of the book. Except for the index, of course (a must-read!).
576 Appendix
list comprehensions
#1 List comprehensions
You’ve seen how we can create a list of numbers using the range function
in Python, but there is an even more powerful way to construct lists that is
similar to the way mathematicians construct sets of numbers. We call them
list comprehensions and they can construct lists of any type. Let’s first look at an
example with numbers:
[x + x for x in range(10)]
Python 3.6.0 Shell
[0, 2, 4, 6, 8, 10, 12, 14, 16, 18]
>>>
Doubles every number in the range
from 0 to 9
Or, how about an example with strings:
lyric = ['I', 'saw', 'heard', 'on', 'you', 'the', 'wireless', 'back', 'in', '52']
[s[0] for s in lyric]
Python 3.6.0 Shell
['I', 's', 'h', 'o', 'y', 't', 'w', 'b', 'i', '5']
>>>
Grabs the first letter of each
word in the list lyric
Okay, but how does this actually work? Well, essentially a list comprehension
creates a list from another list. To see how this works, let’s look at the format of a
list comprehension:
[expression for item in list if conditional ]
The first part is an expression that
uses a variable that represents each
item in the existing list.
We then have a for expression with
the variable and the old list. And finally, we have
a conditional; we
haven’t seen one of
these yet
Revisit the examples above with this
formula in mind.
Here’s how we can add a conditional to our example:
[s[0] for s in lyric if s[0] > 'm']
Python 3.6.0 Shell
['s', 'o', 'y', 't', 'w']
>>>
Only add the item
to the list if it is a
character greater
than ‘m'.
As with many things in this appendix, this will take some study to master, but you
can see it is a powerful way to create new lists.
you are here 4 577
leftovers
output = '{:%A, %B %d, %Y}'
print(output.format(my_date))
#2 Dates and times
Dates and times are an important part of many computations. You can
import the Python datetime module like so:
Or combine them all together.
import datetime
Then you can create a date object by instantiating it with any date up until
the year 9999 (or going to back to year 1):
Year, then month,
then day
Python 3.6.0 Shell
Wednesday, October 21, 2015
The date object supports a
rich formatting language.
my_time = datetime.time(7, 28, 1)
Or you can create a time object by instantiating it with any time, providing
hours, minutes, and seconds:
Or combine them together with the datetime object:
my_datetime = datetime.datetime(2015, 10, 21, 7, 28, 1)
Hour, minutes, and seconds
my_date = datetime.date(2015, 10, 21)
Let’s print them all:
print(my_date)
print(my_time)
print(my_datetime)
Python 3.6.0 Shell
2015-10-21
07:28:01
2015-10-21 07:28:01
2015 10 21
7 28 1
>>>
print(my_date.year, my_date.month, my_date.day)
print(my_time.hour, my_time.minute, my_time.second)
now = datetime.datetime.today()
print(now)
You can also get the current time with:
Python 3.6.0 Shell
2017-07-27 19:12:07.785931
Or use datetime’s formatting facilities:
Notice you can get the
current time down to
microseconds.
We can print each date and time
object to see what it holds.
That’s just a start—in any language there’s a lot to know about handling dates
and times; check out the datetime and related modules in Python to dig
deeper into this topic.
578 Appendix
regular expressions
#3 Regular expressions
import re
for term in ['I heard you on the wireless back in 52',
'I heard you on the Wireless back in 52',
'I heard you on the WIRELESS back in 52']:
result = re.search('[wW]ire', term)
if result:
loc = result.span()
print('found a match between:', loc)
else:
print('No match found')
Remember all the trouble we had matching text that contained words and punctuation?
We could have solved that problem using regular expressions. A regular expression
is, formally, a grammar for describing patterns in text. For instance, using a regular
expression (regex for short), you can write an expression that matches all text that starts
with t and ends with e, with at least one a and no more than two us in between.
Regular expressions can get complex fast. In fact, they can seem like an alien language
when you rst encounter them. But you can get started with simple regular expressions
fairly quickly, and if you like them, become a true expert.
You’ll nd regular expressions supported by most modern languages. Python is no
exception. Here’s how you use Python regular expressions:
'ac*\dc?'
Let's test a few strings...
Search is just one method provided by Python for matching strings with an
expression. Python also has a sophisticated regex compiler in the re module
you’ll want to check out for intensive pattern matching applications.
The real key to understanding and using regular expressions is learning how
to read and create patterns. To do that you’ll want to study the general subject
of regular expressions, and more specifically, the notation that Python uses for
regular expressions.
Import the regular expression module, re
In this example we used a very simple regular expression, but regular
expressions are capable of matching sophisticated patterns—for example, valid
usernames, passwords, and URLs. So, the next time you’re about to write code
to verify a valid username or something similar, pull out the regular expressions
instead—a couple lines of regex could save you a lot of code.
Python 3.6.0 Shell
found a match between: (19, 23)
found a match between: (19, 23)
No match found>>>
Search using a regular expression.
Here's the regular expression part; it
matches ‘wire' or ‘Wire'.
If there's a result, there's a match and the span
method tells us where the match is in the string.
Let's print out where the match is…
…or if there wasn't one.
you are here 4 579
leftovers
a very brief intro to jquery
#4 Other data types: tuples
Python lists have a sister data type we never told you about: tuples. Syntactically the two
are almost identical. Check this out:
A Python list of movies—well,
of strings, actually
my_list = ['Back to the Future', 'TRON', 'Buckaroo Bonzai']
my_tuple = ('Back to the Future', 'TRON', 'Buckaroo Bonzai')
You also already know how to use them, for instance, in iteration:
A Python tuple of strings
So, what's the difference? Well,
syntactically one uses square brackets
and one use parentheses.
for movie in my_list:
print(movie)
for movie in my_tuple:
print(movie)
Python 3.6.0 Shell
Back to the Future
TRON
Buckaroo Bonzai
Back to the Future
TRON
Buckaroo Bonzai
Same output!
And of course you can refer to the items in a tuple with an index too, like my_
tuple[2], which evaluates to 'Buckaroo Bonzai'. Tuples even support most of
the same methods as lists, so what’s the difference? Tuples are immutable—meaning you
can’t change them like you can lists. Once you make a tuple, that’s it, you’re done—
you can access its items, but you can’t change them.
So why would you use them? Why do they exist? Because of what we call time and
space; in other words, tuples take up less memory and you can operate on them faster
than you can with lists. If you’ve got collections of items that are very large and/or
you are computing lots of operations on them, then you may want to consider tuples,
which can significantly improve both memory use as well as execution time.
You’ll also want to take a look at a few things you can do syntactically with tuples you
can’t do with lists:
x, y, z = (1, 2, 3)
apples = 'mac', 'red', 'green'
single = (3.14159265,)
Even without parentheses, comma-separated
items become a tuple.
This is called unpacking; Python assigns each
variable to the corresponding item in the tuple.
Careful, a quirk: because of unpacking, if you
want to assign a single-item tuple to a variable,
you need to add an extra comma.
Extra comma
It can also be
computationally safer to
work on data structures
that can't change!
580 Appendix
the set data type
#5 Other data types: sets
There’s another common data type we haven’t discussed: sets. Do you
remember sets from algebra class? You might recall sets have only
one of each element value, and they have no order. You might also
remember that common operations on sets include taking the union
and intersection of one set with another. Well, Python has sets too; let’s
see what Python provides:
set = {1, 3.14159264, False, 77}
Sets can hold practically any Python
type, but the values need to be unique.
Sets are represented by comma-separated
values enclosed in curly braces.
Like lists, and unlike tuples, sets are mutable, meaning we can change
them and add values to them:
set.add(99)
Or remove them:
set.remove(1)
And of course they provide more interesting methods we can use:
even = {2, 4, 6, 8, 10}
odd = {1, 3, 5, 7, 9}
prime = {1, 3, 5, 7}
even_and_prime = even.intersection(prime)
print(even_and_prime)
odd_and_prime = odd.intersection(prime)
print(odd_and_prime)
even_or_prime = even.union(prime)
print(even_or_prime)
Python 3.6.0 Shell
set()
{1, 3, 5, 7}
{1, 2, 3, 4, 5, 6, 7, 8, 10}
>>>
Python represents the empty list
(having no items) as set().
You can also check to see if a value is in a set with the familiar if x in set syntax.
Check out the Python set documentation for even more interesting methods like set
differences, symmetric differences, and supersets.
Dictionaries have key/value pairs within
curly braces, while sets have just values.
you are here 4 581
leftovers
the arguments object
#6 Server-side coding
Many applications run as web services, providing services like
Google search, social neworks, and ecommerce. These applications
are powered by many different languages, including Python.
Learning server-side coding often requires familiarity with
technologies such as the hypertext transport procotol (HTTP),
HTML (a page markup language), and JSON (as we’ve seen,
for data exchange), to name just a few. In addition, depending
on the language you’re working with, you’ll most likely want
to use a web framework or package. These packages provide
functionality that takes care of many of the low-level details
of serving web pages and data.
If you are working with Python, two of the more popular
frameworks are Flask and Django.
Client-side code executes
on the client—that is, on
your computer.
Server-side code
executes on a server on
the internet.
request
@app.route("/")
def hello():
return "Hello, Web!"
Here's a quick Flask example. With Flask we can
route web traffic from the “root” (think home
page) of a website to the function hello. Hello
simply outputs a simple string.
Flask is a small, more minimal framework aimed at smaller
projects you want to get up and running quickly. Django is a
much heavier-weight framework aimed at larger projects. As
such, Django takes more time to learn but will do a lot more for
you. Django provides page templating, forms, authentication, and
a means to adminster databases. Because we’d guess you’re just
getting started in web development, so we’d recommend Flask as
a place to start, and then upgrading to Django as your skills and
needs increase.
Typically you’d output
HTML or JSON here.
Learning HTML and CSS is also a vital part
of creating web pages. After Head First
Learn to Code you’re more than qualified
to take on this book, and perhaps even Head
First JavaScript Programming at the same
time—JavaScript is the de facto standard
for programming in the browser.
582 Appendix
computing with lazy evaluation
#7 Lazy evaluation
Say you wanted to write some code like this:
def nth_prime(n):
count = 0
for prime in list_of_primes():
count = count + 1
if count == n:
return prime
def list_of_primes():
primes = []
next = 1
while True:
next_prime = get_prime(next)
next = next + 1
primes.append(next_prime)
return primes
Clearly we can't really do this,
because creating an infinite list of
primes takes, literally, forever.
This code returns the nth
prime number...
We can fix this code using a technique called lazy evaluation or calculation on demand, and
in Python this is supported by something called a generator. Here’s how we alter our
code to create a generator:
We no longer need our primes
array, so we've removed it.
…from a list of primes.
We'll leave this function as a
homework assignment (or a
quick Google search).
We could generate an upper
limit, say the first 1,000,
but that could be very
inefficient as well.
def list_of_primes():
next = 1
while True:
next_prime = get_prime(next)
next = next + 1
yield next_prime
Now each time we generate a new
prime, we use the yield statement.
So what does yield do? A bit of magic. Think about it like this: in the nth_prime
function we iterating over all the primes. When the for statement first calls list_
of_primes and the yield statement is used, a generator is created (otherwise known
as an iterator in many languages). The generator is an object that has one method,
next, which can be called (behind the scenes in the case of the for statement) to
get the next value. Each time next is called, the list_of_primes magically picks
up computation where it last left off (computing the next prime) and as soon as the
yield statement is invoked, it returns another value. This repeats as long as there are
values being generated.
Lazy evaluation is a fascinating and powerful form of computation worth looking
into more deeply.
you are here 4 583
leftovers
a very brief intro to JSON
#8 Decorators
Decorators come from an object-oriented design practice
called design patterns. Python loosely implements the
decorator pattern by allowing you to “decorate” functions with
other functions. For instance, if you have a function that just
returns some text, you could create a set of decorators that
add things to that text, like HTML formatting. Say we wanted
to easily add HTML paragraph tags to a piece of text. We
could use decorators like this:
def paragraph(func):
def add_markup():
return '<p>' + func() + '</p>'
return add_markup
@paragraph
def get_text():
return 'hello head first reader'
print(get_text())
As you can see, this can be a little mind-altering and probably
gives you some indication that higher-order functions are worth
studying.
Decorators are a powerful feature and can be used far beyond
decorating text. In fact, you can add one or more decorators to
any type of function that you’d like to give additional behavior
to, without altering the original function.
We need to use our higher-order
function knowledge here. First we’re
going to be passed a function, func,
and then we’ll create and return
another function that surrounds
whatever func returns, when called,
with <p> and </p>.
To make text a
paragraph in HTML,
we just start it with
a <p> and end it with
a </p>.
Then we use the @ syntax
to decorate another
function, like get_text.
Now when get_text is called, it will be
called within the decorator code, which
causes the <p> and </p> tags to be added
to whatever the get_text function returns.
Python 3.6.0 Shell
<p>hello head first reader</p>
584 Appendix
first-class functions
#9 Higher-order and first-class functions
You’ve come a long way in your understanding and use of functions. We’ve talked
about functions as a way to abstract code, but there is so much further you can take
them. In fact, you can do anything with a function that you can with other data
types: you can assign a function to a variable, pass a function to another function,
and even return a function from a function. When we can treat a function like any
other object or data we call it first class, and when we either pass or return a function
from another function, we call that a higher-order function. But what does it even
mean to pass or return a function from a function?
Understanding higher-order functions is a topic worthy of some lengthy study; for
now, whet your appetite with some code that demonstrates using functions in a
higher-order manner.
def addition_maker(n):
def maker(x):
return n + x
return maker
add_two = addition_maker(2)
val = add_two(1)
print(val)
Okay, that’s new, but let’s make this truly higher order. Hang on to your hat:
Did you know you can declare a
function within another function?
The function addition_maker
takes a number n...
def pluralize(str):
def helper(word):
return word + "s"
return helper(str)
val = pluralize('girl')
print(val)
The helper function is only available
within the pluralize function; no
other code can call it.
The pluralize function uses helper to
add an “s” onto a string.
Python 3.6.0 Shell
girls
>>>
…and defines a function that takes
another number, x, and adds n to it.
And then, it returns that function as
the result of calling addition_maker.
So if we pass addition_maker the
number 2, it returns a function, which
here we assign to the variable add_two...
…that, when called, adds two to
whatever it is passed, in this case the
number 1.
Python 3.6.0 Shell
3
>>>
If that’s a little hard to wrap your head around, welcome to the club. But, like
recursion, with a little study and work, thinking in higher-order functions
becomes second nature.
you are here 4 585
leftovers
recursive functions
#10 A lot of libraries
We’ve seen a few Python libraries throughout this book, but there are many more built-in
and third-party Python packages waiting for you. Here are a few to take a look at:
Pygame Pygame is a library for writing video games. Pygame provides
modules for dealing with game graphics as well as sound. If
you’re just starting to write games, this can be a great place to
start.
Beautiful Soup Data on the web isn’t always available in JSON, and often
you’ll just need to grab a web page and sort through the
HTML to find what you need. Unfortunately, many web
pages contain poorly written HTML. The Beautiful Soup
library tries to make all that easier and gives you a nice—no,
beautiful—interface to web pages from Python.
Pillow Pillow is an image library, with everything you need to read,
write, and process many common image file formats. Pillow also
provides support for displaying files and converting images to
other formats.
You’ll find a lot more at https://wiki.python.org/moin/UsefulModules
sched Need to execute code at specific times or on a schedule? The
sched module is a standard Python module that allows you to
create schedules and invoke code on that schedule.
logging An upgrade from putting simple print statements in your code,
the logging module is a built-in module that gives you a way
to output informational warning or error messages. Even better,
you can configure the type of messages that are output based
on the type of execution (say, testing versus a production run of
your code).
requests This third-party package is worth mentioning again. If you
need to make HTTP requests from your application, this is the
package for you.
Flask, Django You’ve seen these frameworks in passing as well. If you need
to build server-side Python code, be sure to check out both.
Flask tends to be for small-scale projects and Django for large
applications, but both should serve you well.
586 Appendix
I can’t believe the book is almost over.
Before you go, you really should read the
index. It’s great stuff. And after that you’ve
always got the website. So I’m sure we’ll see
you again soon...
Don’t worry, this
isn’t goodbye.
Nor is it the end. Now that you’ve got an
amazingly solid foundation in learning to code,
it’s time to become a master. Point your browser
to http://wickedlysmart.com to explore what’s
next!
What’s next? So much more!
Jump head first in to
OOP and an industry-
standard language,
Java.
Follow it with
learning high-level
object design with
design patterns and
principles.
Learn browser-based web
development by reading
these books in parallel.
Learn the languages
that provide the
structure and style
of the web…
…and the
language that
provides the
behavior.
Follow it up
with even more
sophisticated
browser coding.
Start on either path.

This is the index 587
Index
Symbols
\ (backslash) 400
: (colon)
file paths 401
indented statements and 82, 105, 183
key/value pairs 364
slice syntax and 272–273
, (comma) 255, 364, 579
{} (curly brackets) 445, 580
. (dot notation)
attributes and 321
classes and modules 318
docstrings 300–302
examples of 77, 294, 308, 529
methods and 321
variables and 321
__ (double underscore) 51
== (equality operator) 81–82, 93
= (equal sign)
assignment operator 38, 82
keywords arguments 212
** (exponentiation operator) 47–48
/ (forward slash)
as division operator 47–48
as file path separator 400–401
> (greater than operator) 80, 93
>= (greater than or equal to operator) 81
# (hash character) 24, 99
< (less than operator) 93
% (modulus operator) 47–49
* (multiplication operator) 45, 47–48
- (negation operator) 47–48
!= (not equal operator) 81, 101–102
() (parentheses)
Boolean expressions and 102
in functions 60, 183
grouping operations 45
operator precedence and 48
subclassing 536
+ (plus sign)
addition operator 47–48, 158
concatenation and 25–26
>>>> prompt 40
“” (quotation marks)
declaring lists 25–26
strings and 42, 88, 250–251
[] (square brackets) 24–25
- (subtraction operator) 47–48
@ syntax 583
_ (underscore) 51
A
ABC programming language 15
absolute paths 401
abstracting code
about , 179–182, xiv–xvii
avatar example 195–199
object-oriented programming. See OOP
organizing modules for reuse 292–293, 299–304
turning into functions 183–190, 525
Web APIs and. See Web APIs
access tokens (Web API) 440
addition operator (+) 47–48, 158
the index
588
index
after method 499–502
and Boolean operator 92–93, 101–102
append method 156, 158, 320
arguments in constructors 320
arguments in functions
about 61, 183, 186
evaluating 204
keywords in 212, 487
order of 192
parameters comparison 192, 204, 211
argv attribute 423
assignment operator (=) 38, 82
assignment statements 41
associative maps 367
asterisk (*) 45
attributes
about 317, 319, 541, 544, 546
accessing through methods 319, 531
dictionary items 368, 370–372, 450
dot notation and 321
response object 448
state in form of 315–317, 525, 527
turtle example 306, 308, 316
B
backslash (\) 400
base class 536, 544
\b (backspace) 408
Beautiful Soup library 585
behavior of objects
about 306, 308, 315–317, 527
OOP and 525, 542–544
overriding and extending 542–544
Bergey, Nathan 444
blocks of code. See code block
Boolean data type 80–82, 87, 477
Boolean expressions 81–82, 87, 92
Boolean operators 92–93, 101–102
Boole, George 81
break statement 405–406
bubble sort
about 227–229
computing numbers 236
implementing in Python 234–235
pseudocode 231–232
bugs (software) 54, 414
Button object 486
C
calculation on demand 582
call stacks 351–354
case sensitivity
class names 318, 320
from keyword and 486
Python programming language 51
strings 103
choice function (random) 25–26, 86
classes
about 316, 320–321, 544
behaviors and 316–317
built-in 320–321
case sensitivity 318, 320
designing 527, 549, 560
diagramming 316, 525, 527, 549, 558
dot notation and 318
implementing 535, 550
inheritance and 534–537, 541, 544, 558
objects and. See objects
terminology 536
using 318
writing 528–530
client-side coding 581
close method 402
closing files 402, 420
code block 105, 183–188, 418
colon (:)
file paths 401
the index
you are here
4 589
indented statements and 82, 105, 183
key/value pairs 364
slice syntax and 272–273
comma (,) 255, 364, 579
command-line execution 423–424, 442
comments 24, 98–99, 300–301
communication protocol 438
composition 546, 558
computational thinking , 1–4, x–xiii, 14, xiv
concatenating
list items 24–25
strings 46, 96, 139
conditional expressions
about 86
choice function 25–26, 86
if statement 82–85, 92
infinite loops 113
while statement 105–110
constructors
about 318, 544
arguments in 320
functionality 528–529
subclassing and 536
controller (MVC pattern) 491–510
converting
numbers to strings 140
strings to numbers 59–60
Conway, John 468
C programming language 9
Crazy Libs game
about 394–395
creating template 396
handling exceptions 413–415, 417–420
processing template text 411–412
prompting for user input 397
reading template 397, 399
signifying placeholders in template 396–397
storing 421
updating code 420–424
writing completed file 397
CSS (Cascading Style Sheets) 581
Ctrl+C keyboard combination 113
curly brackets 445, 580
current directory 400
current time 577
D
data science 246
data types
about 57–58, 316
Boolean 80–82, 87, 477
classes 316–321
dictionaries 362–372
lists. See lists and list items
None 214, 420–421
numbers. See numbers
primitive , xiii
sets 580
tuples 579
date object 577
datetime module 305, 577
debugging
about 54–56
suggestions for 19, 22, 60
decorators 583
default values
assigning in functions 195, 197–198
parameters with 210
def keyword 183
delegation 546, 559, 560–564
deleting
dictionary keys 363
list items 157–158
del function 157–158, 363
delimiters
commas 255
space separators 24–25, 61, 96, 139
whitespace 253–256
derived class 536, 544
the index
590
index
design patterns 409, 583
dictionaries
about 362, 367
accessing items 366
adding items to 362, 366
attributes of items 368, 370–372, 450
JSON format and 446
key/value pairs and 362–364, 580
list comparison 367–368, 553, 561
memoization and 376–377
division operator (/) 47–48
Django framework 581, 585
docstrings 300–302
Doctorow, Cory 292–293, 299–300, 304
documentation 98–99, 439–441
dot notation (.)
attributes and 321
classes and modules 318
docstrings 300–302
examples of 77, 294, 308, 529
methods and 321
variables and 321
double underscore (__) 296
E
elif keyword 83–85
else keyword 82–85
empty lists
about 134
checking for 344
creating 156, 159, 321
empty strings 88, 198, 349, 409
encapsulation 319, 552, 561
EOL error 22, 43
equality operator (==) 81–82, 93
equal sign (=)
assignment operator 38, 82
keywords arguments 212
escape sequences 407–408
even method 580
event-based programming 494–498
event handlers 494–498
exception handling
about 418
Crazy Libs game 413–415, 417–420
debugging process 54–56
detecting invalid input 100–103
infinite loops 113
int function 59–60
lists 134, 139–140
numbers 53–55
parameters 211
return values 56
strings 53–55, 140
suggestions for 19, 22, 60
syntax 22, 60, 102
variables 207
Web API requests 440
except keyword 418
executing code
about 6, 13
from command line 423–424
from IDLE 18–21
from Python Shell 40–41, 188
exponentiation operator (**) 47–48
expressions
applying operator precedence in 48
assigning values to variables 45–46, 80
Boolean 81–82, 87, 92
conditional 24–25, 82–87, 92, 105–110
regular 578
extend function 157–158
F
False value 80–83, 87, 92, 106
Fibonacci sequence 357–359, 373
file management
closing files 402, 420
file modes 399, 421
naming considerations 309
the index
you are here
4 591
opening files 399–402, 418, 420
reading files into code 402–409
updating code 420–424
writing files 421
File menu (IDLE editor)
New File item 18, 26
Save menu item 20, 26
file object
assigning to variable 399
close method 402
readline method 407, 409
read method 403
write method 421
file paths 400–402
first-class functions 584
Flask framework 581, 585
Flesch-Kincaid readability formula 247–248, 278, 282,
301–303. See also readability formula
Flesch, Rudolph 247
float function 59
floating point numbers 58–59, 320
flowcharts 76
for statement
about , 105, xiii
break statement and 406
bubble sort example 231–232, 234–235
in dictionaries 364
in operator and 364, 409
iteration and 105, 142–148, 151–152, 409
in lists 142–148
sequences and 78, 145, 152
while loop comparison 142, 151–152
forward slash (/)
as division operator 47–48
as file path separator 400–401
fractals, generating 379–382
frames 351–354
from keyword 486, 491
function calls
call stacks 351–354
how to perform 184–188
memoization 376–377
recursive functions and 350–354
to other functions 192
functions
about 37, 77, 183, 192, 315
abstracting code. See abstracting code
accessing within modules 252, 294
arguments in. See arguments in functions
defining 183–185, 192
executing 183–188
first-class 584
hash 367
helper 410
higher-order 583–584
methods and 317, 531
naming 183, 192
parameters in. See parameters in functions
passing functions to 192
process overview 184–188
recursive 343–359
return value 39, 56, 85, 183, 193
turning blocks of code into 183–188
variables and 194, 200–209
G
Game of Life
about 470, 490
adding design patterns 506
building data model 477
building screen view 485
building simulator 472–476
building the controller 491–510
building the data model 477–484
building the view 485–490
Clear button 472, 485, 502–503
complete source code 511–515
computing a generation of 478–484
computing at regular intervals 499–502
correcting layout 488
creating widgets 486–488
defining design patterns 509
the index
592
index
editing cells directly 504
Option Menu 472, 474–475, 485, 506–510
Pattern Loader 472, 474–475, 510
Pause Button 472, 474–475, 494–498
placing widgets into grid layout 489
reactive computation for 494–497
rules in 468–471, 478
sketch of 472
Start button 472, 475, 485, 497–498
translating grid layout to code 489–490
writing grid view handler 505
writing option menu handler 507–508
writing pattern loader 510
generative systems 470
generators 582
get function (requests) 447–448
global keyword 207
global variables
about 194
local variable comparison 208–209
__name__ 296–298
scope of 200–203
using in functions 207
Golden Ratio 357
graphical user interface (GUI). See Game of Life
greater than operator (>) 80, 93
greater than or equal to operator (>=) 81
GUI (graphical user interface). See Game of Life
H
HAS-A relationship 546
hash character (#) 24, 99
hash functions 367
hash maps 367
help documentation 99, 300–304
helper functions 410
help function 300
heuristics 264–273, 276–277
higher-order functions 583–584
history of Python 15
HTML (Hypertext Markup Language) 581, 583
HTTP (Hyptertext Transfer Protocol) 438, 448–450, 581
I
IDEs (Integrated Development Environments) 13, 18
IDLE editor
about 13
installing xxxiv
Python sample programs 18–21, 24–27
if statement
conditional logic and 82–85, 92
in operator and 261, 269, 363
imaginary numbers 58
import statement 24–25, 77–79, 294, 491
indenting statements 82, 105, 183
Index Error 134
indices
dictionary comparison 363
for lists 132–133, 138, 157, 235–236, 477
for strings 272–276
for tuples 579
infinite loop 113
inheritance 534–537, 541, 544, 558
in operator
for statement and 364, 409
if statement and 261, 269, 363
sets and 580
input
defined 22
detecting invalid 100–103
file-based. See file object
prompting for. See prompting for input
input function
functionality 37–39
quotation marks and 42
return values 39, 56, 85
syntax 37
the index
you are here
4 593
insert function 158
insertion sort 239
installing
IDLE editor xxxiv
packages 441–442
Python xxxiv–xxxv, 17
instances. See objects
instance variables. See attributes
instantiating objects 318, 525, 544
integer numbers 58–59, 140
Integrated Development Environments (IDEs) 13, 18
International Space Station 443–444, 449–461
interpreting code 6, 13. See also Python interpreter
int function 59–60, 140
invalid syntax error code 22, 60
IS-A relationship 537–539
isinstance function 538–539
iteration
about , xiii
breaking out of 405–406
dictionaries and 364
for loop. See for statement
in Game of Life 477–479
lines of files 409
lists and 138, 142–148
recursion comparison 355–356
tuples and 579
while loop. See while statement
iterations
infinite loop 113
iterators 409
J
Java programming language 8
JavaScript programming language 9, 581
JSON format 445–448, 450–451, 581
json module 450–451
K
KeyError 363
keys
dictionary 362–364, 367
in JSON 445
key/value pairs
dictionaries and 362–364, 580
JSON format and 445–446
keyword argument 212, 487
keywords 19, 51. See also specific keywords
koch function 379–382
Koch, Niels Fabian Helge von 380
Koch snowflake 380–382
L
lazy evaluation 582
len function 131, 158, 254, 268
less than operator (<) 93
library. See modules
line feed (\n) 403, 407–408
Linux environment
file paths in 400–401
installing Python 17
installing requests package 442
LISP programming language 9
list comprehensions 576
list function 156
list multiplication 156, 477
lists and list items
about , 125–128, 134, xiii–xvi, 146
accessing 129, 134
accessing last item 132
adding to another 157–158
altering 263
creating 128, 156
declaring 25–26
deleting 157–158
the index
594
index
determining number of items 131
dictionary comparison 367–368, 553, 561
empty lists 134, 156, 159, 321, 344
indices 132–133, 138, 157, 235–236, 477
inserting items 158
iteration in 138, 142–148
lists as classes 320
ordering 134
output considerations 139–140
parallel lists 162, 235, 368
range of numbers 145–146, 148
slicing 273, 344
tuples and 579
updating values in 129
zero index value 132, 138, 157, 477
lists within lists 477
literal notation 364
loads function 450–451
local variables 194, 200–203, 207–209
logging module 585
M
macOS environment
installing Python xxxiv
MacOS environment
command 442
command-line execution 424
file paths in 400–401
installing Python 17
Python sample program 18
mainloop function 309, 496
Massachusetts Institute of Technology 307
math module 305
memoization 376–377
merge sort 239
metacognition xxix
methods
about 317, 319, 527, 541, 544
accessing attributes 319, 531
constructor 318
dot notation and 321
functions and 317, 531
invocation process 532
tuples and 579
writing 531–533, 554, 559
model (MVC pattern) 477–484
modules
about 22, 77, 252, 294–295
accessing functions within 252, 294
accessing variables within 252, 294
datetime 305, 577
dot notation and 318
importing 486
json 450–451
logging 585
math 305
naming 309
organizing for reuse 292–293, 299–304
popular Python 305
random. See random module
request. See requests module
sched 585
sys 423
TKinter. See TKinter module
turtle. See turtle module
module view controller pattern. See MVC (module view
controller) pattern
modulus operator (%) 47–49
multiple inheritance 541
multiplication operator (*) 45, 47–48
MVC (module view controller) pattern
about 476
building data model 477–484
building the controller 491–510
building the view 485–490
N
__name__ global variable 296–298
naming considerations
the index
you are here
4 595
Boolean data type 81
class names 318
files 309
functions 183, 192
modules 309
variables 51
National Research Institute for Mathematics and Comput-
er Science (Netherlands) 15
negation operator (-) 47–48
negative indices
for lists 132–133
for strings 273
nested loops 231–232, 234–235
New File menu item (File menu) 20, 26
newline (\n) 403, 407–408
next method 582
\n (newline) 403, 407–408
None value and type 214, 420–421
not Boolean operator 92–93
not equal operator (!=) 81, 101–102
numbers
about 58
converting strings to 59–60
converting to strings 140
data types supported 57
error handling 53–55
Fibonacci sequence 357–359, 373
floating point 58–59, 320
imaginary 58
integer 58–59, 140
pseudo-random 78
Python interpreter and 57
sequences of 78, 145–146
O
Objective-C programming language 8
objects. See also OOP
about 315–316, 321
attributes of. See attributes
behavior of. See behavior of objects
classes and. See classes
constructors and 318, 320, 528–529, 544
HAS-A relationship 546
instantiating 318, 525, 538–539, 544
IS-A relationship 537–539
methods and. See methods
state of 315–317, 525, 527
using 318
object variables. See attributes
odd method 580
OOP (object-oriented programming)
about 436, 524–526
composition 546, 558
delegation 546, 559, 560–564
designing classes 527, 549, 560
encapsulation 319, 552, 561
HAS-A relationship 546
implementing classes 535, 550
inheritance 534–537, 541, 544, 558
IS-A relationship 537–539
overriding and extending behavior 542–544
polymorphism 555–556
subclassing. See subclasses
superclasses 536, 544
terminology 536, 544
writing classes 528–530
writing methods 531–533, 554, 559
open function 399–401
opening files 399–402, 418, 420
Open Notify API 439–440, 443–444, 449
open-notify.org website 443–444, 447
Open Weather Map organization 438
operator (expressions) 45. See also specific operators
operator precedence 47–49, 93
or Boolean operator 92–93
organizing source code xxxvi, 20, 22
output
defined 22
error handling 53
the index
596
index
file output 420–422
list considerations 139–140
print function 22–23, 61–63, 96, 139
overriding behavior 542–544
P
packages
about 294, 441, 585
installing 441–442
palindromes 171, 347–354
paper prototyping 473
Papert, Seymour 307
parallel lists 162, 235, 368
parameters in functions
about 183, 192, 201
abstracting code example 197–198
arguments comparison 192, 204, 211
default values 210
keywords in 212, 487
listing required first 211
Python interpreter processing 185–186
recursive functions and 350
variables comparison 204
variable scope and 200, 202
parentheses ()
Boolean expressions and 102
in functions 60, 183
grouping operations 45
operator precedence and 48
subclassing 536
path separator (/) 400–401
PEMDAS mnemonic 48
period (.). See dot notation
Perl programming language 9
persistent storage. See file management
PHP programming language 8
Pillow image library 585
pip utility 441–442
pixels 310
plus sign (+)
addition operator and 47–48
concatenation and 25–26
polymorphism 555–556
pop method 363
positional arguments. See arguments in functions
prime method 580
primitive data types , xiii
print function
about 22–23
fixing output glitches 139
space separators 96, 139
user-friendly output 61–63
problems, breaking down 2–4
programming languages 6–10, 14
prompting for input
continually 104–105
Crazy Libs game 397
handling errors 56
step-by-step process 37–39
storing user responses in variables 85
while loop logic 110
pseudocode
about 4, 34, 37
anti-social network example 371
attributes of items 368
bubble sort 231–232
computing readability 249
crafting 6
creating 362, 364
deleting keys 363
flowcharts and 76
Game of Life simulator 491
index comparison 363
iterating through keys 364
lists comparison 367–368
order considerations 364
retrieving values by keys 362–363, 367
testing for keys 363
turtle races example 323
writing code from 36
the index
you are here
4 597
pseudo-random numbers 78
punctuation, removing for readability 272–276
.py file extension 20, 252
Pygame library 585
Python interpreter 13, 57, 183–188
Python library. See modules
Python NameError 22
Python programming language
about 10, 14, 23
brief history of 15
case sensitivity 51
decision-making in 80
installing xxxiv–xxxv, 17
sample programs 18–21, 24–27
versions of 15–16, 442
writing and running code 13
Python Shell window
closing 113
entering sample programs 18–19, 24–26, 40–41
viewing program output 21
Q
quicksort algorithm 239
quotation marks (“”)
declaring lists 24–25
strings and 42, 88, 250–251, 301
R
randint function (random) 77–79, 158
random module
choice function 24–25, 86
importing 24–25, 77–79, 294
randint function 77–79
random number generation 77–79
range function 145–146, 148, 576
readability formula
about 247–248, 278, 282, 301–303
analyzing text for 250–251
computing sentences for 247–248, 257–263
computing syllables for 247–248, 264–273, 276–277
computing words for 247–248, 253–256
customizing for reuse 292–293
dealing with extraneous characters 256–257
implementing 278–283
pseudocode for 249
removing punctuation 272–276
setting up function for 252–253
reading files into code 402–409
readline method 407, 409
read method 403–404
recipe. See pseudocode
recursive functions
about 343–346
determining end of 350
Fibonacci sequence 357–359, 373
generating fractals 379–382
how recursion works 350–354
iteration comparison 355–356
palindrome example 347–354
refactoring code , 179–182, 190, xiv–xvii
regular expressions 578
relational operators 80, 93
relative paths 400–401
requests module
about 305, 441–442
get function 447–448
requests package 441, 585
requests (Web APIs)
about 437
access tokens and 440
error handling 440
forming URLs 444
request module process 447
responses (Web APIs)
about 437
ISS example 444
JSON format and 445
request module process 447–448
retrieving stored variable values 44
the index
598
index
return statement 192
return value (functions)
about 183, 193
assigning to variables 39, 85
handling errors with 56
reverse method 320
Rock, Paper, Scissors game 74–76
root window 486
Rossum, Guido van 15
r (read mode) 399
Run menu (IDLE editor) 21–22, 27
Run Module menu item (Run menu) 21–22, 27
runtime errors
about 54, 417
examples 59, 363
S
Save menu item (File menu) 20, 26
sched module 585
Scheme programming language 9
scientific notation 58
screen object 327, 453–456, 460
search method 578
semantic errors 54, 417
semantics of programming languages 7, 38, 535
sentences, computing for readability formula 247–248,
257–263
sequences
of characters 58, 257, 262–263, 268
for loops and 78, 145, 152
len function and 268
of numbers 78, 145–146
of values 142, 260
server-side coding 581
sets 580
shadowing variables 202
shoushiling (game) 74–76
skeleton code 258
slicing
lists 273, 344
strings 272–276
sort function 239
sorting data
about , xv–xvi
bubble sort 227–239
space separators
concatenated items and 25–26
multiple arguments and 61
print function 96, 139
spaghetti code 476
split function 253–256
Spotify website 439
square brackets [ ] 25–26
statements
about 2–3
assignment 41
indenting 82, 105, 183
state of objects 315–317, 525, 527
status codes (HTTP) 448–450
steps, breaking down problems into 2–3
storing variable values 38, 44, 85
str function 140, 183
strings
about 38, 42, 57–58, 262
accessing last character in 263
adding multi-line text into code 250–251, 301
analyzing for readability formula 250–251
calculating terminal characters for sentences 257–261
case sensitivity 103
as classes 320
concatenating 46, 96, 139
converting numeric values to 140
converting to numeric values 59–60
empty 88, 198, 349, 409
error handling 53–55, 140
immutable nature of 263
indices for 272–276
the index
you are here
4 599
keys in JSON as 445
matching with expressions 578
Python interpreter and 57
quotation marks and 42, 88, 250–251
slicing 272–276
splitting apart 253–256
stripping characters off 413–414
substrings. See substrings
string (str) class 540
strip method 413–414
subclasses 536–537, 540, 544, 560
substrings 253, 263, 272–276
subtraction operator (-) 47–48
sum function 342
superclasses 536, 544
Swift programming language 8
syllables, computing for readability formula 247–248,
264–273, 276–277
syntax 7, 37, 535, 583
syntax errors
about 54, 417
examples 22, 43, 60, 102, 211
sys module 423
T
templates 396–397
terminal characters, calculating for sentences 257–261
terminating programs 113
testing code 40, 165, 473
text editors 13
text files 396, 399
text strings. See strings
thinking computationally , 1–4, x–xiii, xiv
third-party packages 441
time object 577
Timsort algorithm 239
Tkinter module 305, 485, 506
Traceback error message 417
triple quotation marks 250–251, 301
True value 80–83, 87, 92, 106
try/except block 417–418, 420
\t (tab) 408
tuples 579
turtle module
about 305–307
adding turtles 311–313
creating turtles 308–310, 314
generating fractals 379–382
OOP rework 563–565
purpose of attributes in 319
purpose of classes in 317
purpose of methods in 319
purpose of objects in 315
screen object and 327, 453–456, 460
turtle races example 322–333
using classes in 318
using objects in 318
U
UnboundLocalError 207
underscore (_) 51
unpacking 579
upper method 320
URLs (Uniform Resource Locators) 438–440
usability testing 473–475
use cases 473, 475
user interface widgets 485–489
V
variables
about 38, 44, 46
accessing within modules 252, 294
assigning default values to 195
assigning objects to 399
assigning return values to 39, 85
assigning values to 41, 44, 58
the index
600
index
computing expressions with 45–46, 80
creating 88
dot notation and 321
functions and 194, 200–209
global 194, 200–203, 207–209, 296–298
instance. See attributes
local 194, 200–203, 207–209
naming 51
parameter comparison 204
shadowing 202
storing values in 38, 44, 85
in while loops 105–110
versions of Python 15–16, 442
view (MVC pattern) 485–490
vowels, computing for syllables in words 266–273,
276–277
\v (vertical tab) 408
W
web addresses 438–440
Web APIs
about 436–437, 446
making web requests 443–444, 447–449
using JSON 445
web addresses and 438–440
while statement
break statement and 406, 409
bubble sort example 231–232, 234–235
fireside chat 151–152
for loop comparison 142, 151–152
introduction 105–110
whitespace 253–256
widgets 485–489
Windows environment
command-line execution 424, 442
file paths in 400–401
installing Python xxxv, 17
Python sample program 18
words, computing for readability formula 247–248,
253–256
write method 421
w (write mode) 399, 421
Y
yield statement 582
Z
zero index value
for lists 132, 138, 157, 477
for strings 274

Don’t know about the website?
We’ve got updates, video,
projects, author blogs, and more!
Bring your brain over to
wickedlysmart.com
