No Starch Press The Book Of Java Script, A Practical Guide To Interactive Web Pages 2nd (2007)
User Manual: Pdf
Open the PDF directly: View PDF ![]() .
.
Page Count: 519 [warning: Documents this large are best viewed by clicking the View PDF Link!]
- The Book of JavaScript, 2nd Edition
- Contents
- Introduction
- Chapter 1: Welcome to JavaScript!
- Chapter 2: Using Variables and Built-in Functions to
- Chapter 3: Giving the Browsers What They Want
- Chapter 4: Working with Rollovers
- Chapter 5: Opening and Manipulating Windows
- Chapter 6: Writing Your Own JavaScript Functions
- Chapter 7: Providing and Receiving Information with Forms
- Chapter 8: Keeping Track of Information with Arrays and Loops
- Chapter 9: Timing Events
- Chapter 10: Using Frames and Image Maps
- Chapter 11: Validating Forms, Massaging Strings, and
- Chapter 12: Saving Visitor Information with Cookies
- Chapter 13: Dynamic HTML
- Chapter 14: Ajax Basics
- Chapter 15: XML in JavaScript and Ajax
- Chapter 16: Server-Side Ajax
- Chapter 17: Putting It All Together in a Shared To Do List
- Chapter 18: Debugging JavaScript and Ajax
- Appendix A: Answers to Assignments
- Appendix B: Resources
- Appendix C: Reference to JavaScript Objects and Functions
- Appendix D: Chapter 15’s Italian Translator and Chapter 17’s To Do List Application
- Index

THE BOOK of ™
JAVASCRIPT
2ND EDITION
A PRACTICAL GUIDE TO INTERACTIVE
WEB PAGES
by thau!
San Francisco
®

THE BOOK OF JAVASCRIPT, 2ND EDITION. Copyright © 2007 by Dave Thau.
First edition © 2000 by Dave Thau.
All rights reserved. No part of this work may be reproduced or transmitted in any form or by any means, electronic or
mechanical, including photocopying, recording, or by any information storage or retrieval system, without the prior
written permission of the copyright owner and the publisher.
10 09 08 07 06 1 2 3 4 5 6 7 8 9
ISBN-10: 1-59327-106-9
ISBN-13: 978-1-59327-106-0
Publisher: William Pollock
Associate Production Editor: Christina Samuell
Cover and Interior Design: Octopod Studios
Developmental Editors: Jim Compton, William Pollock, and Riley Hoffman
Technical Reviewer: Luke Knowland
Copyeditor: Publication Services, Inc.
Compositors: Riley Hoffman and Megan Dunchak
Proofreader: Stephanie Provines
Indexer: Nancy Guenther
For information on book distributors or translations, please contact No Starch Press, Inc. directly:
No Starch Press, Inc.
555 De Haro Street, Suite 250, San Francisco, CA 94107
phone: 415.863.9900; fax: 415.863.9950; info@nostarch.com; www.nostarch.com
Library of Congress Cataloging-in-Publication Data
Thau.
The book of JavaScript : a practical guide to interactive Web pages / Thau!. -- 2nd ed.
p. cm.
Includes index.
ISBN-13: 978-1-59327-106-0
ISBN-10: 1-59327-106-9
1. JavaScript (Computer program language) I. Title.
QA76.73.J39T37 2006
005.13'3--dc22
2006011786
No Starch Press and the No Starch Press logo are registered trademarks of No Starch Press, Inc. Other product and
company names mentioned herein may be the trademarks of their respective owners. Rather than use a trademark
symbol with every occurrence of a trademarked name, we are using the names only in an editorial fashion and to the
benefit of the trademark owner, with no intention of infringement of the trademark.
The information in this book is distributed on an “As Is” basis, without warranty. While every precaution has been
taken in the preparation of this work, neither the author nor No Starch Press, Inc. shall have any liability to any
person or entity with respect to any loss or damage caused or alleged to be caused directly or indirectly by the
information contained in it.
Printed on recycled paper in the United States of America

I dedicate this revised edition of The Book of JavaScript to my wonderful
wife Kirsten Menger-Anderson, who never failed to keep a straight
face when I said, “It’s almost done.”

BRIEF CONTENTS
Foreword by Luke Knowland ......................................................................................... xxi
Foreword to the First Edition by Nadav Savio ................................................................ xxiii
Acknowledgments ....................................................................................................... xxv
Introduction .............................................................................................................. xxvii
Chapter 1: Welcome to JavaScript!.................................................................................. 1
Chapter 2: Using Variables and Built-in Functions to
Update Your Web Pages Automatically.................................................................... 15
Chapter 3: Giving the Browsers What They Want............................................................ 33
Chapter 4: Working with Rollovers................................................................................. 51
Chapter 5: Opening and Manipulating Windows ............................................................ 67
Chapter 6: Writing Your Own JavaScript Functions .......................................................... 83
Chapter 7: Providing and Receiving Information with Forms .............................................. 99
Chapter 8: Keeping Track of Information with Arrays and Loops ...................................... 123
Chapter 9: Timing Events ............................................................................................ 147
Chapter 10: Using Frames and Image Maps ................................................................. 169
Chapter 11: Validating Forms, Massaging Strings, and
Working with Server-Side Programs....................................................................... 191
Chapter 12: Saving Visitor Information with Cookies ...................................................... 215
viii Brief Contents
Chapter 13: Dynamic HTML ........................................................................................ 233
Chapter 14: Ajax Basics ............................................................................................. 261
Chapter 15: XML in JavaScript and Ajax ...................................................................... 279
Chapter 16: Server-Side Ajax ...................................................................................... 299
Chapter 17: Putting It All Together in a Shared To Do List ............................................... 331
Chapter 18: Debugging JavaScript and Ajax ................................................................ 363
Appendix A: Answers to Assignments........................................................................... 381
Appendix B: Resources ............................................................................................... 405
Appendix C: Reference to JavaScript Objects and Functions............................................ 411
Appendix D: Chapter 15’s Italian Translator and Chapter 17’s To Do List Application ........ 455
Index ........................................................................................................................ 469
CONTENTS IN DETAIL
FOREWORD by Luke Knowland xxi
FOREWORD TO THE FIRST EDITION by Nadav Savio xxiii
ACKNOWLEDGMENTS xxv
INTRODUCTION xxvii
How This Book Is Organized .................................................................................. xxvii
Companion Website ...............................................................................................xxx
1
WELCOME TO JAVASCRIPT! 1
Is JavaScript for You?................................................................................................. 1
Is This Book for You? ................................................................................................. 2
The Goals of This Book .............................................................................................. 2
What Can JavaScript Do? .......................................................................................... 3
What Are the Alternatives to JavaScript?...................................................................... 5
CGI Scripting .............................................................................................. 5
VBScript...................................................................................................... 7
Java ........................................................................................................... 7
Flash .......................................................................................................... 7
JavaScript’s Limitations............................................................................................... 7
JavaScript Can’t Talk to Servers ..................................................................... 7
JavaScript Can’t Create Graphics .................................................................. 8
JavaScript Works Differently in Different Browsers ............................................ 8
Getting Started ......................................................................................................... 8
Where JavaScript Goes on Your Web Pages................................................................ 9
Dealing with Older Browsers .................................................................................... 10
Your First JavaScript ................................................................................................ 12
Summary................................................................................................................ 12
Assignment............................................................................................................. 13
2
USING VARIABLES AND BUILT-IN FUNCTIONS TO
UPDATE YOUR WEB PAGES AUTOMATICALLY 15
Variables Store Information ...................................................................................... 16
Syntax of Variables .................................................................................... 16
Naming Variables...................................................................................... 17
Arithmetic with Variables ............................................................................ 18
Write Here Right Now: Displaying Results.................................................................. 19
Line-by-Line Analysis of Figure 2-4 ................................................................ 20
Strings ................................................................................................................... 20
Line-by-Line Analysis of Figure 2-6 ................................................................ 21
xContents in Detail
More About Functions.............................................................................................. 21
alert()........................................................................................................ 22
Line-by-Line Analysis of Figure 2-9 ................................................................ 23
prompt().................................................................................................... 24
Parameters ............................................................................................................. 25
Writing the Date to Your Web Page.......................................................................... 26
Built-in Date Functions ................................................................................. 26
Date and Time Methods .............................................................................. 26
Code for Writing the Date and Time............................................................. 27
Line-by-Line Analysis of Figure 2-12 .............................................................. 29
How the European Space Agency Writes the Date to Its Page ...................................... 30
Summary................................................................................................................ 31
Assignment............................................................................................................. 31
3
GIVING THE BROWSERS WHAT THEY WANT 33
A Real-World Example of Browser Detection .............................................................. 34
Browser Detection Methods ...................................................................................... 35
Quick-but-Rough Browser Detection .............................................................. 35
More Accurate Browser Detection ................................................................ 36
Redirecting Visitors to Other Pages............................................................................ 37
if-then Statements .................................................................................................... 38
Boolean Expressions................................................................................... 38
Nesting..................................................................................................... 40
if-then-else Statements ................................................................................. 40
if-then-else-if Statements ............................................................................... 41
When and Where to Place Curly Brackets..................................................... 41
OR and AND ......................................................................................................... 42
OR ........................................................................................................... 43
AND ........................................................................................................ 44
Putting It All Together............................................................................................... 45
A Few More Details About Boolean Expressions.......................................................... 47
How Netscape Provides Browser-Specific Content ....................................................... 48
Summary................................................................................................................ 50
Assignment............................................................................................................. 50
4
WORKING WITH ROLLOVERS 51
A Real-World Example of Rollovers ........................................................................... 52
Triggering Events .................................................................................................... 53
Event Types ............................................................................................... 53
Quotes in JavaScript................................................................................... 55
Clicking the Link to Nowhere....................................................................... 56
More Interesting Actions.............................................................................. 57
Swapping Images ................................................................................................... 58
Working with Multiple Images .................................................................................. 59
Contents in Detail xi
What’s with All the Dots? ........................................................................................ 60
The document Object.................................................................................. 60
Object Properties ....................................................................................... 61
Finally, Rollovers! ....................................................................................... 62
Image Preloading....................................................................................... 62
How the Tin House Rollovers Work............................................................................ 64
Summary................................................................................................................ 65
Assignment............................................................................................................. 65
5
OPENING AND MANIPULATING WINDOWS 67
Real-World Examples of Opening Windows to Further Information................................ 68
Working with Windows as Objects........................................................................... 69
Opening Windows.................................................................................................. 69
Manipulating the Appearance of New Windows ........................................... 70
Some Browsers and Computers Open Windows Differently ............................. 72
Closing Windows ................................................................................................... 72
Using the Right Name: How Windows See Themselves and Each Other ........................ 73
Moving Windows to the Front or Back of the Screen.................................................... 74
Window Properties.................................................................................................. 74
The status Property ..................................................................................... 74
The opener Property ................................................................................... 75
More Window Methods........................................................................................... 77
Resizing Windows ..................................................................................... 77
Moving Windows ...................................................................................... 77
Summary................................................................................................................ 80
Assignment............................................................................................................. 80
6
WRITING YOUR OWN JAVASCRIPT FUNCTIONS 83
Functions as Shortcuts .............................................................................................. 84
Basic Structure of JavaScript Functions .......................................................... 84
Naming Your Functions............................................................................... 85
Parentheses and Curly Brackets.................................................................... 85
An Example of a Simple Function ................................................................. 85
Writing Flexible Functions ........................................................................................ 86
Using Parameters ....................................................................................... 87
Line-by-Line Analysis of Figure 6-4 ................................................................ 88
Using More Than One Parameter ................................................................. 90
Getting Information from Functions ............................................................................ 91
Line-by-Line Analysis of Figure 6-9 ................................................................ 92
Dealing with Y2K .................................................................................................... 93
Line-by-Line Analysis of Figure 6-12 .............................................................. 94
Defining Variables Properly ...................................................................................... 94
Summary................................................................................................................ 96
Assignment............................................................................................................. 97
xii Contents in Detail
7
PROVIDING AND RECEIVING INFORMATION
WITH FORMS 99
Real-World Examples of Forms................................................................................ 100
Form Basics .......................................................................................................... 101
Text Fields ............................................................................................... 102
Buttons, Checkboxes, and Radio Buttons ..................................................... 102
Select Elements ........................................................................................ 104
Textareas ................................................................................................ 106
Final Form Comments ............................................................................... 106
Forms and JavaScript............................................................................................. 107
Naming Form Elements ............................................................................. 107
Naming Radio Buttons .............................................................................. 108
Naming Options ...................................................................................... 108
Reading and Setting Form Elements......................................................................... 109
Reading Information from Text Fields .......................................................... 109
Setting the Value of a Text Field ................................................................. 110
Textareas ................................................................................................ 111
Checkboxes............................................................................................. 112
Radio Buttons........................................................................................... 114
Pull-Down Menus and Scrollable Lists.......................................................... 115
Handling Events Using Form Elements...................................................................... 116
Make this a Shortcut.............................................................................................. 117
Using Pull-Down Menus as Navigational Tools.......................................................... 118
One Last Forms Shortcut......................................................................................... 119
How the Doctors Without Borders Pull-Down Navigation Tool Works........................... 120
Summary.............................................................................................................. 120
Assignment........................................................................................................... 121
8
KEEPING TRACK OF INFORMATION WITH
ARRAYS AND LOOPS 123
Real-World Examples of Arrays............................................................................... 123
JavaScript’s Built-In Arrays...................................................................................... 124
Figuring Out How Many Items an Array Contains ..................................................... 126
Going Through Arrays ........................................................................................... 126
while Loops .......................................................................................................... 128
while Loops and Arrays ............................................................................ 129
Going Off the Deep End ........................................................................... 130
Using array.length in Your Loop................................................................. 131
An Incremental Shortcut ............................................................................ 131
Beware of Infinite Loops ............................................................................ 131
for Loops.............................................................................................................. 132
How AntWeb Checks Off All the Checkboxes .......................................................... 133
Line-by-Line Analysis of Figure 8-11 ............................................................ 133
Creating Your Own Arrays..................................................................................... 134
Line-by-Line Analysis of Figure 8-12 ............................................................ 135
How the Book of JavaScript Tip Box Works .............................................................. 136
Checking for Blank Statements ................................................................... 137
Checking the Last Element in the Array........................................................ 137
Contents in Detail xiii
Testing the Limits of Arrays ........................................................................ 137
The startScroll() Function............................................................................ 138
A Streamlined Version .............................................................................. 139
Loops Can Nest .................................................................................................... 140
Creating Arrays As You Go Along .......................................................................... 140
Associative Arrays................................................................................................. 142
Line-by-Line Analysis of Figure 8-18 ............................................................ 144
Summary.............................................................................................................. 144
Assignment........................................................................................................... 145
9
TIMING EVENTS 147
Real-World Examples of Timing Events..................................................................... 147
Setting an Alarm with setTimeout()........................................................................... 148
Canceling an Alarm with clearTimeout()................................................................... 149
Line-by-Line Analysis of Figure 9-3 .............................................................. 150
Repeating Timed Actions........................................................................................ 150
Line-by-Line Analysis of Figure 9-5 .............................................................. 152
Using parseInt() with Form Elements............................................................ 152
Clearing Out a Time-Out Before You Set a New One ................................... 153
Declaring Variables That Hold Time-Outs Outside Functions .......................... 153
Building a Clock with Timing Loops ......................................................................... 154
Line-by-Line Analysis of Figure 9-7 .............................................................. 155
How the Book of JavaScript Website’s Timer Works .................................................. 155
How Space.com’s Countdown Script Works............................................................. 157
Calculating Times..................................................................................... 160
Global Variables and Constants................................................................. 160
A Timed Slide Show .............................................................................................. 161
Line-by-Line Analysis of Figure 9-11 ............................................................ 162
A Safer Version of rotateImage() ............................................................................. 163
Why Declaring a Variable Outside a Function Is Unsafe ............................... 163
Why You Can’t Put var Inside a Timing Loop ............................................... 163
The Solution ............................................................................................ 164
The Hitch ................................................................................................ 165
The Solution to the Hitch............................................................................ 165
Why image_array Is Declared Outside the rotateImage() Function.................. 166
Summary.............................................................................................................. 167
Assignment........................................................................................................... 167
10
USING FRAMES AND IMAGE MAPS 169
A Real-World Example of Frames and Image Maps................................................... 170
Frames................................................................................................................. 170
Frame Basics ........................................................................................... 170
Frames and JavaScript .............................................................................. 172
Frames and Image Swaps ......................................................................... 174
Changing the Contents of Two Frames at Once ........................................... 176
Frames Inside Frames ............................................................................... 177
JavaScript and Frames Inside Frames.......................................................... 179
xiv Contents in Detail
Frame Busting.......................................................................................... 179
Using Frames to Store Information .............................................................. 181
Line-by-Line Analysis of Figure 10-15 .......................................................... 183
Image Maps ......................................................................................................... 184
Image Map Basics.................................................................................... 185
Image Maps and JavaScript ...................................................................... 186
How Salon’s Bug-Eating Script Works...................................................................... 186
Salon’s Nested Frames ............................................................................. 188
Salon’s Image Map .................................................................................. 188
The changeMe() Function .......................................................................... 188
Summary.............................................................................................................. 189
Assignment........................................................................................................... 190
11
VALIDATING FORMS, MASSAGING STRINGS,
AND WORKING WITH SERVER-SIDE PROGRAMS 191
A Real-World Example of Form Validation ............................................................... 192
Making Sure a Visitor Has Filled Out a Form Element ................................................ 192
Line-by-Line Analysis of Figure 11-2 ............................................................ 194
String Handling..................................................................................................... 196
Breaking Strings Apart.............................................................................. 196
Matching String Patterns with Regular Expressions........................................ 203
How Dictionary.com’s Form Validators Work ........................................................... 207
Line-by-Line Analysis of Figure 11-11 .......................................................... 210
Summary.............................................................................................................. 213
Assignment........................................................................................................... 214
12
SAVING VISITOR INFORMATION WITH COOKIES 215
A Real-World Example of Cookies........................................................................... 216
What Are Cookies?............................................................................................... 216
What Cookies Can and Can’t Do ........................................................................... 217
Working with Cookies ........................................................................................... 218
Setting Cookies........................................................................................ 218
Reading Cookies...................................................................................... 218
Resetting Cookies..................................................................................... 219
Setting More Than One Piece of Information................................................ 220
Setting the Duration of a Cookie ................................................................ 222
Who Can Read the Cookie?...................................................................... 224
The Whole Cookie ................................................................................... 224
Setting Multiple Cookies............................................................................ 225
Cookie Libraries.................................................................................................... 225
A Cookie-Based Shopping Cart .............................................................................. 226
Adding an Item to the Cart ........................................................................ 227
The Checkout Page................................................................................... 229
The readTheCookie() Function.................................................................... 230
The checkOut() Function ........................................................................... 231
Summary.............................................................................................................. 232
Assignment........................................................................................................... 232
Contents in Detail xv
13
DYNAMIC HTML 233
Real-World Examples of DHTML.............................................................................. 234
CSS Basics ........................................................................................................... 234
The <div> Tag ......................................................................................... 235
Positioning a div with CSS......................................................................... 235
Hiding a div ............................................................................................ 237
Layering divs ........................................................................................... 237
JavaScript and DHTML........................................................................................... 238
Making divs Move ................................................................................................ 239
Using setTimeout() and clearTimeout() to Animate a Page ........................................... 239
Line-by-Line Analysis of Figure 13-10 .......................................................... 240
Changing the Contents of a div............................................................................... 241
spans and getElementsByTagName() ....................................................................... 242
Advanced DOM Techniques................................................................................... 244
W3C DOM Overview .............................................................................. 245
Creating and Adding Elements Using the W3C DOM .................................. 245
Adding Text to an Element......................................................................... 246
Adding Elements in the Middle of a Page and Removing Elements ................. 247
Additional DOM Details............................................................................ 248
Manipulating a Page Using the DOM......................................................... 250
Fancy Event Handling ............................................................................................ 250
The event Object...................................................................................... 250
Adding Event Handlers Using JavaScript ..................................................... 254
Drop-Down Menus ................................................................................................ 257
Line-by-Line Analysis of Figure 13-23 .......................................................... 259
The Borders ............................................................................................. 259
Summary.............................................................................................................. 259
Assignment........................................................................................................... 260
14
AJAX BASICS 261
A Real-World Example of Ajax ............................................................................... 262
Introduction to Ajax ............................................................................................... 263
Asynchronicity—The A in Ajax................................................................... 264
XML—The X in Ajax ................................................................................. 265
JavaScript—The J in Ajax .......................................................................... 265
Creating and Sending Requests .............................................................................. 265
Creating a Request Object ........................................................................ 265
Telling the Object Where to Send the Request ............................................. 266
What to Do When the Request Is Answered ................................................ 266
Writing JavaScript That Is Called After the Request Has Been Answered ......... 268
Sending the Request ................................................................................. 268
Putting Everything Together........................................................................ 269
Getting the Results.................................................................................... 270
Demonstrating Asynchronicity ................................................................................. 271
Line-by-Line Analysis of Figure 14-6 ............................................................ 273
xvi Contents in Detail
Ajax and Usability ................................................................................................ 274
The Back Button ....................................................................................... 274
URLs and Bookmarking ............................................................................. 274
Poor Design............................................................................................. 274
To Ajax, or Not to Ajax ......................................................................................... 275
Bad: Just Because You Can ....................................................................... 275
Bad: It’s the Hot New Thing....................................................................... 275
Bad: Replacing Something That Works with
Something New and Confusing........................................................... 275
Good: In-Context Data Manipulation .......................................................... 276
Good: Interactive Widgets ........................................................................ 276
Good: Saving State.................................................................................. 276
Summary.............................................................................................................. 276
Assignment........................................................................................................... 277
15
XML IN JAVASCRIPT AND AJAX 279
A Real-World Example of Ajax and XML.................................................................. 280
Google Suggest .................................................................................................... 281
XML—the Extensible Markup Language.................................................................... 282
The Rules of XML................................................................................................... 283
The XML Header ...................................................................................... 283
XML Elements........................................................................................... 284
XML Attributes.......................................................................................... 284
Illegal XML Characters .............................................................................. 284
XML Documents Have a Single Root Element................................................ 285
Final Comments About the XML Format ....................................................... 285
Processing XML..................................................................................................... 285
Line-by-Line Analysis of Figure 15-6 ............................................................ 287
Internet Explorer, responseXML, and Client-Side Ajax ................................... 291
Problems with White Space in XML ............................................................ 291
Creating a Suggest Application for Translation ......................................................... 292
Finding the Translations ............................................................................ 294
Displaying the Results ............................................................................... 295
Summary.............................................................................................................. 296
Assignment........................................................................................................... 297
16
SERVER-SIDE AJAX 299
Real-World Examples of Server-Side Ajax ................................................................ 300
The Power of Webservers....................................................................................... 301
A Server-Side Programming Language ..................................................................... 303
PHP Basics ........................................................................................................... 304
Sending Simple Input to PHP with a GET Request ...................................................... 305
Passing Input in a URL............................................................................... 305
Using PHP to Read the Inputs of a GET Request............................................ 306
Contents in Detail xvii
Creating a Google Suggest Application with an Ajax GET Request ............................. 308
Contacting Third-Party Webservers with Ajax and PHP ................................. 308
The JavaScript for the Homemade Google Suggest Application ..................... 309
Using PHP to Contact Other Webservers..................................................... 313
Ajax and the POST Method.................................................................................... 314
An Ajax-Friendly Form .............................................................................. 316
POSTing with Ajax ................................................................................... 316
Sending XML Information from the Browser to a Webserver........................... 318
HEAD Requests: Getting Information About a Server-Side File .................................... 318
Adding Headers to Your Responses............................................................ 319
Headers and XML .................................................................................... 320
The Caching Problem ............................................................................................ 320
File Handling in PHP.............................................................................................. 321
Creating and Adding Contents to a Text File with PHP .................................. 321
Reading Files in PHP................................................................................. 322
When Communication Breaks Down........................................................................ 323
Automatically Updating a Web Page When a Server-Side File Changes...................... 325
readFileDoFunction()................................................................................. 327
callReadFile()........................................................................................... 327
callUpdateIfChanged().............................................................................. 328
stopTimer() .............................................................................................. 328
Recap and Breathe................................................................................... 328
The Server-Side PHP Code......................................................................... 328
Summary.............................................................................................................. 329
Assignment........................................................................................................... 330
17
PUTTING IT ALL TOGETHER IN A SHARED TO DO LIST 331
Features of the To Do List Application ...................................................................... 332
To Do List Data Files .............................................................................................. 334
userInfo.xml............................................................................................. 334
To Do List File .......................................................................................... 335
To Do List Server Side ............................................................................................ 336
The To Do List Client Side, Part 1: The HTML............................................................. 337
The To Do List Client Side, Part 2: The JavaScript ...................................................... 338
The Function Road Map ............................................................................ 339
Logging In and Out .................................................................................. 340
Functions Related to Logging In .................................................................. 341
Helper Functions ...................................................................................... 343
Displaying Available Lists.......................................................................... 346
Displaying a Specific List........................................................................... 349
Processing Changes to a List...................................................................... 352
Limitations on Manipulating XML Documents................................................ 356
Adding a New Item.................................................................................. 357
A Few Closing Notes............................................................................................. 359
Client-Side or Server-Side Code?................................................................ 359
Security Issues.......................................................................................... 359
Summary.............................................................................................................. 361
Assignment........................................................................................................... 361
xviii Contents in Detail
18
DEBUGGING JAVASCRIPT AND AJAX 363
Good Coding Practices.......................................................................................... 364
Starting with Comments ............................................................................ 364
Filling In the Code.................................................................................... 365
Avoiding Common Mistakes ................................................................................... 365
Use a Consistent Naming Convention......................................................... 365
Avoid Reserved Words ............................................................................. 366
Remember to Use Two Equal Signs in Logical Tests....................................... 366
Use Quotation Marks Correctly .................................................................. 366
Finding Bugs......................................................................................................... 367
Printing Variables with alert() Statements ..................................................... 367
Debugging Beyond Alerts.......................................................................... 369
Using Your Browser’s Bug Detector............................................................. 370
Using JavaScript Debuggers ...................................................................... 370
Debugging Ajax in Firefox 1.5 and 2.0...................................................... 374
Other Debugging Resources ...................................................................... 376
Fixing Bugs .......................................................................................................... 376
Back Up Your Program ............................................................................. 377
Fix One Bug at a Time.............................................................................. 377
Avoid Voodoo Coding.............................................................................. 377
Look for Similar Bugs ................................................................................ 378
Clear Your Head...................................................................................... 378
Ask for Help ............................................................................................ 378
Summary.............................................................................................................. 379
A
ANSWERS TO ASSIGNMENTS 381
Chapter 2 ............................................................................................................ 381
Chapter 3 ............................................................................................................ 383
Chapter 4 ............................................................................................................ 383
Chapter 5 ............................................................................................................ 384
index.html ............................................................................................... 384
image_page.html ..................................................................................... 384
Chapter 6 ............................................................................................................ 385
Chapter 7 ............................................................................................................ 385
Chapter 8 ............................................................................................................ 387
Chapter 9 ............................................................................................................ 389
Chapter 10 .......................................................................................................... 390
index.html ............................................................................................... 390
assignment-nav.html.................................................................................. 390
blank.html ............................................................................................... 391
Chapter 11 .......................................................................................................... 391
index.html ............................................................................................... 391
assignment-nav.html.................................................................................. 392
blank.html ............................................................................................... 394
Chapter 12 .......................................................................................................... 394
Chapter 13 .......................................................................................................... 395
Contents in Detail xix
Chapter 14 .......................................................................................................... 397
addressBook.xml...................................................................................... 397
index.html ............................................................................................... 397
Chapter 17 .......................................................................................................... 399
Join Functions .......................................................................................... 400
Giving a User Access to Your To Do List...................................................... 402
B
RESOURCES 405
Tutorials ............................................................................................................... 405
HTML Tutorials ......................................................................................... 406
Cascading Style Sheets Tutorials ................................................................ 406
Advanced Topics in JavaScript................................................................... 406
Ajax Tutorials .......................................................................................... 407
Example JavaScript and Ajax Code......................................................................... 407
Good Ajax Websites............................................................................................. 407
Ajax Frameworks .................................................................................................. 408
JavaScript ............................................................................................... 408
PHP ........................................................................................................ 409
Java ....................................................................................................... 409
.NET....................................................................................................... 410
Ruby....................................................................................................... 410
C
REFERENCE TO JAVASCRIPT OBJECTS AND FUNCTIONS 411
alert()................................................................................................................... 413
Anchor ................................................................................................................ 413
Applet ................................................................................................................. 413
Area.................................................................................................................... 414
Array................................................................................................................... 414
Button (Including Submit and Reset Buttons) .............................................................. 416
Checkbox............................................................................................................. 417
clearInterval()........................................................................................................ 417
clearTimeout() ....................................................................................................... 417
confirm() .............................................................................................................. 418
Date .................................................................................................................... 418
Document............................................................................................................. 421
elements[] ............................................................................................................ 423
escape()............................................................................................................... 423
eval() ................................................................................................................... 423
Event ................................................................................................................... 423
FileUpload ........................................................................................................... 424
Form.................................................................................................................... 424
Hidden ................................................................................................................ 426
History................................................................................................................. 426
HTMLElement........................................................................................................ 427
Image.................................................................................................................. 429
xx Contents in Detail
isNaN() ............................................................................................................... 430
Link ..................................................................................................................... 431
Location ............................................................................................................... 431
Math ................................................................................................................... 432
Navigator ............................................................................................................ 433
Number ............................................................................................................... 434
Option................................................................................................................. 435
parseInt().............................................................................................................. 436
parseFloat() .......................................................................................................... 436
Password ............................................................................................................. 436
prompt()............................................................................................................... 438
Radio .................................................................................................................. 438
Reset ................................................................................................................... 439
Screen ................................................................................................................. 439
Select .................................................................................................................. 439
setInterval()........................................................................................................... 440
setTimeout() .......................................................................................................... 441
String................................................................................................................... 441
Style .................................................................................................................... 445
Submit ................................................................................................................. 446
Text ..................................................................................................................... 446
Textarea............................................................................................................... 447
this ...................................................................................................................... 448
unescape() ........................................................................................................... 448
var ...................................................................................................................... 448
window ............................................................................................................... 448
XMLHttpRequest and ActiveXObject("Microsoft.XMLHTTP") ......................................... 454
D
CHAPTER 15’S ITALIAN TRANSLATOR
AND CHAPTER 17’S TO DO LIST APPLICATION 455
Chapter 15’s Italian Translator................................................................................ 455
Chapter 17’s To Do List Application ........................................................................ 457
todo.html................................................................................................. 457
readXMLFile.php...................................................................................... 467
saveXMLFile.php ...................................................................................... 467
INDEX 469

FOREWORD
The first JavaScript I remember writing was a routine
to change two frames at the same time. I was the pro-
duction specialist for HotWired, and it was shortly after
frames and JavaScript debuted, well before there was documentation for
either. Fortunately, it was also well before Internet Explorer 3.0 appeared on
the scene, so I only had to make sure my JavaScript worked for Netscape 2.0.
Even so, without a reference book to point out where possible pitfalls could be
or answer simple questions such as how to set variables that JavaScript would
like or how to make different windows talk to each other, it was one hell of a
challenge. And it was deeply satisfying when I got it to work correctly.
When Dave asked me to do the technical review of the second edition
of The Book of JavaScript, I couldn’t have been more pleased or honored. The
deep satisfaction I felt when I wrote those first JavaScripts and they worked
correctly, and the deeper satisfaction I felt as more and more browsers were
released and I figured out how to write cross-browser and cross-platform
JavaScript, are the same feelings I got when I read Dave’s explanations and
examples. He describes what a piece of code is going to do and how to think
about it, then lays out an example of code that makes sense—whether you’re
a seasoned programmer or entirely new to JavaScript. On top of all that, he
takes a practical approach to programming, he’s able to explain complex
xxii Foreword
problems in a way that doesn’t make them sound daunting, and when you’re
done covering each topic, you feel like you’ve earned the knowledge. That’s
rare, and it’s really, really refreshing.
Since the first edition of this book was published, there have been a few
advancements in JavaScript, most notably the advent of Ajax. Ajax is a concept
that makes even a few professional programmers’ heads spin, but (not surpris-
ingly) Dave manages to break down what Ajax is and what it isn’t, explains
when it makes sense to use it, and shows you how to do it.
If you’re new to JavaScript, you win—you couldn’t ask for a better person
to teach you how to program. If you’re an old hat at JavaScript and you’re
looking for a refresher course or wondering how to take advantage of Ajax,
you win too.
Happy coding!
Luke Knowland
Interaction Designer, Six Apart
San Francisco

FOREWORD TO THE
FIRST EDITION
I learned JavaScript completely on my own. There was
no one to tell me about “event handlers” or how to set
cookies. No one even explained what a variable is, let
alone the best ways to name them. Of course I had reference books, but
they were intimidating tomes, full of cryptic lists and tables, written by
programmers for programmers.
David Thau is a remarkable combination of natural teacher and seasoned
programmer. As a result, The Book of JavaScript not only teaches JavaScript
thoroughly and enjoyably in a friendly, unintimidating tone, but it teaches
programming as elegantly as any book I’ve seen. In fact, I’ve always thought
of this as Thau’s ulterior motive—he pretends he’s just showing you how to
make a rollover or validate the text in an HTML form, but before you know
it you’ve learned how to code!
Perhaps the most telling thing I can say is that, reading this book, I can’t
help but wish I was learning JavaScript for the first time. If you are, then con-
sider yourself lucky to have Thau as a teacher. You couldn’t do better.
Happy JavaScripting!
Nadav Savio
Principal, Giant Ant Design
San Francisco

ACKNOWLEDGMENTS
This second edition of The Book of JavaScript took me much longer to complete
than I could have imagined. I’d like to thank the entire No Starch Press staff
for putting up with all the delays and surprise extra bits. I would especially like
to thank Christina Samuell for moving the process along, William Pollock,
Riley Hoffman, Jerome Colburn, and Stephanie Provines for extensive edits,
and Luke Knowland for making sure all the code works and offering many
excellent suggestions. I’d also like to thank my neighbor, Laurentino Padilla,
for sweeping our sidewalk on Thursdays. Without him, this book would have
taken even longer to finish.

INTRODUCTION
You are about to begin a journey through JavaScript—
a programming language that adds interactivity and
spark to web pages all over the Internet. This book,
written primarily for nonprogrammers, provides scripts
you can cut and paste for use on your website, but it also explains how they
work, so you’ll soon be writing your own scripts. Each chapter focuses on
a few important JavaScript features, shows you how professional websites
incorporate those features, and gives you examples of how you might add
those features to your own web pages.
How This Book Is Organized
Before you dive in, here is a quick overview of what you’ll learn as you make
your way through The Book of JavaScript.
Have fun!
xxviii Introduction
Chapter 1: Welcome to JavaScript!
This chapter lays out the book’s goals, introduces you to JavaScript and
compares it to other tools, describes some of the nifty ways in which
JavaScript can enhance your web pages, and walks you through writing
your first JavaScript.
Chapter 2: Using Variables and Built-in Functions to Update Your Web Pages
Automatically
Did you know that JavaScript can figure out what day it is and write the
date to a web page? This chapter will show you how. Along the way you’ll
also learn how JavaScript remembers things using variables and performs
actions using functions.
Chapter 3: Giving the Browsers What They Want
In this chapter you’ll learn how to direct someone to a web page specifi-
cally designed for his or her browser. You’ll figure out which browser the
visitor is using, then you’ll use if-then statements and their kin to point
the visitor in the right direction.
Chapter 4: Working with Rollovers
This chapter covers everyone’s favorite JavaScript trick—the image swap.
You’ll also learn how to trigger JavaScript based on a viewer’s actions.
Chapter 5: Opening and Manipulating Windows
This chapter explains everything you need to know about opening new
browser windows—another favorite JavaScript trick. You’ll also learn how
JavaScript writes HTML to the new windows, closes them, and moves
them around on the screen.
Chapter 6: Writing Your Own JavaScript Functions
Functions are the major building blocks of any JavaScript program, so
learning to write your own is a critical step toward JavaScript mastery.
This chapter gives you the tools you’ll need to write your own functions
and put them to work.
Chapter 7: Providing and Receiving Information with Forms
This chapter shows you how JavaScript works with HTML forms to collect
all kinds of information from your users and give them fancy ways to nav-
igate your site.
Chapter 8: Keeping Track of Information with Arrays and Loops
JavaScript calls lists arrays, and they come in very handy. This chapter
describes how JavaScript deals with these lists, whether they include all
the images on a web page or all the friends in your address book.
Chapter 9: Timing Events
This chapter discusses setting events to occur at specific times. For exam-
ple, you can open a window and then close it in five seconds, or you can
write a clock that updates every second. Once you know how to do this,
you can create games and other interactive applications based on timed
events.
Introduction xxix
Chapter 10: Using Frames and Image Maps
How JavaScript works with HTML frames and image maps is the subject
of this chapter. It covers topics including changing two or more frames
at once and preventing your web page from getting trapped in someone
else’s frame set.
Chapter 11: Validating Forms, Massaging Strings, and Working with Server-Side
Programs
This chapter shows you how to make sure people are filling out your
HTML forms completely. Along the way, you’ll learn fancy ways to check
user input—for example, you’ll learn how to check the formatting of an
email address.
Chapter 12: Saving Visitor Information with Cookies
Cookies are bits of code that let your web pages save information a visitor
has provided even after he or she turns off the computer. This allows
your site to greet a guest by name whenever he visits (if he tells you his
name, of course!).
Chapter 13: Dynamic HTML
This chapter introduces Dynamic HTML, a feature of newer browsers
that lets you animate entire web pages.
Chapter 14: Ajax Basics
This chapter begins a trilogy of chapters on Ajax, a programming tech-
nique that helps you build websites that act like desktop applications.
Here you’ll be introduced to Ajax and most of the JavaScript you’ll need
to know to create Ajax applications.
Chapter 15: XML in JavaScript and Ajax
The X in Ajax stands for XML. This chapter describes how to represent
information using the XML data-sharing standard and process XML
documents using JavaScript.
Chapter 16: Server-Side Ajax
You’ll wrap up your introduction to Ajax with instructions for writing
programs that run on webservers. This chapter touches on the PHP
programming language and shows you how PHP programs store files
on webservers and contact other webservers for information.
Chapter 17: Putting It All Together in a Shared To Do List
In this chapter you’ll apply everything you learned in the first 16 chap-
ters and create a collaborative To Do list application. Not much new
material will be introduced, but you’ll see how everything we’ve covered
so far fits together.
Chapter 18: Debugging JavaScript and Ajax
This chapter wraps things up by giving you tips for what to do when the
JavaScript you’ve written isn’t working correctly.
Appendix A: Answers to Assignments
Here you’ll find answers to the assignments that end each chapter.
xxx Introduction
Appendix B: Resources
This appendix provides information about the many JavaScript and Ajax
libraries you can use to further enhance your web pages.
Appendix C: Reference to JavaScript Objects and Functions
This appendix lists all of the objects and functions that comprise JavaScript.
Appendix D: Chapter 15’s Italian Translator and Chapter 17’s To Do List
Application
The last appendix gives a couple of the book’s longest code examples in
their entirety.
Companion Website
The Book of JavaScript website (http://www.bookofjavascript.com) contains
the code examples from each chapter, archived copies of many of the web-
sites mentioned, and lots of script libraries and freeware. You’ll find that
each chapter has its own directory, complete with the example scripts and
relevant images from that chapter, as well as the answer to that chapter’s
assignment. Here’s a rundown of the directories.
/Chapter01, /Chapter02, and so on
Each chapter has its own directory. For example, the code examples
from Chapter 1 are available at http://www.bookofjavascript.com/
Chapter01.
/Freeware
This directory contains free software you may find useful, including:
zXAMPP webserver and PHP packages for Windows and Linux
zMAMP webserver and PHP packages for Macintosh
zFlock social web browser
zVenkman JavaScript debugger for Firefox
zFirefox 2.0 browser
/Libraries
This directory contains free JavaScript libraries you can cut and paste
into your website, including:
zPrototype JavaScript Framework
zWebmonkey Cookie Library
zSarissa XML Toolkit
/Websites
This directory contains HTML (including JavaScript) and images for
many of the websites discussed in the book.
WELCOME TO JAVASCRIPT!
Welcome to The Book of JavaScript.
JavaScript is one of the fastest and easiest
ways to make your website truly dynamic—
that is, interactive. If you want to spruce up
tired-looking pages, you’ve got the right book.
This book will give you some ready-made JavaScripts you can implement
immediately on your website, but, more importantly, it will take you step by
step through sample scripts (both hypothetical and real-world examples) so
that you understand how JavaScript works. With this understanding you can
modify existing scripts to fit your specific needs as well as write scripts from
scratch. Your knowledge of JavaScript will grow as you work through the book;
each chapter introduces and explores in depth a new JavaScript topic by high-
lighting its application in real-life situations.
Is JavaScript for You?
If you want a quick, easy way to add interactivity to your website, if the
thought of using complex programming languages intimidates you, or if
you’re interested in programming but simply don’t know where to start,
JavaScript is for you.
2Chapter 1
JavaScript, a programming language built into your web browser, is one
of the best ways to add interactivity to your website because it’s the only cross-
browser language that works directly with web browsers. Other languages
such as Java, Perl, PHP, and C don’t have direct access to the images, forms,
and windows that make up a web page.
JavaScript is also very easy to learn. You don’t need any special hardware
or software, you don’t need access to a webserver, and you don’t need a degree
in computer science to get things working. All you need is a web browser and
a text editor such as SimpleText or Notepad.
Finally, JavaScript is a complete programming language, so if you want to
learn more about programming, it provides a great introduction. (If you don’t
give a hoot about programming, that’s fine too. There are plenty of places—
including this book and its companion website—where you can get prefab
scripts to cut and paste right into your pages. But you’ll get much more out
of the book by using it as a tool for learning JavaScript programming.)
Is This Book for You?
This book assumes you don’t have any programming background. Even if
you have programmed before, you’ll find enough that’s new in JavaScript to
keep you entertained. One of the best things about JavaScript is that you don’t
have to be a mega-expert to get it working on your web pages right away. You
do need a working knowledge of HTML, however.
The Goals of This Book
The main goal of this book is to get you to the point of writing your own
JavaScripts. An important tool in learning to write scripts is the ability to read
other people’s scripts. JavaScript is a sprawling language, and you can learn
thousands of little tricks from other scripts. In fact, once you’ve finished this
book, you’ll find that viewing the source code of web pages that use JavaScript
is the best way to increase your knowledge.
Each of the following chapters includes JavaScript techniques used in
building professional sites. Along the way, I’ll point out sites that use the
technique described, and by viewing the source code of such sites you’ll soon
see there are many ways to script. Sometimes going through a site’s code
reveals interesting aspects of JavaScript that I don’t cover in this book.
Beyond learning how to write your own JavaScript and read other people’s
scripts, I also want you to learn where to look for additional information on
JavaScript. As I’ve noted, the best place to learn new techniques is to view the
source code of web pages you find interesting. However, several websites also
offer free JavaScripts. I’ll be introducing some of these as we go along, but
here are a few good examples to get you started:
zhttp://www.webmonkey.com/reference/javascript_code_library
zhttp://javascript.internet.com
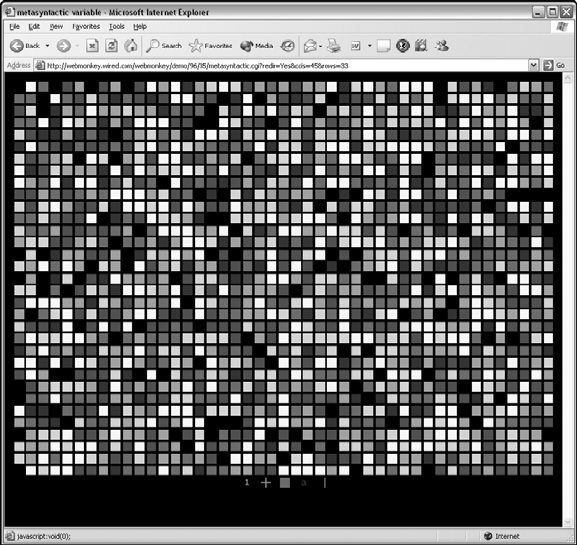
Welcome to JavaScript! 3
zhttp://www.scriptsearch.com/JavaScript/Scripts
zhttp://www.javascriptsearch.com
Another good place to get information is a JavaScript reference book.
The Book of JavaScript is primarily a tutorial for learning basic JavaScript and
making your website interactive. It’s not a complete guide to the language,
which includes too many details for even a lengthy introduction to cover.
If you’re planning to become a true JavaScript master, I suggest picking
up JavaScript: The Definitive Guide by David Flanagan (O’Reilly, 2006) after
making your way through this book. The last 500 or so pages of Flanagan’s
book list every JavaScript command and the browsers in which it works.
What Can JavaScript Do?
JavaScript can add interactivity to your web pages in a number of ways. This
book offers many examples of JavaScript’s broad capabilities. The following
are just two examples that illustrate what you can do with JavaScript.
The first example (Figure 1-1) is a flashing grid of colored squares
(to get the full effect, browse to http://www.bookofjavascript.com/Chapter01/
Fig01-01.html), created by a fellow named Taylor way back in 1996. Flashy,
isn’t it? In this example, a JavaScript function changes the color of a randomly
chosen square in the grid every second or so.
Figure 1-1: A demonstration of JavaScript’s artful abilities
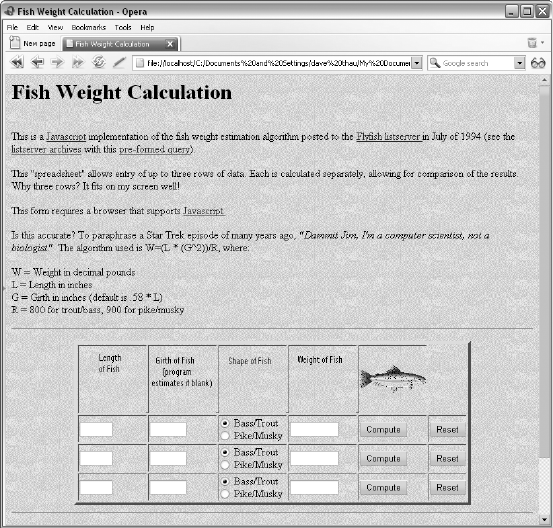
4Chapter 1
Mousing over one of the five icons below the squares (number, plus sign,
square, letter, and horizontal line) tells the page to use a new set of images
on the grid. For example, mousing over the number icon tells the JavaScript
to start replacing the squares with 1s and 0s. This page illustrates four impor-
tant JavaScript features you’ll learn about throughout the book:
zHow to change images on a web page
zHow to affect web pages over time
zHow to add randomness to web pages
zHow to dynamically change what’s happening on a web page based on
an action taken by someone viewing the page
Although Taylor’s demo is beautiful, it’s not the most practical applica-
tion of JavaScript. Figure 1-2 (available at http://www.bookofjavascript.com/
Chapter01/Fig01-02.html) shows you a much more practical use of JavaScript
that calculates the weight of a fish based on its length. Enter the length and
type of fish, and the JavaScript calculates the fish’s weight. This fishy code
demonstrates JavaScript’s ability to read what a visitor has entered into a
form, perform a mathematical calculation based on the input, and provide
feedback by displaying the results in another part of the form. You may not
find calculating a fish’s weight a particularly useful application of JavaScript
either, but you can use the same skills to calculate a monthly payment on a
loan (Chapter 7), score a quiz (Chapter 10), or verify that a visitor has provided
a valid email address (Chapter 11).
Figure 1-2: How much does my fish weigh?
Welcome to JavaScript! 5
These are just two examples of the many features JavaScript can add
to your websites. Each chapter will cover at least one new application. If
you want a preview of what you’ll learn, read the first page or so of each
chapter.
What Are the Alternatives to JavaScript?
Several other programming languages can add interactivity to web pages, but
they all differ from JavaScript in important ways. The four main alternatives
are CGI scripting, Java, VBScript, and Flash.
CGI Scripting
Before JavaScript, using CGI scripts was the only way to make web pages do
more than hyperlink to other web pages containing fixed text. CGI stands for
Common Gateway Interface. It’s a protocol that allows a web browser running on
your computer to communicate with programs running on webservers. It is
most often used with HTML forms—pages where the user enters informa-
tion and submits it for processing. For example, the user might see a web
page containing places for entering the length and selecting the type of a
fish, as well as a Compute button. When the user keys in the length, selects
the type, and clicks the button, the information is sent to a CGI script on the
server. The CGI script (which is probably written in a programming language
like Perl, PHP, or C) receives the information, calculates the weight of the
fish, and sends the answer, coded as an HTML page, back to the browser.
CGI scripts are very powerful, but because they reside on webservers,
they have some drawbacks.
The Need for Back-and-Forth Communication
First, the connection between your web browser and the webserver limits
the speed of your web page’s interactivity. This may not sound like a big
problem, but imagine the following scenario: You’re filling out an order
form with a dozen entry fields including name, address, and phone number
(see Figure 1-3), but you forget to fill out the phone number and address
fields. When you click the Submit button to send the information across the
Internet to the webserver, the CGI script sees that you didn’t fill out the form
completely and sends a message back across the Internet requesting that you
finish the job. This cycle could take quite a while over a slow connection. If you
fill out the form incorrectly again, you have to wait through another cycle.
People find this process tiresome, especially if they’re customers who want
their orders processed quickly.
With JavaScript, though, the programs you write run in the browser itself.
This means that the browser can make sure you’ve filled out the form correctly
before sending the form’s contents to the webserver. JavaScript thus reduces
the time your information spends traveling between the browser and the
server.

6Chapter 1
Figure 1-3: A simple order form
Server Overload by Concurrent Access
Another drawback to CGI scripts is that a webserver running a CGI program
can get bogged down if too many people call the script simultaneously (for
example, if too many fishermen decided to run the weight calculator and
click the Compute button at the same time). Serving up HTML pages is
pretty easy for a webserver. However, some CGI scripts take a long time to
run on a machine, and each time someone calls the script, the server has to
start up another copy of it. As more and more people try to run the script,
the server slows down progressively. If a thousand people are trying to run the
script at once, the server might take so long to respond that either the user
or the browser gives up, thinking the server is dead. This problem doesn’t
exist in JavaScript because its scripts run on each visitor’s web browser—not
on the webserver.
Security Restrictions
A third problem with CGI scripts is that not everyone has access to the parts
of a webserver that can run CGI scripts. Since a CGI script can conceivably
crash a webserver or exploit security flaws, system administrators generally
guard these areas, only allowing fellow administrators access. If you have
Internet access through an Internet service provider (ISP), you may not be
allowed to write CGI scripts. If you are designing web pages for a company,
you may not be given access to the CGI-enabled areas of the webserver.
Welcome to JavaScript! 7
JavaScript, on the other hand, goes right into the HTML of a web page.
If you can write a web page, you can put JavaScript in the page without
permission from recalcitrant administrators.
VBScript
The language most similar to JavaScript is Microsoft’s proprietary language,
VBScript (VB stands for Visual Basic). Like JavaScript, VBScript runs on your
web browser and adds interactivity to web pages. However, VBScript works
only on computers running Internet Explorer (IE) on Microsoft Windows, so
unless you want to restrict your readership to people who use IE on Windows,
you should go with JavaScript.
Java
Although JavaScript and Java have similar names, they aren’t the same.
Netscape, now a part of AOL, initially created JavaScript to provide inter-
activity for web pages, whereas Sun Microsystems wrote Java as a general
programming language that works on all kinds of operating systems.
Flash
Flash is a tool from Macromedia developed to add animation and interactivity
to websites. Almost all modern browsers can view Flash animations or can
easily download the Flash plug-in. Flash animations look great, and a basic
Flash animation requires no programming skills at all. To create Flash ani-
mations, however, you must purchase a Flash product from Macromedia.
While some people consider Flash and JavaScript to be competitors, that’s
not the case. In fact, you can call JavaScript programs from Flash, and you
can manipulate Flash animations using JavaScript. Web page designers will
often blend the two, using Flash for animations and JavaScript for inter-
activity that does not involve animations. Flash animations can also be made
more interactive using a language called ActionScript, which is almost exactly
like JavaScript.
JavaScript’s Limitations
Yes, JavaScript does have limitations, but these limitations are natural and
unavoidable by-products of its main purpose: to add interactivity to your
web pages.
JavaScript Can’t Talk to Servers
One of JavaScript’s drawbacks is also its main strength: It works entirely
within the web browser. As we’ve seen, this cuts down on the amount of time
your browser spends communicating with a webserver. On the other hand,
this also means that JavaScript can’t communicate with other machines and
therefore can’t handle some server tasks you may need to do.
8Chapter 1
For example, JavaScript can’t aggregate information collected from your
users. If you want to write a survey that asks your visitors a couple of questions,
stores their answers in a database, and sends a thank-you email when they
finish, you’ll have to use a program that runs on your webserver. As we’ll see
in Chapter 7, JavaScript can make the survey run more smoothly, but once a
visitor has finished filling out the questions, JavaScript can’t store the informa-
tion on the server, because it can’t contact the server. In order to store the
survey information, you need to use a program that runs on a webserver. Send-
ing email with JavaScript is also impossible, because to send email JavaScript
would have to contact a mail server. Again, you need a server-side program
for this job.
Although JavaScript can’t directly control programs that run on web-
servers, it can ask webservers to run programs, and it can send information to
those programs. We’ll see examples of that in Chapters 7 and 14, and we’ll
get a taste for writing server-side programs in Chapters 15 and 16.
JavaScript Can’t Create Graphics
Another of JavaScript’s limitations is that it can’t create its own graphics.
Whereas more complicated languages can draw pictures, JavaScript can only
manipulate existing pictures (that is, GIF or JPEG files). Luckily, because
JavaScript can manipulate created images in so many ways, you shouldn’t
find this too limiting.
JavaScript Works Differently in Different Browsers
Perhaps the most annoying problem with JavaScript is that it works somewhat
differently in different browsers. JavaScript was introduced in 1996 by Netscape
in version 2 of Netscape Navigator. Since then, JavaScript has changed, and
every browser implements a slightly different version of it—often adding
browser-specific features. Luckily, starting in the late 1990s, the European
Computer Manufacturers Association (ECMA) began publishing standards for
JavaScript, which they call ECMAScript. About 99 percent of all browsers being
used today comply with at least version 3 of the ECMA standard. These include
Internet Explorer version 5.5 and later, Netscape version 6 and later, Mozilla,
Firefox, all versions of Safari, and Opera version 5 and later. Because almost
all browsers currently in use adhere to version 3 of the ECMA standard, I’ll
be using that as the standard version of JavaScript in the book. Where incom-
patibilities between browsers arise, I’ll point them out.
Getting Started
We’re about ready to begin. To write JavaScripts, you need a web browser and
a text editor. Any text editor will do: Notepad or WordPad in Windows and
SimpleText on a Macintosh are the simplest choices. Microsoft Word or
Corel’s WordPerfect will work as well. You can also use a text editor such
as BBEdit or HomeSite, which are designed to work with HTML and
JavaScript.
Some tools for building websites will actually write JavaScript for you—
for example, Adobe’s Dreamweaver and GoLive. These tools work fine when

Welcome to JavaScript! 9
you want to write JavaScripts for common features such as image rollovers
and you know you’ll never want to change them. Unfortunately, the JavaScript
often ends up much longer than necessary, and you may find it difficult to
understand and change to suit your needs. Unless you want a JavaScript that
works exactly like one provided by the package you’ve purchased, you’re often
best off writing scripts by hand. Of course, you can also use one of these tools
to figure out how you want your page to behave and then go back and rewrite
the script to suit your specific needs.
NOTE Always save documents as text only, and end their names with .html or .htm. If you’re
using Microsoft Word or WordPerfect and you don’t save your documents as text-only
HTML or HTM files, both programs will save your documents in formats web browsers
can’t read. If you try to open a web page you’ve written and the browser shows a lot of
weird characters you didn’t put in your document, go back and make sure you’ve saved
it as text only.
Where JavaScript Goes on Your Web Pages
Now let’s get down to some JavaScript basics. Figure 1-4 shows you the
thinnest possible skeleton of an HTML page with JavaScript.
<html>
<head>
<title>JavaScript Skeleton</title>
X <script type = "text/javascript">
// JavaScript can go here!
// But no HTML!
Y </script>
</head>
<body>
<script type = "text/javascript">
// JavaScript can go here too!
// But no HTML!
</script>
</body>
</html>
Figure 1-4: An HTML page with JavaScript
In Figure 1-4, you can see the JavaScript between the <script type =
"text/javascript"> and </script> tags in X and Y.
Note that you can also start JavaScript with this <script> tag:
<script language = "JavaScript">
Although this will work in all browsers, it’s better to stick to the official
format:
<script type = "text/javascript">

10 Chapter 1
If you feel like being extra clear, you can explicitly state which version
of JavaScript your script will support. ECMAScript version 3 is also called
JavaScript version 1.5. To tell a browser to run the JavaScript only if it under-
stands JavaScript version 1.5, you can use this <script> tag:
<script type = "text/javascript" language = "JavaScript1.5">
Unfortunately, not all browsers check the language attribute for a
version number, and the ones that don’t check are, of course, the ones that
don’t understand JavaScript 1.5. So those browsers will happily try to run your
JavaScript and will probably generate a JavaScript error. I’ll talk more about
ways to deal with older browsers in the next section and throughout the book.
All in all, I recommend just sticking with <script type = "text/javascript">.
With one exception, which Chapter 4 will cover, all JavaScript goes
between the open <script> and close </script> tags. Furthermore, you can’t
include any HTML between <script> and </script>. Between those tags, your
browser assumes that everything it sees is JavaScript. If it sees HTML in there,
or anything else it can’t interpret as JavaScript, it gets confused and gives you
an error message.
These JavaScript tags can go in either the head (between <head> and
</head>) or the body (between <body> and </body>) of your HTML page.
It doesn’t matter too much where you put them, although you’re generally
best off putting as much JavaScript in the head as possible. That way you
don’t have to look for it all over your web pages.
One final thing worth mentioning here is that the lines that start with two
slashes are JavaScript comments. The browser ignores any text that appears
after two slashes. Documenting your work with comments is extremely impor-
tant, because programming languages aren’t easily understood. The script
you’re writing may make perfect sense while you’re writing it, but a few days
later, when you want to make a little modification, you might spend hours
just figuring out what you wrote the first time. If you comment your code,
you’ll have a better chance to save yourself the hassle of remembering what
you were thinking when you wrote that bizarre code at 2 AM in the midst of
what seemed like an amazingly lucid caffeine haze.
Dealing with Older Browsers
There’s a slight problem with the JavaScript skeleton in Figure 1-4 (besides
the fact that it doesn’t really have any JavaScript in it): Netscape didn’t intro-
duce the <script> tag until version 2.0 of Netscape Navigator, so any browser
released before 1997 won’t recognize the tag.
When a browser sees an HTML tag it doesn’t understand, it just ignores
that tag. That’s generally a good thing. However, a browser that doesn’t
understand JavaScript will write your lines of JavaScript to the browser as
text. Figure 1-5 shows how the JavaScript skeleton in Figure 1-4 would be
displayed in an older browser.
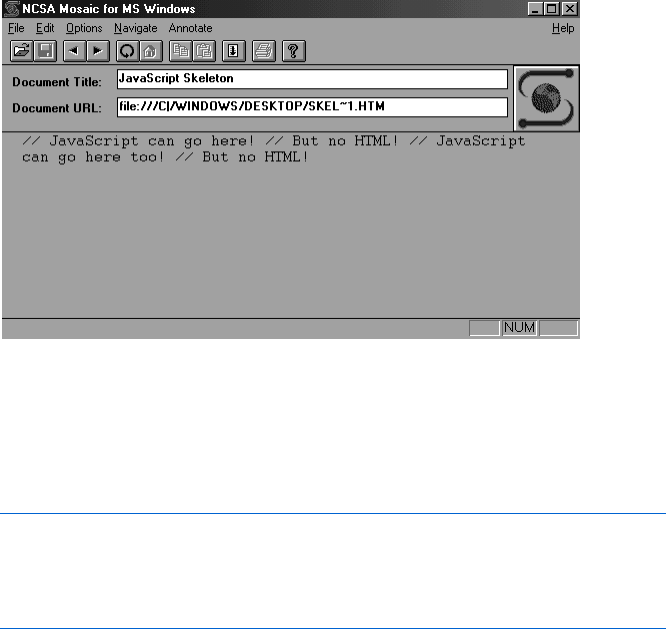
Welcome to JavaScript! 11
Figure 1-5: What Figure 1-4 would display in an older browser
Although more than 99 percent of the browsers in use today understand
JavaScript, most popular sites (Google, for example) still add lines like X
and Y of Figure 1-6, to hide their JavaScript from browsers that don’t
understand JavaScript.
<script type = "text/javascript">
X <!-- hide me from older browsers
// JavaScript goes here
Y // show me -->
</script>
Figure 1-6: Hiding JavaScript from browsers that don’t understand it
The important symbols are the <!-- code in X and the // --> comments
in Y. These weird lines work because in HTML, the <!-- and --> are tags
that mark the beginning and end of an entire block of comments. Older
browsers that don’t recognize the <script> tag see the comment markers
and therefore don’t try to display any of the JavaScript code between them.
In JavaScript, on the other hand, <!-- is the beginning of a comment that
reaches only to the end of that one line, so browsers that understand JavaScript
don’t ignore the rest of the JavaScript between X and Y. The words in the tags
(hide me from older browsers and show me) aren’t important; they’re just there
to help you understand the code better. You can make those whatever you
want or just leave them out entirely. It’s the <!-- and // --> tags that are
important.
This trick may be a bit tough to understand at first. If so, don’t worry—
just remember to put the <!-- tag on its own line right after <script> and
the // --> tag on its own line right before </script>, and people with older
browsers will thank you.
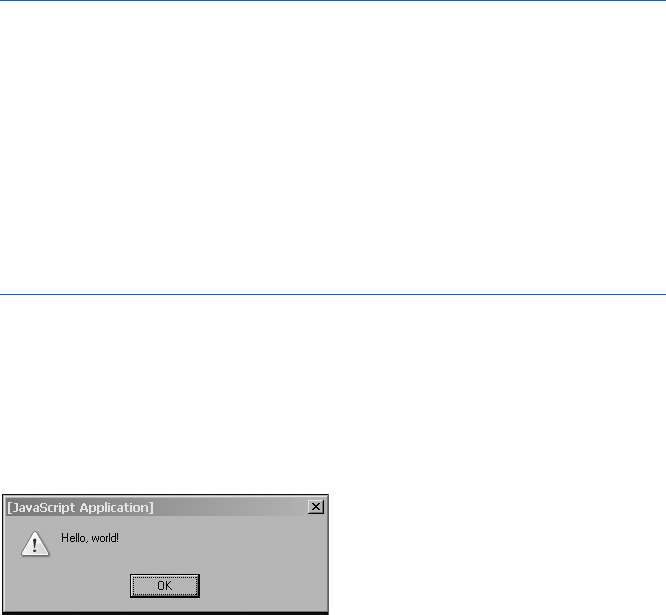
12 Chapter 1
Your First JavaScript
It’s time to run your first JavaScript program. I’ll explain the code in Figure 1-7
in the next chapter, so for now, just type the code into your text editor, save
it as my_first_program.html, and then run it in your browser. If you don’t
want to type it all in, run the example at http://www.bookofjavascript.com/
Chapter01/Fig01-07.html.
<html>
<head>
<title>JavaScript Skeleton</title>
</head>
<body>
<script type = "text/javascript">
<!-- hide me from older browsers
// say Hello, world!
X alert("Hello, world!");
// show me -->
</script>
</body>
</html>
Figure 1-7: Your first JavaScript program
When a browser reads this file, the JavaScript in X instructs the browser
to put up a little window with the words Hello, world! in it. Figure 1-8 shows
you what this looks like in a web browser. Traditionally, this is the first
script you write in any programming language. It gets you warmed up
for the fun to come.
Figure 1-8: Window launched by the
“Hello, world!” script
Summary
Congratulations—you’re now on your way to becoming a bona fide
JavaScripter! This chapter has given you all the basic tools you need and
has shown you how to get a very basic JavaScript program running. If you
followed everything here, you now know:
zSome of the great things JavaScript can do
zHow JavaScript compares to CGI scripting, VBScript, Java, and Flash
Welcome to JavaScript! 13
zJavaScript’s main limitations
zWhere JavaScript goes on the page
zHow to write JavaScript older browsers won’t misunderstand
Assignment
Try typing Figure 1-7 into a text editor and running it in a web browser. You’ll
find the next chapter’s assignments hard to do if you can’t get Figure 1-7
to work.
If you’re sure you’ve recreated Figure 1-7 exactly and it’s not working,
make sure you’re saving the file as text only. You may also find it helpful to
peruse Chapter 14, which discusses ways to fix broken code. Although you may
not understand everything in that chapter, you may find some helpful tips.
If it’s still not working, try running the version of Figure 1-7 at http://
www.bookofjavascript.com/Chapter01/Fig01-07.html. If that doesn’t work,
you may be using a browser that doesn’t support JavaScript, or your browser
may be set to reject JavaScript. If you’re sure you’re using a browser that
supports JavaScript (Netscape 2.0 and later versions, and Internet Explorer 3.0
and later), check your browser’s options and make sure it’s set to run JavaScript.
Once you’re comfortable with the concepts covered in this chapter, you’ll
be ready to write some code!
USING VARIABLES AND BUILT-IN
FUNCTIONS TO UPDATE YOUR WEB
PAGES AUTOMATICALLY
With JavaScript you can update the con-
tent of your pages automatically—every day,
every hour, or every second. In this chapter,
I’ll focus on a simple script that automatically
changes the date on your web page.
Along the way you’ll learn:
zHow JavaScript uses variables to remember simple items such as names
and numbers
zHow JavaScript keeps track of more complicated items such as dates
zHow to use JavaScript functions to write information to your web page
Before getting into the nuts and bolts of functions and variables, let’s
take a look at a couple of examples of web pages that automatically update
themselves, starting with the European Space Agency (http://www.esa.int).
As you can see in Figure 2-1, the ESA’s home page shows you the current date.
Rather than change the home page every day, the ESA uses JavaScript to
change the date automatically.
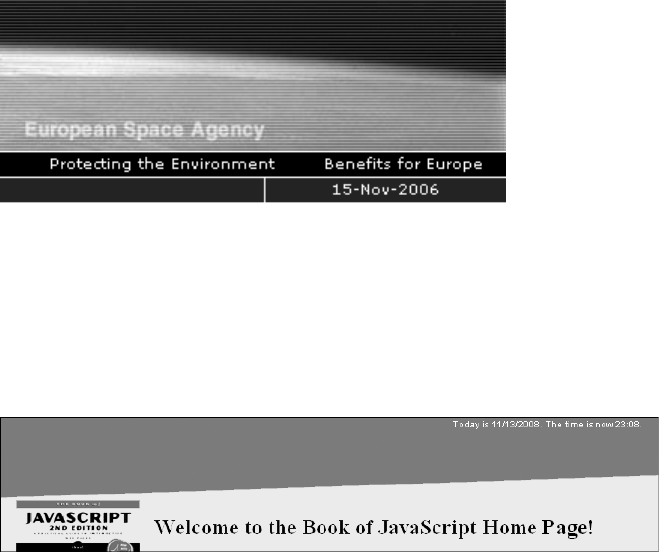
16 Chapter 2
Figure 2-1: Using JavaScript to display the current date
An even more frequently updated page is the home page of the Book of
JavaScript website (http://www.bookofjavascript.com), which updates the
time as well as the date (see Figure 2-2). You don’t have to sit in front of your
computer, updating the dates and times on your websites. JavaScript can set
you free! The ability to write HTML to web pages dynamically is one of
JavaScript’s most powerful features.
Figure 2-2: Dynamically updating the date and time
To understand how to update the date and time on the page, you’ll first
have to learn about variables, strings, and functions. Your homework assign-
ment at the end of this chapter will be to figure out how to add seconds to
the time.
Variables Store Information
Think back to those glorious days of algebra class when you learned about
variables and equations. For example, if x = 2, y = 3, and z = x + y, then z = 5.
In algebra, variables like x,y, and z store or hold the place of numbers. In
JavaScript and other programming languages, variables also store other
kinds of information.
Syntax of Variables
The syntax of variables (the set of rules for defining and using variables) is
slightly different in JavaScript from what it was in your algebra class. Figure 2-3
illustrates the syntax of variables in JavaScript with a silly script that figures
out how many seconds there are in a day.
NOTE Figure 2-3 does not write the results of the JavaScript to the web page—I’ll explain how
to do that in Figure 2-4.

Using Variables and Built-in Functions to Update Your Web Pages Automatically 17
<html>
<head>
<title>Seconds in a Day</title>
<script type = "text/javascript">
<!-- hide me from older browsers
X var seconds_per_minute = 60;
var minutes_per_hour = 60;
var hours_per_day = 24;
Y var seconds_per_day = seconds_per_minute * minutes_per_hour * hours_per_day;
// show me -->
Z </script>
</head>
<body>
<h1>Know how many seconds are in a day?</h1>
<h2>I do!</h2>
</body>
</html>
Figure 2-3: Defining and using variables
There’s a lot going on here, so let’s take it line by line. Line X is a
statement (a statement in JavaScript is like a sentence in English), and it
says to JavaScript, “Create a variable called seconds_per_minute and set its value
to 60.” Notice that X ends with a semicolon. Semicolons in JavaScript are like
periods in English: They mark the end of a statement (for example, one that
defines a variable, as above). As you see more and more statements, you’ll get
the hang of where to place semicolons.
The first word, var, introduces a variable for the first time—you don’t
need to use it after the first instance, no matter how many times you employ
the variable in the script.
NOTE Many people don’t use var in their code. Although most browsers let you get away
without it, it’s always a good idea to put var in front of a variable the first time you use it.
(You’ll see why when I talk about writing your own functions in Chapter 6.)
Naming Variables
Notice that the variable name in X is pretty long—unlike algebraic variables,
it’s not just a single letter like x,y, or z. When using variables in JavaScript
(or any programming language), you should give them names that indicate
what piece of information they hold. The variable in X stores the number
of seconds in a minute, so I’ve called it seconds_per_minute.
If you name your variables descriptively, your code will be easier to under-
stand while you’re writing it, and much easier to understand when you return
to it later for revision or enhancement. Also, no matter which programming

18 Chapter 2
language you use, you’ll spend about 50 percent of your coding time finding
and getting rid of your mistakes. This is called debugging—and it’s a lot easier
to debug code when the variables have descriptive names. You’ll learn more
about debugging in Chapter 14.
There are four rules for naming variables in JavaScript:
1. The initial character must be a letter, an underscore, or a dollar sign,
but subsequent characters may be numbers as well.
2. No spaces are allowed.
3. Variables are case sensitive, so my_cat is different from My_Cat, which in
turn is different from mY_cAt. As far as the computer is concerned, each
of these would represent a different variable—even if that’s not what
the programmer intended. (You’ll see an example of this in the section
“alert()” on page 22.) To avoid any potential problems with capitaliza-
tion, I use lowercase for all my variables, with underscores (_) where
there would be spaces in ordinary English.
4. You can’t use reserved words. Reserved words are terms used by the
JavaScript language itself. For instance, you’ve seen that the first time
you use a variable, you should precede it with the word var. Because
JavaScript uses the word var to introduce variables, you can’t use var as a
variable name. Different browsers have different reserved words, so the
best thing to do is avoid naming variables with words that seem like terms
JavaScript might use. Most reserved words are fairly short, so using longer,
descriptive variable names keeps you fairly safe. I often call my variables
things like the_cat, or the_date because there are no reserved words that
start with the word the. If you have a JavaScript that you’re certain is correct,
but it isn’t working for some reason, it might be because you’ve used a
reserved word.
Arithmetic with Variables
Line Y in Figure 2-3 introduces a new variable called seconds_per_day and sets it
equal to the product of the other three variables using an asterisk (*), which
means multiplication. A plus sign (+) for addition, a minus sign (-) for subtrac-
tion, and a slash (/) for division represent the other major arithmetic functions.
When the browser finishes its calculations in our example, it reaches the
end of the JavaScript in the head (Z) and goes down to the body of the
HTML. There it sees two lines of HTML announcing that the page knows
how many seconds there are in a day.
<h1>Know how many seconds are in a day?</h1>
<h2>I do!</h2>
So now you have a page that knows how many seconds there are in a day.
Big deal, right? Wouldn’t it be better if you could tell your visitors what the
answer is? Well, you can, and it’s not very hard.
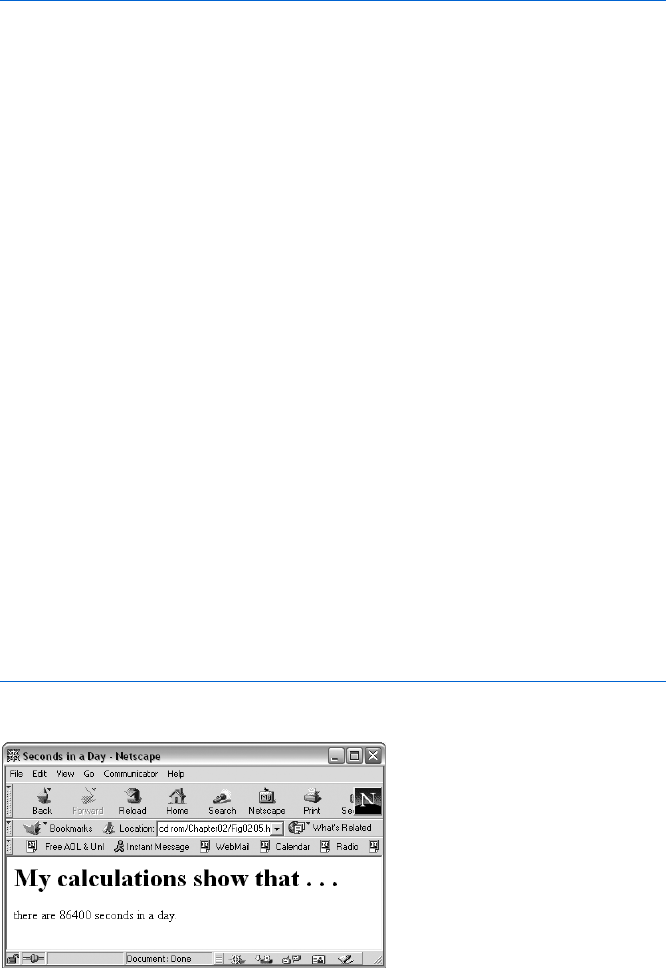
Using Variables and Built-in Functions to Update Your Web Pages Automatically 19
Write Here Right Now: Displaying Results
JavaScript uses the write() function to write text to a web page. Figure 2-4 shows
how to use write() to let your visitors know how many seconds there are in a
day. (The new code is in bold.) Figure 2-5 shows the page this code displays.
<html>
<head>
<title>Seconds in a Day</title>
<script type = "text/javascript">
<!-- hide me from older browsers
var seconds_per_minute = 60;
var minutes_per_hour = 60;
var hours_per_day = 24;
var seconds_per_day = seconds_per_minute * minutes_per_hour * hours_per_day;
// show me -->
</script>
</head>
<body>
<h1>My calculations show that . . .</h1>
<script type = "text/javascript">
<!-- hide me from older browsers
X window.document.write("there are ");
window.document.write(seconds_per_day);
window.document.write(" seconds in a day.");
// show me -->
</script>
</body>
</html>
Figure 2-4: Using write() to write to a web page
Figure 2-5: JavaScript’s calculations

20 Chapter 2
Line-by-Line Analysis of Figure 2-4
Line X in Figure 2-4 writes the words there are to the web page (only the
words between the quotes appear on the page). Don’t worry about all the
periods and what window and document really mean right now (I’ll cover these
topics in depth in Chapter 4, when we talk about image swaps). For now,
just remember that if you want to write something to a web page, use
window.document.write("whatever");, placing the text you want written to the
page between the quotes. If you don’t use quotes around your text, as in
window.document.write(seconds_per_day);
then JavaScript interprets the text between the parentheses as a variable and
writes whatever is stored in the variable (in this case, seconds_per_day) to the
web page (see Figure 2-6). If you accidentally ask JavaScript to write out a
variable you haven’t defined, you’ll get a JavaScript error.
Be careful not to put quotes around variable names if you want
JavaScript to know you’re talking about a variable. If you add quotes
around the seconds_per_day variable, like this:
window.document.write("seconds_per_day");
then JavaScript will write seconds_per_day to the web page. The way JavaScript
knows the difference between variables and regular text is that regular text
has quotes around it and a variable doesn’t.
Strings
Any series of characters between quotes is called a string. (You’ll be seeing
lots of strings throughout this book.) Strings are a basic type of information,
like numbers—and like numbers, you can assign them to variables.
To assign a string to a variable, you’d write something like this:
var my_name = "thau!";
The word thau! is the string assigned to the variable my_name.
You can stick strings together with a plus sign (+), as shown in the bolded
section of Figure 2-6. This code demonstrates how to write output to your page
using strings.
<html>
<head>
<title>Seconds in a Day</title>
<script type = "text/javascript">
<!-- hide me from older browsers
var seconds_per_minute = 60;
var minutes_per_hour = 60;
var hours_per_day = 24;
var seconds_per_day = seconds_per_minute * minutes_per_hour * hours_per_day;

Using Variables and Built-in Functions to Update Your Web Pages Automatically 21
// show me -->
</script>
</head>
<body>
<h1>My calculations show that . . .</h1>
<script type = "text/javascript">
<!-- hide me from older browsers
X var first_part = "there are ";
Y var last_part = " seconds in a day.";
Z var whole_thing = first_part + seconds_per_day + last_part;
window.document.write(whole_thing);
// show me -->
</script>
</body>
</html>
Figure 2-6: Putting strings together
Line-by-Line Analysis of Figure 2-6
Line X in Figure 2-6,
var first_part = "there are ";
assigns the string "there are" to the variable first_part. Line Y,
var last_part = " seconds in a day.";
sets the variable last_part to the string "seconds in a day." Line Z glues
together the values stored in first_part,seconds_per_day, and last_part.
The end result is that the variable whole_thing includes the whole string
you want to print to the page, there are 86400 seconds in a day. The
window.document.write() line then writes whole_thing to the web page.
NOTE The methods shown in Figures 2-4 and 2-6 are equally acceptable ways of writing
there are 86400 seconds in a day. However, there are times when storing strings
in variables and then assembling them with the plus sign (+) is clearly the best way
to go. We’ll see a case of this when we finally get to putting the date on a page.
More About Functions
Whereas variables store information, functions process that information.
All functions take the form functionName(). Sometimes there’s some-
thing in the parentheses and sometimes there isn’t. You’ve already seen
one of JavaScript’s many built-in functions, window.document.write(), which
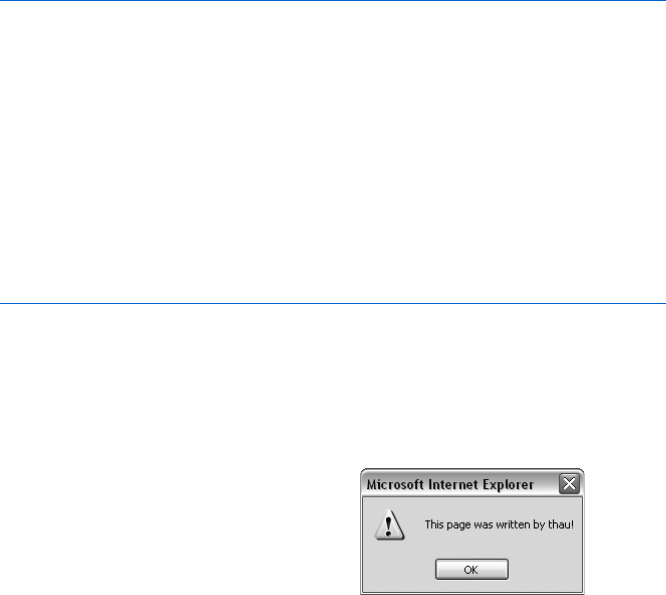
22 Chapter 2
writes whatever lies between the parentheses to the web page. Before diving
into the date functions that you’ll need to write the date to your web page,
I’ll talk about two interesting functions, just so you get the hang of how
functions work.
alert()
One handy function is alert(), which puts a string into a little announcement
box (also called an alert box). Figure 2-7 demonstrates how to call an alert(),
and Figure 2-8 shows what the alert box looks like.
<html>
<head>
<title>An Alert Box</title>
<script type = "text/javascript">
<!-- hide me from older browsers
X alert("This page was written by thau!");
// show me -->
</script>
<body>
Y <h1>To code, perchance to function</h1>
</body>
</html>
Figure 2-7: Creating an alert box
The first thing visitors see when they come to the page Figure 2-7
creates is an alert box announcing that I wrote the page (Figure 2-8).
The alert box appears because of X, which tells JavaScript to execute its
alert() function.
The alert() function is useful for troubleshooting when your JavaScript
isn’t working correctly. Let’s say you’ve typed in Figure 2-6, but when you run
the code, you see that you must have made a typo—it says there are 0 seconds
in a day instead of 86400. You can use alert() to find out how the different
variables are set before multiplication occurs. The script in Figure 2-9 contains
an error that causes the script to say there are “undefined” seconds in a year;
and to track down the error, I’ve added alert() function statements that tell
you why this problem is occurring.
While the alert box is on the
screen, the browser stops doing any
work. Clicking OK in the alert box
makes it go away and allows the
browser to finish drawing the web
page. In this case, that means writing
the words To code, perchance to function
to the page (Y).
Figure 2-8: The alert box

Using Variables and Built-in Functions to Update Your Web Pages Automatically 23
<html>
<head>
<title>Seconds in a Day</title>
<script type = "text/javascript">
<!-- hide me from older browsers
var seconds_per_minute = 60;
var minutes_per_hour = 60;
X var Hours_per_day = 24;
Y alert("seconds per minute is: " + seconds_per_minute);
Z alert("minutes per hour is: " + minutes_per_hour);
[ alert("hours per day is: " + hours_per_day);
\ var seconds_per_day = seconds_per_minute * minutes_per_hour * hours_per_day;
// show me -->
</script>
</head>
<body>
<h1>My calculations show that . . .</h1>
<script type = "text/javascript">
<!-- hide me from older browsers
var first_part = "there are ";
var last_part = " seconds in a day.";
var whole_thing = first_part + seconds_per_day + last_part;
window.document.write(whole_thing);
// show me -->
</script>
</body>
</html>
Figure 2-9: Using alert() to find out what’s wrong
Line-by-Line Analysis of Figure 2-9
The problem with this script is in X. Notice the accidental capitalization of
the first letter in Hours_per_day. This is what causes the script to misbehave.
Line \ multiplies the other numbers by the variable hours_per_day, but
hours_per_day was not set—remember, JavaScript considers it a different
variable from Hours_per_day—so JavaScript thinks its value is either 0 or
undefined, depending on your browser. Multiplying anything by 0 results in
0, so the script calculates that there are 0 seconds in a day. The same holds
true for browsers that think hours_per_day is undefined. Multiplying anything

24 Chapter 2
by something undefined results in the answer being undefined, so the browser
will report that there are undefined seconds in a day.
This script is short, making it easy to see the mistake. However, in longer
scripts it’s sometimes hard to figure out what’s wrong. I’ve added Y,Z, and [
in this example to help diagnose the problem. Each of these statements puts
a variable into an alert box. The alert in Y will say seconds_per_minute is: 60.
The alert in [ will say hours_per_day is: 0, or, depending on your browser, the
alert won’t appear at all. Either way, you’ll know there’s a problem with the
hours_per_day variable. If you can’t figure out the mistake by reading the script,
you’ll find this type of information very valuable. Alerts are very useful
debugging tools.
prompt()
Another helpful built-in function is prompt(), which asks your visitor for some
information and then sets a variable equal to whatever your visitor types. Fig-
ure 2-10 shows how you might use prompt() to write a form letter.
<html>
<head>
<title>A Form Letter</title>
<script type = "text/javascript">
<!-- hide me from older browsers
X var the_name = prompt("What's your name?", "put your name here");
// show me -->
</script>
</head>
<body>
Y <h1>Dear
<script type = "text/javascript">
<!-- hide me from older browsers
document.write(the_name);
// show me -->
</script>
,</h1>
Thank you for coming to my web page.
</body>
</html>
Figure 2-10: Using prompt() to write a form letter
Notice that prompt() in X has two strings inside the parentheses: "What's
your name?" and "put your name here". If you run the code in Figure 2-10, you’ll
see a prompt box that resembles Figure 2-11. (I’ve used the Opera browser in
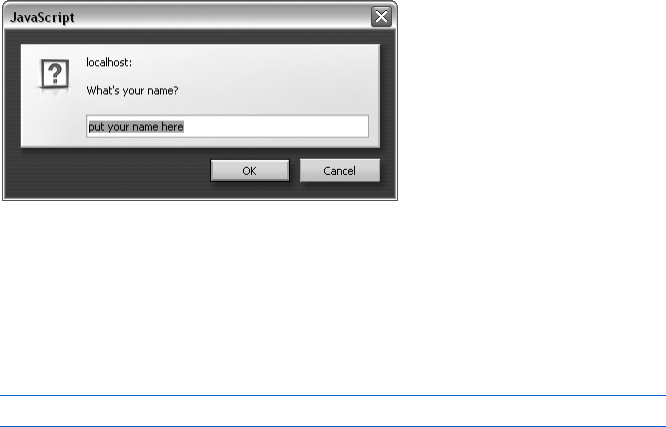
Using Variables and Built-in Functions to Update Your Web Pages Automatically 25
this illustration; prompt boxes will look somewhat different in IE and other
browsers.) If you type Rumpelstiltskin and click OK, the page responds with
Dear Rumpelstiltskin, Thank you for coming to my web page.
Figure 2-11: Starting a form letter with a prompt box
The text above the box where your visitors will type their name ("What's
your name?") is the first string in the prompt function; the text inside the box
("put your name here") is the second string. If you don’t want anything inside
the box, put two quotes ("") right next to each other in place of the second
string to keep that space blank:
var the_name = prompt("What's your name?", "");
If you look at the JavaScript in the body (starting in Y), you’ll see
how to use the variable the_name. First write the beginning of the heading
to the page using normal HTML. Then launch into JavaScript and use
document.write(the_name) to write whatever name the visitor typed into the
prompt box for your page. If your visitor typed yertle the turtle into
that box, yertle the turtle gets written to the page. Once the item in the_name
is written, you close the JavaScript tag, write a comma and the rest of the
heading using regular old HTML, and then continue with the form letter.
Nifty, eh?
The prompt() function is handy because it enables your visitor to supply
the variable information. In this case, after the user types a name into the
prompt box in Figure 2-10 (thereby setting the variable the_name), your script
can use the supplied information by calling that variable.
Parameters
The words inside the parentheses of functions are called parameters. The
document.write() function requires one parameter: a string to write to your
web page. The prompt() function takes two parameters: a string to write above
the box and a string to write inside the box.
Parameters are the only aspect of a function you can control; they are
your means of providing the function with the information it needs to do its
job. With a prompt() function, for example, you can’t change the color of
the box, how many buttons it has, or anything else; in using a predefined
prompt box, you’ve decided that you don’t need to customize the box’s
appearance. You can only change the parameters it specifically provides—

26 Chapter 2
namely, the text and heading of the prompt you want to display. You’ll learn
more about controlling what functions do when you write your own functions
in Chapter 6.
Writing the Date to Your Web Page
Now that you know about variables and functions, you can print the date to
your web page. To do so, you must first ask JavaScript to check the local time
on your visitor’s computer clock:
var now = new Date();
The first part of this line, var now =, should look familiar. It sets the variable
now to some value. The second part, new Date(), is new; it creates an object.
Objects store data that require multiple pieces of information, such as a
particular moment in time. For example, in JavaScript you need an object to
describe 2:30 PM on Saturday, January 7, 2006, in San Francisco. That’s because
it requires many different bits of information: the time, day, month, date,
and year, as well as some representation (in relation to Greenwich Mean
Time) of the user’s local time. As you can imagine, working with an object
is a bit more complicated than working with just a number or a string.
Because dates are so rich in information, JavaScript has a built-in Date
object to contain those details. When you want the user’s current date and
time, you use new Date() to tell JavaScript to create a Date object with all the
correct information.
NOTE You must capitalize the letter D in Date to tell JavaScript you want to use the built-in
Date object. If you don’t capitalize it, JavaScript won’t know what kind of object you’re
trying to create, and you’ll get an error message.
Built-in Date Functions
Now that JavaScript has created your Date object, let’s extract information
from it using JavaScript’s built-in date functions. To extract the current year,
use the Date object’s getYear() function:
var now = new Date();
var the_year = now.getYear();
Date and Time Methods
In the code above, the variable now is a Date object, and the function getYear()
is a method of the Date object. Methods are simply functions that are built in
to objects. For example, the getYear() function is built in to the Date object
and gets the object’s year. Because the function is part of the Date object, it
is called a method. To use the getYear() method to get the year of the date
stored in the variable now, you would write:
now.getYear()

Using Variables and Built-in Functions to Update Your Web Pages Automatically 27
Table 2-1 lists commonly used date methods. (You can find a complete
list of date methods in Appendix C.)
NOTE Notice that getMonth() returns a number between 0 and 11; if you want to show the
month to your site’s visitors, to be user-friendly you should add 1 to the month after
using getMonth(), as shown in Y in Figure 2-12.
Internet Explorer and various versions of Netscape deal with years in
different and strange ways:
zSome versions of Netscape, such as Netscape 4.0 for the Mac, always
return the current year minus 1900. So if it’s the year 2010, getYear()
returns 110.
zOther versions of Netscape return the full four-digit year except when
the year is in the twentieth century, in which case they return just the last
two digits.
zNetscape 2.0 can’t deal with dates before 1970 at all. Any date before Jan-
uary 1, 1970 is stored as December 31, 1969.
zIn Internet Explorer, getYear() returns the full four-digit year if the year
is after 1999 or before 1900. If the year is between 1900 and 1999, it
returns the last two digits.
You’d figure a language created in 1995 wouldn’t have the Y2K problem,
but the ways of software developers are strange. Later in this chapter I’ll show
you how to fix this bug.
Code for Writing the Date and Time
Now let’s put this all together. To get the day, month, and year, we use
the getDate(),getMonth(), and getYear() methods. To get the hour and the
minutes, we use getHours() and getMinutes().
Figure 2-12 shows you the complete code for writing the date and
time (without seconds) to a web page, as seen on the Book of JavaScript
home page.
Table 2-1:
Commonly Used Date and Time Methods
Name Description
getDate() The day of the month as an integer from 1 to 31
getDay() The day of the week as an integer where 0 is Sunday and 1 is Monday
getHours() The hour as an integer between 0 and 23
getMinutes() The minutes as an integer between 0 and 59
getMonth() The month as an integer between 0 and 11 where 0 is January and 11 is
December
getSeconds() The seconds as an integer between 0 and 59
getTime() The current time in milliseconds where 0 is January 1, 1970, 00:00:00
getYear() The year, but this format differs from browser to browser

28 Chapter 2
<html>
<head><title>The Book of JavaScript</title>
<script type = "text/javascript">
<!-- hide me from older browsers
// get the Date object
//
X var date = new Date();
// get the information out of the Date object
//
var month = date.getMonth();
var day = date.getDate();
var year = date.getYear();
var hour = date.getHours();
var minutes = date.getMinutes();
Y month = month + 1; // because January is month 0
// fix the Y2K bug
//
Z year = fixY2K(year);
// fix the minutes by adding a 0 in front if it's less than 10
//
[ minutes = fixTime(minutes);
// create the date string
//
\ var date_string = month + "/" + day + "/" + year;
] var time_string = hour + ":" + minutes;
^ var date_time_string = "Today is " + date_string + ". The time is now " +
time_string + ".";
// This is the Y2K fixer function--don't worry about how this works,
// but if you want it in your scripts, you can cut and paste it.
//
function fixY2K(number) {
if (number < 1000) {
number = number + 1900;
}
return number;
}
// This is the time fixer function--don't worry about how this works either.
function fixTime(number) {
if (number < 10) {
number = "0" + number;
}
return number;
}
// show me -->
</script>
</head>
<body>

Using Variables and Built-in Functions to Update Your Web Pages Automatically 29
_ <h1>Welcome to the Book of JavaScript Home Page!</h1>
<script type = "text/javascript">
<!-- hide me from older browsers
` document.write(date_time_string);
// show me -->
</script>
</body>
</html>
Figure 2-12: Writing the current date and time to a web page
Line-by-Line Analysis of Figure 2-12
Here are a few interesting things in this example.
Getting the Date and Time
The lines from X up until Y get the current date and time from the visitor’s
computer clock and then use the appropriate date methods to extract the
day, month, year, hours and minutes. Although I’m using a variable name
date in X to store the date, I could have used any variable name there: the_date,
this_moment,the_present, or any valid variable name. Don’t be fooled into
thinking that a variable needs to have the same name as the corresponding
JavaScript object; in this case, date just seems like a good name.
Making Minor Adjustments
Before building the strings we will write to the website, we need to make some
little adjustments to the date information just collected. Here’s how it works:
zLine Y adds 1 to the month because getMonth() thinks January is month 0.
zLine Z fixes the Y2K problem discussed earlier in the chapter, in which
the getYear() method returns the wrong thing on some older browsers.
If you feed fixY2K() the year returned by date.getYear(), it will return the
correct year. The fixY2K() function is not a built-in JavaScript function.
I had to write it myself. Don’t worry about how the function works
right now.
zLine [ fixes a minor formatting issue, using another function that’s
not built-in. If the script is called at 6 past the hour, date.getMinutes()
returns 6. If you don’t do something special with that 6, your time will
look like 11:6 instead of 11:06. So fixTime() sticks a zero in front of
a number if that number is less than 10. You can use fixTime() to fix
the seconds too, for your homework assignment.
Getting the String Right
Now that we’ve made a few minor adjustments, it’s time to build the strings.
Line \ builds the string for the date. Here’s the wrong way to do it:
var date_string = "month / day / year";

30 Chapter 2
If you wrote your code this way, you’d get a line that says Today is month
/ day / year. Why? Remember that JavaScript doesn’t look up variables if
they’re inside quotes. So place the variables outside the quote marks and
glue everything together using plus signs (+):
var date_string = month + "/" + day + "/" + year;
This may look a little funny at first, but it’s done so frequently that you’ll
soon grow used to it. Line ] creates the string to represent the time. It is very
similar to \. Line ^ puts \ and ] together to create the string that will be
written to the website. Lines \ through ^ could all have been written as one
long line:
var date_time_string = "Today is " + month + "/" + day + "/" + year +
". The time is now " + hour + ":" + minutes + ".";
However, using three lines makes the code easier for people to read and
understand. It’s always best to write your code as if other people are going to
read it.
What Are Those Other Functions?
The JavaScript between ^ and _ defines the fixY2K() and fixTime() functions.
Again, don’t worry about these lines for now. We’ll cover how to write your
own functions in glorious detail in Chapter 6.
JavaScript and HTML
Make sure to place your JavaScript and HTML in the proper order. In
Figure 2-12, the welcoming HTML in _ precedes the JavaScript that actually
writes the date and time in `, since the browser first writes that text and then
executes the JavaScript. With JavaScript, as with HTML, browsers read from
the top of the page down. I’ve put document.write() in the body so that the
actual date information will come after the welcome text. I’ve put the rest
of the JavaScript at the head of the page to keep the body HTML cleaner.
Why document.write()?
Notice that the code in Figure 2-11 uses document.write() instead of
window.document.write(). In general, it’s fine to drop the word window and the
first dot before the word document. In future chapters I’ll tell you when the
word window must be added.
How the European Space Agency Writes the Date to Its Page
The JavaScript used by the European Space Agency is very much like the
code I used for the Book of JavaScript web page. One big difference between
the two is that the ESA prints out the month using abbreviations like Jan and
Feb for January and February. They do this using arrays, a topic discussed in
Chapter 8, so in Figure 2-13 I’ve modified their code a bit to focus on topics
covered so far.

Using Variables and Built-in Functions to Update Your Web Pages Automatically 31
<script type = "text/javascript">
var now = new Date();
var yyyy = now.getFullYear();
var mm = now.getMonth() + 1;
X if (10 > mm) mm = '0' + mm;
var dd = now.getDate();
Y if (10 > dd) dd = '0' + dd;
document.write(dd + '-' + mm + '-' + yyyy);
</script>
Figure 2-13: How the European Space Agency writes the date to its page
Everything here should look very familiar to you, except for X and Y,
which will make more sense after you’ve read Chapter 3. If anything else in
the ESA script seems unclear to you, try doing the homework assignment.
In fact, do the homework assignment even if it all seems extremely clear.
The only way to really learn JavaScript is to do it. Go ahead, give that
homework a shot! And enjoy!
Summary
This chapter was chock-full of JavaScript goodness. Here’s a review of the most
important points for you to understand:
zHow to declare and use variables (use var the first time and use valid and
descriptive variable names)
zHow to write to web pages with document.write()
zHow to get the current date from JavaScript with the Date object and its
various methods
If you got all that, you’re well on your way to becoming a JavaScript
superstar. Try the following assignment to test your JavaScript skills.
Assignment
Change the script in Figure 2-12 so that it writes out the seconds as well as the
hour and minutes.
If you’re feeling like getting ahead of the game, you can try, for a big
chunk of extra credit, to change the time from a 24-hour clock to a 12-hour
clock. The getHours() method returns the hour as a number between 0 and 23.
See if you can figure out how to adjust that time to be between 1 and 12.
You’ll have to use some tricks I haven’t covered in this chapter. If you can’t
figure this out now, you’ll be able to do it by the end of the next chapter.
GIVING THE BROWSERS
WHAT THEY WANT
Much to the dismay of web developers
everywhere, different browsers implement
JavaScript and HTML in slightly different
ways. Wouldn’t it be great if you could serve
each browser exactly the content it could understand?
Fortunately, you can use JavaScript to determine which browser a visitor
is using. You can then use that information to deliver content suitable for
that specific browser, either by redirecting the visitor to a page containing
content especially tailored for that browser or by writing your JavaScripts
so that the same page does different things depending on the browser
looking at it.
This chapter covers the three topics you need to understand to deliver
browser-specific pages using redirects:
zHow to determine which browser your visitor is using
zHow to redirect the visitor to other pages automatically
zHow to send the visitor to the page you want, depending on which
browser he or she is using
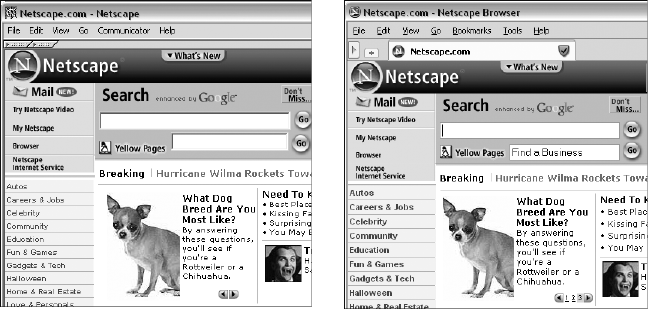
34 Chapter 3
As in Chapter 2, while learning how to handle an important web
authoring task, you’ll also be introduced to fundamental elements of the
JavaScript language—in this case, if-then statements and related methods
for implementing logical decision making in your scripts.
Let’s first talk about determining which browser a visitor is using.
A Real-World Example of Browser Detection
Before we get into the details of how browser detection works, let’s look at a
real-world example.
Netscape, the company that brought you the Netscape Navigator browser,
has a complicated home page with lots of interesting features. They’ve taken
great pains to make their home page look good to most browsers, including
early versions of their own browser. If you compare the Netscape home page
seen with Netscape Navigator 4 (Figure 3-1) to the page seen using Navigator 8
(Figure 3-2), you’ll notice some subtle differences. Among other things, the
news blurb at the bottom of Figure 3-2 has a little navigational element in the
lower-right corner. Clicking the numbers in that corner cycles you through
different news blurbs. Figure 3-1 does not have these numbers, probably
because there isn’t a good way to provide this fancy functionality in the old
Netscape Navigator.
How does Netscape show the numbers to only those browsers that can
provide this feature? There are two steps. First you have to determine which
browser your visitor is using. Once you know the browser, you know what
JavaScript and HTML features it supports. Then you have to figure out how
to control what the person will see based on the known capabilities of the
browser.
Figure 3-1: Netscape Navigator 4 view
of Netscape home page
Figure 3-2: Netscape Navigator 8 view
of Netscape home page

Giving the Browsers What They Want 35
Browser Detection Methods
A browser is identified by its name (Netscape, Firefox, Internet Explorer, and
so on) combined with its version number. Your JavaScript needs to determine
both of these items. There are two ways to approach this task: a quick but
rough method and a slightly less quick but more accurate method.
Quick-but-Rough Browser Detection
In general, the line
var browser_name = navigator.appName;
determines who made the browser. If the user is using a Netscape browser, the
variable browser_name will be set to the string "Netscape". If it’s a Microsoft Inter-
net Explorer browser, browser_name will be set to "Microsoft Internet Explorer".
Every JavaScript-enabled browser must have the variable navigator.appName.
If you use Opera, navigator.appName equals "Opera". Unfortunately, some
browsers travel incognito. For example, the navigator.appName for Firefox is
"Netscape". The JavaScript in Firefox is the same as that for Netscape browsers,
so in general, it’s fine to treat Firefox browsers as Netscape browsers. But, as
you can see, if you want to be sure about the browser being used, you can’t
rely on naviagor.appName.
There’s a similar rough method for determining the browser version
being used: navigator.appVersion. Unfortunately, navigator.appVersion isn’t
just a number but a sometimes cryptic string that varies from browser to
browser. For example, the Macintosh browser Safari has this nice, simple
navigator.appVersion string: "5.0". By contrast, Internet Explorer 6.0 run-
ning under Windows XP has a navigator.appVersion that looks like this:
"4.0 (compatible; MSIE 6.0; Windows NT 5.1; .NET CLR 1.1.4322)". To see the
navigator.appVersion string for your browser, type this into the browser’s
address box (where you normally enter web addresses):
javascript:alert(navigator.appVersion)
If you care only about whether a person is using a 4.0 browser or later,
you can pick out the version numbers from those navigator.appVersion strings
with the parseFloat() command, which looks at the string and grabs the first
item that resembles a floating-point number (a number that contains a decimal
point). Thus the line
var browser_version = parseFloat(navigator.appVersion);
sets the variable browser_version to the first number in the navigator.appVersion
string. For most browsers, this will be the actual version number. For Internet
Explorer, it will be 4.0 for any version of the browser 4.0 or later. You can see
why I call this method rough.

36 Chapter 3
More Accurate Browser Detection
JavaScript has another variable that contains information about the browser
being used: navigator.userAgent. This variable identifies both the manufacturer
of the browser and its version. As it did with navigator.appVersion, however,
the formatting of the string varies from browser to browser.
Because the navigator.userAgent strings are different from each other,
there is no simple way to extract the information you want. Fortunately,
people have already written browser sniffers: bits of JavaScript that will do all
the hard work of browser identification for you. You can find brwsniff.js,
which I downloaded from http://jsbrwsniff.sourceforge.net, at http://
www.bookofjavascript.com/Chapter03.
To use this file, put it in the same folder as the web page containing your
JavaScript. Then, put this line in the header of your web page:
<script type = "text/javascript" src = "brwsniff.js"></script>
This tells JavaScript to add the contents of the file named brwsniff.js to
your web page. Now you can use the JavaScript stored in that file.
To use the JavaScript in brwsniff.js to determine the name and version of
the browser being used to view your web page, add these lines of JavaScript:
X var browser_info = getBrowser();
Y var browser_name = browserInfo[0];
Z var browser_version = browserInfo[1];
Line X calls a function in brwsniff.js that reads the navigator.userAgent
string and compares it to all the different browser version strings it knows.
Once it determines the name and version of the browser, the function loads
this information into a variable called browser_info. All the variables we’ve seen
so far store one piece of information—a string or a number, for example.
This browser_info variable is an array, a type of variable designed to hold
multiple items of related information. You’ll learn how to work with arrays
in Chapter 8. For now it’s enough to know that an array is a variable that
can store more than one piece of information. Line Y puts the first bit of
information stored in the array into a variable called browser_name. Line Z
puts the second piece of information stored in browser_info into a variable
named browser_version. Used together, these two variables tell you what kind
of browser is viewing the web page. Try the web page in Figure 3-3 on your
own browser.
NOTE This <script> tag does not require the <!-- and //--> to hide it from older browsers
because there is no code between the opening and closing tags.
The quick but rough method of browser detection should work for most
situations, especially when you don’t need to know exactly which browser is
being used. For the cases in which you do need the exact name and version,
you should use a browser sniffer like the one just described.
Giving the Browsers What They Want 37
<html>
<head>
<title>I Know Which Browser You're Using!</title>
<script type = "text/javascript" src = "brwsniff.js"></script>
</head>
<body>
<script type = "text/javascript">
<!-- hide me from older browsers
var browser_info = getBrowser();
var browser_name = browser_info[0];
var browser_version = browser_info[1];
document.write ("You're using " + browser_name + " version " +
browser_version);
// show me -->
</script>
</body>
</html>
Figure 3-3: Finding the browser version number with a browser sniffer
Redirecting Visitors to Other Pages
Now that you understand browser detection, you can tailor your site to
provide information specific to each browser. There are two main ways
to do this. First, you can use document.write(), which we saw in the last
chapter, to display one message on your page if the site visitor is using
Netscape Navigator 4, and a different message on the same page for
Internet Explorer 6.0. Alternatively, you can redirect your visitors to
separate pages specifically tailored to different browsers. To redirect
visitors to another page, you’d write something like this:
window.location.href = "http://www.mywebsite.com/page_for_netscape4.html";
When JavaScript sees a line like this, it loads the page with the specified
URL into the browser.
NOTE Are you wondering “What’s with all these periods in commands like window.location.href
and navigator.appName?” Never fear. I’ll address these when I discuss image swaps and
dot notation in Chapter 4.
In general, it’s probably best to use document.write() instead of redirecting
the user. Because there are so many browsers, trying to maintain a different
page for each one can quickly become burdensome. However, if you just want
to redirect someone with an older browser to a page that tells them to upgrade,
redirection is probably the best way to go.

38 Chapter 3
if-then Statements
Now that you know which browser your visitor is using, you need to learn how
to tell JavaScript to write different things depending on the browser being
used—in other words, how to implement a logical test, choosing between
different actions based on specific information. Branching is a fundamental
technique in any programming or scripting language. Be sure to read this
section if you’re not already familiar with the concept.
To alter your web pages based on the browser a visitor is using, you tell
JavaScript something like, “If the visitor is using Internet Explorer, then write
this IE-tailored content.”
An if-then statement in JavaScript looks like this:
if (navigator.appName == "Microsoft Internet Explorer")
{
// write IE-specific content
document.write("Welcome, Internet Explorer user!");
}
Here’s the basic structure of an if-then statement:
if (some test)
{
statement_1;
statement_2;
statement_3;
...
}
NOTE JavaScript is unforgiving: if must be lowercase, and you must put parentheses around
the test that follows it.
The test that appears between the parentheses must be either true or
false. If the variable navigator.appName equals "Microsoft Internet Explorer", the
test between the parentheses is true, and the statements located between the
curly brackets are executed. If the variable doesn’t equal "Microsoft Internet
Explorer", the test between the parentheses is false, and the statements
between the curly brackets aren’t executed.
Boolean Expressions
The test in the parentheses after if is a Boolean expression—an expression that’s
either true or false. In JavaScript, a Boolean expression is usually a statement
about the values of one or more variables. Table 3-1 lists some of the symbols
you’ll be using to form Boolean expressions in JavaScript.
NOTE Boolean expressions are named after George Boole (1815–1864), who invented a way
to express logical statements in mathematical form.
Giving the Browsers What They Want 39
Notice in Table 3-1 that you must use two equal signs when you want
JavaScript to test for equality in an if-then statement Boolean expression.
In fact, accidentally using one equal sign instead of two in an if-then state-
ment is probably the major cause of mind-blowing programming errors. As
you learned in Chapter 2, a single equal sign is used to assign a value to a
variable. So if you accidentally use only one equal sign, JavaScript thinks
you mean to set the variable on the left of the equal sign to the value of
whatever is on the right of the equal sign, and it will act as if the test result
is always true.
Here’s an example of the trauma that this mistake can cause. Say you
want to write a JavaScript that puts Happy Birthday, Mom! on your web page
when it’s your mother’s birthday. If her birthday were August 6, you might
write something like Figure 3-4 (which contains the dreaded error).
If you try this script, you’ll see that it always prints Happy Birthday, Mom! to
the web page, which is great for Mom, but probably not what you want.
<script type = "text/javascript">
<!-- hide me from older browsers
var today = new Date();
var day = today.getDate();
X var month = today.getMonth();
Y if (month = 7) // remember, January is month 0, so August is month 7
{
Z if (day = 6)
{
[ document.write("<h1>Happy Birthday, Mom!</h1>");
}
}
// show me -->
</script>
Figure 3-4: Mom’s birthday greeting—broken version
Table 3-1:
Symbols in Boolean Expressions
Test Meaning Example (All of These Are True)
<Less than 1 < 3
>Greater than 3 > 1
== The same as (equal) "happy" == "happy", 3 == 3
!= Different from (not equal) "happy" != "crabby", 3 != 2
<= Less than or equal to 2 <= 3, 2 <= 2
>= Greater than or equal to 3 >= 1, 3 >= 3
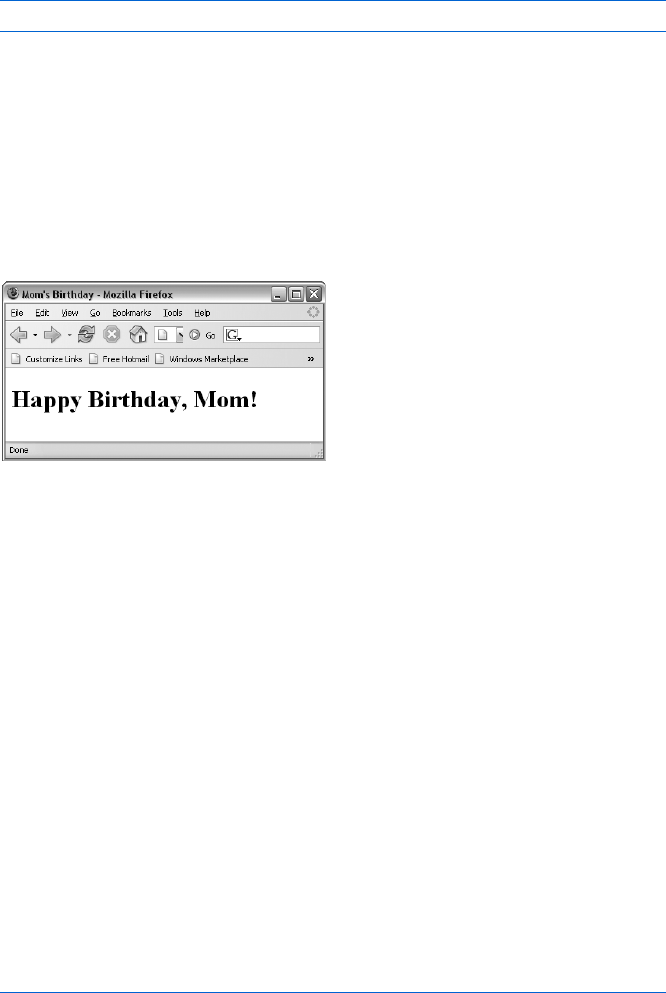
40 Chapter 3
The script starts off correctly. When JavaScript sees X, it sets the variable
month to whatever month it is. If you’re running the script in March, it sets month
to 2. The problem arises in the next line, though:
if (month = 7)
Here JavaScript sees one equal sign and thinks you want to set the variable
month to the value 7. The script does what you’re telling it to do, and then acts
as if your test is true.
Since the result is true, JavaScript moves to the curly brackets, where it
finds Z, another if-then statement that incorrectly uses one equal sign instead
of two. This line sets the variable day to the value 6 and again results in a true
statement. JavaScript then moves to the second set of curly brackets, where it
sees that it’s supposed to [ write <h1>Happy Birthday, Mom!</h1>, which it does—
every time someone visits the page (see Figure 3-5).
Figure 3-5: Mom’s birthday greeting
NOTE I remember the difference between one and two equal signs by thinking is the same as
instead of equals when I’m doing an if-then test, and remembering that is the
same as translates into two equal signs.
Nesting
Figure 3-4 is the first example I’ve used of nesting—one if-then statement
inside another. Although it sometimes makes sense to nest your if-then
statements, things get confusing if you start to get three or more levels deep
(one if-then statement inside the curly brackets of another if-then statement,
which itself is inside the curly brackets of a third if-then statement).
Try to write your code so that it doesn’t need more than two levels of nest-
ing. If you find yourself with if-then statements more than two levels deep, it
often means that you’re doing something complicated enough to justify writing
a new function to handle some of the complexity. (More on that in Chapter 6.)
if-then-else Statements
There are a couple of fancier versions of the if-then statement. The first is
the if-then-else statement:
if (navigator.appName == "Microsoft Internet Explorer")
{
// write IE-specific content

Giving the Browsers What They Want 41
document.write("Welcome, Internet Explorer user!");
}
else
{
// write netscape specific content
document.write("Welcome, Netscape user!");
}
This reads nicely in English if you read else as otherwise: “If they’re using
Internet Explorer, show them IE-specific content, otherwise send them
Netscape-specific content.”
if-then-else-if Statements
The above code assumes that there are only two browser manufacturers in
the world, when in fact there are a multitude. We can solve this problem
with an if-then-else-if statement that, if a visitor has a browser other than
Netscape or Internet Explorer, displays content regarding unknown browsers.
if (navigator.appName == "Netscape")
{
// write netscape-specific content
document.write("Welcome, Netscape user!");
}
else if (navigator.appName == "Microsoft Internet Explorer")
{
// write IE-specific content
document.write("Welcome, Internet Explorer user!");
}
else
{
// write unknown browser content
document.write("Welcome, user of a fancy unknown browser!");
}
This code reads in English as: “If they’re using Netscape, send them
Netscape-specific content; if they’re using Internet Explorer, send them IE-
specific content. Otherwise send them a message about having a mysterious
browser.”
When and Where to Place Curly Brackets
Notice in the examples above that curly brackets (braces) mark the begin-
ning and end of the body of an if-then statement, enclosing the part where
you tell JavaScript what action(s) to take. You’ll also notice that I place my
beginning and ending curly brackets on their own lines, like this:
if (something == something_else)
{
blah_blah_blah;
}

42 Chapter 3
This is my style, one that I think makes it easier to align pairs of beginning
and ending brackets. Other people prefer this slightly more compact style:
if (something == something_else) {
blah_blah_blah;
}
It’s up to you to choose where you put the curly brackets. Many studies
have tried to figure out which formatting style is most readable or which avoids
bugs. When you get right down to it, just decide what you think looks good
and go with that.
Sometimes curly brackets are not needed in an if-then statement, such as
when the body of the statement has only one line. For example, this is legal:
if (something == something_else)
alert("they're equal");
else
alert("they're different!");
Since each of the “then” parts of the clause is only one line (the alert
functions), the curly brackets around these statements are optional. However,
it’s always a good idea to include the braces anyway, because you might want
to add a second line to that else clause. If you do add a second line to the
else clause and forget to put the brackets around the two lines, your script
won’t work.
With curly brackets, the previous example would look like this:
if (something == something_else)
{
alert("they're equal");
}
else
{
alert("they're different!");
}
Or, if you prefer the more compact style:
if (something == something_else) {
alert("they're equal");
} else {
alert("they're different!");
}
OR and AND
The if-then statements we’ve seen so far are pretty simple. You might, however,
want to add more conditions to an if-then statement (for example, “If Joe is
in high school and is not doing his homework, then tell him to get to work”).
To add more conditions to an if-then statement, use the OR and AND operators.
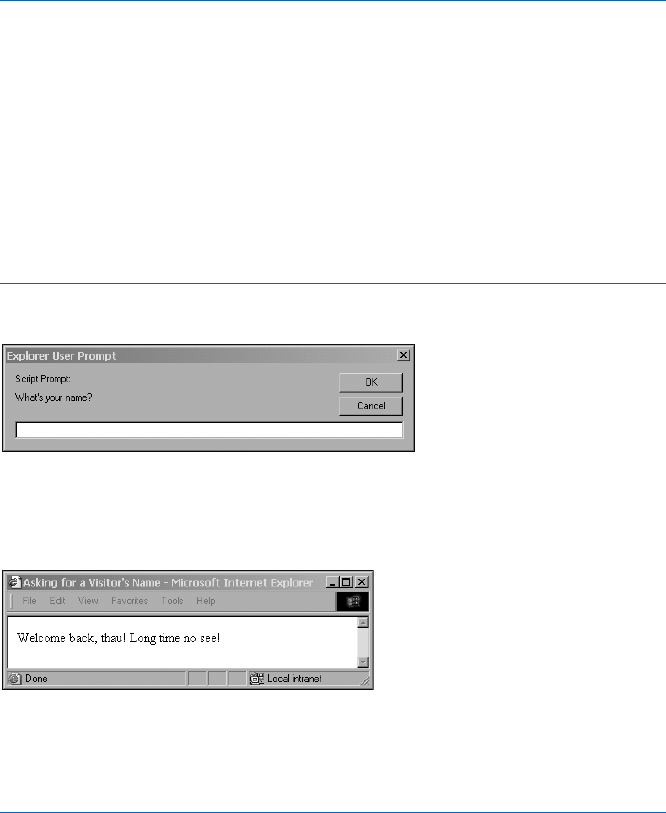
Giving the Browsers What They Want 43
OR
Suppose you want to give different greetings to people who come to your
site, depending on who they are. You could, as in Figure 3-6, use a prompt
box to ask for a visitor’s name (Figure 3-7) and then use an if-then statement
to determine which greeting to give.
<script type = "text/javascript">
<!-- hide me from older browsers
var the_name = prompt("What's your name?", "");
if (the_name == "thau")
{
document.write("Welcome back, thau! Long time no see!");
} else {
document.write("Greetings, " + the_name + ". Good to see you.");
}
// show me -->
</script>
Figure 3-6: Asking for a visitor’s name with the prompt box
Figure 3-7: The prompt box asking for a visitor’s name
This example greets thau with “Welcome back, thau! Long time no see!”
(Figure 3-8) and everyone else with “Greetings, Name. Good to see you.”
Figure 3-8: thau’s greeting
To greet others the same way you greet thau, you could use a series of
if-then statements as in Figure 3-9.
if (the_name == "thau")
{
document.write("Welcome back, thau! Long time no see!");
}
else if (the_name == "dave")
{
document.write("Welcome back, dave! Long time no see!");
}

44 Chapter 3
else if (the_name == "pugsly")
{
document.write("Welcome back, pugsly! Long time no see!");
}
else if (the_name == "gomez")
{
document.write("Welcome back, gomez! Long time no see!");
}
else
{
document.write("Greetings, " + the_name + ". Good to see you.");
}
Figure 3-9: Personalized greetings with a series of if-then statements
This would work, but there’s a lot of waste here: We repeat basically the
same document.write() line four times. What we really want to say is something
like: “If the_name is thau, or dave, or pugsly, or gomez, give the ‘Long time no
see’ greeting.” JavaScript has a feature called the OR operator, which comes
in handy here. Figure 3-10 shows OR in use:
if ((the_name == "thau") || (the_name == "dave") ||
(the_name == "pugsly") || (the_name == "gomez"))
{
document.write("Welcome back, " + the_name + "! Long time no see!");
}
Figure 3-10: The OR operator
The OR operator is represented by two vertical lines (||), called bars. You
will usually be able to type the bar (|) character as the shifted backslash (\)
key on your keyboard.
NOTE Although each of the Boolean tests in Figure 3-10 (for example, the_name == "thau")
has its own parentheses, these aren’t strictly necessary. However, the set of parentheses
around all four Boolean tests is required, and it’s a good idea to include the other
parentheses for legibility’s sake.
AND
AND, another important operator, is represented by two ampersands (&&).
Figure 3-11 shows this operator in use.
var age = prompt("How old are you?", "");
var drinking = prompt("Are you drinking alcohol (yes or no)?", "yes");
if ((age < 21) && (drinking == "yes"))
{
document.write("Beat it!");
}
else
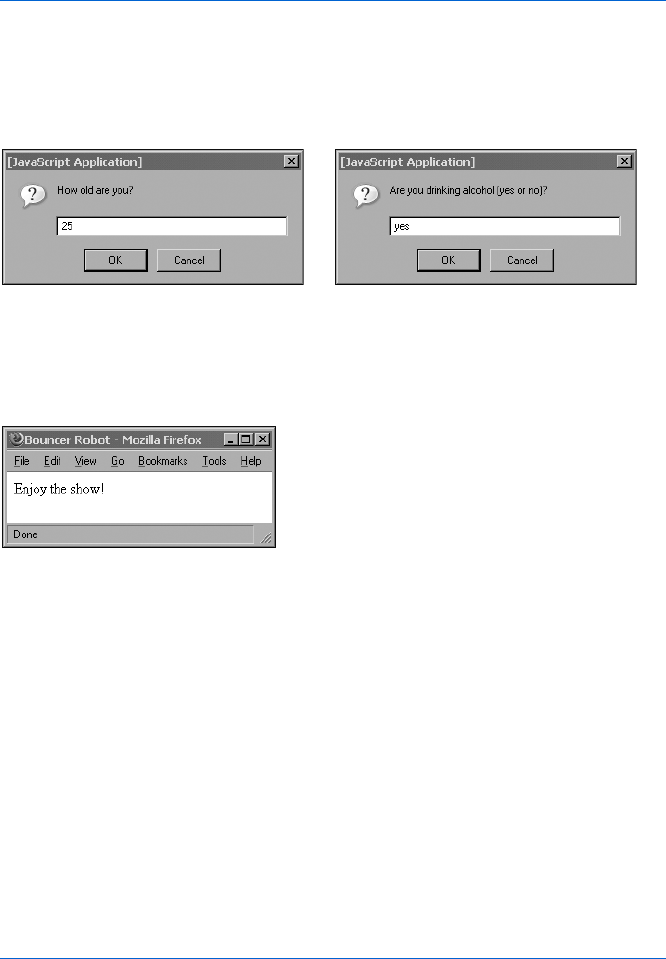
Giving the Browsers What They Want 45
{
document.write("Enjoy the show!");
}
Figure 3-11: The AND operator
When bars start using robot bouncers that run on JavaScript, this is the
kind of code they’ll be running. The script asks a person’s age and whether
he or she is drinking alcohol (Figure 3-12).
Figure 3-12: The bouncer’s questions
If the person is under 21 and is drinking alcohol, the bouncer tells him
or her to beat it. Otherwise, the visitor is perfectly legal and is welcome to stay
(Figure 3-13). (Never mind the fake IDs for now.)
o
Figure 3-13: The bouncer’s response
Putting It All Together
Here’s a script containing most of what’s been presented in the chapter so
far. The script in Figure 3-14 redirects users to one page if they’re using an
older version of Netscape (version 4 or earlier), another page if they’re using
an older version of Internet Explorer (version 5.5 or earlier), a third page for
browsers it’s unfamiliar with, and a fourth page for modern browsers it
knows about.
I’ve broken the code into two blocks of <script> tags. The first sets up the
variables and the second does the redirection.
NOTE It’s a good idea to declare variables at the top of your script. That way, if you want to
change a variable later, you won’t have to go hunting through a lot of HTML and
JavaScript to find it.
<html><head><title>Redirection</title>
<script type = "text/javascript" src = "brwsniff.js"></script>
<script type = "text/javascript">
<!-- hide me from older browsers

46 Chapter 3
var browser_info = getBrowser();
var browser_name = browser_info[0];
var browser_version = browser_info[1];
var this_browser = "unknown";
if (browser_name == "msie")
{
if (browser_version < 5.5)
{
this_browser = "old Microsoft";
}
else
{
this_browser = "modern";
}
} // end if browser_name == Microsoft
if (browser_name == "netscape")
{
if (browser_version < 6.0)
{
this_browser = "old Netscape";
}
else
{
this_browser = "modern";
}
} // end if browser_name == Netscape
// show me -->
</script>
</head><body>
<SCRIPT type = "text/javascript">
<!-- hide me from older browsers
if (this_browser == "old Netscape")
{
window.location = "archaic_netscape_index.html";
} else if (this_browser == "old Microsoft") {
window.location.href = "archaic_ie.html";
} else if (this_browser == "modern")
{
window.location.href = "modern_browser.html";
}
// show me -->
</script>
<h1>Unknown Browser</h1>
Sorry, but this page only works for browsers Netscape 6.0 and later, and
Internet Explorer 5.5 and later.
</body>
</html>
Figure 3-14: Complete redirection code

Giving the Browsers What They Want 47
A Few More Details About Boolean Expressions
There are just a few more things you need to know about Boolean
expressions before you can call yourself a Boolean master. You already
know that you can create an if-then statement using code like this:
if (name == "thau") {
alert("Hello, thau!");
}
This says, “If it is true that the variable name contains the string thau, put
up an alert saying Hello, thau! ” What you may not know is that you can store
the value true or false in a variable and use it later. So, I could have done this
instead:
var thisIsThau = (name == "thau");
if (thisIsThau == true) {
alert("Hello, thau!");
}
The first line tests to see whether the variable name contains the string
"thau". If it does, the test is true. This true value is stored in the variable
thisIsThau. You can then test to see whether the variable thisIsThau is true, as
seen in the subsequent if-then statement. This can be shortened a bit to this:
var thisIsThau = (name == "thau");
if (thisIsThau) {
alert("Hello, thau!");
}
Notice that I’m not explicitly checking to see whether thisIsThau contains
the value true. Instead, I’m just putting the variable inside the if-then test
parentheses. The if-then rule states, “If the thing inside the parentheses is
true, do the action in the curly brackets.” In this case, the variable isThisThau
will be true if the variable name contains the value "thau".
If you wanted to do something in the case where the string stored in name
was something other than "thau" you could do this:
var thisIsThau = (name == "thau");
if (thisIsThau == false) {
alert("Hello, somebody other than thau!");
}
Here, we’re checking to see whether the value stored inside thisIsThau is
false, which it will be if the comparison of name and "thau" turned out to be false
in the line above (for example, if name equaled "pugsly").
The final shortcut involves using the special character !, which means not.
48 Chapter 3
var thisIsThau = (name == "thau");
if (!thisIsThau) {
alert("Hello, somebody other than thau!");
}
The expression means “if thisIsThau is not true, then do the stuff in the
curly brackets.” These Boolean shortcuts are used quite frequently in the
scripts I’ve seen on the Web, so you should take some time to get used to them.
How Netscape Provides Browser-Specific Content
Now we’ve covered just about everything you need to know to understand
how Netscape serves up the browser-specific content illustrated at the begin-
ning of the chapter (Figures 3-1 and 3-2). Here is a somewhat simplified and
modified version of the JavaScript on Netscape’s home page:
<script type = "text/javascript">
X var agent = navigator.userAgent.toLowerCase();
Y var major = parseInt(navigator.appVersion);
var minor = parseFloat(navigator.appVersion);
Z var ns = ((agent.indexOf('mozilla') != -1) &&
(agent.indexOf('compatible') == -1));
[ var ns4 = (ns && (major == 4));
var ns7 = (ns && (agent.indexOf('netscape/7') != -1) );
var ie = (agent.indexOf("msie") != -1);
var ie4 = (ie && (this.major >= 4));
var ie6 = (ie && (agent.indexOf("msie 6.0") != -1));
var op3 = (agent.indexOf("opera") != -1);
</script>
Next comes all of the HTML. Inside the HTML, when you want to decide
whether or not to write something based on the browser being used, you do
something like this:
<script type = "text/javascript">
\ if (!ns4) document.write('<td>the stuff that puts in the numbers</td>');
</script>
The script starts by using the userAgent and appVersion variables to
determine the type of browser being used. Notice the use of parseInt() in Y.
This function works just like parseFloat(), except that it pulls the first integer
out of a string, rather than the first floating-point number. This will set the
variable major to a number like 4, 5, or 6.
The next line (Z) is jam-packed with information, so take it slow. The
first thing to notice is the use of the indexOf() function. We’ll see more of
indexOf() in Chapter 11 when we work with strings. The main thing to
know here is that indexOf() checks to see whether a string contains another

Giving the Browsers What They Want 49
string. To see if the word mozilla is part of the string stored in agent, we use
agent.indexOf('mozilla'). If mozilla is in the agent string, indexOf() will return
some number other than 1. If mozilla is not part of the agent string, indexOf()
will return 1. This can get a little confusing, so make sure you understand
that last rule.
Now, looking at Z, we see that there are two main parts. The first part
checks to see whether some application of the indexOf() function gives a
result different from 1. The next part checks to see if another application
of the indexOf() function gives a result that equals 1. If the first part is true,
and the second part is also true, then the whole thing is true, and the value
true is stored in the variable ns. If either of the comparisons is false, then the
whole thing will be false, and the value false will be stored in ns. Remember
the bouncer’s test:
if ((age < 21) && (drinking == "yes"))
If both statements were true—the person was under 21, and the person
was drinking—the person got bounced. If either part was not true, then they
were okay.
With all that in mind, let’s look to see what the two comparisons in Z are.
The first one will return the value true if indexOf() finds the string mozilla in
the variable agent. Take a long, hard look at the expression:
agent.indexOf('mozilla') != -1
Remember, if the string stored in variable agent contains the string
mozilla,indexOf() will return a value not equal to 1. So this test will be true
if the navigator.userAgent has the word mozilla (upper- or lowercase) in it.
The next part makes sure that the navigator.userAgent does not contain
the string compatible. This is because many browsers say they are Mozilla
compatible, and they’ll have both the words mozilla and compatible in their
navigator.userAgent string. Netscape just has the word mozilla in its string.
The end result of Z is that the variable ns will be true if the navigator.userAgent
contains the string mozilla but not the string compatible.
The next lines figure out which version of Netscape this might be.
Consider [:
var ns4 = (ns && (major == 4));
This line says, “If the variable ns is true, and the variable major has a value
of 4, then put the value true in the variable ns4.” If it’s not true both that the
variable ns is true and that the variable major is 4, then ns4 will be false. The
other lines perform similar tests for Navigator 7 and other browsers. Each
one is a little different from the others, so make sure you take some time to
understand all of them.

50 Chapter 3
Once the browser is known, the decision whether or not to display the
browser-specific feature (namely, the page number navigation links) happens
later in the code. Right at the place where you either write something to the
web page or not, depending on the browser being used, you use a line like \:
if (!ns4) document.write('<td>the stuff that puts in the numbers</td>');
This says, “If this is not a Netscape 4 browser, write the code that puts
in the navigation element.” The variable ns will be true if the earlier code
determined that it was a Netscape 4 browser being used, and false otherwise.
Remember that this code must go between <script> and </script> tags.
Except for the part of the script that determines the type of browser being
used, the Netscape code is fairly simple. If you want to avoid the complexities
involved in determining the browser being used, use one of the browser
sniffer packages available for free on the Web, incorporating the software
into your page using JavaScript statements similar to those shown in the
section “More Accurate Browser Detection” on page 36.
Summary
Here are the things you should remember from this chapter:
zJavaScript’s tools for identifying a visitor’s browser (navigator.appName,
navigator.appVersion, and navigator.userAgent)
zHow if-then,if-then-else, and if-then-else-if statements work
zHow Boolean expressions work
zHow to redirect your visitors to other web pages
zHow to import JavaScript from another file
Did you get all that? If so, here’s an assignment for you.
Assignment
Write a web page that asks for a visitor’s name. If the visitor is someone you
like, send him to your favorite page. If it’s someone you don’t know, send
him to a different page. And if it’s someone you don’t like, send him to yet
another page.
WORKING WITH ROLLOVERS
You’ve seen rollovers a million times.
You mouse over an image, and the image
changes. You mouse off the image, and the
image changes back to its original state. Rollovers
are an easy way to make your site more interactive.
This chapter will show you how to create a good rollover. This involves:
zTelling JavaScript to detect the mouse event that will trigger an
image swap
zTelling JavaScript which of several images to swap in, based on the
mouse event
zReplacing the old image with a new one
I’ll also teach you a new way to detect which browser a visitor is using.
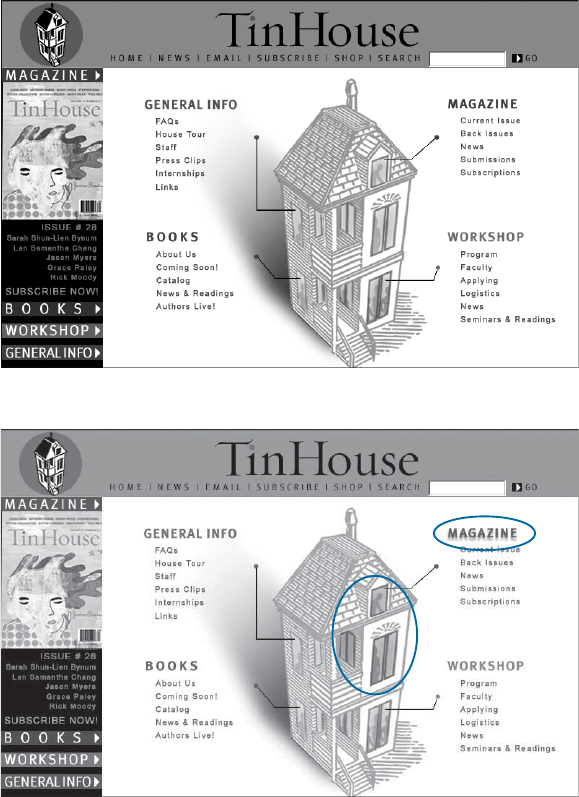
52 Chapter 4
A Real-World Example of Rollovers
To begin, let’s take a look at rollovers in action. Tin House (http://www
.tinhouse.com), one of my favorite literary journals, has a little house on its
home page that helps you navigate the site. When you first come to the page,
all the lights in the house are off (Figure 4-1); rolling over different parts of the
house lights those areas up (Figure 4-2). It may be a little silly, but I like it.
Figure 4-1: Tin House home page before mousing over the house
Figure 4-2: Tin House home page with mouse over the house
The Book of JavaScript home page also has a relatively straightforward and
uncomplicated implementation of an image swap. If you mouse over the
graphic that says Turn it over! the image of the front cover of the book will
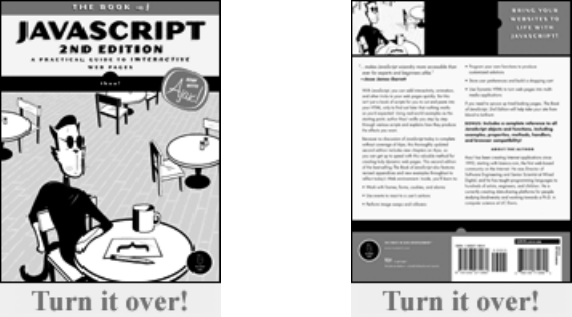
Working with Rollovers 53
change to show the back of the book (see Figures 4-3 and 4-4). Mouse off the
Turn it over! image again and the book image switches back to the front cover.
There are many ways to script a rollover. Because rollovers don’t work in
old browsers, or when people turn JavaScript off, creating them also involves
browser detection, so in this chapter you’ll learn more ways to tailor JavaScripts
to the visitor’s browser.
You’ll also learn how quotation marks are handled in JavaScript and how
the hierarchical framework of a web page, known as the Document Object
Model (DOM), is reflected in JavaScript syntax.
Triggering Events
So far all the JavaScript we’ve seen is triggered when a web page loads into a
browser. But JavaScript can also be event driven.
Event-driven JavaScript waits for your visitor to take a particular action,
such as mousing over an image, before it reacts. The key to coding event-
driven JavaScript is to know the names of events and how to use them.
Event Types
With JavaScript’s help, different parts of your web page can detect different
events. For example, a pull-down menu can know when it has changed (see
Chapter 7); a window when it has closed (see Chapter 5); and a link when a
visitor has clicked on it. In this chapter I’ll focus on link events.
A link can detect many kinds of events, all of which involve interactions
with the mouse. The link can detect when your mouse moves over it and when
your mouse moves off of it. The link knows when you click down on it, and
whether, while you’re over the link, you lift your finger back off the button
after clicking down. The link also knows whether the mouse moves while
over the link.
Figure 4-3: An image from the Book of
JavaScript home page before mouseover
Figure 4-4: The same image after
mouseover
54 Chapter 4
Like the other kinds of interactions that we’ll cover in later chapters, all
of these events are captured in the same way: using an event handler.
onClick
Figure 4-5 shows the basic format of a link that calls an alert after a visitor
clicks it.
Before adding JavaScript:
<a href = "http://www.bookofjavascript.com/">Visit the Book of JavaScript
website</a>
After adding JavaScript:
<a href = "http://www.bookofjavascript.com/"
onClick = "alert('Off to the Book of JavaScript!');">Visit the Book of
JavaScript website</a>
Figure 4-5: A link that calls an alert
Try putting the link with the onClick into one of your own web pages.
When you click the link, an alert box should come up and say Off to the Book
of JavaScript! (Figure 4-6). When you click OK in the box, the page should
load the Book of JavaScript website.
Figure 4-6: The event-driven “Off to the Book of JavaScript!” alert box
Notice that, aside from the addition of onClick, this enhanced link is
almost exactly like the normal link. The onClick event handler says, “When
this link is clicked, pop up an alert.”
onMouseOver and onMouseOut
Two other link events are onMouseOver and onMouseOut. Moving the mouse over
a link triggers onMouseOver, as shown in Figure 4-7.
<a href = "#" onMouseOver = "alert('Mayday! Mouse overboard!');">board</a>
Figure 4-7: onMouseOver
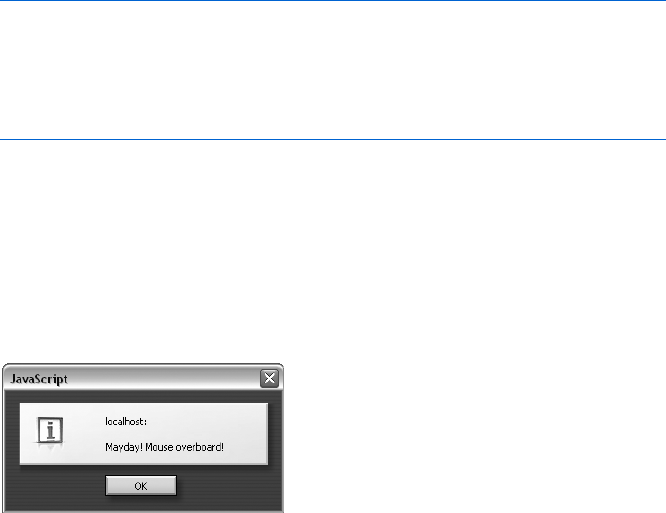
Working with Rollovers 55
As you can see, moving the mouse over the link triggers onMouseOver. The
code for onMouseOut looks like the onMouseOver code (except for the handler
name) and is triggered when the mouse moves off of the link. You can use
onMouseOut,onMouseOver, and onClick in the same link, as in Figure 4-8.
<a href = "#"
onMouseOver = "alert('Mayday! Mouse overboard!');"
onMouseOut = "alert('Hooray! Mouse off of board!!');"
onClick = "return false;">
board
</a>
Figure 4-8: onMouseOut,onMouseOver, and onClick in the same link
Mousing over this link results in an alert box showing the words
Mayday! Mouse overboard! (Figure 4-9). Pressing ENTER to get rid of the first
alert and moving your mouse off the link results in another alert box that
contains the words Hooray! Mouse off of board!! If you click the link instead of
moving your mouse off it, nothing will happen, because of the return false;
code in the onClick.
Figure 4-9: An alert box produced by
mousing over a link
onMouseMove, onMouseUp, and onMouseDown
The onMouseMove,onMouseUp, and onMouseDown event handlers work much like
the others. Try them yourself and see. The onMouseMove event handler is called
whenever the mouse is moved while it is over the link. The onMouseDown event
handler is triggered when a mouse button is pressed down while the mouse is
over a link. Similarly, the onMouseUp event handler is triggered when the mouse
button is lifted up again. An onClick event handler is triggered whenever an
onMouseDown event is followed by an onMouseUp event.
Quotes in JavaScript
This example also demonstrates a new wrinkle in JavaScript syntax. Inside
the double quotes of the onClick (Figure 4-8) is a complete line of JavaScript,
semicolon and all. In previous chapters, we’ve placed all of our JavaScript
between opening <script> and closing </script> tags. The only exception to

56 Chapter 4
this rule is when JavaScript is inside the quotes of an event. Your browser will
assume that anything within these quotes is JavaScript, so you shouldn’t put
<script> and </script> tags in there.
Also note that the quotes in the alert are single quotes ('). If these were
double quotes ("), JavaScript wouldn’t be able to figure out which quotes go
with what. For example, if you wrote
onClick = "alert("Off to the Book of JavaScript!");"
JavaScript would think that the second double quote closed the first one,
which would confuse it and result in an error. Make sure that if you have
quotes inside quotes, one set is double and the other is single.
Apostrophes can also pose problems. For example, let’s say you want the
alert in Figure 4-7 to say
Here's the Book of JavaScript page. You're gonna love it!
You would want the JavaScript to resemble this:
onClick = "alert('Here's the Book of JavaScript page. You're gonna love it!');"
Unfortunately, JavaScript reads the apostrophes in Here's and You're as
single quotes inside single quotes and gets confused. If you really want those
apostrophes, escape them with a backslash (\), like this:
onClick = "alert('Here\'s the Book of JavaScript page. You\'re gonna love it!');"
Putting a backslash before a special character, such as a quote, tells
JavaScript to print the item rather than interpret it.
Clicking the Link to Nowhere
You may have noticed that the links in Figures 4-7 and 4-8 have an unusual
form for the href attribute:
<a href = '#'>
This hash mark (#) in an href means, “Go to the top of this page.” I’ve
included it there because most browsers expect something to be inside the
quotes after the href, usually a URL. In Figure 4-5, for example, the tag is
<a href = "http://www.bookofjavascript.com/">
In HTML, href is a required attribute of the anchor (<a>) tag, or link.
href is an abbreviation for hypertext reference, and it’s required because, as
far as HTML is concerned, the whole purpose of a link is to send the user
Working with Rollovers 57
somewhere else when the link is clicked, so the browser needs to be told
where to go. Usually that’s another page, but in this case you are not trying
to go anywhere. I might have just put nothing inside the quotes (href = ""),
but different browsers will do different things in that case, and it’s usually
something weird. Give it a try in your favorite browser. To avoid weird
behaviors, it’s best to put the # sign inside an href when you don’t want the
link to go anywhere when clicked.
The link in Figure 4-8 had a second way of ensuring that the link didn’t
go anywhere when clicked: onClick = "return false;". Placing return false; in
the quotes after an onClick tells JavaScript to prevent the browser from follow-
ing the URL inside the link’s href. This can be quite useful for dealing with
people who have JavaScript turned off in their browsers. For example, if
someone with JavaScript turned off clicks the link in Figure 4-10, the browser
will ignore the onClick and happily follow the URL inside the href. This
URL might go to a web page that describes the wonders of JavaScript and
tells the user how to turn JavaScript on. People who already have JavaScript
turned on will be treated to the contents of the onClick. They will see an alert
box, and then the return false inside the onClick will prevent the browser
from following the URL in the href. Although very few people turn JavaScript
off (fewer than 1 percent of browsers), it never hurts to take them into
consideration.
<a href = "please_turn_js_on.html" onClick =
"alert('I\'m glad you have JavaScript turned on!'); return false;">Click me</a>
Figure 4-10: Links for people with JavaScript turned off
More Interesting Actions
You can do more with event handlers than simply triggering alert boxes.
Figure 4-11, for instance, uses an event handler to customize a page’s
background color.
<a href = "#"
onClick = "var the_color = prompt('red or blue?','');
window.document.bgColor = the_color;
return false;">
change background</a>
Figure 4-11: Customizing background color
When you click this link, a prompt box asks whether you want to change
the background to red or blue. When you type your response, the background
changes to that color. In fact, you can type whatever you want into that prompt
box, and your browser will try to guess the color you mean. (You can even do
a kind of personality exam by typing your name into the prompt and seeing
what color your browser thinks you are. When I type thau into the prompt,
the background turns pea green.)

58 Chapter 4
This example demonstrates two new facts about JavaScript. First, notice
that the onClick triggers three separate JavaScript statements. You can put as
many lines of JavaScript as you want between the onClick’s quotes, although if
you put too much in there, the HTML starts to look messy.
Second, notice that you can change the background color of a page by
setting window.document.bgColor to the color you desire. To make the back-
ground of a page red, you’d type:
window.document.bgColor = 'red';
In the example, we’re setting the background color to any color the user
enters into the prompt box. I’ll say more about window.document.bgColor soon.
Swapping Images
Using JavaScript, you can change or swap images on your web pages, making
buttons light up, images animate, and features explain themselves. Before
you tell JavaScript to swap an image, you have to tell it what image to swap
by naming the image. Figure 4-12 shows you how.
Before JavaScript:
<img src = "happy_face.gif">
After JavaScript:
<img src = "happy_face.gif" name = "my_image">
Figure 4-12: Naming an image
In this example, I’ve put an image of a happy face on the page and
named it my_image.
NOTE You can name an image whatever you like, but the name can’t contain spaces.
Once you’ve named an image, it’s easy to tell JavaScript to swap it with a
new one. Let’s say you have an image named my_image. To create an image
swap, tell JavaScript you want to change the src of that image to another.gif:
window.document.my_image.src = "another.gif";
Figure 4-13 shows the code for a very basic page with an image and a
link; click the link, and the image changes to happy_face.gif (Figure 4-14).
<html><head><title>Simple Image Swap</title></head>
<body>
<img src = "sad_face.gif" name = "my_image">
<br>
<a href = "#"
onClick = "window.document.my_image.src = 'happy_face.gif';
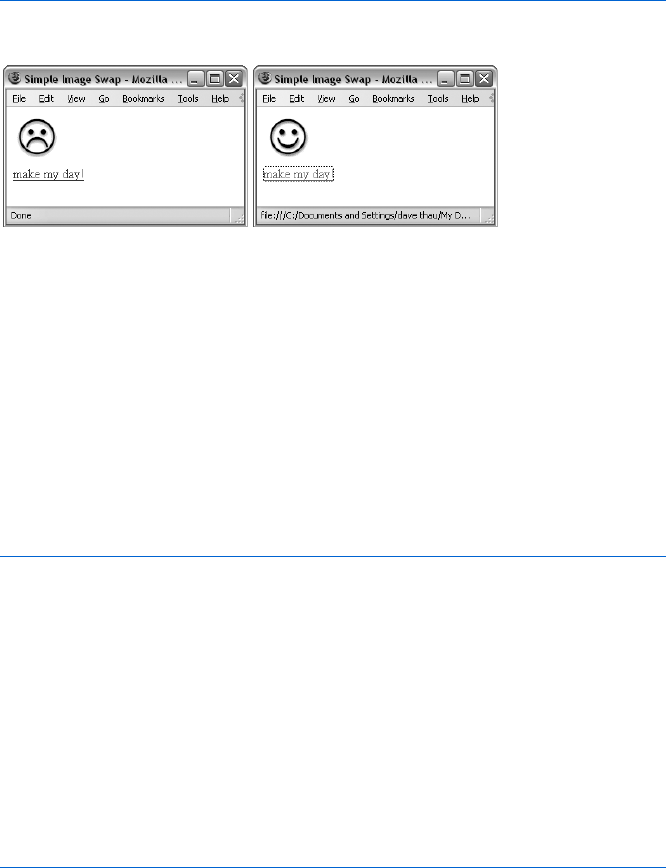
Working with Rollovers 59
return false;">make my day!</a>
</body>
</html>
Figure 4-13: JavaScript for a basic image swap
Figure 4-14: Swapping a sad face for a happy one
Working with Multiple Images
If you have more than one image on a page, you should give each one a
different name. Figure 4-15 has two images and two links. The first link
tells JavaScript to swap the image called my_first_image (the sad face) with
happy_face.gif. The second link tells JavaScript to swap the image called
my_second_image (a circle) with square.gif. The result is shown in Figure 4-16.
NOTE When using more than one image, you must name your images differently. If you
accidentally give two images the same name, the swap won’t work.
<html><head><title>Two Image Swaps</title></head>
<body>
<img src = "sad_face.gif" name = "my_first_image"><br>
<img src = "circle.gif" name = "my_second_image">
<br>
<a href = "#"
onClick = "window.document.my_first_image.src = 'happy_face.gif';
return false;">make my day!</a>
<br>
<a href = "#"
onClick = "window.document.my_second_image.src = 'square.gif';
return false;">square the circle!</a>
</body>
</html>
Figure 4-15: JavaScript for swapping two images
NOTE Image swapping doesn’t work in browsers earlier than Internet Explorer 4.0 or
Netscape 3.0. Furthermore, if you’re trying to replace a small image with a bigger one,
or a big image with a smaller one, browsers earlier than Netscape 4.61 and Internet
Explorer 4.0 will squash or stretch the new image to fit the space the old one occupied.
Later versions of these browsers adjust the page to fit the bigger or smaller image.
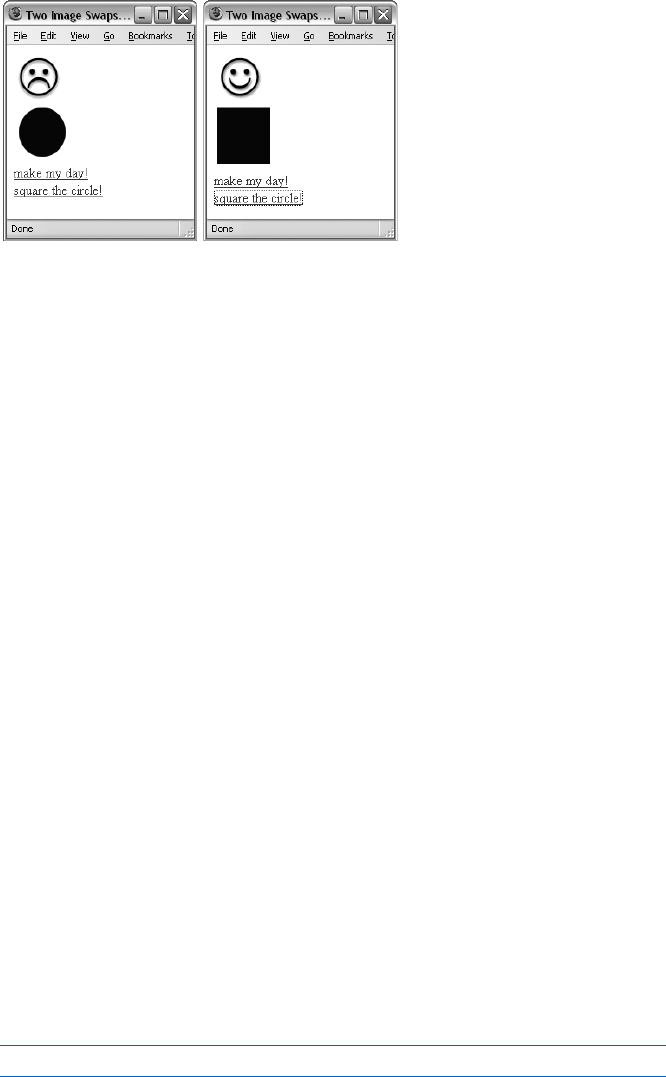
60 Chapter 4
Figure 4-16: Swapping two images
What’s with All the Dots?
You may wonder why JavaScript refers to my_image as window.document.my_image
and not just as my_image. You may also wonder why you would use window
.document.my_image.src when you want to change the src of that image. In
short, what’s with all the dots?
The answer has to do with how your browser looks at your web page.
Figure 4-17 shows the hierarchical organization of a web page as
JavaScript understands it—through the Document Object Model (DOM).
At the top of the DOM is the window that contains the web page you’re view-
ing. That window contains the navigator,document, and location objects. Each
of these objects has a lot of information in it, and by changing one you can
change what happens on your web page.
The dots in a line of JavaScript separate hierarchical levels of objects.
When JavaScript sees a series of objects separated by dots, it goes to the
last object in the series. So, for example, the phrase window.location tells
JavaScript to find the location object inside the current window. Similarly, the
line window.document.my_image.src tells JavaScript to find the source file (src)
of the image named my_image within the document object in the current window.
The current window is the one in which the JavaScript is located.
The document Object
The document object lists all the images, links, forms, and other stuff on a
web page. To code an image swap, we must tell JavaScript to find the document
object in the window, then locate the image object we would like to change
in the document object’s list, and finally change the image’s src. In JavaScript
terms (where happy_face.gif is the image we’re swapping in), this is how
it looks:
window.document.my_image.src = "happy_face.gif";
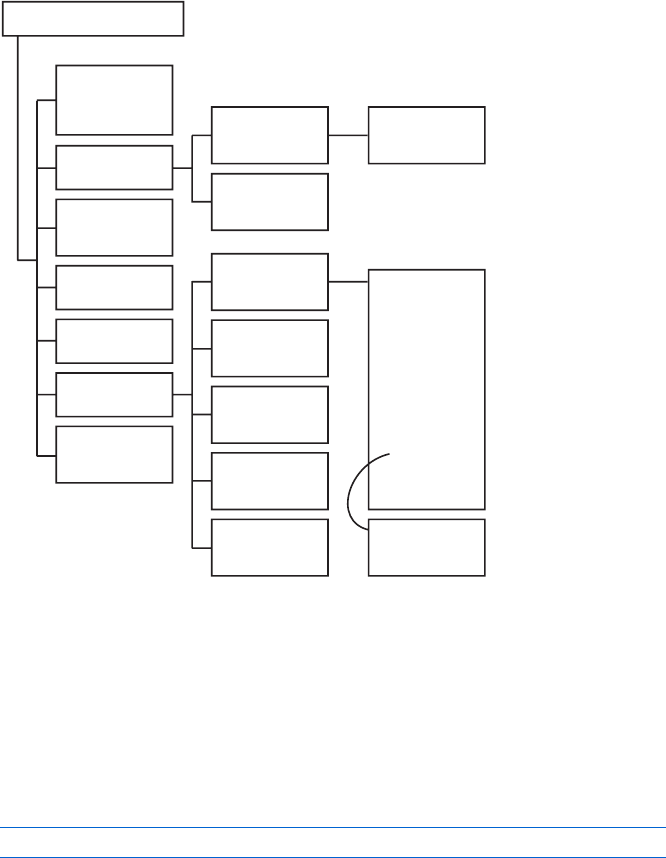
Working with Rollovers 61
Figure 4-17: DOM’s hierarchical organization
Object Properties
An object’s properties are the bits of information that describe the object, such
as its height, width, and src (the name of the file that the image displays).
Some properties, such as the src of an image, can be changed, and others
can’t. As we’ve seen, changing the src property of an image object changes
which file is displayed:
window.document.my_image.src = "happy_face.gif";
Other properties, like the image’s height and width, are read-only and
cannot be changed.
The document object contains the image objects, and it has its own proper-
ties. For example, the background color of the document object is called bgColor.
That’s why we could change the background color of our document using
window.document.bgColor = 'red'. The image and document objects are just two
of many objects we’ll be seeing throughout the book. Each JavaScript object
has its own set of properties. Appendix C provides a list of many JavaScript
objects and their properties.
THE CURRENT WINDOW
self,window,
parent,top
various
Window objects
navigator
Navigator object
frames[]
array of
Window objects
location
Location object
history
History object
document
Document object
Package
JavaPackage
object
elements[]
array of HTML
Form element
objects:
Button
Checkbox
FileUpload
Hidden
Password
Radio
Reset
Select
Submit
Text
Textarea
options[]
array of
Option objects
plugins[]
array of
Plugin objects
mimeTypes[]
array of
MimeType objects
forms[]
array of
Form objects
embeds[]
array of
JavaObject objects
applets[]
array of
JavaObject objects
images[]
array of
Image objects
anchors[]
array of
Anchor objects
mimeType[]
array of
MimeType objects

62 Chapter 4
Finally, Rollovers!
Now that we know how to tell JavaScript how to do an image swap and how
to trigger JavaScript based on a user event with onClick,onMouseOver, and
onMouseOut, we can create a rollover. Just stick an onMouseOver and onMouseOut
inside an image tag, like this:
<img src = "sad_face.gif" name = "my_first_image"
onMouseOver = "window.document.my_first_image.src = 'happy_face.gif';"
onMouseOut = "window.document.my_first_image.src = 'sad_face.gif';"
>
See how that works? When first loaded, the image shows the sad_face.gif
because that’s what the image tag calls.
<img src = "sad_face.gif" name = "my_first_image"...
Then, when the mouse moves over the image, the link around it cap-
tures the onMouseOver, and the image swaps to happy_face.gif, like so:
onMouseOver = "window.document.my_first_image.src = 'happy_face.gif';"
When the mouse moves off the image again, the link captures the
onMouseOut event, which causes JavaScript to swap sad_face.gif back into
the image:
onMouseOut = "window.document.my_first_image.src = 'sad_face.gif';"
Alternatively, the onMouseOut and onMouseOver could have gone inside an
HTML link, as we’ve done with onClick in earlier examples. Because there are
still a few people using browsers that don’t allow onMouseOut and onMouseOver
handlers inside <img> tags, it’s not a bad idea to put them in a link surrounding
the image:
<a href = "#"
onMouseOver = "window.document.my_first_image.src = 'happy_face.gif';"
onMouseOut = "window.document.my_first_image.src = 'sad_face.gif';">
<img src = "sad_face.gif" name = "my_first_image" border = "0">
</a>
Image Preloading
That’s pretty much all there is to your basic image swap. As usual, there’s
something that makes the process a little more difficult. When you do an
image swap as I’ve described, the image that’s swapped in downloads only

Working with Rollovers 63
when your visitor mouses over the image. If your network connection is
slow or the image is big, there’s a delay between the mouseover and the
image swap.
The way around this potential download delay is to preload your
images—grabbing them all before they’re needed and saving them in the
browser’s cache. When the mouse moves over a rollover image, the browser
first looks to see whether the swap image is in its cache. If the image is there,
the browser doesn’t need to download the image, and the swap occurs
quickly.
There are hundreds of image preloading scripts, and they’re all basically
the same. Rather than write your own, you can download one of the free ones
and paste it into your page (Webmonkey has a good one at http://www
.hotwired.com/webmonkey/reference/javascript_code_library/wm_pl_img).
Let’s go over the basics of how preloads work so you’ll recognize them when
you see them.
There are two parts to a preload. First, you create a new image object.
The line
var new_image = new Image();
creates a new image object that has no information. It doesn’t have a GIF or
JPEG associated with it, nor does it have a height or width. If you know the
height and width of the image, you can do this:
var new_image = new Image(width, height);
Giving JavaScript information about the size of the image helps the
browser allocate memory for the image; it doesn’t have much impact on
how users experience your web page.
Once you’ve created this new object,
new_image.src = "my_good_image.gif";
forces the browser to download an image into its cache by setting the image
object’s src. When the image is in the browser’s cache, it can be swapped for
another image without any download delays. Figure 4-18 incorporates a
preload with the rollover we saw in the last example.
<html><head><title>Preloaded Rollover</title>
<script type = "text/javascript">
<!-- hide me from older browsers
var some_image = new Image();
some_image.src = "happy_face.gif";
// show me -->
</script>

64 Chapter 4
</head>
<body>
<img src = "sad_face.gif" name = "my_first_image"
onMouseOver = "window.document.my_first_image.src = 'happy_face.gif';"
onMouseOut = "window.document.my_first_image.src = 'sad_face.gif';">
</body>
</html>
Figure 4-18: Image preload and rollover
How the Tin House Rollovers Work
At the beginning of the chapter, I mentioned the home page of Tin House.
Its image swap JavaScript is quite simple and will give you an idea of how
easy it is to add a little JavaScript to your site. The Tin House rollover involves
four images: the top, middle, left, and right parts of the bottom floor of the
house. These images are placed in an HTML table to create the complete
image of the house. Figure 4-19 shows you the (abbreviated) code for the
top floor.
X <a href = "general_info/submission.html"
Y onMouseOver = "attic3.src='images/index/home_attic3b.gif';"
Z onMouseOut = "attic3.src='images/index/home_attic3.gif';">
[ <img src = "images/index/home_attic3.gif" name =
"attic3" width = "289" height = "68" border = "0" alt =
"General Information: Our history, our glory, and our guidelines.">
</a>
Figure 4-19: Rollover from the Tin House home page
This should look very familiar by now. Line [ describes the image. Notice
that Tin House puts width,height,border, and alt attributes inside their image
tag as well as the name attribute used to do the image swap. The height and
width attributes tell web browsers how much space to reserve for the image.
The alt attribute does two important things. First, some browsers don’t
display images. This might be because the person is on a slow connection
and has turned images off in their browser, or because they using are a
device that can read web pages to them, or perhaps it’s a search engine
visiting your web page, looking for stuff to add to its index. The alt attribute
in an image provides information about that image in all of these situations.
In addition, the alt attribute is used by some browsers even when images are
being displayed. Recent versions of Internet Explorer, for example, will display
the alt text in a yellow box when you leave your mouse over an image for
more than a second or two.
Getting back to the JavaScript, you can see that Tin House has put its
onMouseOver (Y) and onMouseOut (Z) inside an HTML link (X). As we’ve seen,
the onMouseOver and onMouseOut event handlers can go either in the image
itself, or in a link surrounding the image, as Tin House has done.
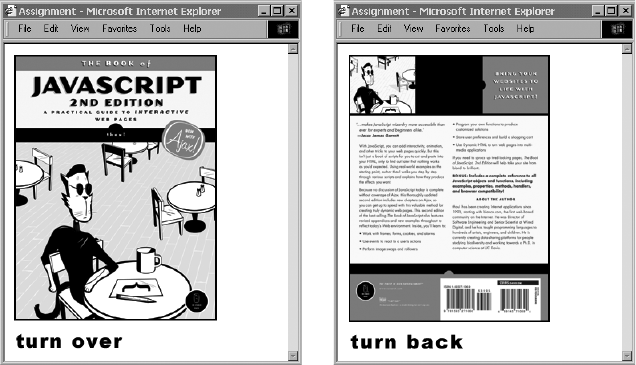
Working with Rollovers 65
Summary
In this chapter you’ve learned:
zHow to trigger events, such as onMouseOver and onMouseOut
zHow to nullify a link with return false inside onClick
zHow to change the background color of a page
zHow to swap images
zHow to preload images so that they’ll swap in more quickly
zHow the DOM uses dots to separate objects into hierarchies
Now that you know the basics of image swapping, you can perform lots of
tricks. You can make an image vanish by swapping in one that’s the same
color as the page background. You can make images composed of explan-
atory text and place them next to the feature they describe. There’s no end
to the fun you can have with image swaps.
As always, we’ll be revisiting many of these points in later chapters, so
you’ll become more and more familiar with them. To make sure you under-
stand how they work, try the following assignment.
Assignment
Figures 4-20 and 4-21 show you a page which does two image swaps simul-
taneously. Notice that mousing over the text on the bottom of the screen
changes the words from turn over to turn back and swaps the book’s front
cover with its back cover. The words, like the book covers, are images, and
they are swapped using the techniques we’ve learned in this chapter. Your
assignment is to write a similar page where mousing over one image causes
two images to change.
Figure 4-20: The Chapter 4 assignment
page before the rollover
Figure 4-21: The Chapter 4 assignment
page after the rollover
OPENING AND MANIPULATING
WINDOWS
JavaScript gives you the ability to open mul-
tiple browser windows and control what’s
inside them. JavaScript can also change where
windows are located on your visitor’s screen.
You can use the windows you open to present a slide
show or some help information or to build a remote
control device for your site.
In this chapter, you’ll learn how to:
zOpen new windows with JavaScript
zMake those windows look the way you’d like
zPosition the windows on your visitor’s screen
zSwap images inside windows you’ve opened
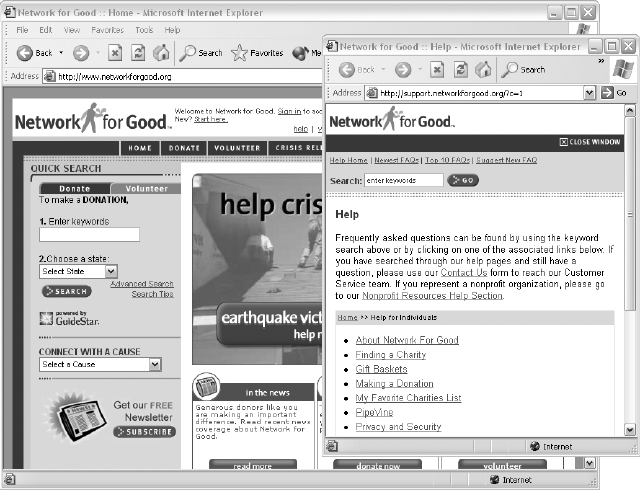
68 Chapter 5
Real-World Examples of Opening Windows to Further
Information
Let’s begin with a quick look at two examples of windows linked from home
pages. The Network for Good (http://www.networkforgood.org) is one of
the best charity resources on the Web. At the top and bottom of its page, it
has links to a Help window (Figure 5-1). Click either link, and a window with
answers to frequently asked questions pops up. Notice that this window is
smaller than the Network for Good home page and has no menu bar across
the top. Also notice the familiar close box button in the upper-right corner
of the Help window. Clicking that box closes the window.
Figure 5-1: Opening a window to further information
The Book of JavaScript web page (http://www.bookofjavascript.com) has
an About the Author link (Figure 5-2), which acts similarly. Clicking this link
opens a smaller window that provides more information about me, the author.
At the bottom of the window is a button that closes the window.
Help windows like these can vastly improve a visitor’s experience of your
site. Rather than clicking to a new web page, waiting for the download, and
then having to click back to the original page if she wants to refer to it for a
moment, the user will find that these windows display your information very
quickly and without browser navigation, and it will be possible for her to see
both pages at once and switch quickly between them.
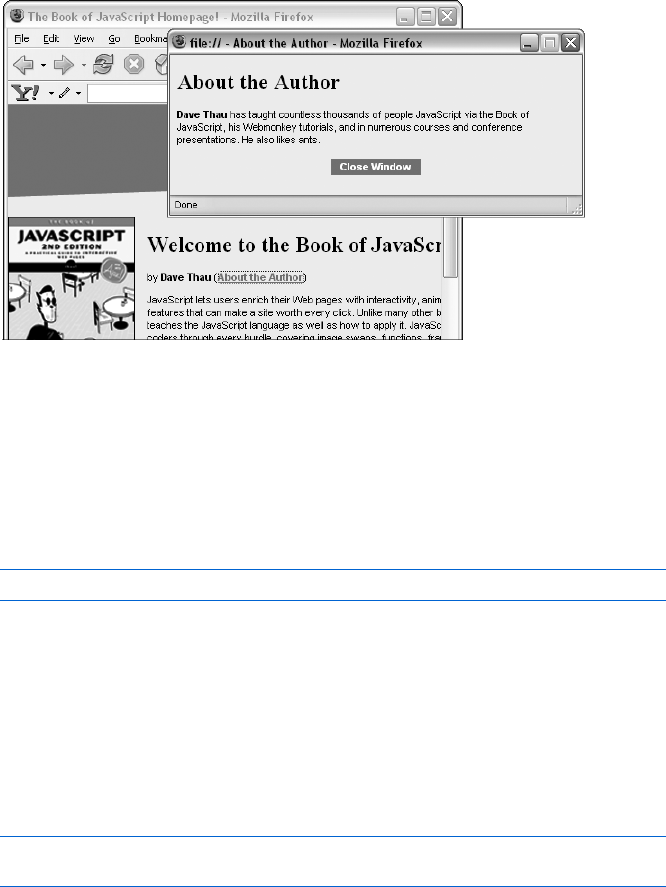
Opening and Manipulating Windows 69
Figure 5-2: A small helper window
Working with Windows as Objects
Because windows are objects, you manipulate them just as you would any
object (see Chapter 2 for a discussion of objects and methods), by using
JavaScript’s dot notation to apply one of the available methods to the window
object you name:
window_name.method_name();
This chapter introduces the methods that JavaScript provides for the most
important window operations, along with useful properties you can specify
for a window object.
Opening Windows
To open a window, use the open() method, which opens a window that has
the characteristics you specify as parameters inside its parentheses:
var window_name =
window.open("some_url", "html_name", "feature1,feature2,feature3,...");
In this example, I’ve set up a variable called window_name to refer to the
window we’re opening. When I want to use JavaScript to change or manip-
ulate what’s inside the window, I’ll refer to this window as window_name. Here
window_name is just a variable—you could use any valid JavaScript variable
name, such as fido, in its place if you so desired (see Chapter 2 for variable
naming rules).
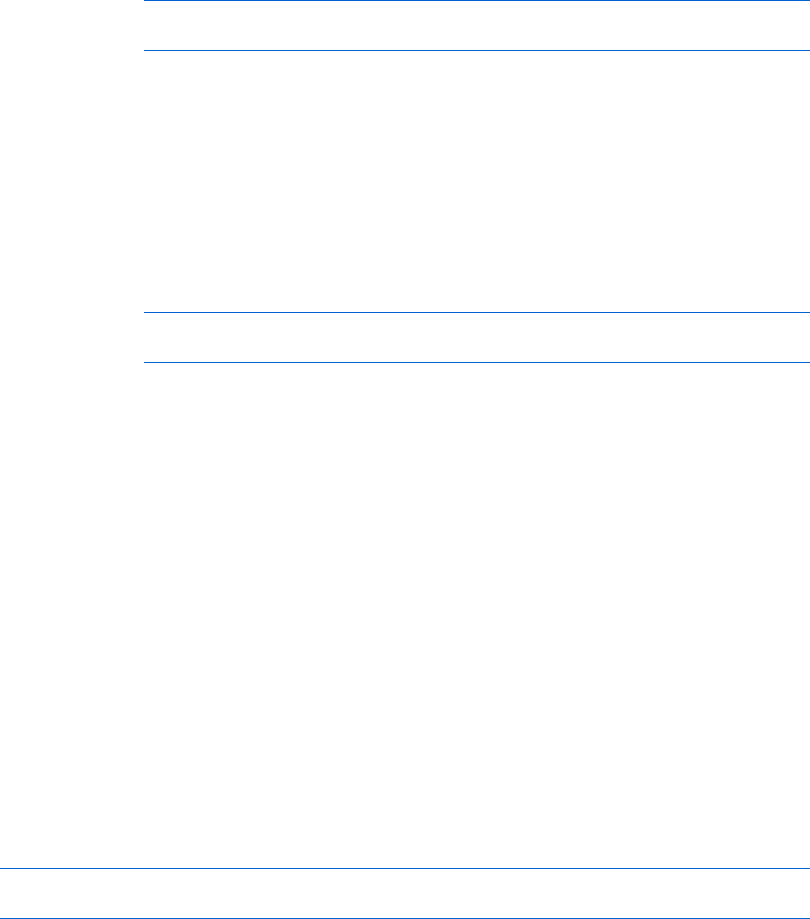
70 Chapter 5
Manipulating the Appearance of New Windows
The three parameters of the window.open() command control the new
window’s characteristics.
The URL Parameter
The first parameter is the URL of the page you want to appear inside the
window when the window opens. If you’d like to open a window with the
Book of JavaScript website, inside the <script> tags you’d write:
var window_name =
window.open("http://www.bookofjavascript.com/", "html_name");
The HTML Name Parameter
The HTML name of the window (the second parameter inside the paren-
theses) is useful only if you want to load a page into the window when the
user clicks an HTML link on a different page. For example, if you open
a window using window.open() and use the second parameter to name the
window my_window, you can then use an HTML link to load a page into your
new window. To do this, put the HTML name of the new window into the
target attribute of the link. For example, clicking the following link loads
the Webmonkey site into my_window:
<a href = "http://www.webmonkey.com/" target =
"my_window">Put Webmonkey into my new window!</a>
You can also use the target element of the link tag to open windows with-
out using JavaScript. For example, if a visitor clicks a link like the one above
and you haven’t already opened a window named my_window with JavaScript,
your browser opens a new window and loads the link. The downside to opening
a window without using JavaScript is that you have no control over what the
window looks like, and you can’t change it once you’ve opened it (except by
loading another page into it from a link).
The Features Parameter
The third parameter in the window.open() command is a list of features
that let you control what the new window will look like. This is where things
start to get fun. Figure 5-3 illustrates the parts of each browser window that
JavaScript allows you to control.
The features parameter lets you open a new window that includes all,
some, or none of these features. If you leave out the third parameter (that
is, you list just the first two parameters and nothing more—not even empty
quotes), the window you open will have all the features you see in Figure 5-3
and will be the same size as the previous window. However, if you list any of
the features in the third parameter, only the listed features appear in the
window you open. So if you open a window with the command
var book_of_javascript_window =
window.open("http://www.bookofjavascript.com/","book_of_javascript", "resizable");
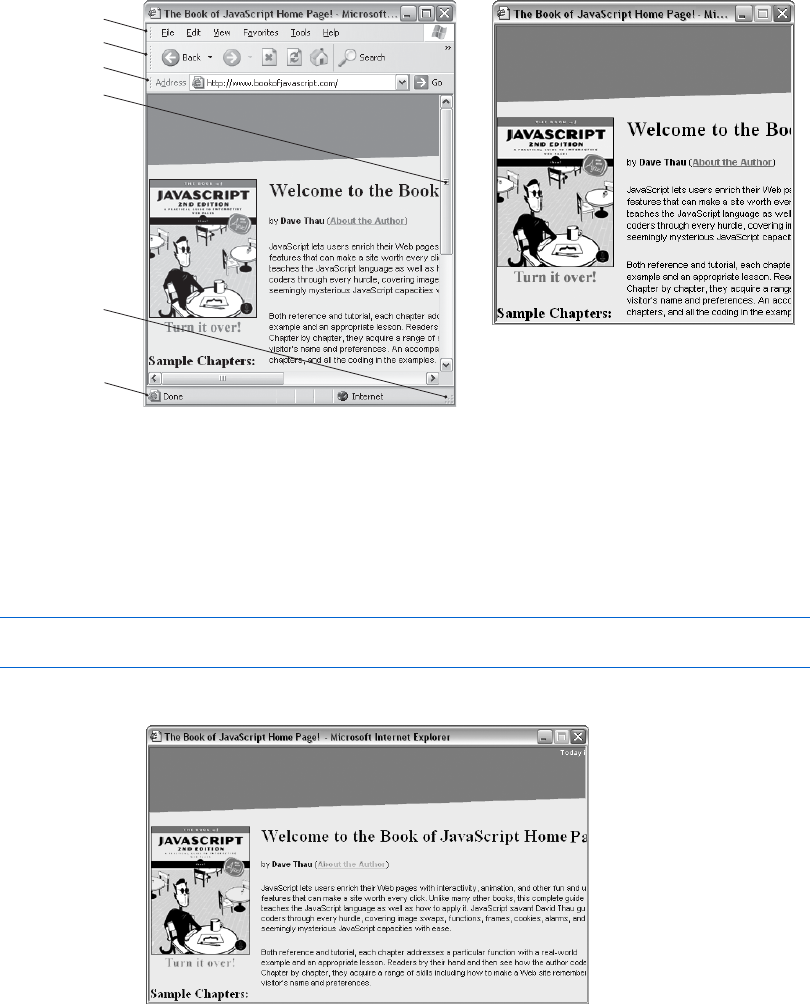
Opening and Manipulating Windows 71
you’ll get a resizable window with the Book of JavaScript site in it. This window
will be the same size as the window from which you opened it, but will lack
the menu bar, status bar, scroll bars, and other features (see Figure 5-4).
If you want more than one feature, you can list them inside the quotes,
separated by commas. Make sure to leave all spaces out of this string. For some
reason, spaces inside a feature string cause some browsers to draw your
windows incorrectly. Here’s an example of a window with two features
(height and width) specified:
var pictures =
window.open("http://bookofjavascript.com", "book_of_javascript","width=605,height=350" );
Figure 5-5 shows the result.
Figure 5-5: The Book of JavaScript window opened with
aheight of 350 pixels and a width of 605 pixels
Figure 5-3: Browser window features you
can control with JavaScript
Figure 5-4: The Book of JavaScript site in a
window without features
menubar
toolbar
location
status
resizable
scrollbar

72 Chapter 5
Table 5-1 lists all the different window.open() features you can play with.
Try experimenting with different ones to see what they do. Except for the
features that deal with pixels (for example, height), all you have to do is type
the feature name inside the third parameter’s quotes. Some of the features
apply to a specific browser—the directories feature, for example, works only
on Netscape.
Some Browsers and Computers Open Windows Differently
The process of opening windows differs slightly depending on the browser and
computer being used. For example, JavaScript windows in Mozilla, Safari, and
Opera browsers are always resizable, so even if you leave that feature out of
the string, the window remains resizable. Another difference is that you
can’t hide the menu bar on a Macintosh.
Closing Windows
If you’ve opened a window called my_window and want to close it later in the
script, use the close() method:
my_window.close();
You’ll recall from Chapter 4 that the word window refers to the window
containing the JavaScript. This means you can also use JavaScript to close
the window that’s actually running the JavaScript, like this:
window.close();
Table 5-1:
JavaScript Window Features
Feature Effect
directories Adds buttons such as What’s New and What’s Cool to the menu bar. Some
browsers ignore this feature. Others add different buttons.
height = XAdjusts the height of the window to X pixels.
left = XPlaces the new window’s left border X pixels from the left edge of the screen.
location Adds a location bar, where the site visitor can enter URLs.
menubar Adds a menu bar.
resizable Controls whether the visitor can resize the window; all Mac windows are
resizable even if you leave this feature out.
scrollbars Adds scroll bars if the contents of the page are bigger than the window.
status Adds a status bar to the bottom of the window. Use the status property of
the window object, discussed later in this chapter, to define what will be
displayed in the status bar.
toolbar Adds a standard toolbar with buttons such as back, forward, and stop.
Which buttons are added depends on the browser being used.
top = XPlaces the window’s top border X pixels from the top edge of the screen.
width = XAdjusts the window width to X pixels.

Opening and Manipulating Windows 73
This is exactly how the About the Author window on the Book of JavaScript
page works. If you view the source code on the page that loads into one of
the help windows, you’ll see it has a button toward the bottom, labeled Close
Window. If that button were a link, the script would look like this:
<a href = "#" onClick = "window.close(); return false;">Close Window</a>
Figure 5-6 shows how to do the same thing with a button instead of
alink.
<form><input type = "button" value = "Close Window" onClick =
"window.close();"></form>
Figure 5-6: Using a button to close a help window
The primary difference between the code in Figure 5-6 and the simple
link I described is that Figure 5-6 uses a button instead of a link. The button
is a form element that takes an onClick, just as a link does.
Using the Right Name: How Windows See Themselves and
Each Other
Every window is a bit egocentric and thinks of itself as window. Let’s say you
open a web page titled The Original Window. Now let’s say that window opens
a second window, new_window.html (titled The New Window), using JavaScript,
like this:
var new_window =
window.open("new_window.html","new_window","height=100,width=100");
These two windows see each other in different ways. The original win-
dow thinks the new window is called new_window. The new window, however,
thinks of itself as window. This means if you want to close the new window using
JavaScript inside the original window, you’d write this code:
new_window.close();
But to close the new window using JavaScript inside the new window, you’d
write the following in new_window.html:
window.close();
This window-centrism is one of the aspects of object-oriented pro-
gramming that makes it interesting. It’s like dealing with distinct individuals
who have different perspectives on the world.
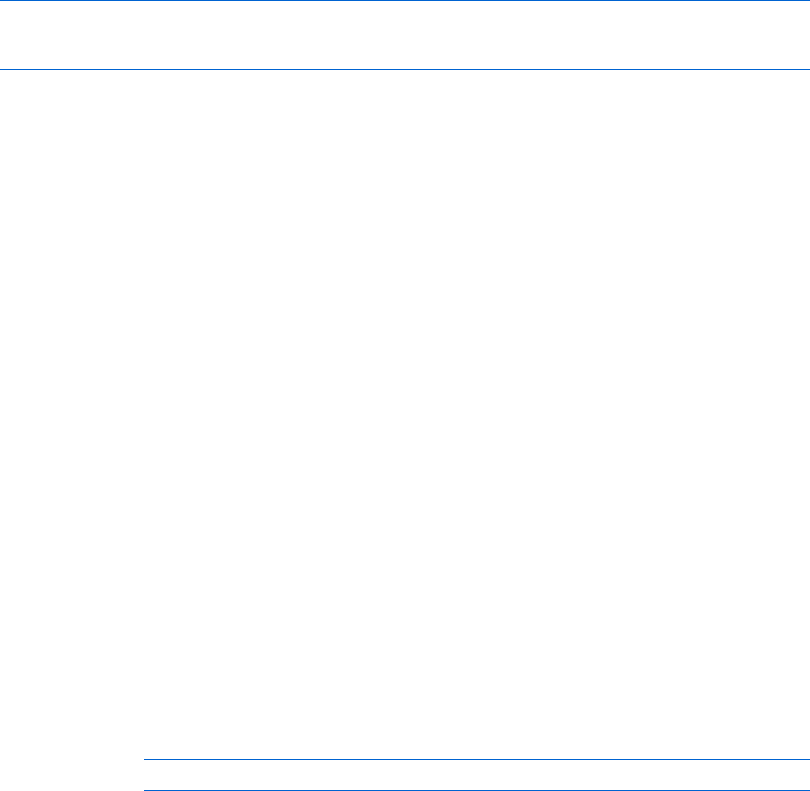
74 Chapter 5
Moving Windows to the Front or Back of the Screen
Of course, once you’ve opened a window, you can do much more than just
close it. You can move it to the front of the screen (on top of the other windows)
or to the back of the screen (behind all the other windows). The focus() method
brings a window forward, and blur() puts the window in back. The focus()
method is especially useful when you have a window that should always appear
at the front of a screen. For example, if I wanted a small navigation window
to appear over the intro page, I could make all the links using this technique:
<a href = "#" onClick =
"navigation = window.open('http://www.bookofjavascript.com/nav.html','navigation',
'width=605,height=350' );navigation.focus(); return false;">Navigation Window</a>
This line opens the navigation window and brings it up to the front.
NOTE Notice that I didn’t put the word var before the navigation variable when I called
window.open(). If you use var inside a link, JavaScript will forget the name of the
window once it executes the rest of the JavaScript commands in the onClick. The
reason for this will be clearer after you read Chapter 6.
Window Properties
So far we’ve seen four methods for the window object: open(),close(),focus(),
and blur(). Later in the chapter, we’ll explore two somewhat more complicated
methods, resizeto() and move(),both of which involve a little math. First, how-
ever, let’s look at some window properties that come in handy from time
to time.
The status Property
One of the most useful (and most abused) properties is the window’s status.
The value of this property defines what appears in the window’s status bar (see
Figure 5-3). One common status is the URL of a link you are mousing over.
You can use the status property to change what appears in the status bar.
You may have noticed that some people put a kind of marquee in this area,
scrolling across the bottom with messages like Buy our stuff! Buy our stuff!
I don’t want to encourage status bar abuse, so I’m not going to teach you
exactly how to do that, but you can use these JavaScript techniques to create
a similar effect. To change what appears in the status bar of a window, use a
<body> tag like this:
<body onLoad = "window.status = 'hi there!';">
This tag tells JavaScript to change the contents of the window’s status bar
after the page has been fully loaded into the browser.

Opening and Manipulating Windows 75
You might want to use the status property to inform visitors about the
site they’ll see if they click a link. For example, if you have a link to a very
graphics-intensive site, the words Warning: This site has a lot of graphics could
appear in the status bar when the visitor mouses over the link. You can set
this up with an onMouseOver:
<a href = "http://www.myheavygraphicsite.com/" onMouseOver =
"window.status='Warning: This site has a lot of graphics'; return true;">
My Heavy Graphic Site</a>
Notice the return true after the window.status command. This is similar to
the return false I put at the end of my onClick in rollover links (see Chapter 4),
and it does almost the same thing. When the user performs an onMouseOver,
return true prevents the URL from appearing in the status bar. If you don’t
put it there, the words Warning: This site has a lot of graphics flash briefly in the
status bar; then the link’s URL quickly replaces them before the warning can
be seen.
NOTE You might be asking, “Why is it return false in the case of onClick and return true
in the case of onMouseOver?” That’s a good question, and unfortunately there’s no good
answer—that’s just how it is. The best you can do is memorize which goes with which.
The opener Property
When one window opens a new window, the new window remembers its
parent (the original window) using the opener property. An opened window
can access its parent through this property and then manipulate the parent.
For example, if you want a link in the new window to change the contents of
the status bar in the original window, you’d include the following code inside
a link in the new window:
<a href = "#" onClick =
"var my_parent = window.opener; my_parent.status='howdy'; return false;">
put howdy into the status bar of the original window</a>
The first statement inside the onClick says, “Find the window that opened
me, and set the variable my_parent to point to that window.” The second
statement changes the status property of that window to howdy.
Alternatively, you could combine the lines:
<a href = "#" onClick =
"window.opener.status = 'howdy'; return false;"> put howdy into the status
bar of the original window</a>
The opener property is very useful if you want to have a remote control that
affects the contents of the original window. The remote control file (available
at http://www.bookofjavascript.com/Chapter05/the_remote.html) offers an
example of this. Figure 5-7 shows the code that triggers the remote control.
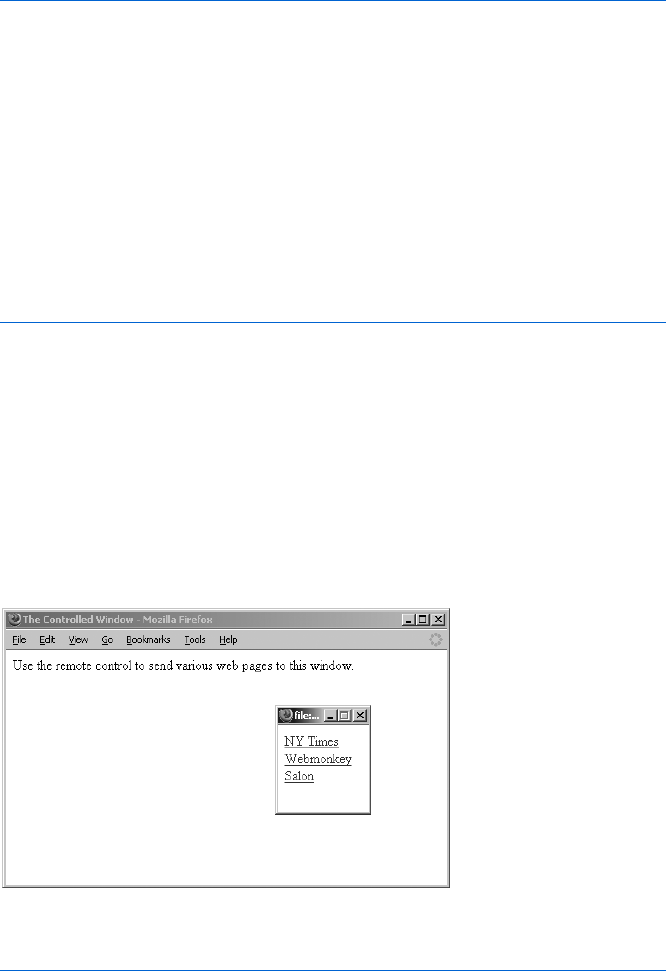
76 Chapter 5
<html>
<head>
<title>The Controlled Window</title>
<script type = "text/javascript">
<!-- hide me from older browsers
// open the control panel window
var control_window =
window.open("the_remote.html","control_window","width=100,height=100");
// show me -->
</script>
</head>
<body>
Use the remote control to send various web pages to this window.
</body>
</html>
Figure 5-7: The code for the window that calls the remote control
NOTE Some people install pop-up blocking software on their computers or set their browsers to
block pop-up windows. Because the JavaScript in Figure 5-7 opens a window automat-
ically (without the user having to click a link), it qualifies as a pop-up window, and
computers that block pop-ups will prevent the window from opening. If the above Java-
Script doesn’t work on your computer, it may be because you have blocked pop-ups.
The code in Figure 5-7 opens a window and loads the web page called
the_remote.html, which is shown in Figure 5-8. Figure 5-9 shows you the code
for the_remote.html.
o
Figure 5-8: The page that calls the remote control, and the
remote control itself
<html>
<head>
<title>Remote Control</title>
</head>
<body>
X <a href = "#"
onClick = "window.opener.location.href='http://www.nytimes.com/';
window.focus();">NY Times</a><br>

Opening and Manipulating Windows 77
<a href = "#"
onClick = "window.opener.location.href='http://www.webmonkey.com/';
window.focus();">Webmonkey</a><br>
<a href = "#"
onClick = "window.opener.location.href='http://www.salon.com/';
window.focus();">Salon</a><br>
</body>
</html>
Figure 5-9: The remote control code
Figure 5-9 includes code for a typical link using an onClick (X). When
a visitor clicks the New York Times link, JavaScript looks up window.opener
(the window that opened the remote control) and then changes its location
to http://www.nytimes.com. Then, because of the window.focus(), JavaScript
brings the remote control window to the front of the screen. Notice that
because this JavaScript is running inside the remote control window, we use
window.focus() rather than control_window.focus().
More Window Methods
You’ve seen four window methods so far: open(),close(),focus(), and blur().
Let’s look at two more that come in handy from time to time: resizing and
moving windows.
Resizing Windows
Modern browsers provide two different ways your JavaScript can resize a
window. The window.resizeTo() method resizes a window to a given width
and height. To change a small window into one that’s 500 pixels wide and
200 pixels high, you’d use the following script:
window.resizeTo(500,200);
Alternatively, you can change the size of a window by a specific amount
using window.resizeBy(). The window.resizeBy() method takes two numbers:
how much the width of the window should change and how much the height
should change. The code
window.resizeBy(10, -5);
makes a browser 10 pixels wider and 5 pixels shorter.
Moving Windows
The window.moveTo() method moves a window to an absolute position on the
screen. If you want the window in the upper-left corner of the user’s screen,
you’d type:
window.moveTo(0,0);

78 Chapter 5
The first number is the number of pixels from the left border of the screen
you want the window’s upper-left corner to appear, and the second number
is the number of pixels from the top of the screen.
An alternative to window.moveTo() is window.moveBy(). If you want to move
a window 5 pixels to the right and 10 pixels down from its current position,
you’d type:
window.moveBy(5,10);
The first number is the number of pixels to the right you want to move the
window, and the second is the number of pixels down. If you want to move
the window 10 pixels up and 5 to the left, just use negative numbers:
window.moveBy(-5,-10);
Be careful not to move a window entirely off a user’s screen. To ensure
against this possibility, you have to know the size of the user’s screen. The two
properties that indicate this are:
window.screen.availHeight
window.screen.availWidth
Figure 5-10 shows how you can use window.screen.availHeight and
window.screen.availWidth to move a window to the center of the screen.
This script centers the window on any screen, regardless of its size.
<html>
<head>
<title>Center Window</title>
<script type = "text/javascript">
<!-- hide me from older browsers
// set some variables
X var window_height = 200;
Y var window_width = 200;
// make the window smallish
Z window.resizeTo(window_height, window_width);
// find out how big the screen is
var height = window.screen.availHeight;
[ var width = window.screen.availWidth;
// get the left position
// it'll be half of the screen
// minus half of the window width
var left_point = parseInt(width / 2) - parseInt(window_width / 2);
// get the top position

Opening and Manipulating Windows 79
// similar calculation as for the left position
\ var top_point = parseInt(height/2) - parseInt(window_height / 2);
// move the window
//
] window.moveTo(left_point, top_point);
// show me -->
</script>
</head>
<body>
<h1>Hi!</h1>
</body>
</html>
Figure 5-10: Code for moving a window to the center of the screen
Lines X through Z resize the window to 200 by 200 pixels. Once that’s
done, the script uses window.screen.availHeight and window.screen.availWidth to
figure out how high and wide the screen is. After determining those values, the
script does some calculations to figure out where the upper-left corner of the
window should go. Let’s look at the formula to calculate the left-hand position
of the window:
var left_point = parseInt(width / 2) - parseInt(window_width / 2);
The first part of this formula determines the screen’s midpoint by dividing
the width of the screen by two (we’ve defined the variable width in [). The
parseInt() command ensures that the resulting number is an integer. Knowing
the screen’s midpoint isn’t enough to center the window, however, because
window.moveTo() sets the left border of the window you’re moving. If you move
the left border of the window into the center of the screen, the window will
be too far to the right. To get the window to the center of the screen, we
have to move it over to the left. The second part of the formula, subtracting
parseInt(window_width / 2), figures out how far to move the window to the left:
half the window’s width (see Figure 5-11).
Figure 5-11: Calculating how to center a window
If you place the left side of the window in the
middle of the screen, the window won’t be
centered. You have to move it a bit to the left.
½ screen width
window window
½ window
width
½ screen width
To center the window, move it ½ of its width
to the left. In other words, the left border is:
½ screen width – ½ window width.
screen screen

80 Chapter 5
Line \ performs a similar calculation to determine where to set the top
of the window. Once we’ve determined the window’s correct top and left
position, we use the window.moveTo() command to move it (]).
NOTE In Internet Explorer, the moveTo() method works only when it is moving the window
containing the JavaScript. In other words, if you have opened a window named
my_window, you can’t move that window using my_window.moveTo(100,100). You can
still use window.moveTo(100,100) to move the window that contains the JavaScript
calling the moveTo() method.
Summary
In this chapter you’ve learned:
zHow to open new windows with window.open()
zHow to incorporate various standard browser elements in the new
window using the feature parameter
zHow to close the windows you’ve opened with window_name.close()
zHow to move windows to the front of the screen with window.focus()
zHow to send windows to the back of the screen with window.blur()
zHow to change the message in the window’s status bar by setting
window.status
zHow a window you’ve opened can affect the previous window with
window.opener
zHow to resize windows with window.resizeTo() and window.resizeBy()
zHow to move windows with window.moveTo() and window.moveBy()
Congratulations! Now that you know how to swap images and mess with
windows, you can handle about 75 percent of what most web professionals do
with JavaScript. The next few chapters will cover some details of JavaScript as
a programming language, and then we’ll be ready for the really fancy stuff.
Assignment
We’ve learned how to change the contents of the status bar of a window
we’ve opened using JavaScript:
var my_window = window.open("http://www.nostarch.com","my_window");
my_window.status = "I'm in the new window's status bar!";
We can use a similar technique to swap an image in a window we’ve
opened using JavaScript. Remember, the code to swap an image looks like
this, where the_image is the name of an image on the page:
window.document.the_image.src = "new_image.gif"
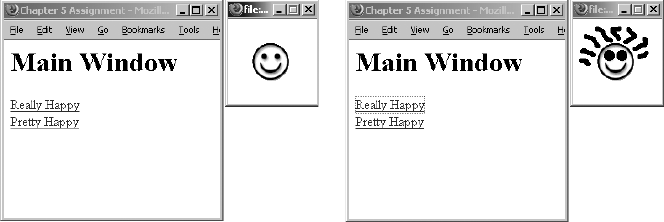
Opening and Manipulating Windows 81
To swap an image in another window, just replace window in the script
with the name of the window containing the image.
Your homework assignment is to write a page (let’s call it the main page)
that contains two links. Write some JavaScript so that when the main page
opens, it also opens a little window containing an image. When clicked, the
two links on the main page swap different images into the little window.
Figures 5-12 and 5-13 demonstrate what I mean.
This assignment is a bit tricky, but give it your best shot before looking at
the solution in Appendix A.
Figure 5-12: After opening the main
window
Figure 5-13: After clicking the Really
Happy link
WRITING YOUR OWN
JAVASCRIPT FUNCTIONS
In this chapter we’re going to focus on
a programming concept—writing your
own functions. Knowing how to write
your own functions will improve almost any
JavaScript you create. In fact, you’ll see how custom-
made functions can enhance several of the JavaScript
tricks you’ve already learned.
In this chapter, you’ll learn how to:
zWrite your own functions
zUse homemade functions to improve your code
zWrite functions you can cut and paste into whatever pages you want
We’ll be using homemade functions in every chapter from now on, so
pay extra-close attention to what’s going on in this chapter. You’ll be glad
you did..

84 Chapter 6
Functions as Shortcuts
Functions aren’t anything new. You’ve already seen a number of functions
that come built in to JavaScript. The alert() function, for example, takes
whatever text you put inside the parentheses and displays an alert box with
that text.
In its simplest form, function is just a shorthand name for a series of
JavaScript instructions. When you call the alert() function, JavaScript under-
stands it as a command to carry out some task, such as opening a window
that has an OK button and a close button and putting some text in the
window.
The functions you create act as shorthand as well. Let’s say you want to
write a link that opens a small window and then centers that window on the
screen if the visitor is using Netscape 4.0 or above.
You could write a link resembling Figure 6-1 (most of the code in it is
similar to Figure 5-10).
<a href = "#"
onClick = "if ((parseInt(navigator.appVersion) > 3) &&
(navigator.appName == 'Netscape')) {
var the_window =
window.open('http://www.nostarch.com/',
'the_window','height=200,width=200');
var screen_height = window.screen.availHeight;
var screen_width = window.screen.availWidth;
var left_point = parseInt(screen_width / 2) - 100;
var top_point = parseInt(screen_height / 2) - 100;
the_window.moveTo(left_point, top_point);
} return false;">Click me to open a small centered window</a>
Figure 6-1: A link that opens a small window and centers it in Netscape 4 and above—
this won’t work in Internet Explorer (see note at the end of Chapter 5)
However, it is not a good idea to write a link in this way: There’s too
much JavaScript embedded in the HTML. This makes HTML hard to follow,
even for people who know JavaScript. Furthermore, if you want two or three
links on your page, your HTML becomes even uglier and your page’s down-
load time increases. Even more problematic, if you want to change the code
to affect window size or centering, you have to make the change everywhere
you put the link.
The solution to these problems is to give all the JavaScript in Figure 6-1
a name and then simply call that name when you want to open and center a
window. That’s exactly what homemade functions are for: They allow you
to call a set of JavaScript instructions (the function) just by using its name.
Basic Structure of JavaScript Functions
Figure 6-2 shows you the skeleton of a homemade function.

Writing Your Own JavaScript Functions 85
function functionName()
{
a line of JavaScript;
another line of JavaScript;
more lines of JavaScript;
}
Figure 6-2: The basic structure of a homemade function
A function definition starts with the word function. When JavaScript sees
that word, it knows you’re about to define the subsequent bunch of JavaScript
as a function.
Naming Your Functions
Next comes the function’s name. The rules for naming a function are similar
to those for naming a variable. The first character must be a letter; the rest of
the characters can include letters, numbers, dashes, and underscores. No
other characters, including spaces, are allowed. Like variables, function names
are case sensitive, so JavaScript will consider a function called feedTheCat() to
be different from a function called FeedTheCat().
Make sure you don’t give a function and a variable the same name. If
you have a variable called my_cat and a function called my_cat, JavaScript will
forget either what the function’s supposed to do or what value you’ve stored
in the my_cat variable. Because of this weird behavior, and because function
names are case sensitive, it makes sense to have a different convention for
naming functions than for naming variables. For variables I use lowercase
letters with underscores, and for functions I use what’s called in-caps or
camel-caps notation. Names in this notation style consist of strings of words
without spaces, in which every word except the first is initial-capitalized, as
in openAndCenterTheWindow(),myCat(), and printDate(). In-caps notation is a
pretty common convention and should serve you well.
Parentheses and Curly Brackets
A pair of parentheses follows the function’s name. For now, you won’t be
entering anything between them, but they’re still necessary.
After the parentheses you need a pair of curly brackets. Between these
brackets you’ll write the JavaScript that will run when the function is called.
An Example of a Simple Function
Figure 6-3 shows you how the window-centering code in Figure 5-10 looks
rewritten as a web page containing a function. Notice that the link calling
the function (X) has the same form as a link that calls a built-in JavaScript
function—the function name appears inside an onClick.

86 Chapter 6
<html>
<head>
<title>Getting Centered</title>
<script type = "text/javascript">
<!-- hide me from older browsers
function openAndCenterWindow()
{
if ((parseInt(navigator.appVersion) > 3) &&
(navigator.appName == "Netscape")) {
var the_window =
window.open('http://www.nostarch.com/',
'the_window','height=200,width=200');
var screen_height = window.screen.availHeight;
var screen_width = window.screen.availWidth;
var left_point = parseInt(screen_width / 2) - 100;
var top_point = parseInt(screen_height / 2) - 100;
the_window.moveTo(left_point, top_point);
}
}
// show me -->
</script>
</head>
<body>
X <a href = "#" onClick =
"openAndCenterWindow(); return false;">Click me to open a small
centered window</a>
</body>
</html>
Figure 6-3: Opening and centering a window using a function
Next, notice that I’ve put the JavaScript declaring the function in the head
of the page. You can declare functions in either the head or the body of an
HTML page, but I like to declare my functions in the head because that way
I don’t have to search for them all over the page.
Finally, it’s important to remember that the browser reads the page from
the top down. When it sees the word function, it remembers the function
name and the lines of JavaScript you’ve associated with that name. However,
the JavaScript between the curly brackets doesn’t actually execute until the
onClick in the link calls the function. When we start putting more than one
function on a web page, you’ll see why it’s important to keep this in mind.
Writing Flexible Functions
The code in Figure 6-3 does a good job of opening and centering a window
containing No Starch Press’s home page. But what if you wanted another
link to open and center a different window with a different URL in it—
Webmonkey’s, for example?

Writing Your Own JavaScript Functions 87
One approach would be to write a second function that looks just like
the first one, the only difference being that you’d replace the line
var the_window =
window.open('http://www.nostarch.com/','the_window','height=200,width=200');
with the line
var the_window =
window.open('http://www.webmonkey.com/','the_window','height=200,width=200');
This would work fine, but it’s not a good idea to have two functions that do
almost exactly the same thing. First of all, it’s wasteful. If you could write one
function that worked regardless of the URL, you’d save both typing and down-
load time. Even more important, if you want to change how you’re doing the
centering, you’ll have to change two functions instead of just one.
Using Parameters
Luckily, there’s a way to make your function more flexible. The trick is to add a
parameter. Remember, the alert() function takes one parameter—the words
you want to appear in the alert box. You can write the openAndCenterWindow()
function to take a parameter, too. In this case, the parameter would be
the URL of the web page you want to appear in the window. In general, a
function’s parameter is whatever item of information the function needs in
order to do its job—text to be displayed, a URL to link to, or whatever. Many
functions use multiple parameters.
The code in Figure 6-4 shows how to add a parameter to your function
and how to call the function with this parameter.
<html>
<head>
<title>Getting Centered Functionally</title>
<script type = "text/javascript">
<!-- hide me from older browsers
function openAndCenterWindow(the_url)
{
if ((parseInt(navigator.appVersion) > 3) &&
(navigator.appName == "Netscape"))
{
X var the_window =
window.open(the_url,'the_window','height=200,width=200');
var screen_height = window.screen.availHeight;
var screen_width = window.screen.availWidth;
var left_point = parseInt(screen_width / 2) - 100;
var top_point = parseInt(screen_height / 2) - 100;
the_window.moveTo(left_point, top_point);
}
}
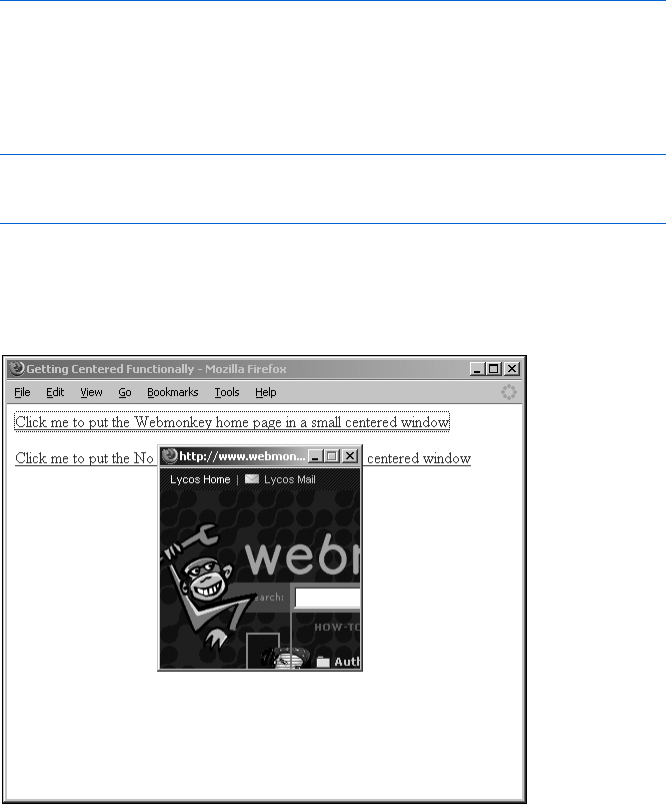
88 Chapter 6
// show me -->
</script>
</head>
<body>
Y <a href = "#"
onClick = "openAndCenterWindow('http://www.webmonkey.com/'); return false;">
Click me to put the Webmonkey home page in a small centered window</a>
<p><a href = "#"
onClick = "openAndCenterWindow('http://www.nostarch.com/'); return false;">
Click me to put the No Starch Press home page in a small centered window</a>
</body>
</html>
Figure 6-4: Opening and centering a window with a parameter
Line-by-Line Analysis of Figure 6-4
The tag for Webmonkey,
<a href = "#" onClick =
"openAndCenterWindow('http://www.webmonkey.com/'); return false;">Click me
to put the Webmonkey home page in a small centered window</a>
calls the function with the URL for Webmonkey in parentheses (see the
result in Figure 6-5). Here Webmonkey’s URL goes into the function just
as the words go into the alert() function, but instead of any random string,
it’s a URL.
Figure 6-5: The Webmonkey site, opened and centered

Writing Your Own JavaScript Functions 89
Similarly, the tag
<a href = "#"
onClick = "openAndCenterWindow('http://www.nostarch.com/'); return false;">
Click me to put the No Starch Press home page in a small centered window</a>
calls the function with the URL for No Starch Press.
Now let’s look at the function itself. Only two lines differ from those in
Figure 6-3. The first line of the function now looks like this:
function openAndCenterWindow(the_url)
Notice that a word appears inside the parentheses now. This term is a variable,
storing whatever value you’ll use when you call the function. So if the line
openAndCenterWindow("happy happy!");
calls the function, the variable the_url holds the value "happy happy!".
When we call the function in Figure 6-4 as follows, the variable the_url
holds the value "http://www.nostarch.com/":
<a href = "#"
onClick = "openAndCenterWindow('http://www.nostarch.com/'); return false;">
Click me to put the No Starch Press home page in a small centered window</a>
The second line in the function that differs from Figure 6-3 is Y, which
opens the window. In Figure 6-3 we opened the window with a web page:
var the_window =
window.open('http://www.nostarch.com/', 'the_window',
'height=200,width=200');
In Figure 6-4 we open the window with the variable that was set when the
function was called:
var the_window =
window.open(the_url, 'the_window', 'height=200,width=200');
JavaScript sees the variable the_url and knows it’s a variable because no
quotes surround it. If the function has 'http://www.nostarch.com/' inside the
parentheses, like this
openAndCenterWindow('http://www.nostarch.com/');
the variable the_url has the value http://www.nostarch.com/, so the window
opens with the No Starch Press home page. Figure 6-6 shows you graphically
what’s going on here.
90 Chapter 6
Figure 6-6: Passing parameters
Using More Than One Parameter
Sometimes you want to change more than one thing each time you call a
function. The built-in JavaScript function prompt(), for example, can change
two sets of words: the words that appear above the text box and those that
appear within it. When we call prompt() as follows, we pass in two parameters,
separated by a comma:
var the_answer = prompt("What's your favorite color?","yellow?");
The method window.open(), discussed in the last chapter, provides an
example of three parameters: the URL you want to open inside the window,
the name of the window, and the window’s features.
The functions you write can also take more than one parameter. Let’s say
you want to write a function to display a web page in a square window. You
might write a function that finds the name of the page and the length of one
of the sides of a window. Figure 6-7 shows you what this would look like.
<html>
<head>
<title>Square Windows</title>
<script type = "text/javascript">
<!-- hide me from older browsers
X function openSquareWindow(the_url, the_length)
{
var the_features = "width=" + the_length + ",height=" + the_length;
var the_window = window.open(the_url, "", the_features);
}
// show me -->
</script>
</head>
<body>
Y <a href = "#"
onClick = "openSquareWindow('http://www.webmonkey.com/', 400); return false;">
Open the Webmonkey home page in a big square window</a><br>
Function Definition
Function Call
function openAndCenterWindow(the_url)
{
var the_window=
window.open(the_url, ", 'height=200,width=200');
}
openAndCenterWindow('http://www.nostarch.com/');
Writing Your Own JavaScript Functions 91
<a href = "#"
onClick = "openSquareWindow('http://www.nostarch.com/', 100); return false;">
Open the No Starch Press home page in a small square window</a><br>
</body>
</html>
Figure 6-7: Writing functions that take more than one parameter
Notice that in X two variables now appear between the parentheses
following the function name: the_url and the_length. In Y we’re calling the
function as we would call prompt(), with two parameters separated by a comma.
Calling the function sets the first variable in the function definition to the
first parameter, so in the case of Y,the_url is set to http://www.webmonkey.com/.
Similarly, the second variable in the function definition is set to the second
parameter in the function call. If we call the function as in Y,the_length is set
to 400. Figure 6-8 depicts the results of calling functions with two parameters.
Figure 6-8: Calling functions with two parameters
Getting Information from Functions
You can also write functions that give information back to you. Consider the
prompt() function:
var the_answer = prompt("What's your name?","Ishmael");
When a user types his or her name into the prompt box and clicks OK, the
name goes into the variable the_answer. In programming parlance, you’d say
that the function prompt() returns the words typed into the prompt box. The
functions you write can return values as well. Figure 6-9 shows a very simple
example of how to make a function return values.
<html>
<head>
<title>Date Printer</title>
<script type = "text/javascript">
<!-- hide me from older browsers
function getNiceDate()
Function Definition
Function Call
function openSquareWindow(the_url, the_length)
{
var the_features = "width=" + the_length + ",height=" + the_length,
var the_window = window.open(the_url, "", the_features);
}
openSquareWindow('http://www.webmonkey.com/', 400);

92 Chapter 6
{
var now = new Date();
var the_month = now.getMonth() + 1; // remember, January is month 0
var the_day = now.getDate();
var the_year = now.getYear();
Xvar the_nice_date = the_month + "/" + the_day + "/" + the_year;
Yreturn the_nice_date;
}
// show me -->
</script>
</head>
<body>
Hello! Today is
<script type = "text/javascript">
<!-- hide me from older browsers
Z var today = getNiceDate();
document.write(today);
// show me -->
</script>
</head>
</body>
</html>
Figure 6-9: A script with a simple function that returns a value
Line-by-Line Analysis of Figure 6-9
Most of the function should be familiar by now. The first four lines create a
new Date object and carry out a few method calls to get information from that
object. Line X takes the information gathered and creates a nicely formatted
date. Notice that the line is
var the_nice_date = the_month + "/" + the_day + "/" + the_year;
and not
var the_nice_date = "the_month/the_day/the_year";
The latter won’t work, because JavaScript won’t recognize the_month,
the_day, or the_year as variables if they appear inside quotes. The correct
version of this line takes the variables out of the quotes and puts them
together with slashes using the plus (+) sign. In the incorrect version,
the quotation marks stop JavaScript from interpreting the names as
variables, so the web page would display Hello! Today is the_month/the_day/
the_year. Line Y tells JavaScript to exit the function and return the value
of the_nice_date to whatever variable is waiting for it. In this case, the
variable is today in Z. Whenever JavaScript sees the word return in a
function, it exits the function and outputs whatever value comes after
return.
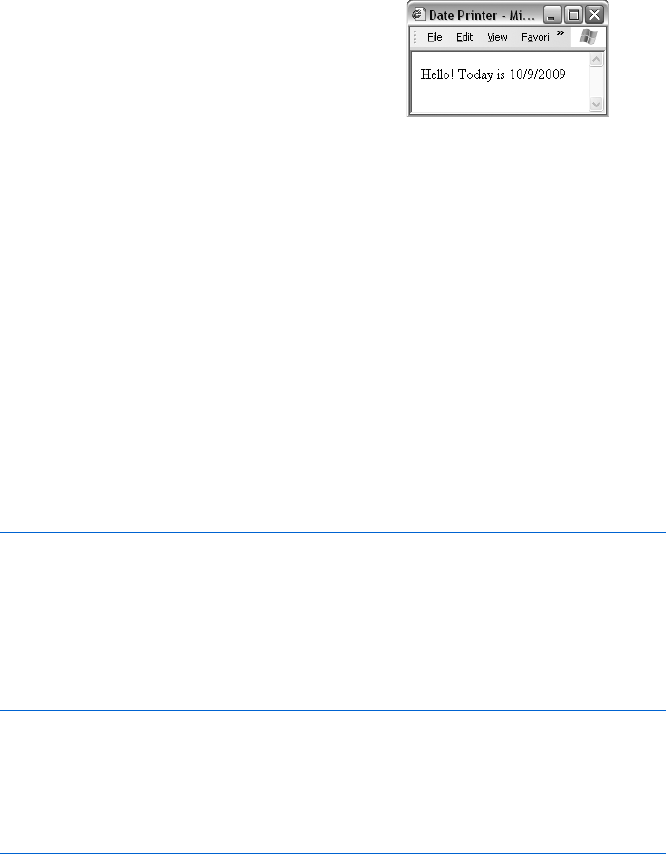
Writing Your Own JavaScript Functions 93
Dealing with Y2K
Figure 6-9 works fine, but it has a little problem. Remember our discussion
of the Y2K problem in the getYear() method of the Date object (“Writing the
Date to Your Web Page” on page 26)? Different browsers deal with years
differently. In some versions of Netscape, getYear() returns the year minus
1900. So if it’s the year 2010, getYear() returns 110. Other versions return the
full four-digit year if the year is before 1900 or after 1999. Different versions
of Internet Explorer give different results for the same date as well.
The way to deal with this problem is to see whether the year returned by
getYear()is less than 1000. If so, your visitor is using a browser that subtracts
1900 from the date if it’s after 1899. In this case, you can get the correct four-
digit year by adding 1900 to the date. You’ll find a concise form for all this
convoluted logic in the JavaScript function Y2K(), shown in Figure 6-11.
function Y2K(the_date)
{
if (the_date < 1000)
{
the_date = the_date + 1900;
}
return the_date;
}
Figure 6-11: Dealing with the Y2K problem
This function adds 1900 to the year if it is less than 1000. You can drop
the Y2K() function into the script shown in Figure 6-8 to deal with its Y2K
problem. Figure 6-12 demonstrates how the two look together.
<html>
<head>
<title>Date Printer</title>
<script type = "text/javascript">
<!-- hide me from older browsers
function getNiceDate()
{
var now = new Date();
var the_month = now.getMonth()+1; // remember, January is month 0
var the_day = now.getDate();
Xvar the_year = now.getYear();
Yvar the_fixed_year = Y2K(the_year);
var the_nice_date = the_month + "/" + the_day + "/" + the_fixed_year;
Line Z calls the function getNiceDate(),
which returns a nicely formatted date.
The code document.write(today) then
puts the date on the web page, as shown
in Figure 6-10.
Figure 6-10: Returning the date

94 Chapter 6
return the_nice_date;
}
Z function Y2K(the_date)
{
if (the_date < 1000)
{
the_date = the_date + 1900;
}
return the_date;
}
// show me -->
</script>
</head>
<body>
Hello! Today is
<script type = "text/javascript">
<!-- hide me from older browsers
var today = getNiceDate();
document.write(today);
// show me -->
</script>
</head>
</body>
</html>
Figure 6-12: The script in Figure 6-9 with the Y2K fix
Line-by-Line Analysis of Figure 6-12
Line X in Figure 6-12 uses the getYear() method to get the year, and Y calls
the function Y2K() on the year to fix it up. The variable the_fixed_year is set to
whatever Y2K() returns. The JavaScript in Figure 6-12 actually defines the
function Y2K() after the getNiceDate() function. It might seem strange that
getNiceDate() can call Y2K() even though Y2K() is defined after getNiceDate().
Remember, though, that when you define functions, you’re just telling
JavaScript their names and what they do, so the order in which you define
your functions doesn’t matter as long as you define them all before you call
any of them from HTML.
Defining Variables Properly
The getNiceDate() function in Figure 6-12 calls the year variable the_year.
However, when you look at how the Y2K() function appears in Z, you’ll see
that it calls whatever passes into it the_date. Since we’re calling Y2K(the_year),
JavaScript looks up the value of the_year and then sends that value to the
Y2K() function. The Y2K() function stores that value in the variable the_date.
In other words, the functions getNiceDate() and Y2K() have two different
names for the same value. It’s as if the functions are different countries
where people speak different languages. If you try to talk about the_year
inside the Y2K() function, it won’t know what you’re saying, and you’ll get
an error. Figure 6-13 shows you a graphical representation of how this works.
Writing Your Own JavaScript Functions 95
Figure 6-13: How variables work in different functions
Why can’t the Y2K() function access the variable the_year in getNiceDate()?
Because when you first defined the_year, you put the word var in front of it:
var the_year = now.getYear();
The word var tells JavaScript to create the variable only for the function
where it’s defined. If you’d omitted var when defining the_year, you could
access that variable inside the Y2K() function. You might think that freedom
would be a good thing. Why shouldn’t you access the_year anywhere in the
program—why hide it inside getNiceDate()? The reason is that if you don’t
hide variables inside functions, you will soon drive yourself crazy. Having
one function change a variable that was declared in another function is a
major cause of difficult-to-debug problems. The idea of protecting variables
declared inside functions is such an important programming concept that
it gets its own name: encapsulation.
Consider the example in Figure 6-14 to see the headaches you’ll avoid
if you define your variables with var:
<html>
<head>
<title>Bad Encapsulation</title>
<script type = "text/javascript">
<!-- hide me from older browsers
function getNames()
{
the_name = prompt("What's your name?","");
dog_name = getDogName();
alert(the_name + " has a dog named " + dog_name);
}
function getNiceDate()
{
var now = new Date();
var the_month = now.getMonth()+1; // remember, Jan is month 0
var the_day = now.getDate();
var the_year = now.getYear();
var the_fixed_year = Y2K(the_year);
var the_nice_date = the_month + "/" + the_day + "/" + the_fixed_year;
return the_nice_date;
}
function Y2K(the_date)
{
if(the_date < 1000)
{
the_date = the_date + 1900;
}
return the_date;
}
Let’s say
now.getYear()
returns
110, meaning that it’s 2010
and your visitor is using IE.
This means that
the_year = 110
inside the
getNiceDate()
function.
Here we’re passing
the_year
into the
Y2K()
function. First,
JavaScript figures out that
the_year
is a variable equal
to 110. Then it passes the value
110 to the
Y2K()
function.
Inside the
Y2K()
function, the
variable
the_date
takes the
value 110, because that’s what
we passed into the function.
Now
the_date
gets changed to 2010.
The value of
the_date
is returned
to the awaiting variable.
The awaiting variable is
the_fixed_year
.
So now
the_fixed_year
has the value 2010.

96 Chapter 6
function getDogName()
{
the_name = prompt("What's your dog's name?","");
return the_name;
}
// show me -->
</script>
</head>
<body>
<a href = "#" onClick = "getNames(); return false;">Click here for a survey</a>
</body>
</html>
Figure 6-14: The dangers of variables without var
If I run this example and input thau when the prompt asks for a name
and fido when the prompt asks for a dog’s name, we end up with an alert that
says fido has a dog named fido. Somewhere along the line, the program forgot
that my name was thau and replaced it with fido.
This happened because both getNames() and getDogName() use a variable
called the_name. Function getNames() saves the user’s name in the variable
the_name. Then function getDogName() saves the dog’s name in the_name.
If I had used var when declaring the variable the_name in the getDogName()
function, JavaScript would have understood that the variable is specific to
that function and would have left alone all the_name variables in other
functions. Because I didn’t use var when I set the variable the_name inside
the getDogName() function, I unintentionally replaced the contents of the_name
with the dog’s name. When getDogName() exits and the alert comes up, we see
the dog’s name:
alert (the_name + " has a dog named " + dog_name);
If I had used var inside the getDogName() function, thau has a dog named fido
would have come up. As your JavaScripts get longer, you’re likely to use the
same variable in different functions. Without var, it’s very difficult to track
down what’s going wrong in these functions, so save yourself the headache
with a little preparation.
Using var to hide variables inside functions also allows you to write
functions that you can cut and paste into other scripts. If you define all your
variables with var, you don’t have to worry about whether a function you’ve
written will mess up another function when you paste it into a different page.
Otherwise you can’t tell whether some variable in a program shares a variable
name with your function.
Summary
There’s an art to figuring out when to use a function and knowing the best
way to write one. In general, the best time to use a function is for a simple
task you need to execute more than once. For example, patching the Y2K

Writing Your Own JavaScript Functions 97
bug in JavaScript is a task you may have to do repeatedly, so it’s a good idea
to create a function to handle it. As we see more complicated examples of
JavaScript later in the book, you’ll get a sense for what should go into func-
tions. And, of course, as you view the source code on all the great web pages
you see, you’ll notice how various JavaScripters use functions.
Almost all complicated JavaScripts use at least one homemade function.
In this chapter, you’ve seen how to write simple functions with no parameters
and more complicated functions that take parameters and return values.
If you found all of this a bit tricky, don’t worry. You’ll have many more oppor-
tunities to learn how to use functions in JavaScript.
Assignment
Write a page with three images on it, each of them a navigational icon lead-
ing to another website. Each time the user mouses over a navigational icon, it
should do an image swap, and a new window should open with an appropriate
URL. For example, the three images could be of an apple, a monkey, and
a sun. (See http://www.bookofjavascript.com/Chapter06.) When the user
mouses over the sun icon, the image could swap to a happy sun, and a window
with the Sun Microsystems home page could open up. Create this effect using
a function that takes three parameters: the image to swap, the new image to
put in its place, and the URL to open in the new window. For example, if the
user mouses over the sun icon, the image should look like this:
<img src = "normal_sun.gif" name = "sun" border = "0"
onMouseOver =
"fancySwap(window.document.sun,'hilight_sun.gif','http://www.sun.com/');"
onMouseOut = "window.document.sun.src='normal_sun.gif';">
The first parameter in the function fancySwap() is the location of the
image you want to swap. Notice that the image has the name sun. This
means JavaScript will refer to this image as window.document.sun. The second
parameter is the name of the GIF file to swap into the image called sun.
The third parameter is the URL that should open in the new window. The
function you write will start as follows:
function fancySwap(the_image_tag, the_new_image, the_url)
{
you fill in here . . .
}
The lines of code you write will carry out the image swap (using what you
learned in Chapter 4) and open a new window with the_url (using what
you learned in Chapter 5).
NOTE As described in Chapter 5, if the user has a pop-up blocker, the code may not work.
Good luck—this is a tough one!
PROVIDING AND RECEIVING
INFORMATION WITH FORMS
So far I’ve shown you a few ways to get
information from your visitors. You can ask
questions with the prompt() function, and you
can use onClick to tell when they click a link or
onMouseOver to detect when they move over a link. In this
chapter, you’ll learn a plethora of ways to collect and display information using
HTML forms and JavaScript. You can rely on forms and JavaScript to create
very interactive sites that might include surveys and quizzes, calculators, games,
and novel navigational tools.
In this chapter you’ll learn how to:
zCreate HTML forms
zUse JavaScript to read a form a visitor has filled out
zUse JavaScript to fill out a form automatically
zUse forms as navigational tools
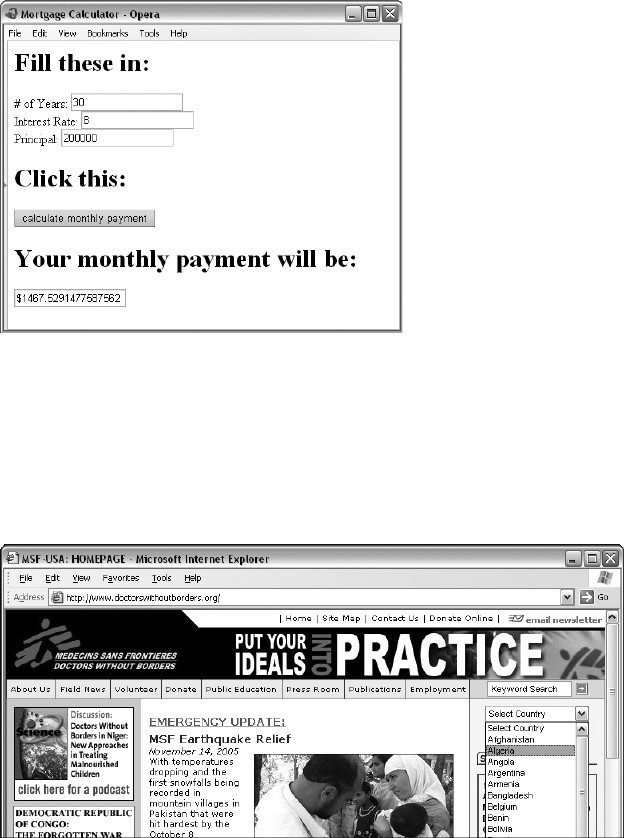
100 Chapter 7
Real-World Examples of Forms
Forms can gather all sorts of input, including demographic information such
as age and gender, answers to quizzes and polls, and numbers for tricky
equations. The mortgage monthly payment calculator shown in Figure 7-1
offers an example of the latter. The form gives you places for the amount,
interest rate, and length of a loan. If you enter all this information and click
the submit button (which says calculate monthly payment), JavaScript reads the
information off the form, performs a calculation, and displays the results in
the monthly payment box.
Figure 7-1: This mortgage calculator uses a form that
presents input fields.
You can also use forms as navigational tools. The home page for Doctors
Without Borders (http://www.doctorswithoutborders.org, shown in Figure 7-2)
has a pull-down menu that functions as a navigational tool. Click the menu,
pull down to highlight the name of the country you’d like information about,
and release the mouse—JavaScript tells the browser to take you to the page.
Figure 7-2: The Doctors Without Borders home page uses a pull-down menu that acts
as a navigational form.
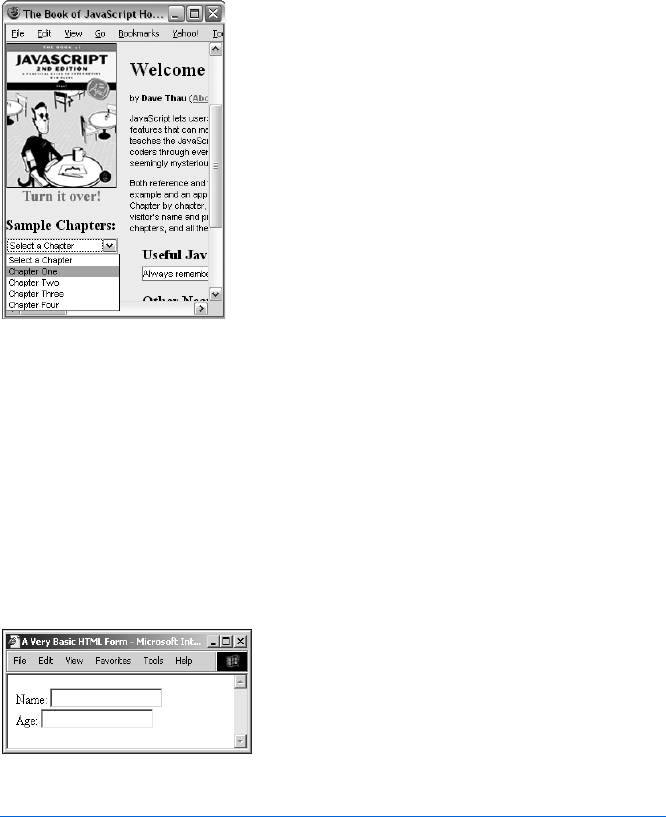
Providing and Receiving Information with Forms 101
As a third example, the Book of JavaScript home page also has a pull-down
menu that functions as a navigational tool (Figure 7-3). Click the menu, pull
down to highlight the name of the chapter you’d like to visit, and release the
mouse—JavaScript directs your browser to a page of information about that
chapter. Figure 7-3 shows the navigation element on the Book of JavaScript
home page.
Figure 7-3: The Book of JavaScript
home page’s navigation element
All three examples work in the same general way: HTML draws the forms
in Figures 7-1 and 7-3 on the web page, and JavaScript reads the information
that the visitor fills in. Most forms that use JavaScript follow this pattern. Let’s
look first at how to write forms to your web page with HTML.
Form Basics
Figure 7-4 shows a simple form displayed in a browser, and Figure 7-5 shows
the HTML behind that form.
Figure 7-4: A simple HTML form
<html>
<head>
<title>A Very Basic HTML Form</title>
</head>
<body>
X <form>
Y Name: <input type = "text"> <br>
Z Age: <input type = "text"> <br>

102 Chapter 7
[ </form>
</body>
</html>
Figure 7-5: HTML code for the basic form shown in Figure 7-4
Text Fields
As you can see in Figure 7-4, the HTML in Figure 7-5 draws two text boxes on
the screen. A visitor to your site can click inside the text boxes and type a name
and age.
Notice that the form is constructed of normal HTML. Like most HTML,
the form must go between the <body> and </body> tags. The form begins with a
<form> tag and ends with a </form> tag (X and [). Between the <form> tags you’ll
see the elements of the form (Y and Z), the parts that hold information. In
this chapter, you’ll encounter a variety of different form elements, each with
special characteristics. The elements in Y and Z are called text fields. These
allow the user to type a line of text in a field. Later you’ll learn how JavaScript
reads the user’s typed input.
The part of Y and Z that tells the browser to draw a text field is the
<input> tag:
<input type = "text">
The <input> tag tells the browser to create an input field of type text. You can
embellish the text field a bit—for example, you can make the text box bigger
by setting its size:
<input type = "text" size = "40">
The size of the text field is roughly equal to the number of characters that can
fit inside the field.
You can also tell the browser to place some words in the text box. For
example, if you want the words Type your name here to appear inside the text
box, enter this:
<input type = "text" value = "Type your name here">
By setting the value of the text box, you determine what goes inside it.
Remember the term value—it will come in handy later.
Buttons, Checkboxes, and Radio Buttons
In addition to text fields, you can put buttons, checkboxes, and radio buttons
in your forms. Figure 7-6 shows you what each of these elements looks like,
and Figure 7-7 shows you the HTML used to draw Figure 7-6.
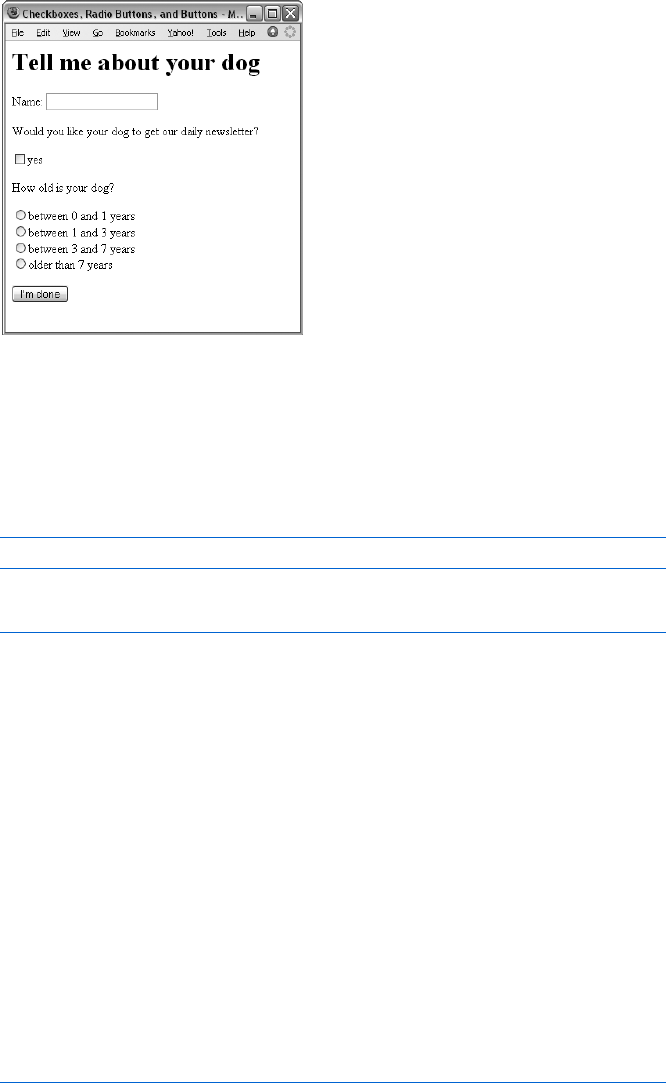
Providing and Receiving Information with Forms 103
Figure 7-6: A checkbox, radio buttons,
and a button
The Checkbox
The code in X of Figure 7-7 shows you the HTML for a single checkbox.
If you want the box checked by default in the above example, put the word
checked inside the element tag, like this:
<input type = "checkbox" checked>
You’ll encounter the word checked again, so remember it.
<html>
<head>
<title>Checkboxes, Radio Buttons, and Buttons</title>
</head>
<body>
<h1>Tell me about your dog</h1>
<form>
<p>Name: <input type = "text">
<p>Would you like your dog to get our daily newsletter?
X <p><input type = "checkbox"> yes
<p>How old is your dog? <br>
Y <input type = "radio" name = "age">between 0 and 1 years<br>
Z <input type = "radio" name = "age">between 1 and 3 years<br>
[ <input type = "radio" name = "age">between 3 and 7 years<br>
\ <input type = "radio" name = "age">older than 7 years<br>
<p>
] <input type = "button" value = "I'm done">
</form>
</body>
</html>
Figure 7-7: The HTML for a checkbox, radio buttons, and a button
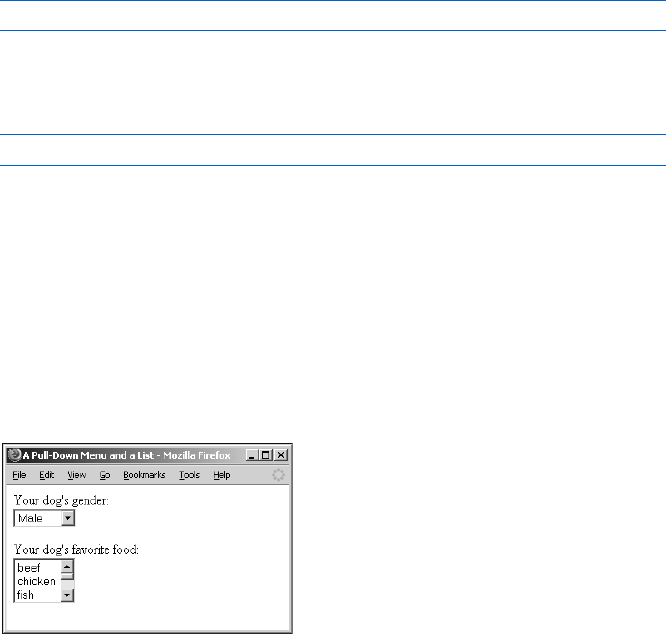
104 Chapter 7
The Radio Button
The next type of input element is the radio button. Radio buttons differ from
checkboxes in that they’re meant to come in groups of mutually exclusive
radio buttons. Since a dog cannot be between 0 and 1 and between 1 and 3
years old, a group of radio buttons is a good way to input the dog’s age range.
The way to put radio buttons into a group is to give them all the same name
attribute. In Figure 7-7 I’ve given the radio buttons the same name (Y through
\) so that a visitor can only choose one of them. Because all these buttons
share the name age, you can only turn on one at a time. For example, if the
visitor chooses the first radio button and then the third one, that action
deselects the first radio button. If you want the page to open with a radio
button already chosen, use the word checked, just as with checkboxes:
<input type = "radio" name = "age" checked>
The Button
The final type of input element demonstrated in Figure 7-7 is the button:
input type = "button"
This input type creates a rectangular button. If you want some words to appear
inside the button, set the button’s value as in ]. Right now the button doesn’t
perform any function, but soon we’ll learn how to attach an action to it.
Select Elements
All the form elements we’ve discussed so far are input elements. The next two
elements, pull-down menus and scrolling lists, have a slightly different format.
Figure 7-8 shows what these elements look like, and Figure 7-9 shows the
HTML used to write that page.
Figure 7-8: A pull-down menu and a
scrolling list
Pull-down menus start with a <select> tag (X) and end with a </select>
tag (Z). An <option> tag (Y) precedes each item in the pull-down menu.
You don’t have to put each option on its own line, but doing that makes for
cleaner-looking HTML.

Providing and Receiving Information with Forms 105
<html>
<head>
<title>A Pull-Down Menu and a List</title>
</head>
<body>
<form>
Your dog's gender:<br>
<select>
<option>Male</option>
<option>Female</option>
</select>
<p>
Your dog's favorite food: <br>
X <select size = "3">
Y <option>beef</option>
<option>chicken</option>
<option>fish</option>
<option>pork</option>
<option>rawhide</option>
<option>lettuce</option>
<option>cactus</option>
Z </select>
</form>
</body>
</html>
Figure 7-9: HTML for a pull-down menu and a scrolling list
Sometimes you want one of the options to appear as the default when the
page loads. To do that, put the word selected inside the <option> tag. If you
want the word Female to appear in the gender pull-down menu when the page
loads, you would write this:
<option selected>Female</option>
The main difference between scrolling lists and pull-down menus is that
scrolling lists have size set inside the <select> tag, as in X. Setting the size
determines how many options appear in the list. In X, since we’re setting
size to 3, three options appear in the list. To see more options, a visitor can
use the scroll bar on the side of the list.
If you want to give your visitors the ability to choose multiple options, put
the word multiple inside the <select> tag, like this:
<select size = "3" multiple>
This allows a visitor on a PC to choose more than one item by holding
down the CTRL key (the apple key for Macintosh users) and clicking
multiple options.
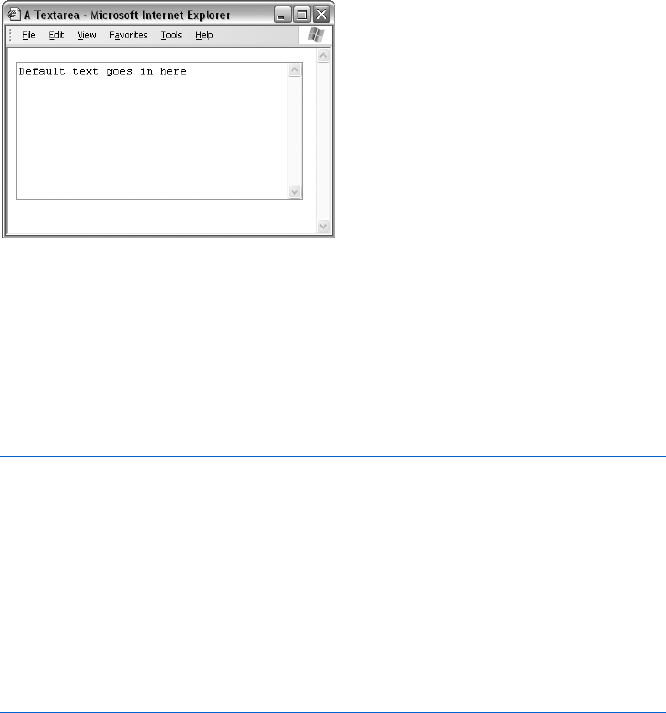
106 Chapter 7
Textareas
If you want to let your visitors input more than one line of text, you’ll have
to use the textarea form element, which scrolls to let your visitors type as
much information as they like. Figure 7-10 shows you what a textarea looks
like in the browser, and Figure 7-11 shows you the HTML used to draw the
textarea.
Figure 7-10: The textarea form element
Any text that goes between the <textarea> and </textarea> tags appears
inside the textarea when the browser renders the page. You can control the
size of the textarea by setting its rows and columns. As with the text box,
these numbers roughly reflect the number of characters a visitor can enter
in the textarea: The rows number controls the textarea’s height, and cols
controls the width.
<html>
<head>
<title>A Textarea</title>
</head>
<body>
<form>
<textarea rows = "10" cols = "40">
Default text goes in here
</textarea>
</form>
</body>
</html>
Figure 7-11: The HTML for a textarea
Final Form Comments
This section has covered much of what you need to know about writing HTML
forms for the purpose of this book. You’ll find other details about forms in any
good HTML manual.
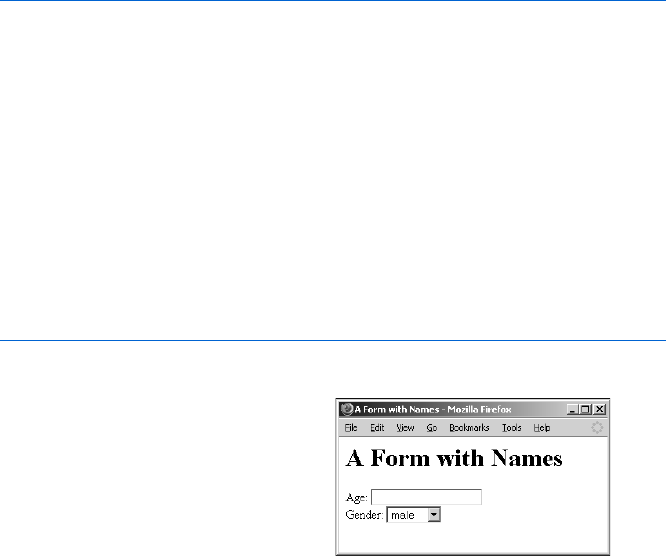
Providing and Receiving Information with Forms 107
Forms and JavaScript
Once you have a form on your web page, you can use JavaScript to read infor-
mation from that form and display information in it. The mortgage monthly
payment calculator, for example, reads the principal, interest rate, and other
information the user types into the form, calculates a monthly payment based
on this information, and then writes the result to the form.
Naming Form Elements
Before you can read from or write to an element of your form, you need to
tell JavaScript which form element you’re talking about by naming your form
and its elements. The code in Figure 7-12 demonstrates how to name forms
(X) and their elements (Y and Z). Notice that you can’t name the <option>
tag ([). Figure 7-13 shows the simple form this code displays.
<html>
<head>
<title>A Form with Names</title>
</head>
<body>
<h1>A Form with Names</h1>
X <form name = "my_form">
Y Age: <input type = "text" name = "the_age_field">
Gender:
Z <select name = "the_gender">
[ <option>male</option>
<option>female</option>
</select>
</form>
</body>
</html>
Figure 7-12: A form with names
you do this, but others will give visitors a JavaScript error.) You can name
buttons, checkboxes, textareas, and radio buttons just as you name text
fields and selects.
When naming form elements,
you should follow the same prin-
ciples as in naming an image tag for
an image swap: Do not use spaces,
make sure no other HTML element
has the same name, and don’t use
names that are also HTML tags. For
example, don’t name a text field
body, because <body> is an HTML
tag. (Some browsers work fine if
Figure 7-13: The form in Figure 7-12

108 Chapter 7
Naming Radio Buttons
Radio buttons are a special case. Since all radio buttons that belong to a
group receive the same name, we can’t use the name to figure out which
radio button the visitor selected. Putting value = "something" inside a radio
button tag lets us differentiate between different radio buttons in the same
set (see Figure 7-14).
<html>
<head>
<title>Values Inside Radio Buttons</title>
</head>
<body>
<form name = "radio_button_form">
How old is your dog? <br>
<input type = "radio" name = "age" value = "puppy">between 0 and 1 years<br>
<input type = "radio" name = "age" value = "young">between 1 and 3 years<br>
<input type = "radio" name = "age" value = "middle_age">between 3 and 7 years<br>
<input type = "radio" name = "age" value = "older">older than 7 years<br>
</form>
</body>
</html>
Figure 7-14: Putting values inside radio buttons
I’ve named each radio button age to show that it’s part of the age group,
but each one has its own value. How JavaScript determines which radio button
the user has selected will be discussed later in this chapter.
Naming Options
The same holds true for the <option> tag in <select> form elements. Although
options don’t receive names, they do take values. In order to use JavaScript
to determine what a visitor has chosen from a pull-down menu, you need to
put values inside the options. Figure 7-15 shows a variant on the code in
Figure 7-12, with values added to the <option> tags.
In Figure 7-15, the <select> tag still gets a name (X), and the <option>
tags get values (Y and Z). When you use JavaScript to determine which
option a user selected, the value of the option will be what you retrieve. If
the visitor selects the Female option, you’ll retrieve the value female because
of the value = "female" inside that option.
<html>
<head>
<title>A Form with Values Inside the Option Tags</title>
</head>
<body>
<h1>A Form with Names</h1>
<form name = "my_form">
Age: <input type = "text" name = "the_age_field">
Gender:
X <select name = "the_gender">

Providing and Receiving Information with Forms 109
Y <option value = "male">Male</option>
Z <option value = "female">Female</option>
</select>
</form>
</body>
</html>
Figure 7-15: Values inside <option> tags
Reading and Setting Form Elements
Once your form and form elements have names, JavaScript can easily find
out what your visitors have typed into the form elements. Just tell JavaScript
the form and element for which you want information.
Reading Information from Text Fields
If you want to see what value a user has typed into the text field named
the_age_field (Y) in Figure 7-12, use this:
window.document.my_form.the_age_field.value
This line tells JavaScript to look in the window, locate its document, find
the form called my_form inside the document, find the form element called
the_age_field inside that form, and read its value. Figure 7-16 shows how to
build a simple calculator using form elements as inputs.
<html>
<head>
<title>A Very Simple Calculator</title>
<script type = "text/javascript">
<!-- hide me from older browsers
function multiplyTheFields()
{
X var number_one = window.document.the_form.field_one.value;
Y var number_two = window.document.the_form.field_two.value;
Z var product = number_one * number_two;
[ alert(number_one + " times " + number_two + " is: " + product);
}
// show me -->
</script>
</head>
<body>
\ <form name = "the_form">
] Number 1: <input type = "text" name = "field_one"> <br>
^ Number 2: <input type = "text" name = "field_two"> <br>
_ <a href = "#" onClick = "multiplyTheFields(); return false;">Multiply them!</a>
</form>
</body>
</html>
Figure 7-16: A very simple calculator
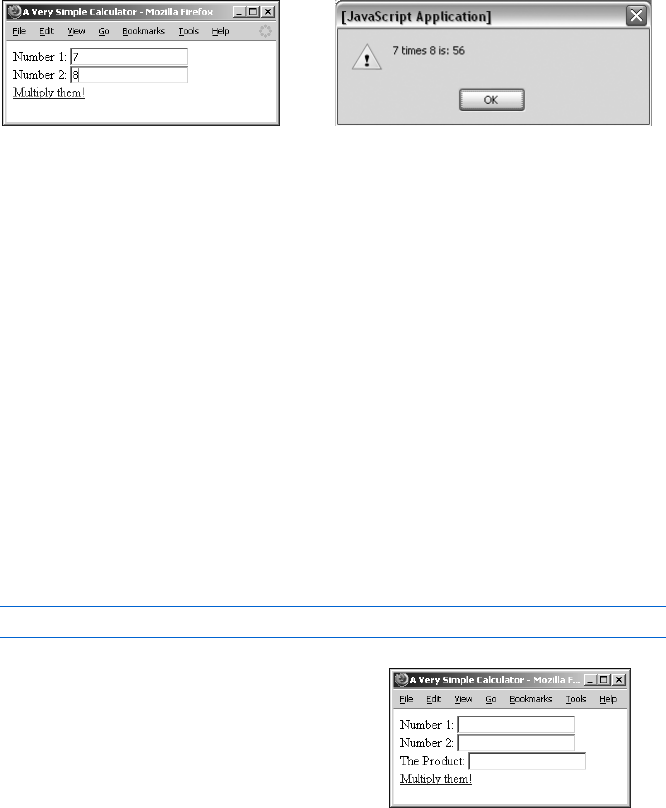
110 Chapter 7
This example presents two text fields and a link. When a visitor puts num-
bers in the text fields and clicks the link (Figure 7-17), an alert box appears,
showing the product of those numbers (Figure 7-18). The link in _ calls the
function multiplyTheFields() when a user clicks it.
The function multiplyTheFields() does all the work. The code in X
of Figure 7-16 looks up the value of the text field field_one (]) inside the
form my_form, located in the document of the window. It then stores this value
in the variable number_one. The same thing happens in Y, except this time
JavaScript looks at the text field named field_two (^) and stores it in the
variable number_two. Once JavaScript reads the values of the two text fields,
it multiplies them (Z) and puts the result inside an alert box ([).
Setting the Value of a Text Field
One difference between Figure 7-17 and the mortgage calculator in
Figure 7-1 is that the results of the mortgage calculator are displayed in
a text field instead of in an alert box. To put an item inside a text field
using JavaScript, simply set the value of the text field to whatever you
want to write inside it.
If Figure 7-16 had a third text field named the_answer, we could put the
product of the other numbers into it using this line:
window.document.the_form.the_answer.value = product;
Figure 7-17: The multiplying calculator Figure 7-18: Displaying the results
Here we’re telling JavaScript to set the
value of the text field named the_answer,
located inside the form called the_form,
to the value product. Figure 7-19 shows
what this looks like in a browser, and
Figure 7-20 lists the complete code.
The only differences between
Figures 7-20 and 7-16 are the addition
of a new text field called the_answer
(Y) and the changed location of the
output from an alert box to inside
the_answer (X).
Figure 7-19: Putting the results of
the calculation in a text field

Providing and Receiving Information with Forms 111
<html>
<head>
<title>A Very Simple Calculator</title>
<script type = "text/javascript">
<!-- hide me from older browsers
function multiplyTheFields()
{
var number_one = window.document.the_form.field_one.value;
var number_two = window.document.the_form.field_two.value;
var product = number_one * number_two;
X window.document.the_form.the_answer.value = product;
}
// show me -->
</script>
</head>
<body>
<form name = "the_form">
Number 1: <input type = "text" name = "field_one"> <br>
Number 2: <input type = "text" name = "field_two"> <br>
Y The Product: <input type = "text" name = "the_answer"> <br>
<a href = "#" onClick = "multiplyTheFields(); return false;">Multiply them!</a>
</form>
</body>
</html>
Figure 7-20: The code for Figure 7-19
Figure 7-20 should give you a basic idea of how the mortgage monthly
payment calculator works. I won’t go into the guts of the mortgage calculator,
but if you’d like to see the mathematics behind your monthly mortgage pay-
ment, browse to http://www.bookofjavascript.com/Websites/Mortgage. This
might be a little tough to understand until you read the next chapter, though,
so tread lightly.
Textareas
You can set and read a textarea, the form element that lets you enter more
than one line of text, just as you can a text field. For example, if you have a
textarea named my_text_area inside a form called my_form, you can enter some
words like this:
window.document.my_form.my_text_area.value =
"Here's the story of a lovely lady...";
If your visitor types some input in the textarea, you can read it
using this:
var the_visitor_input = window.document.my_form.my_text_area.value;
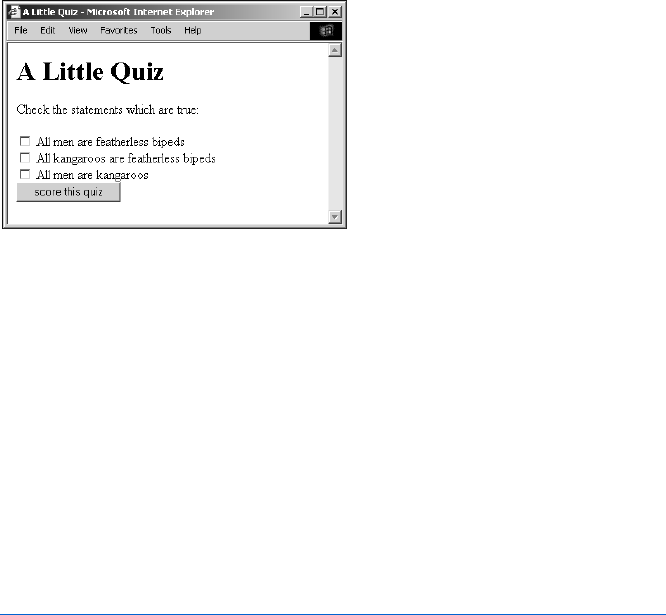
112 Chapter 7
Checkboxes
Checkboxes differ from text fields and textareas. Instead of having a value
as text fields and textareas do, they have a Boolean attribute called checked
(see Chapter 3 for discussion of Booleans).
If a user has clicked a checkbox so that an × or check mark appears in
it, then checked equals true. If the checkbox is not on, then checked equals
false (remember—because true and false are Booleans, they don’t take
quotes). The quiz illustrated in Figure 7-21 shows how to use the checked
property of checkboxes. Figure 7-22 shows the code.
Figure 7-21: A short JavaScript quiz
When a user clicks the button form element at the bottom of the window
in Figure 7-21, it calls the scoreQuiz() function. Line X in Figure 7-22 then
creates a variable called correct and sets its value to 0. This variable keeps track
of how many answers the visitor answered correctly. The code in Y and Z
gives the visitor one point if he or she clicked the checkbox next to the first
question; Y fetches the value of the checked property in the first checkbox and
compares this value to the word true. If the user selects the checkbox, its
checked value is true, so Z executes, adding a 1 to the variable correct, and
[ does the same thing for the second question.
The if-then statement in \ is slightly different from the other two. It says
that if the checked property of the third checkbox is false (that is, the visitor
hasn’t selected the checkbox), then JavaScript should add 1 to correct.
Finally, ] tells visitors how well they did.
<html>
<head>
<title>A Little Quiz</title>
<script type = "text/javascript">
<!-- hide me from older browsers
function scoreQuiz()
{
X var correct = 0;
Y if (window.document.the_form.question1.checked == true) {
Z correct = correct + 1;
}
[ if (window.document.the_form.question2.checked == true) {
correct = correct + 1;

Providing and Receiving Information with Forms 113
}
\ if (window.document.the_form.question3.checked == false) {
correct = correct + 1;
}
] alert("You got " + correct + " answers right!");
}
// show me -->
</script>
</head>
<body>
<h1>A Little Quiz</h1>
Check the statements which are true:
<form name = "the_form">
<input type = "checkbox" name =
"question1"> All men are featherless bipeds<br>
<input type = "checkbox" name =
"question2"> All kangaroos are featherless bipeds<br>
<input type = "checkbox" name = "question3"> All men are kangaroos<br>
<input type = "button" value = "score this quiz" onClick = "scoreQuiz();">
</form>
</body>
</html>
Figure 7-22: The code for the quiz
To show visitors the correct answers after they click the score button in
Figure 7-21, we could use the scoreQuiz() function to determine the value of
each checkbox by setting its checked property to true or false. Figure 7-23
updates the scoreQuiz() function to give the correct answers.
In Figure 7-23, I add an else to each if-then clause, which sets the check-
box to the correct answer if the visitor gets the answer wrong. The first if-then
clause, starting with X, reads in plain English, “If the visitor checks the first
checkbox, the answer is correct, so add 1 to the variable correct. Otherwise,
check the first checkbox to indicate the correct answer.” If the visitor guessed
wrong, Y selects the first checkbox by setting its checked property to true.
function scoreQuiz()
{
var correct = 0;
X if (window.document.the_form.question1.checked == true) {
correct = correct + 1;
} else {
Y window.document.the_form.question1.checked = true;
}
if (window.document.the_form.question2.checked == true)
{
correct = correct + 1;
} else {
window.document.the_form.question2.checked = true;
}
if (window.document.the_form.question3.checked == false) {
correct = correct + 1;
} else {

114 Chapter 7
window.document.the_form.question3.checked = false;
}
alert("You got " + correct +
" answers right! The correct answers are now shown.");
}
Figure 7-23: The scoreQuiz() function from Figure 7-22, changed to show the correct
answers
Radio Buttons
The code for reading and setting radio buttons is slightly more complicated
than for text fields and checkboxes. Because all the radio buttons in a group
have the same name, you can’t just ask about the settings for a radio button
with a certain name—JavaScript won’t know which button you mean.
To overcome this difficulty, JavaScript puts all of the radio buttons with
the same name in a list. Each radio button in the list is given a number. The
first radio button in the group is number 0, the second is 1, the third is 2, and
so on. (Most programming languages start counting from 0—you just have
to get used to this.)
To refer to a radio button, use the notation radio_button_name[item_number].
For example, if you have four radio buttons named age, the first one will be
age[0], the second will be age[1], the third age[2], and the fourth age[3].
To see whether a visitor has chosen a certain radio button, look at its
checked property, just as with checkboxes. Let’s say you have four radio buttons
named age in a form called radio_button_form, as in Figure 7-14. To test whether
your visitor has selected the first radio button in the age group, write some-
thing like this:
if (window.document.radio_button_form.age[0].checked == true)
{
alert("the first radio button was selected!");
}
This is much the same method that you would use for a checkbox. The only
difference is that you must refer to the first radio button in the age group as
age[0], whereas with a checkbox you can just give its name.
Once you know how to determine whether a radio button is checked, it’s
easy to understand how to select a radio button with JavaScript. With check-
boxes, you use something like this:
window.document.form_name.checkbox_name.checked = true;
With radio buttons, you tell JavaScript which radio button you mean by
referring to its list number. To select the first radio button of a set called age,
input this:
window.document.form_name.age[0].checked = true;

Providing and Receiving Information with Forms 115
Pull-Down Menus and Scrollable Lists
JavaScript can read and set pull-down menus and scrollable lists as it does
radio buttons, with two main differences. First, while radio buttons have a
checked property, pull-down menus and scrollable lists have a comparable
property called selected. Second, the list that keeps track of the options in a
pull-down menu or scrollable list differs from that for a radio button. As
discussed in the section on reading and setting radio buttons, when a browser
sees a group of radio buttons, it creates a list with the same name as the set
of radio buttons. In Figure 7-12, we named the radio button set gender, so the
browser calls the list gender. The first element of this list is called gender[0].
In contrast, a pull-down menu or scrollable list has the options property,
a list of all the options in the pull-down or scrollable list, which can tell you
what’s selected in that menu or list. In the list for the simple pull-down shown
in Figure 7-24, male is the first element (item number 0) and female the
second (item number 1).
<form name = "my_form">
<select name = "the_gender">
<option value = "male">Male</option>
<option value = "female">Female</option>
</select>
</form>
Figure 7-24: A simple pull-down menu
Thus the following lines tell you whether a visitor has selected the first
option in the list (male):
if (window.document.my_form.the_gender.options[0].selected == true)
{
alert("It's a boy!)";
}
You can also select an option:
window.document.my_form.the_gender.options[1].selected = true;
Executing this line of JavaScript would select the female option in the pull-
down menu.
Sometimes you have a long list of options in a pull-down menu, and
you just want to know which one the visitor has selected. Happily, pull-
down menus and scrollable lists have a value property that contains the
value of the selected option.
Let’s say you have a pull-down menu like the one in Figure 7-24. To figure
out quickly whether a visitor chose male or female in this pull-down menu, you
write something like this:
var chosen_gender = window.document.my_form.the_gender.value;
116 Chapter 7
If you want to know the index number of the option selected, rather
than its value, you can use the select’s selectedIndex property, like this:
var chosen_gender_index = window.document.my_form.the_gender.selectedIndex;
If your site visitor has selected the first option in the list, selectedIndex
will be 0.
I’ll show you a way to shorten these last two examples when we discuss
using pull-down menus as navigation tools. But before that, you need to
know a little more about forms in general.
Handling Events Using Form Elements
So far, all the functions in this chapter have been triggered by a visitor clicking
a link or button.
Each type of form element has its own list of triggering events. As demon-
strated in Figure 7-22, button elements can use onClick to call a function
when someone clicks the button. However, not all form elements take
onClick. Table 7-1 shows you some of the events that different form elements
handle. You’ll find a complete list in Appendix C.
Note that text fields, textareas, and selects can trigger events only when
someone changes them. If a user clicks on a pull-down menu and then chooses
an already selected option, that doesn’t trigger the onChange event. Similarly,
if someone clicks a text field and then clicks somewhere else without chang-
ing anything in the text field, onChange won’t register this action.
Notice also that the form element takes an event called onSubmit. A form
is submitted when the user presses the ENTER key with the cursor in a text field
or when the user clicks a submit button. Figure 7-25 shows you how to build
a very simple browser using a form with an onSubmit event.
<html>
<head>
<title>A Simple Browser</title>
</head>
<body>
Table 7-1:
Some Events That Different Form Elements Can Handle
Form Element Event What Triggers the Event
Button onClick Self-explanatory
Checkbox onClick Self-explanatory
Radio button onClick Self-explanatory
Text field onChange Change the contents of the text field and then click out of the
field (anywhere else on the web page)
Textarea onChange Change what’s in the textarea and then click out of it
Select onChange Change a selection in the pull-down menu or list
Form onSubmit Press ENTER inside a text field or click a submit button

Providing and Receiving Information with Forms 117
Type a URL and then either click the submit button or just press ENTER.
X <form name = "the_form"
onSubmit =
"window.location = window.document.the_form.the_url.value; return false;">
<input type = "text" name = "the_url" value = "http://">
Y <input type = "submit" value = "Go there!">
</form>
</body>
</html>
Figure 7-25: Using onSubmit inside a form
The <form> tag in X shows you what onSubmit does. In this case, the onSubmit
says, “Whenever someone submits this form, look into the form element
called the_url and send this person to the URL there.” This happens when
a visitor presses ENTER in the text field or clicks the submit button (Y).
The return false that appears at the end of X prevents the web browser
from taking control away from JavaScript when the form is submitted. With-
out it, the JavaScript command never executes.
Make this a Shortcut
You might have noticed that the <form> tag in X of Figure 7-25 is a little
long. You can shorten it by replacing most of the part identifying the form,
window.document.the_form, with the word this, which refers to the thing that
contains it. For example, in X of Figure 7-25, the code that looks for the
value of the_url is located inside the <form> tag. That means you can replace
all the code identifying the <form> tag with the word this—in other words,
you can write X in Figure 7-25 as follows:
<form name = "the_form" onSubmit = "window.location = this.the_url.value;">
I’ve replaced the elements that identify the form, window.document.the_form,
with this, because this is inside the <form> tag. Though it’s sometimes hard to
know what this will be, in general it refers to whichever HTML tag contains it.
Here’s another example. Imagine we’ve written a function called
checkEmail() that makes sure an email address entered into a form is valid
(we’ll be doing this in Chapter 11). The form and text box used to collect
the email address could look like this:
<form name = "the_form">
<input type = "text" name = "email"
onChange = "checkEmail(window.document.the_form.email.value);"/>
</form>
However, the elements window.document.the_form.email inside the onChange
simply identify the text field that the onChange is part of. Because the text field
is sending its own value to the checkEmail() function, the onChange of the text
field can be rewritten like this:
onChange = "checkEmail(this.value);">
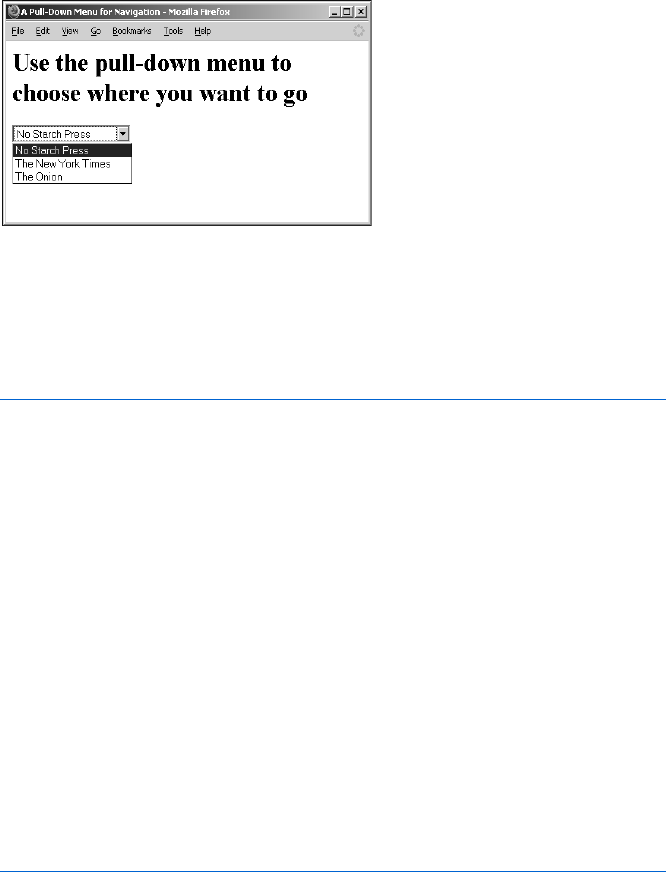
118 Chapter 7
Here, the term this replaces window.document.the_form.email because this
appears inside the text field.
Using Pull-Down Menus as Navigational Tools
Now you’re ready to create a navigational pull-down menu like the one
Doctors Without Borders uses, shown in Figure 7-2. Figure 7-26 shows you what
such a tool typically looks like, and Figure 7-27 gives you the script.
Figure 7-26: A simple navigation tool
You should understand most of the script in Figure 7-27 by now. The
onChange in X is the only tricky part (remember that <select> tags take
the onChange event). When the onChange happens, it calls the function
visitSite(), which receives this.value.
<html>
<head>
<title>A Pull-Down Menu for Navigation</title>
<script type = "text/javascript">
<!-- hide me from older browsers
function visitSite(the_site)
{
window.location = the_site;
}
// show me -->
</script>
</head>
<body>
<h1>Use the pull-down menu to choose where you want to go</h1>
<form name = "the_form">
X <select name = "the_select" onChange = "visitSite(this.value);">
<option value = "http://www.nostarch.com">No Starch Press</option>
<option value = "http://www.nytimes.com">The New York Times</option>
<option value = "http://www.theonion.com">The Onion</option>
</select></form>
</body>
</html>
Figure 7-27: Using pull-down menus as navigation tools
Providing and Receiving Information with Forms 119
One Last Forms Shortcut
Sometimes you just want to find out whether a given radio button has been
selected. As we’ve seen, you can do that with a line like this:
if (window.document.radio_button_form.age[0].checked == true)
{
alert("The first radio button was selected!");
}
This line is pretty long. It can be shortened if you add an id attribute to
your form elements—like so:
<input type = "radio" name = "age" id = "age1" value = "puppy">0 to 1 <br>
<input type = "radio" name = "age" id = "age2" value = "young">1 to 3 <br>
<input type = "radio" name = "age" id = "age3" value = "middle">3 to 7<br>
The contents of the id attribute can be whatever you want, as long as you
don’t give two elements the same id. Once you’ve given each of your form
elements an id, you can refer to an element by its id using the method
getElementById():
var myElement = window.document.getElementById("age1");
if (myElement.checked == true) {
alert("The first radio button was selected!");
}
Or, more concisely:
if (document.getElementById("age1").checked == true) {
alert("The first radio button was selected!");
}
The id attribute can go into any HTML element, not just forms. If an
<img> tag has an id, it can be referenced using the same getElementById()
method. Some people prefer getElementById() over using the names of the
elements, as I’ve been doing in the rest of the book, and there are good
reasons to use it. First, you can access a form element without knowing which
form the element is in. This can be handy if you have many forms on a page.
Second, getElementById() is the only way to manipulate certain parts of HTML.
This will come up in Chapter 13, where you’ll learn about Dynamic HTML.
I prefer to use element names rather than id attributes because of the
frequent need to integrate JavaScript with CGI scripts (see Chapter 11).
Websites often send the contents of forms to server-side programs that do
things like adding information to a database or sending email to site users.
These programs rely on the names of the form elements, rather than their
id attributes. To get full functionality from web forms, you need to give the

120 Chapter 7
elements names. And since you have to give the elements names anyway, you
may as well use the names when manipulating the forms with JavaScript.
As you study other people’s JavaScripts, you’ll see both names and ids being
used. They are equally valid, and which one you use will depend on the situ-
ation and your preferences.
How the Doctors Without Borders Pull-Down Navigation
Tool Works
The Doctors Without Borders pull-down navigation code is very similar to the
JavaScript you saw in Figure 7-27. Figure 7-28 shows you their code, modified
to save space:
<script type = "text/javascript">
<!-- hide me from older browsers
function gotosite(site) {
X if (site != "") {
self.location = site; }
}
// show me -->
</script>
<SELECT class = textbox onchange = javascript:gotosite(this.value); name =
select>
<OPTION selected>Select Country</OPTION>
<OPTION value=/news/afghanistan.cfm>Afghanistan
<OPTION value=/news/algeria.cfm>Algeria
<OPTION value=/news/angola.cfm>Angola
</SELECT>
Figure 7-28: Code for the Doctors Without Borders pull-down navigation tool
The only big difference between the code in Figure 7-27 and the
Doctors Without Borders code in Figure 7-28 is the if-then clause starting
in X. This extra test is necessary because the first option in their pull-down
contains no value—it’s just a header. If a visitor selects an option with no
value, the value property of the select is set to "". So X in Figure 7-28 checks
to see whether the visitor selected the first option of the list. If so, the function
does not send the visitor anywhere.
Summary
We covered a lot of ground in this chapter. If you missed any item in the
following list, go back and take another look. You should now know:
zHow to write HTML forms
zHow to read information entered into a form
zHow to write your own content to a form
zHow to trigger functions from all the form elements
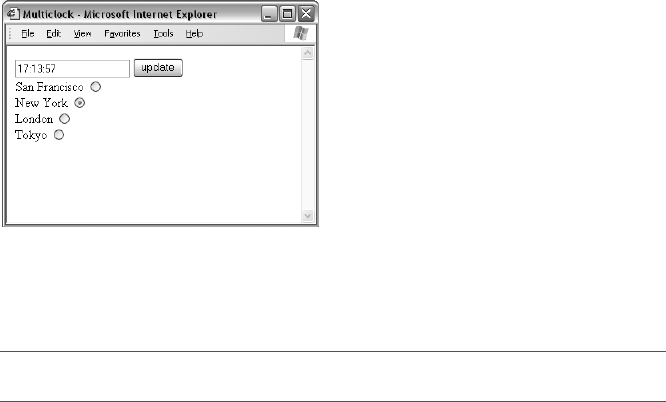
Providing and Receiving Information with Forms 121
zHow to use the word this as a shortcut
zHow to use the id attribute and the getElementById() method to access
HTML elements
Most form hassles involve the various form elements. Take a look at
Appendix C for a complete review of what kinds of events the different ele-
ments trigger and what information your JavaScript can discover from them.
Assignment
Write a clock that tells the time in San Francisco, New York, London, and
Tokyo. The clock should have a text field for the time, a button to update
the clock, and four radio buttons, each for a different time zone. When you
click one of the radio buttons, the correct time should appear in the text
field. When you click the update button, the clock should update with the
time from the zone you’ve selected with the radio buttons. Figure 7-29
shows an example.
Figure 7-29: Updating the time for different cities
First you’ll need some information about looking up time. Remember
from Chapter 2 how to get the current hour:
var now = new Date();
var the_hour = now.getHours();
The Date object has a few methods that come in handy for dealing with
different time zones. In this case, use getUTCHours(),getUTCMinutes(), and
getUTCSeconds(). These methods tell you the hour, minutes, and seconds in
Coordinated Universal Time (UTC), which has replaced Greenwich Mean
Time as the world standard.
London time is the same as UTC time. New York time is five hours behind
London time, California time is eight hours behind London time, and Tokyo
time is nine hours ahead of London time.
As always, the answer is in Appendix A, but you’ll learn a lot more if you
give the assignment a good try before looking there. It’s not an easy assign-
ment, so don’t be surprised if it takes longer than an hour to get it exactly
right.
KEEPING TRACK OF
INFORMATION WITH ARRAYS
AND LOOPS
The last chapter showed you how JavaScript
stores radio buttons and pull-down menu
options in lists. In programmer’s parlance,
lists are called arrays. This chapter will teach you
how to create your own arrays and use them to keep
track of large amounts of information.
In this chapter, you’ll learn how to:
zUse JavaScript’s built-in arrays to control your HTML
zCreate new arrays of your own information
zUse loops to search through arrays for information
Real-World Examples of Arrays
JavaScript’s built-in arrays are useful in a wide variety of applications. One
of the sites I work on, http://www.antweb.org, uses JavaScript’s built-in
arrays to show users which species of ants live in various counties in the
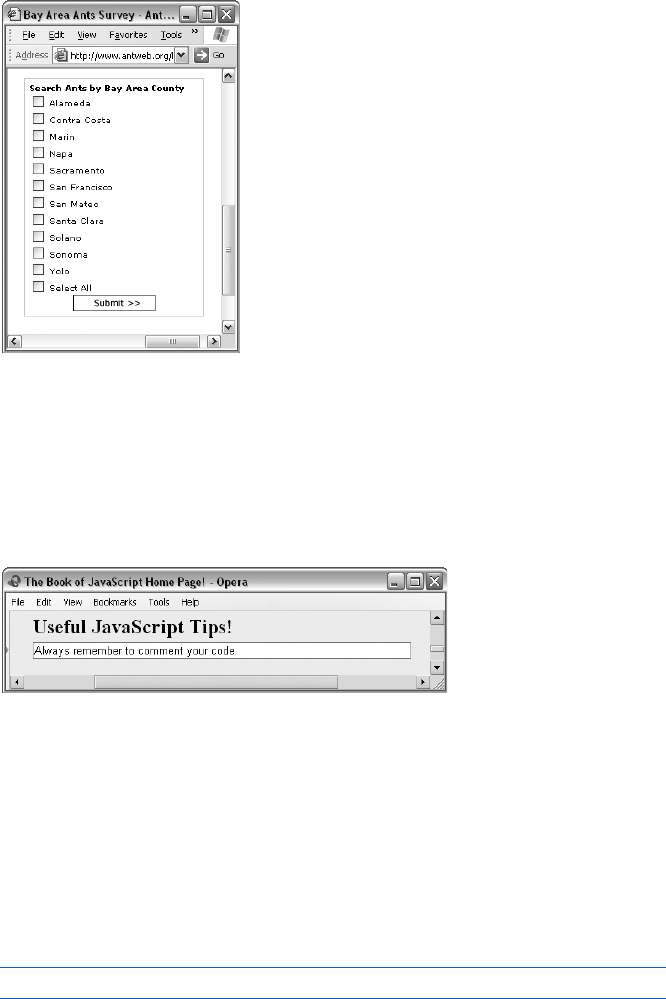
124 Chapter 8
San Francisco Bay Area (see Figure 8-1). At the bottom of the list of counties
is a Select All checkbox. Clicking this box causes all the other checkboxes to
become checked. This trick is easy to script because the checkboxes are stored
in an array, allowing me to use JavaScript to check off each one. Browse to
http://www.bookofjavascript.com/Websites/AntWeb to see this in action.
Figure 8-1: AntWeb checkboxes
Creating your own arrays can be useful as well. The Book of JavaScript
website employs arrays to show visitors a series of JavaScript programming
tips. In the textarea in Figure 8-2, you’ll see one of a dozen programming tips
that rotate through this box. I store these tips in a JavaScript array and rotate
through the array to put different tips into the textarea. The same principle
applies to making a timed slide show, which we’ll see in the next chapter.
Figure 8-2: Rotating programming tips on the Book of
JavaScript home page
JavaScript’s Built-In Arrays
When a web browser reads an HTML page, it automatically creates a number
of arrays. In the previous chapter we saw that JavaScript creates an array for
each set of radio buttons with the same name. If you create a set of radio
buttons named age inside a form named the_form, you can refer to the first
radio button in the set like this:
window.document.the_form.age[0]
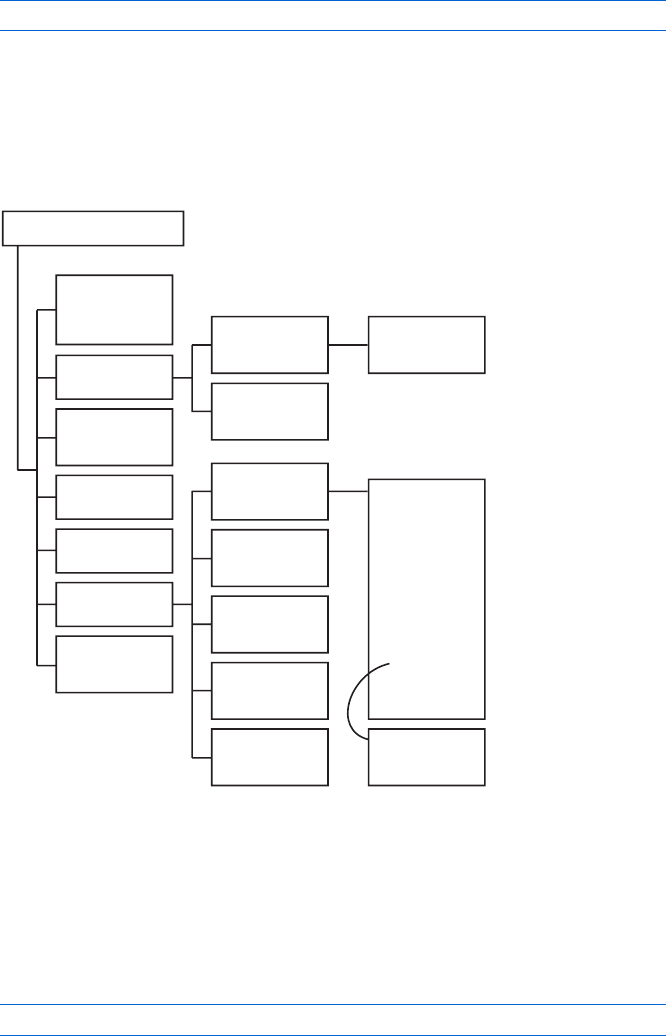
Keeping Track of Information with Arrays and Loops 125
JavaScript also creates an array for the options in each pull-down menu
and scrollable list. Here’s how you could access the second option in a pull-
down menu named gender:
window.document.the_form.gender.options[1]
These are just two of JavaScript’s automatically created arrays. Browsers
also automatically create an array of all the image objects on a web page,
called images. The same holds true for form elements (the array of form
elements is called elements). In Figure 8-3 (part of the Document Object
Model), you can see which elements (the boxes with the words array of in
them) get automatically created arrays.
Figure 8-3: Part of the DOM showing arrays in the document object
Each of these arrays is built based on how the page’s creator has written
its HTML. In the images array, for example, the first image on a web page is
called images[0], the second is images[1], and so on. If you use the images array,
you don’t have to name your images to swap them (as in “Swapping Images”
on page 58). For example, you can swap the first image on a web page with
an image called happy.gif with this line:
window.document.images[0].src = 'happy.gif';
THE CURRENT WINDOW
self,window,
parent,top
various
Window objects
navigator
Navigator object
frames[]
array of
Window objects
location
Location object
history
History object
document
Document object
Package
JavaPackage
object
elements[]
array of HTML
Form element
objects:
Button
Checkbox
FileUpload
Hidden
Password
Radio
Reset
Select
Submit
Text
Textarea
options[]
array of
Option objects
plugins[]
array of
Plugin objects
mimeTypes[]
array of
MimeType objects
forms[]
array of
Form objects
embeds[]
array of
JavaObject objects
applets[]
array of
JavaObject objects
images[]
array of
Image objects
anchors[]
array of
Anchor objects
mimeType[]
array of
MimeType objects

126 Chapter 8
Why would you want to use built-in arrays instead of just naming HTML
elements? Sometimes you have no choice. As we saw in Chapter 7, because
all the radio buttons in a set have the same name, you can access them only
using the built-in array.
Built-in arrays are also useful when you have many elements on a page.
If you have a web page with 100 images, naming them all becomes tedious.
Instead, you can just refer to each image by its number (for a set of 100 images,
the numbers would be 0 to 99).
The best thing about arrays, however, is that a little bit of JavaScript can
act on each element in the array—a great time-saving feature if you have a
100-element array. In the AntWeb example, clicking one checkbox (Select
All) checks all the individual county checkboxes. It doesn’t matter whether
you have a lone checkbox or a thousand of them—the code is the same.
To control an entire array as the AntWeb script does, your code needs to
determine how many elements the array contains and then go through each
element in the array, performing whatever action you want on it. AntWeb,
for example, figures out how many checkboxes there are and then checks
each one.
Figuring Out How Many Items an Array Contains
In all modern JavaScript-enabled browsers, an array’s length property contains
the number of elements in an array. For example, the script in Figure 8-4
figures out how many images a web page holds.
<script type = "text/javascript">
<!-- hide me from older browsers
X var num_images = window.document.images.length;
alert("There are " + num_images + " images on this page. ");
// show me -->
</script>
Figure 8-4: How many images a web page contains
Drop this JavaScript into the bottom of a web page with images, and
you’ll see how it works. The critical line is X, which tells JavaScript to create
a variable called num_images and set it to the number of images in the built-in
images array. If the page has 10 images, num_images will equal 10.
Going Through Arrays
Once you know how many elements are in an array, you need to write some
code that goes through each element. If you have a list of four checkboxes
and want to check them all, you could write a script like Figure 8-5.
<html>
<head>
<title>Checking Four Checkboxes</title>

Keeping Track of Information with Arrays and Loops 127
<script type = "text/javascript">
<!-- hide me from older browsers
function checkFour()
{
window.document.the_form.elements[0].checked = true;
window.document.the_form.elements[1].checked = true;
window.document.the_form.elements[2].checked = true;
window.document.the_form.elements[3].checked = true;
}
// show me -->
</script>
</head>
<body>
<form name = "the_form">
<input type = "checkbox"> One <br>
<input type = "checkbox"> Two <br>
<input type = "checkbox"> Three <br>
<input type = "checkbox"> Four <br>
<input type = "button" value = "check 'em" onClick = "checkFour();"> <br>
</form>
</body>
</html>
Figure 8-5: Checking four checkboxes
With 1,000 checkboxes the function would end up 1,000 lines long, each
line identical to the one before it except for the number between brackets.
Writing this would be very tedious.
Worse, sometimes, when a page is dynamically generated (see
Chapter 13), you don’t know how many checkboxes will appear on a
page. In this case, it would be impossible to write a function like the one
in Figure 8-5.
You can avoid both these problems with a loop. A loop allows you to
execute the same JavaScript statements multiple times with slight variations.
For example, a loop could execute the following line 1,000 times, changing
the number in the brackets each time.
window.document.the_form.elements[0].checked = true;
The checkFour() function in
this script goes through each of
the four checkboxes and sets its
checked property to true (see the
result in Figure 8-6). But this code
is not the best solution, since it
only works for four checkboxes.
To work with five checkboxes,
you’d have to add another line
to the function.
Figure 8-6: The checkboxes checked

128 Chapter 8
while Loops
One kind of loop is called a while loop. In plain English, this translates to
“While such-and-such is true, do the following.” Figure 8-7 shows a while loop
that prints the word happy three times.
<html>
<head>
<title>I'm Happy and I Know It</title>
</head>
<body>
I'm <br>
<script type = "text/javascript">
<!-- hide me from older browsers
X var index = 0;
Y while (index < 3)
Z {
[ window.document.writeln("happy<br>");
\ index = index + 1;
] }
^ // show me -->
</script>
and I know it!
</body>
</html>
Figure 8-7: Printing the word happy three times with a while loop
Loops are a very common programming technique. They may seem
strange the first couple of times you see them, but they are so common that
after a while you’ll understand them on sight.
The typical while loop starts with a variable set to zero, as in X of
Figure 8-7. The variable index is just like any other variable.
Once you’ve set this variable, the while loop begins. Line Y reads, “While
the variable index is less than three, execute the JavaScript between the
curly brackets (Z and ]).” The format of this line is important. The word
while must be lowercase, and the Boolean test index < 3 must fall between
parentheses.
When JavaScript sees Y, it checks whether the variable index has a value
less than 3. If so, the script runs the lines between the curly brackets Z and ].
When we start, index is 0, which is less than 3, so the script executes the two
lines between Z and ]. Line [ writes the word happy to the web page, and \
adds one to index, changing it from 0 to 1.
Once we execute \ and reach the curly bracket in ], JavaScript jumps
back to Y to see if index is still less than three. This is the nature of the while
loop. Every time JavaScript reaches a loop’s closing curly bracket (]), it
jumps back to the beginning of the loop (Y) to see whether the test in the
parentheses is still true. Because 1 is less than 3, JavaScript executes [, which
prints happy again; it then executes \, adding 1 to index (which now has a
value of 2).

Keeping Track of Information with Arrays and Loops 129
Again, because we’re in a while loop, JavaScript jumps from ] to Y and
checks to see whether index is still less than 3. It is, so [ and \ execute again.
The word happy appears a third time, and the script increments index from
2to 3.
Once again, JavaScript jumps from ] to Y and checks to see whether
index is less than 3. This time, however, index is equal to 3, so the test (index < 3)
is not true. The while loop stops and JavaScript jumps to ^, the line after the
closing curly bracket.
Many people have a hard time with looping, so make sure you understand
how it works. You may find it helpful to translate Y into plain English: “While
index is less than 3, write happy and add 1 to index.”
while Loops and Arrays
Now that you know how while loops work, you can apply them to arrays.
Look back at the function in Figure 8-5, and notice that each of the four
lines is more or less the same:
window.document.the_form.elements[some_number].checked = true;
The only difference is the number between the square brackets. Now
think about the variable index in Figure 8-7. Its value increases by 1 each time
the script goes through the loop. This feature makes the index variable ideal
for accessing each element in an array. Figure 8-8 uses index to create a more
flexible version of Figure 8-5.
<html>
<head>
<title>Checking Four Checkboxes</title>
<script type = "text/javascript">
<!-- hide me from older browsers
function checkFour()
{
Xvar index = 0;
Ywhile (index < 4)
Z{
[window.document.the_form.elements[index].checked = true;
\index = index + 1;
]}
^ }
// show me -->
</script>
</head>
<body>
<form name = "the_form">
<input type = "checkbox"> One <br>
<input type = "checkbox"> Two <br>
<input type = "checkbox"> Three <br>
<input type = "checkbox"> Four <br>
<input type = "button" value = "check 'em" onClick = "checkFour();"> <br>

130 Chapter 8
</form>
</body>
</html>
Figure 8-8: Using a loop to check four checkboxes
The critical line is [, which says, “Set form element number index to
true.” The first time through the loop, index is 0, so [ checks the first form
element (the first checkbox). Then \ adds 1 to index, changing index from
0 to 1. JavaScript reaches ] and jumps back to Y, executes [ and \ because
index is less than 4, and repeats the process until index equals 4. When index
equals 4 and JavaScript jumps to Y, the while loop ends (because index is no
longer less than 4) and JavaScript jumps to ^, the line after the closing curly
bracket.
Combining while loops and arrays is extremely common, so make sure
you comprehend the process. The advantage of this kind of code is that it
works whether you have just a few checkboxes or a few thousand. To get the
code to work for, say, 4,000 checkboxes, you would just change the number
in Y from 4 to 4,000. The loop will then run 4,000 times, starting with 0 and
finally ending when index equals 4,000.
Going Off the Deep End
The script in Figure 8-8 looks at the values of form elements 0 through 3,
which are the four checkboxes at the start of the form. The next form
element in the figure is the button. All input elements have a checked value,
although it doesn’t really do anything for a button, so
window.document.the_form.elements[4].checked
will always be false. But what about this:
window.document.the_form.elements[5].checked
Here, we’re asking JavaScript to look at the checked value of whatever is
stored in the sixth spot in the elements array. Sadly, there’s nothing there;
there are only five elements in this form, so JavaScript will respond with the
special word undefined. Then, when you ask JavaScript to find the checked
value of this undefined thing, it gets confused and you get a JavaScript error.
You can prevent this kind of error by making sure that the values stored
in the array are defined, like this:
if (window.document.the_form.elements[5] != undefined) {
var checked_value = window.document.the_form.elements[5].checked;
}
Notice that there are no quotes around the word undefined. It’s a special word
like true and false.

Keeping Track of Information with Arrays and Loops 131
Using array.length in Your Loop
The code in Figure 8-8 works well, but it could use one improvement. In
general, it’s best to have as few literal numbers in your code as possible:
Using specific numbers tends to make code apply only in specific situations.
In Figure 8-8, for example, Y works only when exactly four checkboxes
appear on the page. If you add another checkbox to the web page, you’ll
have to remember to change the 4 in Y to 5. Rather than rely on your memory,
you should let the computer do the remembering. You can rewrite Y like this:
while (index < window.document.the_form.elements.length)
The expression window.document.the_form.elements.length always equals
the number of form elements on a page, since adding another checkbox
automatically increases the length of the elements array.
An Incremental Shortcut
Lines like \ in Figure 8-8 are used so frequently that programmers have
come up with the shorthand index++ to replace index = index + 1. That’s the
variable index followed by two plus signs (++), and it saves you the hassle of
typing index twice. We’ll be seeing many other shortcuts like this later.
Beware of Infinite Loops
You should avoid one common loop mistake like the plague. It’s so common
that it has a name: the infinite loop. Infinite loops happen when your code
enters a loop it can never exit. Figure 8-9 shows you the classic error.
var index = 0;
while (index < 10)
{
window.document.write("I am infinite! <br>");
}
Figure 8-9: The classic infinite loop—don’t try this at home
Running this script will make you sad, so please don’t try it. If you do run
it, the script will endlessly write I am infinite! to the page. To stop the script
from running, you’d have to quit the browser, which isn’t always easy when
you’re stuck in an infinite loop.
This loop is infinite because I forgot to add 1 to index after writing “I am
infinite!” The index variable starts at 0 and never changes, so index < 10 is
always true. Since the test while (index < 10) is always true, the loop continues
until you exit the browser.
The only way to avoid accidentally writing an infinite loop is to exercise
caution. Whenever you write a loop, make sure the loop will exit at some
point.

132 Chapter 8
for Loops
Another type of loop is the for loop. You format while and for loops differently,
but they do the same things. Which loop you use is largely a matter of prefer-
ence. Though for loops look a little more confusing at first, they are more
compact.
Figure 8-10 compares a while loop and a for loop that perform exactly the
same task.
// while loop
X var index = 0;
Y while (index < 10)
{
window.document.writeln("hello<br>");
Zindex++;
}
// for loop
[ for (var index = 0; index < 10; index++)
{
window.document.writeln("hello<br>");
}
Figure 8-10: Comparing a while loop and a for loop
Both of the loops in Figure 8-10 write the word hello to a web page ten
times. The main difference between them is that X,Y, and Z in the while
loop collapse into [ in the for loop. The format of a for loop is as follows:
for (initializer; test; incrementer)
{
// some JavaScript
}
All for loops start with the word for, followed by parentheses containing
three pieces of JavaScript, separated by semicolons. The first piece is a state-
ment that is said to initialize the loop. Usually this statement declares an index
variable and sets it to the starting number. In [ of Figure 8-10, the initializer
of the for loop is var index = 0 (the same as X in the while loop). The sec-
ond parameter of a for loop is the test, which, if true, means that the loop will
execute one more time and then test again. In [ of Figure 8-10, the test is
index < 10 (the same as Y in the while loop). The final piece is the incrementer, a
statement that changes the condition each time the loop repeats, usually by
adding a number to the index variable (like Z in the while loop).
Whether you use while loops or for loops is a matter of taste. You can
write for loops in fewer lines, but while loops are a bit easier to read.
Some people prefer for loops because they lower the risk of accidentally
getting into an infinite loop. In a while loop, you can easily neglect to
put index++ inside the curly brackets. In a for loop, it’s hard to forget
to put this element inside the parentheses because you always have three
expressions there.

Keeping Track of Information with Arrays and Loops 133
How AntWeb Checks Off All the Checkboxes
Figure 8-11 shows a stripped-down version of how AntWeb uses loops to check
off all the checkboxes when a visitor clicks Select All.
I’ve taken out AntWeb’s HTML formatting, along with the repetitive
code for several of the counties, but the checkAll() function is exactly the
same as AntWeb’s. To see the complete AntWeb page in all its formatting
glory, browse to http://www.bookofjavascript.com/Websites/AntWeb.
<html>
<head>
<title>AntWeb's Use of Arrays and Loops</title>
</head>
<body>
X <form name = "bayAreaSearchForm">
Y <input type = "checkbox" name = "counties" value = "alameda">Alameda<br>
<input type = "checkbox" name = "counties" value =
"contra costa">Contra Costa<br>
<input type = "checkbox" name = "counties" value = "marin">Marin<br>
Z <input type = "checkbox" name = "selectall"
onClick = "selectAll(window.document.bayAreaSearchForm);">Select All<br>
</form>
<script type = "text/javascript">
<!-- hide me from older browsers
[ function selectAll(thisForm) {
\ var count = thisForm.counties.length;
] var checkedVal = thisForm.selectall.checked;
^ for (var loop = 0; loop < count; loop++) {
_ thisForm.counties[loop].checked = checkedVal;
}
}
// show me -->
</script>
}
</body>
</html>
Figure 8-11: AntWeb’s use of arrays and loops
Line-by-Line Analysis of Figure 8-11
The first few lines in Figure 8-11 describe the form that contains the check-
boxes. Line X names the form bayAreaSearchForm, and Y and the two lines
after it describe each of the checkboxes. Line Z describes the checkbox that
causes the other checkboxes to become checked. This checkbox is named
selectall; clicking it calls the function selectAll(), which starts in [. Notice
in Z that when the function is called, the name of the form to act on is
passed to the function. In [, that form is named thisForm inside the function.
The nice thing about this is that the selectAll function will work on any
page, and for any form. You just need to pass the form into the function, as is

134 Chapter 8
done when the function is called in Z. Line \, the first line in the function’s
body, stores the number of elements in the form into a variable named count.
There are four elements in this form—the three county checkboxes and the
Select All checkbox—so count will be 4.
Line ] stores the checked value of the selectall checkbox: either true,
if the checkbox was just checked, or false, if it was unchecked. The real
fun begins with the loop, starting in ^. The first time through the loop,
the variable named loop will have a value of 0, so thisForm.counties[loop]
in _ will point to the first element in the bayAreaSearch form—the first
checkbox. The second time through the loop, the value of loop will be 1,
so thisForm.counties[loop] will point to the second checkbox. The loop
occurs four times, once for each checkbox.
You may be thinking that testing the fourth checkbox is a bit unnecessary,
and you would be correct. The fourth time through the loop, the script is
just setting the fourth checkbox to checkVal, which already stores the value
of the fourth checkbox. Hence, the script is just setting the value of the
fourth checkbox to whatever the value already is. If I wanted to avoid this
unnecessary step, I could have changed the loop to this:
for (var loop = 0; loop < count; loop++) {
X if (thisForm.counties[loop].name != 'selectAll') {
thisForm.counties[loop].checked = checkedVal;
}
}
Here, X looks at the name of the checkbox. If it is anything other than
'selectAll', the JavaScript will change the checked value of the checkbox.
I decided to leave that out because the unnecessary effort taken by JavaScript
to change the checked value of a checkbox is less than the effort that would be
required to examine the name of a checkbox and see whether it is selectAll
each time through the script. With the types of tasks JavaScript is generally
used for, efficiency decisions like this don’t really save very much time.
However, if you notice that your script is taking a long time to run, make
sure code inside your loops does not take too long. Slow code that runs
once in a script isn’t too bad. Slow code that runs 1,000 times because it’s
in a loop might slow things down noticeably.
Creating Your Own Arrays
Arrays are so handy that you’ll often want to create your own. A phone book,
for example, is an array of names and phone numbers. You can think of a
survey as an array of questions; an array can also store the answers a visitor
enters. A slide show is an array of pictures shown in sequence.
Happily, JavaScript lets you create your own arrays. If you know what
you want to store in the array when you create it, use a line like the following:
var rainbow_colors =
new Array("red", "orange", "yellow", "green", "blue", "indigo", "violet");

Keeping Track of Information with Arrays and Loops 135
This line creates a variable called rainbow_colors that stores an array of colors.
The words new Array() tell JavaScript to create a new Array object, just as
new Date() created a new Date object back in Chapter 2. To put values in your
new array, simply list them in the parentheses.
Everything you’ve learned about JavaScript’s built-in arrays also applies
to arrays you create yourself. Figure 8-12 uses the rainbow_colors array to create
a psychedelic strobe effect on a web page.
<html>
<head>
<title>Strobe</title>
<script type = "text/javascript">
<!-- hide me from older browsers
function strobeIt()
{
X var rainbow_colors =
new Array("red", "orange", "yellow", "green", "blue", "indigo", "violet");
var index = 0;
Y while (index < rainbow_colors.length)
{
Z window.document.bgColor = rainbow_colors[index];
[ index++;
}
}
// show me -->
</script>
</head>
<body>
<form>
<input type = "button" value = "strobe" onClick = "strobeIt();">
</form>
</body>
</html>
Figure 8-12: A psychedelic strobe effect
Line-by-Line Analysis of Figure 8-12
Line X in Figure 8-12 creates the array and Y sets up the loop, saying, “While
index is less than the number of items in the array, execute the JavaScript
between the curly brackets.” The first time through the loop, index is 0, so
when Z looks up rainbow_colors[index], it gets the first item in the array, the
value red. Line Z assigns this value to window.document.bgColor, which sets the
background color to red. Once the script has set this color, [ adds 1 to index,
and the loop begins again. Next time through, index will be 1, so Z will make
the background color orange, [ then adds 1 to index, making it 2, and back
through the loop we go. If you have a very fast computer, the background
may strobe too quickly for you to see it. In this case, add a few more colors
to the array in X.

136 Chapter 8
How the Book of JavaScript Tip Box Works
The Book of JavaScript website has a little textarea that shows various pro-
gramming tips. The script keeps these tips in an array and then uses JavaScript
to loop through the array, showing one tip at a time. Each tip stays in the
textarea for 3.5 seconds before the next one appears. I should confess that I
got the idea for this tip box from something that the search engine Ask.com
(http://www.ask.com, formerly known as Ask Jeeves) once had on its home
page. In fact, I will present two different versions of the code. The first
version, shown in Figure 8-13, is very similar to the code Ask.com originally
used. The second version, which you’ll see in Figure 8-14, is a bit simpler
(though not necessarily better).
The code in Figure 8-13 is similar to code from Ask.com and contains
many little tricks that I haven’t yet covered. It starts out simply enough with
X, which says, “After the page has loaded, call the function startScroll().”
The first line in the JavaScript tags, Y, creates an array called tips and loads
it with a bunch of familiar programming adages. Line Z creates a variable
called num_tips and sets it equal to the number of tips in the tips array.
<html>
<head>
<title>Arrays and Loops a la Ask.com</title>
</head>
X <body onLoad = "startScroll();">
<script type = "text/javascript">
<!-- hide me from older browsers
Y var tips = new Array("Don't forget to comment your code.", "Beware of infinite
loops.", "Program so that other humans can understand what you're doing.");
Z var num_tips = tips.length;
var index = 0;
[ while ((num_tips > 0) && (tips[num_tips-1] == ""))
{
--num_tips;
}
function startScroll() {
\ if (num_tips != null) {
] if (window.document.tip_form) {
^ window.document.tip_form.tip_box.value = tips[index++];
_ if (index > num_tips - 1)
{
` index = 0;
}
}
a setTimeout("startScroll()", 3500);
}
}
// show me -->
</script>
<form name = "tip_form">
<textarea name = "tip_box" rows = "3" cols = "30"></textarea>

Keeping Track of Information with Arrays and Loops 137
</form>
</body>
</html>
Figure 8-13: Ask.com-style use of arrays and loops
Checking for Blank Statements
The next couple of lines exhibit “paranoid” programming style. Paranoid
programmers make sure everything is perfect before they execute a line of
code that’s going to affect the user experience. Line [ and the line following
it, for example, make sure no blank statements (two quotation marks with
nothing between them) appear at the end of the tips array. Who knows
why that would happen—but just in case, [ checks the last element in the
array. If it’s not blank, the loop ends. If it is blank, the line below it executes,
reducing num_tips by 1. The loop then checks to see whether the second to
last element is blank. If it’s not, the loop ends. If it is, that line runs again,
reducing num_tips by 1 once more. Notice that you can subtract one from a
variable with the syntax variable_name--. You can also use ++variable_name
and --variable_name as shown.
Checking the Last Element in the Array
You might be wondering how [ checks the last element of the array. Remem-
ber, num_tips equals the number of items in the array. If the array has three
items, num_tips equals three. However, because the first element in the array
is zero, the last element in an array will be two—the length of the array minus
one. To look at the last element of an array, use the following line:
var last_element = the_array[the_array.length - 1];
If the array contains three elements, the_array.length equals 3, and
the_array.length minus 1 equals 2, which is the number JavaScript uses to
reference the last element in the array. You may be thinking, “There’s no way
I’d ever figure that out!” But don’t worry—this kind of array mathematics
becomes second nature after you’ve done it a few times.
Testing the Limits of Arrays
You may have noticed that before [ checks to see whether the last ele-
ment in the array is a blank string, it makes sure there is at least one tip in the
array. If there are no elements in the array, num_tips will equal 0. If that’s the
case, then the second part of the while loop would be checking to see whether
tips[0 – 1] == "", or doing the math, tips[-1]. Because arrays start at 0, there
will never be a value in position -1, so there’s really no reason to check what’s
in that position. When you have two parts to a test that contains and, both
parts must be true for the whole thing to be true. JavaScript is smart enough

138 Chapter 8
to not bother checking the second part of a test with an and if the first part is
false. Why bother testing the second part if it already knows the whole thing
will be false?
The startScroll() Function
In the startScroll() function, we find more programming paranoia. Line \
checks to see whether the variable count actually has a setting. If not, its
value is the special word null. Line ] exhibits even more paranoia. Ask.com
makes sure the form named rotate has been drawn to the page by checking
to see whether the form named document.tip_form exists. If it does not exist,
document.tip_form is false, and the lines between the brackets of the if-then
statement won’t execute. I have never encountered any browsers that support
JavaScript but not forms. If they’re out there, however, ] makes sure JavaScript
won’t try to write to a form that doesn’t exist.
Line ^ looks up a tip in the array and writes it into the textarea. This line
tells JavaScript to find the form named tip_form and the form element named
tip_box and sets its value to whatever appears on the right side of the equal
sign. The latter requires some explanation. Instead of just looking up the
value of element index in the text array and then adding 1 to index, as in
document.tip_form.tip_box.value = tips[index];
index++;
line ^ looks up the value of element index and adds 1 to index right there:
document.tip_form.tip_box.value = tips[index++];
This is legal and saves some space, but it’s a little hard to read.
Going back to the notation introduced earlier, if Ask.com had done this,
document.tip_form.tip_box.value = tips[++index];
putting the plus signs in front of index, the JavaScript would add 1 to index
and then look for the value of tips[index]. It’s the same as this line:
index++;
document.tip_form.tip_box.value = tips[index];
It’s rare to see people messing around with the location of the double
plus and minus operators. But if you run into this while looking at source
code, you’ll know what’s going on.
The next two lines, _ and `, are important for any program that con-
tinuously loops through an array. The JavaScript writes a tip in the textarea,
then moves on to the next tip in the array, until it runs out of tips. Once that
happens, the program should return to the first question in the array and
start all over. Lines _ and ` make this happen. Line _ determines whether
the last question has appeared. If the variable index is more than num_tips - 1,

Keeping Track of Information with Arrays and Loops 139
we’ve reached the end of the array. Remember, Z set num_tips to the length
of the array, so num_tips - 1 is the position of the array’s last element. If index
is greater than num_tips - 1, we’ve reached the array’s end, and ` executes. It
sets the variable index back to 0, so the next time the script puts tips[index]
into the textarea, index will indicate the first question in the array.
Finally, a determines how fast the questions change in the textarea.
The next chapter will talk more about how the code in a works. For now,
you just need to know that it translates as, “In 3.5 seconds, call the function
startScroll() again.” Each time the script calls startScroll(), the function
puts a new question in the textarea and increments index by 1.
A Streamlined Version
The code in Figure 8-13 is a bit confusing. Figure 8-14 shows you a streamlined
version that still works under most conditions.
Although the code in this version is more streamlined, it’s not necessarily
better. Paranoia is a good thing in programming. The more checks you put
in, the less likely your visitors are to encounter a JavaScript error. Given the
choice between the approaches demonstrated in Figures 8-13 and 8-14, I’d
recommend the former because it’s more robust. The code in Figure 8-14 is
merely easier to understand.
<html>
<head>
<title>Arrays and Loops</title>
</head>
<body onLoad = "scroll();">
<script type = "text/javascript">
<!-- hide me from older browsers
var tips = new Array("Don't forget to comment your code.", "Beware of infinite
loops.", "Program so that other humans can understand what you're doing.");
var index = 0;
function scroll() {
document.tip_form.tip_box.value = tips[index];
index++;
if (index == tips.length)
{
index = 0;
}
setTimeout("scroll()", 3500);
}
// show me -->
</script>
<form name = "tip_form">
<textarea name = "tip_box" rows = "3" cols = "30">
</form>
</body>
</html>
Figure 8-14: A more streamlined version of the code in Figure 8-13

140 Chapter 8
Loops Can Nest
Just as you can nest if-then statements inside other if-then statements, you can
also put loops inside other loops. For example, Figure 8-15 shows you a script
that writes a solid rectangle of Xs to a web page, five Xs high and ten Xs
wide (see the result in Figure 8-16). Although this script doesn’t do anything
useful, it offers an idea of how nesting loops work.
X for (first_loop = 0; first_loop < 5; first_loop++) {
Y for (second_loop = 0; second_loop < 10; second_loop++) {
Z window.document.writeln("X");
}
[ window.document.writeln("<br>");
}
Figure 8-15: A simple example of nesting loops
Creating Arrays As You Go Along
If you’re giving someone a quiz and want to store the answers in an
array, you must create an array even though you don’t know what
values it will store. In such cases, you’ll need to build your array piece
by piece.
Start by creating an empty array, as in this line:
var the_answers = new Array();
This tells JavaScript to create a new array called the_answers, leaving
it empty.
Line X in Figure 8-15 sets up
a loop that will be executed five times.
Each time through that loop, the
second, or inner, loop (Y and Z) runs.
That loop writes the letter X to the web
page ten times. After the inner loop
has run, [ in the outer loop writes a
<br> to the web page, creating a line
break. After [ runs, the loop in X
runs again. This happens five times.
Each time loop X runs, loop Y writes
a line of ten Xs, then [ writes a <br>.
Loops inside loops can seem puzzling
at first, but they can come in handy.
Figure 8-16: The rectangle of Xs
created with nested loops in
Figure 8-15

Keeping Track of Information with Arrays and Loops 141
Once you’ve created the array, you can load values into it, like this:
the_answers[0] = "yes";
the_answers[1] = "no";
the_answers[2] = "maybe";
The first line puts the word yes into the first slot of the array, the next
puts no into the second slot, and the third line puts maybe into the third slot.
You can store values in an array in any order. Reversing the three lines above
wouldn’t make any difference. The word maybe goes into the third slot of the
array because the number 2 appears between the square brackets. Figure 8-17
demonstrates how to use this technique to create a Mad Lib, that party game.
<html>
<head>
<title>Mad Lib</title>
</head>
<body>
<script type = "text/javascript">
<!-- hide me from older browsers
X alert("This is a Mad Lib! Please fill in the blanks appropriately.");
Y var answers = new Array();
Z answers[0] = prompt("an animal","bear");
answers[1] = prompt("an adjective","happy");
answers[2] = prompt("a past tense verb","kissed");
answers[3] = prompt("an object","tree");
[ var the_string = "";
\ the_string = the_string + "Once upon a time there was a " + answers[0];
the_string = the_string + " who was very " + answers[1] + ".";
the_string = the_string + " In fact, he was so " + answers[1];
the_string = the_string + " that he " + answers[2] + " a " + answers[3] ".";
] window.document.writeln(the_string);
// show me -->
</script>
</body>
</html>
Figure 8-17: A short Mad Lib
It’s not a very long Mad Lib, but you get the idea. When someone comes
to this page, the alert in X greets the visitor. After the alert, the script creates
a new, empty array in Y. The next few lines, starting with Z, fill the array.
Each of these lines uses the prompt() function to ask a question (and display
a default answer) and then loads the visitor’s answer into the array. The first
answer goes into array position 0, the next into array position 1, and so on.

142 Chapter 8
By the time the script reaches [, the visitor has filled the array’s first four
positions. Line [ initializes a variable that stores the contents of the Mad
Lib. The next few lines, starting with \, build this string. Each line adds
content to the string. Line \ adds “Once upon a time there was a user
answer.” The next line appends “who was very user answer” to the end of the
string. Line ] writes the complete string to the web page.
Associative Arrays
All the arrays we’ve seen so far have stored values according to their numerical
position in the array. An associative array uses strings instead of numbers to
store values. For example, the following lines create a phone book with an
associative array:
var phone_book = new Array();
phone_book["dave thau"] = "(415) 555-5555";
phone_book["information"] = "(415) 555-1212";
The first line creates a new, empty array, as we’ve seen before. The next two
lines put two associations into the array. The first associates the string dave
thau with another string, (415) 555-5555. The second associates the string
information with the number to dial for Information. To retrieve that number,
you would look it up using a line like this:
var information_number = phone_book["information"];
This tells JavaScript to look in the array phone_book for the value associated
with the string information. The string used to retrieve the association must
precisely match the string used to store it. Retrieving thau’s phone number
with the line
var thau = phone_book["thau"];
won’t work if you originally stored the information as
phone_book["dave thau"] = "(415) 555-5555";
Figure 8-18 shows how to use an associative array for a functional phone
book, and Figure 8-19 shows the page displayed by this code.
<html>
<head>
<title>Phone Book</title>
<script type = "text/javascript">
<!-- hide me from older browsers
X var phone_book = new Array();
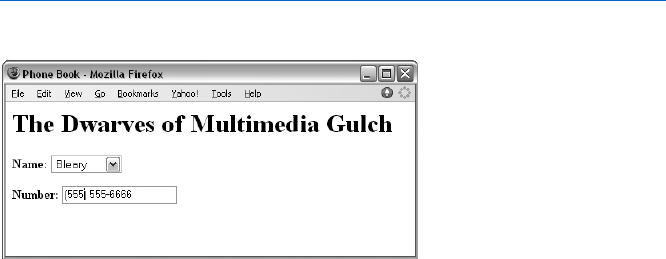
Keeping Track of Information with Arrays and Loops 143
Y phone_book["blank"] = "";
phone_book["happy"] = "(555) 555-1111";
phone_book["sleepy"] = "(555) 555-2222";
phone_book["sneezy"] = "(555) 555-3333";
phone_book["sleazy"] = "(555) 555-4444";
phone_book["sneery"] = "(555) 555-5555";
phone_book["bleary"] = "(555) 555-6666";
phone_book["tweaked"] = "(555) 555-7777";
Z function displayNumber(the_phone_book, entry)
{
[ var the_number = the_phone_book[entry];
\ window.document.the_form.number_box.value = the_number;
}
// show me -->
</script>
</head>
<body>
<h1>The Dwarves of Multimedia Gulch</h1>
] <form name = "the_form">
<b>Name:</b>
^ <select onChange =
"displayNumber(phone_book,this.options[this.selectedIndex].value);">
_ <option value = "blank">-- Choose a Dwarf --
<option value = "happy">Happy
<option value = "sleepy">Sleepy
<option value = "sneezy">Sneezy
<option value = "sleazy">Sleazy
<option value = "sneery">Sneery
<option value = "bleary">Bleary
<option value = "tweaked">Tweaked
</select>
<p>
<b>Number:</b>
<input type = "text" name = "number_box" value = "">
</form>
</body>
</html>
Figure 8-18: Creating a phone book using an associative array
Figure 8-19: The phone book page generated by the
code in Figure 8-18

144 Chapter 8
Line-by-Line Analysis of Figure 8-18
When a browser loads this page, it shows a pull-down menu with some names
and a text box that displays a phone number (Figure 8-19). Selecting a name
puts that person’s phone number in the text box. This neat little application
doesn’t take too much work to implement.
The script starts by creating a new array called phone_book in X and then
filling it with the values in lines Y down. Note that the first element in the
array deals with the header line in the pull-down menu (_). If someone
selects Choose a Dwarf in the pull-down menu, that will put a blank string in
the phone number box.
After building the phone_book array, Z defines a function as displayNumber().
This function takes two parameters: an array that holds the phone book
we want to use and a name we want to look up in the phone book. Line [
looks up the name in the phone book and stores it in the_number. Line \
puts the_number in the text box.
Line ] starts the form and names it the_form. Line ^ is a bit more
complicated; it defines the pull-down menu and describes what should
happen when a visitor changes the value there. Changing the pull-down
menu selection triggers the onChange event, which calls the displayNumber()
function. As described earlier, displayNumber() takes two parameters: the phone
book and the name to look up. In this case, we have just one phone book,
called phone_book. Later we might expand this script to include several phone
books—for example, one for friends, called friends_book; one for business,
called business_book; and one for favorite shops, called shop_book. Because
we can decide which phone book to use whenever we call the displayNumber()
function, switching books is easy. If we wanted to use the business_book phone
book, we’d just call the function like this:
<select onChange =
"displayNumber(business_book, this.options[selectedIndex].value);">
The second parameter in the function is the name to look up. If we
choose Happy, the person listed first in _ of Figure 8-18, the value happy
passes to the function.
Play around with this example and make sure you understand how the
displayNumber() function works and how the values in ^ enter the function.
Summary
This chapter has introduced the last two fundamental ideas behind all
programming languages: arrays and loops. Now that you’ve learned about
variables, if-then statements, functions, loops, and arrays, you’ve learned all
of the basic aspects of computer programming—so be happy! From now
on, everything we learn is specific to how JavaScript works with the browser.
All the tough programming nitty-gritty is behind us.
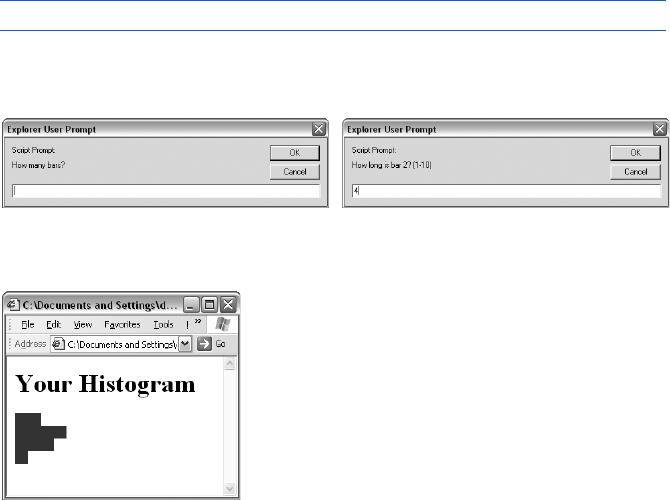
Keeping Track of Information with Arrays and Loops 145
Before you leave this chapter, make sure you’ve learned how to:
zCreate a new array
zAccess elements in an array
zUse loops to go through an array’s elements
zUse both for and while loops
zNest loops
zUse associative arrays
Assignment
To make sure you understand everything in this chapter, try this assignment.
Write a script that creates bar charts. This script should first ask a visitor
how many bars to include in the chart. If the visitor wants four bars, the script
should then ask for four numbers, ranging from 1 to 10, and draw a bar
for each. Figures 8-20 through 8-22 demonstrate what I mean. To draw the
bars, create a square GIF, or use square.gif, which is available at http://
www.bookofjavascript.com/Chapter08/square.gif. If someone wants a bar
that’s ten squares high, use a loop to write
window.document.writeln("<img src='square.gif'>")
ten times to the page. This is another tough assignment, so give yourself
plenty of time to do it.
Figure 8-22: The bar chart
Figure 8-20: Asking visitors how many bars
they want
Figure 8-21: Asking for bar values
TIMING EVENTS
Precise timing of events on your web pages
transforms them from static documents to
true multimedia applications. If you can
time events, you can pace slide shows, create
timed games, and control when visitors may perform
different actions. In later chapters we’ll see how timing
events can animate your entire site.
In this chapter, you’ll learn how to:
zControl when events happen on your web page
zBuild clocks that update in real time
zCreate slide shows that move at whatever pace you want
Real-World Examples of Timing Events
We’ve already seen a few examples of web pages that use event timing.
In the last chapter, we saw how visitors to the Book of JavaScript web page
get a new programming tip every 3.5 seconds. Space.com has a clock that
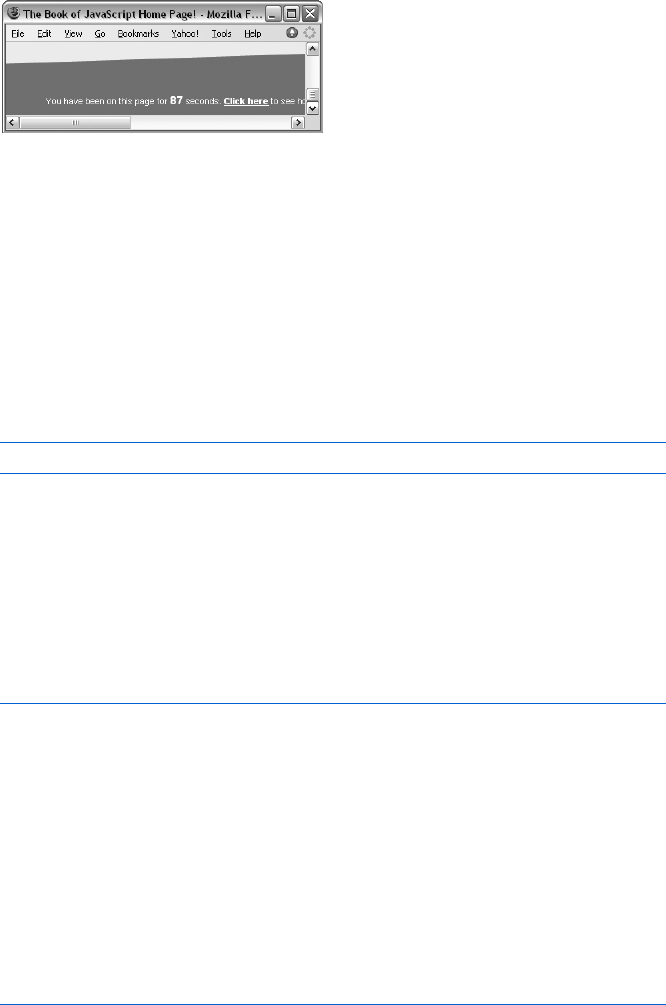
148 Chapter 9
counts down to the next known launch into outer space, available at http://
www.space.com/missionlaunches/launches/next_launch.html. The Book of
JavaScript home page (Figure 9-1) has a clock that shows you how long you’ve
been on the page. Both of these timers update every second.
Figure 9-1: Timer on the Book of JavaScript home page
Timing events is not difficult. In fact, you only need to know two
commands: setTimeout() and clearTimeout().
Setting an Alarm with setTimeout()
The built-in JavaScript function setTimeout() tells JavaScript to run a JavaScript
command at some time in the future. The function takes two parameters:
a JavaScript command and the time (in milliseconds) to wait before running
it. For example, the following line causes an alert box to pop up after a visitor
has been on a page for three seconds:
setTimeout("alert('You have been on this page for 3 seconds!');", 3000);
The first setTimeout parameter contains the JavaScript statement to
execute. This statement must be enclosed by quotes and, like all JavaScript
statements, end with a semicolon. Notice that the string to be displayed by
the alert command appears between single quotes rather than double
quotes (see “Quotes in JavaScript” on page 55).
The second parameter tells JavaScript to execute the first parameter in
3,000 milliseconds, which is three seconds (there are 1,000 milliseconds in a
second). Figure 9-2 puts this line in the context of a full web page.
<html>
<head>
<title>A Three-Second Alert</title>
<script type = "text/javascript">
<!-- hide me from older browsers
setTimeout("alert('You have been on this page for 3 seconds!');", 3000);
// show me -->
</script>
</head>
<body>
<h1>A page so interesting you have to force yourself to stop reading it by
having an alert tell you when you've spent too much time. </h1>
</body>
</html>
Figure 9-2: A three-second alert

Timing Events 149
Canceling an Alarm with clearTimeout()
Sometimes you’ll want to cancel a setTimeout(). Imagine a riddle game in
which a player has 10 seconds to guess the riddle’s answer. If players don’t
answer the riddle correctly in 10 seconds, they are sent to a page that gives
them the answer. If they do figure out the answer in time, they are congrat-
ulated. You could write this game by setting a setTimeout() to send players to
the answer page in 10 seconds. If they answer the riddle correctly before the
10 seconds expire, you need to cancel the setTimeout() so they don’t end up
on the answer page.
To cancel a setTimeout(), you first need to name the time-out by storing it
in a variable:
var my_timeout = setTimeout("goToAnswerPage();", 10000);
This line creates a time-out called my_timeout. Unless clearTimeout()
cancels the time-out, JavaScript will call the function goToAnswerPage() in 10
seconds. To cancel the time-out when the player answers the riddle correctly,
use this line:
clearTimeout(my_timeout);
This looks up the time-out called my_timeout and cancels it. Figure 9-3
shows a working version of the riddle game.
<html>
<head>
<title>A Riddle Game</title>
<script type = "text/javascript">
<!-- hide me from older browsers
X var my_timeout = setTimeout("goToAnswerPage();", 10000);
Y function goToAnswerPage()
{
alert("Sorry!");
window.location = "answer.html";
}
Z function checkAnswer(the_answer, the_timeout)
{
[ if (the_answer == "a newspaper")
{
\ clearTimeout(the_timeout);
] alert("Congratulations! You got it right!");
}
}
// show me -->
</script>
</head>
<body>
<h1>Riddle Me This</h1>
What is black, white, and read all over?<br>
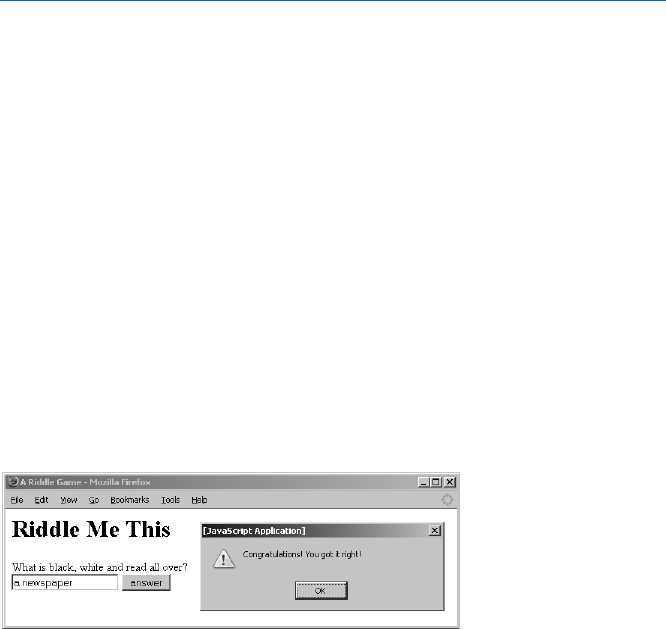
150 Chapter 9
^ <form onSubmit =
"checkAnswer(this.the_answer.value, my_timeout); return false;">
<input type = "text" name = "the_answer">
<input type = "submit" value = "answer">
</form>
</body>
</html>
Figure 9-3: A riddle game
Line-by-Line Analysis of Figure 9-3
Line X initiates setTimeout(). Ten seconds later, unless clearTimeout() cancels
the time-out called my_timeout, the function goToAnswerPage(), defined in Y, is
called. This function calls up an alert box and sends the player to answer.html.
Line Z defines checkAnswer(), the function called when the player submits an
answer (^). checkAnswer() takes two parameters: the answer that the player
submits and the time-out to cancel if the answer is correct. The first line of
the function, [, checks the answer. If it’s correct, \ cancels the time-out,
which stops JavaScript from calling the goToAnswerPage() function, and ] con-
gratulates the player. If ^, which calls the checkAnswer() function when the
player submits the form, seems unfamiliar, look at “Handling Events Using
Form Elements” on page 116, which discusses the onSubmit event. Figure 9-4
shows the riddle game in action.
NOTE If you want to run this script, you’ll need to create the answer.html page, which is just a
normal web page with the riddle’s answer on it.
Figure 9-4: What the riddle game looks like
Repeating Timed Actions
You’ve already seen examples of repeating timed actions. The tip box
discussed in the section “How the Book of JavaScript Tip Box Works” on
page 136 displays each tip for 3.5 seconds, and the text box that tells you how
long you’ve been on the page updates every second. Both of these examples
use the same mechanism.
As you have just seen in Chapter 8, the usual way to get JavaScript to
perform an action repeatedly is to put the action into a loop. Unfortunately,
we can’t use a while or for loop for repeated timed events. The while and for
loops run too quickly, and there’s no good way to slow them down. Even if
you could slow them, there’s no way to time these loops accurately, because
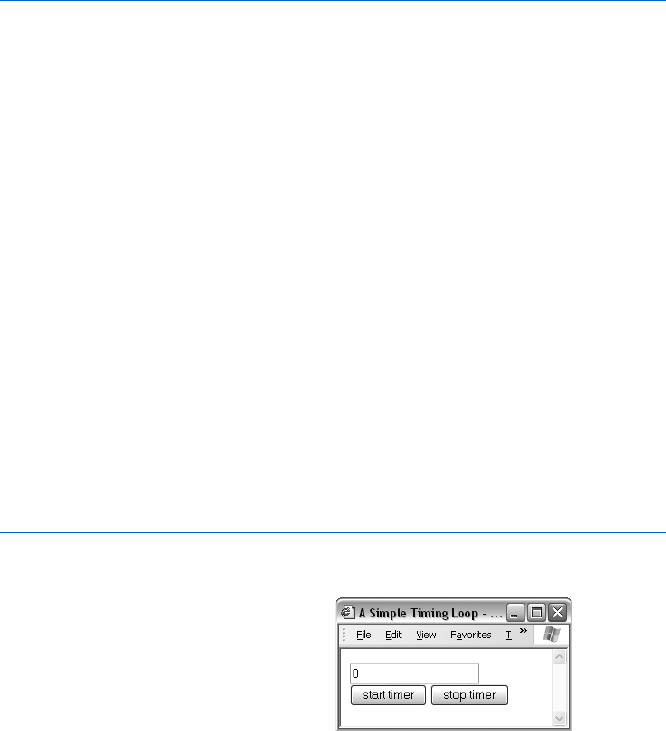
Timing Events 151
they run at different speeds on different computers. It might take an old
computer two seconds to print hello to a web page 1,000 times, while a
newer computer might take just a tenth of a second. What’s more, your
visitor won’t be able to do anything else in the browser while the loop is
running.
Instead of using a for or while loop, you can let JavaScript accurately time
your loop by writing a function to set a time-out that calls the same function
again. Using setTimeout() and clearTimeout(), the function can control exactly
how far in the future it gets called. The simple timing loop in Figure 9-5 should
make this clearer.
<html>
<head>
<title>A Simple Timing Loop</title>
<script type = "text/javascript">
<!-- hide me from older browsers
X var the_timeout;
Y function upDate()
{
Z var the_number = window.document.the_form.the_text.value;
[ the_number = parseInt(the_number) + 1;
\ window.document.the_form.the_text.value = the_number;
] the_timeout = setTimeout("upDate();", 1000);
}
// show me -->
</script>
</head>
<body>
<form name = "the_form">
^ <input type = "text" name = "the_text" value = "0"><br>
_ <input type = "button" value = "start timer" onClick = "upDate();">
` <input type = "button" value = "stop timer" onClick =
"clearTimeout(the_timeout);">
</form>
</body>
</html>
Figure 9-5: A simple timing loop
button, the number in the text box (^) starts to increase by 1 every second.
It will keep increasing until the visitor clicks the stop timer button.
This simple timing loop
(Xthrough ]) forms the basis
for the ones we’ll see later in this
chapter (and in Chapter 13).
The HTML in Figure 9-5
creates a form with three elements:
a text box to hold the timer number
and two buttons (see Figure 9-6).
When a user clicks the start timer
Figure 9-6: What the page coded in
Figure 9-5 looks like in a browser

152 Chapter 9
Line-by-Line Analysis of Figure 9-5
The key part of this script is the upDate() function starting in Y. When a user
clicks the start timer button, the button’s onClick event (_) calls the upDate()
function. This function adds 1 to the contents of the text box (Z through \)
and then sets a time-out (the_timeout) in ] to call itself in one second. After
executing ], the script is done, and control goes back to the browser until
1 second passes; then the time-out goes off and calls the upDate() function
again. The upDate() function adds 1 to the contents of the text box and again
sets the_timeout to call upDate() in 1 second. This cycle of calling the upDate()
function, adding 1 to the contents, and setting another time-out to call
the function in 1 second continues until a visitor clicks the stop timer
button in `. The stop timer button’s onClick event executes the statement
clearTimeout(the_timeout) and cancels the most recently set time-out, stop-
ping the upDate() function from running again. Table 9-1 charts this basic
loop cycle.
The rest of this chapter covers a few applications of this basic timing
loop. Don’t worry if any of the structure of Figure 9-5 confuses you. You’ll
get used to it after seeing a few more examples.
Using parseInt() with Form Elements
All modern browsers treat the contents of form elements as strings. When
the text box in Figure 9-5 has the number 2 in it, browsers read this as the
string '2'. Ordinarily, this wouldn’t be too much of a problem. However,
remember that the plus (+) operator has two meanings. When you use
the plus between two numbers, it adds them: 1 + 2 yields 3. But when you
use the plus between strings, it concatenates them: '1' + '2' yields '12'.
Because browsers read the contents of form elements as strings, they
would just stick a 1 at the end of whatever number appears in the timer
text box, which would show 0, 01, 011, 0111, and so on. This is not what
we’re looking for.
Table 9-1:
The Timing Loop Cycle
Step Event
1A user clicks the start timer button, triggering the upDate() function for the first time.
2upDate() adds 1 to the number shown in the text box.
3upDate() sets a time-out to trigger upDate() in 1 second. The time-out is named
the_timeout.
4If the user hasn’t clicked the stop timer button, then after 1 second passes,
the_timeout goes off and upDate() gets triggered as in step 2.
5The user clicks the stop timer button, which calls clearTimeout(the_timeout).
6clearTimeout(the_timeout) cancels the time-out set in step 3.
7Because the last time-out was canceled, upDate() doesn’t get called again, so the
cycle stops.
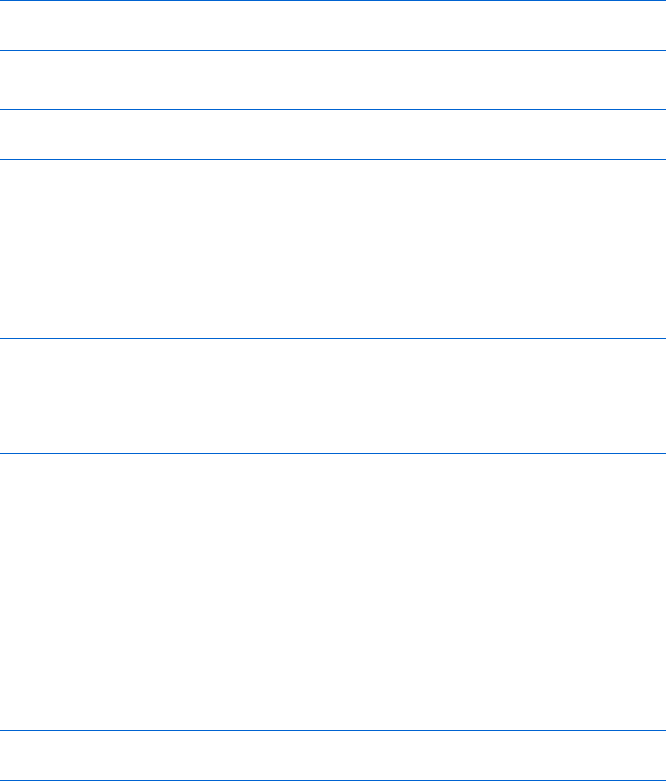
Timing Events 153
The built-in JavaScript function parseInt() in [ overcomes this problem
by converting strings and numbers with decimal points into integers. For
example, the lines
var first_number = '2';
var second_number = first_number + 1;
result in the variable second_number holding the value "21", while the lines
var first_number = '2';
var second_number = parseInt(first_number) + 1;
result in the variable second_number holding the value 3—parseInt(first_number)
converts the string '2' to the number 2.
Calling parseInt() with a value that has no numbers in it results in a NaN
(not a number) value. You can use JavaScript’s isNaN() function to make
sure parseInt() returns a number. The following scrap of code asks for a
person’s age and makes sure he or she has entered a number:
var the_age = prompt("How old are you?", "your age here");
if (isNaN(parseInt(the_age)))
{
alert("That's not a number!");
}
Clearing Out a Time-Out Before You Set a New One
If you’ve tried running the code in Figure 9-5, you might have noticed that
clicking the start timer button multiple times causes the timer to run more
quickly. This happens because each time you click the button, it starts a
timer that runs once a second. If you click the button twice, you have two
timers that run once a second, which means the value in the text box
updates twice a second. To keep this from happening, change the start
timer button’s onClick to clear the time-out before setting it again. In other
words, change _ to the following:
<input type = "button" value = "start timer"
onClick = "clearTimeout(the_timeout); upDate();">
Declaring Variables That Hold Time-Outs Outside Functions
You may have noticed that X in Figure 9-5 declares a variable outside the
function that uses it, even though I told you in Chapter 6 to declare vari-
ables using var inside the functions that use them. Variables that hold
time-outs are one exception to this rule, because you don’t actually want
to hide them. Remember that inside a function the word var means “This
variable only exists inside this function.” If we declared the_timeout inside
the upDate() function in Figure 9-5, we wouldn’t be able to clear the time-
out using the stop timer button, because the button isn’t located inside
the function. Declaring the_timeout with var outside all functions allows

154 Chapter 9
any JavaScript on the page (including the JavaScript inside the onClick of
the stop timer button) to access and change the_timeout.
Building a Clock with Timing Loops
Clocks are one obvious application of timing loops. Figure 9-7 provides the
code for a simple clock, and Figure 9-8 shows the resulting page in a browser.
See if you can understand what’s going on before you read the analysis. Start
by looking at the form in the body of the page.
<html><head><title>A JavaScript Clock</title>
<script type = "text/javascript">
<!-- hide me from older browsers
X var the_timeout;
function writeTime() {
// get a Date object
Y var today = new Date();
// ask the object for some information
Z var hours = today.getHours();
var minutes = today.getMinutes();
var seconds = today.getSeconds();
// make the minutes and seconds look right
[ minutes = fixTime(minutes);
seconds = fixTime(seconds);
// put together the time string and write it out
\ var the_time = hours + ":" + minutes + ":" + seconds;
] window.document.the_form.the_text.value = the_time;
// run this function again in a second
^ the_timeout = setTimeout('writeTime();',1000);
}
_ function fixTime(the_time) {
if (the_time < 10)
{
the_time = "0" + the_time;
}
return the_time;
}
// show me -->
</script>
</head>
<body>
The time is now:
<form name = "the_form">
<input type = "text" name = "the_text">
<input type = "button" value = "Start the Clock" onClick = "writeTime();">
<input type = "button" value = "Stop the Clock"
onClick = "clearTimeout(the_timeout);">
</form>
</body>
</html>
Figure 9-7: Code for a JavaScript clock
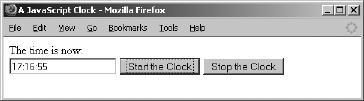
Timing Events 155
Figure 9-8: The JavaScript clock running in Firefox
Line-by-Line Analysis of Figure 9-7
The heart of Figure 9-7’s script is the writeTime() function. Every second, this
function figures out the current time, puts the time in the text field, and then
sets a time-out to run writeTime() a second later (see Figure 9-8).
As usual, the script starts by declaring the variable that will hold the time-
outs (X). Next comes the writeTime() function, which creates a new Date
object in Y (remember that a new Date object holds the current date and
time). Line Zand the two lines following it get the hours, minutes, and sec-
onds from the Date object using the getHours(),getMinutes(), and getSeconds()
methods. This code hearkens back to the section “Writing the Date to Your
Web Page” on page 26, which discussed how the Book of JavaScript web page
updates the date and time.
Line [ in Figure 9-7 is the only really new part of this script. If you look
back at Table 2-1, you’ll see that getMinutes() and getSeconds() each return
an integer from 1 to 59. If it’s two minutes and three seconds past 9 AM, the
variable hours in Z will be 9, minutes will be 2, and seconds will be 3. But putting
these numbers together to display the time would create the string 9:2:3
instead of 9:02:03. Line [ takes care of this little problem by sending the
minutes and seconds variables to a function I’ve written called fixTime(). The
fixTime() function in _ takes a number as its parameter and puts 0 before the
number if it is less than 10 (so 2 becomes 02). Make sure you understand how
the fixTime() and writeTime() functions work together. It’s a good example of
how one function can call on another to do its dirty work.
Once fixTime() fixes the minutes and the seconds by inserting zero
where appropriate, \ creates the time string, and ] writes it into the text
box. Finally, ^ sets the time-out that will call writeTime() again in one second.
When writeTime() is called again, it creates a new Date object, gets the infor-
mation out of it, fixes the minutes and seconds if necessary, writes the new
time into the text box, and sets the time-out again. The whole process starts
when a visitor clicks the Start the Clock button and ends when the visitor
clicks the Stop the Clock button, which cancels the most recently set
time-out.
How the Book of JavaScript Website’s Timer Works
The timer on the Book of JavaScript website works similarly to the clock, but
with a few twists added. Figure 9-9 shows the code.

156 Chapter 9
<html>
<head>
<title>How Long You've Been on the Page</title>
<script type = "text/javascript">
<!-- hide me from older browsers
X function setTimeSinceArriving(start_time, update_time) {
Y if (start_time == 0) {
Z start_time = getCurrentMillisecs();
}
[ var millisecs = getCurrentMillisecs();
\ var milliSecondsOnPage = millisecs - start_time;
] var secondsOnPage = Math.round(milliSecondsOnPage / 1000);
^ document.timeForm.timeSince.value = secondsOnPage;
_ setTimeout("setTimeSinceArriving(" + start_time + "," + update_time + ")",
update_time);
}
function getCurrentMillisecs() {
var now = new Date();
`var millisecs = now.getTime();
return millisecs;
}
// show me -->
</script>
</head>
a <body onLoad = "setTimeSinceArriving(0, 500)">
<form name = "timeForm">
Seconds you've been on this page:
<input type = "text" name = "timeSince" size = "10">
</body>
</html>
Figure 9-9: Code to show how long you’ve been on a page
The fun starts with the onLoad in the <body> tag in a. This onLoad calls
the function setTimeSinceArriving() and passes it two parameters: 0, which
indicates that this is the first time the function is being called, and 500, the
number of milliseconds to pass to the setTimeout() function—in other words,
the time between calls to the setTimeSinceArriving() function.
The setTimeSinceArriving() function is defined at the top of the page,
starting with X. The function first checks to see whether this is the first time
it has been called by checking whether start_time equals 0 (Y). This happens
only when the function is called from the onLoad in the body. If this is the first
call to the function, Z changes start_time to equal a number that represents
the time when the function was called.
For historical reasons, JavaScript (along with other programming lan-
guages) considers 12 AM, January 1, 1970, to be the beginning of time. In `
the function getCurrentMillisecs() calculates the number of milliseconds
from this starting point using the getTime() method of the Date object. Just

Timing Events 157
as you can call getHour() to get the hour from a Date object, you can call
getTime() to get the number of milliseconds between January 1, 1970 and
the time stored in the Date object.
Converting the date to a number in this way lets you compare two dates
by comparing two simple numbers. If you didn’t convert to milliseconds, and
you had very close dates, you’d have to compare each part of the dates sepa-
rately. For example, to make sure that January 1, 1970, 1 AM did indeed fall
earlier than January 1, 1970, 2 AM, you’d have to check the years, then the
months, then the days, then the hours. The difference between these two
dates doesn’t become apparent until you compare their hours. Converting
both dates into milliseconds means you compare just the milliseconds.
Messing around with dates is one of the biggest hassles in programming,
so if this procedure seems awkward, you’re right.
Getting back to the program, Z sets the start_time variable to the time
when the function is first called. Line [ then gets the current time in milli-
seconds again. The first time the function is called, this will be almost exactly
the same number as was calculated in Z. The next time the function is called,
however, it will be different. This is because Z executes only the first time the
function is called, while [ is called every time the function runs.
Lines \ and ] do a little math to get the seconds between the numbers
generated in Z and [. Line \ takes the difference between the two times
and gives you a number in milliseconds. Line ] divides that number by 1,000
to get seconds and rounds it to the nearest whole number. Next, ^ puts this
number in the form element to display the information on the page, and _
calls setTimeout() to call the function again in 500 milliseconds.
The number 500 comes from a, the first time the function is called. You
may be wondering why the function is being called every 500 milliseconds if
it updates the timer only every second. Wouldn’t it make more sense to call
the function every second? It would, except that the JavaScript timer isn’t
perfect. If you are running many programs on your computer, or just a couple,
but one is doing some heavy calculations, the JavaScript timer may be a little
slow. If we asked JavaScript to call the function every second, it might be a little
late. If this happens the timer might skip a second—jumping from 3 seconds
to 5 seconds, for example. To reduce the chance of this, it helps to ask
JavaScript to check its clock twice a second, just to make sure it’s accurate.
This is yet another example of paranoid programming.
How Space.com’s Countdown Script Works
Space.com’s countdown script (Figure 9-10) is a bit more complicated than
the one on the Book of JavaScript website. However, aside from the calcula-
tions involved in determining the time until the next launch, it functions
very similarly.
<script language = "JavaScript">
<!-- hide me from older browsers
// change your event date event here
X var eventdate = new Date("December 6, 2005 00:00:00 EST");

158 Chapter 9
// set to 0 to turn clock off or set to 1 to turn clock on
Y var clock_on = 1;
Z function toSt(n) {
s = ""
if(n<10) s += "0"
return s+n.toString();
}
[ function countdown() {
if (clock_on) {
cl = document.clock;
d = new Date();
\ count = Math.floor((eventdate.getTime()-d.getTime())/1000);
] if(count <= 0) {
{cl.days.value = "----";
cl.hours.value = "--";
cl.mins.value = "--";
cl.secs.value = "--";
^ return;
}
_ cl.secs.value=toSt(count%60);
count=Math.floor(count/60);
cl.mins.value=toSt(count%60);
count=Math.floor(count/60);
cl.hours.value=toSt(count%24);
count=Math.floor(count/24);
cl.days.value=count;
` setTimeout("countdown()",500);
}
}
// show me -->
</script>
a <form name = "clock">
<input name = "days" size = "5" type = "text"><br>
<input name = "hours" size = "5" type = "text"><br>
<input name = "mins" size = "5" type = "text"><br>
<input name = "secs" size = "5" type = "text">
</form>
Figure 9-10: Space.com’s countdown script
Line X sets the date of the next space launch (as of the date I accessed
this code; you’d see a different date if you selected ViewSource to look at
the code now). Up until now, we’ve seen how to get the current date. Line X
shows you how to set the Date object to a specific date. The number after
2005 is the time of the launch, where EST stands for Eastern Standard Time.
Line Y, as mentioned in the comment above it, is set to 0 if there is no
upcoming launch. As we’ll see later, setting a value to 0 is like setting it
equal to false.
The script gets started when the countdown() function ([) is called using
onLoad inside the web page’s body:
<body marginwidth = "0" marginheight = "0" leftmargin = "0" topmargin = "0"
onload = "PageLoad('spaceflight');countdown();">

Timing Events 159
When we discussed if-then statements in Chapter 3, I omitted a little trick.
You can use 0 as a substitute for the term false. So if the clock_on variable
is set to 0, the test if (clock_on) will be false. If clock_on is any other value,
such as 1, the test if (clock_on) will be true. This is another example of pro-
grammers being lazy people—why type false, when you can just type 0?
The next couple of lines set a couple of variables: c1 points to the form
that holds the countdown values (a), and d contains the current date infor-
mation. I’ve taken some of the formatting out of the form, starting in a, but
otherwise it’s the same as on the Space.com page.
The next line of the countdown() function uses the getTime() method
of the Date object to calculate the number of seconds between the current
time and the time of the next launch. Remember that getTime() gives you
the number of milliseconds between the date represented in the object and
January 1, 1970, and there are 1,000 milliseconds in a second. Line \ subtracts
the current date from the launch date and then divides that number by 1,000
to get the number of seconds. The Math.floor() method takes the number
you get from the division and rounds it down to the nearest whole number.
That way, you get 2 seconds rather than 2.821 seconds.
The next block of code puts dashes in the form elements if the launch
date has already passed. The launch date has passed when the current date is
bigger than the launch date. In this case, the count variable in \ will be less
than 0. There’s a very small chance that you’ll have reached the page right
when the rocket is launching. Line ] treats this as if you missed the launch.
Notice the return in ^. Recall from Chapter 6 that return causes
JavaScript to exit the function (returning any value that follows the word
return; in this case we don’t need a return value). Putting the return in the
if clause, as Space.com has done, forces the JavaScript to stop executing
the rest of the countdown() function after putting dashes in the form elements.
Although this works, it’s considered bad style to put return statements in the
middle of functions, because doing that can make it hard to determine the
circumstances under which specific lines in your function will be executed.
If part of a function is in an if clause, you know the conditions under which
that part of the function will be run. In small functions like this, it doesn’t
make too much difference, but in general, it’s best to avoid having return in the
middle of functions. As an alternative, Space.com could rewrite the countdown()
function using an if-else statement, like this:
function countdown() {
// stuff before the if clause
if (count <= 0) {
// put in the dashes
} else {
// do the rest of the function
}
}
Note that if there is no value to return, a function doesn’t need to say
return at the end.
160 Chapter 9
Calculating Times
When Space.com displays the time until the next launch on the web page,
the time is split into the number of days, hours, minutes, and seconds until
launch. JavaScript does this using a mathematical operator that most people
don’t know about: MOD, or modulus. The MOD operator is represented in
JavaScript by the percent sign (%), and it calculates the remainder of a division.
Here are some examples:
5 % 2 = 1 (5 divided by 2 is 2, with 1 left over)
19 % 5 = 4 (19 divided by 5 is 3, with 4 left over)
1 % 3 = 1 (1 divided by 3 is 0, with 1 left over)
The MOD operator is useful when you need to break down one number
into several components (for example, when you have the difference in
seconds between two times and you want to break that into days, hours,
minutes, and seconds). Lines _ until ` use MOD to do exactly that. Let’s
say there are 3,930 seconds until launch—in other words, the count variable
equals 3,930. We want to separate that number into days, hours, minutes,
and seconds until launch. Line _ uses MOD to figure out what should go
in the seconds form element. The expression count%60 means count mod 60.
The value of count, 3,930, divided by 60 is 65, with 30 left over. This new
value, 30, gets run through the toSt() function, which puts a 0 in front of
the number if it’s less than 10, and the result goes into the seconds box.
Next, Space.com figures out what should be in the minutes box. To
calculate how many minutes there are in count, the next line divides count
by 60 seconds, and rounds down. After this calculation, count now equals 65.
In other words, there are 65 minutes in 3,930 seconds. The countdown()
function then mods 65 with 60 to get the number to display in the minutes
box. Because 65/60 = 1, with 5 left over, 5 is run through the toSt() function,
and the result is put into the minutes box. At this point, you should be ready
to follow the rest of these calculations.
After making the calculations and putting the generated values into
their appropriate form elements, the function uses setTimeout() to call itself
in half a second and the timing loop proceeds as we’ve seen in the other
examples in this chapter.
Global Variables and Constants
Before finishing with the Space.com example, I’d like to point out one more
important coding style issue. Notice that the variable declarations in X and
Y in the Space.com script don’t appear inside a specific function. As with the
time-outs described earlier, this means that any function in the script can
access the variables. For example, \ in the countdown() function accesses
eventdate, even though eventdate was declared outside the function. Variables
declared outside JavaScript functions are called global variables. In general,
global variables should be avoided. They tend to introduce hard-to-debug

Timing Events 161
errors into code. These errors occur when multiple functions alter the value
of the global variable at various points in the script, making it difficult to
figure out what part of your script set a variable to a certain value. When your
variables are declared with the word var inside a function, you know that only
that function can alter the value of the variable. If the variable does not
contain the value you think it should when you run the JavaScript, you can
narrow your focus down to the function in which the variable is declared to
debug the problem.
Other than time-outs, the one situation where global variables are a good
idea is when the value of the variable never changes while the script is running.
A variable like this is called a constant, and X and Y in the Space.com script
are a perfect example. While the script is running, the eventdate and clock_on
values never change, so you don’t have to worry about confusion arising
when multiple functions change the variable values. The question of when a
variable should be declared outside of a function, and therefore be available to
all functions, boils down to this rule of thumb: If a variable never changes
and is required in multiple functions, then you should declare it (using var)
outside the functions; otherwise, you should declare the variable inside one
function, and if other functions need it, pass it to those functions as a param-
eter, as described in Chapter 6.
A Timed Slide Show
A slide show is another good application of timed loops. Figure 9-11 shows
you how to combine arrays and timing loops to create a looping slide show.
Again, look the script over before diving into the explanation.
<html>
<head>
<title>A Timed Slide Show</title>
<script type = "text/javascript">
<!-- hide me from older browsers
X var the_images = new Array();
Y the_images[0] = new Image();
Z the_images[0].src = "one.jpg";
the_images[1] = new Image();
the_images[1].src = "two.jpg";
the_images[2] = new Image();
the_images[2].src = "three.jpg";
[ var the_timeout;
\ var index = 0;
function rotateImage()
{
]window.document.my_image.src = the_images[index].src;
index++;
^if (index >= the_images.length)
{
index = 0;
}

162 Chapter 9
_the_timeout = setTimeout("rotateImage();", 1000);
}
// show me -->
</script>
</head>
<body>
` <img name = "my_image" src = "one.jpg">
<form>
<input type = "button" value = "Start the Show"
onClick = "clearTimeout(the_timeout); rotateImage();">
<input type = "button" value = "Stop the Show"
onClick = "clearTimeout(the_timeout);">
</form>
</body>
</html>
Figure 9-11: A timed slide show
Line-by-Line Analysis of Figure 9-11
The first few lines set up the array containing the images we’ll put in the slide
show. Line X creates the new array, Y sets the first item in the array equal to
an image object, and Z sets the src of that image object to the first picture of
the slide show. Lines Y and Z are just like the lines used to preload images
before an image swap (see “Image Preloading” on page 62). The next few
lines load the rest of the images.
After the images have loaded, [ and \ set up two variables for use in the
timing loop. Line [ declares the_timeout, which keeps track of each time-out,
and \ keeps track of which image in the slide show to bring up next time the
script calls rotateImage(). Keep in mind that declaring the index variable
outside the rotateImage() function, as I’ve done here in \, is not the safest
programming practice—it’s just easier and quicker than the safe solution.
Asafer version of rotateImage() will be described subsequently.
Next comes the rotateImage() function, which swaps in a new image and
then calls itself in one second. The first line of the function (]) does the
image swap. It looks up the value of index, finds the src of the element num-
bered index in the the_images array, and swaps in that image for my_image (the
image in `).
After swapping the image, the function adds 1 to the index variable. The
next time rotateImage() gets called, it looks up the next item in the array and
swaps in that item. We have to make sure the number stored in index doesn’t
exceed the number of images stored in the the_images array. The if-then
statement starting in ^ takes care of this issue by ensuring that if index has
incremented past the number of items in the array, it will be set back to 0
(corresponding to the first image in the the_images array). The last line in the
function (_) should be old hat by now. This line sets a time-out to call the
rotateImage() function in one second.
Timing Events 163
The slide show starts when a visitor presses the button that calls
rotateImage() and ends when the user presses the Stop the Show button,
canceling the most recently set time-out.
A Safer Version of rotateImage()
If you’re not interested in perfecting your coding style, you can skip this sec-
tion; it’s a bit advanced. However, if you want to be a supersafe coder, read on.
At a couple of points in this book, I’ve mentioned that it’s best to declare
variables inside the functions that use them. As we saw earlier in the chapter,
this won’t work for variables that hold time-outs, as in [ of Figure 9-11. But
in \ of Figure 9-11, the variable index, declared outside the function, does
not hold a time-out. The only part of the script that uses the index variable is
the rotateImage() function—so I really should be declaring index inside the
rotateImage() function. Unfortunately, as you’ll see in Figure 9-12, I can’t.
Why Declaring a Variable Outside a Function Is Unsafe
Before I describe how to get around this problem, let me first show you in
more detail why declaring index outside rotateImage() is unsafe.
Let’s say your script has two functions: rotateImage(), which performs
the slide show, and beersOnTheWall(), which counts down from 99. If both
rotateImage() and beersOnTheWall() depend on the variable index, and you
don’t declare index inside the functions, both functions will be looking at
the same number—whatever index holds. This is awkward, because you’d
probably want index to start at 99 for the beersOnTheWall() function and 0 for
the rotateImage() function. You’d also want index to decrease by 1 each time
through beersOnTheWall(), but increase by 1 each time through rotateImage().
Having both functions look at the same variable just won’t work.
The easy, though dangerous, solution to the problem would be to make
sure rotateImage() and beersOnTheWall() use different variables. For example,
rotateImage() could use the variable index and beersOnTheWall() could use
beers. This solution might work in a short script, especially if nobody else is
going to change it. However, if the script is lengthy, if more than one person
will modify it, or if the script will be changed and expanded frequently, you
can’t assume the people changing your script will all know they shouldn’t
name any new variable index. If someone accidentally does create another
variable named index, the rotateImage() function probably won’t work, because
rotateImage() will expect a particular index value, and the newly created index
will probably contain another value.
Why You Can’t Put var Inside a Timing Loop
Using var and declaring variables inside the functions that use them is
the safest, simplest solution to this problem. Unfortunately, this solution
doesn’t work exactly right in timing loops. To see why, look at the function
in Figure 9-12.

164 Chapter 9
function rotateImage()
{
Xvar index = 0;
window.document.my_image.src = the_images[index].src;
index++;
if (index >= the_images.length)
{
index = 0;
}
the_timeout = setTimeout("rotateImage();", 1000);
}
Figure 9-12: A faulty rotateImage() function
The addition of X in Figure 9-12 is the only change to Figure 9-11’s
rotateImage() function. This line declares the variable index inside rotateImage(),
thereby avoiding the problem of having two functions look at the same variable.
Unfortunately, each time rotateImage() gets called, index gets set to 0 again.
This means only the first image of the_images would ever show up.
The Solution
Figure 9-13 shows the only really safe way to use setTimeout() to call a function
that takes a parameter. It’s a bit complex, so look closely at it before reading
the explanation.
<html>
<head>
<title>A Timed Slide Show</title>
<script type = "text/javascript">
<!-- hide me from older browsers
var the_images = new Array();
the_images[0] = new Image();
the_images[0].src = "one.jpg";
the_images[1] = new Image();
the_images[1].src = "two.jpg";
the_images[2] = new Image();
the_images[2].src = "three.jpg";
var the_timeout;
X function rotateImage(index)
{
window.document.my_image.src = the_images[index].src;
Yindex++;
if (index >= the_images.length)
{
index = 0;
}
Zvar the_function_string = "rotateImage(" + index + ");";
[the_timeout = setTimeout(the_function_string, 1000);
}

Timing Events 165
// show me -->
</script>
</head>
<body>
<img name = "my_image" src = "one.jpg">
<form>
\ <input type = "button" value = "start the show" onClick = "rotateImage(0);">
<input type = "button" value = "stop the show"
onClick = "clearTimeout(the_timeout);">
</form>
</body>
</html>
Figure 9-13: Coding timing loops the safe way
This safer version of rotateImage() never really declares the problematic
variable index at all. Instead, rotateImage() is called with a parameter—the
number of the image that should appear. Line X shows how rotateImage()
has changed to accept this parameter. Calling rotateImage(0) in \ calls
rotateIndex() and sets index to 0 in X. The first line in the body of the func-
tion then swaps the image stored in position 0 of the_images with the image
on the page. If rotateImage(1) was called instead of rotateImage(0), the second
image in the_images would have been swapped into the page, rotateImage(2)
swaps in the third image, and so on.
The Hitch
Of course, there is a hitch. After incrementing index in Y, as we did in
Figure 9-13, it would make sense to call rotateImage() again in a setTimeout
like this:
the_timeout = setTimeout("rotateImage(index);",1000);
Unfortunately, this triggers a JavaScript error. When one second passes
and the rotateImage(index) command executes, JavaScript tries to remember
what the variable index holds, then calls rotateImage() with that value. However,
at this point, as far as JavaScript knows, no variable index exists. The variable
index exists only inside the function. The setTimeout() in the above line looks
up the variable before calling the function, and since nothing called index
exists outside the function, JavaScript gives the visitor an error message.
The Solution to the Hitch
The way out of this bizarre situation is demonstrated in Z and [ of
Figure 9-13. Line Z creates the command that the setTimeout() will call
in one second. Instead of using the command
"rotateImage(index);"

166 Chapter 9
line Z pulls the word index out of the quotes, forcing JavaScript to look
up the value of the variable index and put that value into the command.
If you have index set to 2, for example, Z writes the command that goes
into the setTimeout() as follows:
"rotateImage(2);"
Line Z may seem confusing, so make sure you understand why it’s written
that way. Because JavaScript calls rotateImage() with the number 2 instead of
the variable index, it doesn’t need to look up the value of any variable when the
command runs in one second. Instead, rotateImage() receives the number 2,
and the function proceeds normally.
Once Z creates the string that holds the command for the time-out to
call, [ performs the setTimeout().
What’s the moral of this story? It’s a bad idea to use setTimeout() to call
a function with a variable between its parentheses, as in
timeout = setTimeout("rotateImage(index);",1000);
because you never know what index will be when you call the function in the
future or even whether index will exist then. If you do use a function inside
asetTimeout() and that function takes a parameter, use a line such as Z to
place the value of the variable into the function.
Why image_array Is Declared Outside the rotateImage() Function
Since rotateImage() is the only function that makes use of image_array, why not
declare it inside the rotateImage() function? Well, I could have, and if I was
being supersafe, I might have. However, re-creating the array every time it
calls the function—possibly hundreds or thousands of times—seems wasteful.
As written, Figure 9-12 creates the array only once. It’s pretty safe to declare
image_array outside the function that uses it because the script probably won’t
ever change this array. Because the values in image_array aren’t likely to
change, I don’t have to worry much about one function changing a value
in the array contrary to the needs of another function.
This section has focused entirely on programming style. The code shown
in Figure 9-11 will serve you perfectly well in many situations, and you may
prefer it for short scripts because it’s more comprehensible. The code shown
in Figure 9-13 is better for complex scripts and for those scripts that you or
others will change frequently.
Timing Events 167
Summary
If you have mastered this chapter, you now know the following:
zHow setTimeout() causes a JavaScript statement to execute in the future
zHow to use clearTimeout() to cancel a time-out
zHow to create a timed loop by writing a function that sets a time-out
that calls the same function
zHow to use parseInt() to convert a string to a number, and why you
might have to do this
If you read the part about coding timing loops the safe way in “A Safer
Version of rotateImage()” on page 163, you also know how to write a timing
loop that calls a function taking parameters.
To make sure you understand timing loops and how to cancel them, try
the following assignment.
Assignment
Try enhancing the slide show in Figure 9-11 so that mousing over the image
stops the slide show and mousing off the image resumes the slide show. It’s a
bit trickier than it sounds.

USING FRAMES AND
IMAGE MAPS
Frames divide a web page into different
sections and are useful for navigation and
page layout. Image maps are images that con-
tain multiple HTML links. Clicking different
parts of an image map brings your visitors to different
web pages. JavaScript can enhance both of these HTML features by allowing
you to manipulate the contents of frames using image maps and links in
other frames.
In this chapter you’ll learn how to:
zCreate basic frames
zUse JavaScript to control the contents of frames
zUse JavaScript to change two frames at once
zUse frames to share information between web pages
zCreate basic image maps
zUse JavaScript to add functionality to your image maps
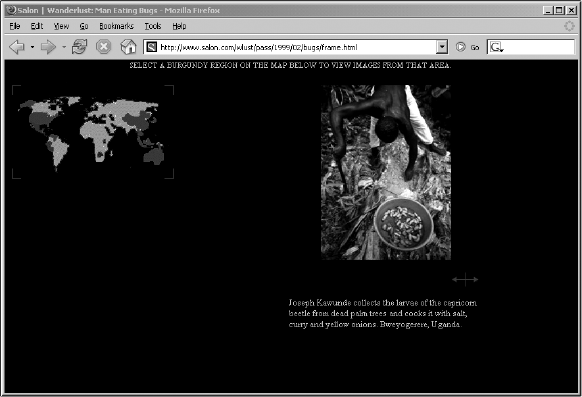
170 Chapter 10
A Real-World Example of Frames and Image Maps
A page that is still my favorite example of integrating image maps, frames, and
JavaScript appeared on the Salon website a few years ago: It presents a book
about eating bugs (see Figure 10-1). The version I will describe may be found
at http://www.bookofjavascript.com/Websites/Salon/frame.html. The current
version of the page is available at http://www.salon.com/wlust/pass/1999/
02/bugs/frame. Mousing over the map highlights that area of the world and
swaps in two pictures: one of the insects that people there eat, and another of
them preparing the insect for a meal.
Figure 10-1: Salon’s bug-eating pictorial
This page is divided into four frames. One frame holds the map of the
world on the left, a second frame holds the picture, a third holds the user
instructions at the top of the page, and a fourth frame holds a caption
describing the picture. The world map is an image map; JavaScript causes
the frames to change when a visitor mouses over any area of the map. Later
in the chapter you’ll see some of the code that creates this set of frames and
activates the image map.
Frames
If you’re already familiar with frames—what they are and how they are used
to build web pages—and don’t need a review of the basics, you can skip to
the section “Frames and JavaScript” on page 172 to learn how the language
works with them.
Frame Basics
A web page with frames is actually a set of HTML pages displayed simulta-
neously. If a page has two frames, it displays two HTML pages, one for each
frame. In addition to the HTML pages that provide the content in the frames,
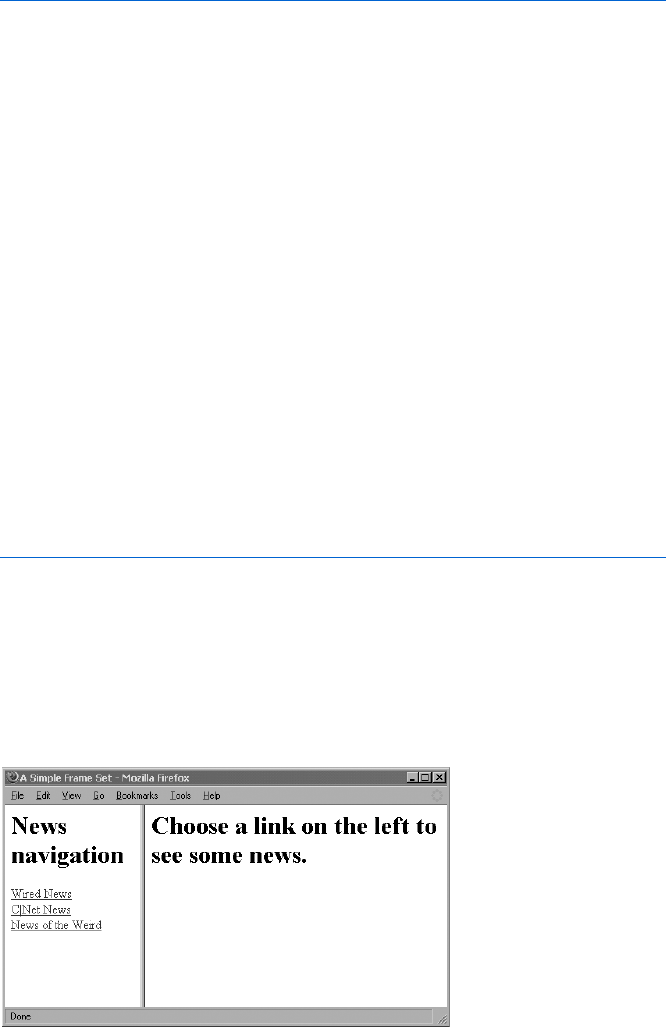
Using Frames and Image Maps 171
another page describes how to display these HTML pages. Figure 10-2 shows
the HTML for a simple web page with frames. Figure 10-3 shows what the
resulting page looks like in a browser.
index.html
<html>
<head>
<title>A Simple Frame Set</title>
</head>
X <frameset cols = "30%, *">
Y <frame src = "navigation.html" name = "nav">
<frame src = "content.html" name = "contents">
Z </frameset>
</html>
navigation.html
<html><head><title>Nav</title></head>
<body>
<h1>News navigation</h1>
<a href = "http://www.wired.com" target = "contents">Wired News</a><br>
<a href = "http://www.news.com" target = "contents">C|Net News</a><br>
[ <a href = "http://www.newsoftheweird.com" target = "contents">News of the
Weird</a><br>
</body></html>
content.html
<html><head><title>News</title></head>
<body>
<h1>Choose a link on the left to see some news.</h1>
</body></html>
Figure 10-2: Code for a simple web page with frames
The code in Figure 10-2 consists of three separate HTML pages. The first
page, index.html, describes how the other two pages should appear on the
screen. The second page, navigation.html, is on the left side of the screen in
Figure 10-3, and the third page, content.html, is on the right side. Clicking
any of the links on the left side loads the corresponding web page on the
right side of the screen.
Figure 10-3: A simple web page with frames

172 Chapter 10
The pages in Figure 10-3 are set next to each other because X in Figure 10-2
tells the browser to set up two frames, arrange them in columns, and make
the first column take up 30 percent of the page and the second column the
rest of the page. Adding more percentages (their sum can’t exceed 100) to
the cols element adds more frames to the page. Alternatively, using the rows
element stacks frames on top of each other. You can tweak frame sets in
dozens of ways. Any good book about HTML devotes a chapter to them.
The two lines after X tell the browser which HTML pages to load into
each frame. Line Y loads navigation.html into the first frame (named nav),
and the next line loads content.html into the second frame (named contents).
Line Z closes the frame set. Notice that you don’t use <body> tags in defining
a frame set.
The next two HTML pages are standard web pages. The first page, navi-
gation.html, contains three links, each leading to a news site. Clicking a link
loads the contents into the contents frame, because each link contains the
element target = "contents" (see [). We’ll see shortly how to use JavaScript to
do the same thing.
Frames and JavaScript
In HTML, the only way an action in one frame can change the contents of
another is through standard HTML links. Fortunately, JavaScript allows you
to expand your repertoire of frame tricks immensely. The JavaScript in Fig-
ure 10-4, for example, makes the contents of the right frame change when
a visitor mouses over one of the links on the left. The pages index.html and
content.html are the same as in Figure 10-2; only navigation.html has changed.
navigation.html
<html><head><title>Nav</title>
<script type = "text/javascript">
<!-- hide me from older browsers
X function changeContents(the_url)
{
Y var content_frame = parent.contents;
Z content_frame.location = the_url;
}
// show me -->
</script>
</head>
<body>
<h1> News navigation</h1>
<a href = "http://www.wired.com"
onMouseOver = "changeContents('http://www.wired.com');
">Wired News</a><br>
<a href = "http://www.news.com"
onMouseOver = "changeContents('http://www.news.com');
">C|Net News</a><br>
[ <a href = "http://www.newsoftheweird.com"
onMouseOver = "changeContents('http://www.newsoftheweird.com');
">News of the Weird</a><br>
</body></html>
Figure 10-4: Using JavaScript to change a frame with a mouseover
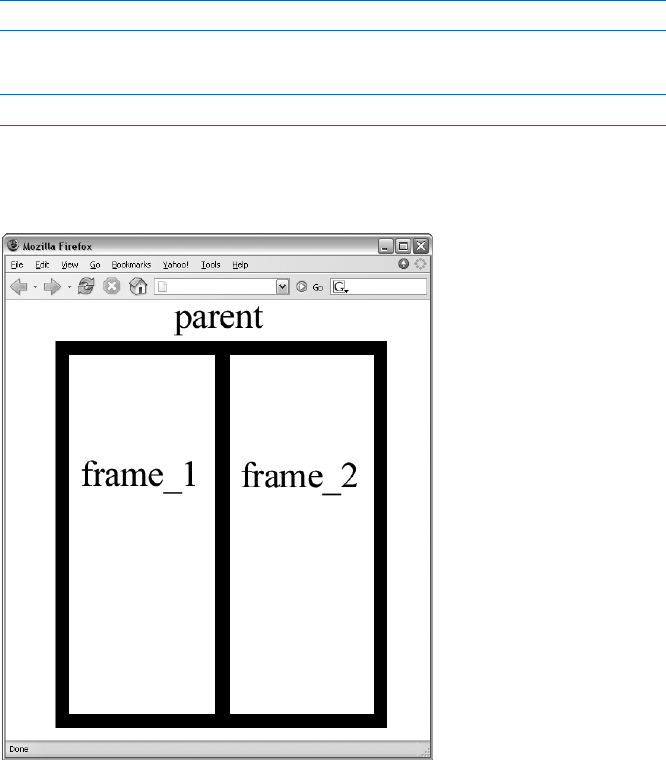
Using Frames and Image Maps 173
Line-by-Line Analysis of Figure 10-4
The key to this script is the function changeContents(). When a visitor mouses
over the News of the Weird link, [ calls changeContents() and sends it the string
"http://www.newsoftheweird.com".
The changeContents() function starts in X, where the_url is set to whatever
string passes into the function. Line Y tells JavaScript to look for the thing
named contents inside its parent (the frame set containing a frame is the
frame’s parent—see Figure 10-5), and sets the variable content_frame to point
to the contents frame.
You refer to frames in JavaScript the same way you refer to windows.
Just as you can change the page shown in a window by referring to its URL
like this:
window_name.location = "http://www.newsoftheweird.com";
you can change the page shown in a frame like this:
the_frame.location = "http://www.newsoftheweird.com";
This is precisely what Z in Figure 10-4 does. After Y assigns content_frame
to point to the frame we want to change, Z changes that frame’s location by
setting content_frame.location to the_url.
Figure 10-5: A graphical representation of frames and
their parents

174 Chapter 10
Frames and Image Swaps
In the Chapter 5 assignment, I described how clicking a JavaScript-
enhanced link in one window can change an image in another window.
Because JavaScript treats frames and windows similarly, the same trick
enables a link in one frame to change an image in another.
As a refresher, Figure 10-6 contains the code necessary to swap an image
in one window by clicking a link in a second window. Figure 10-7 shows how
the same trick works with frames.
first_page.html
<html>
<head>
<title>Control Panel</title>
<script type = "text/javascript">
<!-- hide me from older browsers
X var image_window =
window.open("image_page.html","image_window","width=100,height=100");
// show me -->
</script>
</head>
<body>
Y <a href = "#" onClick =
"image_window.document.the_image.src = 'sad.gif'; return false;">sad</a>
<br>
Z <a href = "#" onClick =
"image_window.document.the_image.src = 'happy.gif'; return false;">happy</a>
</body>
</html>
image_page.html
<html><head><title>The Image Page</title></head>
<body>
[ <img src = "happy.gif" name = "the_image">
</body>
</html>
Figure 10-6: Swapping an image in one window with a link in another
Figure 10-6 consists of two HTML pages. The first page, first_page.html,
starts by launching a new window in X and calling it image_window. This window
will open to image_page.html, which has only one item in it—an image of
a happy face, named the_image ([). When someone clicks the link in Y,
JavaScript looks for the window called image_window and looks in its document
for the_image. Once it finds the_image, it changes its src to sad.gif. The link in
Z changes the image back to happy.gif.
frameset.html
<html>
<head>
<title>Image Swapping in Frames</title>
</head>
<frameset rows = "30%, *">
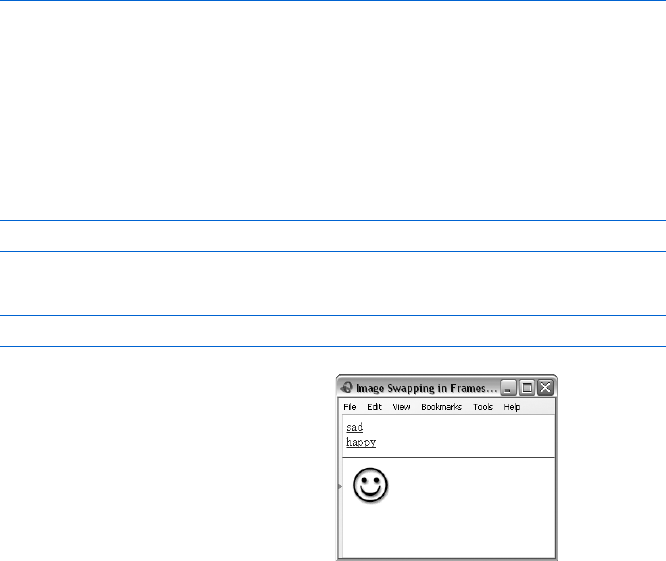
Using Frames and Image Maps 175
<frame src = "navigation.html" name = "navigate">
<frame src = "image_page.html" name = "image_frame">
</frameset>
</html>
navigation.html
<html>
<head>
<title>Control Panel</title>
</head>
<body>
X <a href = "#" onClick =
"parent.image_frame.document.the_image.src = 'sad.gif'; return false;">sad</a>
<br>
<a href = "#" onClick = "parent.image_frame.document.the_image.src =
'happy.gif'; return false;">happy</a>
</body>
</html>
image_page.html
<html><head><title>The Image Page</title></head>
<body>
Y <img src = "happy.gif" name = "the_image">
</body>
</html>
Figure 10-7: Swapping an image in one frame with a link in another
Figure 10-7 does the same thing with frames instead of windows. The
page frameset.html in Figure 10-7 sets up the page illustrated in Figure 10-8;
it has navigation.html in the top frame (which takes up 30 percent of the
window) and image_page.html in the bottom frame with happy.gif (called
the_image in Y). Line X is the link in the top frame that changes happy.gif
in the bottom frame to sad.gif. The critical part of X is
parent.image_frame.document.the_image.src = 'sad.gif';
which is similar to Y in Figure 10-6:
image_window.document.the_image.src = 'sad.gif';
The only difference is that in
Figure 10-6 we refer directly to
the window image_window, while in
Figure 10-7 we tell the JavaScript
in the navigation.html to go up to
its parent and then down to the
frame image_frame. Figure 10-8
shows the code in Figure 10-7
at work. Figure 10-8: Interframe image
swapping in action

176 Chapter 10
Changing the Contents of Two Frames at Once
In some situations, you may want to change the contents of two or more
frames at once. In Salon’s bug-eating piece, for example, mousing over part
of the world in the map frame changes the contents of all three frames.
Figure 10-9 contains the JavaScript for a simple example of changing more
than one frame: a Spanish-language tutorial. As you can see in Figure 10-10,
clicking a Spanish word in one frame shows you an image of what that word
means in a second frame and puts the translation of the word into English
inside a form element in a third frame.
frameset.html
<html>
<head>
<title>Changing Two Frames at Once</title>
</head>
X <frameset cols = "30%, 30%, *">
<frame src = "navigation.html" name = "navigate">
<frame src = "form_page.html" name = "form_frame">
<frame src = "image_page.html" name = "image_frame">
</frameset>
</html>
navigation.html
<html>
<head>
<title>Navigation Frame</title>
<script type = "text/javascript">
<!-- hide me from older browsers
function changeFrames(new_image, new_words)
{
Y parent.image_frame.document.the_image.src = new_image;
Z parent.form_frame.document.the_form.the_name.value = new_words;
}
// show me -->
</script>
</head>
<body>
[ <a href = "#"
onClick = "changeFrames('apple.gif','apple'); return false;">manzana</a>
<br>
<a href = "#"
onClick = "changeFrames('orange.gif','orange'); return false;">naranja</a>
</body>
</html>
form_page.html
<html><head><title>The Form Page</title></head>
<body>
<form name = "the_form">
<input type = "text" name = "the_name">
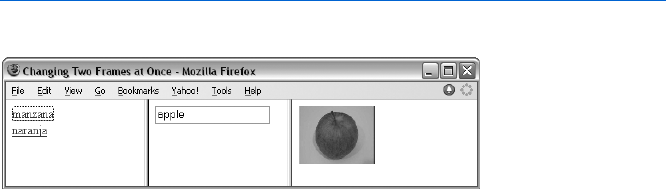
Using Frames and Image Maps 177
</form>
</body>
</html>
image_page.html
<html><head><title>The Image Page</title></head>
<body>
\ <img src = "blank.gif" name = "the_image">
</body>
</html>
Figure 10-9: Changing two frames at once
Figure 10-10: A simple Spanish tutorial—after clicking the word
manzana
Line-by-Line Analysis of Figure 10-9
The tutorial consists of four HTML pages. The first, frameset.html, describes
the layout of the frames (X).
In the first frame, navigation.html contains the JavaScript function and
the links that change the contents of the other two frames. The function
changeFrames() takes the parameters new_image, the name of the image to swap
in the third frame, and new_words, the words to put into the form element in the
second frame. Line Y performs the image swap by telling JavaScript to find
the parent of the navigation frame (frameset.html), then the frame image_frame
inside the frame set, and, inside that frame, the image named the_image (\).
Once JavaScript has found the_image,changeFrames() changes the_image.src
to whatever new_image was set to when the script called the function. Line Z
changes the contents of the text box in form_frame in a similar fashion.
Clicking the manzana link in the navigation frame ([) calls the
changeFrames() function, with apple.gif as the image to swap in and apple
as the word to go into the form. Although changeFrames() only changes two
frames, you could easily expand it to change as many frames as the frame
set holds.
Frames Inside Frames
Sometimes you need to mix side-by-side frames with stacked frames. For
example, the page shown in Figure 10-11 has one wide frame on top and two
narrower frames next to each other, below the wider top frame. You would
achieve this effect by creating one frame set with two frames, one on top of
the other, and loading the bottom frame with a second frame set that has two
frames next to each other. Figure 10-12 shows the code for Figure 10-11.
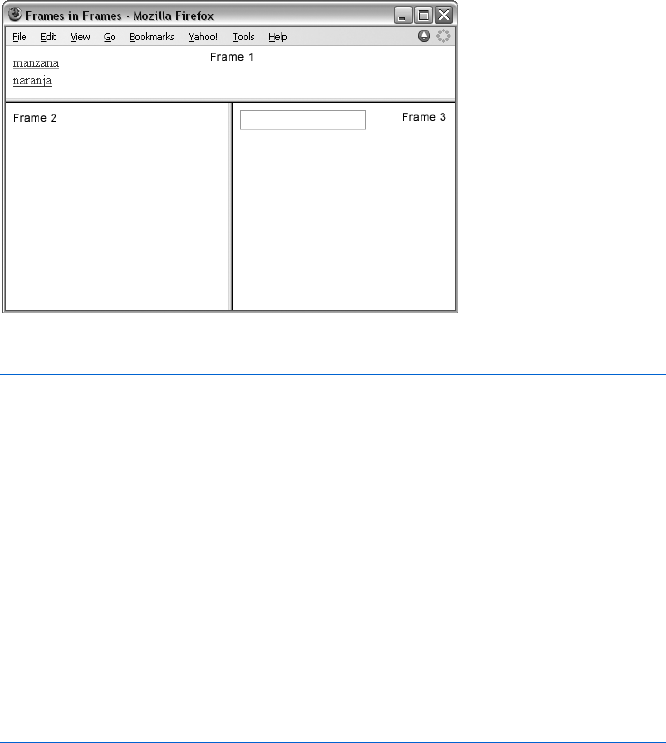
178 Chapter 10
Figure 10-11: Frames inside frames
index.html
<html>
<head><title>Frames in Frames</title></head>
X <frameset rows = "20%,*">
Y <frame src = "navigation.html" name = "navigate">
Z <frame src = "bottom_frame.html" name = "bottom">
</frameset>
</html>
bottom_frame.html
<html>
<head><title>Bottom Frames</title></head>
[ <frameset cols = "50%,*">
<frame src = "image_page.html" name = "image_frame">
<frame src = "form_page.html" name = "form_frame">
</frameset>
</html>
Figure 10-12: The frame set for Figure 10-11
The pages navigation.html, image_page.html, and form_page.html
invoked by the code in Figure 10-12 function in the same way as the corre-
sponding pages in Figure 10-9.
The first frame set (call it the outer frame set) sets up two frames, one
on top of the other (X). The top frame (Y) holds navigation.html, which
contains the navigation links and the JavaScript that controls how the links
affect the other frames. The bottom frame (Z) loads bottom_frame.html,
which holds the second frame set (call it the inner frame set). This frame
set ([) creates two frames: The left frame contains image_page.html, and
the right frame contains form_page.html. Each of these pages could also have
a frame set, since you can nest frame sets infinitely. Be careful, though—
having more than one level of frame sets quickly boggles the minds of even
the best web page producers.

Using Frames and Image Maps 179
JavaScript and Frames Inside Frames
As long as you have only one frame set, JavaScript in one frame can influence
any other frame by referring to it as parent.frame_name. Matters get a bit more
complicated if you have nested frame sets. Consider frame 3 in Figure 10-11.
The parent of this frame is the inner frame set (bottom_frame.html), contain-
ing frames 2 and 3. The appropriate JavaScript in frame 3 could influence
frame 2 using parent.image_frame. For example, to change the URL shown
in frame 2, frame 3 could run the following script:
parent.image_frame.location = "http://www.webmonkey.com";
But how can JavaScript in frame 3 change the contents of frame 1? The
inner frame set (which contains frames 2 and 3) doesn’t “know” anything
about frame 1 because it’s located in another frame set. The outer frame set
(index.html), however, does “know” about frame 1 and the inner frame set
because it set them up. So in order for a frame in the inner frame set to affect
a frame in the outer frame set, the inner frame must ask the outer frame set
to find the frame to change. In this case, you could control frame 1 by calling
the parent of frame 3’s parent:
parent.parent.top_frame.location = "http://www.webmonkey.com";
Running this script in frame 3 changes the URL displayed in frame 1.
The line in frame 3 tells JavaScript to go up to frame 3’s parent, the inner
frame set; find that frame set’s parent, the frame set in frameset.html; and
then find the frame top_frame inside that frame set.
Alternatively, you can have frame 3 refer directly to the outermost frame
set by using the word top in your script:
top.navigate.location = "http://www.webmonkey.com";
This tells JavaScript to find the topmost frame set and look for the frame
named navigate inside that frame set. The top object contains everything in the
web browser window, so if there are frame sets on the page, top refers to the
outermost frame set. If there are no frames in the browser, top means the same
thing as window.
Whether you use top or a chain of parents to deal with nested frame sets
depends on the circumstances. If you have a link in a frame buried four frame
sets deep that you want to affect a frame on the top level, using top probably
makes sense. If you want the link in the buried frame set to affect a frame in
its own frame set, parent is the way to go.
Frame Busting
Some sites use frames to keep you in their site even when you think you’re
leaving it. For example, when you do an image search on Google, the result
appears on a page that has Google’s upper frame (see Figure 10-13). Google

180 Chapter 10
allows its users to get rid of the top frame by clicking a link, but you might
not want your web page showing up in a Google frame at all. To prevent this
from happening, insert the script shown in Figure 10-14 in the header of
your page.
Figure 10-13: Google uses frames to keep you in its site
Line X checks to see whether the HTML page containing this JavaScript
is the top frame of the frame hierarchy (remember, self means this page).
Line X translates to “If this page is not on top, perform the statements
between the curly brackets.” If the HTML page is not on top, it’s inside
an alien frame set. To escape the frame set, the page puts itself on top by
setting the top.location of the window to self.location (Y) which stores the
URL of a web page.
<script type = "text/javascript">>
<!-- hide me from older browsers
X if (self != top)
{
Y top.location = self.location;
}
// show me -->
</script>
Figure 10-14: Frame-busting code

Using Frames and Image Maps 181
Using Frames to Store Information
Web pages have lousy memories. Unless you’ve done something fancy, the
moment a visitor leaves your web page, the page forgets any information it
has collected. If, for example, you have a long quiz and you want to tell a
visitor his or her score at the end, you’ll find it tough to break the quiz into
several pages—the second page can’t keep track of which answers the visitor
gave on the first page.
There are a few ways around this problem. If you want to store the infor-
mation for a long time on your visitor’s computer, cookies are the way to go
(see Chapter 12). But if you only want to save the information briefly, there’s
a neat trick using frames to store information between pages.
The trick involves setting up an invisible frame containing a JavaScript
function with an array that saves the information from each page as your
visitors move from page to page inside your site. When you need to retrieve
the information, simply access an array in the invisible frame. Figure 10-15
lists four web pages to show how you would do this for a quiz. Figure 10-16
shows you what the code in Figure 10-15 generates.
frameset.html
<html>
<head>
<title>A Quiz</title>
</head>
X <frameset rows = "100%,*" frameborder = "0">
Y <frame src = "quiz_page_1.html" noresize>
Z <frame src = "secret_code.html" name = "tracker" noresize>
</frameset>
</html>
secret_code.html
<html>
<head>
<title>A Quiz</title>
<script type = "text/javascript">>
<!-- hide me from older browsers
[ var answers = new Array();
\ function score(answers)
{
var correct = 0;
var correct_answers = new Array("true","true","false","true");
for (var loop = 0; loop < correct_answers.length; loop++)
{
if (answers[loop] == correct_answers[loop])
{
correct++;
}
}
percent_correct = (correct/4) * 100;
alert("You got " + percent_correct + " percent right!");
}
// show me -->
182 Chapter 10
</script>
</head>
<body>
Nothing to see here!
</body>
</html>
quiz_page_1.html
<html>
<head>
<title>Quiz Page 1</title>
</head>
<body>
Answer the following true/false questions:
<p>
<form>
A chicken is a bird.<br>
<input type = "radio" name = "bird"
onClick = "parent.tracker.answers[0]='true';">True<br>
<input type = "radio" name = "bird"
onClick = "parent.tracker.answers[0]='false';">False<br>
<p>
A skink is a lizard.<br>
<input type = "radio" name = "skink"
onClick = "parent.tracker.answers[1]='true';">True<br>
<input type = "radio" name = "skink"
onClick = "parent.tracker.answers[1]='false';">False<br>
<p>
</form>
<p>
] <a href = "quiz_page_2.html">Next Page</a>
</body>
</html>
quiz_page_2.html
<html>
<head>
<title>Quiz Page 2</title>
</head>
<body>
Answer the following true/false questions:
<p>
<form>
A whale is a fish.<br>
<input type = "radio" name = "whale"
onClick = "parent.tracker.answers[2]='true';">True<br>
<input type = "radio" name = "whale"
onClick = "parent.tracker.answers[2]='false';">False<br>
<p>
A human is a primate.<br>
<input type = "radio" name = "human"
onClick = "parent.tracker.answers[3]='true';">True<br>
<input type = "radio" name = "human"
onClick = "parent.tracker.answers[3]='false';">False<br>
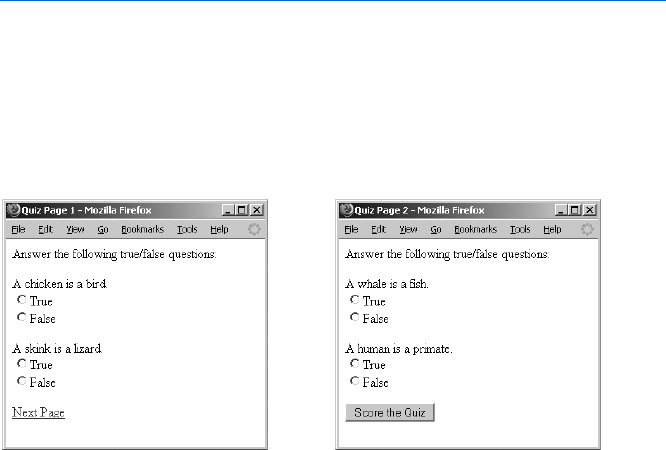
Using Frames and Image Maps 183
<p>
^ <input type = "button" value = "Score the Quiz"
onClick = "parent.tracker.score(parent.tracker.answers);">
</form>
</body>
</html>
Figure 10-15: Preserving information between pages with frames
As you can see in Figure 10-16, the quiz doesn’t look as if it’s in frames.
In fact, it has two frames, but one is invisible. The visible frame holds two
true/false questions and a link to go to the next page (Figure 10-17). Although
clicking the link apparently brings the visitor to a completely new web page,
it’s actually the same page with new contents in the visible frame.
Line-by-Line Analysis of Figure 10-15
The invisible frame stores the visitor’s answers as he or she moves from page
to page. If you didn’t put the quiz in frames, the browser would forget the
visitor’s answers each time it loaded a new web page. Here’s how the invisible
frame stores information.
The first page in Figure 10-15, frameset.html, sets up the frames as we’ve
seen before, but with a few changes. Line X describes two frames. The first
one takes up 100 percent of the window, making it seem as if the page has no
second frame. We’ve set frameborder, which controls the thickness of the line
between the two frames, to 0 to eliminate any trace of the invisible frame.
Lines Y and Z contain another new element: noresize. This attribute
to the <frame> tag tells the browser to prevent visitors from resizing the frames.
Without this element, a visitor might accidentally click the bottom of the
window and pull the hidden frame up. Putting noresize inside the <frame>
tags prevents this from happening. Also note that the invisible frame, called
tracker, holds the HTML page secret_code.html—this is where we’ll be
storing the information. Because the frame is hidden, visitors can’t see the
contents of secret_code.html.
The next page, secret_code.html, holds the visitor’s answers in the answers
array ([) and scores the quiz at the end.
Figure 10-16: Page 1 of the quiz
generated by Figure 10-15
Figure 10-17: Page 2 of the quiz
generated by Figure 10-15

184 Chapter 10
The scoring function starts in \. This function creates an array called
correct_answers, which holds the correct answers and loops through the array,
comparing each correct answer with the answer the visitor gave. If the answers
match, the script increments the variable correct. Once the script has checked
all the answers, the function calculates what percentage the visitor got right
and announces the score in an alert.
The two quiz pages show how the script stores the visitors’ answers in the
invisible frame and how it calls the score() function.
The page quiz_page_1.html contains a form with two quiz questions and
a link. Each quiz question is true or false; the visitor answers by clicking the
appropriate radio button. Clicking the True radio button on the first question
runs the following code:
parent.tracker.answers[0]='true';
This line goes to the frame tracker in the page’s parent (that is, the frame
set) and stores the string 'true' in the first slot (answers[0]) of the array. Click-
ing the False radio button on the second question runs the following code
and then stores the string 'false' in the second slot of the answers array:
parent.tracker.answers[1]='false';
Clicking the link in ] loads the new page, quiz_page_2.html, into
the visible frame. The invisible frame, however, sticks around, storing the
values from the last page. It keeps the visitor’s answers to the two questions
on quiz_page_2.html in the third and fourth slots in the answers array.
Clicking the Score the Quiz button in ^ calls the following code:
parent.tracker.score(parent.tracker.answers);
This line invokes the score() function found inside the tracker frame.
The function takes an array containing the visitor’s answers as a parameter.
Because the tracker frame stores the answers array, the script can pass the
array to the score function by referring to parent.tracker.answers.
This example uses practically every major element of programming this
book has covered to date, so take a long look at it and make sure you under-
stand everything that’s going on. I’ve introduced two major new concepts:
zOne frame refers to a variable stored in another frame with
parent.other_frame.variable, as in parent.tracker.answers
zOne frame calls a function declared in another frame with
parent.other_frame.function(), as in parent.tracker.score()
Image Maps
JavaScript allows you to expand the capabilities of image maps by letting
you call JavaScript statements when users click, mouse over, or mouse off
different parts of an image map.

Using Frames and Image Maps 185
Image Map Basics
To construct an image map, you need an image and a map that describes
which parts of the image should link to which URLs. Figure 10-18 shows you
part of the code for the image map that Salon uses in its bug-eating piece.
Figure 10-19 shows you what this HTML looks like in a browser. Clicking any
of the dark areas in the image brings you to a web page about that area.
<html>
<head>
<title>Image Map Example</title>
</head>
<body>
X <img src = "left.gif" isMap useMap = "#left">
Y <MAP name = "left">
Z <AREA coords = "9,23,41,42"
[href = "http://www.salon.com/wlust/pass/1999/02/bugs/us.html"
\shape = "RECT">
<AREA coords = "26,42,75,64"
href = "http://www.salon.com/wlust/pass/1999/02/bugs/us.html"
shape = "RECT">
<AREA coords = "28,65,55,78"
href = "http://www.salon.com/wlust/pass/1999/02/bugs/mexico.html"
shape = "RECT">
<AREA coords = "58,70,78,86"
href = "http://www.salon.com/wlust/pass/1999/02/bugs/venezuela.html"
shape = "RECT">
<AREA coords = "51,88,63,103"
href = "http://www.salon.com/wlust/pass/1999/02/bugs/peru.html"
shape = "RECT">
] </MAP>
</body>
</html>
Figure 10-18: Part of Salon’s bug-eating image map
Line X in Figure 10-18 tells the browser to display left.gif and associate it
with the map called left. The element isMap tells the browser this is an image
map, and the element useMap tells the browser which map to use.
The rest of the page defines the map. Line Y starts the definition and
gives the map a name, Z through \ define the different regions of the map
(each called an AREA), and ] ends the map definition. Three elements define
each area: shape, coordinates, and URL link. In Salon’s image, each area is
rectangular (\). Line [ associates the first area with a URL that discusses
bug eating in the United States, and Z defines which part of the image this
area covers. The four numbers are the x (horizontal) and y (vertical) coordi-
nates of the upper-left corner and the x and y coordinates of the lower-right
corner, in pixels. So the first area in Figure 10-19 goes from the (9, 23) point
of the image to the (41, 42) point of the image, where the numbers represent
the number of pixels from the upper-left corner (see Figure 10-20).
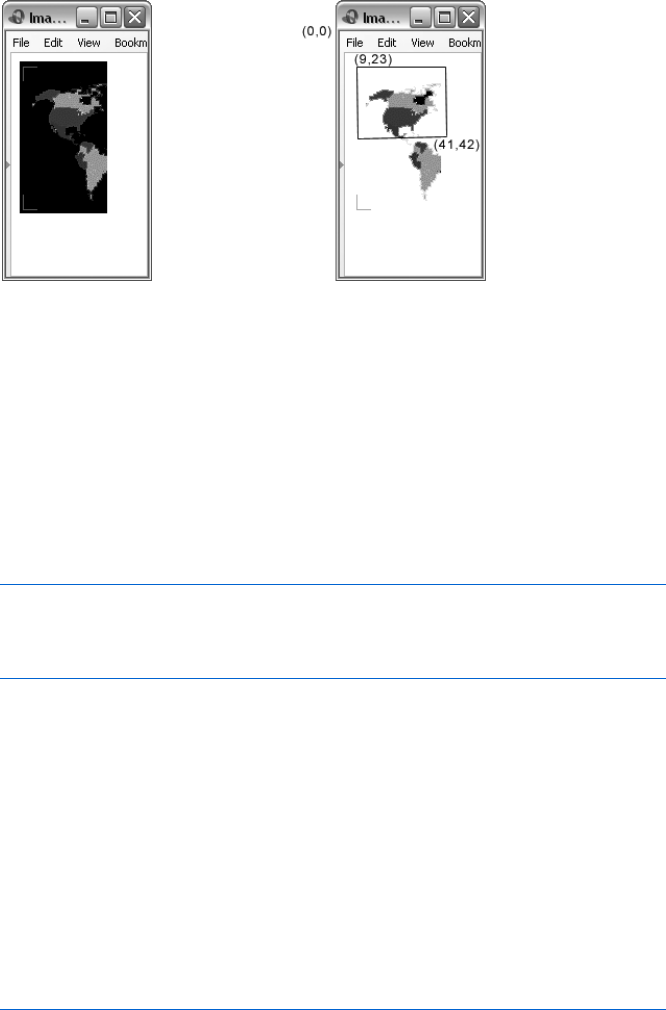
186 Chapter 10
Image Maps and JavaScript
Adding JavaScript to an image map is just like adding JavaScript to an HTML
link. The area tag can handle onClick,onMouseOver, and (in the 4.0 and later
browsers) onMouseOut events. For example, if you want an alert box to pop up
when a visitor moves the mouse over Alaska, you could rewrite the first area
in Figure 10-18 as follows:
<AREA coords = "9,23,41,42"
href = "http://www.salon.com/wlust/pass/1999/02/bugs/us.html"
onMouseOver = "alert('It's cooooold in Alaska!');"
shape = "RECT">
Adding onClick and onMouseOut is equally simple.
How Salon’s Bug-Eating Script Works
Because Salon’s bug-eating piece involves so many pages (see Figure 10-1 for
what the page looks like in a browser), the code in Figures 10-21 through
10-23 describes only the frame set and navigation pages. One large difference
between the code in these figures and Salon’s actual code is that Salon has
divided its image map into three separate images to minimize download times.
Figures 10-21 through 10-23 assume the site has just one image. To see how
the code for handling three separate images differs, look at the scripts avail-
able at http://www.bookofjavascript.com/Websites/Salon.
index.html
<html>
<HEAD>
<TITLE>Salon | Wanderlust: Man Eating Bugs</TITLE>
Figure 10-19: Window
displayed by the HTML
in Figure 10-18
Figure 10-20: Graphical
representation of the area
described by Z through \
in Figure 10-18

Using Frames and Image Maps 187
</HEAD>
X <FRAMESET frameborder = no border = 0 COLS = "280,*">
Y <FRAMESET frameborder = no border = 0 ROWS = "165,*">
<FRAME SRC = "nav.html" NORESIZE SCROLLING = "no" border = "0" NAME = "map">
<FRAME SRC = "teaser.html" NORESIZE SCROLLING = "no" border = "0" NAME =
"teaser">
</FRAMESET>
<FRAME SRC = "eatbug.html" NORESIZE SCROLLING = "no" border = "0" NAME =
"thePicture">
</FRAMESET>
</html>
Figure 10-21: Salon’s bug-eating script—frame set
nav.html
<html>
<head>
<title>Image Map Example</title>
<script type = "text/javascript">>
<!-- hide me from older browsers
X var hold = "notta";
Y function changeMe(theMap,theOne,theBug) {
Zwindow.document.left.src = theMap;
[if (hold == theOne)
{
\return;
} else {
]parent.thePicture.location = theOne;
^parent.teaser.location = theBug;
_hold = theOne;
}
}
// show me --></script></head>
Figure 10-22: Salon’s bug-eating script—navigation page head containing changeMe()
function
The top page of the site, index.html, uses two frame sets to describe three
frames. The frame on the left, called map, contains the image map; the one
below the map, called teaser, contains a little picture and some text; and the
third frame on the right, called thePicture, contains a bigger image of the
appropriate bug. The content of all three frames changes when a visitor
mouses over part of the map.
<body>
X <img src = "left.gif" name = "left" isMap useMap = "#left">
<MAP name = "left">
Y <AREA coords = "9,23,41,42" shape = "RECT" href = "us.html"
Z target = "thePicture"
[ onmouseOver = "changeMe('us.gif','us.html','usteaser.html');"
\ onMouseOut = "window.document.left.src='left.gif';">

188 Chapter 10
<AREA coords = "26,42,75,64" shape = "RECT" href = "us.html"
target = "thePicture"
onmouseOver = "changeMe('us.gif','us.html','usteaser.html');"
onMouseOut = "window.document.left.src='left.gif';">
<AREA coords = "28,65,55,78" shape = "RECT" href = "mexico.html"
target = "thePicture"
onmouseOver = "changeMe('mexico.gif','mexico.html','mteaser.html');"
onMouseOut = "window.document.left.src='left.gif';">
</MAP>
</body>
</html>
Figure 10-23: Salon’s bug-eating script—navigation page body containing images
Salon’s Nested Frames
Salon nested its frames using a different method than the one I described
in the section “JavaScript and Frames Inside Frames” on page 179. Instead
of having a frame call in a second file containing a frame set, as in Z in
Figure 10-12, Salon puts a second frame set right inside the first one (Y
in Figure 10-21). This works fine in HTML, but it confuses JavaScript a
little, as we’ll see.
Salon’s Image Map
Most of the action happens in the frame containing the map, defined in
nav.html in Figure 10-23, starting with X. This line puts the image of the world
map on the page and tells the browser to use the image map left. Line Y sets
the coordinates for the first region of the left image map and the URL link.
Line Z targets the frame thePicture (on the right side of the screen), and Y
tells the browser to load us.html into thePicture when a visitor clicks on the
region. Lines [ and \ tell the browser what to do when a visitor moves the
mouse over or out of this region. Mousing over a region calls the changeMe()
function, which changes the contents of the frames appropriately.
The changeMe() Function
Function changeMe(), shown in Figure 10-22 starting in Y, changes the contents
of the frames. It takes three parameters: theMap, the name of a new map to
swap with the standard one; theOne, the name of the page that holds the big
image to swap into thePicture frame; and theBug, the name of the page with
the teaser information to swap into the teaser frame. Each region of the map
calls changeMe() with a different map, thePicture page, and teaser page. For
example, the mouseOver() in [ of Figure 10-23 calls changeMe() like this:
changeMe('us.gif','us.html','usteaser.html');
Using Frames and Image Maps 189
This tells changeMe() to swap the us.gif map into one frame, us.html into
another frame, and usteaser.html into a third frame.
Line Z in Figure 10-22 swaps the map of the world with another map
with the appropriate region colored green—us.gif, for example. Line [
then checks to see whether the visitor has actually chosen a new area. If the
visitor mouses over Alaska and then moves over to the continental United
States, the picture in thePicture frame shouldn’t change. The variable hold,
declared in X, keeps track of the currently selected region. The if-else state-
ment in [ checks to see whether the page to load into thePicture frame is
already loaded there. If it is, the function just returns (\) and no more swaps
happen. Whenever JavaScript sees the word return inside a function, it leaves
that function. Putting a return inside an if-then statement, as in \, is a handy
way to quit in the middle of a function.
If the visitor has moused over a new area, the else part of the clause runs.
Line ] puts the page theOne into the frame named thePicture, and ^ puts the
page theBug into the frame named teaser.
Summary
Enhanced with JavaScript’s ability to change the contents of web pages,
frames and image maps add functionality that would otherwise be impossible.
The examples shown here just scratch the surface of what you can do with
JavaScript, frames, and image maps. Keep practicing and playing with them,
and you’re bound to come up with amazing designs.
If you’ve read this whole chapter, you should know how to:
zCreate frames
zTrigger image swaps in one frame with an event in another one
zChange the contents of a form in one frame following an event in
another one
zChange the URL shown in a frame using both JavaScript and HTML
zChange more than one frame at the same time
zDeal with nested frames
zUse frames to save information after a visitor leaves a web page
zCreate an image map
zAdd JavaScript to image maps
zSay apple in Spanish
If you have all of that down, you should feel very powerful. Here’s an
assignment to test your knowledge.
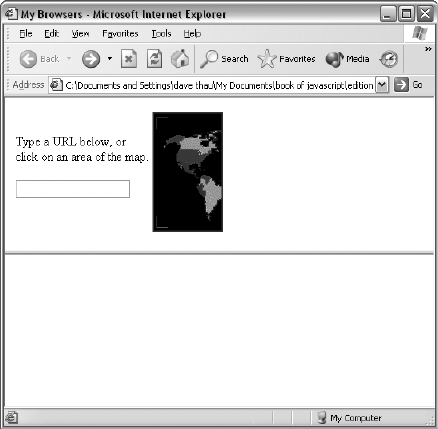
190 Chapter 10
Assignment
Create your own browser page using forms and frames. The page should
have at least two frames: a frame with a text box that allows a visitor to
type in a URL, and a frame that shows the URL after submission of the
form. Figure 10-24 shows an example of what I mean, but you can build a
browser page to suit your taste. In addition to providing a location box,
the browser page in Figure 10-24 uses Salon’s image map to display various
URLs in the display frame.
Figure 10-24: A homemade browser
VALIDATING FORMS, MASSAGING
STRINGS, AND WORKING WITH
SERVER-SIDE PROGRAMS
Web developers can add interactivity to
their sites with code that runs on either the
web browser or the webserver. JavaScript works
inside web browsers, and everything we’ve seen so far
adds interactivity to web pages by making the browser
perform fancy JavaScript tricks. Web developers can
also make their pages more interactive by using CGI scripts, Java servlets,
.NET applications, and other scripting tools. Although the use of these tools
is outside the scope of this book, it’s important to know how JavaScript can
be used to enhance these server-side programs.
One of the most common ways to use JavaScript along with server-side
programs is as a form validator. Making sure that visitors have filled out a form
correctly before sending it to a server-side program speeds up the process
immensely by cutting down on the number of times they have to submit
forms to your webserver.
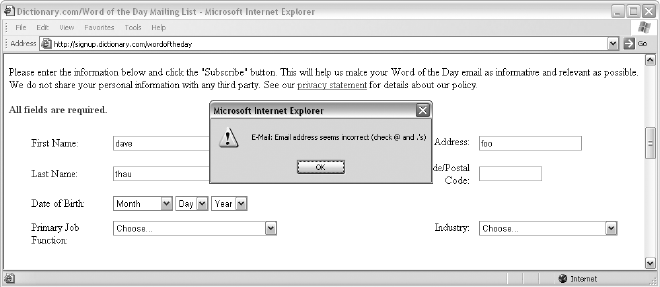
192 Chapter 11
In this chapter you’ll learn how to:
zMake sure visitors fill out HTML forms correctly
zMake sure they have formatted strings (email addresses, for example)
correctly
zMake JavaScript work with server-side programs
A Real-World Example of Form Validation
Before saving the information you’ve entered in a form, many sites use
JavaScript to make sure you’ve filled out the form correctly. When you sign
up for Dictionary.com’s Word of the Day, for example, you must provide
your name, a correctly formatted email address, and several other pieces of
information. Before Dictionary.com saves your information, it checks your
email address for correct formatting and tells you if it sees any mistakes (see
Figure 11-1). Later in the chapter, after you’ve learned the basics of JavaScript
form validation, we’ll look at the code that implements this feature in the
Dictionary.com site.
Figure 11-1: Dictionary.com’s form validator in action
Making Sure a Visitor Has Filled Out a Form Element
Making sure a visitor has supplied all the mandatory information in an
HTML form is the most basic type of form validation. If you want to require
your visitors to provide a name and age, you need a JavaScript function to
make sure they’ve entered this information before the form goes to the
server-side program.
Chapter 7 covers almost everything you need to know to do this. If you’re
feeling unsure about how JavaScript and forms work together, review
Chapter 7 before reading on. If you feel confident, look at Figure 11-2,
which checks whether a user has filled out the mandatory form elements,
and see whether you can figure out the code before reading the line-by-line
analysis.

Validating Forms, Massaging Strings, and Working with Server-Side Programs 193
<html>
<head>
<title>Checking Mandatory Fields</title>
<script type = "text/javascript">
<!-- hide me from older browsers
function checkMandatory()
{
X var error_string = "";
// check the text field
Y if (window.document.the_form.the_text.value == "")
{
error_string += "You must give your name.\n";
}
// check the scrollable list
Z if (window.document.the_form.state.selectedIndex < 0)
{
error_string += "You must select a state.\n";
}
// check the radio buttons
[ var rad_select = "no";
\ for (var loop = 0; loop < window.document.the_form.gender.length; loop++)
{
] if (window.document.the_form.gender[loop].checked == true)
{
rad_select = "yes";
}
}
^ if (rad_select == "no")
{
error_string += "You must select a gender.\n";
}
_ if (error_string == "")
{
return true;
} else {
error_string = "We found the following omissions in your form: \n" +
error_string;
` alert(error_string);
return false;
}
}
// show me -->
</script>
</head>
<form name = "the_form" action = "" method = "post"
a onSubmit = "var the_result = checkMandatory(); return the_result;">
Name:<input type = "text" name = "the_text">
<br>
State you live in:<br>
<select name = "state" size = "3">
<option value = "alabama">Alabama</option>
<option value = "arizona">Arizona</option>
<option value = "california">California</option>
<option value = "colorado">Colorado</option>
<option value = "connecticut">Connecticut</option>
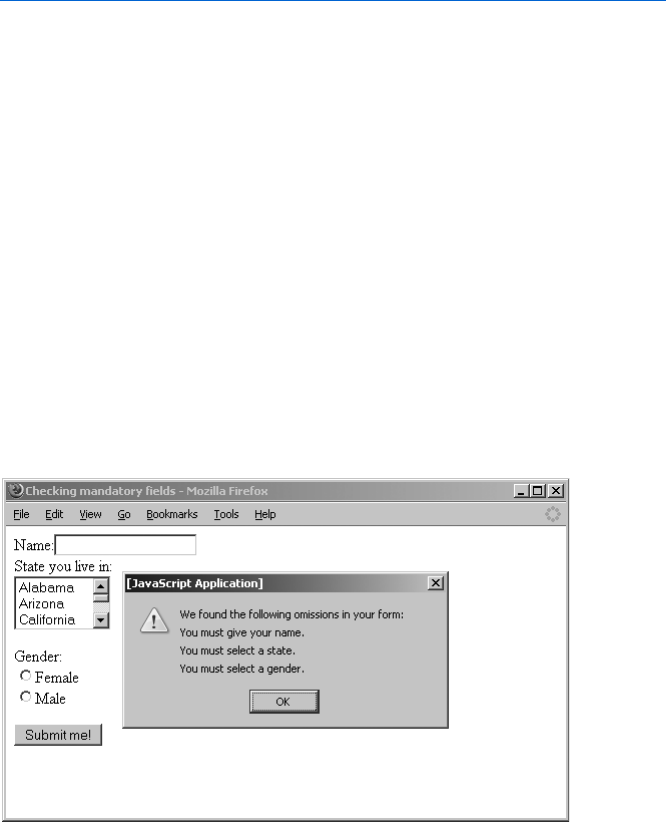
194 Chapter 11
<option value = "delaware">Delaware</option>
<option value = "illinois">Illinois</option>
</select>
<p>
Gender:<br>
<input type = "radio" name = "gender">Female<br>
<input type = "radio" name = "gender">Male<br>
<p>
<input type = "submit" value = "Submit me!">
</form>
</body>
</html>
Figure 11-2: Making sure your visitor has filled in mandatory fields
Line-by-Line Analysis of Figure 11-2
The validation begins in a, which calls checkMandatory() after your visitor
clicks the Submit me! button. If there are any empty form elements, an alert
box pops up explaining what needs filling out. (Figure 11-3 shows you what
happens if the visitor hasn’t filled out any of the form elements before
clicking the button.)
In brief, the checkMandatory() function works by returning the value true if
the visitor has filled out all the fields, false if something’s missing. If the func-
tion returns false, the script sets the variable the_result to false in a. As you
learned in Chapter 7, browsers won’t submit a form if a JavaScript returns
false inside the onSubmit handler.
The checkMandatory() function checks each of the form elements and, if
the user fails to fill out an element, adds a phrase describing the error to the
error_string variable, declared in X. Once the function has made all the
checks, the error_string will contain a blurb for each form element not
filled in, or it will be blank if the user has entered all the elements.
Figure 11-3: The message displayed when your visitor hasn’t filled in any of
the elements
Validating Forms, Massaging Strings, and Working with Server-Side Programs 195
Checking Text Fields and Scrollable Lists
The first check is in Y, where the function determines whether there’s
anything in the name field. If not, it adds some text to the error_string
variable. Notice the use of the plus and equal signs (+=) in the body of the
if-then statement in Y. A statement such as a += b is short for a = a + b.
When dealing with strings, += tells the function to add the following item to
the end of the variable. The body of Y adds the string "You must give your
name.\n" to the variable error_string (the \n at the end creates a line break
inthe alert box). Line Z checks the scrollable list to see whether the user has
selected anything. If the visitor has selected a state, selectedIndex equals the
position of the selected element: 0 with the first option selected, 1 with the
second option selected, and so on. If the visitor has not selected a state,
selectedIndex equals 1. If the selectedIndex of this form element is less
than 0, the script adds the appropriate message to error_string.
Checking Radio Buttons
The trickiest type of form element to check is the radio button. To check
whether a user has selected a particular radio button, you have to loop
through all the buttons in a series and check them one at a time. In Fig-
ure 11-2, [ declares the variable rad_select to keep track of whether the
guest has chosen a radio button. Initially, the function sets rad_select to "no".
If the function encounters a selected radio button as it loops through them,
it sets rad_select to "yes" to show that it’s found a selected radio button.
The loop begins in \ and is the standard loop for checking a list of radio
buttons. The loop might look strange at first, but if you study it long enough
to understand what’s going on, it soon becomes second nature.
The variable loop starts at 0 and goes until it has checked the last radio
button named gender. Each time through the loop,] checks to see whether
the radio button has been selected and, if it has, changes rad_select from "no"
to "yes". After the loop has looked at all the radio buttons, ^ checks whether
rad_select is still "no". If it is, the visitor hasn’t selected any of the radio
buttons, so the script adds the appropriate error message to error_string.
Checking error_string
Now that all the checks are done, _ determines whether any error messages
have been added to error_string. If not, error_string still equals the null
string (""), which is what X set it to. If error_string is null, no error messages
have been added, which means the form is complete and can be sent to the
server-side program that will process the input values in some way.
In a real-world web application, the server-side program would be speci-
fied in the action of the <form> tag. To send the form to that program, the
onSubmit in a must return true. If nothing has been added to error_string, the
if-then statement starting in _ returns true, which sets the variable the_result
in a to true. Thus the onSubmit returns true, and the form is submitted.
196 Chapter 11
NOTE In the example script in Figure 11-2, the action does not specify any server-side pro-
gram. If there were a program there, it would probably store the information in a data-
base somewhere and thank the user for filling out the survey. In this case, since there is
no server-side program, the page just reloads, clearing the values entered into the form.
If the error_string contains something, meaning that the form is incom-
plete, the script adds We found the following omissions in your form: and a line
break to the front of error_string and puts the string in an alert box (`).
After the visitor clicks OK in that box, checkMandatory() returns false, setting
the_result to false in a. As a result, the onSubmit then returns false, the form
does not go to the server-side program, and the page doesn’t reload.
Much of the code in Figure 11-2 applies to all form validation scripts.
The main differences between form validation scripts arise from the types of
input values they need to check. If, for example, you wanted a script to test a
form element for a valid email address, you’d add some code to do that check
in the checkMandatory() function. In order to write that code, however, you
have to know a bit about analyzing strings.
String Handling
You’ll often want to verify that a string has a certain format—that an email
address looks valid, or a date is formatted the way you want, or perhaps that a
credit card number passes a basic validity test. There are two ways to verify
string formats: using string methods, which break strings apart and analyze
them, and using a technique called regular expressions to define patterns of
strings as valid or invalid.
Breaking Strings Apart
To verify string formats by breaking them apart, you need these five useful
string methods: indexOf(),lastIndexOf(),charAt(),substring(), and split().
I’ll cover each method and show how to use them to verify an email address
or date. The credit card script is long, so I don’t discuss it here, but you’ll
find a good example at http://www.bookofjavascript.com/Libraries/
Form_validators/Netscape’s_suite/index.html.
indexOf() and lastIndexOf()
The indexOf() method finds the location of a specified set of characters
(called a substring) inside a string and tells you at what position the substring
starts (the first character of a string is in position 0, the second in position 1,
and so on). If the string doesn’t contain the specified substring, indexOf()
returns 1.
Complementing indexOf(), the lastIndexOf() method gives you the
position of the last occurrence of a character or substring. Table 11-1 shows
the value of various calls to indexOf() and lastIndexOf() when the variable
the_word holds the string superduper (var the_word = "superduper").

Validating Forms, Massaging Strings, and Working with Server-Side Programs 197
Figure 11-4, which checks an email address for valid formatting,
illustrates a more realistic use of indexOf() and lastIndexOf().
<html><head><title>Validating an Email Address</title>
<script type = "text/javascript">
<!-- hide me from older browsers
function checkEmail(the_email)
{
Xvar the_at = the_email.indexOf("@");
Yvar the_dot = the_email.lastIndexOf(".");
Zvar a_space = the_email.indexOf(" ");
[if ((the_at != -1) && // if there's an '@'
\(the_at != 0) && // and it's not at position 0
](the_dot != -1) && // and there's a '.'
^(the_dot > the_at + 1) && // and something between the '@' and '.'
_(the_dot < the_email.length - 1) && // and something after the '.'
`(a_space == -1)) // and there are no spaces
{
alert("Looks good to me!");
return true;
} else {
alert("Sorry, your email address is invalid!");
return false;
}
}
// show me -->
</script>
</head>
<body>
<form method = "POST" action = ""
aonSubmit = "var result = checkEmail(this.emailbox.value); return result;">
Email Address: <input type = "text" name = "emailbox"><br>
<input type = "submit" value = "Submit me!">
</form>
</body>
</html>
Figure 11-4: Validating an email address
Table 11-1:
Some Example Calls to indexOf()
Call to indexOf() Result Reason
the_word.indexOf("s") 0The letter s is in position 0 of the_word.
the_word.indexOf("u") 1The letter u is in position 1 of the_word.
the_word.indexOf("dupe") 5The substring dupe starts at position 5 in superduper.
the_word.indexOf("z") -1 There’s no z in superduper.
the_word.lastIndexOf("u") 6The last u is in position 6 of the_word.
198 Chapter 11
Line-by-Line Analysis of Figure 11-4
When the form is submitted, the onSubmit in a calls the checkEmail() function
and sends it the contents of the emailbox form element. If the visitor filled
out the form correctly (that is, with a correctly formatted email address),
checkEmail() returns true, the form is submitted, and the page reloads. If the
form has been completed incorrectly, the function returns false, the form is
not submitted, and the page doesn’t reload.
The checkEmail() function works by checking for six basic formatting
rules all email addresses must follow:
1. There must be an @ sign.
2. The @ sign can’t be the first character.
3. There must be a period in the address.
4. There must be at least one character between the @ and the last period.
5. There must be at least one character between the last period and the
email’s end.
6. There can be no blank spaces in the address.
To test all six rules, we need a few pieces of information. Lines X
through Z determine the location of the first @ sign, the location of the
last period, and the location of the first space (if any) in the string. Lines [
through ` check to see whether the address violates any of the six rules.
Because these lines are ANDed (&&) together (see the section “AND” on
page 44 if you’ve forgotten about the && operator), they must all be true to
trigger the first result clause of the if-then-else statement (which tells the
visitor he or she filled out the form correctly). If any of the tests turns up
false, that triggers the else part of the if-then-else statement, telling the
visitor he or she entered the email address incorrectly.
Table 11-2 shows you each rule and the line that tests it.
charAt()
The charAt() method finds the position of a specific character inside a string.
To find the character in the first position of the string stored in the_word,
you’d type something like this:
var the_character = the_word.charAt(1);
Table 11-2:
Checking Email Addresses
Line Rule Comment
[1If there’s an @ sign, the_at doesn’t equal –1.
\2If the @ sign is not the first character, the_at is greater than 0.
]3If there’s a period, the_dot doesn’t equal –1.
^4If there’s something between the @ sign and the last period, the_dot is greater
than the_at +1.
_5If a period is the last character, the_dot equals the_email.length –1.
`6If there are no spaces, a_space equals –1.

Validating Forms, Massaging Strings, and Working with Server-Side Programs 199
Table 11-3 shows some more examples of charAt() at work. Let’s say
the_word holds superduper again.
Finding the last character in a string is a bit tricky. After you find out how
many characters are in a string using string_name.length, you have to remem-
ber to subtract 1 from the length, since the first character of a string is at
position 0. Thus the last character will be in position the_word.length-1.
Checking Strings Character by Character
The charAt() method is useful for analyzing strings on a character-by-character
basis. Figure 11-5 lists a function that makes sure a string contains no char-
acters that are illegal in email addresses (!#$%^&*()/:;,+). You can add this
function to the email checker to make sure the address doesn’t contain any
illegal characters.
function hasIllegalCharacters(test_string, illegal_string)
{
Xvar is_illegal = false;
Yvar the_char = "";
Zfor (var loop = 0; loop < illegal_string.length; loop++)
{
[the_char = illegal_string.charAt(loop);
\if (test_string.indexOf(the_char) != -1)
{
]is_illegal = true;
}
}
^return is_illegal;
}
Figure 11-5: Using charAt() with a loop
The hasIllegalCharacters() function takes two parameters: a string to
check for illegal characters and a string that lists which characters are illegal.
To add this to the email checking script in Figure 11-4, drop in the function
hasIllegalCharacters() and call it as follows:
var bad_news = "!#$%^&*()/:;,+";
var the_email = "happy@javascript.is.my.friend.com";
var is_bad = hasIllegalCharacters(the_email, bad_news);
Table 11-3:
Some Example Calls to charAt()
Call to indexOf() Result Reason
the_word.charAt(0) "s" The letter s is in position 0 of the_word.
the_word.charAt(1) "u" The letter u is in position 1 of the_word.
the_word.charAt(the_word.length-1) "r" The last character position is the_word.length–1.
the_word.charAt(100) "" There’s no position 100 in superduper.

200 Chapter 11
After hasIllegalCharacters() has done its work, is_bad will be true if one
or more of the bad characters appear in the string or false if the string is
fine. To use hasIllegalCharacters() in Figure 11-4, you also need to add an
(is_bad == true) clause to the if-then statement starting in [ of Figure 11-4.
NOTE If you use this code, make sure to pass hasIllegalCharacters() the email address you
want checked—happy@javascript.is.my.friend.com is just an example.
The two parameters in hasIllegalChararcters() are test_string, the string
we’re checking for illegal characters, and illegal_string, the string that
lists the illegal characters. The function goes through each character in
illegal_string and determines whether test_string contains that charac-
ter. The loop in Z does most of the work, going from the first character of
illegal_string (0) to the last (one less than illegal_string.length). Each time
through the loop, Z sets the_char to a different character in illegal_string.
Line Z checks to see whether the character stored in the_char is in the
test_string string. If it’s not, indexOf() returns -1. If the bad character appears
in the string, indexOf() returns something other than -1 and ] changes
is_illegal (X) from false to true. At the end of the loop, is_illegal will be
true if the script has found a bad character and false if it hasn’t. The last
line of the function (^) returns this value.
substring()
The substring() method is just like charAt() except that it can grab entire
substrings from a word, not just individual characters. The format is as
follows:
var the_substring = the_string.substring(from, until);
Here from is the position of the first character of the substring, and
until is, strangely enough, one greater than the last position of the substring.
In other words, the substring grabs characters from the first parameter of
the call up to, but not including, the second parameter of the call. Here
it is in use:
var the_string = "superduper";
X var where = the_string.substring(1,3);
Y var who = the_string.substring(0,5);
Line X sets where to up because the letter u is in position 1 of the string
and the letter e is in position 3. Line Y sets who to super because the letter
sis in position 0 and the letter d is in position 5.
You can use substring() with indexOf() to break strings apart. Figure 11-6
shows how to use substring() and indexOf() to take an email address and
separate the person’s username from the domain of the address.
<html><head><title>Username Yanker</title>
<script type = "text/javascript">>
<!-- hide me from older browsers

Validating Forms, Massaging Strings, and Working with Server-Side Programs 201
function getUserName(the_string)
{
Xvar the_at = the_string.indexOf('@');
Yif (the_at == -1)
{
alert("You must type in a valid email address");
} else {
Zvar user_name = the_string.substring(0, the_at);
alert("The username is " + user_name);
}
}
// show me -->
</script>
</head>
<body>
<form onSubmit = "getUserName(this.the_email.value); return false;">
Email: <input type = "text" name = "the_email"><br>
</form>
</body>
</html>
Figure 11-6: indexOf() and substring() working together
The script calls the getUserName() function when the visitor submits the
form. Line X uses indexOf() to find the position of the @ sign and Y warns
the visitor if the @ sign is missing. If there is an @ sign, Z uses substring()
to get everything from the beginning of the string to the @ sign. Remember
that the second parameter of substring() is one past the last position you
want to grab.
Combining indexOf() and substring() in this way is quite common.
Sometimes you have to use them together more than once to get what you
want. For example, to grab the domain name out of a URL, you have to use
indexOf() and substring() twice. Figure 11-7 shows you the scrap of code that
does this.
var the_url = "http://www.webmonkey.com/javascript/";
X var two_slashes = the_url.indexOf('//');
Y var all_but_lead = the_url.substring(two_slashes+2, the_url.length);
Z var next_slash = all_but_lead.indexOf('/');
[ var the_domain = all_but_lead.substring(0,next_slash);
Figure 11-7: Grabbing the domain from a URL
This code first locates the two slashes at the beginning of the string.
The variable two_slashes holds the value 5 because the two slashes start at
position 5. Line Y grabs everything two characters from the beginning of
the two slashes until the end of the string. When it’s done, all_but_lead will
hold "www.webmonkey.com/javascript". Line Z looks at that string and finds the
next slash; then [ grabs everything from the start of all_but_lead to the next
slash, resulting in "www.webmonkey.com".
If it makes you feel any better, string handling is a pain in most languages.
It’s just something you have to get used to. An even more complicated use of

202 Chapter 11
substring() that performs simple checks on credit card numbers is avail-
able at http://www.bookofjavascript.com/Libraries/Form_validators/
Netscape’s_suite/ccnums.html.
NOTE Figure 11-7 only works for URLs with a slash (/) as their last character. You’ll find
a more general version of this code at http://www.bookofjavascript.com/Libraries/
Form_validators/isValidUrl().
split()
The split() method makes extracting the domain name from a URL a little
easier. The split() method uses a character or group of characters to divide a
string into a bunch of substrings, then loads the substrings into an array, as in
the following example:
var my_friends = "eenie,meenie,miney,mo";
var friend_array = my_friends.split(",");
This splits the my_friends string along its commas, creating an array called
friend_array in which element 0 is "eenie", element 1 is "meenie", element 2 is
"miney", and element 3 is "mo".
The split() method simplifies the URL example in Figure 11-7 to this:
var the_url = "http://www.webmonkey.com/javascript/";
var the_array = the_url.split("/");
var the_domain = the_array[2];
split() creates an array in which element 0 is "http:", element 1 is
null (nothing at all), element 2 is "www.webmonkey.com", and element 3 is
"javascript". Though split() can’t always simplify string handling, it does
come in handy when you have a character that breaks up a string, such as the
slash (/) in the URL example or the comma (,) in the example before that.
Figure 11-8 shows you a function that uses split() to make sure a date is
formatted as mm/dd/yy (12/05/68 for December 5, 1968, for example).
function checkDate(the_date)
{
Xvar date_array = the_date.split("/");
Yif ((date_array.length == 3) &&
Z(date_array[0] > 0) && (date_array[0] < 13) &&
(date_array[1] > 0) && (date_array[1] < 32) &&
(date_array[2] >= 0) && (date_array[1] < 100))
{
return true;
} else {
alert("Please type the date in a mm/dd/yy format.");
return false;
}
}
Figure 11-8: Checking a date’s format

Validating Forms, Massaging Strings, and Working with Server-Side Programs 203
This simple function splits a string into pieces along the slash character
in X. The first check, in Y, makes sure there are three pieces of information in
the array (for month, day, and year). Line Z makes sure the first number,
which should represent the month, is between 0 and 13 (noninclusive). The
next two lines perform analogous checks for the day and year. If the tests in
all three of these lines are true, the date is formatted correctly.
NOTE This code doesn’t make sure the date is valid. The date 2/31/99 would pass the test, even
though there are only 28 days in February. Browse to http://www.bookofjavascript.com/
Libraries/Form_validators for a complete set of date validation functions you can
use to make sure an entered date is real.
Matching String Patterns with Regular Expressions
Using indexOf(),substring(),charAt(), and split() to decide whether a string
follows a specific format can get a little tedious. Regular expressions, which
are patterns that a tested string needs to match, can make the process a
little easier. The ability to deal with regular expressions has been built into
all the major browsers, starting with Netscape Navigator 4.0 and Internet
Explorer 4.0.
Regular expressions are string patterns. A very basic string pattern could
be defined like this:
var my_first_expression = /yellow/;
First, notice that a regular expression is stored in a variable, just like
numbers and strings. Second, notice that a regular expression begins and
ends with slash characters. These act like the quotation characters used to
define a string.
You can also define a regular expression like this:
var my_first_expression = new RegExp("yellow");
Now that you have a regular expression, what do you do with it? The
most basic thing you can do is test to see whether a string contains your
regular expression. To do this, use the test() method, as shown in
Figure 11-9.
X var my_regexp = /yellow/;
var my_string = "They call me mellow yellow.";
Y if (my_regexp.test(my_string) == true) {
alert("String contains yellow.");
} else {
alert("Nothing yellow here!");
}
Figure 11-9: Using the test() method of a regular expression

204 Chapter 11
Line X defines the regular expression, and Y checks to see whether the
string my_string contains the characters yellow. In this case it does, so the test
is true, and the appropriate alert pops up.
So far, there’s nothing very interesting about regular expressions. You
could do the same thing using indexOf(). The excitement starts when we
begin using the full powers of regular expressions.
In Figure 11-9, we were just checking to see whether a string had exactly
the letters yellow. But a pattern can be much more complex than just a literal
string. More realistically, a regular expression will contain a combination of
literal characters, placeholders, and possibly operators.
You can use a dot (.) to match any character. For example, a regular
expression like
/r.n/
would match any string containing r, then any character, then n; for example:
"he ran home","see dick run ","I don't know what r^n means", and "hair net".
Notice that last one—because a space is a character, the "r n" in "hair net"
will match r space n. Because the dot (.) matches any character, it is often
called a wildcard.
If you didn’t want to match any character, but instead wanted to match
only lowercase letters, you could use a regular expression like this:
/r[a..z]n/
This matches the letter r, then any letter a through z, and then n. This would
rule out "hair net" and "r^n" but allow "ran" and "run".
Sometimes you want to match the dot (.) character itself. How do you
instruct JavaScript to read the dot (.) character literally instead of as a
wildcard? To match the character specifically, you need to escape it in the
regular expression using a backslash:
/a \. marks the end of a sentence/
Here the backslash before the period tells JavaScript to consider that char-
acter (.) as text rather than as a wildcard.
Repeating Items
What if you wanted to wildcard two characters? You could use two dots. The
regular expression
/ye..ow/
would match any string containing ye, then any two characters, and then ow,
such as "yellow","yeayow", or "ye3%ow". But what if you wanted to match any
number of characters? You couldn’t just list any number of dots. Instead,
you can use one of the operators *,+, or ?. The * character means “zero or
Validating Forms, Massaging Strings, and Working with Server-Side Programs 205
more of the previous item,” the + matches one or more of the previous
item, and ? matches either zero or one of the previous item.
Figure 11-10 shows how to do a simple check for email addresses.
X var mail_checker = /.+@.+\..+/;
Y var the_email = prompt("What's your email address?","");
Z if (my_regexp.test(the_email) == true) {
alert("Nice address!");
} else {
alert("That's not legal!");
}
Figure 11-10: Very basic email tester
The first line in Figure 11-10 defines the regular expression. It looks
crazy, but it’s actually easy to decipher. The expression consists of a space,
followed by one or more of any character, followed by an @ sign, followed
by one or more of any character, followed by a dot, and then any number of
characters, followed by a space. This isn’t the best email tester—it will match
things like "!8675@309......foofoofoo". But it’s a start.
The *,+, and ? characters can follow any character, not just the wildcard.
If, for some reason, you wanted to check for zero or more Xs, you could use a
regular expression /X*/. You can also specify precisely how many repeated
characters you want by putting the number in curly brackets after the match
character. For example, you could check for three Xs like this: /X{3}/. If you
wanted 3, 4, or 5 Xs, you could write /X{3,5}/. Here the minimum is followed
by a comma and the maximum.
Beginnings and Endings
In the examples we’ve seen so far, the regular expressions could match any-
where in the string. Remember that the regular expression /r.n/ matched
not just strings starting with r, but also strings such as "hair net" where the
pattern starts in the middle. Regular expressions have special characters to
mark the beginning and ending of a pattern: ^ marks the beginning, and $
marks the end.
To match a string that starts with r, ends with n, and has zero or more
letters in between, you could use the regular expression
/^r.*n$/
Notice the .* in the middle, which will match any character zero or
more times.
Grouping
The last type of regular expression characters you should know about for
validating form input are the grouping characters. Let’s say you wanted to
match a string that ended in com,org,edu, or net. You could define four
different regular expressions—one for each of the substrings—and then

206 Chapter 11
check to see whether the input string matches any of them, using a long
if then-else statement. You can, however, also define one regular expression
that tests whether any of these are in the string. To do that, you use a |
character when describing your regular expression:
var good_domains = /com|org|edu|net/;
This statement will be true if any of the four items appear in the string. If you
further want to state that the item must appear at the end of the string, you
need to add the $ and put the items in parentheses:
var good_domains = /(com|org|edu|net)$/;
If you just wrote
/com|org|edu|net$/
the regular expression would think the end character $ only belonged to the
net substring, so it would match com,org, or edu anywhere, but net only at the
end of the string.
I’ve only talked about those few regular expression characters most
commonly used in form input validation; many more are available. A larger
list is in Appendix C of this book.
The match() Method
Regular expressions can do more than just check to see whether a string
contains a pattern of characters. They can also be used to tell you what the
matching characters were, and they can replace the matching part of a string
with something else.
To see whether the characters in a string match a certain regular
expression, use the match() method of the String object. For reasons I’ll
explain shortly, match() returns values in an array.
For example,
var matches = "hokey pokey".match(/.ok/);
will result in an array called matches, which has only one item: the string "hok".
In other words, matches[0] will equal "hok". Now, notice that there are actually
two things in the string that could match the regular expression /.ok/: the
hok in hokey, and the pok in pokey. To use the match() method to find both of
these characters, stick a g at the end of the regular expression, after the final
slash. This stands for global and means that the regular expression should
look at the whole string when matching, not simply return the first match.
In this case
var matches = "hokey pokey".match(/.ok/g);
will return an array with two values: matches[0] = "hok" and matches[1] = "pok".

Validating Forms, Massaging Strings, and Working with Server-Side Programs 207
There is one more little twist on match(). Sometimes a regular expression
will match two parts of a string, and you want to see what both those parts
are. Consider the email regular expression from Figure 11-10:
/.+@.+\..+/
If the string is "dave_thau@hotmail.com", your script may want to remember that
the first part of the regular expression matched "dave_thau", the second
matched "hotmail", and the third matched "com". To store these values
separately, use parentheses to mark which parts of the regular expression
you want to remember:
var matches = "dave_thau@hotmail.com".match(/(.+)@(.+)\.(.+)/);
See how the parentheses mark out the things you might want to remember?
When you use parentheses in a match, the first item in the array is the entire
string to be matched. In this case matches[0] would be dave_thau@hotmail.com.
The next items in the array will be the substrings that match: matches[1] =
"dave_thau",matches[2] = "hotmail", and matches[3] = "com".
How Dictionary.com’s Form Validators Work
As usual, there are many ways to write any bit of JavaScript. Figure 11-11 shows
the code that Dictionary.com uses to validate its forms (also see Figure 11-1).
This is only part of Dictionary.com’s form validating script, and it’s still
pretty long. Don’t let the code’s length intimidate you—after all, you know
90 percent of it already.
Because you should understand most of it, I’ll just cover the broad
strokes and then point out a few details I haven’t covered yet.
<body>
<script language="JavaScript" type="text/javascript">
<!-- hide me from older browsers
X var error = new createerror();
var errors = new Array();
errors[31]="Illegal character in a numeric input";
errors[64]="The field is empty.";
errors[131]="Illegal character. You can only enter letters and blank spaces.";
Y var alphachars = "abcdefghijklmnopqrstuvwxyzABCDEFGHIJKLMNOPQRSTUVWXYZ";
Z function createerror() {
this.val = 0;
return this;
}
function validateForm() {
var correct;
correct = checkblank(document.frmMain.FirstName.value, error);
if (!correct) {
alert('First Name: ' + errors[error.val]);
document.frmMain.FirstName.focus();
return false;
}
correct = checkalpha(document.frmMain.FirstName.value, error);
208 Chapter 11
if (!correct){
alert('Name: ' + errors[error.val]);
document.frmMain.FirstName.focus();
return false;
}
correct = checkblank(document.frmMain.DateOfBirth.value, error);
if (!correct) {
alert('Year of birth: ' + errors[error.val]);
document.frmMain.DateOfBirth.focus();
return false;
}
correct =
checkrangenumeric(document.frmMain.DateOfBirth.value, error,1900,2006);
if (!correct) {
alert('Year of Birth: ' + errors[error.val]);
document.frmMain.DateOfBirth.focus();
return false;
}
return true;
}
function checkblank(fieldValue,error)
{
if (fieldValue.length == 0) {
error.val=64;
return false;
}
for (var i=0; i<fieldValue.length; i++) {
if (fieldValue.charAt(i)!=' ' && fieldValue.charAt(i)!='\t') {
return true;
}
}
error.val=64;
return false;
}
function isalpha(sChar){return (alphachars.indexOf(sChar)>=0)}
function checkalpha(fieldValue,error)
{
for (var i=0; i<fieldValue.length;i++)
{
if (!isalpha(fieldValue.charAt(i))){
error.val=131;
return false;
}
}
return true;
}
function checkrangenumeric(fieldValue, error, nMin, nMax)
{
errors[35]="The number must be bigger than ";
errors[36]="The number must be lower than ";
errors[37]="The number must be between ";
if (fieldValue.length > 0)
{

Validating Forms, Massaging Strings, and Working with Server-Side Programs 209
[ if (isNaN(fieldValue) || fieldValue == "")
{
error.val=31;
return false;
}
else
{
var sRange = '';
\ if (typeof nMin!='undefined'){sRange='MIN';}
if (typeof nMax!='undefined'){sRange=sRange+'MAX';}
] switch (sRange)
{
^ case "MIN":
if (fieldValue < nMin){
errors[35]=errors[35]+nMin;
error.val=35;
return false;
}else{return true;}
_ break;
case "MAX":
if (fieldValue > nMax){
errors[36]=errors[36]+nMax;
error.val=36;
return false;
} else { return true; }
break;
case "MINMAX":
if (fieldValue < nMin||fieldValue > nMax) {
errors[37]=errors[37]+nMin + " and " + nMax;
error.val=37;
return false;
} else { return true; }
break;
case "":
return true;
break;
}
}
}
else
{
return true;
}
}
// show me -->
</script>
<form method="post" name="frmMain" >
First Name <input name="FirstName" type="text"> <br>
Year of Birth: <input name="DateOfBirth" type="text">
` <input value="Subscribe"
onclick="javascript:return validateForm();" type="submit">
</form>
</body>
Figure 11-11: Dictionary.com’s form validator

210 Chapter 11
Line-by-Line Analysis of Figure 11-11
As I mentioned, this is only a small part of the Dictionary.com validation
script. Browse to http://www.bookofjavascript.com/Websites/Chapter11
if you want to see the whole thing. Here I’ll only highlight a few of the
interesting things about the code in Figure 11-11.
The validator starts when a user clicks the submit button in `, calling
the validateForm() function. Before this function is called, however, a couple
of interesting global variables are created. Line X introduces something
new: the creation of a custom object. We’ve been dealing with built-in objects
throughout this book. The window object, the form object, and the image object
are just a few of the built-in objects we’ve encountered. JavaScript coders can,
however, also create their own objects. This is an advanced JavaScript trick,
and not one often used, but the Dictionary.com validation script will give you
an idea about how to create your own custom objects. Line X calls the func-
tion createerror(), which creates a new object and saves it to the variable
error. The createerror() function returns an object with a property called val,
and sets that property to 0. The val property of the object returned is just like
any property of any object. For example, in “Image Preloading” on page 62
we saw the following lines:
var new_image = new Image();
new_image.src = "my_good_image.gif";
These lines created a new image object and set its src property to the name
of a GIF file. The function in Z of Figure 11-11 creates a custom object and
gives it a property named val. This property can be treated just like any
property in JavaScript. Once the variable named error is created in X,
the val property can be set like this:
error.val = 50;
And the property can be read like this:
var my_property_value = error.val;
If this doesn’t quite make sense to you, don’t worry; we’ll see how they use
the object in a couple of functions to come. If it still doesn’t make sense,
don’t fear: Dictionary.com could easily have written their script without
using this custom-made object—I think they were just trying to be fancy.
After creating the error variable and an array that contains some error
messages, the Dictionary.com script creates a variable holding all the letters,
upper- and lowercase. This long string will be used to see whether a user
entered a letter where expected, or instead entered a number or some
other character.

Validating Forms, Massaging Strings, and Working with Server-Side Programs 211
Now let’s look at the validateForm() function, which is called when a user
submits the form. This function first checks to see whether the FirstName field
is blank, by calling the checkBlank() function. Notice that the validateForm()
function sends the error variable to the checkBlank() function. Inside check-
Blank(), if the user has done something improper, such leaving the form
element blank, error.val is set to a number that represents the error that has
occurred. When checkBlank() exits, it returns true if the form element was
filled out and false if it wasn’t. If checkBlank() returns true,validateForm()
moves on to its next test, described below. If checkBlank() returns false,
JavaScript displays an alert message describing the error, moves the cursor
into the FirstName form element, and returns false, preventing the form from
being submitted. There’s a lot going on in just those few lines. Take it slowly
and make sure you see how things are working.
If validateForm() has not exited, it then goes on to make sure that the
user’s input in the FirstName field is all letters. Study the checkalpha() and
isalpha() functions to see how they use charAt(),indexOf(), and the variable
created in Y to make sure that every character is a letter.
If validateForm() has not exited because of a nonalphabetic character in
the FirstName field, it goes to make sure that the year entered in the DateOfBirth
field makes sense. (In the real Dictionary.com code, there are also checks for
valid email addresses and last names, but to save space I’ve left those out.) To
ensure that the date is correct, Dictionary.com uses a very general function,
checkrangenumeric(), which makes sure that a number is within a certain
range. That function has several interesting and new JavaScript features.
The first new feature is the built-in isNaN() function. NaN stands for Not
aNumber. As you might expect, if the value passed to the function is not a
number, the function returns true; otherwise it returns false.
The next interesting feature in the function is the built-in JavaScript
operator typeof. This operator goes before a variable and returns the type
of variable it is. Enter the following into your web browser to see the kind of
results you get:
javascript:alert(typeof 12)
javascript:alert(typeof 'hi there')
javascript:var foo = 12; alert(typeof foo)
javascript:alert(typeof new Image())
You’ll see that JavaScript will respond number if given a number or a variable
containing a number, or string if given a string or a variable containing a
string. It might also return the word object if given any sort of object, as seen
in the last example. When given an undefined variable, typeof will return
undefined. Try
javascript:alert(typeof my_purpose_in_life)
to see this work. The typeof operator will also return undefined if you try
typeof null.

212 Chapter 11
Line \ uses typeof to see what kinds of values were sent to the function
checkrangenumeric(). The checkrangenumeric() function is called like this:
checkrangenumeric(fieldValue, error, nMin, nMax)
If you want to check whether a number is between two values, you could
write this:
checkrangenumeric(100, error, 50, 150)
To make sure a number is over some value, you could write this:
checkrangenumeric(100, error, 50, null)
Similarly, if you want to see whether a number is under some value, you
could write this:
checkrangenumeric(100, error, null, 500).
Line \ and the line following it create a variable called sRange. The
value of this variable will be one of the following: 'MIN' if just the nMin value is
given when the function is called; 'MAX' if just the nMax value is given when the
function is called; 'MINMAX' if both values are given; or the empty string '' if
neither has been given.
The next interesting line, ], is a switch statement. The switch statement
is like a complicated if-else statement. It starts with the word switch, followed
by some variable. The value of the variable determines which part of the
switch statement will be executed. Line ^ says “in case sRange is 'MIN', do
everything from here down to either the first return, or the first break.”
Abreak is in line _. Below that, you’ll see what the switch statement does
if sRange is 'MAX','MINMAX', or ''. This switch statement could easily have
been written like this:
if (sRange == 'MIN') {
// do the MIN stuff
} else if (sRange == 'MAX') {
// do the MAX stuff
} else if (sRange == 'MINMAX') {
// do the MINMAX stuff
} else if (sRange == '') {
// do the empty string stuff
}
The if-else route is no better or worse than the switch statement, although
the switch statement can be more efficient. People who try to write the fastest
code possible will tend to use the switch statement. Here’s another example
of a switch statement.

Validating Forms, Massaging Strings, and Working with Server-Side Programs 213
var name = prompt("What is your name?","");
switch (name) {
case "Dave":
case "dave":
case "Thau":
case "thau":
alert("Hello, Dave Thau!");
break;
default:
alert("Howdy, stranger.");
}
In this example, any of the listed cases will trigger a Hello, Dave Thau! alert,
because there were no break statements to cause the switch statement to stop.
The term default in the final line means that anything should trigger this
case unless a break or return has been reached first. The equivalent if-else
statement looks like this:
var name = prompt("What is your name?","");
if (name == 'Dave' || name == 'dave' || name == 'Thau' || name == 'thau') {
alert("Hello, Dave Thau!");
} else {
alert("Howdy, stranger.");
}
The rest of the Dictionary.com script should be fairly straightforward.
Take a close look and make sure you understand everything that’s going
on. For more good validation material, check out the scripts at http://
www.bookofjavascript.com/Websites/Chapter11.
Summary
This chapter has covered the rest of what you need to know about forms,
shown you how to use JavaScript to check a form before sending it to a
server-side script, and demonstrated some of the string-handling methods
that come in handy when checking forms for valid completion.
If you understood everything in this chapter, you should know how to:
zMake sure visitors have filled out all fields in a form
zCheck an email address for valid formatting
zSubmit a correctly filled-out form to a server-side script
zUse the most important string-handling methods to manipulate strings
The string-handling methods described here just scratch the surface.
Check Appendix C to see what other tricks you can perform with strings; it
provides a full list of string-handling instructions.
214 Chapter 11
Assignment
The assignment in the last chapter was to make your own browser using
frames. For this assignment, you will add code to your browser that makes
sure the URLs entered in the browser’s location bar are correct web addresses,
meaning that the URL starts with http:// or https://, has no spaces, and has
at least two words with a period between them. The following URLs are not
valid:
zThe URL www.nytimes.com is missing the http:// beginning.
zThe URL http://nytimes needs the .com ending.
zThe URL http://www..nytimes.com has two periods with nothing
between them.
Enjoy!

SAVING VISITOR INFORMATION
WITH COOKIES
It’s often helpful to remember a little bit
of information about a visitor after he or
she has left your site: a login name, the last
time the visitor visited, or any customization
preferences a visitor has set while visiting your site.
To remember this information, you’ll have to save it
somewhere.
Chapter 10 showed you how to use frames to a store a visitor’s answers to
quiz questions. Unfortunately, after the browser is closed, this method does
not retain the information the visitor entered. Cookies provide a solution to
this problem: They let you save information on your visitor’s computer for a
specified length of time.
Cookies aren’t hard to use, but the code for saving and retrieving them
can pose quite a challenge. You can use other people’s code (I’ll point out
some good cookie libraries), but it’s still a good idea to know how cookies
work so that you can alter the code from libraries to suit your own needs.
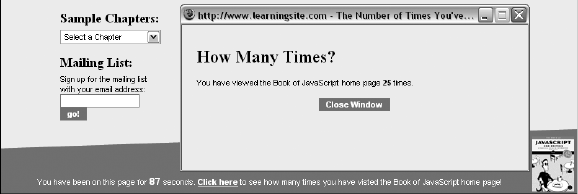
216 Chapter 12
In this chapter you’ll learn:
zWhat cookies are
zWhat you can and can’t do with cookies
zHow to set a cookie
zHow to read a cookie you’ve set
zHow to remember names and dates with cookies
zWhere to get good prewritten cookie code
zHow to write cookie-based mini-applications
A Real-World Example of Cookies
Cookies are used in all sorts of applications. A common use is to determine
whether a visitor has seen a page before. For example, at the bottom of the
Book of JavaScript home page you’ll find a link that brings you to a page which
keeps track of how many times you’ve visited the Book of JavaScript home page
(Figure 12-1). This information is stored using a cookie.
Figure 12-1: Tracking visits to the Book of JavaScript home page
For a more real-world example, the Google search engine uses cookies to
store your preferences. By clicking the Preferences link to the right of Google’s
search box you can change the language of the Google user interface. Along
with popular languages such as English, Chinese, and Spanish (the three most
popular languages on the Internet), there are more esoteric ones such as
Klingon, Pig Latin, and Bork, bork, bork! (the language of the Swedish Chef
Muppet). A code for the selected language is stored in a cookie. Because the
preference is in a cookie, the next time you visit Google, the interface will
still be in that language. Figure 12-2 presents Google in my favorite language,
Hacker. The cookie Google uses to store preference information appears at
the bottom of the figure. The LD=xx-hacker in the middle of the cookie tells
Google that I want the interface displayed in Hacker.
What Are Cookies?
Cookies are little bits of information a site leaves on the hard drive of visitors.
Because the information ends up on the hard drive, it remains after the user
leaves the current page and even after the computer is turned off. You’ll find
this feature extremely useful when you want to remember information about
a user each time he or she visits your site.
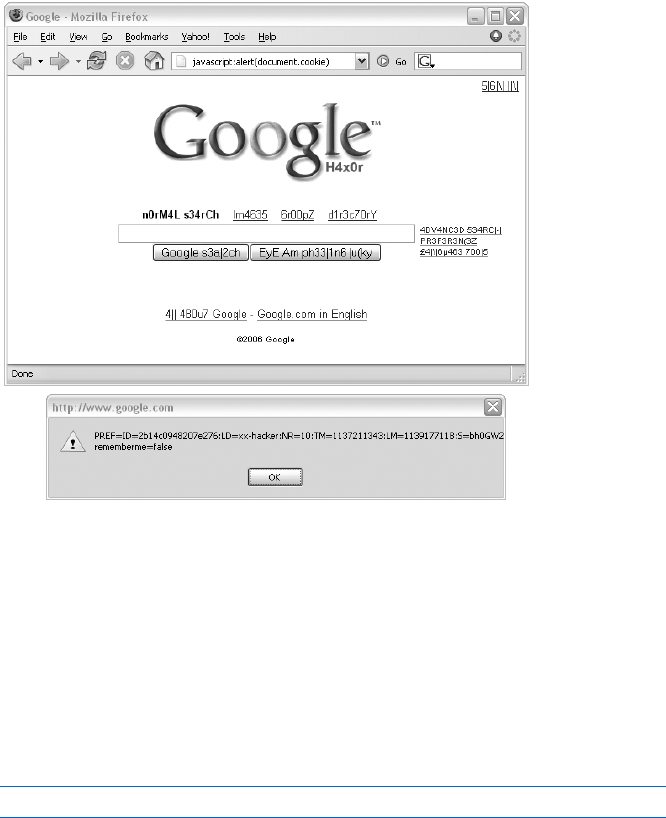
Saving Visitor Information with Cookies 217
Figure 12-2: Google’s search window and its cookie
You can see the cookies saved on your computer by looking for the
cookies.txt file for Netscape or the Cookies directory for Internet Explorer.
In either case, you’ll see a long list of site names, each with a string of text.
The text might seem incomprehensible to you because most sites use packed
and possibly encrypted formats for cookies for efficiency and security. But
take a look to see who’s left these little treats on your system—you’ll find it
very educational. You can also see whether a site you’re viewing in your
browser has stored any cookies on your computer, by typing the following
into your browser:
javascript:alert(document.cookie)
If you try this, you’ll soon see that almost every major site on the Internet
uses cookies in one way or another.
What Cookies Can and Can’t Do
Because cookies involve writing to and reading from your visitors’ hard drives,
cookie-friendly browsers deal with lots of security issues. As a result, using
cookies has many limitations. The most important ones for the purposes of
this chapter are these:
zNot everyone has a cookie-friendly browser.
zNot everyone who has a cookie-friendly browser chooses to accept
cookies (but most people do).

218 Chapter 12
zEach domain may have only 20 cookies (so use them sparingly).
zThere is a 4KB limit on the amount of information one domain can store
using cookies. That’s just over 4,000 characters—actually quite a lot.
zA website can set and read only its own cookies (for example, Yahoo!
can’t read AOL’s cookies).
Keep these limitations in mind when you consider using cookies on
your site.
Working with Cookies
This section covers all the basic cookie operations: setting, reading, and
resetting cookies, and setting expiration dates.
Setting Cookies
Setting a basic cookie is simple. Create a string in the form cookie_name = value
and then set the document.cookie property to that string. The only trick is
that cookie values can’t include spaces, commas, or semicolons. Happily,
the escape() and unescape() functions will code and decode cookies, so you
don’t have to worry about this restriction.
Figure 12-3 lists a simple example that stores a visitor’s name in a cookie
named username.
The first line of the function in Figure 12-3 (X) asks for a visitor’s name
and saves it in the_name. Line Y creates the string to store in the cookie. The
escape() function replaces characters that cookies can’t handle with legal
characters. For example, if I entered dave thau at the prompt, this line would
create the string username=dave%20thau. The percent sign and 20 (%20) replace
the space between dave and thau.
Line Z sets the cookie. To make sure you’ve set a cookie, type the
cookie-viewing code into your browser’s location bar:
javascript:alert(document.cookie)
function setCookie()
{
Xvar the_name = prompt("What's your name?","");
Yvar the_cookie = "username=" + escape(the_name);
Zdocument.cookie = the_cookie;
alert("Thanks!");
}
Figure 12-3: A cookie-setting function
Reading Cookies
It’s pretty easy to read a cookie you’ve saved to someone’s hard disk. Fig-
ure 12-4 shows you code that can read the cookie set in Figure 12-3.

Saving Visitor Information with Cookies 219
function readCookie()
{
Xvar the_cookie = document.cookie;
Yvar broken_cookie = the_cookie.split("=");
Zvar the_name = broken_cookie[1];
[var the_name = unescape(the_name);
alert("Your name is: " + the_name);
}
Figure 12-4: Reading a cookie
Line X in Figure 12-4 is very important. Whenever your browser opens
a web page, the browser reads whatever cookies that site has stored on your
machine and loads them into the document.cookie property.
The tricky part about reading cookies is getting just the information you
want from them. In Figure 12-4, all the instructions after the first line of the
function are needed to pull the user’s name out of the cookie. Once X gets
the cookie, Y breaks the cookie into a two-element array using the method
we learned in “split()” on page 202. The first element in the array consists of
everything in the cookie preceding the equal sign (=). In this case, it’s username,
so that is the first element in the array. The second element in the array
consists of everything following the equal sign, which is dave%20. Line Z grabs
this string from the array and stores it in the_name, and [ decodes the_name
with the unescape() function by swapping %20 for a space.
NOTE If you get a JavaScript error while trying these examples, quit your browser after trying
each example to erase the cookies you’ve set. Because cookies can store more than one
value, the examples in this chapter would require additional—and complicated—
code to separate the different cookie values. The section “Setting Multiple Cookies” on
page 225 covers a more robust way of reading JavaScript cookies.
Resetting Cookies
To reset (change the value of) a cookie, simply set its name to another value.
For example, to keep track of the last time a visitor came to your site, set a
cookie named date each time that person visits your site. Figure 12-5 is the
code for a web page that keeps track of the last time a given visitor entered
the web page.
Loading this page calls the JavaScript functions readCookie() (Y) and
setCookie() (Z). The readCookie() function checks to see whether the site has
set a cookie (X). If the value between the parentheses of the if clause is false
or the null string (""), the lines in the body of the if-then statement won’t exe-
cute. If the string finds a cookie, document.cookie will return whatever that cookie
is, so the lines in the body of the if-then statement will execute, extracting the
date from the cookie and writing it to the web page using document.write().
After readCookie() does its thing, setCookie() sets a new cookie. This func-
tion gets the current date and sets a cookie named date to that date. Each
time setCookie() is called, it replaces the last cookie named date with a new
one. This is just like setting a variable.

220 Chapter 12
<html><head><title>Date Cookie</title>
<script type = "text/javascript">
<!-- hide me from older browsers
function setCookie()
{
var the_date = new Date();
var the_cookie = "date=" + escape(the_date);
document.cookie = the_cookie;
}
X function readCookie()
{
if (document.cookie)
{
var the_cookie = document.cookie;
var the_cookie_array = the_cookie.split("date=");
var the_date = unescape(the_cookie_array[1]);
document.write("The last time you visited here was: " + the_date);
document.write("<br>");
}
}
// show me -->
</script>
</head>
<body>
<h1>Welcome!</h1>
<script type = "text/javascript">
<!-- hide me from older browsers
Y readCookie();
Z setCookie();
// show me -->
</script>
</body>
</html>
Figure 12-5: Tracking a visitor’s last visit to a web page
Setting More Than One Piece of Information
Adding more than one piece of information to a cookie is no problem. For
example, to store a person’s name, age, and phone number, you could set a
cookie like this:
var the_cookie = "username:thau/age:just a tyke/phone:411";
document.cookie = "my_cookie=" + escape(the_cookie);
A slash separates properties (username,age, and phone), and a colon
distinguishes the property names and values (username:thau and phone:411).
The slash and colon are arbitrary; you can use any symbols—so long as you’re
consistent.

Saving Visitor Information with Cookies 221
It’s a bit harder to pull multiple pieces of information out of a cookie.
Try using the method discussed in “Associative Arrays” on page 142 to store
the information. For example, if you saved
my_cookie = username:thau/age:just a tyke/phone:411
to someone’s hard drive, you could read the information into an associative
array using the readTheCookie() function in Figure 12-6.
<html>
<head>
<title>Complex Cookie</title>
<script type = "text/javascript">
<!-- hide me from older browsers
function readTheCookie(the_info)
{
// load the cookie into a variable and unescape it
var the_cookie = document.cookie;
var the_cookie = unescape(the_cookie);
// separate the value pairs from the cookie name
var broken_cookie = the_cookie.split("=");
Xvar the_values = broken_cookie[1];
// break each name:value pair into an array
Yvar separated_values = the_values.split("/");
// loop through the list of name:values and load
// the associate array
var property_value = "";
Zfor (loop = 0; loop < separated_values.length; loop++)
{
property_value = separated_values[loop];
var broken_info = property_value.split(":");
var the_property = broken_info[0];
var the_value = broken_info[1];
[the_info[the_property] = the_value;
}
}
function setCookie()
{
var the_cookie = "my_cookie=name:thau/age:just a tyke/phone:411";
document.cookie = escape(the_cookie);
}
\ setCookie();
] var cookie_information = new Array();
^ readTheCookie(cookie_information);
// show me -->
</script>
</head>
<body>
<h1>This Is What I Know About You</h1>
<script type = "text/javascript">

222 Chapter 12
<!-- hide me from older browsers
_ document.write("Name: " + cookie_information["name"] + "<br>");
document.write("Age: " + cookie_information["age"] + "<br>");
document.write("Phone: " + cookie_information["phone"] + "<br>");
// show me -->
</script>
</body>
</html>
Figure 12-6: Loading a complex cookie into an associative array
When this page loads, \ sets a cookie, ] creates a new array, and ^
sends the new, empty array to the readTheCookie() function. The function first
gets the cookie and splits off the cookie’s name (my_cookie). After X,the_values
will equal "name:thau/age:just a tyke/phone:411" because that’s how we set the
cookie in the setCookie() function.
Next, Y splits the_values into its component parts, loading "name:thau"
into separated_values[0],"age:just a tyke" into separated_values[1], and
"phone:411" into separated_values[2].
After the function breaks up the_values,Z loops through each of the
three elements (name,age, and phone) in separated_values. Each time through
the loop, the function breaks the element into two pieces along the colon. It
then loads the first part of the element into the_property and the second part
into the_value.
The first time through the loop, the_property is "name" and the_value
is "thau". Once the element is split like this, the associative array the_info
gets loaded in [. After the loop has occurred three times, you get these
results: the_info["name"] = "thau",the_info["age"] = "just a tyke", and
the_info["phone"] = "411".
With the associative array loaded properly, the three lines starting in _
retrieve the information and display it on a web page.
Setting the Duration of a Cookie
Until now, we’ve been creating cookies that disappear when a user exits the
browser. Sometimes this is for the best. Since each domain can have only 20
cookies on a user’s machine, you don’t want to waste space by saving unnec-
essary cookies between browser sessions. However, if you do want your cookies
to remain on a user’s hard drive after he or she quits the browser, you have to
set an expiration date in UTC format. For example,
Sun, 12 Jan 1992 00:00:00 UTC
is the supposed birth date in of HAL 9000, the intelligent computer from
2001: A Space Odyssey, expressed in UTC. (“HAL? HAL? Are you out there?”)
NOTE UTC time is the time at the Royal Observatory in Greenwich, England. Urbana,
Illinois, where HAL was built, is six hours west of Greenwich, so the date given
here is actually 6 PM local time on January 11.

Saving Visitor Information with Cookies 223
The UTC format can be sort of a pain, especially since you must figure
out whether the day was a Monday, Friday, or whatever. Luckily, JavaScript’s
toUTCString() date method converts a date in a simpler format to a date in
UTC format. Here’s an easy way to set a date relatively far into the future:
var the_date = new Date("December 21, 2012");
var the_cookie_date = the_date.toUTCString();
NOTE JavaScript versions earlier than 1.3 used a date string format in which the day, month,
and year were separated by hyphens instead of spaces, and the time was followed by the
letters GMT to indicate that it was Greenwich Mean Time. This was therefore called
GMT format, and JavaScript had a toGMTString() method instead of a toUTCString()
method. The toGMTString() method is still provided, but UTC is the norm. For example,
with Windows XP and Internet Explorer 6.0, toGMTString() returns a UTC string,
and new Date() works when passed a UTC string but not when passed a GMT string.
To set your cookie to expire, you have to add the expiration date to the
cookie. Add expires = date to the string, and separate the cookie components
with a semicolon:
cookie_name = whatever;expires = date
Figure 12-7 shows you how to build a cookie that will last until the end of
the Mayan calendar:
function setCookie()
{
// get the information
//
var the_name = prompt("What's your name?","");
var the_date = new Date("December 21, 2012");
var the_cookie_date = the_date.toUTCString();
// build and save the cookie
//
var the_cookie = "my_cookie=" + escape(the_name);
the_cookie = the_cookie + ";expires = " + the_cookie_date;
document.cookie = the_cookie;
}
Figure 12-7: Setting a cookie that will expire far in the future
Before the_cookie in Figure 12-7 is escaped (using the escape() function),
it will resemble the following line:
my_cookie = thau;expires = Fri, 21 Dec 2012 00:00:00 UTC
Once set, this cookie lives on your visitor’s hard drive until the expira-
tion date.

224 Chapter 12
You can also use the expiration date to delete cookies. To do so, set the
date to a time in the past. This can come in handy if you’re using cookies to
log people in and out of your site. When a visitor logs in, assign a cookie that
shows that the visitor has done so. When the user wants to log out, delete the
cookie.
Who Can Read the Cookie?
I’ve already mentioned that only the website that set a cookie can read it—
McDonald’s can’t read Burger King’s cookies, and vice versa. The full story is
a little more complicated than that, however.
Letting One Page Read a Cookie Set on Another
By default, only the web page that set the cookie can read it. If one of your
pages sets a cookie, to let other pages on your site read that cookie you must
set its path. The cookie’s path sets the top-level directory from which a cookie
can be read. Setting the path of a cookie to the root-level directory of your
site makes it possible for all your web pages to read the cookie.
To do this, add path=/; to your cookie. If you just want the cookie to be
readable in a directory called food, add path=/food;.
Dealing with Multiple Domains
Some websites have lots of little domains. For example, the Yahoo! web
portal has a main site (http://www.yahoo.com), a finance site (http://
finance.yahoo.com), a personalized site (http://my.yahoo.com), and many
others. By default, if a web page on the finance site sets a cookie, pages on
the personalized site can’t read that cookie. But if you add domain=domain_name
to a cookie, all domains ending in domain_name can read the cookie. To allow
all the web pages on any of the machines in the yahoo.com domain to read a
cookie, Yahoo! has to add domain=yahoo.com to the cookie.
The Whole Cookie
Adding an expiration date, domain, and path to a cookie makes it pretty big.
Figure 12-8 lists a function that sets all these variables so you can see the whole
picture in one example.
function setCookie()
{
var the_name = prompt("What's your name?","");
var the_date = new Date("December 21, 2012");
var the_cookie = escape(the_name) + ";";
var the_cookie = the_cookie + "path=/;";
var the_cookie = the_cookie + "domain=nostarch.com;";
var the_cookie = the_cookie + "expires=" + the_date.toUTCString() + ";";
document.cookie = "my_cookie=" + the_cookie;
}
Figure 12-8: Setting all the cookie properties

Saving Visitor Information with Cookies 225
Figure 12-8 results in a cookie that looks like this (before escaping it):
my_cookie = thau;path=/;domain = nostarch.com;expires =
Fri, 21 Dec 2012 00:00:00 UTC;
Of course, because I’m setting the domain to nostarch.com, only a web page
from a No Starch Press computer can read this cookie.
Setting Multiple Cookies
Sometimes one cookie just isn’t enough. For instance, if your website has
two different JavaScript applications—one that uses cookies to store infor-
mation about your visitors and one that uses cookies to keep track of their
purchases—you’ll probably want to store these two types of information in
different cookies.
To save multiple cookies, just give each cookie a different name. Setting
document.cookie to a cookie with a new name won’t delete the cookies that are
already there. Here’s some code that sets two cookies:
var visitor_cookie = "this_person=" +
escape("name:thau/occupation:slacker/phone:411");
document.cookie = visitor_cookie;
var purchase_cookie = "purchases=" + escape("tshirt:1/furbie:15/burrito:400");
document.cookie = purchase_cookie;
This code sets document.cookie twice. It looks as if the second document.cookie =
statement should overwrite the information stored by the first one, as would
happen if some other object were to the left of the equal sign. Assignment to
document.cookie works differently, however. As long as the cookies have differ-
ent names, you can store both in document.cookie. After running the lines
above, document.cookie looks like this (except for the escaped characters):
this_person = name:thau/occupation:slacker/phone:411;purchases=tshirt:1/
furbie:15/burrito:400
In this example, storing two cookies in document.cookie works well
because the JavaScript that looks at purchase information doesn’t have to
deal with the information in the other cookie. Unfortunately, it’s a bit difficult
to pull the contents of one cookie out of document.cookie because it contains
multiple cookies. Here’s where prewritten JavaScript libraries come in handy.
Cookie Libraries
You’ll find many free cookie libraries on the Web. Just use any search
engine, and search for javascript cookie to get a list. The functions in the
libraries generally come ready to run, so you can just cut and paste them
into your web pages. Webmonkey has exceptionally well-commented
libraries, so we’ll use its code here. You can find more of Webmonkey’s free

226 Chapter 12
JavaScript code at http://webmonkey.wired.com/webmonkey/reference/
javascript_code_library/wm_ckie_lib/?tw=reference&category=forms_data.
Figure 12-9 shows you Webmonkey’s code for accessing one cookie when
document.cookie is storing multiple cookies.
function WM_readCookie(name) {
if(document.cookie == '') { // there's no cookie, so return false
return false;
} else { // there is a cookie
var firstChar, lastChar;
var theBigCookie = document.cookie;
firstChar = theBigCookie.indexOf(name);// find the start of 'name'
var NN2Hack = firstChar + name.length;
{ // if you found the cookie
if((firstChar != -1) && (theBigCookie.charAt(NN2Hack) == '='))
firstChar += name.length + 1; // skip 'name' and '='
// find the end of the value string (the next ';').
lastChar = theBigCookie.indexOf(';', firstChar);
if(lastChar == -1) lastChar = theBigCookie.length;
return unescape(theBigCookie.substring(firstChar, lastChar));
} else { // if there was no cookie of that name, return false
return false;
}
}
} // WM_readCookie
Figure 12-9: Reading one cookie from document.cookie
To use these functions, cut and paste them into the page, and call the
functions appropriately. To retrieve a cookie named thisuser, call the func-
tion WM_readCookie("thisuser").
Webmonkey’s well-commented functions speak for themselves. If you use
these, read them over first and make sure you understand how they work.
A Cookie-Based Shopping Cart
You can build fairly complicated applications using cookies. This section
discusses code that represents the start of a shopping cart script. You defi-
nitely do not want to use this code to run your own shopping cart—it’s much
too simplistic. For example, you can’t remove an item from the basket once
you’ve selected it.
However, this code should give you an idea of how to start building
complex applications using cookies. Figure 12-10 shows you the code for a
main page of a simple shopping cart (see Figure 12-11) with simple links to
pages that contain items to buy.
<html><head><title>Welcome to My Store</title>
</head>
<body>
<h1>Welcome to My Store!</h1>
Here you can buy:<br>
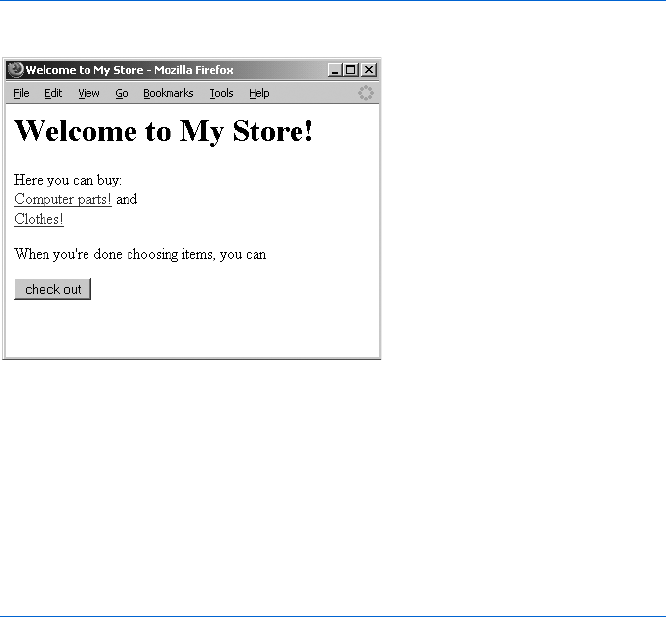
Saving Visitor Information with Cookies 227
<a href = "parts.html">Computer parts!</a> and <br>
<a href = "clothes.html">Clothes!</a><br>
<p>
When you're done choosing items, you can
<form>
X <input type = "button" value = "check out"
onClick = "window.location='checkout.html';">
</form>
</body>
</html>
Figure 12-10: The shopping cart main page
Figure 12-11: What the shopping cart main page looks like
The only new and interesting feature in Figure 12-10 is X, which redirects
visitors to the page checkout.html (listed in Figure 12-15 and discussed later
in this section) when they click the check out button.
Adding an Item to the Cart
Figure 12-12 shows you the code for one of the pages where you can buy a
product.
<html><head><title>Clothes</title>
X <script type = "text/javascript" src = "shopping.js"></script>
</head>
<body>
<h1>Buy these clothes!</h1>
<form name = "clothes">
T-shirt:
<input type = "text" name = "tshirt" size = "3" value = "1">
Y <input type = "button" value = "add"
onClick = "addToCart(window.document.clothes.tshirt.value, 'tshirt',14);">
($14 each)
<p>
Jeans:
<input type = "text" name = "jeans" size = "3" value = "1">
<input type = "button" value = "add"
onClick = "addToCart(window.document.clothes.jeans.value,'jeans',30);">
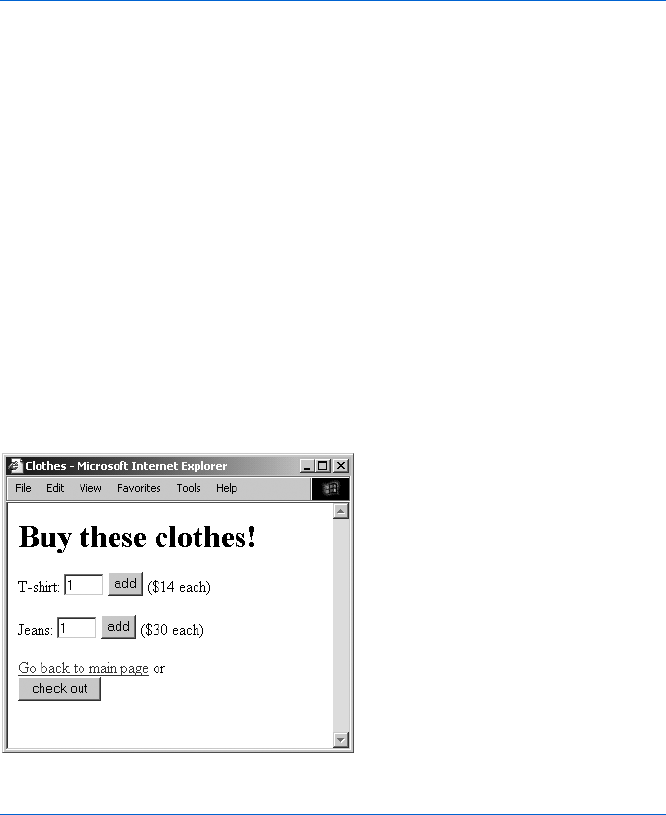
228 Chapter 12
($30 each)
<p>
<a href = "main.html">Go back to main page</a>
or <br>
<form>
<input type = "button" value = "check out"
onClick = "window.location='checkout.html';">
</form>
</body>
</html>
Figure 12-12: Code for a page where you can purchase goods
Most of this page describes the form that lists what visitors can buy.
Each item has a button next to it that lets you buy the item (see Figure 12-13).
Pushing that button (as in Y) calls the function addToCart(), which takes three
parameters: the quantity of the item to buy, what the item is, and how much
it costs. The addToCart() function isn’t stored on this web page but in a file
called shopping.js (Figure 12-14), a normal text file that contains all the
functions the shopping cart needs to work. The browser reads the shopping.js
file into the page and interprets it in X. This technique is very handy when
you have a set of functions that apply to many pages. In our example, all the
shopping pages on the site will need the addToCart() function, so rather than
cut and paste this function onto every page, we can use X to call the func-
tions from shopping.js. You’ll also find this feature extremely useful when
you want to change the function. Instead of having to track down every place
you’ve cut and pasted it, you just need to change it once in the shopping.js
file. Once you’ve changed it there, any page that uses the shopping.js file will
load the changed version.
Figure 12-13: A shopping page
function addToCart(amount, item, price)
{
Xvar purch_string = escape(item + ":" + amount + ":" + price);
Yvar the_cookie = WM_readCookie("purchases");
Zif (the_cookie)

Saving Visitor Information with Cookies 229
{
[purch_string = the_cookie + "/" + purch_string;
}
\WM_setCookie("purchases",purch_string,0,"/");
}
Figure 12-14: shopping.js
The addToCart() function in shopping.js creates a string to save into a
cookie (X) in the form item:amount:price. The function then uses the
Webmonkey WM_readCookie() function to see whether the visitor has already
received a cookie named purchases (Y and Z). If there is already a cookie, [
puts a forward slash (/) at its end and adds the string created in X. Each time
a visitor buys an item, the cookie gets a slash followed by the item name. If you
bought one T-shirt and one pair of jeans, the cookie would look like this:
purchases = tshirt:1:14/jeans:1:30
If you then bought another T-shirt, the cookie would look like this:
purchases = tshirt:1:14/jeans:1:30/tshirt:1:14
A more complete version of addToCart() would realize that you had already
bought a T-shirt and, instead of tacking another tshirt:1:14 to the end of the
cookie, would add one to the T-shirt amount:
purchases = tshirt:2:14/jeans:1:30
However, since that “small” change involves a fair amount of code, I’m
leaving it out.
After the new cookie string has been constructed, \ uses the Webmonkey
library function WM_setCookie() to save the visitor’s cookie information.
The Checkout Page
The final page to consider is the checkout page listing in Figure 12-15.
<html><head><title>Checkout</title>
X <script type = "text/javascript" src = "shopping.js"></script>
</head>
<body>
<h1>Here's Your Basket So Far</h1>
<script type = "text/javascript">
Y checkOut();
</script>
</body>
</html>
Figure 12-15: Code for the checkout page
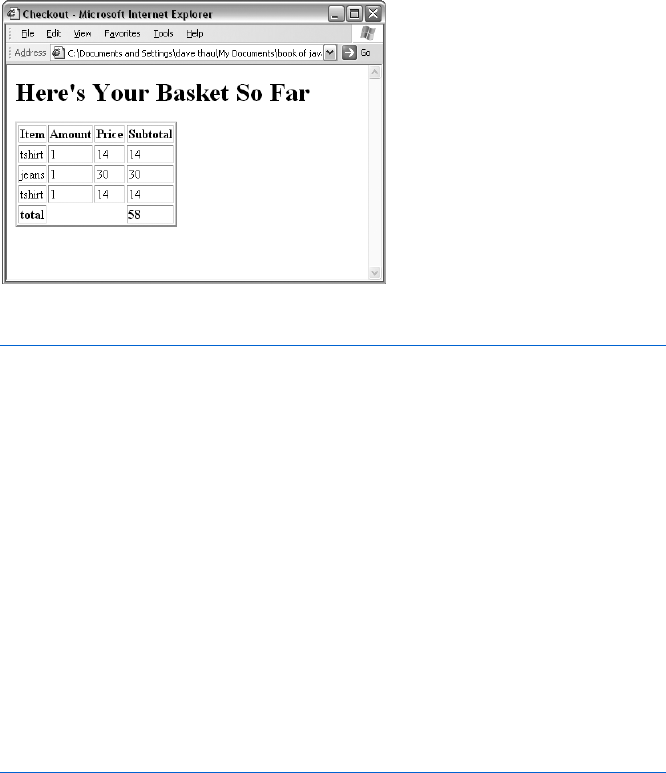
230 Chapter 12
The checkout page loads in the shopping.js file in X just as the product
page does in Figure 12-12. Although there is a little HTML on this page, most
of what you see when you visit this page (Figure 12-16 shows the page in IE) is
generated by the checkOut() function, which is stored in the shopping.js file.
Figure 12-17 lists the readTheCookie() function, which reads the cookie and
formats it in a way that makes the checkOut() function’s job easier. Figure 12-18
lists the checkOut() function itself.
Figure 12-16: What the checkout page looks like
function readTheCookie(the_info)
{
var split_stuff;
// load the cookie into a variable and unescape it
Xvar the_cookie = WM_readCookie("purchases");
if (the_cookie)
{
Yif (the_cookie.indexOf('/') != -1)
{
split_stuff = the_cookie.split("/");
Zfor (var loop = 0; loop < split_stuff.length; loop++)
{
the_info[loop] = split_stuff[loop];
}
} else {
[the_info[0] = the_cookie;
}
}
}
Figure 12-17: Code for the readTheCookie() function
The readTheCookie() Function
The readTheCookie() function, which is called by the checkOut() function,
breaks up the cookie into each item bought and loads the items into the
array passed to it. As is shown in Figure 12-18, the array is new and empty

Saving Visitor Information with Cookies 231
when checkOut() calls readTheCookie(). Line X reads the cookie using the
WM_readCookie() function. If there is a purchases cookie (which the visitor
would have set by adding an item—see Figure 12-13), Y determines whether
the visitor bought more than one item. If he or she purchased only one item,
that item gets loaded into the array in position 0 ([). If he or she purchased
two or more items, a forward slash appears between them and the cookie
gets split into the split_stuff array. Then the loop in Z copies everything
in the split_stuff array into the_info, the array sent into the readTheCookie()
function. At the end of readTheCookie(),the_info contains all the items
purchased.
function checkOut()
{
var total = 0;
var the_stuff = new Array();
XreadTheCookie(the_stuff);
document.writeln("<table border=2>");
document.writeln("<th>Item</th><th>Amount</th><th>Price</th>
<th>Subtotal</th>");
Yfor (var loop = 0; loop<the_stuff.length; loop++)
{
Zvar this_item = the_stuff[loop].split(":");
[document.writeln("<tr>");
\for (var inloop = 0; inloop < this_item.length; inloop++)
{
document.writeln("<td>");
document.writeln(this_item[inloop]);
document.writeln("</td>");
}
]sub_total = this_item[1] * this_item[2];
^total += sub_total;
document.writeln("<td>" + sub_total + "</td>");
document.writeln("</tr>");
}
document.writeln("<tr>");
document.writeln("<td><b>total</b></td>");
_document.writeln("<td></td><td></td><td><b>" + total + "</b></td>");
document.writeln("</tr>");
document.writeln("</table>");
}
Figure 12-18: Code for the checkOut() function
The checkOut() Function
Once readTheCookie() loads the information from the cookie into the_stuff
(X), checkOut() writes the purchased items to the web page. Line Y loops
through the_stuff, each element of which contains a purchased item. If the
first item bought is one pair of jeans, for example, the first element in the array
appears as jeans:1:14. Line Z then splits this element at the colons, loading
the three resulting elements into the this_item array.
The rest of the code writes the table. Line [ begins a new row, and \
sandwiches each element in this_item between <td> and </td> tags.
232 Chapter 12
Line ] calculates how much this_item costs by multiplying the price of the
item (this_item[2]) by the quantity bought (this_item[1]). If the first element
in the_info is jeans:1:14, then this_item[0] is jeans,this_item[1] is 1, and
this_item[2] is 14 because of the split in Z. Line [ then multiplies the quantity
by the price to get the subtotal, and ^ adds this subtotal to the total, written to
the page in _. Figure 12-16 shows you what the checkout page looks like after
someone buys a T-shirt, then a pair of jeans, and then another T-shirt.
Even though this shopping cart requires a lot of JavaScript, each of its
functions is short and fairly easy to understand. Complicated applications
such as shopping carts are usually just groups of smaller functions that work
together.
Once you understand the basics of JavaScript, the hard part of writing an
application is figuring out what functions you need and how they interrelate.
This is the art of programming, and it comes only with a lot of practice. If
you understand the shopping cart code in this example but don’t think you
could write it yourself, practice writing smaller scripts—you’ll soon get the
hang of it.
Summary
Cookies are an advanced JavaScript feature and can add a lot of functionality
to your site. In addition to setting up a shopping cart, you can use cookies to
keep track of when and how often a visitor comes to your site and to save
customization preferences visitors might set. If you’ve thoroughly grasped
this chapter, you now know:
zWhat cookies are
zHow to set a basic cookie
zHow to make a cookie last after the user has turned off the computer
zHow to control which pages can read your cookie
zHow to store more than one piece of information in a cookie
zHow to set and read more than one cookie
zHow to create a separate JavaScript file that other HTML files can
include
zWhere to find JavaScript cookie libraries
zHow to build a complex application using cookies
Assignment
Write a page that greets new visitors with an alert box that says, Welcome,
new-timer! This should only appear the first time a visitor sees the page—
at the next visit, that alert box shouldn’t appear.
DYNAMIC HTML
Dynamic HTML (DHTML) combines
JavaScript, HTML, and Cascading Style
Sheets (CSS) to give web page designers
an incredible degree of freedom to animate their
pages and add interactivity. If you’ve seen sites that
have dynamic menus or images that dance all over the screen, you’ve
seen DHTML in action. DHTML is also a key component of Asynchronous
JavaScript and XML (Ajax), a technique used to create complete web-based
applications. We’ll talk more about Ajax in Chapters 14, 15, 16, and 17.
DHTML is an immense subject. This chapter will introduce DHTML
and show you how what you’ve learned so far fits into the DHTML puzzle.1
1 If you want to learn more about DHTML, I suggest you read Dynamic HTML: The Definitive
Reference by Danny Goodman (O’Reilly, 2002).
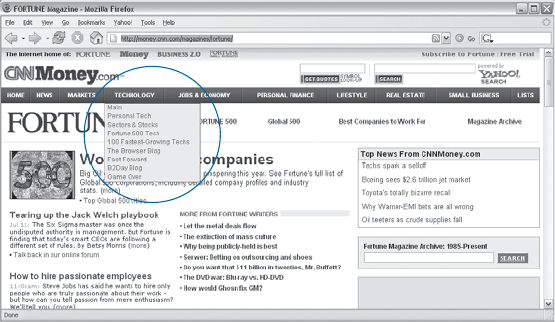
234 Chapter 13
This chapter covers the following topics:
zThe CSS basics you need to know
zHow JavaScript, HTML, and CSS work together to make objects move
around your screen
zHow to use fancy event handling to read the keyboard and discover the
location of the user’s mouse
zHow to create dynamic drop-down menus
Real-World Examples of DHTML
DHTML can enhance your web pages in a variety of ways. There are entire
sites devoted to DHTML examples and tutorials. A few good ones are:
zhttp://www.dhtmldrive.com
zhttp://www.dhtmlcentral.com
zhttp://www.dhtmlgoodies.com
Searching for dynamic html in any search engine will return dozens more
choices.
DHTML is often used to create drop-down menus, examples of which
can be seen on many websites, including the Doctor Who fan site, Outpost
Gallifrey (http://www.gallifreyone.com), and Fortune magazine’s website
(http://www.fortune.com, shown in Figure 13-1). The code for these menus
can be complicated, but by the end of this chapter, you should have a good
sense of how it works.
Figure 13-1: A DHTML pull-down menu
CSS Basics
As mentioned in the opening of the chapter, DHTML is a combination
of JavaScript, HTML, and CSS. CSS enables you to position HTML
precisely on your pages—no longer will you have to use bizarre tables
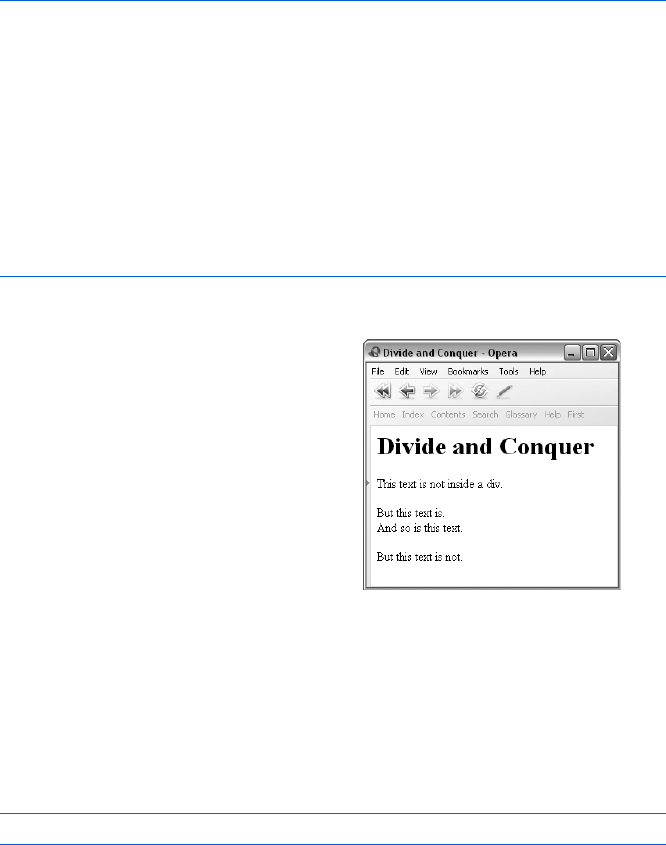
Dynamic HTML 235
and invisible GIFs to position elements. With a CSS you can easily place
a GIF precisely in the center of your page, or position a block of text in
the lower-right corner.
The <div> Tag
Before you can position any HTML, you have to use the <div> and </div> tags
to tell your browser which displayed HTML you want to position. Figure 13-2
shows a simple use of <div> tags.
<html><head><title>Divide and Conquer</title></head>
<body>
<h1>Divide and Conquer</h1>
This text is not inside a div.
<p>
X <div id = "myFirstDiv">
But this text is.<br>
And so is this text.<br>
Y </div>
<p>
But this text is not.
</body>
</html>
Figure 13-2: Basic div usage
Positioning a div with CSS
You can position the contents of a <div> tag anywhere on a web page using
the HTML style element. Replacing X in Figure 13-2 with the following line
moves the block of HTML called myFirstDiv into the lower middle of the page:
<div id = "myFirstDiv" style = "position:absolute; top:150; left:100;">
Figure 13-4 shows what this looks like.
The page displayed by this code
(Figure 13-3) looks just like any other
HTML page. However, X and Y
assign an id to a block of HTML by
using a <div> tag with an id attribute
of myFirstDiv. You can use any set of
letters or numbers for a div’s id, but it
can’t contain spaces or underscores,
and the first character has to be a
letter. Now that we’ve provided a
way for code to refer to this block,
we can use the div’s id to position
the block with CSS or to move it
around dynamically with JavaScript.
Figure 13-3: An HTML page with divs
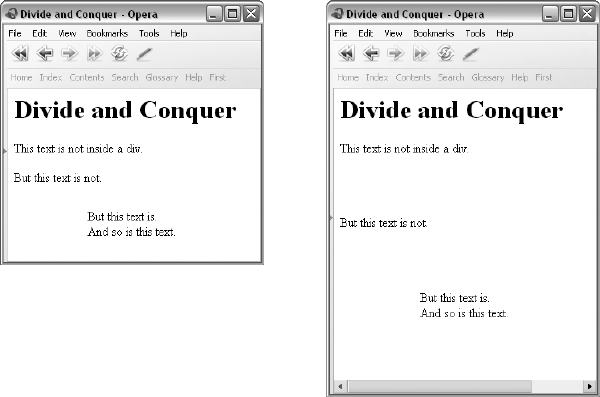
236 Chapter 13
As you can see, the style element goes inside the <div> tag and has
three components separated by semicolons. The position component
gives the div a reference point (with position:absolute, the reference
point is the browser window’s upper-left corner). The top component
determines how many pixels down from the reference point the top-left
corner of the div appears, and the left component determines how
many pixels to the right of the reference point the top-left corner of the
div appears.
Instead of positioning the div relative to the upper-left corner of the
browser window, you can position it relative to where it would normally
appear in the HTML. If you do not include any positioning information
in the div, it would follow the line This text is not inside a div. However, if
you use the style shown in Figure 13-4 but replace position:absolute
with position:relative, the div appears 150 pixels below and 100 pixels to
the right of the This text is… line. Figure 13-5 shows you what this would
look like.
Whether you use position:absolute or position:relative depends
on what you’re aiming for. If you want one block of HTML to appear
directly to the right of another block, you might find it easier to use
position:relative. But if you want to make sure an image appears in
the center of the screen, you’ll find position:absolute more useful.
Figure 13-4: Moving a div into the
lower middle of the page
Figure 13-5: Using position:relative
instead of position:absolute

Dynamic HTML 237
Hiding a div
You can display or hide the contents of a div by setting its visibility to either
visible or hidden. The style below puts the div in the lower center of the page
and hides it.
<div id = "myFirstDiv" style =
"position:absolute; top:150; left:100; visibility:hidden">
You can change the visibility of a div with JavaScript. Sometimes it makes
sense to create a bunch of invisible divs on a page and then use JavaScript to
make them appear when you need them. For example, you could make an
entire section of HTML code blink on and off by alternately hiding and
showing it. Later in the chapter, when we talk about drop-down menus, I’ll
show you how to use JavaScript to hide divs.
Layering divs
Another nice feature of divs is that you can layer them on top of each
other. For example, you could put an image of a mouse in one div and
an image of a maze in another div, then put the mouse in the maze by
layering the mouse div on top of the maze div. Once you’ve done that,
you can change the position of the mouse div to make it look like the
mouse is exploring the maze.
To layer one div on top of another, set the div’s z-index. A div with a
higher z-index value appears on top of a div with a lower z-index. Figure 13-6
shows the code for a page with one GIF (a small white square) on top of
another GIF (a bigger black square). The small white square has a higher
z-index, giving the result shown in Figure 13-7. Figure 13-8 shows what would
happen if the black square were given a higher z-index.
<html><head><title>Layering divs</title></head>
<body>
<div id = "whiteSquare" style =
"position:absolute; top:100; left:100; z-index:2">
<img src = "white.gif">
</div>
<div id = "blackSquare" style = "position:absolute; top:0; left:0; z-index:1">
<img src = "black.gif">
</div>
</body>
</html>
Figure 13-6: Layering divs with z-index
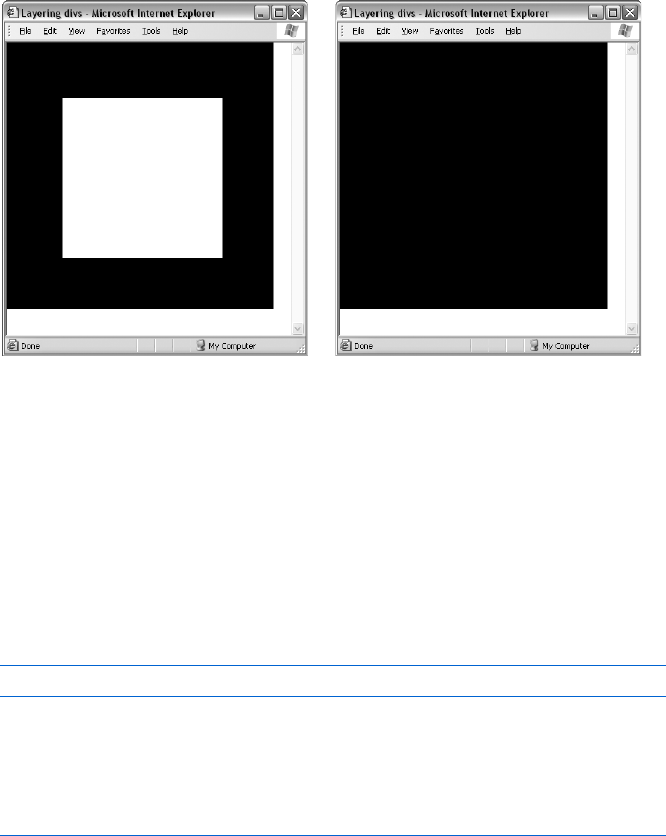
238 Chapter 13
Normal HTML is at z-index 0. If you set the z-index of a div to a negative
number, it appears behind the normal HTML, like a background image.
JavaScript and DHTML
DHTML becomes dynamic when you start using JavaScript to manipulate
divs. For example, if you have a div named myFirstDiv (as in Figure 13-2),
you could use this JavaScript to hide the div:
window.getElementById('myFirstDiv').style.visibility = "hidden";
This line gets the element whose id is myFirstDiv and then gets its CSS
style object and changes the visibility value of that style object from visible
to hidden.
Figure 13-9 shows how you can hide a div when the user clicks a link.
<html><head><title>Hiding a div</title></head>
<body>
<h1>Hide the Div</h1>
This text is not inside a div.
<p>
<div id = "myFirstDiv" style =
"position:absolute; top:150; left:100; visibility:visible">
But this text is.<br>
And so is this text.<br>
</div>
<p>
But this text is not.
<br>
Figure 13-7: The white square with a higher
z-index than the black square
Figure 13-8: The black square with a higher
z-index than the white square
Dynamic HTML 239
<a href = "#"
onClick = "document.getElementById('myFirstDiv').style.visibility="hidden";
return false;">Hide the div.</a>
</body>
</html>
Figure 13-9: Hiding a div
Making divs Move
The top property of a div’s style dictates the vertical position of the div, and
the left property determines the horizontal position. You can use these
properties to move a div around the screen. For example, to position a div
500 pixels from the left border of the browser window, do this:
document.getElementById('myDiv').style.left = 500;
Adding an amount to the top or left attribute of a div’s style will move it
vertically or horizontally. If a div is 500 pixels from the left border of the win-
dow, and you add 5 to the left property, you will move the div to a position
505 pixels from the border. Unfortunately, adding numbers to the left and
top properties is not straightforward, because most browsers will stick a px at
the end of the left and top properties. For example, if you load Figure 13-9
into a browser, and then type
javascript:alert(document.getElementById('myFirstDiv').style.top)
the response will be 150px, and not the number 150. To get rid of the px,
use the parseInt() method that you learned about way back in Chapter 3.
Here is an example:
document.getElementById('myDiv').style.left =
parseInt(document.getElementById('myDiv').style.left) + 5;
To move a div 5 pixels to the left, subtract 5 from the value of the left
property as follows:
document.getElementById('myDiv').style.left =
parseInt(document.getElementById('myDiv').style.left) - 5;
Using setTimeout() and clearTimeout() to Animate a Page
The code described above makes a div jump across the screen. If you want
the div to drift more slowly across the screen or to move along a specific path,
you can use timing loops (discussed in Chapter 9) to animate your div.
To make a div move smoothly across the screen, write a function that
moves the div a little bit, then uses setTimeout() to call itself in a few milli-
seconds. Figure 13-10 contains code that causes an image of the number 1
to roam randomly around the screen.

240 Chapter 13
<html><head><title>The Wandering One</title>
<script type = "text/javascript">
<!-- hide me from older browsers
var the_timeout;
function moveNumber()
{
var the_div, move_amount;
X the_div = window.document.all.numberOne.style;
Ymove_amount = parseInt(Math.random() * 10);
Zif (parseInt(Math.random()*10) < 5) {
the_div.left = parseInt(the_div.left) + move_amount;
} else {
the_div.left = parseInt(the_div.left) - move_amount;
}
[random_number = parseInt(Math.random() * 10);
\if (parseInt(Math.random()*10) < 5)
{
the_div.top = parseInt(the_div.top) + move_amount;
} else {
the_div.top = parseInt(the_div.top) - move_amount;
}
]the_timeout = setTimeout("moveNumber();", 100);
}
// show me -->
</script>
</head>
<body>
<h1>The Wandering One</h1>
<div id = "numberOne" style =
"position:absolute; top:150; left:100; z-index:-1">
<img src = "one.jpg">
</div>
<br>
^ <a href = "#" onClick =
"the_timeout=setTimeout('moveNumber();',100);
return false;">Start wandering</a> <br>
_ <a href = "#" onClick =
"clearTimeout(the_timeout);
return false;">Stop wandering</a>
</body>
</html>
Figure 13-10: The Wandering One
Line-by-Line Analysis of Figure 13-10
In Figure 13-10, the image of the number 1 starts wandering when a visitor
clicks the link in ^, calling the moveNumber() function. The moveNumber()
function sets the_div to point to the div we want to move (X) and then
determines how far the div moves.
Generating Random Numbers
Line Y moves the div by a random amount between 0 and 9 pixels. It chooses
this amount by generating a random number between 0 and 0.999... (that is,
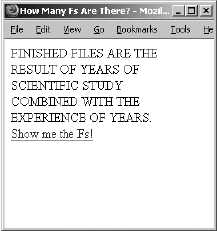
Dynamic HTML 241
0.9 repeating, a fraction with a decimal point followed by an infinite number
of nines after it), using the Math.random() method, and then multiplying this
number by 10. This yields a number between 0 and 9.999… The parseInt()
function then drops the digits to the right of the decimal point. If Math.random()
generates 0.543, then multiplying by 10 gives you 5.43, and parseInt() turns
that into 5.
Determining the Direction of an Image’s Motion
The if-then statement starting in Z generates another number between 0
and 9. If the number is below 5 (which happens exactly half the time), the
amount generated in Y is added to the left property, moving the number 1
on the screen a little to the right. If the number is 5 or above, the amount is
subtracted from the left property, moving the 1 to the left. Lines [ and \
act similarly, moving the 1 up or down.
After the 1 has moved a little horizontally and a little vertically, ] calls
setTimeout() to call the function again in a tenth of a second (remember,
there are 1,000 milliseconds in a second, so 100 milliseconds is one-tenth
of a second). After 100 milliseconds pass, the moveNumber() function is called
again, moving the number a little more and again setting setTimeout(). The 1
keeps wandering until the visitor clicks the link in _, clearing the last timeout
set and ending the cycle.
Changing the Contents of a div
The contents of a div can be changed by setting the div’s innerHTML property.
As the name of the property implies, innerHTML is the HTML inside a div. For
example, Figure 13-11 shows a web page with a brainteaser—find all the Fs in
the text.
In the HTML, the block of text is
contained in a div. Clicking on the link
makes the Fs bigger by replacing the
contents of the div with a string of
HTML that displays the same text,
but with larger Fs. Figure 13-12 shows
the code.
The JavaScript in Figure 13-12 should
look very familiar to you by now. Line Z
creates a div called myDiv,X sets the vari-
able theDiv to point to myDiv, and Y changes
the innerHTML of that div to a new string
containing a block of HTML. Changing
the innerHTML of the div changes its con-
tents, replacing the original HTML with
the HTML in the string.
Figure 13-11: Find all the Fs
in this text.
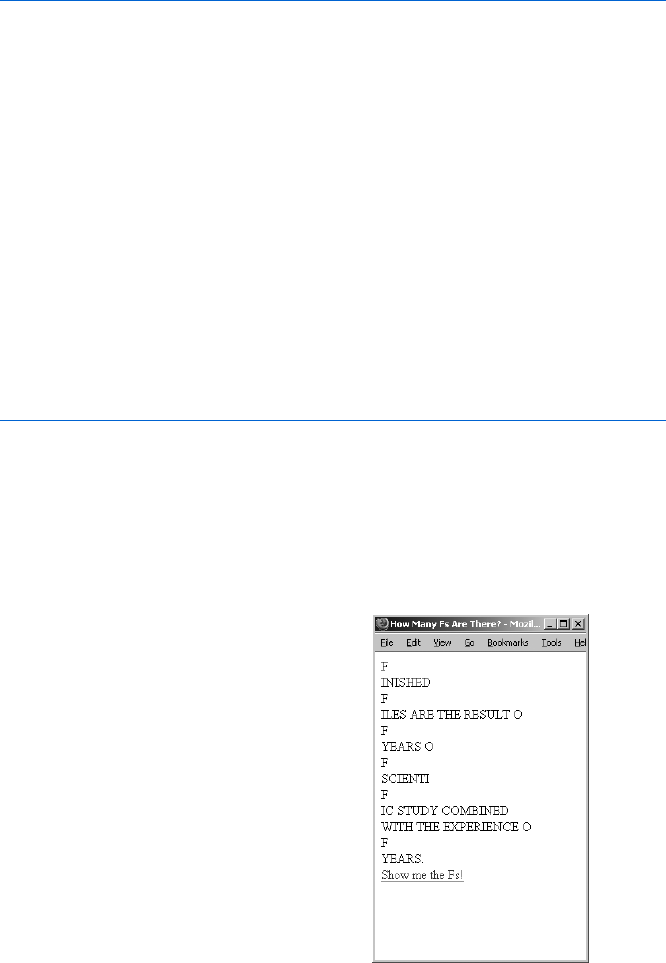
242 Chapter 13
<html><head><title>How Many Fs Are There?</title>
<script type = "text/javascript">
<!-- hide me from older browsers
function swapText() {
X var theDiv = document.getElementById("myDiv");
Y theDiv.innerHTML = "<font size='+3'>F</font>INISHED <font size='+3'>F</
font>ILES ARE THE RESULT O<font size='+3'>F</font> YEARS O<font size='+3'>F</
font> SCIENTI<font size='+3'>F</font>IC STUDY COMBINED WITH THE EXPERIENCE
O<font size='+3'>F</font> YEARS.";
}
// show me -->
</script>
<body>
Z <div id = "myDiv" style = "width:200;height:100">
FINISHED FILES ARE THE RESULT OF YEARS OF SCIENTIFIC STUDY COMBINED WITH
THE EXPERIENCE OF YEARS.
</div>
<a href = "#" onClick = "swapText(); return false;">Show me the Fs!</a>
</body>
</html>
Figure 13-12: Changing the innerHTML property of a div
spans and getElementsByTagName()
If each F were in a div of its own, this JavaScript could be rewritten so that
clicking an individual F would make it bigger. Unfortunately, browsers insert
line breaks before and after each
div, so the text would look like
Figure 13-13. To mark a bit of
HTML without introducing line
breaks, use the <span> tag. A span
is an HTML element that differs
from a div only in that it doesn’t
create line breaks.
Figure 13-14 shows how
to use spans. It also introduces
the built-in JavaScript method
document.getElementsByTagName(),
which returns an array of all the
HTML elements of a given kind
on the web page.
Figure 13-13: Putting Fs inside
<div> tags

Dynamic HTML 243
<html><head><title>How Many Fs Are There?</title>
<script type = "text/javascript">
<!-- hide me from older browsers
X function makeBig(theSpan) {
var spanText = theSpan.innerHTML;
var newText = "<font size='+3'>" + spanText + "</font>";
theSpan.innerHTML = newText;
}
function countBig(correctNumber) {
Yvar theSpans = document.getElementsByTagName("span");
var count = 0;
for (var loop = 0; loop < theSpans.length; loop++) {
[if ((theSpans[loop].innerHTML.indexOf("FONT") != -1) ||
(theSpans[loop].innerHTML.indexOf("font") != -1)) {
\count++;
}
}
]if (count == correctNumber) {
alert("Congratulations! You got all " + correctNumber + " of them!");
} else {
var missed = correctNumber - count;
alert("Not yet...there are still " + missed + " left.");
}
}
// show me -->
</script>
<body>
<h1>Click every F you see below.</h1>
<div style = "width:200;height:100">
^ <span onClick = "makeBig(this); return false;">F</span>INISHED <span
onClick = "makeBig(this); return false;">F</span>ILES ARE THE RESULT O<span
onClick = "makeBig(this); return false;">F</span> YEARS O<span
onClick = "makeBig(this); return false;">F</span> SCIENTI<span
onClick = "makeBig(this); return false;">F</span>IC STUDY COMBINED WITH THE
EXPERIENCE O<span onClick = "makeBig(this); return false;">F</span> YEARS.
</div>
_ <a href = "#" onClick = "countBig(6); return false;">I'm done!</a>
</body>
</html>
Figure 13-14: Using <span> tags and getElementsByTagName()
The script in Figure 13-14 combines much of what has been covered in
this book up until now. Line ^ shows how onClick can be used inside a <span>
tag to call some JavaScript. Notice that the built-in JavaScript variable this is
passed into the makeBig() function. Recall from the chapter on forms and
form elements that the word this stands for the element in which it occurs.
In ^,this means this <span> tag.

244 Chapter 13
Clicking the F inside the span calls the makeBig() function, which starts
in X. The makeBig() function loads the innerHTML of the span into a variable
called spanText. The function then creates a new string called newText, which
is the old text surrounded by beginning and ending <font> tags. Next, the
function sets the span’s innerHTML to this new text. The body of the function
makeBig() could have been written as just one line like this:
theSpan.innerHTML = "<font size='+3'"> + theSpan.innerHTML + "</font>";
but breaking it up into three lines makes the function easier to understand.
The tricky part of the JavaScript comes when the user thinks all the Fs
have been found and clicks the link in _. This calls the countBig() function,
which takes the correct answer as a parameter.
The first line in the body of countBig() calls the built-in JavaScript
method document.getElementsByTagName() to get an array containing all the
span elements on the page (Y). Line Z loops over this array. For each span
in the array, [checks to see if the innerHTML of the span includes a <font>
tag. Notice that [ checks for both the word font and its capitalized version,
FONT. This is because some browsers, like Internet Explorer, automatically
capitalize all HTML tags when they are accessed using innerHTML, whereas
other browsers, like Firefox, automatically lowercase HTML tag elements.
I’ll talk more about cross-browser issues in the next section.
Getting back to the code, if the innerHTML of the <span> tag being consid-
ered does have a <font> tag, the count variable is increased by one. After the
loop has inspected all the <span> tags, ] checks to see if the number of spans
containing tags is correct. If so, the user gets a congratulatory message. If
not, an alert comes up telling the user how many more Fs need to be found.
This script employs many of the techniques and features we’ve discussed
in this book. Pat yourself on the back if you’ve understood the whole thing.
Advanced DOM Techniques
So far we’ve seen how to use JavaScript to change the HTML in a div and a
span, and how to hide, show, and move HTML elements by changing various
attributes of their style objects. We’ve also seen how to get access to HTML
elements using getElementById() and getElementsByTagName(). All of these
techniques make a web page dynamic by altering HTML elements that are
already on the page. This section discusses a few ways to dynamically add
new HTML elements to a web page.
Actually, we’ve already added new HTML elements to a web page
by putting them in the innerHTML property of a span or div. The makeBig()
function in Figure 13-14, for example, added a new <font> tag to the page.
Often, injecting HTML into your web pages using innerHTML is the easiest
and fastest way to add new HTML tags to your page.
Because it’s quick and easy, most people use innerHTML when manipulat-
ing the contents of their web pages. However, innerHTML is not actually part of
the official World Wide Web Consortium (W3C) standard for manipulating

Dynamic HTML 245
HTML documents, so different browsers tend to support it slightly differently.
We’ve already seen one inconsistency—some browsers capitalize HTML
element names, and others lowercase the HTML element names. Another
inconsistency occurs when a user types contents into the text element of a
form. If the innerHTML of the form element is checked, Microsoft browsers
will include the text typed by the users, but Firefox, Opera, and other non-
Microsoft browsers will not include that text.
The standard, W3C-compliant way to add and delete HTML elements
from a web page uses DOM methods. These methods work not only in
JavaScript, but in other programming languages as well. This will become
important when you’re working in Ajax, as you’ll see in the chapters that
follow. If you’re not planning on doing anything with Ajax and innerHTML does
everything you want, you can comfortably skip to the section on drop-down
menus. If you’re ready to embrace the world of the W3C DOM, read on.
W3C DOM Overview
As you learned in Chapter 4, the W3C DOM defines the hierarchical structure
of a web page. According to this model, a web page is a constructed from
nodes, which are organized into a tree. Some of the nodes contain HTML
elements, like <br> and <div>; others contain text. The top node contains the
top-level HTML element, HTML. The HTML element node has two child nodes—
the node containing the HEAD element and the node containing the BODY
element. The BODY node might have several child nodes, some of which
represent HTML tags on your page, such as <img> tags or hyperlinks. Some
of these tag nodes will have children of their own. For example, a form
element might have two text input nodes, each of which would be a child
of the form node.
Creating and Adding Elements Using the W3C DOM
Creating a new HTML element node with the W3C DOM is pretty simple:
var newDiv = document.createElement("div");
This line creates a new div, but it doesn’t put it into a web page. Note that
this new div also lacks an id. If we were to stick it into a web page, there would
be no way to refer to it. Before putting it into the web page, we should give
our new div an id:
newDiv.setAttribute("id","newDiv");
Finally, it’s time to stick the div into the web page. Let’s put the div at
the end of the web page using the DOM’s appendChild() method. To use this
method, you first have to figure out which node you want your new node to
have as a parent. If we want the node to go at the end of the page, the parent
will be the body of the document. The appendChild() method will add our new

246 Chapter 13
node to the end of the list of the parent’s children. If our parent is the body of
the document, that puts the div at the end of the document. First we have to
get the <body> tag.
var bodyTags = document.getElementsByTagName("body");
var thisBody = bodyTags[0];
Remember that getElementsByTagName() returns a list of elements. That’s
why you need the second line to pull the <body> tag out of the list.
Once you’ve set a variable to point to the <body> tag, add the new div to
the list of the <body> tag’s children using appendChild():
thisBody.appendChild(newDiv);
Now we have a new div inserted at the end of the web page.
Adding Text to an Element
The above lines will add the following HTML to the end of a web page:
<div id = "newDiv"></div>. You could use the new div’s innerHTML property to
put some text in there, but that would not be the W3C-compliant way. The
standard says that you must first create a text node, and then make that text
node a child of the div. Here’s how to do it:
var textNode = document.createTextNode("I'm your new div.");
newDiv.appendChild(textNode);
Figure 13-15 presents a JavaScript that inserts a new div containing the
text I’m your new div at the end of a web page.
<html><head><title>Inserting a div</title>
<script type = "text/javascript">
function addDiv() {
var newDiv = document.createElement("div");
newDiv.setAttribute("id","newDiv");
var bodyTags = document.getElementsByTagName("body");
var thisBody = bodyTags[0];
thisBody.appendChild(newDiv);
var textNode = document.createTextNode("I'm your new div.");
newDiv.appendChild(textNode);
}
</script>
</head>
<body>
<a href = "#" onClick = "addDiv(); return false;">Add the new div.</a>
</body>
</html>
Figure 13-15: Adding a div to the end of a page
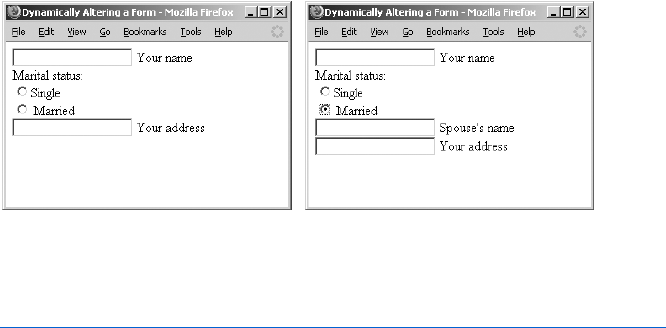
Dynamic HTML 247
Adding Elements in the Middle of a Page and Removing Elements
In the last example, the div was added to the end of the web page, because
the appendChild() method makes whatever is being inserted into the page the
last child of the parent. The insertBefore() method is used when you want to
insert a new element into the middle of a set of elements. Figure 13-16 shows
a web page that asks for some standard information about a person. As seen
at the right of the figure, clicking the Married radio button inserts a new text
element into the middle of the form, which asks for the spouse’s name.
Figure 13-16: Clicking a radio button (left) makes a new form element appear (right).
The JavaScript in Figure 13-17 shows how you might create this page
using DOM methods.
<html><head><title>Dynamically Altering a Form</title>
<script type = "text/javascript">
<!-- hide me from older browsers
function addSpouse(theRadio) {
Xif (document.getElementById("newDiv") == null) {
Yvar newDiv = document.createElement("div");
newDiv.setAttribute("id","newDiv");
Zvar newInput = document.createElement("input");
newInput.setAttribute("type","text");
newInput.setAttribute("id","spouseText");
[var nameText = document.createTextNode(" Spouse's name");
\newDiv.appendChild(newInput);
newDiv.appendChild(nameText);
newDiv.appendChild(document.createElement("br"));
var theForm = document.getElementById("myForm");
var theAddress = document.getElementById("address");
]theForm.insertBefore(newDiv, theAddress);
}
}
function removeSpouse(theRadio) {
^if (document.getElementById("newDiv") != null) {
var newDiv = document.getElementById("newDiv");

248 Chapter 13
var theForm = document.getElementById("myForm");
_myForm.removeChild(newDiv);
}
}
// show me -->
</script>
</head>
<body>
<form id = "myForm">
<input type = "text" id = "name"> Your name<br>
Marital status:<br>
` <input type = "radio" onClick = "removeSpouse(this);" name = "ms">Single <br>
a <input type = "radio" onClick = "addSpouse(this);" name = "ms"> Married<br>
<input type = "text" id = "address"> Your address <br>
</form>
</body>
</html>
Figure 13-17: Adding and removing elements with removeChild() and insertBefore()
In this script, the new form element appears just before the form
element that asks for an address. Clicking the Single radio button removes
that form element. Because the new form element also has a text string that
says Spouse's name, we’re going to put the form element and the text into a
div. That will make it easier to remove both of them if the user clicks Single.
The fun begins in a, which calls the addSpouse() function. This function
first checks to see if there’s already something on the page with an id of newDiv
(X). If there is, we don’t want to add another one. If there isn’t something
on the page with an id of newDiv, looking for the element will return the
JavaScript built-in term null. If that is the case, Y creates a new div and the
next line sets its id to newDiv. Then Z creates a new text input field, and [
creates a new text node. The three lines starting in \ insert the new text
input field, the new text node, and a <br> tag into the div. After setting the
variable theForm to point to the form, and the variable theAddress to point to
the form element that asks for an address, ] inserts the new div into the
form before the address element. Notice that the insertBefore() method
takes two parameters: the new element to insert and the element before
which to insert it. Note also that these two elements need to have the same
parent, which in this case is theForm.
Removing the div when a user clicks Single (`) is much easier. The
removeSpouse() function first makes sure there’s something to remove (^).
If there is something with an id of newDiv, the function sets newDiv to point
to the div and theForm to point to the form, and then it removes the div
from the form using the removeChild() method (_).
Additional DOM Details
You now know most of what you’ll need to manipulate the DOM in the
official way. There are a few additional details you may find helpful.
Dynamic HTML 249
Node Properties
DOM nodes have many interesting properties. Each of the properties listed
below can be accessed with this syntax: node.propertyName.
Table 13-1 provides a list of node properties.
Many of these properties will be discussed in Chapter 14.
Looping Through Lists
In Figure 13-14 we used getElementsByTagName() to get an array of all the
spans, and then we used normal array indexing to access each span (e.g.,
theSpans[0]). With getElementsByTagName() you can also loop through the
elements using the item() method. Here is an example:
var myElements = document.getElementsByTagName("span");
var firstElement = myElements.item(0);
As with arrays, the first item in the list of elements is numbered 0. You
may also use the item() method with the list returned by the childNodes attrib-
ute described above.
Cloning and Replacing Nodes
Sometimes you want to change many children of a node, but you don’t want
the changes to be observable. For example, you might want to rearrange the
order of rows in a table, but only show users the rearranged table, and not the
rows as they are moving around. A good way to do this is to clone the node
that represents the table, make the changes on the clone, and then replace
the original table with the cloned one.
To clone a node, use the cloneNode() method:
var myTable = document.getElementById("myTable");
var cloneTable = myTable.cloneNode(true);
Table 13-1:
Node Properties
Node Description
parentNode Parent node of the node
childNodes List of the children of the node
firstChild First child of the node
lastchild Last child of the node
nextSibling Next node, which is a child of this node’s parent
previousSibling Previous node, which is a child of this node’s parent
nodeValue Text of the node if it’s a text node, null otherwise
nodeType Elements are type 1, attributes are type 2, text nodes are type 3
nodeName Name of the attribute or node (h1,br, or form, for example); some
browsers capitalize these names (BR,H1)
attributes Array of attributes of this node

250 Chapter 13
The word true inside the cloneNode() method means that you want to
clone the node and all its children. In this case it would be the table and all
the contents of the table. If for some reason you didn’t want to make a copy
of the children, you’d put false there.
Once you’ve made your changes, you can replace the original table
with the new one using the replaceNode() method. Like insertBefore() and
removeChild(), this method is called by the parent of the nodes to be replaced.
Given the myTable and cloneTable variables defined above, you could do this:
var tableParent = myTable.parentNode;
tableParent.replaceChild(cloneTable, myTable);
Manipulating a Page Using the DOM
As mentioned earlier, you could do most of the things described in this
section with creative use of innerHTML. However, sometimes dealing with the
complex strings needed to get innerHTML to be what you want can be difficult.
In these cases, the DOM techniques are very helpful. When we get to the
chapters on Ajax, you’ll see even more applications of the DOM manipu-
lation techniques.
Fancy Event Handling
Dynamic web pages call for dynamic reactions to user actions. We’ve discussed
how to write JavaScript that reacts when users click links, buttons, and form
elements. Now it’s time to learn about more complicated event handling:
how to accurately read the keyboard and the mouse.
The event Object
Whenever an event occurs, an event object is generated. The nature of this
object depends on the event which generated it. To access the event object,
simply pass the keyword event to whichever function is handling the event:
<a href = "#" onClick = "handleClick(event); return false; ">Click me!</a>.
The event object is most frequently accessed when you want to know
which key a user has pressed, or precisely where the mouse is.
Keyboard Events
There are two main keyboard event handlers, the functions of which are
pretty obvious: onKeyDown and onKeyUp. Triggering either of these event
handlers creates an event object that stores which key has been pressed
(or unpressed) and whether or not any special keys (ALT,CTRL, or SHIFT)
were pressed at the same time. The relevant properties of the event object
appear in Table 13-2.

Dynamic HTML 251
Figure 13-18 is short script that demonstrates how to use the event object
to determine which key a user has pressed while in a text input field.
<html><head><title>Demonstrating Keyboard Events</title>
<script type = "text/javascript">
<!-- hide me from older browsers
function displayEvent(evt) {
var type = evt.type;
Xvar code = evt.keyCode;
Yvar theChar = String.fromCharCode(code);
var alt = evt.altKey;
var ctrl = evt.ctrlKey;
var shift = evt.shiftKey;
Zvar displayString = "event type: " + type + "; key code: " + code +
", which is the character " + theChar +
"; ALT, CTRL, and SHIFT were: " +
alt + ", " + ctrl + ", and " + shift + "\n\n";
[if ((code >= 65) && (code <= 90)) {
document.getElementById("showEvents").value += displayString;
}
}
// show me -->
</script>
</head>
<body>
<form>
Type here: <input type = "text"
\onKeyDown = "displayEvent(event);" onKeyUp = "displayEvent(event);"><br>
See the events here: <textarea id = "showEvents" cols = "80" rows = "20">
</textarea>
</form>
</body>
</html>
Figure 13-18: Demonstrating keyboard events
Although the script in Figure 13-18 is simple, there are some subtleties.
First, whenever a user types anything while in the text field, the act of pressing
the key down creates one event, and the act of releasing the key creates
another event. These events are captured by the event handlers in \. In either
case, the displayEvent() function is called. This function creates variables for
each of the event’s properties, combines them into a string, and then puts the
Table 13-2:
Properties for Keyboard Events
Property Type Description
altKey boolean True if the ALT key was down when this key was pressed
ctrlKey boolean True if the CTRL key was down when this key was pressed
shiftKey boolean True if the SHIFT key was down when this key was pressed
keyCode integer The Unicode decimal value for the key that was pressed; use
String.fromCharChode(keyCode) to convert this to a string
Type string The type of event—keyup or keydown, for example
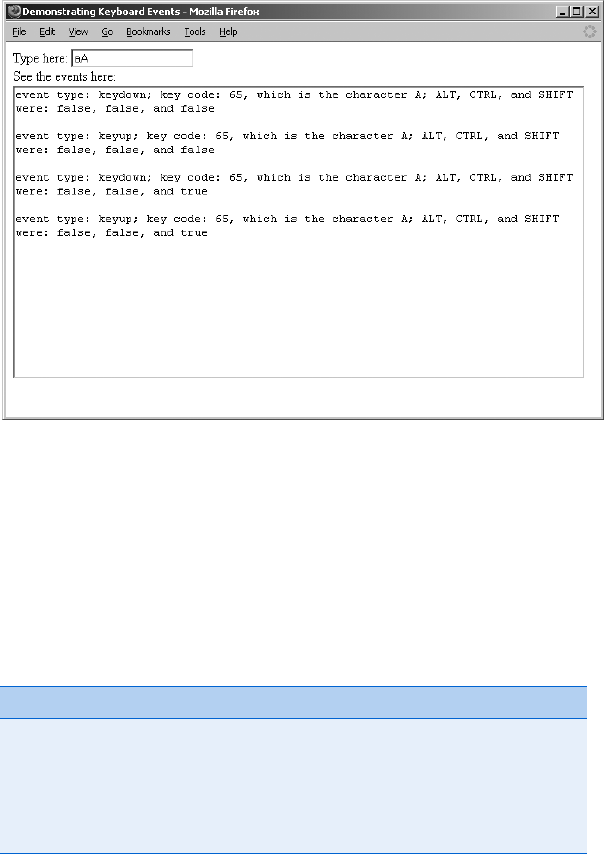
252 Chapter 13
resulting string into the textarea with the id of showEvents. The most interesting
lines in this function are X, which gets a number representing the character
being pressed, and Y, which converts that number into an actual character.
After those lines are executed, Z creates a string representing what happened
in the event and [ puts that string in the text area if the key being pressed is
a letter (letters have character code numbers between 65 and 90).
Figure 13-19 shows what happens when a and then A are typed into the
text field. Notice that in both cases, the characterCode is 65, and the resulting
character is A. In order to determine whether the user has entered a capital
or lowercase letter, the shiftKey property of the event must be examined.
Figure 13-19: Typing a and A into the Figure 13-18 script
Mouse Events
Mouse events have their own properties. Unfortunately, some cross-browser
differences complicate accessing the position of the mouse and determining
which mouse button was clicked. Table 13-3 shows the properties of mouse
events, and it gives some details about how to deal with cross-browser
differences.
Table 13-3:
Properties of Mouse Events
Property Description
button Equals 2 if it’s a right-click—otherwise, it depends on the browser
clientX Internet Explorer’s X position for the mouse
clientY Internet Explorer’s Y position for the mouse
pageX Most other browsers’ X position for the mouse
pageY Most other browsers’ Y position for the mouse

Dynamic HTML 253
As you can see from Table 13-3, all the properties of mouse events are
browser dependent. The button property, for example, describes which button
was clicked when an onMouseDown or onMouseUp event happened. However, the
meaning of the numbers provided by the button property depend on the
browser being used. In Internet Explorer, 1 means the left button was clicked,
2 means the right button, and 4 means the middle button. In most other
browsers, 0 means the left button, 1 means the middle button, and 2 means
the right button. Because 2 means the right button was clicked in both cases
and many people don’t have a middle button on their mouse, it is often safe to
see if the button property of the event was 2 and call it a left-click if it was not.
The position of the mouse is a bit trickier. Browsers other than Internet
Explorer generally use an event’s pageX and pageY properties to give a number
representing the X and Y positions (in pixels) of the event relative to the
top-left corner of the browser window. These two properties take into con-
sideration scrolling a window. If a window is 10,000 pixels long and the user
has scrolled down to the very bottom, the pageY property will be around
10,000 at the bottom of the window. Internet Explorer, on the other hand,
uses properties named clientX and clientY. These properties do not take
scrolling into consideration, so to use them, you should add numbers repre-
senting how far down and to the left the browser has been scrolled. Those
numbers are available as document.body.scrollTop and document.body.scrollLeft.
Figure 13-20 presents a script that determines the X and Y positions of a
mouse and puts the results in a textarea.
<html><head><title>Checking Mouse Position</title>
<script type = "text/javascript">
<!-- hide me from older browsers
function displayEvent(evt)
{
var x = 0;
var y = 0;
Xif (evt.pageX) {
Yx = evt.pageX;
y = evt.pageY;
Z} else if (evt.clientX) {
[x = evt.clientX + document.body.scrollLeft;
y = evt.clientY + document.body.scrollTop;
}
\document.getElementById("results").value += x + " " + y + "\n";
}
// show me -->
</script>
</head>
<body>
<div id = "box" style = "height:100px;width:100px;border:1px black solid;"
] onMouseMove = "displayEvent(event);"
^ onMouseOver = "document.getElementById('results').value='';"></div>
<form><textarea id = "results" cols = "80" rows = "20"></textarea></form>
</body>
</html>
Figure 13-20: Detecting the position of the mouse

254 Chapter 13
In Figure 13-20, moving inside the div calls the displayEvent() function
(]), and moving the mouse onto the div clears the textarea that stores all
the mouse information collected (^). The displayEvent() function first checks
to see if the browser knows about the pageX property of the event (X). If so it
uses pageX to get the x coordinate of the mouse, relative to the top-left corner
of the browser window (Y) and pageY to get the y coordinate. If the browser
does not know about the pageX property but does know about the clientX
property (Z), it uses clientX and clientY. Notice in [ that the amount that
the browser has been scrolled to the right or down must be added to the
clientX and clientY property to account for scrolled windows. The last line
in the function (\) adds the appropriate information to the textarea with
the id of results.
Adding Event Handlers Using JavaScript
Throughout this book, whenever we have wanted to trigger an event based
on a user’s behavior, we have put an event handler inside the triggering
element. For example, in Chapter 4, when we wanted an alert box to pop up
when a user clicked a link, we put an onClick event inside the link:
<a href = "#" onClick = "alert('Thanks!');">Click me</a>
Putting event handlers inside the elements that trigger the events can
cause some problems:
zDoing so puts JavaScript inside your HTML elements rather than inside
<script> tags. This means that someone trying to understand your JavaScript
(and that person may be you) will have to hunt around in the HTML to
find all the various bits of JavaScript on the page.
zSometimes you want a JavaScript function to be triggered by many ele-
ments. For example, if you have 20 checkboxes, each of which has an
onClick, you will need to stick the same code (onClick = "doFunction();")
in 20 different places. If the function’s name changes, or if you decide
to add a parameter to the function, you will need to change the page in
20 different places.
zYou may want an event handler to be invoked in some cases, but not in
others. In the case of writing drag-and-drop code, a given object, such as
adiv, should only be moved if the mouse has been clicked while on that
object. In this case, the object’s onMouseMove event should only trigger a
function when the appropriate object has been clicked.
For these reasons, modern browsers provide ways for JavaScript to attach
functions to the event handlers of objects. The template for this is:
element.handler = function;

Dynamic HTML 255
For example, to call a function named doAlert() whenever a div with
the id of myDiv is clicked, use the following line:
document.getElementById("myDiv").onclick = doAlert;
This line is unusual for two reasons. First, the event handler (onClick)
is all lowercase. This is a requirement when assigning a function to a handler
in this way. Second, notice that the function does not have parentheses after
it. This means that no parameters may be passed to this function. However,
a function called in this way does have access to the event that called the
function, and it turns out that the event is almost always the only parameter
you need.
As with all things related to events, there are some browser incompati-
bilities involved with getting access to the event object. In Internet Explorer,
the event is automatically stored in a variable named event. To access the
event, just use the event variable:
function doAlert() {
myEvent = event;
// do something with the myEvent variable
alert("Got the event!");
}
In most other browsers, the event is automatically passed as a parameter
to the function being called. This means that the function being called,
doAlert() in the example given, needs to have a parameter in its definition:
function doAlert(myEvent) {
// do something with the myEvent variable
alert("Got the event!");
}
Once the event object has been accessed inside a function, it is sometimes
helpful to retrieve information about the object that created the event. To do
this, Internet Explorer uses an event object property called srcElement. Most
other browsers use a property named target.
Figure 13-21 puts all this information together in a cross-browser script
for assigning functions to events using JavaScript.
<html><head><title>Cross-Browser Event Handling</title>
<script type = "text/javascript">
<!-- hide me from older browsers
function attachHandlers() {
Xvar theElements = document.getElementById("myForm").childNodes;
for (var loop = 0; loop < theElements.length; loop++) {
Y if ((theElements[loop].nodeName == "input") ||
(theElements[loop].nodeName == "INPUT")) {
Z theElements[loop].onclick = doAlert;
}
}

256 Chapter 13
}
[ function doAlert(evt) {
var thisBox;
\if (!evt) {
evt = event;
thisBox = evt.srcElement;
]} else {
thisBox = evt.target;
}
alert('You clicked on ' + thisBox.name);
}
// show me -->
</script>
</head>
^ <body onLoad = "attachHandlers();">
<form id = "myForm">
_ <input type = "checkbox" name = "1"><input type = "checkbox" name = "2">
<input type = "checkbox" name = "3"><br>
<input type = "checkbox" name = "4"><input type = "checkbox" name = "5">
<input type = "checkbox" name = "6"><br>
</form>
</body>
</html>
Figure 13-21: Cross-browser script for attaching functions to event handlers
The script in Figure 13-21 creates a set of six checkboxes, each with a
different name. Clicking any of these checkboxes results in an alert box pro-
viding the name of the checkbox that was just clicked. Notice that the HTML
describing the checkboxes contains no onClick handlers (_). This is because
the handlers are assigned using JavaScript. The onLoad handler inside the
<body> tag (^) triggers the function which assigns the handlers. The function
is called by the onLoad handler because an HTML element cannot have a func-
tion attached to its handler until the web browser knows about the element.
If a piece of JavaScript tries to attach a handler to a form element that has
not yet been processed by the browser, an error will result. For this reason,
it’s best to wait until all the elements have been loaded before assigning
functions to their handlers.
The attachHandlers() function has several interesting aspects. First, it uses
the DOM methods covered earlier in the chapter to access the checkboxes.
These checkboxes are child elements of the form element, and so they are
accessible as the childNodes of the form (X). The childNodes property returns
an array, which is then looped through. Each time through the loop, the
JavaScript checks the next element in the array to see if it is an input element.
Notice that both the strings INPUT and input are checked. This is because some
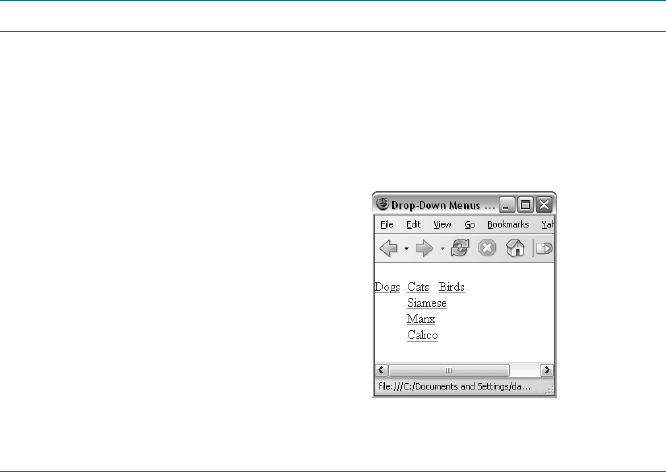
Dynamic HTML 257
browsers capitalize element names and other browsers don’t. For each input
element found, Z attaches the doAlert() function to the element’s onclick
handler.
Once the handlers have been attached, the page waits until a checkbox is
clicked. When that happens, the onclick event is triggered, and the doAlert()
function is called. Notice that the definition of doAlert() contains a parameter
([). In Firefox and most other browsers, this parameter will be filled with
an event object that contains information about the event that caused the
doAlert() function to be called. If that parameter is not filled in, it means the
user is most likely using Internet Explorer. In this case, \ is true. The evt
variable is set to the Internet Explorer variable event, and thisBox is set to the
checkbox that was clicked using Internet Explorer’s srcElement property. If
Firefox, or some other browser was used instead, the function’s evt parameter
would already contain the event object, and we’d only need to set thisBox to
the checkbox that was clicked by accessing the target property (]).
One final note about assigning functions to event handlers using
JavaScript: If for some reason you want to remove an event handler from
an object, simply set the handler’s value to null. Here’s an example:
document.getElementById("myDiv").onclick = null;
Drop-Down Menus
I’ll close this chapter by showing how to build a basic drop-down menu
with DHTML. The menu shown in Figure 13-22 has three links: Dogs,
Cats, and Birds. Mousing over Cats
<html><head><title>Drop-Down Menus</title>
<script type = "text/javascript">
<!-- hide me from older browsers
X var div_array = new Array("divOne", "divTwo", "divThree");
function changeDiv(the_div, the_change)
{
Y document.getElementById(the_div).style.visibility = the_change;
causes a submenu to drop down with
the names of several cat breeds. Click-
ing one of those links sends the browser
to a web page about that kind of cat.
Figure 13-23 shows the code
that drives this drop-down menu. I’ve
already covered everything you must
know to understand this code, so take
a look at it, and see if you can figure
out how it works before reading my
explanation. Figure 13-22: A drop-down menu

258 Chapter 13
}
function closeAll()
{
Z for (var loop = 0; loop < div_array.length; loop++)
{
changeDiv(div_array[loop], "hidden");
}
}
// show me -->
</script>
</head>
<body>
<div id = "top1" style = "position:absolute; top:20; left:0; z-index:1">
[ <a href = "#"
onMouseOver = "closeAll(); changeDiv('divOne','visible');">Dogs</a>
</div>
<div id = "top2" style = "position:absolute; top:20; left:40; z-index:1">
<a href = "#"
onMouseOver = "closeAll(); changeDiv('divTwo','visible');">Cats</a>
</div>
<div id = "top3" style = "position:absolute; top:20; left:80; z-index:1">
<a href = "#"
onMouseOver = "closeAll(); changeDiv('divThree','visible');">Birds</a>
</div>
<div id = "rightBorder" style = "position:absolute; top:20; left:50;">
<a href = "#"
onMouseOver = "closeAll();"><img src = "long_spacer.gif" border = 0></a>
</div>
<div id = "bottomBorder" style = "position:absolute; top:80; left:0;">
\ <a href = "#"
onMouseOver = "closeAll();"><img src = "long_spacer.gif" border = 0></a>
</div>
] <div id = "divOne" style =
"position:absolute; top:40; left:0; visibility:hidden;">
<a href = "#">Collie</a><br>
<a href = "#">Puli</a><br>
<a href = "#">Corgie</a><br>
</div>
<div id = "divTwo" style =
"position:absolute; top:40; left:80; visibility:hidden">
<a href = "#">Siamese</a><br>
<a href = "#">Manx</a><br>
<a href = "#">Calico</a><br>
</div>
<div id = "divThree" style =
"position:absolute; top:60; left:80; visibility:hidden">
<a href = "#">Parakeet</a><br>
<a href = "#">Finch</a><br>
<a href = "#">Canary</a><br>
</div>
</body>
</html>
Figure 13-23: A basic hierarchical menu
Dynamic HTML 259
Line-by-Line Analysis of Figure 13-23
A drop-down menu has a div for each menu option. The nine divs in
Figure 13-23 include one div for each top-level menu element ([), one for
each submenu (]), one for the bottom border, and one for the right border.
Each time a visitor mouses over one of the main menu options, only the sub-
menu matching the link most recently moused over is shown. If the visitor
mouses over Cats, making the list of cat breeds visible, and then mouses
over Dogs, the closeAll() function hides the Cats submenu and changeDiv()
displays the Dogs submenu. Mousing over the bottom or right border closes
all the submenus.
The closeAll() Function
The closeAll() function loops through the array of divs defined in X. Each
time through the loop in Z,closeAll() calls the changeDiv() function to hide
one of the divs.
The changeDiv() Function
The changeDiv() function takes two parameters: the name of a div to change,
and whether to make the div hidden or visible. Line Y changes the visibility
of the specified div to visible or hidden, depending on the value of the sec-
ond parameter of changeDiv().
The Borders
The menu’s bottom border is a long transparent (and therefore invisible)
GIF (\). The code in \ dictates that mousing over this invisible GIF hides
all submenus. This GIF and the blank GIFs on the right of the menus make
sure the submenu vanishes if the visitor’s mouse leaves the menu area
completely.
Figure 13-23 offers a basic example of how you might implement a hier-
archical menu. For more complete versions, check out the menu and naviga-
tion section of Dynamic Drive’s website. Fortune magazine’s website used this
one: http://www.dynamicdrive.com/dynamicindex1/dropmenuindex.htm.
Summary
DHTML is the topic of several excellent books—what we’ve discussed here
should just whet your appetite. But you have learned a few DHTML basics,
including the following:
zHow to use divs to create blocks of HTML
zHow to add styles to divs
zHow to make divs, along with the HTML they contain, visible or invisible
zHow to move divs
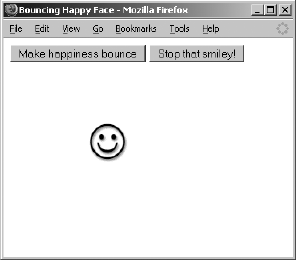
260 Chapter 13
zHow to animate divs with timed loops
zHow to use DOM methods to alter HTML documents
zHow to read keyboard and mouse events
zHow to create a basic hierarchical menu
If you understood all that, you shouldn’t have any problem with the
assignment.
Assignment
Create a DHTML screensaver like the one shown in Figure 13-24. The smiley
face in the figure continually bounces around the screen. When it hits one of
the walls, it bounces off at a random angle. To make the smiley face move
diagonally, change its top and left positions in a timing loop. To get it to
bounce off a wall, make it change directions when it hits one side of the
screen. Remember, to make the smiley move right, you would add to its left
property, and to make it move left, you would subtract from its left property.
Figure 13-24: A screensaver created with
JavaScript

AJAX BASICS
Ajax (Asynchronous JavaScript and XML)
helps create web pages that act like desktop
applications. By combining DHTML with the
ability to download and display information from
a webserver while a user is still interacting with a web
page, Ajax puts an end to the old submit-and-wait cycle
common to most interactive websites.
If you’ve used Google Maps (http://maps.google.com), you’ve seen Ajax
in action. There are also Ajax versions of word processors, spreadsheets, and
other common applications. Like DHTML, Ajax is a complex topic and is the
focus of a number of books. However, with the JavaScript you’ve learned so
far, and a few other details, you will be well on your way to becoming a master
of Ajax.
This chapter introduces Ajax, including:
zAn overview of Ajax and the technologies it encompasses
zThe A in Ajax—Asynchronicity—and why you need it
zThe basic JavaScript you’ll need for Ajax
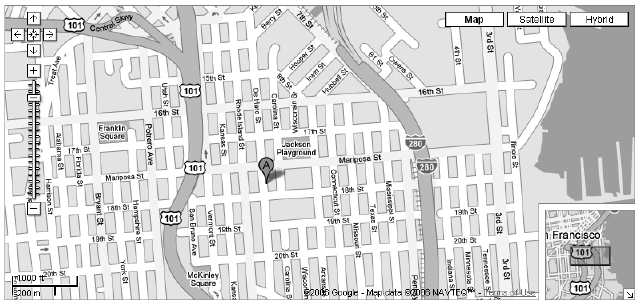
262 Chapter 14
zBrowser compatibility issues
zPotential pitfalls when using Ajax
zWhen to use Ajax and when to avoid it
zHow to set up a webserver and write server-side programs that
communicate with Ajax
This chapter tells only part of the Ajax story. In Chapter 15 you’ll learn
about the X in Ajax (which stands for the data transfer standard XML), and
how to read and navigate XML documents in JavaScript and use them in
Ajax applications.
A Real-World Example of Ajax
The best-known example of Ajax may be Google Maps (maps.google.com).
Figure 14-1 shows you the map which results from searching for the office of
No Starch Press. The map is very interactive; you can zoom in, zoom out, and
pan around without having to reload the page. A smaller map in the bottom-
right corner of the main map shows you the larger context of the map you’re
viewing. A blue box in the smaller map moves around as you pan across the
large map.
Figure 14-1: Google Maps
The map’s interface can mark places you ask about, such as No Starch
Press in Figure 14-1, and show directions between two points. For example,
Figure 14-2 shows the route between the office and El Metate, one of my
favorite Mexican restaurants in San Francisco. All of this interactivity involves
frequent trips to Google’s webservers without the user seeing the page
reload.

Ajax Basics 263
Figure 14-2: Getting directions with Google Maps
Introduction to Ajax
The term Ajax was coined by Jesse James Garrett1 to describe a general
approach to creating web applications. This approach involves the
following steps:
1. An event, such as a user moving the mouse or typing into an input field,
triggers one or more simultaneous requests to a webserver for more
information.
2. While the webserver is processing the requests, the web browser goes
about its business as usual, allowing the user to continue interacting with
the web page.
3. The result from each request appears once the webserver has processed
that request, and it is used to update the web page using the DHTML
techniques you learned in Chapter 13.
Figure 14-3 shows how Ajax works and how it differs from the traditional
style of communication between web browsers and webservers.
In the traditional style of browser-server communication, a user clicks
a link or submits a form in a web browser. This causes the browser to send a
request for information to a webserver: either the web page named in the
href attribute of the link, or the results of a program or script named in the
action attribute of the <form> tag. Once the request is sent, the browser sits
idly, usually animating an icon in the upper-right corner of the window, and
the user waits for the webserver to respond to the request. Eventually the
server responds, and the web page reloads, presenting new information.
1For Garrett’s original essay on Ajax, see http://adaptivepath.com/publications/essays/
archives/000385.php.
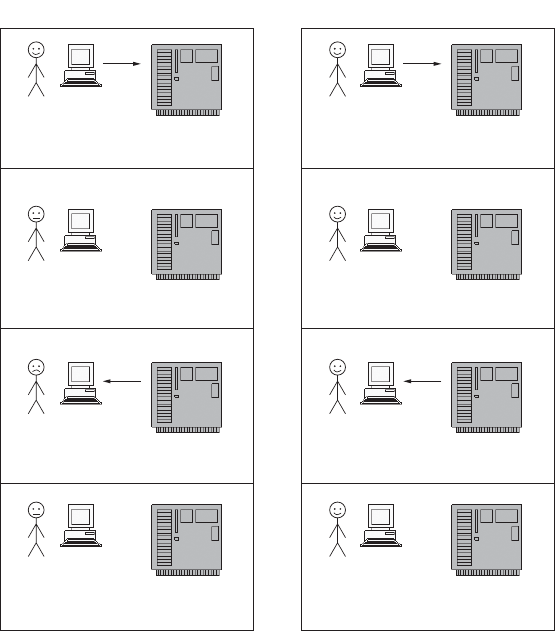
264 Chapter 14
Figure 14-3: Ajax versus traditional communications between a web browser
and a webserver
In the Ajax style, on the other hand, the browser makes a request from
the webserver without the user knowing about the request. The icon in the
browser’s corner doesn’t spin, and the browser can still be used. When
the response comes back from the webserver, the information displayed
in the web browser is updated without reloading the page. The entire process
occurs without causing a pause in the user’s interactions with the web page.
Asynchronicity—The A in Ajax
The A in Ajax stands for asynchronous, which in this context means something
like non-waiting. In asynchronous communication (the After Ajax part of Fig-
ure 14-3), the browser sends a request to a webserver and does not wait for
the reply. Many asynchronous requests can be made simultaneously, and the
browser deals with the responses as they come from the webserver. In contrast,
the traditional style of browser-server communication described in the Before
Ajax part of Figure 14-3 is synchronous; that is, the browser submits a request
to a webserver and then waits for a reply, unable to send any other requests
until the server responds.
Before Ajax After Ajax
User submits form to webserver. Moving off a text field sends
the server a secret message.
User waits while webserver thinks.
( . . . ) ( . . . )
The server thinks. Meanwhile, the
user keeps playing with the page.
Browser page reloads; user can continue. Page is updated, but doesn’t reload.
User has not stopped enjoying the page.
Server done; sends answer back.
!
Server done; sends answer back.
User is still uninterrupted.
!

Ajax Basics 265
An example of asynchronicity can be seen when you download a web
page and watch images appearing on the page at different times. The images
are requested simultaneously, and the browser displays them as it receives
them. While this sort of asynchronicity is built in to all but the oldest web
browsers, until recently JavaScript programmers couldn’t control asynch-
ronous communications with webservers. This all changed with the addition
of a new JavaScript object called the request object.
XML—The X in Ajax
The X in Ajax stands for XML. Since the publication of the XML standard in
1998, XML has become the format for sharing structured text-based infor-
mation between computers. As we will see, browsers have built-in ways for
dealing with information that has been formatted as XML documents. This,
and the ubiquity of XML documents, makes XML a great format for sharing
information between web browsers and webservers.
JavaScript—The J in Ajax
Ajax uses JavaScript to create requests, send them to webservers, parse the
XML results, and update web pages accordingly. The rest of the chapter
describes how to use JavaScript to create and send requests, and deal with
the asynchronous nature of the requests.
Creating and Sending Requests
The key to implementing the Ajax-style communication described above is the
JavaScript request object, which is built into Internet Explorer 6.0 and later,
Firefox 0.8 and later, Opera 7.54 and later, and Safari 1.2.2 and later. Your
JavaScript can use this request object to query a webserver for information,
store the returned information, and update the page when the server has
provided the information.
There are four steps involved in using JavaScript to make an Ajax request:
1. Creating a request object
2. Telling the request object where to send the request
3. Telling the object what to do when the request is answered
4. Telling the object to make the request
Creating a Request Object
The first step in making an Ajax request is to create a request object. Sadly,
there is a little bit of browser incompatibility involved in creating this object.
In Internet Explorer,2 a request object is created like this:
var request = new ActiveXObject("Microsoft.XMLHTTP");
2It’s possible to get slightly different versions of the request object from different versions of IE.
You only need to do this for fancy Ajax tricks that are beyond the scope of this discussion.

266 Chapter 14
In browsers other than Internet Explorer, do this:
var request = new XMLHttpRequest();
Putting these together gives this:
var request = null;
if (window.XMLHttpRequest) {
request = new XMLHttpRequest();
} else if (window.ActiveXObject) {
request = new ActiveXObject("Microsoft.XMLHTTP");
}
Once this block of JavaScript has executed, the request variable will contain
a request object.
Telling the Object Where to Send the Request
The request object will request information from some resource. Usually,
that resource will be the webserver that served up the web page containing
the JavaScript making the request. In this case, the request object needs to
know the URL of a program or script that lives on the webserver (known as
aserver-side program). This server-side program will process the request and
respond with the requested information. (Chapter 16 will focus more on
server-side Ajax.)
If you don’t have access to a webserver, you can instead ask the request
object to request a file that lives in the same directory as the file containing
the JavaScript making the call. To request a file, the request object simply
needs to know the file’s name, such as my_file.txt. Here’s how to tell a request
object to request the file named my_file.txt:
request.open("GET", "my_file.txt");
The open method of the request object takes two parameters. The first
parameter is the type of request you want to make (GET,POST,HEAD, and so on).
I’ll discuss the difference between these in Chapter 16; for now, we’ll only
use GET.
The second parameter is a string that tells the object where to send the
request. If the resource is password protected, the username and password
can be provided as two additional (optional) parameters, like so:
request.open("GET", "my_file.txt", username, password);
What to Do When the Request Is Answered
As described in the introduction, a key feature of Ajax is asynchronicity. After
a request object makes a request, the web browser is free to do whatever it
wants, which may involve creating more request objects to make additional
requests. Each request object is responsible for tracking the process of making

Ajax Basics 267
its request, waiting for a reply, and realizing when all the information provided
in response to the request has been completely downloaded. Your task as a
JavaScript coder is to tell each request object what it should do when the
requested resource has been completely downloaded, using a special prop-
erty of the request object called its readyState.
As the request object moves through its stages, from creation, to being
told about where to send the request, to sending the request, and so on, the
value of the readyState property changes. The property is called readyState
because each stage of a request object is called its state. Table 14-1 lists the
values the readyState property can take and what they mean.
The main trick in Ajax is to write a special function that is called whenever
the readyState property changes value. To define this function and make
sure it is called when the request object’s readyState property changes, do
something like this:
request.onreadystatechange = function() {
alert("the state has changed!");
}
There’s actually a lot happening in the code fragment above, so let’s go
slowly. The part of this JavaScript before the period refers to the request
object we’ve created. The part following the period, onreadystatechange, is an
event handler of the object.
We’ve seen plenty of event handlers before: onClick,onMouseOver, and
so on. These handlers are part of the objects. For example, a form button
(<input type = "button">) will have an onClick handler, which is triggered
whenever a user clicks the button. We’ve used these handlers by referring
to them inside the HTML tag. For example, the tag <input type = "button"
onClick = "myFunction();"> will attach the function myFunction() to the
button’s onClick event handler.
Just as a button has an onClick handler, the request object has a handler
called onreadystatechange, which is called automatically whenever the value of
the request object’s readyState property changes. And, just as we can attach a
function to the button’s onClick handler, we can attach a function to the
onreadystatechange handler.
Table 14-1:
Values of a Request Object’s readyState Property
Property Value State Name Description
0Uninitialized The object has been created but not told about the request:
open() has not been called.
1Loading The object knows about the request but has not sent it yet:
send() has not been called.
2Loaded The request has been sent, and basic information about
the response is available.
3Interactive The response is being loaded into the request object.
4 Completed The entire response has been loaded into the request
object and is now available.

268 Chapter 14
However, in contrast to the button’s handler, we don’t stick the function
into an HTML tag. Instead, we set the onreadystatechange handler equal to
something called an anonymous function. This function has no name; it is
simply called function. By setting this handler equal to this anonymous
function we ensure that whenever the request object’s readyState property
changes, the function—that is, the code in the braces—is called. It looks
weird, but you’ll get used to it.
Writing JavaScript That Is Called After the Request Has Been Answered
A request object begins life with a readyState of 0. Calling request.open()
tells the request object where to send the request, and switches the object’s
readyState to 1. Because the readyState has changed, the anonymous function
attached to the onreadystatechange handler is called.
Usually, you don’t want your JavaScript to do anything special at this
point, so the function should not do anything when the readyState has been
changed to 1. In fact, the function usually does not do anything until the
readyState has changed to 4, which, as you can see in Table 14-1, means that
the request has been answered and that all the information sent by the server
has been downloaded into the object. Once readyState 4 is reached, the
function is ready to do something with the data.
Because JavaScripts usually don’t do anything until the request object
reaches a readyState of 4, the anonymous function often looks something
like this:
request.onreadystatechange = function() {
if (request.readyState == 4) {
alert("Download complete! ");
}
}
In the code above, the alert is called only after the request’s readyState
property changes to 4. The anonymous function is actually called when
the property changes from 0 to 1, 1 to 2, and 2 to 3, but because of the if-then
statement, the alert is called only when the readyState changes to 4. Although
this code sample calls an alert, more typically the JavaScript inside the if-then
statement will do something with the information that has been downloaded
into the request object. We’ll see examples of this soon.
Sending the Request
Once you’ve told the request object where to send the request and what to
do when the request has been answered, it’s time to tell the request object to
send the request, like so:
request.send(null);

Ajax Basics 269
This command sends the request using the request object’s send method.
The single parameter of the send method contains information (for example,
form information) to send to a webserver when making a POST request.
Because the request we’re making is of type GET (remember the first param-
eter of the request.open() method), the parameter of the send method is set
to null, which is a predefined term meaning “no information.”
Putting Everything Together
Figure 14-4 combines everything covered so far in one function, which
includes creating the request object, telling it where to send the request,
providing the anonymous function that is to be triggered when the request
object changes state, and sending the request.
<html><head><title>A Simple Ajax Script</title>
<script type = "text/javascript">
<!-- hide me from older browsers
X function doAjaxCall(the_request) {
var request = null;
Y if (window.XMLHttpRequest) {
request = new XMLHttpRequest();
} else if (window.ActiveXObject) {
request = new ActiveXObject("Microsoft.XMLHTTP");
}
Z if (request) {
[ request.open("GET", the_request);
\ request.onreadystatechange = function() {
] if (request.readyState == 4) {
document.getElementById("resultDiv").innerHTML =
"All done!";
}
}
^ request.send(null);
} else {
_ alert("Sorry, you must update your browser before seeing Ajax in action.");
}
}
// show me -->
</script>
</head>
<body>
<form>
` <input type = "button" value = "Make Ajax Request"
onClick = "doAjaxCall('sample.txt'); return true;">
</form>
a <div id = "resultDiv"></div>
</body>
</html>
Figure 14-4: A simple Ajax script

270 Chapter 14
The action begins when the user clicks the button in `, which calls the
doAjaxCall() function (X) and sends it the name of a file to read.
NOTE In general, a URL would go in here, but because I’m not assuming you have access to
a webserver, we’re just going to read a file that lives in the same directory as the file
containing this JavaScript.
The doAjaxCall() function creates a new request object (Y), which is
either an XMLHttpRequest object or an ActiveXObject object. If the browser
reading the JavaScript knows what the XMLHttpRequest object is, it will create
a new object of this type; if instead it knows what the ActiveXObject is, it will
create a new object of this type. If the browser doesn’t know either of these
objects, request will stay equal to null.
In Z, we make sure that a request object was created. If not, _ lets the
user know that he or she needs a browser upgrade.
If a request object was created, [ tells it where to send the request. The
function to call when the readyState property of the request object changes is
declared in \. This function says, “If the request is in state 4, the request object
has sent the request and received an answer; put the All done! message into the
div with the id of resultDiv (]).”
Finally, the request object makes the request in ^, which begins the
process of downloading the requested text file. The request object then goes
through its five states, and each state change triggers the anonymous function.
Once the request object is in state 4, the anonymous function writes All done!
into the div.
The magic in all of this is that while the request object is performing the
query and getting the results, the browser does not freeze up and the page
does not reload. And that is the beauty of Ajax.
Getting the Results
The code in Figure 14-4 performs the request, retrieves the results, and puts
All done! into the div; it doesn’t actually display the retrieved results. It’s as if
I asked you what you wanted for dinner and ignored what you said.
Usually, once the request object has entered state 4, you will want to look
at the information the object has retrieved. This information is stored in one
or two properties of the request object: The responseText property of the object
always contains a text string with the results, and if the response is an XML
document, the responseXML property of the request contains an XML object
representing the results (more on this in Chapters 15 and 16). If the response
is not an XML document, responseXML will contain the value null.
To put the results of the query into the div in a in Figure 14-4, change
the body of the if-then statement in ] to
document.getElementById("resultDiv").innerHTML = request.responseText;
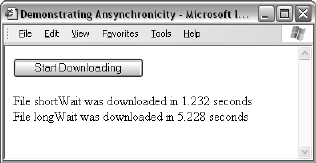
Ajax Basics 271
Demonstrating Asynchronicity
Now it’s time to have a deeper look at asynchronicity. Figure 14-5 demonstrates
how two request objects can download files asynchronously. Here, clicking
the Start Downloading button downloads two files, shortWait and longWait,
which take different amounts of time for a webserver to process. The JavaScript
behind this figure (shown in Figure 14-6) requests the file that takes the
longest to process (longWait) first, and then requests the one that takes less
time to process (shortWait).
Figure 14-5: Demonstrating asynchronicity
Were these files to be downloaded synchronously, the script would down-
load the slowest file—longWait—first, and then the quickest file, shortWait
(because that’s the order in which they were requested). However, because
these files are loaded asynchronously, all requests happen simultaneously.
This means that shortWait will be downloaded before longWait.
Each line in the figure shows the name of the file being downloaded and
the number of seconds it took to download. What you can’t see in the figure
is that each of the lines appeared on the web page as the file is downloaded:
the first line 1.2 seconds after the button was clicked, and the next line about
4 seconds later.
Now let’s have a look at the code behind Figure 14-5 to see how the magic
works. Figure 14-6 reveals the trick.
NOTE Before you can try out this example or most of the examples in Chapters 15, 16, and 17,
you’ll need to set up a webserver and PHP on your local computer. If you don’t already
have a webserver and PHP on your local machine, refer to “Setting Up a Webserver
and PHP” on page 273. If you already have a webserver running on your machine,
it has PHP installed, and you know where the webserver’s top-level document directory
is, you can try running the script in Figure 14-6. To do so, put the files longWait.php,
shortWait.php, and Fig14-06.html in a directory named boj, and put that directory in the
top-level directory of your webserver. Then browse to http://localhost/boj/Fig14-06.html.
If that doesn’t work, try http://127.0.0.1/boj/Fig14-06.html. If that doesn’t work either,
you should refer to your webserver’s manual to determine how to connect with your
webserver. The files longWait.php, shortWait.php, and Fig14-06.html are available
at http://www.bookofjavascript.com/Chapter14.

272 Chapter 14
<html><head><title>Demonstrating Ansynchronicity</title>
<script type = "text/javascript">
<!-- hide me from older browsers
X function demoAsync() {
var now = new Date();
downloadFile("longWait", now );
downloadFile("shortWait", now);
}
Y function downloadFile(the_request, start_time) {
var request = null;
if (window.XMLHttpRequest) {
request = new XMLHttpRequest();
} else if (window.ActiveXObject) {
request = new ActiveXObject("Microsoft.XMLHTTP");
}
if (request) {
request.open("GET", "http://localhost/boj/" + the_request +
".php");
Z request.onreadystatechange =
function() {
if (request.readyState == 4) {
[ document.getElementById("resultDiv").innerHTML +=
"File " + the_request + " was downloaded in " +
\ getExpiredTime(start_time) + " seconds <br>";
}
}
request.send(null);
} else {
alert("Sorry, you must update your browser before seeing" +
" Ajax in action.");
}
}
] function getExpiredTime(start_time) {
var then = start_time.getTime();
var now = new Date();
var now_time = now.getTime();
var diff = (now_time – then) / 1000;
return diff
}
// show me -->
</script>
</head>
<body>
^ <form><input type = "button"
onClick = "demoAsync(); return true;" value = "Start Downloading"></form>
<div id = "resultDiv"></div>
</body>
</html>
Figure 14-6: Asynchronicity in Ajax

Ajax Basics 273
Line-by-Line Analysis of Figure 14-6
The action starts when a user clicks the button in ^, which calls the demoAsync()
function in X. This function creates a new Date object that tracks the time
when the function was called, and then it calls the downloadFile() function
twice (once for each file we want to download). Notice that the function
asks for the largest file, longWait, first and the smallest file, shortWait, next.
The downloadFile() function that starts in Y looks like a typical Ajax func-
tion. It begins by trying to create a new request object, and if that succeeds, it
tells the request which resource to access.
The anonymous function that is called when the request changes its state
is defined in Z. This function says that we should add some information to
the contents of the div named resultDiv ([) once the request has completed
(that is, when the request object’s readyState property equals 4). The informa-
tion added is the name of the requested file and the time it took to download.
Line \ calls getExpiredTime() to determine how long (in seconds) it took to
download the file.
SETTING UP A WEBSERVER AND PHP
Below you’ll find some resources for setting up the Apache webserver and PHP on
your desktop machine. Apache has been the most popular webserver on the Internet
for more than 10 years. It is very robust, has loads of features, and works on all
modern Windows, Macintosh, and Unix (including the major flavors of Linux) operat-
ing systems. In the spirit of full disclosure, I should mention that my cousin, Robert S.
Thau, was one of the original authors of Apache. Hooray, Robert!
For Windows and Linux
If you are using Windows 98, NT, 2000, or XP, or a major version of Linux
(Debian, Mandrake, Red Hat, or SuSE), you can install Apache and PHP
using one easy package called XAMPP from Apache Friends. The package
is available at http://www.apachefriends.org/en/xampp.html and at http://
www.bookofjavascript.com/Freeware/xampp. The useful MySQL database
and a few other things are also included. If you want to get up and running
quickly, I suggest you use XAMPP.
For Macintosh OS X Server
If you’re running the Macintosh OS X Server operating system (http://www
.apple.com/server/macosx)—which is different from its desktop operating system—
you already have Apache and PHP installed. See your OS X Server documentation
for details on how to get it operational.
For Macintosh OS X Standard
If you’re not running OS X Server, there is a simple package for setting up Apache,
PHP, and MySQL on the Macintosh. It’s called MAMP, and it’s available at http://
mamp.info and at http://www.bookofjavascript.com/Freeware/mamp.
274 Chapter 14
Next up, getExpiredTime() (]) is passed a Date object that represents the
time when the demoAsync() function was called. The getTime() method of this
Date object returns the number of milliseconds between January 1, 1970,
and the time represented by the object (getTime() was described in Table 2-1).
Next, a Date object that represents the current date and time is created, and
getTime() calculates the number of milliseconds between the current time
and January 1, 1970; the difference between these two numbers is the time
(in milliseconds) that has passed since the demoAsync() function was called
and the request object completed its download of the requested file. That
number is divided by 1,000 (1,000 milliseconds in a second) to get a time in
seconds.
Ajax and Usability
There are many good examples of Ajax (Google Maps, Flickr, and Google
Suggest, to name a few), but it is very easy to create a confusing and difficult-
to-use Ajax application. Below is a list of some roadblocks that you may
encounter along your road to implementing excellent Ajax.
The Back Button
Web users are accustomed to using their browser’s back button to return to
pages they’ve just seen. Unfortunately, unless special care is taken, the back
button does not work as expected in Ajax applications. For example, if you
click the left side of a Google map and drag it to the right side of the screen,
the map will change, but clicking the browser’s back button won’t return the
map to its previous state. Instead, because all of an Ajax application happens
on a single web page, clicking back will take you off that web page. In the case
of Google Maps, this may take you out of Google Maps entirely. You can use
many of the Ajax frameworks described in Appendix B to help make the
browser’s back button work in ways that will make more sense to your visitors.
Dojo (http://www.dojotoolkit.org), Backbase (http://www.backbase.com), and
RSH (http://codinginparadise.org/projects/dhtml_history/README.html)
are three examples of such libraries.
URLs and Bookmarking
Web page URLs can be written down, sent to friends, and bookmarked.
However, because the URL of a web page for an Ajax application does not
change as the contents of the page change (all updates happen on the same
page), special care must be taken to create URLs that can be bookmarked
and emailed. Again, you’ll find solutions to this problem in the Ajax frame-
works in Appendix B.
Poor Design
People who have been browsing web pages for any length of time are
probably all too familiar with the usual submit-wait-reload method of web
interaction. In this style of communication, the entire web page updates

Ajax Basics 275
when new information is returned from the server, which also signals to the
visitor that the whole page is new. When using Ajax, on the other hand, the
contents of a web page might change without the visitor noticing any signs
of a change. As a web designer, you should be sure to signify important
changes to web pages using design techniques, such as changing color
or borders.
Ajax also offers new types of navigation to the web designer. Pre-Ajax,
designers used links and images to help users navigate between web pages.
Ajax and dynamic HTML offer much greater flexibility, but this flexibility
can also create confusing means of navigation. For example, you could design
a website with an interactive knob that visitors would turn to see different
pages of your site. Although this interactive knob would be nifty, it might also
confuse most web surfers, who are accustomed to navigating websites using
hyperlinks. Adding a fancy new navigation style is probably not a good idea
unless you are simply trying to show off your elite Ajax skills.
For more information about potential problems with Ajax, see Chris
McEvoy’s article “Ajax Sucks Most of the Time”3 and Alex Bosworth’s article
“Ajax Mistakes.”4
To Ajax, or Not to Ajax
Like all technologies, Ajax can be used for good or for evil. Opinions
concerning the best times to use Ajax range from “never” to “whenever
possible.” I tread the middle ground by keeping in mind the following bad
and good uses of Ajax:
Bad: Just Because You Can
No flashy web technique should be unleashed upon your visitors just because
you think it’s cool—unless, of course, your visitors are going to your site
expressly to see cool web tricks.
Bad: It’s the Hot New Thing
Similarly, just because Ajax is new doesn’t mean it solves all problems, and as
we’ve seen, it introduces new ones. Resist the urge to add Ajax to your site
just because it is the hot new thing.
Bad: Replacing Something That Works with Something New and Confusing
Hyperlinks do a great job of leading people from one web page to another.
Confusing your visitors with new and unnecessary forms of navigation will
most likely result in fewer users.
3See http://www.usabilityviews.com/ajaxsucks.html. Note that this article is a rewriting of an older
article by Jakob Neilsen titled “Why Frames Suck (Most of the Time),” which is available at
http://www.useit.com/alertbox/9612.html.
4See http://sourcelabs.com/ajb/archives/2005/05/ajax_mistakes.html.
276 Chapter 14
Good: In-Context Data Manipulation
Imagine you are the CEO of a big company, and you are presented with a
table of information about your employees. This table may include the name,
salary, and tenure of each employee. Now, imagine you want to sort that table
by name, salary, or tenure. Without Ajax, you would click a button and wait
for the whole page to reload. With Ajax, the table can stay on the screen
while the data are being rearranged, which is far less disruptive.
In this example, the object you are manipulating stays in front of you
while you are manipulating it. This is a good use of Ajax.
Another example of in-context data manipulation is Google Maps’ use
of Ajax. In Google Maps, you can move the map by dragging on it. The rest of
the page does not change, and at no point is the screen blank. Mapping appli-
cations that do not use Ajax reload the entire web page each time you want
to pan a map.
Good: Interactive Widgets
Interactive widgets are small components of a website that generally appear
on the margins of a web page. Items such as news tickers, quick one-question
polls (“Do you prefer cats or dogs?”), and login forms fall into this category.
In each of these cases, interacting with the widget may produce results that
do not require the entire web page to reload.
For example, if a visitor tries to log in with an invalid username or
password, the error message might as well appear on the current web page,
rather than bringing the visitor to an entirely new page that says nothing
but Invalid login. Similarly, the current poll results might show up exactly
where the poll the user just completed was placed.
Good: Saving State
Many word processors and other applications have an auto-save function,
which stores a user’s work from time to time. The same functionality can
be added to a web application using Ajax’s ability to send information to a
webserver without alerting or disturbing the user. This kind of behind-the-
scenes application of asynchronous behavior is a perfect context for Ajax.
Summary
This chapter has covered the basics of using Ajax, including:
zHow client-server communication using Ajax differs from the traditional
type of web-based client-server communication
zHow to create a request object and send requests
zHow to get results from a request object once the request has been
fulfilled
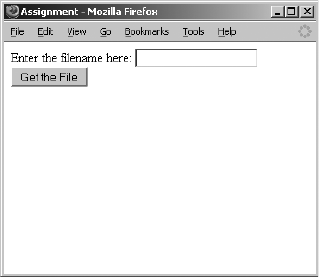
Ajax Basics 277
zWhat asynchronicity means, and what it can do for you
zWhat problems may arise
zWhen to use Ajax
This is just the first of three chapters on Ajax. The next chapter deals
with how to use XML to share information between a web browser and a
webserver. Chapter 16 gets you started with writing programs that run on
webservers and communicate with the Ajax you learned in this chapter and
that you’ll learn in Chapter 15.
Assignment
The JavaScript in Figure 14-4 used Ajax to read the contents of a file called
sample.txt, but it did not display the contents of the file. Your assignment is
to write a page that asks for a file to read in, and then displays the contents
of that file in a div. Figure 14-7 depicts how a solution might look after a user
entered sample.txt into the text field and clicked the Get the File button.
Remember, the file that Ajax reads must live in the same directory as one
that contains the Ajax code.
Figure 14-7: Displaying the contents of a file
XML IN JAVASCRIPT AND AJAX
Chapter 14 introduced Ajax and showed
how it works inside web browsers. Normally,
Ajax applications pass information back and
forth between a web browser and a webserver.
When a user drags a Google map, for example, the
browser sends information to the server about how the user is dragging
the map. The server then returns map-related information for the browser
to interpret and display.
Information passed back and forth between a web browser and a web-
server can take many forms. This chapter discusses the form used by Ajax: XML.
In this chapter you will learn:
zWhat XML is and why it’s useful
zHow to format information using XML
zHow to use JavaScript to read XML documents
zWhat browser-compatibility issues relate to processing XML
zHow to use XML in Ajax communications
280 Chapter 15
Once you’ve mastered the intricacies of XML, you’ll be ready for
Chapter 16, the final Ajax chapter. There you will learn how to write the
server-side code for Ajax communications.
A Real-World Example of Ajax and XML
The photo-sharing community site Flickr (http://www.flickr.com) provides
many fancy web-based tools for uploading, editing, and sharing your photos.
Figure 15-1 shows how Flickr looks after I’ve logged in. At the top of the screen
is a menu with an Organize button. Clicking that button brings you to a page
like the one in Figure 15-2. Here, you can drag your pictures to the canvas,
edit their descriptions, change their dates, and perform a variety of other
image-organizing tasks. What you don’t see is the behind-the-scenes com-
munication Flickr uses to retrieve your images from its webserver. Using
a handy debugging tool called the XmlHttpRequest debugger (which I’ll
describe in detail in Chapter 18), I was able to watch a bit of that communi-
cation. As the web page in Figure 15-2 opens, the browser sends an Ajax
query to the Flickr server, and the server answers with a list of the images
I have already uploaded. Figure 15-3 shows part of the webserver’s
response.
Figure 15-1: Flickr user home page
The gobbledygook you see in Figure 15-3 is XML, the standard way of
communicating information in Ajax. If you look at it long enough, you’ll see
that the response describes three photos. Each photo has a title, a date it was
uploaded, a date it was taken, and a bunch of other information. In addition
to this information, you’ll see lots of tags that look something like HTML tags.
This information is processed by the JavaScript in Flickr’s web page and
turned into a nice interface like the one in Figure 15-2. The XML document
is a bit hard to understand, but keep in mind that XML is meant for programs,
not people. Normal humans are not supposed to see XML in the raw like
this. Only programmers like us have that honor.
XML in JavaScript and Ajax 281
Figure 15-2: Flickr Organize page
Although Flickr is a great example of a site that uses XML in its client-
server communications, the application is a bit too complicated to use as an
instructional example. Instead, this chapter will show you how to use XML to
create a application much like Google’s enhanced search engine interface,
Google Suggest.
<?xml version = "1.0" encoding = "utf-8" ?>
<rsp stat = "ok">
<photos page = "1" pages = "1" perpage = "100" total = "32">
<photo id = "51544990" owner = "76267260@N00" secret = "f69c737a26" server
= "27" title = "Strawberry Picking down the 1" ispublic = "1" isfriend = "0"
isfamily = "0" dateupload = "1129035992" datetaken = "2005-09-26 00:14:57"
datetakengranularity = "0" latitude = "0" longitude = "0" accuracy = "0"
ownername = "thau" iconserver = "0" />
<photo id = "51544989" owner = "76267260@N00" secret = "e64704958b" server
= "33" title = "Fuel Cell Bus at Davis" ispublic = "1" isfriend = "0" isfamily
= "0" dateupload = "1129035992" datetaken = "2005-10-01 17:12:52"
datetakengranularity = "0" latitude = "0" longitude = "0" accuracy = "0"
ownername = "thau" iconserver = "0" />
<photo id = "51542442" owner = "76267260@N00" secret = "6032d0feb8" server
= "27" title = "Grapes, ready for the crushing" ispublic = "1" isfriend = "0"
isfamily = "0" dateupload = "1129035221" datetaken = "2005-10-03 16:09:58"
datetakengranularity = "0" latitude = "0" longitude = "0" accuracy = "0"
ownername = "thau" iconserver = "0" />
</photos>
</rsp>
Figure 15-3: Part of Flickr’s webserver XML response (I removed 29 of the photos)
Google Suggest
Google Suggest (http://labs.google.com/suggest) is just like the usual Google
search engine, but as you type a word into the search field, it presents a list
of frequently searched-for terms beginning with the letters you have already
typed, along with the number of results you’d get if you searched for each of
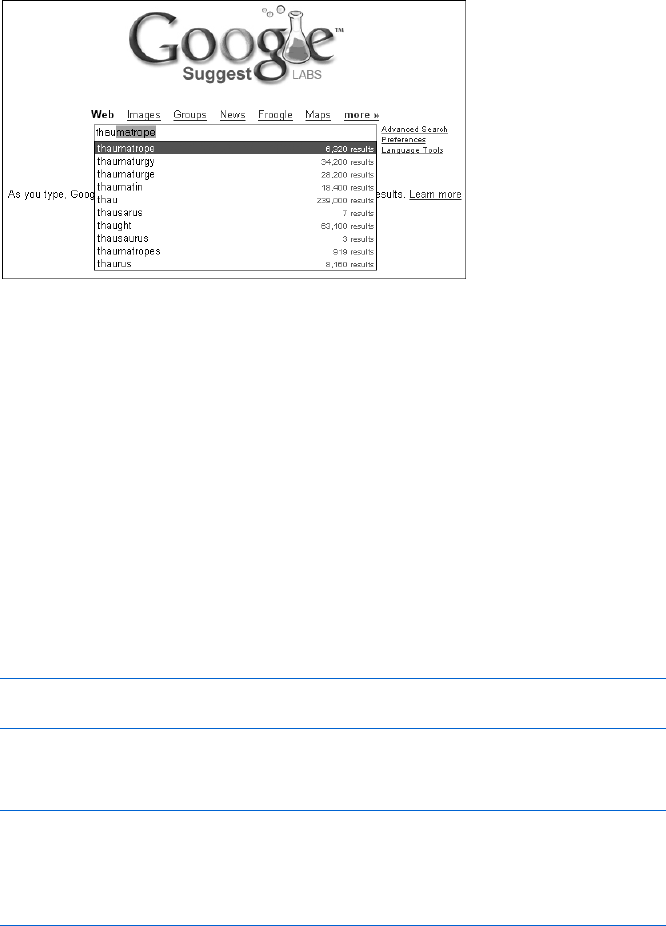
282 Chapter 15
those terms. For example, Figure 15-4 shows what happens when I commit
the narcissistic act of typing my name into Google’s search field. Each time
I type a letter into the search field, Google Suggest gets information from
Google’s webserver and updates the page. In typical Ajax fashion, this trip
to the server occurs invisibly.
Figure 15-4: Finding myself in Google Suggest
In this chapter, we will use XML to create an Ajax application much like
Google Suggest.
XML—the Extensible Markup Language
XML is a standard way of representing information that can be stored in a
file or shared between machines. Computers have been storing and sharing
information since they were first created. In the past, people who wrote soft-
ware invented their own formats for sharing information. Imagine a language
translation program that stores its dictionary in a file. The file will contain
words in English and their translations into another language, say, Italian.
That file can be formatted any number of ways. For example, it might
have each English word and its Italian translation on one line, separated by
a colon:
a: un, uno, una
aardvark: oritteropo
Alternatively, the file could have an English word on one line, the Italian trans-
lation on the next line, and then a blank line before the next English word:
a
un, uno, una
aardvark
oritteropo
There are infinitely many ways to format a file for a computer. As long as the
computer understands the format of the file, it will be able to do something
with the information inside. Unfortunately, all these different file formats

XML in JavaScript and Ajax 283
make it difficult to create tools that can work with arbitrary files. How can a
program or a tool know that the first file uses one line for each English word
and translation, while the second file uses two lines for the English word and
its translation?
This is where XML comes in. XML is a standard file format ratified
by the World Wide Web Consortium in 1998 (http://www.w3.org/XML).
Since the standard’s release, XML has become the way to store and share
structured text documents.
Astructured document is one that can be divided up into meaningful
components. For example, The Book of JavaScript is structured. It has chapters,
each of which has a title at the start and a summary near the end. Each
chapter also has a number of large sections indicated by headers in large
print, and these sections can be subdivided into shorter parts marked by
smaller-print headers.
Most text documents designed to be read and processed by computers
have some sort of structure; XML is a standard way to describe that structure
to a computer. XML has become so popular that all modern web browsers
come with built-in methods to read and process XML documents. Similarly,
all major programming languages used by webservers also have XML-
processing facilities. Because both web browsers and webservers under-
stand XML, they can communicate with each other by sending messages
that conform to the XML standard.
The Rules of XML
The rules for XML documents are simple and few. As another example of
an XML document, consider the XML-style English-to-Italian dictionary in
Figure 15-5.
X <?xml version = "1.0" ?>
Y <dictionary>
<word>
<english>a</english>
<translation>un, uno, una</translation>
</word>
<word>
Z <english>aardvark</english>
<translation>oritteropo</translation>
</word>
</dictionary>
Figure 15-5: A simple XML document
The XML Header
All XML documents start with an XML header like the one in Figure15-5.
XML headers can also include an optional attribute called an encoding, as you
can see in the first line of Figure 15-3. This encoding tells an XML processor
what kind of characters to expect in the document.
284 Chapter 15
XML Elements
XML elements are used to mark up information. For example, to indicate
that something is an English word, we might define an XML element called
english. Most XML elements have a start and end tag; in this case, the english
element has a start tag, <english>, and an end tag </english>. To indicate
that aardvark is an English word, we would use the following XML:
<english>aardvark</english> (Z).
XML elements can nest inside each other. The nesting must be proper—
that is, the inner XML element must be closed before the outer XML ele-
ment is closed. Element names must begin with a letter and should not
contain spaces or punctuation other than periods (.), hyphens (-), and
underscores (_).
If there are no XML elements or text inside the open and close tags of
an XML element, that element is called empty. An empty XML element can
be shortened from <emptyElement></emptyElement> to <emptyElement/>. It does
not have an end tag, but the closing bracket has a slash before it.
The document in Figure 15-5 has several XML elements: dictionary,word,
english, and translation. A computer program that understands XML could
read this document and know that aardvark and a are both considered english
things, and that english things and translation things are parts of word things,
which are parts of a dictionary thing. Because the document is in XML, we
would not have to tell the program that the English and Italian words are
separated by a colon or that each line represents an English/Italian pair.
XML Attributes
Elements can have attributes. An element with an attribute looks like this:
<a href = "http://www.nostarch.com">No Starch Press</a> This is an XML
element named a with an attribute named href. The value of the attribute is
quoted. Attribute names follow the same rules as element names: They must
begin with a letter and should not contain spaces or punctuation other than
periods (.), hyphens (-), or underscores (_). Empty elements can still have
attributes: <person name = "thau!"/>
NOTE Did you notice that the XML above is also HTML? HTML is almost a type of XML.
The main difference between it and XML is that HTML is more relaxed. For example,
the element: <img src = "hello.gif"> is valid HTML, but not valid XML. To be valid
XML it would have to look like this: <img src = "hello.gif"/>. Notice the slash before
the closing bracket.
Illegal XML Characters
Certain special characters (',",<,>, and &) are not allowed in an element
name, an attribute name, attribute values, or text between the elements. If
you need to use one of these characters you must use an encoding known
as an entity, which is introduced by an ampersand (&) and terminated with a
semicolon (;). Use the entities < and > to represent the angle brackets
XML in JavaScript and Ajax 285
< and >, and use ' and " to represent apostrophe and quotation
marks. Because it introduces entities, the ampersand itself is a special char-
acter. If you need to use an ampersand as itself, you must use the entity &.
To ensure maximum cross-browser interoperability, all non-ASCII char-
acters should be encoded using their Unicode decimal numbers. For example,
the character á (a with an acute accent) should be encoded as á. (See
http://www.unicode.org/charts for the entire set of character entities and
http://www.webmonkey.com/webmonkey/reference/special_characters for
a less complete, but more usable, list.)
XML Documents Have a Single Root Element
An XML document must have only one root element. The root element is the
first XML element in the document, and all the other elements of the XML
document go between its open and close tags. For example, in Figure 15-5
the root element is dictionary (Y).
Final Comments About the XML Format
As already mentioned, XML has become an incredibly pervasive standard.
One feature of XML that makes it particularly useful is that you can invent
any element names you desire. This means that organizations can agree
upon a set of XML elements that work for them and that can be used to
structure all information within their organization or field. Varieties of XML,
called XML vocabularies or markup languages, have been invented for many
applications, such as SVG for describing two-dimensional graphics, GedML
for genealogical information, GML for geographic information, VRML for
describing objects in 3D, and SportsML, which the International Press
Telecommunications Council uses to publish sports information. Each
of these uses the rules of XML and a set of predefined element and attrib-
ute names. When using XML, you can either use existing vocabulary or
create your own.
The format of an XML document is just the tip of the XML iceberg.
There are many useful technologies built around XML, including standard
ways to search XML documents, ways to convert XML documents into PDFs
and HTML, and ways to ensure that XML documents conform to specific
vocabularies (such as GML, VRML, and the others described above).
Processing XML
XML is so popular that web browsers have built-in mechanisms for dealing
with XML documents. In fact, all of the methods used to process the DOM
(discussed in Chapter 13) can also be used to process XML documents.
The script in Figure 15-6 shows how to use some of the methods that we
used to process the DOM to create an application that looks up a word in three
dictionary files (German, Portuguese, and Italian), which I downloaded from
the Internet Dictionary Project (http://www.ilovelanguages.com/IDP).

286 Chapter 15
<html><head><title>Reading XML Documents</title>
<script type = "text/javascript">
<!-- hide me from older browsers
X function getTranslations(the_word) {
var languages = new Array("german","italian","portuguese");
for (var loop = 0; loop < languages.length; loop++) {
getTranslationFromFile(languages[loop], the_word);
}
}
Y function getTranslationFromFile(the_file, the_word) {
var request = null;
var xml_response = null;
if (window.XMLHttpRequest) {
request = new XMLHttpRequest();
} else if (window.ActiveXObject) {
request = new ActiveXObject("Microsoft.XMLHTTP");
}
if (request) {
Z request.open("GET", the_file + ".xml");
request.onreadystatechange =
function() {
if (request.readyState == 4) {
[xml_response = request.responseXML;
\document.getElementById(the_file).innerHTML =
findTranslation(xml_response, the_word);
} else {
] document.getElementById(the_file).innerHTML =
"SEARCHING...";
}
}
request.send(null);
} else {
alert("Sorry, you must update your browser before seeing" +
" Ajax in action.");
}
}
^ function findTranslation(xml_doc, the_word) {
var the_translation = "unknown";
var this_word = "";
var this_english_element = null;
_var english_word_elements =
xml_doc.getElementsByTagName("english");
for (var loop = 0; loop < english_word_elements.length; loop++) {
this_english_element = english_word_elements[loop];
`this_word = this_english_element.firstChild.nodeValue;
if (this_word == the_word) {
athe_translation =
this_english_element.nextSibling.firstChild.nodeValue;
}
}
return the_translation;
}
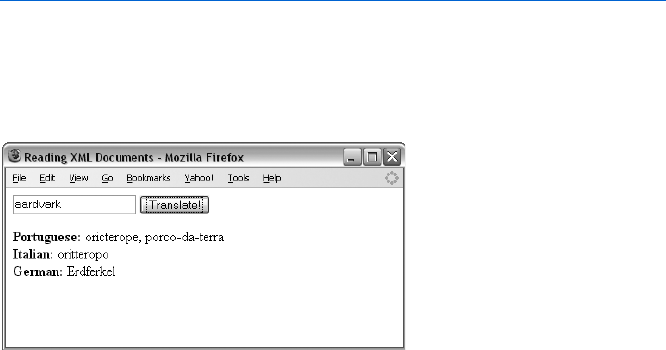
XML in JavaScript and Ajax 287
// show me -->
</script>
</head>
<body>
<form
onSubmit = "getTranslations(document.getElementById('theText').value);
return false;">
<input type = "text" id = "theText">
<input type = "button"
onClick = "getTranslations(document.getElementById('theText').value);
return false;" value = "Translate!">
</form>
<b>Portuguese:</b> <span id = "portuguese"></span><br>
<b>Italian:</b> <span id = "italian"></span ><br>
<b>German:</b> <span id = "german"></span ><br>
</body>
</html>
Figure 15-6: Reading an XML document
As you can see in Figure 15-7, entering aardvark into the text box and
clicking the Translate! button translates the provided word into the three
languages.
Figure 15-7: Translating aardvark
NOTE Unless the XML dictionary files are served up using a webserver, the script in Figure 15-6
will not work in Internet Explorer. To understand why not, why it doesn’t matter too
much, and what you can do about it, see the section “Internet Explorer, responseXML,
and Client-Side Ajax” on page 291.
Line-by-Line Analysis of Figure 15-6
The script in Figure 15-6 begins when a user clicks the Translate! button
or when the user presses ENTER while the cursor is in the text box (thereby
submitting the form). In either case, the function getTranslations() is called
with the contents of the text box. The getTranslations() function in X simply
calls getTranslationsFromFile() for each of the dictionary files.
NOTE It’s nice to use an array and a loop here, because if we want to add a new language
file, we can just add it to the languages array.
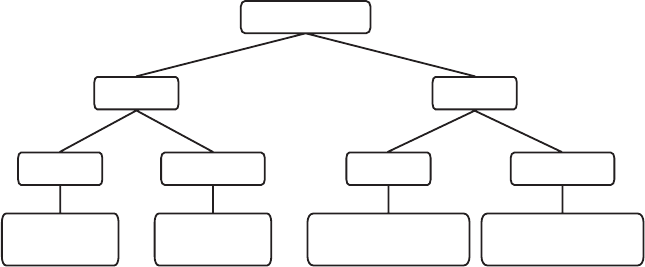
288 Chapter 15
The getTranslationsFromFile() function in Y is called once for each
language. It has two parameters: the name of a language and the word to
translate. This function is the typical Ajax function we’ve seen, with a few
twists. First, in Z notice that the request is getting a file whose name is the
name of the language we want to translate, with the extension .xml. Once the
request has been answered, [ retrieves the value of the request’s responseXML
property. Then \ calls the findTranslation() function and puts its results into
an element with an id attribute set to the language.
NOTE Notice that the variable passed into the getTranslationsFromFile() function is used
to name both the file being read and the element into which the answer should be placed.
Using one variable in multiple contexts is a common trick. Also notice that ] puts
the string "SEARCHING..." into the element, which will soon hold the result whenever the
request object changes into any state other than 4. This is a good way to let your users
know that your page is doing something and that there is more information to come.
Visualizing the XML Document
All of the XML handling is done in the findTranslation() function (^), which
is called once the XML document has been fully loaded (after the equal sign
in \). To understand better how findTranslation() works, see Figure 15-8,
which represents part of the XML document in Figure 15-5 graphically. The
root element of the XML document, dictionary, appears as a node at the top
of Figure 15-8.
Figure 15-8: A graphical representation of part of the XML in Figure 15-5
The dictionary node has two child nodes, each named word, which represent
the word elements in Figure 15-5. Each word node in Figure 15-8, in turn, has
two children, named english and translation, representing the english and
translation elements in Figure 15-5. These elements each have some text
between their open and close tags: an English word and its translation. The
text stored between the tags of an XML element is stored in a text node that is
a child of that element. If the only thing between an element’s open and close
tags is text, the text node containing that text is the first child of the element.
In order actually to get the text from the text node, the node’s nodeValue
property must be accessed. We’ll see that working soon.
dictionary
word
english
nodeValue = a
Text node
translation
nodeValue = un
Text node
word
english
nodeValue = aardvark
Text node
translation
nodeValue = oritteropo
Text node
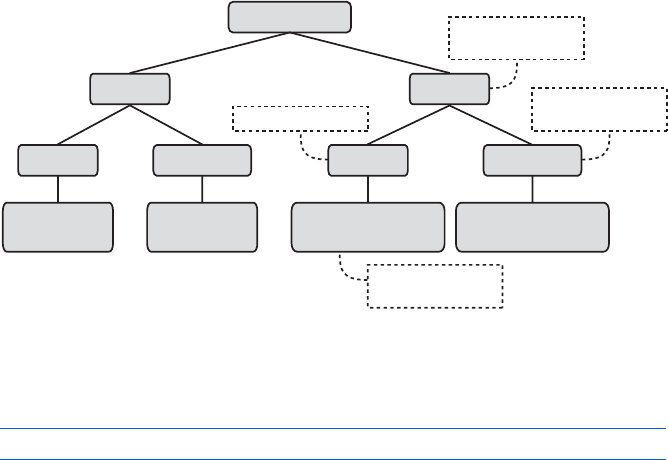
XML in JavaScript and Ajax 289
Navigating the XML Document
Now let’s return to the findTranslation() function. The function first sets
the translation to "unknown" and, if no other translation is found, this will
be the result returned. The first sign of XML handling is in _, which uses the
getElementsByTagName() method (discussed in Chapter 13) to return an array
of all the elements of the XML document with the name "english". You can
see these elements in the XML in Figure 15-5.
Once that array of elements is returned, the function loops through the
array. Each time through the loop, the variable this_english_element is set
to the next english element in the array, and ` extracts the English word
between the open and close tags of the element. Line a then extracts the
translation of that english element.
Extracting Information from XML Elements
Lines ` and a are complicated enough to deserve their own figure. Fig-
ure 15-9 is a graphic representation of the process of translating the word
aardvark. Assume that we’ve retrieved the list of elements named english and
have looped past the first english element. We’re now looking at the second
english element in the list, which is labeled in the figure with the box contain-
ing the words this_english_element. The this_english_element element has a
child element that is a text node with a nodeValue of aardvark.
Figure 15-9: A graphical representation of getting a word’s translation
Line ` extracts the value "aardvark" from this_english_element. Here’s
`again:
this_word = this_english_element.firstChild.nodeValue
This line looks at the built-in firstChild property of the XML element
stored in this_english_element, which is a text node, and then it retrieves the
nodeValue of that text node. The line following ` checks to see whether this
word is the word we want to translate. If it is, a retrieves the translation of
the word.
dictionary
word
english
nodeValue = a
Text node
translation
nodeValue = un
Text node
word
english
nodeValue = aardvark
Text node
translation
nodeValue = oritteropo
Text node
Parent of
this_english_element
this_english_element
Next sibling of
this_english_element
this_english_element
Text node of

290 Chapter 15
To understand a, look back at Figure 15-9. Notice that the parent of
the node labeled this_english_element is a word node and that it has been
labeled Parent of this_english_element. This word node has two children:
this_english_element and a translation node. As is true of people, any two
XML nodes that share a parent are called siblings. The sibling that comes
right after an XML node is called that node’s next sibling. The sibling next to
this_english_element is the node labeled Next Sibling of this_english_element.
This next sibling can be accessed using the built-in property nextSibling.
Now look at a:
the_translation = this_english_element.nextSibling.firstChild.nodeValue
The code in a gets the translation of this_english_element by looking at
this_english_element, finding its next sibling (the translation node), getting
that node’s first child (the text node), and then retrieving the nodeValue
of that text node.
Wrapping Up
Before wrapping up Figure 15-6, let’s review. A visitor has entered a word into
a text field and clicked the Translate! button. This calls getTranslations(),
which loops through a list of languages into which the provided word should
be translated. Each time through the loop, getTranslationFromFile() is passed
the name of a language and the word to translate. The getTranslationFromFile()
function performs an Ajax call that reads in an XML dictionary for that
language and then calls findTranslation() to get the translation. The
findTranslation() function does all the XML handling just covered and
returns the found translation back to the getTranslationFromFile() function.
Now we’re ready to wrap up.
Once findTranslation() finds and returns the translation of the requested
word, \ in getTranslationFromFile() puts the translation into the span with
an id equal to the name of the language being processed. This makes the
translation appear on the web page and completes the Ajax request for this
language.
As with all things Ajax, the calls in getTranslationsFromFile() all are
satisfied asynchronously. Once the user clicks the Translate! button, the
language files are all accessed simultaneously, the translations are retrieved,
and the results are placed in the <span> tags at the bottom of the HTML.
NOTE I’ve used spans instead of divs to avoid a line break between the text listing the
language (e.g., Italian) and the returned translation.
This example has shown you the fundamentals of processing XML
documents in JavaScript. The rest of the chapter will cover a few niggling
details and then take you through another example of using XML in Ajax.
XML in JavaScript and Ajax 291
Internet Explorer, responseXML, and Client-Side Ajax
I noted in the previous section that the script in Figure 15-6 will not work on
Internet Explorer if the XML dictionary files are not served up by a webserver.
This is because Internet Explorer fills the responseXML property only if the
browser is told that the file being read is an XML file. If the file is being read
straight off the hard drive (and not sent by a webserver), Internet Explorer
won’t know that this is an XML file rather than an ordinary text file.
In general, this is not really a problem. If you are developing a web page
that will be available to anyone other than you, you will need to use a web-
server to serve it and all the documents relating to it. Therefore, in practice,
the XML files will be served by a webserver, and Figure 15-6 should work just
as it is. The only time this Internet Explorer “feature” will cause problems is
when testing and debugging your Ajax code without using a webserver.
Fortunately, there is a simple fix: Replace [ in Figure 15-6 with this:
xml_response = new ActiveXObject("Microsoft.XMLDOM");
xml_response.loadXML(request.responseText);
These lines use a special Microsoft ActiveXObject to turn the contents of
the request’s responseText property into XML.
Problems with White Space in XML
Some browsers, such as Firefox, like to treat blank spaces in XML documents
(including spaces used to indent tags) as text nodes. As you might imagine,
these unexpected text nodes can cause problems when using JavaScript to
navigate around an XML page.
To solve this problem, you can write some JavaScript to remove all text
nodes in the XML with nodeValues that contain only spaces, or you can write
your JavaScript to simply ignore these blank text nodes (which usually appear
between XML elements).
For example, if Firefox reads this line of XML
<word><english>a</english> <translation>un</translation></word>
the XML document stored in request.responseXML will contain a word element
with three children: an english element, a text node with the space between
the english and translation elements, and the translation element. This means
that the nextSibling property of the english element would point to the text
node rather than to the translation element. This is bad news for the script
in Figure 15-6, which assumes that each english element will be followed by a
translation element rather than by a text node containing only a space.
A more flexible version of Figure 15-6 would do one of two things.
First, the JavaScript could preprocess the XML document, deleting all the
text nodes that contain only spaces. Alternatively, the code could leave the
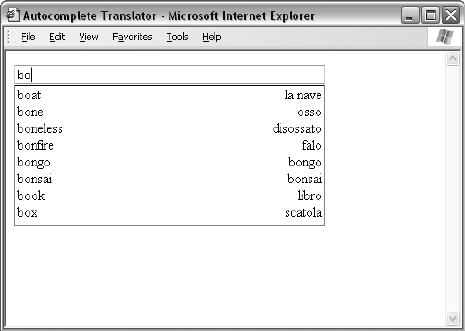
292 Chapter 15
extra text nodes in place but just skip nodes that it doesn’t care about.
For example, when looking for the translation of an English word, the
code in Figure 15-6 could loop through the children of the parent of the
english element, checking the nodeName of each child and stopping when it
finds an element named translation.
As it is now, the code in Figure 15-6 works fine because the XML files
I created do not have a space between the english and translation elements.
For our purposes, this works. In the real world, however, you would want to
write code that would deal with the possibility that somebody writing an XML
dictionary for your application would accidentally put a space between the
english and translation elements.
Creating a Suggest Application for Translation
Let’s apply what we’ve learned so far to another example of using XML with
Ajax. Google Suggest is a very fancy web application, with many interesting
features that help it react quickly to user queries. As shown in Figure 15-4,
Google Suggest provides suggested searches as you type letters into the search
box. Although the JavaScript I’ll describe in this section is not nearly as
advanced as what you see in Google Suggest, it should help to demonstrate
how Google Suggest works.
Figure 15-10 shows a simplified suggest application that translates English
words into Italian. The figure shows how things look in Internet Explorer
after I type bo. On the left side you see a list of the first ten English words in
the dictionary that start with the letters bo, and on the right side are their
translations. After each keypress, the script reloads the italian.xml file and
looks for words that begin with whatever letters are in the text box. As is
typical with Ajax, there is no submit button to push; the JavaScript accesses
the information it needs and updates the page as I type.
Figure 15-10: The translation script with suggestions

XML in JavaScript and Ajax 293
NOTE For a full description of how Google Suggest works, see Chris Justice’s excellent analysis
at http://serversideguy.blogspot.com/2004/12/google-suggest-dissected.html.
The code for this neat little application can be found in Appendix D and
is available at http://www.bookofjavascript.com/Chapter15/translator.html.
It is a bit long, so I will break it up a bit as I describe it here.
NOTE Remember, this code will not work if you are testing it in Internet Explorer unless you
serve up the italian.xml file using a webserver. If you don’t have access to a webserver
and you want to test the script out, make sure to make the change described in the
section “Internet Explorer, responseXML, and Client-Side Ajax” on page 291.
Let’s begin with the text entry form:
<form>
<input type = "text" size = "55" id = "theText"
onKeyUp = "getTranslations('italian', this.value);">
<div id = "theResults" style = "width:22em; border:1px black solid;
padding-left:2px;padding-right:2px">
</div>
</form>
This form has one text input element and a div into which the results of
the script will be placed. The ems you see in the style of the div set the width
of the div equal to some multiple of the width of the letter m (em) in the font
being used. The size of the em unit will vary with the font being used, in direct
proportion to the width of the letter m in that font. As a result, if a user changes
the font size on his or her browser, the script will automatically adjust the
width of the div. The JavaScript code will automatically change the height
of the div as the number of results to be shown changes.
Notice that the text input element has an onKeyUp event handler. When a
letter is typed (that is, a key is pressed), and then released, the getTranslations()
function is called upon the release of the key. This function is almost exactly
like the getTranslationFromFile() function shown in Figure 15-6 except for the
anonymous function defined after Z, which has been changed to:
request.onreadystatechange =
function() {
if (request.readyState == 4) {
xml_response = request.responseXML;
displayResults(findTranslations(xml_response, the_word));
}
}
When the state of the request object changes to 4, it has completely down-
loaded the requested document. At this point it calls findTranslations() to get
the relevant words and translations, and then it sends those results to the
displayResults() function.

294 Chapter 15
Finding the Translations
The findTranslations() function searches through the XML file for the
correct words to display. Figure 15-11 is a slightly abridged version:
function findTranslations(xml_doc, the_word) {
// obvious variable declarations and initializations (omitted)
var these_translations = new Array();
var english_word_elements = xml_doc.getElementsByTagName("english");
Xvar reg_exp = new RegExp("^" + the_word);
Ywhile ((loop < english_word_elements.length) && (found == false)) {
Zthis_word = english_word_elements[loop].firstChild.nodeValue;
[if (reg_exp.test(this_word)) {
the_translation =
english_word_elements[loop].nextSibling.firstChild.nodeValue;
found = true;
}
loop++;
}
\if (found == true) {
]these_translations.push(this_word + "\t" + the_translation);
^for (var count = loop; count < (loop + 10); count++) {
_if (count < english_word_elements.length) {
this_word = english_word_elements[count].firstChild.nodeValue;
if (reg_exp.test(this_word)) {
the_translation =
english_word_elements[count].nextSibling.firstChild.nodeValue;
these_translations.push(this_word + "\t" + the_translation);
}
}
}
}
return these_translations;
}
Figure 15-11: Finding the translations
The findTranslations() function shown in Figure 15-11 is similar to the
findTranslations() function shown in Figure 15-6, except that instead of
getting just one translation for a word, it looks for up to ten words that begin
with the letters in the text box, with their translations. If only seven words
begin with the letters in the text box, only those seven words will be displayed.
The function uses regular expressions (discussed in Chapter 11) to
determine whether a word starts with the letters in the box (X). Next, it
gets a list of all the XML elements named english and loops through that list
until either it runs out of elements or it finds a word that matches the regular
expression (Y). Each time through the loop, this_word is set to the English
word (Z), and then [ checks to see whether this_word matches the regular
expression. If it does, the translation of the word is retrieved from the english
element’s sibling, the found variable is set to true, and the loop ends.

XML in JavaScript and Ajax 295
At the end of the loop, \ checks to see whether a word has been found
that matches the regular expression. If so, ] sticks the word, followed by a tab
(\t) and the word’s translation at the end of an array called these_translations.
The these_translations array now has one word and its translation, and it will
eventually contain all the words and translations to be displayed.
NOTE The push() method ( ]) is a handy way to add something to the end of an array;
it pushes an element to the end.
Once the retrieved word and translation have been added to the array,
it’s time to find other words that begin with the letters in the text field. The
loop in ^ begins by examining the items in the array of english elements,
starting where the previous loop left off. It then looks at the next nine items.
Each time through the loop, the code gets the next english element, checks
to see whether it matches the regular expression, and if so, adds it and its
translation to the these_translations array. The code in _ makes sure the
loop ends if there are no more elements in the array of english elements to
consider, which may happen, for example, if we are looking at words that
begin with the letter z.
When the loop in ^ ends, the function exits and returns the these_
translations array, which is then fed into the displayResults() function.
Displaying the Results
The function displayResults(), which displays the results, is pretty straight-
forward (as shown in Figure 15-12). The function first creates an HTML
table and then inserts that table into the innerHTML of theResultsDiv. The
only tricky thing about this script involves changing the size of the div so
that its border expands and contracts as the table changes size.
function displayResults(the_results) {
var display_me = "";
var splitter;
var this_result = null;
Xfor (var loop = 0; loop < the_results.length; loop++) {
this_result = the_results[loop];
if (this_result != null) {
Ysplitter = this_result.split("\t");
Zdisplay_me += "<tr><td align='left'>" + splitter[0] +
"</td><td align='right'>" + splitter[1] + "</td></tr>";
}
}
[document.getElementById("theResults").style.height =
(the_results.length + parseInt(the_results.length / 5) + 1) + "em";
\document.getElementById("theResults").innerHTML =
"<table width='100%' border='0' cellpadding='0' cellspacing='0'>" +
display_me + "</table>";
}
Figure 15-12: Displaying the results
296 Chapter 15
The displayResults() function is passed an array of results to display. The
code in X loops through this array, setting this_result to the next result each
time it goes through the loop.
NOTE Remember that each result is an English word, followed by a tab and the word’s
translation in Italian (see ] in Figure 15-11).
The split() method in Y is a built-in method of String objects. Given a
character, or a set of characters, the split() method divides a string into parts
and stores those parts in an array. For example, the instance of split() in
Ytakes the string in the_result and divides it into two parts: the part before
the tab (\t) and the part after the tab. These pieces are stored in an array
called splitter;splitter[0] contains the part before the tab, and splitter[1]
contains the part after the tab. The code in Z then takes these parts, creates
a string representing a row in an HTML table, and adds this string to the
display_me variable, which will contain all the rows of the table.
Once the loop completes, [ changes the height property of the div’s
style property, making it roughly as tall as the table that it will contain. The
formula in [ gives an approximation of the div’s height; it says that the div’s
height should equal the number of rows in the table plus a little bit for the
space between the rows. The number of rows in the table, in turn, equals the
number of items in the the_results array. Finally, \ puts the beginning and
ending table tags on the table and puts the table into the innerHTML of the div.
There’s a great deal more to Google Suggest, including choosing an
element from the suggestion box, caching results to make the page react
more quickly, and filling in a few letters in the text box. With the JavaScript
you know now, and a little expertise with cascading style sheets, you should
be able to add those features to your own applications.
Summary
This chapter has covered the basics of using XML with JavaScript and Ajax:
zWhat XML is used for
zHow to format XML documents
zHow Ajax applications use XML to share data
zHow to process XML with JavaScript
zHow to deal with cross-browser XML issues
The chapter has also given you more details about some objects you’ve
already encountered:
zHow to use the split() method to divide a string into parts
zHow to use the push() method to add an element to the end of an array
zHow to use em in a cascading style sheet to make the size of something
proportional to the font being used
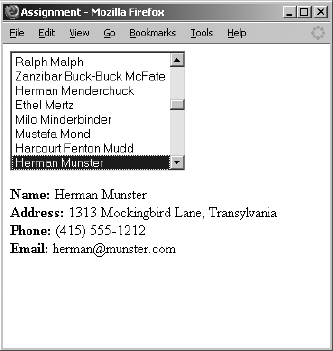
XML in JavaScript and Ajax 297
Now that you know how to perform Ajax calls from the browser, and how
to format XML documents and process them with JavaScript, it’s time to
complete the Ajax cycle and learn about server-side programs. First, however,
you should practice your Ajax skills with the following assignment.
Assignment
Write an Ajax address book like the one shown in Figure 15-13. First, create
an XML file that is to be your address book. Each person should have a name,
a home address, a phone number, and an email address. When the web page
opens, it should get the names of the people in the XML file and then put
them into the select field. When a user clicks a name in the select field, Ajax
should look up that person in the phone book and display the results in the
spans below the select box.
Figure 15-13: An Ajax-enabled address book
SERVER-SIDE AJAX
In Chapter 15 we saw how Ajax can enhance
your user’s experience by making asynchro-
nous requests for information. In that chapter
we focused entirely on client-side Ajax. In this
chapter we’ll focus on using Ajax to communicate
with programs on webservers, which I will also call
server-side programs.
This chapter explains:
zWhat server-side programs can do for you
zDifferent types of requests
zThe basics of PHP, a server-side programming language
zHow to use PHP to read and save files on webservers
zWhat to do if the webserver you are contacting doesn’t respond
zHow to update the contents of a web browser automatically when
a server-side file changes
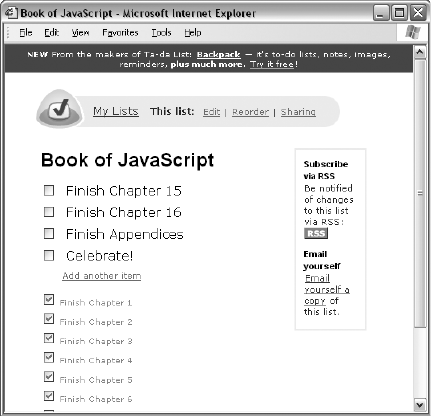
300 Chapter 16
Real-World Examples of Server-Side Ajax
Almost all examples of Ajax on the Web involve communications between a
web browser and a program running on a webserver. For example, when you
search for a restaurant using Google Maps, Google’s webservers provide the
maps and determine where the icon showing the restaurant’s location should
go. The Ajax-driven To Do list site, http://www.tadalist.com, lets you create
To Do lists and then share them so that others (whether in your household
or organization) can add tasks, mark completed tasks, and so on.
Figure 16-1 shows my Book of JavaScript To Do list. At the top are uncom-
pleted items (don’t tell my publisher!), and below those are finished items.
(I’m still waiting to celebrate; any day now, for sure.)
Figure 16-1: A Ta-da List To Do list
Figure 16-2 shows the screen after I click the Add Another Item link. As you
can see, a text field and an Add This Item button appear. When I click the
button, the new item appears on the bottom of the To Do list and is saved
on the Ta-da List webserver. When I exit the browser and then return to the
site, the saved To Do list is read from the Ta-da List webserver and displayed
in my browser.
When we covered cookies in Chapter 12, we saw examples of how to store
a user’s information. For example, when a visitor bought clothing using the
shopping cart, the items the visitor bought were stored on the visitor’s hard
drive. Then, when it was time to purchase the selected items, the checkout
page retrieved this stored information and told the visitor how much was
owed. The difference in the To Do list example is that rather than saving the
information on the computer of the person using the web page, the appli-
cation saves the information on the Ta-da List webserver. As you may recall,
browsers limit the amount of information you can save in a cookie on a visitor’s

Server-Side Ajax 301
hard drive to about 80 kilobytes. In contrast, the amount of information
stored on a webserver’s hard drive is limited only by the amount of space on
the hard drive. Another difference between saving information in a cookie
on a user’s hard drive and saving it on a webserver’s hard drive is that infor-
mation on a webserver can be shared by anybody who accesses that server
with his or her web browser.
Figure 16-2: Adding a new item to the To Do list
Notice the Sharing link at the right end of the navigation bar at the top
of the list in Figures 16-1 and 16-2. When the link is clicked, it brings up a page
that allows you to input an email address for the person you want to set up as
a sharer. Ta-da List then emails a code to that address that lets the recipient
modify the list you’ve shared. Sharing is made possible because both you
(the list owner) and the list sharer are using web browsers to alter information
that is shared on a single, remote webserver that anyone with the correct code
can access.
In this chapter I’ll teach you what you need to know to build your own
collaborative To Do list Ajax application. However, since such an application
is complex and involves a fair amount of code (which pulls together elements
from every chapter of this book), I will cover the application in depth only in
Chapter 17.
The Power of Webservers
Until now, we have focused on JavaScript programs, which run in a web
browser. These programs can save information on the local computer and
rely on the local computer for their system resources. This chapter will focus
on programs that run on webservers—programs that save information to a
remote server and rely on that webserver for much of the heavy lifting.
302 Chapter 16
We touched briefly on webserver-based programs in Chapter 7 when we
discussed submitting forms to webservers. However, in that chapter, once the
information was sent from the web browser to the webserver, we didn’t worry
about it. Now we do; it’s time to dig into the details of webserver programs.
You can use programs that run on webservers to enhance your JavaScript
in two ways. First, when a JavaScript program interacts with a server-side
program, every web browser running that JavaScript can access and interact
with the same webserver. For example, if 100 (or 10,000) people use that
JavaScript, then all can interact with the same webserver. As a result, everyone’s
information can be stored in one central spot: the server. In contrast, when we
use cookies to store information, the information is stored only on the user’s
machine. Because cookies store information locally, we’re prevented from
doing useful things such as compiling answers to a survey taken by multiple
users. On the other hand, when a server-side program is used to store those
answers on a webserver, all of those answers can be collected and analyzed
simply by accessing that webserver.
You can also use server-side programs to enhance your JavaScript by invok-
ing the “magical” powers of the machines running webservers. For example,
although you can’t use JavaScript to send email via a web browser (the browser
doesn’t know how to send email), a computer running a webserver may be
able to send email, so you may be able to use it to send an email with infor-
mation submitted via a web browser form.
Because a webserver can communicate with other Internet-connected
servers, you can also use a webserver to circumvent one of the limitations
of the request object that we covered in Chapter 14. Specifically, for security
reasons, many web browsers, such as Firefox, will not let JavaScript that comes
from one webserver send an Ajax request to another webserver—a limitation
that can be quite restrictive.
For example, imagine that you want to write some Ajax that requests
information from Google Maps and combines the returned information with
weather information from weather.com, perhaps marking spots on the map
where temperature records have been broken that day. Although some
browsers will stop an Ajax script from using a request object to get informa-
tion directly from weather.com, you can write an Ajax script that contacts a
webserver, have the webserver get the information from weather.com, and
then send that information back to the browser.
Figure 16-3 illustrates this transaction nicely. On the left side of the fig-
ure, you see a browser requesting and receiving a page from the No Starch
Press website. The returned page contains some Ajax code that tries to use
a request object to get information from the weather.com server. (I don’t
know; they’re really into the weather in San Francisco.) Unfortunately, this
request is illegal, and it triggers a “Permission denied” error in Firefox and
other browsers.
We circumvent this error by using the technique demonstrated at the right
side of Figure 16-3. This time, when the web browser requests a page from
NoStarch.com, the Ajax in that page makes another request to NoStarch.com
asking a program running on the NoStarch.com webserver to request informa-
tion from the weather.com server. When the weather.com server answers that
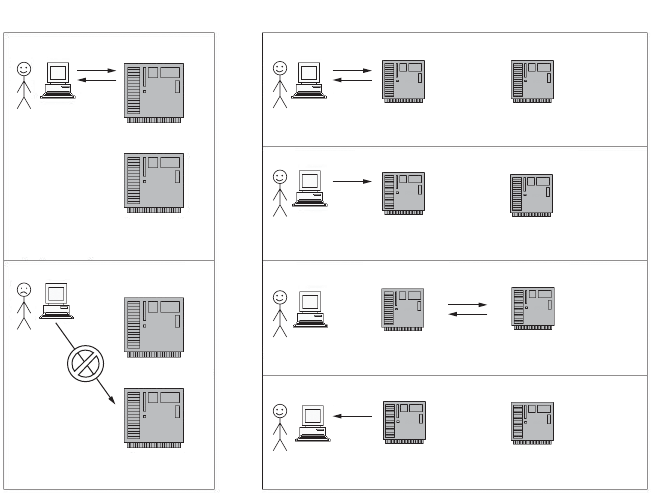
Server-Side Ajax 303
request, the NoStarch.com server-side program passes the information back
to the user’s web browser. Because the web browser never directly requests
information from the weather.com server, the action is allowed, and you
don’t see the “Permission denied” error. This style of communication is
possible only with server-side programs.
Next, you’ll learn some server-side programming basics.
Figure 16-3: Cross-server communication using Ajax
A Server-Side Programming Language
Webservers can run programs written in many different programming lan-
guages, but JavaScript isn’t one of them. Therefore, instead of JavaScript, we’ll
use PHP as our server-side programming language.
The acronym PHP stands for PHP: Hypertext Preprocessor. (This kind of
self-referential naming passes for humor among computer programmers.)
PHP is popular because its code can be incorporated directly into HTML
pages, it’s free, and it’s cross-platform compatible.
NOTE In order to try the examples in this chapter, you’ll need access to a webserver that runs
PHP. See “Setting Up a Webserver and PHP” on page 273 for some resources describing
how to set one up for Windows, Mac, and Linux computers.
Popular alternatives to PHP include Perl, C++, C#, Python, Ruby, and
Java (which is different from JavaScript; remember Chapter 1?). The language
you use will largely be determined by the languages your webserver will run
and what you’re familiar with. (Don’t worry too much about having to learn
PHP in order to do Ajax. PHP and JavaScript are very similar in many ways.)
Illegal Ajax Legal Ajax
NoStarch.com
weather.com
NoStarch.com
weather.com server
NoStarch.com weather.com
NoStarch.com weather.com
NoStarch.com weather.com
NoStarch.com weather.com
Browser requests and receives page
with Ajax from NoStarch.com.
Request object can’t request
data from weather.com.
Browser requests and receives page with Ajax from NoStarch.com.
Request object asks NoStarch.com to get data from weather.com.
NoStarch.com requests and receives data from weather.com.
NoStarch.com sends data back to web browser.
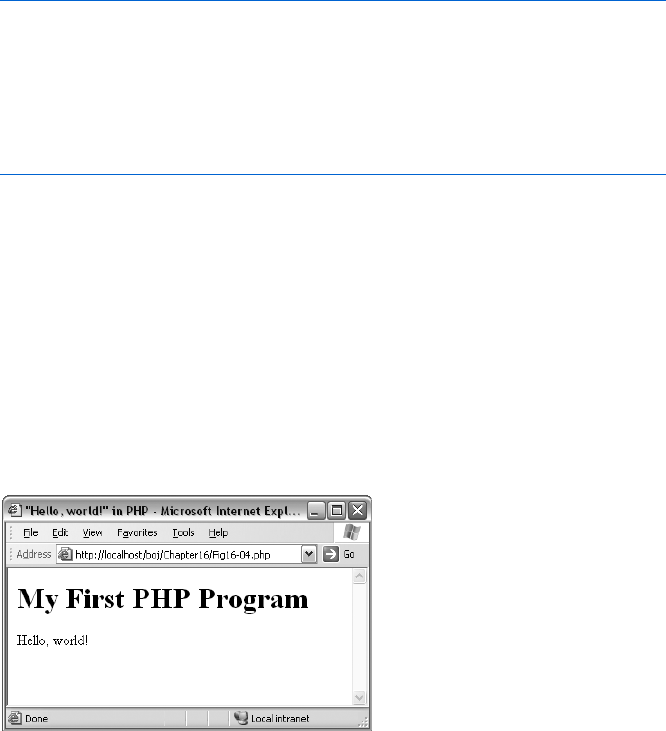
304 Chapter 16
PHP Basics
PHP code can sit in its own text file, or it can be integrated into the HTML of
a web page. The characters <?php mark the beginning of PHP code, and the
characters ?> mark the end of the code. Names of files containing PHP code
generally have the extension .php rather than .html.
Figure 16-4 shows the “Hello, world!” program, which tradition dictates
should be your first program in any language.
<html><head><title>"Hello, world!" in PHP</title></head>
<body>
<h1>My First PHP Program</h1>
X <?php
Y print "Hello, world!";
Z ?>
</body>
</html>
Figure 16-4: A basic PHP program
If you copy the contents of Figure 16-4 into a file, name it something
ending in .php, and put the file into a directory accessible by a webserver that
understands PHP, you’ll see something like Figure 16-5.
NOTE PHP programs must be run by a webserver. This means that you cannot simply “open”
a PHP file using your browser. Instead, you need to enter the URL of the PHP program
into your browser. If you put the PHP program in Figure 16-4 in the top-level directory
of your webserver and name the file hello.php, you can access the file using this URL:
http://localhost/hello.php. If that doesn’t work, try http://127.0.0.1/hello.php. If that
doesn’t work, check your webserver’s documentation to determine how to connect with
your webserver.
Figure 16-5: The web page resulting
from Figure 16-4
That’s it—your first PHP program. Now let’s see what it does.
The code in Figure 16-4 is very simple. First, note that it’s mostly HTML.
The PHP starts with the opening characters in X and ends with the closing
characters in Z. The only real line of PHP (Y) is the one that uses the PHP
function print to put the string “Hello, world!” into the web page. This is like
JavaScript’s document.write() function.

Server-Side Ajax 305
NOTE As in JavaScript, strings in PHP are contained in quotation marks.
When a PHP-savvy webserver reads in a file with a name ending in .php,
it looks for PHP statements between <?php and ?> characters and executes
them. The result is a new web page that is sent to the web browser—in this
case, a page with the string “Hello, world!” inside it. This transformation is
similar to what happens when a web browser reads in a page with JavaScript.
It looks for code between <script> and </script> tags, executes the code, and
shows the user the result.
A web page can contain both PHP and JavaScript. If it does, the page is
transformed twice: First, the page is read by the webserver, which executes
the PHP code and sends the result to the web browser. Next, the browser
executes the JavaScript code and displays the result to the user.
Sending Simple Input to PHP with a GET Request
Server-side programs generally take input from a web browser and use that
input to determine what to send back to the browser. For example, with
Google Maps, the input might be coordinates on a map, and the output
of the server-side program would be a new map. With the Ta-da List To Do
list, the input might be a new To Do item to save and the output might be
a message saying whether or not the new item was successfully saved.
Input can be sent to a server-side program as part of a GET request or as
part of a POST request. A GET request is used when the input you are sending to
a server-side program is fairly short, such as sending a coordinate to Google
Maps to be mapped. A POST request is typically used when the input is longer,
such as the contents of a new To Do item. Let’s start by focusing on GET
requests.
Passing Input in a URL
We used GET requests when we requested a test file from our hard drive in
Chapter 14. Here is an example:
request.open("GET", "my_file.txt");
This request has two parameters. The first indicates that we’re making a GET
request. The second tells JavaScript what we are requesting, in this case, the
file named my_file.txt. However, rather than requesting a local file, a GET
request usually goes to a webserver that is running a server-side program.
Instead of the name of a file, the request is typically a specially formatted
URL that has two parts: one part that indicates where a server-side program
is running, and another part containing input to send to the program.
It’s easiest to describe the format of this special URL with an example.
Here’s the URL used to ask Google Suggest to return a set of search terms
that start with the string no starch:
http://www.google.com/complete/search?js=true&qu=no%20starch

306 Chapter 16
Type that URL into your browser, and you’ll get results from Google that
look like this:
sendRPCDone(frameElement, "no starch", new Array("no starch press", "no
starch", "no starch diet", "no starch recipes", "no starch publishing", "no
starch publisher", "no starch books", "no starch diets", "no starch
publications", "no starch vegetables"), new Array("512,000 results",
"1,150,000 results", "312,000 results", "162,000 results", "271,000 results",
" ", " ", " ", "401,000 results", "237,000 results"), new Array(""));
The results may look like nonsense right now, but we’ll soon use them to
create a simplified version of Google Suggest.
There are a few interesting things about this URL. The part before the
question mark (http://www.google.com/complete/search) is just like a normal
URL; it points to where the resource lives on the Internet. The question mark
(?) indicates that the rest of the URL is input to be sent to the resource.
Input sent in a GET follows the form key1=value1&key2=value2&key3=value3
and so on. This example string is composed of three key-value pairs, joined
with ampersands (&). The three key-value pairs are key1=value1,key2=value2,
and key3=value3. A key-value pair is much like a variable and a value to store
in that variable. When this input is sent to the server-side program, the pro-
gram will access the values value1,value2, and value3 using the keys key1,key2,
and key3. We’ll see how to do this in a moment.
NOTE Keys don’t need to be named key1, key2 and key3. Like variables, they can be named
anything that begins with a letter or an underscore.
Turning back to Google Suggest, the input js=true&qu=no%20starch contains
two key-value pairs: js=true and qu=no%20starch. The first of these key-value
pairs (js=true) tells Google that you want the reply to come back in a single
line of JavaScript. The second key-value pair (qu=no%starch) is the actual string
you want Google to search for. Notice the %20 in the value? Spaces are not
allowed in URLs, so we use the hexadecimal ASCII value for a space instead.
Different resources will require different inputs. There are three ways to
determine what form the input is supposed to take: One is to read the docu-
mentation provided by the resource (or someone else); the second is to code
the resource yourself (as we’ll do in this chapter); and the third is to decon-
struct the JavaScript used by the resource by viewing the source on the web
page that calls the resource. How did I know that Google Suggest needs keys
named js and qu, and that the value for js needs to be true? I read it in a
good article (at http://serversideguy.blogspot.com/2004/12/google-suggest-
dissected.html). If you’re writing your own server-side script, you’ll go with
the second option—you’ll be coding the resource yourself.
Using PHP to Read the Inputs of a GET Request
Consider the following URL:
http://localhost/myKeys.php?name=dave%20thau&job=slacker
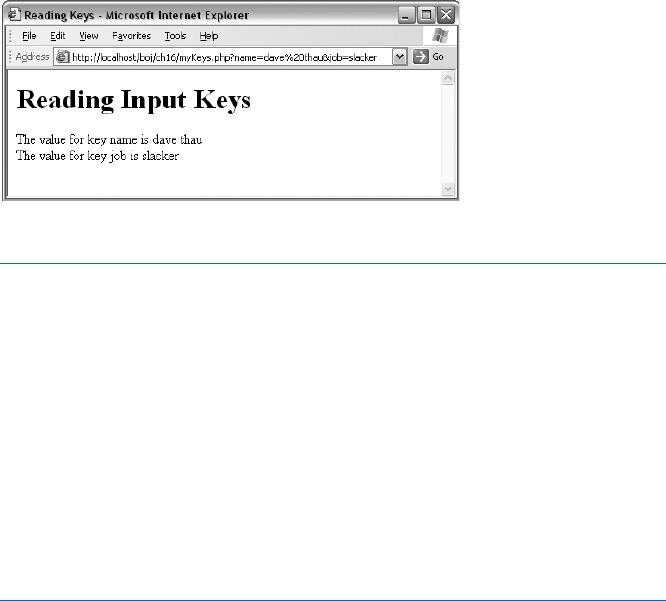
Server-Side Ajax 307
This URL points to a PHP program called myKeys.php. The text file containing
the program resides on a webserver running on my local computer, so I can
reach it using the domain localhost instead of something like nostarch.com.
This URL contains two input keys: name and job. Now the question is, how can
the PHP program access and use this input? The answer lies in PHP’s built-in
$_REQUEST variable.
Figure 16-6 shows the results of running a simple PHP program that reads
some keys from a URL like the one above and displays them in a web page.
The code for this PHP program is shown in Figure 16-7.
Figure 16-6: A web page displaying PHP parameters
<html><head><title>Reading Keys</title></head>
<body>
<h1>Reading Input Keys</h1>
<?php
X $name = $_REQUEST["name"];
$job = $_REQUEST["job"];
?>
Y The value for key name is <?php print $name; ?> <br>
The value for key job is <?php print $job; ?> <br>
</body>
</html>
Figure 16-7: Accessing GET parameters in PHP
Like JavaScript, PHP has many built-in variables. One such variable is
$_REQUEST, which contains all the keys sent to the PHP script using either GET
or POST. To get the value of a GET key, just include that key’s name in quotes
between open and close brackets of the $_REQUEST variable. (In contrast to
JavaScript, PHP variable names all begin with a $ sign, and they do not have
to be declared with var.)
Now you should be able to understand the code in Figure 16-7. Line X
sets the $name variable to the value of the name key retrieved from the built-in
PHP $_REQUEST variable. This value is then inserted into the web page in Y.
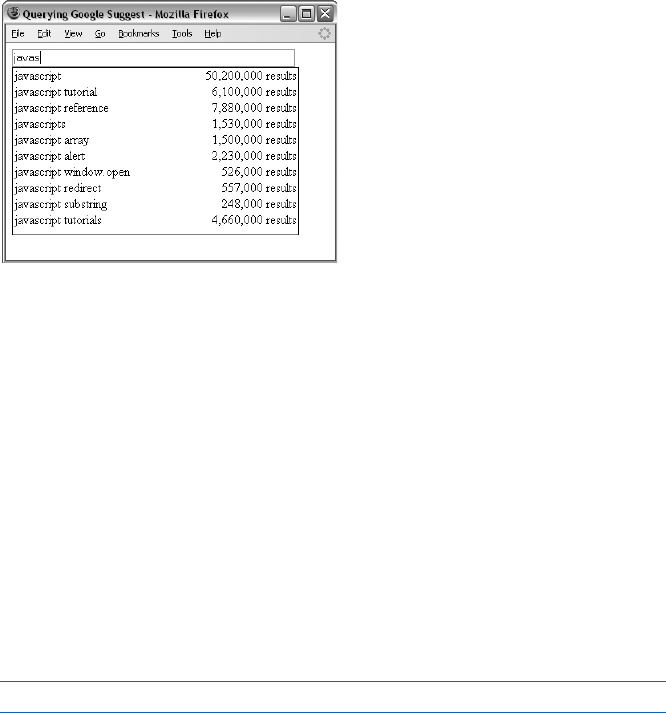
308 Chapter 16
Creating a Google Suggest Application with an Ajax GET
Request
Let’s take what we’ve covered so far and build a useful application with it.
Figure 16-8 shows a homemade interface to the Google search engine that
works much like Google Suggest. As you can see in the figure, I’ve typed the
first few letters of the word javascript, and the application is showing how
many results would be returned by searches starting with those letters.
Figure 16-8: Searching for javascript in our
version of Google Suggest
The page you see in Figure 16-8 is very similar to the translator example
in Figure 15-10. In that example, we used Ajax to read a file containing English
words and their Italian translations and then used the information in that file
to show the words that matched specific user input. In Figure 16-8 the infor-
mation we’re showing comes from Google rather than from a file. In the
following sections, I will modify the code in Figures 15-6, 15-11, and 15-12
to create a simple homemade version of Google Suggest that actually
retrieves data from Google.
Contacting Third-Party Webservers with Ajax and PHP
The main challenge when modifying the code in Figures 15-6, 15-11, and
15-12 will be to retrieve information from Google instead of reading a file
from the hard drive. Line Z in Figure 15-6 looked like this:
request.open("GET", the_file + ".xml");
This line tells JavaScript that we are requesting a file. In the section “Passing
Input in a URL” on page 305, we saw how to format a URL with inputs that,
when entered into a browser, get you some results from Google. It would be
nice if we could simply put this URL in the second parameter of the open()
method instead of a filename. Then, instead of requesting a file, we would
be requesting information from Google. Unfortunately, because of the Ajax
security limitation described by Figure 16-3, we can’t use Ajax to query Google
directly for results. Instead, we have to write a PHP script that queries Google
for us.

Server-Side Ajax 309
Our solution will require two different files: a client-side file, which will
contain the HTML, JavaScript, and Ajax calls, and a server-side PHP file,
which will take user input from the web browser and use it to request infor-
mation from Google. When Google responds to the server-side PHP program’s
request, the server-side PHP program sends the information back to the
browser, which displays it.
This application is a bit complicated, so before getting into the nitty-
gritty of the code, let me sketch out how the code will work. As usual, the
action starts when a visitor types something into the text box in Figure 16-8.
With each keystroke in that box, the following occurs:
1. A JavaScript function sends an Ajax request to a PHP program (which
will be described shortly). The request includes as input the letters typed
into the text box.
2. The PHP program sends a request to Google asking about the number
of search results for words starting with those letters.
3. Google responds.
4. When the response is received, a JavaScript function called displayResults()
parses Google’s response and displays the answer.
Let’s start by looking at the JavaScript side of this application.
The JavaScript for the Homemade Google Suggest Application
Figure 16-9 shows you the client-side code for Figure 16-8. Much of the code
in Figure 16-9 is similar to the code in Figures 15-6, 15-11, and 15-12, so I’ll just
discuss the changes.
<html><head><title>Querying Google Suggest</title>
<script type = "text/javascript">
<!-- hide me from older browsers
function getSuggestions(the_word) {
var request = null;
var xml_response = null;
if (window.XMLHttpRequest) {
request = new XMLHttpRequest();
} else {
request = new ActiveXObject("Microsoft.XMLHTTP");
}
var escaped_word = escape(the_word);
Y var the_URL = "http://localhost/boj/Fig16-10.php" + escaped_word;
if (request) {
request.open("GET", the_URL);
request.onreadystatechange =
function() {
if (request.readyState == 4) {

310 Chapter 16
ZdisplayResults(request.responseText);
}
}
request.send(null);
} else {
alert("Sorry, you must update your browser before seeing" +
" Ajax in action.");
}
}
function displayResults(the_response) {
[var the_results = eval(the_response);
var display_me = "";
var splitter;
var this_result = null;
for (var loop = 0; loop < the_results.length; loop++) {
this_result = the_results[loop];
if (this_result != null) {
splitter = this_result.split("\t");
display_me += "<tr><td align='left'>" + splitter[0] +
"</td><td align='right'>" + splitter[1] + "</td></tr>";
}
}
document.getElementById("theResults").style.height = (the_results.length +
parseInt(the_results.length / 5) + 1) + "em";
document.getElementById("theResults").innerHTML =
"<table width='100%' border='0' cellpadding='0' cellspacing='0'>" +
display_me + "</table>";
}
\ function sendRPCDone(ignore1, ignore2, word_array, count_array, ignore3) {
var result_array = new Array();
for (var loop = 0; loop < word_array.length; loop++) {
result_array.push(word_array[loop] + "\t" + count_array[loop]);
}
return result_array;
}
// show me -->
</script>
</head>
<body>
<form>
]<input type = "text" size = "55" id = "theText"
onKeyUp = "getSuggestions(this.value);">
<div id = "theResults" style =
"width:22em;border:1px black solid;padding-left:2px;padding-right:2px">
</div>
</form>
</body>
</html>
Figure 16-9: The client-side Google Suggest code

Server-Side Ajax 311
As is typical of Ajax, most of the action occurs when the user does some-
thing. In this case, whenever a user types a character in the box, the code in
] calls getSuggestions() with the box’s contents. This function is much like
the typical Ajax functions you’ve seen many times now (e.g., doAjaxCall() in
Figure 14-4). It gets a request object, tells the object what request to make
and what to do when the response is received, and then sends the request.
For example, in Figure 16-9, the request object is told to request information
from the URL described in X and Y.
Dealing with Spaces in URLs
When getSuggestions() is called in ], it is passed the string of characters that
appear in the text box. This string may contain spaces or other characters
that are not allowed in URLs.
Now recall the built-in JavaScript function escape() from Chapter 12.
This function converts a string into something that can be legally saved in
a cookie, and it encodes strings so that they may be sent in a URL (turning
each space into %20, for example). Once the escape() function does its magic,
Y creates the full URL of the PHP program used to query Google. This URL
points to a document called Fig16-10.php, which is served up by my local
webserver. At the end of the URL we see a question mark, the key name word,
an equal sign, and then the URL-legal value of the characters the user entered
in the text box.
Next the request object contacts the PHP program named in the URL
and sets as input the letters typed into the text box. The PHP program (which
we’ll see in Figure 16-10) uses that input to request information from Google.
When the request is sent, and the answer received, the code in Z executes,
calling the function displayResults() and sending it whatever text the PHP
program returned.
The Response from Google
The rest of the script displays the information that our PHP program received
from Google and passed back to our JavaScript. To make sense of it, let's first
see what Google actually sends. Because the PHP program asks Google to
send the information back in a JavaScript-friendly form, Google’s response
looks like this:
sendRPCDone(frameElement, "javascript", new Array("javascript", "javascript
tutorial", "javascript reference", "javascripts", "javascript array",
"javascript alert", "javascript window.open", "javascript redirect",
"javascript substring", "javascript tutorials"), new Array("50,200,000
results", "6,100,000 results", "7,880,000 results", "1,530,000 results",
"1,500,000 results", "2,230,000 results", "526,000 results", "557,000
results", "248,000 results", "4,660,000 results"), new Array(""));
Although it may not seem obvious, this response is actually a call to a
Google-created JavaScript function named sendRPCDone(), which is called
with five parameters: frameElement,"javascript", two big arrays, and then
an empty array.

312 Chapter 16
The only things we care about are the two big arrays. The first array
contains the words that match the input "javascript". The second array con-
tains the numbers of results that each of those words would return if used in
a Google search. For example, the first element in the first array, "javascript",
will return the number of results stored in the first element of the second
array, 50,2000,000 results.
The sendRPCDone() function is defined somewhere by Google. It probably
does many interesting things with the function’s five parameters and then dis-
plays the results on a Google-friendly web page. But we don’t care how Google
uses that function. We're going to define our own sendRPCDone() function that
will do what we want it to do: format the contents of the function’s second and
third parameters and display the formatted information in our web page.
Processing the Google Results—The Magic of eval()
Recall that Z in Figure 16-9 sends the results returned by Google to a func-
tion called displayResults(). The first line of that function is very interesting
because it uses a built-in JavaScript function called eval(). The eval() function
takes a string and forces JavaScript to evaluate it. For example, if we run the
following two lines, we’ll end up with the_solution as 8:
var the_add_string = "3 + 5";
var the_solution = eval(the_add_string);
Notice that the_add_string is a string. If we printed the_add_string using
document.write() or alert() statement, it would print out 3 + 5. The eval()
function, however, treats the string 3 + 5 as if it were a JavaScript statement
and evaluates it.
As just discussed, that big string returned by Google is actually a
sendRPCDone() function call with parameters that contain the information we
requested. When the Ajax request has been completed, Z passes the string
to the displayResults() function, at which point the eval() in [ evaluates and
executes it.
Because we’re writing the JavaScript, we can write the sendRPCDone() func-
tion so that it will transform the two big arrays sent by Google into something
that our displayResults() function can handle.
Displaying the Results
Like the displayResults() function in Figure 15-12, this one displays an
array of items in a div. In Figure 15-12, each item in the array was an English
word, followed by a tab (\t), followed in turn by an Italian translation of
that word. The displayResults() function formatted each item and then
put the resulting lines into a div. The displayResults() function in this
example does exactly the same thing: It too displays a group of items in
an array, where each item is a search term, then a tab, and then the
number of results that you’d get if you searched for the term in Google.

Server-Side Ajax 313
The sendRPCDone() function takes the results retrieved from Google and
puts them into an array for displayResults() to process.
Take a look at sendRPCDone() in Figure 16-9. It takes the two big arrays,
loops through them, creates a string of the form search result,tab,number of
results, and adds that string to a new array. Finally, it sends that new array
back to displayResults(), which puts it into our div, just as displayResults()
did in Chapter 15.
Using PHP to Contact Other Webservers
That does it for the JavaScript side of this example. To recap, a user types
something into the text box. Each key press calls the getSuggestions() func-
tion, which uses a request object to send a request to our PHP program. The
PHP program then passes the request along to Google. Google answers
the PHP program with that big sendRPCDone string, and the PHP program
sends the string back to the request object. When the request object has
received the string, the displayResults() function is called. This function calls
eval() on the sendRPCDone string, and this evaluation results in a call to the
sencdRPCDone() function we wrote. This function takes the response from
Google and returns an array, which displayResults() then uses to update
the web page.
The piece we need to add is the PHP program that takes the request
from the JavaScript, sends it to Google, receives the answer from Google, and
then passes the answer back to the JavaScript. You can see that PHP program
listed in Figure 16-10.
<?php
X include "Snoopy.class.php";
Y $snoopy = new Snoopy;
Z $requestedWord = $_REQUEST["word"];
[ $googleURL =
"http://www.google.com/complete/search?js=true&qu=" .
$requestedWord;
\ $snoopy->fetchtext($googleURL);
] print $snoopy->results;
?>
Figure 16-10: The Google Suggest server-side program
When this PHP program is called, the value of the word key in the URL that
is defined in Y in Figure 16-9 is automatically stored in the $_REQUEST["word"]
PHP variable. The PHP program uses that value to create a Google URL with
two keys, js and qu (as discussed in the section “Passing Input in a URL” on
page 305). Setting the first key to true means we want our results to come
back as JavaScript—that is, as that long string returned by Google, the
one that starts with sendRPCDone. The second key identifies the phrase
to search for.

314 Chapter 16
Let’s start at the top of the script. The first line (X) provides access to a
PHP library named Snoopy. Just as you can import external JavaScript files
into your JavaScript code with a line like
<script type = "text/javascript" src = "blah.js"/>
you can include code from PHP libraries into your PHP code using the
include command.
NOTE Snoopy (available at http://snoopy.sourceforge.net) provides code that makes it very
easy to send messages to other webservers. If you have a webserver running PHP,
download Snoopy and follow the install instructions.
Once Snoopy is included, we create a new Snoopy object in Y. This
object will send the request to Google and store the response. Lines Z and [
create the URL that will be used to contact Google. Line Z gets the value of
the word key, which was set in the URL that was used to call the PHP program.
Line [ puts that value at the end of the Google URL. (Notice here that PHP
uses a period to connect two strings, as opposed to JavaScript, which uses a
plus sign.)
Line \ in the PHP sends the request to Google and stores the response.
Finally, ] prints the results and sends them to the JavaScript request object
that requested the information. Once all the information has been loaded
into that request object, Z in the JavaScript in Figure 16-10 calls the function
displayResults() and the JavaScript proceeds as just discussed in the section
“Displaying the Results” on page 312.
Snoopy handles much of the difficulty involved in sending the request to
Google and receiving the results. (One of the great things about PHP is that
there are many such libraries available.)
That about wraps up your first full Ajax client-server web application. We’ve
covered many details in this example, but what’s most important is that you
understand how to write a web page with JavaScript that contacts a PHP
program, how to use PHP to contact a different webserver in turn for infor-
mation, and how to pass that information back to the JavaScript page.
Before you go on, make sure you understand how to use the GET method
to pass input to the PHP program by appending key-value pairs to the end
of the URL and how the PHP program can read those inputs. Finally, be
sure that you know how to use eval() to execute a function returned by
a webserver such as Google’s. Other webservers, such as Yahoo!’s, also
respond to Ajax requests by returning JavaScript that is meant to be
evaluated.
Ajax and the POST Method
Passing information to PHP programs using a GET is useful for most
situations in which you want to send information to a server-side program
and when that information will easily fit in a URL. Sometimes, however,
you want to send more information than can easily be put into a URL.
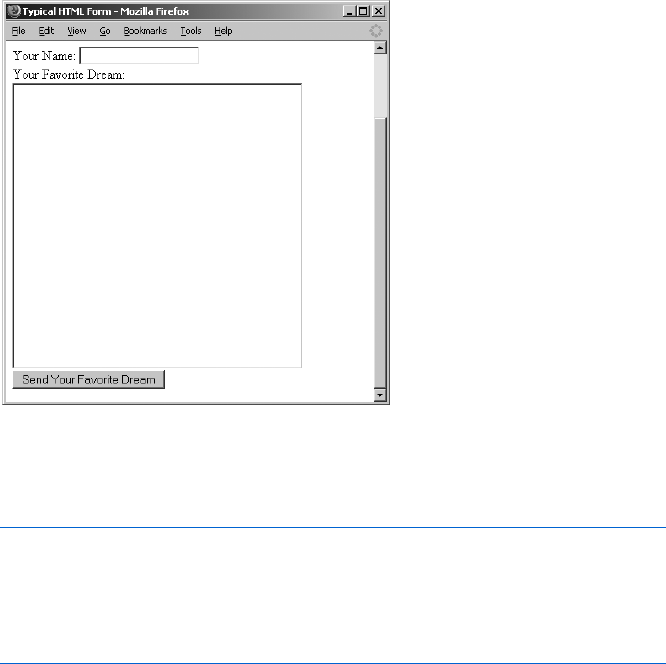
Server-Side Ajax 315
For those cases, it’s best to use the POST method to send information to
a server-side program.
The POST method is usually used in combination with an HTML form,
such as the one shown in Figure 16-11.
Figure 16-11: A typical HTML form
The code for the standard HTML form shown in Figure 16-11 might
look like this:
<form method = "POST" action = "http://www.somesite.com/program_name">
Your Name: <input name = "personName" type = "text"><br>
Your Favorite Dream: <br>
<textarea name = "dream" rows = "20" cols = "40"><br>
<input type = "submit" value = "Send Your Favorite Dream">
</form>
In the non-Ajax style of web browser/webserver interaction, a user would
fill out this form and click the submit button (labeled Send Your Favorite Dream).
The web browser would package the information in the form and send it to
the server-side program named in the action attribute of the <form> tag. That
program would process the input and send a web page back to the browser,
which would then reload to display the new web page.
Things are a bit different with Ajax. Instead of using the web browser’s
normal submission technique, a request object is used to send the form
information. This means that the request can be sent to the webserver and
the results can be displayed to the user without the page reloading.
Luckily for us, the PHP we covered in the previous section works
exactly the same for the GET and POST methods. Only the JavaScript needs
to change.

316 Chapter 16
An Ajax-Friendly Form
Forms designed for Ajax are slightly different from normal HTML forms.
The main differences are that you don’t need to include an action in the <form>
tag and you don’t use a submit form element to submit the form. With these
things in mind, here’s an Ajax-friendly version of the form we just looked at:
<form>
Your Name: <input name = "personName" type = "text"><br>
Your Favorite Dream: <br>
<textarea name = "dream" rows = "20" cols = "40"><br>
<input type = "button" value = "Send Your Favorite Dream"
onClick = "doSubmission(this.form)">
</form>
Notice that there are no action or method attributes in the <form> tag
and that instead of an input of type submit at the end, an input of type button
calls a JavaScript function when clicked. (An HTML link with an onClick in it
would work just as well.)
POSTing with Ajax
Changing our now-familiar Ajax function from using a GET method to using a
POST method requires only a few alterations.
First, the line that tells the request object about the resource to query
needs to change from
request.open("GET", the_URL);
to
request.open("POST", the_URL);
Second, because the URL we’ll be sending will not include any of the
input that we sent with the GET method (the stuff after the question mark), we
modify it for the POST method so that it indicates only where the server-side
program resides.
Instead of putting the input at the end of the URL, we send it as a string
with the request. Previously, the request object made the request using a line
like this:
request.send(null);
Using the POST method, we replace null with a string containing the
information we want to send to the server-side program:
request.send("personName=dave%20thau&dream=world%20peace");
The string looks exactly like the input string we sent using GET: It’s a set of
key-value pairs separated by ampersands (&).

Server-Side Ajax 317
Finally, we tell the server-side program that we’ll be sending it POST-style
information so that PHP will put this information into its $_REQUEST variable.
To do so, use this line:
request.setRequestHeader("Content-Type","application/x-www-form-urlencoded;
charset = UTF-8");
This line says that we’re sending a www-form-urlencoded request. The charset
attribute specifies that the characters are encoded using Unicode, a standard
for representing characters. You can use this line verbatim; just replace request
with the name of the request object.
Figure 16-12 shows the JavaScript side of sending a POST message. Because
the PHP code is almost exactly like the code in Figure 16-7, I won’t discuss it.
<html><head><title>Typical HTML Form</title>
<script type = "text/javascript">
<!-- hide me from older browsers
function submitMe(my_form) {
var request = null;
X var message = "personName=" + my_form.elements["personName"].value +
"&dream=" + my_form.elements["dream"].value;
if (window.XMLHttpRequest) {
request = new XMLHttpRequest();
} else {
request = new ActiveXObject("Microsoft.XMLHTTP");
}
Y var the_URL = "http://localhost/boj/ch16/Figure16-12.php";
if (request) {
Z request.open("POST", the_URL);
[ request.setRequestHeader("Content-Type",
"application/x-www-form-urlencoded; charset=UTF-8");
request.onreadystatechange =
function() {
if (request.readyState == 4) {
\document.getElementById("display").innerHTML =
request.responseText;
}
}
]request.send(message);
} else {
alert("Sorry, you must update your browser before seeing" +
" Ajax in action.");
}
}
// show me -->
</script>
</head>
<body>
<h1>Make Your Dream Unchanging</h1>
^ <div id = "display">
<form>
Your Name: <input name = "personName" type = "text"><br>
Your Favorite Dream: <br>
<textarea name = "dream" rows = "20" cols = "40"></textarea><br>

318 Chapter 16
_ <input type = "button" value = "Send Your Favorite Dream"
onClick = "submitMe(this.form);">
</form>
</div>
</body>
</html>
Figure 16-12: Sending an Ajax POST
Clicking the button in _ calls the submitMe() function. This function is
sent a pointer to the form, and X reads the contents of the form and constructs
the string that will be sent to the PHP program. The URL of that program is
defined in Y. Notice that the only information in the URL is the location of
the program; there is no additional input.
In Z we tell the request object about this URL and that we’re going to
send a POST-style request. Line [ further specifies that the information we’re
sending the server-side program is coming from a form. Finally, ] sends the
request and passes the string constructed in X.
The PHP program will process this message string and return some
results. When the results are fully loaded into the request object, \ will place
them into the div that initially contains the form (^). Replacing the contents
of the div will replace the form with whatever message has been sent back by
the PHP program.
Sending XML Information from the Browser to a Webserver
Don’t forget that the X in Ajax stands for XML. XML files can be sent to a
PHP program just like any other contents. Because XML tends to be lengthy,
it’s generally best to send it by using the POST method and putting the XML
into the request object’s send() method.
HEAD Requests: Getting Information About a Server-Side File
The previous sections described how to use GET and POST methods to send
information to a server-side program and retrieve the server-side program’s
response. Sometimes, in addition to the information returned by the web-
server, a response can contain information about the response itself. This
kind of information, sometimes called metadata, is stored in a normally
invisible part of the response called the response header. A response can have
many headers. Headers might include information such as the number of
kilobytes in the response, when the response was sent, and when that file was
last updated. Here are some of the headers returned by Flickr.com when it
answers an Ajax request:
Date: Wed, 20 Dec 2006 21:11:46 GMT
Server: Apache/2.0.52
Content-Type: text/xml; charset = utf-8

Server-Side Ajax 319
These are just three of the headers Flickr sends back. The first one, named
Date, sends back the time the response was sent. The header named Server
describes the kind of webserver Flickr uses. The last header, Content-Type,
gives you information about the format of the response (it’s XML, sent using
the UTF-8 character set).
These headers can be very useful. For example, in Chapter 17 we will
discuss the details behind developing a multiuser To Do list application. In
order to create a sharable To Do list, we will store the To Do list information
in a file on a webserver so that it can be modified by many different users.
When two people are working on a To Do list at the same time, one user
should see the changes made by the other user soon after those changes have
been made, without needing to reload the page.
In order to have our Ajax program always display the most up-to-date
version of the To Do list, we might refresh the file every few seconds. However,
if there are many items on the To Do list, the file containing the list might
become very large. Rather than repeatedly download a very large file that may
not have changed, we can simply look up the last time it was modified and
use this information to see whether we need to get a newer version of the file.
When a webserver responds to any request, it can include response head-
ers. When you are interested in a header but don’t want to retrieve the entire
response, you can use a HEAD request to retrieve just the response headers:
request.open("HEAD", the_URL);
When the request is answered and the response has been downloaded into
the request object (the request object is in readyState 4) you can access the
header information with the request object’s getResponseHeader() method.
The date and time a file was last modified is usually sent in a header named
Last-Modified, which can be retrieved by calling the getResponseHeader() method
with the string "Last-Modified":
var last_modified = request.getResponseHeader("Last-Modified");
Using the returned value to create a new Date() object makes it easy to
access the information. Here is an example:
var last_modified_date = new Date(last_modified);
(In Figures 16-15 and 16-16 at the end of this chapter, you’ll see an example
of using a HEAD request to see whether a file has been updated.)
Adding Headers to Your Responses
Headers, such as the Last-Modified and Date header just described, are added
to a response by the server-side program that sends the response. To add a
header to a response sent by PHP, use PHP’s header() function, which takes
a string describing the header as a parameter. For example, to set a header
named My-Header, use the following:
header('My-Header: I am a header');

320 Chapter 16
The header information is sent as soon as PHP sees this line. The line should
appear toward the top of your PHP program, before any print commands.
If you try to set a header after using print, PHP will give an error. An example
of setting headers will be shown soon in Figure 16-16.
Headers and XML
In Chapter 14 you saw two different ways to access the information stored
in the request object: responseText and responseXML. A string version of all
responses is stored in the request object’s responseText property, and if the
response is an XML document, an XML version of the response is accessible
in the responseXML property. (The XML version is nice because it allows you to
navigate the XML document using the XML-handling methods we discussed
in Chapter 15.)
The request object needs to know that the response is an XML document
before it will store the response in the responseXML property. To tell it that
your response is XML, set the header information of the PHP response using
the header() function. Simply placing the following line in your PHP program
before using print to send a response should do the trick:
header("Content-Type: text/xml");
This will tell the request object that this response is an XML document.
The Caching Problem
We have now seen three different kinds of requests: GET,POST, and HEAD. Each
of these requests requires a URL pointing to the resource being requested.
In some situations, such as the interactive To Do list application we’ll be
discussing in Chapter 17, a file may be requested multiple times during the
course of a user’s interaction with the application. Although the contents of
the file might change, the URL pointing to that file does not. This situation
can cause problems for some browsers. Internet Explorer, for example, is
notorious for not updating a web page even though the page’s contents have
changed.
Firefox and most other browsers generally behave as you would expect,
updating the web page with the new information. Internet Explorer, how-
ever, decides whether or not to update the page based on the URL used in
the request. If that URL looks familiar, IE assumes that the new page is just
like the old one (it has the same URL after all), and it won’t update. This is
bad news for Ajax, because it means that the new information won’t be
shown.
Happily, there is an easy fix for this problem: Make each URL look
different every time. Here is an example:
var the_URL = "http://mydomain.com?ignoreMe=" + new Date().getTime();

Server-Side Ajax 321
Recall from Chapter 2 that the getTime() method of a Date object returns
the number of seconds between the time the method is called and January 1,
1970; a number that will differ every second. Setting a parameter such as
ignoreMe equal to the results of getTime() makes the URL different every time
the URL is used. This will trick Internet Explorer into thinking it’s a new
URL, inducing IE to update the page. We’ll see an example of this trick in
Figure 16-15.
File Handling in PHP
PHP programs can read and manipulate files that reside on webservers.
With PHP, you can read a text file, create a new text file, and edit the text in
a file on the server. Once a file is created on a webserver, it can be accessed by
any web browser. When a webserver file is edited, those edits will be seen by
anyone looking at the file.
Creating and Adding Contents to a Text File with PHP
To use PHP to create a new text file, or to change the contents of an existing
text file, you must:
1. Open the file and signify that you want to write contents to the file
2. Write text to the file
3. Close the file
To open a file for writing, use PHP’s fopen() function. This function
takes two parameters: the name of the file you want to open and either a "w"
if you want to replace the existing contents of that file with new text, or an
"a" if you want to add text to the end of the file. The fopen() function returns
a value, which you can use in your PHP program to refer to the file you’ve
just opened. For example, to open myFile.txt for writing, use this line:
$myFile = fopen("myFile.txt", "w");
NOTE When you open a file with "w" as the second parameter, the old contents of the file are
deleted. Therefore, if you want to edit the contents of a file, you should first read the
contents of the file into a variable, then edit the contents of the variable, and then write
the contents back to the file. We’ll be doing this in Chapter 17.
Once a file has been opened, use the PHP function fwrite() to write to it.
This function takes the value returned by the fopen() function and the string
you want to write to the file. The function returns either TRUE or FALSE, depend-
ing on whether or not it succeeded in writing to the file. (Writing may fail for
several reasons: the hard drive might be full, or the webserver might not have
permissions to write to the file.) For example, to write two lines to the file
you opened above, use this line:
$success = fwrite($myFile, "line one\nline two");

322 Chapter 16
The \n puts a line break into the file, which creates a two-line file in this case.
If the write is successful, $success will contain the value TRUE; if not, it will con-
tain the value FALSE.
Once you’ve written to a file, close it with fclose():
fclose($myFile);
Combining these lines gives you the PHP script below:
<?php
$myFile = fopen("myFile.txt", "w");
$success = fwrite($myFile, "line one\nline two");
fclose($myFile);
if ($success == TRUE) {
print "Write succeeded";
} else {
print "Write failed";
}
?>
One of the more pernicious problems you’ll encounter when dealing
with server-side programming is that of ensuring that your webserver has
permission to alter the files you want to alter. Sometimes a PHP program can
fail to write to a file because the webserver running it does not have access to
that particular file. If this happens, PHP will give an error like this:
Warning: fopen(yourFile.txt) [function fopen]: failed to open stream:
Permission denied.
File permissions work differently on different operating systems. If you
get this kind of error, refer to your operating system’s manuals to determine
how to inspect and modify file permissions.
Reading Files in PHP
It’s a bit trickier to read a file using PHP than it is to write to a file. The
complication arises because the contents of a file are read line by line, and
PHP needs to know when it has reached the end of a file so that it can stop
reading. Luckily, the PHP function feof() will tell PHP when it has reached
the end of a file. This function takes a variable that points to an open file
(such as $myFile) and returns TRUE when the end of the file has been reached.
Figure 16-13 shows an example of PHP reading a file.
<?php
X$myFile = fopen("myFile.txt","r");
$contents = "";
Ywhile (feof($myFile) == FALSE) {
Z$contents = $contents . fgets($myFile);
}

Server-Side Ajax 323
[fclose($myFile);
print "The file's contents are: " . $contents;
?>
Figure 16-13: Reading a file with PHP
In Figure 16-13, X opens the file for reading and puts a pointer to the
opened file into the variable $myFile. The most complicated line is Y, which
calls the feof() function on $myFile to see whether PHP has reached the end
of the file. If not, feof() returns FALSE, and the line inside the while loop is
executed. This line uses the function fgets() to read a line from $myFile.
It takes that line and attaches it to the end of the $contents variable, so each
time through the loop the next line of $myFile is appended to the end of
$contents. Eventually, the last line of $myFile will be read and the feof()
function will respond with TRUE. When that happens, the loop ends, and the
program returns the contents of the file.
NOTE Notice how similar PHP and JavaScript are. They have identically structured while
loops, they both use two equal signs to see whether two things are the same, and they both
use the values TRUE and FALSE (although in JavaScript these values are lowercase).
When Communication Breaks Down
When a web browser contacts a webserver for information, many things can
go wrong. Here are some examples:
zThe page being requested may not actually be on the server.
zThe user may not have permission to access the page.
zIf a server-side program is being called, something might go wrong with
that program.
zThe server might take too long to get back to the web browser, and the
browser might stop waiting.
When a request object sends a request and then says that the request
has been fulfilled (its readyState is 4), all we really know is that the request has
been answered in some way. Everything could have gone well, with the server
sending the information requested, or something may have gone wrong.
To determine how the client-server communication went, we can check
the status property of the request object for a status code, as listed in
Table 16-1.
The most frequent numbers you’ll see are 200, if everything went well;
404, if the URL provided to the request object does not exist on the server;
and 500, if the request went to a server-side program, but something went
wrong with the program. Somewhat less frequently you may see a 401 or 403
if the page or program you are trying to access is password-protected, 408 if
the server took too long to respond, or 503 if the server exists but the server-
side program you are sending the request to does not.
324 Chapter 16
Typically, you should make sure that the request was satisfied and every-
thing went well (status code 200). To do so, add an if-then statement to
JavaScript functions that make Ajax calls, as shown in Figure 16-14.
request.open("GET", some_url);
request.onreadystatechange = function() {
X if (request.readyState == 4) {
Y if (request.status == 200) {
doSomething();
} else if (request.status == 404) {
Z document.getElementById("errorDiv").innerHTML =
'Sorry, the page you are accessing could not be found.';
} else if (request.status == 500)
document.getElementById("errorDiv").innerHTML =
'Sorry, there was a problem with the server.';
} else {
document.getElementById("errorDiv").innerHTML =
'Sorry, communication breakdown. Please try again.';
}
}
}
Figure 16-14: Adding a status check to an Ajax call
In this code sample, once the request object has reached readyState == 4
(X), we check its status. If the status is 200 (Y), then we do whatever it is
that we want to do when the request has been answered. If not, then we want
to tell the user that something went wrong—in this example, by putting a
message into a div with the id of errorDiv (Z).
Table 16-1:
Request Object Status Codes
Status Code Meaning
200 OK
204 No Content
400 Bad Request
401 Unauthorized
403 Forbidden
404 Not Found
407 Proxy Authentication Required
408 Request Time-out
411 Length Required
413 Requested Data Entity Too Large
414 Requested URL Too Long
415 Unsupported Media Type
500 Internal Server Error
503 Service Unavailable
504 Gateway Time-out

Server-Side Ajax 325
Automatically Updating a Web Page When a Server-Side File
Changes
Figures 16-15 and 16-16 demonstrate how to use HEAD calls, server-side file
reading, and the cache-tricking technique to read a file from a webserver,
display its contents, and update the contents whenever the file on the server
changes. This type of application is useful whenever more than one person
can update a file on a webserver—for example, if two people have access to
the same To Do list.
<html><head><title>Automatically Updating Display of a Changed File</title>
<script type = "text/javascript">
<!-- hide me from older browsers
var timeout;
function callReadFile(file_name) {
X readFileDoFunction(file_name, "GET",
Y function() {
if (request.readyState == 4) {
if (request.status == 200) {
var last_modified = request.getResponseHeader("Last-Modified");
var last_modified_date = new Date(last_modified);
displayResults(request.responseText, file_name,
last_modified_date.getTime());
}
}
}
);
}
function readFileDoFunction(file_name, read_type, the_function) {
if (window.XMLHttpRequest) {
request = new XMLHttpRequest();
} else {
request = new ActiveXObject("Microsoft.XMLHTTP");
}
Zvar the_url =
"http://localhost/boj/ch16/readTextFile.php?fileName=" +
file_name +
"&t=" + new Date().getTime();
var the_results;
if (request) {
[request.open(read_type, the_url);
\request.onreadystatechange = the_function;
request.send(null);
} else {
alert("Sorry, you must update your browser before seeing" +
" Ajax in action.");
}
}
function displayResults(the_results, file_name, last_modified) {

326 Chapter 16
document.getElementById("contents").innerHTML = the_results;
] timeout = setTimeout("callUpdateIfChanged(" + last_modified + ",'" +
file_name + "')", 5000);
}
function callUpdateIfChanged(current_last_modified, file_name) {
readFileDoFunction(file_name, "HEAD",
function() {
if (request.readyState == 4) {
if (request.status == 200) {
var last_modified =
request.getResponseHeader("Last-Modified");
var last_modified_date = new Date(last_modified).getTime();
if (last_modified_date != current_last_modified) {
callReadFile(file_name);
}
timeout = setTimeout("callUpdateIfChanged(" +
last_modified_date + ",'" + file_name + "')", 5000);
}
}
}
);
}
function stopTimer() {
clearTimeout(timeout);
}
// show me -->
</script>
</head>
<body>
<form>
<input type = "button" value = "Read the File"
onClick = "callReadFile('numbers.txt');">
<input type = "button" value = "Stop Checking" onClick = "stopTimer();">
</form>
<div id = "contents">
</div>
</body>
</html>
Figure 16-15: Client-side checking for updated server-side file
Figure 16-15 lists the client-side portion of the application. Clicking the
Read the File button in the form at the bottom calls the callReadFile() func-
tion and sends it the name of a file to read. The callReadFile() function does
only one thing—it calls a function named readFileDoFunction(), which does
the actual work of getting the file. We’ll take a look at readFileDoFunction()
first and then turn back to callReadFile().

Server-Side Ajax 327
readFileDoFunction()
The readFileDoFunction() function is a very generic function that deals with
situations where you want to use Ajax to read a file and then execute some
function. In all the Ajax examples up until now, functions that made Ajax
calls had a couple of lines like this:
request.open("GET", some_url);
request.onreadystatechange = function() {
if (request.readyState == 4) {
doSomething();
}
}
As you know, this tells a request object where a request should be sent and
what to do when the request has been satisfied.
The readFileDoFunction() function does the same thing, but it’s a bit more
flexible. The function is sent three parameters: the name of a file to read, the
way to read it (use a GET or a HEAD call), and the function to execute when the
readyState changes. Line Z in the function takes the first parameter, the
name of the file, and creates a URL with it.
NOTE Notice that the URL has "&t=" + new Date().getTime() at the end. This makes the
URL look different every second and overcomes Internet Explorer’s overzealous caching
by tricking it into thinking that you’re requesting something you haven’t requested
before.
Lines [ and \ are the new versions of the typical Ajax lines mentioned
above. Line [ tells the request object the kind of call to make (GET or HEAD)
and where to send the request. Line \ assigns the function that should be
called when the request object’s readyState changes. Normally, an anonymous
function would go after the equal sign, but in this case we put a variable which
holds the anonymous function there.
callReadFile()
Now let’s look back at the callReadFile() function to see what it’s doing. Line
X calls the readFileDoFunction() function just described. This function takes
three parameters, the first two of which are the name of the file, which was
sent to callReadFile(), and the type of call we want to make, which is a GET call.
The third parameter, which starts in Y, is an entire anonymous function.
We’re taking the function that we normally would have put after the equal
sign in \ and passing it as a parameter to readFileDoFunction(). This tech-
nique is nice because it means that we can use readFileDoFunction() whenever
we want to use Ajax to read in some file and execute some function once the
file is read.
In the case of callReadFile(), which is called when a user clicks the Read
the File button, we want to read in the file whose name was passed into
callReadFile(), numbers.txt; then, when the file has been completely read,
328 Chapter 16
we want to get the Last-Modified header of the file that was read and then
call the displayResults() function, which will display what was retrieved
from the file.
The displayResults() function takes three parameters: the contents of
the file we have just read, the name of the file we’ve read, and the number
of seconds between January 1, 1970 and the time the file was last modified
(from now on, let’s just call that the last modified time). The function first
displays the contents of the file by putting them into the div with the id of
contents. Then ] sets up a time-out that will call the callUpdateIfChanged()
function in five seconds. Once five seconds have passed, this function does
aHEAD call to read the Last-Modified header of the file. If at some point dur-
ing the last five seconds the file has changed, the new Last-Modified header
will differ from the one we retrieved when we first read the file. If the new
Last-Modified value is different, the new version of the file will be read, the
web page will be updated, and the last modified time will be updated to
reflect the fact that the file changed.
callUpdateIfChanged()
Like callReadFile(),callUpdateIfChanged() does just one thing—it calls
readFileDoFunction(). In this case, however, we’re doing a HEAD call and
sending a different anonymous function to be called when the request
object’s readyState changes. This anonymous function gets the value of
the new Last-Modified header, checks to see whether the time is different
from when we read the file the first time, and, if it is, makes another call to
callReadFile(). Just as before, callReadFile() reads in the file and sets the last
modified time. Lastly, callUpdateIfChanged() creates another time-out to call
callUpdateIfChanged() again in five seconds.
stopTimer()
The only function left to describe is stopTimer(), which simply cancels the
most recently set time-out. This function is called when the user clicks the
Stop Checking button.
Recap and Breathe
Summarizing to this point, the interesting elements in Figure 16-15 include
passing an anonymous function as a parameter to another function, using
aHEAD call to retrieve the last modified time of a file, and attaching a new
Date().getTime() to a URL to trick Internet Explorer into thinking you’re
making a request that is different from one you made earlier.
The Server-Side PHP Code
Now let’s turn to Figure 16-16, which lists readTextFile.php, the server-side
program called in Z.

Server-Side Ajax 329
<?php
$fileName = $_REQUEST["fileName"];
X header('Last-Modified: '.
gmdate('D, d M Y H:i:s', filemtime($fileName)) .
' GMT');
Yif ($_SERVER["REQUEST_METHOD"] != "HEAD") {
$myFile = fopen($fileName, "r");
$contents = "";
while (feof($myFile) == FALSE) {
$contents = $contents . fgets($myFile);
}
fclose($myFile);
print $contents;
}
?>
Figure 16-16: The readTextFile.php called in Z of Figure 16-15
The PHP code in Figure 16-16 is fairly straightforward. After getting the
name of the file to read from PHP’s built-in $_REQUEST variable, the code in X
sends the Last-Modified header to the browser.
The tricky part of X involves using built-in PHP functions to create a
date and time that JavaScript can understand. The code uses two PHP
functions: gmdate() formats the string, and filemtime() returns the time
when the file named by $fileName was last modified.
Next, the code checks to see whether this is a HEAD request, using the code
in Y. This code looks at the built-in PHP variable $_SERVER["REQUEST_ METHOD"],
which will store the value "GET","POST", or "HEAD". If it is "HEAD", then all the
PHP script should do is send the header information in X. If it is not a HEAD
request, then the body of the if-then clause reads the contents of the file into
the $contents variable, and Z sends that information to the browser.
Summary
Phew. Here’s a rundown of everything covered in this chapter:
zHow server-side programs let you store information from many users
in one place and let you use facilities available to machines running
webservers
zHow the server-side language PHP uses variables, if-then clauses, and
loops, much like JavaScript does
zHow to use URLs and web forms to send information to server-side PHP
programs
zHow to send GET,POST, and HEAD requests to a server-side program
330 Chapter 16
zHow to use PHP and the Snoopy library to contact other webservers
zHow to use PHP to save and read files on webservers
zHow to trick Internet Explorer into not caching your web pages
zHow to share XML information between client-side and server-side
programs
Congratulations! You have now learned practically all the JavaScript this
book has to teach. The next chapter contains only a small amount of new
information; it mostly applies all the JavaScript you’ve learned so far to the
task of creating a multiuser Ajax-driven To Do list application. So sit back,
take a break, and bask in your new JavaScript knowledge.
Assignment
If you didn’t complete the steps described in “Setting Up a Webserver and
PHP” on page 273, do so now.
PUTTING IT ALL TOGETHER
IN A SHARED TO DO LIST
This is it! The last big script of The Book of
JavaScript! This is where we combine every-
thing that we’ve learned so far to create a
shared To Do list. This application draws from
every chapter in this book. It uses the basic structure of
JavaScript tags from Chapter 1, variables from Chapter 2,
if-then clauses from Chapter 3, events from Chapter 4,
window manipulation from Chapters 5 and 10, functions from Chapter 6,
forms from Chapter 7, loops and arrays from Chapter 8, time-outs from Chap-
ter 9, string handling from Chapter 11, cookies from Chapter 12, dynamic
HTML from Chapter 13, client-side Ajax from Chapter 14, XML from Chap-
ter 15, and server-side Ajax from Chapter 16.
I’ll only cover part of the application here; your homework will be to
complete it.
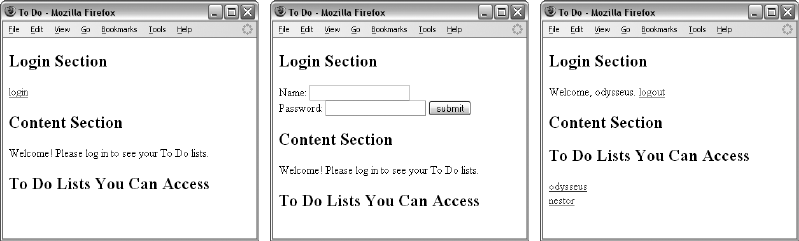
332 Chapter 17
Features of the To Do List Application
Our shared To Do list application will have a membership base. New users
can join the site, and once they’ve joined, can log in to and out of the site.
When someone joins the site, that user starts with a blank To Do list, and I
will call that user the owner of that list.
The owner of a list can add items to the list and mark items as completed
or not. A list owner can also designate other users as subscribers to the list.
Subscribers can modify the To Do list just as an owner can. I’ll use the word
editor to describe the list’s owner or one of the list’s subscribers.
To review, the application will provide the following features:
zNew users will be able to sign up and create their own To Do lists
zCurrent users can log in to and out of the site
zSomeone who has created a To Do list can allow other users to edit her list
zList editors can add new items to a To Do list
zList editors can mark items as completed
zList editors can mark completed items as uncompleted
In the scenarios that follow, two people, Nestor and Odysseus, have signed
up for the To Do list service. Each has built his own To Do list and added
items to it. Nestor has allowed Odysseus to see and modify his list, but Odysseus
is keeping his own list private. Figures 17-1 through 17-6 show you the major
features of the partial application. But first, a caveat. Although the design
and user interface of this application are functional, they are also hideous.
Apologies to those with delicate design sensibilities.
Figures 17-1 through 17-3 show the process of clicking the login button
and logging in. Notice at the bottom of Figure 17-3 that Odysseus can choose
to see either his own list or Nestor’s list. If Nestor had logged in, he would
see only his own list because Odysseus hasn’t shared his list with Nestor.
Notice also that Odysseus can log out.
Figure 17-4 shows the screen after Odysseus has chosen to see his own
list. He has two uncompleted tasks on his To Do list.
Figure 17-1: The view when first
coming to the site
Figure 17-2: After clicking the
login link
Figure 17-3: After Odysseus
logs in
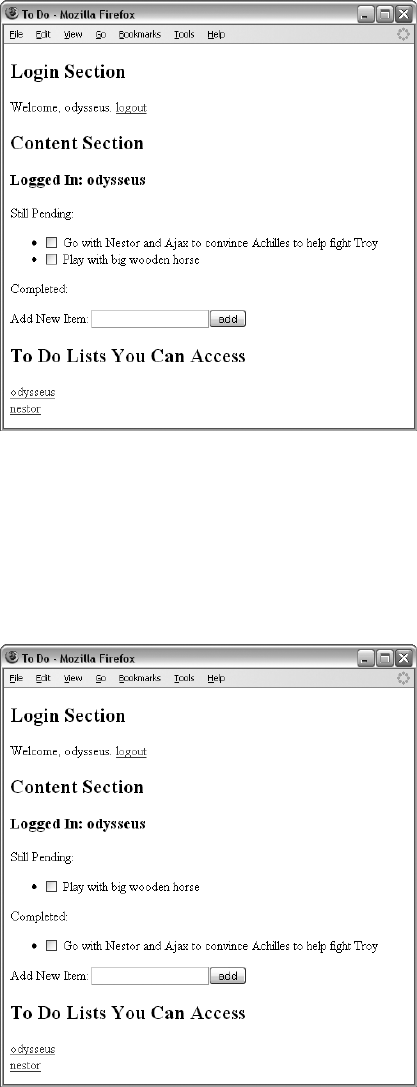
Putting It All Together in a Shared To Do List 333
Figure 17-4: Viewing Odysseus’s list
Figure 17-5 shows the screen after he clicks the checkbox next to the first task
in the Still Pending list, signaling that he has completed it. If Odysseus has
made a mistake and didn’t really finish that task, he can click the checkbox
next to the task in the Completed list and move it back to the Still Pending
section. Finally, Figure 17-6 shows the screen after Odysseus has added a
new item to his list.
Figure 17-5: After marking the first task as completed
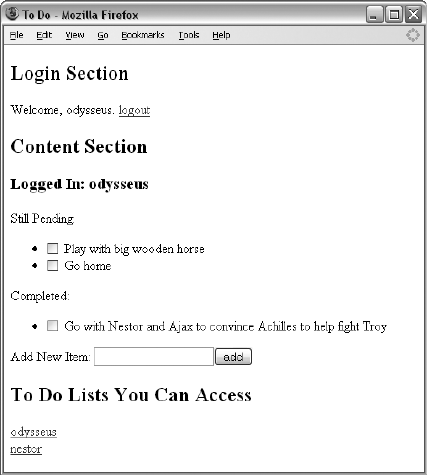
334 Chapter 17
Figure 17-6: After adding a new item to the list
The application uses the automatic updating trick from Chapter 16. If
Nestor is looking at his To Do list, and Odysseus adds something to Nestor’s
list, Nestor will automatically see his list update.
The same is true for the To Do lists each person can see. If someone new,
say Achilles, decides to let Odysseus have access to his list, and Odysseus is
logged in, Odysseus’s page will automatically update to let him know that
he now has access to Achilles’s list.
There are three different types of files that make this application work:
an HTML file with some JavaScript in it, which works in the browser; a server-
side program, which runs on the webserver (a PHP program in this case); and
some data files (XML), which store the information used by the application.
Let’s turn first to the data files.
To Do List Data Files
The To Do list application uses two different types of XML files: One file,
userInfo.xml, describes all users with access to the application. The second
type of file represents a To Do list. Each user will have one To Do list file.
userInfo.xml
userInfo.xml contains the name, password, and profiles of all the users who
have signed up to use the To Do list application. It also contains information
about who can edit which lists. Figure 17-7 shows an example of userInfo.xml.

Putting It All Together in a Shared To Do List 335
X <?xml version = "1.0" ?>
Y <users>
<user>
Z <name>nestor</name>
<password>cup</password>
<profile>King of Pylos, fought the centaurs</profile>
<lists>
<list>nestor</list>
</lists>
</user>
<user>
Z <name>odysseus</name>
<password>horsie</password>
<profile>Hero of the Iliad and Odyssey</profile>
<lists>
<list>odysseus</list>
<list>nestor</list>
</lists>
</user>
</users>
Figure 17-7: XML representing information about users
Let’s walk through this file. As with all valid XML files, the first line (X)
declares that this is an XML file. Line Y declares the one root element in the
file, users.
The usernames odysseus and nestor follow in Z, inside the beginning and
ending <users> tags; these are the two users who have signed up for our appli-
cation so far. Each username is followed with some specific information about
that user including (but not limited to) a name, a password, a profile, and
the lists to which that user has access.
This XML file is updated whenever the user information changes; for
example, if a new user joins, or if one user permits another to see his or
her list.
NOTE This partial version of the application does not have a “join” feature; adding one will
be part of your homework. If it had such a feature, the file would update with informa-
tion related to new users when they create an account in our application.
To Do List File
The second type of XML file contains information about a user’s To Do list.
Each user owns one file, the name of which is based on the username. For
example, Figure 17-8 shows the contents of odysseus.xml, which contains all
the To Do list information shown in Figure 17-4.
<?xml version = "1.0" ?>
<list>
<name>odysseus</name>
<openitems>
X <item>

336 Chapter 17
Y <number>1</number>
Z <contents>Go with Nestor and Ajax to convince....</contents>
</item>
[ <item>
<number>2</number>
<contents>Play with big wooden horse</contents>
</item>
</openitems>
\ <doneitems>
</doneitems>
</list>
Figure 17-8: XML representing Odysseus’s To Do list, stored in odysseus.xml
The root element in this XML file, list, contains three elements: the
name of the list, a list of pending items (openitems), and a list of completed
items (doneitems).
As you can see in Figure 17-8, Odysseus has two tasks to complete (X and
[), and has no completed tasks (there’s nothing between the <doneitems>
tags in \). Each task in the list has two elements: a number (Y), which makes
it easy to identify the item, and the item itself (Z). When Odysseus adds or
changes an item’s status, the XML file odysseus.xml is updated.
NOTE I invented the XML tags for both userInfo.xml and the To Do list file. If there was some
generally accepted XML standard for To Do lists, I could have used that instead.
To Do List Server Side
This example uses only two straightforward PHP programs. The first,
readXMLFile.php, reads in an XML file; it is almost a copy of the code in Fig-
ure 16-16. If a HEAD request was sent, readXMLFile.php returns only the last-
modified date of the file. If a GET request is sent, readXMLFile.php reads the
requested file from the webserver and passes it to the browser. The only dif-
ference between Figure 16-16 and readXMLFile.php is that readXMLFile.php
sends an additional header when responding to a GET request:
header("Content-Type: text/xml");
The second server-side program, saveXMLFile.php, saves an XML file.
Figure 17-9 shows the PHP code. As I hope you’ll see, it’s very similar to the
program we used to write out a text file in “Creating and Adding Contents
to a Text File with PHP” on page 321.
<?php
X $fileName = $_REQUEST["fileName"];
Y $contents = $_REQUEST["contents"];
Z $myFile = fopen($fileName, "w");
[ $success = fwrite($myFile, stripslashes($contents));
Putting It All Together in a Shared To Do List 337
fclose($myFile);
if ($success == TRUE) {
print "success";
} else {
print "failure";
}
?>
Figure 17-9: PHP program for saving a string to a file
Let’s take this program apart. This program receives a POST from the
browser whenever a file needs to be saved. It is passed two keys: the name of
the file to be saved and the contents of the file. These keys are accessed in
PHP using X and Y. Line Z opens the file for writing, and [ writes the
contents to the file.
Before actually writing the contents to the file, [ calls the built-in PHP
function stripslashes(). This function is particularly important because some
versions of PHP add backslashes to quotes inside text sent for parsing, and
we want to remove those backslashes. For example, because we’re sending
XML information, the first line of the file we want to save is
<?xml version = "1.0" ?>
But when this is sent to some versions of PHP, it will be turned into
<?xml version = \"1.0\" ?>
The stripslashes() function removes those inserted backslashes.
The To Do List Client Side, Part 1: The HTML
Most of the power of our To Do list application is in the client-side code.
The client-side code is quite long, so I’ll describe it section by section. For a
listing of the entire client side, see Appendix D.
Let’s first look at the body of the HTML file as shown in Figure 17-10.
X<body onLoad = "checkIfLoggedIn()";>
Y <div id = "errorDiv" style = "color:red">
</div>
<h2>Login Section</h2>
Z <div id = "loginArea">
<a href = "#" onClick = "displayLogin(); return false;">login</a>
</div>
<h2>Content Section</h2>
[ <div id = "contentArea">
Welcome! Please sign in to see your To Do lists.

338 Chapter 17
</div>
<h2>To Do Lists You Can Access</h2>
\ <div id = "listArea">
</div>
</body>
Figure 17-10: The application’s HTML
The body of the page is divided into four sections. The first section (Y)
is reserved for error messages. Whenever anything goes wrong in the appli-
cation (for example, if someone logs in with an incorrect password or if
something goes wrong with the server when trying to read a file), a message
is put into the innerHTML of the div with the id of errorDiv. The error message
will be displayed in red because of the style attribute inside the div.
Below that section, in Z, is a div with the id of loginArea. When the page
is first read in, this div will contain the login link. When that link is clicked,
the contents of this area are replaced by a form that lets a user enter a user-
name and password. Once the user logs in, the form is replaced with a greeting
and the ability to log out.
The div in [ is reserved for displaying the contents of the list being
viewed. It initially holds a greeting message.
Finally, \ marks the div that will contain information about which To Do
lists a person can view. By keeping the contents of the list being viewed in a
div that is separate from all other lists, we make it easy to update one list
without updating any others.
Finally, notice that X the <body> tag calls the checkIfLoggedIn() function
when the page is loaded. This function ensures that if a logged-in user reloads
the web page, or visits another page and returns to this one, the page recog-
nizes that the user has already logged in and shows the user the appropriate
information.
The To Do List Client Side, Part 2: The JavaScript
Now let’s turn to the JavaScript code. Imagine you are assigned the task of
developing the JavaScript for this To Do list application. Where would you
start? Even though this application is simple when compared to something
like Google Maps, it is still complicated enough to make the task of writing
the code seem overwhelming.
When faced with a large problem, it is often helpful to apply a problem
solving technique called divide and conquer. To solve a large problem, divide
the large task into smaller ones, and then conquer the smaller projects one
at a time.
For example, the code in the To Do list application can be divided into
several different feature sets:
zLogging in and out
zDisplaying available lists
zDisplaying a specific list
zProcessing changes to a list
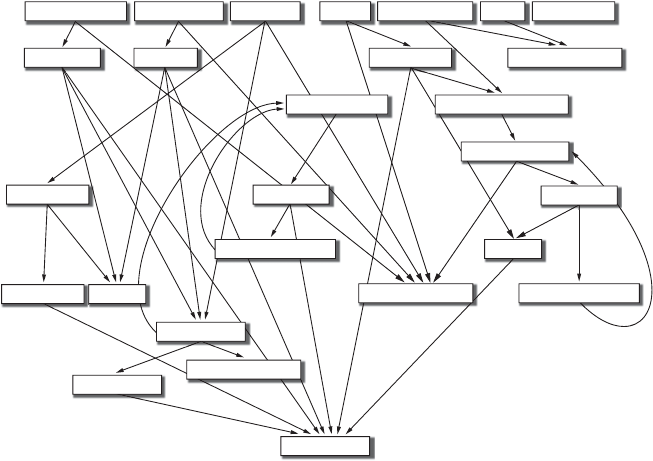
Putting It All Together in a Shared To Do List 339
Applying the divide and conquer technique means that you write the
JavaScript to deal with all the features for logging in and out, then you write
the JavaScript for displaying available lists, and so on. If any of these smaller
tasks still seems overwhelming, apply divide and conquer again to break it up
into smaller tasks that are easier to tackle.
The rest of the chapter will describe the code for each of the feature sets
just listed. As usual, we will write our own functions to complete the tasks.
Although there are only four general feature sets, each will require many
functions. But before getting into the code itself, let’s look at a road map for
how the functions I will describe relate to each other.
The Function Road Map
Figure 17-11 shows each of the 27 functions I will describe. An arrow leading
from one function to another means the first function calls the second func-
tion. The functions at the top of the figure are called by a user interacting
with the web page in some way. As you can see, almost every function calls at
least two other functions.
Figure 17-11: Functions and their dependencies
Functions with many arrows going into them are used by many others.
For example, the getFirstValue() function is called by seven other functions,
and the readFileDoFunction() function is called by six others. Putting the code
of getFirstValue() in its own function means that the code can live in one
place, rather than being repeated seven different times. If you had not yet
been convinced of the magic of functions before seeing this application, you
should be by now. (Don’t let the complexity of this diagram bother you; the
descriptions in this chapter should make everything crystal clear.)
processLogin getNameFromCookie
addNewToFile
displayHomeInformation
displayLegalLists
displayLists
getItemsgetHighValue
saveAndReload
getUser
updateUserIfChanged
getItemString
saveFileDoFunction
getFirstValue
markDone
markUndone
displayList
updateTodoIfChanged
readyDisplayList
readFileDoFunction
readyMarkUndone readyMarkDone addNewItem doLogin checkIfLoggedIn logout displayLogin

340 Chapter 17
Let’s now turn to the first set of features: those that involve logging in to
and logging out of the application.
Logging In and Out
The login process begins when a user clicks the link in the loginArea div
(Zin Figure 17-10), which calls the displayLogin() function shown here:
function displayLogin() {
var theForm = "<form>Name: <input type='text' name='name'><br> " +
"Password: <input type='password' name='password'> " +
"<input type='button' value='submit' " +
"onClick='doLogin(this.form);'><br>"
document.getElementById("loginArea").innerHTML = theForm;
}
This function simply puts a form into the innerHTML of the loginArea div.
When the user fills out the form and clicks the submit button, the JavaScript
calls the doLogin() function.
The doLogin() function contains our first bit of Ajax. The form completed
by the user is sent to it, and it calls the readFileDoFunction(), shown next.
function doLogin(my_form) {
readFileDoFunction("userInfo.xml", "GET",
function() {
if (request.readyState == 4) {
if (request.status == 200) {
processLogin(request.responseXML, my_form);
} else {
document.getElementById("errorDiv").innerHTML =
"Sorry, there was a problem with the server.";
}
}
}
);
}
Notice that readFileDoFunction() is sent "userInfo.xml" as the name of the file
to read, and processLogin() is the function to call once the file has been read.
Notice too that if something goes wrong with reading the file, an error is put
into the div with the id of errorDiv.
The readFileDoFunction() function performs the Ajax call. This func-
tion is shown next, and, as you can see, it looks very much like the function
described in Figure 16-15.

Putting It All Together in a Shared To Do List 341
function readFileDoFunction(file_name, request_type, the_function) {
if (window.XMLHttpRequest) {
request = new XMLHttpRequest();
} else {
request = new ActiveXObject("Microsoft.XMLHTTP");
}
var theURL = "http://localhost/boj/ch17/readXMLFile.php?fileName=" +
file_name + "&t=" + new Date().getTime();
if (request) {
request.open(request_type, theURL);
request.onreadystatechange = the_function;
request.send(null);
} else {
document.getElementById("errorDiv").innerHTML =
"Sorry, you must update your browser before seeing Ajax in " +
" action.";
}
}
However, unlike the function in Figure 16-15, which called the server-side
program readTextFile.php, this function calls a server-side program called
readXMLFile.php. If the browser doesn’t understand Ajax, readFileDoFunction()
puts the error message in the errorDiv div.
As before, readFileDoFunction() executes the passed-in function whenever
the readyState of the request object changes. In this case, when the readyState
of the request object is 4, and the request is satisfied correctly (status is 200),
the passed-in function calls processLogin(), which does the actual work of
logging in.
Functions Related to Logging In
Figure 17-12 lists processLogin() and some of the helper functions it calls.
function processLogin(user_info, my_form) {
X var user_name = my_form.elements["name"].value;
var user_password = my_form.elements["password"].value;
var success = true;
var this_password_node;
var this_password;
Y var this_user = getUser(user_info, user_name);
if (this_user != null) {
Z this_password = getFirstValue(this_user, "password");
if (user_password == this_password) {
success = true;
}
}

342 Chapter 17
if (success == true) {
[ document.cookie = "user=" + user_name;
displayHomeInformation(user_name);
document.getElementById("contentArea").innerHTML = "";
} else {
document.getElementById("errorDiv").innerHTML +=
"<span style='color:red'><br>Login error; please try again.</span>";
}
}
\ function getUser(user_info, user_name) {
var users = user_info.getElementsByTagName("user");
var count = 0;
var found_user = null;
var this_user;
while ((count < users.length) && (found_user == null)) {
this_user = users[count];
this_name = getFirstValue(this_user, "name");
if (this_name == user_name) {
found_user = this_user;
}
count++;
}
return found_user;
}
] function getFirstValue(my_element, child) {
^ return my_element.getElementsByTagName(child)[0].firstChild.nodeValue;
}
_ function displayHomeInformation(user_name) {
document.getElementById("loginArea").innerHTML =
"Welcome " + user_name + ". " +
" <a href='#' onClick='logout(); return false'>logout</a> ";
displayLegalLists(user_name);
}
Figure 17-12: Functions related to logging in
The processLogin() function is passed two files, the first of which is the
XML document retrieved by readFileDoFunction(). This is the userInfo.xml file
described in the section “To Do List Data Files” on page 334. The processLogin()
function is also passed in the form that was filled out by the user. The
processLogin() function first extracts the values submitted with the form
(starting in X). Then, after declaring some variables, in Y the function
calls getUser() which takes the XML document and the username entered
into the form and returns a pointer to the XML element that represents that
user. More on getUser() will be found in the next section.
Next, we want to see whether the password typed into the form is the same
as the user’s password stored in userInfo.xml. If you look at the userInfo.xml
file, you’ll see that each user element has four child elements: name,password,
profile, and lists. Once getUser() returns a pointer to the correct user

Putting It All Together in a Shared To Do List 343
element, Z calls getFirstValue() to get the value of the user element’s password
child element. The getFirstValue() function (defined in ]) takes as param-
eters a pointer to an element, and a string holding the name of the child of
that element whose value you want to return. In this case, we want to return
the value of the password child of the user element. (There are more details
on getFirstValue() coming in the next section.)
If the user and password match, then the success variable will have been
set to true, and three things will happen. First, a cookie is set with the user-
name ([), which will be used whenever the page is reloaded, to check
whether a user has logged in. This cookie will be deleted either when the
user logs out or when the user closes the browser.
Once the cookie is set, the function displayHomeInformation() is called
(defined in _). This function updates the page to reflect that the user suc-
cessfully logged in. Finally, the message currently in the contentArea div is
erased. If something goes wrong with the login (the username doesn’t exist,
the password doesn’t match, or there was a server error), a message is put
into the errorDiv.
Helper Functions
Now let’s turn to the helper functions just mentioned: getFirstValue(),
getUser(), and displayHomeInformation(). Because getFirstValue() is used by
many functions, we’ll discuss it first.
getFirstValue()
The processLogin() function calls getFirstValue() in Z in order to get the
password of a given user. The getFirstValue() function is passed a user ele-
ment and the string "password". The single line of getFirstValue() in ^ gets
the password of that user.
The first part of ^ calls the getElementsByTagName() function on the user
element that is being passed in:
my_element.getElementsByTagName(child)
Because the child parameter is the string "password", this line returns an array
of the password elements of the user element.
Because we control the XML stored in userInfo.xml, we know that each
user element will have only one password. Therefore, we know that the array
returned by getElementsByTagName() will have only one element. The [0] in ^
refers to the first password element, which we know is the only password
element.
Just as we can use my_array[0] to refer to the first element in my_array, we
can use getElementsByTagName("password")[0] to refer to the first (and only)
element in the array returned by getElementsByTagName().
We now have the user element’s child password element thanks to
my_element.getElementsByTagName(child)[0]. Because that password element has
one child (which is the text node containing the password string), we can use
the firstChild property to access that text node. Once we have accessed the

344 Chapter 17
text node, we can get its value from its nodeValue. To make getFirstValue()
more clear, it could have been written like this:
function getFirstValue(my_element, child) {
var child_array = my_element.getElementsByTagName(child);
var first_child_element = child_array[0];
var child_text_node = first_child_element.firstChild;
var child_value = child_text_node.nodeValue;
return child_value;
}
You can see that the longer version is easier to understand but takes up much
more space.
getUser()
The getUser() function (defined in \) takes two parameters: the XML docu-
ment representing the userInfo.xml file, which was read by readFileDoFunction(),
and the username. getUser() returns a pointer to an XML user element that
represents the user.
getUser() calls getElementsByTagName(), which returns an array of all the
user elements of the XML document. It then loops through the array and
uses getFirstValue() to determine the value of the name child of each user
element. If the name child is the same as the name entered into the form, we
have found the user element that matches that name, and this user element
is returned.
displayHomeInformation()
The function displayHomeInformation() (defined in _) does two things. First, it
changes the contents of the loginArea div so that it shows a welcome message
and a logout link instead of the login form. Next, it calls displayLegalLists(),
which determines which lists this user is allowed to see, and puts links to these
lists into the listArea div.
Logging Out and Checking If Logged In
When displayHomeInformation() changes the contents of the loginArea div, it
inserts a logout link into the web page. Logging out is handled by the function
logout() and its helper function, getNameFromCookie(). The getNameFromCookie()
function is also called by checkIfLoggedIn(), which is called whenever the To Do
list application is visited (see X in Figure 17-10). Each of these functions are
shown in Figure 17-13. Let’s see how they get the job done.
function logout() {
var the_date = new Date("December 31, 1900");
var the_cookie_date = the_date.toGMTString();
X var user_name = getNameFromCookie();
document.cookie = "user=" + escape(user_name) +
";expires=" + the_cookie_date;
Y clearTimeout(user_list_timeout);
clearTimeout(current_list_timeout);
Z window.location.reload();

Putting It All Together in a Shared To Do List 345
}
[ function getNameFromCookie() {
var cookieParts = null;
var user_name = null;
if (document.cookie != null) {
\ user_name = document.cookie.split("=")[1];
}
return user_name;
}
] function checkIfLoggedIn() {
var user_name = getNameFromCookie();
if (user_name != null) {
displayHomeInformation(user_name);
}
}
Figure 17-13: Checking for logged-in user and logging out
logout()
The logout() function is called when a user clicks on the logout link shown in
Figure 17-3. The logout() function deletes the cookie that is storing the user-
name, clears any time-outs that have been set, and resets the application to
the pre-logged-in state showing in Figure 17-1.
First, logout() deletes the cookie which is storing the username by
changing its date value to a prior date (as discussed in the section “Setting
the Duration of a Cookie” on page 222). It uses these two lines:
var the_date = new Date("December 31, 1900");
var the_cookie_date = the_date.toGMTString();
Next, X calls getNameFromCookie(), which reads the cookie and returns a
string with the username. Then document.cookie is set with this expired cookie,
effectively deleting it.
A couple of time-outs are cleared in Y (more on these soon). Finally,
logout() calls the reload() method of the window’s location object, which
reloads the page. Because the cookie has been deleted, the user is no longer
logged in, and when the page is reloaded it returns to its pre-logged-in state,
as shown in Figure 17-1.
getNameFromCookie()
getNameFromCookie() in [ retrieves the username from the cookie created upon
login by extracting it in \ with
user_name = document.cookie.split("=")[1];
This line splits whatever is stored in document.cookie into parts, using = as a
delimiter. Our To Do list application stores only one cookie, which, if the
user is logged in, will equal something like username=odysseus. The split()
method splits this string into two parts and puts those parts into an array;
[1] returns the second element of the array.

346 Chapter 17
checkIfLoggedIn()
If a logged-in user clicks the reload button on his or her browser, the To Do
list application should redisplay his or her information when the page is
reloaded. The checkIfLoggedIn() function, defined in ], inspects the applica-
tion’s cookie, which contains a username, and displays the user’s To Do list
information using the displayHomeInformation() function.
Displaying Available Lists
Once a user has logged in, the line after [ in Figure 17-12 calls the
displayHomeInformation() function (_ in Figure 17-12).
This function updates the loginArea div with a welcome message and a
logout link and then calls displayLegalLists(), which (together with the func-
tions described below) determines which To Do lists a user can see and modify.
The collection of available lists is placed inside listArea div.
If a second user decides to give the logged-in user access to his or her list,
the available lists section for that logged-in user needs to be updated. We use
asetTimeout to regularly check to see whether this kind of updating will be
necessary.
Figure 17-14 lists the functions that display and update a user’s list of
available To Do lists.
function displayLegalLists(user_name) {
readFileDoFunction("userInfo.xml", "GET",
function() {
if (request.readyState == 4) {
if (request.status == 200) {
X var last_modified = request.getResponseHeader("Last-Modified");
var last_modified_date = new Date(last_modified);
Y displayLists(request.responseXML, user_name,
last_modified_date.getTime());
} else {
document.getElementById("errorDiv").innerHTML =
"Sorry, your lists could not be displayed due to a " +
"problem with the server.";
}
}
}
);
}
function displayLists(user_info, user_name, last_modified_date) {
var this_user = getUser(user_info, user_name);
var display_info = "";
var this_link;
var this_list;
if (this_user != null) {
Z var lists_element = this_user.getElementsByTagName("lists")[0];
[ var lists = lists_element.getElementsByTagName("list");
for (var loop=0; loop < lists.length; loop++) {
\ this_list = lists[loop].firstChild.nodeValue;
] this_link = "<a href=\"#\" onClick=\"readyDisplayList('" +
this_list + "'); return false;\">" +

Putting It All Together in a Shared To Do List 347
this_list + "</a>";
display_info += this_link + "<br>";
}
document.getElementById("listArea").innerHTML = display_info;
^ user_list_timeout =
setTimeout("updateUserIfChanged(" + last_modified_date + ",'" +
user_name + "')", 60000);
}
}
_ function updateUserIfChanged(current_last_modified, user_name) {
readFileDoFunction("userInfo.xml", "HEAD",
function() {
if (request.readyState == 4) {
if (request.status == 200) {
var last_modified = request.getResponseHeader("Last-Modified");
var last_modified_date = new Date(last_modified).getTime();
if (last_modified_date != current_last_modified) {
` displayLegalLists(user_name);
}
a user_list_timeout = setTimeout("updateUserIfChanged(" +
last_modified_date + ",'" + user_name + "')",
60000);
} else {
document.getElementById("errorDiv").innerHTML =
"Problem updating user " + request.status;
}
}
}
);
}
Figure 17-14: Functions to display and update a user’s To Do list
The displayLegalLists() function starts by using readFileDoFunction() to
trigger an Ajax call.
readFileDoFunction("userInfo.xml", "GET", function() {...})
This call reads in the userInfo.xml file and executes the provided anonymous
function, function() {...}. Most of the anonymous function is executed when
the Ajax request object reaches readyState 4, and the server returns a 200
message, signifying that the request was properly satisfied. When these con-
ditions are met, the anonymous function in X reads the Last-Modified field
of the request object’s response header and turns it into a Date object.
Next, the anonymous function calls displayLists() in Y and sends it
three parameters: the XML retrieved from the request, the name of the
logged-in user, and the time the userInfo.xml file was last updated.
NOTE The value passed to displayLists() is not the Date object itself. Instead, the Date’s
getTime() method is called to return the number of seconds between the last time the
file was updated and January 1, 1970.
348 Chapter 17
displayLists()
The displayLists() function does most of the real work. It first calls getUser()
to get the appropriate user element from the userInfo.xml file. Then, in Z, it
gets the first child element of the user element, named lists. Because there is
only one element named lists for each user element, we know that we want
the first one. Once we have the lists element, getElementsByTagName() is called
again in [ to return an array filled with the set of list elements that are
nested in the lists element.
Once we have our array, we loop through it to create a string to display
each list element. The code in \ gets the name of the each list element in
the loop. For example, the user Odysseus has two available lists: his and
Nestor’s. The array created in [ contains each of these lists. The first time
through the loop, \ pulls out odysseus; the next time through, it pulls nestor.
Once \ determines the name of the list, ] creates the string to be
displayed in the web browser, which will look something like this:
<a href="#" onClick="readyDisplayList('odysseus'); return false;">odysseus</a>
The body of the link is the name of the available list (shown here as odysseus).
An onClick inside the link calls readyDisplayList() when clicked, which pulls
the name of the list.
Once the loop completes, display_info will hold the string with all of
the available To Do lists. This string is then put into the innerHTML of the
listArea div. Finally, ^ sets the time-out that will be used to check whether
the userInfo.xml file has been changed. Line ^ calls updateUserIfChanged()
(defined in _) after one minute and passes it the date userInfo.xml was last
modified and the name of the logged-in user.
THE IMPORTANCE OF FUNCTION PARAMETERS
Many functions in the To Do list application, including displayLists() and
displayLegalLists(), take the name of the logged-in user as a parameter. Because
the user is logged in, that name is also available by inspecting document.cookie. You
may ask yourself, why bother passing the username as a parameter to a function if
it’s available in the cookie? For stylistic reasons, I like to pass in as parameters all the
variables that impact the behavior of a function. This makes it easier to adapt the func-
tions to new situations where, perhaps, the username is not stored in a cookie.
Think of a function as a black box. Input is sent into the box, something happens
inside the box, and out comes some output. We know what goes into the function by
looking at its parameters, and we know what comes out of the function by looking at
the return values.
This style of coding makes it easier to see what a function does and to reuse
functions in other scripts. If a function relies on values that are not passed into it as
parameters, a person reading the function will have to read the whole thing to under-
stand what information the function needs in order to work correctly.

Putting It All Together in a Shared To Do List 349
updateUserIfChanged()
Now the updateUserIfChanged() function does a HEAD call to check whether the
last modified date of the userInfo.xml file differs from the one that was passed
into the function. If the last modified date of userInfo.xml is different, the file
has been updated, and ` calls displayLegalLists() again to reload the user’s
legal list information. Finally, updateUserIfChanged() creates a new time-out to
call updateUserIfChanged() again in one minute (a). This time-out loop, in
which updateUserIfChanged() is called and then a time-out is set to call
updateUserIfChanged() again in a minute, keeps going until the user logs
out, clearing the time-out.
Displaying a Specific List
Now the list of available To Do lists is displayed to the user with the name
of each list as a link. Clicking on a link calls the function readyDisplayList(),
which begins the process of displaying the contents of a given To Do list.
Figure 17-15 lists readyDisplayList().
function readyDisplayList(list_name) {
X var file_name = list_name + ".xml";
Y readFileDoFunction(file_name, "GET",
function() {
if (request.readyState == 4) {
if (request.status == 200) {
var last_modified = request.getResponseHeader("Last-Modified");
var last_modified_date = new Date(last_modified);
Z displayList(request.responseXML,
last_modified_date.getTime());
} else {
document.getElementById("errorDiv").innerHTML =
"Sorry, could not display To Do list " + list_name +
" due to a problem with the server.";
}
}
}
);
}
Figure 17-15: Function to display a To Do list
Figure 17-16 lists the associated functions of readyDisplayList().
function displayList(the_list, last_modified_date) {
X var list_name = getFirstValue(the_list, "name");
var intro_text = "<h3>Looking at list: " + list_name + "</h3>";
var pending_display = "Still Pending:<br><ul>";
Y var open_item_element =
the_list.getElementsByTagName("openitems")[0];
350 Chapter 17
var open_items = open_item_element.getElementsByTagName("item");
for (var loop=0; loop < open_items.length; loop++) {
this_item = open_items[loop];
this_contents = getFirstValue(this_item, "contents");
this_number = getFirstValue(this_item, "number");
Z pending_display += "<li><input type='checkbox' " +
"onClick=\"readyMarkDone('" + list_name +
"'," + this_number + ");\"> " + this_contents;
}
pending_display += "</ul>";
var done_display = "Completed:<br><ul>";
var open_item_element =
the_list.getElementsByTagName("doneitems")[0];
var open_items = open_item_element.getElementsByTagName("item");
for (var loop=0; loop < open_items.length; loop++) {
this_item = open_items[loop];
this_contents = getFirstValue(this_item, "contents");
this_number = getFirstValue(this_item, "number");
done_display += "<li><input type='checkbox' " +
"onClick=\"readyMarkUndone('" + list_name + "'," +
this_number + ");\"> " + this_contents;
}
done_display += "</ul>";
[ document.getElementById("contentArea").innerHTML =
intro_text + pending_display + done_display;
\ document.getElementById("contentArea").innerHTML +=
"<p> <form>Add New Item: <input type='text' name='newItem'>"+
"<input type=\"button\" value=\"add\" " +
onClick=\"addNewItem(this.form, '" +
list_name + "');\"></form>";
] todo_list_timeout =
setTimeout("updateTodoIfChanged(" +
last_modified_date + ",'" + list_name + "')",
5000);
}
function updateTodoIfChanged(current_last_modified, list_name) {
^ readFileDoFunction(list_name + ".xml", "HEAD",
function() {
if (request.readyState == 4) {
if (request.status == 200) {
var last_modified = request.getResponseHeader("Last-Modified");
var last_modified_date = new Date(last_modified).getTime();
if (last_modified_date != current_last_modified) {
_ readyDisplayList(list_name);
}
` todo_list_timeout = setTimeout("updateTodoIfChanged(" +

Putting It All Together in a Shared To Do List 351
last_modified_date + ",'" + list_name + "')",
seconds_between_todo_list_update);
} else {
document.getElementById("errorDiv").innerHTML =
"Problem updating To Do list " + request.status;
}
}
}
);
}
Figure 17-16: The supporting functions for displaying a To Do list
readyDisplayList()
readyDisplayList()is very similar to displayLegalLists(), shown in Figure 17-14.
Like displayLegalLists(), it takes the name of a list to read (for example,
odysseus) and calls the Ajax function readFileDoFunction(), which reads the
file containing the list and then calls another function.
The code in X in Figure 17-15 sets the name of the file equal to the name
of the list, concatenated with the string ".xml". If the user wants to see the
odysseus list, the code in Y will read the file odysseus.xml. The anonymous
function sent to readFileDoFunction() calls displayList() once the file has been
completely loaded (Z). Finally, the displayList() function is sent an XML
document read from the file and the file’s last modification time.
displayList()
The displayList() function in Figure 17-16 does most of the work involved in
displaying a To Do list. Its first line (X) calls getFirstValue() to retrieve the
name of the list from the XML document.
In Figure 17-8, you’ll see that the name element is a child of the root of
the XML file. The getFirstValue() function reads the string inside the first
(and only) name element inside the list element. The next couple of lines
start the strings that we will use to display the To Do list.
To Do List Strings
The To Do list is represented by two strings: one listing the set of items to
complete (pending items), the other listing the set of items which have
already been completed. These two strings are, in turn, constructed in two
loops. The first loop adds the pending items to one string, and the second
adds the completed items to the other string.
The first loop starts in Y, where it accesses the first openitem element that
is a child of the list element. This openitem element has a set of item elements
inside. Each element is a task to complete. The loop iterates through each of
these items, creating a string that is added to the pending_display string. (You
should already be familiar will all the lines in that loop.) Each line in the loop
gets a value of the item, either its contents or its identification number.

352 Chapter 17
Line Z creates the string for each item, which looks like this:
<li><input type='checkbox' onClick="readyMarkDone('odysseus', 2);"> Beat Troy
As you can see, each item gets a checkbox that, when clicked, calls the function
readyMarkDone(). This function marks an item completed, moving it from the
pending to the completed list. The function has two parameters: the name of
the list to update and the item to be updated.
Once the loop describing the pending items completes, the loop that
lists the completed item kicks in. This loop is just like the previous one, except
that it iterates through all the items inside the doneitems element and prints
out a checkbox with an onClick that calls the function readyMarkUndone(),
which moves an item from the completed list back to the pending list.
Adding the Content to the Web Page
Once both loops have run their course, [ puts the introductory text, the list
of pending items, and the list of done items into the contentArea div. Line \
adds a form to that div (with an input box and a button) that calls addNewItem()
to add new items to the To Do list once the add button has been clicked.
Finally, ] starts a time-out that works just like the time-out in a
of Figure 17-14, except that it calls updateTodoIfChanged() instead of
updateUserIfChanged().
updateTodoIfChanged()
The updateTodoIfChanged() function is like updateUserIfChanged() (shown
in _ in Figure 17-14). There are three key differences between these func-
tions. First, updateTodoIfChanged() and updateUserIfChanged() read different
XML files. updateUserIfChanged() reads the userInfo.xml file, and as you can
see in ^ of Figure 17-16, updateTodoIfChanged() reads in the XML file storing
the requested To Do list (for example, odysseus.xml). Second, the functions
updateTodoIfChanged() and updateUserIfChanged() call different functions after
reading their requested files. The updateUserIfChanged() function calls
displayLegalLists() to display the list of To Do lists a user may edit.
In contrast, the updateTodoIfChanged() function calls readyDisplayList() to
display the requested To Do list once it has finished reading the requested
To Do list file (_). The final difference between updateTodoIfChanged() and
updateUserIfChanged() is the time-out set in `, which sets a time-out to call
updateTodoIfChanged() instead of calling updateUserIfChanged(), as occurs in
updateUserIfChanged.
Processing Changes to a List
A user may change a To Do list by moving an item between the pending and
completed lists or by adding a new item to the To Do list. Let’s turn first to
Figure 17-17, which covers the functions needed to change the status of an
existing item.

Putting It All Together in a Shared To Do List 353
X function readyMarkDone(list_name, the_item) {
var file_name = list_name + ".xml";
Y readFileDoFunction(file_name, "GET",
function() {
if (request.readyState == 4) {
if (request.status == 200) {
Z markDone(request.responseXML, the_item, list_name);
} else {
document.getElementById("errorDiv").innerHTML =
"Sorry, this item could not be marked done due to a " +
"problem with the server.";
}
}
}
);
}
[ function markDone(the_document, the_item, list_name, last_modified_date) {
\ var open_items = getItems(the_document,"openitems");
var done_items = getItems(the_document,"doneitems");
var this_number;
var found_item = null;
var count = 0;
] while ((count < open_items.length) && (found_item == null)) {
this_number = getFirstValue(open_items[count], "number");
if (this_number == the_item) {
found_item = open_items[count];
} else {
count++;
}
}
^ if (found_item != null) {
_ open_items.splice(count, 1);
` done_items.push(found_item);
a saveAndReload(open_items, done_items, list_name);
}
}
Figure 17-17: Changing the status of a task
Figure 17-17 shows the two main functions involved in changing an item
from pending to done: readyMarkDone() and markDone().
readyMarkDone()
The readyMarkDone() function in X is called whenever someone clicks a
checkbox next to a pending item in the To Do list. This function is passed
the name of the list to edit and the number of the task to be moved from
pending to done. The function then calls readFileDoFunction() in Y and
passes it the name of the To Do list file to load, as well as an anonymous
function to execute when the request object changes its readyState.

354 Chapter 17
The anonymous function executes the markDone() function once the To Do
file has been completely loaded. The markDone() function takes four parameters:
the name of the requested XML file, the identification number of the item
that is changing its status, the name of the requested list, and the list’s last
modification date.
markDone()
When called, markDone() in [ creates two arrays: open_items (\) contains all
the pending tasks in the To Do list, and done_items contains all the done tasks.
(These arrays are created by getItems(), which we’ll discuss shortly.) Once
these arrays have been created, ] loops through the open_items array, looking
for the item identified by the number passed into markDone()’s second param-
eter. If it finds the item, three things happen, beginning in ^:
1. markDone() removes the item from the open_items array using the built-in
array method splice(). (This method takes two parameters: an item in
the array to remove and the number of items to remove, including the
one in the first parameter.)
2. The splice() method in _ removes just the found item from the
open_items array, and the item is put at the end of the done_items array,
using the array method push() in `.
3. In asaveAndReload() turns the arrays into a new XML file, sends the
XML back to the webserver for saving, and then updates the To Do list.
getItems() and saveAndReload()
The markDone() function in Figure 17-17 relied on some helper functions:
getItems() and saveAndReload(). The getItems() function is passed an XML
document and the name of an XML element, and it returns an array of all
XML elements from the document with the given name. The saveAndReload()
function saves an XML document to the webserver and updates the To Do
list seen in the web browser. These helper functions are shown in Figure 17-18.
X function getItems(the_document, the_item_type) {
var the_items_array = new Array();
var item_elements = the_document.getElementsByTagName(the_item_type)[0];
var items = item_elements.getElementsByTagName("item");
for (var loop=0; loop < items.length; loop++) {
the_items_array[loop] = items[loop];
}
return the_items_array;
}
Y function saveAndReload(open_items, done_items, list_name) {
Z var the_string = "<?xml version='1.0' ?>";
the_string += "<list>";
the_string += "<name>" + list_name + "</name>";
[ the_string += getItemString("openitems", open_items);
the_string += getItemString("doneitems", done_items);
the_string += "</list>";

Putting It All Together in a Shared To Do List 355
var file_name = list_name + ".xml";
\ saveFileDoFunction(file_name, the_string,
function() {
if (request.readyState == 4) {
if ((request.responseText == "success") &&
(request.status == 200)) {
readyDisplayList(list_name);
} else {
document.getElementById("errorDiv").innerHTML =
"Sorry, there was an error saving your list. ";
}
}
}
);
}
] function getItemString(item_list_name, item_list) {
var the_string = "<" + item_list_name + ">";
for (var loop = 0; loop < item_list.length; loop++) {
the_string += "<item>";
the_string += "<number>" +
getFirstValue(item_list[loop], "number") + "</number>";
the_string += "<contents>" +
getFirstValue(item_list[loop], "contents") + "</contents>";
the_string += "</item>";
}
the_string += "</" + item_list_name + ">";
return the_string;
}
^ function saveFileDoFunction(file_name, the_contents, the_function) {
if (window.XMLHttpRequest) {
request = new XMLHttpRequest();
} else {
request = new ActiveXObject("Microsoft.XMLHTTP");
}
_ var the_url = "http://localhost/boj/ch17/saveXMLFile.php?t=" +
new Date().getTime();
` var the_message = "fileName=" + file_name + "&contents=" + the_contents;
if (request) {
a request.open("POST", the_url);
request.setRequestHeader("Content-type",
"application/x-www-form-urlencoded; charset=UTF-8");
request.onreadystatechange = the_function;
request.send(the_message);
} else {
document.getElementById("errorDiv").innerHTML =
"Sorry, you must update your browser before seeing Ajax in action.";
}
}
Figure 17-18: More functions involved in changing a task’s status
356 Chapter 17
getItems()
The function getItems() in Figure 17-18 (X) retrieves an array of tasks that are
either openitems or doneitems. The function getItems() is called with an XML
document and a type of item to get: either items inside an openitems element or
items inside a doneitems element. getItems() calls getElementsByTagName() to get
an array of elements of the given type and then it loops through this array,
loading each item into a new array called the_items_array.
Limitations on Manipulating XML Documents
Ordinarily, there’s no reason to loop through one array just to add all of
its elements to a new array as I’m doing in getItems(). But here’s why I’m
doing that.
When getItems() uses getElementsByTagName() to retrieve an array of ele-
ments, that array comes from the XML document. You may recall that the
markDone() function alters the array returned by getItems(), calling splice() to
remove elements from the array and push() to add elements. Unfortunately,
most browsers won’t allow changes to arrays retrieved from the XML docu-
ment. Therefore, getItems() creates its own JavaScript array and copies the
items out of the array returned by getElementsByTagName() into the new array
called the_items_array.
saveAndReload()
The next helper function, saveAndReload(), is defined in Y. It creates a string
containing an XML document, which is based on the information in the
open_items and done_items arrays created by markDone() and markUndone(),
and then it sets up the Ajax call that saves this string to the webserver.
Line Z begins the creation of a string that holds the XML document.
The next few lines add the name of the To Do list and the opening list
element tag. The next two lines (starting with [) call getItemString() to
create strings that contain the information stored in the open_items and
done_items arrays.
getItemString()
The getItemString() function, declared in ], loops through the provided
array and creates a string representing each item. (You should find the code
in getItemString() easy to follow by now.)
The lines after [ add the closing list tag, then set up the Ajax call that
will save the altered To Do list to the webserver and call the functions used
to display the To Do list. This Ajax call, performed by saveFileDoFunction(),
is similar to readFileDoFunction() (discussed in “Logging In and Out” on
page 340), except that it saves a file instead of reading it.
saveAndReload()
The function saveAndReload() calls saveFileDoFunction() in \ and passes it the
name of a file to save, the string to be saved into the file, and an anonymous
function that is called when the Ajax request object changes its readyState.

Putting It All Together in a Shared To Do List 357
In this case, once the file has been saved to the server, the anonymous func-
tion calls readyDisplayList(), which, if you remember from Figures 17-15
and 17-16, sets up an Ajax call that reads the file that was just saved and
displays the results.
saveFileDoFunction()
The contents of saveFileDoFunction(), which start in ^ in Figure 17-18, should
look very familiar to you. Line _ defines the URL that points to the server-side
program being called (saveXMLFile.php). Line ` creates the message to send
with the POST, which includes the name of the file to be saved and the file’s
contents. (Because the contents are sent via POST, rather than GET, I don’t need
to use escape() here, as I did when sending information in a GET in Figure 16-9.)
Finally, a and the subsequent lines send the POST request.
NOTE It would be a good idea to remove all of the characters that are illegal XML, however,
such as quotation marks and less than and greater than symbols. To do that, replace
each with its HTML encoding: ",<, and >. For brevity’s sake, I’ll leave
that as an exercise for the reader.
Adding a New Item
The final section of code in the application adds a new item to a To Do list
when a user fills in the Add New Item text box in Figure 17-4. Clicking the
add button calls addNewItem() and sends it the form and the name of the list
being edited.
Figure 17-19 shows you the addNewItem() function and the functions it
relies on.
X function addNewItem(the_form, list_name) {
var file_name = list_name + ".xml";
readFileDoFunction(file_name, "GET",
function() {
if (request.readyState == 4) {
if (request.status == 200) {
Y addNewToFile(request.responseXML, the_form.newItem.value,
list_name);
} else {
document.getElementById("errorDiv").innerHTML =
"Sorry, new item could not be added to To Do list for" + list_name +
" due to a problem with the server.";
}
}
}
);
}
Z function addNewToFile(the_document, new_contents, list_name) {
[ var open_items = getItems(the_document,"openitems");
var done_items = getItems(the_document,"doneitems");

358 Chapter 17
\ var high_number = getHighValue(the_document);
var new_number = high_number + 1;
] var new_item = document.createElement("item");
var new_item_number = document.createElement("number");
var new_item_content = document.createElement("contents");
new_item_number.appendChild(document.createTextNode(new_number));
new_item_content.appendChild(document.createTextNode(new_contents));
new_item.appendChild(new_item_number);
new_item.appendChild(new_item_content);
^ open_items.push(new_item);
_ saveAndReload(open_items, done_items, list_name);
}
` function getHighValue(the_document) {
var high_number = 0;
var this_number = 0;
var items = the_document.getElementsByTagName("item");
for (var loop=0; loop < items.length; loop++) {
this_number = parseInt(getFirstValue(items[loop], "number"));
if (this_number > high_number) {
high_number = this_number;
}
}
return high_number;
}
Figure 17-19: Adding new items
Function addNewItem() in X is a now-familiar Ajax setup function. It calls
readFileDoFunction(), tells it to read the appropriate To Do list, and defines an
anonymous function that calls addNewToFile() in Y, once the request list has
been read.
The addNewToFile() function in Z is passed an XML document repre-
senting the To Do list, new information to add to that list, and the name of
the list. Line [ uses the getItems() function described in Figure 17-18 to get
all pending items in the To Do list, and the following line gets all the com-
pleted items.
The rest of addNewToFile() creates the item to add to the list, each of which
has an identifier number, which the various functions use to refer to each
item. These identifiers are assigned in order, so each new item gets a number
one higher than the highest-numbered item in the To Do list.
Line \ calls getHighValue() to determine the highest numbered item on
the To Do list; the following line adds one to that value to set a new identifier
number. The lines beginning in ] and ending in ^ use XML methods to
create a new item. Once they complete, new_item will be an XML element that
looks like this:
<item>
<number>6</number>
<contents>This is a new item</contents>
</item>
Putting It All Together in a Shared To Do List 359
Line ^ adds this new item to the array of open items retrieved in [.
Finally, _ calls saveAndReload() (introduced in Figure 17-18) to save the two
item arrays.
getHighValue()
Believe it or not, we are almost done. The only function left to describe,
getHighValue() (`), loops through all the items in a list, retrieves their iden-
tifier numbers, and returns the highest number among them.
And that, dear reader, is the entirety of the application so far.
A Few Closing Notes
This application combines elements from every chapter of this book. If
you’ve understood everything here, you can consider yourself well versed in
JavaScript lore. However, before closing, I have two final issues to raise about
the application: how to decide whether code should run in the client side
versus the server side, and considerations about the security of the application.
Client-Side or Server-Side Code?
Most of the code in this application was written in JavaScript and therefore
appeared on the client side. I designed the application this way because this
is The Book of JavaScript, not The Book of PHP (which may be in the works).
Nevertheless, some of the code would have been better placed on the
server side. For example, displayLegalLists() in Figure 17-14 displays a user’s
list of available To Do lists. However, even though the application cares only
about changes to the logged-in user’s information, displayLegalLists() actually
retrieves the entire userInfo.xml file. The entire file must be read, because
all the code for extracting the information specific to the logged-in user from
userInfo.xml appears in the JavaScript.
In contrast, when information about the user is extracted on the server
side instead, the PHP can send only the part of userInfo.xml that we care
about. This sends less information across the network and gives the JavaScript
less to deal with. When one million people have signed up for your shared
To Do list service, the difference between a few lines of XML and millions of
lines of XML is enormous.
Sending information across the Internet is often the biggest bottleneck
in any client-server application, so do what you can to minimize the amount
of information that clients and servers pass back and forth.
Security Issues
When writing server-side applications, you must pay attention to security
issues. Many servers are hacked because of poorly written server-side code.
The application described here is insecure in two ways. First, user pass-
words are sent from the web browser to the webserver without encryption.
Second, the application does not do enough to ensure that a user has suc-
cessfully logged in before giving the user access to To Do lists.
360 Chapter 17
Password Encryption
Information does not pass directly from a web browser to a webserver; it is
routed around the Internet, passing from one server to another until it reaches
its destination. Any server along the way can spy on you, looking for passwords,
and if those passwords are sent without encryption (also called a cleartext),
the spy’s job is made even easier.
One solution might be to write a JavaScript function to encrypt the pass-
word before it is sent to the webserver, and then decrypt it on the server side.
This is a bad solution, because anyone can view the JavaScript on your web
page and figure out how your encryption function works.
The solution is to use a secure webserver that understands the HTTPS
protocol (that is, secure HTTP). HTTPS works just like HTTP except that it
adds an additional encryption/authentication layer between HTTP and TCP.
Okay, that’s enough of that mumbo jumbo for now.
To send a message to a secure HTTPS server, use https:// instead of
http:// at the beginning of your URL. When https:// is used, the web browser
and webserver act together to encrypt and decrypt information securely.
To send information securely within your application (assuming that
you have access to a secure server), use an https:// URL in your Ajax calls
and the username and password parameters in the request.open() method (see
“Telling the Object Where to Send the Request” on page 266).
NOTE All commonly used brands of webservers have a secure mode, so if you are running
your own webserver, check that server’s documentation. If you are not running your
own webserver, ask your server’s system administrator whether your server supports
secure transactions.
Using Server-Side Sessions
Our application uses a cookie to determine if a user has logged in. This poses
another security problem. Because cookies live on the client side of the
application, they can be faked by clever users. A malicious user could create
his own username=odysseus cookie, put it on his hard drive, and get access to
Odysseus’s account.
To avoid this potential problem, you should have your server track users
who have logged in properly. When a user logs in properly with the login
function, the server records that. Then, whenever a user wants to get infor-
mation from the webserver, the server checks to see whether this user has
properly logged in. If not, the server doesn’t give the user access to restricted
information or services.
The traditional way to track logged in users is with a session. When a
user logs in, the server starts a session, which tracks the user. All server-side
languages, including PHP, provide some way of creating sessions.
NOTE To learn more about sessions in PHP, pick up a PHP book or search the Internet. In
addition, many of the toolkits described in Appendix B, such as Sajax, help you handle
sessions.
Putting It All Together in a Shared To Do List 361
Summary
The primary point of this chapter has been to show how you can integrate
everything in this book to create a useful and practical web application. If
you’ve lost track of how all the functions described work together, see the
road map in Figure 17-11, and then check the JavaScript again to see where
the dependencies arise.
Although most of the application used JavaScript learned earlier in the
book, there were a few new tidbits of information. We discussed:
zUsing splice() to delete elements from arrays (Figure 17-17)
zDealing with browsers that won’t let you edit XML documents (see
“Limitations on Manipulating XML Documents” on page 356)
zUsing https:// and the open() method of the request object to send
information securely
zApplying the divide and conquer problem-solving technique when faced
with an overwhelming task
Congratulations on making it this far! You are now ready to start writing
very complex JavaScript applications. Be warned, however! As your JavaScript
gets more complex, bugs get trickier to detect and weed out. The next chapter
discusses the very important topic of debugging and introduces you to a
number of tools and techniques that will help you find and stomp out those
bothersome bugs.
Assignment
Your assignment is to add these critical features to the application discussed
in this chapter:
zAllow new users to join the service
zAllow a user to permit another user to access his or her To Do list
How you add these features and what they look like is completely up to you.
You’re the expert now!

DEBUGGING JAVASCRIPT
AND AJAX
Now that you’ve mastered the basics of
JavaScript, it’s time to start writing some
complicated scripts of your own. This chapter
will help you solve the problems that inevitably
arise in writing even simple scripts. The key point is to
think before you code. Having a clear idea of how your
script will work before you write it will cut down tremen-
dously on your rewriting and bug fixing.
Of course, you can’t avoid bugs altogether, so you’ll need to learn how to
decrease the number of bugs in your scripts and figure out why a program
isn’t doing what you want. This chapter covers some common debugging tips
and techniques, including how to:
zWrite clear and relatively bug-free code
zAvoid common mistakes
zPrint out variables and log messages in various ways
zUse and interpret your browser’s JavaScript bug detector

364 Chapter 18
zUse a more complete JavaScript debugger
zDebug Ajax
zFix bugs without creating new ones
Good Coding Practices
Two keys to good programming are to write programs for people, not for computers,
and to think before you code.
Writing programs for people means using comments to guide readers
through your code, using meaningful variable names, and writing code that’s
easy to understand rather than clever. Clever coding is cute, but the clever
coder gets the bug.
Sketching out your code using comments is a good way to wind up with
commented and well thought-out code. Programmers often think that they
will have time to “clean up” the code after they have everything working.
Unfortunately, once one bit of code works, there will always be more to write,
so people rarely have time to go back and comment their code. Commenting
first ensures that the comments will be there when you are done. It also forces
you to figure out how your JavaScript will work before you dive in and start
coding. Thinking before you code means that you will be less likely to pursue a
path that will not work. Writing comments first also means that you will have
a feeling for how much work lies before you. As you write the JavaScript that
performs the tasks described by your comments, you will be able to keep
track of what you have accomplished and how much remains.
Starting with Comments
Here’s an example of writing the comments for a function before writing the
function itself:
//function beKind()
// beKind asks for a user's name, chooses a random affirmation,
// and returns an alert box with the name and the kind words
function beKind()
{
// first construct a list of affirmations
//
// next get the user's name
//
// then choose a random affirmation
//
// finally return the personalized kindness
//
}

Debugging JavaScript and Ajax 365
Filling In the Code
Now that you have your JavaScript plotted out in comments, you can fill in
the code itself, step by step.
//function beKind()
// beKind asks for a user's name, chooses a random affirmation,
// and returns an alert box with the name and the affirmation
function beKind()
{
// first construct a list of affirmations
//
var the_affirmation_list = new Array();
the_affirmation_list[0] = "You are a great coder!";
the_affirmation_list[1] = "Your JavaScript is powerful!";
the_affirmation_list[2] = "You finished the whole book!";
// next get the user's name
//
var the_name = prompt("What's your name?", "");
// then choose a random affirmation
//
var the_number = Math.floor(Math.random() * 5);
var the_affirmation = the_affirmation_list[the_number];
// finally return the personalized kindness
//
alert("Congratulations, " + the_name + ". " + the_affirmation);
}
Commenting not only forces you to think before you code; it also makes
the task of coding seem a lot easier. Instead of facing one huge task, you’ve
already broken it down into easily coded sections.
Avoiding Common Mistakes
Most beginning programmers make simple syntactic mistakes. It takes a long
time to stop forgetting to close quotes, curly brackets, and parentheses, but
luckily modern browsers have JavaScript bug detectors that detect such errors
for you. Those bug detectors will be described later in the chapter. This
section covers techniques for avoiding a few common mistakes that many
browser bug detectors won’t catch.
Use a Consistent Naming Convention
The JavaScript bug detector often misses incorrect capitalization and plural-
ization of variable and function names, a common and annoying error. You’ll
greatly reduce the occurrence of such mistakes if you stick to one convention
for naming variables and functions. For instance, I name my variables in
all lowercase and with underscores replacing spaces (my_variable,the_date,

366 Chapter 18
an_example_variable, and so on), and I use in-caps notation for functions
(addThreeNumbers(),writeError(), and so on). See the section “Naming Your
Functions” on page 85 for more information. I avoid pluralizing anything
because it’s easy to forget which variables you’ve made plural.
Avoid Reserved Words
You can’t use words reserved for JavaScript as variables. For example, you
can’t name a variable if, because JavaScript uses if. Though it’s not likely
you’d name a variable if, you might want to use a variable called, for example,
document. Unfortunately, document is a JavaScript object, so using it as a variable
would wreak all kinds of havoc.
Even more unfortunately, different browsers reserve different words, so
there’s no complete list of words to eschew. The safest course of action is to
avoid words used in JavaScript and in HTML. If you’re having problems with
a variable and you can’t figure out what’s wrong, you may be running into
such a problem—try renaming the variable.
Remember to Use Two Equal Signs in Logical Tests
Some browsers catch the equal-sign error; some don’t. This very common
mistake is extremely difficult to detect if the browser doesn’t find it for you.
Here’s an example:
var the_name = prompt("What's your name?", "");
if (the_name = "thau")
{
alert("Hello, thau!");
} else {
alert("Hello, stranger.");
}
This code shows you the Hello, thau! alert box regardless of what you type
in the prompt, because only one equal sign appears in the if-then statement.
The equal sign sets the_name equal to "thau" and returns a value of true. This
extremely insidious bug will drive you batty. For your own sanity’s sake, con-
centrate on not making mistakes like this. Your psychiatrist will thank you.
I avoid this mistake by thinking about two equals signs as is the same as,
and one equal sign as equals. When I code, I say to myself, “If the_name is the
same as "thau", then. . . .” Thinking about the code this way helps me
remember the difference between one and two equal signs.
Use Quotation Marks Correctly
This one gets me time and time again. The only way JavaScript knows the
difference between a variable and a string is that strings have quotes around
them and variables don’t. Here’s an obvious error:
var the_name = 'Ishmael';
alert("the_name is very happy");

Debugging JavaScript and Ajax 367
The above code yields an alert box that says the_name is very happy even
though the_name is a variable. Once JavaScript sees quotes around something,
it simply treats it like a string. Putting the_name in quotes stops JavaScript from
looking up the_name in its memory.
Here’s a less obvious variation of this bug, which we saw in Chapter 9:
function wakeMeIn3()
{
var the_message = "Wake up! Hey! Hey! WAKE UP!!!!";
setTimeout("alert(the_message);", 3000);
}
The problem is that you’re telling JavaScript to execute alert(the_message)
in three seconds—but three seconds from now the_message won’t exist because
you’ve exited the wakeMeIn3() function (the function itself defines the_message
variable). Here’s the solution to this problem:
function wakeMeIn3()
{
var the_message = "Wake up!";
setTimeout("alert('" + the_message + "');", 3000);
}
When you pull the_message out of the quotes, the setTimeout() schedules the
command alert("Wake up!");—which is the result you want.
Finding Bugs
Much of the debugging process involves discovering where the bug is in the
first place. Unfortunately, finding the little pests isn’t always easy.
You can look for bugs in lots of different ways. This section covers some
of your major options, from writing alerts into your code to using your
browser’s bug detector and other debugging tools.
Printing Variables with alert() Statements
The most tried-and-true debugging method is to use alert() statements to
print out what’s going on in your script.
Figure 18-1 lists two functions. In one, if you enter random names in
the prompt boxes, you’ll see the greeting Ahoy, polloi! If you enter Dave in the
first prompt box and Thau in the second one, you’re supposed to get the
message Howdy, partner! However, running the functions won’t work because
one of them contains an error.
Running theGreeting() doesn’t result in any JavaScript syntax errors,
but the function works incorrectly. In this simple example, you may discover
the error easily just by looking at the JavaScript. However, as your scripts
get more complicated, you’ll find it harder to locate errors by eyeballing
your code.

368 Chapter 18
function getName()
{
var first_name = prompt("What's your first name?","");
var last_name = prompt("What's your last name?","");
var the_name = first_name + " " + last_name;
}
function theGreeting()
{
var the_name = getName();
if (the_name == "Dave Thau")
{
alert("Howdy, partner!");
} else {
alert("Ahoy, polloi!");
}
}
Figure 18-1: Find the error
If JavaScript doesn’t catch your error and you can’t figure it out by looking
at the script, try printing out the variables. The easiest way to do this is to use
an alert() to print out a variable, as in Figure 18-2:
function getName()
{
var first_name = prompt("What's your first name?","");
var last_name = prompt("What's your last name?","");
var the_name = first_name + " " + last_name;
X alert("in getName, the_name is: " + the_name);
}
function theGreeting()
{
var the_name = getName();
Y alert("after getName, the_name = " + the_name);
if (the_name == "Dave Thau")
{
alert("Howdy, partner!");
} else {
alert("Ahoy, polloi!");
}
}
Figure 18-2: Using alert() to print out variables
After you enter the names Dave and Thau at the prompts in getName(), the
alert in X says “in getName, the_name is Dave Thau.” That looks fine, so you
can be pretty sure nothing’s wrong up to the point of X. However, the alert
in Y says “after getName,the_name = undefined.” That means the script has
a problem somewhere between X and Y—the_name is correct just before
getName() exits, but it’s wrong after theGreeting(). Because getName() gets the
right answer but theGreeting() fails to receive that answer from getName(),
the problem probably lies in the way the script passes the answer from
getName() to theGreeting().

Debugging JavaScript and Ajax 369
Sure enough, that’s the problem. The getName() function figures out the
name but never returns it. We need to put return the_name at the end of the
function.
Debugging Beyond Alerts
Putting alert boxes in your code is a good debugging tool, but when you
need to examine variables at many places in a JavaScript it can be annoying
to have to press the OK button every other line.
One trick that can make your debugging experience more pleasant
involves using a variable to set different levels of debugging, such as brief,
extreme, and none. The brief level might use alert() statements to print a
few debugging messages along the way, while the extreme level might print a
ton of debugging messages into another window or a textarea inside a form.
The third option, none, won’t print any messages at all. Figure 18-3 lists some
code that uses a variable to determine what kind of debugging you want to do.
X var debug = "none";
function getName()
{
var first_name = prompt("What's your first name?","");
var last_name = prompt("What's your last name?","");
var the_name = first_name + " " + last_name;
Y doError("in getName, the_name is: " + the_name);
}
function theGreeting()
{
var the_name = getName();
doError("after getName, the_name = " + the_name);
if (the_name == "Dave Thau")
{
alert("Howdy, partner!");
} else {
alert("Ahoy, polloi!");
}
}
function doError(the_message)
{
if (debug == "brief")
{
Z alert(the_message);
} else if (debug == "extreme") {
[ window.document.the_form.the_text.value +=
the_message + "\n";
}
}
Figure 18-3: Using a debug variable
370 Chapter 18
Figure 18-3 uses a function called doError() to handle its debugging. For
example, Y passes a debugging message to doError(); the doError() function
then decides what to do with this message based on how X sets the debug
variable. If it sets debug to "brief",Z puts the debugging message in an alert
box. Using alerts is handy when you want to check variables in just a few places
and you don’t mind pressing OK in each alert box. However, if you want to
look at a lot of debugging messages simultaneously, it’s more helpful to set
the debug variable to "extreme" ([). Finally, when you’re ready to show your
code to the world, just set debug to "none" to prevent the debugging messages
from appearing at all.
Setting a debug variable like the one in Figure 18-3 saves you the hassle
of having to find and remove multiple debugging statements. Depending on
how you set debug, you can even use document.write() to show or hide the
textarea you’re using to display the debug message. That way, you can show
the textarea while debugging the script and then hide it when you’re ready
to let visitors see your JavaScript.
A number of people have written logging libraries that you can add to
your JavaScripts if you don’t feel like writing something like Figure 18-3. Two
good examples are Andre’s JSLog, available at http://earthcode.com/blog/
2005/12/jslog.html, and Log4Ajax by Eric Spiegelberg, available at http://
today.java.net/pub/a/today/2005/12/13/log4ajax.html.
Using Your Browser’s Bug Detector
If you’ve been trying the examples and doing the assignments as we’ve
gone along, you’ve no doubt encountered your browser’s bug detector.
When you’ve made a coding mistake, running your code in the browser
often results in a window that describes the error. Some browsers, such
as Internet Explorer 5.0 and up, warn you by putting an error icon at the
bottom-left corner of the window. Clicking the error icon opens a window
that describes the error. Other browsers, such as Firefox, may not show
errors at all but instead have a console that displays errors. To see the
console, type javascript: in the location box of your browser.
Sometimes you may find the JavaScript error messages helpful; other
times they may seem confusing. For serious debugging, you may have to move
up to a full-fledged JavaScript debugger.
Using JavaScript Debuggers
If you use Firefox or Mozilla, you can download the handy JavaScript
debugger named Venkman at https://addons.mozilla.org/firefox/216.
Once you have installed the extension, a new JavaScript Debugger option
appears under Firefox’s Tools menu, as shown in Figure 18-4. Selecting this
option brings up the Venkman debugger, which looks like Figure 18-5. There
are many little windows in Venkman, and like any debugger, Venkman is a
complicated application. For our purposes, the most important window is
the middle one on the left, named Local Variables.
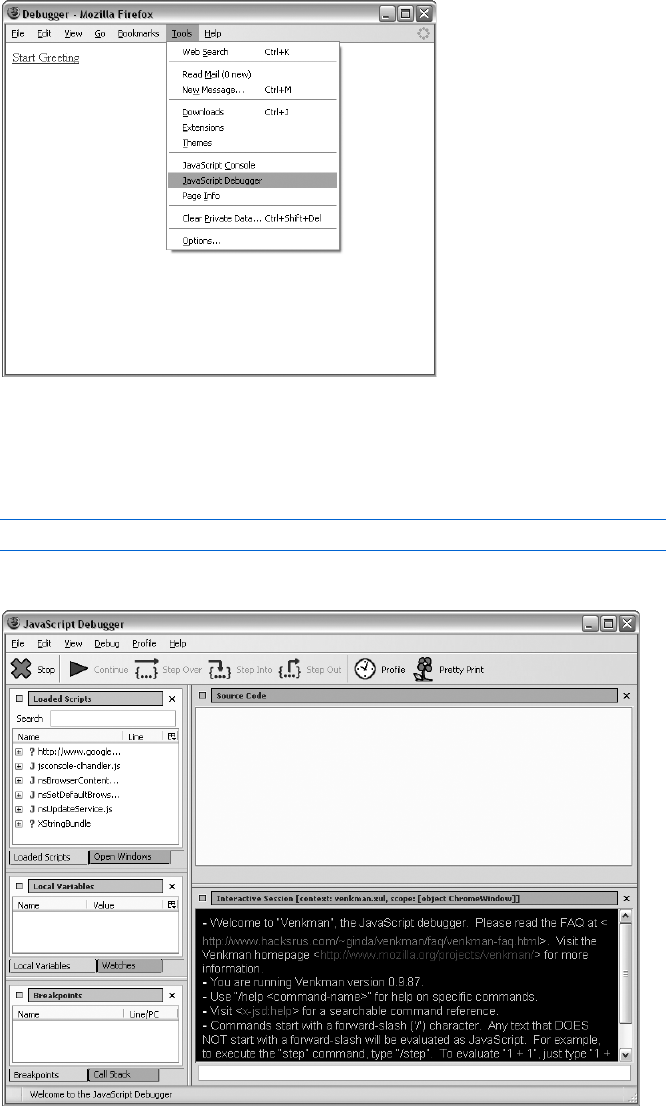
Debugging JavaScript and Ajax 371
Figure 18-4: Selecting the Venkman JavaScript debugger
extension in Firefox
As long as the debugging window is open, the debugger can be invoked
at any point in your JavaScript program by adding the line:
debugger;
at the point where you want the debugger to start.
Figure 18-5: The Venkman JavaScript debugger
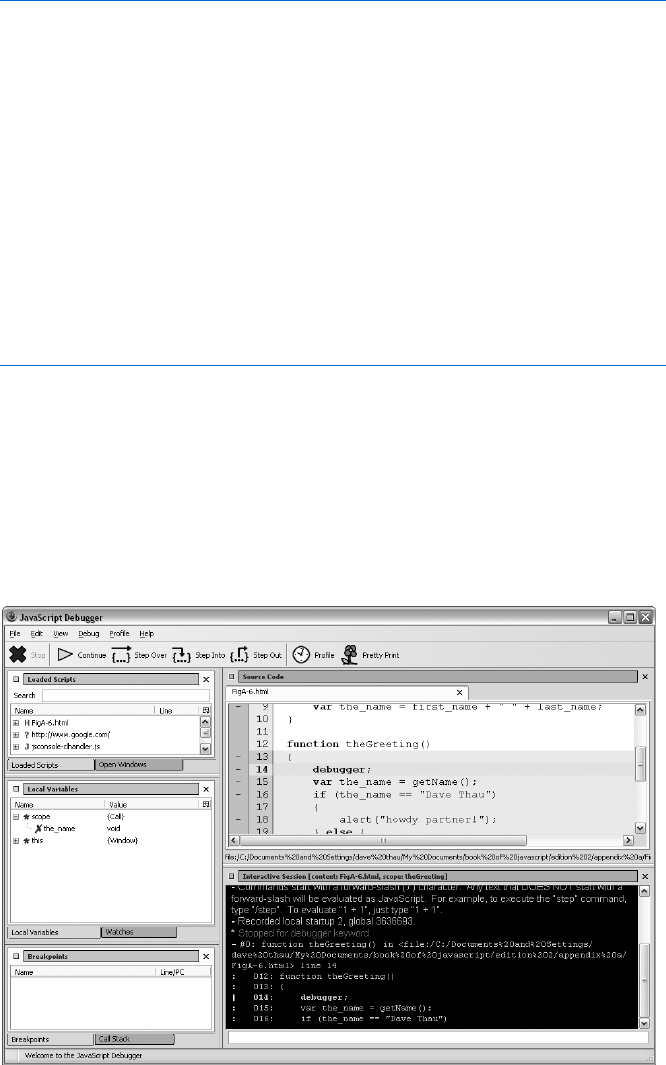
372 Chapter 18
Consider the code in Figure 18-6.
function getName()
{
var first_name = prompt("What's your first name?","");
var last_name = prompt("What's your last name?","");
var the_name = first_name + " " + last_name;
}
function theGreeting() {
X debugger;
var the_name = getName();
if (the_name == "Dave Thau")
{
alert("Howdy, partner!");
} else {
alert("Ahoy, polloi!");
}
}
Figure 18-6: Starting the debugger
As before, we suspect that something funny is going on with getName().
In this case, rather than putting in an alert or using logging, we invoke the
JavaScript debugger in X. This stops the JavaScript program and makes
the JavaScript debugger window look like Figure 18-7. The debugger; line
appeared within theGreeting(), so the Local Variables section of the debugger
shows you what it knows about the function. Initially, it knows that there is
one variable, the_name, and that it has no value (the value is void).
Figure 18-7: After X has been executed
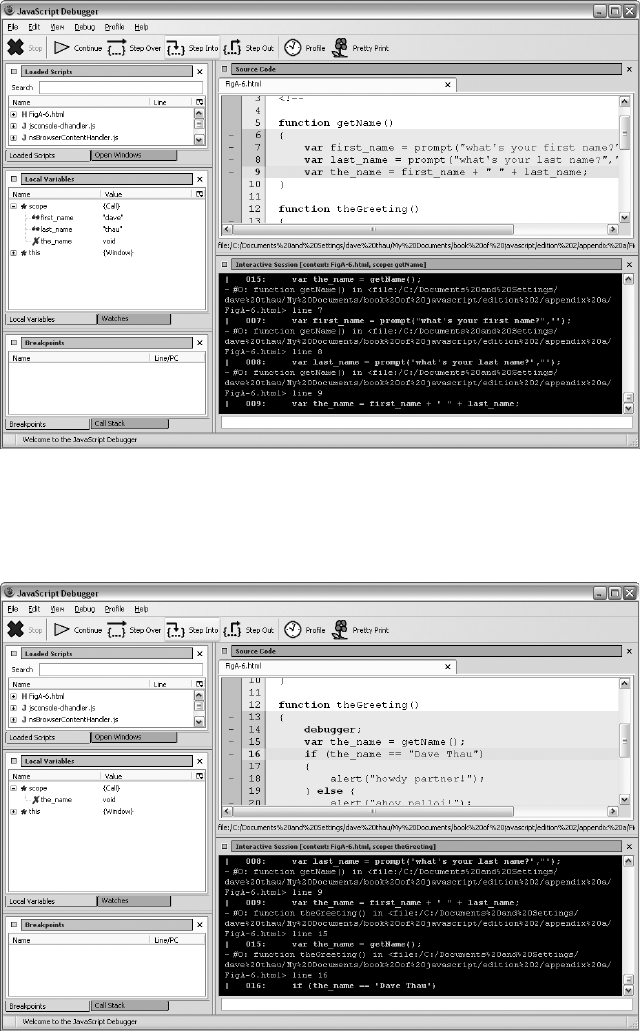
Debugging JavaScript and Ajax 373
After I click the Step Into button a couple of times to get into getName(),
then fill in some prompts, the debugger in Figure 18-8 shows that first_name
and last_name are set correctly.
Figure 18-8: Examining variables; first_name and last_name look correct
I click the Step Into button a few more times until I’ve exited getName(),
and I see in Figure 18-9 that for some reason the_name is still void. From this I
can deduce that the value is not getting passed out of the getName() function.
Figure 18-9: Examining variables; the_name looks incorrect

374 Chapter 18
In this simple example, the complexity of a full-blown debugger such as
Venkman is unnecessary. However, with complicated functions, being able to
step through the JavaScript one line at a time, and see the values of the varia-
bles at every step, can cut down debugging time immensely. If you’d like to
learn more about how to use Venkman, you can find an excellent tutorial at
http://www.svendtofte.com/code/learning_venkman.
The Venkman debugger is by far the easiest JavaScript debugger to use
and is itself a reason to download Firefox. If you are trying to debug a problem
that occurs only in Internet Explorer, you will need a debugger that works
for Internet Explorer. The best option here is the Microsoft Script Editor,1
which comes packaged with Microsoft Office.
Debugging Ajax in Firefox 1.5 and 2.0
Debugging Ajax is much like debugging JavaScript. However, the client-server
communication that goes on in debugging Ajax adds a bit of complexity. An
extension for Firefox 1.5 and 2.0 called Greasemonkey,2 combined with a
script called the XMLHttpRequest Debugging Script,3 can give you a window
into how your web browser and a webserver are communicating.
Once you have downloaded and installed Greasemonkey and the
XMLHttpRequest Debugging script, you can monitor requests sent and
received by Firefox request objects. The XmlHttpRequestDebugging script
maintains a list of JavaScripts that might have request objects that need to be
monitored. To add JavaScripts that run on your desktop computer to that
list, choose ToolsManage User Scripts from the Firefox menu, and add
http://localhost/* to the Included Pages list, as seen in Figure 18-10.
Once you have done so, a div is added to any web page on this list that
makes an Ajax-style request. For example, Figure 18-11 shows the debugging
window after Odysseus has logged into the To Do list application from
Chapter 17. The figure shows two Ajax calls. The first line of a call tells
you the type of call it was, in this case a GET. The next line tells you where
the request was sent. The third line lets you see what message was sent
with the request when the request.send() method was invoked. In the case
of a GET, the message is null. With POST, the message will be the string sent.
On the third line is also an [edit&replay] button, which gives you a window
like Figure 18-12. In this window you can change the message sent in the
request and then resend the request to see what happens.
The fourth line of the window in Figure 18-11 gives you the status
of the webserver’s response. Clicking [export] opens a window with the
complete response from the webserver (Figure 18-13). As you can gather,
this tool is extremely useful for debugging client-server communications
in Ajax.
1A good tutorial is available at http://www.jonathanboutelle.com/mt/archives/2006/01/
howto_debug_jav.html.
2See http://greasemonkey.mozdev.org.
3See http://blog.monstuff.com/archives/images/XMLHttpRequestDebugging.v1.2.user.js.
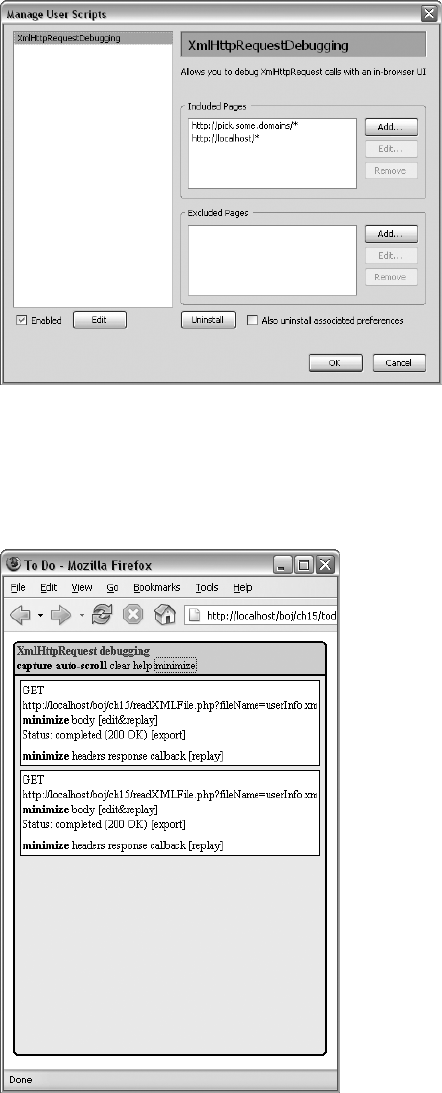
Debugging JavaScript and Ajax 375
Figure 18-10: Adding JavaScripts that run on your desktop
machine to the list of scripts to monitor
NOTE Only you (and other users who have added Greasemonkey and the XMLHttpRequest
Debugging script and have added your web page to their watch list) will see the
XmlHttpRequest debugging window. Don’t worry about anyone else being affected by it.
Figure 18-11: XmlHttpRequest debugger showing
client-server traffic
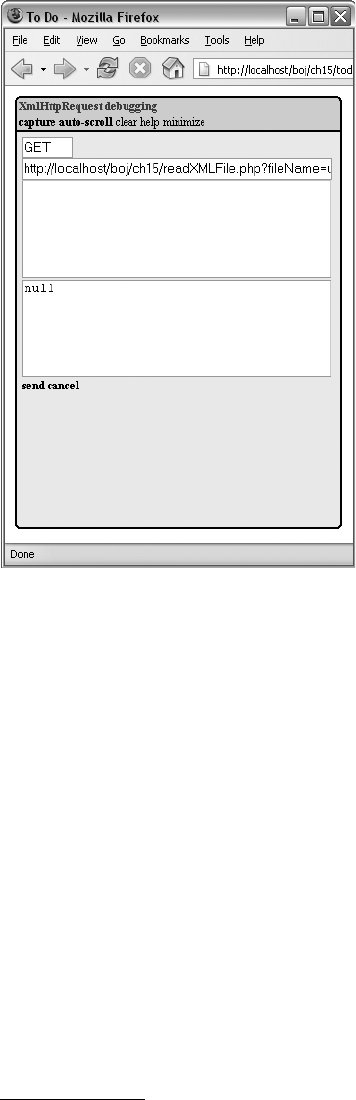
376 Chapter 18
Figure 18-12: Using the XmlHttpRequest debugger
to examine and edit an Ajax message
Other Debugging Resources
Before closing this section on debugging, I should mention two other
debugging tools. Firebug4 is a relatively new and popular debugger for
Firefox 1.5 that combines logging, a JavaScript debugger, and the ability to
watch Ajax requests. Microsoft’s Visual Web Developer Express Edition5 is a
free website development environment that includes a JavaScript debugger
and can also watch Ajax requests.
Fixing Bugs
Once you’ve found where your bugs are, you need to fix them—and you
have multiple options for this, both good and bad. This section covers a few
things you should do when getting rid of bugs.
4See http://www.joehewitt.com/software/firebug.
5See http://msdn.microsoft.com/vstudio/express/vwd.
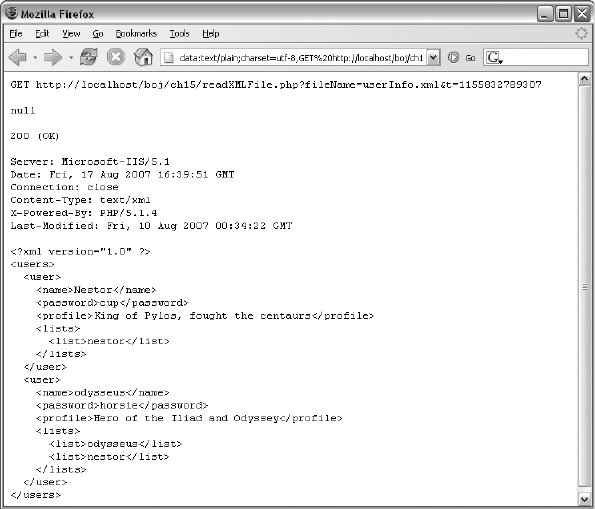
Debugging JavaScript and Ajax 377
Figure 18-13: A detailed look at the client-server communication
Back Up Your Program
Some bugs are really hard to get rid of. In fact, sometimes in the process of
eradicating a little bug that’s driving you nuts, you end up destroying your
entire program. This happens a lot, so saving a backup of your program
before you start to debug is the best way to ensure that a bug doesn’t get the
best of you.
Fix One Bug at a Time
If you have multiple bugs, fix one and test your fix before moving to the next
bug. Fixing a lot of bugs at once increases the risk of adding even more bugs.
Avoid Voodoo Coding
Sometimes you know a bug exists, but you don’t really know why. Let’s say
you have a variable called index and for some reason index is always 1 less
than you think it should be. At this point you can do two things. You can sit
there for a while and figure out why index is 1 less than it should be, or you
378 Chapter 18
can just shrug, add 1 to index before using it, and move on. The latter method
is called voodoo programming. When you start thinking, “What the hell? Why is
index 2 instead of 3 here? Well . . . I’ll just add 1 for now and fix it later,”
you’re engaging in voodoo programming.
Voodoo programming may work in the short term, but eventually it will
doom you. It’s like sweeping dust under a rug. The problem resurfaces—
either you get yet another weird error you can’t figure out, or the next poor
soul cursed to look at your code will find it extremely hard to understand.
Don’t practice voodoo coding.
Look for Similar Bugs
In some ways, the ability to cut and paste code is the worst thing that ever
happened to programmers. Often you’ll write some JavaScript in one function,
then cut and paste it into another function. If the first function had a problem,
you have now created problems in two functions. I’m not saying you shouldn’t
cut and paste code—but keep in mind that bugs have a way of multiplying, so
if you find one bug, look for similar bugs elsewhere in your code. One bug
that typically crops up several times in every JavaScript is misspelled variable
names. If you misspell the_name as teh_name in one place, chances are you’ve
done it someplace else too.
Clear Your Head
You’re sitting there staring at a bug, and you just can’t figure out what’s
going on or how to fix it. Or maybe you can’t even find the bug in the first
place. The best thing to do is walk away from your computer. Go read a book
and take a stroll around the corner. Get a tasty beverage. Do something—
anything—but don’t think about the program or the problem. This tech-
nique is called incubation, and it works amazingly well. After you’ve had a
little break and relaxed a bit, try finding the bug again. Often you’ll approach
the problem in a new, more fruitful way. Incubation works because it breaks
you out of a dysfunctional mindset.
Ask for Help
Sometimes you get stuck in your own contorted thought patterns, and you
need someone who hasn’t thought about the problem to find the hole in
your logic. In structured coding environments, programmers periodically
review each other’s code. Code review not only helps iron out bugs but
also results in better code. Don’t be afraid to show other people your
JavaScripts. You’ll become a better JavaScripter.
Debugging JavaScript and Ajax 379
Summary
Programming is a skill that improves dramatically over time, and learning
how to debug efficiently is one of the biggest components of that process.
Whenever you program, you will need to debug. A completely bug-free pro-
gram is almost never written in one draft. The best you can do is to try to
minimize the bugs and to write your programs in a way that makes it easy
to detect and fix the bugs that slip in. The tools and techniques covered in
this chapter should help make your debugging experience as pleasant as
possible.
Congratulations! You now know everything you need to start a career as
an official JavaScripter. All that remains is lots and lots of practice. View source
on every page that catches your fancy, and check out the free JavaScript
resources listed in Appendix B.
If you’ve made it this far, you’ve learned a lot of JavaScript, but this book
hasn’t by any means covered every detail of this huge subject—so leaf through
Appendix C to get a feel for the other JavaScript functions and objects at your
disposal. If you’re going to do a lot of JavaScripting, get a good JavaScript
reference book, like David Flanagan’s JavaScript: The Definitive Guide (O’Reilly,
2006). But most importantly, experiment freely and push the boundaries of
what you’ve learned here. Now go forth and code!
ANSWERS TO ASSIGNMENTS
Here are solutions to the assignments I’ve
given at the end of each chapter. The scripts
and images used in the solutions may be found
on this book’s companion website (http://www
.bookofjavascript.com). The JavaScript in this appendix
contains comments where I think explanation is neces-
sary. If your solution works and is not much longer than
mine, you’ve done a good job. There is no assignment
for Chapter 1, so we’ll start with Chapter 2.
Chapter 2
The Chapter 2 assignment asks you to change Figure 2-12 so that seconds are
displayed along with minutes and hours. Use the Date object’s getSeconds()
method to get the number of seconds and the fixTime() function to fix the
formatting of the seconds.

382 Appendix A
<html>
<head>
<title>Chapter 2 Assignment</title>
<script type = "text/javascript">
<!-- hide me from older browsers
// get the date information
//
var today = new Date();
var the_day = today.getDate();
var the_month = today.getMonth();
var the_hour = today.getHours();
var the_minutes = today.getMinutes();
var the_seconds = today.getSeconds();
// correct for the month starting from zero
//
the_month = the_month + 1;
// add leading zeros if necessary
the_day = fixTime(the_day);
the_minutes = fixTime(the_minutes);
the_seconds = fixTime(the_seconds);
// create the string you want to print
//
var the_whole_date = the_month + "/" + the_day + " ";
var the_whole_time = the_hour + ":" + the_minutes + ":" + the_seconds;
// This is the time fixer function--don't worry about how this works either.
function fixTime(number) {
if (number < 10) {
number = "0" + number;
}
return number;
}
// show me -->
</script>
</head>
<body>
Right now it's:
<script type = "text/javascript">
<!-- hide me from older browsers
// write the date
//
document.write(the_whole_date);
document.write(the_whole_time);
// show me -->
</script>
</body>
</html>

Answers to Assignments 383
Chapter 3
In this assignment, you are asked to send people you like to one page, people
you don’t like to another page, and everyone else to a third page. This should
exercise your new understanding of if-then-else-if statements.
<html><head><title>Chapter 3 Assignment</title></head>
<body>
<script type = "text/javascript">
<!-- hide me from older browsers
// get the visitor's name
//
var the_name = prompt("What's your name?", "");
// If the name is thau, dave, pugsly, or gomez,
// send the visitor to Sesame Street.
// If it's darth vader, the evil emperor, or jar jar binks,
// send the visitor to the American Psychological Association
// for some therapy.
// If it's none of the above, send him or her to the New York Times.
if ((the_name == "thau") || (the_name == "dave") ||
(the_name == "pugsly") || (the_name=="gomez"))
{
window.location = "http://www.sesamestreet.com/";
} else if ((the_name == "darth vader") || (the_name == "the evil emperor") ||
(the_name == "jar jar binks"))
{
window.location = "http://www.apa.org/";
}
else
{
window.location = "http://www.nytimes.com/";
}
// show me -->
</script>
</body>
</html>
Chapter 4
This assignment asks you to create an image swap that changes two images at
once. Do this by putting two image swap statements inside the event handlers.
<html>
<head>
<title>Chapter 4 Assignment</title>
</head>
<body>
<h1>Welcome to the Book of JavaScript Website!</h1>
<p>
<img src = "front_cover.gif" name = "cover">
</p>
<p>
<a href = "#"

384 Appendix A
onMouseOver = "window.document.cover.src='back_cover.gif';
window.document.turn.src='turn_back.gif';"
onMouseOut = "window.document.cover.src='front_cover.gif';
window.document.turn.src='turn_over.gif';">
<img src = "turn_over.gif" border = "0" name = "turn">
</a>
</p>
</body>
</html>
Chapter 5
This assignment asks you to write a web page that contains two links. When the
web page opens, it should also open a little window containing an image. When
clicked, the two links on the main page should swap different images into the
little window. Make sure that index.html and image_page.html are in the same
directory.
index.html
The index.html file opens the little window.
<html>
<head>
<title>Chapter 5 Assignment</title>
<script type = "text/javascript">
<!-- hide me from older browsers
// open the little window with the page image_page.html and call the
// little window the_window
//
var the_window =
window.open("image_page.html","the_window","width=100,height=100");
// show me -->
</script>
</head>
<body>
<h1>Play with a little window</h1>
<a href = "#"
onClick = "the_window.document.the_image.src='sad_face.gif';">Make him
sad</a><br>
<a href = "#"
onClick = "the_window.document.the_image.src='happy_face.gif';">Make him
happy</a><br>
</body>
</html>
image_page.html
The image_page.html file specifies the content of the little window.
<html><head><title>Little Window</title></head>
<body>

Answers to Assignments 385
<img name = "the_image" src = "happy.gif">
</body>
</html>
Chapter 6
This assignment asks you to create a function that swaps one image with
another and opens a new window to a given URL. The function takes three
parameters: the name of an image to swap, the URL of a new image to put in
its place, and a URL to open in the new window.
<html><head><title>Chapter 6 Assignment</title>
<script type = "text/javascript">
<!-- hide me from older browsers
// function fancySwap() takes three parameters:
// 1. the web page image that's getting swapped out
// 2. the filename of an image to swap into the web page image
// 3. a URL to open into a new window
//
function fancySwap(the_image, new_image, the_url)
{
the_image.src = new_image;
var my_window = window.open(the_url, my_window, "height=300,width=150");
}
// show me -->
</script>
</head>
<body>
<a href = "#"
onMouseOver = "fancySwap(window.document.apple,'hilight_apple.gif',
'http://www.apple.com/'); "
onMouseOut = "window.document.apple.src='normal_apple.gif';">
<img src = "normal_apple.gif" name = "apple" border = "0">
</a>
<a href = "#" onMouseOver =
"fancySwap(window.document.sun,'hilight_sun.gif','http://www.sun.com/');"
onMouseOut = "window.document.sun.src='normal_sun.gif';">
<img src = "normal_sun.gif" name = "sun" border = "0">
</a>
<a href = "#" onMouseOver =
"fancySwap(window.document.monkey,'hilight_monkey.gif',
'http://www.webmonkey.com/');"
onMouseOut = "window.document.monkey.src='normal_monkey.gif';">
<img src = "normal_monkey.gif" name = "monkey" border = "0">
</a>
</body>
</html>
Chapter 7
This assignment asks you to write a script for a clock that tells the time in
San Francisco, New York, London, and Tokyo. The clock should have a text
field for the time, a button to update the clock, and four radio buttons, one
for each of those time zones. When you click on one of the radio buttons,

386 Appendix A
the correct time should appear in the text field. When you click on the update
button, the clock should update with the time from the zone you’ve selected
with the radio buttons.
This solution has two main functions: updateClock() is called when the
update button is clicked, and updateReadout() is called when one of the time
zone radio buttons is clicked.
<html><head><title>Chapter 7 Assignment</title>
<script type = "text/javascript">
<!-- hide me from older browsers
// Function updateReadout() takes one parameter, the time zone to
// convert the time to. The parameter can be either newyork, sanfran or
// tokyo.
// The function determines the time for that time zone and then sets the
// value of a text field to that time.
function updateReadout(the_zone)
{
// get the current UTC time
//
var now = new Date();
var the_hours = now.getUTCHours();
var the_minutes = now.getUTCMinutes();
var the_seconds = now.getUTCSeconds();
// adjust for selected time zone
//
if (the_zone == "newyork")
{
the_hours = the_hours - 4;
} else if (the_zone == "sanfran") {
the_hours = the_hours - 7;
} else if (the_zone == "tokyo") {
the_hours = the_hours + 9;
}
// now fix the hours if over 24 or under 0
//
if (the_hours < 0)
{
the_hours = the_hours + 24;
} else if (the_hours > 24) {
the_hours = the_hours - 24;
}
// put zeros in front of minutes and seconds if necessary
the_minutes = formatTime(the_minutes);
the_seconds = formatTime(the_seconds);
// now put the time in the text box
var the_time = the_hours + ":" + the_minutes + ":" + the_seconds;
window.document.clock_form.readout.value = the_time;
}

Answers to Assignments 387
// function formatTime() takes a number as a parameter.
// If that number is less than 10, it puts a 0 in front
// of it for formatting purposes.
//
function formatTime(the_time)
{
if (the_time < 10) {
the_time = "0" + the_time;
}
return the_time;
}
// By looping through a set of radio buttons, function updateClock()
// checks to see which time zone has been selected by the viewer. Once
// it determines the selected time zone, it calls updateReadout().
//
function updateClock()
{
var selected_zone = "";
for (var loop = 0; loop < window.document.clock_form.zones.length; loop++)
{
if (window.document.clock_form.zones[loop].checked == true)
{
selected_zone = window.document.clock_form.zones[loop].value;
}
}
updateReadout(selected_zone);
}
// show me -->
</script>
</head>
<body>
<form name = "clock_form">
<input type = "text" name = "readout">
<input type = "button" value = "update" onClick = "updateClock();"><br>
San Francisco <input type = "radio" name = "zones" value = "sanfran"
onClick = "updateReadout('sanfran');" checked><br>
New York <input type = "radio" name = "zones" value = "newyork"
onClick = "updateReadout('newyork');"><br>
London <input type = "radio" name = "zones" value = "london"
onClick = "updateReadout('london');"><br>
Tokyo <input type = "radio" name = "zones" value = "tokyo"
onClick = "updateReadout('tokyo');"><br>
</form>
</body>
</html>
Chapter 8
This assignment uses arrays and loops to draw a chart based on user input.
One function, getNumbers(), creates an array that stores the values to the
chart. After collecting these values from the user, getNumbers() then loops
through the array, calling drawSquares() to draw each line of the chart.

388 Appendix A
<html><head><title>Chapter 8 Assignment</title>
<script type = "text/javascript">
<!-- hide me from older browsers
// function getNumbers() gets a number of bars to draw
// and the length of those bars. It calls the drawSquares()
// function to actually draw the bars to the web page.
//
function getNumbers()
{
// create a new array
//
var the_values = new Array();
// find out how many bars the person wants
//
var how_many = prompt("How many bars?","");
// now loop that many times, asking for a value
// each time and loading that value into the array
//
for (var loop = 0; loop < how_many; loop++)
{
var value = prompt("How long is this bar? (1-10)","");
the_values[loop] = value;
}
// now loop through the array and print out the bars
//
for (var loop = 0; loop < how_many; loop++)
{
drawSquares(the_values[loop]);
}
}
// function drawSquares()
// takes a number of squares to draw, and then draws them to
// the web page
//
function drawSquares(the_number)
{
for (var loop = 0; loop < the_number; loop++)
{
window.document.write("<img src='square.gif'>");
}
window.document.write("<br>");
}
// show me -->
</script>
</head>
<body>
<a href = "#" onClick = "getNumbers(); return false;">Draw the histogram</a>
</body>
</html>

Answers to Assignments 389
Chapter 9
This assignment asks you to alter Figure 9-11 so that mousing over the image
stops the slide show, and mousing off the image starts it again. The solution
is very much like Figure 9-11. The only addition is the link around the image
that clears the time-out when it is moused over and restarts the slideshow
when the mouse moves off of it.
<html>
<head>
<title>Chapter 9 Assignment</title>
<script type = "text/javascript">
<!-- hide me from older browsers
// preload the images
var the_images = new Array();
the_images[0] = new Image();
the_images[0].src = "one.jpg";
the_images[1] = new Image();
the_images[1].src = "two.jpg";
the_images[2] = new Image();
the_images[2].src = "three.jpg";
var the_timeout;
var index = 0;
// function rotateImage() swaps in the next image in the_images
// array and increases the index by 1. If the index exceeds the
// number of images in the array, index is set back to zero.
// setTimeout is used to call the function again in one second.
function rotateImage()
{
window.document.my_image.src = the_images[index].src;
index++;
if (index >= the_images.length)
{
index = 0;
}
the_timeout = setTimeout("rotateImage();", 1000);
}
// show me -->
</script>
</head>
<body>
<a href = "#"
onMouseOver = "clearTimeout(the_timeout);"
onMouseOut = "rotateImage();">
<img name = "my_image" src = "one.jpg"></a>
<form>
<input type = "button" value = "Start the show"
onClick = "clearTimeout(the_timeout); rotateImage();">
<input type = "button" value = "Stop the show"
onClick = "clearTimeout(the_timeout);">
</form>
</body>
</html>

390 Appendix A
Chapter 10
This assignment asks you to create a page with at least two frames. The first
frame should contain a submit button and a text box into which a visitor should
type a URL. After the submit button is clicked, the second frame shows the
web page called by the URL in the text box. In addition to providing a
location box, the browser page in the solution uses Salon’s image map to
show various URLs in the display frame.
Because it uses frames, this assignment requires three HTML files:
index.html, assignment-nav.html, and blank.html.
index.html
The first page, index.html, lays out the frameset.
<html><head><title>Chapter 10 Assignment</title></head>
<frameset rows = "50%,*">
<frame src = "assignment-nav.html" name = "nav">
<frame src = "blank.html" name = "contents">
</frameset>
</html>
assignment-nav.html
The second page, assignment-nav.html, contains the image map and the form.
Clicking on an area in the image map or submitting the form loads a URL
into the lower frame. Notice the use of this in the form’s onSubmit.
<html><head><title>nav</title></head>
<body>
<table border = 0>
<tr><td>
Type a URL below, or
<br>
click on an area of the map.
<form onSubmit = "parent.contents.location=this.the_url.value; return false;">
<input type = "text" name = "the_url">
</form>
</td>
<td>
<img src = "src/left.gif" name = "left" isMap useMap = "#left">
</td>
</tr>
</table>
<MAP name = "left">
<AREA coords = "9,23,41,42" shape = "RECT" href = "#"
target = "thePicture"
onClick = "parent.contents.location = 'http://www.whitehouse.gov/'; return
false;"
onmouseOver = "window.document.left.src='src/us.gif';"
onMouseOut = "window.document.left.src='src/left.gif';">

Answers to Assignments 391
<AREA coords = "26,42,75,64" shape = "RECT" href = "#"
target = "thePicture"
onClick = "parent.contents.location = 'http://www.whitehouse.gov/'; return
false;"
onmouseOver = "window.document.left.src='src/us.gif';"
onMouseOut = "window.document.left.src='src/left.gif';">
<AREA coords = "28,65,55,78" shape = "RECT" href = "#"
target = "thePicture"
onClick = "parent.contents.location = 'http://www.gob.mx/wb/'; return
false;"
onmouseOver = "window.document.left.src='src/mexico.gif';"
onMouseOut = "window.document.left.src='src/left.gif';">
</MAP>
</body>
</html>
blank.html
The third page, blank.html, is just a blank page which appears in the lower
frame.
<html><head><title>blank</title></head>
<body>
</body>
</html>
Chapter 11
This assignment extends Chapter 10’s assignment by adding string validation
to make sure the URLs entered in the browser’s location bar are valid web
addresses. This means the URL should start with http:// or https://, have no
spaces, and have at least two words with a period between them.
The solution begins with the code from Chapter 10’s assignment and
adds a function named domainCheckAndGo() that performs the string validation.
Like the Chapter 10 assignment, this assignment requires three HTML files
because it uses frames.
index.html
The first page, index.html, lays out the frameset.
<html><head><title>Chapter 11 Assignment</title></head>
<frameset rows = "50%,*">
<frame src = "assignment-nav.html" name = "nav">
<frame src = "blank.html" name = "contents">
</frameset>
</html>

392 Appendix A
assignment-nav.html
The second page, assignment-nav.html, contains the contents of the top frame,
including the JavaScript.
<html><head><title>nav</title>
<script type = "text/javascript">
<!-- hide me from older browsers
// function domainCheckAndGo()
// This function makes sure a URL is legal. If it is, it
// sends the visitor to that URL.
function domainCheckAndGo(the_url)
{
// split the URL into two parts, along the //
// there should be two parts to it, the protocol (for example, http:)
// and the address
var first_split = the_url.split('//');
if (first_split.length != 2)
{
alert("Sorry, there must be one // in a domain name");
return false;
}
// Now check to see if the URL is legal--see the alerts in the
// if-then statement to see what the if-then statement is checking.
// If any of the conditions are violated, the script calls up an
// alert box explaining the error and then uses return to exit
// the function without changing the URL in the bottom frame.
if ((first_split[0] != 'http:') && (first_split[0] != 'https:'))
{
alert("Sorry, the domain must start with http:// or https://");
return false;
}
if (the_url.indexOf(' ') != -1)
{
alert("Sorry, domains can't have spaces");
return false;
}
// get everything after the http://
//
var two_slashes = the_url.indexOf('//');
var all_but_lead = the_url.substring(two_slashes + 2, the_url.length);
var domain_parts = all_but_lead.split('.');
if (domain_parts.length < 2)
{
alert("Sorry, there must be at least two parts to a domain name");
return false;
}
// Loop through all the parts of the domain, making
// sure there's actually something there--for example,
// http://i.am.happy...com is not legal because there
// are three dots in a row.

Answers to Assignments 393
for (var loop = 0; loop < domain_parts.length; loop++)
{
if (domain_parts[loop] == '')
{
alert("Sorry, there must be some text after each .");
return false;
}
}
// If we've made it this far, the URL must be legal,
// so load the URL into the frame.
parent.contents.location = the_url;
}
// show me -->
</script>
</head>
<body>
<table border = 0>
<tr><td>
Type a URL below, or
<br>
click on an area of the map.
<form onSubmit = "domainCheckAndGo(this.the_url.value); return false;">
<input type = "text" name = "the_url">
</form>
</td>
<td>
<img src = "src/left.gif" name = "left" isMap useMap = "#left">
</td>
</tr>
</table>
<MAP name = "left">
<AREA coords = "9,23,41,42" shape = "RECT" href = "#"
target = "thePicture"
onClick = "parent.contents.location = 'http://www.whitehouse.gov/'; return
false;"
onmouseOver = "window.document.left.src='src/us.gif';"
onMouseOut = "window.document.left.src='src/left.gif';">
<AREA coords = "26,42,75,64" shape = "RECT" href = "#"
target = "thePicture"
onClick = "parent.contents.location = 'http://www.whitehouse.gov/'; return
false;"
onmouseOver = "window.document.left.src='src/us.gif';"
onMouseOut = "window.document.left.src='src/left.gif';">
<AREA coords = "28,65,55,78" shape = "RECT" href = "#"
target = "thePicture"
onClick = "parent.contents.location = 'http://www.mexico.gov/'; return false;"
onmouseOver = "window.document.left.src='src/mexico.gif';"
onMouseOut = "window.document.left.src='src/left.gif';">
</MAP>
</body>
</html>

394 Appendix A
blank.html
The third page, blank.html, is just a blank page which appears in the lower
frame.
<html><head><title>blank</title></head>
<body>
</body>
</html>
Chapter 12
This assignment asks you to use cookies to keep track of whether or not a user
has visited a web page. The solution below uses Webmonkey’s cookie library
to set and read a cookie named was_here.
<html><head><title>Chapter 12 Assignment</title>
<script type = "text/javascript">
<!-- hide me from older browsers
// this is from the webmonkey cookie library at http://www.webmonkey.com/
//
function WM_readCookie(name) {
if(document.cookie == '') {
// there's no cookie, so go no further
return false;
} else {
// there is a cookie
var firstChar, lastChar;
var theBigCookie = document.cookie;
firstChar = theBigCookie.indexOf(name);
// find the start of 'name'
var NN2Hack = firstChar + name.length;
if((firstChar != -1) && (theBigCookie.charAt(NN2Hack) == '=')) {
firstChar += name.length + 1; // skip 'name' and '='
lastChar = theBigCookie.indexOf(';', firstChar); //
if(lastChar == -1) lastChar = theBigCookie.length;
return unescape(theBigCookie.substring(firstChar, lastChar));
} else {
// If there was no cookie of that name, return false.
return false;
}
}
}
// WM_readCookie
// Function setCookie() sets a cookie named was_here to expire far
// in the future.
//
function setCookie()
{
var the_future = new Date("December 31, 2023");
var the_cookie_date = the_future.toGMTString();
var the_cookie = "was_here=yes;expires=" + the_cookie_date;
document.cookie = the_cookie;

Answers to Assignments 395
}
// Function checkFirst() checks if the was_here cookie
// has been set. If it hasn't, the alert pops up and the
// cookie is set using setCookie();.
//
function checkFirstTime()
{
var the_date = WM_readCookie("was_here");
if(the_date == false)
{
alert("Welcome, newtimer!");
setCookie();
}
}
// show me -->
</script></head>
<body>
<h1>My Page</h1>
<script type = "text/javascript">
<!-- hide me from older browsers
checkFirstTime();
// show me -->
</script>
Don't you just love this page?
</body>
</html>
Chapter 13
This assignment asks you to create a bouncing smiley face screen saver using
Dynamic HTML. The script below uses two variables, x_motion and y_motion, to
keep track of the horizontal and vertical directions in which the smiley face is
moving. These variables will either hold the value "plus" or "minus". A "plus"
value calls for a number to be added to the current position. If the variable is
x_motion, adding a value will move the smiley face to the right. If the variable
is y_motion, adding a value will move the smiley face down.
<html>
<head>
<title>Chapter 13 Assignment</title>
<script type = "text/javascript">
<!-- hide me from older browsers
// set the direction
//
var x_motion = "plus";
var y_motion = "plus";
// set the borders
//
var top_border = 100;
var bottom_border = 200;
var left_border = 100;
var right_border = 300;

396 Appendix A
// This function moves the face 5 pixels in the vertical dimension
// and 5 pixels in the horizontal dimension. It uses two variables,
// x_motion and y_motion, to determine the direction left versus
// right and up versus down. When the face reaches a horizontal or
// vertical border, the x_motion or y_motion variable changes, so that
// the next time the face moves, it moves in the opposite direction.
function moveSmile()
{
var the_smile = document.getElementById("smile").style;
if (x_motion == "plus")
{
the_smile.left = parseInt(the_smile.left) + 5;
} else {
the_smile.left = parseInt(the_smile.left) - 5;
}
if (y_motion == "plus")
{
the_smile.top = parseInt(the_smile.top) + 5;
} else {
the_smile.top = parseInt(the_smile.top) - 5;
}
if (parseInt(the_smile.left) > right_border)
{
x_motion = "minus";
} else if (parseInt(the_smile.left) < left_border) {
x_motion = "plus";
}
if (parseInt(the_smile.top) > bottom_border)
{
y_motion = "minus";
} else if (parseInt(the_smile.top) < top_border) {
y_motion = "plus";
}
theTimeOut = setTimeout('moveSmile()', 100);
}
// show me -->
</script>
</head>
<body>
<form>
<input type = "button" value = "Make happiness bounce"
onClick = "moveSmile();">
<input type = "button" value = "Stop that smiley!"
onClick = "clearTimeout(theTimeOut);">
</form>
<div id = "smile" style = "position:absolute; left:100; top:100;">
<img src = "happy_face.gif" width = "130" height = "75">
</div>
</body>
</html>

Answers to Assignments 397
Chapter 14
This assignment asks you to create an address book using Ajax. The address
information should be stored in an XML file. Each entry should have a name,
a home address, a phone number, and an email address. The solution requires
two files: addressBook.xml, which stores the address information, and
index.html, which contains the Ajax code.
addressBook.xml
The first file is an XML file storing information in the address book.
<?xml version = "1.0"?>
<addressBook>
<person>
<name>Herman Munster</name>
<address>1313 Mockingbird Lane, Transylvania</address>
<phone>(415) 555-1212</phone>
<email>herman@munster.com</email>
</person>
<person>
<name>Nicholas Nickleby</name>
</person>
</addressBook>
index.html
The second file is the HTML page that contains the JavaScript and Ajax calls
to read in and display the file.
<html><head><title>Chapter 14 Assignment</title>
<script type="text/javascript">
<!-- hide me from older browsers
// gets the names from addressBook.xml and puts them into the select box
function populatePullDown() {
if (window.XMLHttpRequest) {
request = new XMLHttpRequest();
} else if (window.ActiveXObject) {
request = new ActiveXObject("Microsoft.XMLHTTP");
}
if (request) {
request.open("GET", "addressBook.xml");
request.onreadystatechange =
function() {
var name_array = new Array();
if (request.readyState == 4) {
xml_response = request.responseXML;
elements = xml_response.getElementsByTagName("name");
for (var loop = 0; loop < elements.length; loop++) {
if (elements[loop].firstChild != null) {
name_array.push(elements[loop].firstChild.nodeValue);
} else {
name_array.push(" ");
398 Appendix A
}
}
writeSelect(name_array);
}
}
}
request.send(null);
}
// takes an array and writes the contents to theSelect
function writeSelect(the_array) {
var this_option;
var this_select = document.getElementById("theSelect");
for (var loop = 0; loop < the_array.length; loop++) {
this_option = new Option();
this_option.value = the_array[loop];
this_option.text = the_array[loop];
this_select.options[loop] = this_option;
}
}
// takes a name, gets the information about that person from
// addressBook.xml and writes it to the correct divs
function loadInfo(the_name) {
if (window.XMLHttpRequest) {
request = new XMLHttpRequest();
} else if (window.ActiveXObject) {
request = new ActiveXObject("Microsoft.XMLHTTP");
}
if (request) {
request.open("GET", "addressBook.xml");
request.onreadystatechange =
function() {
if (request.readyState == 4) {
xml_response = request.responseXML;
elements = xml_response.getElementsByTagName("name");
for (var loop = 0; loop < elements.length; loop++) {
if ((elements[loop].firstChild != null) &&
(elements[loop].firstChild.nodeValue == the_name)) {
parent = elements[loop].parentNode;
children = parent.childNodes;
var address_node;
var phone_node;
var email_node;
for (var inner = 0; inner < children.length; inner++) {
if (children[inner].nodeName == "address") {
address_node = children[inner];
} else if (children[inner].nodeName == "phone") {
phone_node = children[inner];
} else if (children[inner].nodeName == "email") {
email_node = children[inner];
}
}
insertValue(document.getElementById("theName"),
elements[loop]);
insertValue(document.getElementById("theAddress"),
address_node);
insertValue(document.getElementById("thePhone"), phone_node);
insertValue(document.getElementById("theEmail"), email_node);

Answers to Assignments 399
}
}
}
}
}
request.send(null);
}
// writes the text value of an XML element (the_node) to a div (the_element)
function insertValue(the_element, the_node) {
if (the_node.firstChild != null) {
the_element.innerHTML = the_node.firstChild.nodeValue;
}
}
// show me -->
</script>
</head>
<body onLoad = "populatePullDown()";>
<form>
<select id = "theSelect" size = "8" onChange = "loadInfo(this.value);"></select>
</form>
<b>Name:</b> <span id = "theName"></span><br>
<b>Address:</b> <span id = "theAddress"></span><br>
<b>Phone:</b> <span id = "thePhone"></span><br>
<b>Email:</b> <span id = "theEmail"></span><br>
</body>
</html>
Chapter 17
This is your final exam. If you got this working, take yourself out to dinner.
If you gave it a good shot, take yourself out to dinner. Heck, if you’ve read to
this point in the book, take yourself out to dinner.
The assignment was to add these critical features to the To Do list appli-
cation described in the chapter:
zAllow new users to join the service
zAllow a user to permit another user to access his or her To Do list
Only the HTML file containing the JavaScript needs to be changed here.
First, you needed to make a change to the HTML at the bottom of the page
to add the “join” link to the login section:
<h2>Login Section</h2>
<div id = "loginArea">
<a href = "#" onClick = "displayLogin(); return false;">login</a> or
<a href = "#" onClick = "displayJoin(); return false;">join</a>
</div>
Then there are a number of new functions. First, I’ll cover the functions
necessary to provide the ability to join, then the functions necessary to allow
someone to give another user access to his or her list.

400 Appendix A
Join Functions
Seven functions work together to create a new user:
displayJoin() Displays the form that will collect new user information
doJoin() Called when the join link is clicked; reads in userInfo.xml and
calls processJoin()
processJoin() Creates a new user and adds it to userInfo.xml
createUserFileAndLogin() Creates an empty To Do list for a new user
addUser() Actually creates a new userInfo.xml file
makeNewUser() Makes a new user element
makeUserInfoDoc() Converts the userInfo.xml file into a string to save
to a file
// puts a join form into the loginArea
function displayJoin() {
var theForm = "<form>Name: <input type='text' name='name'><br> " +
"Password: <input type='password' name='password'><br> " +
"Password again: <input type='password' name='password2'><br> " +
"Profile: <input type='text' name='profile'><br> " +
"<input type='button' value='submit' " +
"onClick='doJoin(this.form);'></form>";
document.getElementById("loginArea").innerHTML = theForm;
}
// reads in the userInfo.xml file and calls processJoin
function doJoin(my_form) {
readFileDoFunction("userInfo.xml", "GET",
function() {
if (request.readyState == 4) {
if (request.status == 200) {
processJoin(request.responseXML, my_form);
} else {
document.getElementById("errorDiv").innerHTML =
"Sorry, there was a problem with the server.";
}
}
}
);
}
// creates a new user and adds it to the userInfo.xml file
function processJoin(user_info, my_form) {
var user_name = my_form.elements["name"].value;
var user_password = my_form.elements["password"].value;
var user_password_2 = my_form.elements["password2"].value;
var profile = my_form.elements["profile"].value;
var error = "no error";
var this_user = getUser(user_info, user_name);
if (this_user != null) {
error = "A user with this name already exists.";
} else if (user_password != user_password_2) {
error = "The two provided passwords don't match.";
}
if (error == "no error") {
var new_user_doc = addUser(user_name, user_password, profile, user_info);
Answers to Assignments 401
saveFileDoFunction("userInfo.xml", new_user_doc,
function() {
if (request.readyState == 4) {
if ((request.responseText == "success")&&(request.status == 200)) {
createUserFileAndLogin(user_name);
} else {
document.getElementById("errorDiv").innerHTML =
"Sorry, there was an error saving the user information. ";
}
}
}
);
} else {
document.getElementById("errorDiv").innerHTML +=
"<font color='red'><br>Sorry, " + error + "</font>";
}
}
// creates an empty To Do list for a new user and then logs the user in
function createUserFileAndLogin(the_user) {
var the_file = "<?xml version='1.0'?><list>" +
"<name>" + the_user + "</name>" +
"<openitems></openitems><doneitems></doneitems></list>";
saveFileDoFunction(the_user + ".xml", the_file,
function() {
if (request.readyState == 4) {
if (request.status == 200) {
document.cookie = "user="+the_user;
displayHomeInformation(the_user);
document.getElementById("contentArea").innerHTML = "";
} else {
document.getElementById("errorDiv").innerHTML =
"Sorry, there was a problem saving the To Do list for " +
the_user;
}
}
}
);
}
// creates a new userInfo.xml document with the new user
function addUser(the_name, the_password, profile, user_info) {
var users_array = user_info.getElementsByTagName("user");
var new_users_array = new Array();
for (var loop = 0; loop < users_array.length; loop++) {
new_users_array[loop] = users_array[loop];
}
new_users_array[loop] = makeNewUser(the_name, the_password, profile,
new Array(the_name));
var new_document = makeUserInfoDoc(new_users_array);
return new_document;
}
// makes a new user element
function makeNewUser(the_name, the_password, profile, list_array) {
var new_user = document.createElement("user");
var new_name = document.createElement("name");
new_name.appendChild(document.createTextNode(the_name));
var new_password = document.createElement("password");

402 Appendix A
new_password.appendChild(document.createTextNode(the_password));
var new_profile = document.createElement("profile");
new_profile.appendChild(document.createTextNode(profile));
var new_lists = document.createElement("lists");
var new_list;
for (var loop = 0; loop < list_array.length; loop++) {
new_list = document.createElement("list");
new_list.appendChild(document.createTextNode(list_array[loop]));
new_lists.appendChild(new_list);
}
new_user.appendChild(new_name);
new_user.appendChild(new_password);
new_user.appendChild(new_profile);
new_user.appendChild(new_lists);
return new_user;
}
// builds the new XML string for the userInfo.xml file
function makeUserInfoDoc(user_array) {
var the_doc = "<?xml version='1.0' ?>";
var this_user;
the_doc += "<users>";
for (var loop = 0; loop < user_array.length; loop++) {
this_user = user_array[loop];
the_doc += "<user>";
the_doc += "<name>" + getFirstValue(this_user, "name") + "</name>";
the_doc += "<password>" + getFirstValue(this_user, "password") +
"</password>";
the_doc += "<profile>" + getFirstValue(this_user, "profile") +
"</profile>";
the_doc += "<lists>";
this_lists = this_user.getElementsByTagName("lists")[0];
var these_lists = this_lists.getElementsByTagName("list");
for (var list_loop = 0; list_loop < these_lists.length; list_loop++) {
the_doc += "<list>" + these_lists[list_loop].firstChild.nodeValue +
"</list>";
}
the_doc += "</lists>";
the_doc += "</user>";
}
the_doc += "</users>";
return the_doc;
}
Giving a User Access to Your To Do List
These seven functions allow a user to share his or her To Do list with another
user. I’ll use the word owner to refer to the user who owns the To Do list, and
the word collaborator to refer to the user being given access to the owner’s
To Do list.
displayHomeInformation() Just like the one in Chapter 16, but adds an
additional link that calls giveAccess()
giveAccess() Reads in all the system’s users and calls listAllUsers()
listAllUsers() Creates a form with a radio button for each potential
collaborator, so one may be chosen

Answers to Assignments 403
readyAddAvailableUser() Reads in the userInfo.xml list and calls
addAvailableUser()
addAvailableUser() Adds the newly chosen collaborator to the owner’s
lists section in the userInfo.xml file
addNewAvailableToUserElement() Returns a new user element with the col-
laborator’s name added to the owner’s lists element
// add a "Give another user access" link to the loginArea after a person has
// logged in by changing displayHomeInformation()
function displayHomeInformation(user_name) {
document.getElementById("loginArea").innerHTML =
"Welcome " + user_name + ". " +
" <a href = '#' onClick = 'logout(); return false;'>logout</a> " +
" <a href = '#' onClick = 'giveAccess(\"" + user_name +
"\"); return false;'>give another user access</a> ";
displayLegalLists(user_name);
}
// get userInfo.xml and list all the users
function giveAccess(the_user) {
readFileDoFunction("userInfo.xml", "GET",
function() {
if (request.readyState == 4) {
if (request.status == 200) {
listAllUsers(request.responseXML, the_user);
} else {
document.getElementById("errorDiv").innerHTML =
"Sorry, could not get a list of the users.";
}
}
}
);
}
// create the form showing all the users
function listAllUsers(user_info, current_user) {
var display = "<form>";
var all_users = user_info.getElementsByTagName("user");
var this_user;
var this_name;
for (var loop = 0; loop < all_users.length; loop++) {
this_user = all_users[loop];
this_name = getFirstValue(this_user,"name");
if (this_name != current_user) {
display += "<input type='radio' onClick='readyAddAvailableUser(\"" +
this_name + "\",\"" + current_user + "\");'>" + this_name + "<br>";
}
}
display += "</form>";
document.getElementById("contentArea").innerHTML = display;
}
// get userInfo.xml and add a new available user
function readyAddAvailableUser(user_to_add, this_user) {
readFileDoFunction("userInfo.xml", "GET",
function() {
if (request.readyState == 4) {
if (request.status == 200) {

404 Appendix A
addAvailableUser(request.responseXML, user_to_add, this_user);
} else {
document.getElementById("errorDiv").innerHTML =
"Sorry, there was a problem getting the list of users.";
}
}
}
);
}
// add the new user to the user's available list, then
// create a new userInfo.xml document and save it
function addAvailableUser(user_info, user_to_add, current_user) {
var new_user_array = new Array();
var curr_user_array = user_info.getElementsByTagName("user");
var count = 0;
for (var loop = 0; loop < curr_user_array.length; loop++) {
this_user = curr_user_array[loop];
this_name = getFirstValue(this_user, "name");
if (this_name == current_user) {
add_to_array = addNewAvailableToUserElement(this_user, user_to_add);
} else {
add_to_array = this_user;
}
new_user_array[loop] = add_to_array;
}
var new_user_doc = makeUserInfoDoc(new_user_array);
saveFileDoFunction("userInfo.xml", new_user_doc,
function() {
if (request.readyState == 4) {
if ((request.responseText == "success")&&(request.status == 200)) {
document.getElementById("contentArea").innerHTML = "";
displayLegalLists(current_user);
} else {
document.getElementById("errorDiv").innerHTML =
"Sorry, there was an error saving the user information. ";
}
}
}
);
}
// return a new user element with the new user added to the available list
function addNewAvailableToUserElement(this_user, user_to_add) {
var lists = this_user.getElementsByTagName("lists")[0];
var the_name = getFirstValue(this_user, "name");
var profile = getFirstValue(this_user, "profile");
var the_password = getFirstValue(this_user,"password");
var lists_array = lists.getElementsByTagName("list");
var new_lists_array = new Array();
for (var loop = 0; loop < lists_array.length; loop++) {
new_lists_array[loop] = lists_array[loop].firstChild.nodeValue;
}
new_lists_array[loop] = user_to_add;
var new_user = makeNewUser(the_name, the_password, profile,
new_lists_array);
return new_user;
}
RESOURCES
You are not alone. There are plenty of
JavaScript and Ajax resources to guide and
support you along the path to JavaScript
mastery. This book is just the beginning of your
journey. In this appendix you’ll find tutorials, libraries,
frameworks, and blogs that will give you more informa-
tion than you could possibly process.
Tutorials
This book covered all of the basics of JavaScript and Ajax, and many advanced
topics as well. Here are tutorials that will help you fill in the details not
covered in this book.
406 Appendix B
HTML Tutorials
HTML is the backbone of any web page. The following sites provide
in-depth HTML details:
Webmonkey http://www.webmonkey.com/webmonkey/authoring
W3 Schools http://www.w3schools.com/html
Cascading Style Sheets Tutorials
Cascading Style Sheets (CSS) and the JavaScript style object were used
throughout the book to add formatting to HTML elements. CSS is a big
topic all on its own.
Webmonkey http://www.webmonkey.com/webmonkey/authoring/
stylesheets
W3 Schools http://www.w3schools.com/css/default.asp
Westciv http://www.westciv.com/style_master/academy/css_tutorial
Advanced Topics in JavaScript
There aren’t many aspects of JavaScript not covered in this book. You might
want to learn even more about object-oriented programming in JavaScript,
how events work in different browsers, and handling errors.
Object-Oriented Programming
Object-oriented programming (OOP) is a programming style that simplifies
many aspects of programming. The following tutorials at WebReference.com
describe OOP in detail and discuss how to use this style of coding with
JavaScript:
http://www.webreference.com/js/column79
http://www.webreference.com/js/column80
Advanced Event Handling
Chapters 2 and 13 covered many details about how to handle events in
JavaScript. Believe it or not, there is a bit more to learn on the topic. A series
of articles at the bottom of this QuirksMode.org page give an excellent in-
depth discussion of advanced event handling:
http://www.quirksmode.org/js/contents.html
Exception Handling
JavaScript has some fancy ways of responding to errors in your code. The
following tutorial at Dev Shed discusses how to use the JavaScript commands
try and catch to capture errors and respond to them.
http://www.devshed.com/c/a/JavaScript/JavaScript-Exception-Handling
Resources 407
Ajax Tutorials
Because Ajax is a complex topic, there are many tutorials about it. For
tutorials that focus on Ajax frameworks, see “Ajax Frameworks” on page 408.
For general Ajax tutorials, a regularly updated list of Ajax tutorials may be
found at http://www.maxkiesler.com/index.php. Especially helpful will be
the “Round-up of 30 AJAX Tutorials” (March 15, 2006) and “60 More AJAX
Tutorials” (May 8, 2006).
Example JavaScript and Ajax Code
The following sites contain many examples of JavaScript and Ajax code that
you can cut and paste into your web pages.
dhtmlgoodies.com http://www.dhtmlgoodies.com
A nicely laid-out site from Alf Magne Kalleland
The JavaScript Source http://javascript.internet.com
EarthWeb’s JavaScript resource, with over two thousand scripts and
counting
Dynamic Drive http://www.dynamicdrive.com
Another very nicely laid-out site, with a CSS library as well
JS Made Easy.com http://www.jsmadeeasy.com
Code examples, tutorials, and JavaScript cheat sheets
Webmonkey http://www.webmonkey.com/webmonkey/reference/
javascript_code_library
An oldie but a goodie, close to my heart
Good Ajax Websites
These sites provide news and tips for Ajax programmers.
ajaxian http://ajaxian.com
My favorite site for Ajax news
Ajax Goals http://ajaxgoals.com
Another good Ajax news site
AjaxPatterns http://ajaxpatterns.org
An Ajax wiki with a great deal of information about advanced Ajax topics
AJAX Magazine http://ajax.phpmagazine.net
Not updated as frequently as the rest, but that can be a good thing
408 Appendix B
Ajax Frameworks
As you’ve seen, the code for Ajax applications can get complicated and
long. However, there is a fair amount of code that is common to many Ajax
applications. Creating a request object, for example, occurs in every Ajax
application.
Ajax frameworks do a great deal of the work for you. Frameworks exist
for handling XML, achieving common interface effects such as drag and
drop, and working with numerous server-side languages. Here is a list of some
of the most commonly used frameworks, separated into categories based on
the server-side languages they work with. All the frameworks are free, or have
a free version, unless otherwise specified. This is just a sample of available
frameworks. See http://ajaxpatterns.org/Ajax_Frameworks for a more
exhaustive list.
JavaScript
The following sites provide numerous JavaScript widgets and libraries used
by many professional sites to ease their JavaScript coding.
Dojo http://dojotoolkit.org
Lots of navigation and page layout tools, such as drag and drop, slide
shows, collapsible trees, rich text editors, and more
Lightbox http://www.huddletogether.com/projects/lightbox2
Nice library for displaying and managing images using Prototype and
Scriptaculous, which are available from sites in this list
Mochikit http://mochikit.com
Hundreds of JavaScript functions, covering areas including string for-
matting, date and time handling, logging, CSS manipulation, and all
sorts of visual effects
Prototype http://prototype.conio.net
A JavaScript programming framework that promotes good object-ori-
ented programming and includes Ajax support, higher-order program-
ming constructs, and easy DOM manipulation (lots of other toolkits use
this, so most likely you will too)
Rico http://openrico.org
A very popular user interface client that uses Prototype
Simple Ajax Code Kit (SACK) http://twilightuniverse.com/resources/
code/sack
Gives you a fancy way to deal with the standard request object
Sarissa http://sarissa.sf.net
An excellent toolkit to support XML manipulation, including good
ways to query XML documents and easy calls to turn XML documents
into strings
Resources 409
Scriptaculous http://script.aculo.us
This very popular framework gives you lots of visual effects, using
Prototype
Spry http://labs.adobe.com/technologies/spry
A framework from Adobe intended to give web designers access to the
powers of Ajax without having to know very much JavaScript
PHP
The following sites provide tools for developing Ajax applications using PHP.
CakePHP http://cakephp.org
A popular rapid development framework for PHP that integrates well
with the Prototype JavaScript library
Ajax Task List http://grahambird.co.uk/cake/tutorials/ajax.php
A good tutorial for CakePHP, also based on a To Do list application
Simple Ajax Toolkit (Sajax) http://www.modernmethod.com/sajax
Lets you call PHP code from within your JavaScript and makes it easier to
do PHP calls without having to bother with sending information to the
webserver via a request object
Java
Fans of the Java programming language can find useful tools for Ajax pro-
gramming in the following list.
AjaxTags http://ajaxtags.sourceforge.net
Tags for Java Server Pages to provide common Ajax techniques such as
form validation, text box auto-complete, and content highlighting
Direct Web Remoting (DWR) http://getahead.ltd.uk/dwr
A very popular framework that allows you to embed Java calls inside your
JavaScript, much like the PHP framework Sajax
Echo2 http://www.nextapp.com/platform/echo2/echo
A Java servlet that generates the JavaScript for you to create and run an
entire Ajax application in Java
Google Web Toolkit (GWT) http://code.google.com/webtoolkit
A Java-to-JavaScript translator that enables you to code your Ajax in Java,
then convert it to JavaScript; similar to Echo2, except in GWT all the
code runs on the client side
Comparing the Google Web Toolkit to Echo2
http://www.theserverside.com/news/thread.tss?thread_id=40804
A thorough comparison of Echo2 and GWT (written by the author of
Echo2)
410 Appendix B
.NET
Coders who prefer to use Microsoft’s .NET technology will find Ajax support
at the following sites.
Atlas http://atlas.asp.net
Free web development framework from Microsoft, marketed as integrat-
ing “cross-browser client script libraries with the ASP.NET 2.0 server-
based development framework”
ComfortASP.NET http://www.comfortasp.de
A framework that enables you to add many Ajax features to sites in the
Active Server Pages (ASP) environment without needing to know how to
program; features include timers, prevention of multiple form submits,
and handling the Ajax calls
Ruby
Ruby is not a new programming language, but it has recently become very
popular among web developers.
Ruby on Rails http://www.rubyonrails.org
A framework for developing database-backed web applications that has
Ajax support and a cultlike following (some of my friends swear by it)
REFERENCE TO JAVASCRIPT
OBJECTS AND FUNCTIONS
This reference covers all objects and
functions currently part of JavaScript in
Firefox and various versions of Internet
Explorer. Each entry appears with the earliest
version of Internet Explorer that supports it and
whether or not Firefox supports it. For example,
an entry listed with FF, IE 5 will work in Firefox 1.0,
Internet Explorer 5, and later versions of those
browsers.
In the summer of 2006, according to a variety of sites (including W3
Schools,1 Counter.com,2 and the Browser News3), approximately 70 percent
of users were using some version of Internet Explorer (mostly IE 6), and
1 See http://www.w3schools.com/browsers/browsers_stats.asp.
2 See http://www.thecounter.com/stats/2006/August/browser.php.
3 See http://www.upsdell.com/BrowserNews/stat.htm.

412 Appendix C
18 percent of users were using some version of Firefox. An additional 4 per-
cent were using a browser that executes JavaScript much as Firefox does (such
as Netscape, Opera, or Safari). The remaining 8 percent represent a hodge-
podge of earlier browsers, Internet spiders (like Google’s) that crawl around
the Internet adding websites to their databases, and later browsers that may
or may not support JavaScript but, if they do, probably support the same
objects and methods as Firefox. If you want the flashiest web pages, writing
JavaScript for IE 5.5 and Firefox will allow at least 92 percent of web browsers
to see your pages. To expand that by another 1 percent or so, you could go
through the extra effort of writing special code for IE 4 and Netscape 4
browsers. In that case, I recommend you buy the latest version of The JavaScript
Bible by Danny Goodman (Wiley, 2004).
If I have used an entry in this book or consider it an important func-
tion, I define it here and illustrate it with an example. For the less common
JavaScript functions and objects, I provide brief descriptions and list the
browsers that support them. This reference capitalizes object entries and lists
them with their methods, properties, and handlers (properties come first, in
alphabetical order, followed by methods, and then handlers). Because certain
browsers support some but not all of an object’s properties, methods, and
handlers, I list each item with the earliest browser versions that support it.
Object properties can be read-only or read-write. If a property is read-write,
JavaScript can look up and change its value. However, JavaScript can’t change
a read-only property—JavaScript can only look up the value of that property.
For example, JavaScript changes (writes to) the src property of an image in
an image swap:
window.document.my_image.src = "happy.gif";
JavaScript can also look it up (read it):
var the_gif_showing = window.document.my_image.src;
On the other hand, JavaScript can only look up the firstChild property of a
DOM node:
var my_child = window.document.getElementById('something').firstChild;
In Firefox and other similar browsers, some properties can be written to only
if the script is “signed.” See http://www.mozilla.org/projects/security/
components/signed-scripts.html for more information on signed scripts.
Unless stated otherwise, the properties in this appendix are read-write.
Although this reference tries to cover all the objects and methods you
are likely to need when writing JavaScript, browsers have literally hundreds of
browser-specific methods and properties, and new ones are added with each
new browser version. Get the most complete references straight from the
horses’ mouths:
Internet Explorer http://www.microsoft.com/technet/prodtechnol/IE
Firefox http://developer.mozilla.org
Reference to JavaScript Objects and Functions 413
alert() [FF, IE 3]
Displays a dialog box with one button labeled OK and a message specified by
the function’s parameter.
For example:
alert("Hello, world!");
creates a dialog box with the words Hello, world! and an OK button. The
browser window is frozen until the user clicks the OK button.
Anchor
All anchors on a page are stored in the document’s anchor array:
window.document.anchors[].
Example:
<a name = "some_name"></a>
Properties
Applet
Refers to a Java applet. All applets on a page are stored in the JavaScript array
window.document.applets[].
Properties
hash FF, IE 3 Contents of an anchor after the # character
host FF, IE 3 Hostname and the port of a link
hostname FF, IE 3 Hostname of an anchor
href FF, IE 3 href of the anchor
name FF, IE 4 Anchor tag’s name
pathname FF, IE 3 Part of an anchor after the host
port FF, IE 3 Port of an anchor (usually null)
protocol FF, IE 3 Protocol of an anchor (http and ftp are the most common)
rel,rev FF, IE 3 Additional attribute, called rel or rev, used in some anchors
to add more information about the link
search FF, IE 3 Part of an anchor following the ? character
target FF, IE 3 HTML target of an anchor
code FF, IE 4 Read-only: URL string of the applet’s Java class file
codeBase FF, IE 4 Read-only: Path to the applet, not including the class file name
height,width FF, IE 4 Size of the applet display section
hspace,vspace FF, IE 4 Padding around the applet display, in pixels
name FF, IE 4 Read-only: Applet’s name

414 Appendix C
Methods
For example:
window.document.applets[0].start();
tells the first Java applet on a web page to start, while
window.document.applets[0].stop();
tells the first Java applet on a web page to stop.
Area [FF, IE 3]
An HTML tag that describes a clickable region inside a client-side image map.
Area tags are stored in the JavaScript array window.document.links[]; an area is
treated just like a link object (see “Link” on page 431 for more information).
Array [FF, IE 3]
A list of information. There are two ways to create an array:
var the_array = new Array();
var the_array = new Array(element_one, element_two, element_three...);
You can look up or change elements in an array using their position
numbers (numbering starts with 0):
the_array[0] = "thau!";
window.document.writeln(the_array[0] + " wrote this book.");
Properties
Example:
var my_array = new Array("eenie", "meenie", "miney", "moe");
var number_of_things = my_array.length;
The variable number_of_things holds the value 4, because there are four
elements in the array.
start() FF, IE 3 Starts a Java applet
stop() FF, IE 3 Stops a Java applet
length FF, IE 3 Number of elements in an array
prototype FF, IE3 Adds properties and methods to all objects of an array. See the tutorials
in “Object-Oriented Programming” on page 406.
Reference to JavaScript Objects and Functions 415
Methods
Example:
var my_array = new Array("eenie", "meenie", "miney", "moe");
var my_string = my_array.join(":");
The variable my_string contains eenie:meenie:miney:moe.
Example:
var my_array = new Array("eenie", "meenie", "miney", "moe");
var new_array = my_array.reverse();
The variable new_array contains an array with the elements moe,miney,
meenie, and eenie, in that order.
Examples:
var my_array = new Array("eenie", "moe", "miney", "meenie");
var sorted_array = my_array.sort();
The variable sorted_array contains the elements eenie,meenie,miney, and
moe in that order.
var my_array = new Array(1, 12, 2);
var sorted_array = my_array.sort(numericalSorter);
function numericalSorter(element_one, element_two)
{
return element_one - element_two;
}
The variable sorted_array contains the elements 1,2, and 12, in that order.
join() FF, IE 3 Creates a string from an array. Each element in the array will be listed
in the string and separated by a space from the previous and following
ele-ments, unless some other delimiter is listed as a parameter to join().
reverse() FF, IE 3 Returns a copy of an array with the elements reversed
sort() FF, IE 4 Returns an array with the elements of another array sorted in alphabetical
order. If the name of a function is listed as a parameter to sort(), that
function will define the order of two elements passed to it as follows:
zIf the function returns a value less than 0, the first element is smaller
than the second.
zIf the function returns a value greater than 0, the second element is
smaller than the first.
zIf the function returns 0, do not change the order of the elements.
416 Appendix C
Less Common Methods
Button (Including Submit and Reset Buttons)
The button,submit, and reset form elements.
Properties
Handlers
Example:
<input type = "button" value = "Click me" onClick = "this.value='Stop
clicking me!';">
When the user clicks this button, the words on the button change from
Click me to Stop clicking me!
Methods
concat() FF, IE 4 Concatenates many elements into one array
pop() FF, IE 5.5 Returns the last element of an array and deletes that element from
the array
push() FF, IE 5.5 Appends a value to the end of an array
shift() FF, IE 5.5 Returns the first element of an array and shifts the other elements to
replace it
slice() FF, IE 4 Creates a new array by taking a piece out of this array
splice() FF, IE 5.5 Replaces or deletes parts of an array or puts something in the middle
toString() FF, IE 3 Converts an array into a comma-separated string
unShift() FF, IE 5.5 Appends a value to the start of an array
form FF, IE 3 Read-only: Form containing the button
name FF, IE 3 Name of a button. Note that name is not the text that shows up in
the button on the web page (see the value property).
type FF, IE 3 Read-only: Type of button: button,submit, or reset
value FF, IE 3 String shown on the button
onClick FF, IE 3 Triggered when a visitor clicks on the button
onMouseDown FF, IE 4 Triggered when the mouse is clicked on the button
onMouseUp FF, IE 4 Triggered when the mouse is released after clicking
click() FF, IE 3 Simulates the act of clicking the button
Reference to JavaScript Objects and Functions 417
Checkbox
The checkbox form element.
Properties
Example:
if (window.document.my_form.the_checkbox.checked == true)
{
alert("Thanks for clicking the checkbox!");
}
Handlers
Methods
clearInterval() [FF, IE 4]
Cancels an interval set by setInterval(). JavaScript commands may execute
repeatedly every n milliseconds. See “setInterval()” on page 440 for more
information.
clearTimeout() [FF, IE 3]
Cancels a time-out set by setTimeout(). See “setTimeout()” on page 441 and
Chapter 9 for more information on time-outs.
For example:
clearTimeout(my_timeout);
cancels a time-out named my_timeout.
checked FF, IE 3 true if a visitor has selected the checkbox, false otherwise. Setting
the property to true will cause the checkbox to act as if a visitor had
selected the box.
form FF, IE 3 Read-only: Form containing the checkbox
name FF, IE 3 Name of a checkbox
type FF, IE 3 Read-only: Set to 'checkbox'
value FF, IE 3 Value of the checkbox
onClick FF, IE 3 Triggered when a visitor clicks the checkbox
click() FF, IE 3 Simulates the act of clicking the checkbox
418 Appendix C
confirm() [FF, IE 3]
Creates a dialog box with two buttons, OK and Cancel, and text specified by
the function’s parameter. Clicking OK results in the function returning a
value of true, and clicking Cancel results in a false value.
Example:
if (confirm("Are you feeling happy?"))
{
alert("Clap your hands!");
} else {
alert("Don't worry!");
}
This example calls up a dialog box with the text Are you feeling happy? along
with an OK button and a Cancel button. Clicking the OK button causes the
function to return true, executing the first part of the if-then-else statement
with an alert box showing the words Clap your hands! Clicking Cancel causes
the function to return false, triggering the else clause of the if-then-else
statement and calling an alert box showing the words Don’t worry!
Date
This object represents dates; you can create it in several ways:
var the_date = new Date();
var the_date = new Date("month dd, yyyy");
var the_date = new Date("month dd, yyyy hh:mm:ss");
var the_date = new Date(yy, mm, dd);
var the_date = new Date(milliseconds);
Here month is the name of the month (January, February, and so on), dd is a
two-digit day (01 to 31), yyyy is a four-digit year (0000 to 9999), and so on. If
you create a Date object without anything in the parentheses, JavaScript will
assume you mean the current date and time according to the computer that’s
running the JavaScript.
The Date object has numerous methods for getting and setting the date.
Except where noted, the methods work for all JavaScript-enabled browsers.
Methods for Getting the Date and Time
Supported by FF and IE 3 except where noted.
getDate() Returns the day of the month as an integer from 1 to 31
getDay() Returns the day of the week as an integer, where 0 is Sunday and 1 is Monday
getFullYear() Returns the year as a four-digit number (only in FF, IE 4)
getHours() Returns the hour as an integer between 0 and 23
getMinutes() Returns the minutes as an integer between 0 and 59
Reference to JavaScript Objects and Functions 419
Example:
var the_date = new Date();
var the_hours = the_date.getHours();
If the clock on the computer running the JavaScript thinks it’s 8 PM,
the_hours contains the number 20.
Methods for Getting the UTC Date and Time
The following methods (FF, IE 4) return dates and times in UTC time (Uni-
versal Time Coordinate, measured somewhat differently from Greenwich
Mean Time, which it replaced as the world standard).
The Problematic getYear() Method
The getYear() method should return the number of years since 1900, but its
behavior differs from browser to browser. Some browsers perform as adver-
tised—for example, returning 110 if the year is 2010. Others, however, equate
getYear() with getFullYear(), returning 2010 if the year is 2010. Because of
these cross-browser discrepancies, it’s best to adjust the date provided by
getYear() as follows:
var the_date = new Date();
var the_year = the_date.getYear();
if (the_year < 1000)
{
the_year = the_year + 1900;
}
This code always results in the_year containing the correct four-digit year.
getMonth() Returns the month as an integer between 0 and 11, where 0 is January and
11 is December
getSeconds() Returns the seconds as an integer between 0 and 59
getTime() Returns the current time in milliseconds, where 0 is January 1, 1970, 00:00:00
getUTCDate() Returns the day of the month as an integer from 1 to 31
getUTCDay() Returns the day of the week as an integer, where 0 is Sunday and 1 is
Monday
getUTCFullYear() Returns the year as a four-digit number
getUTCHours() Returns the hour as an integer between 0 and 23
getUTCMinutes() Returns the minutes as an integer between 0 and 59
getUTCMonth() Returns the month as an integer between 0 and 11, where 0 is January
and 11 is December
getUTCSeconds() Returns the seconds as an integer between 0 and 59
420 Appendix C
Methods for Setting the Date and Time
The following methods change the contents of a Date object (FF, IE 3, except
where noted):
Example:
var the_date = new Date();
the_date.setHours(22);
the_date.setYear(2012);
The Date object called the_date thinks it’s 10 PM in the year 2012.
Methods for Setting the UTC Date and Time
The following methods (FF, IE 4) are like the ones just described, except the
dates and times set by the methods are adjusted to reflect UTC time, the
replacement for Greenwich Mean Time.
Example:
var the_date = new Date();
the_date.setUTCHours(10);
If the computer is one time zone to the west of Greenwich, England,
the_date will now think it’s 9 AM UTC.
setDate() Sets the day of the month as an integer from 1 to 31
setFullYear() Sets the year as a four-digit number (only in FF and IE 4)
setHours() Sets the hour as an integer between 0 and 23
setMinutes() Sets the minutes as an integer between 0 and 59
setMonth() Sets the month as an integer between 0 and 11, where 0 is January and
11 is December
setSeconds() Sets the seconds as an integer between 0 and 59
setTime() Sets the current time in milliseconds, where 0 is January 1, 1970, 00:00:00
setYear() Sets the year—uses two digits if the year is between 1900 and 1999,
four digits otherwise
setUTCDate() Sets day of the month as an integer from 1 to 31
setUTCFullYear() Sets the year as a four-digit number
setUTCHours() Sets the hour as an integer between 0 and 23
setUTCMinutes() Sets the minutes as an integer between 0 and 59
setUTCMonth() Sets the month as an integer between 0 and 11, where 0 is January and
11 is December
setUTCSeconds() Sets the seconds as an integer between 0 and 59
Reference to JavaScript Objects and Functions 421
Methods for Converting Dates to Strings
These methods turn the date stored in a Date object into a string.
Document
The document of a window holds all the HTML elements of the web page in
that window.
Properties
Example:
window.document.bgColor = "#000000";
This line makes the background of a page black.
Example:
window.document.writeln("last changed on: " + window.document.lastModified);
This line writes the date of the last time the page was modified.
toGMTString() FF, IE3 Returns the date adjusted to reflect Greenwich Mean Time,
the former world standard
toUTCString() FF, IE4 Suggested method for later browsers
alinkColor FF, IE 3 Color of a link when you click it
anchors[] FF, IE 3 Read-only: Array of anchor objects. See “Anchor” on page 413
for more information.
applets[] FF, IE 3 Read-only: Array storing the applets in the document. See “Applet”
on page 413 for more information.
bgColor FF, IE 3 Background color of a page. The value can be the name of a
color or a hexadecimal triplet.
body FF, IE 4 Body element of a web page
cookie FF, IE 3 HTML cookie associated with this document. See Chapter 12
for more information on cookies.
documentElement FF, IE 5 Read-only: Root element of an XML file
domain FF, IE 4 Domain of a web page (e.g., nostarch.com)
embeds[] FF, IE 4 Read-only: Array of embeds[]
fgColor FF, IE 3 Default font color
forms[] FF, IE 3 Array that stores all of a document’s forms. See “Form” on
page 424 for more information.
images[] FF, IE 3 Array that stores all of a document’s images. See “Image” on
page 429 for more information.
lastModified FF, IE 3 Read-only string that stores the date on which a user most recently
changed the document
422 Appendix C
For example:
window.document.writeln("Thanks for coming from " + window.document.referrer);
writes Thanks for coming from www.nostarch.com if a hyperlink from the No
Starch Press website led to the page.
For example:
window.document.title = "Presto Chango";
changes the title of the page to Presto Chango.
Methods
linkColor FF, IE 3 Default color of a link
links[] FF, IE 3 Array storing all of a document’s hyperlinks. See “Link” on page 431
for more information.
referrer FF, IE 3 Read-only string containing the domain name of the hyperlink that led to
this page
styleSheets[] FF, IE 4 Read-only: Array of all style elements
title FF, IE 3 Contains the document’s title
URL FF, IE 4 URL of the document
vlinkColor FF, IE 3 Color of visited links; can’t be changed once you write the link
close() FF, IE 3 Use close() when you’ve finished writing to the document
(optional). Sometimes, because of browser bugs, writing
to a web page using document.write() won’t actually
complete that action unless you execute document.close()
after executing document.write().
createAttribute() FF, IE 6 Given a string, creates an XML attribute named that string
createElement() FF, IE 4 Given a string, creates an XML element named that string
createTextNode() FF, IE 5 Given a string, creates a text node with a nodeValue equal
to the string
getElementById() FF, IE 5 Returns the element in a document that has the id equal to
a provided string
getElementsByName() FF, IE 5 Returns an array of elements that have a name attribute set
to a given string
getElementsByTagName() FF, IE 5 Returns an array of elements which have a given name,
such as <br> or <person>
open() FF, IE 3 Use open() if you want to clear the contents of a web
page before writing to it using write() or writeln(). If
you use document.open(), use document.close() when
you’re done writing to the page.
write(),writeln() FF, IE 3 Writes to a web page. The only difference between these
two methods is that writeln() appends a line break at the
end of whatever is written.
Reference to JavaScript Objects and Functions 423
elements[] [FF, IE 3]
An array in the form object that stores all the elements (buttons, check-
boxes, radio buttons, and so on) of a form. See “Form” on page 424 for
more information.
escape() [FF, IE 3]
Formats a string so that it conforms to URL encoding. Generally used for
setting cookies (Chapter 12) and sending information to servers (Chapters 15
and 16).
Example:
var encoded_string = escape("a string safe for cookies");
The variable encoded_string now holds a%20string%20safe%20for%20cookies
because the escape function replaces spaces with %20. See “unescape()” on
page 448 for more information.
eval() [FF, IE 3]
Evaluates a string. Example:
var the_sum = eval("2 + 3");
The variable the_sum will equal 5 because eval() forces JavaScript to evaluate
the string "2 + 3".
Event
The event object describes an event that just happened: a mouse click, a
cursor movement, and so on. See Chapter 13 for more details.
Properties
altKey FF, IE 4 true if the ALT key is held down
button FF, IE 4 If the event involves a click, this says what kind. A 2 means the right
button was clicked. Some other number probably means the left button.
See Chapter 13 for more information.
clientX IE 4 x coordinate of an event in a window
clientY IE 4 y coordinate of an event in a window
ctrlKey FF, IE 4 true if the CTRL key is held down
keyCode FF, IE 4 ASCII value of the key that was pressed
pageX FF x coordinate of an event in a window
pageY FF y coordinate of an event in a window
screenX FF, IE 4 x coordinate of an event on the screen
screenY FF, IE 4 y coordinate of an event on the screen
shiftKey FF, IE 4 true if the SHIFT key is held down
srcElement IE 4 Element that received the event
424 Appendix C
FileUpload
The FileUpload form element lets a visitor choose a file on the computer to sub-
mit to a CGI script along with the form. Use the syntax <input type = "file">.
Properties
Methods
Handlers
Form
Every form on a web page has a form object. The window.document.forms[]
array stores all of a web page’s form objects.
Properties
Each type of Form element—button,checkbox,FileUpload,hidden,password,radio,
reset,select,submit,text, and textarea—has its own object listing in this
appendix. See each individual object for more information.
Example:
if (user == "expert")
{
window.document.the_form.action = "expert_script.cgi";
} else {
window.document.the_form.action = "basic_script.cgi";
}
If the user is considered an expert, the form is set to run expert_script.cgi
when the user submits the form.
target FF Element that received the event
type FF, IE 4 Type of event
name FF, IE 3 Name of the FileUpload field
value FF, IE 4 Read-only: Filename selected
blur() FF, IE 3 Removes the cursor from the FileUpload element
focus() FF, IE 3 Moves the cursor to the FileUpload element
select() FF, IE 3 Selects the text inside the FileUpload element
onBlur FF, IE 3 Called when the user removes the cursor from the field
onChange FF, IE 3 Triggered when a visitor changes the contents of the field
onFocus FF, IE 3 Called when the user puts the cursor into the field
action FF, IE 4; read-only in IE 3 Triggers a specified CGI script when a user submits the form
Reference to JavaScript Objects and Functions 425
For example:
window.document.form_name.elements[0].checked = true;
will set the checked value of the first element of the form named form_name
to true.
Example:
var number_elements = window.document.the_form.length;
Example:
window.document.the_form.method = "GET";
For example:
window.document.form_name
indicates the form named form_name.
Example:
var target_window = window.open("blank.html","my_target");
window.document.the_form.target = "my_target";
The first line opens a window with the name my_target. The second line
tells the form named the_form that the CGI script it runs should return its
results to the window named my_target.
elements[] FF, IE 3 Array of the elements of this form
encoding FF, IE 4;
read-only in IE 3
How the information in the form is encoded when it’s sent to a CGI
script. It’s almost always "application/x-www-form-urlencoded"
and there’s almost never a reason to change it.
length FF, IE 3 Number of elements in a form
method FF, IE 4;
read-only in IE 3
Specifies how a form sends information (via either POST or GET) to
the CGI script listed in the action tag
name FF, IE 3 Looks for a form by name if you need to locate it
target FF, IE 3;
read-only in IE 3
Window in which the form is to write the results of the form’s CGI
script. If the target specifies a window that does not exist, a new
window opens.
426 Appendix C
Methods
Example:
window.document.the_form.reset();
Handlers
Example:
<FORM onSubmit = "if (formNotDone(this)) {return false;})">
This calls the function formNotDone() on the form. If the function returns
true, the if-then statement returns false and the form is not submitted.
Note that formNotDone() is not a built-in JavaScript function. See Chapter 11
for more information on form validation.
Hidden
An invisible form element that can store values on a web page without the
visitor seeing them; useful for sending secret information to a CGI script.
Properties
For example:
window.document.the_form.my_hidden.value = "a nice person";
will set the value of the hidden element named my_hidden to a nice person.
If the form is subsequently sent to a CGI script, the value will be passed
along.
History
The history of URLs visited by the visitor’s browser.
reset() FF, IE 4 Resets the elements of a form, as if a visitor clicked a reset button
submit() FF, IE 3 Submits the form, as if a visitor clicked a submit button, except that the
onSubmit handler is not called when the submit() method is invoked
onReset FF, IE 3 Triggered when a form is reset
onSubmit FF, IE 3 Triggered when a form is submitted. Executing return false inside a
submit handler stops submission of the form to the CGI script.
name FF, IE 3 Name of a hidden element
value FF, IE 3 Value of a hidden element
Reference to JavaScript Objects and Functions 427
Properties
Methods
Example:
history.back();
Example:
history.forward();
Example:
history.go(-2);
HTMLElement [FF, IE 4]
All HTML elements (images, links, forms, and form elements) are considered
objects.
Properties
length FF, IE 4 Number of URLs in the history list
back() FF, IE 3 Returns to the previous page (like clicking the browser’s back button)
forward() FF, IE 3 Advances to the next page (like clicking the browser’s forward button)
go() FF, IE 3 Takes one parameter: the number of URLs to advance (positive values) or go
back (negative values). In IE 3, the parameter can be only 1, 0, or 1.
all[] FF, IE 4 Read-only: Array holding all the elements the element contains
attributes[] FF, IE 5 Read-only: Array holding all the attributes of an element
childNodes[] FF, IE 4 Read-only: Array of child nodes
className FF, IE 4 CSS identifier for the element
dir FF, IE 5 Contents of an HTML element’s dir attribute
disabled FF, IE 4 If set to true, dims the element so that it looks inactive
document FF, IE 4 Read-only: Reference to the element’s document
firstChild,
lastChild
FF, IE 5 Read-only: First or last child node of an element
height,width FF, IE 5 Height and width of an element
id FF, IE 4 id attribute of an element
innerHTML FF, IE 4 HTML text inside the element, not including the start and end tags
lang FF, IE 4 Element’s lang attribute, used by Internet Explorer to determine
how to display language-specific characters
428 Appendix C
Methods
nextSibling,
previousSibling
FF, IE 5 Read-only: Next or previous sibling of an element or node. See
Chapter 14 for details.
nodeName FF, IE 5 Read only: Name of a node or element
nodeType FF, IE 5 Read only: Type of node or element. 1 = element, 2 = attribute,
3 = text node, 8 = comment, 9 = document node
nodeValue FF, IE 5 Value of a textNode, or null
offsetHeight,
offsetWidth
FF, IE 4 Read-only: Element’s height and width
offsetLeft,
offsetTop
FF, IE 4 Read-only: Horizontal or vertical position of the element in
pixels, relative to the containing element
offsetParent FF, IE 4 Read-only: Reference to the element that contains this element
parentNode FF, IE 5 Read-only: Parent node of this node or element
scrollHeight,
scrollWidth
FF, IE 4 Read-only: Measurements of an element regardless of how much
is visible
scrollLeft,
scrollTop
FF, IE 4 Read-only: Amount an object is scrolled, in pixels
style FF, IE 4 Element’s CSS style information
tabIndex FF, IE 4 Position of this element in the traversal order (the order in which
elements are selected successively by pressing the TAB key)
tagName FF, IE 4 HTML tag name of the element
addEventListener(),
removeEventListener()
FF Advanced event handling for Firefox. See “Advanced
Event Handling” on page 406.
appendChild() FF, IE 5 Append a node to the end of another node’s array of
child elements
attachEvent(),
detatchEvent()
IE 5 Advanced event handling for Internet Explorer. See
“Advanced Event Handling” on page 406.
blur() FF, IE 3 Moves focus off an element
click() FF, IE 3 Simulates a click on an element
cloneNode() FF, IE 5 Makes a copy of a node. If true is passed as a parameter,
the node and all its children (and their children . . . ) are
also copied.
dispatchEvent() FF Advanced event handling for Firefox. See “Advanced
Event Handling” on page 406.
fireEvent() IE 5.5 Advanced event handling for Internet Explorer. See
“Advanced Event Handling” on page 406.
getAttribute() FF, IE 4 Given a string with an attribute name, returns the value of
the attribute of this element
focus() FF, IE 3 Moves focus onto an element
getAttributeNode() FF, IE 6 Given a string with an attribute name, gets a node
representing the attribute of this element
getElementsByTagName() FF, IE 5 Given a string with the name of an HTML or XML element,
returns an array with all the elements with that tag name
hasChildNodes() FF, IE 5 Returns true if this element has child elements
Reference to JavaScript Objects and Functions 429
Handlers [FF, IE 4]
Image
JavaScript stores images in the images array of the document object. A user may
create a new image object as follows:
var new_image = new Image();
This statement creates a new image and sets its src property to a GIF or JPEG,
then preloads that file. See Chapter 4 for more information about images
and preloading.
Properties
Example:
var the_border_size = window.document.my_image.border;
insertBefore() FF, IE 5 Given a new child node and a reference child node,
inserts the new child node into this element’s list of
children before the reference child node
item() FF, IE 5 Given a number, returns the child of this node with that
index number (the first child is item 0)
releaseCapture(),
setCapture()
IE 5 Advanced event handling for Internet Explorer. See
“Advanced Event Handling” on page 406.
removeAttribute() FF, IE 4 Given the name of an attribute, removes it from this
element
removeAttributeNode() FF, IE 6 Given an attribute node, removes it from this element
removeChild() FF, IE 5 Given a node, removes it from the children list of this element
replaceChild() FF, IE 5 Given a new child node and an old child node, replaces
the old child node with the new one
setAttribute() FF, IE 6 Adds an attribute node to this element
onBlur onDblclick onHelp onKeyPress onMouseDown onMouseOut onMouseUp
onClick onFocus onKeyDown onKeyUp onMouseOver onMouseOver onResize
align FF, IE 4 Orientation of an image relative to the surrounding text. Values can be:
absbottom,absmiddle,baseline,bottom,left,middle,right,texttop,top
alt FF, IE 4 alt text of an image
border FF, IE 4 Size of the border around the image
complete FF, IE 4 Read-only: true if the image has completely downloaded and false
otherwise
430 Appendix C
Example:
if (window.document.pretty_bird.complete)
{
alert("you should now see a pretty bird");
}
Example:
window.document.the_image.lowsrc = "small_image.gif";
Example:
<img src = "sad.gif" name = "my_image">
If this appears on your web page, the following JavaScript swaps sad.gif
with happy.gif:
window.document.my_image.src = "happy.gif";
The name of the image, my_image, identifies which image to swap.
For example:
window.document.my_image.src = "happy.gif";
swaps the image contained in the file happy.gif into the image named
my_image.
isNaN() [FF, IE 4]
Returns true if the parameter is not a number, false otherwise. Example:
var zip_code = "none of your business";
if (isNaN(zip_code))
{
alert("Please provide something that at least looks like a zip code!");
}
Since zip_code contains a string, isNaN() returns true, triggering the alert.
height, width FF, IE 4 Height of an image in pixels
hspace, vspace FF, IE 4 Number of transparent pixels around an image
isMap FF, IE 4 If set to true, the x and y coordinate of the image is sent to whatever
server-side program appears in an anchor link around the image
lowsrc FF, IE 4 Image to show on a low-resolution monitor
name FF, IE 4 Name of an image; JavaScript can use this to identify the image
src FF, IE 4 Name of the file containing the image to show
Reference to JavaScript Objects and Functions 431
Link
The hypertext link object: <a href = ""></A>. See “Anchor” on page 413 for
more information.
Location
The location object controls the URL shown in the browser window.
Properties
Example:
window.location.hash = "where_to_go";
This will cause the browser to jump to the position of the current page
that has the anchor <a name = "where_to_go"></a>.
For example, if the URL is http://www.feedmag.com:80/index.html,
the host is www.feedmag.com:80.
Example:
if (window.location.hostname == "www.nostarch.com")
{
alert("welcome to No Starch Press");
}
For example:
window.location.href = "http://www.nostarch.com/index.html";
loads the page index.html from the No Starch Press website.
Example:
var the_path = window.location.pathname;
The variable the_path will hold "index.html" if the window is currently
showing http://www.nostarch.com/index.html.
hash FF, IE 3 Part of the URL following a hash mark
host FF, IE 3 Hostname and port of a URL
hostname FF, IE 3 Domain of the URL shown in the browser
href FF, IE 3 Full path of the page shown. Changing href causes the browser to load the
specified page.
pathname FF, IE 3 Path and filename shown in the browser window (the URL minus the
domain information)
432 Appendix C
If the URL is http://www.feedmag.com:80/index.html, the port
will be 80.
If the URL is http://www.feedmag.com:80/index.html, the protocol
will be "http".
If the URL is http://www.webmonkey.com/index.html?hello_there,
var the_search = window.location.search;
the variable the_search will contain "hello_there".
Methods
For example:
window.location.reload();
will act as if a visitor clicked the reload or refresh button in the browser.
Example:
window.location.replace("http://www.npr.com"); 0
Math [FF, IE 3]
The math object contains numerous properties and methods. Except where
noted, all of these properties and methods work in Firefox, IE 3, and more
recent browsers, and all the properties are read-only. Because most of the
methods and properties are self-explanatory, I will give few examples. I’ll
round all numbers to the sixth decimal point.
port FF, IE 3 URL’s port
protocol FF, IE 3 URL’s protocol
search FF, IE 3 Part of a URL following a question mark
reload() FF, IE 4 Reloads the page
replace() FF, IE 4 Loads the page specified by the URL passed as a parameter into the
browser window. The page shown when replace() is called is removed
from the browser’s history and replaced with the new page. This means
that clicking the back button after the new page has replaced the currently
shown page won’t result in revisiting the current page. It’s as if you’re
telling the browser to forget the currently shown page.
Reference to JavaScript Objects and Functions 433
Properties
Methods
Navigator
The navigator object lets JavaScript know what type of web browser your
visitor is using.
Properties
Ee, Euler’s constant, the base of natural logarithms (2.718282)
LN2 Natural log of 2 (0.693147)
LN10 Natural log of 10 (2.302585)
LOG2E Base 2 log of e (1.442695)
LOG10E Base 10 log of e (0.434294)
PI Pi (3.141593)
SQRT2 Square root of 2 (1.414214)
abs() Absolute value of the argument, for example, var ab_value = Math.abs(-10); sets
ab_value to 10
acos() Arc cosine of the argument in radians
asin() Arc sine of the argument in radians
atan() Arc tangent of the argument in radians
ceil() Integer greater than or equal to the number passed, for example, var the_ceiling =
Math.ceil(9.5); sets the_ceiling to 10
cos() Cosine of the number of radians passed as the argument
exp() Value of e raised to the power passed as the argument
floor() Integer lower than or equal to the number passed as the argument
log() Natural log of the argument
max() Higher of the two numbers passed as arguments, for example, var the_higher =
Math.max(10,11); sets the_higher to 11
min() Lower of the two numbers passed as arguments
pow() First argument raised to the power passed as the second argument, for example,
two_cubed = Math.pow(2,3); sets two_cubed to 8 (2 to the third power)
random() Random number between 0 and 1
round() Argument rounded up if its decimal value is greater than or equal to 0.5 and
rounded down otherwise
sin() Sine of the number of radians passed as the argument
sqrt() Square root of the argument
tan() Tangent of the number of radians passed as the argument
appName FF, IE 3 Manufacturer of the browser (Netscape, Internet Explorer, Opera, and so on)
434 Appendix C
Example:
if (navigator.appName == "Netscape")
{
window.location = "netscape_index.html";
}
This code sends a visitor to a page called netscape_index.html if the visitor
is using Netscape.
Example:
if (parseFloat(navigator.appVersion) < 2)
{
alert("Isn't it time to upgrade?");
}
Less Common Properties
Methods
Number
The Number object has some helpful read-only properties.
Properties
appVersion FF, IE 3 String representing the version of the browser. It’s not useful unless
interpreted with the parseFloat() function.
appCodeName FF, IE 3 Read-only: Browser’s code name
browserLanguage IE 4 Read-only: Language in which the browser’s interface is dis-
played, for example, "en-us" for U.S. English or "ar-iq" for
Iraqi Arabic
cookieEnabled FF, IE 4 Read-only: true if the browser can take cookies
language FF Read-only: Language of the browser
online FF, IE 4 Read-only: true if the browser is online
platform FF, IE 4 Read-only: Browser’s operating system
systemLanguage IE 4 Language in which the operating system’s interface is displayed
userAgent FF, IE 3 Generally a string composed of appCodeName and appVersion
javaEnabled FF, IE 4 Read-only: true if Java is on
MAX_VALUE FF, IE 4 Read-only: Highest integer possible given the configuration of the
browser and the computer it’s on
MIN_VALUE FF, IE 4 Read-only: Lowest integer possible given the configuration of the
browser and the computer it’s on
NaN FF, IE 4 Read-only: Not a number, the result if a mathematical operation fails
(Math.sqrt(-1), for example); can be tested with the isNaN() function
Reference to JavaScript Objects and Functions 435
Example:
if (isNaN(Math.sqrt(-1)))
{
alert("Get real! You can't take the square root of -1!");
}
Methods
Example:
var the_answer = 4321;
alert(the_answer.exponential(2));
The alert contains the string 4.32e+3.
Option
The option object refers to an option in a select element of a form—either
a pull-down menu or scrollable list. All the options of a select element are
stored in the options[] array of that element.
Properties
Example:
if (window.document.the_form.the_pulldown.options[0].selected == true)
{
var the_option_text =
window.document.the_form.the_pulldown.option[0].text;
alert("thanks for picking " + the_option_text);
}
NEGATIVE_INFINITY FF, IE 4 Read-only: Value smaller than Number.MIN_VALUE. You know no
number will ever be less than this value.
POSITIVE_INFINITY FF, IE 4 Read-only: Value bigger than Number.MAX_VALUE. No number
will ever exceed this value.
toExponential() FF, IE 5.5 Displays the number in exponential notation. An integer parameter
specifies the number of digits to the right of the decimal point.
toFixed() FF, IE 5.5 Sets the number of digits following a decimal point. The number is
rounded up if it has more trailing digits than n, and "0"s are used
after the decimal point if needed to create the desired decimal
length.
toPrecision() FF, IE 5.5 Formats any number so it is of length n, where n is an integer
passed as a parameter. Also called significant digits. A decimal
point and "0"s are used if needed to create the desired length.
toString() FF, IE 3 Turns a number into a string
Form FF, IE 3 Form containing the option
selected FF, IE 3 true if the option has been selected and false otherwise

436 Appendix C
parseInt() [FF, IE 3]
Converts a string to an integer as long as the first character is a number. If
the first character is not a number, parseInt() returns NaN (not a number).
If the string is a number followed by letters, parseInt() grabs the first set of
digits in the string.
Example:
var the_string = "123abc456";
var the_numbers = parseInt(the_string);
The variable the_numbers contains 123.
parseFloat() [FF, IE 3]
Converts a string to a floating-point number as long as the first character is a
number. If the first character is not a number, parseFloat() returns NaN (not
a number). If the string is a number followed by letters, parseFloat() grabs
the first set of numbers in the string.
Example:
var the_string = "3.14etc";
var the_numbers = parseFloat(the_string);
The variable the_numbers contains 3.14.
Password
The password form element, like the text form element, allows a visitor to type
a line of text into a form. In a password element, however, asterisks or bullets
replace the letters to hide the contents from view. The element is represented
like this in HTML: <input type = "password">.
Properties
text FF, IE 3 Text associated with an option (see the preceding example)
value FF, IE 3 Value of the option
defaultValue FF, IE 3 Read-only: Browser-set default value for the element
Form FF, IE 3 Read-only: Form containing the element
maxLength FF, IE 4 Maximum number of characters allowed in the field
name FF, IE 3 Name of the password field
readOnly FF, IE 4 true if users can’t enter data into the field
size FF, IE 4 Width of the field
type FF, IE 4 Read-only: Set to 'PASSWORD'
value FF, IE 3 Text that appears in the password field
Reference to JavaScript Objects and Functions 437
Example:
<input type = "password" onChange = "alert(this.value);">
When a visitor enters a password into this field and presses ENTER, what-
ever the visitor typed gets sent to the alert() function.
Methods
Example:
window.document.my_form.the_password.blur();
Example:
window.document.my_form.the_password.focus();
This line puts the cursor inside the password element named the_password.
Unless the focus is changed, the next characters typed go into the_password.
Example:
window.document.my_form.the_password.select();
Handlers
Example:
<input type = "password" onBlur = "alert('Don\'t forget your password!');">
Example:
<input type = "password" onChange = "Thanks for the password!">
blur() FF, IE 3 Removes the cursor from the password element
focus() FF, IE 3 Moves the cursor to the password element
select() FF, IE 3 Selects the text inside the password element
onBlur FF, IE 3 Called when a visitor removes the cursor from the password element
onChange FF, IE 3 Triggered when a visitor changes the contents of the field and then clicks
out of the field or presses ENTER
438 Appendix C
Example:
<input type = "password" onFocus = "window.open('instruct.html','inst')";>
This method opens a window when a visitor clicks inside the password
field.
prompt()
A dialog box that has OK and Cancel buttons, a place for a message to the
visitor, and a box into which the visitor may type a reply. The prompt() function
returns the visitor’s reply and takes two parameters: a message that appears
above the input area and a default value to put in the input area. If the
visitor clicks Cancel, prompt() returns the value null.
Example:
var the_name = prompt("What's your name?", "your name here");
if (the_name == null)
{
the_name = prompt("Come on! What's your name?","Please...");
}
This calls up a prompt box asking visitors for their names. The words your
name here appear as default text in the input area. If a visitor clicks Cancel, the
if-then statement asks for the name one more time.
Radio
The radio button form element. Radio buttons given the same name are
considered a set and are stored in an array with the set’s name. A visitor can
select only one radio button of the set at any given time. If a web page has
five radio buttons named favorite_color, the second radio button in the set
is referred to as:
window.document.the_form.favorite_color[1]
Properties
Example:
if (window.document.the_form.favorite_color[3].checked == true)
{
alert("I like that color too!");
}
onFocus FF, IE 3 Called when the cursor is put into the password field
checked FF, IE 3 true if a visitor has selected the radio button and false otherwise.
Setting the property to true causes the radio button to act as if a visitor
selected the button.
Reference to JavaScript Objects and Functions 439
This if-then statement calls an alert box if a visitor selects the fourth
radio button named favorite_color.
Methods
Handlers
Reset
See “Button (Including Submit and Reset Buttons)” on page 416.
Screen
The screen object contains a number of read-only properties that provide
information about the computer screen used to view a web page.
Properties
Example:
var screen_height = screen.availHeight;
Select
The select form element can either be a pull-down menu or a scrollable
list. The items in it are called the options of the select and are stored in the
select element’s options[] array.
defaultValue FF, IE 3 Read-only: Browser-set default value for the element
length FF, IE 3 Read-only: Number of elements in a group of radio buttons with the
same name
name FF, IE 3 Radio button’s name
type FF, IE 3 Read-only: Identifies element as a radio button
value FF, IE 3 Value of a radio button
click() FF, IE 3 Simulates a click on the element
onClick FF, IE 3 Triggered when a visitor clicks the radio button
availHeight,availWidth FF, IE 4 Read-only: Available height and width of the screen, in
pixels. Excludes the taskbar in Windows systems and any
other permanent screen elements.
height,width FF, IE 4 Read-only: Height and width of the screen in pixels
colorDepth FF, IE 4 Read-only: Number of colors on the screen (bits per pixel in IE,
natural log in FF)
pixelDepth FF, IE 4 Read-only: Bits per pixel
440 Appendix C
Properties
Example:
var option_number = window.document.the_form.the_select.selectedIndex;
if (selected_option_number != -1)
{
var option_text =
window.document.the_form.the_select.options[option_number].text;
alert("Thanks for choosing " + option_text);
}
This code determines which option (if any) has been selected, and it pre-
sents an alert box with the selected option’s text.
Handlers
Example:
<select onChange = "alert(this.options[selectedIndex].text + ' is a good
choice');">
<option>Cat
<option>Dog
</select>
Selecting Cat or Dog triggers the select’s onChange, resulting in an alert
box commending the visitor on his or her choice.
setInterval() [FF, IE 4]
Executes JavaScript statements at repeated time intervals, given two param-
eters: the JavaScript statements to execute and the number of milliseconds
between each execution. The function returns a reference to the interval so
that clearInterval() may cancel it.
For example:
var the_interval = setInterval("alert('Stop procrastinating!');", 10000);
creates an interval that calls up an alert box every 10 seconds.
length FF, IE 3 Number of options in the select
multiple FF, IE 4 If true, accept multiple selections in select box
name FF, IE 3 select object’s name
options[] FF, IE 3 Read-only: Array containing the select’s options. See “Option”
on page 435 for more information.
selectedIndex FF, IE 3 Contains the selected option’s array position in a select element. If
no item has been selected, selectedIndex is 1. If more than one
option has been selected, selectedIndex contains the position of
the first option. To determine all the options selected, use a loop to
look at the selected property of each option object. See “Option”
on page 435 for more information.
onChange FF, IE 3 Triggered when a visitor selects or deselects an option
Reference to JavaScript Objects and Functions 441
setTimeout() [FF, IE 3]
Executes JavaScript statements once after a specified amount of time, given
two parameters: the JavaScript statements to execute and the number of
milliseconds in the future to execute the statements. The function returns a
reference to the time-out so that clearTimeout() may cancel it.
For example:
var the_timeout = setTimeout("alert('Stop procrastinating!');", 10000);
creates a time-out that calls up an alert box in 10 seconds.
String
Strings are sets of characters between quotes. See Chapter 11 for more
information on strings.
Properties
Example:
var the_string = "hello";
var the_length = the_string.length;
This code sets the_length to 5.
Methods
For example:
var the_string = "Information About Fish";
var the_anchor = the_string.anchor("fish_info");
window.document.writeln(the_anchor);
writes <a name = "fish_info">Information About Fish</a> to a web page.
For example:
var the_string = "something really important";
window.document.writeln(the_string.big());
writes <big>something really important</big> to a web page.
length FF, IE 3 Read-only: Number of characters in a string
anchor() FF, IE 3 Takes a name as a parameter and returns an anchor tag with the string
as the text of the link
big() FF, IE 3 Puts the string between <big> and </big> tags
442 Appendix C
For example:
var the_string = "something really important";
window.document.writeln(the_string.bold());
writes <b>something really important</b> to a web page.
For example:
var the_string = "rabbit";
var the_first_char = the_string.charAt(0);
sets the_first_char to r because r is in position 0 of the string.
For example:
var the_string = "Hi";
window.document.writeln(the_string.concat(" there"));
writes "Hi there" to a web page.
For example:
var the_string = "pretty";
window.document.writeln(the_string.fontcolor("pink"));
writes <FONT COLOR = "pink">pretty</FONT> to a web page.
For example:
var the_string = "cheese";
window.document.writeln(the_string.fontsize(48));
writes <FONT SIZE = "48">cheese</FONT> to a web page.
bold() FF, IE 3 Puts the string between <b> and </b> tags
charAt() FF, IE 3 Takes a number as a parameter and returns the character in that position
of the string. Returns null if there is no character.
charCodeAt() FF, IE 4 Takes a number as a parameter and returns the ASCII code of
the character in that position of the string. Returns null if there is
no character.
concat() FF, IE 4 Given a string, adds it to the end of this string
fixed() FF, IE 3 Puts the string between <tt> and </tt> tags
fontcolor() FF, IE 3 Takes the name of a color or a hexadecimal triplet as a parameter
and encloses the string between <FONT COLOR = "the_color"> and
</FONT> tags
fontsize() FF, IE 3 Takes an integer as a parameter and encloses the string between
<FONT SIZE = "the_size"> and <FONT> tags
Reference to JavaScript Objects and Functions 443
For example:
alert(String.fromCharCode(72, 73));
puts up an alert with the string "HI".
For example:
var the_string = "The Waldorf Astoria";
var wheres = the_string.indexOf("Waldo");
sets wheres to 4 because the W in Waldo is in position 4 in the string.
For example:
var the_string = "tower";
window.document.writeln(the_string.italics());
writes <i>tower</i> to a web page.
For example:
var the_string = "The last word.";
var last_space = the_string.lastIndexOf(" ");
sets last_space to 8.
For example:
var the_string = "News For Geeks";
window.document.writeln(the_string.link("http://www.slashdot.org"));
writes <a href = "http://www.slashdot.org">News for Geeks</A> to a web page.
String.fromCharCode() FF, IE 4 Constructs a string from ASCII codes
indexOf() FF, IE 3 Searches within the string for the substring specified by the first parameter.
The optional second parameter is an integer that dictates where in the
string to start searching. If the string contains the substring, indexOf()
returns the position of the substring within the string. If the string does
not contain the substring, indexOf() returns 1.
italics() FF, IE 3 Puts the string between <i> and </i> tags
lastIndexOf() FF, IE 3 Returns the position of the last occurrence of a substring in a string.
Like indexOf(), it can take one or two parameters. The first is the
substring to search for, and the second is where in the string to start
searching.
link() FF, IE 3 Takes a URL as a parameter and creates a hyperlink with the string as the
text of the link and the URL as the contents of the HREF attribute
444 Appendix C
Example:
var the_string = "Jan,Feb,Mar,Apr,May,Jun,Jul,Aug,Sep,Oct,Nov,Dec";
var the_months = the_string.split(",");
This code creates an array called the_months, which has "Jan" in position
0, "Feb" in position 1, and so on.
For example:
the_string = "Apple"; alert(the_string.localeCompare("\u0041pple"))
returns zero.
Example:
var the_string = "Happy";
alert(the_string.replace(/p/, "r"));
alert(the_string.replace(/p/g, "r"));
The first alert will say Harpy and the second will say Harry.
split() FF, IE 4 Splits a string into an array along a substring passed as a parameter
localeCompare() FF, IE 5.5 Compares Unicode versions of this string and the string passed
as a parameter. Returns zero if they are the same, 1 if this string
sorts after the parameter, and 1 if this string sorts before the
parameter.
match() FF, IE 4 Takes a regular expression as the parameter. Returns true if the string
matches the regular expression. See Chapter 11 for more information.
replace() FF, IE 4 Takes a regular expression and a string as parameters. Replaces the
match for the regular expression with the string.
search() FF, IE 4 Takes a regular expression as a parameter and returns the position in the
string that matches the expression, or 1 if the regular expression does
not match
slice() FF, IE 4 Returns a substring of a string. Takes a start position and an end position
of the substring. If end position is not included, returns from start position
to the end of the string.
small() FF, IE 3 Puts the string between <small> and </small> tags
sub() FF, IE 3 Puts the string between <sub> and </sub> tags
substr() FF, IE 4 Extracts a substring from a string. Takes two parameters: the position of
the first character of the substring and the length of the substring. Similar
to the substring() method.
Reference to JavaScript Objects and Functions 445
Example:
var the_string = "core";
var the_extract = the_string.substr(1, 2);
This code sets the_extract to "or" because "o" is in position 1 in the string
and is 2 letters long.
Example:
var the_string = "core";
var the_extract = the_string.substr(1, 3);
This code example sets the_extract to "or" because "o" is in position 1 of
the string and "e", the letter after the last character in "or", is in position 3.
Example:
var the_string = "\u0041pple";
window.document.writeln(the_string.toLocaleLowerCase());
This code writes apple to a web page.
Style [FF, IE 4]
The object that represents a Cascading Style Sheet (CSS). As discussed in
Chapter 13, you can use CSS in combination with JavaScript to animate a web
page in many ways. Style sheets are often attached to <div> HTML tags as
follows:
<div id = "mystyle" STYLE = "position:absolute;top:100;left:100;">
Here's a style sheet!
</div>
This code gives div an id of "mystyle" and positions the text between the <div>
and </div> tags 100 pixels from the left and 100 pixels from the top of the
screen.
substring() FF, IE 3 Extracts a substring from a string. Takes two parameters: the position
of the first character of the substring and the position of the character
after the last character in the substring. Similar to the substr() method,
except it works in more browsers and takes a different second
parameter.
sup() FF, IE 3 Puts the string between <sup> and </sup> tags
toLocaleLowerCase(),
toLocaleUpperCase()
FF, IE 5.5 Converts a string to lowercase or upper case. Can handle
Unicode characters.
toLowerCase(),toUpperCase() FF, IE 3 Converts a string to lowercase or uppercase. Doesn’t
know Unicode.
446 Appendix C
The style object is available for all HTML elements. The following line
accesses the style object for the div in the preceding example:
var the_style = document.getElementById("mystyle").style;
All the properties of a style object are read-write. There are many, many
properties for the style object. The ones compatible with both Firefox and
Internet Explorer 5 and above are listed in the following table. For more
information about those properties, pick up a good book on CSS or
Dynamic HTML.
Properties [FF, IE 5]
Submit
The submit button sends an onSubmit event to the form that contains it. See
“Button (Including Submit and Reset Buttons)” on page 416 for more
information.
Text
The text form element allows a visitor to type a line of text into a form. See
“Password” on page 436 for more information.
background borderRightWidth fontVarient paddingTop
backgroundAttachment borderStyle fontWeight pageBreakAfter
backgroundColor borderTop height pageBreakBefore
backgroundImage borderTopColor left position
backgroundPosition borderTopStyle letterSpacing right
backgroundRepeat borderTopWidth lineHeight tableLayout
border borderWidth listStyleImage textAlign
borderBottom bottom listStylePosition textDecoration
borderBottomColor clear listStyleType textIndent
borderBottomStyle clip margin textIndex
borderBottomWidth color marginBottom textTransform
borderColor cssText marginLeft top
borderLeft cursor marginRight unicodeBidi
borderLeftColor direction marginTop verticalAlign
borderLeftStyle display overflow visibility
borderLeftWidth font padding whiteSpace
borderRight fontFamily paddingBottom width
borderRightColor fontSize paddingLeft wordSpacing
borderRightStyle fontStyle paddingRight zIndex
Reference to JavaScript Objects and Functions 447
Textarea
A textarea is a multiline box into which text can be typed. Its HTML looks
like this:
<textarea rows = "10" cols = "40">some default text</textarea>.
Properties
Methods
Example:
window.document.my_form.the_area.blur();
Example:
window.document.my_form.the_area.focus();
This line puts the cursor inside the password element named the_password.
Unless the focus is changed, the next characters typed go into the_password.
Example:
window.document.my_form.the_area.select();
Handlers
cols FF, IE 4 Number of columns of the textarea
defaultValue FF, IE 3 Read-only: Browser-set default value for the element
form FF, IE 3 Read-only: Form containing the element
maxLength FF, IE 4 Maximum number of characters allowed in the field
name FF, IE 3 Name of the textarea field
readOnly FF, IE 4 true if users can’t enter data into the field
rows FF, IE 4 Number of rows of this textarea
type FF, IE 4 Read-only: Set to "TEXTAREA"
value FF, IE 3 Text that appears in the textarea
blur() FF, IE 3 Removes the cursor from the textarea
focus() FF, IE 3 Moves the cursor to the textarea
select() FF, IE 3 Selects the text inside the textarea
onBlur FF, IE 3 Called when a visitor removes the cursor from the textarea
onChange FF, IE 3 Triggered when a visitor changes the contents of the field and then clicks
outside the field or presses ENTER
onFocus FF, IE 3 Called when the cursor is put into the password field
448 Appendix C
this [FF, IE 3]
A term that refers to the object in which it appears. Example:
<input type = "checkbox" name = "riddle_me" onClick = "alert(this.name)">
Here, this refers to the checkbox named riddle_me because that’s where this
appears. The alert box will have the text riddle_me inside.
unescape() [FF, IE 3]
Decodes a string encoded with escape(). Example:
var decoded_string = unescape("a%20string%20safe%20for%20cookies");
The variable decoded_string now holds the string "safe for cookies" because
the unescape function replaces each %20 with a space. See “escape()” on page
436 for more information.
var [FF, IE 3]
A term used the first time a variable is named. Example:
var a_new_variable = "I feel good!";
window
The window object is either a browser window or a frame. Many methods of
the window object have been listed in this appendix already. Those are left out
of the description of the window object.
Properties
Example:
if (my_window.closed == false)
{
my_window.location = "http://www.hits.org";
}
This example makes sure the window named my_window has not been
closed before sending a visitor to http://www.hits.org.
closed FF, IE 4 Read-only: true if a window has been closed and false if it is still open. The
window referenced is generally created using the window.open() method.
Reference to JavaScript Objects and Functions 449
Example:
window.frames[0].document.writeln("Hello!");
This line writes the word Hello! into the document of the first frame in
the window’s frame set.
Example:
var first_frame_name = window.frames[0].name;
Example:
function alertError(the_message, the_url, the_line)
{
var the_string = "Warning, Will Robinson! " + the_message;
the_string += " occurred on line " + the_line " of " + the_url;
}
window.onerror = window.alertError;
Now, whenever there is a JavaScript error, an alert will pop up with the
contents of that error.
defaultStatus FF, IE 3 Read-only: Browser’s default message in the status area of the
window
document FF, IE 3 Read-only: document object of the window. See “Document” on
page 421 for more information.
frames[] FF, IE 3 Read-only: Array of frames stored in a window. Each frame is
considered another window object.
history FF, IE 3 Read-only: History object of a window. See “History” on page 426
for more information.
innerHeight FF Height of the display area of the web page (only signed scripts can
make this smaller than 100 pixels)
innerWidth FF Width of the display area of the web page (only signed scripts can
make this smaller than 100 pixels)
name FF, IE 3 Name of a frame or window. The frame set provides the name of
a frame. The name of a window is the second parameter in the
window.open() method.
navigator FF, IE 4 Read-only: navigator object of the window
onerror FF, IE 4 The name of a function to trigger when there’s a JavaScript error. The
function must take three parameters: the error message, the URL of the
document in which the error occurred, and the line of the error.
450 Appendix C
Example:
window.opener.location = "http://www.nostarch.com";
This example changes the URL shown in the window that opened the
current window.
Example:
parent.frames[1].location = "http://www.aclu.org";
This line changes the URL of the second frame in a frame set when
called by another frame in the same frame set.
Example:
self.location = "http://www.npr.org";
Example:
window.status = "Don't forget to smile!";
offscreenBuffering IE 4 Setting this to true may reduce flicker in DHTML animations
opener FF, IE 3 Reference back to the window or frame that opened the
current window
outerHeight FF Height of the window (only signed scripts can make this smaller than
100 pixels)
outerWidth FF Width of the window (only signed scripts can make this smaller than
100 pixels)
pageXOffset FF Read-only: How far to the right the screen has scrolled in pixels
pageYOffset FF Read-only: How far down the screen has scrolled in pixels
parent FF, IE 3 Read-only: Parent of this window (used in the context of frames)
screen FF, IE 4 Read-only: Window’s screen object
screenLeft IE 5 Read-only: Horizontal coordinate (in pixels) of the left border of the
browser window’s content area relative to the upper left corner of the
screen. The content area is where the web page resides.
screenTop IE 5 Read-only: Vertical coordinate (in pixels) of the top border of the
browser window’s content area relative to the upper left corner of
the screen. The content area is where the web page resides.
screenX FF Horizontal coordinate of the left side of the window
screenY FF Vertical coordinate of the top of the window
scrollX FF Read-only: Horizontal scrolling of the browser window
scrollY FF Read-only: Vertical scrolling of the browser window
self FF, IE 3 Read-only: Reference to the current window or frame, the same as window
status FF, IE 3 Contents of the window’s status bar

Reference to JavaScript Objects and Functions 451
Example:
window.location = "http://www.theonion.com";
top.location = "http://www.theonion.com";
When executed inside a frame, the first line changes the URL of the
frame to www.theonion.com, and the second line changes the URL of
the entire web page.
Methods
Example:
window.blur();
Example:
var little_window = window.open("http://www.ebay.com", "little_window",
"height=50,width=50,resizable");
The above code opens up a small resizable window holding eBay’s website.
Features
The following list contains all the features a window may have and which
browsers allow which features. The first list contains the window features that
work in Netscape 2, Internet Explorer 3, and more recent versions of these
browsers.
top FF, IE 3 Read-only: Topmost window in a window hierarchy. Helpful when your
JavaScript is in a deeply nested frame and you want it to affect the whole
web page.
blur() FF, IE 4 Sends a window behind all the other windows on the screen
close() FF, IE 3 Closes a window
open() FF, IE 3 Opens a new window and returns a reference to it. Takes three param-
eters: the URL of the window to open, the target name of the window, and
a comma-delimited list of features the window should have. Some of the
features, such as width and height, must have values assigned to them. If
the third parameter is left out, the new window contains the same features
as the window that opened it.
copyhistory Copies the history of the current window to the window being opened (that is, it
enables the use of the back button in the new window)
directories Directory buttons
height Height of the new window
location Location bar (where URLs may be typed)
452 Appendix C
The following list contains features that only work in Firefox and similar
browsers. Certain features, noted by an asterisk, require that Firefox sign
your script.
Methods
Example:
window.scroll(100,500);
This line moves the scroll bars so that the part of the screen 100 pixels
from the left border and 500 pixels from the top of the screen appears at
the upper left corner of the screen.
Example:
window.scrollBy(50,-100);
This line scrolls the window 50 pixels to right and 100 pixels up.
menubar Menu bar (File, Edit, and so on); always present on a Macintosh
resizable Makes the window resizable (Macintosh windows are always resizable)
scrollbars Provides scrollbars when the content of the window exceeds the window size
status Shows the status bar
toolbar Toolbar (back, forward, and so on)
width Width of the window
alwaysLowered*Always puts this window behind others on the screen
alwaysRaised*Always puts this window above others on the screen
dependent Closes the new window when the opening window closes
hotkeys Disables keyboard shortcuts except Quit
innerHeight Height of the window’s content region
innerWidth Width of the window’s content region
outerHeight Total height of the window
outerWidth Total width of the window
screenX How far from the left side of the screen the window appears
screenY How far from the top of the screen the window appears
titlebar*Set titlebar = no to hide the title bar
z-lock*Puts the window below all other browser windows
scroll() FF, IE 4 Takes two parameters: a number of pixels to scroll horizontally and a
number to scroll vertically
scrollBy() FF, IE 4 Takes two parameters: the number of pixels to scroll the window
horizontally and vertically (use negative numbers to move the scroll
bars to the left or up)
Reference to JavaScript Objects and Functions 453
Less Common Methods
Handlers
Window handlers go inside the <body> tag of the web page.
Example:
<body onBlur = "window.close();">
This window closes itself if the user selects another window.
Example:
<body onError = "alert('Warning! JavaScript error!');">
Example:
<body onFocus = "alert('Nice to see you again.');">
For example:
<body onLoad = "startThauScript();">
calls the function startThauScript() when the page has fully loaded.
back() FF Goes back a page (like clicking the browser’s back button)
find() FF Searches in the document for the string passed as the parameter
forward() FF Goes forward a page (like clicking the browser’s forward button)
home() FF Goes to the home page (like clicking the browser’s home button)
moveBy() FF, IE 4 Moves the window a specified number of pixels horizontally and verti-
cally. Firefox script must be signed to move the window off the screen.
moveTo() FF, IE 4 Moves the window to a certain x,y position relative to the upper left
corner of the browser window. Firefox script must be signed to move
the window off the screen.
print() FF, IE 5 Prints the current web page (like clicking the browser’s print button)
resizeBy() FF, IE 4 Takes two parameters: an amount in pixels to resize the window hori-
zontally and an amount to resize it vertically
resizeTo() FF, IE 4 Takes two parameters: a width in pixels and a height in pixels. Resizes
the window to these dimensions.
scrollTo() FF, IE 4 Just like window.scroll()
stop() FF Stops loading the web page (like clicking the browser’s stop button)
onBlur FF, IE 4 Triggered when the window is no longer topmost on the screen
onError FF, IE 4 Triggered when a JavaScript error occurs
onFocus FF, IE 4 Triggered when the user selects the window
onLoad FF, IE 3 Triggered when the page, including all its images, has completely loaded
454 Appendix C
Example:
<body onResize = "alert('Hey, that tickles.');">
Example:
<body onUnload = "alert('Sorry to see you go!');">
XMLHttpRequest [FF]
and ActiveXObject("Microsoft.XMLHTTP") [IE 5.5]
These objects are used extensively in Ajax, as described in Chapters 14, 15,
16, and 17.
Properties
Methods
Handlers
onResize FF, IE 4 Triggered when the visitor has resized the page
onUnload FF, IE 3 Triggered when a visitor is about to leave the page. This occurs even when
the browser holding the page is closed, when the visitor clicks a link, or
when the visitor reloads the page.
readyState State of the request
responseText String containing the response to the request
responseXML If the response is an XML document, it is stored here
status Response status from the server
abort() Cancels the request
open() Tells the request object where the request should go and what kind of request it is.
See Chapter 14 for more information.
send() Sends the request. If this is a POST-type request, the information to send to the server
is sent as a parameter. Otherwise, the parameter is null.
onReadyStateChange Triggered when the request object’s readyState property changes
CHAPTER 15’S ITALIAN
TRANSLATOR AND CHAPTER 17’S
TO DO LIST APPLICATION
The examples given in this appendix
were too long to list in their entirety
in Chapters 15 and 17. For more informa-
tion about how each works, please refer to the
appropriate chapter.
Chapter 15’s Italian Translator
<html><head><title>Translator Suggestion Script</title>
<script type = "text/javascript">
<!-- hide me from older browsers
function getTranslations(the_file, the_word) {
var request = null;
var xml_response = null;
if (window.XMLHttpRequest) {
request = new XMLHttpRequest();
} else {
request = new ActiveXObject("Microsoft.XMLHTTP");
456 Appendix D
}
if (request) {
request.open("GET", the_file + ".xml");
request.onreadystatechange =
function() {
if (request.readyState == 4) {
xml_response = request.responseXML;
displayResults(findTranslations(xml_response, the_word));
}
}
request.send(null);
} else {
alert("Sorry, you must update your browser before seeing" +
" Ajax in action.");
}
}
function findTranslations(xml_doc, the_word) {
var these_translations = new Array();
var this_word = "", this_result = "";
var found = false;
var loop = 0;
var reg_exp = new RegExp("^" + the_word);
var the_translation = null;
if (the_word.length == 0) {
return these_translations;
}
var english_word_elements = xml_doc.getElementsByTagName("english");
while ((loop < english_word_elements.length) && (found == false)) {
this_word = english_word_elements[loop].firstChild.nodeValue;
if (reg_exp.test(this_word)) {
the_translation =
english_word_elements[loop].nextSibling.firstChild.nodeValue;
found = true;
}
loop++;
}
if (found == true) {
this_result = this_word + "\t" + the_translation;
these_translations.push(this_result);
for (var count = loop; count < (loop + 10); count++) {
if (count < english_word_elements.length) {
this_word = english_word_elements[count].firstChild.nodeValue;
if (reg_exp.test(this_word)) {
the_translation =
english_word_elements[count].nextSibling.firstChild.nodeValue;
this_result = this_word + "\t" + the_translation;
these_translations.push(this_result);
}

Chapter 15’s Italian Translation Script and Chapter 17’s To Do List Application 457
}
}
}
return these_translations;
}
function displayResults(the_results) {
var display_me = "";
var splitter;
var this_result = null;
for (var loop = 0; loop < the_results.length; loop++) {
this_result = the_results[loop];
if (this_result != null) {
splitter = this_result.split("\t");
display_me += "<tr><td align='left'>" + splitter[0] +
"</td><td align='right'>" + splitter[1] + "</td></tr>";
}
}
document.getElementById("theResults").style.height =
(the_results.length + parseInt(the_results.length / 5) + 1) + "em";
document.getElementById("theResults").innerHTML =
"<table width='100%' border='0' cellpadding='0' cellspacing='0'>" +
display_me + "</table>";
}
// show me -->
</script>
</head>
<body>
<form>
<input type = "text" size = "55" id = "theText"
onKeyUp = "getTranslations('italian', this.value);">
<div id = "theResults"
style = "width:22em;border:1px black solid;padding-left:2px;padding-
right:2px">
</div>
</form>
</body>
</html>
Chapter 17’s To Do List Application
The To Do list application used one HTML file and two PHP files.
todo.html
<html><head><title>To Do</title>
<script type = "text/javascript">
<!-- hide me from older browsers
var user_list_timeout;
var current_list_timeout;
var seconds_between_user_list_update = 60000;
458 Appendix D
var seconds_between_todo_list_update = 5000;
var request;
function displayLogin() {
var theForm = "<form>Name: <input type='text' name='name'><br> " +
"Password: <input type='password' name='password'> " +
"<input type='button' value='submit' onClick='doLogin(this.form);'><br>"
document.getElementById("loginArea").innerHTML = theForm;
}
function doLogin(my_form) {
readFileDoFunction("userInfo.xml", "GET",
function() {
if (request.readyState == 4) {
if (request.status == 200) {
processLogin(request.responseXML, my_form);
} else {
document.getElementById("errorDiv").innerHTML =
"Sorry, there was a problem with the server.";
}
}
}
);
}
function getUser(user_info, user_name) {
var users = user_info.getElementsByTagName("user");
var count = 0;
var found_user = null;
var this_user;
while ((count < users.length) && (found_user == null)) {
this_user = users[count];
this_name = getFirstValue(this_user, "name");
//this_user.getElementsByTagName("name")[0].firstChild.nodeValue;
if (this_name == user_name) {
found_user = this_user;
}
count++;
}
return found_user;
}
function processLogin(user_info, my_form) {
var user_name = my_form.elements["name"].value;
var user_password = my_form.elements["password"].value;
var this_password_node;
var success = false;
var this_password;
var this_user = getUser(user_info, user_name);
if (this_user != null) {
this_password = getFirstValue(this_user, "password");
if (user_password == this_password) {
Chapter 15’s Italian Translation Script and Chapter 17’s To Do List Application 459
success = true;
}
}
if (success == true) {
document.cookie = "user=" + user_name;
displayHomeInformation(user_name);
document.getElementById("contentArea").innerHTML = "";
} else {
document.getElementById("errorDiv").innerHTML +=
"<font color='red'><br>Login error; please try again.</font>";
}
}
function displayHomeInformation(user_name) {
document.getElementById("loginArea").innerHTML =
"Welcome, " + user_name + ". " +
"<a href='#' onClick='logout(); return false'>logout</a> ";
displayLegalLists(user_name);
}
function readFileDoFunction(file_name, request_type, the_function) {
if (window.XMLHttpRequest) {
request = new XMLHttpRequest();
} else {
request = new ActiveXObject("Microsoft.XMLHTTP");
}
var theURL = "http://localhost/boj/ch17/readXMLFile.php?fileName=" +
file_name + "&t=" + new Date().getTime();
if (request) {
request.open(request_type, theURL);
request.onreadystatechange = the_function;
request.send(null);
} else {
document.getElementById("errorDiv").innerHTML =
"Sorry, you must update your browser before seeing Ajax in action.";
}
}
function saveFileDoFunction(file_name, the_contents, the_function) {
if (window.XMLHttpRequest) {
request = new XMLHttpRequest();
} else {
request = new ActiveXObject("Microsoft.XMLHTTP");
}
var the_url = "http://localhost/boj/ch17/saveXMLFile.php?t=" +
new Date().getTime();
var the_message = "fileName=" + file_name + "&contents=" + the_contents;
460 Appendix D
if (request) {
request.open("POST", the_url);
request.setRequestHeader("Content-type",
"application/x-www-form-urlencoded; charset=UTF-8");
request.onreadystatechange = the_function;
request.send(the_message);
} else {
document.getElementById("errorDiv").innerHTML =
"Sorry, you must update your browser before seeing Ajax in action.";
}
}
function displayLegalLists(user_name) {
readFileDoFunction("userInfo.xml", "GET",
function() {
if (request.readyState == 4) {
if (request.status == 200) {
var last_modified = request.getResponseHeader("Last-Modified");
var last_modified_date = new Date(last_modified);
displayLists(request.responseXML, user_name,
last_modified_date.getTime());
} else {
document.getElementById("errorDiv").innerHTML =
"Sorry, your lists could not be displayed due to a problem with " +
"the server.";
}
}
}
);
}
function displayLists(user_info, user_name, last_modified_date) {
var this_user = getUser(user_info, user_name);
var display_info = "";
var this_link;
var this_list;
if (this_user != null) {
var lists_element = this_user.getElementsByTagName("lists")[0];
var lists = lists_element.getElementsByTagName("list");
for (var loop = 0; loop < lists.length; loop++) {
this_list = lists[loop].firstChild.nodeValue;
this_link = "<a href=\"#\" onClick=\"readyDisplayList('" +
this_list + "'); return false;\">" + this_list + "</a>";
display_info += this_link + "<br>";
}
document.getElementById("listArea").innerHTML = display_info;
user_list_timeout =
setTimeout("updateUserIfChanged(" + last_modified_date + ",'" +
user_name + "')", seconds_between_user_list_update);
}
}
function updateUserIfChanged(current_last_modified, user_name) {
Chapter 15’s Italian Translation Script and Chapter 17’s To Do List Application 461
readFileDoFunction("userInfo.xml", "HEAD",
function() {
if (request.readyState == 4) {
if (request.status == 200) {
var last_modified = request.getResponseHeader("Last-Modified");
var last_modified_date = new Date(last_modified).getTime();
if (last_modified_date != current_last_modified) {
displayLegalLists(user_name);
}
user_list_timeout = setTimeout("updateUserIfChanged(" +
last_modified_date + ",'" + user_name +
"')",seconds_between_user_list_update);
} else {
document.getElementById("errorDiv").innerHTML =
"Problem updating user " + request.status;
}
}
}
);
}
function updateTodoIfChanged(current_last_modified, list_name) {
readFileDoFunction(list_name + ".xml", "HEAD",
function() {
if (request.readyState == 4) {
if (request.status == 200) {
var last_modified = request.getResponseHeader("Last-Modified");
var last_modified_date = new Date(last_modified).getTime();
if (last_modified_date != current_last_modified) {
readyDisplayList(list_name);
}
todo_list_timeout = setTimeout("updateTodoIfChanged(" +
last_modified_date + ",'" + list_name + "')",
seconds_between_todo_list_update);
} else {
document.getElementById("errorDiv").innerHTML =
"Problem updating To Do list " + request.status;
}
}
}
);
}
function addNewItem(the_form, list_name) {
var file_name = list_name + ".xml";
readFileDoFunction(file_name, "GET",
function() {
if (request.readyState == 4) {
if (request.status == 200) {
addNewToFile(request.responseXML, the_form.newItem.value,
list_name);
} else {
document.getElementById("errorDiv").innerHTML =
"Sorry, new item could not be added to To Do list for" + list_name +
" due to a problem with the server.";
}
462 Appendix D
}
}
);
}
function addNewToFile(the_document, new_contents, list_name) {
var open_items = getItems(the_document,"openitems");
var done_items = getItems(the_document,"doneitems");
var high_number = getHighValue(the_document);
var new_number = high_number + 1;
var new_item = document.createElement("item");
var new_item_number = document.createElement("number");
var new_item_content = document.createElement("contents");
new_item_number.appendChild(document.createTextNode(new_number));
new_item_content.appendChild(document.createTextNode(new_contents));
new_item.appendChild(new_item_number);
new_item.appendChild(new_item_content);
open_items.push(new_item);
saveAndReload(open_items, done_items, list_name);
}
function getHighValue(the_document) {
var high_number = 0;
var this_number = 0;
var items = the_document.getElementsByTagName("item");
for (var loop = 0; loop < items.length; loop++) {
this_number = parseInt(getFirstValue(items[loop], "number"));
if (this_number > high_number) {
high_number = this_number;
}
}
return high_number;
}
function readyDisplayList(list_name) {
var file_name = list_name + ".xml";
readFileDoFunction(file_name, "GET",
function() {
if (request.readyState == 4) {
if (request.status == 200) {
var last_modified = request.getResponseHeader("Last-Modified");
var last_modified_date = new Date(last_modified);
displayList(request.responseXML, last_modified_date.getTime());
} else {
document.getElementById("errorDiv").innerHTML =
"Sorry, could not display To Do list " + list_name +
" due to a problem with the server.";
}
}
}
);
}
function displayList(the_list, last_modified_date) {
var list_name = getFirstValue(the_list, "name");
Chapter 15’s Italian Translation Script and Chapter 17’s To Do List Application 463
var intro_text = "<h3>Looking at list: " + list_name + "</h3>";
var pending_display = "Still Pending:<br><ul>";
var open_item_element = the_list.getElementsByTagName("openitems")[0];
var open_items = open_item_element.getElementsByTagName("item");
for (var loop = 0; loop < open_items.length; loop++) {
this_item = open_items[loop];
this_contents = getFirstValue(this_item, "contents");
this_number = getFirstValue(this_item, "number");
pending_display += "<li><input type='checkbox' " +
"onClick=\"readyMarkDone('" + list_name + "'," +
this_number + ");\"> " + this_contents;
}
pending_display += "</ul>";
var done_display = "Completed:<br><ul>";
var open_item_element = the_list.getElementsByTagName("doneitems")[0];
var open_items = open_item_element.getElementsByTagName("item");
for (var loop = 0; loop < open_items.length; loop++) {
this_item = open_items[loop];
this_contents = getFirstValue(this_item, "contents");
this_number = getFirstValue(this_item, "number");
done_display += "<li><input type='checkbox' " +
"onClick=\"readyMarkUndone('" + list_name + "'," + this_number +
");\"> " + this_contents;
}
done_display += "</ul>";
document.getElementById("contentArea").innerHTML = intro_text +
pending_display + done_display;
document.getElementById("contentArea").innerHTML +=
"<p> <form>Add New Item: <input type='text' name='newItem'>" +
"<input type=\"button\" value=\"add\" " +
"onClick=\"addNewItem(this.form, '" + list_name + "');\"></form>";
todo_list_timeout =
setTimeout("updateTodoIfChanged(" + last_modified_date + ",'" +
list_name + "')", seconds_between_todo_list_update);
}
function getFirstValue(my_element, child) {
return my_element.getElementsByTagName(child)[0].firstChild.nodeValue;
}
function readyMarkDone(list_name, the_item) {
var file_name = list_name + ".xml";
readFileDoFunction(file_name, "GET",
function() {
if (request.readyState == 4) {
if (request.status == 200) {
markDone(request.responseXML, the_item, list_name);
} else {
document.getElementById("errorDiv").innerHTML =
"Sorry, this item could not be marked done due to a problem " +
"with the server.";
}
}
}
464 Appendix D
);
}
function readyMarkUndone(list_name, the_item) {
var file_name = list_name + ".xml";
readFileDoFunction(file_name, "GET",
function() {
if (request.readyState == 4) {
if (request.status == 200) {
markUndone(request.responseXML, the_item, list_name);
} else {
document.getElementById("errorDiv").innerHTML =
"Sorry, this item could not be marked undone due to a problem " +
"with the server.";
}
}
}
);
}
function markDone(the_document, the_item, list_name, last_modified_date) {
var open_items = getItems(the_document,"openitems");
var done_items = getItems(the_document,"doneitems");
var this_number;
var found_item = null;
var count = 0;
while ((count < open_items.length) && (found_item == null)) {
this_number = getFirstValue(open_items[count], "number");
if (this_number == the_item) {
found_item = open_items[count];
} else {
count++;
}
}
if (found_item != null) {
open_items.splice(count, 1);
done_items.push(found_item);
saveAndReload(open_items, done_items, list_name);
}
}
function markUndone(the_document, the_item, list_name) {
var open_items = getItems(the_document,"openitems");
var done_items = getItems(the_document,"doneitems");
var this_number;
var found_item = null;
var count = 0;
while ((count < done_items.length) && (found_item == null)) {
this_number = getFirstValue(done_items[count], "number");
if (this_number == the_item) {
found_item = done_items[count];
} else {
count++;
}
}
Chapter 15’s Italian Translation Script and Chapter 17’s To Do List Application 465
if (found_item != null) {
done_items.splice(count, 1);
open_items.push(found_item);
saveAndReload(open_items, done_items, list_name);
}
}
function getItems(the_document, the_item_type) {
var the_items_array = new Array();
var item_elements = the_document.getElementsByTagName(the_item_type)[0];
var items = item_elements.getElementsByTagName("item");
for (var loop = 0; loop < items.length; loop++) {
the_items_array[loop] = items[loop];
}
return the_items_array;
}
function saveAndReload(open_items, done_items, list_name) {
var the_string = "<?xml version='1.0' ?>";
the_string += "<list>";
the_string += "<name>" + list_name + "</name>";
the_string += getItemString("openitems", open_items);
the_string += getItemString("doneitems", done_items);
the_string += "</list>";
var file_name = list_name + ".xml";
saveFileDoFunction(file_name, the_string,
function() {
if (request.readyState == 4) {
if ((request.responseText == "success") && (request.status == 200)) {
readyDisplayList(list_name);
} else {
document.getElementById("errorDiv").innerHTML =
"Sorry, there was an error saving your list. " +
request.responseText;
}
}
}
);
}
function getItemString(item_list_name, item_list) {
var the_string = "<" + item_list_name + ">";
for (var loop = 0; loop < item_list.length; loop++) {
the_string += "<item>";
the_string += "<number>" + getFirstValue(item_list[loop], "number") +
"</number>";
the_string += "<contents>" +
getFirstValue(item_list[loop], "contents") + "</contents>";
the_string += "</item>";
}
the_string += "</" + item_list_name + ">";
return the_string;
}
function logout() {
var the_date = new Date("December 31, 1900");

466 Appendix D
var the_cookie_date = the_date.toGMTString();
var user_name = getNameFromCookie();
document.cookie = "user=" + escape(user_name) +
";expires=" + the_cookie_date;
clearTimeout(user_list_timeout);
clearTimeout(current_list_timeout);
window.location.reload();
}
function getNameFromCookie() {
var cookieParts = null;
var user_name = null;
if (document.cookie != null) {
user_name = document.cookie.split("=")[1];
}
return user_name;
}
function checkIfLoggedIn() {
var user_name = getNameFromCookie();
if (user_name != null) {
displayHomeInformation(user_name);
}
}
// show me -->
</script>
</head>
<body onLoad = "checkIfLoggedIn()";>
<div id = "errorDiv" style = "color:red">
</div>
<h2>Login Section</h2>
<div id = "loginArea">
<a href = "#" onClick = "displayLogin(); return false;">login</a>
</div>
<h2>Content Section</h2>
<div id = "contentArea">
Welcome! Please sign in to see your To Do lists.
</div>
<h2>To Do Lists You Can Access</h2>
<div id = "listArea">
</div>
</body>
</html>

Chapter 15’s Italian Translation Script and Chapter 17’s To Do List Application 467
readXMLFile.php
<?php
$fileName = $_REQUEST["fileName"];
header('Last-Modified: '.
gmdate('D, d M Y H:i:s', filemtime($fileName)).' GMT');
if ($_SERVER["REQUEST_METHOD"] != "HEAD") {
header('Content-Type: text/xml');
$myFile = fopen($fileName, "r");
$contents = "";
while (feof($myFile) == FALSE) {
$contents = $contents . fgets($myFile);
}
fclose($myFile);
print $contents;
}
?>
saveXMLFile.php
<?php
$fileName = $_REQUEST["fileName"];
$contents = $_REQUEST["contents"];
$myFile = fopen($fileName, "w");
$success = fwrite($myFile, stripslashes($contents));
fclose($myFile);
if ($success == TRUE) {
print "success";
} else {
print "$success";
}
?>

INDEX
Symbols & Numbers
& (ampersand), in XML entities, 284
&& (AND) operator, 198
in if-then statements, 44–45
<> (angle brackets), entities in XML
for, 284
<!-- and //-->
for HTML comments, 11
and <script> tag, 36
' (apostrophe)
entities in XML for, 285
escaping, 56
* (asterisk)
for multiplication, 18
in regular expressions, 204–205
\ (backslash)
for escaping apostrophe, 56
for escaping in regular
expressions, 204
^ (caret), for beginning of regular
expression pattern, 205
{} (curly brackets) in functions, 85
placement of, 41–42
$ (dollar sign), for end of regular
expression pattern, 205
$_REQUEST variable (PHP), 307
. (dot)
in object names, 60, 69
in regular expressions, 204
== (equal) symbols, 39
in logical tests, 366
= (equal sign), confusion with double, 40
> (greater than) symbol, 39
# (hash mark), in href tag, 56
< (less than) symbol, 39
- (minus sign), 18
! (NOT) operator, 47–48
!= (not equal) symbol, 39
"" (null string), 195
() (parentheses), for Boolean tests, 44
% (percent sign), as MOD operator, 160
+ (plus sign)
for addition, 18
for connecting strings, 20–21
in regular expressions, 205
? (question mark), in regular
expressions, 205
" (quotes, double)
debugging, 366–367
for events, 55–56
for text in write() function, 20
and variables, 30
' (quotes, single), inside quotes, 56
; (semicolon)
in JavaScript, 17
in XML entities, 284
/ (slash)
for division, 18
in regular expressions, 203
|| (vertical bars), for OR operator, 44
A
<a> tag, 413
target attribute of, 70
abort() method, of XMLHttpRequest
object or ActiveXObject, 454
abs() method, of math object, 433
absolute positioning, 236–237
acos() method, of math object, 433
action property, of form object, 424
ActionScript, 7
ActiveXObject, 454
addEventListener() method, of
HTMLElement object, 428
addition, 18
Adobe Dreamweaver, 8
Ajax (Asynchronous JavaScript and
XML), 233, 261
asynchronicity, 264–265
caching problem, 320–321
470 INDEX
Ajax, continued
client-side, 291
code examples, 407
for contacting third-party webserver,
308–309
creating and sending requests,
265–270
cross-server communication
using, 303
debugging in Firefox, 374
decision to use, 275–276
forms for, 316
frameworks, 408
in-context data manipulation, 276
introduction, 263–265
and POST method, 314–318
reading file, 327
real-world examples, 262, 280–281
script example, 269
tutorials, 407
and usability, 274–275
web resources, 407
alarm
canceling, 149–150
setting, 148
alert box, 22
line break in, 195
alert() method, 22–23, 84, 413
for printing variables, 367–369
timer to display, 148
alerts, link to call, 54
align property, of image object, 429
alinkColor property, of document
object, 421
all array, of HTMLElement object, 427
alt attribute, of <img> tag, 64
alt property, of image object, 429
altKey property
of event object, 423
of keyboard event, 251
alwaysLowered feature, for window, 452
alwaysRaised feature, for window, 452
ampersand (&), in XML entities, 284
ampersands (&&), for AND operator, 198
in if-then statements, 44–45
anchor element, 413
target attribute of, 70
anchor() method, of string, 441
anchors array, of document object, 421
AND (&&) operator, 198
in if-then statements, 44–45
Andre’s JSLog, 370
animation, timing loops for, 239–241
anonymous function, 268, 272, 327, 347
AntWeb page, process for checking off
checkboxes, 133–134
Apache webserver, 272
apostrophe (')
entities in XML for, 285
escaping, 56
appCodeName property, of navigator
object, 434
appendChild() method, 245–246, 428
applet element, 413–414
applets array, of document object, 421
appName property, of navigator object, 433
appVersion property, of navigator
object, 434
appVersion variable, 48
area element, 414
arithmetic, with variables, 18
array element, 414–416
array.length in loops, 131
Array object, 135
arrays, 36
associative, 142–144
checking last element in, 137
code for going through elements,
126–127
creating, 134–135
creating empty, 140
determining number of items in, 126
examples, 123–124
of HTML elements, returning, 243
JavaScript built-in, 124–126
loading values into, 141
reading cookie information into, 221
testing limits, 137–138
for tip box on website, 136–139
and while loops, 129–130
asin() method, of math object, 433
Ask.com, 136
associative arrays, 142–144
asterisk (*)
for multiplication, 18
in regular expressions, 204–205
asynchronicity, 264–265, 271–274
Asynchronous JavaScript and XML. See
Ajax (Asynchronous JavaScript
and XML)
atan() method, of math object, 433
attachEvent() method, of HTMLElement
object, 428
INDEX 471
attributes array, of HTMLElement
object, 427
attributes property, of nodes, 249
availHeight property, of screen object,
78, 439
availWidth property, of screen object,
78, 439
B
back button, in Ajax applications, 274
back() method
of history element, 427
of window object, 453
Backbase, 274
background color, event handler to
customize, 57–58
backslash (\)
for escaping apostrophe, 56
for escaping in regular
expressions, 204
backup, before fixing bug, 377
bars (||), for OR operator, 44
BBEdit, 8
bgColor property, of document object, 421
big() method, of string, 441
blank statements, checking for, 137
blocked pop-ups, 76
blur() method, 74
of FileUpload element, 424
of HTMLElement object, 428
of password element, 437
of textarea element, 447
of window object, 451
BODY node, in W3C DOM, 245
body of HTML page, JavaScript
tags in, 10
body property, of document object, 421
<body> tag, for status bar content, 74
bold() method, of string, 442
bookmarks, for Ajax application, 274
Book of JavaScript website, 16
About the Author link, 68
array use, 124
pull-down menu, 101
rollovers, 52, 54
timer, 148, 155–157
tip box, 136–139
tracking visits, 216
Boole, George, 38
Boolean expressions, 38–40
details, 47–48
OR (||) in if-then statements, 43–44
AND (&&) in if-then statements, 44–45
border property, of image object, 429
borders, for drop-down menus, 259
Bosworth, Alex, 275
branching, 38. See also if-then statements
browser. See web browsers
-server communications
Ajax style, 264
problems, 323–324
synchronous, requests in, 264
traditional style, 263–264
sniffers, 36, 50
-specific content, provided by
Netscape, 48–50
browser_info variable, 36
browserLanguage property, of navigator
object, 434
bug-eating script, in Salon, 186–189
bugs. See debugging
button
element, 416
property
for event object, 423
for mouse events, 252
buttons
for closing windows, 73
on forms, 103, 104
C
cache of browser, preloading
images to, 63
calculator, from form elements,
109–110
camel-caps notation, 85
canceling alarm, 149–150
caret (^), for beginning of regular
expression pattern, 205
Cascading Style Sheets (CSS), 234–237
to position div element, 235–237
tutorials, 406
case, of HTML tags, 244
case sensitivity
of function names, 85
of variable names, 18, 23
ceil() method, of math object, 433
center of screen for window placement,
78–80
function for, 86
CGI (Common Gateway Interface)
scripting, 5–7
472 INDEX
characters
checking email for illegal, 199
illegal XML, 284–285, 357
charAt() method, 198–199
of string, 442
charCodeAt() method, of string, 442
checkalpha() function, 211
checkBlank() function, 211
checkbox element, 417
checkboxes, 112–114
AntWeb’s process for checking,
133–134
array for storing, 124
checked Boolean attribute of, 112
on forms, 103
checked property
of checkbox element, 417
of radio element, 438
checkrangenumeric() function, 211, 212
child nodes
in W3C DOM, 245
in XML, 288
childNodes array, of HTMLElement
object, 427
childNodes property, of nodes, 249
className property, of HTMLElement
object, 427
clearing time-outs, 153
clearInterval() function, 417
cleartext, 360
clearTimeout() function, 149–150,
151, 417
for animation, 239–241
click() method
of button element, 416
of checkbox element, 417
of HTMLElement object, 428
of radio element, 439
clicking link, to hide div element,
238–239
client-server applications, Internet as
bottleneck, 359
client-side
Ajax, 291
programs
JavaScript for Google Suggest
application, 309–313
vs. server-side, 359
clientX property
of event object, 253, 254, 423
of mouse event, 252
clientY property
of event object, 253, 254, 423
of mouse event, 252
clock
checking local time on, 26
with timing loops, 154–155
cloneNode() method, 249–250
of HTMLElement object, 428
cloning nodes, 249
close() method, 72–73
of document object, 422
of window object, 451
closed property, of window object, 448
closing windows, 72–73
codeBase property, of applet element, 413
code property, of applet element, 413
color, background, event handler to
customize, 57–58
colorDepth property, of screen object, 439
cols
element, 172
property, of textarea element,
106, 447
comments in code, 364–365
in HTML, 11
in JavaScript, slashes for, 10
Common Gateway Interface (CGI)
scripting, 5–7
communication between browser and
server
Ajax style, 264
CGI requirements for, 5
problems, 323–324
traditional style, 263–264
companion website
brwsniff.js file, 36
credit card script, 196
date validation functions, 203
isValidUrl(), 202
substring() for checking credit card
numbers, 202
complete property, of image object, 429
concat() method
of array element, 416
of string, 442
confirm() method, 418
constants, 161
cookieEnabled property, of navigator
object, 434
cookie property, of document object, 218,
219, 421
INDEX 473
cookies
basics, 216–217
capabilities and limitations, 217–218
for data storage, vs. webserver,
300–301, 302
example, 216
libraries, 225–226
reading, 218–219, 224
into array, 221
resetting, 219–220
and security, 360
setting, 218
duration of, 222–224
multiple, 225
multiple pieces of information,
220–222
for shopping cart, 226–232
uses, 215
viewing, 217
Coordinated Universal Time (UTC)
date and time
format for cookie expiration date,
222–223
methods for, 419
copyhistory feature of window, 451
Corel WordPerfect, 8
cos() method, of math object, 433
countdown script, for Space.com,
157–161
createAttribute() method, of document
object, 422
createElement() method, of document
object, 422
createTextNode() method, 246, 422
credit card script, 196, 202
CSS (Cascading Style Sheets), 234–237
to position div element, 235–237
tutorials, 406
ctrlKey property
for event object, 423
of keyboard event, 251
curly brackets ({}) in functions, 85
placement of, 41–42
custom object, creating, 210
cut-and-paste, and bugs, 378
D
data, in-context manipulation
with Ajax, 276
data entry to form
checking for radio buttons, 195
text field and scrollable lists
check, 195
validation, 194
date
automatically changing, 15–16
code for writing, 27–29
formatting, 202–203
validation functions, 203
writing to web page, 26–30
Date
header, 319
object, 26, 418–421
date and time, methods for, 419
debugging, 18
Ajax in Firefox, 374
avoiding common mistakes, 365–367
bug search process, 367–376
printing variables, 367–369
fixing bugs, 376–378
good coding practices and, 364–365
JavaScript, 370–374
quotes ("), 366–367
with Venkman JavaScript
debugger, 373
with web browser bug detector, 370
declaring
image_array, 166
variables outside functions
risks from, 163
for time-outs, 153–154
decrementing, shortcuts for, 137
default option
for select element, 105
for switch statement, 213
defaultStatus property, of window
object, 449
defaultValue property
of password element, 436
of radio element, 439
of textarea element, 447
deleting
cookies, 224
elements from page, 247–248
frames, 179–180
dependent window, 452
detachEvent() method, of HTMLElement
object, 428
DHTML (dynamic HTML), 233
real-world examples, 234
dialog boxes
alert() method to display, 413
confirm() method to create, 418
474 INDEX
Dictionary.com form validation,
207–213
directories feature of window, 451
in browser, 72
dir property, of HTMLElement object, 427
disabled property, of HTMLElement
object, 427
dispatchEvent() method, of HTMLElement
object, 428
displaying script results, 19–20
<div> tag, 235
adjusting size based on contents,
295–296
changing contents, 241–242
clicking link to hide, 238–239
hiding, 237
layering, 237–238
and line breaks, 242
for menu option, 259
moving, 239
divide and conquer problem-solving
technique, 338–339
division
remainder calculation for, 160
slash (/) for, 18
Doctors Without Borders website, 100
pull-down navigation tool, 120
documentElement property, of document
object, 421
document object, 60, 421–422
cookie property, 218, 219
storing two cookies in, 225
createElement(), 245
write() method, 30
vs. redirection, 37
Document Object Model (DOM), 53, 60
advanced techniques, 244–250
arrays in, 125
cloning and replacing nodes,
249–250
hierarchy, 161
looping through lists, 249
node properties, 249
for page manipulation, 250
W3C, overview, 245–246
document property
of HTMLElement object, 427
of window object, 449
documents, saving as text only, 9
Dojo, 274
dollar sign ($), for end of regular
expression pattern, 205
DOM. See Document Object
Model (DOM)
domain property, of document object, 421
domains, multiple, and cookies, 224
dot notation, for windows, 69
dots (.)
in object names, 60, 69
in regular expressions, 204
downloading files, asynchronously for
request objects, 271–274
Dreamweaver, 8
drop-down menus. See pull-down (drop-
down) menus
duration of cookie, setting, 222–224
dynamic HTML (DHTML), 233
real-world examples, 234
E
E property, of math object, 433
ECMA (European Computer
Manufacturers Association), 8
elements
adding in middle of page and
removing, 247–248
XML, 284, 288
extracting information from,
289–290
root element, 285
elements array, 125, 423
of form object, 425
else,if-then statements with, 40–41
else-if,if-then statements with, 41
email
checking address for valid
formatting, 197–198
checking for illegal characters, 199
JavaScript and, 8
embeds property, of document object, 421
empty XML element, 284
em unit, font size and, 293
encapsulation, 95
encoding in XML header, 283
encoding property, of form object, 425
encryption, for passwords, 359–360
end of file, PHP function for, 322
entities in XML, 284–285
equal (==) symbols, 39
in logical tests, 366
equality test, troubleshooting, 39
error messages
from HTML <script> tag, 10
for To Do list application, 338
INDEX 475
errors. See also debugging
from global variables, 161
from undefined values, 130
escape() function, 218, 311, 423
European Computer Manufacturers
Association (ECMA), 8
European Space Agency (ESA), 15, 116
date on website, 30–31
eval() function, 312, 423
event handler, 54, 406
adding with JavaScript, 254–257
attaching function to, 254–255
to customize background color, 57–58
event object, 250–254, 423–424
events
for Ajax, 263
as function parameter, 255
triggering, 53–58
types, 53–55
variables for storing, 255
exception handling, tutorials, 406
exp() method, of math object, 433
expiration date for cookie, 222–223
and deleting cookie, 224
Extensible Markup Language. See XML
(Extensible Markup Language)
F
false value, storing in variable, 47
fclose() function (PHP), 322
features parameter, of open() method,
70–72
feof() function (PHP), 322
fgColor property, of document object, 421
fgets() function (PHP), 323
file handling (PHP), 321–323
filemtime() function (PHP), 329
FileUpload form element, 424
find() method, of window object, 453
Firebug, 376
fireEvent() method, of HTMLElement
object, 428
Firefox
case of HTML tags, 244
-compatible web browser, 49
console for error display, 370
debugging Ajax in, 374
ECMA standard compliance by, 8
navigator.appName variable for, 35
request object, 265
treatment of XML document white
space, 291
updating web page, 320–321
user input to form text element, 245
users, 412
windows in, 72
firstChild property
of HTMLElement object, 427
of nodes, 249
fixed() method, of string, 442
Flanagan, David, 3, 379
Flash, 7
Flickr.com, 280, 281
headers for, 318–319
floating-point number, for browser
versions, 35
floor() method, of math object, 159, 433
focus() method, 74
of FileUpload element, 424
of HTMLElement object, 428
of password element, 437
of textarea element, 447
fontcolor() method, of string, 442
font size, and em unit, 293
fontsize() method, of string, 442
<font> tag, 244
fopen() function (PHP), 321
for loops, 132, 150
form
object, 424–426
property
of button element, 416
of checkbox element, 417
of option object, 435
of password element, 436
of textarea element, 447
form elements
array for, 125
attaching handlers to, 256
checking for completion, 192–196
for event handling, 116–117
id attribute for, 119
names for, 107
number on page, 131
parseInt() function with, 152–153
reading and setting, 109–116
select element, 104–105
textarea element, 106
forms
adding and removing elements, 248
for Ajax, 316
basics, 101–106
buttons, 103, 104
checkboxes, 103
radio buttons, 103, 104
text fields, 102
476 INDEX
forms, continued
example, 100–101
and JavaScript, 107–109
and POST method, 315
sending to server-side program,
195–196
forms array, of document object, 421
form validation, 191
check for mandatory information,
192–196
Dictionary.com, 207–213
example, 192
Fortune magazine website, 259
forward() method
of history element, 427
of window object, 453
frameborder, 183
frames, 169
basics, 170–172
busting, 179–180
changing contents of two at once,
176–177
example, 170
and image swapping, 174–175
and JavaScript, 172–173
nesting, 177–178, 188
referring to, 173
in JavaScript, 179
storing information with, 181–184
frames array, of window object, 449
<frameset> tag, 178
<frame> tag, noresize attribute, 183
fromCharCode() method, of string, 443
functions, 21–25
anonymous, 268, 272, 327, 347
attaching to event handlers, 254–255
basic structure, 84–85
built-in date, 26
called by frame when declared in
another frame, 184
declaring variables for time-outs
outside, 153–154
determining when to use, 96
example, 85–86
flexibility for, 86–91
getting information from, 91–92
hiding variables inside, 95
for multiple pages, 228
names for, 85, 365
parameters for, 25–26
adding, 87–89
importance of, 348
road map for planning, 339
as shortcuts, 84–86
text file for, 228
fwrite() function (PHP), 321
G
Garrett, Jesse James, 263
GedML, 285
Geography Markup Language
(GML), 285
GET request (Ajax), creating Google
Suggest application with,
308–314
GET request (PHP)
reading inputs of, 306–307
to send simple input, 305–307
getAttribute() method, of HTMLElement
object, 428
getAttributeNode() method, of
HTMLElement object, 428
getDate() method, 27, 418
getDay() method, 27, 418
getElementById() method, 119, 238–239
of document object, 422
getElementsByName() method, of document
object, 422
getElementsByTagName() method, 243, 244,
246, 289, 343, 348, 422, 428
getFullYear() method, 418
getHours() method, 27, 31, 155, 418
getMinutes() method, 27, 155, 418
getMonth() method, 27, 29, 419
getResponseHeader() method, 319
getSeconds() method, 27, 155, 419
getTime() method, 27, 156–157, 159,
273, 419
getUTCDate() method, 419
getUTCDay() method, 419
getUTCFullYear() method, 419
getUTCHours() method, 419
getUTCMinutes() method, 419
getUTCMonth() method, 419
getUTCSeconds() method, 419
getYear() method, 26, 27, 93, 419
GIF, using invisible, 259
global match, for regular expression, 206
global variables, 160–161
risks from, 163
gmdate() function (PHP), 329
GML (Geography Markup
Language), 285
GoLive, 8
INDEX 477
go() method, of history element, 427
Goodman, Danny (The Javascript
Bible), 412
Google
Maps, 261, 262, 274
in-context data manipulation, 276
Suggest, 281–282
with Ajax GET request, 308–314
creating application
JavaScript for homemade
application, 309–313
processing results, 312
for translation, 292–296
URL to return set of search terms,
305–306
graphics
JavaScript limitations, 8
preloading, 62–64
referring to by number, 126
src property, 61
swapping, 58–59
and frames, 174–175
between windows, 81
working with multiple, 59–60
Greasemonkey, 374, 375
greater than (>) symbol, 39
grouping characters, in regular
expressions, 205–206
H
hasChildNodes() method, of HTMLElement
object, 428
hash mark (#), in href tag, 56
hash property
of <a> tag, 413
of location object, 431
HEAD element, in W3C DOM, 245
header() function (PHP), 319
head of HTML page
declaring functions in, 86
JavaScript tags in, 10
height of screen, determining, 78
height property, 451
of applet element, 413
of browser window, 72
of HTMLElement object, 427
of image object, 430
of <img> tag, 64
of screen object, 439
help windows, 68, 73
hidden form element, 426
hiding
JavaScript from browsers without
capability, 11
variables inside functions, 95
history element, 426–427
history property, of window object, 449
home() method, of window object, 453
HomeSite, 8
hostname property
of <a> tag, 413
of location object, 431
host property
of <a> tag, 413
of location object, 431
hotkeys, for window, 452
href property
of <a> tag, 413
hash mark (#) in, 56
of location object, 431
hspace property
of applet element, 413
of image object, 430
.htm file extension, saving
documents with, 9
HTML (Hypertext Markup Language)
<!-- and // --> for comments, 11
and JavaScript, 30
name parameter, for open()
method, 70
tags, case of, 244
for To Do list application, 337–338
tutorials, 406
vs. XML, 284
HTML elements
returning array of, 243
vs. <script> tags, 254
in W3C DOM, 245
.html file extension, saving
documents with, 9
HTMLElement object, 427–429
HTTPS protocol, 360
Hypertext Markup Language. See
HTML (Hypertext Markup
Language)
I
IDP (Internet Dictionary Project), 285
id property
assigning to HTML block, 235
for elements in DOM, 245
for form elements, 119
for HTMLElement object, 427
478 INDEX
IE. See Internet Explorer (IE)
if-then statements, 38–42
for checked property, 112
with else, 40–41
with else-if, 41
nesting, 40
OR and AND operators, 42–45
vs. switch, 212
image_array, declaring, 166
image maps, 169, 184–186
basics, 185
example, 170
and JavaScript, 186
image objects, 429–430
array for, 125
images. See graphics
images array, 125
of document object, 421
<img> tag
alt attribute of, 64
height attribute of, 64
id attribute of, 119
onMouseOver or onMouseOut inside, 62
width attribute of, 64
in-caps notation, 85
incrementing
in loop, 132, 138
shortcuts for, 131
incubation, 378
indexOf() method, 48–49, 196–198
of string, 443
substring() method used with,
200–201
infinite loops, 131
information
extracting from XML elements,
289–290
frames for storing, 181–184
initializing loops, 132
innerHeight property, of window
object, 449
innerHTML property
of div element, 241, 244–245, 246
of HTMLElement object, 427
innerWidth property, of window object, 449
<input> tag
for Ajax form, 316
for button to close window, 73
insertBefore() method, 247, 248
of HTMLElement object, 429
interactivity
options, 191
on website, 2
Internet, as bottleneck, 359
Internet Dictionary Project (IDP), 285
Internet Explorer (IE)
case of HTML tags, 244
dates in, 93
debugger for, 374
ECMA standard compliance by, 8
error icon, 370
mouse button clicks, 253
moveTo() method in, 80
navigator.appVersion variable for, 35
problems updating web page,
320–321
request object, 265
size of images for swapping, 59
srcElement property, 257
users, 411
variables for storing event, 255
VBScript for, 7
viewing Cookies directory for, 217
webserver for sending XML to, 291
years in, 27
invisible frames, storing
information with, 181–184
invisible GIFs, 259
isMap element, 185
isMap property, of image object, 430
isNaN() function, 153, 211, 430
italics() method, of string, 443
item() method, of HTMLElement object, 429
J
Java, 7
for Ajax applications, 409
javaEnabled method, of navigator
object, 434
JavaScript
in Ajax, 265
alternatives, 5–7
basics, 3–5
browser-specific methods and
properties, 412
browser variations in, 8
code examples, 407
debugging, 370–374
deciding to use, 1–2
first example, 12
and forms, 107–109
and frames, 172–173
hiding from browsers without
capability, 11
and HTML, 30
INDEX 479
and image maps, 186
limitations, 7–8
links for browsers with JavaScript
turned off, 57
permissions, vs. CGI, 7
and PHP, 305
read-only vs. read-write
properties, 412
slashes (/), for comments, 10
tutorials, 406
widgets and libraries, 408–409
The JavaScript Bible (Goodman), 412
JavaScript: The Definitive Guide
(Flanagan), 3, 379
join() method, of array element, 415
Justice, Chris, 293
K
keyboard, event handlers, 250–252
keyCode property
for event object, 423
for keyboard event, 251
key-value pairs
for GET, 306
for POST, 316
L
lang property, of HTMLElement object, 427
language property, of navigator
object, 434
lastChild property
of HTMLElement object, 427
of nodes, 249
lastIndexOf() method, 196, 443
Last-Modified header, 319
lastModified property, of document
object, 421
layering <div> tags, 237–238
left
component, 236
property
of browser window, 72
of div element, 239
length property
of array element, 126, 414
of form object, 425
of history element, 427
of radio element, 439
of select element, 440
of string, 441
less than (<) symbol, 39
libraries, for cookies, 225–226
limits of arrays, testing, 137–138
line breaks
in alert box, 195
and <div> tag, 242
link
object, 431
property, for document object, 422
link events, 53
link() method, of string, 443
links array, for document object, 422
link tag. See also <a> tag
to open and center window, 84
status property for information
about, 75
target element of, 70
var inside, 74
Linux, webserver and PHP for, 272
literal numbers, minimizing use, 131
LN2 property, of math object, 433
LN10 property, of math object, 433
localeCompare() method, of string, 444
Local Variables window in Venkman
JavaScript debugger, 370,
371, 372
location
in browser window, 71, 72
for window, 451
location object, 431–432
LOG2E property, of math object, 433
Log4Ajax, 370
LOG10E property, of math object, 433
logging in and out, for To Do list
application, 340–341
logging libraries, 370
logical tests, 38. See also if-then
statements
log() method, of math object, 433
looping through lists, with DOM, 249
loops, 127
array.length used in, 131
for loops, 132
incrementing in, 132, 138
infinite, 131
initializing, 132
nesting, 140
performance and, 134
timing, for clock, 154–155
while loops, 128–131
lowercase letters, in regular
expressions, 204
lowsrc property, of image object, 430
480 INDEX
M
Macintosh, windows in, 72
Macintosh OS X, webserver and
PHP for, 272
Macromedia, 7
Mad Lib, 141–142
MAMP package, 272
mandatory information, checking for
completion, 192–196
maps. See image maps
markup language, 285
match() method, 206, 444
math object, 432–433
and floor() method, 159
and random() method, 241
maxLength property
of password element, 436
of textarea element, 447
max() method, of math object, 433
MAX_VALUE property, of Number object, 434
McEvoy, Chris, 275
menubar for window, 71, 72, 452
menus. See pull-down (drop-down)
menus
metadata, 318
method property, of form object, 425
methods, 26
Microsoft
Internet Explorer. See Internet
Explorer (IE)
Script Editor, 374
Visual Web Developer Express
Edition, 376
Word, 8
min() method, of math object, 433
minus sign (-), 18
MIN_VALUE property, of Number object, 434
MOD operator, 160
modulus, 160
mortgage calculator, 110–111
mouse
detecting position, 253
event trigger from moving, 54–55
mouse events, 252–254
moveBy() method, 78, 453
moveTo() method, 77–78, 80, 453
moving
div elements, 239
images, determining direction, 241
windows, 77–80
to front or back of screen, 74
Mozilla Firefox–compatible web
browser, 49
ECMA standard compliance by, 8
windows in, 72
multiple domains, and cookies, 224
multiple property, of select element, 440
multiplication, asterisk (*) for, 18
MySQL database, 272
N
name property
<a> tag, 413
applet element, 413
button element, 416
checkbox element, 417
FileUpload element, 424
form object, 425
hidden element, 426
image object, 430
password element, 436
radio element, 104, 439
select element, 440
textarea element, 447
window object, 449
names
elements, vs. id attributes, 119–120
form elements, 107
functions, 85
graphics, 58, 59
<option> tag, 108–109
radio buttons, 108
variables, 17–18, 364
date, 29
vs. function name, 85
windows, 69, 73
XML elements, 284
naming convention, consistency in,
365–366
NaN (Not a Number), 153, 211
property, of Number object, 434–435
navigation. See also pull-down (drop-
down) menus
in Ajax, 275
forms for, 100
in XML documents, 289
navigator
object, 433–434
appName variable, 35
appVersion variable, 35
userAgent variable, 36
property, of window object, 449
INDEX 481
NEGATIVE_INFINITY property, of Number
object, 435
nesting
frames, 177–178, 188
if-then statements, 40
loops, 140
XML elements, 284
Netscape
browser-specific content, 34, 48–50
dates in, 93
determining version, 49
JavaScript creation by, 7, 8
size of images for swapping, 59
viewing cookies.txt file for, 217
years in, 27
.NET technology, for Ajax
applications, 410
Network for Good website, 68
nextSibling property
of HTMLElement object, 428
of nodes, 249
nodeName property
of HTMLElement object, 428
of nodes, 249
nodes, in W3C DOM, 245
nodeType property
of HTMLElement object, 428
of nodes, 249
nodeValue property
of HTMLElement object, 428
of nodes, 249
of XML text node, 288
noresize attribute, of <frame> tag, 183
Notepad, 2, 8
not equal (!=) symbol, 39
null string (""), 195
Number object, 434–435
O
object-oriented programming
(OOP), 406
objects. See also Document Object
Model (DOM)
creating, 26
properties of, 61
windows as, 69
offscreenBuffering property, of window
object, 450
offset properties, of HTMLElement object,
428
onBlur handler
FileUpload element, 424
password element, 437
textarea element, 447
of window object, 453
onChange event, 116, 118
for menu selection, 144
onChange handler
FileUpload element, 424
password element, 437
select element, 440
textarea element, 447
onClick event, 54, 116, 254
to call JavaScript, 243
to trigger multiple events, 58
onClick handler
button element, 416
checkbox element, 417
radio element, 439
onError handler, of window object, 453
onerror property, of window object, 449
onFocus handler
FileUpload element, 424
password element, 438
textarea element, 447
of window object, 453
onKeyDown event handler, 250
onKeyUp event handler, 250, 293
online property, of navigator object, 434
onLoad event, 156
onLoad handler, 256
of window object, 453
onMouseDown event, 55
onMouseDown handler, of button
element, 416
onMouseMove event, 55
onMouseOut event, 54–55
in <img> tag, 62
in link, 64
onMouseOver event, 54–55
for changing frame, 172–173
in <img> tag, 62
in link, 64
for status property, 75
onMouseUp event, 55
onMouseUp handler, of button
element, 416
onReadyStateChange handler
of request object, 267–268
of XMLHttpRequest object or
ActiveXObject, 454
482 INDEX
onReset handler, of form object, 426
onResize handler, of window object, 453
onSubmit event, 116–117
onSubmit handler, of form object, 426
onUnload handler, of window object, 453
OOP (object-oriented
programming), 406
opener property, of window object,
75–77, 450
opening windows, 69–72
function for, 86
open() method, 69–72
of document object, 422
of request object, 266, 268, 305, 316
of window object, 451
of XMLHttpRequest object or
ActiveXObject, 454
Opera
ECMA standard compliance by, 8
request object, 265
and user input to form text
element, 245
windows in, 72
option object, 435–436
options[] array, of select element,
439–440
options property, for pull-down menu
or scrollable list, 115
<option> tag
names for, 108–109
for pull-down menu items, 104
order form, 6
OR operator (||), in if-then statements,
43–44
outerHeight property, of window
object, 450
outerWidth property, of window object, 450
owner of To Do list, 332
P
pages
DOM for manipulating, 250
number of form elements on, 131
redirecting visitors to other, 37
pageXOffset property, of window
object, 450
pageX property
of event object, 252, 254, 423
of mouse event, 252
pageYOffset property, of window
object, 450
pageY property
of event object, 252, 254, 423
of mouse event, 252
parameters for functions, 25–26
adding, 87–89
using multiple, 90–91
parent
of frame, 179
property, of window object, 450
parentheses ()
for Boolean tests, 44
in functions, 85
variables inside, 89
parentNode property
of HTMLElement object, 428
of nodes, 249
parent window, accessing, 75–77
parseFloat() method, 35, 436
parseInt() method, 48, 79, 239, 241, 436
with form elements, 152–153
password element, 436–438
passwords, encryption for, 359–360
pathname property
of <a> tag, 413
of location object, 431
path of cookie, 224
percent sign (%), as MOD operator, 160
performance, loops and, 134
periods (.)
in object names, 60, 69
in regular expressions, 204
“Permission denied” error, avoiding,
302–303
permissions
CGI vs. JavaScript, 7
webserver actions and files, 322
phone book, associative array for,
142–144
PHP: Hypertext Preprocessor (PHP), 303
for Ajax applications, 409
basics, 304–305
built-in variables, 307
for contacting third-party webservers,
308–309, 313–314
for creating and adding text file
contents, 321–322
file handling, 321–323
GET request to send simple input,
305–307
and JavaScript, 305
on local computer, 271
setup, 272
INDEX 483
to query Google, 308–309
reading
files, 322–323
inputs of GET request, 306–307
server-side code, 328–329
strings in, 305
for To Do list application, 336–337
pictures. See graphics; <img> tag
PI property, of math object, 433
pixelDepth property, of screen
object, 439
platform property, of navigator
object, 434
plus sign (+)
for addition, 18
for connecting strings, 20–21
in regular expressions, 205
pop() method, of array element, 416
pop-up blocking software, 76
port property
of <a> tag, 413
of location object, 432
position component, 236
positioning, reference point for, 236
position on page, CSS for, 234
POSITIVE_INFINITY property, of Number
object, 435
POST request (PHP), 305
and Ajax, 314–318
for To Do list application, 337
pound sign (#), in href tag, 56
pow() method, of math object, 433
preloading graphics, 62–64
previousSibling property
of HTMLElement object, 428
of nodes, 249
printing variables, with alert()
statements, 367–369
print() method, of window object, 453
programming
divide and conquer problem-solving
technique, 338–339
function road map, 339
prompt box, 24, 25
asking for visitor’s name with, 43
prompt() method, 24–25, 91, 141, 438
properties. See also individual properties
of objects, 61
protocol property
of <a> tag, 413
of location object, 432
prototype property, of array
element, 414
pull-down (drop-down) menus,
104–105, 118, 257–259
array for options, 125
borders, 259
DHTML for, 234
on Doctors Without Borders
website, 120
reading and setting, 115–116
push() method, 295
of array element, 416
Q
question mark (?), in regular
expressions, 205
quiz, with checkboxes, 112–114
quotes (" and ')
debugging, 366–367
for events, 55–56
inside quotes, 56
for text in write() method, 20
variables and, 30, 92
R
radio buttons
checking, 195
determining selected, 119
on forms, 103, 104
names for, 108
reading and setting, 114
referring to first in set, 124
radio element, 438–439
random() method, of math object, 241, 433
random numbers, generating, 240–241
reading cookies, 218–219, 224
reading files
in Ajax, 327
in PHP, 322–323
readOnly property
of password element, 436
of textarea element, 447
read-only properties, in JavaScript, 412
read-write properties, in JavaScript, 412
readXMLFile.php program, 341
readyState property
of request object, 267
of XMLHttpRequest object or
ActiveXObject, 454
redirecting visitors to other pages, 37
based on browser used, 45–46
reference point for positioning, 236
referrer property, of document
object, 422
484 INDEX
regular expressions, 196, 203–207, 294
^ to begin, 205
$ to end, 205
grouping characters, 205–206
match() method, 206
repeating items, 204–205
relative positioning, 236–237
releaseCapture() method, of HTMLElement
object, 429
reload() method, of location object, 432
rel property, of <a> tag, 413
remainder, calculation for division, 160
remove methods, of HTMLElement object,
428–429
removing
cookies, 224
elements from page, 247–248
frames, 179–180
repeating
items in regular expressions, 204
timed actions, 150–154
replaceChild() method, of HTMLElement
object, 429
replace() method
of location object, 432
of string, 444
replacing nodes, 249
request object (Ajax), 265
action when answered, 266–268
creating, 265–266
doAjaxCall() function to create, 269
downloading files asynchronously,
271–274
JavaScript called after answer to, 268
responseText property, 269
responseXML property, 269
sending request, 268–269
and server-side program, 266
webserver to circumvent
limitations, 302
$_REQUEST variable (PHP), 307
reserved words, 18, 366
reset element, 416
reset() method, of form object, 426
resizable feature, for window, 452
resizeBy() method, 77
of window object, 453
resizeTo() method, 77
of window object, 453
resizing windows, 71, 72, 77
response header (XML), 318
responseText property
of request object, 269, 320
of XMLHttpRequest object or
ActiveXObject, 454
responseXML property
of request object, 269, 291, 320
of XMLHttpRequest object or
ActiveXObject, 454
results of script, displaying, 19–20
return, 92, 159
return false, 57
return true, in onMouseOver, 75
return values from function, 91
reverse() method, of array element, 415
rev property, of <a> tag, 413
riddle game, 149–150
rollovers, 51–65
example, 52–53
on Tin House website, 64
triggering events, 53–58
root element, for XML document,
285, 288
round() method, of math object, 433
rows
attribute, of textarea element, 106
element, 172
property, of textarea element, 447
RSH, 274
Ruby, 410
S
Safari
ECMA standard compliance by, 8
navigator.appVersion variable for, 35
request object, 265
windows in, 72
Salon
bug-eating script, 186–189
image maps, 188
nested frames, 188
saving
documents as text only, 9
state in Ajax, 276
Scalable Vector Graphics (SVG), 285
screen
object, 439
property, of window object, 450
screen display, determining size, 78
screenLeft property, of window
object, 450
screenTop property, of window object, 450
screenX property
of event object, 423
of window object, 450
INDEX 485
screenY property
of event object, 423
of window object, 450
scripts, signed, 412
<script> tag
and <!-- and //-->, 36
and </script> tag, 10
vs. HTML elements for
JavaScript, 254
<script language = "Javascript">, 9
<script type = "text/javascript">,
9–10
scrollable lists
array for options, 125
checking, 195
reading and setting, 115–116
scrollbar for window, 71, 72, 452
scrollBy() method, of window, 452
scrollHeight property, of HTMLElement
object, 428
scrollLeft property
of body object, 253
of HTMLElement object, 428
scroll() method, for window, 452
scrollTo() method, of window object, 453
scrollTop property
of body object, 253
of HTMLElement object, 428
scrollWidth property, of HTMLElement
object, 428
scrollX property, of window object, 450
scrollY property, of window object, 450
search() method, of string, 444
search property
of <a> tag, 413
of location object, 432
secure webserver, 360
security
restrictions on CGI scripts, 6–7
for server-side programs, 359–360
selectedIndex property, of select
element, 116, 440
selected property
of option object, 435
for pull-down menu or
scrollable list, 115
select elements, 439–440
on forms, 104–105
select() method
of FileUpload element, 424
of password element, 437
of textarea element, 447
<select> tag
names for, 108
for pull-down menu, 104
self property, 180
of window object, 450
semicolon (;)
in JavaScript, 17
in XML entity, 284
send() method
of request object, 268–269
of XMLHttpRequest object or
ActiveXObject, 454
sendRPCDone() function, 311–312, 313
servers
JavaScript and, 7–8
overloaded by CGI scripts, 6
server-side
files, web page update after change,
325–329
programming language, 303
programs, 299
Ajax real-world examples, 300–301
vs. client-side, 359
JavaScript enhancements for, 191
PHP code, 328–329
PHP file for Google query, 309
and request object, 266
security for, 359–360
sessions, 360
setAttribute() method, 245
of HTMLElement object, 429
setCapture() method, of HTMLElement
object, 429
setInterval() method, 440
set methods, of Date object, 420
setTimeout() method, 148, 151, 241,
367, 441
for animation, 239–241
safe way to call function with,
164–166
shift() method, of array element, 416
shiftKey property
of event object, 423
of keyboard event, 251
shopping cart with cookies, 226–232
adding item, 227–229
checkout page, 229–230
readTheCookie() function, 230–231
shortcuts
for decrementing, 137
for incrementing, 131
this as, 117–118
486 INDEX
siblings, of XML nodes, 290
signed scripts, 412
SimpleText, 2, 8
sin() method, of math object, 433
size
of images, 59, 63
of screen, determining, 78
of windows, changing, 77
size property, of password element, 436
slash (/)
for division, 18
double (//), for JavaScript
comments, 10
for regular expressions, 203
slice() method
of array element, 416
of string, 444
slide show, timed loops for, 161–163
small() method, of string, 444
Snoopy PHP library, 314
sort() method, of array element, 415
source code of web pages, viewing, 2
Space.com
clock, 147–148
countdown script, 157–161
Spanish-language tutorial, 176–177
<span> tag, 242
Spiegelberg, Eric, 370
splice() method, of array element, 416
split() method, 202–203, 296, 444
SportsML, 285
SQRT2 property, of math object, 433
sqrt() method, of math object, 433
srcElement property
for event object, 423
for Internet Explorer, 255
src property, of image, 61, 430
start() method, of applet element, 414
state, saving in Ajax, 276
statements, 17
loop for executing multiple
times, 127
status bar of browser window, 71, 72
changing content of, 74
status of window, 452
status property
of request object, 323–324
of window object, 74–75, 450
of XMLHttpRequest object or
ActiveXObject, 454
stop() method
of applet element, 414
of window object, 453
strings, 20–21, 196–207, 441–445
breaking apart, 196–203
building for date, 29–30
checking for string in, 48–49
debugging quotes, 366–367
form element contents as, 152
matching patterns with regular
expressions, 203–207
in PHP, 305
stripslashes() function, 337
structured document, 283
style
element (HTML), 235
object, 445–446
property, of HTMLElement object, 428
styleSheets array, of document object, 422
sub() method, of string, 444
submit element, 416
submit() method, of form object, 426
subscribers to To Do list, 332
substring, 196
substring() method, 200–202
of string, 445
substr() method, of string, 444
subtraction, 18
from variable, 137
Sun Microsystems, Java creation by, 7
sup() method, of string, 445
SVG (Scalable Vector Graphics), 285
swapping image, with link in other
window, 174
switch statement, 212–213
synchronous browser-server communi-
cations, requests in, 264
systemLanguage property, of navigator
object, 434
T
tabIndex property, of HTMLElement
object, 428
Ta-da List, 300–301. See also To Do list
application
tagName property, of HTMLElement
object, 428
tan() method, of math object, 433
target property
of <a> tag, 413
for browser, 255
for event object, 424
of form object, 425
testing
limits of arrays, 137–138
in loop, 132
INDEX 487
test() method, 203–204
text
adding to element, 246
editor, 2, 8–9
element
in suggest application, 293
web browser and user input to, 245
fields
checking, 195
on forms, 102
reading information from,
109–110
setting value, 110–111
files
containing functions, 228
PHP for creating and adding
contents, 321–322
node
for spaces in XML, 291
in XML, 288
text
form element, 446
property, of option object, 436
textarea element, 447
on forms, 106
setting and reading, 111
text only, saving documents as, 9
Thau, Robert S., 272
third-party webserver, contacting with
Ajax and PHP, 308–309
this, 243, 448
as shortcut, 117–118
time and date. See also UTC (Coordi-
nated Universal Time)
automatic update, 16
calculating, 160
code for writing, 27–29
timed actions, repeating, 150–154
timeouts
clearing, 153, 345
declaring variables for those outside
functions, 153–154
timing
events
example, 147–148
setting alarm, 148
Space.com countdown script,
157–161
loops
for animation, 239–241
clock with, 154–155
for slide show, 161–163
var and, 163–164
Tin House website, rollovers, 64
tip box on Book of JavaScript website,
136–139
titlebar for window, 452
title property, of document object, 422
To Do list application
client-side code
adding content to web page, 352
adding new item, 357–359
displaying available lists, 346–349
displaying specific list, 349–352
functions for logging in, 341–343
HTML, 337–338
JavaScript, 338–359
limitations on manipulating XML
documents, 356–357
logging in and out, 340–341
processing list changes, 352–356
strings, 351–352
data files, 334–336
To Do list file, 335–336
userInfo.xml, 334–335
features, 332–334
server-side PHP programs, 336–337
Ta-da List, 300–301
toExponential() method, of Number
object, 435
toFixed() method, of Number object, 435
toGMTString() method, 223, 421
toLocaleLowerCase() method, of
string, 445
toLocaleUpperCase() method, of
string, 445
toLowerCase() method, of string, 445
toolbar, for window, 71, 72, 452
top
attribute, for browser window, 72
component, 236
object, 179
property
of div element, 239
of window object, 451
top, moving window to, 74
toPrecision() method, of Number
object, 435
toString() method
of array element, 416
of Number object, 435
toUpperCase() method, of string, 445
toUTCString() method, 223, 421
translation, suggest application for,
292–296
488 INDEX
triggering events, 53–58
for form elements, 116
troubleshooting
alert() method for, 22–23
equality test, 39
opening windows, 76
window feature appearance, 71
true value, storing in variable, 47
tutorials, web resources, 405–406
typeof operator, 211
type property
button element, 416
checkbox element, 417
event object, 424
keyboard event, 251
password element, 436
radio element, 439
textarea element, 447
U
undefined, 130
undefined variable, 23–24
unescape() function, 218, 448
unShift() method, of array element, 416
updating web page, after server-side file
change, 325–329
URL
parameter, for open() method, 70
property, for document object, 422
URLs
for Ajax application, 274
avoiding spaces in, 306
passing input in, 305–306
in window status bar, 74
usability and Ajax, 274–275
useMap element, 185
userAgent property, of navigator
object, 434
userAgent variable, 48
userInfo.xml file, 334–335, 342
users
data entry and event creation, 251
dynamic reactions to, 250
getting information from, 99. See also
forms
information. See cookies
UTC (Coordinated Universal Time)
date and time
format for cookie expiration date,
222–223
methods for, 419
V
validateForm() function, 210
validation. See form validation
value property
button element, 416
checkbox element, 417
FileUpload element, 424
hidden element, 426
option object, 436
password element, 436
pull-down menu or scrollable list, 115
radio element, 108, 439
textarea element, 447
values, loading into array, 141
var, 17, 95, 161, 448
inside link, 74
and timing loop, 163–164
variables, 16–18
alert() method for printing, 367–369
arithmetic with, 18
assigning string to, 20
built in to PHP, 307
declaring, 45
for time-outs outside functions,
153–154
defining, 94–96
in different functions, 95
frame referring to one stored in
another frame, 184
global, 160–161
inside function parentheses, 89
misspellings, 378
names for, 17–18, 364, 365
date, 29
vs. function name, 85
quotes and, 92
risks from declaring outside
function, 163
for storing events, 255
storing true or false in, 47
syntax, 16–17
value from function, 91–92
for windows, 69
VBScript, 7
Venkman JavaScript debugger, 370–374
vertical bars (||), for OR operator, 44
visibility, of div element, 237
vlinkColor property, of document
object, 422
voodoo coding, 377–378
VRML (Virtual Reality Modeling
Language), 285
INDEX 489
vspace property
of applet element, 413
of image object, 430
W
W3C. See World Wide Web
Consortium (W3C)
web browsers
browser sniffers, 36, 50
browser-specific content, provided by
Netscape, 48–50
bug detector, 370
button clicks, 253
dealing with older, 10–11
detection, 33
example, 34
methods for, 35–37
Firefox-compatible, 49
JavaScript and, 7, 8
links when JavaScript is turned off, 57
preloading images to cache, 63
redirecting visitors based on, 45–46
sending XML information to
webserver, 318
and user input to form text
element, 245
users, 412
XML documents, 283
Webmonkey.com, 63, 88
for cookie libraries, 225–226
WM_readCookie() function, 229
web pages
automatic update
after server-side file change,
325–329
examples, 15, 16
JavaScript location on, 9–10
web resources
charity resources, 68
for free JavaScripts, 2–3
JavaScript and Ajax code
examples, 407
scripts for preloading images, 63
tutorials, 405–406
webservers, 266
advantages of programs, 302
contacting third-party with Ajax and
PHP, 308–309, 313–314
for data storage, vs. cookies,
300–301, 302
file handling in PHP, 321–323
on local computer, 271
setup, 272
for PHP programs, 304
power of, 301–303
secure, 360
sending XML information from web
browsers to, 318
for sending XML to Internet
Explorer, 291
website, Book of JavaScript
brwsniff.js file, 36
credit card script, 196
date validation functions, 203
isValidUrl(), 202
substring() for checking credit card
numbers, 202
websites, interactivity on, 2
while loops, 128–131, 150
and arrays, 129–130
vs. for loops, 132
white space in XML, 291–292
widgets, interactive, 276
width of screen, determining, 78
width property
of applet element, 413
of browser window, 72
of HTMLElement object, 427
of image object, 64, 430
of screen object, 439
wildcard, dots (.) as, 204
window object, 448–454
document.the_form.elements.length,
131
document.write() method, 19–20,
30, 422
screen.availHeight property, 78
screen.availWidth property, 78
windows
closing, 72–73
function to open and center, 86
manipulating appearance of, 70–72
moving, 77–80
to front or back of screen, 74
as objects, 69
opener property of, 75–77
opening, 69–72
example, 68
resizing, 77
status property of, 74–75
swapping image in another, 81
swapping image with link in
another, 174
490 INDEX
Windows, webserver and PHP for, 272
WM_readCookie() function, 229
WordPad, 8
WordPerfect (Corel), 8
World Wide Web Consortium (W3C)
and DOM
for creating and adding elements,
245–246
overview, 245
and XML, 283
writeln() method, for document
object, 422
write() method, 19–20, 30, 422
writing date to web page, 26–30
X
XAMPP package, 272
XML (Extensible Markup Language),
282–283
in Ajax, 265
attributes, 284
document navigation, 289
elements, 284
extracting information from,
289–290
root, 285, 288
header, 283, 318–320
adding to responses, 319–320
illegal characters, 284–285
limitations on manipulating
documents, 356–357
processing, 285–290
real-world examples, 280–281
rules, 283–285
sending information from browser to
webserver, 318
visualizing document, 288
vocabularies, 285
white space in, 291–292
XmlHttpRequest debugger, 280,
374, 375
XMLHttpRequest object, 454
Y
Y2K problem, 27, 29, 93–94
Yahoo!, 314
Z
zero-based numbering, 114
z-index, of div element, 237
z-lock, for window, 452
