Open Layers.2.10.Beginners.Guide
User Manual: Pdf
Open the PDF directly: View PDF ![]() .
.
Page Count: 372 [warning: Documents this large are best viewed by clicking the View PDF Link!]
- Cover
- Copyright
- Credits
- About the Author
- About the Reviewers
- www.PacktPub.com
- Table of Contents
- Preface
- Chapter 1:
Getting Started with OpenLayers
- What is OpenLayers?
- What, technically, is OpenLayers?
- Anatomy of a web-mapping application
- Relation to Google / Yahoo / and other mapping APIs
- The OpenLayers website
- Time for action – downloading OpenLayers
- Time for action – creating your first map
- How the code works
- Behind the scenes—Object Oriented Programming (OOP)
- Time for Action – play MadLibs
- Now what?
- Where to go for help
- OpenLayers source code repository
- Summary
- Chapter 2: Squashing Bugs With Firebug
- Chapter 3:
The 'Layers' in OpenLayers
- What's a layer?
- Layers in OpenLayers
- Time for Action – creating a map with multiple layers
- Creating layer objects
- Time for Action – configuring the options parameter
- Configuring layer options
- Map tiles
- Available layer properties
- The OpenLayers.Layer class
- Other layer types
- Time for Action – creating a Google Maps layer
- Time for Action – using the image layer
- Accessing layer objects
- Time for Action – accessing map.layers
- Time for Action – accessing layer objects in Firebug
- Layer class methods
- Time for Action – defining a global layer object variable
- Summary
- Chapter 4: Wrapping Our Heads Around Projections
- Chapter 5:
Interacting with Third Party APIs
- Third party mapping APIs
- Google Maps
- Time for Action – using Goole Maps V3 (standard way)
- Time for Action – creating a Google Map layer with V2
- (Deprecated)
- Yahoo Maps API
- Time for Action – using the Yahoo Maps Layer
- Microsoft's mapping API
- Time for Action – creating a Bing/Virtual Earth Layer
- OpenStreetMap
- Time for Action – creating an OpenStreetMap Layer
- Spherical Mercator
- Time for Action – using Spherical Mercator
- Using Google Maps and other layers
- Time For Action – creating your first mashup
- Summary
- Chapter 6:
Taking Control of Controls
- What are controls?
- Adding controls to your map
- Time for Action – creating a map with no controls
- Time for Action—Adding controls to a map
- OpenLayers.Control class
- OpenLayers.Control subclasses
- Time for Action – using attributions
- Time for Action – using the NavigationHistory control
- Panels
- Time for Action – using Panels
- Creating our own controls
- Creating a custom button
- Time for Action – creating a simple button
- Events
- Time for Action – creating a custom TYPE_TOGGLE control
- Summary
- Chapter 7: Styling Controls
- Chapter 8:
Charting the Map Class
- The Map class
- Map class properties
- Time for Action – using the allOverlays Map property
- Time for Action – setting zoom levels and maxExtent
- Time for Action – using resolutions array
- Time for Action – using Min and Max resolution
- Time for Action – Using scales
- Time for Action – working with Pan animations
- Map functions
- Time for Action – using control methods
- Time for Action – using coordinate related functions
- Doing stuff with events
- Time for Action – using eventListeners
- Time for Action – working with Map events
- Multiple maps
- Time for Action – using multiple map objects
- Time for Action – creating a multiple map and custom
- event application
- Summary
- Chapter 9:
Using Vector Layers
- What is the Vector Layer?
- Time for Action – creating a Vector Layer
- How the Vector Layer works
- Time for Action – changing the Renderers array
- Vector Layer class
- Time for Action – adding features
- Time for Action – destroying features
- Time For Action – working with feature events
- Vector Layer class events
- Time For Action – using Vector Layer events
- Time For Actions – working with more events
- Geometry and Feature classes
- Time for Action – using Geometry class methods
- Time For Action – using the SelectFeature control
- The Vector class, part two
- Time for Action – creating a Vector Layer
- Time for Action – using the Format and Strategy classes alone
- Format class
- Strategy class
- Summary
- Chapter 10:
Vector Layer Style Guide
- Styling the Vector Layer
- Time For Action – applying some basic Styling
- The StyleMap class
- The Style class
- Time for Action – common style examples
- Attribute replacement
- Time For Action – working with attribute replacement
- Rules and filters
- Time For Action – using addUniqueValueRules
- Rules and filters
- Time for Action – using rules and filters
- OpenLayers.Rule class
- OpenLayers.Filter class
- Time For Action – figuring out logical filters
- Summary
- Chapter 11:
Making Web Map Apps
- Development strategies
- Creating a web map application using Flickr
- Time For Action – getting Flickr data
- Time for Action – adding data to your map
- Time for Action – extract style
- Turning our example into an application
- Time for Action – adding some interactivity
- Using real time data with a ProxyHost
- Time for Action – getting dynamic data
- Wrapping up the application
- Time For Action – adding dynamic tags to your map
- Deploying an application
- Building the OpenLayers Library file
- Time for Action – building a Config file
- Time for Action – running the Build script
- Summary
- Appendix:
Pop Quiz Answers
- Chapter 2: Squashing Bugs With Firebug
- Chapter 3: The 'Layers' in OpenLayers
- Chapter 4: Wrapping Our Heads Around Projections
- Chapter 6: Taking Control of Controls
- Chapter 7: Styling Controls
- Chapter 8: Charting the Map Class
- Chapter 9: Using Vector Layers
- Chapter 10: Vector Layer Style Guide
- Chapter 11: Making Web Map Apps
- Index

OpenLayers 2.10
Beginner's Guide
Create, opmize, and deploy stunning cross-browser web
maps with the OpenLayers JavaScript web-mapping library
Erik Hazzard
OpenLayers 2.10
Beginner's Guide
Copyright © 2011 Packt Publishing
All rights reserved. No part of this book may be reproduced, stored in a retrieval system,
or transmied in any form or by any means, without the prior wrien permission of the
publisher, except in the case of brief quotaons embedded in crical arcles or reviews.
Every eort has been made in the preparaon of this book to ensure the accuracy of the
informaon presented. However, the informaon contained in this book is sold without
warranty, either express or implied. Neither the author, nor Packt Publishing, and its dealers
and distributors will be held liable for any damages caused or alleged to be caused directly or
indirectly by this book.
Packt Publishing has endeavored to provide trademark informaon about all of the
companies and products menoned in this book by the appropriate use of capitals. However,
Packt Publishing cannot guarantee the accuracy of this informaon.
First published: March 2011
Producon Reference: 1110311
Published by Packt Publishing Ltd.
32 Lincoln Road
Olton
Birmingham, B27 6PA, UK.
ISBN 978-1-849514-12-5
www.packtpub.com
Cover Image by Jose Argudo (josemanises@gmail.com)

Credits
Author
Erik Hazzard
Reviewers
Xurxo Méndez Pérez
Alan Palazzolo
Ian Turton
Couzic Mikael
Acquision Editor
Usha Iyer
Development Editor
Maitreya Bhakal
Technical Editors
Pallavi Kachare
Indexers
Hemangini Bari
Rekha Nair
Editorial Team Leader
Aanchal Kumar
Project Team Leader
Priya Mukherji
Project Coordinator
Jovita Pinto
Proofreader
Steve Maguire
Graphics
Nilesh Mohite
Producon Coordinator
Adline Swetha Jesuthas
Cover Work
Adline Swetha Jesuthas

About the Author
Erik Hazzard is a web developer—designer, Open Source advocate, and VI user. He
loves to learn, teach, and occasionally blogs on his website at http://vasir.net/.
As a professional web developer of ve years, Erik specializes in Python and JavaScript,
using open source soware whenever possible. When he's not developing web applicaons,
he's oen developing or designing video games.
He works at FREAC (Florida Resources and Environmental Analysis Center), a great place
with great people that does all kinds of GIS and web development work.
I'd like to thank the developers of OpenLayers, who connually do a
fantasc job of developing the best web-mapping framework. I'd like to
also thank my friends and mentors Ian Johnson and David Arthur for giving
me the condence and support I needed to get into web development.
I'd like to thank Georgianna Strode and Stephen Hodge for their guidance,
advice, and providing me with the opportunity to become a beer web
developer. I could not have wrien this book without the help of the great
team at Packt; I hope every author can be as lucky as me to have such an
excellent group of people to work with. I'd like to thank my parents for
their never ending support. Lastly, I'd like to thank my love, Alisen, for her
understanding and taking the me to help me make sure that the book is
as easy to read as possible.
About the Reviewers
Xurxo Méndez Pérez was born in 1983 in Ourense, a lile town in the south of Galicia,
Spain. He lived there unl he started the study for a degree in IT in the University of A
Coruña, which nalized in 2008.
For the last two years he has been working, at the Computer Architecture Group of the
University of A Coruña developing GIS applicaons (making intensive use of many OGC
standards) like Sitegal and SIUXFor (web GIS based applicaons to manage land properes
and promote their good uses in the Galician region), MeteoSIX (a GIS system that provides
access to geolocated observed and forecasted meteorological data in Galicia) and others.
He also has large experience (3+ years) as a developer of mobile applicaons, having played
rst with JavaME, but nowadays he specializes in Google Android, with more than a dozen
developed applicaons, some of them combining concepts like GIS and geolocaon, real
me responsiveness, and muluser needs.
Alan Palazzolo has been building web applicaons big and small for over ve years,
most of which have been with the open source, content management system Drupal, and
along the way has picked up some experience in data visualizaon and mapping. He is a
strong believer and advocate for the open source methodology in soware and in life. He
was involved in starng a Free Geek chapter in the Twin Cies, and constantly tries to use
technology, and specically the Internet, to enhance the lives of those that are less fortunate
than most.
Ian Turton is a geography researcher at the Pennsylvania State University. He became a
geographer by accident nearly 20 years ago and hasn't managed to escape yet. During that
period he was a co-founder of the GeoTools open source Java toolkit that is now used as
the basis of many geographic open source projects. He connues to serve on the Project
Steering Commiee for the project as well as comming new code and patches. He has also
taught the very popular course "Open Web Mapping" using open standards and open source
programs at the Pennsylvania State University and the University of Leeds.

www.PacktPub.com
Support les, eBooks, discount offers, and more
You might want to visit www.PacktPub.com for support les and downloads related to your
book.
Did you know that Packt oers eBook versions of every book published, with PDF and ePub
les available? You can upgrade to the eBook version at www.PacktPub.com and as a print
book customer, you are entled to a discount on the eBook copy. Get in touch with us at
service@packtpub.com for more details.
At www.PacktPub.com, you can also read a collecon of free technical arcles, sign up for a
range of free newsleers and receive exclusive discounts and oers on Packt books and eBooks.
http://PacktLib.PacktPub.com
Do you need instant soluons to your IT quesons? PacktLib is Packt's online digital book
library. Here, you can access, read and search across Packt's enre library of books.
Why Subscribe?
Fully searchable across every book published by Packt
Copy and paste, print and bookmark content
On demand and accessible via web browser
Free Access for Packt account holders
If you have an account with Packt at www.PacktPub.com, you can use this to access
PacktLib today and view nine enrely free books. Simply use your login credenals for
immediate access.

Table of Contents
Preface 1
Chapter 1: Geng Started with OpenLayers 7
What is OpenLayers? 8
Why use OpenLayers? 8
What, technically, is OpenLayers? 8
Client side 8
Library 9
Anatomy of a web-mapping applicaon 9
Web map client 10
Web map server 10
Relaon to Google / Yahoo! / and other mapping APIs 11
Layers in OpenLayers 11
What is a Layer? 12
The OpenLayers website 12
Time for acon – downloading OpenLayers 13
Making our rst map 15
Time for acon – creang your rst map 15
How the code works 17
Understanding the code—Line by line 18
JavaScript object notaon 21
Behind the scenes—Object Oriented Programming (OOP) 24
Interacon happens with objects 25
MadLibs 25
Time for Acon – play MadLibs 25
Programming with OOP 26
Subclasses 26
Now what? 27
API docs 28

Table of Contents
[ ii ]
Where to go for help 28
This book's website 28
Mailing lists 28
IRC 29
OpenLayers source code repository 29
Summary 30
Chapter 2: Squashing Bugs With Firebug 31
What is Firebug? 32
Seng up Firebug 32
Time for Acon – downloading Firebug 32
Firebug controls 34
Panels 34
Console panel 35
HTML panel 35
CSS panel 37
Script panel 37
DOM panel 38
Net panel 38
Panel conclusion 41
Using the Console panel 42
Time for Acon – execung code in the Console 42
Time for Acon – creang object literals 43
Object literals 44
Time for Acon – interacng with a map 45
API documentaon 47
Summary 47
Chapter 3: The 'Layers' in OpenLayers 49
What's a layer? 50
Layers in OpenLayers 50
Base layer 51
Overlay layers 51
Time for Acon – creang a map with mulple layers 51
Creang layer objects 54
Layer.WMS class 55
WMS layer parameters: 55
Parameters versus arguments 57
Time for Acon – conguring the opons parameter 58
Conguring layer opons 61
wms_state_lines layer opons 61
Scale dependency 61
wms_layer_labels layer opons 62
The visibility property 62

Table of Contents
[ iii ]
The opacity property 62
Map les 62
Many images make up a map 63
Available layer properes 65
Data types 66
OpenLayers.Layer class properes 66
Modifying layer properes 71
The OpenLayers.Layer class 71
Subclasses 71
Layer Class—Sub and super classes 72
Other layer types 72
Layer.ArcGIS93Rest 72
Layer.ArcIMS 73
Layer.Google 73
Time for Acon – creang a Google Maps layer 73
Layer.Grid 75
Layer.Image 76
Time for Acon – using the image layer 76
Image layer parameters 77
Layer.MapGuide 78
Layer.TileCache 79
Layer.Vector 79
Layer.VirtualEarth 79
Layer.WFS 80
Layer.WMS 80
Layer.Yahoo 80
Accessing layer objects 80
Time for Acon – accessing map.layers 80
Time for Acon – accessing layer objects in Firebug 82
Accessing layer properes 82
map.layers 82
Storing references to layer objects 83
Layer class methods 85
Time for Acon – dening a global layer object variable 85
Layer class method denions 86
Summary 88
Chapter 4: Wrapping Our Heads Around Projecons 89
Map projecons 90
Why on earth are Projecons used? 90
Projecon characteriscs 90
Area 90

Table of Contents
[ iv ]
Scale 91
Shape 91
Other characteriscs 91
Types of projecons 92
EPSG codes 92
Time for Acon – using dierent projecon codes 93
Specifying a dierent projecon 94
Longitude/Latude 95
Latude 96
Longitude 96
Time for Acon – determining LonLat coordinates 96
OpenLayers projecon class 97
Creang a projecon object 97
Parameters 97
Funcons 98
Transforming projecons 99
Time for Acon – coordinate transforms 99
The Proj4js library 100
Time for Acon – seng up Proj4js.org 101
Dening custom projecons 102
Summary 102
Chapter 5: Interacng with Third Party APIs 103
Third party mapping APIs 103
Map mashups 104
OpenLayers and third party APIs 104
Google Maps 104
Dierences between Google Maps version 2 and version 3 105
Time for Acon – using Goole Maps V3 (standard way) 105
Creang a Google Map layer object 108
Google layer properes 108
sphericalMercator {Boolean} 109
type {GmapType} 109
V2 GMapType values 110
Time for Acon – creang a Google Map layer with V2 (Deprecated) 111
Yahoo! Maps API 113
Time for Acon – using the Yahoo! Maps Layer 113
Yahoo! Maps Layer class properes 115
Yahoo! Maps Layer types 115
Microso's mapping API 115
Time for Acon – creang a Bing/Virtual Earth Layer 115
VirtualEarth layer class properes 117
Possible type values 118
OpenStreetMap 118

Table of Contents
[ v ]
Time for Acon – creang an OpenStreetMap Layer 118
Accessing your own OSM les 119
Spherical Mercator 120
Spherical Mercator—EPSG code 120
Time for Acon – using Spherical Mercator 121
Map properes with Spherical Mercator layers 122
maxExtent 122
maxResoluon 122
units 123
projecon 123
Using Google Maps and other layers 123
Time For Acon – creang your rst mashup 124
WMS with Spherical Mercator/third party map layers 127
Summary 127
Chapter 6: Taking Control of Controls 129
What are controls? 130
Using controls in OpenLayers 130
Adding controls to your map 130
Time for Acon – creang a map with no controls 131
Time for Acon—Adding controls to a map 132
Adding controls by passing in an array of controls 135
Adding controls to map with addControl() and addControls() 135
Removing controls 136
OpenLayers.Control class 136
OpenLayers.Control properes 137
OpenLayers.Control funcons 137
OpenLayers.Control subclasses 138
OpenLayers.Control.ArgParser 138
OpenLayers.Control.Permalink 139
OpenLayers.Control.Aribuon 139
Aribuon properes 139
Time for Acon – using aribuons 140
OpenLayers.Control.EdingToolbar 141
OpenLayers.Control.Gracule 141
Gracule properes 142
OpenLayers.Control.KeyboardDefaults 143
KeyboardDefaults properes 143
OpenLayers.Control.LayerSwitcher 143
LayerSwitcher properes 143
LayerSwitcher funcons 144
OpenLayers.Control.MousePosion 144
MousePosion properes 144

Table of Contents
[ vi ]
OpenLayers.Control.Navigaon 145
Navigaon properes 145
OpenLayers.Control.NavigaonHistory 146
NavigaonHistory properes 146
NavigaonHistory funcons 146
Time for Acon – using the NavigaonHistory control 146
OpenLayers.Control.NavToolbar 147
OpenLayers.Control.OverviewMap 147
OverviewMap properes 148
OverviewMap funcons 150
OpenLayers.Control.PanPanel 150
PanPanel properes 151
OpenLayers.Control.PanZoom 151
OpenLayers.Control.PanZoomBar 151
PanZoomBar properes 151
OpenLayers.Control.Scale 151
Scale properes 152
OpenLayers.Control.ScaleLine 152
ScaleLine properes 152
OpenLayers.Control.ZoomPanel 153
Panels 153
Control types 153
Time for Acon – using Panels 154
OpenLayers.Control.Panel 157
Panel properes 158
Panel funcons 159
Now what? 159
Creang our own controls 159
OpenLayers.Control.Buon 159
Buon properes 160
Buon funcons 161
Creang a custom buon 161
Time for Acon – creang a simple buon 161
Other control types 165
Process for creang other buon control types 165
Events 165
Event listeners and handlers 165
Custom events 166
Creang a TYPE_TOGGLE control 166
Time for Acon – creang a custom TYPE_TOGGLE control 166
Summary 170

Table of Contents
[ vii ]
Chapter 7: Styling Controls 171
What is CSS? 172
Ideas behind CSS and HTML 172
Eding CSS 172
HTML elements 173
HTML—IDs and classes 173
Styling HTML elements with CSS 174
Using CSS in your code 175
Time for Acon – using external CSS les 176
Cascading Style Sheets—Inheritance 178
Order of inheritance 178
Referencing elements 179
OpenLayers and CSS 180
Styling OpenLayers—using themes 180
Creang your own themes 181
OpenLayers—class names and IDs 181
Time for Acon – styling controls 182
Time for Acon – styling the LayerSwitcher control 186
Other resources 188
Summary 189
Chapter 8: Charng the Map Class 191
The Map class 192
Creang a map object 192
Map class properes 192
Map properes 193
allOverlayers 193
controls 193
displayProjecon 194
div 194
Time for Acon – using the allOverlays Map property 194
eventListeners 196
fallThrough 197
layers 197
maxExtent 198
minExtent 198
restrictedExtent 198
numZoomLevels 198
Time for Acon – seng zoom levels and maxExtent 199
Map properes—Connued 200
Resoluons 200
Time for Acon – using resoluons array 201
Map/Layer property inheritance 201

Table of Contents
[ viii ]
Map properes discussion—Connued 202
maxResoluon 202
minResoluon 202
Time for Acon – using Min and Max resoluon 202
scales 204
maxScale 204
minScale 204
Time for Acon – Using scales 205
panMethod 206
panDuraon 207
Time for Acon – working with Pan animaons 207
projecon 208
theme 208
leSize 208
unit 208
Map funcons 209
Control related 209
Time for Acon – using control methods 210
Extent/Coordinate/Bounds related 210
Methods 211
Time for Acon – using coordinate related funcons 213
Layer related funcons 214
Other funcons 214
Doing stu with events 215
Map event types 216
Using map events 216
Using the eventListeners property 217
Time for Acon – using eventListeners 217
Using map.events.register 218
Event object 218
Time for Acon – working with Map events 219
Mulple maps 220
Using mulple map objects 220
Time for Acon – using mulple map objects 221
Mulple maps and custom events 223
Time for Acon – creang a mulple map and custom event applicaon 223
Summary 225
Chapter 9: Using Vector Layers 227
What is the Vector Layer? 228
What makes the Vector Layer special? 229
The Vector Layer is client side

Table of Contents
[ ix ]
Other uses 229
What is a 'Vector'? 230
Time for Acon – creang a Vector Layer 230
How the Vector Layer works 232
How the Vector Layer is rendered 233
SVG 233
Canvas 233
VML 233
'Renderers' array 233
Time for Acon – changing the Renderers array 234
Vector Layer class 235
OpenLayers.Layer.Vector properes 235
OpenLayers.Layer.Vector methods 237
Working with features 237
Time for Acon – adding features 237
Vector Layer methods (Connued) 239
Time for Acon – destroying features 239
Vector Layer methods (Connued) 241
Time For Acon – working with feature events 242
Vector Layer class events 243
Vector Layer event types 244
Time For Acon – using Vector Layer events 246
Time For Acons – working with more events 247
Geometry and Feature classes 248
Geometry class 249
Geometry subclasses—Theory 249
Geometry class methods 250
Time for Acon – using Geometry class methods 251
Geometry subclasses 253
Geometry subclass methods 255
Feature class 255
How the Feature class works 255
Feature subclasses 256
Feature funcons 256
Instanang a feature object 256
Interacng with Features using Control.SelectFeature 257
Time For Acon – using the SelectFeature control 257
Control.SelectFeature class 262
SelectFeature control properes 262
SelectFeature control methods 264
The Vector class, part two 264
Format, protocol, and strategy classes 265
Who invited these classes over? 265

Table of Contents
[ x ]
Brief overview of the three classes 266
How these three classes interact 267
Example instanaon 267
Time for Acon – creang a Vector Layer 268
Cross server requests 269
Using the Vector Layer without a Protocol class 270
Time for Acon – using the Format and Strategy classes alone 270
Format class 273
Format class properes 273
Format class methods 273
Format subclasses 274
Strategy class 274
Strategy.BBOX 274
Strategy.Cluster 274
Strategy.Filter 275
Strategy.Fixed 275
Strategy.Paging 275
Strategy.Refresh 275
Strategy.Save 276
Summary 276
Chapter 10: Vector Layer Style Guide 277
Styling the Vector Layer 277
Applying styles 278
What are symbolizers? 278
Time For Acon – applying some basic Styling 279
The StyleMap class 281
What is an 'intent'? 281
The Style class 281
Symbolizer properes 282
List of common symbolizer properes 282
Time for Acon – common style examples 284
Remaining symbolizer properes 286
Aribute replacement 287
Time For Acon – working with aribute replacement 287
Rules and lters 289
How do we follow rules? 289
Using addUniqueValueRules 290
Calling the addUniqueValueRules funcon 290
The intent parameter 290
The property parameter 290
The symbolizer_lookup parameter 291
The context parameter 291

Table of Contents
[ xi ]
Time For Acon – using addUniqueValueRules 291
Rules and lters 294
How do they work? 295
How do we use them? 295
Time for Acon – using rules and lters 295
OpenLayers.Rule class 298
OpenLayers.Filter class 299
Filter Subclasses 299
Filter.Comparison 299
Filter.FeatureId 303
Feature.Logical 303
Time For Acon – guring out logical lters 304
Feature.Spaal 308
Summary 309
Chapter 11: Making Web Map Apps 311
Development strategies 311
Creang a web map applicaon using Flickr 312
Note on APIs 312
Accessing the Flickr public data feeds 312
How we'll do it 313
Time For Acon – geng Flickr data 313
Why did we do this? 314
Reducing possible errors 314
Time for Acon – adding data to your map 315
Time for Acon – extract style 317
Turning our example into an applicaon 318
Adding interacvity 319
Selecng features 319
Time for Acon – adding some interacvity 319
Using real me data with a ProxyHost 325
Time for Acon – geng dynamic data 325
Wrapping up the applicaon 326
Recap 326
The plan 327
Changing the URL 327
Time For Acon – adding dynamic tags to your map 327
Deploying an applicaon 330
Building the OpenLayers Library le 330
Always try to serve small les 330
Using the OpenLayers build le 331
Conguring the build script 331
Time for Acon – building a Cong le 332

Table of Contents
[ xii ]
Running the build script 333
Time for Acon – running the Build script 333
Summary 334
Appendix: Pop Quiz Answers 335
Chapter 2: Squashing Bugs With Firebug 335
Chapter 3: The 'Layers' in OpenLayers 335
Chapter 4: Wrapping Our Heads Around Projecons 335
Chapter 6: Taking Control of Controls 335
Chapter 7: Styling Controls 336
Chapter 8: Charng the Map Class 336
Chapter 9: Using Vector Layers 336
Chapter 10: Vector Layer Style Guide 336
Chapter 11: Making Web Map Apps 336
Index 337
Preface
Web mapping is the process of designing, implemenng, generang, and delivering maps
on the World Wide Web and its products. OpenLayers is a powerful, community driven,
open source, pure JavaScript web-mapping library. With it, you can easily create your
own web map mashup using WMS, Google Maps, and a myriad of other map backends.
Interested in knowing more about OpenLayers? This book is going to help you learn
OpenLayers from scratch.
OpenLayers 2.10 Beginner's Guide will walk you through the OpenLayers library in the easiest
and most ecient way possible. The core components of OpenLayers are covered
in detail, with examples, structured so that you can easily refer back to them later.
The book starts o by introducing you to the OpenLayers library and ends with developing
and deploying a full-edged web map applicaon, guiding you through every step of the way.
Throughout the book, you'll learn about each component of the OpenLayers library. You'll
work with backend services like WMS, third-party APIs like Google Maps, and even create
maps from stac images. You'll load data from KML and GeoJSON les, create interacve
vector layers, and customize the behavior and appearance of your maps.
There is a growing trend in mixing locaon data with web applicaons. OpenLayers 2.10
Beginner's Guide will show you how to create powerful web maps using the best web
mapping library around.
This book will guide you to develop powerful web maps with ease using the open source
JavaScript library OpenLayers.

Preface
[ 2 ]
What you need for this book
The only thing you'll need for this book is a computer and text editor. Your operang system
will come with a text editor, and any will do, but if you are using Windows I recommend
using Notepad++ (http://notepad-plus-plus.org/), VI if you are using Linux, and
Textmate if on OSX. An Internet connecon will be required to view the maps, and you'll
also need a modern web browser such as Firefox, Google Chrome, Safari, or Opera. While a
modern browser is required to get the most of the library, OpenLayers even provides support
for non standards based browsers such as Internet Explorer (even IE6, to some extent).
No knowledge of Geographic Informaon Systems (GIS) is required, nor is extensive
JavaScript experience. A basic understanding of JavaScript syntax and HTML / CSS will greatly
aid in understanding the material, but is not required.
What this book covers
Chapter 1: Geng Started with OpenLayers. This chapter will introduce OpenLayers and
some programming concepts behind it. It covers how to create a map, walking through
how to set up the code and congure various sengs.
Chapter 2: Squashing Bugs with Firebug. This chapter will cover seng up the Firebug
plugin, which we'll use throughout the book, so that we can do simple debugging and
beer understand how OpenLayers works behind the scenes.
Chapter 3: The 'Layers' in OpenLayers. Here, we'll cover one of the core classes of
OpenLayers—the Layer class. We'll discuss what a 'Layer' is, how to work with layers
and the dierent layer classes.
Chapter 4: Wrapping our Heads Around Projecons. This chapter will cover a few basic
geography concepts and why understanding them will help us use OpenLayers. We'll also
cover projecons, why they are used, and how to use them.
Chapter 5: Interacng With Third Party APIs. This chapter will focus on creang an
OpenLayers map using dierent third party APIs, such as Google Maps and OpenStreetMaps.
Chapter 6: Taking Control of Controls. We'll cover another core class of OpenLayers, the
Control class. We'll cover what controls are and discuss the various types of controls, along
with how to work with the events.
Chapter 7: Giving Controls Some Style. This chapter will walk through how OpenLayers uses
CSS to style controls.

Preface
[ 3 ]
Chapter 8: Charng the Map Class. This chapter will discuss another core component of
OpenLayers—the Map class. We'll learn about how to map funcons and their properes,
along with how to set up mulple maps on the same page.
Chapter 9: Using Vector Layers. Here, we'll learn what a Vector layer is and how it works.
We'll also cover how to work with the data, such as KML les.
Chapter 10: Vector Layer Style Guide. In this chapter we'll cover how to style the vector
layer and how to use the Rule and Filter classes.
Chapter 11: Creang Web Map Applicaons. This nal chapter will go over how to build
a web-mapping applicaon from scratch, and how to use the OpenLayers build le.
Who this book is for
This book is for anyone who has any interest in using maps on their website, from hobbyists
to professional web developers. OpenLayers provides a powerful, but easy-to-use, pure
JavaScript and HTML (no third-party plug-ins involved) toolkit to quickly make cross-
browser web maps. A basic understanding of JavaScript will be helpful, but there is no prior
knowledge required to use this book. If you've never worked with maps before, this book
will introduce you to some common mapping topics and gently guide you through the
OpenLayers library. If you're an experienced applicaon developer, this book will also serve
as a reference to the core components of OpenLayers.
How to read this book
This book is primarily designed to be read from start to nish, with chapters building on each
other and increasing in complexity. At the same me, however, the chapters are modular
so that each can also serve as reference once you've learned the material. This book should
preferably be read straight through rst, of course, and then serve as a reference later.
Conventions
In this book, you will nd several headings appearing frequently.
Preface
[ 4 ]
To give clear instrucons of how to complete a procedure or task, we use:
Time for action – heading
1. Acon 1
2. Acon 2
3. Acon 3
Instrucons oen need some extra explanaon so that they make sense, so they are
followed with:
What just happened?
This heading explains the working of tasks or instrucons that you have just completed.
You will also nd some other learning aids in the book, including:
Pop quiz – heading
These are short quesons intended to help you test your own understanding.
Have a go hero – heading
These set praccal challenges and give you ideas for experimenng with what you have
learned.
You will also nd a number of styles of text that disnguish between dierent kinds of
informaon. Here are some examples of these styles, and an explanaon of their meaning.
Code words in text are shown as follows: "You can download it as either a tar.gz or .zip."
A block of code is set as follows:
Lines [21] to [23]
if(!map.getCenter()){
map.zoomToMaxExtent();
}
When we wish to draw your aenon to a parcular part of a code block, the relevant lines
or items are set in bold:
var wms_layer = new OpenLayers.Layer.WMS(
'WMS Layer Title',
'http://vmap0.tiles.osgeo.org/wms/vmap0',
Preface
[ 5 ]
{layers: 'basic'},
{}
);
New terms and important words are shown in bold. Words that you see on the screen, in
menus or dialog boxes for example, appear in the text like this: "By default, your map adds
an argParser control which will try to pull informaon from a permalink.".
Warnings or important notes appear in a box like this.
Reader feedback
Feedback from our readers is always welcome. Let us know what you think about this
book—what you liked or may have disliked. Reader feedback is important for us to
develop tles that you really get the most out of.
To send us general feedback, simply send an e-mail to feedback@packtpub.com, and
menon the book tle via the subject of your message.
If there is a book that you need and would like to see us publish, please send us a note in
the SUGGEST A TITLE form on www.packtpub.com or e-mail suggest@packtpub.com.
If there is a topic that you have experse in and you are interested in either wring or
contribung to a book, see our author guide on www.packtpub.com/authors.
Customer support
Now that you are the proud owner of a Packt book, we have a number of things to help you
to get the most from your purchase.
Downloading the example code for this book
You can download the example code les for all Packt books you have purchased from your
account at http://www.PacktPub.com. If you purchased this book elsewhere, you can
visit http://www.PacktPub.com/support and register to have the les e-mailed directly
to you.

Preface
[ 6 ]
Errata
Although we have taken every care to ensure the accuracy of our content, mistakes do
happen. If you nd a mistake in one of our books—maybe a mistake in the text or the code—
we would be grateful if you would report this to us. By doing so, you can save other readers
from frustraon and help us improve subsequent versions of this book. If you nd any
errata, please report them by vising http://www.packtpub.com/support, selecng
your book, clicking on the errata submission form link, and entering the details of your
errata. Once your errata are veried, your submission will be accepted and the errata will
be uploaded on our website, or added to any list of exisng errata, under the Errata secon
of that tle. Any exisng errata can be viewed by selecng your tle from http://www.
packtpub.com/support.
Piracy
Piracy of copyright material on the Internet is an ongoing problem across all media.
At Packt, we take the protecon of our copyright and licenses very seriously. If you come
across any illegal copies of our works, in any form, on the Internet, please provide us with
the locaon address or website name immediately so that we can pursue a remedy.
Please contact us at copyright@packtpub.com with a link to the suspected
pirated material.
We appreciate your help in protecng our authors, and our ability to bring you
valuable content.
Questions
You can contact us at questions@packtpub.com if you are having a problem with any
aspect of the book, and we will do our best to address it.
1
Getting Started with OpenLayers
Within the past few years, the popularity of interacve web maps has exploded.
In the past, creang interacve maps was reserved for large companies or
experts with lots of money. But now, with the advent of free services like Google
and Yahoo! Maps, online mapping is easily accessible to everyone. Today,
with the right tools, anyone can easily create a web map with lile or even no
knowledge of geography, cartography, or programming.
Web maps are expected to be fast, accurate, and easy to use. Since they
are online, they are expected to be accessible from anywhere on nearly any
plaorm. There are only a few tools that fulll all these expectaons.
OpenLayers is one such tool. It's free, open source, and very powerful. Providing
both novice developers and seasoned GIS professionals with a robust library,
OpenLayers makes it easy to create modern, fast, and interacve web-mapping
applicaons.
In this chapter we will
Learn what OpenLayers is
Discuss some web mapping applicaon concepts
Make our First Map
Cover concepts behind OpenLayers, such as Object Oriented Programming
Provide informaon on resources outside of this book

Geng Started with OpenLayers
[ 8 ]
What is OpenLayers?
OpenLayers is an open source, client side JavaScript library for making interacve web
maps, viewable in nearly any web browser. Since it is a client side library, it requires no
special server side soware or sengs—you can use it without even downloading
anything! Originally developed by Metacarta, as a response, in part, to Google Maps, it
has grown into a mature, popular framework with many passionate developers and a very
helpful community.
Why use OpenLayers?
OpenLayers makes creang powerful web-mapping applicaons easy and fun. It is very
powerful but also easy to use—you don't even need to be a programmer to make a great
map with it. It's open source, free, and has a strong community behind it. So if you want to
dig into the internal code, or even improve it, you're encouraged to do so. Cross browser
compability is handled for you—it even works in IE6.
OpenLayers is not ed to any proprietary technology or company, so you don't have to
worry so much about your applicaon breaking (unless you break it). At the me of wring,
support for modern mobile and touch devices is in the works (with many proof of concept
examples), and should be in the ocial library in the near future—if they aren't by the me
you're reading this.
OpenLayers allows you to build enre mapping applicaons from the ground up, with the
ability to customize every aspect of your map—layers, controls, events, etc. You can use a
multude of dierent map server backends together, including a powerful vector layer. It
makes creang map 'mashups' extremely easy.
What, technically, is OpenLayers?
We said OpenLayers is a client side JavaScript library, but what does this mean?
Client side
When we say client side we are referring to the user's computer, specically their web browser.
The only thing you need to have to make OpenLayers work is the OpenLayers code itself and
a web browser. You can either download it and use it on your computer locally, or download
nothing and simply link to the JavaScript le served on the site that hosts the OpenLayers
project (http://openlayers.org). OpenLayers works on nearly all browsers and can be
served by any web server or your own computer. Using a modern, standard-based browser
such as Firefox, Google Chrome, Safari, or Opera is recommended.
Chapter 1
[ 9 ]
Library
When we say library we mean that OpenLayers is an API (Applicaon Programmer
Interface) that provides you with tools to develop your own web maps. Instead of building
a mapping applicaon from scratch, you can use OpenLayers for the mapping part, which is
maintained and developed by a bunch of brilliant people.
For example, if you wanted to write a blog you could either write your own blog engine,
or use an exisng one such as WordPress or Blogger and build on top of it. Similarly, if you
wanted to create a web map, you could write your own from scratch, or use soware that
has been developed and tested by a group of developers with a strong community behind it.
By choosing to use OpenLayers, you do have to learn how to use the library (or else you
wouldn't be reading this book), but the benets greatly outweigh the costs. You get to use
a rich, highly tested and maintained code base, and all you have to do is learn how to use it.
Hopefully, this book will help you with that.
OpenLayers is wrien in JavaScript, but don't fret if you don't know it very well. All you really
need is some knowledge of the basic syntax, and we'll try to keep things as clear as possible
in the code examples.
If you are unfamiliar with JavaScript, Mozilla provides phenomenal
JavaScript documentaon at https://developer.mozilla.
org/en/javascript.
Anatomy of a web-mapping application
First o—what is a 'web-mapping applicaon'? To put it bluntly, it's some type of Internet
applicaon that makes use of a map. This could be a site that displays the latest geo-tagged
images from Flickr (we'll do this in Chapter 11), a map that shows markers of locaons
you've traveled to, or an applicaon that tracks invasive plant species and displays them. If it
contains a map and it does something, you could argue that it is a web map applicaon. The
term can be used in a prey broad sense.
Downloa d f r o m W o w ! e B o o k < w w w.woweb o o k . c o m >
Geng Started with OpenLayers
[ 10 ]
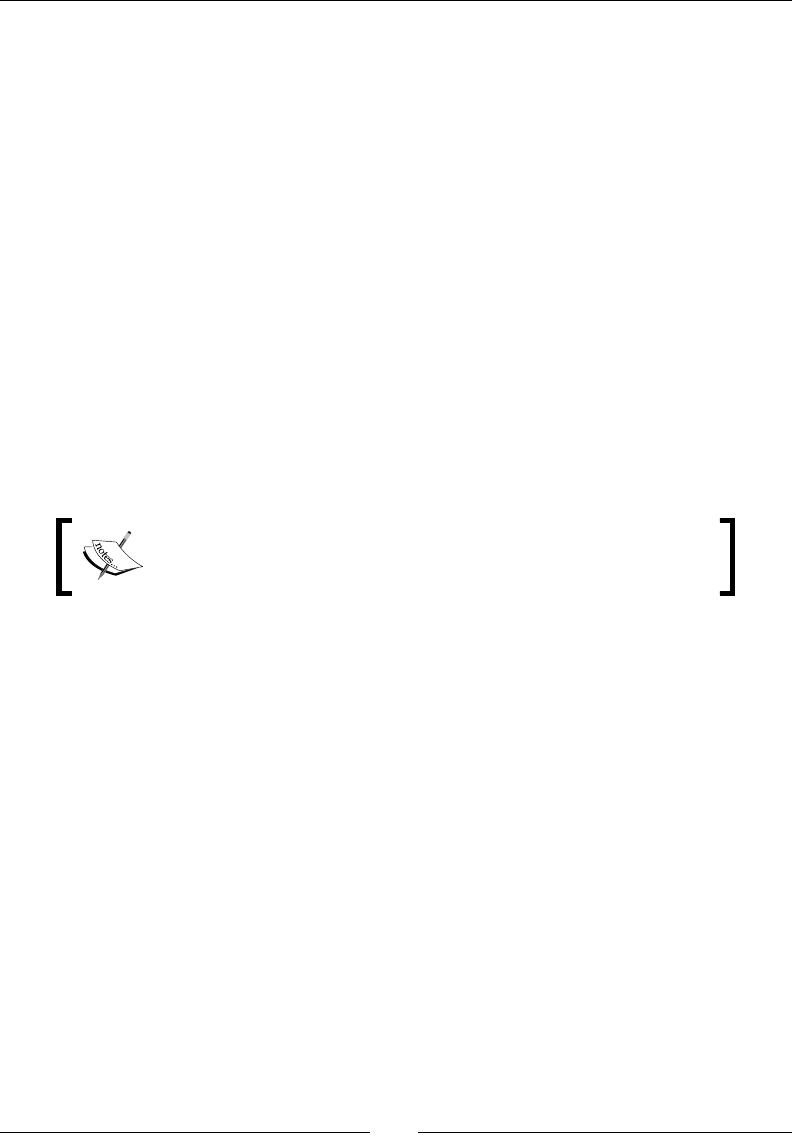
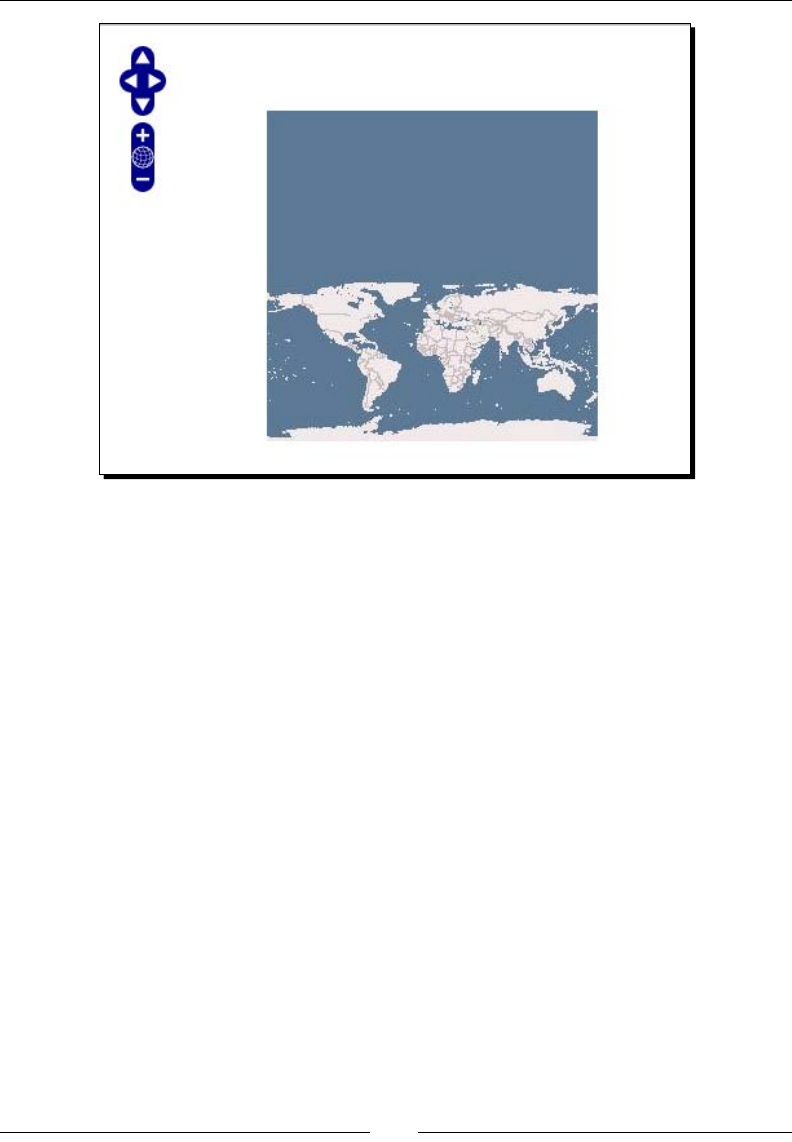
So where exactly does OpenLayers t in? We know OpenLayers is a client side mapping
library, but what does that mean? Let's take a look at the following screenshot:
This is called the Client / Server Model and it is, essenally, the core of how all web
applicaons operate. In the case of a web map applicaon, some sort of map client (e.g.,
OpenLayers) communicates with some sort of web map server (e.g., a WMS server or the
Google Maps backend).
Web map client
OpenLayers lives on the client side. One of the primary tasks the client performs is to get
map images from a map server. Essenally, the client has to ask a map server for what you
want to look at. Every me you navigate or zoom around on the map, the client has to make
new requests to the server—because you're asking to look at something dierent.
OpenLayers handles this all for you, and it is happening via asynchronous JavaScript (AJAX)
calls to a map server. To reiterate—the basic concept is that OpenLayers sends requests to a
map server for map images every me you interact with the map, then OpenLayers pieces
together all the returned map images so it looks like one big, seamless map. In Chapter 2,
we'll cover this concept in more depth.
Web map server
A map server (or map service) provides the map itself. There are a myriad of dierent map
server backends. A small sample includes WMS, Google Maps, Yahoo! Maps, ESRI ArcGIS,
WFS, and OpenStreet Maps. If you are unfamiliar with those terms, don't sweat it. The basic
principle behind all those services is that they allow you to specify the area of the map you
want to look at (by sending a request), and then the map servers send back a response
containing the map image. With OpenLayers, you can choose to use as many dierent
backends in any sort of combinaon as you'd like.
OpenLayers is not a web map server; it only consumes data from them. So, you will need to
be able to access some type of web map service. Don't worry though. Fortunately, there are
a myriad of free and/or open source web map servers available that are remotely hosted or
easy to set up yourself, such as MapServer.

Chapter 1
[ 11 ]
Throughout this book, we'll oen use a freely available web mapping service
from OSGeo, so don't worry about having to provide your own.
With many web map servers you do not have to do anything to use them—just supplying
a URL to them in OpenLayers is enough. OSGeo, OpenStreet Maps, Google, Yahoo!, and
Bing Maps, for instance, provide access to their map servers (although, some commercial
restricons may apply with various services in some situaons).
Relation to Google / Yahoo! / and other mapping APIs
The Google, Yahoo!, Bing, and ESRI Mappings API allow you to connect with their map
server backend. Their APIs also usually provide a client side interface (at least in the
case of Google Maps).
The Google Maps API, for instance, is fairly powerful. You have the ability to add markers,
plot routes, and use KML data (things you can also do in OpenLayers)—but the main
drawback is that your mapping applicaon relies totally on Google. The map client and map
server are provided by a third party. This is not inherently a bad thing, and for many projects,
Google Maps and the like are a good t.
However, there are quite a few drawbacks.
You're not in control of the backend
You can't really customize the map server backend, and it can change at any me
There may be some commercial restricons, or some costs involved
These other APIs also cannot provide you with anything near the amount
of exibility and customizaon that an open source mapping applicaon
framework (i.e., OpenLayers) oers
Layers in OpenLayers
So, what's with the Layer in OpenLayers? Well, OpenLayers allows you to have mulple
dierent 'backend' servers that your map can use. To access a web map server, you create
a layer object and add it to your map with OpenLayers.
For instance, if you wanted to have a Google Maps and a WMS service displayed on your
map, you would use OpenLayers to create a GoogleMaps layer object and a WMS layer
object, and then add them to your OpenLayers map. We'll soon see an example with a
WMS layer, so don't worry if you're a lile confused.
Geng Started with OpenLayers
[ 12 ]
What is a Layer?
Like layers of an onion, each layer is above and will cover up the previous one; the order
that you add in the layers is important. With OpenLayers, you can arbitrarily set the overall
transparency of any layer, so you are easily able to control how much layers cover each other
up, and dynamically change the layer order at any me.
For instance, you could have a Google map as your base layer, a layer with satellite imagery
that is semi-transparent, and a vector layer all acve on your map at once. A vector layer is
a powerful layer that lets us add markers and various geometric objects to our maps—we'll
cover it in Chapter 9. Thus, in this example, your map would have three separate layers. We'll
go into much more depth about layers and how to use and combine them in Chapter 3.
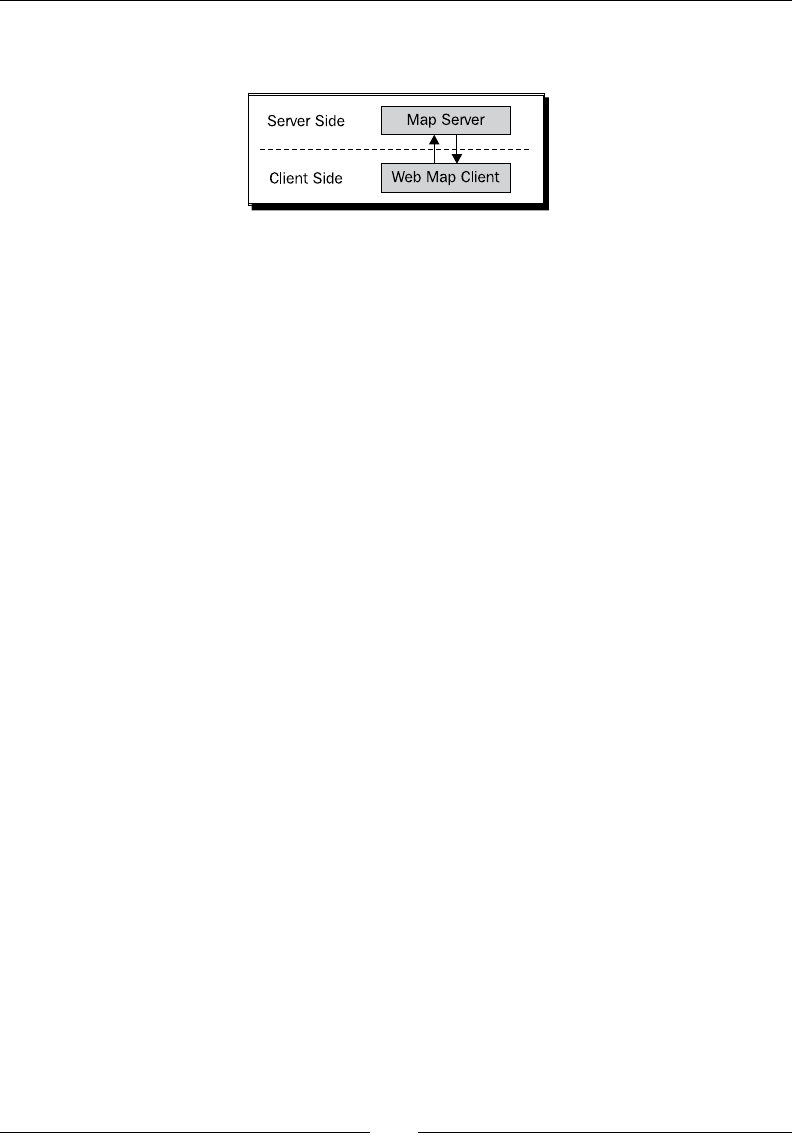
The OpenLayers website
The website for OpenLayers is located at http://openlayers.org/. To begin, we need to
download a copy of OpenLayers (or, we can directly link to the library—but we'll download a
local copy). You can download the compressed library as either a .tar.gz or .zip, but both
contain the same les.

Chapter 1
[ 13 ]
Let's go over the links:
Link to the hosted version: If you do not want to actually download OpenLayers,
you can instead link to the OpenLayers library by adding this script URL to your site
in a <script> tag.
2.10 (Stable) .tar.gz or .zip: This should show the latest stable release (2.10 at
the me of wring). You can download it as either a tar.gz or .zip; if you are
unsure of which to get, you should download the .zip version.
2.10 Release Notes: This highlights things that have changed, bugs that have been
xed, etc.
Class documentaon, more documentaon: These are links to the API
documentaon, which we will make heavy use of throughout the book. I
recommend opening it up and keeping it up while working through the examples.
See examples...: OpenLayers provides a rich array of examples demonstrang
features of the library; if you're ever stuck or looking for a good example—go here.
Time for action – downloading OpenLayers
Let's download the OpenLayers library. Aer you're done, you should have the OpenLayers
library les set up on your computer.
1. Go to the OpenLayers website (http://openlayers.org) and download the
.zip version (or if you prefer the .tar.gz version).
2. Extract the le you just downloaded. When you extract it, you'll end up with a folder
called OpenLayers-2.10 (or whatever your version is).
Geng Started with OpenLayers
[ 14 ]
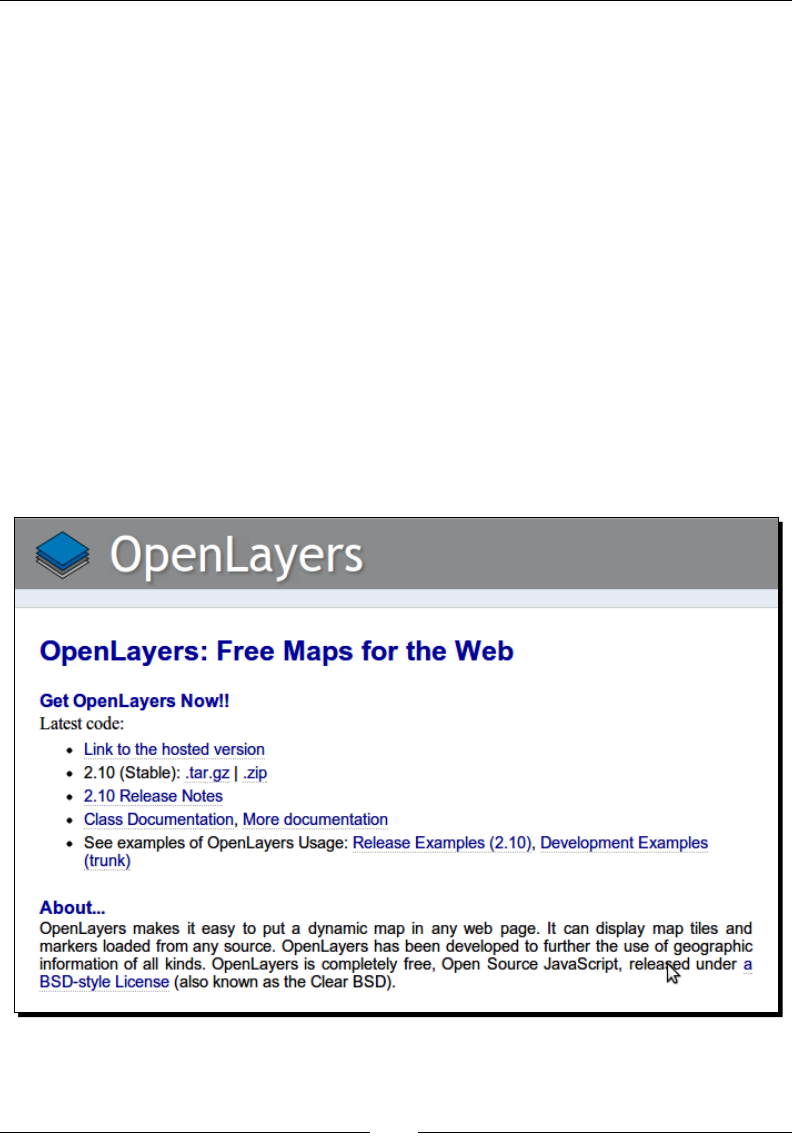
3. Open up the OpenLayers folder. Once inside, you'll see a lot of folders and les, but
the ones we are concerned with right now is a le called OpenLayers.js and two
folders, /img and /theme. We'll be copying these to a new folder.
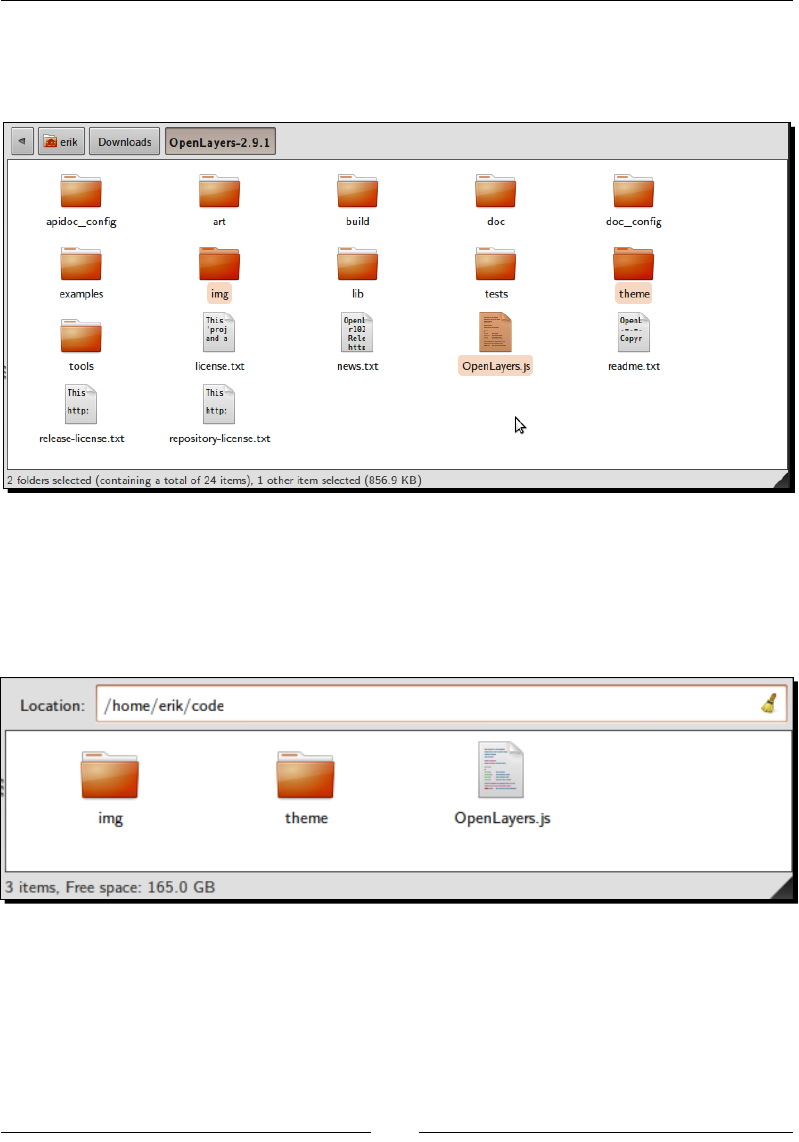
4. Create a new folder outside the OpenLayers directory; we'll use ~/code/ (if you are
on Windows, then c:/code). You can name the folder whatever you like, but we'll
refer to it as the code folder. Inside the code folder, copy over the OpenLayers.
js and two folders (/img and /theme) from the previous step. Your new folder
structure should look similar to this:
What just happened?
We just 'installed' OpenLayers by copying over a pre-built, compressed JavaScript le
containing the enre OpenLayers library code and two directories containing assets (images
and stylesheets). To use OpenLayers, you'll need at a minimum the OpenLayers.js le and
the img and theme folders.
Chapter 1
[ 15 ]
If you open the OpenLayers.js le, you'll noce it is nearly unreadable. This is because
this is a minied version, which basically means extra white space and unnecessary
characters have been stripped out to cut down on the le size. While it is no longer readable,
it is a bit smaller and thus requires less me to download. If you want to look at the
uncompressed source code, you can view it by looking in the OpenLayers source code folder
you extracted.
You can, as we'll see in the last chapter of this book, build your own custom conguraons
of the library, including only the things you need. But for now, we'll just use the enre library.
Now that we have our OpenLayers library les ready to use, let's make use of them!
Making our rst map
The process for creang a map with OpenLayers requires, at a minimum, the
following things:
Including the OpenLayers library les
Creang an HTML element that the map will appear in
Creang a map object from the Map class
Creang a layer object from a Layer class
Adding the layer to the map
Dening the map's extent (seng the area the map will inially be displaying)
Now we're nally ready to create our rst map!
Time for action – creating your rst map
Let's dive into OpenLayers and make a map! Aer you nish this secon, you should have a
working map, which uses a publicly available WMS server backend from OSGeo.
1. Navigate to the code directory that contains the OpenLayers.js le, /img and /
theme directories. Create a le here called index.html. This directory (/code) will
be referred to as our root directory, because it is the base (root) folder where all our
les reside.
2. Add in the following code to index.html and save the le as an .html le—if
you are using Windows, I suggest using Notepad++. Do not try to edit the le in a
program like Microso Word, as it will not save properly. The following code will also
be used as the base template code for many future examples in this book, so we'll
be coming back to it a lot.
Geng Started with OpenLayers
[ 16 ]
The lines numbers in the code are for demonstraon purposes; do not type
them in when you are wring your code.
1.<!DOCTYPE html>
2.<html lang='en'>
3.<head>
4. <meta charset='utf-8' />
5. <title>My OpenLayers Map</title>
6. <script type='text/javascript' src='OpenLayers.js'></script>
7. <script type='text/javascript'>
8.
9. var map;
10.
11. function init() {
12. map = new OpenLayers.Map('map_element', {});
13. var wms = new OpenLayers.Layer.WMS(
14. 'OpenLayers WMS',
15. 'http://vmap0.tiles.osgeo.org/wms/vmap0',
16. {layers: 'basic'},
17. {}
18. );
19.
20. map.addLayer(wms);
21. if(!map.getCenter()){
22. map.zoomToMaxExtent();
23. }
24. }
25.
26. </script>
27.</head>
28.
29.<body onload='init();'>
30. <div id='map_element' style='width: 500px; height: 500px;'>
31. </div>
32.</body>
33.</html>
3. Open up index.html in your web browser. You should see something similar to:
Chapter 1
[ 17 ]
What just happened?
We just created our rst map using OpenLayers! If it did not work for you for some reason,
try double checking the code and making sure all the commas and parentheses are in place.
You can also refer to the Preface where a link to code samples used in the book is given. By
default, we're given a few controls if we don't specify any. We will use the le we created as
a template for many examples throughout the book, so save a copy of it so you can easily
reference it later.
The control on the le side (the navigaon buons) is called the PanZoom control. You can
click the buons to navigate around the map, drag the map with your mouse/use the scroll
wheel to zoom in, or use your keyboard's arrow keys. We'll cover controls in far greater detail
in Chapter 6.
How the code works
Now, let's take a look at the code—line by line. Before we do that, let's include a quick
reference to the line numbers at which the requirements from the previous secon occur at.
These are the core things that you need to do to have a funconing map.
Geng Started with OpenLayers
[ 18 ]
We'll denote line numbers with brackets—[x], where x is the line number.
1. Including the OpenLayers library les:
Line [6]
<script type='text/javascript' src='OpenLayers.js'></script>
2. Creang an HTML element for our map:
Lines [30] and [31]
<div id='map_element' style='width: 500px; height: 500px'>
</div>
3. Creang a map object from the Map class:
Line [12]
map = new OpenLayers.Map('map_element', { });
4. Creang a layer object from a Layer class:
Lines [13] to [18]
var wms_layer = new OpenLayers.Layer.WMS(
'WMS Layer Title',
'http://vmap0.tiles.osgeo.org/wms/vmap0',
{layers: 'basic'},
{}
);
5. Adding the layer to the map:
Line [20]
map.addLayer(wms_layer);
6. Dening the map's extent:
Lines [21] to [23]
if(!map.getCenter()){
map.zoomToMaxExtent();
}
Understanding the code—Line by line
Lines [1] to [5]: Sets up the HTML page. Every HTML page needs an <html> and <head> tag,
and the extraneous code you see species various sengs that inform your browser that this
is an HTML5 compliant page. For example, we include the DOCTYPE declaraon in line [1] to
specify that the page conforms to standards set by the WC3. We also specify a <title> tag,
which contains the tle that will be displayed on the page.
Chapter 1
[ 19 ]
This is the structure that all our code examples will follow, so this basic
code template will be implicitly assumed in all examples that follow
throughout the book.
Line [6]: <script type='text/javascript' src='OpenLayers.js'></script>
This includes the OpenLayers library. The locaon of the le is specied by the
src='OpenLayers.js' aribute. Here, we're using a relave path. As the index.
html page is in the same folder as the OpenLayers.js le, we don't have to worry about
specifying the path to it. The le could be either on your computer or another computer—it
doesn't maer much, as long as the browser can load it.
We can also use an absolute path, which means we pass in a URL that the script is located at.
OpenLayers.org hosts the script le as well; we could use the following line of code to link
to the library le directly:
<script type='text/javascirpt' src='http://openlayers.org/api/
OpenLayers.js'></script>
Noce how the src species an actual URL—this is how we use absolute paths. Either way
works, however, throughout the book we'll assume that you are using a relave path and
have the OpenLayers library on your own computer/server. If you use the hosted OpenLayers
library, you cannot be sure that it will always be available, and it may change overnight (and
changes when the library is updated)—so using a local copy is recommended.
Line [7]: Starts a <script> block. We'll set up all our code inside it to create our map. Since
the OpenLayers library has been included in line [5], we are able to use all the classes and
funcons the library contains.
Line [8]: var map;
Here we create a global variable called map. In JavaScript, anyme we create a variable we
need to place var in front of it to ensure that we don't run into scope issues (what funcons
can access which variables). When accessing a variable, you do not need to put var in front
of it.
Since we are dening map as a variable at the global level (outside of any funcons), we can
access it anywhere in our code. Soon we will make this map variable our map object, but
right now it is just an empty global variable.

Geng Started with OpenLayers
[ 20 ]
Line [11]: Creates a funcon called init. When the page loads (via body
onload='init();' on line [29]), this funcon will get called. This funcon contains all of
our code to set up our OpenLayers map. If you are familiar with JavaScript, you do not have
to put all the code in a funcon call—you could, for instance, just put the code at the boom
of the page and avoid a funcon call all together. Creang a funcon that gets called when
the page loads is a common pracce and so we will be doing it throughout the book.
Line [12]: map = new OpenLayers.Map('map_element', { });
Remember that global map variable? Well, now we're making it a map object, created from
the OpenLayers.Map class. It is also referred to as an instance of the Map class. We'll talk
about what this means later in this chapter in the Object Oriented Programming secon. The
map object is the crux of our OpenLayers applicaon— we call its funcons to tell the map to
zoom to areas, re o events, keep track of layers, etc.
Now, let's look at the right hand side of the equal sign (=): new means that we are creang a
new object from the class that follows it. OpenLayers.Map is the class name which we are
creang an object from. Noce that something is inside the parenthesis: ('map_element',
{}). This means we are passing two things into the class (called arguments, and you pass
them in separated by a comma). Every class in OpenLayers expects dierent arguments to be
passed into it, and some classes don't expect anything.
The Map class expects two parameters. The rst argument, map_element, is the ID of the
HTML element that the map will appear in. The second argument, { }, are the map opons,
consisng of key:value pairs (e.g., {key:value} ). This is also called JavaScript Object
Notaon, a way to create objects on the y. We'll cover this in more depth very shortly in the
next secon. Also, you are not required to include this argument if it is empty (even though
we just did it), but we are just doing it here for consistency.
Because we passed in map_element as the rst parameter, we will have an HTML element
(almost always a <div>) with the ID of map_element. The HTML element ID can be anything,
but for the sake of clarity and to avoid confusion, we call it map_element.
Line [13]: var wms = new OpenLayers.Layer.WMS(
Here, we create a layer object for the map to use from the WMS subclass of the Layer class.
In OpenLayers, every map needs to have at least one layer. The layer points to the 'back end',
or the server side map server, as we discussed earlier. The layer can be any of a multude of
dierent services, but we are using WMS here. WMS, which stands for Web Map Service, is
an internaonal standard dened by the Open Geospaal Consorum (OGC).
The arguments we can pass in for layers are dependent on the layer class—we cover layers
in detail in Chapter 3. If you don't want to wait, you can also check out the documentaon
at http://dev.openlayers.org/docs/files/OpenLayers/Layer-js.html to see
what arguments dierent layers of classes expect.

Chapter 1
[ 21 ]
Noce we don't include everything on one line when creang our layer object—this
improves readability, making it easier to see what we pass in. The only dierence is that we
are also adding a new line aer the commas which separate arguments, which doesn't aect
the code (but does make it easier to read).
Line [14]: 'WMS Layer Title',
This is the rst parameter passed in; the layer's tle. Most layer classes expect the rst
parameter passed in to be the tle of the layer. This tle can be anything you would like, the
main purpose of it is for human readability—it is displayed in controls such as the layer list.
Line [15]: 'http://vmap0.tiles.osgeo.org/wms/vmap0',
The URL is the second parameter that the WMS layer class expects to receive. For now, we're
using a publicly available WMS service from OSGeo. We will cover in depth the WMS in
Chapter 3. For now, all you need to know is that this is the base URL, which the layer will be
using.
Line [16]: {layers: 'basic'},
The third parameter is an anonymous object containing the layer properes (similar in
format to the previous opons object on line [12]), and is specic to the WMS layer class.
These are the things that are actually added (more or less) straight into the GET call to the
map server backend when OpenLayers makes requests for the map images.
JavaScript object notation
In OpenLayers, we pass in anonymous objects to classes a lot. In JavaScript, anonymous
objects are comma separated key:value pairs, and are set up in the format of
{key1:value1, key2:value2}. They are, basically, objects that are created without
deriving from a class. This format is also referred to as JavaScript Object Notaon.
When we say key1:value1, it's similar to saying "key1 = value1", but we use a colon
instead of an equals sign. We can also create an anonymous object and pass it in instead of
creang it on the line, for example:
var layer_parameters = {layers: 'basic'};
var wms = new OpenLayers.Layer.WMS('layer_title', 'url',
layer_parameters, …);
With a WMS layer, we need to pass in, at a minimum, a layers key. In this case it has the
value of 'basic'. This layer parameter species layers that exist on the map server. So,
when you ask the WMS server from a map image with the layer 'basic', it sends you back
an image that is composed of that layer. You can also ask for mulple layers from the map
server. In this case, we only want the WMS service to give us back an image that contains a
layer called 'basic'.

Geng Started with OpenLayers
[ 22 ]
Let's get back to the code.
Line [17]: { }
The fourth parameter is an oponal opons object, an anonymous object in the format we
just discussed. These properes are generally shared by every OpenLayers Layer class. For
instance, regardless of the Layer type (e.g., WMS or Google Layer), you can pass in an opacity
seng (e.g., {opacity: .8} for 80 percent opacity). So, regardless of whether you are
working with a WMS or a Vector layer, this opacity property can apply to either layer.
Since this is the last thing passed into the Layer object creaon call, make sure
there is not a leading trailing comma. Trailing commas are a common error and
are oen tedious to debug.
This opons object is oponal, but we will oen use it, so it's a good habit to keep our code
consistent and provide an empty object (by {}), even if we aren't passing anything into it yet.
Line [18]: );
This simply nalizes the object creaon call.
Line [20]: map.addLayer(wms);
Now that we have a wms_layer object created, we need to add it to the map object. Noce
we are calling a funcon of the map object. There are actually a few ways to go about adding
a layer to a map object. We can use the above code (by calling map.addLayer), where we
pass in an individual layer, or we could use map.addLayers:
map.addLayers( [layer1, layer2, ...] );
Here, we pass an array of layers. Both methods are equally valid, but it may be easier to pass
in an array when you have mulple layers.
You can also create the layer objects before you create the map object and pass the layer
objects into the map when you create it, for instance:
map = new OpenLayers.Map('map_element', {layers: [layer1, layer2,
…]});
All ways are valid, but we will usually use addLayer or addLayers throughout the book.
Line [21] - [23]:
if(!map.getCenter()){
map.zoomToMaxExtent();
}
Chapter 1
[ 23 ]
Finally, we must specify the map's viewable area. Here, the actual code that moves the map
is map.zoomToMaxExtent(), which zooms the map to the map's maximum extent. It is
inside an if statement. This if statement checks to see whether the map already has a
center point.
The reason why we add in this check is because, by default, your map can accept a specially
formaed URL that can contain an extent and layers to turn on/o. This is, in more common
terms, referred to as a permalink. If we did not check to see if a center has already been
set, permalinks would not work.
By default, your map adds an argParser control which will try to pull
informaon from a permalink. We cover this in Chapter 6, but to see it in acon
now you can simply add the following to your URL, which will zoom the map to
the same coordinate and zoom level: ?zoom=4&lat=56&lon=-116
So, your URL might look like c:/code/index.
html?zoom=4&lat=56&lon=-116
There are a few ways to set the map's extent. If you know you want to show everything, the
map.zoomToMaxExtent() funcon is a quick and good way to do it. There are other ways
as well, such as
map.zoomToExtent(new OpenLayers.Bounds([minx,miny,maxx,maxy]);
There are even more ways though. If you know a specic locaon you want the map to start
at, this is another way to do it:
map.setCenter(new OpenLayers.LonLat(x,y));
map.zoomTo(5);
Where x,y are the Lon/Lat values, and 5 is the zoom level you wish to zoom to. By default,
your map will have 16 zoom levels, which can be congured by seng the numZoomLevels
property when creang your map object.
More ways exist, but these are the most common strategies. The basic idea is that you need
to specify a center locaon and zoom level—seng the extent accomplishes this, as does
explicitly seng the center and zoom level.
Line [24]: }
This simply nishes the init() funcon.
Lines [26], [27]:
These lines close the script tag and head tag.
Line [29]: <body onload='init();'>

Geng Started with OpenLayers
[ 24 ]
This starts the body tag. When the page is nished loading, via the onload='init();'
aribute in the body tag, it will call the JavaScript init() funcon. We have to wait unl
the page loads to do this because we cannot use the map div (or any HTML element) unl
the page has been loaded. Another way to do this would be to put the init() call in a
JavaScript tag at the boom of the page (which would not be called unl the page loads), but
both methods accomplish the same thing.
When browsers load a page, they load it from top to boom. To use any DOM (Document
Object Model) elements (any HTML element on your page) in JavaScript, they rst have to
be loaded by the browser. So, you cannot reference HTML with JavaScript before the browser
sees the element. It'd be similar to trying to access a variable that hasn't yet been created.
Even though we have JavaScript code that references the map_element div at the top of
the page, it is not actually executed unl the page is loaded (hence the need for the onload
and init() funcon call).
Line [30] and [31]: <div id='map_element' style='width: 500px; height:
500px'></div>
To make an OpenLayers map, we need an HTML element where the map will be displayed in.
Almost always this element will be a div. You can give it whatever ID you would like, and the
ID of this HTML element is passed into the call to create the map object. You can style the div
however you would like—seng the width and height to be 100 percent, for instance, if you
wanted a full page map. It would be best to style the elements using CSS, but styling the div
in line like this works as well.
Lines [32] and [33]: These lines nalize the page by closing the remaining tags.
Behind the scenes—Object Oriented Programming (OOP)
Now, let's talk about how this stu works from a more theorecal and technical level.
OpenLayers employs Object Oriented Programming (OOP) techniques, meaning that to use
with the library, we create objects from built in classes that OpenLayers provides.
What does this mean? You already are familiar with what classes and objects are, but you
just may not know it. Think of the concepts of a class and object in terms of the parts of
speech. For example, think of what the abstract idea of a noun means—a person, place,
thing, or idea. Noun itself (the abstract idea) is a class. But the actual, concrete words that
qualify as a noun are objects.
Chapter 1
[ 25 ]
Interaction happens with objects
Ironman and Batman are two separate words (or, in terms of OOP, two objects), but they
belong to the same noun class. A class is primarily used to generate objects; we interact with
objects. Consider these two sentences:
"Noun was in a ght with noun."
"Ironman was in a ght with Batman."
Now, the second sentence is more of an actual sentence. We use the words Ironman and
Batman in the sentence (which are objects; they are instances of the noun class). We don't
use noun (a class) in the sentence, because interacng with a class like this doesn't make
much sense. This is one of the important concepts of OOP—we interact with objects, and we
generate objects through classes.
MadLibs
Madlibs, for those unfamiliar with it, is a game where you are given text with some missing
words. The point is to come up with words to ll in the blanks, but each blank can only
contain a certain type of word (noun, adjecve, verb, and so on). The type of word is a class
and the actual word you insert is an object.
Time for Action – play MadLibs
Finish this sentence, by replacing verb and noun with verb and noun 'objects':
I verb up to the noun. It's about 7 or 8 o'clock. I looked at my noun. I was there, to verb on
my throne as prince of noun(place).
What Just Happened?
You just did a Madlibs, demonstrang some of the concepts of OOP. As you can see, it
doesn't make much sense to read the sentence as "I verb up to the noun". Since verb and
noun are classes, we don't use the actual term verb or noun in the sentence.
So, the idea would be to generate separate objects, one of the class noun and one of the
class verb. For example, the previous sentence could be completed like: "I pulled up to
the house". Pulled and house are objects that are instances of the verb and noun classes,
respecvely.
We use words that belong to those classes, which are objects. Another term used when
referring to objects is instance, which is used to designate the class the object is derived
from, for example, Frodo (a person / hobbit) is an instance of a noun.
Downloa d f r o m W o w ! e B o o k < w w w.woweb o o k . c o m >

Geng Started with OpenLayers
[ 26 ]
Programming with OOP
The same concept applies to programming. The only thing we can really do with a class is to
create an object from it. Objects are derived from classes—you can interact and do things
with objects, but not with classes. So, in OpenLayers, we need to create objects from the
built in classes to be able to really do anything. The main thing we need are map and layers
objects. If we want to create an OpenLayers map, we need a map object, and we create it in
the following manner:
var map = new OpenLayers.Map( … );
The new declaraon means that we want to create a new object from the OpenLayers.Map
class. The ellipsis (...) in the parenthesis presents things we pass into the class to create
our object, called arguments. Each class expects dierent arguments to be passed into it. It
is similar to the Madlibs example—the noun class accepts only certain words. If we were to
create a word object in JavaScript, the code may look something like this:
var my_word_object = new Noun('Ironman');
Here, we pass in 'Ironman' to the noun class, and now we have our word object. Because
the Noun class only accepts nouns, this would work ne. If we try to pass in a verb, for
instance, it would not work because the noun class cannot accept things that are verbs.
Similarly, the Map class expects dierent arguments to be passed into it than the Layer class
does.
Subclasses
There are also subclasses, which are classes derived from another class and inherit all the
aributes from the 'base' class it inherits from. Subclasses can also override properes and
methods that they inherit.
For instance, let's say we have a Dog class that is a subclass of the Animal class. The Dog class
would inherit all the aributes of the base Animal class—such as, perhaps, a speak method.
Now, the Dog class would override the speak method and it would bark (or 'yap' annoyingly)
when called. The Dog class might also provide addional methods that weren't in the base
Animal class, such as, perhaps, a wag_tail method.
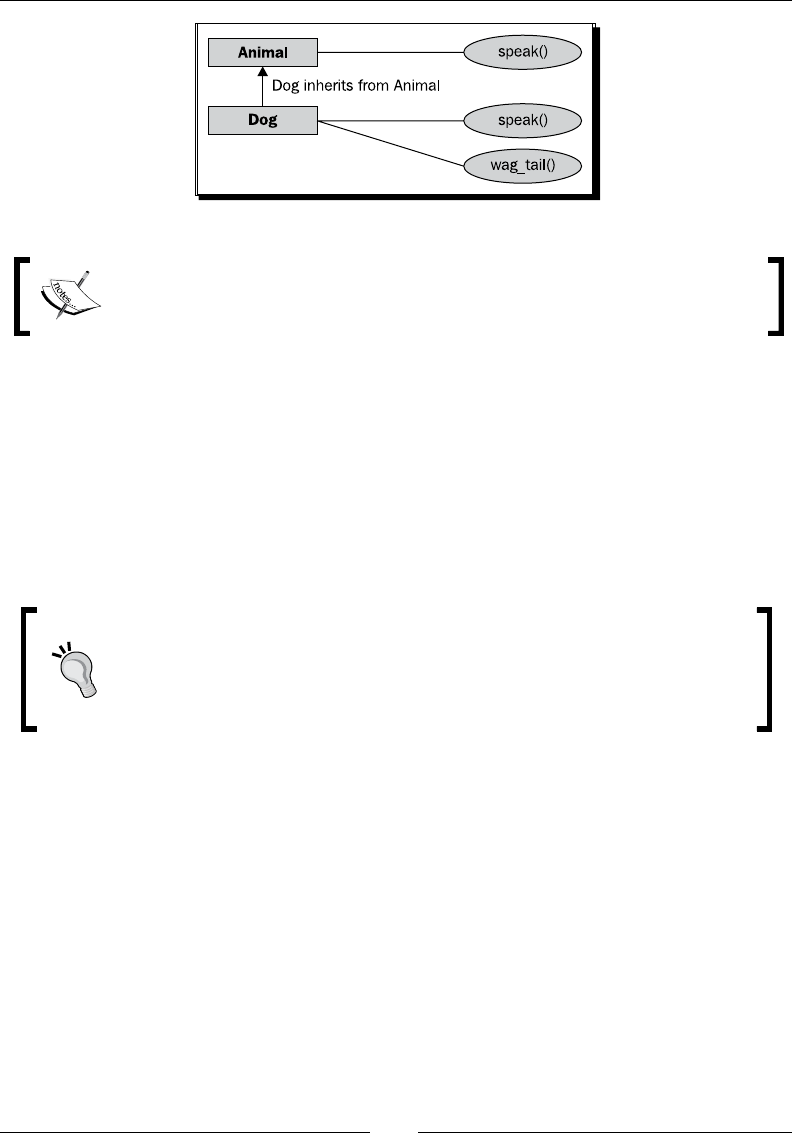
Chapter 1
[ 27 ]
'Base' class and 'Subclasses' are both classes; the terminology just helps to clear
up what class inherits from what other class.
There are many subclasses in OpenLayers, for example, the GoogleMap Layer class is a
subclass of the base Layer class, and the Navigaon control class is a subclass of the base
Control class. Subclasses are sll classes, and the exact same concept applies; we sll need
to generate objects from the class to use it.
The previous secon was just an introducon to OOP. While you don't necessarily need
to know a whole lot more about OOP concepts to use this book, a great resource to learn
more about the concepts can be found at http://en.wikipedia.org/wiki/Object-
oriented_programming.
Classes are easy to spot in OpenLayers code. By convenon, in OpenLayers
(and many other places) class names are CamelCased, which means the
rst leer of each word is capitalized, while objects are not. For example,
MyClass would be an example of a class name, while my_object would be
an example of an object.
Now what?
Our coverage of the sample code was not meant to be extremely thorough; just enough to
give you an idea how it works. We'll be covering OOP concepts in more detail throughout the
chapters, so if anything is bit unclear, don't worry too much.
As OpenLayers is a library and provides funcons for you, it is important to know what those
funcons are and what they do. There are many places to do this, but the best source is the
API docs.

Geng Started with OpenLayers
[ 28 ]
API docs
The API documentaon is always up to date and contains an exhausve descripon of all
the classes in OpenLayers. It is usually the best rst place to go when you have a queson.
You can access the documentaon at http://dev.openlayers.org/docs/files/
OpenLayers-js.html. It is connually updated and contains a wealth of informaon. We
will constantly refer to it throughout the book, so keep the link handy! Somemes, however,
the API docs may not seem clear enough, but there are plenty of other resources out there
to help you.
Where to go for help
Books are great, but they're basically just a one way form of communicaon. If you have any
quesons that the book does not answer, Google is the best rst place to go. Mailing lists
and IRC are other great resources. Somemes it's hard to formulate the right queson, but
there is help!
This book's website
The extension website for this book can be found at http://vasir.net/openlayers_
book. Current, up to date correcons and code xes, along with more advanced tutorials
and explanaons, can be found there—and also on my blog at http://vasir.net/blog.
You can also grab the code and more informaon about this book at Packt Publishing's
website for the book, located at https://www.packtpub.com/openlayers-2-1-
javascript-web-mapping-library-beginners-guide/book.
Mailing lists
The OpenLayers mailing list is an invaluable resource that lets you not only post quesons,
but also browse quesons others have asked (and answered). There are two main
OpenLayers news groups—Users and Dev. The Users list is where the majority of quesons
are asked. Dev is reserved for development of the OpenLayers library itself. If you have
quesons about how to use OpenLayers, they belong in the Users list, not the Dev list. You
can subscribe to the mailing list at http://lists.osgeo.org/mailman/listinfo/
openlayers-users.
There are various ways to browse the content, and I prefer to use Nabble. You can view the
lists at http://osgeo-org.1803224.n2.nabble.com/OpenLayers-f1822462.html.

Chapter 1
[ 29 ]
Please do a thorough search before posng quesons, as it is likely that a
queson similar to yours has already been asked and solved. If you have a
queson about using OpenLayers, please use the User list. Please do not post
quesons to the Dev list, unless it has to do strictly with development of the
OpenLayers library itself.
When posng a queson, please be as thorough as possible, stang your problem, what you
have done, and the relevant source code (e.g. "I have a problem with using a WMS layer. I
have tried this and that, and here is what my source code looks like..."). A good guideline
for asking quesons in a way that will best elicit a response can be found at http://www.
catb.org/~esr/faqs/smart-questions.html.
IRC
Internet Relay Chat (IRC) is another great place to go if you have quesons about
OpenLayers. IRC is used for group communicaon; a big chat room, essenally. If you have
exhausted Google and the mailing list, IRC provides you with real me with other people
interested in OpenLayers.
Generally, the people who hang out in the OpenLayers chat room are very friendly, but
please try to nd an answer before asking in IRC. The server is irc.freenode.net and
the chat room is #openlayers. You can download an IRC client online; a good Windows
one is mIRC (http://mirc.com). More informaon about how to use IRC can be found at
http://www.mirc.com/install.html.
OpenLayers source code repository
Tradionally, OpenLayers has used SVN as its revision management system. At the me of
wring, however, the source code repository locaon is hosted at GitHub. You can access the
enre code repository at http://github.com/openlayers/openlayers.
Feel free to download a copy and play around with it yourself. There is a process to actually
get your code permanently added to the ocial source code base, but it cannot hurt to
download a copy of the code base and look around it yourself to gure out how it's really
working!

Geng Started with OpenLayers
[ 30 ]
Summary
In this chapter we were introduced to OpenLayers and learned a bit about it.
We saw what Web Map Applicaons are and how they work. Aer that, we created our rst
map with OpenLayers, then analyzed how the code works. Then we covered a fundamental
concept, Object Oriented Programming, which we'll need to know about while really working
with OpenLayers. Lastly, resources for help and informaon outside this book were provided.
Now that we have a basic handle on OpenLayers, we'll jump straight into debugging
OpenLayers. By doing so, we'll cover more thoroughly many of the concepts that we've
discussed, such as how OpenLayers requests and receives map images, and how it puts
them together.
2
Squashing Bugs With Firebug
OpenLayers is, at a fundamental level, not doing anything that is conceptually
too hard to grasp. It gets map images from a server, and puts them together.
From a technical level, however, there is a lot of work going on, and it might
seem magical how it all works together so well.
Fortunately, there are many tools to dispel any potenal magical thinking
we might have and show us how OpenLayers is working behind the scenes.
Firebug, a free and open source plugin for Firefox, is one such great tool.
Speeding up development me, viewing network communicaon, and
squashing bugs are just a few things that Firebug, and other web development
tools, do that make them hard to live without.
To really use OpenLayers eecvely and to its full potenal, we need to
understand how it works. In this chapter, we'll try our best to do just that, by
using web development tools to examine OpenLayers' inner workings. By doing
so, we'll accomplish two things. First, we'll become familiar with these tools
which will signicantly help us when developing our maps. Secondly, and more
importantly for now, we'll gain a beer understanding of how OpenLayers
works.
Throughout this chapter we'll cover:
What Firebug and other development tools are
Seng up Firebug
Each of the Firebug Panels
Using the JavaScript Command Line Console panel
Squashing Bugs With Firebug
[ 32 ]
What is Firebug?
Firebug is a free, open source addon for Firefox. If you do not have Firefox, I recommend
downloading it (it is also free and open source). However, other modern and standards
based browsers, such as Google's Chrome, Apple's Safari, and Opera, also work well and
have great built in developer tools.
Firebug, and other web development tools, makes the web development process much
easier and quicker. What do I mean by this? With these tools, we can change anything on
our site, on the y, without eding or saving any les. We can type in JavaScript code with
a command line interface and execute it immediately. We can view all the requests that our
web page sends to servers, along with the server's reply. For example, if our map isn't able to
get back map images from the server, we could examine the requests our page is making and
nd out if we have any typos or haven't set up our map layer properly.
Using these tools makes it a lot easier to develop not only an OpenLayers mapping
applicaon, but any web applicaon, and makes it easier to x any bugs we encounter in the
process. We'll focus on Firebug in this chapter and refer back to it throughout the book, but
other tools such as Google's Chrome and Apple's Safari's built in developer tools work just as
well (although some funconality may vary).
Setting up Firebug
Since Firebug is an extension of Firefox, you'll need to rst install Firefox. You can download
it for free at http://getfirefox.com. Aer that, Firebug can be freely downloaded at
http://getfirebug.com. When you click on the link to download Firebug, Firefox will
prompt you with a message asking if you wish to install the plugin. Aer installing, all you
have to do is restart Firefox and you'll be good to go.
Time for Action – downloading Firebug
If you do not already have an up to date version of Firefox installed, please do so now. Aer
you have installed Firefox, set up Firebug by following these steps:
1. Go to http://getfirebug.com.
2. Click on the Install Firebug for Firefox buon. Once you click this, you should see a
message similar to this:

Chapter 2
[ 33 ]
3. Click Install, wait for it to nish installing, and then restart Firefox.
4. Now that Firebug is installed, you should see a Firebug icon on the boom
right side of your screen.
What Just Happened?
When Firebug is not enabled, the Firebug Icon is gray. When it is in enabled, it has an orange
color—this is just a quick way for you to tell if Firebug is enabled or not for the current page
you're on.
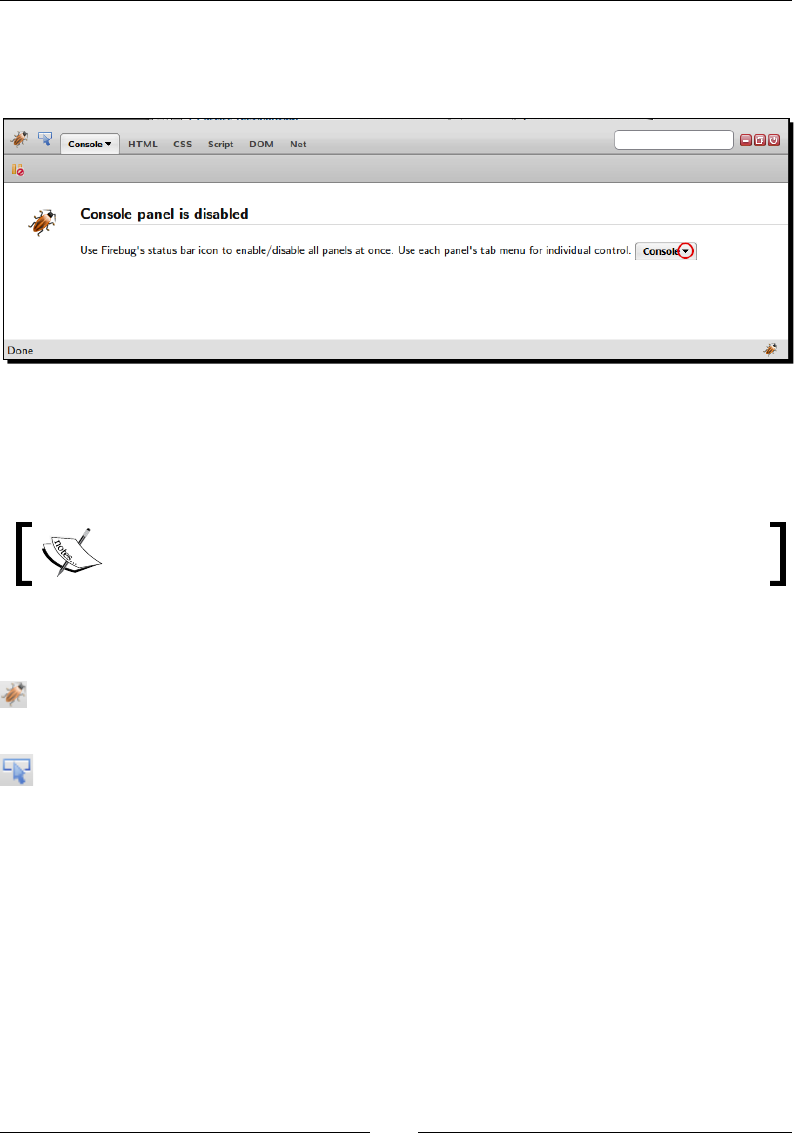
Squashing Bugs With Firebug
[ 34 ]
When you click on the Firebug icon (near the boom right of your browser's window),
Firebug will open and you can start using it. But before we start, let's take a look at what
Firebug looks like aer inially installing it and clicking on the Firebug icon:
The top row contains two icons (a Firebug icon and a Page Inspector icon), mulple panels
that provide specic funconality (they look and act similar to tabs, but the technical term is
"panels"), a search box, and nally minimize, maximize, and close the buons. Let's go over
the items, le to right, one at a me.
The posion of the icons may change over me as Firebug is updated; but the
general funconality should remain (more or less) the same.
Firebug controls
Firebug icon: The Firebug icon on the top le contains various commands and opons
related to Firebug when you click on it.
Page Inspector icon: This icon, a cursor inside a rectangle, is the HTML Inspector. When
you click on it, your mouse cursor will idenfy HTML elements on the web page. So, when
you mouse over anything on a website, the element will be outlined in blue and the HTML
panel will open up and show you the element your mouse is over.
Panels
The next set of controls is called panels; each panel provides a dierent type of funcon. The
panels act like tabs (the two terms can be used interchangeably), but Firebug refers to them
as 'panels' in the documentaon. Let's go over each panel, since they are, essenally, what
makes up Firebug.
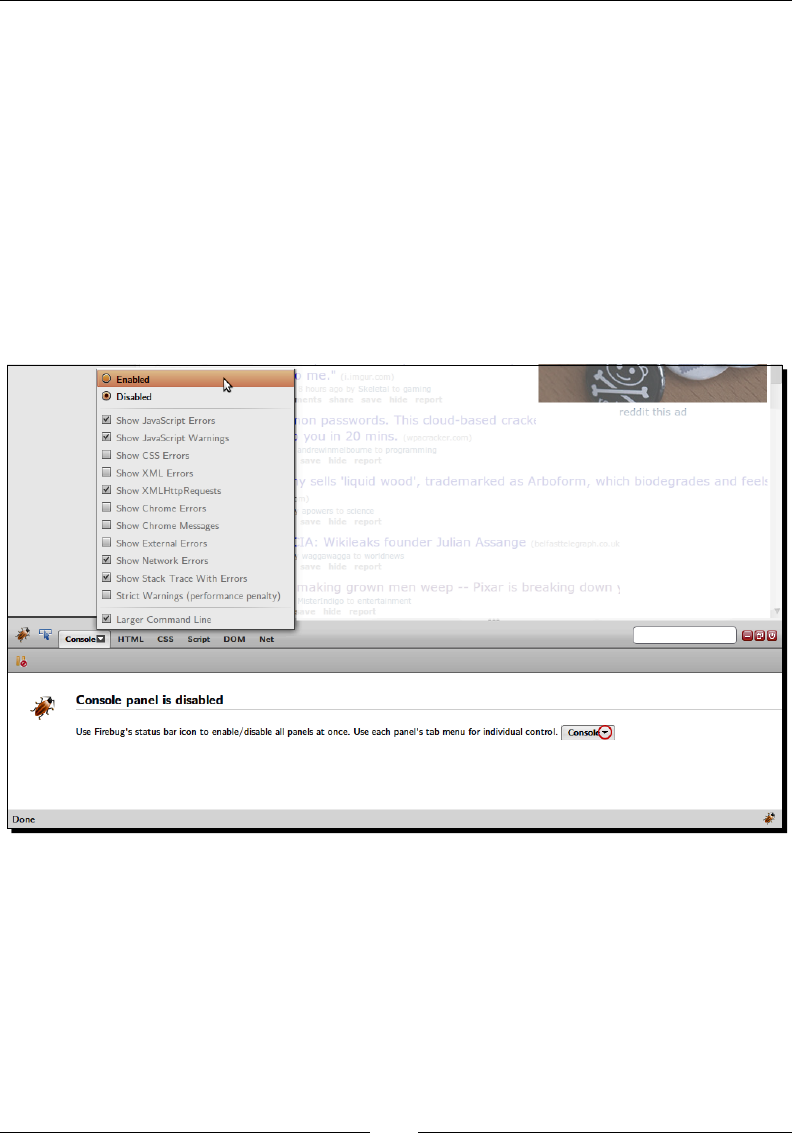
Chapter 2
[ 35 ]
Console panel
Firebug's Console panel is where we'll spend most of our me. It acts as a powerful
JavaScript command line, or interpreter, which means we can type in JavaScript code
and execute it right away—no need to save or edit any les.
One thing that makes this so useful is that we can interact directly with the DOM (Document
Object Model—any HTML element on the webpage), including any exisng JavaScript code
the page contains. So, this means we're able to interact with our OpenLayers map on the y,
issuing command and tesng code to instantly see what works and what doesn't. As you can
imagine, this saves a ton of me!
By default, the Console panel is disabled. To enable it, click on the arrow near the Console
text and select Enabled.
HTML panel
The HTML panel provides not just a display of the HTML source code, but also the ability
to quickly edit any HTML element and its associated style. You can add and remove HTML
elements, edit HTML aributes, and change nearly anything about the page without having
to save any les. It's great for development.

Squashing Bugs With Firebug
[ 36 ]
How it works
Firebug automacally builds a tree structure from your HTML code, allowing you to expand
and hide each HTML tag. It is important to note that the code you see in the HTML panel
is generated HTML code—the code in the panel may not be exactly the same as the page's
source code.
HTML panel contents
Here is what the HTML tab looks like when Firebug is opened while viewing a webpage:
On the le side, Firebug shows us the HTML of the page. We can right click on any tag and do
various things—such as copying the HTML to the clipboard, deleng the element, changing
the tag aributes, and more.
On the right side, we see the associated style informaon for the element we have selected.
Here, we can modify or add properes and they will instantly appear on the page. In this
example we selected a div element with a class of 'left_sidebar_item'. Looking at the
CSS on the right side, there is no denion for the 'left_sidebar_item' class (if there
was, we would see something called .left_sidebar_item, with a period in front of it
to indicate that it is indeed a class). We do, however, see a denion for #left_sidebar,
which is a parent div of the currently selected div.
If you are unfamiliar with HTML or CSS, the w3schools site is a great resource.
For more informaon on HTML, visit http://www.w3schools.com/
html/default.asp and for CSS visit http://www.w3schools.com/
css/default.asp.
What does this mean? Well, Firebug lists all inherited style informaon, and parent element
styles propagate down to all their child elements (each child has all its parent's styles, unless
the child overrides a style, which doesn't happen in this example). That's why we also see
the body, html denion, and every div will display that, since every div sits inside the
<html> and <body> tags of the web page.
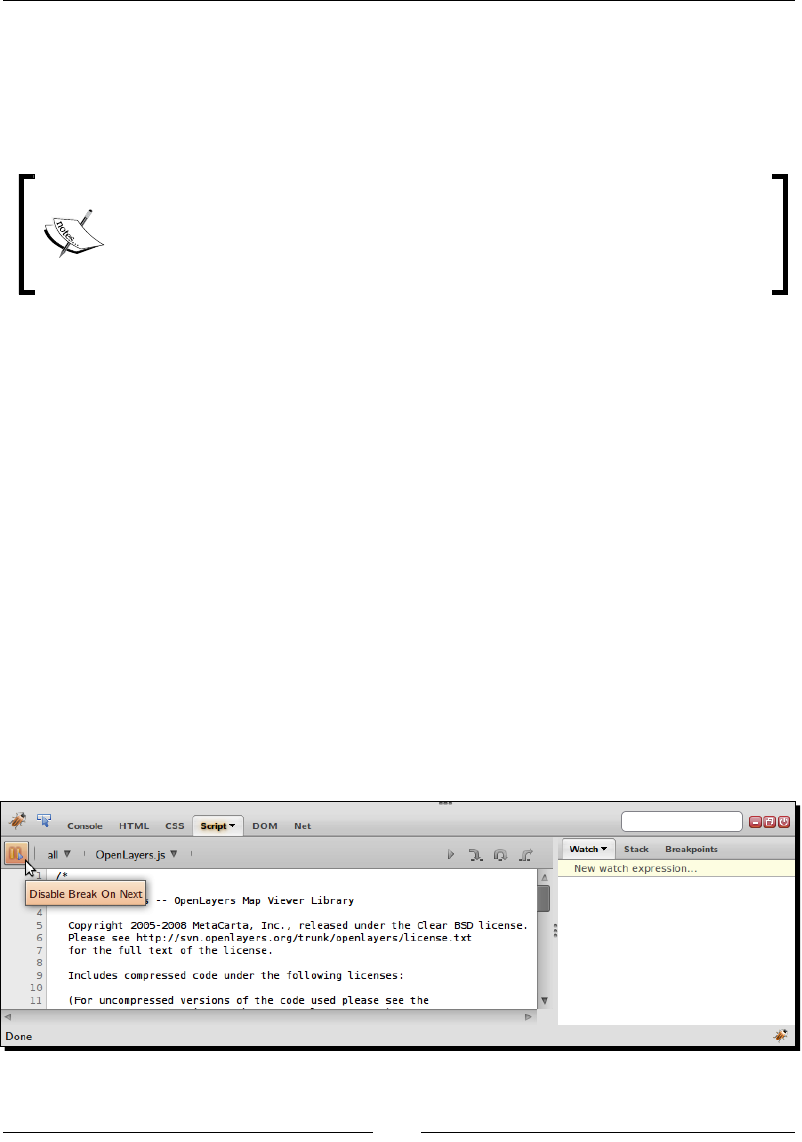
Chapter 2
[ 37 ]
By double clicking on prey much anything in the HTML or CSS list you can quickly change
values and names. Any change you make will immediately show up on the page, which
makes it very easy to change style in real me and see how the page is aected without
having to edit and save any les. Play around with it a bit—if you mess anything up, you can
just reload the page.
When eding pages with Firebug, any changes you make will disappear when
you refresh the page. You are not eding the actual web server's les with
Firebug—instead, you are eding a copy that is on your computer that only you
can see when you make changes to it. So, if you make any changes and want
them to be saved, you'll have to edit your actual source code.
CSS panel
This panel provides similar funconality as the CSS sidebar in the HTML panel we just talked
about. It also provides the opon to edit any CSS document associated with the page, not
just the style of a selected element. We need not talk much about this panel, and for the
purposes of this book we won't spend much me here. But if you are a web designer, this is
another powerful panel that can greatly speed up your development me.
Script panel
The Script panel is very powerful. Not only does it allow you to view all the JavaScript
code associated with the page, it is a great real-me code debugger. You can set watch
expressions, view the stack, set breakpoints, etc. If those terms are foreign, don't worry,
we won't be spending much me with this panel.
However, before we move on to the next panel I want to quickly talk about enabling
breaking on errors. With this opon enabled, Firebug will stop the web page whenever a
JavaScript error is encountered. This makes it very easy to quickly pinpoint where your page
is blowing up at. To enable it, simply click on the pause-buon icon.

Squashing Bugs With Firebug
[ 38 ]
Keep note of when you enable it—I've been frustrated more than once when developing
because I forgot that it had been enabled. When it is enabled, the Script text will glow
yellow, as demonstrated in the above screenshot. You can also enable/disable it through
the Console panel.
Unfortunately (depending on your viewpoint), we can't go much more in depth with these
tools, as it is outside the scope of this book. But please feel free to play around with them,
as Firebug's powerful debugger is a great resource. More informaon on it can be found at
http://getfirebug.com/errors.
DOM panel
The next panel is the Document Object Model panel, or DOM panel. The DOM is, basically,
a representaon of HTML elements as objects. The DOM panel automacally sets up a
tree structure to represent our HTML page, allowing us to view everything our HTML page
contains. We can also see JavaScript variables and their values, as well as funcons, objects,
and more. When using the DOM panel, aributes and properes are colored black, and
funcons and methods are colored green.
We won't go much more in depth here, but the DOM panel is a very valuable tool, especially
when you want to take a peek at JavaScript components. By using the DOM panel (and
assuming we are looking at a page that includes OpenLayers), we can quickly see all of
OpenLayer's classes, funcons, etc. It is not a replacement for the API docs, but serves as a
good, quick way to view such informaon.
Net panel
Firebug's Net panel is a tool we will oen use throughout this book. Basically, it provides a
way for us to monitor network acvity by viewing all the requests and responses the web
page is making. We can see any Asynchronous JavaScript (AJAX) request the page makes.
Without AJAX, we would have to refresh our enre page anyme we wanted to do anything
with our OpenLayers map. So, for example, every me you zoom in, OpenLayers makes a
series of requests to the map server to get new map images, and the map server's response
is a new map image that OpenLayers then displays. This request/response method is handled
via AJAX—without it, we would have to refresh the enre page aer every request.
AJAX is a method by which, through JavaScript, you can send a request
to a server and receive a response without actually refreshing the page.
Tradionally, if you want your web page to get an update from the server,
you would need to have the page itself send a request.

Chapter 2
[ 39 ]
The Net panel allows us to see the URL that is being requested, the GET or POST parameters,
the server's response, the size of the response in KB, and the me it took to complete the
request. You may also have to enable the Net panel—it can be enabled in a similar way we
enabled the Console panel, by clicking on the arrow next to the Net text on the top tab. Let's
take a look at what the Net panel looks like for the example from Chapter 1:
Before we talk about the requests being made, take a look at the toolbar above the lists of
requests—the one that contains the links Clear, Persist, All, HTML, etc. Clicking on Clear will
do what its name implies—clears out the list of requests. Clicking on Persist will cause the
list of requests to persist, or not get deleted, on page reloads.
The next grouping of links allows us to lter the requests by type. Because we are geng
back only images from the map server in this case, all the requests you see would belong to
the Images opon. If the CSS opon was clicked, we would not see those requests, as they
are not CSS les.
Now, let's break down the actual request list.
Request list
The request list shows us all the requests the page makes. Each URL in the previous
screenshot is a URL that OpenLayers is making a request to. By clicking on the + (plus) sign
next to each request, we can get more informaon about the request, including the full
request URL and the response. When we click on the plus sign, we get a box with Params,
Headers, Response, and Cache tabs. The Params tab lists all the parameters, or key/value
pairs the URL contains. The Response tab provides us with the server's response to our
request. For the purpose of this book, we do not need to worry about the other two tabs.
Squashing Bugs With Firebug
[ 40 ]
Parameters
Take a look again at the list—before we mouse over the text in the screenshot, the tles
contain GET vmap0?LAYERS. The GET species that the request type is GET, which basically
means we are embedding variables inside the URL itself with key=value pairs, separated
by a & sign.
When we mouse over a URL, we can see more of it—as in the previous screenshot, we
see a bunch of variables in the format key=value&key=value& . . .. These values
correspond to the values listed in the Params tab when you expand the URL.
If you take a look at the link we have our mouse over, you'll noce that the URL is the same
as the URL from the example in Chapter 1, http://labs.metacarta.com/wms/vmap0.
However, there is an addional text aer vmap0; a queson mark followed by key=value
pairs. The queson mark signies the start of the key=value pairs in a GET request.
Let's take a look at some of the variables the URL contains.
?LAYERS=basic&SERVICE=wms . . .
The LAYERS key should look familiar, as we specied in Chapter 1. In that example,
we used the code:
{layers: 'basic'},
When we dened the key:value pair, we were essenally telling OpenLayers what to pass
into the actual URL it generates. From the generated URL, we can see that it did indeed pass
over the right layer name. Now, as we discussed earlier, this layer name, basic, is the layer
we want from the WMS service. The layer name we pass in here aects what image the WMS
server responds with. In this case, we'll get back an image with the layer named basic.
Noce that there are many more parameters (separated by & signs) than what we passed in.
OpenLayers automacally adds these parameters for you, so we get back the right image of a
map without us having to manually build each URL.
To see the enre key:value pairs, or parameters, expand the URL and look at the
Params tab.
Note that these GET variables, such as LAYERS and SERVICE are specic to WMS.
Other layer types will use dierent values.
Downloa d f r o m W o w ! e B o o k < w w w.woweb o o k . c o m >
Chapter 2
[ 41 ]
BBOX parameter
One of the important variables to take a look at in the URL is the BBOX, or Bounding Box,
parameter. Expand one of the URLs by clicking on the plus sign next to it and take a look in
the Params tab. This BBOX number is the extent of that individual map image piece. You'll
see a number in the following format:
minx, miny, maxx, maxy
These four numbers form a rectangle that contains the extent of the map image. A number
example might be something like -73.5, 39.3, -67.5, 45. These numbers will depend
on the projecon your map is in—but don't worry too much about that for now.
If you look at the BBOX parameter of other URLs, you'll noce that part (or all) of the
BBOX values change for each request. URLs that are grouped together in the request
list share some values for their BBOX parameter. It is analogous to a grid; each request
returns an individual cell of the grid. (This funconality is not the same for all Layer types in
OpenLayers, but this basic concept holds for the majority of Layer types, including the WMS
layer in this example.)
Pop Quiz– panel
1. What panel would you use if you wanted to execute JavaScript code?
a. The Net panel
b. The Console panel
c. The DOM panel
d. The HTML panel
Panel conclusion
Each panel serves a certain purpose and all of Firebug's panels are extremely useful, but
throughout the book we will be mainly focusing on the following panels:
Console panel (Command Line JavaScript)
HTML panel
Net panel
These three panels will be used the most throughout the book. We'll occasionally come back
to the other panels, but we won't spend a whole lot of me with them. However, before
we conclude this chapter, let's get a bit more familiar with the Console panel, since we'll be
making heavy use of it in the coming chapters.
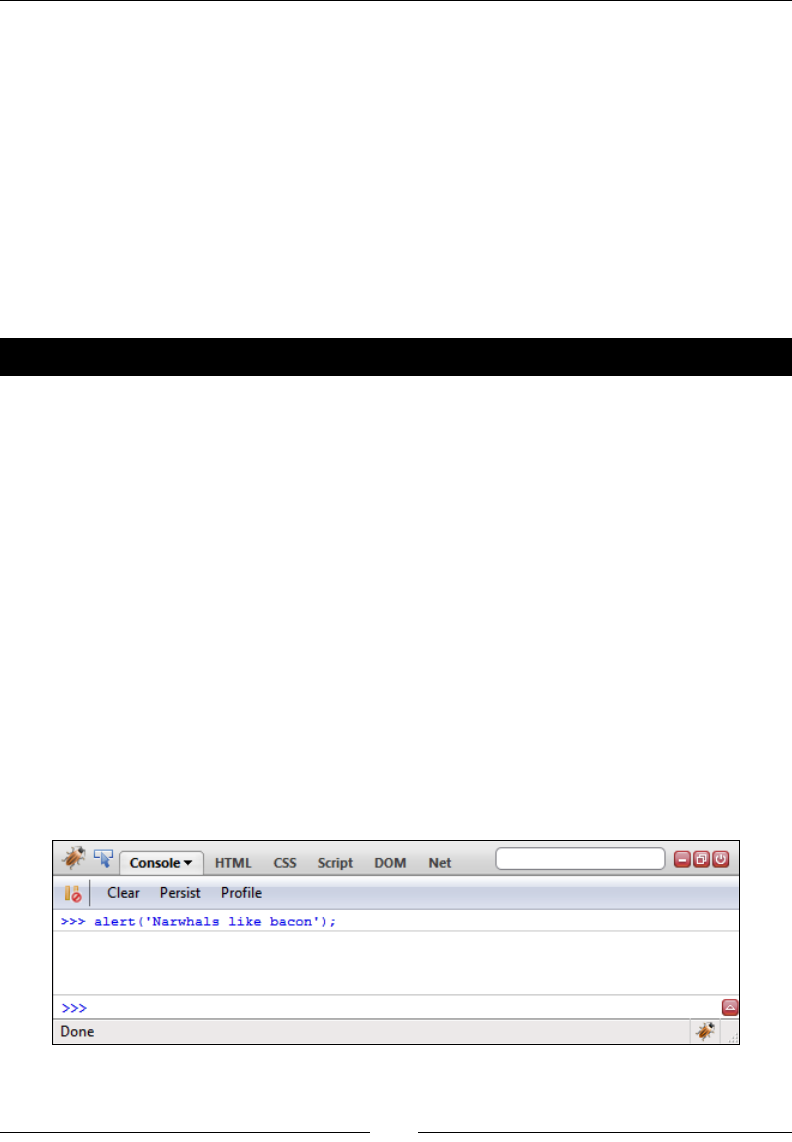
Squashing Bugs With Firebug
[ 42 ]
Using the Console panel
We talked a bit about what the console panel is—essenally, a JavaScript command line. We
can execute any JavaScript code we want, and interact with any page element. There are two
primary components to the Console panel—the console log area and the input area.
The console log area will display informaon about any errors, along with displaying any
code that is entered. The input area allows us to either enter a single line of code or, by
clicking on the red arrow on the right side of the input box, mulple lines of code.
Before we start using the console with our maps, let's get familiar with the console by
execung some JavaScript code.
Time for Action – executing code in the Console
We're going to do some basic JavaScript coding via the Firebug console; specically, just
calling a built in alert() funcon to display an alert.
1. Open up Firefox. It doesn't maer at this point what website (if any) that you go to,
since we will be wring a stand alone code.
2. Open up Firebug by clicking on the Firebug icon. Go to the Console panel. If it is not
enabled, enable it.
3. Now, at the boom of your screen you'll see an area where you can enter code,
designated by >>>. Clicking anywhere aer that will allow you to enter the code.
4. Type in the following code, and then hit Enter.
alert('Narwhals like bacon');
5. You should see an alert box pop up with the text Narhwals like bacon (or
whatever string you passed into the alert funcon). Aer the code is executed,
it will appear in the log above the input line.

Chapter 2
[ 43 ]
What Just Happened?
We just executed some JavaScript code without having to edit and save any les. Although
we did a simple alert, we are really not limited by what we can do. Anything that we could
save in a JavaScript le, we could enter in the Console.
You'll also noce that the same code that we typed in appeared in the log area. We'll also get
an error message if any errors occur with the code—go ahead and try it! Instead of typing
alert('My alert'); type something like fakealert('Boom');. This will give you a
reference error, since nowhere is the funcon fakealert() dened—alert(), on the
other hand, is a built in funcon, so we can call it from any page.
That's prey much to it! The rest just builds on those principles. Let's go ahead and do just
one more thing, something only slightly more involved, before jumping into manipulang an
OpenLayers page.
Time for Action – creating object literals
We're going to introduce object literals and get acclimated with how to manipulate them
now, so we can beer work with OpenLayers code.
1. Open up Firefox and Firebug's Console panel (enabling it if it disabled)—again, it
doesn't maer right now what page you're on.
2. Click on the red arrow on the boom right, above the Firebug icon. This will open
up a side panel where we can type in mulple lines of code. The code will not be
executed when we press Enter, like in single line mode. Instead, we can execute the
code by either pressing Ctrl + Enter or clicking Run.
3. Type in the following code, and then execute it by pressing Ctrl+Enter or clicking
Run.
var my_parameters = {'answer': 42, 'question': null};
console.log(my_parameters);
4. The above code should display, in the console log area, something similar to
Object { answer=42 }. Click on it, and the DOM panel will open, showing you
all the informaon about the object you just created.
5. Click on the Console panel to get back to it. In the input box, add the following code
to the exisng code and execute it:
console.log(my_parameters.answer);
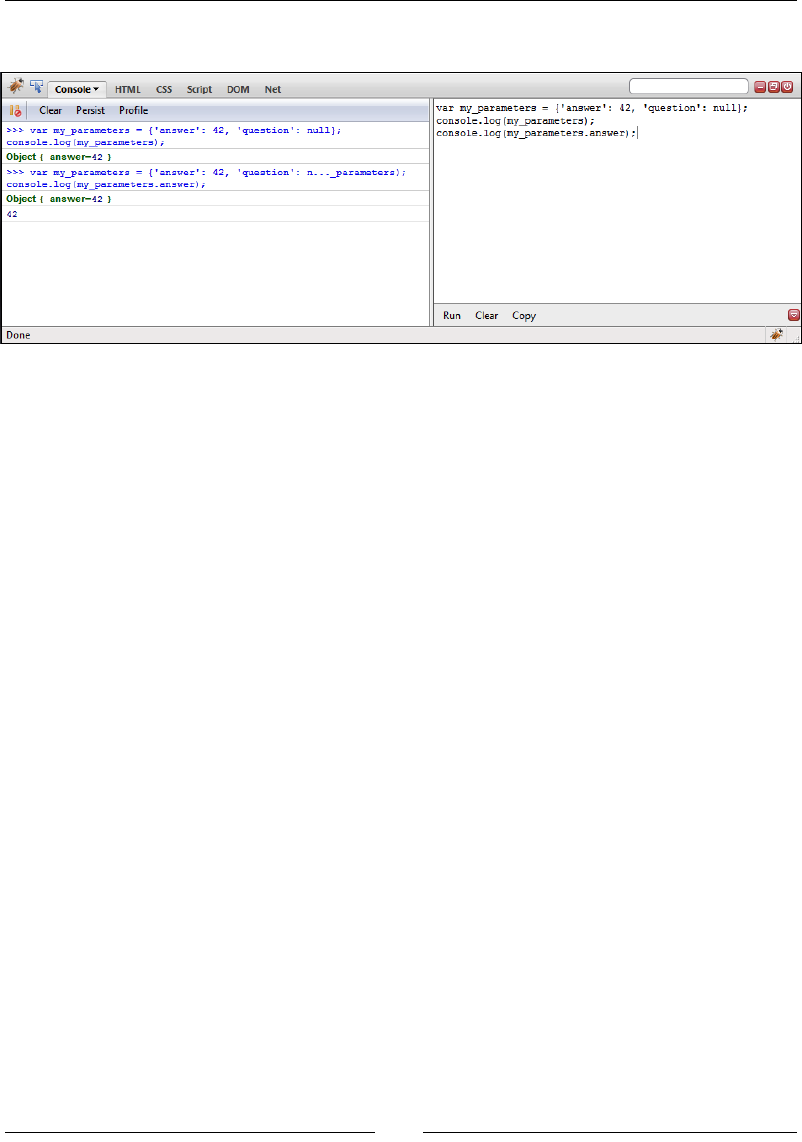
Squashing Bugs With Firebug
[ 44 ]
6. You should see a line of output in the console area containing the number 42.
What Just Happened?
We just created what is called in JavaScript an anonymous object, or object literal. Now, we
have discussed how objects are created from classes, and in JavaScript we need to use the
new keyword to instanate an object from a class. But there is no new keyword here!
Object literals
The key concept here is that we are just creang a single object that does not derive from a
class. Since object literals (anonymous objects) do not derive from a class, it is, essenally, an
empty object. It contains only what we explicitly dene. The value associated with a key can
be almost anything—a string, integer, funcon, array, or even another object literal.
We encountered object literals in Chapter 1 when we discussed JavaScript Object
Notaon—they were the {key:value} pairs used to dene the parameters and opons
of our layer and objects. The only dierence is that we did not assign a variable to them;
we simply passed them in when we created our layer object.
Object literals are extremely useful for a variety of tasks, and it is a great way to package
informaon in an easy to use form. They are in the form of {key:value, key2:value2}.
We can access any property of an object literal by using dot notaon, in the form of my_
object_literal.key. The key, like before, is the key part of the key:value pair. In the
above code, we call console.log(my_parameters.answer); and the value of the key
answer is displayed in the console's log area.
Chapter 2
[ 45 ]
console.log(): The Firebug funcon console.log() is a funcon that will,
essenally, display what you pass into it in the console log. You can pass in
variables, strings, objects; anything, and it will display in the log. It comes in
handy oen, so geng familiar with it is a good idea.
We will use object literals frequently when making our maps—so if they don't make much
sense yet, don't worry. The basic idea to grasp, and the primary way we will use them, is
that they are essenally key:value pairs. Before we end this chapter, let's do one quicker
example where we interact with an OpenLayers map using the Console panel.
Time for Action – interacting with a map
We'll use the map we created in Chapter 1 to do this example, interacng with our
OpenLayers map by calling various funcons of the map.
1. Open up the map from Chapter 1 in Firefox. Enable Firebug and the Console panel. If
you would like, you can take a look at the Net panel and view the network acvity to
see the requests your page is making.
2. Go to the Console panel, input and then execute the following code:
console.log(map);
3. You should see the map object informaon come up in the console log. Click on
it, and take a moment to look over the various aributes it has. Near the boom,
you can see a list of all the funcons that belong to it (which are also referred to as
methods).
Take note of the funcon names, as we'll be using them.
4. Go back to the Console panel, type in and execute the following code:
map.zoomIn();
map.getExtent();
5. Take note of the extent. Clear out the code you typed in, then type in the following
and execute it:
map.zoomToMaxExtent();
map.getExtent();
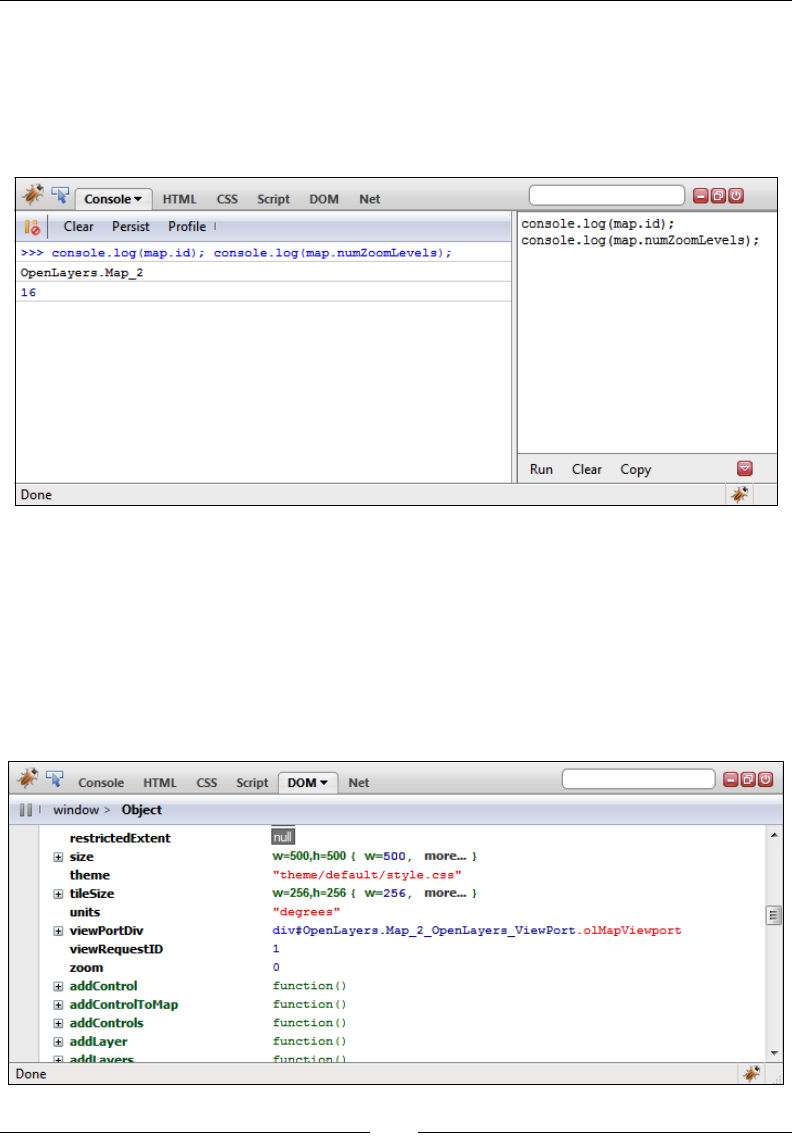
Squashing Bugs With Firebug
[ 46 ]
6. Now, let's take a look at some properes of the map object. We can access the map
properes using the dot notation, which we discussed previously. Clear any code
you've typed so far, input and execute the following code:
console.log(map.id);
console.log(map.numZoomLevels);
7. Refer back to the funcons of the map object (by running console.log(map);
then clicking on the output in the log area). Try playing around with dierent
funcons and aributes the map object has. To access the funcons, you just need
to type in map.function();.
You can also access the properes of the map by typing map.key, where key would
be something like id (so the full code would be map.id). The aributes are black in
the DOM panel, and the funcons are colored green.

Chapter 2
[ 47 ]
What Just Happened?
We just executed some funcons of our map and accessed some properes of it. All we
have to do is call our object, map, followed by a period, then a funcon or property it owns.
Using this dot notaon (e.g., map.zoomIn();), we can access any property or funcon of
the map object.
We also saw how the DOM panel comes in handy, and took a look at funcons that we
can call, which the map object owns. Any funcon listed there can be called via map.
functionname();, but some funcons require parameters to be passed in or they will not
work. But where can we go to gure out more informaon about the funcons and what
they require?
Have a Go Hero – experiment with functions
Try to call dierent funcons that you see listed in the DOM tab. Many funcons will not
work unless you pass certain arguments into them, but don't be afraid of errors! Poke
around the various funcons and properes and try to interact with them using the Console
tab like in the example above.
API documentation
The API documentaon for the Map class, which our map object derives from (and thus,
inherits all the funcons and properes of the class) provides more detailed explanaons
of the properes, funcons, and what we can do with them. They can be found at http://
dev.openlayers.org/apidocs. Even though Firebug is a great resource to quickly
interact with code and learn from it, the API docs present an extra level of informaon that
Firebug cannot necessarily provide.
Summary
In this chapter, we learned more about how OpenLayers works. We learned how to set up
and use Firebug and other Web Development tools.
We then took a look at the panels that Firebug provides and what they are used for. Finally,
we spent me with the Console panel—something you'll be making extensive use of
throughout this book (and when you're developing your own web maps).
This chapter aimed to provide some foundaonal knowledge of web development tools for
geng into both OpenLayers and general web development. Web development tools, like
Firebug, are one of the biggest assets in our toolkit. They speed up development me, help
us idenfy bugs, interact with our code beer, and much more.

Squashing Bugs With Firebug
[ 48 ]
Firebug and such tools can also degrade performance if you are just browsing
the web, so it is probably best to leave them disabled unless you're using them.
For the code exercises in the following chapters, it will be very benecial if you use Firebug to
rst test the code, to see what it's doing. That way, you immediately know, so to say, where
each piece of the puzzle ts in; you know what each line of code actually does, and how it
aects the enre project.
In the next chapter, we'll really dive into OpenLayers, covering perhaps the most
fundamental topic in OpenLayers: the Layer class.
3
The 'Layers' in OpenLayers
Maps can contain an overwhelming amount of informaon, but some maps
don't show enough. Figuring out just what informaon to display on a map is
certainly an art form, and creang printed maps with just the right balance of
informaon is quite dicult.
Fortunately, creang maps for the web is slightly easier in this respect, because
we can let the user determine what informaon they want to see. Imagine
two people looking at a city map—one person just cares about the bus routes,
while the other wants to only know about bicycle routes. Instead of creang
two maps, we could create a single map with two dierent layers, one for
each route. Then the user can decide if they want to see the bus routes, bicycle
routes, both, or none at all.
OpenLayers provides us with a variety of layer types to choose from and use.
We can do all sorts of things—such as changing layer opacity, turning the layers
on or o, changing the layer order, and much more.
In this chapter we'll go over what Layers are—both in the abstract and concrete sense
(via OpenLayer's Layer class). By the end, you will possess enough experse to use
dierent types of Layers on your map and interact with them. In this chapter, we will:
Learn what layers are
Show the dierence between base layers and overlay layers
Talk about the WMS layer class
Learn about the layer class properes
Cover other types of layers
Discuss layer class funcons

The 'Layers' in OpenLayers
[ 50 ]
What's a layer?
A layer is basically a way to show mulple levels of informaon independent of each other.
Layers are not just a mapping or cartography concept; graphic designers and digital arsts
make heavy use of layers.
Imagine a printed-out map of a city. Let's say you also have two sheets of transparent paper.
One sheet has blue lines that indicate bus routes, and the other sheet contains green lines
that indicate bicycle routes. Now, if you placed the transparent sheet of paper with bicycle
routes on top of the map, you would see a map of the city with the bicycle routes outlined.
Pung on or taking o these transparent pieces of paper would be equivalent to turning
a layer on or o. The order you place the sheets on top of each other also aects what the
map will look like—if two lines intersect, you would either see the green line on top or the
blue line on top. That's the basic concept of a layer.
Layers in OpenLayers
OpenLayers is a JavaScript framework, and as discussed earlier is built using Object Oriented
Programming. When we want to actually create a layer, we create (or instanate) an object
from an OpenLayers Layer class.
OpenLayers has many dierent Layer classes, each allowing you to connect to a dierent
type of map server 'back end.' For example, if you wanted to connect to a WMS map server,
you would use the Layer.WMS class, and if you wanted to use Google Maps you'd use the
Layer.Google class. Each layer object is independent of other layer objects, so doing
things to one layer won't necessarily aect the other.
How many layers can I have?
The safest maximum amount of layers you can have on a map at one me
depends largely on the user's machine (i.e., their processing power and
memory). Too many layers can also overwhelm users; many popular web
maps (e.g., Google and Yahoo!) contain just a few layers. If you need to
use tons of layers (say, more than y), it might be a beer idea to create/
destroy them as necessary, as having too many layers may slow down your
map on some machines.
Whatever the purpose of your web map applicaon is, you will need at least one layer to
have a usable map. An OpenLayers map without any layers would be sort of like an atlas
without any maps. You need at least one layer—at least one Base layer. All other layers
that 'sit above' the base layer are called Overlay layers. These are the two 'types' of layers
in OpenLayers.
Chapter 3
[ 51 ]
Base layer
A base layer is at the very boom of the layer list, and all other layers are on top of it. This
would be our printed out map from the earlier example. The order of the other layers can
change, but the base layer is always below the overlay layers. By default, the rst layer that
you add to your map acts as the base layer. You can, however, change the property of any
layer on your map to act as the base layer (by seng the isBaseLayer property to True).
You may also have mulple base layers. However, only one base layer can be acve at a me.
When one base layer is turned on, all the other base layers are turned o. Overlay layers (non
base layers), however, do not behave this way—turning on or o overlay layers will not aect
other overlay layers. Base layers are similar to radio buons—only one can be acve at a me.
Overlay layers are similar to check boxes—you can have as many on or o as you'd like.
At the me of wring, there was a discussion to remove the 'base layer'
terminology and replace it with 'mutually exclusive layers.' If this is the case
when you are reading this, the ideas and concepts work the same as the base
layer/overlay concept.
Overlay layers
Any layer that is not a base layer is called an overlay layer. Like we talked about, the order
that you add layers to your map is important. Every me you add a layer to the map, it is
placed above the previous one.
Throughout the rest of this book, we'll be using the map we created in Chapter
1's example as a sort of template. The only thing that will change is that you will
not be using the lines of code that create the WMS layer and add it to the map.
You will need to delete those lines of code yourself, or refer to the template from
the book's website at http://vasir.net/openlayers_book/.
Time for Action – creating a map with multiple layers
Let's create a map with two WMS layers. One layer will act as our base layer, and the other
will be an overlay layer containing labels for country, state, and city names.
1. Create a copy of the le you made for the last example of Chapter 1 and remove
the exisng WMS layer code (or, use the template from http://vasir.net/
openlayers_book/). You can name it whatever you'd like, but we'll refer to it as
chapter3_ex1_wms_layers.html. Make sure it is in the same directory as your
OpenLayers.js le.

The 'Layers' in OpenLayers
[ 52 ]
1. First we're going to remove everything that was in the init() funcon. Your
funcon should now look like this:
function init() {
}
2. Next, inside the init() funcon, we're going to setup our map object like before:
map = new OpenLayers.Map('map_element', {});
3. Now we're going to create our rst layer. We'll use a WMS layer and ask the WMS
server for the layer 'basic' (a layer on the WMS service). We'll also explicitly set it
to be a base layer.
var wms_layer_map = new OpenLayers.Layer.WMS(
'Base layer',
'http://vmap0.tiles.osgeo.org/wms/vmap0',
{layers: 'basic'},
{isBaseLayer: true}
);
4. Let's create a second layer object now. It will also be a WMS layer. This me, we're
going to ask for a few dierent layers from the WMS service—a bunch of labels.
We're also going to set the transparent property to true, so the map images
which the server sends back will be transparent. We'll also set the opacity to be 50
percent (by seng the opacity to .5). This layer will be an overlay layer.
var wms_layer_labels = new OpenLayers.Layer.WMS(
'Location Labels',
'http://vmap0.tiles.osgeo.org/wms/vmap0',
{layers: 'clabel,ctylabel,statelabel',
transparent: true},
{opacity: .5}
);
5. Time to add the layers to the map. We'll use the addLayers funcon and pass in an
array of layer objects.
map.addLayers([wms_layer_map, wms_layer_labels]);
6. Now, let's add a Layer Switcher control that will show us the layers on the map.
map.addControl(new OpenLayers.Control.LayerSwitcher({}));
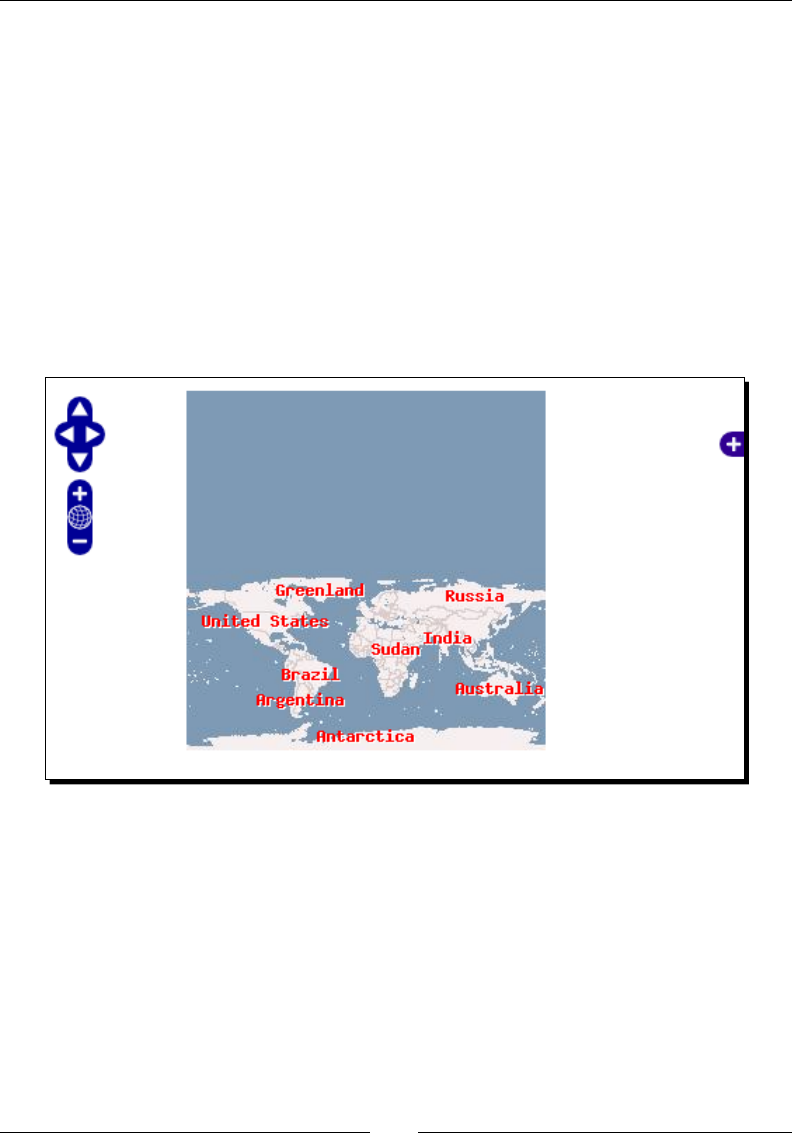
Chapter 3
[ 53 ]
7. Finally, we need to set the map center informaon. This last step needs to be
repeated for all further examples throughout the book—you need to be sure to
include it even if it isn't explicitly asked for. All our maps will need to have their
extent set somehow, and this is one standard way to do so (refer to Chapter 1 for
more explanaon).
if(!map.getCenter()){
map.zoomToMaxExtent();
}
8. Save the le, and then open it up in your web browser (preferably Firefox, since we'll
be using Firebug). Because we're just working with HTML and JavaScript, you don't
need to place this on a server or anything. You can simply open the le with your
web browser directly from the folder. You should see something like this:
What Just Happened?
We just created a map with two WMS layers and a Layer Switcher Control that allows us
to turn on and o layers. Controls are what OpenLayers provides that allows us to actually
interact with the map and layers. To use controls, we create objects from dierent Control
classes. By default, all maps get a Navigaon control object which allows us to pan and zoom
the map. In Chapter 6, we'll cover controls in depth.
The 'Layers' in OpenLayers
[ 54 ]
In the previous example, our layer objects were called wms_base_layer
and wms_overlay_layer. Throughout this book, this will be the format I
will use to name objects—all lowercase with underscores (_), no spaces. You
can, of course, use whichever convenon you like, as long as your naming
scheme is consistent.
Creating layer objects
The process to work with layers consists of two steps:
1. Create the layer object.
2. Add the layer object to the map. You can use either map.addLayer(layer)
to add an individual layer, or map.addLayers([layer1, layer2, ...])
to add an array of layers, like in the previous example.
These two steps can actually be combined into one step (by instanang the layer object
when calling the addLayer funcon—this works, but I don't recommend it as it makes it a
lile harder to work with the layer object). By now, we have a bit of experience instanang
objects from the WMS Layer class. Let's take a look at the code that creates our wms_base
layer object.
var wms_layer_map = new OpenLayers.Layer.WMS(
'Base layer',
'http://vmap0.tiles.osgeo.org/wms/vmap0',
{layers: 'basic'},
{isBaseLayer: true}
);
Each item inside the parentheses, aer OpenLayers.Layer.WMS(, are called arguments
which we pass in while creang the object. But how did I know what arguments to pass in?
We didn't write the class, so we don't know what it expects to take in. So, as with nearly any
third party library, we have to refer to the documentaon to see what arguments the class
expects. OpenLayers has great documentaon, and we'll be using it throughout the book.
Since we're using a WMS Layer, let's take a look at the documentaon for the WMS class at
http://dev.openlayers.org/docs/files/OpenLayers/Layer/WMS-js.html.

Chapter 3
[ 55 ]
Layer.WMS class
There's a lot of informaon in the API docs, but let's look specically at the secon
tled Constructor. This will tell us how to create a WMS layer object. The process varies
for dierent types of layer but let's focus on the WMS class for now. Take a look at the
Parameters sub secon—this species what arguments this specic class expects to take in:
Parameters Descripon
name {String} A name for the layer.
url {String} Base url for the WMS (e.g. http://vmap0.tiles.osgeo.org/
wms/vmap0).
params {Object} An object with key/value pairs represenng the GetMap query string
parameters and parameter values.
opons {Object} Hashtable of extra opons to tag onto the layer.
The parameters tell us about the order of arguments to pass in, and what each argument
means. The word in between the curly brackets ({ }) refers to the data type of parameter.
So, {string} means the parameter should be a string.
Let's take a look at the wms_base_layer layer instanaon code and see how we use the
four parameters.
WMS layer parameters:
The four WMS layer parameters are as follows:
Name
The rst parameter is the layer's name and it should be a string. We pass in 'Base Layer'.
Noce how we enclose Base Layer in quotes—this is how we signify that it is a string. The
tle can be anything that you like—if you have a layer switcher control, the tle will show
up in it. Keep in mind that there is a comma aer the closing quote, which means that we're
done with this rst argument and are ready to proceed to the next one.
This name parameter is present in nearly all Layer classes.
URL
The URL is the second parameter, and it should also be a string. It species the URL of the
web map server. We pass in 'http://vmap0.tiles.osgeo.org/wms/vmap0'. This URL
parameter is present in most Layer classes.

The 'Layers' in OpenLayers
[ 56 ]
Params
Params is the third parameter, and it is an anonymous objector consisng of key:value pairs.
This parameter species server side sengs that aect the map image, which the WMS
server returns. The key:value pairs you pass in here will be appended (more or less) to the
URL that OpenLayers generates when it makes requests to the map server.
For example, in the previous example when creang the wms_layer_labels we
passed in {layers: 'clabel,ctylabel,statelabel'}. In this case, we are
asking the WMS server to give us back a map image with the server side layers called
'clabel,ctylabel,statelabel' turned on. We specify mulple server side layers—it
doesn't maer what or how many server side layers we request though, because the WMS
Layer object on the client side is sll considered by OpenLayers to be a single layer object.
This params parameter is present in most Layer classes.
Possible params keys and values
The possible keys and values for this params object depend on the map server you are
working with. Unfortunately, covering them all for all layer types is outside the scope of this
book. We'll only be using a few WMS parameters throughout this book—layers (to specify
what layers the WMS service should give us), transparent (to ask for transparent images,
for things such as label layers), and srs (to specify the projecon).
For now, at least, our main concerns are just guring out what layer names are on the
WMS server. To gure this out, you can issue a GETCAPABILITIES request in the URL
(SERVICE=WMS must also be specied). For instance, to get the possible layers from the
WMS service we've been using so far go to the following URL:
http://vmap0.tiles.osgeo.org/wms/vmap0?SERVICE=WMS&REQUEST=GETCAPABIL
ITIES
If you are interested in more informaon about WMS, the specicaons can be found at
http://www.opengeospatial.org/standards/wms.
Options
Opons is the last parameter and is an anonymous object that species the layer object's
sengs. You are not required to pass in this parameter.
The opons object contains properes for the client side OpenLayers Layer object. These
are the sengs for the layer object itself, so all Layer classes have this parameter. To
dene various properes of the OpenLayers Layer object, we use this options argument.
Properes include sengs such as isBaseLayer, opacity, and visibility. Since the
layer properes are client side sengs, the WMS server (or whichever map server the layer
uses) doesn't know about them.
Downloa d f r o m W o w ! e B o o k < w w w.woweb o o k . c o m >
Chapter 3
[ 57 ]
The possible values are, basically, anything that you nd in the API documentaon for either
the base Layer class (at http://dev.openlayers.org/docs/files/OpenLayers/
Layer-js.html), or the specic subclass you're working with, e.g., the WMS Layer Class,
at http://dev.openlayers.org/docs/files/OpenLayers/Layer/WMS-js.html.
You can use this opons parameter to inialize any of the layer parameters
described in the API—the best way to get more familiar with it is to just
play around with the dierent properes listed in the docs. The Layer class
docs can be found at http://dev.openlayers.org/docs/files/
OpenLayers/Layer-js.html.
Parameters versus arguments
These two terms are oen confused and used interchangeably (but usually, that's ok).
Parameters are what the items are called during the class or funcon denion, but when
we call the funcon, the actual values of the parameters are referred to as arguments. For
example, this is how we create a funcon in JavaScript:
function add_numbers(a, b){
return a + b;
}
This is referred to as the add_numbers funcon denion. Here a and b are referred to as
parameters. Now, take a look at how we call it:
var the_sum = add_numbers(13, 37);
Here, 13 and 37 are referred to as the arguments. In the add_numbers funcon, 13 acts as
a and 37 acts as b.
Both terms are technically talking about the same thing. Parameter is the term to use when
talking about funcon denions, and argument is the term to use when talking about
funcon calls. The disncon is sort of like that of a meteoroid (when it's in space), a meteor
(when it's in the atmosphere), and a meteorite (when it hits the ground)—these three terms
refer to the same object.
Now, let's take a look at some of the dierent arguments we can pass in when creang our
layer objects.

The 'Layers' in OpenLayers
[ 58 ]
Time for Action – conguring the options parameter
The opons parameter is something that is present in all Layer classes, so let's get a bit more
familiar with it. I suggest opening up the Layer documentaon and following along, and even
trying to add in the opons yourself from the possible list of layer properes (at http://
dev.openlayers.org/docs/files/OpenLayers/Layer-js.html).
1. Use the template (or code from Chapter 1 with the WMS layer code removed).
We'll be adding some WMS layers, and we'll refer to this le as chapter_3_ex2_
options_config.html.
2. First we'll add in a layer that contains the 'basic' layer from the WMS server, like
in the previous example.
// Setup our two layer objects
var wms_layer_map = new OpenLayers.Layer.WMS(
'Base layer',
'http://vmap0.tiles.osgeo.org/wms/vmap0',
{layers: 'basic'},
{isBaseLayer: true}
);
3. Next we'll create another layer object. We'll create a layer using labels, like in
the previous example. This me though, let's set the layer's opons to include
visibility: false. This will cause the layer to be hidden by default. The layer
denion should now look like:
var wms_layer_labels = new OpenLayers.Layer.WMS(
'Location Labels',
'http://vmap0.tiles.osgeo.org/wms/vmap0',
{layers: 'clabel,ctylabel,statelabel',
transparent: true},
{visibility: false, opacity:0.5}
);
4. Time to create another layer. We'll set the layer params to ask the WMS service for
the stateboundary layer. Then, we'll specify the opons so that it won't display
in the layer switcher control (via displayInLayerSwitcher: false) and set a
minimum scale at which it will be visible (via minScale). That means this layer will
only show up once we've reached a certain scale. Add the following to your init()
funcon.
var wms_state_lines = new OpenLayers.Layer.WMS(
'State Line Layer',
'http://labs.metacarta.com/wms/vmap0',
{layers: 'stateboundary',

Chapter 3
[ 59 ]
transparent: true},
{displayInLayerSwitcher: false,
minScale: 13841995.078125}
);
5. Now let's add a layer that will show a dierent layer from the WMS service and we'll
set the layer object's opacity to .8 (or 80 percent):
var wms_water_depth = new OpenLayers.Layer.WMS(
'Water Depth',
'http://labs.metacarta.com/wms/vmap0',
{layers: 'depthcontour',
transparent: true},
{opacity:0.8}
);
6. Finally, we'll create a layer object that shows some road layers from the WMS
service and has an opons object containing the transitionEffect: resize
property. This causes the layer to have a 'resize' animaon when zooming in or out.
var wms_roads = new OpenLayers.Layer.WMS(
'Roads',
'http://labs.metacarta.com/wms/vmap0',
{layers: 'priroad,secroad,rail',
transparent: true},
{transistionEffect:'resize'}
);
7. Now we just add the layers to the map (replace the previous addLayers funcon
call with this one):
map.addLayers([
wms_layer_map,
wms_layer_labels,
wms_state_lines,
wms_water_depth,
wms_roads]);
8. Save the le and then open it in your web browser.
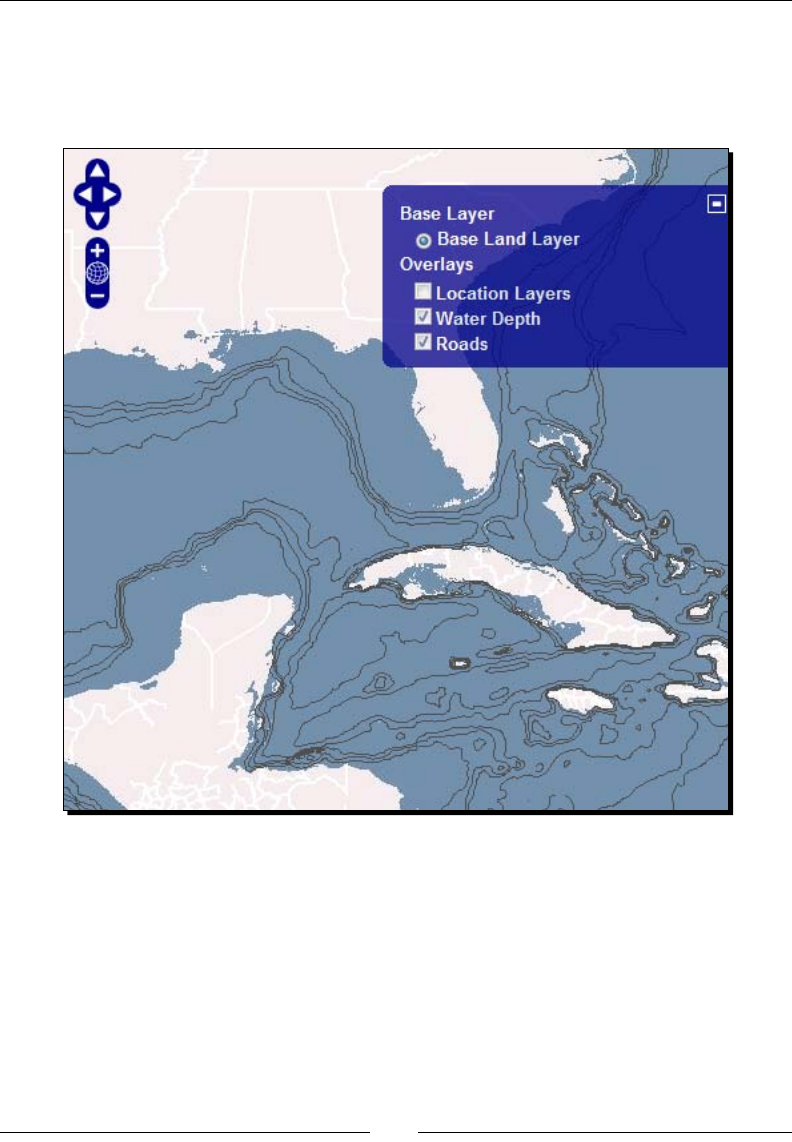
The 'Layers' in OpenLayers
[ 60 ]
9. Zoom in a few mes around the Gulf of Mexico. You'll start to noce black contour
lines in the ocean when you zoom in, and you should see a resize eect from the
base ground layer. Depending on where you zoom, you should see something
like this:
What Just Happened?
We just created another map with a few more layers and demonstrated some more layer
opons. The map looks slightly dierent than the rst example's map because we are using
dierent WMS server side layers (which are congured in each layer's params argument).
For now, let's focus on the fourth argument passed in—the opons argument. This argument
is used in all Layer classes, so when we move on to other types of Layers you'll be able to
use all the same properes we're talking about. The opons argument controls the layer's
object's properes.
Chapter 3
[ 61 ]
Conguring layer options
Let's take a look at a couple of the layer's options argument we passed in during the
previous example.
Pay close aenon to the commas. Both arguments and key:value pairs are
separated by a comma, but make sure you do not have a comma aer the
last pair. Trailing commas will usually break your map and are usually a pain
to debug—so if your map isn't working and you don't see any helpful error
messages in Firebug, check for trailing commas. A great site to help with your
code is http://jslint.com.
wms_state_lines layer options
This layer's opons are:
{ displayInLayerSwitcher: false, minScale: 13841995.078125}
The rst property, displayInLayerSwitcher, can be either true or false, and
determines if the layer will appear in the layer switcher control (if there is a layer switcher
control). In our example, we do have a layer switcher control and you'll noce that we
don't see it in the list of layers. The layer is sll there, and we can programmacally
turn it on or o through the setVisibility() funcon, e.g. wms_state_lines.
setVisibility(false);. In fact, when you turn on or o a layer through the layer
switcher control, this setVisibility funcon is what is being called. This property is
useful when you want to include layers in your map that you don't want to let the user
control.
The second property is minScale: 13841995.078125. The value for this property is
oat, a number that can contain a decimal point. This minScale property determines the
minimum scale the map must be at before the layer is displayed, which basically means
how far we must be zoomed in before the layer will be turned on. There is also a maxScale
property which determines how far we can zoom in before the layer is turned o. The term
for this behavior is referred to as scale dependency.
Scale dependency
Scale dependency can be controlled either from the client or server side (or both). You'll
noce that the wms_water_depth layer (with black contour lines in the water to specify
depth) does not turn on unl we start to zoom in. We haven't set the minScale property for
the wms_water_depth layer, so why don't we see it at all zoom levels? The reason is WMS
server has its own scale dependencies on the server side, so even if we wanted to see this
layer when the map is zoomed out we can't because the server does not allow it.

The 'Layers' in OpenLayers
[ 62 ]
When we set the minScale or maxScale properes on a layer, we are specifying client side
scale dependency—so even if the server allows it, we're telling OpenLayers not to show it. To
determine the current scale of the map, you can call the map.getScale(); funcon which
will show you the current scale value.
wms_layer_labels layer options
This layer's opons property consists of:
{visibility: false, opacity:0.5}
The visibility property
We've already covered the rst property, so let's talk about the visibility property.
Its value can be either true (by default) or false. This visibility property controls if a
layer is visible or not. Seng it to false will make it hidden, but the user can turn it on
by enabling it in the layer switcher control. The map.getVisibility(); and map.
setVisibility({{Boolean}}); funcons refer to this property. {{Boolean}}
means we can pass in a Boolean, in other words, we can pass in either true or false.
The opacity property
The next property is opacity. It accepts a oat with values between 0 and 1. A value of
0 means the layer will be completely transparent, and a value of 1 means the layer will be
completely opaque. We set it to 0.5 here, so it will be 50 percent opaque. If you turn on the
layer in the map (you can click on the layer in the layer switcher to enable it), you'll noce
the labels are sort of see-through. This opacity seng helps you to create more visually
pleasing maps, as by enabling mulple layers and changing their opacies you can produce
some niy eects.
Map tiles
Let's take a short break now and talk about just a lile bit of theory. It has been menoned
that OpenLayers works by requesng 'map les' from a backend map server, but I haven't
really gone much into what that means. Nearly all layers work on this map ling principle
(except the Vector layer and the Image layer). So, what is it exactly and how does it work?
Think of how you might go about creang a web map from scratch—specically, how would
you handle the map image itself? You could go about it in two ways. First, you could just
send back one giant image of a map. If the user zooms in, the server sends back an even
bigger, more zoomed in image of a map. Using this strategy, you'd very quickly be sending
over exponenally large image les every me the user zooms. This is why this method is not
really praccal.
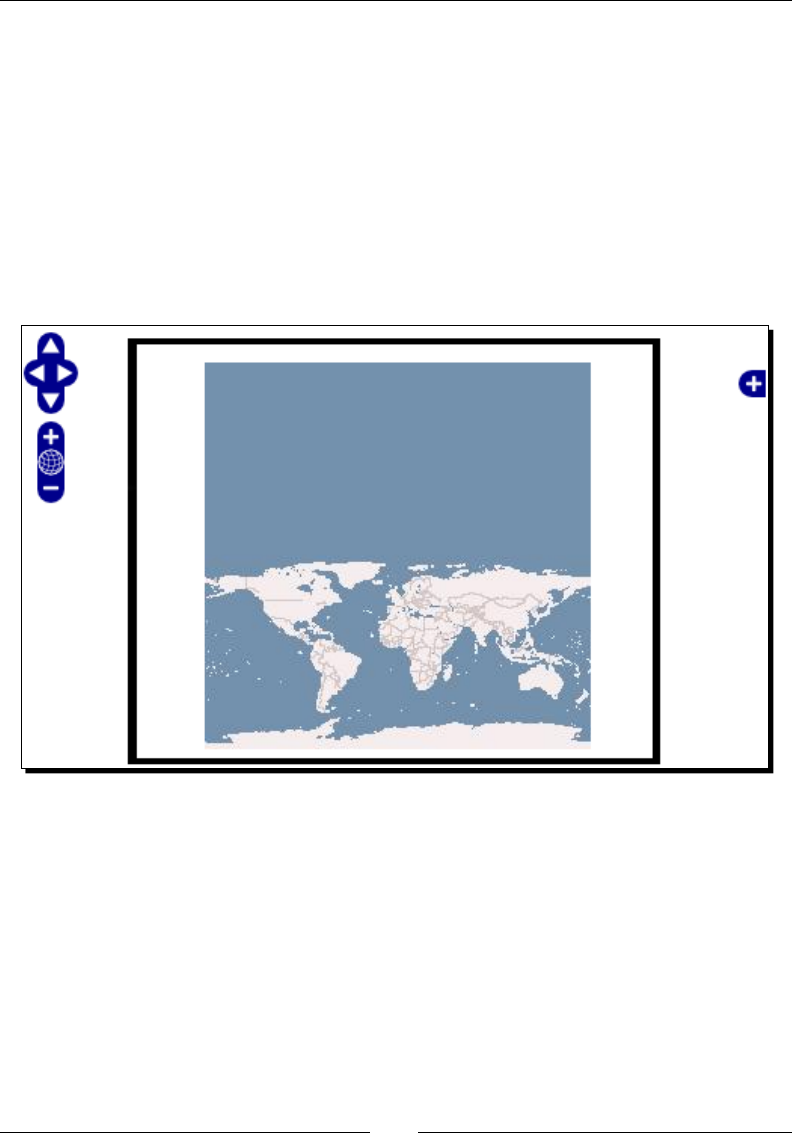
Chapter 3
[ 63 ]
Many images make up a map
The second way is that you break up the desired map image into a bunch of smaller images,
or map les. So, no maer how far the user zooms in, the server only has to send over a
relavely small amount of images. This sort of map ling strategy is what nearly every web
map does—Google Maps, Yahoo! Maps, most OpenLayers Layers, etc. When you request a
new extent, OpenLayers asks for a new set of map images. Each map image is the same size
(e.g., 256 x 256 pixels); this is referred to as the le size, and can be specied when creang
your map.
Let's take a look at an example of a basic OpenLayers map. In our example, when you're
completely zoomed out, the enre visible area will t in one map le image.
When the client asks for the map's max extent, only one map le needs to be returned.
OpenLayers will gure out what extents to ask the map server for. In this case, it only needs
to ask for one map le, because we're zoomed out so far that the enre world will t in one
map image.

The 'Layers' in OpenLayers
[ 64 ]
At this point, you might be wondering if there is any benet in breaking the images into les,
as we're only geng back one image. However, when we zoom-in, it becomes more clear.
Now we've zoomed in once. OpenLayers has to gure out what the extent of your map is,
and how many les it has to ask the map server for. OpenLayers calculates the extent for
each le, and then sends a request to the map server to get an image of the requested
extent. So, in this example, OpenLayers determines that it needs to send two requests to the
map server. Each request will result in a response of a map image, and then OpenLayers will
piece the les together.
Keep in mind that the le size is sll the same as it was in the previous request. Your map
only has one le size, and in this case (and by default) it is 256 x 256 pixels. You can change
the size of the les with the map's tileSize property, which we'll talk more about in
Chapter 8 on the Map class. So what happens when we zoom in and move the map around
a lile bit?

Chapter 3
[ 65 ]
In this case, OpenLayers requests more les because the total map area is outside what you
can see (called the Viewport). The les are all sll 256 x 256 pixels, but now les lie outside
of the map's visible range. Any me the user moves their map to a new area (by zooming or
panning), OpenLayers gures out how many les it needs to get, the extent for each le, and
where to place them.
Available layer properties
Let's go over the properes available for OpenLayers version 2.9, as we'll be using
them throughout the book. These properes can be used by any Layer class, as all Layer
subclasses (such as the WMS and Google Maps Layer) inherit from them.

The 'Layers' in OpenLayers
[ 66 ]
Data types
Before we talk about the layer properes, let's quickly go over the notaon for the data
types used. The curly brackets { } indicate the JavaScript data type the parameter expects.
The data types are as follows:
{Array}: An array of elements separated by commas and enclosed in brackets. For
e.g.: [1,2,3]
{Boolean}: Possible values are true or false.
{Float}: Possible values are numbers that can contain a decimal point. For e.g.:
42.5
{Integer}: Possible values are whole numbers (no decimals). For e.g.: 42
{Object}: An anonymous object, key:value pairs separated by commas, enclosed
in curly brackets. For e.g.: {'answer': 42, 'question': null}
{OpenLayers.______}: An object instanated from an OpenLayers class. The
blank could be any OpenLayers class. For e.g.: new OpenLayers.Control.
LayerSwitcher({});
{String}: Possible value is any string, indicated by enclosed quotes (either single
quote, ', or double quote, "). For e.g.: 'This is a string'
Now that we're familiar with some of the data types, let's take a look at the Layer properes
available to us.
OpenLayers.Layer class properties
So far we've only been working with the WMS Layer class, but OpenLayers has many more
Layer classes. The following properes apply to all layer classes. We can set these properes
via the opons argument when we create the layer, and we can access them in Firebug by
simply calling layer_object.property.
The following is a table of layer properes available as of OpenLayers version 2.10. We
will be using them throughout the book, and coming back to them oen, so don't feel as
if you need to memorize them right now. The latest properes can always be found in the
OpenLayers Layer docs at http://dev.openlayers.org/docs/files/OpenLayers/
Layer-js.html.

Chapter 3
[ 67 ]
Property Property Data
Type
Descripon Default Value
events {OpenLayers.
Event}
An OpenLayers event object. We
can pass in an event object here
that will call a funcon when an
event, such as zooming in, occurs.
We will talk more about events in
a later chapter.
-
map {OpenLayers.
Map}
The map object that this
layer belongs to. This is set
automacally when the layer
is added to the map via the
setMap() funcon.
isBaseLayer {Boolean} Determines if a layer is to act as a
base layer.
false
alpha {Boolean} Species if the layer's images
contain an alpha channel. This
was originally designed to x
transparency issues in IE, but
incurs a large performance hit. It
is recommended that you do not
use this.
false
displayIn
LayerSwitcher
{Boolean} Determines if the layer should be
displayed in the layer switcher.
true
visibility {Boolean} Determines if the layer is visible
on the map and enabled or
disabled in the Layer Switcher
control.
true
attribution {String} Text that is displayed when the
Aribuon control has been
added to the map. By default,
the aribuon text appears in
the boom right and each layer's
aribuon is separated by a
comma.
-
inRange {Boolean} Is either True or False,
depending if the current map's
resoluon is within the layer's
minimum and maximum range.
This is set when the zoom level
changes.
-
imageOffset {OpenLayers.
Pixel}
The displacement of the image
les for layers with a guer.
-
The 'Layers' in OpenLayers
[ 68 ]
Property Property Data
Type
Descripon Default Value
options {Object} Oponal object whose properes
will be set on the layer. Any of
these layer properes can be
dened in this opons object.
This is the same opons object
we've spent the past couple of
pages discussing.
-
eventListeners {Object} Event listeners will be registered if
this is set during the layer object's
creaon. We will discuss this in
detail in Chapter 6.
-
gutter {Integer} Somemes you may noce
arfacts around the edges of les
that the map requests. When you
set the guer value, OpenLayers
will request les that are bigger
than the normal le size by two
mes the guer value. So, if your
default le size was 256 x 256,
and if you had a guer value of 10
then OpenLayers would request
les with a size of 276 x 276.
Anything outside the normal le
though (256 x 256 in this case)
is not shown, and to OpenLayers
the le size is sll 256 x 256. This
really only needs to be used when
you encounter problems with
arfacts near the edge of your
les. Non-led layers always have
a guer value of zero.
0

Chapter 3
[ 69 ]
Property Property Data
Type
Descripon Default Value
projection {OpenLayers.
Projection}
or {String}
This will override the default
projecon of the map if
specied. You may also need
to set the maxExtent,
maxResolution, and units
properes. If you pass in a
string instead of a projecon
object, it will be converted to a
projecon object. Projecons
are used to display a three
dimensional object (the earth)
in two dimensions (on our map).
Dierent projecons use dierent
coordinates and measurement
units. We will cover projecons in
more detail in Chapter 4.
{EPSG:4326}
units {String} The units the map's layer is in.
Possible values are 'degrees'
(or 'dd'), 'm', 'ft', 'km',
'mi', or 'inches'.
'degrees'
scales {Array} Contains the map scales,
from highest to lowest values.
The units property must also
be set when using this. It is
recommended that you use the
resoluons property instead.
-
resolutions {Array} Contains an array of map
resoluons (map units per pixel)
from highest to lowest values. If
this is not set, it will be calculated
automacally based on other
properes, such as maxExtent,
maxResolution, etc.).
-

The 'Layers' in OpenLayers
[ 70 ]
Property Property Data
Type
Descripon Default Value
maxExtent {OpenLayers.
Bounds}
An OpenLayers.Bounds
object consisng of min x, min
y, max x, and max y values
that specify the extent of
the layer. Any coordinates
outside this bounding box
will not be displayed. If the
displayOutsideMaxExtent
property is set to false, les
that fall outside these coordinates
will simply not be requested.
-
maxResolution {Float} Sets the maximum resoluon (the
width or height, in map units,
per pixel). Default max is 360
degrees/256 pixels. If you are not
using a geographic projecon,
specify a dierent value.
-
numZoomLevels {Float} Species the number of zoom
levels a layer has. The layer will
not be displayed if the zoom level
of the map is greater than this
value.
16
minScale {Float} Species the minimum scale at
which the layer will turn on.
-
MaxScale {Float} Species the maximum scale at
which the layer will be shown.
If the map scale is greater than
this value, the layer will not be
displayed.
-
displayOut
sideMaxExtent
{Boolean} Species if the map should
request les that are completely
outside of the layer's
maxExtent property.
false
wrapDateLine {Boolean} This will cause the map to wrap
around the date line. This allows
you to connue dragging the map
le/right forever, as the map is
wrapped around onto itself.
-
Chapter 3
[ 71 ]
Property Property Data
Type
Descripon Default Value
transitionEffect {String} Species the transion eect to
use when the map is panned or
zoomed. Possible values at the
me of wring are null (no
eect) and 'resize.'
null
SUPPORTED_
TRANSITIONS
{Array} This is a constant—it does not
change. It contains a list of
support transion eects to use
with the transitionEffect
property.
-
metadata {Object} Allows you to store addional
informaon about the layer. This
does not have an eect on the
layer itself.
-
Modifying layer properties
Now that you're familiar with a few more layer properes, try to modify the second
example's code, passing in addional properes to the opons object. Open up the
previous example and use Firebug to access individual layer properes, for example, map.
layers[1].propertyName. Play around by passing in dierent properes to the opons
object when creang the layer objects, and don't be afraid to break your code!
The OpenLayers.Layer class
So far, we've only been using the OpenLayers.Layer.WMS class in the examples. This has
been the beginning of all our layer object instanaon code so far:
var wms = new OpenLayers.Layer.WMS(
Noce the period between Layer and WMS: Layer.WMS. This means that we're accessing
the WMS subclass of the Layer superclass. What do I mean when I say this? Well, the WMS
class is a subclass of the Layer class, so let's briey refresh our knowledge about subclasses.
Subclasses
In Chapter 1, we menoned Subclasses. Subclasses are, basically, classes that derive from
some base class. This base class is called a Superclass. The Layer class is thus the Superclass
of all Layer subclasses (Superclasses and Subclasses are sll classes). Subclasses inherit all
the properes of their superclass.

The 'Layers' in OpenLayers
[ 72 ]
Layer Class—Sub and super classes
The Layer class is therefore the superclass from which all other Layer classes derive. The
Layer.WMS layer class is dierent from the Layer.Image class, and each of those two
classes has their own unique properes and funcons. But both layers also share all the
properes of their Layer superclass—so all those properes we discussed earlier apply to
both classes.
Some Layer classes also inherit from mulple Layer class in a hierarchical way. For
example, the Layer.WMS class inherits from the Layer.Grid class, which inherits
from the Layer class.
Other layer types
OpenLayers supports a multude of dierent Layer classes. As you may recall from Chapter
1, each Layer class is associated with a dierent map server back end. The Layer.WMS class
is used to connect to a WMS map server, and the Layer.Google class is used to connect to
the Google Maps service.
Because OpenLayers is such an acvely developed framework, there are a few layer classes
that are deprecated (not recommended to use anymore). Later versions of OpenLayers will
deprecate more Layer classes, so we'll try to focus on the classes that should be around for
a while. We won't be able to cover every Layer class, but we will discuss the common ones.
The Layer classes which we don't menon below will not be covered in this book, either
because they are deprecated or outside the scope of this book. Let's take a look.
Layer.ArcGIS93Rest
This is the class that allows us to interact with ArcGIS Server 9.3 via its REST interface.
Interacon with the REST interface is handled by construcng requests with URLs, and is
similar in concept to how GET requests work.
The structure to instanate objects from this class is similar to Layer.WMS, as both inherit
from the Layer.Grid class. ArcGIS Server is a third party, proprietary piece of soware
from ESRI, but OpenLayers provides excellent support for it. The OpenLayers documentaon
for the ArcGIS layer can be found at http://dev.openlayers.org/docs/files/
OpenLayers/Layer/ArcGIS93Rest-js.html.
The documentaon for ArcGIS Server's REST API can be found at http://
resources.esri.com/help/9.3/arcgisserver/apis/rest/
index.html.
Downloa d f r o m W o w ! e B o o k < w w w.woweb o o k . c o m >
Chapter 3
[ 73 ]
Layer.ArcIMS
This layer class is similar to the ArcGIS93Rest class, and allows us to display data from
ArcIMS Mapping Services. ArcIMS is another proprietary soware product from ESRI. The
documentaon for this Layer class is at http://dev.openlayers.org/docs/files/
OpenLayers/Layer/ArcIMS-js.html. More informaon about ArcIMS can be found at
http://www.esri.com/software/arcgis/arcims/index.html.
Layer.Google
This layer allows us to interact with Google Maps via the Google Maps API. The
documentaon for this layer class is located at http://dev.openlayers.org/docs/
files/OpenLayers/Layer/Google-js.html.
Time for Action – creating a Google Maps layer
Let's take a look at how to create a Google Maps layer.
1. From this point onward, I'm going to assume that when I say "create a new map"
you will use the template from http://vasir.net/openlayers_book/, or
create a copy of the example from Chapter 1 and remove the WMS layer calls (they
both result in the same code). So, create a new map.
2. The rst thing we'll need to do is add in a script tag to the <head> secon that
references the Google API library. This allows us to actually use the Google Maps
library:
<script src="http://maps.google.com/maps/api/js?sensor=false"></
script>
3. Now, we'll need to create a Google Maps layer object. We won't pass in any
addional sengs, so the default sengs will be used. By default, we'll see the
Google 'Streets' Map (we could ask for the aerial imagery layer, the physical
topology layer, etc—we'll cover this soon). Add the following in your init funcon:
var google_map_layer = new OpenLayers.Layer.Google(
'Google Map Layer',
{}
);
4. All we have to do now is add the layer to the map. Before you do this, make sure
you've removed the exisng line of code that adds the WMS layer to the map. We
only want to have our map contain the google_map_layer.
map.addLayer(google_map_layer);
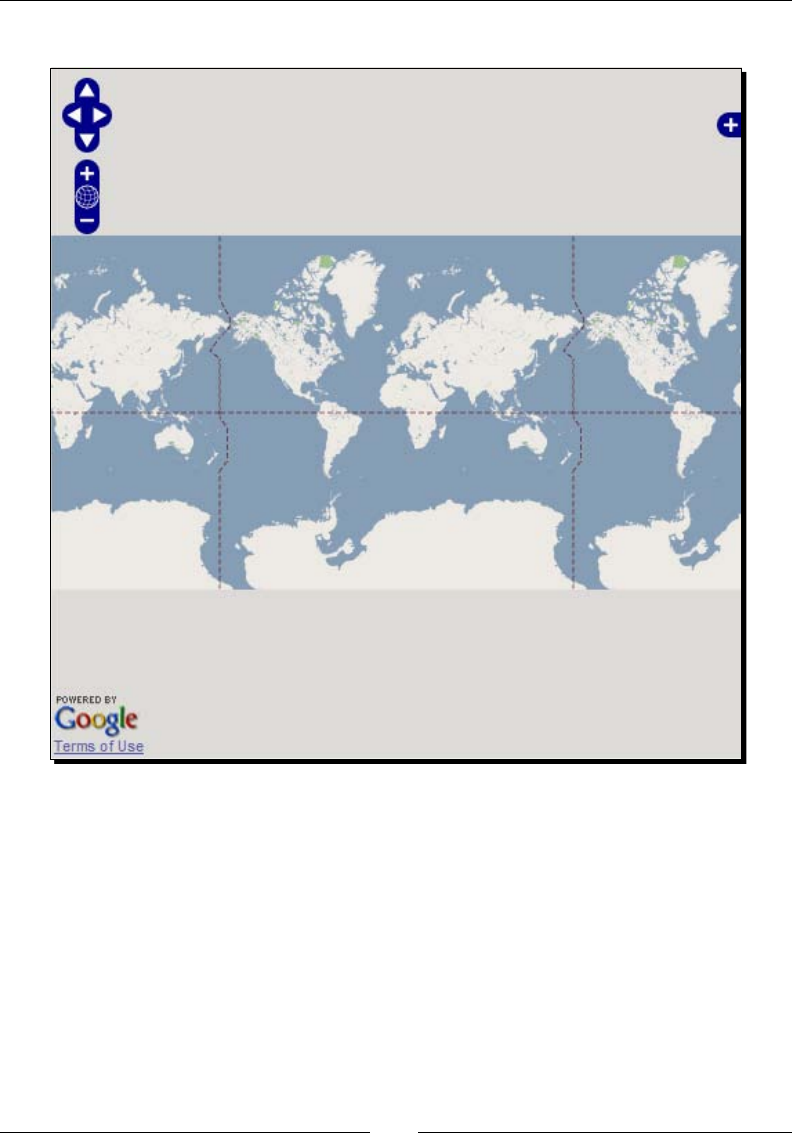
The 'Layers' in OpenLayers
[ 74 ]
You should see something like this:
What Just Happened?
We just created a map with a single Google Maps layer object using the Google Maps API
(version 3). The layer that Google is showing us is the default layer named ROADMAP (referred
to also as the 'streets' map). We can change the type of layer we see by changing the type
value in the layer's opons object. The possible values we can set for the type key are:
google.maps.MapTypeId.ROADMAP (the default)
google.maps.MapTypeId.TERRAIN
google.maps.MapTypeId.HYBRID
google.maps.MapTypeId.SATELLITE

Chapter 3
[ 75 ]
You'll noce that each type is preceded by google.maps.MapTypeID., which must be
present. For example, to specify that you wish to use the hybrid layer (satellite imagery
combined with the ROADMAP layer), you could use:
var google_hybrid_layer = new OpenLayers.Layer.Google(
"Google Hybrid",
{type: google.maps.MapTypeId.HYBRID}
);
Because of the projecons Google Maps and the other third party APIs use, it can be
lile tricky to get other layers to work with them—we'll talk about this more in Chapter 4
and Chapter 5. Briey though, it has to do with the fact that these third party APIs use a
projecon called EPSG:900913, which uses a dierent coordinate system than EPSG:4326
(the projecon our WMS layers have been in so far). Because of this, the coordinates don't
match up. So, we can't just place our WMS layer (which is in the EPSG:4326 projecon) on
top of the Google Layer (which is in the EPSG:900913 projecon), as the coordinates are
very dierent. In the next chapters, we'll address how to solve this issue.
The Google Maps Version 3 API can be found at http://code.google.
com/apis/maps/documentation/javascript/ and more
informaon on possible Google Maps Layer types can be found at http://
code.google.com/apis/maps/documentation/javascript/
overlays.html.
Layer.Grid
This is a base class that many other layers, such as WMS, inherit from. We won't be using it
explicitly, but it is important to know that it exists. It works, basically, by construcng a grid
and placing les (map images) inside the grid. It uses the HTTPRequest class to communicate
with a map server to get the les it needs to build the map.
Classes that inherit from it, such as WMS, work in a similar way. So, if you're familiar
with how to use the WMS layer, you'll be familiar with how to use nearly any class that
inherits from the Layer.Grid class. The documentaon for this class is at http://dev.
openlayers.org/docs/files/OpenLayers/Layer/Grid-js.html.

The 'Layers' in OpenLayers
[ 76 ]
Layer.Image
This class allows us to use an image as a map layer. It's bit dierent than the other layer
classes OpenLayers oers, because it doesn't strictly follow a client/server model. Once the
inial request for the image is made, the client has the image and OpenLayers handles all
further map interacon—no further requests are made to the server aer the rst request
to get the image. There are no les, like with other raster (non vector, which is nearly every
other layer class) layers. Instead, just a single image is used.
The original purpose (and one of the best uses) of this class is to use an image for the
overview map control. But it can be used for many more things than just that—this class, a
great example of OpenLayers can be used for other purposes than just mapping.
Time for Action – using the image layer
Let's use the image layer to create a sort of image viewer.
1. First we'll need to add an image layer. The image layer expects the name as the rst
parameter (like other layers), the URL of the image next, then an {OpenLayers.
Bounds} object specifying bounds of the image, then an {OpenLayers.Size}
object which contains Width, Height pixel dimensions, and nally an oponal
opons object.
var image_layer = new OpenLayers.Layer.Image(
'Wallpaper',
'http://us.starcraft2.com/images/wallpapers/wall3/
wall3-1920x1200.jpg',
new OpenLayers.Bounds(-180,-112.5,180,112.5),
new OpenLayers.Size(1920,1200),
{numZoomLevels:7, maxResolution:.625}
);
2. Let's create another image layer now. We'll set the opacity to 20 percent and make
sure it's not a base layer by seng isBaseLayer: false in the opons object.
We'll also be using a dierent URL:
var image_layer_2 = new OpenLayers.Layer.Image(
'Wallpaper 2',
'http://us.starcraft2.com/images/wallpapers/wall6/
wall6-1920x1200.jpg',
new OpenLayers.Bounds(-180,-112.5,180,112.5),
new OpenLayers.Size(1920,1200),
{numZoomLevels:7, maxResolution:.625, isBaseLayer:false,
opacity:0.2}
);

Chapter 3
[ 77 ]
3. Finally, add the image layers to the map:
map.addLayers([image_layer, image_layer_2]);
You should see the following:
What Just Happened?
We just created an OpenLayers map that wasn't a map at all, but more of an image viewer.
There are plenty of other uses for this though—you could overlay an image on top of a WMS
layer, create a map from image layers consisng of high resoluon scans of older printed
maps, etc. The parameters required to create an image layer are:
Image layer parameters
name: {String} Name of the layer.
url: {String} URL of the image. Can be on your own computer/server, or
an external server.

The 'Layers' in OpenLayers
[ 78 ]
extent: {OpenLayers.Bounds} The extent of the image.
size: {OpenLayers.Size} The size of the image, in pixels.
options: {Object} An anonymous object containing the layer property sengs.
Let's take a look at our image_layer object's extent, size, and opons arguments:
new OpenLayers.Bounds(-180,-112.5,180,112.5),
new OpenLayers.Size(1920,1200),
{numZoomLevels:7, maxResolution:.625}
The extent argument is an {OpenLayers.Bounds} object, which is created via
OpenLayers.Bounds(-180,-112.5,180,112.5). We pass in the min x, min y, max x,
and max y values to create the bounding box. For images, you may have to play around with
the values depending on your image's dimensions. The rao of our image (1920/1200) is 1.6,
so I've set the bounds to have a similar rao (180 / 112.5 = 1.6).
The size argument, new OpenLayers.Size(1920,1200), is an {OpenLayers.Size}
object, and we pass in the width and height of the image.
For the next argument, the opons, we pass in {numZoomLevels:7,
maxResolution:.625}. The numZoomLevels property can be anything you'd like, but
higher values may allow you to zoom in too far to the image. The value of maxResolution
property is set to .625, which is a value I arrived at by dividing 1200/1920 (the width divided
by the height)—just a rough calculaon that, in case, makes the map look just about right.
Documentaon for this layer class is at http://dev.openlayers.org/docs/files/
OpenLayers/Layer/Image-js.html.
Have a Go Hero – make your own image based maps
Using the previous example's code, nd other high resoluon images and create a similar
'image viewer' with them. Add as many layers as you'd like, and play around with the opacity
seng to see how the image layers interact with each other.
Layer.MapGuide
This is the layer for the open source MapGuide plaorm. We won't be covering MapGuide
in this book, but it is a popular project and, since it is free and open source, you're welcome
to install it on your own computer. It behaves similar to the Layer.WMS class and has the
same parameters. It also inherits from Layer.Grid. The documentaon for this layer class
can be found at http://dev.openlayers.org/docs/files/OpenLayers/Layer/
MapGuide-js.html. More informaon on MapGuide can be found at http://mapguide.
osgeo.org/.

Chapter 3
[ 79 ]
Layer.TileCache
The TileCache layer allows you to interact with MetaCarta's TileCache, which is free open
source soware that caches WMS requests. TileCache provides enormous performance
boosts because it caches requests to a WMS server. This means that once a request has been
made, the response (the map image) is stored either on the server's hard drive or in memory
and is immediately returned to the client.
The normal process of requesng a map image from a WMS server goes like this:
1. Client sends request to WMS server, asking for a specic part of the map.
2. WMS Server receives the request and generates an image based on the
requested map extent.
3. WMS Server returns the rendered map image to the client.
The boleneck is Step 2, the WMS server rendering the image based on the request. With
caching (either through TileCache or by other means), the second step becomes a lot easier.
With caching, the server only has to generate an image once, and then it saves it (in the hard
drive or memory). So, instead of having to generate an image for every request, it simply grabs
an image which it has already generated. This makes the request seem almost instantaneous,
and most popular web maps use some form of caching—including Google Maps.
We will be discussing TileCache a lile more in the last chapter, where we talk about deploying
and using OpenLayers in a producon environment. The documentaon for this layer class is
at http://dev.openlayers.org/docs/files/OpenLayers/Layer/TileCache-js.
html. For more informaon on TileCache, head to http://tilecache.org/.
Layer.Vector
The vector layer is one of the more powerful features of OpenLayers. It allows us to draw
points and polygons on the map, style them however we want, retrieve and use KML and
other geo data formats, etc. The vector layer makes uses of Protocols (such as HTTP),
Formats (such as KML), and Strategies (such as Clustering) to display and provide an
interacve layer. The vector layer also allows us to create and edit vector features.
In Chapter 9, our chapter on the Vector Layer class, we'll go into far more detail.
Layer.VirtualEarth
This layer allows us to interact with Microso's VirtualEarth API. It works in a similar way to
the Google Layer, so we won't spend more me discussing it here. Chapter 6 will fully cover
this layer class.

The 'Layers' in OpenLayers
[ 80 ]
Layer.WFS
This is a class that is deprecated, so try to avoid using it, as it will soon no longer be
supported. I wanted to explicitly menon it because it is on its way out, but I sll see lots of
code that uses it. WFS (Web Feature Service), allow us to interact with data that is stored on
the server. If you would like to use WFS, the general procedure is to use the Layer.Vector
class and use WFS as the format. We'll be covering this in detail in Chapter 9, our chapter on
the Vector Layer class.
Layer.WMS
This is the Layer class we've been using throughout the book so far. It inherits from Layer.
Grid, and is similar to other classes we've menoned. WMS is a popular standard and
the way we interact with it is similar to how we interact with other Layer classes. We
will be using this class throughout the book, so you haven't seen the last of it. Layer
class documentaon can be found at http://dev.openlayers.org/docs/files/
OpenLayers/Layer/WMS-js.html. More informaon and specicaons of the WMS
protocol can be found at http://www.opengeospatial.org/standards/wms.
Layer.Yahoo
This Layer class allows us to interact with the Yahoo! API. It works in a similar way to
Layer.Google and Layer.VirtualEarth, and we'll be covering it in more detail in Chapter 6.
Documentaon for this layer class is at http://dev.openlayers.org/docs/files/
OpenLayers/Layer/Yahoo-js.html. The Yahoo! Maps API can be found at http://
developer.yahoo.com/maps/.
Accessing layer objects
The last topic to cover concerns the funcons of the base Layer class. Before we do that
though, let's go over how to access layer objects in Firebug. We'll be doing this oen
throughout the book, so it is quite important.
Time for Action – accessing map.layers
Let's jump in to using some of the Layer class funcons.
1. Open up the second WMS example, chapter3_ex2_opons_cong.html in Firefox.
We won't be eding the code yet.
2. Enable Firebug and go to the Console panel.

Chapter 3
[ 81 ]
3. In the console, input and run this line of code:
map.layers;
4. You should then see a list of layers.
What Just Happened?
You just accessed the layers property of the global map object. This is a property of the
map object that contains an array of all the layers in the map. The list is ordered by the way
you add layers to the map, so the rst item in the list corresponds to the rst layer we added
to the map, the wms_layer_map layer. Not only will Firebug list the layer objects, you can
also access any one of them by clicking on them.
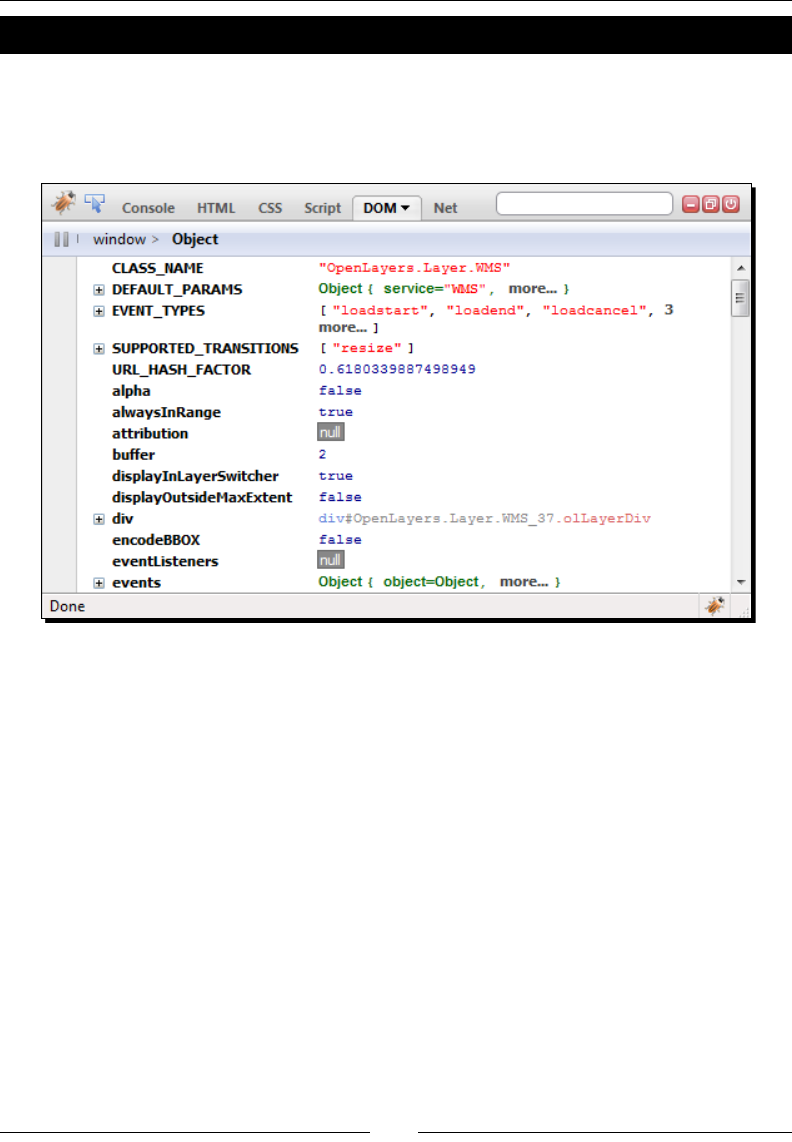
The 'Layers' in OpenLayers
[ 82 ]
Time for Action – accessing layer objects in Firebug
Let's take a look at how to access an object in Firebug now.
Click on one of the items in the array of objects that was outpued from the previous
Time for Acon secon. You should see something like this:
What Just Happened?
We just accessed our map's wms_layer_map layer object. What you see in the DOM panel is
a lisng of all the properes and funcons that layer object contains. The DOM panel is one
way we can access a layer object's properes. The DOM panel is a great way to get a quick
look at all the properes and values of any object we wish to know more about. You'll noce
some of the properes have not yet been menoned; this is because some properes are
specic to the Layer.WMS class, and is not included in the base Layer class.
Accessing layer properties
There are two common ways to access a layer object's properes.
map.layers
The rst way is by accessing the layer object through the map.layers array, which we did
in the previous example. Here, we are accessing the global map object, which was dened
outside the init() funcon with var map;.

Chapter 3
[ 83 ]
If we know the index of a layer object we wish to view, we can use map.layers[n] to
access the layer object (where n is the index). For example, if we wanted to access the
wms_layer_map layer object, we know it is the rst layer added to the map so its index
is 0 (because array start its index at 0), so we would type map.layers[0]. The next layer,
wms_layer_labels, has an index of 1, and so on.
Accessing layers this way, however, is not advised. Adding a layer will change the array, as
will deleng a layer. The best way to access layer objects is to store a reference to them,
like we've been doing in all the examples (e.g., var my_layer = new OpenLayers.
Layer()), as we'll go over now.
Storing references to layer objects
The second way is to dene our layer objects as global variables, like how we did with our
map object. So far, all our layer objects are dened inside the init() funcon, which means
we can't access them or refer to them outside of the init() funcon. If we try to access the
wms_base_ground layer object in Firebug, we will get an error because the wms_layer_
map layer object is not a global variable as we are not 'inside' of the init() funcon in
Firebug. This concept is referred to as scope.
Let's look at our code to see how the map object is dened as a global variable.
var map;
function init() {
//Setup our map object
map = new OpenLayers.Map('map_element', {});
// Setup our two layer objects
var wms_layer_map = new OpenLayers.Layer.WMS( ...
When you specify var, you are basically saying 'create a new variable here'. Noce how
we dene var map; outside the init() funcon. Inside the init() funcon, we do not
use var when we set map equal to the map object, because the map variable has already
been created.
The 'Layers' in OpenLayers
[ 84 ]
So, the process for making an object global is to:
1. Dene the object/variable outside of the init() (or any funcon) with var
variable_name;.
2. When you create the object inside the init() funcon, do not specify var when
referring to variable_name.
Noce our code to create the wms_layer_map layer object: var wms_layer_map = new
OpenLayers.Layer.WMS(.…) Since we are using var inside the init funcon, the object
is only now being created, and can only be referenced inside the init funcon. The wms_
layer_map object will only be accessible inside the same scope that it was dened. In this
case, since it was dened inside init(), we can only refer to it with the code that is inside
the init() funcon. To dene it globally to access it outside the funcon, we could do:
var map;
var wms_layer_map
function init(){
map = new OpenLayers.Map ...
wms_layer_map = new OpenLayers.Layer.WMS( ...
Using global variables can make things easier, but try to avoid using them
if possible. If you do use them, keep track of them and take care when
naming them.
Pop Quiz – working with Variable Scope
Take a look at the following code. What will be the value of the variable final?
var a = 3;
//Create a function that will set a variable called 'b' equal to 5
function set_variable(){
var b = 5;
}
//Call the function
set_variable()
final = a + b;
1. 8
2. 3
3. 5

Chapter 3
[ 85 ]
4. There will be an error because the variable b cannot be accessed outside the
test funcon.
Layer class methods
We've covered the properes of the base layer class and discussed most of the layer
subclasses so far. The remaining topic to cover is the funcons or methods of the base layer
class. Since we'll be talking about the funcons of the layer class, all layer subclasses inherit
and use these funcons. Before we get to the funcons though, let's cover how to access
layer objects in Firebug.
What's the dierence between a funcon and a method? A method is just a
term for a funcon that is owned by an object or a class.
Time for Action – dening a global layer object variable
Let's make the layer objects global variables access some properes of a layer, and call one
of the layer's methods.
1. Make a copy of chapter3_ex2_options_config.html. Add the following lines
right above the init() funcon:
var wms_layer_map, wms_state_lines, wms_labels, wms_water_depth,
wms_roads;
2. Inside your init() funcon, remove the var declaraon before each of the layer
object names. For example, the rst line of your wms_layer_map denion should
now look like this:
wms_layer_map = new OpenLayers.Layer.WMS(
3. Save the le (we'll refer to it as chapter3_ex5_global_variables.html).
4. Open it up in Firefox and enable the Firebug console.
5. In the console panel, input and run: wms_layer_map;. You should see some output
like this:
Object { options=Object, more... }
6. Input and run the following command in Firebug:
wms_layer_map.name

The 'Layers' in OpenLayers
[ 86 ]
7. Here we are directly accessing a property of the layer. You should see the layer's
name property output:
Base layer
8. Input and run the following command in Firebug:
wms_layer_map.setVisibility(false);
9. Assuming you are at the full extent, you should no longer see the layer now, as
you've just turned o the base layer's visibility.
What Just Happened?
We just made wms_base_ground a global variable, accessed a property of it, and called one
of its methods. Any of the Layer class properes we talked about before can be accessed via
layer_object.property;.
So, now that we're a bit more familiar with how to access layer properes and funcons
on the y, let's go over the methods of the base layer class. Now, just like properes, most
layer subclasses (e.g., Layer.WMS) have their own set of funcons, but also inherit all the
funcons from the base layer class.
Layer class method denitions
All of the following funcons can be called the same way we called the setVisibility()
funcon; by calling layer_object.function_name();. Some methods require that you
pass arguments into them. We won't cover all the funcons of the base layer class, as some
are either deprecated, found in the Map class funcon list, or outside the scope of this book.
The required arguments (if any) are listed under the parameters column.
Funcon Descripon/Acon Parameters Return Value
setName( newName ) Set a new name for
the layer based on the
passed in string. This will
also update the display
name for the layer in the
layer switcher control,
and may trigger a
changelayer event.
newName:
{String} The new
name of the layer.
-

Chapter 3
[ 87 ]
Funcon Descripon/Acon Parameters Return Value
addOptions(
options )
Add addional opons to
the layer. The parameter
behaves like the opons
parameter, and allows
you to set properes on
the layer.
options:
{Object} An
anonymous object
containing key:value
pairs of layer
properes and
values.
-
redraw() Redraws the layer.
Returns true if the layer
was successfully redrawn
or false if the layer
could not be redrawn.
You will need to call this
while adding features to
a vector layer, as we'll
cover in Chapter 9.
-{Boolean}
getVisibility() Checks if the layer is
visible or not. Returns
true if the layer is
visible, false if not.
-{Boolean}
SetVisibility(
visibility )
Sets the visibility to
true or false, hide/
show the layer, and
redraw it. The visibility
determines if a layer
should be shown or not.
visibility:
{Boolean} true
to show the layer,
false to hide the
layer.
-
calculateInRange() Returns true or false
if the layer can be
displayed at the map's
current resoluon. If
the alwaysInRange
property is true, this
will always return true.
-{Boolean}
setIsBaseLayer(
is_base )
Will turn the layer into
a base layer if true is
passed in and if false
is passed in it will no
longer make it a base
layer.
is_base:
{Boolean} Set to
true to make layer
a base layer, false
to make it an overlay
layer.
-
The 'Layers' in OpenLayers
[ 88 ]
Funcon Descripon/Acon Parameters Return Value
setOpacity(
opacity )
Sets the opacity of a
layer based on the value
passed in. The passed
in opacity value is a
oat with valid values
from 0 to 1, with 0 being
completely transparent
and 1 being fully
opaque. 0.5 would be
50 percent transparent.
opacity:
{Float} Value of
desired opacity.
-
Have a Go Hero – call some functions
Now that we've gone over some of the Layer class funcons that we'll be making use of
throughout this book, try calling them yourself. Open up Firefox, enable Firebug, and try
calling some of the above funcons on the layer objects (accessing the layer objects through
either the map.layers array or the global layer objects themselves). Again, don't be afraid
to experiment or break things!
Summary
In this chapter we talked about the Layer class. We covered the concept of layers and the
dierences between base layers and overlay layers. We went in depth with the WMS Layer
class. We discussed the Layer class properes and methods and were introduced to various
layer subclasses.
Whew! This was all likely a lot to take in. We covered a lot of Layer classes individually,
but we have not yet made a map with dierent types of Layer classes. This is one of the
things that OpenLayers excels at, and is what drives map 'mash ups.' To understand how
to go about pung dierent layer classes together though, we'll need to have a basic
understanding of projecons—the topic of our next chapter.

4
Wrapping Our Heads Around
Projections
When you look at a map, you are looking at a two dimensional representaon
of a three dimensional object (the earth). Because we are, essenally, 'losing'
a dimension when we create a map, no map is a perfect representaon of the
earth. All maps have some distoron.
The distoron depends on what projecon (a method of represenng the
earth's surface on a two dimensional plane) you use. In this chapter, we'll talk
more about what projecons are, why they're important, and how we use them
in OpenLayers. We'll also cover some other fundamental geographic principles
that will help make it easier to beer understand OpenLayers.
In this chapter, we will cover:
Concept of map projecons
Types of projecons
Longitude, latude, and other geographic concepts
OpenLayers projecon class
Transforming coordinates
Let's get started!

Wrapping Our Heads Around Projecons
[ 90 ]
Map projections
No maps of the earth are truly perfect representaons; all maps have some distoron. The
reason for this is because they are aempng to represent a three dimensional object (an
ellipsoid: the earth) in two dimensions (a plane: the map itself).
A projecon is a representaon of the enre, or parts of a, surface of a three dimensional
sphere on a two dimensional plane (or other type of geometry).
Why on earth are Projections used?
Every map has some sort of projecon—it is an inherent aribute of maps. Imagine
unpeeling an orange and then aening the peel out. Some kind of distoron will occur, and
if you try to fully t the peel into a square or rectangle (like a at, two dimensional map),
you'd have a very hard me.
To get the peel to t perfectly onto a at square or rectangle, you could try to stretch out
certain parts of the peel or cut some pieces of the peel o and rearrange them. The same
sort of idea applies while trying to create a map.
There are literately an innite amount of possible map projecons; an unlimited number
of ways to represent a three dimensional surface in two dimensions, but none of them are
totally distoron free.
So, if there are so many dierent map projecons, how do we decide on what one to use?
Is there a best one? The answer is no. The 'best' projecon to use depends on the context in
which you use your map, what you're looking at, and what characteriscs you wish to preserve.
Projection characteristics
As a two dimensional representaon is not without distoron, each projecon makes a
tradeo between some characteriscs. And as we lose a dimension when projecng the
earth onto a map, we must make some sort of tradeo between the characteriscs we want
to preserve. There are numerous characteriscs, but for now let's focus on three of them.
Area
Area refers to the size of features on the map. Projecons that preserve area are known as
equal area projecons (also known as equiareal, equivalent, or homolographic). A projecon
preserves area if, for example, an inch measured at dierent places on the map covers the
same area. Because area remains the same, angles, scales, and shapes are distorted. This is
what an equal area projected map may look like:
Chapter 4
[ 91 ]
Scale
Scale is the rao of the map's distance to the actual distance (e.g., one cenmeter on the
map may be equal to one hundred actual meters). All map projecons show scale incorrectly
at some areas throughout the map; no map can show the same scale throughout the map.
There are parts of the map, however, where scale remains correct—the placement of these
locaons migates scale errors elsewhere. The deformaon of scale also depends on the
area being mapped. Projecons are referred to as equidistant if they contain true scale
between a point and every other point on the map.
Shape
Maps that preserve shape are known as conformal or orthomorphic. Shape means that
relave angles to all points on a map are correct. Most maps that show the enre earth
are conformal, such as the Mercator projecon (used by Google Earth and other common
web maps). Depending on the specic projecon, areas throughout the map are generally
distorted but may be correct in certain places. A map that is conformal cannot also be
equal-area. The maps we've been using so far have been conformal.
Other characteristics
Projecons have numerous other characteriscs, such as bearing, distance, and direcon.
The key concept to take away here is that all projecons preserve some characteriscs
at the expense of others. For instance, a map that preserves shape cannot completely
preserve area.
There is no 'perfect' map projecon. The usefulness of a projecon depends on the context
the map is being used in. A parcular projecon may excel for a certain task, e.g. navigaon,
but can be a poor choice for other purposes.
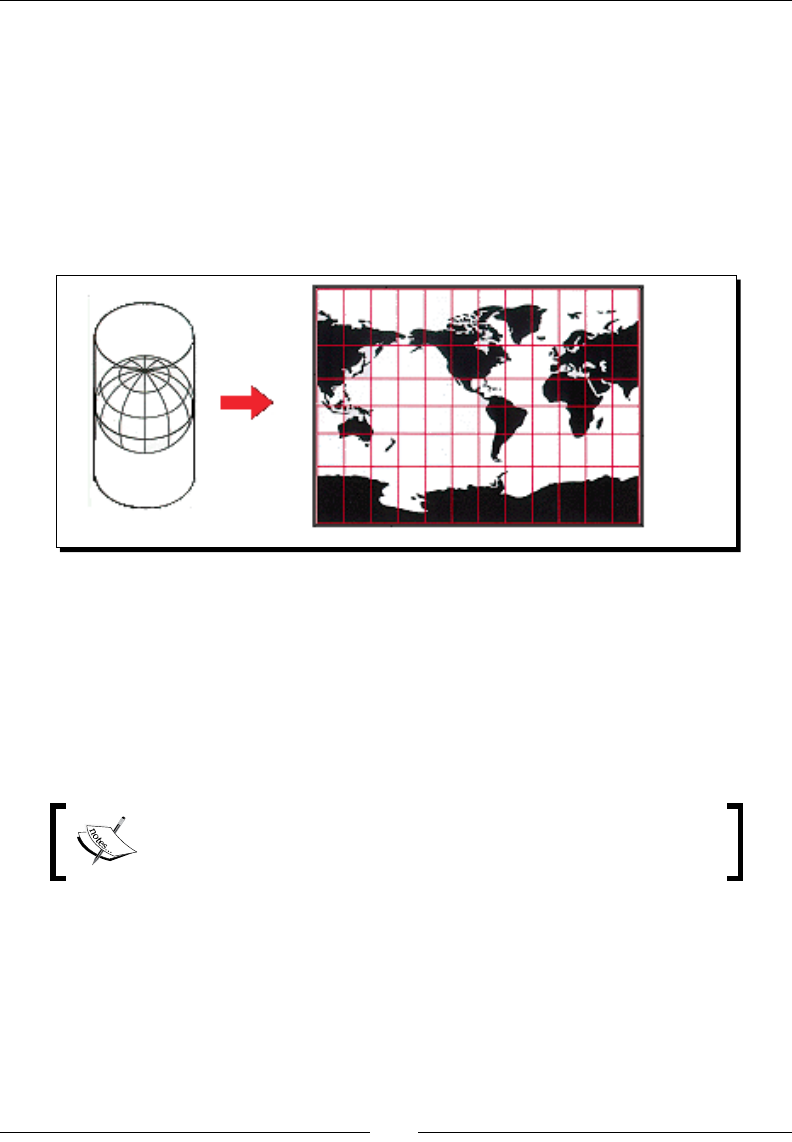
Wrapping Our Heads Around Projecons
[ 92 ]
Types of projections
Projecons are a way to represent three dimensions with two dimension surface. Projecons
are projected onto some geometric surface, three of the most common ones being a plane,
cone, or cylinder.
Imagine a cylinder being wrapped around the earth, with the center of the cylinder's
circumference touching the equator. Now, the earth is projected onto the surface of this
cylinder, and if you cut the cylinder from top to boom vercally and unwrap it, and lay it
at, you'd have a regular cylindrical projecon:
The Mercator projecon is one type of projecon. If you've never worked with projecons
before, there is a good chance that most of the maps you've seen were in this projecon.
Because of its nature, there is heavy distoron near the ends of the poles. Looking at the
previous screenshot, you can see that the cells get progressively larger, the closer you get to
the North and South Poles. For example, Greenland looks larger than South America, but in
reality it is about the size of Mexico. If area distoron is important in your map, you might
consider using an equal area projecon as we previously menoned.
More informaon about projecons can be found at the USGS (US
Geological Survey) website at http://egsc.usgs.gov/isb/
pubs/MapProjections/projections.html.
EPSG codes
As we menoned, there are literally an innite number of possible projecons. So, it
makes sense that there should be some universally agreed upon classicaon system that
keeps track of projecon informaon. There are many dierent classicaon systems, but
OpenLayers uses EPSG codes. EPSG refers to the European Petroleum Survey Group, a
scienc organizaon involved in oil exploraon, which in 2005 was taken over by the OGP
(Internaonal Associaon of Oil and Gas Producers).

Chapter 4
[ 93 ]
For the purpose of OpenLayers, EPSG codes are referred to as:
EPSG:4326
The numbers (4326 in this case) aer EPSG: refer to the projecon idencaon number.
This projecon, EPSG:4326, is the default projecon which OpenLayers uses. It has been
the projecon used in all our examples so far, and uses the familiar Longitude/Latude
coordinate system, with coordinates that range from -180° to 180° (longitude) and -90° to
90° (latude).
Time for Action – using different projection codes
Let's create a basic map using a dierent projecon.
1. Using the template code, recreate your map object the following way. We'll be
specifying the projection property, along with the maxExtent, maxResolution,
and units properes. If we use a projecon other than the default projecon, we
need to tell OpenLayers the type of coordinates to use, and seng the maxExtent
is one way to do this. The projecon we're going to use is EPSG:900913, a
projecon used by Google Maps and other third party APIs.
map = new OpenLayers.Map('map_element', {
projection: 'EPSG:900913',
maxExtent: new OpenLayers.Bounds(-20037508, -20037508,
20037508, 20037508.34),
maxResolution: 156543.0339,
units: 'm'
});
2. Save the le, we'll refer to it as chapter4_ex1.html.
Downloa d f r o m W o w ! e B o o k < w w w.woweb o o k . c o m >
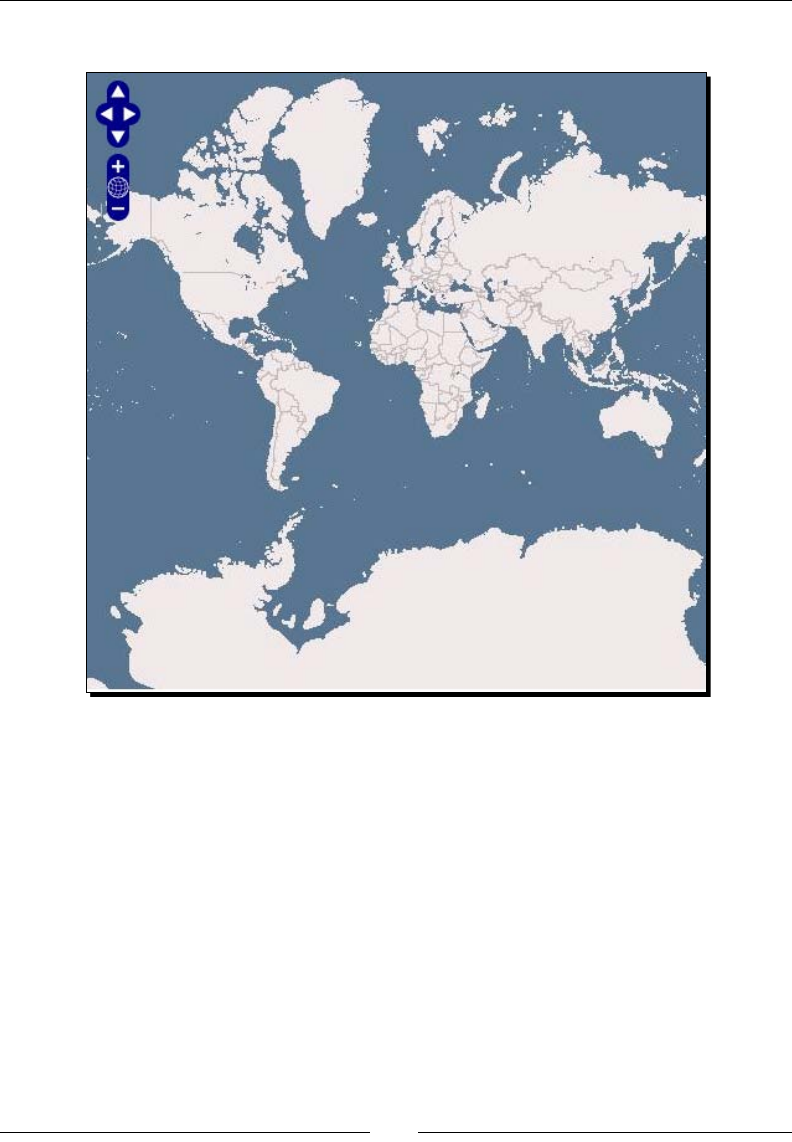
Wrapping Our Heads Around Projecons
[ 94 ]
3. You should see something like the following:
What Just Happened?
We just created a map with the projecon EPSG:900913. You'll noce that it looks quite a
bit dierent than the maps we've made so far. This is because it is in a dierent projecon.
Specifying a different projection
OpenLayers supports any projecon, but if you want to use a projecon other than
EPSG:4326, you must specify the following three opons:
maxExtent: Default value is -180,-90,180,90
maxResoluon: Default value is 1.40625
projecon: Default value is EPSG:4326

Chapter 4
[ 95 ]
If you do not specify those opons, the default values are used (all the other maps so far
have been using the default values). You should also specify the units property, as we did
with units: 'm', depending on the units your projecon uses.
The reason you must specify these properes is because dierent projecons use dierent
coordinates. In the above example, we set the maxExtent to:
maxExtent: new OpenLayers.Bounds(-20037508, -20037508,
20037508, 20037508.34)
These values are much dierent than the default values—they are not longitude and latude
values. Instead, they use an x/y coordinate system, and to OpenLayers the longitude is the x
value and latude is the y value.
Pop Quiz – projections
Give some reasons why you might want to use a projecon other than EPSG:4326. What
areas would not be best suited for displaying the EPSG:4326 projecon?
Longitude/Latitude
Longitude and latude are two terms most people are familiar with, even if they have
limited geographic knowledge or get confused by the two. Let's take a look at the following
screenshot and then go over these two terms.

Wrapping Our Heads Around Projecons
[ 96 ]
Latitude
Latude lines are imaginary lines parallel to the equator, aptly known also as 'Parallels of
Latude'. Latude is divided into 90 'degrees', or 90 spaces (or cells), above and below the
equator. -90° is the South Pole, 0° would be the Equator, and 90° is the North Pole.
Each space, or cell, (from 42° to 43°, for example) is further divided into 60 minutes and each
minute is divided into 60 seconds. The minutes and seconds terminology has lile to do with
me. In the context of mapping, they are just terms used for precision. The size of a degree
of latude is constant. Because they measure 'north to south', OpenLayers considers the y
coordinate to be the latude.
Longitude
Longitude lines are perpendicular to the lines of latude. All lines of longitude, also known
as meridians of longitude, intersect at the North Pole and South Pole, and unlike latude, the
length of each longitude line is the same. Longitude is divided into 360 'degrees', or spaces.
Similar to latude, each space is also divided into 60 minutes, and each minute is divided
into 60 seconds.
As the space between longitude lines gets smaller, the closer you get to the poles the size of
a degree of longitude changes. The closer you are to the poles, the shorter amount of me it
would take you to walk around the earth.
With latude, it makes sense to use the equator as 0°, but with longitude there is no
spot beer than another to start the 0° mark at. So, while this spot is really arbitrary, the
Observatory of Greenwich, England is today universally considered to be 0° longitude. Because
longitude measures east and west, OpenLayers considers the x coordinate to be longitude.
Time for Action – determining LonLat coordinates
Let's take a look at a couple of examples on coordinates from our previous maps.
1. Open up the nal example from Chapter 1.
2. Pan around the map in any direcon. Then, in Firebug, type:
map.getCenter();
3. Depending on where you have panned, your output should read something like this:
lon=-72.8125, lat=19.6875
4. Now, open up the example from the beginning of this chapter.
5. Pan around, and then in Firebug type:
map.getCenter();

Chapter 4
[ 97 ]
6. You should see something like:
lon=-9397474.0038099,lat=3595597.9798909
What Just Happened?
We just took a look at the longitude and latude values for the center of the map in two
dierent maps with dierent projecons. When we call map.getCenter(), we get back an
OpenLayers LonLat object.
In the rst map, the max extent of the map was between -180° and 180° for longitude, and
between -90° and 90° for latude. These are the values used by the EPSG: 4326, and it is a
longitude/latude type of coordinate system. The values for longitude and latude change in
the second map because they are not in the same projecon (they are in EPSG:900913).
OpenLayers projection class
So far, we've been talking about the abstract idea of a projecon. Let's dive into OpenLayer's
Projecon class, OpenLayers.Projection, which is what we use to actually handle
projecons. The Projecon class relies on an external library called Proj4js, which can be
found at http://proj4js.org. First, we'll talk about what we can do without the proj4js
library, and then talk about what we can do with it.
Creating a projection object
To instanate an object from the Projecon class, the code would look like the following:
my_proj = new OpenLayers.Projection('EPSG:4326', {});
Parameters
Let's take a look at the parameters for the Projecon class.
projectionCode: {String}: A string of idenfying the Well Known Idener
(WKID) for the projecon, such as an EPSG code in the form of EPSG:4326.
options:{Object}: An oponal object. For instanang projecon objects, it is
very common to leave this out.
When creang a map and specifying the projecon property, you can either pass in a
projecon object (like the one created above), or pass a string containing the projecon
code. This string, such as EPSG:4326, is also known as an SRS code. When passing in a
code, like we've done with all our examples so far, OpenLayers automacally turns it into a
projecon object for you.

Wrapping Our Heads Around Projecons
[ 98 ]
Functions
The Projecon class has a number of methods, including:
Funcon Descripon Parameters
getCode() Returns a {String}
containing the projecon
code, e.g., 'EPSG:4326'
-
getUnits() Returns a {String}
the units string for
the projecon, e.g.,
'degrees'. If the Proj4js
library is not included on
your page, this will return
null.
-
addTransform(from,
to, method)
Dene a custom
transformaon funcon
between two projecons.
This usually will not be
necessary, especially if you
are using Proj4js, unless you
need to dene a custom
projecon transformaon.
from: {String} Source
projecon code
to: {String} Desnaon
projecon code
method:{Function} A funcon
that transforms the source point to
the desnaon point, leaving the
original point unmodied.
transform(point,
source,
destination)
Calling this funcon will
transform the passed in
point from the passed in
source projecon to the
passed in destination
projecon. You can also
pass in an {Object} as
long as it contains x and y
properes. This funcon
will transform the point in
place, meaning that the
point you passed in will be
transformed. If you need
a copy of the point,
you should rst make a
clone of it before calling
transform() by calling
the point's clone()
method.
point: {Geometry.Point}
An object from the OpenLayers.
Geometry.Point class,
containing an x and y coordinate
source:{OpenLayers.
Projection} Projecon object of
the source projecon
destination:{OpenLayers.
Projection} Projecon object of
the desnaon map projecon.

Chapter 4
[ 99 ]
Transforming projections
Transforming a point means you take a coordinate in one projecon and turn it into a
coordinate of another projecon. Apart from transforming EPSG:4326 to EPSG:900913
and vice-versa, OpenLayers does not provide support for transforming other projecons out
of the box—to do transforms of other projecons, you'll need to include Proj4js (which can
be found at http://proj4js.org/).
In most scenarios, it is the job of the backend map server to handle projecon
transformaons, but oen it's useful or faster to do it on the client side (such as in the
case of vector layer coordinate transformaons). Let's take a look at how to transform
EPSG:4326 to EPSG:900913 with OpenLayers.
Time for Action – coordinate transforms
Proj4js is not necessary for this example, as transforming between these two projecons is
possible without Proj4js.
1. Open up the previous example in Firefox. We won't be modifying any code, so any
page which includes the OpenLayers library will be ne.
2. Open Firebug. In the console, create two projecon objects:
var proj_4326 = new OpenLayers.Projection('EPSG:4326');
var proj_900913 = new OpenLayers.Projection('EPSG:900913');
3. Now let's create a LonLat object which will contain a point in EPSG:4326
coordinates.
var point_to_transform = new OpenLayers.LonLat(-79, 42);
4. And now let's transform it. We'll take it from EPSG:4326 (our source proj_4326
projecon object) to EPSG:900913 (our desnaon proj_900913 projecon
object):
point_to_transform.transform(proj_4326, proj_900913);
5. Finally, we'll print the new value:
console.log(point_to_transform);
console.log(point_to_transform.lon, point_to_transform.lat)
6. Your output should read something like:
lon=-8794239.7714444,lat=5160979.4433314 { lon=-8794239.7714444,
more...}
-8794239.7714444 5160979.4433314
Wrapping Our Heads Around Projecons
[ 100 ]
What Just Happened?
We just transformed a point in the EPSG:4326 projecon to a point in the EPSG:900913
projecon. Let's take a closer look at the transform method we called on the point_to_
transform object.
point_to_transform.transform(proj_4326, proj_900913);
This will transform the original point from the proj_4326 projecon to the proj_900913
projecon. Noce, we aren't calling the transform() funcon of a projecon object, but
of a LonLat object. The transform() funcon's denion for an OpenLayers.LonLat object
is as follows:
Funcon Descripon Parameters
transform(source,
dest)
This funcon transforms a point in
place, meaning that the original point
will be transformed; hence the original
value will be lost. If you need a copy of
it, use the .clone() method rst. It
returns itself.
source: Source projecon
dest: Desnaon
projecon.
In this case, our source projecon is in EPSG:4326, and our desnaon projecon is in
EPSG:900913. Keep in mind however, that EPSG:4326 and EPSG:900913 are the only
two projecons you can do transforms on with OpenLayers if you do not include the
Proj4js library.
When creang your map, all your raster layers (image-based layers;
nearly every layer except the vector and image layer) must be in the
same projecon as your map. You can do projecon transformaons
with coordinates and the vector layer, but once OpenLayers gets back
an image from a map server it cannot reproject the image itself (that's
something the map server has to do).
The Proj4js library
The Proj4js library allows you to transform the coordinates from one coordinate system into
another coordinate system. The Proj4js website is located at http://proj4js.org. By just
including the Proj4js library on your page (like you do with OpenLayers), you can do more
transforms within OpenLayers. Not all EPSG codes are supported, but there are many and if
your desired code is not supported you can add a projecon denion for it.
Chapter 4
[ 101 ]
The site http://spatialreference.org contains Proj4js denions for
most of the EPSG codes.
Ideally, you should be using the same projecon throughout your map, but there are mes
when you may want to display the coordinates in a dierent projecon—such as with a
vector layer. Let's take a look at how to setup the Proj4js library.
Time for Action – setting up Proj4js.org
This step is similar to the way we set up OpenLayers.
1. Download Proj4js from http://trac.osgeo.org/proj4js/wiki/Download.
At the me of wring, the latest version was proj4js-1.0.1.zip, so go ahead and
download it (or whichever the latest version is).
2. Extract it and copy the proj4js folder to your root code directory (the folder where
your OpenLayers.js le is located).
3. Add the following line in the <head> secon of your code aer the OpenLayers
library inclusion code.
<script type='text/javascript' src="proj4js/lib/
proj4js-combined.js"></script>
4. Now, open up the page and start Firebug. Type and run the following:
var test_proj = new Proj4js.Proj('EPSG:4325');
console.log(test_proj);
5. You should see output that looks like the following:
Object { srsCodeInput="EPSG:4325", more...}
What Just Happened?
We just included the Proj4js library and tested to see if it worked. If you received an
error when you aempted to call new Proj4js.Proj() it means that the locaon
of the proj4js-combined.js le was wrong. Ensure that the directories are set up properly
(your example le should be in the same directory as the proj4js folder, and inside the
proj4js folder should be a bunch of les and folders, including a lib folder that contains
the proj4js-combined.js le).

Wrapping Our Heads Around Projecons
[ 102 ]
Dening custom projections
Now that the Proj4js library is included, you can do transforms with more projecons the
same way we did in the previous example. Not all projecons are dened; however, you are
able to dene them yourself, for example:
Proj4js.defs["EPSG:27563"] = "+title=LAMB sud france +proj=lcc
+lat_1=44.1 +lat_0=44.1 +lon_0=0 +k_0=0.999877499 +x_0=600000
+y_0=200000 +a=6378249.2 +b=6356515 +towgs84=-168,-60,320,0,0,0,0
+pm=paris +units=m";
Aer that, you'd be able to use EPSG:27563 for projecon transformaons just like you
were able to use EPSG:4326 and EPSG:900913 from the earlier examples.
There are a number of already dened projecons, and you can view them more extensively
at http://proj4js.org. A more complete list (containing Proj4js denions for nearly
any EPSG code) can be found at http://spatialreference.org/.
Summary
In this chapter, we talked about projecons. We covered what they are and the various
dierent types of projecons. Longitude, latude, and other geographic concepts were also
discussed. While we just scratched the surface of these prey complex topics, you should
have enough fundamental informaon to understand how to use projecons.
We also talked about the Projecon class, along with how to transform coordinates and use
the Proj4js library. You'll oen work with data in coordinate systems other than EPSG:4326,
and knowing how to work with and transform data in other projecons is important.
In the next chapter, we'll take a look at Google Maps and other third party APIs, and put
some of our recently gained knowledge of projecons to use.

5
Interacting with Third Party APIs
Web maps are very popular today, and are growing in popularity. Aer Google
Maps was introduced, there was an explosion of interacve web maps. Google
provides an API to interface with its mapping service, as do others now, and
OpenLayers work well with most of them. Not only can we use these third party
APIs with OpenLayers, we can also 'mashup' other layers on top of them.
In this chapter, we're going to learn:
Concept of third party mapping APIs
Using the layer classes for third party APIs: Google, Microso, and Yahoo!
How to use OpenStreetMap
Working with Spherical Mercator
Combining dierent layer classes
Third party mapping APIs
Web based maps are commonplace today. The catalyst for the explosive growth of web maps
was the introducon of Google Maps. Web maps existed before, but they were not quick or
developer friendly. In June 2005, Google released an API for Google Maps which provided a
front end client (the role OpenLayers plays) along with an access to the backend map server.
This allowed anyone to insert not just a Google Map on their site, but also allowed them to
add in their own point data and manipulate the map in other ways. Google Maps grew in
popularity, and other companies, such as Microso and Yahoo!, followed in their footsteps,
creang their own web-mapping APIs.
Interacng with Third Party APIs
[ 104 ]
Map mashups
The term mashup refers to an applicaon that combines various dierent data sources and
funconality together. A map mashup is a map that combines dierent layers and data. Third
party mapping APIs, like Google and Yahoo! Maps, allow people to more easily create these
'map mashups'. For example, a map with a Google Maps base layer overlaid with markers
that track places you've traveled to could be considered a map mashup.
OpenLayers did not introduce map mashups, but it allows us to create very powerful ones
with ease. Combining a Google's Map layer, a WMS layer, and a Vector layer is prey simple
with OpenLayers.
OpenLayers and third party APIs
OpenLayers allows you to use third party mapping APIs inside your map applicaon, leng
you use their maps inside of yours. The main caveat is that, at the me of wring, the third
party API map must be a base layer (but, as we discussed before, you can use as many base
layers as you wish).
The three large commercial mapping APIs that OpenLayers can communicate with are
Google Maps, Yahoo! Maps, and Bing (Microso) Maps. There is another free and open
source API that OpenLayers works well with (and works in a similar manner to the previous
three) called OpenStreetMap.
We'll rst take a look at each of these four Layer classes, and then we'll go over how to
combine them with other Layer classes.
Google Maps
The soware behind Google Maps consists of a client and server. The client is what you use
when you visit http://maps.google.com, and it communicates with the Google Maps
backend servers. Google provides an API that lets you use their own client and backend
server, but since OpenLayers is used as our client, we're only interested in interacng with
Google's backend map server.
There may be legal restricons depending on how you plan to use the Google
Maps. Full restricons can be found at http://code.google.com/apis/
maps/terms.html and http://www.google.com/intl/en_ALL/
help/legalnotices_maps.html.

Chapter 5
[ 105 ]
In the previous chapters, we've set up the Google Layer using Version 3 (V3) of the Google
Map API. Because Google Maps updates their API, OpenLayers must also update to
accommodate any changes that are made. OpenLayers versions prior to 2.10 (the one this
book is based on) use Version 2 (V2) of the Google Maps API. Google Maps V2 usage is
deprecated however, so we will focus on using V3. From our perspecve, our code doesn't
change much—OpenLayers handles all the version specic funconality behind the scenes
for us.
However, you are likely to encounter older OpenLayers maps made using Google Maps
Version 2, so we will cover how to use both V2 and V3. Again, please use only V3 when
making new maps, as V2 will eventually no longer be supported.
Differences between Google Maps version 2 and version 3
There are really only three things that you must do dierently when going from Google
Maps V3 to V2 (or vice versa):
1. The script tag you add in to reference the Google Maps library is dierent. You do
not need to provide an API key with V3 of the Google Maps API.
2. The layer names used in the type property are dierent. For example, the 'terrain'
layer in V3 is dened as type: google.maps.MapTypeId.TERRAIN, but in V2 it
is type: G_PHYSICAL_MAP.
3. The layer is congured with spherical Mercator (we'll cover what this means
shortly).
It is recommended you use V3 of the Google Maps API. The ocial Google Maps
V3 documentaon can be found at http://code.google.com/apis/
maps/documentation/javascript/.
Ocial Google Maps API docs for V2 can be found at http://code.
google.com/apis/maps/documentation/javascript/v2/
reference.html.
Time for Action – using Goole Maps V3 (standard way)
Let's create a map using V3 of the Google Maps API. We've already done this in Chapter 3,
so you should be somewhat familiar with it. This is the standard way to use the Google Maps
Layer, and you should use this method unless you specically need a layer type in V2 that V3
does not yet support.
Interacng with Third Party APIs
[ 106 ]
With versions of OpenLayers prior to 2.10, accessing Google Maps V3 may
not work.
1. Version 3 of the Google Maps API does not require an API key. However, you sll
must include the following in your <head> secon, so OpenLayers knows where
to look for the Google Maps API library. We'll be asking the map's API and specify
that we want v3.2 of the Google Maps API (you can leave the &v=3.2 parameter if
you'd like to let Google Maps provide the latest version for you automacally). Add
this before your OpenLayers inclusion script:
<script
src="http://maps.google.com/maps/api/js?sensor=false&v=3.2"></
script>
2. Let's start by adding a hybrid layer to our map. The type property is in the form
of google.maps.MapTypeId.TYPE, where TYPE in this case is HYBRID:
var google_hybrid = new OpenLayers.Layer.Google(
"Google Hybrid",
{type: google.maps.MapTypeId.HYBRID}
);
3. Now we'll add a physical (topographic type) layer:
var google_physical = new OpenLayers.Layer.Google(
"Google Physical",
{type: google.maps.MapTypeId.TERRAIN}
);
4. To add a satellite layer type:
var google_satellite = new OpenLayers.Layer.Google(
"Google Satellite",
{type: google.maps.MapTypeId.SATELLITE}
);
5. Now, we'll create a streets layer. If we do not pass in a layer type, the streets layer
is used by default. If you wish to manually specify the type, the streets map type is
google.maps.MapTypeId.ROADMAP.
var google_streets = new OpenLayers.Layer.Google(
"Google Streets",
{
);
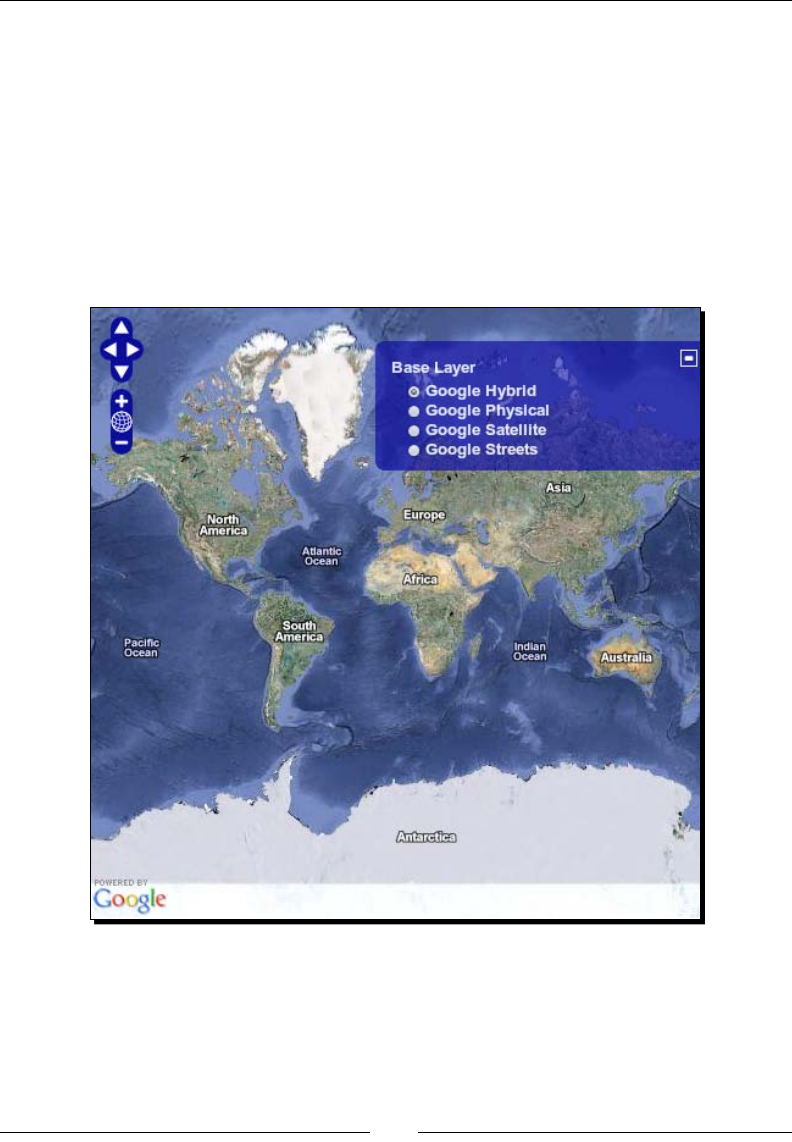
Chapter 5
[ 107 ]
6. We'll add the layers to the map:
map.addLayers([google_hybrid,google_physical,google_satellite,
google_streets]);
7. Finally, add a layer switcher control. You'll also noce that all the layers on the map
that we've added are all base layers. By default, third party map API layers act as
base layers.
map.addControl(new OpenLayers.Control.LayerSwitcher());
8. Open up the page. You should see something similar to this:

Interacng with Third Party APIs
[ 108 ]
What Just Happened?
We just created a map using Google Maps API V3. We only needed to do two things:
1. Include the Google Maps V3 API with <script src="http://maps.google.
com/maps/api/js?sensor=false&v=3.2"></script>. This lets OpenLayers
access the Google Maps API.
2. Set the type property, such as type: google.maps.MapTypeId.HYBRID.
Including the Google Maps API enables OpenLayers to communicate with the Google Maps
backend. Because we included the Google Maps API, we can use variables that are part of
it. Specically, the possible values for the type property come directly from the Google
Maps API—for example, if we didn't include the API, we could not use google.maps.
MapTypeId.HYBRID.
Noce that if you run map.getCenter(); in Firebug, the center point we get back has very
dierent coordinates than what we're used to—they aren't longitude/latude values. This is
because sphericalMercator is set for us automacally, so we can easily lay other layers,
such as vector layers, on top of the third party map layer. Before we cover the reason for this
(which is related to the other third party mapping APIs) let's go over the Google Map Layer
class in more detail.
Creating a Google Map layer object
The format to create a Google Map layer object is the same for both V2 and V3 of the
Google Maps API. The basic format for instanang a Google Maps layer is:
var google_layer_object = new OpenLayers.Layer.Google(
'Layer Name',
{Properties}
);
The rst argument, as with most Layer classes, is the layer's name. The second argument
is a properes object. There are just a few Google Layer specic properes, so let's go
over them.
Google layer properties
Because the Google Layer inherits from the base Layer class, you can use nearly any property
that the Layer class provides—such as numZoomLevels or maxExtent. We'll cover just the
properes that are specic to the Google Maps layer class. The possible values for the type
aribute depend on the version of the Google Maps API used.
Chapter 5
[ 109 ]
sphericalMercator {Boolean}
This property determines if the map should behave as a Mercator-projected map. Seng
to true will allow us to use other layers, such as the Vector layer, with the actual map
projecon. Spherical Mercator is covered in more depth later in this chapter. When using
V3 of the Google Map API, this property is automacally set to true. With V2, you will have
manually set it to true. Example: sphericalMercator: true.
type {GmapType}
The type property species the Google Map layer type—what layer Google should give us.
V2 and V3 of the Google Maps API have dierent possible values. Let's go over Version 3's
values, and then take a look at Version 2's values.
V3 GMapType values
The standard, V3 way to refer to layer types is in the form of:
var google_layer_V3 = new OpenLayers.Layer.Google(
'Google Maps V3 Layer',
{type: google.maps.MapTypeId.TYPE}
);
To specify the layer type, we can simply change the TYPE property. The possible TYPE values
can be one of the following:
Type Descripon
google.maps.MapTypeId.ROADMAP The default value, used if nothing is passed
in. Shows the default street map (same as G_
NORMAL_MAP).
google.maps.MapTypeId.HYBRID Displays a map with a semi-transparent street layer
overlaid on satellite imagery (same as G_HYBRID_
MAP).
google.maps.MapTypeId.
SATELLITE
Displays satellite imagery (same as G_
SATELLITE_MAP).
google.maps.MapTypeId.TERRAIN Displays a map with features such as terrain (same
as G_PHYSICAL_MAP).
An up-to-date list of possible layer types can be found in the Google Maps
API documentaon at http://code.google.com/apis/maps/
documentation/javascript/maptypes. html#MapTypes.
At the me of wring, the non-earth (moon, Mars, and sky) layers were not yet available
from Google Maps.
Interacng with Third Party APIs
[ 110 ]
V2 GMapType values
Version 2 of the Google Maps API provides various layers as well. Some of the layer types
are even maps of other planets, but no extra work is required to view them inside the
OpenLayers. To specify the map type for V2, use the following:
var google_layer_V2 = new OpenLayers.Layer.Google(
'Google Maps V2 Layer',
{type: TYPE}
);
The possible TYPE values are the following:
Type Descripon
G_NORMAL_MAP The default value. This is used if no GMapType is specied. This
map type will display the normal street map.
G_SATTELITE_MAP Displays satellite imagery.
G_AERIAL_MAP Displays aerial photography.
G_HYBRID_MAP Displays a map with a semi-transparent street layer overlaid on
satellite imagery.
G_AERIAL_HYBRID_
MAP
Displays a map with a semi-transparent street layer overlaid on
aerial imagery.
G_PHYSICAL_MAP Displays a map with features such as terrain.
G_MOON_ELEVATION_
MAP
Displays a terrain map of the moon with altude color coded.
G_MOON_VISIBLE_MAP Displays photography taken from orbit around the moon.
G_MARS_ELEVATION_
MAP
Displays a terrain map of Mars with altude color coded.
G_MARS_VISIBLE_MAP Displays photography taken from orbit around Mars.
G_MARS_INFRARED_
MAP
Displays infrared imagery of Mars. Warm areas are bright and
cooler areas are dark.
G_SKY_VISIBLE Displays a map of the full celesal sphere.
To use any of these layer types, simply pass in the type name when creang the layer.
Example: type: G_NORMAL_MAP.
The previous list was the supported layer types at me of wring, but current
and up-to-date layer values can be found on the Google Maps V2 API docs
at http://code.google.com/apis/maps/documentation/
javascript/v2/reference.html#GMapType.
Chapter 5
[ 111 ]
Time for Action – creating a Google Map layer with V2
(Deprecated)
Let's create a map with V2 of the Google Maps API. This is not the proper way to use the
Google Maps layer, but I am including it because you are likely to come across a code that
uses V2 of the API. Google Maps V2 also provides a few dierent layer types (like a moon
layer) that V3 does not provide at the me of wring.
1. V2 of the Google Maps API requires you to register an API key, so grab one (for free)
at http://code.google.com/apis/maps/signup.html. If you don't have a
domain name, use http://localhost.
2. In the <head> secon, before the OpenLayers script tag, include the following.
Replace YOUR_KEY with the key generated from Step 1:
<script
src='http://maps.google.com/maps?file=api&v=2&key=YOUR_
KEY'></script>
3. Let's create some layers now. The format of the type aribute is slightly dierent
with V2. We'll go over the possible layer type values right aer this example. First,
let's create some layers, starng with a 'hybrid' layer. The type value for the hybrid
layer is G_HYBRID_MAP. We'll also specify 20 zoom levels with the numZoomLevels
property. Dierent base layers can support dierent numbers of zoom levels:
//Create Google Map Layer objects
var google_hybrid = new OpenLayers.Layer.Google(
"Google Hybrid",
{type: G_HYBRID_MAP, numZoomLevels: 20}
);
4. Now let's create a 'physical' layer, which is a terrain/topology type of layer. The
type is G_PHYSICAL_MAP, and we'll specify a dierent numZoomLevels property:
var google_physical = new OpenLayers.Layer.Google(
"Google Physical",
{type: G_PHYSICAL_MAP, numZoomLevels: 22}
);
5. We'll use the G_SATELLITE_MAP to create a satellite layer:
var google_satellite = new OpenLayers.Layer.Google(
"Google Satellite",
{type: G_SATELLITE_MAP}
);

Interacng with Third Party APIs
[ 112 ]
6. If we don't pass in a type, the default 'streets map' layer will be used. This is the
layer you'll see by default in Google Maps. If you wish to manually specify this layer
type, it is called G_NORMAL_MAP.
var google_streets = new OpenLayers.Layer.Google(
"Google Streets",
{}
);
7. Now let's add a layer type that is not (at the me of wring) supported by V3
of the Google Maps API—a layer of Mars:
var google_mars = new OpenLayers.Layer.Google(
"Google Mars",
{type: G_MARS_VISIBLE_MAP}
);
8. Finally we just add the layers to the map:
map.addLayers([google_hybrid,google_physical,google_satellite,
google_streets,google_mars]);
9. Take a look at your map. You should see something like this:
Chapter 5
[ 113 ]
What Just Happened?
We just created a map using Google Maps V2 with a few of the possible Google Maps
layer types. Because we're using a dierent version of the API here, you'll noce that our
code is slightly dierent than it was when using the standard (V3) of the Google Maps API.
Specically, the type property is dierent because V2 of the API supports dierent layer
types than Version 3 does.
Yahoo! Maps API
OpenLayers provides us with an easy way to interface with the Yahoo! mapping API as well.
We work with it similar to how we work with the Google Maps Layer class. The ocial
Yahoo! Maps API documentaon can be found at http://developer.yahoo.com/maps/.
Let's take a look!
Time for Action – using the Yahoo! Maps Layer
Let's create a map with the Yahoo! Maps Layer class.
1. In the <head> secon, we need to reference the locaon of the Yahoo! Maps API.
Add the following before the OpenLayers inclusion script tag:
<script
src="http://api.maps.yahoo.com/ajaxymap?v=3.0&appid=euzuro-
openlayers"></script>
2. Let's set up some Yahoo! layer objects now. Like the Google Maps Layer, we specify
the type of the layer we want by seng the type property. Let's create a hybrid
layer. The type property for Yahoo! layers start with YAHOO_MAP_, followed by a
three character code:
var yahoo_hybrid = new OpenLayers.Layer.Yahoo(
"Hybrid",
{type: YAHOO_MAP_HYB, numZoomLevels: 24}
);
3. Now let's create a satellite layer type. The three character code for satellite is SAT.
We'll also set a dierent amount of zoom levels to further illustrate how each base
layer can have its own amount of zoom levels:
var yahoo_satellite = new OpenLayers.Layer.Yahoo(
"Satellite",
{type: YAHOO_MAP_SAT, numZoomLevels: 20}
);
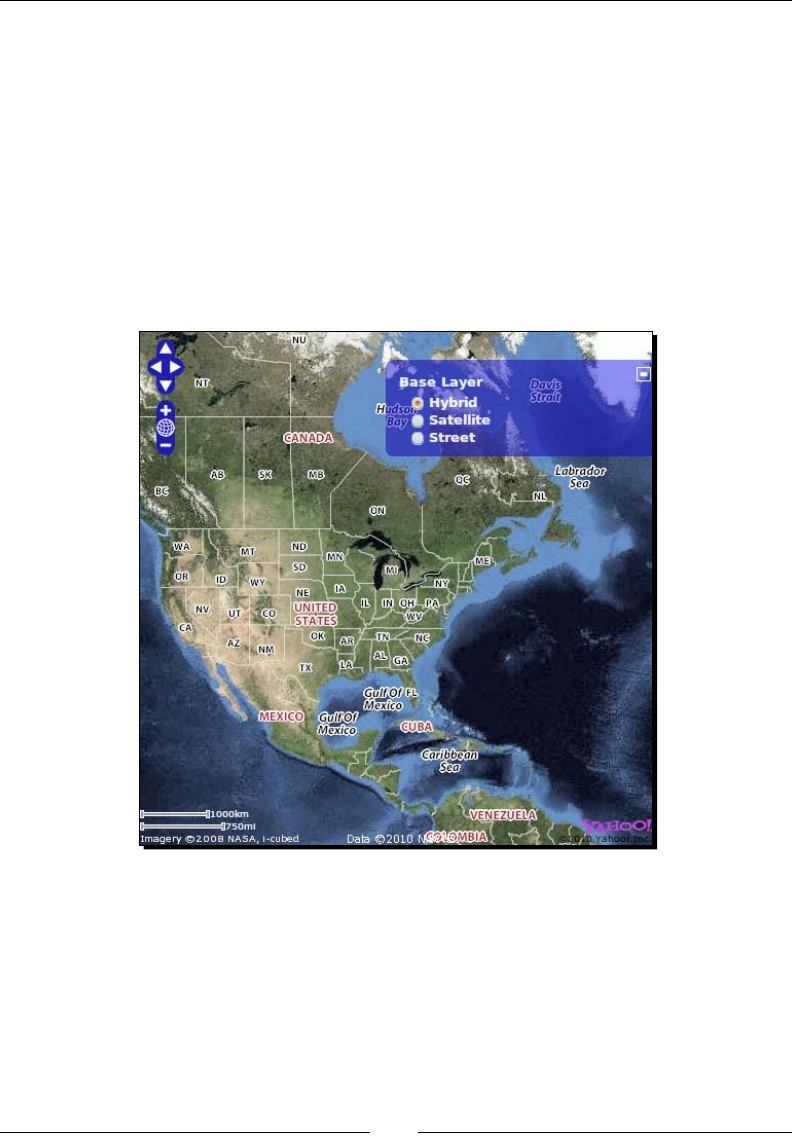
Interacng with Third Party APIs
[ 114 ]
4. Let's add a default layer next. If we don't pass a type in, the default value will be
used, which is YAHOO_MAP_REG—a street-like map.
var yahoo_street = new OpenLayers.Layer.Yahoo(
"Street",
{}
);
5. Finally we just add the layers to the map:
map.addLayers([yahoo_hybrid, yahoo_satellite, yahoo_street]);
6. Open the page. You should see something like the following:
What Just Happened?
We just created a map with a Yahoo! Maps layer. Like the Google Maps layer, we need to
include a link to the Yahoo! API—but we do not need an API key. We included the API with:
<script src="http://api.maps.yahoo.com/ajaxymap?v=3.0&appid=euzuro-
openlayers"></script>
Like the Google Maps API script, this script allows OpenLayers to communicate with the
Yahoo! Maps API. It also provides us values to use for the type property.
Chapter 5
[ 115 ]
Yahoo! Maps Layer class properties
Like the Google Maps, our main focus on this layer class will be on the type property.
Let's go over the available type values.
Yahoo! Maps Layer types
At the me of wring there were three layer types the Yahoo! Maps API gives us access to:
Type Descripon
YAHOO_MAP_HYB Displays a hybrid map consisng of the satellite map overlaid with the
regular street map.
YAHOO_MAP_SAT Displays satellite photography.
YAHOO_MAP_REG Displays a street map. This is the default type value, so if type is not
passed in this will be used.
Microsoft's mapping API
Microso provides an interface to their mapping services as well. Their mapping service
previously was referred to as Virtual Earth, but they have since re-branded it as Bing Maps.
Hence, in OpenLayers, the Layer Class is called VirtualEarth, and we use it the same way
we've created Google and Yahoo! layers. The ocial Microso documentaon can be found
at http://msdn.microsoft.com/en-us/library/dd877180.aspx.
Time for Action – creating a Bing/Virtual Earth Layer
1. Include a reference to the Microso Mapping API in your <head> secon, before
the OpenLayers inclusion script:
<script
src="http://ecn.dev.virtualearth.net/mapcontrol/mapcontrol.
ashx?v=6.2&mkt=en-us"></script>
2. Let's set up some layer objects now. We specify the type property like in the
previous examples. For this layer, the type is prexed by VEMapStyle., which
stands for 'Virtual Earth Map Style'. Let's create a 'shaded' layer, which in this
case is the street/road layer with shaded elevaon:
var ve_shaded = new OpenLayers.Layer.VirtualEarth(
"Shaded",
{type: VEMapStyle.Shaded}
);
Downloa d f r o m W o w ! e B o o k < w w w.woweb o o k . c o m >

Interacng with Third Party APIs
[ 116 ]
3. We'll add an aerial (satellite imagery) layer now:
var ve_aerial = new OpenLayers.Layer.VirtualEarth(
"Aerial",
{type: VEMapStyle.Aerial}
);
4. Now, let's create a default layer. If we don't pass in a type, the VEMapStyle.Road
layer will be used. It is similar to the shaded layer, but without the shading. We'll
also use another property called animationEnabled, which we'll set to false.
By default, this property is set to true and controls whether or not a zooming
animaon will be applied to the layer (this animaon is a Virtual Earth layer specic
property):
var ve_road = new OpenLayers.Layer.VirtualEarth(
"Road",
{animationEnabled: false}
);
5. Let's add a hybrid layer:
var ve_hybrid = new OpenLayers.Layer.VirtualEarth(
"Hybrid",
{type: VEMapStyle.Hybrid}
);
6. Finally, add the layer objects to the map:
map.addLayers([ve_shaded, ve_aerial, ve_road, ve_hybrid]);
7. You should see something like the following:
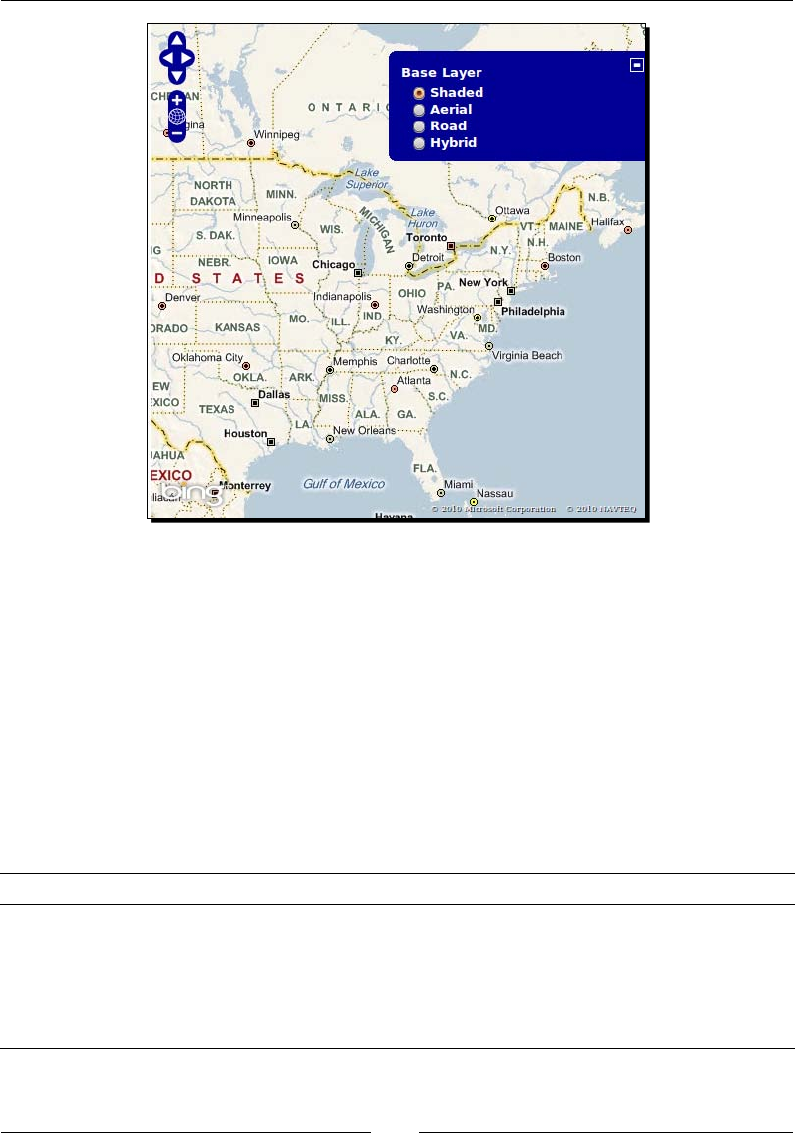
Chapter 5
[ 117 ]
What Just Happened?
We just made a map using the Microso Virtual Earth/Bing API. It works similar to how the
Google and Yahoo! Maps API work—by providing a script tag to the Microso mapping API.
We can communicate with Microso's map server and use dierent type values. Let's go
over the properes, as there is a new one the other third party layer classes do not provide.
VirtualEarth layer class properties
Like the previous layers, the type property controls what layers we get back from the map
server. However, there is a unique animationEnabled property that we can use with the
VirtualEarth layer. Let's take a look at it:
Property Data Type Descripon
animationEnabled {Boolean} This property determines if panning/zooming
animaons should be enabled. By default, the value
is true. If it is false, the animaons will be the
same as the other layers' animaons. If you look at the
Road layer from the previous example, you can see the
dierence with this property set to false.
Interacng with Third Party APIs
[ 118 ]
Possible type values
The possible values for the type property, at the me of wring, are the following.
Type Descripon
VEMapStyle.Shaded Displays a shaded street/road map, showing elevaons.
VEMapStyle.Aerial Displays aerial (satellite) imagery.
VEMapStyle.Road Displays a road map.
VEMapStyle.Hybrid Displays an aerial layer overlaid with a road map.
Let's cover one more layer type before we start combining dierent layers together—the
OpenStreetMap Layer.
OpenStreetMap
OpenStreetMap (or OSM) is a free, wiki-style, map of the world driven by user
contributed content. You are able to use your own OSM les or ones provided through
the OpenStreetMap servers. Unlike the previous third party APIs, there is no type
property to specify for this layer.
Seng up an OpenStreetMap service and les yourself is not too dicult, but it is outside
the scope of this book (visit http://wiki.openstreetmap.org/wiki/OpenLayers_
Simple_Example for more informaon on this). Accessing OSM with OpenLayers,
however, isn't.
More informaon about OpenStreetMap can be found at
http://www.openstreetmap.org/.
Time for Action – creating an OpenStreetMap Layer
1. For the OpenStreetMap layer, we do not need to include a script; we can access it
outside of the box.
2. This will be prey simple. We just need to create an OSM layer object:
var osm_layer = new OpenLayers.Layer.OSM(
'OpenStreetMap Layer'
);
Chapter 5
[ 119 ]
3. Then, we just add the layer object to the map. Even though we're only passing in
one layer object, we'll use the addLayers funcon to keep our code consistent:
map.addLayers([osm_layer]);
4. You should see something like this:
What Just Happened?
The map we just created is showing an OpenStreetMap layer. Unlike the previous layers, we
did not have to provide an API key or link to OSM specic les—OpenLayers knows about it
already. Another thing that separates the OpenStreetMap layer from the other third party
map layers is that the OSM layer has no type property.
Accessing your own OSM tiles
The above code uses the publicly available OSM les, but it is easy to point it at your own
les. To do so, create the layer in this format:
var osm_layer = new OpenLayers.Layer.OSM(
'My OSM Layer',
'http://URL_TO_TILES/${z}/${x}/${y}.png',
Interacng with Third Party APIs
[ 120 ]
{}
);
To use this, you would replace URL_TO_TILES with the server hosng your OSM les. The
${z}, ${x}, ${y} are variables which OpenLayers will replace with the appropriate values
to reference specic map les.
Spherical Mercator
Let's talk about Spherical Mercator. I've made a couple of references to it throughout this
chapter, but what is it? It is a term used to refer to the projecon that many commercial,
third party mapping APIs use. We need to use Spherical Mercator to properly overlay data
and layers on top of third party map layers.
All the APIs we've used in this chapter so far (Google, Yahoo!, VirtualEarth/Bing, and OSM)
are in the Spherical Mercator projecon—a projecon that treats the earth as a sphere (as
opposed to an ellipsoid).
Spherical Mercator—EPSG code
The ocial EPSG code for the projecon is currently EPSG:3857, but when the code was
established it was referred to as EPSG:900913. This EPSG:900913 code can sll be used
in OpenLayers, as the EPSG:3857 code is idencal to it. Google was one of the (if not the)
rst to publish maps with this projecon—noce how 900913 resembles 'gOOglE' (with a
backwards 'E' for 3).
You may also see other EPSG codes that represent the same Spherical Mercator
projecon. For example, ArcGIS version 9.3 uses the code EPSG:102113, and
you may also encounter the standard EPSG:3785. These all refer to the same
'Spherical Mercator' projecon and can be used interchangeably.
So, what does this mean for us? Well, when we use these third party APIs, we use coordinates
that don't look like Lon/Lat coordinates (they are x, y in meters). Because the earth is treated
as a sphere in the Spherical Mercator projecon, calculaons are aected and data from other
sources may not match up perfectly with it if we don't re-project our data.
We need to set up Spherical Mercator before we can add in other layer classes and have
them line up correctly, so let's take a look.

Chapter 5
[ 121 ]
Time for Action – using Spherical Mercator
Let's set up a map using Spherical Mercator with a Yahoo! Maps Layer. When using the
Google Maps Layer (V3), the sphericalMercator property is set to true automacally, so
you do not need to do anything extra. However, explicitly specifying it is a good idea when
working with other layers that are not in the Spherical Mercator projecon.
1. Since we'll use the Virtual Earth layer type, we need to make sure to include the
Microso Mapping API:
<script
src="http://ecn.dev.virtualearth.net/mapcontrol/mapcontrol.
ashx?v=6.2&mkt=en-us"></script>
2. The rst step is to specify the maxExtent, maxResolution, units, and
projection properes when creang our map object. If you'll remember from
the previous chapter, these are the properes we must set when we specify a
map projecon other than the default EPSG:4326 projecon. We'll also set
the displayProjection property to an EPSG:4326 projecon object. This
displayProjection property species what projecon various controls, such
as the MousePosition control, display coordinates in. For the EPSG: 900913
projecon, (-)128 * 156543.0339 is the max extent.
map = new OpenLayers.Map('map_element',{
maxExtent: new OpenLayers.Bounds(
-128 * 156543.0339,
-128 * 156543.0339,
128 * 156543.0339,
128 * 156543.0339),
maxResolution: 156543.0339,
units: 'm',
projection: new OpenLayers.Projection('EPSG:900913'),
displayProjection: new OpenLayers.Projection("EPSG:4326"),
});
3. Now, we'll create a Microso Virtual Earth (Bing) map layer object. This me, we'll
specify sphericalMercator: true so the layer is properly projected to the
projecon:
var ve_road = new OpenLayers.Layer.VirtualEarth(
"Road",
{sphericalMercator:true}
);

Interacng with Third Party APIs
[ 122 ]
4. Open the map, and in Firebug run the command:
map.getProjection();
5. You should see the following output:
"EPSG:900913"
What Just Happened?
We just set up a map using a Yahoo! Maps Layer with Spherical Mercator enabled on it.
When using a dierent projecon, we have to specify some properes (as we talked about in
the previous chapter). Let's briey go over the properes relevant to the EPSG:900913, the
Spherical Mercator, projecon.
Map properties with Spherical Mercator layers
Because we're working in a dierent projecon, we have to tell OpenLayers some things
about the map so it knows how to set it up. Let's take a look at the map properes which
we set in the code above.
maxExtent
The rst property we pass in to the map properes is:
maxExtent: new OpenLayers.Bounds(
-128 * 156543.0339,
-128 * 156543.0339,
128 * 156543.0339,
128 * 156543.0339),
The maxExtent property tells OpenLayers the maximum boundaries of the map. The four
numbers represent the minimum x, the minimum y, the maximum x, and the maximum y
coordinates. The numbers we use here are the coordinates for the extent of the world in
EPSP:900913—quite dierent from Longitude/Latude coordinates. Without specifying
the maxExtent, our map would not display properly since OpenLayers would not know
what the boundaries of the world are.
maxResolution
This property sets the maxResoluon of the map, which is based on ng the map's extent
into 256 pixels. This is a {Float} data type. For example,
maxResolution: 156543.0339,
More informaon about this property can be found in Chapter 8, the chapter about the
Map Class.

Chapter 5
[ 123 ]
units
This species that the map is in meters. It is a {String} data type.
units: 'm',
By default, the units property is set to degrees. Since Spherical Mercator is a projecon
that uses meters, we need to specify it here.
projection
Here we set the map's projecon to be ESPG:900913, i.e., the Spherical Mercator
projecon:
projection: new OpenLayers.Projection('EPSG:900913'),
If we wish to work with Longitude/Latude, or other layer types in a dierent projecon,
we need to transform the coordinates from EPSG:900913 to the appropriate other
projecon. Once we start to use a third party map API, we're stuck using the Spherical
Mercator projecon.
Using Google Maps and other layers
Geng other layers to play nicely with these third party layers involve three things,
two of which we've already done:
1. Set up the correct map projecon properes.
2. Make sure sphericalMercator is set to true on the third party map layer.
3. Ensure all raster layers (any non-Vector or Image layer), such as WMS, are in the
map's projecon. In this case, we'll need to make sure we ask our WMS server for
map les in the EPSG:900913 projecon.
Using what we learned so far, let's make a mashup. We'll use a Google Maps layer as the
base layer, and WMS and Vector layers as overlay layers.

Interacng with Third Party APIs
[ 124 ]
Time For Action – creating your rst mashup
Let's make a map 'mashup' that consists of a Google Map layer, a WMS layer, and a
Vector layer.
1. First, we need to add the Google Maps V3 script API tag in the <head> secon:
<script src="http://maps.google.com/maps/api/
js?sensor=false&v=3.2"></script
>
2. Now, set up your map object with the proper projecon info, like in the
previous example:
map = new OpenLayers.Map('map_element',{
maxExtent: new OpenLayers.Bounds(
-128 * 156543.0339,
-128 * 156543.0339,
128 * 156543.0339,
128 * 156543.0339),
maxResolution: 156543.0339,
units: 'm',
projection: new OpenLayers.Projection('EPSG:900913'),
displayProjection: new OpenLayers.Projection("EPSG:4326"),
});
3. Now let's create a Google Maps layer. Because we are using V3 of the API, we
do not need to specify sphericalMercator: true because it is set to true
automacally.
var google_streets = new OpenLayers.Layer.Google(
"Google Streets",
{numZoomLevels: 20}
);
4. We'll create our WMS layer now and specify that we want the basic and various
label layers back from the WMS server. We'll also set the opacity to .7, or 70
percent opaque, and set isBaseLayer: false so we're sure it will be an overlay
layer. Now, we are not specifying a projection property on the layer because our
layer will inherit the projecon of the map object. All layers (with the excepon of
the Vector layer) should be in the same projecon as your map. The WMS server
we're using does support the EPSG:900913 projecon, so we'll get back proper
map les. If the WMS service does not support this projecon, we wouldn't be able
to use it—we'll talk about this more aer the example. Go ahead and create the
WMS layer:
var wms_layer = new OpenLayers.Layer.WMS(

Chapter 5
[ 125 ]
'OpenLayers WMS',
'http://vmap0.tiles.osgeo.org/wms/vmap0',
{layers: 'basic,clabel,ctylabel,statelabel', transparent: true},
{isBaseLayer: false,
opacity: .7}
);
5. Now let's add a Vector layer. It will be in the EPSG:900913 projecon as well,
since it inherits the projecon from the map object. We could, however, specify a
dierent projecon for the vector layer and re-project vector data on the y (we
can't do this on raster layers, like the WMS layer)—but we'll save this topic for
Chapter 9, our Vector layer chapter. Create the vector layer object:
var vector_layer = new OpenLayers.Layer.Vector(
'Editable Vectors');
6. We'll add an EdingToolbar control now, which lets us add points and polygons to
a vector layer via a toolbar that will appear in the upper right corner of the map (by
default). When creang the control object, we simply pass in the vector layer object
we wish the control to use:
//Add a vector editing control
map.addControl(new
OpenLayers.Control.EditingToolbar(vector_layer));
7. Finally, we just need to add the layers to the map.
map.addLayers([google_streets, wms_layer, vector_layer]);
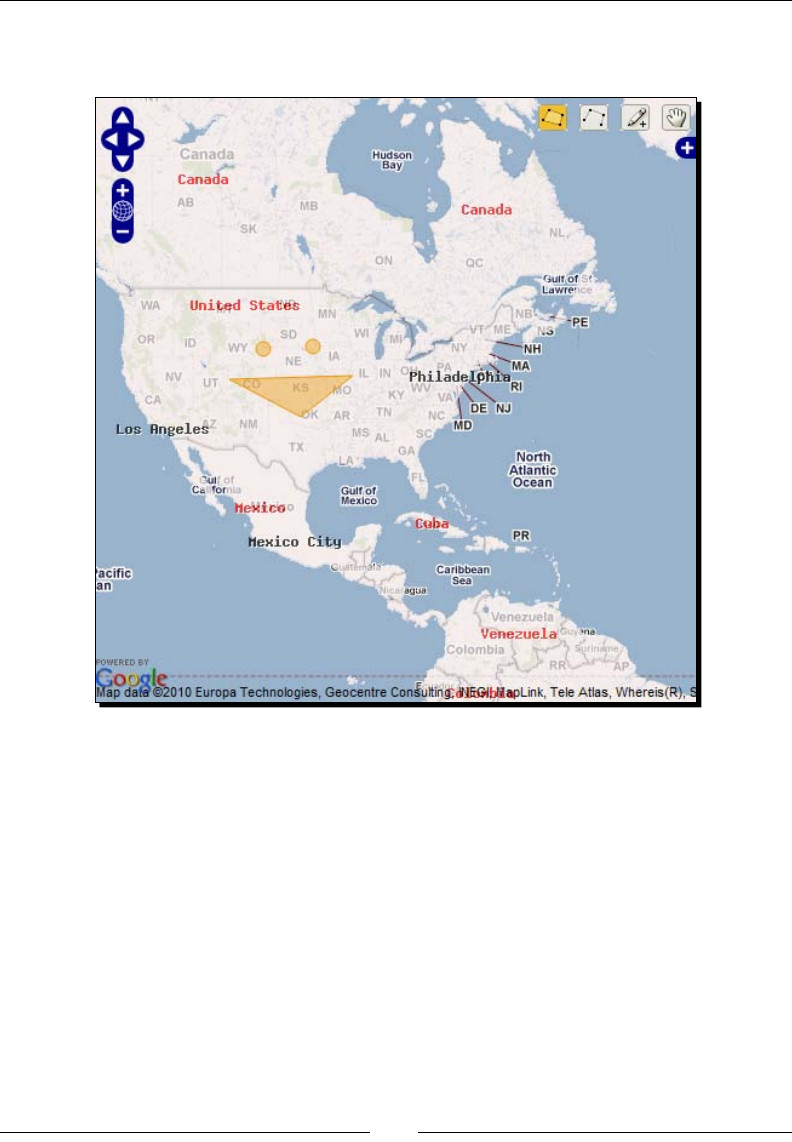
Interacng with Third Party APIs
[ 126 ]
8. Open up your map now. You can add points and polygons to the vector layer via the
EdingToolbar control in the top right corner:
What Just Happened?
We just created a map using Google Maps, WMS, and Vector layers. We also have an
EdingToolbar control hooked up to the vector layer object, which will let us create points
and polygons in the vector layer. Any points or polygons (also called features) we create will
be in the map's projecon, EPSG:900913, and line up with the Google Map layer below it.

Chapter 5
[ 127 ]
WMS with Spherical Mercator/third party map layers
We also have a WMS layer, set to be an overlay layer. To use a WMS service on top of a
Google Maps layer (or any other third party map layer), the WMS service must support the
EPSG:900913 projecon. The WMS service we used, http://vmap0.tiles.osgeo.org/
wms/vmap0, does support this projecon so the map le images properly lined up with the
Google Maps layer. If a WMS service does not support the EPSG:900913 projecon, the
map le images would not properly line up.
To nd out what projecons a WMS service supports, you can make a
getCapabilities request to the server. To make this request, specify the
request, service, and version properes in the URL. For example,
http://wmsserver/?request=GetCapabilities&service=WMS&
version=1.1.1.
Summary
In this chapter, we talked about what third party mapping APIs are and how to use them.
We learned how to use the Google, Yahoo!, and Microso mapping APIs, along with the
OpenStreetMaps API. We also discussed Spherical Mercator and demonstrated how to
use it. Finally, we created a map 'mashup', mixing various dierent layer types together.
The next chapter will focus on another part of OpenLayers—the Control class. This is another
thing that sets OpenLayers apart from other mapping libraries. With it, we're able to interact
with our map, add tons of addional funconality, and even create our own custom controls.

6
Taking Control of Controls
So far, we've taken for granted that the map will move when we drag it. Or that
we can just click a layer in the layer switcher and it will turn on or o. Or that
we can zoom in and out. We haven't yet talked much about what actually is
behind the map interacon or how it works.
Simply put, the OpenLayers Control class is what makes our maps interacve.
There are many built in controls, each with their own unique funcons. But, not
only do you have a large number of pre-made controls at your disposal, you
also have the ability to easily create your own controls.
In this chapter, we'll cover:
What controls are
Adding controls to a map
The Control class and its subclasses
Using panels to add controls outside of the map
Creang custom controls

Taking Control of Controls
[ 130 ]
What are controls?
Controls allow us to interact with our map. They also allow us to display extra informaon,
such as displaying a scale bar with the ScaleLine control. Some controls do not have a
visual appearance, such as the ArgParser control, but others do, such as the OverviewMap
control. You can have as many controls on your map as you'd like. There are even some cases
where you may not want any controls—such as embedding an unmovable map in a page, or
showing a stac map for prinng.
Using controls in OpenLayers
Most controls are added directly to the map, such as the Navigaon control. Others
are added to the map, but can also be placed in a <div> tag outside the map—like the
overview map control.
Other controls act similar to buons which can be clicked or toggled on and o. These types
of controls can be placed inside of a panel, which can also be placed outside the map.
Furthermore, we can even create our own controls and place them directly in the map or
inside of a panel. We'll cover all this and more, so let's get started with how to add controls
to your map.
Adding controls to your map
There are two methods for adding controls to a map.
1. Pass in a JavaScript array of OpenLayers Control objects when you instanate the
map object.
2. Add controls to the map object aer it has been created by calling either of
the two map funcons addControl(), passing in a single control object, or
addControls(), passing in an array of control objects.
When you create your map, four control objects are added automacally. These four
controls are:
OpenLayers.Control.Navigation: Responsible for handling map interacon
from mouse events, such as dragging the mouse, zooming with the scroll bar, and
double-clicking.
OpenLayers.Control.PanZoom: Adds a Pan/Zoom bar to the top le hand side
of the map. Contains up/down/le/right arrows for panning, and zoom in, zoom
out, and zoom to maximum map extent buons for zooming.

Chapter 6
[ 131 ]
OpenLayers.Control.ArgParser: Allows the map to zoom to a specic locaon
and turn on/o layers based on the URL that you call the map with. In other words,
when you use the OpenLayers.Control.Permalink control to generate a URL,
the ArgParser control will parse the URL and manipulate the map based on the
parameters embedded in the URL. We'll cover both controls in detail later in this
chapter.
OpenLayers.Control.Attribution: This control will add aribuons from
layers to the map if any aribuons are passed into the layer object.
Since these controls are added without us explicitly adding them, how do we opt to not
include them? The simplest way is to pass in an empty array to the controls property
when we instanate a map object.
Time for Action – creating a map with no controls
Without controls, our map will not be interacve. This is somemes exactly what you want,
such as when displaying a map on a printer friendly page.
1. First, we'll need to create our map object and pass in an empty array to the
controls property:
map = new OpenLayers.Map('map_element', {
controls: []
});
2. Now, no controls will be added to the map unless you manually call addControl or
addControls. Let's create and add a WMS layer to our map:
var wms_layer = new OpenLayers.Layer.WMS(
'WMS Layer Title',
'http://vmap0.tiles.osgeo.org/wms/vmap0',
{layers: 'basic'},
{}
);
map.addLayer(wms_layer);
3. Make sure you also set the extent—as stated in previous chapters, this step will be
implied in all future examples:
if(!map.getCenter()){
map.zoomToMaxExtent();
}
Downloa d f r o m W o w ! e B o o k < w w w.woweb o o k . c o m >

Taking Control of Controls
[ 132 ]
4. Open up the page. You should see a map with no controls, and you won't be able to
pan around or zoom in since the map has no controls, as shown below:
What Just Happened?
We just created a map without any controls. Users cannot interact with the map—they
can see it, but they cannot navigate or change it. By passing in an empty array when we
instanated our map object via controls: [], we overrode the four controls that are
added to the map by default.
Time for Action – adding controls to a map
There are tons of other controls that OpenLayers provides that aren't passed in by default
but are sll very useful. Let's take a look at some of them and how to add them to our map.
Aer we cover how to do this, we'll go over each Control class in more detail.
1. What we'll do now is create an array of control objects that we'll pass in when
creang our map object. Let's create a NavigaonControl object rst. This way, we'll
be able to reference the control anywhere in our code easily. Next, we'll create a
JavaScript array that will contain the navigation_control object we created;
along with four other control objects we'll immediately instanate. So, the rst thing
we'll need to do inside our init() funcon is to create an array of control objects:
var navigation_control = new OpenLayers.Control.Navigation({});

Chapter 6
[ 133 ]
var controls_array = [
navigation_control,
new OpenLayers.Control.PanZoomBar({}),
new OpenLayers.Control.LayerSwitcher({}),
new OpenLayers.Control.Permalink(),
new OpenLayers.Control.MousePosition({})
];
2. Now we'll create the map object and pass in the array of controls we just made:
map = new OpenLayers.Map('map_element', {
controls: controls_array
});
3. Create and add a WMS layer like in the previous example. If I ask you to create a
WMS layer in future examples in this chapter, I'll be referring to this block of code.
var wms_layer = new OpenLayers.Layer.WMS(
'WMS Layer Title',
'http://vmap0.tiles.osgeo.org/wms/vmap0',
{layers: 'basic'},
{}
);
map.addLayer(wms_layer);
4. Passing in an array of control objects when creang our map object is one way to
add controls, but as you know we can also call addControl or addControls. Let's
call addControl and pass in an object that will be instanated on the y—we won't
create a variable to reference it.
map.addControl(new OpenLayers.Control.ScaleLine());
5. Let's make an overview map control object. We'll instanate it and save a reference
to it by using a variable, then add it to the map by passing it into an array and
calling addControls. We'll also pass in a KeyboardDefaults control which we will
instanate in the addControls itself. Both ways work—passing in a reference to a
control object, or instanang an object in the method call:
var overview_map = new OpenLayers.Control.OverviewMap();
map.addControls([
overview_map,
new OpenLayers.Control.KeyboardDefaults()
]);
Taking Control of Controls
[ 134 ]
6. Open up the page. You should see something similar to this:
What Just Happened?
We added various controls to our map by passing in an array of control objects when
construcng the map object, and by calling map.addControl and map.addControls.
These two funcons take in control object(s) and add them to the map, which also causes
the map.control array to get updated.
Have a go hero – add controls
Add and remove various controls and see if you can determine which controls are which.
Take a look at the Control class documentaon at http://dev.openlayers.org/docs/
files/OpenLayers/Control-js.html to see a list of all available control classes (we'll
cover each one soon) and try adding dierent controls to your map.
Use map.removeControl() and pass in a control object you wish to remove. You can
either use the variable name, or a less eloquent method of accessing the controls array
itself, e.g.:
map.removeControls(map.controls[2]);

Chapter 6
[ 135 ]
Doing it this way should make it clear why creang variables is a much beer way to
instanate control/layer objects, as it makes it much easier to access the right object.
Another downside to using the controls array itself is that removing a control will aect
the index of all other controls, so there can be a lot of guesswork involved as to what control
you're actually removing. So, in short, avoid removing controls this way if you can.
Adding controls by passing in an array of controls
The rst way to specify controls for your map is to pass them in as an array when the map
object is instanated. Passing in an array of control objects when creang your map object
is the preferred way to add controls—it keeps all your control objects in one place, making
your code a lile easier to read and maintain.
In the above example, we created an array that held ve control objects, four of which were
instanated in the array itself:
var navigation_control = new OpenLayers.Control.Navigation({});
var controls_array = [
navigation_control,
new OpenLayers.Control.PanZoomBar({}),
new OpenLayers.Control.LayerSwitcher({}),
new OpenLayers.Control.Permalink(),
new OpenLayers.Control.MousePosition({})
];
As we've menoned before, it's best to create a reference to an object (be it a control or a
layer object) before adding it to your map. We created the navigation_control object
outside an array, so we can easily access it just by referring to it.
To access the other controls, we'd have to either call controls_array[index] or map.
controls[index], where index is the index of the control you wish to access. You
should try to avoid this method if possible, as the array may change, throwing o the index.
Furthermore, accessing controls by index like this aects your code's readability, as it's not
immediately obvious which control object you're trying to access.
Adding controls to map with addControl() and addControls()
There are cases where you might want to dynamically add controls to your map aer it has
been created. To do so, we can use either the addControl() method of our map object
and pass in a single control object, or we can use addControls() and pass in an array of
objects.

Taking Control of Controls
[ 136 ]
In the example above, we called addControl and passed in a ScaleLine control object,
which we instanated on the y:
map.addControl(new OpenLayers.Control.ScaleLine({}));
We also used addControls by passing in a control object that has already been instanated
and an object which we created in the funcon call itself:
var overview_map = new OpenLayers.Control.OverviewMap();
map.addControls([
overview_map,
new OpenLayers.Control.KeyboardDefaults()
]);
Whichever method of adding controls you use, you should try to keep all your control related
code together. The bulk of the me you spend programming will be spent in reading your
code and not wring it. Your code will be much easier for you to read and maintain if you
organize it. There is no 'right' way to go about organizing your code, but keeping related
things (like code blocks related to controls) grouped together is a good rule of thumb.
Removing controls
So, we know how to add controls, but how about removing them? There are two common
ways to do this:
Call map.removeControl(map.controls[x]); where x is the index of the
control you wish to remove. As we stated before, removing controls this way is
discouraged because it is not clear which control is actually being removed.
Another way is to call map.removeControl(control_object); where
control_object is a reference to a control object you've already instanated. Be
sure to keep in mind, if you dene an object with var inside a funcon, you won't
be able to access it outside the funcon.
Now that we're familiar with how to add and remove controls, let's get into the Control class
itself and take a look at various dierent types of controls.
OpenLayers.Control class
As we saw in the previous example, there are quite a few controls available to us. The
Control class is similar in nature to the Layer class—there is a base Control class which all
other control subclasses inherit from. Because most controls provide completely dierent
funconality from one another, the base Control class does not contain a lot of properes.
The ocial, up to date documentaon for this class can be found at http://dev.
openlayers.org/docs/files/OpenLayers/Control-js.html.
Chapter 6
[ 137 ]
OpenLayers.Control properties
Like properes of other classes, you can specify these properes when instanang your
control object. There are a few properes of the base OpenLayers.Control class, which are
inherited by all other Control classes:
Name Type Descripon
autoAcvate {Boolean} Set the control to acvate when added to the map.
Default value is false.
div {HTML
Element}
Many controls support the ability to be placed in a div
outside the map. (This does not work for all controls,
however.) An example call would look like: {div:
document.getElementById('my_control_
div') }
id {String} This species the ID of the HTML element that will be
assigned to the control.
eventListeners {Object} This object species event listeners to register. Events are
covered later in this chapter.
displayClass {String} Species the CSS class that the control will receive.
By default, controls receive a class name made
up of OlControl plus the control name, e.g.
OlControlNavToolBar. We cover this in more detail
in Chapter 7 on styling controls.
tle {String} The tle you set here will be displayed in a toolp (or
other places, when appropriate).
type {Number} Species the type of control, which is related to how the
control funcons. Used in various cases, such as when
working with buons or panels. We cover this later in the
chapter, on the secon on panels.
OpenLayers.Control functions
There are a few funcons that all control subclasses inherit that we should take a look at.
Name Descripon
destroy() This will perform any clean up acons (such as removing any events
aached to the control) and then remove the control from the map.
Since the control is removed from the map, it also will no longer show
up when accessing map.controls.

Taking Control of Controls
[ 138 ]
Name Descripon
moveTo(location) This funcon takes in a single parameter, location, an
OpenLayers.Pixel object, and will move the control to the passed
in pixel coordinate (in the order of x coordinate, y coordinate).
This funcon will only really aect controls which have a visible
component. An example call might be: control_object.
moveTo(new OpenLayers.Pixel(200,100)); which would
move the control to the x, y, posion of 200, 100 inside of the map.
The origin is the top le of the map, so it would move 200 pixels to
the right and 100 pixels down.
activate() Calling this funcon will acvate the control and its event handler (if
one is set). Returns true if control was successfully acvated and
false if it was already acve.
deactivate() Deacvates the control and any associated event handlers. The
behavior of this will vary among controls. Returns true if control was
successfully deacvated and false if it was already inacve.
draw() This funcon inializes the control. You will rarely have to call this, as
it is usually called automacally. There may, however, be cases where
you may want to issue the call manually. It returns a {DOMElement}
which is a reference to the div containing the control (if one exists).
OpenLayers.Control subclasses
OpenLayers provides a lot of dierent types of controls, and an up to date list can always
be found at http://dev.openlayers.org/docs/files/OpenLayers/Control-js.
html. Some controls are deprecated, and should not be used, so we will not cover controls
that will not be supported in OpenLayers version 3.0 or greater.
Some properes and funcons of some controls are mainly for advanced users and are
outside the scope of this book, so we won't cover them all. Some other controls are used in
accordance only with the Vector Layer class—so we'll get to those in Chapter 9. However,
that sll leaves us a lot to cover here now, so let's get started!
OpenLayers.Control.ArgParser
As we menoned earlier, this is a control added to the map by default. It is aptly
named; it parses the arguments passed in via the URL. For example, when appending
?zoom=0&lat=0&lon=0&layers=B to the URL of your map, the ArgParser control will
parse the variables (i.e., zoom=0, lat=0, lon=0, and layers=B).
Chapter 6
[ 139 ]
This control will then manipulate the map based on the parameters—it would zoom the map
to level 0, set the lat and lon to 0, and turn on a certain layer. The ArgParser control does
not handle the generaon of these URL parameters. It is usually used in accordance with
the Permalink control. The Permalink control, as we'll see soon, is the control that actually
generates the URL.
Example Call: var argparser_control = new OpenLayers.Control.ArgParser();
OpenLayers.Control.Permalink
The Permalink control will create an HTML link element (an anchor, an <a>, element) at the
boom right of the map. The link has a URL embedded with the current map's longitude,
latude, zoom values, and layer informaon (e.g., which layers are turned on).
When vising a page from one of these generated URLs, the URL is read in by the ArgParser
control we just discussed. Anyme the map is updated (zooming, panning, turning layers
on/o, etc.) the permalink URL changes to reect the map's current state.
Example Call: var permalink_control = new OpenLayers.Control.Permalink();
When using the Permalink control, an ArgParser control will be automacally
added to the map.
OpenLayers.Control.Attribution
This is another control added to your map by default. It will display layer aribuons on the
map (if you specify the aribuon property for the layers). A layer aribuon is just some
string that will be displayed on your map with this control. You can also specify the separator
by seng the separator property, which will separate the aribuons for each layer. For
this control to be useful, you must specify the attribution property of layers that you
want to show aribuons for.
Attribution properties
Name Type Descripon Default Value
separator {String} Separator used between layer aribuon text. ', '
div {HTML
Element}
HTML Element to place this control in. Example:
document.getElementById('map_
control_div');
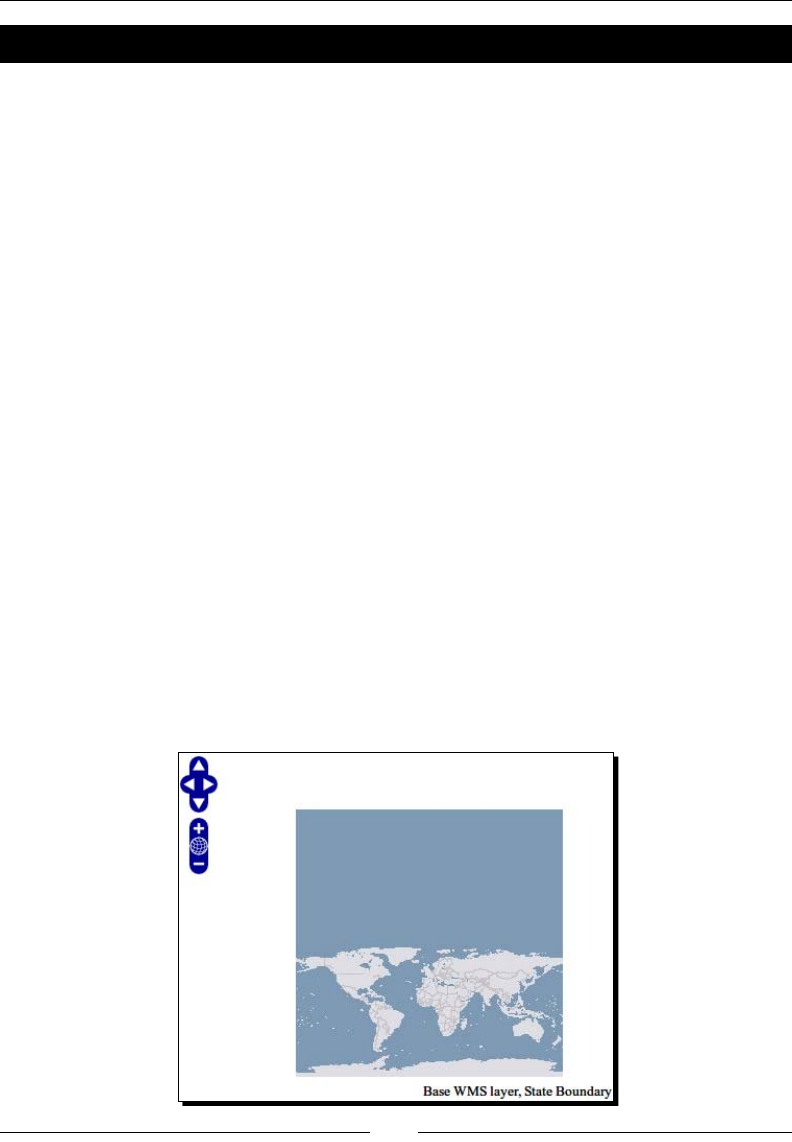
Taking Control of Controls
[ 140 ]
Time for Action – using attributions
Let's take a look at the aribuon control in acon.
1. To make the Aribuon control useful, we must specify an attribution property
on our layer objects. So, let's create a WMS layer with this property set to 'Base
WMS Layer':
var wms_base = new OpenLayers.Layer.WMS(
'OpenLayers WMS',
'http://vmap0.tiles.osgeo.org/wms/vmap0',
{layers: 'basic'},
{attribution: 'Base WMS layer'}
);
2. Now, let's add another layer and set the attribution text to 'State
Boundary'.
var wms_state_lines = new OpenLayers.Layer.WMS(
'State Line Layer',
'http://vmap0.tiles.osgeo.org/wms/vmap0',
{layers: 'stateboundary'},
{attribution: 'State Boundary', isBaseLayer: false,
opacity: .2}
);
3. Finally, add the layers to the map:
map.addLayers([wms_base, wms_state_lines]);
4. You should see something like the following, with the layer aribuon text at the
boom right hand of the map:
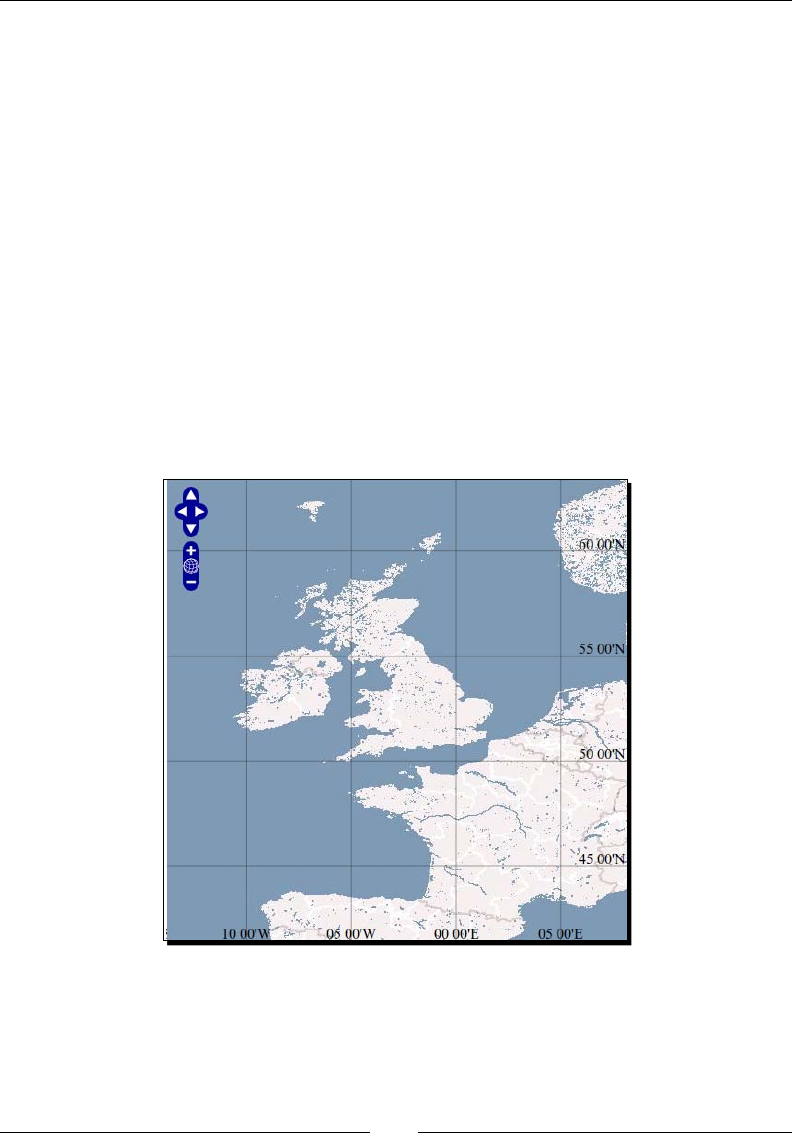
Chapter 6
[ 141 ]
What Just Happened?
You just used the aribuon control with two layers containing an attribution property.
The text on the boom right of the map shows the current acve layers' aribuon text.
Let's connue going over more of the built in control classes.
OpenLayers.Control.EditingToolbar
The EdingToolbar control is a panel composed of tools that allow drawing and eding
of vector features. It required a vector layer to be present in your map. We will cover this
control, and how to use it, in much detail in Chapter 9.
OpenLayers.Control.Graticule
This will display lines of longitude and latude (or whichever measurements your projecon
is) on your map. Unlike some of the other controls, this control has quite a few properes
that we can set to change the way it behaves. This is what our map looks like aer adding
the Gracule control with the default parameters:
Let's go over the properes of the Gracule control.

Taking Control of Controls
[ 142 ]
Graticule properties
Name Type Descripon Default Value
intervals {Float
{Array}}
An array of oats of possible
gracule widths, in degrees.
The dierent widths will
be used depending on the
current map zoom levels.
Example: intervals:
[50,30,15,7,4,2,1,.5]
[45,30,20,
10,5,2,1,0
.5,0.2,0.1
,0.05,0.01
,0.005,0.0
02,0.001]
displayInLayerSwitcher {Boolean} If set to true, the gracule control
will be displayed in the layer
switcher.
true
visible {Boolean} Determines if the gracule control
should be visible or not.
true
numPoints {Integer} Species the number of points to
use in each of the gracule lines.
50
targetSize {Integer} Determines the maximum size of
the grid in pixels on the map.
200
layerName {String} Species the layer name that will
be displayed in the LayerSwitcher
control.
null
labeled {Boolean} Determines if the gracule lines
should be labeled.
true
labelFormat {String} The format of the coordinates
the labels will display in. Possible
values, for example, would be'd',
'dm', or 'dms', which represent
'degree', 'minutes', and 'seconds',
which determine how precise the
coordinates will be displayed in.
'dm'
lineSymbolizer {Symbolizer} Species the symbolizer to be used
to render the lines. A symbolizer
species style informaon. In
Chapter 10, we will discuss
symbolizers and how to use them
in detail.
labelSymbolizer {Symbolizer} The symbolizer used to render
labels, which controls the label
style. Chapter 10 discusses
symbolizers (objects that dene
style) in detail.

Chapter 6
[ 143 ]
OpenLayers.Control.KeyboardDefaults
This control adds panning and zooming funconality, controlled by the keyboard. By pressing
the arrow keys, plus/minus keys, or home keys, the map will be moved or zoomed. There is
one relevant property we should take a look at.
KeyboardDefaults properties
Name Type Descripon Default Value
slideFactor {Integer} Sets the amount of pixels to slide the
map by.
75
OpenLayers.Control.LayerSwitcher
This control will create a layer list that allows you to turn on/o map layers. By default, it
creates a toggle-able window in the map, but you can pass in a div HTML element and the
layer list will be created in it.
LayerSwitcher properties
Name Type Descripon Default Value
ascending {Boolean} Changes the order the layers are
displayed.
true
roundedCorner {Boolean} Species if rounded corners should
be created for the layer switcher
window.
true
div {HTML Element} If specied, the HTML Element
to place this control in. If you
use this, you should set the
roundedCorner property
to false, otherwise, rounded
corners will be created inside the
target div. Example: document.
getElementById('map_
control_div');
null
Taking Control of Controls
[ 144 ]
LayerSwitcher functions
There are a couple of funcons we can manually call to show or hide the LayerSwitcher
control.
minimizeControl(): When called, it will minimize the layer switcher control.
Especially useful if you want to programmacally hide the layer switcher control.
maximizeControl(): Shows the layer switcher control; it essenally does the
opposite of mimizeControl().
OpenLayers.Control.MousePosition
This control displays the longitude and latude of where the mouse is currently located. By
default, the control displays the posion on the boom right hand side of the map.
MousePosition properties
Name Type Descripon Default
Value
prex {String} The string that will be added to
the beginning of the coordinate
text.
''
sux {String} The string that will be added aer
the coordinate text.
''
emptyString {String} Text that will be displayed instead
of the coordinates if the mouse
is moved outside of the map. By
default, when the mouse is moved
outside of the map the last known
coordinates will remain displayed.
null
separator {String} The string that will be placed
in between the longitude and
latude.
','
numDigits {Integer} Species the numbers of digits
aer the decimal point (i.e.,
precision), of the coordinate
displayed.
5

Chapter 6
[ 145 ]
Name Type Descripon Default
Value
displayProjecon {OpenLayers.
Projection}
Controls what projecon the
coordinates will be displayed
in. Any projecon other than
EPSG:4326 or EPSG:900913
will require the Proj4js library
to properly re-project the
coordinates. If this property is not
set, the map's projecon will be
used.
div {HTML Element} If specied, the HTML Element to
place this control in.
OpenLayers.Control.Navigation
The Navigaon control is one of the four controls added by default to your map. This control
handles map navigaon via mouse input, such as dragging the map and scrolling to zoom in.
Let's take a look at a couple of the properes.
Navigation properties
Name Type Descripon Default Value
documentDrag {Boolean} Determines whether the map should
be allowed to be dragged when the
mouse exits the map viewport (i.e.,
the map HTML div element).
false
handleRightClicks {Boolean} If set to turn, the map will intercept
right clicks. On a double right click, the
map will zoom out.
false
zoomWheel {Boolean} Species if the mouse scroll wheel will
make the map zoom in.
true
autoAcvate {Boolean} Determines whether the control
should be acvated when it is added
to the map. It can be useful when
adding this control to a panel.
true
Taking Control of Controls
[ 146 ]
OpenLayers.Control.NavigationHistory
The NavigaonHistory control stores informaon about, as you could guess, map navigaon.
It is actually a control that creates two children controls called next and previous.
You do not need to access these child controls directly, you should usually only use the
methods of the NavigaonHistory control object itself. By calling the nextTrigger() or
previousTrigger() funcons, you can go forwards or backwards (if possible) through
your navigaon history.
NavigationHistory properties
Name Type Descripon Default Value
limit {Integer} Species the limit of history states to store. 50
nextStack {Array} Contains an array of next history states.
Not used when instanang an object.
previousStack {Array} Contains an array of previous history states.
Not used when instanang an object.
NavigationHistory functions
There are two funcons we can call to access the navigaon history.
nextTrigger(): This funcon will call the child next control's trigger() funcon (which
can also be called via nav_history_control.next.trigger()). If there is a
next posion, it will move the map to the next posion on the posion stack.
previousTrigger(): This funcon will call the child previous control's trigger()
funcon (which can also be called via nav_history_control.previous.
trigger()). If there is a previous posion, it will move the map to the previous
posion on the posion stack.
Time for Action – using the NavigationHistory control
Let's use the NavigaonHistory control's nextTrigger and previousTrigger methods to
go through our navigaon history.
1. Open up the previous examples and enable Firebug. We're going to create a
NavigaonHistory control object and add it to the map via the console. Enter and
run the following code:
var nav_history_control = new
OpenLayers.Control.NavigationHistory();
map.addControl(nav_history_control);
Chapter 6
[ 147 ]
2. Pan and zoom around the map. Each me you update the map, the
NavigaonHistory control stores informaon about your acons. Then, in
Firebug, issue the following command:
nav_history_control.previousTrigger();
3. You should see the map return to the previous zoom level and coordinate.
Now, let's return to where we were by calling:
nav_history_control.nextTrigger();
What Just Happened?
We just created and added a NavigaonHistory control to the map, then called
previousTrigger() and nextTigger() methods.
OpenLayers.Control.NavToolbar
OpenLayer's NavToolbar control creates a toolbar of navigaon control buons. It contains
two buons by default—one for panning, and one for zooming. The panning mode allows
you to pan around the map like in the Navigaon control; while the zoom control lets you
select an extent to zoom to. This control comes in handy especially if you wish to provide
addional custom funconality to your map.
OpenLayers.Control.OverviewMap
The OverviewMap control creates a toggle-able window at the boom right side of
your map that displays a smaller, zoomed out map containing a draggable rectangle that
represents your current posion on the map (i.e., an overview map). As you zoom in on the
map itself, the overview map will update accordingly (although, you can turn this behavior
o by seng the numZoomLevels property in the mapOptions property).

Taking Control of Controls
[ 148 ]
It's likely that you're familiar with this tool, and many people expect it to be on a web map as
Google, Bing, etc. all have similar controls—so including it may be a good idea, depending on
your applicaon. There are a few conguraon opons we should cover.
OverviewMap properties
Name Type Descripon Default Value
size {OpenLayers.
Size}
Sets the size of the overview
map, in pixels, in the format
of width, height. An example
call would be: size:
new OpenLayers.
Size(300,300). This
will increase the size of the
overview map itself, but
the actual div element the
overview map resides in is
specied with CSS.
new OpenLayers.
Size(180, 90)
layers {Array
{OpenLayers.
Layer}}
Species an array of layers
from the map to be used in
the overview map. If none
are added here, by default
the base layer will be used in
the overview map.
Uses the map base layer
by default.
minRectSize {Integer} This property determines
what the minimum width
or height, in pixels, of the
extent rectangle can be
before it will be replaced
with the value of the
minRectDisplayClass.
The larger the number,
the bigger the extent
rectangle will be before it
gets replaced. This property
can be used in accordance
with the minRatio and
maxRatio properes to
provide a more custom
behavior of the overview
map control.
15

Chapter 6
[ 149 ]
Name Type Descripon Default Value
minRect
DisplayClass
{String} This species the name of
the class that the extent
rectangle will use when the
minRectSize value is
reached. We'll talk about
control styling in much more
detail in the next chapter on
Styling Map Controls.
'RectReplacement'
minRao {Float} This property will help
determine when to zoom out
the overview map. This rao
is calculated by dividing the
overview map's resoluon
with the base map's
resoluon. The default value
is 8. This means that if the
resoluon of the overview
map is less than 8 mes the
resoluon of your main map,
the overview map will zoom
out.
8
maxRao {Float} This property helps in
determining when to zoom
the overview map in. The
same principle applies
here as above. The default
value is 32, meaning, if the
resoluon of the overview
map is greater than 32 mes
the resoluon of the main
map, the overview map will
zoom in.
32

Taking Control of Controls
[ 150 ]
Name Type Descripon Default Value
mapOpons {Object} This is an object just like
the opons property of
the map object. It is an
anonymous object that can
contain the same opons
the map can contain. Seng
some of these opons can
be very useful, especially
the numZoomLevels
property. For example,
mapOptions:
{numZoomLevels: 1}
will cause the overview map
never to zoom in or out,
staying at the max extent.
{}
autoPan {Boolean} This property determines
whether to automacally
pan the overview map to
keep the extent rectangle
in the middle. Seng this
value to true will mimic
the behavior of the overview
map in Google Maps.
false
div {HTML
Element}
If specied, the HTML
Element to place this control
in. If not specied, the
OverviewMap control goes
in the boom right hand of
the map.
OverviewMap functions
minimizeControl(): When called, it will minimize the layer switcher control. It is
especially useful if you want to programmacally hide the layer switcher control.
maximizeControl(): It shows the layer switcher control, it essenally does the
opposite of minimizeControl().
OpenLayers.Control.PanPanel
This control adds a pan panel to the top le hand side of the map. It contains four
images: up, le, right, and down arrows. Clicking on an arrow will pan the map in
the arrow's direcon.
Chapter 6
[ 151 ]
PanPanel properties
Name Type Descripon Default Value
slideFactor {Integer} Similar to the KeyboardDefault control,
it sets the amount of pixels to slide by.
50
OpenLayers.Control.PanZoom
This is another one of the four controls added to your map by default. It adds a PanPanel
and ZoomPanel control to the top le side of the map. It contains the slideFactor
property that the PanPanel has. Other than this property, there are no more properes to
cover for this control.
OpenLayers.Control.PanZoomBar
This control is similar to the PanZoom control; however, it also adds a zoom bar with a
slider which you can move up and down to specify the zoom level. There are just a couple
properes we'll take a look at.
PanZoomBar properties
Name Type Descripon Default Value
zoomWorldIcon {Boolean} Species whether the zoom to
max extent world icon should be
displayed. If set to false, the icon
will be hidden.
true
div {HTML
Element}
If specied, the HTML Element to
place this control in.
OpenLayers.Control.Scale
When using this control, your map will display the current map scale as a rao (for example
Scale = 1:443M) placed in the boom right hand side of the map by default. There is only
one relevant property we should take a look at.
Downloa d f r o m W o w ! e B o o k < w w w.woweb o o k . c o m >
Taking Control of Controls
[ 152 ]
Scale properties
Name Type Descripon Default Value
geodesic {Boolean} Determines if geodesic measurement
should be used. This value should
be changed to true if your map's
projecon is EPSG:900913. When
set to true, the scale is calculated
from the horizontal size of the pixel
to the center of the map.
false
OpenLayers.Control.ScaleLine
The ScaleLine control adds a line represenng scale to the boom le hand side of your
map. It will show the scale using both km and mi, or m and when zoomed in (by default).
By specifying dierent property values, we can change this behavior; let's take a look.
ScaleLine properties
Name Type Descripon Default Value
maxWidth {Integer} Controls the maximum width of the
scale line, in pixels.
100
topOutUnits {String} Species the units to zoom on the
top bar of the scale line when the
map is zoomed out.
km
(kilometers)
topInUnits {String} Species the units to zoom on the
top bar of the scale line when the
map is zoomed in.
m (meters)
boomOutUnits {String} Species the units to zoom on the
boom bar of the scale line when
the map is zoomed out.
mi (miles)
boomInUnits {String} Species the units to zoom on the
boom bar of the scale line when
the map is zoomed in.
ft (feet)
geodesic {Boolean} Determines if geodesic measurement
should be used. This value should
be changed to true if your map's
projecon is EPSG:900913.
false
div {HTML
Element}
If specied, the HTML Element to
place this control in.

Chapter 6
[ 153 ]
OpenLayers.Control.ZoomPanel
The ZoomPanel control will add a zoom panel to the top le of the map. It contains
ZoomIn, ZoomOut, and ZoomToMaxExtent controls which are acvated by clicking on the
corresponding icons. It is part of the PanZoom control that is added to the map by default.
That's it for our overview on the available built in controls! Let's move on to another related
topic—Panels.
Panels
So far, we've covered the most common controls, ones that we'll be using throughout the
book. There is another type of control that we have not yet discussed—the panel control. It
is a container, a control that allows us to add and group together other controls inside of a
(you guessed it) panel. We have, in fact, encountered the panel control to some degree with
a few of the controls we've discussed. The PanPanel and ZoomPanel controls are actually
panels which contain other controls.
Control types
With a panel, each control is represented by an icon (which can be styled anyway you
wish). When the icon is clicked, the activateControl method of that control is called.
Remembering to call activateControl is very important—most controls will not acvate
by themselves (we'll cover this in more detail soon). Some of the controls we've encountered
can be placed inside a panel, as we'll see in a moment.
Each control in a panel has one of the three 'types':
OpenLayers.Control.TYPE_BUTTON: This is a buon type control, which acts
like a buon—when it is clicked, some event gets red o. An example control of
this type is the ZoomIn and ZoomOut buons we encountered in the ZoomPanel
Control.
OpenLayers.Control.TYPE_TOGGLE: Controls like this are acvated by a click
and turned o by another click. Turning on one of these controls will not aect
other controls, and you can have as many toggle controls as you would like in the
same panel.
OpenLayers.Control.TYPE_TOOL: This type of control is like the toggle control
above, but only one tool type control can be acve at a me. For instance, the
ZoomBox control is one of the controls of this type.
Let's take a look at how to create a panel and see how we add controls to it.

Taking Control of Controls
[ 154 ]
Time for Action – using Panels
In this example, we're going to demonstrate how to create and use the Panel class. We'll
create a panel control object that will be placed in a div outside the map, and then add
control objects to the panel. We're going to place the panel in a div element outside of the
map. We'll rst create an HTML <div> element to contain our panel. Add a new div aer the
map div like this:
<div id='panel_div'></div>
1. Now, we need to create a panel control object. We're going to rst create a
Navigaon control object, as it will act as the 'default control' for the panel, which
means it will be the control acvated by default. Then, we'll create our panel object
and place it inside of the previously created panel_div HTML element. Add a
WMS layer to the init() funcon and place the following code aer the map.
addLayer() call.
var navigation_control = new OpenLayers.Control.Navigation();
var control_panel = new OpenLayers.Control.Panel({
div: document.getElementById('panel_div'),
defaultControl: navigation_control
});
2. Let's add some controls to it. The Panel control has a method called
addControls which takes in an array of control objects. Let's add a ZoomBox and
ZoomToMaxExtent control. Take note that we pass in navigation_control, an
already instanated object, instead of instanang a Navigaon control object
on the y. This navigation_control object is the same control object that the
defaultControl property points to. If we just instanated a Navigaon control
object here, the defaultControl property would be poinng to a dierent control
object. Creang the navigaon control object outside this array ensures that we use
the same object.
control_panel.addControls([
navigation_control,
new OpenLayers.Control.ZoomBox(),
new OpenLayers.Control.ZoomToMaxExtent()
])

Chapter 6
[ 155 ]
3. Now that we have created our panel, we just need to add it to the map. The
panel control has a property called autoActivate which will acvate the
panel control when it is added to the map. By default, it is set to true. Panels
must be acvated to be used, so if you set this property to false you must call
the panel's activate() method. Similarly, if you wanted a control other than
the defaultControl to be acvated by default, you would call the panels'
activateControl() method and pass in the desired control.
map.addControl(control_panel);
4. There's just one more thing le to do. If you open up the page now, you probably
won't see anything in the panel. This is because the controls do not yet have any
style associated with them. We'll fully cover the raonale behind this, along with
how to customize control styles, in the next chapter—but for now, just put the
following CSS <style> tag in the <head> secon of your page (outside of the
<script> tag):
<style type='text/css'>
/*Navigation Control*/
#panel_div .olControlNavigationItemActive {
background: #226699 url('http://dev.openlayers.org/releases/
OpenLayers-2.9.1/theme/default/img/pan_on.png');
width: 22px;
height: 22px;
}
#panel_div .olControlNavigationItemInactive {
background: #996622 url('http://dev.openlayers.org/releases/
OpenLayers-2.9.1/theme/default/img/pan_off.png');
width: 22px;
height: 22px;
}
/*Zoom Box Control*/
#panel_div .olControlZoomBoxItemInactive {
width: 22px;
height: 22px;
background:#999933 url('http://dev.openlayers.org/releases/
OpenLayers-2.9.1/img/drag-rectangle-off.png');
}
#panel_div .olControlZoomBoxItemActive {
width: 22px;
height: 22px;
background:#999966 url('http://dev.openlayers.org/releases/
OpenLayers-2.9.1/img/drag-rectangle-on.png');
}
Taking Control of Controls
[ 156 ]
/*Zoom to Max Extent Control*/
#panel_div .olControlZoomToMaxExtentItemInactive {
width: 18px;
height: 18px;
background:#333399 url('http://dev.openlayers.org/releases/
OpenLayers-2.9.1/img/zoom-world-mini.png');
}
</style>
5. Open up the page now and you should see something like the following:
What Just Happened?
We just created a panel and placed three controls inside. By clicking on one of the buons
in the panel, you acvate the control (specically, the activateControl method is called).
When creang controls inside the panels that you wish to acvate programmacally, you
must call the activateControl method of the panel, passing in the desired control object.
If you click on the ZoomBox control buon, you'll noce that the Navigaon control gets
deacvated—only one of these controls can be acve at a me.

Chapter 6
[ 157 ]
Since the panel control is a control object that gets added to the map, the panel
control is available in the map.controls array. The same is true for controls
that are added to panels.
Pop Quiz – zoomBox control type
Which type of control is the ZoomBox Control?
1. TYPE_BUTTON
2. TYPE_TOGGLE
3. TYPE_TOOL
4. The Navigaon Control does not have a control type
5. TYPE_I_DONT_KNOW
Hint: If you're not sure, take a look at the ZoomBox control object's type property.
OpenLayers.Control.Panel
As we saw in the previous example, we're able to create a panel and place the panel inside
of a <div> element outside the map. If we do not specify the div property, the panel will
be added directly to the map. The panel we made was prey simple, but even creang more
advanced panels isn't too dicult.
Before we start geng too fancy though, let's go over the properes and methods of the
panel class so we know what we're working with.

Taking Control of Controls
[ 158 ]
Panel properties
Name Type Descripon Default
Value
controls {Array
{OpenLayers.
Control}}
Species an array of control objects that get
added to the panel. As in the previous example,
you can either instanate objects in the call
itself (via new OpenLayers.Control) or
use a previously created object. When you
create a panel, you need to either use this
property to specify the controls the panel
receives, or use the panel's addControls
method. Example: controls: [new
OpenLayers.Control.Navigation(),
new OpenLayers.Control.
ZoomBox()]
[]
autoAcvate {Boolean} Determines if the panel should be acvated
when it is added to the map. If this is not set to
true, you must call the panel's activate()
method before you use the panel.
true
defaultControl {OpenLayers.
Control}
Species the default control to be acvated.
This should point to a control that the panel will
or does own. Like in the example above, you
should pass in a control object that has already
been instanated. If you instanate an object
when specifying the value, instead of passing
in an already created one, nothing will happen
because the default control would be poinng
to a dierent object than one owned by the
panel. Example: defaultControl: my_
control_object
null
saveState {Boolean} If this property is true, then the acve state
of the controls inside the panel (i.e., their state)
will be saved if the panel is deacvated, and
restored if it is acvated. It will also override
the defaultControl property (if set) aer
the rst acvaon, restoring whatever controls
were acve instead.
false

Chapter 6
[ 159 ]
Panel functions
The Panel class has just two funcons that we need to know about for now.
Acvate(): This funcon will acvate the panel control itself. By default,
the autoActivate property is set to true and this funcon will be called
automacally. However, if the panel is not acvated by default, you must call this
funcon to use the panel.
acvateControl( {OpenLayers.Control} ): This funcon will acvate the passed in
control. The control passed in must be a control that belongs to the panel. This is
the funcon that gets called when a control inside the panel is clicked on by a user.
If you wish to manually acvate a control, you will call this funcon.
Now what?
Whew! We've covered the majority of controls OpenLayers oers and we've gone over how
to use a panel. There's been a lot to take in, but don't feel overwhelmed. One of the reasons
we covered so much is so that we can refer back to this chapter later if we need a refresher
on how to use a control or what we can do with one.
So, now that we're done with the niy griy details, let's move on to something a lile bit
more complex.
Creating our own controls
You're familiar (or perhaps fed up) with control descripons by now. Let's make things a lile
more interesng and create our own control. Here's the plan:
1. Quickly talk about the Buon Control class.
2. Create a Buon control with custom funconality.
3. Add the buon to a panel.
4. Viola! You just created your own custom control.
So, before we talk about creang a custom buon, let's go over the Buon subclass that we
didn't cover in the secon above, which we'll use to create our custom controls.
OpenLayers.Control.Button
There's not much to cover here really, as we've been over the base control class. There are
two properes we need to discuss however—the type and displayClass property. We'll
use these two properes when creang our own custom control.
Taking Control of Controls
[ 160 ]
Button properties
Name Type Descripon Default Value
type {Integer} This is an integer which represents
the type of control this buon is.
This is part of what we discussed
earlier—the buon types.
OpenLayers.Control.TYPE_
BUTTON is represented by a 1,
OpenLayers.Contro.lTYPE_
TOGGLE is represented by a 2, and
OpenLayers.Control.TYPE_
TOOL is represented by a 3. By default,
as this is a OpenLayers.Control.
TYPE_BUTTON control, the value is
1. However, by changing the value of
this property you can change its control
type. You can specify the type by either
using the {Integer} number (such
as 2), or use the built in constant
name. The constant name starts with
OpenLayers.Control and is
followed by the control type (such as
OpenLayers.Control.TYPE_
BUTTON). Both methods accomplish
the same thing, but using the constant
name is cleaner and easier to read.
1 (or OpenLayers.
Control.TYPE_
BUTTON)
displayClass {String} This string will specify the name
of the CSS class the buon will
be assigned. An example would
be 'olControlMyButton'.
Whatever class you specify,
OpenLayers automacally adds in
'ItemInactive' at the end of
it. If it is a toggle-able buon, then
'ItemActive' will be added to
the end when the buon is acve.
We'll cover this in great detail in the
next chapter. If this property is not
dened, it will get the default value of
'olControlButtonItem' (with
'Inactive' or 'Active' added at
the end).
olControlButton
ItemInactive
Chapter 6
[ 161 ]
Button functions
There is also only one funcon we need to go over. One of the main uses of this funcon is
that we usually pass it in when we instanate the buon object.
trigger(): This funcon is called when the control buon is clicked (assuming it is an
OpenLayers.Control.TYPE_BUTTON control). If we don't dene it when creang
our buon (or dene it aer the buon is created), nothing will happen when we
click on our buon. When passing in this as a property while creang your buon
object, a funcon return code (a funcon's name) should be passed in and not an
actual funcon. So, to dene this on instanaon, create a funcon outside the new
OpenLayers.Control.Button call and then refer to that funcon's name as the
trigger. For example,
var my_func = function(){ alert( 'Stop clicking me'); }
var my_button = new OpenLayers.Control.Button({ trigger: my_func
});
Creating a custom button
You know a bit more about the Buon class now, so let's put that knowledge to use. We'll
create a fairly simple custom buon (of control type TYPE_BUTTON) that will update the
base layer's opacity and zoom the map to a random spot. We'll cover the few basic things
that should be included when creang a buon:
Specifying the buon's displayClass to give it style (oponal)
Creang a funcon and seng it as the trigger funcon
Adding the buon a panel, and then adding that panel to a map
Time for Action – creating a simple button
Let's create a simple buon that has a CSS class and contains a trigger funcon that does a
lile something when we click on it.
1. Create a new page using the map template from Chapter 1. We'll be creang a
buon and a panel to place the buon in (although, this me, the panel will be
inside the map).

Taking Control of Controls
[ 162 ]
2. Before we create our buon, let's create a funcon that will be called when we
click on the buon via the trigger funcon. We're actually going to create a
variable and assign a funcon to it—this is one of the things that makes JavaScript
prey powerful. Let's make the funcon change the map's layer opacity and zoom
to a random coordinate. Inside the init() funcon, add a WMS layer and aer
the map.addLayer(wms); call, add the following. It will generate a random
coordinate, set the map's center to it, and change the WMS layer's opacity:
var custom_button_func = function(){
//Get a random coordinate from -90 to 90
var random_lon = Math.floor(Math.random() * 360) - 180;
var random_lat = Math.floor(Math.random() * 180) - 90;
if(map.layers[0].opacity === 1){
//If the layer opacity is 1 (fully opaque), then change it
and zoom
map.layers[0].setOpacity(.5);
map.setCenter(new OpenLayers.LonLat(random_lon,
random_lat), 3);
}
else{
//If the layer opacity is anything but 1, change it and
zoom
map.layers[0].setOpacity(1);
map.setCenter(new OpenLayers.LonLat(random_lon,
random_lat), 3);
}
};
3. Now let's create our buon control object. We're going to assign it a CSS class and
set the trigger to be the custom_button_func we just created. So, when the
buon is clicked, custom_button_func funcon will be called. Noce how we just
passed in the name of the funcon (also known as the funcon's return code) and
we don't use parenthesis like we normally do when we call a funcon.
var my_button = new OpenLayers.Control.Button({
displayClass: 'olControlCustomButton',
trigger: custom_button_func
});
4. Let's create a panel that will store the newly created buon. We won't pass in a div,
so it will be added straight into the map.
var control_panel = new OpenLayers.Control.Panel({});

Chapter 6
[ 163 ]
5. We've got our panel made, so now we need to add our custom buon to it. Even
though we only have one control, we sll must call addControls as there is not a
singular addControl method of the Panel class.
control_panel.addControls([
custom_button
])
6. Almost there! Now, let's add the panel to the map:
map.addControl(control_panel);
7. Now, by default, the panel will appear in the top le corner of the map. We
could change this via CSS, but let's sck to what we've covered so far and use
the moveTo funcon, moving the panel 450 pixels to the right (the origin is
the top le of the map).
control_panel.moveTo(new OpenLayers.Pixel(450,0));
8. One last thing, if we view the map right now, we wouldn't see our buon. This is
because we have assigned it a custom CSS class, but we have not yet dened the
class. So, let's add the following to the <head> secon, before the <script> tags.
Even though our displayClass was set to olControlCustomButton, we must
dene olControlCustomButtonItemInactive, as that's the actual class name
OpenLayers generates for the inacve state of the buon.
<style type='text/css'>
/*Custom Button*/
.olControlCustomButtonItemInactive {
background:#22dd22;
border:5px solid #202020;
cursor: pointer;
height: 28px;
width: 28px;
}
</style>
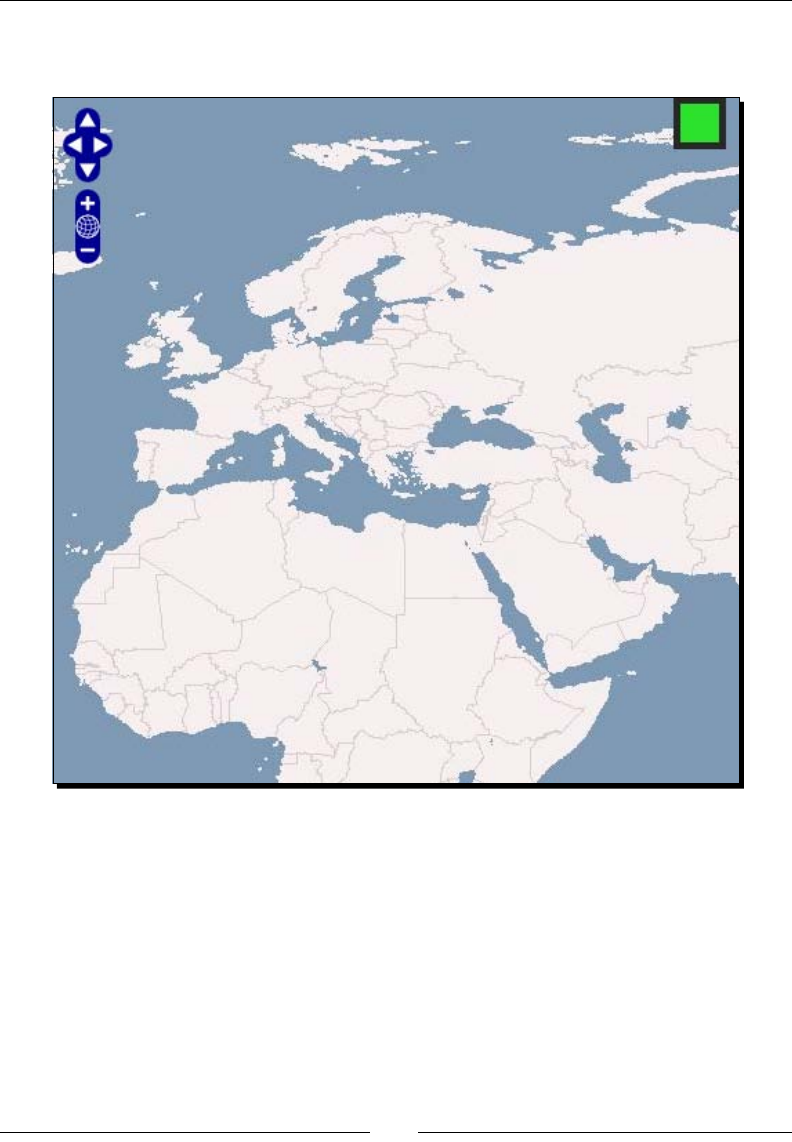
Taking Control of Controls
[ 164 ]
9. OK. Take a look at the map. You should see a big honking ugly buon on the top
right hand side of the map:
What Just Happened?
We just created a fairly simple buon control that will change the map's opacity and center
locaon when clicked. In the next chapter, we'll talk more about how to use CSS to make it
look like a buon instead of an ugly green box. Before we nish up this chapter though, let's
go over one more thing—creang a custom buon that has a dierent control type than the
TYPE_BUTTON control we just made.

Chapter 6
[ 165 ]
Other control types
So, with the previous example, we created a buon control whose type was TYPE_BUTTON.
It works like we expect and should work, but what if we wanted it to be toggle-able? We
know, from earlier in the chapter, that there are TYPE_TOOL and TYPE_TOGGLE buon
types, and we menoned how we could assign a buon to be one of those types.
Process for creating other button control types
While there are a few dierent ways to achieve this, the process basically boils down
to the following:
Create a control object (either by extending the base Control class—a more
advanced technique, or by creang a Buon control) and specify the type
Specify funcons that will get called when certain events occur (e.g., when the
control is acvated)
To keep things simple and accomplish this, we're going create a Buon control like we did in
the previous example. Then, we'll specify eventHandlers that will call funcons when the
control is acvated. But what's an event?
Events
An event basically means what it sounds like—something happening. Really, all user input is
an event—a key press, a mouse click, etc. are all events.
Using JavaScript, we're able to access user generated events, such as a mouse click, and do
things when an event occurs. Events are what drive the interacon in OpenLayers—when
you drag the map, you are actually issuing a mouse event that OpenLayers interprets and
then updates the map accordingly.
OpenLayers has its own Event class which makes interacng with events easier, and even
enables us to create our own custom events. We won't get much into that right now, but
we should briey talk about something known as event handlers.
Event listeners and handlers
If you understood the previous paragraphs, then you may be able to guess what an event
handler (and listener) is. In essence, an event listener is something that listens for events,
and an event handler is something that responds to an event.

Taking Control of Controls
[ 166 ]
Consider the buon control we created in the previous example. The control will wait for
someone to click on it—this is the event listener. When the buon is clicked, the trigger
funcon is called—this is the event handler. So, in OpenLayers, event listeners are used to
add event handler funcons to certain event types (such as clicks or mouse overs).
Custom events
While user created events give us plenty to work with, life is easier if we can work with
events other than just mouse clicks and key presses. If we can interact with events that
are red o not by the user, but by the map itself, then we can do a whole lot of more
interesng and neat things. And of course, we wouldn't be building this concept up if
OpenLayers didn't provide us with the ability to do so.
While we won't be creang our own custom events here, we will be working with custom
events. When you click on a TYPE_TOGGLE control buon, a custom event called activate
is red. In turn, if we want to call some funcon when that happens, we can assign an
eventHandler to the activate event. We'll go over exactly this when we create a more
advanced custom control.
Creating a TYPE_TOGGLE control
Now it's me to create some more custom controls with TYPE_TOGGLE and TYPE_TOOL.
Two things need to happen for us to do this—we must create the control object, and then
we have to assign funcons that get called when the control is acvated (i.e., an event
handler). The previous secon on events was used to provide an explanaon for the theory
behind events, but don't worry if you're a lile confused. We're going to clarify, through
code, what we will talk about. Let's get to it!
Time for Action – creating a custom TYPE_TOGGLE control
We're going to create a TYPE_TOGGLE control buon. We'll actually be using events in two
ways. We'll use events to call a funcon when the control is acvated/deacvated (i.e.,
toggled). This acvated/deacvated concept is important, as we cannot use controls if they
are not acvated.
When the toggle control is acvated, the activate() funcon that gets called will add an
event handler to the map. The map event handler will look for a click event and upon a click
will call a funcon which updates the base layer's opacity. When the control is deacvated,
the deactivate() funcon that gets called will remove the map event handler.
1. Open up the previous example. We'll be using that as the basis for this example.
We don't really need to change anything there, so let's go ahead and start creang
our buons!

Chapter 6
[ 167 ]
2. First, we're going to create the funcon that will randomly change the map's base
layer's opacity when the map is clicked. This will only happen when our toggle
control is acve. Right before the map.addControl(control_panel); line,
insert the following:
//Function that the map will call when the map is clicked (only
when
// the toggle button is active though)
var map_event_function = function(){
map.layers[0].setOpacity(Math.random());
}
3. Before we create a TYPE_TOGGLE buon, we need to create two funcons: one
that will get called when it is acvated and one called when it is deacvated. This
is similar to what we did in the previous example. Let's do that, right aer the
previous code:
//Create a function for the toggle button
var toggle_button_activate_func = function(){
//Attach the map_event_function to the map
map.events.register('click', map, map_event_function);
}
var toggle_button_deactivate_func = function(){
//Remove the map_event_function from the map
map.events.unregister('click', map, map_event_function);
//Restore the layer's opacity
map.layers[0].setOpacity(1);
}
4. Now, we need to create the toggle control itself. The format is similar to before,
but we'll be using a couple dierent properes. Because this is a toggle control,
we won't use a trigger funcon. Instead, we'll add two event listeners—one for
the acvate event, and another for the deacvate event. We'll also set the type to
OpenLayers.Control.TYPE_TOGGLE (the TYPE_TOGGLE type—we could also set
the type to 2 to accomplish the same thing, but it's much more readable to use the
built in constant name). Add the following on the next line:
//Create the toggle button object
var custom_toggle_button = new OpenLayers.Control.Button({
displayClass: 'olControlCustomButtonToggle',
eventListeners: {
'activate': toggle_button_activate_func,
'deactivate': toggle_button_deactivate_func
},

Taking Control of Controls
[ 168 ]
type: OpenLayers.Control.TYPE_TOGGLE
})
5. You can probably guess the next part—add the control to the panel. Easy enough!
control_panel.addControls([custom_toggle_button]);
6. Now, just make sure the control_panel is added to the map:
map.addControl(control_panel);
7. Lastly, we just need to add the appropriate CSS classes. We gave our toggle
control the class of olControlCustomButtonToggle, so we'll need to add the
appropriate classes. Because this is a toggle control, there are actually two CSS
classes we need—one for acve, and another for inacve. Add the following inside
the <style> tag in the <head> secon:
/*Custom Toggle Button*/
.olControlCustomButtonToggleItemActive {
background:#336699;
border:5px solid #202020;
cursor: pointer;
height: 28px;
width: 28px;
}
.olControlCustomButtonToggleItemInactive {
background:#003366;
border:5px solid #202020;
cursor: pointer;
height: 28px;
width: 28px;
}
8. All done! When you click the newly created control, the activate() event is red,
and since we added an event listener for it the appropriate toggle_button_
activate_func is called. It will add an event handler to the map that will wait for
a click. When the mouse click event res, the base layer's opacity will be set to some
random value between 0 (fully transparent) and 1 (fully opaque). Then, when the
toggle control is clicked again, it will be deacvated and the layer will return to full
opaqueness.

Chapter 6
[ 169 ]
What Just Happened?
You probably have a good idea now of how the controls we just made work. Just as a quick
recap, the following happens:
1. The custom_toggle_button toggle control waits for the activate or
deactivate events to be red (these are custom OpenLayers events, not general
JavaScript events like a mouse click). This is done by registering the events with
map.events.register.
2. When the custom_toggle_button control is clicked (which toggles it on), the
activate control event is detected and the corresponding toggle_button_
activate_func funcon gets called.
3. The toggle_button_activate_func funcon that gets called then adds an
event listener to the map (with map.events.register again).
4. This event listener will wait for a click (a mouse click, a general JavaScript event)
and then re o the map_event_function every me a click is received.
5. When the custom_toggle_button control buon receives a deactivate
event (i.e., it is clicked and toggled o), the corresponding toggle_button_
deactivate_func funcon is called.
6. The toggle_button_deactivate_func funcon removes the previously added
map event listener with map.events.unregister. Therefore, the listener is gone
and mouse clicks on the map will no longer cause the map_event_function to be
red o.
Taking Control of Controls
[ 170 ]
And that's about it!
When using panels and controls inside panels, make sure that the controls get
acvated via activate() or the panels' activateControl() methods.
The control cannot be used if a control is not acvated (or cannot be acvated
by the user by clicking on the control, for example).
Summary
We covered a good deal in this chapter. We talked about the idea behind controls and
how they are used in OpenLayers. We then demonstrated how to add controls to a map.
We covered the Control class and its various subclasses in depth. We also went over how
to set up panels and how to add controls to them. To nish the chapter, we provided an
introducon to events and learned how to create our own custom controls.
Even though we've been prey thorough in this chapter, there's sll more to learn about
controls—such as how to style them. In Chapter 9, on the Vector layer class, we'll go over
some Vector layer specic controls we neglected. This chapter was likely a lot to take in, but
the next chapter will be a bit shorter. We'll discuss styling controls using CSS, and we'll make
controls that actually look like they should be clicked, not just big green and blue squares.
Downloa d f r o m W o w ! e B o o k < w w w.woweb o o k . c o m >
7
Styling Controls
So far, we've seen how we can customize nearly everything oered by
OpenLayers—Layers, Controls, etc. However, we haven't been too concerned
with the actual appearance of the interface of our maps.
OpenLayers provides prey good looking default controls, so you may not nd
it necessary to change them. Like nearly everything else in OpenLayers though,
changing the style and images used by the Control class is easy.
We talked about the Control class in the last chapter, and in this chapter
we'll explore how OpenLayers applies styles to controls and how to go about
customizing controls.
In this chapter we'll:
Talk about what CSS is and what purpose it serves
Discuss how HTML uses CSS
Go over how OpenLayers uses CSS
Cover the naming schemes OpenLayers uses for controls
Give controls some custom styles
Let's dive in!

Styling Controls
[ 172 ]
What is CSS?
CSS is an acronym for Cascading Style Sheets. It is a type of markup language used to specify
the appearance of HTML elements. CSS is actually quite simple, and if you've been able to
follow along up to this point in the book, you will have absolutely no problem at all with CSS.
Before we get into it a lile more, let's talk a lile bit about how CSS works.
Ideas behind CSS and HTML
HTML, CSS, and JavaScript serve three disnct purposes.
HTML is used, as we've seen, to create the structure and content of a webpage
CSS, on the other hand, is used to control the site's presentaon, or how the page
should look
JavaScript, as we've seen throughout the book, is used to handle the logic behind
the site
So, when you make a site you will have at least three discrete things to consider—the HTML
behind it, the CSS that styles the HTML, and the JavaScript that handles any logic or user
interacon. For now, we'll focus on HTML and CSS.
Ideally, HTML, CSS, and JavaScript should not mix (i.e., you shouldn't use style tags, or tags
like <center>, in your HTML). Your HTML pages should link to external JavaScript and CSS
les, especially in a producon environment. One advantage of following this principle is that
if you want to change the way your website looks, you only have to edit the CSS in one place
(the external le) instead of on every page. The disadvantage is that it is slightly easier and
faster to edit things if everything is contained inside the same HTML le; that's why we've
been doing it this way so far.
But how do we edit the CSS and what does this even mean?
Editing CSS
If you're familiar with CSS, feel free to skip the next few pages and go directly to the second
secon on How OpenLayers uses CSS. If you aren't, don't fret! It's quite easy.
CSS isn't a programming language; in fact, you already are familiar with how it is structured.
Let's look at the 'template' code for applying a CSS style:
element {
property: value;
property-two: value;
}
Chapter 7
[ 173 ]
Looks familiar? It's essenally what an anonymous object in JavaScript looks like. The main
dierence is that a semi colon (;) is required at the end of each line (not a comma).
You'll noce we also have property: value (key: value pairs). There are
many dierent possible properes and values. We'll cover common ones later in
this chapter, but a full list can be found at http://www.w3schools.com/
css/css_reference.asp.
The other dierence, you'll noce, is that there is something called an element in front of
the brackets. This refers to a single (or mulple) HTML element—either by tag name, class
name, or ID. Mulple elements are separated by a comma.
HTML elements
So far, we've talked just a lile bit about elements in HTML. Every <tag> in your HTML page is
an element (e.g., <div id='my_div'>This div is an element</div>). Now, to use
CSS, we have to have a way to refer to the element(s) we want to give a style to. This is the
element part of the CSS code outline above.
The DOM (Document Object Model) is a way to represent objects (such as
these elements) that are in your page. We won't go into much depth about it
now, but if you are interested in learning more then http://w3schools.
com/dom/default.asp is a great resource.
HTML—IDs and classes
We can refer to specic elements in two primary ways: via an ID or class name(s).
HTML IDs
Every HTML element can have a single ID. The ID is unique, and no elements should share
the same ID. For example,
<div id='map_element'></div>
With this code, we're creang a div element with an ID of 'map'—no other element (be it
a div or otherwise) should have the same ID. So, IDs are very useful when we want to refer
to one specic element. We've used the ID property to specify the div that our maps should
appear in (via <div id='map_element'></div> and specifying map_element when
instanang our map object).

Styling Controls
[ 174 ]
HTML classes
There is another way to refer to elements, via class names. Classes in HTML have lile in
common with the classes you're used to from JavaScript. The only things you really need to
know about classes in HTML is that, unlike an ID, class names can be used mulple mes
(that's primarily what they're designed for) and an element can have mulple class names
(separated by a single space).
So, what does this look like in HTML?
<div id='some_div' class='some_class_1'></div>
<div id='some_other_div' class='some_class1 some_class2'></div>
Here, we have two dierent div elements, each with dierent IDs. However, both elements
share the class some_class1 and will receive whatever properes that class contains. The
second div will also inherit any properes that the class some_class contains.
Styling HTML elements with CSS
Now that we know how HTML uses classes and IDs, we can learn how to use them with
CSS. Specically, how do we refer to the element in our CSS code? There are three ways to
specify an element in CSS:
Element Type: Specifying the name of an element alone will apply the style to all
elements of that type. For example:
div {
color: #ff0000;
}
This would apply the color #ff0000 (red) to all div elements.
Element ID: Specifying the ID will cause the style to be applied only to the element
with the specied ID. To do this, place an octothorpe (a hash or pound sign, #) in
front of the desired ID. For example:
#map_element {
height:500px;
width:500px;
}
Element Class Name: Specifying the class name will cause the style to be applied to
all elements that have the desired class name. To do this, place a period in front of
the class name. For example:
.some_class1 {
color:#0000ff;
}
Chapter 7
[ 175 ]
Using CSS in your code
So we know how to refer to elements now, but how do we use CSS in our HTML? There are
three ways to go about this:
Including an external CSS le: This is the preferred way to add CSS to our HTML
pages, as we only need to change the style in one place if we need to make changes.
It works similar in principle to how including an external JavaScript le works—we
basically point to an external CSS le, and the page will read it in. To do this, we
place a <link> tag in the <head> secon of our HTML page. For example:
<link rel='stylesheet' href='style.css' />
The rel aribute species the link is a stylesheet, and the href species the
locaon of the .css le itself.
Including the CSS in a <style> tag in the <head> tag: This is another way to specify
CSS, but is the least desirable way to go about it, as we'll have to update it on
every page if we want to change some style. However, when working with only
one le this isn't too much of an issue and this is why we've been doing it this way
throughout the book so far. In the <head> tag, you can add a <style> tag, which
will contain all your CSS denions. Everything inside the <style> tag is interpreted
as CSS code, similar to how code inside a <script> tag is considered as JavaScript
code.
Including "in line" CSS denions as style aributes on elements: We've seen
this in the previous chapters. Everything inside the quotes of the style aribute is
considered CSS code. An example would be:
<div id='map_element' style='height:500px; width:500;'></div>
For those familiar with the <link> tag, you may noce that we have only
included the rel and href aributes. We do not need to specify the type
aribute in HTML5, the current version of HTML at the me of wring.

Styling Controls
[ 176 ]
Time for Action – using external CSS les
Let's create a simple page using an external CSS style sheet le (a .css le), making use of
IDs and classes.
1. Create a new, empty HTML le. We'll just make a basic HTML5 page with a few
<div> tags to demonstrate CSS inheritance. We'll also include a <link> tag that
will reference a CSS le created in the next step, which contains all our CSS code.
2. First, we'll need to start the HTML page with a DOCTYPE tag that tells browsers this
is an HTML5 standard page. Then, we'll need an html tag and a head tag, which
contains some meta informaon (such as a title tag), and our JavaScript and CSS
le links.
<!DOCTYPE html>
<html lang='en'>
<head>
<meta charset='utf-8' />
<link rel='stylesheet' href='ex1_style.css' />
<title>Ugly_Webpage_01</title>
</head>
3. Now, we'll need to create a body tag which will contain our page's actual content.
We'll also put in some div tags, which act as content blocks. Each div element will
have a unique ID. Each div will also have at least one class. Classes can be used by
mulple elements, and you can apply mulple classes to an element by separang
the class name with a space:
<body>
<div id='title' class='background_green'>
Hello world!
</div>
<div id='content' class='background_green align_left'>
The cake is a lie.
<div id='message' class='align_left'>
Hello, world.
</div>
</div>
</body>
</html>
4. Create a le called ex1_style.css and put in the following code. We'll specify a
background and text color property for the body tag. Because elements inherit
style from their parent element, every single element will also receive these two
properes (but they can be overwrien):
Chapter 7
[ 177 ]
body {
background:#ffffff;
color:#000000;
}
5. Let's specify styles for elements by IDs, which we'll designate with a # sign. IDs are
used to specify a single element. This will cause the element that has the specied
ID to be styled; however, we will dene it. We'll also specify styles for classes by
using a period (.). In CSS, classes are used to apply styles to mulple elements:
#title {
font-size:1.5em;
font-variant: small-caps;
}
#content {
background:#ababab;
color:#f0f0f0;
font-weight:bold;
text-align:right;
}
#message {
background:#336699;
}
.background_green {
background: #22dd22;
}
.align_left {
text-align:left;
}
6. You should see something like this:
What Just Happened?
We've demonstrated what we've been talking about so far in this chapter, including an
external CSS le and using IDs and class names to reference elements. You might be
wondering why some styles got applied and others did not. Let's quickly go over why
that happens, and then move onwards to learn about how OpenLayers uses CSS.
Styling Controls
[ 178 ]
In CSS, you can use /* to begin a comment, and */ to end it. For example,
/* This is a comment */
Have a Go Hero – view HTML and CSS in Firebug
Open up Firebug and go to any website. Firebug will automacally build an HTML tree and
populate the Style tab with the site's style informaon. Poke around and try changing values
with Firebug, and you'll be able to immediately see the site's appearance change based on
the styles you apply with Firebug.
Cascading Style Sheets—Inheritance
CSS uses inheritance in a similar way our classes in JavaScript do. With CSS, child elements
can inherit properes of their parent elements, as well as override them. So, as in the
example above, our body element had a text color (the color property) of black (#000000).
This means that any element inside the body element (which is, praccally, every HTML
element on the page) will receive the color:#000000 property unless overwrien.
This is a situaon where the 'cascading' part of CSS comes in. Styles 'cascade' downwards,
so the properes found in the child element (the 'boom' most elements) will override
properes which it inherits from its parents (the elements above it).
Order of inheritance
When trying to determine which style an element will receive, any styles from the class
name will overwrite base element styles, and any styles from the ID will overwrite class
styles. Take a look at the following code:
<div id='my_element' class='random_class'> Some text </div>
<style>
.random_class { #00ff00; }
#my_element { color: #ff0000; }
div { color: #000000; }
</style>
In this code, the element will have a nal color of #ff0000. The base element (the div
style) will be overwrien by the .random_class class style, and then the class style will
be overwrien by the #my_element ID style. So, the order of importance is ID > class > base
element type.
Using the !important statement aer the value of a property will ensure that the
property is not overwrien by any of its children. If however, one of the children contains
an !important statement on that property, then it will be overwrien.

Chapter 7
[ 179 ]
Referencing elements
One very useful thing we can do with CSS is to use the inheritance we just talked about.
More specically, we can write:
#my_element div {
background: #2222ff;
}
This will apply a background color only to div elements that are children of #my_element.
This nesng can be as deep as you'd like—just separate elements by a space. This, for
example:
#my_element #my_inner_element .random_class a {
font-weight: bold;
}
This would be applied to all a elements (an anchor tag, specied by <a>) inside all elements
with a class of random_class inside an element with an ID of my_inner_element inside
of an element with the ID my_element. If we want to apply the same style to mulple
elements, we have to simply specify the elements and place a comma in between them:
#my_element1, #my_element2, .random_class {
color:#cdcdcd;
}
Alright, we've covered the basics behind CSS and HTML element referencing, so let's see
how OpenLayers uses CSS.
Pop Quiz – how to reference elements
Take a look at the following code. Try to think of at least three dierent ways you could
reference the inner_most span element. Hint—think of ways to access it with inheritance
as well.
<div id='outter_div'>
<p class='paragraph_style'>
<div id='middle_div'>
<span id='inner_most'>
</span>
</div>
</p>
</div>

Styling Controls
[ 180 ]
OpenLayers and CSS
OpenLayers applies class names and IDs to most every HTML element it creates, so
customizing your map's UI is quite easy once we know how it generates class names and IDs.
Before we talk about how to override styles though, we need to know where the style les
themselves are.
Styling OpenLayers—using themes
In OpenLayers, themes are used to control the appearance of your UI elements. A theme is
comprised of a CSS le and any related user interface images. OpenLayers applies a lot of
styles to your map by default, using a theme called default. Creang your own theme is
easy though.
If you want to create custom UI styles for your map, you'll essenally need to either create
a 'theme folder' which will contain a CSS le and images for your UI controls to use (e.g.,
pan arrow images), or manually overwrite certain default styles. The theme folder can be
anywhere you'd like, just keep in mind what its path is when referencing it in your HTML le.
To use your own theme, you just need to do three things:
1. Aer including OpenLayers in your page, add a link to your CSS le which includes
your customized map styles.
2. You must tell OpenLayers where to nd the images you use for your map. To do this,
specify the locaon of the folder your images are in (your theme folder) by adding
the follow to your JavaScript code. The path is relave to the locaon of the le
containing the JavaScript code:
OpenLayers.ImgPath = 'path/to/your/theme_folder/';
3. Specify the locaon of your theme folder when creang your map object via the
theme property. The path is relave to the locaon of the le containing the
JavaScript code. For example:
var map = new OpenLayers.Map('map_element', {theme:
'theme_folder'});

Chapter 7
[ 181 ]
Creating your own themes
Now we know how to use themes, but how do we create a theme? Well, the answer for
that is simple—we just create a CSS le, some images, and create a folder that will house
them. The images will go in a folder called img inside your theme folder. Then, we just tell
OpenLayers to use that theme. The expected structure of the theme folder may change
with later versions of OpenLayers, so the best way to gure what images are provided
by default (and their names) is to look in the default theme folder. You can nd it in the
theme | default folder of your downloaded OpenLayers folder.
But the bigger queson is how do we refer to the user interface elements? The answer lies
in knowing how OpenLayers generates class names and IDs for the elements it creates.
OpenLayers—class names and IDs
To style an element, you must refer to it. If we want to refer to a specic div, we need to
know its class and/or it's ID. OpenLayers generates class names and IDs, so we need to just
know how the names are generated. The most common way is to style your controls using
the generated class names.
Generated class names
The class names that OpenLayers generates for your controls follow the form of
.olControlControlNameExtra
This means that .olControl is always at the beginning of the class name, and
ControlName is the name of the control class itself. The Extra refers to any addional
descripons or elements of the control (such as 'Inactive' and 'Active' added aer many
controls, especially buon controls).
So, for instance, if we wanted to style the scale control line control, we would refer to it as
.olControlScaleLine
As we've encountered before, for buon type controls we add 'Inactive' or 'Active'
at the end. Other controls, such as the OverviewMap control, also contain an
OverviewMapElement class name—the element refers to the generated HTML container
of the overview control. There are other similar cases, such as the LayerSwitcher control. A
quick way to gure out the class name of an element is to use Firebug to inspect your page
and nd the element.
We'll go over the class names of common controls soon, but rst let's talk about another way
to reference your control elements: by ID.

Styling Controls
[ 182 ]
Generated IDs
Referring to control elements by class name is the preferred way of styling controls, but
styling by ID is also possible. There are two ways to accomplish this:
Wrong way: Using the generated ID. The ID is generated in the form of
OpenLayers.Control.ControlName_XX where XX is a number that is assigned
based on various things, such as control order. The number is likely to change based
on how you make your map. So, if you use it in your style declaraons and the ID
changes, then the style will no longer be applied.
Right way: Passing in an ID when creang the control and referring to it - in other
words, when you create a new control, pass the id property with some string value
which you will use as the element's ID. This way, we don't have to worry about the
generated XX numbers changing, and we can be sure what the ID will be.
Alright, so we know how to refer to elements now, and how OpenLayers generates class
names and IDs, so let's take a look at an example to solidify the concepts.
Time for Action – styling controls
Let's work with styling some OpenLayers controls. We won't be creang a theme here;
instead, we'll just link to an external CSS le which will overwrite the default styles of the
elements we wish to style.
1. Let's start o with creang a new page. We're going to also put all our custom styles
in a le called control_style.css. So, whenever we add a style, be sure to put it in the
control_style.css. Also, make sure to include the CSS le in the <head> secon with:
<link rel='stylesheet' href='control_style.css' />
2. Now, let's create our map object. We'll specify the controls array when we
instanate it since we do not want the PanZoombar control in this example.
We also are not using a custom theme (we are just overriding styles with the
external CSS le), but if we were we would specify the theme property as well.
map = new OpenLayers.Map('map_element', {
controls: [new OpenLayers.Control.Navigation()]
});
3. Alright, let's create some controls. We'll go over each control individually so we can
see all the steps involved. First, let's create a ScaleLine control. In our JavaScript
code, use the following to create a default ScaleLine control object:
map.addControl(new OpenLayers.Control.ScaleLine());

Chapter 7
[ 183 ]
4. Now, let's apply some style to it. Because we haven't passed in a class name or ID,
we'll use the class name that gets automacally generated. This is a standard control
that does not have any 'acve' or 'inacve' states, so we can just use the name
generated by default, olControlScaleLine. In your control_style.css le,
add the following:
.olControlScaleLine {
background: #777777;
color:#ffffff;
}
5. Most controls can be styled by just using their main class name (i.e.,
.olControlControlName). Other controls, such as buons and controls with
acve/inacve states have addional class names. This is a good thing—you usually
want a buon to have a dierent style when it's clicked. Let's use the NavToolbar
control—in your JavaScript code, input the following:
map.addControl(new OpenLayers.Control.NavToolbar());
6. Now, let's style the NavToolbar control. We have to style two things—the
NavToolbar control itself (which is actually a panel) and the Inacve/Acve states
of the buons it contains. The NavToolbar control also contains a ZoomBox control,
which we'll need to style as well. It also contains Inacve/Acve states that we'll
need to style.
By default, the buons have a left and top property. We'll replace those values
with 0 and add the !important value, which will make sure our newly set values
are not overwrien. In your CSS le, add:
.olControlNavToolbar {
top: 0;
}
.olControlNavigationItemInactive {
background: #787878 !important;
border: 2px solid #232323;
cursor: pointer;
left:0 !important;
top:0 !important;
}
.olControlNavigationItemActive {
background: #dedede !important;
border: 2px solid #787878;
cursor: pointer;
left:0 !important;
top:0 !important;
}
Downloa d f r o m W o w ! e B o o k < w w w.woweb o o k . c o m >

Styling Controls
[ 184 ]
.olControlZoomBoxItemInactive {
background: #336699 !important;
border: 2px solid #232323;
cursor: pointer;
left:0 !important;
top:0 !important;
}
.olControlZoomBoxItemActive {
background: #77aadd !important;
border: 2px solid #5588aa;
cursor: pointer;
left:0 !important;
top:0 !important;
}
7. Let's create an OverviewMap control. In your JavaScript code, add the following:
map.addControl(new OpenLayers.Control.OverviewMap());
8. Now, let's style it. This is a control comprised of a few dierent elements, but they
all have class names, so we can style it however we'd like. We'll style the background
of the overview map when it's opened (via .olControlOverviewMap), the extent
rectangle on the overview map, and the locaon of the minimize/maximize buons.
Add this to your CSS:
.olControlOverviewMapMaximizeButton,
.olControlOverviewMapMinimizeButton{
bottom:0 !important;
}
.olControlOverviewMapElement {
background: #cdcdcd !important;
}
.olControlOverviewMapExtentRectangle {
background:rgba(60,90,120,.7);
border:2px dashed #22dd22 !important;
}
9. Open up your map, move around, and look at your controls. You should see
something like this:
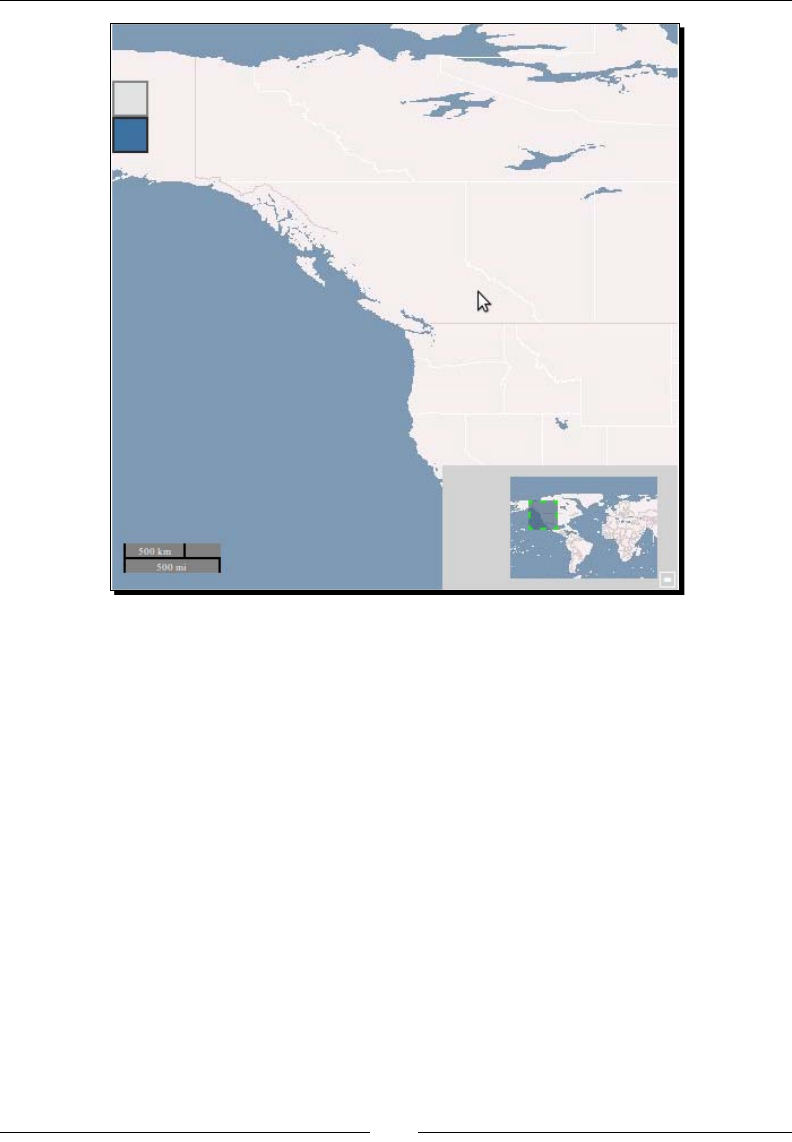
Chapter 7
[ 185 ]
What Just Happened?
We made a few controls and added styles to them. We applied styles in the following three
dierent ways:
Styling the controls themselves based on their class name (e.g.,
olControlScaleLine)
Styling buon controls (their Inacve and Acve states)
Styling various other elements created by the control
It may not always be immediately obvious what class names to use to refer to a control, but
it is always possible to gure it out. One of the quickest and easiest ways to do so is to use
Firebug (or other web development tools) to inspect your page's generated HTML and look
for elements that have the control's name in the class name.
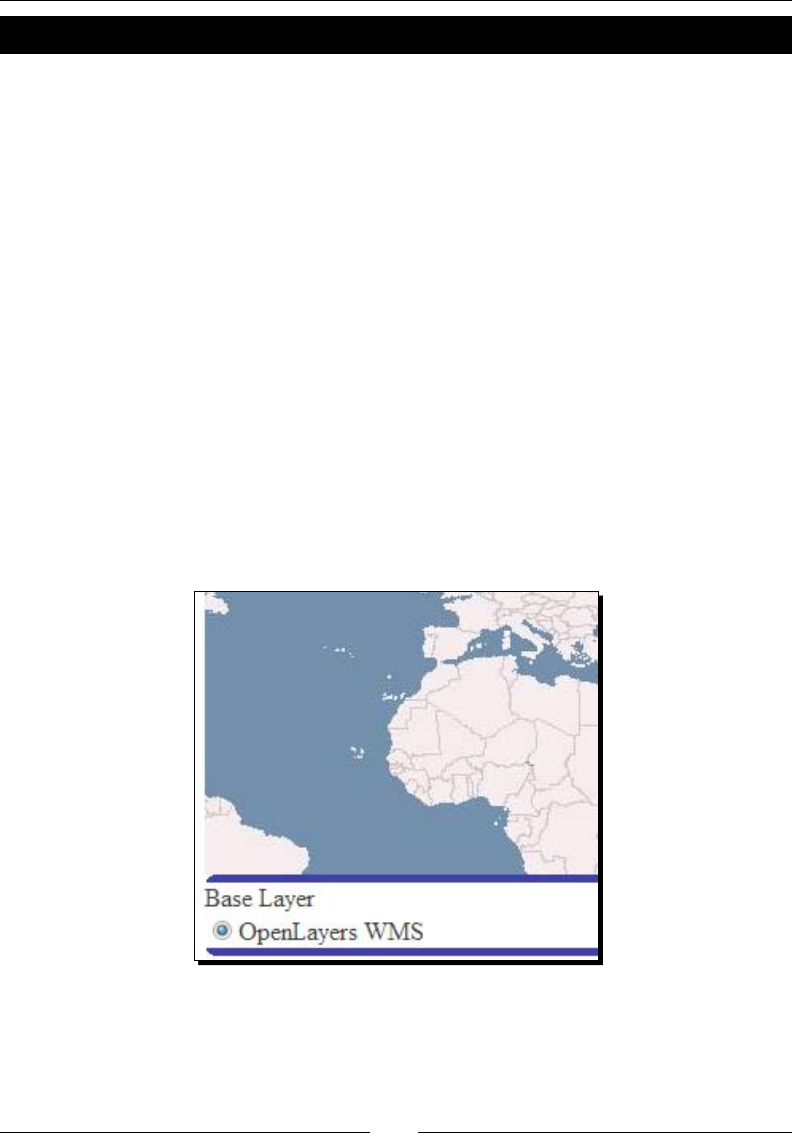
Styling Controls
[ 186 ]
Time for Action – styling the LayerSwitcher control
Let's take a look now at how to style the LayerSwitcher control. Unlike the previous example,
we'll place this control in a div element outside the map.
1. Start a new page. We'll link to an external CSS le that will override the base
LayerSwitcher control style, like in the previous example. Include a <link> tag that
references a le called ex3_layerswitcher_style.css, which we'll create soon.
2. Next, we'll need to create a div element that will house our control. Create a div tag
aer the map_element div:
<div id='layer_switcher_control'></div>
3. Now, in your JavaScript code, create the map and WMS layer object as normal. Add
a LayerSwitcher control, and pass in the layer_switcher_control element as
the div property:
map.addControl(new OpenLayers.Control.LayerSwitcher({
div: document.getElementById('layer_switcher_control')
}));
4. Now, if you open up the map you should see the map with the layer switcher control
beneath it:
5. By default, it looks prey plain. It also has a border with rounded corners. First, we'll
need to disable the rounded corners by passing in roundedCorner: false.
map.addControl(new OpenLayers.Control.LayerSwitcher({
div: document.getElementById('layer_switcher_control'),

Chapter 7
[ 187 ]
roundedCorner: false
}));
6. Let's create the ex3_layerswitcher_style.css le now. We'll specify the control's style
here. As we have manually specied the div property when creang the control,
the rst thing we'll style is the div we passed in (with an ID of layer_switcher_
control). Because we passed this in ourselves, OpenLayers does not apply any
default styles to it. Let's give it a solid border and some padding. Add this to the
style le:
#layer_switcher_control {
border:2px solid #454545;
padding:2px;
}
7. Now we need to start overriding the styles the control inherits from OpenLayers.
First, we'll need to get the relevant class names. We can use Firebug to see that the
'Base Labels' text is inside a div with a class of baseLbl. Since it's a heading
that lists base layers below it, let's make it a bit bigger and give it a background. It
also falls inside our layer_switcher_control div, so when we specify it in the
CSS let's be as specic as we can:
#layer_switcher_control .baseLbl {
background:#cdcdcd;
font-size:1.3em;
font-weight:bold;
}
8. Let's also style the label text for the actual layer names. Using Firebug, we can see
that the label text is inside a <span> tag with a class of labelSpan, which is a child
element of a div with the class baseLayersDiv. All base layers will show up in this
div, while any overlay layers will show up in a div called dataLayersDiv. Using
this informaon, let's apply a style to it, specifying the inheritance to access the
element:
#layer_switcher_control .baseLayersDiv .labelSpan {
font-style: italic;
font-weight:bold;
}
Styling Controls
[ 188 ]
9. Open up the page now and you should see the styled layer switcher div:
What Just Happened?
We just added a LayerSwitcher control outside the map and styled it. We saw how to style
the div element that we created, along with styling the elements by grabbing the class
names that OpenLayers generates. The LayerSwitcher control along with some others such as
OverviewMap, have more elements to style than other controls. It may not be immediately
obvious what elements need to be styled, but we can always use Firebug to inspect the
HTML and determine the class names.
Have a Go Hero – add layers
Add more layers to the map you just created. Noce how there is now another set of
elements for the overlay layers, in an element with a class that starts with 'dataLayers'. All
your overlay layers are considered to be 'data layers' and will show up here, while base layers
show up in the baseLayersDiv. Using what you learned in the previous example, apply
your own styles to the overlay layers div elements.
Other resources
A comprehensive coverage of CSS is outside the scope of this book, but hopefully
this chapter has provided necessary informaon for styling OpenLayers elements.
More extensive informaon on CSS can be found at the W3Schools site, located at
http://www.w3schools.com/css/default.asp.

Chapter 7
[ 189 ]
A developer that has procient design skills is not a common thing—fortunately, there are
resources that provide high quality, professional user interface elements. GeoExt is a third
party library that integrates ExtJS, a popular JavaScript framework, with OpenLayers, and
includes numerous user interface and OpenLayers map components. It does, however,
require a bit of familiarity with the ExtJS library. GeoExt can be found at http://www.
geoext.org/index.html, and the ExtJS can be found at http://www.sencha.com/
products/js/.
Summary
In this chapter, we talked about what CSS is and what it's used for. We learned how to use
CSS and HTML together, along with how to refer to elements in CSS. Then, we discussed
how OpenLayers uses CSS, and how control elements get their names. Lastly, we created
and applied our own custom styles to some controls.
The goal of this chapter was to provide a foundaon for understanding how we style controls
with CSS. If you haven't worked much with CSS before or if you're unsure how to style other
types of controls then don't worry. We'll be styling controls throughout the book using the
same principles we introduced in this chapter, so you'll get a lot more exposure to it.

8
Charting the Map Class
The Map class is, as you have probably gured out by now, the core piece
behind your map. The map object(s) you create is the most important thing
behind your map, as without a map object you can't do anything with layers or
controls. In this chapter, we'll be talking about the Map class, which we've been
taking for granted so far.
Understanding the Map class will enable us to do even more cool things with
our applicaons, and provides a way for us to programmacally tell our maps
what to do.
We've been using the Map class throughout the book so far without really knowing how or
why. This chapter aims to not only explain how and why we've been doing things (such as
using map.zoomToMaxExtent()), but also provide a thorough coverage of one of the core
parts of OpenLayers—the Map class. We'll take a look at
What the Map class is
How the Map class relates to the other classes we've discussed
Accessing the Map class' properes
Using funcons of the Map class
Working with events to dene and extend map behavior
Creang a simple applicaon that contains mulple maps

Charng the Map Class
[ 192 ]
The Map class
OpenLayers' Map class is what drives our maps. All the things we'd like to do with our
maps—moving them, zooming, adding layers—all these things are made possible by this
class. We've worked extensively with it already by creang a map object, adding controls and
layers to it, then telling the map to zoom to the max extent. While we've covered Layers and
Controls in prey good detail, we have yet to really discuss the funconality behind the Map
class, the core component of our applicaons.
In OpenLayers, control and layer objects belong to a map object. Control and layer objects
must be hooked up to a map if we want them to do anything. So, we need a map object to
actually make a useful map—and as you might imagine, we'll see later in the chapter that it
is possible to make an applicaon that uses mulple map objects.
Creating a map object
Before we jump in, let's review the base code for instanang a map object. We've done
this many mes before, but a lile review won't hurt.
var map = new OpenLayers.Map('html_element', { options });
The rst parameter is a string consisng of the ID of the HTML element you wish the map to
be placed in (almost always a div element). The second parameter is oponal, and consists
of an object literal, or anonymous object, (key:value pairs) containing property and value
sengs.
So, there's not much new here yet. This is, essenally, all you need to set up your map
object. However, as we've menoned before, if you're using a projecon other than
EPSG:4326, such as spherical Mercator, you're going to have to set some other properes
as well (such as maxExtent and units), when creang the map object.
This chapter will cover most of the properes and funcons available to us through the Map
class, so let's start with the properes.
Map class properties
There is a vast array of possible properes that you can pass in, and we've already seen a few
of them throughout the book. There are also quite a few properes which are prey useful
which we haven't yet covered. I'll start o by introducing a few properes, and then we'll see
them in acon with some examples.
Chapter 8
[ 193 ]
Throughout the explanaon of properes and methods, I'll typically refer to an arbitrary map
object as map. If your map object is called something else, then you would simply replace
map with the name of your map object. Another quick note; while we will be talking about all
these properes in the context of passing them in while creang the map object, you can call
any of them at any me to get the value (e.g., calling map.tileSize will return the map's
le size).
While we'll cover all the properes and funcons relevant to all the examples
and discussions in the book, for an always up to date and complete list you
can visit the docs at http://dev.openlayers.org/docs/files/
OpenLayers/Map-js.html.
Map properties
Let's go over the map properes that are typically passed in when creang a map object.
There are other properes that we can access but shouldn't pass in at instanaon me—
we'll cover those next. For now, let's focus on properes to use when instanang map
objects.
allOverlayers
allOverlays: {Boolean} Default is false
The allOverlays property species whether or not the map can funcon without any base
layers. So far, we've been using base layers in all our examples, either explicitly or implicitly
(leng our layers be set as base layers automacally). By seng this property, all layers will
act as overlay layers.
There may be mes when you wish to use this—just keep in mind, when using this property,
users have the ability to disable all layers and they could, in eect, see an empty map. By
seng this property to true, third party API layers will also act as overlay layers. So, if you
wish, you could use a Google maps layer as an overlay layer and make it semi transparent.
controls
controls: {Array {OpenLayers.Control}}
We covered controls in Chapter 6, so we don't need to go into too much depth here. We
can dene our map's controls when we create the map object, or we can add them via
addControl(s) aer the map object has been instanated. Aer the map is instanated,
we can access its controls by calling map.controls. If you do not specify an array of
controls for the map to use when you create it, your map will receive four default controls:
Navigaon, PanZoom, ArgParser, and Aribuon.

Charng the Map Class
[ 194 ]
displayProjection
displayProjection: {OpenLayers.Projection}
This is a property that is used mainly by controls which show coordinate informaon. By
seng this property on the map object, any control that has a displayProjection
property will be set to this value. Controls, such as the MousePosion control, can display
coordinates in the displayProjection. So, your map could be in a dierent projecon
than what you wish to display the coordinates in. However, to use a displayProjection
other than EPSG:4326 or EPSG:900913, Proj4js must be included on your page.
This property comes in very handy if, for instance, your map is in a spherical Mercator
projecon (i.e., EPSG:900913), but you might wish to display coordinates in another
projecon, like EPSG:4326 (to display lon/lat coordinates).
div
div: {HTML Element or String}
So far, we've been creang our maps like this:
var map = new OpenLayers.Map('map_element', {});
With the div property, we can instead pass in an HTML element (or the ID of the element,
as above) in the opons; i.e.,
var map = new OpenLayers.Map({'div': 'map_element'});
One of the advantages of doing it this way is that the div property is oponal, so you can
create a map object and choose not to place it in any div. If you do this, you can place your
map in a div later by using the render() method.
This is actually almost the same thing OpenLayers is doing for us automacally when we pass
in an HTML element during map object instanaon. When we do specify this div property,
OpenLayers simply calls the render() method right then—we're just delaying this from
happening and calling it manually if we choose not to specify a div. This can be useful when
we only want to show the map aer a user clicks on a buon, for instance.
Time for Action – using the allOverlays Map property
Let's take a look at using the allOverlays property and not specifying a div when creang
a map.
1. In your init() funcon, let's create our map object with allOverlays set to
true and with some controls passed in. We will also not specify an HTML element:
var map = new OpenLayers.Map({

Chapter 8
[ 195 ]
allOverlays: true,
controls: [new OpenLayers.Control.Navigation(),
new OpenLayers.Control.PanZoom(),
new OpenLayers.Control.LayerSwitcher()]
});
2. Now, let's create a couple of layers so we can see how the allOverlays property
works. We'll assume that you will add WMS layers to your maps for future examples.
var wms_layer_all = new OpenLayers.Layer.WMS(
'OpenLayers WMS',
'http://vmap0.tiles.osgeo.org/wms/vmap0',
{layers: 'basic'},
{}
);
var wms_layer_labels = new OpenLayers.Layer.WMS(
'Labels',
'http://vmap0.tiles.osgeo.org/wms/vmap0',
{layers: 'clabel,ctylabel,statelabel',
transparent:true},
{}
);
map.addLayers([wms_layer_all, wms_layer_labels]);
3. Since we didn't specify a div when instanang our map object, we'll have to call
the render() funcon to place the map inside a div. The funcon takes in either an
HTML element or the string of the element's ID, so let's pass in the element's ID.
map.render('map_element');
4. Finally, check to see if a center is set. If it is not, zoom to the max extent. We'll
assume you do this step in future examples. You can place the call to the render()
funcon aer this bit if you'd like, and it will sll zoom to the center or the max
extent—the order in which you call render() and set the map's locaon is up to
you.
if(!map.getCenter()){
map.zoomToMaxExtent();
}
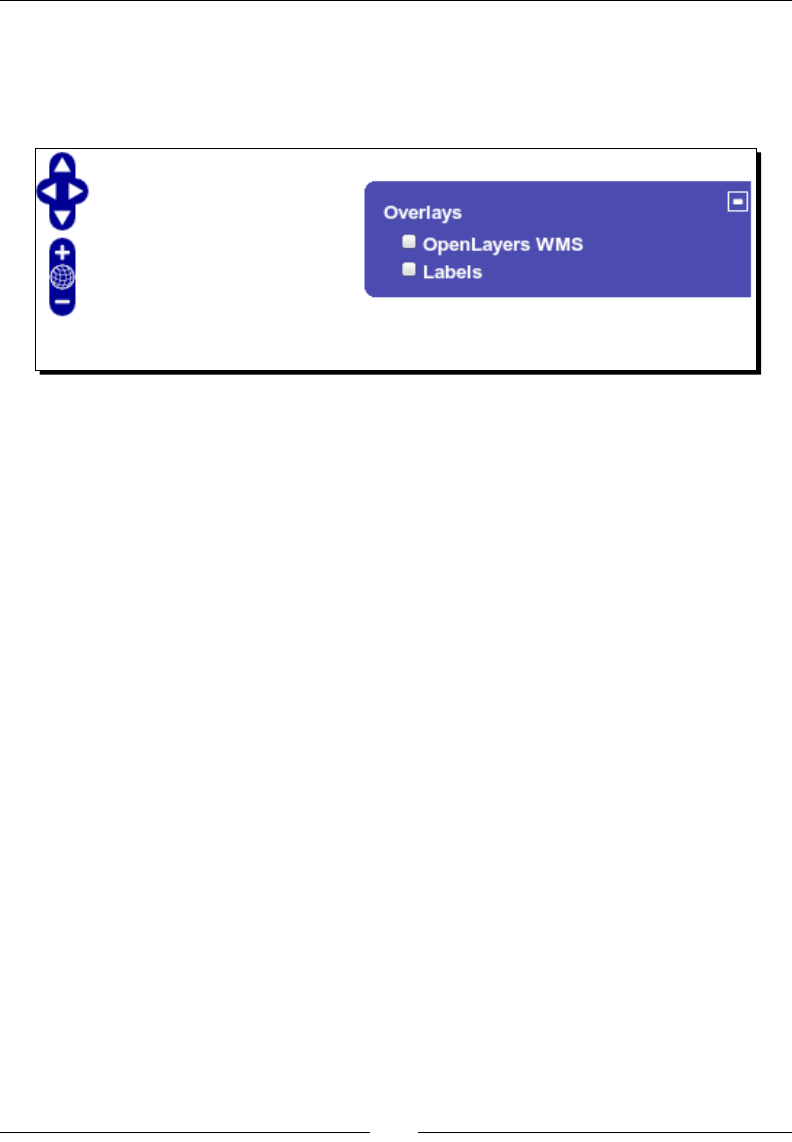
Charng the Map Class
[ 196 ]
5. Take a look at the map and open the layer switcher—you should be able to turn o
both layers and see an empty map now. Because we don't have a base layer and all
the Overlayers are disabled by default, you'll just see a blank map unl you enable
a layer.
What Just Happened?
We have just looked at a few of the properes we brought up—allOverlays, controls,
and (leaving out) the div property. We also saw how the user can potenally see no map at
all by turning o all the layers.
The map will not automacally render, because we did not pass in an HTML element.
Instead, we called the render() method and passed in an HTML element aer our map
object was created. There may be mes when you wish to delay rendering the map, such
as waing for a user to click a buon, and in those cases this is a good way to do it. We'll
talk more about map methods later in this chapter, but let's get back to discussing map
properes.
eventListeners
eventListeners: {Object}
This property accepts an anonymous object containing key:value pairs of event types (as
the key) and funcons to call (the values) when those events are red. We saw this property
briey in Chapter 6, and it behaves the same way here. An example would be:
var map = new OpenLayers.Map('map_element', {
eventListeners: { 'moveend': my_moveend_function }
});
The above code assumes that a funcon named my_moveend_function exists. We will
cover this property in much more detail, along with the possible event types, later in this
chapter in the secon on events.

Chapter 8
[ 197 ]
fallThrough
fallThrough: {Boolean} Default: true
The fallThrough property determines whether or not OpenLayers will allow events on
the map to propagate downwards (i.e., 'fall through') to other elements on your page.
Let's go over the meaning with an example. Say your map_element div has an event
aached to it that will show an alert when you click on it. This event is outside of
OpenLayers. Now, let's assume you create a map object and aach it to that map_element
div. If fallThrough is set to true (it is by default), you will receive the original alert by
clicking on the map—the mouse click event will be allowed to 'fall through'. If it is set to
false, you will not receive the alert, as OpenLayers will consume that mouse click event.
layers
layers: {Array {OpenLayers.Layer}}
We've encountered this property, to some degree, already. Aer the map is instanated,
we can access its layers by calling map.layers. So far, we've been creang our map object,
then our layer objects, then adding the layers to the map with addLayer(). We can,
however, use the layers property when instanang our map and pass in an array of
layer objects.
Passing in layers using this property when we create our map object or calling addLayers
essenally does the same thing—use whichever method you're most comfortable with. An
example would be:
var map = new OpenLayers.Map('map_element', {
layers: [my_layer_1, new OpenLayers.Layer.WMS({ … })]
});
You can pass in layer objects that have already been created (e.g., my_layer_1, assuming
a layer object with that name has been created), or by instanang a layer object in the call
itself (e.g., new OpenLayers.Layer.WMS({...})).
In the example above, the … would be replaced with the opons
for the WMS layer.

Charng the Map Class
[ 198 ]
maxExtent
maxExtent: {OpenLayers.Bounds} Default: bounds in decimal degrees,
(-180, -90, 180, 90)
Seng this will specify the maximum extent of your map. Tiles that fall outside of the
maximum extent will not be requested, nor can users pan to a coordinate that lies outside
the maxExtent. If you are using a dierent projecon than the default projecon, you will
need to change this to reect the world's coordinates in your desired projecon.
The maxExtent property's data type is an OpenLayers.Bounds object. The OpenLayers.
Bounds class is used to create a 'bounds' object, which contains four coordinates that
make up a bounding box. The four coordinates are minimum x (le), minimum y (boom),
maximum x (right), and maximum y (top). To instanate a bounds object, you just pass in
the coordinates in the order of:
var bounds_object = new OpenLayers.Bounds(minx, miny, maxx, maxy);
minExtent
minExtent: {OpenLayers.Bounds}
Seng the minExtent will specify the minimum extent of the map. There is no default
value for this property. You will usually not need to set this, unless you are specifying
custom resoluons using maxResolution—in such case, you will usually set the values
to (-1, -1, 1, 1).
restrictedExtent
restrictedExtent: {OpenLayers.Bounds}
This property species the bounds the user can navigate in—meaning that the user will be
able to only pan around inside the bounds specied by the restrictedExtent property
(if it is given, and if restricng their navigaon is possible).
Seng this property will sll allow the user to zoom out and see parts of the map that are
outside the restricted extent, but the map's center will be set to the restricted extent. If you
want to limit the zoom level, you could set the resolutions array, maxResolution, or
scales properes (covered in the following pages). This property is similar to maxExtent,
however, les outside the restrictedExtent will sll be requested, but the user won't
necessarily be able to pan to them.
numZoomLevels
numZoomLevels: {Integer} Default: 16
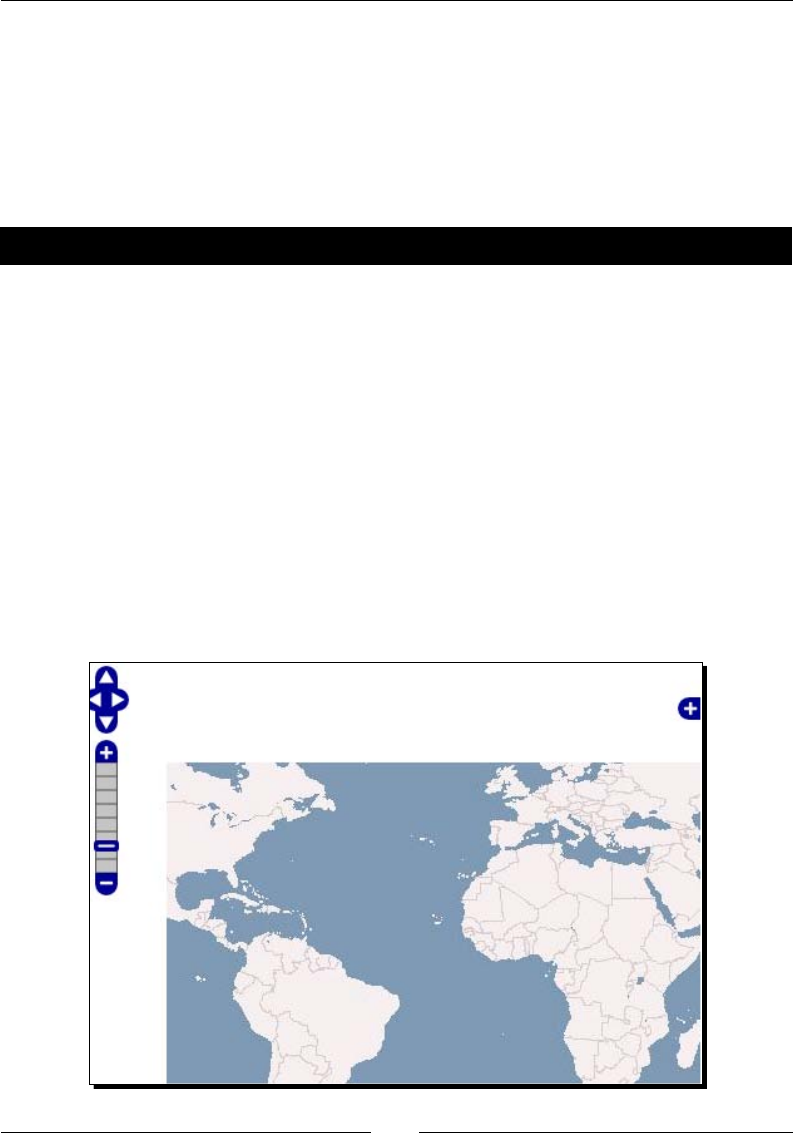
Chapter 8
[ 199 ]
The numZoomLevels property species the amount of possible zoom levels that your map
will have. For many applicaons, giving users 16 zoom levels is not always desirable. In most
cases, just specifying the numZoomLevels (along with maxExtent, if using a dierent
projecon) is all you need to do to set the number of zoom levels. We'll see, as we look at
other properes, more ways to specify the number of zoom levels (some without using this
property at all). However, let's look at how to use this property to set the number of zoom
levels—it's prey easy!
Time for Action – setting zoom levels and maxExtent
1. Create your map object, by specifying the numZoomLevels and adding a
PanZoomBar control. We'll also set the numZoomLevels property to 8, meaning
that only eight zoom levels will be available. Lastly, we'll set the maxExtent
property to include just a subset of the world, like the following:
map = new OpenLayers.Map('map_element', {
controls: [
new OpenLayers.Control.Navigation(),
new OpenLayers.Control.PanZoomBar(),
new OpenLayers.Control.LayerSwitcher()
],
numZoomLevels: 8,
maxExtent: new OpenLayers.Bounds(-100, -30, 40, 30)
});
2. Open up the page, and you should see something like this:

Charng the Map Class
[ 200 ]
What Just Happened?
Our map has only eight zoom levels and a maximum extent of (-100, -30, 40, 30). You
must have noced that the map started at a zoom level that is zoomed in a couple of mes.
This is mainly due to the fact that the furthest out zoom level would show more than the
maximum extent of the map. Let's quickly talk about what zoom levels are.
Zoom levels accessing the map.zoom property (or calling map.getZoom()) will show your
current zoom level (an {Integer} value). The zoom level numbers descend from 0 (the
'furthest out' zoom level—the level your map will usually start at) to the maximum zoom
value minus one (since the rst value starts at 0, not 1).
In our example, the highest zoom value we can have is 7, because our numZoomLevel
seng is 8. Since the zoom values start at 0, not 1, we have to subtract one from the
maximum number of zoom levels to get the current zoom level value.
On the PanZoomBar control, the very boom item on the slider represents the zoom level
further out (we'll call this the minimum zoom level). The highest you can go will be referred
to as the maximum zoom level. Now, if we're using a third party API layer, we can simply set
minZoomLevel and maxZoomLevel on those layer properes, but to set these values for
the map (and other non third party API layers), we use either scales or resoluons along
with min or maxScale, and min or maxResolution.
Map properties—Continued
Let's connue our discussion on map properes.
Resolutions
resolutions: {Array{Float}}
This is an array of resoluons the map will use. Each value in the array is a possible zoom
level. If you do not pass this in when instanang your map (or layer), it will be automacally
determined based on other properes, such as maxExtent. Seng this property is another
way to specify the number of zoom levels on your map. The resolutions array descends
from high values to low values.
Resoluon is the width/height in map units per pixel—so, for example, 150 miles divided
by 512 pixels would be a resoluon of 0.29296875. If you are using a le cache server,
you will need to specify the resoluons at which the les are cached (as well as set the
serverResolutions property, which species the resoluons at which the les are cached
on the server). Otherwise, you will oen simply just dene the numZoomLevels to specify
how many zoom levels you want.
Chapter 8
[ 201 ]
Another quick note on the resoluons array is that each value in the array
is half the value of the previous item. So, if the rst item in your resoluons
array was 0.703125, the next value would be 0.3515625, the next
0.17578125, and so on.
Time for Action – using resolutions array
Seng the resoluons array is one way to specify the number of zoom levels. Let's see it in
acon.
1. In the map object denion specify the resoluon array as the following:
map = new OpenLayers.Map('map_element', {
resolutions: [ 1.40625,0.703125, 0.703125, 0.3515625,
0.17578125, 0.087890625, 0.0439453125 ]
});
2. Zoom around on the map. Because we've only provided ve possible resoluons,
you should be able to zoom in ve mes.
What Just Happened?
Using the resolutions array, we were able to specify the number of zoom levels. Unless
we're using a cached le service, this isn't necessarily the easiest way to specify the number
of zoom levels. We have menoned earlier we can also use scales, and we can also use
minResolution and maxResolution.
Map/Layer property inheritance
Resoluons/scales/max extent etc. properes can be specied in the map object or layer
objects. Preferably, they should be specied in the map, as you won't have to worry about
which layers to apply the properes to. However, if you do not specify them in the map,
then the sengs of the base layer will be applied to the map. This isn't necessarily bad, but
it can be a bit ambiguous as to what layers are controlling the resoluons, because if these
properes are set in overlay layers they won't necessarily be applied.
So, to be safe, if you set those properes on the map then you don't have to worry about
applying them to layers. The main excepon is if you are using a third party API layer—in this
case, you must set those layer properes, such as minZoomLevel, maxZoomLevel, (two
third party API specic properes cannot be set on the map), and numZoomLevels.
If you want to set properes that mimic liming the minimum or maximum zoom level, you
can use max/minResolution or max/minScale, which we'll cover now.

Charng the Map Class
[ 202 ]
Map properties discussion—Continued
Let's get back to looking at some of the remaining map properes.
maxResolution
maxResolution: {Float or String (with value of 'auto')}. Default: 360
degrees / 256 px
The maxResolution property species what the maximum resoluon of the map can
be. Or, in other words, how far 'zoomed out' the map can be. Seng this property will
aect what the base zoom level is and how far you can zoom out. If you want to get
the value for this property, then you can zoom to the desired zoom level and call map.
getResolution(); or access the map.resolution; property in Firebug to get the
current zoom level's resoluon.
Seng the maxResolution to 'auto' is one way to make sure the map's extent 'ts' your
map's div completely. Seng the property to 'auto' can also be used with other properes
to automacally generate zoom levels.
minResolution
minResolution: {Float or String (with value of 'auto')}
Specifying this property will limit the minimum resoluon of the map—how far in the user can
zoom. This property can also be set to 'auto', but if it is then the minExtent property must
be set as well. If minResolution is not set, the number of zoom levels will be determined
either by the numZoomLevels seng, the resolutions array, or the scales property.
Time for Action – using Min and Max resolution
Let's look at how to use the minResolution and maxResolution properes and how they
aect our zoom levels.
1. Instanate your map object, by specifying the the min/max resoluon properes:
//Create a map with an empty array of controls
map = new OpenLayers.Map('map_element', {
controls: [
new OpenLayers.Control.Navigation(),
new OpenLayers.Control.PanZoomBar(),
new OpenLayers.Control.LayerSwitcher()
],
minResolution: 0.02197265625,
maxResolution: 0.3515625
});
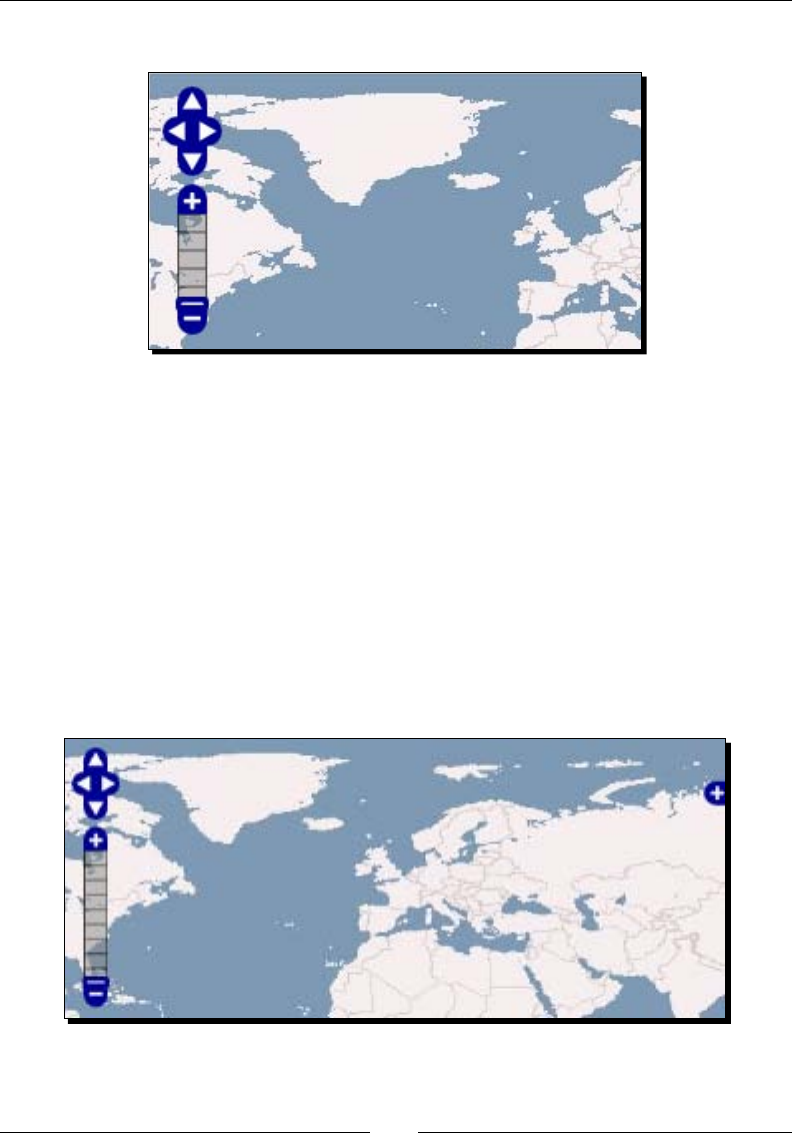
Chapter 8
[ 203 ]
2. You should see something like this, with limited zoom levels:
3. Now, let's recreate the map element and set the maxResolution and
numZoomLevels properes:
map = new OpenLayers.Map('map_element', {
controls: [
new OpenLayers.Control.Navigation(),
new OpenLayers.Control.PanZoomBar(),
new OpenLayers.Control.LayerSwitcher()
],
maxResolution: 0.3515625,
numZoomLevels:8
});
4. The map should now show zoom levels like:
Charng the Map Class
[ 204 ]
What Just Happened?
We just used the minResolution and maxResolution properes to specify the zoom
levels of our map. There is another way, apart from using resoluons, to specify zoom levels
and that is by using the scales property.
scales
scales: {Array}
To specify the scales, pass in an array of scale values. When using this property, do not
use the minResolution, maxResolution, minScale, maxScale, numZoomLevels,
minExtent or resolutions properes. If these properes are set, they override the
scales property and it will not be used. You should also specify the unit property if your
projecon is using units other than 'degrees'.
Like the resolutions array, scales are ordered from highest to lowest—most zoomed out
to most zoomed in. You can use map.getScale() to get the scale of the current zoom level.
maxScale
maxScale: {Float}
This species the maximum scale of the map. This property is similar to maxResolution—it
limits how far out the user can zoom the map. If you specify the maxScale property, seng
the maxResolution or minResolution properes may cause errors. Use either scales or
resoluons, but avoid mixing them.
minScale
minScale: {Float}
This property species the map's minimum scale. More specically, it determines how
far the user can zoom in. If you set this property, the same idea applies as with
maxScales—do not mix scales and resoluons properes.
When seng maxScale and minScale, the minScale value should be
larger than the maxScale value.

Chapter 8
[ 205 ]
Time for Action – Using scales
Using scales is another way we can control the zoom levels on our map. Let's take a look.
1. Create your map object using minScale and maxScale as follows:
map = new OpenLayers.Map('map_element', {
controls: [
new OpenLayers.Control.Navigation(),
new OpenLayers.Control.PanZoomBar(),
new OpenLayers.Control.LayerSwitcher()
],
maxScale: 27683990.15625,
minScale: 221471921.25
});
2. You should see something like this:
3. Now, let's go back to the code and recreate our map object. This me, we'll
pass in a scales array.
//Create a map with an empty array of controls
map = new OpenLayers.Map('map_element', {
controls: [
new OpenLayers.Control.Navigation(),
new OpenLayers.Control.PanZoomBar(),
new OpenLayers.Control.LayerSwitcher()
],
scales: [ 55367980.3125, 27683990.15625, 13841995.078125,
6920997.5390625],
});
Downloa d f r o m W o w ! e B o o k < w w w.woweb o o k . c o m >

Charng the Map Class
[ 206 ]
4. You should see something like this:
What Just Happened?
We just used scales to determine the zoom levels of our map. Using scales or resoluons
comes in handy when you want to specify the maximum or minimum zoom levels, as well
as if you want to specify a hard-coded array of zoom level values (and especially when you
are working with a cached le server). Let's talk about some other, non zoom level related
properes now.
panMethod
panMethod: {Function} Default: OpenLayers.Easing.Expo.easeOut
This property species what type of tween animaon will be used when panning the map.
The default value is a funcon called OpenLayers.Easing.Expo.easeOut, which causes
the animaon to 'ease out' (or slow down) when the panning is nished. At the me of
wring, the possible values are OpenLayers.Easing.Expo, OpenLayers.Easing.
Quad, and OpenLayers.Easing.Linear. Each of those three base funcons are divided
into three further types: easeOut ('out' means when the animaon is nished), easeIn (in
means when the animaon starts), and easeInOut (which means the animaon will happen
at both mes). The docs at http://dev.openlayers.org/docs/files/OpenLayers/
Tween-js.html will contain the most up to date possible values.
When specifying this property, use the full combinaon of the base class and subclass, such
as OpenLayers.Quad.easeInOut. The animaon eect will occur whenever the map is
panned, such as when using the pan arrow buons, panning the map with your keyboard, or
calling panTo().

Chapter 8
[ 207 ]
panDuration
panDuration: {Integer} Default: 50
Specifying this will control how long panning takes to complete. Like the panMethod
property, this property only eects the panning animaon of the map.
Time for Action – working with Pan animations
OpenLayers gives us the ability to use dierent types of animaons when the user pans
the map. Using the properes we just discussed, let's learn how to customize the pan
animaons.
1. Create a new page from the template in Chapter 1. Dene your map object like this,
passing panMethod and panDuration properes:
map = new OpenLayers.Map('map_element', {
panMethod: OpenLayers.Easing.Quad.easeInOut,
panDuration: 100
});
2. Pan the map by clicking on one of the arrows in the control on the top le. In
Firebug, call the following panTo funcon to pan the map to pass in a coordinate:
map.panTo(new OpenLayers.LonLat(-18,42);)
3. You should see an animaon when panning the map.
What Just Happened?
We just used the panMethod and panDuration properes to customize our map's pan
animaons. Changing the panDuration will aect how long the animaon itself lasts,
and changing the panMethod determines which type of animaon to use. By using these
properes, you can mimic the way Google Maps or other third party maps funcon.
Have a Go Hero – use different animation types
Using what we learned from the previous secon, try changing the panMethod property
to various dierent possible values (such as OpenLayers.Expo.easeInOut) to see the
dierent animaon styles. Also, change the panDuration to see how much dierent values
aect the speed of the animaon.
Let's get back to some more map properes now.

Charng the Map Class
[ 208 ]
projection
projection: {String} Default: 'EPSG:4326'
We've covered this in depth in Chapter 4, our chapter on projecons, so we don't need to
spend much me going over it here. Essenally, if you are using a projecon other than
EPSG:4326, then you can set the EPSG code here to specify your map's projecon. All your
layers should be in the same projecon as your map's projecon. If you do set the projecon
here, you will also usually have to specify related properes such as the maxExtent,
maxResolution, and units (if the projecon is not in degrees).
theme
theme: {String or null} Default: 'theme/default/style.css'
This property species the relave path (meaning, relave to the path your map page is in)
to the map's theme style le—a CSS le. If you are using your own theme le, you should
specify the path to the CSS le here, along with seng the OpenLayers.ImgPath (the path
of any custom map images).
This property can also be set to null, in which case you can simply include CSS le link tags
in your page (or put style informaon in <style> tags). See Chapter 7 for more informaon
on using CSS to style your map.
tileSize
tileSize: {OpenLayers.Size} Default: (256, 256)
Specifying this will override the default le size, which is 256 x 256 pixels. This default size
(256, 256) is the size of les from third party APIs such as Google. If you are not using third
party APIs, there may be a good reason to change this value. The larger the le size, the
fewer requests have to be made to the server—but the longer each le takes to send over.
Some le cache servers may cache les at 512 x 512 pixels; in this case you would need to
set your map size to match it. In most cases, however, you will not need to change this, but
feel free to try changing the values to nd a 'sweet' spot for your applicaon. An example
would be:
tileSize: new OpenLayers.Size(512,512);
unit
unit: {String} Default: 'degrees'
This species the map's units. Unless you are using a non default projecon, you probably
won't need to change this. Possible values are 'degrees' or ('dd'), 'm', 'ft', 'km',
'mi', 'inches'.

Chapter 8
[ 209 ]
Map functions
We've used a few methods of the Map class already, such as addLayers and
zoomToMaxExtent. In fact, we've used the more common methods at least a couple of
mes throughout the previous chapters. We haven't covered them in good detail yet, and
there are a few funcons we haven't encountered but are sll quite handy, especially when
developing maps with any sort of custom funconality.
This secon is divided into groups of related funconality. Each group will have its own
header and then lists funcons alphabecally, so you can quickly nd the funcon you're
looking for.
Control related
addControl( control ): Parameters—control {OpenLayers.Control}.
This funcon takes in a single control object and adds it to the map.
addControls( controls ): Parameters—controls {Array {OpenLayers.
Control}}. This funcon takes in an array of control objects and adds them to the
map.
getControl( match ): Parameters—match {String}. Accepts one argument,
the ID of a control. It will return a control object, if found, that matches the ID
passed in.
Returns: {OpenLayers.Control} or null. If no match is found, returns null.
getControlsBy( property, match ): Parameters—property {String},
match {String or Object}. This is an extremely useful funcon that is
somemes overlooked. If you need to get control objects that match some
criteria, this is the funcon to use. It accepts two arguments, a property (such
as 'active'), and a match (such as true). The match argument can be either
a string, regular expression, or Boolean. The property is the string name of any
property of a control—so, if you want to get all the controls that are acve, you
would call map.getControlsBy('active', true);.
Returns: {{Array of OpenLayers.Control objects}} or null. If no match
is found, returns null; otherwise, returns an array of matched control objects.
getControlsByClass( match ): Parameters—match {String or Object}.
Similar to getControlsBy, but instead will perform a match for class name.
Calling this funcon and passing in a string containing the class name (or a regular
expression) will return either null or an array of control objects.
Returns: {Array of OpenLayers.Control objects} or null.

Charng the Map Class
[ 210 ]
removeControl( control ): Parameters—control { OpenLayers.
Control }. This funcon takes in a single parameter, an OpenLayers Control
object, and removes it from the map. Removing a control will aect the map.
controls array, so be aware of this if you are using indexes to reference control
objects in other places of your code. This is another reason why creang a variable
to reference control objects is preferred, as you don't have to worry about the order
of the map.controls array.
Time for Action – using control methods
Let's go through a quick example using some of the funcons we just covered.
1. Open up an exisng map (any map is ne).
2. In Firebug, input and run the following:
var returned_controls = map.getControlsBy('active', true);
3. Now, if that array is not empty, call the following. If the array is empty, it means that
there are no acve controls. Try to add some controls to your map unl this funcon
returns a non empty array:
map.removeControl(returned_controls[0])
What Just Happened?
We just got an array of controls that were acve and then removed the rst item in
the returned array from the map. If the returned_controls array is empty, calling
removeControl will not do anything (you can't remove a null control). Let's now look
at a larger group of funcons.
Extent/Coordinate/Bounds related
The following funcons are all related, in some capacity, to moving or geng posion
informaon about the map.
Some of the funcons will make use of the OpenLayers.LonLat class. This class is used to
create a coordinate object, which contains a longitude and latude value (or x and y values,
depending on your projecon). To instanate a LonLat object, simply call the class and pass
in longitude (x) and latude (y) values (which are {Float} data types):
var my_lonlat_object = new OpenLayers.LonLat(-42.18, 42.20);

Chapter 8
[ 211 ]
Methods
The methods are as follows:
getCenter(): Returns{OpenLayers.LonLat}. Calling this funcon will return
a LonLat object containing the center point of the map.
getExtent(): Returns {OpenLayers.Bounds}. Returns the current extent
of the map.
getMaxExtent(): Returns {OpenLayers.Bounds}. Returns a Bounds
object consisng of the map's max extent; essenally, it returns the value of
the map.maxExtent property.
getMaxResolution(): Returns {Float}. Returns the maximum resoluon
of the map.
getNumZoomLevels(): Returns {Integer}. The number of zoom levels the
map contains is returned.
getResolution(): Returns {Float}. Returns the map's current resoluon.
getResolutionForZoom( zoom ): Parameters are zoom { Integer }.
This funcon allows you to pass in a zoom level, zoom (an {Integer}), and
receive the resoluon for that zoom level. Returns: {Float}. Returns the
resoluon for a passed in zoom level.
getScale(): Returns {Float}. Returns the map's current scale value.
getZoom(): Returns {Integer}. Returns the current zoom level value,
which is also the value of the map.zoom property.
getZoomForExtent(bounds, closest): Parameters are bounds
{OpenLayers.Bounds}, closest {Boolean} (Oponal). Takes in an
OpenLayers.Bounds object and an oponal closest argument (default value is
false) and returns a level for the passed in bounds. If closest is set to true, a
suitable zoom level is returned that may not fully contain the enre extent. Returns:
{Integer}. This returns a zoom level appropriate for the passed in bounds.
getZoomForResolution(resolution, closest): Parameters: bounds
{OpenLayers.Bounds}, closest {Boolean} (Oponal). Similar to
getZoomForExtent; takes in a resoluon and oponal closest argument and
returns a zoom level. Returns: {Integer}. Returns a zoom level appropriate for
the passed in resoluon.
isValidLonLat( lonlat ): Parameters are lonlat {OpenLayers.LonLat}.
Takes in a single lonlat object and returns a Boolean specifying if the passed in
coordinate is within the extent of the map. Returns: {Boolean}. Whether or not
the passed in point is within the map's maxExtent.

Charng the Map Class
[ 212 ]
isValidZoomLevel( zoomLevel ): Parameters are zoomLevel {Integer}.
This funcon accepts a single zoomLevel parameter and returns true or false if
the passed in zoom level is within the range of map zoom levels. Returns: {Boolean}.
Whether the passed in zoom level is within range of map zoom levels.
moveTo( lonlat, zoom, options ): Parameters are lonlat {OpenLayers.
LonLat}, zoom {Integer}, options {Object} (Oponal). Takes in an
OpenLayers.LonLat object, zoom level, and oponal options object. This funcon
will move the map to the specied coordinate and zoom level, but will not show any
panning animaons.
pan( dx, dy, options ): Parameters are dx {Integer}, dy {Integer},
options {Object} (Oponal). This funcon takes in two integer parameters and
an oponal options object. The dx parameter species the distance to pan the
map in the x (longitude) direcon and it can be either posive or negave. The dy
parameters species how much to pan the map in the y (latude) direcon. The
opons object can consist of two properes: animate {Boolean} species if the
panning animaon will be enabled. Default value is true. The second property
is dragging {Boolean}, which species whether or not to call setCenter with
dragging, the default value is false.
panTo( lonlat ): Parameters—lonlat {OpenLayers.LonLat}. Pans the
map to a passed in coordinate (an OpenLayers.LonLat object). This will perform
any associated panning animaons if the passed in coordinate is within the current
extent.
setCenter( lonlat, zoom, dragging ): Parameter—lonlat
{OpenLayers.LonLat}, zoom {Integer} (Oponal), dragging {Boolean}
(Oponal). This funcon will set the map's center to the passed in coordinate
and (oponally) zoom level. If dragging is set to true (it is true by default),
movestart and moveend events will be triggered.
zoomIn(): Calling zoomIn() will cause the map to zoom in the next zoom level,
if possible.
zoomOut(): Calling zoomOut() will cause the map to zoom out one zoom level,
if possible.
zoomTo( zoomLevel ): Parameters—zoomLevel {Integer}. Takes in a zoom
level and zooms the map to the specied zoom level.
zoomToExtent( bounds, closest ): Parameters—bounds {OpenLayers.
Bounds}, closest {Boolean} (Oponal). Zooms to the passed in bounds and
re-centers the map. By default, closest is set to false. If it is true, a zoom
level that most closely ts the bounds will be found, but it may not fully contain
the extent.
Chapter 8
[ 213 ]
zoomToMaxExtent( options ): Parameters—options {Object} (Oponal).
Zooms to the map's maximum extent. An oponal options object can be passed in
that contains one property—restricted (True by default). If restricted is set
to true, this funcon will zoom to the map's restricted extent instead.
Time for Action – using coordinate related functions
Let's put some of these funcons to use!
1. Open up an exisng map, any page will do.
2. In Firebug, let's call the pan funcon. We'll move -30 degrees (30 degrees le) in the
x (longitude) direcon, and 30 degrees up in the y (latude) direcon. In the Firebug
console, input and run the following:
map.pan(-30,30);
3. Now let's see how the setCenter funcon works.
map.setCenter( new OpenLayers.LonLat(-42, 70), 2);
4. Zoom out now with the zoomOut() funcon:
map.zoomOut();
5. Let's check to see if a coordinate outside the map's max extent is valid. The following
should return False:
map.isValidLonLat( new OpenLayers.LonLat(-190, 20) );
What Just Happened?
As you can see, it's easy to call any of those map funcons we want. The prior group of
funcons was quite long, but it was the longest group—I promise! We'll do a quick quiz, and
then take a look at some more funcons.
Pop Quiz – using coordinate related functions
In most cases, it will be your map's users who will navigate the map. However,
programmacally controlling map navigaon is oen necessary or useful. Describe two
possible ways to move or set the map's center to the coordinates (-42, 52).

Charng the Map Class
[ 214 ]
Layer related functions
The following group of funcons involves layer acons—adding layers, removing layers, etc.
You've seen most of these funcons already:
addLayer( layer ): Parameters—layer {OpenLayers.Layer}. Takes in a
layer object and adds it to the map. The layer object can be an already instanated
object, or you can instanate a layer object on the y in the call itself.
addLayers( layers ): Parameters—layers {Array{OpenLayers.Layer}}.
This funcon takes in an array of layer objects and adds them to the map. Like in the
addLayer funcon, you can pass in already instanated layers or instanate them
on the y. It is recommended that you instanate layer objects so you can refer to
them by name, but either way is acceptable.
raiseLayer( layer, delta ): Parameters—layer {OpenLayers.Layer},
delta {Integer}. This allows you to change the order layers appear on the map,
allowing you to place layers above or below other layers. This funcon changes the
order of the layer by the passed in delta value. If delta is posive, the layer is
moved up in the map.layers array by delta. If it is negave, it is moved down by
delta. We'll be using this funcon later in the book to move layers up and down
the layer list.
removeLayer( layer, setNewBaseLayer ): Parameters—layer
{OpenLayers.Layer}, setNewBaseLayer {Boolean}(Oponal). This funcon
will remove a passed in layer from the map. It removes the associated HTML
elements, removes the layer from the map's layer list, set's the layer's map value
to null, and triggers a removelayer event. The setNewBaseLayer property is
oponal and defaults to true, which will aempt to set a new base layer if need be.
getNumLayers(): Returns: {Integer}. Returns the number of layers on the map.
Other functions
The following funcons are also very useful and will be used throughout the book, but do
not necessarily fall into the above funcon categories:
destroy(): Calling destroy() will do what you would imagine—it destroys the
map object. Aer the map is destroyed, the map object is essenally made useless.
getLonLatFromPixel( pixel ): Parameters—pixel {OpenLayers.Pixel}.
This funcon returns an {OpenLayers.LonLat} object based on the passed in
pixel—whatever coordinates are passed in that pixel is returned. An example call
would be map.getLonLatFromPixel(new OpenLayers.Pixel(250,250));.
We'll be using this funcon later in the book.
Returns: {OpenLayers.LonLat}. Returns a LonLat object from the passed in pixel.
Chapter 8
[ 215 ]
getPixelFromLonLat( lonlat ): Parameters—lonlat {OpenLayers.
LonLat}. This funcon will return a pixel locaon based on a passed in lonlat
coordinate. The returned pixel coordinate is returned in view port coordinates
(meaning, the pixel locaon is relave to the map div element). This funcon is
quite useful if you want to, for instance, display another div on top of your map
at a specied coordinate. We will be using this funcon later in the book.
Returns: {OpenLayers.Pixel}. It returns an OpenLayers.Pixel from the
passed in coordinate.
render( element ): Parameters—element {HTML element or String
(of ID of element)}. This funcon takes in a single parameter—an HTML
element or the ID of an element you wish to render the map to. We saw this
funcon in acon earlier in this chapter. If you do not pass in an HTML element (or
ID) to the map object when you create it, you can delay rendering and later call this
render method. This funcon will render the map to the element that is passed in.
updateSize(): This funcon should be called whenever the map div's size is
updated. For example, if you have a resize-able div that the map is placed in, then
your code should call map.updateSize() whenever that div is resized.
Doing stuff with events
In Chapter 6, we introduced the noon of events and how OpenLayers uses events. At the
core, there are essenally two types of events used by OpenLayers: Browser events and Map
events. Browser events are things like clicking on the map div with your mouse, while Map
events are things such as zooming the map to some coordinate. We worked a lile bit with
events in Chapter 6, so let's extend that knowledge and add even more custom funconality
to our map.
We won't go over browser events much, but the ideas behind them are
essenally the same as map events. A great resource to nd out more about
browser events can be found at https://developer.mozilla.org/en/
DOM/event.

Charng the Map Class
[ 216 ]
Map event types
There are a number of supported map event types. Let's take a look at them, and then we'll
cover how to use them in your map. You can also call map.EVENT_TYPES, which will return
an array of valid map events. Some event types will return an event object to the event
listener. If an event object is returned, it will be specied as Event Object in the event type
descripons below:
addlayer: This event is triggered aer a layer is added. Event object: Includes a
layer property that references the added layer.
changebaselayer: Triggered aer the base layer changes.
changelayer: This event gets triggered aer a layer's properes are changed.
Specically, it gets triggered whenever its name, order, opacity, parameters, or
visibility is changed. Event object: Includes a layer property which refers to the
changed layer, and a property property which refers to the type of property that
was changed (order, opacity, etc.).
mousemove: The event is triggered whenever the mouse is moved inside the map.
mouseout: This event is triggered on mouseout; whenever your mouse leaves the
map div.
mouseover: This gets triggered whenever the map gets a mouseover event;
whenever your mouse rst enters the map div.
movestart: Whenever the start of a drag, pan, or zoom occurs, this event is
triggered. This event refers to the movement of the map itself, not just the mouse.
moveend: Triggered aer a drag, pan, or zoom is nished. This event refers to the
movement of the map itself, not just the mouse.
move: This event is triggered on any drag, pan, or zoom of the map.
preaddlayer: This is triggered before a layer is added. Event object: Includes a layer
property that references the layer to be added.
removelayer: When a layer has been removed from the map, this event is triggered.
Event object: Includes a layer property that references the layer that was removed.
zoomend: This event is triggered aer a map zoom completes.
Using map events
There are primarily two common ways to use map events. Both ways accomplish the same
thing—adding listeners to the map that will do something when a specic type of event is
triggered. One way is to use the eventListeners property when creang your map object.
The other way is to use map.events.register(type, obj, lisenter). We'll cover
both.

Chapter 8
[ 217 ]
Using the eventListeners property
This is a good way to add the events if you know what events you want to add to your map
when you inially create the map object. To use this property, pass in an anonymous object
consisng of eventType: listenerFunction (key: value) pairs. The eventType is one
of the event types we described in the previous secon, and the listenerFunction is the
name of the funcon that will get called when that event type occurs.
Time for Action – using eventListeners
Let's demonstrate how to use event listeners. We'll start o with a simple example that will
send an alert anyme the map nishes zooming.
1. The rst thing we'll need to do is to create a funcon that will get called by the
event listener when some event happens. We'll have to do this for both the
eventListeners method and the map.events.register method which we'll
talk about shortly. Let's create a simple funcon that will send an alert when the
user zooms in. Place this as the rst line in your init() funcon, before your
OpenLayers map code:
function alert_on_zoom(event){ alert('You finished zooming'); }
2. Next, we'll need to create our map object and pass in an eventListeners object.
We'll want to listen for a zoomend event type, which is an event that happens when
the map has nished zooming. So, the key inside our eventListeners object will
be the event type, which is 'zoomend'. The value will be the name of the funcon
we wish to get called. Make sure that you do not include the parentheses, as we
aren't actually calling the funcon—we're just seng the value to be a reference to
the funcon, which will get called later when the event happens:
map = new OpenLayers.Map('map_element', {
eventListeners: {
'zoomend': alert_on_zoom
}
});
3. Now, when you visit the map and zoom in, an alert box will pop up with the text
'You nished zooming'.

Charng the Map Class
[ 218 ]
What Just Happened?
We just use the eventListeners property of the map object to add an event listener for
the zoomend event type. Be sure to set the value to the funcon's name only, do not include
the parentheses, as we do not want to call the funcon right now. When the zoomEnd event
occurs, it will call the alert_on_zoom funcon and pass in the event object. We'll talk
about what the event object contains shortly.
Using map.events.register
Using map.events.register will do essenally the same thing as seng the
eventListeners property, but we can set it aer the map object has been created.
The funcon call looks like:
map.events.register(type, object, listener);
The type argument refers to the eventType, the object is a reference to the map
object—you will almost always simply pass in your map object—and the listener refers
to the funcon that will be called when the event is triggered. The following example will do
exactly the same thing as the example in the prior event listeners secon. Like before, we
create a funcon that will get called when the zoomend event occurs. The dierence here is
that we are adding the event to the map object aer it has been created.
function alert_on_zoom(event){ alert('Map zoomed'); }
map.events.register('zoomend', map, alert_on_zoom);
Now, let's talk about the event object that is passed into the listener funcon.
Event object
When working with events, it's usually useful to know a bit about what occurred. The event
object provides us with some informaon about the event. Depending on the event type,
the event object will have dierent properes.
All event objects will have at least one property referred to as object, which references
the map object, and an element property which references the HTML element the map is
in. Addionally, some event types include more properes. The previous Map event types
secon includes informaon on the event object properes that are populated for dierent
event types.
To access the event object properes, you just have to use event.property, where
property is the name of the property you wish to access.
Chapter 8
[ 219 ]
Time for Action – working with Map events
1. Before the map object is instanated, let's create a funcon that will get called
when the map's zoomend event is called. First, we'll create the funcon:
function zoomend_event(event){
alert('Done zooming');
}
2. Let's add another funcon aer that which will update the rst layer's opacity to a
random value when the map is nished being moved. First, create the funcon:
function update_opacity(event){
map.layers[0].setOpacity(Math.random());
}
3. Now we're going to create the map object. Use the following code to instanate the
map object, passing in event listeners for zoomend and moveend:
map = new OpenLayers.Map('map_element', {
eventListeners: {
'zoomend': zoomend_event,
'moveend': update_opacity
}
});
4. Be sure to add a WMS layer to the map, along with seng the extent like we've
done before. Now, open up the map and start navigang around it. When you zoom
in, you should receive an alert. When you nish panning, the layer's opacity should
change. Now, let's see how the events we just created can actually trigger other
events. With the moveend event listener we have, the layer's opacity will change
every me the user nishes panning. Changing the layer's opacity causes the layer's
changelayer event to trigger. So, let's demonstrate how it works. Create a funcon
that will send an alert containing some informaon about the event object, namely
the layer's name and the property that was changed.
function show_layer_info(event){
alert('Layer changed: ' + event.layer.name + ' |
Property Changed: ' + event.property);
}
5. Now, we'll need to register the changelayer event. Just like before, we'll use
map.events.register:
map.events.register('changelayer', map, show_layer_info);
Charng the Map Class
[ 220 ]
6. Open up your map now and start triggering events. You'll probably get annoyed of
the alerts prey quickly.
What Just Happened?
We just demonstrated how event listeners can be added to the map and trigger funcons
when map events happen. You probably also noced that whenever you moved the map,
the changelayer event got called. This is because the layer's opacity was updated, which
triggers the changelayer event. So, one important idea to take away is that events can
(and oen do) call other events. We'll use events more throughout the book, so if you aren't
totally comfortable with them yet—don't worry; they'll be coming up again.
Multiple maps
So far, we've only used one map in all our examples. And, for most applicaons, only
one map is required. There are mes though when having two maps is a good thing—like
when you're learning about how the Map class works (although, I'm sure you can be a bit
more creave).
Using multiple map objects
Making two map objects on your page isn't too hard. We just need another element to place
the second map element in, along with adding controls and layers to map—things we've
been doing throughout the book.

Chapter 8
[ 221 ]
We've talked about how control and layer objects belong to a single map object. But what
if you want to have mulple map objects that use the same layers? A single layer object can
only belong to one map object at a me, but fortunately there is a simple way to use the
'same' layer object in mulple maps—by calling the layer's (or control's) clone() method.
Time for Action – using multiple map objects
We've used only one map object in all our examples up to this point. Adding mulple map
objects isn't very hard though—let's gure out how it's done.
1. We're going to rst have to add another HTML element for our second map,
and we'll rename the rst map element's ID for consistency. Edit your HTML
div elements:
<div id='map_1_element' style='height: 500px; float:left;
width:400px;'></div>
<div id='map_2_element' style='height: 500px; float:left;
width:400px;'></div>
<div style='clear:both;'></div>
2. Now, in your JavaScript code, let's rename the global map variable and add another
one to hold our second map (right above the init() funcon):
var map1, map2;
3. Let's create our rst map and its layers and controls. Nothing new here, we're
mainly just renaming the map object to map_1, and adding a layer to it and seng
the center:
map_1 = new OpenLayers.Map('map_1_element', {});
//Create a base layer
var wms_layer_all = new OpenLayers.Layer.WMS(
'OpenLayers WMS',
'http://vmap0.tiles.osgeo.org/wms/vmap0',
{layers: 'basic'},
{}
);
map_1.addLayer(wms_layer_all);
if(!map_1.getCenter()){
map_1.zoomToMaxExtent();
}
Charng the Map Class
[ 222 ]
4. Now, let's create our second map object.
map_2 = new OpenLayers.Map('map_2_element', {});
5. We haven't yet added any layers to it. In this case, we want to use the same layer
that the rst map has. However, since a layer object can belong only to one map at
a me, we need to call the layer's clone() method, which will basically create a
duplicate layer object.
var wms_layer_all_map_2 = wms_layer_all.clone();
6. Add the layer, then we'll zoom in with the second map and set it to a dierent
locaon:
map_2.addLayer(wms_layer_all_map_2);
map_2.setCenter(new OpenLayers.LonLat(-42, 42), 3);
7. Take a look at your page. You should see something like this:
What Just Happened?
We just created two maps on the same page. We used the layer's clone() method to
duplicate the layer object so that each map object would have the same layer, without
having to manually recreate the layer object. If we were adding control objects to our maps,
we would use the clone() method on our control objects if we wanted to duplicate them.
While this is a prey simple example, there are mes when showing maps side by side would
be more useful.

Chapter 8
[ 223 ]
Multiple maps and custom events
Let's create a slightly more complicated applicaon using mulple maps and adding event
listeners. One map will show a zoomed out view of a country, and the map next to it will
show a close up view. Whenever one map is moved, the other map's center point will be
immediately updated. This type of mapping applicaon can be quite useful for things such as
data entry processes, where two large maps might be more usable than one large map with
an overview map.
Let's put together some of the concepts we've learned in this chapter and create a similar
type of applicaon.
Time for Action – creating a multiple map and custom
event application
In this example, we'll make an applicaon that contains two maps, side by side, that update
one another when moved.
1. Create a copy of the previous example. We'll be working on it as the basis for
this example.
2. Let's recreate the rst map objects. For this example, we'll make the rst map
zoomed in a bit and set a maxResolution so the map cannot be zoomed out
more than a few mes. We'll also use two control—Navigaon and PanZoomBar.
map_1 = new OpenLayers.Map('map_1_element', {
controls: [
new OpenLayers.Control.Navigation(),
new OpenLayers.Control.PanZoomBar()
],
maxResolution:0.0054931640625,
minResolution:0.00034332275390625
});
3. Let's also change the center point. We'll create a variable to store the starng
center coordinate (which will also be used by the second map) and change the
map.zoomToMaxExtent line. Aer the layer has been added to the map, use the
following code:
var map_center = new OpenLayers.LonLat(-120, 34);
if(!map_1.getCenter()){
map_1.setCenter(map_center);
}
Charng the Map Class
[ 224 ]
4. Now for the second map, we'll set it at a more zoomed out level and restrict the
resoluons as well. Change the second map's creaon code to the following:
map_2 = new OpenLayers.Map('map_2_element', {
controls: [
new OpenLayers.Control.Navigation(),
new OpenLayers.Control.PanZoomBar()
],
maxResolution: 0.17578125,
minResolution: 0.0439453125
});
5. Next, let's set the map_2 object's center point to the same center point as the
rst map:
map_2.setCenter(map_center);
6. Now, our two map objects are set up just the way we want them—half of our work
is done. If you open the map, you should see something like this:
7. Our next goal is to add events to the map that will cause the map objects to update
each other when the maps are moved. This is a lile trickier than it may rst
sound. Let's start o by creang a funcon for each map that will get called when a
moveend event is triggered.
It is important that when calling setCenter, we pass in true as the third
parameter so that the moveend event is not triggered. If it is triggered, we will end
up with an innite loop (not good).
function update_map_1(event){
map_2.setCenter(map_1.getCenter(), null, true);
}
Downloa d f r o m W o w ! e B o o k < w w w.woweb o o k . c o m >

Chapter 8
[ 225 ]
function update_map_2(event){
map_1.setCenter(map_2.getCenter(), null, true);
}
8. Finally, let's nish up by registering the events for our two map objects.
map_1.events.register('moveend', map_1, update_map_1);
map_2.events.register('moveend', map_2, update_map_2);
9. All done! Open the page and pan around. When you nish panning around with
one map, the other map will be updated.
What Just Happened?
You just created a fairly complicated mapping applicaon with two map objects and a couple
custom events. With all you've learned from this chapter and the previous ones, we can start
to do some prey interesng things. This example is just a small sample of what we can do
with just a lile bit of work in OpenLayers.
Summary
This brings us to the end of the core coverage of the OpenLayers library. At this point,
we've covered in good detail the three 'core' classes—Layer, Control, and Map.
This chapter specically covered the Map class, along with its properes and methods.
We then went in to greater detail about map events and how to work with them. Lastly,
we learned how to use mulple map objects on the same page.
Now that we've goen the fundamentals down, we're ready to start applying those concepts
and to create some really interesng mapping applicaons. The next chapter covers the
Vector class, a very powerful layer class that allows us to do a lot of really neat things.
9
Using Vector Layers
At this point, we've gone over the foundaon of OpenLayers. We've covered the
core classes—Map, Controls, and Layers. The rest of this book will focus more
on rening that core knowledge, expanding on concepts already introduced and
delving a bit into more of the 'advanced' things we can do with the API.
We'll start diving into some of these advance topics starng with this chapter,
covering the Vector Layer class. With it, our maps can be made even more
interacve, responsive, and sleeker by showing and allowing interacon with
vector data.
We'll go over how to create a vector layer, create and interact with objects
in it, load data from external les (like KML), and more. Throughout this
chapter, we'll go over many dierent types of examples and build upon them to
demonstrate how the Vector Layer works.
In this chapter will cover the Vector Layer class, along with a couple of other related
classes. We'll:
Discuss what the Vector Layer class is and see how it works
Cover properes, methods, and events of Vector Layer class
Go over the Feature and Geometry classes
Discuss how to create more advanced Vector layers
Demonstrate how to use the Strategy class
Learn about the Protocol class
Cover the Format class
Using Vector Layers
[ 228 ]
What is the Vector Layer?
OpenLayers' Vector Class is generally used to display data on top of a map and allow real
me interacon with the data. What does this mean? Basically, it means we can load in
data from geospaal les, such as KML or GeoJSON les, and display the contents on a map,
styling the data however we see t. For example, take a look at this map:
This shows a map with a Google layer as underlying base layer and a vector layer on top of
it. The data (all the circles with numbers in them) are loaded in from a GeoJSON le, an open
le format that many other applicaons support. In the vector layer, there are a bunch of
data points throughout the map. Each dot on the map is an object in the vector layer, and
these objects are referred to as Features.
In this case, each feature is actually a cluster of data points—the numbers in each circle
represent how many points belong to that cluster. This clustering behavior is something
we can use out of the box with OpenLayers via the Strategy class, which we'll be covering
later in the chapter. Before we get to that point, let's talk about one of the main things that
separate a vector layer from other layers.

Chapter 9
[ 229 ]
What makes the Vector Layer special?
With a raster image, what you see is what you get. If you were to look at some close up
satellite imagery on your map and see a bunch of buildings clustered together, you wouldn't
necessarily know any addional informaon about those buildings. You might not even know
they are buildings. Since raster layers are made up of images, it is up to the user to interpret
what they see. This isn't necessarily a bad thing, but vector layers provide much more.
With a vector layer, you can show the actual geometry of the building and aach addional
informaon to it—such as the value of it, who owns it, its square footage, etc. As we'll see
later in this chapter, it's easy to put a vector layer on top of your exisng raster layers and
create features in a specic locaon. We'll also see how we can get addional informaon
about features just by clicking or hovering our mouse over them.
The Vector Layer is client side
Another fundamental dierence is that the vector layer is, generally, used as a client side
layer. This means that, usually, interacon with the actual vector data happens only on the
client side. When you navigate around the map, for instance, the vector layer does not send
a request to a server to get more informaon about the layer. Once you get the inial data,
it's in your browser and you do not have to request the same data again (in most cases,
although WFS is an excepon; we'll cover this later in the chapter).
Since, in most cases, the vector data is loaded on the client side, interacon with the vector
layer usually happens nearly instantaneously. However, there are some limitaons. The
vector layer is dependent on the user's browser and computer. While most browsers other
than Internet Explorer have been progressing exceponally well and are becoming more
powerful each day, limitaons do exist.
Due to browser limitaons, too many features in a vector layer will start to slow things down.
There is no hard number on the amount of features, but generally anything over a couple
hundred of features will start to slow things down on most computers. However, there are
many ways around this, such as deleng features when you don't need them, and we'll talk
about performance issues in more depth later.
Other uses
With the vector layer, we can display any type of geometrical object we'd like—points, lines,
polygons, squares, makers...any shape you can imagine. We can use the vector layer to draw
lines or polygons and then calculate the distance between them. We can draw shapes and
then export the data using a variety of formats, then import that data in other programs,
such as Google Earth. These are just a few basic cases though, and throughout this chapter
you'll see how powerful the vector layer can be.
Using Vector Layers
[ 230 ]
What is a 'Vector'?
In terms of graphics, there are essenally two types of images: raster and vector. Most
images you see are raster images—meaning, basically, they are comprised of a grid of pixels
and their quality degrades as you zoom in on them. A photograph, for example, would be a
raster image. If you enlarge it, it tends to get blurry or stretched out. The majority of image
les—.jpegs, .png, .gifs, any bitmap image—are raster images.
A vector, on the other hand, uses geometrical shapes based on math equaons to form an
image. Meaning that when you zoom in, the quality is preserved. If you were to zoom in on a
vector image of a circle, the lines would always appear curved—with raster image, the lines
would appear straight, as raster images are made up of a grid of colors. Vector graphics are
not constrained to a grid, so they preserve shape at all scales.
Time for Action – creating a Vector Layer
Let's begin by creang a basic vector layer. In this example, aer you add some points and
other feature types to your vector layer, try to zoom in. You'll noce that the points you
added don't lose quality as you zoom in. We'll go over how it works aerwards.
1. We'll start o by using a basic WMS layer:
var wms_layer = new OpenLayers.Layer.WMS(
'OpenLayers WMS',
'http://vmap0.tiles.osgeo.org/wms/vmap0',
{layers: 'basic'},
{}
);
2. Now, let's create the vector layer itself. We'll use the default projecon and default
values for the vector layer, so to create the layer all we need to do is create it:
var vector_layer = new OpenLayers.Layer.Vector('Basic Vector
Layer')
3. Add the layers to the map now:
map.addLayers([wms_layer, vector_layer]);
4. If we looked at the map now, we would just see a simple map—our vector layer
does not have any data loaded into it, nor do we have any controls to let us add
vector data.
Chapter 9
[ 231 ]
5. Let's add the EdingToolbar control to the map, which allows us to add points and
draw polygons on a vector layer. To do so, we just need to instanate an object from
OpenLayers.Control.EditingToolbar and pass in a vector layer. We'll pass in
the vector_layer object we previously created:
map.addControl(new OpenLayers.Control.EditingToolbar(vector_
layer));
6. Take a look at the map now. You should see the EditingToolbar control (which
is basically a panel control with control buons). Selecng dierent controls will
allow you to place vector objects (called features) on the vector layer. Play around
with the EditingToolbar control and place a few dierent points / polygons on
the map:
7. Now, one more step. You've placed some features (points / polygons / lines / etc.) on
the map, but if you were to refresh the page they would disappear. We can, however,
get the informaon about those features and then export it to a geospaal le. We'll
work with les later, but for now let's grab the informaon about the features we've
created. To access the informaon about the vector layer's features, all we need to do
is access its features array. In Firebug, type and run the following:
map.layers[1].features
Using Vector Layers
[ 232 ]
8. You should see a bunch of objects listed, each object is a feature you placed on
the map:
[Object { layer=Object, more...}, Object { layer=Object, more...},
Object { layer=Object, more...}, …]
9. Now, if you expand one of those objects, you'll get the informaon about a feature.
The geometry property is an anonymous object each feature has which contains
geometry informaon. You can also see the methods of the feature objects—try
playing around with dierent funcons. You can access the individual features by
using map.layers[1].features[x], where x is the index of the feature in the
features array. For instance, to destroy the rst feature which we added to the map
we could use:
map.layers[1].features[0].destroy();
What Just Happened?
We just demonstrated how to create a basic vector layer and added features to it using the
EditingToolbar control. Using the features array of the vector layer, we also destroyed
some features. As you've just seen, it's not terribly dicult to start using the vector layer—
prey easy, in fact. The rest of this chapter will more or less build on what we just saw, so
there's no need to be inmidated.
Pop Quiz – why use a Vector Layer?
Vector layers tend to be very fast, as the data can be stored enrely on the client. Interacon
happens instantly, which can greatly enhance the user's experience. Come up with a couple
of cases where you would use a vector layer.
Now, before we jump into more advanced uses of the vector layer, let's see how it actually
works rst.
How the Vector Layer works
There are primarily four things we need to cover to understand how the vector layer works.
How the Vector Layer is rendered
The Vector Layer class itself
The Geometry and Feature classes
How to use the related Strategy, Protocol, and Format classes
Let's go over rendering—fortunately, there's not much to it.

Chapter 9
[ 233 ]
How the Vector Layer is rendered
As we discussed earlier, the vector layer doesn't use raster graphics. Other layer types use
the <img> tag (image tag) to show images—in HTML, the image tag will only display raster
images. So, we can't just use <img> tags like other layers. Instead, we have to use a vector
image renderer. As we menoned before, the vector data is not just an image, and can
contain addional informaon such as the coordinates of the data.
The vector data must be rendered to be seen. OpenLayers supports three ways to render
the vector layer: SVG, Canvas, and VML.
SVG
The default way to render the vector layer is to use the SVG renderer, which makes use of
the <svg> tag. SVG is an acronym for Scalable Vector Graphics, and allows us to render
vector images in the browser. All browsers (except Internet Explorer) support SVG, so by
default OpenLayers uses SVG to render the vector layer.
Canvas
We can use the Canvas renderer, which makes use of the <canvas> HTML tag. Using this
renderer tends to be a lile slower however, as the vector is actually turned into a raster
with the canvas tag—but this may be desirable in some cases.
VML
Internet Explorer does not follow web standards, and at the me of wring did not support
SVG or Canvas. Fortunately, by default, OpenLayers will detect if the user's web browser does
not support modern technologies and a fall back renderer called VML will be used (which is
similar to SVG, but is Microso specic). SVG tends to be faster than VML, so the only case
where you would want to use VML over SVG is when Internet Explorer is used.
'Renderers' array
When you create a vector layer, it looks for an array called renderers which contains the
names of renderers, in order, to use. By default, the renderers array is set as:
["SVG", "VML", "Canvas"]
This means that OpenLayers will try to use SVG rst, and if the browser does not support
SVG it will fall back on VML—and if it does not support VML, it will try to use Canvas.
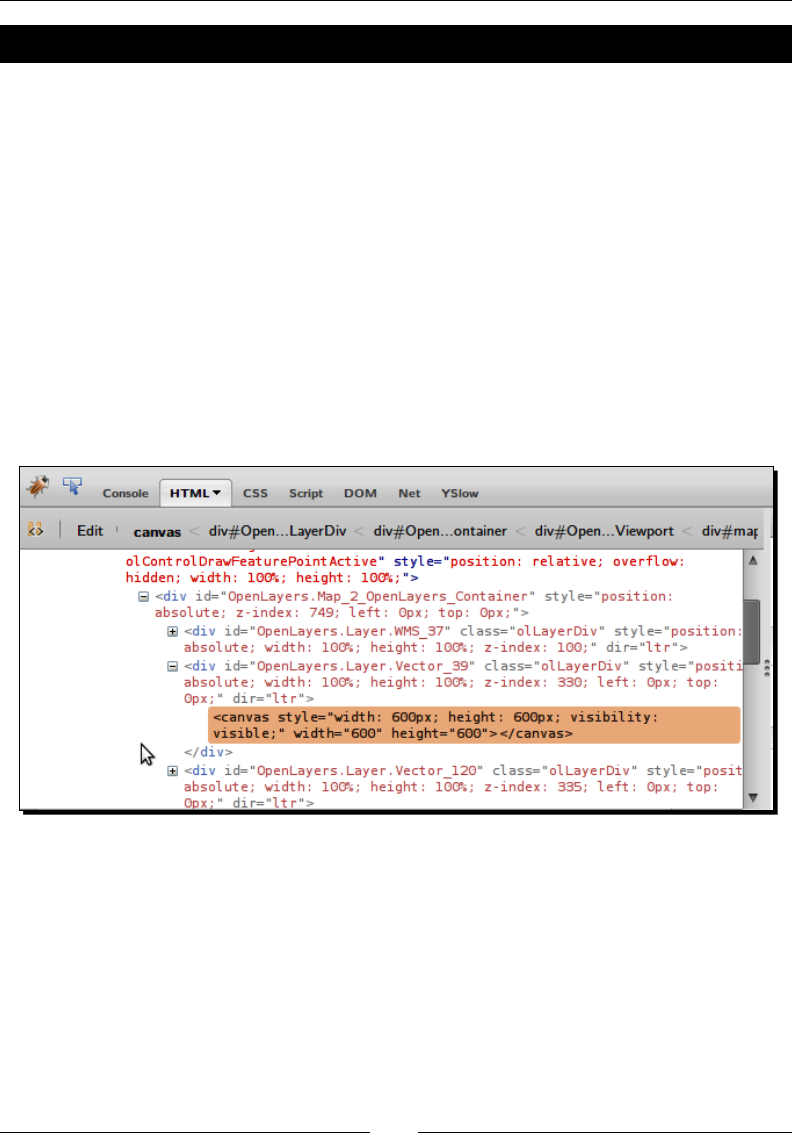
Using Vector Layers
[ 234 ]
Time for Action – changing the Renderers array
Let's use the Canvas renderer and see what our map looks like.
1. Make a copy of the previous example. We'll just be changing one line of the code.
2. The only thing we'll need to do is set the renderers property when instanang
the vector layer. By default, it is set as ['SVG', 'VML', 'Canvas']. Let's make
Canvas the default renderer. Replace your vector layer instanaon code with:
var vector_layer = new OpenLayers.Layer.Vector('Basic Vector
Layer', {
renderers: ['Canvas', 'SVG', 'VML']
});
3. Open up the map and draw some points. It may look similar, but you will probably
noce that the lines don't look as sharp as they do when using the SVG renderer. If
you use Firebug to inspect the map element, you'll see a <canvas> tag:
What Just Happened?
You just saw how easy it is to change the renderer used by the vector layer—although
it is not usually necessary to change it.
Now that we know how the vector layer is rendered, let's talk about the class itself.

Chapter 9
[ 235 ]
Vector Layer class
The Vector Layer, by itself, is a layer like the other layers we've discussed so far—but to really
get the most out of it, we'll be working with other classes.
To even get a basic example working (like the rst one in this chapter), we make use of a few
other classes. Specically, the Vector class makes use of the Feature class to show objects
on the layer. But for the Feature class to work, it needs to use the Geometry class to create
geometry objects. Therefore, the actual vector objects in your vector layers are Feature
objects which are composed of Geometry objects—we'll cover all that soon.
Before we do that though, let's cover the Vector Layer class itself. We'll rst go over the
properes of the Vector class, and then the methods (in a similar manner to Chapter 3).
OpenLayers.Layer.Vector properties
Let's go over the properes that the Vector class contains. Some of them are instanated
objects from other classes, which will be covered later in this chapter.
drawn: {Boolean}. Returns true or false depending on whether the features
have been drawn or not. You do not set this property when instanang the vector
layer object.
features: {Array {OpenLayers.Feature.Vector}}. This is an array of
feature objects belonging to the vector layer. We saw this in the earlier example—by
accessing this array, we can nd out informaon about all the objects (features)
which a vector layer contains. Since this is an array, you can access an individual
feature by calling vector_layer.features[X], where X is the index of the
desired feature. We'll go much more in depth with how to interact with features
later in the chapter.
filter: {OpenLayers.Filter}. By assigning a lter object to a vector layer
object, you can (as the name implies) lter out certain data based on the properes
supplied to the lter object. This is very useful when you want to display some, but
not all, features from a data source. We will go over this property thoroughly in the
Filter class secon in Chapter 10.
isBaseLayer: {Boolean}. Default value is false. Species if the layer is a base
layer or not. You could use a vector layer as a base layer, having an enrely vector
based map instead of relying on a WMS or Google Maps Layers as a base layer.
isFixed: {Boolean}. Default value is false. Determines if the vector layer will
move around when the map is dragged. This can come in handy if, for instance,
you want to place a marker on your map that always stayed in the center of the
map (in which case you would set this property to true).

Using Vector Layers
[ 236 ]
isVector: {Boolean}. Returns true if the layer is a vector layer. You do not set
this property when you instanate the vector layer. This property is used primarily
to check if an already instanated layer is a vector layer or not. For instance, if you
wanted to loop through all the layers on your map and determine if a layer was a
vector layer or not, you would likely use this property.
protocol: {OpenLayers.Protocol}. Species a protocol object to use for the
vector layer. In the secon on strategies, protocols, and formats, we talk about this
in much more depth.
renderers: {Array{String}}. Species an array containing strings which
contain the renderers to use. Each renderer is tried, in order, and if it is not
supported by the browser, the next one is tried. Earlier in the chapter we went over
how to use this property.
rendererOptions: {Object}. The renderer will use an anonymous object
consisng of properes. We won't talk any more about renderers in this chapter,
but the properes this object can contain are listed in the OpenLayers docs for each
renderer class at http://dev.openlayers.org/docs/files/OpenLayers/
Renderer-js.html.
reportError: {Boolean}. Default is true. This property species whether or
not to report error messages if the renderer fails to load.
selectedFeatures: {Array{OpenLayers.Feature.Vector}}. This property
contains an array of features the layer contains that are currently selected. Features
can be selected by, for instance, clicking on a feature. This property is discussed
more in the secon on interacng with features.
strategies: {Array{OpenLayers.Strategy}}. An array of strategy objects.
Strategies tell the vector layer how to behave, such as clustering features together.
In the secon on strategies, protocols, and formats, we talk about this in much
more depth.
style: {Object}. Contains style informaon for the vector layer. Using this, we
can change the color, size, etc. of features in our vector layer. We talk about this in
much more detail in Chapter 10.
styleMap: {OpenLayers.StyleMap}. A stylemap object that denes styles the
vector layer will use. Chapter 10 covers the Style and StyleMap class in detail.
unrenderedFeatures: {Object}. This contains an anonymous object of features
that failed to render (if any exists). You do not set this property when instanang
the vector layer object.
Chapter 9
[ 237 ]
OpenLayers.Layer.Vector methods
Now that we've gone over the Vector Layer class properes, let's discuss the methods we
can call. We'll just cover funcons specic to the Vector layer; funcons that are inherited
from the base OpenLayers.Layer parent class can be found in Chapter 3.
clone(): Makes a copy of the layer and the features it contains. Returns an
{OpenLayers.Layer.Vector} object, which is a copy of the layer.
getDataExtent(): This funcon will return an {OpenLayers.Bounds} object
consisng of the max extent that includes all the features of the layer.
refresh(obj): Causes the layer to request features and redraw them. If the layer
is visible and in range of the map extent, the refresh event will be triggered. Takes in
an oponal obj object containing properes for event listeners.
assignRenderer(): Assigns a renderer to the layer based on the layer's
renderers property.
displayError(): Shows an alert informing the user that their browser does not
support the layer's renderers.
Working with features
The remaining methods that we'll discuss involve features. A feature, as we saw earlier, is an
object that belongs to the vector layer. We'll cover methods rst, and then walk through the
related examples to show how to properly use them.
addFeatures(features, opons): Calling this funcon will add features to the map. You must
pass in at least an array of features objects, and you can oponally pass in an options
object. The features parameter is an {Array{OpenLayer.Feature.Vector}}, and
opons is an anonymous {Object}.
Time for Action – adding features
Let's add some features to a map manually.
1. Make a copy of the rst example—we'll just need a basic WMS base layer and a
vector layer.
2. Open up the map in Firefox and enable Firebug. We'll use the JavaScript console to
add features to the vector layer.
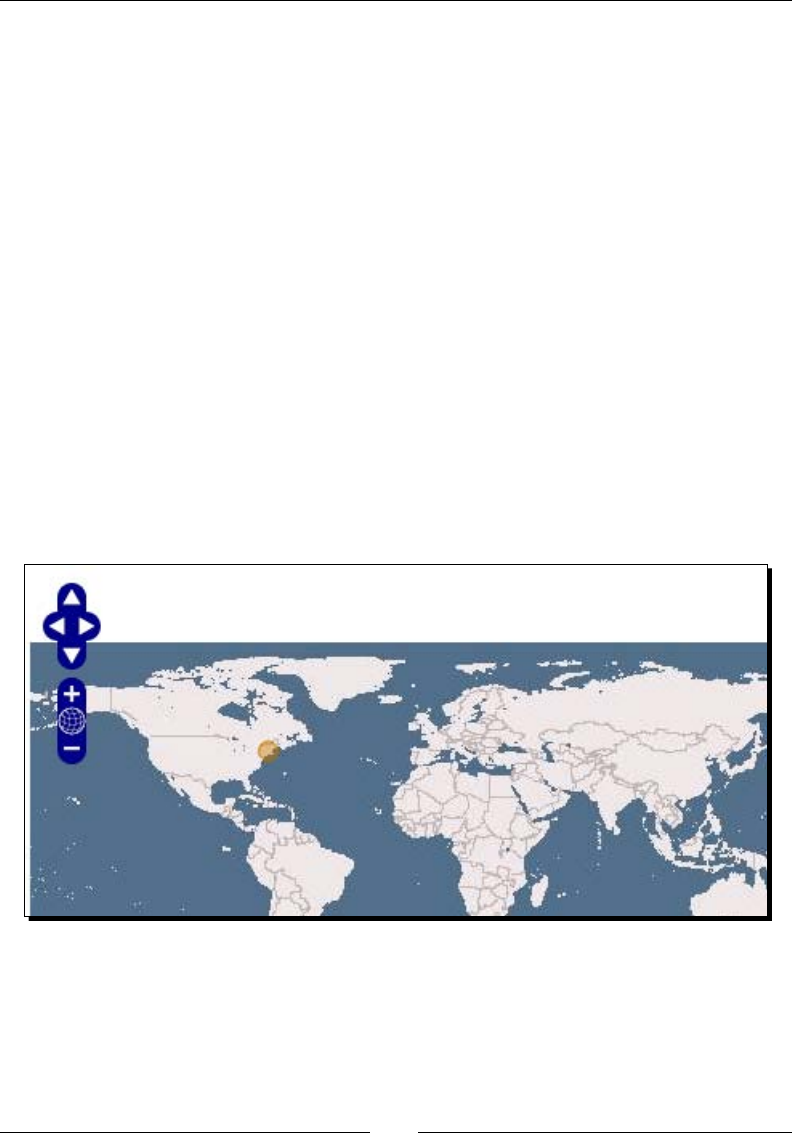
Using Vector Layers
[ 238 ]
3. Let's create some features rst. To do so, we'll need to make use of the
OpenLayers.Geometry classes. Let's start o by creang a OpenLayers.
Geometry.Point object, passing in a longitude and latude (type and execute
the following in Firebug):
var point = new OpenLayers.Geometry.Point(-72, 42);
4. Now that we have a geometry object, we can create a feature object from it. We'll
use the OpenLayers.Feature.Vector class to create a feature object using the
point object we just created. When instanang, the constructor can take in three
arguments—geometry, attributes (oponal), and style (oponal). We'll cover
the Feature class in detail later in the chapter. Create the feature point, by passing in
the geometry object we created above:
var feature_point = new OpenLayers.Feature.Vector(point);
5. Alright, now we're ready to add the feature to the map with addFeatures.
Even though we are passing in a single feature, we sll must pass in an array.
Add it like this:
map.layers[1].addFeatures([feature_point]);
6. You should see the point added to the map:
What Just Happened?
We just used the addFeatures method to add a feature we created from a geometry object
to the map. Don't worry if the OpenLayers.Geometry class is new to you—we'll cover it,
along with more examples of it, throughout this chapter.
Chapter 9
[ 239 ]
Have a Go Hero – create more points
Now that you know how to add a point to the map, try to add some more points. Use the
code from the previous example as a guide to add mulple Geometry Point objects to your
map. Change the coordinates and see how the locaons are aected. Also try to add a point
outside the map's extent and see what happens.
Let's connue our discussion about the Vector Layer's methods.
Vector Layer methods (Continued)
removeFeatures(features, opons): This funcon will remove features from the
vector layer by erasing the passed in features and removing them from the layer
(but the features themselves are not destroyed). Two events are triggered for each
feature—beforefeatureremoved and featureremoved.
This funcon takes in two parameters, like the addFeatures method. The
features parameter is an {Array{OpenLayer.Feature.Vector}}, and
opons is an anonymous {Object}. The options parameter can accept a silent
property which is a {Boolean} with a default value of false which determines if
the events will be triggered or not.
removeAllFeatures(opons): Calling this funcon will remove all features from
the map. Like the method above, it will not destroy the features, but it will erase
them from the map and remove them from the layer's feature array. It takes in one
oponal options parameter that can accept a silent property, if set to true, will
suppress events from triggering.
destroyFeatures(features, opons): This funcon will erase and destroy any features
that get passed in. The dierence between this funcon and removeFeatures is
that destroyFeatures will both remove the features from the layer and destroy
the features themselves—so you cannot add a feature back to the map that has been
destroyed. It takes in two parameters—both are oponal. If the features parameter
is not passed in, all the features of the layer will be destroyed.
Time for Action – destroying features
Let's demonstrate the dierence between removeFeatures and destroyFeatures.
1. Open up the rst example from the chapter. We'll use Firebug again.

Using Vector Layers
[ 240 ]
2. Before we remove features, we rst need to add them to the map. We'll use the
same code from the previous example. Let's create a feature object. In Firebug,
type and execute:
var feature_point = new OpenLayers.Feature.Vector(new OpenLayers.
Geometry.Point(-72, 42));
3. Now, let's add it to the map:
map.layers[1].addFeatures([feature_point]);
4. We have the feature on the map now, so let's see how removeFeatures works.
We can call this funcon and either pass in a feature from the map.layers[1].
features array, or pass in a feature object we've already created. Let's use the
second method:
map.layers[1].removeFeatures([feature_point]);
5. Now you should not see any features on your map. If we check the map.
layers[1].features array, it should be empty:
>>>map.layers[1].features;
[]
6. So, as we expected, the feature we originally added to the map is no longer in the
features array. However, the feature itself sll exists. We can check this by simply
typing in the feature object's name:
>>>feature_point
Object { data=Object, more...}
7. This is what the primary dierence between removeFeatures and
destroyFeatures is—when calling removeFeatures, the feature itself sll exists
in memory. This is not a good thing if you plan to never use the feature again. Let's
see what happens when we use destroyFeatures. First though, we must add the
feature back to the map:
map.layers[1].addFeatures([feature_point]);
8. Now we can destroy it. We'll pass in the feature by using the map.layers[1].
features array this me when calling destroyFeatures:
map.layers[1].destroyFeatures([map.layers[1].features[0]]);

Chapter 9
[ 241 ]
9. The feature should now be removed from the map. The feature object itself will be
destroyed as well though. If we try to access the feature, all the aributes are null.
>>>feature_point.data
null
>>>feature_point.geometry
null
What Just Happened?
We just demonstrated the dierences between removeFeatures and destroyFeatures.
The former removes the features from the layer, while the laer does the same and destroys
the feature itself so it cannot be added to the map again.
Let's connue.
Vector Layer methods (Continued)
drawFeature(feature, style): This will draw / redraw a passed in feature to the layer.
You should only use this funcon if the feature's style has changed—it will not add a
feature to the layer, and will only work aer a feature has been added. The feature
parameter is the feature you wish to draw, and the style parameter is an oponal
style {Object}. If no style is passed in, the layer's default style is used.
eraseFeatures(features): This funcon takes in an array of feature objects and
erases them from the map. It does not remove the features from the layer object,
nor does it destroy the feature object itself. Using this funcon, you can remove the
feature from the map, but retain the feature in the layer's feature list—then you can
pass the erased feature into the drawFeature method to reshow it.
getFeatureById(featureId): This funcon accepts a {String} consisng of a feature
ID. It will return a {OpenLayers.Feature.Vector} object (a feature object)
that corresponds to the passed in ID—if none is found, it will return null. The ID,
if you do not set it when creang a feature object, is an automacally generated
string that will be something like OpenLayers.Feature.Vector_42—the
number is also essenally random, so you will likely only need to use this funcon
if you set the ID of a feature when creang it. Otherwise, you may want to use the
getFeatureByFid method.
getFeatureByFid(featureFid): This funcon is similar to the getFeatureById
funcon, but looks for a FID instead of an ID. The FID is a string that normally
species the index of the feature in the features array (and it may have to be
set manually if not loading data from external sources). Like getFeatureById,
it accepts a {String} consisng of a feature Fid. It will return a {OpenLayers.
Feature.Vector} object (a feature object) that corresponds to the passed in
FID—if none is found, it will return null.

Using Vector Layers
[ 242 ]
getFeatureFromEvent(event): Calling this funcon will return either the
feature passed in an {Event} occurred over, or return null. For example, if a
featureselected event was passed in, this funcon would return the feature
that was selected. We cover vector layer events in the next secon.
onFeatureInsert(feature): This method will be called right aer a feature is inserted
into the vector layer. By default, it is an empty funcon. If you supply a funcon, it
will be called aer a feature is inserted. The feature parameter will be passed in to
whatever funcon you create. An example call to override this funcon would be:
map.layers[1].onFeatureInsert = function(feature){ alert(feature);
};
The above code would cause an alert to be displayed that would display the feature
that was inserted into the map. The next Time for Acon example will use this
funcon.
preFeatureInsert(feature): This method will be called right before a feature is
inserted into the vector layer. By default, it is an empty funcon. If you supply a
funcon, it will be called aer a feature is inserted. The feature parameter will be
passed in to whatever funcon you create. An example call to override this funcon
would be:
map.layers[1].onFeatureInsert = function(feature){ alert(feature);
};
The above code would cause an alert to be displayed which would display the
feature that was inserted into the map. The next Time for Acon example will
use this funcon.
Time For Action – working with feature events
Let's take a quick look at a couple of the previous Vector class methods.
1. Open up the rst example from the chapter—we'll be using Firebug, and we'll just
need a vector layer and EdingToolbar control. We won't be eding any code, so
open up the rst example and Firebug's JavaScript console.
2. We're going to add a funcon using preFeatureInsert that will display an alert
containing the feature's ID. This funcon will be triggered before the feature is
inserted into the map. Type and run the following in Firebug to create the funcon
as follows:
map.layers[1].preFeatureInsert = function(feature){
alert('preFeatureInsert – ID: ' + feature.id)
};

Chapter 9
[ 243 ]
3. Take a look at the map now and add a point using the EdingToolbar control (or
calling map.layers[1].addFeatures()). You should see an alert that will be
triggered before the feature is added to the map that displays the ID of the soon
to be added feature. Take note of the ID that the alert contains.
4. Using the ID that was in the alert, let's call the getFeatureById funcon (if you
didn't get the ID, just create another feature or nd the ID in the map.layers[1].
features array). An ID that was generated for me was OpenLayers.Feature.
Vector_143, so I'll use that—but be sure to use the one generated for you. Call
the following funcon, substung the ID that I used with your ID:
map.layers[1].getFeatureById('OpenLayers.Feature.Vector_143');
Running that should return to you the feature object.
5. Now, let's use onFeatureInsert to trigger a funcon to be called aer a feature
is added. Let's show an alert containing the feature's geometry informaon:
map.layers[1].onFeatureInsert = function(feature){
alert('onFeatureInsert - Geometry:' + feature.geometry)
};
6. Now, try to add a feature. You should see two alerts—one before the point is added
that displays the feature's ID, and another aer the feature is added that contains
geometry informaon.
What Just Happened?
We just used a few funcons involving vector layer events. That ends our discussion on the
Vector class methods secon and starts our coverage of Vector Layer class events. Don't
worry—it's not as long as the previous secons and you've already been exposed to the
dicult event stu in earlier chapters.
Vector Layer class events
In Chapter 8 we covered events. The same concepts we talked about there apply here, but
there are a few vector layer specic event types that we'll use later in this chapter that
haven't been covered yet. Let's go over the supported event types then see them in acon.
Because the Vector class inherits from the OpenLayers.Layer base class, all the event
types of the Layer class can be used as well.

Using Vector Layers
[ 244 ]
Vector Layer event types
All these events can be registered the same way we registered events in the previous
chapter. For example:
vector_layer.events.register(type, obj, listener);
Assuming vector_layer is the name of your vector layer object, the previous code will
register a listener for an event of a passed in type. Along with the event types of the Layer
class, the Vector class supports the following event types (in alphabecal order):
aerfeaturemodied: Triggered aer a feature has been modied. The listener
funcon receives a feature object which references the modied feature.
beforefeatureadded: This event is triggered before a single feature is added to the
map. The listener funcon will receive an object containing a feature property that
references the soon to be added feature. If the listener funcon returns false, the
feature will be not be added to the map.
beforefeaturesadded: This event does the same thing as beforefeatureadded,
but the listener funcon will accept an array of features instead of a single feature.
If the listener funcon returns false, the features will not be added.
beforefeaturemodied: Triggered before a feature is selected to be modied.
The listener funcon receives a feature object which references the soon to be
modied feature.
beforefeatureremoved: Triggered before a single feature object is removed from
the map, and the listener funcon receives a feature object which references the
removed feature.
beforefeaturesremoved: Triggered before an array of feature objects are removed
from the map, and the listener funcon receives a features array which references
the removed features.
featureadded: Triggered right aer a single feature object is added to the map, and
the listener funcon receives a feature object which references the added feature.
featuresadded: Like the previous type, but designed to take in an array of features.
It is triggered right aer an array of feature objects are added to the map. The
listener funcon receives a features array which references the added features.
featuremodied: Triggered when a feature has been modied. There is a
slight dierence between this and the afterfeaturemodified event. This
featuredmodified event gets red as soon as the feature is modied, and the
afterfeaturemodified event gets triggered aer the modicaon is fully
complete. The listener funcon receives a feature object which references the
modied feature.
Downloa d f r o m W o w ! e B o o k < w w w.woweb o o k . c o m >

Chapter 9
[ 245 ]
featureremoved: Triggered aer a single feature object is removed from the map,
and the listener funcon receives a feature object which references the added
feature.
featuresremoved: Triggered aer an array of feature objects are removed from
the map, and the listener funcon receives a features array which references
the removed features.
featureselected: Triggered aer a feature is selected. The listener funcon receives
a feature object which references the selected feature. Usually used when using
the SelectFeature control, covered later in this chapter.
featureunselected: Triggered aer a feature is unselected. The listener funcon
receives a feature object which references the unselected feature. Usually used
when using the SelectFeature control, covered later in this chapter.
refresh: This event is triggered when the vector layer makes a request for new
features, or when the refresh method is called. Using the WFS protocol, for
example, the vector layer will make addional requests for features and this
event will be triggered. We go over requesng data from external sources later
in this chapter.
sketchcomplete: Triggered aer a sketch has been completed. A sketch can be
made, for example, with the EditingToolbar control—drawing a line or a polygon
is considered a 'sketch'. When the drawing is fully complete (i.e., when you double
click to nish the sketch), the sketchcomplete event is red. The listener receives
a feature object which references the sketched feature. If the listener funcon
returns false, the features will not be added.
sketchmodied: Triggered when a sketch is modied. If, for example, you are in the
middle of drawing a polygon using the EditingToolbar control and move your
mouse, this event is red. The listener receives a feature object which references
the sketched feature, and vertex property which references the modied point.
sketchstarted: Triggered as soon as a sketch is started. If, for example, you click
on the draw polygon control of the EditingToolbar control and place a point
on the map, this event is triggered. The listener receives a feature object which
references the sketched feature, and vertex property which references the starng
point.
vertexmodied: Whenever any vertex contained by any feature is modied this
event is triggered. The listener funcon receives three arguments: feature which
references the feature the vertex belongs to, vertex which references a point (the
modied vertex), and pixel which contains the on screen pixel locaon the vertex
was modied at.

Using Vector Layers
[ 246 ]
Time For Action – using Vector Layer events
Now that you know the possible event types, let's play around with some.
1. Open up the rst example from this chapter. We won't be eding the code, but
instead we'll use Firebug again. We just need a vector layer and EditingToolbar
control. As in the previous chapters, map.layers[1] is assumed to be the
vector layer.
2. Open up Firebug. We'll start o by registering a beforefeatureadded event to the
map. First, like in Chapter 8, we need to create a listener funcon that will get called
when the event res. We know from the previous list of event types that the listener
funcon will receive an object containing the feature, so let's create our funcon
with a feature parameter that will reference the feature. In Firebug, create a
funcon:
function before_feature_added(feature){ console.log('before adding
a feature!', feature); };
3. All we have to do now is register the beforefeatureadded event on our vector
layer:
map.layers[1].events.register('beforefeatureadded', this, before_
feature_added);
4. Now, look at your map and add a feature. We used console.log and passed in two
parameters to it (a string and a feature object). Take care when using console.log
in your applicaons—users without Firebug or a development console may receive
errors. Since we're tesng things out now though, we don't have to worry about it.
Your console should log something like:
before adding a feature! Object { feature=Object, more...}
5. The denion for this event type says we can return false to stop the feature from
being added. To do so, we'll have to register a dierent event to the layer for the
beforefeatureadded event type. Let's rst unregister to the event, as we want to
ensure that we won't run into any issues:
map.layers[1].events.unregister('beforefeatureadded', this,
before_feature_added);
6. Try to add some features to your map now. Nothing should be happening, since we
unregistered the beforefeatureadded event. So, let's redene the funcon and
then register it to the layer again.
function before_feature_added(feature){
console.log('feature will not be added!', feature);

Chapter 9
[ 247 ]
return false;
};
7. Now we will just register the event:
map.layers[1].events.register('beforefeatureadded', this, before_
feature_added);
8. Try to add a feature to the map. The feature should not be added, and your console
should log:
feature will not be added! Object { feature=Object, more...}
What Just Happened?
We just showed how to register and unregister an event on our vector layer that gets
triggered before a feature is added to the layer. Let's take a look at one more example
involving events, and then connue our discussion about how the Vector Layer class works.
Time For Actions – working with more events
In this example, we'll examine the events related to adding features to the map. We'll look
at the feature added event type, which gets triggered when a feature is added to the map
(either programmacally or by a user), as well as sketch events which can be triggered by the
EdingToolbar control.
1. Open up the rst example from this chapter. Again, we'll use Firebug.
2. This me, we'll demonstrate the featureadded, sketchstarted, and
sketchcomplete events. Let's create three appropriate listener funcons:
function feature_added(feature){ console.log('feature added',
feature); };
function sketch_start(feature){ console.log( 'sketch started:',
feature); };
function sketch_complete(feature){ console.log( 'sketch done:',
feature); };
3. Now, register the feature added event:
map.layers[1].events.register('featureadded', this, feature_
added);
4. Take a look at the map and add a feature. You should see a message aer adding a
point or aer adding a polygon / line (sketch):
feature added Object { feature=Object, more...}

Using Vector Layers
[ 248 ]
5. Now let's register the sketch events. They will get triggered when using any of
the EditingToolbar controls.
map.layers[1].events.register('sketchstarted', this, sketch_
start);
map.layers[1].events.register('sketchcomplete', this, sketch_
complete);
6. Now, when adding a point or creang a polygon / line, you should see a total of
three messages when you nish adding the feature:
sketch started Object { feature=Object, more...}
sketch done Object { feature=Object, more...}
feature added Object { feature=Object, more...}
What Just Happened?
We just demonstrated a few more event types. You can also gure out how the events
propagate (which events get executed rst) by viewing the console log. From the
example above, we can see that the sketchcomplete event get executed before the
featureadded event.
Even though we registered the featureadded event rst, the order that we register the
events in does not change the order that the events propagate in. We'll be using more of the
vector layer events throughout the chapter, but it shouldn't be much more complicated than
the previous two examples. So, let's get on with it!
Geometry and Feature classes
We've been using feature objects throughout the chapter so far without really talking about
the Feature class itself. We also have hinted at the Geometry class, but we haven't gone
into any detail so far. This secon will cover both classes in a bit more detail so that you can
gain a bit more condence working with them. Don't worry—it's easy, you've already been
exposed to both classes.
Before we get into the Feature class though, we should go over the Geometry class, as it's
used to create the actual geometry objects that make up a feature object.

Chapter 9
[ 249 ]
Geometry class
The Geometry class is, more or less, the foundaon of the feature objects we've seen so
far. Specically, up to this point, we have been using the Feature.Vector class as the
base class for our feature objects. We'll talk more about that shortly, but for now it is just
important to know that the Feature.Vector class uses the Geometry class to store
geometry informaon about a feature.
But what exactly is the Geometry class? In a nutshell, it stores geographic informaon.
Remember the earlier example in this chapter where we added a feature. The code was:
var feature_point = new OpenLayers.Feature.Vector(
new OpenLayers.Geometry.Point(-72, 42)
);
We passed in Geometry Point object (we'll get to what the subclasses are in a minute). Now,
if executed and looked at it on the map, we'd see a point at the coordinate -72, 42. Then,
if we get the feature informaon via something like map.layers[1].features[0], we'd
see informaon about that feature. When we look at it, we see a geometry property.
Expanding it, or using map.layers[1].features[0].geometry, we nd out that it has
a bounds property, along with x, y, and ID properes. This is how feature store geographic
informaon in a geometry object.
Let's take a look again at the code that instanates a geometry object: new OpenLayers.
Geometry.Point(-72, 42). As you might have guessed, we're using the Point subclass
of the Geometry class.
Geometry subclasses—Theory
When working with the Geometry class, we actually almost always use some subclass of it.
What do we mean? Think about the Layer classes we've used throughout the book—we've
been using subclasses of the base Layer class the enre me (Layer.WMS, Layer.Image,
etc. are all subclasses of the OpenLayers.Layer class).
Just like how we work with layers, we almost always work with OpenLayers.Geometry
subclasses when we want a Geometry object. So far, we've only been explicitly calling the
Geometry.Point subclass, which accepts a single X,Y coordinate and creates a geometry
based on the passed in coordinate. There are many more subclasses that let us do things a
bit more tricky than just working with points.
Before we cover the subclasses, let's quickly go over some of the methods available to
all of the subclasses via the base Geometry class. All these methods are available to any
Geometry subclass, as all the subclasses inherit from the Geometry class.

Using Vector Layers
[ 250 ]
Geometry class methods
atPoint(lonlat, toleranceLon, toleranceLat): This will return a {Boolean} indicang
whether the geometry object is at the passed in lonlat. The lonlat parameter
is an {OpenLayers.LonLat} object containing a coordinate to check, and the
toleranceLon, toleranceLat parameters specify a {Float} number which sets
the threshold for the longitude and latude, respecvely. If a point lies within the
threshold of the longitude and latude, true will be returned—if not, false will be
returned. The calculaon which determines if the geometry is at the passed in point
is an approximaon based on the geometry object's bounds.
calculateBounds(): Calling this funcon will recalculate the bounds of the geometry.
It does not return anything. If you wish to see the geometry object's bounds, see
getBounds().
clearBounds(): This funcon will turn the geometry object's bounds object to null.
clone(): This funcon creates a copy of the geometry and returns a cloned
{OpenLayers.Geometry} object.
destroy(): Calling this funcon will destroy the geometry object. Note—if you call
this on a geometry object that is already part of a feature object, it will not remove
the geometry object from the map.
distanceTo(geometry, opons): Calling this funcon will calculate the nearest
distance between the current geometry object and a geometry object passed in.
The options parameter can contain addional calculaon opons, which vary
depending on the geometry subclasses. There is a details opon which is a
{Boolean} and can be specied for all subclasses. If details is set to true in the
options parameter, this funcon will return an {Object} containing the distance
and x0, y0, and y1,y0 values which represent the coordinates of the two geometry
objects. If details is not set (or set to false), this funcon will by default return a
{Number} containing the distance. Take care to mind the units that the map is in.
extendBounds(bounds): This funcon will extend the geometry's bounds, including
the passed in bounds object, which must be an {OpenLayers.Bounds} object.
If the geometry does not have a bounds set when this funcon is called, then it will
be set.
getArea(): Returns a {Float} containing the area the geometry object covers.
This funcon is redened in various subclasses, but can be called by all subclasses.
getBounds(): Returns the bounds of the geometry as an {OpenLayers.Bounds}
object. If no bounds are set, the bounds are calculated. This will return the bounds
for a single geometry object—if you want to get the bounds of all the features on
your layer, see the Vector class' getDataExtent method.
Chapter 9
[ 251 ]
getCentroid(): Returns a {OpenLayers.Geometry.Point} object containing the
center point of geometry object. This funcon is redened in various subclasses, but
can be called by all subclasses.
getLength(): Returns a {Float} containing the length the geometry object covers.
This funcon is redened in various subclasses, but can be called by all subclasses.
getVerces(nodes): This funcon returns an {Array} of all the points in the
geometry object. It accepts a {Boolean} parameter which is True by default,
which species that all verces should be returned. If it is set to false, then if the
geometry is a Line, this funcon will only return verces that are not endpoints.
toString(): Returns a WKT (Well-Known Text) {String} of the geometry object.
WKT is a markup language, similar to HTML or XML, which is used to represent
geometry objects. For example, when calling this funcon on a Geometry.Point
object with a coordinate of (-72, 42) would return the WKT string "POINT(-72
42)". More informaon on WKT can be found at http://en.wikipedia.org/
wiki/Well-known_text.
Time for Action – using Geometry class methods
Let's demonstrate some of the methods we just talked about. These methods can be applied
to any geometry subclass—Point, Polygon, etc.
1. Open up the rst example from this chapter. We'll use Firebug again to demonstrate
the funcons.
2. Before we can do anything we need some geometry objects. We won't use the
Feature class here—we'll just demonstrate some geometry object methods.
Because we aren't associang the Geometry objects with Feature objects this me,
we won't see anything geng added to the map, as a Geometry object alone is not
necessarily ed to any layer or feature. Let's create two geometry point objects with
random coordinates:
var geom_1 = new OpenLayers.Geometry.Point(
(Math.floor(Math.random() * 180) - 90),
(Math.floor(Math.random() * 180) - 90)
);
var geom_2 = new OpenLayers.Geometry.Point(
(Math.floor(Math.random() * 180) - 90),
(Math.floor(Math.random() * 180) - 90)
);

Using Vector Layers
[ 252 ]
3. Now we have two geometry point objects. Let's use distanceTo to calculate the
distance between the two points. We'll calculate the distance between geom_1 and
geom_2. Because random numbers were used, your output for this call will likely be
dierent:
geom_1.distanceTo(geom_2);
4. Let's use the atPoint method now and play around with the tolerance parameters.
First, let's get the center point coordinate of the geom_1 object:
geom_1.getCentroid();
5. The returned object will have an x and a y property. Mine are x: 27, y: 35.
Substute your returned coordinate for the next steps. First, let's call the atPoint
method-use the returned coordinate to make sure it works:
geom_1.atPoint(new OpenLayers.LonLat(27,35));
6. The output should be true if you have substuted your coordinates. Now, let's try
to call it but oset our coordinate by ve degrees:
geom_1.atPoint(new OpenLayers.LonLat(32,40));
7. You should have false returned now, since we haven't set a tolerance. Let's go
ahead and do that, using 5 as a tolerance for both lon and lat:
geom_1.atPoint(new OpenLayers.LonLat(32,40), 5, 5);
8. Because our point lies within the tolerance, you should see true returned. If you
set the tolerance as 4, then false would be returned.
9. One more quick example—Let's create a line geometry object and then add it to the
map. Using the Geometry.LineString class, we can create a single line. We just
pass in an array of Point objects to create a line.
var line_geom = new OpenLayers.Geometry.LineString([
new OpenLayers.Geometry.Point(
(Math.floor(Math.random() * 360) - 180),
(Math.floor(Math.random() * 180) - 90)
),
new OpenLayers.Geometry.Point(
(Math.floor(Math.random() * 360) - 180),
(Math.floor(Math.random() * 180) - 90)
)
]);
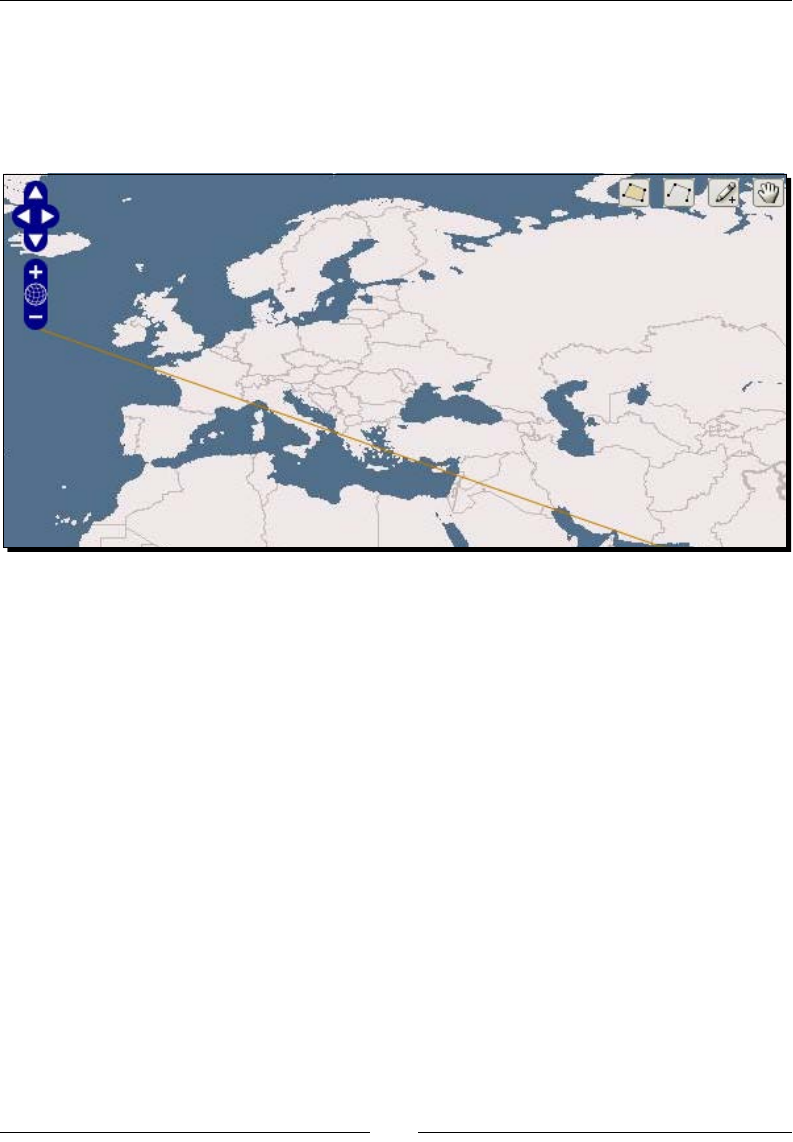
Chapter 9
[ 253 ]
10. Now let's add it to the map:
map.layers[1].addFeatures([new OpenLayers.Feature.Vector(line_
geom)]);
11. You should see a line placed randomly on the map. For example:
What Just Happened?
We just showed how to use a couple of Geometry class methods. Keep in mind—we only
worked with the Geometry.Point and Geometry.LineString subclasses, but the
methods we used (and the ones we covered) can be used for all Geometry subclasses.
We also saw how to create a line using the Geometry.LineString class. Similarly, we
can create MultiLine strings by passing in an array of LineStrings to the Geometry.
MultiLineString class. Let's take a brief look at some of the other Geometry subclasses.
Geometry subclasses
Let's take a real quick look at some of the Geometry subclasses. We won't cover their
methods, but just look at how to create an object from them. All the subclasses can, again,
use the methods we previously discussed—they just have slightly dierent implementaons.
Geometry.Point: Contains properes x and y. To instanate, pass in an x and y.
For example:
var my_point = new OpenLayers.Geometry.Point(-50, 42);

Using Vector Layers
[ 254 ]
Geometry.Collecon: This is a class that contains a collecon (an {Array}) of
geometry objects. Many other geometry classes, such as LineString, inherit
from this class. To instanate, pass in an array of geometry objects. For example, to
create a geometry collecon object you would pass in an array of geometry objects
(assuming you have a geom_point_object and a geom_line_object):
var geom_collection_object = new OpenLayers.Geometry.Collection([
geom_point_object, geom_line_object ]);
Geometry.MulPoint: This is a collecon ({Array}) of geometry point objects.
Other classes, such as LineString, inherit from this class. To instanate, pass
in an array of Point objects:
var geom_multipoint = new OpenLayers.Geometry.MultiPoint([ geom_
point_1, geom_point_2 ]);
Geometry.Curve: This class is similar to MultiPoint (it also inherits from it) but
it assumes that the point objects are connected. To instanate, pass in an array of
Point objects:
var geom_curve = new OpenLayers.Geometry.Curve([ geom_point_1,
geom_point_2 ]);
Geometry.LineString: This class, as we saw earlier, is composed on point objects
that are connected together. It is inherited from the Curve class—it is basically a
curve which cannot contain less than two points. To instanate, pass in an array of
Point objects:
var geom_line = new OpenLayers.Geometry.LineString([ geom_point_1,
geom_point_2 ]);
Geometry.MulLineString: MulLineStrings contain mulple LineString objects. To
instanate, pass in an array of LineString objects:
var geom_multi_line = new OpenLayers.Geometry.MultiLineString([
geom_line_1, geom_line_2 ]);
Geometry.LinearRing: This class is a version of a LineString that is closed—meaning
the line 'loops back' on itself, the beginning and end points are connected. When
creang the object, you can close the line yourself by making the last point equal to
the rst point. To instanate, pass in an array of LineString objects:
var geom_linear_ring = new OpenLayers.Geometry.LinearRing([ geom_
point_1, geom_point_2, geom_point_3, geom_point_1 ]);
You can also call it without passing the start point in as the end point. If you do this,
it will be automacally closed for you (OpenLayers will automacally add in the start
point as the end point).
Chapter 9
[ 255 ]
Geometry.Polygon: This class is essenally just an {Array} of LinearRing
objects. For a basic polygon, you can pass in just one LinearRing object. The rst
LinearRing object you pass in will serve as the outer bounds of the polygon. All
LinearRings objects passed in aer the rst will be holes within the polygon (for
example, you could form a doughnut by passing in a large circle rst then a smaller
circle). To instanate, pass in an array of LinearRing objects:
var geom_polygon = new OpenLayers.Geometry.Polygon([ geom_linear_
ring_1, geom_linear_ring_2 ]);
Geometry.MulPolygon: A MulPolygon consists of mulple Polygon objects. To
instanate, pass in an array of Polygon objects:
var geom_multi_polygon = new OpenLayers.Geometry.MultiPolygon([
geom_polygon_1, geom_polygon_2 ]);
Geometry subclass methods
All the Geometry subclasses contain their own versions of the base Geometry class methods,
along with some addional methods in some subclasses. The rest of this chapter (and book)
will focus on the methods we've seen so far, so you should have all the knowledge you need
to connue.
Some of the subclass methods are outside the scope of this book,
but they can all be found in the ocial docs at http://dev.
openlayers.org/docs/files/OpenLayers/Geometry-
js.html.
Feature class
There's one more class we should cover before connuing further discussion of the Vector
class. The Feature class is what the Vector class uses to actually show Geometry objects on
the map. We've used the Feature class throughout this chapter because, well, we can't show
objects on vector layers without it—so you've been exposed to a lot of the class already.
How the Feature class works
The Vector layer class has a property called features, which is an array of Feature objects.
We've used it in this chapter so far, and we'll be using it a lot more. The feature objects are
created, as you can imagine, from the Feature class.
The base Feature class is composed of two things—Geometry objects (as you've seen), and
aributes. The aributes contain data associated with the feature.

Using Vector Layers
[ 256 ]
Feature subclasses
There is only one subclass we'll be making use of—the Feature.Vector class. Like its
parent Feature class, it is composed of a Geometry object and contains an attributes
property. In addion, there is a style property which controls what the feature looks like
(similar to how CSS styles HTML). We'll talk about the Style class in detail in Chapter 10.
Feature functions
There are really just a few methods we'll be using throughout the book:
destroy(): Destroys the feature object.
clone(): Creates a copy of the feature object and returns it, as an {OpenLayers.
Feature.Vector} object.
getVisibility(): Returns a {Boolean} which species whether the feature is
displayed or not.
move(locaon): Moves the feature to a passed in locaon. The location can be
either an {OpenLayers.LonLat} object, which will move the feature to a passed
in map coordinate, or an {OpenLayers.Pixel} object which will move it to a pixel
locaon on the screen.
onScreen(boundsOnly): Returns a {Boolean} indicang if the feature is within
the map viewport (if it is visible on the screen). A boundsOnly parameter can be
passed in, which is a {Boolean} set to false by default. If set to true, a quicker
but less precise bounding box intersecon method will be used.
Instantiating a feature object
To create a feature object, we just call it like:
var my_feature = new OpenLayers.Feature.Vector( geometry_object,
attributes, style);
The geometry_object is a geometry object (covered in the previous secon). The
attributes object is an oponal object literal which will be mapped to the feature's
attributes property, which can be used to provide addional informaon about the
feature (such as {'building_area': 18000, 'building_floors': 2}). Lastly, the
style object is an oponal object specifying the feature's style (covered in more detail in
Chapter 10).

Chapter 9
[ 257 ]
Interacting with Features using Control.SelectFeature
Now that we know how to create features and put them in our vector layer, how do we
interact with them? Earlier, we said that interacon with features happens nearly instantly—
this is because all the vector feature data is stored in the client's browser. There is no need to
request informaon from a server when clicking on a feature.
To make something happen when clicking on a feature, we'll need to use the SelectFeature
control class (the OpenLayers.Control.SelectFeature class). This control allows us to
interact with our feature objects—such as doing things whenever we mouse over or click on
a feature. Let's take a look at how to use it in an example and then go over the SelectFeature
control class itself.
Time For Action – using the SelectFeature control
Let's put together a few things we've learned so far. We'll create some points and a polygon,
place it on the map, and use the SelectFeature control to allow the user to select them. We'll
register the featureselected and featureunselected events so that we can re an
event when the user interacts with a feature. When those events are red, we'll access the
feature's attributes object and display informaon from it. Let's do it.
1. We'll be adding a vector layer, some features, and a SelectFeature control. The le
will be referred to as chapter9_selectFeature.html.
2. First, let's make vector_layer a global variable like we did earlier in this chapter.
Place this outside the init funcon, right aer var map;.
var vector_layer;
3. Next, we'll add a <div> element that we'll output feature info to when the user
clicks on a feature. Add this div aer the map div:
<div id='map_feature_log'></div>
4. Now, back to the init funcon code. Add the vector layer aer the WMS layer is
added to the map:
vector_layer = new OpenLayers.Layer.Vector('Basic Vector Layer');
map.addLayer(vector_layer);
5. Now, let's add some features. We'll add two point features and one polygon feature.
We'll pass in an aributes object (an object with key:value pairs to store data) to
each feature. Let's rst create the two point features:
var feature_point_1 = new OpenLayers.Feature.Vector(
new OpenLayers.Geometry.Point(6.055, 46.234),
{

Using Vector Layers
[ 258 ]
'location': 'Cern',
'description': "Stand back, I'm going to try science!"
}
);
var feature_point_2 = new OpenLayers.Feature.Vector(
new OpenLayers.Geometry.Point(-129, 3),
{
'location': 'The Sea',
'description': 'Here be dragons'
}
);
6. Noce how we passed in two key:value pairs—location and description. These
are just arbitrary keys and values—you can use whatever you like, and we'll see
how to access them in a minute. First though, let's add a polygon feature. To do so,
remember—we'll need to pass in an array of points into a LinearRing object, then
pass that LinearRing object into the Polygon class to instanate it. Whew. It's
easier than it sounds:
var feature_polygon = new OpenLayers.Feature.Vector(
//We'll make a polygon from a linear ring object, which
consists of points
new OpenLayers.Geometry.Polygon(new OpenLayers.Geometry.
LinearRing(
[
new OpenLayers.Geometry.Point(-124.2, 41.9),
new OpenLayers.Geometry.Point(-120.1, 41.9),
new OpenLayers.Geometry.Point(-120, 39),
new OpenLayers.Geometry.Point(-114.5, 34.9),
new OpenLayers.Geometry.Point(-114.7, 32.7),
new OpenLayers.Geometry.Point(-117.1, 32.5),
new OpenLayers.Geometry.Point(-120, 34),
new OpenLayers.Geometry.Point(-123.7, 38.4)
//We won't pass in the first point, the polygon will close
automatically
]
)),
{
'location': 'Fanghorn Forest',
'description': 'Land of the Ents'
}
);
Downloa d f r o m W o w ! e B o o k < w w w.woweb o o k . c o m >
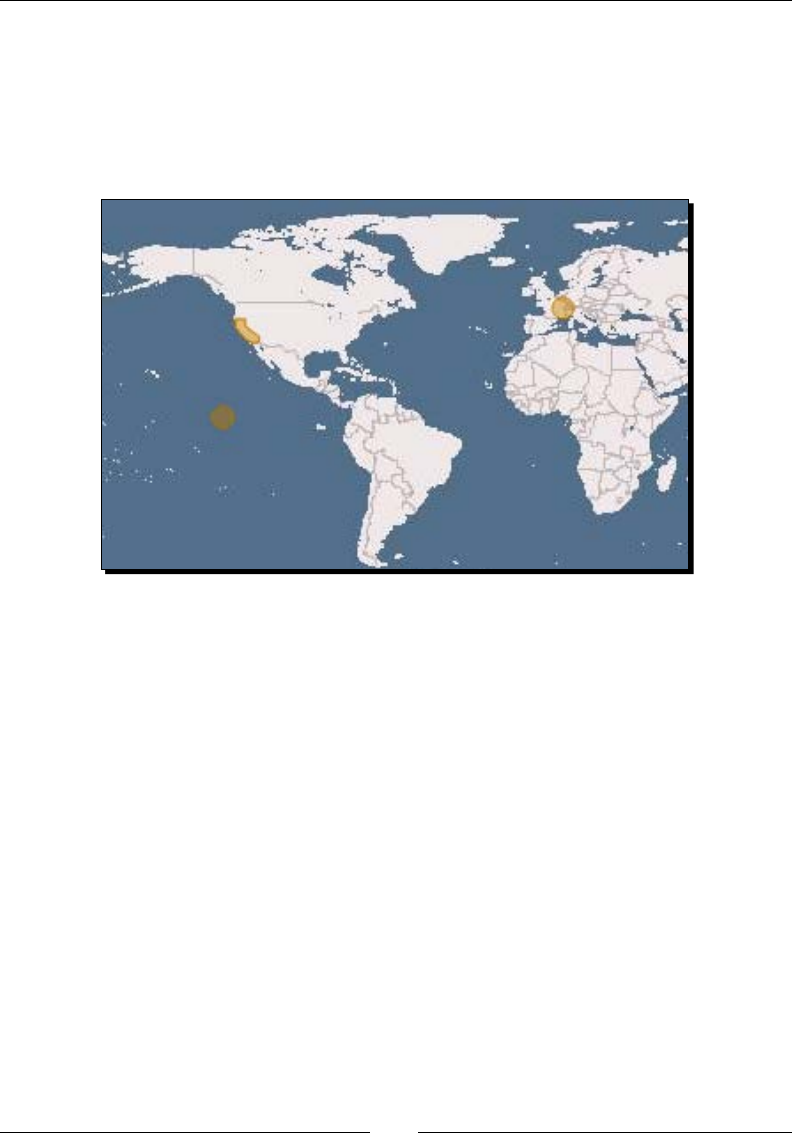
Chapter 9
[ 259 ]
7. Now we add the features to the map:
vector_layer.addFeatures([feature_point_1, feature_point_2,
feature_polygon]);
8. Alright—nothing too new so far. Take a look at the map, and you should see the
features. We can't yet interact with them though.
9. Now, let's make the features interacve. To do so, we'll rst need a SelectFeature
control. When we instanate it, we pass in the vector layer that we want the control
to use (alternavely, we could pass in an {Array} of vector layers if we wanted the
control to use mulple vector layers). We'll also pass in a couple properes, which
we'll cover in more detail aer this example. The multiple property will allow
mulple features to be selected at once, the toggle property will cause features to
be unselected when selecng a dierent feature, and the multipleKey species
which key to press to allow mulple features to be selected:
var select_feature_control = new OpenLayers.Control.
SelectFeature(
vector_layer,
{
multiple: false,
toggle: true,
multipleKey: 'shiftKey'
}
);
map.addControl(select_feature_control);
Using Vector Layers
[ 260 ]
10. At this point, the control is created and has been added to the map. However,
before we can use it we must acvate it by calling its activate method.
select_feature_control.activate();
11. Now we can select our features. Because we passed in the multipleKey property,
we can select mulple controls by holding Shi and clicking on them. Holding
control will toggle a feature selecon. Click on a feature to see:
12. Now, let's do something when the user clicks on a feature. To do this, we'll
create two funcons that will be called when the featureselected and
featureunselected events are red (they get red from the SelectFeature
control). First let's create the funcon to call when a feature is selected. It will
clear the map_feature_log div and then look at the attributes object of the
passed in feature. Finally, it will loop through all selected features and display the
location property of all selected features.
function selected_feature(event){
//clear out the log's contents
document.getElementById('map_feature_log').innerHTML = '';
//Show the current selected feature (passed in from the
event object)
var display_text = 'Clicked on: '
+ '<strong>' + event.feature.attributes.location + '</
strong>'
+ ': ' + event.feature.attributes.description + '<hr
/>';
document.getElementById('map_feature_log').innerHTML =
display_text;

Chapter 9
[ 261 ]
//Show all the selected features
document.getElementById('map_feature_log').innerHTML += 'All
selected features: ';
//Now, loop through the selected feature array
for(var i=0; i<vector_layer.selectedFeatures.length; i++){
document.getElementById('map_feature_log').innerHTML
+=
vector_layer.selectedFeatures[i].attributes.
location + ' | ';
}
}
13. We need a funcon to call when a feature is unselected now. It will do a similar
thing to the previous funcon—display the feature the user clicked on, then show all
the selected features.
function unselected_feature(event){
var display_text = event.feature.attributes.location + '
unselected!' + '<hr />';
document.getElementById('map_feature_log').innerHTML =
display_text;
//Show all the selected features
document.getElementById('map_feature_log').innerHTML += 'All
selected features: ';
//Now, loop through the selected feature array
for(var i=0; i<vector_layer.selectedFeatures.length; i++){
document.getElementById('map_feature_log').innerHTML
+=
vector_layer.selectedFeatures[i].attributes.
location + ' | ';
}
}
14. Just one more thing now! We have to register the events to call those funcons
when a feature is selected or unselected:
vector_layer.events.register('featureselected', this, selected_
feature);
vector_layer.events.register('featureunselected', this,
unselected_feature);
Using Vector Layers
[ 262 ]
15. All done! Open up your map and select some features (use Shi to select mulple
features). You should see the log update:
What Just Happened?
We just demonstrated how to use the SelectFeature control with some feature data.
We'll be doing much more with the SelectFeature control and features throughout the
remainder of the book, so if you aren't totally comfortable with it don't sweat it too much.
Try to create your own funcons and features. To do that, you'll need to know a lile bit
more about the SelectFeature class and what some of the properes of it are. Let's quickly
go over them.
Control.SelectFeature class
First we'll cover the properes then look at some methods of the SelectFeature class.
SelectFeature control properties
box: {Boolean} Species whether features can be selected by drawing a box. Set
to false by default. If set to true, when acvang the SelectFeature control
object, you'll be able to draw a box to select features instead of clicking on features
to select them.

Chapter 9
[ 263 ]
clickout: {Boolean} Determines if features will be unselected when clicking
outside of any feature. Default is false.
geometryType: {Array{String}} An array of strings which specify the only
geometry types that the feature will be able to select. Each string should be the
name of a Geometry class. By default, null is specied for this property, meaning
all geometry types can be selected. For example, if you wanted the control to only
allow the selecon of Point objects, you would pass in this property like:
geometryTypes: ['OpenLayers.Geometry.Point']
handlers: {Object} This contains a reference to handler object instances.
highlightOnly: {Boolean} This species whether features can be selected, or if
features can only be highlighted. Set to false by default. If hover is set to true,
this will do nothing.
hover: {Boolean} Set to false by default. If this is set to true, features will be
selected (and added to the vector_layer.features array) when the user mouse
overs a feature—clicking on a feature will do nothing, only mousing over them will.
layer: {OpenLayers.Layer.Vector} or {Array{OpenLayers.Layer.
Vector}} Species the vector layer(s) the selectFeature control is associated with.
mulple: {Boolean} Controls whether or not mulple features will be selected by
clicking on them. Default is false. This does not mean mulple features can never
be selected (you can use the multipleKey to select mulple features even if this is
set to false). If set to true, features will not be unselected when clicking on other
features.
mulpleKey: {String} Species a key to be used to allow for mulple selecon of
features. When holding down the key, mulple features can be selected. An example
would be multipleKey: 'shiftKey' or 'altKey'. Default value is null.
onBeforeSelect: {Function} Funcon to be called before a feature is selected. By
default, this is an empty funcon.
onSelect: {Function} Funcon to be called when a feature is selected. By default,
this is an empty funcon.
onUnselect: {Function} Funcon to be called when a feature is unselected. By
default, this is an empty funcon.
renderIntent: {String} Used to get the style to use from the style map of the
layer. Styles are covered in Chapter 10.
selectStyle: {Object} Contains an object of styles. Styles are discussed later in
this chapter.
toggle: {Boolean} Determines whether or not to unselect a selected feature when
the feature is clicked. Default value is false. If the hover property is set to true,
this will do nothing.

Using Vector Layers
[ 264 ]
toggleKey: {String} Species a key that, when held down, will set the toggle
property to true. When the key is released, the toggle property will be set back to
false. An example would be multipleKey: 'altKey'. Default value is null.
These properes can be set when instanang a SelectFeature control. To create a
SelectFeature control object, the form for calling it is:
var select_feature_control = new OpenLayers.Control.SelectFeature(
vector_layer,
{}
);
The {} is the oponal options object which can be lled with the properes we just
discussed. Now, let's take a look at some of the methods of the SelectFeature control.
SelectFeature control methods
Let's just take a look at a few methods that we'll be using throughout the rest of the book.
acvate(): Acvates the control, allowing us to use it.
deacvate(): Deacvates the control. Aer calling, features cannot be selected unl
the control is acvated again.
highlight(feature): Draws the passed in feature with the feature's select style.
unhighlight(feature): Draws the passed in feature with the feature's normal style.
select(feature): Selects a passed in feature object, adding it to the layer's
selectedFeature array, calling the onSelect method, and rendering the feature
as selected (applying any styles, etc.).
unselect(feature): Unselects a passed in feature object, removing it from the
layer's selectedFeature array, calling the onUnselect method, and rendering
the feature back to its normal state (applying any styles, etc.).
unselectAll(opons): Calling this will unselect all features currently selected by the
control. If you wish to unselect everything except a specic feature, pass it in to the
options parameter as an except property.
That ends our discussion of the Feature and Geometry classes. Next, we'll be diving into the
Vector class again—but this me, we'll focus on the more advanced uses.
The Vector class, part two
Now that we've goen a bit more of an understanding as to how the vector layer works, we
can start doing some more interesng things. First though, let's do a quick recap of what
we've covered so far:

Chapter 9
[ 265 ]
The Vector class allows us to display vector objects on our map, using a variety of
dierent renderers (SVG, Canvas, VML) to accomplish this.
Objects, such as points and polygons, in the vector layer are OpenLayers.
Feature.Vector class objects.
Each Feature object contains a Geometry object which contains spaal
informaon.
We can use a variety of Vector, Geometry, and Feature class methods to move the
feature objects on the map, add features, and get informaon about the feature and
geometry objects on the map.
So to reiterate—so far, we've looked mainly at the Vector class itself and how to interact with
features we add to it. What's le then?
Well, funny you should ask. You've probably noced we have not spent a whole lot of me
creang the actual vector layer objects. The next part of this chapter will largely focus on just
that—creang vector layer objects.
Format, protocol, and strategy classes
At the beginning of the chapter, we menoned that to really use the Vector class we actually
use other classes as well. So far, we've used the Geometry and Feature class—but we've
only done so aer the vector layer was created. Let's now focus on creang more useful
vector classes.
To do that, we'll need to make use of the Format, Protocol, and Strategy classes when we
instanate our vector layer object. Using these three classes, we can further control the
Vector layer behavior.
Who invited these classes over?
So, what are these classes and why do we need them? There are a lot of good answers, and
we won't be able to get to all of them in this book—but here is a short list of some of the
things we can do by using these three classes:
Load data from outside sources—KML les, GeoJSON les, WFS services, etc.
Save the features that we create as KML or other le formats
Group hundreds of points together using the Cluster strategy, like we saw at the
beginning of the chapter
Create even more interacve web-mapping applicaons
How do these three classes relate to each other, and what purpose does each one serve?

Using Vector Layers
[ 266 ]
Brief overview of the three classes
These classes work together to help us dene how the Vector layer behaves. We'll cover
each class in more detail soon, but rst let's take an overview of them.
Protocol class
The Protocol class controls how the Vector layer communicates with a source of data. Like
the Geometry class, we actually use subclasses of the Protocol class. The two common
subclasses used are Protocol.HTTP and Protocol.WFS. The HTTP protocol class allows
us to communicate directly with a source that contains vector data, and the WFS protocol
class lets us talk to a WFS service.
Format class
The Format class lets us use a type of le (such as a KML le), and turn the data in that le
to actual feature objects in our map. We can also take exisng feature objects and convert
them to a KML, GeoJSON, etc. le format. The vision the OpenLayers developers have is
to support more Formats and Protocols for the Vector class, as opposed to having specic
subclasses like WFS (which is deprecated). Other layer classes, like the WMS or Google Maps
layer, do not use the Format class—this is because they are raster layers, and we do not need
to worry about data formats.
More technically, the Format class handles the serializaon and de-serializaon of the
feature data. Serializaon is a term programmers use which basically means to extract
objects from your code and turn them into something like a le, or a human readable string,
so those objects can be accessed outside your code. De-serializaon does the opposite—it
takes a le or string and turns it into an object that your code can use.
So, what does this mean in the context of OpenLayers? Using the format class, we can
serialize and de-serialize feature data from a huge variety of dierent le formats—such as
KML, GeoJSON, GeoRSS, ArcXML, etc.
Strategy class
Lastly, the Strategy class is used to control how requests to the server are set up and then
what to do with the data returned from the server. The Strategy class is also a base class
and we interact with subclasses of it. There are numerous subclasses we can use, such as
Strategy.BBOX and Strategy.Cluster. Unlike the Protocol and Format classes, where
we can use only one of the subclasses for each of those classes, with the Strategy class we
can use mulple strategies together.
To clarify, let's look at what the Strategy.BBOX class does. The Strategy class is used to
set up requests and determine what to do with the response. The Strategy.BBOX class
is one subclass that handles the rst part. Using a WFS server, for example, we can use the
Strategy.BBOX class to send a request to the server that asks only for data within the
viewable map extent. So, the BBOX class determines how to set up the request.

Chapter 9
[ 267 ]
Another thing the Strategy class does is control what happens to the data returned from the
server. Using a class like Strategy.Cluster, when the layer gets back the data it will group
the returned data together in clusters. Therefore, it helps to control what happens with the
results of the response to the server.
We can use the BBOX class and Cluster classes together—i.e., set up the layer to ask a WFS
server for data within the map's extent, then the layer receives the data which it will turn it
into clusters.
How these three classes interact
Now, you might have started to get an idea how these classes interact. The Protocol class
determines that the data is communicated to and from the client. That data is in some
format which is serialized and de-serialized by the Format class. Finally, the Strategy class
tells the Vector class how to set up the request to the server and what to do with the
response.
Example instantiation
Before we dive into examples or further discussion, let's take a look at how we could create
a vector layer using all these three classes. The following will load in feature data from a
GeoJSON le. The le must be located on the same server—if it's on a dierent server, or if
you wish to point to an external URL, you'll need a proxy host (which we'll cover later).
var vector_layer = new OpenLayers.Layer.Vector('More Advanced Vector
Layer',{
protocol: new OpenLayers.Protocol.HTTP({
url: 'some_data.json',
format: new OpenLayers.Format.GeoJSON({})
}),
strategies: [new OpenLayers.Strategy.Fixed()]
});
The above code would use the HTTP Protocol class and use the GeoJSON format. Noce
how the format is actually part of the protocol object. The Fixed Strategy class is also used,
which essenally just causes the vector layer to request features once and never request
new features again.
That's actually prey much all there is to it! Dierent formats would use a dierent
Format class, and if you wanted to use other strategies you'd simply pass them into
the strategies array.
That's a lot to take in. Let's go through two examples which show how to use these
three classes together.

Using Vector Layers
[ 268 ]
Time for Action – creating a Vector Layer
In this rst example, we'll use the code similar to what we just saw above—making use of all
three classes to build our vector layer, which will request data from a URL.
There are two caveats to this example. The rst is that it assumes you have a le called ex5_
data.json in the same directory as your map le. You can nd it in this book's source code
les at http://vasir.net/openlayers_book/files/.
Secondly, unless you are running this on a server, it won't work. It will need a proxy host,
which we'll cover right aer this example. If you do not have access to a server, you can
view the example in acon at the URL above.
1. Start a new map le using the base template from Chapter 1. We'll use the Protocol,
Format, and Strategy classes. So rst, let's create objects for each of them. Let's start
with the format object, as the protocol object will use it. We'll use the GeoJSON
format.
//Create a Format object
var vector_format = new OpenLayers.Format.GeoJSON({});
2. Now, let's create a protocol object using the format object just created:
var vector_protocol = new OpenLayers.Protocol.HTTP({
url: 'ex5_data.json',
format: vector_format
});
3. Finally, we'll create a strategy variable to use which will actually be an array of
the strategy object.
var vector_strategies = [new OpenLayers.Strategy.Fixed()];
4. Now, put that together to create the vector layer and add it to the map:
//Create a vector layer that contains a Format, Protocol, and
Strategy class
vector_layer = new OpenLayers.Layer.Vector('More Advanced Vector
Layer',{
protocol: vector_protocol,
strategies: vector_strategies
});
map.addLayer(vector_layer);
5. If you are running this on a server, you can open up the page and you should see
something like:

Chapter 9
[ 269 ]
What Just Happened?
We just demonstrated how to set up a vector layer using Format, Protocol, and Strategy
classes. If we wanted to use a, say, KML le, we would just use the Format.KML class and
change the URL to point to a KML le.
Now, the previous example will not work if you are just running it from a folder—it needs to
be on a server. Seng up a server is outside the scope of this book, but let's talk about why
the previous example doesn't work if you just open it from a folder.
Cross server requests
JavaScript uses an XMLHttpRequest to make AJAX requests. When using the Protocol
classes, OpenLayers makes an XMLHttpRequest to get the feature data from the URL. If
that data le is on a dierent server than your map, the request will not work. JavaScript has
security restricons in place that prevent it from making these sort of cross domain requests.
So, to get around this, we have to use a proxy. Other layer classes do not need to do this
because other raster layers request images, but do not use AJAX—so the cross domain
request restricons do not apply.
Using Vector Layers
[ 270 ]
Using a proxy host
A proxy will, essenally, make the requests to external servers instead of having JavaScript
do it. We set up a proxy host with some server side script (using python, php, cgi, and so
on) that will sit on our server in between our JavaScript code and external servers, so the
JavaScript can (by using the proxy) talk to external servers and get around the inherent
security restricon.
So, basically, JavaScript will send requests to the proxy host, and the proxy host will
make external requests for JavaScript. You can write the proxy script yourself (which isn't
recommended unless you really know what you're doing), or use the standard proxy host
CGI le from OpenLayers. You can nd it at http://trac.osgeo.org/openlayers/
browser/trunk/openlayers/examples/proxy.cgi.
Once you have the proxy script set up on your server, you will need to tell OpenLayers to use
a proxy host to make external requests. To do this, put the following in your code:
OpenLayers.ProxyHost = '/cgi-bin/proxy.cgi?url=';
You will need to replace the URL with the URL to your proxy script—this code assumes that
you are using standard apache sengs and are using the proxy.cgi le.
This step is not required for the previous example. If you have a server, running
the previous example then the server does not require the use of a proxy host,
as the data le is on the same server.
Using the Vector Layer without a Protocol class
If you desire to just load data from some data source, for most use cases, the standard
Protocol / Format / Strategy usage we just covered will work well. However, you do not
have to use those three classes together. The classes can be used somewhat independently.
For example, we could use the Clustering class to cluster our point data without using the
Format or Protocol classes. We could use the Format class outside our vector layer to read
from and output feature data in a variety of dierent formats.
Time for Action – using the Format and Strategy classes alone
Let's take a look at another example now. Here, we'll do something very similar to what we
did in the rst example—this me, however, we won't use the Protocol. Instead, we'll read
in feature data as a JavaScript object and, using the GeoJSON Format class, read in the data.
This way, this example will work without having to use a server or proxy host.

Chapter 9
[ 271 ]
1. Create a new page using the template in Chapter 1. We'll be doing three things
here—creang some feature data in GeoJSON format, creang a vector layer, and
loading the GeoJSON data into it. Let's create some basic feature data. Feel free to
play around with the coordinates and amount of features here:
var feature_data = {
"type": "FeatureCollection",
"features": [
{"type":"Feature","properties":{},
"geometry":{"type":"Point", "coordinates":[-81, 42]}},
{"type":"Feature","properties":{},
"geometry":{"type":"Point", "coordinates":[-82, 43]}},
{"type":"Feature","properties":{},
"geometry":{"type":"Point", "coordinates":[-80, 41]}},
{"type":"Feature","properties":{},
"geometry":{"type":"Point", "coordinates":[19, -24]}},
{"type":"Feature","properties":{},
"geometry":{"type":"Point", "coordinates":[4, 42]}},
{"type":"Feature","properties":{},
"geometry":{"type":"Point", "coordinates":[32, 35]}},
]
}
2. Now, we need to create a format object to use for the feature_object we just
created. JSON stands for 'JavaScript Object Notaon' and GeoJSON is just JSON with
geographic informaon associated with it. More informaon about GeoJSON can be
found at http://geojson.org/geojson-spec.html. The data you see above
is, more or less, what is in the data le from the previous example. Let's create a
GeoJSON format object:
Create a format object var format_geojson = new OpenLayers.Format.
GeoJSON({});
3. Now, let's create a clustering strategy that will group points together if they fall
within some distance of each other. By default, the distance is 20—let's change it to
42.
//Create an array of strategy objects
var vector_strategies = [new OpenLayers.Strategy.
Cluster({distance:42})];
4. Let's now create and add the vector layer and pass in the strategy object we just
created. We don't need to pass in a protocol or format object, because our vector
layer won't directly use the format object, and won't use a protocol object at all.
//Create a vector layer that contains a Format, Protocol, and
Strategy class
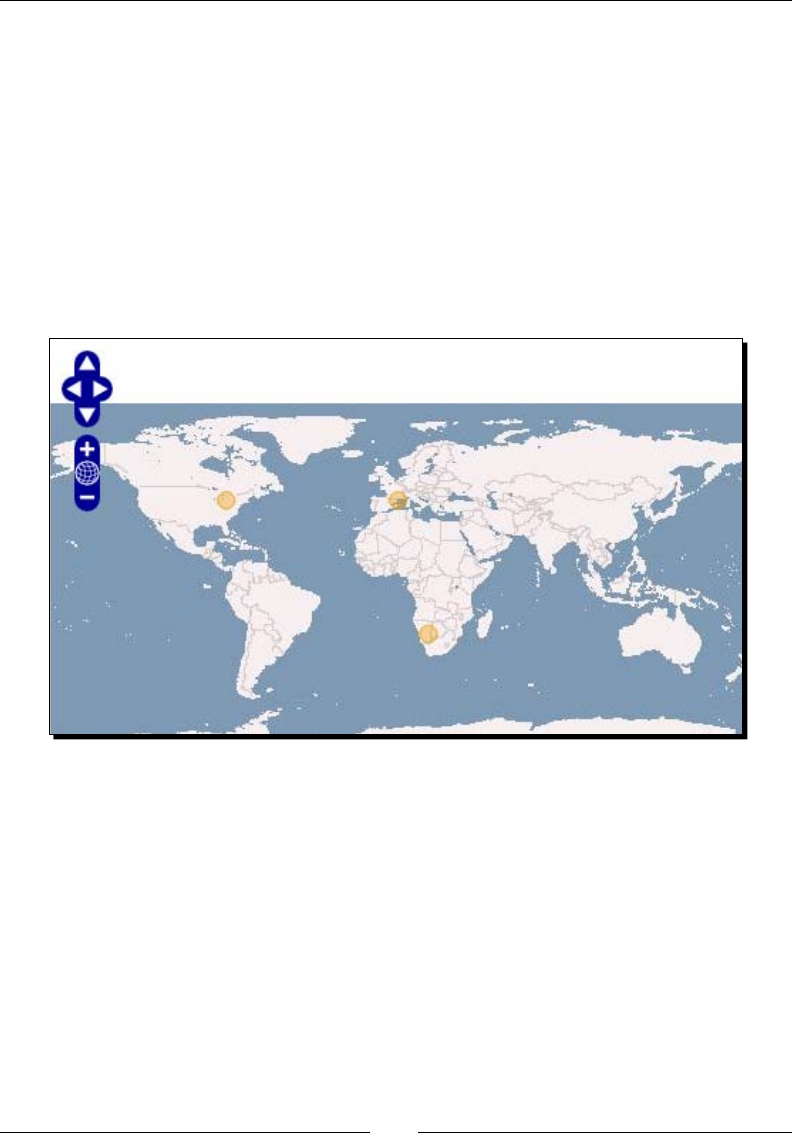
Using Vector Layers
[ 272 ]
vector_layer = new OpenLayers.Layer.Vector('More Advanced Vector
Layer',{
strategies: vector_strategies
});
5. Finally, we'll use the format object to read in the feature_data object (de-serialize
it) and add the features to our vector layer.
//Load in the data
vector_layer.addFeatures(format_geojson.read(feature_data));
6. Take a look at the map. You should see three points, even though we created six.
This is because the clustering strategy has grouped some of the points together.
What Just Happened?
We just used the Format.GeoJSON class and Strategy.Cluster class without using
the Protocol class. Hard coding the data, we used the read method of the format object
to load in data and deserialize it, turning it into an array of features that we add with
addFeatures.
If you open up Firebug and take a look at the vector layer's features (map.layers[1].
features for example), you'll noce there are only three features listed. But we passed
in six features—why is this? Since we used the Cluster strategy, features that are close
together get clustered together and turned into a single feature. We can, however, sll
access the clustered features by accessing the cluster object of each feature (e.g., map.
layers[0].features[0].cluster).

Chapter 9
[ 273 ]
Now that we have a hold on how to use these classes, let's nish up by talking just a lile
more about the Format and Strategy classes.
Format class
The Format class is used to serialize and deserialize feature data. There are just two
properes, a few methods, and a list of valid subclasses we should quickly cover.
Format class properties
You'll oen run into a situaon where you have a data le that is in a dierent projecon
than your map. For instance, if you are using a spherical Mercator projecon for your
map and the data is in EPSG:4326, you'll need to set the following two properes so that
OpenLayers can transform the projecon.
externalProjection: {OpenLayers.Projection} This species the
projecon that the data is in.
internalProject: {OpenLayers.Projection} This species the projecon
that the map (or the geometries that will be returned) is in.
By default, you can only use the spherical Mercator and EPSG:4326 projecons.
If you wish to use a dierent projecon, you will need to include the Proj4js
library, which was covered in more detail in Chapter 4.
Format class methods
There are two primary methods that all subclasses share.
read(data): Deserializes passed in data. There are other parameters that
dier between subclasses. The return type also diers, but is oen an array
of feature objects.
write(features): Serializes passed in features and returns a string. The returned
string will be in whatever format the format object is in—i.e., if you are using a KML
format object, the returned string will be in a valid KML format.
Most subclasses extend the above methods, allowing more parameters to be passed in. Full
coverage is outside the scope of this book, but can be found in the docs at http://dev.
openlayers.org/docs/files/OpenLayers/Format-js.html.

Using Vector Layers
[ 274 ]
Format subclasses
There are a myriad of subclasses available to us. Because new formats are oen added,
check the docs for a complete up to date list. At the me of wring, valid subclasses were:
ArcXML, Atom, GeoJSON, GeoRSS, GPX, JSON, KML, OSM, OWSContext, SOSCapabilies,
Text, WFS, WKT, WMSGetFeatureInfo, WMTSCapabilies, XML
Strategy class
The strategy class is used to determine how the vector layer will request data and what it
does with the feature data. Strategies can be used together—for example, the BBOX and
Cluster strategies can be both used at the same me. Each subclass is quite dierent from
each other, so let's take a look at each of the subclasses.
Strategy.BBOX
This class is used to display data that is within the map's extent. When used with the WFS
protocol, it will set up the request to grab only the data that falls within the map's extent. If
you are working with a lot of feature data, using the BBOX strategy will be quite helpful, as
you'll only get back the data that is within the visible extent. This is possible only with some
sort of feature server though—a stac le won't know what to do with the requests passed
in map extent, and will always return back every feature which the stac le contains.
Strategy.Cluster
This will cluster features together based on a distance and oponal threshold
parameter. Features in the vector layer's feature list will be replaced with cluster features,
and each cluster contains all of its features' informaon in a cluster object property.
The distance property species an {Integer} pixel distance between clusters. If a point
falls within the distance, it is added to the cluster. Default value is 20.
The threshold property is an oponal property which determines whether or not features
will be clustered depending on how many features are found. By this, if the threshold is
set at 4, it means that at least four features must be found to create a cluster. If there are
three features that fall within the distance, then they will not be clustered as they don't
meet the threshold value.

Chapter 9
[ 275 ]
Strategy.Filter
The Strategy.Filter class is used to limit features that get added to the vector layer. It uses
the OpenLayers.Filter class to do comparisons on feature data. To use this strategy, you
must create a OpenLayers.Filter object, which is covered in detail in the next chapter.
Strategy.Fixed
This strategy is used to request features once and never request them again. There is a
preload property that will load data before the layer is visible, which is false by default. If
set to true, data will be loaded before features are drawn, but can slow down your map.
Strategy.Paging
Using this strategy, features can be grouped into 'pages,' which means you'll receive groups
of your data. If you have tons of data, this is a very useful strategy. There is a length
property which takes in an {Integer} which species the number of features per page.
The default value is 10.
Another property, num, contains an {Integer} of the current page number. To use this
strategy, you will need to call the pageNext() and pagePrevious() methods to advance
through the pages.
Strategy.Refresh
This strategy will refresh the vector layer, causing features to be re-requested and redrawn. It
can be called manually, or an interval can be set and it will refresh at the passed in interval.
The interval property is a {Float} in milliseconds which, if set to a number greater than
0, species how oen to automacally refresh the vector layer. By default, it is set to 0, and
will not automacally refresh.
There is a force property as well, which will force the layer to be refreshed. It is set to
false by default.
There are a few relevant methods to use:
refresh(): Causes the layer to be refreshed
reset(): Resets the ming interval (if set)
start(): Begins the auto-refresh behavior based on the interval property
stop(): Ends the auto-refresh
Downloa d f r o m W o w ! e B o o k < w w w.woweb o o k . c o m >

Using Vector Layers
[ 276 ]
Strategy.Save
Using this strategy, features can be saved to a server. The server must allow saving, such
as a WFS server using transacons. When the save() method is called, changes will be
aempted to be saved to the server.
There is also an auto property which can be set to a {Boolean} or {Float} (in seconds).
If set to true, which will save immediately aer the features are modied (or deleted).
If set to a number, the features will be saved at the passed in interval.
Summary
This ends the chapter on the Vector Layer class. We talked about what the Vector Layer class
is and how it works. We also went over the properes, methods, and events of Vector Layer
class and demonstrated them with examples. The Feature and Geometry classes were also
covered, along with their properes and methods. Lastly, we learned about the Strategy,
Protocol, and Format classes and how to create a vector layer with them.
In the next chapter, we'll work more with the Vector Layer. We'll learn how to style our
Vector layers, along with learning how to use the Rule and Filter classes to give us complete
control over how our vector layer looks.

10
Vector Layer Style Guide
At this point, you're hopefully geng prey comfortable with OpenLayers.
We've talked about how to customize the appearance of Controls (UI elements),
but we haven't talked much about how to customize the appearance of the
map itself.
In this chapter, we'll make things look prey (more or less). We'll:
Learn how to style Vector layers in OpenLayers
Discuss the Style class and demonstrate how to use it
Go over the StyleMap class
Work with the Rules class
Learn about the Filter class
Let's get to it!
Styling the Vector Layer
In the last chapter, you saw how powerful the vector layer can be. In this chapter, we'll
go a bit deeper and talk about how to customize the appearance of the features within
your vector layer. The way vector layer styling works is similar to how we customized the
appearance of our control objects, but instead of using CSS, we use Style and StyleMap
objects with the vector layer. We can style the vector layer this way because the vector
layer does not use raster images—it uses SVG (or Canvas or VML) elements that can be
styled, similar to how HTML elements can be styled with CSS.

Vector Layer Style Guide
[ 278 ]
Changing the feature styles, such as changing the color of our features from the default
orange to blue, is quite easy. But changing colors of a vector layer's features is perhaps just
one of the most basic things we can do. By using the Rule and Filter classes, we can specify
how (and what) features should be styled. For example, we could color points dierently
depending on their geographic locaon or depending on the values of properes contained
in their attributes.
We can do much more than just modify colors. We can change the sizes, opacies, line
styles, and a variety of other properes. Style properes can be set arbitrarily, or be based
on properes of individual feature objects themselves.
Applying styles
We can do a lot, but how? There are three dierent ways to apply styles to a vector layer.
Use the StyleMap and Style objects.
Apply a symbolizer (an anonymous object with style properes) directly to the layer.
Apply a symbolizer directly on a feature. This primarily only occurs when reading in
data from a source like a KML le.
The rst way is what we'll be using throughout this chapter. A StyleMap is, essenally, a
mapping of Style objects to various 'states', or intents, of feature objects. For example,
the default intent is what a feature object is normally set as. When you select it, it then
receives the select intent, and any styles mapped to that intent.
The Style object contains a style symbolizer, or numerous style properes and values. We
use symbolizers to dene style, and we can use symbolizers on Style objects, directly on
layer objects, or directly on an individual feature.
What are symbolizers?
A symbolizer is just an an anonymous object consisng of key:value pairs that contains
style properes, similar to CSS. For example, { fillColor: '#336699', strokeWidth:
4 } is a symbolizer which tells the feature to have a ll color of #336699 (light blue), and a
stroke width of 4 pixels. We'll cover a full list of valid properes later in this chapter.
We use symbolizers when we create Style objects to specify the style properes to apply to
our features. We can apply a symbolizer directly to the vector layer object, or read in style
informaon from a source le (such as a KML le).
Before we dive into the StyleMap and Style classes, let's rst take a look at an example so
we can beer wrap our heads around what we intend to do in this chapter.

Chapter 10
[ 279 ]
Time For Action – applying some basic Styling
Applying styles is prey easy, as you'll see:
1. We'll be doing a few things in this example. First, we'll create a vector layer. Then,
we'll add some features to it. Nothing new so far. Then, we'll style the layer by
creang a StyleMap and Style object and applying them to the vector layer.
2. Add a WMS layer to the map (like in previous chapters) then create and add a
vector layer to the map:
vector_layer = new OpenLayers.Layer.Vector('Basic Vector Layer');
map.addLayer(vector_layer);
3. Let's add some feature points. We'll create a loop which will create ten randomly
placed feature objects and add them to the vector layer. These coordinates will be
dierent each me you refresh the page, as they are being randomly generated:
for(var i=0; i<10; i++){
vector_layer.addFeatures([new OpenLayers.Feature.Vector(
new OpenLayers.Geometry.Point(
(Math.floor(Math.random() * 360) - 180),
(Math.floor(Math.random() * 180) - 90)
)
)]);
}
4. Now, let's add some style to our vector layer. We'll be using a StyleMap object and
apply a style to the 'default' intent (the 'normal state' of the features) so all features
will receive the style. First, we'll need to create a Style object which will be used
by the StyleMap object that gets applied to the layer. The Style object consists of a
symbolizer, as we previously menoned, that contains key:value pairs of styles to
apply to the features (similar to CSS):
var vector_style = new OpenLayers.Style({
'fillColor': '#669933',
'fillOpacity': .8,
'strokeColor': '#aaee77',
'strokeWidth': 3,
'pointRadius': 8
});
Vector Layer Style Guide
[ 280 ]
5. Next, we create a StyleMap object and use the Style object we just created
to dene the layer's 'default' intent style.
var vector_style_map = new OpenLayers.StyleMap({
'default': vector_style
});
6. Finally, we set the StyleMap object to the vector layer.
vector_layer.styleMap = vector_style_map;
7. You should see a bunch of green dots similar to the following. The actual point
locaons will be dierent for you, as the points are randomly generated:
What Just Happened?
We just used the StyleMap and Style classes to apply a custom style to our vector layer.
The Style object we created (the vector_style object) contains properes which
determine what the features will look like. If you were to create an empty style object (with
no key:value pairs, just an empty set of brackets {}), no styles would be applied to the
layer—you would be overwring the default style with a blank, empty style.
We only used a few symbolizer properes, such as strokeColor, but we'll go over a full list
of valid symbolizer properes later in this chapter. For now, let's rst talk more about how
the StyleMap and Style classes work.

Chapter 10
[ 281 ]
The StyleMap class
The StyleMap class tells the vector layer what Style objects to use when the features are in
a certain 'state', or what OpenLayers refers to as intent. As the previous example showed,
there's really not much in using this class. To create a StyleMap object you pass in an intent
as the key (as a {String}), and a Style object is used as the value. For example, as in the
previous example, 'default' is the desired intent and the vector_style object is the
desired style object to use for that intent. This causes the vector_style to be applied to
the 'default' intent:
var vector_style_map = new OpenLayers.StyleMap( {'default': vector_
style} );
What is an 'intent'?
The 'intent', short for render intent, is a way to specify how features should be drawn, or
what features should look like when in dierent 'states'. There are only three default intents
we can use:
'default': This is the intent used most of the me. If a feature is not in the two
next intents, it is in this 'default' intent.
'select': Features are in this intent only when they are selected. When
unselected, they return to the 'default' intent.
'temporary': This intent is used when features are being drawn or 'sketched';
e.g., via the EdingToolbar control. When the feature is nished being sketched, it is
returned to the 'default' intent.
When creang a StyleMap object, if you specify a style object for only one intent, then all
intents will receive that style object.
For instance, in the previous example, we applied a style object only to the default intent—
because we applied it to only one intent, all other intents receive that style. If we were to
select one of the features, we would see no changes in the feature's style because we did
not specify a separate 'select' intent style object.
The Style class
The Style class is used to specify the styles a vector layer should use. As menoned a couple
of mes before, it's quite similar in principle to how we use CSS to style our controls. The
dierence is that with the vector layer we are directly embedding the style in the JavaScript
code itself, using an anonymous object which is referred to as a symbolizer.
Vector Layer Style Guide
[ 282 ]
When we talk about symbolizers, we're just referring to an anonymous object
that denes styles (or, by some stretch, their 'symbol'). The term 'symbolizer'
is maybe not the best term that could have been used, but it's part of the
OpenLayers vocabulary so we need to learn it.
To create a Style object, we just pass in a symbolizer (an anonymous object) that denes the
layer's style. As in the previous example:
var vector_style = new OpenLayers.Style({
'fillColor': '#669933',
'fillOpacity': .8,
'strokeColor': '#aaee77',
'strokeWidth': 3,
'pointRadius': 8
});
That's essenally all there is to it for creang a style object! A context property can also
be specied, which can be used to provide addional variables to be used for the style class
with aribute replacement—we'll talk about that soon.
Aer creang our style object, we can then use it with a StyleMap object. We could also
apply the symbolizer (but not the vector_style object itself) to the layer's style property
and 'skip' the StyleMap object step—although, it is recommend that you do it this way, as it's
a bit liming and it's not as 'clean' or modular as using a StyleMap object.
Rules and lters can also be applied to our style objects to get even more ne grain control
over feature styles, as we'll see soon. First, let's go over the valid symbolizer properes.
Symbolizer properties
The following properes can be used when creang a style symbolizer. Some properes will
only aect certain types of geometries (e.g., the font type properes apply only to text
features). We'll go over some of the more common symbolizer properes rst, and then
cover the remaining properes.
List of common symbolizer properties
cursor: The cursor style to use when the mouse is over a feature. Can be any valid
CSS cursor style, such as help, move, cursor, crosshair, text, wait, pointer,
or progress.
llColor: Color of the ll area, a six digit RGB value. Example: #000000 would be
black (00 red, 00 green, and 00 blue.) #ffffff would be white.

Chapter 10
[ 283 ]
llOpacity: Species the opacity of the lled area, ranging from 0 to 1 (1 being
fully opaque, 0 being fully transparent).
fontColor: The font color, a six digit RGB value. Example: #000000 would be
black (00 red, 00 green, and 00 blue.) #ffffff would be white.
fontFamily: Species the font family to use for labels. Similar to the CSS
font-family property. An example value would be Arial or sans-serif.
fontOpacity: Opacity of font, ranging from 0 to 1 (1 being fully opaque, 0 being
fully transparent).
fontSize: Species the size of the font. Can be any valid font-size CSS value,
such as in pixels (e.g., '18px') or em units (e.g., '1.2em').
fontWeight: The font weight to be applied. Can be a valid CSS font-weight
property, such as normal or bold.
graphicName: Species the type of the graphic to use when rendering points. The
default value is 'circle', and will cause points to be rendered as circles. Other
possible values include 'square', 'star', 'x', 'cross', and 'triangle'.
Other styles, such as ll and stroke properes, will sll be applied to the type of
shape drawn. For example, 'graphicName': 'square' will produce a square
for points instead of a circle.
label: Text to apply to a feature. The value of this property is a {String} type,
for example, label: 'My Label'.
labelAlign: Determines where to align the label (if one is provided). Unlike the
align property in CSS, the labelAlign property takes in one or two characters,
one for horizontal alignment and one for vercal alignment. The possible horizontal
values are 'l' (le), 'c' (center), and 'r' (right). Possible vercal values are are 't' (top),
'm' (middle), and 'b' (boom). The alignment refers to a point relave to where the
text would be, which means a 't' (top) alignment would actually put the label at
the boom, since the inseron point is to the top of the text (a lile confusing, but
it might help to think of the alignment as 'opposite' of where you want the labels
to be). A valid value is any single or two leer combinaons of the horizontal and
vercal values—such as 'r' (right) or 'lb' (le boom).
labelSelect: If set to true, labels can also be selected with the selectFeature
control. Default value is false.
labelXOset: How far, in the X direcon, to oset the label (in pixels).
labelYOset: How far, in the Y direcon, to oset the label (in pixels).
pointRadius: Species how large, in pixels, the radius of point features will be.
Default value is 6.
stroke: Species whether to show a stroke. Set to false if you wish to have no
stroke shown.

Vector Layer Style Guide
[ 284 ]
strokeColor: Color of the stroke, a six digit RGB value. Example: #000000 would be
black (00 red, 00 green, and 00 blue.) #ffffff would be white.
strokeDashstyle: Type of style applied to the strokes. Can be either 'dot', 'dash',
'dashdot', 'longdash', 'longdashdot', or 'solid'.
strokeLinecap: The type style to be applied to the line caps. Can be either 'but',
'round', 'square'.
strokeOpacity: Opacity of strokes, ranging from 0 to 1 (1 being fully opaque,
0 being fully transparent).
strokeWidth: Stroke width, in pixels.
Time for Action – common style examples
Let's take a look at what some of these common properes do through an example. We'll
also demonstrate how to use two dierent intents—the default intent and the selected
intent.
1. Make a copy of the previous example's le. We'll be using the same code, but
modifying the feature styles a bit. We'll also use the select intent, so we'll need
two style objects. Let's rst recreate the default style object:
var vector_style = new OpenLayers.Style({
'cursor': 'pointer',
'fillColor': '#787878',
'fillOpacity': .8,
'fontColor': '#343434',
'pointRadius': 14,
'strokeColor': '#232323',
'strokeDashstyle': 'dot',
'strokeWidth': 3
});
2. Now, let's create a style object to use when the feature is selected. We'll change the
border to solid, change the ll color, increase the point's radius a lile bit, change
the graphicName to 'square', and add a label that will display 'X'.
var vector_style_select = new OpenLayers.Style({
'fillColor': '#ffffff',
'fillOpacity': .9,
'graphicName': 'square',
'label': 'X',
'pointRadius': 16,
'strokeColor': '#343434',
'strokeDashstyle': 'solid',

Chapter 10
[ 285 ]
'strokeWidth': 4
});
3. Update the StyleMap object now to include the newly added vector_style_
select style object:
var vector_style_map = new OpenLayers.StyleMap({
'default': vector_style,
'select': vector_style_select
});
4. Finally, we'll just add a selectFeature control that will allow us to select a feature.
//Add a select feature control
var select_feature_control = new OpenLayers.Control.SelectFeature(
vector_layer
);
map.addControl(select_feature_control);
//Activate the control
select_feature_control.activate();
5. Now, take a look at the map and select a feature. You should see the style change:
What Just Happened?
We pracced using common symbolizer properes and demonstrated how to add mulple
Style objects to a StyleMap object with two intents. So far, you might not be too impressed.
We've styled some features, and while there's a ton of customizaon we can do, we haven't
done anything too fancy yet.

Vector Layer Style Guide
[ 286 ]
Have a Go Hero – style layers
Now that you're a lile more familiar with how to use symbolizers, open up the
previous example and change some of the symbolizers. Test dierent property and value
combinaons—dierent colors, opacies, background colors, etc. See if you can come up
with something that looks a lile beer than grey and black circles.
Before we go into aribute replacement, our next topic, let's look at the remaining
symbolizer properes we haven't covered yet.
Remaining symbolizer properties
backgroundGraphic: Species the URL of an image to use. This will be placed
under the externalGraphic (if one is set).
backgroundGraphicZIndex: Species the z-index (order of what gets placed on
each other) of the backgroundGraphic.
backgroundHeight: Determines the height of the background image. If none
is specied, graphicHeight is used.
backgroundWidth: Height of the background image, if one exists. If this property is
not set and an image is provided, the graphicHeight property will be tried to use.
backgroundXOset: Species how far, in the X direcon, to oset the image
(in pixels).
backgroundYOset: Species how far, in the Y direcon, to oset the image
(in pixels).
display: If set to none, the symbolizer styles will not be applied.
externalGraphic: Species the URL of an image to use (instead of the stroke
and ll properes) when feature points are shown.
ll: If set to false, no ll will be shown.
graphic: Seng to false will disable any graphics from being shown.
graphicHeight: The height, in pixels, of an external graphic (if it exists).
graphicOpacity: Species the opacity of associated graphic, ranging from 0 to 1
(1 being fully opaque, 0 being fully transparent).
graphicTitle: This species toolp text that will appear when mousing over an
external graphic (if one is provided).
graphicWidth: The width, in pixels, of an external graphic (if it exists).
graphicXOset: How far, in the X direcon, to oset the external graphic (in pixels).
graphicYOset: How far, in the Y direcon, to oset the external graphic (in pixels).
Chapter 10
[ 287 ]
graphicZIndex: Species the z-index of the external graphic. A higher z-index means
it will appear over elements with lower z-indexes.
rotaon: Species how much to rotate a feature in a clockwise direcon around
its center. Values range from 0 to 360, default is 0. A value of 180 would be
upside down.
Pop Quiz – determining which attributes to use
There are two ways we can specify an image: using the background or using the
externalGraphic properes. When using them together, it is important to keep in mind
how each of them work. If we want to show an image of a marker, and a separate image of
the marker's shadow, how would we do it?
Attribute replacement
One easy, but powerful, thing we can do with feature styles is called aribute replacement.
It's a way to use a feature's aributes in the layer's style denion, like a variable. When
creang the symbolizer, you can set the value of any property in a format of:
${variable_name}
Where variable_name is the name of a property contained in a feature's attributes
property. For example, let's say all our features have an aribute property called 'size'
with random integer values. If we wanted to assign the pointRadius to each feature's
size property, we would use:
{ 'pointRadius': ${size} }
What happens then is that when each feature is styled, the ${size} is replaced by the
feature's attribute.size property (if one exists). The best way to further explain this is
through an example. Let's take a look, then go even further in depth.
Time For Action – working with attribute replacement
Let's demonstrate how to use aribute replacement to change the style of features based on
their aribute.
1. Make a copy of the previous example. We'll be changing it slightly to demonstrate
aribute replacement. To do so, we'll rst need to give our features some aributes
that we can access. Modify the addFeature code in the for loop to add aributes
as follows:
for(var i=0; i<10; i++){
vector_layer.addFeatures([new OpenLayers.Feature.Vector(

Vector Layer Style Guide
[ 288 ]
new OpenLayers.Geometry.Point(
(Math.floor(Math.random() * 360) - 180),
(Math.floor(Math.random() * 180) - 90)
),
{
//Attributes go here
size: 5 + (Math.floor(Math.random() * 20)),
label: 'F' + i,
strokeWidth: (Math.floor(Math.random() * 10))
}
)]);
}
2. Now, we just need to modify the vector_style style object to include aribute
replacements so we can use the size, label, and strokeWidth properes
of the features we just created. The syntax to do so is '${variable_name}',
where variable_name is the name of the feature property we want to use.
Modify the vector_style object as follows, changing the label, pointRadius,
strokeDashStyle, and strokeWidth:
var vector_style = new OpenLayers.Style({
'cursor': 'pointer',
'fillColor': '#787878',
'fillOpacity': .8,
'fontColor': '#343434',
'label': '${label}',
'pointRadius': '${size}',
'strokeColor': '#232323',
'strokeDashstyle': 'solid',
'strokeWidth': '${strokeWidth}'
});
3. Open the map. We used randomized values, so when you refresh your map you
should see something dierent each me. You should see something similar to this,
but with dierent point locaons and sizes:

Chapter 10
[ 289 ]
What Just Happened?
We just demonstrated how to use aribute replacement when creang our styles. Changing
the point radius for features based on aributes is a fairly common pracce, but as you've
seen we're not just limited to a few properes—we can change any of the properes using
aribute replacement. This can be quite powerful, and we'll be using it throughout the rest
of this book. However, aribute replacement is just the p of the iceberg.
Rules and lters
For even more ne grained control, we can style objects by using the Rule and Filter classes.
These two classes allow us to apply dierent styles to dierent features based on some
arbitrary 'rules' we choose. We can use the feature's attributes property to apply certain
styles if one (or more) of the properes match some value we choose.
How do we follow rules?
Rules allow us to apply symbolizers when certain condions occur. Those condions are
handled via the Filter class. We can have mulple rules and lters, and even use logical
operators (such as OR and AND) with them. Before we talk about that though, there are two
ways we can use rules.
The rst is by using the addUniqueValueRules method of the StyleMap class. This allows
simple property matching and is fairly straighorward to use. We'll go over this method rst.
Downloa d f r o m W o w ! e B o o k < w w w.woweb o o k . c o m >

Vector Layer Style Guide
[ 290 ]
The second way, using custom rule and lter objects, is a bit complicated, but allows us
snowake level control over what styles get applied. We'll cover this, along with the Rule
and Filter classes themselves, aer we discuss how to use addUniqueValueRules.
Using addUniqueValueRules
The easiest way to use rules is to use the addUniqueValueRules method of the StyleMap
class. It allows us to do a sort of value look-up and apply dierent styles depending on
a property's value. More concretely, let's say we had a bunch of point features which
represented selements. Each feature has an aribute property called settlement_type,
with values such as 'village', 'city', or 'metropolis'.
Now, let's also say we want to style our points dierently depending on what type of
selement it is. We want to color them dierently, make the point radius larger, and change
the stroke size. We could, in theory, just use aribute replacement and embed these
values with each feature, but a more elegant and easy to maintain way would be to use
addUniqueValueRules.
With this method, we could create three dierent symbolizers and have the proper styles
applied to dierent selement types. If the settlement_type property's value matches
'village', for instance, it would get a certain style, and if it matched 'city' it would
receive a dierent style, etc. If this explanaon was confusing, don't worry, we'll go over it
in an example briey.
Calling the addUniqueValueRules function
First, let's look at the general syntax for calling the addUniqueValueRules funcon:
style_map_object.addUniqueValueRules(intent, property, symbolizer_
lookup, context);
The intent parameter
The intent parameter species the desired intent—usually 'default'.
The property parameter
The second parameter, property, is the property of the feature you want to
check—e.g., 'settlement_type' as in our previous explanaon.

Chapter 10
[ 291 ]
The symbolizer_lookup parameter
The symbolizer_lookup parameter is an anonymous object containing key:value pairs
to use if the rule matches. The key species a value of the passed in property, and the
value species the symbolizer to apply if the property matches that value. It might make a bit
more sense to take a look at how it would appear in the code, for example:
var symbolizer_lookup = {
'village': {pointRadius:5, strokeWidth:2},
'city': {pointRadius:10, strokeWidth:4}
}
This applies the 'village' symbolizer if the feature's settlement_type property
is 'village', and applies the 'city' style symbolizer if the property is 'city'. The
symbolizers will extend whatever default symbolizers are already associated with the
StyleMap object. Lastly, and importantly, if the property you search for contains a value that
does not exist in the symbolizer_object, the feature will not receive a style. So, it is best
to use this funcon when you know what to expect from the property values—if you don't,
you can create custom rules, which we'll cover next.
The context parameter
The last argument, context, is an oponal (usually not included) object which species an
anonymous object to check the property against. If no context is passed in, features.
attributes are used by default (normally, this is what you want to happen).
Time For Action – using addUniqueValueRules
Now that we know about addUniqueValueRules, let's see it in acon.
1. We're going to use a basic vector layer with some randomly generated features and
settlement_type properes. Add a WMS layer. Then, we need a vector layer:
vector_layer = new OpenLayers.Layer.Vector('Settlement Vector
Layer');
map.addLayer(vector_layer);
2. Now, let's create an anonymous object consisng of integer values as the keys and
our desired settlement_type values as the values. We do this because we'll need
a way to randomly pick what type of selement a feature should be.
var settlement_values = {
0: 'hut',
1: 'village',
2: 'city',
3: 'metropolis',

Vector Layer Style Guide
[ 292 ]
4: 'facebook'
}
3. Ok, let's now create 20 random points. Using code similar to the previous example,
we'll create twenty random points and assign a random selement type to each
feature using the settlement_values object we just created.
for(var i=0; i<20; i++){
vector_layer.addFeatures([new OpenLayers.Feature.Vector(
new OpenLayers.Geometry.Point(
(Math.floor(Math.random() * 360) - 180),
(Math.floor(Math.random() * 180) - 90)
),
{
'settlement_type': settlement_values[(Math.floor(Math.
random() * 5))]
}
)]);
}
4. Next, we'll need to create a StyleMap object. We won't apply any style objects to
any intents this me, we'll just leave it empty. Keep in mind—if you just added an
empty StyleMap object to your vector layer, you would sll see the default layer
styles as we haven't overwrien the symbolizers that the intents use.
var vector_style_map = new OpenLayers.StyleMap({});
5. We're almost ready to call the addUniqueValueRules method. Before we do that
though, we'll need to create an object that contains symbolizers to use for each
value we nd. So, we need to create an object that contains a symbolizer for each
of the values in settlement_type. This object will be the symbolizer_lookup
object that we previously discussed. Let's go ahead and set up symbolizers for all the
values of the settlement_values we previously created (feel free to dene your
own styles here if you'd like):
var symbolizers_lookup = {
'hut': {
'fillColor': '#ababab', 'fillOpacity':.8, 'pointRadius':4,
'strokeColor': '#454545', 'strokeWidth':2
},

Chapter 10
[ 293 ]
'village': {
'fillColor': '#FFFA93', 'fillOpacity':.8, 'pointRadius':8,
'strokeColor': '#AFAB57', 'strokeWidth':4
},
'city': {
'fillColor': '#aaee77', 'fillOpacity':.8, 'pointRadius':12,
'strokeColor': '#669933', 'strokeWidth':5
},
'metropolis': {
'fillColor': '#BD1922','fillOpacity':.8, 'pointRadius':16,
'strokeColor': '#812B30', 'strokeWidth':6
},
'facebook': {
'fillColor': '#336699','fillOpacity':.8, 'pointRadius':26,
'strokeColor': '#003366', 'strokeWidth':2
}
}
6. Whew—now we can call the addUniqueValueRules funcon. We'll use the
'default' intent, as we want to see these styles applied by default. The property
we want to use is the 'settlement_type' property. Finally, we'll pass in the
symbolizer_lookup object we created above.
The symbolizers we use in the symbolizer_lookup object will also extend
whatever style is already applied to the StyleMap—however; in this case, we haven't
dened any style objects to use so the symbolizers will just extend the default style.
Let's call the funcon as follows:
vector_style_map.addUniqueValueRules('default', 'settlement_type',
feature_symbolizers_lookup);
7. Finally, we need to hookup the StyleMap object to our vector layer. We just set the
vector layer to use the vector_style_map object:
vector_layer.styleMap = vector_style_map;
Vector Layer Style Guide
[ 294 ]
8. You should now see something like the following on your map. If some point
types are missing, don't worry! Since the points are randomly generated, you will
somemes not see certain selement types—refreshing your map will generate
new points:
What Just Happened?
We just used a 'shortcut' for creang rules. This doesn't mean that this is something you
should avoid doing though. The method is prey fast, does its job well, and is easy to
read and understand. Just keep in mind that if you don't dene a symbolizer for a value
that gets found, the feature containing that value may not have a style. If you're in the
situaon where you need to do this sort of property value checking on known values,
addUniqueValueRules is a good way to solve the problem.
However, there is an even more powerful way to customize styles—by using custom Rules
and Filters.
Rules and lters
So far, we've prey much just been doing a one to one match on properes to specify style.
With aribute replacement, we directly replace a value. With addUniqueValueRules, we
see if a property is equal to something. So far, we haven't had much exibility.

Chapter 10
[ 295 ]
By using Rules and Filters, we can be as exible as we want. We can do comparisons on
properes, such as styling a feature a certain way if, for instance, it has a property less than or
greater than some value. We can create lters to check for a multude of dierent types of
comparisons (greater than, less than, equal to, etc.), and have lters interact with each other.
How do they work?
A lters object belongs to a rule object. A rule object belongs to a style object. Each style
object can have mulple rules, and rules can interact with each other depending on how
their lters are dened.
How do we use them?
To use custom rules and lters, we just need to associate them with a style object. The
general syntax to dene a rule and add it to a style object is:
var my_rule = new OpenLayers.Rule({
filter: new OpenLayers.Filter({}),
symbolizer: { key:values }
});
style_object.addRules([my_rule]);
The lter object determines how the rule will be applied (such as checking to see if a
property is greater than some value). We'll cover the Filter class in more detail aer an
example, as we can do lots of complex things with lters. This may all sound a bit abstract,
so let's jump into an example to see how it works, then cover both classes in detail.
Time for Action – using rules and lters
Let's use rules and lters to assign dierent styles to feature objects based on their
aributes.
1. Let's jump in to using rules and lters. Add a WMS layer to the map. We'll also need
a vector layer, so add in a vector layer:
vector_layer = new OpenLayers.Layer.Vector('Basic Vector
Layer');
map.addLayer(vector_layer);
2. Next, we'll need some features. We'll generate some random feature points again,
and we'll create a property for each object called population which contains a
random number between 0 and 2000:
for(var i=0; i<20; i++){
vector_layer.addFeatures([new OpenLayers.Feature.Vector(

Vector Layer Style Guide
[ 296 ]
new OpenLayers.Geometry.Point(
(Math.floor(Math.random() * 360) - 180),
(Math.floor(Math.random() * 180) - 90)
),
{
'population': Math.floor(Math.random() * 2000)
}
)]);
}
3. Now we need to create a style object—rules are applied directly to style objects,
and lters are applied directly to rules. So, let's create the objects in order, starng
with the style object:
var vector_style = new OpenLayers.Style();
4. Let's now create three rules. For each rule, we'll pass in an object with two keys:
filter (which will be a Filter class object) and symbolizer (which is a familiar
symbolizer object). The lter object will need a lter type, which we'll cover
aer this example, and a property which the rule will match on (in this case,
population). We'll also need to specify the value (or range of values) we want to
match for each rule. The value parameter depends on the lter type, and we'll be
using either value or lowerBound and upperBound. Let's create the rst rule
which will handle population values less than 500:
var rule_pop_low = new OpenLayers.Rule({
filter: new OpenLayers.Filter.Comparison({
type: OpenLayers.Filter.Comparison.LESS_THAN,
property: 'population',
value: 500
}),
symbolizer: {
fillColor: '#ababab', fillOpacity:.8,
pointRadius:8, strokeColor: '#454545',
strokeWidth:2
}
});

Chapter 10
[ 297 ]
5. Now we'll take care of the second rule, which handles population values between
a lowerBoundary of 500 and an upperBoundary of 1500. The boundaries are
inclusive; meaning values of 500 and 1500 will be matched. Noce how we don't
have a value property like in the previous rule—the values here are determined by
the two boundary properes:
var rule_pop_mid = new OpenLayers.Rule({
filter: new OpenLayers.Filter.Comparison({
type: OpenLayers.Filter.Comparison.BETWEEN,
property: 'population',
lowerBoundary:500,
upperBoundary:1500
}),
symbolizer: {
fillColor: '#aaee77', fillOpacity:.8,
pointRadius:14, strokeColor: '#669933',
strokeWidth:5
}
});
6. Our last rule will match population values above 1500:
var rule_pop_high = new OpenLayers.Rule({
filter: new OpenLayers.Filter.Comparison({
type: OpenLayers.Filter.Comparison.GREATER_THAN,
property: 'population',
value: 1500
}),
symbolizer: {
fillColor: '#BD1922', fillOpacity:.8,
pointRadius:20, strokeColor: '#812B30',
strokeWidth:5
}
});
7. Almost done—now we need to add those three rules to the style object. We pass in
an array of the rule objects to the addRules method:
vector_style.addRules([rule_pop_low, rule_pop_mid, rule_pop_
high]);
Vector Layer Style Guide
[ 298 ]
8. Now create a styleMap object and apply the style object to it and set the vector
layer to use it:
var vector_style_map = new OpenLayers.StyleMap({
'default': vector_style
});
vector_layer.styleMap = vector_style_map;
9. Take a look at the map now. You should see something like this, but with dierent
point locaons and colors, as the values were randomized:
What Just Happened?
We just showed how rules and lters are used. We used three rule objects, each with a
dierent lter object. The type property of the lter objects determine the type of comparison
that will be applied. So, in the previous example, if a feature had a property of 'population'
with a value less than 500, the rule_pop_low rule would be applied to it. Now that we have
a basic understanding of how it's used, let's look more closely at the two classes.
OpenLayers.Rule class
When you want to be very specic about the types of styles that get applied to feature
objects, the best way to do it is by using the Rule class. When you create a rule object, you
specify a Filter object, a symbolizer to apply to the feature if the rule matches, and an
oponal name property which species an arbitrary name for the rule.

Chapter 10
[ 299 ]
Rule objects are applied to style objects, and you can have virtually as many rules on a style
object as you want. The syntax for creang a rule object, as menoned previously, is:
var my_rule = new OpenLayers.Rule({
filter: new OpenLayers.Filter({}),
symbolizer: { key:values }
});
style_object.addRules([my_rule]);
As we saw in the previous example, it's not too hard to create and apply mulple rules to
a style object. We only used a single lter for each rule object in the previous example, but
OpenLayers makes it easy to specify mulple lters to give you even more control over your
feature styles.
Rules are used in accordance with lters—it's the lters that do the work in determining if
the rule will be applied to a feature. So, let's take a look at the Filter class, and how we can
use it to customize our feature styles even more.
OpenLayers.Filter class
The Filter class controls the logic of match feature property aributes to see if a rule should
be applied or not. We can use a single lter, like in the previous example, or we can combine
lters together (e.g., if property1 is greater than 500 and another property2 is less than
200, then apply the style).
Filters can also be spaal—we can check to see if features intersect geometry objects, are
within some distance of a point, and more. To do all these things, we use subclasses of the
base Filter class, similar to how we use subclasses of the Layer class and other classes.
Filter Subclasses
There are four subclasses we'll cover here—Comparison, FeatureId, Logical, and Spaal.
Filter.Comparison
The Comparison class is the lter class we've been using so far. Like the name implies, this
class will compare properes based on the specied parameters of the lter object. The type
of comparison applied is specied by the type property. We also have to specify a value to
check for—most lters use the value property (but some use dierent properes, such as
lowerBoundary and upperBoundary). Finally, we must also specify a property to check
for in the feature.

Vector Layer Style Guide
[ 300 ]
For instance, let's take a look at the lter object used in the rule_pop_low rule from the
previous example:
var rule_pop_mid = new OpenLayers.Rule({
filter: new OpenLayers.Filter.Comparison({
type: OpenLayers.Filter.Comparison.GREATER_THAN,
property: 'population',
value: 1500
}),
Here, we ask OpenLayers to do a GREATER_THAN comparison type, which looks at the
population property of the features and matches it if the value of population is
greater than (but not including) 1500.
Filter.Comparison Value property
All Filter.Comparison objects must have some accompanying value property. Almost all
lter comparison types, like the GREATER_THAN type we just demonstrated, simply use
the value property. Others, like the Comparison type, use the lowerBoundary and
upperBoundary properes. Without specifying the value a lter should look for, the
lter won't work (it wouldn't know what to compare).
Let's take a look at the dierent Filter.Comparison types available.
Filter Comparison types
Unless otherwise specied, each comparison type will have a corresponding value
property. The value property is an {Integer} type, unless otherwise specied.
Filter Type: BETWEEN
BETWEEN: Checks to see if a property is between two values. This does not use the value
property—instead, you specify lowerBound and upperBound values to check between.
The values are inclusive—so if the lowerBound is 500 and the upperBound is 1500, it will
match values in between and including 500 to 1500. Example constructor call:
var my_filter = new OpenLayers.Filter.Comparison({
type: OpenLayers.Filter.Comparison.BETWEEN,
property: 'population',
lowerBoundary:500,
upperBoundary:1500
});

Chapter 10
[ 301 ]
Filter Type: EQUAL_TO
EQUAL_TO: Checks if a property is equal to a specied value. Example constructor call:
var my_filter = new OpenLayers.Filter.Comparison({
type: OpenLayers.Filter.Comparison.EQUAL_TO,
property: 'population',
value: 1337
});
Filter Type: GREATER_THAN
GREATER_THAN: Checks if a property is greater than, but not including, a specied value.
The following example constructor call would match anything greater than (but not
including) 1000—so the smallest value it would match would be 1001:
var my_filter = new OpenLayers.Filter.Comparison({
type: OpenLayers.Filter.Comparison.GREATER_THAN,
property: 'population',
value: 1000
});
Filter Type: GREATER_THAN_OR_EQUAL_TO
GREATER_THAN_OR_EQUAL_TO: Checks if a property is greater than or equal to a specied
value. The following example constructor call would match the value 1000 and anything
greater:
var my_filter = new OpenLayers.Filter.Comparison({
type: OpenLayers.Filter.Comparison.GREATER_THAN_OR_EQUAL_TO,
property: 'population',
value: 1000
});
Filter Type: LESS_THAN
LESS_THAN: Checks if a property is less than, but not including, a specied value.
Example constructor call—this would match anything below 1000, but would not
match the value 1000:
var my_filter = new OpenLayers.Filter.Comparison({
type: OpenLayers.Filter.Comparison.LESS_THAN,
property: 'population',
value: 1000
});

Vector Layer Style Guide
[ 302 ]
Filter Type: LESS_THAN_OR_EQUAL_TO
LESS_THAN_OR_EQUAL_TO: Checks if a property is less than, or including, a specied
value. Example constructor call—this would match anything below 1000, and would
also match 1000:
var my_filter = new OpenLayers.Filter.Comparison({
type: OpenLayers.Filter.Comparison.LESS_THAN_OR_EQUAL_TO,
property: 'population',
value: 1000
});
Filter Type: LIKE
LIKE: Checks if a property contains a value, which in this case is a {String}. For
example, if the property's value was 'village' and the value you specify to check for is
'village', then it would match. The value you specify is also a regular expression—which
means you can pass in various special characters to match on. For example, * will match
zero or more instances of any character. If you just want to see if a certain string is contained
within the property, you can simply set the value to that string without worrying about what
regular expressions are. Example constructor call:
var my_filter = new OpenLayers.Filter.Comparison({
type: OpenLayers.Filter.Comparison.LIKE,
property: 'settlement_type',
value: 'village'
})
More informaon on regular expressions can be
found at http://en.wikipedia.org/wiki/
Regular_expression.
Filter Type: NOT_EQUAL_TO
NOT_EQUAL_TO: Checks to see if a property is not equal to some value passed in, which
is an {Integer} type. An example constructor call would be the following, which would
match everything that did not have a population property equal to the value 1000.
var my_filter = new OpenLayers.Filter.Comparison({
type: OpenLayers.Filter.Comparison.NOT_EQUAL_TO,
property: 'population',
value: 1000
});

Chapter 10
[ 303 ]
Filter.FeatureId
This will lter features based on Feature IDs. This is useful parcularly when working
with WFS services or SLDs. With WFS, FeatureID is a way to reference a unique feature.
WFS servers return data about features, each one containing a FeatureID which uniquely
idenes it. SLDs can also idenfy features by a unique FeatureID. This can be useful if you
know the IDs of specic features you want styled. When using the FeatureID lter, it expects
an array of ds during instanaon:
var my_filter = new OpenLayers.Filter.FeatureId({
fids: ['fid1', 'fid2']
});
Feature.Logical
We've already pracced applying lters to rules, but what about applying a lter object
to another lter object? Why would we want to do this? Well, it allows us to use logical
operators with lters. Meaning, we can create really complex lters quite easily.
There are three types of logical operators that we can use:
OpenLayers.Filter.Logical.AND: Checks if mulple lters match
OpenLayers.Filter.Logical.OR: Checks if at least one of the mulple lters match
OpenLayers.Filter.Logical.NOT: If the lter does not match
We can combine these lters together to create very specic rules, giving us very ne grain
control over what features should get styled. To create a logical lter, you simply specify the
type (which is one of the three logical operators above) and an array of filters which
contains other lter objects.
For example,
var my_logical_filter = new OpenLayers.Filter.Logical({
type: OpenLayers.Filter.Logical.AND,
filters: [
new OpenLayers.Filter.Comparison({
type: OpenLayers.Filter.Comparison.LESS_THAN,
property: 'population',
value: 1000
}),
new OpenLayers.Filter.Comparison({
type: OpenLayers.Filter.Comparison.LIKE,
property: 'settlement_type',
value: 'village'
})
]
});

Vector Layer Style Guide
[ 304 ]
The above lter uses the AND logical operator and two comparison lters. The result
is that this logical lter will match only features that match both the comparison lters
(population less than 1000 and settlement_type contains 'village').
Let's go over this with an example.
Time For Action – guring out logical lters
In this example, we'll use a few logical lters and some random points with random
population and settlement_type values.
1. Add in a WMS and vector layer.
vector_layer = new OpenLayers.Layer.Vector('Basic Vector
Layer');
map.addLayer(vector_layer);
2. Now, we'll need to create an anonymous object containing some selement value
that we'll pick from at random:
var settlement_values = {
0: 'village',
1: 'city',
}
3. Let's create some feature. We'll create twenty features, using some random
population and settle_type values in each feature's attribute property:
for(var i=0; i<20; i++){
vector_layer.addFeatures([new OpenLayers.Feature.Vector(
new OpenLayers.Geometry.Point(
(Math.floor(Math.random() * 360) - 180),
(Math.floor(Math.random() * 180) - 90)
),
{
'population': Math.floor(Math.random() * 2000),
'settlement_type': settlement_values[(Math.floor(Math.
random() * 2))]
}
)]);
}
4. Like before, we'll now need a style object to apply lters to:
var vector_style = new OpenLayers.Style();

Chapter 10
[ 305 ]
5. Now comes the 'hard' part. We'll create a logical lter that checks two comparison
lters. It will see if the population is lower than 1000 and the settlement_type
is 'village'. This is all that's to it:
var filter_village_low_pop = new OpenLayers.Filter.Logical({
type: OpenLayers.Filter.Logical.AND,
filters: [
new OpenLayers.Filter.Comparison({
type: OpenLayers.Filter.Comparison.LESS_THAN,
property: 'population',
value: 1000
}),
new OpenLayers.Filter.Comparison({
type: OpenLayers.Filter.Comparison.LIKE,
property: 'settlement_type',
value: 'village'
})
]
});
6. Next, we'll create another logical lter. This one will check to see if the population
is between 100 and 1500 and check to see if the settlement_type is 'village'.
var filter_village_high_pop = new OpenLayers.Filter.Logical({
type: OpenLayers.Filter.Logical.AND,
filters: [
new OpenLayers.Filter.Comparison({
type: OpenLayers.Filter.Comparison.BETWEEN,
property: 'population',
lowerBoundary: 1000,
upperBoundary: 1500
}),
new OpenLayers.Filter.Comparison({
type: OpenLayers.Filter.Comparison.LIKE,
property: 'settlement_type',
value: 'village'
})
]
});
Downloa d f r o m W o w ! e B o o k < w w w.woweb o o k . c o m >

Vector Layer Style Guide
[ 306 ]
7. Now we'll create one more lter. This one will use the OR logical operator to see if
the population is above 1500 or if the settlement_type is 'city'. So, even
if settlement_type is 'city' and the populaon is say, 500, it will get matched
because at least one of the lters matches:
var filter_city = new OpenLayers.Filter.Logical({
type: OpenLayers.Filter.Logical.OR,
filters: [
new OpenLayers.Filter.Comparison({
type: OpenLayers.Filter.Comparison.GREATER_THAN,
property: 'population',
value: 1500
}),
new OpenLayers.Filter.Comparison({
type: OpenLayers.Filter.Comparison.LIKE,
property: 'settlement_type',
value: 'city'
})
]
});
8. Ok—now we'll just create some rules and apply the lters to them. Each rule
will be applied to one of the lters we just created.
var rule_village_low_pop = new OpenLayers.Rule({
filter: filter_village_low_pop,
symbolizer: {
fillColor: '#ababab', fillOpacity:.8,
pointRadius:8, strokeColor: '#454545',
strokeWidth:2
}
});
var rule_village_high_pop = new OpenLayers.Rule({
filter: filter_village_high_pop,
symbolizer: {
fillColor: '#FFFA93', fillOpacity:.8,
pointRadius:8, strokeColor: '#AFAB57',
strokeWidth:4,
}
});
var rule_city = new OpenLayers.Rule({
filter: filter_city,
symbolizer: {
fillColor: '#BD1922', fillOpacity:.8,
Chapter 10
[ 307 ]
pointRadius:16, strokeColor: '#812B30',
strokeWidth:6,
fontSize:'.8em', fontColor: '#efefef',
label: '${population}'
}
});
9. Last thing—we need to add the rules to the vector_style object, create a
style_map object and apply the style object to the 'default' intent, and nally
set the vector layer's StyleMap to the style map object.
vector_style.addRules([rule_village_low_pop, rule_village_high_
pop, rule_city]);
var vector_style_map = new OpenLayers.StyleMap({
'default': vector_style
});
vector_layer.styleMap = vector_style_map;
10. You should see something like the following, with dierent distribuons of points
and colors since the values were randomized:
What Just Happened?
We just demonstrated how to use logical lters in our map. We can mix and match the
dierent logical operators to create even more complex lters, allowing us to style features
exactly how we want to. There's one more feature class to cover—Feature.Spaal.

Vector Layer Style Guide
[ 308 ]
Feature.Spatial
The Feature.Spaal class allows us to lter features based on their geographic informaon.
This class is used when creang a vector layer. It diers from the previous logical lter, as we
don't typically add this to a rule aer a vector layer has been created—it's used to specify
the features returned from a source like a WFS server. If you are creang a vector layer which
uses the WFS protocol, this is a very useful lter.
When creang a spaal lter, a type and value must be specied. The value will be either
a {OpenLayers.Bounds} or {OpenLayers.Geometry} object, depending on the type.
Some types also allow for addional distance and distanceUnits parameters. Let's take
a look at some of the types:
OpenLayers.Filter.Spaal.BBOX: Species features to match that fall inside a
bounding box, set by an {OpenLayers.Bounds} object in the value property
OpenLayers.Filter.Spaal.CONTAINS: Used to check if an {OpenLayers.
Geometry} object specied by the value property contains a feature
OpenLayers.Filter.Spaal.DWITHIN: Species if a feature is within some distance
specied by the distance property
OpenLayers.Filter.Spaal.INTERSECTS: Used to check if a feature intersects an
{OpenLayers.Geometry} object specied in the value property
OpenLayers.Filter.Spaal.WITHIN: Used to check if a feature is completely within an
{OpenLayers.Geometry} object specied in the value property
So, to use this lter, you'll usually use it when instanang your vector layer. We won't do
an in depth example, as it follows the general format of our previous examples. However,
an example instanaon call using the Spaal lter would look like this:
var my_vector_layer = new OpenLayers.Layer.Vector(
'My WFS Layer',
{
protocol: new OpenLayers.Protocol.WFS({
url: wfs_server
}),
filter: new OpenLayers.Fitler.Spatial({
type: OpenLayers.Filter.Spatial.BBOX,
value: new OpenLayers.Bounds(-180,-90,0,0),
projection: new OpenLayers.Projection('EPSG:4326')
})
});

Chapter 10
[ 309 ]
Summary
We've reached the end of our discussion about the core components of OpenLayers. This
was the last chapter that deals specically with dening parts of the OpenLayers API. In
this chapter, we discussed styling vector layers in OpenLayers. We covered the Style and
StyleMap classes, and went over how to work with the Rules and Filter classes.
The next chapter will be similar to the laer part of this chapter. Instead of going over more
of the OpenLayers library (you know enough now to be dangerous), we'll go over the process
of creang a web applicaon using OpenLayers. We'll put together the things we've learned
throughout this book to demonstrate how everything 'ts together', and what a typical
development process looks like.
11
Making Web Map Apps
By now, we've covered all the parts of OpenLayers that are essenal for making
our own web map applicaon. So far, we've been focusing on how to use the
various dierent parts of OpenLayers. In this chapter we'll put together those
pieces that we've learned and demonstrate how to create an actual web map
applicaon with OpenLayers.
While we won't be introducing many new things in this chapter, we will be pung them
together in ways we haven't before. Throughout this chapter, we'll:
Cover common development strategies
Learn how to interact with third party data
Build a web-mapping applicaon from scratch using Flickr
Deploy our applicaons and discuss what deployment means
Discover how to build the OpenLayers library le
Development strategies
In this chapter, we'll be developing a web map applicaon that loads in data from a third
party source (Flickr). The examples have been structured with iterave development in
mind. What this means is that you start small and make many changes, gradually building
up your web map from nothing into something useful.

Making Web Map Apps
[ 312 ]
Iterave development is an important, popular, and eecve way to develop applicaons.
The core idea is that you create something simple, get it working, and then improve it. You
can gure out more quickly what does and doesn't work by improving on
and learning from previous iteraons.
Another strategy we'll make use of is modular programming. What this means, essenally, is
that we try to keep things as discrete (or modular) as possible. By doing so, once we know a
component works, we don't have to worry about it later.
Creating a web map application using Flickr
Because OpenLayers is so exible, it's easy to make third party soware and data work with
our maps. Sharing geospaal data is becoming more popular, with services such as Flickr and
Twier freely oering geospaally embedded data. Being able to visualize data oen helps
us to understand it. Using OpenLayers, we can place geospaal data (say, twier posts or
Flickr images) on a map and get a clearer picture about the data.
Note on APIs
Many popular sites provide an API (Applicaon Programmer Interface) which allows
programmers to interact with their data. For instance, both Flickr and Twier provide APIs
that enables developers to view recent updates (photo uploads and tweets). These APIs (but
not all APIs) let us get geospaal data that we can use with OpenLayers. Flickr provides some
very easy to use methods to retrieve data with associated geographic informaon, so we'll
focus this chapter on building a web-mapping applicaon around Flickr.
Accessing the Flickr public data feeds
While Flickr provides a very robust developer API, we'll only interface with Flickr via URL
calls which provide access to feeds. Feeds provide informaon about data, and we can get
dierent kinds of feeds (e.g., a specic user's feed or the feed for all users combined). It's
really quite easy to do so; we just make a call to a URL and specify certain parameters. The
base URL we'll call is http://api.flickr.com/services/feeds/geo/?format=kml.
The format parameter can be a number of values—JSON, RSS, SQL, etc. We'll be using
KML and JSON in this chapter. When calling this URL, a le in the format you ask for will be
returned which contains informaon about the latest photos uploaded that have geographic
informaon associated with them (that's what the geo in the URL is for).
Chapter 11
[ 313 ]
Flickr's API documentaon can be found at http://www.flickr.com/
services/api/. More informaon about the Flickr feeds can be found at
http://www.flickr.com/services/feeds/.
Specifying data
We can rene what data is returned by adding addional parameters to the URL. You can
specify a user's ID via the ID key, a group via the g key, and tags via the tags key. You can also
specify other things, such as a certain coordinate and radius—for now, we'll just be focusing
on the tags key.
How we'll do it
Let's create a web map applicaon that will pull in data from Flickr and display it on a map.
This will allow us to see, geographically, where photos were submied from. We could, for
example, search for 'bird photos' and get an idea where some parcular bird species might
be common (or at least, commonly photographed and uploaded to Flickr). We'll break down
the development of this applicaon into a few dierent examples, so let's get started.
Time For Action – getting Flickr data
The rst step in our applicaon will require us to get data from Flickr. We'll request some
data and then save it to the server.
1. The rst step is to gure out what sort of data we want to get. We'll use the URL
we menoned before, but we'll also specify a tag. Let's use 'bird' as a tag. Open up
this URL in your web browser, and you should be able to download it as a KML le
http://api.flickr.com/services/feeds/geo/?format=kml&tags=bird.
2. Save the le as flickr_data.kml and place it in your map directory.
3. Open up the le and take a look at it. We won't be eding it, but just take a look to
see how the data is structured. Noce that there are style tags—if we want, we
can directly apply the styles from the le to our map (as we'll see soon).
What Just Happened?
We just downloaded the latest images in KML format that contained a tag called 'bird.'
When you call the URL and pass in some tag, Flickr will return back to you the latest images
uploaded that have some geographic informaon associated with them.
Making Web Map Apps
[ 314 ]
Have a Go Hero – accessing the Flickr API
Make a request to the URL from the previous example. Try changing the tags parameter
and noce how the returned le is dierent. Based on the parameters in the URL, Flickr will
return dierent data.
Why did we do this?
You may be wondering why we downloaded the KML le. If you remember from Chapter 9,
we could just create a vector layer and point to the Flickr URL instead of a local le.
However, if we download the KML le we then have direct control over it; we can modify
it. When we're in the 'development mode', we want to keep things as easy to debug and
x as possible.
Reducing possible errors
Once we get the code working to load the KML le we downloaded (in the next example), we
don't need to worry about it anymore. When we develop our applicaon and nd bugs or
errors with it, we don't have to spend much me tracking them down. We get the stac le
working, and we move on to the next task. We don't have to worry about the Flickr API going
down, our requests not compleng, or other things—we can focus on other parts. Once we
get more parts of our applicaon working, then we'll switch to using the dynamic URL. For
now, let's use the stac le.
Because we'll be loading in a le, you must run this code on a server. You
can run it on localhost—if you don't have a server, you can download
Apache for windows at http://www.apachefriends.org/en/
xampp.html.
The reason it needs to run on a server is because the KML le is loaded
via an AJAX call, and the les must reside on the same domain as the
originang request. See Chapter 9 for more details on loading les.
Chapter 11
[ 315 ]
Time for Action – adding data to your map
Time to get back to coding. Now that we have the data from Flickr from the previous
example, let's add it to our map. We'll create a Google Maps base layer and then a vector
layer lled with the Flickr data on top of it.
1. First, we need to make sure the flickr_data.kml le is in the same directory
that we'll be creang our map in. Save the le in your server's document root folder,
which may be something like (with Xampp on windows) c:/xampp/htdocs or on
OSX (with Xammp, http://www.apachefriends.org/en/xampp-macosx.
html) in /Applications/XAMPP, or on Linux: /var/www/. We'll refer to it as
example_1.html.
2. Now let's create the map. We won't be using a WMS layer this me—instead, we'll
just be using a Google base map and place our vector layer on top of it. Make sure
to rst add the reference to the Google Maps API in the <head> secon:
<script src="http://maps.google.com/maps/api/js?sensor=false"></
script>
3. Now, create and add a Google Maps layer.
var google_map = new OpenLayers.Layer.Google(
'Google Layer',
{}
);
map.addLayer(google_map);
4. We'll now need a vector layer. We'll have to dene it's projecon as EPSG:4326
because that's the projecon the coordinates in the KML le are in. If they were
in a dierent projecon, we would dene it as whatever projecon they were in
(although, we would need Proj4js to do projecon transformaons).
We'll use the HTTP protocol because we'll be accessing the KML le from our local
server. This is why we can't simply open up the page in a folder—when we do so, the
protocol is file:///, so we must open it from our local web server (provided you
have one installed, see the previous note).
Inside the protocol, we'll set up a format object from the KML class and set
extractAttribtues to true so we can access the aributes associated with each
image. Finally, we'll use a Fixed strategy.
var vector_layer = new OpenLayers.Layer.Vector('Flickr Data',
{
projection: new OpenLayers.Projection('EPSG:4326'),
protocol: new OpenLayers.Protocol.HTTP({
url: 'flickr_data.kml',

Making Web Map Apps
[ 316 ]
format: new OpenLayers.Format.KML({
extractAttributes: true
})
}),
strategies: [new OpenLayers.Strategy.Fixed()]
}
);
5. And add it to the map:
map.addLayer(vector_layer);
6. We should see some points now that show the locaon of the images that were
uploaded. Open up the page via localhost, for example: http://localhost/
openlayers_book/chapter_11/code/example_1.html.
7. Now, let's take a look at what extractAttributes is used for. When we set it to
true, aributes from each feature in the KML le is applied to the attributes
property of each feature object. More bluntly—it takes aributes from the le and
applies them to your points. Bring up Firebug and, in the console, access one of the
feature objects:
map.layers[1].features[0].attributes
Chapter 11
[ 317 ]
8. You should see an object that contains three properes: Snippet, name, and
styleUrl. These are somewhat arbitrary properes, specied in the KML le for
each photo, and with extractAttributes: true we can access them. The
styleUrl is a reference to a style tag inside the KML le—we'll talk about it in the
next example.
What Just Happened?
We just loaded in the KML le and used extractAttributes to look at the properes that
each photo contains. Flickr is providing these aributes—the aributes in the KML le gets
applied to our feature objects. Another property we can use is extractStyles to apply the
styles from the KML le to our features.
Time for Action – extract style
The extractStyles can be used to style the vector layer based on the styles specied
in the KML le. Because the Flickr KML le provides style informaon, we can use this
property—let's see how.
1. If the KML le you are working with contains style informaon, we can directly
access and use it. In this case, Flickr is providing us with a KML le embedded
with style tags, so let's use it.
2. We'll specify extractStyles: true inside our vector layer creaon call.
In the format value seng, add it in, and be sure to include the comma:
...
format: new OpenLayers.Format.KML({
extractAttributes: true,
extractStyles: true
})
...
Making Web Map Apps
[ 318 ]
3. Now open the page and you should see thumbnails of the images:
What Just Happened?
Using extractStyles, our features went from the default orange dots to thumbnails of
the actual uploaded photos. When this property is used, style denions in the KML le are
applied to the style property of each feature. KML les can include style informaon—that
is why we can use the extractStyles property with the KML format. OpenLayers will
parse the style informaon from the KML le and generate the necessary style denions.
Turning our example into an application
So far, we've accessed data from Flickr, saved it to a le, and added it to our map. This
is prey cool, but we really haven't done much else than just load in the data, from an
OpenLayers point of view. It's useful, but we really haven't created a full featured 'web
applicaon' just yet. So, let's focus on how to build a more useful web-mapping applicaon.

Chapter 11
[ 319 ]
To do this, we'll basically need to do two general things:
1. Add some interacvity to our map.
2. Use 'live' data. We shouldn't have to manually download a KML le every me
we want new data—our web applicaon should do it automacally.
Let's focus on the rst part, and then change the data source aer we develop some
interacvity.
Adding interactivity
In the previous example, each feature received an externalGraphic property because we
used extractStyles (causing thumbnails to be displayed for each feature)—but it's hard
to see where they are on the map, especially when zoomed out. We'll need to address that.
We want to show the photos, but we also want to show where they are.
To accomplish this, we could revert back to using point features and making use of the
selectFeature control. But what if too many features are too close to each, making it
harder to select them? That's what the cluster strategy is for, so we'll use it as well.
Selecting features
What should happen when we select a feature? We'll need to show informaon about the
feature we clicked on, and that informaon is the Flickr photo itself and any associated
aributes. So, let's keep things a lile simple for now and show the photo(s) informaon
below the map when a feature is selected.
Time for Action – adding some interactivity
In this example, we'll be using the cluster strategy, selectFeature control, and showing photo
informaon on selecon. As we go along, feel free to tweak the examples yourself, change
the funconality, or anything else—that's the best way to learn!
1. Make a copy (or direct edit) of the code from the previous example. We'll be
improving it.
2. We'll keep extractAttributes and extractStyles. Even though we specify
extractStyles, we're going to be using a custom styleMap object. We're
doing this so that we can sll access the thumbnail image locaon (which is set as
externalGraphic in the feature's style object when using extractStyles).
Make sure the format object looks like the following:
...
format: new OpenLayers.Format.KML({
extractAttributes: true, extractStyles: true
Downloa d f r o m W o w ! e B o o k < w w w.woweb o o k . c o m >

Making Web Map Apps
[ 320 ]
})
…
3. Let's add a cluster strategy to the vector layer now so our points cluster. Our
strategies array should now look like the following:
strategies: [new OpenLayers.Strategy.Fixed(),
new OpenLayers.Strategy.Cluster()]
4. Let's take a quick look at the map to make sure it works. Since we have used the
cluster strategy, we won't see the thumbnails that we would have (like in the
previous example). Remember to access it from http://localhost/...:

Chapter 11
[ 321 ]
5. So far, so good. Our points look kind of small though, and we can't visually
disnguish how many points are in a cluster. Let's change that. We'll make the
clusters larger depending on how many points the cluster contains. When using
clustering, each feature belongs to a cluster, and we can access the number of
features in a cluster through feature.attributes.count. Let's also add a label
to each feature showing the number of points it contains. We'll also pass in a second
context object when instanang the style object, which allows us to dene the
values of variables to use with aribute replacement. The context object will
contain a funcon that returns some value which will be used with the aribute
replacement.
//Create a style object to be used by a StyleMap object
var vector_style = new OpenLayers.Style({
'fillColor': '#669933',
'fillOpacity': .8,
'fontColor': '#f0f0f0',
'fontFamily': 'arial, sans-serif',
'fontSize': '.9em',
'fontWeight': 'bold',
'label': '${num_points}',
'pointRadius': '${point_radius}',
'strokeColor': '#aaee77',
'strokeWidth': 3
},
//Second parameter contains a context parameter
{
context: {
num_points: function(feature){ return feature.
attributes.count; },
point_radius: function(feature){
return 9 + (feature.attributes.count)
}
}
});
//Create a style map object and set the 'default' intent to the
var vector_style_map = new OpenLayers.StyleMap({
'default': vector_style
});
//Add the style map to the vector layer
vector_layer.styleMap = vector_style_map;
Making Web Map Apps
[ 322 ]
6. Let's take a look. The size and labels should change for each cluster:
7. The rst part of our plan is done—we've successfully added clusters. Now, we need
to add feature selecon ability. Let's create a selectFeature control. We'll add
events soon, but for now let's just create the control and add it to the map and then
acvate it.
//Add a select feature control
var select_feature_control = new OpenLayers.Control.SelectFeature(
vector_layer,
{}
)
map.addControl(select_feature_control);
select_feature_control.activate();
8. Now, if we select a feature it won't look quite right. This is because we haven't
dened a style for the select intent. Let's go back and dene a style object and
add it to our vector_style_map object:
var vector_style_select = new OpenLayers.Style({
'fillColor': '#cdcdcd',
'fillOpacity': .9,
'fontColor': '#232323',

Chapter 11
[ 323 ]
'strokeColor': '#ffffff'
})
//Create a style map object and set the 'default' intent to the
var vector_style_map = new OpenLayers.StyleMap({
'default': vector_style,
'select': vector_style_select
});
9. On to the last part—creang the events. Our plan is to have some photo informaon
display when we select features. Let's go ahead and get the framework for that set
up rst by simply creang a div that will appear below the map. In your HTML code,
add the following:
<div id='photo_info_wrapper'></div>
Let's now create a funcon that will be called when we select a feature. It will need
to update the photo_info_wrapper div with informaon about the photo(s)
contained in the selected cluster. We'll need to create a loop that will look at each
feature in the selected cluster, pull out its aributes, and update the HTML of the
div. This will all happen in a funcon that gets called when a feature is selected, and
we also need to create a funcon that will clear the div when a feature is unselected.
We'll need to grab properes from the feature's attributes property, which are
lled by the earlier extractAttributes parameter when creang the vector
layer. We'll also access the style property of the features (which is populated by
the extractStyles parameter we used earlier) to get the externalGraphic
locaon. Let's create the funcons:
function on_select_feature(event){
//Store a reference to the element
var info_div = document.getElementById('photo_info_wrapper');
info_div.innerHTML = '';
//Store the clusters
var cluster = event.feature.cluster;
//Loop through the cluster features
for(var i=0; i<cluster.length; i++){
//Update the div with the info of the photos
info_div.innerHTML += "<strong>"
+ cluster[i].attributes.name
+ "</strong><br />"
+ "<img src='" + cluster[i].style.externalGraphic + "'
/>"
+ cluster[i].attributes.Snippet
+ "<br /><hr />";
Making Web Map Apps
[ 324 ]
}
}
function on_unselect_feature(event){
//Store a reference to the element
var info_div = document.getElementById('photo_info_wrapper');
//Clear out the div
info_div.innerHTML = '';
}
10. Now, we just need to register the events.
vector_layer.events.register('featureselected', this, on_select_
feature);
vector_layer.events.register('featureunselected', this, on_
unselect_feature);
11. Now, when we click on a cluster we should see informaon about the points
as follows:

Chapter 11
[ 325 ]
What Just Happened?
We just added some interacvity to our map. It's nothing too complex, although at rst
glance the code may seem daunng. We didn't really do anything 'new' though. We
registered a couple of vector layer events that get red when selecng a feature and then
show informaon about the features selected. From here, you could change the applicaon
a bit with ease—such as changing how and what is shown. This example is to be used more
or less as a guide to help you create your own applicaons. Let's take this example further;
but rst, we'll need to use realme data.
Using real time data with a ProxyHost
The data we've loaded (flickr_data.kml) is from a third party source, but it's only
fresh up to the point that we download it. Let's address the second point we came across
previously:
Use 'live' data, and not download a KML le ourselves when we want new data
What we need to do is access the data in real me. To do this, we'll need to use a ProxyHost.
This term is discussed in more detail in Chapter 9, but it's essenally a way to circumvent
the cross domain request restraints of AJAX by calling on some server side script to make
requests for us (acng as a proxy).
Time for Action – getting dynamic data
Let's specify a ProxyHost and get data from Flickr in real me.
1. We can use the example we just created, as we'll only be adding two things to it.
2. First, we'll need to dene the URL of our proxyhost. It can be a CGI script, python
script, etc. A CGI script is provided by OpenLayers at http://trac.osgeo.org/
openlayers/wiki/FrequentlyAskedQuestions#ProxyHost.
If you use that le, be sure to have Python installed. By default, the le would go in
c:/xampp/cgi-bin using Xampp on Windows or on Linux: /usr/lib/cgi-bin
or /var/www/cgi (the locaon may vary between distribuons). In your code,
specify the ProxyHost, changing the URL to point to your ProxyHost:
OpenLayers.ProxyHost = '/cgi-bin/proxy.cgi?url=';

Making Web Map Apps
[ 326 ]
3. Next, we'll need to add the Flickr domain to the allowed host variable in the proxy
le. Edit the proxy le and add the Flickr URL to the list of allowedHosts (near the
top of the le provided by OpenLayers). At the me of wring, the last item in the
list is 'vmap0.tiles.osgeo.org'. Add a comma aer the last item and then add
'api.flickr.com' to the list:
allowedHosts = [ …, 'vmap0.tiles.osgeo.org', 'api.flickr.com']
4. Lastly, we'll just change the URL that the vector layer points to. In the protocol
object in the vector layer, we'll need to change the url value and add a params
object which species addional GET variables that will be appended to the URL call.
In this case, we'll want to specify the format and tags params:
...
protocol: new OpenLayers.Protocol.HTTP({
url: 'http://api.flickr.com/services/feeds/geo/',
params: {'format':'kml', 'tags':'bird'},
…
5. That's it! Now, assuming you've set up the ProxyHost properly, you should see nearly
the same thing as before. The only dierence is the data is likely to be dierent, as
you're now tapping into the stream in real me.
What Just Happened?
We just used a ProxyHost and pointed our vector layer to the actual Flickr API URL. Why
didn't we do this at rst? Again, to cut down on the things we need to worry about when
developing the applicaon. Now that we've got a lile bit of interacvity and a live URL,
let's take it a step further.
Wrapping up the application
Showing bird pictures from around the world is nice—but what about giving users the
ability to show a photo with any tag they want? That's what we'll do next.
Recap
So far, we've created a map that lets users interact with Flickr data. As far as we're
concerned, we're more or less done with the interacon part. Now we'll focus on changing
the 'data source' part. Currently, we're only asking for photos with the tag bird, but we
want to allow that to be any tag.
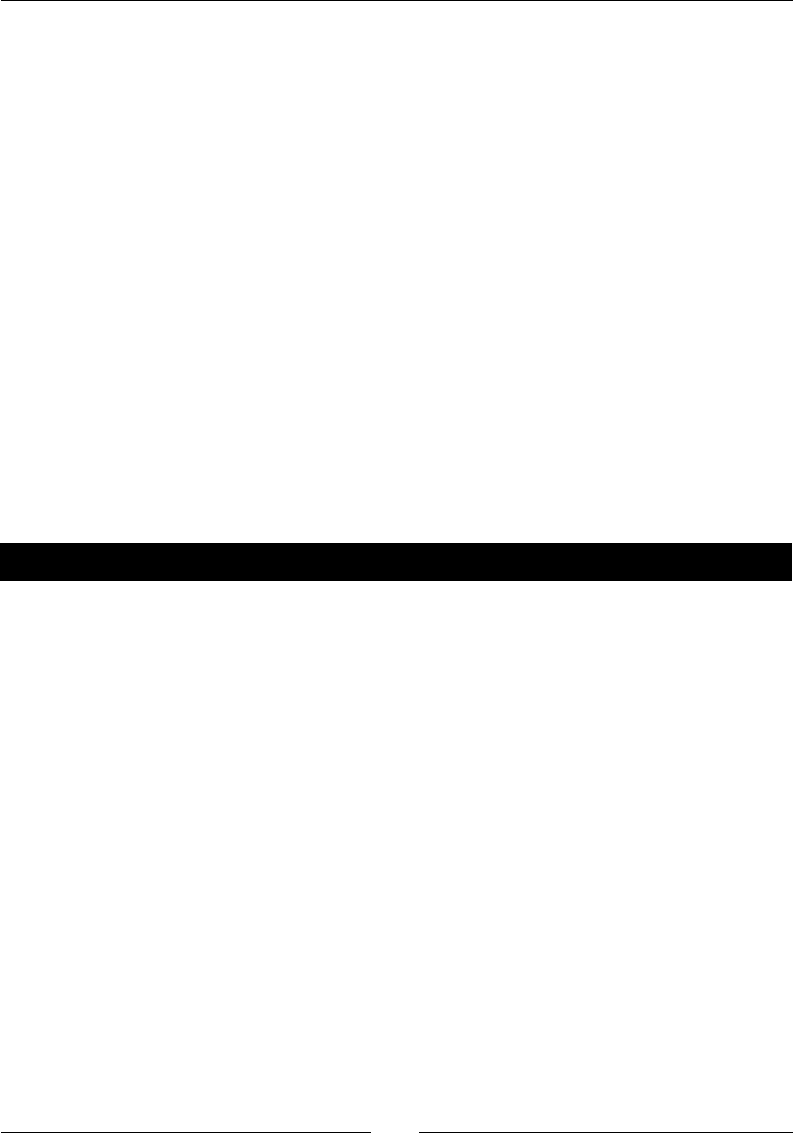
Chapter 11
[ 327 ]
An important concept in applicaon development is to keep things modular. This basically
means that we try to write out applicaons in such a way that we can take out and put in
dierent parts without drascally changing the rest of our code. In this case, we're going
to leave the interacon part of our code alone (what we've done so far at least) and focus
mainly on the code that retrieves data.
The plan
What needs to happen? Well, let's think through this. We want the user to be able to specify
any tag they want. We want to allow mulple tags. This means we'll need to change the URL
that the vector layer is poinng to, but only aer they specify the tags. We'll be able to do
this by changing the params property of the vector layer's protocol object. Right now, the
tags is hard-coded as 'bird', but this will be a variable based on user input.
Changing the URL
So, we know we need to allow a variable which species the tags parameter in the URL to
be based on user input. We'll need to create an input box that will allow the user to specify
tags. We'll also have a submit buon that will, when clicked, call a funcon that updates the
vector layer's URL with the specied parameters.
Time For Action – adding dynamic tags to your map
Let's add some more interacon to our map now. We'll add an input box that will change the
requested Flickr data based on the user's input.
1. Open up the previous example, we'll be adding to it. First, we'll need to add an input
box and buon to the HTML page. We'll create a div that holds them and place it
right next to the map. Right aer the map div, add the following:
<div id='input_wrapper' style='position:absolute; left:610px;
top:0;'>
<input type='text' id='input_tags' value='bird' />
<input type='button' id='input_submit' value='Show Data'
/>
</div>
2. Next, we'll need to create a funcon that will get called when the input_submit
buon is clicked. This funcon does three things. First, it will set the tags
parameter of the vector layer to be equal to whatever value is in the input_tags
input box. Secondly, it will call the vector layer's refresh() method which updates
the vector layer and makes a new request for data based on the new parameters.
Lastly, it will clear out the photo_info_wrapper div's HTML. You can add this at
the boom of the init() funcon.

Making Web Map Apps
[ 328 ]
function update_vector_layer(){
//Change URL based on input tags
vector_layer.protocol.options.params['tags'] =
document.getElementById('input_tags').value
//Refresh the layer with the new params
vector_layer.refresh();
//Lastly, clear out the div that shows photo info
document.getElementById('photo_info_wrapper').
innerHTML = '';
}
3. Lastly, we'll need to make the input_submit buon call the funcon when it is
clicked. Now, we're going to be using JavaScript's built in event handling— but it's
quite similar to what we do in OpenLayers. We just call the addEventListener
method of an element. To get that element, we'll use document.getElementById
like we've been doing throughout the book. When calling it, we pass in the event
type ('click' in this case), the name of a funcon to call, and a Boolean that
species how the event propagates (if you're not sure about this, just leave it as
false).
document.getElementById('input_submit').addEventListener(
'click',
update_vector_layer,
false);
4. Open up the page and you should see an input box next to the map. When you
change the value and hit the buon next to it, the update_vector_layer
funcon will get called and refresh the vector layer. Try typing in various tags (or
mulple tags separated by a comma) and hing the buon:
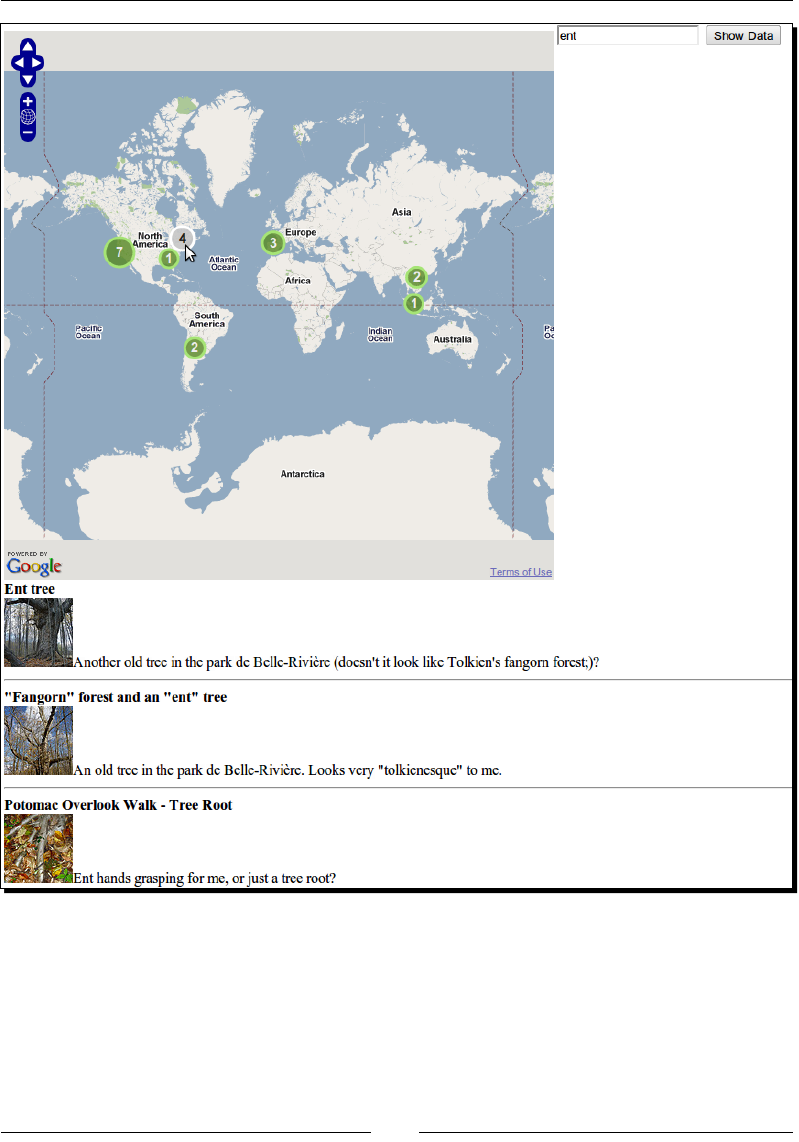
Chapter 11
[ 329 ]
What Just Happened?
We just updated our Flickr applicaon to allow user input that aects what data is shown.
We did this in a sort of modular way—we didn't have to change any of the previous code
we wrote. Instead, we just updated the data source and added addional funconality. Now
that we've wrien an applicaon, let's talk a lile bit about how to deploy it.
Making Web Map Apps
[ 330 ]
Deploying an application
What does it mean to deploy an OpenLayers (or any other) applicaon? Basically, deploying
something means that we're switching from a development mode to a producon mode;
we're releasing something for the rest of the world to see.
The producon applicaon should be as fast and bug free as possible. Because we want the
producon version to be accessed as quickly as possible, this will oen include removing
things we used in the development environment and tweaking the producon environment
to beer handle a lot of users. It also means using les that are as small in size as possible.
One of the rst things we should do to deploy our applicaon is to use the OpenLayers build
script to create a library le which is much smaller in le size.
There are many other things we can do to beer prepare
our producon environment, such as using caching as well
as combining and minimizing our JavaScript les. These, and
other pracces, are outside the scope of this book, but further
informaon can be found on the book's website at http://
vasir.net/.
Building the OpenLayers Library le
OpenLayers provides an easy way to congure the library le that gets included in your page.
Throughout the book, we've been including a le called OpenLayers.js, which is a le that
contains all the funconality (classes, funcons, and so on) that OpenLayers provides. So far,
this has been great—we've been developing up to this point, so we want to be sure that we
have access to all the classes that we may use. What's my point here?
Always try to serve small les
Well, the OpenLayers.js le we've been using is around 920 KB! That's almost a
megabyte—quite a large le to load, especially since it contains only JavaScript code. Even
though large le sizes aren't as much of an issue as they were years ago, when everyone
was on slower connecons, a one megabyte JavaScript le in a producon environment is
something we want to avoid if at all possible.
We want all our les in a producon environment to be as small as they can absolutely be.
This will allow users to download the les faster (since there is less to download) which
decreases the page's loading me (saves on bandwidth expenses). Faster page loads (even
if the speed is only perceived) will greatly enhance the user's experience. Fortunately,
we can greatly reduce the size of the OpenLayers library le with a build tool provided by
OpenLayers.
Chapter 11
[ 331 ]
Using the OpenLayers build le
When you download the OpenLayers archive le, there is a folder inside it called as
build. Inside that, there is a le called build.py, which is a python script that creates an
OpenLayers.js le based on a separate build conguraon le. Building the library this
way is called a single le build, as all the JavaScript code behind OpenLayers is contained in
a single le.
So, what we can do is tell the build script to create an OpenLayers.js le that includes
only the classes our applicaon needs. This means that we can't access other classes, but in
a producon environment we won't need to, as the code won't be changing—that's what
development is for. The benet to doing this is because if the le has less code in it, the le
size will be smaller.
Conguring the build script
When the build script runs, it looks for a conguraon le to determine which classes to
include and exclude when creang the OpenLayers.js le. There are two conguraon
les OpenLayers ships with by default:
full.cfg: Causes the build script to include everything
lite.cfg: Includes just a minimal amount of classes to create a WMS or led layer,
and does not include controls
You can create your own les by copying one of these les and specifying the les you want
to include. When creang your own build conguraon le, you must include at least the
secon labeled [first] from the full.cfg or lite.cfg les.
The [include] secon species what les should be added to the OpenLayers.js output
le. If le blank, all les will be included. Otherwise, only les specied in this secon get
included. To nd out what les should be included here, look at your code and whenever you
see a reference to the class (e.g., when calling new OpenLayers.Classname), it means
you'll need to include that class here.
The build script will automacally look for class dependencies, so you do
not need to specify a parent class. For example, if you wish to include
an individual control class, you can specify that class name and the build
script will automacally include the base Control.js le.
The [exclude] secon will be read in if the [include] secon is le blank. These are
classes that will not be included in the nal build le. However, if you specify classes in the
[include] secon, this secon will be ignored and only the classes in the [include]
secon will get included.

Making Web Map Apps
[ 332 ]
Time for Action – building a Cong le
Let's take a look at how to write a build cong le.
1. Copy the lite.cfg le found in the build directory and name the copied version
example_1.cfg (or whatever you'd like, but that's what we'll refer to it as).
2. Let's manually specify some les. We'll add in a couple controls. Add in the
following and then save the le. The full le should look like this:
# Config File
[first]
OpenLayers/SingleFile.js
OpenLayers.js
OpenLayers/BaseTypes.js
OpenLayers/BaseTypes/Class.js
OpenLayers/Util.js
[last]
[include]
OpenLayers/Map.js
OpenLayers/Layer/WMS.js
OpenLayers/Control/LayerSwitcher.js
OpenLayers/Control/Navigation.js
OpenLayers/Control/Scale.js
[exclude]
What Just Happened?
We just created a conguraon le for our build named example_1.cfg. We'll be
using this le to build the OpenLayers.js le. Noce that we did not have to include
the base Control.js class—the build script will automacally look for and include
the dependencies.
Pop Quiz – using the Build script
Now that you know how to use the build script, can you come up with some reasons why
you think using it would be a good idea? What are some of the benets of using it? What
would be a downside of using it?
Chapter 11
[ 333 ]
Running the build script
To build the OpenLayers.js le, we must run the build.py script. This will require
Python installed on your computer, which can be downloaded for free at http://www.
python.org/—download either the 2.6 or 2.7 version.
When the script is run, it will look for a conguraon le and build a combined
OpenLayers.js le depending on the conguraon le. It will automacally include
the class dependencies. Lastly, it will also minify (remove whitespace and unnecessary
characters) the combined JavaScript code and create an OpenLayers.js le in the build
directory. From there, you can copy the le and use it in your producon code.
To run the script, on Linux you can simply cd into the directory and run:
./build.py config_file.cfg
Where config_file.cfg is oponal. If not included, the full.cfg le will be used.
On Windows, you can use the command prompt to cd into the directory and run the build
le the same way. You can also hit Start then select Run and copy the locaon of the build.
py le from the Windows Explorer's address bar and paste it, along with the name of the
cong le. For example,
c:\users\your_name\Download\OpenLayers\build\build.py config_file.cfg
Time for Action – running the Build script
Let's take a look at how to run the script now.
1. Execute the build script with the cong le we created in the previous example.
Depending on your operang system (refer to the commands we just talked about):
./build.py example_1.cfg
2. You should see the output aer running the command which informs you what the
script is doing. In this case, it merged a total of 34 les and the nal le size was just
over 160 KB. That's a huge decrease from the original 920 KB!
What Just Happened?
We just run the build script and an OpenLayers.js le was produced. Depending on your
own applicaon, you would create a build script and specify the classes your code uses.
Then, you would run the build script with that conguraon le and copy the outpued
OpenLayers.js le over to your producon code base.
Doing it this way, you cut down the me users have to wait to load your page, as the le size
will be smaller and take less me to download.
Downloa d f r o m W o w ! e B o o k < w w w.woweb o o k . c o m >
Making Web Map Apps
[ 334 ]
Summary
You've reached the end of the book! In this chapter we built a simple web map applicaon
that grabs Flickr data based on user input. We covered some development concepts
throughout the chapter, such as aempng to keep our code modular. We learned how to
interact with other third party APIs, and built an applicaon from the ground up. Lastly, we
talked about deployment and learned how to use the OpenLayers build script. Now that
you've nished reading this book (I hope you've enjoyed it), you should be able to go out
and make your own impressive web maps!
All code samples throughout this book, along with more deployment and
JavaScript opmizaon techniques and more can be found at this book's
website, http://vasir.net/openlayers_book/.
Pop Quiz Answers
Chapter 2: Squashing Bugs With Firebug
Answer: 2
Chapter 3: The 'Layers' in OpenLayers
Answer: 4. There will be an error because the variable b cannot be accessed outside the
test funcon.
Chapter 4: Wrapping Our Heads Around Projections
Answer: There are a variety of reasons why other projecons would be useful. Other
projecons preserve dierent aributes, and you would likely want to use a dierent
projecon if your map was aimed at showing close up areas. The EPSG:4326 projecon
would not be well suited for showing locaons near the poles.
Chapter 6: Taking Control of Controls
Answer: 3—TYPE TOOL

Pop Quiz Answers
[ 336 ]
Chapter 7: Styling Controls
Answer: There are numberless ways to access the element, here are just a few
possible ways:
#inner_most
#ouer_div .paragraph_style #middle_div #inner_most
div p div span
#ouer_div p #middle_div #inner_most
div #inner_most
Chapter 8: Charting the Map Class
Answer: A couple of possible ways would be to use map.setCenter(new OpenLayers.
LonLat(-42,52));, map.panTo(new OpenLayers.LonLat(-42,52));, or create a
bounds object containing the coordinate and call, for example: map.zoomToExtent(new
OpenLayers.Bounds(-43, 51, -41, 53));.
Chapter 9: Using Vector Layers
Answer: There is really no 'right' answer. Any applicaon that involves clients interacng
with data would be a great use case for the vector layer. For example, a real estate site that
mapped houses and displayed informaon about them would be a great use for the vector
layer.
Chapter 10: Vector Layer Style Guide
Answer: We would set the background property to contain the drop shadow image, and the
externalGraphic property to contain the image of the marker. We could also adjust the
image osets to give it a more realisc eect if necessary.
Chapter 11: Making Web Map Apps
Answer: Any number of reasons would be good, parcularly reasons involving reduced le
size. The smaller the le size, the faster the users can download the le. This also saves on
bandwidth costs. The only real downside is that once the le is created by the build script, it
will be harder for humans to read.
Index
A
absolute path 19
acvateControl method 156
acvateControl() method 170
acvate() event 168
acvate() funcon, OpenLayers.Control
class 138
addControl method 163
addEventListener method 328
addLayer funcon 54
addLayers funcon 59
addOpons( opons ) funcon 87
addUniqueValueRules funcon 290
addUniqueValueRules method 289, 290
alert() funcon 42
allOverlays property, Map class
about 193
using 194-196
alpha, layer properes 67
animaonEnabled, VirtualEarth layer class
properes 117
Apache, for Windows
downloading 314
API 312
API documentaon 28, 47
Applicaon Programmer Interface. See API
ArcGIS layer documentaon
reference link 72
ArcGIS Server REST API
reference link 72
area, map projecons characteriscs 90
argParser control 23
ArgParser control, OpenLayers.Control
subclasses 138, 139
arguments 26
aribute replacement
about 287
working with 287, 289
aributes property 323
Aribuon control, OpenLayers.Control subclasses
about 139
div property 139
parator property 139
using 140
aribuon, layer properes 67
autoAcvate property, OpenLayers.Control class
137
B
base layer 51
BBOX parameter 41
beforefeatureadded event 246
Bing Maps 115
Bing (Microso) Maps 104
Bing/Virtual Earth Layer
creang 115-117
build le, OpenLayer
cong le, building 332
conguring 331
build script, OpenLayer
running 333
Buon subclass, controls
about 159
displayClass property 160
trigger() funcon 161
type property 160
C
calculateInRange() funcon 87
Cascading Style Sheets. See CSS
changelayer event 220
characteriscs, map projecons

[ 338 ]
area 90
bearing 91
direcon 91
distance 91
scale 91
shape 91
class events, Vector Layer. See event types,
Vector Layer
about 243
event types 244, 245
Client / Server Model, web mapping applicaon
10
client side, OpenLayers 8
clone() method 222
Clustering class 270
code
JavaScript object notaon 21-24
understanding, line by line 18-21
working 17
Comparison class, Filter class subclasses
about 299
types 300, 301, 302
types, BETWEEN 300
types, EQUAL_TO 301
types, GREATER_THAN 301
types, GREATER_THAN_OR_EQUAL_TO 301
types, LESS_THAN 301
types, LESS_THAN_OR_EQUAL_TO 302
types, LIKE 302
types, NOT_EQUAL_TO 302
Value property 300
console.log() 45
console panel, Firebug
about 35
API documentaon 47
code, execung 42, 43
console log area 42
enabling 35
input area 42
object literals, creang 43
using 42
Constructor 55
Control class 136
control related funcons, Map class
ddControl () 209
addControls() 209
getControl () 209
getControlsByClass () 209
removeControl() 210
using 210
controls
about 130
adding, to map 130
ArgParser control 130
creang 159
Navigaon control 130
OverviewMap control 130
panel control 153
removing, ways 136
ScaleLine control 130
using, in OpenLayers 130
controls, adding to map
addControl() method, using 135, 136
addControls() method, using 135, 136
map creang, no controls used 131, 132
methods 130
OpenLayers.Control.ArgParser 131
OpenLayers.Control.Aribuon 131
OpenLayers.Control.Navigaon 130
OpenLayers.Control.PanZoom 130
passing, in array of controls 135
steps 132-134
controls, creang
Buon subclass 159
Control.SelectFeature class
about 262
methods 264
properes 262
controls property, Map class 193
control types, panel control
OpenLayers.Control.TYPE_BUTTON 153
OpenLayers.Control.TYPE_TOGGLE 153
OpenLayers.Control.TYPE_TOOL 153
panel class, using 154-157
Panel control 157
coordinate transforms 99
CSS
about 172
and OpenLayer 180
eding 172, 173
external les, using 176, 177
HTML elements, styling 174
inheritance, order 178
purpose 172

[ 339 ]
using, in HTML 175
viewing, in Firebug 178
CSS panel, Firebug 37
custom buon
other control types 165
other control types, creang 165
requirements 161
simple buon, creang 161-164
custom_buon_func funcon 162
custom projecons
dening 102
D
data types
about 66
{Array} 66
{Boolean} 66
{Float} 66
{Integer} 66
{Object} 66
{OpenLayers.______} 66
{String} 66
deacvate() funcon, OpenLayers.Control
class 138
destroy() funcon, OpenLayers.Control class 137
Dev list 28
dierent projecon
specifying 94, 95
using 93, 94
displayClass property, OpenLayers.Control
class 137
displayInLayerSwitcher property 61, 67
displayOutsideMaxExtent, layer properes 70
displayProjecon property 121
displayProjecon property, Map class 194
distance property 308
div property, Map class 194
div property, OpenLayers.Control class 137
DOM (Document Object Model) 35
DOM (Document Object Model) elements 24
DOM panel, Firebug 38
dot notaon 44
draw() funcon, OpenLayers.Control class 138
E
EdingToolbar 125
EdingToolbar control, OpenLayers.Control
subclasses 141
EPSG 92
EPSG codes 92
EPSG code, Spherical Mercator 120
European Petroleum Survey Group. See EPSG
event
about 165
acvate() 168
changelayer event 220
custom events 166
event handler 166
event listener 165
moveend event 224
TYPE_TOGGLE control, creang 166-170
zoomend 219
eventListeners, layer properes 68
eventListeners property, Map class 196
eventListeners property, OpenLayers.Control
class 137
event object
accessing 218
map events, working with 219, 220
events
browser events 215
event object 218
map events 215
map events, types 216
map events, using 216-218
events, layer properes 67
event types, Vector Layer
about 244
aerfeaturemodied 244
beforefeatureadded 244
beforefeaturemodied 244
beforefeatureremoved 244
beforefeaturesadded 244
beforefeaturesremoved 244
featureadded 244
featuremodied 244
featureremoved 245
featuresadded 244
featureselected 245
featuresremoved 245
featureunselected 245
refresh 245
sketchcomplete 245

[ 340 ]
sketchmodied 245
sketchstarted 245
using 246
vertexmodied 245
working with 247
example, converng into applicaon
about 318, 319
features, selecng 319
interacvity, adding 319-325
Extent/Coordinate/Bounds related funcons,
Map class
about 210
coordinate related funcons, using 213
getCenter() method 211
getExtent() method 211
getMaxExtent() method 211
getMaxResoluon() method 211
getNumZoomLevels() method 211
getResoluonForZoom() method 211
getResoluon() method 211
getScale() 211
getZoomForExtent() method 211
getZoomForResoluon() method 211
isValidLonLat() method 211
isValidZoomLevel() method 212
pan() method 212
panTO() method 212
zoomIn() method 212
zoomOut() method 212
zoomToExtent() method 212
zoomToMaxExtent() method 213
zoomTo() method 212
externalGraphic property 319
ExtJS
URL 189
extractAributes parameter 323
F
fallThrough property, Map class 197
Feature class
about 248
funcons 256
interacng with, Control.SelectFeature used 257
object, instanang 256
SelectFeature control, using 257-262
ubclasses 256
working 255
Features 228
featureselected event 260
features, OpenLayers 8
featureunselected event 260
feeds 312
Filter class
about 299
Feature IDs 303
Logical 303
logical lters, locang 304-307
Spaal class 308
subclasses 299
lters
about 295
using 295-298
working 295
Firebug
about 32
console panel, using 42
controls 34
CSS, viewing 178
downloading 32
features 32
HTML, viewing 178
installing 33, 34
panel conclusion 41
seng up 32
Firebug controls
Firebug icon 34
Page Inspector icon 34
panels 34
Firebug icon 34
Fixed strategy class 267
Flickr
web map applicaon, creang 312
Flickr data, obtaining
adding, to map 315, 316
errors, reducing 314
extractStyles, using 317, 318
need for 314
steps 313
Format class
about 266, 273
methods 273
properes 273
subclasses 274

[ 341 ]
format parameter 312
funcons, Feature class
clone() 256
destroy() 256
getVisibility() 256
move(locaon) 256
onScreen(boundsOnly) 256
funcons, Map class
about 209
control related 209
destroy() 214
Extent/Coordinate/Bounds related 210
getLonLatFromPixel() 214
getPixelFromLonLat() 215
layer related 214
render() 215
updateSize() 215
funcons, OpenLayers.Control class
acvate() 138
deacvate() 138
destroy() 137
draw() 138
moveTo(locaon) 138
G
GeoExt
URL 189
GeoJSON format 267
Geometry class
about 248, 249
methods 250, 251
methods, using 251-253
ubclasses 249, 253
Geometry class, subclasses
Geometry.Collecon 254
Geometry.Curve 254
Geometry.LinearRing 254
Geometry.LineString 254
Geometry.MulLineString 254
Geometry.MulPoint 254
Geometry.MulPolygon 255
Geometry.Point 253
Geometry.Polygon 255
methods 255
Geometry.LineString class 253
geometry property 232
getVisibility() funcon 87
GitHub 29
Google layer properes
about 108
sphericalMercator {Boolean} 109
type {GmapType} 109
V2 GMapType values 110
V3 GMapType values 109
Google Map layer
creang, with V2 111, 113
Google Map layer object
creang 108
Google Maps
about 103, 104
Google layer properes 108
Google Map layer object, creang 108
URL 104
using 105, 123
V2 and V3, dierences 105
V3, using 105, 106, 108
Google Maps API 11
Google Maps layer
creang 73, 74
Google Maps V2
documentaon 105
Google Maps V3
documentaon 105
using 105
Gracule control, OpenLayers.Control subclasses
about 141
displayInLayerSwitcher property 142
intervals property 142
labeled property 142
labelFormat property 142
labelSymbolizer property 142
layerName property 142
lineSymbolize property 142
numPoints property 142
targetSize property 142
visible property 142
guer, layer properes 68
H
HTML
elements 173
elements styling, CSS used 174

[ 342 ]
purpose 172
viewing, in Firebug 178
HTML, elements
classes 174
IDs 173
HTML Inspector, Firebug controls 34
HTML panel, Firebug
about 35
contents 36
working 36
HTTP protocol class 267
I
id property, OpenLayers.Control class 137
image layer
using 76, 77
image layer parameters
extent 78
name 77
opons 78
size 78
url 77
imageOset, layer properes 67
inheritance, CSS
about 178
elements, referencing 179
order 178
init() funcon 20, 23
inRange, layer properes 67
intent
default 281
select 281
temporary 281
Internet Relay Chat. See IRC
IRC 29
isBaseLayer, layer properes 67
isBaseLayer property 51
iterave development 312
J
JavaScript
purpose 172
JavaScript documentaon
reference link 9
K
key
g key 313
ID key 313
tags key 313
KeyboardDefaults control, OpenLayers.Control
subclasses
about 143
slideFactor property 143
L
latude 96
Layer.ArcGIS93Rest class 72
Layer.ArcIMS class 73
Layer class 20, 136
Layer classes
about 50
base layer 51
Layer.ArcGIS93Rest 72
Layer.ArcIMS 73
Layer.Google 73
Layer.Google class 72
Layer.Grid 75
Layer.Image 76
Layer.MapGuide 78
Layer.TileCache 79
Layer.Vector 79
Layer.VirtualEarth 79
Layer.WFS 80
Layer.WMS 80
Layer.WMS class 72
Layer.Yahoo 80
overlay layers 51
Layer class methods
about 85
dening 86
global layer object variable, dening 85
Layer.Google class
about 73
Google Maps layer, creang 73, 74
Layer.Grid class 75
Layer.Image class
about 76
image based maps, creang 78
image layer parameters 78
image layer, using 76, 77

[ 343 ]
Layer.MapGuide class 78
layer objects
accessing 80
accessing, in Firebug 82
creang 54
map.layers, accessing 80, 81
parameters, versus arguments 57
WMS layer object 55
layer opons
conguring 61
wms_layer_labels layer opons 62
wms_state_lines layer opons 61
layer properes. See also OpenLayers.Layer
class properes
about 65
accessing 82
accessing, through map.layers 82
data types 66
OpenLayers.Layer class properes 66
references, storing with layer objects 83
layer related funcons, Map class
addLayer() 214
addLayers() 214
getNumLayers() 214
raiseLayer() 214
removeLayer() 214
layers 11, 50
layers property, Map class 197
Layer subclass 71
Layer superclass 72
Layer Switcher control 52
LayerSwitcher control, OpenLayers.Control
subclasses
about 143
ascending property 143
div prroperty 143
maximizeControl() funcon 144
minimizeControl() funcon 144
roundedCorner property 143
styling 186-188
Layer.TileCache class 79
Layer.Vector class 79
Layer.VirtualEarth class 79
Layer.WFS class 80
Layer.WMS class 80
Layer.Yahoo class 80
library le, OpenLayer
build le, using 331
small les, serving 330
library, OpenLayers 9
longitude 96
LonLat coordinates
determining 96
M
Madlibs
about 25
playing 25
map
about 19
creang 15-17
Map class
about 20, 191, 192
funcons 209
Map object, creang 192
properes 193
map events, types
addlayer 216
changebaselayer 216
changelayer 216
eventListeners property, using 217
map.events.register, using 218
mousemove 216
mouseout 216
mouseover 216
move 216
moveend 216
movestart 216
preaddlayer 216
removelayer 216
using 216
zoomend 216
map.funconname() 47
map, layer properes 67
map mashup 104
map projecons
about 90
characteriscs 90
EPSG codes 92
longitude/latude 95
transforming 99
types 92
using 90
Downloa d f r o m W o w ! e B o o k < w w w.woweb o o k . c o m >

[ 344 ]
map projecons, types
about 92
cylindrical projecon 92
equal area projecon 92
Mercator projecon 92
map properes, Spherical Mercator layers
about 122
maxExtent 122
maxResoluon 122
projecon 123
units 123
map.zoomToMaxExtent() funcon 23
mashup
about 104
creang 124, 125
maxExtent, layer properes 70
maxExtent property 122
maxExtent property , Map class
seng 199, 200
maxExtent property, Map class 198
maxResoluon, layer properes 70
maxResoluon property 122
MaxScale, layer properes 70
maxScale property 204
metadata, layer properes 71
method
acvateControl 156
addControl 163
addEventListener 328
addUnqiueValueRules 290
clone() 222
refresh() 327
methods, Control.SelectFeature class
acvate() 264
deacvate() 264
highlight() 264
select() 264
unhighlight() 264
unselect() 264
unselectAl() 264
methods, Format class
read(data) 273
write(features) 273
methods, Geometry class
atPoint() 250
calculateBounds() 250
clearBounds() 250
clone() 250
destroy() 250
distanceTo() 250
extendBounds() 250
getArea() 250
getBounds() 250
getCentroid() 251
getLength() 251
getVerces( ) 251
toString() 251
using 251-253
methods, projecon class
addTransform(from, to, method) 98
getCode() 98
getUnits() 98
transform(point, source, desnaon) 98
Microso mapping API
about 115
Bing/Virtual Earth Layer, creang 116, 117
minExtent property, Map class 198
minScale, layer properes 70
modular programming 312
MousePosion control, OpenLayers.Control
subclasses
about 144
displayProjecon property 145
div property 145
emptyString property 144
numDigits property 144
prex property 144
separator property 144
sux property 144
moveend event 224
moveTo(locaon) funcon, OpenLayers.Control
class 138
mulple base layers 51
mulpleKey property 260
mulple map objects
about 220
custom event applicaon, creang 223, 224
using 221, 222
N
Nabble 28
name parameter, WMS layer parameters 55

[ 345 ]
Navigaon control, OpenLayers.Control subclasses
about 145
autoAcvate property 145
documentDrag property 145
handleRightClicks property 145
zoomWheel property 145
NavigaonHistory control, OpenLayers.Control
subclasses
about 146
limit property 146
nextStack property 146
nextTrigger() funcon 146
previousStack property 146
previousTrigger() funcon 146
using 146, 147
NavToolbar control, OpenLayers.Control sub-
classes 147
Net panel, Firebug
about 38, 39
request list 39
numZoomLevels, layer properes 70
numZoomLevels property 23
numZoomLevels property, Map class
about 199
eng 199, 200
O
object literals
about 44
creang 43
funcons, experimenng with 47
map, interacng with 45, 46
Object Oriented Programming. See OOP
OOP
about 24
Madlibs 25
objects, interacng with 25
programming 26
subclasses 26
OOP programming 26
opacity property 62
Open Geospaal Consorum (OGC) 20
OpenLayers
about 7, 171
and CSS 180
API documentaon 28
applicaon, deploying 330
bugs, squashing with Firebug 31
client side 8
controls, using in 130
features 8
Layer classes 50
layer properes 65
layers 11
library 9
library le, building 330
Map class 192
map, creang 15-17
map ling strategy 63
map tles 62
relang, to APIs 11
resources, for help 28
styling, themes used 180
themes, creang 181
third party APIs, using 104
URL 8
Vector Layers 228
OpenLayers.Bounds class 198
OpenLayers.Bounds object 198
OpenLayers.Control class
funcons 137
properes 137
OpenLayers.Control, subclass
ArgParser control 138, 139
Aribuon control 140, 141
Control.Scale control 151
EdingToolbar control 141
Gracule control 141
KeyboardDefaults control 143
LayerSwitcher control 144
MousePosion control 144
Navigaon control 145
NavigaonHistory control 146
NavToolbar control 147
OverviewMap control 147
PanPanel control 150
PanZoomBar control 151
PanZoom control 151
Permalink control 139
ScaleLine control 152
ZoomPanel control 153
OpenLayers.Filter class 275. See Filter class

[ 346 ]
OpenLayers.Layer class
about 71
subclasses 71
uperclass 72
OpenLayers.Layer class properes
about 66
alpha 67
aribuon 67
displayInLayerSwitcher 67
displayOutsideMaxExtent 70
eventListeners 68
events 67
guer 68
imageOset 67
inRange 67
isBaseLayer 67
map 67
maxExtent 70
maxResoluon 70
MaxScale 70
metadata 71
minScale 70
modifying 71
numZoomLevels 70
opons 68
projecon 69
resoluons 69
scales 69
SUPPORTED_TRANSITIONS 71
transionEect 71
units 69
visibility 67
wrapDateLine 70
OpenLayers Layer object
about 56
isBaseLayer property 56
opacity property 56
visibility property 56
OpenLayers.Layer.Vector. See Vector Layer
OpenLayers.Layer.Vector methods
about 237
addFeatures(features, opons) funcon 237
assignRenderer() 237
clone() 237
destroyFeatures(features, opons) 239
displayError() 237
drawFeature(feature, style) 241
eraseFeatures(features) 241
feature events, working with 242, 243
features, adding 237, 238
features, destroying 239, 241
getDataExtent() 237
getFeatureByFid(featureFid) 241
getFeatureById(featureId) 241
getFeatureFromEvent(event) 242
onFeatureInsert(feature) 242
preFeatureInsert(feature) 242
refresh() 237
removeAllFeatures( opons) 239
removeFeatures() 239
OpenLayers.Layer.Vector properes, Vector
Layer class
about 235
drawn: {Boolean} 235
lter: {OpenLayers.Filter} 235
isFixed: {Boolean} 235
isVector: {Boolean} 236
protocol: {OpenLayers.Protocol} 236
rendererOpons: {Object} 236
renderers: {Array{String}} 236
reportError: {Boolean} 236
selectedFeatures: {Array{OpenLayers.Feature.
Vector}} 236
strategies: {Array{OpenLayers.Strategy}} 236
styleMap: {OpenLayers.StyleMap} 236
style: {Object} 236
unrenderedFeatures: {Object} 236
OpenLayers library
downloading 13
OpenLayers.LonLat class 210
OpenLayers mailing list
about 28
Dev list 28
Users list 28
OpenLayers map
about 63-65
interacng with 45, 46
OpenLayers.Map class 20
OpenLayers.Pixel object 138
OpenLayers.Rule class. See Rule class
OpenLayers source code repository 29
OpenLayers website 12
OpenStreetMap
about 104, 118

[ 347 ]
reference link 118
seng up 118
OpenStreetMap layer
creang 118, 119
OSM les, accessing 119
opons, layer properes 68
opons object 21, 22
opons parameter 239
opons parameter, WMS layer parameters
about 56, 57
conguring 58, 59
overlay layer
about 51
map, creang with mulple layers 51, 53
OverviewMap control, OpenLayers.Control
subclasses
about 147
autoPan property 150
div property 150
layers property 148
mapOpons property 150
maximizeControl() funcon 150
maxRao property 149
minimizeControl() funcons 150
minRao property 149
minRectDisplayClass property 149
minRectSize property 148
size property 148
P
panel control
about 153
acvateControl( {OpenLayers.Control} ) funcon
159
Acvate() funcon 159
autoAcvate property 158
controls property 158
control types 153
defaultControl property 158
saveState property 158
panels, Firebug
about 34
console panel 35
CSS panel 37
DOM panel 38
HTML panel 35
Net panel 38
script panel 37, 38
panMethod property 206, 207
PanPanel control, OpenLayers.Control subclasses
about 150
slideFactor property 151
PanZoomBar control, OpenLayers.Control sub-
classes
about 151
div property 151
zoomWorldIcon property 151
PanZoom control 17
PanZoom control, OpenLayers.Control subclasses
151
parameters
versus arguments 57
parameters, projecon class
opons 97
projeconCode 97
params parameter, WMS layer parameters
about 56
possible keys and values 56
Params tab 39
Permalink control, OpenLayers.Control
subclasses 139
preload property 275
Proj4js library
about 100, 101
downloading 101
seng up 101
URL 100
projecon 90
projecon class
about 97
methods 98
projecon object, creang 97
projecon, layer properes 69
projecon object
creang 97
funcons 98
parameters 97
projecon property 123
projecon property, Map class 208
projecon transforms
coordinate transforms 99
handling 99

[ 348 ]
properes, Control.SelectFeature class
box 262
box: {Boolean} 262
clickout: {Boolean} 263
geometryType: {Array{String}} 263
handlers: {Object} 263
highlightOnly: {Boolean} 263
hover: {Boolean} 263
layer: {OpenLayers.Layer.Vector} 263
mulple: {Boolean} 263
mulpleKey: {String} 263
onBeforeSelect: {Funcon} 263
onUnselect: {Funcon} 263
renderIntent: {String} 263
selectStyle: {Object} 263
toggle: {Boolean} 263
toggleKey: {String} 264
properes, Format class 273
about 273
externalProjecon: {OpenLayers.Projecon}
273
properes, Map class
allOverlayers 193
controls 193
displayProjecon 194
eventListeners 196
fallThrough 197
layers 197
maxExtent 198
maxResoluon 202, 203
maxScale 204
minExtent 198
minResoluon 202, 203
minScale 204
numZoomLevels 199
panDuraon 207
panMethod 206
projecon 208
resoluons 200
restrictedExtent 198
scales 204
theme 208
leSize 208
unit 208
properes, OpenLayers.Control class
autoAcvate 137
displayClass 137
div 137
eventListener 137
id 137
tle 137
type 137
Protocol class 266
ProxyHost
dynamic data, geng 325, 326
R
real me data, using
with ProxyHost 325
redraw() funcon 87
refresh() method 327
relave path 19
render intent. See intent
request list, Firebug Net panel
about 39
BBOX parameter 41
parameters 40
resoluons, layer properes 69
resoluons property, Map class
about 200
resoluons array, seng 201
resources, for help
book website 28
IRC 29
mailing list 28
Response tab 39
restrictedExtent property, Map class 198
Rule class 298
rules
using 295-298
working 295
S
Scalable Vector Graphics. See SVG
Scale control, OpenLayers.Control subclasses
about 151
geodesic property 152
scale dependency 61
ScaleLine control, OpenLayers.Control subclasses
about 152
boomInUnits property 152
boomOutUnits property 152
div property 152

[ 349 ]
geodesic property 152
maxWidth property 152
topInUnits property 152
topOutUnits property 152
scale, map projecons characteriscs 91
scales, layer properes 69
script panel, Firebug 37, 38
setIsBaseLayer( is_base ) funcon 87
setName( newName ) funcon 86
setOpacity( opacity ) funcon 88
setVisibility() funcon 61, 87
shape, map projecons characteriscs 91
single le build 331
sketchstarted event 247
Spaal class, types
OpenLayers.Filter.Spaal.BBOX 308
OpenLayers.Filter.Spaal.CONTAINS 308
OpenLayers.Filter.Spaal.DWITHIN 308
OpenLayers.Filter.Spaal.INTERSECTS 308
OpenLayers.Filter.Spaal.WITHIN 308
Spherical Mercator
about 108, 120
EPSG code 120
using 121
sphericalMercator {Boolean} 109
Spherical Mercator layers
map properes 122
sphericalMercator property 121
SRS code 97
stateboundary layer 58
Strategy.BBOX class 266
Strategy class
about 228, 266, 274
Strategy.BBOX 274
Strategy.Cluster 274
Strategy.Filter 275
Strategy.Fixed 275
Strategy.Paging 275
Strategy.Refresh, methods 275
Strategy.Save 276
Style class
about 281
symbolizer 281
symbolizer properes 282
StyleMap class
about 281
default intent 281
select intent 281
temporary intent 281
style property 318
styles applying, Vector Layer
intents, using 278
steps 279, 280
StyleMap, using 278
symbolizer 278
ways 278
subclasses
about 26
example 26
GoogleMap Layer class 27
Navigaon control class 27
subclasses, Filter class
Comparison class 299
FeatureId 300
SUPPORTED_TRANSITIONS, layer properes 71
SVG 233
symbolizer_lookup parameter 291
symbolizer properes, Style class
backgroundGraphic 286
backgroundGraphicZIndex 286
backgroundHeight 286
backgroundWidth 286
backgroundXOset 286
backgroundYOset 286
cursor 282
display 286
examples 284, 285
externalGraphic 286
ll 286
llColor 282
llOpacity 283
fontColor 283
fontOpacity 283
fontSize 283
fontWeight 283
graphic 286
graphicHeight 286
graphicName 283
graphicOpacity 286
graphicTitle 286
graphicWidth 286
graphicXOset 286
graphicYOset 286
graphicZIndex 287

[ 350 ]
label 283
labelAlign 283
labelSelect 283
labelXOset 283
labelYOset 283
pointRadius 283
rotaon 287
stroke 283
strokeColor 284
strokeDashstyle 284
strokeLinecap 284
strokeOpacity 284
strokeWidth 284
T
theme property, Map class 208
themes, OpenLayer
class names 181
rcontrols, styling 182-185
creang 181
generated class names 181
generated IDs, ways 182
IDs 181
LayerSwitcher control, styling 186-188
NavToolbar control, styling 183, 184
third party mapping APIs
about 103
Google Maps 104
map mashup 104
Microso mapping API 115
OpenStreetMap 118
Spherical Mercator 120
Yahoo! Maps API 113
threshold parameter 274
leSize property, Map class 208
tle property, OpenLayers.Control class 137
toggle_buon_acvate_func funcon 169
toggle_buon_deacvate_func funcon 169
transform() funcon 100
transionEect
resize property 59
transionEect, layer properes 71
trigger funcon 162
type {GmapType} 109
type property, OpenLayers.Control class 137
U
unit property, Map class 208
units, layer properes 69
units property 123
update_vector_layer funcon 328
URL parameter, WMS layer parameters 55
Users list 28
V
V2 GMapType values 110
V3 GMapType values 109
Vector Layer
about 79, 228, 230
class events 243
creang 230-232
EdingToolbar control, adding 231
features 229
objects, Features 228
overview 227
rendering, Canvas renderer used 233
rendering, SVG renderer used 233
rendering, VML used 233
styling 277
uses 229
using, as client side 229
using, without Protocol class 270
vector 230
working 232
Vector Layer class
about 235, 264
class, interacng with each other 267
cross server requests 269
example instanaon 267
Format class 266
OpenLayers.Layer.Vector methods 237
OpenLayers.Layer.Vector properes 235
overview 265
Protocol class 266
proxy host, using 270
Strategy class 266
Vector Layer, creang 268
Vector Layer, styling
styles, applying 278
Vector Layer using, without Protocol class
Format class, using alone 270, 272
steps 270

[ 351 ]
Strategy class, using alone 270, 272
Vector Layer, working
about 232
Renderers array 233
Renderers array, changing 234
rendering step 233
VirtualEarth 115
VirtualEarth layer class properes
about 117
animaonEnabled 117
type values 118
visibility, layer properes 62, 67
W
web map applicaon
creang, Flickr used 312
dynamic tags, adding 327, 329
wrapping up 326, 327
web map applicaon creang, Flickr used
APIs 312
data, accessing 313
public data feeds, accessing 312, 313
web map client 10
web mapping applicaon
about 9
Client / Server Model 10
drawbacks 11
web map client 10
web map server 10, 11
web map server 10, 11
Web Map Service 20
Well Known Idener (WKID) 97
WFS (Web Feature Service) 80
WKT (Well-Known Text) 251
WMS 80
wms_base_layer layer 55
wms_base layer object 54
WMS class
parameters 55
wms_layer_labels layer opons
about 62
opacity property 62
visibility property 62
WMS layer object
about 22
creang 55
WMS layer parameters
about 55
name 55
opons 56
params 56
URL 55
WMS service
using 127
wms_state_lines layer opons
conguring 61
displayInLayerSwitcher property 61
maxScale property 61
minScale property 61
scale dependency 61, 62
WMS subclass 20
WMS with Spherical Mercator/third party Map
Layers 127
wrapDateLine, layer properes 70
X
Xampp on Windows 315
Y
Yahoo! Maps API
about 104, 113
Yahoo! Maps Layer class, using 113, 114
Yahoo! Maps Layer class
using 113, 114
Yahoo! Maps Layer class properes
about 115
Yahoo! Maps Layer types 115
Yahoo! Maps Layer types
about 115
YAHOO_MAP_HYB 115
YAHOO_MAP_REG 115
YAHOO_MAP_SAT 115
Z
ZoomBox control 153
zoomend event 219
ZoomPanel control, OpenLayers.Control
subclasses
ZoomIn 153
ZoomOut 153
ZoomToMaxExtent 153

Thank you for buying
OpenLayers 2.10 Beginner's Guide
About Packt Publishing
Packt, pronounced 'packed', published its rst book "Mastering phpMyAdmin for Eecve
MySQL Management" in April 2004 and subsequently connued to specialize in publishing
highly focused books on specic technologies and soluons.
Our books and publicaons share the experiences of your fellow IT professionals in adapng
and customizing today's systems, applicaons, and frameworks. Our soluon based books
give you the knowledge and power to customize the soware and technologies you're
using to get the job done. Packt books are more specic and less general than the IT books
you have seen in the past. Our unique business model allows us to bring you more focused
informaon, giving you more of what you need to know, and less of what you don't.
Packt is a modern, yet unique publishing company, which focuses on producing quality,
cung-edge books for communies of developers, administrators, and newbies alike. For
more informaon, please visit our website: www.packtpub.com.
About Packt Open Source
In 2010, Packt launched two new brands, Packt Open Source and Packt Enterprise, in order
to connue its focus on specializaon. This book is part of the Packt Open Source brand,
home to books published on soware built around Open Source licences, and oering
informaon to anybody from advanced developers to budding web designers. The Open
Source brand also runs Packt's Open Source Royalty Scheme, by which Packt gives a royalty
to each Open Source project about whose soware a book is sold.
Writing for Packt
We welcome all inquiries from people who are interested in authoring. Book proposals
should be sent to author@packtpub.com. If your book idea is sll at an early stage and you
would like to discuss it rst before wring a formal book proposal, contact us; one of our
commissioning editors will get in touch with you.
We're not just looking for published authors; if you have strong technical skills but no wring
experience, our experienced editors can help you develop a wring career, or simply get
some addional reward for your experse.
OpenStreetMap
ISBN: 978-1-84719-750-4 Paperback: 252 pages
Be your own cartographer
1. Collect data for the area you want to map with this
OpenStreetMap book and eBook
2. Create your own custom maps to print or use online
following our proven tutorials
3. Collaborate with other OpenStreetMap contributors
to improve the map data
OmniGrafe 5 Diagramming Essentials
ISBN: 978-1-84969-076-8 Paperback: 380 pages
Create beer diagrams with less eort using
OmniGrae
1. Produce high-quality professional-looking diagrams
that communicate informaon much beer than
words
2. Makes diagramming fun and simple for Macintosh
users
3. Master the art of illustrang your ideas with
OmniGrae
4. Learn to draw engaging charts and graphs to grasp
your viewers' aenon to your presentaons
Please check www.PacktPub.com for information on our titles
Downloa d f r o m W o w ! e B o o k < w w w.woweb o o k . c o m >
