Packt Pub.j BPM.Developer.Guide.Dec.2009
User Manual: Pdf
Open the PDF directly: View PDF ![]() .
.
Page Count: 371 [warning: Documents this large are best viewed by clicking the View PDF Link!]
- Copyright
- Credits
- About the Author
- About the Reviewers
- Table of Contents
- Preface
- Chapter 1: Why Developers Need BPM?
- Business Process, why should I know about that?
- Some buzzwords that we are going to hear when people talk about BPM
- Business Process Management Systems (BPMS), my tool and your tool from now on
- Summary
- Chapter 2: jBPM for Developers
- Graph Oriented Programming
- Common development process
- Decoupling processes from our applications
- Graph Oriented Programming on top of OOP
- Implementing Graph Oriented Programming on top of the Java language (finally Java code!)
- Implementing our process definition
- Testing our brand new classes
- Process execution
- Wait states versus automatic nodes
- Homework
- Creating a simple language
- Nodes description
- Homework solution
- Quick start guide to build Maven projects
- Summary
- Chapter 3: Setting Up Our Tools
- Chapter 4: jPDL Language
- Chapter 5: Getting Hands Dirty with jPDL
- Chapter 6: Persistence
- Why do we need persistence?
- Disambiguate an old myth
- Framework/process interaction
- Process and database perspective
- Different tasks, different sessions
- Configuring the persistence service
- How is the framework configured at runtime?
- Configuring transactions
- Some Hibernate configurations that can help you
- Hibernate caching strategies
- Two examples and two scenarios
- Summary
- Why do we need persistence?
- Chapter 7: Human Tasks
- Chapter 8 : Persistence and Human Tasks in the Real World
- Chapter 9: Handling Information
- Chapter 10: Going Deeply into the Advanced Features of jPDL
- Chapter 11: Advanced Topics in Practice
- Chapter 12: Going Enterprise
- Index

jBPM Developer Guide
A Java developer's guide to the JBoss Business
Process Management framework
Mauricio "Salaboy" Salatino
BIRMINGHAM - MUMBAI
This material is copyright and is licensed for the sole use by ALESSANDRO CAROLLO on 18th December 2009
6393 south jamaica court, , englewood, , 80111

jBPM Developer Guide
Copyright © 2009 Packt Publishing
All rights reserved. No part of this book may be reproduced, stored in a retrieval
system, or transmitted in any form or by any means, without the prior written
permission of the publisher, except in the case of brief quotations embedded in
critical articles or reviews.
Every effort has been made in the preparation of this book to ensure the accuracy
of the information presented. However, the information contained in this book is
sold without warranty, either express or implied. Neither the author, nor Packt
Publishing, and its dealers and distributors will be held liable for any damages
caused or alleged to be caused directly or indirectly by this book.
Packt Publishing has endeavored to provide trademark information about all of the
companies and products mentioned in this book by the appropriate use of capitals.
However, Packt Publishing cannot guarantee the accuracy of this information.
First published: December 2009
Production Reference: 1101209
Published by Packt Publishing Ltd.
32 Lincoln Road
Olton
Birmingham, B27 6PA, UK.
ISBN 978-1-847195-68-5
www.packtpub.com
Cover Image by Filippo Sarti (filosarti@tiscali.it)
This material is copyright and is licensed for the sole use by ALESSANDRO CAROLLO on 18th December 2009
6393 south jamaica court, , englewood, , 80111

Credits
Author
Mauricio "Salaboy" Salatino
Reviewers
Jeronimo Ginzburg
Federico Weisse
Acquisition Editor
David Barnes
Development Editor
Darshana S. Shinde
Technical Editors
Ishita Dhabalia
Charumathi Sankaran
Copy Editor
Sanchari Mukherjee
Indexer
Rekha Nair
Editorial Team Leader
Gagandeep Singh
Project Team Leader
Priya Mukherji
Project Coordinator
Leena Purkait
Proofreader
Andie Scothern
Graphics
Nilesh R. Mohite
Production Coordinator
Shantanu Zagade
Cover Work
Shantanu Zagade
This material is copyright and is licensed for the sole use by ALESSANDRO CAROLLO on 18th December 2009
6393 south jamaica court, , englewood, , 80111

About the Author
Mauricio Salatino (a.k.a. Salaboy) has been a part of the Java and open source
software world for more than six years now. He's worked with several technologies
(such as PHP, JSP, Java SE, Java ME, and Java EE) during these years and is now
focused on JBoss frameworks. He got involved with the JBoss Drools project about
a year and a half ago as a contributor, gaining a lot of experience with the open
source community and with multiple technologies such as JBoss jBPM, JBoss
Drools, Apache RIO, Apache Mina, and JBoss Application Server.
During 2008 he dictated the ofcial jBPM courses for Red Hat Argentina several
times, and he was involved in several JBoss jBPM and JBoss Drools implementations
in Argentina. He was also part of the Research and Development team of one of the
biggest healthcare providers in Argentina, where he trained people in the BPM and
Business Rules eld.
Mauricio is currently involved in different open source projects that are being
created by the company he co-founded, called Plug Tree (www.plugtree.com),
which will be released in 2010. Plug Tree is an open source based company that
creates open source projects and provides consultancy, training, and support on
different open source projects.
Mauricio is an Argentinian/Italian citizen based in Argentina. In his free time
he gives talks for the JBoss User Group Argentina (www.jbug.com.ar), that he
co-founded with a group of local friends. He also runs his personal blog about
JBoss, jBPM, and JBoss Drools, that was originally targeted to Hispanic audiences
but is now aimed at an international audience and receives more than ve hundred
questions per year.
I would like to thank my family for always being there to support
my decisions and adventures, my new and old friends who have
helped me during this process, all the Packt Publishing staff who
have guided me during these months of hard work; and last but
not least, the open source community guys who are always
creating new, interesting, and exciting projects.
This material is copyright and is licensed for the sole use by ALESSANDRO CAROLLO on 18th December 2009
6393 south jamaica court, , englewood, , 80111

About the Reviewers
Jeronimo Ginzburg has a degree in Computer Science from Universidad de
Buenos Aires, Argentina. He has more than 10 years of experience in designing
and implementing Java Enterprise applications. He currently works at Red Hat as
a Middleware Consultant, specialized in JBoss SOA-P (jBPM, Rules, ESB, and JBoss
AS). During the last four years, Jeronimo has been researching Web Engineering and
he has co-written articles published on journals, proceedings, and as a book chapter.
Federico Weisse was born in Buenos Aires, Argentina. He has over 10 years
of expertise in the IT industry. During his career he has worked with several
technologies and programming languages such as C, C++, ASP, PHP; different
relational databases (Oracle, SQLServer, DB2, PostgreSQL), platforms (AS400, Unix,
Linux) and mainframe technologies.
In 2002, he adopted Java as his main technology. He has been working with it since
then, becoming a specialist in this eld. A couple of years later, he got involved with
BPM systems.
Nowadays, he is a J2EE architect of a BPM system based on OSWorkow in one of
the most important healthcare providers of Argentina.
I want to thank Mauricio for choosing me to review his book, which
I think has great value for the developers who want to get to know
BPM theory and jBPM technology.
I also want to mention the effort and dedication of all the developers
around the world who provide open source software of excellent
quality, making it accessible for anyone eager to get new IT
knowledge.
This material is copyright and is licensed for the sole use by ALESSANDRO CAROLLO on 18th December 2009
6393 south jamaica court, , englewood, , 80111

This material is copyright and is licensed for the sole use by ALESSANDRO CAROLLO on 18th December 2009
6393 south jamaica court, , englewood, , 80111

Dedicated to my loving future wife Mariela, and especially to my mother
who helps me with the language impedance.
This material is copyright and is licensed for the sole use by ALESSANDRO CAROLLO on 18th December 2009
6393 south jamaica court, , englewood, , 80111

This material is copyright and is licensed for the sole use by ALESSANDRO CAROLLO on 18th December 2009
6393 south jamaica court, , englewood, , 80111

Table of Contents
Preface 1
Chapter 1: Why Developers Need BPM? 7
Business Process, why should I know about that? 8
"A sequence of tasks that happen in a repeatable order" 8
"executed by humans and/or systems" 9
"to achieve a business goal" 12
I know what BPs are, but what about the final "M" in BPM? 12
BPM stages 13
BPM stages in a real-life scenario 15
BPM improvements 16
Global understanding of our processes 16
Agile interaction between systems, people, and teams 16
Reduce paperwork 17
Real time process information 17
Process information analysis 18
Statistics and measures about each execution 18
BPM and system integration "history" 18
Some buzzwords that we are going to hear when people talk
about BPM 19
Theoretical definitions 19
Integration (system integration) 20
Workflow 20
Service Oriented Architecture (SOA) 21
Orchestration 21
Technological terms 21
Workflow 21
Enterprise Service Bus (ESB) 21
BPEL (WS-BPEL) 22
This material is copyright and is licensed for the sole use by ALESSANDRO CAROLLO on 18th December 2009
6393 south jamaica court, , englewood, , 80111

Table of Contents
[ ii ]
Business Process Management Systems (BPMS), my tool
and your tool from now on 22
BPM systems versus BPM suites 22
Why we really need to know BPM and BPMS, and how do they
change/impact on our daily life 23
New approach 23
Homework 25
Summary 27
Chapter 2: jBPM for Developers 29
Graph Oriented Programming 30
Common development process 30
Database model 32
Business logic 32
User interfaces 32
Decoupling processes from our applications 33
Graph Oriented Programming on top of OOP 34
Implementing Graph Oriented Programming on top of the
Java language (finally Java code!) 35
Modeling nodes in the object-oriented world 37
Modeling a transition in the object-oriented world 37
Expanding our language 38
Process Definition: a node container 39
Implementing our process definition 40
The Node concept in Java 40
The Transition concept in Java 41
The Definition concept in Java 42
Testing our brand new classes 43
Process execution 44
Wait states versus automatic nodes 45
Asynchronous System Interactions 46
Human tasks 47
Creating the execution concept in Java 48
Homework 52
Creating a simple language 53
Nodes description 54
Stage one 55
Stage two 56
Stage three 57
Homework solution 59
This material is copyright and is licensed for the sole use by ALESSANDRO CAROLLO on 18th December 2009
6393 south jamaica court, , englewood, , 80111

Table of Contents
[ iii ]
Quick start guide to building Maven projects 59
Summary 59
Chapter 3: Setting Up Our Tools 61
Background about the jBPM project 62
JBoss Drools 64
JBoss ESB 64
JBoss jBPM 64
Supported languages 65
Other modules 66
Tools and software 68
Maven—why do I need it? 69
Standard structure for all your projects 70
Centralized project and dependencies description 70
Maven installation 71
Installing MySQL 72
Downloading MySQL JConnector 73
Eclipse IDE 73
Install Maven support for Eclipse 74
SVN client 74
Starting with jBPM 75
Getting jBPM 75
From binary 75
From source code 79
jBPM structure 82
Core module 83
DB module 84
Distribution module 84
Enterprise module 84
Example module 85
Identity module 85
Simulation module 86
User Guide module 86
Building real world applications 86
Eclipse Plugin Project/GPD Introduction 86
GPD Project structure 88
Graphical Process Editor 91
Outcome 95
Maven project 95
Homework 99
Summary 100
This material is copyright and is licensed for the sole use by ALESSANDRO CAROLLO on 18th December 2009
6393 south jamaica court, , englewood, , 80111

Table of Contents
[ iv ]
Chapter 4: jPDL Language 101
jPDL introduction 101
jPDL structure 103
Process structure 104
GraphElement information and behavior 106
NodeCollection methods 106
ProcessDefinition properties 106
Functional capabilities 107
Constructing a process definition 108
Adding custom behavior (actions) 110
Nodes inside our processes 110
ProcessDefinition parsing process 111
Base node 112
Information that we really need to know about each node 116
Node lifecycle (events) 116
Constructors 117
Managing transitions/relationships with other nodes 117
Runtime behavior 119
StartState: starting our processes 122
EndState: finishing our processes 125
State: wait for an external event 126
Decision: making automatic decisions 128
Transitions: joining all my nodes 131
Executing our processes 132
Summary 137
Chapter 5: Getting Your Hands Dirty with jPDL 139
How is this example structured? 140
Key points that you need to remember 140
Analyzing business requirements 141
Business requirements 141
Analyzing the proposed formal definition 145
Refactoring our previously defined process 147
Describing how the job position is requested 151
Environment possibilities 153
Standalone application with jBPM embedded 153
Web application with jBPM dependency 154
Running the recruiting example 155
Running our process without using any services 155
Normal flow test 156
Summary 158
This material is copyright and is licensed for the sole use by ALESSANDRO CAROLLO on 18th December 2009
6393 south jamaica court, , englewood, , 80111

Table of Contents
[ v ]
Chapter 6: Persistence 159
Why do we need persistence? 160
Disambiguate an old myth 161
Framework/process interaction 161
Process and database perspective 164
Different tasks, different sessions 167
Configuring the persistence service 169
How is the framework configured at runtime? 173
Configuring transactions 174
User Managed Transactions (UMT) 175
What changes if we decide to use CMT? 176
Some Hibernate configurations that can help you 176
Hibernate caching strategies 177
Two examples and two scenarios 177
Running the example in EJB3 mode 181
Summary 183
Chapter 7: Human Tasks 185
Introduction 186
What is a task? 186
Task management module 188
Handling human tasks in jBPM 189
Task node and task behavior 191
TaskNode.java 193
Task.java 193
TaskInstance.java 194
Task node example 194
Business scenario 194
Assigning humans to tasks 199
Managing our tasks 202
Real-life scenario 203
Users and tasks interaction model 205
Practical example 207
Setting up the environment (in the Administrator Screen) 207
It's time to work 211
userScreen.jsp 212
UserScreenController.java 213
taskCheckDeviceForm.jsp 214
TaskFormController.java 214
Summary 215
Chapter 8: Persistence and Human Tasks in the Real World 217
Adding persistence configuration 218
Using our new configurations 219
This material is copyright and is licensed for the sole use by ALESSANDRO CAROLLO on 18th December 2009
6393 south jamaica court, , englewood, , 80111

Table of Contents
[ vi ]
Safe points 222
Advantages of persisting our process during wait states 226
Persistence in the Recruiting Process example 228
Human tasks in our Recruiting Process 228
Modifying our process definitions 229
Analyzing which nodes will change 230
Modified process definitions 231
Variable mappings 232
Task assignments 234
Assignments in the Recruiting Process example 238
Summary 240
Chapter 9: Handling Information 241
Handling information in jBPM 242
Two simple approaches to handle information 244
Handling process variables through the API 245
ContextInstance proposed APIs 245
ExecutionContext proposed APIs 247
Telephone company example 248
Storing primitive types as process variables 251
How and where is all this contextual information stored? 252
How are the process variables persisted? 252
Understanding the process information 257
Types of information 258
Variables hierarchy 260
Accessing variables 261
Testing our PhoneLineProcess example 262
Storing Hibernate entities variables 264
Homework 266
Summary 266
Chapter 10: Going Deeply into the Advanced Features of jPDL 267
Why do we need more nodes? 267
Fork/join nodes 268
The fork node 268
The join node 271
Modeling behavior 271
Super state node 274
Phase-to-node interaction 277
Node in a phase-to-phase interaction 278
Node-to-node interaction between phases 278
Complex situations with super state nodes 279
Navigation 279
Process state node 281
This material is copyright and is licensed for the sole use by ALESSANDRO CAROLLO on 18th December 2009
6393 south jamaica court, , englewood, , 80111

Table of Contents
[ vii ]
Mapping strategies 285
The e-mail node 286
Advanced configurations in jPDL 287
Starting a process instance with a human task 287
Reusing actions, decisions, and assignment handlers 288
Properties 289
Bean 290
Constructor 291
Compatibility 292
Summary 293
Chapter 11: Advanced Topics in Practice 295
Breaking our recruiting process into phases 295
Keeping our process goal focused with process state nodes 299
What exactly does this change mean? 301
Sharing information between processes 302
Create WorkStation binding 302
Asynchronous executions 304
Synchronous way of executing things 304
The asynchronous approach 307
How does this asynchronous approach work? 307
What happens if our server crashes? 308
Configuring and starting the asynchronous JobExecutor service 310
Different situations where asynchronous nodes can be placed 313
Summary 317
Chapter 12: Going Enterprise 319
jBPM configurations for Java EE environments 319
JBoss Application Server data source configurations 321
Taking advantage of the JTA capabilities in JBoss 324
Enterprise components architecture 325
The CommandServiceBean 327
JobExecutor service 330
JobExecutor service for Java EE environments 331
Timers and reminders 332
Mail service 334
Calendar 335
Timers 337
How do the timers and reminders work? 339
Summary 340
Index 341
This material is copyright and is licensed for the sole use by ALESSANDRO CAROLLO on 18th December 2009
6393 south jamaica court, , englewood, , 80111

This material is copyright and is licensed for the sole use by ALESSANDRO CAROLLO on 18th December 2009
6393 south jamaica court, , englewood, , 80111

Preface
You are reading this because you are starting to get interested in the open source
world. This book is especially for Java architects and developers with a free mind,
who want to learn about an open source project. The fact that jBPM is an open source
project gives us a lot of advantages, but it also comes with a big responsibility. We
will talk about both—all the features that this great framework offers us and also all
the characteristics that it has, being an open source project.
If you are not a Java developer you might nd this book a bit harder, but it will give
you all the points to understand how the open source community works.
I would like to take you through my own history, about how I discovered jBPM so
that you can identify your situation right now with mine. Take this preface as an
introduction to a new eld—integration. It doesn't matter what your programming
skills, experiences, and likes (user interfaces, code logic, low level code, simple
applications, enterprise applications, so on) are, if you are a courageous developer
you will like to tackle down all types of situations at least once.
With the myriad of web technologies these days, it's not a surprise that the new
developers' generation starts building web applications. I have been working in the
software development eld for approximately six years now. I used to spend most
of my time creating, developing, and designing web-based applications. I have also
learned more "low level" languages such as C and C++, but in the beginning I could
not make money with that. So, PHP and JSP were my rst options. Although it was
challenging I realized that I could not create bigger projects with my knowledge
about JSP and PHP. The main reason for this, in my opinion, is that bigger projects
become unmanageable when you start having web pages that contain all your
application logic. At that point I recognized that I needed to learn new paradigms
in order to create bigger and scalable applications. That is when I switched to Java
Enterprise Edition (version 1.4), which provides us with a componentized way to
build applications in order to be able to scale and run our applications on clusters
and with all these features about high availability and fault tolerance. But I was
not interested in conguring and making environmental settings, I just wanted
This material is copyright and is licensed for the sole use by ALESSANDRO CAROLLO on 18th December 2009
6393 south jamaica court, , englewood, , 80111

Preface
[ 2 ]
to develop applications. An important point in my career was when I started
getting bored as I had to spend hours with HTML and CSS frontend details that
I did not care about. So, I looked for other frameworks like JSF, which provides
a componentized way to build UIs and newer frameworks like JBoss Seam/web
beans (JSR-299) that have intimate relationships with the EJB3 specication, but
once again I had to check for HTML and CSS details for end users. I think that the
fact that I used to get bored with HTML and CSS is one of the biggest reasons why
I got interested in integration frameworks. When I use the word integration, I mean
making heterogeneous applications work together. Most of the time when you are
doing integrations; the user interfaces are already done and you only need to deal
with backends and communication stuff. That was my rst impression, but then
I discovered a new world behind these frameworks. At this point two things got
my attention: the open source community and the theoretical background of the
framework. These two things changed my way of thinking and the way I used to
adapt to a new open source framework. This book reects exactly that. First we'll
see how we can adapt all the theoretical aspects included in the framework and
then move on to how we can see all these concepts in the framework's code. This is
extremely important, because we will understand how the framework is built, the
project direction, and more importantly how we can contribute to the project.
I have been involved with the open source community for two years now, working
with a lot of open source frameworks and standards that evolve every day. When
I got interested in jBPM I discovered all the community work that is being done to
evolve this framework. I wanted to be part of this evolution and part of this great
community that uses and creates open source frameworks. That is one of the
main reasons why I created a blog (http://salaboy.wordpress.com) and
started writing about jBPM, I also cofounded the JBoss User Group in Argentina
(http://www.jbug.com.ar) and now Plug Tree (http://www.plugtree.com), an
open source-based company. With these three ventures I encourage developers to
take interest in new frameworks, new technologies and the most important thing,
the community.
What this book covers
Chapter 1, Why Developers Need BPM? introduces you to the main theoretical
concepts about BPM. These concepts will lead you through the rest of the book. You
will get an idea of how all the concepts are implemented inside the jBPM framework
to understand how it behaves in the implementations of the projects.
Chapter 2, jBPM for Developers, introduces the jBPM framework in a
developer-oriented style. It discusses the project's main components and
gets you started with the code distribution.
This material is copyright and is licensed for the sole use by ALESSANDRO CAROLLO on 18th December 2009
6393 south jamaica court, , englewood, , 80111

Preface
[ 3 ]
Chapter 3, Setting Up Our Tools, teaches you to set up all the tools that you will be
using during this book. Basic tools such as Java Development Kit and the Eclipse IDE
will be discussed. It will also provide you with a brief introduction to Maven2 here
to help you understand how to build your projects and the framework itself. At
the end of this chapter you will see how to create simple applications that use the
jBPM framework.
Chapter 4, jPDL Language, introduces the formal language to describe our business
processes. It gives you a deep insight in to how this language is structured and how
the framework internally behaves when one of these formal denitions is used.
Chapter 5, Getting Your Hands Dirty with jPDL, gets you started with working on
real-life projects. You will be able to create your rst application that uses jBPM
and dene simple processes, using the basic words in the jPDL language.
Chapter 6, Persistence, sheds light on the persistence service inside the jBPM
framework, which is one of the most important services to understand in order to
create real-life implementations using this framework. The persistence services are
used to support the execution of long-running processes that represent 95% of
the situations.
Chapter 7, Human Tasks, describes the human interactions inside business processes,
which are very important because humans have specic requirements to interact
with systems and you need to understand how all this works inside the framework.
Chapter 8, Persistence and Human Tasks in the Real World, mainly covers congurations
to be done for real environments where you have long-running processes that
contain human interactions. If you think about it, almost all business processes
will have these requirements, so this is extremely important.
Chapter 9, Handling Information, helps you to understand how to handle all the
process information needed by human interactions inside the framework, as the
human interactions' information is vital to get the activities inside our business
processes completed.
Chapter 10, Going Deeply into the Advanced Features of jPDL, analyzes the advanced
features of the jPDL language. This will help you improve your exibility to model
and design business processes, covering more complex scenarios that require a more
advanced mechanism to reect how the activities are done in real life.
Chapter 11, Advanced Topics in Practice, provides us with practical examples on the
topics discussed in the previous chapters. This will help you to understand how all
the advanced features can be used in real projects.
This material is copyright and is licensed for the sole use by ALESSANDRO CAROLLO on 18th December 2009
6393 south jamaica court, , englewood, , 80111

Preface
[ 4 ]
Chapter 12, Going Enterprise, introduces the main features provided by jBPM to run
in enterprise environments. This is very important when your projects are planned
for a large number of concurrent users.
Who this book is for
This book is mainly targeted at Java developers and Java architects who need
to have an in-depth understanding of how this framework (jBPM) behaves in real-life
implementations. The book assumes that you know the Java language well and also
know some of the widely-used frameworks such as Hibernate and Log4J. You should
also know the basics of relational databases and the Eclipse IDE. A brief introduction
to Maven2 is included in this book but prior experience might be needed for more
advanced usages.
Conventions
In this book, you will nd a number of styles of text that distinguish between
different kinds of information. Here are some examples of these styles, and an
explanation of their meaning.
Code words in text are shown as follows: "As you can see, inside the <task-node>
tags different tasks (<task> tag) can be dened."
A block of code is set as follows:
public class MyAssignmentHandler implements AssignmentHandler {
public void assign(Assignable assignable, ExecutionContext
executionContext) throws Exception {
//Based on some policy decides the actor that needs to be
// assigned to this task instance
assignable.setActorId("some actor id");
}
}
When we wish to draw your attention to a particular part of a code block, the
relevant lines or items are set in bold:
<event type="superstate-enter">
<action class="org....LogSuperStateEnterActionHandler">
<phaseNumber>One</phaseNumber>
<phaseName>Initial Interview</phaseName>
</action>
</event>
<state name="Initial Interview">
<transition to="Initial Interview Passed?" />
...
</state>
This material is copyright and is licensed for the sole use by ALESSANDRO CAROLLO on 18th December 2009
6393 south jamaica court, , englewood, , 80111

Preface
[ 5 ]
Any command-line input or output is written as follows:
mvn clean install -Dmaven.test.skip
New terms and important words are shown in bold. Words that you see on
the screen, in menus or dialog boxes for example, appear in the text like this:
"If we take a look at the Source tab, we can see the generated jPDL source code."
Warnings or important notes appear in a box like this.
Tips and tricks appear like this.
Reader feedback
Feedback from our readers is always welcome. Let us know what you think about
this book—what you liked or may have disliked. Reader feedback is important for
us to develop titles that you really get the most out of.
To send us general feedback, simply send an email to feedback@packtpub.com,
and mention the book title via the subject of your message.
If there is a book that you need and would like to see us publish, please send
us a note in the SUGGEST A TITLE form on www.packtpub.com or e-mail
suggest@packtpub.com.
If there is a topic that you have expertise in and you are interested in either writing
or contributing to a book on, see our author guide on www.packtpub.com/authors.
Customer support
Now that you are the proud owner of a Packt book, we have a number of things to
help you to get the most from your purchase.
This material is copyright and is licensed for the sole use by ALESSANDRO CAROLLO on 18th December 2009
6393 south jamaica court, , englewood, , 80111

Preface
[ 6 ]
Downloading the example code for the book
Visit http://www.packtpub.com/files/code/5685_Code.zip to
directly download the example code.
Errata
Although we have taken every care to ensure the accuracy of our content, mistakes
do happen. If you nd a mistake in one of our books—maybe a mistake in the text or
the code—we would be grateful if you would report this to us. By doing so, you can
save other readers from frustration, and help us to improve subsequent versions of this
book. If you nd any errata, please report them by visiting http://www.packtpub.
com/support, selecting your book, clicking on the let us know link, and entering the
details of your errata. Once your errata are veried, your submission will be accepted
and the errata added to any list of existing errata. Any existing errata can be viewed by
selecting your title from http://www.packtpub.com/support.
Piracy
Piracy of copyright material on the Internet is an ongoing problem across all media.
At Packt, we take the protection of our copyright and licenses very seriously. If you
come across any illegal copies of our works, in any form, on the Internet, please
provide us with the location address or web site name immediately so that we
can pursue a remedy.
Please contact us at copyright@packtpub.com with a link to the suspected
pirated material.
We appreciate your help in protecting our authors, and our ability to bring you
valuable content.
Questions
You can contact us at questions@packtpub.com if you are having a problem with
any aspect of the book, and we will do our best to address it.
This material is copyright and is licensed for the sole use by ALESSANDRO CAROLLO on 18th December 2009
6393 south jamaica court, , englewood, , 80111

Why Developers Need BPM?
I will start this book with a sentence that I say every time that I talk about jBPM.
"jBPM is a framework, keep it in mind". That's it, this is all that developers and
architects want to know to be happy, and it keeps them excited during the talks. For
this reason, the aim of the book is to give all developers an in-depth understanding
of this excellent, widely-used, and mature framework.
In this chapter we will cover the following topics:
Business process denition and conceptual background
Business process management discipline and the stages inside it
Business process management systems
To give you a brief introduction to this chapter, we are going to explain why
developers need to know about BPM and when they should use it. Before reaching
to this important conclusion we are going to analyze some new concepts like business
process, business process management discipline, and business process management systems
because it's important that developers manage the specic terminology pretty well.
Bearing these new concepts in mind, you will be able to start analyzing how your
company handles everyday work, so you can rediscover your environment with a
fresh perspective.
This chapter deals with vital conceptual topics that you need to know in order
to start off on the right foot. So, do not get disappointed if you feel that this is all
about theoretical stuff. Quite the opposite, just think that with all this conceptual
introduction, you will know, even before using the framework, why and how it
gets implemented as well as the main concepts that are used to build it internally. I
strongly recommend reading this chapter even if you don't know anything or if you
don't feel condent about the BPM discipline and all the related concepts. If you are
an experienced BPM implementer, this chapter will help you to teach developers the
BPM concepts, which they need in order to go ahead with the projects that will be
using it. Also if you are familiar with other BPM tools, this chapter will help you to
•
•
•
This material is copyright and is licensed for the sole use by ALESSANDRO CAROLLO on 18th December 2009
6393 south jamaica court, , englewood, , 80111

Why Developers Need BPM?
[ 8 ]
map your vision about BPM with the vision proposed by the jBPM team. Because it's
a vast theoretical topic, it is important for you to know the terminology adopted by
each project reducing and standardizing the vocabulary.
The moment you get to the concepts that we are going to see in this chapter, you will
get a strange feeling telling you: "Go ahead, you know what you are doing". So you
can take a deep breath, and brace yourself to get your hands on planning actions
using the concepts discussed in this chapter. Because these concepts will guide you
through till the end of this book.
First things rst, we will start with business process denition, which is a main
concept that you will nd in everyday situations. Please take your time to discuss the
following concepts with your partners to get an insight to these important concepts.
Business Process, why should I know
about that?
As you can see, jBPM has Business Process (BP) in the middle; so, this must be
something very important. Talking seriously, Business Process is the rst key
concept to understand what we are really going to do with the framework. You
must understand why and how you describe these Business Processes and discover
the real application of this concept.
A common denition of Business Process is: Business Process is a sequence of tasks that
happen in a repeatable order, executed by humans and/or systems to achieve a business goal.
To understand this denition we need to split it into three pieces and contrast it with
a real example.
"A sequence of tasks that happen in a
repeatable order"
This denition shows us two important points:
1. First of all, the word "task", sounds very abstract. For learning purposes we
can say that a task is some kind of activity in the company, atomic in the
context, which contributes towards obtaining/completing some business
goal. In real world a task (or an activity if you prefer) could be:
Signing a contract
Hiring a new employee
Reviewing a document
°
°
°
This material is copyright and is licensed for the sole use by ALESSANDRO CAROLLO on 18th December 2009
6393 south jamaica court, , englewood, , 80111

Chapter 1
[ 9 ]
Paying a bill
Calculating a discount
Backing up a le
Filling a form
As you can see, these examples are concrete, and the rule of thumb is
that these tasks should be described with an action (verb in the sentence,
Reviewing for example) and a noun (document in this case) that represents
where the action is applied.
Developers and architects should avoid thinking that "call myMethod()"
will be a good example of a task in a Business Process. Because this is not!
"call myMethod()" does not have anything to do with the business eld.
Also remember that this is a conceptual denition and is not related to
any particular technology, language, or system.
The second important word that we notice is "sequence", which demands a logical
order in which the actions are executed. This kind of sequence in real scenarios could
be seen as: Buyer buys an Item -> Buyer pays the bill -> Dispatch buyer the order. An
important thing to note here is that this sequence does not change in a short period
of time. This means that we can recognize a pattern of work and an interaction that
always occurs in the same order in our company to achieve the same business goals.
This order could change, but only if we suffer changes in business goals or in the
way that we accomplish them. Also you can see that this sequence is not achieved by
one person; there is some kind of interaction/collaboration among a group of people
to complete all the activities.
"executed by humans and/or systems"
Here we will see who performs these activities. But probably you have a question,
why denition makes these distinctions about humans and/or systems? This is
because humans behave differently from systems. Human beings are slow (including
me) and machines are fast, so we need to handle this interaction and coordination
carefully. Why are humans slow? From the application perspective, this is because
when a task is assigned to a human being, let's say Paul, this task must wait for Paul
to be ready to do the job. In case Paul is on vacation for a month, the task would
have to wait for one month to begin. Systems (also called automatic procedures)
on the other hand, just execute the action as fast as they can, or when the action is
required. These two opposite behaviors are one of the principal inuences in the
design of the framework. For this reason, we are going to see how these behaviors
are implemented inside the framework in the following chapters.
°
°
°
°
This material is copyright and is licensed for the sole use by ALESSANDRO CAROLLO on 18th December 2009
6393 south jamaica court, , englewood, , 80111

Why Developers Need BPM?
[ 10 ]
Another important thing to keep in mind about these two behaviors is: ''waiting
for humans to respond'' and ''executing it as fast as possible for systems'', are the
behaviors that we will need to synchronize. In real-life situations, we will have them
in a random order. (The order could be somewhat like: wait, execute as fast as you
can, wait, wait, execute as fast as you can, and so on) Let's clarify these points with
a practical, real-world example. Imagine that we are in a company called Recycling
Things Co. In one of the company branches papers are recycled. This branch of the
company is in charge of recycling used paper, processing it, and storing it until
someone buys it. Probably this process contains the following activities/tasks:
1. Receiving X ton(s) of a pile of paper in the "Just received" warehouse—here,
we probably have a guy (the "Just received" guy), who lls in a form the
specics like the type of paper, the weight, and other technical details
about it upon receiving something each time. When he nishes the form, he
receives the paper pile and stores it in the warehouse. Finally, he sends the
form to the main ofces of Recycling Things Co.
2. The form lled in the "Just received" warehouse arrives at the main ofce of
Recycling Things Co., and now we know that we can send X ton(s) of paper
to the recycling station. So, we send the X ton(s) of paper from "Just received"
warehouse to the recycling station. Probably we do that by just making a call
to the warehouse or lling another form.
3. When the pile of paper arrives at the recycling station, an enormous machine
starts the process of recycling. Of course, we must wait until this big machine
nishes its job.
4. The moment the machine nishes, the guy in charge of controlling the
outcome of this machine (Recycling Station guy), checks the status of the
just-recycled paper and, depending on the quality of the outcome he decides
to reinsert the paper into the machine again or to move the nished paper
to the "Just nished" warehouse. Just after that he lls in a form to report
to the main ofce of Recycling Things Co. that the X ton(s) of papers were
successfully recycled, and includes also the number of iterations he needed
to perform with the required level of quality to get the job done in the form.
Probably this level of quality of the recycled paper will also be included on
the form, because it is valuable information.
5. When the guy from the "Just nished" warehouse receives the recycled
X ton(s) of paper, he also sends a form to Recycling Things Co. main
ofces to inform them that X ton(s) of paper are ready to sell.
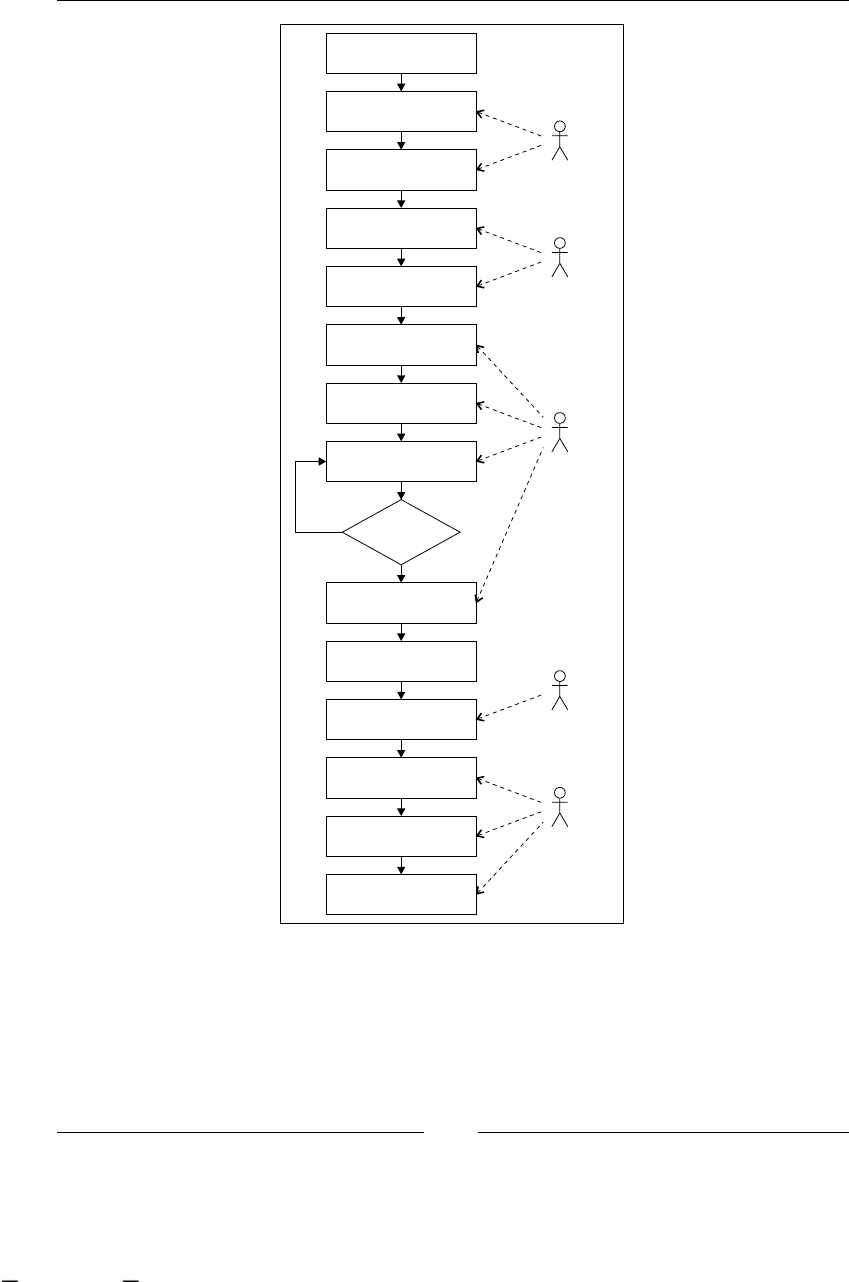
To have a clear understanding of this example, we can graph it, in some
non-technical representation that shows us all the steps/activities in our
just-described process. One of the ideas of this graph is that the client, in this
case Recycling Things Co. manager, can understand and validate that we are
on the right track regarding what is happening in this branch of the company.
This material is copyright and is licensed for the sole use by ALESSANDRO CAROLLO on 18th December 2009
6393 south jamaica court, , englewood, , 80111
Chapter 1
[ 11 ]
Used Paper arrives
Store used paper
Fill and Send Form to
Main Offices
Form Arrives
Call to the Recycling
Station
Receive Call
Move the paper to
recycling station
Just Received
Warehouse
Main
Offices
Recycling
Station
Main
Offices
Recycle Paper in Big
Machine
No
Yes
Fill and Send Form to
Main Offices
Form Arrives
Call to Just Finished
Warehouse
Receive Call
Move and Send Form to
Main Offices Just Finished
Warehouse
Fill and Send Form to
Main Offices
Quality Check
Pass?
As you can see, the process looks simple and one important thing to notice is that
these chained steps/activities/tasks are described from a higher-level perspective,
like manager level, not employee perspective. It is also necessary to clarify the
employee perspective and add this detail to each activity. We need to have a
clear understanding of the process as a whole, the process goal, and the details
of each activity.
This material is copyright and is licensed for the sole use by ALESSANDRO CAROLLO on 18th December 2009
6393 south jamaica court, , englewood, , 80111

Why Developers Need BPM?
[ 12 ]
If you are trying to discover some processes in your company, rst ask at
manager level, they should have a high-level vision like in the Recycling
Things Co. example. Then you should know what is going on in everyday
work. For that, you should ask every person involved in the process about
the activities that they are in charge of. In a lot of companies, managers
have a different vision of what is going on everyday. So ask both sides,
and remember employees have the real process in their minds, but they
don't have full visualization of the whole process. Pay close attention
to this. Also remember that this kind of discovering task and modeling
process is a business analyst's job.
"to achieve a business goal"
It is the main goal of our jobs, without this we have done nothing. But be careful,
in most cases inexperienced developers trying to make use of their new framework
forget this part of the denition. Please don't lose your focus and remember why
you are trying to model and include your processes in your application. In our
previous example, Recycling Things Co., the business goal of the process (Recycle
paper) is to have all the recycled papers ready as soon as possible in order to sell it.
When the company sells this paper, probably with another process (Sell recycled
paper), the company will get some important things: of course money, standardized
process, process formalization, process statistics, and so on. So, stay focused on
relevant processes that mean something to the company's main goal. Try not to
model processes everywhere because you can. In other words, let the tools help you;
don't use a tool because you have it, but because it's in these situations where all the
common mistakes happen.
I know what BPs are, but what about the final
"M" in BPM?
If we have a lot of business processes, we will need to manage them over time. This
means, that if we have too many process denitions, and also we have executed
these denitions, we will probably want to have some kind of administration that
lets us store these denitions as well as all the information about each execution. You
may also want to keep track of all the modications and execution data throughout.
This is really necessary because the process will surely change and we need to
adapt to the new requirements of our business that evolves each day. That is why
Business Process Management (BPM) emerges as a discipline to analyze, improve,
automatize, and maintain our business processes. This discipline proposes four
stages that iteratively let us have our business processes in perfect synchronization
with business reality.
This material is copyright and is licensed for the sole use by ALESSANDRO CAROLLO on 18th December 2009
6393 south jamaica court, , englewood, , 80111

Chapter 1
[ 13 ]
BPM stages
Now we are going to analyze the stages that this discipline proposes to us:
1. Finding/discovering real-life process: In this stage, business analysts try
to nd business processes in the company. Depending on the methodology
used by the analysts to nd a process, probably we will get some description
about the activities in the process. Most of the time these processes can be
found by asking company managers and employees about the goals of the
various processes and the activities needed to fulll them. This will also give
us a list of all the business roles involved in each process.
2. Designing/modeling process: If we start with the description that business
analysts carry out in the previous state, this stage will try to represent
this denition in some formal representation/language. Some, in vogue
languages to do that are BPMN (Business Process Modeling Notation) and
XPDL (XML Process Denition Language), these languages are focused in
an easy graph representation of these processes and an intuitive and quick
understanding of what is happening in each of them. The goal of this stage
is that all the people who are in contact with this formal representation
understand the process well and know how the company achieves the
process business goal.
3. Executing process: This is one of the most interesting stages in BPM (at least
for us), because here our process denitions come to life and run, guiding the
work that the company is doing everyday. With this guidance the company
gains all the advantages discussed in the next section. The goal of this stage
is to improve the process execution times and performance and to make the
systems and people communication between people and systems smoother
in order to achieve the business goal.
4. Improving process: At this point, with processes already executed, we try
to analyze and nd some improvements to our processes. This is achieved
by analyzing the execution data and trying to reduce the gap between the
formal denition of the process and the actual implementation style of our
company. Also, we try to reduce and nd possible bottlenecks and analyze
if there are some activities that can be done simultaneously, or if we have
unnecessary activities, or if we need to add new activities to speed up our
process performance.
This material is copyright and is licensed for the sole use by ALESSANDRO CAROLLO on 18th December 2009
6393 south jamaica court, , englewood, , 80111

Why Developers Need BPM?
[ 14 ]
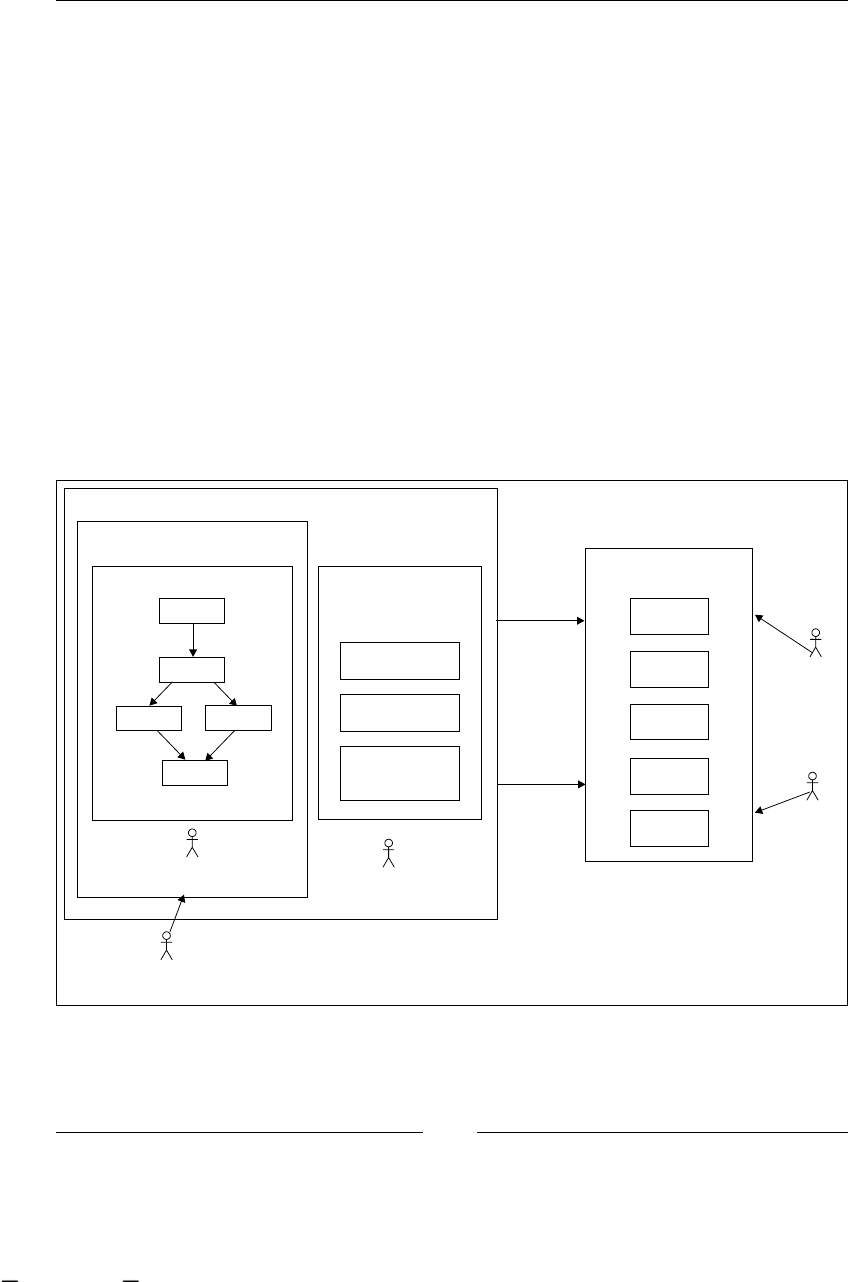
As you can imagine, all these stages are iteratively repeated over time. Take a look
at the following gure that shows us all the BPM stages. It also includes the most
common artifacts that are generated in each step.
<Ask>
Business
Analysts
DISCOVERING
PROCESS
<helps>
<helps>
<Use>
<Use>
Process
textual
description
IMPROVING
PROCESS
<Improve>
<Validate>
Process
formal
description
Statistics /
Execution
data
Business Users
Manager Employees
Business Users
Manager Employees
MODELING
PROCESS
EXECUTING
PROCESS
Developers
Business
Analysts
Developers
Business
Analysts
Manager
This material is copyright and is licensed for the sole use by ALESSANDRO CAROLLO on 18th December 2009
6393 south jamaica court, , englewood, , 80111

Chapter 1
[ 15 ]
BPM stages in a real-life scenario
One entire cycle that goes through all these stages is one step forward to our
well-dened processes that will guide our company everyday.
If we take the previous example of Recycling Things Co., we can say that BPM works
as follows:
1. A business analyst is hired to analyze the branch that is in charge of recycling
paper. He observes what happens in the branch and tries to describe the
activities of this branch with a textual description. Very similar to the process
we described in the example. Here we see the rst stage, which is discovering
the process. This stage could start with previous denition of the process; in
this case the business analyst will need to update this denition with what is
happening then.
2. This business analyst translates the previously described process with the
help of a developer and with knowledge of some formal language. At this
point a validation with a client (in this case the manager of Recycling Things
Co.) would be advisable.
3. Once we have the formal denition of the processes validated, the developers
will analyze the environmental requirements of the processes. Moreover, all
the technical details that the process will need to run will be added (this is
our job/developer's job). When all of these details are set up, the process is
ready to run and guide the business users in their everyday work.
4. When the processes are running, the business analyst and developers need to
work together to analyze how this process is working, trying to improve the
process denition, and all the settings to make it perform better.
At the end of stage four, another cycle begins: improving, adapting, and
rediscovering all the processes continuously in the company.
In the next section we are going to discuss about all the advantages that this
discipline gives us.
This description of BPM is incomplete, but for developers who want to use jBPM, it
is ne. If you are interested in learning more concepts and theoretical background
about this discipline there is plenty of interesting literature out there. You just need
to search BPM on the Internet and many pages and articles will appear. For example,
take a look at http://en.wikipedia.org/wiki/Business_process_management
and http://www.bpminstitute.org/index.php?id=112.
This material is copyright and is licensed for the sole use by ALESSANDRO CAROLLO on 18th December 2009
6393 south jamaica court, , englewood, , 80111

Why Developers Need BPM?
[ 16 ]
BPM improvements
BPM, as with any other discipline, gives us a large number of practical advantages
that we want to know before we adapt it. Here we are going to discuss some of the
most important advantages and improvements that we can have if we adopt BPM
and how they can benet our company.
Global understanding of our processes
When we nd a process in our company, we discuss it with the manager and the
business analysts. This process now could be formalized in some formal language.
(Formal means it has no ambiguous terms, and it's said the same for everybody who
understands it.) If we achieve that, we gain two main things:
Now we know our process. This is important and no minor thing. Now our
process is no longer something that we have a vague idea about, we now
know what exactly our process goal is and what business roles we require
to achieve this goal. This formalization and visibility is the rst step to
improving our existing process, because now we can see the possible
points of failure and nd the best solution to x them.
All our managers and employees can see the process now. This is very
helpful in two areas:
New employees could be easily trained because the process
will guide them through the activities of the process that
correspond to the new employee's role.
Managers can make more accurate decisions knowing exactly
what is going on in their processes. Now they have gained
the visibility of the roles involved in each process and the
number of tasks performed by each role in a specic process.
Agile interaction between systems, people, and
teams
When our process denitions are executed, all the employees will be guided through
their tasks, making the system integrations transparent to them, and improving
people's communication. For example, say in a post ofce we have a task called
receive letter. The person at the front desk there receives the letter and lls all the
information about the destination address of the letter on a form. When delivery time
arrives, some other task (say Deliver letter) will use all this information. In this case,
the process itself will be in charge of moving this data from one activity to another,
taking away the responsibility from both users. The data will go from one task to
another, making the information available for everyone needing it.
•
•
°
°
This material is copyright and is licensed for the sole use by ALESSANDRO CAROLLO on 18th December 2009
6393 south jamaica court, , englewood, , 80111

Chapter 1
[ 17 ]
Reduce paperwork
In all the human tasks (tasks that need an interaction with people) the most common
behaviors will be:
Read/insert/modify information: When people interact with activities of
the process, it is common that they introduce or read information that will
be used in the following tasks for any other role. In our Recycling paper
example, each form lled can be considered information that belongs to the
process. So, we can reduce all the paper work and translate it to digital forms
that give us two interesting advantages:
Reduction of paper storage in our company: There will be
no need to print forms and store them for future audits
or analysis.
Reduction of the time spent: The time spent on moving the
information from one place to another.
So, this results in saving money and not having to wait for the forms that
may not arrive or could be lost on their way.
Make a decision: Choose if something is OK or not and take some special
path in the process (we will talk about different paths in our process later). In
our post ofce example, when the Recycling Station guy checks the quality
of the just-recycled paper, he needs to choose if the recycling of paper is
done properly or it needs to be retried. Here the quality of the paper and the
number of retries could be maintained as process information, and do not
need to be written down on a paper or form. The machine can automatically
inform our process about all this data. In these cases, the advantage that BPM
gives us is that we can make automatic decisions based on the information
that the process passes from one activity to the next.
Real-time process information
In every process execution and at any moment, our managers can see in which
activity the process is currently stopped and who must complete it. With this
valuable information about the status of all the processes, the manager will know if
the company is ready to make commitments about new projects. Also you can switch
to other methodologies, such as, BAM (Business Activity Monitoring) to make a
more in-depth and wider analysis about how your company processes are working.
•
°
°
•
This material is copyright and is licensed for the sole use by ALESSANDRO CAROLLO on 18th December 2009
6393 south jamaica court, , englewood, , 80111

Why Developers Need BPM?
[ 18 ]
Process information analysis
With the formal denition of our processes we can start improving the way the
information is treated in each of our processes. We can analyze if we are asking for
unnecessary data or if we need more data to improve performance of our processes.
Statistics and measures about each execution
With audit logs of each execution we can nd out where the bottlenecks are, who is
a very efcient worker, and who spends too much time on an assigned task without
completing it.
As you can see there are a lot of advantages of BPM but we need to understand all
the concepts behind it to implement it well.
BPM and system integration "history"
We as developers see BPM closely related to system integration, so in our head when
we see BPM we automatically merge the concepts and disciplines:
Workows: This branch is conceived for people-to-people interactions, born
in the mid 70s.
Business process improvements: These suggest methodologies to
increment the overall performance of the processes inside a company,
born in the mid 80s.
System integration: This branch is focused on achieving uid
system-to-system interactions. This concept is newer than the other
two and is more technical.
This mix gives us important advantages and exibility, which let us manage all the
interactions and information inside our company in a simple way. But this mix also
brings a lot of confusion about terminology in the market.
At this point, when BPM began to appear in the market, vendors and customers
had their own denition about what BPM meant. Some customers just wanted
BPM; it didn't really matter what BPM really was, but they wanted it. Also vendors
had different types of technologies, which they claimed to be BPM just in order to
sell them.
When all this confusion lessened a bit and not everyone wanted to buy or sell BPM
tools, the big boom of SOA (Service Oriented Architecture) began. SOA was born
to bring us new architecture paradigms into give us more exibility at design and
integration time. The main idea is: with SOA, each business unit will have a set of
services that can be easily integrated and have uid interactions with other business
unit services and also with other business server partners.
•
•
•
This material is copyright and is licensed for the sole use by ALESSANDRO CAROLLO on 18th December 2009
6393 south jamaica court, , englewood, , 80111

Chapter 1
[ 19 ]
At this point, the confusion about overloaded terms came again. Also with
the addition of SOA, new languages come to play; one of the most fashionable
languages was BPEL (Business Process Execution Language, also known as
WS-BPEL—Web Services BPEL). BPEL is basically an integration language that
allows us to communicate with heterogeneous systems, which all talk (communicate)
using Web Services Standards. All of this is done in a workow-oriented way (but
only for systems and not for people), so we can describe systems' interactions with
a graph that shows us the sequence of systems calls.
Also ESB (Enterprise Service Bus) products started gaining a lot of popularity
among vendors and customers. This product proposes a bus that lets us connect all
our services, which speak in different languages and protocols, and allows them to
communicate with each other.
But as you can see, SOA has two faces, one is technological and the other
corresponds to the architectural design patterns. This second face contributes
a lot to today's enterprise architectural choices that are being taken by big
companies around the world.
In the next section we are going to see some brief denitions about all these
technologies that are around BPM as they always bring confusion to all of us. If we
understand the focus of each technology, we will be able to think and implement
software solutions that are exible enough and have the right concepts behind
them. Do not confuse technical terms with theoretical denitions.
Some buzzwords that we are going to
hear when people talk about BPM
In this short section we are going to discuss words that sometimes confuse us and
sometimes we misuse these words as synonyms. This section is aimed at clarifying
some ambiguous technical and theoretical terms that surround BPM. These terms
will be distinguished as theoretical denitions and technological terms. Sometimes
you will notice that different roles have different perspectives about the same term.
Theoretical definitions
These theoretical denitions try to clarify some concepts that aim to dene topics
that are agnostic to technology, trying to understand the cornerstones behind terms
that are often used by technical people. Feel free to query other bibliographies about
these terms to get all the background that you need.
This material is copyright and is licensed for the sole use by ALESSANDRO CAROLLO on 18th December 2009
6393 south jamaica court, , englewood, , 80111

Why Developers Need BPM?
[ 20 ]
Integration (system integration)
We frequently hear about integration. BPM is about integration, but what exactly do
we need to understand when we hear that?
Probably when someone says "I want to integrate my systems", we understand
that this person wants all his or her company systems to talk (communicate) to
each other in order to work together. That is the most common understanding,
but we also need to understand that this integration will include the following
out-of-the-box implicit requisites:
Flexibility: The integration solution needs to be exible enough to allow us
any kind of interaction
Extensibility: In future we need to be able to add other systems to the
newly-integrated solution
Maintainability: If some changes emerge, the solution should let us change
the integration to let us adapt to these changes and future changes as well
Scalability: The solution should allow our applications to
grow transparently
Workflow
One of the most overloaded words in the market. When we hear conversations
about workows in most cases, we are talking about situations where only people
get involved. Most of the workows are related to documents that are moved
through business units inside the company, where these business units modify these
documents, to achieve some business goal. Currently, in many companies the terms
BPM and workow are used as synonyms, but in this book we are trying to make the
distinction between them clear.
Here when we talk about workows we refer to some steps inside them and
specic application domains. BPM is like a more generic and extended set of
tools, which let us represent situation that integrate heterogeneous systems and
people's activities, with a ne-grained control.
However, workows and BPM share the same theoretical nature; try to see
workows like a domain specic set of activities and BPM as a set of tools to
integrate and communicate all the work that is being done in the company.
•
•
•
•
This material is copyright and is licensed for the sole use by ALESSANDRO CAROLLO on 18th December 2009
6393 south jamaica court, , englewood, , 80111

Chapter 1
[ 21 ]
Service Oriented Architecture (SOA)
Here we will discuss the theoretical aspect of the term SOA. When people talk
about SOA, most of the time they are talking about some specic architectural
design patterns that let our application be designed as services communicating with
each other. This means that in most of the cases our applications will be used across
the company business units. This requires one application to interact with services of
each unit. So, SOA advises us about how to build our application to have exibility
and uid communications between each business unit services.
Orchestration
This term refers to the possibility to coordinate the interaction between systems calls.
This coordination is always achieved by a director that will know which is the next
system call in the chain. This term is used to represent a logical sequence, which is
used to obtain a business result using different calls to different systems in a specic
order. This term is used very frequently in conjunction with BPEL. We'll discuss that
in the next section.
Technological terms
These technological terms, in contrast with all the theory that we see behind them,
give us the knowledge that we need to use tools in the way that is intended. Try
to link all this technical information with the theory that we have seen before. If
you feel that something is missing, please read more bibliographies until you feel
condent with it. But don't worry, I will do my best to help you.
Workflow
When developers talk about workows, probably they are referring to some
framework, tool, or product, which lets them dene a sequence of steps that one
application will take. That is, they mean some kind of state machine that will be
embedded in the application. As we mention this in most of the cases, workows
are specic to one domain and probably to one application.
Enterprise Service Bus (ESB)
Enterprise service buses emerge as very exible products that implement a lot of
connectors, which let us plug our heterogeneous applications to them and then
interact with each other. With ESB, we achieve the abstraction about which protocol
we need to use to talk with another application and we only need to know how
to talk with the bus. Then the bus is in charge of the translation between different
protocols and languages.
This material is copyright and is licensed for the sole use by ALESSANDRO CAROLLO on 18th December 2009
6393 south jamaica court, , englewood, , 80111

Why Developers Need BPM?
[ 22 ]
BPEL (WS-BPEL)
Business Process Execution Language (BPEL) is a language that denes how web
services calls are coordinated one after the other to obtain some business information
or to achieve some business action. This language lets us dene how and when web
services for different applications need to be called and how the data should be
passed through these calls.
One nal thing to notice here is that BPM is a discipline. This means that
BPM is technology agnostic, you can implement this discipline in your
company just with a pen and paper, but if you are a developer I would
think that you wouldn't want to do that.
That is why BPMS comes to save us.
Business Process Management Systems
(BPMS), my tool and your tool from
now on
Now, we know about BPM as a discipline, so we can implement it; but wait a second,
we don't need to. That's because jBPM is a framework that lets us implement the
main stages of BPM (unless you want to implement it in pen and paper!). BPMS
makes up for a piece of software that lets us implement all the main stages that the
discipline describes. These tools are frameworks that provide us with the designing
tools to describe our Business Processes. They also offer congurable executional
environments to execute our designed processes, and tools to analyze and audit the
history of our process executions in order to improve our processes and make more
accurate business decisions. That is exactly what jBPM gives us—an open source
development framework integrated with nice tools to describe our processes in a
formal language (called jPDL, jBPM Process Denition Language), an executional
environment to see how the processes live and guide our company through their
activities, and a set of best practices to analyze our processes and improve the
company performance and incomings.
BPM systems versus BPM suites
There is a lot of noise in the market about this. If you have not heard about any of
these terms you are lucky, because these too are overused terms.
This material is copyright and is licensed for the sole use by ALESSANDRO CAROLLO on 18th December 2009
6393 south jamaica court, , englewood, , 80111

Chapter 1
[ 23 ]
BPM systems, as we have discussed earlier, are developer-oriented tools that lets
us implement software solutions that use the BPM approach (this approach will be
discussed later). In the case of jBPM, that is a BPM system; we are going to see that
it is also designed to have a graph-oriented language that can be useful to have a
uid communication with business analysts. But somehow, business analysts are
not supposed to design and execute business process on their own.
On the other hand, BPM suites are products oriented to help business analysts to
design and implement a fully-functional process on their own. These products have
a "developer free" policy. These kind of products are commonly closed sources and
also come integrated with an application server.
As you can imagine BPM suites are good tools. But the main problem is that most
of the time they do not have enough exibility and expressiveness to adapt to
everyone's business needs.
To tackle the exibility issues, BPM system's developers can adapt and modify the
entire framework to fulll the business requirements. Also, BPM systems are like
any other framework—environment agnostic, so depending on the kind of business
requisites, developers can choose to create a standalone application, web application,
or a full enterprise application. This comes with another huge advantage; we can
choose any vendor of web or application server! We are not tied to JBoss, not to any
other license fees.
Why we really need to know BPM and BPMS,
and how do they change/impact on our
daily life
Enough of theoretical chat, we want to see how these tools and concepts will be
applied by us in our everyday job. Because these tools will change the way we think
about our applications and in my experience I never want to go back.
This is because a new approach of development arrives. This will give our applications
exibility and an easy way to adapt to everyday changes that our company requires.
New approach
Here we are going to see how our component-oriented paradigm is modied a bit to
make use of the advantages proposed by the BPM discipline.
The main idea is to give developers more exibility to adapt to future changes and,
of course improve the way they create applications that include/reect the company
business processes.
This material is copyright and is licensed for the sole use by ALESSANDRO CAROLLO on 18th December 2009
6393 south jamaica court, , englewood, , 80111
Why Developers Need BPM?
[ 24 ]
To achieve that, we must have formal description of our processes, know on which
environment our processes should run and then combine these two areas in one
implementation that the business analysts understand and have all the technical
details that allow the process to run in a production environment. Running of this
process will guide all the employees involved in that process through their
tasks/activities in everyday work.
To make this implementation exible and adaptable, we need to have a
loosely-coupled design and relationship between our formal representation of
the processes and all the technical details. Remember that these two "artifacts"
(process formal description and all that involves technical details: Java code, XML
conguration le, and so on) are focused on two different roles in the BPM systems'
perspective. This is because our process denition must always be understood by
business analysts, and technical details will always be implemented for developers
who know about environments and executional congurations.
To have a clear vision about what I'm talking about, we will analyze the
following image:
Runtime Environment
(Execute)
Activity
Activity
Activity
Activity
Activity
<Deploy>
Developers Code/Configure and Maintain
Business Analysts Define
Business Process Definition
Business
Analyst
Runtime Environment
Configuration
Configuration
Files
Java Code
XMLs
Developer
<Validate / Ask for modifications>
Business
Manager
Business
User
Business
User
This material is copyright and is licensed for the sole use by ALESSANDRO CAROLLO on 18th December 2009
6393 south jamaica court, , englewood, , 80111

Chapter 1
[ 25 ]
Now our process and applications can change smoothly to reect the changes
that our company has day after day. And our work will just be to modify some
process denition adoptions for new requirements (for example, change one
activity before another or put a new activity) and our process will be synchronized
with our company changes. I do not want to lie here, but if you apply some basic
principles to technical details, minor changes will be needed when our process
requires modications.
Now it is time to get to know jBPM implementation in depth, so in the next chapter
we are going to focus on a deep analysis of the framework's internal component
distribution and the basic principles that cause the real implementation.
But wait a moment, before the next chapter I have some homework for you to do.
Homework
This is a special homework, and you can use the outcome to see your knowledge
improvements throughout the rest of the book.
For this homework you will need to nd one or two simple processes in your
company and describe them, like the example that we saw in this chapter.
Try to describe your processes using the following guidelines:
First look for business goals: Try to nd something that is important to your
company, not only for developers. You probably will nd something that is
not even close to systems or computers (like the recycling example).
Put a name to your process: When you nd a business goal, it's easy to name
your process related to the goal, as follows:
Goal: Recycle Paper
Name: Recycling Paper process
Focus on the entire company, not only on your area: As we mentioned
earlier, business processes are about team, business unit, and also business
partners' integration. So, don't limit your processes to your area. Ask
managers about tasks and if these tasks are part of a bigger business scenario.
80% of tasks are part of bigger business scenarios; so bother your managers
for ve minutes, they will probably get interested in what you are doing with
the company processes.
Identify business roles: You will need to nd out who does which tasks
that you nd inside your process. This is a very important point, try to also
identify the nature of these roles, for example if some role in your process is
irreplaceable, or if there are a lot of people who can do the job.
•
•
°
°
•
•
This material is copyright and is licensed for the sole use by ALESSANDRO CAROLLO on 18th December 2009
6393 south jamaica court, , englewood, , 80111

Why Developers Need BPM?
[ 26 ]
Identify systems interactions: Try to identify different systems that are
used throughout different business units, and try not to imagine systems'
improvement. Just write down what you see.
Not too macro and not too micro: Try to focus on processes that have
concrete tasks, which people do every day. If you nd that you are
describing a really huge process, and that every activity you nd is another
complete process, this is not within the scope of this homework. On the other
hand, you can describe very detailed tasks that in reality is just one task;
for example, if you have a form that demarcates three sections, and these
three sections are lled in all together for the same business role at the same
time, you do not need to describe three separate tasks, one for each section,
because with one task you are representing them all in the lled form.
Do not rely on old documentation: Sometimes companies have these
business processes documented (probably if the company was trying to
achieve some Quality Assurance certication), but most of the time these
documented processes are not reected in the company's everyday work.
So, try to look at a process that happens right near you.
Do not be creative: Do not add extra activities to your processes, there will
be time to improve your current processes. So, if you are not sure that the
task is being performed, throw it away.
A graph can help a lot: If you can graph your process as boxes and arrows,
you are heading in the right direction. Also a graph could be helpful to draw
quick validations from your partners and managers.
As I mentioned before, this discovering process task is for business
analysts. But for learning reasons, this can help us to understand and gain
expertise in recognizing real-life processes and then have more uid talks
with business analysts.
Take your time to do this homework, later you will nd that you are
learning how to improve your newly-found processes.
•
•
•
•
•
This material is copyright and is licensed for the sole use by ALESSANDRO CAROLLO on 18th December 2009
6393 south jamaica court, , englewood, , 80111

Chapter 1
[ 27 ]
Summary
In this chapter, we learned the meaning of three key concepts that will underpin all
of our work with jBPM:
Business Process: Sequence of activities that are done by humans and systems
interactions in order to achieve some business goal. This is a key concept, keep it
in mind.
Business Process Management: BPM is discipline oriented to analyze, improve,
and maintain business processes in an iterative way over time. We also see all the
advantages and some history about this.
Business Process Management Systems: It's a software that lets us
implement the main stages of BPM. A set of tools for designing, managing,
and improving our business processes. It is designed for teams composed by
developers and business analysts.
We also tried to understand why developers need to know all these concepts, and
we reached the conclusion that a new paradigm of software development can be
implemented using the BPM theory.
In the next chapter, we will learn about the jBPM framework. We will see how
it is composed and the set of tools that this framework provides us. The focus of
this book is to show how the framework is internally built using a developer's
perspective that will help you to:
Learn about any open source frameworks
Learn how to teach and guide the learning process of open
source frameworks
•
•
•
•
•
This material is copyright and is licensed for the sole use by ALESSANDRO CAROLLO on 18th December 2009
6393 south jamaica court, , englewood, , 80111

This material is copyright and is licensed for the sole use by ALESSANDRO CAROLLO on 18th December 2009
6393 south jamaica court, , englewood, , 80111

jBPM for Developers
This chapter will give us a basic background into how the framework was built.
We will be fully focused on the approach used to implement jBPM. This approach
is called Graph Oriented Programming, and we will discuss and implement a basic
solution with it. This will guide us to knowing about the framework internals with a
simplistic vision. That will give us the power to understand the main guidelines used
to build the entire framework.
During this chapter, the following key points will be covered:
Common development process
Decoupling processes from our applications
Graph Oriented Programming
Modeling nodes
Modeling transitions
Expanding our language
Implementing our graph-oriented solution in Java
Wait states versus automatic nodes
Executing our processes
Let's get started with the main cornerstone behind the framework. This chapter will
give us the way to represent our business processes using the Java language and all
the points that you need to cover in order to be able to represent real situations.
•
•
•
°
°
°
•
•
•
This material is copyright and is licensed for the sole use by ALESSANDRO CAROLLO on 18th December 2009
6393 south jamaica court, , englewood, , 80111

jBPM for Developers
[ 30 ]
Graph Oriented Programming
We will start talking about the two main concepts behind the framework's internal
implementation. The Graph Oriented Programming(GOP) approach is used to
gain some features that we will want when we need to represent business processes
inside our applications. Basically, graph oriented programming gives us the
following features:
Easy and intuitive graphical representation
Multi-language support
These are concepts that jBPM implementers have in mind when they start with
the rst version of the framework. We are going to take a quick look at that and
formulate some code in order to try to implement our minimal solution with these
features in mind.
Starting with GOP as a bigger concept, you will see that the ofcial documentation
of jBPM mentions this topic as one of the most important concepts behind
the framework. Here, we will reveal all of the advantages that this approach
implementation will give us. Basically, by knowing GOP, we will gain complete
knowledge about how processes are represented and how they are executed.
Therefore, a common question here is, why do we need a new approach (GOP) for
programming our processes when we have already learnt about the object-oriented
programming paradigm?
Common development process
In order to answer the previous question, we will quickly analyze the situation
here. To achieve this, we need to understand the nature of our processes. We will
also analyze what kind of advantages developers gain when the business process
information is decoupled from the rest of the application code.
Let's clarify this point with a simple example. Imagine that we have to build an
entire application that represents the stages in the "Recycling Things Co." example
previously presented. The most common approach for a three-tier application and
development process will be the following:
•
•
This material is copyright and is licensed for the sole use by ALESSANDRO CAROLLO on 18th December 2009
6393 south jamaica court, , englewood, , 80111
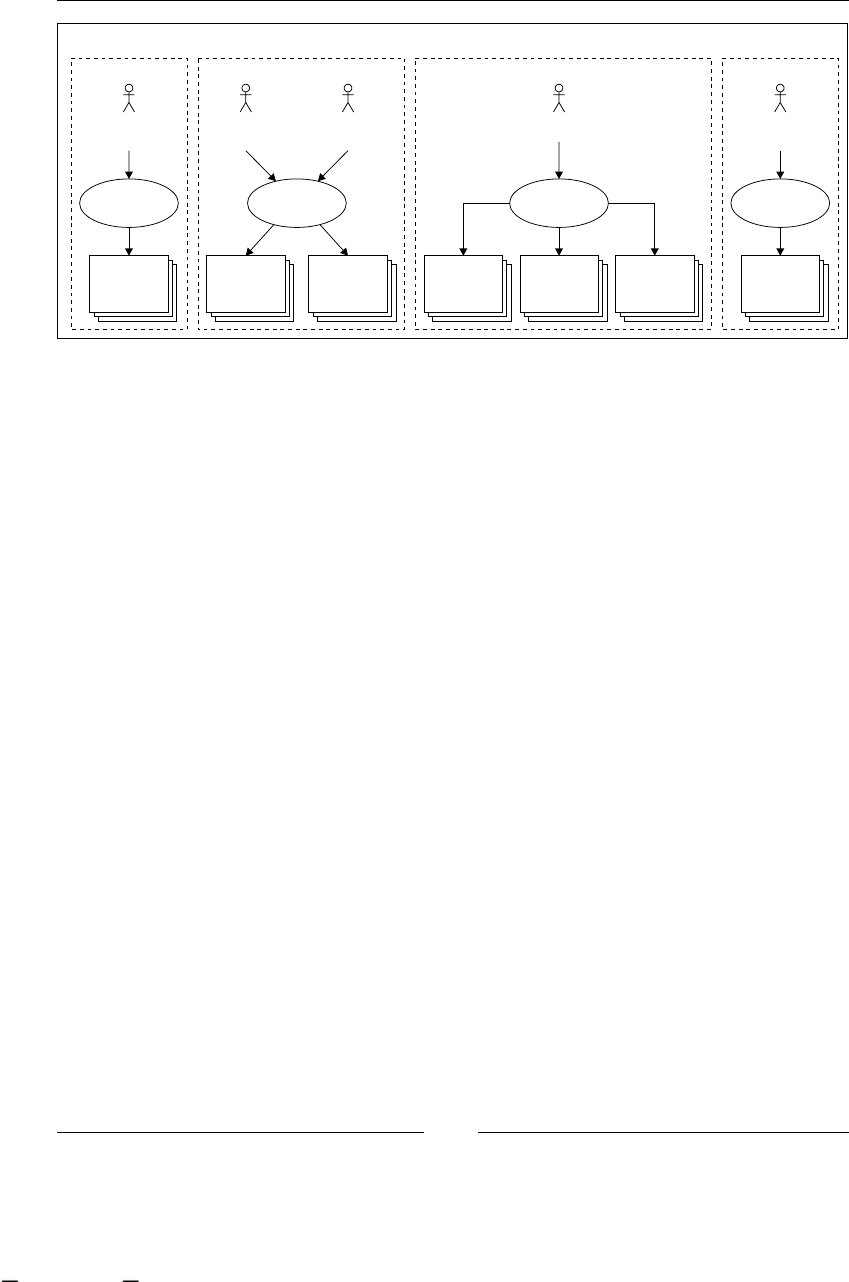
Chapter 2
[ 31 ]
Development Process
Requirements Analysis and Design Implementation
Business
Analyst
Observe /
Inquire
Use Cases /
Text
Description
Developer
Analysis
Class
Diagrams
Design
Class
Diagrams
Analysis and
Design
Business
Analyst
Implementation
Code
(Logic)
DB
(Structure /
Tables)
Developer
Presentation
Code (User
Interface)
Tester
Test Cases
(Test
Scenarios)
Test
Test
This is a traditional approach where all the stages are iteratively repeated for each
stage/module of the application.
One thing that we can notice here, and which happens in real software projects,
is that the business analyst's description will be lost in the design phase, because
the business analyst doesn't fully understand the design class diagrams as these
diagrams are focused on implementation patterns and details. If we are lucky and
have a very good team of business analysts, they will understand the diagrams.
However, there is no way that they could understand the code. So, in the best case,
the business analyst description is lost in the code—this means that we cannot show
our clients how the stages of their processes are implemented in real working code.
That is why business analysts and clients (stakeholders) are blind. They need to
trust that we (the developers) know what we are doing and that we understand 100
percent of the requirements that the business analysts collect. Also, it is important to
notice that in most of the cases, the client validates the business analyst's work—if
changes emerge in the implementation phase, sometimes these changes are not
reected in the business analyst's text and the client/stakeholders never realize that
some implementation aspect of their software changes.
Maybe they are not functional changes, but there are sometimes changes that affect
the behavior of the software or the way users will interact with it. This uncertainty
generated in the stakeholder causes some dependency and odd situations where the
stakeholder thinks that if he/she cannot count on us (the developers and architects
team) any longer, nobody will be able to understand our code (the code that we
write). With this new approach, the client/stakeholders will be able to perceive, in
a transparent way, the code that we write to represent each business situation. This
allows them (the stakeholders) to ask for changes that will be easily introduced to
reect everyday business requirements. Let's be practical and recognize that, in most
situations, if we have the application implemented in a three-tier architecture, we will
have the following artifacts developed:
This material is copyright and is licensed for the sole use by ALESSANDRO CAROLLO on 18th December 2009
6393 south jamaica court, , englewood, , 80111

jBPM for Developers
[ 32 ]
Database model
That includes logic tables to do calculations, UI tables to store UI customizations or
users' data about their custom interfaces, domain entities (tables that represent the
business entities, for example, Invoice, Customer, and so on), and history logs
all together.
Business logic
If we are careful developers, here we are going to have all of the code related to a
logical business processes method. In the case of the example, here we will have
all the stages represented in some kind of state machine in the best cases. If we
don't have a kind of state machine, we will have a lot of if and switch statements
distributed in our code that will represent each stage in the process. For example, if
we have the same application for all the branches of a company, this application will
need to behave differently for the main ofce's employee than for the 'just nished'
warehouse employee. This is because the tasks that they are doing are very different
in nature. Imagine what would happen if we want to add some activity in the
middle, probably the world would collapse! Developers will need to know in some
depth how all the if and switch statements are distributed in the code in order to
add/insert the new activity. I don't want to be one of these developers.
User interfaces
Once again, if we are lucky developers, the process stages will not be represented
here, but probably many if and switch statements will be dispersed in our UI code
that will decide what screen is shown to each of the users in each activity inside the
process. So, for each button and each form, we need to ask if we are in a specic
stage in the process with a specic user.
This material is copyright and is licensed for the sole use by ALESSANDRO CAROLLO on 18th December 2009
6393 south jamaica court, , englewood, , 80111
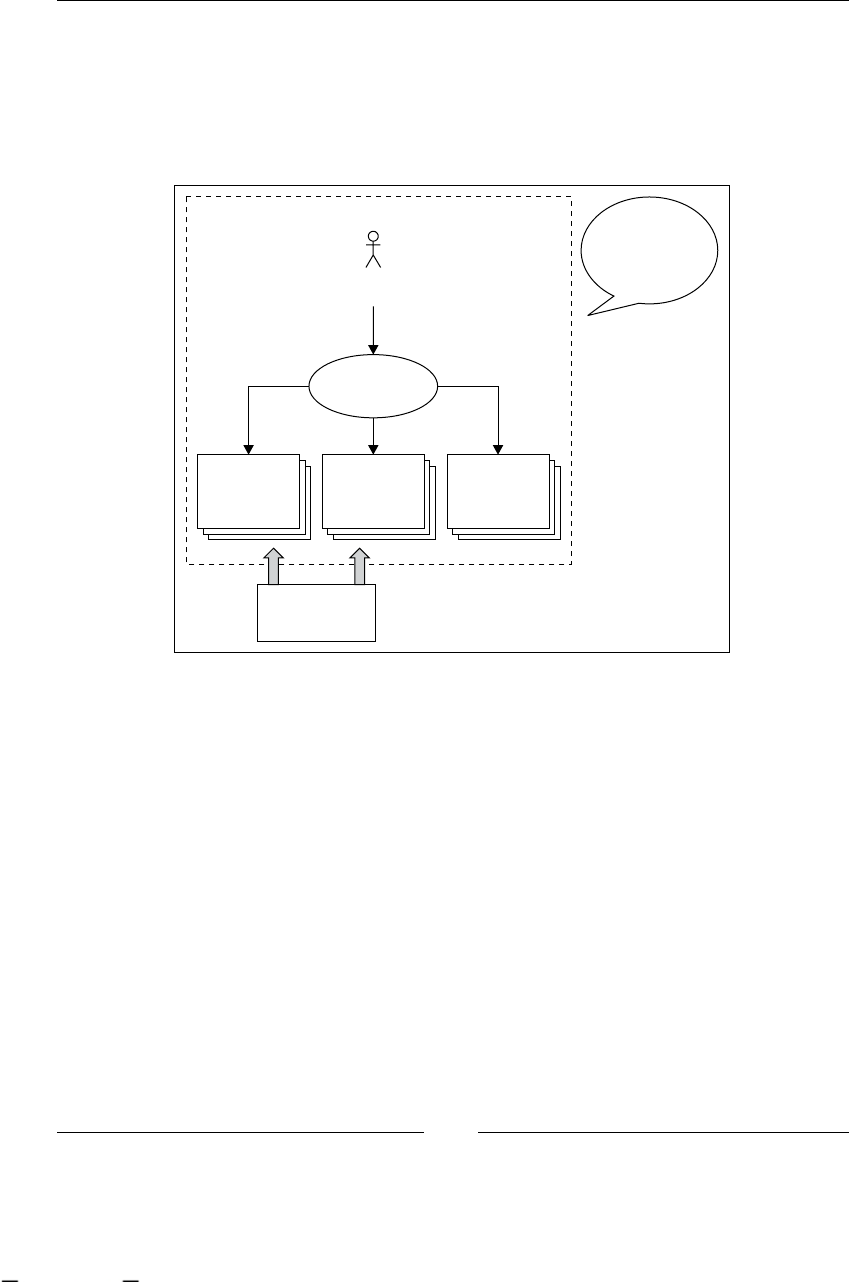
Chapter 2
[ 33 ]
Decoupling processes from our
applications
By decoupling the business process from these models, we introduce an extra layer
(tier) with some extra artifacts, but this helps us to keep the application simple.
Implementation
Implementation
Code
(Logic)
DB
(Structure /
Tables)
Developer
Presentation
Code (User
Interface)
Business
Processes
Where do
Business
Processes fit
here?
This new paradigm proposed here includes the two Business Process Management
(BPM) roles in all the development and execution stages of our processes (business
analysts and developers). This is mainly achieved through the use of a common
language that both sides understand. It lets us represent the current process that
the business analysts see in the everyday work inside the company, and all of
the technical details that these processes need, in order to run in a production
environment. As we can see in the next image, both roles interact in the creation
of these new artifacts.
This material is copyright and is licensed for the sole use by ALESSANDRO CAROLLO on 18th December 2009
6393 south jamaica court, , englewood, , 80111
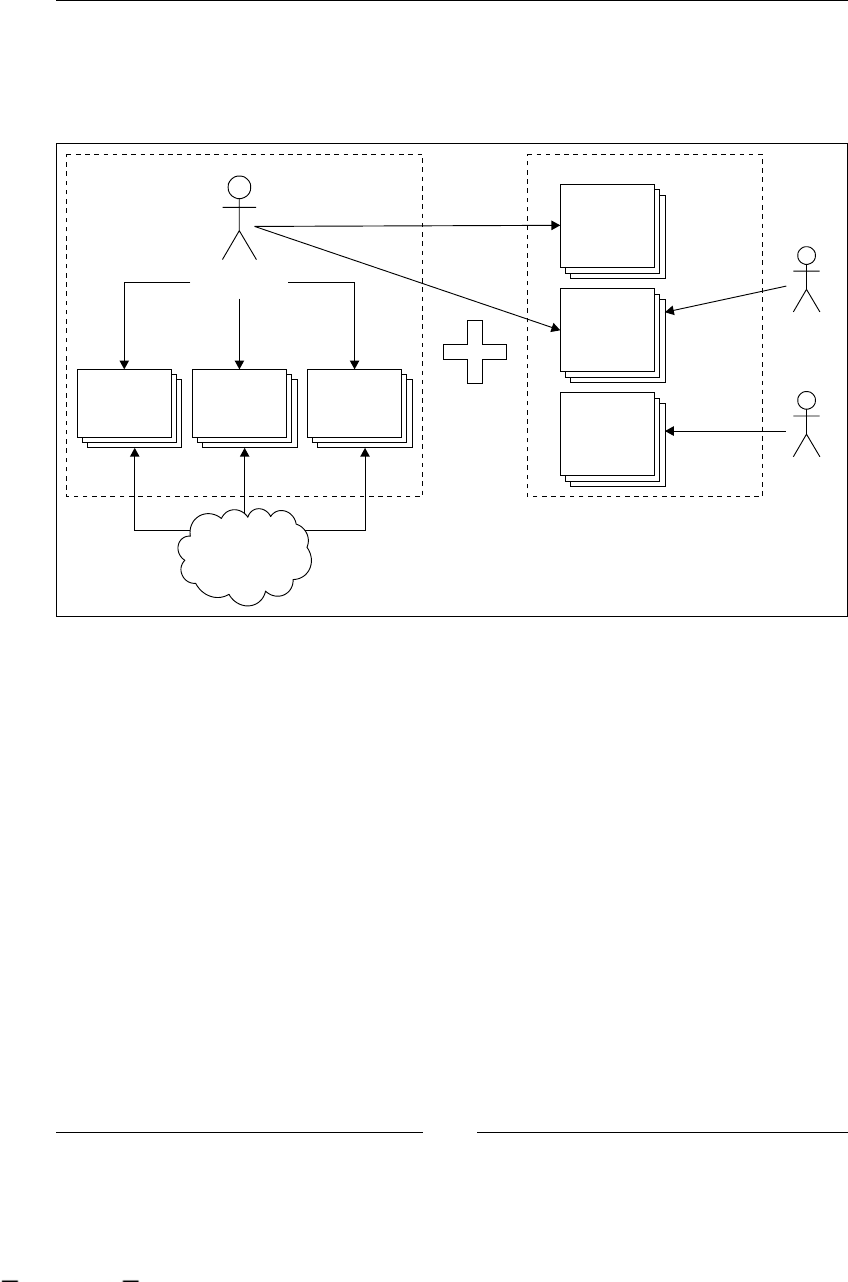
jBPM for Developers
[ 34 ]
We don't have to forget about the clients/managers/stakeholders that can validate
the processes every day as they are running them. Also, they can ask for changes to
improve the performance and the current way used to achieve the business goal of
the process.
DB
(Structure /
Tables)
Presentation
Code (User
Interface)
BPM System
Technical
Details
Processes
Definitions
DB Structure
for processes
runtime and
versioning
<<helps>>
Without
process details
mixed in the
code
<<review>>
Business
Analyst
DBA
Developer
Code
(Logic)
On comparing with the OOP paradigm, class diagrams here are commonly used
to represent static data, but no executional behavior. These newly created artifacts
(process denitions) can be easily represented in order to be validated by our
clients/stakeholders. One of the main advantages of this approach is that we can
get visibility about how the processes are executed and which activity they are in at
any given moment of time. This requirement will force us to have a simple way to
represent our business processes—in a graphicable way. We need to be able to see, all
the time, how our production processes are running.
Graph Oriented Programming on top
of OOP
Here, we will discuss the main points of the Graph Oriented Programming paradigm.
With this analysis, we will implement some basic approach to understand how we use
this paradigm on top of the Java language in the next section.
This material is copyright and is licensed for the sole use by ALESSANDRO CAROLLO on 18th December 2009
6393 south jamaica court, , englewood, , 80111
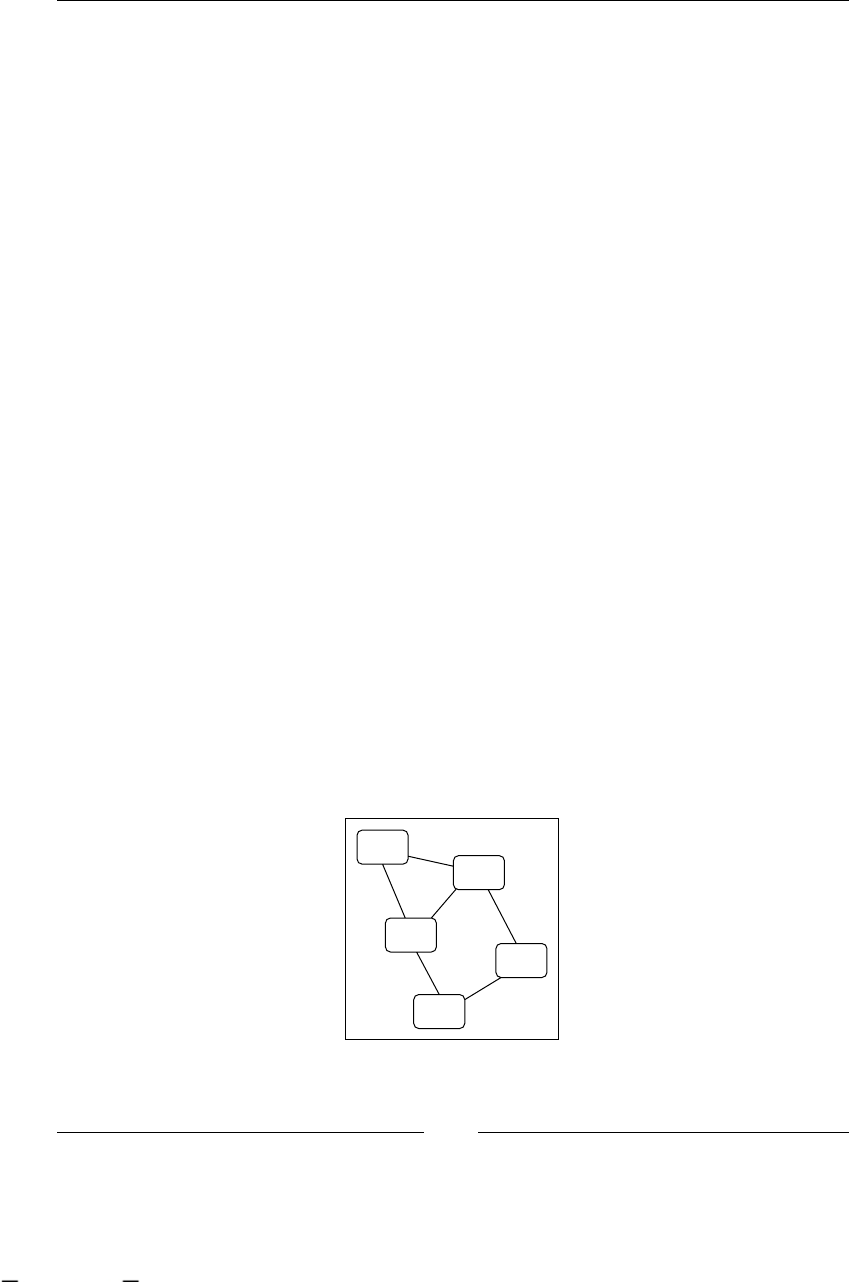
Chapter 2
[ 35 ]
In order to do that, we need to know the most important requisites that we have
to fulll in order to achieve the goal which integrates, maintains, and executes our
business processes in real-world implementation:
Easy and intuitive graphical representation: To let the business analysts
and developers communicate smoothly and to fully understand what is
happening in the real process.
Must give us the possibility of seeing the processes' executions in real time:
In order to know how our processes are going on to make more accurate
business decisions.
Could be easily extended to provide extra functionality to fulll all of the
business situations.
Could be easily modied and adapted to everyday business (reality)
changes. No more huge development projects for small changes and
no more migrations.
Implementing Graph Oriented
Programming on top of the Java
language (finally Java code!)
With these requisites, presented in the previous section, in mind, we are able to
implement a simple solution on top of the Java language that implements this new
approach (called the Graph Oriented Programming paradigm). As the name of
the paradigm says, we are going to work with graphs—directed graphs to be
more precise.
A graph can be dened as a set of nodes linked to each other as the following
image shows us:
•
•
•
•
This material is copyright and is licensed for the sole use by ALESSANDRO CAROLLO on 18th December 2009
6393 south jamaica court, , englewood, , 80111

jBPM for Developers
[ 36 ]
If we are talking about directed graphs, we need to know that our nodes will be
linked using directed transitions. These transitions will be directed, because they will
dene a source node and a destination node. This means that if we have a transition
that has node A as the source node, and node B as the destination node, that
transition will not be the same as the one that has node B as the source node,
and node A as the destination node. Take a look at the following image:
Like in the object-oriented programming paradigm, we need to have a language with
specic set of words (for example, object) here. We will need words to represent our
graphs, as we can represent objects in the object-oriented paradigm. Here we will
try to expand the ofcial documentation proposed by the jBPM team and guide the
learning process of this important topic. We will see code in this section and I will
ask you to try it at home, debug it, and play with this code until you feel condent
about what is the internal behavior of this example.
Let's get started rst with the graph denition and with some of the rules that the
graph needs to implement, in order to represent our business processes correctly.
Up until now, we have had two concepts that will appear in our graph oriented
programming language—Node and Transition. These two concepts need to be
implemented in two separate classes, but with a close relationship. Let's see a class
diagram about these two classes and make a short analysis about the attributes and
methods proposed in this example.
leavingTransitions
destination
Node Transition
String label
Long id
String name
This material is copyright and is licensed for the sole use by ALESSANDRO CAROLLO on 18th December 2009
6393 south jamaica court, , englewood, , 80111

Chapter 2
[ 37 ]
Modeling nodes in the object-oriented world
This concept will be in charge of containing all of the information that we want
to know about the activities in our process. The idea here is to discover the vital
information that we will need to represent a basic activity with a Plain Old
Java Object (POJO).
Node
Long id
String name
List<Transition> leavingTransitions
Note that we are using Generics
here. A feature available from the
Java Language Specification 1.5
This lets us define a Collection, List in
this case, that only will contain
Transition objects.
As you can see in the class diagram, this class will contain the following attributes
that store information about each activity of our process:
id (long): For a unique identication of the node
name (String): To describe the node activity
leaving Transitions(List<Transition>): This represents all the
transitions that leave the node
This concept will need to implement some basic methods about executional
behavior, but it will be discussed when we jump to the executional stage.
For now, we are only going to see how we can represent a static graph.
Modeling a transition in the object-oriented
world
This concept is very simple, we want to know how the nodes will be linked to each
other. This information will dene the direction of our graph. For that, we need to
know the following information:
name (String): That must be unique for the same source node
source (Node): This is the source node from where the transition begins
destination (Node): This is the destination node where the transition arrives
•
•
•
•
•
•
This material is copyright and is licensed for the sole use by ALESSANDRO CAROLLO on 18th December 2009
6393 south jamaica court, , englewood, , 80111
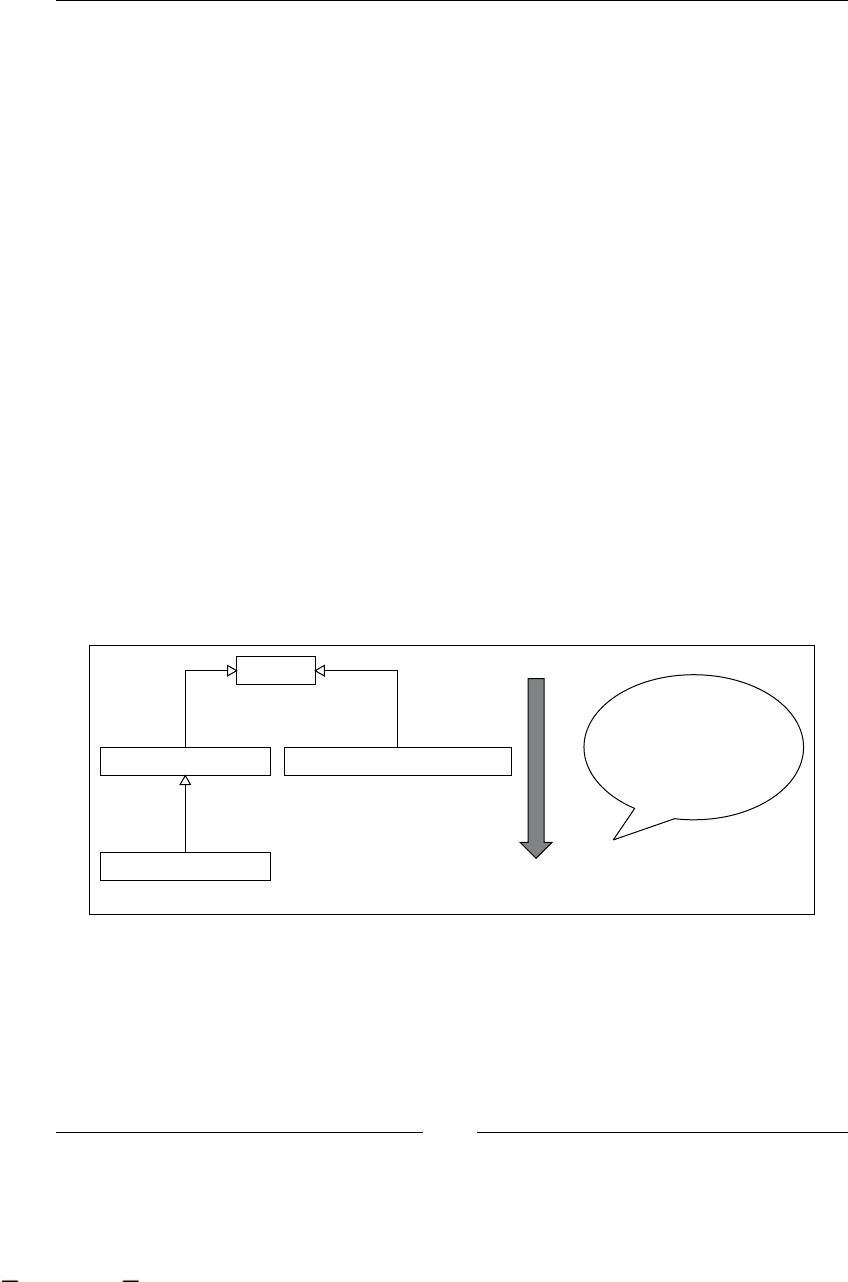
jBPM for Developers
[ 38 ]
With these two classes, we will be able to represent our processes. But wait a minute;
if our processes only have nodes, we are hiding what is happening inside them,
we only see nodes and not what is happening in the process. So, we need more
expressiveness, to describe our processes in a more shocking way. Those who see the
process, can understand the process "direction" and the nature of each activity inside
it. Of course, the behavior of each activity will also be claried with a more specic
language that provides us with other words, and not just nodes and transitions to
describe activities and the ow.
Expanding our language
The only thing that we need to do in order to have more expressive power in our
graphs is to increase the number of words in our language. Now we only have Node
and Transition, these two words are not enough to create clear graphs that can be
understood by our stakeholders. To solve that, we can have some kind of hierarchy
from the most abstract concepts that represent a generic activity to more concrete
concepts related to specic activities such as Human Tasks, Automatic Activities,
Decision Activities, and so on.
In order to do this, you only need to extend the Node concept and add the
information that you want to store for a specic activity behavior. Basically, what I
am saying here is that the Node concept has the basic and generic information that
every activity will have, and all subclasses will add the specic information related
to that specic activity behavior in our specic domain.
ConcreteNode Concrete Node Functionality /
To achieve a concrete Activity
Abstract Node Functionality
MoreConcreteNode AnotherMoreConcreteNode
Node
Note that the node
class is not an
Abstract Class. It just
represents an Abstract
concept but it could
be instantiated
As you can imagine, if we have different sets of nodes to represent different
domains, we can say that our Graph Oriented Programming solution supports
multiple languages.
This material is copyright and is licensed for the sole use by ALESSANDRO CAROLLO on 18th December 2009
6393 south jamaica court, , englewood, , 80111
Chapter 2
[ 39 ]
Another important thing here, is to notice that the Node concept needs to be easily
graphicable, just to have graphical views of our processes. In an Object Oriented
Paradigm, we achieve that by implementing the graphicable interface, because we
want all the subclasses of Node to be graphicable as well (this is not shown in the
diagrams, but you can see it in the code). This interface provides the signature and
makes us implement the methods to graph each node easily, giving us the exibility
to graph our process in different formats. It is also important to note that each
subclass can override the graphic functionality in order to represent, graphically,
the difference of each behavior.
The only thing that we need now is some container that represents the graph as a
whole. As we have a collection of nodes and transitions now, we need a place to
have all of them together.
Process Definition: a node container
This will be a very simple concept too, we can also use the word 'graph' to represent
this container, but here we will choose 'denition', because it is more related to
the business process world. We can say that this class will represent the formal
denition or our real situation. This will only contain a list of nodes that represent
our process. One interesting thing to see here is that this concept/class will
implement an interface called NodeContainer, which provides us methods with
which to handle a collection of nodes. For this interface, we need to implement the
functionality of the methods addNode(Node n), getNode(long id), getNodes(),
and so on.
<<implements>><<implements>>
Definition
String name
List<Node> nodes
<<Interface>>
Graphicable
graph()
<<Interface>>
Node Container
addNode(Node)
getNode(Long)
getNodes()
In the next section, we will see how these concepts and class diagrams are translated
into Java classes.
This material is copyright and is licensed for the sole use by ALESSANDRO CAROLLO on 18th December 2009
6393 south jamaica court, , englewood, , 80111

jBPM for Developers
[ 40 ]
Implementing our process definition
During the following section, we will implement our own simple solution to
represent our business processes. The main goal of this section is to be able
to understand from the source how the jBPM framework is built internally.
Understanding this simple implementation will help you to understand how the
framework represents, internally, our processes denitions. That knowledge will
allow you to choose the best and more accurate way to represent your business
activities in a technical way.
We are ready to see how this is translated to Java classes. Please feel free to
implement your own solution to represent process denitions. If you don't feel
condent about the requirements or if you are shy to implement your own solution,
in this section we are going to see all the extra details needed to represent our
denitions correctly. I also provide the Java classes to download, play, and test.
As in the previous section, we start with the Node class denition. In this class,
we are going to see details of how to implement the proposed concept in the
Java language.
Here we are just implementing our own solution in order to be able
to represent simple business processes. This is just for the learning
process. This implementation of GOP is similar and simpler than the
real jBPM implementation.
The Node concept in Java
This class could be found in the code bundle for the book at http://www.
packtpub.com/files/code/5685_Code.zip (in the project called chapter02.
simpleGOPDefinition). We can nd the Node class placed inside the package
called org.jbpm.examples.chapter02.simpleGOP.definition:
public class Node implements Graphicable{
private Long id;
private String name;
private Map<String, Transition> leavingTransitions =
new HashMap<String, Transition>();
public Node(String name) {
this.name = name;
}
public void addTransition(String label, Node destination) {
leavingTransitions.put(label, new Transition(label, this,destination));
This material is copyright and is licensed for the sole use by ALESSANDRO CAROLLO on 18th December 2009
6393 south jamaica court, , englewood, , 80111

Chapter 2
[ 41 ]
}
public void graph() {
String padding="";
String token="-";
for(int i=0; i < this.getName().length(); i++){
padding+=token;
}
System.out.println("+---"+padding+"---+");
System.out.println("| "+this.getName()+" |");
System.out.println("+---"+padding+"---+");
Iterator<Transition> transitionIt =
getTransitions().values().iterator();
while(transitionIt.hasNext()){
transitionIt.next().graph();
}
}
... (Setters and Getters of each property)
}
As you can see, there is nothing to worry about. It is a simple class that contains
properties—here, you need to notice:
Implementing the Graphicable interface forces us to dene the
graph() method.
The graph()method's implementation, in this case, will print some ASCII
characters on the console.
The use of a Map to store each transition with a name associated to it. The idea
here is to use the transitions based on names and not objects. In other words,
we can choose which transition to take using just a String.
The addTransition(String, Node) method that wrap the put method of
the Map and creates a new instance of the Transition class.
The Transition concept in Java
In the same package of the Node class, we can nd the denition of the
Transition class:
public class Transition implements Graphicable{
private Node source;
private Node destination;
private String label;
public Transition(String label,Node source, Node destination) {
•
•
•
•
This material is copyright and is licensed for the sole use by ALESSANDRO CAROLLO on 18th December 2009
6393 south jamaica court, , englewood, , 80111

jBPM for Developers
[ 42 ]
this.source = source;
this.destination = destination;
this.label = label;
}
... (Getters and Setters for all the properties)
}
Another very simple class. As you can see, here we have two Node class properties
that allow us to dene the direction of the transition. Also, we have the label
property that allows us to identify the transition by name. This property (the label
property) is a kind of ID and must be unique inside all the leaving transitions of a
particular node, but it could be repeated in any other node.
The Definition concept in Java
In the same package, we can nd the Definition class. The idea of this class is to
store all the nodes that compose a process denition.
public class Definition implements Graphicable, NodeContainer {
private String name;
private List<Node> nodes;
public Definition(String name) {
this.name = name;
}
public void graph(){
for (Node node : getNodes()){
node.graph();
}
}
public void addNode(Node node) {
if(getNodes() == null){
setNodes(new ArrayList<Node>());
}
getNodes().add(node);
}
public Node getNode(Long id) {
for(Node node : getNodes()){
if(node.getId() == id){
return node;
}
}
return null;
}
...(Getters and Setters for all the properties)
}
This material is copyright and is licensed for the sole use by ALESSANDRO CAROLLO on 18th December 2009
6393 south jamaica court, , englewood, , 80111

Chapter 2
[ 43 ]
The main things to notice here:
The name property will store the name of our process denition. This will be
important when we want to store these denitions in a persistent way.
This class implements the Graphicable and NodeContainer interfaces.
This forces us to dene the graph() method from the Graphicable
interface, and the addNode(Node) and getNode(Long) methods from
the NodeContainer interface.
The graph() method, as you can see, only iterates all the nodes inside the list
and graphs them, showing us the complete process graph in the console.
The addNode(Node) method just inserts nodes inside the list and the
getNode(Long) method iterates the nodes inside the list, until it nds
a node with the specied id.
Testing our brand new classes
At this point, we can create a new instance of the Definition class and start adding
nodes with the right transitions. Now we are going to be able to have some graphical
representation about our process.
All of these classes could be seen in the chapter02 code in the simpleGOPDefinition
maven project. You will see two different packages, one that show a simple denition
implementation about these concepts, and the other shows a more expressive set
of nodes overriding the basic node implementation, to have a more realistic
process representation.
If you don't know how to use maven, there is a quick start guide at the
end of this chapter. You will need to read it in order to compile and run
these tests.
In the test sources, you will nd a test class called TestDefinition, it contains
two tests—one for the simple approach and the other with the more expressive
approach. Each of these test methods inside the TestDefinition class uses the JUnit
framework to run the dened tests. You can debug these tests or just run them and
see the output on the console (and yes, I'm an ASCII fan!). Feel free to modify and
play with this implementation. Always remember that here we are just dening our
processes, not running them.
•
•
•
•
This material is copyright and is licensed for the sole use by ALESSANDRO CAROLLO on 18th December 2009
6393 south jamaica court, , englewood, , 80111

jBPM for Developers
[ 44 ]
If you see the test code, it will only show how to create a denition instance and then
graph it.
public void testSimpleDefinition(){
Definition definition = new Definition("myFirstProcess");
System.out.println("########################################");
System.out.println(" PROCESS: "+definition.getName()+" ");
System.out.println("########################################");
Node firstNode = new Node("First Node");
Node secondNode = new Node("Second Node");
Node thirdNode = new Node("Third Node");
firstNode.addTransition("to second node", secondNode);
secondNode.addTransition("to third node", thirdNode);
definition.addNode(firstNode);
definition.addNode(secondNode);
definition.addNode(thirdNode);
definition.graph();
}
Process execution
At this point, where our denitions are ready, we can create an execution of our
dened processes. This can be achieved by creating a class where each instance
represents one execution of our process denition—bringing our processes to life
and guiding the company with their daily activities; letting us see how our processes
are moving from one node to the next one. With this concept of execution, we will
gain the power of interaction and inuence the process execution by using the
methods proposed by this class.
We are going to add all of the methods that we need to represent the executional
stage of the process, adding all the data and behavior needed to execute our
process denitions.
This material is copyright and is licensed for the sole use by ALESSANDRO CAROLLO on 18th December 2009
6393 south jamaica court, , englewood, , 80111
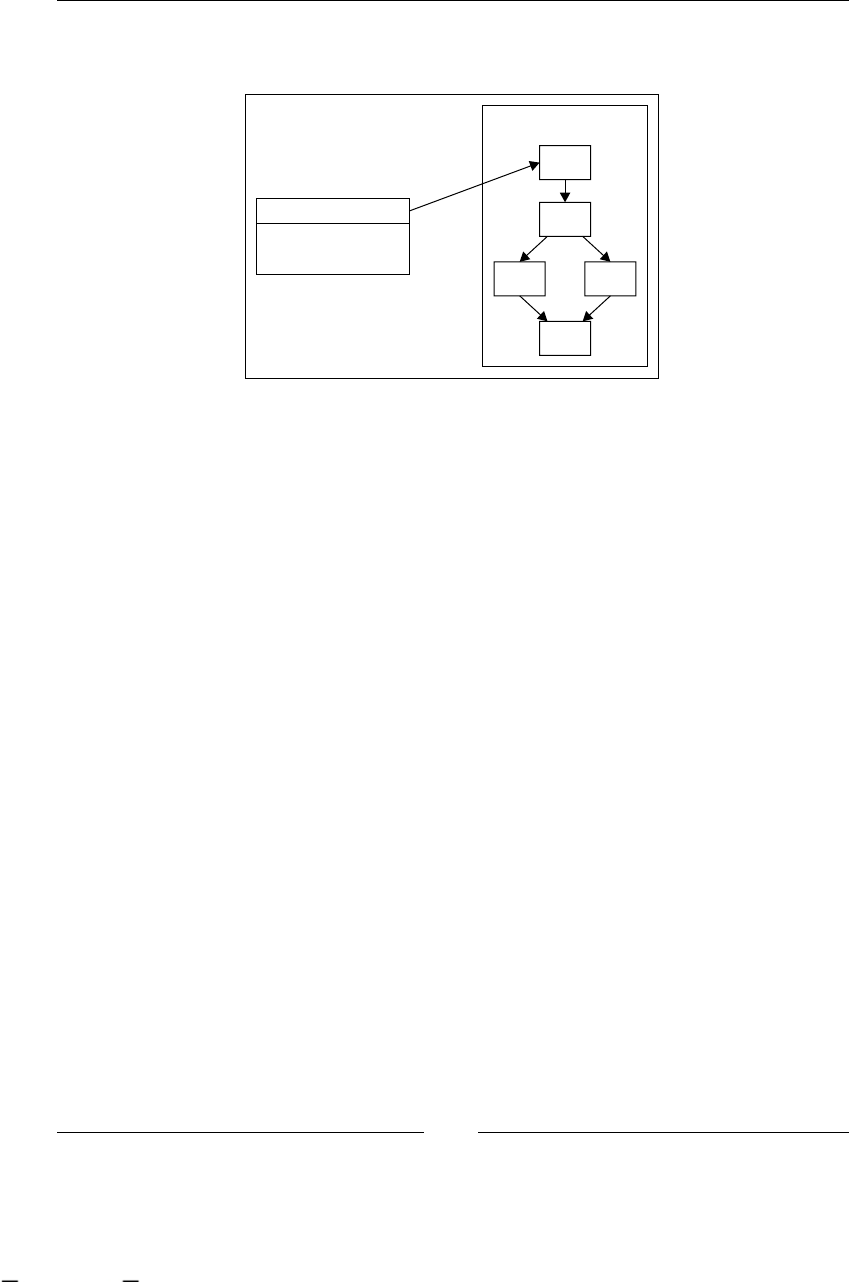
Chapter 2
[ 45 ]
This process execution will only have a pointer to the current node in the process
execution. This will let us query the process status when we want.
Execution
Node currentNode
Definition definition
Definition
An important question about this comes to our minds: why do we need to interact
with our processes? Why doesn't the process ow until the end when we start it?
And the answer to these important questions is: it depends. The important thing here
is to notice that there will be two main types of nodes:
One that runs without external interaction (we can say that is an automatic
node). These type of nodes will represent automatic procedures that will run
without external interactions.
The second type of node is commonly named wait state or event wait. The
activity that they represent needs to wait for a human or a system interaction
to complete it. This means that the system or the human needs to create/re
an event when the activity is nished, in order to inform the process that it
can continue to the next node.
Wait states versus automatic nodes
The difference between them is basically the activity nature. We need to recognize
this nature in order to model our processes in the right way. As we have seen before,
a "wait state" or an "event wait" situation could occur when we need to wait for some
event to take place from the point of view of the process. These events are classied
into two wide groups—Asynchronous System Interactions and Human tasks.
•
•
This material is copyright and is licensed for the sole use by ALESSANDRO CAROLLO on 18th December 2009
6393 south jamaica court, , englewood, , 80111
Download at WoweBook.com
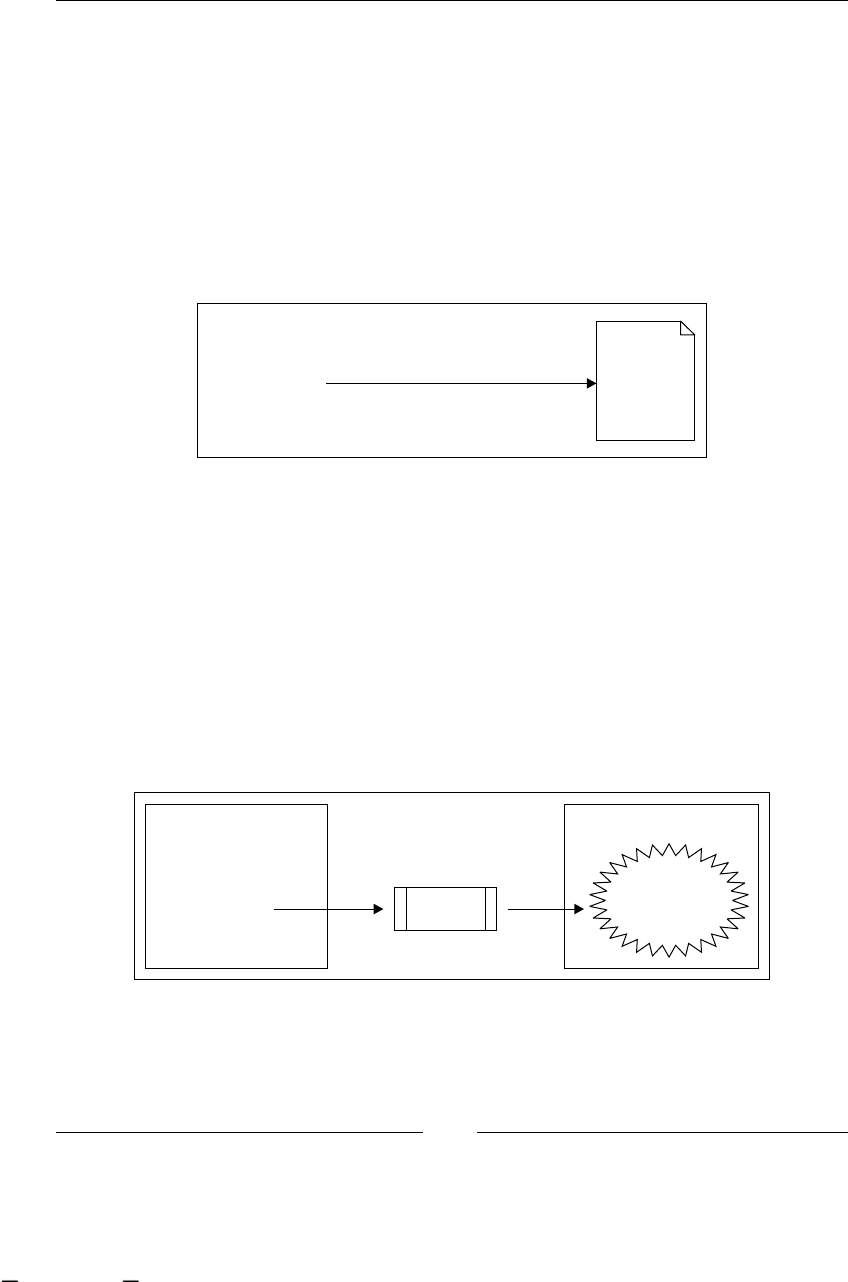
jBPM for Developers
[ 46 ]
Asynchronous System Interactions
This means the situation when the process needs to interact with some other system,
but the operation will be executed in some asynchronous way.
For non-advanced developers, the word "asynchronous" could sound ambiguous or
without meaning. In this context, we can say that an asynchronous execution will
take place when two systems communicate with each other without blocking calls.
This is not the common way of execution in our Java applications. When we call a
method in Java, the current thread of execution will be blocked while the method
code is executed inside the same thread. See the following example:
public class Main{
public void static main(String[] args){
doSomething();
doBackup();
System.out.printIn("Backup Finished!");
}
}
Wait until finish doBackUp()
method code
The doBackup()method will block until the backup is nished. When this happens,
the call stack will continue with the next line in the main class. This blocking call is
commonly named as a synchronous call.
On the other hand, we got the non-blocking calls, where the method is called but we
(the application) are not going to wait for the execution to nish, the execution will
continue to the next line in the main class without waiting.
In order to achieve this behavior, we need to use another mechanism. One of the
most common mechanisms used for this are messages.
Let's see this concept in the following image:
Create Message and Continue
Main Thread
...
doBackup();
...
External Thread
Execute Backup
MSG
Message
This material is copyright and is licensed for the sole use by ALESSANDRO CAROLLO on 18th December 2009
6393 south jamaica court, , englewood, , 80111
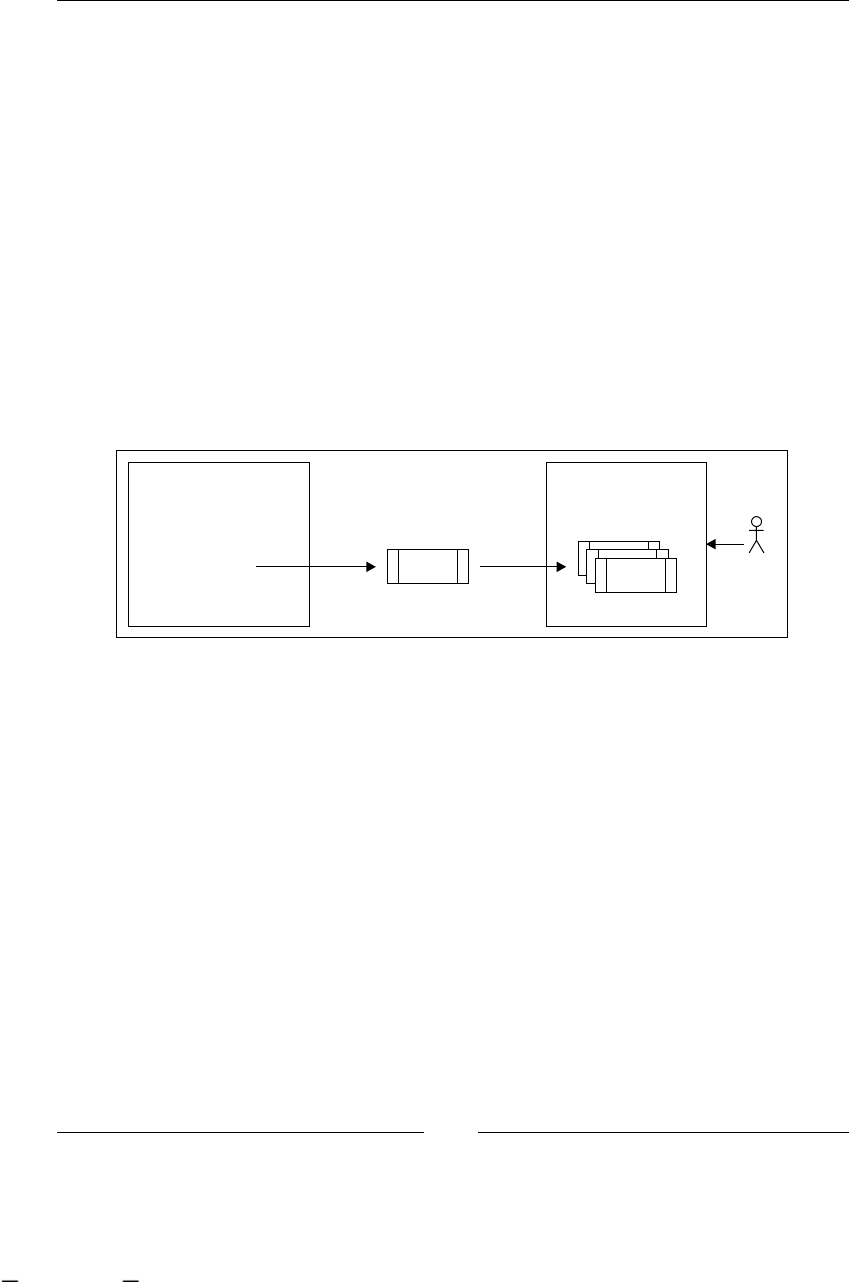
Chapter 2
[ 47 ]
In this case, by using messages for asynchronous executions, the doBackup() method
will be transformed into a message that will be taken by another thread (probably
an external system) in charge of the real execution of the doBackup()code. The main
class here will continue with the next line in the code. It's important for you to notice
that the main thread can end before the external system nishes doing the backup.
That's the expected behavior, because we are delegating the responsibility to execute
the backup code in the external system. But wait a minute, how do we know if the
doBackup() method execution nished successfully? In such cases, the main thread
or any other thread should query the status of the backup to know whether it is
ready or not.
Human tasks
Human tasks are also asynchronous, we can see exactly the same behavior that we
saw before. However, in this case, the executing thread will be a human being and
the message will be represented as a task in the person's task list.
Create Message and Continue
Main Thread
...
doBackup();
...
Task List
Task Task
Task
Task
Do
Actor
As we can see in this image, a task is created when the Main thread's execution
reaches the doBackup() method. This task goes directly to the corresponding user in
the task list. When the user has time or is able to do that task, he/she completes it. In
this case, the "Do Backup" activity is a manual task that needs to be performed by a
human being.
In both the situations, we have the same asynchronous behavior, but the parties that
interact change and this causes the need for different solutions.
For system-to-system interaction, probably, we need to focus on the protocols that
the systems use for communication.
In human tasks, on the other hand, the main concern will probably be the user
interface that handles the human interaction.
This material is copyright and is licensed for the sole use by ALESSANDRO CAROLLO on 18th December 2009
6393 south jamaica court, , englewood, , 80111

jBPM for Developers
[ 48 ]
How do we know if a node is a wait state node or an automatic node?
First of all, by the name. If the node represents an activity that is done
by humans, it will always wait. In system interactions, it is a little more
difcult to deduce this by the name (but, if we see an automatic activity
that we know takes a lot of time, that will probably be an asynchronous
activity which will behave as a wait state). A common example could be
a backup to tape, where the backup action is scheduled in an external
system . If we are not sure about the activity nature we need to ask about
the activity nature to our stakeholder.
We need to understand these two behaviors in order to know how to implement
each node's executional behavior, which will be related with the specic
node functionality.
Creating the execution concept in Java
With this class, we will represent each execution of our process, which means that
we could have a lot of instances at the same time running with the same denition.
This class can be found inside another project called chapter02.simpleGOPExecution.
We have to separate the projects, because in this one, all the classes we have for
representing the processes include all the code related to the execution of the process.
Inside the package called org.jbpm.examples.chapter02.simpleGOP.execution,
we will nd the following class:
public class Execution {
private Definition definition;
private Node currentNode;
public Execution(Definition definition) {
this.definition = definition;
//Setting the first Node as the current Node
this.currentNode = definition.getNodes().get(0);
}
public void start(){
// Here we start the flow leaving the currentNode.
currentNode.leave(this);
}
... (Getters and Setters methods)
}
This material is copyright and is licensed for the sole use by ALESSANDRO CAROLLO on 18th December 2009
6393 south jamaica court, , englewood, , 80111

Chapter 2
[ 49 ]
As we can see, this class contains a Definition and a Node, the idea here is to have
a currentNode that represents the node inside the denition to which this execution
is currently "pointing". We can say that the currentNode is a pointer to the current
node inside a specic denition.
The real magic occurs inside each node. Now each node has the responsibility of
deciding whether it must continue the execution to the next node or not. In order to
achieve this, we need to add some methods (enter(), execute(), leave()) that
will dene the internal executional behavior for each node. We do this in the Node
class to be sure that all the subclasses of the Node class will inherit the generic way
of execution. Of course, we can change this behavior by overwriting the enter(),
execute() and leave() methods.
We can dene the Node.java class (which is also found in the
chapter02.simpleGOPExecution project) as follows:
...
public void enter(Execution execution){
execution.setCurrentNode(this);
System.out.println("Entering "+this.getName());
execute(execution);
}
public void execute(Execution execution){
System.out.println("Executing "+this.getName());
if(actions.size() > 0){
Collection<Action> actionsToExecute = actions.values();
Iterator<Action> it = actionsToExecute.iterator();
while(it.hasNext()){
it.next().execute();
}
leave(execution);
}else{
leave(execution);
}
}
public void leave(Execution execution){
System.out.println("Leaving "+this.getName());
Collection<Transition> transitions =
getLeavingTransitions().values();
Iterator<Transition> it = transitions.iterator();
if(it.hasNext()){
it.next().take(execution);
}
}
...
This material is copyright and is licensed for the sole use by ALESSANDRO CAROLLO on 18th December 2009
6393 south jamaica court, , englewood, , 80111
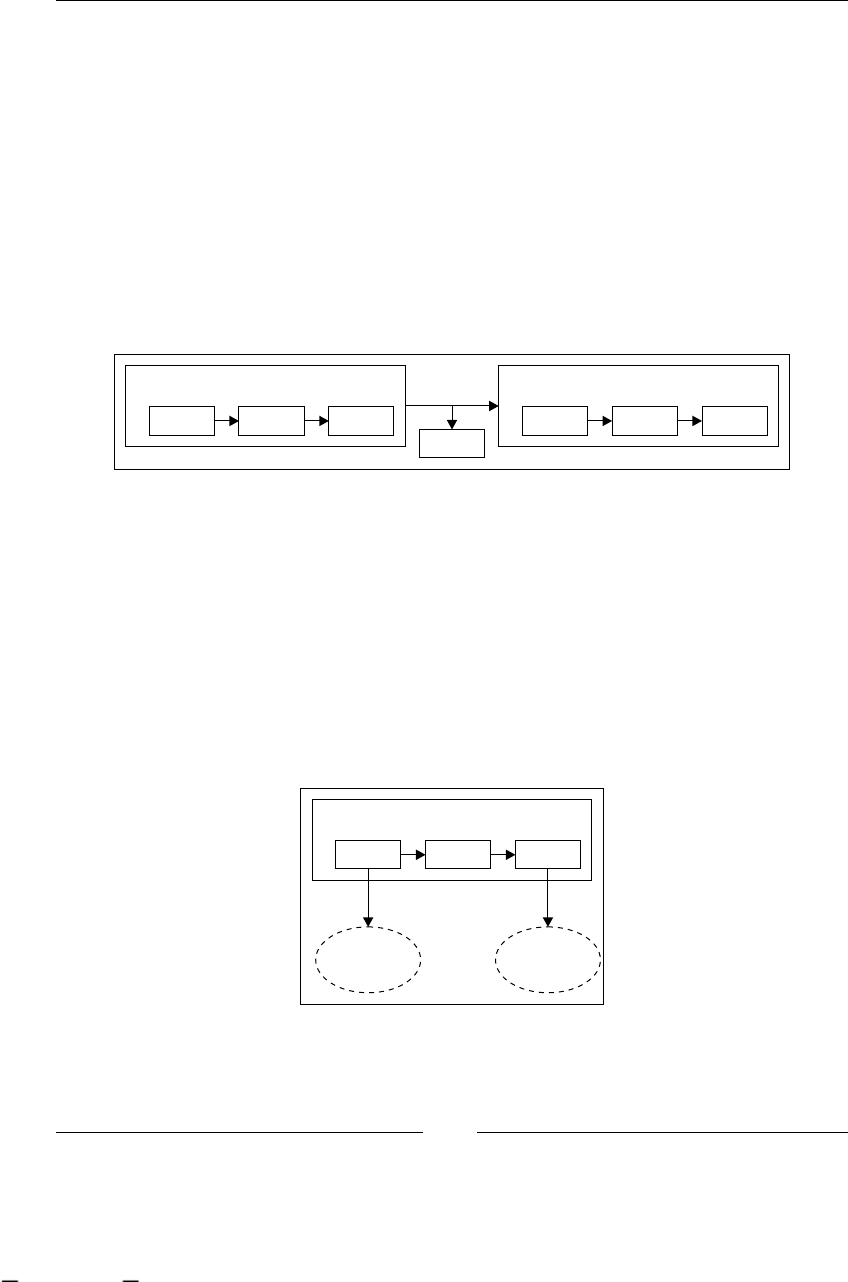
jBPM for Developers
[ 50 ]
As you can see in the Node class, which is the most basic and generic implementation,
three methods are dened to specify the executional behavior of one of these nodes
in our processes. If you carefully look at these three methods, you will notice that
they are chained, meaning that the enter() method will be the rst to be called.
And at the end, it will call the execute() method, which will call the leave()
method depending on the situation. The idea behind these chained methods is to
demarcate different phases inside the execution of the node.
All of the subclasses of the Node class will inherit these methods, and with that the
executional behavior. Also, all the subclasses could add other phases to demarcate a
more complex lifecycle inside each node's execution.
The next image shows how these phases are executed inside each node.
Node
Enter Execute Leave
Take
Node
Enter Execute Leave
As you can see in the image, the three methods are executed when the execution
points to a specic node. Also, it is important to note that transitions also have the
Take phase, which will be executed to jump from one node to the next.
All these phases inside the nodes and in the transition will let us hook custom blocks
of code to be executed.
One example for what we could use these hooks for is auditing processes. We could
add in the enter() method, that is the rst method called in each node, a call to an
audit system that takes the current timestamp and measures the time that the node
uses until it nishes the execution when the leave() method is called.
Node
Enter Execute Leave
Audit
System Call
Audit
System Call
This material is copyright and is licensed for the sole use by ALESSANDRO CAROLLO on 18th December 2009
6393 south jamaica court, , englewood, , 80111
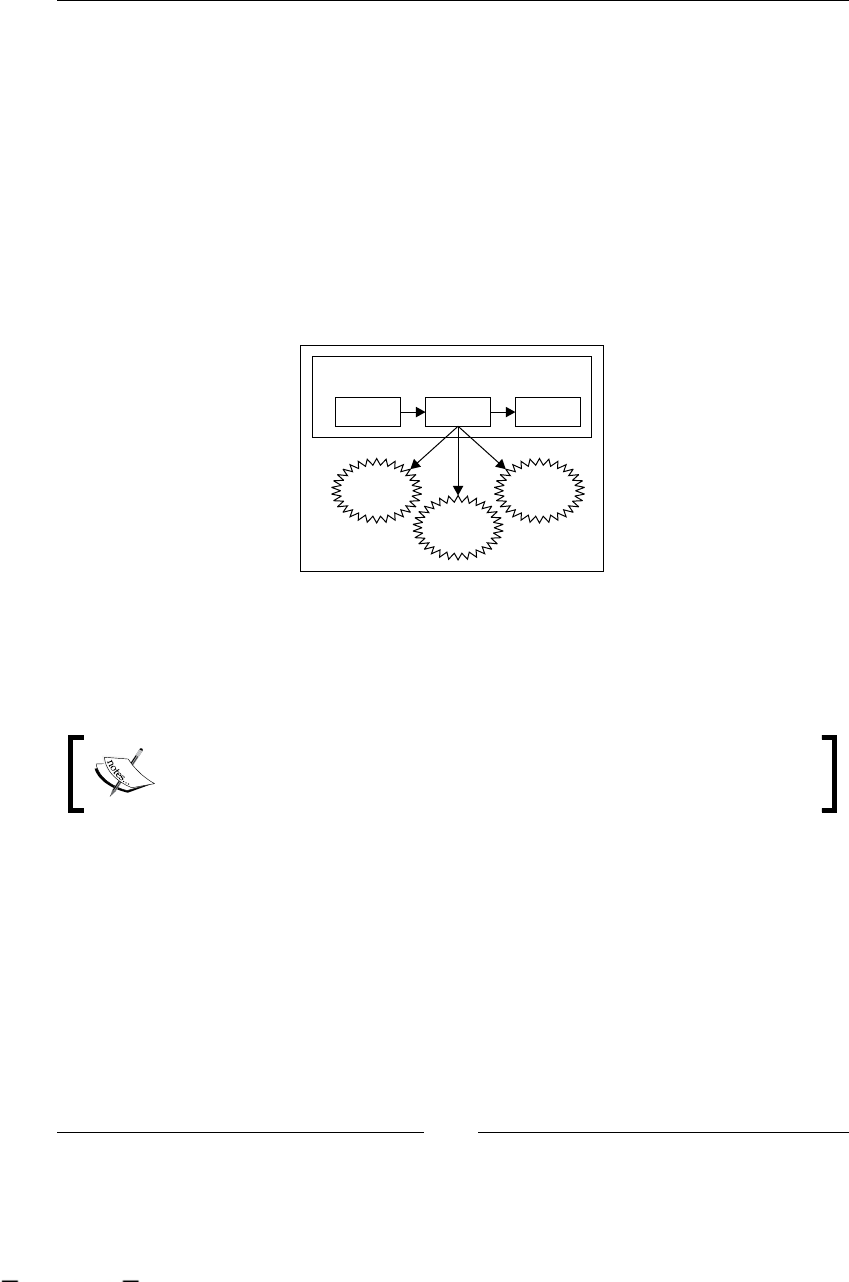
Chapter 2
[ 51 ]
Another important thing to notice in the Node class is the code inside the execute()
method. A new concept appears. The Action interface that we see in that loop,
represents a pluggable way to include custom specic logic inside a node without
changing the node class. This allows us to extend the node functionality without
modifying the business process graph. This means that we can add a huge amount
of technical details without increasing the complexity of the graph. For example,
imagine that in our business process each time we change node, we need to store the
data collected from each node in a database. In most of the cases, this requirement is
purely technical, and the business users don't need to know about that. With these
actions, we achieve exactly the above. We only need to create a class with the custom
logic that implements the Action interface and then adds it to the node in which we
want to execute the custom logic.
Node
Enter Execute Leave
Action
ActionAction
The best way to understand how the execution works is by playing with the code.
In the chapter02.simpleGOPExecution maven project, we have another test that
shows us the behavior of the execution class. This test is called TestExecution and
contains two basic tests to show how the execution works.
If you don't know how to use maven, there is a quick start guide at the
end of this chapter. You will need to read it in order to compile and run
these tests.
public void testSimpleProcessExecution(){
Definition definition = new Definition("myFirstProcess");
System.out.println("########################################");
System.out.println(" Executing PROCESS:
"+definition.getName()+" ");
System.out.println("########################################");
Node firstNode = new Node("First Node");
Node secondNode = new Node("Second Node");
Node thirdNode = new Node("Third Node");
This material is copyright and is licensed for the sole use by ALESSANDRO CAROLLO on 18th December 2009
6393 south jamaica court, , englewood, , 80111

jBPM for Developers
[ 52 ]
firstNode.addTransition("to second node", secondNode);
secondNode.addTransition("to third node", thirdNode);
//Add an action in the second node.
CustomAction implements Action
secondNode.addAction(new CustomAction("First"));
definition.addNode(firstNode);
definition.addNode(secondNode);
definition.addNode(thirdNode);
//We can graph it if we want.
//definition.graph();
Execution execution = new Execution (definition);
execution.start();
//The execution leave the third node
assertEquals("Third Node", execution.getCurrentNode().getName());
}
If you run this rst test, it creates a process denition as in the denition tests, and
then using the denition, it creates a new execution. This execution lets us interact
with the process. As this is a simple implementation, we only have the start()
method that starts the execution of our process, executing the logic inside each node.
In this case, each node is responsible for continuing the execution to the next node.
This means that there are no wait state nodes inside the example process. In case we
have a wait state, our process will stop the execution in the rst wait state. So, we
need to interact with the process again in order to continue the execution.
Feel free to debug this test to see how this works. Analyze the code and follow the
execution step by step. Try to add new actions to the nodes and analyze how all of
the classes in the project behave.
When you get the idea, the framework internals will be easy to digest.
Homework
We are ready to create our rst simple GOP language, the idea here is to get
hands-on code and try to implement your own solution. Following and using the
guidelines proposed in this chapter with minimal functionality, but with the full
paradigm implemented, will represent and execute our rst process. We could
try to implement our example about "Recycling Thing Co.", but we will start with
something easier. So, you can debug it and play with it until you get the main points
This material is copyright and is licensed for the sole use by ALESSANDRO CAROLLO on 18th December 2009
6393 south jamaica court, , englewood, , 80111
Chapter 2
[ 53 ]
of functionality. In the following sections, I will give you all the information that you
need in order to implement the new words of our language and the behavior that the
process will have. This is quite a lot of homework, but trust me, this is really worth
it. The idea of nishing this homework is to feel comfortable with the code and the
behavior of our dened processes. You will also see how the methods are chained
together in order to move the process from one node to the next.
Creating a simple language
Our language will be composed with subclasses from our previous node class.
Each of these subclasses will be a word in our new language. Take a look at the
ActivityNode proposed in the chapter02.simpleGOPExecution project, inside
the org.jbpm.examples.chapter02.simpleGOP.definition.more.expressive.
power package. And when we try to represent processes with this language, we
will have some kind of sentence or paragraph expressed in our business process
language. As in all languages, these sentences and each word will have restrictions
and correct ways of use. We will see these restrictions in the Nodes description section
of the chapter.
So, here we must implement four basic words to our simple language. These words
will be start, action, human decision, and end to model processes like this one:
Start
Human
Decision
End
Action
*
Action
*Action
*
?
This material is copyright and is licensed for the sole use by ALESSANDRO CAROLLO on 18th December 2009
6393 south jamaica court, , englewood, , 80111

jBPM for Developers
[ 54 ]
Actually, we can have any combination that we want of different types of nodes
mixed in our processes. Always follow the rules/restrictions of the language that
we implement. These restrictions are always related to the words' meanings. For
example, if we have the word "start" (that will be a subclass of node) represented
with the node: StartNode, this node implementation could not have arriving
transitions. This is because the node will start the process and none of the rest
of the nodes could be connected to the start node. Also, we could see a similar
restriction with the end node, represented in the implementation with the EndNode
class, because it is the last node in our processes and it could not have any leaving
transitions. With each kind of node, we are going to see that they have different
functionality and a set of restrictions that we need to respect when we are using
these words in sentences dening our business processes. These restrictions could be
implemented as 'not supported operation' and expressed with: throw new Unsupport
edOperationException("Some message here");. Take a look at the EndNode
class, you will see that the addTransition() method was being overridden to
achieve that.
Nodes description
In this section, we will see the functionality of each node. You can take this
functionality and follow it in order to implement each node. Also, you could think
of some other restrictions that you could apply to each node. Analyze the behavior
of each method and decide, for each specic node type, whether the method
behavior needs to be maintained as it is in the super class or whether it needs
to be overwritten.
StartNode: This will be our rst node in all our processes. For this
functionality, this node will behave as a wait state, waiting for an external
event/signal/trigger that starts the process execution. When we create a
new instance of process execution, this node is selected from the process
description and set as the current node in the current execution. The start()
method in the execution class will represent the event that moves the process
from the rst node to the second, starting the ow of the process.
EndNode: It will be our last node in all our processes. This node will end
the life of our process execution instance. As you can imagine, this node will
restrict the possibility of adding leaving transitions to this node.
ActionNode: This node will contain a reference to some technical code that
executes custom actions that we need for fullling the process goal. This is a
very generic node where we can add any kind of procedure. This node will
behave as an automatic activity, execute all of these actions, and then leave
the node.
•
•
•
This material is copyright and is licensed for the sole use by ALESSANDRO CAROLLO on 18th December 2009
6393 south jamaica court, , englewood, , 80111
Chapter 2
[ 55 ]
HumanDecisionNode: This is a very simple node that gives a human being
some information in order to decide which path of the process the execution
will continue through. This node, which needs human interaction, will
behave as a wait state node waiting for a human to decide which transition
the node must take (this means that the node behaves as an OR decision,
because with this node, we cannot take two or more paths at the same time).
One last thing before you start with the real implementation of these nodes. We
will need to understand what the expected results are in the execution stage of our
processes. The following images will show you how the resultant process must
behave in the execution stage. The whole execution of the process (from the start
node to the end node) will be presented in these three stages.
Stage one
The following image represents the rst stage of execution of the process. In this
image, you will see the common concepts that appear in the execution stage. Every
time we create a new process execution, we will start with the rst node, waiting for
an external signal that will move the process to the next node.
Start
Human
Decision
End
Action
*
Action
*Action
*
?
wait
Execution
new
1. An execution is created using our process denition instance in order to
know which activities the process will have.
2. The start node is selected from the process denition and placed inside the
current node reference in the execution instance. This is represented by the
black arrow pointing to the Start node.
•
This material is copyright and is licensed for the sole use by ALESSANDRO CAROLLO on 18th December 2009
6393 south jamaica court, , englewood, , 80111
jBPM for Developers
[ 56 ]
3. As the StartNode behaves as a wait state, it will wait and externally trigger
to start the process execution. We need to know this, because may, we can
think that if we create an instance of execution, it will automatically begin
the execution.
Stage two
The second stage of the execution of the process is represented by the
following image:
Start
Human
Decision
End
Action
*
Action
*Action
*
?
wait
Execution
start start()
1. We can start the execution by calling the start() method inside the
execution class. This will generate an event that will tell the process to start
owing through the nodes.
2. The process starts taking the rst transition that the start node has, to the rst
action node. This node will only have an action hooked, so it will execute this
action and then take the transition to the next node. This is represented with
the dashed line pointing to the Action node.
This node will continue the execution and will not behave as a
wait state—updating the current node pointer, which has the
execution, to this node.
3. The Human Decision node is reached, this means that some user must decide
which path the process will continue through. Also, this means that the
process must wait for a human being to be ready to decide. Obviously, the
node will behave as a wait state, updating the current node pointer to
this node.
This material is copyright and is licensed for the sole use by ALESSANDRO CAROLLO on 18th December 2009
6393 south jamaica court, , englewood, , 80111
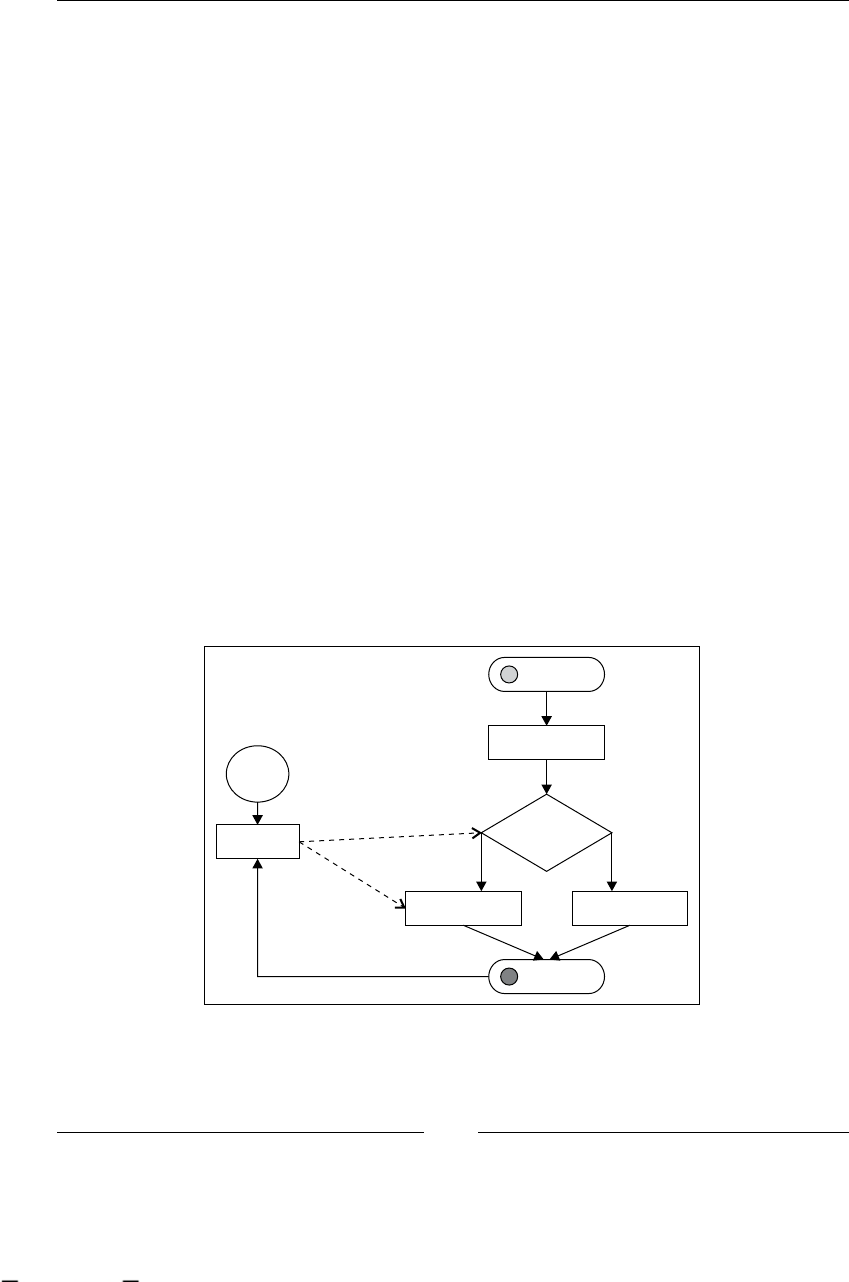
Chapter 2
[ 57 ]
But wait a second, another thing happens here, the process will return the
execution control to the main method. What exactly does this mean?
Until here, the execution goes from one wait state (the start node) to another
wait state (the human decision node) inside the method called start,
enclosing all the automatic nodes' functionality and leaving the process
in a wait state. Let's analyze the method call stack trace:
• Execution.start()
• StartNode.leave(transtion)
• ActionNode.enter()
• ActionNode.execute()
• CustomAction.execute()
• ActionNode.leave(transition)
• HumanDecisionNode.enter()
• HumanDecisionNode.execute()
When the process reaches the HumanDecisionNode.execute(), it doesn't need to
do anything more. It returns to the main() method and continues with the next line
after the Execution.start() call.
Stage three
The following image represents the third stage of execution of the process:
Start
Human
Decision
End
Action
*
Action
*Action
*
?
end
Execution
Decide
decide()
This material is copyright and is licensed for the sole use by ALESSANDRO CAROLLO on 18th December 2009
6393 south jamaica court, , englewood, , 80111

jBPM for Developers
[ 58 ]
1. Now we are waiting for a human to make a decision, but wait a second, if the
thread that calls the start() method on the instance of the execution dies,
we lose all the information about the current execution, and we cannot get it
back later. This means that we cannot restore this execution to continue from
the human decision node. On the other hand, we can just sleep the thread
waiting for the human to be ready to make the decision with something like
Thread.currentThread().sleep(X). Where X is expressed in milliseconds.
But we really don't know how much time we must wait until the decision is
taken. So, sleeping the thread is not a good option. We will need some kind
of mechanism that lets us persist the execution information and allows us to
restore this status when the user makes the decision. For this simple example,
we just suppose that the decision occurs just after the start() method
returns. So, we get the execution object, the current node (this will be the
human decision node), and execute the decide() method with the name of
the transition that we want to take as argument.
Let's run ((HumanDecisionNode)execution.getCurrentNode()).
decide("transition to action three", execution). This is an ugly
way to make the decision, because we are accessing the current node from
the execution. We could create a method in the execution class that wraps
this ugly call. However, for this example, it is okay. You only need to
understand that the call to the decide() method is how the user
interacts with the process.
2. When we make this decision, the next action node is an automatic node
like the action one, and the process will ow until the EndNode, which
is ending the execution instance, because this is the last wait state, but
any action could be made to continue. As you can see, the wait states
will need some kind of persistent solution in order to actually be able to
wait for human or asynchronous system interactions. That is why you
need to continue your testing of the execution with ((HumanDecisionN
ode)execution.getCurrentNode()).decide("transition to action
three",execution), simulating the human interaction before the current
thread dies.
In the following chapters, you will see how this is implemented inside the
jBPM framework.
This material is copyright and is licensed for the sole use by ALESSANDRO CAROLLO on 18th December 2009
6393 south jamaica court, , englewood, , 80111

Chapter 2
[ 59 ]
Homework solution
Don't worry, I have included a solution pack to this exercise, but I really encourage
you to try to make it on your own. Once you try it, you will feel that you really
understand what is going on here; giving you a lot of fundamental concepts ready
to use.
You could download the solutions pack from http://www.packtpub.com/files/
code/5685_Code.zip and you will nd the solution for this homework in the project
called chapter02.homeworkSolution.
Quick start guide to building Maven
projects
A quick start guide for building Maven projects is follows:
Download and install Maven 2.x (http://maven.apache.org/)
Append maven binaries in the PATH system variable
Open a terminal/console
Go to the chapter02 code directory and look for a le called pom.xml
Type mvn clean install into the console, this will compile the code, run the
tests, and package the project
If you are using Netbeans, you can just open your project (having the maven
plugin activated)
If you are using Eclipse, you need to run the project in the mvn eclipse:
eclipse project directory, in order to generate the les needed for the
project. Then you can just import the project into your workspace
Summary
In this chapter, we learnt the following main points that you will need in order to
understand how the framework works internally.
We have analyzed why we need the Graph Oriented Programming approach to
represent and execute our business processes.
In the next chapter, we will be focused on setting up our environment to get
started with jBPM. However, not for a simple "hello world", but for real application
development. We will also talk about the project source structure and how we can
create projects that use the framework in an embedded way.
•
•
•
•
•
•
•
This material is copyright and is licensed for the sole use by ALESSANDRO CAROLLO on 18th December 2009
6393 south jamaica court, , englewood, , 80111

This material is copyright and is licensed for the sole use by ALESSANDRO CAROLLO on 18th December 2009
6393 south jamaica court, , englewood, , 80111

Setting Up Our Tools
This chapter is about setting up the environment that we need in order to build
a rock-solid application, which uses jBPM. In order to achieve this, we need to
download, install, and understand a common set of tools that will help us in the
development process.
This chapter will begin with a short introduction about the jBPM project so that we
can be "ordered" and understand what we are doing. We will discuss the project's
position inside all the JBoss projects. We will also talk about the project's main
modules and the features proposed by this framework.
All these tools are widely used in the software development market, but for those
who don't know about them, this chapter will briey introduce these tools one
by one.
This chapter will also include two important steps. Firstly, a revision of the
framework source code structure. Secondly, how to set up this code in our
favorite IDE in order to have it handy when we are developing applications.
Once we have set up the whole environment, we will be able to create two
simple, real applications that will be our project templates for bigger applications.
At the end of this chapter, you will be able to create applications that use the
framework and also gain knowledge about how all of these tools interact in our
development environment.
This material is copyright and is licensed for the sole use by ALESSANDRO CAROLLO on 18th December 2009
6393 south jamaica court, , englewood, , 80111

Setting Up Our Tools
[ 62 ]
The following topics will be covered throughout this chapter:
Background about the jBPM project
Tools and software
Maven
MySQL
Eclipse IDE
SVN client
Starting with jBPM
Binary structure
Building jBPM from source
First jBPM project
First jBPM Maven Project
Background about the jBPM project
In this section, we will talk about where the jBPM framework is located inside the
JBoss projects. As we know, JBoss jBPM was created and maintained for JBoss. JBoss
is in charge of developing middleware "enterprise" software in Java. It is middleware
because it is a type of software to make or run software, and "enterprise", as it is
focused on big scenarios. This enterprise does not necessarily mean Java EE. It is also
interesting to know that JBoss was bought from a company called Red Hat (famous
for the Linux distribution with the same name, and also in charge of the Fedora
community distribution).
In order to get the right rst impression about the framework, you will need to know
a little about other products that JBoss has developed and where this framework
is located and focused inside the company projects. At this moment, the only
entry point that we have is the JBoss community page, http://www.jboss.org/.
This page contains the information about all the middleware projects that JBoss is
developing (all open source). If we click on the Projects link in the top menu,
we are going to be redirected to a page that shows us the following image:
•
•
o
o
o
o
•
o
o
•
•
This material is copyright and is licensed for the sole use by ALESSANDRO CAROLLO on 18th December 2009
6393 south jamaica court, , englewood, , 80111
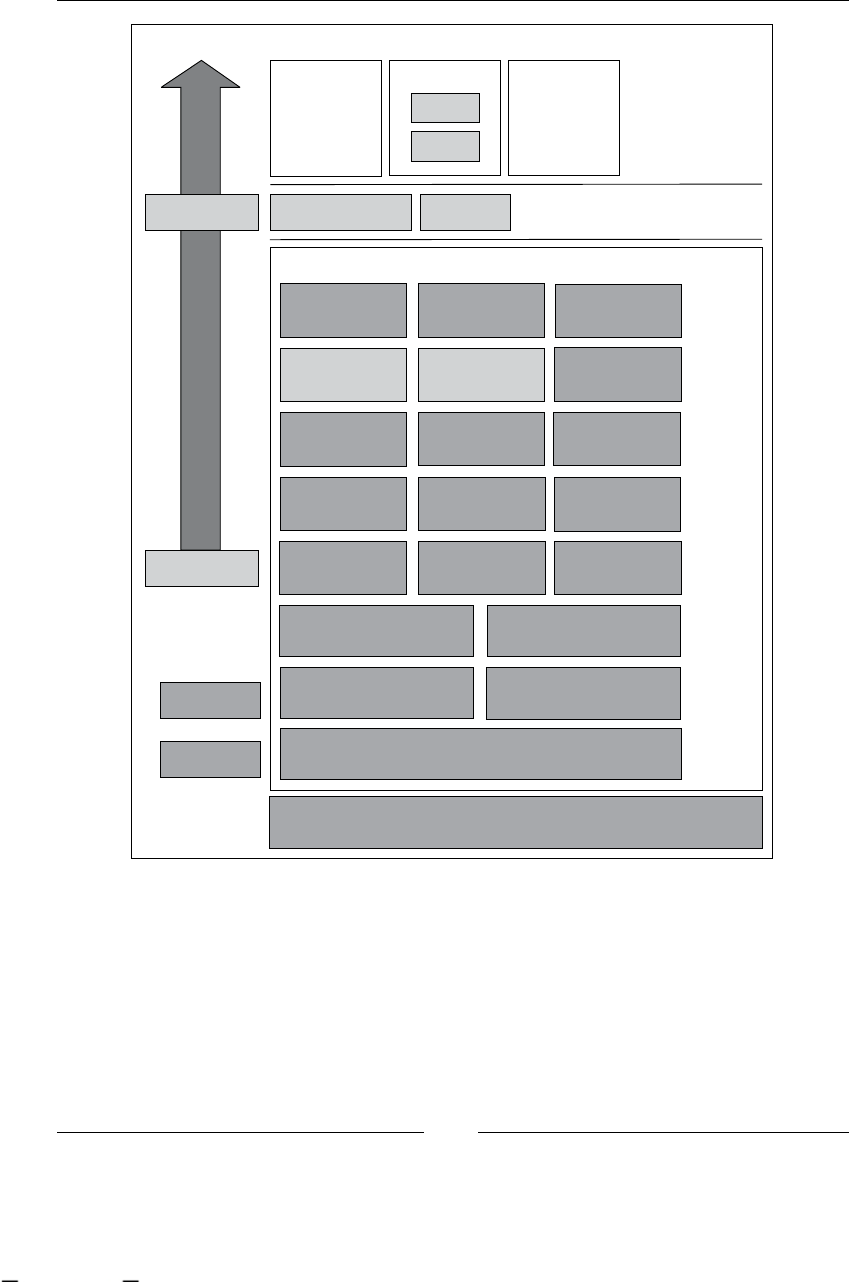
Chapter 3
[ 63 ]
JBoss Profiler
Drools
JSF Unit
JRunit
Dev Tools Portal Integration Telecom
JBoss Portal JBoss ESB Mobicents
Test Tools
jBPM
RichFaces/Ajax4jsf Gravel Web Interface
JBoss Tools
JBoss AS
JNDI JCA
Seam Hibernate JGroups
IIOP
JBoss JMX JBoss Web JBoss Web
Services
JBoss
Transactions
JBoss
Messaging JBoss EJB3
JBoss
Serialization
JBoss
Remoting JBoss Cache
JBoss Federated SSO
JBoss Security & Identity
Management
JBoss AOP Javassist
JBoss Microcontainer
Teiid
Application Server
This image shows us one important major central block for the JBoss Application
Server, which contains a lot of projects intended to run inside this application server.
The most representative modules are:
JBoss Web: The web container based on Tomcat Web Server
JBoss EJB3: EJB3 container that is standard EJB3 compliance for Java EE 5
Hibernate: The world-renowned Object Relational Mapping (ORM)
framework
•
•
•
This material is copyright and is licensed for the sole use by ALESSANDRO CAROLLO on 18th December 2009
6393 south jamaica court, , englewood, , 80111

Setting Up Our Tools
[ 64 ]
Seam: The new web framework to build rich Internet applications
JBoss Messaging: The default JMS provider that enables high performance,
scalable, clustered messaging for Java
On top of that, we can see two frameworks for Web Interface design (RichFaces/
Ajax4jsf and Gravel) based on the components, which can be used in any web
application that you code.
And then, on top of it all, we can see three important blocks—Portal, Integration,
and Telecom. As you can imagine, we are focused on the Integration block that
contains three projects inside it.
As you can see, this Integration block is also outside the JBoss Application Server
boundaries. Therefore, we might suppose that these three products will run without
any dependency from JBoss or any other application server.
Now we are going to talk about these three frameworks, which have different
focuses inside the integration eld.
JBoss Drools
Drools is, of late, focused on business knowledge, and because it was born as an
inference engine, it will be in charge of using all that business knowledge in order
to take business actions based on this knowledge for a specic situation. You can
nd out more information about this framework (now redened as Business Logic
integration Platform) at http://www.drools.org.
JBoss ESB
It is a product focused on supplying an Enterprise Service Bus (ESB), which
allows us to use different connectors to communicate with heterogeneous
systems that were created in different languages. These use different protocols
for communication. You can nd out more information about this project at
http://www.jboss.org/jbossesb/.
JBoss jBPM
jBPM has a process-centric philosophy. This involves all the APIs and tools that are
related to the processes and how to manage them. As we are going to see in all the
chapters of this book, the framework perspective is always centered on the business
process that we describe. Also, the services available inside the framework are
only for manipulating the processes. All the other things that we want or need for
integration with our processes will be delegated to third-party frameworks or tools.
•
•
This material is copyright and is licensed for the sole use by ALESSANDRO CAROLLO on 18th December 2009
6393 south jamaica court, , englewood, , 80111

Chapter 3
[ 65 ]
Now, if we enter into the ofcial page of jBPM (http://www.jbpm.org), we are
going to see all the ofcial information and updates about the framework. It is
important to notice the home page, which shows us the following image:
Pageflow
jPDL BPEL ...
Identity Task
Mgmt
GPD
Process Virtual Machine (PVM)
Enterprise
jBPM
This is the rst image that developers see when they get interested in jBPM. This
image shows us the component distribution inside the jBPM framework project.
Understanding these building blocks (components) will help us to understand the
code of the framework and each part's functionality. Most of the time, this image is
not clearly understood, so let's analyze it!
Supported languages
One of the important things that the image shows is the multi-language support
for modeling processes in different scenarios. We can see that three languages are
currently supported/proposed by the framework with the possibility to plug in
new languages that we need, in order to represent our business processes with
extra technology requirements.
These supported languages are selected according to our business scenario and the
technology that this scenario requires.
The most general and commonly used language is jBPM Process Denition
Language (jPDL). This language can be used in situations where we are dening the
project architecture and the technology that the project will use. In most of the cases,
jPDL will be the correct choice, because it brings the exibility to model any kind
of situation, the extensibility to expand our process language with new words to
add extra functionality to the base implementation, and no technology pluggability
limitation, thereby allowing us to interact with any kind of external services and
systems. That is why jPDL can be used in almost all situations. If you don't have
any technology restriction in your requirements, this language is recommended.
jBPM also implements the Business Process Execution Language (BPEL),
which is broadly used to orchestrate Web Services classes between different
systems—currently, both versions of the BPEL language support Versions 1.1
and 2.0, but this language is outside the scope of this book.
This material is copyright and is licensed for the sole use by ALESSANDRO CAROLLO on 18th December 2009
6393 south jamaica court, , englewood, , 80111

Setting Up Our Tools
[ 66 ]
To support business scenarios where all the interactions are between web services, I
recommend that you make use of this language, only if you are restricted to using a
standard like BPEL, in order to model your business process.
PageFlow is the last one shown in the image. This language will be used when
you use the JBoss Seam framework and want to describe how your web pages are
synchronized to fulll some requirements. These kind of ows are commonly used
to describe navigation ow possibilities that a user will have in a website.
Web applications will benet enormously from this, because the ow of the web
application will be decoupled from the web application code, letting us introduce
changes without modifying the web pages themselves. This language is also outside
the scope of this book.
At last, the language pluggability feature is represented with the ellipse (...). This will
be required in situations wherein the available languages are not enough to represent
our business scenarios. This could happen when a new standard like BPEL or BPMN
arises, or if our company has its own language to represent business processes. In
these kind of situations, we will need to implement our custom language on top
of the process' virtual machine. This is not an easy task and it is important for you
to know that it is not a trivial thing to implement an entire language. So, here we
will be focused on learning jPDL in depth, to understand all of its features and how
to extend it in order to fulll our requirements. Remember that jPDL is a generic
language that allows us to express almost every situation. In other words, the only
situation where jPDL doesn't t is where the process denition syntax doesn't allow
us to represent our business process or where the syntax needs to follow a standard
format like BPMN or BPEL.
Also, it is important to notice that all these languages are separate from the Process
Virtual Machine (PVM), the block on the bottom-left of the image, which will
execute our dened process. PVM is like the core of the framework and understands
all the languages that are dened. This virtual machine will know how to execute
them and how to behave for each activity in different business scenarios. When we
begin to understand the jPDL language in depth, we will see how PVM behaves for
each activity described in our process denitions.
Other modules
Besides the PVM and all the languages, we can also see some other modules that
implement extra functionality, which will help us with different requirements. The
following list contains a brief description of each module, but there will be chapters
that detail each module:
Graphical Process Designer (GPD) module: It is the graphical process
designer module implemented as an Eclipse plugin.
•
This material is copyright and is licensed for the sole use by ALESSANDRO CAROLLO on 18th December 2009
6393 south jamaica court, , englewood, , 80111
Chapter 3
[ 67 ]
Identity module: This module is a proof of concept, out-of-the-box working
module used to integrate business roles for our processes. This module is
focused on letting us represent people/users inside the process denition
and execution. This module shows us a simple structure for users and groups
that can be used inside our processes. For real scenarios, this module will
help us to understand how we will map our users' structures with the
jBPM framework.
Task ManaGeMenT (TaskMGMT) module: This module's functionality
involves dealing with all the integration that the people/employees/business
roles have with the processes. This module will help us to manage all the
necessary data to create application clients, which the business roles will
use in their everyday work.
Enterprise module: This module brings us extra functionality for enterprise
environments.
Now that we know how the components are distributed inside the framework, we
can jump to the jPDL section of jBPM's ofcial web page. Here we will nd the third
image that all the developers will see when they get started with jBPM.
Eclipse JPDL Editor
<XML/>
Any DB
jbpm.war/.ear
hibernate.jar
jbpm.jpdl.jar
PVM
jbpm-identity.jar
jPDL
•
•
•
This material is copyright and is licensed for the sole use by ALESSANDRO CAROLLO on 18th December 2009
6393 south jamaica court, , englewood, , 80111

Setting Up Our Tools
[ 68 ]
Let's analyze this image to understand why and how the framework can be used in
different platforms. This image tries to give us an example of how jBPM could be
deployed on a web server or an application server. Please, keep in mind that this is
not the only way that jBPM could be deployed on, or embedded in, an application,
because jBPM can also be used in a standalone application. In addition, this image
shows us some of the BPM stages that are implemented. For example, we can see
how the designed processes will be formalized in the jPDL XML syntax in Graphical
Process Designer (GPD)— here called the Eclipse jPDL Editor. On the other side
of the image, we can see the execution stage implemented inside a container that
could be an Enterprise Container (such as JBoss Application Server) or just a web
server (such as Tomcat or Jetty). This distinction is made with the extensions of the
deployed les (war, for Web Archives, and ear, for Enterprise Archives). In this
container, it is important to note the jpdl-jbpm.jar archive that contains the PVM
and the language denition, which lets us understand the process dened in jPDL.
Also, we have the jbpm-identity.jar as a result of the Identity Module that we
have seen in the other image. Besides, we have the hibernate.jar dependency. This
fact is very important to note, because our processes will be persisted with Hibernate
and we need to know how to adapt this to our needs.
The last thing that we need to see is the Firefox/Internet Explorer logo on top of the
image, which tries to show us how our clients (users), all the people who interact
and make activities in our processes will talk (communicate) with the framework.
Once again, HTTP interaction is not the only way to interact with the processes,
we can implement any kind of interactions (such as JMS for enterprise messaging,
Web Services to communicate with heterogeneous systems, mails for some kind of
exibility, SMS, and so on).
Here we get a rst impression about the framework, now we are ready to go ahead
and install all the tools that we need, in order to start building applications.
Tools and software
This section will guide us through the download and installation of all the software
that we will need in the rest of this book.
For common tools such as Java Development Kit, IDE installation, database
installation, and so on, only the key points will be discussed. Detailed explanation
about how to set up all these programs is beyond the scope of this book. You can
always query the ofcial documentation for each specic product.
In jBPM tooling, a detailed explanation will follow the download and installation
process. We will be going into the structure detail and specication in depth; about
how and why we are doing this installation.
This material is copyright and is licensed for the sole use by ALESSANDRO CAROLLO on 18th December 2009
6393 south jamaica court, , englewood, , 80111

Chapter 3
[ 69 ]
If you are an experienced developer, you can skip this section and go directly to the
jBPM installation section. In order to go to the jBPM installation section straightaway,
you will need to have the following software installed correctly:
Java Development Kit 1.5 or higher (This is the rst thing that Java developers
learn. If you don't know how to install it, please take a look at the following
link: http://java.sun.com/javase/6/webnotes/install/index.html.)
Maven 2.0.9 or higher
A Hibernate supported database, here we will use MySQL
You will need to have downloaded the Java Connector for your
selected database
JBoss 5.0.1.GA installed (If you are thinking about creating Enterprise
Applications, you will need JBoss AS installed. If you only want to create
web applications with Tomcat or Jetty installed, this will be ne. In the book,
I've included some Java EE examples. Therefore, JBoss AS is recommended.)
Eclipse IDE 3.4 Ganymede (Eclipse IDE 3.4 Ganymede is the suggested
version. You can try it with other versions, but this is the one tested in
the book.)
An SVN client, here we will use Tortoise SVN (Available for Windows only,
you can also use a subversion plugin for Eclipse or for your favorite IDE.)
If you have all this software up and running, you can jump to the next section. If
not, here we will see a brief introduction of each one of them with some reasons
that explain why we need each of these tools.
Maven—why do I need it?
Maven is an Apache project that helps us to build, maintain, and manage our
Java Application projects. One of the main ideas behind Maven is to solve all the
dependency problems between our applications and all the framework libraries
that we use. If you read the What is Maven? page (http://maven.apache.org/
what-is-maven.html), you will nd the key point behind this project.
The important things that we will use here and in your diary work will be:
A standard structure for all your projects
Centralized project and dependencies description
•
•
•
•
•
•
•
•
•
This material is copyright and is licensed for the sole use by ALESSANDRO CAROLLO on 18th December 2009
6393 south jamaica court, , englewood, , 80111

Setting Up Our Tools
[ 70 ]
Standard structure for all your projects
Maven proposes a set of standard structures to build our Java projects. The project
descriptor that we need to write/create depends on the Java project type that we
want to build. The main idea behind it is to minimize the conguration les to build
our applications. A standard is proposed to build each type of application.
You can see all the suggested standard structure on the ofcial Maven page:
http://maven.apache.org/guides/introduction/introduction-to-the-
standard-directory-layout.html.
Don't worry too much about it! In the project examples at the end of the
chapter, you will see how all of these topics work. During the rest of this
book, we will be analyzing different projects, which will introduce you to
the main functionalities of Maven.
Centralized project and dependencies description
When we are using Maven, our way of building applications and managing the
dependencies needed by these applications changes a lot. In Maven, the concept
of Project Object Model (POM) is introduced. This POM will dene our project
structure, dependencies, and outcome(s) in XML syntax. This means that we will
have just one le where we will dene the type of project we are building, the rst
order dependencies that the project will have, and the kind of outcome(s) that we
are expecting after we build our project.
You have already seen these POM les in the chapter02 examples where we built
jar les with Maven.
Take a look at the following pom.xml le:
<?xml version="1.0" encoding="UTF-8"?>
<project xmlns="http://maven.apache.org/POM/4.0.0" xmlns:xsi="http://
www.w3.org/2001/XMLSchema-instance" xsi:schemaLocation="http://maven.
apache.org/POM/4.0.0 http://maven.apache.org/maven-v4_0_0.xsd">
<modelVersion>4.0.0</modelVersion>
<groupId>org.jbpm.examples</groupId>
<artifactId>chapter02.homeworkSolution</artifactId>
<packaging>jar</packaging>
<version>1.0-SNAPSHOT</version>
<name>chapter02.homeworkSolution</name>
<url>http://maven.apache.org</url>
<build>
<plugins>
<plugin>
<artifactId>maven-compiler-plugin</artifactId>
This material is copyright and is licensed for the sole use by ALESSANDRO CAROLLO on 18th December 2009
6393 south jamaica court, , englewood, , 80111

Chapter 3
[ 71 ]
<version>2.0.2</version>
<configuration>
<source>1.5</source>
<target>1.5</target>
</configuration>
</plugin>
</plugins>
</build>
<dependencies>
<dependency>
<groupId>junit</groupId>
<artifactId>junit</artifactId>
<version>3.8.1</version>
<scope>test</scope>
</dependency>
</dependencies>
</project>
We are basically dening all the mentioned characteristics of our project. If you
take a look at the pom.xml le for the homeworkSolution project discussed in
Chapter 2, jBPM for Developers, you will realize that we haven't described how to
build this project. We also haven't specied where our sources are located and
where our compiled project will be placed after it is built.
All this information is deduced from the packaging attribute, which in this case is:
<packaging>jar</packaging>
The standard structure of directories will be used in order to know where the source
code is located and where the compiled outcome will be placed.
Maven installation
Getting maven installed is a very simple task. You should download the Maven
binaries from the ofcial page (http://maven.apache.org). This will be a .zip le,
or a .tar.gz le, which you will only need to uncompress in the programs directory.
You will also add the bin directory to the system Path variable. With that, you will
be able to call the mvn command from the console.
This material is copyright and is licensed for the sole use by ALESSANDRO CAROLLO on 18th December 2009
6393 south jamaica court, , englewood, , 80111
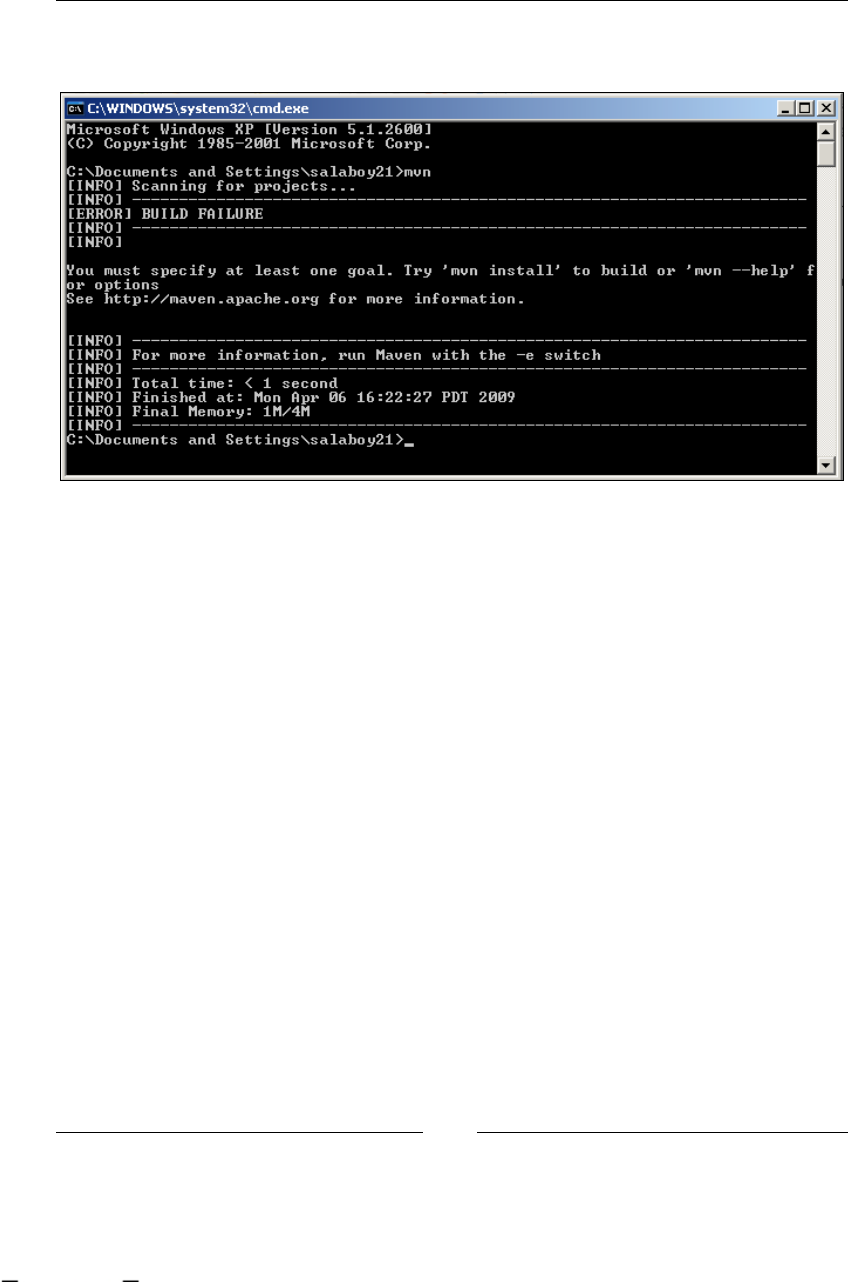
Setting Up Our Tools
[ 72 ]
To test whether Maven is working properly, you can open the Windows console and
type mvn. You should get something like this:
This output shows us that Maven is correctly installed. However, as it is installed in
C:\Documents and Settings\salaboy21\ (the installation directory) where there
is no project descriptor, the build failed.
I strongly recommend that you read and understand the Getting Started section
in the ofcial Maven documentation at http://maven.apache.org/guides/
getting-started/index.html.
Installing MySQL
In most situations, we will need to store the current state of our processes and all the
information that is being handled inside it. For these situations, we will need some
persistence solution. The most common one is a relational database. In this case, I
chose MySQL, as it's free and easy to install in most of the operating systems. Feel
free to try and test jBPM with any of the other Hibernate-supported databases.
Installing MySQL is very easy, you just need to download the binaries provided on
the ofcial page (http://www.mysql.org), then run it and follow the instructions
that appear in the wizard window. The only things that I chose, but are defaults,
are the type of installation Developer Machine and MySQL as a Windows service.
This will help us to always have a running database for our process and it will not
be necessary to start it or stop it at the beginning or the end of our sessions.
This material is copyright and is licensed for the sole use by ALESSANDRO CAROLLO on 18th December 2009
6393 south jamaica court, , englewood, , 80111

Chapter 3
[ 73 ]
Downloading MySQL JConnector
In order to connect every Java application to a relational database, we will need a
particular connector for each database. This connector, in this case, will be used by
Hibernate to create a JDBC connection to the database when it needs to store our
processes' data.
Almost all vendors provide this connector in the ofcial page. Therefore, for MySQL,
you can look for it on the MySQL ofcial page.
You will need to download it and then put it in your application class path, probably
right next to Hibernate.
Remember that this MySQL JConnector (JConnector is the name of the MySQL
JDBC Driver) is only a Java library that contains classes— it knows how to create and
handle connections between our Java programs and the MySQL database server. For
this reason, like any other dependency, you can use JConnector with Maven, as it's
only a JAR le. Depending on your database and its version, you will need to add
the correct dependency to your project descriptor (in the pom.xml le).
In this case, because I'm using MySQL 5, I will need to add the following
dependency to my project in the dependency section:
<dependency>
<groupId>mysql</groupId>
<artifactId>mysql-connector-java</artifactId>
<version>5.1.6</version>
</dependency>
Eclipse IDE
In these scenarios where we will handle a lot of different types of information—for
example Java code, XML les, business processes, conguration les, and so on—it's
very handy to have a unique tool that handles all of these kind of les and lets us
build/compile, run, and debug all our applications. For this, we have the Eclipse IDE
that provides us a lot of tools for our development work. Of course, we can install
other IDEs such as Netbeans or IntelliJ, but in this case, the jBPM plugins are only for
Eclipse. This could be a very interesting contribution if you want write a plugin for
the Netbeans IDE (another open source IDE) and the community will be very happy.
This doesn't mean that you can't use any other IDE, but probably, you will need to
write your processes in XML format from scratch.
This material is copyright and is licensed for the sole use by ALESSANDRO CAROLLO on 18th December 2009
6393 south jamaica court, , englewood, , 80111

Setting Up Our Tools
[ 74 ]
Installing Eclipse IDE is also very easy, you just need to download the IDE binary
from the ofcial page (http://www.eclipse.org/downloads/). Then uncompress
the zip le inside the programs directory and when it's done, you will nd the
eclipse.exe executable that you could run inside the bin directory. The only thing
that you need here is to have your JAVA_HOME variable set and the Java JDK binaries
inside your PATH variable.
Install Maven support for Eclipse
This is an optional plugin that can make our life easier. This plugin will allow us to
invoke and use Maven inside the IDE. This means that now our IDE will know about
Maven and give us different options to handle and manage our Maven projects.
This plugin, like any other plugin for Eclipse, needs to be installed with the
Software Update Manager. You will nd instructions about how to do that in
each plugin's ofcial page (http://code.google.com/p/q4e/wiki/Installation).
In this case, the quick way will be to add the update site (you need to go to
Help | Software Update inside Eclipse IDE). In the Available Software tab, click
on the Add Site button and enter http://q4e.googlecode.com/svn/trunk/
updatesite/. Then choose the site and wait for Eclipse to get all the information
about this site and choose the plugin for the list. This will install all the components
in the list and all this functionality will be turned on by the IDE.
SVN client
It's very important for you and your projects to have a right source version system.
In this case, we will not version our projects, but we will download the source code
of the framework for the ofcial JBoss SVN repositories. For this task, you could add
an SVN plugin or an external tool to do the same with the Eclipse IDE.
For this book, I chose Tortoise SVN, which is a much-used SVN client and will let us
manage all our versioned projects by integrating with the Windows environment.
For this, you only need to download the binaries from the ofcial Tortoise Page, run
it, and then restart your machine. This is because some major changes will be needed
for integrating the SVN client with the Windows explorer.
This material is copyright and is licensed for the sole use by ALESSANDRO CAROLLO on 18th December 2009
6393 south jamaica court, , englewood, , 80111

Chapter 3
[ 75 ]
Starting with jBPM
At this point, we are ready to download and install the jBPM framework into our
machine to start building up applications, which will use the framework.
As I have said in the rst chapter of this book, jBPM is a framework like Hibernate.
Why do I need to install it? Hibernate doesn't need an installation. "Install jBPM"
doesn't sound good at all. Like every other framework, jBPM is only a JAR le that
we need to include in our application classpath in order to use it.
So, the idea in this section is to nd out why we download a jBPM installer from the
jBPM ofcial page as well as what things are included in this installer and in which
situations we need to install all these tools.
Getting jBPM
Basically, as developers, we have two ways to get the framework up and working.
We can download the installer from the ofcial site of jBPM or we can download
the source and build it with our hands. None of these two ways are complex,
but always getting the source code of our frameworks will help us to debug our
applications by looking at how the framework behaves at runtime. We will
analyze these two ways in order to show which is the quickest way to have the
framework ready for production, and also what we need to do in order to extend
the framework functionality.
From binary
Just download the framework binaries from the jBPM ofcial page and install it, you
will see that the installer asks you for some other installed software, such as JBoss
Application Server and the database which you will use.
This binary le (the installer) contains the framework library archives, a graphical
process designer (Eclipse Plugin), and a JBoss prole that contains everything
you will need to start up a JBoss Application Server instance and start using jBPM
deployed inside it. Also, it contains the framework sources that will help us to have
the framework code that we need in order to debug our applications and see our
processes in action.
This material is copyright and is licensed for the sole use by ALESSANDRO CAROLLO on 18th December 2009
6393 south jamaica court, , englewood, , 80111
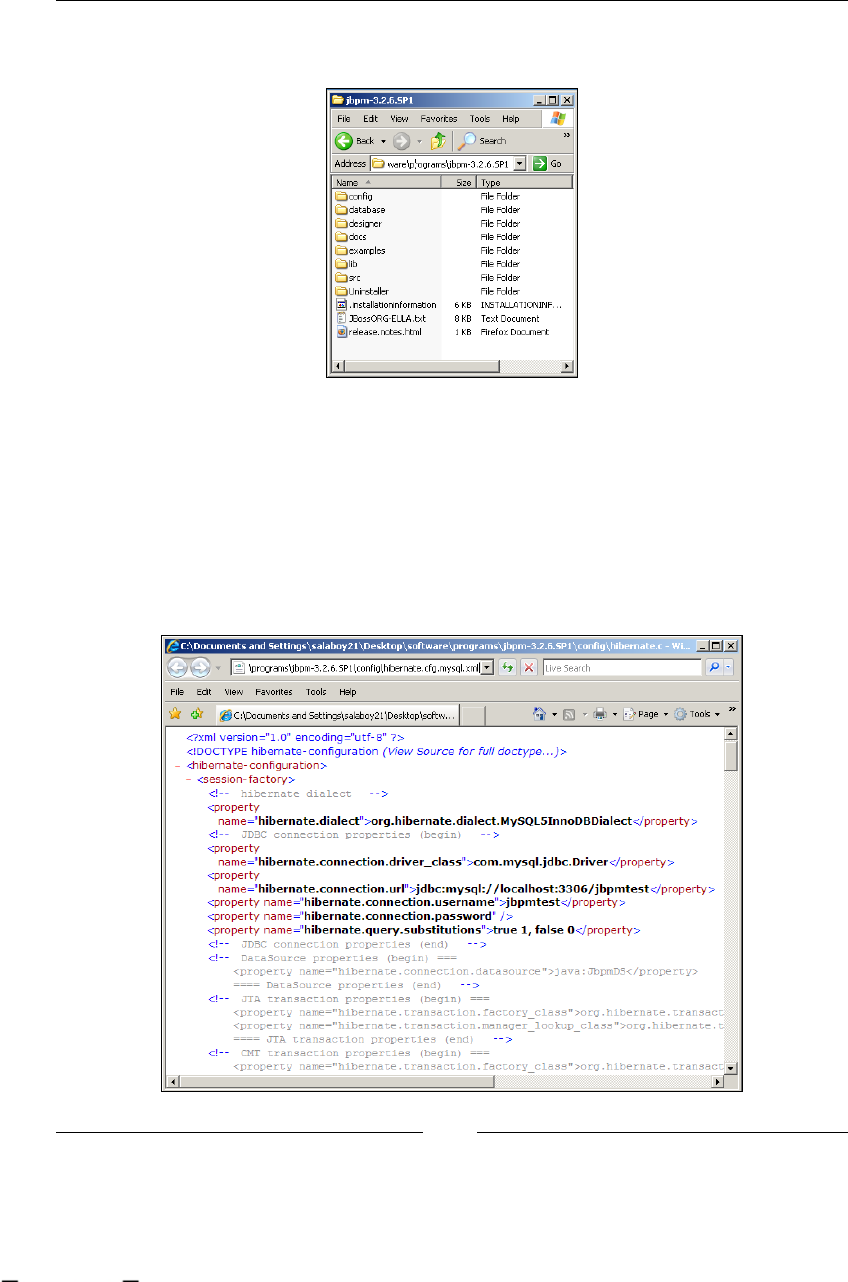
Setting Up Our Tools
[ 76 ]
Here we will see the results of this installation and the directory structure that
contains jBPM les.
As you can see in the image, we will have the directories as described in the
following sections:
config directory
This directory will contain XML les with the conguration needed for the database
that we choose. We will use the le called hibernate.cfg.mysql.xml. You will
need to choose the le for your corresponding installed database. If you open this
le, you will nd something like this:
This material is copyright and is licensed for the sole use by ALESSANDRO CAROLLO on 18th December 2009
6393 south jamaica court, , englewood, , 80111

Chapter 3
[ 77 ]
This le, by default, congures a JDBC connector to use for jBPM persistence. I know
that the persistence usage has not been introduced yet, but then when I talk about
that, you will know where the conguration is.
In the rst section of the le, you will nd a tag called <session-factory>. With
this information, jBPM can create two types of database connections—JDBC or
Datasource connections.
These two types of connection will be used depending on the environment that we
use. If we are building an application that will run outside a container, we will need
to congure the JDBC connector as shown in the image, where we specify the dialect
that Hibernate will use and the driver corresponding to the database we choose.
Pay close attention to the com.mysql.jdbc.Driver class, because this class will
be inside the JConnector in MySQL. So, it will be necessary that this jar is in the
application classpath. The other properties used here are the common ones to set
up a connection to a database.
For a DataSource connection, meaning that our application will run inside a
container like JBoss (an Enterprise Application container) or any other application
server, we will need to uncomment the line that species the DataSource connection
and comment the lines that specify the JDBC connection. With this DataSource
connection, all the access to the database will be handled by a connection pool that
will be inside the container that we will use—this is the reason why we only need
to specify the name of the DataSource, and then the container will handle all the
connection details for us.
database directory
This directory is very useful, because inside it, we will nd the schema denition
that jBPM will use. The idea is to have the generation script for each database to
create each of them. If you open the le called jbpm.jpdl.mysql.sql, you will nd
all the tables used by jBPM. The important thing to know here is that all these scripts
will need to be reviewed by your Database Administrator, because these tables are
not optimized for a production environment. What does this mean exactly? This is
only a recommendation, because jBPM generates a lot of data, and if you are in a
production environment where 1,000 users have access to your dened process,
this structure will generate and log a lot of information by default. So, take a look
at this le; you could also execute it inside a MySQL database to see the tables that
are created.
This material is copyright and is licensed for the sole use by ALESSANDRO CAROLLO on 18th December 2009
6393 south jamaica court, , englewood, , 80111

Setting Up Our Tools
[ 78 ]
designer directory
This directory will contain just one ZIP le that has the structure of an Update
Site for Eclipse and contains only the plugin that will turn our IDE into a Business
Process Designer. If you want to install this plugin in your current Eclipse
installation, you only need to go to Help | Software Updates. When the Software
Updates and Add-ons window opens, you should switch to the Available Software
tab, click on the Add Site… button followed by the Archive button, and locate the
ZIP le placed in this directory.
Then you should select the newly added feature, jBPM jPDL GPD, and click on
the Install... button. This will install all the software needed to start using the jBPM
plug-in inside Eclipse, but you will need to restart Eclipse before you can use it.
docs directory
This directory contains all the Javadoc for all the code of the jBPM different modules.
It also contains the HTML user guide. This is very important documentation that will
also help you to understand the framework.
examples directory
This directory contains a Maven project that includes a lot of tests that show us how
to use the jBPM APIs. If you are starting with jBPM, this example project will help
you to see the most common ways to use the jBPM APIs.
This material is copyright and is licensed for the sole use by ALESSANDRO CAROLLO on 18th December 2009
6393 south jamaica court, , englewood, , 80111

Chapter 3
[ 79 ]
lib directory
This contains all the jars needed by the framework. You will need to add these jars
to every application that use jBPM. These libs will be necessary if we don't use
Maven. If you choose to build your applications with Maven, these dependencies
will be resolved automatically. These jars will be needed in our application
classpath to compile and run our project that is using the jBPM framework.
src directory
This directory contains jar les that include the source code of the framework,
which is very useful for debugging our projects. You should notice that all of the
code cannot be modied or rebuilt. These libs with source code are only helpful to
see what the current executed code is. To build the framework from scratch, you will
need to download the code from the ofcial JBoss SVN repositories, which will also
contain all the projects' descriptors needed to build the sources. This topic will be
described in the following section.
From source code
This section is focused on introducing the "common way of doing things" of
the community members. You could take this way of building the source code
that is downloaded from an SVN server, as one step towards being a part of
the community. Remember that jBPM, as all the projects hosted on the ofcial
community page of JBoss, is an open source project. So take advantage of that—as an
open source developer, you can get involved with the projects that you use and help
the community to improve them. This is not as difcult as you assume it to be.
That is why, you always have the chance to get all the source code from the ofcial
JBoss SVN repository. With these sources, you will be able to build the binaries that
you can download from the jBPM ofcial page from scratch.
You can take advantage of this when you need to modify some or extend the base
code of the framework. This is not recommended for rst time users, modications
and extensions will need to be extremely justied.
This is just a quick way to do it. First of all, we need to get the framework sources
from the ofcial JBoss SVN repository server. We do that with the SVN client
(Tortoise SVN that we have downloaded and installed earlier). We just need to
check out the source code from our framework version.
The ofcial JBoss SVN repository can be found at http://anonsvn.jboss.org/
repos/jbpm/jbpm3.
You can see three directories in this repository: branches, tags, and trunk.
This material is copyright and is licensed for the sole use by ALESSANDRO CAROLLO on 18th December 2009
6393 south jamaica court, , englewood, , 80111
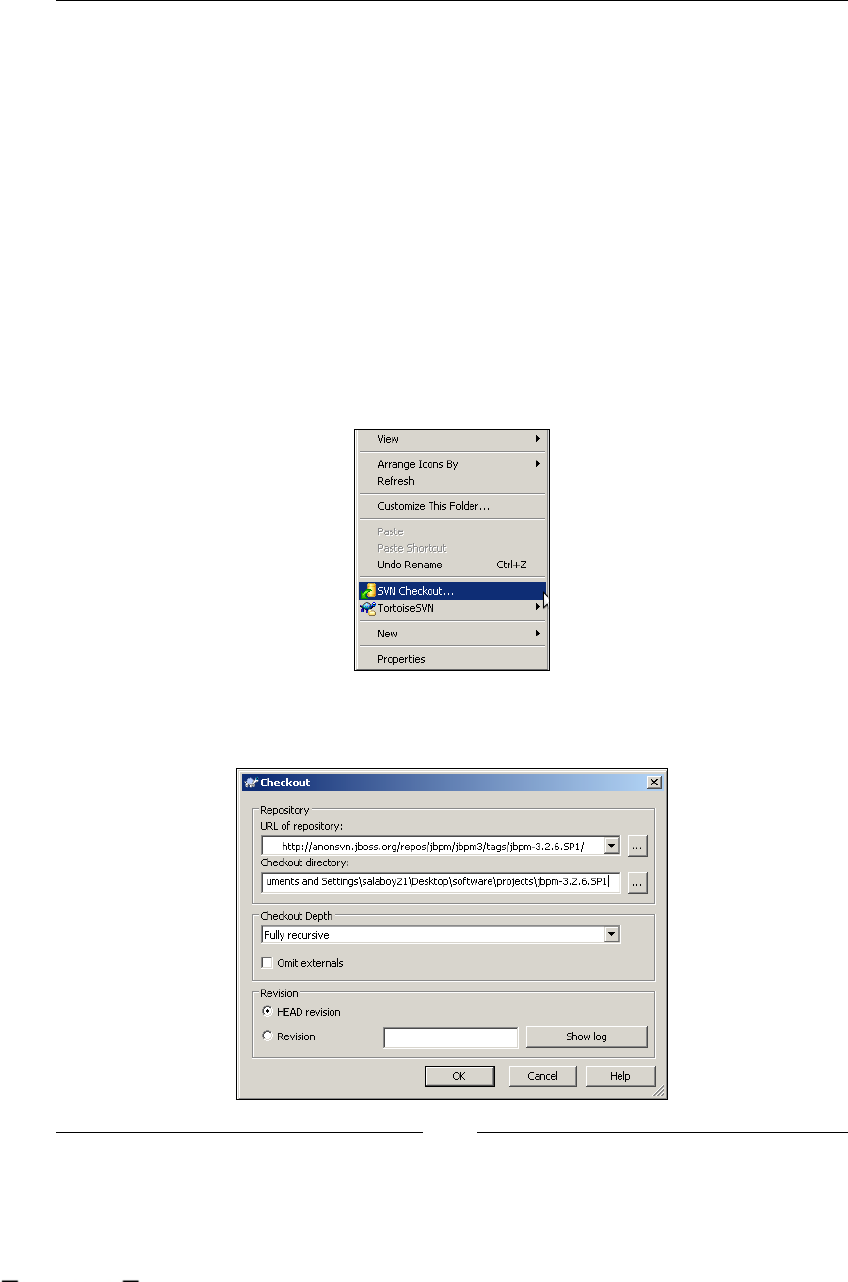
Setting Up Our Tools
[ 80 ]
In branches directory, you will nd different sub-directories that contain code for
testing new functionalities that will be added to future framework releases. Also,
branches are used to patch existing versions that are in the maintenance mode.
In tags directory, you will nd all the released versions from jBPM, to which you
will need to point, in order to perform the framework sources checkout. In this case,
you will need to check out the sources located at http://anonsvn.jboss.org/
repos/jbpm/jbpm3/tags/jbpm-3.2.6.SP1/.
These sources were used to build all the binaries of the 3.2.6.SP1 version that is
uploaded to the ofcial page.
Finally, in the trunk directory, you will nd all the code, which is used by the
community members that continuously add and improve the code of the framework.
In order to get the code from the ofcial repository, you only need to do a check-out
with your SVN client as shown in the following screenshot:
By right-clicking on every directory, you will see the Tortoise SVN options. You just
have to click on SVN Checkout. This will pop up a window like the following one:
This material is copyright and is licensed for the sole use by ALESSANDRO CAROLLO on 18th December 2009
6393 south jamaica court, , englewood, , 80111
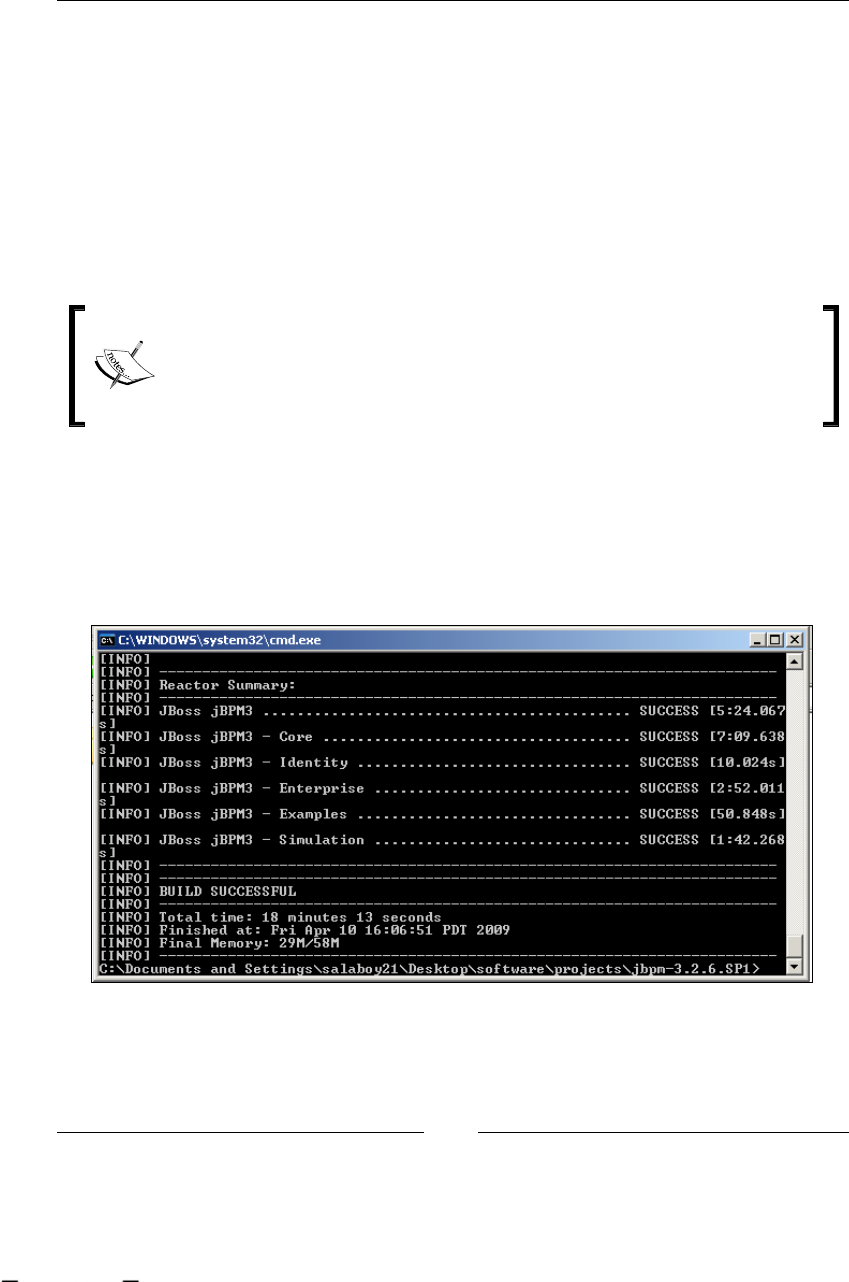
Chapter 3
[ 81 ]
You should set the repository URL to the JBoss Ofcial SVN repository and the
Checkout directory to where your working copy will be located. I created a new
directory inside software directory called projects. Here we will locate all our
projects from now on, because jBPM framework is just another project we will put in
there. When you click on OK, the check out of the source code will begin. When the
check out command nishes in order to get all the repository code, you will have all
the sources of a major Maven project in the directory that you specify.
Now you can build this project by running the following command from the console:
mvn clean install -Dmaven.test.skip
The -Dmaven.test.skip ag is only used here to make the build faster.
Supposing that if the code downloaded is a stable release, all the tests
in the project will be passed. But, probably, running all the tests for the
whole project could take a long time. You can try without this ag if
you want.
These Maven goals will build the framework by skipping all the tests and then
move/install the resulting jars to the local Maven repository. The local Maven
repository will contain all the compiled artifacts that you build. This will mean that
we will have a local directory in our machine that will contain all the jars that we
compile and all the jars needed by our applications (dependencies). The default
location of this repository is <UserHome>/.m2/respository/.
This material is copyright and is licensed for the sole use by ALESSANDRO CAROLLO on 18th December 2009
6393 south jamaica court, , englewood, , 80111
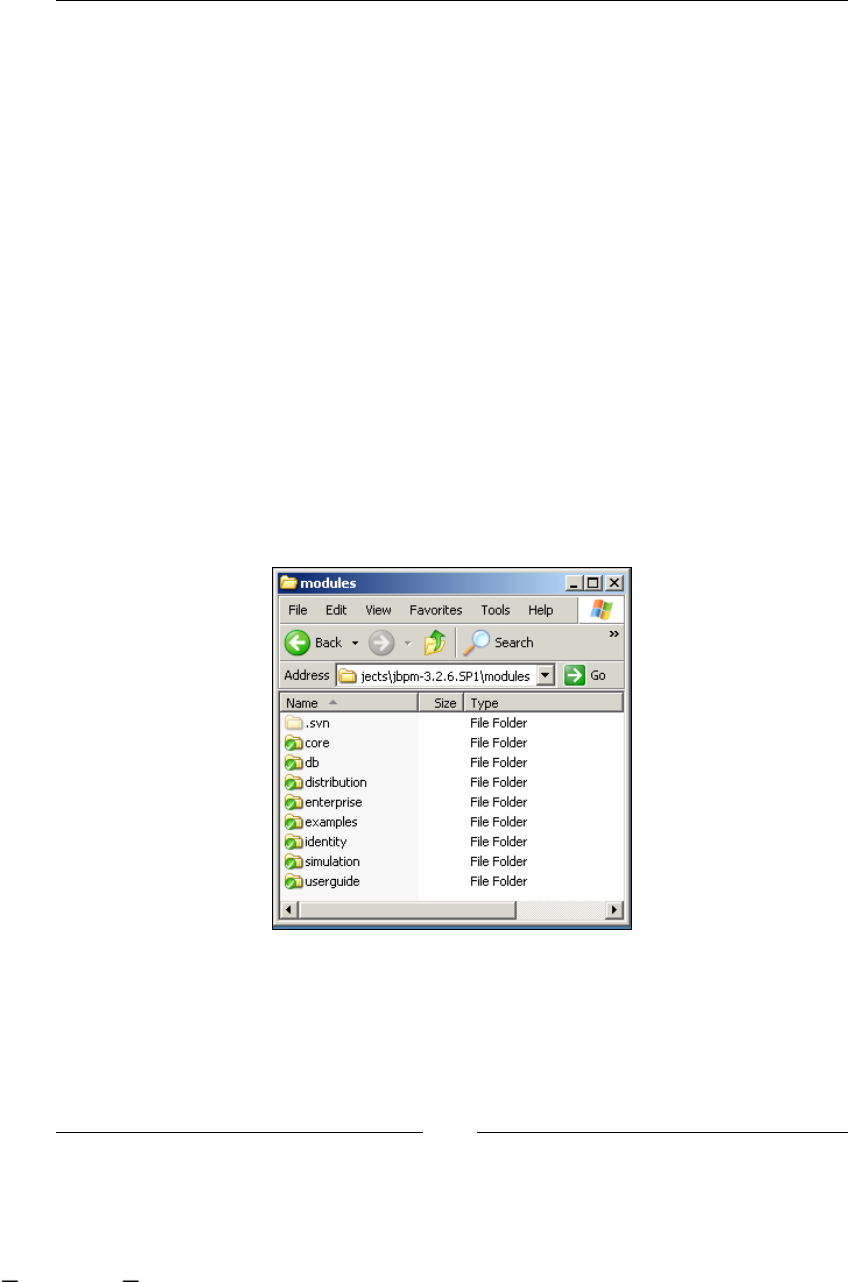
Setting Up Our Tools
[ 82 ]
jBPM structure
It is an important task to understand the jBPM framework structure. We will nd out
how the framework sources are divided by looking at similarities with the theoretical
background discussed in Chapter 2, jBPM for Developers.
Also, this section is very important for those programmers who want to be active
community developers, xing issues and adding new functionalities.
As we have already discussed, jBPM was built and managed with Maven. For this
reason, we will nd a le called pom.xml inside our working copy of the ofcial
JBoss SVN repository that represents the project as a whole. If we run Maven goals to
this project, all the framework will be built. As we have seen in the previous section,
all the project modules were built. Look at the previous screenshot that informs us
that, by default, the modules Core, Identity, Enterprise, Examples, and Simulation
are built when we run the clean install goals to the main project. With the install
goal too, the generated jar les are copied to our local Maven repository, so we can
use it in our applications by only referencing the local Maven repository.
So, the idea here is to see in detail what exactly these modules include. If you open
the modules directory that is located inside your working copy, you will see the
following sub-directories:
In the next few sections, we will talk about the most important modules that
developers need to know in order to feel comfortable with the framework. Take
this as a quick, deep introduction to becoming a JBoss jBPM community member.
This material is copyright and is licensed for the sole use by ALESSANDRO CAROLLO on 18th December 2009
6393 south jamaica court, , englewood, , 80111
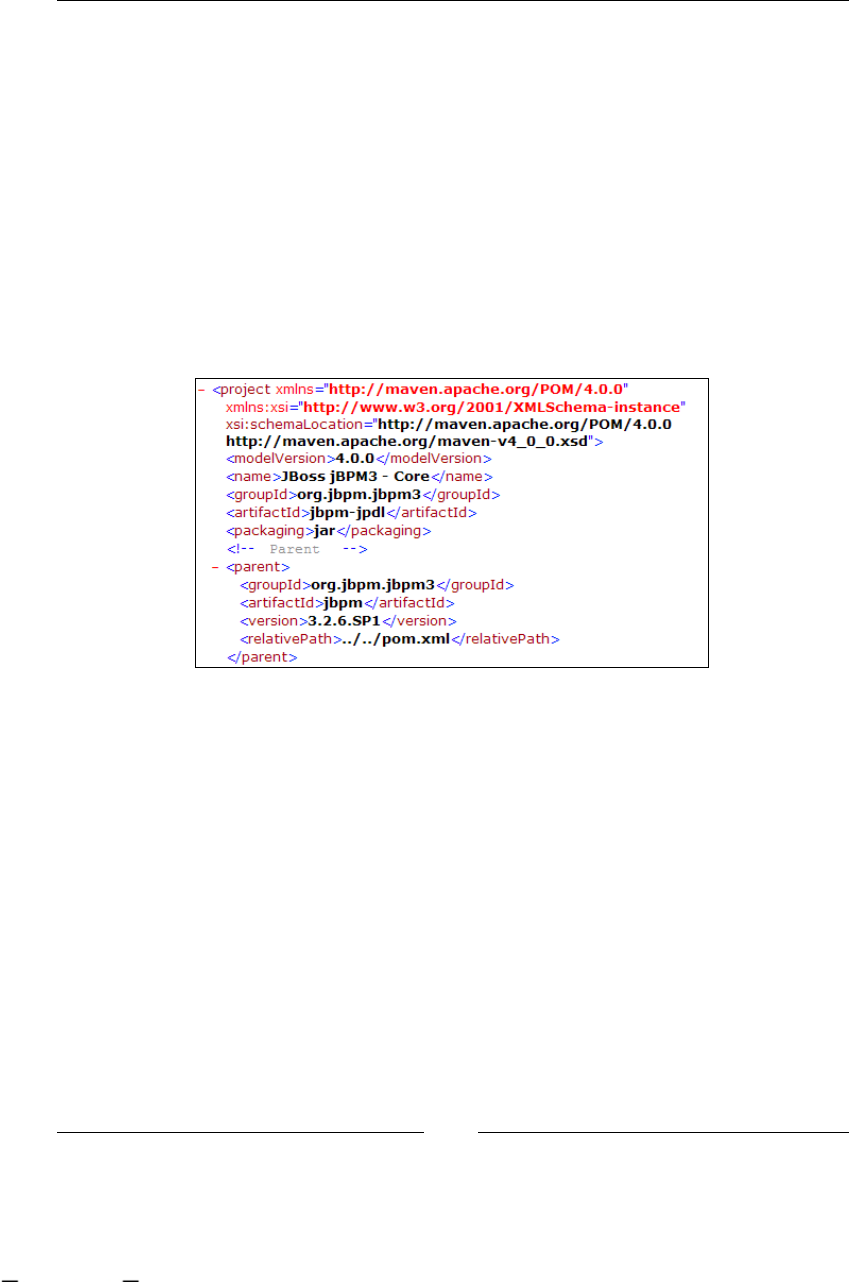
Chapter 3
[ 83 ]
Core module
The most important module of the jBPM framework is the core module. This module
contains all the framework functionality. Here we will nd the base classes that we
will use in our applications. If you open this directory, you will nd the pom.xml le
that describes this project. The important thing to notice from this le is that it gives
us the Maven ArtifactID name and the GroupID. We will use this information to
build our applications, because in our applications, we will need to specify the jBPM
dependency in order to use the framework classes.
The following image will show us only the rst section of the pom.xml le located
inside the modules/core/directory. This le will describe the project name,
the group id that it belongs to, and also the relationship with its parent
(the main project).
If you open this le, you will notice that all the dependencies that this project
(jar archive) needs, in order to be built, will be described in the next section. This is
also interesting when you want to know exactly which libraries the framework will
need to have in the classpath in order to run. You need to remember that Maven
will take care of all the transitory dependencies, meaning that in this project le, only
the rst order dependencies will be described. So, for example, in the dependencies
section of the pom.xml le, we will see the Hibernate dependency, but you won't see
all the artifacts needed to build and run Hibernate—Maven will take care of all these
second order dependencies.
This material is copyright and is licensed for the sole use by ALESSANDRO CAROLLO on 18th December 2009
6393 south jamaica court, , englewood, , 80111

Setting Up Our Tools
[ 84 ]
If we build only the Core module project by running the clean install goal
(mvn clean install -Dmaven.test.skip), we will get three new JAR archives in
the target directory. These archives will be:
jbpm-jpdl-3.2.6.SP1.jar: The core functionality of the framework—you
will need this JAR in all your applications that use jBPM directly. Remember,
if you are using Maven, you will need to add this artifact dependency to your
project and not this archive.
jbpm-jpdl-3.2.6.SP1-config.jar: Some XML congurations that the
framework needs. This conguration will be used if you need your process
to persist in some relational database.
jbpm-jpdl-3.2.6.SP1-sources.jar: This JAR will contain all the sources
that were used to build the main jar le. This can be helpful to debug our
application and see how the core classes interact with each other when our
processes are in the execution stage.
You will also nd a few directories that were used as temporary directories to build
these three JAR les.
DB module
This module is in charge of building the different database schemes to run jBPM
needed by the different vendors that support Hibernate. If you build this module
in the target directory of the project (generated with the clean install of
maven goals).
Distribution module
This is only a module created with specic goals to build and create the binary
installer, which can be downloaded from jBPM's ofcial page. If you want to get a
modied installer of this framework, you will need to build this module. But it is
rarely used by development teams.
Enterprise module
This module will contain extra features for high-availability environments, including
a command service to interact with the framework's APIs, an enterprise messages
solution for asynchronous execution, and enterprise-ready timers.
If we build this module, we will get three JAR les. The main one will be
jbpm-enterprise-3.2.6.SP1.jar, the source code and the conguration
les that these classes will need.
•
•
•
This material is copyright and is licensed for the sole use by ALESSANDRO CAROLLO on 18th December 2009
6393 south jamaica court, , englewood, , 80111
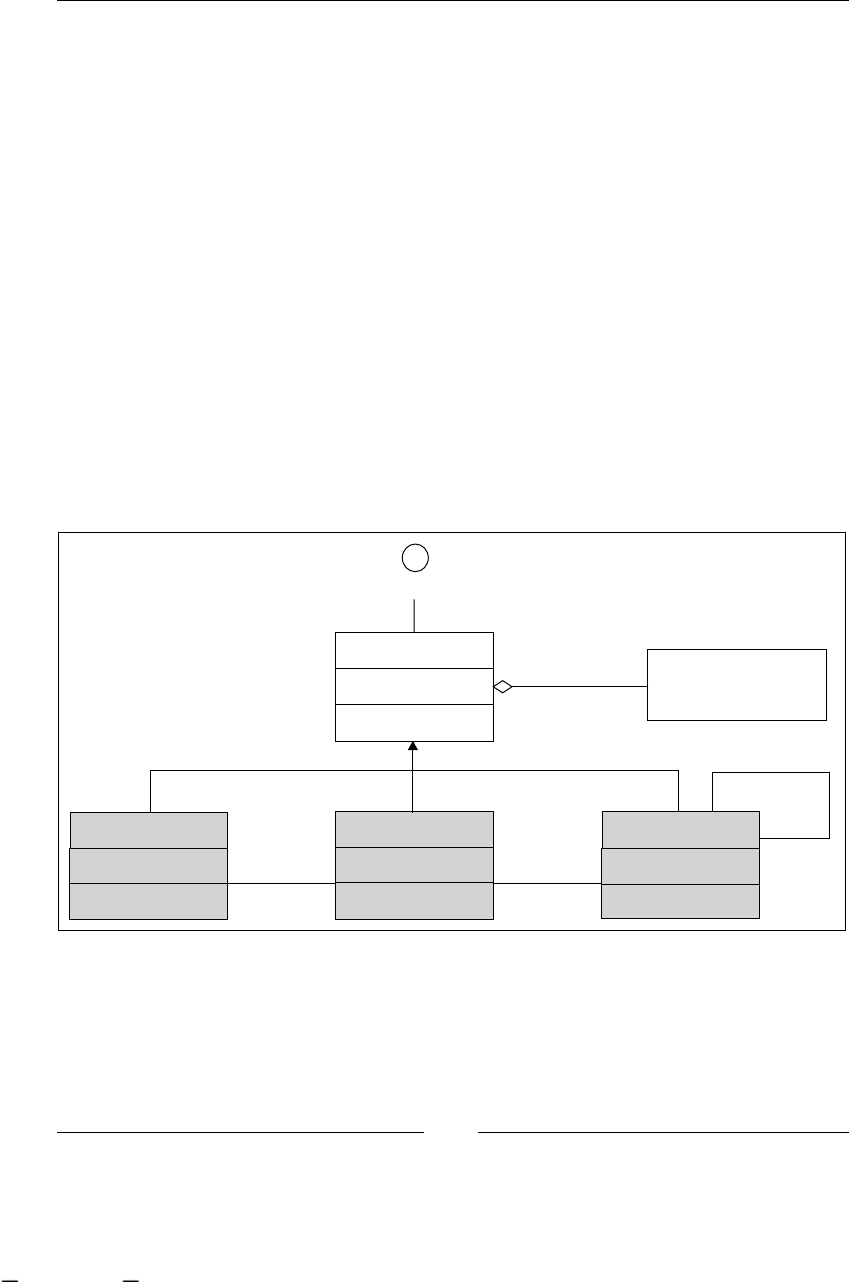
Chapter 3
[ 85 ]
A deep analysis about this topic will be done in Chapter 12, Going Enterprise.
Example module
This is a very interesting module, because it contains some basic examples about
how the framework could be used. If you open this module, you will nd different
packages with JUnit tests that show us how to use the framework APIs to achieve
some common situations. These tests are used only for a learning purpose and try to
introduce the most common classes that all developers will use. Feel free to play with
these tests, modify them, and try to understand what is going on there.
Identity module
This module contains a proof of concept model to use out of the box when we start
creating applications that handle human interactions. The basic idea here is to have a
simple model to represent how the process users are structured in our company. As
you can imagine, depending on the company structure, we need to be able to adapt
this model to our business needs. This is just a basic implementation that you will
probably replace for your own customized implementation.
Principal
+children
Entity
-name:String Permission
(from java::security)
+parent
User Membership
+user +group
Group
-groupType:String
+ permissions
* *
*
*
This material is copyright and is licensed for the sole use by ALESSANDRO CAROLLO on 18th December 2009
6393 south jamaica court, , englewood, , 80111

Setting Up Our Tools
[ 86 ]
Simulation module
This module includes some use cases for simulating our process executions. The idea
here is to know how to obtain reports that help us to improve our process executions,
measuring times, and costs for each execution.
User Guide module
This module will let you build the ofcial documentation from scratch. It is not
built when the main project is built, just to save us time. You can build all the
documentation in three formats—HTML le separated for chapters, one single
and long HTML le, or PDF.
Knowing this structure will help us to decide where to make changes and where to
look for a specic functionality inside the framework sources. Try to go deep inside
the src directory for each project to see how the sources are distributed for each
project in more detail.
Building real world applications
In this section, we are going to build two example applications—both similar in
content and functionalities, but built with different methodologies. The rst one will
be created using the Eclipse Plugin provided by the jBPM framework. This approach
will give us a quick structure that lets us create our rst application using jBPM.
On the other hand, in the second application that we will build, we will use Maven
to describe and manage our project, simulating a more realistic situation where
complex applications could be built by mixing different frameworks.
Eclipse Plugin Project/GPD Introduction
In this section, we will build an example application that uses jBPM using the Eclipse
plugin, which provides us with the jBPM framework. The idea here is to look at how
these kinds of projects are created and what the structure proposed by the plugin.
The outcome of this section will be a Process Archive (PAR) le generated by the
GPD plugin, which contains a process denition and all the technical details needed
to run in an execution environment.
To achieve this, I have set up my workspace in the directory projects inside the
software directory. And by having the jBPM plugin installed, you will be able
to create new jBPM projects. You can do this by going to File | New | Other
and choosing the New type of project called Process Project.
This material is copyright and is licensed for the sole use by ALESSANDRO CAROLLO on 18th December 2009
6393 south jamaica court, , englewood, , 80111
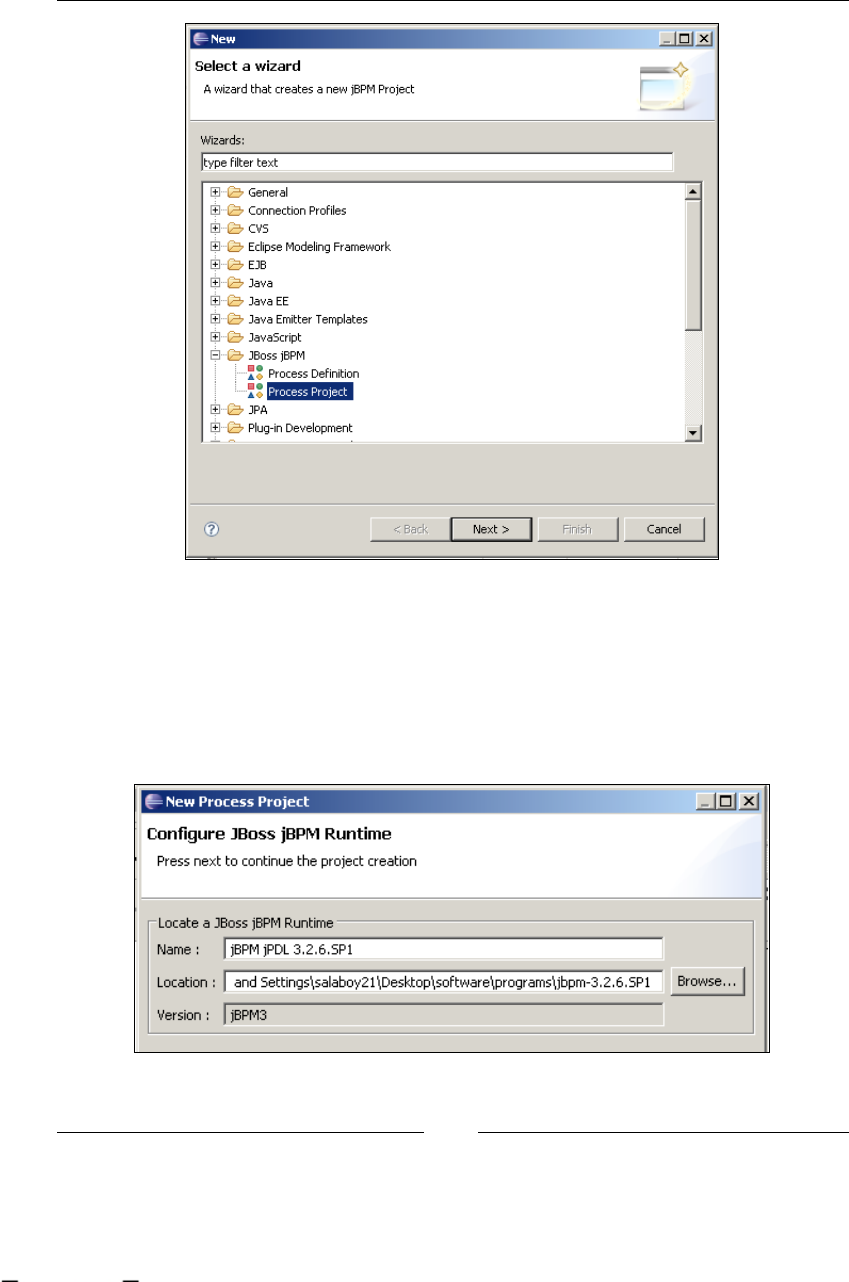
Chapter 3
[ 87 ]
Then you must click on the Next button to assign a new name to this project.
I chose FirstProcess for the project name (I know, a very original one!) and
click on Next again.
The rst time that you create some of these projects, Eclipse will ask you to choose
the jBPM Runtime that you want. This means that you can have different runtimes
(different versions of jBPM to use with this plugin) installed.
This material is copyright and is licensed for the sole use by ALESSANDRO CAROLLO on 18th December 2009
6393 south jamaica court, , englewood, , 80111
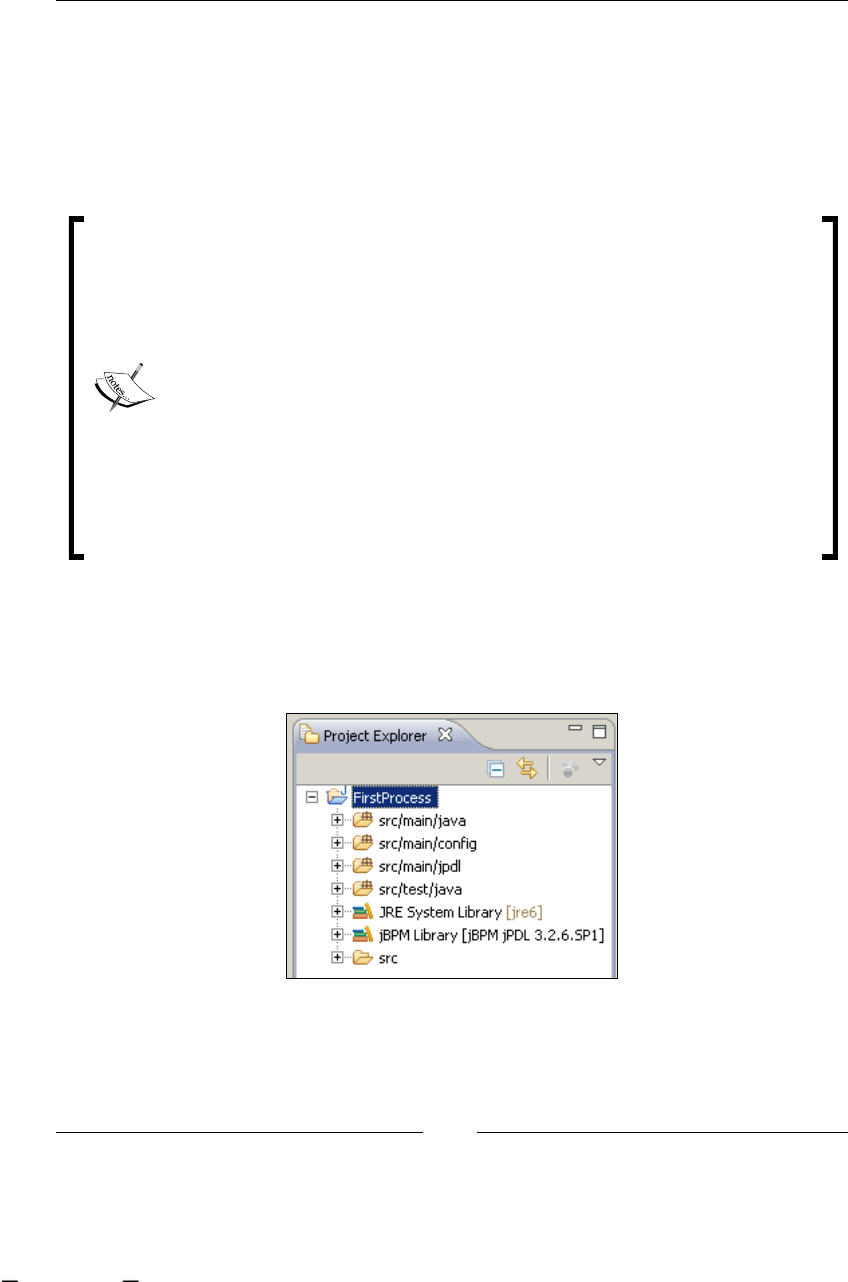
Setting Up Our Tools
[ 88 ]
To congure the correct runtime, you will need to locate the directory that the
installer creates—it's called jbpm-3.2.6.SP1—then assign a name to this runtime.
A common practice here is to put the name with the correct version, this will help
us to identify the runtime with which we are conguring our process projects.
Then you should click on the Finish button at the bottom of the window. This will
generate our rst process project called FirstProcess.
If you have problems creating a new jBPM project, this can be noticed
because you'll have a red cross placed in your project name in the
Project Explorer window. You could see the current problems in the
Problems window (Windows | Show View | Problems). If the problem
is that a JAR le called activation.jar is missing, you should do
a workaround to x this situation. To x this, you should go to your
jBPM installation directory—in this case, software/programs/jbpm-
3.2.6.SP1 on my desktop, and then go to src/resources/gpd and
open a le called version.info.xml and remove the line that makes
the reference to the le called activation.jar. Then you should restart
the IDE and the problem will disappear.
If you create the process project and the sample process denition is
not created (under src/main/jpdl), you could use the project created
inside this chapter's code directory called FirstProcess.
GPD Project structure
Once you have created the project, we could take a look at the current structure
proposed by the plugin.
This material is copyright and is licensed for the sole use by ALESSANDRO CAROLLO on 18th December 2009
6393 south jamaica court, , englewood, , 80111

Chapter 3
[ 89 ]
This image show us the structure proposed by the GPD plugin. Four source
directories will be used to contain different types of resources that our project will
use the rst one src/main/java will contain all the Java sources that our process
uses in order to execute custom Java logic. Here we will put all the classes that
will be used to achieve custom behaviors at runtime. When you create a process
project, a sample process and some classes are generated. If you take a look inside
this directory, you will nd a class called MessageActionHandler.java. This class
represents a technical detail that the process denition will use in order to execute
custom code when the process is being executed.
The src/main/config directory will contain all the resources that will be needed to
congure the framework.
In the src/main/jpdl directory, you will nd all the dened processes. When you
create a sample process with your project, a process called simple is created. If you
create a process and the process sample is not created, just open the project called
First Process inside the code directory of this chapter.
And in src/test/java, you will nd all the tests created to ensure that our
processes behave in the right way when they get executed. When the sample
process is created, a test for this process is also created. It will give us a quick
preview of the APIs that we will use to run our processes.
For the sample process, a test called SimpleProcessTest is created. This test creates
a process execution and runs it to test whether the process will behave in the way in
which it is supposed to work. Be careful if you modify the process diagram, because
this test will fail. Feel free to play with the diagram and with this test to see what
happens. Here we will see a quick introduction about what this test does.
SimpleProcessTest
This test is automatically created when you create a jBPM process project with a
sample process. If you open this class located in the src/test/java directory of the
project, you will notice that the behavior of the test is described with comments in
the code. Here we will try to see step by step what the test performs and how the
test uses the jBPM APIs to interact with the process dened using the Graphical
Process Editor.
This test class, like every JUnit tests class will extend the class TestCase (for JUNIT
3.x). It then denes each test inside methods that start with the prex test*. In this
case, the test is called testSimpleProcess(). Feel free to add your own test in other
methods that use the prex test* in the name of the method.
This material is copyright and is licensed for the sole use by ALESSANDRO CAROLLO on 18th December 2009
6393 south jamaica court, , englewood, , 80111

Setting Up Our Tools
[ 90 ]
If we see the testSimpleProcess() method, we will see that the rst line of code
will create an object called processDefinition of the ProcessDefinition type
using the processdefinition.xml le.
ProcessDefinition processDefinition = ProcessDefinition.
parseXmlResource("simple/processdefinition.xml");
At this point, we will have our process denition represented as an object. In other
words, the same structure that was represented in the XML le, is now represented
in the Java Object.
Using the APIs provided by JUnit, we will check that the ProcessDefinition object
is correctly created.
assertNotNull("Definition should not be null", processDefinition);
Then we need to create a process execution that will run based on the process
denition object. In the jBPM language, this concept of execution is represented with
the word instance. So, we must create a new ProcessInstance object that will
represent one execution of our dened process.
ProcessInstance instance = new ProcessInstance(processDefinition);
Then the only thing we need to do is interact with the process and tell the process
instance to jump from one node to the next using the concept of a signal, which
represents an external event. It tells the process that it needs to continue the
execution to the next node.
instance.signal();
If you take a look at all the assert methods used in the code, they only conrm that
the process is in the node in which it is supposed to be.
Another thing that this test checks is that the Actions attached to the process change
the value of a process variable. Try to gure out what is happening with that variable
and where the process denition changes this variable's value.
The following assert can give you a small clue about it:
assertEquals("Message variable contains message",
instance.getContextInstance().
getVariable("message"), "Going to the first state!");
This material is copyright and is licensed for the sole use by ALESSANDRO CAROLLO on 18th December 2009
6393 south jamaica court, , englewood, , 80111
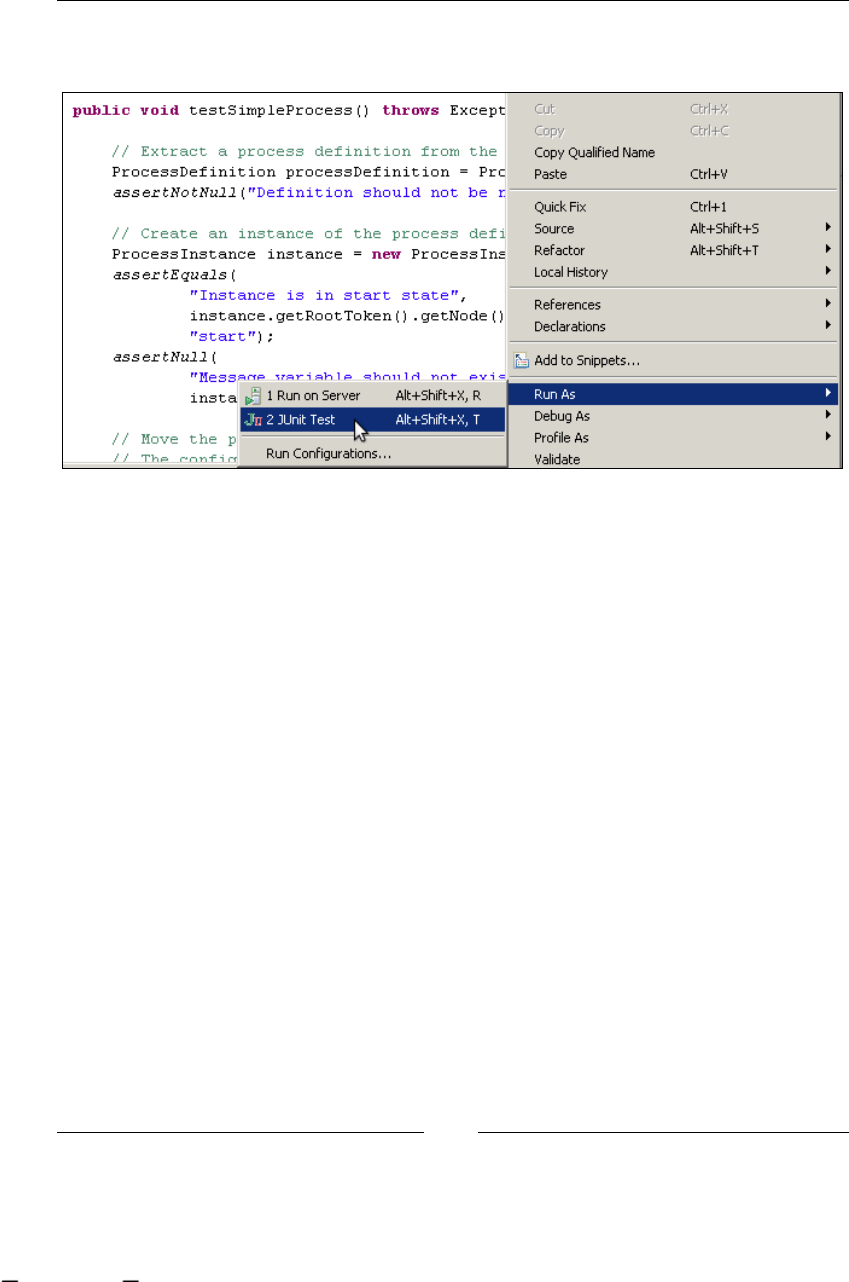
Chapter 3
[ 91 ]
To run this test, you just need to right click on the source of this class and go to Run
As, and then choose JUnit Test.
You should check whether the test succeeded in the JUnit panel (a green light will be
shown if all goes well).
Graphical Process Editor
In this section, we will analyze the most used GPD windows, giving a brief
introduction to all the functionality that this plugin provides us. We already see
the project structure and the wizard to create new jBPM projects.
The most frequently used window that GPD proposes to us is the Graphical Process
Editor, which lets us draw our processes in a very intuitive way.
This editor contains four tabs that gives us different functionalities for different
users/roles.
This material is copyright and is licensed for the sole use by ALESSANDRO CAROLLO on 18th December 2009
6393 south jamaica court, , englewood, , 80111
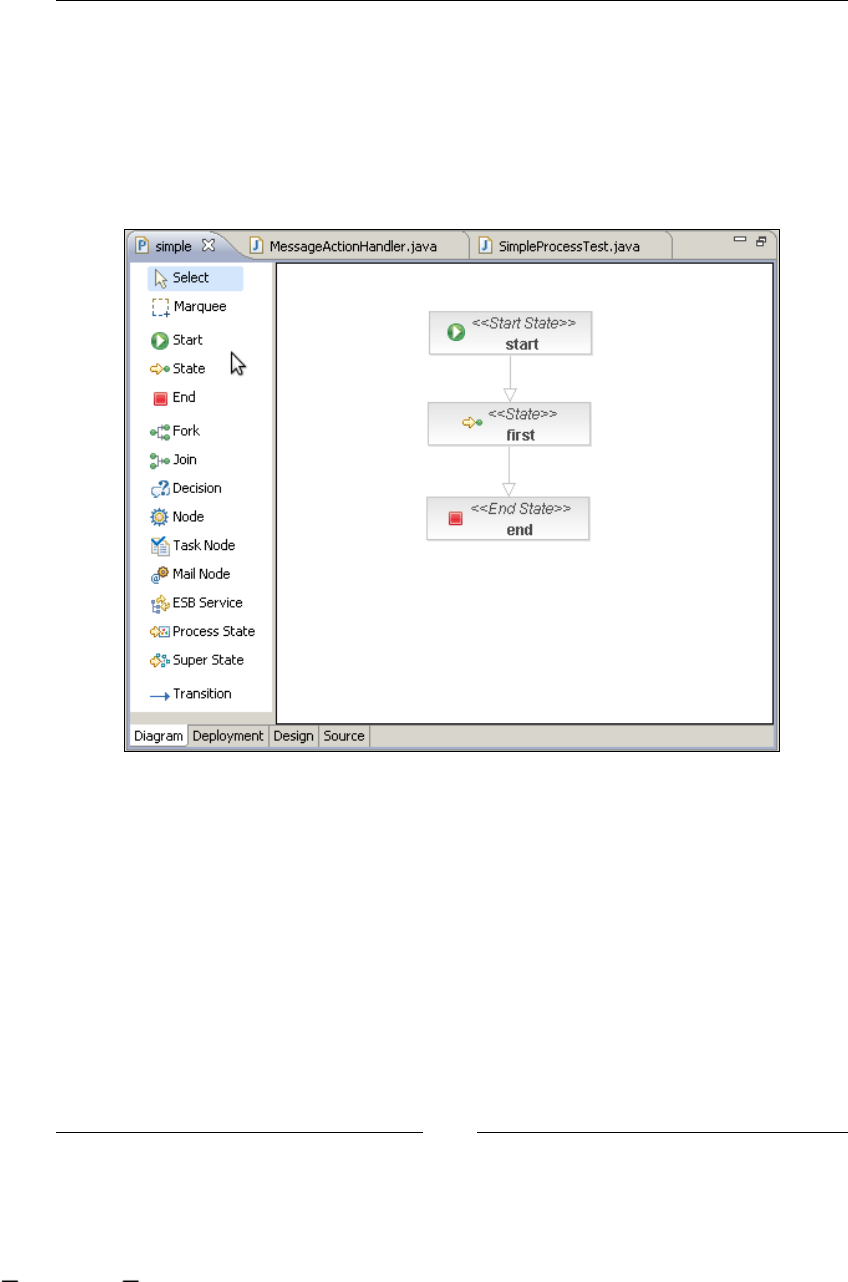
Setting Up Our Tools
[ 92 ]
The Diagram tab
This tab will let us draw our business process. Basically, we only need to
drag-and-drop the basic nodes proposed in the palette and then join them with
transitions. This is a very useful tool for business analysts who want to express
business processes in a very intuitive way with help from a developer. This will
improve the way that business analysts communicate with developers when they
need to modify or create a new business process.
The Deployment tab
This tab is exclusively for developers who know and understand the environment
in which the process will be deployed. This tab will help us to create and deploy
process archives. These special archives will contain all the information and technical
details that the process will need in order to run. In order to get our process archive
ready for deployment, rst we need to select the resources and the Java classes that
will be included in this process archive, and then check the Save Process Archive
locally option. Now, we provide a correct path to store it and then click on Save
Without Deploying. Feel free to inspect the process archive generated—it's just a
ZIP le with the extension changed to .par with all the classes compiled and ready
to run.
This material is copyright and is licensed for the sole use by ALESSANDRO CAROLLO on 18th December 2009
6393 south jamaica court, , englewood, , 80111
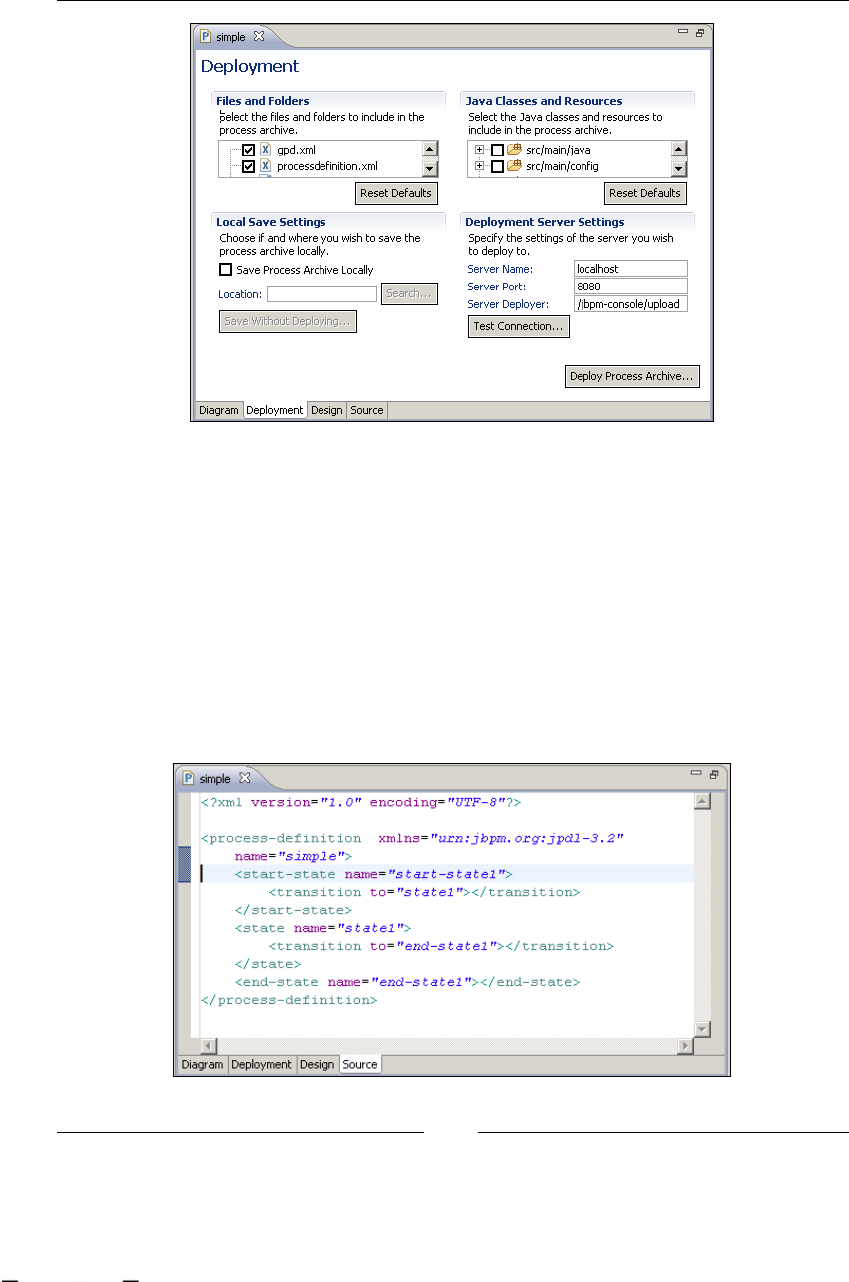
Chapter 3
[ 93 ]
The Source tab
This tab will show us all the jPDL XML generated by the Diagram tab and will
keep all the changes that can be made in both tabs in sync. Try not to change the
graph structure from this view, because sometimes, you could break the parser
that is checking the changes in this view, all the time, to sync it with the diagram
view. In the next chapter, we will analyze each type of node, so you will probably
feel comfortable writing jPDL tags without using the GPD diagram view. For that
situation, when you know what you are doing, I don't recommend the use of the
plugin—just create a new XML le and edit it without opening the le as a process.
This will allow us to be IDE agnostic and also know exactly what we are doing, and
not depend on any tool to know what is happening with our processes.
This material is copyright and is licensed for the sole use by ALESSANDRO CAROLLO on 18th December 2009
6393 south jamaica court, , englewood, , 80111
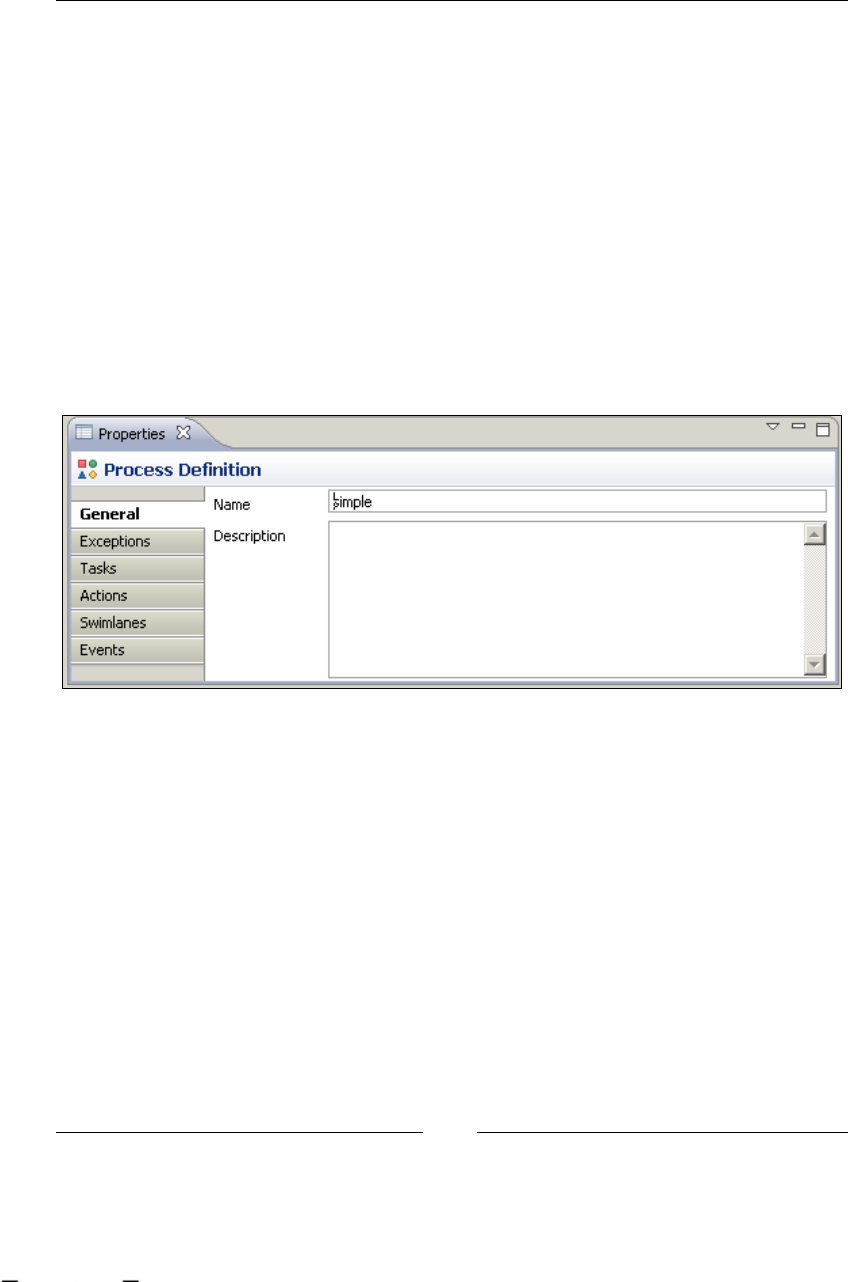
Setting Up Our Tools
[ 94 ]
Properties panel panel
This panel is used in conjunction with the Graphical Process Editor window, as it gives
us all the information about all the elements displayed in our processes denitions. If
you can't see this panel, you should go to Window | Show View | Properties.
This panel will help you to add extra information to your diagrammed process and
customize each element inside it.
This panel will show different sections and information for each element typed
inside our process. If you look at the following screenshot, you will see that it
represents all the properties allowed to be set in the process denition element. In
other words, these properties are applied to the process denition and not to any
particular element dened inside the process. The selected element is shown at the
top of the panel with the element type and icon. In this case, the Process Denition
element is selected.
To see the global process denition information, you should click on the white
background of the GPD designer window that has no elements selected.
Also, you should notice the additional tabs for each element. In this case, we could
add Global Exceptions handlers, Global Tasks denitions, Global Actions, Swimlanes
and Global Events to our process. All these different technical details will be
discussed in the coming chapters.
If you select another element of the process, you will notice that this panel will
change and show another type of information to be lled in and other tabs for
selection, depending on the selected element type. The following image shows a
selected state node in our process. As we have discussed earlier, it is important
to notice that the tabs allowed for the state node will let us add another type of
information and all of this information will be related only with the state node.
This material is copyright and is licensed for the sole use by ALESSANDRO CAROLLO on 18th December 2009
6393 south jamaica court, , englewood, , 80111
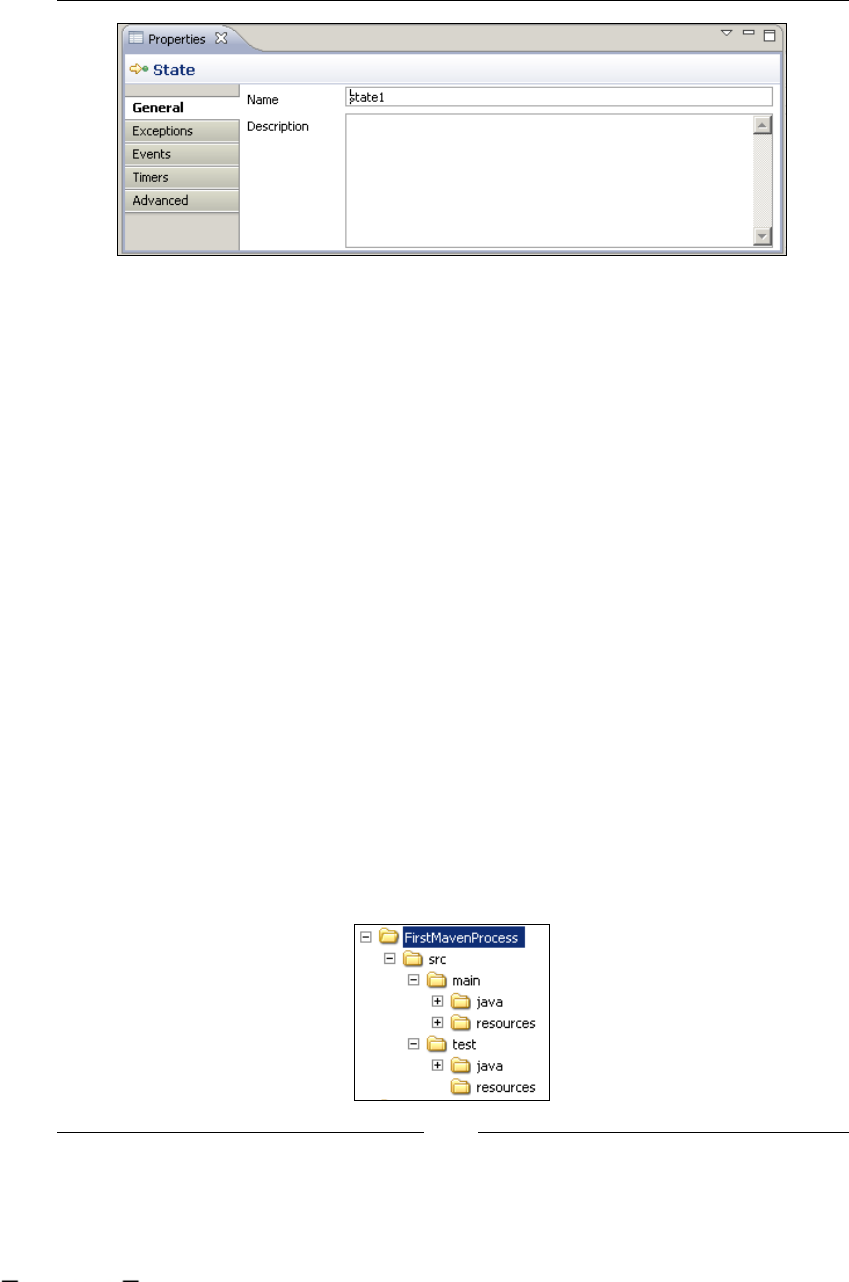
Chapter 3
[ 95 ]
Outcome
As we mentioned before, the outcome of this section is only a PAR generated with
the Deployment tab of the GPD Designer window. Feel free to look at and modify
the sample process provided by the plugin and regenerate the PAR to see what
has changed.
Maven project
The idea of this section is to build an application using Maven to describe the project
structure. Meaning that we will need to write the pom.xml le from scratch. For this
example, we will use the same code that tested our process dened with the GPD
plugin. In this case, to create a console application that uses the jBPM API.
The outcome of this section will be a template for a project that could be used to
create any project that you want, which will contain the jBPM library to manage
and use business processes.
The only thing that you will need for this is a text editor and a console to create the
directory structure. The directory structure is needed by Maven to know where our
project sources are located in order to build them.
If you prefer, you could also use the Eclipse Q4E Maven plugin and Maven
archetypes to create this structure. In both situations, the plugin or by hand, we
need to have the following structure in order to have a standard project structure:
This material is copyright and is licensed for the sole use by ALESSANDRO CAROLLO on 18th December 2009
6393 south jamaica court, , englewood, , 80111

Setting Up Our Tools
[ 96 ]
Inside both src/main/java and src/test/java, you could start adding Java classes
structured in packages like you normally do in all of your projects.
The most common goals that you will use to build and manage your projects will be:
clean: This goal will erase all the already compiled code located in the
target directory.
package: It will build and package our project following the declared
packaging structure in the pom.xml le. The resulting jar le could be
located in the target directory if the build succeeds. If the compilation
of just one class can't be done, all the goals will fail.
test: This goal will run all the tests that are inside our project (located in the
src/main/test directory). If just one of these test fails, all the test goals fail.
If this goal is called from another goal, for example the install goal, when
just one test fails, the install goal will also fail.
install: This will run the package goal followed by the test goal, and if
both succeed, the outcome located in the target directory will be copied to
the local Maven 2 repository.
It is very helpful to know that you can chain these goals together in order to run
them together, for example mvn clean install. This will clean your target
directory and then package and test the compiled code. If all these goals succeed,
the outcome will be copied to the local Maven2 repository.
Sometimes, in the development stage, you know that some tests are failing, but want
to compile and install your project for testing. In these situations, you could use the
following ag to skip the tests in the install goal: mvn clean install -Dmaven.
test.skip.
The main points to notice in the pom.xml le will be the project description with the
artifact ID, the group ID properties, and of course the packaging tag with the jar
value that species the outcome when we build our project.
With the Q4E plugin from Maven 2 in Eclipse, we could create this project by
following the next few steps described further in the section.
If you have installed the Q4E plugin in your Eclipse IDE, you should go to
the New Project wizard and then choose Maven 2 Project | Maven 2 Project
Creation Wizard, then click on Next and enter a new name for the project. I chose
FirstMavenProcess, because it is the name of the root directory shown in the
previous image. Inside this directory, all the standard directory structure needed by
Maven will be created. Once you enter the name and click on Next, the following
screen will appear:
•
•
•
•
This material is copyright and is licensed for the sole use by ALESSANDRO CAROLLO on 18th December 2009
6393 south jamaica court, , englewood, , 80111
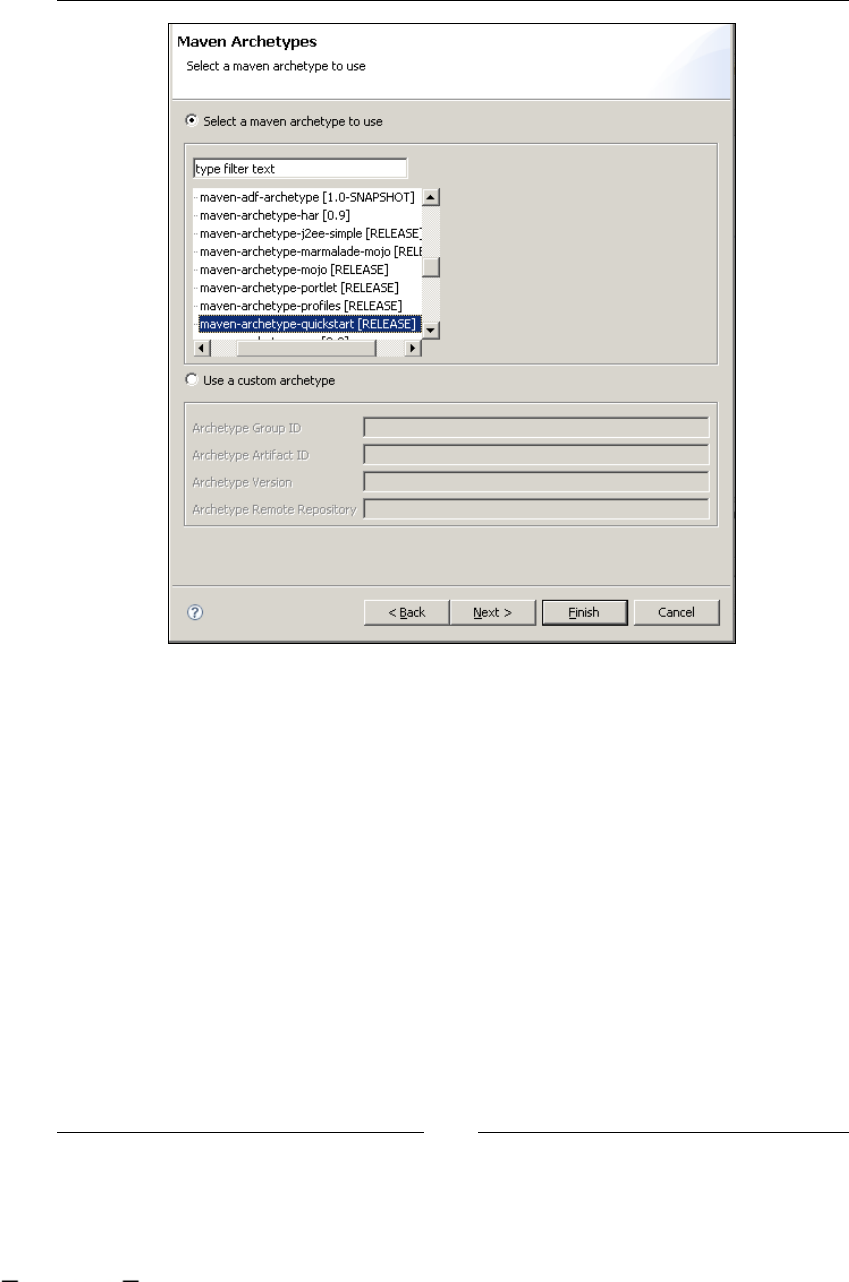
Chapter 3
[ 97 ]
In this screen, we will choose the Maven Archetype that we want for our project.
These archetypes specify what kind of structure Maven will use to create our
project. This maven-archetype-quickstart represents the most basic structure
for a JAR le.
If you browse the list, you will also nd the archetype called maven-archetype-
webapp that is used for creating the standard structure for web-based applications.
At this point, you can click on Finish and the corresponding project structure, and
the pom.xml le will be created.
This material is copyright and is licensed for the sole use by ALESSANDRO CAROLLO on 18th December 2009
6393 south jamaica court, , englewood, , 80111
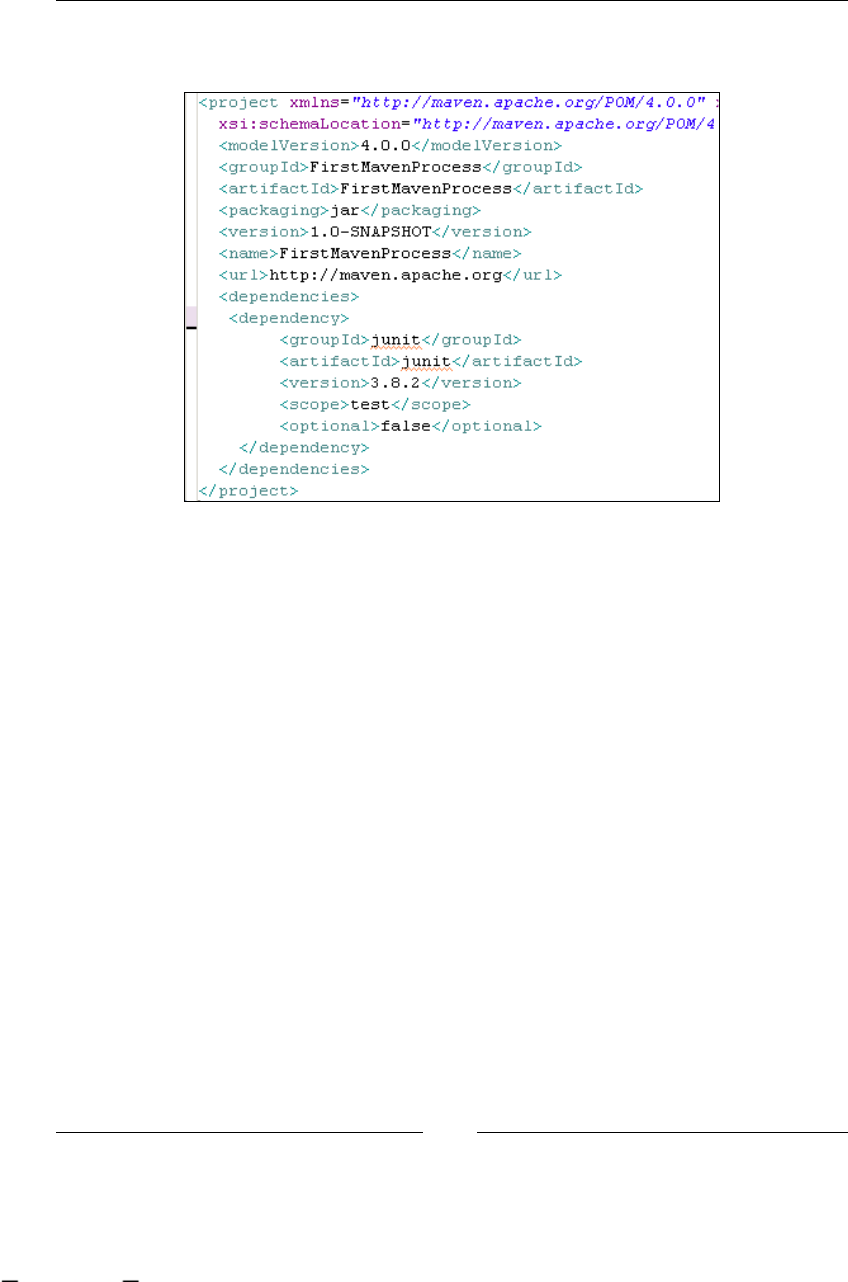
Setting Up Our Tools
[ 98 ]
If we create this le manually, or using the Q4E plugin, it should look like the
following image:
Now, for telling Maven that this project will use jBPM, we only need to add the
reference to the jBPM artifact in the dependency section:
<dependency>
<groupId>org.jbpm.jbpm3</groupId>
<artifactId>jbpm-jpdl</artifactId>
<version>3.2.6.SP1</version>
<optional>false</optional>
</dependency>
This will ensure that Maven takes care of the jBPM artifact and all of their required
dependencies.
You can now open the project called FirstMavenProcess located in the chapter03
code directory. However, because Eclipse needs some special les to recognize that
this directory is a Maven project, you will need to open a console, go to the directory
called FirstMavenProcess, check the pom.xml le that is inside the directory, and
then run the mvn eclipse:eclipse maven goal, which will generate all the Eclipse
needed les (project.xml and other les).
Then you will be able to open the project inside Eclipse. Take a look at the added
classes and the App.java class that contains a similar code for the tests generated by
the GPD plugin.
This material is copyright and is licensed for the sole use by ALESSANDRO CAROLLO on 18th December 2009
6393 south jamaica court, , englewood, , 80111

Chapter 3
[ 99 ]
The last thing that you need to understand here is how to package your project
source code into a binary JAR le for running and distributing your application.
You can do that by running the mvn package goal from the console—this will
generate a JAR le called FirstMavenProcess-1.0-SNAPSHOT.jar.
If you run the App.java class (with Run As... | Java Application), you will see the
following output on the console:
Process Instance Created
We are in the 'start' Node
We Signal the process instance to continue to the next Node
At this point the variable message value is = Going to the first state!
Now we are in the 'first' Node
We Signal the process instance to continue to the next Node
Now we are in the 'end' Node ending the process
Now the variable message value is = About to finish!
If you see some warnings before that output, don't worry about them.
Homework
For this chapter, there will be two activities for homework. The rst one will be to
create your rst project with the Eclipse IDE GPD plugin and modifying the simple
process that it includes. Also, try to play with the sample test created, in order to
modify the process diagram and also pass the test. You should also explore all the
features of the plugin, learning how to use it. Don't expect discussion about everything
here. Feel free to test the plugin and give your feedback in the user forums.
The second part of the homework will be to create a web application (war archive)
that includes jBPM with Maven, and change the output from the console to a
web browser. You could use any web framework you want, this will be useful
to get involved with Maven and to see how you can create simple and complex
applications with it. Follow the same steps used, to create the simple JAR application,
but now you should use the war packaging type. You can achieve this by using the
maven-archetype-webapp to build your project from the Q4E Maven plugin.
I didn't give the project result for this homework, because the most difcult part
here is the investigation and getting our hands dirty with Maven and jBPM. Try to
spend at least a couple of hours playing with the project description, Maven goals
(clean, package, install, and so on), and the IDE in order to get all the details
that have been omitted here.
This material is copyright and is licensed for the sole use by ALESSANDRO CAROLLO on 18th December 2009
6393 south jamaica court, , englewood, , 80111

Setting Up Our Tools
[ 100 ]
Summary
In this chapter, we've learnt about all the tooling that we will use everyday in a
jBPM project implementation. At the end of this chapter, we saw how to create two
basic applications that include and use the jBPM framework, just to see how all
the pieces t together. With the use of Maven, we gained some important features
including dependency management, the use of standard project structures, and IDE
independence.
Also, the Graphic Process Designer was introduced. This jBPM plugin for the
Eclipse IDE will let us draw our processes in a very intuitive way. Just dragging and
dropping our process activities and then joining them with connections will result
in our process denitions. This plugin also allows us to write all the technical details
that our process will need in order to run in a runtime environment.
In the next chapter, we will start to understand in deep the jPDL language that will
let us know exactly how our processes must be dened and implemented. This will
be very important, because we will be in charge of implementing and knowing in
more detail how all of our processes and the framework will behave in the runtime
environment. Probably, we will also guide the learning process of our business
analysts to enable them to understand this language in order to create more
accurate process denitions.
This material is copyright and is licensed for the sole use by ALESSANDRO CAROLLO on 18th December 2009
6393 south jamaica court, , englewood, , 80111

jPDL Language
At the end of this chapter, you will be able to use, with a deep understanding,
the basic nodes proposed by the jPDL language. These basic nodes will be fully
explained in order to take advantage of the possibilities and exibility that the
language provides.
This chapter will be focused on showing us all the technical details about basic
process denitions allowing us to know how we could correctly model/diagram
and build/run processes.
During this chapter, the following topics will be covered:
jPDL introduction
Process denition analysis
Base node analysis
jPDL introduction
As we have seen in Chapter 3, Setting Up our Tools, Graph Process Designer (GPD)
gives us the power to draw our business processes by dragging and dropping nodes.
This is a very useful and quick way to get our processes dened and validated by
our business analysts and also by our stakeholders.
But if you start modeling a process without understanding what exactly each node
in the palette means, and how these nodes will behave in the execution stage, then
when you want to run the modeled process, you will need to modify it to reect
desirable behavior.
•
•
•
This material is copyright and is licensed for the sole use by ALESSANDRO CAROLLO on 18th December 2009
6393 south jamaica court, , englewood, , 80111

jPDL Language
[ 102 ]
In this section, we will analyze each node type and discover how the graph
represented in GPD is translated into jPDL XML syntax. This XML syntax will
describe our formal language, which is exible enough to represent and execute
our business processes.
On one hand we will have the graphical representation that lets our business
analysts see how our processes look like at the denition stage and, on the other
hand, we will have the same process represented in jPDL XML syntax that allows
us (developers) to add all the technical information that the process needs in order
to run in a specic runtime environment.
It will be our responsibility to understand how the processes will be expressed in
this language and to understand how this language works internally, in order to
lead correct implementations. This will also allow us to extend the language if that
is required. This is because we will be able to decide whether we need a completely
new one based on the current implemented behaviors.
This chapter is aimed at developers who will be in charge of the implementation of a
project that uses jBPM to manage the business processes for a company. If you don't
have this knowledge, you will probably have to make a lot of unnecessary changes
in your model and you will not get the desirable behavior in the execution stage,
causing a lot of confusion and frustration.
This deep analysis will help you to understand the code behind your processes and
how this code will behave to fulll your requirements.
If you analyze the process created in Chapter 3, Setting Up Our Tools, you
will see that the graphical representation of the process is composed of two XML
les. The main one is called processdefinition.xml and contains the jPDL
denition of our process. jPDL is expressed in XML syntax—for this reason, the
processdefinition.xml le needs to follow this syntax for dening correctly
our process graph.
In the next section, we will start analyzing how this le must be composed for it
to be a valid jPDL process denition. Once again, we need to understand how the
framework works and to know exactly what we are doing.
Another XML le is also needed by GPD to graph our processes, this le is called
GPD.xml and it only contains the positions of all the elements of our process
(graph geometry).
With this separation of responsibility (graph elements' positions and process graph
denition), we gain a loosely coupled design and two very readable artifacts.
This material is copyright and is licensed for the sole use by ALESSANDRO CAROLLO on 18th December 2009
6393 south jamaica court, , englewood, , 80111
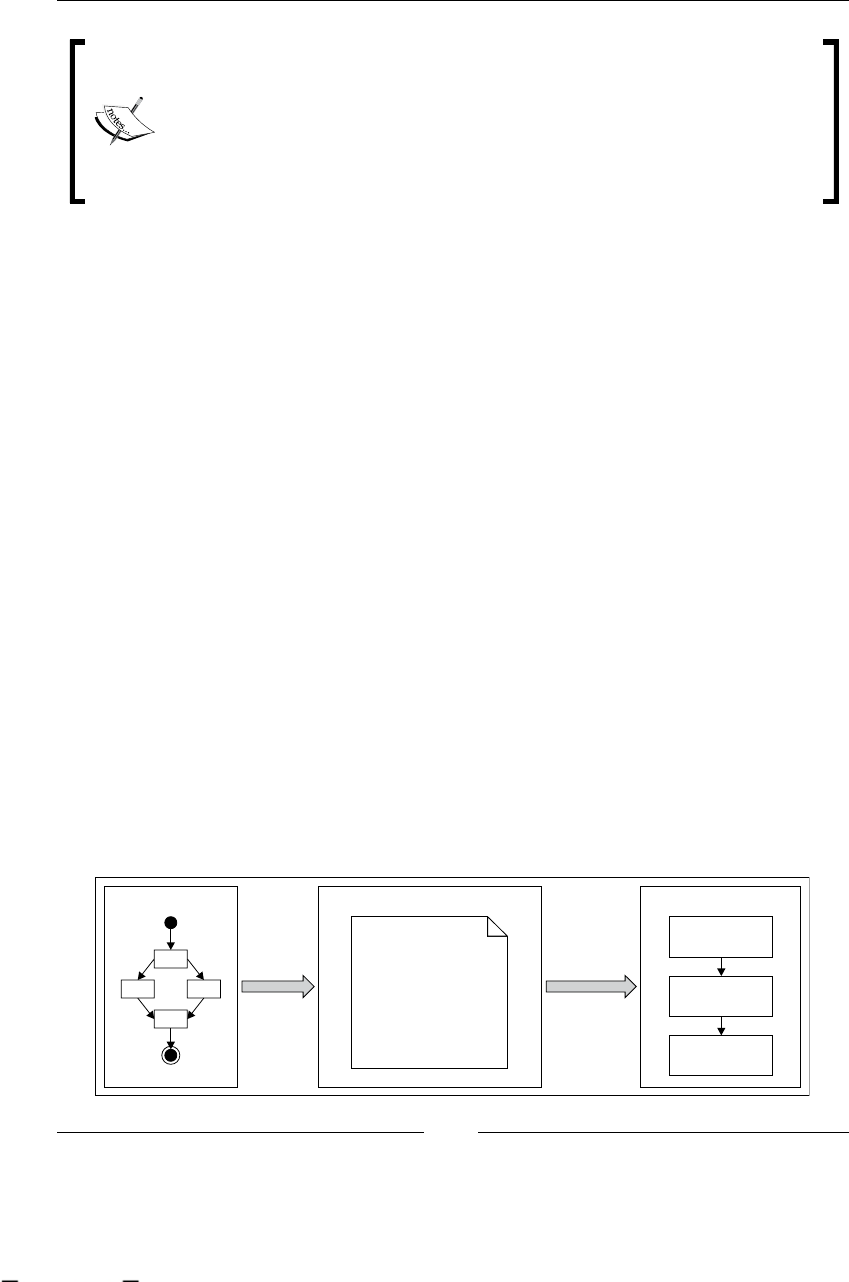
Chapter 4
[ 103 ]
Something important to notice here is that the GPD plugin must keep
these two les in sync permanently for obvious reasons. If one of
these les changes, the other needs to change in order to have a valid
representation. This introduces one disadvantage— if we modify the
processdefinition.xml le outside the IDE, we will need to modify
the GPD.xml le accordingly, in order to keep the sync between these two
les and this is not an easy task.
It's important to note that the GPD.xml le is only necessary to represent our
process graphically; if we don't need that, or if we want to build our custom process
graphical representation, the GPD.xml le can be discarded. In other words, the
GPD.xml le will neither inuence the formal description of the process nor the
process execution behavior.
jPDL structure
The main goal of this section is to know how to write and express processes with
jPDL XML syntax. This is important because we will do a deep analysis of each
element that can be represented inside our process.
However, before that, we need to know where all the elements will be contained.
If you remember, in Chapter 2, jBPM for Developers, we discussed about something
called process denition (or just denition) that will contain the list of all the
nodes which will compose our process. In this case, we will have a similar object
to represent the same concept, but more powerful and with a complete set of
functionalities to fulll real scenarios. The idea is the same, but if jPDL has XML
syntax, how are these XML tags translated to our Denition object?
This translation is achieved in the same way that we graph our dened process
in our simple GOP implementation. However, in this case we will read our
dened process described in the processdefinition.xml le in order to get
our object structure. In order to make this situation more understandable,
see the following image:
Model/Design Phase
Translation
Process Definition (jPDL XML Syntax)
<process-definition>
<node>
<transition/>
</node>
<node>
<transition/>
</node>
<node></node>
</process-definition>
Parse Process
jBPM Framework Objects
ProcessDefinition
List of Nodes
List of Leaving
Transitions
*
*
This material is copyright and is licensed for the sole use by ALESSANDRO CAROLLO on 18th December 2009
6393 south jamaica court, , englewood, , 80111
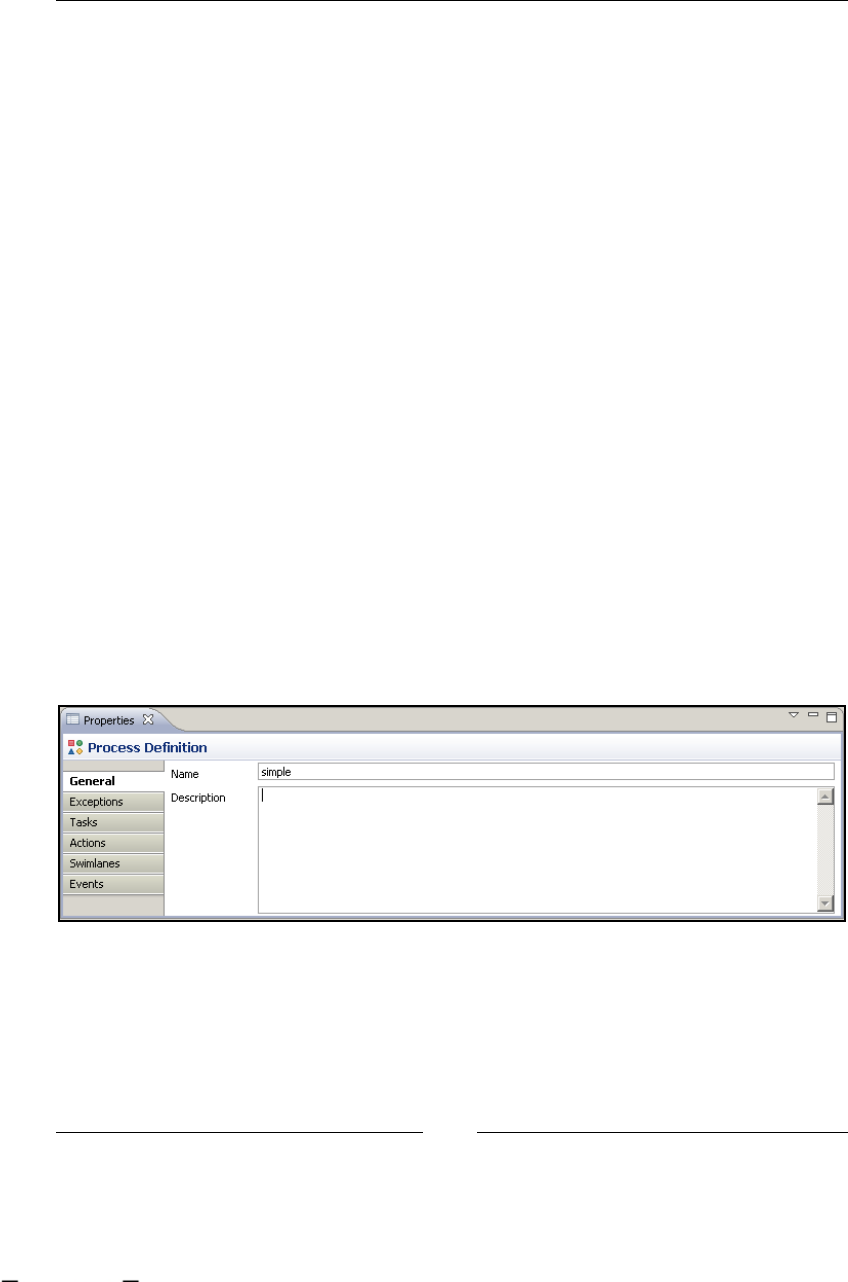
jPDL Language
[ 104 ]
We could say that the processdefinition.xml le needs to be translated to objects
in order to run.
In the rest of this chapter, we will see how all these "artifacts" (graph representation
of our process → jPDL XML description → Object Model) come into play. Analyzing
the basic nodes, starting from the design view and the properties window, to the
translation to XML syntax, and how this XML becomes running objects.
It's necessary to understand this transformation, in order to know how our processes
need to be designed. This will also help us to understand each property's meaning
for each particular node; showing us how each property will inuence the design
and execution stage of our process.
Process structure
It's important to note that one processdefinition.xml le, generated or not with
GPD, will represent just one business process. There is no way to put more than one
process in one le, so do not try it at home.
The process designed with GPD will be automatically translated to jPDL XML
syntax, so if you don't have the plugin, you will need to write this jPDL XML syntax
by hand (a common practice for advanced developers who know jPDL). This XML
will be the rst technical artifact that we need to know in depth. So, here you will
nd how this le is internally composed and structured.
If you create a new process and select the background (not an element), you will see
the following Properties window:
This panel will represent all of the global properties that can be set to a
process-definition element. Remember that this element will contain all the
nodes in our process, so all the global information must be placed here. As you can
see in the image, global exceptions, tasks, actions, and events can be congured here.
This material is copyright and is licensed for the sole use by ALESSANDRO CAROLLO on 18th December 2009
6393 south jamaica court, , englewood, , 80111

Chapter 4
[ 105 ]
If you now switch to the Source tab, you will nd that basically, one process
denition represented in XML jPDL syntax needs to have the following structure:
<process-definition name="simple">
<node>
<transition></transition>
...
</node>
...
</process-definition>
As you can notice, the root node will be a <process-definition> XML tag that will
accept a collection of nodes, where each of these nodes will accept a collection of
leaving transitions.
This structure will help us to quickly understand how the process ow works without
having a graphical representation. We only need a little bit of imagination.
As you can imagine, this process denition tag and all of the elements inside it will
be parsed and transformed into objects by the jBPM framework. The Java class that
will represent this <process-definition> tag will be the ProcessDefinition class.
Here we will analyze this class, but only how the basic concepts are implemented.
The ProcessDefinition class can be found in the org.jbpm.graph.def package,
inside the core module's src/main/java directory.
Here we are talking about the checked out project from the SVN
repository, not the binary distribution.
This class is in charge of containing and representing all the data described in the
processdefinition.xml le. It also includes a few extra meta data that will be
useful in the execution stage of our processes.
If you open this class (recommended, as you will learn a lot about the internal details
of the framework and you will also start feeling comfortable with the code). The rst
thing that you will notice is that the class inherits functionality from a class called
GraphElement and implements the NodeCollection interface.
public class ProcessDefinition extends GraphElement
implements NodeCollection
This material is copyright and is licensed for the sole use by ALESSANDRO CAROLLO on 18th December 2009
6393 south jamaica court, , englewood, , 80111

jPDL Language
[ 106 ]
GraphElement information and behavior
The GraphElement class will give the ProcessDefinition class all the information
needed to compose a graph and also some common methods for the execution stage.
The most common properties that we, as developers, will use are the following:
long id = 0;
protected String name = null;
protected String description = null;
These properties will be shared through all the elements that can be part of our
business process graph (Nodes and the Process Denition itself).
It is also important to see all the methods implemented inside the GraphElement
class, because they contain all the logic and exceptions related to events inside our
processes. But some of these concepts will be discussed later, in order not to confuse
you and mix topics.
NodeCollection methods
The NodeCollection interface will force us to implement the following methods to
handle and manage collections of nodes:
List<Node> getNodes();
Map<String, Node> getNodesMap();
Node getNode(String name);
boolean hasNode(String name);
Node addNode(Node node);
Node removeNode(Node node);
Feel free to open the GraphElement class and the NodeCollection interface in order
to take a look at other implementations' details.
ProcessDefinition properties
Now it is time to continue with the ProcessDefinition properties.
Right after the class denition, you will see the property denition section, all these
properties will represent the information about the whole process. Remember that
the properties inherited for the GraphElement class are not shown here. The most
meaningful ones are as shown in the following table. These properties represent core
information about a process that you will need to know in order to understand how
it works:
•
•
•
This material is copyright and is licensed for the sole use by ALESSANDRO CAROLLO on 18th December 2009
6393 south jamaica court, , englewood, , 80111

Chapter 4
[ 107 ]
Property Description
Node startState It represents the node that will be the rst node in our
process, as you can see, this property is not restricted to
the StartState type. It is this way, because this Node
class could be reused for another language that could
dene another type of start node.
List<Node> nodes It represents the collection of nodes included
between the <process-definition> tags in the
processdefinition.xml le.
transient Map<String,
Node> nodesMap
This property allows us to query all the nodes in our
process by name, without looping through all the nodes
in the list. With just one string, we can get the node that
we are looking for. As this property is transient, it will not
be persisted with the process status. This means that this
property will be lled when the process is in the execution
stage only.
Map<String, Action>
actions
It represents global actions (custom code) that will
be bonded to a name (String) and could be reused in
different nodes of our process. This feature is very
helpful to reuse code and congurations. It also keeps the
processdefinition.xml le as short as possible.
Map<String,
ModuleDefinition>
definitions
It represents different internal/external services that could
be accessed by the process denition, we will learn more
about these modules later.
This is all that you need to know about the information maintained as process
denition level.
Functional capabilities
Now we need to see all the functionality that this class provides in order to handle
our process denitions.
This material is copyright and is licensed for the sole use by ALESSANDRO CAROLLO on 18th December 2009
6393 south jamaica court, , englewood, , 80111

jPDL Language
[ 108 ]
An array of strings is dened to store the events supported by the process
denition itself.
// event types //////////////////////////////////////////////////////
////////
public static final String[] supportedEventTypes = new String[]{
Event.EVENTTYPE_PROCESS_START,
Event.EVENTTYPE_PROCESS_END,
Event.EVENTTYPE_NODE_ENTER,
Event.EVENTTYPE_NODE_LEAVE,
Event.EVENTTYPE_TASK_CREATE,
Event.EVENTTYPE_TASK_ASSIGN,
Event.EVENTTYPE_TASK_START,
Event.EVENTTYPE_TASK_END,
Event.EVENTTYPE_TRANSITION,
Event.EVENTTYPE_BEFORE_SIGNAL,
Event.EVENTTYPE_AFTER_SIGNAL,
Event.EVENTTYPE_SUPERSTATE_ENTER,
Event.EVENTTYPE_SUPERSTATE_LEAVE,
Event.EVENTTYPE_SUBPROCESS_CREATED,
Event.EVENTTYPE_SUBPROCESS_END,
Event.EVENTTYPE_TIMER
};
public String[] getSupportedEventTypes() {
return supportedEventTypes;
}
These events will represent hook points to attach extra logic to our process, which
will not modify the graphical representation of the process. These events are
commonly used for adding technical details to our processes and have a tight
relationship with the graph concept. This is because each GraphElement will have
a life cycle that can be dened where events will be red. We will continue talking
about events in the following chapters.
Constructing a process definition
In this section, we will nd different ways to create and populate our process
denition objects. This section will not describe the ProcessDefinition constructors
because they are rarely used, we will directly jump to the most used methods in
order to create new ProcessDefinition instances.
This material is copyright and is licensed for the sole use by ALESSANDRO CAROLLO on 18th December 2009
6393 south jamaica court, , englewood, , 80111

Chapter 4
[ 109 ]
In most cases, instances of the parseXXX() method will be used to create
ProcessDefinition instances that contain the same structure and information
as a processdefinition.xml le.
Similar methods are provided to support different input types of process denitions,
such as the following ones:
parseXmlString(String)
parseXMLResource(String)
parseXMLReader(Reader)
parseXMLInputStream(InputStream)
parseParZIPInputStream(ZipInputStream)
The only difference between all of these methods is the parameters that they
receive. All of these methods will parse the resource that they receive and create a
new ProcessDefinition object that will represent the content of the XML jPDL
processdefinition.xml le.
The most simple parse method will take a String representing the process denition
and return a brand new ProcessDefinition object created by using the string
information. This String needs to represent the correct jPDL process denition in
order to be correctly parsed.
The most commonly used will be the one that uses a path to locate where the
processdefinition.xml le is and creates a brand new ProcessDefinition object.
It is good to know how we will construct or create a new process denition object
that will reect the process described in the XML jPDL syntax. It is also important to
know how this generation is done. It could be helpful to know how the framework
works internally and where all the information from the XML process denition is
stored in the object world.
When we nish parsing all the elements inside the XML le, if our process denition
doesn't have any errors, a brand new ProcessDefinition object will be returned.
Just for you to know, this kind of parsing in real applications is only used a few
times. As you can imagine, this parsing process could take a while when you have
a large number of nodes inside it, but this is just a note, don't worry about that.
•
•
•
•
•
This material is copyright and is licensed for the sole use by ALESSANDRO CAROLLO on 18th December 2009
6393 south jamaica court, , englewood, , 80111

jPDL Language
[ 110 ]
Adding custom behavior (actions)
If you jump to the actions section (in the ProcessDefinition class, marked with
the comment // actions), you will nd methods for adding, removing, and getting
these custom technical details called actions. These actions could be used and linked
in different stages (graph events) and nodes in the current process. These actions
are global actions that must be registered with a name, and then referenced by each
node that wants to use them. These process-dened actions are commonly used for
reuse code and conguration details. This will also keep your process denition
XML le clean and short. If you look at the code, you will nd that a bi-directional
relationship is maintained between the action and the process denition.
public Action addAction(Action action) {
if (action == null) throw new IllegalArgumentException
("can't add a null action to an process definition");
if (action.getName() == null) throw new IllegalArgumentException
("can't add an unnamed action to an process definition");
if (actions == null) actions = new HashMap<String, Action>();
actions.put(action.getName(), action);
action.processDefinition = this;
return action;
}
The bi-directional relationship between Actions and the process
denition will allow nding out how many action denitions the
process contains, to be able to dynamically dene actions in different
places in the runtime stage.
I think that no more notes could be written about ProcessDefinition. Let's jump to
the basic nodes section. But feel free to analyze the rest of the process denition class
code, you will only nd Java code, nothing to worry about.
Nodes inside our processes
Inside our <process-definition> tag, we will have a collection (set) of nodes.
These nodes could be of different types and with different functionalities. You should
remember Chapter 2, jBPM for Developers, where we discussed about GOP and created
a new GOP language. This custom language used node hierarchy to achieve this
multiple behavior and functionalities. It expands language capabilities by adding
new words to our language, which are represented by different types of nodes.
jPDL is basically that; a main node which implements the basic functionality and
then a set of subclasses that conform the language.
This material is copyright and is licensed for the sole use by ALESSANDRO CAROLLO on 18th December 2009
6393 south jamaica court, , englewood, , 80111
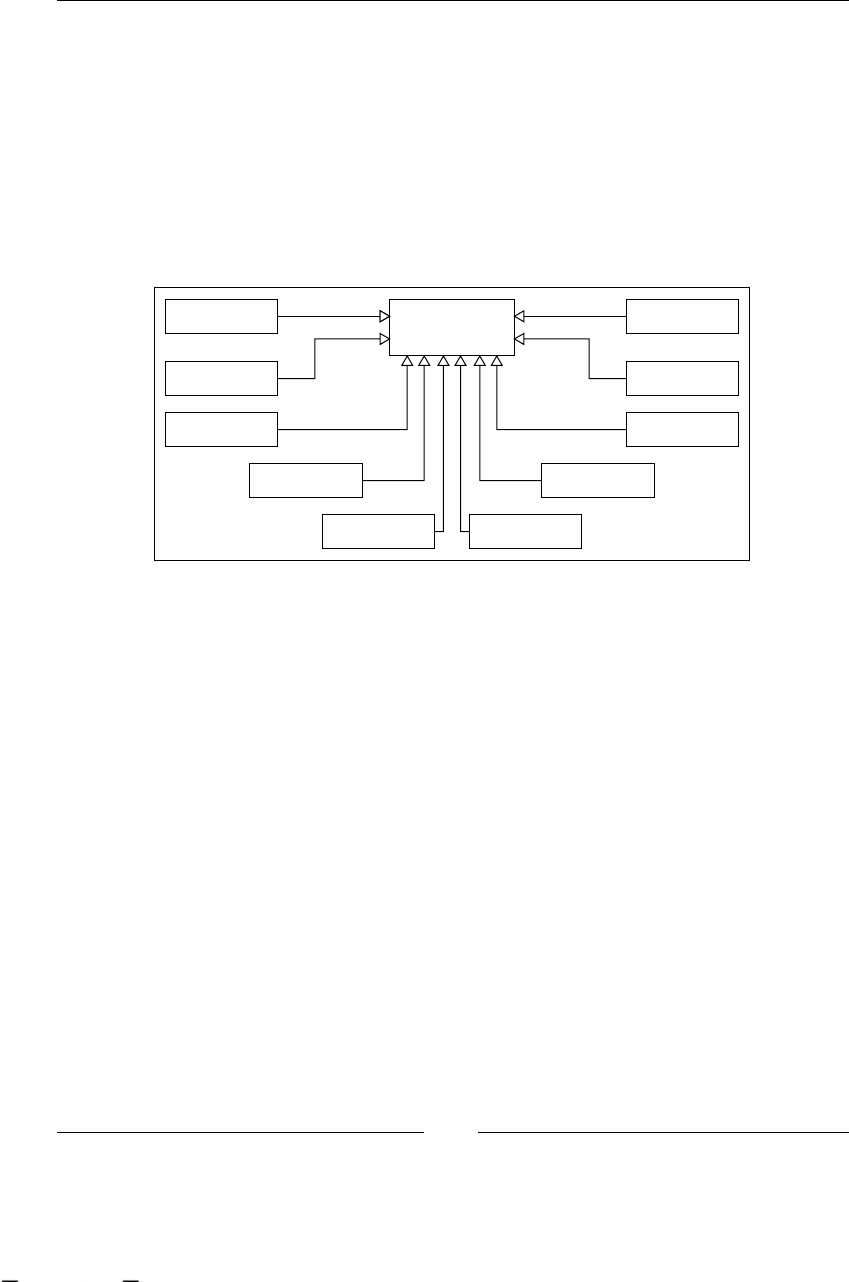
Chapter 4
[ 111 ]
This language (jPDL) contains 12 words/nodes in this version (in the GPD palette).
These nodes implement some basic and generic functionalities that, in most cases, it's
just logic about whether the process must continue the execution to the next node or
not. This logic is commonly named propagation policies.
If we want to understand how each word behaves, how it is composed, and which
"parameters" need to be lled in order to work correctly, rstly we will need to
understand how the most basic and generic node behaves. This is because all the
functionalities inside this node will be inherited, and in some cases overridden, by
the other words in the language.
StartState EndState
ProcessState
State
Join
Fork
TaskNode
SuperState
Decision
MailNode
Node
For this reason, we will start a deep analysis about how the Node class is
implemented and then we will see all the other nodes, just mentioning the
changes that are introduced for each one.
To complete this section, we will just mention some details about the
parsing process.
ProcessDefinition parsing process
This parsing process begins when we load the processdefinition.xml le
using some of the parseXXX() methods of the ProcessDefinition class. These
methods internally use the JpdlXMLReader class to parse all the content of the
processdefinition.xml le. It's important to know that this JpdlXMLReader
class is designed to work with DOM elements. One of the core methods of the
JpdlXMLReader class is the following method:
public ProcessDefinition readProcessDefinition()
This method is in charge of parsing all of the process denition XML elements and
creating all the Objects needed to represent the process structure.
This material is copyright and is licensed for the sole use by ALESSANDRO CAROLLO on 18th December 2009
6393 south jamaica court, , englewood, , 80111
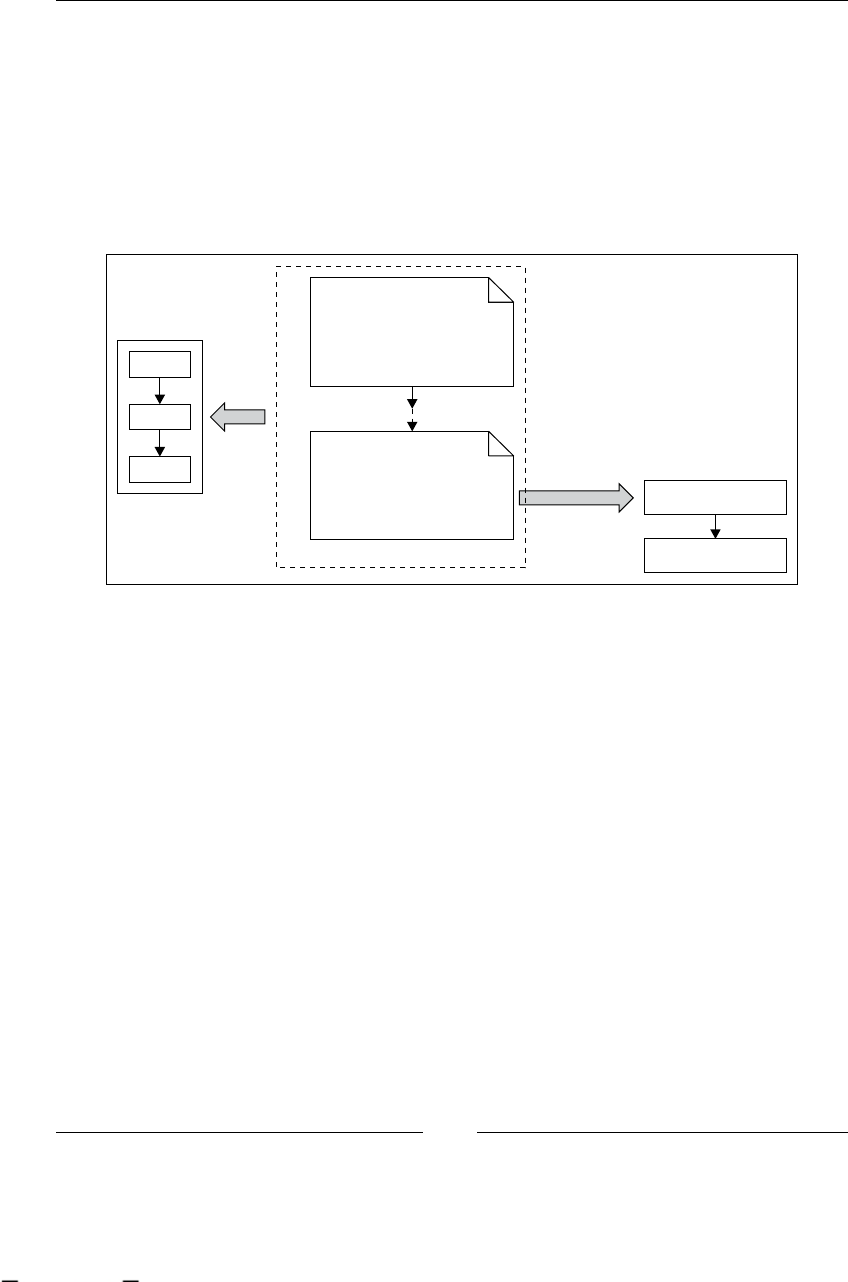
jPDL Language
[ 112 ]
In this method, we will nd the section that will read each part of the process
denition shown as follows:
readSwimlanes(root);
readActions(root, null, null);
readNodes(root, processDefinition);
readEvents(root, processDefinition);
readExceptionHandlers(root, processDefinition);
readTasks(root, null);
ProcessDefinition
List<Node>nodes
graph()
parseXXX()
Node
Node
Node
gpd.xml
processdefinition.xml
<node x="10" y="10"
width="10" height="10"/>
<node x="15" y="15"
width="10" height="10"/>
<process.definition>
<node/>
<node/>
</process.definition>
It is important to note that the graphical information stored in the gpd.xml le is
neither parsed nor stored in the ProcessDefinition object. In other words, it is
lost in this parsing process and if you don't keep this le, the elements' position will
get lost. Once again, the absence of this le will not inuence the denition and the
execution of our dened process.
Base node
As we have seen before, this node will implement logic that will be used by all the
other words in our language, but basically this class will represent the most common
lifecycle and properties that all the nodes will have and share.
With these nodes' hierarchy, our process denition will contain only nodes causing
that all the nodes in the palette will be of the Node type as well as all of its subclasses.
This material is copyright and is licensed for the sole use by ALESSANDRO CAROLLO on 18th December 2009
6393 south jamaica court, , englewood, , 80111

Chapter 4
[ 113 ]
First of all, we will see how the node concept is represented in jPDL XML syntax. If
you have GPD running, create a new process denition le and drag a node of the
Node type inside your process.
Note the icon inside the node rectangle, a gear, is used to represent the node
functionality, meaning that the base functionality for a Node is the generic work
to be done, which can probably be represented with a piece of Java code.
This means that something technical is needed in our business process. That is why
the gear appears there, just to represent that some "machine working" will happen
during this activity of our business process. As you will see a few sections later, if
the technical details are not important for the business analysts, you can add them
in other places, which are hidden from the graphical view. This will help us to avoid
increasing the complexity of the graphical view with technical details, that doesn't
mean anything to the real business process.
An example of that could be a backup situation—if one activity in our process takes
a backup of some information, we will need to decide if the backup activity will be
shown in the graphical representation (as a node) of our process depending on the
context of the process, or if it will be hidden in the technical denitions behind the
process graph.
In other words, you will only use these type of nodes if the Business Analyst team
tells you that some important technical details are part of the process, and these
technical details need to be displayed in the process diagram as an activity.
In the jBPM context, we will use "technical detail" to refer to all of the code
needed to be able to run our process inside an execution environment. Do
not confuse this with something minimal or less important.
This material is copyright and is licensed for the sole use by ALESSANDRO CAROLLO on 18th December 2009
6393 south jamaica court, , englewood, , 80111
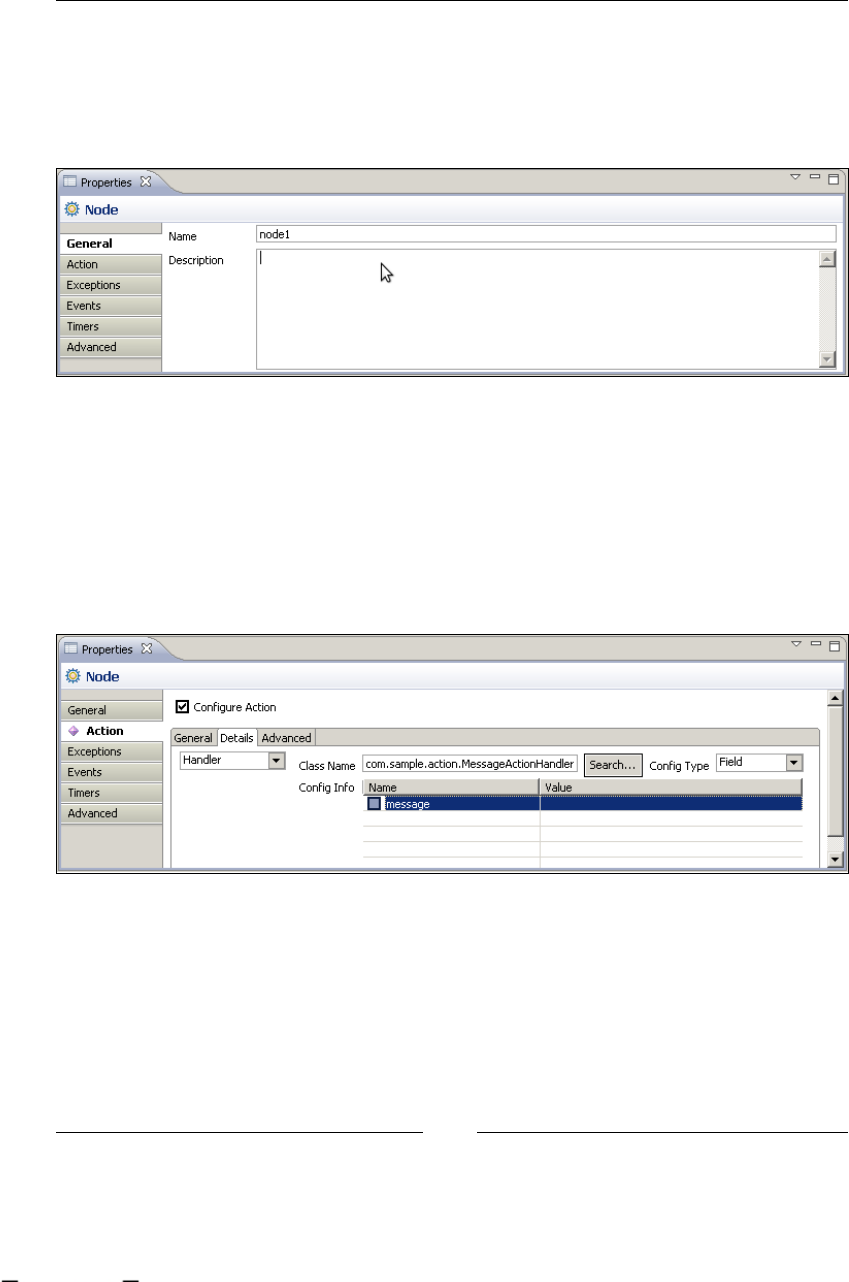
jPDL Language
[ 114 ]
Let's analyze this node—if you have GPD plugin installed, select the node dropped
before, and go to the properties panel. Here you will see that some basic information
could be inserted as name, description, and so on. Just add the basic information,
save the process denition, and go to the source tab to see how this information is
translated inside the node tag.
In order to see these basic node properties, you could open the Node class to see how
these properties are reected in the Java code. As we discussed before, this class will
represent the execution of technical details. So, if we select the node in GPD and see
the properties window, we will see that we have an Action tab that has a checkbox
to activate the conguration from this action. This will represent the added technical
details that will be executed when the process execution enters into this node. These
technical details could be anything you want. When you activate this option, you will
see that new elds appear asking about information that will describe this action.
This material is copyright and is licensed for the sole use by ALESSANDRO CAROLLO on 18th December 2009
6393 south jamaica court, , englewood, , 80111

Chapter 4
[ 115 ]
If you read some documentation about this, you will see that these actions are called
delegated actions. This name is because these actions are in some way delegated
to external classes that will contain the logic to execute. These delegated classes
are external to the framework. In other words, we will implement these delegated
classes and we will just tell the process the class name that contains the action, then
the framework will know how to execute this custom logic.
In order to achieve this functionality, the command design pattern (click on
http://en.wikipedia.org/wiki/Command_pattern for more information) is
applied. Therefore, we only need to implement a single method interface called
ActionHandler in our class. We will see more about how to do this in the next
chapter where we build two real, end-to-end applications. You must keep in mind
that this action can include custom logic that you will need to write. This can be
done by implementing the ActionHandler interface that the framework knows
how to execute.
Until this point, we have a node (of the Node type) graphed in GPD, also expressed
in jPDL XML syntax with the tag <node> that is kept in sync with the graphical
diagram by the plugin. When we load the processdefinition.xml le in a new
ProcessDefinition object, our node (written and formally described in jPDL)
will be transformed in one instance of the Node class. The same situation will occur
with all of the other node types, because all the other nodes will be treated as
Node instances.
Here we will analyze some technical details implemented in the node class that
represent the node generic concepts and the implementation of nodes that can be
used in our processes.
This class also implements the Parsable interface that forces us to implement the
read() and write() methods in order to understand and be able to write the jPDL
XML syntax, which has been used in our process denitions.
public interface Parsable {
void read(Element element, JpdlXmlReader jpdlReader);
void write(Element element);
}
This material is copyright and is licensed for the sole use by ALESSANDRO CAROLLO on 18th December 2009
6393 south jamaica court, , englewood, , 80111
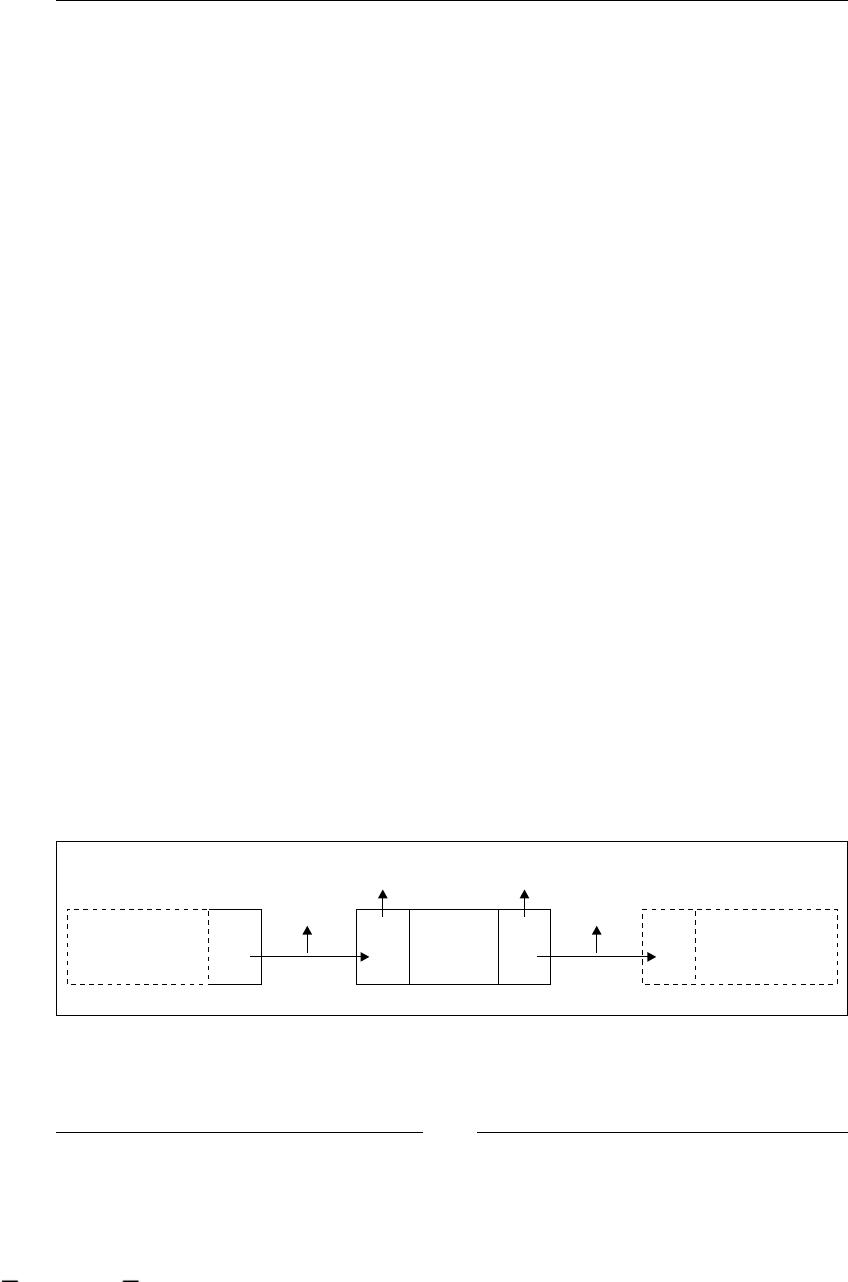
jPDL Language
[ 116 ]
Information that we really need to know about
each node
Leaving transitions are one of the most important properties that we need to store
and know.
protected List<Transition> leavingTransitions = null;
This list is restricted only to store Transition objects with generics. This list will
store all of the transitions that have the current node as the source node.
The action property is also an important one, because this property will store the
action that will be executed when the current node is in the execution stage.
It is important to note that a public enum is dened here to store each type of node
that could be dened using this super class.
public enum NodeType { Node, StartState, EndState, State, Task, Fork,
Join, Decision };
This enum species the built-in nodes inside the framework. If you create your own
type of node, you will need to override the getNodeType() method to return your
own custom type.
Node lifecycle (events)
The following section, the events section, marked with a comment
//event types////.. in the Node class, is used to specify the internal
points where the node execution will pass through. These points will represent
hook points which we can add the custom logic that we need. In this case, the
base node, support events/hook points called NODE_ENTER, NODE_LEAVE,
BEFORE_SIGNAL, and AFTER_SIGNAL. This means that we will be able to add
custom logic to these four points inside the node execution.
NODE_ENTER NODE_LEAVE
TRANSITIONTRANSITION
take()take()
leave()leave() enter() enter()execute()
NODE NODE NODE
The BEFORE_SIGNAL and AFTER_SIGNAL events will be described later when we
discuss external events/triggers that could inuence the process execution.
This material is copyright and is licensed for the sole use by ALESSANDRO CAROLLO on 18th December 2009
6393 south jamaica court, , englewood, , 80111
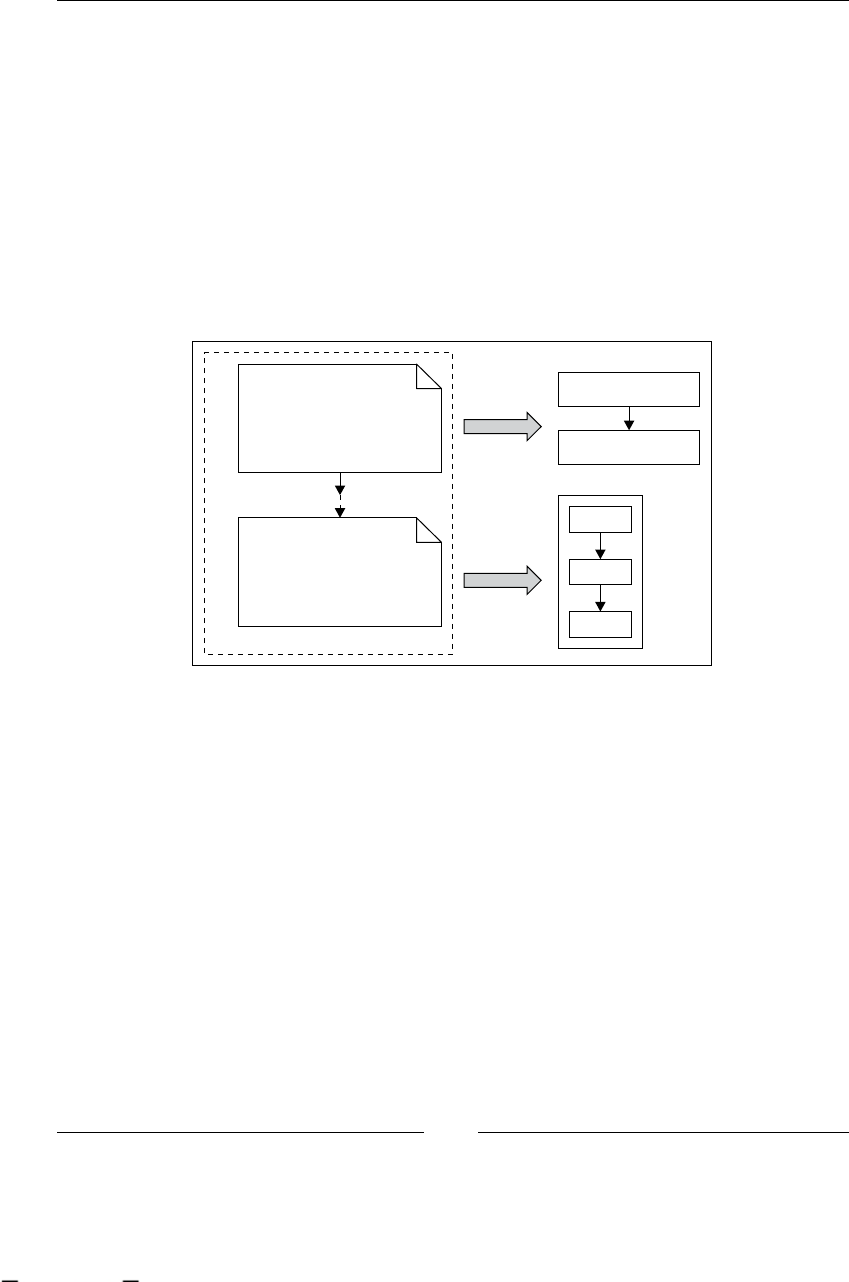
Chapter 4
[ 117 ]
Constructors
The node class instances will rarely be constructed using the following constructors:
public Node() { }
public Node(String name) {
super(name);
}
In most of the cases the instances of node class will be created by the method
parseXXX() that reads the whole process denition and all the nodes inside it. So, in
most cases we don't need to create nodes by hand. However, it is important for us to
know how this parsing process is done.
ProcessDefinition
List<Node>nodes
parseXXX()
graph()
gpd.xml
processdefinition.xml
<node x="10" y="10"
width="10" height="10"/>
<node x="15" y="15"
width="10" height="10"/>
<process.definition>
<node/>
<node/>
</process.definition>
Node
Node
Node
Managing transitions/relationships with
other nodes
If we observe the section delimited with the //leaving transitions// and
//arriving transitions// comments, we will nd a few methods to
manage all of the transitions related to some nodes in our process.
As we have seen before, the transitions for a node are stored in two properties of
type list called leavingTransitions and arrivingTransitions. We have also a
helper map to locate each transition inside a particular node by name. In this section
of the node class, we will nd wrapper methods to these two lists that also add some
very important logic.
This material is copyright and is licensed for the sole use by ALESSANDRO CAROLLO on 18th December 2009
6393 south jamaica court, , englewood, , 80111

jPDL Language
[ 118 ]
For example, if we take a look at the method called addLeavingTransition(Transi
tion), we can see the following piece of code:
public Transition addLeavingTransition(Transition
leavingTransition)
{
if (leavingTransition == null)
throw new IllegalArgumentException("can't add a null
leaving transition to an node");
if (leavingTransitions == null)
leavingTransitions = new ArrayList<Transition>();
leavingTransitions.add(leavingTransition);
leavingTransition.from = this;
leavingTransitionMap = null;
return leavingTransition;
}
Where the rst few lines of this method check to see if the list of leavingTransitions
is null. If this is true, it will only create a new ArrayList to store all the transitions
from this node. This is followed by the addition of new transitions to the list,
and then the node reference is added to the recently added transition. At last, the
leavingTransitionMap is set to null in order to be generated again, if the method
getLeavingTransitionMap() is called. This is done in order to keep the transition
map updated with the recently added transition.
Another important method is called getDefaultLeavingTransition(), this method
logic will be in charge of dening which transition to take if we do not specify a
particular one. In other words, you must know how this code works in order to
know which transition will be taken.
public Transition getDefaultLeavingTransition()
{
Transition defaultTransition = null;
if (leavingTransitions != null)
{
// Select the first unconditional transition
for (Transition auxTransition : leavingTransitions)
{
if (auxTransition.getCondition() == null)
{
defaultTransition = auxTransition;
break;
}
}
}
This material is copyright and is licensed for the sole use by ALESSANDRO CAROLLO on 18th December 2009
6393 south jamaica court, , englewood, , 80111

Chapter 4
[ 119 ]
else if (superState != null)
{
defaultTransition = superState.getDefaultLeavingTransition();
}
return defaultTransition;
}
If you see the code inside this method, you will see that the rst unconditional
transition will be chosen if no other transition is selected. It is also important to see
that if there is a situation with nested nodes, the parent node will be also queried for
a default transition.
Runtime behavior
Up until this point, we have seen how and where the information is kept, but
from now on, we will discuss how this node will behave in the execution stage of
our processes.
The rst method in the //Behavior methods// comment delimited section is the
method called enter(ExecutionContext).
The ExecutionContext class is used by the enter(), execute(), and
leave() methods in order to know all the contextual information needed
to execute each phase inside the node.
We already see the Node lifecycle graph, where this method will be the rst method
called when the node is reached.
It's very important to see all the code in this method, because it give us the rst phase
in the execution lifecycle of our node.
public void enter(ExecutionContext executionContext)
{
Token token = executionContext.getToken();
// update the runtime context information
token.setNode(this);
// fire the enter-node event for this node
fireEvent(Event.EVENTTYPE_NODE_ENTER, executionContext);
// keep track of node entrance in the token,
so that a node-log can be generated at node leave time.
token.setNodeEnter(Clock.getCurrentTime());
// remove the transition references from the runtime context
executionContext.setTransition(null);
This material is copyright and is licensed for the sole use by ALESSANDRO CAROLLO on 18th December 2009
6393 south jamaica court, , englewood, , 80111

jPDL Language
[ 120 ]
executionContext.setTransitionSource(null);
// execute the node
if (isAsync)
{
ExecuteNodeJob job = createAsyncContinuationJob(token);
MessageService messageService = (MessageService)Services.
getCurrentService(Services.SERVICENAME_MESSAGE);
messageService.send(job);
token.lock(job.toString());
}
else
{
execute(executionContext);
}
}
Here in the rst lines of the method appears the concept of Token that will represent
where the execution is, at a specic moment of time. This concept is exactly the same
as the one that appears in Chapter 2, jBPM for Developers.
That is why, this method gets the Token from the Execution Context and changes
the reference to the current node. If you see the following lines, you can see how this
method is telling everyone that it is in the rst phase of the node life cycle.
// update the runtime context information
token.setNode(this);
// fire the enter-node event for this node
fireEvent(Event.EVENTTYPE_NODE_ENTER, executionContext);
If you analyze the fireEvent() method that belongs to the GraphElement class, you
will see that it will check whether some action is registered for this particular event.
If there are some actions registered, just re them in the dened order.
As you can see at the end of this method, the execute() method is called,
jumping to the next phase in the life cycle of this node. The execute() method
is called as follows:
public void execute(ExecutionContext executionContext)
{
// if there is a custom action associated with this node
if (action != null)
{
try
{
// execute the action
executeAction(action, executionContext);
This material is copyright and is licensed for the sole use by ALESSANDRO CAROLLO on 18th December 2009
6393 south jamaica court, , englewood, , 80111

Chapter 4
[ 121 ]
}
catch (Exception exception)
{
raiseException(exception, executionContext);
}
}
else
{
// let this node handle the token
// the default behaviour is to leave the
node over the default transition.
leave(executionContext);
}
}
In this execute() method, the base node functionality implements the following
execution policy. If there is an action assigned to this node, execute it. If not, leave
the node over the default transition.
This node functionality looks simple, and if I ask you if this node behaves as a wait
state, you will probably think that this node never waits. Having seen the code
above, we can only afrm that if no action is congured to this type of node, the
default behavior is to continue to the next node without waiting. However, what
happens if there is an action congured? The behavior of the node will depend
on the action. If the action inside it contains a call to the executionContext.
leaveNode() method, the node will continue the execution to the next node in the
chain (of course, passing through the leave() method). But if the action does not
include any call to the leave() method, the node as a whole will behave like a
wait state.
If this node does not behave like a wait state, the execution will continue to the next
phase calling the leave() method.
public void leave(ExecutionContext executionContext,
Transition transition)
{
if (transition == null)
throw new JbpmException("can't leave node '" + this + "'
without leaving transition");
Token token = executionContext.getToken();
token.setNode(this);
executionContext.setTransition(transition);
// fire the leave-node event for this node
fireEvent(Event.EVENTTYPE_NODE_LEAVE, executionContext);
// log this node
This material is copyright and is licensed for the sole use by ALESSANDRO CAROLLO on 18th December 2009
6393 south jamaica court, , englewood, , 80111
Download at WoweBook.com

jPDL Language
[ 122 ]
if (token.getNodeEnter() != null)
{
addNodeLog(token);
}
// update the runtime information for taking the transition
// the transitionSource is used to calculate
events on superstates
executionContext.setTransitionSource(this);
// take the transition
transition.take(executionContext);
}
This method has two important lines:
The rst one is the one that res the NODE_LEAVE event telling everyone that
this node is in the last phase before taking the transition out of it, where
actions could be attached like the NODE_ENTER event
The second line is the one at the end of this method where the execution gets
out of the current node and enters inside the transition:
transition.take(executionContext);
This is the basic functionality of the Node class. If the subclasses of the Node class do
not override a method, the functionality discussed here will be executed.
StartState: starting our processes
As we have already seen in the GPD node palette, we have a node called Start State.
This will be the rst node in all our processes. This is our rst rule, we cannot break
it. As we already know, jPDL is a formal language where the syntax forces us to
begin our process denition with one node of the type Start State. It's important
to note that this syntax also denes that it could only have one start state for each
process. It is also important to observe that this node type takes the name of Start
State and not Start Node, because it will behave internally as a wait state. Remember
this important distinction, because all the nodes that will behave as wait states will
have the word "State" in their name.
Here we will drop a Start State node with GPD and also inspect these node properties.
We could see some of the same properties inherited from the GraphElement class
such as name and description.
•
•
This material is copyright and is licensed for the sole use by ALESSANDRO CAROLLO on 18th December 2009
6393 south jamaica court, , englewood, , 80111
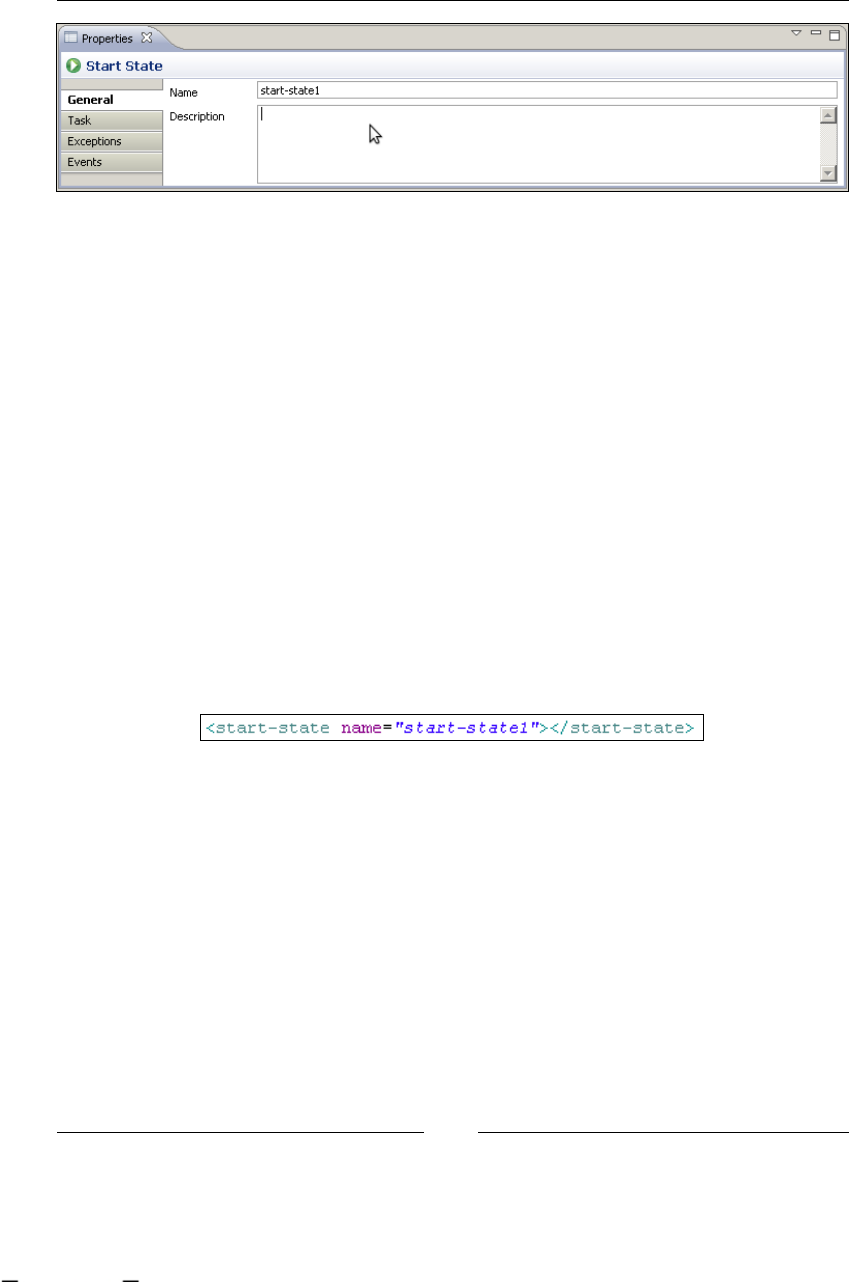
Chapter 4
[ 123 ]
If we take a quick look at the tabs that are available in this node, we will notice
that there's no Action tab here. For this type of node, however, we can see a tab
called Task.
For now, we need to know that when jPDL uses the word Task, it always makes
reference to an Activity that needs to be done by a person. In other words, task
always means human interaction.
The idea of this task placed inside the Start State is used to represent the fact that the
process will need to be started by a person and not automatically by a system. We
will analyze where we may need to use this functionality later.
Now, we will open the StartState class to see what methods were inherited from
the parent classes GraphElement and Node, and which of them were overridden. We
will see a lot more about tasks in Chapter 7, Human Tasks.
These modications to the base functionality inherited will dene the semantics
(in other words, the meaning) of each node/word in the jPDL language.
In jPDL language, a Start State will look like:
In this case, because it is the rst word that we will use to dene all of our processes,
we need to dene some restrictions that we have already discussed when we talked
about GOP in Chapter 2.
The rst and obvious restriction is that the StartState node could not have arriving
transitions, this is because it will be the rst node in our processes, and this node
will be selected when the process execution is created to start our process. This is
implemented by just overriding the addArrivingTransition() method into the
StartState class as follows:
public Transition addArrivingTransition(Transition t) {
throw new UnsupportedOperationException( "illegal operation :
its not possible to add a transition that
is arriving in a start state" );
}
This material is copyright and is licensed for the sole use by ALESSANDRO CAROLLO on 18th December 2009
6393 south jamaica court, , englewood, , 80111

jPDL Language
[ 124 ]
Another functionality that we see in the Start State node is that this node will never
get executed. That is why the execute() method is overridden and it doesn't have
any code inside it.
public void execute(ExecutionContext executionContext) { }
This also means that it will behave as a wait state, because the execution is not
followed by any transition.
We could say that the StartState node has a reduced life cycle, because it will only
execute the leave stage. The supported events dened for this class are as follows:
public static final String[] supportedEventTypes = new String[]{
Event.EVENTTYPE_NODE_LEAVE,
Event.EVENTTYPE_AFTER_SIGNAL
};
It's supposed that the start node will never execute the enter stage, because this is an
automatically selected node in the creation of the process execution. Another reason
for this is that no transition will arrive at it.
If you look at the other overridden method called read(), which is in
charge of reading the non-generic information stored for this particular type
of node, this method is called by instances of the parseXXX() method in the
ProcessDefinition class.
public void read(Element startStateElement,
JpdlXmlReader jpdlReader) {
// if the start-state has a task specified,
Element startTaskElement = startStateElement.element("task");
if (startTaskElement!=null) {
// delegate the parsing of the start-state
task to the jpdlReader
jpdlReader.readStartStateTask(startTaskElement, this);
}
}
In this case, this method is in charge of reading the task that can be dened inside
this node from the XML. This task will represent the fact that the process needs
human interaction in order to start the process ow.
This material is copyright and is licensed for the sole use by ALESSANDRO CAROLLO on 18th December 2009
6393 south jamaica court, , englewood, , 80111
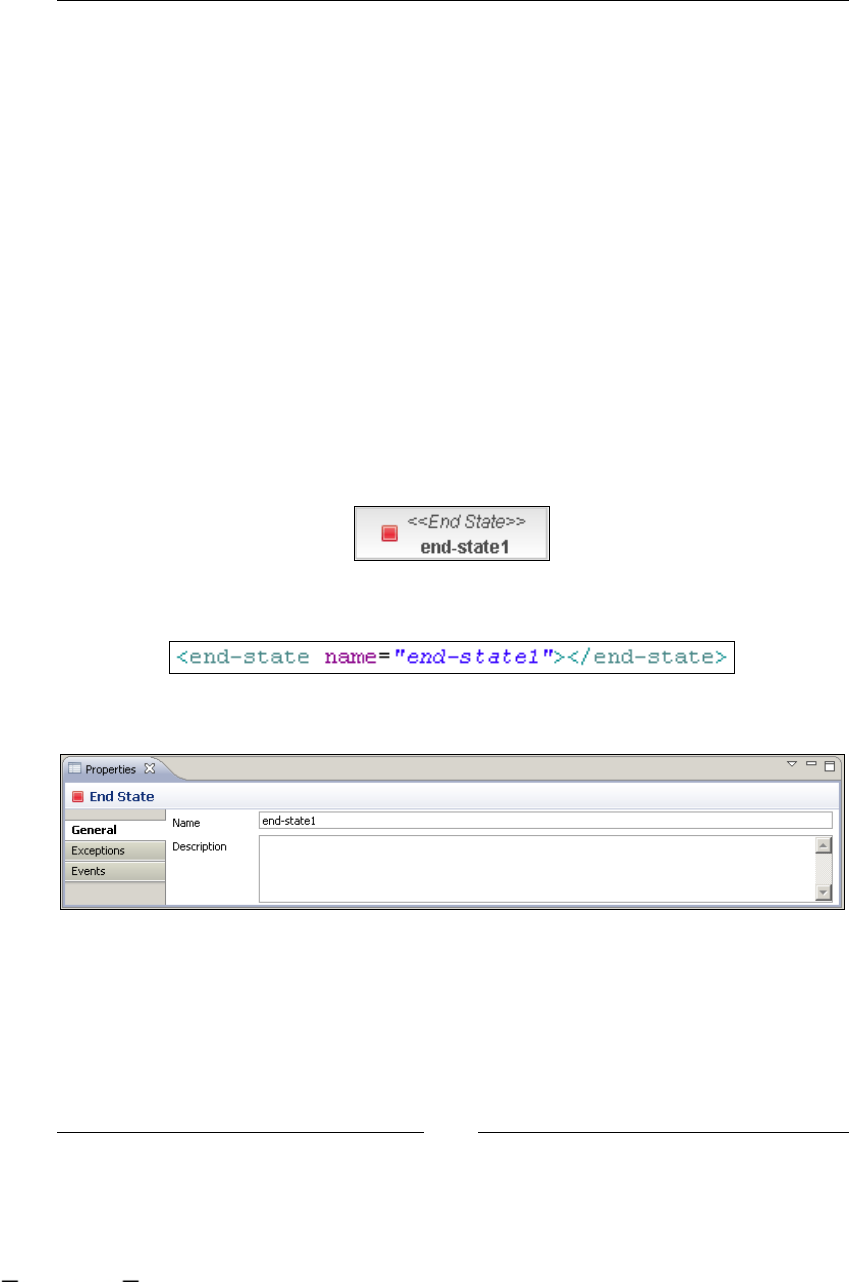
Chapter 4
[ 125 ]
EndState: finishing our processes
The EndState node is used to dene where and when our processes will end. The
basic implementation could allow this node to be restrictive as the StartState node.
But in the jPDL implementation, the end word means a couple of things depending
on the situation.
As we can imagine, the basic functionality of this node will allow us to say where the
execution of our process will end. However, what exactly does the end of our process
execution mean?
Basically, our process will end when there are no more activities to perform. This
will probably happen when the business goal of the process is accomplished.
So, when our process ends, the execution stage also ends. That means that we will
not be able to interact with the process anymore. We will only be able to query the
process logs or information, but only in the sense of history queries. We will not be
able to modify the current state of the process anymore.
So, drop an EndState in GPD and let's analyze what properties it has:
That is translated into jPDL XML syntax in the following way:
And allow us to add some generic properties:
The restrictions of these nodes are similar to the StartState node, because this node
also has a minimal life cycle, because, it gets executed but this node is never left. This
node will only implement the NODE_ENTER stage.
public static final String[] supportedEventTypes =
new String[]{Event.EVENTTYPE_NODE_ENTER};
This material is copyright and is licensed for the sole use by ALESSANDRO CAROLLO on 18th December 2009
6393 south jamaica court, , englewood, , 80111

jPDL Language
[ 126 ]
This is also reected in the behavior of the method addLeavingTransitions()
inside the EndState class that could not be called because it throws an exception.
public Transition addLeavingTransition(Transition t) {
throw new UnsupportedOperationException
("can't add a leaving transition to an end-state");
}
You could also see in the EndState class that there is a property to represent whether
the End State stands for the real end of our process. As we can have different ending
situations, we need to express in each End State whether it will represent the real
ending of the whole process execution. For now it's okay to think that this node will
always represent that. But you could see where this property is used in the execute
method of this class.
public void execute(ExecutionContext executionContext) {
if ( (endCompleteProcess!=null)
&& (endCompleteProcess.equalsIgnoreCase("true"))) {
executionContext.getProcessInstance().end();
} else {
executionContext.getToken().end();
}
}
As you can see, the endCompleteProcess property will decide if the
ProcessInstance needs to be ended or just the current token that represents
the current path of execution end.
State: wait for an external event
There are situations in which the process itself could not continue the execution on
to the next activity. This is because the current activity needs to wait for someone or
some system(s) to do an external activity before going on. This very generic situation
is represented with this node, the State node.
In other words, with this node, we will be able to represent wait state situations. And
basically, this node functionality is reduced to the minimum, it only needs to wait
that an external event comes and tells the process that it can continue to the next
activity. This node has the full node life cycle, but it doesn't implement any logic
in the execute method. This node responsibility is only to wait.
This material is copyright and is licensed for the sole use by ALESSANDRO CAROLLO on 18th December 2009
6393 south jamaica court, , englewood, , 80111
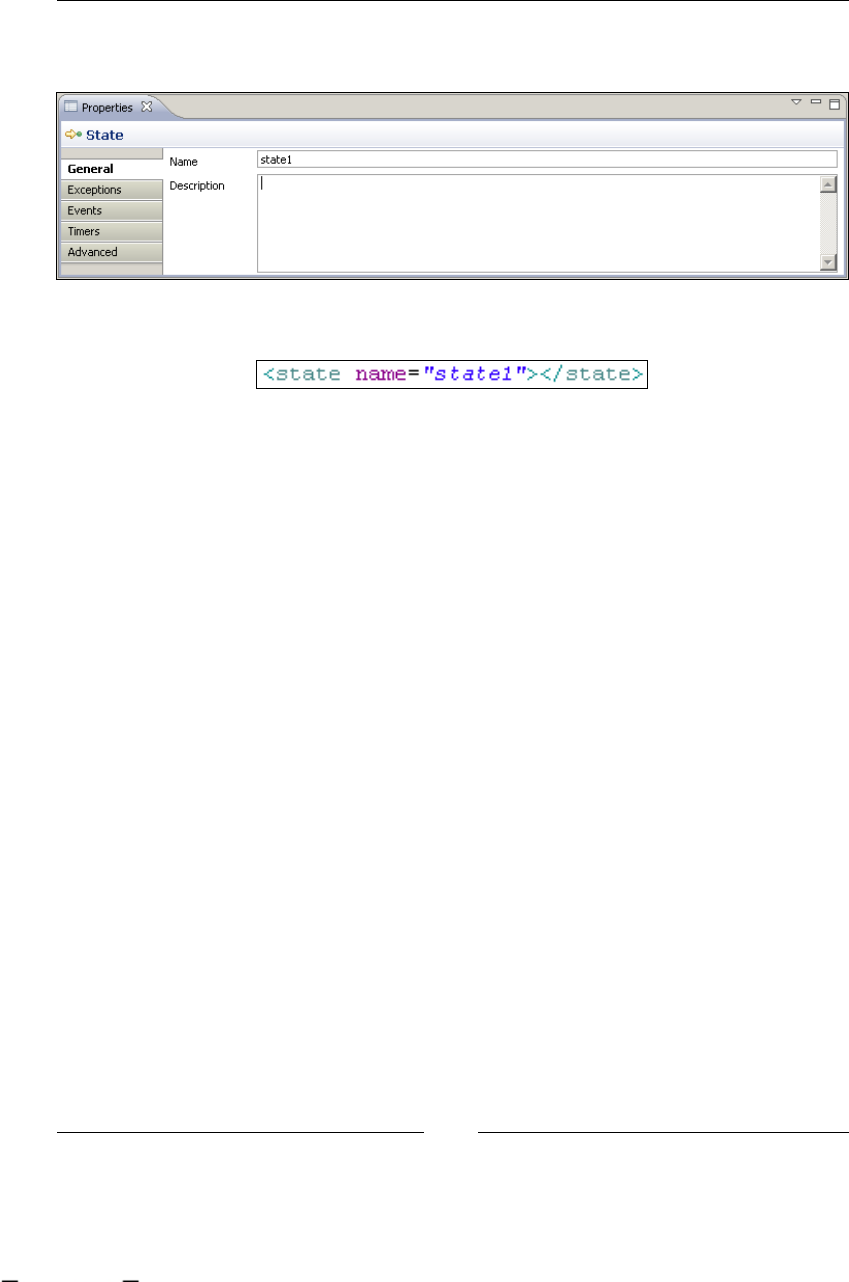
Chapter 4
[ 127 ]
If we drag a State node using the GPD plugin and then select it, we will nd
something like this in the Properties panel:
This is a very simple node that will be represented in jPDL as follows:
If we open the State class, we will nd a very reduced class. The most important
change in comparison with the base Node class is that the execute() method
was overridden.
public class State extends Node {
public State() {
this(null);
}
public State(String name) {
super( name );
}
@Override
public NodeType getNodeType()
{
return NodeType.State;
}
public void execute(ExecutionContext executionContext) { }
}
This State node will behave in the same way as the base node class except for the
execute() method. That will change the behavior of the node and the execution of
the whole process will wait in this node, until some external event/signal comes in.
This material is copyright and is licensed for the sole use by ALESSANDRO CAROLLO on 18th December 2009
6393 south jamaica court, , englewood, , 80111
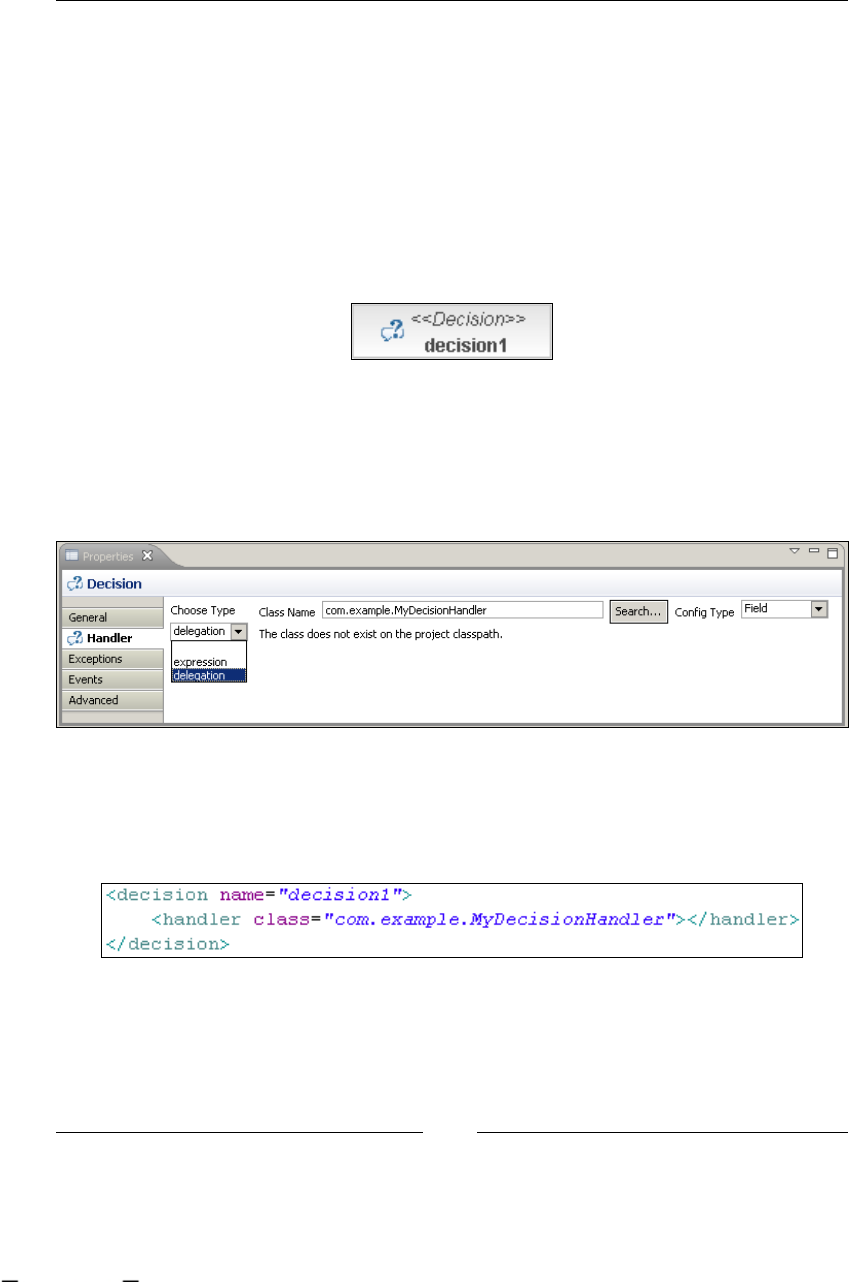
jPDL Language
[ 128 ]
Decision: making automatic decisions
The node decision will let us choose between different and exclusive paths modeled
on our processes. As you can imagine, this node will handle more than one leaving
transition, choosing just one in order to continue the process execution. This decision
based in a runtime information, or just a simple evaluation, will be automatically
taken and the process will always continue the execution to the selected next node.
In other words, this node will never behave as a wait state. It is also important to
note that this node will not include any human interaction. Then we will see how
to achieve this human decision, when we talk about humans.
If we see the decision node in GPD, we can notice that the node will let us take our
decision with a simple expression evaluation (Expression Language) or by using
a compiled Java class that needs to implement a single method interface called
DecisionHandler. This interface forces us to implement the decide() method
that must return a String representing the name of the chosen transition.
This will let us call whatever logic we want in order to take/choose the right
path/transition for a specic execution. In this DecisionHandler, we can call
external services, an inference engine that contains business rules, and so on in
order to make our decisions.
This material is copyright and is licensed for the sole use by ALESSANDRO CAROLLO on 18th December 2009
6393 south jamaica court, , englewood, , 80111
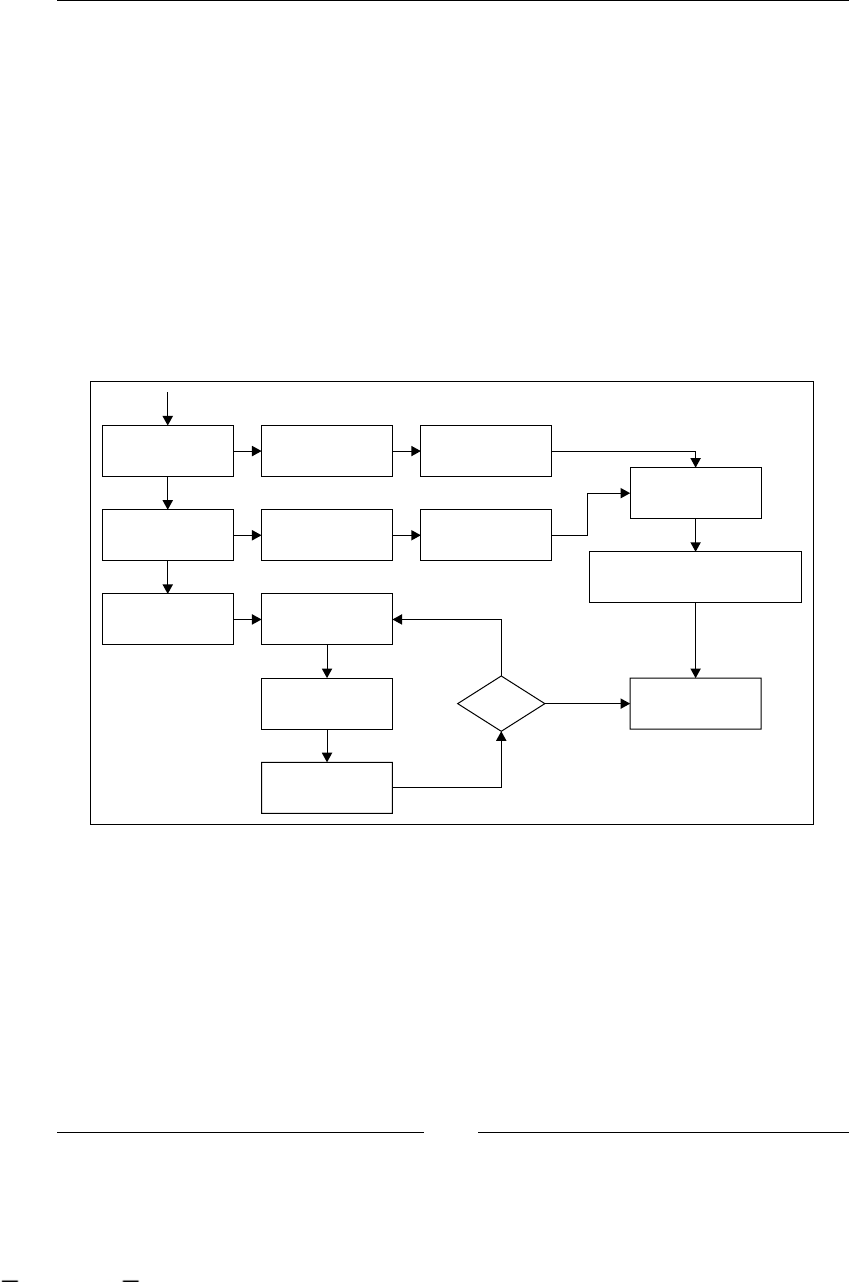
Chapter 4
[ 129 ]
In the code of the Decision class, we could see some kind of policy for taking a
transition based on different kinds of evaluations. Something important to notice
here is that if no transitions are selected by the evaluations, the default transition is
taken using the getDefaultLeavingTransition() method dened in the base Node
class. If you look at the code that is used to get the default transition, you can see that
is the rst one dened in the list of transitions in the jPDL syntax. You need to know
about this, because in most cases, your evaluations could not end in any particular
transition, so the rst one dened will be taken.
This extra functionality will help us and give us a higher grade of exibility when we
make path decisions in our processes.
The core functionality of this node is in the execute() method and it could be
divided into three phases of analysis.
execute()
Decision
Delegation Class Instantiate Call decide()
Decision
Expression Get Expression Evaluate
String =
Transition
Conditions For Each
Transition
Get Condition True?
Evaluate
getLeavingTransition(String)
take(Transition)
next Transition
The rst phase checks if there is a delegation class assigned to this decision. This
check is done using the following line:
if (decisionDelegation != null)
This material is copyright and is licensed for the sole use by ALESSANDRO CAROLLO on 18th December 2009
6393 south jamaica court, , englewood, , 80111

jPDL Language
[ 130 ]
If the decisionDelegation variable is not null, the framework will be in charge of
creating a new instance of the delegated class that we specify and then it will call
the decide() method proposed by the DecisionHandler interface. This decide()
method will return a String with the name of the leaving transition that was chosen
by our delegated class.
If the decisionDelegation variable is null, the code jumps to the next decision
phase where it checks for a decision expression with the following line:
else if (decisionExpression != null)
This decisionExpresion variable makes reference to an expression described in
Expression Language (EL), the same language that is used in Java Server Faces for
reference variables in custom JSP tags.
For more information about this language and how this expression can be built,
please visit the following page:
http://java.sun.com/j2ee/1.4/docs/tutorial/doc/JSPIntro7.html
If this decisionExpression is not null, the content of the expression is retrieved and
passed on to the Expression Language evaluator, which will decide what transition
to take.
At last, if we don't specify a delegation class or decision expression, the third phase
will check for conditions. These conditions will be inside each transition that is
dened inside the decision node. If you see the code about conditions, you will
nd that there are two blocks to handle conditions. This is because some backward
compatibility needs to be maintained. You need to focus on the second one where
the following code is used:
// new mode based on conditions in the transition itself
for (Transition candidate : leavingTransitions) {
String conditionExpression = candidate.getCondition();
if (conditionExpression != null) {
Object result = JbpmExpressionEvaluator.evaluate
(conditionExpression, executionContext);
if (Boolean.TRUE.equals(result)) {
transition = candidate;
break;
}
}
}
Here, each leaving transition is analyzed in order to nd if it has a condition declared
inside it. Then these conditions get evaluated and if some of them evaluate to true,
the method stops and the transition is taken.
This material is copyright and is licensed for the sole use by ALESSANDRO CAROLLO on 18th December 2009
6393 south jamaica court, , englewood, , 80111
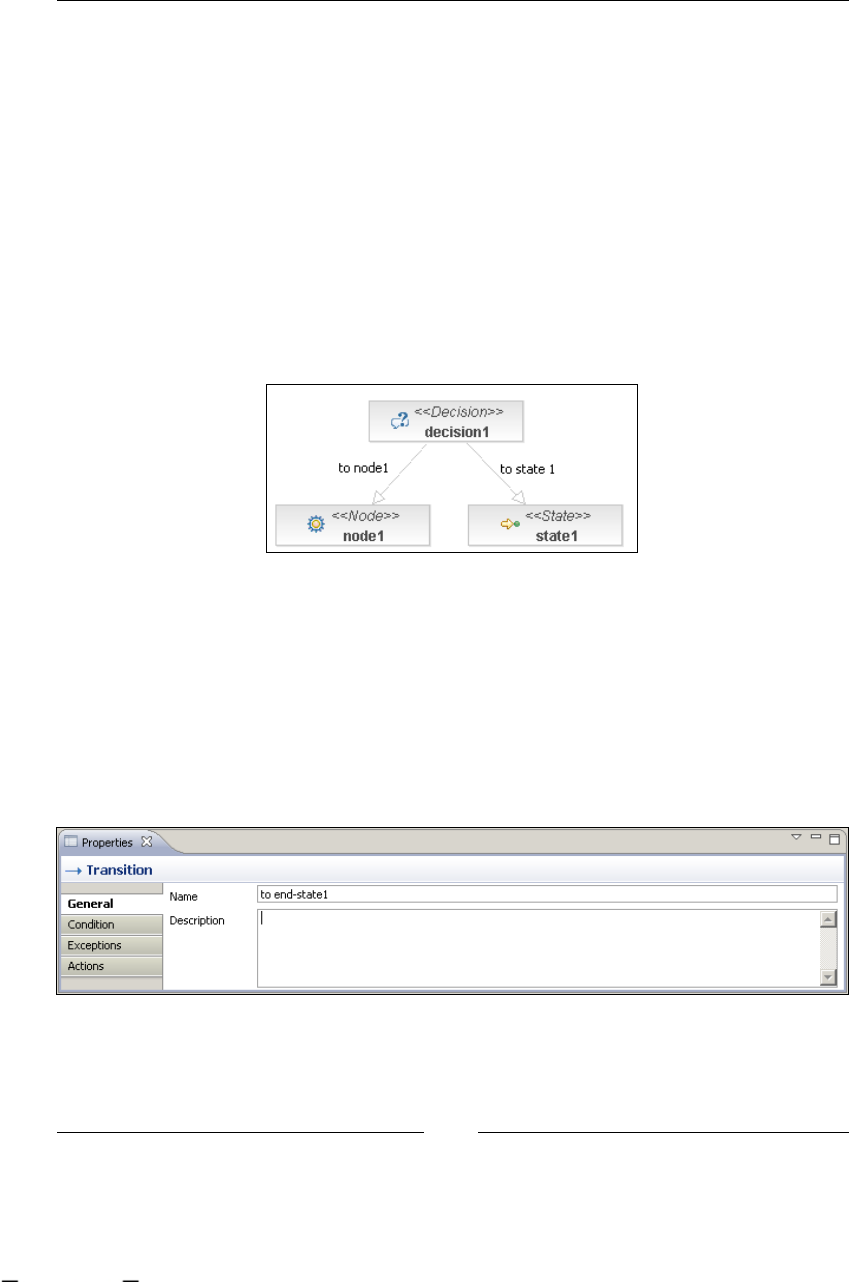
Chapter 4
[ 131 ]
Summarizing the above, we can say that the decision priority will be:
Delegation class
Expression evaluation
Conditions inside the transitions (for backward compatibility)
Transitions: joining all my nodes
At last, but not least important, we have the transition element that will join our
nodes in the process denition. These transitions will dene the direction of our
process graph. As we have discussed when we talked about GOP, transitions are
stored in the source node list called leavingTransitions. Each one of them will
have a reference to the destination node.
These transitions will be represented by the class called Transition, which is also a
GraphElement but not a sub class of Node.
As all the transitions are GraphElements, they will a have minimal lifecycle.
Transitions in particular have a single stage lifecycle, represented with the take()
method where technical details (custom behavior) can be added. This is important
because we will have an extra stage (represented with the event) between the
leave() method from the source node and the enter() method from the
destination node, giving us extra exibility for adding custom logic.
•
•
•
This material is copyright and is licensed for the sole use by ALESSANDRO CAROLLO on 18th December 2009
6393 south jamaica court, , englewood, , 80111
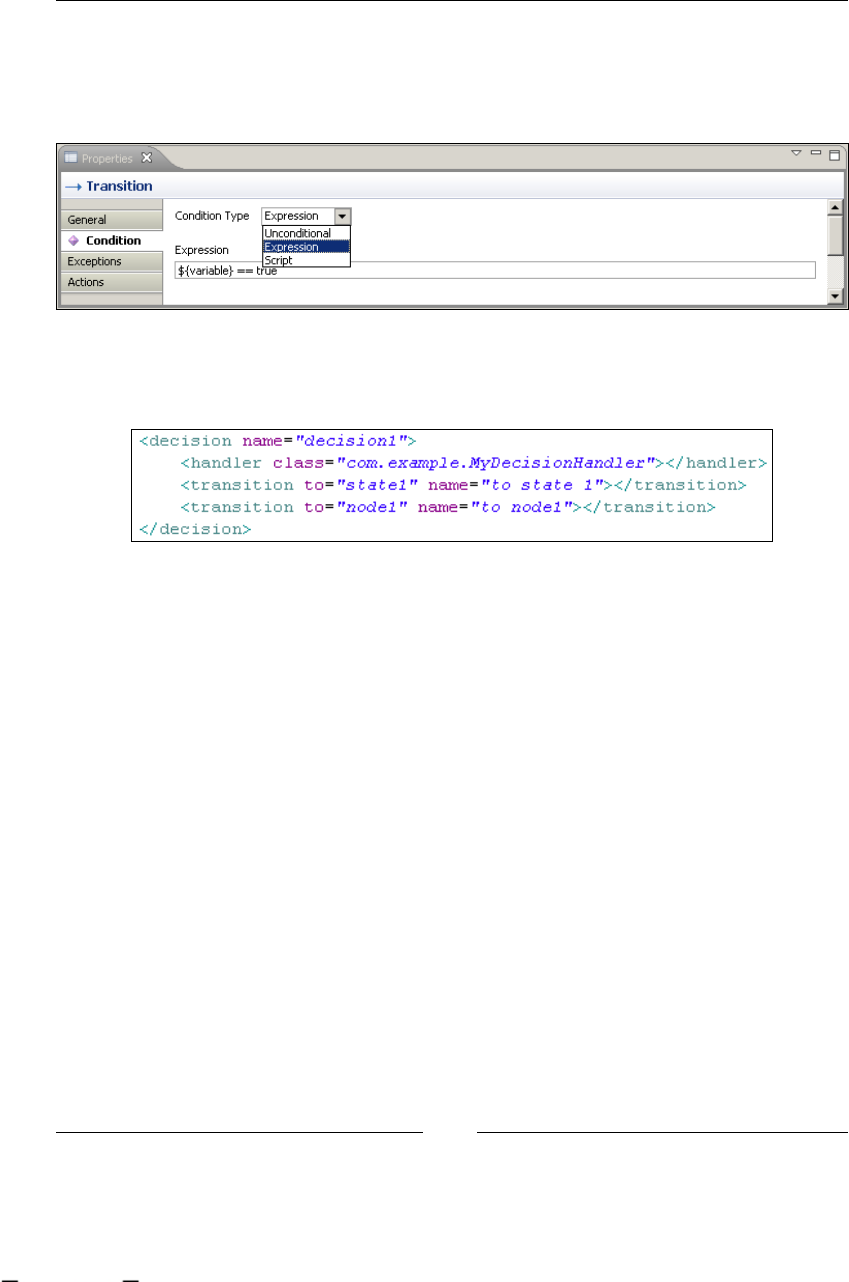
jPDL Language
[ 132 ]
If we look at the code of this class, we will notice that transition doesn't have a
hierarchy relationship with any other class (of course, other than the java.lang.
Object class). If you think about it, there is no need to try to extend this concept,
because it is very generic and exible enough to support any custom logic inside it.
If we use the DecisionHandler inside the decision node where we delegate
the decision to an external class, the conditions will be inside that class and the
transitions will be generated clean, as we can see in the following image:
Try to add some expressions and see how the code of the conditions is generated
inside the transition tag.
Executing our processes
Until now, we have discussed ve basic nodes and how the information is stored in
each one of them. We have also seen how each node would behave in the execution
stage, but we haven't seen how to execute them.
Basically, a process execution stage is represented with an object called
ProcessInstance. This object will contain all the information related, with
just one execution of our process denition.
In order to create one process execution, we will need to have the
ProcessDefinition object that will represent which process we want to
execute. We have seen a little preview about this in the last section of Chapter 3,
Setting Up our Tools.
This material is copyright and is licensed for the sole use by ALESSANDRO CAROLLO on 18th December 2009
6393 south jamaica court, , englewood, , 80111

Chapter 4
[ 133 ]
Now we are going to analyze some sections of the ProcessInstance class to see
some important concepts. These concepts will be extended when you start using the
framework and realize that you need to be sure about the runtime behavior of your
process and how to interact with this just-created execution.
Some interesting properties in the ProcessInstance class that we need to know are:
long id;
int version;
protected Date start;
protected Date end;
protected ProcessDefinition processDefinition;
protected Token rootToken;
As you can see here, some important properties will be the two Dates—start and
end. These two properties will store the specic point of time when the process starts
and also when it ends. It is important to store this information in order to be able
to analyze the statistics of the processes' execution, which will help us to optimize
them. You can also see that the ProcessDefinition object is stored in order to know
which process we are executing.
Finally, the most important property here is the Token rootToken property. This
property will represent all of the executional aspects of our process. The word token
is used to represent how the execution is passed from one node to the next until it
reaches a node of the End State type.
As we have seen in Chapter 3, the main constructors for the ProcessInstance
class are:
public ProcessInstance(ProcessDefinition processDefinition)
{
this(processDefinition, null, null);
}
public ProcessInstance(ProcessDefinition processDefinition,
Map<String, Object> variables)
{
this(processDefinition, variables, null);
}
Both of them call for the real implementation of the constructor that initializes
some internal variables, in order to correctly start the process execution. In this
initialization, a new token will be created, the StartState node will be selected,
and the token will be placed inside this StartState node, which will behave as a
wait state until someone starts the process ow.
This material is copyright and is licensed for the sole use by ALESSANDRO CAROLLO on 18th December 2009
6393 south jamaica court, , englewood, , 80111

jPDL Language
[ 134 ]
In the second constructor, a Map<String, Object> is passed as the second argument.
This map will contain all the variables needed before the process starts. This could be
because some information is needed before it starts in the early stages of the process.
If we look at the methods that the class proposes, we could nd that the most
important ones are wrapper methods that interact with this internal token. If
we jump to the operations section of the method, we will nd the rst one—the
signal() method comes in three avors:
// operations ///////////////////////////////////////////////////////
////////
/**
* instructs the main path of execution to continue by
taking the default transition on the current node.
*
* @throws IllegalStateException if the token is not active.
*/
public void signal()
{
if (hasEnded())
{
throw new IllegalStateException("couldn't signal token :
token has ended");
}
rootToken.signal();
}
/**
* instructs the main path of execution to continue by
taking the specified transition on the current node.
*
* @throws IllegalStateException if the token is not active.
*/
public void signal(String transitionName)
{
if (hasEnded())
{
throw new IllegalStateException("couldn't signal token :
token has ended");
}
rootToken.signal(transitionName);
}
/**
This material is copyright and is licensed for the sole use by ALESSANDRO CAROLLO on 18th December 2009
6393 south jamaica court, , englewood, , 80111

Chapter 4
[ 135 ]
* instructs the main path of execution to continue by
taking the specified transition on the current node.
*
* @throws IllegalStateException if the token is not active.
*/
public void signal(Transition transition)
{
if (hasEnded())
{
throw new IllegalStateException("couldn't signal token :
token has ended");
}
rootToken.signal(transition);
}
All of the methods in the operations section will be in charge of letting us interact
with the process execution. The method signal will inform the process that the
token needs to continue the process execution to the next node when it is stopped
in a wait state situation. This method, and the word signal itself, are used to
represent an external event that will inuence the current status of the process. As
we can see in the following image, the process execution will stop when it reaches
a node that behaves like a wait state. So, if we try to access the rootToken of the
ProcessIntance object and get the node where it is currently stopped, we will
nd that this node is behaving as a wait state.
The next method inside the operations section is the end method that will terminate
our process execution on lling the endDate property. All the processes that have
this property with a non-null value will be excluded from all of the lists that show
the current process execution.
/*** ends (=cancels) this process instance and
all the tokens in it. */
public void end()
{
// end the main path of execution
rootToken.end();
if (end == null)
{
// mark this process instance as ended
setEnd(Clock.getCurrentTime());
// fire the process-end event
ExecutionContext executionContext =
new ExecutionContext(rootToken);
processDefinition.fireEvent(Event.EVENTTYPE_PROCESS_END,
executionContext);
This material is copyright and is licensed for the sole use by ALESSANDRO CAROLLO on 18th December 2009
6393 south jamaica court, , englewood, , 80111

jPDL Language
[ 136 ]
// add the process instance end log
rootToken.addLog(new ProcessInstanceEndLog());
...
ExecutionContext superExecutionContext =
new ExecutionContext(superProcessToken);
superExecutionContext.setSubProcessInstance(this);
superProcessToken.signal(superExecutionContext);
}
...
}
As you can see, the method end will rst of all get the current token and end it. Then
it will get the current timestamp and set the endDate property. Finally, it res the
Event.EVENTTYPE_PROCESS_END event to advise everyone that the process instance
has been completed. Also, it is important to note the rst comment at the top of
the method, which informs us that ends could be also interpreted as canceled. This
comment is important, because in most cases, we don't need to end our process
instances, as they will end automatically when the execution reaches one of the
possible end states. This method is only used when we want to nish the process
at a point at which it is not supposed to end.
Basically, you will need only your process denition object, then create a new
ProcessInstance instance, and call the method signal for the process to start.
We can see that in the following code snippet:
ProcessDefinition processDefinition = ProcessDefinition.
parseXmlResource("simple/processdefinition.xml");
ProcessInstance instance = new ProcessInstance(processDefinition);
instance.signal();
Now you have all the tools required to start modeling the basic process. We are
now ready to continue. So, get your tools, because it's time to get your hands dirty
with code!
This material is copyright and is licensed for the sole use by ALESSANDRO CAROLLO on 18th December 2009
6393 south jamaica court, , englewood, , 80111

Chapter 4
[ 137 ]
Summary
We have learnt the basic nodes in this chapter—you need to understand how these
nodes work in order to correctly model your business processes. It is important to
note that, these nodes implement only the basic functionality, and more advanced
nodes will be discussed in the following chapters.
In this chapter we start with the most generic node called "Node". This node will be
our main word in our jPDL language. Extending it we will dene all the other words
giving us an extreme exibility to represent real business scenarios.
Then we analyze the StartState and EndState node. Both nodes have very similar
implementations and lifecycles and allow us to create correct denitions using the
jPDL syntax.
Finally, the nodes State and Decision were analyzed. The rst one, State node,
has the most simplistic implementation, letting us describe/model a wait state
situation, where the node's job is only to wait, doing nothing, until some external
event comes. The second one, Decision node, has a little more logic inside it, and it
will help us in situations where we need to make an automatic decision inside our
process ow.
In the next chapter, we will build real business processes inside real applications
using these basic nodes. These real processes will help us to understand how our
designed process will behave in a real runtime environment.
This material is copyright and is licensed for the sole use by ALESSANDRO CAROLLO on 18th December 2009
6393 south jamaica court, , englewood, , 80111

This material is copyright and is licensed for the sole use by ALESSANDRO CAROLLO on 18th December 2009
6393 south jamaica court, , englewood, , 80111

Getting Your Hands Dirty
with jPDL
In this chapter, we will practice all the conceptual and theoretical points that we have
already discussed in the previous chapters. Here we will cover the main points that
you need in order to start working with the jBPM framework.
This chapter will tackle, in a tutorial fashion, the rst steps that you need to know in
order to start using the framework with the right foot. We will follow a real example
and transform the real situation into requirements for a real jBPM implementation.
This example will introduce us to all the basic jPDL nodes used in common
situations for modeling real world scenarios. That's why this chapter will cover
the following topics:
Introduction to the recruiting example
Analyzing the example requirements
Modeling a formal description
Adding technical details to our formal description
Running our processes
We have already seen all the basic nodes that the jPDL language provides. Now it's
time to see all of them in action. It is very important for the newcomers to see how
the concepts discussed in previous chapters are translated into running processes
using the jBPM framework.
The idea of this short chapter is to show you a real process implementation. We will
try to cover every technical aspect involved in development in order to clarify not
only your doubts about modeling, but also about the framework behavior.
•
•
•
•
•
This material is copyright and is licensed for the sole use by ALESSANDRO CAROLLO on 18th December 2009
6393 south jamaica court, , englewood, , 80111

Getting Your Hands Dirty with jPDL
[ 140 ]
How is this example structured?
In this chapter, we will see a real case where a company has some requirements to
improve an already existing, but not automated process.
The current process is being handled without a software solution, practically we
need to see how the process works everyday to nd out the requirements for our
implementation. The textual/oral description of the process will be our rst input,
and we will use it to discover and formalize our business process denition.
Once we have a clear view about the situation that we are modeling, we will draw
the process using GPD, and analyze the most important points of the modeling
phase. Once we have a valid jPDL process artifact, we will need to analyze what
steps are required for the process to be able to run in an execution environment.
So, we will add all the technical details in order to allow our process to run.
At last, we will see how the process behaves at runtime, how we can improve
the described process, how we can adapt the current process to future changes,
and so on.
Key points that you need to remember
In these kind of examples, you need to be focused on the translation that occurs
from the business domain to the technical domain. You need to carefully analyze
how the business requirements are transformed to a formal model description that
can be optimized.
Another key point here, is how this formal description of our business scenario
needs to be congured (by adding technical details) in order to run and guide the
organization throughout its processes.
I also want you to focus on the semantics of each node used to model our process. If
you don't know the exact meaning of the provided nodes, you will probably end up
describing your scenario with the wrong words.
You also need to be able to distinguish between a business analyst model, which
doesn't know about the jPDL language semantics and a formal jPDL process
denition. At the same time, you have to be able to do the translations needed
between these two worlds. If you have business analysts trained in jPDL, you will
not have to do these kind of translations and your life will be easier. Understanding
the nodes' semantics will help you to teach the business analysts the correct meaning
of jPDL processes.
This material is copyright and is licensed for the sole use by ALESSANDRO CAROLLO on 18th December 2009
6393 south jamaica court, , englewood, , 80111

Chapter 5
[ 141 ]
Analyzing business requirements
Here we will describe the requirements that need to be covered by the recruiting
team inside an IT company. These requirements will be the rst input to be analyzed
in order to discover the business process behind them.
These requirements are expressed in a natural language, just plain English. We will
get these requirements by talking to our clients—in this case, we will talk to the
manager of an IT company called MyIT Inc. in order to nd out what is going
on in the recruiting process of the company.
In most cases, this will be a business analyst's job, but you need to be aware of the
different situations that the business scenario can present as a developer. This is very
important, because if you don't understand how the real situation is sub-divided into
different behavioral patterns, you will not be able to nd the best way to model it.
You will also start to see how iterative this approach is. This means that you will
rst view a big picture about what is going on in the company, and then in order to
formalize this business knowledge, you will start adding details to represent the real
situation in an accurate way.
Business requirements
In this section, we will see a transcription about our talk with the MyIT Inc. manager.
However, we rst need to know the company's background and, specically, how it
is currently working. Just a few details to understand the context of our talk with the
company manager would be sufcient.
The recruiting department of the MyIT Inc. is currently managed without any
information system. They just use some simple forms that the candidates will have to
ll in at different stages during the interviews. They don't have the recruiting process
formalized in any way, just an abstract description in their heads about how and
what tasks they need to complete in order to hire a new employee when needed.
In this case, the MyIT Inc. manager tells us the following functional requirements
about the recruiting process that is currently used in the company:
This material is copyright and is licensed for the sole use by ALESSANDRO CAROLLO on 18th December 2009
6393 south jamaica court, , englewood, , 80111

Getting Your Hands Dirty with jPDL
[ 142 ]
We have a lot of demanding projects, that's why we need to hire new employees on a
regular basis. We already have a common way to handle these requests detected by
project leaders who need to incorporate new members into their teams.
When a project leader notices that he needs a new team member, he/she will
generate a request to the human resources department of the company. In this
request, he/she will specify the main characteristics needed by the new team
member and the job position description.
When someone in the human resources team sees the request, they will start
looking for candidates to fulll the request. This team has two ways of looking
for new candidates:
By publishing the job position request in IT magazines
By searching the resume database that is available to the company
When a possible candidate is found through these methods, a set of interviews will
begin. The interviews are divided into four stages that the candidate needs to go
through in order to be hired.
These stages will contain the following activities that need to be performed in the
prescribed order:
Initial interview: The human resources team coordinates an initial interview
with each possible candidate found. In this interview, a basic questionnaire
about the candidate's previous jobs and some personal data is collected.
Technical interview: During the technical interview stage, each candidate is
evaluated only with the technical aspects required for this particular project.
That is why a project member will conduct this interview.
Medical checkups: Some physical and psychological examinations need to
be done in order to know that the candidate is healthy and capable to do the
required job. This stage will include multiple checkups which the company
needs to determine if the candidate is apt for the required task.
Final acceptance: In this last phase the candidate will meet the project
manager. The project manager is in charge of the nal resolution. He will
decide if the candidate is the correct one for that job position. If the outcome
of this interview is successful, the candidate is hired and all the information
needed for that candidate to start working is created.
If a candidate reaches the last phase and is successfully accepted, we need to
inform the recruiting team that all the other candidate's interviews need to be
aborted, because the job position is already fullled.
•
•
•
•
•
•
This material is copyright and is licensed for the sole use by ALESSANDRO CAROLLO on 18th December 2009
6393 south jamaica court, , englewood, , 80111
Chapter 5
[ 143 ]
At this point, we need to analyze and evaluate the manager's requirements and nd
a graphical way to express these stages in order to hire a new employee. Our rst
approach needs to be simple and we need to validate it with the MyIT Inc. manager.
Let's see the rst draft of our process:
Initial
Interview
Technical
Interview
Medical Check
Ups
Final
Acceptance
With this image, we were able to describe the recruiting process. This is our rst
approach that obviously can be validated with the MyIT Inc. manager. This is our
rst draft that tells us how our process will appear and it's the rst step in order
to dene which activities will be included in our model and which will not. In
real implementations, these graphs can be made with Microsoft Visio, DIA (Open
Source project), or just by hand. The main idea of the rst approach is to rst have a
description that can be validated and understood by every MyIT Inc. employee.
This image is only a translation of the requirements that we hear from the manager
using common sense and trying to represent how the situation looks in real life.
In this case, we can say that the manager of the MyIT Inc. can be considered as the
stakeholder and the Subject Matter Expert (SME), who know how things happen
inside the company.
Once the graph is validated and understood by the stakeholder, we can use our
formal language jPDL to create a formal model about this discovered process.
This material is copyright and is licensed for the sole use by ALESSANDRO CAROLLO on 18th December 2009
6393 south jamaica court, , englewood, , 80111
Getting Your Hands Dirty with jPDL
[ 144 ]
The idea at this point, is to create a jPDL process denition and discard the old
graph. From now on we will continue with the jPDL graphic representation of the
process. Here you can explain to the manager that all the new changes that affect
your process will go directly to the jPDL dened process.
Until now our artifact has suffered the following transformations:
Transcript from
the description
given by the
manager
Description Hand Sketch
of the
process
Formalization
jPDL/XML
The nal artifact (the jPDL process denition) will let us begin the
implementation of all the technical details needed by the process in order
to run in an execution environment.
So, let's analyze how the jPDL representation will look for this rst approach in the
following gure:
<<Start State>>
START
<<End State>>
END
<<State>>
Initial Interview
<<State>>
Medical Check Ups
<<State>>
Final Acceptance
<<State>>
Technical Interview
This material is copyright and is licensed for the sole use by ALESSANDRO CAROLLO on 18th December 2009
6393 south jamaica court, , englewood, , 80111

Chapter 5
[ 145 ]
At this point we don't add any technical details, we just draw the process. One key
point to bear in mind in this phase is that we need to understand which node we will
use to represent each activity in our process denition.
Remember that each node provided by jPDL has its own semantics and meanings.
You also need to remember that this graph needs to be understood by the manager, so
you will use it in the activity name business language. For this rst approach we use
state nodes to represent that each activity will happen outside the process execution.
In other words, we need to inform the process when each activity ends. This will mean
that the next activity in the chain will be executed. From the process perspective, it
only needs to wait until the human beings in the company do their tasks.
Analyzing the proposed formal definition
Now that we have our rst iteration that denes some of the important aspects
described by the MyIT Inc. manager, some questions start to arise with relation to
our rst sketch, if it is complete enough, or not. We need to be sure that we represent
the whole situation and it denes the activities that the candidates and all the people
involved in the process need, to fulll the job position with a new employee. We will
use the following set of questions and their answers as new requirements to start the
second iteration of improvement.
The idea is that each iteration makes our process one step closer
to reecting the real situation in the company. For reaching that
goal, we also need to be focused on the people who complete each
activity inside our process. They will know whether the process is
complete or not. They know all the alternative activities that could
happen during the process execution.
If we see the proposed jPDL denition we can ask the following questions to add
more details to our denition.
How about the rst part of the description? Where is it represented? The
proposed jPDL process just represents the activities of the interviews, but it
doesn't represent the request and the creation of the new job position.
What happens if the candidate goes to the rst interview and he/she doesn't
fulll the requirements for that job position?
How many medical checkups are done for each candidate?
What happens if we fulll the job position? What happens with the rest of
the candidates?
•
•
•
•
This material is copyright and is licensed for the sole use by ALESSANDRO CAROLLO on 18th December 2009
6393 south jamaica court, , englewood, , 80111

Getting Your Hands Dirty with jPDL
[ 146 ]
These questions will be answered by the MyIT Inc. manager and the people who
are involved in the process activities (business users). The information provided by
the following answers will represent our second input, which will be transformed
into functional requirements. These requirements need to be reected in our formal
description once again. Let's take a look at the answers:
How about the rst part of the description? Where is it represented?
The proposed jPDL process just represents the activities of the
interviews, but it doesn't represent the request and the creation of the
new job position.
Yes, we will need to add that part too. It's very important for us to have
all the processes represented from the beginning to the end. Also, you
need to understand that the interviews are undertaken for each candidate
found, and the request to fulll a new job position is created just once. So
the relationship between the interviews and the new employee request is
1 to N, because for one request, we can interview N candidates until the
job position is fullled.
What happens if the candidate goes to the rst interview and he/she
doesn't fulll the requirements for that job position?
The candidate that doesn't pass an interview is automatically discarded.
There is no need to continue with the following activities if one of the
interviews is not completed successfully.
How many medical checkups are done for each candidate?
All the candidates need to pass three examinations. The rst one
will check the physical status of the candidate, the second will check
the psychological aspects, and the third one will be a detailed heart
examination.
What happens if a candidate fullls the job position? What happens
with the rest of the candidates?
If one of the candidates is accepted, all the remaining interviews for all
the other candidates need to be aborted.
This material is copyright and is licensed for the sole use by ALESSANDRO CAROLLO on 18th December 2009
6393 south jamaica court, , englewood, , 80111
Chapter 5
[ 147 ]
Refactoring our previously defined process
Now with the answers to our questions, we can add some extra nodes to represent
the new information provided. Take a look at the following image of the process,
you will nd new nodes added, and in this section, we will discuss the reason for
each of them.
The new proposed process is much more complex than the rst, but the main idea is
still intact. You need to be able to understand the process ow without problems. It's
more complex just because it represents the real situation more closely.
<<Decision>>
Technical Interview Passed?
<<Fork>>
<<State>>
Technical Interview
<<Decision>>
Initial Interview Passed?
<<State>>
Initial Interview
<<Start State>>
Interview Possible Candidate
<<State>>
Heart Check Up
<<Join>>
<<Decision>>
Medical Exams passed?
<<State>>
Project leader Interview
<<Decision>>
Final Acceptance?
<<Node>>
Create Workstation
<<End State>>
Candidate Accepted
<<State>>
Physical Check Up
<<State>>
Psychological Check Up
?
?
?
?
to Heart Check Up
to Physical Check Up to Psychological Check Up
No- Find a New Candidate
No- Find a New Candidate
No- Find a New Candidate
No- Find a New Candidate
Last Interview
<<End State>>
Candidate Discarded
This material is copyright and is licensed for the sole use by ALESSANDRO CAROLLO on 18th December 2009
6393 south jamaica court, , englewood, , 80111
Getting Your Hands Dirty with jPDL
[ 148 ]
In this section, we will review all the nodes added at each stage of the process.
With this, you will have a clear example to see how a real situation is translated
to a specic node type in our process denition and how we will iteratively add
information when we nd more and more details about the situation.
<<Start State>>
Interview Possible Candidate
<<State>>
Initial Interview
<<Decision>>
Initial Interview Passed?
Approved - Go to Technical Interview
?
If you take a look at the CandidateInterviews process (/RecruitingProcess/src/
main/resources/jpdl/CandidateInterviews/processdefinition.xml), you
will see that the rst node (Start State node) doesn't have the default name Start/
start-state1. Here, I have chosen a more business-friendly name, Interview Possible
Candidate. This name looks too long, but it says precisely what we are going to do
with the process. Here a possible candidate was found and the process will interview
him/her in order to decide if this candidate is the correct one for the job.
Using the business terminology will help us to have a more descriptive
process graph that can be easily validated by the stakeholders.
The second node called Initial Interview will represent the rst interview for each
selected candidate. This means that someone in the recruiting team will schedule a
face-to-face meeting with the candidate to have the rst interview. If you take a close
look at the process denition graph or the jPDL process denition XML, you will
nd that for this activity, I have chosen to use a State node. I chose this type of node,
because the activity of having an interview with the candidate is an external activity
that needs to be done by a person and not by the process. The process execution
must wait until this activity is completed by the candidate and by the recruiting
team. In the following (more advanced) chapters, we will see how to use a more
advanced node to represent these human activity situations. For now, we will use
state nodes to represent all the human activities in our processes.
Once the Initial Interview is completed, an automatic decision node will evaluate
the outcome of the interview to decide if the candidate must be discarded, or if
he/she should continue to the next stage of the process.
This material is copyright and is licensed for the sole use by ALESSANDRO CAROLLO on 18th December 2009
6393 south jamaica court, , englewood, , 80111
Chapter 5
[ 149 ]
This will look like:
<<State>>
Initial Interview
<<State>>
Technical Interview
Approved - Go to Technical Interview
<<Decision>>
Initial Interview Passed?
?
<<End State>>
Candidate Discarded
No - Find a new Candidate
Just for you to know, this is not the only way to model these kinds of situations, feel
free to try other combinations of nodes to represent the same behavior.
The decision node is used to decide for which transition the process will continue
its execution. This decision node can dene N (in this case, only two) leaving
transitions, but at runtime, just one will be chosen to continue.
Remember that the Decision node takes a transition based on the following two
evaluation methods:
Using an EL expression
Using a delegated class, implementing the method interface
DecisionHandler
No matter which method we choose, the information that is used to make a
decision needs to be set before the node was reached by the process execution.
In this situation, the information used in the evaluation method of the decision
node will be set in the state node called Initial Interview as the interview outcome.
Another way you can use to model this situation is by dening
multiple leaving transitions from the state node.
<<State>>
state1
<<State>>
state3
<<State>>
state2
to state2 to state3
•
•
This material is copyright and is licensed for the sole use by ALESSANDRO CAROLLO on 18th December 2009
6393 south jamaica court, , englewood, , 80111
Getting Your Hands Dirty with jPDL
[ 150 ]
This approach writes the following logic inside an action of the state node:
1. The logic used to determine which transition to take is based on
the interview outcome.
2. Explicitly signals one of the N leaving transitions dened based on
the logic outcome.
This approach tends to be more difcult to maintain than a detached
decision node that handles all that logic. Basically, it is up to you to decide
how to model these kinds of situations.
The pattern of using a state node and then a decision node, to decide if the
previous activity is completed, with the desired outcome, is applied throughout
all the process stages in order to decide if the candidate can continue or not,
based on each activity's outcome.
The next stage described in the process denition looks exactly the same as the rst
one. The Technical Interview looks exactly the same as the Initial Interview stage.
It also includes a decision node to evaluate the outcome of this specic interview.
If the candidate passes/approves the rst two interviews, some medical
examinations need to be taken in the third stage.
As these check ups have to be done in different buildings across the city, taking
advantage of the fact that all of them are independent from each other, a fork node is
used to represent this temporal independence. Take a look at the following image:
<<State>>
psychological Check Up
<<State>>
Heart Check Up
<<State>>
Physical Check Up
to Physical Check Up to Psychological Check Up
to Heart Check Up
<<Fork>>
<<Join>>
Here we need to understand that the Fork and Join nodes are used to dene behavior,
not to represent a specic activity by itself. In this situation, the candidate has the
possibility to choose which exam to take rst. The only restriction that the candidate
has is that he/she needs to complete all the activities to continue to the next stage. It
is the responsibility of the Join node to wait for all the activities between the Fork and
Join nodes to complete before it can continue with the execution.
This material is copyright and is licensed for the sole use by ALESSANDRO CAROLLO on 18th December 2009
6393 south jamaica court, , englewood, , 80111

Chapter 5
[ 151 ]
This section of the modeled process will behave and represent the
following situations:
When the process execution arrives at the fork node. (Note that the fork node
doesn't represent any one-to-one relationship with any real-life activity. It is
just used to represent the concurrent execution of the activities.)
It will trigger three activities, in this case, represented by state nodes. This
is because the checkups will be done by an external actor in the process. In
other words, each of these activities will represent a wait state situation that
will end when each doctor nishes each candidate's checkup and noties the
outcome of the process.
In this case, when the three activities end, the process goes through the join
node and propagates the execution to the Decision node to evaluate the
outcome of the three medical checkups. If the candidate doesn't have three
successful outcomes, he/she will automatically be discarded.
We use the fork node because the situation behaviors can be
modeled as concurrent paths of execution. A detailed analysis of
the fork node will take place in the following chapters. But it's
important for you to play a little bit with it to start knowing this
node type. Try to understand what we are doing with it here.
Describing how the job position is
requested
In the previous section, we nd all the answers to our questions; however, a few
remain unanswered:
How is the rst part of the process represented? How can we track when the
new job position is discovered, the request for that job position is created,
and when this job position is fullled?
Why can't we add more activities to the current dened process? What
happens when we add the create request, nd a candidate, and job position
fullled activities inside the interview process?
•
•
•
•
•
This material is copyright and is licensed for the sole use by ALESSANDRO CAROLLO on 18th December 2009
6393 south jamaica court, , englewood, , 80111
Getting Your Hands Dirty with jPDL
[ 152 ]
The answers for these questions are simple. We cannot add these proposed nodes
to the same process denition, because the interview process needs to be carried
out (needs to be instantiated) once for each candidate that the recruiting team nds.
Basically, we need to decouple all these activities into two processes. As the MyIT
Inc. manager said, the relationship between these activities is that a job request will
be associated with the N-interviews' process.
The other important thing to understand here, is that both the processes can be
decoupled without using a parent/child relationship. In this case, we need to create
a new interview's process instance when a new candidate is found. In other words,
we don't know how many interviews' process instances are created when the request
is created. Therefore, we need to be able to make these creations dynamically.
We will introduce a new process that will dene these new activities. We need to
have a separate concept that will create an on-demand new candidate interviews'
process, based on the number of candidates found by the human resources team.
This new process will be called "Request Job Position" and will include the
following activities:
Create job request: Different project leaders can create different job requests
based on their needs. Each time that a project leader needs to hire a new
employee, a new instance of this process will be created where the rst
activity of this process is the creation of the request.
Finding a candidate: This activity will cover the phase when the research
starts. Each time the human resources team nds a new candidate inside this
activity, they will create a new instance of the candidate interviews' process.
When an instance of the candidate interviews' process nds a candidate who
fullls all the requirements for that job position, all the remaining interviews
need to be aborted.
We can see the two process relationships in the following gure:
Create Job Request
Find Candidate
For Each
possible Candidate
Candidate Found
Candidate Interviews
If we express the Request Job Position process in jPDL, we will obtain something
like this:
•
•
This material is copyright and is licensed for the sole use by ALESSANDRO CAROLLO on 18th December 2009
6393 south jamaica court, , englewood, , 80111

Chapter 5
[ 153 ]
<<Start State>>
Job Position Opened
<<End State>>
Job Position Fulfilled
<<State>>
Create request
<<State>>
Finding Candidate
In the following section, we will see two different environments in which we can run
our process. We need to understand the differences between them in order to be able
to know how the process will behave in the runtime stage.
Environment possibilities
Based on the way we choose to embed the framework in our application, it's the
conguration that we need. We have three main possibilities:
Standalone applications
Web applications
Enterprise application (this will be discussed in Chapter 12, Going Enterprise)
Standalone application with jBPM embedded
In Java Standard Edition (J2SE) applications, we can embed jBPM and connect it
directly to a database in order to store our processes. This scenario will look like the
following image:
Standalone
Application Database
jbpm-jpdl.jar jbpm.cfg.xml /
hibernate.cfg.xml
•
•
•
This material is copyright and is licensed for the sole use by ALESSANDRO CAROLLO on 18th December 2009
6393 south jamaica court, , englewood, , 80111
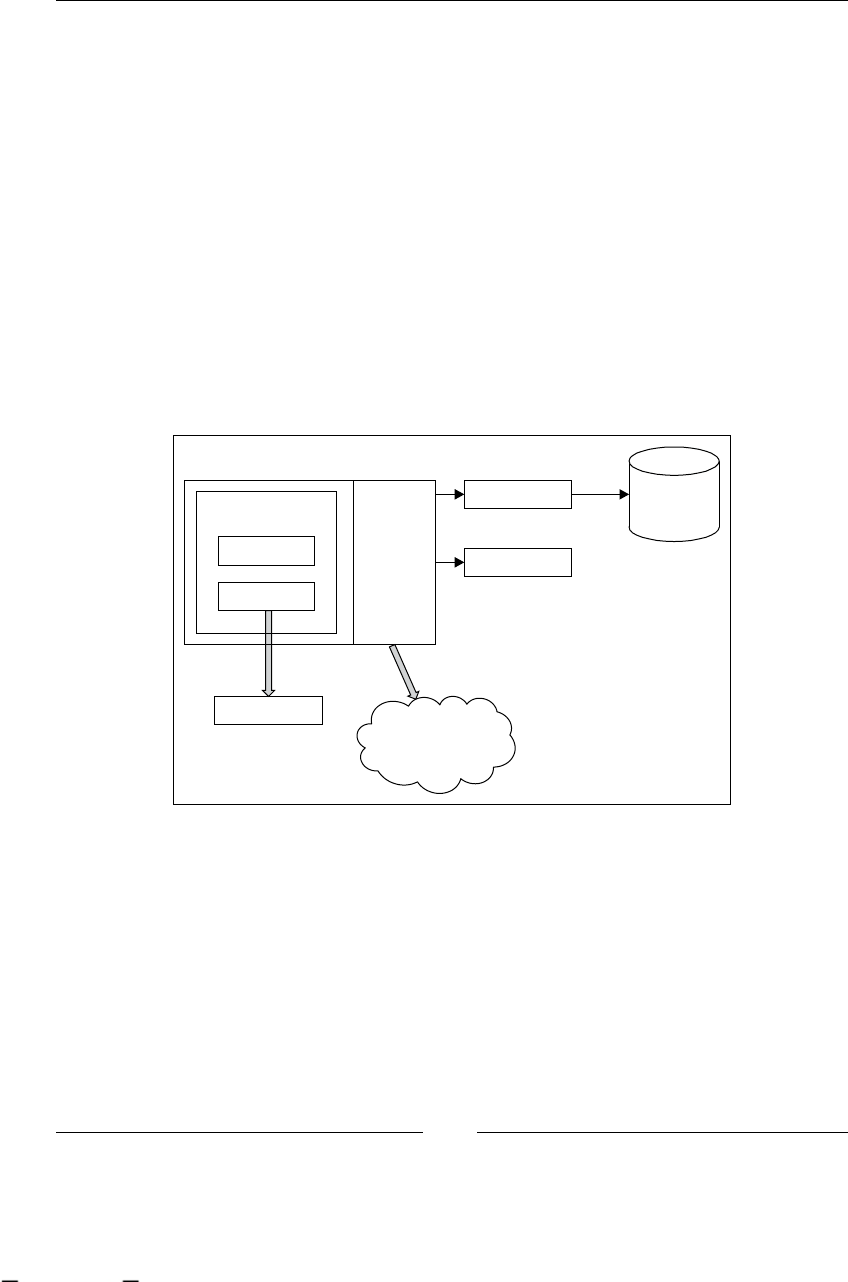
Getting Your Hands Dirty with jPDL
[ 154 ]
In this case, we need to include the jBPM JARs in our application classpath in order
to work. This is because our application will use the jBPM directly in our classes.
In this scenario, the end users will interact with a desktop application that includes
the jbpm-jpdl.jar le. This will also mean that in the development process, the
developers will need to know the jBPM APIs in order to interact with different
business processes.
It's important for you to know that the conguration les, such as
hibernate.cfg.xml and jbpm.cfg.xml will be congured to access the
database with a direct JDBC connection.
Web application with jBPM dependency
This option varies, depending on whether your application will run on an
application server or just inside a servlet container. This scenario will look like:
jbpm.cfg.xml /
hibernate.cfg.xml
jbpm-jpdl.jar
Libraries
Application
Servlet Container
Services
Database
Data Source
Transactions
In this case, we can choose whether our application will include the jBPM JARs
inside it, or whether the container will have these libraries. But once again, our
application will use the jBPM APIs directly.
In this scenario, the end user will interact with the process using a web page that
will be congured to access a database by using a JDBC driver directly or between
a DataSource conguration.
This material is copyright and is licensed for the sole use by ALESSANDRO CAROLLO on 18th December 2009
6393 south jamaica court, , englewood, , 80111

Chapter 5
[ 155 ]
Running the recruiting example
In this section, we will cover the rst conguration (the standalone one). This
conguration can also be used to develop a web application. We will see that one
has to test the whole process, which has been recently executed in order to see
how it behaves.
This process will live only in memory, and when the thread that starts it dies, all the
changes in that process will be lost. In other words, this process will start and end in
the same thread, without using the database access to store the process status.
Running our process without using any
services
In this section, we will see how our two processes will run using JUnit, so that we
can test their behavior. The idea is to know how to move the process from one state
to the other, and also to see what is really going on inside the framework.
Feel free to debug the source code provided here step by step, and also to step
into jBPM code to see how the jBPM classes interact in order to guide the
company's activities.
In this test, we will see how our two processes are chained logically in order to
simulate the real situation. By "logically", I mean that the two processes are manually
instantiated when they are needed. It is important to notice this, because there are
situations where the process can be automatically instantiated, which is not the
case here.
Take a look at the project called /RecruitingProcess/. You will nd both the
process denitions under /src/main/resources/jpdl. If you open the test called
RecruitingProcessWithOutServicesTestCase located inside /src/test/org/
jbpm/example/recruiting/, you will see a long test that shows how the process
behaves in a normal situation.
Here we will explain this execution in order to understand the expected behavior
and how this can be checked using JUnit asserts.
This material is copyright and is licensed for the sole use by ALESSANDRO CAROLLO on 18th December 2009
6393 south jamaica court, , englewood, , 80111

Getting Your Hands Dirty with jPDL
[ 156 ]
Normal flow test
If you take a look at the method called test_NormalFlowWithOneCandidate()
inside the test case, you will see that we are trying to execute and test the normal
ow of our dened process. We will simulate the situation where a new job position
request is created. Then in our test, a new candidate is found. This will mean that a
new candidate interview process will be created to evaluate if the candidate will get
the job or not.
This is a simple but large test, because the process has a lot of activities. I suggest you
to take a look at the code and follow the comments inside it.
In a few lines, you will see the following behavior:
1. A new job position request is created. This will happen when a project
leader requires a new team member. This will be translated to an instance
of the Request Job Position process. Basically, we parse the jPDL XML
denition to obtain a ProcessDefinition object and then create a new
ProcessInstance from it.
2. Now we need to start this process. When we start this process, the rst
activity is to create the request. This means that someone needs to dene
the requisites that the job position requires. These requisites will then be
matched with the candidate's resume to know if he/she has the required
skills. The requests (requisites) are created automatically to simulate the
developer job position. This is done inside the node-enter event of the
"Create Request" activity. You can take a look at the source code of the
CreateNewJobPositionRequestActionHandler class where all this
magic occurs.
3. When this request is created, we need to continue the process to the next
activity. The next activity is called "Find Candidate". This activity will be
in charge of creating a new process instance for each candidate found by
the human resources team. In the test, you will see that a new candidate
is created and then a new instance of the Candidate Interviews process is
created. Also, in the test, some parameters/variables are initialized before
we start the process that we created. This is a common practice. You will
have a lot of situations like this one where you need to start a process, but
before you can start it, some variables need to be initialized. In this case, we
set the following three variables:
This material is copyright and is licensed for the sole use by ALESSANDRO CAROLLO on 18th December 2009
6393 south jamaica court, , englewood, , 80111

Chapter 5
[ 157 ]
REQUEST_TO_FULFILL: This variable will contain a reference
to the process instance that was created to request a new
job position.
REQUEST_INFO: This variable will contain all the information
that denes the job request. For example, this will contain the
prole that the candidate resume needs to fulll in order to
approve the rst interview.
CANDIDATE_INFO: This variable will contain all the candidate
information needed by the process.
4. Once the variables are set with the correct information, the process can
be started. When the process is started, it stops in the "Initial Interview"
activity. In this activity, some data needs to be collected by the recruiting
team, and this again is simulated inside an action handler called
CollectCandidateDataActionHandler. In this action handler, you
will see that some information is added to the candidate object, which
is stored in the CANDIDATE_INFO process variable.
5. The information stored in the CANDIDATE_INFO process variable is analyzed
by the following node called "Initial Interview Passed?" that uses a
decision handler (called ApproveCandidateSkillsDecisionHandler)
to decide whether the candidate will go to the next activity or he/she
will be discarded.
6. The same behavior is applied to the "Technical Interview" and "Technical
Interview Passed?" activities.
7. Once the technical interview is approved, the process goes directly to the
"Medical Checkups" stage where a fork node will split the path of execution
into three. At this point, three child tokens are created. We need to get each
of these tokens and signal them to end each activity.
8. When all the medical examinations are completed, the join node will
propagate the execution to the next decision node (called "Medical Exams
passed?"), which will evaluate whether the three medical check ups are
completed successfully.
9. If the medical exam evaluation indicates that the candidate is suitable
for the job, the process continues to the last stage. It goes directly to the
Project leader Interview, where it will be decided whether the candidate
is hired or not. The outcome of this interview is stored inside a
process variable called PROJECT_LEADER_INTERVIEW_OK inside
the ProjectLeaderInterviewActionHandler action handler.
That process variable is evaluated by the decision handler
(FinalAcceptanceDecisionHandler) placed inside the "Final
Acceptance?" activity.
°
°
°
This material is copyright and is licensed for the sole use by ALESSANDRO CAROLLO on 18th December 2009
6393 south jamaica court, , englewood, , 80111

Getting Your Hands Dirty with jPDL
[ 158 ]
10. If the outcome of the "Final Acceptance?" node is positive, then an automatic
activity is executed. This node called "Create WorkStation" will execute an
automatic activity, which will create the user in all the company systems. It
will generate a password for that user and nally, create the user's e-mail
account. It will then continue the execution to the "Candidate Accepted"
end state.
11. In the "Candidate Accepted" node, an action is executed to notify that the job
position is fullled. Basically, we end the other process using the reference of
the process stored in the variable called REQUEST_TO_FULFILL.
I strongly recommend that you open the project and debug all the tests to see exactly
what happens during the process execution. This will increase your understanding
about how the framework behaves. Feel free to add more candidates to the situation
and more job requests to see what happens.
When you read Chapter 6, Persistence, you will be able to congure this
process to use the persistence service that will store the process status inside
a relational database.
Summary
In this chapter, we saw a full test that runs two processes' denitions, which are
created based on real requisites. The important points covered in this chapter are:
How to understand real-life processes and transform them into
formal descriptions
How this formal description behaves inside the framework
How to test our process denitions
In the next chapter, we will cover the Persistence congurations that will let us
store our process executions inside the database. This will be very helpful in
situations where we need to wait for external actors or events to continue the
process execution.
•
•
•
This material is copyright and is licensed for the sole use by ALESSANDRO CAROLLO on 18th December 2009
6393 south jamaica court, , englewood, , 80111

Persistence
This chapter will talk about how the jBPM framework handles every task related
to the persistence and storage of our processes information. When we use the word
persistence here, we are talking about storing the runtime status of our processes
outside the RAM memory. We usually do that in order to have a faithful snapshot
of our process executions, which we can continue later when it's required. In the
particular case of jBPM, persistence will mean how the framework uses Hibernate
to store the process instances status to support long-running processes. Here we
will discuss all the persistence mechanisms and all the persistence-related
frameworks' congurations.
If you are planning to do an implementation that will use jBPM, this chapter is for
you. Because, there are a lot of points/topics that can affect your project structure,
there are a lot of advantages and design patterns that you can apply if you know
exactly how the framework works.
As you already know, the database structure of an application needs to represent
and store all the information for that application to work. If you are planning to
embed jBPM in your application, you also need to dene where the framework
will put its own data.
In this chapter, we will cover the following topics:
The reason and the importance of persistence
How persistence will affect our business processes executions
APIs used to handle persistence in the jBPM framework
Conguring persistence for your particular situation
•
•
•
•
This material is copyright and is licensed for the sole use by ALESSANDRO CAROLLO on 18th December 2009
6393 south jamaica court, , englewood, , 80111

Persistence
[ 160 ]
Why do we need persistence?
Everybody knows that the most useful feature of persistence is the fact that it lets us
store all the information and status of each of our processes.
The question then is: when do we need to store all that information? The answer is
simple—every time the process needs to wait for an unknown period of time.
Just for you to remember, every time the process reaches a wait state, the
framework will check the persistence conguration (we will discuss this
conguration in the following sections). If the persistence service is correctly
congured, the framework will try to persist the current process status and all
the information contained inside it.
What is the idea behind that? More than an idea, it is a need, a strong requirement
to support long-running processes. Imagine that one of the activities in our process
could take an hour, a day, a month, even a year, or also could never be completed.
Remember that we are representing our real processes into a formal specication.
But in reality, these kind of things happen. An example that clearly demonstrates
this situation is when someone is waiting for a payment. That's to say, in these times
of world crisis, when people try to save money, we see that some payments will
never be repaid. Also in this kind of situation, where the activity must be achieved
by a third party, outside of the company boundaries, we don't have any type of
control over the time used to complete the activity. If this payment isn't paid back,
and we don't use persistence, our process will be using server resources just to wait.
If you think about it, we will consume server CPU cycles just to wait for something
to happen. This also means that in the cases of server crash, power down, or JVM
failure, our process status will be lost because it only exists in the server RAM
memory where all our applications run.
That is why we need to talk about persistence. It is directly related to the support of
long-running processes. Think about it, if you have some small and quick process
without wait states, you can just run it in the memory without thinking about
persistence, but in all the other cases you must analyze how persistence will
work for you.
As we have mentioned before, using persistence will also give us the exibility
of support server crashes without doing anything. Practically we will have fault
tolerance for free, by just conguring the persistence service. This occurs when our
server crashes and our process is stopped or is waiting in a wait state activity; the
stopped process will not be at the server RAM memory, it will just be stored in the
database waiting for someone or some system to bring it up to complete the activity.
This material is copyright and is licensed for the sole use by ALESSANDRO CAROLLO on 18th December 2009
6393 south jamaica court, , englewood, , 80111
Chapter 6
[ 161 ]
Disambiguate an old myth
Another primary goal of this chapter is to have a clear view about how the
framework works. This view is important because we can hear a lot of confusing
terminology in the market and in the BPM eld. In this section we will attack the
term BPM Engine.
When we (especially I) hear BPM Engine, we automatically imagine a
service/application that is running all the time (24/7) holding your processes
(denition and instances) and provides you a way to interact with it. I imagine
some kind of server where I need to know which port I must use to be able to
communicate to. This is not how it works in jBPM. We need to get out of our
head the idea of a big and heavy server dedicated to our processes.
Remember that jBPM is a framework, and not a BPM engine. The way it works very
different from that concept. And one of the reasons for this difference is the way the
framework uses persistence.
Framework/process interaction
At the beginning, when you see the ofcial documentation of jBPM; it is very difcult
to see the stateless behavior between the framework and the database. Let's analyze
this with a simple process example. Imagine the following situation:
Sell Item
Wait For
Payment
Dispatch Item
In a situation like this, the process is started and run until the process reaches the
Wait For Payment node, it will take all the process instance information and persist
it using Hibernate in the congured database.
This material is copyright and is licensed for the sole use by ALESSANDRO CAROLLO on 18th December 2009
6393 south jamaica court, , englewood, , 80111

Persistence
[ 162 ]
This will cause the process instance object to go out of the server RAM memory.
Basically, the following steps are executed from the beginning of the execution:
1. Get an already deployed process denition from the database. This will
be achieved using the framework APIs, which will generate a query
(rst a Hibernate query that will be translated to a standard SQL query
by Hibernate) to retrieve the process denition and will populate a new
ProcessDefinition object.
2. Create a ProcessInstance instance using the retrieved ProcessDefinition
object. This step doesn't use the database at all, because it only creates a new
ProcessInstance object in memory. When the ProcessInstance object is
created, we can start calling the signal() method.
3. The process ows until it reaches a wait state situation. In this moment,
no matter if the process ows throughout one or one thousand nodes, the
process instance information is persisted for the rst time in the database. In
this case, the framework will generate a set of insert and update queries to
persist all the ProcessInstance object information. As you can remember
from Chapter 4, jPDL Language, the ProcessInstance object has all the
process status information, including the token information and all the
process variables in the ContextInstance object. When all the persistence is
done, all these objects go out from the server memory and leave space for all
the other running instances.
4. When some external system completes the activity, it must inform the
process that it is ready to continue the execution. This is achieved by
retrieving the process information from the database and again populating
a ProcessInstance object with all the information retrieved from the
database. In other words, when other systems/threads wants to nish one
activity and continue to the next node, it retrieves the process status, using
the process ID and signal to the process to continue the execution.
5. The execution continues without using the database until the next wait state
is reached. In this case the end of the process is reached, and the process
instance status is persisted once again.
This material is copyright and is licensed for the sole use by ALESSANDRO CAROLLO on 18th December 2009
6393 south jamaica court, , englewood, , 80111
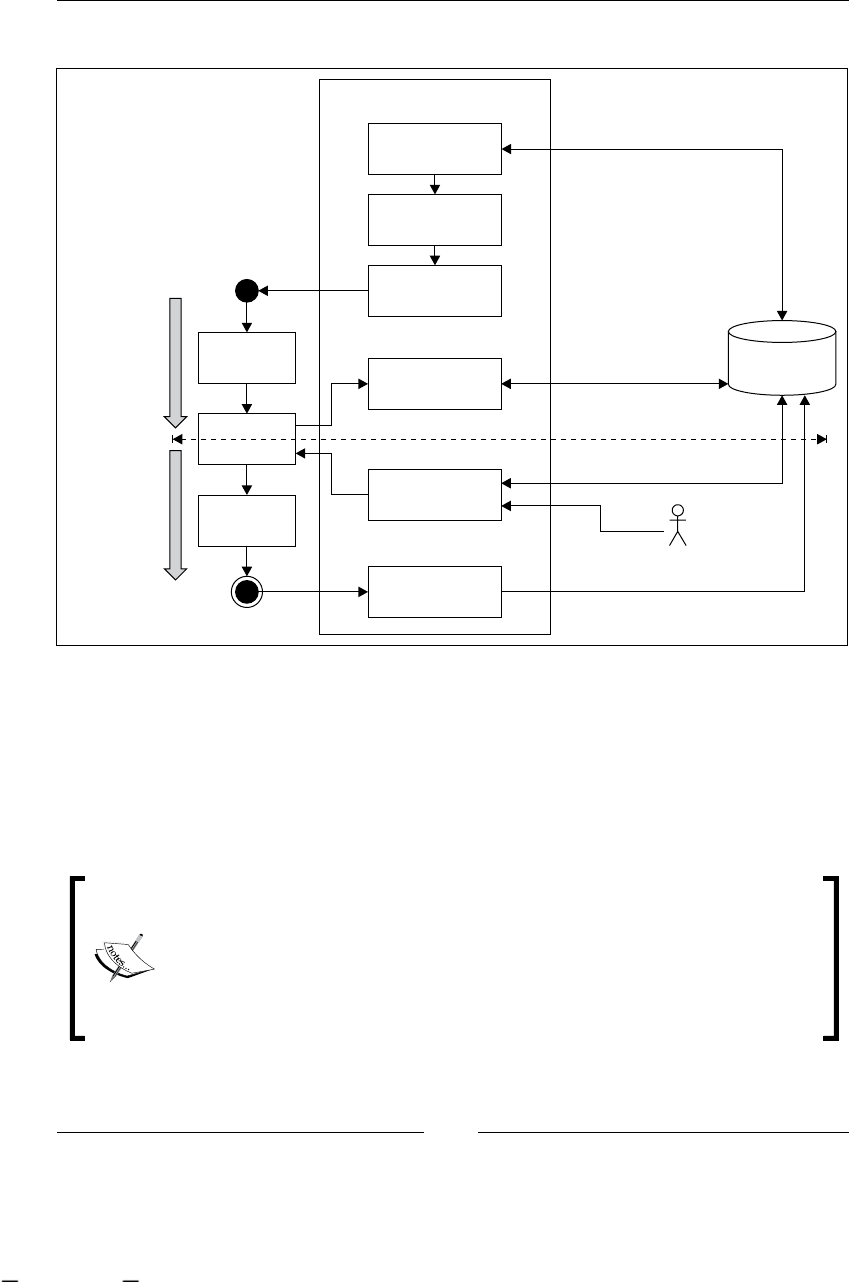
Chapter 6
[ 163 ]
Take a look at the following image to follow the steps mentioned:
First Stage
of execution
Second Stage
of execution
Sell Item
Wait For
Payment
Dispatch
Item
Our Application using jBPM APIs
Get Deployed
Process Definition HQL Named Query
Create Process
Instance
Start it /Signal it
Persist Process
Instance Status
Get Process
Instance
HQL Named Query
HQL Named Query
HQL Named Query
Database
Pay
Persist Process
Instance Status
Buyer
It's important to note that every time we need to wait, the process needs to be stored
in the database for that time. Then, using the framework APIs you will maintain
stateless calls to the database to retrieve and update the process status.
As you can see, here the BPM Engine concept doesn't t at all. You are not querying
a BPM engine to store the process status or to retrieve that status. You are just
generating custom Hibernate queries to retrieve and store data in a stateless way.
Here the word stateless is used to emphasize the way that the framework
communicates with the database. As you can see in the previous example,
the framework will generate a Hibernate query depending on the status
of the process. This will generate a request/response interaction with the
database, which is in contrast with the idea of a channel that is open all
the time where data ows when it's generated.
This material is copyright and is licensed for the sole use by ALESSANDRO CAROLLO on 18th December 2009
6393 south jamaica court, , englewood, , 80111
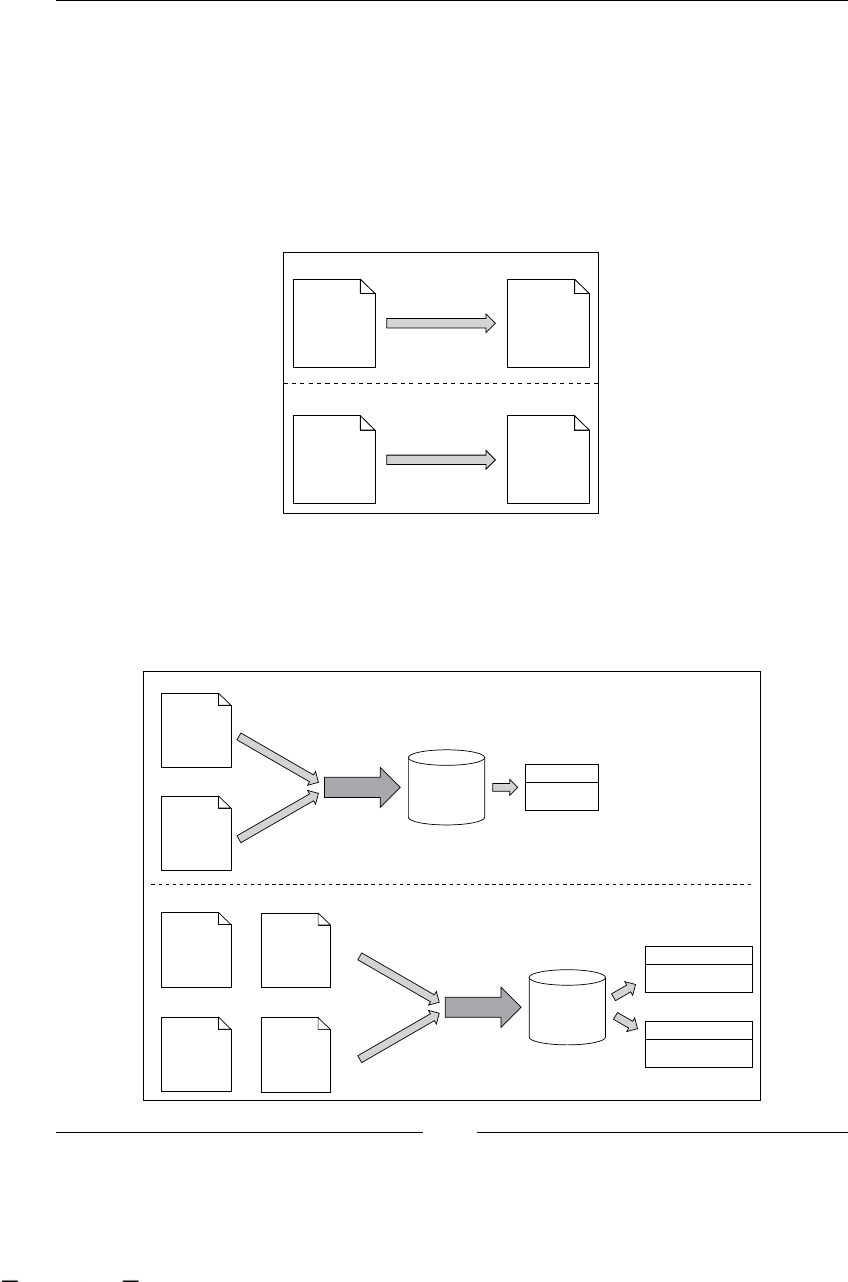
Persistence
[ 164 ]
Process and database perspective
In this section we will see the execution from the process and database perspective.
We need to understand that in the database we will have some kind of snapshots
of our processes, executions. With these snapshots we can populate a full
ProcessInstance Java object and make it run again.
If we also want to include the process denition in the equation we will get
something like this:
jPDL
<process-
definition/>
.class
Process
Definition
parse()
Artifact
<xml/> Object
.class
parse()
As we can see in the image our process denition represented with jPDL syntax in
XML format is parsed and translated into a Java object. Because these objects are
Hibernate entities, they can be persisted in a relational database to store each
object status.
.class
Node
.class
Process
Definition
.xml .xml
Object
.class
.xml
HBM
Process
Definition
Mapping
HBM
Node
Mapping
HBM
Persist
Persist
*
*
*
*
*
... ...
...
... ...
Database
Database
Table
Node
ProcessDefinition
This material is copyright and is licensed for the sole use by ALESSANDRO CAROLLO on 18th December 2009
6393 south jamaica court, , englewood, , 80111
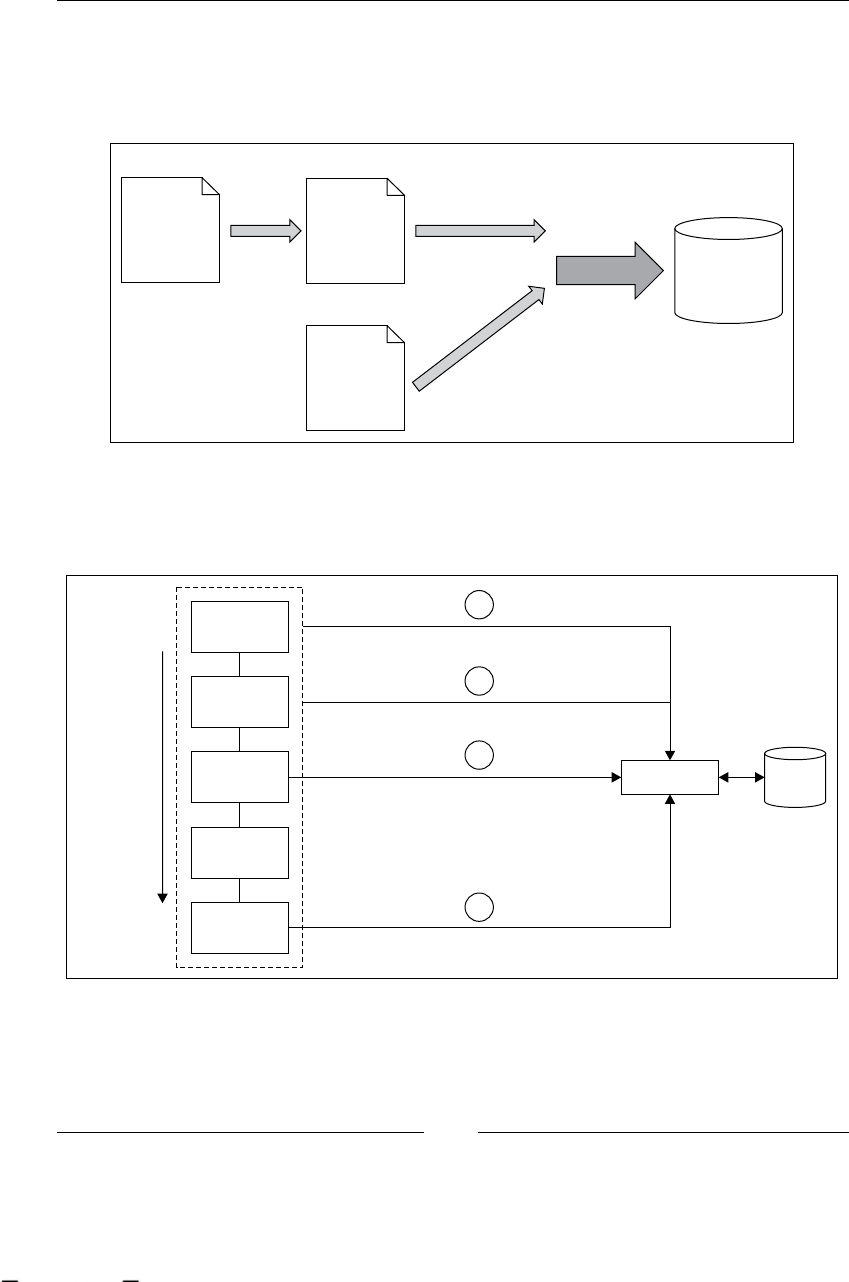
Chapter 6
[ 165 ]
Something similar happens with the process execution. Our executions will be
represented in Java objects and with rows entries in a relational database structure.
But in contrast with the process denition, our execution will not be represented in
jPDL/XML format.
.class
hbm.xml
jPDL
<process-
definition/>
Process
Definition
Process
Definition
Hibernate
Mapping
Hibernate
Persist
Database
parse()
In the execution stage of our processes we have another kind of interaction. This is
because the process instance will be updated each time our process reaches a wait
state. We will see the following type of interaction when our processes are executed:
EXECUTION
END
AUTOMATIC
NODE
AUTOMATIC
NODE
WAIT STATE
START DEPLOY/PERSIST PROCESS DEFINITION
CREATE/PERSIST PROCESS INSTANCE
UPDATE PROCESS INSTANCE STATUS HIBERNATE DB
END PROCESS INSTANCE
1
4
3
2
This material is copyright and is licensed for the sole use by ALESSANDRO CAROLLO on 18th December 2009
6393 south jamaica court, , englewood, , 80111
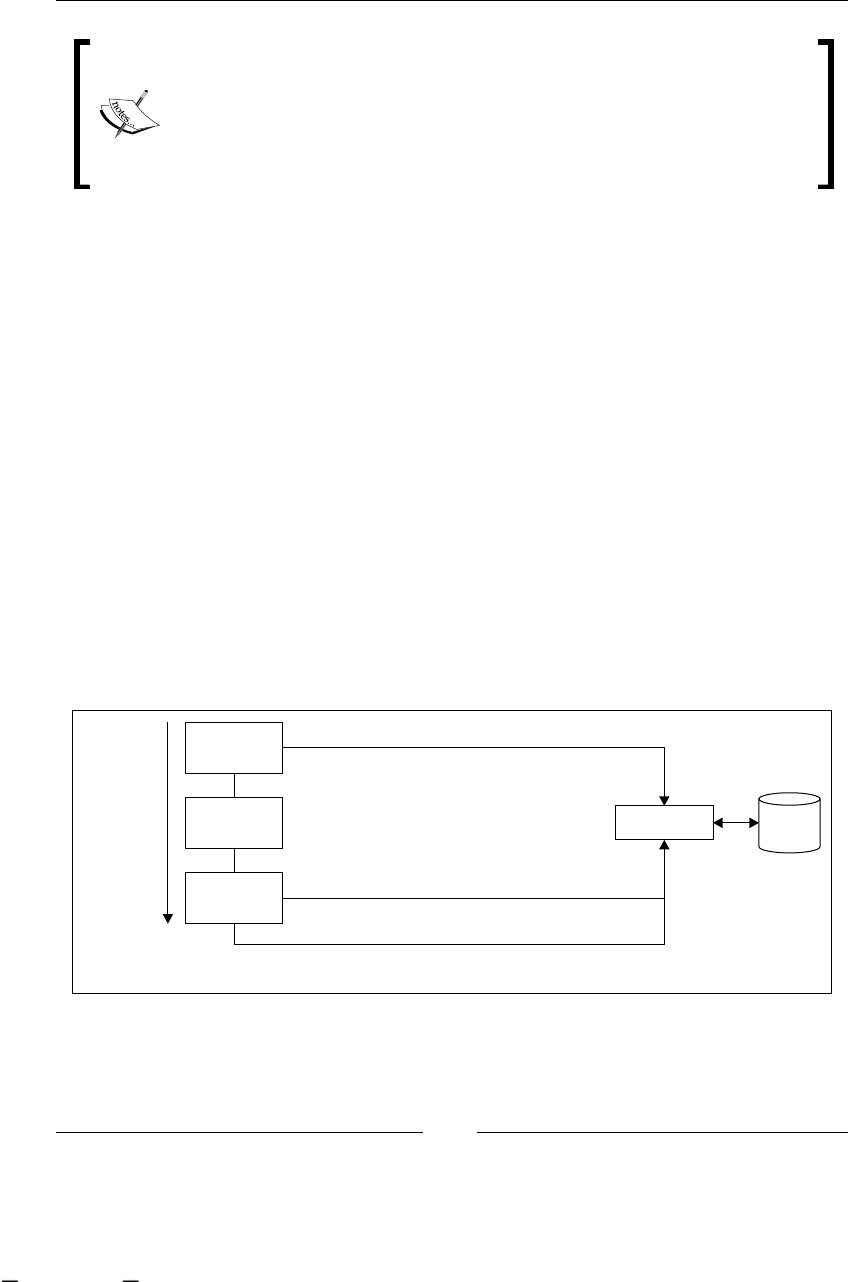
Persistence
[ 166 ]
The deploy/persist process denition in the database, in general, is done
just once. Then you can use that deployed denition to create unlimited
numbers of process instances. The only situation when you will persist
the process denition again will be when you need to use an updated
version of your processes.
With this kind of interaction we can take advantage of the database transactions to
commit the state of the process if all the activities are successfully completed until
reaching the wait state that triggers the persistence.
If something goes wrong, the database transaction is rolled back and the changes
are never persisted. So, you need to be cautious and know that this will happen if
something goes wrong.
In the Conguring transactions section, we will go in depth into this database
transaction topic and we will analyze the pros and cons of this type of interaction.
From the process perspective, the process will live in the server memory until
it reaches a wait state. Basically, the process will be using CPU cycles when it is
executing the automatic activities, and when it reaches a wait state the process will
go directly to the relational database. This approach will give us a performance
boost, because our process will be in memory for short periods of time, allowing
us to have multiple processes running without CPU bottlenecks.
The following image shows us how the process will go out of the memory, and how
the interaction with the database populates the object stored in a previous wait state:
2 UPDATE PROCESS INSTANCE STATUS
3 USING THE PROCESS ID GET THE PROCESS
INSTANCE AND SIGNAL IT TO CONTINUE
EXECUTION AUTOMATIC
NODE
WAIT STATE
START
HIBERNATE DB
1 GET PROCESS INSTANCE - CREATE PROCESS INSTANCE - SIGNAL IT
This material is copyright and is licensed for the sole use by ALESSANDRO CAROLLO on 18th December 2009
6393 south jamaica court, , englewood, , 80111

Chapter 6
[ 167 ]
In this case, the third step can be done by the other decoupled thread, which restores
the process status using the process ID and then signals it to continue the execution.
Different tasks, different sessions
The jBPM APIs are structured around the different functionalities they provide. In
this section we will see how the framework APIs use different sessions to achieve
different activities. The idea behind dividing the APIs is that different tasks have
different requirements, and if the framework handles all those requirements in a
generic way (with a unique API), users will be confused.
If you take a look at the JbpmContext class, inside the framework APIs you will
notice that the following sessions are used to fulll different types of requirements:
TaskMgmtSession: This session is focused on giving us the most generic
methods to handle human tasks in our processes. You will use this session
when you need to query the task instances created by your processes
execution. If you take a look at the TaskMgmtSession you will nd a lot of
methods that handle and execute Hibernate queries to the relational database
to retrieve TaskInstance objects using some kind of lter. Some example of
these methods are:
findTaskInstances(String): This method retrieves all the
task instances for the specied actorId without ltering the
process. This method is useful when you need to create a
task list for a specic user that is involved in more than
one process.
findTaskInstancesByToken(long): This method retrieves
all the task instances that were created related to a specic
token. This is very helpful when you want to lter tasks
within the scope of a process.
getTaskInstance(long): This method will retrieve a task
instance with the specied ID.
Many more methods; check out the class to know them all.
•
°
°
°
°
This material is copyright and is licensed for the sole use by ALESSANDRO CAROLLO on 18th December 2009
6393 south jamaica court, , englewood, , 80111

Persistence
[ 168 ]
GraphSession: This session will be in charge of storing and retrieving the
information of process denition and process instance. You will use this
session when you need to deploy a new process denition or to get an
already deployed process denition. You can also query and create new
processes' instances with this session. Some of the methods that you can
nd in this class are:
deployProcessDefinition(ProcessDefinition): This
method will be used when you get a process denition
parsed from a jPDL XML le and you want to store that
denition inside the relational database. In jBPM, that means
deploying of a process, just to store the process denition
that is modeled in jPDL XML syntax in a relational way. This
transformation between XML syntax and the Object world is
achieved by parsing the XML le and populating objects that
at last will be persisted using Hibernate.
findLatestProcessDefinition(String): This method will
let you nd an already deployed process denition ltering
by the process name. This method, as the name species will
also lter by the version number of the process denition,
only returning the process with the highest version number.
You will use this method to obtain an already deployed
process denition in order to instantiate a new process
instance with the returned denition. Once you get the
process denition deployed you don't need the jPDL XML
le anymore.
findProcessInstances(long): Using this method you
will be able to nd a specic process instance ltered by the
process instance ID.
Take a look at the other methods in this class, probably you
will use these methods to administrate and instantiate your
different processes.
Every time we deploy a process denition to the jBPM database schema,
the APIs automatically increment the version number of the deployed
denition. This procedure will check by the name of the deployed
process. If there is an other process with the same name, the deployment
procedure will increase the version number of the process denition and
deploy it to the jBPM database schema.
•
°
°
°
°
This material is copyright and is licensed for the sole use by ALESSANDRO CAROLLO on 18th December 2009
6393 south jamaica court, , englewood, , 80111

Chapter 6
[ 169 ]
LoggingSession: This session is in charge of letting you retrieve and handle
all the process logging that occurs when your process is executed. In this
class, you will nd the following important methods:
findLogsByProcessInstance(ProcessInstance): This
method will let you retrieve all the process logs generated by
the process instance execution.
loadProcessLog(long): This method will let us get a specic
process log using the process log ID.
JobSession: This session is related to jobs, and will let us handle our jobs in
jBPM. In the jBPM terminology, the word job is used to refer asynchronous
automatic activities. So, for example, if you want to execute a method in an
external system, and you don't want to wait until the method is nished, you
can do an asynchronous call using some kind of message strategy like JMS or
a database messaging system provided by jBPM. We will attempt this topic
in the last chapter of this book.
Configuring the persistence service
In this section we will discuss how to congure the persistence service in jBPM,
in order to understand how the conguration can change the runtime behavior of
our process.
The main conguration les in jBPM are jbpm.cfg.xml and hibernate.cfg.xml.
These two les contain the core conguration for the jBPM context.
The rst le (jbpm.cfg.xml) contains conguration for all the services. If we open it
we will see something like this:
<jbpm-context>
<service name="authentication"
factory="org.jbpm.security.authentication
.DefaultAuthenticationServiceFactory" />
<!-- Logging Service (begin) -->
<service name="logging"
factory="org.jbpm.logging.db.DbLoggingServiceFactory" />
<!-- Logging Service (end) -->
<service name="message"
factory="org.jbpm.msg.db.DbMessageServiceFactory" />
<service name="persistence"
factory="org.jbpm.persistence.db.DbPersistenceServiceFactory" />
<service name="scheduler"
factory="org.jbpm.scheduler.db.DbSchedulerServiceFactory" />
<service name="tx" factory="org.jbpm.tx.TxServiceFactory" />
</jbpm-context>
•
°
°
•
This material is copyright and is licensed for the sole use by ALESSANDRO CAROLLO on 18th December 2009
6393 south jamaica court, , englewood, , 80111

Persistence
[ 170 ]
As we can see, this conguration includes the conguration of the persistence
service, which uses the DbPersistenceServiceFactory in this case, to create and
congure the persistence service.
This factory will use the resource.hibernate.properties property to retrieve the
hibernate.cfg.xml le. This property is also specied in the jbpm.cfg.xml le
with the following line:
<!-- configuration property used by persistence service
impl org.jbpm.persistence.db.DbPersistenceServiceFactory -->
<string name="resource.hibernate.cfg.xml"
value="hibernate.cfg.xml" />
This le contains two main sections of congurations. The rst one congures the
data source where the framework will store all the information about our processes.
We can choose to congure a direct JDBC connection or an already
existent data source. Take a look at the following XML conguration in
the hibernate.cfg.xml le:
<!-- hibernate dialect -->
<property name="hibernate.dialect">
org.hibernate.dialect.HSQLDialect
</property>
<!-- JDBC connection properties (begin) -->
<property name="hibernate.connection.driver_class">
org.hsqldb.jdbcDriver</property>
<property name="hibernate.connection.url">
jdbc:hsqldb:mem:jbpm
</property>
<property name="hibernate.connection.username">sa</property>
<property name="hibernate.connection.password"></property>
<!-- JDBC connection properties (end) -->
<!-- DataSource properties (begin) ===
<property name="hibernate.connection.datasource">
java:JbpmDS</property>
==== DataSource properties (end) -->
As you can see these properties will dene the database that jBPM will use to store
all our process data.
This material is copyright and is licensed for the sole use by ALESSANDRO CAROLLO on 18th December 2009
6393 south jamaica court, , englewood, , 80111

Chapter 6
[ 171 ]
Let's see the meaning of each property in order to fully understand what we are
conguring here:
hibernate.dialect: One of the most important properties in this section.
This property will set the Hibernate dialect for each particular database
vendor. This dialect denes each of the vendor specic ways to create
the queries and the schemas in the database. In the code snippet before,
this dialect is set to HSQLDialect. This is the dialect for the embedded
Hypersonic database. This is a commonly-used database in development
scenarios, because it does not require installation and can be created to work
in memory. It is a very quick and easy way to have some test relational
database for testing our applications. In the real world you will probably
choose proprietary vendors like Oracle or DB2 or some license-free vendors
like PostgreSQL or MySQL. In any of these cases you must change the
Hibernate dialect property to match your selected vendor. To know which
values this property can take, please refer to the Hibernate documentation,
where you can also nd all the supported database vendors.
hibernate.connection.driver_class: This property will contain the
fully qualied name of the class (package name plus the class name) that is
a JDBC driver for your specied vendor. This class needs to implement the
java.sql.Driver interface.
hibernate.connection.url: This property will let you set up where your
database is located. In this case, the URL specied is jdbc:hsqldb:mem:
jbpm. This URL tells us that Hypersonic is using an in-memory database to
run. If you take a look at Hypersonic documentation you will see that you
can also congure it to work in a le mode, where a le is created to store all
the database information. In a production scenario, you will see a different
URL depending on the vendor driver you are using.
hibernate.connection.username and hibernate.connection.password:
These two properties are self-explained by their names.
Those are all the properties that you need to modify, if you are planning to use jBPM
with a direct JDBC connection. In case you want to use an existing data source you
will need to comment out all the previous properties except on the dialect one. And
uncomment the following section:
<!-- DataSource properties (begin) ===
<property name="hibernate.connection.datasource">
java:JbpmDS
</property>
==== DataSource properties (end) -->
•
•
•
•
This material is copyright and is licensed for the sole use by ALESSANDRO CAROLLO on 18th December 2009
6393 south jamaica court, , englewood, , 80111

Persistence
[ 172 ]
With this property we will use a specied and existing data source, which already
has a database conguration. This data source will be registered in a JNDI tree, and
that is why we can reference it with java:JbpmDS. If we are working with JBoss
Application Server probably we will choose this data source approach. In those
cases, we have sample data source les for the most common vendors in the
config directory of the framework binaries.
For example, if you choose to use MySQL, the data source le will look like this:
<?xml version="1.0" encoding="UTF-8"?>
<datasources>
<xa-datasource>
<jndi-name>JbpmDS</jndi-name>
<xa-datasource-class>
com.mysql.jdbc.jdbc2.optional.MysqlXADataSource
</xa-datasource-class>
<xa-datasource-property name="ServerName">
localhost
</xa-datasource-property>
<xa-datasource-property name="PortNumber">
3306
</xa-datasource-property>
<xa-datasource-property name="DatabaseName">
jbpmtest
</xa-datasource-property>
<user-name>jbpmtest</user-name>
<password></password>
<!-- reduce isolation from the default level (repeatable read)-->
<transaction-isolation>
TRANSACTION_READ_COMMITTED
</transaction-isolation>
<!-- separate connections used with and without JTA transaction-->
<no-tx-separate-pools />
<!-- disable transaction interleaving -->
<track-connection-by-tx />
<!-- leverage mysql integration features -->
<exception-sorter-class-name>
com.mysql.jdbc.integration.jboss.ExtendedMysqlExceptionSorter
</exception-sorter-class-name>
<valid-connection-checker-class-name>
com.mysql.jdbc.integration.jboss.MysqlValidConnectionChecker
</valid-connection-checker-class-name>
<!-- corresponding type-mapping in conf/standardjbosscmp-jdbc.xml
-->
<metadata>
<type-mapping>mySQL</type-mapping>
</metadata>
</xa-datasource>
</datasources>
This material is copyright and is licensed for the sole use by ALESSANDRO CAROLLO on 18th December 2009
6393 south jamaica court, , englewood, , 80111

Chapter 6
[ 173 ]
This le comes with the jBPM binaries, and can be found in the config directory
with the name jbpm-mysql-ds.xml. One important thing to notice here is that this
data source is an XA data source, which means that it is prepared to work with
distributed transactions. When XA data sources are used, you need to think that
these data sources support two-phase commits using an XA driver. In other words,
if we have multiple databases and our processes insert, modify, or remove data
from all those databases, probably we want to do all those insertions, modications,
or removals in a single transaction. To achieve this, we need to use distributed
transactions, which will hold all the modications until all the drivers guarantee
that all the operations in different databases or resources are completed successfully.
If you want to learn more about transactions' congurations you can take a look at:
http://www.jboss.org/community/wiki/ConfigDataSources
If we are just using a single database resource, you can congure this data source
as <local-tx-datasource>. Please take a look at the JBoss Application Server
documentation to see how to do this correctly.
This le, which must be called *-ds.xml, in this case jbpm-mysql-ds.xml, must
be inside the /server/<instance>/deploy directory, which is, in turn, inside the
application server structure.
This data source approach delegates the database pooling strategy to the application
server, which in turn takes the responsibility of administrating the database
connections for us.
With this approach we can also change the database vendor without modifying the
jBPM conguration les.
How is the framework configured at runtime?
All of these conguration les let us create two objects that you already know:
JbpmConfiguration and JbpmContext.
JbpmConfiguration is a class with a single purpose. It will parse and maintain all
the information stored in the XML conguration les, to make it available in the
object world.
JbpmContext will be created using a method called createNewJbpmContext()in
the JbpmConfiguration class because the context will be based on the current
conguration. This context will contain all the congured services available to be
used by our processes' executions. This context will also decide how our process
will be persisted using this congured persistence service. In other words, the
JbpmContext will let us dene each interaction with the database, messaging
service, logging service, and so on we will interact.
This material is copyright and is licensed for the sole use by ALESSANDRO CAROLLO on 18th December 2009
6393 south jamaica court, , englewood, , 80111
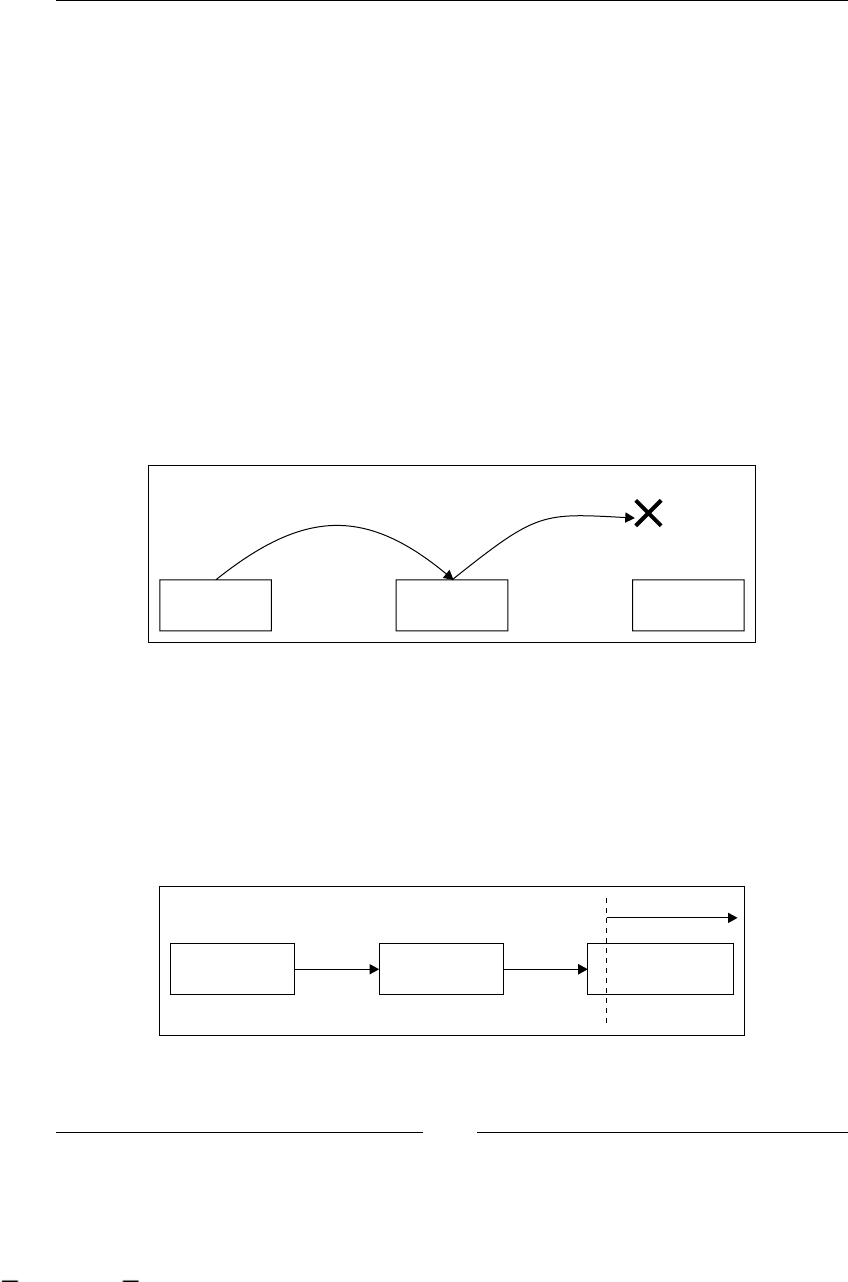
Persistence
[ 174 ]
Configuring transactions
As we discussed before, the idea of transactions are very important here. We don't
want to have corrupt data stored in our database. Also, we need to be sure that
status details of our processes stored in the database are faithful snapshots of our
processes' status.
In the world of Java, when we talk about transactions we will see two ways to
manage them:
1. User Managed Transactions
2. Container Managed Transactions
Depending on our environment, we can choose either of the approaches mentioned.
But, why do we need transactions here?
There are a lot of reasons, the rst thing is that we need to know how to store only
correct information in our database. Let's imagine the following situation:
AUTOMATIC
NODE
AUTOMATIC
NODE
HUMAN TASK
SERVER CRASH
Our process is running in memory, and an actor nishes a human task and this task
completion will trigger a signal that will take the transition to the next node. What
happens, and what is supposed to happen if the server shuts down in the middle?
When the server goes up again, where will the process point? It is very difcult to
see a generic solution for situations like these.
Imagine the following situation in the new phone line process:
FILL REQUIRED
CLIENT INFO
GENERATE
NEW ACCOUNT GENERATE BILL
SERVER CRASH
This material is copyright and is licensed for the sole use by ALESSANDRO CAROLLO on 18th December 2009
6393 south jamaica court, , englewood, , 80111

Chapter 6
[ 175 ]
In this kind of situation, we need a mechanism to dene boundaries where
the activities are done or undone in an atomic way. That mechanism is called
transactions. Back to the beginning of the section, we have two ways to dene
these boundaries:
User Managed Transactions (UMT)
If we are in a standalone application or we don't want to take advantage of the
container (Application Server) policies to dene transactions, we need to specify
where a transaction begins and where it ends. Basically, we will dene a segment
in our process execution that must be completed without errors or must be undone
(rolled back). If we talk about transactions in the market, or if you are familiar with
transactions probably you know the terms begin, commit, and rollback a transaction.
If we choose to use user-managed transactions, we need to tell the process execution
where to start and where to end the current transaction. If we take a look at the
jbpm.cfg.xml le in the JbpmContext tag conguration, we already have our
transaction service congured.
<service name="persistence" factory="org.jbpm.persistence.db.DbPersist
enceServiceFactory"/>
This conguration is for user-managed transactions. If we have that service
congured, every time we create a new JbpmContext object a transaction will begin.
And when we close the JbpmContext, the transaction will be committed. If there is
a problem between the creation and the close of our context, the transaction will be
rolled back and the changes will not be reected in the database.
If our server crashes, there is no possible way to have corrupt data persisted in our
database. It is also important to note that the transaction can also contain information
about the message queue status, and any other transaction-aware resource. We will
discuss more about other services in the next section, What changes if we decide to use
CMT? User-managed transactions translated to the jBPM APIs will look like the
following code:
JbpmConfiguration config = JbpmConfiguration
.parseResource("config/jbpm.cfg.xml");
JbpmContext context = config.createJbpmContext();
ProcessInstance processInstance = context
.newProcessInstance("MySimpleProcess");
assertNotNull("Definition should not be null", processInstance);
processInstance.signal();
context.close();
This material is copyright and is licensed for the sole use by ALESSANDRO CAROLLO on 18th December 2009
6393 south jamaica court, , englewood, , 80111

Persistence
[ 176 ]
If there are some errors, the transaction will never be committed. All the code
between the createJbpmContext() and context.close() methods need to be
executed without any exception. Otherwise, context.close() will discard all the
changes. All the changes in the process status are rolled back and never sent to the
database. As you can imagine, in the database, the changes are never reected if an
error occurs in the process execution. Just for you to remember, each node change
is not reected until the process reaches a wait state where it persists all the current
progress and the modied information.
What changes if we decide to use CMT?
The idea to delegate the transaction demarcation boundaries to a container-based
approach will give us one less concern or problem in our head: the container
itself will decide when a transaction should begin and when the transaction
must be committed.
This approach is commonly used in EJB3 containers where, by default, each method
represents a separate transaction.
Every time a method is called, a new transaction begins (by default). When the logic of
the method ends, the transaction is committed. As a result, we don't need to specify the
transaction boundaries, letting us write less lines of code of pure business logic.
If our code is running inside a container we can take advantage of these capabilities,
we only need to change the framework conguration to use the container policies to
manage all the transactions stuff.
This chapter provides two example projects with two different congurations, which
show you how the code behaves in these two kinds of environments.
The idea of these examples is to show you how the congurations look, and also
to show you how the interactions occur in a standalone application versus an
Enterprise Application (Java EE). Depending on your own situation you will
need to choose one of these two congurations.
Some Hibernate configurations that can
help you
First, we will take a look at the basic ones. In the hibernate.cfg.xml le you can
specify the following properties:
hibernate.show_sql(true/false): This option will activate the SQL
logging in the console. We will see all the Hibernate-generated SQL queries.
hibernate.format.sql(true/false): This option will activate the SQL
formatting option in the logger.
•
•
This material is copyright and is licensed for the sole use by ALESSANDRO CAROLLO on 18th December 2009
6393 south jamaica court, , englewood, , 80111

Chapter 6
[ 177 ]
hibernate.ddl2sql.auto (update/create/createdrop): This option will
let us create, modify, or drop the database every time we start up a Hibernate
session. These options are widely used during the development stage.
Hibernate caching strategies
Based on the nature of each piece of information, you can choose whether to
apply a caching policy or not. The idea behind using cache is not to query the
relational database all the time. This will probably give a performance boost to your
application. But you need to be careful and decide which pieces of information are
the best candidates for caching.
The pieces of information that don't frequently change are the best candidates for
this kind of policies. For example, the process denition objects commonly do not
change every day, so they can probably be cached.
If you think about process instances, the situation becomes more complex. You need
to analyze if your cached process instances don't change often. This is because if
you have a lot of changes, you will create a bad use of the caching policies and the
performance can be affected. For applying caching strategies with Hibernate, please
review the ofcial documentation.
Two examples and two scenarios
This section is about the code examples provided by this chapter, available for
downloading at http://www.packtpub.com/files/code/5865_Code.zip (look for
Chapter 6). There are two simple projects, one standalone (/standAloneExample/)
and the other is an EJB3 module (/EJB3Example/).
Both the standalone and the EJB3 projects have the same functionalities. The main
idea here is to see how the persistence can be congured for a standalone application
and also for an enterprise environment. The standalone application is congured to
work with a direct JDBC connection to a local database. It is also congured to use
the default database transaction strategies.
This project will have four main functionalities:
Deploy a process denition
List the deployed process denitions
Create a new process instance
List all the process instances for a specic process denition
•
•
•
•
•
This material is copyright and is licensed for the sole use by ALESSANDRO CAROLLO on 18th December 2009
6393 south jamaica court, , englewood, , 80111
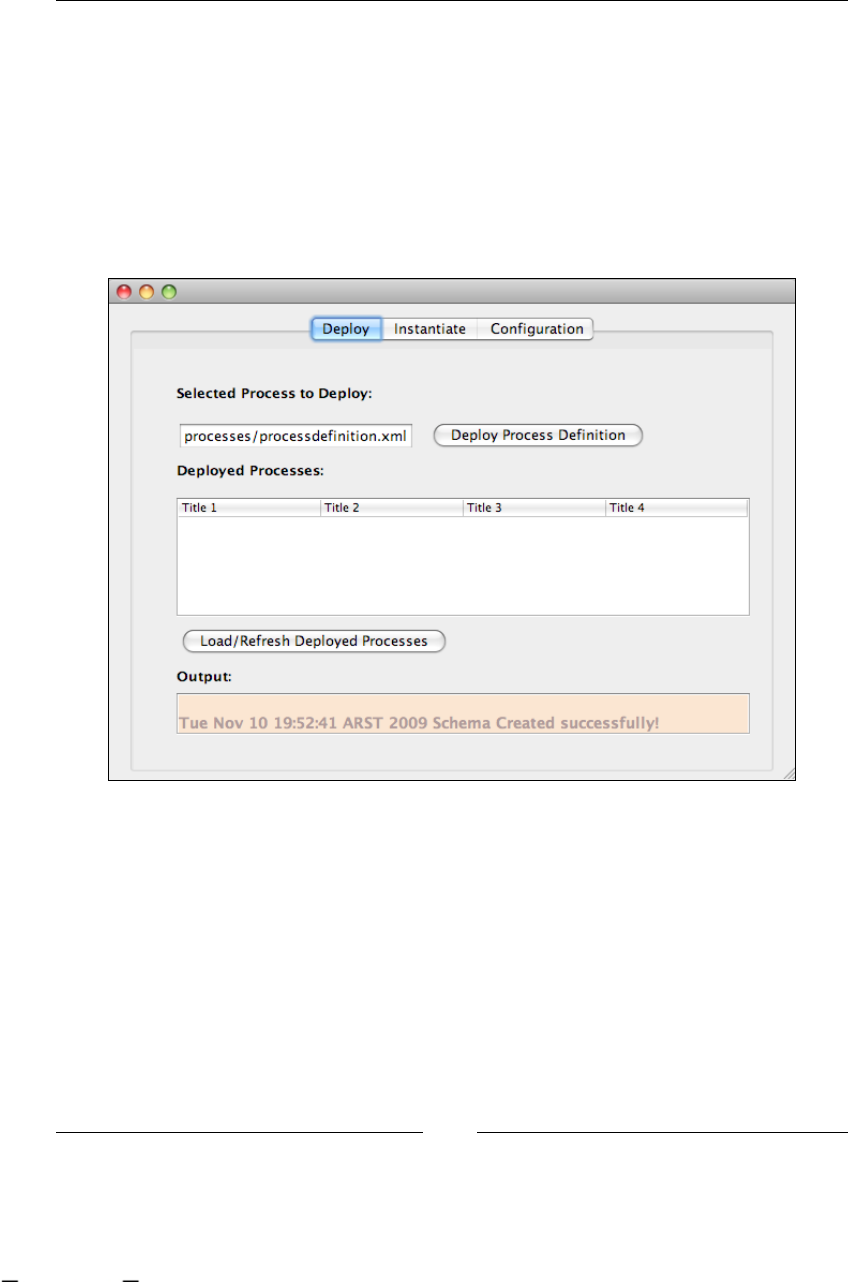
Persistence
[ 178 ]
This project will use Swing technology as a UI, just to show you that you can use any
UI you want (not only web interfaces).
Basically, the standalone project will have the UI and also the code to work in the
standalone mode. We can congure the application to work with the code that uses
a direct JDBC connection or to use an Enterprise Java Bean that will execute the logic
inside a JBoss Application Server.
In the standAloneExample project, you need to nd the Launcher class that will
start up the Swing application.
This application will let us fulll the features mentioned before (deploy, list
process denitions, create new process instance, and list these instances ltered
by process denitions).
All the magic happens inside the Main.java class (inside /standAloneExample/
src/main/java/org/jbpm/examples/standAloneExample/ui directory). This class
is just a JFrame from Swing that will contain all the logic for all the actions behind
the buttons and tables inside this simple application.
As you can see there is a tab called Conguration. In this tab, you will select the
execution mode of the application. By default, the StandAlone mode of execution
will be used.
This material is copyright and is licensed for the sole use by ALESSANDRO CAROLLO on 18th December 2009
6393 south jamaica court, , englewood, , 80111
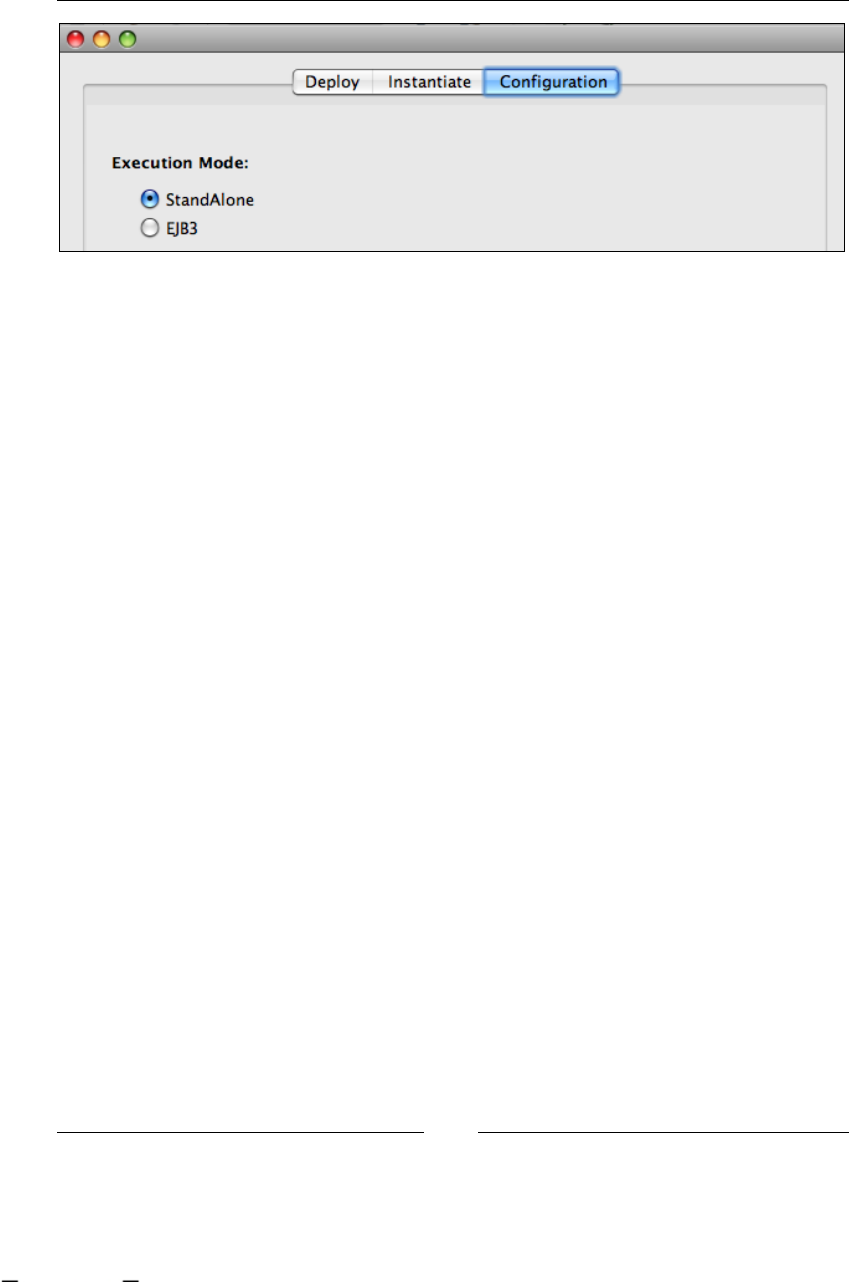
Chapter 6
[ 179 ]
For using the EJB3 mode, you will need to have the /EJB3Example/ project deployed
inside an application server.
Let's see how the application works in the StandAlone mode. If you open the
main class that contains the Swing form and inspect the code, you will see that
in the actions bound to the buttons in the UI we call the jBPM APIs to interact
with our processes.
In the code we will analyze the following section:
JbpmContext context = null;
///////////////////////////////////////////////////////
// First Action: Deploy process definition //
///////////////////////////////////////////////////////
//If we are working in StandAlone mode
if (jRadioButton1.isSelected()) {
try {
context = conf.createJbpmContext();
ProcessDefinition processDefinition = ProcessDefinition
.parseXmlResource(jTextField1.getText());
context.deployProcessDefinition(processDefinition);
} catch (Exception ex) {
ex.printStackTrace();
} finally {
context.close();
}
//If we are working with the EJB3 module
} else if (jRadioButton2.isSelected()) {
InputStream is = Main.class.getClass()
.getResourceAsStream("/" + jTextField1.getText());
BufferedReader reader = new BufferedReader(new
InputStreamReader(is));
StringBuilder sb = new StringBuilder();
This material is copyright and is licensed for the sole use by ALESSANDRO CAROLLO on 18th December 2009
6393 south jamaica court, , englewood, , 80111

Persistence
[ 180 ]
String line = null;
try {
while ((line = reader.readLine()) != null) {
sb.append(line + "\n");
}
} catch (IOException e) {
e.printStackTrace();
} finally {
try {
is.close();
} catch (IOException e) {
e.printStackTrace();
}
}
processSession.deployProcessDefinition(sb.toString());
jTextPane1.setText(jTextPane1.getText() + "\n "
+ new Date(System.currentTimeMillis())
+ " Process Deployed successfully!");
jButton3ActionPerformed(evt);
}
The rst block of code, the one that starts after the comment If we are working in
StandAlone mode represents the code used to work in the standAlone mode. This
code only uses the normal jBPM APIs to deploy a process. To execute these lines a
JbpmContext must be created. This context will be created using the jbpm.cfg.xml
le and the hibernate.cfg.xml le provided in that project. The important thing
to know about these les is that they are both congured to work in a standalone
mode using a direct JDBC connection to the database. Remember to modify these
les to reect your database installation parameters (such as host, username, and
password).Another thing that's important to note is the demarcation of transaction
boundaries using:
try {
context = conf.createJbpmContext();
<Operations>
} finally {
context.close();
}
We need to do this for the framework to know when to, and, with which, services
reect the process status in the relational database.
Every time you invoke a method here, you won't see any generated SQL until the
context.close() method is reached. It is here where the magic occurs and the
process status is merged with the already stored status in the database.
This material is copyright and is licensed for the sole use by ALESSANDRO CAROLLO on 18th December 2009
6393 south jamaica court, , englewood, , 80111

Chapter 6
[ 181 ]
The idea of these projects is that you can debug them and see what is going on in
each step of your program. Also if you have the framework sources available in your
IDE, you can step into the framework code and see what is happening inside it.
Running the example in EJB3 mode
We can also use the EJB3 mode of execution in the example Swing application. This
mode will use an Enterprise Java Bean Module (EJB3), which contains a Stateless
Session Bean with our business logic. The same functionalities of the standalone
application are covered by this component. This project will demonstrate how we
can use jBPM in different environments. In this case we will encapsulate the logic
inside the Stateless Session Bean that will be hosted inside the Application Server,
taking away the need to have the dependency from the jBPM framework in our
application. If you take a look at the second block of code after the comment:
//If we are working with the EJB3 module
We will see that there are no jBPM APIs used there. The code there just reads the
le containing the process denition, which needs to be deployed and stores this
denition in a simple String.
Then we call our EJB Stateless Session Bean to execute the logic in the server side.
processSession.deployProcessDefinition(sb.toString());
This line requires us to have a JBoss Application Server instance up and running
with the EJB3Example project deployed inside it.
In the rest of this section we will see all the details that we need to have in order to
have the code provided run into a Java EE environment.
If you take a look at the jbpm.cfg.xml le, you will see that the persistence
property now is set to use a JTA approach.
<service name="persistence"
factory="org.jbpm.persistence.jta
.JtaDbPersistenceServiceFactory" />
Also in the hibernate.cfg.xml le, it is congured to use an already deployed data
source. This is achieved using JNDI to nd the data source by name in the JNDI tree
contained in the application server.
<!-- DataSource properties (begin) === -->
<property name="hibernate.connection.datasource">
java:JbpmDS
</property>
<!-- ==== DataSource properties (end) -->
This material is copyright and is licensed for the sole use by ALESSANDRO CAROLLO on 18th December 2009
6393 south jamaica court, , englewood, , 80111

Persistence
[ 182 ]
This means that besides our deployed application we need to deploy a data source
that has the same JNDI name specied in the hibernate.cfg.xml le.
In this case we are using MySQL, so we need to create a le called mysql-ds.xml
with the following content:
<datasources>
<xa-datasource>
<jndi-name>JbpmDS</jndi-name>
<xa-datasource-property name="URL">
jdbc:mysql://[your host]:3306/[your database]
</xa-datasource-property>
<xa-datasource-class>
com.mysql.jdbc.jdbc2.optional.MysqlXADataSource
</xa-datasource-class>
<user-name>[your user]</user-name>
<password>[your password]</password>
<track-connection-by-tx>true</track-connection-by-tx>
<min-pool-size>1</min-pool-size>
<max-pool-size>10</max-pool-size>
<idle-timeout-minutes>10</idle-timeout-minutes>
<metadata>
<type-mapping>mySQL</type-mapping>
</metadata>
</xa-datasource>
</datasources>
This data source needs to be deployed besides our EJB3Example application inside
the JBoss Application server's /deploy/ directory. It's also important to remember
that we need to put the application server instance of the JDBC driver, which will be
used by the data source, inside the /lib/ directory.
The code provided for this chapter also includes a project called
CommonInterfacesExample, which includes the common code used by the
standalone application and by the EJB3 module. This project needs to be compiled
and the resultant JAR le needs to be copied inside the /lib/ directory in the
application server instance.
With all these congurations you can select the EJB3 execution mode in the Swing
application and start using the remote services provided by the EJB3 module.
For more information about how to congure persistence and all the services for
Enterprise environments take a look at:
http://docs.jboss.com/jbpm/v3.3/userguide/ch08.html
This material is copyright and is licensed for the sole use by ALESSANDRO CAROLLO on 18th December 2009
6393 south jamaica court, , englewood, , 80111

Chapter 6
[ 183 ]
Summary
This chapter describes various topics related to the persistence of our processes.
This is a very important topic that you need to know in order to lead successful
implementations. So take a look at the examples, debug them, and feel free to play
with them.
The idea here is to understand that jBPM is not a black box that you cannot control.
So, go ahead and step into the framework.
In the next chapter we will see how the human actors become involved with
our business processes and how the persistence plays an important role in the
human interactions.
This material is copyright and is licensed for the sole use by ALESSANDRO CAROLLO on 18th December 2009
6393 south jamaica court, , englewood, , 80111

This material is copyright and is licensed for the sole use by ALESSANDRO CAROLLO on 18th December 2009
6393 south jamaica court, , englewood, , 80111

Human Tasks
In real business scenarios, human interaction is extremely important. If you take a
look at your own company, you will see that all the employees around you interact
with each other in order to make the company run on a day-to-day basis.
Up to this point, we have used the basic nodes from the jPDL language to represent
our business process. However, if our business is heavily based on or includes
situations where human interaction is needed, the question is how can we include
all the interaction that people have in our processes everyday? In this chapter we
will learn all about human tasks (and not just automatic procedures), and how these
tasks let us represent the work that the company does daily. To accomplish this, we
will introduce a special node and discuss some extra features, so that you can gain a
complete knowledge to comprehend and decide how you can model and congure
your company-specic situation.
During this chapter the following topics will be covered:
What is a task?
Task management module
Handling human tasks in jBPM
Task node example
Assigning humans to tasks
Practical example
•
•
•
•
•
•
This material is copyright and is licensed for the sole use by ALESSANDRO CAROLLO on 18th December 2009
6393 south jamaica court, , englewood, , 80111

Human Tasks
[ 186 ]
Introduction
As we have seen before, in jPDL we have a node called "State", which represents a
generic situation while the process waits. We call those situations wait states. We
also said that when a human needs to interact with an activity inside our process, the
process as a whole needs to wait. This waiting is needed because a human may need
large periods of time to complete a particular task.
We can say that a human task is a special situation of wait state, because besides
waiting it also requires a real user who needs to complete the task, interact, and
manipulate the information in it.
Basically, if we try to use a node of type State to represent our human task activity,
which appears inside our process, we can do it, but the task node adds new specics
and extended capabilities to support the required human interaction.
For this reason, the human task node is created, and is available in the jPDL
language. Task node allows us to represent the human interaction in a more specic
way, which gives us more features to represent these specic situations, that appear
in real scenarios, in a generic and comprehensible way.
This chapter will be focused on analyzing all the aspects that need to be covered in
order to represent a real situation that includes very complex human interactions.
In jBPM there is a set of functionalities related to this topic called task management
module, so we, as developers need to know about how to implement real scenarios
that include human tasks and all these module features. You can take a look at
Chapter 2, jBPM for Developers, where this module is introduced.
What is a task?
In the jBPM language a task is always an activity that requires human interaction to
be completed. Every time you see the word task in the jBPM jPDL language you need
to understand that we are talking about one or more people who need to interact
with the process to complete one or more specic activities.
If we try to describe this kind of activity in generic terms , we can say that a generic
task is composed by the following elements:
Input data
Assigned user
Action
Output data
•
•
•
•
This material is copyright and is licensed for the sole use by ALESSANDRO CAROLLO on 18th December 2009
6393 south jamaica court, , englewood, , 80111
Chapter 7
[ 187 ]
TASK
Action 2Action 1
INPUT
DATA
OUTPUT
DATA
add/update/remove/review
User
In most situations we will have some input data that will be needed by the assigned
actor to begin work. This data can be anything that the user requires to work on
the activity. We can think about this information as contextual data needed by the
activity in order to be completed.
Imagine the situation where a user needs to review an article to be published on a
site. This article content will be the task data input, that the user will review and
decide if the article information is correct or not. This decision will be the action
listed earlier, for example if the article information is correct, the user can choose
to publish the article, if it is not sent to rewrite the article. The output data, in this
case can be the same article content that can be modied by the reviewer if some
minor things need to be changed. This output data will continue owing through
the process if it is needed.
REVIEW
ARTICLE
Rewrite
Publish
ARTICLE
REVIEWED
ARTICLE
add/update/remove/review
Reviewer
This material is copyright and is licensed for the sole use by ALESSANDRO CAROLLO on 18th December 2009
6393 south jamaica court, , englewood, , 80111

Human Tasks
[ 188 ]
As you can guess, there are some requirements that this kind of situation needs in
order to have an application interact with a human being and vice versa. One of the
most basic features that we need to have is a User Interface (UI) that lets the human
interact with the software. It is also important to note that most of the time the
human activities handle and modify information; here it's the input data as discussed
before. A mechanism to handle all that information will be needed. Last, but not
least is the fact that human interactions are done by people within our company,
which brings us to the concept of assigned users. This implies that some user/role
assignment policies need to be done and congured.
We can say that this task management module needs to fulll the
following requirements:
Well-dened UIs
A mechanism to handle information
User/roles policies to assign each task to the correspondent role
Task management module management modulemanagement module module
In jBPM a whole module is created to handle this new concept of tasks. (Remember
that in jBPM there are always human tasks.)
You may ask, when do I need to know about this module? The answer is simple: you
must know about this module if your process includes human activities, because this
module will give you a lot of features to make your life easier.
This module introduces a new node called task node, which extends the basic node
functionality, allowing us to represent generic situations where human interaction is
required in our processes.
It also introduces a mechanism to expose all the data that needs to be shown to the
end user. With that information we can create our custom UIs. This mechanism also
hides all the technical details and all the process information that is not related to the
activity that requires human interaction.
This module formally introduces a set of tools that will allow us to easily manage all
the tasks created within our processes. Basically, it gives us a methodology that will
handle all the interactions needed by business roles to complete the dened human
activities in a specic process.
•
•
•
This material is copyright and is licensed for the sole use by ALESSANDRO CAROLLO on 18th December 2009
6393 south jamaica court, , englewood, , 80111

Chapter 7
[ 189 ]
With the inclusion of human interaction in our process denitions, we obtain the
following advantages:
Represent process that include human interactions: This is an obvious
point, but now we can easily represent real business scenarios that include
activities requiring human intervention. In some way, we are describing all
the human activities in our business processes. This will help us to know
exactly what information is handled by each user in our business activities.
In other languages like BPEL, the human activity concept doesn't have any
representation. This is the reason that we cannot represent situations where
humans are involved, in all such languages.
Analyze and improve the way humans achieve business goals: When we
have the description about how our information ows in our company's
processes, we can start analyzing and optimizing all the information handled
by each activity. These kind of improvements will help in the overall process
performance, letting all the managers know how to present the information
to each user involved in the company. Also, with this kind of analysis we
can discover silent failures or situations where information is missing.
Humans will be guided by the processes: The other clear advantage is
that all the new employees will be guided throughout their activities.
This is because now the responsibility to gure out each possible situation
that the process may face, is taken away from them and has become the
process responsibility.
Handling human tasks in jBPM
We need to represent human activities in our business processes, but how can we
achieve this?
In jPDL the task node gives us all that we want. However, we need to know in detail
how to congure it in order to represent our particular situation.
We are going to congure the task node for various real situations in order to choose
the correct conguration to your particular scenario.
As we described earlier, human tasks are wait states by nature. We rst need to
understand when to use human tasks, that is, whether the situation in our process
really needs a human being or the activity could be done automatically.
•
•
•
This material is copyright and is licensed for the sole use by ALESSANDRO CAROLLO on 18th December 2009
6393 south jamaica court, , englewood, , 80111
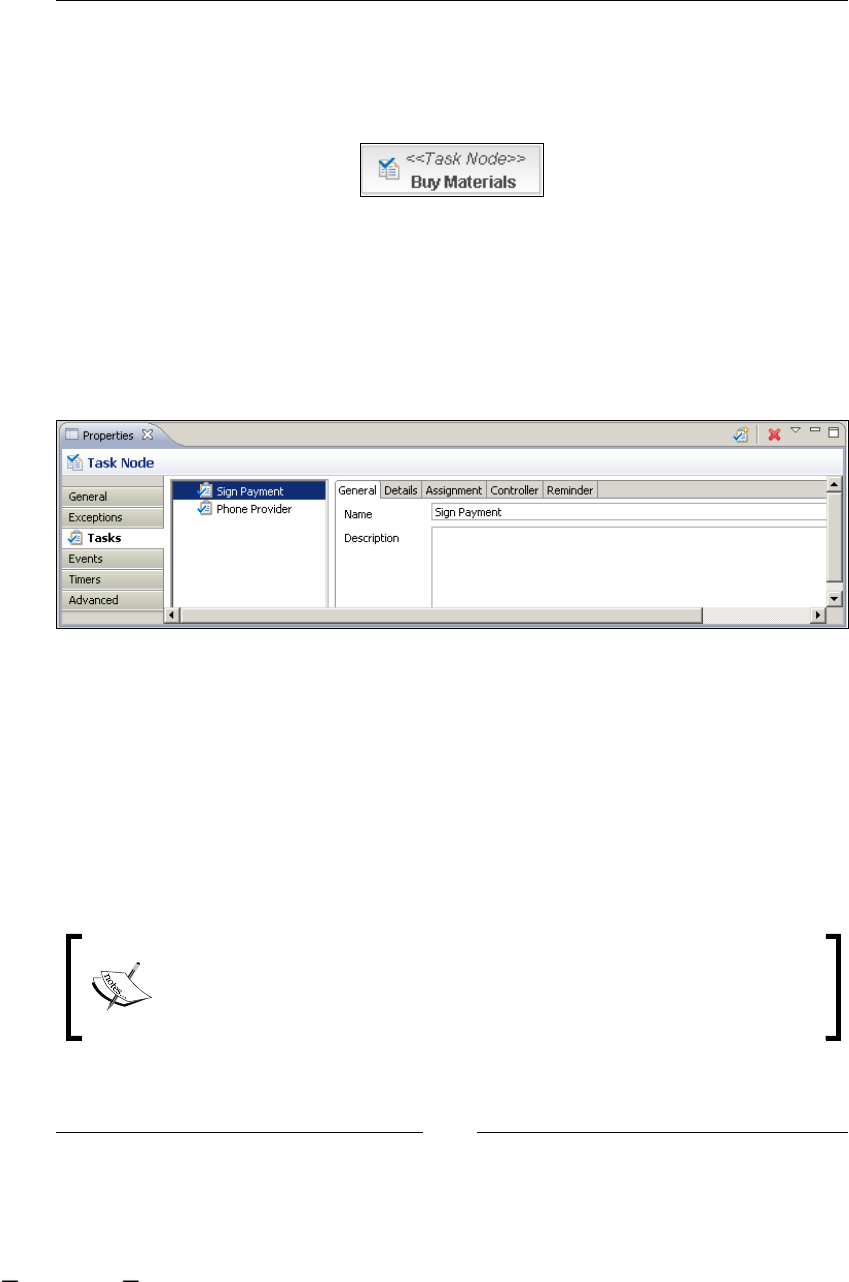
Human Tasks
[ 190 ]
Once the real situation is understood we need to know how we can represent it in
our models. In jPDL models the task node will represent situations when we can
have one or more activities that need human interaction to allow the process to
continue the execution to the next activity.
Inside this Task Node, we can express each particular task that needs to be
completed to continue the execution to the next node. Basically, a task node is
a container of task denitions that will be created at runtime, when the process
execution arrives at this node.
If we drag a new task node to our process in GPD, we can analyze the properties this
node accepts.
In this case, two internal tasks are dened inside this Task Node. These two tasks
will represent two real activities that will require human interaction to be completed.
It's very important to notice that each task dened here, can be assigned to different
users, and there are no restrictions about that. So, in this case, the manager can sign
the materials bill and his/her secretary can call the provider.
Also, it is important to note that the denition order of these two tasks will not
demarcate the order of work that needs to be done. These two tasks can be done in
parallel or in a non-predened order. In the case that we really need to express order
between tasks, two or more task nodes need to be created.
Remember that whenever we need to demarcate a sequence of tasks
within our processes, the concepts of nodes need to be used. If we decide
to dene multiple tasks inside a task node, we are just dening a set of
tasks that will require completing of just one activity in our process graph.
This material is copyright and is licensed for the sole use by ALESSANDRO CAROLLO on 18th December 2009
6393 south jamaica court, , englewood, , 80111

Chapter 7
[ 191 ]
If we take a look at the Source tab, we can see the generated jPDL source code.
<task-node name="Buy Materials">
<task name="Sign Payment"></task>
<task name="Phone Provider"></task>
</task-node>
As you can see, inside the <task-node> tags different tasks (<task> tag) can
be dened.
TASK NODE
TASK
TASK
TASK
These two concepts are reected in two Java classes: TaskNode and Task.
Task node and task behaviorbehavior
In this section we will see how the task node and the task concepts are implemented in
jBPM and also all the technical details that let our tasks' denitions run. It guides our
company roles/users in their every day work, because now, the concept of task will
represent each user's activity. It is also very important to be able to know how these
denitions will behave at runtime.
The task concept, as a whole, introduces additional execution stages and behavior to
the basic node functionality. All this additional functionality is created to handle, in a
generic way, a lot of different situations where human interactions are needed.
This extra functionality is oriented to represent and store all the specic information
that we will need in order to fulll these human interactions.
It is important to mention that the concept of task denes the static information
about our activities. The task node on the other hand denes an extension of the base
node, where the specic runtime behavior for this kind of nodes is dened. But wait
a second, there is something missing! If the <task> tags are the only the static way to
dene our tasks, how can we represent the tasks that are running currently?
This material is copyright and is licensed for the sole use by ALESSANDRO CAROLLO on 18th December 2009
6393 south jamaica court, , englewood, , 80111
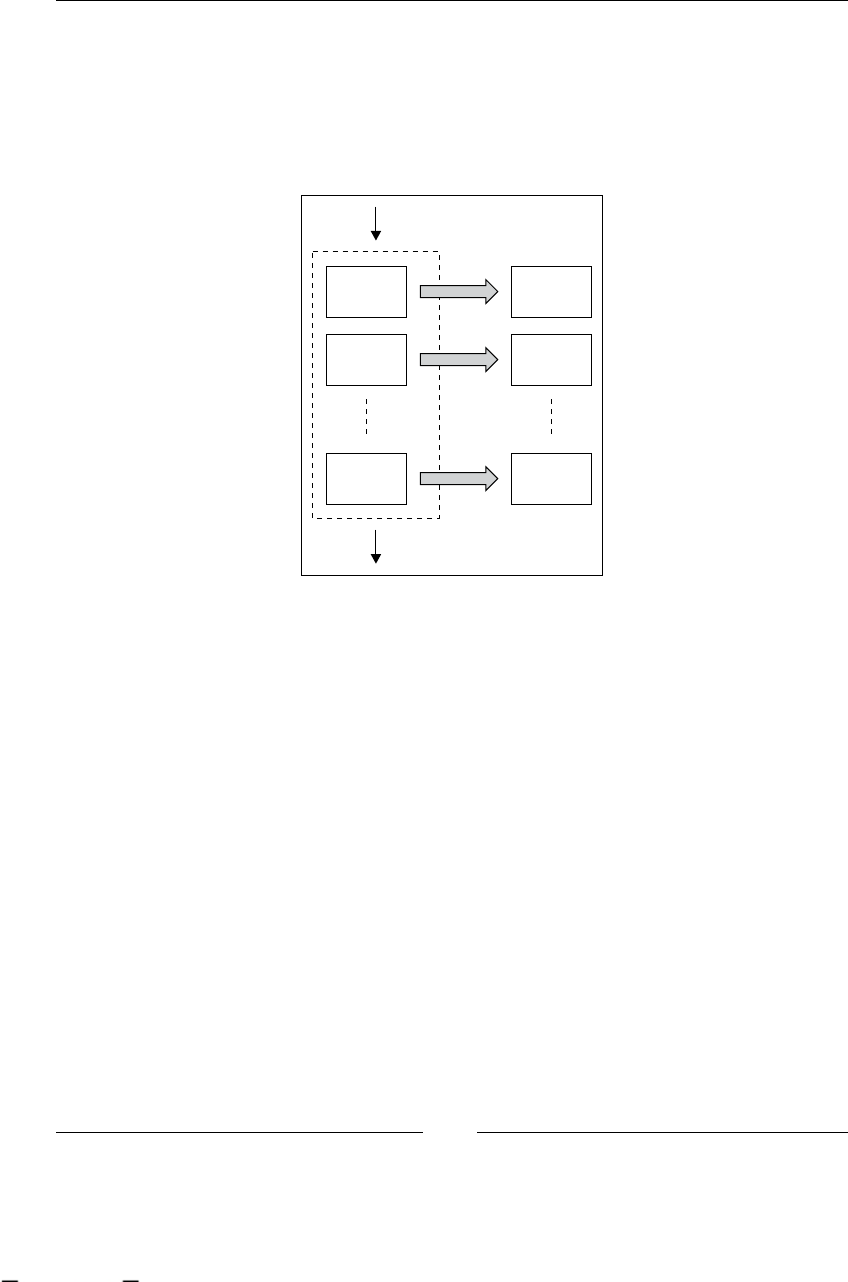
Human Tasks
[ 192 ]
To represent the tasks running inside our processes, we have the concept of task
instances. This concept will tell us if the tasks we dened in our process are
instantiated and are ready to work on. In other words, these task instances will
represent the units of work that will be selected by the users in order to complete
each activity. These task instances can be used to create each user task list, because
they will represent all the active tasks that the user has been assigned to complete.
TASK
TASK
TASK
Task
Instance
Task
Instance
Each of these task instances will be exposed to the corresponding business role. The
specied business role will interact with these task instances through a UI. This UI
will let them review, add, remove, and modify information to complete each task.
Each of these task instances also adds four more events to the node life cycle,
which will be red when each task instance is created, assigned, started, and
completed respectively:
EVENTTYPE_TASK_CREATE
EVENTTYPE_TASK_ASSIGN
EVENTTYPE_TASK_START
EVENTTYPE_TASK_END
Like every other event, these four new events will let us hook up automatic actions,
giving us extra exibility to run custom code before and after each task completion.
These task instances will be created inside the execute() method of the class
TaskNode based in all the task elements dened or referenced inside the
<task-node> tags.
•
•
•
•
This material is copyright and is licensed for the sole use by ALESSANDRO CAROLLO on 18th December 2009
6393 south jamaica court, , englewood, , 80111

Chapter 7
[ 193 ]
Basically, to handle all the human interactions we will have three classes that
interact in both phases (denition phase and execution phase) to fulll the most
common requirements.
TaskNode�java�java
As you can imagine, the TaskNode.java class will represent the node that will
contain a set of task denitions. For this reason, this class extends the Node class.
public class TaskNode extends Node
If you take a look at the properties dened inside this class, you will nd:
Set <Task> tasks: This property will store all the tasks dened inside this
task node.
int signal (initialized with SIGNAL_LAST): This property will dene the
behavior of the task node. More about this in the example.
Boolean createTasks (initialized true): This property will dene if the node
needs to create the task instances automatically when it's reached by the
process execution, or if another procedure will be in charge of that creation.
We will probably override this value when we need to dynamically create
task instances.
Boolean endTasks (initialized with false): This property will dene if the
node must end all the task instances created by this node before it leaves
the activity.
Task�java
The Task.java class will contain all the information related to each task inside a task
node. This class is also an in charge and decides how the actor assignment should be
calculated at runtime.
The following three properties are used for this purpose:
protected String actorIdExpression: This property will take and resolve
the actorId expression if it is dened in the task conguration.
protected String pooledActorsExpression: This property will take and
resolve the pooledActors expression if it is dened in the task conguration.
protected Delegation assignmentDelegation: This property will take and
use the delegation class to perform the assignment in the runtime stage.
•
•
•
•
•
•
•
This material is copyright and is licensed for the sole use by ALESSANDRO CAROLLO on 18th December 2009
6393 south jamaica court, , englewood, , 80111

Human Tasks
[ 194 ]
TaskInstance�java
The TaskInstance.java class will represent our currently running tasks. If you take
a look at this class source, you will see the following interesting properties dened:
protected String name = null;
protected String description = null;
protected String actorId = null;
protected Date create = null;
protected Date start = null;
protected Date end = null;
protected Date dueDate = null;
protected int priority = Task.PRIORITY_NORMAL;
protected boolean isCancelled = false;
protected boolean isSuspended = false;
protected boolean isOpen = true;
As you can see, these properties contain all the information about which actor is
currently assigned to this task, when the task was created, started, and ended. It also
contains a eld to represent the priority of this specic task instance. And the last
three boolean properties let us express the status of the task instance.
Task node example
To have a clear view about how this task node works, we will use a real example
where a task node needs to be modeled and congured in order to fulll real
scenarios and different situations that commonly occur in real life. The code of this
example can be found at http://www.packtpub.com/files/code/5685_Code.zip
(look for Chapter 7). In this section only the most signicant code will be shown, so I
encourage you to take a look at the full project for complete comprehension.
Business scenario
Imagine that a bank implements a process to withdraw money or jewels from the
vault. This process will start when someone needs to take out something from
his/her account. When this happens, the account manager has to ll in a request,
which has to be approved by the bank manager. When this operation is accepted,
the customer is informed with the date when he can do the transaction. When this
withdrawal is made, all the data about the customer and his/her assets in the vault
must be updated. This process is represented in the following graph:
This material is copyright and is licensed for the sole use by ALESSANDRO CAROLLO on 18th December 2009
6393 south jamaica court, , englewood, , 80111

Chapter 7
[ 195 ]
Fill in
Request
Request
Approval
Transaction
Update Data
Account Manger
Bank Manager
Customer
The rst and the most important key point in this situation, in my opinion, is to
identify the business actors that will interact to fulll the business goal. In the graph
these actors are already identied, but in real situations we need to be sure about
their roles.
It will be important for us to know if, in the business scenario, each role can be
accomplished by one person or if the task can be done by a group of prepared
people. This kind of detail will affect the way we relate the task to the correct
business user.
If you nd that a group of people can be assigned for each activity, you
will need to use the concept of pooled actors, that will represent a group
of people who have the knowledge to complete one specic activity.
The second key point is to know the nature of each activity. For example, if we have
to wait to get our withdrawal approved by different managers and also by the bank
security chief, we will need to nd how to model this particular situation in order to
reect the real activities. As you can imagine, this kind of situation can be modeled
in a variety of ways.
Common sense will dictate to us that we can create one task for each of the
authorizations, but if we do that, which authorization will be the rst one?
Which will be the last one?
This material is copyright and is licensed for the sole use by ALESSANDRO CAROLLO on 18th December 2009
6393 south jamaica court, , englewood, , 80111
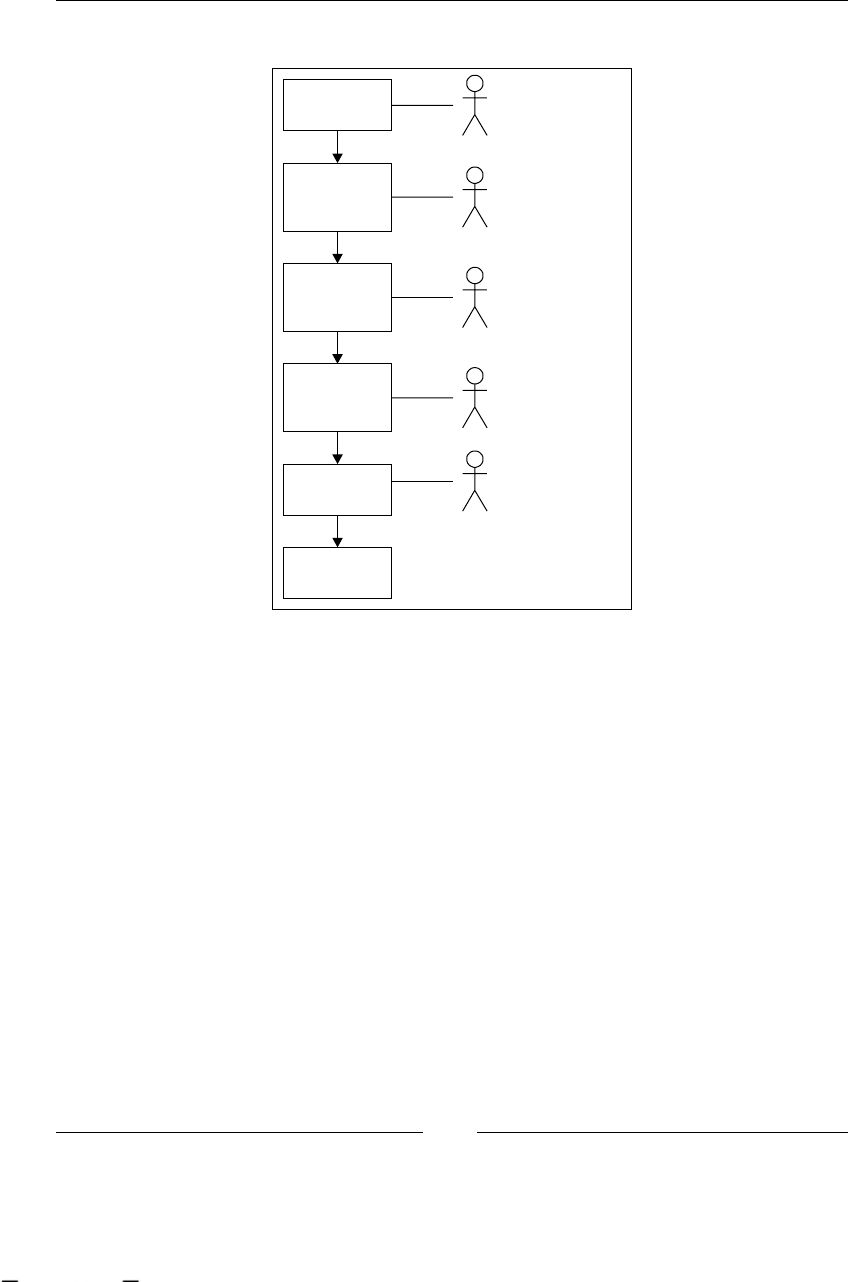
Human Tasks
[ 196 ]
Take a look at the following image:
Bank
Manager
Approval
Account
Advisor
Approval
Security
Chief
Approval
Manager
Account Advisor
Security Chief
Fill in
Request
Transaction
Update Data
Account Manger
Customer
In this particular situation, the process needs to wait for each participant to approve
the withdrawal sequentially. It is obvious that this is not the optimal way to do it.
This is because if the rst role is very busy or for some reason (such as vacation or
sickness), he/she cannot fulll the activity, the other activities couldn't be started. If
you think about it, there is no reason for this sequence, because in real scenarios the
transaction approval can be done in any order (in this situation). The important thing
here, is to note that some similar activities/tasks need to be done by these three roles.
This material is copyright and is licensed for the sole use by ALESSANDRO CAROLLO on 18th December 2009
6393 south jamaica court, , englewood, , 80111
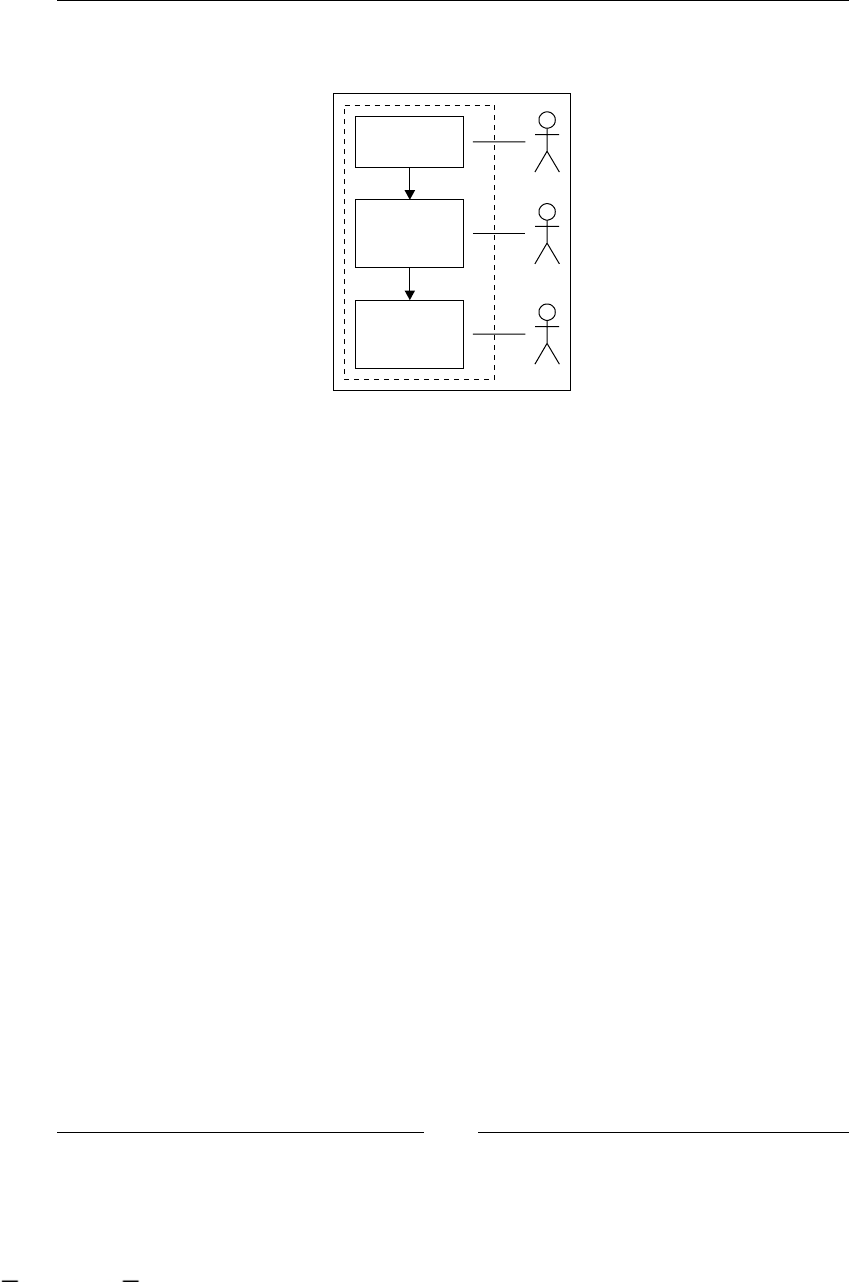
Chapter 7
[ 197 ]
So, for this situation we can enclose these three activities inside a task node that
describes the real scenario.
Bank
Manager
Approval
Security
Chief
Approval
Manager
Approval
Here, these tasks will be created and can be completed in no particular order.
This is because these three tasks do not depend on each other, and no particular
order is needed.
Another key point here is that the three tasks have similar behaviors. In this
situation, the same review and approving information task needs to be done by the
three roles. In other words, the three tasks will display information to each user, and
the user interface will let them decide if they approve the transaction required by the
customer or not.
For this kind of situation we can dene three different tasks inside the task node, and
then dene some policies to tell the process when it must continue to the next node.
This is because now we can dene if all the tasks will need to be completed,
or just one needs to be completed, or it can continue without waiting.
In cases like the example where the task node contains multiple task denitions,
it is important to know what kind of policies will be set for execution propagation.
The default behavior is to wait until all the tasks created inside the task node are
completed, and then continue the execution. This behavior is implicitly dened
inside the <task-node> tags. And when we have <task-node></task-node>, it is
the same as having <task-node signal="last">.
This material is copyright and is licensed for the sole use by ALESSANDRO CAROLLO on 18th December 2009
6393 south jamaica court, , englewood, , 80111

Human Tasks
[ 198 ]
As you can see, a new property called signal appears. This property cannot be
specied using the GPD plugin property panels, and needs to be set by hand in the
Source tab.
Other values that this property can take are:
first: This value will let us continue the process execution to the next node
when the rst task is completed. Remember that inside the task node there
will be no order specied. So, the rst task is not necessarily dened rst in
the XML le. When any of the tasks dened is completed, it will continue the
execution to the next node.
never: The process execution never continues, it will always wait for some
external signal that tells the token to continue to the next node.
unsynchronized: the execution will always continue, it doesn't matter if the
tasks are unnished. The execution will create the tasks dened inside the
node and then it will continue to the next node.
It is also important to know what would happen if we dene a task node without
tasks inside them, and also how we can create two or more identical tasks inside the
same node with the same denition.
If we don't dene any tasks inside the task node tags, the default behavior (with
signal property equals to last) for the task node will not behave as a wait state
and continue the execution to the next node.
We can also have other behaviors when we don't dene any task inside the task
node. In this case, if we want process execution to wait in the task node, we can
have two more values for the signal property:
last-wait: If no tasks are created, the execution will wait until tasks are
created.
first-wait: If no tasks are created, the execution will wait until tasks are
created and the rst task is completed.
If we don't use any of these ags when no tasks are dened inside the task node, the
task node will behave as an automatic node and it will continue the execution to the
next node in the process without waiting.
In situations when we need to have more than one task that is created with the
same task denition, or in situations when we need to create tasks based in runtime
information, we need to know how to create tasks programmatically.
•
•
•
•
•
This material is copyright and is licensed for the sole use by ALESSANDRO CAROLLO on 18th December 2009
6393 south jamaica court, , englewood, , 80111
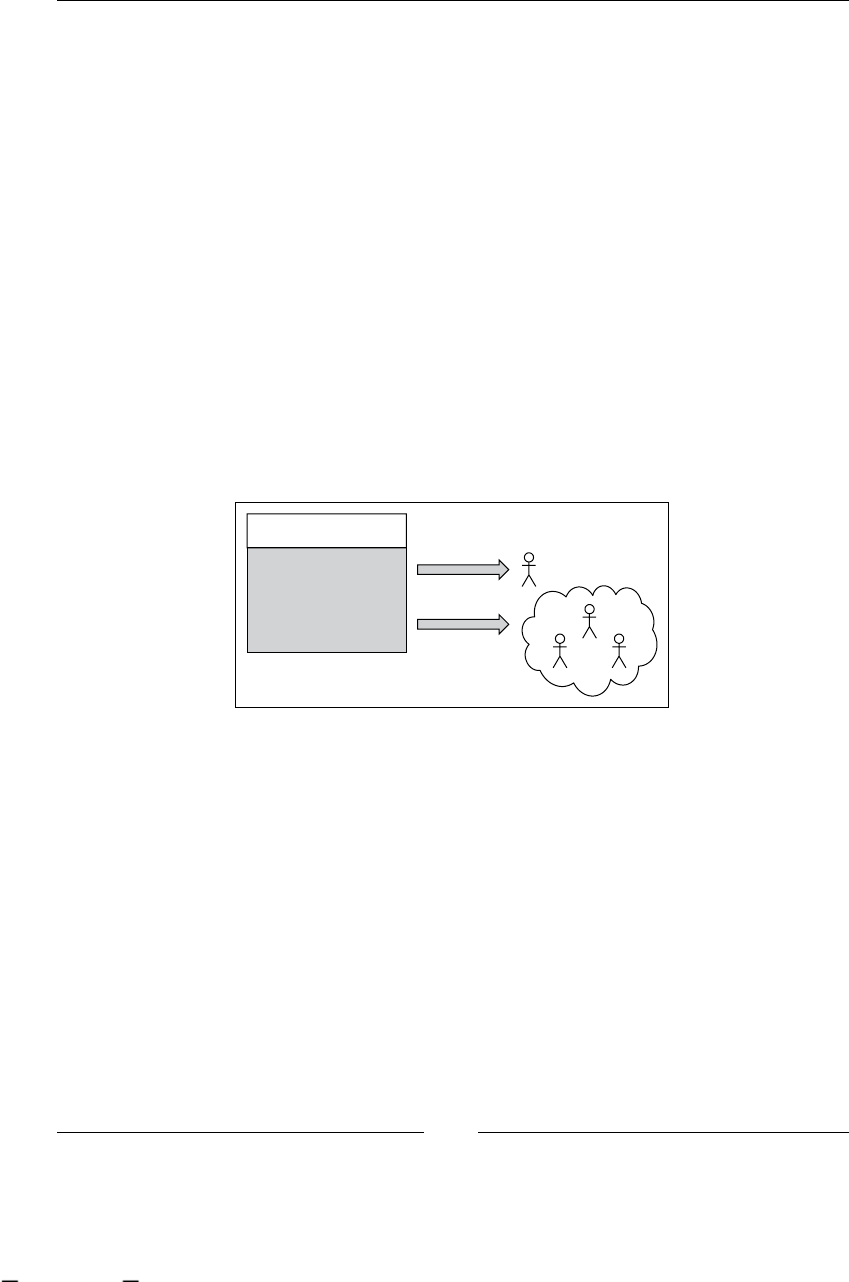
Chapter 7
[ 199 ]
Assigning humans to tasks
All the tasks in jPDL are related with physical human beings. For this reason, a
relationship with our business users needs to be maintained. As we have seen in
the previous example, business roles/users are related to each task dened in the
process denition. We will discuss how this works and all the features related to
these assignments.
jBPM has a very exible way to maintain this relationship. If you see the class
TaskInstance where all the information about each particular task is stored, you
can see that this class has two simple properties to maintain these relationships:
protected String actorId = null;
protected Set<PooledActor> pooledActors = null;
Based on these two properties' values, each task will be related to one actor to
complete the activity, or with a set of possible actors that can voluntarily take on
each task to work on it.
The relationship between tasks and actors is described in the following image:
TASK INSTANCE
String actorid
Set <PooledActor>
pooled Actor
1
*
Basically, we say that the task is assigned to an actor if the actorId String is not
equal to null. In the cases where the actorId has a value different from null, the
task instance can only be worked by this actor.
If the actorId String is equal to null, and the pooledActors have a value
different from null, the task can be taken from one of the users listed in the set of
pooledActors. When the task is claim, the actorId property is lled and the task
cannot be claim for all the actors inside the pooledActors property anymore.
This material is copyright and is licensed for the sole use by ALESSANDRO CAROLLO on 18th December 2009
6393 south jamaica court, , englewood, , 80111
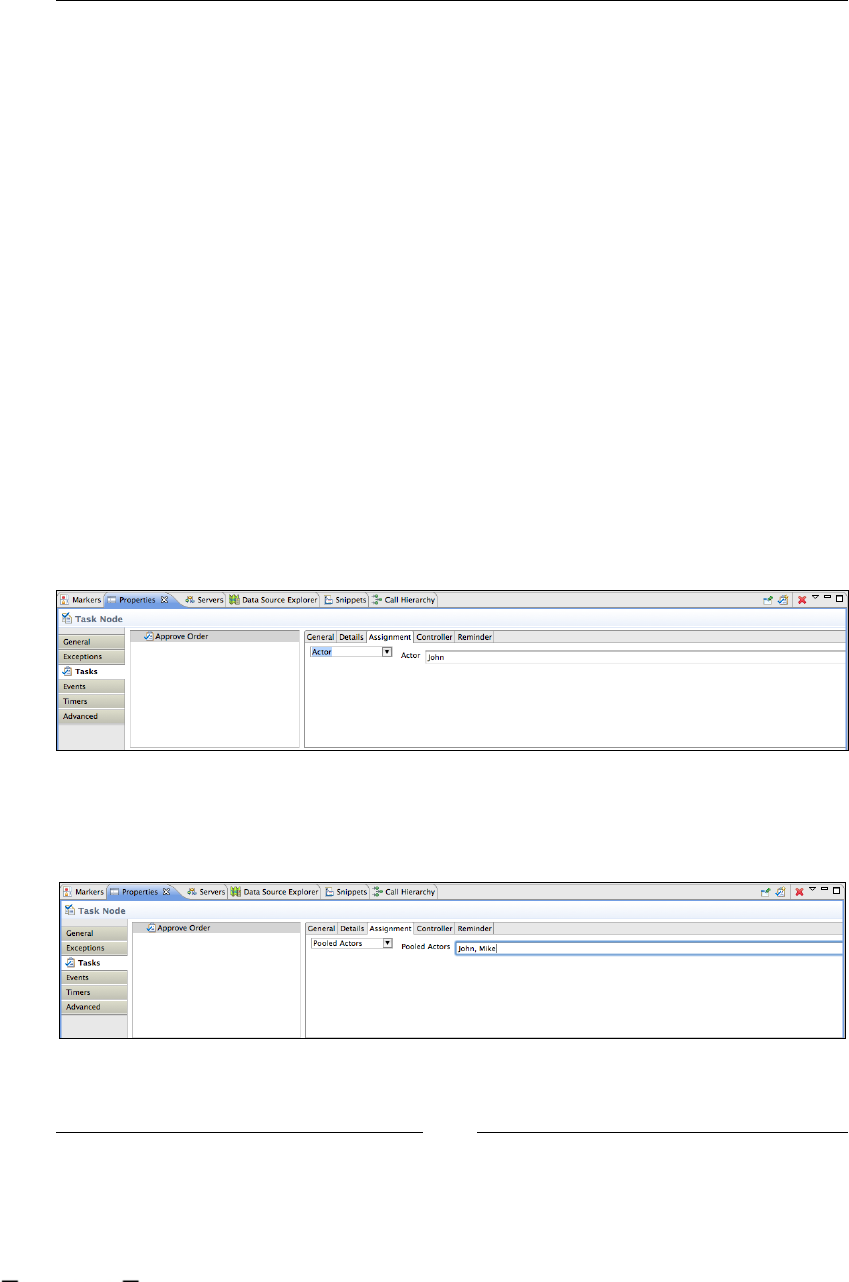
Human Tasks
[ 200 ]
All these claimed tasks have the chance to return to the pool if the actor taking the
task decides that he/she cannot complete the task at this moment. The task will
return to the pool if the actorId property becomes null again. When this happens,
again, all the actors in the set of pooled actors can see this task and are able to take it.
There are several ways of doing this kind of assignment; we will discuss briey how
to do it in real scenarios. It's important for you to know that the next three sections
will work with the jBPM Identity module.
The jBPM Identity module is a simple module containing a simple structure to
support simple cases where our users will be stored in the database. This model
will let us store users, groups, and the memberships that will link the users with
different groups. It's important for you to know that this module is just for simple
scenarios, and in most cases, this module is replaced by a directory service (for more
information, refer to http://en.wikipedia.org/wiki/Directory_service).
Expression assignments
If we decide to use direct assignments, we will be directly writing the Task
actorIdExpression and pooledActorsExpression properties. These two
properties will be used at runtime to assign the ActorId or the pooledActors
properties in the TaskInstance instance. In the following gure, we can see how
we can set the actorId value in the task property panel inside the task node.
In the following gure, we can see that if we need to assign a set of pooled actors, we
just need to insert them separated with commas, and select the Pooled Actors option
from the drop-down menu.
This material is copyright and is licensed for the sole use by ALESSANDRO CAROLLO on 18th December 2009
6393 south jamaica court, , englewood, , 80111
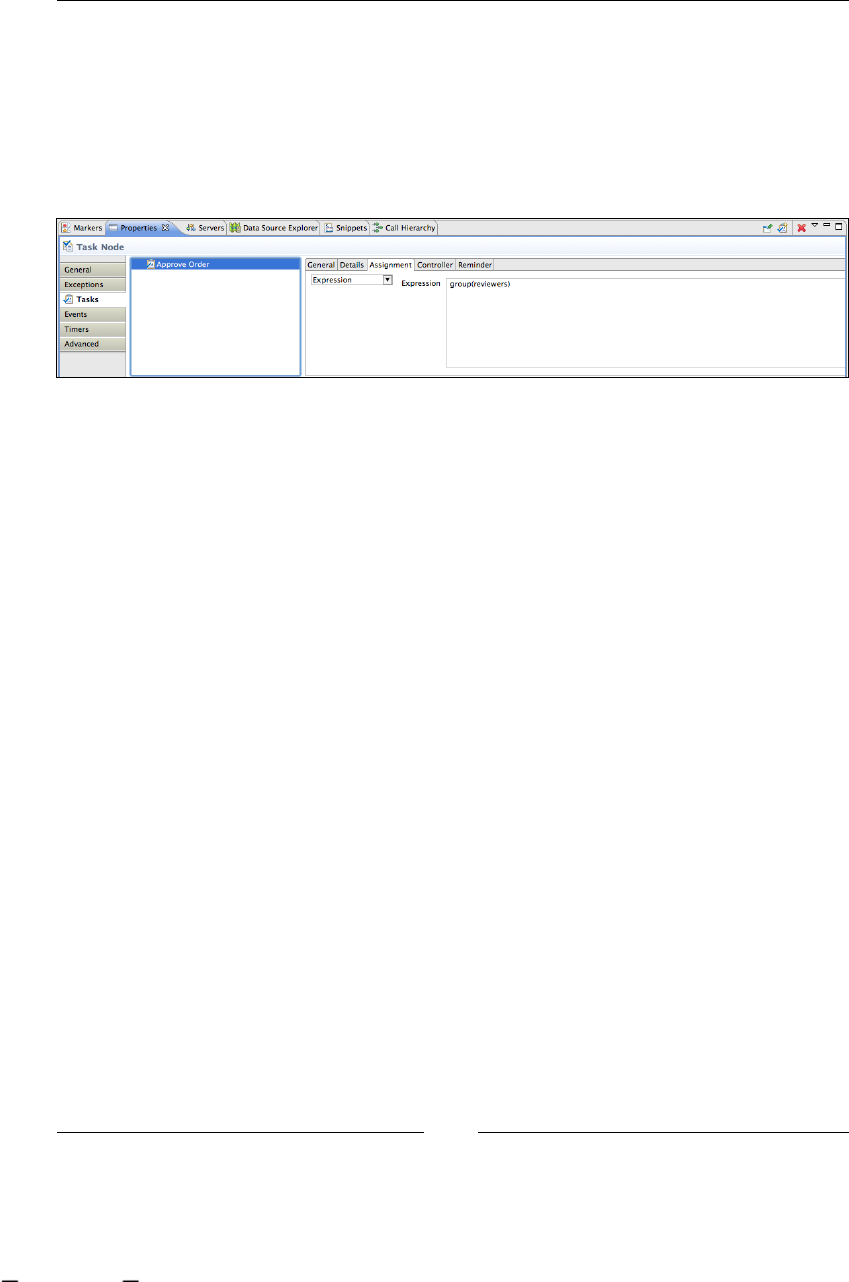
Chapter 7
[ 201 ]
If you take a look at the drop-down menu, you will see that there is also an option
called Expression. This option will let us insert a JSF-like expression that will be
evaluated at runtime and the result will be added to the correspondent eld. For
more information you can take a look at the class called org.jbpm.identity.
assignment.ExpressionAssignmentHandler, which contains the current evaluator
for this type of expression. Just for you to know, you can build expressions like the
one shown in the following gure:
As you can deduce, these expressions will be parsed and resolved by the
ExpressionAssignmentHandler class, which will contain logic that will be specic
for the Identity module provided by jBPM. In other words, if you change the Identity
module for your company directory service, you will probably need to provide a
different implementation for the ExpressionAssignementHander.
Delegated assignments
In the case of delegations, we will just provide a class that will decide which actor
will be in charge of each specic TaskInstance at runtime.
In this case, we are lling the assignmentDelegation property of the Task class.
This property will contain a class that implements the AssignmentHandler interface
that will know how to assign users to each TaskInstance.
If you take a look at the AssignmentHandler interface, you will nd that it is a very
simple interface that contains just one method:
public interface AssignmentHandler extends Serializable {
void assign( Assignable assignable, ExecutionContext
executionContext ) throws Exception;
}
This material is copyright and is licensed for the sole use by ALESSANDRO CAROLLO on 18th December 2009
6393 south jamaica court, , englewood, , 80111
Download at WoweBook.com
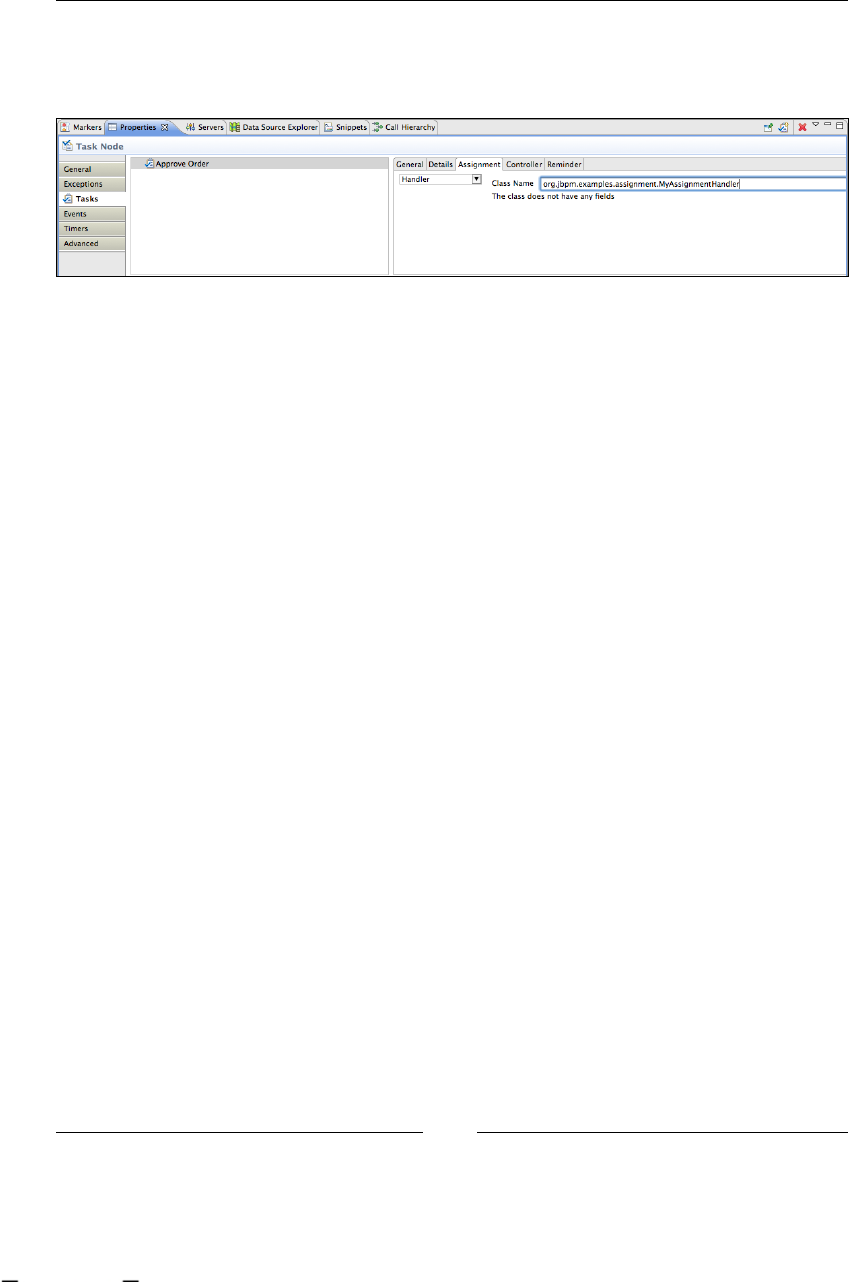
Human Tasks
[ 202 ]
We need to provide the delegation property with the fully-qualied name of the class
that implements this interface, in order to be able to do an automatic assignation
during runtime.
In this case, the MyAssignmentHandler implementation is just a simple class that
implements the AssignmentHandler interface and decides which actor will be
assigned for each particular TaskInstance.
public class MyAssignmentHandler implements AssignmentHandler {
public void assign(Assignable assignable, ExecutionContext
executionContext) throws Exception {
//Based on some policy decides the actor that needs to be
// assigned to this task instance
assignable.setActorId("some actor id");
}
}
Just as a last detail, it's important for you to know that the TaskInstance class
implements the Assignable interface that contains just two methods:
public interface Assignable extends Serializable {
public void setActorId(String actorId);
public void setPooledActors(String... pooledActors);
}
Managing our tasks our tasks
The most common way to see and organize these task instances is to make use of the
task list for each user involved in the process.
These task lists can be generated/populated using the task management APIs
provided by the task management module. These APIs let us query information
about all the task instances created in our processes, with the possibility of ltering
the information retrieved with different conditions. For example, we can query all
the tasks that a user is assigned to, and with that information populate the user
task list.
This material is copyright and is licensed for the sole use by ALESSANDRO CAROLLO on 18th December 2009
6393 south jamaica court, , englewood, , 80111
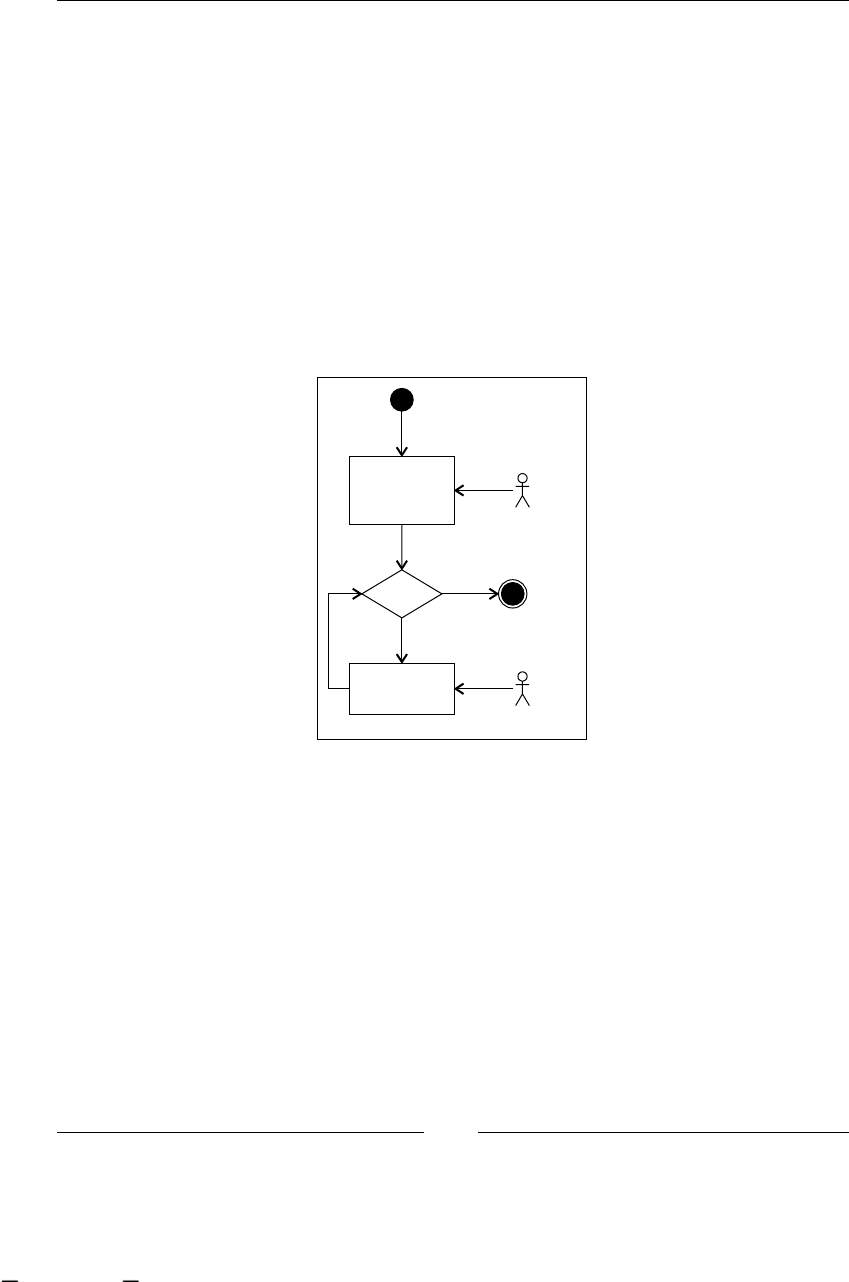
Chapter 7
[ 203 ]
In this section we will create some basic user interfaces, to see how all the task
management APIs are used by implementing a real-life scenario that shows us
how this task list behaves with multiple users.
Real-life scenario
Here, we will discuss a simple scenario that has some business roles interacting with
their corresponding human activity.
A simple process with two task nodes and an automatic decision node will be used
to demonstrate how these tasks need to be handled in order to seamlessly complete
business goals.
This simple process is described in the following image:
Check
Device
Temperature Device Checker
YES
NO
Cooling Expert
Modify Fan
Velocity
OK?
If we model this process in jPDL syntax we will get something like this:
<process-definition xmlns="urn:jbpm.org:jpdl-3.2"
name="taskExample">
<start-state name="start">
<transition to="Check device temperature"></transition>
</start-state>
<task-node name="Check device temperature">
<task name="Check device temperature">
<assignment actor-id="deviceChecker"/>
</task>
<transition to="OK?"></transition>
</task-node>
This material is copyright and is licensed for the sole use by ALESSANDRO CAROLLO on 18th December 2009
6393 south jamaica court, , englewood, , 80111

Human Tasks
[ 204 ]
<decision name="OK?"
expression="#{(temperature + prediction) > 100}">
<transition name="true" to="Modify fan velocity"></transition>
<transition name="false" to="end"></transition>
</decision>
<task-node name="Modify fan velocity">
<task name="Modify fan velocity">
<assignment actor-id="coolingExpert"/>
</task>
<transition to="OK?"></transition>
</task-node>
<end-state name="end"></end-state>
</process-definition>
This simple process will store some data about the current status of an electronic
device that needs to be cooled by a fan. When the heat of the device is over a dened
threshold, a process instance is created to control the situation.
The rst task that appears in the process (Check device temperature) only checks the
current temperature, and adds a value inside a process variable, which represents a
forecast prediction based on the weather of the day. If this forecast prediction plus
the current temperature is over the threshold, the process will create a new task to
the fan technician that needs to correct the velocity of the fan manually to cool
the device.
In this process, the following two business roles interact:
The guy who checks the temperature (called deviceChecker in the process
denition): This user role needs to be near the device and will always be
responsible for checking the device status and adding the forecast prediction
for the next few hours.
The guy who is a cooling expert (called coolingExpert in the process
denition): This user role is miles away from the device, and he has the
knowledge to modify the fan velocity to keep the device temperature
under a dened threshold.
Here we have only an automatic node, the decision node that automatically checks if
the temperature plus the forecast prediction is added by the reviewer and, based on
that decides which path of the process to take.
Now that we have a real-life example and our process is modeled, we can start
analyzing how our users will interact with these tasks.
•
•
This material is copyright and is licensed for the sole use by ALESSANDRO CAROLLO on 18th December 2009
6393 south jamaica court, , englewood, , 80111
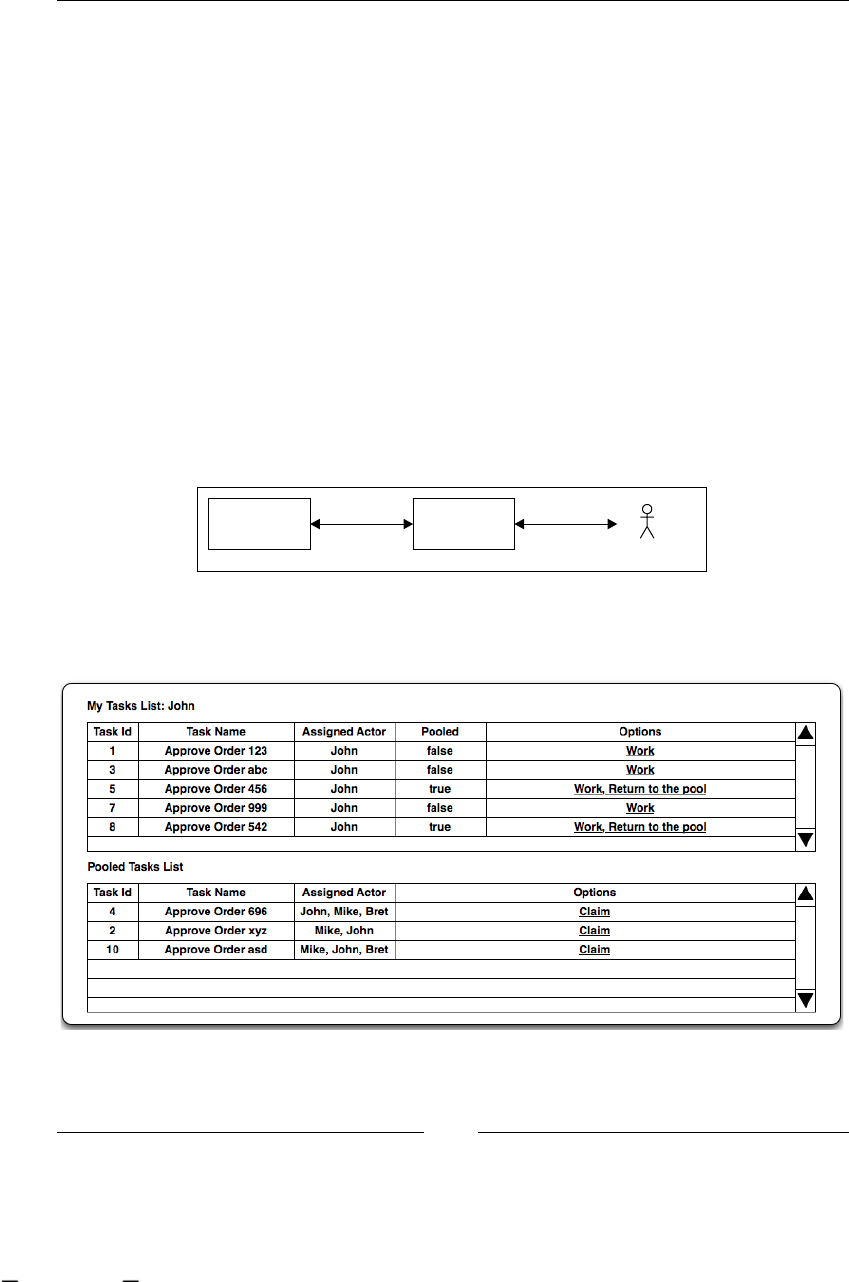
Chapter 7
[ 205 ]
Users and tasks interaction model
As you can imagine, each task needs to be represented graphically for the end user
to interact with. In this section we will describe the common model to organize and
show these tasks to each end user involved in our processes. This section has a tight
relationship with how we assign the tasks to our users. So, the screens discussed here
will be for generic situations, where actor IDs and pooled actors can be used.
In normal situations all the tasks are presented to each user in the form of task list.
This task list will include all the tasks created for the task list owner. In other words,
each user task list will only display tasks that have the current logged/selected
user assigned.
All the tasks listed inside a task list will be running tasks, so basically each
entry in the task list will be an instance of the TaskInstance class. Each of these
TaskInstance instances will need to be represented graphically in order for the
user to be able to interact with it.
Basically, we are organizing all the UIs for each TaskInstance.
TASK
INSTANCE
USER
INTERFACE
Assigned User
The following image has the sketch of how these generic task lists can be placed in
the user screen:
This material is copyright and is licensed for the sole use by ALESSANDRO CAROLLO on 18th December 2009
6393 south jamaica court, , englewood, , 80111

Human Tasks
[ 206 ]
The following image demonstrates a particular task form:
TASK NAME
LABEL
LABEL
LABEL
COMPLETE
SAVE
You can see in these two images that these screens will handle all the information
from one business role in a generic way. Let's analyze each of them a little.
The rst screen shows us two task lists, one labeled MyTasks List / "username",
which displays all the created tasks that have the username in the actorId eld, in
other words, all the tasks that are currently assigned to the logged/selected user.
As we discussed in the Assigning human roles to tasks section, in most situations, we
need to have a user for each business role that interacts with the process.
The second task list, labeled Pooled Tasks List contains all the pooled tasks that are
created and have the currently logged-in users as possible assignees. This means
that these tasks need to be taken in order to work on it. In this second task list we
need to "claim" one of these pooled tasks, and it automatically will be assigned to us
and moved to our task list. When we take one of these pooled tasks, each of them
becomes our responsibility. These pooled tasks are displayed in all the user pooled
tasks lists that have their name in the String[] pooledActors eld of the task.
In the second screen, we can see all the information of each task. Most of these
screens are forms where we can review, enter, modify, or remove information. It also
will contain some buttons that let us notify the process about the status of each task.
Some common buttons used in most cases are:
Finish/Complete: This will inform the process that the particular task is over.
Save: This will save the current information inside the task; however, the
task is still unnished.
•
•
This material is copyright and is licensed for the sole use by ALESSANDRO CAROLLO on 18th December 2009
6393 south jamaica court, , englewood, , 80111

Chapter 7
[ 207 ]
Practical example
In this section we will analyze the code that comes with this chapter in order to see
how all the theoretical issues discussed in this chapter are applied to the process
example proposed before.
The proposed example will be implemented as a web application that you can run
inside a Servlet Container as Tomcat or Jetty.
This project is also created and built with Maven, so if you are not familiar with
Maven take a look at the Maven introduction section in Chapter 3, Setting Up
Our Tools.
This project will take the proposed process denition and deduces that the device is
getting hotter using a random value that the role/user called "Device Checker" will
need to check.
So, if you open and build the web application created with Maven, you will nd four
different screens. The home page of the application will contain two links that will
only redirect us to the Administrator Screen and to the User Screen.
As you can imagine the Administrator Screen will only contain a few actions to
congure the environment to be ready for the process execution.
The User Screen on the other hand will let us interact with the human tasks that our
process will create. In real situations, the User Screen will take the logged-in user and
display only the data/tasks that this user can see. Here, the example implements a
drop-down list to select the user, without any security restrictions.
Let's take a look at the Administrator Screen functionality.
Setting up the environment (in theenvironment (in the (in the
Administrator Screen)
As an administrator, you will need to set up some basic artifacts to be able to run the
dened process correctly.
It is important to see the order of these actions, because there are some dependencies
between them. For example, we can create new users in our database if we don't
create the database structure rst. So, you must follow the order proposed in the
user interface to congure our environment successfully.
This material is copyright and is licensed for the sole use by ALESSANDRO CAROLLO on 18th December 2009
6393 south jamaica court, , englewood, , 80111

Human Tasks
[ 208 ]
As you can see in the Administrator Screen, the following actions will be proposed:
1. Create DB schema: This action will create all the tables in the database
needed for our processes to work. The code for this action can be found
inside the AdminScreenController HttpServlet. If you take a look inside
the processRequest method of the HttpServlet, you will nd the following
block of code:
if (action.equals("createSchema")) {
conf = JbpmConfiguration.parseResource("jbpm.cfg.xml");
conf.createSchema();
request.setAttribute("message", "Schema Created!");
RequestDispatcher rD = request
.getRequestDispatcher("newProcessScreen.jsp");
rD.forward(request, response);
}
It is important to see the classes and the conguration les that interact,
in order to create all the tables' denition that will support our running
processes. As you can see, an important le here is the le called
jbpm.cfg.xml. This will contain all the services available for our
execution. For example, the persistence service, that will be in charge
of storing our processes in the database. If you open this jbpm.cfg.xml
le you will nd an important line inside it:
<string name="resource.hibernate.cfg.xml"
value="hibernate.cfg.xml" />
This line tells jBPM where to locate the le called hibernate.cfg.xml that
will contain all the information about how Hibernate will communicate with
a relational database in order to persist our processes in the database. In this
case, it is pretty obvious that we need to know what kind of database we are
using, in which dialect does this database talk, where is it located, and with
which user we connect it to. So, if you open this hibernate.cfg.xml le you
will nd something like this:
<!-- hibernate dialect -->
<property name="hibernate.dialect">
org.hibernate.dialect.MySQL5InnoDBDialect
</property>
<!-- JDBC connection properties (begin) -->
<property name="hibernate.connection.driver_class">
com.mysql.jdbc.Driver
</property>
<property name="hibernate.connection.url">
jdbc:mysql://[YOUR HOST]:3306/[YOUR DB NAME]
</property>
This material is copyright and is licensed for the sole use by ALESSANDRO CAROLLO on 18th December 2009
6393 south jamaica court, , englewood, , 80111

Chapter 7
[ 209 ]
<property name="hibernate.connection.username">
[YOUR USER]
</property>
<property name="hibernate.connection.password">
[YOUR PASSWORD]
</property>
<property name="hibernate.query.substitutions">
true 1, false 0
</property>
<!-- JDBC connection properties (end)
Here you need to replace everything inside the brackets with the data of your
installed MySQL server.
All this conguration needs to be done, before deploying the application. If
all of these settings are correctly congured when you run the createSchema
action, jBPM will connect to your database and it will create all the tables
required. This needs to be done only once, because all the tables' structure
will remain persisted until you decide to drop it.
2. Insert some users This action will insert the users needed in this process
denition. Here the action will only execute two native SQL queries using
the hibernate session wrapped within the jBPMContext class. As you can
see, this is only a conguration step, required by this situation. In most of the
cases, you will already have your user database or LDAP tree, and you will
not need to do this step. This functionality is implemented in the following
block of code:
if (action.equals("insertUsers")) {
JbpmContext context = conf.createJbpmContext();
int inserted = 0;
Query query = context.getSession()
.createSQLQuery("INSERT INTO JBPM_ID_USER VALUES(1,'U',
'deviceChecker','deviceChecker@jbpm.org','deviceChecker');");
inserted += query.executeUpdate();
query = context.getSession().createSQLQuery("INSERT INTO
JBPM_ID_USER VALUES(2,'U','coolingExpert',
'coolingExpert@jbpm.org','coolingExpert');");
inserted += query.executeUpdate();
context.close();
request.setAttribute("message",
"User inserted = "+inserted+"!");
RequestDispatcher rD = request
.getRequestDispatcher("adminScreen.jsp");
rD.forward(request, response);
}
This material is copyright and is licensed for the sole use by ALESSANDRO CAROLLO on 18th December 2009
6393 south jamaica court, , englewood, , 80111

Human Tasks
[ 210 ]
3. Deploy process denition: This action will get the processdefinition.
xml le and deploy it to the relational database. This will make sure that
the process denition can be used for different clients who will not need
the processdefinition.xml le. The process denition represented in
jPDL XML syntax will be translated to a relational structure of data, which
will be inserted in the relational schema created in the rst step. When you
run this action, you can take a look at the data inside the database to see
what rows are inserted to represent our process denition. Some tables that
you can query to see the data inside them are: JBPM_PROCESSDEFINITION,
JBPM_TASK, JBPM_NODE, and so on. It is important to note that the le called
processdefinition.xml is not copied to the database. Take a look at the
following block of code where the process denition is deployed to the
relational schema:
if (action.equals("deployProcess")) {
JbpmContext context = conf.createJbpmContext();
ProcessDefinition processDefinition = ProcessDefinition
.parseXmlResource("processes/processdefinition.xml");
context.deployProcessDefinition(processDefinition);
context.close();
request.setAttribute("message", "Process Deployed!");
RequestDispatcher rD = request
.getRequestDispatcher("adminScreen.jsp");
rD.forward(request, response);
}
4. Create new process instance: This action will retrieve the process denition
we deployed in the previous step and create a new process execution/
instance. This will be achieved with the following piece of code:
if (action.equals("newProcess")) {
JbpmContext context = conf.createJbpmContext();
// Create an instance of the process definition.
ProcessInstance instance = context
.newProcessInstance("taskExample");
instance.signal();
context.close();
request.setAttribute("message", "Process Instantiated!");
RequestDispatcher rD = request
.getRequestDispatcher("adminScreen.jsp");
rD.forward(request, response);
}
This material is copyright and is licensed for the sole use by ALESSANDRO CAROLLO on 18th December 2009
6393 south jamaica court, , englewood, , 80111

Chapter 7
[ 211 ]
As you can see, we are creating a new ProcessInstance by just using
the name of the deployed process. This name can be found inside
the processdefinition.xml le in the name property of the
<process-definition> tag.
It's time to worktime to work to work
Once we get our environment congured, we can start working on the tasks
that the process will create. We can do this if we select in the Main Menu option,
Users Screen.
This screen will contain the task list for each user that will interact with the process.
In this case we will have just two users and a drop-down list on the top that will let
us change the user just by selecting the one we want.
When you select one of these two users, you will see all the tasks that the user can
perform at that moment. You will also be able to work on a task by clicking on the
Work link of that task.
If we execute the fourth step in the previous section, we will have a process instance
running, and if we take a look at the process denition, we will see that the rst task
will be created just after the process continues. This rst task will be assigned to the
user called deviceChecker; so, now we will be able to see the Device Checker user
and nd the TaskInstance created for this user.
You will be able to work on that task and simulate the user action. If you click on the
Work link, you will be redirected to the task form where you can review, modify,
and remove data. In this rst task you only can see the temperature of the device and
add a forecast prediction. For example, from your experience you can tell when the
device is at a temperature higher than 30 degrees Celsius, and if it is a sunny day the
probability of the device being overheated is higher, whereas, if it is a cloudy day the
probability of the overheating will be lower.
These two values will be analyzed by the automatic decision node, and depending
on an evaluation, another task for the cooling expert user will be created, or the
process instance will be completed.
The expression used to evaluate these two values is:
(temperature + prediction) > 100
When this expression evaluates to true, a new task will be created and the fan
velocity will need to be changed. When this change is made, once again the
expression is evaluated, and if all is good, the process instance will end.
This material is copyright and is licensed for the sole use by ALESSANDRO CAROLLO on 18th December 2009
6393 south jamaica court, , englewood, , 80111

Human Tasks
[ 212 ]
It is important for you to take a look at the code behind the task list and also the task
form. Here we will take a look at the most relevant code.
For the task list and the task form, two Servlets and two JSP les are used.
The task list is handled by the following les:
userScreen�jspjsp
This screen will only show an HTML table with all the task instances found for the
current user. If you take a look at the following block of code you will nd that it
only iterates the current task instances:
<%
List<TaskInstance> tIS = (List<TaskInstance>)
request.getAttribute("tasks");
if(tIS !=null){
for(int i = 0; i < tIS.size(); i++){
out.println("<tr>");
out.println("<td>");
out.println(tIS.get(i).getId());
out.println("</td>");
out.println("<td>");
out.println(tIS.get(i).getName());
out.println("</td>");
out.println("<td>");
out.println(tIS.get(i).getActorId());
out.println("</td>");
out.println("<td>");
out.println("<a href='TaskFormController?
action=workOnTask&taskId="+tIS.get(i).getId()+"'>Work</a>");
out.println("</td>");
out.println("</tr>");
}
}
%>
As you can see, it will only iterate through a list of task instances that are retrieved
by the UserScreenController Servlet.
This material is copyright and is licensed for the sole use by ALESSANDRO CAROLLO on 18th December 2009
6393 south jamaica court, , englewood, , 80111

Chapter 7
[ 213 ]
UserScreenController��java
This HttpServlet acts as a controller in a Model-View-Controller interaction. This
Servlet is in charge of getting all the TaskInstances for a specied user. This is
achieved with the following code:
if (action.equals("listTasks")) {
JbpmContext context = conf.createJbpmContext();
List<TaskInstance> taskInstances = context.getTaskMgmtSession()
.findTaskInstances(actor);
context.close();
request.setAttribute("tasks",taskInstances);
RequestDispatcher rD = request
.getRequestDispatcher("userScreen.jsp");
rD.forward(request, response);
}
As you can see the method findTaskInstances(String) is used to get all the task
instances for a particular actor. This method is called through the TaskMgmtSession
class that is inside the jBPMContext class.
If you take a look at the TaskMgmtSession class, and in particular at the method
findTaskInstances(String actor), you will nd that this method makes use of a
Hibernate named query called TaskMgmtSession.findTaskInstancesByActorId.
This named query is dened inside a le called hibernate.queries.hbm.xml that
is inside the jBPM source packages (in the package org.jbpm.db). This named query
looks like this:
SELECT ti
FROM org.jbpm.taskmgmt.exe.TaskInstance as ti
WHERE ti.actorId = :actorId
AND ti.isSuspended = false
AND ti.isOpen = true
The task forms are handled separately: the task form will need to represent each
different task instance created in our process. Due to this, each task can contain and
handle different types of information, a form needs to be created to handle each of
these tasks. Here in this example, we have a pair of presentation les (JSPs) for each
task form and only one HttpServlet as a controller.
This material is copyright and is licensed for the sole use by ALESSANDRO CAROLLO on 18th December 2009
6393 south jamaica court, , englewood, , 80111

Human Tasks
[ 214 ]
For the rst task, Check device temperature, we have the following pair of les
interacting:
taskCheckDeviceForm�jsp�jsp
This archive is in charge of the UI and it only gets the task instance that was retrieved
by the TaskFromController Servlet and displays the data that it contains in the
form elds. This le is created specically for this situation and will display the user
the information related to the Check device temperature task. For this example, the data
displayed is the temperature of the device and it is displayed as a read-only eld;
and an empty eld called "forecast prediction" is also displayed, which is lled by
the Device Checker role based on his/her experience on how the weather can affect
this device.
TaskFormController�java�java
This HttpServlet has the responsibility of getting the corresponding TaskInstance
from the relational database using the method getTaskInstace from the
JbpmContext class. If you take a look at the internal code of this method, you
will see that it internally uses the TaskMgmtSession instance created inside
the JbpmContext class.
In this example, if the temperature plus the forecast prediction exceeds the threshold
of one hundred degrees Celsius, the automatic decision node called "OK?" will
evaluate to false and the process will create the second task called "Modify fan
velocity". This task needs to be executed by the role/user called "Cooling Expert".
This Cooling Expert user will interact with other custom UI created to present
him/her with the data that he/she needs to regulate the device's fan in order to
maintain the temperature under 100 degrees.
In this case the second task form is handled by another JSP le called
taskModifyFanForm.jsp and is in charge of displaying the following data:
Temperature: The temperature of the device, as a read-only eld
Forecast prediction: The prediction introduced by the Device Checker role in
the rst task, also as a read-only eld
Estimated total: The result of the temperature plus the forecast prediction
Fan velocity: An empty eld that allows the Cooling Expert to change the
velocity of the fan that cools the device
•
•
•
•
This material is copyright and is licensed for the sole use by ALESSANDRO CAROLLO on 18th December 2009
6393 south jamaica court, , englewood, , 80111

Chapter 7
[ 215 ]
If the fan velocity is successfully modied and the device is cooled enough, and the
temperature is under the threshold of 100 degrees, the process instance will end. If
not, another task will be created for the Cooling Expert role in order to modify the
fan velocity again.
Summary
In this chapter we saw how human interaction can be handled with the task
management module. We also saw how we can assign the roles involved in our
business processes with each task dened.
At the end of this chapter, we talked about the example project provided by this
chapter and how it works in order to allow the users involved in the process to
interact with the human activities.
In the next chapter we will see how all the persistence mechanisms work inside
jBPM. This is a very important topic because it will help us understand how the
jBPM framework works internally and how it handles all the information about
our process instances.
This material is copyright and is licensed for the sole use by ALESSANDRO CAROLLO on 18th December 2009
6393 south jamaica court, , englewood, , 80111

This material is copyright and is licensed for the sole use by ALESSANDRO CAROLLO on 18th December 2009
6393 south jamaica court, , englewood, , 80111

Persistence and Human Tasks
in the Real World
Throughout this chapter we will see how the persistence service and the human task
mechanism work together in the framework, fullling all the requirements needed
by the process to correctly guide people with day-to-day activities.
At the end of this chapter you will see the recruiting process running with these two
added features. You will feel that these processes are now usable and complete from
the usability perspective. Also you will see that now the process can be used in real
situations to effectively guide people during their work.
In this chapter, we will radically change the recruiting process and the way in which
we interact with it. We will add some of the most common conguration les to
the project and we will modify our process denition in order to represent the real
situation more accurately. Of course, we will need to make some tweaks to our test
to pass and reect the new behavior and the way of interaction.
Because we will change the denitions of our processes, we will need to analyze
how these new words (nodes) in our sentence (process) will change the meaning
and behavior of our process.
The following topics are covered in this chapter:
Conguring persistence in our Recruiting Process
Modifying the test that runs without persistence to use the
congured services
Analyzing how these services will impact on the process runtime behavior
Advantages of demarcating transactions in our tests and how these
transactions work
Considerations needed to use human tasks
•
•
•
•
•
This material is copyright and is licensed for the sole use by ALESSANDRO CAROLLO on 18th December 2009
6393 south jamaica court, , englewood, , 80111

Persistence and Human Tasks in the Real World
[ 218 ]
How these human tasks will affect our process behavior and interactions
How all the information about tasks is stored
How these human tasks will interact with people and vice versa
Adding persistence configuration
We have already discussed and seen examples about this topic in Chapter 6,
Persistence. Here we will see the same congurations applied to our Recruiting Process.
First of all we need to create or copy the two main conguration les:
jbpm.cfg.xml: This le will contain all the services that our process
execution will have to use at runtime. The important services discussed here
will be:
Persistence service: This service is delegated to Hibernate.
Transactions: We need to make a choice based on our need
and environment. Here in our example we will choose to
use UMT (User Managed Transactions), because it is the
standalone way of doing things.
hibernate.cfg.xml: This le will contain the entire conguration needed by
the Object Relational Mapping (ORM) framework. This le is divided into
three major sections:
Data source conguration: Hibernate needs a relational
database to work. In this section you can congure any
supported database to work with jBPM throughout
Hibernate. Basically you have two ways in which to do it:
A direct JDBC connection: You will need a JDBC
driver for your chosen database vendor and then
complete all the properties needed to establish the
connection with the database. The most common
properties are URL, username, password, host, and
so on.
Using an existing data source published using JNDI:
Here you will only need to put the string that will be
used to look up in the JNDI tree.
In both situations you need to set up a correct Hibernate dialect for
your chosen database vendor and version.
•
•
•
•
°
°
•
°
♦
♦
This material is copyright and is licensed for the sole use by ALESSANDRO CAROLLO on 18th December 2009
6393 south jamaica court, , englewood, , 80111

Chapter 8
[ 219 ]
Transaction congurations: In this section you will choose
the way Hibernate needs to treat the transactions internally.
Mappings and Misc Hibernate properties: This section of the
le will contain extra Hibernate properties just to customize
and congure the framework behavior. Some of the common
properties used here are:
hibernate.autoddl.update = create| update |
dropcreate
hibernate.show_sql = true | false
hibernate.format.sql = true | false
For more information about Hibernate conguration properties
take a look at the ofcial documentation: http://docs.jboss.
org/hibernate/core/3.3/reference/en/html/session-
configuration.html
And the last part of this le will be dedicated to all the currently mapped Hibernate
entities. This means that all these POJOs will be managed by Hibernate and it will
decide when and how to persist each one of them, based on those mappings.
Take a close look at these mappings because if you need to customize the way or the
data that is being persisted and not the framework, this is the rst place to look.
Using our new configurations
Once we place these les in the application classpath, we can start using the
congured services in our tests. (I have chosen the /src/main/resources/config
directory.) We need to tell the framework that the services are congured and ready
to use. To start using this new conguration we will use the JbpmConfiguration
class, which contains a set of methods to parse and store our specic conguration
in the object-oriented world.
Basically, we will use the following line to load all the information from the XML
les into a brand new JbpmConfiguration instance:
JbpmConfiguration config = JbpmConfiguration
.parseResource("config/jbpm.cfg.xml");
As you can see, in the jbpm.cfg.xml le you will nd a reference to the
hibernate.cfg.xml le so that conguration will be loaded too.
°
°
♦
♦
♦
This material is copyright and is licensed for the sole use by ALESSANDRO CAROLLO on 18th December 2009
6393 south jamaica court, , englewood, , 80111

Persistence and Human Tasks in the Real World
[ 220 ]
In the mapping section of the bundled hibernate.cfg.xml le
you will nd some mappings for certain classes, which are not in the
jbpm-jpdl.jar le. This situation, of course, will cause an error.
These missing classes such as User.java, Group.java, and so
on, are distributed in another JAR le called jbpm-identity.jar,
which is used to manage user groups and membership' information
in a simple way.
Once we get our JbpmConfiguration object, we can create a new JbpmContext
that will represent all the congured services, which the process can use during
its execution.
We can get a new instance of this JbpmContext based on the JbpmConfiguration
that we load from our conguration les with the following line:
JbpmContext context = config.createNewJbpmContext();
Once we have our context created, we are ready to start working as usual. But
one thing we need to know is that the previous line creates a transaction in our
congured services. In other words, all the process status information that we
use from now on will be, in some way, tracked by our congured services
(in the jbpm.cfg.xml le).
Until now, we have only opened a new transaction, after that we can make use of the
available services.
If we copy the rst few lines of our Recruiting Process test that doesn't use any
service, we will see something like this:
context = config.createJbpmContext();
ProcessInstance requestJobPositionPI = context
.newProcessInstance("RequestJobPosition");
//Start the process
requestJobPositionPI.signal();
Assert.assertEquals(requestJobPositionPI.getRootToken()
.getNode().getName(), "Create request");
requestJobPositionPIID = requestJobPositionPI.getId();
context.close();
If we think about it, now we can make use of the persistence service and don't need
to parse our XML ProcessDefinition everytime we need to create a new instance.
We can go directly and get it from the database, if it is already deployed.
This material is copyright and is licensed for the sole use by ALESSANDRO CAROLLO on 18th December 2009
6393 south jamaica court, , englewood, , 80111

Chapter 8
[ 221 ]
This is the most common way to do it. So, if you don't have the process already
deployed in your database you can do it with the following lines:
config = JbpmConfiguration.parseResource("config/jbpm.cfg.xml");
context = config.createJbpmContext();
try{
//Deploy RequestJobPosition Process Definition.
ProcessDefinition requestJobPositionPD = ProcessDefinition
.parseXmlResource("jpdl/RequestJobPosition/processdefinition.xml");
context.deployProcessDefinition(requestJobPositionPD);
}
finally{
context.close();
}
These lines of code can be copied inside another separate test or in another class. The
only requirement of this approach is, obviously, that you must run it before trying to
get the process from the database with another test.
If you know that the process denition is already deployed, you can use the
following lines to get it, and to start using it:
context = config.createJbpmContext();
ProcessInstance requestJobPositionPI = context
.newProcessInstance("RequestJobPosition");
//Start the process
requestJobPositionPI.signal();
context.close();
In this case, we are testing the framework functionality. So, we can deploy our
process denition and create the default JbpmConfiguration in the JUnit
setup method.
@Before
public void setUp() throws Exception {
config = JbpmConfiguration.parseResource("config/jbpm.cfg.xml");
context = config.createJbpmContext();
try{
//Create a new HumanResource Request.
//This action must be executed by the
//Tecnical Leader actor
ProcessDefinition requestJobPositionPD = ProcessDefinition
.parseXmlResource("jpdl/RequestJobPosition
/processdefinition.xml");
context.deployProcessDefinition(requestJobPositionPD);
}
finally{
context.close();
}
...
}
This material is copyright and is licensed for the sole use by ALESSANDRO CAROLLO on 18th December 2009
6393 south jamaica court, , englewood, , 80111

Persistence and Human Tasks in the Real World
[ 222 ]
Safe points
If we copy all the existing code (the old test without persistence) into the new
persistence test, and enclose all the operations between context = config.
createJbpmContext() and context.close(), all the information modied inside
this big transaction will only be persisted when the process ends. To solve this, we
need to know the correct time to close a transaction and start a new one.
So, it is important for you to know how, and when, it is recommended that you
commit your process changes using the context.close() method call.
Let's analyze the following blocks of code trying to see the differences between them:
Block one:
context = config.createJbpmContext();
ProcessInstance requestJobPositionPI = context
.newProcessInstance("RequestJobPosition");
//Start the process
requestJobPositionPI.signal();
Assert.assertEquals(requestJobPositionPI.getRootToken().getNode()
.getName(), "Create request");
requestJobPositionPIID = requestJobPositionPI.getId();
//The node-leave event from the Create Request state node, will
//create a new request, here we need to signal the node
//Continue the execution
requestJobPositionPI.signal();
//Create a new Candidate from the Job Position Request
//As a result the recruiting team will find a new candidate
Candidate candidate = createCandidateExample();
ProcessInstance candidateInterviewPI = context
.newProcessInstance("CandidateInterviews");
//We will start the CandidateINterviews process with some
//pre-loaded variables
HashMap<String, Object> variablesForCandidadteInterviews = new
HashMap<String, Object>();
variablesForCandidadteInterviews.put("REQUEST_TO_FULFILL",
requestJobPositionPI);
variablesForCandidadteInterviews.put("REQUEST_INFO",
requestJobPositionPI.getContextInstance()
.getVariable("REQUEST_INFO"));
variablesForCandidadteInterviews.put("CANDIDATE_INFO", candidate);
candidateInterviewPI.addInitialContextVariables(variablesForCandidadt
eInterviews);
//We start the CandidateInterviews Process
candidateInterviewPI.signal();
...
context.close();
This material is copyright and is licensed for the sole use by ALESSANDRO CAROLLO on 18th December 2009
6393 south jamaica court, , englewood, , 80111

Chapter 8
[ 223 ]
In this rst block of code, we do a lot of operations in one big transaction. If we debug
this code, we will see that the changes are not reected into the database until the
context.close() line is reached by the execution. This approach will be ne if we
only need to track an entire process being completed. Using this approach we cannot
split the process execution using safe points to be able to restore its status if something
goes wrong. In most of the situations this is not the best route to take. Let's analyze the
following block that reects the common way of working with transactions:
Block two:
context = config.createJbpmContext();
ProcessInstance requestJobPositionPI = context
.newProcessInstance("RequestJobPosition");
//Start the process
requestJobPositionPI.signal();
Assert.assertEquals(requestJobPositionPI.getRootToken().getNode()
.getName(), "Create request");
requestJobPositionPIID = requestJobPositionPI.getId();
context.close();
//The node-leave event from the Create Request state node,
//will create a new request, here we need to signal the node
context = config.createJbpmContext();
//Continue the execution
requestJobPositionPI = context.getProcessInstance(requestJobPositionP
IID);
requestJobPositionPI.signal();
context.close();
//Create a new Candidate from the Job Position Request
//This will cause that the recruiting team will find a new candidate
Candidate candidate = createCandidateExample();
context = config.createJbpmContext();
requestJobPositionPI = context
.getProcessInstance(requestJobPositionPIID);
ProcessInstance candidateInterviewPI = context
.newProcessInstance("CandidateInterviews");
//We will start the CandidateINterviews process with some
//pre-loaded variables
HashMap<String, Object> variablesForCandidadteInterviews= new
HashMap<String, Object>();
variablesForCandidadteInterviews.put("REQUEST_TO_FULFILL",
requestJobPositionPI);
variablesForCandidadteInterviews.put("REQUEST_INFO",
This material is copyright and is licensed for the sole use by ALESSANDRO CAROLLO on 18th December 2009
6393 south jamaica court, , englewood, , 80111

Persistence and Human Tasks in the Real World
[ 224 ]
requestJobPositionPI.getContextInstance()
.getVariable("REQUEST_INFO"));
variablesForCandidadteInterviews.put("CANDIDATE_INFO", candidate);
candidateInterviewPI
.addInitialContextVariables(variablesForCandidadteInterviews);
//We start the CandidateInterviews Process
candidateInterviewPI.signal();
candidateInterviewPIID = candidateInterviewPI.getId();
context.close();
In this second block of code, we enclose each meaningful operation in a transaction.
This will persist the process execution in each wait state, that will represent our
safe points in the process. Please note that if we have a fully automatic process,
without wait states, the rst processInstance.signal() will run until the
process ends. We will talk about ne-grained ways to demarcate transactions
for these particular situations.
The obvious and big difference between both the blocks is where and when the
transactions are demarcated using:
context = config.createNewJbpmContext();
...
context.close();
The rst block will start the execution by getting the ProcessDefinition from
the database. It will create a new ProcessInstance based on that denition and
start it by calling the method signal(). It is here where the difference begins. This
rst block just waits until the signal method returns, meaning until it reaches the
next wait state in the process, returning the execution to the main thread and then
the test signals the process to continue again. This behavior doesn't represent a
real-life situation, because the process reaches a wait state and this wait situation
is automatically nished by the line following in the code. In other words, the
process doesn't wait at all.
This material is copyright and is licensed for the sole use by ALESSANDRO CAROLLO on 18th December 2009
6393 south jamaica court, , englewood, , 80111
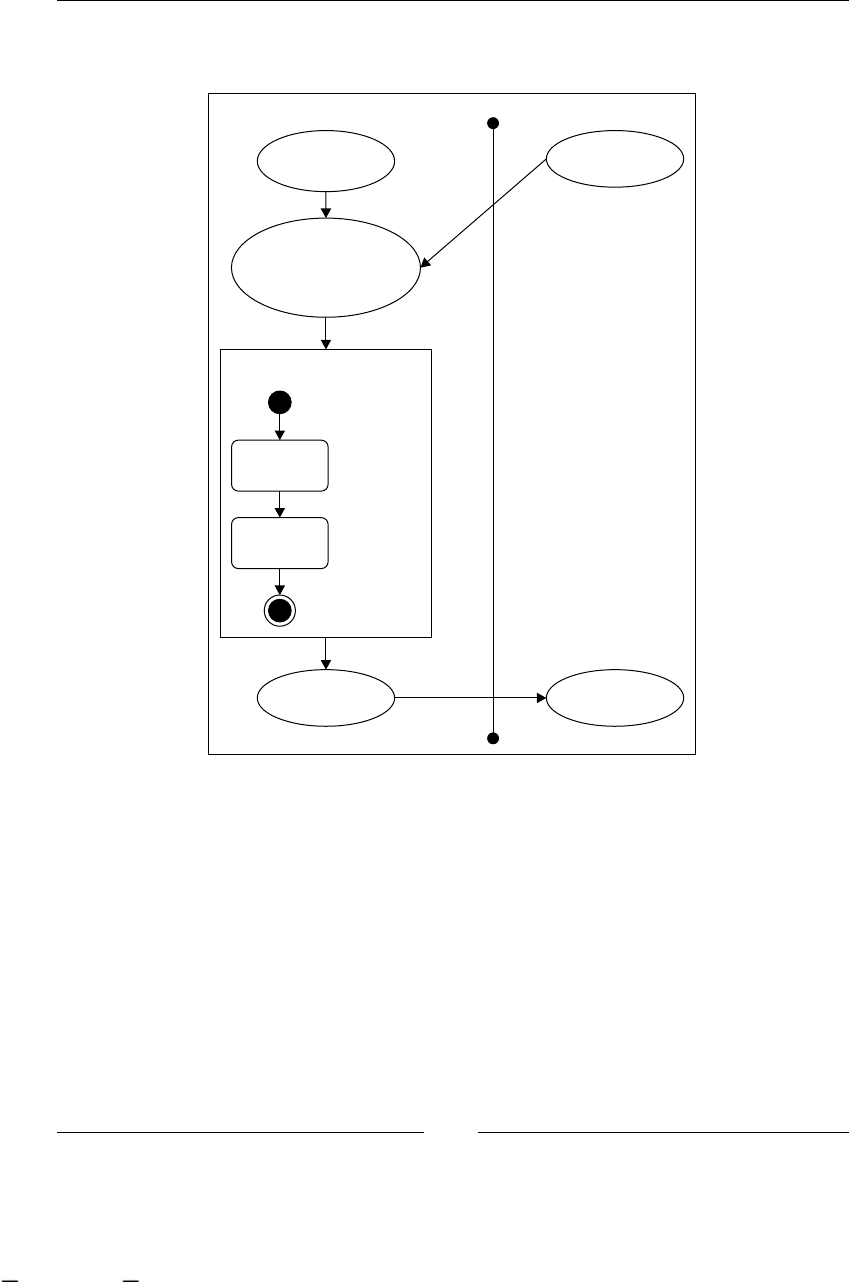
Chapter 8
[ 225 ]
Take a look at the following image that shows us how both situations behave in the
execution stage:
Java Thread Database
new
JbpmContext
new
ProcessInstance
using
ProcessDefinition
JbpmContext.
close()
ended
ProcessInstance
ProcessDefinition
Process Execution
pl.signal()
pl.signal()
pl.signal()
Wait State
node 1
Wait State
node 2
This image represents the behavior of the rst block of code described previously.
We can see how our process is executed from start to end, by only interacting with
the database to get the ProcessDefinition that needs to be deployed previously,
and to persist the ProcessInstance that has already ended. This last interaction
with the database will let us see that the process has successfully executed from
start to end.
This material is copyright and is licensed for the sole use by ALESSANDRO CAROLLO on 18th December 2009
6393 south jamaica court, , englewood, , 80111
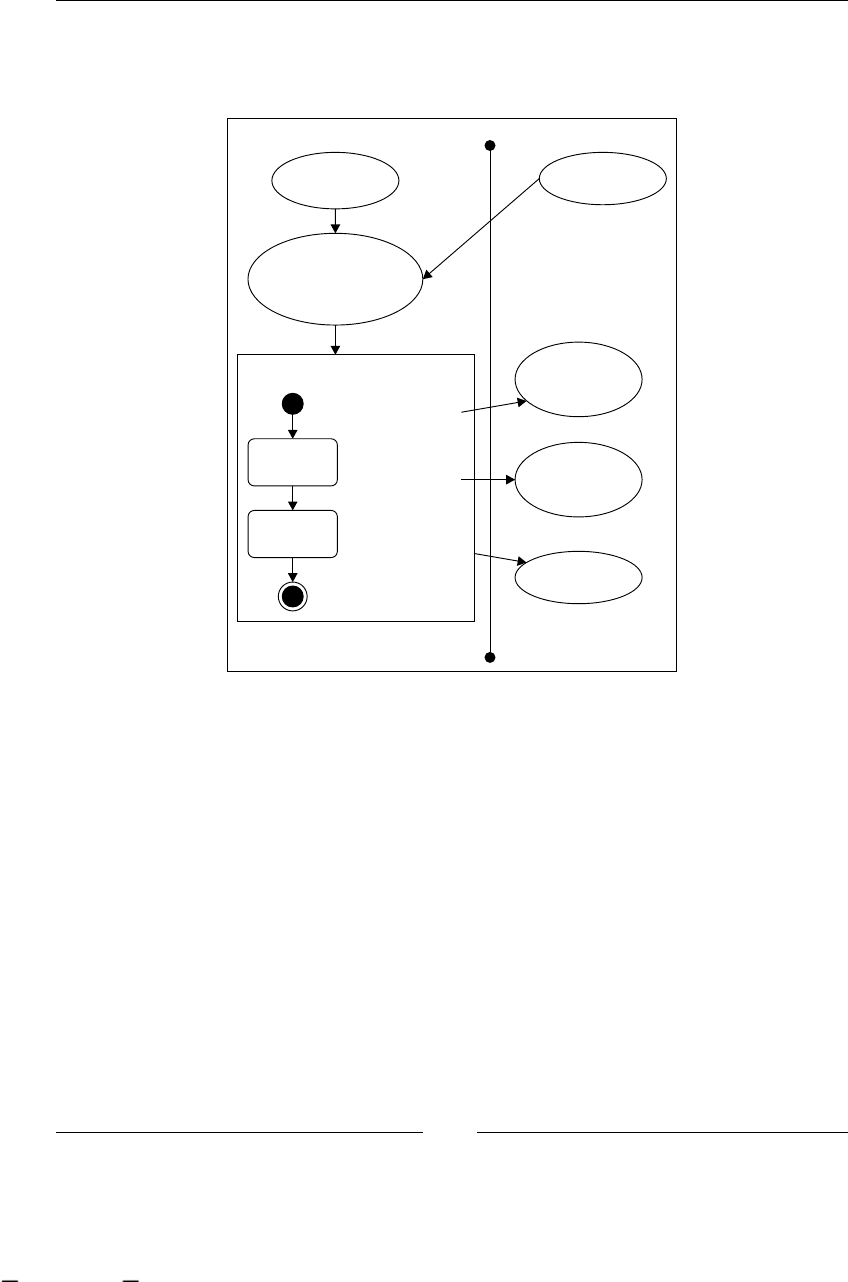
Persistence and Human Tasks in the Real World
[ 226 ]
Now let's take a look at the following image, which shows us how we close the
JbpmContext everytime we know that the process is in a wait state in the second
block of code. This will afford us many advantages.
Java Thread Database
new
JbpmContext
new
ProcessInstance
using
ProcessDefinition
ended
ProcessInstance
ProcessDefinition
Process Execution
new JbpmContext
pl.signal()
context.close()
pl.signal()
context.close()
new JbpmContext
context.close()
pl.signal()
Wait State
node 1
Wait State
node 2
ProcessInstance
at Wait State
node 1
ProcessInstance
at Wait State
node 2
In this kind of situation we will see the following pattern a lot:
context = config.createJbpmContext();
...
processInstance.signal();
context.close();
This pattern will be repeated over the time, because each time the signal() method
returns, it will be because a new wait state or safe point is reached.
Advantages of persisting our process during
wait states
In this section we will analyze what advantages we will have using the JbpmContext
in the same way as the code of Block two, trying to understand how we will apply
this to our Recruiting Process example.
This material is copyright and is licensed for the sole use by ALESSANDRO CAROLLO on 18th December 2009
6393 south jamaica court, , englewood, , 80111
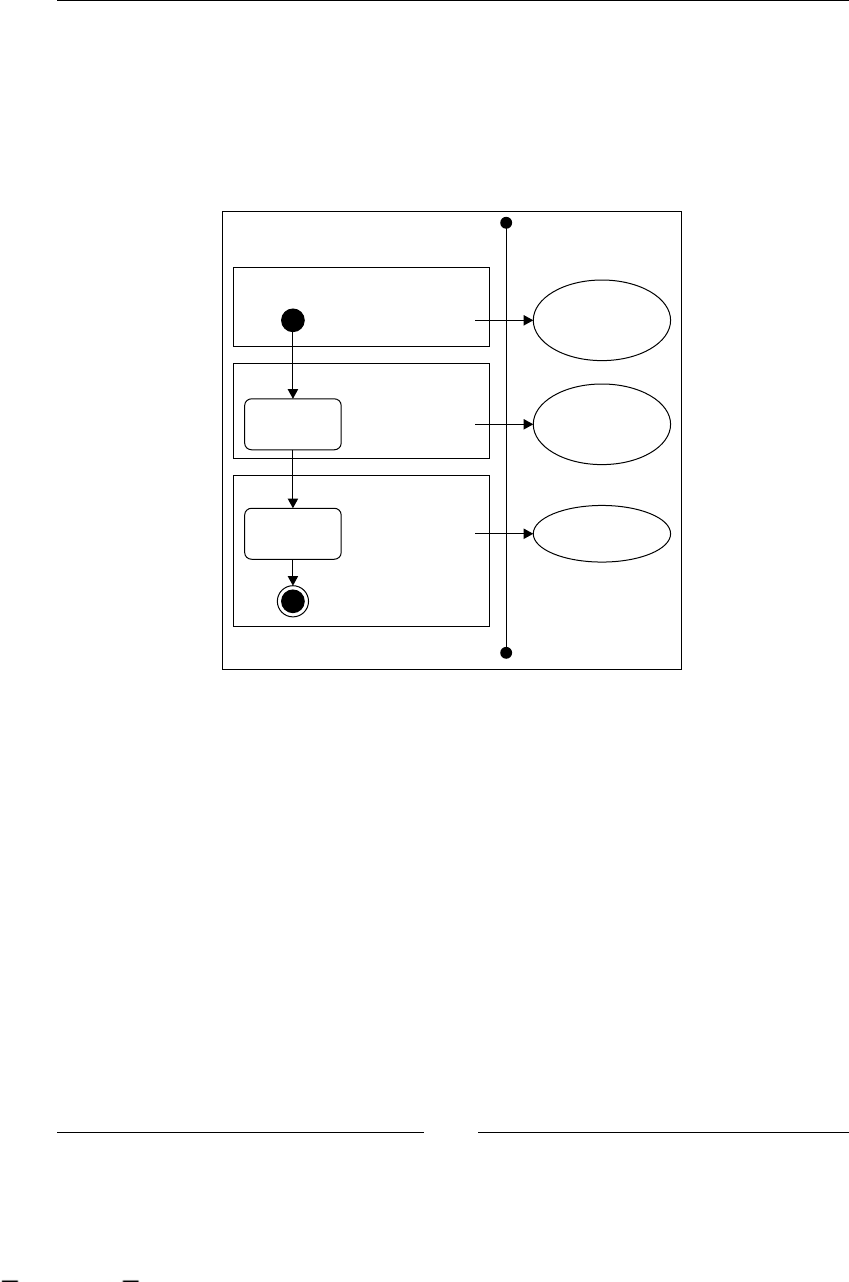
Chapter 8
[ 227 ]
The rst and huge advantage is that when we call context.close(), the current
process status is persisted to a relational database. As a result, if our process is in
a wait state, it will not be in the server's memory. Meaning, if the server crashes
after that, we persist the process (when we are waiting for an external activity
to be completed); when the servers come up again it can continue the execution.
Another advantage is that now we can have something like this:
Java Thread Database
ended
ProcessInstance
Java Thread 1
new JbpmContext
pl.signal()
context.close()
pl.signal()
context.close()
new JbpmContext
context.close()
pl.signal()
Wait State
node 1
Wait State
node 2
ProcessInstance
at Wait State
node 1
ProcessInstance
at Wait State
node 2
Java Thread 2
Java Thread 3
This image shows us, that now we can use decoupled Java threads to continue our
execution. There is no need for the same thread that creates the process instance and
starts it, continues it after the process status is persisted in the database. Now if the
thread that creates the process instance dies, it doesn't matter because we have the
state saved in our congured database.
In the second thread, we just need the process instance ID to get the current
status and continue it. So, now we have the exibility to get our processes' current
status from the database and continue them using multiple and different threads
of execution.
This material is copyright and is licensed for the sole use by ALESSANDRO CAROLLO on 18th December 2009
6393 south jamaica court, , englewood, , 80111

Persistence and Human Tasks in the Real World
[ 228 ]
The term thread is used because each Java application runs in a
different thread of execution. Don't confuse this with concurrent
multi-threading executions.
Persistence in the Recruiting Process
example
Now it's time to apply these concepts to our Recruiting Process example. If you take
a look at the project called RecruitingExampleWithPersistence, you will nd the
RecruitingProcessTest in it, with the concepts from the previous sections applied.
In this project, you will also nd the conguration les needed by the example
to work. Remember that you must change these les in order to reect your
current environment parameters needed by Hibernate to establish a connection
to your database.
Now when you run this test you can see how for each context.close() the
framework will commit the status changes of the process instance into the database.
I encourage you to debug this test with a MySQL client opened, to see how the
framework commits the changes to the database. For this you can look at the
JBPM_TOKEN table that will be updated with the node where the process was
pointing when it reaches the wait state.
You can also activate the Hibernate SQL logging feature to see the generated HQL
queries to store and retrieve the process status and information in each step.
You can do this by uncommenting the following line inside the
hibernate.cfg.xml le:
<property name="hibernate.show_sql">true</property>
Human tasks in our Recruiting Process
In the previous section we saw how our processes are persisted in the relational
database using Hibernate. Now we will see how all the human tasks, previously
represented with state nodes, will be more accurately represented using task nodes.
This task node, as we discussed earlier in Chapter 7, Human Tasks, is designed to
model situations where human beings interact with the process.
This material is copyright and is licensed for the sole use by ALESSANDRO CAROLLO on 18th December 2009
6393 south jamaica court, , englewood, , 80111

Chapter 8
[ 229 ]
This TaskNode will behave as a wait state plus some extra functionality added to
support human interactions. Just to remind you, we have some of the advantages of
using task nodes; take a look at the following points:
We can have an easy, clean, and measured way of exchanging information
between the process and the people who interact with each activity
We can have a exible mechanism to show the task information to the user
who needs to interact with it
We can have a generic API to build task lists for each user involved in
the process
We have a exible and pluggable way to assign tasks to users or groups who
already exist in our company database or in an LDAP tree
Based on our Recruiting Process with persistence, we will modify our Recruiting
Process with human tasks in order to change all the human interaction to task nodes
instead of state nodes (generic wait states).
With these changes, our test will end up looking very different. The main reason for
this is that now our way to interact with the process has improved.
Modifying our process definitions
At rst sight it looks as if it is an easy task. We just need to change from the
<state> tag to <task-node> tag in our jPDL XML processes' denition. But wait a
second! We are humans/complex creatures, so we need to congure each node to
behave in the right way. We will know how to congure each TaskNode based on the
situation that we are modeling and also, on how the people want to interact with the
process in each activity.
If you go through the two Recruiting Processes and change all the human activities
to TaskNodes, the following points are the next steps to follow in order to achieve
our goal in the right way:
1. For each activity, analyze if it can be broken into different tasks.
2. Analyze the people/roles needed to complete each task. This is an extremely
important point. If you don't know whether you have all the roles needed to
complete your process, your process will never run.
3. If you have multiple users/persons that can do one specic task, you need
to decide who will be in charge of completing the task in a specic process
instance and how.
•
•
•
•
This material is copyright and is licensed for the sole use by ALESSANDRO CAROLLO on 18th December 2009
6393 south jamaica court, , englewood, , 80111

Persistence and Human Tasks in the Real World
[ 230 ]
4. You need to decide and formalize which piece of information will be used
for each dened task. This is another important point. For each task that you
dene you need to be sure about all the information needed by the user to
complete that task successfully. This information will also help you to dene
your different user screens to do their jobs.
5. The last step here, is to decide if the information used in the task will be
modied by the user. This means that you need to explicitly dene whether a
piece of data can be modied in the task. Another possibility here, is to mark
a variable as required. This will mean that some value must be entered by the
user in charge of this task in order to continue the process.
Basically, we are going to analyze these points and we will modify our process
denitions and our tests based on these recommendations.
Once we modify the tests and the denitions accordingly, we will go step by step
explaining what is happening inside the framework.
So, are you ready to make some changes?
Analyzing which nodes will change
This section will begin with a golden rule:
If a person is involved in the activity you need to use task nodes.
There is one and only one situation in which you can avoid this rule. That situation
is when the TaskNode functionality or the task module itself doesn't fulll your
requirements.
In those situations (you really need to justify this with blood!) you will probably
extend or implement your own way to handle human tasks. These situations can
include complex businesses where your task lifecycle is more detailed than the one
provided with jBPM.
If that is not your situation, please review once again why you have decided to use
another node from task node. If your activity interacts with human beings, the task
node might be your rst and only option.
In most cases, people who don't use task nodes don't really get the idea/meaning of
this node or probably they migrate to other frameworks, like OSWorkow, where
the concept of human tasks doesn't exist.
This material is copyright and is licensed for the sole use by ALESSANDRO CAROLLO on 18th December 2009
6393 south jamaica court, , englewood, , 80111

Chapter 8
[ 231 ]
Once we have learned this golden rule we can go directly to our process denitions
and decide in each activity if it must be changed to a TaskNode.
Because we are talking about a Recruiting Process, there will be a lot of people
involved. We can say that basically this process is all about human interactions.
So, don't be surprised if you decide to change all the State nodes into task nodes.
Modified process definitions
Here we will analyze the modications proposed to our last version
of the Recruiting Process. We will also look at the sources inside the
/RecruitingExampleWithTasks/ project.
Before we open the two process denitions, it's important to remember one of the
main characteristics of the task node. As we have seen in Chapter 7, Human Tasks,
the <task-node> tag can dene multiple tasks in it. At XML level you will see
something like this:
<task-node name="">
<task name="">
</task>
</task-node>
At this point, it is important for you to remember this relationship between
<task-node> tag and the <task> tags that can be dened inside them.
Basically, if we only replace <state> nodes with <task-node> and we don't dene
any task inside the node, the default behavior of the <task-node> will just continue
the execution to the next node because it has nothing dened to do.
One of the common mistakes made by newcomers is to dene only a <task-node>
and suppose that it will behave as a wait state. Each of the tasks dened inside the
<task-node> (with the <task> tag) will represent a new instance of the TaskInstance
class at runtime. All the information that this instance contains will be stored in the
database because it is a mapped Hibernate entity.
For this reason, if you need to look for all your task instances' information you can go
to the database and take a look at the JBPM_TASKINSTANCE table.
This material is copyright and is licensed for the sole use by ALESSANDRO CAROLLO on 18th December 2009
6393 south jamaica court, , englewood, , 80111

Persistence and Human Tasks in the Real World
[ 232 ]
Let's go ahead, open the process denitions and take a look at the modications:
<task-node name="Create request">
<task name="Create request">
<assignment actor-id="John Smith"></assignment>
<controller>
<variable access="read,write,required"
name="yearsOfExperience" />
<variable access="read,write,required" name="skill1" />
</controller>
</task>
<transition to="Finding Candidate"></transition>
</task-node>
We can see that state nodes are replaced by <task-node> that denes just one task
element inside.
In this case it is not necessary, but if in your process you have the same
task with the same conguration multiple times, you can dene a global
task element and then you can reference it by name inside multiple
task nodes. These global tasks can be dened at process denition level
(between <process-definition> tags) and then to use it inside your
task nodes, you only need to use the same name. This will help us reuse
congurations that are needed in multiple task nodes.
Another important thing here, is to analyze how task elements are congured based
on the task needs.
Variable mappings
Here we will discuss how mapping congurations will work for our example
processes and also why it is so important to do it!
The main idea behind variable mappings for the task is that they help us dene and
formalize each piece of information needed to fulll this activity. To be more precise
here you will dene:
Information that the task needs to display to the user in order to make him
able to complete the activity. In most of the cases, this information is only for
reading. So, this information will be marked as "read".
Information that will be added or modied by the person who interacts with
the task in order to complete it. This information will be marked as "write".
Information that will be required to end the task. Without this information
you won't be able to nish the activity. And it will remain open until you
complete the required information.
•
•
•
This material is copyright and is licensed for the sole use by ALESSANDRO CAROLLO on 18th December 2009
6393 south jamaica court, , englewood, , 80111
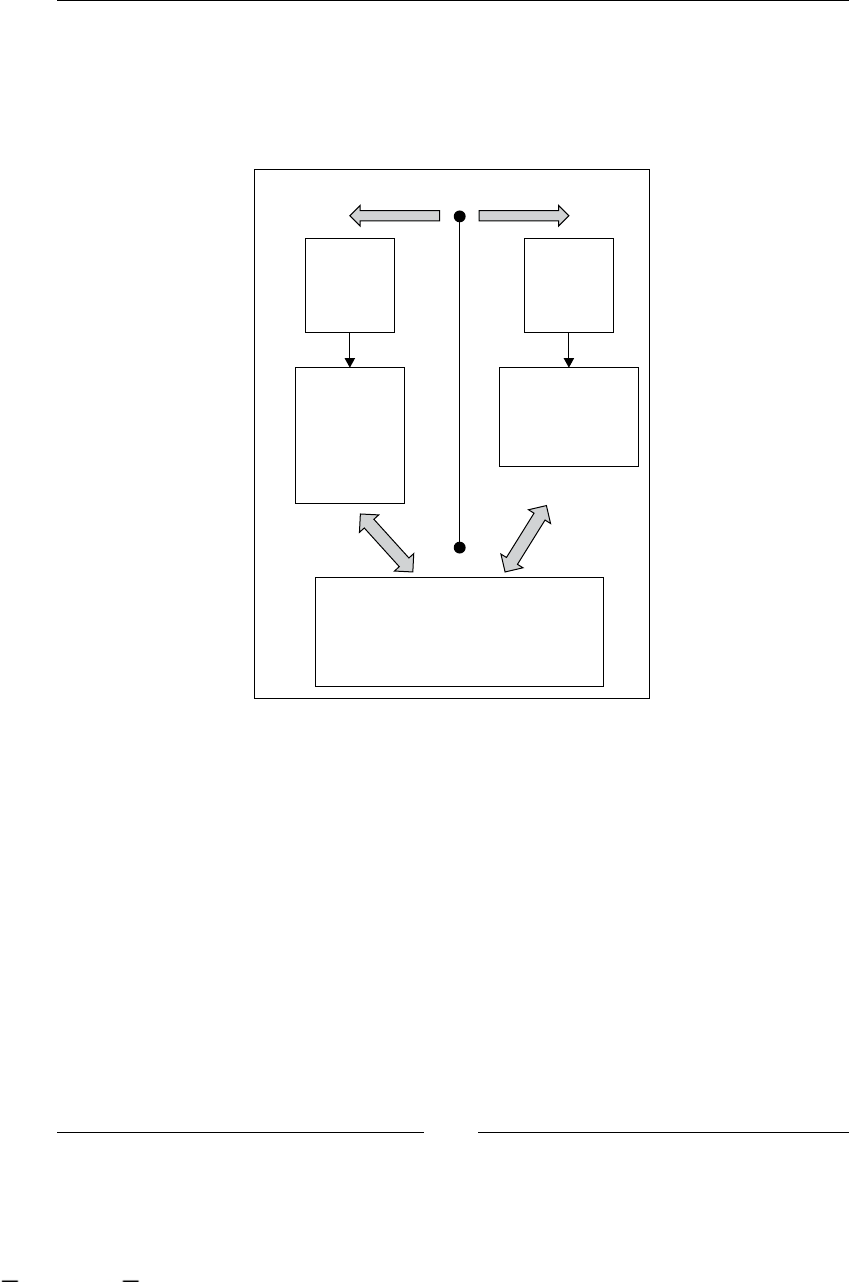
Chapter 8
[ 233 ]
You also need to dene an internal name for each piece of information. Remember
that you have all the information needed by the process in the process variables.
These variables are stored in the ContextInstance of your ProcessInstances. Here
with TaskInstances a new context appears dedicated to containing this limited
information that we dene for each task. Let's clarify this with the following image:
Process Instance Scope Task Instance Scope
Variables
var1 | value
var2 | value
var3 | value
var4 | value
var5 | value
Variables
variable1 | value
variable2 | value
variable5 | value
Process
Instance
Task
Instance
var1 | variable1 | read, write
var2 | variable2 | read
var5 | variable5 | read,write,required
Variable Mappings
These mappings will decide how the variables will be copied between the two
scopes. It is important for you to note that you can also change the name of the
variables between contexts and, based on the mappings, you will be able to track
those relationships.
You also need to remember that variables marked with the "write" strategy will be
copied back to the process scope when the task instance is marked as ended.
To summarize, you are only reducing the amount of information handled by each
task avoiding going directly to modify the process information.
This material is copyright and is licensed for the sole use by ALESSANDRO CAROLLO on 18th December 2009
6393 south jamaica court, , englewood, , 80111

Persistence and Human Tasks in the Real World
[ 234 ]
In our Recruiting Process you will see that each task denes different variable
mappings for each specic task. The following code snippet is from the Request
Job Position process, and denes two variables, that in this case the user will ll
to complete the task.
<task-node name="Create request">
<task name="Create request">
<assignment actor-id="John Smith"></assignment>
<controller>
<variable access="read,write,required"
name="yearsOfExperience" />
<variable access="read,write,required" name="skill1" />
</controller>
</task>
<event type="node-leave">
<action class="org.jbpm.example.recruiting.handlers
.CreateNewJobPositionRequestActionHandler"/>
</event>
<transition to="Finding Candidate"></transition>
</task-node>
As you can see, both variables dene the access as read, write, and required.
This will mean that the user needs to complete that information to end the activity,
and, when this happens, the value of these variables will be copied back to the
process scope. Another important thing to note here, is that we are not using the
mapped-name attribute. So, our variable name will be the same for both the process
and the task instance context.
Task assignments
Once we have dened the information needed by each task, we will need to decide
the role or the specic user that will be responsible for completing the task when it
is created.
If the outcome of this analysis is static and well dened, you can go and directly
congure each task to the corresponding user. Sometimes, in big companies, you
don't have just one user to do a specic task; probably you will have a hundred or
a thousand people trained to do the same task.
This material is copyright and is licensed for the sole use by ALESSANDRO CAROLLO on 18th December 2009
6393 south jamaica court, , englewood, , 80111
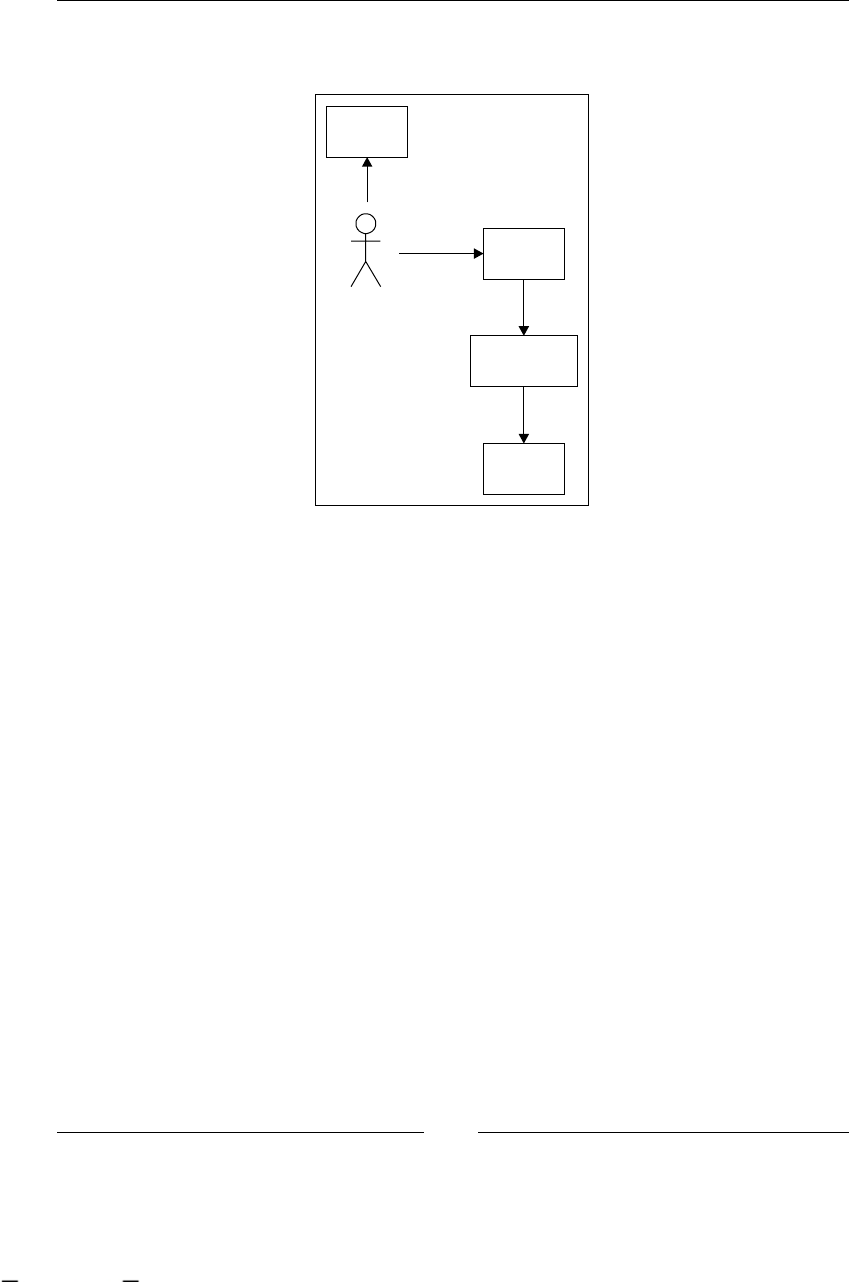
Chapter 8
[ 235 ]
Just to make it clear, the relationship among roles, groups, and users are explained in
the following image:
User
Membership
Group
1
1
*
Role/
Skills
*
Actor
Role is not a jBPM term. It just represents some specic skills needed to complete a
task. A good example of a role will be Project Leader. With Project Leader, we are
not making reference directly to a person. It can be anyone having the skills to lead
a project to a successful end. In this gure, we can say that the actor for a specic
situation is "John Smith", the User in the database can be "jsmith", and the Group
that will contain all the project leaders can be called "Project Leaders Group". The
Membership will only contain the relationship that says the user "jsmith" is in the
"Project Leaders Group".
The important thing here is our analysis of each task and who must take care of each
of them. We need to decide which persons will be involved in the execution of our
processes. This is our task, we need to nd out all the people involved, and formalize
this information for the frameworks to know who will handle each task.
This material is copyright and is licensed for the sole use by ALESSANDRO CAROLLO on 18th December 2009
6393 south jamaica court, , englewood, , 80111
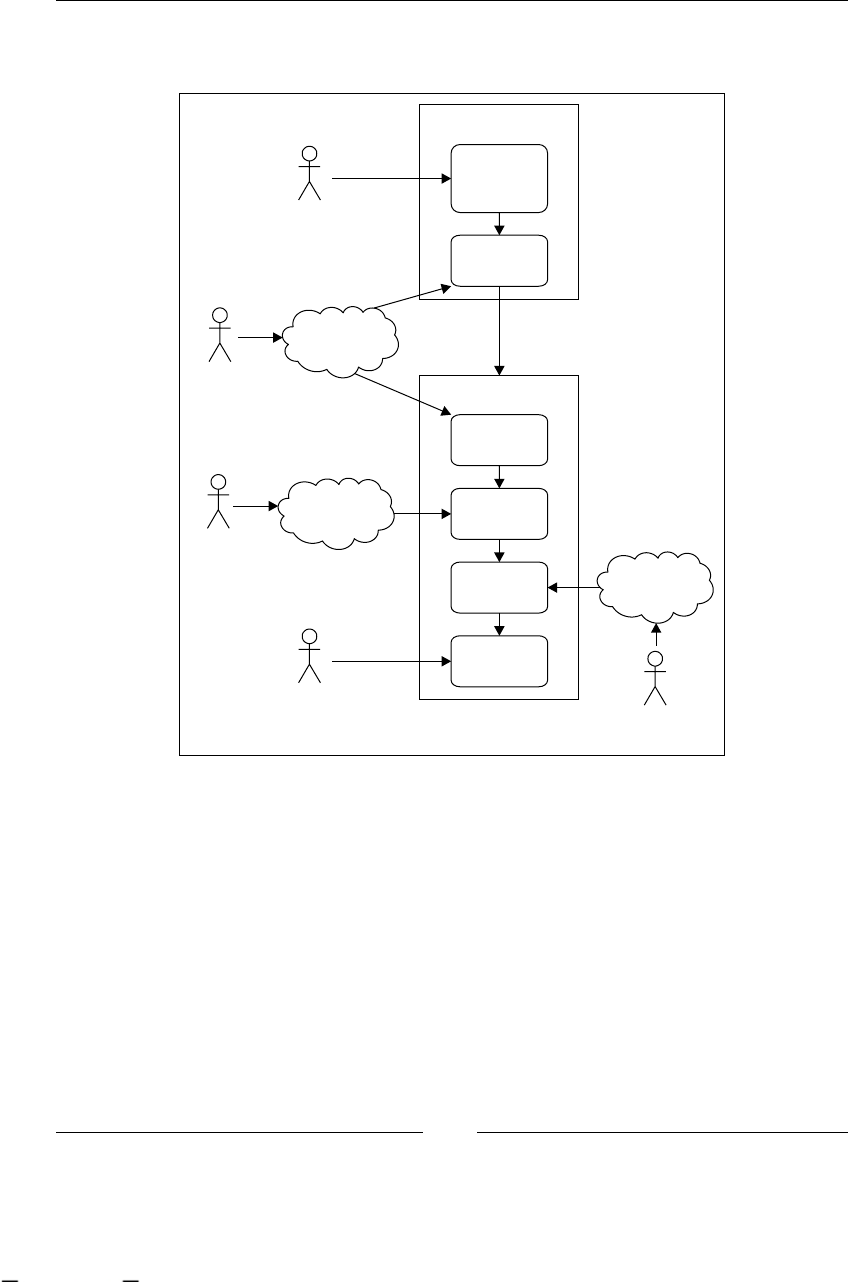
Persistence and Human Tasks in the Real World
[ 236 ]
Take a look at the following gure, you will see our proposed actors for our two
example processes.
<project leader>
<project leader>
Technical
Leaders
Doctors
Recruiting
Staff
John
Smith
John
Smith Albert
Watts
Jack
Johnson
Mike
Harris
Request Job Position
Create Job
Position
Request
Find
Candidate
Candidate Interviews
Initial
Interview
Technical
Interview
Medical
Check Ups
Final
Acceptance
As you can see, we have four actors involved in our two processes. We need to
decide if each of them will represent a specic person or a group of people who
are trained to do a specic task.
This material is copyright and is licensed for the sole use by ALESSANDRO CAROLLO on 18th December 2009
6393 south jamaica court, , englewood, , 80111

Chapter 8
[ 237 ]
Let's analyze each proposed actor in order to understand how we can model it
in jBPM.
Project Leader: This person will be the one who identies that his/her
project needs a new member. As the company has a lot of projects and a lot
of project leaders this will be formalized as the "Project Leaders Group".
Recruiting team member: The recruiting department is in charge of selecting
the correct candidate for each job position in the company. In this case
just one member will be in charge of handling one job position request.
So, when a vacancy for a new job position is opened, a member of the
recruiting department takes responsibility for it and starts the interviews.
Behind the scenes, a new CandidateInterviews process is created to guide
each candidate found by the recruiting team member throughout all the
interviews needed to fulll the job position.
In this case, the recruiting team will also be modeled as a group called
"Recruiting Staff".
Technical Leader: For each project that the company has, there is only one
project leader and one technical leader. This technical leader will be in charge
of the technical interviews of the process. Because there exists a one-to-one
relationship between a project and a job position request, the technical leader
of that specic project will know exactly what to look for in each candidate.
In this case, it is just one person who can be assigned to the activity for each
process instance. But this information needs to be calculated at runtime based
on the project that requests a new member.
Basically, the technical leader concept will also be modeled as a group, but at
runtime an assignment handler will be in charge of calculating and assigning
the right person for each technical interview.
Doctors: This actor will represent all the doctors involved in the medical
check ups. We have multiple ways to formalize these roles. For this example
we will choose to create a group called "Doctors", and all the doctors will
belong to this group. The idea is, irrespective of the type of the examination
a doctor must undertake, if he/she is in the user group "Doctors", he/she can
do it.
In the previous gure you can see how the project leader who is generating the
request for a new team member will be the same actor that will accept the candidate
who reaches the last step in the second process.
•
•
•
•
This material is copyright and is licensed for the sole use by ALESSANDRO CAROLLO on 18th December 2009
6393 south jamaica court, , englewood, , 80111

Persistence and Human Tasks in the Real World
[ 238 ]
Assignments in the Recruiting Process example
Let's take a look at the source code to see how these assignments will be formalized
in our process denitions. The code that we will see in this section can be found in
the /RecruitingProcessWithHumanTasks/ project delivered with this chapter.
We will start with the RecruitingProcessWithHumanTasksTestCase class
that contains a test throughout both the processes (RequestJobPosition and
CandidateInterviews).
Before looking at the test itself, we will review the setUp() method that will
congure our environment to be able to run the test.
As you will remember from previous chapters, we need to deploy our processes to
the jBPM schemas before using them. For that we will have similar blocks of code
for each of our processes.
config = JbpmConfiguration.parseResource("config/jbpm.cfg.xml");
context = config.createJbpmContext();
try{
//Deploy RequestJobPosition Process Definition.
ProcessDefinition requestJobPositionPD = ProcessDefinition
.parseXmlResource( "jpdl/RequestJobPosition
/processdefinition.xml");
context.deployProcessDefinition(requestJobPositionPD);
}
finally{
context.close();
}
Nothing to worry about there. If you take a look at the lines after that, inside
the setUp() method, you will nd some queries to insert users, groups, and
memberships in the jbpm-identity tables.
//Users
Query query = context.getSession().createSQLQuery("INSERT
INTO JBPM_ID_USER VALUES(1,'U','John Smith',
'j.smith@myit.org','jsmith');");
inserted += query.executeUpdate();
...
//Groups
query = context.getSession().createSQLQuery(
"INSERT INTO JBPM_ID_GROUP VALUES(1,'G','Project Leaders',
'hierarchy',null);");
inserted += query.executeUpdate();
...
This material is copyright and is licensed for the sole use by ALESSANDRO CAROLLO on 18th December 2009
6393 south jamaica court, , englewood, , 80111

Chapter 8
[ 239 ]
//Memberships
query = context.getSession().createSQLQuery(
"INSERT INTO JBPM_ID_MEMBERSHIP VALUES(1,'M'
,'ProjectLeaderJohn','',1,1);");
inserted += query.executeUpdate();
As you can see here, we are inserting information in the jBPM-identity tables. We
start with users in the JBPM_ID_USER table. The only thing to notice is the second
value of the inserted query ('U') that means that this entity will be a user. The
same goes for groups ('G') and memberships ('M'). At the end, we need to
create the relationships between the users and the groups, inserting rows in the
JBPM_ID_MEMBERSHIP table. Note that the last two elds in the inserted query
are the user and group IDs respectively.
After that, let's see our processes' denitions to know how we can use these
congured actors and all the variable mappings for each specic task:
<task-node name="Project leader Interview">
<task name="Project Leader Interview">
<assignment actor-id="John Smith"></assignment>
<controller>
<variable access="read,write,required" name="variable1"
mapped-name="var1"/>
<variable access="read" name="variable2" mapped-name="var2"/>
</controller>
</task>
<transition to="Final Acceptance?"></transition>
</task-node>
Then at API level you will see a different way of interaction. Now you need to query
the tasks for each specic user (in this case) using the task management session
(TaskMgmtSession) from the JbpmContext class. This task management session will
contain a set of methods that will allow us to query and retrieve all the information
needed to create our task lists and interact with each specic task in our processes.
context = config.createJbpmContext();
taskInstancesForJohnSmith = context.getTaskMgmtSession()
.findTaskInstances( "John Smith");
Assert.assertEquals(1,taskInstancesForJohnSmith.size());
taskInstance = taskInstancesForJohnSmith.iterator().next();
taskInstance.start();
// John Smith can read the information that defines the Request
taskInstance.setVariable("PROJECT_LEADER_INTERVIEW_OK",true);
taskInstance.end();
This material is copyright and is licensed for the sole use by ALESSANDRO CAROLLO on 18th December 2009
6393 south jamaica court, , englewood, , 80111

Persistence and Human Tasks in the Real World
[ 240 ]
This code snippet shows how we can query all the tasks for "John Smith" in this
case. Then, once we get the task, we can manipulate the task instance adding the
information needed to complete the task.
Summary
In this chapter we have seen two important theoretical concepts implemented into
our Recruiting Process example. The idea is that you see how the persistence services
is congured and used in a real-life process. We also have seen how people involved
with our process will interact with the process activities that they are in charge of.
In the next chapter you will learn about how we will handle all the information
needed by the process. You will review some of the most common examples on how
the information should ow from one activity to the next, and all the features that
jBPM provides to handle all this information in an intuitive way.
This material is copyright and is licensed for the sole use by ALESSANDRO CAROLLO on 18th December 2009
6393 south jamaica court, , englewood, , 80111

Handling Information
In this chapter you will learn how the jBPM framework handles the information that
will ow throughout the activities dened in our business process.
This is a very important topic because in most cases, your business process will share
data among systems, users, roles, or even third-party companies. Most of the time,
all of the information is vital for the company. It's very important for us to know
how to handle this information and see how we can differentiate our various process
executions depending on the value of this specic data. If you think about it, most of
the modeled business processes are conceived around the business information that
they will handle.
In this chapter, we will see how the framework lets us handle this vital information
and how we, as developers can manipulate and store all the data that our process
will need to guide our company in its everyday work.
In this chapter, the following topics will be covered:
Handling information in jBPM
Two approaches to handle information in our processes
Handling process variables through the jBPM API
How and where is all of this contextual information stored?
Understanding the process information
Testing our PhoneLineProcess example
•
•
•
•
•
•
This material is copyright and is licensed for the sole use by ALESSANDRO CAROLLO on 18th December 2009
6393 south jamaica court, , englewood, , 80111

Handling Information
[ 242 ]
Handling information in jBPM
In the jBPM framework, all this information will be stored in what we know as
process variables. These process variables will be objects and primitive types
(as integers, longs, doubles, and so on), which will store pieces of information
that our process will require during the execution stage.
As we have said before, this information will give the process instance the contextual
information needed to fulll the business goal. All this information needs to be
handy in each of the activities dened in our processes. This is required in most
cases because the activities will use, modify, and remove all this information to
achieve a business goal.
Each one of these variables can be classied in the following types of information:
A simple piece of information: This could be any object or just a primitive
Java type that contains information to be used by the process.
A business key: This is a key (or an ID) to nd information in a third-party
system, which needs to be related with the process execution. Because this
information is stored inside the third-party system, we just store the ID to
avoid duplication of the same information inside the process.
Temporal information: This type comprises of all the information that's
required just for the process execution and that doesn't need to be persisted.
This information will only be used for temporal calculations or decisions.
Let's go and see an example of this classication; you will nd it very easy
and intuitive.
Imagine the business process in a telephone company that describes the steps to
give new clients new lines. First of all, the client has to give the company all his/her
data in order to create a new client account in the company. In this case, and only for
example reasons, the data required will be:
First name
Last name
Address
E-mail
•
•
•
•
•
•
•
This material is copyright and is licensed for the sole use by ALESSANDRO CAROLLO on 18th December 2009
6393 south jamaica court, , englewood, , 80111
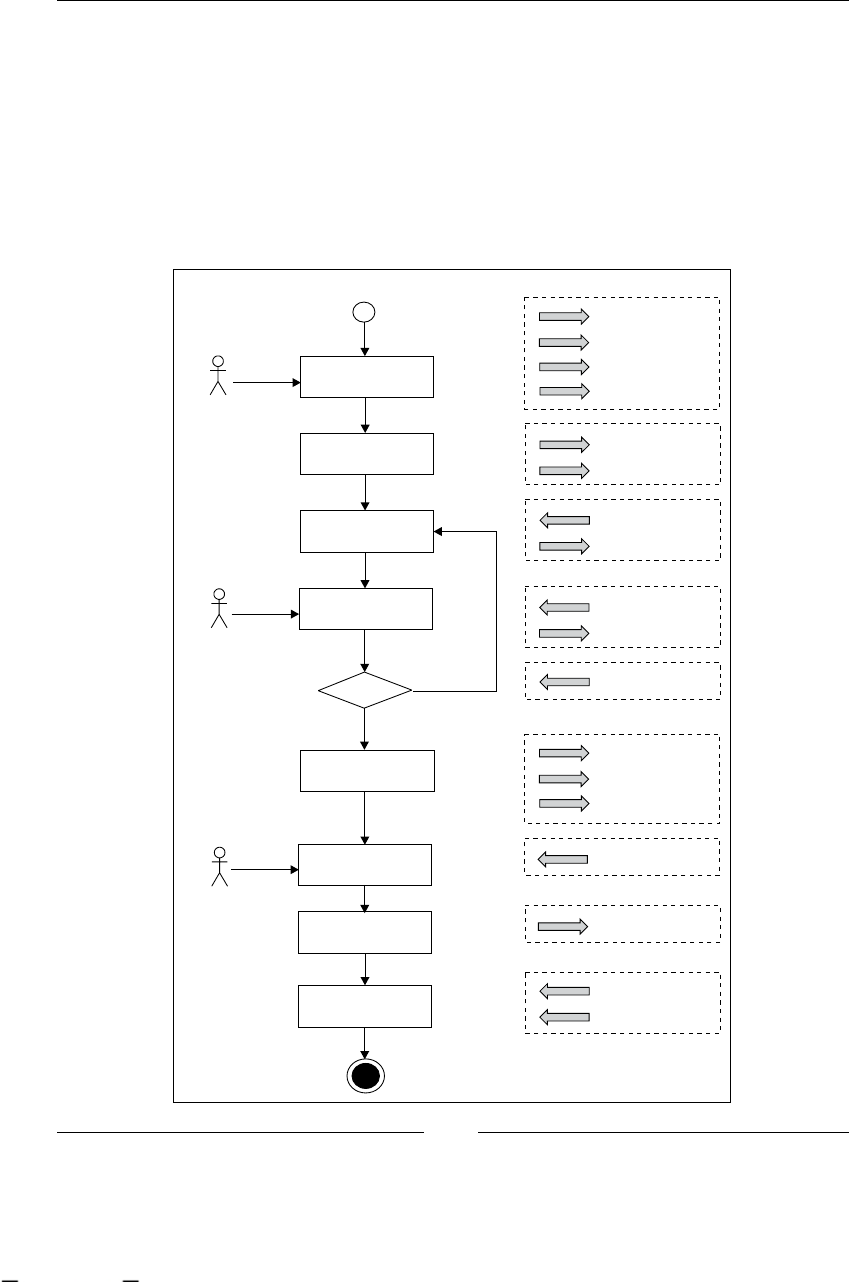
Chapter 9
[ 243 ]
We will suppose that with these four pieces of information we can dene a
new client account for all the people in one city. When the new client gives this
information to the company, a new account can be created and a new client ID will
be created. When the account is created, a new telephone number is assigned to the
client and this information has to be sent to the accounting staff to create the client
bill. Then the bill is automatically generated and reviewed by a person from the
accounting staff. When the bill is approved, it is sent to the client's address. At this
point, the process needs to wait until the payment is made by the client. Let's see
how the process will look at this point:
Wait For Payment
Activate Account
Generate New
Account
Fill Required
Client Info
Generate Bill
Review Bill
Send Bill
OK
Inform Client
First Name
Last Name
Address
E-mail
Client - ID
Phone Number
All The Variables
Bill - ID
First Name
Last Name
Address
Bill - ID
All The Variables
Approved
Approved
Activated
All The Variables
E-mail
Front Desk
Account Staff
Pay
Client
New Phone Number Process
This material is copyright and is licensed for the sole use by ALESSANDRO CAROLLO on 18th December 2009
6393 south jamaica court, , englewood, , 80111

Handling Information
[ 244 ]
When the company gets the payment, the new line is activated and the client is
informed the time when he/she can start using the line.
As you can see in the process image, inside the dotted boxes you can nd the
pieces of information that each activity handles. In the image also, we can see if the
information already exists, if it is created for a particular activity, or if it is used for a
particular activity.
It's common to see this kind of situation where the data is lled in during some early
activities in the process and this data is then used, modied, and completed by the
rest of the activities in the process.
Let's take a look at two basic approaches to handle all the information that is
generated and manipulated by this process.
Two simple approaches to handle information
As you can see in the example, in most cases we will have information exchange,
generation, and manipulation of data that the process needs to fulll the business
goal. In this section we will learn about two different approaches to handle each
piece of information that is created, inserted, or manipulated by the process. These
two approaches are not mutually exclusive, and in most cases we will use both at
the same time.
To handle the information that will ow throughout our processes, we can choose
between two basic approaches:
Use model objects: This approach will let us represent all the information
handled by the process in object structures that will represent our business
entities. In the telephone company example, a possible entity could be the
Account entity, that will contain all the information about a client and the
telephone number assigned to it.
Use primitive properties: With this approach we will store each atomic piece
of information in one process variable. In this case we don't need an object to
represent information: we save the information in separate and independent
primitive variables, all at the same level. In the telephone company example,
the piece of information used to see if the bill is approved or not, can be
stored as a simple primitive Boolean property, because it is not related to the
Account entity. This kind of information is more related to the ow of the
process than the information that is more related to the business use, like the
Account entity.
•
•
This material is copyright and is licensed for the sole use by ALESSANDRO CAROLLO on 18th December 2009
6393 south jamaica court, , englewood, , 80111

Chapter 9
[ 245 ]
Handling process variables through
the API
The jBPM framework exposes the same simple API to support these two approaches
to handle information as process variables. This API lets us store each variable as a
key/object pair. Basically, we can store any simple piece of information or a group
of related information bound to a name. Then, when we need to use this information
again we can retrieve it using the same name. This lets us modify or update the
content of each of these variables when needed.
The jBPM framework exposes the following API to handle process variables in two
different classes that can be used in two different contexts.
ContextInstance proposed APIs
We will see the methods proposed to handle process variables in the
ContextInstance class. Here, the methods are divided by categories to
describe the functionalities provided:
Create and set information variables:
public void setVariable(String name, Object value)
public void setVariable(String name, Object value,
Token token)
public void createVariable(String name, Object value)
public void createVariable(String name, Object value,
Token token)
public void setVariables(Map<String, Object>
variables)
public void setVariables(Map<String, Object>
variables, Token token)
public void addVariables(Map<String, Object>
variables)
public void addVariables(Map<String, Object>
variables, Token token)
public void setVariableLocally(String name, Object
value)
public void setVariableLocally(String name, Object
value, Token token)
•
°
°
°
°
°
°
°
°
°
°
This material is copyright and is licensed for the sole use by ALESSANDRO CAROLLO on 18th December 2009
6393 south jamaica court, , englewood, , 80111

Handling Information
[ 246 ]
public void setTransientVariable(String name, Object
value)
public void setTransientVariables(Map<String,
Object> transientVariables)
In this category we can see that we have different methods to store
information as a process variable. The most basic method in the
ContextInstance class is the setVariable(String,Object), which
lets us store an object inside the rootToken of the process.
If we are inside a nested path, for example in a path created by a fork node,
we can choose where the variable will be stored. That is why the overloaded
method setVariable(String,Object,Token) is created.
After that, you can see the createVariable() methods with the same
functionality as setVariable().
With setVariables() and addVariables() methods, we are adding a
bunch of variables or overriding the whole set of variables with a new Map.
The setVariableLocally() method will use the rootToken as the default
token to store data.
At the end, we can see the setTransientVariables() methods, which lets
us store variables in a separate Map that will only be available until our
process gets persisted. This variables Map won't be persisted in a relational
table. It will reside only in memory.
Get the variables information:
public Map<String, Object> getVariables()
public Map<String, Object> getVariables(Token token)
public Object getVariable(String name)
public Object getVariable(String name, Token token)
public Object getLocalVariable(String name, Token
token)
public Object getVariableLocally(String name, Token
token)
public Map<String, Object> getTransientVariables()
public Object getTransientVariable(String name)
With these methods we can get all the variables we had stored previously.
Depending on the token in which we stored the variables or whether the
variables are transient, you will select one of these methods.
°
°
•
°
°
°
°
°
°
°
°
This material is copyright and is licensed for the sole use by ALESSANDRO CAROLLO on 18th December 2009
6393 south jamaica court, , englewood, , 80111

Chapter 9
[ 247 ]
As we will see in the project example, the most-used methods are
getVariable(String) and getVariable(String, Token). Unless
you use transient variables you don't need anything else.
Query variables status:
public boolean hasVariable(String name)
public boolean hasVariable(String name, Token token)
public boolean hasTransientVariable(String name)
These three methods are important for validation purposes. Sometimes, you
will require these methods when you need to know if the data is already
stored as a process variable to continue your process execution.
Delete variables:
public void deleteVariable(String name)
public void deleteVariable(String name, Token token)
public void deleteTransientVariable(String name)
These methods are rarely used. These methods, opposed to the common
sense, will not delete the information about the variables inside the relational
database. If we call these methods, they will only mark the variables as not
used by the token.
ExecutionContext proposed APIs
Another context where we want to handle information is in the process actions.
That is why we need to know how to access the process variables information inside
an ActionHandler, a DecisionHandler, and an AssignmentHandler. If you take
a look at these three interfaces, you will notice that the methods execute(),
decide(), and assign() receive the ExecutionContext object to access all the
contextual information. This ExecutionContext class provides two methods to
handle the process variables:
public Object getVariable(String name)
public void setVariable(String name, Object value)
These two methods will interact with the current token that is calling the action, the
decision, or the assignment. Basically, these let you interact with the information
stored in your current execution path. If you are in the main path of the execution
(rootToken), you will be able to access all the variables stored, but if you are in a
child token, you only can access the variables that are inside that child.
•
°
°
°
•
°
°
°
•
•
This material is copyright and is licensed for the sole use by ALESSANDRO CAROLLO on 18th December 2009
6393 south jamaica court, , englewood, , 80111
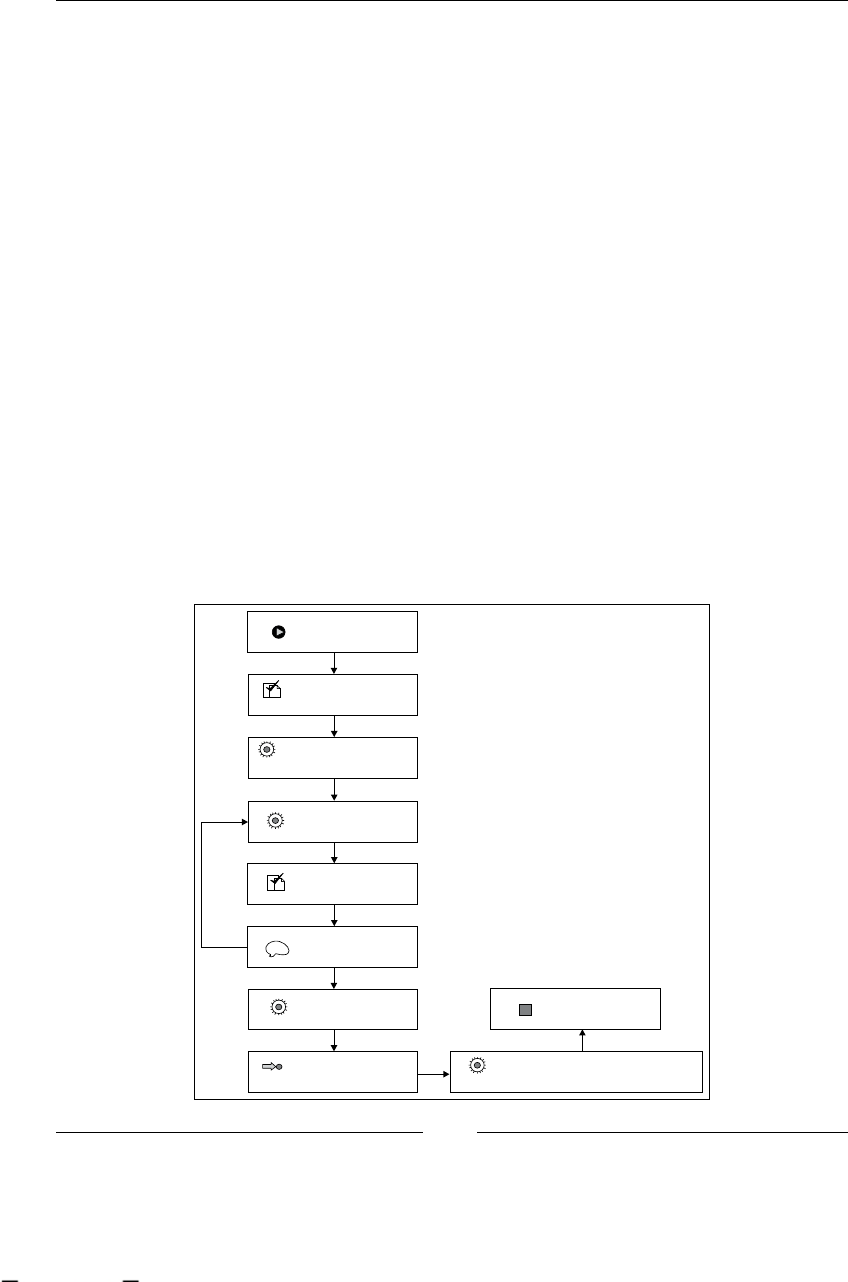
Handling Information
[ 248 ]
It's also important to note that these two methods will also look at the task instance,
if there is any, related with the execution. This will let us store and retrieve
information that is currently in a task instance. If no task instance exists in the
contextual information stored in the ContextInstance object instance, the method
will choose the token ContextInstance Map of variables to store and retrieve
the information. In other words, when you have a process that involves human
interaction, the task instance contextual information will also be evaluated as a
separate context to look for process variables.
Let's implement our telephone company example and see how this API can be used
in real life.
Telephone company example
In this section we will implement the proposed process to see how we can handle
information inside our processes. We will mix the two approaches discussed before,
to see how the information is handled internally by the framework.
You can nd this example in the code provided at http://www.packtpub.
com/files/code/5685_Code.zip (look for Chapter 9). This project is called
newPhoneLinesProcess.
Let's see our modeled process in jPDL syntax (processdefinition.xml):
END
<<End State>>
OK ?
<<DECISION>>
?
Review bill
<< >>Task Node
Collect client info
<<Task Node>>
START
<<Start State>>
Wait for payment
<<State>>
Send Bill
<<Node>>
Generate bill
<< >>Node
Generate new account
< >><Node
Activate account and inform client
<<Node>>
false
This material is copyright and is licensed for the sole use by ALESSANDRO CAROLLO on 18th December 2009
6393 south jamaica court, , englewood, , 80111

Chapter 9
[ 249 ]
Let's analyze the jPDL syntax:
<?xml version="1.0" encoding="UTF-8"?>
<process-definition xmlns="urn:jbpm.org:jpdl-3.2"
name="phoneLinesProcess">
<start-state name="START">
<transition to="Collect client info"></transition>
</start-state>
<task-node name="Collect client info">
<task name="Collect client info">
<assignment actor-id="FrontDesk"></assignment>
</task>
<event type="task-end">
<action class="org.jbpm.example.CollectTaskVariables"></action>
</event>
<transition to="Generate new account"></transition>
</task-node>
<node name="Generate new account">
<action class="org.jbpm.example.GenerateNewAccount"></action>
<transition to="Generate bill"></transition>
</node>
<node name="Generate bill">
<action class="org.jbpm.example.GenerateNewClientBill"></action>
<transition to="Review bill"></transition>
</node>
<task-node name="Review bill">
<task name="Review Bill">
<assignment actor-id="AccountStaff"></assignment>
</task>
<transition to="OK?"></transition>
</task-node>
<decision name="OK?" expression="#{approved}">
<transition to="Send bill" name="true"></transition>
<transition to="Generate bill" name="false"></transition>
</decision>
<node name="Send bill">
<action class="org.jbpm.example.SendBillToClient"></action>
<transition to="Wait for payment"></transition>
</node>
<state name="Wait for payment">
<transition to="Activate account And inform client"></transition>
</state>
<node name="Activate account And inform client">
<action class="org.jbpm.example.ActivateAccount" ></action>
<transition to="END"></transition>
</node>
<end-state name="END"></end-state>
</process-definition>
This material is copyright and is licensed for the sole use by ALESSANDRO CAROLLO on 18th December 2009
6393 south jamaica court, , englewood, , 80111

Handling Information
[ 250 ]
In the second node of our process called Fill required client information, the client
information needs to be entered in order to continue. It's important to note that it
is a human task node, which will behave as a wait state and it will generate a new
TaskInstance. In this case, we can create a Client object and ll its properties with
the values collected in this task. This can be achieved in multiple ways; in this case,
we will use an action hooked in the task-end event to create the Client object and
populate it with the information collected from the task. The values of the properties
inside the task will be stored inside the following Client object properties:
First name
Last name
Address
E-mail
Now that we have our Client object populated, we can store it inside a process
variable called client. We do that with the following code line:
executionContext.setVariable("client", client);
Here, client is just a String that will let us retrieve the client object, which is stored
as a process variable. Then, when we need the client information in other activities,
we can get the entire object using the name client with the following line:
Client client=(Client)executionContext.getVariable("client");
It is important to note that we can store this client information as an object, as a
process variable, or we can just store each eld separately as a bunch of process
variables. In this case we chose to store the client information as an object because
all the information is related to the Client concept.
•
•
•
•
This material is copyright and is licensed for the sole use by ALESSANDRO CAROLLO on 18th December 2009
6393 south jamaica court, , englewood, , 80111

Chapter 9
[ 251 ]
Strategies to store information
To make a good choice in each particular case, we need to know how the
choice of storing variables will inuence our process development and
maintenance. In most cases, when the framework lets you choose between
different strategies to do the same thing (in this case, store information),
it's because you will need to evaluate which strategy you should use,
depending on your problem and your particular situation.
In case we have a complex data structure for containing information, you
can tackle it smartly by storing it in separate variables. Let's say you have
an object that represents all your family members in some kind of tree
structure, and in this process you only want to include the members who
have children and an income. For this situation, it will be probably better
if we just store each of the members in a separate variable, and not the
whole tree structure in just one variable.
The reason for this solution is, rst of all, the family tree structure
contains too much information that the process won't need. So, we
might need to store the information that is not even needed, and that
will probably affect our process performance. Secondly, if we store
each member separately, accessing each member's information will be
easier than searching throughout the tree structure. We will see different
methods to access these variable values in the following sections.
As a common practice, if you reduce the amount of information that the process
needs to handle, your process execution performance will be better. On the other
hand, if you store only business keys inside the process, you will create a lot of
third-party interactions during the process executions. You need to dene a good
strategy to maintain a performance level that works for you.
Storing primitive types as process variables
If, for some reason, we decide that we don't want to store an object as a process
variable, we can always store it as simple/primitive types (including Strings and
Dates) into our process variables. In our previous example, a good practice would be
to store the approved variable as a single boolean or a String because this variable is
not related to some structure like the Client structure and it is only used to dene
the path that the ow will take.
This material is copyright and is licensed for the sole use by ALESSANDRO CAROLLO on 18th December 2009
6393 south jamaica court, , englewood, , 80111

Handling Information
[ 252 ]
We can store these primitive types using the same API, but internally the information
will be handled differently:
executionContext.setVariable("approved",true);
Or
executionContext.setVariable("approved","true");
In the next section, we will learn how and where these variables are stored.
How and where is all this contextual
information stored?
This is a very important question. We will nd the answer to this question and also
see the steps required to store all this information.
As we have seen before, you can choose how and which variables/pieces of
information should be stored in the process contextual information. The way you
choose to store information can directly impact the performance differently in
different scenarios. You need to know how to handle all the information inside your
process to be able to predict possible negative impact in your processes performance.
You always need to be sure that your solution will minimize the following points:
Data duplication
Extreme query generation/systems interactions
Complex data structures
The following section will demonstrate the working of the information-handling
mechanism in jBPM. Then you must choose for each piece of data, what strategy
should be used and how it must be stored. In other words, there is no single
solution that fullls every possible situation.
How are the process variables persisted?
As you can imagine, all the persistence is done through Hibernate. In the same
way that the process instance status is persisted when the execution reaches a wait
state, the process variables are persisted as a part of the process status information.
Basically, we can say that the process instance status is the information about
where the token is (in which node of our process) and all the information that
this token contains.
•
•
•
This material is copyright and is licensed for the sole use by ALESSANDRO CAROLLO on 18th December 2009
6393 south jamaica court, , englewood, , 80111

Chapter 9
[ 253 ]
Some special considerations need to be taken into account to handle the process
variables' persistence. This is because the process variables can be of different types.
That is why a simple process is required to analyze and decide how to persist each
of them.
When this analysis is done, all the variables are scanned to discover each variable
type. When this type is found, a persistence strategy is chosen and applied.
Let's discuss this with a concrete variable example. Imagine that we have a
primitive value that will be stored inside our process; we can use a client e-mail for
the example. This value can be stored in a String variable. Here, when the type of
the variables is searched, a persistence strategy is selected and the variable will be
directly persisted with the strategy selected.
We have eight pre-dened strategies, which support the following types of variables:
java.lang.String
java.lang.Boolean
java.lang.Character
java.lang.Long
java.lang.Byte
java.lang.Short
java.lang.Integer
java.lang.Double
java.lang.Float
java.util.Date
byte[]
Hibernate entities with java.lang.Long ID
Hibernate entities with java.lang.String ID
JPA entities (EJB 3)
JSR 170 JCR node
An untyped null value
Any serializable class that can be persisted using Hibernate
These supported types of variables and also the strategies to persist each variable
type can be found in a le called jbpm.varmapping.xml. This archive can be found
inside the core project source code, inside the following directory:
core/src/main/resources/org/jbpm/context/exe/jbpm.varmapping.xml
•
•
•
•
•
•
•
•
•
•
•
•
•
•
•
•
•
This material is copyright and is licensed for the sole use by ALESSANDRO CAROLLO on 18th December 2009
6393 south jamaica court, , englewood, , 80111

Handling Information
[ 254 ]
First let's analyze how these strategies are applied, and then we will see the le
structure that contains all the information needed to persist each variable.
The following image shows us the steps that each variable in our process will take in
order to be persisted:
java.lang.Integer
LongInstance
DateInstance
ByteArray
Instance
String
Instance
YourType
Instance
Double
Instance
Converter
Matcher
Variable
Instance
contextInstance.setVariable ( “mylnt” ,newInteger (1));
ClassNameMatcher
HibernateLongIDMatcher
HibernateStringIDMatcher
Process reaches a wait state
ShortToLongConverter
IntToLongConverter
Serializable To
ByteArrayConverter
YourConverter
SerializableMatcher
EJB3Matcher
YourMatcher
Match
The rst step is obviously the process variable assignment using the
ContextInstance obtained from the process instance or using the
executionContext in an ActionHandler, a DecisionHandler, or an
AssignmentHandler. When you do that, using the setVariable(String, Object)
method, the process variable is maintained in memory until the process reaches a
wait state. At that point, all the process status information needs to be persisted.
For that, all the process variables stored inside the ContextInstance need to be
analyzed in order to decide how to persist each of them. This analysis is done by
This material is copyright and is licensed for the sole use by ALESSANDRO CAROLLO on 18th December 2009
6393 south jamaica court, , englewood, , 80111

Chapter 9
[ 255 ]
a set of ordered matchers. Each matcher will decide if the variable currently being
analyzed is of the type inspected by the matchers. Basically, we will have a list of
matchers (that we can plug), which will evaluate each process variable in order to
persist it. In the image, we can see the following matchers:
ClassNameMatcher: This matcher will only evaluate a String that contains
the fully qualied name (FQN) of the class. So, if we want, we can reuse
this matcher to match one of our custom classes. One example of how this
matcher works can be the way jBPM evaluates java.util.Date objects:
<matcher>
<bean class="org.jbpm.context.exe.matcher.ClassNameMatcher">
<field name="className">
<string value="java.util.Date" />
</field>
</bean>
</matcher>
In this case, if we store a process variable of type java.util.Date, the
ClassNameMatcher matcher will evaluate to true, and will apply the
congured strategy to persist this variable.
HibernateLongIDMatcher: This matcher will evaluate to true if the
variable we stored as a process variable is a Hibernate-mapped entity that
has the ID eld of a type java.lang.Long. For a variable to qualify as a
Hibernate-mapped entity, the Hibernate Mapping File needs to be created.
HibernateStringIDMatcher: This matcher is the same as
HibernateLongIdMatcher, except that this entity needs to have a
String ID eld.
SerializableMatcher: This matcher will evaluate to true if
the object stored as a process variable is implementing the
java.io.Serializable interface.
There are a few more matchers that you can analyze if you are interested in this
topic. The main idea here is that if the out-of-the-box matchers don't fulll your
needs, you can always create your own custom matcher and decide how to persist
your custom types.
•
•
•
•
This material is copyright and is licensed for the sole use by ALESSANDRO CAROLLO on 18th December 2009
6393 south jamaica court, , englewood, , 80111

Handling Information
[ 256 ]
The second step in the persistence strategy decision is to convert your object that is
stored as a process variable into a subclass of the VariableInstance class. Why do
we need that? The VariableInstance class is the super class of all the types allowed
by the jBPM framework. That means that all the subclasses of the VariableInstance
class will know how to persist themselves. Basically, the converter classes will
know how to convert from a specied type of object (found with the matcher) to a
VariableInstance subclass.
As you can see in the image, you can also plug your type converters. And in some
cases, there is no need for conversion, you can bypass this step.
Out of the box, we can nd eight types of VariableInstance subclasses:
ByteArrayInstance
DateInstance
DoubleInstance
HibernateLongInstance
HibernateStringInstance
LongInstance
NullInstance
StringInstance
However, you can dene your own VariableInstance subclass if your project
requires more advanced persistence options.
Now we can take a look at how all of these concepts are congured in the
jbpm.varmapping.xml le.
In this case we will analyze how a strategy is dened to support the java.lang.
Integer type. So every time we put a java.lang.Integer in a process variable,
the following matcher will be executed:
<!-- java.lang.Integer -->
<jbpm-type>
<matcher>
<bean class="org.jbpm.context.exe.matcher.ClassNameMatcher">
<field name="className"><string value="java.lang.Integer" />
</field>
</bean>
</matcher>
<converter class="org.jbpm.context.exe.converter
.IntegerToLongConverter" />
<variable-instance
class="org.jbpm.context.exe.variableinstance.LongInstance" />
</jbpm-type>
•
•
•
•
•
•
•
•
This material is copyright and is licensed for the sole use by ALESSANDRO CAROLLO on 18th December 2009
6393 south jamaica court, , englewood, , 80111

Chapter 9
[ 257 ]
As you can see, a converter is needed to transform the Integer object into a Long
object. This is because a single strategy is dened to store numbers, and that strategy
uses the VariableInstance subclass called LongInstance.
Another thing that you need to know is that the strategies dened in the
jbpm.varmapping.xml le will be evaluated sequentially in the order described in
the le. As a result, if you decide to implement your own strategy for your custom
type, you will need to be careful that you put your strategy in the right place. It's a
very common situation when you create your custom strategy and put it at the end,
then you store an object that is of your custom type, but is also Serializable, and
then your custom matcher will never be executed.
Let's see a business example that shows us how variables are dened, which
conguration is dealing with those variables and how our variables are stored
in the congured database.
Understanding the process information
We need to understand some important considerations and techniques to handle
information in our process. These techniques will help you with the following topics:
Analyzing and classifying each piece of information in order to know how
to handle it
Knowing some rules that are applied to the process variables when the
process has nested paths
Accessing each variable from the jPDL syntax to take advantage of dynamic
evaluations at the runtime
The following three short sections describe these three topics giving some examples
that you will nd useful when you have to implement a real situation.
•
•
•
This material is copyright and is licensed for the sole use by ALESSANDRO CAROLLO on 18th December 2009
6393 south jamaica court, , englewood, , 80111

Handling Information
[ 258 ]
Types of information
When we are modeling a new business process it is very important to understand
the nature of each piece of information that the process handles, in order to correctly
decide how to store and load this information when we need it. This information can
be split into three main groups:
Information that we already have and we will use only to query: In our
telephone company example, we are creating a new client account that
doesn't exist in the company. But in other situations, we probably will have
this information already stored in a database. If we implement another
business process in the telephone company, for example, a business process
to offer promotions to our existing clients, the client information will
already have been stored and just used for queries. The key point here is
to differentiate the information created by the process, and the information
used as contextual information that already exists outside the process. In
other words, you will need to formally dene separately the information that
the process will use to control the process ow and all the information that
will be used as contextual information that already exists in the company and
needs to be retrieved for third-party systems.
New information that is created by the activities in a process that is related
to information that we already have: In our telephone company example,
we can have all the information about the new bill created for a particular
client. In the new phone lines process, the client information itself is created
and stored by this process. This information needs to be maintained closely
with the process information, because the process execution could create
different information for different situations, and sometimes we will need
to review the process execution to know why a specic piece of information
was created.
Temporal information, which can or cannot be persisted, because it is
only used to do calculations or to guide our process: In our telephone
company example, information that has the approved or the activate ag
is information that just controls the ow of the process and is not related
with any business entity. This information could be transient or persisted for
history analysis, but the key point here is to notice that this information has a
tight relationship with the process instance and not with the business entities
used in the process.
•
•
•
This material is copyright and is licensed for the sole use by ALESSANDRO CAROLLO on 18th December 2009
6393 south jamaica court, , englewood, , 80111

Chapter 9
[ 259 ]
For the rst type of information we only need to know how to get it. So, a very
simple strategy can be used. For this kind of information you can store a business
key (a fashionable way to say ID and the context where this ID is valid, for example
System ID + Table name + Person ID). With this key we will be able to retrieve the
information when we need it. The Person, Customer, and Client entities are the most
common examples where we need to store only the ID value to nd out all the data
that we need about them. It is important to note that this information, in most cases,
can be stored in other systems or databases, and with this approach we keep the
business process loosely coupled with other applications. In the example, we create
a Client and store it as a process variable, because in this case we are collecting the
client information. In this case, we are not using an already existent structure/class.
For the second type of data, that is the data that will be collected and needed by this
particular process, the data handling will depend on the amount and the structure
of the data. You can choose to create and handle different process variables or an
object that will contain all this information. If you choose to create an object, it will
probably contain the client ID, so we can relate the process instance information
and the client data very easily. In our case, the Client class is created to store all
the client information.
The third type of information needs to be analyzed in each situation. You can
include this information in your current model (in this case the Client class), or
if it is only used for some calculations or in decisions, you can choose if it needs to
be persisted or not. If you don't want to persist a process variable you can always
use the setTransientVariable() method. This method will let you have the
information stored in a separate Map of variables that are erased when the process
instance reaches a wait state. In other words, all the variables in the transient Map
are bypassed when the persistence is applied.
Note about information classication:
It is very important to note some not-so-intuitive topics about how we
handle all the information in our processes. For example, if you only store
the client ID and make intensive use of some client information, and also
the client information is distributed in multiple tables, you will probably
generate a lot of queries and network trafc to get all the information
you need.
For each piece of information that you will consume, you need to carefully
analyze the possible impact and make decisions based on this analysis.
You also need to keep in mind that if you store objects in the process
variables, the information will be very easy to access, but the serialization
process for your objects can drastically decrease your system performance.
This material is copyright and is licensed for the sole use by ALESSANDRO CAROLLO on 18th December 2009
6393 south jamaica court, , englewood, , 80111
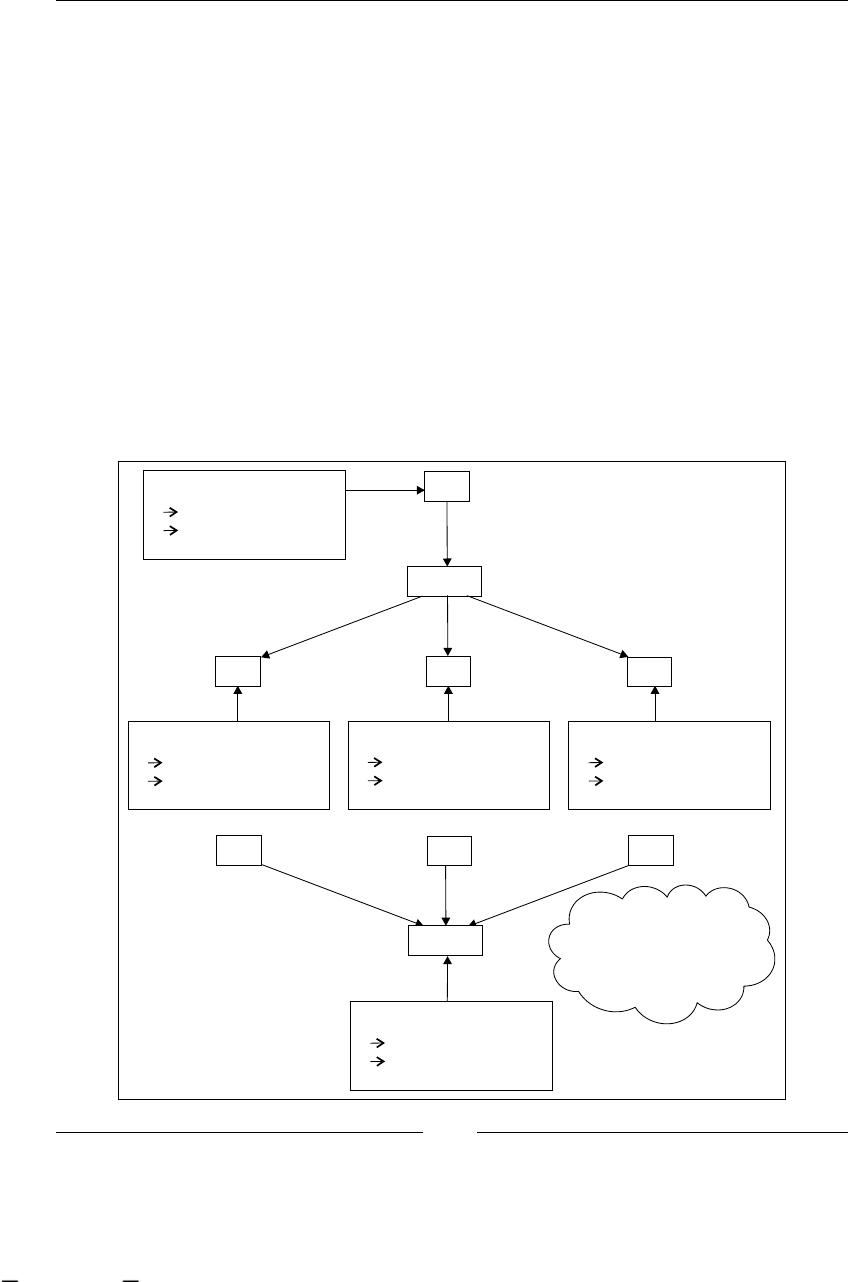
Handling Information
[ 260 ]
Variables hierarchy
In a process instance, variables hierarchy is used to specify different scopes where
the variable can be accessed. This is a very useful feature when we need to handle
variables in nested paths of our processes. We will create nested paths inside our
process executions when we use concurrent paths or subprocesses.
The most common example of these nested paths is when we use a fork node
that creates a child token for each path it creates. See the fork node denition in
Chapter 10, Going Deeply into the Advanced Features of jPDL.
Each of these child tokens will handle their own Map of variables, which we can
merge with the root token Map when all the child nodes reach the join node. Here
it is important to learn about the rules applied to these variables. First of all, it is
important to notice that the variable Map is directly related to the token containing it.
Let's see an example about how this hierarchy works with a process that contains a
fork node to represent concurrent paths.
Fork
Variables Root Token
Age= 30
Salary= USD 5000
Variables Child Token 2
Age= 30
Salary= USD 5000
Variables Child Token 1
Age= 21
Salary= USD 3000
Variables Child Token 3
Age= 50
Salary= USD 9000
Join
Variables Root Token
Age= 50
Salary= USD 9000
We can decide to take
action at the
Join node if we want to merge
information about all the child
token variables
node-leave
This material is copyright and is licensed for the sole use by ALESSANDRO CAROLLO on 18th December 2009
6393 south jamaica court, , englewood, , 80111

Chapter 9
[ 261 ]
We can see that the variables Age and Salary are copied to the child tokens when the
fork node is reached by the process execution. Now these new variables in the child
token are independent of the variables in the root token. If we change the value of
a variable in one of the child tokens, the other tokens will notice neither this change
nor the root token. This happens, because each token will have an independent copy
of the variables.
Depending on our situation we can do a manual merge between these variable
values in the join node when all the modications are already done.
A key point to remember here is that, if we have multiple nested tokens and we need
to access a process variable using the getVariable(String) method, a recursive
search over the parent token will be done in order to nd our variable if it doesn't
exist in the current nested token.
Accessing variables
Until now we have seen how variables are stored in the contextual information of
each token in our processes and all its children. Also, we have analyzed how the
variables can be accessed by the jBPM APIs using the getVariable() method.
In this section we will see how we can access process variables from the jPDL process
denition. This will give us automatic evaluations to make decisions or just to print
information that will be dynamically calculated during the process execution.
As you can remember, the process denition in jPDL is a static view of our process
that needs to be instantiated to create the execution context that will guide us
throughout the process.
We can take advantage of the information that we know will ow throughout the
process to add dynamic evaluations using EL (Expression Language) expressions.
Let's see an example of how these expressions can be used in our dened process.
In our telephone company example, we have a decision node that evaluates if the
bill created for a client is correct or not. In this case, our decision node can use an
expression to read a process variable, and based on the variable value it can choose
a transition. This generic expression will be evaluated at the runtime for each
process instance.
In this case, the expression looks like:
<decision expression="#{approved}">
This material is copyright and is licensed for the sole use by ALESSANDRO CAROLLO on 18th December 2009
6393 south jamaica court, , englewood, , 80111

Handling Information
[ 262 ]
Based on a process variable approved, this decision node will choose between two
transitions. This expression is dened using the EL, the same language used in JSF.
You can nd more about this expression language at:
http://developers.sun.com/docs/jscreator/help/jsp-jsfel/
jsf_expression_language_intro.html
In these kind of situations we know at denition time, that the client information
will be needed in the process to make decisions or calculations. We can take this
information and we can start creating expressions that model generic situations.
In the same way we can also be use EL to dene the name of the (human) task that is
dynamically created by the process execution.
In our example the human task called Review Bill can be called #0012 - Review John
Smith Bill, where #0012 can be the process instance ID.
This is because we already have all the client information collected in previous tasks.
In this case the name of the tasks can contain an expression that will be dynamically
resolved at the runtime. The expression can be like the following:
<task-node name="Review bill">
<task name="Review #{client.lastName,client.name} Bill">
<assignment actor-id="AccountStaff"></assignment>
</task>
<transition to="OK?"></transition>
</task-node>
A good use of these expressions can help you to be more expressive or declarative in
the way the data is used in your process.
Then, in the task list of the users, each task will have the name of the client, helping
to identify all the tasks related with the same client and process them in a very
intuitive way.
Testing our PhoneLineProcess example
In this section we will run a test that interacts with our dened process, letting you
see how the variables are handled by the process and by the action handlers.
This test is called PhoneLineProcessTest and you can nd it in the code provided
with this chapter at http://www.packtpub.com/files/code/5685_Code.zip
(Look for Chapter 9).
This material is copyright and is licensed for the sole use by ALESSANDRO CAROLLO on 18th December 2009
6393 south jamaica court, , englewood, , 80111

Chapter 9
[ 263 ]
For running this test, rst you need to congure your database connection in the
hibernate.cfg.xml le. In this case we will use a direct JDBC connection to persist
our process information. You can learn a lot more about this conguration in
Chapter 6, Persistence.
So probably you will need to change the following data in the hibernate.cfg.xml le:
<!-- hibernate dialect -->
<property name="hibernate.dialect">
org.hibernate.dialect.MySQL5InnoDBDialect
</property>
<!-- JDBC connection properties (begin) -->
<property name="hibernate.connection.driver_class">
com.mysql.jdbc.Driver
</property>
<property name="hibernate.connection.url">
jdbc:mysql://localhost:3306/jbpmtestvariables
</property>
<property name="hibernate.connection.username">root</property>
<property name="hibernate.connection.password">salaboy</property>
<property name="hibernate.query.substitutions">
true 1, false 0
</property>
<!-- JDBC connection properties (end) -->
As you can see, the common properties to establish a connection are required. If you
take a look at the hibernate.connection.url property, you will see that in this
case we are using a MySQL schema called jbpmtestvariables. You need to create
this schema in order for Hibernate to establish the connection successfully.
If you have time and want to experiment with another database, please feel free to
change the Hibernate Dialect and the connection properties to your specic vendor.
To do these kind of changes you will also need to get your correspondent JDBC
driver. Remember that you can do that with Maven, editing the pom.xml le, and
adding your driver dependency near the MySQL dependency.
<dependency>
<groupId>mysql</groupId>
<artifactId>mysql-connector-java</artifactId>
<version>5.1.6</version>
</dependency>
Now you can go and run the test. Let's analyze what is happening in that test. I have
left many comments there to guide you through what is happening.
This material is copyright and is licensed for the sole use by ALESSANDRO CAROLLO on 18th December 2009
6393 south jamaica court, , englewood, , 80111
Download at WoweBook.com
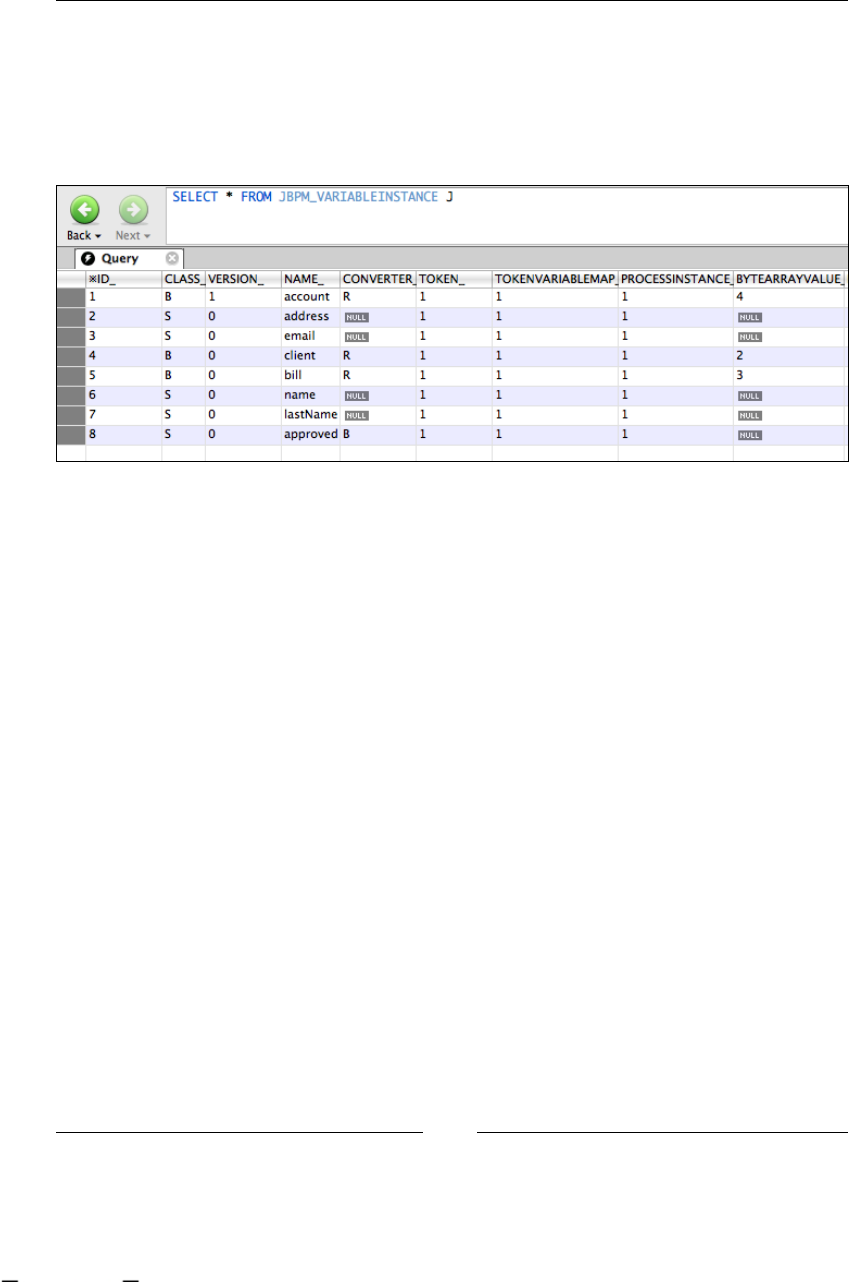
Handling Information
[ 264 ]
Basically, the test just shows you how the telephone company process works
with real APIs. You will nd how the variables are managed and handled by the
framework APIs and you can see how these variables are stored in the database.
If you take a look at the table called JBPM_VARIABLEINSTANCE, you will nd all
the variables that your process stored in the context instance.
As you can see, the account, client, and bill process variables are persisted as a
ByteArray inside the JBPM_BYTEARRAY table, with the IDs corresponding to the
BYTEARRAYVALUE_ column in this table. We can deduce how jBPM persists
each variable, based on the CLASS_ column in this table. In the case of the variables
account, client, and bill, the value of this column is B (for binary or byte array).
If you want to see all the different variables' mappings and which letter represents
each of them, you can open all the HBM les that map each variable type.
The important thing here is that the variables of type object that match with the
Serializable matcher, will be serialized and stored as a binary object. This can be
a good approach in some situations but for the most common use cases we want to
persist these variables in a relational way.
In the next section we will see how we can store the client information in a
relational manner.
Storing Hibernate entities variables
In the PhoneLineProcessTest example, we just store the Client object as a
Serializable object. That means our object is being serialized each time our process
reaches a wait state. Sometimes, this is not the optimal approach. Here we will see
how to store these variables as a Hibernate entity. That means our object will be
mapped with a relation table containing all its data.
This material is copyright and is licensed for the sole use by ALESSANDRO CAROLLO on 18th December 2009
6393 south jamaica court, , englewood, , 80111

Chapter 9
[ 265 ]
We can achieve this by just mapping the Client class using a HBM le. The
client-mapping le will look like this:
<?xml version="1.0"?>
<!DOCTYPE hibernate-mapping PUBLIC
"-//Hibernate/Hibernate Mapping DTD 3.0//EN" "http://hibernate.
sourceforge.net/hibernate-mapping-3.0.dtd">
<hibernate-mapping auto-import="false" default-access="field" >
<class name="org.jbpm.example.model.Client">
<id name="id" column="ID"><generator class="native" /></id>
<property name="name" column="NAME"/>
<property name="lastName" column="LASTNAME"/>
<property name="email" column="EMAIL"/>
<property name="address" column="ADDRESS"/>
</class>
</hibernate-mapping>
You will only need to add this mapping le into the hibernate.cfg.xml
conguration le in the mapping section. In the example project, you can
nd the comments at the end of the mapping section that looks like this:
<!-- ################## -->
<!-- CUSTOM MAPPINGS -->
<!-- ################## -->
And uncomment the following line:
<mapping resource="client.hbm.xml"/>
Now, when you run the test again, you will see that in your database the Client table
is now created and used to store your client objects.
In some situations this approach is much more useful than having your object
serialized in your database.
It's important for you to know that you will need to choose between
serializing or mapping your objects as Hibernate entities. This decision
needs to be analyzed for each type of information that you will handle. If
you use external/third-party entities, you will probably want to reuse the
tables that contain your entities information. Remember that if you choose
to serialize your objects and they are already persisted as Hibernate
entities, you will be duplicating unnecessary data.
This material is copyright and is licensed for the sole use by ALESSANDRO CAROLLO on 18th December 2009
6393 south jamaica court, , englewood, , 80111

Handling Information
[ 266 ]
Homework
For this homework you should try to create the mapping le for the Account class
that represents a new client account into the company. If you are familiar with the
syntax in the HBM les, this will be an easy task for you. Then you can test and see
in the database how your Account objects are stored in the Account table. If you
are not familiar with the HBM les syntax, you can take a look at the Hibernate
documentation page to play with your mapping les.
Summary
In this chapter we learned about how the information ows throughout our
processes and the importance of analyzing each piece of information in order
to see how it will be persisted.
As you can see in this chapter, the persistence plays a big role in the behavior and the
performance of our processes. To reduce risks and do successful implementations
with jBPM, we must know about the framework internals conguration and how the
persistence needs to be congured for each situation. We'll see more on that in the
next chapter.
The points that you need to remember about this chapter are the following:
The information in our process is stored in process variables
The process variables are persisted at the same time that the process status
information is persisted when the execution reaches a wait state
There are extensible and pluggable strategies that let you customize how
each of the process variables is persisted
There are some rules about the process variables, which you need to know
when your process has nested paths
You can read, evaluate, and print the process variables' information using EL
How to add your custom mappings to store your process variables as
Hibernate entities
In the next chapter we will discuss more advanced topics of the jPDL language that
will help us model complex processes to fulll a broader range of situations.
•
•
•
•
•
•
This material is copyright and is licensed for the sole use by ALESSANDRO CAROLLO on 18th December 2009
6393 south jamaica court, , englewood, , 80111

Going Deeply into the
Advanced Features of jPDL
In this chapter, the reader will learn about the advanced capabilities of the jPDL
process denition language. We need to go deep inside these capabilities to be able
to represent complex situations. We also have to understand about the exibility that
the language provides.
We will begin this chapter by looking at the rest of the nodes that were not
covered in Chapter 4, jPDL Language, in order to give you a complete overview
of the built-in capabilities offered by the language. Then we will continue to
more advanced settings and conguration of nodes, and actions inside the
process denition.
In this chapter, we will discuss the following topics:
Fork and join nodes
Super state node
Process state node
E-mail node
Advanced congurations in jPDL
Start state task denitions
Parameterizing actions
Why do we need more nodes?
jPDL includes extra functionalities to give you the ultimate exibility to represent
situations where you need advanced features like subprocesses, concurrent paths,
hierarchical organization, and so on.
•
•
•
•
•
°
°
This material is copyright and is licensed for the sole use by ALESSANDRO CAROLLO on 18th December 2009
6393 south jamaica court, , englewood, , 80111
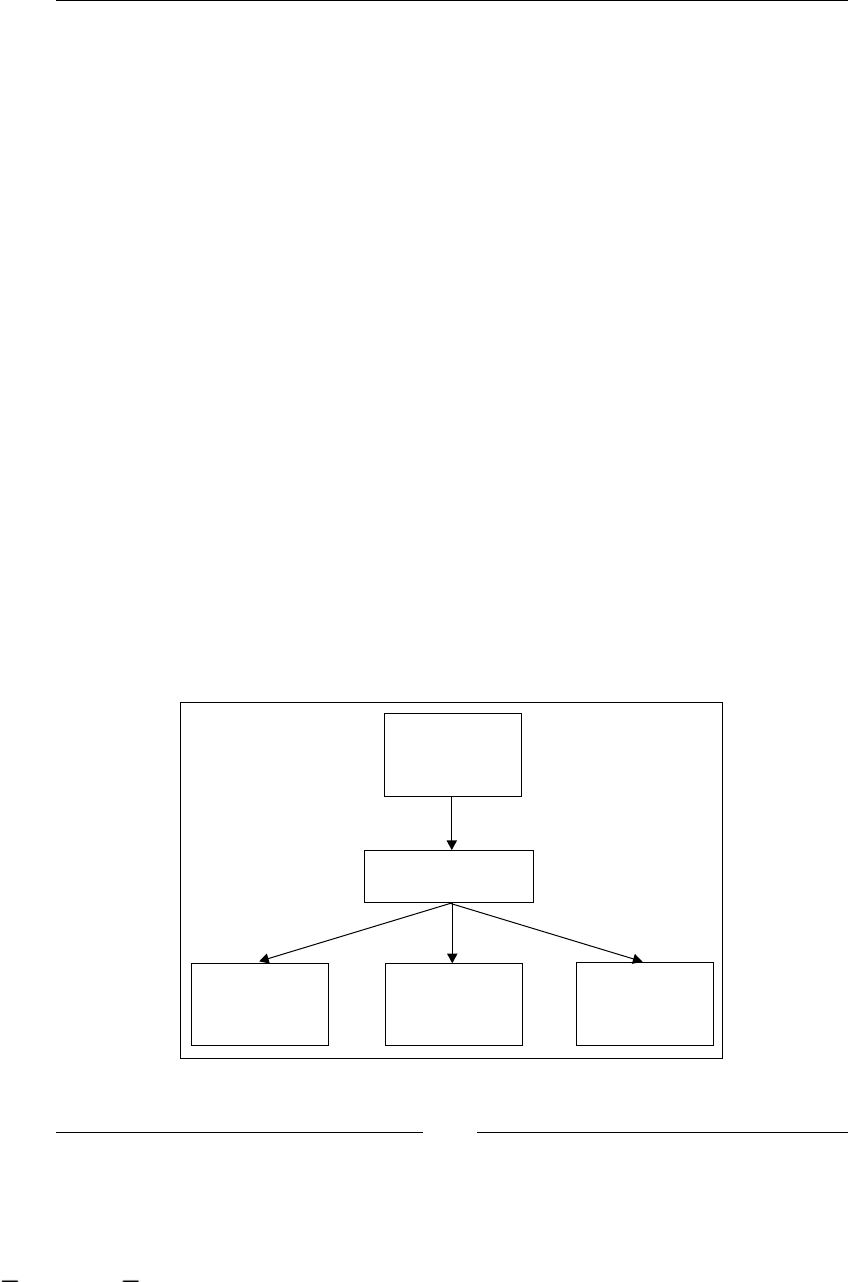
Going Deeply into the Advanced Features of jPDL
[ 268 ]
As you can see, all the mentioned behavior is generic and it can be applied in every
situation that meets some of these requirements. Once you have understood all
these behaviors and functionalities, you will be able to decide whether you need to
implement or extend a custom type of behavior that ts in your particular situation.
All the nodes discussed here are subclasses of the Node class, basically all the rules
that we have already seen about behavior and functionality are applied to these
nodes as well.
Fork/join nodes
This pair of nodes work together, that is why I need to explain them in the same
section. Besides this restriction, both implement different logic.
We will start by talking about fork node, because it implements a new
functionality that has not been covered yet, and it is very important that
you understand it correctly.
The fork node
This node is used to split the current path of execution (also known as token) into
multiple concurrent paths. We will need this functionality when we want two or
more activities to be executed and completed in parallel. The only requirement of
these two or more activities is to not have any order dependency on each other.
Let's discuss this with an example. Imagine that we need to pass different medical
exams to get a job. Basically, we can see a process like this one:
FORK
INITIAL
INTERVIEW
BLOOD
PRESSURE
EXAM
LUNGS EXAM
HEART EXAM
This material is copyright and is licensed for the sole use by ALESSANDRO CAROLLO on 18th December 2009
6393 south jamaica court, , englewood, , 80111
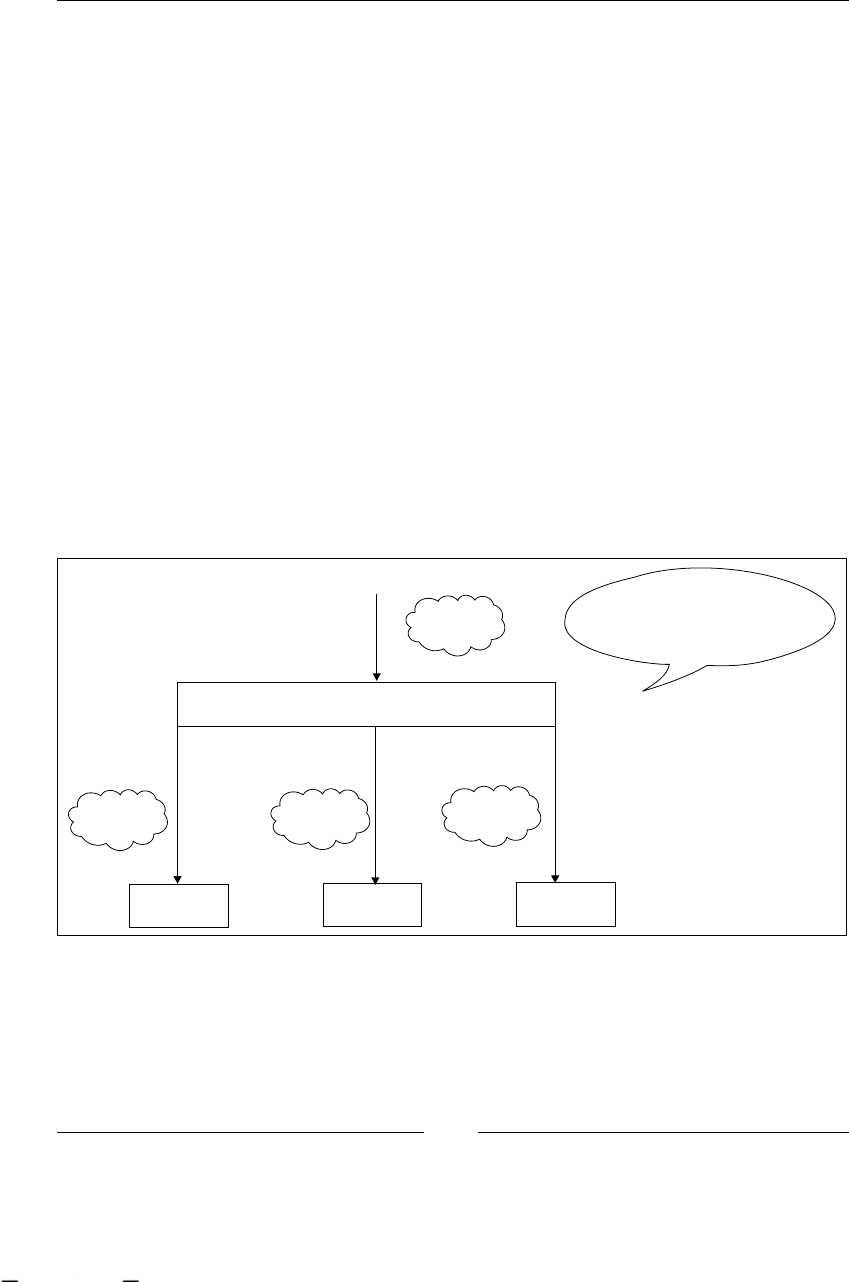
Chapter 10
[ 269 ]
In a situation like this, where the activities don't have any dependencies on
each other, the exams can be done in parallel. No matter which is started rst or
which is ended rst, the only important point here is that all the exams need to be
nished successfully.
The fork node gives us the possibility to take more than one path at the same time.
How does this work? Which is the current path? If there are multiple paths, how do I
interact with them?
The mechanism implemented in jBPM works as follows:
When the execution arrives at the fork node, we say that the execution is split into
N paths of execution. N is the number of leaving transitions dened in the fork node.
This node creates N new subpaths of execution, so each of the newly-dened paths
gives a signal to start the execution. Each of these new subexecution paths has a
hierarchical relationship with the main path of execution, which arrives at the fork
node. In other words, when the process execution arrives at the fork node, new child
tokens will be created and its parent-child relationship will be maintained with all
of them.
The following image describes how this works inside the framework, let's analyze it!
ROOT
TOKEN
CHILD
TOKEN1
CHILD
TOKEN3
CHILD
TOKEN2
FORK
1 COUNT LEAVING TRANSITIONS
2 FOR EACH TRANSITION
2.1 CREATE NEW CHILD TOKEN
2.2 SIGNAL IT
This material is copyright and is licensed for the sole use by ALESSANDRO CAROLLO on 18th December 2009
6393 south jamaica court, , englewood, , 80111
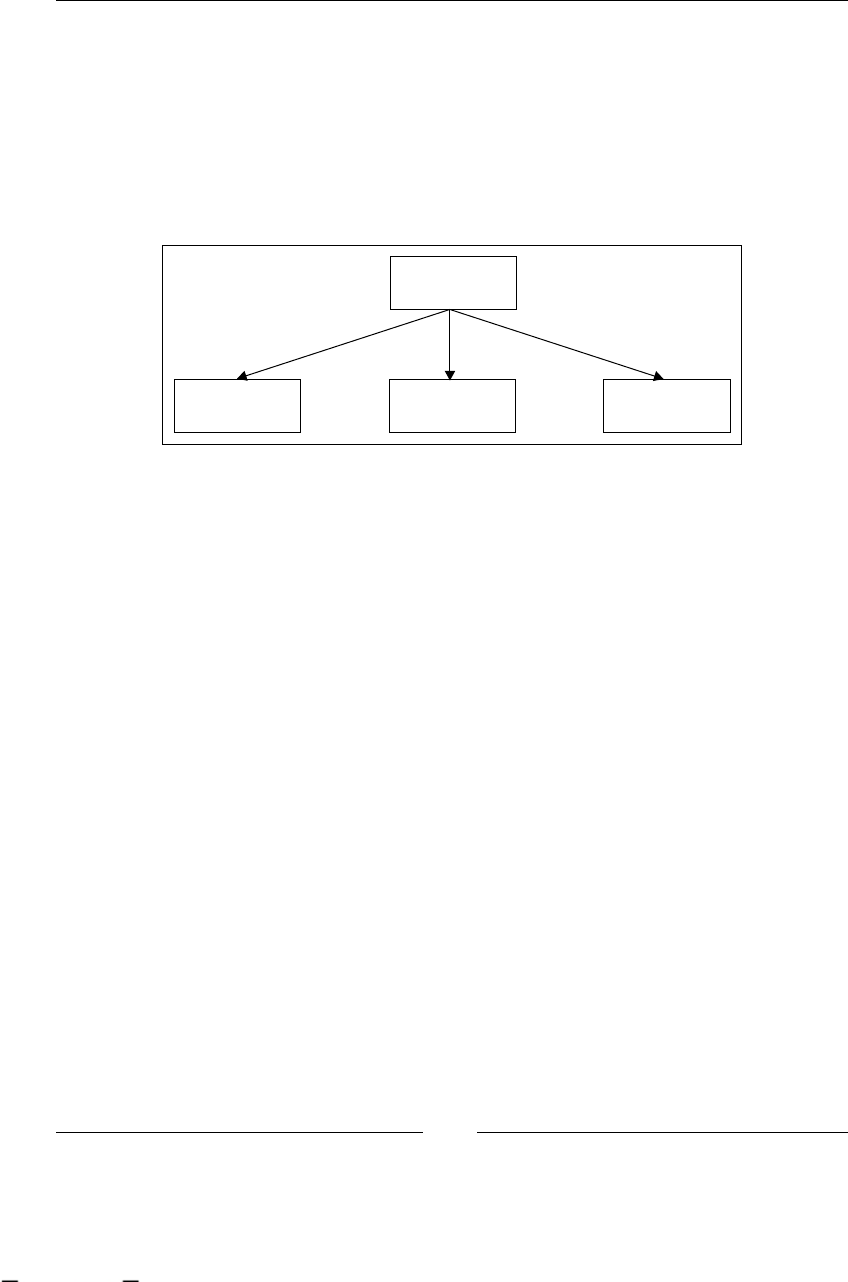
Going Deeply into the Advanced Features of jPDL
[ 270 ]
As you can see in the image, when the execution reaches the fork node, three new
child tokens are created (child token 1, child token 2, and child token 3) and the
main token (the root token) remains in the fork node. The newly created tokens are
automatically signaled to start their executions through each leaving transition.
Now our whole process execution will be represented by the root token and the three
just-created subtokens. We will have a parent path and the three child paths created
for the fork node. We will be able to query each of these tokens to nd out in which
node they are stopped.
ROOT TOKEN
CHILD TOKEN
CHILD TOKEN CHILD TOKEN
If we take a look at the framework's APIs, we will nd that we can query the token
and get all of its children, and also the token of its parent.
public Map<String,Token> getChildren()
public Token getChild(String name)
public boolean hasChild(String name)
public Token getParent()
If we take a look at the database, we will nd that new tokens are persisted and all of
them have a reference to the root token ID.
In jPDL, we can dene a fork node with the following syntax:
<fork name="fork1">
<transition to="state1" name="to state1"></transition>
<transition to="state2" name="to state2"></transition>
<transition to="state3" name="to state3"></transition>
</fork>
This will automatically create N child tokens (because we have N leaving transitions)
and signal them for you—in this case, N is 3.
At this point, if we ask the process where it has stopped, it will reply "in the fork
node". This is because the main path of execution is waiting for all of its children to
nish their executions in order to continue.
This material is copyright and is licensed for the sole use by ALESSANDRO CAROLLO on 18th December 2009
6393 south jamaica court, , englewood, , 80111
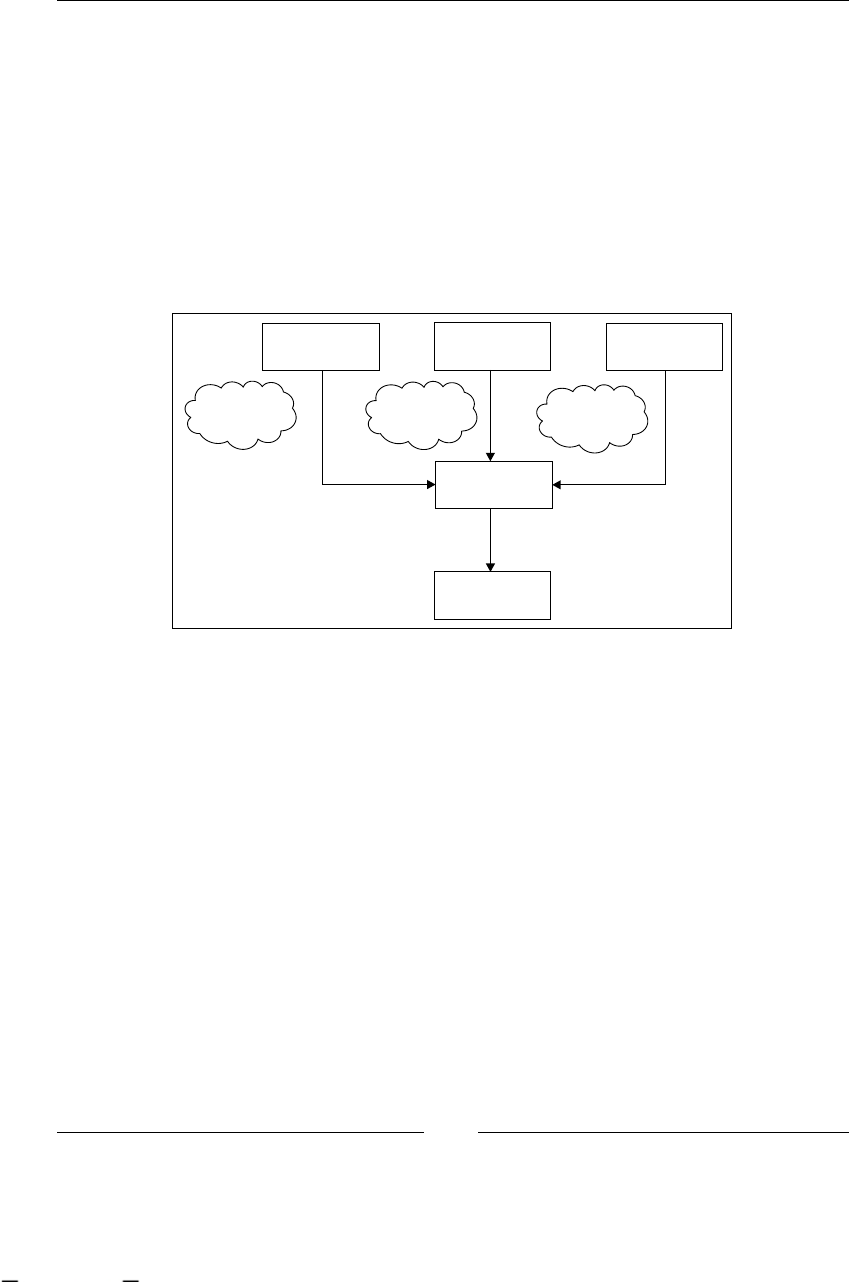
Chapter 10
[ 271 ]
When the execution of our concurrent activities ends, we need a way to tell
the process execution that all the parallel paths have nished and we need to
synchronize them again in order to have just one main sequential path of execution.
We can achieve this synchronization by using the join node, which will let us wait
until all the sub-paths created by the fork node end.
The join node
This node is in charge of waiting for all the child tokens to arrive at it in order
to continue the main path of execution. The join node can only have one leaving
transition that will be taken when all the children arrive at this node.
CHILD
TOKEN1
CHILD
TOKEN2
CHILD
TOKEN3
NEXT NODE
NODE NODE NODE
JOIN
When all the child tokens arrive at the join node, the child token (subpaths of
execution) is marked as ended. It automatically triggers a signal to the root token
to continue.
The root token will not pass through all the nodes between the fork and join nodes.
It will only jump from the fork node to the join node when all the activities between
them are completed (by its child tokens).
Modeling behavior
Remember that we are modeling real business processes here and not discussing
technical issues. This is related to the behavior that we are trying to model. The
parallelism between the activities represented with the fork and join nodes is not
related to technological concerns. In other words, try not to relate fork/join nodes to
multi-threaded programming. This is a common mistake that needs to be avoided.
Try not to use fork and join nodes to represent technical issues. The aim of these
nodes is to represent business scenarios without any impact on the technical aspects
of the process execution.
This material is copyright and is licensed for the sole use by ALESSANDRO CAROLLO on 18th December 2009
6393 south jamaica court, , englewood, , 80111
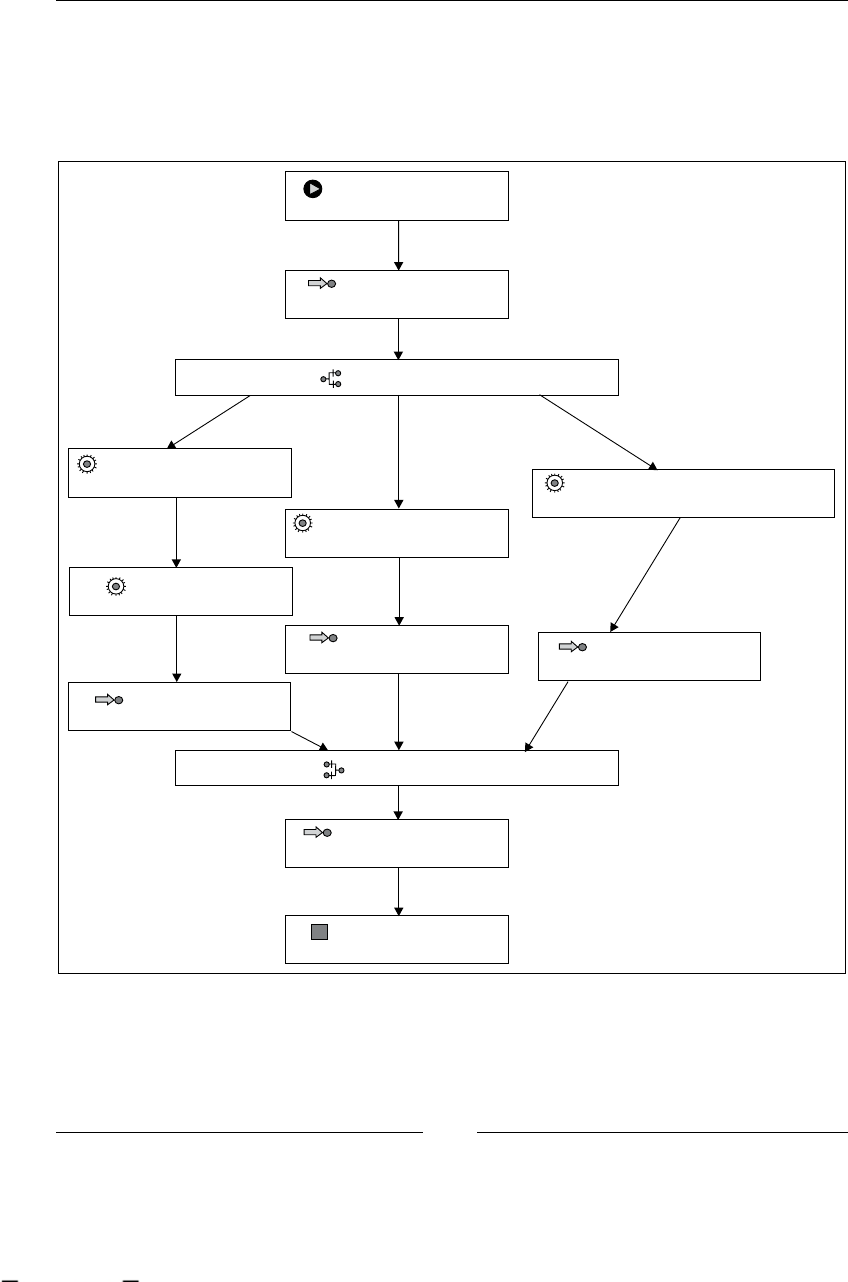
Going Deeply into the Advanced Features of jPDL
[ 272 ]
Let's see how these nodes work in the following code example—you can nd the
sources of this example in the /forkAndJoinNodesExample/ directory.
If we take a look at the project provided in this chapter, we will see the following
implemented process:
Blood Pressure Exam
<<State>>
Initial Interview
<< >>State
Sign Final Approval
<<State>>
Lungs Exam
<<State>>
Heart Exam
<<State>>
Set up Blood Pressure Interview
<<Node>>
Call Nurse
<<Node>>
Set up Heart Interview
<<Node>>
Set up Lungs Interview
<<Node>>
<<End State>>
End
Start
<< >>Start State
<<Join>>
<<Fork>>
Heart Interview Blood Pressure interview
This material is copyright and is licensed for the sole use by ALESSANDRO CAROLLO on 18th December 2009
6393 south jamaica court, , englewood, , 80111

Chapter 10
[ 273 ]
The jPDL modeled process tries to represent a situation similar to the one
discussed before. It is important to know that this example uses a lot of state
nodes to represent the activities in our process. This is just to isolate the example
for external complications that can confuse you. If you need to model the same
scenario, but in real life and not just for an example, you will probably use the
task node to represent human tasks. Here I have decided not to use task nodes.
It requires additional congurations that are outside the scope of this example.
Using the state nodes, we will get a kind of state machine where we will need to
signal each state node to continue the process execution.
Let's analyze the test included in the src/test/org/jbpm/example/ProcessTest.
java project directory.
ProcessDefinition pD = ProcessDefinition.parseXmlResource
("processes/processdefinition.xml");
assertNotNull(pD);
ProcessInstance pI = pD.createProcessInstance();
assertNotNull(pI);
pI.signal();
assertEquals("Initial Interview", pI.getRootToken().getNode().
getName());
//When we signal the first state node called "Initial Interview", the
// process goes directly to the fork node, generate three child token
// and signal them. These three tokens (new sub paths of executions)
// will continue until each of them reaches a wait state node.
//Here is a good point to step into the jBPM code and see what is
// happening behind scenes.
pI.signal();
//Once the fork node was executed and each of the three new sub paths
// of execution reach a wait a state or the Join node, the method
// signal return.
//Here we check that the main path of execution is stopped in the
// Fork Node.
assertEquals("fork1", pI.getRootToken().getNode().getName());
Map<String, Token> childTokens = pI.getRootToken().getChildren();
//We have three child tokens now.
assertEquals(3, childTokens.size());.
Set<String> keys = childTokens.keySet();
//We need to iterate each of them to end the activities in each
// sub path.
for(String key: keys){
childTokens.get(key).signal();
}
assertEquals("Sign Final Approval", pI.getRootToken().getNode()
.getName());
pI.signal();
assertEquals("End", pI.getRootToken().getNode().getName());
This material is copyright and is licensed for the sole use by ALESSANDRO CAROLLO on 18th December 2009
6393 south jamaica court, , englewood, , 80111

Going Deeply into the Advanced Features of jPDL
[ 274 ]
This test will read the process denition, then it will create an instance of that
denition, which will start calling the signal()method.
As the rst node called initial interview is a wait state, we will need to call the
signal() method again for the process to continue the execution to the fork node.
When the process reaches the fork node, it will automatically create three child
tokens based on the three leaving transitions dened in this example.
As the fork node doesn't behave as a wait state, it will automatically call the
signal() method for the three newly-created tokens. It is important to note that the
implementation of the fork node has a foreach loop that creates a token and signals
it for each leaving transition dened. This will cause each path of the execution to
continue until it reaches a wait state.
Once again, there is no multi-threaded programming, it is sequential from the
framework perspective, because the paths created are executed one at a time. From
the process perspective, the execution is in parallel because all the wait states are
external for the framework and can be worked out and completed independently,
without a specied order.
In this example, we will see that the execution continues through the automatic
nodes until each path reaches a wait state node.
As you can see, the three paths can have different amount of activities and there are
no restrictions about that. In other words, one of your paths could have one activity
and another path can have a thousand activities. In this example, we don't have any
path that only includes automatic nodes, but there is no restriction about that either.
In that case, the path will be executed throughout all the automatic nodes until it
reaches the join node. When you call the signal() method for the child token, you
will see how that path will arrive at the join node and be marked as ended.
Super state node
Another common situation when you need extra functionality is when you have a
large process with a lot of activities. The super state node allows us to order all of our
process nodes in phases. The idea here is to enclose a bunch of activities with a super
state to demarcate that all these activities are in a certain phase of the process. If we
do this grouping and enclose all the activities in different super state nodes (phases),
we will be able to query these phases and know, very quickly, the block or high-level
group of activities in which our process has been stopped.
In large processes, this technique will bring order to your activities and also
exibility to add custom code when the process moves from one phase to another.
This material is copyright and is licensed for the sole use by ALESSANDRO CAROLLO on 18th December 2009
6393 south jamaica court, , englewood, , 80111
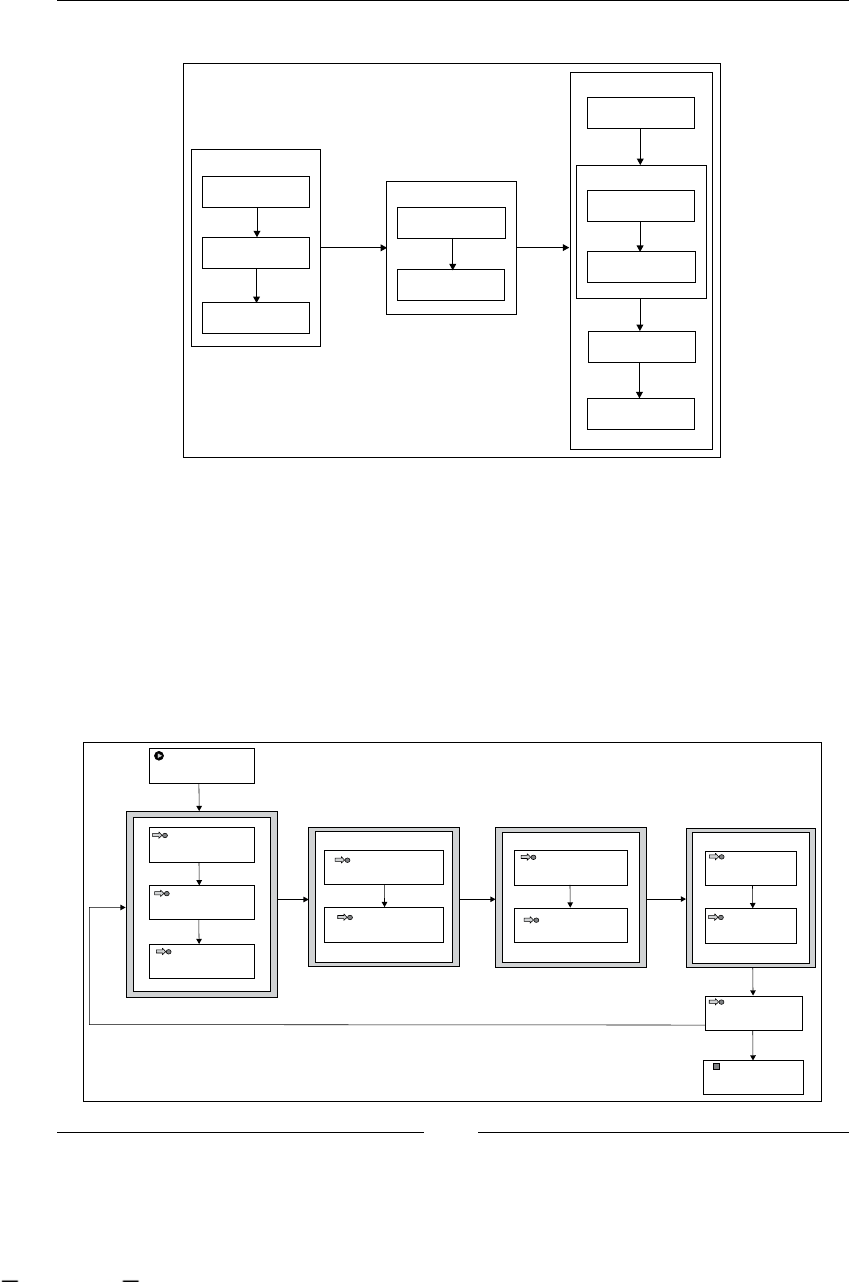
Chapter 10
[ 275 ]
Let's discuss how this works by looking at the following image:
ACTIVITY 4
ACTIVITY 5
Phase 2
ACTIVITY 6
Phase 3
Inner Phase1
ACTIVITY 7
ACTIVITY 8
ACTIVITY 9
ACTIVITY 10
ACTIVITY 1
ACTIVITY 2
ACTIVITY 3
Phase 1
With this subdivision, we will get a clear overview of where we are in the execution
of the whole process. If we need to design a user interface, using these phases will
allow us to demarcate a meaningful percentage of advance. When we have a lot of
activities, probably a few of them will represent a large amount of work.
In the following image, we see different phases that contain a similar amount of
work, grouping different amounts of activities. These phases will probably be
designed and discovered by business analysts.
In the example provided in this chapter, you will nd the following real scenario:
<<State>>
Implement Classes
<<State>>
Create DB Structure
<<State>>
Validate Use Cases
<<State>>
Collect Use Cases
<<State>>
Refine Use Cases
<<Start State>>
Start
<<State>>
Define DB Structure
<<State>>
Define Class Diagrams
<<State>>
Define Tests
<<State>>
Run Tests
to Next Iteration
<<End State>>
End
<<State>>
Last Iteration
This material is copyright and is licensed for the sole use by ALESSANDRO CAROLLO on 18th December 2009
6393 south jamaica court, , englewood, , 80111

Going Deeply into the Advanced Features of jPDL
[ 276 ]
In this example, we can see a simplistic and incomplete view of the unied process
for software development.
In this process, we can see a lot of activities grouped in different phases of the
software development cycle. As one of the main characteristics of the process of
software development is the iterative approach, we need to start with the rst phase
when the previous one is completed.
In this incomplete view of the unied process, we have four dened phases:
1. Requirements
2. Analysis and design
3. Implementation
4. Testing
Each one of these phases is represented by a big gray block enclosing the state nodes,
and contains different amounts of activities. When we jump from one phase to the
other, we get to know that the cycle is progressing.
In this case, just for the example, we can say that each phase in the cycle represents
a quarter of the effort needed to complete a full cycle. Note that the amount of work
in each phase is not the same, because we have different amounts of activities that
logically represent the same amount of work.
In jPDL XML syntax, we can dene a super state node with:
<super-state name="Implementation">
<state name="Implement classes">
<transition to="Create DB Structure"></transition>
</state>
<state name="Create DB Structure"></state>
<event type="superstate-enter">
<action class="org.jbpm.example.MyActionHandler">
<firedevent>superstate-enter</firedevent>
<message>Entering Implementation Phase</message>
</action>
</event>
<event type="superstate-leave">
<action class="org.jbpm.example.MyActionHandler">
<firedevent>superstate-leave</firedevent>
<message>Leaving Implementation Phase</message>
</action>
</event>
<transition to="Testing"></transition>
</super-state>
This material is copyright and is licensed for the sole use by ALESSANDRO CAROLLO on 18th December 2009
6393 south jamaica court, , englewood, , 80111
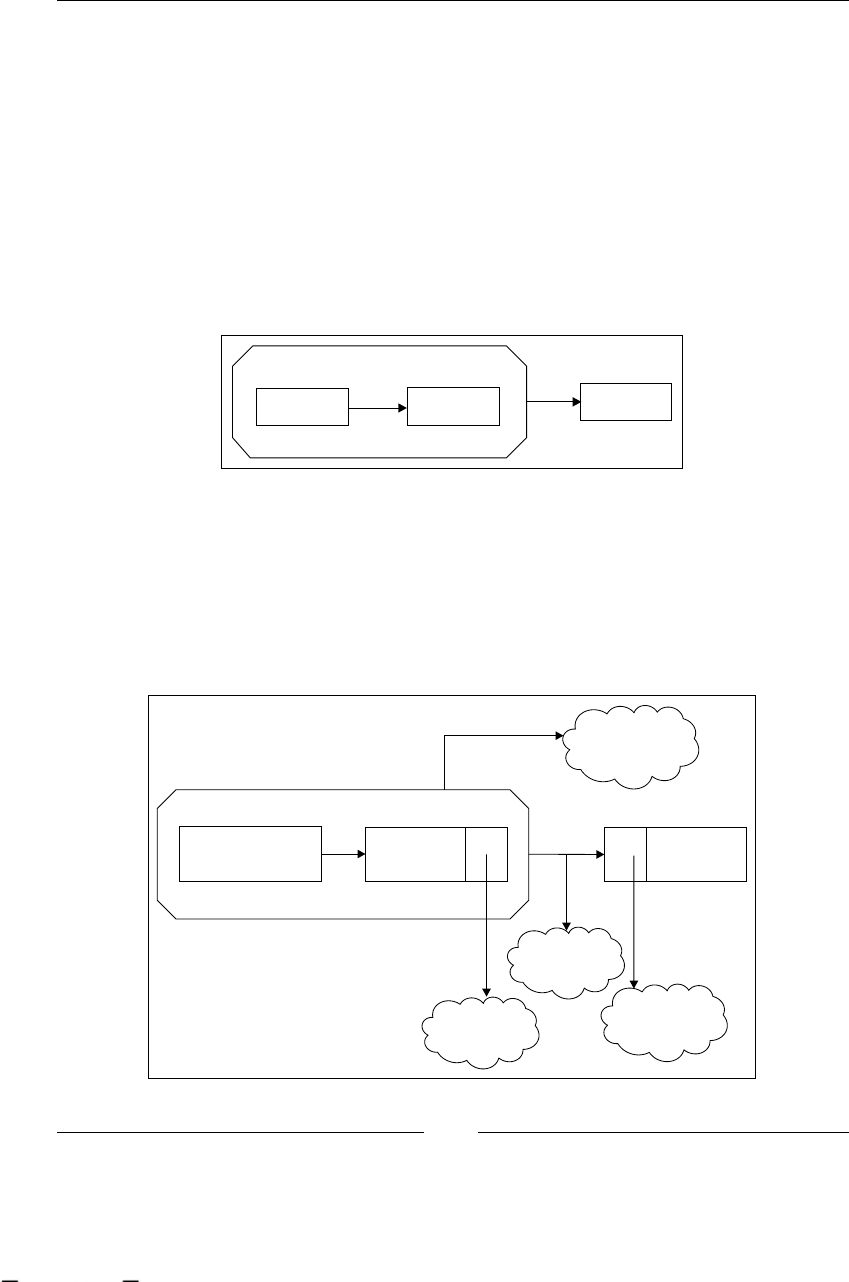
Chapter 10
[ 277 ]
As you can see in the code snippet, you will have a set of nodes included between
the <super-state> tags. It's also important to note that this super state node
includes some useful events such as superstate-enter and superstate-leave.
The example discussed here is extremely simple, and in real scenarios, we will
certainly have more complicated situations. Let's see some other combination that
we can have in real scenarios, which isn't covered in the previous example.
Phase-to-node interaction
This is the other normal scenario that we can have when we are working with
node hierarchies.
NODE 3
NODE 1 NODE 2 NODE 4
This execution works as a normal node-to-node execution. When the second node
ends its execution, it triggers the end of the super state node that will take the default
leaving transition. Note that we cannot have a transition between the NODE 2 and
the super state node.
In this case and in all the cases where we use state nodes, we will have the following
events to hook custom actions:
1) NODE
LEAVE
3) TRANSITION
4) NODE-ENTER
2) SUPERSTATE-
LEAVE
This material is copyright and is licensed for the sole use by ALESSANDRO CAROLLO on 18th December 2009
6393 south jamaica court, , englewood, , 80111
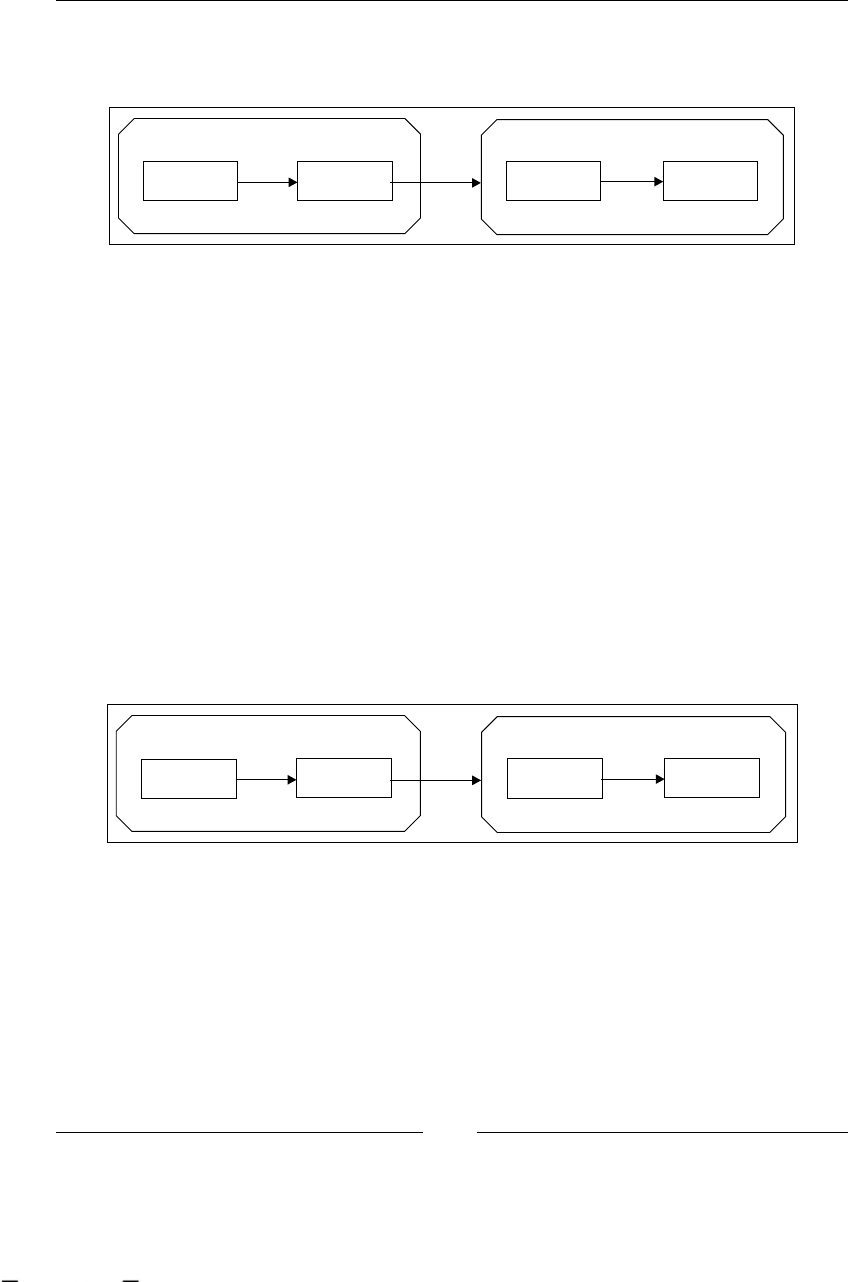
Going Deeply into the Advanced Features of jPDL
[ 278 ]
Node in a phase-to-phase interaction
Another common situation is when we want two stages of our processes to interact.
NODE 3
NODE 1 NODE 2 NODE 5 NODE 6
NODE 4
These kind of cases look complicated, but in fact, all of them work in the same way.
When NODE 2 ends its execution, it will trigger the node-leave, transition,
superstate-leave, superstate-enter, and node-enter events.
If you try to model this situation, you will see that a special mechanism is needed
to make a node, which is inside a phase, communicate with an external node that is
outside it.
This happens because we need to specify that the transition is leaving a phase
without nishing all the necessary activities inside the phase. In other words, we can
also have situations where NODE 1 (in the previous gure) goes directly to NODE 4,
without completing NODE 2.
We will talk about this mechanism and its rules in the Navigation section.
Node-to-node interaction between phases
NODE 3
NODE 1 NODE 2 NODE 5 NODE 6
NODE 4
Something similar to what we have discussed before happens here. In situations
like this one, we are leaving a phase without pointing a transition to any super
state node. Here the transition will be dened inside the node. As opposed to the
phase-to-phase (in the development process example) and phase-to-node situations
where the transition is dened in the super state node.
This material is copyright and is licensed for the sole use by ALESSANDRO CAROLLO on 18th December 2009
6393 south jamaica court, , englewood, , 80111
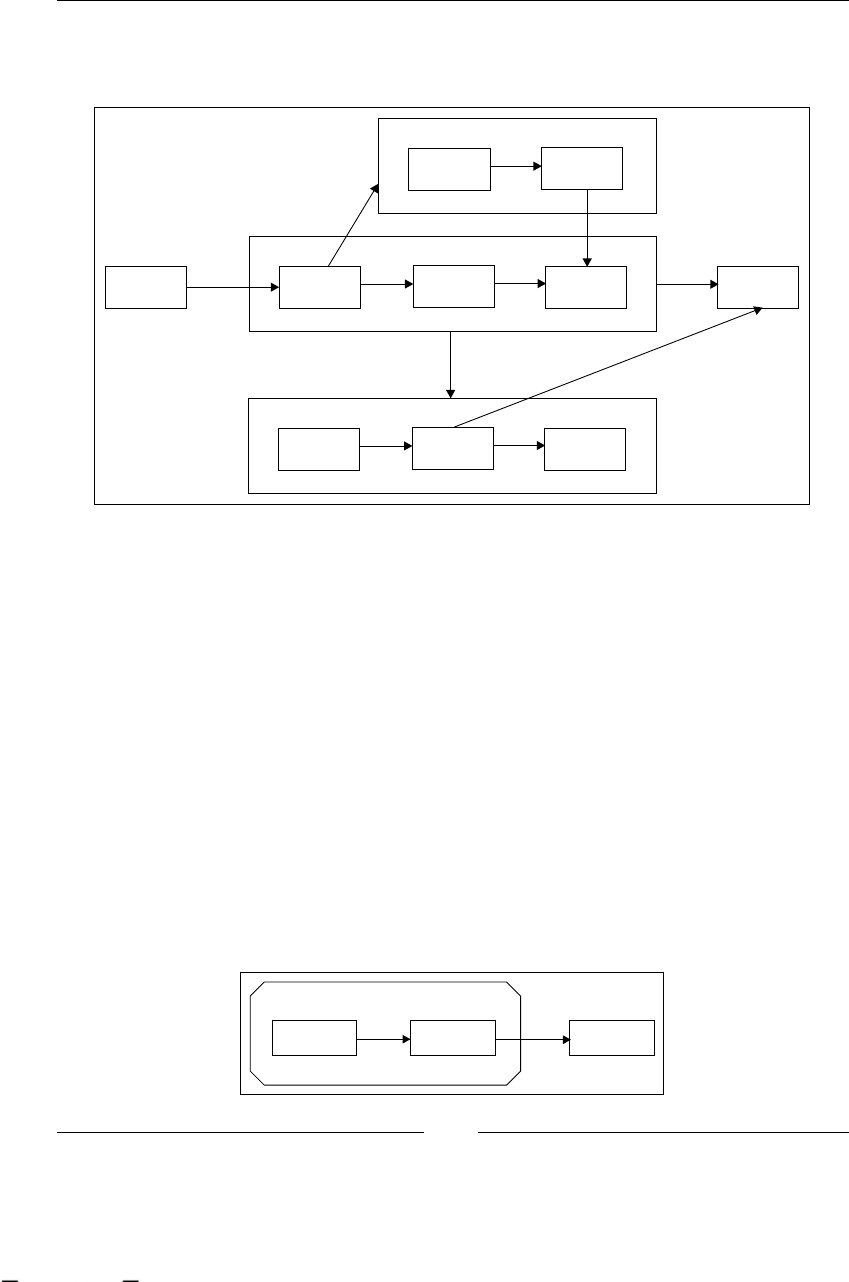
Chapter 10
[ 279 ]
Complex situations with super state nodes
Of course, we can also have more complex situations, such as:
START END
Here, everything works in the same way, don't worry! It's important to know that no
new tokens are created by the super state nodes.
At the API level, it is very useful to know that a super state node implements the
NodeContainer interface, similar to the ProcessDefinition class. Knowing this,
we will be able to query all the nodes enclosed by a super state, and with this we
can create some kind of description of each phase inside our processes.
Navigation
As we have seen in the previous sections, we need a mechanism to specify when we
are leaving or arriving directly to a node inside a super state (without pointing the
transition to the super state). This mechanism is very simple and intuitive. It is based
on the directory structure and directory paths of a lesystem. That automatically
denotes a hierarchy and inclusion between elements.
If we have the following situation:
NODE C
NODE A NODE B NODE D
This material is copyright and is licensed for the sole use by ALESSANDRO CAROLLO on 18th December 2009
6393 south jamaica court, , englewood, , 80111
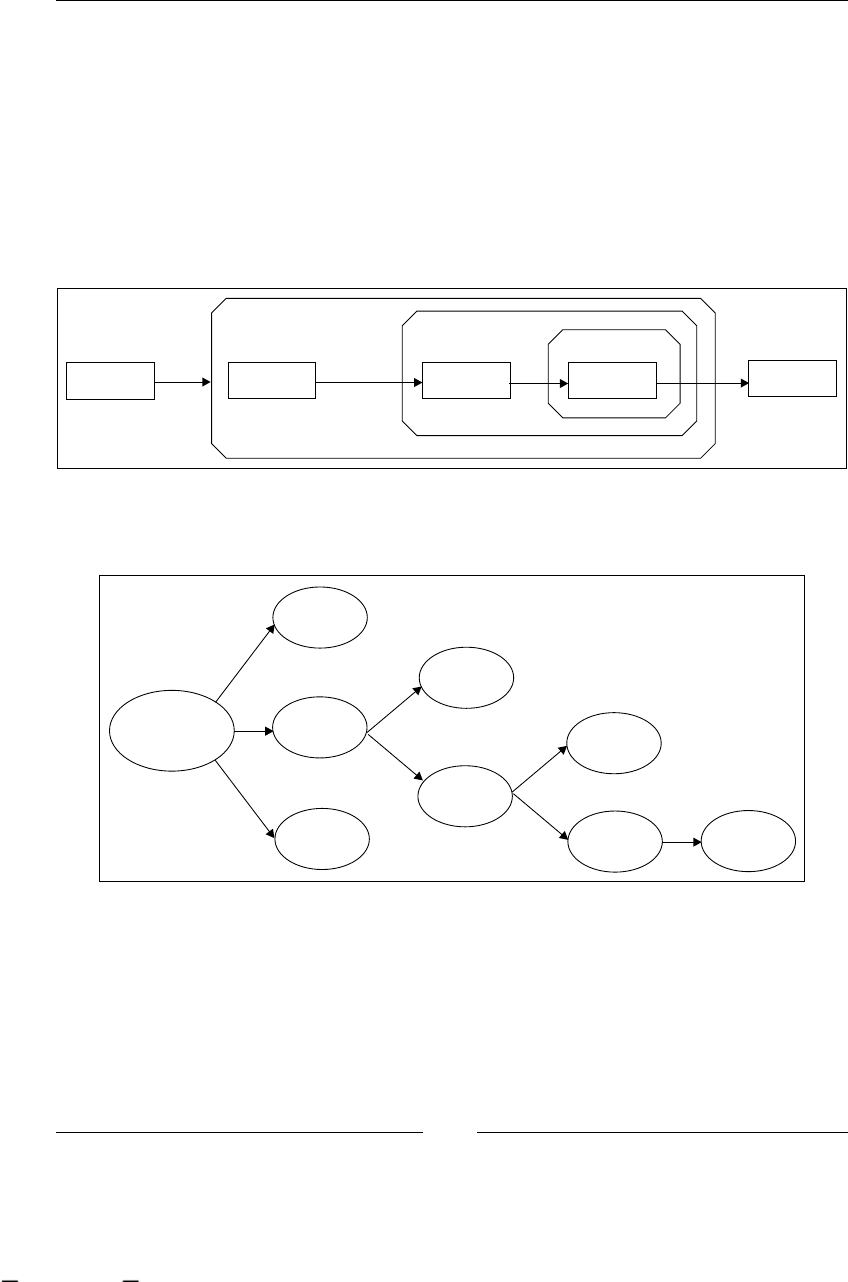
Going Deeply into the Advanced Features of jPDL
[ 280 ]
The transition dened in NODE B will look like:
<node name="node B">
<transition name="to node D" to="../node D"/>
</node>
Here ,with ../ ,we are going down one level in the hierarchy. We can say that for
each nested super state, we have one more level in the hierarchical relationship.
Something that has not been mentioned yet is that we can have multiple nested
super states without any restriction.
NODE B
NODE A NODE D NODE F NODE H
NODE G
NODE E
NODE C
If we want to have a clear vision of complex situations that involve many nested
super states, we can represent the same graph in something like a tree structure:
PROCESS
DEFINITION
NODE A
NODE B
NODE G
NODE C
NODE D
NODE E
NODE F
NODE H
As you can see, the root level is the process denition itself. It represents level 0 of
the hierarchy. We are creating a transition between two nodes at the same level. So,
we don't need to specify anything in the transition name. A transition between two
nodes at the root level will appear as we already know:
<node name="A">
<transition name="to node B" to="B">
</node>
This material is copyright and is licensed for the sole use by ALESSANDRO CAROLLO on 18th December 2009
6393 south jamaica court, , englewood, , 80111

Chapter 10
[ 281 ]
However, if we are linking the nodes between different levels of hierarchy—in other
words, between different super states (that may or may not be nested), we need to
specify if we are going down or up the hierarchy.
In order to see an example, we can see the transition between the NODE D and the
NODE F inside the super state called E, which is jumping between different levels.
The transition in this case will look like:
<node name="D">
<transition name="to node F" to="E/F" />
</node>
The transition species that the NODE F is inside the NODE E in the path.
We can also have the opposite situation. If you take a look at the relationship
between the NODE H and the NODE C, you will notice that we need to go
down multiple levels of the hierarchy. The transition in this case will look like:
<node name="H">
<transition name="to node C" to="../../../C">
</node>
To complete this section, it is important for you to know that your node names
should avoid the use of the "/" (slash) character. You can try this if you want,
but at your own risk.
Process state node
This node will let us bind two different jPDL dened processes. In other words,
you will be able to include the execution of a whole process inside a node. This lets
us break our large processes into small ones with highly focused goals and then
coordinate them together.
It is very important to understand the difference between the process state node and
the super state node. This process state node will instantiate a whole new process
execution that will run as we have already seen.
The parent process will be in a wait state until the child process ends its execution.
When the child process is instantiated by a process state node, it is automatically
signaled to begin.
This material is copyright and is licensed for the sole use by ALESSANDRO CAROLLO on 18th December 2009
6393 south jamaica court, , englewood, , 80111

Going Deeply into the Advanced Features of jPDL
[ 282 ]
In order to create a relationship between the parent and the child process, we need to
specify the following information in the process state node denition:
Process denition name: The process denition name that needs to be
already deployed. This parameter is analyzed at runtime, so it will not be
validated when you deploy your parent process. If the child process has not
already been deployed when the process execution reaches the process state
node, an exception will be thrown.
Version: This is the version of the process denition that you want to use.
If you don't specify any version number, the latest process denition will
be used.
Variable mapping: You will be able to send information between your
parent and child processes. In most cases, this is required by the business
logic associated with your processes. However, having variable mapping
is optional.
Let's see an example of how this process state node works.
Imagine that you have to get some medical checkups done to be able to work in a
company. If you see the entire process to recruit people, the medical exams look like
just one activity. But indeed, it is a very complicated process that varies depending
on your age, sex, and the type of work that you will do in the company.
If you remember, in Chapter 4, jPDL Language, we said that we can dene just one
process denition inside a jPDL XML le, so we need to dene two processes in two
different les and then bind them together. It is important to mention that the child
process doesn't need to make any reference to the parent process. With this feature,
you can reuse your dened processes without making a special modication for
each parent.
•
•
•
This material is copyright and is licensed for the sole use by ALESSANDRO CAROLLO on 18th December 2009
6393 south jamaica court, , englewood, , 80111
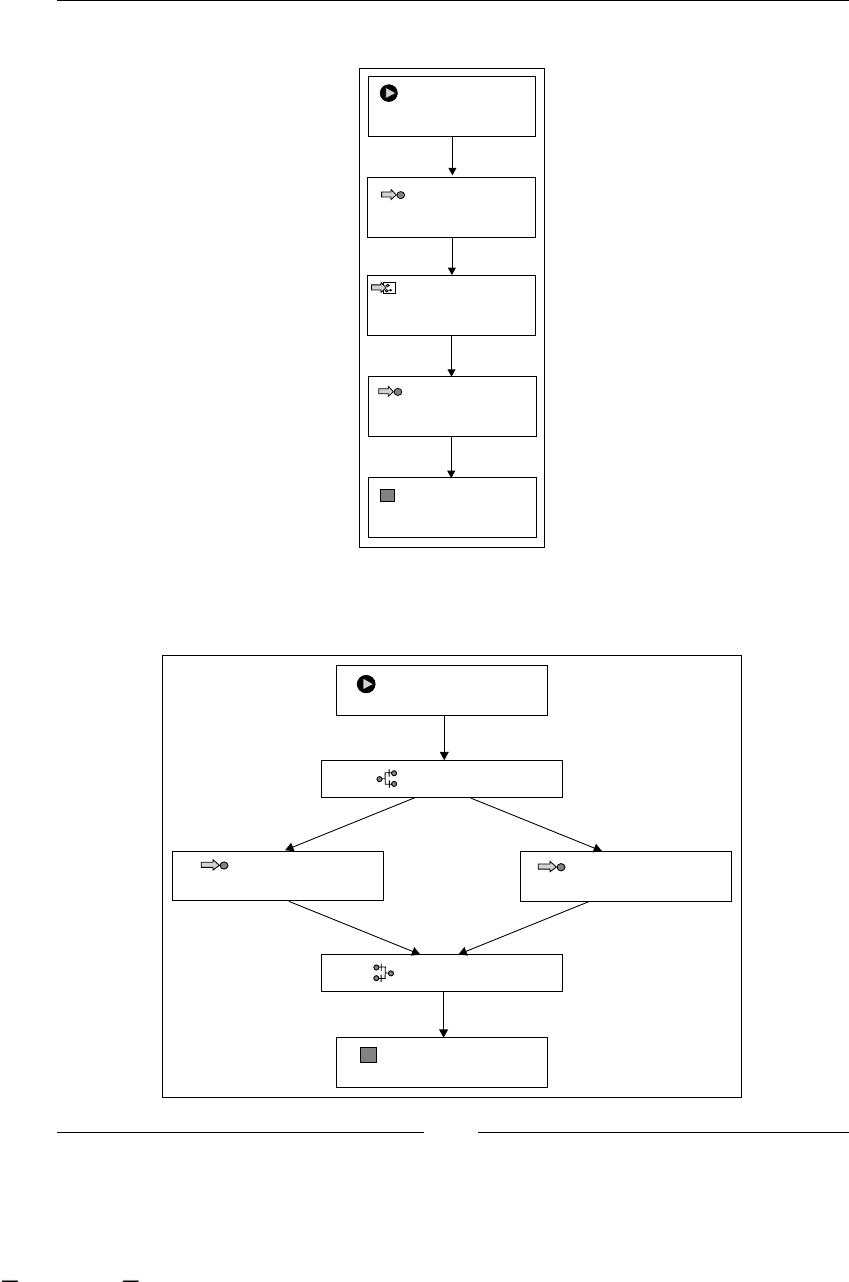
Chapter 10
[ 283 ]
In the "medical exams" situation, this will look like:
<<End State>>
End
<<State>>
Initial Interview
<<State>>
Final Approvement
<<Start State>>
Start
<< >>Process State
Medical Exams
And the child process that will present a detailed description about the medical
exams is dened in another le as a normal process denition.
<<State>>
Blood Pressure Exam
<< >>Start State
Start
<< >>State
Heart Exam
<< >>End State
End
<<Fork>>
<<Join>>
Heart Exam Blood Pressure
This material is copyright and is licensed for the sole use by ALESSANDRO CAROLLO on 18th December 2009
6393 south jamaica court, , englewood, , 80111
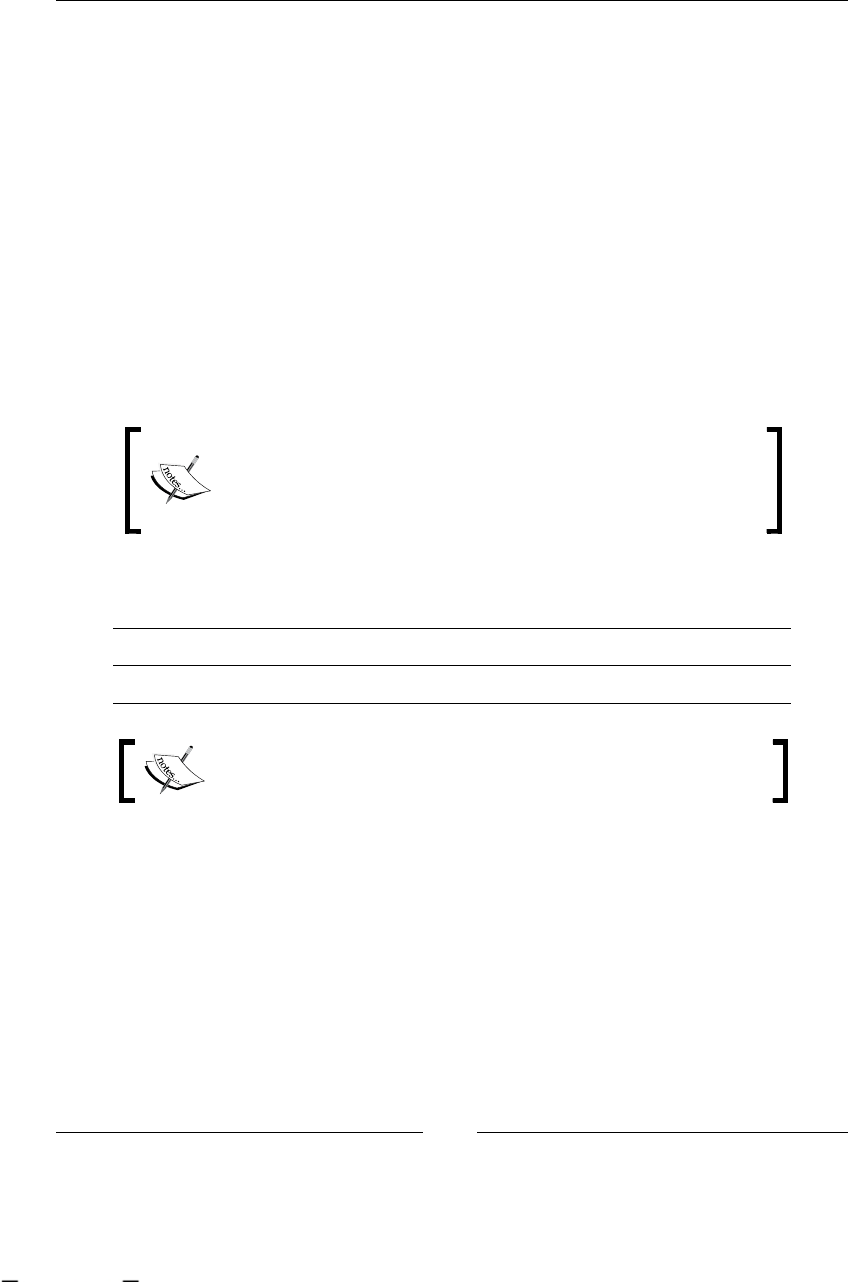
Going Deeply into the Advanced Features of jPDL
[ 284 ]
If you take a look at the code provided for this chapter, you will nd an example
called /ProcessStateExample/ where you will nd two dened processes and a
test case that will execute both processes.
It is a very common requirement that we need to pass contextual information from
the parent process to the child process. We can achieve this by using the variable
mapping feature provided by the process state node. This will let you map variables
that already exist in the parent process to variables that will be created in the child
process at runtime.
These mappings also include a strategy to decide if the variables can be modied
inside the child process and copied back to the parent.
The variable mapping for the process state node works in the same way as the
task instances variable mapping. In both situations, the same variable mapping
implementation is used.
The variable mapping between the parent process and the
sub-process is done inside the process state node properties,
in the same place where you parameterize the name of the
sub-process and the version to be used.
With the built-in implementation, you can create a one-to-one mapping using the
variable names. For example:
Variable Mapped name Read Write Required
Variable1 Var1 X X
If we don't specify the mapped name attribute, the same name
will be used in the child process.
This mapping will copy, at runtime, the value of the variable called Variable1 of the
parent process to a variable called Var1 in the child process.
As we know, the variable value is copied into a new variable in the child process. If
we change the variable value inside the child process, the parent process will never
see that the change is reected in its variable.
Basically, if we need to modify the parent variables inside a child process, we need
to use the strategies mentioned before. These strategies will let us dene whether the
variables can be changed in the child process, and whether these changes are copied
back to the original variable when the child process is ended.
This material is copyright and is licensed for the sole use by ALESSANDRO CAROLLO on 18th December 2009
6393 south jamaica court, , englewood, , 80111
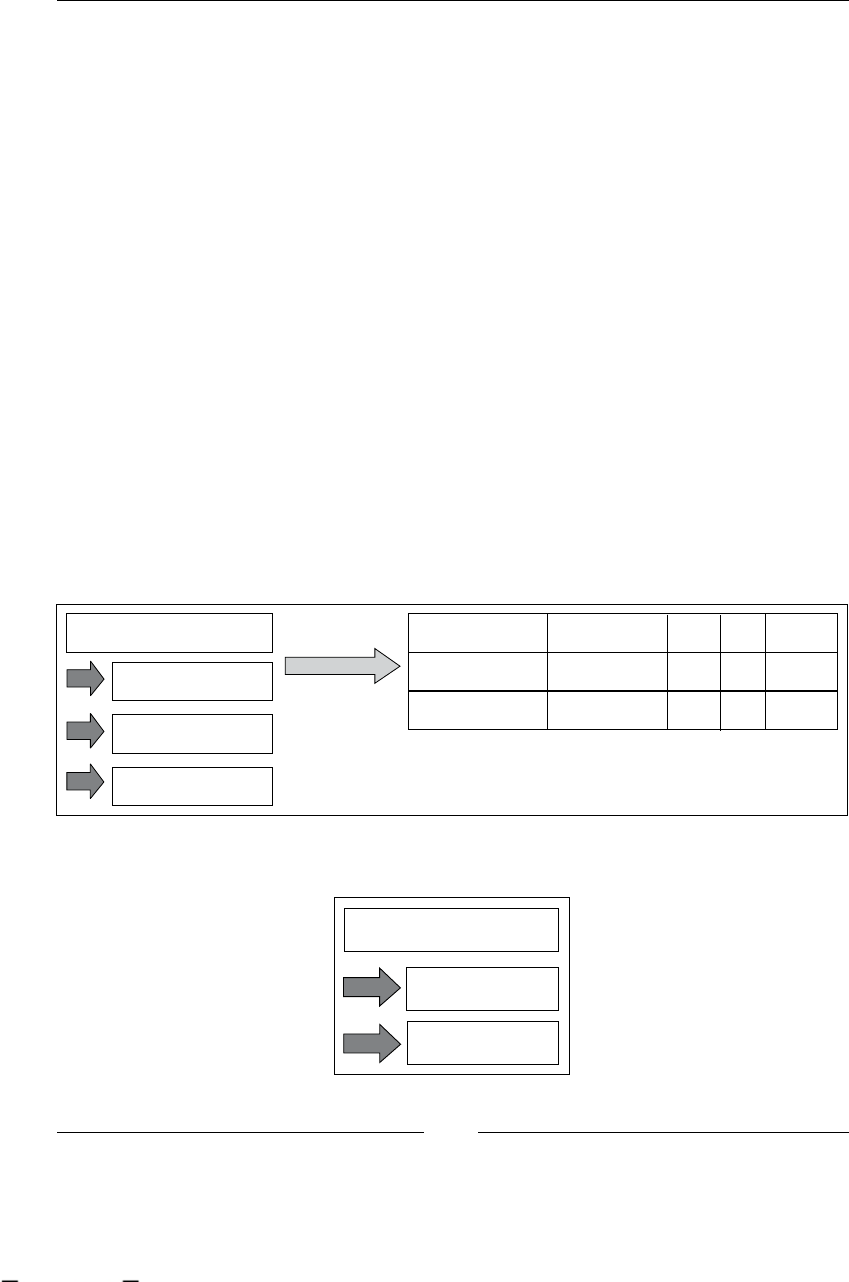
Chapter 10
[ 285 ]
Mapping strategies
The mapping strategies mentioned here are used to inform the framework how
to handle the process variables between a parent process and a child process
specied inside a process state node. These strategies are part of the base mapping
implementation that you can easily extend. We have three built-in strategies to use:
read: Each variable that is marked with the read strategy will be
automatically copied into the child process when the child process is
instantiated at runtime.
write: If we mark a variable as write, the variable's value will be copied back
to the parent process at the end of the child process.
required: If the variable is marked as required, at runtime, when the
framework tries to copy the variable from the parent to the child or vice
versa and the variable doesn't exist, an exception will be thrown.
It's important to note that if we use the read strategy, it will allow us to make
modications (write and update) in the variable value inside the child process. The
only difference between read and write is that read doesn't copy the value back to
the parent variable when the child process ends.
The following images will show you how these mappings work and how we can
choose different strategies for different variables:
Parent Process Variables
Variable1= "10"
Variable2= "5"
Variable3= "15"
Mappings
Name Mapped Name Read Write Required
Variable1 var1 x
Variable2 x x
When the child process is instantiated at runtime, it will have the following variables:
Child Process Variables
Variable2 = "5"
var1 = "10"
•
•
•
This material is copyright and is licensed for the sole use by ALESSANDRO CAROLLO on 18th December 2009
6393 south jamaica court, , englewood, , 80111
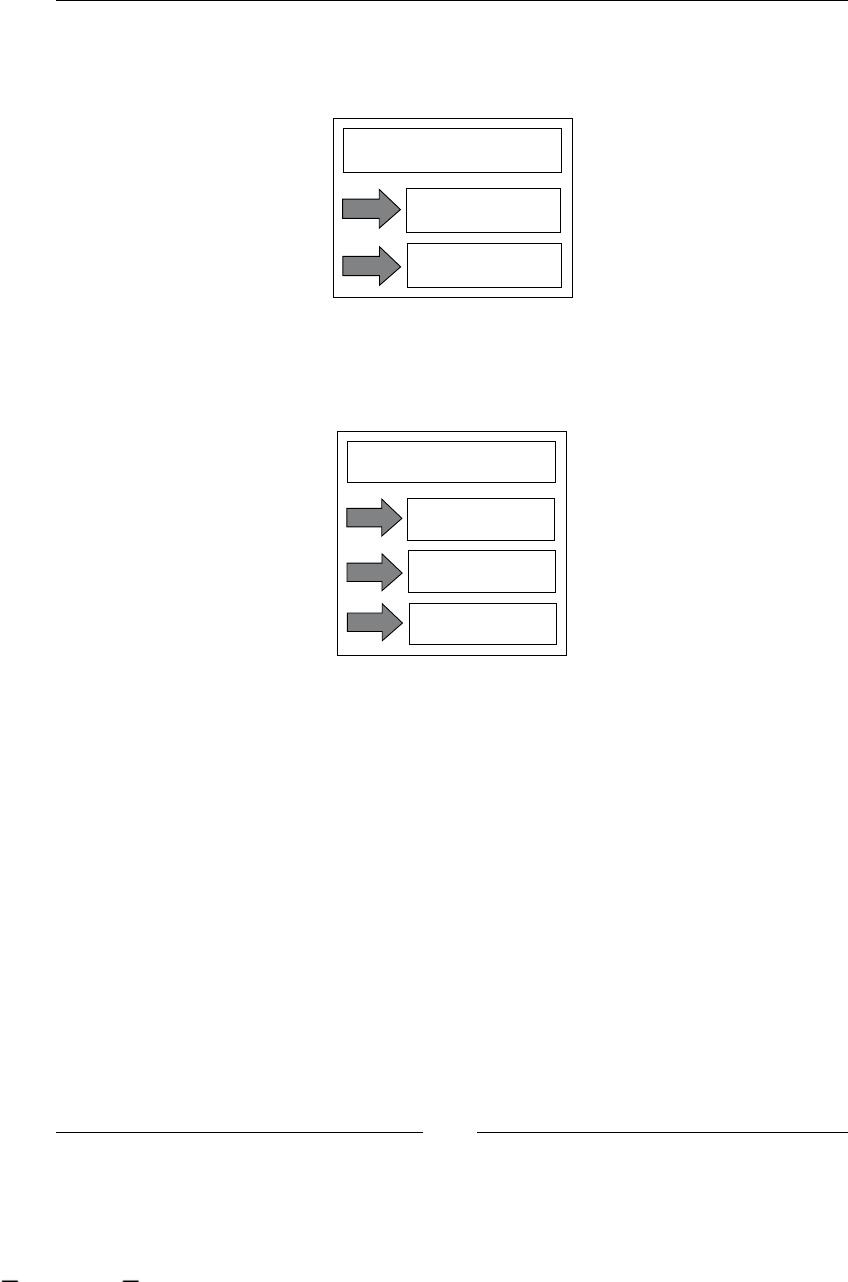
Going Deeply into the Advanced Features of jPDL
[ 286 ]
Now, in the child process logic, we can modify both variables. Let's suppose that
an activity modies the variable called var1 with the value 0 and the variable called
variable2 with the value 8.
Child Process Variables
Variable2 = "8"
var1 = "0"
When the child process ends, once again, the strategies come into play and only
variable2 will be copied back, leaving us with the following process variables in
the parent process:
Parent Process Variables
Variable2 = "8"
Variable3 = "15"
Variable1 = "10"
In this short example we can see how the mapping strategies work by letting us copy
information between nested processes.
It's important to note that it is recommended to just copy the information needed by
the child process and not to map unnecessary information.
We need to remember that each variable that we store will represent one or more
queries to the database.
The e-mail node
This node is a classic example of how you can plug a specic activity extending the
Node class. This node, basically, will send an e-mail when the process execution
reaches the node. One interesting feature that this node provides is the availability of
customizing your mail with templates, which will be lled with the value of process
variable instances.
This material is copyright and is licensed for the sole use by ALESSANDRO CAROLLO on 18th December 2009
6393 south jamaica court, , englewood, , 80111

Chapter 10
[ 287 ]
As you can imagine, this node will need extra conguration and a valid running
e-mail server in order to work properly.
To congure the e-mail server needed, you have to take a look at the le called
jbpm.cfg.xml and change the parameter to reach the server. If you open the
default.jbpm.cfg.xml le provided with the jbpm-jpdl.jar, you will nd
the following properties to congure your mail server.
<string name="jbpm.mail.smtp.host" value="localhost" />
<bean name="jbpm.mail.address.resolver"
class="org.jbpm.identity.mail.IdentityAddressResolver"
singleton="true" />
<string name="jbpm.mail.from.address"
value="jbpm@noreply" />
It's important to note that the main difference between using this node and using
a code snippet to send a mail inside an action node, is the fact that the e-mail node
describes the process in a more declarative way so that it can be understood by a
person who sees the process graph.
Advanced configurations in jPDL
This section will be about the advanced features provided by the jPDL language.
You will see a lot of different topics covered here. So you can use this section as a
reference for the most commonly used advanced topics.
We will begin covering topics about congurations inside our process denitions
that are not yet covered because they describe ways of working that are not intuitive.
The rst topic in this section will be how to start a process instance with a human
action, and also how to start the process with some input data needed at the time of
process initialization.
Starting a process instance with a human task
This feature was introduced based on the fact that a business role must be able to
start a process, and this action needs to be considered as a human task.
With this feature, you gain the ability to see a task in your task list that will represent
the starting activity in your process.
This material is copyright and is licensed for the sole use by ALESSANDRO CAROLLO on 18th December 2009
6393 south jamaica court, , englewood, , 80111

Going Deeply into the Advanced Features of jPDL
[ 288 ]
A common situation for this type of usage is when, for example, an administrator
creates the process instance, but the process needs additional information in order to
start, that is not known by the administrator at creation time. In these cases, a human
task can be created and assigned to the business role that knows or can nd the
information needed to start the process execution. When this business role has a look
at the created task in his/her task list, he/she lls the required data, ends the task
and the process begins, leaving the start state.
The human task feature in the start state node is also used to know which business
role is the role that starts the process. In a lot of cases, you need the business role
that starts the process to be able to also handle other related tasks in this specic
process instance.
In the cases when the user creates the process instance, he/she already knows
all this information and wants to immediately begin the process, a map with the
process variables can be specied using the jBPM APIs, before the rst call to the
signal method:
pI = pD.createsProcessInstance();
pI.getContextInstance().setVariables(variables); // variables is a Map
pI.signal(); //To start the process execution
It is important to see that both work, and achieve exactly the same goal, but you need
to analyze how the process behaves in the real world in order to choose a way to
implement your situation.
Reusing actions, decisions, and assignment
handlers
As we can already see, if you want to specify custom action code inside a node or
inside an event, you need to implement the ActionHandler interface and then bind
the FQN of the class to the node or the event action. We see the same situation with
decision and assignment handlers.
If you think about it and have similar but not the same functionalities in a set of
actions, you will need to create, compile, and maintain a class for each of them.
For these cases, you can take advantage of the jPDL features to reuse your classes
and parameterize them to behave differently in each situation.
This material is copyright and is licensed for the sole use by ALESSANDRO CAROLLO on 18th December 2009
6393 south jamaica court, , englewood, , 80111

Chapter 10
[ 289 ]
This parameterization can be achieved in multiple ways:
Properties
Bean
Constructor
Compatibility
Properties
This is the most common way to do it. This will let you parameterize your action
handler, setting property values specied in the jPDL XML syntax. Let's see how this
works in the following example.
jPDL syntax to parameterize your action handlers:
<node name="node1">
<action class="org.jbpm.example.InitializePropertiesActionHandler">
<firstName>
John
</firstName>
<lastName>
Smith
</lastName>
<age>
30
</age>
</action>
<transition to="node2"></transition>
</node>
In this case, the action handler code will look like:
public class InitializePropertiesActionHandler
implements ActionHandler {
private String firstName;
private String lastName;
private Long age;
@Override
public void execute(ExecutionContext executionContext)
throws Exception {
System.out.println("First Name:" + firstName);
System.out.println("Last Name:" + lastName);
System.out.println("Age:" + age);
}
}
•
•
•
•
This material is copyright and is licensed for the sole use by ALESSANDRO CAROLLO on 18th December 2009
6393 south jamaica court, , englewood, , 80111

Going Deeply into the Advanced Features of jPDL
[ 290 ]
Now if you need to use this action in multiple nodes or events, you can change the
action conguration each time the process calls it. In other words, you can change
the behavior without changing the compiled class.
This method of conguration will access and set the properties directly, utilizing the
concept of encapsulation from the object-oriented programming perspective. In other
words, the properties will be set without using the accessor (setter/getter) methods.
Bean
Works in the same way as the properties method, but this method will use the
standard accessor methods to access the properties inside the ActionHandler class.
In this case, we need to add the getter and setter methods inside the ActionHandler
class for this conguration to work.
This method will let us validate the conguration provided inside the jPDL le.
Take a look at the following code:
public class InitializePropertiesActionHandler implements
ActionHandler {
private String firstName;
private String lastName;
private Long age;
@Override
public void execute(ExecutionContext executionContext)
throws Exception {
System.out.println("First Name:" + getFirstName());
System.out.println("Last Name:" + getLastName());
System.out.println("Age:" + getAge());
}
private void setLastName(String lastName) {
this.lastName = lastName;
}
private String getLastName() {
return lastName;
}
private void setFirstName(String firstName) {
this.firstName = firstName;
}
private String getFirstName() {
return firstName;
}
private void setAge(Long age) {
This material is copyright and is licensed for the sole use by ALESSANDRO CAROLLO on 18th December 2009
6393 south jamaica court, , englewood, , 80111

Chapter 10
[ 291 ]
this.age = age;
}
private Long getAge() {
return age;
}
}
In jPDL, the only modication is:
<action class="org.jbpm.example.InitializePropertiesActionHandler"
config-type="bean">
Constructor
This conguration will use a specic constructor to initialize the action variables.
This constructor will need to follow the next signature:
public class InitializePropertiesActionHandler implements
ActionHandler {
private String firstName;
private String lastName;
private Long age;
public InitializePropertiesActionHandler(String args) {
super();
String[]argsArray = args.split("|");
this.firstName = argsArray[0];
this.lastName = argsArray[1];
this.age = Long.parseLong(argsArray[2]);
}
@Override
public void execute(ExecutionContext executionContext)
throws Exception {
System.out.println("First Name:" + firstName);
System.out.println("Last Name:" + lastName);
System.out.println("Age:" + age);
}
}
In jPDL, the conguration will look like:
<node name="node1">
<action class="org.jbpm.example.InitializePropertiesActionHandler"
config-type="constructor">
John|Smith|30
</action>
<transition to="node2"></transition>
</node>
This material is copyright and is licensed for the sole use by ALESSANDRO CAROLLO on 18th December 2009
6393 south jamaica court, , englewood, , 80111

Going Deeply into the Advanced Features of jPDL
[ 292 ]
Compatibility
This conguration type will call a method with the following signature:
public class InitializePropertiesActionHandler implements
ActionHandler {
private String firstName;
private String lastName;
private Long age;
public InitializePropertiesActionHandler(String args) {
super();
}
public void configure(String args){
String[]argsArray = args.split("|");
this.firstName = argsArray[0];
this.lastName = argsArray[1];
this.age = Long.parseLong(argsArray[2]);
}
@Override
public void execute(ExecutionContext executionContext)
throws Exception {
System.out.println("First Name:" + firstName);
System.out.println("Last Name:" + lastName);
System.out.println("Age:" + age);
}
}
This method will receive a String that you will need to parse in order to initialize
your own variables, and the class will be constructed using the default constructor.
In jPDL this will look like:
<node name="node1">
<action class="org.jbpm.example.InitializePropertiesActionHandler"
config-type="configuration-property">
John|Smith|30
</action>
<transition to="node2"></transition>
</node>
This material is copyright and is licensed for the sole use by ALESSANDRO CAROLLO on 18th December 2009
6393 south jamaica court, , englewood, , 80111

Chapter 10
[ 293 ]
Summary
In this chapter, we have covered the most advanced node with generic functionalities
provided by the jPDL language. With these nodes, we will be able to model more
complex and real situations. The nodes covered in this chapter were:
Fork and join nodes
Super state node
Process state node
Also, advanced features of conguration are covered here. We need to know these
features to be able to add technical details using the best way to t the situation that
we are trying to model. In this chapter, features like the human tasks inside the start
node and how to reuse and congure our action, decision, and assignment handler
classes were covered.
In the next chapter, you will learn to apply the advanced features of jPDL language
we learned in this chapter.
•
•
•
This material is copyright and is licensed for the sole use by ALESSANDRO CAROLLO on 18th December 2009
6393 south jamaica court, , englewood, , 80111

This material is copyright and is licensed for the sole use by ALESSANDRO CAROLLO on 18th December 2009
6393 south jamaica court, , englewood, , 80111

Advanced Topics in Practice Topics in Practice
In this chapter, the reader will apply the advanced concepts learnt in the previous
chapter. During this chapter, we will also cover an extra topic that becomes
important in real world implementation.
The rst part of the chapter will cover how to include super state nodes and process
state nodes in our Recruiting Process example.
The second part of this chapter will be about asynchronous executions. This feature
will enable us to delegate the execution of special nodes to an external service that
will guarantee the node execution. In this chapter also, we will see how this service
is congured for standalone applications.
This chapter will cover the following:
How to introduce super state nodes to our Recruiting Process example
How to introduce a process state node to our Recruiting Process example
Asynchronous executions
Conguration needed by the executing services
Sample project that shows us how the asynchronous nodes will work
Breaking our recruiting process into
phases
The main idea of using super state nodes is to have different phases demarcated
in our processes. In other words, we will group nodes inside super state nodes in
order to have a clear view about the process phases. These phases will let us logically
group the activities in our process in highly focused subsets.
•
•
•
•
•
This material is copyright and is licensed for the sole use by ALESSANDRO CAROLLO on 18th December 2009
6393 south jamaica court, , englewood, , 80111
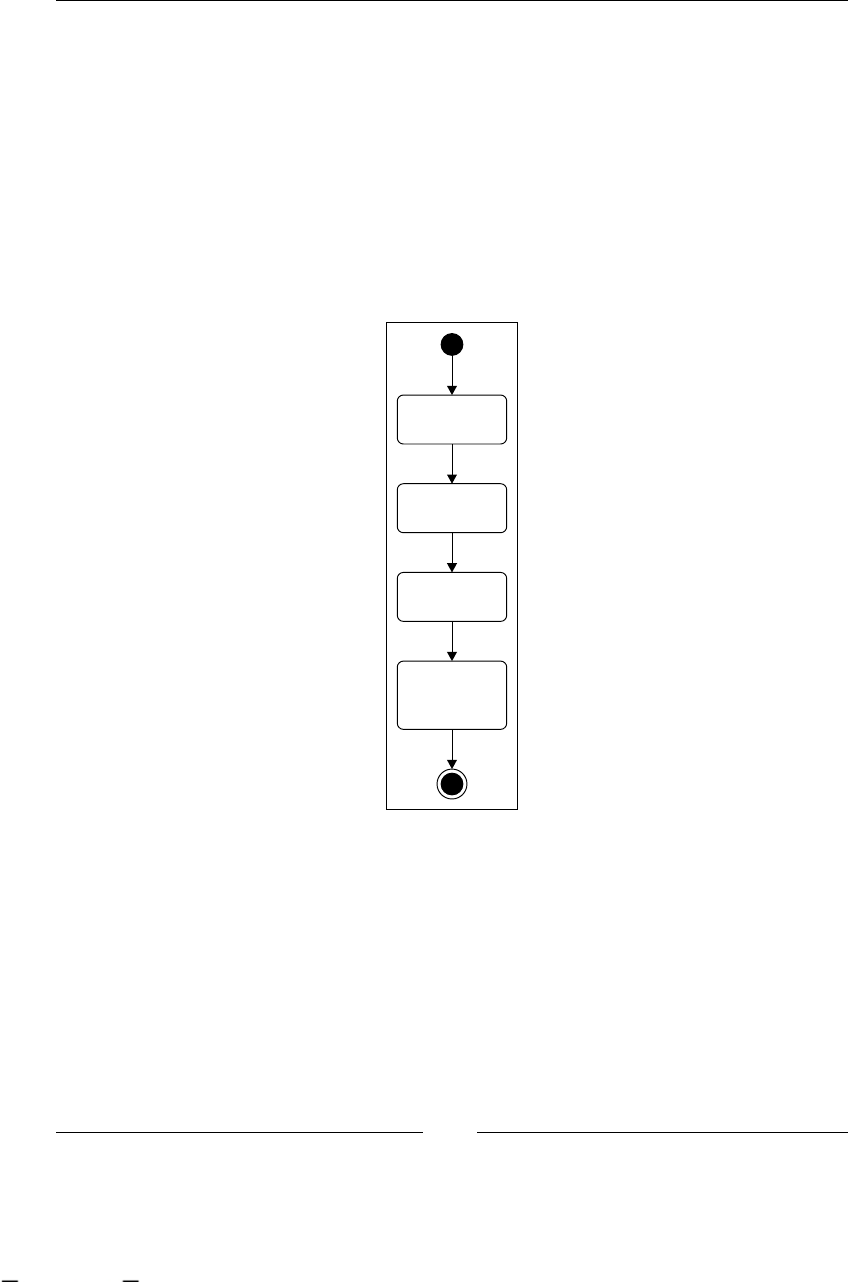
Advanced Topics in Practice
[ 296 ]
In our particular situation, we will use super state node to split our Recruiting
Process into four phases. This will give us a higher level perspective on how
our processes are going.
One of the main advantages of this approach is that we can be notied each time that
our process enters or leaves one of these phases. To be more precise, we can attach
any kind of behavior to the "enter" and "leave" events of the super state nodes.
Here, we will group our dened nodes into four super state nodes. Then we will
notify or log the user each time that we enter or leave one of these four phases.
Our resultant process at the higher level will look like:
Initial
Interview
Technical
Interview
Medical Check
Ups
Project Leader
Interview / Final
Acceptance
Now you can gain a higher-level view about how our processes are executed using
this notication or logging mechanism.
Managers or project leaders in general are more interested in seeing how the process
ows from one stage to another, than considering the low-level details about
activities that occur inside a phase.
Of course, you can use super state nodes to measure how much time and what
resources you are using in a set of activities. With simple actions hooked to
superstate-enter and superstate-leave events, you can get all this information
and use it from statistics or measure your processes in an orderly way.
This material is copyright and is licensed for the sole use by ALESSANDRO CAROLLO on 18th December 2009
6393 south jamaica court, , englewood, , 80111
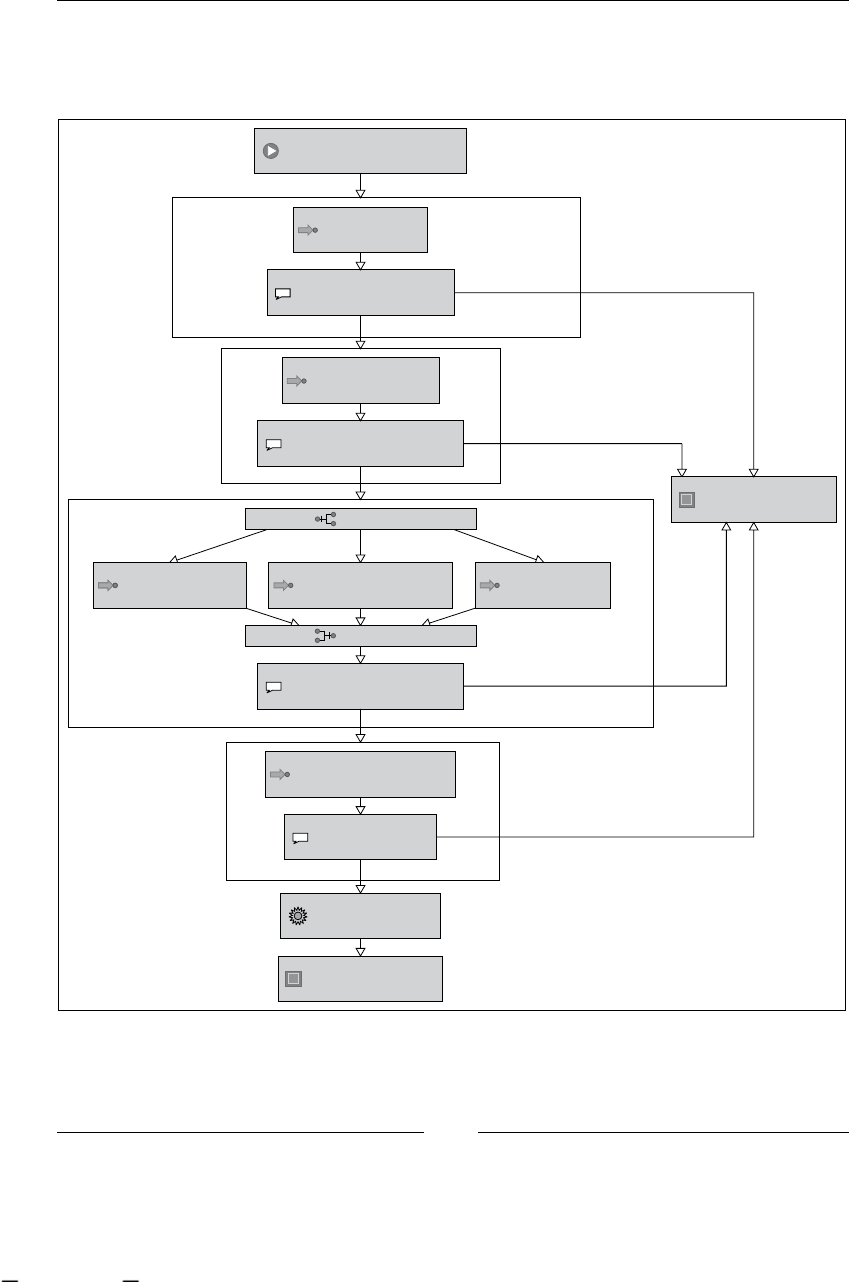
Chapter 11
[ 297 ]
There are no more tricks about super state nodes. Just take a look at the
/RecruitingProcessWithSuperStates/ project to see how the super state
is introduced in our example process.
<<State>>
Initial Interview
<<Decision>>
Initial Interview Passed?
Approved - Go to Technical Interview
<<State>>
Technical Interview
<<Decision>>
Technical Interview Passed?
to Medical Check Ups
to Physical Check Up to Psychological Check Up to Heart Check Up
<<State>>
Physical Check Up
<<State>>
Psychological Check Up
<<State>>
Heart Check Up
<<Decision>>
Medical Exams Passed?
?
?
?
?
<<Fork>>
<<Join>>
Last Interview
<<State>>
Project Leader Interview
<<Decision>>
Final Acceptance?
No - Find a new Candidate
to Create WorkStation
<<End State>>
Candidate Accepted
<<End State>>
Candidate Discarded
<<Node>>
Create WorkStation
No - Find a new Candidate
No - Find a new Candidate
No - Find a new Candidate
<<Start State>>
Interview Possible Candidate
This material is copyright and is licensed for the sole use by ALESSANDRO CAROLLO on 18th December 2009
6393 south jamaica court, , englewood, , 80111

Advanced Topics in Practice
[ 298 ]
As you can see in the process image generated with Eclipse GPD, now our Candidate
Interviews process has four well-delimited phases. It's a aw of the plugin to not allow
us to print the name of each phase in the diagram.
If you open this process denition, you will see how each phase is enclosed inside a
super state node. The following block of XML code shows us the rst phase called
the Initial Interview phase.
<super-state name="Initial Interview Phase">
<event type="superstate-enter">
<action class="org....LogSuperStateEnterActionHandler">
<phaseNumber>One</phaseNumber>
<phaseName>Initial Interview</phaseName>
</action>
</event>
<state name="Initial Interview">
<transition to="Initial Interview Passed?" />
...
</state>
<decision name="Initial Interview Passed?">
...
<transition to="../Technical Interview Phase"
name="Approved - Go to Technical Interview" />
<transition to="../Candidate Discarded"
name="No - Find a new Candidate" />
</decision>
<event type="superstate-leave">
<action class="org....LogSuperStateLeaveActionHandler">
<phaseNumber>One</phaseNumber>
<phaseName>Initial Interview</phaseName>
</action>
</event>
</super-state>
In this block of code, you can see how easy it is to hook actions inside the
SuperState frontiers. In this case, we are just logging into the console using two
customizable actions. For the rest of the sections, the pattern will be the same,
all the nodes in each phase will be surrounded by the <super-state> tags.
To reuse the code of the actions, we just create two classes—one to log when
the executions enters into SuperState (LogSuperStateEnterActionHandler)
and the other to log when the execution is going out of one of our phases
(LogSuperStateLeaveActionHandler).
This material is copyright and is licensed for the sole use by ALESSANDRO CAROLLO on 18th December 2009
6393 south jamaica court, , englewood, , 80111

Chapter 11
[ 299 ]
If you open one of these classes, which is very simple, you will nd a
normal action handler where you can add time measurements' logic. The
LogSuperStateEnterActionHandler in our example just contains the
following code:
public class LogSuperStateEnterActionHandler implements ActionHandler
{
private String phaseNumber;
private String phaseName;
public void execute(ExecutionContext executionContext)
throws Exception {
System.out.println("LOG: Entering to "+phaseNumber+":
"+phaseName+" Phase");
}
}
Here we are just printing out a log to the standard console, but you can try to put in
some information about how much time an entire phase execution takes in order to
be completed.
Keeping our process goal focused with
process state nodes
The idea of this section is to show how ProcessState works in practice. But one
more important goal is to remember that each of our processes has one clear and
well-dened business goal. This business goal needs to be accomplished by all the
activities dened in that process. In other words, if you start introducing activities
that don't collaborate directly with the process goal, you probably have other goals
mixed in your process denition.
For this reason, and to maintain well-dened goals in our processes, ProcessState
nodes will let us include a full and complete process inside another process activity.
This material is copyright and is licensed for the sole use by ALESSANDRO CAROLLO on 18th December 2009
6393 south jamaica court, , englewood, , 80111
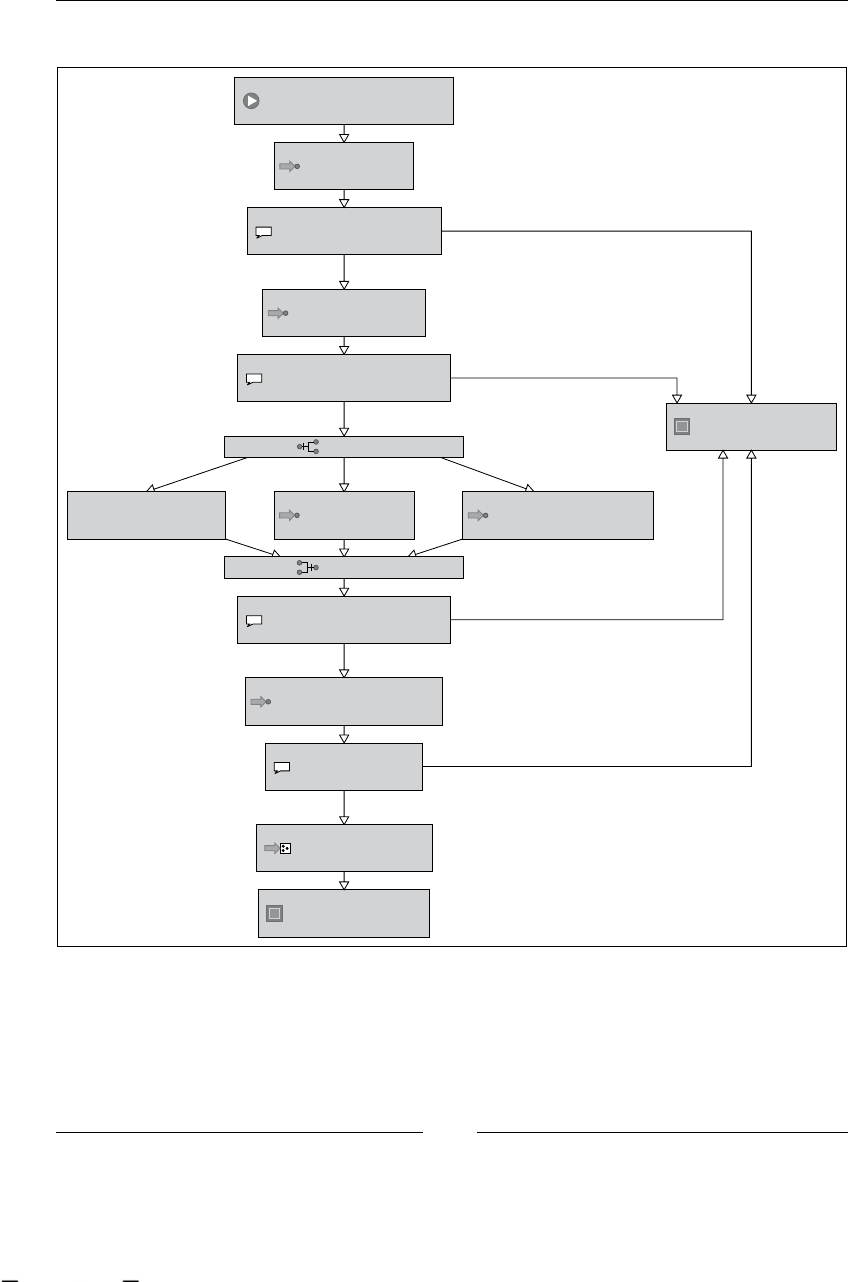
Advanced Topics in Practice
[ 300 ]
Let's see how it works in our Recruiting Process example:
<<State>>
Initial Interview
<<Decision>>
Initial Interview Passed?
Approved - Go to Technical Interview
<<State>>
Technical Interview
<<Decision>>
Technical Interview Passed?
to Medical Check Ups
to Physical Check Up to Psychological Check Up
to Heart Check Up
<<State>>
Physical Check Up
<<State>>
Psychological Check Up
<<State>>
Heart Check Up
<<Decision>>
Medical Exams Passed?
?
?
?
?
<<Fork>>
<<Join>>
Last Interview
<<State>>
Project Leader Interview
<<Decision>>
Final Acceptance?
No - Find a new Candidate
to Create WorkStation
<<End State>>
Candidate Accepted
<<End State>>
Candidate Discarded
No - Find a new Candidate
No - Find a new Candidate
No - Find a new Candidate
<<Start State>>
Interview Possible Candidate
<<Process State>>
Create WorkStation
As you can see in this image, the Create WorkStation node (of Node type) was
replaced by a process state node.
This material is copyright and is licensed for the sole use by ALESSANDRO CAROLLO on 18th December 2009
6393 south jamaica court, , englewood, , 80111
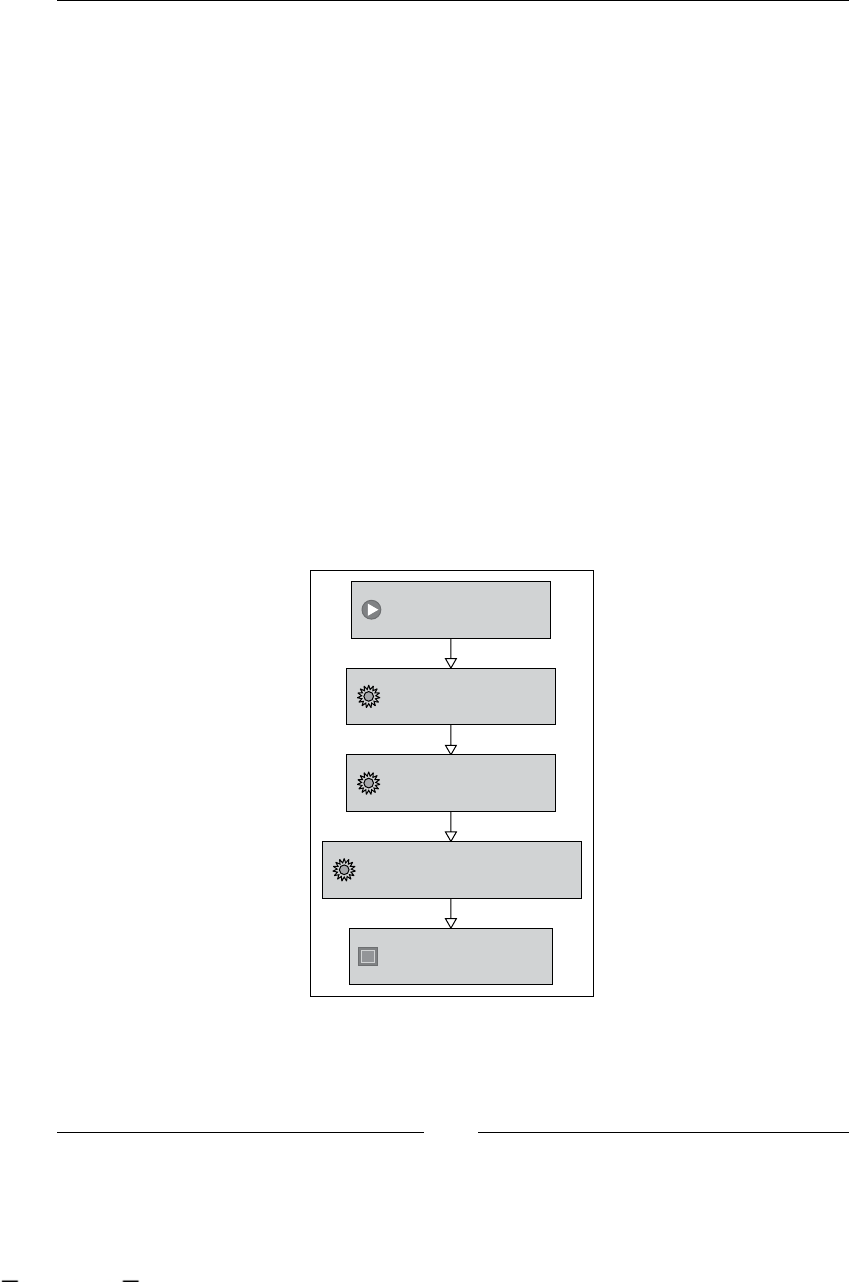
Chapter 11
[ 301 ]
What exactly does this change mean?
First of all, the Create WorkStation activity will now include several well-dened
activities that are not directly related to fullling the business goal of nding a
candidate. The business goal of these newly-introduced activities will be, as the
node name informs us, "Create a WorkStation for the newly-accepted candidate".
We decide that these activities need to be placed in another process and then link
them with the Create WorkStation activity.
As you can remember, the original node was an automated activity. Therefore,
unless we want to change that behavior, all the activities in our subprocess need
to be automated.
You can include wait states (and human tasks) if you want. But the process state in
the Candidate Interviews process will be blocked until the subprocess ends.
As we have seen in the previous chapter, when we discussed about process state
nodes, we said that there is no need to modify the child process. In this case, the
Create WorkStation process will not need any changes in order to be embedded
inside a Process State node.
In this case, our subprocess will look as shown in the following image:
<<Start State>>
Create WorkStation
<<Node>>
Create System User
<<Node>>
Create Email Account
<<Node>>
Create Security Credentials
<<End State>>
WorkStation Created
This very simple process will be called CreateWorkStationActivities and can be
found inside the resources/jpdl/CreateWorkStationActivities directory in the
/RecruitingProcessWithProcessState/.
This material is copyright and is licensed for the sole use by ALESSANDRO CAROLLO on 18th December 2009
6393 south jamaica court, , englewood, , 80111

Advanced Topics in Practice
[ 302 ]
Sharing information between processes
As you might remember, process information lives in each process instance context.
These different contexts (one for each execution) will represent and differentiate one
instance from the other.
We can predict that when jBPM creates a subprocess (using a process state), the
process context is empty. In other words, if you decide or want some pieces of
information to be shared between your parent and child processes, you need to
explicitly mention it.
The idea is to copy/share only the information from the parent to the child, which
is needed by the child. If you copy the entire context content inside the subprocess
context, all this information will be duplicated inside your database.
We will share information between processes using the already known method
Variable Mappings. The same rules as those for task instances apply here. If you
mark a variable as "write", this variable will be copied to the subprocess context
information and you can modify it, and when the subprocess ends, it will be copied
back to the original variable.
Create WorkStation binding
Here we will discuss how this process state is congured in our Recruiting
Process example.
It is important for you to know that if you have multiple denitions of the same
process, I mean different versions of the same process, you can choose which
version to use in a specic binding. In this case, jBPM will get the latest version
of the process denition.
<process-state name="Create WorkStation">
<sub-process name="CreateWorkStationActivities" binding="late"/>
<variable access="read" name="CANDIDATE_INFO"/>
<transition to="Candidate Accepted"/>
</process-state>
As you can see, you only need to dene the name of the process that is
already deployed and the variable mappings to share information between
these two processes.
This material is copyright and is licensed for the sole use by ALESSANDRO CAROLLO on 18th December 2009
6393 south jamaica court, , englewood, , 80111
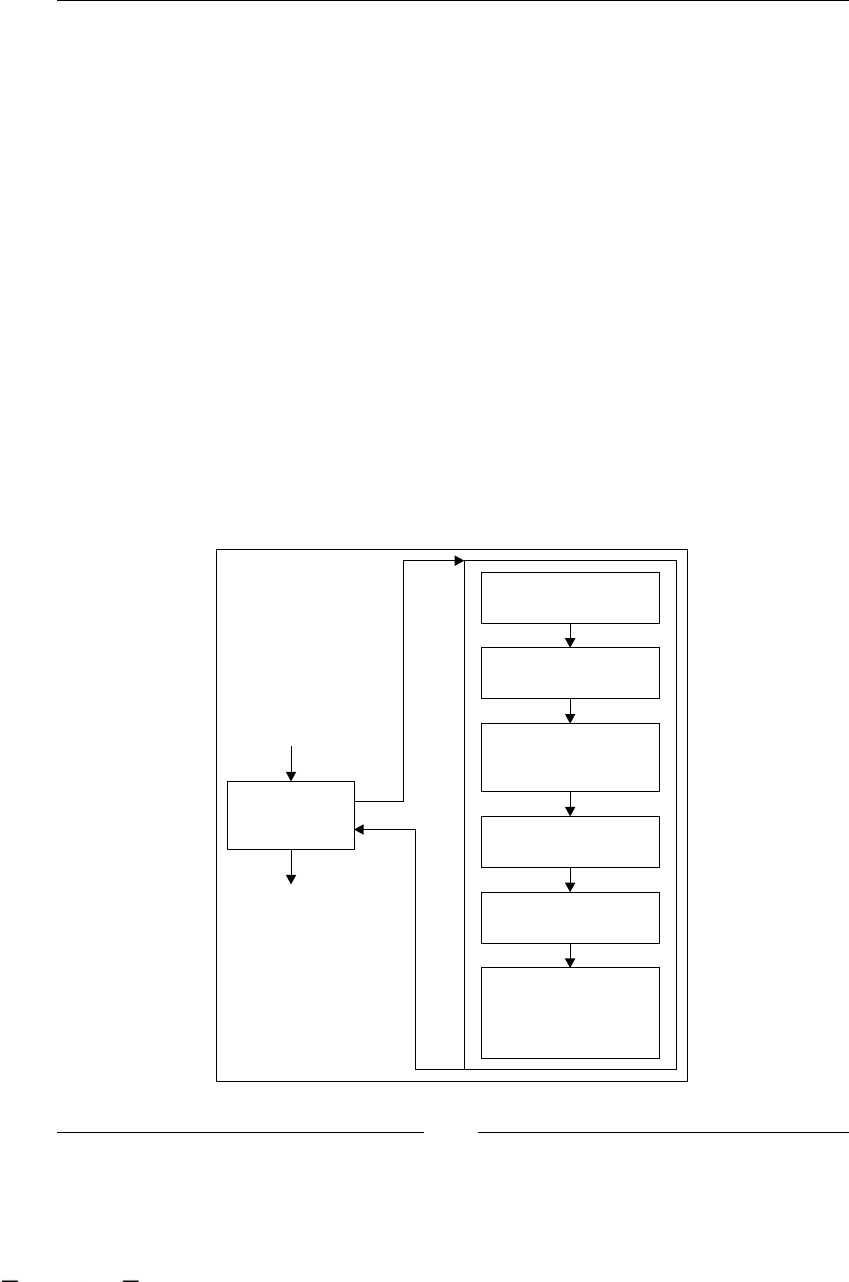
Chapter 11
[ 303 ]
The <sub-process> tag will allow us to create the binding between the process state
node and the subprocess, which will be instantiated when the process execution
reaches the process state node. It is important to note the binding="late" attribute
of this tag, because it ensures that the process denition will be checked at runtime
and at the time of deployment. Just for you to know, the version attribute is
also accepted by this tag and you will use it when you need the subprocess to be
instantiated for a specic version. If you don't use the version attribute, the last
(the newest) version will be used.
It is very important to note that the framework will be in charge of creating a new
instance of the selected process denition as well as to signal it to start the execution.
Then the variable tag inside the process state will allow us to share information
between the parent and the child process. In this case, we are only sharing a variable
called CANDIDATE_INFO and the subprocess will use it only to read the information
contained inside the variable. If the subprocess makes a modication to this
variable, when the subprocess ends, it will not reect the changes to the parent
process variable.
In the following image, we can see all the steps that are executed when the parent
process reaches the process state called "Create WorkStation".
Look for Subprocess
Definition
Instantiate
Subprocess
Copy variables
defined in Variable
Mappings
Start / Signal
Subprocess
The process runs until
it ends
Copy back the
variables marked as
"write" in Variable
Mappings
Process State
This material is copyright and is licensed for the sole use by ALESSANDRO CAROLLO on 18th December 2009
6393 south jamaica court, , englewood, , 80111
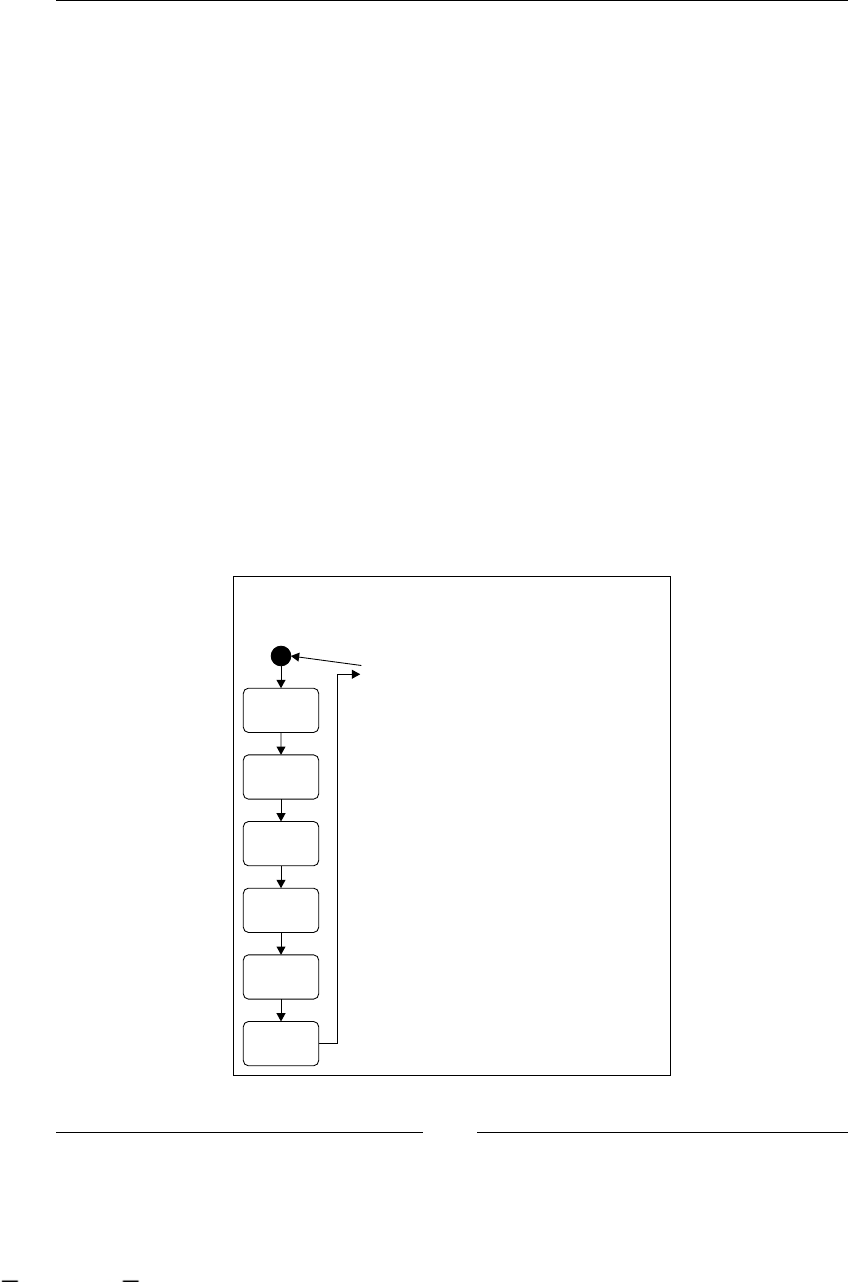
Advanced Topics in Practice
[ 304 ]
Take a look at the code inside the /RecruitingProcessWithProcessState/
project to see how this works. For this example, we keep the same behavior of the
automated tasks inside the process. This means that in the newly dened Create
WorkStation process, you will nd just three automated nodes, which will only
log what they are doing.
Asynchronous executions
In this second part of the chapter, we will focus on asynchronous executions. We will
understand when we need to use them and how we will use them inside the jBPM
framework. It is really important that you get the concept and know when to apply it.
Asynchronous executions and communications can be found in a lot of places, but
many programmers and developers haven't got the idea yet.
Let's see how the asynchronous executions appear as compared to the synchronous
style of doing things that we have used until now.
Synchronous way of executing things
The following image represents the process execution as we know it:
Java Application Thread
Automatic
Node
Automatic
Node
Automatic
Node
Automatic
Node
Automatic
Node
Wait State
Node
System.out.println(""+System.currentTimeMillis());
System.out.println(""+System.currentTimeMillis());
pl.signal();
This material is copyright and is licensed for the sole use by ALESSANDRO CAROLLO on 18th December 2009
6393 south jamaica court, , englewood, , 80111
Chapter 11
[ 305 ]
The following steps are involved in creating the process:
1. We create a new process instance.
2. We start it.
3. We (our Java thread) need to wait until the process reaches the next wait
state. In other words, our Java thread (that runs our process) will be blocked
until the signal() method returns the execution to the main thread where
the wait state is reached.
So far, we haven't seen anything wrong or unusual. We will know if our server
crashes in the middle of our process execution and, that if we are using the
persistence service, any of the changes we make in the process status will be
committed to the database when a wait state is reached.
In those situations, we only need to start or continue the process from the last saved
status (wait state) in the database.
That's okay, but what if (I hate my boss's "what ifs.." !) we have the
following situation?
Calculate all
the country
taxes
Do a huge
tape back up
Send a lot of
emails
All these automatic nodes can take more than two hours each, making the overall
process execution time over six hours before it ends. In situations such as this, if
our server hangs up in the last minute of work (after 5 hours and 59 minutes of
work), you will need to do all the work again. One of the reasons for this really
bad news is that there is no wait state in your process and the intermediate
status is never persisted. In such cases, we have mentioned that we don't have
a ne-grained transaction demarcation. This means that we don't have any way
to persist the process status between these automated tasks.
This material is copyright and is licensed for the sole use by ALESSANDRO CAROLLO on 18th December 2009
6393 south jamaica court, , englewood, , 80111
Advanced Topics in Practice
[ 306 ]
We can propose a really ugly solution to the problem. For instance, we can insert a
wait state node between automatic nodes. But if we do that, we need to signal each
of these wait states manually whenever we see that the automatic work ends. We can
see this solution as a manual form of validation (human validation), which tells us
that everything is going ne with our automatic nodes.
Calculate all
the country
taxes
Do a huge
tape back up
Control
Taxes
calculation
Control
Huge Back
up Tape
Control
that all email
are sent
Admin
Send a lot of
emails
This can be a valid solution only for some situations, but it doesn't solve the whole
problem. This approach will persist the process status after each long-automated
activity ends.
Let's suppose that the described process is executed every night (the old and well
known nightly batch procedures or nightly builds). For such situations, you will
need to stay awake to continue/restart the process if something goes wrong.
There is another ugly thing that may happen here. Our main thread, which starts the
process, will be blocked until these large activities are executed. For this reason, the
signal() method will only return a value when the procedures that run inside the
Calculate all the country taxes, Do a huge tape backup and Send a lot of e-mails
nodes end.
Imagine that you have an end-user application that has a screen, which contains a
button to start this process. If you call the signal() method inside that button code
to start the process, the screen with the button will be blocked until the rst activity
nishes. We can say that the user screen can be blocked for about two hours.
The same thing happens in web applications. If your request takes more than the
maximum time allowed by the web server, the user will get a time out response
screen in the application.
It is obvious that we need a way not to block our application threads when we start
a process that has large activities or a lot of automatic activities chained together. We
also need a way to manage our transactions with a ne-grained control. And, last but
not the least important, we need a way to be sure that the activities end successfully
without human control.
Those are the main reasons to start thinking about asynchronous executions.
This material is copyright and is licensed for the sole use by ALESSANDRO CAROLLO on 18th December 2009
6393 south jamaica court, , englewood, , 80111
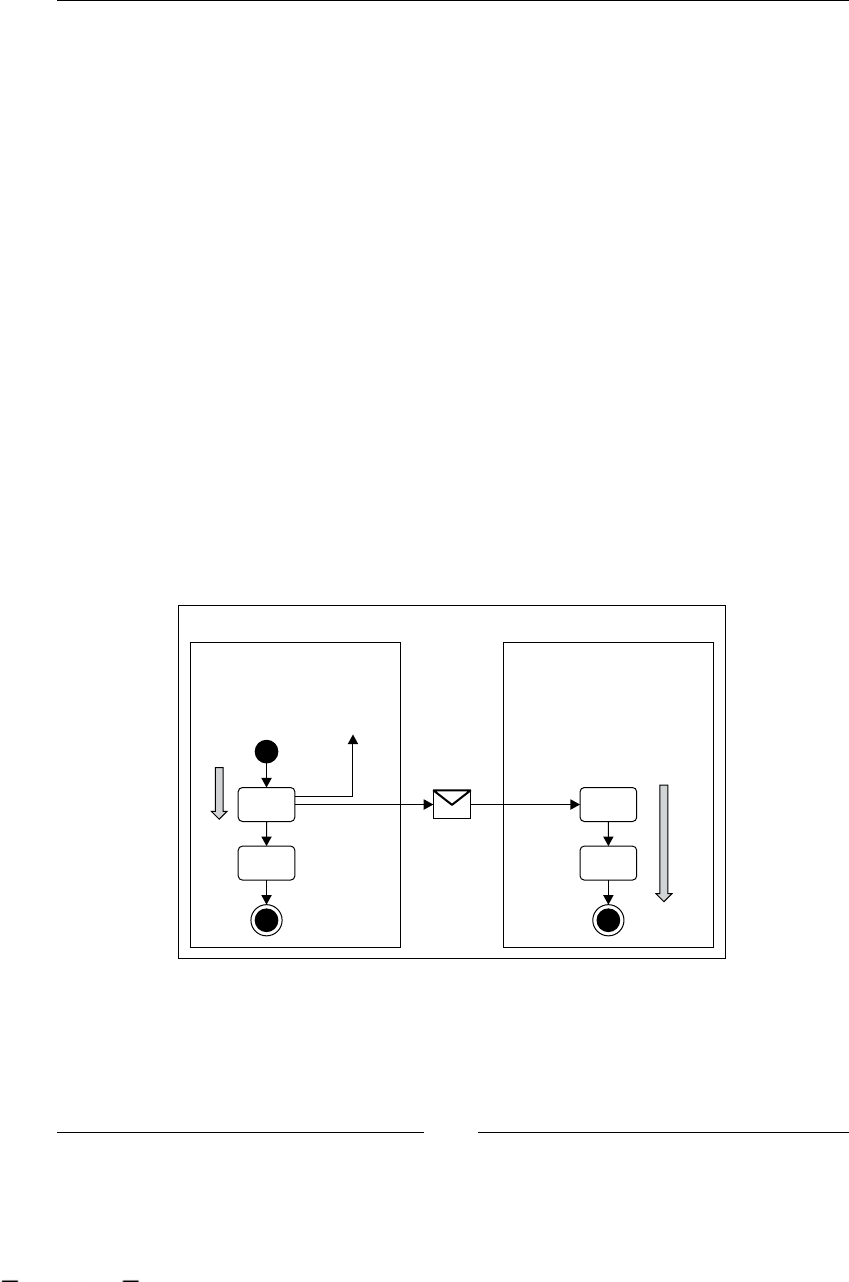
Chapter 11
[ 307 ]
The asynchronous approach
In this section, we will see how to solve the following problems, which have been
mentioned before:
Blocking calls that take too long
The need of controlling the fact that some activities need to be launched
again if the server crashes without human interaction
The need of ne-grained transaction demarcations to persist the process
status without introducing extra activities to solve technical problems
How does this asynchronous approach work?
The main idea is to delegate the execution of our nodes to another thread of
execution. In jBPM, this other thread is called JobExecutor, as it offers some extra
features more than a simple thread does.
This approach is considered as a service because it is totally decoupled from the
framework and our applications. It needs to be started separately, just as any service
that we want to run, such as database, backup service, mail server, web server, and
so on.
Take a look at the following image that describes how these two threads interact:
Our Application Thread Executor Service Thread
1) Get Messages to Execute
2) Execute message
Async
Auto
1) Create JbpmContext
2) Get Process Definition
3) New Process Instance
4) Process Instance signal()
return
Async
Auto
•
•
•
This material is copyright and is licensed for the sole use by ALESSANDRO CAROLLO on 18th December 2009
6393 south jamaica court, , englewood, , 80111
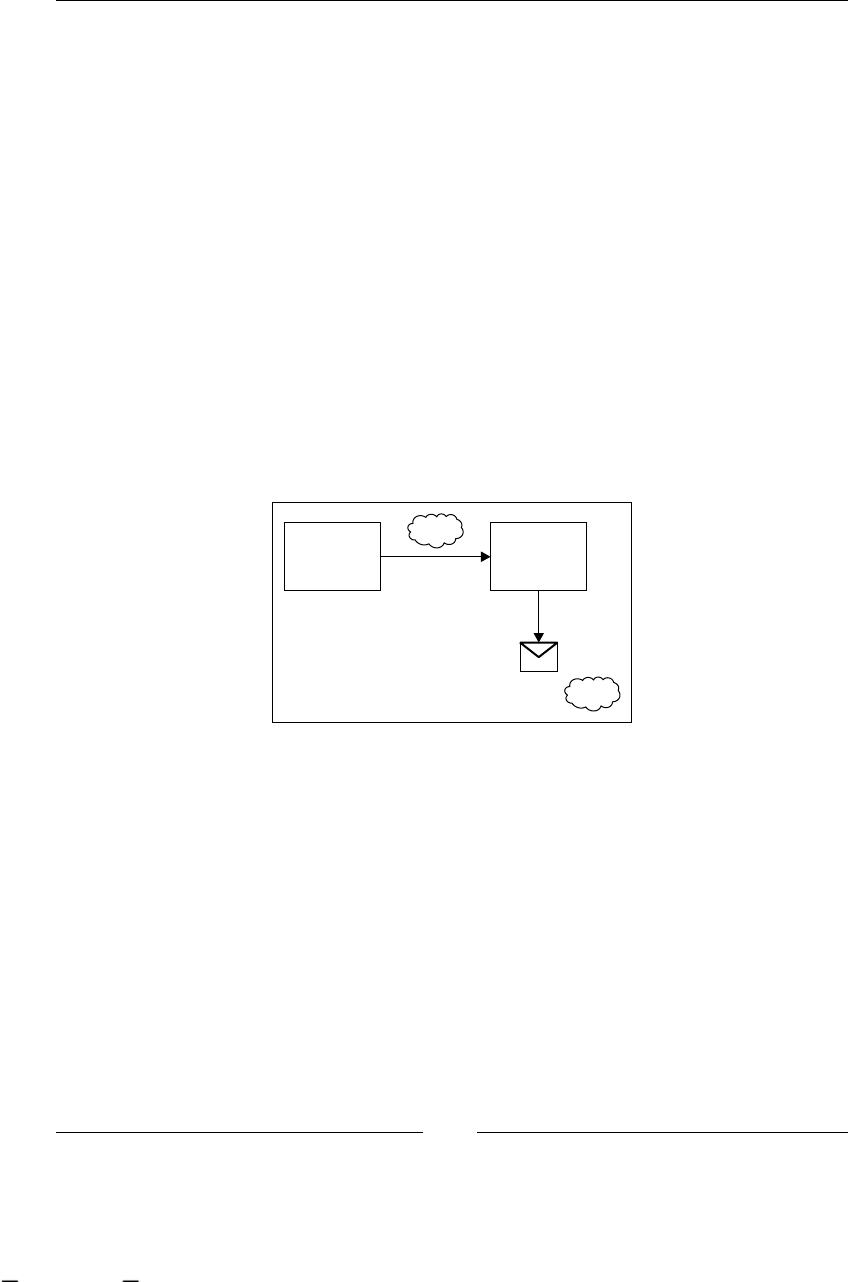
Advanced Topics in Practice
[ 308 ]
As you can see in the previous image, our blocking problems are solved,
now when we call the method signal(), the process will run until it reaches
the rst wait state or the rst node marked with asynchronous ag. In case the rst
node is marked with the async ag, the method signal will not be blocked and
returned immediately.
<node name="MyAsyncNode" async="true">
<action class="org.jbpm.example.LargeAutomaticActivityActionHandler">
</action>
<transition to="nextNode"></transition>
</node>
Our nodes will be executed asynchronously only if they are marked with the async
ag and if our JobExecutor service is congured and running.
What happens if our server crashes?
In this section, we will analyze the default behavior of our process when our server
(or just the JVM) crashes while we are using the JobExecutor service.
Start / Or
Wait State
Node
Async Node
1
2
If the server crashes at stage 1 (and the previous node is not marked as an async
node), we must manually execute the signal() method again, in the previous
node, to continue or restart the execution. This means that we will lose the activities
executed after the last wait state.
If the server crashes at stage 2 (when the message is delivered to the JobExecutor
service) the executor service will be in charge of executing the content of the message
delivered to it until it conrms that the execution has ended successfully. Basically,
the JobExecutor service will include a mechanism to look at all the messages
delivered to it, nd the ones that haven't been executed yet, and execute them.
This material is copyright and is licensed for the sole use by ALESSANDRO CAROLLO on 18th December 2009
6393 south jamaica court, , englewood, , 80111
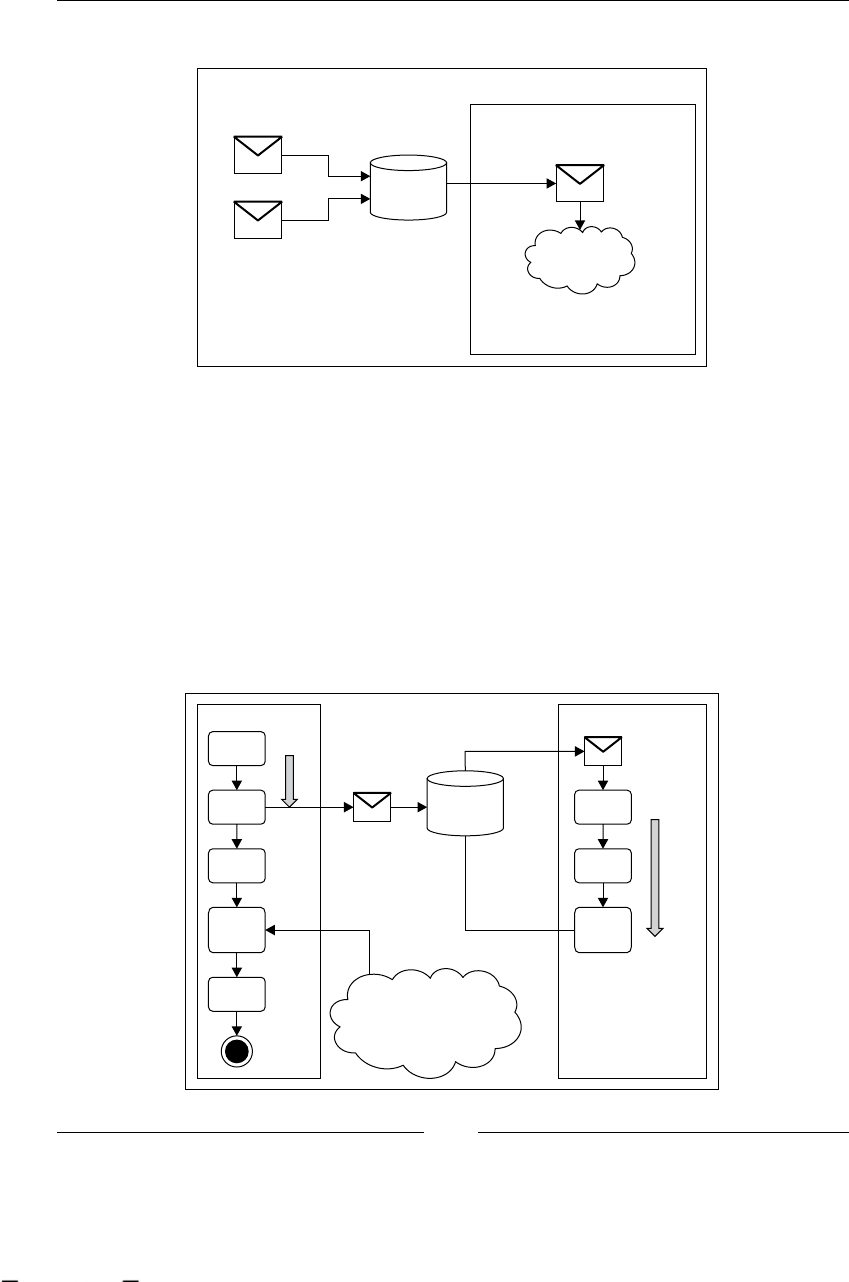
Chapter 11
[ 309 ]
This behavior can be represented as follows:
Executor Service
1) Async Node creates a message
Database
2) Take unfinished message
3) Execute()
4) Mark Message as finished
When the message is retrieved from the database, it is executed to continue the
execution ow. It is important to note that if a node is marked as async and the
nodes following it are not marked with the async ag and are not wait states, the
execution started by the JobExecutor service will continue until the process reaches
a wait state or another async node. In other words, we need to know that when
the JobExecutor service takes a message and starts its execution, the execution will
continue in the JobExecutor service thread until it reaches a wait state or until a new
async node is reached.
It is normal to have the following behavior if we use asynchronous executions in
our processes.
Get unfinished
Message
Mark as finished
Then you need to
signal the Wait State to
continue the process
until the end
Async
Auto
Auto
Wait
State
Async
Auto
Wait
State
execute()
Database
This material is copyright and is licensed for the sole use by ALESSANDRO CAROLLO on 18th December 2009
6393 south jamaica court, , englewood, , 80111

Advanced Topics in Practice
[ 310 ]
In such scenarios, when an asynchronous node is found, the JobExecutor service
continues the execution until the wait state node is reached. This classical, but not
intuitive behavior needs to be clearly understood by newcomers.
If you think about it, you will nd that your Java application thread is free to do
other things after the message is sent to the JobExecutor service. It's important
to note that the JobExecutor service is not responsible for continuing the process
execution when it completes processing the message. Your application will be
responsible for querying the process status and decide when to continue, in this
case from the last wait state.
Configuring and starting the asynchronous
JobExecutor service
Until here we have seen how it works, but we really need to see how it is
implemented and congured. In this section, we will congure and start the
JobExecutor service for a standalone application.
This JobExecutor service will store all the messages that it receives in a database table
to track the execution of each of them. This table will be periodically queried looking
for messages that are not completed yet. When these queries nd one of these
messages, the service is in charge of taking the message from the table and
executing it until it's marked as completed.
The parameters used by the framework to congure the messaging DB service
are located inside the jbpm.cfg.xml le. Here we can see what this block of
conguration looks like:
<bean name="jbpm.job.executor"
class="org.jbpm.job.executor.JobExecutor">
<field name="jbpmConfiguration">
<ref bean="jbpmConfiguration" />
</field>
<field name="name"><string value="JbpmJobExecutor" /></field>
<field name="nbrOfThreads"><int value="1" /></field>
<field name="idleInterval"><int value="5000" /></field>
<field name="maxIdleInterval"><int value="3600000" /></field>
<!-- 1 hour -->
<field name="historyMaxSize"><int value="20" /></field>
<field name="maxLockTime"><int value="600000" /></field>
<!-- 10 minutes -->
<field name="lockMonitorInterval"><int value="60000" /></field>
<!-- 1 minute -->
<field name="lockBufferTime"><int value="5000" /></field>
<!-- 5 seconds -->
</bean>
This material is copyright and is licensed for the sole use by ALESSANDRO CAROLLO on 18th December 2009
6393 south jamaica court, , englewood, , 80111
Download at WoweBook.com

Chapter 11
[ 311 ]
With this conguration and the following line in the services conguration block:
<service name="message"
factory="org.jbpm.msg.db.DbMessageServiceFactory" />
We are conguring the framework to use the built-in DBMessageService that
will be using just one thread to query the JBPM_JOB table looking for new
messages to execute.
The number of threads used by the JobExecutor service can be modied by the
nbrOfThreads property as well as the time between two calls to the database by
changing the value of the idleInterval property, which is set to ve seconds by
default. Remember, if you decrease this value, for example to one second or less, you
will be generating a lot of SQL SELECT queries just for checking if a new message
arrives at the JobExecutor service.
This service works with the following components' interaction:
The database table called JBPM_JOB
A cron-like service that queries the database table looking for messages
during regular time intervals
The asynchronous ag (async = true) to mark a node that needs to be
executed asynchronously
We have seen the database table used by this service and also the conguration of
the cron-like procedure that will query the mentioned table. Now we need to see
what happens inside a node marked with the async ag and how the framework
reacts during the execution stage. We will also see a full interaction and an example
about how this works.
If you open the Node.java le that contains the Node class, which you will nd
inside the enter() method, you'll nd the following lines of code:
// execute the node
if (isAsync)
{
ExecuteNodeJob job = createAsyncContinuationJob(token);
MessageService messageService = (MessageService)Services
.getCurrentService(Services.SERVICENAME_MESSAGE);
messageService.send(job);
token.lock(job.toString());
}
•
•
•
This material is copyright and is licensed for the sole use by ALESSANDRO CAROLLO on 18th December 2009
6393 south jamaica court, , englewood, , 80111

Advanced Topics in Practice
[ 312 ]
Also, you'll nd a very short method called createAsyncContinuationJob
(Token token).
protected ExecuteNodeJob createAsyncContinuationJob(Token token)
{
ExecuteNodeJob job = new ExecuteNodeJob(token);
job.setNode(this);
job.setDueDate(new Date());
job.setExclusive(isAsyncExclusive);
return job;
}
These lines indicate that a message needs to be created when the node that the
framework is executing is marked with the async ag. Then this newly-created
message is delivered to the already-congured messaging service.
As you can see, the ExecuteNodeJob class is in charge of representing the job that
the JobExecutor service will take and execute. This class, as it needs to be persisted,
is mapped to the Hibernate entity using the ExecuteNodeJob.hbm.xml le.
It's also important to note that this class inherits from the abstract class called Job.
This class is also the super class of another class called ExecuteActionJob. This class
will be in charge of executing only those actions that are marked with the async ag.
This will enable us to have a node that contains multiple actions, but we need some
of them to be executed in an asynchronous way. In other words, with this feature, we
can also mark our actions (represented by classes that implement the ActionHandler
interface) to be executed in an asynchronous way.
You may ask, why can't I see where the message is persisted in the database using
Hibernate in the code? This is because we can plug in different type of services,
not just based on a database table approach. We will see how a JMS approach is
congured in Chapter 12, Going Enterprise. In the Node class, the framework asks
for the already congured messaging service with the following line:
MessageService messageService = (MessageService)Services.
getCurrentService(Services.SERVICENAME_MESSAGE);
This line will return the congured messaging service. In this case, it will return
DBMessagingService.
The last important thing about congurations and the JobExecutor service is how to
start the JobExecutor service itself. It's not a minor thing, because we need to have
this service running before our processes' executions.
This material is copyright and is licensed for the sole use by ALESSANDRO CAROLLO on 18th December 2009
6393 south jamaica court, , englewood, , 80111
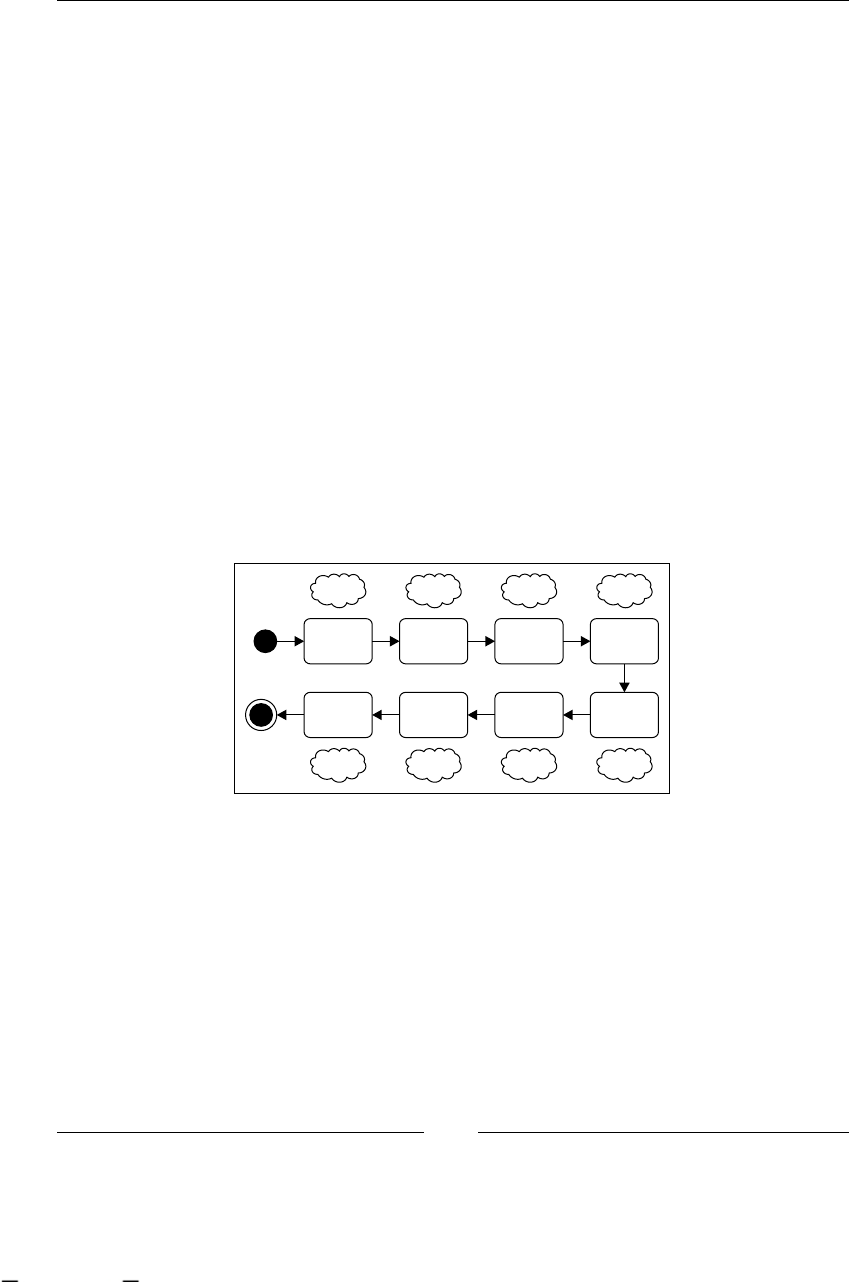
Chapter 11
[ 313 ]
Basically, in our example, we have another class to start the service before running
our tests. This class will just contain the following lines:
public class StartJobExecutor {
public static void main(String[] args){
JbpmConfiguration config = null;
config = JbpmConfiguration.parseResource("config/jbpm.cfg.xml");
config.startJobExecutor();
}
}
As you can see, the idea is just to get the conguration information and then start the
JobExecutor service.
Different situations where asynchronous
nodes can be placed
In this section, we will analyze the project delivered with this chapter called
/SimpleAsyncExecutionExample/ in order to discuss how it works.
The process denition for this example will appear as follows:
1 2
Wait
State
Wait
State
Async Async
Async
Async
AutoAuto
34
65
7
8
The process has a lot of chained nodes to show the different situations, which you
can nd when you mix asynchronous node executions with automatic and wait
state behaviors.
This material is copyright and is licensed for the sole use by ALESSANDRO CAROLLO on 18th December 2009
6393 south jamaica court, , englewood, , 80111

Advanced Topics in Practice
[ 314 ]
Basically, the following behavior is expected during the execution of the described
process. Two columns are used to represent the interaction between the application
thread and the JobExecutor service thread. The conguration used here is
DbMessageService.
Application thread JobExecutor service thread
Start the process instance by calling the
signal() method.
As the rst node is marked with the async
ag, the node execution will just create a
message that will be taken by the executor
service. The process status is persisted and
the signal() method returns the control
to the application thread.
(Free time, no waiting, no blocking the
main thread)
This service periodically reviews the
messages stored in the table called
JBPM_JOB. When it nds the message
created by the process execution, the service
takes it and executes it. When the node
content is executed, it takes the transition to
node 2. As node 2 is a wait state, the process
status is persisted in the database and the
message is marked as completed.
In our application, we can query the process
status to know if the process has reached
node 2. When this query returns that the
process is waiting in node 2, we can signal
the node to continue the execution. Now
the execution will take the transition to
node 3. Here, a new message is created and
delivered to the messaging service.
(Free time, no waiting, no blocking the
main thread)
Once again, the message is taken by the
executor service and executed by this thread.
In this case, node 4 is also marked with the
async ag, so another message is created
and the status after creating the new message
is stored in the database, marking the node 3
execution also as nished.
(Free time, no waiting, no blocking the
main thread )
The node 4 message is retrieved and
executed until node 5 is reached and the
status is persisted in the database, marking
the node 4 message as nished also.
This material is copyright and is licensed for the sole use by ALESSANDRO CAROLLO on 18th December 2009
6393 south jamaica court, , englewood, , 80111
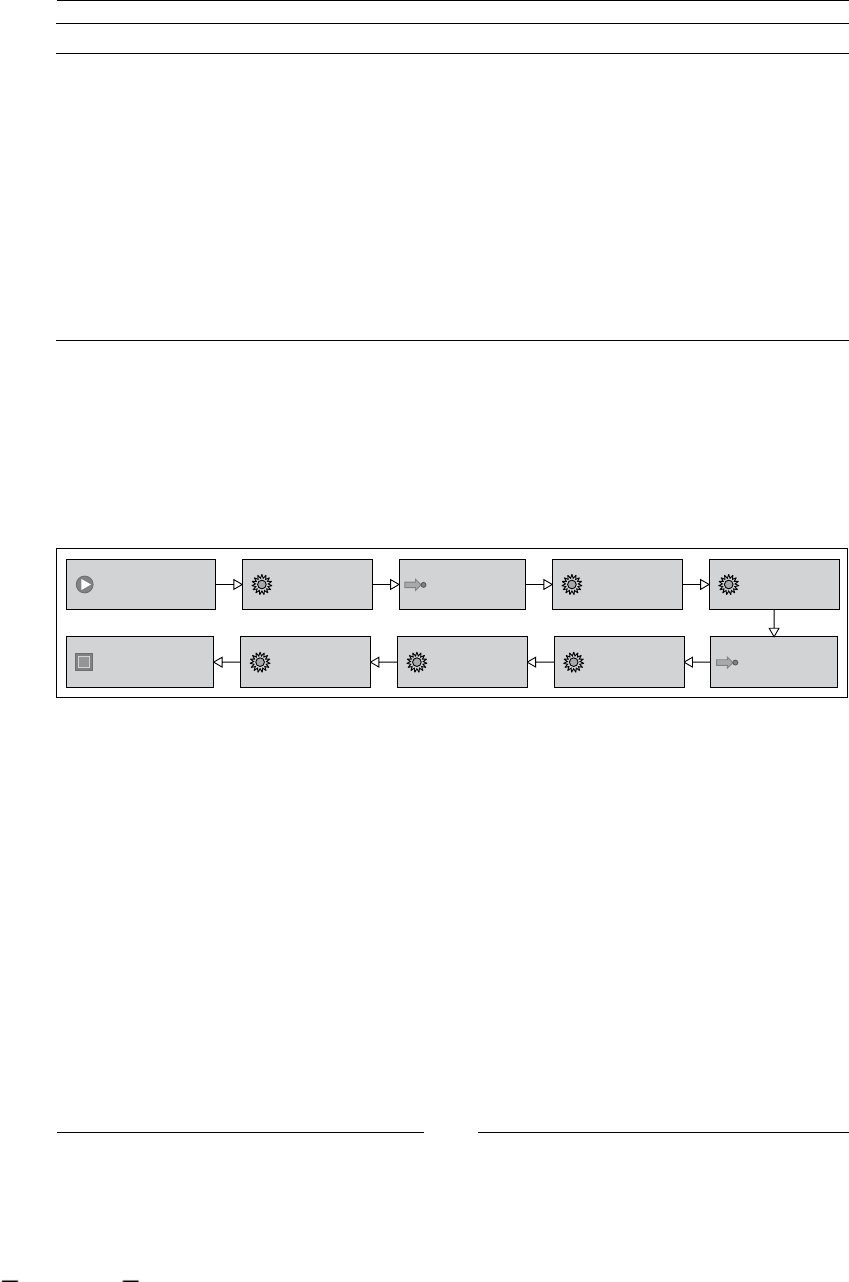
Chapter 11
[ 315 ]
Application thread JobExecutor service thread
When we decide to signal the wait state,
(node 5) the process will reach the last
asynchronous node, creating the last
message for this execution. Here the
method signal() returns the control to
the application thread after persisting the
process status to the database.
(Free time, no waiting, no blocking the
main thread)
The executor service takes the message
and executes the nodes 6, 7, and 8. When it
reaches the last node, it persists the process
status as ended, marking the successfully
nished message execution.
As you can see in this example, if your asynchronous node includes large and
time-consuming automatic tasks, the JobExecutor service thread will be in charge
of taking and executing that job.
If you open the process denition called SimpleAsyncExecution located inside the
resources/jpdl/SimpleAsyncExecution directory, you will nd the following
modeled process denition.
<<Start State>>
START
<<End State>>
END
<<State>>
2-wait state
<<State>>
5-wait state
<<Node>>
1-Async
<<Node>>
3-Async
<<Node>>
4-Async
<<Node>>
6-Async
<<Node>>
7-Auto
<<Node>>
8-Auto
The idea behind this process example is to show you how the asynchronous
nodes are executed by the JobExecutor service. I encourage you to debug this
process execution and also to see how the messages are inserted as rows in the
JBPM_JOB table.
Remember that before running the test called SimpleAsyncExecutionTestCase,
you need to run the StartJobExecutor.
In this test, you will see the behavior explained in the previous sections where
you will need to query the current status of the process in order to know if the
JobExecutor service has completed its asynchronous jobs.
This material is copyright and is licensed for the sole use by ALESSANDRO CAROLLO on 18th December 2009
6393 south jamaica court, , englewood, , 80111

Advanced Topics in Practice
[ 316 ]
Remember that the default conguration is set for querying the JBPM_JOB
table every ve seconds. This is important for us because our asynchronous
nodes have activities that last for ten seconds and our automatic (auto)
nodes have activities that last for one second. You can see what these
activities do inside the LargeAutomaticActivityActionHandler and
ShortAutomaticActivityActionHandler classes.
Let's analyze the code inside the TestCase class:
ProcessInstance simpleAsyncExecutionPI = context.newProcessInstance
("SimpleAsyncExecution");
simpleAsyncExecutionPI.signal();
Assert.assertEquals("1- Async", simpleAsyncExecutionPI.
getRootToken().getNode().getName());
processInstanceID = simpleAsyncExecutionPI.getId();
context.close();
//Wait for five seconds
try {
Thread.currentThread().sleep(5000);
} catch (InterruptedException ex) {
//Log
}
//End waiting
context = config.createJbpmContext();
simpleAsyncExecutionPI = context.getProcessInstance
(processInstanceID);
//Ask again if the process is stopped in the first activity
Assert.assertEquals("1- Async", simpleAsyncExecutionPI.
getRootToken().getNode().getName());
context.close();
//Wait for ten seconds
try {
Thread.currentThread().sleep(10000);
} catch (InterruptedException ex) {
//Log
}
//End waiting
context = config.createJbpmContext();
//Now the process must be in the 2- wait state node
simpleAsyncExecutionPI = context.getProcessInstance
(processInstanceID);
//check if the process is now in the second activity
Assert.assertEquals("2- wait state", simpleAsyncExecutionPI.
getRootToken().getNode().getName());
// if it is, signal it to continue
simpleAsyncExecutionPI.signal();
context.close();
This material is copyright and is licensed for the sole use by ALESSANDRO CAROLLO on 18th December 2009
6393 south jamaica court, , englewood, , 80111

Chapter 11
[ 317 ]
In this code, we can see that the following steps have been executed:
1. Creating the process and starting it (by calling the signal() method).
2. The signal() method returns instantaneously, which means that it creates a
message and delegates the execution to the JobExecutor service. You can see
that a new row is inserted in the database (JBPM_JOB table).
3. Then we decide to wait for ve seconds to see if the JobExecutor service
nishes its job. It is important to note that we can do something else in that
time or we can query the process status all the time.
4. After waiting for ve seconds, we query the process status to see if we
are still stopped at the 1- Async node, which will be true because our
asynchronous node will last for ten seconds to nish, plus the time between
the last query to the JBPM_JOB table and the next. In the worst case scenario,
the execution of our rst asynchronous node will take 15 seconds.
5. That is why we make it sleep for another ten seconds to be sure that our
activity has ended.
6. Then, when we ask if the process has stopped in the 2- wait state node—if
the assertion is true, we can signal that wait state to continue the execution.
Take a look at the rest of the test case, because it reects another situation explained
in the previously-described two-column table.
Summary
In this chapter, we have discussed several topics. The main idea behind this chapter
is to understand some advanced features, which are provided in the jPDL language
and the capabilities provided by the framework as a whole.
We saw some examples of how to use super states and process states in our recruiting
example process and jumped directly to the topic of asynchronous executions.
With this chapter, we have covered the most meaningful features of the framework,
taking care to cover the conceptual and practical aspects of all these topics.
If you are planning a jBPM implementation or if you are already a member of a
team responsible for an implementation, you must understand all the topics
discussed here in depth.
This material is copyright and is licensed for the sole use by ALESSANDRO CAROLLO on 18th December 2009
6393 south jamaica court, , englewood, , 80111

Advanced Topics in Practice
[ 318 ]
One of the most generalized ways of learning a new technology is by a
proof-and-error approach. I don't recommend that way of doing things. The
way of learning that I propose for things like the jBPM framework and all of the
other open source projects is to just learn about the background that creates the
new technology.
Sometimes, you don't have time to sit and learn about theoretical topics in order to
understand how to use a new tool and that is the main reason why I wrote this book.
It is focused on the technical background of the framework and how its technical
implementation reects that background in the project's source code.
If you get that idea, minimal theoretical background and a little research about
how the framework/tool is implemented will guide you to adopt any kind of
new technology.
In the next chapter, the last one, we will see some features that the framework
includes for enterprise environments. These features for larger scenarios will help
us to understand how and when we need to start thinking about running jBPM in a
Java EE-compliant application server.
This material is copyright and is licensed for the sole use by ALESSANDRO CAROLLO on 18th December 2009
6393 south jamaica court, , englewood, , 80111

Going Enterprise
In this chapter the reader will learn about some topics introduced in the
jbpm-enterprise module. This enterprise module is aimed at solving
some of the most common problems that appear in large, clustered, and
distributed environments.
The topics that this chapter will cover are:
Congurations needed to run in an EE environment
CommandServiceBean
JobExecutor service in EE environments using JMS
Timers and reminders for standalone and enterprise environments
This chapter is aimed at people who need to know about how jBPM behaves in
Java EE environments. If you aren't planning a Java EE implementation, this
chapter will show you some of the advantages of designing and implementing
jBPM in such environments.
jBPM configurations for Java EE
environments
Here, when we talk about Java EE environments, we are talking about
Java EE-compliant application servers. Because JBoss has its own application
server, which is Java EE 5-compliant, we will use it as an example. However,
you can choose any Application Server to run jBPM. This means that jBPM is
not tied to JBoss Application Server in any way.
It's important for you to know that when we create enterprise applications, our
application will run with a lot of services that the application server provides us
out of the box.
•
•
•
•
This material is copyright and is licensed for the sole use by ALESSANDRO CAROLLO on 18th December 2009
6393 south jamaica court, , englewood, , 80111
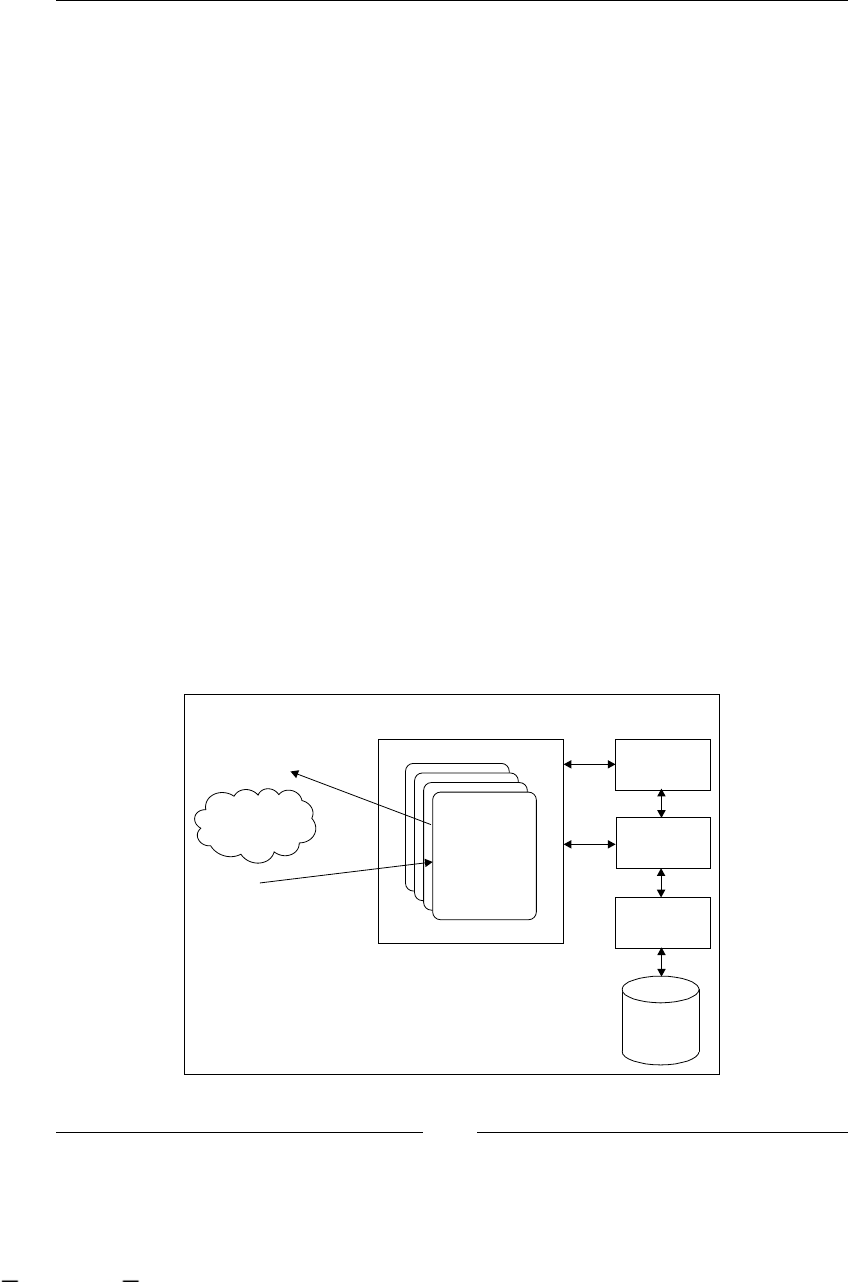
Going Enterprise
[ 320 ]
One of the most commonly used services that the application server provides us with
is the transaction management. This service is provided using the specication Java
Transaction API (JTA). We can use it and delegate the transaction demarcation from
the user to the application server's Enterprise Java Bean (EJB) container. In other
words, we are now changing from the User Managed Transaction (UMT) approach
to the Container Managed Transaction (CMT) one.
This will change the whole way that we interact with the framework. If you review
Chapter 6, Persistence, where we talk about the UMT approach, you will see that we
need to demarcate our application code when a transaction begins with:
JbpmContext context = config.createJbpmContext();
And when we nish the interaction, we need to close this context to commit the
current transaction changes. We use the following line to do that:
context.close();
We also need to remember that if an exception arises between the
createJbpmContext() and the close() method, the transaction will be
automatically rolled back. This is the correct behavior, because an error has occurred.
In such cases, all the modications made in the process as well as the information
that the process maintains inside it are lost. This is a way for us to know that in the
database we will store only data that represents a correct status.
Now, in the Java EE counterpart all the methods inside our EJB will run by default
inside a transaction. We don't need to explicitly say anything about transactions, and
all our methods will run in a transactions-aware context by default.
Business
Logic
my Method(){ create tx
commit tx
EJB DataSource
JTA
JDBC/
JConnector
Database
}
EJB Container
This material is copyright and is licensed for the sole use by ALESSANDRO CAROLLO on 18th December 2009
6393 south jamaica court, , englewood, , 80111

Chapter 12
[ 321 ]
In the previous gure we can see how our myMethod() method will run inside our
dened EJB enclosed inside a JTA transaction that will begin before it enters the
method and ends right after the method completion.
I'm trying to say that in this environment, all the code inside myMethod()—the
Business Logic cloud in the gure—that modies transactional resources such as
relational databases, a mail service using transactions, le copies, tape backups,
and so on, won't be automatically committed after each line of execution. All the
changes need to wait until the method successfully ends without any error to be able
to commit all the changes made. If all the operations are completed successfully the
transaction in each resource will commit all the modications made, if not all the
modications are rolled back together.
To achieve this, our resources must support "two phase commits" using an
XA-compatible driver. This is a strong requirement that needs the application
server to handle distributed transactions across multiple resources.
In our case, we have been using just one relational database (MySQL), so we need to
congure it as a data source inside the application server. Doing this we will delegate
the database connections' administration to the application server, which will use
a connection pool to decide dynamically how many connections should be kept
open for our applications. Until now, we just used a direct JDBC connection to our
database, which we congure in the hibernate.cfg.xml le with the connection
parameters. Now we need to congure a new data source inside JBoss and then
congure jBPM to look up and use that data source. We need to create a new data
source, but we can use one of the data sources suggested in the /config/ directory
of the jBPM binary distribution.
JBoss Application Server data source
configurations
Conguring a data source in JBoss Application Server is an easy task. Basically, we
will dene a data source descriptor (XML le) to describe the characteristics of our
particular data source. If we are talking about a relational database, these will be the
common properties, which need to be congured in jbpm-mysql-ds.xml:
<?xml version="1.0" encoding="UTF-8"?>
<datasources>
<xa-datasource>
<jndi-name>JbpmDS</jndi-name>
<xa-datasource-class>
com.mysql.jdbc.jdbc2.optional.MysqlXADataSource
</xa-datasource-class>
This material is copyright and is licensed for the sole use by ALESSANDRO CAROLLO on 18th December 2009
6393 south jamaica court, , englewood, , 80111

Going Enterprise
[ 322 ]
<xa-datasource-property name="ServerName">
${jdbc.mysql.server}
</xa-datasource-property>
<xa-datasource-property name="PortNumber">
${jdbc.mysql.port}
</xa-datasource-property>
<xa-datasource-property name="DatabaseName">
${jdbc.mysql.database}
</xa-datasource-property>
<user-name>${jdbc.mysql.username}</user-name>
<password>${jdbc.mysql.password}</password>
<!-- reduce isolation from the default level (repeatable read)-->
<transaction-isolation>
TRANSACTION_READ_COMMITTED
</transaction-isolation>
<!-- separate connections used with and without JTA
transaction -->
<no-tx-separate-pools />
<!-- disable transaction interleaving -->
<track-connection-by-tx />
<!-- leverage mysql integration features -->
<exception-sorter-class-name>
com.mysql.jdbc.integration.jboss.ExtendedMysqlExceptionSorter
</exception-sorter-class-name>
<valid-connection-checker-class-name>
com.mysql.jdbc.integration.jboss.MysqlValidConnectionChecker
</valid-connection-checker-class-name>
<!-- corresponding type-mapping in conf/standardjbosscmp-jdbc.xml
-->
<metadata>
<type-mapping>mySQL</type-mapping>
</metadata>
</xa-datasource>
</datasources>
You will need to replace all the ${...} values with your corresponding environment
information. With this le ready, we can deploy this data source inside the
application server. Pay attention to the name of the le, it's important to use the
format *-ds.xml, because JBoss will detect that pattern and automatically deploy the
data source located inside the /deploy/ directory. Then the application server will
publish it in the JNDI tree. This will allow us to reference this data source using just a
name, decoupling the entire database conguration from our application.
This material is copyright and is licensed for the sole use by ALESSANDRO CAROLLO on 18th December 2009
6393 south jamaica court, , englewood, , 80111

Chapter 12
[ 323 ]
Then we need to change our hibernate.cfg.xml le, where we usually specify
a direct JDBC connection to our database, now we will use the newly-deployed
data source:
<!-- hibernate dialect -->
<property name="hibernate.dialect">
org.hibernate.dialect.MySQL5InnoDBDialect
</property>
<!-- DataSource properties (begin) === -->
<property name="hibernate.connection.datasource">
java:JbpmDS
</property>
<!-- ==== DataSource properties (end) →
Note the name used in the data source descriptor le (jbpm-mysql-ds.xml):
<jndi-name>JbpmDS</jndi-name>
It is the same property present in the hibernate.cfg.xml le, where this appears
with the prex java::
<property name="hibernate.connection.datasource">
java:JbpmDS
</property>
If you look for different examples of these data sources, you will nd some of
them use:
<local-tx-datasource>
...
</local-tx-datasource>
And not:
<xa-datasource>
...
</xa-datasource>
This <local-tx-datasource/> data source will be used when we don't have more
than one data source modication in a simple transaction.
But in other cases, when you have an already existing database for your already
existing applications, and you need to start working with jBPM in one of your
applications, you will probably require to have the jBPM database schema in a
different database.
This material is copyright and is licensed for the sole use by ALESSANDRO CAROLLO on 18th December 2009
6393 south jamaica court, , englewood, , 80111

Going Enterprise
[ 324 ]
In that kind of situation it is important for you to realize that
<local-tx-datasource/> is not enough. We need to enable the distributed
transaction management using XA drivers provided by each database vendor.
This will enable the application server to coordinate transactions between multiple
resources in a highly scalable way.
<xa-datasource>
...
</xa-datasource>
The example congurations, which provide the binary distribution of jBPM, will
propose an XA data source because in most normal cases we will integrate jBPM
into an existing environment.
Taking advantage of the JTA capabilities in
JBoss
If our application will run inside the EJB container, we can take advantage of the
CMT capabilities offered by the container. In other words, we will let the container
demarcate the transactions' boundaries that we previously needed to do manually
in Java SE applications.
To do that, we need to congure jBPM to delegate the transaction handling to the
container. That conguration can be found in the jbpm.cfg.xml XML conguration
le. In the <jbpm-context> section you will nd congurations for all the services,
and there you need to change the following values for enterprise environments:
<jbpm-context>
<service name="persistence"
factory="org.jbpm.persistence.jta
.JtaDbPersistenceServiceFactory" />
<service name="message"
factory="org.jbpm.msg.jms.JmsMessageServiceFactory" />
<service name="scheduler"
factory="org.jbpm.scheduler.ejbtimer
.EntitySchedulerServiceFactory" />
</jbpm-context>
Now when our application runs (I'm talking about enterprise applications or
modules running in the EJB container) the container will automatically create
and close the transactions needed by the framework.
This material is copyright and is licensed for the sole use by ALESSANDRO CAROLLO on 18th December 2009
6393 south jamaica court, , englewood, , 80111
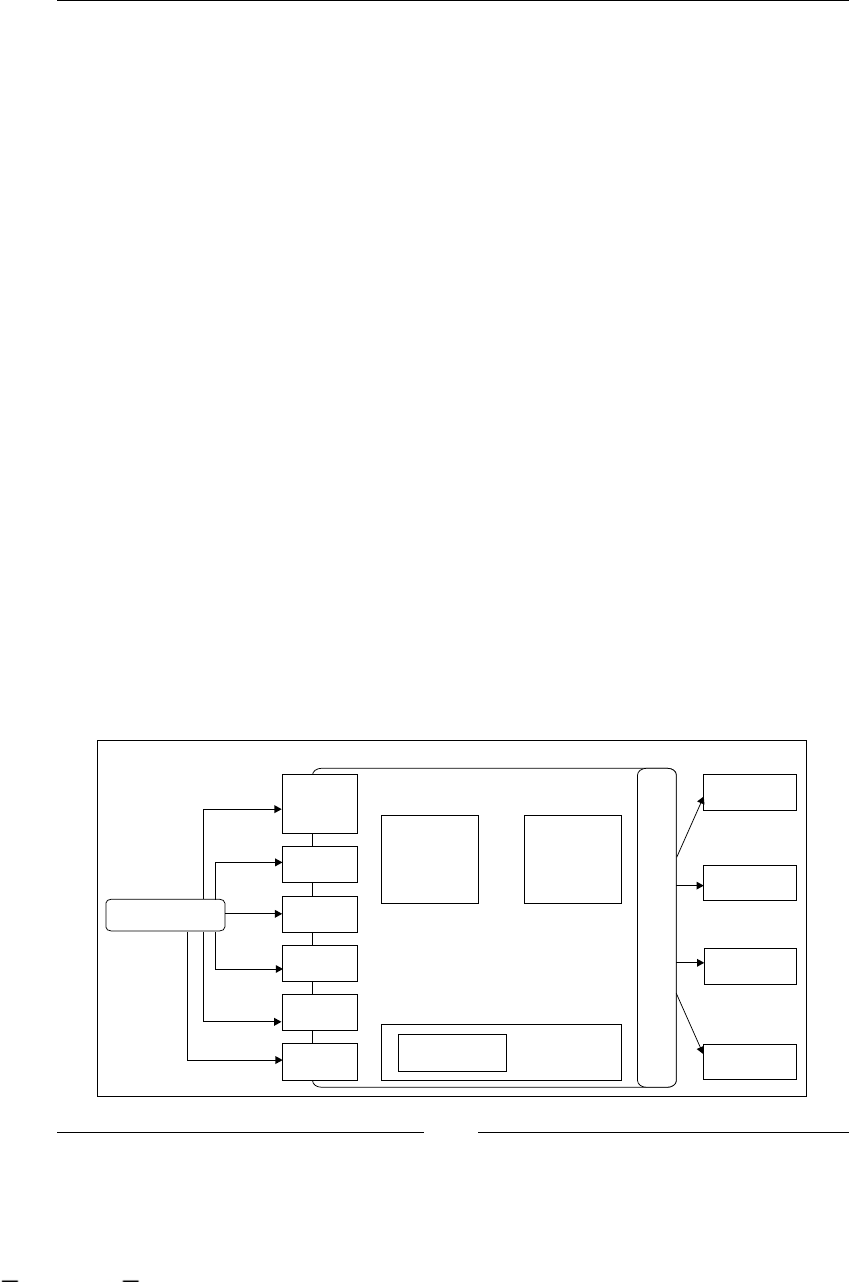
Chapter 12
[ 325 ]
Let's see an example of how will a method look in a Stateless Session Bean. This
method will create a new instance of an already deployed process denition and
then we will signal it to start the ow.
public long startProcess(String name){
context = config.createJbpmContext();
ProcessInstance pi = context.newProcessInstance(name);
pi.signal();
}
That's it! You may ask why the context needs to be created. And the answer is, because
we need to initialize the rest of the services needed by the framework to run. If you
pay close attention you will see that we don't call the context.close() method at the
end of the method. This is because, the EJB container will be in charge of creating and
closing the transactions for us, when the method completes successfully.
For more details about how to congure jBPM for enterprise environments you can see
the following link: http://docs.jboss.com/jbpm/v3.3/userguide/ch08s02.html.
Enterprise components architecture
Now that we have our framework congured to use some of the JBoss Application
Server capabilities, we need to know when and why we need to jump from a web
container Tomcat to a full Java EE 5 application server like JBoss.
This is a common question that you need to ask yourself at this point. To answer
that question, rst you need to see and understand how our architecture will look
in this kind of environment and what will be the advantages if we choose to use this
entire infrastructure.
Client Application
JAX/
REST/
JSON WS
CORBA
HTTPS
HTTP
RMI
JMS
Web Container EJB Container
S
E
R
V
I
C
E
S
Libraries
jbpm-jpdl.jar
DataSource
Messaging
JNDI
JTA
Application Server
This material is copyright and is licensed for the sole use by ALESSANDRO CAROLLO on 18th December 2009
6393 south jamaica court, , englewood, , 80111

Going Enterprise
[ 326 ]
If you take a look at this gure, you can start describing the advantages we have in
such scenarios.
First of all, we can hide the jBPM implementation from our clients. This means that
all the application interaction with the framework will be done using an intermediate
layer. This approach will let us change the jBPM version or the entire framework
without any change in our clients. This is a common pattern proposed by architects
to avoid being tied with any particular framework.
When we have an already existing application, we don't want to increase the
application complexity. In common cases we add the framework dependencies
to our project (the jBPM library and all its dependencies), and this results in more
code to maintain and probably some performance implications. With this proposed
architecture we will delegate the execution to the application server and use a
componentized approach to build our applications. Also taking advantage of the
cluster and replication features of these environments will give us the exibility to
scale and increase our application's performance if the numbers of users increase.
As you can see, this logic delegation will cause the need for our application to
interact with the application server. These interactions can occur in a myriad of
protocols that can be congured, based on your application's needs. In these days,
using web services is a common requirement in Service Oriented Architectures
(SOA). In that kind of architecture you can see jBPM as a BPM/Orchestration
service. That is one of the ideas behind the CommandServiceBean explained in
the following section.
If you take a look at the Stateless Session Bean example again, you can notice that we
are only wrapping the jBPM method within a Stateless Session Bean method. One of
the biggest reasons to do that is to have a clustered and multiprotocol way to interact
with jBPM in a very decoupled way.
You can also note that the method returns a long value. This long value represents
the processInstanceID of the newly created and started ProcessInstance.
Our client application will use this value to be able to interact with the same
ProcessInstance again in the future. We can have the method continue(long
processInstanceId) that continues the execution of an already existing instance.
Take a look at the continue() method, it just wraps the signal method plus the
recovery of the ProcessInstance object using the received processInstanceId:
public void continue(long processInstanceId){
context = config.createJbpmContext();
ProcessInstance pI = context.getProcessByID(processInstanceId);
pI.signal();
}
This material is copyright and is licensed for the sole use by ALESSANDRO CAROLLO on 18th December 2009
6393 south jamaica court, , englewood, , 80111
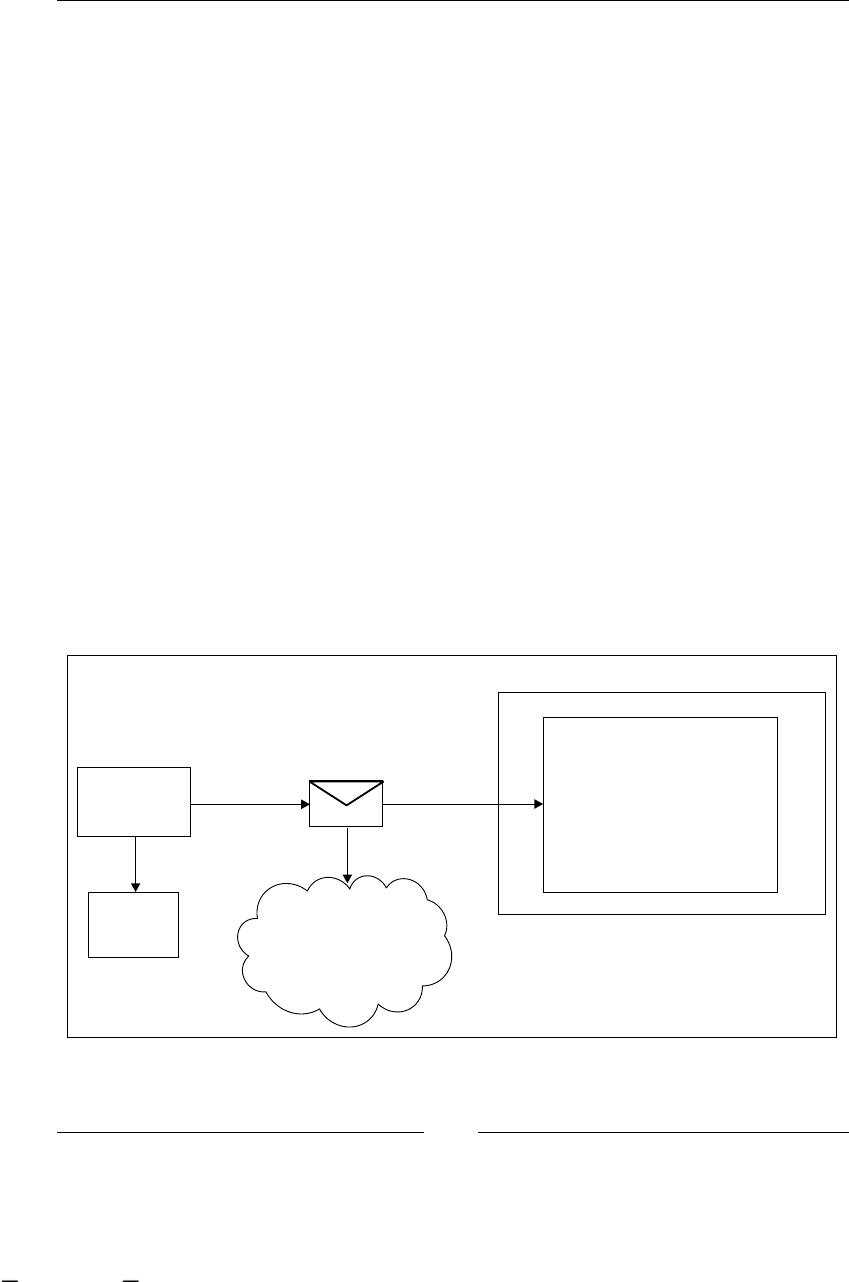
Chapter 12
[ 327 ]
Another already-mentioned advantage of this approach is that if we decide to switch
to another BPM framework, we only need to change these three lines. That means
that our client applications—all the applications that call this method—will not
suffer any changes at all.
Because we are running our application in an enterprise environment we have the
possibility to congure this Stateless Session Bean to run in a cluster, gaining the
ability of handling hundreds of concurrent requests.
We can also bring out this Stateless Session Bean in multiple protocols to be
accessible from different platforms in different ways depending on the application's
needs. Some examples of these protocols can be: HTTP, HTTPS, RMI, web services
such as REST-WS, JAX-WS, JSON-WS, CORBA, JMS, and so on.
The CommandServiceBean
Basically, it is the command design pattern (http://en.wikipedia.org/wiki/
Command_pattern) applied inside a Stateless Session Bean. It will contain a set of
built-in commands that will be executed on the server side. These commands are
designed to wrap all the interactions with the framework to be able to interact
with it in remote environments. These commands are generic and all works in
the same way.
Take a look at the following gure, which shows us how this command service
bean works:
Client
Application
jbpm-
jpdl.jar
CMD
Contains the type
of the command
and the properties
needed to execute
that command
CommandService
Bean
execute( Command cmd)
EJB Container
This material is copyright and is licensed for the sole use by ALESSANDRO CAROLLO on 18th December 2009
6393 south jamaica court, , englewood, , 80111

Going Enterprise
[ 328 ]
As you can see in the gure, the client application will create and send a command
to the CommandServiceBean to be executed. Each command will be of different type,
depending on its behavior, and it will contain different properties to be executed.
Each of these commands will implement the Command interface, which only contains
the execute() method.
public interface Command extends Serializable
{
Object execute(JbpmContext jbpmContext) throws Exception;
}
The CommandServiceBean will get the command and it will call the execute()
method on the server side, returning the result of the execution to the caller.
If you take a look at the jBPM distribution you will nd a set of implemented
commands that will let you interact with your business processes covering the
common use cases.
We can analyze one of the most used commands that will let you start a new process
instance based on a ProcessDefinition ID.
The following block of code belongs to the NewProcessInstanceCommand, which can
be found in the org.jbpm.command package inside the core project.
public class NewProcessInstanceCommand extends AbstractBaseCommand
{
private String processDefinitionName = null;
private long processDefinitionId = 0;
...
public NewProcessInstanceCommand(String processDefinitionName)
{
this.processDefinitionName = processDefinitionName;
}
/**
* return the id of the newly created process instance.
*
* @throws Exception
*/
public Object execute(JbpmContext jbpmContext) throws Exception
{
if (actorId != null)
{
jbpmContext.setActorId(actorId);
}
ProcessInstance processInstance = null;
This material is copyright and is licensed for the sole use by ALESSANDRO CAROLLO on 18th December 2009
6393 south jamaica court, , englewood, , 80111

Chapter 12
[ 329 ]
if (processDefinitionName != null)
{
processInstance = jbpmContext
.newProcessInstance(processDefinitionName);
}
else
{
ProcessDefinition processDefinition = jbpmContext
.getGraphSession().loadProcessDefinition(processDefinitionId);
processInstance = new ProcessInstance(processDefinition);
}
...
jbpmContext.save(processInstance);
return result;
}
...
}
As you can see this class contains two main properties: processDefinitionName
and processDefinitionId. These properties need to be set by the client
application that is creating the command. In this case, you can choose between
these two possibilities, because it's the same whether you use the ID or the name.
With these parameters, when the Command Service Bean receives the command,
it will call the execute() method.
This is a very powerful solution but there are two problems there. The rst
problem is that the client still needs to have the jBPM library, because it needs to
create the jBPM commands that are dened inside the jbpm-jpdl.jar le. The
second problem is that the result needs to be casted by the caller, who needs to
know the type of the result.
Do not confuse this solution with the asynchronous JobExecutor service.
This solution is for synchronous, decoupled, and delegated interaction to
use the jBPM framework in enterprise environments. These commands
will replace the way we call the framework functionalities, such as start a
process, continue process execution, complete a human task, and so on.
Just as a suggestion, I will recommend the following approach that includes the
CommandServiceBean and our Stateless Session Bean as a facade. This is not the
only way, or solution, of doing an implementation, but it has some advantages.
This material is copyright and is licensed for the sole use by ALESSANDRO CAROLLO on 18th December 2009
6393 south jamaica court, , englewood, , 80111

Going Enterprise
[ 330 ]
We will change our continue() method example to this new one in our Stateless
Session Bean:
public void continue(long tokenId){
SignalCommand signalCmd = new SignalCommand(tokenId);
commandServiceBean.execute(signalCmd);
}
The use of the Command Service Bean will require us to deploy the
jbpm-enterprise.ear package in our application server. Then in our Stateless
Session Bean we need to get a reference of the Command Service Bean (which is
also a Stateless Session Bean) in order to be able to execute the commands.
We can do that with the following line:
@EJB(mappedName="ejb/CommandServiceBean") RemoteCommandServiceHome
cmdService;
The advantages of using the CommandServiceBean with our Stateless Session Bean as
a facade are:
To be framework independent
To avoid transport of large objects over the net
These key points are very important when our applications are distributed and we
don't want to transfer large amount of data over the net. This will help us improve
software communications when our server is in a remote location and each of our
requests needs to go out to the net to be able to interact.
Imagine a full ProcessInstance object serialized into the binary format and then
sent through the net, there will be a lot of unnecessary information to be deserialized
to get the ProcessInstance object again in the client application.
It's important to see that we are not exposing the framework's APIs here. Our
methods will only send and return the minimal information needed to interact.
JobExecutor service
As we have seen in Chapter 11, Advanced Topics in Practice, jBPM has a built-in
message service that works using a database table and another thread to query
that table in regular intervals, using a poll schema.
All these mechanisms start working when we mark an activity node or an action
with the async ag. We were delegating the execution of our asynchronous activity
to the JobExecutor service thread. For simple cases, this works very well, and gives
us a simple way to solve asynchronous executions in Java SE environments.
•
•
This material is copyright and is licensed for the sole use by ALESSANDRO CAROLLO on 18th December 2009
6393 south jamaica court, , englewood, , 80111
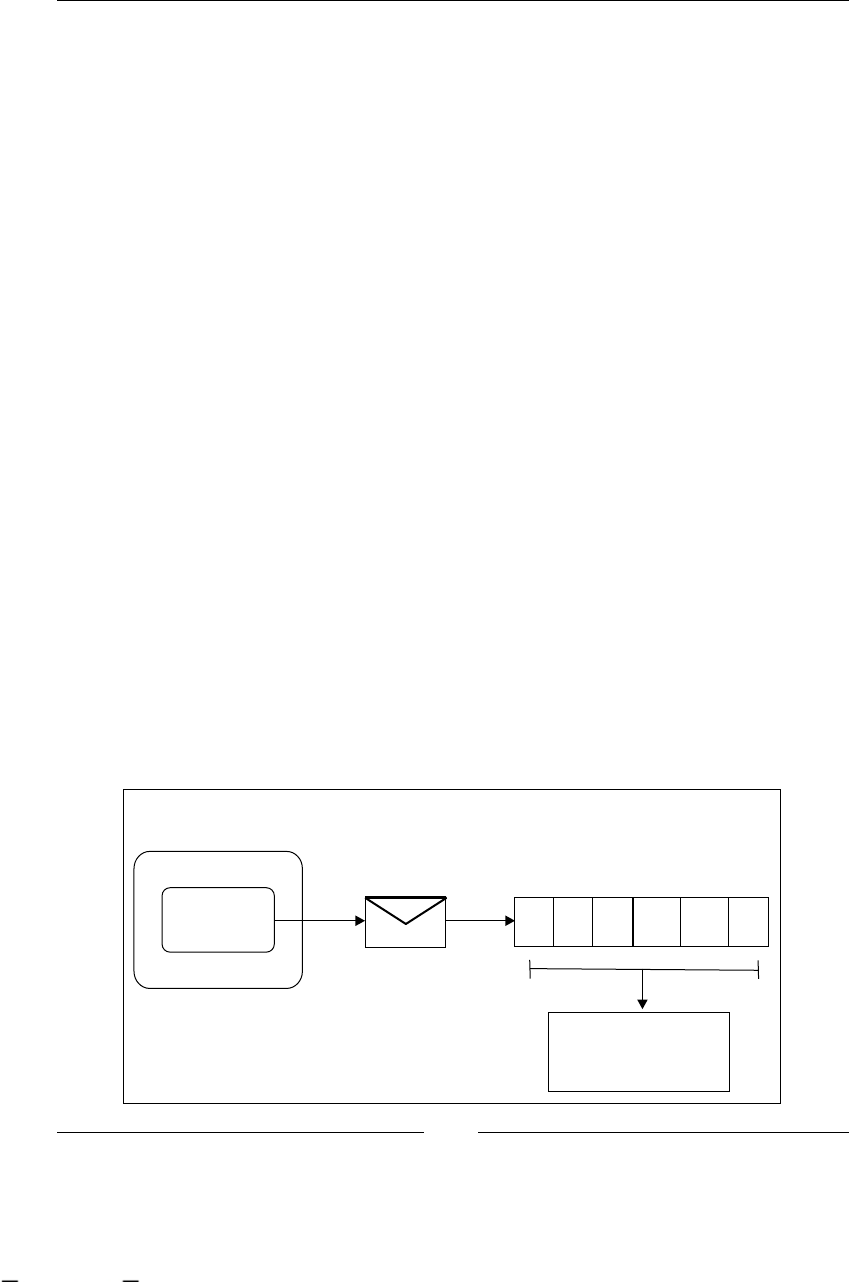
Chapter 12
[ 331 ]
Now, in larger environments, this solution would not be enough. Imagine that we
have a thousand process instances running, all with asynchronous nodes. Basically,
we will have a lot of execution charge in our JobExecutor service. You can also
congure the built-in JobExecutor service to have more than one thread to execute
your nodes, but the bottleneck in this case will be your centralized database.
This approach couldn't cope with a lot of requests, because all the applications and
all the JobExecutor threads will be generating a large amount of queries to the same
database schema.
JobExecutor service for Java EE environments
The solution for such a large amount of interactions in EE environments is the
enterprise JobExecutor, which uses JMS for messaging and a Message Driven
Bean (MDB) to execute these messages.
Our processes will now be producers of JMS messages to a jBPM special JMS
queue. This JMS queue will be monitored by a special MDB that will be in charge
of executing all our generated messages.
The huge advantage of this approach is that all the interactions between your
components can run in a clustered environment with just simple congurations.
You don't need to change each component to be able to attend more requests to
work in a distributed environment.
Our JMS queues also can be clustered bringing us fault tolerance and our MDB can
be clustered giving us a scalable way to process more messages at the same time if
the request amount increases.
Last, but not least, our client won't notice the difference because the only thing that
changes is how we congure the jBPM framework.
Stateless Session
Bean
JMS Message JBPM JMS Queue
Process
Instance
Message Driven
Bean
This material is copyright and is licensed for the sole use by ALESSANDRO CAROLLO on 18th December 2009
6393 south jamaica court, , englewood, , 80111
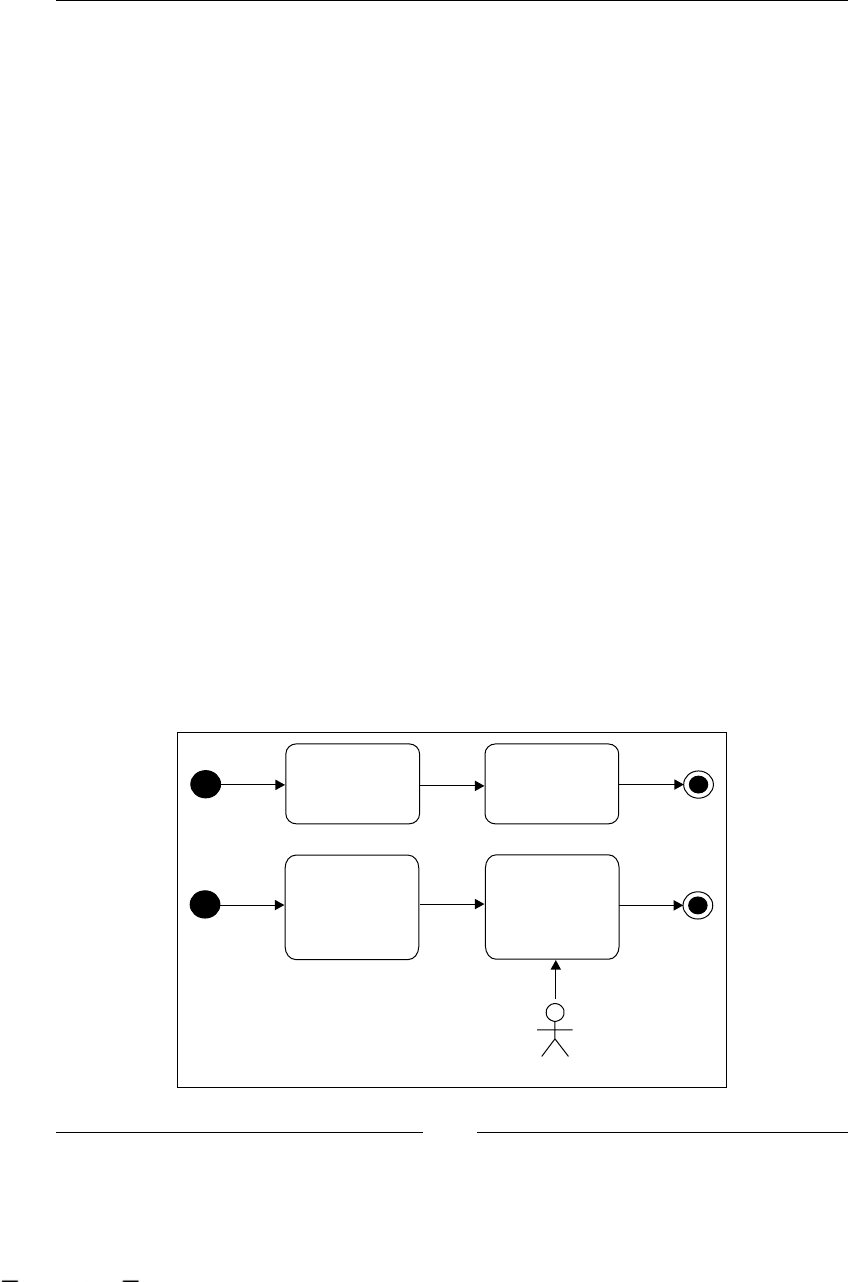
Going Enterprise
[ 332 ]
This gure shows us that the client, in this case, can be a Stateless Session Bean
or any standalone application, which has already congured the JMS messaging
service. It will now deliver a message to the congured JMS queue that is being
monitored with an MDB.
This MDB is in charge of taking out the message from the queue and executing it.
One of the advantages of this approach is that if something happens in the middle
(of the extraction or the execution) the MDB will be in charge of re-executing the
message until it is nished successfully.
Another big advantage is that you can replicate the jBPM JMS queue in multiple
nodes of a cluster to have "fault tolerance" support. Also, you can have multiple
instances of the MDB in different servers to speed up the execution of your
asynchronous activities.
It's important for you to remember that the messages sent to the JobExecutor will
be executed in the JobExecutor server thread, so the execution will go in the MDB
thread until the process reaches the next wait state.
Timers and reminders
Until now we have not discussed anything about timers in our processes. This is an
extra topic that I want to cover in this chapter, because it also includes a different
conguration for enterprise environments. The main idea behind using a timer or a
reminder is to dene actions that our business requires to happen at a well-dened
point in the future.
Let's see a simple example:
Control the
backed up
information
Admin
Back up
Information
to a Tape
Automatic
Activity
Human
Task
This material is copyright and is licensed for the sole use by ALESSANDRO CAROLLO on 18th December 2009
6393 south jamaica court, , englewood, , 80111

Chapter 12
[ 333 ]
This process is just a simple tape backup process. This process will start and execute
a tape backup (that is just an automatic activity). Imagine this process needs to be
executed each night and it must nish before the employees enter the company in
the morning.
Basically, the automatic activity that does the backup will be executed and the output
is reviewed by the human task. The human actor will decide if the result is OK,
the task will end the process and if there was any error the actor needs to start the
backup again.
Now imagine that the backup process starts at 1 A.M. The rst activity that the
backup performs, would take between two and three hours. When this activity
nishes, the human task is created.
As we have said before, the human task is very important, because if there is
something wrong with the backup, we need to start it again as soon as possible. So
we need to be sure that the administrator (human actor) will see this task and take an
action as soon as the task is created. Imagine the poor administrator staying awake
all night waiting for the backup to nish. We need some way of notifying the actor if
the task is created and is not completed after a reasonable period.
Basically, the process will detect if the task is not completed and it will generate a
notication to the actor in charge of that task. This notication is also known as a
reminder when some actions are required to continue the process execution.
This can be achieved in two ways:
Using timers
Using reminders
Both work in the same way, but reminders are specic for human tasks. Humans
forget things, machines don't.
In this case we have a human task, so we can create a reminder that performs an
action in regular periods (let's say every 10 minutes) to remind the user that the task
needs to be completed.
As you can imagine, this action can be whatever you need. For example:
Send an e-mail
Send an SMS
Call a number
Play an alarm
•
•
•
•
•
•
This material is copyright and is licensed for the sole use by ALESSANDRO CAROLLO on 18th December 2009
6393 south jamaica court, , englewood, , 80111
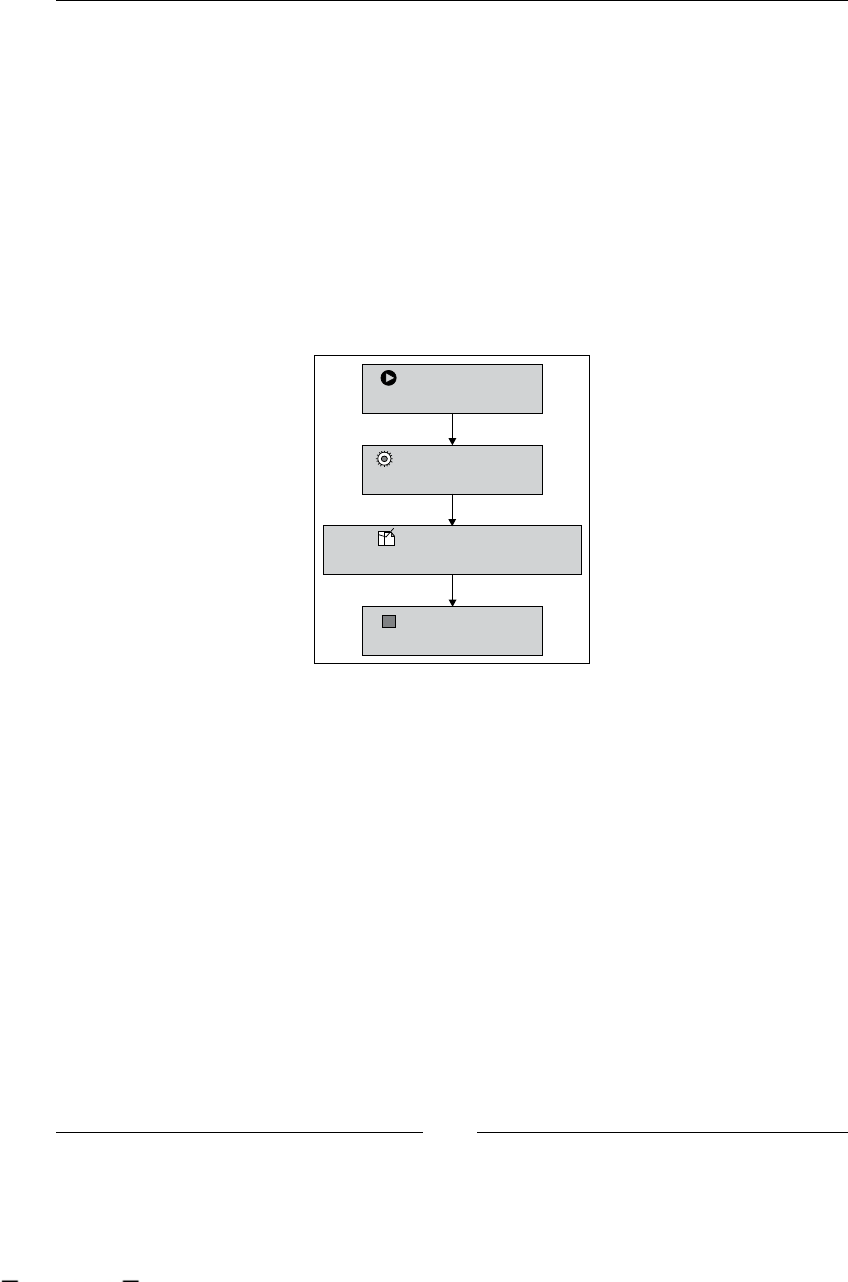
Going Enterprise
[ 334 ]
In the case that the example represents we will have a reminder like this one:
<task-node name="Control the Backed up information">
<task name="Control Backup">
<assignment actor-id="admin"></assignment>
<reminder duedate="10
business minutes"
repeat="10 business minutes"/>
</task>
<transition to="End"></transition>
</task-node>
A mail will be delivered to the admin user every 10 minutes until the task
is completed.
<<Node>>
Backup Information
<< >Task Node>
Control the Backed up Information
<< >Start State>
Start
<< >>End State
End
It is important to note that reminders are related with human tasks, that's why the
functionality attached to them is just to send a mail, each time the reminder is due.
For that reason, it is also important to know, how to congure the mail service that
has not been discussed here.
Mail service
This very short section describes the way to congure the mail service in jBPM.
The main idea behind this conguration is to have a mail service congured to
send e-mails. This service will be used by the Email node and in the reminders
for human tasks.
This material is copyright and is licensed for the sole use by ALESSANDRO CAROLLO on 18th December 2009
6393 south jamaica court, , englewood, , 80111

Chapter 12
[ 335 ]
This service can be congured in the jbpm.cfg.xml le setting the values for the
following properties:
<string name="jbpm.mail.smtp.host" value="localhost" />
<bean name="jbpm.mail.address.resolver"
class="org.jbpm.identity.mail.IdentityAddressResolver"
singleton="true" />
<string name="jbpm.mail.from.address" value="jbpm@noreply" />
The property called jbpm.mail.smtp.host needs to be congured to point to a
valid SMTP running server. If the server is found, the mail will be delivered using
the form address "jbpm@noreply".
The org.jbpm.identity.mail.IdentityAddressResolver class will be in charge
of resolving the mail for a specied user. This class is related closely with the identity
module, so if you have your custom identity module, you will need to write your
custom class to resolve each user mail. The idea is to be exible enough to plug any
identity source and then write the custom address resolver for each one.
Calendar
As you can see, in the previous reminder we specify the due date using the
following string:
duedate ="10 business minutes"
This string will represent the due date for the reminder, and is based on a
congured business calendar. This calendar can be congured to represent
your company calendar.
The structure for this due date is expressed as follows:
duedate ::= [<basedate> +/-] <duration>
If this base date is omitted, the duration is relative to the current date when the
calculation is done.
This material is copyright and is licensed for the sole use by ALESSANDRO CAROLLO on 18th December 2009
6393 south jamaica court, , englewood, , 80111

Going Enterprise
[ 336 ]
If you take a look at the default calendar represented in the jbpm.business.
calendar.properties le, you will see that each day's working hours can be
congured and you can also specify the holidays in the business year. Here's the
code for this le:
hour.format=HH:mm
# weekday ::= [<daypart> [& <daypart>]*]
# daypart ::= <start-hour>-<end-hour>
# start-hour and end-hour must be in the hour.format
# dayparts have to be ordered
weekday.monday= 9:00-12:00 & 12:30-17:00
weekday.tuesday= 9:00-12:00 & 12:30-17:00
weekday.wednesday= 9:00-12:00 & 12:30-17:00
weekday.thursday= 9:00-12:00 & 12:30-17:00
weekday.friday= 9:00-12:00 & 12:30-17:00
weekday.saturday=
weekday.sunday=
day.format=dd/MM/yyyy
# holiday ::= <holiday-period>
# holiday-period ::= <start-day> [- <end-day>]
# start-day and end-day must be in the day.format
# below are the Belgian official holidays
holiday.1= 01/01/2005 # nieuwjaar (saturday)
holiday.2= 27/03/2005 # pasen (sunday)
holiday.3= 28/03/2005 # paasmaandag
holiday.4= 01/05/2005 # feest van de arbeid (sunday)
holiday.5= 05/05/2005 # hemelvaart
holiday.6= 15/05/2005 # pinksteren (sunday)
holiday.7= 16/05/2005 # pinkstermaandag
holiday.8= 21/07/2005 # my birthday
holiday.9= 15/08/2005 # moederkesdag
holiday.10= 01/11/2005 # allerheiligen
holiday.11= 11/11/2005 # wapenstilstand
holiday.12= 25/12/2005 # kerstmis (sunday)
# typical workday excluding breaks
business.day.expressed.in.hours= 7.5
# 7.5 hours * 5 days a week
business.week.expressed.in.hours= 37.5
# 253 business days / 12 months
business.month.expressed.in.business.days= 21
# 365 natural days - 105 weekend days - 7 holidays
business.year.expressed.in.business.days= 253
This material is copyright and is licensed for the sole use by ALESSANDRO CAROLLO on 18th December 2009
6393 south jamaica court, , englewood, , 80111
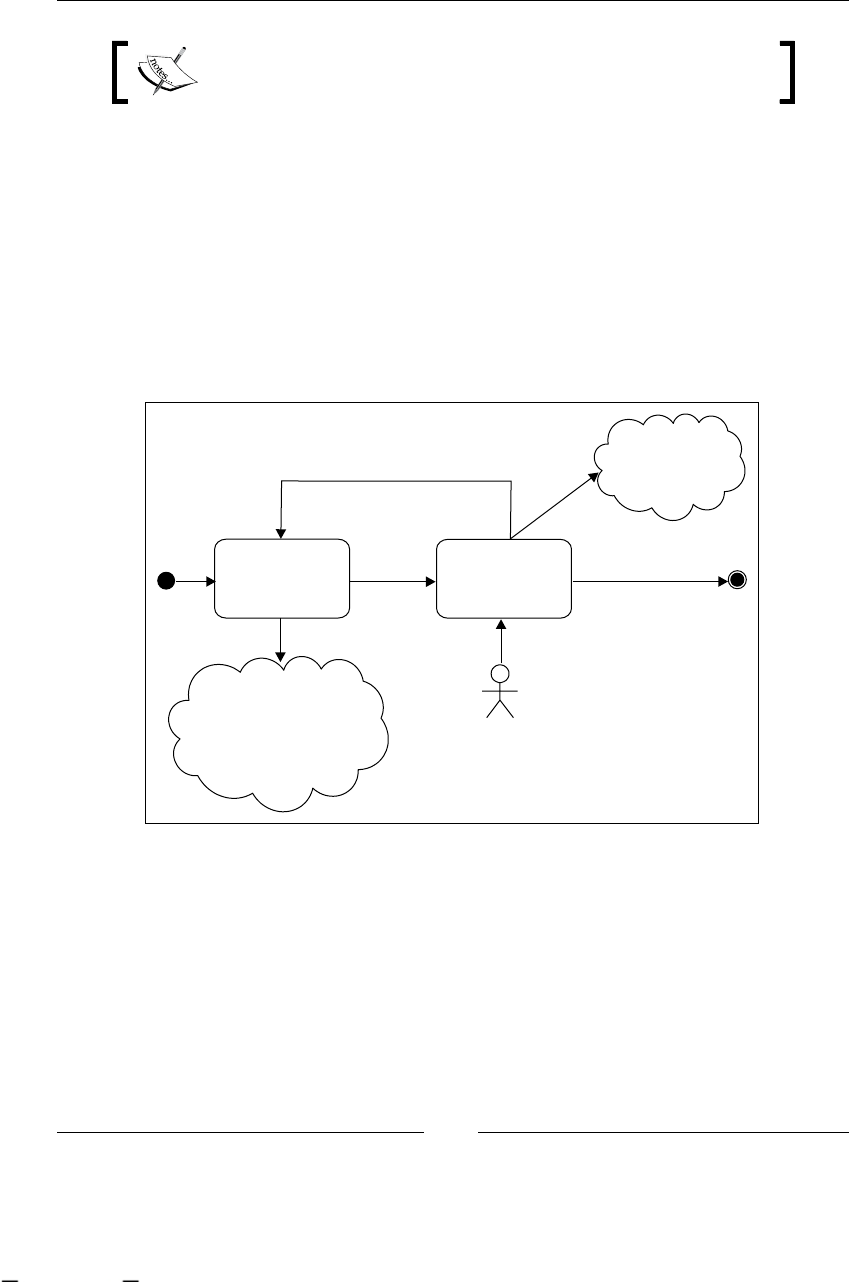
Chapter 12
[ 337 ]
Timer and reminders will use the same calendar conguration.
If you don't use the keyword business, the due dates will be calculated using the
system date.
Timers
In the case of timers, we can start and cancel a timer when we want. This timer can
be used in different activities, not just human tasks. Timers are more generic than
reminders, which are only for human tasks and only send mails.
Let's analyze the following process:
Start Count
Down
Cancel the
timer
Enter
Numbers
Reset The Clock
to the End
of the World
John
Lock
Start a timer
with due
date in 108
seconds
In this case we have a simple process to demonstrate how the timers work.
This material is copyright and is licensed for the sole use by ALESSANDRO CAROLLO on 18th December 2009
6393 south jamaica court, , englewood, , 80111
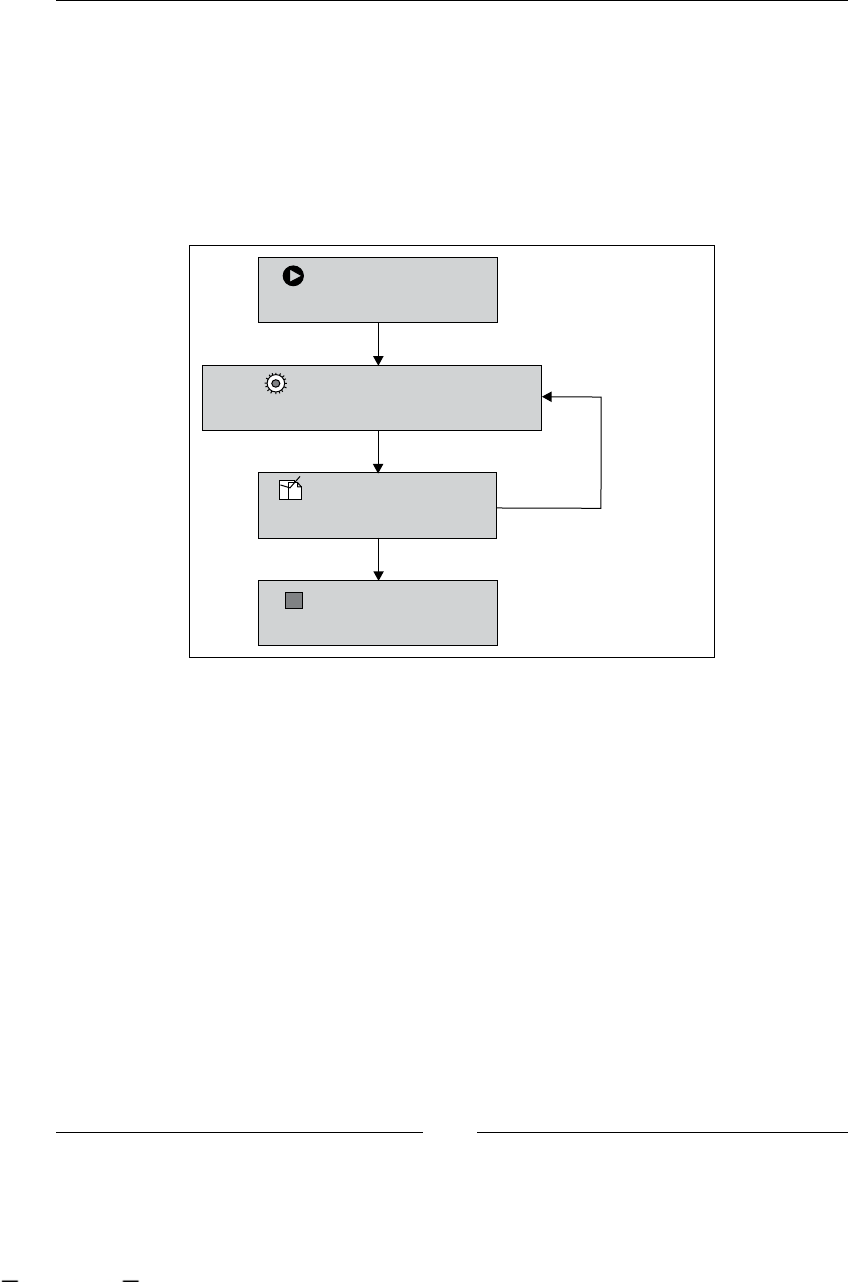
Going Enterprise
[ 338 ]
The rst node will start a timer that will expire at 108 seconds (just a coincidence).
Then a human task will be created. This is a basic human task that will require the
user in charge to enter some magical numbers and then nish the task. If the task is
completed before the timer's expiration, the timer is canceled and the process moves
to the rst activity where the timer is created again. If the task is not completed
before the timer's expiration, the timer will execute its action. This action just signals
the process to take the transition called to the End of the World, which will lead us
to the EndState node.
<< >Node>
Start Count Down (108 seconds)
<< >Task Node>
Enter Numbers
<< >Start State>
Start
<< >>End State
End of the world
to the end of the world
reset clock
This gure shows us the graphical view of the following process:
<process-definition xmlns="urn:jbpm.org:jpdl-3.2"
name="L0stExample">
<start-state name="Start">
<transition to="Start Count Down (108 seconds)"></transition>
</start-state>
<node name="Start Count Down (108 seconds)" async="true">
<event type="node-enter">
<create-timer duedate="108 seconds" name="Count Down">
<action class="org.jbpm.example.handlers
.EndOfTheWorldActionHandler"></action>
</create-timer>
</event>
<transition to="Enter Numbers"></transition>
</node>
<task-node name="Enter Numbers">
<event type="task-end">
<cancel-timer name="Count Down"/>
This material is copyright and is licensed for the sole use by ALESSANDRO CAROLLO on 18th December 2009
6393 south jamaica court, , englewood, , 80111
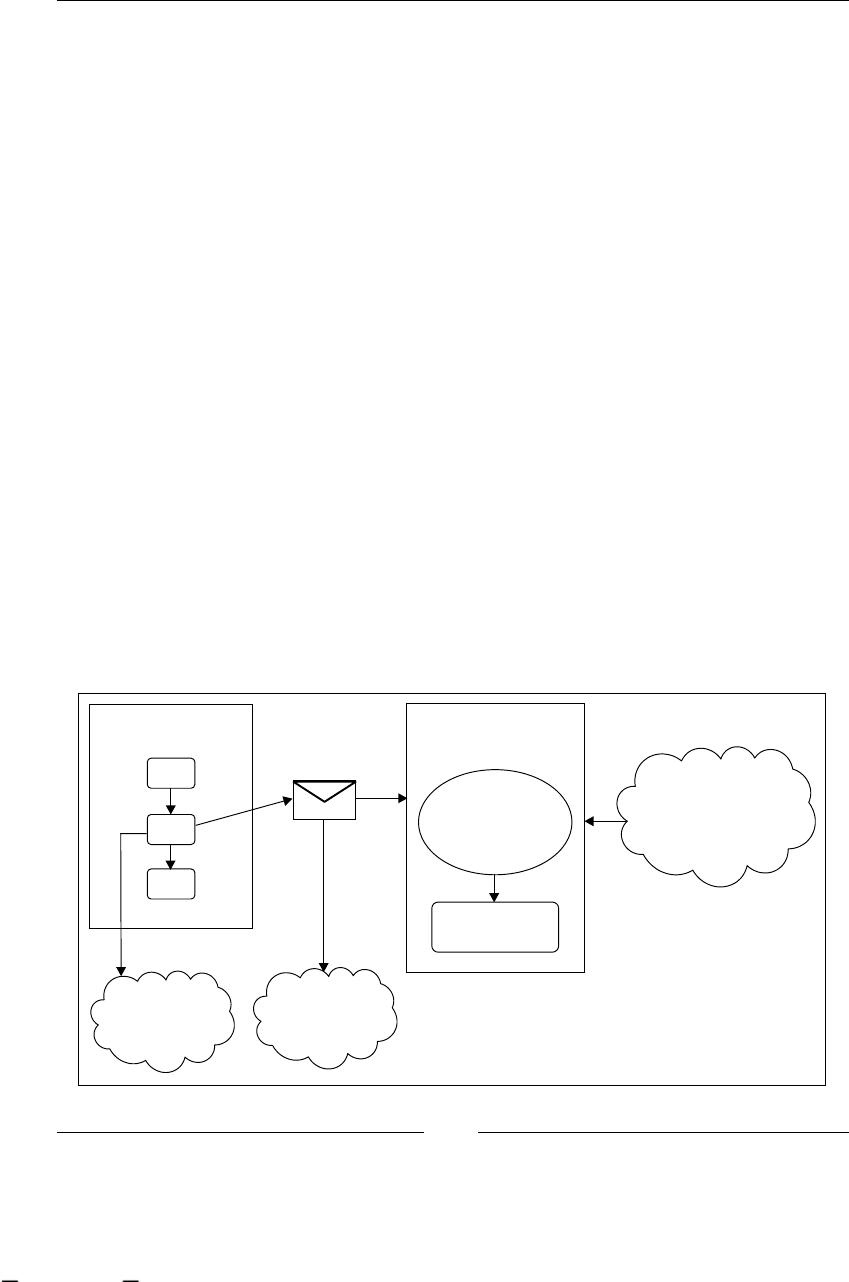
Chapter 12
[ 339 ]
</event>
<transition to="End of the World" name="to the end of the world">
</transition>
<transition to="Start Count Down (108 seconds)"
name="reset clock"></transition>
</task-node>
<end-state name="End of the World"></end-state>
</process-definition>
You can nd this process and a test that runs in the project called /TimerExample/,
provided with this chapter. Feel free to analyze and run the test to see how it creates
and executes the jobs.
How do the timers and reminders work?
Until now, you have seen how you can use both timers and reminders, but nothing
about how they work and behave internally. If you get the idea of asynchronous
executions, this will be very easy because the mechanism is the same.
They both create jobs that are delegated to the JobExecutor service to be executed
sometime in the future. The only difference with the normal asynchronous node
executions is that timers and reminders will include a due date different from the
current timestamp.
Then the JobExecutor service will check for all the unnished messages and for each
of them it will also check if the due date is greater than the current timestamp.
Take a look at the following gure that will show you how this works:
Job
Process Instance Job Executor
Service
If The Due
Date>
Current time
Execute()
Check the Due
Date of the
Timer /
Reminder
Create
Timer /
Reminder
Including
the Due
Date
This material is copyright and is licensed for the sole use by ALESSANDRO CAROLLO on 18th December 2009
6393 south jamaica court, , englewood, , 80111

Going Enterprise
[ 340 ]
We can see that the JobExecutor service needs to be up and running for the timers
and reminders to work.
If you take a look at the database (if you have a standalone Java SE conguration)
in the JBPM_JOB table you can see how the jobs are created and executed when the
time comes.
For Java EE environments you can check the JMS queue that is congured to receive
the JMS messages created by our timers and reminders. But the way of work will be
the same, no matter in which environment we work.
For more information about timers and reminders please take a look at
http://docs.jboss.com/jbpm/v3.2/userguide/html_single/#scheduler.
Summary
In this chapter we have discussed the following topics:
How to congure the common services for Java EE environments
The advantages and conguration of the JobExecutor service in EE
environments
The main functionalities, advantages, and congurations of timers and
reminders in Java SE and Java EE environments
The main idea of this chapter is to understand when and why we need to switch to a
full Java EE environment. This is a big decision, but when we decide, we need to be
sure about the advantages and disadvantages of each environment.
•
•
•
This material is copyright and is licensed for the sole use by ALESSANDRO CAROLLO on 18th December 2009
6393 south jamaica court, , englewood, , 80111

Index
Symbols
-Dmaven.test.skip ag 81
<process-denition> tag
nodes 110
ProcessDenition parsing process 111, 112
<sub-process> tag 303
A
action property 116
addNode(Node) method 43
addTransition() method 54
addTransition(String, Node) method 41
Administrator Screen
Create DB schema 208, 209
Create new process instance 210
Deploy process denition 210
Insert some users 209
advanced feature, jPDL
bean 290
compatibility 292
constructor 291
process instance, starting 287, 288
properties 289
asynchronous executions
about 304
asynchronous JobExecutor service,
conguring 310-312
asynchronous way 307
DbMessageService conguration 314
nodes, placing 313
server crash, situations 308-310
SimpleAsyncExecution process denition
315
synchronous way 304-306
TestCase class, code analyzing 316
asynchronous way, asynchronous
executions
working 307, 308
B
BAM 17
base node
about 112, 191
action property 116
analyzing 114
delegated actions 115
gear 113
technical details, analyzing 115
BP
about 8
BPM 12
business goal, achieving 12
dening 8
executing, by humans 9-12
executing, by systems 9-12
sequence 9
task 8
BPEL 65
BPM
about 12
advantages 16
history 18, 19
improvements 18
integration 20
orchestration 21
SOA 21
stages 13, 14
stages, in real-life scenario 15
system integration 18
This material is copyright and is licensed for the sole use by ALESSANDRO CAROLLO on 18th December 2009
6393 south jamaica court, , englewood, , 80111

[ 342 ]
workow 18, 20
BPM, advantages
agile interaction 16
global understanding 16
paper work reduction 17
process information analysis 18
real time process information 17
BPM Engine
about 161
ESB 21
technological terms 21
BPMN 13
BPMS
about 22, 23
new approach 23-25
system, versus suites 23
Business Process Execution Language.
See BPEL
Business Process Management Systems.
See BPMS
Business Process. See BP
business process, decoupling
implementation 33
OOP paradigm, comparing with 34
Business Process Management. See BPM
Business Process Modeling Notation. See
BPMN
business requirements
analyzing 141
CandidateInterviews process 148
candidates, searching 141
decision node, using 149
example 141-143
nal acceptance 142
initial interview 142, 148
jPDL representation, analyzing 144, 145
medical checkups 142
previously dened process, refactoring
147-151, 158
proposed formal denition, analyzing 145,
146
State node, using 148
technical interview 142
business scenario example, task node
activity nature, knowing 195
business actors, identifying 195
delegated assignments 201
expression assignments 200, 201
human, assigning to tasks 199, 200
process 195, 196
signal property 198
signal property, values 198
tasks 197
C
CANDIDATE_INFO variable 157
Candidate Interviews process, recruiting
example
Initial Interview phase 298
LogSuperStateEnterActionHandler, code
299
CMT
about 176
Hibernate caching strategies 177
Hibernate congurations 176
command design pattern 115
CommandServiceBean
about 327
advantage 330
execute() method 328
NewProcessInstanceCommand code 328,
329
processDenitionId. property 329
processDenitionName property 329
using 330
working 327
Container Managed Transactions. See CMT
context information
PhoneLineProcess example, testing 262
pre-dened strategies 253
process information 258
process information, types 258, 259
process variable, persisting 253-255
storing 252
VariableInstance subclasses 256
ContextInstance class
addVariables() method 245, 246
deleteVariable() 247
ExecutionContext 247
getVariable(String) 247
hasVariable() 247
setTransientVariable() method 246
setTransientVariables() method 246
This material is copyright and is licensed for the sole use by ALESSANDRO CAROLLO on 18th December 2009
6393 south jamaica court, , englewood, , 80111

[ 343 ]
setVariable() method 245
setVariable(String,Object) 246
setVariableLocally() method 245, 246
setVariables() method 246
contextual information
about 252
process variables, persisting 252
D
data source conguration, JBoss Application
Server
<local-tx-datasource/> data source , using
323, 324
CommandServiceBean 327-329
Enterprise components architecture 325
JBoss JTA capabilities 324, 325
steps 321-323
decide() method 58
decision node
about 128
core functionality 129
getDefaultLeavingTransition() method 129
delegated actions 115
development process
about 30
business logic 32
common approach 31, 32
database model 32
executing 44
executing, automatic node 45
executing, wait-state 45
user interface 32
doBackup() method 46, 47
downloading
jBPM 75
jBPM, from binary 75, 76
jBPM, from source code 79
MySQL JConnector 73
Drools 64
E
Eclipse IDE
about 73, 74
Maven support, installing 74
Eclipse plugin project
FirstProcess 88
GPD project structure 88
Graphical Process Editor 91
using 86, 87
EJB 320
email node
about 286
server, conguring 287
endDate property 135
EndState node
about 125
basic functionality 125
generic properties, adding 125
properties, analyzing 125
enter() method 50, 131
Enterprise components architecture
advantages 326
continue() method 326
Enterprise Java Bean. See EJB
Enterprise Service Bus. See ESB
ESB 19, 21
event wait node 45
execute() method 50
ExecutionContext class 119-122
Expression Language (EL) 130
F
Fork node
about 268
child token 270
dening, in jPDL 270
working 269, 270
fully qualied name (FQN) 255
G
GDP 101
getDefaultLeavingTransition() method 101
getNode(Long) method 43
getNodeType() method 116
getVariable() method 261
GOP
about 30
features 30
implementing, on top of Java language
35, 36
requisites 34
This material is copyright and is licensed for the sole use by ALESSANDRO CAROLLO on 18th December 2009
6393 south jamaica court, , englewood, , 80111

[ 344 ]
GOP, implementing
language, expanding 38
nodes, modeling 37
on top of Java language 35-39
process denition 39
transition, modeling 37, 38
GPD 66
GPD project structure, Eclipse plugin
project
bout 88
SimpleProcessTest 89, 90
src/main/cong directory 89
src/main/java directory 89
src/main/jpdl directory 89
src/test/java directory 89
graph() method 41
Graphical Process Designer. See GPD
Graphical Process Editor, Eclipse plugin
project
deployment tab 92
diagram tab 92
source tab 93
Graph Oriented Programming. See GOP
Graph Process Designer. See GDP
H
handling information, jBPM
about 242
approaches, use model objects 244
approaches, use primitive properties 244
business key 242
example 242, 244
simple piece of information 242
Temporal information 242
hibernate.cfg.xml le
data source conguration 218
direct JDBC connection 218
existing data source, using 218
Hibernate properties 219
hibernate.ddl2sql.auto () property 177
hibernate.format.sql property 177
hibernate.show_sql () property 176
transaction congurations 219
hibernate.connection.driver_class property
171
hibernate.connection.password property
171
hibernate.connection.url property 171
hibernate.connection.username property
171
hibernate.dialect property 171
human task
modied process denitions 231
node change, analysing 230
process denitions, modifying 229, 230
task assignments 234
task node 229
variable mappings 232-234
human task node 186
I
installing
Maven 71, 72
MySQL 72
integration
extensibility 20
exibility 20
J
J2SE
about 153
jBPM, embedding 153, 154
Java denition concept
about 42-44
addNode(Node) method 43
getNode(Long) method 43
graph() method 43
Graphicable interface 43
name property 43
NodeContainer interface 43
Java EE environment
EJB 320
jBPM congurations 319-321
JobExecutor service 331
myMethod() 321
Java Standard Edition. See J2SE
Java Transaction API. See JTA
JBoss
community page 62
This material is copyright and is licensed for the sole use by ALESSANDRO CAROLLO on 18th December 2009
6393 south jamaica court, , englewood, , 80111

[ 345 ]
Drools 64
ESB 64
jBPM 62
JBoss Application Server
data source, conguring 321-323
Hibernate 63
JBoss EJB3 63
JBoss Messaging 64
JBoss Web 63
Seam 64
jBPM
about 7, 64
BPEL, implementing 65
Business Process 8
downloading 75
downloading, from binary 75, 76
downloading, from source code 79
information, handling 242
homepage 65
jPDL 65
modules 66
multi-language support 65
project 62
starting with 75
structure 82
persistence 159
jBPM, downloading from binary
about 75
cong directory 76, 77
database directory 77
designer directory 78
docs directory 78
examples directory 78
lib directory 79
src directory 79
jBPM, downloading from source code
about 79-81
branches directory 80
tags directory 80
trunk directory 80
jBPM, structure
Core module 83, 84
Core module, JAR archives 84
DB module 84
Distribution module 84
Enterprise module 84
Example module 85
Identity module 85
modules directory 82
Simulation module 86
User Guide module 86
jbpm-enterprise module 319
JbpmContext class, persistence
GraphSession 168
GraphSession, methods 168
JobSession 169
LoggingSession 169
LoggingSession, methods 169
TaskMgmtSession 167
TaskMgmtSession, examples 167
jBPM human tasks, task management
module
Source Tab 191
task node 190
jBPM installation
Maven 69
requirements 69
jBPM Process Denition Language.
See jPDL
jBPM project
about 62, 63
Drools 64
JBoss Application Server 63
JBoss ESB 64
jBPM 64
JobExecutor service
about 330
advantage 331, 332
for Java EE environments 331, 332
Join node 217
jPDL
about 101, 102
advanced feature 287
disadvantage 103
nodes 267
process instance, starting 287
process structure 104
structure 103
jPDL process structure
functionality 108
GraphElement class 106
NodeCollection methods 106
ProcessDenition class 105
ProcessDenition properties 106
This material is copyright and is licensed for the sole use by ALESSANDRO CAROLLO on 18th December 2009
6393 south jamaica court, , englewood, , 80111

[ 346 ]
properties window 104
jPDL process structure, functionality
process denition, constructing 108, 109
jPDL structure 104
JTA 320
K
key points, business requirements 140
L
language
action 53
creating 53
end 53
human decision 53
start 53
leave() method 50, 121
M
mapping strategies, process state node
child process variables 286
choosing 285
parent process variables 285, 286
read strategy 285
required strategy 285
write strategy 285
matchers
about 255
ClassNameMatcher 255
HibernateLongIdMatcher 255
HibernateStringIdMatcher 255
matches
SerializableMatcher 255
Maven
about 69
centralized project 70, 71
dependencies, describing 70, 71
installing 71, 72
POM 70, 71
standard structure 70
Maven project
building 96-98
clean goal 96
install goal 96
package goal 96
src/main/java 96
test goal 96
Maven projects
building, quick start guide 59
MDB 331
Message Driven Bean. See MDB
modules, jBPM
Enterprise 67
GPD 66
identity 67
jPDL image 67, 68
TaskMGMT 67
multi-language support, jBPM
about 65, 66
BPEL 65
jPDL 65
PageFlow 66
myParentVariable 284
MySQL
installing 72
JConnector, downloading 73
N
nbrOfThreads property 311
Node
AFTER_SIGNAL events 116
BEFORE_SIGNAL events 116
diagrammatic representation 111
life cycle 116
Node, life cycle
automatic decision, making 128
constructors, parsing process 117
constructors using 117
decide() method 128
EndState node 125
external event, waiting for 126
joining 131
process, nishing with 125, 126
process, starting up 122-124
processes, executing 132, 133
runtime behavior 119, 120
StartState node 122
State node 126, 127
Transition class 131, 132
transitions/relationship management, with
other nodes 117-119
This material is copyright and is licensed for the sole use by ALESSANDRO CAROLLO on 18th December 2009
6393 south jamaica court, , englewood, , 80111

[ 347 ]
nodes
about 267, 268
ActionNode 55
behavior, modeling 271-274
email node 286
EndNode 54
execution process, rst stage 55, 56
execution process, second stage 56
execution process, third stage 57, 58
Fork node 268
HumanDecisionNode 55
Join node 271
process state node 281
super state node 274
StartNode 54
O
Object Relational Mapping. See ORM
orchestration 21
ORM 218
P
PAR 86
parent process 284
parseParZIPInputStream(ZipInputStream)
method
about 109
custom behavior, adding 110
parseXMLInputStream(InputStream)
method 109
parseXMLReader(Reader) method 109
parseXMLResource(String) method 109
parseXmlString(String) method 109
parseXXX() method 117
persistence
BPM Engine 161
database perspective execution 166
EJB3 module example 181, 182
JbpmConguration class 173
JbpmContext class 167, 173
need for 160
process execution 164, 165
service, conguring 169-173
simple process example, analyzing 161-163
standAloneExample project 178-181
transactions, conguring 174
persistence conguration
hibernate.cfg.xml, creating 218
jbpm.cfg.xml, creating 218
new congurations, using 219-221
wait Recruiting Process example 228
wait states process persistence, advantages
226, 227
PhoneLineProcess example
Hibernate entity variables, storing 265
running 263, 264
proces denition
implementing 40
Java denition concept 42
Java Node concept 40, 41
Java transition concept 41, 42
Process Archive. See PAR
ProcessDenition properties
protected List<Node> nodes 107
protected Map<String, Action> actions 107
protected Map<String, ModuleDenition>
denitions 107
protected Node startState 107
transient Map<String, Node> nodesMap
107
process information, context information
created new information 258
pre-sent information 258
temporal information 259
variables, accessing 261, 262
variables hierarchy 260
variables hierarchy, working 260, 261
ProcessState
conguring, in recruiting process 302, 303
process state node
about 281-284
Create WorkStation activity 301, 302
denition name 282
information, sharing 302, 303
mapping strategies 285
variable mapping 282, 284
version 282
working, in recruting example 299, 300
process variables
about 242
ActionHandler 247
AssignmentHandle 247
ContextInstance class 245
This material is copyright and is licensed for the sole use by ALESSANDRO CAROLLO on 18th December 2009
6393 south jamaica court, , englewood, , 80111

[ 348 ]
DecisionHandler 247
ExecutionContext class 247
getVariable() 247
handling, through API 245
primitive types, storing 251
setVariable() 247
telephone company example 248, 249
Process Virtual Machine. See PVM
protected Delegation assignmentDelegation
property 193
protected String actorIdExpression property
193
protected String pooledActorsExpression
property 193
PVM 66
Q
Quick start guide
using, to build Maven projects 59
R
read() method 124
real world application
Eclipse plugin project 86
recruiting example
about 140
Candidate Interviews process 298
key points 140
process state nodes, including 295
normal ow test 156, 157
running 155
running, without using any services 155
super state nodes, including 296, 297
test_NormalFlowWithOneCandidate
method 156
reminder. See also timer
reminder
calendar 335, 337
mail service 334, 335
tape backup process 333
using 333, 334
working 339, 340
REQUEST_INFO variable 157
REQUEST_TO_FULFILL variable 157
Request Job Position
describing 152
jPDL 153
S
serializable class 253
Service Oriented Architecture. See SOA
setTransientVariable() method 259
signal() method
calling 314
using 162
SME 143
SOA 18, 21
software. See tools
start() method 52
StartState node
Action tab 123
Task tab 123
viewing, in jPDL language 123
State node
about 126
Properties panel 127
representing, in jPDL 127
sub-process 284
Subject Matter Expert. See SME
super state node
about 274
complex situations 279
dened phases 276, 277
example 276
image 275
navigation 279-281
node to node between phases interaction
278
super state nodephase-to-node interaction
277, 278
synchronous calls 46
T
take() method 131
task
about 186
assigned users 188
elements 186
This material is copyright and is licensed for the sole use by ALESSANDRO CAROLLO on 18th December 2009
6393 south jamaica court, , englewood, , 80111

[ 349 ]
input data 187
output data 187
Task.java class
protected Delegation assignmentDelegation
property 193
protected String actorIdExpression
property 193
protected String pooledActorsExpression
property 193
task assignments, human task
doctors 237
in Recruiting Process example 238, 239
project leader 237
recruiting team member 237
technical leader 237
taskCheckDeviceForm.jsp 214
task concept 191
TaskFormController.java 214
TaskInstance.java class 194
task instances
about 192
EVENTTYPE_TASK_ASSIGN 192
EVENTTYPE_TASK_CREATE 192
EVENTTYPE_TASK_END 192
EVENTTYPE_TASK_START 192
Task ManaGeMent. See TaskMGMT
task management example, task node
real life scenario 203, 204
tasks interaction model 205, 206
users 205, 206
task management module
about 186, 188
advantages 189
jBPM human tasks, handling 189, 190
requirements 188
Task.java class 193
task concept 191
TaskInstance.java class 194
task node 188, 191
TaskNode.java class 193
TaskMGMT 67
task node
advantage 229
business scenario example 194
example 194, 202
task management example 203
TaskNode.java class
Boolean createTasks property 193
Boolean endTasks property 193
int signal property 193
set <Task> tasks 193
telephone company example
Client object properties 250
jPDL syntax, analyzing 248, 249
test_NormalFlowWithOneCandidate
method 156
testSimpleProcess() method 89
timer
about 332
graphical view 338, 339
using 337
working 338-340
Token rootToken property 133
tools
about 68
Eclipse IDE 73
MySQL 72
SVN client 74
transactions, persistence
CMT 175
managing, ways 174
UMT 175
U
UMT
about 175
conguration 175, 176
User Managed Transactions. See UMT
userScreen.jsp 212
UserScreenController.java 213
Users Screen 211
V
VariableInstance
subclasses 256
VariableInstance, subclasses
ByteArrayInstance 256
DateInstance 256
DoubleInstance 256
HibernateLongInstance 256
HibernateStringInstance 256
This material is copyright and is licensed for the sole use by ALESSANDRO CAROLLO on 18th December 2009
6393 south jamaica court, , englewood, , 80111

[ 350 ]
LongInstance 256
NullInstance 256
StringInstance 256
variable tag 303
W
wait state node. See also event wait node
wait state node 45
wait states 186
wait state versus automatic nodes
about 45
asynchronous system interaction 46
human task 47
Java execution concept, creating 48-52
synchronous calls 46, 47
web application
jBPM dependency 154
Web Service BPEL. See WS-BPEL
workow 20
WS-BPEL 19, 22
X
XML Process Denition Language. See
XPDL
XPDL 13
This material is copyright and is licensed for the sole use by ALESSANDRO CAROLLO on 18th December 2009
6393 south jamaica court, , englewood, , 80111

Thank you for buying
jBPM Developer Guide
Packt Open Source Project Royalties
When we sell a book written on an Open Source project, we pay a royalty directly to that
project. Therefore by purchasing jBPM Developer Guide, Packt will have given some of the
money received to the Java project.
In the long term, we see ourselves and you—customers and readers of our books—as part of
the Open Source ecosystem, providing sustainable revenue for the projects we publish on.
Our aim at Packt is to establish publishing royalties as an essential part of the service and
support a business model that sustains Open Source.
If you're working with an Open Source project that you would like us to publish on, and
subsequently pay royalties to, please get in touch with us.
Writing for Packt
We welcome all inquiries from people who are interested in authoring. Book proposals
should be sent to author@packtpub.com. If your book idea is still at an early stage and you
would like to discuss it rst before writing a formal book proposal, contact us; one of our
commissioning editors will get in touch with you.
We're not just looking for published authors; if you have strong technical skills but no writing
experience, our experienced editors can help you develop a writing career, or simply get some
additional reward for your expertise.
About Packt Publishing
Packt, pronounced 'packed', published its rst book "Mastering phpMyAdmin for Effective
MySQL Management" in April 2004 and subsequently continued to specialize in publishing
highly focused books on specic technologies and solutions.
Our books and publications share the experiences of your fellow IT professionals in adapting
and customizing today's systems, applications, and frameworks. Our solution-based books
give you the knowledge and power to customize the software and technologies you're using
to get the job done. Packt books are more specic and less general than the IT books you have
seen in the past. Our unique business model allows us to bring you more focused information,
giving you more of what you need to know, and less of what you don't.
Packt is a modern, yet unique publishing company, which focuses on producing quality,
cutting-edge books for communities of developers, administrators, and newbies alike. For
more information, please visit our website: www.PacktPub.com.
This material is copyright and is licensed for the sole use by ALESSANDRO CAROLLO on 18th December 2009
6393 south jamaica court, , englewood, , 80111

Business Process Management
with JBoss jBPM
ISBN: 978-1-847192-36-3 Paperback: 220 pages
Develop business process models for implementation
in a business process management system
1. Map your business processes in an efcient,
standards-friendly way
2. Use the jBPM toolset to work with business
process maps, create a customizable user
interface for users to interact with the process,
collect process execution data, and integrate
with existing systems.
3. Use the SeeWhy business intelligence toolset
as a Business Activity Monitoring solution,
to analyze process execution data, provide
real-time alerts regarding the operation of the
process, and for ongoing process improvement
JBoss Tools 3 Developers Guide
ISBN: 978-1-847196-14-9 Paperback: 408 pages
Develop JSF, Struts, Seam, Hibernate, jBPM, ESB,
web services, and portal applications faster than
ever using JBoss Tools for Eclipse and the JBoss
Application Server
1. Develop complete JSF, Struts, Seam,
Hibernate, jBPM, ESB, web service, and portlet
applications using JBoss Tools
2. Tools covered in separate chapters so you can
dive into the one you want to learn
3. Manage JBoss Application Server through JBoss
AS Tools
4. Explore Hibernate Tools including reverse
engineering and code generation techniques
Please check www�PacktPub�com for information on our titles
This material is copyright and is licensed for the sole use by ALESSANDRO CAROLLO on 18th December 2009
6393 south jamaica court, , englewood, , 80111

Drools JBoss Rules 5�0
Developer’s Guide
ISBN: 978-1-847195-64-7 Paperback: 320 pages
Develop rules-based business logic using the
Drools platform
1. Discover the power of Drools as a platform for
developing business rules
2. Build a custom engine to provide real-time
capability and reduce the complexity in
implementing rules
3. Explore Drools modules such as Drools Expert,
Drools Fusion, and Drools Flow, which adds
event processing capabilities to the platform
4. Execute intelligent business logic with ease
using JBoss/Drools, a stronger business-rules
solution
JasperReports for Java
Developers
ISBN: 978-1-904811-90-9 Paperback: 344 pages
Create, Design, Format and Export Reports with the
world’s most popular Java reporting library
1. Get started with JasperReports, and develop the
skills to get the most from it
2. Create, design, format, and export reports
3. Generate report data from a wide range of
datasources
4. Integrate Jasper Reports with Spring,
Hibernate, Java Server Faces, or Struts
Please check www�PacktPub�com for information on our titles
This material is copyright and is licensed for the sole use by ALESSANDRO CAROLLO on 18th December 2009
6393 south jamaica court, , englewood, , 80111
OSWorkflow
ISBN: 978-1-847191-52-6 Paperback: 212 pages
Get your workow up and running with this step-
by-step guide authored by an active developer of the
OSWorkow project with real-world examples
1. Basics of OSWorkow
2. Integrating business rules with Drools
3. Task scheduling with Quartz
JBoss Drools Business Rules
ISBN: 978-1-847196-06-4 Paperback: 304 pages
Capture, automate, and reuse your business processes
in a clear English language that your computer can
understand
1. An easy-to-understand JBoss Drools business
rules tutorial for non-programmers
2. Automate your business processes such as
order processing, supply management, staff
activity, and more
3. Prototype, test, and implement workows by
themselves using business rules that are simple
statements written in an English-like language
4. Discover advanced features of Drools to write
clear business rules that execute quickly
Please check www�PacktPub�com for information on our titles
This material is copyright and is licensed for the sole use by ALESSANDRO CAROLLO on 18th December 2009
6393 south jamaica court, , englewood, , 80111

EJB 3 Developer Guide
ISBN: 978-1-847195-60-9 Paperback: 276 pages
A Practical Guide for developers and architects to the
Enterprise Java Beans Standard.
1. A rapid introduction to the features of EJB 3
2. EJB 3 features explored concisely with
accompanying code examples
3. Easily enhance Java applications with new,
improved Enterprise Java Beans
Seam 2�x Web Development
ISBN: 978-1-847195-92-0 Paperback: 300 pages
Build robust web applications with Seam, Facelets,
and RichFaces using the JBoss application server
1. Develop rich web applications using Seam 2.x,
Facelets, and RichFaces and deploy them on the
JBoss Application Server
2. Integrate standard technologies like JSF,
Facelets, EJB, and JPA with Seam and build on
them using additional Seam components
3. Informative and practical approach to
development with fully working examples and
source code for each chapter of the book
Please check www�PacktPub�com for information on our titles
This material is copyright and is licensed for the sole use by ALESSANDRO CAROLLO on 18th December 2009
6393 south jamaica court, , englewood, , 80111
