Renesas IDE Installation Manual
User Manual: Pdf
Open the PDF directly: View PDF ![]() .
.
Page Count: 49

i
Version 1.00 [ANDTR100]
April 2014
Renesas Micom Car Rally Secretariat
Renesas Integrated
Development Environment
Installation Manual
(RMC-RX62T board Version)
ii
All trademarks and registered trademarks are the property of their respective owners.
Important Notice (Revision 1.2)
Copyright
Copyright of this manual and its contents belongs to the Renesas Micom Car Rally Secretariat.
This manual is protected under copyright law and international copyright conventions.
Prohibited Use
The user is prohibited from doing any of the following:
Sale of the manual to a third party, or advertisement, use, marketing, or reproduction of the manual for
purpose of sale
Transfer or reauthorization to a third party of usage rights to the manual
Modification or deletion of the contents of the manual, in whole or in part
Translation into another language of the contents of the manual
Use of the contents of the manual for a purpose that may pose a danger of death or injury to persons
Reprinting and Reproduction
Prior written permission from the Renesas Micom Car Rally Secretariat is required in order to reprint or
reproduce this manual.
Limitation of Liability
Every effort has been made to ensure the accuracy of the information contained in this manual. However, the
Renesas Micom Car Rally Secretariat assumes no responsibility for any loss or damage that may arise due to
errors this manual may contain.
Other
The information contained in this manual is current as of the date of publication. The Renesas Micom Car
Rally Secretariat reserves the right to make changes to the information or specifications contained in this
manual without prior notice. Make sure to check the latest version of this manual before starting fabrication.
Contact Information
Micom Car Rally Secretariat, Renesas Solutions Corp.
MN Building, 2-1 Karuko-saka, Ageba-cho, Shinjuku-ku, Tokyo, 162-0824, Japan
Tel. (03) 3266-8510
E-mail: official@mcr.gr.jp
iii
Contents
1. What is the Renesas Integrated Development Environment ................................................................ 1
2. Downloading the MCR Start-up Kit from the MCU Rally site ............................................................. 3
3. Downloading the Renesas IDE (e2 Studio) and supporting RX Toolchains ..................................... 5
3.1 Preliminary to download from the Renesas home page(User registration of MY Renesas) ....................... 5
3.2 Download of Renesas RX Toolchains ............................................................................................... 7
3.3 Installing the Renesas RX Toolchains ............................................................................................ 10
3.4 Download of Renesas Integrated Development Environment ............................................................. 12
3.5 Installing the Renesas integrated development environment ............................................................. 15
3.6 Create the shortcut icon............................................................................................................. 19
3.7 Display of the extensions ............................................................................................................ 21
4 Preparation for Writing Program to MCU ..................................................................................................... 23
4.1 Download of FDT (Flash Development Toolkit) .............................................................................. 23
4.2 Install of FDT (Flash Development Toolkit) ................................................................................... 26
4.3 Download of USB Drivers............................................................................................................ 29
4.4 Install of USB Drivers and connecting the car ................................................................................ 31
4.5 Confirmation of COM Port .......................................................................................................... 33
4.6 Download sample code ............................................................................................................... 36
4.7 Programming Procedure .............................................................................................................. 39
Renesas Integrated Development Environment Installation Manual (RMC-RX62T board Version)
1
1. What is the Renesas Integrated Development Environment
Renesas eclipse embedded studio (e2 studio) is a complete development & debug environment based on the popular
Eclipse CDT project. Essentially open-source, the Eclipse CDT covers build (editor, compiler and linker control) as
well as debug phase based on an extended GDB interface.
e2 studio is required to edit, compile & build the code for your MCU Car Rally kit. A free evaluation version of the
tool can be downloaded from the Renesas website, or you can install from the MCR Start-up Kit – the
MCRResources.zip folder downloadable from mcurally.com.
▲Renesas integrated development environment e2 Studio
Item
Description
Operating
environment
IBM PC/AT compatibles
o Windows® 8 (32-bit, 64-bit)
o Windows® 7 (32-bit, 64-bit)
o Windows® XP (32-bit)
Processor: 1 GHz or higher (must support hyper-threading, multi-core CPUs)
Memory capacity: 2 GB or more recommended. Minimum requirement is 1 GB or more
(64-bit Windows requires 2 GB or more)
Hard disk capacity: 1 GB or more spare capacity
Display: 1024 x 768 or higher resolution, 65,536 or more colors
Interface: USB 2.0

Renesas Integrated Development Environment Installation Manual (RMC-RX62T board Version)
2
Target Devices
e² studio has been developed to support the key promotion families of Renesas controllers:
RL78 Family
RX Family
RH850 Family*
SuperH Family (SH-2 and SH-2A)
Main features
Renesas eclipse embedded studio, known as e² studio, is a complete development and debug
environment based on the popular Eclipse CDT project. Essentially open source, the Eclipse CDT
covers build (editor, compiler and linker control) as well as debug phase based on an extended GDB
interface.
A wide range of compilers can be integrated into e² studio to ensure customer has the choice of tools
to match their project requirements. When combined with the extremely powerful editor functionality
and project management tools automatically built into Eclipse CDT, e² studio offers a state of the art
coding environment for Renesas embedded controllers.
To complete the development cycle, Renesas has developed a range of GDB debuggers to interface
between the coding environment and a range of on-chip and in-circuit emulators.
Limitation of
free evaluation
version
・The linker is limited to 128KB Code & Data after the initial unlimited 60 day period.
・Supplied without technical support.
Renesas Integrated Development Environment Installation Manual (RMC-RX62T board Version)
3
2. Downloading the MCR Start-up Kit from the MCU Rally site
Downloading and installing the software from the MCR Start-up Kit is advantageous as everything is located in one
place.
1
Open the MCU Rally
page:
http://mcurally.com/
2
Scroll down to the ’Kit
Resources’ icon and
click the link.

Renesas Integrated Development Environment Installation Manual (RMC-RX62T board Version)
4
3
Click ’Download’ to get
the kit – the file is
called ’MCRResource
s.zip’ and is 765MB in
size.
It may take some time to
download but will
provide you with
everything you need to
modify and program in
your car’s software
code.
Once this has
downloaded skip ahead
to section ‘Installing
the Renesas RX
Toolchains’.
Renesas Integrated Development Environment Installation Manual (RMC-RX62T board Version)
5
3. Downloading the Renesas IDE (e2 Studio) and supporting RX
Toolchains
The IDE and supporting Toolchains can be downloaded through the Renesas website, or can be loaded from the
‘MCR Kit Software Tools & Drivers’ folder in the MCR Start-up Kit.
To download the IDE and Toolchains from the Renesas webiste follow the steps below, or if you have the MCR
Start-up Kit, skip ahead to section ‘Installing the Renesas RX Toolchains’.
3.1 Preliminary to download from the Renesas home page(User
registration of MY Renesas)
To download items from the Renesas site, you will need to register a My Renesas account. It is free to register, and
needs your e-mail address.
Advance to "Download of Renesas RX Toolchains" if you are already registered.
1
Renesas Electronics
http://www.renesas.eu
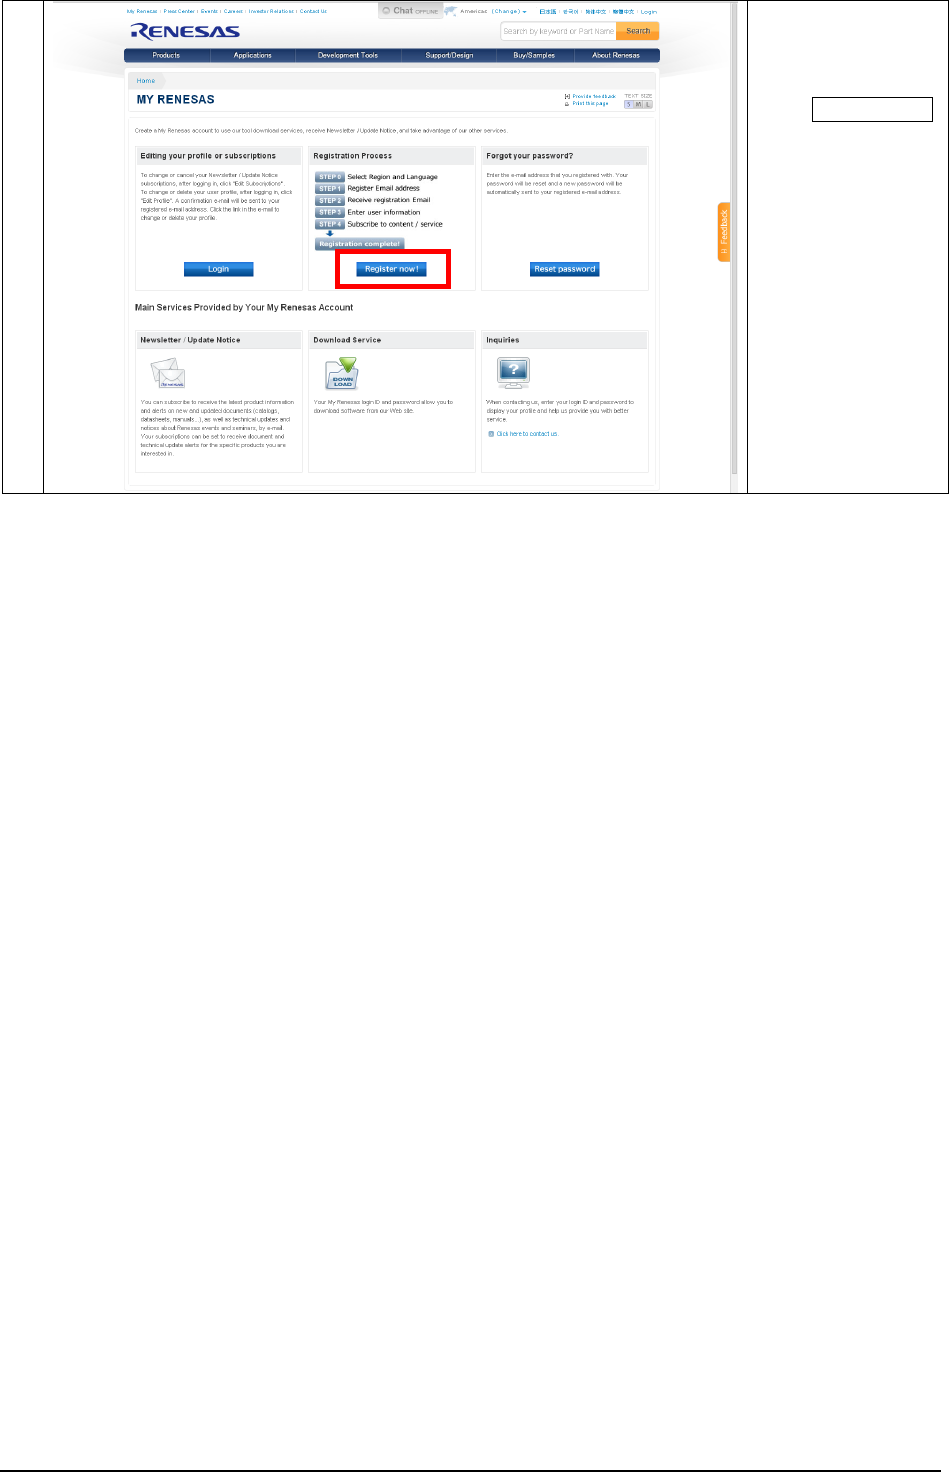
Click My Renesas.
Click "My Renesas"
Renesas Integrated Development Environment Installation Manual (RMC-RX62T board Version)
6
2
Click Register now!,
and proceed with
registration.
Note:
Remember
which email
and password
you use here as
they will be
needed when
downloading
the software.

Renesas Integrated Development Environment Installation Manual (RMC-RX62T board Version)
7
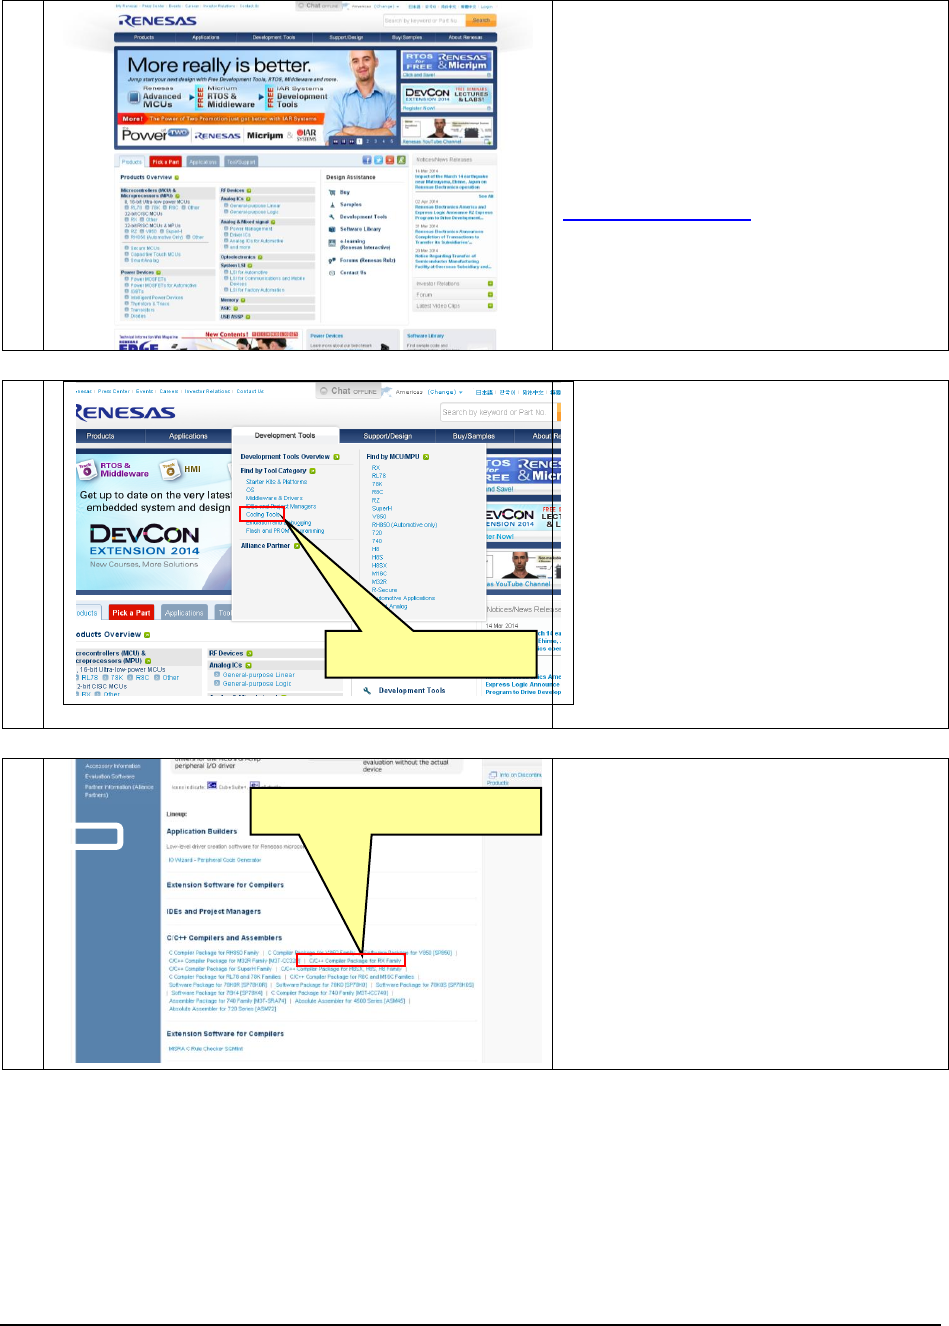
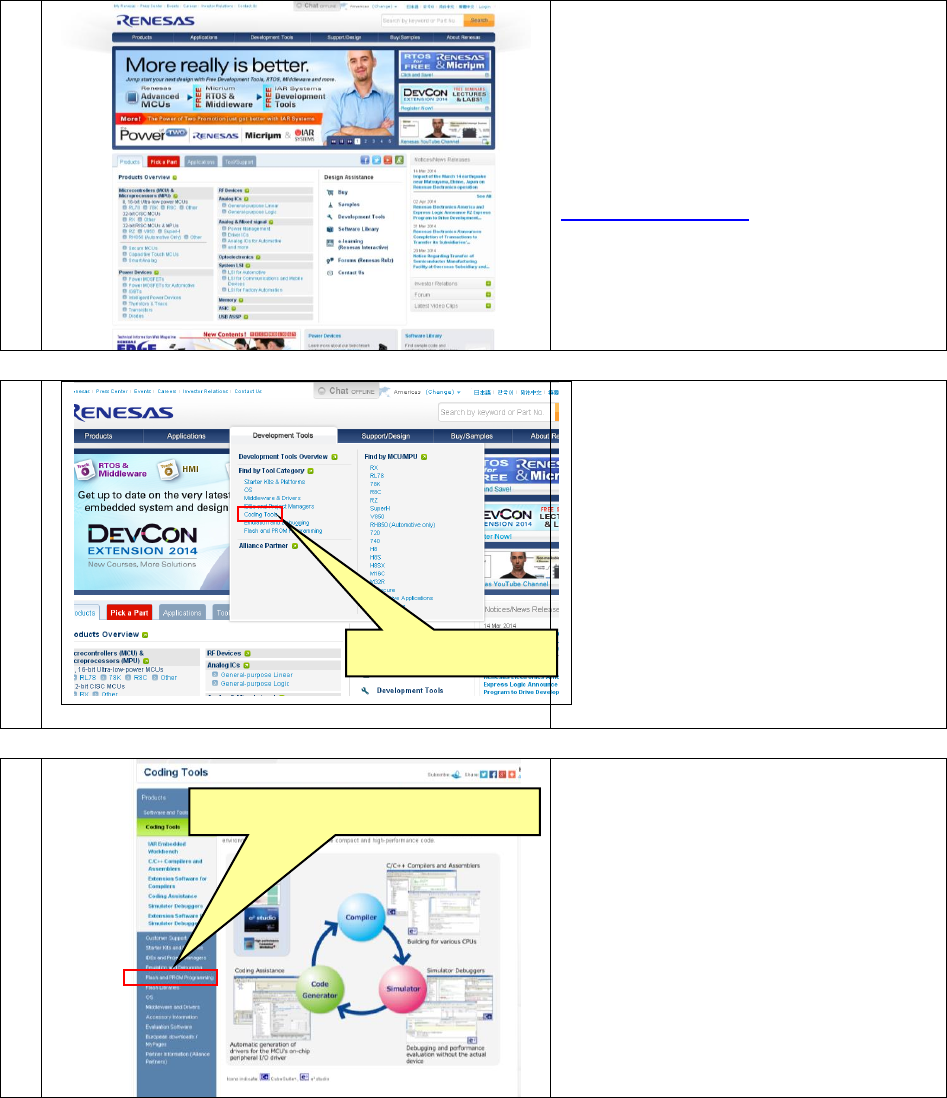
3.2 Download of Renesas RX Toolchains
1
Get the RX Toolchains from the Renesas site.
Renesas Electronics
http://www.renesas.eu
2
Under Devlepment Tools, click Coding Tools.
3
Scroll down to the section labelled C/C++
Compilers and Assemblers and select C/C++
Compiler Package for RX Family.
Click "Coding Tools"
Click "Package for RX Family "
Renesas Integrated Development Environment Installation Manual (RMC-RX62T board Version)
8
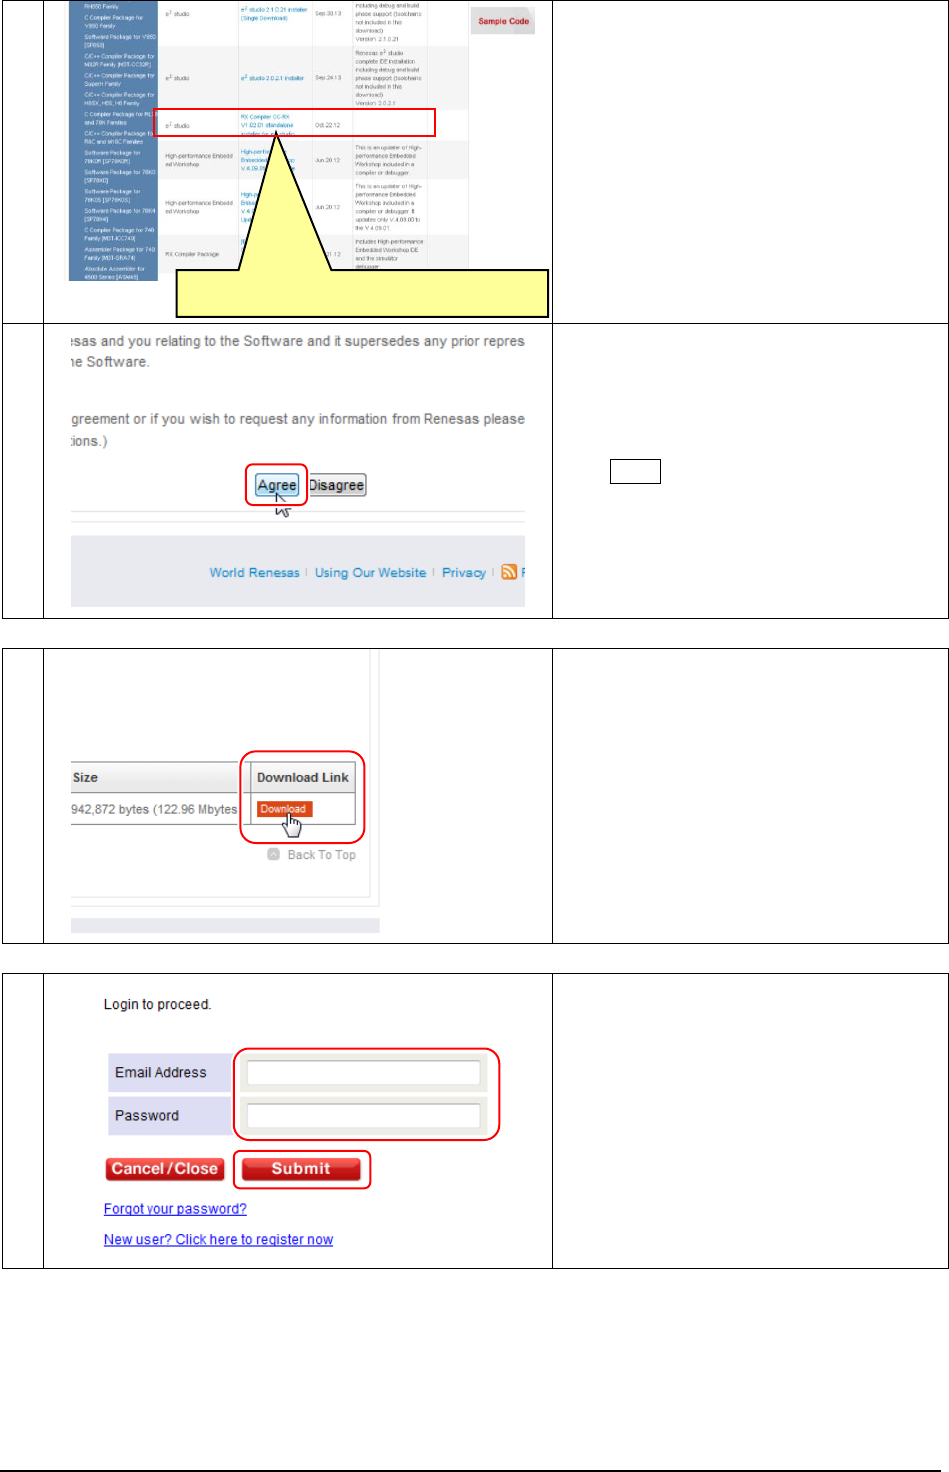
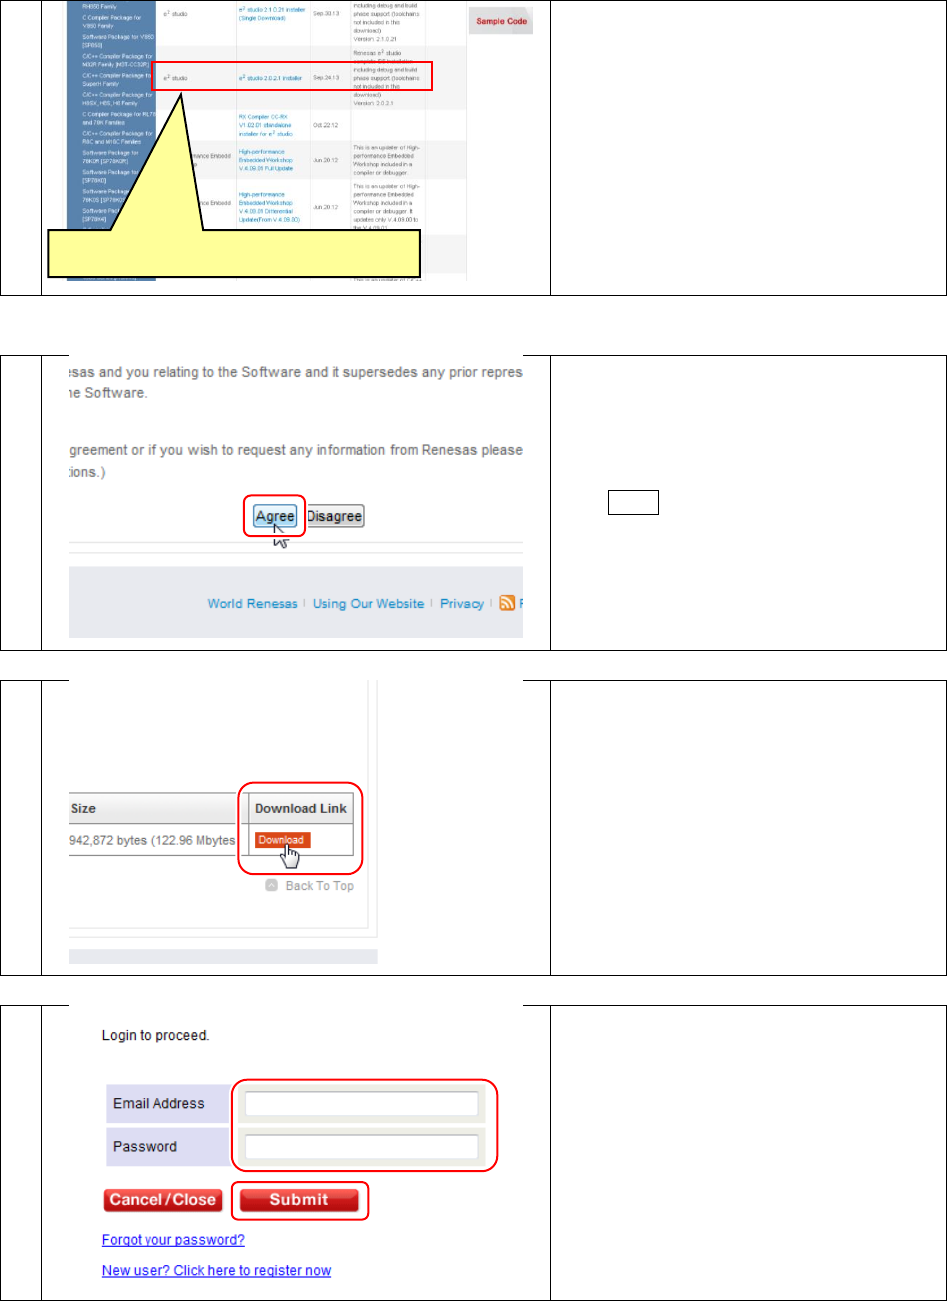
4
Click the Downloads tab, then on the second
page of results, select RX Compiler CC-RX
V1.02.01 standalone installer for e2 studio
5
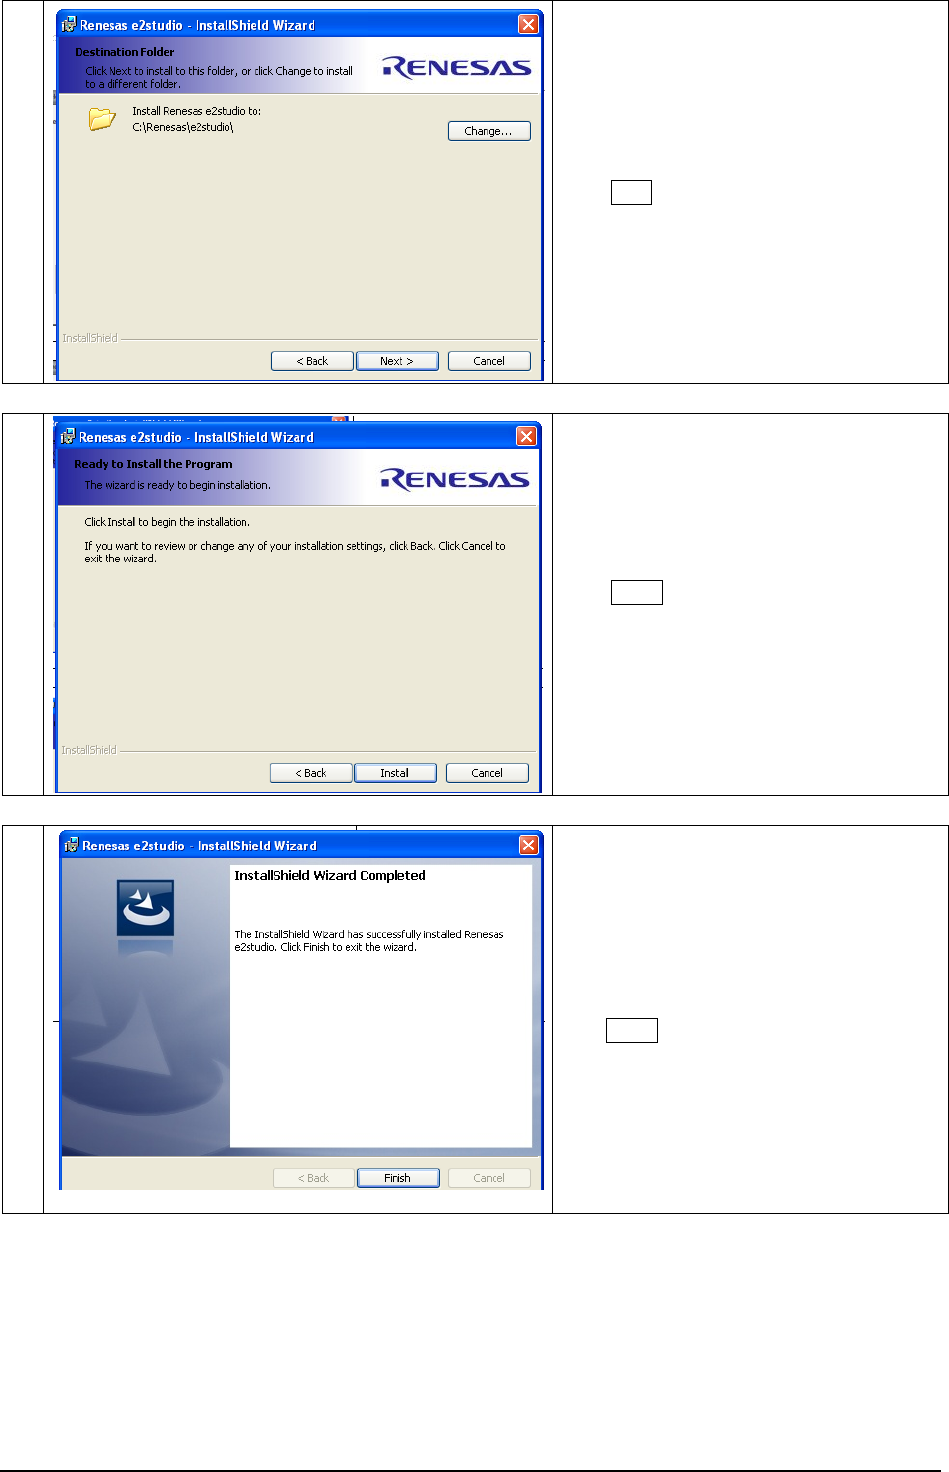
Click Agree after reading the AGREEMENT.
6
Click Download.
7
If you do not have a My Renesas account,
please register for a new account first.
A My Renesas account is required in order to
download this software.
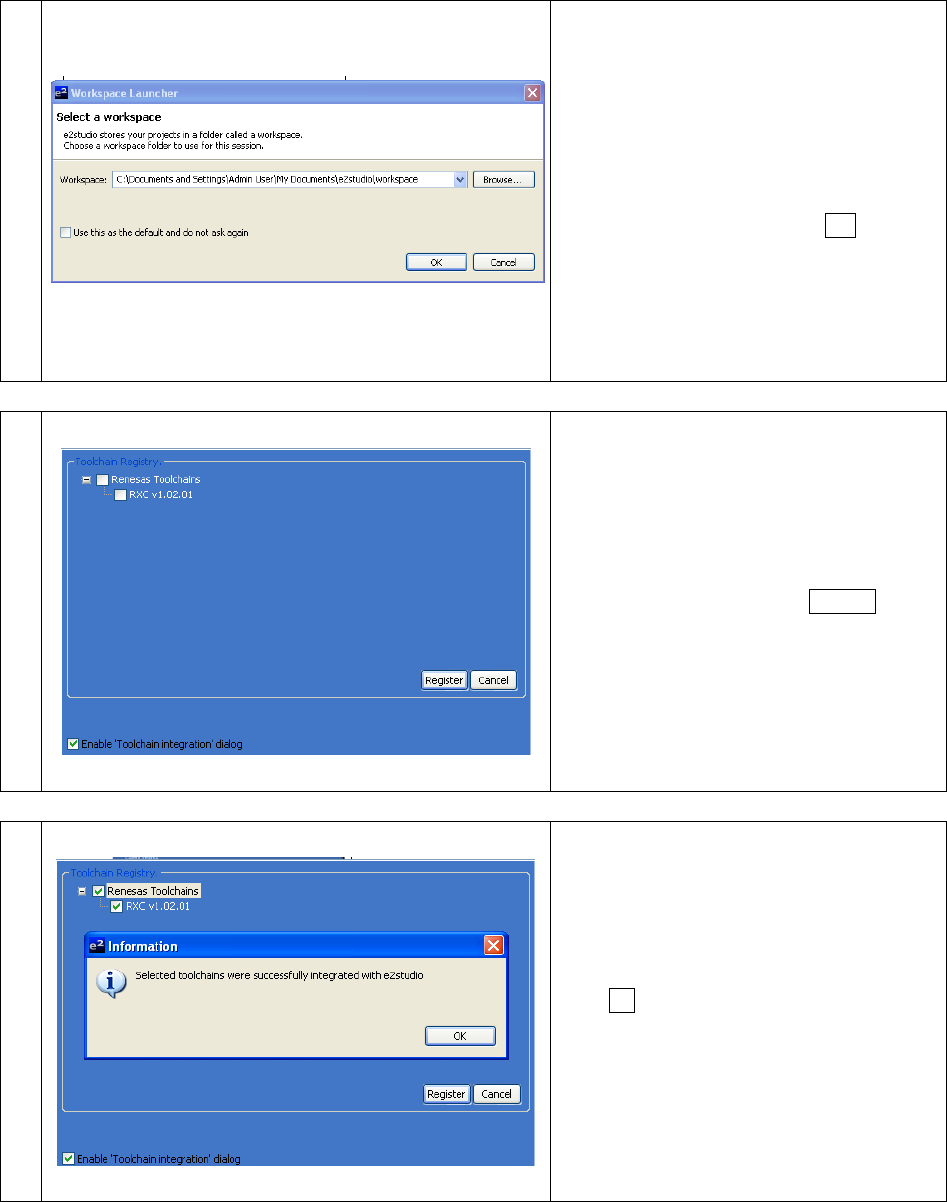
If you have a My Renesas account, login by
entering your e-mail address and password,
and clicking Submit.
Click "RX Compiler CC-RX v1.02.01 "

Renesas Integrated Development Environment Installation Manual (RMC-RX62T board Version)
9
8
Check your purpose, and click Submit.
Save the file to your PC.
9
Downloading of RX Toolchains is complete.
Renesas Integrated Development Environment Installation Manual (RMC-RX62T board Version)
10
3.3 Installing the Renesas RX Toolchains
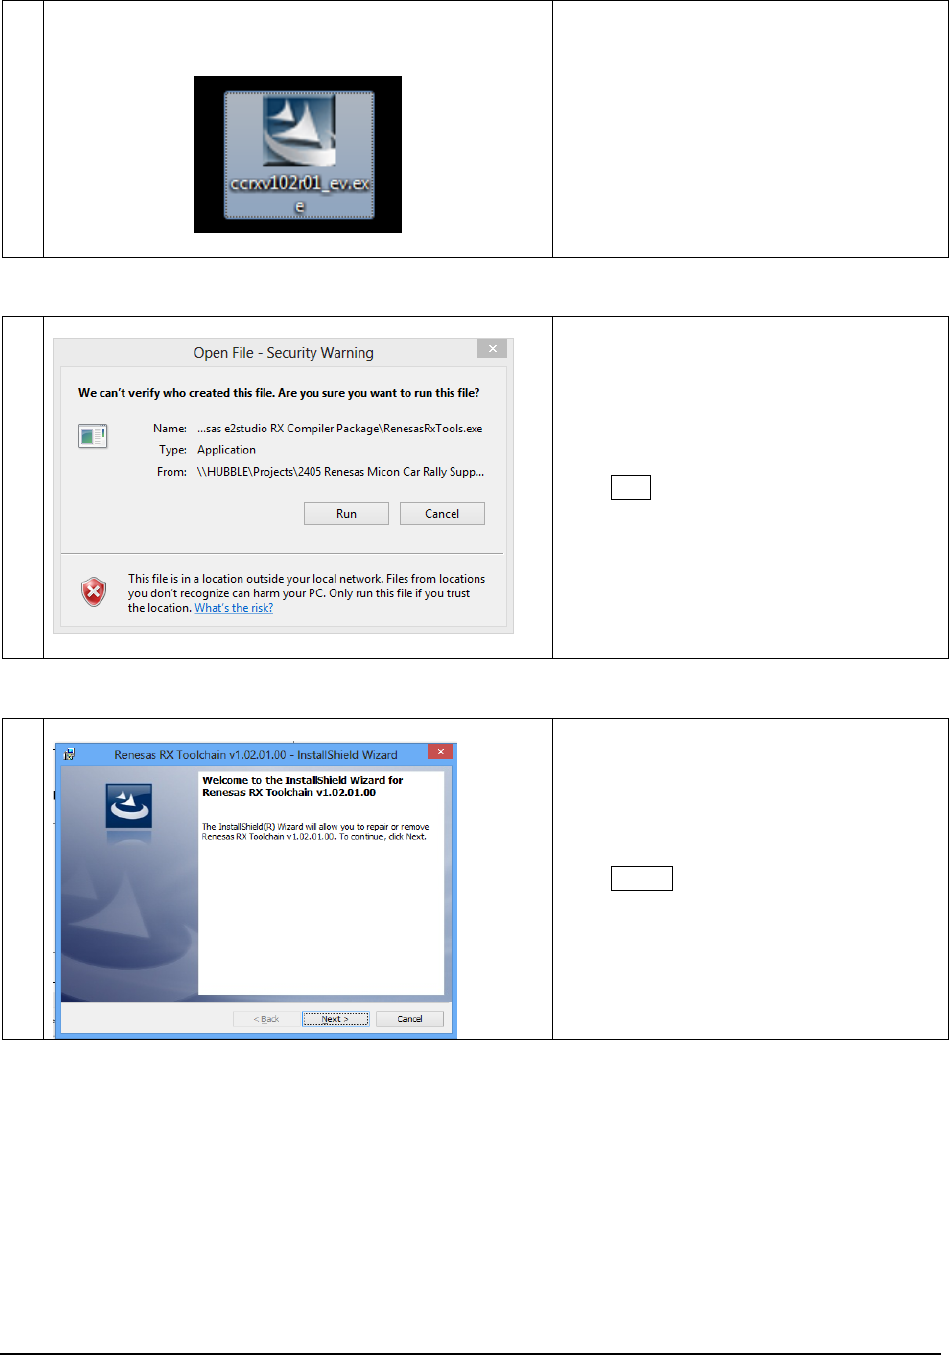
1
Run the downloaded file ccrxv102r01_ev.exe
for the ‘Renesas RX Toolchains' from where
you saved it, or run the RenesasRxTools.exe
file from the MCR Start-up Kit (it is located
inside the ‘Resources’ folder, then ‘MCR Kit
Software Tools & Drivers’, then ‘Renesas
e2studio RX Complier Package’).
2
Click Run.
3
Click Next >.
Renesas Integrated Development Environment Installation Manual (RMC-RX62T board Version)
11
4
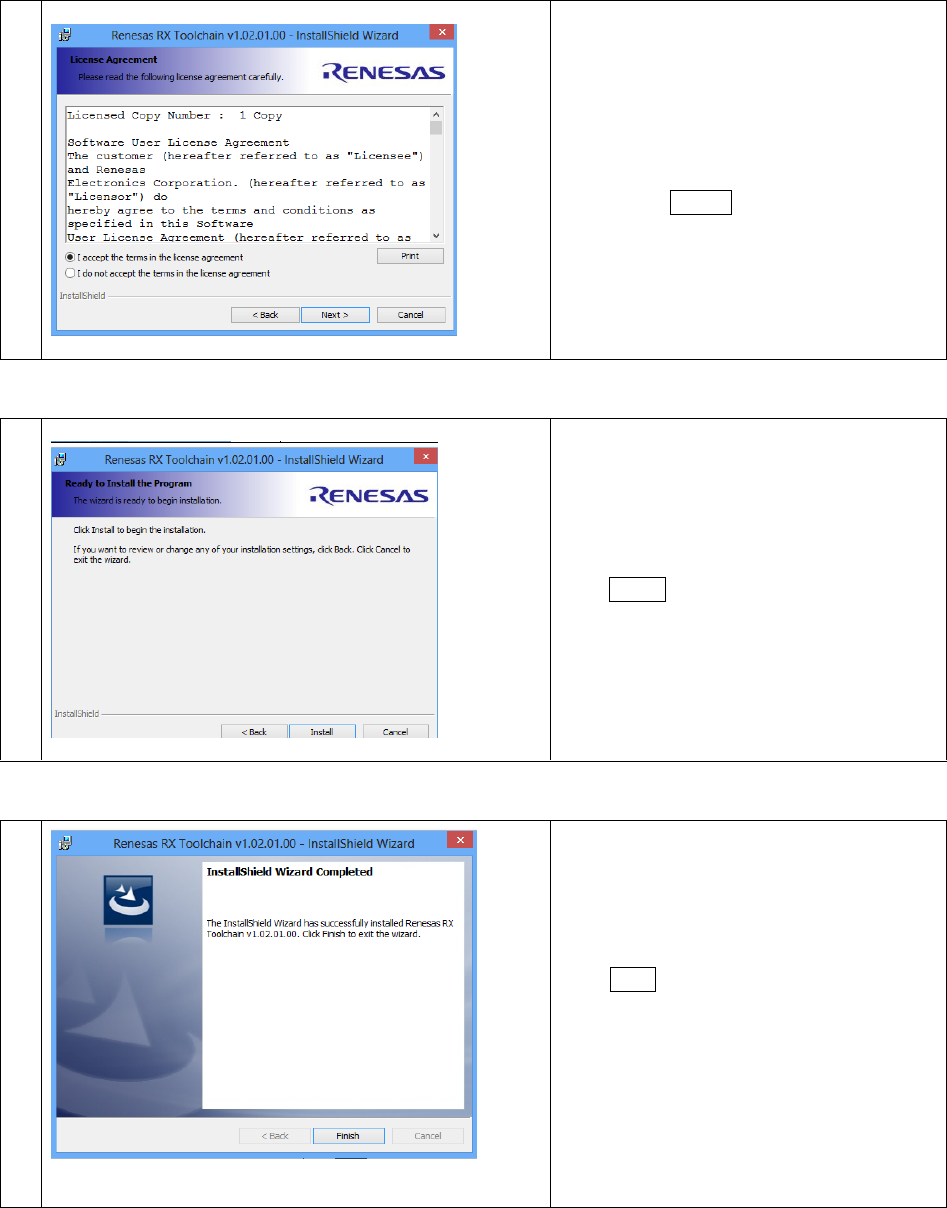
Read the the license agreement and check the
‘I accept the terms in the license agreement’
option. Click Next >.
5
Click Install.
6
Click Finsh to complete the installation of the
RX Toolchains. Later we will register the
toolchains with the Renesas IDE e2 Studio the
first time we load the program.
Renesas Integrated Development Environment Installation Manual (RMC-RX62T board Version)
12
3.4 Download of Renesas Integrated Development Environment
To download the IDE from the Renesas webiste follow the steps below, or if you have the MCR Start-up Kit, skip
ahead to section ‘Installing the Renesas integrated development environment’.
1
Get the IDE (Integrated Development
Environment) from the Renesas site.
Renesas Electronics
http://www.renesas.eu
2
Under the Develepmet tools tab, click Coding
Tools.
3
Scroll down to the section labelled C/C++
Compilers and Assemblers and select C/C++
Compiler Package for RX Family.
Click "Coding Tools"
Click "Package for RX Family"
Renesas Integrated Development Environment Installation Manual (RMC-RX62T board Version)
13
4
Click the Downloads tab, select ‘E2 Studio
1.1.0.30’
5
Click Agree after reading the AGREEMENT.
6
Click Download.
7
If you do not have a My Renesas account,
please register for a new account first.
A My Renesas account is required in order to
download this software.
If you have a My Renesas account, login by
entering your e-mail address and password,
and clicking Submit.
Click "E2 Studio 1.1.0.30"

Renesas Integrated Development Environment Installation Manual (RMC-RX62T board Version)
14
8
Check your purpose, and click Submit.
Save the file to your PC.
9
Downloading of Renesas integrated
development environment has completed.

Renesas Integrated Development Environment Installation Manual (RMC-RX62T board Version)
15
3.5 Installing the Renesas integrated development environment
1
Run the downloaded file of the Renesas
integrated development environment from
where you saved it from the web, or run the
setup.exe file from the MCR Start-up Kit (it is
located inside the ‘Resources’ folder, then
‘MCR Kit Software Tools & Drivers’, then
‘Renesas e2studio’).
This will load the install wizard.
Note: It is important to install this version
of the Renesas integrated
development environment even if
other versions are already present.
2
One the wizard has set up, click Next >.
3
Read the license agreement, check the ‘I
accept’ option, and click Next >.
Renesas Integrated Development Environment Installation Manual (RMC-RX62T board Version)
16
4
Click Next.
5
Click Install.
6
After the wizard has completed the install,
click Finish.
Renesas Integrated Development Environment Installation Manual (RMC-RX62T board Version)
17
7
Go to programs > Renesas Electronics
e2studio > Renesas e2studio and open your
newly installed program. Choose a location to
open a new workspace and click OK.
8
Select the toolchains and click Register.
9
Click Ok to open the e2 Studio IDE

Renesas Integrated Development Environment Installation Manual (RMC-RX62T board Version)
18
10
Click Finish.
11
This is the welcome screen. To learn more
details about e2, explore using the icons.
When you are ready to begin, select the arrow
icon which takes you to the Workbench.
12
A blank Workspace looks like this; later we
will load the sample code.
* The linker is limited to 128KB code & data after the initial unlimited 60 day period. The evaluation version of
e2studio is provided without technical support.
Renesas Integrated Development Environment Installation Manual (RMC-RX62T board Version)
19
3.6 Create the shortcut icon
For running the "e2 Studio" easily, create a shortcut icon on your desktop.
1
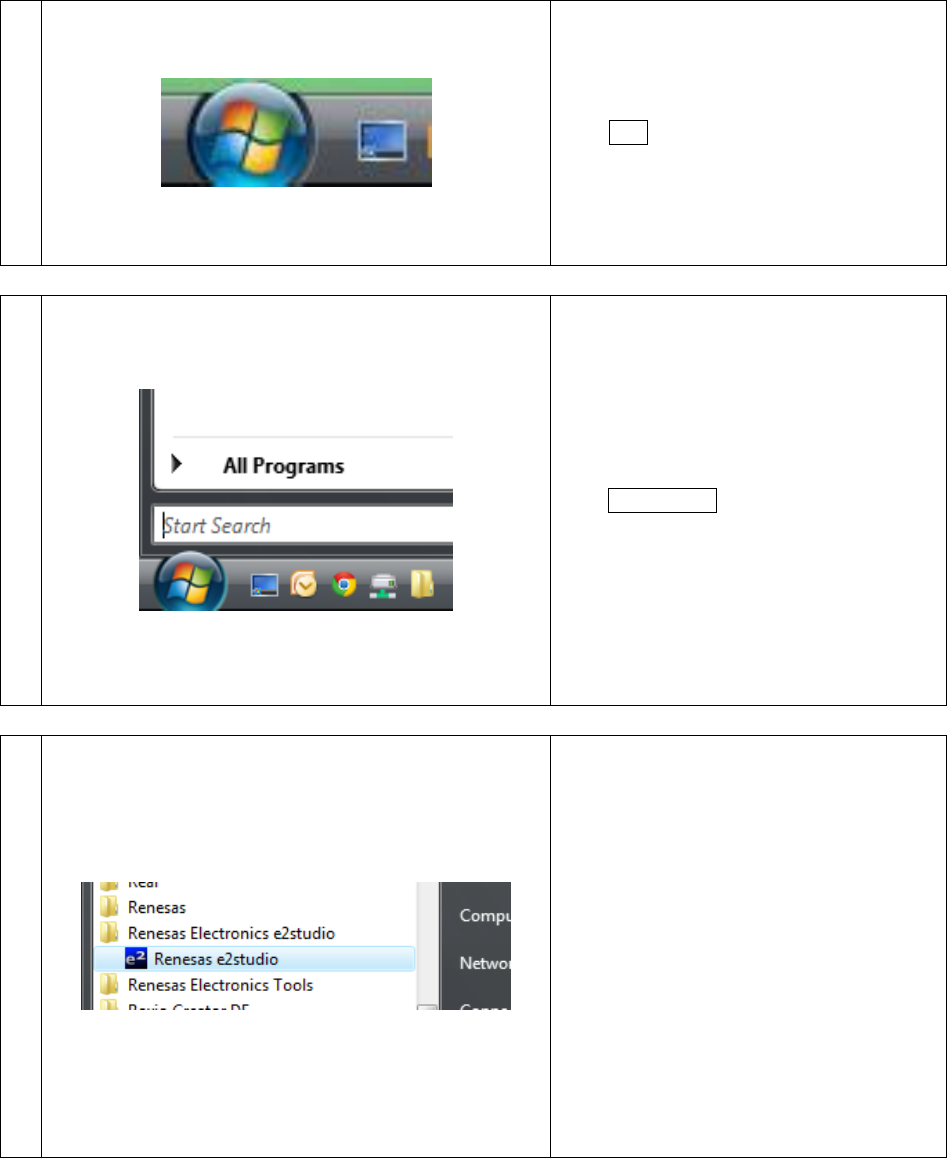
Click Start.
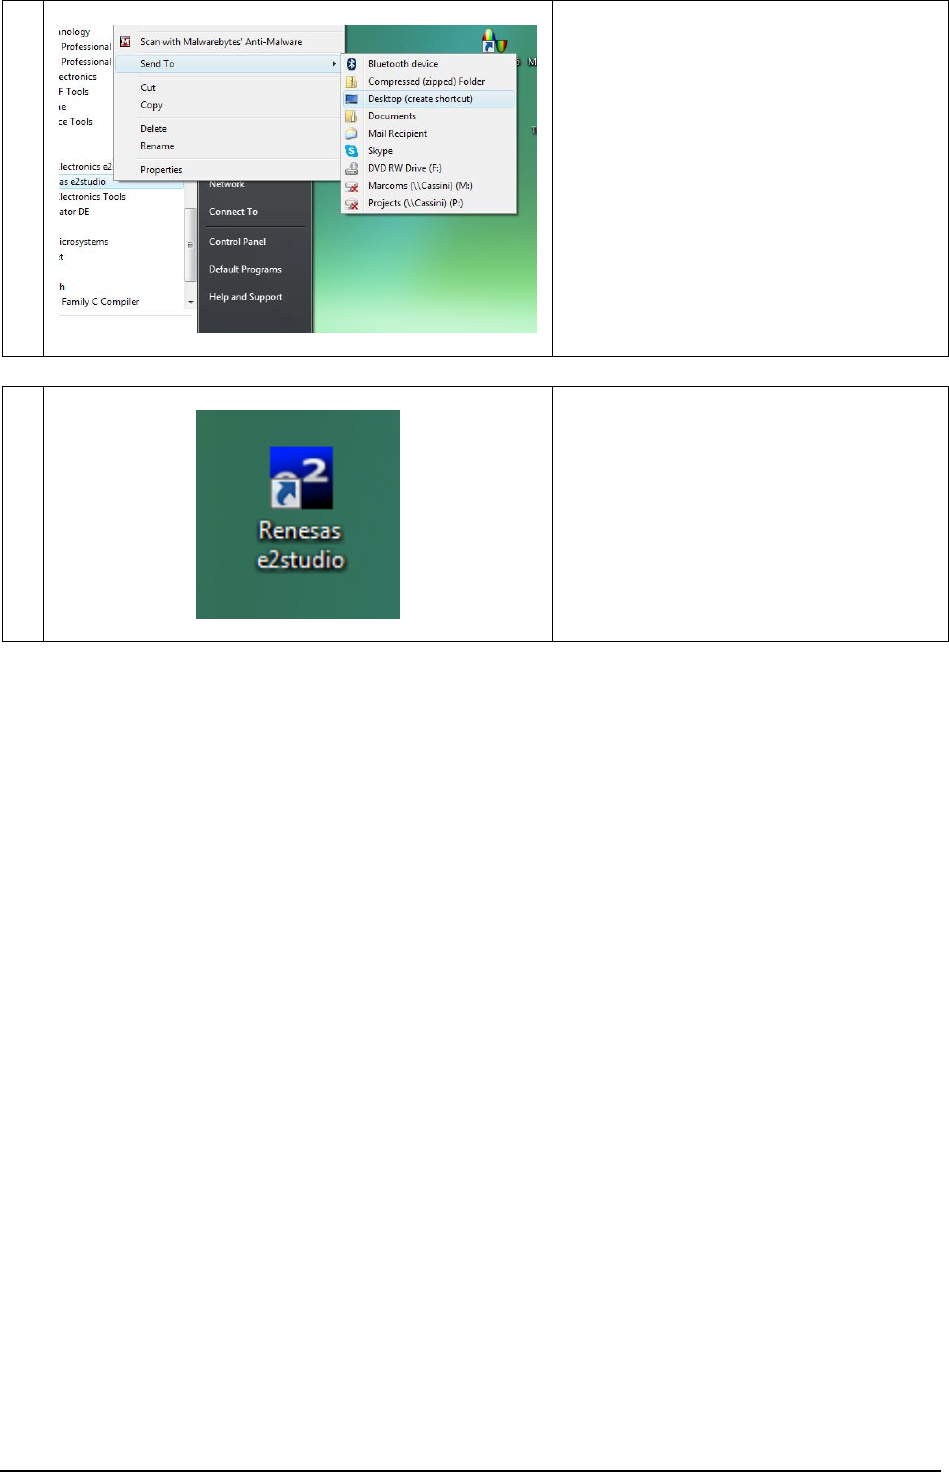
2
Click All Programs.
3
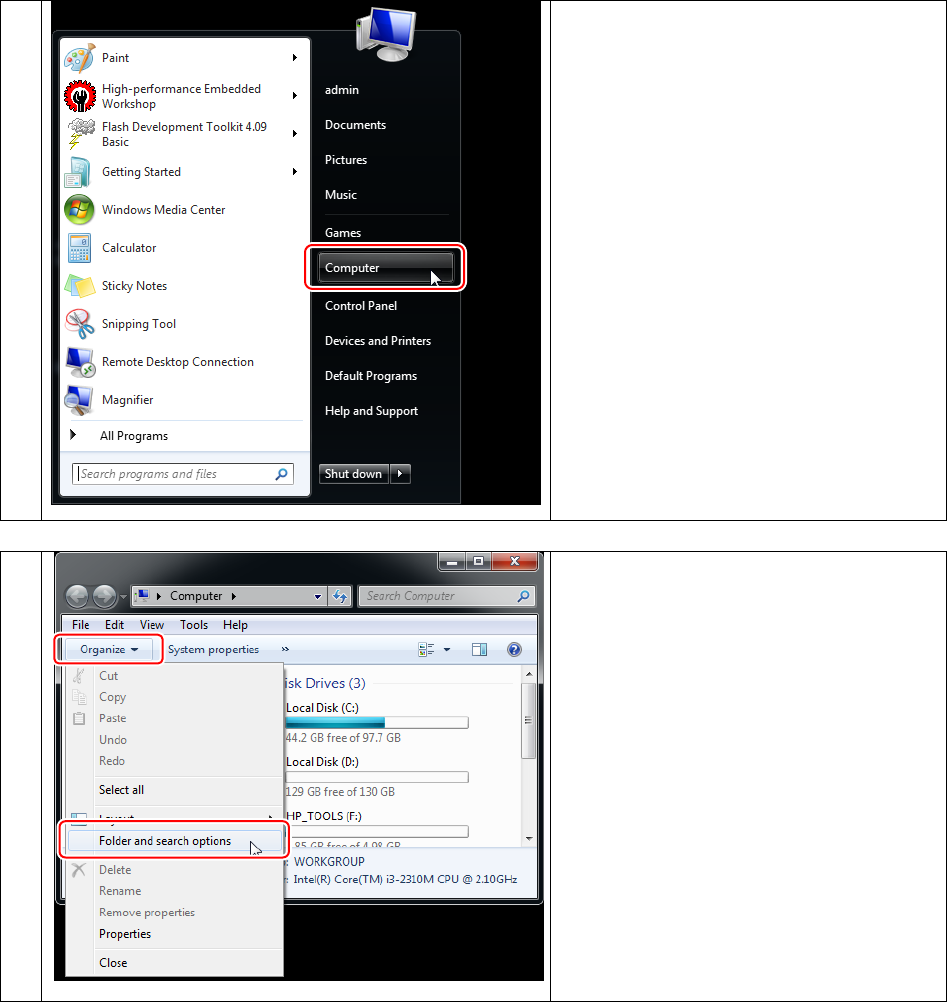
Open folder Renesas Electronics e2studio.
Renesas Integrated Development Environment Installation Manual (RMC-RX62T board Version)
20
4
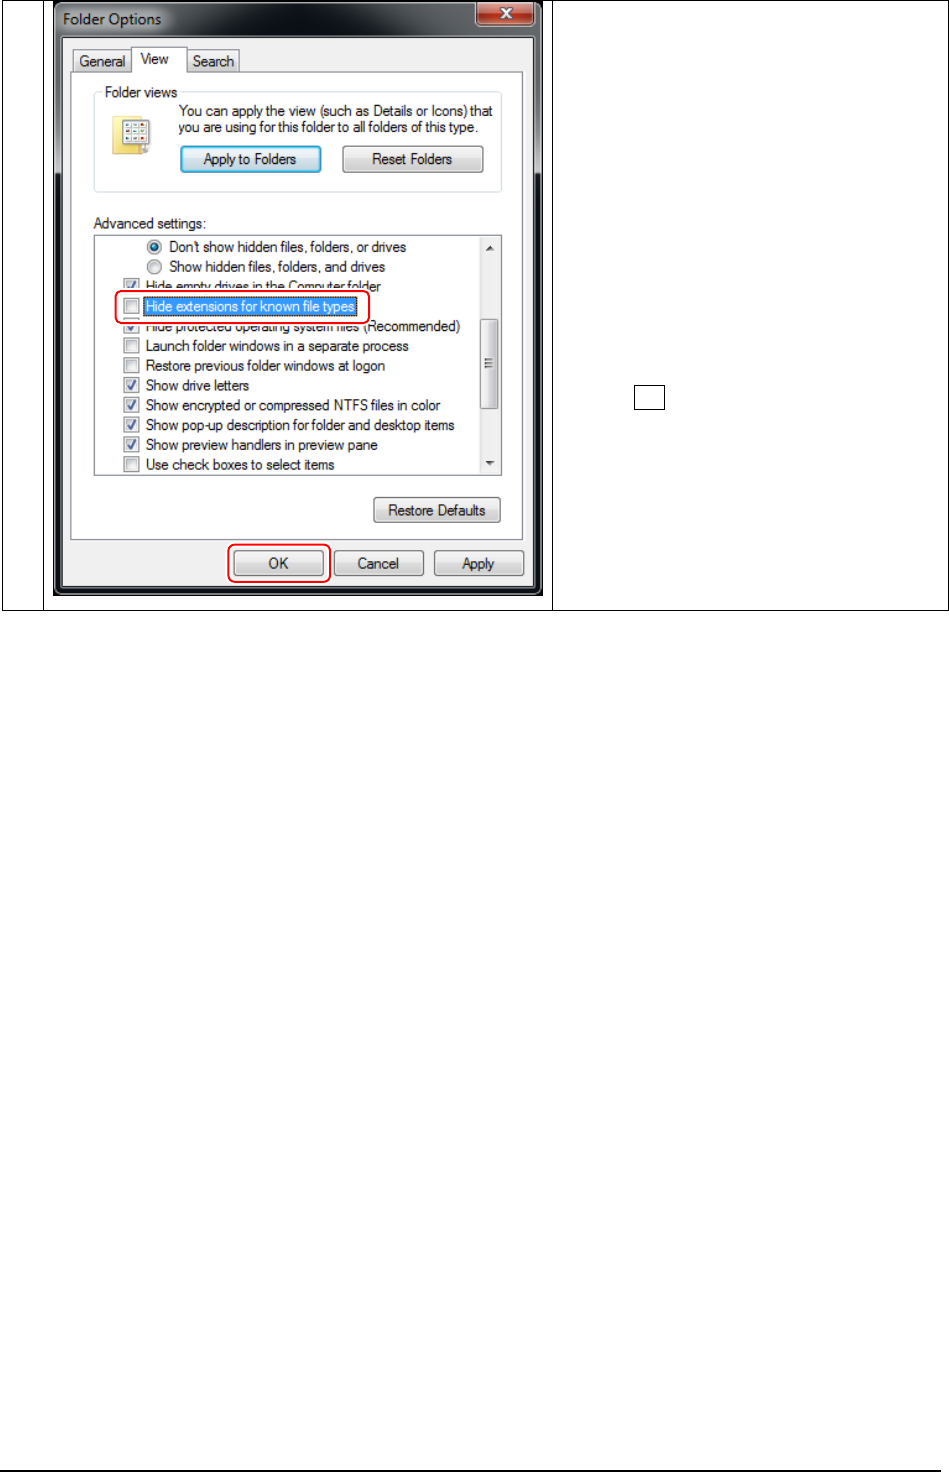
[1]Right-click the mouse button on Renesas
e2studio.
[2]Click Send to.
[3]Click Desktop (create shortcut).
6
Shortcut was created on the desktop.
Renesas Integrated Development Environment Installation Manual (RMC-RX62T board Version)
21
3.7 Display of the extensions
There are many files only differentiated by their extension such as "kit12_rx62t.c", "kit12_rx62t.obj" and
"kit12_rx62t.mot", used by the Renesas software. Therefore, we would confuse the files if the "Hide file extensions
for known file types" Windows setting was selected. Change the default setting to display extension here.
1
[1]Click Start.
[2]Click Computer.
2
[1]Click Organize.
[2]Click Folder and search options.
Renesas Integrated Development Environment Installation Manual (RMC-RX62T board Version)
22
3
[1] Open the View tab.
[2] Move scroll bar below of Advanced
settings.
[3]Uncheck Hide extensions for known file
types.
[4]Click OK.
23
4 Preparation for Writing Program to MCU
4.1 Download of FDT (Flash Development Toolkit)
Advance to "Install of FDT (Flash Development Toolkit)" if you are using the the MCR Start-up Kit.
1
Get the FDT (Flash Development Toolkit)
from the Renesas site.
Renesas Electronics
http://www.renesas.eu
2
Under the Develepmet tools tab, click Coding
Tools.
3
In the left hand panel, select ‘Flash and
PROM Programming’.
Click "Coding Tools"
Click "Flash and PROM Programming"
Renesas Integrated Development Environment Installation Manual (RMC-RX62T board Version)
24
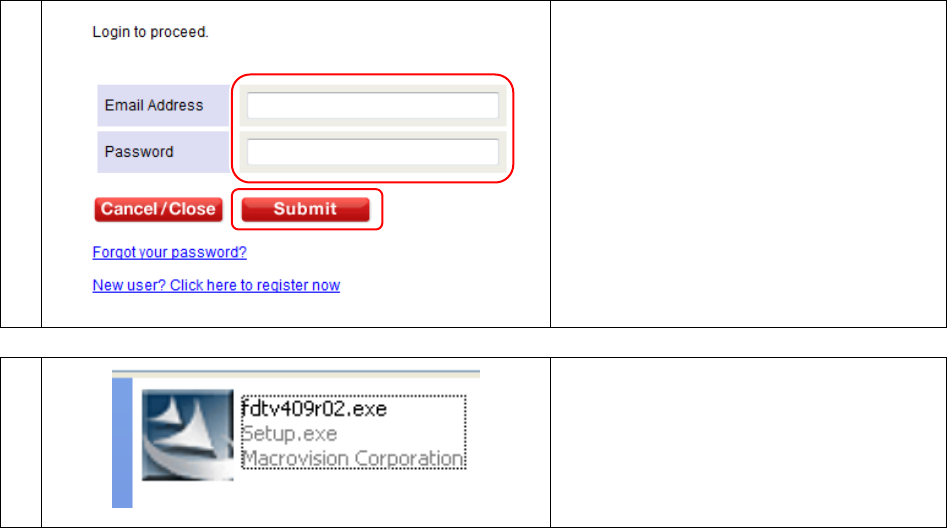
4
Scroll down and select ‘Flash Development
Toolkit [Programming software]’.
5
Under the downloads tab, select ‘[Evaluation
Software] Flash Development Toolkit V.4.09
Release 02’.
6
Click Agree after reading the AGREEMENT.
7
Click Download.
25
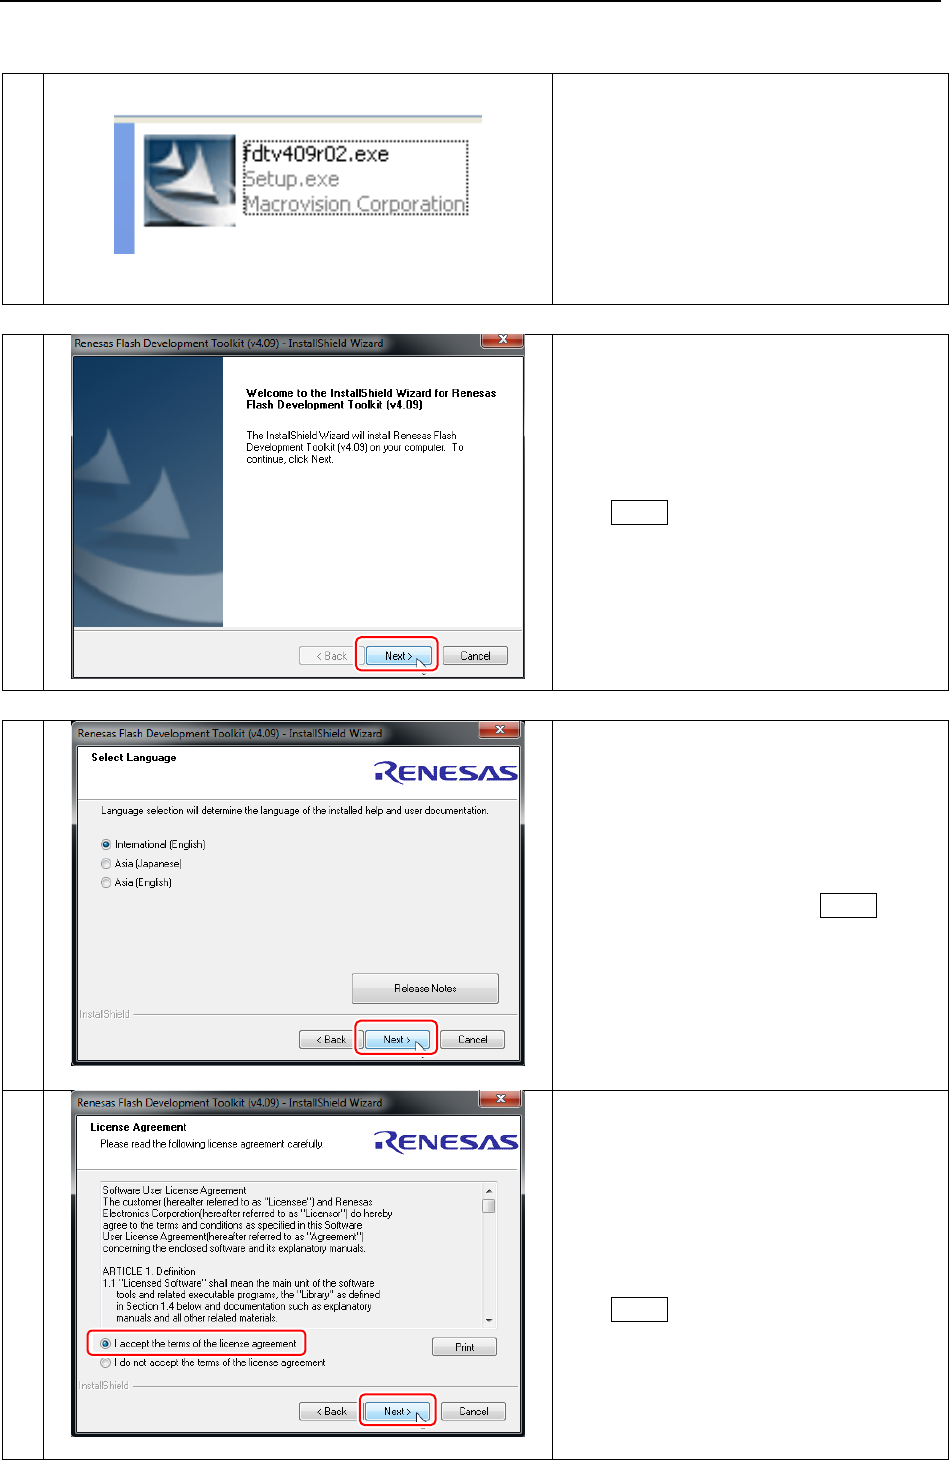
8
If you do not have a My Renesas account,
please register for a new account first.
A My Renesas account is required in order to
download this software.
If you have a My Renesas account, login by
entering your e-mail address and password,
and clicking Submit.
Save the file to your PC.
9
Downloading of FDT (Flash Development
Toolkit) has completed.
The installed file is fdtv409r02.exe.
Renesas Integrated Development Environment Installation Manual (RMC-RX62T board Version)
26
4.2 Install of FDT (Flash Development Toolkit)
1
Run the fdtv409r02.exe file of the "FDT
(Flash Development Toolkit)" you
downloaded from the web, or run it from the
run the setup.exe file from the the MCR
Start-up Kit (it is located inside the
‘Resources’ folder, then ‘MCR Kit Software
Tools & Drivers’, then ‘Renesas FDT’).
2
Click Next >.
3
After select the language, Click Next >.
4
Select "I accept" after reading the
AGREEMENT.
Click Next >.
27
5
Click Next >.
6
Click Next >.
7
Click Next >.
Renesas Integrated Development Environment Installation Manual (RMC-RX62T board Version)
28
8
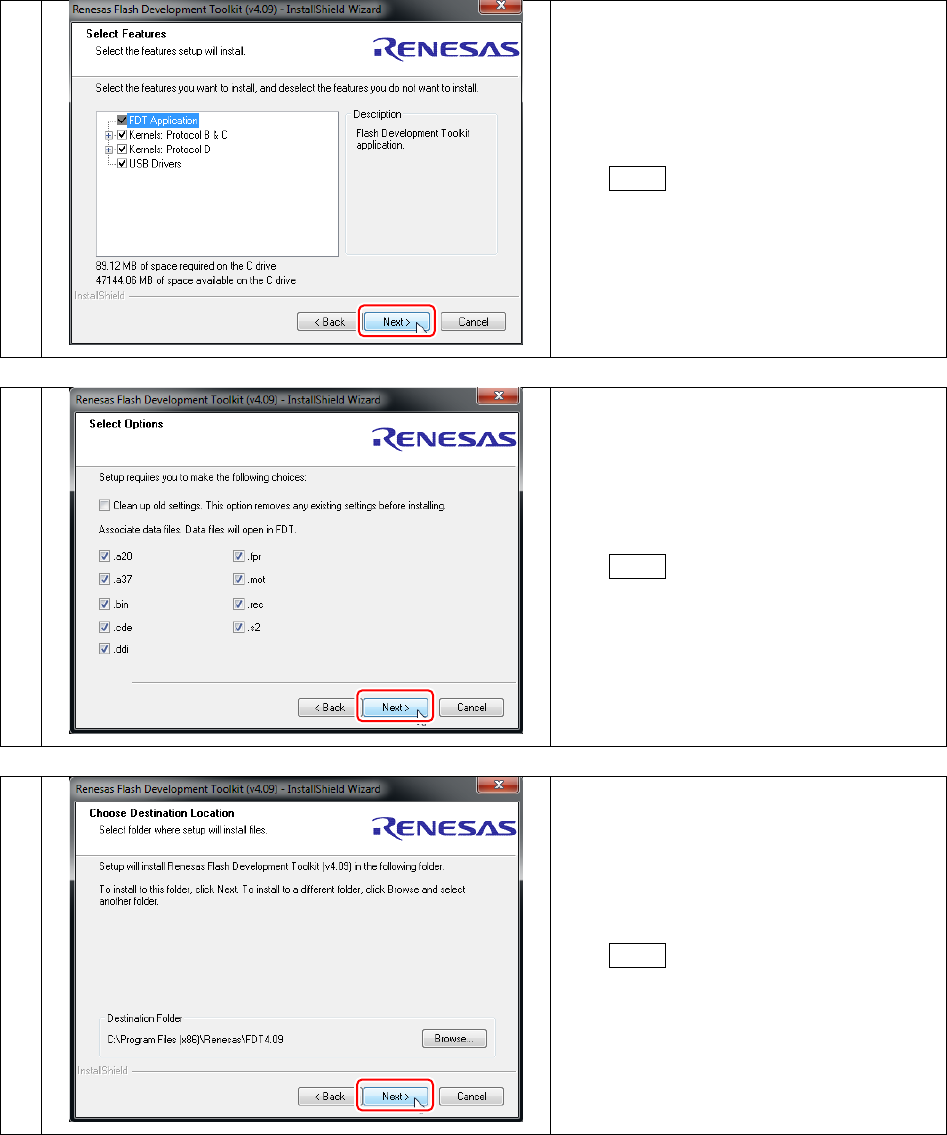
Click Install.
9
Click Finish to complete installation.
10
For your convenience, a shortcut icon for
Flash Development Toolkit 4.09 Basic is
created on your desktop.
29
4.3 Download of USB Drivers
To write programs to the RMC-RX62T MCU board, the USB Serial Converter and USB Serial Port Driver are
needed. You can get these drivers from the FTDI (Future Technology Devices International Ltd.) site.
Note: Advance to "Install of USB Drivers" if you are using the the MCR Start-up Kit.
1
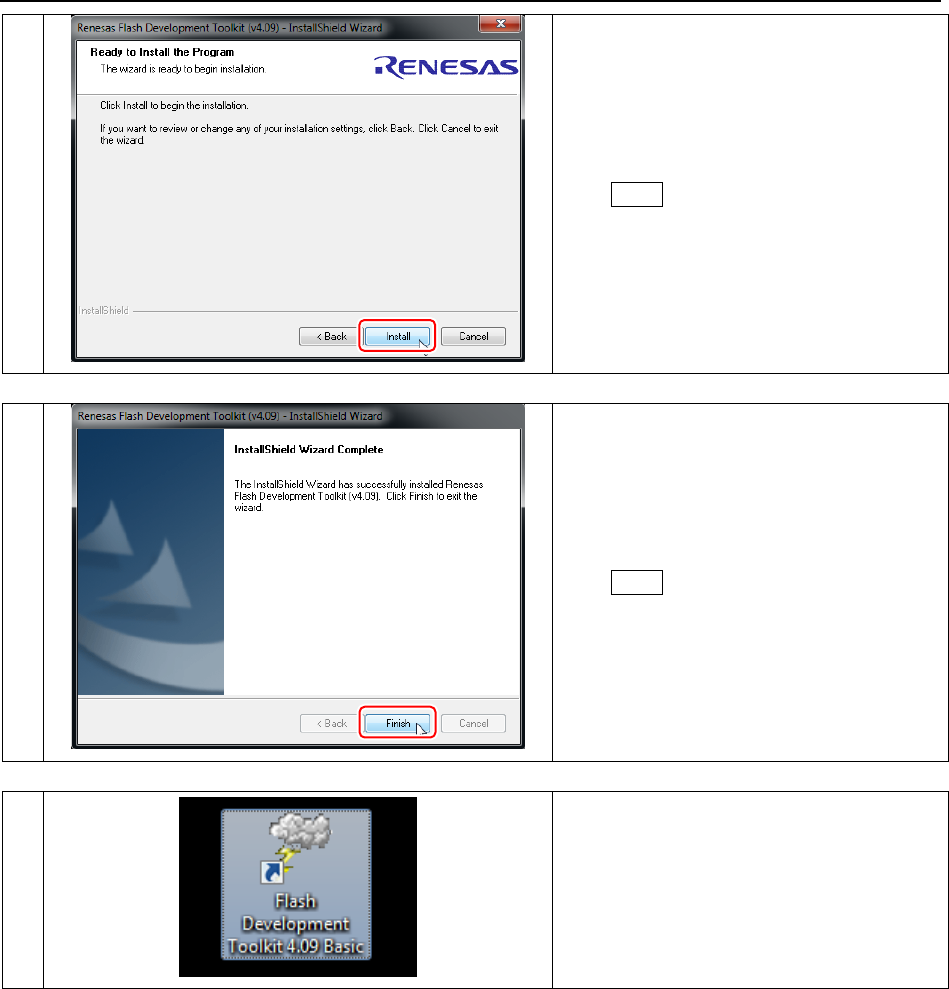
Open the FTDI site.
FTDI site: http://www.ftdichip.com/
2
Click Drivers.
3
Click D2XX Drivers.
Renesas Integrated Development Environment Installation Manual (RMC-RX62T board Version)
30
4
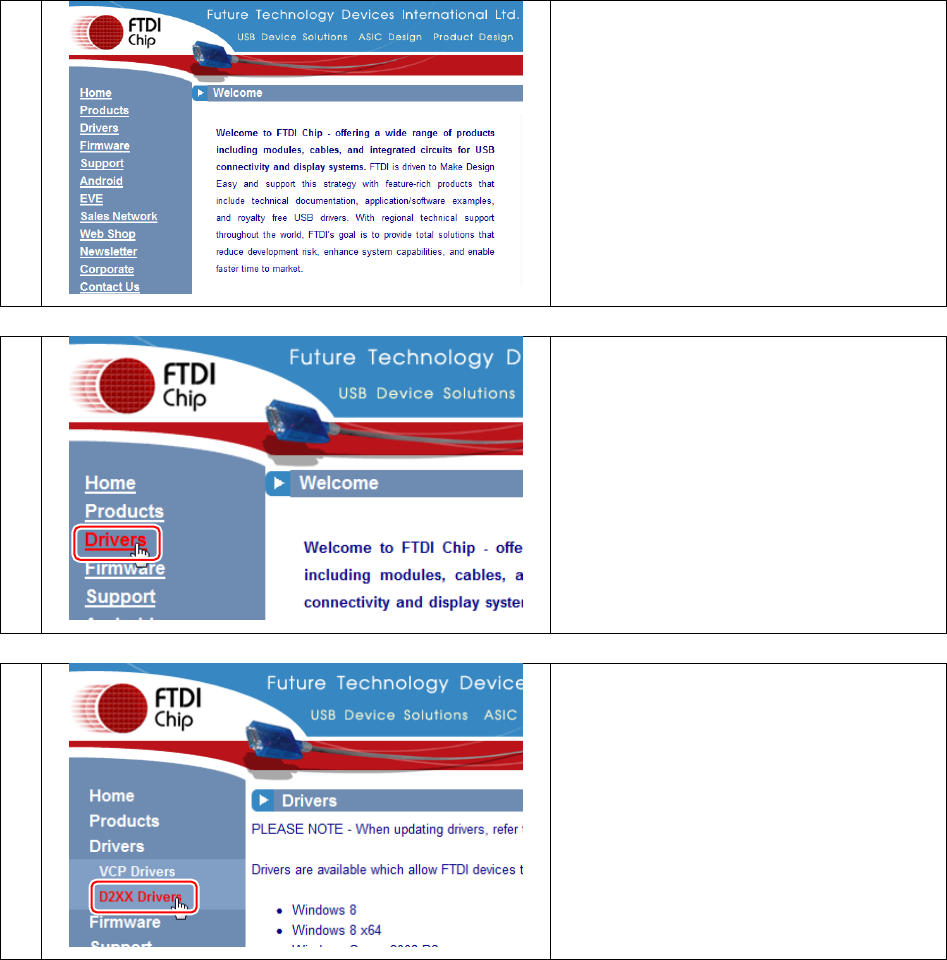
Choose D2XX Drivers according to your PC
system.
For 64-bit version select ‘setup executable’
link in the row for the Wndows 8.1 2.08.30
drivers.
For 32-bit version select ‘setup executable’
link in the row for the Wndows 2.08.30
drivers.
D2XX Drivers contain the USB Serial
Converter and USB Serial Port Driver.
5
Save the downloaded executable file.
64-bit download link
32-bit download link
31
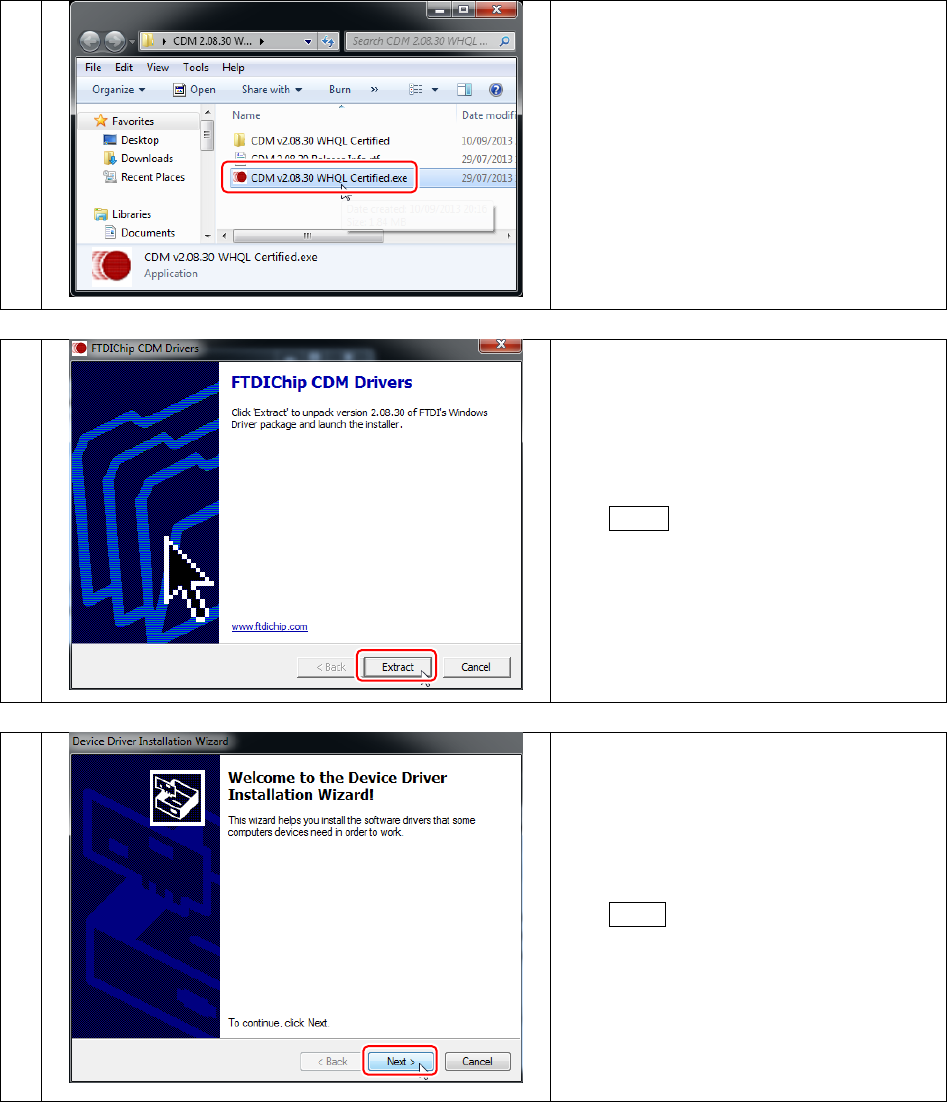
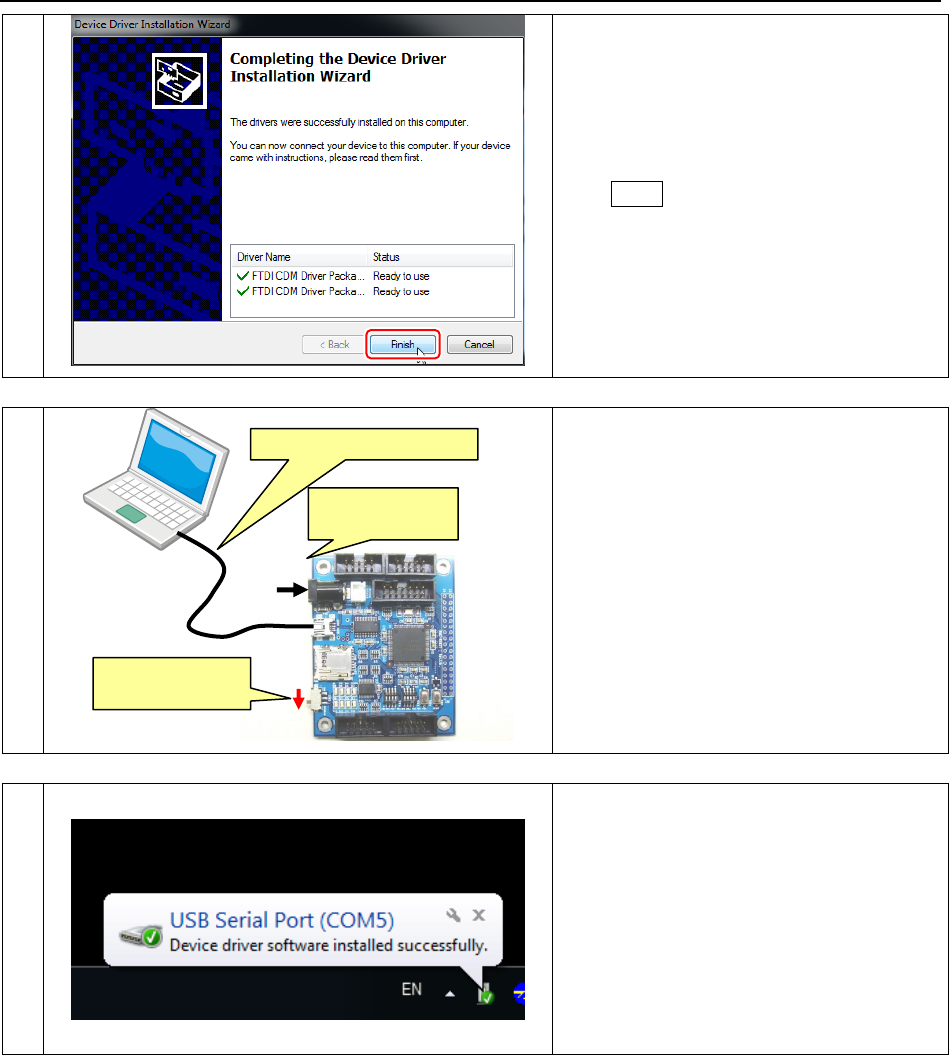
4.4 Install of USB Drivers and connecting the car
1
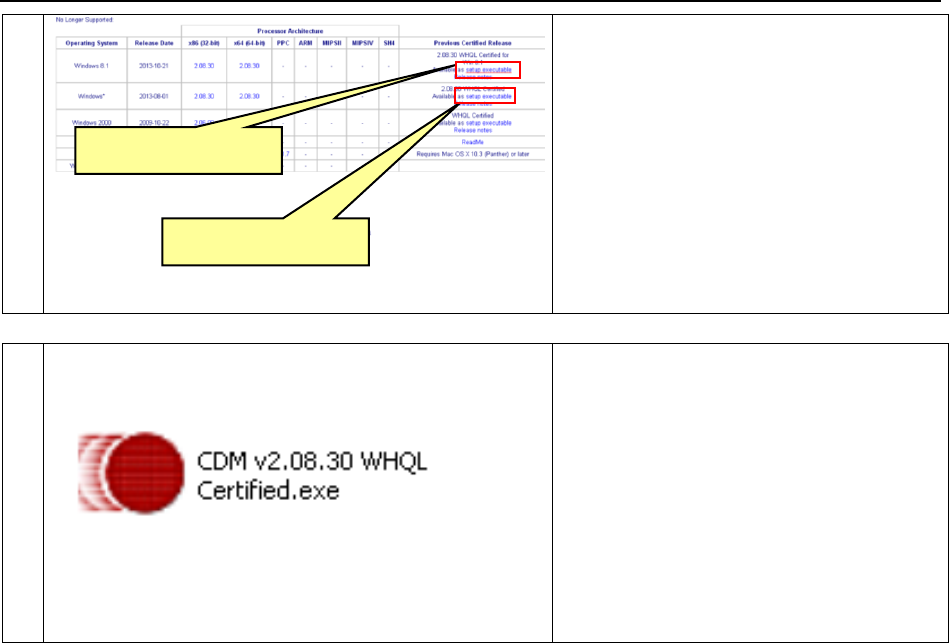
Run the downlaoded file CDM v2.08.30
WHQL Certified.exe you downloaded from
the web, or or run the file from the the MCR
Start-up Kit (it is located inside the
‘Resources’ folder, then ‘MCR Kit Software
Tools & Drivers’, then ‘FDTI Drivers’ – then
you have the option to choose either 64- or
32-bit depending on your machine).
2
Click Extract
3
Click Next >
Renesas Integrated Development Environment Installation Manual (RMC-RX62T board Version)
32
4
Click Finish
5
USB cable
5V
1. Power OFF
4. Power ON
2. Turn SW5 to
PROGRAMM
3. Connect by USB cable
Connect the PC and MCU board on the car
using a USB cable.
The procedure is as follows.
[1] Power off the MCU board.
[2] Turn the SW5 of the MCU board to
PROGRAM.
[3] Connect the PC and MCU board using a
USB cable.
[4] Power on the MCU board.
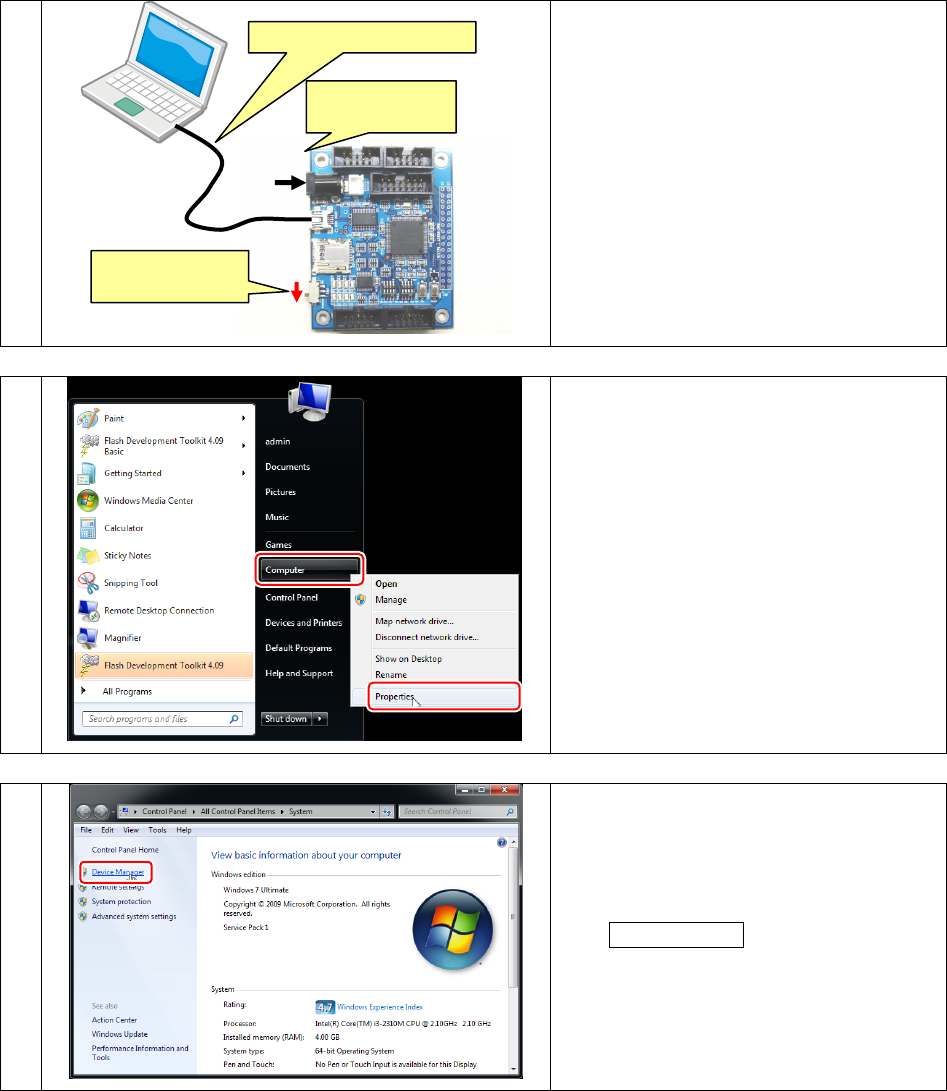
6
If "Serial Com Port (COMXX)" is displayed,
installation is complete.
Note: If "Serial Com Port (COMXX)" is not
displayed, refer to "Confirmation of
COM Port" and please confirm it.
33
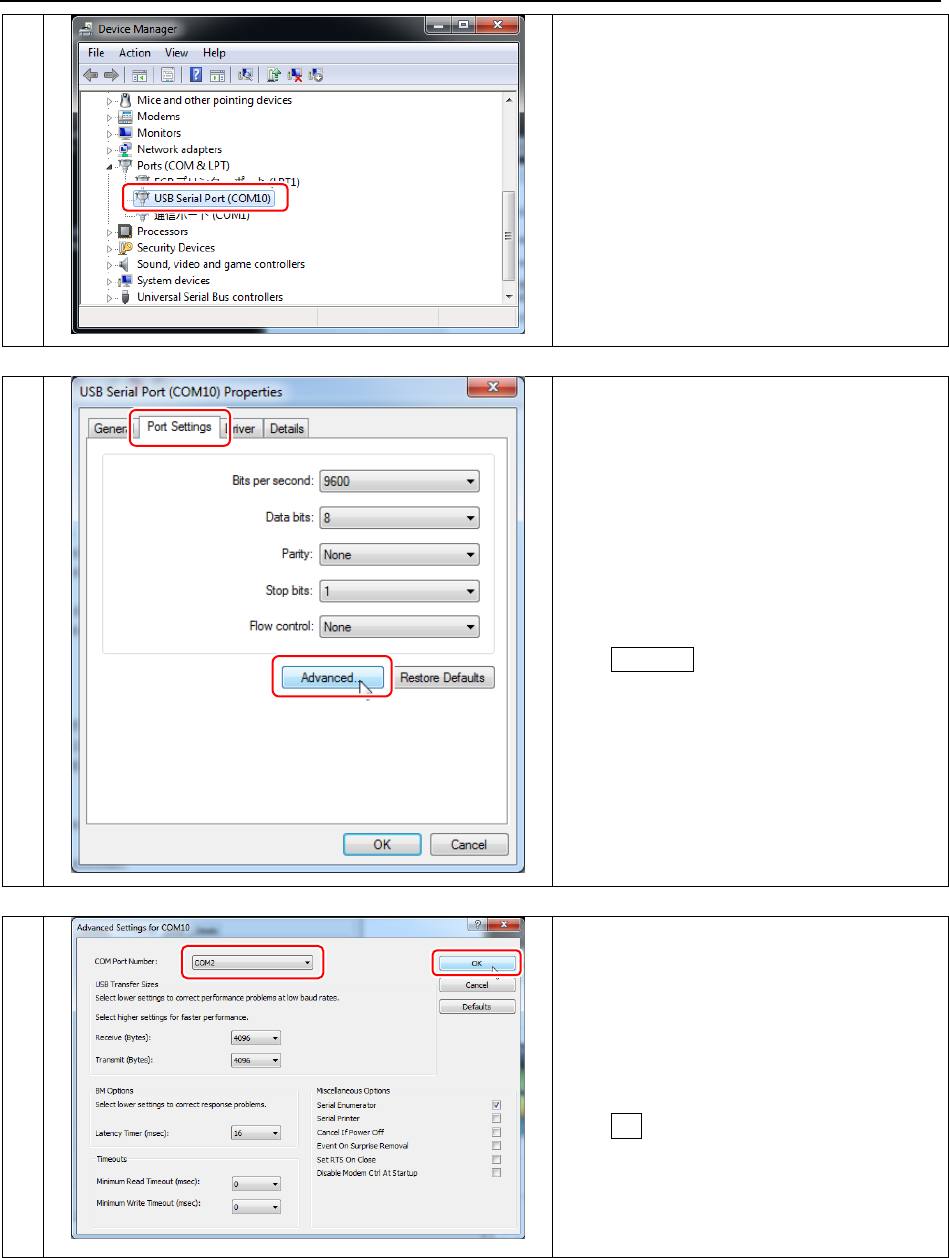
4.5 Confirmation of COM Port
1
USB cable
5V
1. Power OFF
4. Power ON
2. Turn SW5 to
PROGRAMM
3. Connect by USB cable
Connect the PC and MCU board using a USB
cable.
The procedure is as follows.
[1] Power off the MCU board.
[2] Turn the SW5 of the MCU board to
PROGRAM.
[3] Connect the PC and MCU board using a
USB cable.
[4] Power on the MCU board.
2
To confirm the COM port number for the
USB serial port, open Properties in My
Computer.
3
Click Device Manager.
①
②
Renesas Integrated Development Environment Installation Manual (RMC-RX62T board Version)
34
4
Confirm the number of the USB Serial Port
(COMxx) under Ports (COM and LPT).
In this example, the port number is COM10.
The COM number here must be between
COM1 and COM9. If your COM number is
something other than COM1 to COM9,
change the COM number according to the
following procedure.
Open the properties of USB Serial Port
(COM10).
5
Open the Port Settings tab.
Click Advanced.
6
Set a COM port number between COM1 and
COM9.
Click OK.
35
7
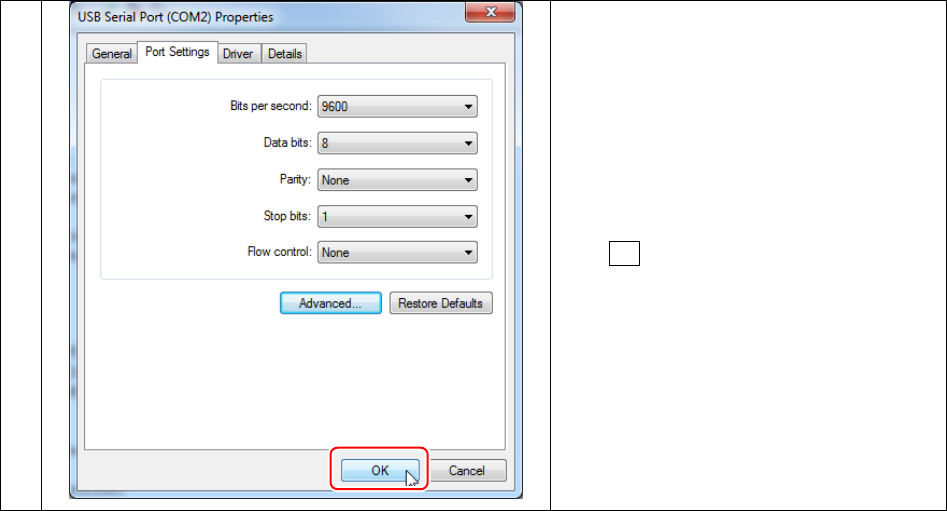
Click OK to finish setting the COM number.
Renesas Integrated Development Environment Installation Manual (RMC-RX62T board Version)
36
4.6 Download sample code
Renesas provides a sample code which allows you to test the car is operating correctly (refer to Operation Test
Manual) and begin running the car around a track (refer to Program Explanation Manual). The main code can then
be used as a starting point for optimising the car – you can create your own code from scratch or continuously
modify the basic code supplied.
Note: Advance to "Access Sample Code from the MCR Start-up Kit" if you are using the MCR Start-up Kit.
4.7 Access Sample Code from the Web
1
The sample code is found at the following web
address:
http://am.renesas.com/company_info/carrally/
download/index.jsp
2
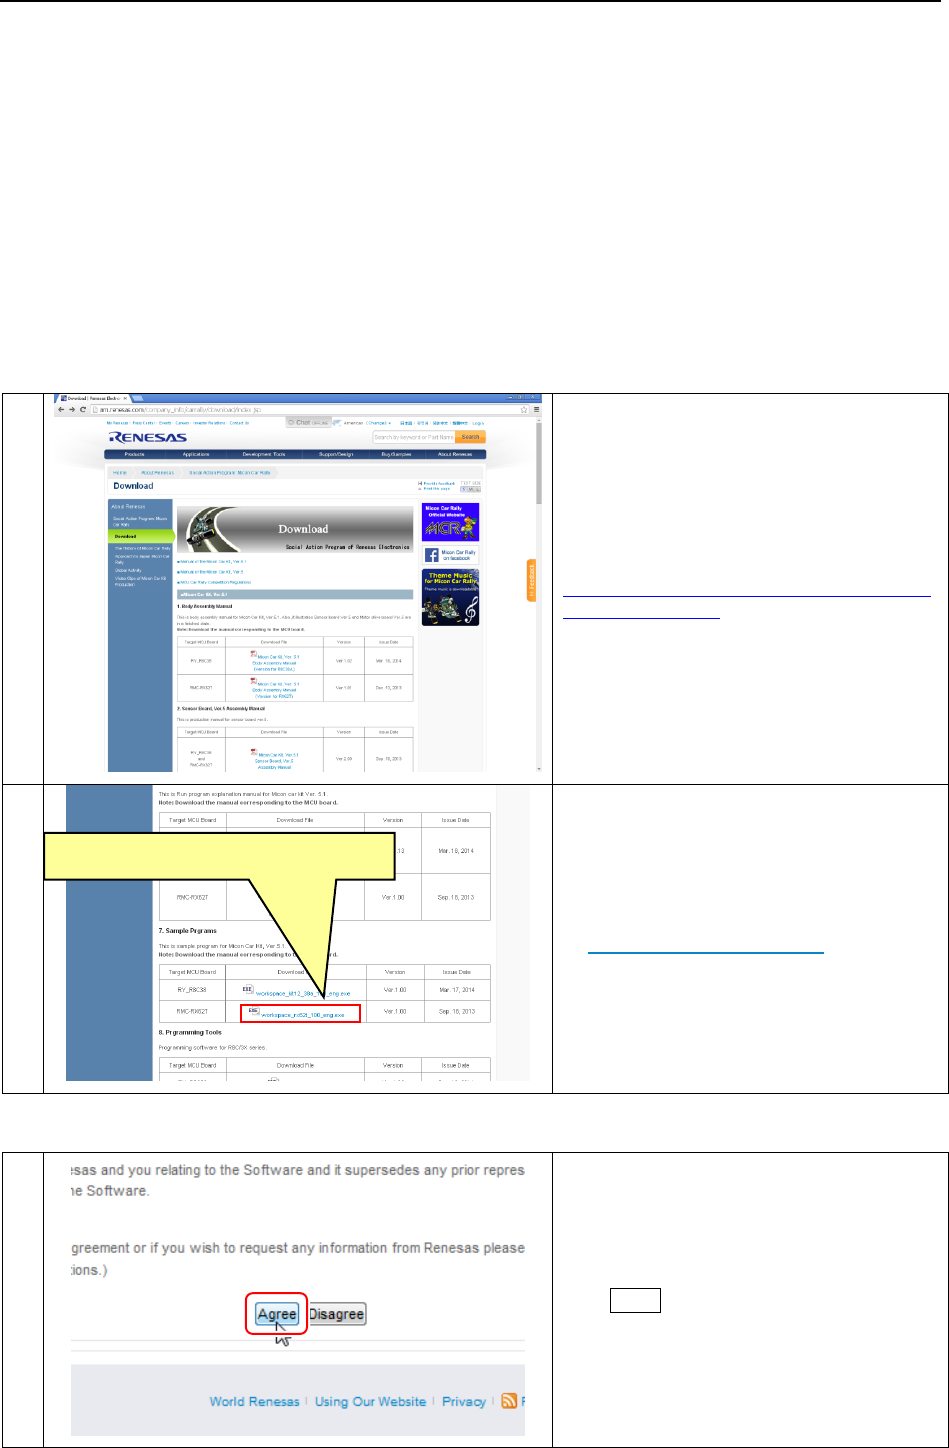
Under the ‘Micon Car Kit, Ver 5.1’ banner,
scroll down to ‘7. Sample Programs’ and click
on workspace_rx62t_100_eng.exe
3
Click Agree after reading the AGREEMENT.
Click "workspace_rx62t_100_eng.exe"
37
4
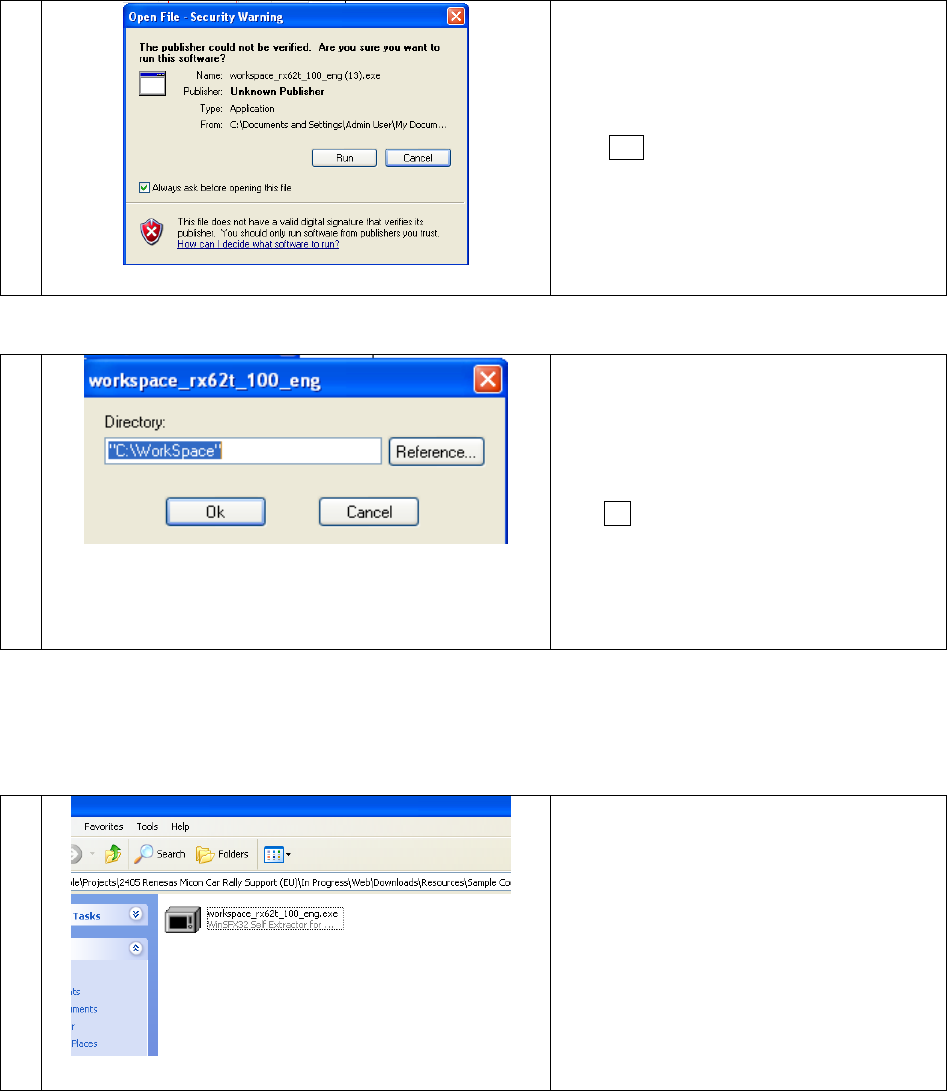
Click Run.
5
Select a location to save the sample code and
click Ok.
4.6 Access Sample Code from the MCR Start-up Kit
1
Open the the MCR Start-up Kit folder then go
into ‘Resources’, then ‘Sample Code’. Open
the file ‘workspace_rx62t_100_eng.exe’.
Renesas Integrated Development Environment Installation Manual (RMC-RX62T board Version)
38
2
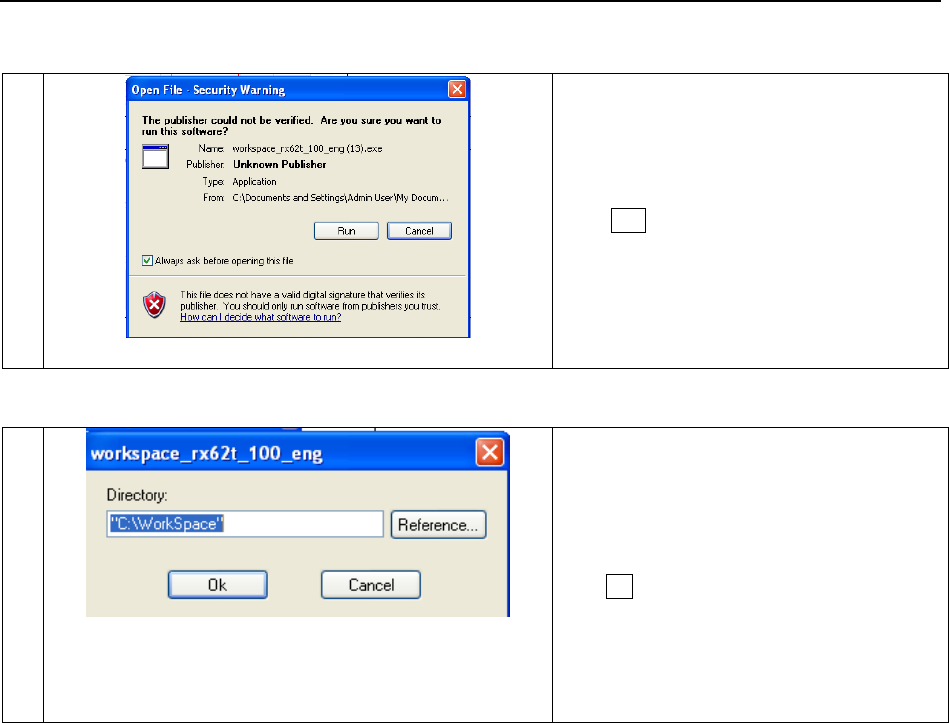
Click Run.
3
Select a location to save the sample code and
click Ok.
39
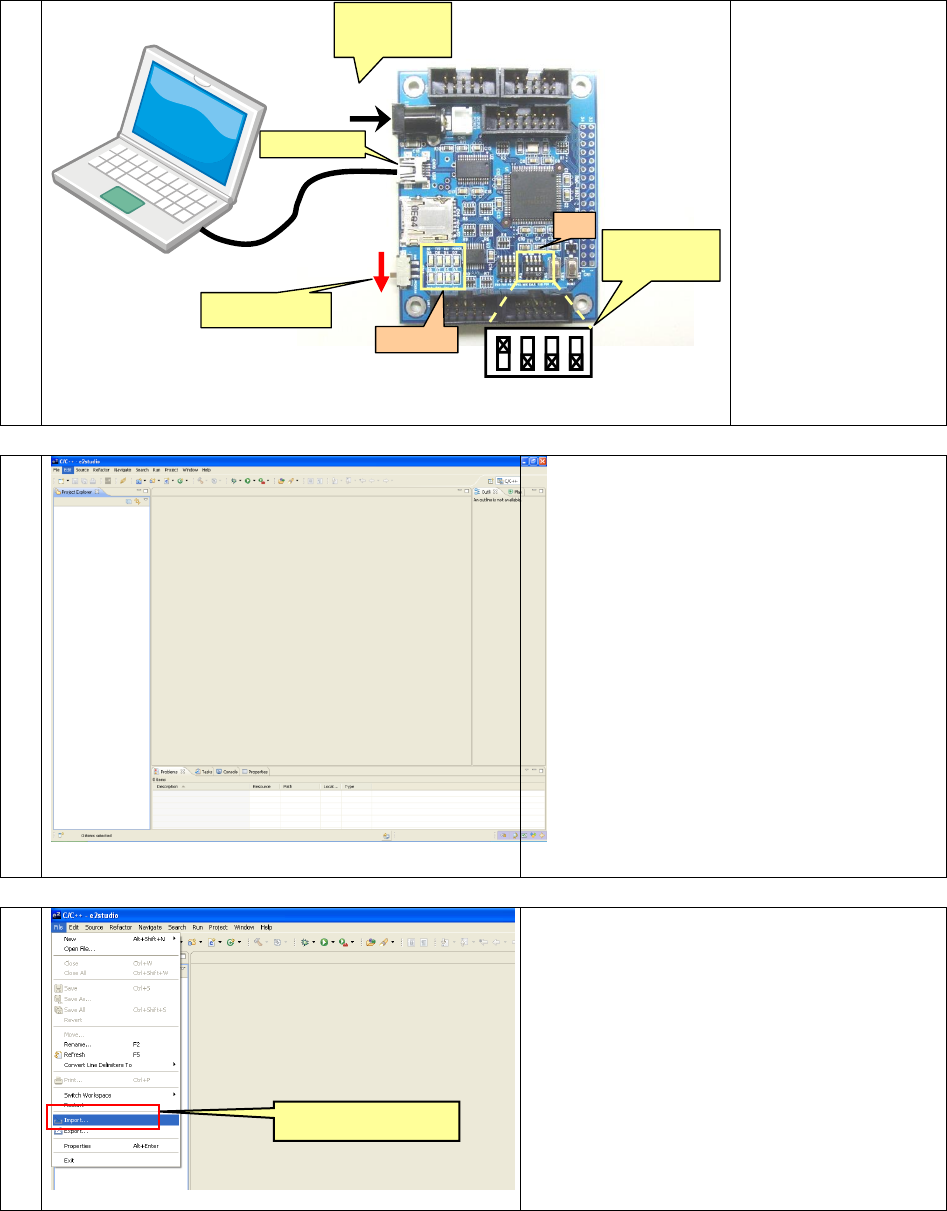
4.7 Programming Procedure
1
5 V
USB cable
[4] program position
[2] Connect
[1] Power off
[5] Power on
LED lights
SW3
POR
RXD
EMLE
MDE
OFF
ON
[3] Change mode of
RXD and EMLE
[1] Power off
[2] Connect PC and
MCU board by USB
cable.
[3] Turn on RXD and
EMLE of SW3.
[4] Turn SW5 to
PROGRAM.
SW5 must change
states while the
power is off.
[5] Power on
The LEDs on the MCU
board should light at
this time.
2
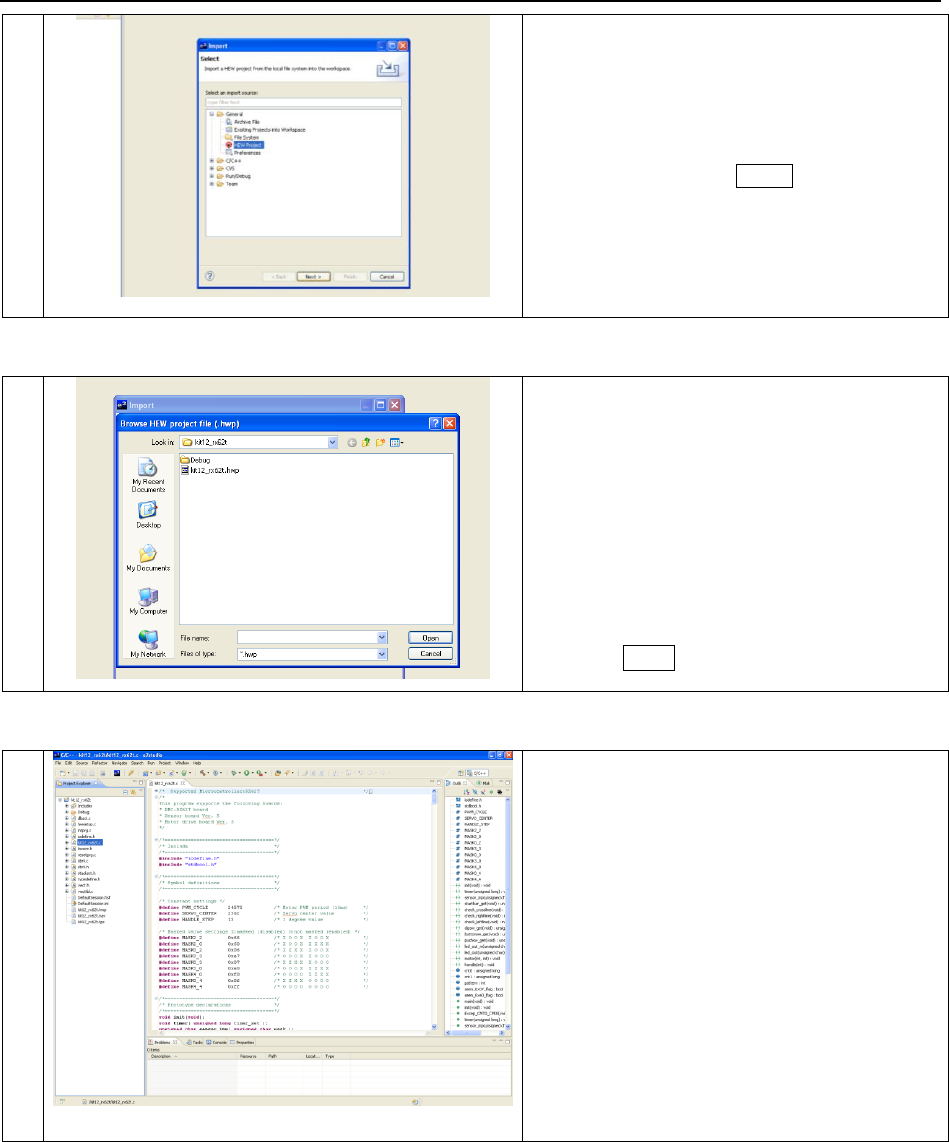
Open e2 Studio and go to the Workbench
3
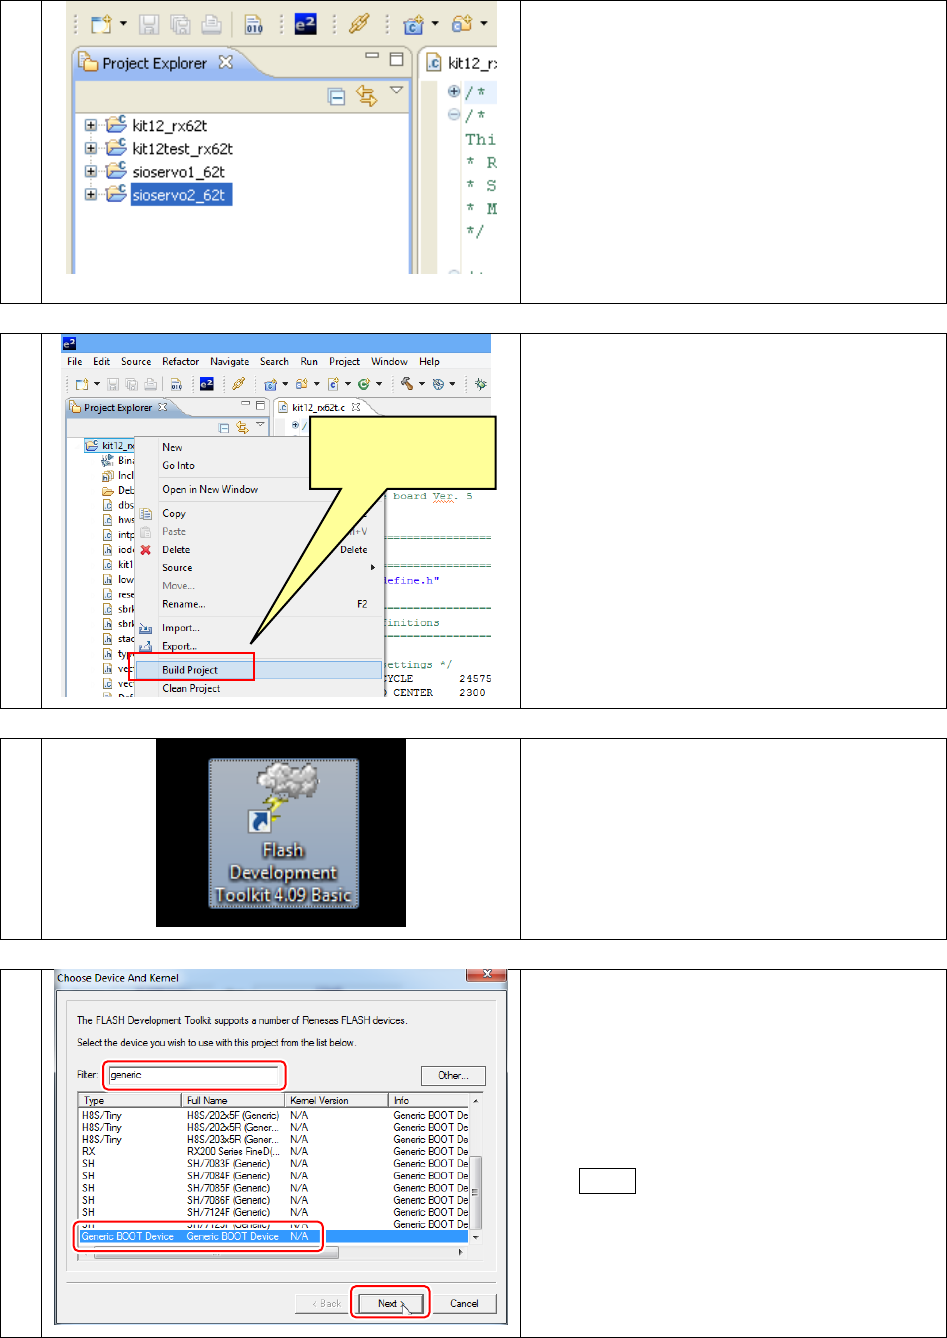
Under the file tab at the top, select ‘import’.
Click "import"
Renesas Integrated Development Environment Installation Manual (RMC-RX62T board Version)
40
4
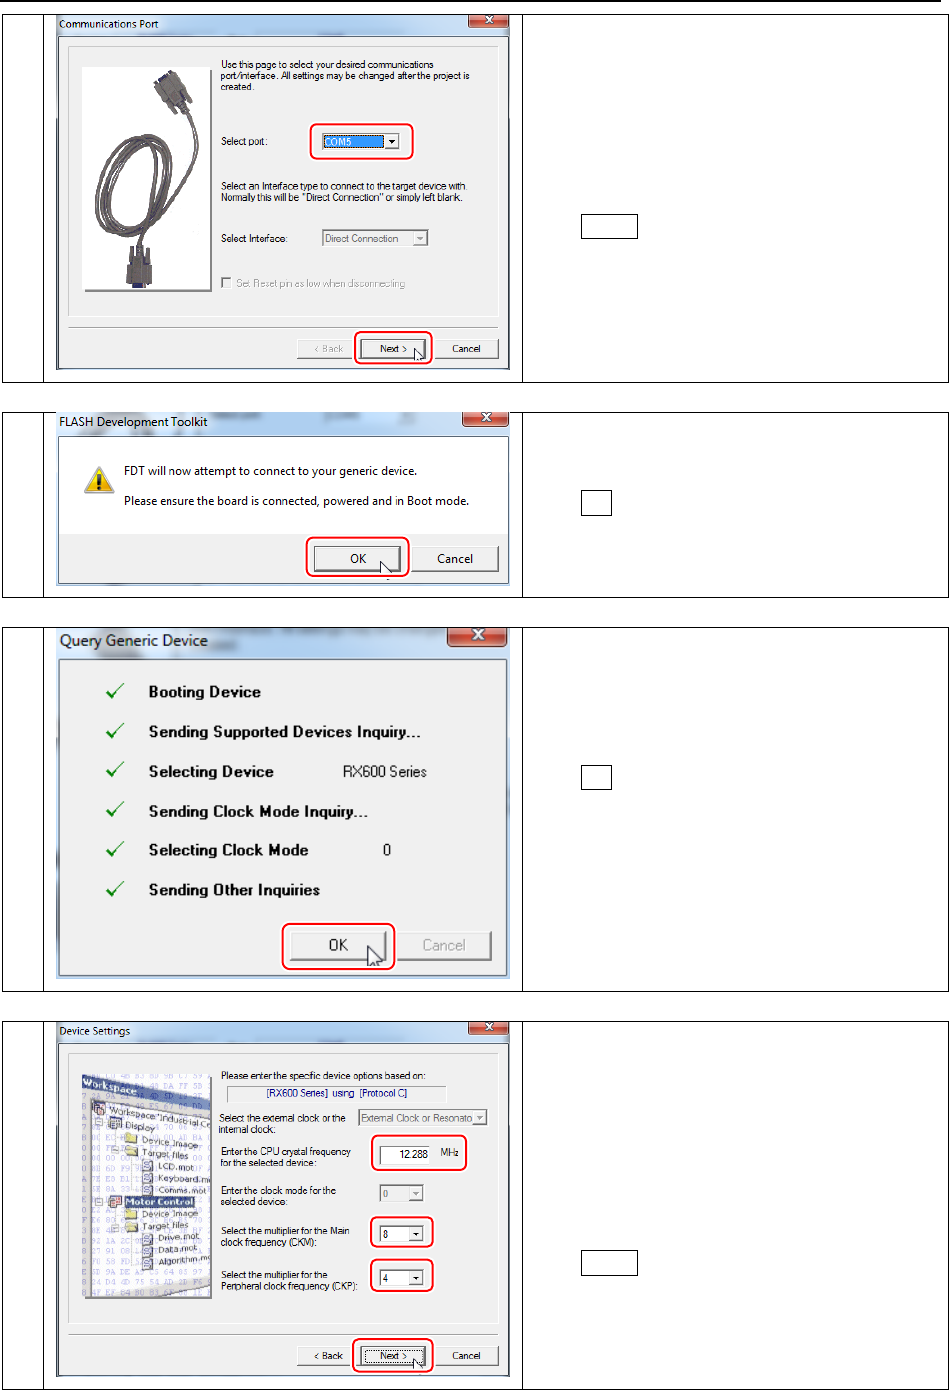
Expand the folder labelled ‘General’, then select
‘HEW Project’ and click Next >
5
Click ‘browse’ and locate the sample code folder
you saved earlier. Opening this takes you to a
folder labelled ‘kit12_rx62t’. Inside this are four
folders named ‘kit12_rx62t’, ‘kit12test_rx62t’,
‘sioservo1_62t’ and ‘sioservo2_62t’.
You will need to load each file in turn. Firstly, go
into the folder ‘kit12_rx62t’ and select the file
‘kit12_rx62t.hwp’
Then click Finish
6
This opens the main running sample code for the
car. You can double click on ‘kit12_rx62t.c’ in the
left hand Project Explorer panel which opens the
C file in the main window as shown.
It is the .c file with the same name as the project
that contains the main code for each of the car’s
programs – e.g. the main code for the project
sioservo1_62t is found in the file sioservo1_62t.c.
41
7
Repeat steps 3-5 three times to open the other
three .hwp files - ‘kit12test_rx62t.hwp’,
‘sioservo1_62t.hwp’ and ‘sioservo2_62.hwpt’.
Once you have done this you should see them all
together in your Project Explorer panel on the left.
8
Execute a BUILD.
Select project from the Project Explorer panel.
Choose the corresponding project for the program
you wish to program to the car; main running
code, test code, servo adjust 1 or servo adjust 2.
For now we will load the kit12_rx62t.c main
running code but the process is the same for each
file.
Right click on the project title and select ‘Build
Project’ – this generates a .mot file in the debug
folder of the chosen project where you originally
saved your sample code.
9
Start up Flash Development Toolkit 4.09 Basic.
Click its shortcut icon on the desktop.
10
Write "generic" in the Filter field.
Then choose Generic BOOT Device.
Click Next >.
1
2
3
Click “Build
Project)”
Renesas Integrated Development Environment Installation Manual (RMC-RX62T board Version)
42
11
Choose the COM number.
Click Next >.
12
Click OK.
13
Click OK.
If an error occurs, please try again.
14
[1] Write 12.288 for CPU crystal frequency.
[2] Choose 8 for CKM.
[3] Choose 4 for CKP.
Click Next >.
1
2
3
43
15
Click Next >.
16
Click Finish.
17
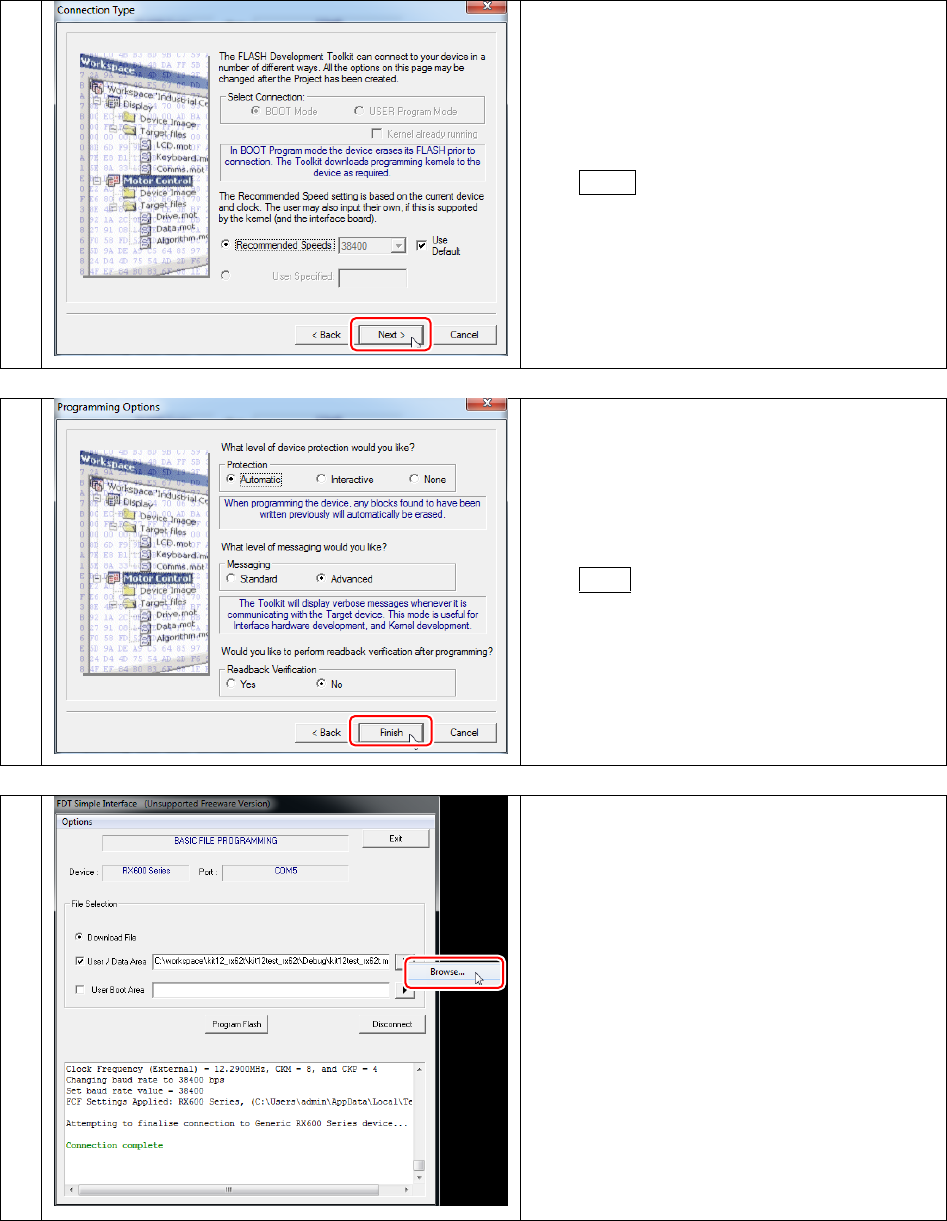
Check User/Data Area.
Then click the triangle on the far right and click
Browse.
Renesas Integrated Development Environment Installation Manual (RMC-RX62T board Version)
44
18
Open the kit12_rx62t.mot file.
The kit12_rx62t.mot file is found in the debug
folder inside the folder kit12_rx62t where you
saved your sample code.
Click Open.
19
Click Program Flash.
Then program writing will begin.
20
After programming has finished, click
Disconnect.
45
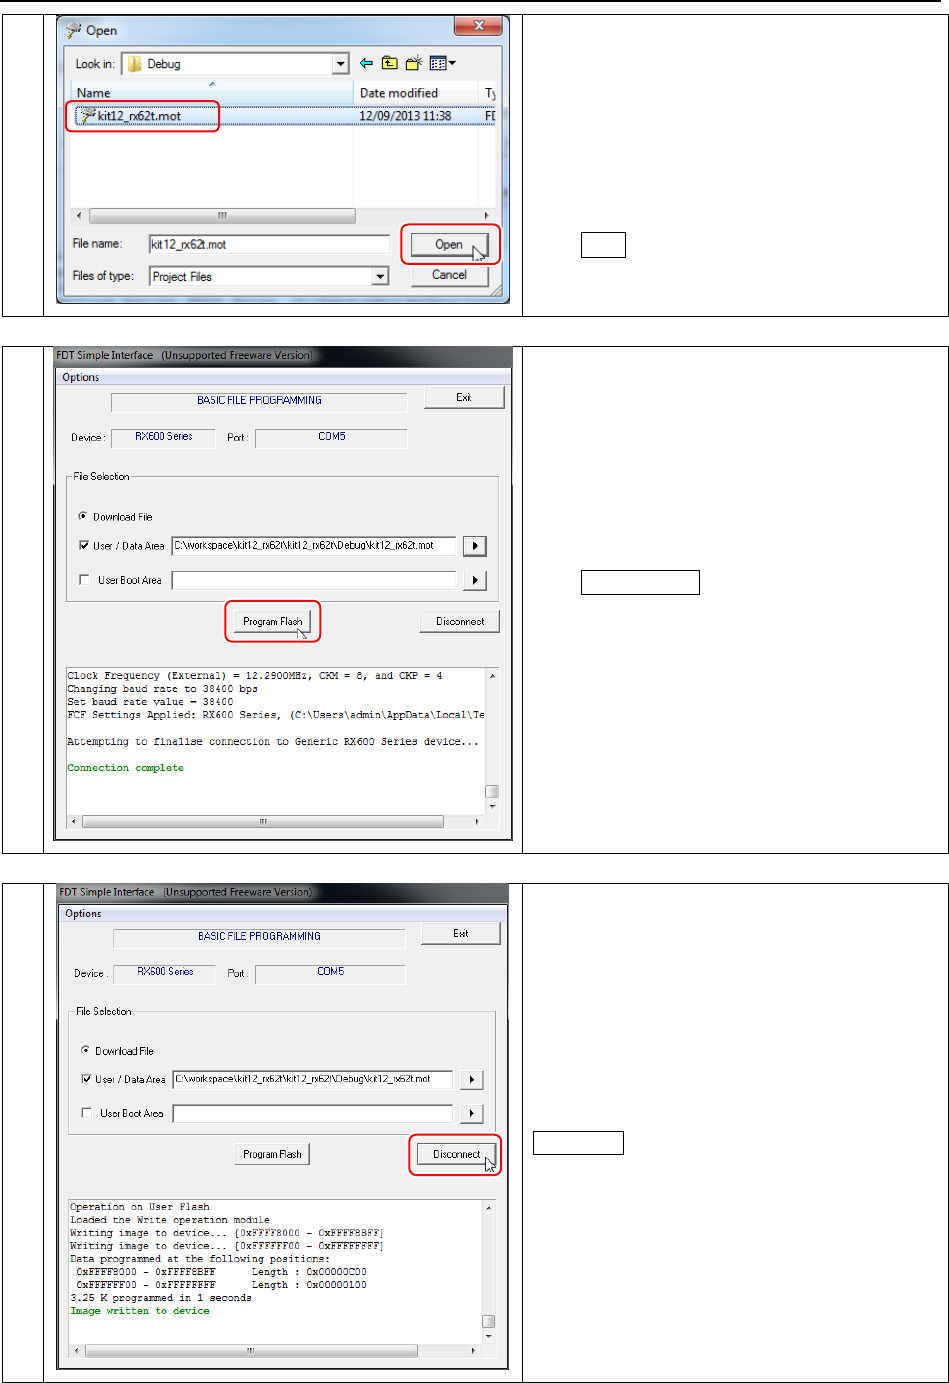
21
Click OK.
22
Program writing completed.
23
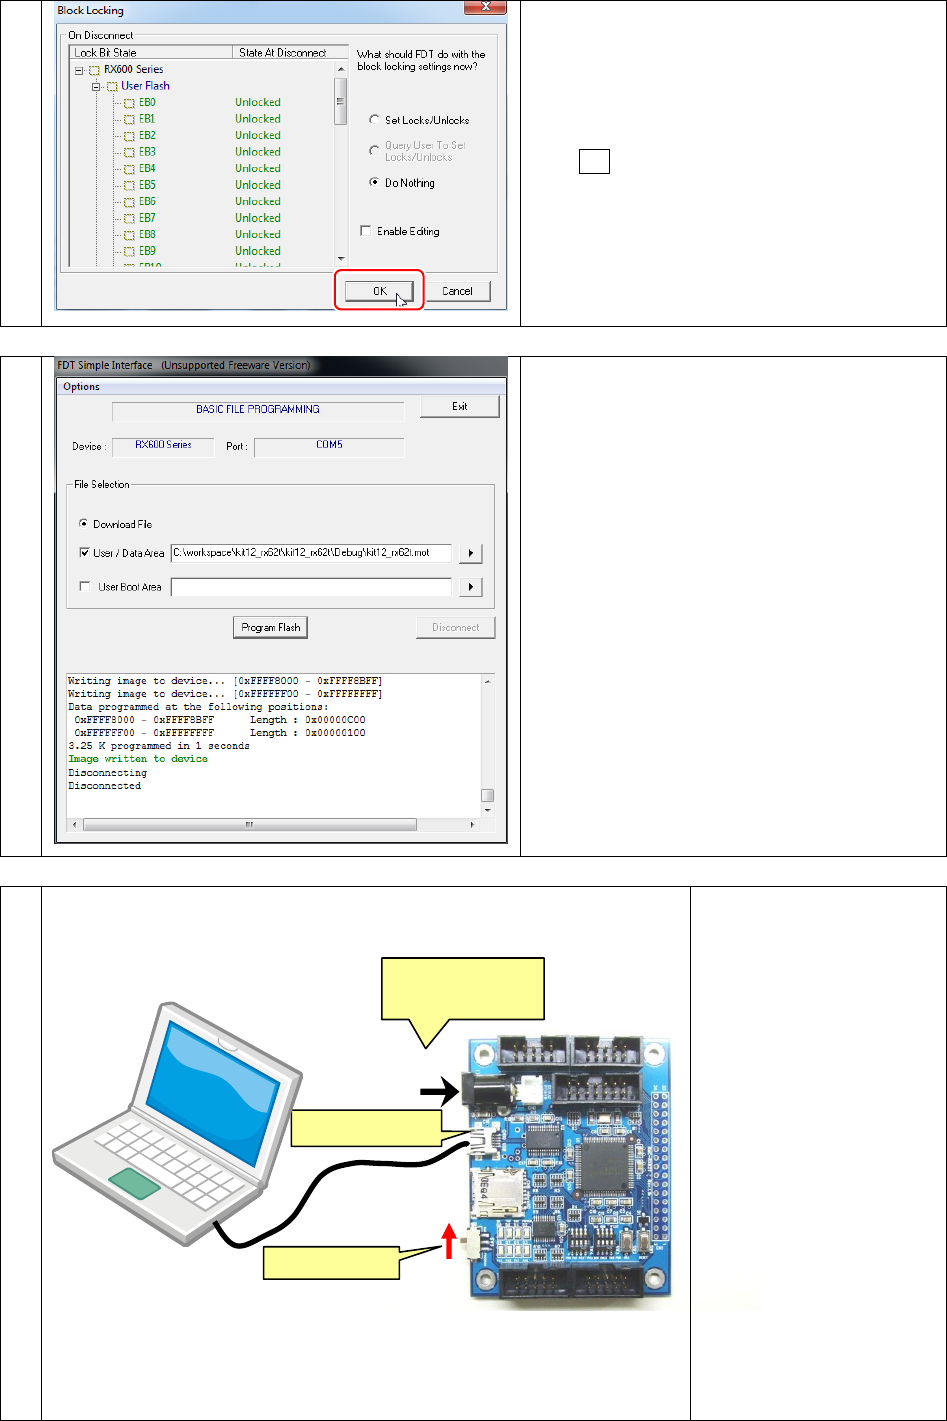
5 V
USB cable
[3] Run position
[2] Remove the cable
[1] Power is turned off
[4] Power is turned on
When the programming
operation has completed, run
the program using the
following procedure.
[1] Turn off the power.
[2] The USB cable may be
left connected or may be
disconnected. (However,
it should be disconnected
if the MCU car will be
operated.)
[3] Turn SW5 to RUN.
[4] The downloaded program
will be run when the
power is turned on.
