Replacement Instructions For Drain And Overflow Parts
2017-10-20
: Pdf Replacement Instructions For Drain And Overflow Parts Replacement Instructions for Drain and Overflow Parts toto
Open the PDF directly: View PDF ![]() .
.
Page Count: 2

Nexus Cast Iron Bathtub
Re
p
lacement Instructions
for Drain and Overflow Parts with Different Platin
g
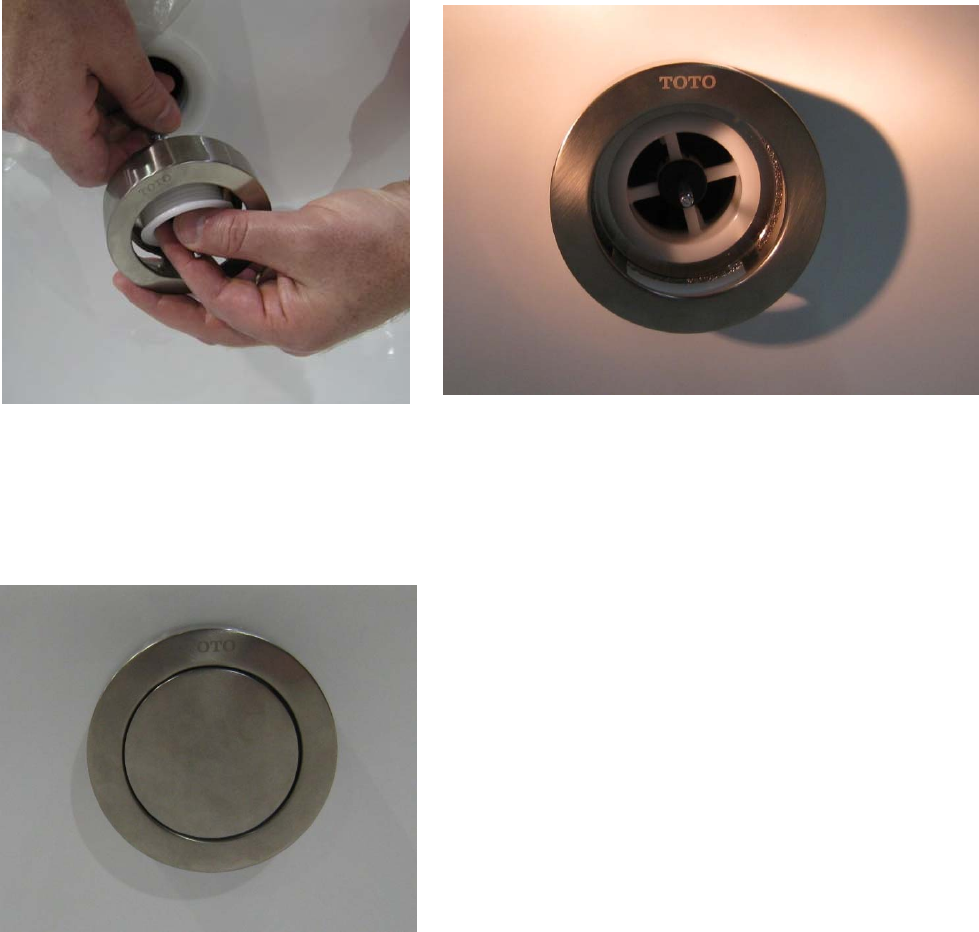
1) Replace the CP stopper with the new stopper. The stopper can be pulled up by hand.
2) Remove the CP button.
Rotate the cover to access the set screws (M3 x 3) from above. Rotate the button to access one of the set screws.
Loosen or remove the set screw. Rotate the button and loosen or remove the other set screw.
Be careful not to lose the set screws. Remove the button and thread on the set screws (if removed).
CP
NewStopper
Cover SetScrew
Replacement Instructions for Drain and Overflow Parts 4/11/2012 Page 1 of 2
3) Remove the CP cover.
Unthread the cover. Loosen the knurled nut on the cable and carefully disassemble the cable and remove the cover.
It is best to have a second person remove the cover while the first person holds the disassembled cable parts which can be easily lost.
Button
Knurled
Nut
Replacement Instructions for Drain and Overflow Parts 4/11/2012 Page 1 of 2
Nexus Cast Iron Bathtub
3) Install the new cover.
Re-assemble the non-cable parts to the new cover. Re-install the cable the reverse of the disassembly and tighten the knurled nut.
Thread the new cover assembly back onto the tub.
4) Install the new button.
Thread the set screws onto the button (if removed). Rotate the cover to access the set screws (M3 x 3) from above.
Insert the button on the cable fully so the button will be flush with the cover. Tighten the set screws. Reorient the cover.
Confirm the button actuates the stopper and is flush with the cover. Confirm the opening of the cover is at the bottom.
Replacement Instructions for Drain and Overflow Parts 4/11/2012 Page 2 of 2Replacement Instructions for Drain and Overflow Parts 4/11/2012 Page 2 of 2
