183_ruby_FC Ruby Developer's Guide (2002)
Ruby%20Developer's%20Guide%20-%20Robert%20Feldt
Ruby%20Developer's%20Guide%20(2002)
User Manual: Pdf
Open the PDF directly: View PDF ![]() .
.
Page Count: 721 [warning: Documents this large are best viewed by clicking the View PDF Link!]

1 YEAR UPGRADE
BUYER PROTECTION PLAN
Everything You Need to Develop and Deliver Ruby Applications
• Complete Case Studies with Ready-to-Run Source Code and Full
Explanations
• Hundreds of Developing & Deploying Sidebars,Ruby FAQs,and Ruby
Sample Applications
• Complete Coverage of Ruby GUI Toolkits:Tk,GTK+, FOX,SWin/Vruby
Extensions,and Others
Robert Feldt
Lyle Johnson
Michael Neumann
Technical Editor
RUBYDeveloper’s
Guide

solutions@syngress.com
With more than 1,500,000 copies of our MCSE, MCSD, CompTIA, and Cisco
study guides in print, we continue to look for ways we can better serve the
information needs of our readers. One way we do that is by listening.
Readers like yourself have been telling us they want an Internet-based ser-
vice that would extend and enhance the value of our books. Based on
reader feedback and our own strategic plan, we have created a Web site
that we hope will exceed your expectations.
Solutions@syngress.com is an interactive treasure trove of useful infor-
mation focusing on our book topics and related technologies. The site
offers the following features:
■One-year warranty against content obsolescence due to vendor
product upgrades. You can access online updates for any affected
chapters.
■“Ask the Author” customer query forms that enable you to post
questions to our authors and editors.
■Exclusive monthly mailings in which our experts provide answers to
reader queries and clear explanations of complex material.
■Regularly updated links to sites specially selected by our editors for
readers desiring additional reliable information on key topics.
Best of all, the book you’re now holding is your key to this amazing site.
Just go to www.syngress.com/solutions, and keep this book handy when
you register to verify your purchase.
Thank you for giving us the opportunity to serve your needs. And be sure
to let us know if there’s anything else we can do to help you get the
maximum value from your investment. We’re listening.
www.syngress.com/solutions
183_Ruby_FM.qxd 1/7/02 4:04 PM Page i
183_Ruby_FM.qxd 1/7/02 4:04 PM Page ii

1 YEAR UPGRADE
BUYER PROTECTION PLAN
Robert Feldt
Lyle Johnson
Michael Neumann
Technical Editor
Ruby
Developer’s Guide
183_Ruby_FM.qxd 1/7/02 4:04 PM Page iii
Syngress Publishing, Inc., the author(s), and any person or firm involved in the writing, editing, or
production (collectively “Makers”) of this book (“the Work”) do not guarantee or warrant the results to be
obtained from the Work.
There is no guarantee of any kind, expressed or implied, regarding the Work or its contents.The Work is
sold AS IS and WITHOUT WARRANTY. You may have other legal rights, which vary from state to state.
In no event will Makers be liable to you for damages, including any loss of profits, lost savings, or other
incidental or consequential damages arising out from the Work or its contents. Because some states do not
allow the exclusion or limitation of liability for consequential or incidental damages, the above limitation
may not apply to you.
You should always use reasonable care, including backup and other appropriate precautions, when working
with computers, networks, data, and files.
Syngress Media®, Syngress®,“Career Advancement Through Skill Enhancement®,” and “Ask the Author
UPDATE®,” are registered trademarks of Syngress Publishing, Inc. “Mission Critical™,”“Hack Proofing™,”
and “The Only Way to Stop a Hacker is to Think Like One™” are trademarks of Syngress Publishing, Inc.
Brands and product names mentioned in this book are trademarks or service marks of their respective
companies.
KEY SERIAL NUMBER
001 UJG4TFR2T5
002 AKJ7T4MAS4
003 VMERF3854N
004 SGD34BK9HN
005 85DFMU6N7H
006 NFG438GEM4
007 BAQ2HTR46T
008 CV5TR56KMR
009 83N5M4BT6Y
010 GT67FRWFEC
PUBLISHED BY
Syngress Publishing, Inc.
800 Hingham Street
Rockland, MA 02370
The Ruby Developer’s Guide
Copyright © 2002 by Syngress Publishing, Inc.All rights reserved. Printed in the United States of America.
Except as permitted under the Copyright Act of 1976, no part of this publication may be reproduced or
distributed in any form or by any means, or stored in a database or retrieval system, without the prior
written permission of the publisher, with the exception that the program listings may be entered, stored,
and executed in a computer system, but they may not be reproduced for publication.
Printed in the United States of America
1 2 3 4 5 6 7 8 9 0
ISBN: 1-928994-64-4
Technical Editor: Michael Neumann Cover Designer: Michael Kavish
Acquisitions Editor: Catherine B. Nolan Page Layout and Art by: Reuben Kantor and Shannon Tozier
Developmental Editor: Kate Glennon Copy Editor: Jesse Corbeil
Indexer: Robert Saigh
Distributed by Publishers Group West in the United States and Jaguar Book Group in Canada.
183_Ruby_FM.qxd 1/7/02 4:04 PM Page iv

v
Acknowledgments
v
We would like to acknowledge the following people for their kindness and support
in making this book possible.
Richard Kristof and Duncan Anderson of Global Knowledge, for their generous
access to the IT industry’s best courses, instructors, and training facilities.
Ralph Troupe, Rhonda St. John, and the team at Callisma for their invaluable insight
into the challenges of designing, deploying and supporting world-class enterprise
networks.
Karen Cross, Lance Tilford, Meaghan Cunningham, Kim Wylie, Harry Kirchner,
Kevin Votel, Kent Anderson, and Frida Yara of Publishers Group West for sharing
their incredible marketing experience and expertise.
Mary Ging, Caroline Hird, Simon Beale, Caroline Wheeler,Victoria Fuller, Jonathan
Bunkell, and Klaus Beran of Harcourt International for making certain that our
vision remains worldwide in scope.
Annabel Dent of Harcourt Australia for all her help.
David Buckland,Wendi Wong, Marie Chieng, Lucy Chong, Leslie Lim,Audrey Gan,
and Joseph Chan of Transquest Publishers for the enthusiasm with which they receive
our books.
Kwon Sung June at Acorn Publishing for his support.
Ethan Atkin at Cranbury International for his help in expanding the Syngress
program.
Jackie Gross, Gayle Vocey,Alexia Penny,Anik Robitaille, Craig Siddall, Darlene
Morrow, Iolanda Miller, Jane Mackay, and Marie Skelly at Jackie Gross & Associates
for all their help and enthusiasm representing our product in Canada.
Lois Fraser, Connie McMenemy, and the rest of the great folks at Jaguar Book Group
for their help with distribution of Syngress books in Canada.
183_Ruby_FM.qxd 1/7/02 4:04 PM Page v

Technical Editor’s
Acknowledgements
I’d like to thank the Syngress staff for their support, and John Small, who
encouraged me in overseeing the writing of this book. I’d like to thank
Matz for creating such a wonderful language; Dave and Andy for two
really great books about programming in general, and Ruby; Kentaro
Goto for his tutorial that directed me three years ago to Ruby; and
Hiroshi Nakamura for many valuable comments and explanations about
SOAP4R. Finally, thank you to the team of Merlin.zwo for being patient
with me, as well as to the whole Ruby community for letting me partici-
pate in such a great development.
vi
183_Ruby_FM.qxd 1/7/02 4:04 PM Page vi

vii
Contributors
Jason Wong is the Chief Executive Officer of ionami design, a Web
development and design firm headquartered in Berkeley, CA. His respon-
sibilities include developing and maintaining client relationships, project
management, application development and support, and operations man-
agement. Previously, he managed all aspects of 3dfxgamers.com, the 3dfx
interactive community Web site. Jason holds a bachelor’s degree from the
University of California at Berkeley. He would like to thank Joyce,Ted
and Tim, and his parents for all their support.
Lyle Johnson is a Software Team Leader at ResGen, Invitrogen
Corporation in Huntsville,AL. Prior to his employment at ResGen, Lyle
served as Group Leader for Graphical User Interface Development at
CFD Research Corporation. Lyle has worked primarily in commercial
software development for computational fluid dynamics and bioinfor-
matics applications, but has also managed and contributed to a number of
open-source software projects.
Lyle holds a bachelor’s degree in Aerospace Engineering from Auburn
University and a master’s of Science degree in Aerospace Engineering
from the Georgia Institute of Technology. He currently lives in Madison,
AL with his wife, Denise.
Jonothon Ortiz is Vice President of Xnext, Inc. in Winter Haven, FL.
Xnext, Inc. is a small, privately owned company that develops Web sites
and applications for prestigious companies such as the New York Times
Company. Jonothon is the head of the programming department and
works together with the CEO on all company projects to ensure the best
possible solution. Jonothon lives with his wife, Carla, in Lakeland, FL.
Robert Feldt is a Software Engineering Researcher at Chalmers
University of Technology in Gothenburg, Sweden. His professional
interest is in how to produce robust, reliable software. Robert’s research
183_Ruby_FM.qxd 1/7/02 4:04 PM Page vii

viii
focuses on what can be learned from applying the complex but robust
systems found in nature to tools and methods for developing and testing
software. Robert also teaches courses on software engineering to students
in the Computer Science and Computer Engineering programs at
Chalmers University.
Robert holds a master’s degree from Chalmers University and is a
member of the IEEE. He has previously worked as a consultant software
engineer. He programs mostly in C, Haskell, and Ruby and uses Ruby
frequently in his research since its dynamic nature allows him to easily test
new ideas. He is working on a number of larger Ruby projects, including
the Rockit compiler construction toolkit and the RubyVM project, to
build a set of plug-and-play components for assembling Ruby virtual
machines.
Robert currently resides in Gothenburg, Sweden with his wife,
Mirjana, and daughter, Ebba. He wants to acknowledge them for their
support and love.
Stephen Legrand (Ph.D.) has both an academic and commercial back-
ground. He was a post-doctoral fellow at MIT and has lectured both
mathematical and computer science related subjects at the university level.
He has taught graduate and undergraduate courses in such diverse areas as
assembly language, automata theory, computability, discrete mathematics,
computer graphics, and in mathematical subjects such as differential equa-
tions, advanced calculus, financial mathematics, and model theory. In addi-
tion, Stephen has over 10 years of software development expertise in such
areas as fixed income derivatives, interest rate modeling, artificial intelli-
gence, and telecommunications. He has authored computer graphics
engines, computer chess games, option pricing engines, cellular propaga-
tion models, and workflow management systems. He is currently con-
sulting on the IRROS project and on J2EE-related technologies in the
Washington, DC area.
183_Ruby_FM.qxd 1/7/02 4:04 PM Page viii

ix
Technical Editor and Contributor
Michael Neumann is a Database and Software Developer for
Merlin.zwo InfoDesign GmbH in Germany (near Stuttgart). He is also
studying computer science at the University of Karlsruhe. Merlin.zwo
develops large-scale database applications based on Oracle products.
With more than 10 years of experience in software development,
Michael has specialized in many different domains, from system-near
programming, administration of Unix systems, and database develop-
ment with several RDBMSs, to OOA/OOD techniques, and design and
implementation of distributed and parallel applications. One of his
greatest interests lies is the design principles of programming languages.
Before he was employed at Merlin.zwo, he was a Database/Web
Developer and Principal of Page-Store.
183_Ruby_FM.qxd 1/7/02 4:04 PM Page ix
183_Ruby_FM.qxd 1/7/02 4:04 PM Page x

Contents
xi
Foreword xxiii
Chapter 1
Booting Ruby 1
Introduction 2
An Overview of Ruby 2
Installing Ruby and its Tools 3
Installing Ruby on Unix 5
Installing Ruby from Source Code 5
Installing from Packages 7
Installing Ruby on a Windows System 7
Installing Applications and Libraries
from RAA 8
IDE and Editor Support in Ruby 10
Emacs 11
VIM 12
Other Editors 12
RubyWin 12
Ruby Development Environment (RDE) 13
Additional Tools a Rubyist Must Have 13
Ruby Interactive (Ri) 14
Interactive Ruby (IRb) 15
Debugging Ruby Applications
with debug.rb 17
A Short Syntax Style Guide 22
Using Comments 22
Naming 23
Iterators 24
Indentation, Spacing, Parentheses 24
■Ruby’s design
philosophy is known
as the Principle of
Least Surprise. That
means that Ruby
works the way that
you expect it to
work. The more you
develop with Ruby,
the more you’re
going to realize that
you’re spending
time producing
code—real code
which works, is
readable, and solves
the problems at
hand.
183RubyToC.qxd 1/7/02 4:31 PM Page xi
xii Contents
Dangerous Ruby 25
Local Variables versus Methods 25
More Whitespace Issues 25
Block Local Variables 26
Comparing Ruby 26
Java 26
Perl 32
Language Constructs 32
Object-Oriented Programming 33
Access Control 34
Arrays and Hashes 35
Hashes 36
Iterators 36
Convincing Management to Use Ruby 37
Summary 39
Solutions Fast Track 39
Frequently Asked Questions 41
Chapter 2
GUI Toolkits for Ruby 43
Introduction 44
Using this Book’s Sample Applications 45
Using the Standard Ruby GUI:Tk 46
Obtaining Tk 46
Ruby/Tk Basics 47
Creating Responses to Tk’s Callbacks
and Events 48
Working with Ruby/Tk’s Layout Managers 50
Ruby/Tk Sample Application 54
Using the SpecTcl GUI Builder 67
Obtaining Tk Extensions:Tix and BLT 68
Using the GTK+ Toolkit 68
Obtaining Ruby/GTK 69
Ruby/GTK Basics 70
Programming Signals and Signal Handlers 71
Working with Ruby/GTK’s Layout Managers 72
Ruby/GTK Sample Application 76
183RubyToC.qxd 1/7/02 4:31 PM Page xii

Contents xiii
Using the Glade GUI Builder 87
Using the FOX Toolkit 90
Obtaining FOX and FXRuby 90
FXRuby Basics 91
Targets and Messages 93
Working with FOX’s Layout Managers 95
Fox Sample Application 99
Using the SWin/VRuby Extensions 111
Obtaining SWin and VRuby 112
VRuby Library Basics 112
Layout Managers 116
Event Handling 118
VRuby Sample Application 120
Other GUI Toolkits 127
Choosing a GUI Toolkit 128
Summary 129
Solutions Fast Track 130
Frequently Asked Questions 132
Chapter 3
Accessing Databases with Ruby 135
Introduction 136
Accessing Databases with Ruby/DBI 136
Obtaining and Installing Ruby/DBI 140
Programming with Ruby/DBI 141
Understanding Ruby/DBI Architecture
and Terminology 143
Connecting to Databases 144
Using Driver URLs and
Datasource Names 146
Preparing and Executing SQL Statements 148
Fetching the Result 156
Performing Transactions 162
Handling Errors 164
Tracing the Execution of
DBI Applications 166
Accessing Metadata 169
Master the Grid Layout
Manager
183RubyToC.qxd 1/7/02 4:31 PM Page xiii

xiv Contents
Using Driver-specific Functions
and Attributes 171
Accessing Databases Remotely Using
DBD::Proxy 174
Copying Table Data between
Different Databases 175
Getting Binary Objects Out of a Database 176
Transforming SQL-query Results to XML 179
Accessing Databases with Ruby/ODBC 190
Accessing LDAP Directories with Ruby/LDAP 195
Using Ruby/LDAP 195
Adding an LDAP Entry 196
Modifying an LDAP Entry 196
Deleting an LDAP Entry 197
Modifying the Distinguished Name 197
Performing a Search 197
Handling Errors 199
Utilizing Other Storage Solutions 199
Reading and Writing Comma-Separated
Value Files 199
Using Berkeley DBM-file Databases 200
Using the Berkeley DB Interface BDB 201
Storing Ruby Objects in a Relational
Database 205
Summary 208
Solutions Fast Track 208
Frequently Asked Questions 209
Chapter 4
XML and Ruby 211
Introduction 212
Why XML? 212
Making XML Manageable 214
Validation though DTD 214
Validating With XML-Schemas 216
XPath 218
XML Parser Architectures and APIs 218
Answers to Your Ruby
Database Questions
Q: Using Ruby/DBI, I
have set the tracing
level to 2and
output to standard
error, but nothing
happened. What’s
wrong?
A: You may have
forgotten to require
the dbi/trace file at
the top of your
program.
183RubyToC.qxd 1/7/02 4:31 PM Page xiv

Contents xv
Parsing and Creating XML in Ruby 221
Shared Code for Examples 228
Defining and Implementing Classes
Host and Port 229
Defining and Implementing the
Report Class 230
Using XMLParser 234
Installing XMLParser on Unix 234
Using NQXML 240
Installing NQXML 241
Using REXML 251
Using XSLT in Ruby 254
Ruby-Sablotron 254
XSLT4R 254
Summary 256
Solutions Fast Track 257
Frequently Asked Questions 258
Chapter 5
Web Services and Distributed Ruby 261
Introduction 262
Using XML-RPC for Ruby 262
Obtaining and Installing xmlrpc4r 263
Configuring xmlrpc4r 263
Writing XML-RPC Clients 264
Using the MultiCall Extension 268
Introspecting XML-RPC Servers 268
Writing XML-RPC Servers 270
Project:A File Upload Service 274
XML-RPC Datatypes 276
User-defined Datatypes 278
Dumping and Loading XML-RPC Messages 278
Communicating with Python’s xmlrpclib 279
Securing XML-RPC Services 280
Client-side Support 280
Server-side Support 281
Performance Comparisons 281
REXML has the following
advantages:
1. It is written 100
percent in Ruby.
2. It can be used for
both SAX and DOM
parsing.
3. It is small—
approximately 1845
lines of code.
4. Methods and classes
are in easy-to-
understand English.
183RubyToC.qxd 1/7/02 4:31 PM Page xv

xvi Contents
Using SOAP for Ruby 284
Obtaining and Installing SOAP4R 286
Writing SOAP4R Client and Server
Applications 286
Choosing an XML Parser 288
Writing SOAP4R Clients 289
Writing SOAP4R Services 298
SOAP Datatypes and Type-Conversion 303
Creating Multi-dimensional or
Typed SOAP Arrays 306
Creating User-defined Datatypes 306
Changing the Default Type-Mapping 308
Using SOAP as Marshalling Format 310
Project:A SOAP Authentification Server 313
Using Distributed Ruby 321
A Name Server for DRb 324
Using DRb to Speed Up CGI Scripts 325
Using Rinda and Distributed TupleSpaces 328
Load-Balancing 331
Security Considerations 333
Summary 336
Solutions Fast Track 336
Frequently Asked Questions 337
Chapter 6
WWW and Networking with Ruby 339
Introduction 340
Connecting to the Web with Ruby 340
Low-Level Functions:The Socket Class 340
High-Level Functions:The Net Class 341
POP/SMTP 341
HTTP 342
FTP 342
Telnet 344
Writing a Server in Ruby 345
Models of Server Architectures 345
Basic Web Servers Using Ruby 347
Monitoring TCP/IP Based
Services
We can monitor Web
services, or any TCP/IP-
based client and server, by
using a very simple
monitor application that
comes with XML-RPC for
Ruby or TCPSocketPipe
(available from the Ruby
Application Archive
[RAA]).
183RubyToC.qxd 1/7/02 4:31 PM Page xvi

Contents xvii
Using Ruby on the Web 355
Generating HTML with Ruby 356
Ruby HTML Code Generation 356
Ruby CGI HTML Generation 357
Scripting With Ruby Using eruby and ERb 358
Templating With Ruby 359
Using the HTML/Template Extension 359
Using Ruby-tmpl 361
Putting It All Together 361
Implementing an Online Shopping Application 361
Designing the Data Model 362
The Database Access Layer 366
Initializing the Database 369
Developing the Web Interface 372
Improving the Online Shop 379
Using mod_ruby and eruby 383
Installing and Configuring mod_ruby 384
Using mod_ruby and eruby in the
Online Shop Example 386
Dynamically Generating XML with eruby 395
Displaying RSS News Channels 396
Installing and Configuring IOWA 400
Using IOWA for the Online Shop Example 404
Implementing a TreeView Component 410
Summary 420
Solutions Fast Track 420
Frequently Asked Questions 422
Chapter 7
Miscellaneous Libraries and Tools 423
Introduction 424
Graphics Programming in Ruby 424
Using OpenGL in Ruby 425
Defining the Goal and the Strategy 425
Starting with a Sample Program 425
Creating Multiple Curves 434
Generating Diagrams with GD::Graph 441
Dynamically Generating
XML with eruby
You can also generate
XML with eruby and
mod_ruby. This is useful,
for example, if you want
to deliver XML to the
browser, which then (on
the client-side) invokes an
XSLT script to transform it
to HTML. Not many
browsers support this; in
fact only Microsoft’s
Internet Explorer can do
this for certain.
183RubyToC.qxd 1/7/02 4:31 PM Page xvii

NOTE
There are basically
two types of libraries,
those written in pure
Ruby, and those that
are C extensions to
Ruby. Generally, pure
Ruby extensions only
require being on the
search path. The C
extensions to Ruby
are usually installed
by unzipping or
untarring, and then at
the command line
typing ruby
extconf.rb, which
builds a Makefile.
xviii Contents
Mathematical Programming in Ruby 442
Using the NArray Library 442
Using the BigFloat Library 447
Using the Polynomial Library 448
Using the Algebra Extension 454
Working with Polynomials 454
Working with Matrices 455
Exploring C/S Data-Structure Tools 460
Using the BinaryTree Extension 460
Using the BitVector Extension 464
Using Random Numbers, Genetic Algorithms,
and Neural Nets 467
Working with a Random-Number Generator 467
Genetic Programming in Ruby 468
Neural Nets 475
Working with Ruby and Windows 482
Using ActiveScript in Ruby 482
Using WinOLE in Ruby 484
Using OOP-Related Tools 488
Using the EachDelegator Library 488
Using the Preserved, Forwardable, and
Finalize Modules 489
Using Text-Processing, Date, and Calendar Tools 493
Using the Soundex Extension 493
Using the Date2 and Date3 Extensions 494
Using the Calendar Extension 496
Using Language Bindings 498
Using JRuby 498
Ruby Calling Java 499
Java Calling Ruby 503
Using the Ruby/Python Extension 507
Summary 511
Solutions Fast Track 511
Frequently Asked Questions 513
183RubyToC.qxd 1/7/02 4:31 PM Page xviii

Contents xix
Chapter 8
Profiling and Performance Tuning 515
Introduction 516
Analyzing the Complexity of Algorithms 517
Comparing Algorithms 520
The Different “Ordos” 522
Average and Worst-case Complexity 523
Improving Performance by Profiling 525
Profiling Using profile.rb 529
How the Standard Profiler Works 531
Drawbacks with the Standard Profiler 533
Profiling Using RbProf in AspectR 533
Understanding AOP and AspectR 539
Using AspectR 540
How AspectR Works 542
Comparing AspectR and AspectJ 543
Comparing the Speed of Ruby Constructs 544
Adding Elements to Arrays 546
Concatenating Strings 549
Predeclaring Variables 551
Iterating Over Array Elements 552
Iterating Over Array Elements with
an Index 553
Destructive versus Non-destructive Methods 554
Accessing the First Array Element 555
Creating Arrays and Hashes 556
Calling Methods and Proc Objects 557
Further Performance Enhancements 558
Caching Results 558
When Not To Use Result Caching 560
How Memoize Works 561
Disabling the Garbage Collector 561
Writing a C Extension 563
Summary 565
Solutions Fast Track 566
Frequently Asked Questions 567
A Process for Program
Optimization
1. Question the need!
2. Look at the big
picture!
3. Find the hot-spots!
4. Check structure and
data!
5. Dig deep!
6. Know your Ruby
environment and
use it wisely.
183RubyToC.qxd 1/7/02 4:31 PM Page xix

Comparing Racc and
Rockit
■Racc is more stable
than Rockit.
■The Bison algorithms
used in Racc have
been well studied
since the 1970’s.
■Rockit’s parsers are
first-class objects in
Ruby and ordinary
Ruby code can be
used when defining
them, so you have
the power of Ruby
at your fingertips
while writing your
grammars.
■Racc’s grammar
cannot use
repetition operators
(+, * and ?) so you
will have to rewrite
your grammar in a
form that Racc can
understand. Rockit
can use repetitions
operators. It can also
be used to parse
context-sensitive
constructs.
xx Contents
Chapter 9
Parser Generators 569
Introduction 570
Creating the Parsing Library
of your Dreams 571
Why Not Use Regexps? 576
Representing Recovered Structures
with Abstract Syntax Trees 577
Parsing in Ruby with Rockit 581
Deviations from Parsing Library of
Our Dreams 582
Using Rockit as a Parser Generator 587
Case-Insensitive Parsing 589
Customizing Your Parser 589
Parser Generators 590
Parser Combinators 591
Parser Transformers 593
Error-related Building Blocks 595
Parsing in Ruby with Racc 596
Writing the Grammar Rules 599
Writing a Lexical Analyzer for Use
with Racc 600
Invoking the Racc Command Line Tool 605
Building Abstract Syntax Trees with
Racc-generated Parsers 606
Comparing Racc and Rockit 609
Summary 610
Solutions Fast Track 610
Frequently Asked Questions 611
Chapter 10
Extending and Embedding Ruby 613
Introduction 614
Writing C/C++ Extensions 615
Working with Datatype Conversions 618
Working with Objects 618
Working with Numbers 619
183RubyToC.qxd 1/7/02 4:31 PM Page xx

Contents xxi
Working with Strings 620
Working with Arrays 623
Working with Hashes 627
Working with C/C++ Data Wrappers 627
Implementing Methods 632
An Example: K-D Trees 635
Ruby Implementation of the K-D Tree 636
Compiling the C Implementation
of the K-D Tree 656
Comparing the Results 657
Using SWIG 658
A Simple SWIG Example in C 658
Using SWIG With C++ 661
Choosing SWIG 666
Embedding Ruby 666
Configuring Extensions with Mkmf 671
Summary 674
Solutions Fast Track 674
Frequently Asked Questions 676
Index 677
Writing C/C++
Extensions
■Ruby alone may not
provide the speed or
functionality
required for your
Ruby applications.
When this is true,
you can write
extension modules
in C or C++ that
look like regular
modules to the Ruby
interpreter.
■Ruby’s C API
provides a wide
variety of functions
that assist extension
writers in defining
modules, classes,
and constants, and
converting back and
forth between C and
Ruby datatypes.
183RubyToC.qxd 1/7/02 4:31 PM Page xxi
183RubyToC.qxd 1/7/02 4:31 PM Page xxii

If you define efficiency as the ruler for the success of a language, Ruby should be
one of the very first languages to come to mind.The introduction of Ruby to the
programming world has astounded developers with its ability to simply make pro-
gramming fun again. Ruby frees programmers to concentrate on the problem at
hand, creating fewer obstacles than other languages. In Ruby, ideas flow directly into
the code.
Even though Ruby is very effective, there’s still a deficit of written documenta-
tion and tutorials about deploying it for real world applications. Deployment usually
requires knowledge in one or more of these fields:
■Graphical User Interfaces (GUIs)
■Distributed Computing and Networking
■Accessing Databases
■Processing and Transforming XML
■Text-Processing and Parsing
■WWW-based Applications
■Profiling and Performance Tuning
■Connecting with other Languages, Extending, and Embedding
This is why we wrote this book.We hope it helps you become more a more pro-
ductive programmer with Ruby—and that you have fun reading it and performing
the examples.
xxiii
Foreword
183Ruby_fore.qxd 1/7/02 4:32 PM Page xxiii

xxiv Foreword
Why Ruby?
With its clean object-oriented (OO) programming model (everything is an object) and
its solid foundation, it is one of the simplest-to-use and most powerful OO lan-
guages. Ruby unifies many positive features of other languages, for instance :
■Strong dynamic typing; no need to declare variables
■Exceptions
■Closures, code-blocks, and iterators as found in Smalltalk, Sather, or CLU
■A powerful yet easy-to-use object-oriented class library, designed with the
“principle of least surprise” in mind, and with several design patterns
included (for example, Delegator, Observer,Visitor, and Singleton)
■A comfortable, familiar syntax, which is a mixture of elements from C++,
Eiffel, Perl, and Python.
■Arbitrary precise integers with automatic conversion to and from
fixed-sized integers
■Mark-and-sweep Garbage Collectors and a simple C-API for extending and
embedding Ruby
■Lightweight threads and continuations
■Built-in regular expressions
Sweetened with a healthy amount of syntax, Ruby applications have the potential
of being more concise and condensed than (or at least the same length as) an equiva-
lent application written in Perl (or Python), as well as being easier to read, maintain,
and learn—not to mention that it’s much more fun to program!.
Who Should Read This Book?
This book will not serve as an introduction to Ruby, but more as an extension of
existing books about Ruby programming, so we expect that the reader has gathered
a certain degree of knowledge and experience with Ruby before reading this.
Nevertheless, newcomers to Ruby who have even a basic understanding of the
language may find it very useful to fortify their knowledge by studying many of the
examples. Learning by doing is the best way to really learn a language. In addition, of
course, readers of any level will be aided in exercising their natural interests in dis-
www.syngress.com
183Ruby_fore.qxd 1/7/02 4:32 PM Page xxiv

Foreword xxv
covering new ideas and entertaining different and creative ways to solve existing
problems!
Content of this Book
Ruby is a rapidly evolving language. Every few months, new projects are started and
existing ones are being shaped and improved; we have accepted this challenge by
providing a snapshot of the current state of development and encouraging you to
look into the continuing evolution.
Chapter 1:Booting Ruby provides the basics of getting started by explaining
Ruby syntax, and about working with applications and editors.
Chapter 2:GUI Toolkits for Ruby develops a sample application (a XML
viewer) with four different GUI toolkits available for Ruby:Tk, Gtk, Fox,
and VRuby.
Chapter 3:Accessing Databases with Ruby introduces you to programming
with Ruby/DBI, a unique database-independent interface for accessing
many relational databases; it covers Ruby/ODBC as well as other data
storage solutions like CSV or Berkeley DBM-like file databases.
Chapter 4:XML and Ruby takes a look at some of the more popular
parsing options available for Ruby and XML, including SAX and DOM,
and open source parsers XMLParser, NQXML, and REXML.
Chapter 5:Web Services and Distributed Ruby describes and explains how to
use the two XML-based communication protocols (XML-RPC and SOAP)
from Ruby as well as how to connect two or more Ruby applications across
a network using Distributed Ruby (DRb).
Chapter 6:WWW and Networking with Ruby develops a Web-based,
database-driven online-shop application, comparing a CGI/FastCGI
approach with the utilization of mod_ruby and eruby, and using Interpreted
Objects for Web Applications (IOWA), Ruby’s powerful application server.
Chapter 7:Miscellaneous Libraries and Tools explores Ruby extensions, which
are either written in pure Ruby or are Ruby wrappers around C code, and
compares them for ease of install, easy to read, and easy to customization
and development.
www.syngress.com
183Ruby_fore.qxd 1/7/02 4:32 PM Page xxv

xxvi Foreword
Chapter 8:Profiling and Performance Tuning examines how to improve perfor-
mance by looking at your overall algorithm, and how to analyze its com-
plexity by using the ordo notation as a tool or by using a profiler such as
RbProf; other solutions include result caching.
Chapter 9:Parser Generators looks at the options and benefits in producing a
parser by writing it manually versus using a parser generator that will gen-
erate a parser from the grammar.
Chapter 10:Extending and Embedding Ruby explains how and why you
might write a Ruby extension module in C/C++.
About the Web Site
The Syngress Solutions Web Site contains the code files that are used in specific
chapters of this book.The code files for each chapter are located in a “chXX” direc-
tory. For example, the files for Chapter 6 are in ch06.Any further directory structure
depends on the projects that are presented within the chapter.
It will be extremely useful for you to have the applications and tools included in
these files on hand, however, because many of them are still evolving, within the
chapters you will be able to find mention of other online sources, such as the Ruby
Application Archive, from which you can obtain updates to the very latest versions.
Look for this icon to locate the code files
that will be included on our Web site.
www.syngress.com
183Ruby_fore.qxd 1/7/02 4:32 PM Page xxvi

Booting
Ruby
Solutions in this chapter:
■An Overview of Ruby
■Installing Ruby and its Tools
■A Short Syntax Style Guide
■Dangerous Ruby
■Comparing Ruby
■Convincing Management to Use Ruby
;Summary
;Solutions Fast Track
;Frequently Asked Questions
Chapter 1
1
183RubyC01.qxd 1/4/02 3:50 PM Page 1

2 Chapter 1 • Booting Ruby
Introduction
Programming should be like driving a good car: Buttons are clearly labeled and
easy to reach; you’re comfortable as soon as you get inside; there are always a
couple of nuances, but soon, the machine becomes an extension of yourself;
you zig, you zag, and you always get where you’re going.Welcome to the
Porsche of programming languages. Perhaps you come from the world of C++
or Java, but would like something easier on the eyes and the fingers. Perhaps
you program in Perl, and would like to avoid bending over backwards for re-
usability. Congratulations, you’ve found Ruby, an object-oriented language
that’s easy to write and easy to read.
Ruby usage is growing daily. For instance, Ruby is spreading like wildfire in
Japan, ever since Yukihiro ‘Matz’ Matsumoto’s posting of version 0.95 on Japanese
domestic newsgroups.There, Ruby surpasses Python in popularity. In 2000, tech-
nical references began introducing and championing Ruby to the English-
speaking markets as an alternative programming language, and Ruby growth
became an international phenomenon. By adding Ruby to your language reposi-
tory, you join a burgeoning rank of developers that know an easier, faster, and
more enjoyable way to get the job done.
An Overview of Ruby
Ruby’s design philosophy is known as the Principle of Least Surprise.That means
that Ruby works the way that you expect it to work.The more you develop with
Ruby, the more you’re going to realize that you’re spending time producing code.
Real code, which works, is readable, and solves the problems at hand. Less time in
the debugger, less time spent in setup—hence, the Principle of Least Surprise.
Ruby, the vast majority of the time, works intuitively.
From this design philosophy comes a pure, powerful and simple object-ori-
ented programming language.We like to believe that Ruby takes many of the
best features from other languages and blends them together very, very well.
Ruby derives much of its object-oriented system from Smalltalk:All data
structures are objects, allowing you to perform methods on them.
Furthermore, you can add methods to a class or instance during runtime. Like
Java or Smalltalk, Ruby features single inheritance. Because multiple inheritance
sometimes leads to an almost mystic inheritance determination, single-inheri-
tance reduces the chance for pilot error. If you miss multiple inheritance, you
www.syngress.com
183RubyC01.qxd 1/4/02 3:50 PM Page 2

Booting Ruby • Chapter 1 3
can import methods from multiple classes using modules, also known as
mixins.
The open source nature of Ruby makes it free for anyone’s use. Because of
this, you are free to modify it. Many people have taken license to make Ruby a
cross-platform language, so while primary development occurs on Unix, Ruby
ports exist for a number of different platforms, including BeOS, DOS, MacOS,
Win32, and many flavors of Unix, including Solaris and FreeBSD. Furthermore,
Ruby’s Application Programming Interface (API) is written in C.This enables
straightforward extension writing with C.
Ruby’s dynamic typing saves time and creates a more flexible design structure.
In a static language, such as Java or C++, you must declare your variable types,
which requires setup time. Ruby is smart enough to know “hello” is a string, 2.0
could be a double, and 2 is an integer. Furthermore, Ruby doesn’t require
explicit declaration of its internal representation. Fixnum, which is an integer
type for small numbers, automatically converts to Bignum when it gets suffi-
ciently large. Furthermore, dynamic typing allows for design changes without
changing types across the program, as the interpreter makes type decisions
during runtime.
An automatic mark-and-sweep garbage collector cleans all Ruby objects
without needing to maintain a reference count; you won’t have memory leaks,
and this results in fewer crashes.With languages such as C++, you have to release
allocated memory. However, Ruby flushes dynamically-allocated storage through
program execution, and has periods set to reclaim memory.
Installing Ruby and its Tools
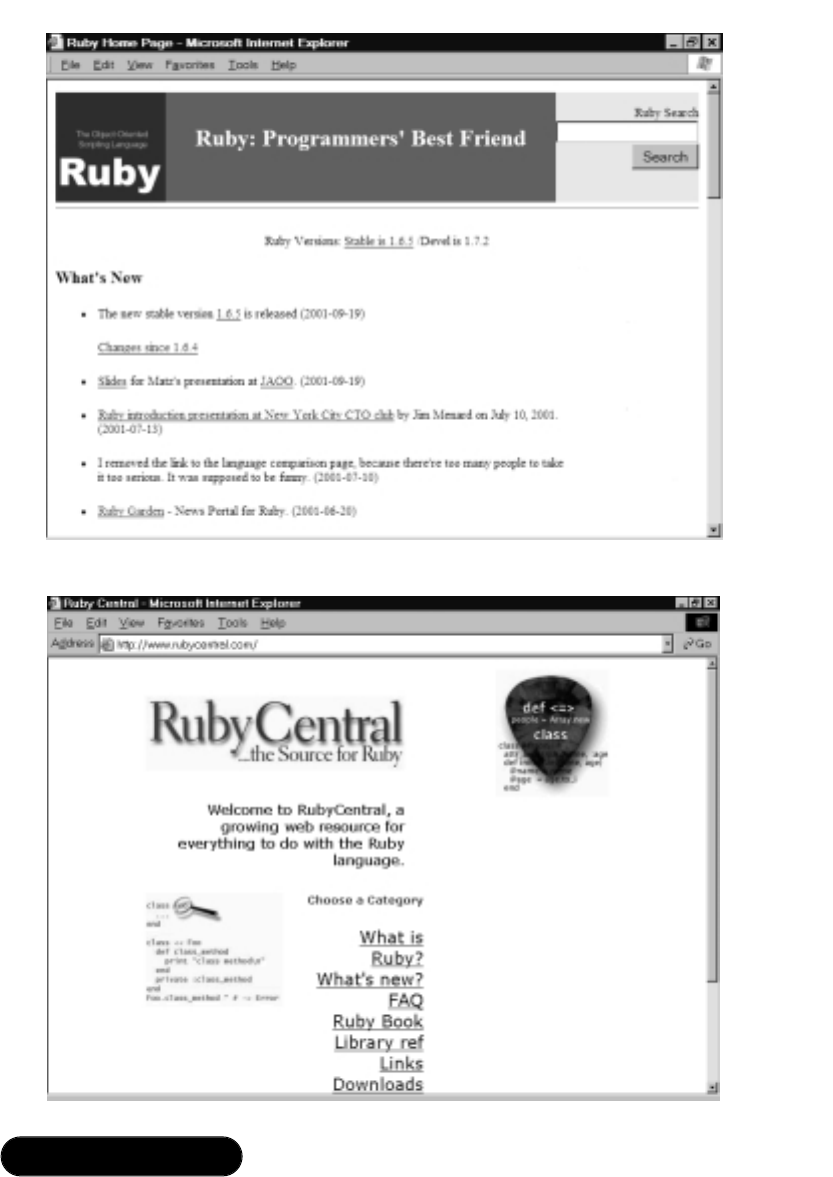
Your first step into Ruby starts with its home on the Web, which is at
www.ruby-lang.org (Figure 1.1).You’ll find the source tarball for stable and
development versions, various links to documentation, commentary, the Ruby
Application Archive (RAA), and more.You can download and install Ruby in less
than 15 minutes. Some tools will be more or less complex, depending on size and
their individual dependencies on other files. MySQL and PostgreSQL interfaces
will require their respective databases, for instance.
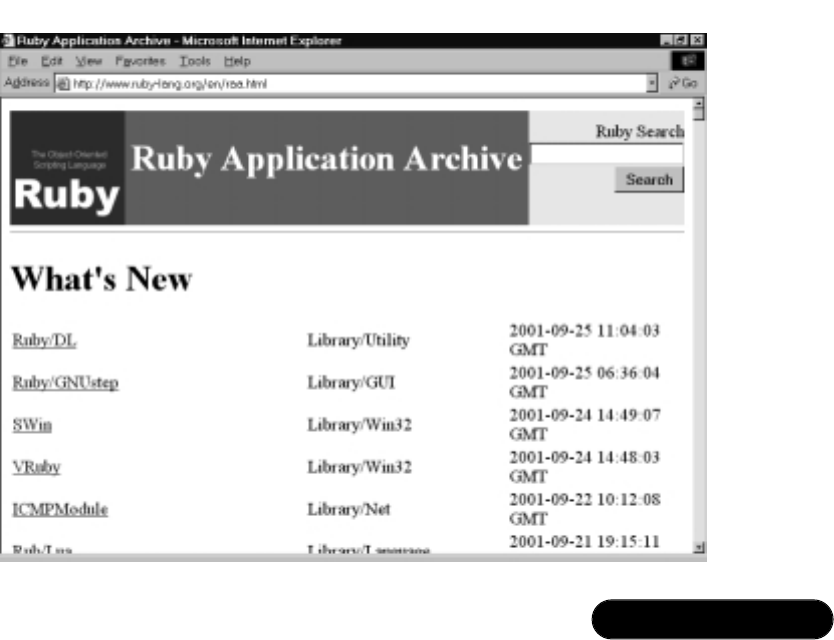
Andrew Hunt and Dave Thomas (known as the Pragmatic Programmers) main-
tain www.rubycentral.com (Figure 1.2).This site contains the binary installation
of Ruby, various articles, links, an FAQ and an online version of their book,
Programming Ruby:A Pragmatic Programmer’s Guide.
www.syngress.com
183RubyC01.qxd 1/4/02 3:50 PM Page 3
4 Chapter 1 • Booting Ruby
www.syngress.com
Figure 1.1 The Ruby Language Home Page
Figure 1.2 The RubyCentral Home Page
183RubyC01.qxd 1/4/02 3:50 PM Page 4

Booting Ruby • Chapter 1 5
Installing Ruby on Unix
Adding Ruby to your Unix development toolbox is a snap. In the following sec-
tions, we’ll show you how to download Ruby through various distribution
mechanisms, and take you through the installation procedure. If you install any-
thing through source, this is about as easy as it gets.
Installing Ruby from Source Code
For those of you that like to play with the latest stable and development versions,
get the latest code drop using the Concurrent Versioning System (CVS), File
Transfer Protocol (FTP), or by downloading it from Ruby’s homepage. As the
source uses less than 1 megabyte of hard drive space, you can get the Ruby
source in less than five minutes over a 56k modem.
FTP Installation
FTP requires a client application. Standard distributions come with an FTP
client installed.The commands used in a Unix FTP installation can be seen in
Figure 1.3.
Figure 1.3 Unix FTP (or Windows DOS-based FTP) Commands
ftp ftp.ruby-lang.org
User: anonymous
Password: youremail@yourdomainname
binary
cd pub/ruby
ls
get ruby-x.tar.gz (latest version)
While some versions of Windows come with an FTP client, we suggest
downloading Bullet Proof FTP (shareware) or LeechFTP (freeware) from
www.download.com.
1. Set up your FTP client to log into ftp.ruby-lang.org, User: anonymous,
Password: youremail@yourdomainname.
2. Change to directory pub/ruby.
3. Choose the latest version of Ruby for download: ruby-x.tar.gz (make
sure you download it as binary).
www.syngress.com
183RubyC01.qxd 1/4/02 3:50 PM Page 5

6 Chapter 1 • Booting Ruby
After having downloaded the Ruby archive, unpack it and change into the
newly created directory:
tar -xvzf ruby-1.6.6.tgz
cd ruby-1.6.6
Then configure and compile it:
./configure
make
Finally, install it with:
su -l root # become a root user
make install
exit # become the original user again
After installation, see if you can start Ruby by issuing the following command
on the command-line:
ruby --version
This should output the version of the installed Ruby interpreter; on my
system this is revealed as a Unix version.
ruby 1.6.4 (2001-06-04) [i386-netbsd]
If you have problems with the Ruby interpreter or one of its libraries, write
an e-mail to Ruby’s mailing list and include this version output.
CVS Installation
By using CVS, you can get the latest and greatest version of Ruby. Be forewarned
that this version is usually not stable, as it is a development version.
You can use either the Web or a CVS client.To access CVS via the Web, go
to www.ruby-lang.org/cgi-bin/cvsweb.cgi/ruby.At the bottom of the page, there
is a link to download the directory as a tarball or Zip archive. Download that
directory, as well as the doc,ext,lib,misc,sample, and win32 directories. Proceed
with the downloaded tarballs in the same way as for the FTP installation except
that you have to execute autoconf just before executing ./configure.
To use a CVS client, check out the development version using the following
two commands:
cvs -d :pserver:anonymous@cvs.ruby-lang.org:/src login
www.syngress.com
183RubyC01.qxd 1/4/02 3:50 PM Page 6

Booting Ruby • Chapter 1 7
(Logging in to anonymous@cvs.ruby-lang.org)
CVS password: anonymous
cvs -z4 -d :pserver:anonymous@cvs.ruby-lang.org:/src co ruby
After that, change into the ruby directory in which CVS downloaded all files,
and issue the autoconf command.Then proceed the same way as for the FTP
installation.
Installing from Packages
Some prefer to do source installations, as that offers access to the latest source;
and occasionally, packages get a little sticky with where directories are placed and
such.That being said, there’s no easier way to get Ruby onto your system than
through a ready-made package.
Red Hat 7.2 currently ships with Ruby 1.6.4.You can download a Red Hat
distribution from ftp.redhat.com.The rpm –i rubyx.x. command installs
without a hitch.
FreeBSD and NetBSD ports (OpenBSD currently has only Ruby 1.4.6 in its
port collection) of the newest Ruby interpreter are available through their port
collections, as well as many other Ruby related packages.
The current stable branch of Debian Linux contains an older version of
Ruby (currently 1.4.3), and will install and configure that version for you.Testing
branches currently contain 1.6.3, and unstable versions will offer you the latest
installation.
Installing Ruby on a Windows System
On Windows, the easiest possible installation option is to use the Pragmatic
Programmer’s binary release.
Grab the latest ruby-x.exe file at www.rubycentral.com/downloads/
ruby-install.html.This double-click installation includes the Ruby interpreter, a
required Cygwin DLL, documentation, and Tk and FOX support. If you run
Windows 9x or above, we highly recommend using this package. It makes instal-
lation as simple as clicking the Next button a few times and you will be up and
running with Ruby in minutes.
If you use Windows and absolutely, positively must have the latest version, the
install process requires a few extra steps.You must first download Cygwin, which
is a Unix environment for Windows.
1. Download Cygwin: Go to http://sources.redhat.com/cygwin and click
Install Cygwin Now.The setup process will give you a number of files
www.syngress.com
183RubyC01.qxd 1/4/02 3:50 PM Page 7

8 Chapter 1 • Booting Ruby
to download.You should install everything, just in case. For this installa-
tion you should have copious amounts of hard disk space, but if you
don’t, you can remove files at your discretion (you must keep bash, GCC,
and the basic Cygwin files).
2. Download the Ruby source via FTP or CVS.
3. Create an instance of Cygwin.
4. Change to the Ruby source directory where you’ve unpacked the Ruby
sources.
5. Use standard Unix compile, configure, and install commands:
./configure
make
make install
If you use Windows 9x, add the following lines to your c:\autoexec.bat:
set PATH="D:\(ruby install directory)\bin;%PATH%"
Windows NT/2000 users need to modify their registries.
1. Click Control Panel | System Properties | Environment Variables.
2. Under System Variables, select Path and click EDIT.
3. Add your Ruby directory to the end of the Variable Value list and
click OK.
4. Under System Variables, select PATHEXT and click EDIT.
5. Add .RB and .RBW to the Variable Value list and click OK.
Installing Applications and Libraries from RAA
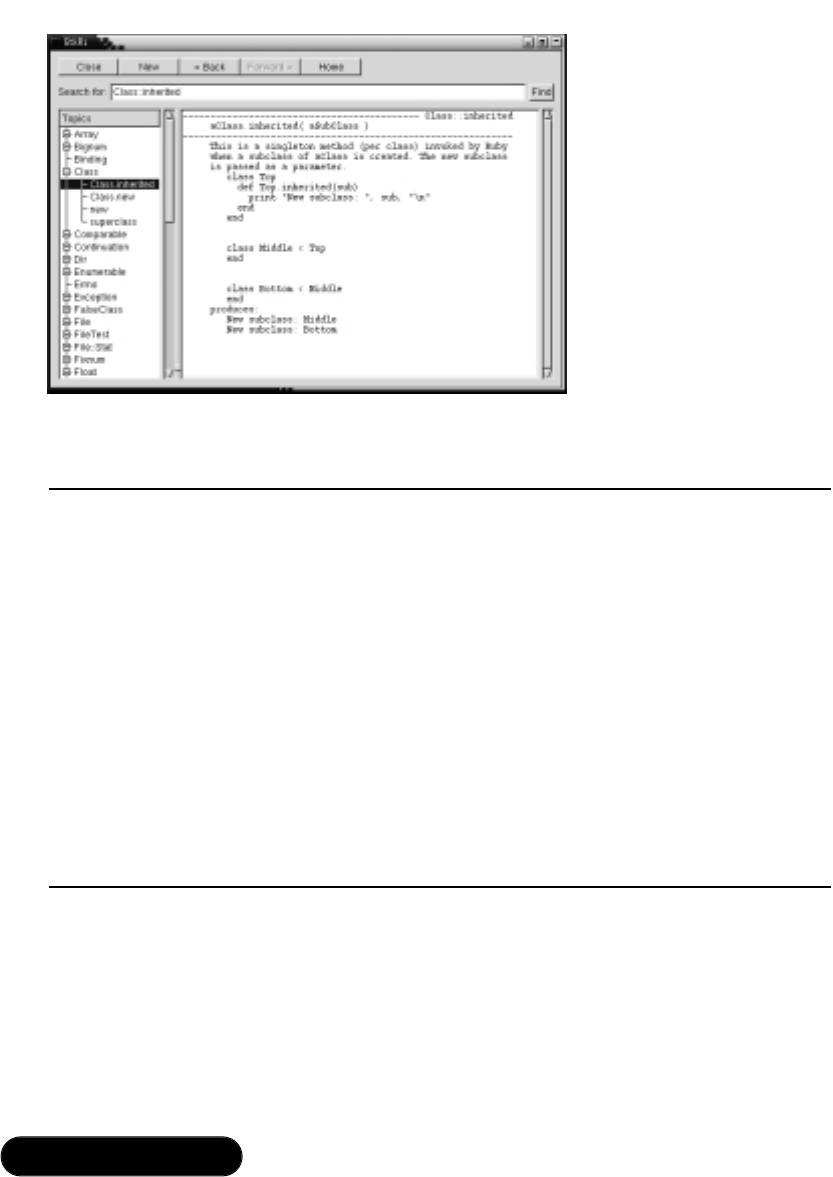
If you program in Ruby for any length of time, you will need to know about the
Ruby Application Archive (RAA), which is at www.ruby-lang.org/en/raa.html
(see Figure 1.4).As fun as it is to write everything from scratch, save yourself
some time by using libraries and applications written by other Ruby developers.
The RAA contains a comprehensive list of links to Ruby applications in various
stages of development. After you develop and find a place to host your applica-
tion, you can add your Ruby application to the RAA by submitting your entry at
www.ruby-lang.org/en/raa-entry.rhtml.
1. The RAA gives easy access to a wealth of applications and libraries.
Many applications install painlessly, and attached README files provide
www.syngress.com
183RubyC01.qxd 1/4/02 3:50 PM Page 8
Booting Ruby • Chapter 1 9
detailed instructions. For this example, we’re going to use RubyUnit,
which is a testing framework. If you use Extreme Programming,
RubyUnit provides similar functionality to JUnit or SUnit (For more
information on Extreme Programming, visit www.xprogramming.com).
Download RubyUnit from the RAA in the Library section under devel.
2. Extract the file to your hard drive
tar –xvzf rubyunit-x.x.x.tar.gz
3. Install the application, in this case, the following:
cd rubyunit-x.x.x
ruby install.rb
Other Ruby packages may use a Ruby configuration script to grab parame-
ters before installing.The extconf.rb installation procedure is fairly straightforward.
After untarring your package, do the following:
ruby extconf.rb
make
make install
www.syngress.com
Figure 1.4 The Ruby Application Archive
183RubyC01.qxd 1/4/02 3:50 PM Page 9

10 Chapter 1 • Booting Ruby
IDE and Editor Support in Ruby
Your choice of editor has a direct effect on productivity, as there are strengths and
weaknesses to every editor.While some developers stick with Windows’ Notepad
for its speed and simplicity, it doesn’t support syntax highlighting, macros, and a
host of other modern editor features. Invest time early to find a powerful editor
that you like, get familiar with it, and learn to take advantage of the shortcuts.
Build macros to save yourself time.This advice remains true regardless of what
language you use for development.
Editor support for Ruby depends on the capabilities of the editor.At a min-
imum, your editor should support Ruby syntax highlighting, a way for your
editor to help you differentiate between keywords in your program and increase
its readability. Some editors, such as Emacs, allow “shells” to run Ruby, or Ruby
applications on code within your editor.
www.syngress.com
Getting Help
The Ruby community quickly responds to questions from both the unini-
tiated and advanced. If you pore through this text and the README file
associated with the library or module you’re using, and still encounter
problems, Ruby users from around the world will answer your questions
quickly.
First, perform a quick search through newsgroups to see if your
question has already been asked and answered. www.ruby-talk.org
contains a complete archive of posts to the English-based
comp.lang.ruby and Ruby’s mailing-list. Google also provides an easy-
to-use archive of the Ruby newsgroup (although it contains about
5,000 fewer of the early messages) at http://groups.google.com/
groups?hl=en&group=comp.lang.ruby. Polite questions draw a
response within hours, if not minutes. As an alternative, the #ruby-lang
channel on DALnet provides immediate satisfaction. You receive near-
immediate responses to your questions. However, an order of magni-
tude fewer users exist at any one time in IRC than those that chat
through the newsgroups/mailing-list.
Developing & Deploying…
183RubyC01.qxd 1/4/02 3:50 PM Page 10

Booting Ruby • Chapter 1 11
Emacs
Configurability often comes at the cost of simplicity. Such is the case with
Emacs, an editor with a steep learning curve, but great opportunities to extend,
customize, and optimize to your development style.
Grab the latest version at ftp.gnu.org/gnu/emacs, or the Windows version at
ftp.gnu.org/gnu/windows/emacs/latest.With a little elbow grease, you can set up
Emacs for Ruby support:
1. Drop the elisp files (inf-ruby.el ruby-mode.el) into the emacs\lisp direc-
tory of your choice. For this example, I drop them into d:\emacs\lisp.
2. Add the code in Figure 1.5 to your .emacs file (located in your home
directory).
Figure 1.5 Emacs Code to Add Ruby Support
(autoload 'ruby-mode "ruby-mode"
"Mode for editing ruby source files")
(setq auto-mode-alist
(append '(("\\.rb$" . ruby-mode)) auto-mode-alist))
(setq interpreter-mode-alist (append '(("ruby" . ruby-mode))
interpreter-mode-alist))
(autoload 'run-ruby "inf-ruby"
"Run an inferior Ruby process")
(autoload 'inf-ruby-keys "inf-ruby"
"Set local key defs for inf-ruby in ruby-mode")
(add-hook 'ruby-mode-hook
'(lambda ()
(inf-ruby-keys)
))
If you enjoy tweaking Emacs, other Ruby developers have listed extensions
that they have written at www.rubygarden.org/ruby?EmacsExtensions.The page
is in Wiki format, so if you tweak Emacs, you can add your own extensions to
the list.
www.syngress.com
183RubyC01.qxd 1/4/02 3:50 PM Page 11

12 Chapter 1 • Booting Ruby
VIM
VIM (Vi IMproved) is straightforward and loads quickly, and its little brother, vi,
is available on almost all Unix machines. If you’re a Windows user, or you just
haven’t grown up on vi, you may not appreciate VIM’s edit and command mode
structures.
Download VIM at www.vim.org.VIM 5.7 and above support Ruby syntax
highlighting.
Other Editors
For those budding Ruby enthusiasts who want more “Windows-like” editors,
there are a number of alternatives. If you’ve grown up on Notepad, you may
want to try TextPad. For a commercial editor,Visual SlickEdit is another powerful
alternative that receives rave reviews in the press.
Other editors that support Ruby include NEdit, JEdit, CodeWright, Kate,
and JED.There is a list of Ruby editors with extensions at the RAA. Perform a
find on Editor, and the various Ruby extensions for editors will be listed.
TextPad
A low priced and powerful Notepad replacement for Windows,TextPad loads
quickly and has a simple and straightforward interface.TextPad is shareware; there
is a 30-day trial available at www.textpad.com, and you can purchase a single-user
license online for $16.50.
You add Ruby support through the Ruby syntax file at
www.textpad.com/add-ons/ntsyn.html.
Visual SlickEdit
If you prefer commercial packages,Visual SlickEdit (www.slickedit.com) wins
high marks and comes with excellent documentation and, of course, commercial
support.The primary disadvantage to using SlickEdit is its high price tag ($295
US), especially when compared to the free Emacs and VIM.
To add Ruby Syntax highlighting, use the code found at
www.rubygarden.com/ruby?VisualSlickEditExtensions.
RubyWin
RubyWin is a Ruby Integrated Development Environment (IDE) for Windows.
The Ruby binary installation, by Andy Hunt, supplies a version of RubyWin.You
www.syngress.com
183RubyC01.qxd 1/4/02 3:50 PM Page 12

Booting Ruby • Chapter 1 13
can also grab the latest version at the RAA in the Aplication section under IDE.
This application provides syntax highlighting, buffer evaluation, the Interactive
Ruby (discussed later), multiple window displays, line counts, and more.As
RubyWin comes fully configured to take advantage of Ruby tools, it’s a pretty
decent place to start.
Ruby Development Environment (RDE)
Another Windows IDE is the Ruby Development Environment (RDE), by
Sakazuki (see Figure 1.6). Features include file tabs, syntax highlighting, debugger
support, and more.You can get RDE at the RAA in the Application section
under IDE.
Additional Tools a Rubyist Must Have
While the RAA contains every known Ruby tool available, there are a couple
with which you should get familiar immediately: Ri, IRb, and debug.rb.
www.syngress.com
Figure 1.6 The RDE IDE
183RubyC01.qxd 1/4/02 3:50 PM Page 13

14 Chapter 1 • Booting Ruby
Ruby Interactive (Ri)
The Ruby Interactive reference (or Ri) gives quick access to definitions, and
method names. Download Ri at www.pragmaticprogrammer.com/ruby/
downloads/ri.html.This proves invaluable when looking at other people’s source
code, when you need to view certain libraries, or when you are writing your
own application and you can’t remember a method name or usage.
Adding a macro that allows use of Ri from within your text editor provides
an additional level of convenience. For VIM, add the following code (Figure 1.7)
to your .vimrc:
Figure 1.7 .vimrc File Modifications
function Ri()
let b:x = system("ri '" . input("ri: ") . "' > /tmp/ri_output")
sp /tmp/ri_output
endfunction
map <F2> :call Ri()<CR>
Pressing F2 lets you input a class name, method, etc. and shows Ri’s output in
a new window.
For information on a class or method, just call ri with it as argument:
ri Array
This results in the following output:
------------------------------------------------------------------------
class: Array
------------------------------------------------------------------------
Arrays are ordered, integer-indexed collections of any object.
Array indexing starts at 0, as in C or Java. A negative index is
assumed relative to the end of the array—-that is, an index of -1
indicates the last element of the array, -2 is the next to last
element in the array, and so on.
------------------------------------------------------------------------
&, *, +, —, <<, <=>, ==, ===, [], [], []=, assoc, at, clear,
www.syngress.com
183RubyC01.qxd 1/4/02 3:50 PM Page 14

Booting Ruby • Chapter 1 15
collect, collect!, compact, compact!, concat, delete, delete_at,
delete_if, each, each_index, empty?, eql?, fill, first, flatten,
flatten!, include?, index, indexes, indices, join, last, length,
map!, new, nitems, pack, pop, push, rassoc, reject!, replace,
reverse, reverse!, reverse_each, rindex, shift, size, slice,
slice!, sort, sort!, to_a, to_ary, to_s, uniq, uniq!, unshift, |
------------------------------------------------------------------------
If you see a method that about which you need more information, you can
enter its class followed by a #and the method name, as done below:
ri "Array#collect"
This results in the following:
---------------------------------------------------------- Array#collect
arr.collect {| obj | block } -> anArray
------------------------------------------------------------------------
Returns a new array by invoking block once for every element,
passing each element as a parameter to block. The result of block
is used as the given element in the new array. See also
Array#collect!.
a = [ "a", "b", "c", "d" ]
a.collect {|x| x + "!" } #=> ["a!", "b!", "c!", "d!"]
a #=> ["a", "b", "c", "d"]
To add Emacs support, follow the directions within Ri’s /contrib/csteele or
/contrib./dblack/emacs directory.
GtkRi (Figure 1.8) is a graphical version of Ri, available at
http://bocks.dhs.org/~pizman/myri. GtkRi offers extra browsing functionality,
such as hyperlinks, tree view, and navigation buttons.This application (for Unix
systems running X) requires Ruby/Gtk, Ri, and Gtk.
Interactive Ruby (IRb)
Interactive Ruby (IRb) provides a shell for experimentation (see Figure 1.9).
Within the IRb shell, you can immediately view expression results, line by line.
Grab the latest version at www.ruby-lang.org/en/raa-list.rhtml?name=irb+-
+interactive+ruby or use the version that comes by default with Ruby.
www.syngress.com
183RubyC01.qxd 1/4/02 3:50 PM Page 15
16 Chapter 1 • Booting Ruby
Figure 1.9 An Interactive Ruby Session
irb 0.6.1(99/09/16)
irb(main):001:0> 1+1
2
irb(main):002:0> def hello
irb(main):003:1> out = "Hello World"
irb(main):004:1> puts out
irb(main):005:1> end
nil
irb(main):006:0> hello
Hello World
nil
irb(main):007:0>
The latest versions of IRb include tab completion, a feature that allows you
to save even more time.The following:
irb(main):001:0> al<tab>
completes the word as:
alias
www.syngress.com
Figure 1.8 GtkRi
183RubyC01.qxd 1/4/02 3:50 PM Page 16

Booting Ruby • Chapter 1 17
Even better, pressing the Tab key in the following situation:
irb(main):001:0> a = "aString"
irb(main):002:0> a.u<tab>
outputs all applicable methods for the object referred by variable a:
a.unpack a.untaint a.upcase a.upcase! a.upto
To activate the tab completion module, start IRb with:
irb –r irb/completion
Debugging Ruby Applications with debug.rb
Ruby comes with a debugger included.To debug a Ruby program, simply start it
with the –r debug option:
ruby –r debug applicationToDebug.rb
Suppose we have two files: test.rb (Figure 1.10) and pi.rb (Figure 1.11) that
we want to debug (not really debug, because there are no errors in them, but we
want to have a look at how they work).
Figure 1.10 File test.rb
require "pi"
arr = []
pi { |d|
arr << d
break if arr.size > 10
}
Figure 1.11 File pi.rb
def pi
k, a, b, a1, b1 = 2, 4, 1, 12, 4
loop do
# Next approximation
www.syngress.com
Continued
183RubyC01.qxd 1/4/02 3:50 PM Page 17

18 Chapter 1 • Booting Ruby
p, q, k = k*k, 2*k+1, k+1
a, b, a1, b1 = a1, b1, p*a+q*a1, p*b+q*b1
# Print common digits
d = a / b
d1 = a1 / b1
while d == d1
yield d
a, a1 = 10*(a%b), 10*(a1%b1)
d, d1 = a/b, a1/b1
end
end
end
Let’s start by invoking the debugger:
ruby –r debug test.rb
Debug.rb
Emacs support available.
test.rb:1:require "pi"
At first, we display the debugger’s help by typing h(or help) followed by a
carriage return.This gives us the following output:
(rdb:1) h
Debugger help v.-0.002b
Commands
b[reak] [file|method:]<line|method>
set breakpoint to some position
wat[ch] <expression> set watchpoint to some expression
cat[ch] <an Exception> set catchpoint to an exception
b[reak] list breakpoints
cat[ch] show catchpoint
del[ele][ nnn] delete some or all breakpoints
disp[lay] <expression> add expression into display expression list
www.syngress.com
Figure 1.11 Continued
183RubyC01.qxd 1/4/02 3:50 PM Page 18

Booting Ruby • Chapter 1 19
undisp[lay][ nnn] delete one particular or all display
expressions
c[ont] run until program ends or hit breakpoint
s[tep][ nnn] step (into methods) one line or till
line nnn
n[ext][ nnn] go over one line or till line nnn
w[here] display frames
f[rame] alias for where
l[ist][ (-|nn-mm)] list program, - lists backwards
nn-mm lists given lines
up[ nn] move to higher frame
down[ nn] move to lower frame
fin[ish] return to outer frame
tr[ace] (on|off) set trace mode of current thread
tr[ace] (on|off) all set trace mode of all threads
q[uit] exit from debugger
v[ar] g[lobal] show global variables
v[ar] l[ocal] show local variables
v[ar] i[nstance] <object> show instance variables of object
v[ar] c[onst] <object> show constants of object
m[ethod] i[nstance] <obj> show methods of object
m[ethod] <class|module> show instance methods of class or module
th[read] l[ist] list all threads
th[read] c[ur[rent]] show current thread
th[read] [sw[itch]] <nnn> switch thread context to nnn
th[read] stop <nnn> stop thread nnn
th[read] resume <nnn> resume thread nnn
p expression evaluate expression and print its value
h[elp] print this help
<everything else> evaluate
Then we type l(or list) to show the current executed line (preceded by =>)
together with the 5 lines before and after it.
(rdb:1) l
[-4, 5] in test.rb
www.syngress.com
183RubyC01.qxd 1/4/02 3:50 PM Page 19

20 Chapter 1 • Booting Ruby
=> 1 require "pi"
2
3 arr = []
4
5 pi { |d|
But we want to see the whole program, so we specify the range of numbers
to be shown:
(rdb:1) l (1-10)
[0, 10] in test.rb
=> 1 require "pi"
2
3 arr = []
4
5 pi { |d|
6 arr << d
7 break if arr.size > 10
8 }
Okay, now let’s add a break point at the pi method of file pi.rb, and let the
program run until a break or watch-point is reached, or until it exits:
(rdb:1) b pi.rb:pi
Set breakpoint 1 at pi.rb:pi
(rdb:1) c
Breakpoint 1, pi at pi.rb:pi
./pi.rb:1:def pi
As you see, the program has reached our defined breakpoint. Once again we
type lto see where we are:
(rdb:1) l
[-4, 5] in ./pi.rb
=> 1 def pi
2 k, a, b, a1, b1 = 2, 4, 1, 12, 4
3 loop do
4 # Next approximation
5 p, q, k = k*k, 2*k+1, k+1
www.syngress.com
183RubyC01.qxd 1/4/02 3:50 PM Page 20

Booting Ruby • Chapter 1 21
We manually execute the next few lines:
(rdb:1) n
./pi.rb:2: k, a, b, a1, b1 = 2, 4, 1, 12, 4
(rdb:1) n
./pi.rb:5: p, q, k = k*k, 2*k+1, k+1
(rdb:1) n 5
./pi.rb:10: while d == d1
(rdb:1) s
./pi.rb:11: yield d
and list the local variables by typing v1 (or var local):
(rdb:1) v l
a => 12
a1 => 76
b => 4
b1 => 24
d => 3
d1 => 3
k => 3
p => 4
q => 5
Next, we move one line forward to list where we are in the program again:
(rdb:1) n
test.rb:6: arr << d
(rdb:1) l
[1, 10] in test.rb
1 require "pi"
2
3 arr = []
4
5 pi { |d|
=> 6 arr << d
7 break if arr.size > 10
8 }
www.syngress.com
183RubyC01.qxd 1/4/02 3:50 PM Page 21

22 Chapter 1 • Booting Ruby
At this position, we add a watchpoint that interrupts the execution if its
expression evaluates as true. In our case this is the last iteration of the code block.
After that, we continue to run the program.
(rdb:1) watch arr.size > 10
Set watchpoint 2
(rdb:1) c
Watchpoint 2, toplevel at test.rb:7
test.rb:7: break if arr.size > 10
As you can see, our watchpoint caused the program to halt.We output the
local variables and print the length of the variable arr:
(rdb:1) v l
arr => [3, 1, 4, 1, 5, 9, 2, 6, 5, 3, 5]
d => 5
(rdb:1) arr.size
11
That’s all for now, so we leave the debugger by typing q(or quit).
(rdb:1) q
Really quit? (y/n) y
A Short Syntax Style Guide
Ruby style, with a few exceptions, follows standard guidelines for readability.This
style guide is derived from Ruby code from numerous libraries. By following this
guide, your code will be more readable, and allow other engineers to learn from
your work more quickly. For additional style tips, consult
www.rubygarden.com/ruby?RubyStyleGuide.
Using Comments
Source files should begin with comments that list class name, copyright, author
name, filename, version number, date and time of last change, and license terms.
# StringReplace
# $Id: stringreplace.rb, v 1.0 10/15/01 20:05:17$
# Copyright © 2001, Jason Wong
# You can redistribute and/or modify it under the same term as Ruby
www.syngress.com
183RubyC01.qxd 1/4/02 3:50 PM Page 22

Booting Ruby • Chapter 1 23
You may also use
=begin
Block of comments here
=end
Make sure trailing comments are far enough from the code that it is easily
distinguished. If more than one trailing comment exists in a block, align them:
@counter # keeps track times page has been hit
@siteCounter # keeps track of times all pages have been hit
should be:
@counter # keeps track times page has been hit
@siteCounter # keeps track of times all pages have been hit
Naming
Classes and modules begin with an upper case letter.This is actually enforced by
Ruby’s interpreter. Each word in a class name begins with an upper case (unless
it’s part of an acronym):
module Observable
module ParseDate
class StringInputMethod
class StringReplace
class XMP
Method names start with a lower case letter
def sqrt
def abs
def puts
def getValue
Core Ruby library methods generally separate their names’ parts with an
underscore rather than upper case letter on the second word:
get_value
versus:
getValue
www.syngress.com
183RubyC01.qxd 1/4/02 3:50 PM Page 23

24 Chapter 1 • Booting Ruby
Iterators
For one line code blocks, use braces ({…}):
5.times {|i| puts i}
For iterators that use multiple lines, use do…end:
5.times do |i|
puts i
puts Math.sqrt(i)
end
Optionally, you may want to place a space between the pipes ( |) and the
variable names:
5.times do | i |
puts i
end
Indentation, Spacing, Parentheses
Code begins at the far left with no indents. Sub-indents are usually two spaces.
Put parentheses (()) around all complex expressions or expressions that start
with parentheses.This saves later confusion so the Ruby parser won’t act in a
manner different than what you expect. Look at the following two lines of code:
puts ((2+5) * 4))
puts (2+5) * 4
The former command results in 28 (the expected answer), while the latter
yields an undefined method for nil (NameError).
Ruby takes the numbers between the parentheses as part of a parameter list.
However, * 4 is not part of the parameter list, and is applied on the return value
of puts, which is nil, yielding the undefined method error.
Don’t create white space ( ) where it may throw you off. For instance, don’t
put white space between a method and the parentheses enclosing its parameters.
Math.sqrt (6+3) * 9
The above results in 27, where you may have been expecting 9.
For clarity, it is better to rewrite the code as follows:
Math.sqrt(6+3) * 9
www.syngress.com
183RubyC01.qxd 1/4/02 3:50 PM Page 24

Booting Ruby • Chapter 1 25
For the results of the square root of 6 + 3 * 9, place a parenthesis around the
entire equation.
Dangerous Ruby
Ruby makes it easy to create a lot of functional code in a short period of time.
However, there are some instances where you must be explicit and take care to
avoid errors.
Local Variables versus Methods
If a local variable exists with the same name as a method, the local variable will
be used unless you put parentheses behind the method or use self.methodName.
def colors(arg1="blue", arg2="red")
"#{arg1}, #{arg2}"
end
colors = 6
print colors
The above outputs 6. If you were expecting to use the color method, you
might have been surprised. Using parentheses, in this case, would yield the
desired result:
def colors(arg1="blue", arg2="red")
"#{arg1}, #{arg2}"
end
colors = 6
print colors("purple", "chartreuse")
This outputs:
purple, chartreuse
More Whitespace Issues
You need to ensure that you use whitespace properly when using methods, as
extra whitespace can result in errors.
www.syngress.com
183RubyC01.qxd 1/4/02 3:50 PM Page 25

26 Chapter 1 • Booting Ruby
def countdownLength= length
def countdownLength=(length)
def countdownLength= (length)
def countdownLength= ( length )
The above works fine, while this:
def countdownLength = (length)
results in a parse error, because the whitespace before the equal sign makes it part
of the method name.
Block Local Variables
Be careful to keep variables in the scope for which they are intended. Not doing
so will yield in unexpected results. Here’s a particularly nasty one:
i = 0
while i < 10
...
[1,2,3].each {|i| ... } # i gets overwritten here
i += 1
end
While we intended the iwithin the each iterator to stay in its own scope, it
actually overwrote the iin the while loop, resulting in an endless loop.
Comparing Ruby
Ruby has its roots in several different languages, including Smalltalk, Perl, and Eiffel.
It puts together some of the best features of each, and along with Matz’s ingenuity,
forms a cohesive unit. By looking at Ruby in relation to Java and Perl, we will
showcase these features and ease your transition into this wonderful language.
Java
Java makes all the programming headlines these days. Sun brought its brainchild
to prominence in a flurry of public relations and marketing, and if you don’t see
Microsoft Visual Tools in an enterprise deployment, you’ll probably see Java.
Today, in many computer science curriculums, Java replaces C and C++ for first
year introductory courses.
www.syngress.com
183RubyC01.qxd 1/4/02 3:50 PM Page 26

Booting Ruby • Chapter 1 27
Java simplifies development for enterprise computing. Basic language features,
object-orientation, single inheritance, garbage collection, (somewhat) cross plat-
form development, and especially Sun’s heavy marketing gives Java an edge in
terms of sheer usage; if you use Java, you’re going to find a lot of commercial and
open source support, especially with regards to networking and Web development.
There are quite a few similarities between Java and Ruby: they’re both cross-
platform, meaning they’ll run across MacOS,Windows, and the various Unices
(FreeBSD, Unix, and Solaris, for instance). However, because Java is a closed
system that requires a native interpreter, it doesn’t exist on many platforms, and
even on some more popular OSes (like FreeBSD), the Java environment is non-
native (it uses a Unix emulation layer) and is also over a year old.With an open
source platform like Ruby, people are free to port to their hearts’ desire.The
latest versions compile straight away on many flavors of Unix, and even less pop-
ular platforms, such as BeOS, have versions of Ruby running on them.
They both have strong support for error handling.They’re both multi-
threaded. However, Ruby features light-weight threads that are built into the
interpreter, while Java uses native threads. Lightweight threads are far more
portable than native (Ruby features threads even on plain DOS), and are superior
in some situations.
Here’s the Ruby code for creating 1000 threads that sleep:
print "Create 1000 Threads..."
1000.times do
Thread.new { sleep }
End
puts "done"
# do some calculations
And here is the same in Java:
public class Test implements Runnable {
public static void main(String[] args) {
System.out.print("Create 1000 Threads...");
for (int i=0; i<=1000; i++) {
Thread th = new Thread(new Test());
th.start();
www.syngress.com
183RubyC01.qxd 1/4/02 3:50 PM Page 27

28 Chapter 1 • Booting Ruby
}
System.out.println("done");
// do some calculations
}
public void run() {
try {
Thread.currentThread().sleep(100000);
} catch (InterruptedException e) {}
}
}
If you are coming from the world of Java, picking up Ruby will be easy.The
following example is a simple string replace application in Java. Ruby has strong
string processing, which is derived from Perl. Because of this, the same applica-
tion can be as small as half a dozen lines, depending on how you write it in
Ruby.
You will, however, notice a few major differences. Java code requires a byte
code compilation.The Java byte code is parsed by an interpreter before being run
on the computer. Ruby, on the other hand, is a so-called scripting language, so the
interpreter reads the Ruby script directly to run on the computer, or more pre-
cisely, Ruby creates an abstract syntax tree that it then executes.
Java is object oriented. However, unlike Ruby, it is not fully object oriented.
As stated earlier, data is an object in Ruby, whereas in Java, this is not true. For
example, strings are objects with methods (see Figure 1.12).
Figure 1.12 Performing an Operation on a String in Ruby
puts "Hello".length # => 5
Finally, Java is statically typed.This means that all variables must be declared
with a known type at the compile time. Ruby, on the other hand, uses dynamic
typing.You won’t have to declare whether a variable is an Array, String, or Integer
before you start using it.
Let’s take a simple example in which Ruby beats Java hands-down. Being
strongly influenced by Perl, Ruby excels at regular expressions.The
www.syngress.com
183RubyC01.qxd 1/4/02 3:50 PM Page 28

Booting Ruby • Chapter 1 29
StringReplace program (Figure 1.13) takes a search word, a replacement word,
and the document for replacement.
Figure 1.13 The Java Version of StringReplace
import java.io.*;
public class StringReplace {
static void searchAndReplace( Reader in, Writer out, String search,
String replace ) throws IOException
{
int si = 0;
for ( int c = in.read(); c >= 0; c = in.read() ) {
if ( c == search.charAt( si ) ) {
si++;
if ( si >= search.length() ) {
out.write( replace );
si = 0;
}
} else {
if ( si > 0 ) {
for ( int i = 0; i < si; i++ ) {
out.write( search.charAt( i ) );
}
si = 0;
}
out.write( (char) c );
}
}
}
public static void main( String[] args ) {
www.syngress.com
Continued
183RubyC01.qxd 1/4/02 3:50 PM Page 29

30 Chapter 1 • Booting Ruby
int ai = 0;
String search = args[ ai++ ];
String replace = args[ ai++ ];
for ( ; ai < args.length; ai++ ) {
try {
String fileName = args[ ai ];
FileReader in = new FileReader( fileName );
StringWriter buf = new StringWriter();
try {
searchAndReplace( in, buf, search, replace );
} finally {
in.close();
}
FileWriter out = null ;
try {
out = new FileWriter( fileName );
out.write( buf.toString() );
} finally {
if ( out != null )
out.close();
}
} catch ( Exception e ) {
e.printStackTrace();
}
}
}
}
Invoke the Java StringReplace by compiling it into bytecode and then run-
ning it through the JRE.
www.syngress.com
Figure 1.13 Continued
183RubyC01.qxd 1/4/02 3:50 PM Page 30

Booting Ruby • Chapter 1 31
javac StringReplace.java
java StringReplace blue red blue.txt
The Java version of StringReplace requires 50 lines of code.There are a
couple ways to write the Ruby version (see Figure 1.14).
Figure 1.14 Ruby Version of String Replace
def stringReplace(searchString, replaceString, fileName)
# read the file content
aFile = File.open(fileName, "r")
aString = aFile.read
aFile.close
# replace/substitute ...
aString.gsub!(searchString, replaceString)
# write string back to file
File.open(fileName, "w") { |file| file << aString }
end
stringReplace(*ARGV)
You may compact this even further:
def stringReplace(searchString, replaceString, fileName)
# read file content
aString = File.readlines(fileName).to_s
# replace/substitute ...
aString.gsub!(searchString, replaceString)
# write string back to file
File.open(fileName, "w") { |file| file << aString }
end
stringReplace(*ARGV)
Invoke the Ruby version with:
www.syngress.com
183RubyC01.qxd 1/4/02 3:50 PM Page 31

32 Chapter 1 • Booting Ruby
ruby stringreplace.rb blue red blue.txt
That’s 6 lines, for starters.While we crushed the Java version in both length
and readability, you can do this all on the command line if you don’t mind a
little verbosity:
ruby -pi -e "gsub('blue', 'red')" blue.txt
Perl
In Perl, Larry Wall created a great language to make simple projects easy. Perl is
great for creating short scripts and getting the job done quickly. However, on
larger projects, with multiple developers, it can quickly become a tangled mess,
and the syntax quickly becomes confusing.
Ruby derives many concepts from Perl. Both are interpreted languages, and
they share similar syntax. Regular expressions are a mainstay of both Perl and
Ruby, and this makes both strong text processors.
The Perl version of the StringReplace program (see Figure 1.15) maintains
Ruby’s brevity, but you’ll notice that while the syntax is similar, it’s a bit more
confusing.
Figure 1.15 Perl Version of StringReplace
foreach $file (glob($ARGV[2])) {
open (FILE, "+<$file"), @contents = <FILE>, seek(FILE, 0, 0);
foreach $line (@contents) {
$line =~ s/\Q$ARGV[0]\E/$ARGV[1]/g, print FILE $line;
}
}
Perl has a similar one-liner for command line use. Note that the command
line options –pi and –e are the same in both Ruby and Perl.
perl -pi -e 's/blue/red/g'
Language Constructs
If you’re coming from the land of Java or Perl, you’ll notice significant differences
in the way that the languages are structured.The following is a brief overview of
their differences from Ruby in terms of major features.
www.syngress.com
183RubyC01.qxd 1/4/02 3:50 PM Page 32

Booting Ruby • Chapter 1 33
Object-Oriented Programming
Java and Ruby were designed from the ground up for object-oriented program-
ming (OOP), whereas Perl was a procedural language up until Perl 5, when OO
features were added. Let’s start by looking at how Ruby, Java, and Perl inherit
from other classes.
Inheritance
There are some major differences in the way the three languages inherit objects.
Java and Ruby were built from the ground up to support object-oriented pro-
gramming, and as such, simplify development substantially.
Perl directly supports multiple inheritance. Packages that act as classes inherit
methods of the inherited class.To resolve namespace clashes or determine which
method to use , the package first inherits from the blessed class. If it doesn’t exist,
the package then inherits the first method in a left to right order.
package Square;
@ISA = qw( Shape Geometry )
Java uses single inheritance.This is meant to reduce the chances of pro-
grammer error by simplifying the development process. In the case where an
object should inherit from two or more super classes (ball is both a RoundObject
and SportsItem), there are interfaces, but no real way to implement methods from
multiple classes.
class Square extends Shape
At first glance, Ruby supports single inheritance.
class Square < Shape
Ruby’s modules provide a method for mixing in (mixins) methods from mul-
tiple classes, giving Ruby the functional equivalent of multiple inheritance
without the namespace clashing, which saves us from many potential problems.
class Shape
def randomMethod
…
end
end
module Geometry
www.syngress.com
183RubyC01.qxd 1/4/02 3:50 PM Page 33

34 Chapter 1 • Booting Ruby
def randomMethod
…
end
end
class Square < Shape
include Geometry
…
end
The Java equivalent of a module (or namespace) is a package. Packages allow
the creation of class collections and access to the associated functionality.
package Shapes;
public class Square
{
//definition
}
To utilize the package, you would do this:
import Shapes.Square;
public class SquareUsage {
Square firstSquare = new Square(5.0);
}
Access Control
Ruby access control keywords are the same as in Java, however, the meanings are
slightly different.Additionally, unlike Java, access control in Ruby is determined
dynamically at run time.
In both Ruby and Java, public methods are open for use from anywhere by
default. In Ruby and Java, private methods cannot be called from outside the
object. Private is the strictest form of access control in Ruby. Protected methods
are only accessed by objects that are defined by the class and subclasses in Ruby,
while Java’s protected methods are accessible from classes within the same
package and sub-classes from anywhere.The following example shows how pri-
vate, protected, and public methods are declared in Ruby and Java.
www.syngress.com
183RubyC01.qxd 1/4/02 3:50 PM Page 34

Booting Ruby • Chapter 1 35
In Ruby:
class RubyAccessControl
# methods are public by default
def default()end
# private, protected, and public keywords declare the access control of
# the methods following them
private
def privateMethod()end
protected
def protectedMethod()end
def secondProtectedMethod()end
public
def publicMethod()end
In Java
class JavaAccessControl {
# Method access control is declared immediately preceding each method
public void publicMethod() {…}
private void privateMethod() {…}
protected void protectedMethod() {…}
Arrays and Hashes
The construct for Arrays and Hashes in each of the three languages are fairly sim-
ilar.The main differences among the three languages are syntactical.With Java,
type declaration is required, while variable type is declared in front of the array’s
name in Perl and Ruby (see Table 1.1).
www.syngress.com
183RubyC01.qxd 1/4/02 3:50 PM Page 35

36 Chapter 1 • Booting Ruby
Table 1.1 Array Constructs
Language Array Construct
Java int[] odds = {1, 3, 5, 7};
Perl @odds= (1, 3, 5, 7);
Ruby odds = [1, 3, 5, 7]
Hashes
Hash tables are a collection of key-value pairs. Hashes in Perl and Ruby are con-
structed similarly to Arrays (see Table 1.2).A mapping is indicated by the use of =>.
Table 1.2 Hash Constructs
Language Hash Construct
Java Hashtable antonyms = new Hashtable();
antonyms.put("clean", "dirty"));
antonyms.put("black", "white");
numbers.put("fall", "fly");
System.out.println(antonyms.get("clean")); #=> dirty
Perl %antonyms = ( 'clean' => 'dirty', 'black' => 'white', 'fall' =>
'fly', 'evil' => 'good' );
print antonyms{'clean'}; # => dirty
Ruby antonyms = { 'clean' => 'dirty', 'black' => 'white', 'fall' =>
'fly', 'evil'=> 'good' }
print antonyms['black'] # => white
antonyms.type # => Hash
Iterators
In Ruby, an iterator is a method that yields control to a passed code block using
yield or Proc#call.
www.syngress.com
183RubyC01.qxd 1/4/02 3:50 PM Page 36

Booting Ruby • Chapter 1 37
antonyms = { 'clean' => 'dirty', 'black' => 'white', 'fall' => 'fly',
'evil' => 'good' }
antonyms.each { |i| print i }
The closest Perl equivalent to this is a foreach loop or function map.
%antonyms = ( 'clean' => 'dirty', 'black' => 'white', 'fall' => 'fly',
'evil' => 'good' );
# using foreach loop...
foreach $i (keys %antonyms) {
print $i;
}
# or using function map...
map {print} keys %antonyms;
Java iterators work over collections.While Perl and Ruby can iterate over
arrays, arrays are not collections in the way a hash table would be.
Hashtable h;
Iterator i = h.iterator();
while (i.hasNext()) {
System.out.println(i.next());
}
Convincing Management to Use Ruby
Convincing the boss to use Ruby might not be an easy task.You’ll hear all of the
old excuses: Ruby is too new, why learn another language, we’ve built all this
code on x, and so forth. Of course, at some point, most of the world was on
Fortran—then C, and then Java. Same excuses, different eras. Ruby doesn’t spend
money to evangelize its effectiveness, relying instead on the passion of its devel-
opment community. Unfortunately, passion doesn’t buy analyst reports or public
www.syngress.com
183RubyC01.qxd 1/4/02 3:50 PM Page 37

38 Chapter 1 • Booting Ruby
relations.That being said, your boss’s job is to make you productive, and passion
begets productivity. Present the benefits and convince him of the large efficiency
gains, and you should be able to use Ruby at work, perhaps even creating a few
converts along the way!
In a Perl shop, convincing management to use Ruby is a bit easier.You’re
probably running a Unix variant, and management is already using an open-
source language. On the other hand, Perl is a language with a fairly long history
and a large library (www.cpan.org).When taking your case up to the top, don’t
forget to mention the rapidly-growing RAA. Because of the similarities between
the two languages, you, and anyone else on board, can get pretty familiar within a
couple of days. Selling aspects should definitely include re-usability through
object-oriented development and the readability of Ruby syntax.
Your boss needs real-world examples of Ruby? There’s a page dedicated to it:
See www.rubygarden.com/ruby?RealWorldRuby. Companies like Lucent use
Ruby for their third generation wireless telephony products; a research group
within Motorola uses Ruby to post and generate data for a simulator. For more
public Web sites, the newsgroup gateway at www.ruby-talk.org is based on
200 lines of Ruby code! That is a testament to the ease of developing Ruby
applications.
Many programming “thought leaders” are involved with Ruby. Extreme
Programming gurus, such as Kent Beck and Ron Jeffries, have been spotted in
the comp.lang.ruby newsgroups.The Pragmatic Programmers, Andrew Hunt and
Dave Thomas, are regulars on the newsgroups and in the #ruby-lang IRC
channel.Also, they have written the popular introduction, Programming Ruby.
To encourage a transition, you are going to need buy-in from your boss. Start
small.This project shouldn’t entail a lot of risk, and if possible, can be leveraged
into larger projects. Look first at the Ruby Application Archive.As easy as writing
Ruby code is, it’s even easier if the code is written for you. If you need to re-use
legacy code, there are extensions for Perl, Python and Java. Next, develop Ruby
tools that aid development on your company’s base language.The Lucent project
created over 150,000 lines of C++ source code! Template generators, mainte-
nance scripts, and the like can get you into the Ruby groove, and give you a taste
of what’s possible.
www.syngress.com
183RubyC01.qxd 1/4/02 3:50 PM Page 38

Booting Ruby • Chapter 1 39
Summary
Ruby’s beauty stems from its basis on the Principle of Least Surprise.With this
guiding principle,Yukihiro ‘Matz’ Matsumoto created an easy to use, open source,
object-oriented programming language.
Ruby, and every known Ruby application, is posted at www.ruby-lang.org
and www.ruby-lang.org/en/raa.html.You can install most applications by decom-
pressing them and following the instructions provided in the README file.
Make sure that you grab Ri, and become familiar with IRb.
There are many editors to choose from. Make sure that you choose an editor
with which you feel comfortable and can be efficient. It should cover all basic
editor commands (cut, copy), and language-specific features (syntax highlighting,
etc).
You can experience frustrating troubles for quite a while if you don’t know
what problems to look for. Some areas prone to error are due to extra whites-
pace, blocking, and forgetting to specify the use of a method when a local vari-
able with the same name exists.
Ruby is a lot closer to Perl than Java in terms of syntax. Ruby code tends to
be more terse than Java code, and much more readable than Perl.While all three
languages are object-oriented, their implementations vary widely, from inheri-
tance to the exact definition of an object.
Solutions Fast Track
An Overview of Ruby
;Everything in Ruby is an object. If you can see something (such as a
variable), you can perform an operation on it.
;Ruby is an open source programming language. If you’re interested in
making changes to the language or porting it to another operating
system, the source is openly available to you.
;There are many features designed to make programming easier,
including garbage collection and dynamic typing.
Installing Ruby and its Tools
;Read the README. It will get you through most installations without
a hitch.
www.syngress.com
183RubyC01.qxd 1/4/02 3:50 PM Page 39

40 Chapter 1 • Booting Ruby
;If all else fails, go online. Search the comp.lang.ruby newsgroup first, and
then either post there, or ask on #ruby-lang (on IRC) for helpful
advice.
;Get an editor and spend time to make yourself an expert at it. Make sure
that it supports syntax highlighting, and from there, build macros that
make your life easier.
A Short Syntax Style Guide
;Classes and modules begin with upper case letters.
;For one line iterators use {…}; for multiple-line iterators, use do…end.
;Code begins with no indents; sub-indent, 2 spaces. Place parentheses
around all complex expressions or expressions that start with paren-
theses.
Dangerous Ruby
;If a local variable exists with the same name as a method, the local vari-
able will be used by default unless you put parentheses behind the
method or use self.methodName. Make sure you specify whether you
intend to use the method or local variable if both share the same name.
;Block local variables.This keeps variables from operating out of their
intended scope.
Comparing Ruby
;Java code tends to spend a lot of time in setup, which is part of the
reason Java programs tend to be much larger than Ruby programs.
;Ruby and Perl share some syntax similarities, and both have strong reg-
ular expression support. Ruby code tends to be cleaner, and therefore
more maintainable.
Convincing Management to Use Ruby
;Bring Ruby into the workplace slowly. Start with smaller projects.
;There are a number of examples where companies such as Motorola and
Lucent are using Ruby. Have a look at www.rubygarden.com/
ruby?RealWorldRuby.
www.syngress.com
183RubyC01.qxd 1/4/02 3:50 PM Page 40

Booting Ruby • Chapter 1 41
Frequently Asked Questions
The following Frequently Asked Questions, answered by the authors of this book,
are designed to both measure your understanding of the concepts presented in
this chapter and to assist you with real-life implementation of these concepts. To
have your questions about this chapter answered by the author, browse to
www.syngress.com/solutions and click on the “Ask the Author” form.
Q: Where are the increment/decrement (++ and --) operators?
A: Matz left out pre-post increment/decrement operators due to the lack of
object-oriented semantics (see newsgroup: 2001-08-01 02:51:12 PST [ruby-
talk:18951]).
Q: I’m a Windows developer, and I’m not particularly fond of being tied to
Cygwin.What are my alternatives?
A: You can compile Ruby with mingw or Visual C++. For mingw, make sure
you ./configure –enable-shared i386-mingw.
Q: I love this language, and I want to get more involved in the Ruby
Community! What’s the next step I can take?
A: There are a number of ways to contribute. Starting user groups, evangelism, and
writing a book are good ways. For those who are a little bit less extroverted,
take a look at CPAN (Comprehensive Perl Archive Network).You’ll notice that
it’s much larger than the RAA.Try working with someone on a Ruby module
(you might want e-mail someone on the newsgroups or someone who’s devel-
oped a module on the RAA), or start a module completely on your own.As
Ruby’s application base grows, so grows the community.
www.syngress.com
183RubyC01.qxd 1/4/02 3:50 PM Page 41
183RubyC01.qxd 1/4/02 3:50 PM Page 42

GUI Toolkits for
Ruby
Solutions in this chapter:
■Using the Standard Ruby GUI: Tk
■Using the GTK+ Toolkit
■Using the FOX Toolkit
■Using the SWin/VRuby Extensions
■Other GUI Toolkits
■Choosing a GUI Toolkit
;Summary
;Solutions Fast Track
;Frequently Asked Questions
Chapter 2
43
183RubyC02.qxd 1/7/02 4:00 PM Page 43

44 Chapter 2 • GUI Toolkits for Ruby
Introduction
Although Ruby is an excellent tool for writing low-level scripts for system
administration tasks, it is equally useful for writing end-user applications. And
because graphical user interfaces (GUIs) are a must for modern end-user appli-
cations, you need to learn how to develop GUIs for Ruby. One of the benefits
of Ruby programming that you’ve no doubt come to appreciate is that it
enables rapid application development. In contrast to the time-consuming code-
compile-test cycle of traditional programming languages, you can quickly make
changes to your Ruby scripts to try out new ideas.This benefit becomes all the
more evident when you start developing GUI applications with Ruby; it’s both
instructive and rewarding to build up the user interface incrementally, adding
new elements and then re-running the program to see how the user interface
has changed as a result.
You may already know that the standard Ruby source code distribution
includes an interface to Tk, which is an established cross-platform GUI toolkit. If
you peruse the Ruby Application Archive (RAA) however, you’ll quickly dis-
cover that there is a large number of other GUI toolkit choices for use with
Ruby (www.ruby-lang.org/en/raa.html).Why wouldn’t you want to stick with
Tk if it’s the standard? Well, as you work through this chapter you’ll learn about
some of the considerations that might prompt you to look at alternatives. Like all
software, these packages are in various stages of development: some are new and
unstable, while others are older and quite robust, but most fall somewhere in-
between. Most of the GUI toolkits for Ruby are cross-platform, meaning that
applications built around them will work on multiple operating systems, while
others are targeted towards a single operating system.
Every GUI toolkit has its own unique feel and feature-set, but there are some
things that are true of almost any GUI toolkit with which you may work:
■GUI applications are event-driven. Many programs you’ll write proceed
from start to finish in a very predictable path, and for a given set of
inputs they’ll produce the same outputs with little or no user interven-
tion. For example, consider a Ruby script written to process a large
number of text files in batch mode, perhaps updating selected text in
those files. Such a program will always produce the same results for a
given set of input files, and it does so without any user intervention.
In contrast, event-driven programs spend most of their time waiting for user
inputs (events) that drive the program’s flow.
www.syngress.com
183RubyC02.qxd 1/7/02 4:00 PM Page 44

GUI Toolkits for Ruby • Chapter 2 45
■Every toolkit has its own way of communicating these user interface
events to your application code, which boils down at some point to your
registering certain functions with the toolkit to “handle” the event.
■GUI toolkits consist of a large number of basic user interface objects
(called widgets), like buttons, labels and text fields, as well as more com-
plex widgets, like spreadsheets, calendars or text editors.
■User interface windows are constructed using a “parent-child” composi-
tion; the top-level main window contains one or more child windows;
each child window may in turn contain child windows; and so on.This
is an application of the Composite pattern, in that operations applied to
parent windows (such as hiding it) usually affect the window’s children
as well (they are hidden as well).
■GUI toolkits offer one or more geometry (or layout) management
options for arranging child windows (or widgets) inside other container
windows.
The purposes of this chapter are to introduce some of the most popular GUI
toolkits for Ruby, demonstrate how some of the common GUI programming
idioms discussed above are implemented, and help you decide which might be
the best choice for your applications.To do this, we’ll first describe a simple
application that has a lot of features and functionality that you would use in any
GUI application.Then we’ll take a look at how you would develop this applica-
tion in each of the GUI toolkits.Along the way, we’ll discuss other related topics,
such as how to download, compile and install the toolkit on your system, and
auxiliary tools (such as GUI builders) that can make application development
with that GUI toolkit easier. Sources for additional information and resources can
be found in the discussion of each respective toolkit.
Using this Book’s Sample Applications
For each of the four major toolkits covered (Tk, GTK+, FOX and
SWin/VRuby) we’ll develop a similar sample application so that you can easily
identify the similarities and differences among the toolkits while learning how to
use them.The application is a simple XML viewer that uses Jim Menard’s
NQXML module as its document model, so you’ll need to obtain and install that
extension before you can actually run the sample applications on your system.
For your convenience, this book provides the source code for each of the four
sample applications at www.syngress.com/solutions:
www.syngress.com
183RubyC02.qxd 1/7/02 4:00 PM Page 45

46 Chapter 2 • GUI Toolkits for Ruby
■tk-xmlviewer.rb is the Ruby/Tk version of the sample application;
■gtk-xmlviewer.rb is the Ruby/GTK version of the sample application;
■fxruby-xmlviewer.rb is the FXRuby version of the sample application;
■vruby-xmlviewer.rb is the VRuby version of the sample application.
To give you a head start on developing your own GUI applications, the user
interface for this application will demonstrate the following common features:
■Displaying a menu bar, with several pull-down menus and choices for
opening XML files or quitting the application.
■Using common dialog boxes, like a file-open dialog, to request informa-
tion from the user.
■Using geometry-layout managers to automatically arrange widgets.
■Using various widgets to display the XML document nodes (or entities)
and their attributes.
Using the Standard Ruby GUI: Tk
The standard graphical user interface (GUI) for Ruby is Tk.Tk started out as the
GUI for the Tcl scripting language developed by John Ousterhout in the mid-
eighties, but has since been adopted as a cross-platform GUI by all of the popular
scripting languages (including Perl and Python).Although Tk’s widget set is a bit
limited as compared to some of the more modern GUIs, it has the unique dis-
tinction of being the only cross-platform GUI with a strong Mac OS port.
Obtaining Tk
One of the primary advantages of using Tk with Ruby is that, because it is the
standard, it’s very easy to get started. Developing GUI applications with Ruby/Tk
requires both a working installation of Tk itself as well as the Ruby/Tk extension
module.
You’re welcome to download the source code for Tk from the Tcl/Tk home
page at www.tcltk.org and build it yourself, but precompiled binaries for Tk are
available for most operating systems (including Linux and Microsoft Windows).
To make life even easier, if you’re running the standard Ruby for Windows distri-
bution from the Pragmatic Programmers’ site (www.pragmaticprogrammer.com/
ruby/downloads/ruby-install.html), you already have a working Tk installation.
www.syngress.com
183RubyC02.qxd 1/7/02 4:00 PM Page 46

GUI Toolkits for Ruby • Chapter 2 47
Similarly, most Linux distributions include Tcl/Tk as a standard installation
option.
The other piece of the puzzle, the extension module that allows Ruby to
access Tk, is included in the Ruby source code distribution. If you built Ruby
from its source code, the Ruby/Tk extension was automatically built as well and
should be installed along with the rest of the Ruby library on your system.The
standard Ruby installer for Windows also includes the Ruby/Tk extension.
Ruby/Tk Basics
Ruby/Tk provides a number of classes to represent the different Tk widgets. It
uses a consistent naming scheme and in general you can count on the class name
for a widget being Tk followed by the Tk widget name. For example,Tk’s Entry
widget is represented by the TkEntry class in Ruby/Tk.
A typical structure for Ruby/Tk programs is to create the main or “root”
window (an instance of TkRoot), add widgets to it to build up the user interface,
and then start the main event loop by calling Tk.mainloop.The traditional “Hello,
World!” example for Ruby/Tk looks something like this:
require 'tk'
root = TkRoot.new
button = TkButton.new(root) {
text "Hello, World!"
command proc { puts "I said, Hello!" }
}
button.pack
Tk.mainloop
The first line just loads the Ruby/Tk extension into the interpreter and the
second line creates a top-level window for the application. Finally, we get to the
interesting part:
button = TkButton.new(root) {
text "Hello, World!"
command proc { puts "I said, Hello!" }
}
www.syngress.com
183RubyC02.qxd 1/7/02 4:00 PM Page 47

48 Chapter 2 • GUI Toolkits for Ruby
Here we’re creating a button whose parent widget is the main window. Like
all of the GUI toolkits we’ll look at, Ruby/Tk uses a composition-based model
where parent widgets can contain one or more child widgets, some of which
may themselves be containers.This code fragment also demonstrates one way to
specify various configuration options for a widget by following it with a code
block. Inside the code block, you can call methods that change aspects of the
widget’s appearance or behavior; in this example, the text method is used to set
the text displayed on the button, while the command method is used to associate a
procedure with the button’s callback (more on this in the next section).An alter-
nate (but equivalent) form for specifying widget options is to pass them as hash-
style (key, value) pairs, for the second and following arguments to the widget’s new
function, as follows:
button = TkButton.new(root, text => "Hello, World!",
command => proc { puts "I said, Hello!" })
The second line is important because it instructs the button’s parent container
(the root window) to place it in the correct location. For this example that’s not
too difficult, since the root window only has one child widget to deal with.As
we’ll see later, real applications have much more complicated layouts with deeply
nested structures of widgets contained within other container widgets. For those
cases, we’ll pass additional arguments to the widget’s pack method to indicate
where it should be placed in the parent container, how its size should change
when its parent’s size changes, and other aspects related to the layout.
This example program “ends”, as most Ruby/Tk programs do, with a call to
Tk.mainloop; but this is actually where the action begins.At this point, the program
loops indefinitely, waiting for new user interface events and then dispatching them
to the appropriate handlers.A lot of your work in developing GUI applications
with Ruby/Tk is deciding which events are of interest and then writing code to
handle those events; this is the topic of the following section.
Creating Responses to Tk’s Callbacks and Events
Tk’s event model is split along two closely-related lines. On one hand, the
window system generates low-level events such as “the mouse cursor just moved
into this window” or “the user just pressed the Skey on the keyboard”.At a
higher level,Tk invokes callbacks in your program to indicate that something sig-
nificant happened to a widget (a button was clicked, for example). For either
www.syngress.com
183RubyC02.qxd 1/7/02 4:00 PM Page 48

GUI Toolkits for Ruby • Chapter 2 49
case, you can provide a code block or a Ruby Proc object that specifies how the
application responds to the event or callback.
First, let’s take a look at how to use the bind method to associate basic
window system events with the Ruby procedures that handle them.The simplest
form of bind takes as its inputs a string indicating the event name and a code
block that Tk uses to handle the event. For example, to catch the ButtonRelease
event for the first mouse button on some widget, you’d write:
someWidget.bind('ButtonRelease-1') {
… code block to handle this event …
}
For some event types, it’s sufficient to use the basic event name, like
“Configure” or “Destroy”, but for others you’ll want to be more specific. For
this reason the event name can include additional modifiers and details. A modifier
is a string like “Shift”,“Control” or “Alt”, indicating that one of the modifier
keys was pressed.The detail is either a number from 1 to 5, indicating a mouse
button number, or a character indicating a keyboard character. So, for example,
to catch the event that’s generated when the user holds down the Ctrl key and
clicks the right mouse button (sometimes known as Button 3) over a window,
you’d write:
aWindow.bind('Control-ButtonPress-3', proc { puts "Ouch!" })
The names of these events are derived from the names of the corresponding
X11 event types, for mostly historical reasons;Tcl/Tk was originally developed
for the Unix operating system and the X Window system.The Tk ports for
Windows, Macintosh and other platforms use the same event names to repre-
sent their “native” windowing system events.The sample application we’ll
develop later uses a few other event types, but for a complete listing of the
valid event names, modifiers and details you should consult the manual pages
for Tk’s bind command.A good online source for this kind of reference infor-
mation is the Tcl/Tk documentation at the Tcl Developer Xchange Web site
(http://tcl.activestate.com/doc).
It’s useful to be able to intercept these kinds of low-level events, but more
often you’re interested in the higher-level actions. For example, you’d simply like
to know when the user clicks on the Help button; you don’t really need to know
that the user pressed the left mouse button down on the Help button and then, a
few milliseconds later, released the mouse button. Many Ruby/Tk widgets can
www.syngress.com
183RubyC02.qxd 1/7/02 4:00 PM Page 49

50 Chapter 2 • GUI Toolkits for Ruby
trigger callbacks when the user activates them, and you can use the command call-
back to specify that a certain code block or procedure is invoked when that hap-
pens.As with any other widget option, you can specify the command callback
procedure when you create the widget:
helpButton = TkButton.new(buttonFrame) {
text "Help"
command proc { showHelp }
}
or you can assign it later, using the widget’s command method:
helpButton.command proc { showHelp }
Note that since the command method accepts either procedures or code
blocks, you could also write the previous code example as:
helpButton = TkButton.new(buttonFrame) {
text "Help"
command { showHelp }
}
Some widgets, like TkCanvas,TkListbox and TkText, may not be able to dis-
play all of their contents in the space allotted to them. For example, if you’re
using a TkText widget to display a very long document, at best you’ll only be
able to see a screen’s worth of text at a time. For this reason you’ll typically attach
TkScrollbar widgets to one or more sides of the main widget to allow the user to
scroll through the widget’s contents. In order to properly interact with scrollbars,
widgets like TkText or TkListbox can also generate callbacks when their contents
are scrolled horizontally or vertically.To associate code blocks with these callbacks
you can use the widget’s xscrollcommand or yscrollcommand methods (for horizontal
or vertical scrolling).We’ll see an example of how this works in the sample appli-
cation later in this chapter.
Working with Ruby/Tk’s Layout Managers
When you’re designing the behavior of your application, it’s critical to under-
stand how Ruby/Tk’s events and callbacks work. An equally important aspect
of the design is the layout of the user interface. Many widgets serve as interac-
tive components upon which the user clicks on or types to get the program to
www.syngress.com
183RubyC02.qxd 1/7/02 4:00 PM Page 50

GUI Toolkits for Ruby • Chapter 2 51
perform an action. Other widgets, however, are more passive and should be
used as containers (or parents) for yet other widgets.We’ve already seen that the
top-level root window is one such container widget, and inside the main
window you can use TkFrame widgets to group child widgets together in an
organized way.
The layout manager for a container basically defines the strategy it’s going to
use when assigning positions and sizes to its child widgets.As you’ll come to see,
even after you understand how layout managers work, it takes some experi-
menting to translate your mental image of the user interface layout into code that
correctly implements that layout.With Ruby/Tk, you can choose from three dif-
ferent layout managers, although you don’t have to use the same layout manager
for every container. In fact, for non-trivial user interfaces it’s quite likely that
you’ll use more than one of them.
The simplest layout manager is the placer, which just places the child widgets
using the positions and sizes that you specify.At first glance, this might sound
reasonable; after all, a lot of the “GUI builder” tools that let you drag widgets off
of a tool palette and drop them on to a work window use this approach in the
source code that they generate.The drawbacks of this fixed layout become
apparent as soon as you try to run the program on other computers, with dif-
ferent configurations and possibly running other operating systems. For example,
if the system fonts are different, a button that requires only 40 pixels’ width to
display its text on your system might require 60 pixels on another system. If you
had placed a text field at some fixed position immediately to the right of that
button, those two widgets are now going to overlap each other. Because it’s so
inflexible, you probably won’t use the placer much in practice.
The next layout manager is the grid layout manager, which places its child
widgets in a table-like arrangement.When you add a child widget to a container
using the grid layout manager, you specify the column and row in which it
should be placed.The child widgets are arranged so that all of the widgets in the
same column have the same width, and all of the widgets in the same row have
the same height. For a quick example, here’s a grid layout with 3 rows and 4
columns of label widgets:
require 'tk'
root = TkRoot.new
3.times { |r|
4.times { |c|
TkLabel.new(root) {
www.syngress.com
183RubyC02.qxd 1/7/02 4:00 PM Page 51
52 Chapter 2 • GUI Toolkits for Ruby
text "row #{r}, column #{c}"
}.grid('row' => r, 'column' => c, 'padx' => 10, 'pady' => 10)
}
}
Tk.mainloop
Figure 2.1 shows the results when you run this program.The grid layout
manager is more powerful than this simple example suggests, however.You can
see that by default, the grid centers each child widget in its cell, but you can pro-
vide additional arguments to the grid method to specify that one or more sides
of the child widget stretches to “stick” to the side(s) of its cell.Additionally, grid
cells can span multiple rows or columns. For more information about advanced
options for the grid layout manager, consult your favorite Tk reference.
The last layout manager we’ll discuss is the packer, which is the one you’ll use
most often because it is very flexible yet easy to use.The packer uses what is
known as a “cavity” model for assigning the positions and sizes of its children.
Imagine an empty frame widget, before any child widgets have been added to it.
When you add the very first child widget to the frame, you specify which side
(left, right, top or bottom) of the rectangular cavity against which the child
widget should be packed (or aligned).The packer allocates that entire side of the
cavity to this widget, and reduces the size of the cavity by the amount of space
taken up by that first child. It’s important to note that the packer allocates the
entire side of the cavity to the newly added widget, even if that widget doesn’t
need the space. Successive child widgets are also packed against selected sides of
the remaining cavity space until you’re done.
www.syngress.com
Figure 2.1 Grid Layout Manager
183RubyC02.qxd 1/7/02 4:00 PM Page 52

GUI Toolkits for Ruby • Chapter 2 53
It’s also important to understand that the packer layout manager distinguishes
between packing space and display space.The display space is the amount of space
that a particular child widget would prefer to have to display itself properly. For
example, a label or button widget’s display space is a little wider than the space
needed to display the text on that label or button.The packing space is the entire
space that’s available when positioning a widget in the cavity, which may be more
or less than the display space for the widget.
When the amount of packing space exceeds the needed display space for a
widget, the default behavior is to just center the child widget in that packing
space, leaving gaps on the other sides. If you would instead like for the child
widget to fill all the available packing space, you can set the fill parameter to one
of three values (x,yor both), indicating the direction(s) in which the widget
should fill.We’ll see examples of this later, in the sample application.
A related parameter, expand, has to do with how the child widgets resize
themselves when the parent container (the packer) itself is resized. By default,
expand is false, meaning that even if the parent container grows (or shrinks) the
child widgets will maintain their current positions and sizes. If you instead set
expand to true, the child widgets will resize according to the new size of the
parent. In general, if you’ve specified fill => “both” for a particular child widget,
you’ll also want to specify expand => true for that child widget.
It may help to work through a more concrete exercise to demonstrate how
the packer’s layout algorithm works. Remember that we start out with an empty,
rectangular cavity. Let’s start by adding a widget to the top side of the cavity (see
Figure 2.2 [A]):
After this first step, the top section of the cavity is now claimed by the first
child widget. Regardless of how we pack the remaining child widgets, this is the
only one that can be adjacent to the top edge of the container; the bottom edge
of this first widget has become the “top” of the remaining cavity space. Next, let’s
add a widget to the left side of the cavity (B).
Once again, the remaining space in the cavity shrinks, this time by the width
of the second widget.The bottom edge of the first widget is still the top of the
cavity, but the right edge of this second widget becomes the new left side of the
cavity. Now let’s add a third widget (C), this time to the bottom.
After adding this widget, the remaining space shrinks by the widget’s height
and its top edge becomes the new bottom side of the cavity. Finally, add the last
widget (D), this time to the right side.
www.syngress.com
183RubyC02.qxd 1/7/02 4:00 PM Page 53

54 Chapter 2 • GUI Toolkits for Ruby
Ruby/Tk Sample Application
Figure 2.3 shows the source code for the Ruby/Tk version of our sample appli-
cation.The source code for this application appears at www.syngress.com/
solutions, under the file name tk-xmlviewer.rb.
www.syngress.com
Figure 2.2 Tk Packer Layout Manager
Widget 1 Unused
Cavity
Space
Remaining
Cavity
Space
Widget 1 Unused
Cavity
Space
Remaining
Cavity
Space
Widget 2
Widget 1 Unused
Cavity
Space
Remaining
Cavity
Space
Widget 2
Widget 3
Widget 1 Unused
Cavity
Space
Remaining
Cavity
Space
Widget 2
Widget 3
Widget 4
(A) (C)
(B) (D)
183RubyC02.qxd 1/7/02 4:00 PM Page 54

GUI Toolkits for Ruby • Chapter 2 55
www.syngress.com
Figure 2.3 Ruby/Tk Source Code for Sample Application (tk-xmlviewer.rb)
#!/usr/bin/env ruby
require 'tk'
require ‘nqxml/treeparser'
class XMLViewer < TkRoot
def createMenubar
menubar = TkFrame.new(self)
fileMenuButton = TkMenubutton.new(menubar,
'text' => 'File',
'underline' => 0)
fileMenu = TkMenu.new(fileMenuButton, 'tearoff' => false)
fileMenu.add('command',
'label' => 'Open',
'command' => proc { openDocument },
'underline' => 0,
'accel' => 'Ctrl+O')
self.bind('Control-o', proc { openDocument })
fileMenu.add('command',
'label' => 'Quit',
'command' => proc { exit },
'underline' => 0,
'accel' => 'Ctrl+Q')
self.bind('Control-q', proc { exit })
fileMenuButton.menu(fileMenu)
fileMenuButton.pack('side' => 'left')
helpMenuButton = TkMenubutton.new(menubar,
'text' => 'Help',
'underline' => 0)
Continued
183RubyC02.qxd 1/7/02 4:00 PM Page 55

56 Chapter 2 • GUI Toolkits for Ruby
www.syngress.com
Figure 2.3 Continued
helpMenu = TkMenu.new(helpMenuButton, 'tearoff' => false)
helpMenu.add('command',
'label' => 'About...',
'command' => proc { showAboutBox })
helpMenuButton.menu(helpMenu)
helpMenuButton.pack('side' => 'right')
menubar.pack('side' => 'top', 'fill' => 'x')
end
def createContents
# List
listBox = TkListbox.new(self) {
selectmode 'single'
background 'white'
font 'courier 10 normal'
}
scrollBar = TkScrollbar.new(self) {
command proc { |*args|
listBox.yview(*args)
}
}
rightSide = TkFrame.new(self)
attributesForm = TkFrame.new(rightSide)
attributesForm.pack('side' => 'top', 'fill' => 'x')
TkFrame.new(rightSide).pack('side' => 'top', 'fill' => 'both',
'expand' => true)
listBox.yscrollcommand(proc { |first, last|
scrollBar.set(first, last)
})
listBox.bind('ButtonRelease-1') {
itemIndex = listBox.curselection[0]
Continued
183RubyC02.qxd 1/7/02 4:00 PM Page 56

GUI Toolkits for Ruby • Chapter 2 57
www.syngress.com
Figure 2.3 Continued
if itemIndex
# Remove currently displayed attributes
TkGrid.slaves(attributesForm, nil).each { |slave|
TkGrid.forget(attributesForm, slave)
}
# Add labels and entry widgets for this entity's attributes
entity = @entities[itemIndex]
if entity.kind_of?(NQXML::NamedAttributes)
keys = entity.attrs.keys.sort
keys.each_index { |row|
TkLabel.new(attributesForm) {
text keys[row] + “:”
justify 'left'
}.grid('row' => row, 'column' => 0, 'sticky' => 'nw')
entry = TkEntry.new(attributesForm)
entry.grid('row' => row, 'column' => 1, 'sticky' => 'nsew')
entry.value = entity.attrs[keys[row]]
TkGrid.rowconfigure(attributesForm, row, 'weight' => 1)
}
TkGrid.columnconfigure(attributesForm, 0, 'weight' => 1)
TkGrid.columnconfigure(attributesForm, 1, 'weight' => 1)
else
end
end
}
listBox.pack('side' => 'left', 'fill' => 'both', 'expand' => true)
scrollBar.pack('side' => 'left', 'fill' => 'y')
rightSide.pack('side' => 'left', 'fill' => 'both', 'expand' => true)
@listBox = listBox
@attributesForm = attributesForm
Continued
183RubyC02.qxd 1/7/02 4:00 PM Page 57

58 Chapter 2 • GUI Toolkits for Ruby
www.syngress.com
Figure 2.3 Continued
end
def initialize
# Initialize base class
super
# Main Window Title
title 'TkXMLViewer'
geometry '600x400'
# Menu bar
createMenubar
createContents
end
def populateList(docRootNode, indent)
entity = docRootNode.entity
if entity.instance_of?(NQXML::Tag)
@listBox.insert('end', ' '*indent + entity.to_s)
@entities.push(entity)
docRootNode.children.each do |node|
populateList(node, indent + 2)
end
elsif entity.instance_of?(NQXML::Text) &&
entity.to_s.strip.length != 0
@listBox.insert('end', ' '*indent + entity.to_s)
@entities.push(entity)
end
end
def loadDocument(filename)
@document = nil
begin
Continued
183RubyC02.qxd 1/7/02 4:00 PM Page 58

GUI Toolkits for Ruby • Chapter 2 59
www.syngress.com
Figure 2.3 Continued
@document = NQXML::TreeParser.new(File.new(filename)).document
rescue NQXML::ParserError => ex
Tk.messageBox('icon' => 'error', 'type' => 'ok',
'title' => 'Error', 'parent' => self,
'message' => “Couldn't parse XML document”)
end
if @document
@listBox.delete(0, @listBox.size)
@entities = []
populateList(@document.rootNode, 0)
end
end
def openDocument
filetypes = [[“All Files”, “*”], [“XML Documents”, “*.xml”]]
filename = Tk.getOpenFile('filetypes' => filetypes,
'parent' => self)
if filename != “”
loadDocument(filename)
end
end
def showAboutBox
Tk.messageBox('icon' => 'info', 'type' => 'ok',
'title' => 'About TkXMLViewer',
'parent' => self,
'message' => 'Ruby/Tk XML Viewer Application')
end
end
# Run the application
root = XMLViewer.new
Tk.mainloop
183RubyC02.qxd 1/7/02 4:00 PM Page 59

60 Chapter 2 • GUI Toolkits for Ruby
The first few lines simply import the required Tk and NQXML modules, and
the majority of the code consists of the XMLViewer class definition.The main
application window class, XMLViewer, is derived from TkRoot. Its initialize
method looks like this:
def initialize
# Initialize base class
super
# Main Window Title
title 'TkXMLViewer'
geometry '600x400'
# Menu bar
createMenubar
createContents
end
The first line of initialize calls super to initialize the base class; don’t forget to
do this! The next two lines call TkRoot’s title and geometry methods, respectively, to
set the main window title string and its initial width and height in pixels.These
two methods are actually provided by Ruby/Tk’s Wm module, which defines a
number of functions for interacting with the window manager.
The last two lines of the initialize method call out to other XMLViewer
methods to create the window’s menu bar and contents area.We could have
included the code from these methods directly in the initialize method, but
breaking up different parts of the GUI construction into different methods is a
common way to organize larger, more complicated applications and so we’ll use
it here for consistency. Unlike some of the other tookits we’ll look at, Ruby/Tk
doesn’t have a specific class for the “menu bar”; instead, we just use a TkFrame
container widget stretched along the top of the main window.
A Ruby/Tk pulldown menu consists of a TkMenubutton object associated
with a TkMenu object.The TkMenubutton is the widget that you see on the menu
bar itself; its text is the name of the menu, such as File, Edit or Help.When the
user clicks this button, the associated TkMenu will be displayed.You can add one
or more menu options to a TkMenu using its add method. Let’s look at the setup
for our sample application’s File menu:
www.syngress.com
183RubyC02.qxd 1/7/02 4:00 PM Page 60

GUI Toolkits for Ruby • Chapter 2 61
fileMenuButton = TkMenubutton.new(menubar,
'text' => 'File',
'underline' => 0)
Menu buttons are created as child widgets of the menu bar itself.The
underline attribute for TkMenubutton widgets is an integer indicating which
letter in the menu button title should be underlined. Underlining a letter in
the menu title is a commonly-used visual cue in GUI applications to identify
the accelerator key that can be used to activate the menu; for example, in
most Windows applications the Alt+F keyboard combination activates the
File menu.
Next, we’ll create the TkMenu associated with this TkMenubutton and add the
first entry for that menu:
fileMenu = TkMenu.new(fileMenuButton, 'tearoff' => false)
fileMenu.add('command',
'label' => 'Open',
'command' => proc { openDocument },
'underline' => 0,
'accel' => 'Ctrl+O')
self.bind('Control-o', proc { openDocument })
Note that the TkMenu is created as a child of the menu button. Here we’re
specifying that it’s not a tear-off style menu.The first entry we’ll add to the menu
is a command entry, for the Open command.The first argument to add is a
string indicating the type of the menu entry; in addition to command, there are
types for checkbutton entries (check), radiobutton entries (radio), separators (sepa-
rator), and cascading sub-menus (cascade).The command attribute for this menu
entry is a Ruby Proc object that calls a different XMLViewer instance method,
openDocument, which we’ll see shortly. Note that the accel attribute defines the
keyboard accelerator string that is displayed alongside the Open menu entry but it
doesn’t automatically set up the keyboard binding for that accelerator; we need to
call bind on the main window to do this ourselves.
Now let’s take a look at the createContents method.This method sets up the
main contents area of the application main window, which is divided into a
listing of the XML document nodes on the left side and a listing of the node
attributes on the right.
www.syngress.com
183RubyC02.qxd 1/7/02 4:00 PM Page 61

62 Chapter 2 • GUI Toolkits for Ruby
listBox = TkListbox.new(self) {
selectmode 'single'
background 'white'
font 'courier 10 normal'
}
scrollBar = TkScrollbar.new(self) {
command proc { |*args|
listBox.yview(*args)
}
}
listBox.yscrollcommand(proc { |first, last|
scrollBar.set(first, last)
})
Tk’s list-box widget displays a list of strings that the user can select from. Our
TkListbox instance sets the selectmode attribute to single, indicating that only one
item can be selected at a time (other selection modes allow for multiple selec-
tions at the same time).We also set the font attribute to a fixed-pitch Courier font
instead of the default GUI font, which is usually a system-dependent, proportion-
ally-spaced font. Since the number of list items may become very large (too
many to fit onscreen) we’ll also attach a TkScrollbar widget to use with this
listbox.The code block or procedure passed to the scrollbar’s command method
modifies the listbox’s “view”, the range of items displayed in its window.The
number of parameters passed to the scrollbar’s command method varies depending
on what the user does to the scrollbar. For example, if the user adjusts the
scrollbar position by clicking on one of the arrow buttons, the command method
will receive three arguments (scroll,1,units). For more details about the different
arguments that can be passed, see the Tk reference documentation for Tk’s
scrollbar command. In general, you don’t need to concern yourself with which set
of arguments get passed to the command method, and you simply pass them
along to the scrolled widget’s xview or yview method. Similarly, the code block or
procedure passed to the list’s yscrollcommand method can adjust the position and
range of the scrollbar when the list contents are modified.The next section of
code sets up the right-hand side of the main window:
rightSide = TkFrame.new(self)
attributesForm = TkFrame.new(rightSide)
attributesForm.pack('side' => 'top', 'fill' => 'x')
www.syngress.com
183RubyC02.qxd 1/7/02 4:00 PM Page 62

GUI Toolkits for Ruby • Chapter 2 63
TkFrame.new(rightSide).pack('side' => 'top', 'fill' => 'both',
'expand' => true)
For now, this isn’t very interesting, because the attributes form is still empty.
But the next section of code, which handles list selections, makes its purpose a bit
clearer:
listBox.bind('ButtonRelease-1') {
itemIndex = listBox.curselection[0]
if itemIndex
# Remove currently displayed attributes
TkGrid.slaves(attributesForm, nil).each { |slave|
TkGrid.forget(attributesForm, slave)
}
# Add labels and entry widgets for this entity's attributes
entity = @entities[itemIndex]
if entity.kind_of?(NQXML::NamedAttributes)
keys = entity.attrs.keys.sort
keys.each_index { |row|
TkLabel.new(attributesForm) {
text keys[row] + ":"
justify 'left'
}.grid('row' => row, 'column' => 0, 'sticky' => 'nw')
entry = TkEntry.new(attributesForm)
entry.grid('row' => row, 'column' => 1, 'sticky' => 'nsew')
entry.value = entity.attrs[keys[row]]
TkGrid.rowconfigure(attributesForm, row, 'weight' => 1)
}
TkGrid.columnconfigure(attributesForm, 0, 'weight' => 1)
TkGrid.columnconfigure(attributesForm, 1, 'weight' => 1)
end
end
}
This entire code block is bound to the ButtonRelease event for the left mouse
button on the list box.This is the event that will be generated when the user
selects a list item by first pressing, and then releasing, the left mouse button over
www.syngress.com
183RubyC02.qxd 1/7/02 4:00 PM Page 63

64 Chapter 2 • GUI Toolkits for Ruby
the list.We start by calling the TkListbox’s curselection method to get an array of
the selected items’ indices; since this is a single-selection list, we only expect one
selected item (as the zeroth element of this array). Next, we clear the current
attributes form’s contents by calling TkGrid.slaves to get an array of the child wid-
gets for the form, and then calling TkGrid.forget on each as we iterate through
them.Whereas most GUI toolkits use the “parent-child” terminology to refer to
the hierarchical composition of GUI containers,Tk often uses the terms “master”
and “slave”, especially when referring to layout managers like TkGrid.
The next section of this event handler loops over all of the attributes for the
currently selected XML document node, and adds a TkLabel and TkEntry to the
form for each. Note that we can override the default justification for the TkLabel
through its justify attribute; valid values for this attribute are left,center and right,
but the default label justification is centered text.Also, since we’d like grid
columns and rows to be equally weighted, we’re calling the TkGrid.rowconfigure
and TkGrid.columnconfigure module methods to set the weight attribute for each
row and column to 1.
We need to look at some of the lower-level methods for the XMLViewer class.
For starters, there’s the openDocument method which is invoked when the user
selects the Open entry from the File menu (or presses the Ctrl+O accelerator):
def openDocument
filetypes = [["All Files", "*"], ["XML Documents", "*.xml"]]
filename = Tk.getOpenFile('filetypes' => filetypes,
'parent' => self)
if filename != ""
loadDocument(filename)
end
end
The important parts of this function are the call to Tk.getOpenFile and
loadDocument.Tk.getOpenFile is a Tk module method that displays a system-spe-
cific file dialog box for selecting an existing file’s name; a similar function,
Tk.getSaveFile, can be used to get either an existing or new file name when
saving documents.The filetypes attribute specifies a list of file type descriptions
and patterns, while the parent attribute specifies the owner window for the file
dialog.Assuming the user didn’t cancel the dialog and provided a legitimate file
name, we call the XMLViewer method loadDocument to actually read the XML
document:
www.syngress.com
183RubyC02.qxd 1/7/02 4:00 PM Page 64

GUI Toolkits for Ruby • Chapter 2 65
def loadDocument(filename)
@document = nil
begin
@document = NQXML::TreeParser.new(File.new(filename)).document
rescue NQXML::ParserError => ex
Tk.messageBox('icon' => 'error', 'type' => 'ok',
'title' => 'Error', 'parent' => self,
'message' => "Couldn't parse XML document")
end
if @document
@listBox.delete(0, @listBox.size)
@entities = []
populateList(@document.rootNode, 0)
end
end
If the XML parser raises an exception while reading the XML file, we can
display a simple dialog box stating this fact using the Tk.messageBox module
method.The icon attribute can be one of the four strings error,info,question or
warning, to provide a visual cue of the kind of message.The type attribute indi-
cates which terminator buttons should be displayed on this message box. For our
simple case, we’ll just display the OK button to dismiss the dialog, but other
options for type include abortretrycancel,okcancel,retrycancel,yesno, and yesnocancel.
Assuming there were no errors in reading the document, the instance variable
@document should now hold a reference to an NQXML::Document object.We call
the delete method to erase all of the current list entries and then call populateList
to start filling the list with the new document’s entities:
def populateList(docRootNode, indent)
entity = docRootNode.entity
if entity.instance_of?(NQXML::Tag)
@listBox.insert('end', ' '*indent + entity.to_s)
@entities.push(entity)
docRootNode.children.each do |node|
populateList(node, indent + 2)
end
elsif entity.instance_of?(NQXML::Text) &&
www.syngress.com
183RubyC02.qxd 1/7/02 4:00 PM Page 65
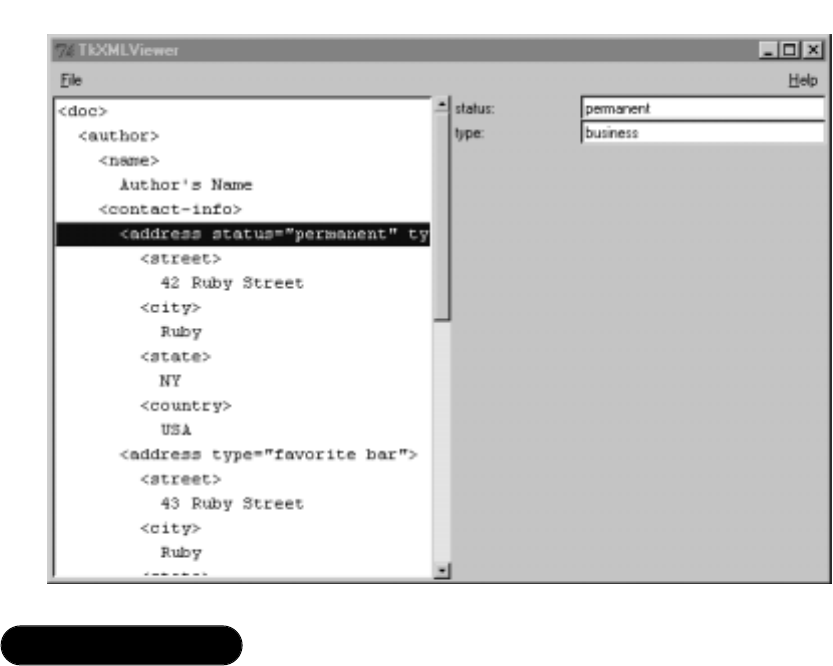
66 Chapter 2 • GUI Toolkits for Ruby
entity.to_s.strip.length != 0
@listBox.insert('end', ' '*indent + entity.to_s)
@entities.push(entity)
end
end
Other GUI toolkits we’ll cover in this chapter have tree widgets that are
well-suited for displaying hierarchical data like an XML document.Tk doesn’t
have such a widget, although Tix, a popular Tk extension does. For more infor-
mation on Tix, see “Obtaining Tk Extensions:Tix and BLT” later in this section.
Since Tix isn’t always available, we’ll approximate the tree widget using a regular
TkListbox with the list items indented to indicate their depth in the tree.The
populateList method is called recursively until the entire document is represented.
In the earlier event handler code, we saw how the application handles selection
of list items corresponding to different document entities.
Figure 2.4 shows the Ruby/Tk version of our sample application, running
under Microsoft Windows 2000.
www.syngress.com
Figure 2.4 Ruby/Tk Version of Sample Application
183RubyC02.qxd 1/7/02 4:00 PM Page 66
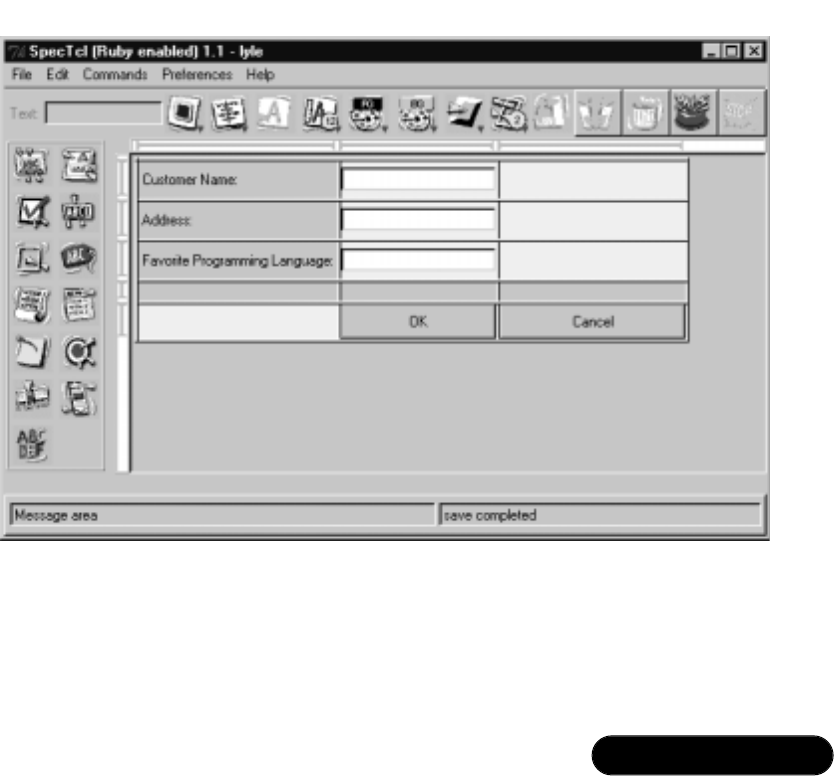
GUI Toolkits for Ruby • Chapter 2 67
Using the SpecTcl GUI Builder
SpecTcl (http://spectcl.sourceforge.net) is a GUI building tool for Tk. It was
originally developed by Sun Microsystems and has more recently been devel-
oped and maintained by a group of volunteers led by Morten Jensen.Although
the original intent of SpecTcl was to generate Tcl source code based on the
user interface design, people have since developed code generation backends for
other scripting languages (such as Perl, Python, and Ruby) that use Tk as a
GUI.An experimental version of the Ruby backend for SpecTcl, known as
“specRuby,” was developed by Conrad Schneiker and is currently maintained
by Jonathan Conway. Figure 2.5 shows a sample specRuby session and the
layout of a simple Tk user interface, while Figure 2.6 shows the result when
you test this GUI.
There is currently no home page for specRuby, but it is listed in the RAA
and you should check there for the latest version and download site. Note that
since SpecTcl is a Tcl/Tk application, you will need a working Tcl/Tk installa-
tion on your system.
www.syngress.com
Figure 2.5 A Sample SpecTcl Session
183RubyC02.qxd 1/7/02 4:00 PM Page 67

68 Chapter 2 • GUI Toolkits for Ruby
Obtaining Tk Extensions: Tix and BLT
In addition to Tk’s core widgets, there are many third-party widgets (and widget
collections) that are compatible with Tk.While the level of effort required to
obtain these Tk extensions can be intimidating, the end result is often a much
more powerful toolkit than the one provided by Tk alone.
One of the most popular Tk-compatible extensions is Tix, the Tk Interface
Extension (http://tix.sourceforge.net).Tix offers a hierarchical list (a.k.a.“tree”
list) widget, a notebook widget and a combo-box, as well as others.You can
always download the source code for Tix from the Tix home page, but be aware
that in order to build Tix from its source code you also need to have downloaded
and built Tcl/Tk from its source code, as the Tix build process uses these source
code directories directly.
Another popular Tk extension is BLT (www.tcltk.com/blt). Like Tix, BLT
adds a variety of new functionality, most notably for creating charts and graphs.
You can download the source code or precompiled binaries for Windows from the
BLT home page, and unlike Tix, the build procedure for BLT is the standard con-
figure,make and make install cycle common to many free software programs.
To use Tix or BLT with Ruby/Tk, you’ll also need Hidetoshi Nagai’s TclTk-
ext package; you should be able to find a download link for the latest version in
the RAA. Note that as of this writing, all of the documents for this extension are
in Japanese.
Using the GTK+ Toolkit
GTK+ is a cross-platform GUI originally developed for use with the GNU
Image Manipulation Program (GIMP) toolkit (available at www.gimp.org).
www.syngress.com
Figure 2.6 Resulting Ruby/Tk GUI Generated by SpecTcl
183RubyC02.qxd 1/7/02 4:00 PM Page 68

GUI Toolkits for Ruby • Chapter 2 69
Although GTK+ is primarily designed for the X Window system, it has also been
ported to Microsoft Windows. As a part of the GNU project, it is used for a lot
of popular free software and is a core component of the GNU project’s GNU
Network Object Model Environment (GNOME) desktop environment.
Ruby/GTK is a Ruby extension module written in C that provides an inter-
face from Ruby to GTK+.This extension was originally developed by Yukihiro
Matsumoto (the author of Ruby) and is currently maintained by Hiroshi Igarashi.
Obtaining Ruby/GTK
The home page for Ruby/GTK is www.ruby-lang.org/gtk. If you’re using the
standard Ruby for Windows installation from the Pragmatic Programmers’ site,
there’s a good chance that it includes precompiled binaries for Ruby/GTK. For
other platforms (including Unix and Linux) you’ll need to build Ruby/GTK
from the source code.
In order to build Ruby/GTK from the source code, you will need a working
installation of GTK+ itself. Most Linux distributions include a GTK+ develop-
ment package as an installation option; in Red Hat Linux, for example, this is the
gtk+-devel package. If your operating system doesn’t already have a working
GTK+ installation, the GTK+ home page (www.gtk.org) has plenty of informa-
tion about how to download the source code and build it yourself.You can also
download the sources for Ruby/GTK from its home page.
Once you’ve established a working GTK+ installation, you can download
the Ruby/GTK sources from the Ruby/GTK home page.As of this writing,
the latest version of Ruby/GTK is 0.25.The source code is distributed as a
gzipped tar file named ruby-gtk-0.25.tar.gz and the build procedure is similar to
that for other Ruby extensions.To extract this archive’s contents on a Unix
system, type:
gzip –dc ruby-gtk-0.25.tar.gz | tar xf -
These commands create a new directory named gtk-0.25 (not ruby-gtk-0.25)
containing the source code.To configure the build, change to the gtk-0.25 direc-
tory and type:
ruby extconf.rb
This command automatically generates the Makefile for this extension.To
start compiling Ruby/GTK, just type:
make
www.syngress.com
183RubyC02.qxd 1/7/02 4:00 PM Page 69

70 Chapter 2 • GUI Toolkits for Ruby
The Ruby/GTK source code distribution includes several example programs
that you can use to verify that it’s working properly. Once you’re satisfied that it’s
working properly, you can install it by typing:
make install
Ruby/GTK Basics
Although the GTK+ library is written in C, its design is very object-oriented,
and the Ruby/GTK extension reflects its class hierarchy. If you’re already familiar
with the GTK+ C API and its widget names (GtkLabel, GtkButton, etc.) then
the transition to programming with Ruby/GTK should be very smooth. GTK+
widget names of the form GtkWidgetName become Gtk::WidgetName in
Ruby/GTK; that is, the Ruby module name is Gtk and the widget’s class name is
WidgetName. Similarly, the Ruby/GTK instance methods are similar to the corre-
sponding C function names; the C function gtk_label_set_text() becomes the
Gtk::Label instance method set_text.
The minimal Ruby/GTK program will create a main window with one or
more child windows, set up one more signal handlers and then start the main
GTK+ event loop.Without further ado, we present the Ruby/GTK version of
“Hello,World”:
require 'gtk'
window = Gtk::Window::new
button = Gtk::Button::new("Hello, World!")
button.signal_connect(Gtk::Button::SIGNAL_CLICKED) {
puts "Goodbye, World!"
exit
}
window.add(button)
button.show
window.show
Gtk::main
The program begins by requiring the feature associated with Ruby/GTK; its
name is “gtk”. Next we create two new widgets: a GtkWindow widget, which by
default is a top-level “main” window; and a GtkButton widget with the label
www.syngress.com
183RubyC02.qxd 1/7/02 4:00 PM Page 70

GUI Toolkits for Ruby • Chapter 2 71
“Goodbye,World!”. Note that so far, there’s no connection between these two
widgets; with Ruby/GTK, you compose complex user interfaces by explicitly
adding child widgets to parent widgets.
The next line demonstrates one kind of event handler used by Ruby/GTK.
The code inside the code block isn’t executed immediately; instead, Ruby/GTK
associates this code block with the button’s Gtk::Button::SIGNAL_CLICKED
signal which may be generated later, once the program’s running.We’ll get into
this in more depth in the next section, but for the time being take it on faith that
when this GtkButton widget is clicked, the program’s response will be to print
the string “Goodbye,World!” to the standard output and then exit.
The next two lines are critical, and they’re somewhat unique to Ruby/GTK
as far as the other toolkits are concerned. By default, newly-created Ruby/GTK
widgets are not visible and you must explicitly make them visible by calling their
show method.This step is easily forgotten by new Ruby/GTK programmers.
The last line of the program starts the GTK+ main event loop.At this point,
GTK+ will wait for your inputs, paying special attention to those signals (like the
button click) for which you’ve defined signal handler methods.
Now let’s take a more detailed look at some of these basics and see how they
work in real programs.
Programming Signals and Signal Handlers
Ruby/GTK’s event model is based on the idea of user interface objects (widgets)
emitting signals when something interesting happens. Some of these signals are
low-level events generated by the window system, and indicate general informa-
tion such as “the mouse moved” or “the left mouse button was clicked”. Other
signals are synthesized by GTK+ itself and provide more specific information,
such as “a list item was selected”. A widget can emit any number of signals, and
every signal in Ruby/GTK has a name that indicates its significance. For
example, a GtkButton widget emits a “clicked” signal when the button is clicked.
Because GTK+ is an object-oriented toolkit, a given widget can emit not only
its widget-specific signals, but also the signals emitted by all of its ancestor classes.
To associate a signal from a widget with some specific action, you can call the
widget’s signal_connect method.This method takes a string argument indicating the
signal name (like “clicked”) and a code block that will be evaluated in the caller’s
context. For example, if your Ruby/GTK-based spreadsheet program should save
the spreadsheet’s contents whenever the Save button is clicked, you might
include the lines:
www.syngress.com
183RubyC02.qxd 1/7/02 4:00 PM Page 71

72 Chapter 2 • GUI Toolkits for Ruby
saveButton.signal_connect('clicked') {
saveSpreadsheetContents if contentsModified?
}
Each class defines symbolic constants for the names of the signals it can emit,
and these can be used instead of the literal strings. For example, we could have
written the above code snippet as:
saveButton.signal_connect(Gtk::Button::SIGNAL_CLICKED) {
saveSpreadsheetContents if contentsModified?
}
The advantage of using the symbolic constants like
Gtk::Button::SIGNAL_CLICKED instead of literal strings like clicked is that if
you make a typographical error, you’re likely to discover the mistake much more
quickly when you try to run your program. If you attempt to reference a con-
stant and misspell its name, Ruby will raise a NameError exception; if you use a
literal string, Ruby has no way to verify whether it is a valid signal name before
passing it on to signal_connect.
As an application developer, it is up to you to decide which widgets’ signals
are of interest, and how your program should react when those signals are
emitted.Also note that if it makes sense for your application, you can connect the
same signal (from the same widget) to more than one signal handler code block.
In this case, the signal handlers are executed in the order they were originally
connected.
Once we start developing the sample application, you’ll see a few more
examples of how to connect signals to code blocks. For a complete listing of the
signals emitted by different Ruby/GTK widgets, refer to the online API reference
documentation at the Ruby/GTK home page (www.ruby-lang.org/gtk).
Working with Ruby/GTK’s Layout Managers
Like Ruby/Tk, Ruby/GTK offers a variety of flexible layout managers. Each of
the three layout managers we’ll look at is a container widget to which you add
one or more child widgets; the container itself is invisible for all practical pur-
poses.The first two layout managers, the horizontal packing box (Gtk::HBox) and
vertical packing box (Gtk::VBox) arrange their child widgets in a row or column,
respectively.The third, Gtk::Table, arranges its child widgets in a tabular format
like Ruby/Tk’s grid layout.
www.syngress.com
183RubyC02.qxd 1/7/02 4:00 PM Page 72

GUI Toolkits for Ruby • Chapter 2 73
The horizontal packing box (Gtk::HBox) arranges its children horizontally.All
of the child widgets will have the same height, but their widths can vary
according to the packing box parameters. Conversely, Gtk::VBox arranges its chil-
dren vertically, and all of them will have the same width. Since the two packing
boxes are so similar, we’ll focus on Gtk::HBox.
The new method for Gtk::HBox takes two arguments:
hBox = Gtk::HBox.new(homogeneous=false, spacing=0)
The first argument is a Boolean value indicating whether the child widgets’
sizes are ”homogeneous” or not. If this argument is true (homogeneous), this
simply means that the box will divide its width equally among its child widgets; if
false (non-homogeneous), each child widget is allocated as much space as it
needs, but no more.The second argument is the spacing (in pixels) placed
between child widgets.
You add child widgets to a packing box using either its pack_start or pack_end
instance methods.You may recall that in Ruby/Tk we always passed the parent
widget in to as the first argument of the new function for its child widgets.
Ruby/GTK takes a different approach: Child widgets are created and then added
(or packed) into container widgets.To pack child widgets into a Gtk::HBox or
Gtk::VBox, you can call its pack_start method:
hBox.pack_start(child, expand=true, fill=true, padding=0)
The first argument to pack_start is just a reference to the child widget you
want to add to this packing box; the last three arguments require some additional
discussion.The second argument (expand) is an instruction to the packing box
that this widget is willing to take extra space if some becomes available (e.g. if the
user resizes the window to make it wider).We’ve already commented on the dif-
ference between homogeneous and non-homogeneous packing boxes; homoge-
neous packing boxes divide their space evenly among the child widgets. Another
way to think of this is that each child widget will be allocated as much space as
the widest child widget.A side effect of this setting is that the child widgets that
would have preferred a narrower space are now centered in their assigned spot in
the packing box. By passing true for the fill argument of pack_start, you can
instruct that child widget to grow and fill its assigned space.The last argument to
pack_start simply indicates the padding (in pixels) you’d like to place around this
child widget; this is in addition to the spacing already specified for the packing
box in Gtk::HBox.new. If this child widget is either the first or last widget in the
www.syngress.com
183RubyC02.qxd 1/7/02 4:00 PM Page 73

74 Chapter 2 • GUI Toolkits for Ruby
packing box, this is also the amount of space that will appear between the edge
of the packing box and this child.
Ruby/GTK also provides the Gtk::Table layout manager for arranging wid-
gets in rows and columns.The new method for Gtk::Table takes three arguments:
table = Gtk::Table.new(numRows, numColumns, homogeneous=false)
The first two arguments are the number of rows and columns for the table,
and the homogeneous argument has the same meaning as it did for Gtk::HBox and
Gtk::VBox.To specify the spacing between rows and columns, use one of the four
instance methods:
table.set_row_spacing(row, spacing)
table.set_row_spacings(spacing)
table.set_column_spacing(column, spacing)
table.set_column_spacings(spacing)
The set_row_spacings and set_column_spacings methods assign a global spacing
amount (in pixels) that applies to all table rows (or columns). If you need more
fine-grained control, you can use set_row_spacing or set_column_spacing to assign
the space that should appear below a particular row (or to the right of a partic-
ular column).The spacing amounts specified by calls to set_row_spacing and
set_column_spacing override the global spacing amounts specified by set_row_spac-
ings and set_column_spacings.
To add child widgets to a Gtk::Table, use its attach method:
table.attach(child, left, right, top, bottom,
xopts=GTK_EXPAND|GTK_FILL, yopts=GTK_EXPAND|GTK_FILL,
xpad=0, ypad=0)
This appears more complex than the argument lists for pack_start and
pack_end (and it is) but observe that the last four arguments have default values.
The first argument is again a reference to the child widget to be added.The next
four arguments (left,right,top and bottom) are integers that indicate where in the
table to place this child and how many rows and columns it spans.To understand
how these arguments are used, it’s better to think of the bounding lines of the
table and its cells instead of the table cells themselves. For example, consider a
table with 5 columns and 3 rows (see Figure 2.7).To draw this table, you’d need
to draw 6 vertical lines (one on the left and right side of each of the 5 columns)
and 4 horizontal lines (one on the top and bottom of the each of the 3 rows).
www.syngress.com
183RubyC02.qxd 1/7/02 4:00 PM Page 74

GUI Toolkits for Ruby • Chapter 2 75
With this picture in mind, the meanings of the left,right,top and bottom argu-
ments of Gtk::Table.new are as follows:
■Left indicates which vertical line of the table the left edge of this child
widget is attached to.
■Right indicates which vertical line of the table the right edge of this
child widget is attached to.
■Top indicates which horizontal line of the table the top edge of this
child widget is attached to.
■Bottom indicates which horizontal line of the table the bottom edge of
this child widget is attached to.
For widgets that occupy only one table cell, the value for right will always be
one more than the value for left and the value for bottom will always be one more
than the value for top. But for a widget that occupies the fourth and fifth
columns of the second and third rows of a table, you’d use something like:
table.attach(child, 3, 5, 1, 3)
www.syngress.com
Figure 2.7 Edge Numbering for Sample GtkTable
Vertical
Edge 0
Vertical
Edge 1
Vertical
Edge 2
Vertical
Edge 3 Vertical
Edge 4
Vertical
Edge 5
Horizontal
Edge 0
Horizontal
Edge 1
Horizontal
Edge 2
Horizontal
Edge 3
Result for
table.attach(child, 3, 5, 1, 3)
183RubyC02.qxd 1/7/02 4:00 PM Page 75

76 Chapter 2 • GUI Toolkits for Ruby
If your user interface layout looks incorrect, double-check the values you’re
passing to attach. Ruby/GTK will raise an exception if the arguments to attach
would create a cell with zero width or height (i.e., if left is less than or equal to
right, or top is less than or equal to bottom). But in many cases, Ruby/GTK will
not raise an exception if the values for left,right,top or bottom are incorrect, even
if they cause table cells to overlap one another.
The xopts and yopts arguments of Gtk::Table#attach specify how the table
should allocate any additional space to this child widget.Valid values for xopts and
yopts are GTK_EXPAND,GTK_FILL or GTK_EXPAND|GTK_FILL (both
expand and fill).The meanings of these flags are the same as the corresponding
parameters for the pack_start and pack_end methods for packing boxes.The final
two arguments for Gtk::Table#attach specify the horizontal and vertical padding
(in pixels) to apply around the outside of this widget, in addition to the spacing
settings previously applied to the table in Gtk::Table.new.
Ruby/GTK Sample Application
Figure 2.8 shows the source code for the Ruby/GTK version of our sample
application.The source code for this application appears at www.syngress.com/
solutions, under the file name gtk-xmlviewer.rb.
www.syngress.com
Figure 2.8 Ruby/GTK Source Code for Sample Application (gtk-xmlviewer.rb)
require 'gtk'
require 'nqxml/treeparser'
class XMLViewer < Gtk::Window
def initialize
super(Gtk::WINDOW_TOPLEVEL)
set_title('Ruby/Gtk XML Viewer')
set_usize(600, 400)
menubar = createMenubar
@treeList = Gtk::Tree.new
@treeList.show
Continued
183RubyC02.qxd 1/7/02 4:00 PM Page 76

GUI Toolkits for Ruby • Chapter 2 77
www.syngress.com
Figure 2.8 Continued
@columnList = Gtk::CList.new(['Attribute', 'Value'])
@columnList.show
bottom = Gtk::HBox.new(false, 0)
bottom.pack_start(@treeList, true, true, 0)
bottom.pack_start(@columnList, true, true, 0)
bottom.show
contents = Gtk::VBox.new(false, 0)
contents.pack_start(menubar, false, false, 0)
contents.pack_start(bottom, true, true, 0)
add(contents)
contents.show
signal_connect(Gtk::Widget::SIGNAL_DELETE_EVENT) { exit }
end
def createMenubar
menubar = Gtk::MenuBar.new
fileMenuItem = Gtk::MenuItem.new("File")
fileMenu = Gtk::Menu.new
openItem = Gtk::MenuItem.new("Open...")
openItem.signal_connect(Gtk::MenuItem::SIGNAL_ACTIVATE) {
openDocument
}
openItem.show
fileMenu.add(openItem)
quitItem = Gtk::MenuItem.new("Quit")
quitItem.signal_connect(Gtk::MenuItem::SIGNAL_ACTIVATE) { exit }
Continued
183RubyC02.qxd 1/7/02 4:00 PM Page 77

78 Chapter 2 • GUI Toolkits for Ruby
www.syngress.com
Figure 2.8 Continued
quitItem.show
fileMenu.add(quitItem)
fileMenuItem.set_submenu(fileMenu)
fileMenuItem.show
helpMenuItem = Gtk::MenuItem.new("Help")
helpMenu = Gtk::Menu.new
aboutItem = Gtk::MenuItem.new("About...")
aboutItem.signal_connect(Gtk::MenuItem::SIGNAL_ACTIVATE) {
showMessageBox('About XMLViewer', 'Ruby/GTK Sample Application')
}
aboutItem.show
helpMenu.add(aboutItem)
helpMenuItem.set_submenu(helpMenu)
helpMenuItem.show
menubar.append(fileMenuItem)
menubar.append(helpMenuItem)
menubar.show
menubar
end
def selectItem(entity)
@columnList.clear
if entity.kind_of?(NQXML::NamedAttributes)
keys = entity.attrs.keys.sort
keys.each { |key|
@columnList.append([key, entity.attrs[key]])
}
Continued
183RubyC02.qxd 1/7/02 4:00 PM Page 78

GUI Toolkits for Ruby • Chapter 2 79
www.syngress.com
Figure 2.8 Continued
end
end
def populateTreeList(docRootNode, treeRoot)
entity = docRootNode.entity
if entity.instance_of?(NQXML::Tag)
treeItem = Gtk::TreeItem.new(entity.to_s)
treeRoot.append(treeItem)
if docRootNode.children.length > 0
subTree = Gtk::Tree.new
treeItem.set_subtree(subTree)
docRootNode.children.each do |node|
populateTreeList(node, subTree)
end
end
treeItem.signal_connect(Gtk::Item::SIGNAL_SELECT) {
selectItem(entity)
}
treeItem.show
elsif entity.instance_of?(NQXML::Text) &&
entity.to_s.strip.length != 0
treeItem = Gtk::TreeItem.new(entity.to_s)
treeRoot.append(treeItem)
treeItem.signal_connect(Gtk::Item::SIGNAL_SELECT) {
selectItem(entity)
}
treeItem.show
end
end
def loadDocument(filename)
@document = nil
Continued
183RubyC02.qxd 1/7/02 4:00 PM Page 79

80 Chapter 2 • GUI Toolkits for Ruby
www.syngress.com
Figure 2.8 Continued
begin
@document = NQXML::TreeParser.new(File.new(filename)).document
rescue NQXML::ParserError => ex
showMessageBox("Error", "Couldn't parse XML document")
end
if @document
@treeList.children.each { |child|
@treeList.remove_child(child)
}
populateTreeList(@document.rootNode, @treeList)
end
end
def openDocument
dlg = Gtk::FileSelection.new('Open File')
dlg.ok_button.signal_connect(Gtk::Button::SIGNAL_CLICKED) {
dlg.hide
filename = dlg.get_filename
loadDocument(filename) if filename
}
dlg.cancel_button.signal_connect(Gtk::Button::SIGNAL_CLICKED) {
dlg.hide
}
dlg.show
end
def showMessageBox(title, msg)
msgBox = Gtk::Dialog.new
msgLabel = Gtk::Label.new(msg)
msgLabel.show
Continued
183RubyC02.qxd 1/7/02 4:00 PM Page 80

GUI Toolkits for Ruby • Chapter 2 81
Since most of the code is taken up by the XMLViewer class definitions, we’ll
start by examining the initialize method for that class.
XMLViewer is a subclass of Gtk::Window and so the first step is to initialize
the base class by calling super. Note that the single argument to Gtk::Window.new
is an optional integer indicating the window type; the default is
Gtk::WINDOW_TOPLEVEL, but other valid values are
Gtk::WINDOW_POPUP and Gtk::WINDOW_DIALOG.The next two lines set
the window title and its initial width and height.
The next task is to create the application’s menu bar and pulldown menus;
we’ve purposely put this into a separate method createMenubar to keep things
clear. Creating menus in Ruby/GTK requires creating a Gtk::MenuBar widget
and then adding one or more Gtk::MenuItem objects to it.A menu item can rep-
resent an actual menu command or it can be used to display a sub-menu of other
menu items contained in a Gtk::Menu widget.This excerpt from the
createMenubar method illustrates the key points:
www.syngress.com
Figure 2.8 Continued
okButton = Gtk::Button.new('OK')
okButton.show
okButton.signal_connect(Gtk::Button::SIGNAL_CLICKED) { msgBox.hide }
msgBox.set_usize(250, 100)
msgBox.vbox.pack_start(msgLabel)
msgBox.action_area.pack_start(okButton)
msgBox.set_title(title)
msgBox.show
end
end
if $0 == __FILE__
mainWindow = XMLViewer.new
mainWindow.show
Gtk::main
end
183RubyC02.qxd 1/7/02 4:00 PM Page 81

82 Chapter 2 • GUI Toolkits for Ruby
fileMenuItem = Gtk::MenuItem.new("File")
fileMenu = Gtk::Menu.new
openItem = Gtk::MenuItem.new("Open...")
openItem.signal_connect('activate') { openDocument }
openItem.show
fileMenu.add(openItem)
fileMenuItem.set_submenu(fileMenu)
fileMenuItem.show
menubar.append(fileMenuItem)
The File menu item (fileMenuItem) is a Gtk::MenuItem instance whose purpose is
to display a sub-menu (fileMenu) containing other menu items.We call the set_sub-
menu method to create this association between fileMenuItem and fileMenu. In con-
trast, the Open… menu item (openItem) represents a command for the application;
we connect its activate signal to the openDocument method, which we’ll see later.
Returning to the initialize method, we create and show the tree list widget:
@treeList = Gtk::Tree.new
@treeList.show
As well as the columned list widget:
@columnList = Gtk::CList.new(['Attribute', 'Value'])
@columnList.show
Here, we’re using a constructor for Gtk::CList that specifies an array of
column titles; an alternate constructor allows you to simply specify the number of
columns and then set their titles later using the set_column_title method.
The entire layout of the main window widgets is handled using a horizontal
packing box nested in a vertical packing box.The horizontal packing box (named
bottom) holds the Gtk::Tree widget on the left and the Gtk::CList on the right.
The vertical packing box (named contents) holds the menu bar along its top edge,
and the rest of the space is taken up by the horizontal packing box. Note that the
arguments to pack_start for the menu bar direct the vertical packing box to not
stretch the menu bar vertically, even if there is extra space to do so:
contents.pack_start(menubar, false, false, 0)
www.syngress.com
183RubyC02.qxd 1/7/02 4:00 PM Page 82

GUI Toolkits for Ruby • Chapter 2 83
The last line of initialize sets up a signal handler for the main window itself.
When the main window is “deleted” (usually, by the user clicking the Xbutton
in the upper right-hand corner of the window), GTK+ will fire off the
Gtk::Widget::SIGNAL_DELETE_EVENT (a symbolic constant for the
delete_event).We’d like to catch this event and exit the program at that time.
Digging down to the next level of the application, we need to look at the
signal handlers for the menu commands; these were assigned when we created
the menu items in the createMenubar method.We can quickly see that the Quit
menu command simply exits the application:
quitItem = Gtk::MenuItem.new("Quit")
quitItem.signal_connect(Gtk::MenuItem::SIGNAL_ACTIVATE) { exit }
The About… menu command displays a little dialog box containing a mes-
sage about the application:
aboutItem = Gtk::MenuItem.new("About...")
aboutItem.signal_connect(Gtk::MenuItem::SIGNAL_ACTIVATE) {
showMessageBox('About XMLViewer', 'Ruby/GTK Sample Application')
}
Here, showMessageBox is a helper method for the XMLViewer class that dis-
plays a dialog with a specified title and message string, plus an OK button to dis-
miss the dialog:
def showMessageBox(title, msg)
msgBox = Gtk::Dialog.new
msgLabel = Gtk::Label.new(msg)
msgLabel.show
okButton = Gtk::Button.new('OK')
okButton.show
okButton.signal_connect(Gtk::Button::SIGNAL_CLICKED) { msgBox.hide }
msgBox.set_usize(250, 100)
msgBox.vbox.pack_start(msgLabel)
msgBox.action_area.pack_start(okButton)
msgBox.set_title(title)
msgBox.show
end
www.syngress.com
183RubyC02.qxd 1/7/02 4:00 PM Page 83

84 Chapter 2 • GUI Toolkits for Ruby
A more general-purpose method would give you more control over the mes-
sage box’s size, contents and layout, but this simple approach serves our purposes.
As an aside, the GNOME library (built on top of GTK+) provides much more
powerful and easy-to-use classes for putting message boxes and About boxes into
your applications.You should be able to find information about Ruby bindings
for GNOME at the Ruby/GTK home page.
The menu command that really gets things going, however, is the Open…
command, which invokes XMLViewer’s openDocument method:
def openDocument
dlg = Gtk::FileSelection.new('Open File')
dlg.ok_button.signal_connect(Gtk::Button::SIGNAL_CLICKED) {
dlg.hide
filename = dlg.get_filename
loadDocument(filename) if filename
}
dlg.cancel_button.signal_connect(Gtk::Button::SIGNAL_CLICKED) {
dlg.hide
}
dlg.show
end
The new method for Gtk::FileSelection takes a single string argument indi-
cating the title for the file-selection dialog box.We’re interested in catching the
“clicked” signals for both the OK and Cancel buttons on this dialog, and we can
use Gtk::FileSelection’s ok_button and cancel_button accessor methods to set up those
signal handlers. In particular, we’d like to retrieve the file name selected by the
user (by calling get_filename) and then load that XML document by calling
XMLViewer’s loadDocument method:
def loadDocument(filename)
@document = nil
begin
@document = NQXML::TreeParser.new(File.new(filename)).document
rescue NQXML::ParserError => ex
showMessageBox("Error", "Couldn't parse XML document")
end
if @document
www.syngress.com
183RubyC02.qxd 1/7/02 4:00 PM Page 84

GUI Toolkits for Ruby • Chapter 2 85
@treeList.children.each { |child|
@treeList.remove_child(child)
}
populateTreeList(@document.rootNode, @treeList)
end
end
If the XML parser raises an exception while creating the NQXML::Document
object, we’ll again use our showMessageBox helper method to alert the user to this
error.Assuming the document loads successfully, we’ll clear out the tree’s previous
contents and then refill it by calling populateTreeList.To clear the tree list’s contents,
we make a call to the children method (inherited from Gtk::Container) which returns
an array containing the top-level tree items.Then we iterate over the child items and
remove each of them in turn by calling the tree list’s remove_child method.
The populateTreeList method calls itself recursively to build up the tree con-
tents.The process of populating a Gtk::Tree widget is similar to the process for
building pulldown menus that we saw in createMenubar.You can add Gtk::TreeItem
objects to a Gtk::Tree and attach signal handlers to those items to receive notifica-
tion when they are selected or deselected, expanded or collapsed, etc. But just as
Gtk::MenuItem objects can have sub-menus associated with them (for cascading
pulldown menus), Gtk::TreeItem objects can have sub-trees (that is, other Gtk::Tree
objects) associated with them. In this excerpt from the populateTreeList method,
we use this construct to model the XML document’s nested nodes:
treeItem = Gtk::TreeItem.new(entity.to_s)
treeRoot.append(treeItem)
if docRootNode.children.length > 0
subTree = Gtk::Tree.new
treeItem.set_subtree(subTree)
docRootNode.children.each do |node|
populateTreeList(node, subTree)
end
end
Here, treeItem is a child of the current treeRoot (which is itself a Gtk::Tree
instance). If we see that this XML entity has one or more child entities, we spin
off a new Gtk::Tree instance (named subTree) and make this the sub-tree of
treeItem by calling its set_subtree method.
www.syngress.com
183RubyC02.qxd 1/7/02 4:00 PM Page 85

86 Chapter 2 • GUI Toolkits for Ruby
Whenever a tree item is selected, we want to update the attributes list (our
Gtk::CList object) on the right-hand side of the main window.To do this, we
attach a handler to each of the tree items that handles the
Gtk::Item::SIGNAL_SELECT signal by invoking our selectItem method:
def selectItem(entity)
@columnList.clear
if entity.kind_of?(NQXML::NamedAttributes)
keys = entity.attrs.keys.sort
keys.each { |key|
@columnList.append([key, entity.attrs[key]])
}
end
end
This handler begins by clearing out the old list contents and then, if there are
some attributes associated with the currently-selected XML entity, it appends list
items for each of them.
Figure 2.9 shows the Ruby/GTK version of our sample application, running
under the X Window system on Linux.
www.syngress.com
Figure 2.9 Ruby/GTK Version of the Sample Application
183RubyC02.qxd 1/7/02 4:00 PM Page 86

GUI Toolkits for Ruby • Chapter 2 87
Using the Glade GUI Builder
Glade (http://glade.gnome.org) is a GUI building tool for GTK+ and GNOME.
Its authors are Damon Chaplin and Martijn van Beers.You can obtain the source
code for Glade from the Glade home page, and it comes as a standard installation
option for many popular Linux distributions.This section does not cover the use
of Glade in general, but good documentation is freely available.A plain text ver-
sion of the Glade FAQ List is at http://glade.gnome.org/FAQ and the GNOME
version of Glade includes on-line copies of the Glade FAQ List, Quick-Start
Guide and Manual.
Glade’s project file (the .glade file) is an XML file that includes all of the
information about the user interface. James Henstridge developed a supporting
library, libglade, that allows you to read Glade project files and dynamically create
your user interface at run-time.This is significant because it allows you to use
Glade to design user interfaces for a number of programming languages that
Glade doesn’t support directly.The home page for libglade is www.daa.com.au/
~james/gnome, but like Glade itself, libglade comes as a standard installation
option with most Linux distributions.
Ruby/LibGlade is an extension module, developed by Avi Bryant, that pro-
vides a wrapper for libglade.There is currently no home page for Ruby/LibGlade,
but it is listed in the RAA and you should check there for the latest version and
download site.The Ruby/LibGlade source code distribution includes installation
and usage instructions, as well as a sample project file for testing purposes.
Ruby/LibGlade defines a single class, GladeXML.The new method for
GladeXML takes the file name of the Glade project file and, optionally, the name
of the root widget for the section of the user interface in which you’re interested.
If you want to load the entire user interface, you can omit the second argument.
Finally, GladeXML.new also expects an iterator-style code block, which it uses to
associate signal handler names with Ruby procedures or methods.While libglade
starts loading information about your user interface from the Glade project file, it
calls this iterator code block for each handler name that it encounters.Your code
block should return either a Ruby Proc or Method object, which provides the
code used to handle that GTK+ signal. For example, a version that returns Proc
objects would look like this:
GladeXML.new('myproject.glade') { |handler_name|
case handler_name
when "on_button1_clicked"
www.syngress.com
183RubyC02.qxd 1/7/02 4:00 PM Page 87

88 Chapter 2 • GUI Toolkits for Ruby
proc { puts "Goodbye, World!"; exit }
when "on_button2_clicked"
proc { puts "button2 was clicked" }
end
}
If you’ve structured your code such that the Ruby methods that handle sig-
nals have the same names as the handler names you assigned in Glade, an even
cleaner approach would be to use Ruby’s method Kernel#method to automatically
return references to those handler methods:
def on_button1_clicked
puts "Goodbye, World!"
exit
end
def on_button2_clicked
puts "button2 was clicked"
end
GladeXML.new('myproject.glade') { |handler_name|
method(handler_name)
}
The GladeXML class provides two other instance methods, getWidget and
getWidgetByLongName. Both methods return a reference to a specific widget in
the user interface, and both take a single string argument as input.The getWidget
method takes the short name for a widget (for example,“button1”) while
getWidgetByLongName takes the full widget path name (for example,
“mainWindow.hbox.button1”).
Figure 2.10 shows a sample Glade session, with our original Hello,World!
user interface consisting of a top-level window and a button as the child of that
window. Of particular importance is the Properties window for the button
widget.As shown in the Figure, we’ve added a signal handler for the button’s
clicked signal, and have named that signal handler “on_button1_clicked”.The
names of the signal handlers that you assign in Glade are significant for con-
necting the user interface to Ruby code using Ruby/LibGlade.
www.syngress.com
183RubyC02.qxd 1/7/02 4:00 PM Page 88
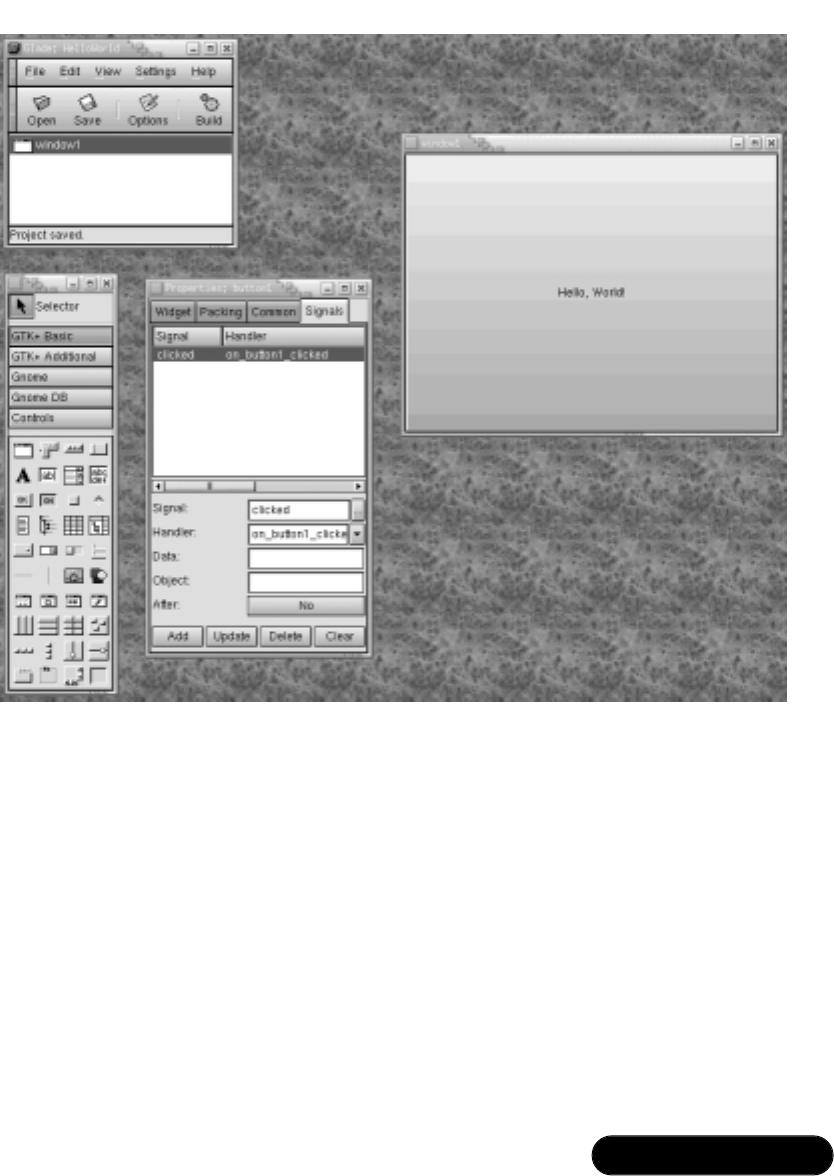
GUI Toolkits for Ruby • Chapter 2 89
After saving this Glade project to a file (say, helloworld.glade) we can write a
short Ruby program that uses Ruby/LibGlade to display this user interface:
require 'gtk'
require 'lglade'
def on_button1_clicked
puts "Goodbye, World!"
exit
end
www.syngress.com
Figure 2.10 A Sample Glade Session
183RubyC02.qxd 1/7/02 4:00 PM Page 89

90 Chapter 2 • GUI Toolkits for Ruby
GladeXML.new('helloworld.glade') { |handler_name|
method(handler_name)
}
Gtk::main
The first two lines of this program import the Ruby/GTK and
Ruby/LibGlade extensions, respectively (where “lglade” is the feature name for
Ruby/LibGlade).The next section of the program defines the on_button1_clicked
method which we’ll use to handle the button’s clicked signal.The new code for
Ruby/LibGlade comes next, when we create a GladeXML object for the hel-
loworld.glade project and associate the handler name,“on_button1_clicked”, with
the appropriate handler method, on_button1_clicked. Finally, as for all Ruby/GTK
programs, the last line in the program kicks off the GTK+ main event loop.
Figure 2.11 shows the results of running this program.
Using the FOX Toolkit
Free Objects for X (FOX ) is a cross-platform GUI toolkit developed by Jeroen
van der Zijp. Compared to Tk and GTK+, FOX is the new kid on the block, but
it is quickly gaining recognition among software developers looking for a cross-
platform GUI toolkit.
FXRuby is the Ruby extension module that provides an interface to FOX
from Ruby programs. It was developed by Lyle Johnson and its home page is at
http://fxruby.sourceforge.net.
Obtaining FOX and FXRuby
A prerequisite for programming with FXRuby is to have a working FOX instal-
lation. If you’re using the standard Ruby installation for Windows from the
Pragmatic Programmers’ site, you can download a compatible precompiled binary
distribution of FXRuby from the FXRuby home page. Further, the most recent
versions of the Windows installer for Ruby even include FXRuby as a standard
www.syngress.com
Figure 2.11 Resulting Ruby/GTK GUI Generated by Glade
183RubyC02.qxd 1/7/02 4:00 PM Page 90

GUI Toolkits for Ruby • Chapter 2 91
installation option. Regardless of which source you use, the shared library in this
distribution already incorporates the FOX library, so after downloading and
installing the distribution you’re ready to get started;There’s no need to down-
load and build FOX separately.
If you’re running some other version of Ruby (including other non-
Windows operating systems), you will most likely have some more work to do.
Unlike Tk and GTK+, none of the Linux distributions include FOX as a stan-
dard installation package, and as of this writing, precompiled binaries for FOX
aren’t available at all; so you’ll need to download, build and install FOX on your
system.The FOX source code can be downloaded from the FOX home page
(www.cfdrc.com/FOX/fox.html) and includes comprehensive build and installa-
tion instructions. For Linux and other Unix operating systems, the process is the
standard configure,make and make install.
Once you have a working FOX installation, you can download the FXRuby
source code from the FXRuby home page, and build and install that extension
module.The build process for FXRuby begins by configuring the build by typing:
ruby setup.rb config
Then launch the build by typing:
ruby setup.rb setup
Once the build is completed, you can install FXRuby by typing:
ruby setup.rb install
For more detailed instructions about the build and installation options, check
the FXRuby documentation.
FXRuby Basics
FXRuby’s API follows FOX’s C++ API very closely and, for the most part, you
should be able to use the standard FOX class documentation to learn about the
FXRuby class hierarchy and interfaces. All of the FXRuby classes, methods and
constants live in a single Ruby module named Fox, and most of FXRuby is
implemented in a C++ extension module whose feature name is “fox”.The min-
imal FXRuby program would look something like this:
require 'fox'
include Fox
www.syngress.com
183RubyC02.qxd 1/7/02 4:00 PM Page 91

92 Chapter 2 • GUI Toolkits for Ruby
application = FXApp.new("Hello", "FoxTest")
application.init(ARGV)
main = FXMainWindow.new(application, "Hello", nil, nil, DECOR_ALL)
FXButton.new(main, "&Hello, World!", nil, application, FXApp::ID_QUIT)
application.create()
main.show(PLACEMENT_SCREEN)
application.run()
This program loads the Fox module by requiring the fox feature. Despite the
fact that all FXRuby classes live in the Fox module’s namespace, the class names
begin with the FX prefix to avoid clashes with other class names. It’s for this
reason that most FXRuby applications can safely mix the Fox module’s contents
directly into the global namespace (using the include Fox statement).
The program begins by creating an FXApp object, with the application name
“Hello” and the vendor name “FoxTest”. Of the toolkits that we’ll examine in
this chapter, FOX is the only one that requires you to explicitly create and refer
to an application object, which is used as a kind of central repository for global
application resources (like default application fonts, colors and so on). It’s also the
entity responsible for managing the event loop, as we’ll see toward the end.
The next step is to initialize the application.We call the application object’s
init method and pass in the command line arguments (Ruby’s ARGV array), from
which FOX can pick out selected meaningful options. For example, to enable
FOX’s tracing output from your FXRuby application, you can specify the
–tracelevel option on the command line:
ruby hello.rb –tracelevel 301
For more information about which command line options FOX recognizes,
consult the FOX documentation.
It’s at this point that we finally get around to creating our first widget.The
main window (named main) is an instance of the Fox::FXMainWindow class, and
its new method expects a reference to the application object as well as a window
title.
The next widget is a button (an instance of Fox::FXButton), and it’s created as
a child of the main window.This button will display the string “Hello,World!”
and the first letter will be underlined because we placed an ampersand character
(“&”) before it.This is a special signal to the FXButton widget that this character
should be underlined, and that the Ctrl+H accelerator key combination should
have the same affect as directly clicking the button.
www.syngress.com
183RubyC02.qxd 1/7/02 4:00 PM Page 92

GUI Toolkits for Ruby • Chapter 2 93
The fourth and fifth arguments to FXButton’s new method are significant in
terms of how FOX processes user interface events.The fourth argument is a mes-
sage target object (an instance of FXObject or one of its subclasses) and the fifth
argument is a message identifier. In this case, the application is the message target
for the button; any events generated on or by the button (button clicks, for
example) will result in a message sent to the application.The message’s identifier
serves to distinguish between similar but different messages that the target object
might receive; any given object can be the message target for multiple widgets.
The server-side resources (like windows, fonts and cursors) are created during
the call to FXApp’s create method. FOX’s distinction between the client side rep-
resentation of objects (such as their instance variables) and server side resources
associated with those objects is also unique to FOX. Once the windows and
other resources have been created, the main window is shown centered onscreen
and we enter the main event loop by calling the application’s run method.
Targets and Messages
FOX’s event model is based on the idea of application objects sending messages to
other objects (their targets) when something interesting happens. It’s your job as
the application developer to decide how a target responds to a message. Because
this target-message system is inherently bidirectional, part of that response often
involves sending a message back to the original sender.
Every widget in your application has the ability to send messages, but some
messages are more meaningful than others; for example, you’ll probably want the
application to respond in some way when the user types new text in a text field,
or selects a new item from a tree list.You should specify a message target object
for those widgets that you expect to send meaningful messages.Almost all FOX
widgets allow you to specify their target as an argument to their constructors. For
example, to construct a new FXList instance and specify that anObject is its target,
you’d write:
myList = FXList.new(parent, numItems, anObject, …)
You can also change the target after the widget has been constructed by
calling the widget’s setTarget method:
myList.setTarget(anotherObject)
Every message has a type that indicates its significance. Some messages rep-
resent low-level events generated by the window system; for example, the
www.syngress.com
183RubyC02.qxd 1/7/02 4:00 PM Page 93

94 Chapter 2 • GUI Toolkits for Ruby
SEL_LEFTBUTTONPRESS message is sent when the left mouse button is
pressed down while the SEL_LEFTBUTTONRELEASE message is sent when
the same button is released. Other messages are generated by FOX and indicate
more useful user interface events, like deleting text from a text widget or
selecting a cell in a table.The message types are just integers (unlike the strings
used for Ruby/Tk’s events or Ruby/GTK’s signals) but you’ll always use the
symbolic constants with names of the form SEL_name.
One message type that you’ll encounter frequently in FOX applications is the
SEL_COMMAND message; it generically means that the widget has just com-
pleted its primary action. For example, an FXButton widget will send a
SEL_COMMAND message to its target after the user clicks on the button, while
an FXTextField widget will send a SEL_COMMAND message after the user
presses the Enter key in the text field or clicks outside of the text field.
It’s a common practice in FOX applications to make one object the target of
multiple widgets’ messages. For example, your application might include multiple
menu buttons for operations like Open File,Save File, and Print File, all
sending their SEL_COMMAND messages to a single target. But you might
wonder how that target object is able to distinguish between similar messages
from different widgets.When the target receives a SEL_COMMAND message,
how does it know which button sent the message? The answer is that each mes-
sage includes an identifier (in addition to its type) to provide additional informa-
tion about the source or significance of the message.
The message identifier is just an integer, usually represented by a symbolic
constant that is defined by the receiver of the message. A class defines the different
message identifiers it understands and, since FOX is an object-oriented toolkit, an
object also understands all of the message identifiers defined by its ancestor
classes. For example, since FXButton is a subclass of FXLabel, it inherits the mes-
sage identifiers defined by FXLabel and FXLabel’s base class.
In order for an object to receive and respond to messages, it needs to register
message handler functions for the different message types and identifiers.This
registering is taken care of in the class initialize function, using the FXMAP-
FUNC method to associate a message type and identifier with the name of an
instance method for that class. For example, if we wanted to catch the
SEL_COMMAND message with an ID_OPEN_FILE identifier, and use the
onOpenFile method to handle that message, we’d write:
FXMAPFUNC(SEL_COMMAND, ID_OPEN_FILE, "onOpenFile")
www.syngress.com
183RubyC02.qxd 1/7/02 4:00 PM Page 94

GUI Toolkits for Ruby • Chapter 2 95
Message handler functions (like our onOpenFile method) always take three
arguments:
def onOpenFile(sender, sel, ptr)
… handle this message …
end
The first argument (sender) is just a reference to the sender of the message,
which is some other object in your application. It’s often useful to know who
sent the message, especially if part of the response involves sending a message back
to the original sender.
The second argument (sel) is a number, sometimes referred to as the selector,
which encodes both the message type and the message identifier. If necessary, you
can extract the message type and identifier from the selector using the SELTYPE
and SELID functions:
def onOpenFile(sender, sel, ptr)
messageType = SELTYPE(sel)
messageId = SELID(sel)
… handle this message …
end
The last argument passed to the message handler (ptr) contains message-spe-
cific data; the type of this data depends on both the sender and the message
type. For example, when an FXTextField widget sends the SEL_COMMAND
message to a target, the data sent along with the message is a string containing
the text field’s contents.When an FXColorWell widget sends a SEL_COM-
MAND message to a target, however, the message data is an integer indicating
the color well’s current color. Our sample application will demonstrate some of
the kinds of messages that get sent during a FOX application, but for a complete
listing you should consult the FOX reference documentation (available at the
FOX home page).
Working with FOX’s Layout Managers
FOX’s choices of layout managers are very similar to those for Tk and GTK+,
with a few differences.We’re going to focus on the four powerhouse layout man-
agers: FXPacker,FXHorizontalFrame,FXVerticalFrame and FXMatrix. Like their
counterparts in Tk and GTK+, these are the layout managers you’ll use most
www.syngress.com
183RubyC02.qxd 1/7/02 4:00 PM Page 95

96 Chapter 2 • GUI Toolkits for Ruby
often in real-world applications. For information about how to use some of the
more special-purpose layout managers (like FXSwitcher,FXSplitter and
FX4Splitter) check the FOX documentation.
As in GTK+, FOX layout managers are themselves just invisible container
widgets that hold one or more child widgets.They’re not strictly “invisible,” since
you have some control over how the outer border of the container is drawn (it’s
frame style), but we’re mostly interested in how they arrange their child widgets.
As with Tk, FOX widgets are always constructed by passing in the parent
widget as the first argument.You can later reparent a child window (that is, move
it from one parent window to another) but unlike in Ruby/GTK, a child
window cannot exist without a parent.
Unlike either of the other toolkits, FOX child widgets specify their layout
preferences (or layout “hints”) as part of their constructors.You can change a
widget’s layout settings after it exists by calling its setLayout instance method, but it’s
still a different model than those used in Tk and GTK+.As a FOX layout manager
works its way through its unique layout strategy, it requests the layout hints from
each of its children and uses those to assign the positions and sizes of those widgets.
We’ll start by looking at FXPacker since it is both the most general of all the
layout managers and it serves as the base class for the other three we’ll cover
(FXHorizontalFrame,FXVerticalFrame and FXMatrix). FXPacker uses roughly the
same layout strategy as Tk’s packer, and the names of the layout hints reflect its
heritage.The new method for FXPacker goes like this:
aPacker = FXPacker.new(parent, opts=0,
x=0, y=0, w=0, h=0,
pl=DEFAULT_SPACING, pr=DEFAULT_SPACING,
pt=DEFAULT_SPACING, pb=DEFAULT_SPACING,
hs=DEFAULT_SPACING, vs=DEFAULT_SPACING)
You might take a few moments to recover from the shock at seeing such a
long argument list. On closer examination, it should give you some relief to see
that all but the first of its arguments are optional and have reasonable default
values.As you start taking a look at the new methods for other FOX widgets,
you’ll see this pattern repeated: long argument lists with default values for most
of the arguments.And in fact, most or all of these arguments can be changed
after the widget has been constructed using its accessor methods, so that a call
such as the following:
www.syngress.com
183RubyC02.qxd 1/7/02 4:00 PM Page 96

GUI Toolkits for Ruby • Chapter 2 97
aPacker = FXPacker.new(parent, LAYOUT_EXPLICIT,
0, 0, 150, 80)
is equivalent to these four lines of code:
aPacker = FXPacker.new(parent) # accept default values
aPacker.width = 150 # fixed width (in pixels)
aPacker.height = 80 # fixed height (in pixels)
aPacker.layoutHints = LAYOUT_EXPLICIT # make sure width and height
# values are actually enforced!
But we need to say more about the meanings of the arguments. Let’s tem-
porarily skip over the second argument (opts) and consider the remaining ones.
The x,y,wand harguments are integers indicating the preferred position (in
its parent’s coordinate system) and size for a widget, with the caveat that any of
these parameters is ignored if we don’t also set the corresponding layout hint
(LAYOUT_FIX_X,LAYOUT_FIX_Y,LAYOUT_FIX_WIDTH or
LAYOUT_FIX_HEIGHT).These arguments show up in almost every widget’s
new method and they are not unique to FXPacker.new. In the above code
example, we used a shortcut option, LAYOUT_EXPLICIT, that simply combines
the four LAYOUT_FIX options; this makes sense, since a layout that uses fixed
positions and sizes for its child widgets will need all of these options set.
The next four arguments to FXPacker.new are the left, right, top and bottom
padding values, in pixels. Padding refers to the extra space placed around the
inside edges of the container; if the layout of a particular packer in your program
looks like it could use some extra breathing room around its edges, try increasing
the padding values from their default value of DEFAULT_SPACING (a constant
equal to 4 pixels).
The last two arguments for FXPacker.new indicate the horizontal and vertical
spacing, in pixels, to be placed between the packer’s children.As with the internal
padding, this spacing defaults to four pixels.
Now let’s come back to the second argument for FXPacker.new, its options
flag (opts). Most FOX widgets’ new methods use this value to turn on or off dif-
ferent bitwise flags describing their appearance or behavior.We’ve already seen
that some of the flags include layout hints, hints from a child widget to its parent
container about how it should be treated during the layout procedure. In addition
to the LAYOUT_FIX hints, you can use:
www.syngress.com
183RubyC02.qxd 1/7/02 4:00 PM Page 97

98 Chapter 2 • GUI Toolkits for Ruby
■LAYOUT_SIDE_LEFT or LAYOUT_SIDE_RIGHT, and
LAYOUT_SIDE_TOP or LAYOUT_SIDE_BOTTOM indicate which
side(s) of the packing cavity this child widget should be packed against
■LAYOUT_FILL_X or LAYOUT_CENTER_X, and LAYOUT_FILL_Y
or LAYOUT_CENTER_Y indicate how the child widget should make
use of any leftover space assigned to it (should it grow to fill the space,
or merely center itself in that space?)
There are two packer-specific options (or packing styles) that can be binary
OR-ed into the optionsflag: PACK_UNIFORM_WIDTH and PACK_UNI-
FORM_HEIGHT. Similar to the “homogeneous” property for Ruby/GTK’s
layout managers, these two options constrain the layout manager to assign equal
widths (and/or heights) for its children.These packing styles apply to all of the
packer’s child widgets and override their preferences (including
LAYOUT_FIX_WIDTH and LAYOUT_FIX_HEIGHT).These options are more
appropriate for the other layout managers derived from FXPacker, but you can use
them with the general packer if you know what you’re doing.
We’ll consider the next two layout managers, FXHorizontalFrame and
FXVerticalFrame, together since they’re so similar.As you might expect by now,
these two arrange their child widgets horizontally and vertically, respectively.The
new method for FXHorizontalFrame looks like this:
aHorizFrame = FXHorizontalFrame.new(parent, opts=0,
x=0, y=0, w=0, h=0,
pl=DEFAULT_SPACING,
pr=DEFAULT_SPACING,
pt=DEFAULT_SPACING,
pb=DEFAULT_SPACING,
hs=DEFAULT_SPACING,
vs=DEFAULT_SPACING)
By default, the child widgets for a horizontal frame are arranged from left to
right, in the order they’re added.To request that a particular child should be packed
against the right side of the horizontal frame’s cavity, pass in the LAYOUT_RIGHT
layout hint.Vertical frames arrange their children from top to bottom by default,
and the LAYOUT_BOTTOM hint can be used to alter this pattern.
The last layout manager we’ll review is FXMatrix, which arranges its children
in rows and columns.The new method for FXMatrix is:
www.syngress.com
183RubyC02.qxd 1/7/02 4:00 PM Page 98

GUI Toolkits for Ruby • Chapter 2 99
aMatrix = FXMatrix.new(parent, size=1, opts=0,
x=0, y=0, w=0, h=0,
pl=DEFAULT_SPACING, pr=DEFAULT_SPACING,
pt=DEFAULT_SPACING, pb=DEFAULT_SPACING,
hs=DEFAULT_SPACING, vs=DEFAULT_SPACING)
FXMatrix introduces two options, MATRIX_BY_ROWS and
MATRIX_BY_COLUMNS, to indicate how the size argument for FXMatrix.new
should be interpreted. For MATRIX_BY_ROWS (the default), size indicates the
number of rows; the number of columns is ultimately determined by the total
number of children for the matrix. In this configuration, the first size child wid-
gets added to the matrix make up its first column: the first child becomes the
first widget on the first row, the second child becomes the first widget on the
second row, and so on.Alternately, the MATRIX_BY_COLUMNS option means
that size is the number of columns and the number of rows varies.
Fox Sample Application
Figure 2.12 shows the complete source code for the FXRuby version of our
sample application.The source code for this application appears on the CD
accompanying this book, under the file name fox-xmlviewer.rb.
www.syngress.com
Figure 2.12 Source Code for Sample Application—FXRuby Version
(fox-xmlviewer.rb)
#!/bin/env ruby
require "fox"
require "fox/responder"
require "nqxml/treeparser"
include Fox
class XMLViewer < FXMainWindow
include Responder
Continued
183RubyC02.qxd 1/7/02 4:00 PM Page 99

100 Chapter 2 • GUI Toolkits for Ruby
www.syngress.com
Figure 2.12 Continued
# Define message identifiers for this class
ID_ABOUT, ID_OPEN, ID_TREELIST =
enum(FXMainWindow::ID_LAST, 3)
def createMenubar
menubar = FXMenubar.new(self, LAYOUT_SIDE_TOP|LAYOUT_FILL_X)
filemenu = FXMenuPane.new(self)
FXMenuTitle.new(menubar, "&File", nil, filemenu)
FXMenuCommand.new(filemenu,
"&Open...\tCtl-O\tOpen document file.", nil, self, ID_OPEN)
FXMenuCommand.new(filemenu,
"&Quit\tCtl-Q\tQuit the application.", nil,
getApp(), FXApp::ID_QUIT, MENU_DEFAULT)
helpmenu = FXMenuPane.new(self)
FXMenuTitle.new(menubar, "&Help", nil, helpmenu, LAYOUT_RIGHT)
FXMenuCommand.new(helpmenu,
"&About FOX...\t\tDisplay FOX about panel.",
nil, self, ID_ABOUT, 0)
end
def createTreeList
listFrame = FXVerticalFrame.new(@splitter,
LAYOUT_FILL_X|LAYOUT_FILL_Y|FRAME_SUNKEN|FRAME_THICK)
@treeList = FXTreeList.new(listFrame, 0, self, ID_TREELIST,
(LAYOUT_FILL_X|LAYOUT_FILL_Y|
TREELIST_SHOWS_LINES|TREELIST_SHOWS_BOXES|TREELIST_ROOT_BOXES))
end
def createAttributesTable
tableFrame = FXVerticalFrame.new(@splitter,
Continued
183RubyC02.qxd 1/7/02 4:00 PM Page 100

GUI Toolkits for Ruby • Chapter 2 101
www.syngress.com
Figure 2.12 Continued
LAYOUT_FILL_X|LAYOUT_FILL_Y|FRAME_SUNKEN|FRAME_THICK)
@attributesTable = FXTable.new(tableFrame, 5, 2, nil, 0,
(TABLE_HOR_GRIDLINES|TABLE_VER_GRIDLINES|
FRAME_SUNKEN|FRAME_THICK|LAYOUT_FILL_X|LAYOUT_FILL_Y))
end
def initialize(app)
# Initialize base class first
super(app, "XML Editor", nil, nil, DECOR_ALL, 0, 0, 800, 600)
# Set up the message map
FXMAPFUNC(SEL_COMMAND, ID_ABOUT, "onCmdAbout")
FXMAPFUNC(SEL_COMMAND, ID_OPEN, "onCmdOpen")
FXMAPFUNC(SEL_COMMAND, ID_TREELIST, "onCmdTreeList")
# Create the menu bar
createMenubar
@splitter = FXSplitter.new(self, LAYOUT_FILL_X|LAYOUT_FILL_Y)
# Create the tree list on the left
createTreeList
# Attributes table on the right
createAttributesTable
# Make a tool tip
FXTooltip.new(getApp(), 0)
end
# Create and show the main window
def create
Continued
183RubyC02.qxd 1/7/02 4:00 PM Page 101

102 Chapter 2 • GUI Toolkits for Ruby
www.syngress.com
Figure 2.12 Continued
super
show(PLACEMENT_SCREEN)
end
def loadDocument(filename)
@document = nil
begin
@document = NQXML::TreeParser.new(File.new(filename)).document
rescue NQXML::ParserError => ex
FXMessageBox.error(self, MBOX_OK, "Error",
"Couldn't parse XML document")
end
if @document
@treeList.clearItems()
populateTreeList(@document.rootNode, nil)
end
end
def populateTreeList(docRootNode, treeRootNode)
entity = docRootNode.entity
if entity.instance_of?(NQXML::Tag)
treeItem = @treeList.addItemLast(treeRootNode, entity.to_s, nil,
nil, entity)
docRootNode.children.each do |node|
populateTreeList(node, treeItem)
end
elsif entity.instance_of?(NQXML::Text) &&
entity.to_s.strip.length != 0
treeItem = @treeList.addItemLast(treeRootNode, entity.to_s, nil,
nil, entity)
end
end
Continued
183RubyC02.qxd 1/7/02 4:00 PM Page 102

GUI Toolkits for Ruby • Chapter 2 103
www.syngress.com
Figure 2.12 Continued
def onCmdOpen(sender, sel, ptr)
dlg = FXFileDialog.new(self, "Open")
dlg.setPatternList([
"All Files (*)",
"XML Documents (*.xml)"])
if dlg.execute() != 0
loadDocument(dlg.getFilename())
end
return 1
end
def onCmdTreeList(sender, sel, treeItem)
if treeItem
entity = treeItem.getData()
if entity.kind_of?(NQXML::NamedAttributes)
keys = entity.attrs.keys.sort
@attributesTable.setTableSize(keys.length, 2)
keys.each_index { |row|
@attributesTable.setItemText(row, 0, keys[row])
@attributesTable.setItemText(row, 1, entity.attrs[keys[row]])
}
end
end
return 1
end
# About box
def onCmdAbout(sender, sel, ptr)
FXMessageBox.information(self, MBOX_OK, "About XMLViewer",
"FXRuby Sample Application")
return 1
end
end
Continued
183RubyC02.qxd 1/7/02 4:00 PM Page 103

104 Chapter 2 • GUI Toolkits for Ruby
The FXRuby version of our sample application begins by requiring the fox
and fox/responder features, which correspond to the main FOX library as well as
the code used by widgets to register their message handler methods:
require "fox"
require "fox/responder"
require "nqxml/treeparser"
include Fox
class XMLViewer < FXMainWindow
include Responder
# Define message identifiers for this class
ID_ABOUT, ID_OPEN, ID_TREELIST =
enum(FXMainWindow::ID_LAST, 3)
www.syngress.com
Figure 2.12 Continued
if $0 == __FILE__
# Make application
application = FXApp.new("XMLViewer", "FoxTest")
# Open the display
application.init(ARGV)
# Make window
mainWindow = XMLViewer.new(application)
# Create the application windows
application.create
# Run the application
application.run
end
183RubyC02.qxd 1/7/02 4:00 PM Page 104

GUI Toolkits for Ruby • Chapter 2 105
As we’ll see shortly, we want the main window class (XMLViewer) to respond
to three message identifiers: ID_ABOUT, which is related to the About… menu
command; ID_OPEN, which is related to the Open… menu command, and
ID_TREELIST, which is related to selections in the tree list. In order to register
message handler functions for a class, you need to first mix-in the Responder
module.The enum function is a helper provided by this module, and it simply
constructs an array of integers beginning with its first input and continuing for a
number of elements equal to its second argument. In this case, we make sure that
the enumerated values begin with FXMainWindow::ID_LAST so that we don’t
clash with any of FXMainWindow’s message identifiers.This is a standard pro-
gramming idiom for FXRuby applications.
The first step in the initialize method is to initialize the base class
(FXMainWindow):
super(app, "XML Editor", nil, nil, DECOR_ALL, 0, 0, 800, 600)
It’s important not to omit this step! Here, the second argument to
FXMainWindow’s initialize method is the window title (“XML Editor”).The fifth
argument is a set of flags that provide hints to the window manager about which
window decorations (for example, a title bar or resize handles) should be dis-
played for this window. In our case, we’ll request all possible decorations,
DECOR_ALL.The last two arguments specify the initial width and height for
the main window.
The next step is to set up the message map for this object:
FXMAPFUNC(SEL_COMMAND, ID_ABOUT, "onCmdAbout")
FXMAPFUNC(SEL_COMMAND, ID_OPEN, "onCmdOpen")
FXMAPFUNC(SEL_COMMAND, ID_TREELIST, "onCmdTreeList")
The FXMAPFUNC method is mixed-in from the Responder module and its
arguments are the message type, identifier, and message handler method name.
The first call, for example, declares that if an XMLViewer object is asked to handle
a SEL_COMMAND message with the message identifier
XMLViewer::ID_ABOUT, it should do so by calling its onCmdAbout method.
The remainder of the initialize method sets up the contents and layout of the
main window.The first point of interest is the application’s menu bar, created in
the createMenubar method:
def createMenubar
menubar = FXMenubar.new(self, LAYOUT_SIDE_TOP|LAYOUT_FILL_X)
www.syngress.com
183RubyC02.qxd 1/7/02 4:00 PM Page 105

106 Chapter 2 • GUI Toolkits for Ruby
filemenu = FXMenuPane.new(self)
FXMenuTitle.new(menubar, "&File", nil, filemenu)
FXMenuCommand.new(filemenu,
"&Open...\tCtl-O\tOpen document file.", nil, self, ID_OPEN)
FXMenuCommand.new(filemenu,
"&Quit\tCtl-Q\tQuit the application.", nil,
getApp(), FXApp::ID_QUIT, MENU_DEFAULT)
helpmenu = FXMenuPane.new(self)
FXMenuTitle.new(menubar, "&Help", nil, helpmenu, LAYOUT_RIGHT)
FXMenuCommand.new(helpmenu,
"&About FOX...\t\tDisplay FOX about panel.",
nil, self, ID_ABOUT, 0)
end
An FXMenubar acts as a horizontally-oriented container for one or more
FXMenuTitle widgets.The FXMenuTitle has a text string associated with it for the
menu title (like ‘File’) as well as an associated popup FXMenuPane that contains
one or more FXMenuCommand widgets.The text for the menu title can include
an ampersand character (“&”) in front of one of the title’s characters; when this is
present, that letter will be underlined and FOX will install a keyboard accelerator
to activate that menu. For example, the FXMenuTitle for the File menu:
FXMenuTitle.new(menubar, "&File", nil, filemenu)
will display the text “File” with the “F” underlined, and the Alt+F keyboard
combination can be used to post that menu. Similarly, the text for menu com-
mands can contain special control characters and delimiters:
FXMenuCommand.new(filemenu,
"&Open...\tCtl-O\tOpen document file.", nil, self, ID_OPEN)
The ampersand in front of the “O” in “Open…” defines a hot key for that
menu command; if the File menu is already posted, you can press the Okey to
activate the Open… command.The tab characters (“\t”) are recognized by
FOX as field separators.The first field is the primary text displayed on the
FXMenuCommand.The second field is an optional string indicating an accelerator
www.syngress.com
183RubyC02.qxd 1/7/02 4:00 PM Page 106

GUI Toolkits for Ruby • Chapter 2 107
key combination that can be used to directly access that command, even if the
menu isn’t posted.The optional last field’s string is the status line help text for
this menu command.
Although we don’t use any menu separators in this example, it is often helpful
to add one or more horizontal separators to a pulldown menu to group together
closely related menu commands.To add a menu separator to an FXMenuPane,
simply create an instance of the FXMenuSeparator class in the desired position:
FXMenuSeparator.new(filemenu)
The left-hand side of the main window houses a tree listing of the XML
document nodes; it’s created in the createTreeList method:
def createTreeList
listFrame = FXVerticalFrame.new(@splitter,
LAYOUT_FILL_X|LAYOUT_FILL_Y|FRAME_SUNKEN|FRAME_THICK)
@treeList = FXTreeList.new(listFrame, 0, self, ID_TREELIST,
(LAYOUT_FILL_X|LAYOUT_FILL_Y|
TREELIST_SHOWS_LINES|TREELIST_SHOWS_BOXES|TREELIST_ROOT_BOXES))
end
Because the FXTreeList class isn’t derived from FXFrame, it doesn’t directly
support any of the frame style flags. In order to get a nice-looking sunken border
around the tree list, we need to enclose it in some kind of FXFrame-derived con-
tainer; here, we’re using an FXVerticalFrame.
From the third and fourth arguments passed to FXTreeList.new we can see
that the message target for this FXTreeList is the main window (self) and its mes-
sage identifier is XMLViewer::ID_TREELIST.As we saw in the initialize function
when we were setting up the message map, a SEL_COMMAND message sent
with this identifier should lead to the onCmdTreeList method being invoked:
def onCmdTreeList(sender, sel, treeItem)
if treeItem
entity = treeItem.getData()
if entity.kind_of?(NQXML::NamedAttributes)
keys = entity.attrs.keys.sort
@attributesTable.setTableSize(keys.length, 2)
keys.each_index { |row|
www.syngress.com
183RubyC02.qxd 1/7/02 4:00 PM Page 107

108 Chapter 2 • GUI Toolkits for Ruby
@attributesTable.setItemText(row, 0, keys[row])
@attributesTable.setItemText(row, 1, entity.attrs[keys[row]])
}
end
end
return 1
end
When FXTreeList sends a SEL_COMMAND to its message target, the mes-
sage data (the third argument passed to the message handler method) is a refer-
ence to the selected tree item, if any.Assuming that the selected item (named
treeItem) is not nil, we get a reference to the user data associated with this tree
item.As we’ll see later, when we review the populateTreeList method that created
these tree items, the user data associated with the tree items are references to the
XML entities that the tree items represent. If the entity has attributes associated
with it, we modify the table’s row count by calling its setTableSize method and
then iterate over the attributes to update the table cells’ contents.
The attributes table on the right-hand side of the main window is created by
the createAttributesTable method, and it consists of an FXTable widget, which is also
enclosed in an FXVerticalFrame:
def createAttributesTable
tableFrame = FXVerticalFrame.new(@splitter,
LAYOUT_FILL_X|LAYOUT_FILL_Y|FRAME_SUNKEN|FRAME_THICK)
@attributesTable = FXTable.new(tableFrame, 5, 2, nil, 0,
(TABLE_HOR_GRIDLINES|TABLE_VER_GRIDLINES|
FRAME_SUNKEN|FRAME_THICK|LAYOUT_FILL_X|LAYOUT_FILL_Y))
end
For some of the other GUI toolkits we’ve looked at, the name table refers to a
layout manager that arranges its children in rows and columns (what FOX calls
the FXMatrix layout manager). For FOX, the FXTable is more of a spreadsheet-
like widget.We’re creating an FXTable widget that initially has 5 visible rows and
2 visible columns, although, as we’ll see later, the table dimensions are changed
dynamically while the program’s running.
The onCmdOpen method handles the SEL_COMMAND message generated
when the user clicks the Open… menu command from the File menu:
www.syngress.com
183RubyC02.qxd 1/7/02 4:00 PM Page 108

GUI Toolkits for Ruby • Chapter 2 109
def onCmdOpen(sender, sel, ptr)
dlg = FXFileDialog.new(self, "Open")
dlg.setPatternList([
"All Files (*)",
"XML Documents (*.xml)"])
if dlg.execute() != 0
loadDocument(dlg.getFilename())
end
return 1
end
We construct a new FXFileDialog object, initialize its pattern list and then dis-
play the dialog by calling its execute method.The execute method returns non-zero
if the user pressed the OK button, and when this is the case, we query the file-
name entered by the user and call loadDocument to load that XML document:
def loadDocument(filename)
@document = nil
begin
@document = NQXML::TreeParser.new(File.new(filename)).document
rescue NQXML::ParserError => ex
FXMessageBox.error(self, MBOX_OK, "Error",
"Couldn't parse XML document")
end
if @document
@treeList.clearItems()
populateTreeList(@document.rootNode, nil)
end
end
If the XML parser raises an exception while trying to create the
NQXML::Document object, we call the FXMessageBox.error singleton method to
display a simple dialog box explaining to the user what happened.The first
argument to FXMessageBox.error identifies the owner window for this dialog
box, i.e. the window above which this message box should float until it’s dis-
missed.The second argument is a flag indicating which terminator buttons
www.syngress.com
183RubyC02.qxd 1/7/02 4:00 PM Page 109

110 Chapter 2 • GUI Toolkits for Ruby
should be displayed on the message box; other options include
MBOX_OK_CANCEL,MBOX_YES_NO,MBOX_YES_NO_CANCEL,
MBOX_QUIT_CANCEL and MBOX_QUIT_SAVE_CANCEL.The
FXMessageBox class supports a handful of other convenient singleton methods
for displaying common messages (information,question and warning). If there were
no errors, we clear the tree list’s contents and then build up the tree list’s con-
tents with recursive calls to populateTreeList:
Parameter "self" in parens looks as if it is an argument to
FXMessageBox.errordef populateTreeList(docRootNode, treeRootNode)
entity = docRootNode.entity
if entity.instance_of?(NQXML::Tag)
treeItem = @treeList.addItemLast(treeRootNode, entity.to_s, nil,
nil, entity)
docRootNode.children.each do |node|
populateTreeList(node, treeItem)
end
elsif entity.instance_of?(NQXML::Text) &&
entity.to_s.strip.length != 0
treeItem = @treeList.addItemLast(treeRootNode, entity.to_s, nil,
nil, entity)
end
end
Here, we’re using FXTreeList’s addItemLast method to add new tree items to
the tree list.The first argument to addItemLast is a reference to a tree item, the
parent for the item to be created; to create tree items at the top level, you can
instead pass in nil for this argument.The second argument to addItemLast is the
text to be displayed on the tree item and the third and fourth (optional) argu-
ments are the “opened” and “closed” icons to be displayed alongside the tree
item’s text. If no icons are provided, FXTreeList will draw either a plus or minus
sign in a square as the default icons.The last argument to addItemLast is optional
user data; it’s any Ruby object that you’d like to associate with the newly created
tree item. In our case, we’ll store a reference to the XML entity that this tree
item represents.
Figure 2.13 shows the FXRuby version of our sample application, running
under Microsoft Windows 2000.
www.syngress.com
183RubyC02.qxd 1/7/02 4:00 PM Page 110
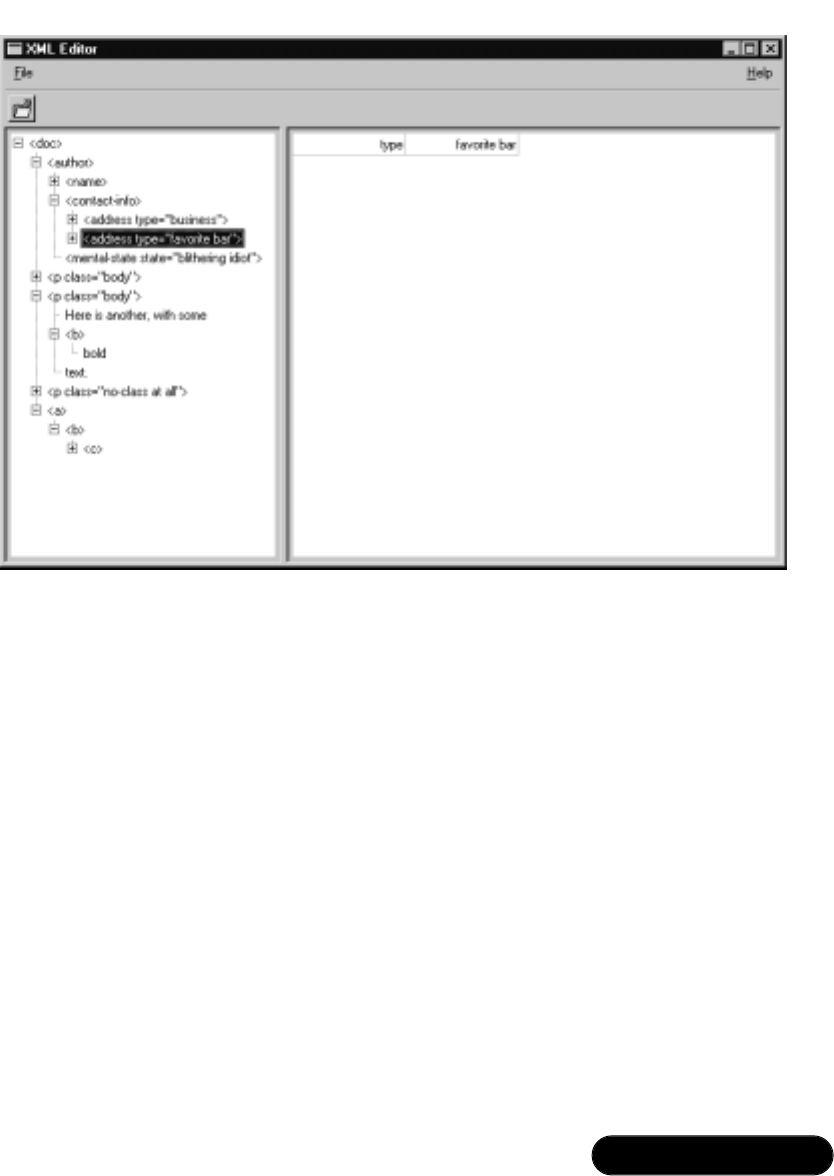
GUI Toolkits for Ruby • Chapter 2 111
Using the SWin / VRuby Extensions
SWin and VRuby are the two primary components of the VisualuRuby project.
SWin is a Ruby extension module, written in C, that exposes much of the
Win32 API to the Ruby interpreter.VRuby is a library of pure Ruby modules
built on top of SWin, that provides a higher-level interface to the Win32 pro-
gramming environment.
As is the case with many Ruby extensions, most of the documentation for
SWin and VRuby is only available in Japanese.And although the example pro-
grams from the VisualuRuby Web site will give you some idea about what’s pos-
sible with SWin and VRuby, there’s an implicit assumption that you’re already
familiar with basic Windows programming concepts.This section provides
enough of an overview of the VRuby API to develop our sample application, but
for a real appreciation of SWin/VRuby you need a stronger background in
Windows programming.There are some excellent books on this subject, and
although they may discuss the Win32 API from a C programming standpoint,
they should help you to fill in a lot of the blanks about programming with
www.syngress.com
Figure 2.13 The FXRuby Version of the XML Viewer Application
183RubyC02.qxd 1/7/02 4:00 PM Page 111

112 Chapter 2 • GUI Toolkits for Ruby
VRuby as well.Along those lines, another invaluable reference is the Win32 API
reference from the Microsoft Developer Network (MSDN) CDs and DVDs.
Obtaining SWin and VRuby
SWin and VRuby are included in the Ruby installer for Windows from the
Pragmatic Programmers’Web site.The source code for SWin can be downloaded
from the VisualuRuby project home page, and you should be able to find pre-
compiled binaries there as well.
VRuby Library Basics
Because there is so little English-language documentation available for SWin and
VRuby, we’re going to take an additional section here to provide a brief
overview of the VRuby library and the classes and modules it provides. Most of
this information has been extracted from the source file comments, which them-
selves are pretty sketchy, but this may give you a head start when you set out to
begin working with VRuby.
The VRuby library is organized as a set of Ruby source files installed under
the vr package directory.Table 2.1 lists some of the most important files that
you’ll be using in your applications (and the corresponding require statements).
Note that most or all of the non-core files depend on the core classes and mod-
ules from vr/vruby.rb, so you probably won’t need to import this file explicitly.
Table 2.1 VRuby Library Contents
Description How to Import
Core Classes and Modules require ‘vr/vruby’
Layout Managers require ‘vr/vrlayout’
Standard Controls require ‘vr/vrcontrol’
Common Controls require ‘vr/vrcomctl’
Multipane Windows require ‘vr/vrtwopane’
The core classes and modules for VRuby (Table 2.2) consist of very high-level
base classes and mix-in modules that you won’t use directly in most programs.
Two notable exceptions, however, are VRForm and VRScreen.VRForm is the base
class used for top-level windows, such as your application’s main window.As we’ll
see in the sample application, you typically want to derive your main window
class from VRForm, possibly mixing in some other behaviors, and handling most
customization in that class’ construct method.
www.syngress.com
183RubyC02.qxd 1/7/02 4:00 PM Page 112

GUI Toolkits for Ruby • Chapter 2 113
Table 2.2 Core Classes and Modules for VRuby
Class/Module Name Description
VRMessageHandler This module should be mixed in to any class that
needs to receive Windows messages; it provides
module methods acceptEvents and addHandler.
VRParent This module provides module methods used by
parent windows (windows that can function as
containers of other child windows). It is mixed
in to VRForm and VRPanel (among others) since
they’re the most popular container classes
you’ll use.
VRWinComponent This is the base class of all windows.
VRControl Base class for all controls (widgets); a subclass of
VRWinComponent.
VRCommonDialog This module offers several convenience functions
for using common Windows dialogs; provides
module methods openFilenameDialog,
saveFilenameDialog, chooseColorDialog and
chooseFontDialog.
VRForm This is the base class for all top-level windows,
like your application’s main window, and it mixes
in the VRMessageHandler, VRParent and
VRCommonDialog modules.
VRPanel This is the base class for all child windows (like
controls); a subclass of VRControl.
VRDrawable This module should be mixed in to any class that
needs to handle the paint message (indicating
that the window’s contents need to be redrawn);
that class should override the self_paint method.
VRResizeable This module should be mixed in to any class that
needs to intercept window resize events; that
class should override self_resize method.
VRUserMessageUseable This module should be mixed in to any class that
needs to register user-defined messages with the
operating system.
VRScreen This class represents the Windows desktop, and
provides methods to create and show new top-
level windows and manage the event loop.
VRuby defines exactly one global instance of this
class, VRLocalScreen.
www.syngress.com
183RubyC02.qxd 1/7/02 4:00 PM Page 113

114 Chapter 2 • GUI Toolkits for Ruby
Some of the Windows controls have existed since the pre-Windows 95 days,
and this set has come to be known as the standard controls.The standard controls
(like buttons, labels and text fields), are accessible when you require ‘vr/vrcon-
trol.rb’.Table 2.3 lists the classes exposed by this module.
Table 2.3 Standard Controls for VRuby
Class/Module Name Description
VRStdControl This class (a subclass of VRControl) is just the
base class of all the standard controls.
VRButton This is a standard push button; you can assign
the button’s text using the caption= instance
method.
VRGroupbox Group box
VRCheckbox This is a check box control. You can set or
remove the check mark using the check instance
method, and test for its current setting using the
checked? instance method.
VRRadioButton This is a radio button, usually displayed as one of
a group of radio buttons used to indicate mutu-
ally exclusive choices. Because it is a special case
(a subclass) of VRCheckbox, it also supports the
check and checked? instance methods.
VRStatic This is a static text control, which simply displays
a non-editable text label. The label text can be
assigned using its caption= instance method.
VREdit This is a single-line, editable text control. It pro-
vides a number of instance methods related to
getting and setting the text, as well as working
with the selected (highlighted) text and transfer-
ring text between the VREdit control and the
Windows clipboard.
VRText This is a multi-line editable text control. It’s sim-
ilar to the single-line version (VREdit) but pro-
vides a number of additional instance methods
related to navigating through the text.
VRListbox This is a vertically-oriented list of strings from
which the user can select one or more items.
VRCombobox This is a drop-down list of strings, similar to the
VRListbox but with the difference that only one
string can be selected.
www.syngress.com
Continued
183RubyC02.qxd 1/7/02 4:00 PM Page 114

GUI Toolkits for Ruby • Chapter 2 115
Table 2.3 Continued
Class/Module Name Description
VRMenu This is a menu bar, populated with pulldown
menus, that typically appears along the top edge
of the application’s main window.
VRMenuItem This is a single menu item that appears in a
VRMenu (for example, the Save As… command
in an application’s File menu). You’ll usually
create these implicitly when you call a menu’s
set method.
VRMenuUseable This module should be mixed in to any window
class that needs to use menus; it provides the
newMenu and setMenu module methods.
VRBitmapPanel This is a special kind of panel used to display a
(static) bitmap image.
VRCanvasPanel This is a special kind of panel used to display
drawable bitmap images; you specify its width
and height and can then use GDI functions to
draw into it.
Windows 95 introduced a host of new user interface controls known as the
common controls.These included controls such as the list views and tree views
used extensively in the Windows Explorer.The VRuby classes representing
common controls are listed in Table 2.4.
Table 2.4 Common Controls for VRuby
Class Name Description
VRNotifyControl This class (a subclass of VRControl) is just the
base class of all the common controls.
VRListview This is an enhanced list control that can be con-
figured to display its data in a variety of formats
( as icons with simple descriptions, or in a more
detailed list form). The most familiar use of this
control is in the Windows Explorer.
VRTreeview This control, also commonly known as a tree list, is
used to display hierarchically structured data. It’s a
popular choice for many Windows programs,
used, for example, in the Registry Editor utility.
www.syngress.com
Continued
183RubyC02.qxd 1/7/02 4:00 PM Page 115

116 Chapter 2 • GUI Toolkits for Ruby
Table 2.3 Continued
Class Name Description
VRProgressbar This control is used during time-consuming oper-
ations to provide the user with some feedback
on how far the operation has progressed and
how much time is left before it’s completed.
VRTrackbar This control consists of a slider and optional tick
marks. It is useful when you want the user to
select a discrete value from a range of values.
VRUpdown This control consists of a pair of arrow buttons
(usually one pointing up and one pointing down)
that the user can use to increment or decrement
some value in the application. It is almost always
paired with a buddy window, such as a VREdit
control, to display its current setting.
VRStatusbar This control is a horizontal strip that can appear
at the bottom of the main window and is used
to display status information.
VRStatusbarDockable This module should be mixed in to a VRForm
that will include a status bar control. It defines
an addStatusbar method for adding a statusbar
to the form.
VRTabControl This control displays one or more tabs which can
be used as the basis of a property sheet or
tabbed panel.
VRTabbedPanel This control combines the VRTabControl with a
series of panels to create a tabbed notebook
control.
Layout Managers
In contrast to all the other GUI toolkits we’ve seen so far,VRuby doesn’t offer
much in terms of layout managers.This is primarily due to the fact that the Win32
API on which SWin and VRuby are based doesn’t include any layout management
at all.Although the layout managers currently packaged with VRuby are some-
what limited, one would expect this situation to improve as VRuby matures.
The three layout managers for VRuby are VRHorizLayoutManager,
VRVertLayoutManager and VRGridLayoutManager. Instead of serving as standalone
container classes, these layout managers are modules that you mix in to a VRuby
www.syngress.com
183RubyC02.qxd 1/7/02 4:00 PM Page 116

GUI Toolkits for Ruby • Chapter 2 117
container class like VRPanel. Like their counterparts in Ruby/GTK and
FXRuby, the first two arrange their children either horizontally or vertically.To
use them, first mix the desired layout manager module into your container class:
require 'vr/vrlayout'
class MyPanelClass < VRPanel
include VRHorizLayoutManager
end
Then add one or more child widgets (or, in Windows-speak, controls) to the
container using addControl:
aPanel = MyPanelClass.new ...
aPanel.addControl(VRButton, "button1", "Caption for First Button")
aPanel.addControl(VRButton, "button2", "Caption for Second Button")
The full argument list for VRHorizLayoutManager#addControl (or
VRVertLayoutManager#addControl) is:
addControl(type, name, caption, style=0)
where type is the VRuby class for the control, name is its name, and caption is the
text to display on the control (for controls that support captions).The last argu-
ment, style, can be used to pass in additional Windows style flags for this control.
By default,VRuby will create a control with only the basic style flags; for
example, VRButton controls are created with the WStyle::WS_VISIBLE and
WStyle::BS_PUSHBUTTON flags. Unlike their counterparts in other GUI
toolkits, you’d don’t really have any control over the child controls’ resizing
parameters. For VRHorizLayoutManager, each child’s height is the same as the
container’s height and the width of the container is equally divided amongst the
child controls. Furthermore, each child is automatically stretched (horizontally
and vertically) to fill its assigned space.
The VRGridLayoutManager roughly corresponds to Tk’s grid layout, GTK’s
Gtk::Table and FOX’s FXMatrix, but with the same kinds of limitations of child
control sizing that we saw for VRHorizLayoutManager and VRVertLayoutManager.
Before adding any controls to a container using the VRGridLayoutManager layout
manager, you should first set the number of rows and columns using
VRGridLayoutManager#setDimension:
www.syngress.com
183RubyC02.qxd 1/7/02 4:00 PM Page 117

118 Chapter 2 • GUI Toolkits for Ruby
require 'vr/vrlayout'
class MyPanel < VRPanel
include VRGridLayoutManager
end
aPanel = MyPanel.new ...
aPanel.setDimension(5, 3)
where the two arguments are the number of rows and number of columns,
respectively.After that you can add child controls using
VRGridLayoutManager#addControl:
addControl(type, name, caption, x, y, w, h, style=0)
Here, the first three arguments are the same as for the previous layout man-
agers’ addControl methods.The next two arguments (x and y) are used to indicate
the upper-left cell of the range of cells occupied by this control, and the wand h
arguments indicate the width and height (in numbers of table cells) of the range.
For a control that only takes up one table cell’s space, you’d use a width and
height of one.
Event Handling
VRuby uses a callback-based approach for event handling that is quite unlike any
of the others we’ve looked at.You may have wondered about why you specify a
name for each control that you add to a form. For example, when adding a
button control you might use:
aForm.addControl(VRButton, "button1", "Caption for Button", …)
The third argument is the caption string that is displayed on the button.The
name string doesn’t appear to be used anywhere, but in fact, whenever you add a
new control to a VRForm or VRPanel (actually, any class that mixes in the
VRParent module), that container object also adds new instance variable and
accessor methods with the name you specified in the call to addControl.This new
instance variable is just a reference to the child control. So, after executing the
previous line of code, you could later change the button’s caption with:
aForm.button1.caption = "New Caption for Button"
The controls’ names are also used when they generate callbacks, and these
callback methods must have names of the form:
www.syngress.com
183RubyC02.qxd 1/7/02 4:00 PM Page 118

GUI Toolkits for Ruby • Chapter 2 119
def controlname_eventname
… handle this event …
end
So, for example, if you wanted to catch the clicked event for the button1 con-
trol, you’d need a method named button1_clicked:
def button1_clicked
puts "Button 1 was clicked!"
end
These callback methods must be defined as instance methods for the con-
tainer window, that is, if we had created button1 as a child of aForm,button1_clicked
would need to be an instance method of aForm.We’ll see a few examples of how
this works in the sample application, but Tables 2.5 and 2.6 provide listings of the
event names for all the VRuby controls you might use.
Table 2.5 Event Names for Standard Controls
Control Class Event Name(s)
VRButton clicked, dblclicked
VREdit changed
VRListbox selchange
VRCombobox selchange
Table 2.6 Event Names for Common Controls
Control Class Event Name(s)
All Common Controls clicked, dblclicked, gotfocus, hitreturn, lostfocus,
rclicked, rdblclicked
VRListview itemchanged, itemchanging, columnclick,
begindrag, beginrdrag
VRTreeview selchanged, itemexpanded, deleteitem,
begindrag, beginrdrag
VRUpdown changed
VRTabControl selchanged
www.syngress.com
183RubyC02.qxd 1/7/02 4:00 PM Page 119

120 Chapter 2 • GUI Toolkits for Ruby
VRuby Sample Application
Figure 2.15 (found at the close of this section) shows the VRuby version of the
sample application in its entirety.The source code for this application appears on
the CD accompanying this book, under the file name vruby-xmlviewer.rb. It begins
by importing the various VRuby library files that we’ll need:
require 'vr/vruby'
require 'vr/vrcontrol'
require 'vr/vrcomctl'
require 'vr/vrtwopane'
Next, we define the global constants that we’ll need to display message boxes
later in the program:
# The values of these constants were lifted from <winuser.h>
MB_OK = 0x00000000
MB_ICONEXCLAMATION = 0x00000030
MB_ICONINFORMATION = 0x00000040
The Win32 API uses a large number of named constants (like MB_OK,
MB_ICONEXCLAMATION and MB_ICONINFORMATION) to specify style
flags for controls. In our case, the last argument of VRuby’s messageBox function
specifies message box options such as the displayed buttons and icon. Since these
named constants are not yet exposed by SWin/VRuby, you need to dig around
in the Windows header files to determine the actual numeric values of those
constants.As you might have guessed, this is one of those times that a Windows
programming background is a must!
The next major block of code defines the XMLViewerForm class and its
instance methods; this is the focal point of the program. Before we jump into this,
let’s skip ahead for a moment and take a look at the last few lines of the program:
mainWindow = VRLocalScreen.newform(nil, nil, XMLViewerForm)
mainWindow.create
mainWindow.show
# Start the message loop
VRLocalScreen.messageloop
After defining the XMLViewerForm class (which is just a subclass of VRForm)
we call VRLocalScreen’s newform method to create an instance of XMLViewerForm.
www.syngress.com
183RubyC02.qxd 1/7/02 4:00 PM Page 120

GUI Toolkits for Ruby • Chapter 2 121
Recall that VRLocalScreen is a special variable in VRuby; it’s the single, global
instance of VRScreen and it loosely corresponds to the Windows desktop.The first
two arguments to VRScreen#newform are the parent window and the style flags
for this window. In our case, this is the application’s top-level main window and
so we pass nil for the parent window.We also pass nil for the style flags, to indi-
cate that we want the default style.
The call to mainWindow.create actually creates the real window backing this
Ruby object. Since this is also a container window, the call to create triggers a call
to mainWindow’s construct method (which we’ll see in a moment) to create its
child controls and menus.The last step before entering the main event loop is to
make the main window visible by calling show.
Now let’s go back and look at the code for our form class, XMLViewerForm.We
begin by mixing-in two modules that add useful functionality to the basic VRForm:
include VRMenuUseable
include VRHorizTwoPane
The VRMenuUseable module gives us the newMenu and setMenu methods for
setting up the application’s pulldown menus.The VRHorizTwoPane module adds
the addPanedControl method and enables a horizontally-split paned layout for the
main window contents. Next, we define the form’s construct method, which actu-
ally creates the menus and adds child controls to the main window:
def construct
# Set caption for application main window
self.caption = "XML Viewer"
# Create the menu bar
@menu = newMenu()
@menu.set([ ["&File", [ ["&Open...", "open"], ["Quit", "quit"] ] ],
["&Help", [ ["About...", "about"] ] ]
])
setMenu(@menu)
# Tree view appears on the left
addPanedControl(VRTreeview, "treeview", "")
# List view appears on the right
www.syngress.com
183RubyC02.qxd 1/7/02 4:00 PM Page 121

122 Chapter 2 • GUI Toolkits for Ruby
addPanedControl(VRListview, "listview", "")
@listview.addColumn("Attribute Name", 150)
@listview.addColumn("Attribute Value", 150)
end
The call to newMenu simply creates an empty menu and assigns it to our
@menu instance variable; the call to set actually defines the menu’s contents. It’s a
bit difficult to read, but set takes a single argument that is an array of arrays, one
per pulldown menu.The sub-array for each pulldown menu is itself a two-ele-
ment array. Consider the first nested array, corresponding to the File menu:
["&File", [ ["&Open...", "open"], ["Quit", "quit"] ] ]
The first array element is the name of the pulldown menu. By placing an
ampersand (“&”) before the “F” in “File”, we can make the Alt-F keyboard com-
bination an accelerator for this menu choice.The second element in this array is
another array, this time of the different menu items. Each element in the menu
items array is either a two-element array providing the caption and name for the
menu item, or the caption and yet another array of menu items (for defining
nested or cascading menus).All of these nested arrays were making me a little dizzy
and so for this example I stayed with single-level (non-cascading) menus.
In the earlier section on event handling, we saw that the names of controls
are significant because they are used in the names of VRuby’s callback methods.
In the same way, the names you assign to menu items are significant; when the
user clicks on one these menu items,VRuby will look for a callback method
named name_clicked. Soon we’ll see that the XMLViewerForm class defines callback
methods open_clicked,quit_clicked and about_clicked to handle these three menu
commands.
After setting up the application’s menus in XMLViewerForm’s construct method,
we add exactly two controls to our horizontal pane:
# Tree view appears on the left
addPanedControl(VRTreeview, "treeview", "")
# List view appears on the right
addPanedControl(VRListview, "listview", "")
Recall that the names of child controls added to a VRParent become the
names of instance variables.We’ll take advantage of this to further configure the
list view widget (named listview):
www.syngress.com
183RubyC02.qxd 1/7/02 4:00 PM Page 122

GUI Toolkits for Ruby • Chapter 2 123
@listview.addColumn("Attribute Name", 150)
@listview.addColumn("Attribute Value", 150)
Next, let’s take a look at the three callback methods that handle the Open…,
Quit and About… menu commands. Because the name associated with the
Open… menu command was open, its callback method is named open_clicked:
def open_clicked
filters = [["All Files (*.*)", "*.*"],
["XML Documents (*.xml)", "*.xml"]]
filename = openFilenameDialog(filters)
loadDocument(filename) if filename
end
The openFilenameDialog method is a convenience function for displaying a
standard Windows file dialog. It is a module method for the VRCommonDialog
module, which is mixed in to the VRForm class, so you can call this method for
any form. Its input is an array of filename patterns (or filters) that will be dis-
played in the file dialog and returns the name of the selected file (or nil if the
user cancelled the dialog).The callback for the About… menu command is han-
dled by the about_clicked method:
def about_clicked
messageBox("VRuby XML Viewer Example", "About XMLView",
MB_OK|MB_ICONINFORMATION)
end
The messageBox method is another kind of convenience function, and is actu-
ally an instance method of the SWin::Window class (a distant ancestor class of our
form).As you can probably surmise, the three arguments are the message box’s
message, its window title, and the style flags indicating which icon and termi-
nating buttons to display.The callback for the Quit menu command is the easiest
to understand, since it just calls Ruby’s exit method:
def quit_clicked
exit
end
Figure 2.14 shows the VRuby version of our sample application, running
under Microsoft Windows 2000.
www.syngress.com
183RubyC02.qxd 1/7/02 4:00 PM Page 123
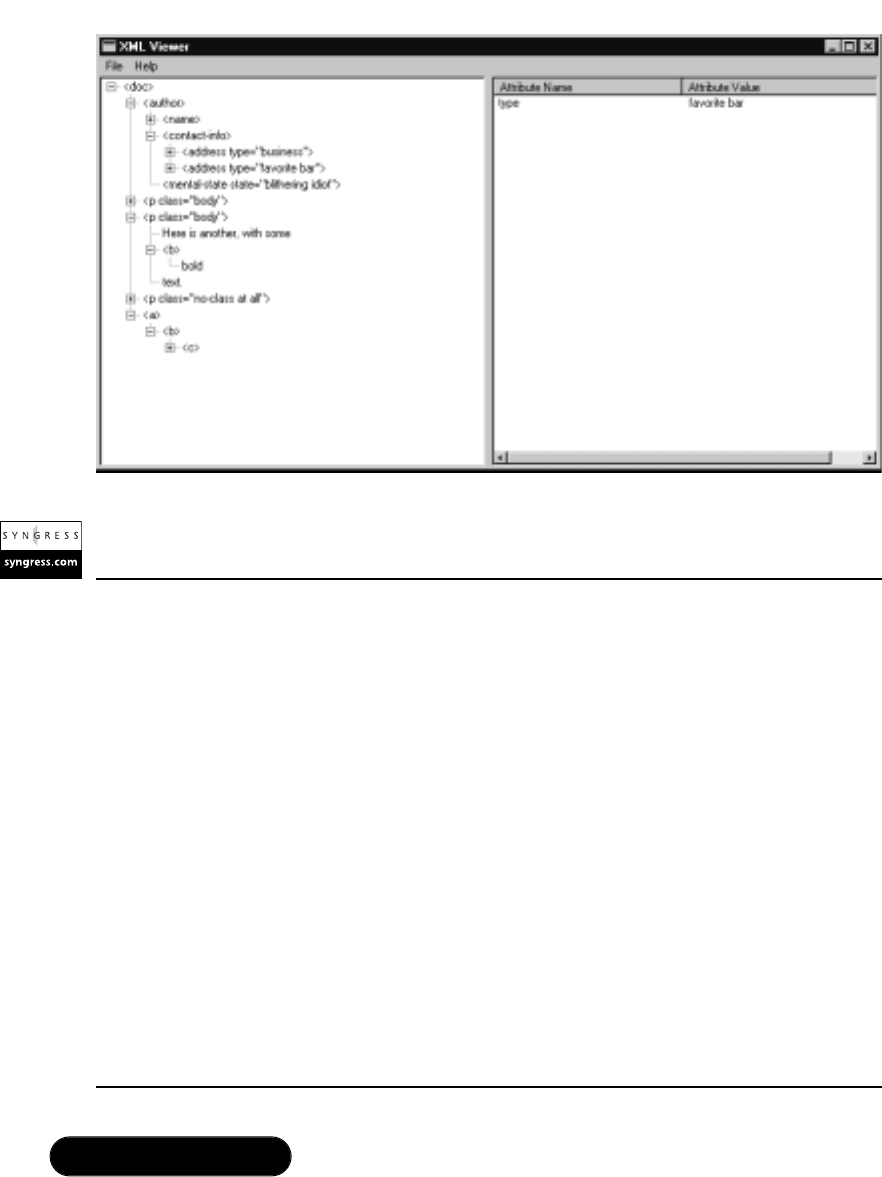
124 Chapter 2 • GUI Toolkits for Ruby
www.syngress.com
Figure 2.14 The VRuby Version of the XML Viewer Application
Figure 2.15 Source Code for Sample Application—VRuby Version
(vruby-xmlviewer.rb)
require 'vr/vruby'
require 'vr/vrcontrol'
require 'vr/vrcomctl'
require 'vr/vrtwopane'
require 'nqxml/treeparser'
# The values of these constants were lifted from <winuser.h>
MB_OK = 0x00000000
MB_ICONEXCLAMATION = 0x00000030
MB_ICONINFORMATION = 0x00000040
class XMLViewerForm < VRForm
include VRMenuUseable
include VRHorizTwoPane
Continued
183RubyC02.qxd 1/7/02 4:00 PM Page 124

GUI Toolkits for Ruby • Chapter 2 125
www.syngress.com
Figure 2.15 Continued
def construct
# Set caption for application main window
self.caption = "XML Viewer"
# Create the menu bar
@menu = newMenu()
@menu.set([ ["&File", [ ["&Open...", "open"], ["Quit", "quit"] ] ],
["&Help", [ ["About...", "about"] ] ]
])
setMenu(@menu)
# Tree view appears on the left
addPanedControl(VRTreeview, "treeview", "")
# List view appears on the right
addPanedControl(VRListview, "listview", "")
@listview.addColumn("Attribute Name", 150)
@listview.addColumn("Attribute Value", 150)
end
def populateTreeList(docRootNode, treeRootItem)
entity = docRootNode.entity
if entity.instance_of?(NQXML::Tag)
treeItem = @treeview.addItem(treeRootItem, entity.to_s)
@entities[treeItem] = entity
docRootNode.children.each do |node|
populateTreeList(node, treeItem)
end
elsif entity.instance_of?(NQXML::Text) &&
entity.to_s.strip.length != 0
treeItem = @treeview.addItem(treeRootItem, entity.to_s)
@entities[treeItem] = entity
end
Continued
183RubyC02.qxd 1/7/02 4:00 PM Page 125

126 Chapter 2 • GUI Toolkits for Ruby
www.syngress.com
Figure 2.15 Continued
end
def loadDocument(filename)
@document = nil
begin
@document = NQXML::TreeParser.new(File.new(filename)).document
rescue NQXML::ParserError => ex
messageBox("Couldn't parse XML document", "Error",
MB_OK|MB_ICONEXCLAMATION)
end
if @document
@treeview.clearItems()
@entities = {}
populateTreeList(@document.rootNode, @treeview.root)
end
end
def open_clicked
filters = [["All Files (*.*)", "*.*"],
["XML Documents (*.xml)", "*.xml"]]
filename = openFilenameDialog(filters)
loadDocument(filename) if filename
end
def quit_clicked
exit
end
def about_clicked
messageBox("VRuby XML Viewer Example", "About XMLView",
MB_OK|MB_ICONINFORMATION)
end
Continued
183RubyC02.qxd 1/7/02 4:00 PM Page 126

GUI Toolkits for Ruby • Chapter 2 127
Other GUI Toolkits
There are a number of other GUI toolkits under development for Ruby, and as
always, you should check the RAA for the latest word.
The Fast Light Toolkit (FLTK) (www.fltk.org) is a nice cross-platform GUI
developed in part by Bill Spitzak. FLTK is very efficient in terms of memory use
and speed, and provides excellent support for OpenGL-based applications as well.
It is currently available for both Windows and X (Unix) platforms.A Ruby inter-
face to FLTK is being developed by Takaaki Tateishi and Kevin Smith, and the
home page for this effort is at http://ruby-fltk.sourceforge.net.
Qt (www.trolltech.com) is an excellent cross-platform GUI toolkit that has
been ported to Unix, Microsoft Windows and, most recently, Mac OS X. It is the
basis of the popular KDE desktop for Linux.The Ruby language bindings for Qt
(http://sfns.u-shizuoka-ken.ac.jp/geneng/horie_hp/ruby/index.html) are devel-
oped by Nobuyuki Horie.
www.syngress.com
Figure 2.15 Continued
def treeview_selchanged(hItem, lParam)
entity = @entities[hItem]
if entity and entity.kind_of?(NQXML::NamedAttributes)
keys = entity.attrs.keys.sort
@listview.clearItems
keys.each_index { |row|
@listview.addItem([ keys[row], entity.attrs[keys[row]] ])
}
end
end
end
mainWindow = VRLocalScreen.newform(nil, nil, XMLViewerForm)
mainWindow.create
mainWindow.show
# Start the message loop
VRLocalScreen.messageloop
183RubyC02.qxd 1/7/02 4:00 PM Page 127

128 Chapter 2 • GUI Toolkits for Ruby
Apollo (www.moriq.com/apollo/index-en.html), developed by Yoshida
Kazuhiro, is a project whose goal, in the author’s words, is to provide a “dream
duet” of Delphi and Ruby. Delphi is a commercial application development envi-
ronment from Borland/Inprise.The specific interest for Ruby GUI developers is
in the Ruby extension that provides access to Delphi’s Visual Component Library
(VCL).As of this writing, Delphi is only available on Windows, but very soon,
Kylix (the Unix port of Delphi) should be available for Linux and other platforms.
Choosing a GUI Toolkit
It can be both a blessing and a curse to have so many options when choosing a
GUI for your Ruby application. Ultimately, there is no magic formula to make
this decision for you, but here are a few considerations to keep in mind:
■Upon which platforms will your application need to run? If you need
support for the Macintosh,Tk is really your only choice at this time.
Similarly, if you need to support platforms other than Microsoft
Windows, you probably don’t want to develop the GUI using
SWin/VRuby.
■If you do intend for your application to run on different platforms, do
you prefer a uniform look-and-feel for the GUI, or would you rather
have a native look-and-feel for each target platform? Tk provides a
native look-and-feel on each platform, but “theme-able” toolkits like
GTK can provide extremely customizable interfaces (possibly different
from any platform’s native GUI). FOX provides a consistent look-and-
feel for both Unix and Windows (but that look-and-feel is decidedly
Windows-like).
■Software licensing issues can be a significant concern, especially if you’re
developing commercial software applications. Most of the GUI toolkits
for Ruby use some kind of open-source software license, but you should
study their licenses carefully to understand the terms.
All other issues aside, the great intangible factor is how comfortable you are
developing programs with a given toolkit. From a programmer’s standpoint, every
GUI toolkit has its own unique character and feel and you may not be able to
put a finger on just what it is that you like about a particular toolkit. If you have
some free time, take the opportunity to learn more about all the toolkits we’ve
introduced in this chapter before settling on the one or couple that you like best.
www.syngress.com
183RubyC02.qxd 1/7/02 4:00 PM Page 128

GUI Toolkits for Ruby • Chapter 2 129
Summary
This chapter has taken you on a tour of some of the most popular GUI toolkits
for Ruby. It’s good to have a number of options at your disposal, but to be an
effective application developer it’s in your best interests to experiment with sev-
eral GUI toolkits and then pick the one that seems like the best fit for what
you’re trying to accomplish. Most GUI programming wisdom can’t be taught in
a book; it requires some trial and error.
We started out by looking at Ruby/Tk, the standard for Ruby and a senti-
mental favorite for many application developers.Tk was one of the first cross-
platform GUIs, and the easy application development afforded by Tcl/Tk opened
up the world of GUI programming to a lot of programmers who were struggling
with earlier C-based GUI libraries like Motif and the Windows Win32 API. Of
all the toolkits we’ve looked at, it’s also usually true that Ruby/Tk will require
the least amount of code to get the GUI up and running.This simplicity, how-
ever, is at the expense of more recent GUI innovations like drag and drop, or
advanced widgets like spreadsheets and tree lists.
The next GUI toolkit we considered was Ruby/GTK. For developers who
work primarily on the Linux operating system and are already familiar with
GTK+ and GNOME-based applications in that environment, this is an obvious
choice.The Ruby/GTK bindings are quite complete and there’s extensive online
documentation to get you started, including tutorial exercises.The only drawback
seems to be for Windows developers, where it’s sometimes difficult to get GTK+
and Ruby/GTK to work properly.
FXRuby is a strong cross-platform GUI toolkit for Ruby, and it works
equally well under Unix and Windows. In addition to a full complement of
modern widgets, FOX and FXRuby provide a lot of infrastructure for features
like OpenGL-based 3-D graphics, drag and drop, and a persistent settings registry.
In its relatively short time on the Ruby GUI scene, FXRuby has become one of
the most popular GUI toolkits for Ruby. Its disadvantages can’t be ignored, how-
ever: due to its close conformance to the C++ library, FXRuby’s event handling
scheme is awkward compared to that used by most other Ruby GUI toolkits.
The lack of comprehensive user manuals and reference documentation for FOX
and FXRuby is also a sore spot for many new developers.
Speaking of poor documentation, SWin/VRuby is a hard sell for anyone
other than experienced Windows programmers. On the other hand, if your pro-
gramming experience is such that you are already well-versed in the fine art of
www.syngress.com
183RubyC02.qxd 1/7/02 4:00 PM Page 129

130 Chapter 2 • GUI Toolkits for Ruby
Win32 programming, and you’d like to transfer that knowledge to Ruby appli-
cations development on Windows, SWin and VRuby may be the right choice
for you.
Finally, while these are four of the more popular choices, this is only the tip
of the iceberg.There are a number of other choices for GUI toolkits and new
ones may have appeared by the time you read this.Take the time to check the
RAA as well as newsgroup and mailing list posts to learn about the latest devel-
opments.
Solutions Fast Track
Using the Standard Ruby GUI:Tk
;Tk is still the standard GUI for Ruby, and this alone is a compelling
reason to consider Tk for your application’s user interface. It offers the
path of least resistance in terms of distributing your Ruby applications,
because you’re almost guaranteed that your end users will already have a
working Ruby/Tk installation in place.
;The most serious problem with Tk is its lack of more modern widgets
like combo-boxes, tree lists, and the like.While it’s true that Tk can be
extended with third-party widget sets like BLT and Tix, and at least one
Ruby extension module exists to take advantage of these Tk extensions,
the build and installation efforts are non-trivial.
Using the GTK+ Toolkit
;Because it serves as one of the core components of the popular
GNOME desktop for Linux, GTK+ development should be strong for
the foreseeable future.The Ruby/GTK extension is likewise under
ongoing development and already exposes most or all of the GTK+
functionality.
;One potential source of problems for GTK+ (and hence Ruby/GTK) is
the weakness of the Windows port of GTK+, which typically lags behind
the main X Window version. It is likely, however, that these problems will
be sorted out at some point with the redesigned GTK+ 2.0.
www.syngress.com
183RubyC02.qxd 1/7/02 4:00 PM Page 130

GUI Toolkits for Ruby • Chapter 2 131
Using the FOX Toolkit
;FOX provides an excellent cross-platform GUI solution, and unlike
GTK+, it works very well out of the box on both Linux and Windows.
In addition to its extensive collection of modern widgets, FOX offers
built-in support for drag-and-drop, OpenGL, and a wide variety of
image file formats.
;One drawback for choosing FOX is the lack of printed documentation.
Most of the large chain bookstores (or online booksellers) will have a
large selection of reference books for both Tk and GTK+, but you’re
not going to find any books on FOX programming.
Using the SWin/VRuby Extensions
;SWin and VRuby provide a fast, native solution for developing graphical
user interfaces on Windows. If you don’t need to run your Ruby appli-
cation on non-Windows systems, or have some alternative user interface
plan for those systems, this may be the right solution for you.
;Documentation is a bit of a problem when you’re getting started with
these extensions, especially if you’re not already an experienced
Windows programmer. It will probably help immensely to first educate
yourself about the basics of Windows programming using one of the
many fine reference books on Win32 programming.
Other GUI Toolkits
;We chose to cover a handful of popular GUI toolkits for Ruby in this
chapter, but that shouldn’t discourage you from investigating any of the
others that look interesting to you.You should pay attention to posts on
the Ruby newsgroup and mailing list, and check the Ruby Application
Archive (RAA) regularly, because you never know when new choices
will become available.
Choosing a GUI Toolkit
;Although Ruby is a powerful programming language for any single plat-
form, many programmers are drawn to it because of its cross-platform
www.syngress.com
183RubyC02.qxd 1/7/02 4:00 PM Page 131

132 Chapter 2 • GUI Toolkits for Ruby
nature. If you want your GUI applications written in Ruby to be simi-
larly cross-platform, you need to be mindful of the target platforms
when choosing a GUI toolkit.
;The bottom line is that there is no one-size-fits-all solution when
choosing a GUI toolkit. Instead of being swayed by the hype about one
toolkit versus another, invest some time to try out two or three that look
promising and decide for yourself which is the best fit.
Frequently Asked Questions
The following Frequently Asked Questions, answered by the authors of this book,
are designed to both measure your understanding of the concepts presented in
this chapter and to assist you with real-life implementation of these concepts. To
have your questions about this chapter answered by the author, browse to
www.syngress.com/solutions and click on the “Ask the Author” form.
Q: Are any of the GUI toolkits for Ruby thread-safe?
A: The answer depends very much on your definition of “thread-safe.” In the
most general sense, none of the GUI toolkits we’ve looked at are thread-safe;
that is to say, the GUI objects’ instance methods don’t provide proper support
for reentrancy.A good practice for multithreaded GUI applications is to let
the GUI operate in the main thread and reserve non-GUI “worker” threads
for background tasks whenever possible.
Q: Ruby/GTK and FXRuby come with some good example programs but I
didn’t find much for Ruby/Tk.What’s a good source for additional Ruby/Tk
example programs?
A: Check the Ruby Application Archives for the latest version of a set of
“Ruby/Tk Widget Demos” maintained by Jonathan Conway.These are a
Ruby/Tk port of the original Tcl/Tk widget demos and should give you a
good head start on writing your own Ruby/Tk applications.You should also
scan the Ruby Application Archives for other Ruby/Tk applications from
which you can learn.
www.syngress.com
183RubyC02.qxd 1/7/02 4:00 PM Page 132

GUI Toolkits for Ruby • Chapter 2 133
Q: I built and installed FOX, and then built and installed FXRuby, and both
appeared to build without errors.When I try to run any of the FXRuby
example programs under Linux, Ruby responds with an error message that
begins “LoadError: libFOX.so: cannot open shared object file”. I checked the
FOX installation directory and confirmed that libFOX.so is indeed present, so
why does Ruby report this error?
A: The problem has to do with how the operating systems locate shared libraries
that Ruby extensions like FXRuby depend on. Ruby is finding the FXRuby
extension properly, but it cannot find the FOX shared library that FXRuby
needs because it’s not in the standard path searched for dynamically-loaded
shared libraries.To correct the problem you simply need to add the FOX
library’s installation directory (usually, /usr/local/lib) to your
LD_LIBRARY_PATH environment variable. See the FXRuby installation
instructions for more information about this problem.
www.syngress.com
183RubyC02.qxd 1/7/02 4:00 PM Page 133
183RubyC02.qxd 1/7/02 4:00 PM Page 134

Accessing
Databases
with Ruby
Solutions in this chapter:
■Accessing Databases with Ruby/DBI
■Accessing Databases with Ruby/ODBC
■Accessing LDAP Directories with
Ruby/LDAP
■Utilizing Other Storage Solutions
;Summary
;Solutions Fast Track
;Frequently Asked Questions
Chapter 3
135
183RubyC03.qxd 1/7/02 3:06 PM Page 135

136 Chapter 3 • Accessing Databases with Ruby
Introduction
The existence of a variety of data-storage solution interfaces is essential for broad
acceptance of a language like Ruby. Certainly, interfaces to relational databases
such as Oracle, MySql, PostgreSQL, or DB2 are the most important, with those
to hierarchical databases like Lightweight Directory Access Protocol (LDAP) and
Berkley DBM file databases; or flat-file databases like Comma Separated Values
(CSV) coming in a close second.That being said, the ability to access databases of
different vendors with the same interface is also a desirable trait.
In Ruby, all of the aforementioned is already reality. Ruby’s equivalent to Perl’s
DataBase Interface (DBI) is Ruby/DBI which acts as a uniform way to access a
lot of different databases (for example, Oracle, DB2, InterBase, PostgreSQL or
MySql) with a simple yet powerful interface.And with Ruby/ODBC, the Open
Database Connectivity (ODBC) binding for Ruby, you can access any database for
which an ODBC driver exists. Besides Ruby/DBI and Ruby/ODBC, a lot of
other database-dependent libraries for Ruby exist, including sybase-ctlib for
Sybase databases, Ruby/LDAP for accessing LDAP directories, gdbm, ndbm, bdb,
and cbd for Berkeley DBM files or library csv for comma separated flat-files, to
mention only those not yet incorporated into Ruby/DBI.
This chapter gives an in-depth introduction into Ruby/DBI, briefly intro-
duces Ruby/ODBC, and shows how to use Ruby/LDAP to access LDAP direc-
tories. Other solutions to store data are also exhibited, for example how to use
the Berkley DB embedded database system or CSV files.
Accessing Databases with Ruby/DBI
Ruby/DBI is a unique database-independent interface for accessing numerous
relational databases from within Ruby. It is designed after Perl’s DBI, but pays
special attention to Ruby’s features that are not found in Perl (especially code
blocks). For now, drivers for the following databases exist:
■Oracle, DB2 and InterBase
■PostgreSQL, MySql and mSQL
■ODBC and ActiveX Data Objects (ADO)
■SQLRelay, SQLite
■Proxy (remote database access over Transmission Control Protocol/
Internet Protocol [TCP/IP])
www.syngress.com
183RubyC03.qxd 1/7/02 3:06 PM Page 136

Accessing Databases with Ruby • Chapter 3 137
www.syngress.com
Ruby/DBI’s Interactive SQL Shell
Ruby/DBI is distributed with the small interactive SQL shell, or command-
line processor, sqlsh.rb. It uses Ruby’s readline module, which features
command line history and keyword completion, as well as the ability to
run SQL scripts. This works with every database driver, be it Oracle, DB2
or even a remote connection to a MS Access database.
Let us start now and launch sqlsh.rb from the command line (it
resides in the bin/commandline directory of Ruby/DBI’s package and
should have been installed into your system’s binaries directory):
sqlsh.rb
This outputs which parameters it accepts and which Database
Drivers (DBDs) and datasource names (DSNs) it is aware of, as follows:
USAGE: sqlsh.rb [—file file] driver_url [user [password] ]
Available driver and datasources:
dbi:Oracle:
dbi:DB2:
dbi:DB2:SAMPLE
dbi:DB2:CRTLN
Notice that the list of datasource names may be incomplete, as was
the case for the dbi:Oracle driver in the output shown above, but this
does not mean that you can’t connect to an Oracle database. It is pos-
sible to connect in another way; here we connect to the Oracle database
with the Transparent Network Substrate (TNS) name “oracle.neumann”
using user “scott” and password “tiger”:
sqlsh.rb dbi:Oracle:oracle.neumann scott tiger
Developing & Deploying…
Continued
183RubyC03.qxd 1/7/02 3:06 PM Page 137

138 Chapter 3 • Accessing Databases with Ruby
www.syngress.com
If you have specified a valid TNS name, username, and password
(and no error occurred during the connection phase), a prompt will
appear, where you can input any SQL statement, be it Data Control
Language (DCL), Data Definition Language (DDL) or Data Manipulation
Language (DML):
CONNECT TO dbi:Oracle:oracle.neumann USER scott PASS tiger
dbi =>
As with some common UNIX shells (like bash or zsh), you can use
the Tab-key to complete keywords, and pressing Tab twice shows all
possible keywords for the current input. (This will only work if you have
compiled Ruby with “readline” support, otherwise command line history
and completion are disabled.)
Now let us execute a SQL statement. Note that you have to end it
with a semicolon:
dbi => SELECT EMPNO, ENAME, JOB, COMM, DEPTNO
dbi =| FROM EMP WHERE COMM IS NOT NULL ORDER BY SAL;
And sqlsh.rb responds with the following output:
+--------+--------+------------+--------+---------+
| EMPNO | ENAME | JOB | COMM | DEPTNO |
+--------+--------+------------+--------+---------+
| 7521.0 | WARD | SALESMAN | 500.0 | 30.0 |
| 7654.0 | MARTIN | SALESMAN | 1400.0 | 30.0 |
| 7844.0 | TURNER | SALESMAN | 0.0 | 30.0 |
| 7499.0 | ALLEN | SALESMAN | 300.0 | 30.0 |
+--------+--------+------------+--------+---------+
4 rows in set (0.001 sec)
To leave the SQL shell, type \q followed by a carriage return. To get
a list of other internal sqlsh.rb commands, press \h (Table 3.1).
To use sqlsh.rb to execute files containing multiple SQL commands,
use the command line option --file:
sqlsh.rb --file script.sql dbi:Pg:rdg matz 123
Continued
183RubyC03.qxd 1/7/02 3:06 PM Page 138

Accessing Databases with Ruby • Chapter 3 139
www.syngress.com
This would execute the commands in file script.sql. After that the
usual command prompt of sqlsh.rb would occur. If this is not desired,
simply pipe a “\q” on Stdin as shown:
echo \\q| sqlsh.rb --file script.sql dbi:Pg:rdg matz 123
Table 3.1 Internal sqlsh.rb Commands
Command Explanation
\h[elp] Displays help screen listing all available
commands.
\t[ables] Lists all tables and views of the connected
database.
\dt table Describes columns of table.
\s table Short-cut for “SELECT * FROM table”.
\c[ommit] Commits the current transaction.
\r[ollback] Rolls the current transaction back.
\a[utocommit] Shows current autocommit mode.
\a[utocommit] on|off Switches autocommit mode on/off.
\i[nput] filename Reads and executes lines read from file
filename.
\o[utput] Disables output to a file.
\o[utput] filename Sets output to file filename. All SQL state-
ments (and transaction control) the user
enters are stored in this file.
\pl nSets the page length to n.
\rb ... Executes the rest of the line as Ruby
command.
\irb Starts irb (interactive Ruby interpreter) in the
current conext. Constant Conn refers to the
current connection.
\q[uit] Quits sqlsh.rb.
183RubyC03.qxd 1/7/02 3:06 PM Page 139

140 Chapter 3 • Accessing Databases with Ruby
Obtaining and Installing Ruby/DBI
You can download a package containing the complete sources of Ruby/DBI and
all of its database drivers (not including their dependent libraries) from
www.ruby-projects.org/dbi.You’ll also find a link to this page by following
Ruby/DBI’s Ruby Application Archive (RAA) entry in the Library section,
under Database (www.ruby-lang.org/en/raa.html), but don’t mix it up with John
Small’s Ruby/dbi package! Besides the official releases, there is also a Concurrent
Versioning System (CVS) snapshot available, but be careful using this unless you
know exactly what you are doing! Users of Debian Linux, FreeBSD, or NetBSD,
may also check out the packages collections, where there are easy-to-install pack-
ages of Ruby/DBI as well.
Dependent on the database(s) you want to access, you will probably have to
install other libraries before being able to use Ruby/DBI:
■ADO (dbd_ado) RAA entry Library | Win32 | Win32OLE
■DB2 (dbd_db2) RAA entry Library | Database | Ruby/DB2
■InterBase (dbd_interbase) RAA entry Library | Database | interbase
■mSQL (dbd_msql) RAA entry Library | Database | Ruby/mSQL
■MySql (dbd_mysql) RAA entry Library | Database | MySQL/Ruby
■ODBC (dbd_odbc) RAA entry Library | Database | Ruby/ODBC
■Oracle (dbd_oracle) RAA entry Library | Database | oracle
■PostgreSQL (dbd_pg) RAA entry Library | Database | postgres
■Proxy-Server (dbd_proxy) RAA entry Library | comm | druby
■SQLite (dbd_sqlite) www.hwaci.com/sw/sqlite
■SQLRelay (dbd_sqlrelay) www.firstworks.com/sqlrelay
After installing the dependent libraries, unpack the downloaded Ruby/DBI
package (as of this writing, this is ruby-dbi-all-0.0.12.tar.gz) and change into the
newly-created directory:
tar –xvzf ruby-dbi-all-0.0.12.tar.gz
cd ruby-dbi-all
As Ruby/DBI consists of multiple database drivers (and you usually don’t want
to install all of them), you can choose what to install by using the --with option:
www.syngress.com
183RubyC03.qxd 1/7/02 3:06 PM Page 140

Accessing Databases with Ruby • Chapter 3 141
ruby setup.rb config –-with=dbi,dbd_oracle,dbd_pg
This would configure installation of the DBI module (which is necessary to
run any database driver) and the two database drivers for Oracle (dbd_oracle) and
PostgreSQL (dbd_pg).After that, execute the following command, which com-
piles and builds C extensions if necessary:
ruby setup.rb setup
Before installing Ruby/DBI into the appropriate directories, make sure you
have the rights to do this (UNIX users might have to login as, or su to, the root
user).Then execute:
ruby setup.rb install
Now, Ruby/DBI should be installed on your system and you can start using it.
Programming with Ruby/DBI
In this section we’ll give you an in-depth introduction to programming with
Ruby/DBI, showing many of its methods and features.You may also use this as a
function reference. But first, let’s have a look at an initial example that we’ll
implement using Ruby/DBI, Perl’s DBI, and Python’s DB API 2.0.All examples
will complete the same tasks:
1. Connect to a database.
2. Query a table.
3. Output the result of the query.
4. Close the connection to the database.
Our first example uses Ruby/DBI. It connects to an Oracle database with the
TNS name “oracle.neumann,” and uses the user “scott,” the password “tiger.” and
which queries the table “EMP”:
require "dbi"
URL = "dbi:Oracle:oracle.neumann"
# establish connection to Oracle database
dbh = DBI.connect(URL, "scott", "tiger")
# query table EMP
www.syngress.com
183RubyC03.qxd 1/7/02 3:06 PM Page 141

142 Chapter 3 • Accessing Databases with Ruby
rows = dbh.select_all("SELECT * FROM EMP")
# output the result
p rows
# disconnect from database
dbh.disconnect
The same example using Perl’s DBI looks like this:
use DBI;
$URL = "dbi:Oracle:oracle.neumann";
# establish connection to Oracle database
$dbh = DBI->connect($URL, "scott", "tiger");
# query table EMP
$rows = $dbh->selectall_arrayref("SELECT * FROM EMP");
# output result
foreach $row (@$rows) {
print join(',', $@row), "\n";
}
# disconnect from database
$dbh->disconnect();
Besides the language differences between Perl and Ruby (there’s less punctua-
tion in Ruby, for one), there are only minor differences between the two exam-
ples, the usage of the selectall_arrayref method in Perl and select_all in Ruby, for
instance.
Now we’ll modify our initial Ruby example to make use of Ruby’s code
blocks.This frees us from calling the disconnect method or other methods in order
to free resources.
require "dbi"
URL = "dbi:Oracle:oracle.neumann"
www.syngress.com
183RubyC03.qxd 1/7/02 3:06 PM Page 142

Accessing Databases with Ruby • Chapter 3 143
DBI.connect(URL, "scott", "tiger") do | dbh |
p dbh.select_all("SELECT * FROM EMP")
end
Finally, let’s see how the same would look using Python’s DB API 2.0.The
example below uses the Python API, and connects to a DB2 database instead of
an Oracle database.
import DB2
# establish connection to DB2 database
conn = DB2.connect(dsn='SAMPLE', uid='', pwd='')
# create new cursor object
curs = conn.cursor()
# execute SQL statement ...
curs.execute('SELECT * FROM EMPLOYEE')
# ... and fetch all rows
rows = curs.fetchall()
# close/free the cursor
curs.close()
# output result
print rows
# disconnect from database
conn.close()
Understanding Ruby/DBI Architecture
and Terminology
Ruby/DBI features a driver-based architecture similar to Perl’s DBI.This archi-
tecture consists of two parts:
www.syngress.com
183RubyC03.qxd 1/7/02 3:06 PM Page 143

144 Chapter 3 • Accessing Databases with Ruby
■The Database Interface (DBI), which is database-independent.This is the
interface with which the programmer works.
■The Database Drivers (DBDs), which implement the database-depen-
dent parts.
In the following text, we’ll use the term DBI module or simply DBI when we
refer to the Database Interface as a part of Ruby/DBI, and Ruby/DBI to refer to
both DBI and DBD as a whole.
Figure 3.1 depicts Ruby/DBI’s architecture. Each Ruby application exclu-
sively calls DBI methods, which dispatch the method calls to the DBDs.The
figure also indicates that it’s possible to have multiple connections open to dif-
ferent databases at the same time, or to one and the same database.
Ruby/DBI mainly consists of three classes.These are the three Handle classes,
DriverHandle,DatabaseHandle and StatementHandle, which all inherit from the
same abstract superclass Handle. Each class wraps one of the database-depended
classes defined by a DBD (classes Driver,Database, and Statement of module
DBI::DBD::DriverName).
■A DriverHandle is created for each loaded DBD, and is stored inter-
nally by the DBI in a hashtable. It provides methods for connecting to a
database (creates a DatabaseHandle) and to get more information about
the underlying driver (for example, which datasources are available, the
default username, and so on).You’ll rarely call methods of this class
directly, because most of its methods are wrapped by the module DBI as
module functions (such as method connect).
■A DatabaseHandle is created for each connection to a database. It pro-
vides methods mainly for transaction control, gathering more information
about the database, or for preparing (creates a StatementHandle) or imme-
diately executing SQL statements.We’ll name variables of this class dbh.
■A StatementHandle represents a prepared statement and provides
methods mainly for binding values to parameter markers, executing the
statement and fetching the resulting rows.We’ll name variables of this
class sth.
Connecting to Databases
Before we can use any of DBI’s methods, we have to load the feature dbi. Once that
is done, we can establish a database connection by calling the module function
DBI.connect, either with or without code block, as the code snippet below shows:
www.syngress.com
183RubyC03.qxd 1/7/02 3:06 PM Page 144
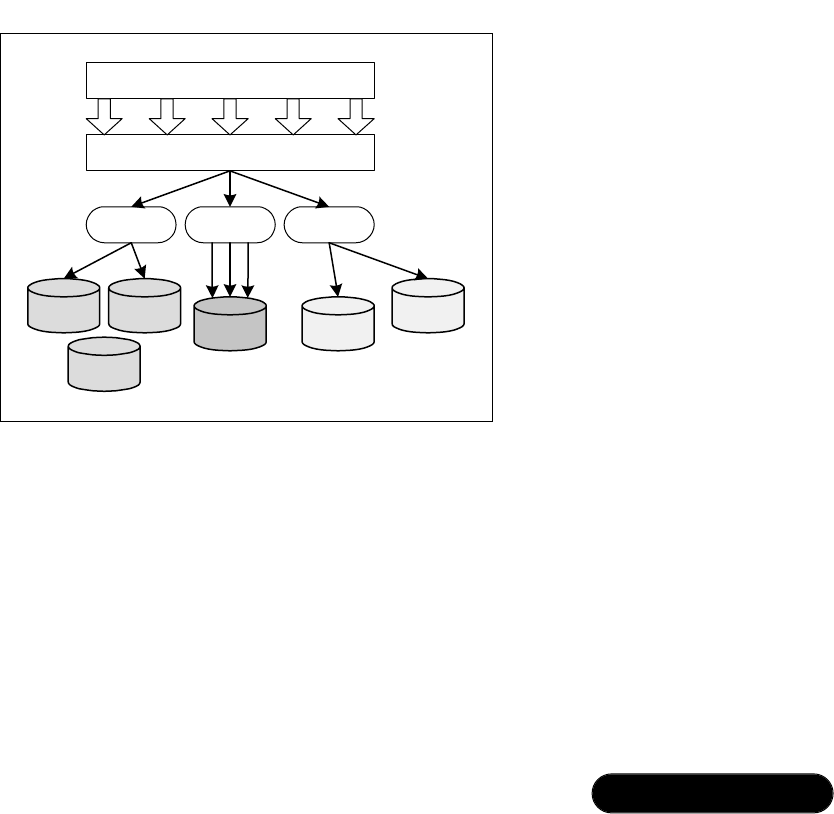
Accessing Databases with Ruby • Chapter 3 145
www.syngress.com
require 'dbi'
# (1) without code block
dbh = DBI.connect(dsn, user=nil, auth=nil, params=nil)
# ...use DatabaseHandle dbh...
dbh.disconnect
# (2) with code block
DBI.connect(dsn, user=nil, auth=nil, params=nil) do |dbh|
# ...use DatabaseHandle dbh...
end
Invoking DBI.connect without code block returns a DatabaseHandle object that
has to be closed explicitly by calling the disconnect method, whereas the code block
variant implicitly closes the connection at the end of the block. So, the block form
fits very well into the behavior of File.open or File.new of Ruby’s standard library.
DBI.connect takes the following parameters:
■Parameter dsn must be a valid datasource name.The DBI uses this to
load the DBD (if it’s not yet loaded) and to connect with the specified
database.
■Parameters user and auth specify the username and password to use for
the connection and all following operations performed on it. If both
Figure 3.1 Ruby/DBI’s Architecture
Ruby Application
DBI
DBD
Oracle DBD DB2 DBD
Sybase
Oracle Oracle
Oracle
DB2 Sybase Sybase
183RubyC03.qxd 1/7/02 3:07 PM Page 145

146 Chapter 3 • Accessing Databases with Ruby
parameters are omitted, default values provided by the underlying DBD
are taken instead. For example, the default username and password for an
Oracle database is “scott” and “tiger,” and empty strings “” and “” for
DB2; some others require you to specify both explicitly.
■The last parameter params lets you specify several database-related
options, for example, whether autocommit mode should be on or off by
default for this connection (option AutoCommit). Because it is the last
parameter of the method, Ruby allows us to leave off the curly braces (
“{“ and “}” ) around the key/value pairs.
The connected? method of the DatabaseHandle class lets us find out whether
the connection was already closed by a call to the disconnect method.The ping
method will check if the connection is still alive, usually by executing some SQL.
Rarely there will be a need for closing all connections established by one spe-
cific DBD or even of all loaded DBDs. Both is possible with the
DBI.disconnect_all method, which you pass a datasource name of the DBD whose
connections should be closed or call it without arguments to close really all con-
nections of all loaded DBDs:
# close all connections established by DBD Pg (PostgreSQL)
DBI.disconnect_all('dbi:Pg')
# close all established connections
DBI.disconnect_all
Using Driver URLs and Datasource Names
Driver URLs and datasource names are almost the same thing. Both are used by
the DBI with the difference that a driver URL is just used to represent a specific
DBD ( such as dbi:Pg for the PostgreSQL DBD) whereas a datasource name (for
example “dbi:Pg:database”) also includes the driver-specific parameters needed to
establish a connection to a database. So each datasource name is a valid driver
URL, whereas the reverse is not true.
The format of a driver URL is as follows:
dbi:driver_name
A datasource name includes additional driver-specific data:
dbi:driver_name:driver_specific_data
www.syngress.com
183RubyC03.qxd 1/7/02 3:07 PM Page 146

Accessing Databases with Ruby • Chapter 3 147
Table 3.2 lists all currently available DBDs with an explanation of their
driver-specific parameters.A db in the table stands for the name of the database
with which the DBD connects, whereas host and port are placeholders for the
location of the database. Parameters with default values are optional and may be
omitted.
Note that since Ruby/DBI version 0.0.6, database driver names are case-
insensitive, so that both “dbi:Mysql:...” and “dbi:mysql:...” refer to the same DBD.
Table 3.2 Format of the Datasource Names
Database Datasource Name Explanation
ADO dbi:ADO:dns dns: ODBC Datasource
name.
IBM DB2 UDB dbi:DB2:db
InterBase dbi:InterBase:database= chrset: Character set,
db;charset=chrset defaults to NONE.
dbi:InterBase:db
mSQL dbi:Msql:database host: Defaults to the local
=db;host=host host.
dbi:Msql:db:host
MySql dbi:Mysql:database= host: defaults to
db;host=host;port= “localhost”.
port;socket=socket;port, socket, flag:
flag=flag optional.
dbi:Mysql:db:host
ODBC dbi:ODBC:dns dns: ODBC Datasource
name.
Oracle 7/8(i) dbi:Oracle:tnsname tnsname: Oracle TNS name.
www.syngress.com
Continued
183RubyC03.qxd 1/7/02 3:07 PM Page 147

148 Chapter 3 • Accessing Databases with Ruby
Table 3.2 Continued
Database Datasource Name Explanation
PostgreSQL dbi:Pg:database=db;host, port, options, tty:
host=host;port=port; default to the default
options=options;tty=tty settings of PostgreSQL.
dbi:Pg:db:host
Proxy-Server dbi:Proxy:hostname=host;host, port: location of the
port=port;dsn=dsn DBI-Proxyserver, defaults to
localhost:9001.
dns: DBI datasource name
of the database to connect
with.
SQLite Dbi:SQLite:db
SQLRelay dbi:SQLRelay:host:port host: defaults to
dbi:SQLRelay:host=host;“localhost”.
port=port;socket=socket;port: defaults to 9000.
retrytime=retrytime;retrytime: defaults to 0
tries=tries tries: defaults to 1
socket: optional
If you want to see which database drivers are installed on your system, you can
execute the code in Figure 3.2. It calls method DBI.available_drivers to get an array
containing the driver URL of each installed DBD.Then calls DBI.data_sources for
each DBD, which returns all known datasources for the specified DBD.
Preparing and Executing SQL Statements
The Structured Query Language (SQL) consists of the three sub-languages,
DDL,DCL and DML, each of which has a different purpose.
■Data Definition Language (DDL): Create databases, tables or views, for
example: CREATE TABLE, CREATE VIEW.
■Data Control Language (DCL): Create users, grant and revoke privileges,
for example: GRANT, REVOKE, CREATE USER.
■Data Manipulation Language (DML): Query, insert, delete and update
tables or views, for example: INSERT, SELECT, DELETE, UPDATE.
www.syngress.com
183RubyC03.qxd 1/7/02 3:07 PM Page 148

Accessing Databases with Ruby • Chapter 3 149
www.syngress.com
Executing SQL statements can be classified into three categories:
1. Executing DDL,DCL or INSERT,UPDATE and DELETE statements.
All have the common characteristic that they return no result-set (no
need to provide methods for fetching rows): Use the DatabaseHandle#do
method.
2. Immediately executing SELECT statements without former preparation.
Use the DatabaseHandle#execute method.
3. Executing prepared DML SQL statements. Useful if the same structural
statement is executed repetitively. Use the DatabaseHandle#prepare and
StatementHandle#execute methods.
Tables 3.3 and 3.4 list all methods related to preparing and executing SQL
statements.The methods listed in Table 3.3 belong to the DatabaseHandle class,
whereas Table 3.4 lists the methods of the StatementHandle class.
Figure 3.2 List All DBDs with Their DSNs
require 'dbi'
DBI.available_drivers.each do |driver|
puts "Driver: " + driver
DBI.data_sources(driver).each do |dsn|
puts " Datasource: " + dsn
end
end
Executing this might result in the following output:
Driver: dbi:DB2:
Datasource: dbi:DB2:SAMPLE
Datasource: dbi:DB2:CRTLN
Driver: dbi:Mysql:
Datasource: dbi:Mysql:database=database
Datasource: dbi:Mysql:database=michael
Datasource: dbi:Mysql:database=mysql
Datasource: dbi:Mysql:database=test
183RubyC03.qxd 1/7/02 3:07 PM Page 149

150 Chapter 3 • Accessing Databases with Ruby
Table 3.3 Methods of the DatabaseHandle Class for Preparing and Executing
SQL Statements
Method Explanation
do( stmt, *bindvars ) => rpc Executes stmt immediately with
binding bindvars to parameter
markers beforehand. Returns the
Row Processed Count (RPC).
execute( stmt, *bindvars ) => sth Executes stmt immediately with
binding bindvars to parameter
execute( stmt, *bindvars ) markers beforehand. Returns a
{ |sth| aBlock } StatementHandle object (sth) which
is ready for fetching rows. The block
form ensures that the
StatementHandle is freed, that is, its
finish method is called.
prepare( stmt ) => sth Prepares stmt and returns a
StatementHandle object (sth). The
prepare( stmt ) { |sth| aBlock } block form ensures that the
StatementHandle is freed, that is, its
finish method is called.
Table 3.4 Methods of the StatementHandle Class for Preparing or Executing
SQL Statements
Method Explanation
bind_param Binds value to the parameter marker represented
( param_marker, by param_marker, which is either an integer
value, attribs=nil ) (position) or a string (for example “:name”;
which is only supported by Oracle). Parameter
attribs is currently unused and should be
omitted.
execute( *bindvars ) Executes an already prepared StatementHandle
with binding bindvars to parameter markers
beforehand. Afterwards the StatementHandle is
ready for fetching rows.
www.syngress.com
183RubyC03.qxd 1/7/02 3:07 PM Page 150

Accessing Databases with Ruby • Chapter 3 151
Using Parameter Markers
Parameter markers are to SQL statements what a programming language’s argu-
ments or parameters are to methods, procedures or functions.That is, they are
placeholders that must be bound to real values prior to execution.They are appli-
cable for all but DDL and DCL-SQL statements.
Parameter markers are usually represented by question marks, whereas the
Oracle DBD additionally supports arbitrary strings preceded by a colon (for
example “:mymarker”) or positional parameters such as “:1”,“:2” etc.To bind them
to real values, either use one of the methods listed in Table 3.3 or 3.4 that takes a
bindvars parameter, or the bind_param method of the StatementHandle class. Oracle’s
textual parameter markers can only be bound to values using the latter method.
The values you bind to parameter markers are converted to SQL datatypes, as
Table 3.5 shows.
Table 3.5 Ruby to SQL Type Conversion
Ruby Type SQL Type
NilClass (nil) NULL
TrueClass, FalseClass (true, false) CHAR(1), BOOL
String VARCHAR, CHAR, TEXT
Integer (Fixnum or Bignum) INT, BIGINT
Float FLOAT, DOUBLE, REAL
DBI::Binary BLOB, CLOB, LONG, LONG RAW
DBI::Time (or String) TIME
DBI::Date (or String) DATE
DBI::Timestamp (or String) TIMESTAMP
To create an instance of class DBI::Binary, simply pass its new method a String
object that contains the following binary data:
aBinary = DBI::Binary.new( "Binary data\000\001..." )
Similarly, you can create instances of classes DBI::Date,DBI::Time and
DBI::Timestamp as follows:
aTs = DBI::Timestamp.new(year=0, month=0, day=0, hour=0,
minute=0, second=0, fraction=0)
www.syngress.com
183RubyC03.qxd 1/7/02 3:07 PM Page 151
152 Chapter 3 • Accessing Databases with Ruby
aTime = DBI::Time.new(hour=0, minute=0, second=0)
aDate = DBI::Date.new(year=0, month=0, day=0)
The three classes also have accessor methods for their attributes with the same
names as the parameters in their new method. For example, you can set the hour
of a DBI::Time object using its time= method or get it via the time method.
Immediately Executing Statements without Result-set
As we already know, immediate execution without result-set is provided by the
DatabaseHandle class’ do method.We will use it here to create a table called Lang
(see Figure 3.3) that will store some of the most famous languages together with
their creators.
First we create the table:
require 'dbi'
DBI.connect('dbi:Pg:rdg', 'matz', '123',
'AutoCommit' => true) {|dbh|
# create table
dbh.do "CREATE TABLE Lang (
id INTEGER NOT NULL PRIMARY KEY,
name VARCHAR(10) NOT NULL,
creator VARCHAR(10) NOT NULL,
age INTEGER
)"
}
www.syngress.com
Figure 3.3 Model of Table Lang using UML Data Profile
183RubyC03.qxd 1/7/02 3:07 PM Page 152

Accessing Databases with Ruby • Chapter 3 153
Then we insert some rows into it. In all following examples we assume that
dbh is an already established connection:
dbh.do "INSERT INTO Lang VALUES (1, 'C', 'Dennis', 28)"
This is not very elegant, so we’ll insert the next two rows using parameter
markers:
sql = "INSERT INTO Lang VALUES (?, ?, ?, ?)"
dbh.do( sql, 2, 'Python', 'Guido', 10 )
dbh.do( sql, 3, 'Tcl', 'John', 12 )
With an Oracle database, we could have instead written the following as the
first line:
sql = "INSERT INTO Lang VALUES (:1, :2, :3, :4)"
Now if everything went well and no exception occurred, we should have
three rows in our table. Unfortunately we cannot proof this yet, because the do
method returns no result-set that we could output. Instead we update the three
rows and increment each row’s age field by one.
sql = "UPDATE Lang SET age=age+? WHERE age IS NOT NULL"
rpc = dbh.do( sql, 1 )
puts "#{ rpc } row(s) updated"
Here is the output:
3 row(s) updated.
What the do method returned in the last example is called the Row
Processed Count (RPC), which is the number of rows processed by the execu-
tion of the statement (and not the number of returned rows!).The RPC is nil if
no one exists for that statement, as is usually the case for DDL,DCL or SELECT
statements.
Immediately Executing Statements with Result-set
Immediate statement execution with result-set is provided by the DatabaseHandle
class’ execute method. Don’t mix this up with the method of the same name associ-
ated with the StatementHandle class, which executes an already prepared statement!
www.syngress.com
183RubyC03.qxd 1/7/02 3:07 PM Page 153

154 Chapter 3 • Accessing Databases with Ruby
In the example below we use this method to output all languages of the table
Lang that have existed for more than 12 years:
sql = "SELECT name FROM Lang WHERE age > ?"
sth = dbh.execute( sql, 12 )
p sth.fetch_all
sth.finish
Here is the output:
[ ["C"], ["Tcl"] ]
As a result of calling the execute method we get back a StatementHandle
object, which we use in the next line to fetch the resulting rows via the
fetch_all method. At the end we close the StatementHandle by calling the finish
method, which frees all the resources it holds internally.This should not be for-
gotten, as it prevents too many open database cursors. Instead of explicitly
calling finish, we could use the block form of the execute method, as the next
example shows:
sql = "SELECT name FROM Lang WHERE age > ?"
dbh.execute( sql, 12 ) do |sth|
p sth.fetch_all
end
The output is:
[ ["C"], ["Tcl"] ]
Executing Statements Preceded by Preparation
Execution preceded by preparation is a method best applied when executing a
large number of structurally similar DML SQL statements (structurally similar
meaning that they differ only in the values bound to parameter markers).
This kind of execution consists of two phases:
1. Preparation. Good databases create an execution plan for a given state-
ment, which makes subsequent (repetitive) executions faster.This is sup-
ported by the DatabaseHandle class’ prepare method, which returns a
StatementHandle object.
www.syngress.com
183RubyC03.qxd 1/7/02 3:07 PM Page 154

Accessing Databases with Ruby • Chapter 3 155
2. Execution. Bind concrete values to the parameter markers of the pre-
pared statement and execute it.This is supported by the StatementHandle
class’ execute method.
Up to now, our table Lang just contains the three languages: C,Tcl, and
Python. Perl and Ruby are still missing, so we will add them:
sql = "INSERT INTO Lang VALUES (?, ?, ?, ?)"
dbh.prepare( sql ) do |sth|
# add singleton method to sth
def sth.insert(*values)
execute(*values)
end
sth.insert(4, 'Perl', 'Larry', 14)
sth.insert(5, 'Ruby', 'Matz' , 6)
end
Of course in Ruby, as in Perl, there are many ways of doing the same thing.
We could have inserted both languages also with the following piece of code:
sql = "INSERT INTO Lang VALUES (?, ?, ?, ?)"
sth = dbh.prepare( sql )
sth.execute(4, 'Perl', 'Larry', 14)
sth.execute(5, 'Ruby', 'Matz' , 6)
sth.finish
Or, if we used the bind_param method, we’d write:
sql = "INSERT INTO Lang VALUES (?, ?, ?, ?)"
dbh.prepare( sql ) do |sth|
# first row
sth.bind_param(1, 4)
www.syngress.com
183RubyC03.qxd 1/7/02 3:07 PM Page 155

156 Chapter 3 • Accessing Databases with Ruby
sth.bind_param(2, 'Perl')
sth.bind_param(3, 'Larry')
sth.bind_param(4, 14)
sth.execute
# proceed with the second row in the same way...
end
Fetching the Result
After you’ve successfully executed a SQL query, you will normally want to fetch
some rows of its result-set.To do this, the DBI provides several different methods
(Tables 3.6 and 3.7).
Table 3.6 Short-cut Methods of the DatabaseHandle Class to Fetch Rows
Method Explanation
select_one( stmt, Executes the stmt statement with the bindvars
*bindvars ) => aRow | nil binding beforehand to parameter markers.
Returns the first row or nil if the result-set is
empty.
select_all( stmt, *bindvars ) Executes the stmt statement with the bindvars
=> [aRow, ...] binding beforehand to parameter markers.
Calling this method without block returns an
select_all( stmt, *bindvars ) array containing all rows. If a block is given, this
{ |aRow| aBlock } will be called for each row.
Table 3.7 Methods of the StatementHandle Class
Method Explanation
fetch => aRow | nil Returns the next row. Returns nil if no further
rows are in the result-set.
fetch { |aRow| aBlock } Invokes the given block for the remaining rows
of the result-set.
fetch_all => [aRow, ...] Returns all remaining rows of the result-set col-
lected in an array.
www.syngress.com
Continued
183RubyC03.qxd 1/7/02 3:07 PM Page 156

Accessing Databases with Ruby • Chapter 3 157
Table 3.7 Continued
Method Explanation
fetch_many( cnt ) => Returns the next cnt rows collected in an
[aRow, ...] array.
fetch_scroll( direction, Returns the row specified by the direction
offset=1 ) => aRow | nil parameter (one of the constants listed in
Table 3.8) and offset. Parameter offset is
discarded for all but SQL_FETCH_ABSOLUTE
and SQL_FETCH_RELATIVE.
fetch_array => anArray | nil (Obsolete) Returns or passes an array
fetch_array { |anArray| instead of a DBI::Row object.
aBlock }
fetch_hash => aHash | nil (Obsolete!) Returns or passes a hash instead
fetch_hash { |aHash| of a DBI::Row object.
aBlock }
each { |aRow| aBlock } Behaves like the fetch method, called as
iterator.
All other methods of The StatementHandle class mixes in the
module Enumerable Enumerable module so you can use all of its
methods, such as collect, select etc.
column_names => anArray Returns the names of the columns.
column_info => Returns an array of DBI::ColumnInfo
[ aColumnInfo, ... ] objects. Each object stores information
about one column and contains its name,
type, precision and more.
rows => rpc Returns the Row Processed Count of the
executed statement or nil if no such exist.
fetchable? => true | false Returns true if it’s possible to fetch rows,
otherwise false.
cancel Frees the resources held by the result-set.
After calling this method, it is no longer
possible to fetch rows until you again call
execute.
finish Frees the resources held by the prepared
statement. After calling this method no
further methods can be called onto this
object.
www.syngress.com
183RubyC03.qxd 1/7/02 3:07 PM Page 157

158 Chapter 3 • Accessing Databases with Ruby
Table 3.8 The direction Parameter of the fetch_scroll Method
Constant Explanation
DBI::SQL_FETCH_FIRST Fetch first row.
DBI::SQL_FETCH_LAST Fetch last row.
DBI::SQL_FETCH_NEXT Fetch next row.
DBI::SQL_FETCH_PRIOR Fetch previous row.
DBI::SQL_FETCH_ABSOLUTE Fetch row at position offset.
DBI::SQL_FETCH_RELATIVE Fetch the row that is offset rows away from
the current.
The DBI represents a row as an instance of the DBI::Row class.This makes it
easy to access columns by name or index without the need for two separate
methods, as is the case for Perl’s DBI or Ruby/ODBC.A common error when
fetching rows is:
sql, rows = 'SELECT creator FROM Lang ORDER BY age DESC'
dbh.execute( sql ) do |sth|
rows = sth.collect { |row| row } # WRONG !!!
end
p rows
This code outputs the following incorrect result:
[["Matz"], ["Matz"], ["Matz"], ["Matz"], ["Matz"]]
The reason for this is that due to performance reasons, the DBI::Row object
passed to the block as parameter row (or returned when not called with the
block) is always one and the same object, except that the values it holds are dif-
ferent each time.To fix this problem we could simply duplicate the object before
storing it in the array, as shown here:
sql, rows = 'SELECT creator FROM Lang ORDER BY age DESC'
dbh.execute( sql ) do |sth|
rows = sth.collect { |row| row.dup }
www.syngress.com
183RubyC03.qxd 1/7/02 3:07 PM Page 158

Accessing Databases with Ruby • Chapter 3 159
end
p rows
This time it would output the correct result:
[["Dennis"], ["Larry"], ["John"], ["Guido"], ["Matz"]]
But we could also use the fetch_all method:
sql = 'SELECT creator FROM Lang ORDER BY age DESC'
rows = dbh.execute( sql ) do |sth|
sth.fetch_all
end
p rows
Or we could have written the following more Perl-ish code:
sql = 'SELECT creator FROM Lang ORDER BY age DESC'
rows = []
sth = dbh.execute( sql )
while row=sth.fetch do
rows << row.dup
end
sth.finish
p rows
Instead of storing whole DBI::Row objects in an array, we could instead store
only the column values, as below.The advantage here is that we do not have to
duplicate the DBI::Row object.
sql = 'SELECT creator FROM Lang ORDER BY age DESC'
creators = dbh.execute( sql ) do |sth|
sth.collect { |row| row['creator'] }
end
p creators
www.syngress.com
183RubyC03.qxd 1/7/02 3:07 PM Page 159

160 Chapter 3 • Accessing Databases with Ruby
This outputs our desired result:
["Dennis", "Larry", "John", "Guido", "Matz"]
Table 3.9 lists the methods of the DBI::Row class.As a side note, the
DBI::Row class is currently implemented using the delegator pattern (delegate.rb)
and delegates all but some specific method calls to an internally held Array
object, which is used to store the column values.
Some different methods for accessing one or multiple columns of a DBI::Row
object are demonstrated in the following example:
row = dbh.select_one('SELECT * FROM Lang WHERE age < 10')
p row # => [5, "Ruby", "Matz", 6]
p row[1] # => "Ruby"
p row['creator'] # => "Matz"
p row[:age] # => 6
p row[1, 3] # => ["Ruby", "Matz" 6]
p row[:name, 3] # => ["Ruby", "Matz", 6]
p row[[:age, :name]] # => [6, "Ruby"]
p row[:age, :name, :age] # => [6, "Ruby", 6]
p row[/n/] # => [5, "Ruby"]
p row['name'..'age'] # => ["Ruby", "Matz", 6]
p row[1..'age'] # => Error!!!
p row.field_names # => ["lang_id", "name",
# "creator", "age"]
p row.is_a? Array # => false
p row.to_a.is_a? Array # => true
www.syngress.com
183RubyC03.qxd 1/7/02 3:07 PM Page 160

Accessing Databases with Ruby • Chapter 3 161
Table 3.9 Methods of the DBI::Row Class
Method Explanation
column_names => anArray Returns an array of all column names.
field_names => anArray
by_index(index) => anObj Returns the column at position index.
by_field(field_name) Returns the column named field_name.
=> anObj
each_with_name { |value, Calls for each column aBlock with two
name| aBlock } arguments, the column’s value and its name.
Note that the order of arguments differ from
that of the Hash#each method.
to_h => aHash Converts the DBI::Row object into a hash or
to_a => anArray array. Both methods return newly created
objects.
[ aString | aSymbol | Equal to the by_field method for aString and
anInteger ] => anObj aSymbol and to by_index for anInteger.
[ anArray | aRegexp | Returns the array of columns specified by
aRange ] => anArray anArray, aRegexp (all columns whose name
match the regular expression) or aRange.
[ aString | aSymbol | Returns length columns starting at the column
anInteger, length ] specified by aString, aSymbol or anInteger.
=> anArray
[ more than two values ] Calls the one-parameter form of method [] for
=> anArray each parameter. Collects the results and
returns them as array.
[ aString | aSymbol | Set the column specified by aString, aSymbol
anInteger ] = anObj or anInteger to anObj.
[ aRange ] = anObj Behaves like calling the same method of the
Array class with the difference that strings in
ranges are converted to integers before (posi-
tion of column with that name).
[ aString | aSymbol | Behaves like calling the same method of the
anInteger, length ] = anObj Array class, only that the first parameter is
converted to an integer if it’s a string or
symbol.
Finally,Table 3.10 lists the mappings between SQL and Ruby types. User-
defined PostgreSQL datatypes, as well as values (except NULL) from MySql or
mSQL databases, are returned as strings.
www.syngress.com
183RubyC03.qxd 1/7/02 3:07 PM Page 161

162 Chapter 3 • Accessing Databases with Ruby
Table 3.10 SQL to Ruby Type Conversion
SQL Type Ruby Type
BOOL TrueClass, FalseClass ( or String)
VARCHAR, CHAR String
INT, BIGINT Integer (Fixnum or Bignum)
FLOAT, DOUBLE, REAL Float
BLOB, CLOB, LONG, LONG RAW String
TIME DBI::Time (or String)
DATE DBI::Date (or String)
TIMESTAMP DBI::Timestamp (or String)
Performing Transactions
Transactions are a mechanism that ensures data consistency.An often-recited
example of where transactions are essential is that of transferring money between
two accounts. If the system crashes just after debiting one account, or credits
before it crashes, way it harms either the bank or the user.Therefore, both opera-
tions must be performed as one atomic operation in order for the transaction to
be viable.
Transactions (should) have the following four properties (which form the
acronym “ACID”):
■Atomicity: Either a transaction completes or nothing happens at all.
■Consistency:A transaction must start in a consistent state and leave the
system is a consistent state.
■Isolation: Intermediate results of a transaction are not visible outside the
current transaction.
■Durability: Once a transaction was committed, the effects are persistent;
even after a system failure.
The DBI provides two methods to either commit or rollback a transaction.
These are the commit and rollback methods of the DatabaseHandle class. If you call
one of them for a database that does not support transactions (for example MySql
or mSQL), the current default behavior is to do nothing, though this may change
to raising an exception or something similar in future versions of Ruby/DBI.
www.syngress.com
183RubyC03.qxd 1/7/02 3:07 PM Page 162

Accessing Databases with Ruby • Chapter 3 163
Generally, there are two different ways that databases handle transactions.
Some databases implicitly start new transactions and provide COMMIT and
ROLLBACK commands, whereas others require an explicit start for transactions
with commands, BEGIN WORK or BEGIN TRANSACTION, for instance.An
example for the latter is PostgreSQL. Its DBD has to emulate the commit and roll-
back behavior.
The DBI provides a third transaction control method.This is the transaction
method, which takes a block as argument and behaves as follows:
# assuming dbh is a DatabaseHandle
def dbh.transaction
dbh.commit
begin
yield dbh
dbh.commit
rescue Exception
dbh.rollback
raise # reraise exception
end
end
It first commits the current transaction, then executes the code block. If the
block raises an exception, the transaction is rolled back and the exception is
raised again. Otherwise, the transaction is committed. Use this method to ensure
that the database operations inside the block execute atomically – either all of
them complete or nothing happens at all.
Enabling or Disabling Autocommit Mode
You can enable or disable autocommit mode either by setting the AutoCommit
option in the last parameter of DBI.connect, or via the DatabaseHandle class’[]=
method.
# disable AutoCommit from the beginning on
dbh = DBI.connect('dbi:Pg:rdg', 'matz', '123',
'AutoCommit' => false)
# enable AutoCommit
www.syngress.com
183RubyC03.qxd 1/7/02 3:07 PM Page 163

164 Chapter 3 • Accessing Databases with Ruby
dbh['AutoCommit'] = true
# print current value of AutoCommit
p dbh['AutoCommit'] # => true
# disable AutoCommit
dbh['AutoCommit'] = false
If your application depends on whether AutoCommit mode is on or off, make
sure to set it explicitly. Don’t rely on a default setting!
Transaction Behavior on Disconnect
If the connection to a database is closed by the user with the disconnect method,
any outstanding transactions are rolled back by the DBI. However, instead of
depending on any of DBI’s implementation details, your application would be
better off calling commit or rollback explicitly.
Handling Errors
There are many sources of errors. A few examples are a syntax error in an exe-
cuted SQL statement; a connection failure; or calling the fetch method for an
already canceled or finished StatementHandle — just to mention a few.To see
what happens when an error occurs, try executing the following at the command
line:
ruby –r dbi –e "DBI.connect('dbi:Oracel:')"
This tries to connect to the non-existent DBD “Oracel” (note the typo).As a
consequence we’ll get the following message on the screen, which shows us that
a DBI::InterfaceError exception was raised:
/usr/pkg/lib/ruby/site_ruby/1.6/dbi/dbi.rb:244:in `load_driver': Could
not load driver (No such file to load – DBD/Oracel/Oracel)
(DBI::InterfaceError)
The DBI defined exception class hierarchy is shown in Figure 3.4. Note that
all exceptions but RuntimeError are defined under the DBI module.
■DBI::Warning: Its purpose is to signal a (usually unexpected) misbe-
havior such as data truncation.This exception is currently neither used
by the DBI nor by any of the DBDs.
www.syngress.com
183RubyC03.qxd 1/7/02 3:07 PM Page 164
Accessing Databases with Ruby • Chapter 3 165
■DBI::Error: Base class of all other exception classes defined by the
DBI. Use it in a rescue clause to catch all DBI-related errors.
■DBI::InterfaceError: Raised due to an error related to the DBI’s inter-
face; if, for example, the DBI is not able to load a DBD, or if you call
the fetch method after you called cancel or finish.
■DBI::NotImplementedError: Raised due to a mandatory DBD
method that was not implemented. If you are using stable DBDs, this
exception should never be raised.
■DBI::DatabaseError: Base class for all exceptions related to database
errors.
The two most important exception classes are DBI::InterfaceError and
DBI::DatabaseError.The latter implements three methods of getting more infor-
mation about the reason of the underlying database error, which are:
■err: Returns an integer representation of the occurred error or nil if this
is not supported by the DBD.The Oracle DBD for example returns the
numerical part of an “ORA-XXXX” error message.
■errstr: Returns a string representation of the occurred error.
■state: Returns the SQLSTATE code of the occurred error.The SQL-
STATE is a five-character-long string. Most DBDs do not support this
and return nil instead.
In the example below we implement the try_connect method, which tries to
connect to a database; if necessary, repeat this up to a specified number of times
(the tries parameter) with a delay between each attempt (the sleep_sec parameter).
www.syngress.com
Figure 3.4 Hierarchy of DBI’s Exception Classes
RuntimeError
DBI::Warning
DBI::Error
NotImplementedError
InterfaceError
DatabaseError
DataError
OperationalError
IntegrityError
InternalError
ProgrammingError
NotSupportedError
183RubyC03.qxd 1/7/02 3:07 PM Page 165

166 Chapter 3 • Accessing Databases with Ruby
require 'dbi'
def try_connect(dsn, user, pass, tries=3, sleep_sec=5)
1.upto(tries) do |n|
print "#{n}. Try ..."
begin
dbh = DBI.connect(dsn, user, pass)
puts "connected"
return dbh
rescue DBI::DatabaseError => err
puts "failed with error (#{err.errstr})"
sleep sleep_sec
end
end
raise 'could not connect to database #{ dsn }'
end
# try 10 times to connect, wait 20 secs between each try
dbh = try_connect('dbi:Pg:rdg', 'matz', '123', 10, 20)
# ...
Tracing the Execution of DBI Applications
Tracing DBI method calls can save you some time if your database application
does some strange things that it shouldn’t be doing. However, before you can use
tracing in Ruby/DBI, you have to install the AspectR module by Robert Feldt
and Avi Byrant.
The DBI provides two methods of controlling the tracing behavior of
DatabaseHandle and StatementHandle objects or the default behavior for all new
created handles:
■DBI.trace(level=nil, output=nil)
■DBI::Handle#trace(level=nil, output=nil)
The level parameter specifies the tracing level, which is a value from 0 to 3
(see Table 3.11).With the output parameter, you can define where the tracing
www.syngress.com
183RubyC03.qxd 1/7/02 3:07 PM Page 166

Accessing Databases with Ruby • Chapter 3 167
messages should be written to.This is usually an object of the IO or File classes,
but may also be any object implementing the << method. If one of the parame-
ters is nil, its current value is not changed.This is useful for modifying only one
value while keeping the others unchanged.An example would be to increase the
tracing level without modifying the output location.
By default, the trace-level is set to 2, and the output to StdErr, but unless you
require ”dbi/trace”, no tracing at all is performed.To modify the default settings,
call the DBI.trace method.This will affect all newly created handles. Note that
trace settings are inherited to subsequently created sub-handles.
Table 3.11 Tracing Levels and Their Meaning
Level Meaning
0 No Tracing at all.
1 Show only return values and exceptions.
2 Show method calls (with parameters), return values and
exceptions. (default)
3 Like 2, but uses inspect instead of to_s to output objects.
This often results in much more output.
To enable tracing without changing any line of code, just run your applica-
tion like this:
ruby –r dbi/trace yourapp.rb
The example below demonstrates some aspects of tracing an application.
Note that each handle could have a different output location, which is not pos-
sible in Perl’s DBI.
require 'dbi'
require 'dbi/trace'
# disable tracing for all subsequent created Handles
DBI.trace(0)
dbh = DBI.connect('dbi:Pg:rdg', 'matz', '123')
dbh.do('CREATE TABLE trace_test (name VARCHAR(30))')
www.syngress.com
183RubyC03.qxd 1/7/02 3:07 PM Page 167

168 Chapter 3 • Accessing Databases with Ruby
# enable tracing for this and all subsequent created
# StatementHandles
dbh.trace(1, File.new('trace.log', 'w+'))
sql = 'INSERT INTO trace_test VALUES (?)'
dbh.prepare(sql) do |sth|
# sth inherits the trace settings from dbh
sth.execute('Michael')
# increase trace-level
sth.trace(2)
sth.execute('John')
end
dbh.do('DROP TABLE trace_test')
# generate an exception
dbh.select_one('SELECT * FROM trace_test')
dbh.disconnect
After execution, the trace.log file should contain something like the following
(some lines were cut in this example):
<= cancel for #<DBI::StatementHandle:0x80ae2f8> = nil
<= column_names for #<DBI::StatementHandle:0x80ae2f8> =
<= execute for #<DBI::StatementHandle:0x80ae2f8> =
-> execute for #<DBI::StatementHandle:0x80ae2f8> ("John")
[... some lines cut ...]
!! ERROR: Relation 'trace_test' does not exist
<= select_one for #<DBI::DatabaseHandle:0x80b9694>
<= connected? for #<DBI::DatabaseHandle:0x80b9694> = true
<= disconnect for #<DBI::DatabaseHandle:0x80b9694> = nil
Lines starting with “->“ show method calls whereas “<-“ shows method’s
returns. In trace mode 1only one line for a method call and its return value is
shown.These are the lines starting with “<=”. Exceptions are denoted by “!!”.
www.syngress.com
183RubyC03.qxd 1/7/02 3:07 PM Page 168

Accessing Databases with Ruby • Chapter 3 169
Values between parentheses at the end of a line denote arguments to methods,
whereas a value after an equal sign denotes a return value.
Accessing Metadata
“Metadata” are data about data. In the case of database tables, this is mainly infor-
mation stored about a table’s columns, such as name, type, scale and precision; as
well as whether or not it’s nullable, unique, a primary key; or whether it’s indexed
or not.A list of tables and views (and other database objects) is also part of a
database’s stored metadata .
Because most databases store this metadata differently, the DBI provides a
common interface for accessing the metadata.
First let us look at the DatabaseDriver class’tables method. It is supported by all
but the ADO DBD, and returns a list of all the current connected database’s
tables. For example, we could use this to output all tables of a PostgreSQL
database other than the system tables that start with “pg_”:
require 'dbi'
DBI.connect(ARGV[0], ARGV[1], ARGV[2]) do |dbh|
p dbh.tables.select {|t| t !~ /^pg_/ }
end
Which outputs (on my system):
["tab_referer", "tab_user_agent", "tab_log_data", "tab_url", "language",
"person", "demo"]
Now let us try to gather more information about the table’s columns. In
Figure 3.5 (its output is shown in Figure 3.6) we use the DatabaseHandle class’s
columns method, which returns an array of DBI::ColumnInfo objects for a given
table. Each DBI::ColumnInfo object represents one column of the table, and has
the following attributes:
■name:The column’s name.
■type_name: String representation of its type.
■sql_type: Portable integer representation of its type (DBI::SQL_XXX
constants).
■precision: Number of bytes or digits.
www.syngress.com
183RubyC03.qxd 1/7/02 3:07 PM Page 169

170 Chapter 3 • Accessing Databases with Ruby
■scale: Number of digits from right.
■default: Default value for this column.
■nullable: Is NULL allowed for this column?
■indexed: Is there an index on this column?
■primary: Is this column a primary key?
■unique: Is this column unique to the table?
www.syngress.com
Figure 3.5 Using the columns Method to Access Metadata
require 'dbi'
DBI.connect(ARGV[0], ARGV[1], ARGV[2]) do |dbh|
dbh.do %[
CREATE TABLE test (
pk INTEGER NOT NULL PRIMARY KEY,
name VARCHAR(30) DEFAULT 'nobody',
flt DECIMAL(10,2) NOT NULL UNIQUE
)
]
head = %w(name type_name precision scale default
nullable indexed primary unique)
rows = dbh.columns('test').collect do |col|
head.collect{|a| col[a]}
end
DBI::Utils::TableFormatter.ascii(head, rows)
dbh.do 'DROP TABLE test'
end
183RubyC03.qxd 1/7/02 3:07 PM Page 170

Accessing Databases with Ruby • Chapter 3 171
If an attribute is nil then it was not possible to get information about it.
Using Driver-specific Functions and Attributes
The DBI lets database drivers provide additional database-specific functions,
which can be called by the user through the func method of any Handle object.
Furthermore, driver-specific attributes are supported and can be set or gotten
using the []= or [] methods. Driver-specific attributes are lowercase and preceded
by the DBD name, pg_client_encoding or odbc_ignorecase, for instance.
PostgreSQL
The DBD for PostgreSQL implements the driver-specific functions listed below
for DatabaseHandle objects, all related to handling Binary Large OBjects (BLOBs).
blob_import(file)
blob_export(oid, file)
blob_create(mode=PGlarge::INV_READ)
blob_open(oid, mode=PGlarge::INV_READ)
blob_unlink(oid)
blob_read(oid, length=nil)
To import binary data or a file into a table, we could either use blob_import,
which returns an object identifier (OID) for the inserted file; blob_create, which
returns a PGlarge object; or we could simply insert a DBI::Binary object. Say we
have an existing table BlobTest with two columns. name of type VARCHAR(30)
and data of type OID and an already established database connection dbh,we
could insert a file into this table in three different ways:
SQL = 'INSERT INTO BlobTest (name, data) VALUES (?,?)'
# (1) using blob_import
www.syngress.com
Figure 3.6 Output of Figure 3.5
183RubyC03.qxd 1/7/02 3:07 PM Page 171

172 Chapter 3 • Accessing Databases with Ruby
dbh.do(SQL, 'test.rb', dbh.func(:blob_import, 'test.rb'))
# (2) using DBI::Binary
data = DBI::Binary.new( File.readlines('test.rb').to_s )
dbh.do(SQL, 'test.rb (2)', data)
# (3) using blob_create
data = File.readlines('test.rb').to_s
blob = dbh.func(:blob_create, PGlarge::INV_WRITE)
blob.open
blob.write data
dbh.do(SQL, 'test.rb (3)', blob.oid)
blob.close
To read the BLOB back, we could use blob_export to store the BLOB into a
file, blob_read to read the whole or a part of the BLOB into a String object, or
blob_open to handle the BLOB similarly to a file.The latter is especially useful for
streaming applications.
To get the BLOB with name “test.rb” out of the database and print it to
Stdout, we could write:
SQL = "SELECT data FROM BlobTest WHERE name=?"
oid = dbh.select_one(SQL, 'test.rb')['data']
# (1) using blob_export
dbh.func(:blob_export, oid, '/tmp/test.rb')
puts File.readlines('/tmp/test.rb').to_s
# (2) using blob_read
puts dbh.func(:blob_read, oid)
# (3) using blob_open
blob = dbh.func(:blob_open, oid, PGlarge::INV_READ)
blob.open
puts blob.read
blob.close
www.syngress.com
183RubyC03.qxd 1/7/02 3:07 PM Page 172

Accessing Databases with Ruby • Chapter 3 173
You can also use blob_open to modify already existing BLOBs.To delete a
BLOB, use blob_unlink and pass it the OID of the BLOB to remove it from the
database.
MySql
MySql implements the following driver-specific functions for the DriverHandle
class:
createdb(db, host, user, pass [, port, sock, flag])
dropdb(db, host, user, pass [, port, sock, flag])
shutdown(host, user, pass [, port, sock, flag])
reload(host, user, pass [, port, sock, flag])
And for the DatabaseHandle class, the following functions are defined:
createdb(db)
dropdb(db)
shutdown()
reload()
With the driver-specific functions of the DriverHandle class, it is possible to
create or drop a database, or to shutdown or restart the database server without
connecting to a database, using the connect method.Thus, to create a database we
could write:
require "dbi"
# get DriverHandle object for DBD MySql
drh = DBI.get_driver('dbi:Mysql')
# create a datbase
drh.func(:createdb, 'demo', 'localhost', 'user', 'pw')
Whereas using a DatabaseHandle object we would write instead:
require "dbi"
DBI.connect('dbi:Mysql:test', 'user', 'pw') do |dbh|
dbh.func(:createdb, 'demo')
end
www.syngress.com
183RubyC03.qxd 1/7/02 3:07 PM Page 173

174 Chapter 3 • Accessing Databases with Ruby
ODBC
The ODBC database driver implements one driver-specific attribute: odbc_ignore-
case. It has the same effect as the Ruby/ODBC method with the same name
(“ignorecase”). If enabled, all column names are reported upper case.
Accessing Databases Remotely
Using DBD::Proxy
With Ruby/DBI it is very easy to remotely connect to databases, even if the
databases themselves do not support remote connections.This is achieved by a
server component: the proxy server which runs on the machine where the
database resides, and a database driver which communicates with that proxy server.
Note that there is currently no compression or encryption implemented. If
security is important for your application, you might consider using a Virtual
Private Network (VPN) that implements both encryption and compression trans-
parently for all TCP/IP connections.
NOTE
Free VPN implementations are FreeS/WAN (www.freeswan.org) for Linux
or KAME (www.kame.net) for BSDs.
Now to start the proxy server, change into the DBI distribution’s bin/
proxyserver directory and enter the following at the command line:
ruby proxyserver.rb work 9001
This would start a proxy server listening on port 9001 and accepting connec-
tions for the work host.To test whether or not you can access the remote
database, use sqlsh.rb:
REMOTE_DSN=dbi:Pg:dbname
URI=dbi:Proxy:hostname=work;port=9001;dsn=$REMOTE_DSN
sqlsh.rb $URI user passwd
On the remote host, this would establish a connection to the database speci-
fied by REMOTE_DSN.The proxy server would then forward this connection
to you.
www.syngress.com
183RubyC03.qxd 1/7/02 3:07 PM Page 174

Accessing Databases with Ruby • Chapter 3 175
Copying Table Data between
Different Databases
Have you ever tried to transfer whole tables from one database to another of a
different type or vendor (for example, PostgreSQL and MS Access), and possibly
even over TCP/IP? With Ruby/DBI this is a simple task that can be done in less
than 40 lines of code, as we’ll demonstrate below.
This example assumes that the table already exists in the destination database.
Furthermore, we don’t care about possible referential constraints, which would
make our life unnecessarily hard.
We start with writing a helper function that lets us pass the username and
password together with the DSN in one string of the form user:pass@dsn:
def parse_uri( uri )
auth, uri = uri.split('@')
if uri.nil?
return auth
else
user, pass = auth.split(':')
return uri, user, pass
end
end
The real work is done by the replicate_table method, which inserts all rows of
table src_tab from database src into the table dst_tab of database dst. It loops over
each row of the source table and prepares a statement for inserting a row into the
destination table once it knows the number of fields.The prepared statement is
then executed in each iteration.
def replicate_table(src, dst, src_tab, dst_tab)
stmt = nil
src.select_all("SELECT * FROM #{src_tab}") do |row|
if stmt.nil?
fields = row.field_names.join(",")
qs = (['?'] * row.size).join(",")
stmt = dst.prepare %[
INSERT INTO #{dst_tab} (#{fields}) VALUES (#{qs})
]
end
www.syngress.com
183RubyC03.qxd 1/7/02 3:07 PM Page 175

176 Chapter 3 • Accessing Databases with Ruby
stmt.execute(*row.to_a)
end
end
In the main program we just have to connect to both databases, turn auto
commit mode off for the destination database to increase performance, and finally
call the replicate_table method.
require 'dbi'
unless (3..4) === ARGV.size
puts 'USAGE: #$0 src_dsn dst_dsn src_table [dst_table]'
exit 1
end
SRC_DSN = ARGV[0]
DST_DSN = ARGV[1]
SRC_TAB = ARGV[2]
DST_TAB = ARGV[3] || SRC_TAB
DBI.connect(*parse_uri(SRC_DSN)) do |src|
DBI.connect(*parse_uri(DST_DSN)) do |dst|
dst['AutoCommit'] = false
dst.transaction do
replicate_table(src, dst, SRC_TAB, DST_TAB)
end
end
end
If the insertion of one row should fail or another error should occur, all
changes already made to the destination database are rolled back and the program
is aborted.
Getting Binary Objects Out of a Database
Suppose you develop a Web application. It is an online auction platform that
allows users to upload pictures of objects they want to sell.You extend your
already complex data model and add one more table (see Figure 3.7) that stores
www.syngress.com
183RubyC03.qxd 1/7/02 3:07 PM Page 176

Accessing Databases with Ruby • Chapter 3 177
the pictures inside the database. In the same table, we also store the content type
(for example, image/jpeg) as well as a primary key to uniquely access each image.
To insert a binary object into a database, simply use DBI’s DBI::Binary class;
pass the binary data as a string to its new method, and bind this object to a param-
eter marker as usual.This works for all databases including PostgreSQL (note that
the column must be of the OID type) and MySql (TEXT column type).
To get the binary object out of the database, we write a little Common
Gateway Interface (CGI) application, taking the primary key as of the image to
show as CGI parameter id.
#!/usr/bin/env ruby
require "cgi"
require "dbi"
DSN, USER, PWD = 'dbi:Pg:rdg', 'matz', '123'
SQL = 'SELECT data, content_type FROM picture WHERE ' +
'picture_id = ?'
cgi = CGI.new
id = cgi['id'][0].to_i
DBI.connect(DSN, USER, PWD) do |dbh|
row = dbh.select_one(SQL, id)
puts "Content-Type: %s" % row['content_type']
puts "Content-Length: %s" % row['data'].size
puts "Date: %s" % Time.now
# cache image three minutes
puts "Expires: %s" % (Time.now + 3*60)
puts
# output image data
print row['data'].to_s
end
www.syngress.com
183RubyC03.qxd 1/7/02 3:07 PM Page 177

178 Chapter 3 • Accessing Databases with Ruby
This works for all databases. For PostgreSQL databases (currently the only
DBD supporting streaming operations on BLOBs) we could modify this so that
we don’t need to load the whole image in memory. Instead, we read in the image
in fixed-sized blocks (BLK_SIZE) and pass them, one after the other, to the Web
server. Of course, this only makes sense if the images’ binary data is large or is
frequently requested.
#!/usr/bin/env ruby
require "cgi"
require "dbi"
DSN, USER, PWD = 'dbi:Pg:rdg', 'matz', '123'
SQL = 'SELECT data, content_type FROM picture WHERE ' +
'picture_id = ?'
BLK_SIZE = 8 * 1024
cgi = CGI.new
id = cgi['id'][0].to_i
DBI.connect(DSN, USER, PWD) do |dbh|
row = dbh.select_one(SQL, id)
stream = dbh.func(:blob_open, row['data'])
puts "Content-Type: %s" % row['content_type']
puts "Content-Length: %s" % stream.size
puts "Date: %s" % Time.now
# cache image three minutes
puts "Expires: %s" % (Time.now + 3*60)
puts
# output image data
loop {
data = stream.read(BLK_SIZE)
www.syngress.com
183RubyC03.qxd 1/7/02 3:07 PM Page 178

Accessing Databases with Ruby • Chapter 3 179
print data
break if data.size != BLK_SIZE
}
stream.close
end
Transforming SQL-query Results to XML
XML is everywhere, so it’s not very surprising that most of today’s commercial
database systems integrate it by default, or at least provide XML extensions.
Microsoft’s SQL Server, for example, makes the generation of XML very easy by
extending the syntax of SQL’s SELECT statement to SELECT ... FOR XML,
whereas Oracle takes a more solid approach and provides functions returning
XML documents as Character Large OBjects (CLOBs) similar to the statement
SELECT xmlgen.getXML('select * from ....') FROM DUAL
Again, others use different approaches with different features and capabilities.
In this section we don’t want to limit XML generation to the databases of
only one or two vendors. Instead, we want to achieve this capability indepen-
dently of specific databases, for which Ruby/DBI provides an excellent solution.
Indeed, Ruby/DBI comes with some methods for generating XML by default,
which are the following methods, defined in module DBI::Utils::XMLFormatter:
row(row, rowtag='row', output=STDOUT)
extended_row(row, rowtag='row', cols_in_row_tag=[],
cols_as_tag=nil, add_row_tag_attrs={},
output=STDOUT)
table(rows, roottag='rows', rowtag='row', output=STDOUT)
www.syngress.com
Figure 3.7 Data Model of Table to Store Images
183RubyC03.qxd 1/7/02 3:07 PM Page 179

180 Chapter 3 • Accessing Databases with Ruby
Use the row method if you don’t need extra control over how the generated
XML should look. Passing it a DBI::Row object as the row parameter and the
name of the enclosing tag (the rowtag parameter), this method writes the gener-
ated XML to the output parameter (using the << method).The generated XML
would look as shown below, where each column has its own tag:
<row>
<name>Michael Neumann</name>
<email>...</email>
.
.
</row>
The extended_row method has more options that let you specify the following:
■Which columns should go into the row-tag as attributes (cols_in_row_tag)
■Which column should have its own tag (cols_as_tag;nil means all but
those specified in cols_in_row_tag)
■Additional attributes for the row-tag (add_row_tag_attrs)
Finally, the table method calls the row method for each row of its parameter
rows and puts an XML tag named roottag around it.
To demonstrate the usage of the extended_row method, let’s write a little CGI
application that returns an XML document for a supplied SQL query (see Figure
3.8).
#!/usr/bin/env ruby
require "cgi"
require "dbi"
XML = '<?xml version="1.0" encoding="utf-8"?>'
cgi = CGI.new
sql = cgi["sql"][0] # sql query
root = cgi["root"][0] || "root" # name of root element
row = cgi["row"][0] || "row" # name of row tag
id = cgi["id"][0] || "" # columns shown in the tag
exit if sql.nil? or sql.empty?
print cgi.header("text/xml")
www.syngress.com
183RubyC03.qxd 1/7/02 3:07 PM Page 180
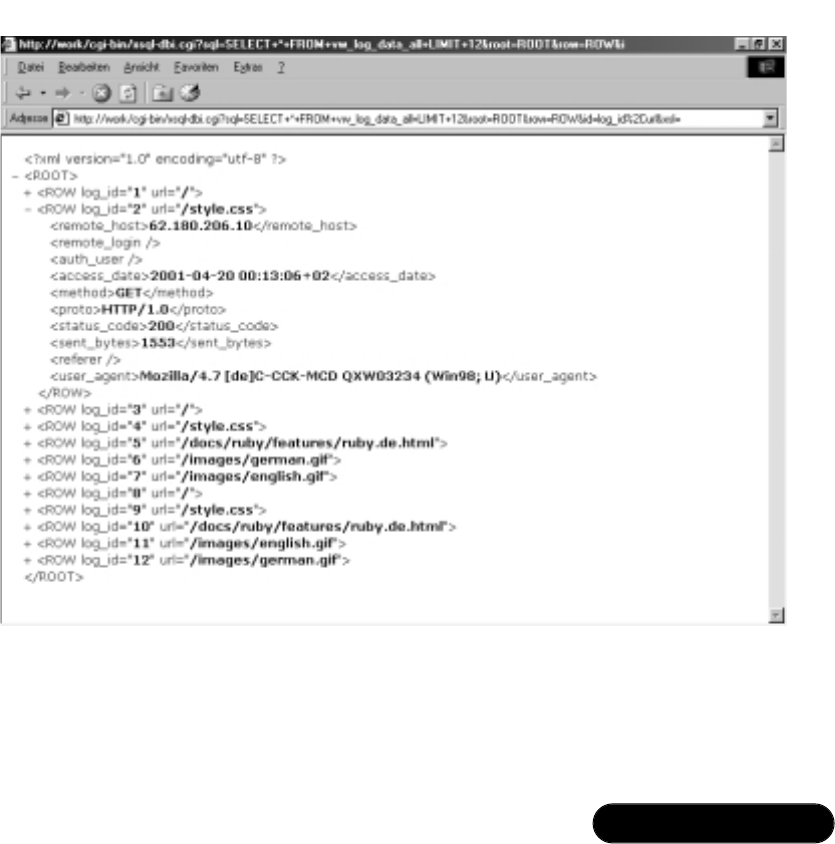
Accessing Databases with Ruby • Chapter 3 181
puts XML, "<#{root}>"
DBI.connect("dbi:Pg:db", "user", "pass") do |dbh|
dbh.select_all(sql) do |r|
DBI::Utils::XMLFormatter.extended_row(r, row,
id.split(/\s*,\s*/))
end
end
puts "</#{root}>"
To get this example to work, you probably have to modify the DBI connec-
tion string appropriately.
All three above-mentioned methods work well for generating flat XML doc-
uments, but generating nested documents with them is not possible.Therefore, I
decided to write an add-on (xmlgen.rb) using Sean Russell‘s XML parser,
REXML.The add-on is included in the DBI package’s examples directory—
www.syngress.com
Figure 3.8 Generated XML for SQL Query
183RubyC03.qxd 1/7/02 3:07 PM Page 181

182 Chapter 3 • Accessing Databases with Ruby
additionally, you’ll find it in this book’s accompanying CD in the xsql directory. It
extends the DBI::Utils::XMLFormatter module for two further methods:
row_to_xml(row, rowtag="row", include_nulls=true,
colmap={})
table_to_xml(rows, roottag="rows", rowtag="row",
include_nulls=true, colmap={})
Again, the table_to_xml method is just a wrapper around row_to_xml to conve-
niently process multiple rows.The difference between the methods mentioned
earlier and row_to_xml or table_to_xml is that the latter ones make it possible to
easily generate arbitrary nested XML documents.To demonstrate this, let’s take a
table that we’ll call Test, with columns entry_id,author_id,author_name,
author_email,title and body.Then we can specify within the SELECT statement
which column creates which XML tag or attribute by misusing the column
name for exactly this purpose:
SELECT title, body,
entry_id AS "@id",
author_id AS "author/@id",
autor_name AS "author/name",
author_email AS "author/email"
FROM Test
When we now call the row_to_xml method for one row of the above state-
ment’s resultset and with the rowtag parameter set to ROW, we would get an
XML document structured like the one below:
<ROW id="...">
<title>...</title>
<body>...</body>
<author id="...">
<name>...</name>
<email>...</email>
</author>
</ROW>
Instead of specifying the structure of the XML document within the SQL
statement, we could also pass a mapping to the method as last parameter, in
which case a simple SELECT * FROM Test would suffice:
www.syngress.com
183RubyC03.qxd 1/7/02 3:07 PM Page 182

Accessing Databases with Ruby • Chapter 3 183
row_to_xml(row, "ROW", true,
"entry_id" => "@id",
"author_id" => "author/@id",
"author_name" => "author/name",
"author_email" => "author/email")
The return value of both row_to_xml and table_to_xml methods is an object of
the REXML::Element class, which we can transform into a string as follows:
anElement = row_to_xml(...)
asString = ""
anElement.write(asString)
# asString now contains the XML document as string
So far so good, except that we now want to write an application that comes
close to Oracle’s XSQL servelet. Never heard of XSQL? Doesn’t matter! That
won’t affect our example at all.What our (very limited) version of XSQL should
be able to do is the following:
■Execute the SQL queries surrounded by a <xsql:query>tag and substi-
tute it with the result-set transformed to XML.
■Substitute parameters in the SQL statement before executing them
(e.g. {@ID} ).
■Forward the resulting XML document to an Extensible Stylesheet
Language Transformations (XSLT) processor or return it as is if none
was specified.
To implement this in Ruby we will make use of the following libraries:
■Ruby/DBI
■REXML
■XSLT4R (would also use any other external XSLT processor)
Figure 3.9 shows a sample XSQL document. Of course, an arbitrary number
of <xsql:query> tags are allowed in one XSQL document, though it may be that
only one <xsql:query> tag will occur as the root tag.
www.syngress.com
183RubyC03.qxd 1/7/02 3:07 PM Page 183

184 Chapter 3 • Accessing Databases with Ruby
So let’s start with the part of the application that does the really hard job,
which is parsing and transforming the XSQL-XML document, executing the
SQL statements, and finally triggering the XSLT processor.The source code for
this is shown in Figure 3.10; it also appears at www.syngress.com/solutions under
the xsql directory as the file named xsql.rb.
www.syngress.com
Figure 3.9 Sample XSQL Document
<?xml version="1.0"?>
<?xml-stylesheet type="text/xsl"
href="http://www.syngress.com/rdg/page.xsl"?>
<page>
<xsql:query xmlns:xsql="urn:ruby-xsql" connection="demo"
rowset-element="nav-bar" row-element="link">
SELECT href AS "@href", title, imgsrc
FROM navigation WHERE nav_id = {@ID}
</xsql:query>
<p>Welcome to...</p>
.
.
</page>
Figure 3.10 Sourcecode of XSQL Application (xsql.rb)
require "rexml/document"
require "xslt"
require "dbi"
require "xmlgen"
require "net/http"
class XSQL
XSQL_URI = 'urn:ruby-xsql'
Continued
183RubyC03.qxd 1/7/02 3:07 PM Page 184

Accessing Databases with Ruby • Chapter 3 185
www.syngress.com
Figure 3.10 Continued
def initialize(connections)
@connections = connections
end
def process(stringOrReadable, params)
doc = REXML::Document.new stringOrReadable
stylesheet = getStylesheet(doc)['href']
processQueries(doc, params)
xml = ""; doc.write(xml)
applyStylesheet(fetchURL(stylesheet), xml) rescue xml
end
private # ----------------------------------------------
def fetchURL(url)
if url =~ /^http:\/\//
addr, path = $'.split("/", 2)
host, port = addr.split(":")
Net::HTTP.start(host, (port||80).to_i) do |sess|
res = ""
sess.get("/" + (path || ""), nil, res)
return res
end
else
File.readlines(url).to_s
end
end
def processQueries(doc, params)
doc.elements.each("//query") do |q|
Continued
183RubyC03.qxd 1/7/02 3:07 PM Page 185

186 Chapter 3 • Accessing Databases with Ruby
www.syngress.com
Figure 3.10 Continued
next unless q.namespace == XSQL_URI
begin
conn = @connections[q.attributes["connection"]]
sql = q.text.gsub(/\{\s*@(\w+)\s*\}/) {params[$1]}
raise "No connection specified" if conn.nil?
DBI.connect(*conn) do |dbh|
q.replace_with DBI::Utils::XMLFormatter.
table_to_xml(
dbh.select_all(sql),
q.attributes["rowset-element"] || "ROWSET",
q.attributes["row-element"] || "ROW",
!(q.attributes["include-nulls"] == "no")
)
end
rescue Exception => err
elt = REXML::Element.new("xsql:exception")
elt.attributes["class"] = err.type.to_s
elt.attributes["xmlns:xsql"] = XSQL_URI
elt.add_text(err.message)
q.replace_with(elt)
end
end
end
def applyStylesheet(stylesheet, xml)
output = ""
xslt = XSLT::Stylesheet.new(stylesheet, {})
xslt.output = [output]
xslt.apply(xml)
output
end
Continued
183RubyC03.qxd 1/7/02 3:07 PM Page 186

Accessing Databases with Ruby • Chapter 3 187
To explain what you’ve seen in Figure 3.10, note the following points
regarding the methods of the XSQL class:
■The fetchURL method fetches the document with the specified URL from
a Web server, or reads it from the local file system and returns its content.
■The processQueries method substitutes all <xsql:query>tags through the
result-set (converted to XML) of executed SQL statements, or in the
case of an error, through a <xsql:exception>tag.
■The applyStylesheet method, as the name suggests, applies the XSLT
stylesheet supplied as a string by the first parameter onto the XML doc-
ument (second parameter) and returns the transformed document.
www.syngress.com
Figure 3.10 Continued
def getStylesheet(doc)
arr = doc.select { |i|
i.is_a? REXML::Instruction and
i.target == 'xml-stylesheet'
}.collect { |i|
i.remove
keyValuePairsToHash(i.content)
}
arr.empty? ? {} : arr.first
end
def keyValuePairsToHash(str)
hash = {}
str.scan(/\s*([\w_]+)\s*=\s*(['"])(.*?)\2/).each{
|k, d, v|
hash[k] = v
}
hash
end
end
183RubyC03.qxd 1/7/02 3:07 PM Page 187

188 Chapter 3 • Accessing Databases with Ruby
■The getStylesheet method looks in the XSQL-XML document for <?xml-
stylesheet ...?> processing instructions, parses the key/value pairs (using
the keyValuePairsToHash method), and returns a hash.This hash then con-
tains for example the key href, which points to the stylesheet to use.
An XSQL object is initialized with a hash containing all valid database con-
nection names (key), and the DBI connection string, username, and password as
values.After that, we can trigger the transformation by calling the process method
and passing it the filename or IO object of the XSQL-XML document to trans-
form, along with a list of parameters that get substituted inside the <xsql:query>
tag, as hash (for example, Figure 3.9 contains one {@ID} parameter, which gets
substituted by the value of the key ID). It returns the transformed document as
a string.
Before we go on, we want to try this out using a little script that processes
the following XSQL document (test.xsql):
<?xml version="1.0"?>
<xsql:query xmlns:xsql="urn:ruby-xsql" connection="test">
SELECT 1+2 AS "{@COLUMN}"
</xsql:query>
Here is the script I used:
require "xsql"
conns = { 'test' => ["dbi:Pg:db", "pass", "auth"] }
params = { 'COLUMN' => '@expr' }
puts XSQL.new(conns).process("test.xsql", params)
Please modify the DBI connections string, username, and password. On exe-
cution, this script would respond with the following output, which reveals that it
works as we expected it to:
<?xml version="1.0"?>
<ROWSET>
<ROW expr="3"/>
</ROWSET>
However, which exact attributes can or must one <xsql:query> tag contain?
■connection: Name of the connection—mandatory
■rowset-element: Name of all rows surrounding element—defaults to
ROWSET
www.syngress.com
183RubyC03.qxd 1/7/02 3:07 PM Page 188

Accessing Databases with Ruby • Chapter 3 189
■row-element: Name of the element which surrounds one single row—
defaults to ROW
■include-nulls: Either yes or no for whether to include NULLs or not—
defaults to include NULLs
Note that because we don’t want to process our XSQL documents from the
command line each time, but instead want them to be publicly available around
the Internet, a CGI application is the way to go. Figure 3.11 shows this CGI
application.Again, you should modify the DBI connection string appropriately.
www.syngress.com
Figure 3.11 XSQL CGI Application
#!/usr/bin/env ruby
require "xsql"
require "cgi"
CONNECTIONS = {
'test' => ["dbi:Mysql:test", "user", "auth"],
'demo' => ["dbi:DB2:SAMPLE", "", ""]
# add more if you want
}
cgi = CGI.new
xsql = XSQL.new(CONNECTIONS)
# collect CGI parameters in params
params = {}
cgi.params.each {|k, v| params[k] = v[0] }
# process XSQL file
data = xsql.process(File.new(cgi.path_translated), params)
# and finally output it
content_type = data =~ /^\s*<?\s*xml/ ? 'xml' : 'html'
cgi.out('text/' + content_type) { data }
183RubyC03.qxd 1/7/02 3:07 PM Page 189

190 Chapter 3 • Accessing Databases with Ruby
Put this CGI script into the cgi-bin directory, make it executable (chmod +x
xsql.cgi) and modify Apache’s httpd.conf file, where we add the following into the
main section (<Directory “/path/to/document-root”>):
AddHandler xsql .xsql
Action xsql /cgi-bin/xsql.cgi
Now save the .xsql file anywhere in the htdocs directory, do the same with
the XSLT stylesheet (don’t forget to refer to it from within the XSQL file using
its complete URL) and direct your browser to its URL (for example,
http://127.0.0.1/test.xsql?COLUMN=@expr) to display.
If you develop such an application yourself you should always have a shell
open and showing Apache’s error log file so you can see any errors that occur in
your script.You can do this under Unix by executing the following code:
tail -f /var/log/httpd/error_log
Below is a list of some additional extensions that you could make to the
XSQL application:
■Recognize the <?xml-stylesheet?> media attribute and apply only the
matching stylesheet (different stylesheets for Netscape and Internet
Explorer or for WAP cellular phones).
■Extend the <xsql:query> tag for attributes max-rows and skip-rows.
■Supply tags <xsl:if>, <xsql:param-for-stylesheet>, and <xsql:for-each-
row>.
■Supply a tag to emit table schemas into the XML document.
■Improve speed by using FastCGI (or a similar approach) instead of CGI.
■Improve speed by using connection pooling, or at least reuse opened
connections within one XSQL file.
Accessing Databases with Ruby/ODBC
An alternative to Ruby/DBI for accessing different types of databases is Christian
Werner’s Ruby/ODBC package, which enables us to access any ODBC data-
source from within Ruby.
An installed ODBC driver manager is a requirement to use Ruby/ODBC, as
well as an ODBC driver for the database you want to access. On Windows, there
is an ODBC driver manager installed by default, whereas on Unix you have to
www.syngress.com
183RubyC03.qxd 1/7/02 3:07 PM Page 190

Accessing Databases with Ruby • Chapter 3 191
either install UnixODBC (www.unixodbc.org) or iODBC (www.iodbc.com)
before you can use Ruby/ODBC.
Shown below is a sample configuration file for use with iODBC and the
ODBC driver for MySql. Just save this as file .odbc.ini in your home directory and
modify the paths to the driver library and the host and database name, if needed.
[Myodbc]
Driver = /usr/local/lib/libmyodbc-2.50.36.so
Host = localhost
Database = rdg
To install Ruby/ODBC, download it from its homepage at www.ch-werner
.de/rubyodbc (As of this writing the newest version is 0.94).A precompiled
binary for Windows is available there, though if you don’t want to use the pre-
compiled binary, you can compile and install the uncompiled Ruby/ODBC via
the following commands:
ruby extconf.rb
make
make install
On Unix, you’ll probably have to specify the directory for the ODBC
libraries and header files. Do this with the command line option —with-odbc-dir:
ruby extconf.rb --with-odbc-dir=/usr/pkg
Now that you’ve successfully installed Ruby/ODBC, let’s look at an example
(Figure 3.12) where we connect to an ODBC datasource (in our case the data-
source Myodbc), create a table, insert several rows into it and afterwards query the
table. Finally we close the connection.
www.syngress.com
Figure 3.12 Sample Ruby/ODBC Application
require "odbc"
# modify settings below
DSN, USER, PWD = "Myodbc", "matz", "123"
ODBC.connect(DSN, USER, PWD) do |dbh|
Continued
183RubyC03.qxd 1/7/02 3:07 PM Page 191

192 Chapter 3 • Accessing Databases with Ruby
www.syngress.com
Figure 3.12 Continued
# enable autocommit (fails e.g. with Mysql)
dbh.autocommit = true
# drop table 'test' (if it already exists)
begin
dbh.do("DROP TABLE test")
rescue ODBC::Error; end
# create table 'test'
dbh.do("CREATE TABLE test (id INT, name VARCHAR(30))")
# insert one row
dbh.do("INSERT INTO test VALUES (?,?)", 1, 'Michael')
# pull autocommit mode off (fails e.g. with Mysql)
dbh.autocommit = false
# insert some more rows
dbh.prepare("INSERT INTO test VALUES(?,?)") do |sth|
name = "AAAAA"
99.times {|n| sth.execute(n+2, name.succ!) }
end
# commit changes (fails e.g. with Mysql)
dbh.commit
# count rows in table 'test'
dbh.run("SELECT COUNT(*) FROM test") do |sth|
p sth.fetch[0] # => 100
end
# query table 'test' again
Continued
183RubyC03.qxd 1/7/02 3:07 PM Page 192

Accessing Databases with Ruby • Chapter 3 193
Note that you can call most methods of Ruby/ODBC similarly to those in
Ruby/DBI, with or without code block.The behavior is the same except that
you don’t have to duplicate row objects if you want to store them somewhere
else using methods fetch or fetch_hash (or similar), which you must do in
Ruby/DBI.To do this in Ruby/DBI, execute the following code:
arr = []
sth.fetch { |row| arr << row.dup }
This is equivalent to the following in Ruby/ODBC:
arr = []
sth.fetch { |row| arr << row }
Table 3.12 lists some Ruby/ODBC methods together with their Ruby/DBI
counterparts. Not all methods are covered below; only the most important ones.
Sometimes parameters or return values differ, so you should consult
Ruby/ODBC’s documentation for the exact behaviors.
www.syngress.com
Figure 3.12 Continued
sql = "SELECT name FROM test WHERE id BETWEEN ? AND ?"
sth = dbh.run(sql, 49, 50)
# convert column names to uppercase
sth.ignorecase = true
# fetch the resulting rows
sth.fetch_hash do |row|
p row['NAME'] # => "AAABW", "AAABX"
end
# close and free the statement
sth.drop
end
183RubyC03.qxd 1/7/02 3:07 PM Page 193

194 Chapter 3 • Accessing Databases with Ruby
Table 3.12 Comparing Ruby/DBI’s and Ruby/ODBC’s Methods
Ruby/ODBC Ruby/DBI Comments
module ODBC module DBI
connect connect
drivers available_drivers Different return value.
datasources data_sources Different return value.
class Database class DatabaseHandle
connected? connected?
disconnect disconnect
tables tables Ruby/ODBC returns a Statement.
columns columns Ruby/ODBC returns a Statement.
do do
run execute
prepare prepare
commit commit
rollback rollback
transaction transaction
autocommit [‘AutoCommit’]
class Statement class StatementHandle
cancel cancel
close Closes (but not frees)
Statement.
drop finish
fetch fetch Ruby/ODBC returns an Array,
Ruby/DBI a DBI::Row
fetch_hash Not necessary in Ruby/DBI.
fetch_many fetch_many Same as for method fetch.
fetch_all fetch_all Same as for method fetch.
execute execute
columns column_info Different return value.
fetch_scroll fetch_scroll Same as for method fetch.
www.syngress.com
183RubyC03.qxd 1/7/02 3:07 PM Page 194

Accessing Databases with Ruby • Chapter 3 195
Ruby/ODBC provides several methods that are not found in Ruby/DBI, for
example metadata access methods like indexes,types,primary_keys,foreign_keys,
table_privileges or procedures of theODBC::Database class. Furthermore
Ruby/ODBC lets you query and set a variety of different attributes using the
ODBC::Driver class.
The conversion from SQL to Ruby types (and vice versa) takes place as
shown in Table 3.13.
Table 3.13 Datatype Conversion
SQL Ruby
INTEGER, SMALLINT, TINYINT, BIT Fixnum, Bignum
FLOAT, DOUBLE, REAL Float
DATE ODBC::Date
TIME ODBC::Time
TIMESTAMP ODBC::TimeStamp
All others String
All in all, Ruby/ODBC is a good alternative to Ruby/DBI if an ODBC
driver exists for the database you want to access and if you’re able and willing to
install and use an ODBC driver manager—especially as performance is currently
better than that of Ruby/DBI.
Accessing LDAP Directories with
Ruby/LDAP
As the Lightweight Directory Access Protocol (LDAP) gets more and more
important, its good to know that we can access LDAP directories from within
our Ruby applications using the Ruby/LDAP library (see the RAA’s Database
section).This library enables us to perform a search on the entries in an LDAP
directory, add new entries, and modify or delete existing ones.
Using Ruby/LDAP
After requiring the feature ldap, we connect to a LDAP directory with:
conn = LDAP::Conn.new
which is equivalent to:
www.syngress.com
183RubyC03.qxd 1/7/02 3:07 PM Page 195

196 Chapter 3 • Accessing Databases with Ruby
conn = LDAP::Conn.new('localhost', LDAP::LDAP_PORT)
Then we login.This is where we usually specify the username and password
we will use for the rest of the session:
conn.bind('cn=Manager,dc=syngress,dc=com', 'pwd') do
...
end
Or without using code blocks, this is:
conn.bind('cn=Manager,dc=syngress,dc=com', 'pwd')
...
conn.unbind
We can now perform search, add, modify or delete operations inside the
block of the bind method (between bind and unbind), provided we have the proper
permissions.
Adding an LDAP Entry
We can add an entry to the directory using the add method:
conn.add 'cn=Michael Neumann,dc=syngress,dc=com',
'objectclass' => ['person'],
'cn' => ['Michael Neumann'],
'sn' => ['Neumann'],
'telephoneNumber' => ['private: 0333444',
'mobile: 333-444']
The add method’s first parameter is the distinguished name for the new entry
to be added.A distinguished name is comparable to a primary key in RDBMS -
it is unique and identifies only one row.The second parameter is a hash that con-
tains the attributes of the new entry.
Modifying an LDAP Entry
Modifying an entry is similar to adding one. Just call the modify method instead
of add with the attributes to modify. For example, to modify the surname of the
entry we added in the previous section, we’d write:
conn.modify 'cn=Michael Neumann,dc=syngress,dc=com',
'sn' => ['New surname']
www.syngress.com
183RubyC03.qxd 1/7/02 3:07 PM Page 196

Accessing Databases with Ruby • Chapter 3 197
Deleting an LDAP Entry
To delete an entry, call the delete method with the distinguished name as parameter:
conn.delete('cn=Nobody,dc=syngress,dc=com')
Modifying the Distinguished Name
It’s not possible to modify the distinguished name of an entry with the modify
method. Instead, use the modrdn method.
Suppose we have the following entry (in LDIFF format):
dn: cn=Michal Neumann,dc=dyngress,dc=com
cn: Michal Neumann
sn: Neumann
objectclass: person
Then we modify its distinguished name with the following code:
conn.modrdn('cn=Michal Neumann,dc=syngress,dc=com',
'cn=Michael Neumann', true)
If the last parameter of modrdn is true, the attribute that is part of the distin-
guished name ( ‘cn=Michal Neumann’) is deleted before the new (cn=Michael
Neumann) is added.This would result in the following entry:
dn: cn=Michael Neumann,dc=dyngress,dc=com
cn: Michael Neumann
sn: Neumann
objectclass: person
If we specify false as last parameter, we get:
dn: cn=Michael Neumann,dc=dyngress,dc=com
cn: Michal Neumann
cn: Michael Neumann
sn: Neumann
objectclass: person
Performing a Search
Finally, to perform a search on a LDAP directory, use the search method with one
of three different search modes:
www.syngress.com
183RubyC03.qxd 1/7/02 3:07 PM Page 197

198 Chapter 3 • Accessing Databases with Ruby
■LDAP_SCOPE_BASE: Search only the base node.
■LDAP_SCOPE_ONELEVEL: Search all children of the base node.
■LDAP_SCOPE_SUBTREE: Search the whole subtree including the
base node.
For example, to search the whole subtree of entry dc=syngress,dc=com for
person objects, we’d write:
base = 'dc=syngress,dc=com'
scope = LDAP::LDAP_SCOPE_SUBTREE
filter = '(objectclass=person)'
attrs = ['sn', 'cn']
conn.search(base, scope, filter, attrs) do |entry|
# print distinguished name
p entry.dn
# print all attribute names
p entry.attrs
# print values of attribute 'sn'
p entry.vals('sn')
# print entry as Hash
p entry.to_hash
end
This invokes the given code block for each matching entry where the LDAP
entry is represented by an instance of the LDAP::Entry class.With the last param-
eter of search you can specify the attributes in which you are interested, omitting
all others. If you pass nil here, all attributes are returned (same as “SELECT *” in
relational databases).
The dn method(alias for get_dn) of the LDAP::Entry class returns the distin-
guished name of the entry, and with the to_hash method you can get a hash rep-
resentation of its attributes (including the distinguished name).To get a list of an
entry’s attributes use the attrs method (alias for get_attributes).Also, to get the list
of one specific attribute’s values, use the vals method (alias for get_values).
www.syngress.com
183RubyC03.qxd 1/7/02 3:07 PM Page 198

Accessing Databases with Ruby • Chapter 3 199
Handling Errors
Ruby/LDAP defines two different exception classes. In case of an error, the new,
bind or unbind methods raise an LDAP::Error exception, whereas the methods
related to modifying (add, modify, delete) or searching an LDAP directory instead
raise a LDAP::ResultError— if, for example, you try to delete or modify a non-
existing entry, or you try to add an entry with an existing distinguished name or
without specifying a mandatory attribute.
Utilizing Other Storage Solutions
There are several other solutions for storing data persistently on disk with Ruby.
In the following sections we’ll introduce you into the following solutions:
■Reading and writing CSV files
■Berkeley DBM file databases like gdbm,sdbm or dbm
■The more advanced Berkeley DB database system
■Storing marshaled objects in a relational database
Storing Ruby objects as XML files is handled in Chapter 5, in the XML-
RPC and SOAP sections.
Reading and Writing
Comma-Separated Value Files
With Nakamura Hiroshi’s CSV module (see the RAA’s csv entry in the Text sec-
tion) we can read and write Comma Separated Value files from within Ruby.To
install this library, simply take the csv.rb file from the downloaded archive and put
it into your site_ruby directory (for example, /usr/local/lib/ruby/site_ruby/1.6).
Suppose we have the following CSV file, which we have named test.csv:
id,name,creator,age
1,C,Dennis,
4,Perl,"Larry Wall",14
5,Ruby,Matz,6
To parse this we could write:
require "csv"
www.syngress.com
183RubyC03.qxd 1/7/02 3:07 PM Page 199

200 Chapter 3 • Accessing Databases with Ruby
File.each("test.csv") do |line|
p CSV.parse(line.chomp)
end
This outputs the following:
["id", "name", "creator", "age"]
["1", "C", "Dennis", nil]
["4", "Perl", "Larry Wall", "14"]
["5", "Ruby", "Matz", "6"]
Notice that we have to remove the line ending character (\n) before we pass
the string to method CSV.parse.
To create a CSV file simply use the CSV.create method for each row:
require "csv"
rows = [
["id", "name", "creator", "age"],
[1, "C", "Dennis", nil],
[4, "Perl", "Larry Wall", 14],
[5, "Ruby", "Matz", 6]
]
rows.each do |row|
puts CSV.create(row)
end
This outputs:
id,name,creator,age
1,C,Dennis,
4,Perl,Larry Wall,14
5,Ruby,Matz,6
Using Berkley DBM-file Databases
Ruby’s standard library has three classes for accessing Berkeley DBM databases.
These are DBM,GDBM and SDBM.They behave similarly to the Hash class,
with the difference that the values are stored in a file instead of in memory.
www.syngress.com
183RubyC03.qxd 1/7/02 3:07 PM Page 200

Accessing Databases with Ruby • Chapter 3 201
The following example demonstrates how to use the DBM class.To use one
of the other two classes, simply modify the first line to require gdbm or sdbm and
create an instance of class GDBM or SDBM in the second line.
require 'dbm'
db = DBM.open('test')
db['ruby'] = "matz"
db['perl'] = "larry"
db.keys # => ['ruby', 'perl']
db.values # => ['matz', 'larry']
db.each do |k, v|
puts "#{k} => #{v}"´ # ruby => matz; perl => larry
end
db['obj'] = Marshal.dump [1,2,3]
p Marshal.load(db['obj']) # => [1,2,3]
db.close
Using the Berkeley DB Interface BDB
With Guy Decoux’s BDB module (see the RAA’s bdb entry in the Database
section), you can use the embedded Berkeley DB database system from within
Ruby.This module is already included in the Pragmatic Programmers Windows
Installer version of Ruby, but to use it on Unix systems you have to download
and install.
BDB supports transactions, cursors, locking and three different access
methods:
■B+tree: BDB::Btree
■Hashing: BDB::Hash
■Fixed and Variable Length Records: BDB::Recno or BDB::Queue
www.syngress.com
183RubyC03.qxd 1/7/02 3:07 PM Page 201

202 Chapter 3 • Accessing Databases with Ruby
This module also lets you write your own sorting methods to be used by the
database in Ruby.
Next we’ll implement a little translator application that can translate words
from German into English and vice versa.We’ll take Frank Richter’s German to
English/English to German word list (www.tu-chemnitz.de/dict), parse it, and
store the translations in two language-specific databases (using BDB::Recno).Also,
because some translations include more than one word, we’ll create two further
databases (using BDB::Btree) to index the words of the translations.
First let us create the four databases.This is done in Figure 3.13.You’ll also
find its source code at www.syngress.com/solutions in the file create_dbs.rb
under the bdb directory. Note that the execution of this application may take sev-
eral minutes to complete.
www.syngress.com
Figure 3.13 Create Databases for Translator Application (create_dbs.rb)
require "bdb"
FILE_NAME = "ger-eng.txt"
# here we store the translations
ger_db = BDB::Recnum.open "ger.db", nil, BDB::CREATE, 0644
eng_db = BDB::Recnum.open "eng.db", nil, BDB::CREATE, 0644
# here we store the indices
ger_inx = BDB::Btree.open "ger.inx", nil, BDB::CREATE,
0644, "set_flags" => BDB::DUP | BDB::DUPSORT
eng_inx = BDB::Btree.open "eng.inx", nil, BDB::CREATE,
0644, "set_flags" => BDB::DUP | BDB::DUPSORT
# extracts the words contained in one line
def words(line)
line.scan(/\b[\w]+/).each{|w| w.downcase!}.uniq
end
Continued
183RubyC03.qxd 1/7/02 3:07 PM Page 202

Accessing Databases with Ruby • Chapter 3 203
Now let us write the application that queries the databases to translate the
words. Follow the example shown by Figure 3.14. Its sourcecode also appears on
the accompanying CD.To translate the word “hello” from English to German,
invoke the application as follows:
ruby query.rb hello en_de
www.syngress.com
Figure 3.13 Continued
rec_no = 0 # current record number
File.foreach( FILE_NAME ) do | line |
# skip line if comment or empty
next if line[0] == ?# or line.strip.empty?
g, e = line.split("::")
e ||= ""
g.strip! ; e.strip!
# append translations to database
ger_db << g
eng_db << e
# extract words to index
inx = [rec_no].pack("L") # store rec_no as LONG word
words(g).each {|w| ger_inx[w] = inx}
words(e).each {|w| eng_inx[w] = inx}
rec_no += 1
# display progress in percent
puts "#{(rec_no*100 / 126_000)} %" if rec_no % 1000 == 0
end
# close all databases
[ger_db, eng_db, ger_inx, eng_inx].each {|d| d.close}
183RubyC03.qxd 1/7/02 3:07 PM Page 203

204 Chapter 3 • Accessing Databases with Ruby
which outputs:
DE: (jemandem) guten Tag sagen
EN: to say hello (to someone)
DE: Hallo allerseits!
EN: Hello everybody!
DE: Hallo!; Guten Tag!
EN: Hello!
www.syngress.com
Figure 3.14 English to German/German to English Translator (query.rb)
require "bdb"
# open databases
ger_db = BDB::Recnum.open "ger.db", nil, BDB::RDONLY
eng_db = BDB::Recnum.open "eng.db", nil, BDB::RDONLY
ger_inx = BDB::Btree.open "ger.inx", nil, BDB::RDONLY,
"set_flags" => BDB::DUP | BDB::DUPSORT
eng_inx = BDB::Btree.open "eng.inx", nil, BDB::RDONLY,
"set_flags" => BDB::DUP | BDB::DUPSORT
word = (ARGV[0] || raise).downcase
inx = if ARGV[1] == "en_de" then eng_inx else ger_inx end
# output translations
inx.each_dup_value(word) {|i|
x = i.unpack("L").first
print "DE: ", ger_db[x], "\n"
print "EN: ", eng_db[x], "\n"
puts
}
# close all databases
[ger_db, eng_db, ger_inx, eng_inx].each {|d| d.close}
183RubyC03.qxd 1/7/02 3:07 PM Page 204

Accessing Databases with Ruby • Chapter 3 205
Storing Ruby Objects in a Relational Database
To make Ruby objects persistent, you’ll have to store them somewhere, either in
a plain file, a Berkeley DBM-like database or a relational database. Storing a large
number of objects in a plain file is very inflexible and slow, because you have to
load and store the whole file even to read or write just one object.A better
choice is a DBM database; these are fast but allow only one key to access an
object.The best would be to map the instance variables of Ruby objects to fields
of SQL tables, but that’s not so easy to accomplish.
Another approach is to store Ruby objects of one class in a database table that
contains N+2 fields:
■Obj_id: Unique ID for each stored object
■Data: Stores the marshaled Ruby object
■N-keys: N user-definable fields, which are mapped to attributes of the
stored object
This approach allows you to access the stored Ruby objects with more than
one key.You find the implementation in the DBI distribution’s examples/persis-
tence.rb file .
Suppose we have a Language class defined as follows:
class Language
attr_accessor :name, :creator, :age, :info
def initialize(name, creator, age)
@name, @creator, @age = name, creator, age
end
def to_s
"#@name, #@creator, #@age. " +
(@info ? @info[:home] : '')
end
end
And we want to store our Language objects in the Language table.To achieve
this, we have to enable the class for persistency.
require 'persistence'
Persistence.new('Language', Persistence::Pg) {
index_on :name, 'VARCHAR(10) NOT NULL'
www.syngress.com
183RubyC03.qxd 1/7/02 3:07 PM Page 205

206 Chapter 3 • Accessing Databases with Ruby
index_on :creator, 'VARCHAR(10) NOT NULL'
index_on :age, 'INT'
}.add(Language)
Note that instead of Persistence::Pg for PostgreSQL databases we could also
have used Persistence::Oracle for Oracle databases. Others are not currently sup-
ported.
With index_on we declared three additional fields for the Language table. Now
we can establish a database connection and create the table if it does not yet exist:
dbh = DBI.connect('dbi:Pg:rdg', 'matz', '123',
'AutoCommit' => true)
# set the connection used for Language objects
Language.connection = dbh
# if the table not yet exists, create it!
Language.install unless Language.installed?
Then we create some Ruby objects of the Language class with:
l1 = Language.new('C', 'Dennis', 28)
l2 = Language.new('Ruby', 'Larry', 13)
l3 = Language.new('Perl', 'Matz', 5)
l3.info = {:home => 'http://www.ruby-lang.org'}
Note that the objects are not stored in the database unless you call the store
method:
l1.store
l2.store
l3.store
To read the objects back from the database, we can either use get_where,get_all
or each.Thus to increase the age of each language we simply write:
Language.each {|lang| lang.age += 1; lang.store }
Have you recognized that we mixed up Perl with Ruby above? Well, we can
easily correct this and delete language C:
www.syngress.com
183RubyC03.qxd 1/7/02 3:07 PM Page 206

Accessing Databases with Ruby • Chapter 3 207
perl = Language.get_where('name = ?', 'Ruby')[0]
ruby = Language.get_where('name = ?', 'Perl')[0]
perl.name, ruby.name = ruby.name, perl.name
perl.store; ruby.store
Language.get_where("name = 'C'")[0].delete
Finally, we check to see if everything went well and print out all objects:
Language.each {|lang| puts lang.to_s}
This outputs the following:
Perl, Larry, 14.
Ruby, Matz, 6. http://www.ruby-lang.org
www.syngress.com
183RubyC03.qxd 1/7/02 3:07 PM Page 207

208 Chapter 3 • Accessing Databases with Ruby
Summary
In this chapter we mainly looked at Ruby/DBI and developed several applica-
tions with it. Ruby/DBI is a database-independent interface for a large number
of different databases, similar to Perl’s DBI. However, we also showed how to
access ODBC datasources using Ruby/ODBC, and we confronted methods of
both interfaces in the Accessing Databases with Ruby/ODBC section. Furthermore
we gave an introduction into Ruby/LDAP and other alternative data storage
solutions, such as Berkeley DBM.
Solutions Fast Track
Accessing Databases with Ruby/DBI
;Ruby/DBI provides an easy-to-use, database-independent interface for a
large number of relational databases. Currently most database drivers still
depend on other database libraries.This results in harder installations and
decreases performance.
;Due to its short existence, Ruby/DBI has not yet reached the same level
of maturity as other comparable database interfaces, for example Perl’s
DBI or Python DB API 2.0.
Accessing Databases with Ruby/ODBC
;Ruby/ODBC is the ODBC binding for Ruby. Its API is very similar to
Ruby/DBI’s, which makes it very easy to switch between the two.
Ruby/ODBC’s performance is better than that of Ruby/DBI.
;Ruby/ODBC works not only on Windows, but also on UNIX systems
using the unixODBC or iODBC driver manager.
Accessing LDAP Directories with Ruby/LDAP
;With Ruby/LDAP we can access LDAP directories from within our
Ruby applications.
Utilizing Other Storage Solutions
;There are numerous other data storage solutions for Ruby. Berkeley
DBM files provide a hash-like interface for storing data, whereas the
www.syngress.com
183RubyC03.qxd 1/7/02 3:07 PM Page 208

Accessing Databases with Ruby • Chapter 3 209
Berkeley DB system has more advanced features (like transactions and
cursors), and provides three different access methods (B+tree, Hashing
and Fixed or Variable Length Records). A very simple solution is to store
data in plain text files using the Comma Separated Values (CSV) format.
Frequently Asked Questions
The following Frequently Asked Questions, answered by the authors of this book,
are designed to both measure your understanding of the concepts presented in
this chapter and to assist you with real-life implementation of these concepts. To
have your questions about this chapter answered by the author, browse to
www.syngress.com/solutions and click on the “Ask the Author” form.
Q: Using Ruby/DBI, I have set the tracing level to 2and output to standard
error, but nothing happened.What’s wrong?
A: You may have forgotten to require the dbi/trace file at the top of your program.
Q: Using Ruby/DBI, I installed the DBI and some DBDs, but when I start my
application, I get a “No such file to load” error.
A: You have probably forgotten to install one of the libraries upon which a
DBD depends.
Q: Using Ruby/DBI, I use the StatementHandle#collect method to get all rows of
a SQL query, but all the rows have the same content.What’s wrong?
A: All DBI::Row objects passed to the StatementHandle#collect method refer to
one and the same object. Use dup to copy the object.
Q: I’m experiencing problems compiling a database library required by
Ruby/DBI.Where can I get help?
A: Either write the author of the library an email, or post a message on Ruby’s
mailing list (ruby-talk).
www.syngress.com
183RubyC03.qxd 1/7/02 3:07 PM Page 209
183RubyC03.qxd 1/7/02 3:07 PM Page 210

XML and
Ruby
Solutions in this chapter:
■Why XML?
■XML Parser Architectures and APIs
■Parsing and Creating XML in Ruby
■Using XSLT in Ruby
;Summary
;Solutions Fast Track
;Frequently Asked Questions
Chapter 4
211
183RubyC04.qxd 1/7/02 3:09 PM Page 211

212 Chapter 4 • XML and Ruby
Introduction
Since its inception, Extensible Markup Language (XML) has been turning heads
in the programming and development world. It used to be that creating a
database required pre-made and sometimes costly tools, such as MySQL or
Microsoft Access; but the advent of XML, with its open architecture and
extremely supple simplicity, has completely changed that.
If you know what you are doing, you can have Ruby take advantage of its
own architecture and apply it to XML fairly simply. If you are new to Ruby, you
can always spend time by yourself, learn Ruby, and create a parser by yourself.
However, XML has simple needs; all it requires from a parser is that it reads and
formats the file –nothing more.
Instead of working with our own parser, let’s take a look at some of the more
popular parsing options available for Ruby and XML. Remember, all we are
doing here is looking at and understanding XML parsers—which you can always
use to develop a more robust engine, if that’s what you need.
NOTE
This chapter examines XML with Ruby, not how XML works. If you need
a good reference for XML, pick up Syngress Publishing’s XML.NET
Developer’s Guide (ISBN 1-928994-47-4).
Why XML?
XML is the frequent subject of both marketing hyperbole and heated predictions
of its imminent decline, but at heart it’s a very straightforward and useful tech-
nology: Plain text files are combined with a simple but powerful markup scheme.
Much of XML’s appeal to programmers lies in its embrace of the so-called
“80/20 Rule.”The 80/20 Rule simply states that:
■80% of a problem can be solved with 20% of the code.
■The remaining 80% of the code solves only 20% of the problem.
Which, in essence, means that a little work goes a long way. XML exemplifies
this with its simplicity in design, allowing us to easily create solutions for various
problems.
www.syngress.com
183RubyC04.qxd 1/7/02 3:09 PM Page 212

XML and Ruby • Chapter 4 213
For a quick XML example, look at Figure 4.1.There, we define a root ele-
ment, which is used by XML parsers to determine the top-level node.A root-
level element can be named anything, just like the rest of XML elements and
attributes, but it is very good practice (and good for your sanity!) to keep all ele-
ments and attributes relevant, easy to read, and easy to parse. In this example, we
have named our root element PhoneBook (line 01; and its closing tag on line 11),
which also defines for us that this XML file will probably be used as a personal
phone book of some kind.
Line 02 begins our first actual phone book entry. Entry, as we have so aptly
named the element, is the parent node; for those with database experience it can
be viewed as the beginning of a new row. Each node within the parent node is
referred to as a child node. Child nodes can be thought of as the columns within a
row of data in a database. Lines 03 through 09 are our child nodes; each one
written in plain English, readable, and easy to analyze if any other programmer
views our XML code.
There’s another reason why we want to use names that are easy to read –
they are also easy to remember.With XML files like the one in Figure 4.1, a
simple set of entries allows us to remember the name of each entry while we are
coding and makes our parser code easier to read as well. For example, if we were
to see this file in a browser, we would see the output shown in Figure 4.2.
www.syngress.com
Figure 4.1 Small XML Example
01: <PhoneBook>
02: <Entry>
03: <Title>Cacawatha Construction Company</Title>
04: <Name>Fred Williams, Jr.</Name>
05: <Position>CEO</Position>
06: <Phone1>555-555-1234</Phone1>
07: <Phone2>555-554-4567</Phone2>
08: <Fax>555-555-8910</Fax>
09: <Comments>Nice Guy!</Comments>
10: </Entry>
11: </PhoneBook>
183RubyC04.qxd 1/7/02 3:09 PM Page 213
214 Chapter 4 • XML and Ruby
While this is nicely organized and displayed, why can’t we view XML in a
more orderly fashion, such as in a table view, like in traditional databases? Also,
even though the XML file is small and tidy, where are the database capabilities?
Several side projects from the W3 have answered these questions; they have cre-
ated a couple of extra languages that make XML a more manageable—and pret-
tier to look at.
Making XML Manageable
So just how do you deal with XML then? Well, we have already introduced
parsers, but does XML need to depend on hand-coded parsers alone? The answer
is no; there are several languages available that we can use in order to augment
XML.We can use either a Document Type Definition (DTD) or a Schema to
provide an XML file with proper validation; Extensible Stylesheet Language
Transformations (XSLT) to provide the XML file with a graphical look and/or
transform from XML to text files or Hypertext Markup Language (HTML);
XPath allows us to travel through an XML file, and XPointer extends XPath’s
capabilities. Let’s take a look at how XML is validated first through the DTD and
the Schema.
Validation though DTD
A Document Type Definition is a file that XML can use to validate itself.You may
be familiar with this term from working with HTML files.The DTD defined an
www.syngress.com
Figure 4.2 Phonebook XML File In A Browser
183RubyC04.qxd 1/7/02 3:09 PM Page 214

XML and Ruby • Chapter 4 215
HTML document that would be matched against the HTML you wrote to make
sure your code was up to a specific standard, such as “strict” HTML or “transi-
tional” HTML.The DTD format did not change its syntax for XML, and kept its
own method of doing things, so if you’re familiar with DTDs for HTML, you’re
well on your way to using them for XML.
Figure 4.3 has our XML phonebook example with an inline DTD added.
The only modification done to the XML file itself is that we have changed
<ENTRY> from being a parent node with child nodes to just another child
node.An inline DTD is a DTD that is defined within the XML file, sort of like
declaring a class within the same file as the main code. Line 01 starts off our
DTD by wrapping it around a DOCTYPE definition.The DOCTYPE defini-
tion tells the client that a new type, Phonebook is being created and its description
is within the open and close brackets (“[“ and “]”). Elements within the DOC-
TYPE are defined using the <!ELEMENT> tag; even the document’s Type (root
element) has to be declared as an ELEMENT.
The value within captions (in this case #PCDATA for all of the elements) is
used to describe the element content, (referred to as the element-content space)
or the type of value stored within the element – pretty much like declaring a
variable, storing the value 19 to it and declaring the variable an integer.The ele-
ment-content space can also store the number of times it appears.A DTD can
also be included externally by using the DOCTYPE element; if we were to refer-
ence the DTD in Figure 4.3 externally it would look like <!DOCTYPE
Phonebook SYSTEM “phonebook.dtd”> where SYSTEM defines the location
of the DTD file.
www.syngress.com
Figure 4.3 Phonebook XML with an Inline DTD
00: <?xml version = "1.0">
01: <!DOCTYPE Phonebook [
02:<!- -The following line wraps- ->
03: <!ELEMENT Phonebook (Entry, Title, Name, Position, Phone1,
Phone2, Fax, Comments)>
04: <!ELEMENT Entry (#PCDATA)>
04: <!ELEMENT Title (#PCDATA)>
05: <!ELEMENT Name (#PCDATA)>
06: <!ELEMENT Position (#PCDATA)>
07: <!ELEMENT Phone1 (#PCDATA)>
Continued
183RubyC04.qxd 1/7/02 3:09 PM Page 215

216 Chapter 4 • XML and Ruby
NOTE
Even though DTD can check the value, it actually only makes sure the
XML file conforms to the syntax within the DTD file.
Validating With XML-Schemas
It’s obvious from the start that DTD has some drawbacks. First, its language is not
XML, which is rather an academic point, but it still forces a requirement on
XML in terms of requiring a different, external tool and language for validation.
DTD also falls short that validating complex hierarchies using DTD can be quite
daunting. Finally, DTD has poor support for data types; #PCDATA is really the
one that gets the most use. In light of these drawbacks, the alternative Schema
was propositioned to the W3C and accepted as a recommendation in Autumn
2001. Schema has been widely accepted and has already begun to replace DTDs
as the validation technique of choice for XML.
www.syngress.com
Figure 4.3 Continued
08: <!ELEMENT Phone2 (#PCDATA)>
09: <!ELEMENT Fax (#PCDATA)>
10: <!ELEMENT Comments (#PCDATA)>
11: ] >
12:
13: <PhoneBook>
14: <Entry>Work</Entry>
15: <Title>Cacawatha Construction Company</Title>
16: <Name>Fred Williams, Jr.</Name>
17: <Position>CEO</Position>
18: <Phone1>555-555-1234</Phone1>
19: <Phone2>555-554-4567</Phone2>
20: <Fax>555-555-8910</Fax>
21: <Comments>Nice Guy!</Comments>
22: </PhoneBook>
183RubyC04.qxd 1/7/02 3:09 PM Page 216

XML and Ruby • Chapter 4 217
NOTE
Technically, Schema is superior to DTD in the following areas:
It validates data as well as form – Remember, DTD only validates the
formation (or the document’s conformance to XML syntax rules), and
not the data types per se.
Both sender and receiver know what to expect – While DTD can say
PCDATA, Schema can break it down as String, Character, Integer, Date,
and other various formats, giving both parties a good expectation of
what they are about to get.
It allows data facets, data patterns, data type creation, and data con-
version – DTD can’t even begin to figure out how to do this.
It is written with XML syntax – Possibly the biggest reason that many
programmers have taken to Schema; Schema is able to benefit from XML
syntax perks, such as manipulation via DOM and use of XSLT.
Since we know that a Schema is XML we can start right off the bat without
having to go into too much detail. Figure 4.4 is an example of how an inline
Schema may appear in the same Phonebook file.
www.syngress.com
Figure 4.4 Phonebook XML With Inline Schema
00: <?xml version = "1.0"?>
01: <xs:schema xmlns:xs="http://www.w3.org/2001/XMLSchema">
02:
03: <xs:element name="Phonebook">
04: <xs:complexType>
05: <xs:sequence>
06: <element name="Entry" type="xs:string"/>
07: <element name="Title" type="xs:string"/>
08: <element name="Name" type="xs:string"/>
09: <element name="Position" type="xs:string"/>
10: <element name="Phone1" type="xs:string"/>
11: <element name="Phone2" type="xs:string"/>
12: <element name="Fax" type="xs:string"/>
Continued
183RubyC04.qxd 1/7/02 3:09 PM Page 217

218 Chapter 4 • XML and Ruby
XPath
XPath is an official W3 recommendation that uses XPath expressions. For
example, say you want to find the Name element in our previous phonebook
example.To find the Name variable, our XPath syntax would be:
/Phonebook/Name
Pretty simple, right? However, this simplicity hides a very robust system.
XPath can use the same type of syntax throughout an XML document, and liter-
ally filter for what you are looking for if you perform a search. XPath can even
accept the wild card indicator “*”.Attributes can also be located by including an
“@” symbol before the attribute name. For example, /Root/*[@test] would look
for any element one level under the root element that has an attribute named
“test”.There are also features available, such as Count() and Postition(), which
would select elements based on the count of their children or on their position.
XPath can also use Boolean expressions.
NOTE
The XPath expressions work just like the URI (Uniform Resource Indicator,
similar to URL) style mapping in order to navigate through an XML docu-
ment. You can find out more information about XPath at
www.w3.org/xpath.
XML Parser Architectures and APIs
XML parsers and the Application Programming Interfaces (APIs) they offer gen-
erally come in two fundamentally different flavors: event streams and object trees.
www.syngress.com
Figure 4.4 Continued
13: <element name="Comments" type="xs:string"/>
14: </xs:sequence>
15: </xs:complexType>
16: </xs:element>
17:
18:</xs:schema>
183RubyC04.qxd 1/7/02 3:09 PM Page 218

XML and Ruby • Chapter 4 219
Event streams are typified by the Simple API for XML interface (SAX) that grew
out of the xml-dev mailing list discussions.To use the SAX interface, you register
callbacks for events of interest and then let the parser proceed through the docu-
ment. In contrast, the Document Object Model (or DOM, currently a World
Wide Web Consortium recommendation [www.w3.org]) builds an in-memory
tree of objects to represent all the features of an XML document. Both can be
used for most tasks, but there are certain niche applications for which one or the
other is better suited.
Stream interfaces have certain inherent performance advantages: memory con-
sumption for the parser itself is roughly constant since only the current event, the
callback routines and whatever data structures they construct need be kept in
memory, and document processing doesn’t have to wait for the entire document
to be parsed.With very large documents or very tight memory and response time
constraints, stream interfaces often enjoy a critical advantage, whereas for more
linear documents or those in which only small subset of the elements are of
interest, it is often simplest to use a callback interface to specify the handling of
relevant entities and completely ignore the rest.
Object tree interfaces tend to have memory demands that grow with the size of
the document and must wait for parsing to complete before any processing can
begin, but they really shine for more complex manipulations and highly dynamic
requirements.Their DOM-style interfaces allow one to walk the object tree in
any manner desired, completely free of the event stream’s linear constraints.They
generally allow you to manipulate the contents and arrangements of the nodes as
needed, and tend to provide a wider variety of methods for each object.When
you have a complex document (one with extensive use of ID/IDREF pairs), a
requirement to revisit nodes, or perhaps a need to manipulate the structure of the
document prior to further processing the object tree is a natural fit.
Several of the Ruby parsers offer a third alternative: iterators. Like SAX-style
callback interfaces, these parsers function on a stream of events (with the perfor-
mance advantages that implies), but they take a more natural approach for Ruby
by using iterators to walk the event stream.This approach (as implemented by
both XMLParser and NQXML) is often the simplest solution for a Ruby pro-
gram that needs to extract data from XML.An experienced Ruby programmer is
likely to be very comfortable working with enumerable collections, and that
experience can translate directly to working with the entities present in XML.
A rather unscientific benchmark, executed by running each of the sample
scripts several times with the Unix time command on a 500MHz Pentium III,
gave the results shown in Table 4.1:
www.syngress.com
183RubyC04.qxd 1/7/02 3:09 PM Page 219

220 Chapter 4 • XML and Ruby
Table 4.1 CPU Times for Sample Scripts
Program / Parser User CPU
libgdome.rb / libgdome-ruby 65 ms
nqxml_stream.rb / nqxml 220 ms
nqxml_tree.rb / nqxml 240 ms
xmlparser_iterator.rb / XMLParser 85 ms
www.syngress.com
When to Use SAX and DOM Together?
SAX obviously can’t process information as fast as DOM can when
working with large files. On the other hand, using DOM exclusively can
really kill your resources, especially if used on a lot of small files. SAX is
read-only, while DOM allows changes to the XML file. Since these two
different APIs literally complement each other there is no reason why
you can’t use them both for large projects.
Here are some situations that would require a combination of SAX
and DOM:
■The application will experience large changes between small
XML files and large XML files.
■The application has a system in which small, inconsequential
or referential data is stored in small XML files.
■The application will require extensive traversing of a central-
ized XML file.
A good example would be a huge XML file that needed to be
updated and have a report generated for each section that changed. You
could use DOM to build the tree and move freely as you find the areas
that need change, then generate smaller XML files containing the items
that were changed. SAX could then come in, look through the smaller
files, and generate a customized report for each change.
Developing & Deploying…
183RubyC04.qxd 1/7/02 3:09 PM Page 220

XML and Ruby • Chapter 4 221
Parsing and Creating XML in Ruby
Ruby’s extensibility has always been one of its strong points; its ease of use can
easily rival C/C++’s header file system, and with the added Ruby perks it is defi-
nitely a simple process to enhance Ruby itself for whatever is needed. Several
users have already created parsers for Ruby that work either directly with XML
or with one of XML’s APIs. In this section we’ll take a look at some of the more
popular parsers available and how they work.
The best way possible to show the differences between the parsers is to pro-
vide a single set of XML that each parser needs to work with and display the
output for which we are looking.The application with which each parser will be
working will provide the following tasks in XML:
1. Parse an XML file.
2. Properly identify the needed tags.
3. Return information as required.
The application itself is a semi-functional port-scanning tool that will operate
based on a central list of servers.When fed an XML file with a list of settings and
ports for which to scan on each server, it will check these ports and return their
status.
Figure 4.5 (servers.xml) is a very lengthy XML file that is our standard server
input file (this can be found at www.syngress.com/solutions in the shared direc-
tory).The server’s file has the following information stored within it:
■<servers> root tag;
■<hosts> complex type, with the host’s name and primary ip address as
attributes;
■<owner> for owner information;
■<department> for department information;
■<service> complex type with the attributes type for usage (domain, dsn,
email, etc.), role,name,version, and source;
■<port> with number and protocol attributes.
www.syngress.com
183RubyC04.qxd 1/7/02 3:09 PM Page 221

222 Chapter 4 • XML and Ruby
www.syngress.com
Figure 4.5 Sample Server’s Input File: servers.xml
<?xml version="1.0" encoding="UTF-8" standalone="yes"?>
<servers>
<host name="alecto" primary_ip="10.0.11.2">
<owner>John Q. Admin</owner><department>MIS</department>
<alias>ns-1</alias><alias>www-2</alias><alias>sql-3</alias>
<service type="Domain" role="primary" name="Bind"
version="9.1.2" source="www.isc.org">
<port number="53" protocol="tcp"/>
<port number="53" protocol="udp"/>
<port number="1486" protocol="udp"/>
</service>
<service type="Web Server" role="cluster-member" name="Apache"
version="1.3.19" source="httpd.apache.org">
<port number="80" protocol="tcp"/>
<port number="443" protocol="tcp"/>
</service>
<service type="PostgreSQL" role="backup" name="PostgreSQL"
version="7.1.3" source="www.postgresql.org">
<port number="5432" protocol="tcp"/>
</service>
<service type="ident" role="support">
<port number="113" protocol="tcp"/>
<port number="113" protocol="udp"/>
</service>
<service type="ssh" role="support" name="OpenSSH"
version="2.9p1" source="www.openssh.com">
<port number="22" protocol="tcp"/>
</service>
</host>
<host name="megaera" primary_ip="10.0.11.3">
<owner>John Q. Admin</owner><department>MIS</department>
Continued
183RubyC04.qxd 1/7/02 3:09 PM Page 222

XML and Ruby • Chapter 4 223
www.syngress.com
Figure 4.5 Continued
<alias>sql-1</alias><alias>ns-2</alias><alias>www-3</alias>
<service type="Domain" role="secondary" name="Bind"
version="9.1.2" source="www.isc.org">
<port number="53" protocol="tcp"/>
<port number="53" protocol="udp"/>
<port number="1486" protocol="udp"/>
</service>
<service type="Web Server" role="cluster-member" name="Apache"
version="1.3.19" source="httpd.apache.org">
<port number="80" protocol="tcp"/>
<port number="443" protocol="tcp"/>
</service>
<service type="PostgreSQL" role="primary" name="PostgreSQL"
version="7.1.3" source="www.postgresql.org">
<port number="5432" protocol="tcp"/>
</service>
<service type="ident" role="support">
<port number="113" protocol="tcp"/>
<port number="113" protocol="udp"/>
</service>
<service type="ssh" role="support" name="OpenSSH"
version="2.9p1" source="www.openssh.com">
<port number="22" protocol="tcp"/>
</service>
</host>
<host name="tisiphone" primary_ip="10.0.11.4">
<owner>John Q. Admin</owner><department>MIS</department>
<alias>www-1</alias><alias>sql-2</alias><alias>ns-3</alias>
<service type="Domain" role="secondary" name="Bind"
version="9.1.1" source="www.isc.org">
<port number="53" protocol="tcp"/>
Continued
183RubyC04.qxd 1/7/02 3:09 PM Page 223

224 Chapter 4 • XML and Ruby
Figure 4.6 (scans.xml) is our sample XML file that tells the application where
and which ports to check, based on the general information provided in the
servers.xml file (it can be found at www.syngress.com/solutions). It has the fol-
lowing structure:
1. <scans> root tag
a. <host> complex type with ip,scan_time,scanner_name,scanner_version,
scanner_arch attributes
i. <port> element with number,protocol, and service attributes
www.syngress.com
Figure 4.5 Continued
<port number="53" protocol="udp"/>
<port number="1486" protocol="udp"/>
</service>
<service type="Web Server" role="cluster-member" name="Apache"
version="1.3.19" source="httpd.apache.org">
<port number="80" protocol="tcp"/>
<port number="443" protocol="tcp"/>
</service>
<service type="PostgreSQL" role="backup" name="PostgreSQL"
version="7.1.3" source="www.postgresql.org">
<port number="5432" protocol="tcp"/>
</service>
<service type="ident" role="support">
<port number="113" protocol="tcp"/>
<port number="113" protocol="udp"/>
</service>
<service type="ssh" role="support" name="OpenSSH"
version="2.9p1" source="www.openssh.com">
<port number="22" protocol="tcp"/>
</service>
</host>
</servers>
183RubyC04.qxd 1/7/02 3:09 PM Page 224

XML and Ruby • Chapter 4 225
Figure 4.7 displays a sample output file based on the information provided in
the previous samples (this can be found at www.syngress.com/solutions).
www.syngress.com
Figure 4.6 Sample Scans Input File: scans.xml
<?xml version="1.0" encoding="utf-8" standalone="yes" ?>
<scans>
<host ip="10.0.11.2" scan_time="2001-10-31 20:14:33"
scanner_name="nmap" scanner_version="2.53"
scanner_arch="i686-linux">
<port number="22" protocol="tcp" service="ssh"/>
<port number="53" protocol="tcp" service="domain"/>
<port number="53" protocol="udp" service="domain"/>
<port number="80" protocol="tcp" service="http"/>
<port number="443" protocol="tcp" service="https"/>
<port number="1486" protocol="udp" service="nms_topo_serv"/>
<port number="5432" protocol="tcp" service="postgres"/>
<port number="6000" protocol="tcp" service="X11"/>
</host>
<host ip="10.0.11.3" scan_time="2001-10-31 20:15:13"
scanner_name="nmap" scanner_version="2.53"
scanner_arch="i686-linux">
<port number="22" protocol="tcp" service="ssh"/>
<port number="53" protocol="udp" service="domain"/>
<port number="80" protocol="tcp" service="http"/>
<port number="113" protocol="tcp" service="auth"/>
<port number="113" protocol="udp" service="auth"/>
<port number="443" protocol="tcp" service="https"/>
<port number="1486" protocol="udp" service="nms_topo_serv"/>
<port number="5432" protocol="tcp" service="postgres"/>
</host>
</scans>
183RubyC04.qxd 1/7/02 3:09 PM Page 225

226 Chapter 4 • XML and Ruby
www.syngress.com
Figure 4.7 Sample Output File: output.xml
<?xml version="1.0"?>
<scan_report report_time="Tue Oct 09 00:35:54 MDT 2001">
<host ip="10.0.11.2" name="alecto" owner="John Q. Admin"
department="MIS">
<port port_number="22" protocol="tcp" status="Normal">
<comment>Service status normal for ssh on 22/tcp.</comment>
</port>
<port port_number="53" protocol="tcp" status="Normal">
<comment>Service status normal for Domain on 53/tcp.</comment>
</port>
<port port_number="53" protocol="udp" status="Normal">
<comment>Service status normal for Domain on 53/udp.</comment>
</port>
<port port_number="80" protocol="tcp" status="Normal">
<comment>Service status normal for Web Server on 80/tcp.</comment>
</port>
<port port_number="443" protocol="tcp" status="Normal">
<comment>Service status normal for Web Server on
443/tcp.</comment>
</port>
<port port_number="1486" protocol="udp" status="Normal">
<comment>Service status normal for Domain on 1486/udp.</comment>
</port>
<port port_number="5432" protocol="tcp" status="Normal">
<comment>Service status normal for PostgreSQL on
5432/tcp.</comment>
</port>
<port port_number="6000" protocol="tcp" status="Unexpected Open
Port">
<comment>An undocumented open port was found at 6000/tcp which may
be the X11 service.</comment>
</port>
Continued
183RubyC04.qxd 1/7/02 3:09 PM Page 226

XML and Ruby • Chapter 4 227
www.syngress.com
Figure 4.7 Continued
<port port_number="113" protocol="tcp" status="Not Found">
<comment>The ident service at 113/tcp was not detected. Please
check service status.</comment>
</port>
<port port_number="113" protocol="udp" status="Not Found">
<comment>The ident service at 113/udp was not detected. Please
check service status.</comment>
</port>
</host>
<host ip="10.0.11.3" name="megaera" owner="John Q. Admin"
department="MIS">
<port port_number="22" protocol="tcp" status="Normal">
<comment>Service status normal for ssh on 22/tcp.</comment>
</port>
<port port_number="53" protocol="udp" status="Normal">
<comment>Service status normal for Domain on 53/udp.</comment>
</port>
<port port_number="80" protocol="tcp" status="Normal">
<comment>Service status normal for Web Server on 80/tcp.</comment>
</port>
<port port_number="113" protocol="tcp" status="Normal">
<comment>Service status normal for ident on 113/tcp.</comment>
</port>
<port port_number="113" protocol="udp" status="Normal">
<comment>Service status normal for ident on 113/udp.</comment>
</port>
<port port_number="443" protocol="tcp" status="Normal">
<comment>Service status normal for Web Server on
443/tcp.</comment>
</port>
<port port_number="1486" protocol="udp" status="Normal">
<comment>Service status normal for Domain on 1486/udp.</comment>
</port>
Continued
183RubyC04.qxd 1/7/02 3:09 PM Page 227

228 Chapter 4 • XML and Ruby
Shared Code for Examples
To facilitate things a bit, we are going to create two Ruby files; one for defining
the Host and Port classes, named “hosts.rb” and another file for defining the
Report class, which generates our output.We’ll name this one “report.rb”.We are
going to be using the XML parser Not Quite XML (NQXML) for our two
shared files; however, since we have not looked at NQXML yet, we’ll concentrate
on the design portion of hosts.rb and reports.rb.This rule applies to XMLParser,
NQXML, and libgdome-ruby. Ruby Electric XML (REXML) will have its own
file set.
NOTE
In order to save time, we are using NQXML to handle the light reading
and writing stuff. While this does not mean that NQXML is the best
parser out there, it is one of the faster ones to work with and its Ruby
architecture allows us to override whatever methods we need to provide
the required functionality. It also makes the functionality required for the
hosts.rb and report.rb files easier to use than if we’d used XMLParser
and libgdome-ruby.
www.syngress.com
Figure 4.7 Continued
<port port_number="5432" protocol="tcp" status="Normal">
<comment>Service status normal for PostgreSQL on
5432/tcp.</comment>
</port>
<port port_number="53" protocol="tcp" status="Not Found">
<comment>The Domain service at 53/tcp was not detected. Please
check service status.</comment>
</port>
</host>
<unscanned_host>tisiphone</unscanned_host>
<missing_ports>3</missing_ports>
<extra_ports>1</extra_ports>
<good_ports>15</good_ports>
</scan_report>
183RubyC04.qxd 1/7/02 3:09 PM Page 228

XML and Ruby • Chapter 4 229
Defining and Implementing Classes Host and Port
In Figure 4.8 we find the Host class as defined in hosts.rb. Host takes the fol-
lowing attributes: ports,ip,name,owner,department,aliases, and scanned. For all
intents and purposes it follows the general layout of servers.xml.The ports
attribute is a hash that stores port numbers and port protocols (80/HTTP, for
example); aliases contains an array of possible aliases used by the server.
In Figure 4.9 we find the Port class as defined in hosts.rb.
www.syngress.com
Figure 4.8 Host Class Definition
class Host
attr_accessor :ports, :ip, :name, :owner, :department, :aliases,
:scanned
def initialize(ip, name="unknown")
@ports = Hash.new
@ip = ip
@name = name
@owner = ""
@department = ""
@aliases = Array.new
@scanned = false
end
end
Figure 4.9 Port Class Definition
class Port
attr_accessor :port_number, :protocol, :service_data, :status
def initialize(port_number, protocol, service_data=Hash.new)
@port_number = port_number
@protocol = protocol
@service_data = service_data
@status = "Not Found"
end
end
183RubyC04.qxd 1/7/02 3:09 PM Page 229

230 Chapter 4 • XML and Ruby
Defining and Implementing the Report Class
Figure 4.10 contains our initialize method for the Report class.We are going to be
using Report not only to write our output, but also to keep track internally of the
number of extra ports (that is, ports not listed in the server.xml file), the number
of missing ports, and the number of good ports in order to provide a summary at
the end of the output.xml file from Figure 4.9.The writer is defined and started,
and a root tag of <scan_report> is listed in the new output.xml file as well as the
date and time,The Report class will also check to see which scans did not go
through and which scans failed, and include them in the report it generates.
Figure 4.11 shows an override of a pre-existing method inside the NQXML
writer that is modified to add a new line character after the prettify method.The
nopretty method is used to tell Report not to use the pretty override. Figure 4.12
displays the start_host and end_host methods, which generates the <host> tag.
Figure 4.13 displays the add_port,unscanned_host, and finish methods.
www.syngress.com
Figure 4.10 Report Class, Initialize Method
def initialize
@extra_ports = 0
@missing_ports = 0
@good_ports = 0
@writer = NQXML::Writer.new($stdout, true)
@writer.processingInstruction('xml', 'version="1.0"')
@writer.startElement('scan_report')
@writer.attribute('report_time', Time.new)
end
183RubyC04.qxd 1/7/02 3:09 PM Page 230

XML and Ruby • Chapter 4 231
www.syngress.com
Figure 4.11 Report Class, def pretty and def nopretty
# the default printing behavior doesn't interact well with our
# report structure, so we'll handle it manually
def pretty
@writer.prettify = true
@writer.write("\n")
end
def nopretty
@writer.prettify = false
end
Figure 4.12 Report class, def start_host and def end_host
def start_host(ip, name, owner, department)
# a host element has ip, name, owner and department attributes
@writer.startElement('host')
@writer.attribute('ip', ip)
@writer.attribute('name', name)
# for the owner attribute we'll use startAttribute, write and
# endAttribute since write will handle escaping for us
@writer.startAttribute('owner')
@writer.write(owner)
@writer.endAttribute
# and we'll do the same for department
@writer.startAttribute('department')
@writer.write(department)
@writer.endAttribute
end
def end_host
@writer.endElement('host')
end
183RubyC04.qxd 1/7/02 3:09 PM Page 231

232 Chapter 4 • XML and Ruby
www.syngress.com
Figure 4.13 Report class, def add_port, def unscanned_port, and def_finish
def add_port(port_number, protocol, status,
reported_service, expected_service)
@writer.startElement('port')
@writer.attribute('port_number', port_number)
@writer.attribute('protocol', protocol)
@writer.attribute('status', status)
# we need to set the appropriate comment and update our statistics
comment = ""
case status
when /Not Found/i
@missing_ports += 1
comment = "The #{expected_service} service at #{port_number}/" +
"#{protocol} was not detected. Please check service status."
when /Unexpected Open Port/i
@extra_ports += 1
if (reported_service == "unknown") then
comment = "An undocumented open port was found at " +
"#{port_number}/#{protocol}."
else
comment = "An undocumented open port was found at " +
"#{port_number}/#{protocol} which may be the " +
"#{reported_service} service."
end
when /Normal/i
@good_ports += 1
comment = "Service status normal for #{expected_service} on " +
"#{port_number}/#{protocol}."
end
@writer.startElement('comment')
nopretty
@writer.write(comment)
@writer.endElement('comment')
pretty
Continued
183RubyC04.qxd 1/7/02 3:09 PM Page 232

XML and Ruby • Chapter 4 233
www.syngress.com
Figure 4.13 Continued
@writer.endElement('port')
end
def unscanned_host(host)
# an unscanned host is simple element with only text content
@writer.startElement('unscanned_host')
nopretty
@writer.write(host.name)
@writer.endElement('unscanned_host')
pretty
end
def finish
# as are the port counts
@writer.startElement('missing_ports')
nopretty
@writer.write(@missing_ports.to_s)
@writer.endElement('missing_ports')
pretty
@writer.startElement('extra_ports')
nopretty
@writer.write(@extra_ports.to_s)
@writer.endElement('extra_ports')
pretty
@writer.startElement('good_ports')
nopretty
@writer.write(@good_ports.to_s)
@writer.endElement('good_ports')
pretty
# ending the root element completes the output
@writer.endElement('scan_report')
end
end
183RubyC04.qxd 1/7/02 3:09 PM Page 233

234 Chapter 4 • XML and Ruby
Using XMLParser
XMLParser, developed by Yoshida Masato, is a Ruby wrapper around everyone’s
favorite XML Parser, expat. Expat, developed by James Clark, uses a SAX-like API
to traverse through XML and is relied upon by users worldwide. XMLParser has
some major drawbacks however, though many of them are inherited from expat
and are no fault of Yoshida Masato’s:
■Can generate segfault errors easily, depending on installation (see the
Note sidebar in this section);
■No support for Namespaces.
However, XMLParser has the following excellent advantages:
■Full XML conformance;
■Very stable due to its existence;
■Very fast.
NOTE
Frequently generating segfault errors seems like a serious claim to make
about a program that’s been around (and worked for as long as) expat.
However, it’s a serious issue that has been documented and is, ironically,
due to the open source nature of the application. Several developers
have integrated expat as a statically-compiled application. When called
by anything that dynamically loads expat, the result will be a segfault
because expat is already there. For example, Apache and PHP have their
own static expat, so if you add a module (like XMLParser) that loads
expat dynamically, it will result in a segfault.
The true beauty of expat lies in its speed when dealing with XML files. Its
flexible C code makes it a powerful tool for working with XML, and the “pure”
version of expat works great without requiring extensive mods or files.
To successfully install and run XMLParser, you first need the expat parser.You
may already have expat from an earlier Apache or PHP installation, so take a look
www.syngress.com
183RubyC04.qxd 1/7/02 3:09 PM Page 234

XML and Ruby • Chapter 4 235
around before downloading and installing it. Once you have installed expat, you
install XMLParser by compiling it and using the following lines to point to the
expat header file or library file:
—with-xmlparse-lib=/path/to/expat/xmlparse
—with-xmlparse-include=/path/to/expat/xmlparse
XMLParser is currently only available to work with Unix but can be compiled
for Windows through Cygwin as well.
Figure 4.14 has our XMLParser example.
www.syngress.com
libgdome-ruby
Libgdome-ruby is a wrapper for an existing Unix XML parser called
libgdom, which relies on yet another existing XML parser called libxml.
Libgdome-ruby is maintained by Tobias Peters and is currently in Beta.
This beta release is unstable and suffers from a memory leak as a result
of a libgdom fault. Unlike XMLParser, libgdome-ruby uses DOM to tra-
verse through an XML file.
Since libgdome-ruby has not been in active development for the last
seven months, we won’t be covering it in detail in this book. However, if
you want to see the libgdome-ruby code for this particular application,
feel free to view the source code on the CD that accompanies this book,
in Chapter 4’s libgdome-ruby directory. You’ll have to procure your own
copy of libgdome-ruby but it can work with Windows (albeit with diffi-
culty) provided you can install libgdom. The file, and instructions on
installing it, are available at http://libgdome-ruby.berlios.de/.
Developing & Deploying…
Figure 4.14 Sample Application Using XMLParser’s Iterator Interface
#! /usr/bin/ruby -w
require 'hosts'
require 'ports'
require 'report'
require 'xmlparser'
Continued
183RubyC04.qxd 1/7/02 3:09 PM Page 235

236 Chapter 4 • XML and Ruby
www.syngress.com
Figure 4.14 Continued
def server_host_start(ip, name, hosts)
host = Host.new(ip, name)
hosts[ip] = host
return host
end
begin
parser = XMLParser.new
current_host = nil
current_service = nil
hosts = Hash.new
# since there is no "parent" object to provide context in a stream
# we'll have to track it with flags to handle text elements
in_owner = false
in_dept = false
in_alias = false
# the each method iterates over all entities in the file
servers = File.open('servers.xml').readlines.join
parser.parse(servers) { |event, name, data|
# events are returned as the values of constants in the XMLParser
# class so our case statement switches on constants
case event
when XMLParser::START_ELEM
case name
when "host"
# we need to create and record in the hosts Hash an object for
# the host entity we've entered
current_host = Host.new(data["primary_ip"],
data["name"])
Continued
183RubyC04.qxd 1/7/02 3:09 PM Page 236

XML and Ruby • Chapter 4 237
www.syngress.com
Figure 4.14 Continued
hosts[ data["primary_ip"] ] = current_host
when "owner" then in_owner = true
when "department" then in_dept = true
when "alias" then in_alias = true
when "service"
current_service = data.dup
when "port"
port_number = data["number"]
protocol = data["protocol"]
port_pair = port_number + "/" + protocol
current_host.ports[ port_pair] =
(Port.new( port_number, protocol, current_service))
end
when XMLParser::END_ELEM
case name
when "host"
current_host = nil
when "owner" then in_owner = false
when "department" then in_dept = false
when "alias" then in_alias = false
when "service"
current_service = nil
when "port" # no action necessary
end
when XMLParser::CDATA
if (data !~ /\S/m or data =~ /^[\s\n]+$/)
next
else
# set parts of the host record based on our context flags
if in_owner then current_host.owner = data end
if in_dept then current_host.department = data end
if in_alias then current_host.aliases.push(data) end
Continued
183RubyC04.qxd 1/7/02 3:09 PM Page 237

238 Chapter 4 • XML and Ruby
www.syngress.com
Figure 4.14 Continued
end
else
next
end
}
# parsers can't be reused, so we create a new one
parser = nil
parser = XMLParser.new
report = Report.new
scans = File.open('scans.xml').readlines.join
parser.parse(scans) { |event, name, data|
case event
when XMLParser::START_ELEM
case name
when "host"
# get the correct host record and start a report section for
# it in the hosts hash
current_host = hosts[ data["ip"] ]
current_host.scanned = true
report.start_host(current_host.ip, current_host.name,
current_host.owner,
current_host.department)
when "port"
# update port status in the host record
port_number = data["number"]
protocol = data["protocol"]
port_pair = port_number + "/" + protocol
status = ""
# open ports need to be added to to the report with a status
# based on the presence or lack of a port record
Continued
183RubyC04.qxd 1/7/02 3:09 PM Page 238

XML and Ruby • Chapter 4 239
www.syngress.com
Figure 4.14 Continued
if current_host.ports.has_key?( port_pair )
current_host.ports[port_pair].status = "Normal"
service =
current_host.ports[port_pair].service_data["type"]
report.add_port(port_number, protocol, "Normal",
nil, service)
else
report.add_port(port_number, protocol,
"Unexpected Open Port",
data["service"], nil)
end
end
when XMLParser::END_ELEM
case name
when "host"
# add reports for ports not found in the scan
current_host.ports.each { |key, port|
if (port.status == "Not Found") then
report.add_port(port.port_number, port.protocol,
"Not Found", nil,
port.service_data["type"])
end
}
report.end_host
current_host = nil
when "port" # no action necessary
end
when XMLParser::CDATA
if (data !~ /\S/m or data =~ /^[\s\n]+$/)
next
else
if in_owner then current_host.owner = data end
Continued
183RubyC04.qxd 1/7/02 3:09 PM Page 239

240 Chapter 4 • XML and Ruby
Using NQXML
NQXML is the brainchild of Jim Menard. It’s exactly what its name means
(“Not Quite XML”); not all of XML’s functions are available for use. Here’s a list
of what is missing (this is also available from the LIMITATIONS text in the
package):
■The only encoding supported in NQXML is ASCII-8; there is no sup-
port for UTF-8 or UTF-16.This essentially means that you can forget
about using NQXML for any projects or applications that require inter-
national characters.
www.syngress.com
Figure 4.14 Continued
if in_dept then current_host.department = data end
if in_alias then current_host.aliases.push(data) end
end
else
next
end
}
# print a sorted report of hosts not scanned
hosts.values.sort { |hosta, hostb|
hosta.name <=> hostb.name
}.
each { |host|
if (! host.scanned ) then report.unscanned_host(host) end
}
report.finish
rescue XMLParserError => exception
print "Parser exception at line #{parser.line()}: #{$!}\n"
end
183RubyC04.qxd 1/7/02 3:09 PM Page 240

XML and Ruby • Chapter 4 241
■It checks for well-formed documents only.
■There is no DTD support.
■There are no external references (which basically shoots down Schema
as well).
■ELEMENT, ATTLIST, and NOTATION tags return their attributes as
string only.
However, even with the somewhat basic items it is missing, NQXML has
some advantages:
■It is built with Ruby.
■It does not require external applications.
■It is not a wrapper for any existing parser.
■Its functionality is easy to remember and easy to find.
So, in essence, items that are part of standard XML, such as Unicode
Transformation Format (UTF) and DTD/external link support, are missing; but
we are able to use NQXML for basic XML parsing and maybe a few more
advanced strategies with some tinkering.Also, since NQXML is written in Ruby,
any Ruby programmer can open up any of the files and edit them as they see fit.
Figure 4.15 and Figure 4.16 in the next section show two different ways of
approaching our application.
Installing NQXML
Installing NQXML on Unix is quite simple since it comes with a handy install.rb
file. Just untar/ungzip the NQXML archive to the directory of your choice and
run install.rb.
On Windows, open the DOS shell and use ruby install.rb from within the
NQXML application folder.This a little bit trickier if the installer doesn’t
work, but it can still be done: download the NQXML.tar file and use either
WinRAR or WinZIP (or the free PowerArchiver) to extract the files. Once
the files are extracted, copy the folder NQXML to the C:\ruby\lib\ruby\1.6
directory (assuming you first installed it in the default directory).This will
work for both Windows 9x and Windows 2000. Let’s take a look at Figure
4.15 and Figure 4.16.
www.syngress.com
183RubyC04.qxd 1/7/02 3:09 PM Page 241

242 Chapter 4 • XML and Ruby
www.syngress.com
Figure 4.15 Sample Application Using NQXML’s Iterator Interface
#! /usr/bin/ruby -w
require 'hosts'
require 'ports'
require 'report'
require 'nqxml/streamingparser'
begin
servers_parser =
NQXML::StreamingParser.new(File.open('servers.xml'))
current_host = nil
current_service = nil
hosts = Hash.new
# since there is no "parent" object to provide context in a stream
# we'll have to track it with flags to handle text elements
in_owner = false
in_dept = false
in_alias = false
# the each method iterates over all entities in the file
servers_parser.each { |entity|
# skip the XML Declaration
if (entity.is_a?(NQXML::XMLDecl) or
# and all whitespace or newline only text entities
(entity.is_a?(NQXML::Text) and
((entity.text !~ /\S/m) or (entity.text == "\n"))) or
# and the servers tags
(entity.is_a?(NQXML::Tag) and entity.name == "servers")
) then
next
end
Continued
183RubyC04.qxd 1/7/02 3:09 PM Page 242

XML and Ruby • Chapter 4 243
www.syngress.com
Figure 4.15 Continued
if entity.is_a?(NQXML::Tag) then
case entity.name
when "host"
# for host entries we have to set up the current_host variable
# we're using for context
if entity.isTagStart then
current_host = Host.new(entity.attrs["primary_ip"],
entity.attrs["name"])
hosts[ entity.attrs["primary_ip"] ] = current_host
# or tear it down on exit from the element
elsif entity.isTagEnd
current_host = nil
end
when "owner" then in_owner = entity.isTagStart
when "department" then in_dept = entity.isTagStart
when "alias" then in_alias = entity.isTagStart
when "service"
if entity.isTagStart then
current_service = entity.attrs.dup
else
current_service = nil
end
when "port"
if entity.isTagStart then
port_number = entity.attrs["number"]
protocol = entity.attrs["protocol"]
port_pair = port_number + "/" + protocol
current_host.ports[ port_pair] =
(Port.new( port_number, protocol, current_service))
end
else
raise "Unhandled tag: #{entity.name}\n"
end
Continued
183RubyC04.qxd 1/7/02 3:09 PM Page 243

244 Chapter 4 • XML and Ruby
www.syngress.com
Figure 4.15 Continued
elsif entity.is_a?(NQXML::Text) then
# text values are set based on which kind of element we're in
if in_owner then current_host.owner = entity.text end
if in_dept then current_host.department = entity.text end
if in_alias then current_host.aliases.push(entity.text) end
else
raise "Unhandled entity type: #{entity.type}\n"
end
}
servers_parser = nil
scans_parser = NQXML::StreamingParser.new(File.open('scans.xml'))
report = Report.new
scans_parser.each { |entity|
# skip the XML Declaration
if (entity.is_a?(NQXML::XMLDecl) or
# and all whitespace or newline only text entities
(entity.is_a?(NQXML::Text) and
((entity.text !~ /\S/m) or (entity.text == "\n"))) or
# and the scans tags
(entity.is_a?(NQXML::Tag) and entity.name == "scans")
) then
next
end
if entity.is_a?(NQXML::Tag) then
case entity.name
when "host"
if entity.isTagStart then
# get the correct host record and start a report section for
# it
current_host = hosts[ entity.attrs["ip"] ]
current_host.scanned = true
Continued
183RubyC04.qxd 1/7/02 3:09 PM Page 244

XML and Ruby • Chapter 4 245
www.syngress.com
Figure 4.15 Continued
report.start_host(current_host.ip, current_host.name,
current_host.owner,
current_host.department)
elsif entity.isTagEnd then
# add reports for ports not found in the scan
current_host.ports.each { |key, port|
if (port.status == "Not Found") then
report.add_port(port.port_number, port.protocol,
"Not Found", nil,
port.service_data["type"])
end
}
report.end_host
current_host = nil
end
when "port"
if entity.isTagStart then
# update port status in the host record
port_number = entity.attrs["number"]
protocol = entity.attrs["protocol"]
port_pair = port_number + "/" + protocol
status = ""
# open ports need to be added to to the report with a status
# based on the presence or lack of a port record
if current_host.ports.has_key?( port_pair )
current_host.ports[port_pair].status = "Normal"
service =
current_host.ports[port_pair].service_data["type"]
report.add_port(port_number, protocol, "Normal",
nil, service)
else
report.add_port(port_number, protocol,
"Unexpected Open Port",
Continued
183RubyC04.qxd 1/7/02 3:09 PM Page 245

246 Chapter 4 • XML and Ruby
www.syngress.com
Figure 4.15 Continued
entity.attrs["service"], nil)
end
end
end
end
}
scans_parser = nil
# print a sorted report of hosts not scanned
hosts.values.sort { |hosta, hostb|
hosta.name <=> hostb.name
}.
each { |host|
if (! host.scanned ) then report.unscanned_host(host) end
}
report.finish
rescue NQXML::ParserError => exception
print "Parser exception at line #{exception.line()}: #{$!}\n"
end
Figure 4.16 Sample Application Using NQXML’s Tree Interface
#! /usr/bin/ruby -w
require 'hosts'
require 'report'
require 'nqxml/treeparser'
def host_child(child, host)
if (child.entity.is_a?(NQXML::Tag)) then
Continued
183RubyC04.qxd 1/7/02 3:09 PM Page 246

XML and Ruby • Chapter 4 247
www.syngress.com
Figure 4.16 Continued
# only the text content is relevant for the first three types
case child.entity.name
when "owner" then
# take the text value of the first (only) child's entity
host.owner = child.firstChild.entity.text
when "department" then
host.department = child.firstChild.entity.text
when "alias" then
host.aliases.push( child.firstChild.entity.text )
when "service" then
# services are more complex since the service data needs to be
# applied to each port in turn
service_data = Hash.new
# the service data fields are accessible from the attributes
# hash of the child's entity object
service_data["type"] = child.entity.attrs["type"]
service_data["role"] = child.entity.attrs["role"]
# we iterate over the ports for each service and create a Port
# object to place in the host's ports list
child.children.each { |service_node|
if (service_node.entity.is_a?(NQXML::Tag)) then
port_number = service_node.entity.attrs["number"]
protocol = service_node.entity.attrs["protocol"]
# create a key in /etc/services style port/protocol format
port_pair = port_number + "/" + protocol
host.ports[ port_pair] =
(Port.new( port_number, protocol, service_data))
end
}
end
end
end
def scan_child(port_node, host, report)
Continued
183RubyC04.qxd 1/7/02 3:09 PM Page 247

248 Chapter 4 • XML and Ruby
www.syngress.com
Figure 4.16 Continued
port_number = port_node.entity.attrs["number"]
protocol = port_node.entity.attrs["protocol"]
port_pair = port_number + "/" + protocol
status = ""
if host.ports.has_key?( port_pair )
host.ports[port_pair].status = "Normal"
report.add_port(port_number, protocol, "Normal", nil,
host.ports[port_pair].service_data["type"])
else
report.add_port(port_number, protocol, "Unexpected Open Port",
port_node.entity.attrs["service"], nil)
end
end
begin
# first we build an array of Host objects and their expected
# services from the servers.xml file
# skip directly to the root node
server_root = NQXML::TreeParser.new(File.open("servers.xml")).
document.rootNode
hosts = Hash.new()
server_root.children.each { |host_node|
# we ignore all none tag nodes at this level
if (host_node.entity.is_a?(NQXML::Tag)) then
# index the hosts by ip (retrieved from the attrs hash)
ip = host_node.entity.attrs["primary_ip"]
name = host_node.entity.attrs["name"]
host = Host.new(ip, name)
hosts[ip] = host
host_node.children.each { |child_node|
if (child_node.entity.is_a?(NQXML::Tag)) then
host_child(child_node, host)
Continued
183RubyC04.qxd 1/7/02 3:09 PM Page 248

XML and Ruby • Chapter 4 249
www.syngress.com
Figure 4.16 Continued
end
}
end
}
server_root = nil
# now we compare the results from our scanner (scans.xml) to our
# expected hosts and services
scan_root = NQXML::TreeParser.new(File.open("scans.xml")).
document.rootNode
report = Report.new
scan_root.children.each { |host_node|
# we ignore all none tag nodes at this level
if (host_node.entity.is_a?(NQXML::Tag)) then
# index the hosts by ip (retrieved from the attrs hash)
host = hosts[ host_node.entity.attrs["ip"] ]
host.scanned = true
report.start_host(host.ip, host.name,
host.owner, host.department)
# now we build the report from the ports found open by the scan
host_node.children.each { |port_node|
if (port_node.entity.is_a?(NQXML::Tag)) then
scan_child(port_node, host, report)
end
}
host.ports.each { |key, port|
if (port.status == "Not Found") then
report.add_port(port.port_number, port.protocol,
"Not Found", nil,
port.service_data["type"])
end
}
report.end_host
Continued
183RubyC04.qxd 1/7/02 3:09 PM Page 249

250 Chapter 4 • XML and Ruby
www.syngress.com
Figure 4.16 Continued
end
}
# print a sorted report of hosts not scanned
hosts.values.sort { |hosta, hostb|
hosta.name <=> hostb.name
}.
each { |host|
if (! host.scanned ) then report.unscanned_host(host) end
}
report.finish
rescue NQXML::ParserError => exception
print "Parser exception at line #{exception.line()}: #{$!}\n"
end
Xmlscan
The xmlscan library by Ueno Katsuhiro is another pure-Ruby XML parser
that offers limited DTD support and one of the few XPath implementa-
tions available for Ruby, among other features. It’s been used as the
basis for MoonWolf’s MWDOM (a DOM implementation) and Michael
Neumann’s XSLT module for Ruby. As of this writing, xmlscan is under-
going a complete rewrite and its API is in a state of flux. In the previous
releases, the author paid special attention to standards conformance
and performance issues, making xmlscan a strong contender in the
native parser niche. The older version is available from the author’s
home page at www.blue.sky.or.jp/atelier/ruby/xmlscan-0.0.10.tar.gz, and
the next release will almost certainly be announced on the ruby-talk
mailing list and the Ruby Application Archive. Ruby-talk has also carried
occasional mentions of the development version (available as of October
2001 from www.blue.sky.or.jp/.tmp/xmlscan-snapshot.tar.gz) so a
search of the archives is probably your best bet for current information.
Developing & Deploying…
183RubyC04.qxd 1/7/02 3:09 PM Page 250

XML and Ruby • Chapter 4 251
Using REXML
REXML can be chalked up as a frustrated developer’s dream; Sean Russell cre-
ated REXML after fidgeting with two Ruby XML parsers and finding both to
be insufficient. Instead of sitting back and waiting for someone to make a good
one, Sean took it upon himself to make a XML Parser using the foundations of
Ruby. REXML has the following advantages:
1. It is written 100 percent in Ruby.
2. It can be used for both SAX and DOM parsing.
3. It is small—approximately 1845 lines of code.
4. Methods and classes are in easy-to-understand and remember English.
All of the hard-core parsing in REXML is done using Ruby’s powerful
built-in regular expression support and are likewise coded in native code. If you
have used Electric XML you may find some similarities in the simplicity of this
parser; in fact Sean Russell was inspired by the Electric XML code, and was
even given permission by TheMind to hack it.You can find Electric XML at
www.themindelectric.com/products/xml/xml.html. Let’s examine our sample
XML in Figure 4.17, and then we will look at our small REXML application,
written specifically in Windows (these can be found at www.syngress.com/
solutions in the rexml directory). Our output will just display the names of the
movies we have in our list.
www.syngress.com
Figure 4.17 movies.xml
<collection>
<movie title="Left Behind">
<type>Reality, Religious</type>
<format>DVD</format>
<year>2000</year>
<rating>PG</rating>
<stars>10</stars>
<description>Talk about a straight shot</description>
</movie>
<movie title="Transformers">
<type>Anime, Science Fiction</type>
<format>DVD</format>
Continued
183RubyC04.qxd 1/7/02 3:09 PM Page 251

252 Chapter 4 • XML and Ruby
Now let’s take a look at our quick little app.All we need to do is generate a
list of our movie titles so we can keep track of what we have:
require "rexml/document"
include REXML
xmfile = File.new( "movies.xml" )
xmdoc = Document.new xmfile
xmdoc.elements.each("collection/movie") {|element|
puts element.attributes["title"] }
www.syngress.com
Figure 4.17 Continued
<year>1999</year>
<rating>R</rating>
<stars>8</stars>
<description>Until all are one!</description>
</movie>
<movie title="Trigun">
<type>Anime, Action</type>
<format>DVD</format>
<episodes>4</episodes>
<rating>PG</rating>
<stars>10</stars>
<description>Vash the Stampede!</description>
</movie>
<movie title="Ishtar">
<type>Comedy</type>
<format>VHS</format>
<rating>PG</rating>
<stars>2</stars>
<description>Viewable boredom</description>
</movie>
</collection>
183RubyC04.qxd 1/7/02 3:09 PM Page 252

XML and Ruby • Chapter 4 253
Simple, no? REXML has been gifted with perhaps the simplest API available.
As you may remember from the NQXML and XMLParser examples, doing
something as simple as cycling though a list of elements and plucking out the
content of just one element was tricky and tedious. REXML made it as easy as
writing one line.We can enhance the output on this one a little bit by generating
the movie list with ratings and comments associated with it:
require "rexml/document"
include REXML
xmfile = File.new( "movies.xml" )
xmdoc = Document.new xmfile
puts "Current movie list:"
xmdoc.elements.each("collection/movie") {|element|
puts element.attributes["title"] }
puts "\n"
puts "with ratings of:"
xmdoc.elements.each("collection/movie/rating") { |element|
puts element.text }
puts "\n"
puts "and the following descriptions:"
xmdoc.elements.each("collection/movie/description") { |element|
puts element.txt }
www.syngress.com
183RubyC04.qxd 1/7/02 3:09 PM Page 253

254 Chapter 4 • XML and Ruby
Using XSLT in Ruby
XSLT is not completely out of the Ruby picture; there are two XSLT parsers
available that Ruby can use, namely Ruby-Sablotron and XSLT4R.
Ruby-Sablotron
Technically, this module is named “Sablotron module for Ruby” and is written
primarily for Linux. It is written and maintained by Masayoshi Takahashi and
requires the following libraries in order to properly work with Sablotron:
■Sablot
■Iconv (when used)
■Expat
The author does not provide any English documentation (at the time of this
writing, accessing the “pseudo-english” section of the website results in a 404
error ) and has a lot of heavy dependencies on the libraries it uses.You can find
this module at www.rubycolor.org/sablot.
XSLT4R
XSLT4R is the brainchild of Michael Neumann (whose name may ring a bell to
those readers who checked the name of this book’s editor), and can be found at
the RAA in the Library section under XML. XSLT4R uses a simple command-
line interface, though it can alternatively be used within a third-party application
to transform an XML document.
XSLT4R needs XMLScan to operate, which is included within the XSLT4R
archive and which is also a 100 percent Ruby module. Installation is easy too; just
run ruby install.rb. If you have any problems with it, just copy the XSLT4R and
XMLScan files to the ruby directory (C:\ruby\lib\ruby\1.x).As I mentioned, XSLT
can run either from the command line or from within an application. From the
command line, XSLT4R has the following syntax:
ruby xslt.rb stylesheet.xsl document.xml [arguments]
www.syngress.com
183RubyC04.qxd 1/7/02 3:09 PM Page 254

XML and Ruby • Chapter 4 255
If you want to useXSLT4R from within an application, you can include
XSLT and input the parameters you need. For example:
require "xslt"
stylesheet = File.readlines("stylesheet.xsl").to_s
xml_doc = File.readlines("document.xml").to_s
arguments = { 'image_dir' => '/....' }
sheet = XSLT::Stylesheet.new( stylesheet, arguments )
# output to StdOut
sheet.apply( xml_doc )
# output to `str'
str = ""
sheet.output = [ str ]
sheet.apply( xml_doc )
www.syngress.com
183RubyC04.qxd 1/7/02 3:09 PM Page 255

256 Chapter 4 • XML and Ruby
Summary
XML can be as extensible as it needs to be; it does not need any particular plat-
form to operate on or any particular application from which to be read and/or
processed.This can allow a developer to create files from one application that will
be read with another application on a different platform.Also, XML itself is easy
to read and follow, provided the author wrote it correctly, so there is usually no
need to hunt down arcane names.The fact that XML is basically a text database
organized in a hierarchal system allows languages with speedy string methods,
such as Ruby, to fully exploit XML.
There are currently two widely-used, Ruby-compatible APIs for the parsing
of XML: SAX and DOM. SAX beats DOM in terms of memory requirements
and forward-read speed, while DOM allows a developer to jump back and forth
in an XML file, at a memory cost. DOM’s storing of the XML tree allows for
faster traversing when dealing with larger XML files. Since both APIs have fairly
open architectures, they can both be used simultaneously without damaging one
another.
Ruby can use a number of widely available Open Source parsers; in this
chapter we looked at XMLParser, NQXML, and REXML for standard XML.
XMLParser and Libgdome-ruby (which has example code in the CD that
accompanies this book) have dependencies on the expat XML parser; NQXML
and REXML are true Ruby parsers that have been written completely in Ruby.
While XMLParser and Libgdome-ruby have the ability to use a tried-and-true
parser, NQXML and REXML load up faster since they don’t have to rely on
loading expat. Because they don’t depend on expat, NQXML and REXML are
also less segault-prone than the other parsers.
Ruby for Sablotron and XSLT4R are two libraries that are available for
XSLT, and which currently work with both Unix/Linux and Windows. Ruby for
Sablotron requires the Sablotron parser, but XSLT4R is entirely Ruby-based,
giving it a speed edge. Neither one of the parsers are 100 percent complete, and
both are missing implementations.
www.syngress.com
183RubyC04.qxd 1/7/02 3:09 PM Page 256

XML and Ruby • Chapter 4 257
Solutions Fast Track
Why XML?
;XML is a portable, open source language that allows programmers to
develop applications that can be read by other applications, regardless of
operating system and/or developmental language.
;XML is extremely useful for keeping track of small to medium amounts
of data without requiring a SQL-based backbone.
XML Parser Architectures and APIs
;SAX (Simple API for XML), is based on the xml-dev list. It offers low
memory consumption and high speed but tedious coding and jumping
when dealing with complex XML files.
;DOM (Document Object Model), is based on a recommendation from
the W3C. Its memory consumption is higher but it can fly through an
XML file, regardless of its location within the tree.
Parsing and Creating XML in Ruby
;NQXML and REXML are the only two totally Ruby-only parsers that
we looked at extensively in this chapter (though we briefly mentioned
xmlscan, a third 100-percent pure Ruby parser).
;XMLParser provides a reasonably reliable system since it is based on
expat. Because of this, many of the possible errors in XMLParser arise
out of problems with expat, and not with XMLParser itself.
;NQXML does not fully support XML, but rather provides quick func-
tionality due to its English-readable methods.
;REXML is a fairly complete XML parser and uses XPath and regular
expression for many of its actions. It is very fast and its functionality also
uses English-readable methods.
www.syngress.com
183RubyC04.qxd 1/7/02 3:09 PM Page 257

258 Chapter 4 • XML and Ruby
Using XSLT in Ruby
;The two XSLT parsers in Ruby are Ruby-Sablotron and XSLT4R
;Ruby-Sablotron depends on the Sablotron XSLT parser.
;XSLT4R depends on the XMLScan library but both XSLT4R and
XMLScan are written in pure Ruby.
Q: Isn’t part of the Ruby philosophy that whatever runs in one operating system
should run in another?
A: Yes, it is, but many of the current Ruby developers are running Unix/Linux
on their machines, since Ruby was originally a language made to be a substi-
tute for Perl. Many developers are bringing their modules up to Windows,
though this will take time.
Q: I am currently using Windows; do I need to run the install file that the
module comes with?
A: On a majority of modules, the answer is “no”; even some apparently
Unix/Linux-only modules will run fine if placed within the correct folder in
your Ruby directory. Usually, you will want to place the folder in the
TAR/GZIP file that has all of the Ruby files (usually the folder that contains
the files for the module will be within a folder with the name and revision of
the module) into the C:\ruby\lib\ruby\1.x folder (xbeing the current Ruby
build you are using).
www.syngress.com
Frequently Asked Questions
The following Frequently Asked Questions, answered by the authors of this book,
are designed to both measure your understanding of the concepts presented in
this chapter and to assist you with real-life implementation of these concepts. To
have your questions about this chapter answered by the author, browse to
www.syngress.com/solutions and click on the “Ask the Author” form.
183RubyC04.qxd 1/7/02 3:09 PM Page 258

XML and Ruby • Chapter 4 259
Q: I am using REXML and am receiving the following (or similar) error:
/cygdrive/c/RUBY/lib/ruby/1.6/rexml/parent.rb:59:in `[]': no
implicit conversion from string(TypeError)
A: More than likely you tried to use the following line in your code:
Document.elements.each("root/element") { |element| puts element
["rating"]
which is wrong, as element does not respond to method []. However, you can
use element.text to return what you need as long as you define the element
you need in the XPath string being passed to Document.elements.each.
Q: I run a Cobalt server; can I run Ruby and the parser described in this book?
A: Yes, you will be able to without any problems, but keep an eye out for the
segfault problems when you work with any of the parsers that require expat.
www.syngress.com
183RubyC04.qxd 1/7/02 3:09 PM Page 259
183RubyC04.qxd 1/7/02 3:09 PM Page 260

Web Services and
Distributed Ruby
Solutions in this chapter:
■Using XML-RPC for Ruby
■Using SOAP for Ruby
■Using Distributed Ruby
;Summary
;Solutions Fast Track
;Frequently Asked Questions
Chapter 5
261
183RubyC05.qxd 1/7/02 3:12 PM Page 261

262 Chapter 5 • Web Services and Distributed Ruby
Introduction
In this chapter we’ll introduce you into three libraries, XML-RPC for Ruby
(xmlrpc4r), Simple Object Access Protocol for Ruby (SOAP4R) and Distributed
Ruby (DRb).The first two are interfaces to XML-RPC and SOAP, which are
XML-based and language-independent protocols; both are used for writing or
accessing Web services.The third library is a pure Ruby solution for remote
method calls, and is limited to Ruby That is, it’s not possible to write a client or a
server in a language other than Ruby using Distributed Ruby.
Using XML-RPC for Ruby
XML-RPC takes a pragmatic approach to distributed computing between different
systems and languages, based on two major Internet standards: HTTP for transmis-
sion, and XML to encode information in a human-readable and portable way.
XML-RPC’s specification (see www.xmlrpc.com/spec) defines a set of
datatypes: Integer,Float,Boolean,String,Hash,Array,DateTime,Base64, and Nil—nil
values are a non-standard extension to the XML-RPC specification; it also
www.syngress.com
Monitoring TCP/IP Based Services
We can monitor Web services, or any TCP/IP-based client and server, by
using a very simple monitor application that comes with XML-RPC for
Ruby (see file samples/monitor/monitor.rb) or TCPSocketPipe (available
from the Ruby Application Archive [RAA]).
Suppose you are running a SOAP service on port 8070. To display
the traffic between that service and a SOAP client, start the monitor with
the following:
ruby monitor.rb 8060 localhost 8070
The SOAP client should now access the service through port 8060
instead of port 8070.
In addition to the graphical user interface (GUI) displaying the
traffic, a hex dump of the TCP/IP traffic and some logging messages are
stored in the directory’s TCPSocketPipe.log file.
Developing & Deploying…
183RubyC05.qxd 1/7/02 3:12 PM Page 262

Web Services and Distributed Ruby • Chapter 5 263
defines Remote Procedure Call (RPC) elements (for example, method name,
parameters, return value, or fault information), for simple, hard-wired, relatively
easy-to-parse encoding in XML. Unlike SOAP, XML-RPC does not directly
support user-defined datatypes, but with little effort we can emulate them using
hashes, as we’ll see later.
The Ruby XML-RPC implementation, called xmlrpc4r, is a pure Ruby solu-
tion. Some of its features include the following:
■Support for Introspection and multiCall extensions;
■HTTP Basic Authentication and Secure Sockets Layer (SSL) (client-only);
■Asynchronous RPCs and connection-alive;
■Common Gateway Interface (CGI), FastCGI, standalone and mod_ruby
servers.
Obtaining and Installing xmlrpc4r
Xmlrpc4r was developed by Michael Neumann. Its homepage is at www.fantasy-
coders.de/ruby/xmlrpc4r, though you’ll also find it at Ruby’s Application Archive
(RAA) in the Library section under XML.
It requires either Jim Menard’s NQXML or Yoshida Masato’s XMLParser
package, both of which can be obtained from the RAA.
After you’ve downloaded the xmlrpc4r package (which, as of this writing, is
xmlrpc4r-1_7_4.tar.gz), extract and install it as follows:
tar –xvzf xmlrpc4r-1_7_4.tar.gz
cd xmlrpc4r-1_7_4
ruby install.rb
To run some test-cases for xmlrpc4r, change into the extracted archive’s test
directory and execute:
ruby test.rb
Note that the test-cases require both NQXML and XMLParser to be installed,
otherwise running the tests will result in a lot of failure messages being thrown.
Configuring xmlrpc4r
You may configure xmlrpc4r globally by setting several options in the xmlrpc/
config.rb file, located at Ruby’s site_ruby directory (e.g. /usr/local/lib/ruby/
site_ruby/1.6).Table 5.1 lists the possible settings.
www.syngress.com
183RubyC05.qxd 1/7/02 3:12 PM Page 263

264 Chapter 5 • Web Services and Distributed Ruby
Table 5.1 Configuration Options of xmlrpc4r (file xmlrpc/config.rb)
Option Default value Meaning (when option = true)
DEFAULT_ XMLWriter:: The default XML writer. Other possible
WRITER Simple value is XMLWriter::XMLParser.
DEFAULT_ XMLParser:: The default XML parser. Other possible
PARSER NQXMLStream values are XMLParser::NQXMLTreeParser,
Parser XMLParser::XMLStreamParser and
XMLParser::XMLTreeParser.
ENABLE_BIGINT false Allow Bignums with more than 32 bits.
Non-standard!
ENABLE_ false Allow passing/returning nil to/from a
NIL_CREATE RPC. Non-standard!
ENABLE_ false Accept a <nil> tag. Non-standard!
NIL_PARSER
ENABLE_ true Convert objects which classes include
MARSHALLING module XMLRPC::Marshallable into
hashes and reconstruct them later from
that hash.
ENABLE_ false Enable the multiCall extension by
MULTICALL default.
ENABLE_ false Enable the Introspection extension by
INTROSPECTION default.
Writing XML-RPC Clients
Our first XML-RPC client, presented below, will output all entries of the RAA
as well as detailed information about the entry XML-RPC.This is possible
because the RAA is accessible (read-only) through a SOAP and XML-RPC
interface. For more information about the XML-RPC interface, see the directory
samples/raa of xmlrpc4r’s distribution.
require "xmlrpc/client"
client = XMLRPC::Client.new2(
'http://www.ruby-lang.org/~nahi/xmlrpc/raa/')
p client.call('raa.getAllListings')
p client.call('raa.getInfoFromName', 'XML-RPC')
www.syngress.com
183RubyC05.qxd 1/7/02 3:12 PM Page 264

Web Services and Distributed Ruby • Chapter 5 265
The XML-RPC request that the client application sends to the server, caused
by the second RPC raa.getInfoFromName, looks like this:
<?xml version="1.0" ?>
<methodCall>
<methodName>raa.getInfoFromName</methodName>
<params>
<param>
<value><string>XML-RPC</string></value>
</param>
</params>
</methodCall>
To play with some other public XML-RPC services, take a look at the
Services section of XML-RPC’s homepage (www.xmlrpc.com), where you can
find examples such as a real-time news client interface, a search engine, or a spell
checker.
In the above example, we used the new2 method to create an instance of the
XMLRPC::Client class. However, there are three constructor methods that can do
the job:
client = XMLRPC::Client.new(
host='localhost', path='/RPC2', port=80,
proxy_host=nil, proxy_port=8080, user=nil,
password=nil, use_ssl=false, timeout=30)
client = XMLRPC::Client.new2(
uri='http://localhost:80/RPC2' , proxy=nil, timeout=30)
# 'hash' takes same keys as the names of method new's parameters
client = XMLRPC::Client.new3(hash)
If you pass one of the three methods nil as parameter, the default value (for
example, port=80 or path=”/RPC2”) is taken instead.
Again, in our first example, we used the call method to invoke a remote
procedure, but there are other methods designed for the same purpose.We
divide them into two major categories, return value convention, and concurrent
behavior:
www.syngress.com
183RubyC05.qxd 1/7/02 3:12 PM Page 265

266 Chapter 5 • Web Services and Distributed Ruby
■Return value convention
■Raise a XMLRPC::FaultException if a fault-structure was returned
from a RPC.This applies to methods call,proxy,multicall,call_async,
proxy_async, and multicall_async.
■Raise no exception. Instead, return two values:The first indicates
whether or not the second is an instance of
XMLRPC::FaultException (false) or if it is a regular return value
(true).This applies to the following methods: call2,proxy2,multicall2,
call2_async,proxy2_async, and multicall2_async.
■Concurrent behavior
■Synchronous. All remote procedure calls use the same Net::HTTP
object. If the server supports HTTP connection-alive, only one con-
nection is used for all remote procedure calls.This saves network
bandwidth and increases overall performance.The disadvantage is
that you cannot concurrently call two (or more) remote procedures
using the same XMLRPC::Client object.This applies to all methods
without “async” in their name.
■Asnychronous. A new connection to the server is established for each
remote procedure call.Therefore it’s no problem to call two (or
more) remote procecure using the same XMLRPC::Client object
concurrently.This applies to all methods with “async” in their name.
Regarding the return value convention, both forms are equivalent:
# (1)
begin
param = client.call('raa.getInfoFromName', 'XML-RPC')
p param
rescue XMLRPC::FaultStructure => err
p err.faultCode; p err.faultString
end
# (2)
ok, param = client.call2('raa.getInfoFromName', 'XML-RPC')
if ok
p param
else # param is a fault-structure
www.syngress.com
183RubyC05.qxd 1/7/02 3:12 PM Page 266

Web Services and Distributed Ruby • Chapter 5 267
p param.faultCode; p param.faultString
end
Of course the above example applies to methods proxy and multicall as well as
their asynchronous counterparts (proxy_async, etc.).
The concurrent behavior category establishes whether or not we can call
remote procedures concurrently. Using threads, we now rewrite our initial example
and call both remote procedures getAllListings and getInfoFromName concurrently:
require "xmlrpc/client"
client = XMLRPC::Client.new2(
'http://www.ruby-lang.org/~nahi/xmlrpc/raa/')
list = info = nil
t1 = Thread.new {
list = client.call_async("raa.getAllListings")
}
t2 = Thread.new {
ok, param = client.call2_asnyc("raa.getInfoFromName", "XML-RPC")
info = param if ok
}
# wait for the threads to complete
t1.join; t2.join
p list, info
We have to use threads because the asynchronous methods block the execu-
tion of the program in the same way any synchronous method would.
Instead of using the call method and specifying the remote procedure’s name as
the first parameter, we could use method proxy, which creates a XMLRPC::Proxy
object:
# creates a XMLRPC::Proxy object
raa = client.proxy("raa")
www.syngress.com
183RubyC05.qxd 1/7/02 3:12 PM Page 267

268 Chapter 5 • Web Services and Distributed Ruby
p raa.getAllListings
p raa.getInfoFromName("XML-RPC")
Similar to the call method, also exist the proxy2,proxy_async, and proxy2_async
methods. Note that using a service method named to_s or inspect (all methods
defined in class Object and module Kernel) will not work using an
XMLRPC::Proxy object (due to using method_missing).
Using the MultiCall Extension
MultiCall is an extension by Eric Kidd, the author of XML-RPC for C/C++
(MultiCall’s RFC: www.xmlrpc.com/discuss/messageReader$1208). Its intent is
to enhance performance for applications that need to invoke many short (in
terms of time) remote procedures. In this situation, the overhead of each XML-
RPC message can be very high; sometimes too high, in fact.
MultiCall allows us to call an arbitrary number of remote procedures with
one RPC to the remote procedure system.multicall.This procedure then calls all
specified procedures on the server side and returns a return value for each called
procedure.
Note that MultiCall is not supported by every XML-RPC server.To enable a
server written with XML-RPC for Ruby, read the section Configuring xmlrpc4r.
Let’s look at an example:
res = client.multicall(
["num.div", 10, 5], # divide 10 by 5 => 2
["num.add", 4, 12], # add 4 and 12 => 16
["num.div", 51, 0] # 51/0 => division by zero
)
p res # => [2, 16, <XMLRPC::FaultException#...>]
Each array in the parameter list of the multicall method specifies one RPC;
the first element is the remote procedure’s name, and the rest is its arguments.
Note that there are also other methods, such as multicall2,multicall_async, etc.
Introspecting XML-RPC Servers
The Introspection extension, as proposed by Edd Dumbill (http://xmlrpc.use-
fulinc.com/doc/reserved.html), specifies three service methods for introspecting
XML-RPC servers:
www.syngress.com
183RubyC05.qxd 1/7/02 3:12 PM Page 268

Web Services and Distributed Ruby • Chapter 5 269
■array system.listMethods() Returns a list of all available methods.
■array system.methodSignature(string methodName) Returns the
method signature(s) of the methodName method
■string system.methodHelp(string methodName) Returns the
help text of the methodName method
The application presented below introspects an introspection-enabled XML-
RPC server and outputs the method signatures together with their help texts.The
source code also appears as file introspect.rb on the CD accompanying this book.
# file: introspect.rb
require "xmlrpc/client"
uri = ARGV[0] || "http://localhost:8080"
system = XMLRPC::Client.new2(uri).proxy("system")
puts "Introspecting #{ uri }"
for meth in system.listMethods.sort
puts '=' * 70
for sig in system.methodSignature(meth)
puts "- %s %s( %s )" % [
sig[0], meth, (sig[1..-1] || []).join(', ')
]
end
puts "", system.methodHelp(meth)
end
We can test our application by introspecting O’Reilly’s Meerkat server. At the
command line we type:
ruby introspect.rb http://www.oreillynet.com/meerkat/xml-rpc/server.php
This outputs:
Introspecting http://www.oreillynet.com/meerkat/xml-rpc/server.php
======================================================================
- array meerkat.getCategories( )
www.syngress.com
183RubyC05.qxd 1/7/02 3:12 PM Page 269

270 Chapter 5 • Web Services and Distributed Ruby
Returns an array of structs of available Meerkat categories each with
its associated category Id.
======================================================================
- array meerkat.getCategoriesBySubstring( string )
Returns an array of structs of available Meerkat categories each with
its associated category Id
given a substring to match (case-insensitively).
======================================================================
- array meerkat.getChannels( )
Returns an array of structs of available RSS channels each with its
associated channel Id.
======================================================================
- array meerkat.getChannelsByCategory( int )
Returns an array of structs of RSS channels in a particular category
(specified by integer
category id) each with its associated channel Id.
======================================================================
[.. More snipped ..]
With such a nice output, it should be an easy to start writing a client for that
service. As an exercise you might write a WWW or GUI adapted version of the
introspector.
Writing XML-RPC Servers
XML-RPC for Ruby supports three different types of servers:
■Standalone server (XMLRPC::Server)
■CGI/FastCGI-based server (XMLRPC::CGIServer)
■mod_ruby-based server (XMLRPC::ModRubyServer) Mod_ruby embeds a
Ruby interpreter into the Apache Web server.This speeds up the execu-
tion of Ruby applications because it removes the process creation for
each request.
www.syngress.com
183RubyC05.qxd 1/7/02 3:12 PM Page 270

Web Services and Distributed Ruby • Chapter 5 271
All three server classes inherit from the same abstract XMLRPC::BasicServer
superclass.This common superclass implements methods that are used by all sub-
classes for adding service handlers or internally-used methods for dispatching
RPCs etc.
Look at the following XML-RPC server, which introduces all important
aspects:
require "xmlrpc/server"
class Num
INTERFACE = XMLRPC::interface("num") {
meth 'int add(int, int)', 'Add two numbers', 'add'
meth 'int div(int, int)', 'Divide two numbers'
}
def add(a, b) a + b end
def div(a, b) a / b end
end
server = XMLRPC::Server.new(8080, "0.0.0.0")
server.add_handler(Num::INTERFACE, Num.new)
server.serve
The example implements a standalone server that exposes two services
(num.add and num.div) and specifies a signature and a help text for them.The con-
structor method new of the XMLRPC::Server class takes the following parameters:
server = XMLRPC::Server.new(port=8080, host="127.0.0.1",
maxConnections=4, stdlog=$stdout,
audit=true, debug=true)
The first two parameters, port and host, specify the port the server listens on
and for which host it should accept requests.All further parameters are bypassed
to the HTTP server framework (John Small’s generic server framework GServer,
available at RAA) and specify the maximum number of concurrent connections
as well as the server’s logging and debugging behavior.
Once you’ve started a standalone server (initiated by method serve) it will start
up a TCPServer and wait for connections.To quit the server, either call the shut-
www.syngress.com
183RubyC05.qxd 1/7/02 3:12 PM Page 271

272 Chapter 5 • Web Services and Distributed Ruby
down method or send the process a SIGHUP signal (by typing kill –HUP pid at
the command line, where pid is the process’ ID).
To use a CGI- or mod_ruby-based server in the example above, simply
change this line:
server = XMLRPC::Server.new(8080, "0.0.0.0")
into this:
server = XMLRPC::CGIServer.new
# or
server = XMLRPC::ModRubyServer.new
For a FastCGI-based server you have to change a bit more.The example
would then look like:
require "xmlrpc/server"
require "fcgi" # or "fastcgi"
class Num
# ..same as above..
end
server = XMLRPC::CGIServer.new
server.add_handler(Num::INTERFACE, Num.new)
FCGI.each_request do |f|
$stdin = f.in
server.serve
end
There are currently two FastCGI implementations for Ruby — the fastcgi
module (written in pure Ruby) and fcgi, a C-extension module. Both are available
from Eli Green’s homepage at http://fenris.codedogs.ca/~eli/fastcgi.html.
Alternatively, follow the link from the FastCGI entry in the RAA’s Library sec-
tion, under WWW.
To add a service handler to the server, there are several other possible ways
we have not yet handled. For example:
# using a code-block
server.add_handler("num.add", ["int", "int", "int"],
"Add two numbers") { |a, b| a + b }
www.syngress.com
183RubyC05.qxd 1/7/02 3:12 PM Page 272

Web Services and Distributed Ruby • Chapter 5 273
# the same without method signature and help text
server.add_handler("num.add") { |a, b| a + b }
# add all public methods of class Num under namespace "num"
server.add_handler(XMLRPC::iPIMethods("num"), Num.new)
The datatypes in the method signature should be one of the following
strings: int,boolean,double,string,dateTime.iso8601,base64,array, or struct.
Some other methods of class BasicServer are listed in Table 5.2.
Table 5.2 Further Methods of Class BasicServer
Method Explanation
add_multicall Enables the multiCall extension (unless enabled by
default).
add_introspection Enables the introspection extension (unless enabled
by default).
set_parser( parser ) Uses parser instead of the default one.
set_writer( writer ) Uses writer instead of the default one.
set_default_handler Calls the block if no service handler for a request
{ |meth, *params| } was found; meth is the name of the not-found ser-
vice method, params its arguments.
set_service_hook The block is called instead of each service handler;
{ |obj, *params| } obj is the Proc object of the original service han-
dler, params its arguments. The return value of the
block is the result of the RPC.
For instance, we could use the set_service_hook method to convert return values
passed to, or returned from, service handlers to types recognized by XML-RPC in
order to catch exceptions etc. So, with the little code snippet below, we convert all
arguments that are Integer types to Strings before we pass them to the service handler:
server.set_service_hook { |obj, *args|
args.collect! { |e|
e.kind_of?(Integer) ? e.to_s : e
}
obj.call(*args)
}
www.syngress.com
183RubyC05.qxd 1/7/02 3:12 PM Page 273

274 Chapter 5 • Web Services and Distributed Ruby
Project: A File Upload Service
In this section we’ll implement a XML-RPC file upload service that will enable
us to upload a compressed file to the server, where it will be uncompressed and
stored in a predefined directory (in our case /tmp/). For compressing and
uncompressing we use the Ruby/zlib module, available from RAA. Furthermore,
we pass a MD5 checksum of the file to the service, so that it can check whether
data-loss has happened or not.
Figure 5.1 shows the source code of this application (it can also found at
www.syngress.com/solutions under the file named fileupload.rb).
www.syngress.com
Figure 5.1 Source Code of file-upload service (fileupload.rb)
require "xmlrpc/server"
require "xmlrpc/client"
require "md5"
require "zlib"
class FileUpload
NS = "file"
INTERFACE = XMLRPC::interface(NS) {
meth 'boolean upload(string, string, base64)',
'Upload a file to the servers file system.'
}
FAULT_BASE = 9000
MAX_FILE_SIZE = 1024*1024
def initialize(upload_dir, max_file_size=MAX_FILE_SIZE)
@upload_dir = upload_dir
@max_file_size = max_file_size
end
def upload(name, md5, data)
Continued
183RubyC05.qxd 1/7/02 3:12 PM Page 274

Web Services and Distributed Ruby • Chapter 5 275
www.syngress.com
Figure 5.1 Continued
if data.size > @max_file_size
fault(0, 'File too large.')
elsif name.include? '/' or name.include? '\\'
fault(1, 'Invalid name.')
elsif File.exists?( @upload_dir + name )
fault(2, 'File already exists.')
elsif MD5.new(data).hexdigest != md5
fault(3, 'MD5 checksum mismatch.')
else
data = Zlib::Inflate.inflate(data)
if data.size > @max_file_size
fault(0, 'File too large.')
else
File.open(@upload_dir + name, "w+") { |f| f << data }
return true
end
end
end
private # -------------------------------------------------
def fault(code, message)
raise XMLRPC::FaultException.new(FAULT_BASE + code, message)
end
# ---------------------------------------------------------
class Client
def initialize(uri, compression=Zlib::Deflate::BEST_COMPRESSION)
@file = XMLRPC::Client.new2(uri).proxy(NS)
@compression = compression
end
Continued
183RubyC05.qxd 1/7/02 3:12 PM Page 275

276 Chapter 5 • Web Services and Distributed Ruby
We test our service by uploading a file (/etc/hosts) to the server and storing
it there as hosts.We do this with the following script (make sure the server is run-
ning before you execute the script):
require "fileupload"
file = FileUpload::Client.new("http://localhost:8080/")
file.upload('/etc/hosts, 'hosts')
XML-RPC Datatypes
Table 5.3 lists the mappings between Ruby and XML-RPC types (column 1 and
2) and vice versa (column 2 and 3).You can pass all types listed in column 1 as
parameters to a RPC or return them from a service-handler.The types you get
www.syngress.com
Figure 5.1 Continued
def upload(localfile, remotefile)
content = File.readlines(localfile).to_s
content = Zlib::Deflate.deflate(content, @compression)
content = XMLRPC::Base64.new(content)
md5 = MD5.new(content).hexdigest
@file.upload(remotefile, md5, content)
end
end
end
if __FILE__ == $0
PORT = (ARGV.shift || 8080).to_i
# starts a FileUpload server
XMLRPC::Server.new(PORT, "0.0.0.0").
add_handler(FileUpload::INTERFACE, FileUpload.new('/tmp/')).
serve
end
183RubyC05.qxd 1/7/02 3:12 PM Page 276

Web Services and Distributed Ruby • Chapter 5 277
back from an RPC (for example, return value of Client#call) or that a service
handler receives as arguments are listed in column 3.
Table 5.3 Mapping of Ruby to XML-RPC Types and Vice Versa
Ruby type => XML-RPC type => Ruby type
Fixnum, Bignum <i4> <int> Fixnum, Bignum
TrueClass, FalseClass <boolean> TrueClass, FalseClass
(true, false) (true, false)
Float <double> Float
String, Symbol <string> String
Hash, Struct <struct> Hash
Array <array> Array
Date, Time, <dateTime.iso8601> XMLRPC::DateTime
XMLRPC::DateTime
XMLRPC::Base64 <base64> String
NilClass (nil) <nil> NilClass (nil)
Non-Standard!
To transfer binary data (as we did in out file upload service) use a
XMLRPC::Base64 object:
aBase64 = XMLRPC::Base64.new( aString )
To pass dates before 1970 that include the time, you have to use instances of
class XMLRPC::DateTime:
aDateTime = XMLRPC::DateTime.new(year, month, day, hour, min, sec)
Otherwise, you may use class Time for dates after 1970 that include the time,
or class Date for dates without the time.
An instance of XMLRPC::DateTime has attribute accessor methods with the
same names as the parameter names of the new method shown above.
Additionally, it has the to_date,to_time and to_a methods that return a Date,Time
or Array object respectively.
Instances of XMLRPC::FaultException represent XML-RPC fault structures.
They provide two attribute readers, faultCode and faultString.To return a fault-
structure, simply raise them in the service-handler:
aFaultException = XMLRPC::FaultException.new(faultCode, faultString)
www.syngress.com
183RubyC05.qxd 1/7/02 3:12 PM Page 277

278 Chapter 5 • Web Services and Distributed Ruby
User-defined Datatypes
There is a convenient way of passing Ruby objects other than the default types
listed in Table 5.3.All you need to do is to include the XMLRPC::Marshallable
module into their classes.An example follows:
class Person
include XMLRPC::Marshallable
attr_reader :name, :father, :mother
def initialize(name, father=nil, mother=nil)
@name, @father, @mother = name, father, mother
end
end
This only works if the Config::ENABLE_MARSHALLING option is true. If
this applies, XML-RPC for Ruby converts instances of Person into a hash.This
hash contains all instance variables and one additional key “___class___” storing
the class name. If the Config::ENABLE_NIL_CREATE option is true (it is false
by default), then all instance variables with a value of nil are left out.
Note that both the client and server application must be aware of the class
definition, otherwise a hash is returned instead of a Person object.
Dumping and Loading XML-RPC Messages
If we leave off the distributed component of XML-RPC, we end up in its XML
encoding specification.We could use this to store Ruby objects in XML-RPC’s
encoding, or to communicate between two programs without the need of estab-
lishing a TCP/IP connection, simply by exchanging XML-RPC messages using
files or pipes.
For this purpose there is a XMLRPC::Marshal class defined in xmlrpc/mar-
shal.rb (the output is shown in bold):
require "xmlrpc/marshal"
str = XMLRPC::Marshal.dump( { 'Ruby' => 'is cool' } )
puts str
<?xml version="1.0" ?><methodResponse><params><param><value>
<struct><member> <name>Ruby</name><value><string>is cool</string>
</value></member></struct></value> </param></params></methodResponse>
www.syngress.com
183RubyC05.qxd 1/7/02 3:12 PM Page 278

Web Services and Distributed Ruby • Chapter 5 279
p XMLRPC::Marshal.load( str )
{"Ruby"=>"is cool"}
The methods Marshal.load and Marshal.dump are aliases for
Marshal.load_response and Marshal.dump_response.To create or load XML-RPC
method calls instead, use the Marshal.dump_call( methodName, *args ) or
Marshal.load_call( stringOrReadable ) methods respectively.
Communicating with Python’s xmlrpclib
Exchanging XML-RPC messages between Ruby’s xmlrpc4r and Python’s xmlrp-
clib is problematic, because messages created with xmlrpclib have <params> as the
root tag whereas xmlrpc4r requires this to be either <methodCall> or
<methodResponse>.We can fix this by surrounding Python’s output with a
<methodResponse> tag and by adding a XML declaration at the top:
require "xmlrpc/marshal"
def load_from_python( stringOrReadable )
XMLRPC::Marshal.load_response( %{
<?xml version="1.0"?>
<methodResponse>
#{ stringOrReadable }
</methodResponse>
} )
end
Below you see a little Python script that marshals an array (a tuple in Python)
of two values:
# file: xmlrpc.py
import xmlrpclib
data = ( ("From Python", 2), )
print xmlrpclib.dumps( data )
We now try to unmarshal the output generated by the Python script
xmlrpc.py shown above, using our new load_from_python method:
# back in Ruby
p load_from_python( `python xmlrpc.py` )
www.syngress.com
183RubyC05.qxd 1/7/02 3:12 PM Page 279

280 Chapter 5 • Web Services and Distributed Ruby
This outputs:
["From Python", 2]
To unmarshal a XML-RPC message in Python we write a second script
xmlrpc2.py:
# file: xmlrpc2.py
import xmlrpclib, sys
print xmlrpclib.loads( sys.stdin.read() )[0][0]
This script reads the XML-RPC documents from standard input, parses it
and outputs the native Python value to standard output.We call it at the com-
mand-line together with a Ruby one-liner, creating a XML-RPC message (this
line just wraps in our book layout):
ruby –r xmlrpc/marshal –e "puts XMLRPC::Marshal.dump(
['From Ruby, 1.7])" | python xmlrpc2.py
This outputs:
['From Ruby', 1.7]
Securing XML-RPC Services
Due to the usage of HTTP as transport protocol, it is very easy to transparently
add security mechanisms without changing the XML-RPC specification by
making use of standards like SSL or HTTP authentication (403 Authentication
Required status code).You can use SSL to encrypt the communication between
the client and server and HTTP authentication (it is currently impossible to use
the Digest method, as only the Basic method is implemented) to restrict access to
a specified group of persons.
Currently, both are supported by only the client-side of xmlrpc4r.
Client-side Support
To enable SSL, either call Client.new or Client.new3 with the use_ssl parameter set
to true, or use https as the protocol (instead of http) in the Uniform Resource
Identifier (URI) passed to Client.new2.
If you want to access XML-RPC services restricted by HTTP authentifi-
cation, pass the parameters user and password to Client.new or Client.new3 or
specify them in the URI (http://user:pass@host) passed to Client.new2.You
www.syngress.com
183RubyC05.qxd 1/7/02 3:12 PM Page 280

Web Services and Distributed Ruby • Chapter 5 281
can also set the user or password later through the setter methods user= and
password=.
NOTE
Before you can use client-side SSL, you have to install the SSL_Socket
extension, which is available at the RAA. Note that the client side will not
(yet) validate a certificate sent by an SSL-enabled server.
Server-side Support
As mentioned above, there is no direct support in xmlrpc4r for server-side
HTTP authentification or SSL, but by using a SSL and/or HTTP authentifica-
tion-capable Web server together with a CGI (or FastCGI) based XML-RPC
server, it is possible to support these authentication protocols.
An Apache Web server, for example, supports SSL through mod_ssl and HTTP
authentication by putting a .htaccess file inside the directory to be protected. Figure
5.2 shows a sample .htaccess file. Note that you have to use the program htpasswd to
create a password file, first. For example, to create a new password file (password.file)
with one user called michael, type the following at the command-line:
htpasswd –c password.file michael
When prompted, enter the password twice for the new user. For more infor-
mation on htpasswd see its man page (in Unix type man htpasswd at the com-
mand line).
Figure 5.2 A Sample .htaccess File
AuthType Basic
AuthName "XML-RPC Restricted Area"
AuthUserFile "/path/to/password.file"
Require valid-user
Performance Comparisons
XML-RPC for Ruby comes with four different XML-RPC parsers; a tree and
stream parser each for NQXML and XMLParser. For small XML documents,
www.syngress.com
183RubyC05.qxd 1/7/02 3:12 PM Page 281

282 Chapter 5 • Web Services and Distributed Ruby
tree parsers perform almost equally to stream parsers, but they are totally unusable
for really large XML documents with many tags, due to the huge performance
decrease and memory usage.
The major difference between xmlrpc4r’s tree and stream parsers is that the tree
parsers validate their XML-RPC documents whereas the stream parsers don’t, or at
least not at the same degree.That is, if you want to make sure that only valid
XML-RPC documents are processed and they are not very large, go for a tree
parser. Otherwise, if speed is most important, consider using a stream parser.
Table 5.4 compares the four parsers and shows their performance levels rela-
tive to NQXMLTreeParser.You can see from the numbers that XMLStreamParser is
the fastest parser overall; for example, it parses a really huge document (many
tags, 561796 bytes) about 316 times faster than NQXMLTreeParser and still 17
times as fast as XMLTreeParser. But we also see that XMLTreeParser is incredibly
slow at parsing one (or more) large Base64 elements; this makes it relatively unus-
able for many tasks; uploading files, for example.
There are two reasons why XMLStreamParser is so incredibly fast:
1. It uses the XMLParser module (the wrapper for James Clark’s XML
Parser toolkit, expat), an XML parser written in C.
2. Unlike NQXMLTreeParser or XMLTreeParser, it does not build a DOM-
like tree in memory. It’s a stream parser, which means that it streams on-
the-fly through the XML document.
Table 5.4 Performance Comparison of the XML Parsers Supported by xmlrpc4r
XML NQXMLTree NQXMLStream XMLTree XMLStream
Document Parser Parser Parser Parser
Small (343 bytes) 1 1,14 1,6 22,66
Middle (6687 bytes) 1 1,2 2,54 25,85
Large (14390 bytes) 1 1,2 2,43 22,38
Huge 1 1,67 18,5 316,39
(561796 bytes)
Base64 1 0,97 1/3877 1,92
(1421526 bytes)
(One Base64
element, 1 MB
in size)
www.syngress.com
183RubyC05.qxd 1/7/02 3:12 PM Page 282

Web Services and Distributed Ruby • Chapter 5 283
www.syngress.com
XML-RPC - SandStorm Component Architecture
SandStorm (developed by Idan Sofer and found at http://sstorm.source-
forge.net) is a “loose framework for creating cross-platform, multi-lan-
guage, modular and distributed middle-ware Web applications” that
uses XML-RPC as its communication protocol. It is mostly written in
Python and PHP, but that should not deter us from using it.
One of SandStorm’s main components is a central service registry
(which is itself a XML-RPC service), where components (XML-RPC ser-
vices) located anywhere on a network can be registered with a name.
Thereafter, clients can easily access the components by name without
knowledge of its current location.
Each registered SandStorm component must have a unique
namespace (for example my.component), under which all its methods
are defined. This is also the name stored in the central registry for this
component.
The SandStorm architecture implements a simple load balancing
mechanism that allows multiple components to be registered with the
same name. SandStorm supposes that all these components have the
same implementation, but are located on different servers. Each time a
client requests a component with that name, SandStorm returns dif-
ferent one in a round-robin fashion.
To access the central service registry: Use the Active::Registry class
defined in xmlrpc4r’s samples/sandstorm/active.rb file or the file
lib/ruby/active.rb from the SandStorm distribution.
The location of the service registry server must be supplied either in
the environment variables ACTIVE_REGISTRY_HOST, ..._PORT and ..._URI,
or by passing it to Active::Registry#new:
registry = Active::Registry.new(uri=nil, host=nil,
port=nil)
Default values are taken in the case that both parameters and envi-
ronment variables are not given.
The getComponents method returns a list of all registered compo-
nents, whereas getComponent(comp) returns a XMLRPC::Proxy object
for the component specified by parameter comp:
Developing & Deploying…
Continued
183RubyC05.qxd 1/7/02 3:12 PM Page 283

284 Chapter 5 • Web Services and Distributed Ruby
Using SOAP for Ruby
Similar to XML-RPC, the Simple Object Access Protocol (SOAP) is a cross-platform
and language-independent RPC protocol based on XML and, usually (but not
necessarily) HTTP. It uses XML to encode the information that makes the
remote procedure call, and HTTP to transport that information across a network
from clients to servers and vice versa.
SOAP was not designed to compete in performance with binary communica-
tion protocols like Sun’s RPC or Common Object Request Broker Architecture
www.syngress.com
registry = Active::Registry.new
# assuming that the XML-RPC interface of RAA
# was registered before as component 'Ruby.RAA'
raa = registry.getComponent('Ruby.RAA')
p raa.getAllListings
To get more information about a component, such as its location,
call the getComponentInfo(comp) method. It returns a Hash containing
the keys “host”, “port” and “uri”.
To add components to the registry: Two methods exist to add com-
ponents to the registry:
Active::Registry#setComponent(name, uri, host, port)
Active::Registry#addComponent(name, uri, host, port)
They add or set the component located at host, port and uri, under
the name name, to the registry and return true on success or false if not.
The addComponent method is different in that it allows multiple com-
ponents with the same name (for load balancing, as noted above).
To remove a component from the registry: call the following to
remove a component:
Active::Registry#removeComponent(name)
It returns true on success. Note that this removes all components
registered as name.
183RubyC05.qxd 1/7/02 3:12 PM Page 284

Web Services and Distributed Ruby • Chapter 5 285
(CORBA), nor for massive parallel computing like the Message Passing Interface
(MPI) or Parallel Virtual Machine (PVM). Instead, SOAP has several other advan-
tages: for example, its relatively cheap deployment and debugging costs (because
XML is human readable, SOAP is as well), its extensibility and ease-of-use, and the
existence of several implementations for different languages and platforms (see
Table 5.5 for a list of some SOAP implementations).
Table 5.5 References to Some SOAP Implementations, Ordered by Language
Language Name of Implementation Info on the Web
C++ WASP Server for C++ www.zvon.org
(IdooXoap for C++) www.idoox.com
COM/Windows MS SOAP Toolkit 2.0 http://msdn.microsoft.com/
library/default.asp?url=/
library/en-us/soap/htm/
kit_intro_19bj.asp
Java Apache SOAP http://xml.apache.org/soap
WASP Server for Java www.zvon.org
(IdooXoap for Java) www.idoox.com
Perl SOAP::Lite www.soaplite.com
Python SOAPPy http://soapy.sourceforge
.net
soaplib.py www.pythonware.com/
products/soap
Ruby SOAP4R www.jin.gr.jp/~nahi/
Ruby/SOAP4R
Initially developed by companies like Microsoft (.NET platform), IBM
(Websphere Application Server), DevelopMentor, Lotus and UserLand, the
SOAP 1.1 specification was submitted to the World Wide Web Consortium
(W3C) as W3C Note and is now likely to become SOAP 1.2 (details of the
specification can be found at www.w3.org/TR/SOAP). Many companies have
shown interest in SOAP, and by now many tools and implementations are
available, with many more on the way — it’s good to know that Ruby is not an
exception in this.
In the following sections we’ll introduce you to the SOAP implementation
for Ruby (SOAP4R).We’ll explain how to write clients and servers, mention
www.syngress.com
183RubyC05.qxd 1/7/02 3:12 PM Page 285

286 Chapter 5 • Web Services and Distributed Ruby
logging and exception handling, and marshaling and datatype conversion between
SOAP and Ruby.At the end, we present one large example of an authentication
server for SOAP services.
Obtaining and Installing SOAP4R
SOAP4R is the SOAP implementation for Ruby developed by Hiroshi
Nakamura. Its homepage is at www.jin.gr.jp/~nahi/Ruby/SOAP4R; alterna-
tively, you’ll find it by looking for the SOAP4R entry in the Library section
under XML at the RAA.
SOAP4R depends on the use of one of the following packages:
■NQXML, the pure-Ruby XML parser by Jim Menard
■XMLParser, the expat wrapper by Yoshida Masato
Both are available from RAA.All other libraries upon which SOAP4R
depends are redistributed in its redist directory.
Extract and install the SOAP4R package (as of this writing this is soap4r-
1_4_1.tar.gz) as follows:
tar –xvzf soap4r-1_4_1.tar.gz
cd soap4r-1_4_1
ruby install.rb
Writing SOAP4R Client and Server Applications
In this section, we will learn how to write client and server applications using
SOAP4R. Before we dive too deep into SOAP4R’s details, let’s implement a very
simple client/server SOAP application, the client/server version of “Hello
World.”
Figure 5.3 shows the server (file hw_s.rb), and Figure 5.4 shows the client
application (file hw_c.rb). Note that both applications can also be found at
www.syngress.com/solutions as files hw_s.rb and hw_c.rb.
When executed, the server application starts a standalone SOAP server on
localhost and listens for requests on port 8080. It exposes one service method,
helloWorld, which takes one parameter from and returns the string Hello World, from
#{from} to the client.
www.syngress.com
183RubyC05.qxd 1/7/02 3:12 PM Page 286

Web Services and Distributed Ruby • Chapter 5 287
www.syngress.com
Figure 5.3 Sourcecode of the Hello World SOAP Server (hw_s.rb)
require "soap/standaloneServer"
class HelloWorldServer < SOAP::StandaloneServer
def methodDef
addMethod(self, 'helloWorld', 'from')
end
def helloWorld(from)
return "Hello World, from #{ from }!"
end
end
server = HelloWorldServer.new('HelloWorld-Server',
'urn:ruby:hello-world', 'localhost', 8080)
server.start
Figure 5.4 Sourcecode of Hello World SOAP Client (hw_c.rb)
require "soap/driver"
driver = SOAP::Driver.new(nil, nil,
'urn:ruby:hello-world', 'http://localhost:8080/')
driver.addMethod('helloWorld', 'from')
puts driver.helloWorld("Ruby")
We test our client/server application by first starting the server in a separate
shell:
ruby hw_s.rb
183RubyC05.qxd 1/7/02 3:12 PM Page 287
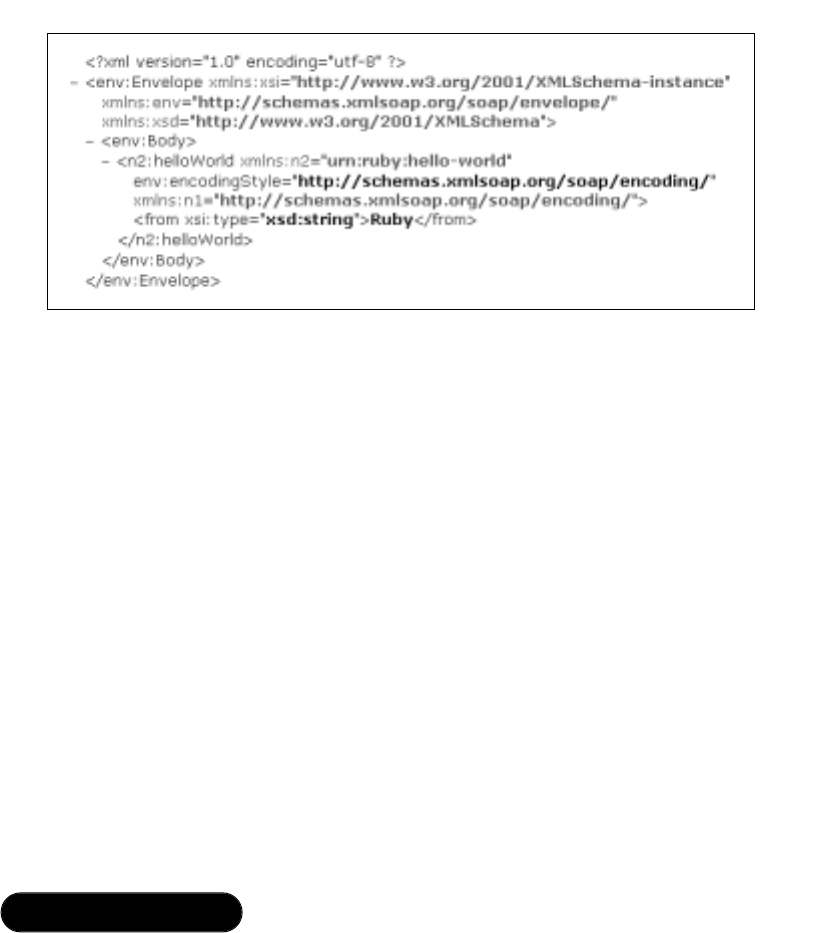
288 Chapter 5 • Web Services and Distributed Ruby
Then we start the client:
ruby hw_c.rb
If everything went well, this results in the following output:
Hello World, from Ruby!
The SOAP request sent by our client application to the server is shown in
Figure 5.5.
Choosing an XML Parser
SOAP4R operates with three different XML parsers:
■NQXML (default)
■XMLParser
■SAX driver for XMLParser
To use XMLParser or the SAX driver of XMLParser instead of the default
parser (which is NQXML), simply put the line require “soap/xmlparser” or require
“soap/saxdriver”after other SOAP4R related requires.
Note that XMLParser is the fastest parser; NQXML is a bit slower — but
even slower than NQXML is the SAX driver for XMLParser. However, an
advantage of using NQXML is that it is written in pure Ruby and is therefore
easy to install on every platform.
www.syngress.com
Figure 5.5 SOAP Request Sent by Client Application
183RubyC05.qxd 1/7/02 3:12 PM Page 288

Web Services and Distributed Ruby • Chapter 5 289
Writing SOAP4R Clients
The SOAP::Driver class provides support for writing SOAP client applications. In
this section we will describe this class and demonstrate its usage on the basis of
an application.
The following list includes some of the information needed to invoke a
SOAP service:
■The URL of the SOAP service (SOAP Endpoint URL)
■The namespace of the service methods (Method Namespace URI)
■The SOAPAction field used inside the HTTP header (not required by all
services)
■The names of the service methods and their parameters
Increasingly, all this information is optionally provided within a Web Service
Description Language (WSDL) file.WSDL is a standardized XML document-
type for encoding Web-Service-related information, not only SOAP services. For
instance, some SOAP implementations make use of WSDL to automate the gen-
eration of wrapper classes for accessing SOAP services. Unfortunately, SOAP4R
is not (yet) able to parse WSDL files, but I am sure that this is in the works and
will arrive on the scene at some point in the future.
The aforementioned SOAPAction field gives a Web server or firewall the
chance to make a decision (the Web server to invoke different CGI scripts, and
the firewall to reject a request) for a HTTP request without parsing the XML
SOAP message—which would be too time-consuming.
With this initial information in mind, let’s start writing a SOAP client in
Ruby; this one will invoke a service, named BabelFish, to translate text up to 5
KB in size from one language to another.You can find out more about that ser-
vice at Xmethods’Web Service List (www.xmethods.com), a page especially
suited to finding interesting SOAP services with which to experiment.
Our application (shown in Figure 5.6, and found in the file babelfish.rb at
www.syngress.com/solutions) wraps the BabelFish service and provides an easy-
to-use command-line interface; it can even act as a filter by translating the text
read from Stdin and having it output to Stdout. Note that for the command-line
parsing we used the getoptlong, library, which is part of Ruby’s standard library.
www.syngress.com
183RubyC05.qxd 1/7/02 3:12 PM Page 289

290 Chapter 5 • Web Services and Distributed Ruby
www.syngress.com
Figure 5.6 Client Application Using the SOAP Service “BabelFish” (babelfish.rb)
#!/usr/bin/env ruby
require 'soap/driver'
require 'getoptlong'
NAMESPACE = 'urn:xmethodsBabelFish'
URL = 'http://services.xmethods.net:80/perl/soaplite.cgi'
SOAP_ACTION = 'urn:xmethodsBabelFish#BabelFish'
HTTP_PROXY = nil
# default values for the arguments
input, output, lang = STDIN, STDOUT, "en_de"
# process the command-line arguments
opts = GetoptLong.new(
[ "--file", "-f", GetoptLong::REQUIRED_ARGUMENT ],
[ "--output", "-o", GetoptLong::REQUIRED_ARGUMENT ],
[ "--lang", "-l", GetoptLong::REQUIRED_ARGUMENT ]
)
opts.each do |opt, arg|
case opt
when "--file"
input = File.open(arg, "r")
when "--output"
output = File.open(arg, "w+")
when "--lang"
lang = arg
end
end
# create a SOAP::Driver object
Continued
183RubyC05.qxd 1/7/02 3:12 PM Page 290

Web Services and Distributed Ruby • Chapter 5 291
To test our application and translate a short message from French to English,
we specify on the command line that our application should read a text message
from Stdin, translate it from French to English (option --lang) and finally write
the result into the file english.txt (option --output).After that, we output the file
english.txt (cat english.txt) to display the translated output.
ruby babelfish.rb --lang fr_en --output english.txt
Allo mon ami,
Je suis Michael et j'habite dans une petit village en Allemagne.
Au revoir.
^D
cat english.txt
This outputs the following:
Hello my friend,
I am Michael and I live in a small village in Germany.
Goodbye.
The essence of our application, that is, the part that performs the SOAP RPC
can be cut down to a few lines of code:
require 'soap/driver'
www.syngress.com
Figure 5.6 Continued
driver = SOAP::Driver.new(nil, nil, NAMESPACE, URL, HTTP_PROXY,
SOAP_ACTION)
# add the SOAP method "BabelFish" that takes two arguments
# "translationmode" and "sourcedata" to driver
driver.addMethod('BabelFish', 'translationmode', 'sourcedata')
# finally call the SOAP service
result = driver.BabelFish(lang, input.read)
output.puts result
183RubyC05.qxd 1/7/02 3:12 PM Page 291

292 Chapter 5 • Web Services and Distributed Ruby
NAMESPACE = 'urn:xmethodsBabelFish'
URL = 'http://services.xmethods.net:80/perl/soaplite.cgi'
SOAP_ACTION = 'urn:xmethodsBabelFish#BabelFish'
HTTP_PROXY = nil
driver = SOAP::Driver.new(nil, nil, NAMESPACE, URL, HTTP_PROXY,
SOAP_ACTION)
driver.addMethod('BabelFish', 'translationmode', 'sourcedata')
result = driver.BabelFish(lang, input.read)
In the first line, we load the feature ‘soap/driver,’ which implements the
SOAP::Driver class.Then we define four constants and use them in the next line,
where we create an instance of SOAP::Driver by calling its new method (Table
5.6 lists the parameters of SOAP::Driver.new):
aDriver = SOAP::Driver.new(log, logId, namespace, endPoint,
httpProxy=nil, soapAction=nil)
Table 5.6 Parameters of SOAP::Driver.new
Parameter Explanation
log An object of class Log, or nil to disable logging (see the
section “Client-side Logging” for more information).
logId A string that is used in each log-line to distinguish mul-
tiple clients using the same logfile. Only useful if param-
eter log is not nil.
namespace The namespace to use for all RPCs done with this
SOAP::Driver object (Method Namespace URI).
endPoint URL of the SOAP server to connect with (SOAP Endpoint
URL).
httpProxy Unless nil, this parameter specifies the HTTP-Proxy
through which to communicate instead of a direct con-
nection to the SOAP server. It takes the form
“http://host:port”.
soapAction A value for the SOAPAction field of the HTTP header. If
nil this defaults to the empty string “”.
www.syngress.com
183RubyC05.qxd 1/7/02 3:12 PM Page 292

Web Services and Distributed Ruby • Chapter 5 293
After that, we call the addMethod method, passing it the name of the SOAP
service method we want to invoke later on as well as its parameter names.As you
might know, SOAP’s method parameter names are often not taken into account
on the server side. In this case, what really counts is the order in which the
parameters were passed to the service. For services, this assumption applies you
may forego calling addMethod and invoke BabelFish directly. However, I wouldn’t
recommend this for anything other than small scripting tasks.
To add a SOAP service method to a SOAP::Driver we can use one of the
two following methods (Table 5.7 lists the parameters of addMethod and
addMethodWithSOAPAction):
SOAP::Driver#addMethod(name, *paramArg)
or
SOAP::Driver#addMethodWithSOAPAction(name, soapAction, *paramArg)
Table 5.7 Parameters of addMethod and addMethodWithSOAPAction
Parameter Explanation
name The name of the remote procedure.
soapAction SoapAction header to use instead of the default one speci-
fied in SOAP::Driver.new
paramArg Specifies the names and modes (in/out/inout/retval) of the
remote procedures’ parameters. It has two different forms:
(1) If it is an array of strings, each string represents an
parameter name of mode “in”. A parameter “return” with
mode “retval” is automatically added.
(2) If it is an array of size one and the single element is
itself an array, then the inner array contains itself arrays
each containing two strings, the first representing the
mode and the second the name of the parameter.
To understand the usage of the paramArg parameter, regard the two different,
but equivalent, calls to the addMethod method, where the second one explicitly
uses parameter mode specifiers:
driver.addMethod('BabelFish', 'translationmode', 'sourcedata')
driver.addMethod('BabelFish', [
www.syngress.com
183RubyC05.qxd 1/7/02 3:12 PM Page 293

294 Chapter 5 • Web Services and Distributed Ruby
['in', 'translationmode'],
['in', 'sourcedata'],
['retval', 'return']
])
Possible parameter mode specifiers are in,out,inout and retval.You can com-
bine them with an arbitrary number of other specifiers simply by separating
them either through whitespace or commas; SOAP4R will just ignore the
unknown ones.
Finally, in the last line of our example, we invoke the SOAP service:
result = driver.BabelFish(lang, input.read)
Note that addMethod creates a singleton method in the SOAP::Driver object.
This method then invokes the SOAP service. If you don’t call addMethod,
method_missing will do the same, but it will use random parameter names.
As mentioned earlier, SOAP lets you declare a parameter as in,out,inout or
retval — but how can we call a method that takes inout or out parameters?
Consider the following:
# define service method
driver.addMethod('aMeth', [
['in', 'inParam'],
['inout', 'inoutParam'],
['out', 'outParam'],
['retval', 'return']
])
# invoke it
ret, inoutParam, outParam = driver.aMeth(inParam, inoutParam)
That is, you have to pass all in and inout parameters in the order in which they
were defined in the call to addMethod. Similar, the inout and out parameters are
returned in the same order they occur, but after the return value (mode retval).
Up to this point, we haven’t yet discussed the datatypes you can pass as
parameters to SOAP RPCs or which are returned from the same. Basically, you
can pass any standard Ruby type, but for complex datatypes or types that cannot
be represented directly in Ruby, you have to use special classes or special creator
www.syngress.com
183RubyC05.qxd 1/7/02 3:12 PM Page 294

Web Services and Distributed Ruby • Chapter 5 295
methods.All this will be explained in detail in section “SOAP Datatypes and Type
Conversion.”
Exceptions
What happens if the execution of a SOAP service method fails? Unless the
whole service fails (which would result in a 500 Internal Server Error), a SOAP
Fault is returned, indicating that an error occurred on the server-side. In this case,
SOAP4R raises in the client application either a RuntimeError or the same excep-
tion as occurred on the server side, if you accessed a server running SOAP4R
(SOAP4R marshals the exception and passes it in the detail tag of the SOAP
Fault structure).
To distinguish remote from local exceptions, all remote exceptions include
module SOAP::RPCServerException.The following example demonstrates this:
begin
driver.rpcThatRaisesAnException(someParams)
raise # local exception
rescue SOAP::RPCServerException => err
# remote exception
...
rescue
# local exception
...
end
Client-side Logging
Logging is useful for detecting possible errors, especially for autonomously run-
ning applications like HTTP servers and daemons. Not only can logging save a
lot of time, but it can also make an application more readable if logging is imple-
mented as a basic service, as is the case for SOAP4R.
We already came across the log parameter of SOAP::Driver.new which takes nil
to disable logging or an object of class Log:
aLog = Log.new(log, shiftAge=3, shiftSize=102400)
Table 5.8 lists the parameters of Log.new.
www.syngress.com
183RubyC05.qxd 1/7/02 3:12 PM Page 295

296 Chapter 5 • Web Services and Distributed Ruby
Table 5.8 Parameters of Log.new
Parameter Explanation
log Specifies the file to use for logging; it is either the name
of a file (String) or an instance of class IO or File. The
file gets opened or created in append mode.
shiftAge Specifies when to switch to another log file. It is either
one of the strings ‘daily’, ‘weekly’ or ‘monthly’, or an
integer specifying the number of log files to keep.
shiftSize If the shiftAge parameter is an integer, shiftSize specifies
the size a log file must exceed to trigger the switch to
another one. Otherwise it is not used.
A sample log line generated by a SOAP::Driver object with a logId of
CLIENT1 looks like this:
D, [Thu Jul 05 22:09:29 CEST 2001 161940 #8584] DEBUG — SOAP::Driver:
<CLIENT1> call: parameters '["DE", "AU"]'.
The SOAP::Driver class provides two further methods for logging:
SOAP::Driver#setWireDumpDev(dumpDev)
and
SOAP::Driver#setWireDumpFileBase(fileBase)
The setWireDumpDev method writes all HTTP requests and responses,
together with the complete SOAP XML message, to the File or IO object speci-
fied by the dumpDev parameter.The setWireDumpFileBase method instead logs the
SOAP XML messages without the HTTP headers and stores them in two files,
of which the fileBase parameter is part of the name:
■fileBase_SOAPmethodName_request.xml (The SOAP message for the
RPC to SOAPmethodName)
■fileBase_SOAPmethodName_response.xml (The server’s response for the
above RPC)
WARNING
Each SOAP RPC overwrites its two corresponding files. It does not
append its log messages!
www.syngress.com
183RubyC05.qxd 1/7/02 3:12 PM Page 296

Web Services and Distributed Ruby • Chapter 5 297
The example in Figure 5.7 is an advanced version of our “Hello World” client
application from Figure 5.4. It also appears as file hw_c2.rb at www.syngress.com/
solutions.What’s new here is that it makes use of the Application class.
www.syngress.com
Figure 5.7 Advanced Hello World SOAP Client (hw_c2.rb)
require "soap/driver"
class HelloWorldClient < Application
NS = 'urn:ruby:hello-world'
AppName = 'HelloWorldClient'
def initialize(server, proxy=nil)
super(AppName)
@server = server
@proxy = proxy
@logId = AppName
@driver = nil
# Log to HelloWorldClient.log instead of STDERR
setLog(AppName + '.log')
end
def run
# Driver initialization and method definition
@driver = SOAP::Driver.new(@log, @logId, NS, @server, @proxy)
@driver.addMethod('helloWorld', 'from')
# Method invokation
puts @driver.helloWorld("Ruby")
end
end
if __FILE__ == $0
HelloWorldClient.new('http://localhost:8080/').start
end
183RubyC05.qxd 1/7/02 3:12 PM Page 297

298 Chapter 5 • Web Services and Distributed Ruby
Writing SOAP4R Services
SOAP4R currently supports two different types of servers:
■CGI/FastCGI based (SOAP::CGIStub)
■Standalone (SOAP::StandaloneServer)
Both the SOAP::CGIStub (defined in “soap/cgistub”) and
SOAP::StandaloneServer (defined in “soap/standaloneServer”) classes inherit from
SOAP::Server, which itself inherits from the Application class.
The implementation of a SOAP server hardly differs between a CGI,
FastCGI or a standalone one; a general template is given below (replace the
occurrences of “XXX” with the appropriate values):
require "soap/XXX"
class MyServer < SOAP::XXX
def methodDef
addMethod(self, 'add', 'a', 'b')
# add further service methods here
end
def add(a, b)
a + b
end
# add further implementations of service methods here
end
# ..put here the code to start the server..
The methodDef method is implicitly called from SOAP::Server’s initialize
method and has the purpose of exposing service methods with one of the
two following methods (Table 5.9 lists the parameters of addMethod and
addMethodWithNS):
SOAP::Server#addMethod(receiver, methodName, *paramArg)
or
SOAP::Server#addMethodWithNS(namespace, receiver, methodName,
*paramArg)
www.syngress.com
183RubyC05.qxd 1/7/02 3:12 PM Page 298

Web Services and Distributed Ruby • Chapter 5 299
Table 5.9 Parameters of addMethod and addMethodWithNS
Parameter Explanation
receiver The object that contains the methodName method. If
you define the service methods in the same class as the
methodDef method, this parameter is self.
methodName The name of the method that is called due to a RPC
request. It is a String.
paramArg Specifies, when given, the parameter names and param-
eter modes. It takes the same values as the parameter
with the same name of the SOAP::Driver#addMethod
method (see Table 5.6).
namespace Overwrites the default namespace you specified with
the second argument to SOAP::Server#initialize for the
current method.
To demonstrate the usage of inout or out parameters, imagine the following
service method that takes two parameters (inParam and inoutParam), returns one
normal return value (retVal) and two further parameters: inoutParam and outParam:
def aMeth(inParam, inoutParam)
retVal = inParam + inoutParam
outParam = inParam – inoutParam
inoutParam = inParam * inoutParam
return retVal, inoutParam, outParam
end
To expose it from within methodDef, call:
addMethod(self, 'aMeth', [
%w(in inParam),
%w(inout inoutParam),
%w(out outParam),
%w(retval return)
])
At this point, we complete the template from the beginning of the section
and implement three working SOAP servers.We start with a CGI-based server:
www.syngress.com
183RubyC05.qxd 1/7/02 3:12 PM Page 299

300 Chapter 5 • Web Services and Distributed Ruby
#! /usr/bin/env ruby
require "soap/cgiStub"
class MyCGIServer < SOAP::CGIStub
def methodDef
addMethod(self, 'add', 'a', 'b')
addMethod(self, 'div', 'a', 'b')
end
# handler methods -----------------
def add(a, b) a + b end
def div(a, b) a / b end
end
if __FILE__ == $0
server = MyCGIServer.new("CGIServer", "urn:ruby:test1")
server.start
end
The arguments to MyCGIServer.new are the application’s name (this is similar
to SOAP::Driver.new’s logId parameter) and the default namespace for all via
addMethod-exposed service methods.The application’s name distinguishes mul-
tiple servers using the same log file.
We should mention here that a CGI-based server has one major disadvantage:
performance. It gets even worse if it needs to query a database, because each
request has to establish a new connection unless a persistent connection mecha-
nism is used (such as using DRb).
Below the same example using FastCGI is shown. For more information
about the FastCGI module, see Eli Green’s homepage at
http://fenris.codedogs.ca/~eli/fastcgi.html, or alternatively, the RAA entry
FastCGI in the Library section, under WWW.
#! /usr/bin/env ruby
require "soap/cgiStub"
class MyFastCGIServer < SOAP::CGIStub
# ..same as for the CGI-based server..
www.syngress.com
183RubyC05.qxd 1/7/02 3:12 PM Page 300

Web Services and Distributed Ruby • Chapter 5 301
end
if __FILE__ == $0
require "fcgi" # or "fastcgi"
server = MyFastCGIServer.new("FastCGIServer", "urn:ruby:test2")
FCGI.each_request do |f|
$stdin = f.in
server.start
end
end
The implementation of a standalone server is very similar, except that the
constructor takes two further parameters, host and port.The standalone server
shown in Figure 5.8 exposes one service method, getInfoFromName, which returns
the result-set of a SQL query (using Ruby/DBI. See Chapter 3). Note that we
established only one database connection for all requests; so to prevent concur-
rent access, we have to use a Mutex.The source code of this application can also
be found at www.syngress.com/solutions, under the file named dbserver.rb.
www.syngress.com
Figure 5.8 Standalone SOAP Server (dbserver.rb)
require "soap/standaloneServer"
require "dbi" # for database access
require "thread" # for Mutex
# change to appropriate values!
DB_URL = 'dbi:Mysql:database=testdb'
DB_USER = 'UserName'
DB_PASS = 'MySecret'
class DBServer < SOAP::StandaloneServer
def initialize(appname, namespace, host, port)
super
Continued
183RubyC05.qxd 1/7/02 3:12 PM Page 301

302 Chapter 5 • Web Services and Distributed Ruby
www.syngress.com
Figure 5.8 Continued
@mutex = Mutex.new
# establish database connection
@dbh = DBI.connect(DB_URL, DB_USER, DB_PASS)
# use build-in logging features
log( SEV_INFO,
"Established database connection <#{DB_URL}>" )
# prepare SQL query (change this appropriately)
sql = "SELECT * FROM test WHERE name = ?"
@query = @dbh.prepare(sql)
end
def methodDef
addMethod(self, 'getInfoFromName', 'name')
end
def shutdown
@dbh.disconnect
log( SEV_INFO,
"Closed database connection <#{DB_URL}>" )
end
# handler methods --------------------------------
def getInfoFromName(name)
result = @mutex.synchronize { @query.execute(name) }
result.to_a unless result.nil?
end
end # class DBServer
Continued
183RubyC05.qxd 1/7/02 3:12 PM Page 302

Web Services and Distributed Ruby • Chapter 5 303
Once the server was started with the start method, it will serve until the pro-
cess receives a SIGHUP signal (for example, by typing kill -HUP pid at the com-
mand-line).
Exceptions
To return a SOAP Fault from a service method instead of a regular return value,
simply raise an exception. SOAP4R will use the exceptions’ message attribute as
the value for the faultString tag and will pass the marshaled exception in the detail
tag.This way, a SOAP4R client is able to reconstruct the original exception by
unmarshaling the detail tag.
Server-side Logging
By default, logging is enabled because the SOAP::Server class inherits from
Application.The default logging device is StdErr.Thus, using a CGI or FastCGI-
based server, the log messages are written to the Web server’s error log file (for
example, /var/log/httpd/error_log in Apache).To change the logging device and
other logging-related parameters, the Application class provides the public setLog
method which takes the same parameters as Log.new (see Table 5.7). For example,
to disable the nerving log messages of our “Hello World” SOAP service (see
Figure 5.3) we could set the log device to /dev/null respectively to a Windows
equivalent, by simply adding the line:
server.setLog('/dev/null')
SOAP Datatypes and Type-Conversion
SOAP and Ruby use different representations for datatypes as well as different
names, value ranges and semantics. For this reason, SOAP4R must perform a
www.syngress.com
Figure 5.8 Continued
if __FILE__ == $0
server = DBServer.new('SOAP-Server', 'urn:ruby:dbserv',
'localhost', 8080)
server.start
server.shutdown # closes database connection
end
183RubyC05.qxd 1/7/02 3:12 PM Page 303

304 Chapter 5 • Web Services and Distributed Ruby
translation from Ruby to SOAP types and vice versa.This takes place in the fol-
lowing manner:
1. SOAP4R converts a build-in Ruby object into a special type defined in
module SOAP (For example: SOAPInt,SOAPString,SOAPArray), also
called SOAP4R type (see Table 5.9).
2. It converts the SOAP4R types into SOAP’s XML encoding (see Table
5.10).
The XML namespaces we use in the two tables are as follows:
xsi = http://www.w3.org/2001/XMLSchema-instance
xsd = http://www.w3.org/2001/XMLSchema
xsd1999 = http://www.w3.org/1999/XMLSchema
n1 = http://schemas.xmlsoap.org/soap/encoding/
n2 = http://xml.apache.org/xml-soap
rb = http://www.ruby-lang.org/xmlns/ruby/type/1.6
Of course, step one only takes place if the object is not yet a SOAP4R type.
The translation from SOAP’s XML representation into Ruby objects is similar —
simply reverse the two steps.
By default, SOAP4R uses the 2001 XML Schema Definitions.To use the
1999 XML Schema Definitions, require the file soap/XMLSchema1999 just after
soap/driver,soap/cgistub,soap/server or soap/standaloneServer.
Table 5.9 Conversion from “Build-in” Ruby Types to SOAP4R Types
“Build-in” Ruby Type SOAP4R type
NilClass (nil) SOAPNil
TrueClass, FalseClass (true, false) SOAPBoolean
Integer (Fixnum, Bignum) SOAPInt, SOAPLong, SOAPInteger
Float SOAPFloat
String SOAPString
Date, Time SOAPDateTime
Array SOAPArray
Hash, Struct SOAPStruct
www.syngress.com
183RubyC05.qxd 1/7/02 3:12 PM Page 304

Web Services and Distributed Ruby • Chapter 5 305
Table 5.10 Conversion from SOAP4R Types to SOAP’s XML Encoding
SOAP4R type (range) SOAP’s encoding (XMLSchema 1999)
SOAPNil xsi:nil=”true” (xsi:null=”1”)
SOAPBoolean xsi:type=”xsd:boolean”
SOAPInt (-2^31 to 2^31-1) xsi:type=”xsd:int”
SOAPInteger xsi:type=”xsd:integer”
SOAPLong (-2^63 to 2^63-1) xsi:type=”xsd:long”
SOAPFloat (32 bit) xsi:type=”xsd:float”
SOAPDouble (64 bit) xsi:type=”xsd:double”
SOAPDecimal xsi:type=”xsd:decimal”
SOAPString xsi:type=”xsd:string”
SOAPBase64 xsi:type=”n1:base64”
SOAPHexBinary xsi:type=”xsd:hexBinary”
SOAPDate xsi:type=”xsd:date”
SOAPTime xsi:type=”xsd:time”
SOAPDateTime xsi:type=”xsd:dateTime”
(xsi:type=”xsd1999:timeInstant”)
SOAPArray xsi:type=”n1:Array”
SOAPStruct (from Struct) xsi:type=”rb:Struct..Classname”
SOAPStruct (from Hash) xsi:type=”n2:Map”
Instead of passing a built-in Ruby type to a remote procedure, you could also
directly pass a SOAP4R type. Below we create some SOAP4R types directly:
aLong = SOAP::SOAPLong.new( 123_456_789_012_345 )
anInt = SOAP::SOAPInteger.new( 123456789 )
aDecimal = SOAP::SOAPDecimal.new( "-123456789.012345678" )
aFloat = SOAP::SOAPFloat.new( 123.456 )
aHex = SOAP::SOAPHexBinary.new( "binary string" )
aBase64 = SOAP::SOAPBase64.new( "binary string" )
aDate = SOAP::SOAPDate.new( Date.today )
aTime = SOAP::SOAPTime.new( Time.now )
www.syngress.com
183RubyC05.qxd 1/7/02 3:12 PM Page 305

306 Chapter 5 • Web Services and Distributed Ruby
Creating Multi-dimensional or Typed SOAP Arrays
Ruby has no built-in multi-dimensional arrays. Despite this fact, we can encode a
Ruby Array as a multi-dimensional SOAP array:
three_dim_ary = [ [ [1,2], [3,4] ], [ [5,6], [7,8] ] ]
obj = SOAP::RPCUtils.ary2md(three_dim_ary, 3)
# now pass "obj" as argument to a SOAP-RPC
SOAP::RPCUtils.ary2md takes two further parameters that let you specify the
element’s datatype and one to specify the mapping registry to use:
SOAP::RPCUtils.ary2md( ary, rank, typeNamespace = SOAP::XSD::Namespace,
type = SOAP::XSD::AnyTypeLiteral,
mappingRegistry = SOAP::RPCUtils::MappingRegistry.new )
By default, the elements are of the type anyType, but you may specify another
type and namespace. See the soap/XMLSchema file for existing namespaces and
type literals.
The ary2soap method behaves similarly to ary2md, with the difference that it
creates one-dimensional arrays.
SOAP::RPCUtils.ary2soap( ary, typeNamespace = SOAP::XSD::Namespace,
type = SOAP::XSD::AnyTypeLiteral,
mappingRegistry = SOAP::RPCUtils::MappingRegistry.new )
To create a typed SOAP array whose elements are String objects, we’d write:
ary = ["this", "is", "an", "array"]
obj = SOAP::RPCUtils.ary2soap( ary, SOAP::XSD::Namespace,
SOAP::XSD::StringLiteral )
Creating User-defined Datatypes
Creating user-defined datatypes with SOAP4R is very easy: all you have to do is
specify a type name (class variable @@typeName) and a type namespace (class vari-
able @@typeNamespace) for your own class that distinguishes it from others. For
various reasons, you should include the SOAP::Marshallable module into the class.
Below we implement the user-defined Human datatype with the type name
human and the namespace urn:ruby-dev-guide:
www.syngress.com
183RubyC05.qxd 1/7/02 3:12 PM Page 306

Web Services and Distributed Ruby • Chapter 5 307
class Human
include SOAP::Marshallable
@@typeName = 'human'
@@typeNamespace = 'urn:ruby-dev-guide'
attr_reader :name, :sex, :birth
def initialize( name, sex, birth = Date.now )
@name, @sex, @birth = name, sex, birth
end
def say( text = "hello" )
print @name, " says '#{text}'.\n"
end
end
An instance of this class in SOAP’s XML encoding would look like Figure
5.9 (without the SOAP envelope).
More formally, SOAP4R proceeds as follows to convert the instance to
XML:
■Type name of object obj is examined as:
@typeName || @@typeName || obj.class.to_s
■Type namespace is examined as:
@typeNamespace || @@typeNamespace ||
'http://www.ruby-lang.org/xmlns/ruby/type/custom'
www.syngress.com
Figure 5.9 Sample Human Class in SOAP’s XML Encoding
183RubyC05.qxd 1/7/02 3:12 PM Page 307

308 Chapter 5 • Web Services and Distributed Ruby
Then it generates a SOAPStruct containing the instance variables of the
object as key/value pairs and with the type name and type namespace as examined
above. Finally, SOAP4R converts the SOAPStruct into XML, as usual.
The conversion back from such a user-defined datatype encoded in XML to
a Ruby object is a bit more complicated.Therefore, SOAP4R performs the fol-
lowing steps:
1. It first tries to find a class with the capitalized type name (xsi:type argu-
ment; human in the example above) as name. If this fails it returns a
Struct.
2. If the class was found and includes the SOAP::Marshallable module, it
returns an object of this class.
3. If the class was found but do not include the SOAP::Marshallable
module, the class must have, for each instance variable, an attribute
writer method and an initialize method callable without parameters. If
both are present, a new object of that class is created and returned, oth-
erwise a Struct is returned.
Now back to our example. In step one, the xsi:type value is human.
Capitalized, this is “Human.”Therefore, SOAP4R searches for and finds a class
named Human. In step 2, it checks whether this class includes the module
SOAP::Marshallable, which is true; thus it returns an object of class Human.
What would happen if the type name differs from the class name in Ruby?
Imagine that in our above example the xsi:type argument would have been
“n5:human_type” instead of “n5:human”. SOAP4R would capitalize
“human_type” to “Human_type”, but it wouldn’t find a class Human_type;it
would fail in Step one and return a Struct::Human_type object.
A solution for this problem is presented in the next section.
Changing the Default Type-Mapping
SOAP4R gives you the ability to customize the mapping between Ruby and
SOAP types.There are two possible ways:
■Extend the SOAP::RPCUtils::MappingRegistry::UserMapping array.This
has a global effect.
■Set the mappingRegistry attribute of SOAP::Driver or SOAP::Server
instances to an object of the SOAP::RPCUtils::MappingRegistry class.
This only affects the particular object.
www.syngress.com
183RubyC05.qxd 1/7/02 3:12 PM Page 308

Web Services and Distributed Ruby • Chapter 5 309
For instance, to map an Integer to a SOAPLong (64 bit integer), we could write:
MR = SOAP::RPCUtils::MappingRegistry # abbreviation
entry = [Integer, SOAP::SOAPLong, MR::BasetypeFactory]
## 1. solution (global effect)
MR::UserMapping << entry
## 2. solution (local effect)
# obj is either a SOAP::Driver or a SOAP::Server object
obj.mappingRegistry = MR.new
obj.mappingRegistry.set( *entry )
In the same way, you can change the mappings of all other base datatypes.
Compound or array types are a bit more difficult to change.
The following example adds a mapping between the IntArray class and a
typed SOAP::SOAPArray (type and namespace specified by the last element of
entry) using the MR::TypedArrayFactory factory. Note that we use class
SOAP::Marshal to marshal and unmarshal Ruby objects; you’ll read more about
this in the section “Using SOAP as Marshaling Format.”
require "soap/marshal"
MR = SOAP::RPCUtils::MappingRegistry # abbreviation
class IntArray < Array; end # Integer-only Array
entry = [
IntArray, SOAP::SOAPArray, MR::TypedArrayFactory,
[XSD::Namespace, XSD::IntLiteral]
]
MR::UserMapping << entry
# ------ test the mapping ------
obj = IntArray[1, 2, 3]
www.syngress.com
183RubyC05.qxd 1/7/02 3:12 PM Page 309

310 Chapter 5 • Web Services and Distributed Ruby
str = SOAP::Marshal.marshal(obj)
obj2 = SOAP::Marshal.unmarshal(str)
puts "before: #{obj.inspect} : #{obj.type}"
puts "after: #{obj2.inspect} : #{obj2.type}"
This outputs:
before: [1, 2, 3] : IntArray
after: [1, 2, 3] : IntArray
Do you remember the problem we discussed at the end of the section
“Creating User defined Datatypes?”We got a Struct::Human_type instead of an
instance of the Human class due to the type name “human_type”.The following
mapping fixes this:
Human, SOAP::SOAPStruct, MR::TypedStructFactory, ['urn:ruby-dev-guide',
'human_type']
Note that if you add such an entry to the mapping registry, the class variables
@@typeNamespace and @@typeName of the Human class become superfluous.
There is even more possible with the mapping registry; to gather more infor-
mation about it, take a look at the file soap/mappingRegistry.rb.
Using SOAP as Marshalling Format
SOAP’s specification consists of three (independent) parts:
■The SOAP envelope.
■The encoding rules.
■The RPC representation.
In this section, we’ll use only the first two parts of SOAP without the RPC
representation, to store Ruby objects as a human readable XML document. For
this purpose, SOAP4R provides two class methods of SOAP::Marshal, defined in
the file soap/marshal:
str = SOAP::Marshal.marshal( obj,
mappingRegistry = SOAP::RPCUtils::MappingRegistry.new )
to marshal obj into a string representation, and
www.syngress.com
183RubyC05.qxd 1/7/02 3:12 PM Page 310

Web Services and Distributed Ruby • Chapter 5 311
obj = SOAP::Marshal.unmarshal( str,
mappingRegistry = SOAP::RPCUtils::MappingRegistry.new,
parser = SOAP::Processor.loadParser )
to unmarshal str back to a Ruby object.The mappingRegistry parameter provides a
way to change the default mapping between Ruby and SOAP types (see the ear-
lier section “Changing the Default Type-Mapping”).
In the following example, we marshal some instances of the Human class and
store the resulting XML document in the humans.xml file (see Figure 5.10):
require "soap/marshal"
class Human
include SOAP::Marshallable
@@typeName = 'human'
@@typeNamespace = 'urn:ruby-dev-guide'
attr_reader :name, :sex, :birth
def initialize( name, sex, birth = Date.now )
@name, @sex, @birth = name, sex, birth
end
def say( text = "hello" )
print @name, " says '#{text}'.\n"
end
end
people = [
Human.new( 'Ada Lovelace', 'f', Date.new(1815) ),
Human.new( 'Albert Einstein' 'm', Date.new(1879,3, 14) )
]
File.open( 'humans.xml', 'w+' ) do |f|
f << SOAP::Marshal.marshal( people )
www.syngress.com
183RubyC05.qxd 1/7/02 3:12 PM Page 311

312 Chapter 5 • Web Services and Distributed Ruby
end
Then we unmarshall the XML representation back to Ruby objects:
require "soap/marshal"
class Human
# ..same as above..
end
str = File.readlines( 'humans.xml' ).to_s
people = SOAP::Marshal.unmarshal( str )
p people[0]
p people[1]
This outputs:
#<Human:0x80c9548 @birth=#<Date: 4767949/2,0,2299161>, @sex=
"f", @name="Ada Lovelace">
#<Human:0x80c7ae0 @birth=#<Date: 4814845/2,0,2299161>, @sex=
"m", @name="Albert Einstein">
www.syngress.com
Figure 5.10 SOAP XML Representation of Marshaled Ruby Objects
183RubyC05.qxd 1/7/02 3:12 PM Page 312

Web Services and Distributed Ruby • Chapter 5 313
Project: A SOAP Authentification Server
How we can make sure that only authorized users are allowed to access our
SOAP services? As we have seen in the section “Securing XML-RPC Services,”
we could use HTTP authentication. Implementing this for SOAP4R wouldn’t be
that hard, but we want to take another approach:Authentication at the applica-
tion level instead of at the HTTP protocol layer.
The method we will use for Authentication works with symmetrical keys,
and can be described as follows:
1. The user sends his username to the Authentication server.
2. The Authentication server creates a “nonce” (a random number), and
sends this back to the user.
3. The user encrypts the nonce with his password and sends this back to
the Authentication server.
4. The Authentication server compares the initial created nonce encrypted
with the users password and the nonce sent by the user. If both are
equal, the user has been successfully authenticated.
To implement this in Ruby we need:
1. A random number generator:We will use a simple linear congruence
generator for this.
2. An encryption algorithm:We will use RC4 for this.
Ideally both the random number generator and the encryption algorithm
should be cryptographically secure, whereas the algorithms we use are not!
First let us implement a linear congruence generator (LCG). LCGs generate
sequences of pseudo random numbers and are described with the following
equation:
X(n) = (a * X(n-1) + b) mod m
X(n) is the nth created random number, and X(n-1) is its forerunner.Variable
ais the multiplier, bthe increment and mthe modulo; all three are constant
values.There are several good values for a,band mand they differ in the period
of the generated sequence.We choose for a,band mthe values 2416,374441
and 1771875 respectively, which result in a generator with a maximal period of
m, that is, all numbers from 0 to 1771874 are generated in a pseudo random
order.
www.syngress.com
183RubyC05.qxd 1/7/02 3:12 PM Page 313

314 Chapter 5 • Web Services and Distributed Ruby
# file: lcg.rb
# Linear Congruence Generator
class LCG
def initialize(seed=Time.now.to_i, a=2416, b=374441, m=1771875)
@x, @a, @b, @m = seed % m, a, b, m
end
def next() @x = (@a * @x + @b) % @m end
end
It follows the implementation of the encryption algorithm RC4:
# file: rc4.rb
# RC4, algorithm by Ron Rivest (RSA)
# symetrical algorithm (stream cipher)
class RC4
def RC4.crypt(key, str)
RC4.new(key).crypt(str)
end
def initialize(key)
raise "Empty key" if key.empty?
s, j = (0..255).to_a, 0
k = (key * ((256 / key.size)+1))[0,256].unpack('C*')
for x in 0..255 do
j = (j + s[x] + k[x]) & 0xFF
s[x], s[j] = s[j], s[x]
end
@i, @j, @s = 0, 0, s
end
def crypt(str)
str = str.dup
(0...(str.size)).each {|i| str[i] ^= next_rand }
www.syngress.com
183RubyC05.qxd 1/7/02 3:12 PM Page 314

Web Services and Distributed Ruby • Chapter 5 315
str
end
private # ------------------------------
def next_rand
i, j, s = @i, @j, @s
i = (i + 1) & 0xFF
j = (j + s[i]) & 0xFF
s[i], s[j] = s[j], s[i]
t = (s[i] + s[j]) & 0xFF
@i, @j = i, j
s[t]
end
end
Figure 5.11 shows the implementation of our SOAP Authentication server. It
can be divided into two parts:The Authentication model implemented by the
Auth class (it does the hard work), and the standalone SOAP server, which
exposes the two methods initAuth and validateAuth as SOAP services.
www.syngress.com
Figure 5.11 The SOAP Authentication Server (auth.rb)
# The SOAP Authentication Server
require "md5"
require "lcg" # linear congruence generator
require "rc4" # RC4 encryption algorithm
require "thread" # for Mutex
class Auth
def initialize(user_info, ticket_life=30, gc_interval=120)
@user_info = user_info
@ticket_life = ticket_life
Continued
183RubyC05.qxd 1/7/02 3:12 PM Page 315

316 Chapter 5 • Web Services and Distributed Ruby
www.syngress.com
Figure 5.11 Continued
@rng = LCG.new
@rng_mutex = Mutex.new
@nonce_list = {}
@nonce_mutex = Mutex.new
# garbage collects @nonce_list
install_gc(gc_interval)
end
def initAuth(user)
pass = @user_info[user]
return nil if pass.nil?
nonce, nonce_enc = nonce_pair(pass)
@nonce_mutex.synchronize {
@nonce_list[nonce_enc] = [user, Time.now + @ticket_life]
}
nonce
end
def validateAuth(enc_nonce)
user, time = @nonce_mutex.synchronize {
@nonce_list.delete(enc_nonce)
}
(time.nil? or Time.now > time) ? nil : user
end
private # --------------------------------------
def install_gc(interval)
Thread.new {
Continued
183RubyC05.qxd 1/7/02 3:12 PM Page 316

Web Services and Distributed Ruby • Chapter 5 317
www.syngress.com
Figure 5.11 Continued
loop do
sleep interval
@nonce_mutex.synchronize {
@nonce_list.delete_if {|k, v| Time.now > v[1] }
}
end
}
end
def nonce_pair(pass)
rng = @rng_mutex.synchronize { @rng.next }
nonce = MD5.new(rng.to_s).hexdigest
nonce_enc = Auth.enc_nonce(pass, nonce)
[nonce, nonce_enc]
end
# class methods -------------------
def self.enc_nonce(pass, nonce)
MD5.new(RC4.crypt(pass, nonce)).hexdigest
end
end
if __FILE__ == $0
require "soap/standaloneServer"
class AuthServer < SOAP::StandaloneServer
USERS = {
'john' => 'ahgr',
Continued
183RubyC05.qxd 1/7/02 3:12 PM Page 317

318 Chapter 5 • Web Services and Distributed Ruby
Note that we prevent concurrent access to the variables @rng and @nonce_list
by making use of two instance of the Mutex class stored in @rng_mutex and
@nonce_mutex. Furthermore, we run a concurrent thread (started by the install_gc
method) that every nseconds activates and removes timed-out nonces.
To authenticate, we use the model illustrated in Figure 5.12.The SOAP client
requests a nonce (initAuth) from the SOAP authserver (1). It encrypts this nonce
with its password and sends it to the SOAP service (2).To validate the encrypted
nonce sent by the client, the SOAP service calls validateAuth of the SOAP auth-
server (3). If the Authentication succeeded, the SOAP service can proceed with
its original task and sends the result to the client (4).
To test the SOAP Authentication Server, we’ll adapt our “Hello World”
client/server application and add Authentication to it.
Here is the source code for the server:
# file: ahw_s.rb
require "soap/standaloneServer"
require "soap/driver"
www.syngress.com
Figure 5.11 Continued
'wayne' => 'h98xh'
}
def methodDef
auth = Auth.new(USERS)
addMethod(auth, 'initAuth', 'user')
addMethod(auth, 'validateAuth', 'enc_nonce')
end
end
# start SOAP AuthServer
server = AuthServer.new('Auth-Server', 'urn:ruby:authsvr',
ARGV[0] || 'localhost', (ARGV[1] || 9876).to_i)
server.start
end
183RubyC05.qxd 1/7/02 3:12 PM Page 318

Web Services and Distributed Ruby • Chapter 5 319
module AuthMixin
AUTH_NS = 'urn:ruby:authsvr'
AUTH_URL = 'http://localhost:9876/'
class UnauthorizedError < Exception; end
def setupAuth
@auth = SOAP::Driver.new(nil, nil, AUTH_NS, AUTH_URL)
@auth.addMethod('initAuth', 'user')
@auth.addMethod('validateAuth', 'enc_nonce')
addMethod(self, 'initAuth', 'user')
end
def initAuth(user)
@auth.initAuth(user)
end
private
def validate(enc_nonce)
raise UnauthorizedError unless @auth.validateAuth(enc_nonce)
end
end
class HelloWorldServer < SOAP::StandaloneServer
include AuthMixin
def methodDef
addMethod(self, 'helloWorld', 'enc_nonce', 'from')
end
www.syngress.com
183RubyC05.qxd 1/7/02 3:12 PM Page 319

320 Chapter 5 • Web Services and Distributed Ruby
def helloWorld(enc_nonce, from)
validate(enc_nonce)
return "Hello World, from #{ from }!"
end
end
if __FILE__ == $0
server = HelloWorldServer.new('HelloWorld-Server',
'urn:ruby:hello-world', 'localhost', 8080)
server.setupAuth
server.start
end
And here the client’s source code:
# file: ahw_c.rb
require "soap/driver"
require "auth" # for Auth.enc_nonce
USER, PASS = 'john', 'ahgr'
driver = SOAP::Driver.new(nil, nil, 'urn:ruby:hello-world',
'http://localhost:8080/')
driver.addMethod('helloWorld', 'enc_nonce', 'from')
driver.addMethod('initAuth', 'user')
nonce = driver.initAuth(USER) # get nonce from service
enc_nonce = Auth.enc_nonce(PASS, nonce) # encrypt nonce with password
puts driver.helloWorld(enc_nonce, "Ruby") # call the service
The source code for all applications presented in this section appear at
www.syngress.com/solutions.
www.syngress.com
183RubyC05.qxd 1/7/02 3:12 PM Page 320
Web Services and Distributed Ruby • Chapter 5 321
Using Distributed Ruby
What Remote Method Invocation (RMI) is to Java programmers, Distributed
Ruby (DRb) is to Ruby programmers.With DRb, a Ruby application can trans-
parently call the methods of remote objects simply by doing a method call. DRb
was written by Masatoshi Seki in pure Ruby and is only around 500 lines long.
To install it on your computer, download it from RAA (it’s the druby entry in the
Library section, under comm), extract it and invoke install.rb.
DRb uses a front server architecture.That means that every DRb application, be
it a client or server, runs a front server (a TCPServer) that acts as interface to
exposed Ruby objects. A DRb server initially exposes exactly one object, the
front object, whereas a DRb client does not expose any object explicitly—this is
the only difference between a client and a server.
A client that makes contact for the first time with a DRb server can only
access its front object.This object’s methods may return other remote objects,
which the client can then access directly.The client’s front-server comes into play
when you (as client) pass an object as argument to a remote method, which is
either an instance of a non-marshalable class like IO,File,Process,Proc,Thread, or
an object that includes the DRbUndumped module and thus should be passed as
reference and not as value (to pass an object as reference simply include the
DRbUndumped module into its class). In this case, DRb wraps the object’s ID
together with the front-server’s URI in a DRbObject, marshals this, and passes it
to the server. If the server (or better yet, one of its methods) calls a method of
this object, it turns into a client, and the client into a server.
Let’s have a look at an example, for which we’ll use the obligatory “Hello
World” application.The source code of the server is given below:
www.syngress.com
Figure 5.12 Authentication Model
SOAP
Service
SOAP
Auth Server
Client
3.
validateAuth(enc_nonce)
nonce
initAuth(user)
1.
2.
enc_nonce
4.
183RubyC05.qxd 1/7/02 3:12 PM Page 321

322 Chapter 5 • Web Services and Distributed Ruby
require "drb/drb"
uri = ARGV.shift || 'druby://0.0.0.0:0'
class HelloWorld
def helloWorld() "Hello World from DRb!" end
end
DRb.start_service(uri, HelloWorld.new)
puts DRb.uri
puts '[return] to exit'
gets
The call to DRb.start_service is important. Its first parameter specifies the URI
of the front server to start, and the second parameter specifies the front object to
expose. If the URI is nil then DRb generates its own URI (which we output
using DRb.uri). Similarly, when the URI specifies a port number of 0 (as in
druby://0.0.0.0:0), DRb searches for a port number which is not in use and
uses it.We use an IP number of 0.0.0.0 if no other URI is given on the com-
mand line. It gets replaced by the IP address of the machine where you start the
application.
Now for the “Hello World” client application:
require "drb/drb"
uri = ARGV.shift
DRb.start_service(nil, nil)
ro = DRbObject.new(nil, uri)
puts ro.helloWorld
Again, we call DRb.start_service, but this time without specifying a URI and
without exposing a front object. Note also that we could omit the two nil argu-
ments.Then we create a proxy for the remote object exposed by the server with
the URI specified by the uri variable. Using this object (ro) we can call methods
of the remote object as we do in the last line.
To run our Hello World application, let us first start the server (file named
hw_s.rb) with this:
www.syngress.com
183RubyC05.qxd 1/7/02 3:12 PM Page 322

Web Services and Distributed Ruby • Chapter 5 323
ruby hw_s.rb
This outputs something similar to the following (port number may vary):
druby://0.0.0.0:61782
[return] to exit
Now we start the client in another shell:
ruby hw_c.rb druby://localhost:61782
This outputs:
Hello World from DRb!
Below, we demonstrate a more advanced example which remotely iterates
over the elements of an array:
# file_s.rb
require "drb/drb"
front = [1, 2, 3, 4, "aString"]
primary = DRb::DRbServer.new(ARGV.shift, front)
puts primary.uri
primary.thread.join
This example also shows the usage of the DRb::DRbServer class, which can be
used in place of calling DRb.start_service; the effect is the same, except that it’s
now possible to instantiate more than one DRb::DRbServer.
The client that iterates over the lines of the exposed Array object looks like
this:
# file_c.rb
require "drb/drb"
primary = DRb::DRbServer.new
ro = DRb::DRbObject.new(nil, ARGV.shift)
ro.each do | elt |
p elt
end
When a remote method is called with a code block, the Proc object of the
block is passed by reference to the remote method.When the remote method
www.syngress.com
183RubyC05.qxd 1/7/02 3:12 PM Page 323

324 Chapter 5 • Web Services and Distributed Ruby
yields control to that code block, it gets executed on the client machine and the
result is transferred back to the remote method.
If executing the example above results in a Connection refused error, you prob-
ably have to change the third line of the client as follows:
primary = DRb::DRbServer.new
# to
primary = DRb::DRbServer.new("druby://0.0.0.0:0")
Or when calling DRb.start_service, this is:
DRb.start_service
# to
DRb.start_service("druby://0.0.0.0:0")
A Name Server for DRb
A central name server can be very useful if you want to expose more than one
object to the client applications.We implement one below:
# file: ns.rb
require "drb/drb"
class NS
def initialize
@services = {}
end
def [](name)
@services[name]
end
def []=(name, obj)
@services[name] = obj
end
end
DRb.start_service(ARGV[0], NS.new)
puts DRb.uri
www.syngress.com
183RubyC05.qxd 1/7/02 3:12 PM Page 324

Web Services and Distributed Ruby • Chapter 5 325
puts '[enter]'
gets
To register or lookup an object from the name server, you have to create a
proxy for the remote name server object first, with:
require "drb/drb"
DRb.start_service
ns = DRbObject.new(nil, 'druby://here:65333') # modify URI
Then you can register or lookup a service. Note that this is usually done in
separate processes/applications:
# register a service
ns['anArray'] = (1..10).to_a
# lookup a service
ro = ns['anArray']
ro.each { |i| p i }
Using DRb to Speed Up CGI Scripts
CGI applications have one major disadvantage: a new process is created for each
request, and it’s not possible to hold values in memory across multiple requests.To
hold information across multiple requests, you have to store them persistently on
disk or in a database; or simply use DRb to access a long-running process, which
returns the requested data and itself stores them in memory.
In the following examples we’ll use DRb to write a page access counter. First,
the CGI script shown below demonstrates one possible solution (without using
DRb):
#!/usr/bin/env ruby
f = File.new('counter', File::CREAT | File::RDWR)
counter = f.gets.to_i
f.rewind
f << (counter + 1).to_s
f.close
puts "Content-type: text/html"
www.syngress.com
183RubyC05.qxd 1/7/02 3:12 PM Page 325

326 Chapter 5 • Web Services and Distributed Ruby
puts
puts "<html>"
puts "<body>Accessed #{counter} times.</body>"
puts "</html>"
Of course, for a simple page access counter, this is probably the best solution,
but when storing/retrieving more information (for example, the entries of
RAA), reading each instance into memory, modifying them all and then writing
them back would be slow.Another example where DRb would be useful is for
CGI scripts that have to access an Oracle database; for example, where the time
to establish a connection is relatively high (several seconds).
Below, we implement the DRb page access counter service:
# file: counter.rb
require "drb/drb"
class Counter
def self.load(name)
if test(?e, name)
new( Marshal.load(File.readlines(name).to_s) )
else
new
end
end
def initialize(count = nil)
@count = count || {}
@changed, @mutex = false, Mutex.new
end
def value(s)
@count[s] || 0
end
def next(s)
@mutex.synchronize {
www.syngress.com
183RubyC05.qxd 1/7/02 3:12 PM Page 326

Web Services and Distributed Ruby • Chapter 5 327
@changed = true
@count[s] = value(s) + 1
}
end
def store(name)
@mutex.synchronize {
break unless @changed
File.open(name,'w+') {|f| f << Marshal.dump(@count)}
@changed = false
}
end
end
if __FILE__ == $0
URI = 'druby://0.0.0.0:12000'
counter = Counter.load("counter")
# store all 5 minutes counters to disk
Thread.new do
loop {
sleep 300
counter.store("counter")
}
end
DRb.start_service(URI, counter)
puts "[return]"; gets
# store on exit
counter.store("counter")
end
www.syngress.com
183RubyC05.qxd 1/7/02 3:12 PM Page 327

328 Chapter 5 • Web Services and Distributed Ruby
When running this application, we can access the counter from our CGI
script as shown below:
#!/usr/bin/env ruby
require "drb/drb"
URI = 'druby://localhost:12000'
DRb.start_service
cnt = DRbObject.new(nil, URI)
puts "Content-type: text/html"
puts
puts "<html>"
puts "<body>Accessed #{ cnt.next('cnt') } times.</body>"
puts "</html>"
Using Rinda and Distributed TupleSpaces
Rinda, Ruby’s equivalent of Linda (for information on Linda, see www.cs.yale
.edu/Linda/linda.html), uses DRb to distribute a TupleSpace across a TCP/IP net-
work.A TupleSpace is a space in which you can store arbitrary tuples of any
length and type.Three operations are defined on it:
■in: Removes a matching tuple from the TupleSpace and returns it.
■rd: Same as in but does not remove the tuple from the TupleSpace.
■out: Stores a tuple in the TupleSpace.
All three operations are performed atomically, that is, they are thread-safe.The
pattern-matching on tuples is performed using Ruby’s ===;nil in a pattern
matches everything.
An example of how to use a TupleSpace is shown below, where we imple-
ment the consumer-producer scenario that the Petri-Net in Figure 5.13
depicts. (For more about Petri Networks see www.daimi.au.dk/PetriNets or
www.cis.um.edu.mt/~jskl/petri.html.) Both the consumer and the producer
thread synchronize to each other using the TupleSpace.The tokens in the
“Cars” place of Figure 5.13 are represented in the TupleSpace by car tuples,
and the “Credit” tokens by credit tuples, whereas all others are not required.
www.syngress.com
183RubyC05.qxd 1/7/02 3:12 PM Page 328

Web Services and Distributed Ruby • Chapter 5 329
The transitions of the Petri-Net are marked in the source code below with
comments.
# file: prod_cons.rb
require "tuplespace"
ts = TupleSpace.new
# init with 2 credits
2.times do
ts.out ['credit']
end
producer = Thread.new {
loop do
# produce
ts.get ['credit']
puts "P: produce car"
sleep 1
# deliver
ts.out ['car']
puts "P: car delivered"
end
}
consumer = Thread.new {
loop {
# consume
ts.out ['credit']
puts "C: car ordered"
# receive
ts.get ['car']
www.syngress.com
183RubyC05.qxd 1/7/02 3:12 PM Page 329
330 Chapter 5 • Web Services and Distributed Ruby
puts "C: car received"
sleep 4
}
}
gets
To distribute a TupleSpace, simply expose it via DRb as shown in the
example below or invoke the drb/rinda.rb file from the command line.
# A distributed TupleSpace
require "drb/rinda"
uri = ARGV.shift || 'druby://0.0.0.0:0'
DRb.start_service(uri, TupleSpace.new)
puts DRb.uri
puts '[return] to exit'
gets
After starting this, you can access the distributed TupleSpace from everywhere
if you know its URI (ARGV[0] below):
www.syngress.com
Figure 5.13 Petri-Net Consumer-Producer Example
deliver
produce
Producer Consumer
Cars
Credit
consume
receive
183RubyC05.qxd 1/7/02 3:12 PM Page 330

Web Services and Distributed Ruby • Chapter 5 331
require "drb"
DRb.start_service
ts = DRbObject.new( nil, ARGV[0] )
# ...
Load-Balancing
Suppose we own a computation server, and the number of clients using it reaches
a critical limit and slows it down too much.What we could do is either buy a
new, faster server to replace the old one, or distribute the load to one or multiple
additional servers.The second solution is more flexible and scalable; at any time
we can add or remove a server to suit our changing needs.
To balance the requests of multiple clients to multiple servers we make use of
a distributed TupleSpace.The server-side code that multiplies two numbers and
puts the result back to the TupleSpace is listed below:
# file: comp_s.rb
require "drb"
DRb.start_service
ts = DRbObject.new( nil, ARGV[0] )
loop {
# get a request from the TupleSpace
req, a, b = ts.in( ['req', nil, nil] )
# compute the result
res = a * b
# to identify the server on the client side
host = DRb.uri.split('//')[1].split(':')[0]
# put the result back into the TupleSpace
ts.out( ['res', a, b, res, host] )
}
Start as many servers as you want (even on different machines or located any-
where on the Internet), and pass all the URI of the distributed TupleSpace as the
www.syngress.com
183RubyC05.qxd 1/7/02 3:12 PM Page 331

332 Chapter 5 • Web Services and Distributed Ruby
parameter. Now let’s write a client that uses any number of servers to perform
some multiplications:
# file: comp_c.rb
require "drb"
DRb.start_service
ts = DRbObject.new( nil, ARGV[0] )
for a in 6..9 do
for b in 3..5 do
ts.out( ['req', a, b] )
end
end
for a in 6..9 do
for b in 3..5 do
_, a, b, res, host = ts.in( ['res', a, b, nil, nil] )
puts "#{a} * #{b} = #{res} (#{host})"
end
end
Looking at the output confirms that the load is distributed across multiple
computational servers.With five different machines, each running one server
application, I got the following output:
6 * 3 = 18 (server3)
6 * 4 = 24 (server1)
6 * 5 = 30 (server2)
7 * 3 = 21 (server4)
7 * 4 = 28 (server1)
7 * 5 = 35 (server2)
8 * 3 = 24 (server4)
8 * 4 = 32 (server3)
8 * 5 = 40 (server5)
9 * 3 = 27 (server4)
9 * 4 = 36 (server5)
9 * 5 = 45 (server1)
www.syngress.com
183RubyC05.qxd 1/7/02 3:12 PM Page 332

Web Services and Distributed Ruby • Chapter 5 333
Security Considerations
DRb implements neither encryption nor authentication, but it still has some
mechanisms to protect a server against malicious clients.The considerations we
must bear in mind when using DRb are:
1. Marshaled objects should not exceed a maximal size. Larger objects
should be rejected;
2. We don’t want to allow more than a maximum number of arguments to
remote methods;
3. We don’t want certain methods to be called (e.g. instance_eval);
4. We want to allow or deny specific hosts;
5. We want the user to self-authenticate.
6. DRbObjects are passed with the object’s id. If a malicious user changes
this id, he or she can get access to objects that should normally not be
accessible.We don’t want this!
And so what can we do to protect against each of these points?
1. Limit the maximum size a marshaled object may reach, with either the
DRb::DRbServer#load_limit= or DRb::DRbServer.default_load_limit
methods;
2. Limit the maximum number of allowed arguments, with the
DRb::DRbServer#argc_limit= or DRb::DRbServer.default_argc_limit
methods;
3. Override the DRb::DRbServer#insecure_methods? method.This method
gets passed a Symbol of the called method. Return true to disallow calling
this method. (Another solution is provided below);
4. Set an Access Control List (ACL) to allow/deny specific hosts. Use
DRb::DRbServer#install_acl or DRb::DRbServer.default_acl;
5. Use Kerberos authentication. Masatoshi Seki’s DRbAuth implements this
on DRb(for information on DRbAuth,see
www2a.biglobe.ne.jp/~seki/ruby/drbauth-0.9.tar.gz);
6. Write an ID-to-object converter. For Ids, use a cryptographically secure
random number generator and store a mapping between the random
and the real ID.
www.syngress.com
183RubyC05.qxd 1/7/02 3:12 PM Page 333

334 Chapter 5 • Web Services and Distributed Ruby
In the third point, we mentioned that there is another solution to disallow
the calling of specific methods.We can achieve this by using a restricted or a spe-
cific delegator:
# file: deleg.rb
require "delegate"
class RestrictedDelegator < SimpleDelegator
def initialize(obj, *without_methods)
super(obj)
eval %[
class << self
#{ without_methods.collect { |m| "undef :#{m}" }.
join("\n") }
end
]
end
end
class SpecificDelegator
def initialize(obj, *exposed_methods)
@obj = obj
eval %[
class << self
#{ exposed_methods.collect { |m|
"def #{m}(*a, &b)
@obj.send(:#{m}, *a, &b)
end"
}.join("\n")
}
end
]
end
end
www.syngress.com
183RubyC05.qxd 1/7/02 3:12 PM Page 334

Web Services and Distributed Ruby • Chapter 5 335
If, for example, we now want to expose an Array object but allow the client
to only call its each and collect methods, we could write:
obj = [1, 2, 3, 4]
new = SpecificDelegator.new(obj, :each, :collect)
# now pass 'new' to the clients
Or if we want to disable only specific methods, e.g. method freeze, we could
write:
obj = [1, 2, 3, 4]
new = RestrictedDelegator.new(obj, :freeze)
# now pass 'new' to the clients
www.syngress.com
183RubyC05.qxd 1/7/02 3:12 PM Page 335

336 Chapter 5 • Web Services and Distributed Ruby
Summary
The first section of this chapter covered writing XML-RPC clients and servers,
including service-introspection. Furthermore we learned how to use the
MultiCall extension to increase performance and marshal Ruby objects to a
XML-RPC document, as well as how to secure Web services using HTTP
Authentication and SSL.
In the following section, we handled many aspects regarding SOAP services,
such as writing SOAP client and server applications, client and server-side log-
ging, datatype-conversion, user-defined datatypes, marshaling and more.
The last section covered DRb, Ruby’s equivalent to Java’s Remote Method
Invocation (RMI).We used it to write a little name server for DRb services and
a CGI-interface to a DRb page access counter. Furthermore we introduced
Rinda – Ruby’s version of Linda, which uses DRb to distribute a TupleSpace
across a TCP/IP network.We used a Distributed TupleSpace to balance load to
multiple servers.
At the end we listed some points and solutions to make DRb more secure.
Solutions Fast Track
Using XML-RPC for Ruby
;XML-RPC is a simple, hard-wired XML document type that makes dis-
tributed computing as easy as possible. If you want to represent user-
defined datatypes with it, you have to misuse a struct (a Hash in Ruby)
for this purpose.
Using SOAP for Ruby
;The Simple Object Access Protocol (SOAP) is an XML document type
for Remote Procedure Calls (RPCs). It uses XML-Namespaces and
XML Schemas extensively and allows user-defined datatypes.
Using Distributed Ruby
;DRb is Ruby’s equivalent to Java’s Remote Method Invocation (RMI). It
allows for calling the methods of remote objects, even remote iterators.
;A Distributed TupleSpace allow for easy communication and synchro-
nization between different threads and processes. Load-Balancing can
also be implemented easily.
www.syngress.com
183RubyC05.qxd 1/7/02 3:12 PM Page 336

Web Services and Distributed Ruby • Chapter 5 337
Frequently Asked Questions
The following Frequently Asked Questions, answered by the authors of this book,
are designed to both measure your understanding of the concepts presented in
this chapter and to assist you with real-life implementation of these concepts. To
have your questions about this chapter answered by the author, browse to
www.syngress.com/solutions and click on the “Ask the Author” form.
Q: I started a server using localhost as host.When I try to connect to it using the
IP address 127.0.0.1, I get a Connection refused error.What’s happening?
A: Try the IP-address 0.0.0.0 as host, which allows each host to connect to the
server.
Q: When starting a SOAP server on my Linux machine’s port 80, I get a
Permission denied error.
A: On Unix-like systems, the ports below 1024 are usually reserved for the
administrator and cannot be used by a normal user. But it should work if you
login as root-user before you start the server.
Q: When calling the type method of a remote object using DRb, I get
DRb::DRbObject as a result instead of the remote objects’ type. How can I
determine the remote objects’ type?
A: Assuming ro is the remote object, simply call ro.method_missing(:type).The
same works for other methods, too.
Q: I can call methods of a DRb server, but when I call a method with iterator, I
get a Connection refused error.What’s wrong?
A: Pass method DRb.start_service a URI containing the special IP 0.0.0.0 as the
first parameter and retry.
Q: Using DRb, how can I pass an object by reference instead of by value?
A: Include the module DRb::DRbUndump into the objects’ class.
Q: I am running Linux and I get a SocketError telling me getnameinfo: ai_family
not supported.What can I do?
A: You have to recompile your Ruby interpreter (make and make install), first
configuring it with ./configure --enable-ipv6 --with-lookup-order-hack=INET.
www.syngress.com
183RubyC05.qxd 1/7/02 3:12 PM Page 337
183RubyC05.qxd 1/7/02 3:12 PM Page 338

WWW and
Networking
with Ruby
Solutions in this chapter:
■Connecting to the Web with Ruby
■Looking at WWW and Networking Classes
■Using Ruby on the Web
■Implementing an Online Shop
■Using mod_ruby and eruby
■Installing and Configuring IOWA
;Summary
;Solutions Fast Track
;Frequently Asked Questions
Chapter 6
339
183RubyC06.qxd 1/7/02 2:50 PM Page 339

340 Chapter 6 • WWW and Networking with Ruby
Introduction
Just like Perl, Ruby’s reach extends into the field of networking and the Web.
When Perl/CGI applications popped up all over the Web, people who were not
exactly expectant of the phenomenon failed to react properly. Part of the train of
thought driving Ruby, on the other hand, is that it needs to be extensible in
order to cover the unexpected—hence we find that Ruby can swim quite well in
the world of the Web.
Ruby’s socket library is very robust; everything from Network Interface Card
(NIC) connections to FTP connections can be configured through this library.
Ruby can also be set up to run within a server like running a standard Perl
file through a couple of modules which are readily available, such as eruby and
pRuby.There are even a couple of small servers out there that run on pure Ruby.
In this chapter, we’ll develop a Web-based, database-driven online-shop appli-
cation, at first taking a CGI/FastCGI approach, then rewrite the same utilizing
mod_ruby and eruby; finally we’ll implement it using Interpreted Objects for
Web Applications (IOWA), Ruby’s powerful application server. Furthermore, we’ll
show how to apply mod_ruby and eruby for rendering RDF Site Summary
(RSS) news channels to an HTML representation or to dynamically generate
XML. In the last section, we’ll implement a reusable and attractive tree-view
component for IOWA.
Go to www.syngress.com/solutions for supplemental material:“Writing a
TCP/IP-based server in Ruby” and “Parsing and Creating HTML with Ruby.”
Connecting to the Web with Ruby
Like any other network, the Web is one big connection of client-servers; each
home computer is a client connecting to a machine acting as a server.All of the
“server” machines together, simply put, create what we know today as the
Internet.The system used by computers to connect is called the socket system;
one can think of them as the endpoints of a bi-directional connection.
Ruby’s socket library is very robust; it is split between low-level functions
(within the Socket class) and high level functions (within the Net class).
Low-Level Functions: The Socket Class
The Socket class contains all of the information you need to create raw connec-
tions. For example, you can use the IPSocket class to create a base class that relies
www.syngress.com
183RubyC06.qxd 1/7/02 2:50 PM Page 340

WWW and Networking with Ruby • Chapter 6 341
on IP to provide transport while TCPSocket creates a base class that relies on
TCP/IP connections; there’s even the TCPServer class which awaits all incoming
connections, essentially giving you a base class with which to build a Web server.
High-Level Functions: The Net Class
The Net class brings with it a lot of ready functionality, such as FTP, HTTP,
POP/SMTP, and even Telnet, allowing for quick and easy creation and program-
ming of these services. Its internal ease of use makes writing these applications
feel like simple scripting.
POP/SMTP
The Internet mail protocols POP and SMTP are commonly used by developers
who want to integrate their applications with an existing and reliable e-mail
system. Let’s take a look at the simple SMTP application shown in Figure 6.1
(this is also provided at www.syngress.com/solutions in the smtp.rb file).
www.syngress.com
Figure 6.1 SMTP Application (smtp.rb)
Require 'net/smtp’
mail = SMTP.new
# -- set smtp server
mail.start ('syngress.com’)
# -- create mail; start with "from" field
# -- we’re also using "do" to set the rest
# -- of the SMTP process.
mail.read ('you@syngress.com’, 'you’) do |msg|
# -- write out the subject
msg.write "Subject: hi!\r\n"
# -- jump to body
msg.write "\r\n"
# -- write the body
msg.write "This is the body"
# -- end & send
end
183RubyC06.qxd 1/7/02 2:50 PM Page 341

342 Chapter 6 • WWW and Networking with Ruby
With the same simplicity we can write a POP3 interface.
Require 'net/pop'
# -- create the pop3 object & connect to the pop3 server
Getmail = Net::POP3.new('pop3.server')
# -- login and start a do loop for emails
Getmail.start('user', 'login') do |Getmail|
Mailmsg = Getmail.mails[0]
# -- show a list of emails on the server
Print "From :" + Mailmsg.header.split("\r\n").grep(/^From: /)
Print "\n"
Print "Subject: " + Mailmsg.header.split("\r\n").grep(/^Subject: /)
Print "\n\n""
# -- close connection
end
An alternative to using POP is using Net::POPMail, which is a bit higher-level.
POP will create the “raw” POP connection but POPMail has a more basic set of
methods and classes so it is a bit easier to work with when time is of the essence.
HTTP
The Net class offers two ways to work with HTTP data: Net::HTTP and
Net::HTTPResponse.Net::HTTP handles many of the basic HTTP functions such
as retrieving the header using GET and POST in order to send data.You can
combine Net:HTTP with Net::HTTPResponse in order to create some custom
code that reacts differently based on responses from the server.
FTP
The Net class has a single class for working with FTP, aptly named Net::FTP.
Net::FTP has the basic functionality of an FTP server, such as OPEN, CLOSE, and
GET. However, Net::FTP has also methods that can output the traffic to and from
the server (debug_mode), get a file in binary (getbinaryfile) or in ASCII (gettextfile)
mode, login (login), and even set the connection as passive (passive). Let’s take a look
at a quick example in Figure 6.2 (the ftp.rb file at www.syngress.com/solutions)
that connects us to ftp.simtel.net.
www.syngress.com
183RubyC06.qxd 1/7/02 2:50 PM Page 342

WWW and Networking with Ruby • Chapter 6 343
www.syngress.com
Figure 6.2 Connecting to FTP (ftp.rb)
require 'net/ftp’
ftploc=Net::FTP.new('ftp.simtel.net’)
ftploc.login
# -- display welcome msg
puts ftploc.welcome
puts "\r\n"
# -- display directory list
puts "Getting list... \n"
puts ftploc.list('*’)
puts "\r\n"
# -- chdir to pub
puts "Going to pub... \n"
ftploc.chdir('pub’)
puts "\r\n"
# -- list directory in pub
puts "Getting pub list... \n"
puts ftploc.list('*’)
puts "\r\n"
# Uncomment the line below & pick a file to
# download. Make sure it’s in the right dir!
# IMPORTANT! rename file to a SAFE DIRECTORY
# and a SAFE FILE NAME (i.e. don’t accidently
# overwrite something important!)
# ftploc.getbinaryfile('filename’, 'saveas’)
ftploc.close
183RubyC06.qxd 1/7/02 2:50 PM Page 343

344 Chapter 6 • WWW and Networking with Ruby
NOTE
Even though we used ftp.simtel.net in the example in Figure 6.2, any
anonymous FTP server will work. Keep in mind that if you want to use
ftp.simtel.net you will be redirected to one of many FTP servers in the
ftp.simtel.net network; while most mirror networks are 100 percent
accurate, you may find some that are missing a minor file (such as a
README or a welcome.msg file).
If you are using Windows you can get a more “complete” look at what’s
going by just redirecting the output to a text file. For example, assuming ftp.rb is
on the C:\code directory, the command to run ftp.rb from DOS would appear
like this:
C:\code> ruby ftp.rb >> debug.txt
This would create a file named “debug.txt” in your C:\code directory that
you can open and read to view what ftp.rb did when it connected to
ftp.simtel.net.
Telnet
The Telnet functionality within Ruby is substantial as well. Basic functions, such
as login (login), running commands (cmd), and a raw write to the server (write) are
all available. Let’s take a look at some dead code to get an idea of how a basic
Telnet application would function. In the CD that comes with this book under
the Chapter 6 folder (chap06/code) you can find a small but great Telnet client
written in Ruby by Mike Wilson (http://members.home.net/wmwilson01/
myindex.html) that you can glance over.
NOTE
In order to test the Telnet applications you will need shell access to a
server or be running your server and configure it to allow telnet access
(port 23). If you do not have a server and are having a hard time finding
a shell provider, just use a search engine like Google and do a search for
“shell accounts.”
www.syngress.com
183RubyC06.qxd 1/7/02 2:50 PM Page 344

WWW and Networking with Ruby • Chapter 6 345
Writing a Server in Ruby
If you would like to start writing your own server, the first thing that you need
to keep in mind is what type of server architecture you want to follow.We’ll
take a look at the main three first and then take a look at a small, yet efficient
Web server.
Models of Server Architectures
There are three popular and common server models; a server without forking, a
server with forking, and a server with pre-forking. Forking is the creation of a
child process in response to a request, or because it is needed. Each one of these
models has their advantages and disadvantages, as shown in Table 6.1.
Table 6.1 Server Models
Server Model Advantage Disadvantage
Server without Highly portable, Does not scale well for
Forking no context switching multi-processor systems
Server with Great for machines Constant fork creation
Forking that can not thread increases overhead and
resource consumption
Server with Since forks are just Mutual exclusion needed
Pre-forking “waiting”, it bypasses in some systems to make
the fork creation overhead it work properly
and resource consumption
Server without Forking
Server without forking is a model in which no child processes are created and there
is nothing to clean up. It sounds simple but it’s actually quite difficult to properly
write a stable server without forking that can scale well. Figure 6.3 displays the
server without forking model.
The common technique for writing a server that will not fork involves either
an array or object array of concurrent connections that the server keeps track of.
You can see that you would have to code responses for each object in an array,
and at the same time produce diligent and constant clean up to prevent any type
of overruns or other ailments associated with an array being bombarded by a
thousand connections at a time.
www.syngress.com
183RubyC06.qxd 1/7/02 2:50 PM Page 345
346 Chapter 6 • WWW and Networking with Ruby
Server with Forking
Server with forking is a model in which the server forks a process which is a clone
of itself, to handle new connections to the server. Once the connection discon-
nects, the fork will either be immediately cleaned up or cleaned up following a
specific interval. Figure 6.4 displays the server with forking model.
Server with forking commonly requires the knowledge of how to work with
child processes. In Ruby you should be able to create clones of the server object
itself and keep track of them within a master array.
www.syngress.com
Figure 6.3 Server Without Forking Model
Non-forking
Server
Connection requests
array entry 0 array entry 1 array entry 2 array entry 3
Server doesn't fork and
handles all incoming
connections as arrays
within itself.
Figure 6.4 Server With Forking Model
server
clone
Server detects incoming
connection and creates a clone
of itself to handle the connection.
Connection requests Forking
Server
server
clone
server
clone
server
clone
183RubyC06.qxd 1/7/02 2:50 PM Page 346
WWW and Networking with Ruby • Chapter 6 347
Server with Pre-Forking
Server with pre-forking has become very popular. It is the server model archi-
tecture for the Apache Web server, one of the Web’s most widely used servers,
since version 1.3. Using pre-forking, a “pool” of forks is available at any time
without requiring a connection to be initiated.This way, when a connection
starts, all the server needs to do is “dip” the connection into the pool and get a
fresh fork for the connection.This is essentially a server with forking without
the requirement of the creation process. Figure 6.5 displays the server with pre-
forking model.
Basic Web Servers Using Ruby
There are several Web servers that rely completely on Ruby. Many of these
servers supply what appear to be bare-bones support but that is because many are
still under development; however, most have support for CGI.The current Ruby
Web servers that are stable are the following:
■httpd by Michel van de Ven
■httpserv by Michael Neumann
There are also a couple of other servers that are in alpha or beta stages of
development:
■wwwsrv.rb by Yoshinori Toki
■wwwd by ringo
www.syngress.com
Figure 6.5 Server With Pre-Forking Model
Pre-created fork pool used for incoming connections
Pre-fork
Server
Connection requests
Server detects incoming
connection and references
pool.
183RubyC06.qxd 1/7/02 2:50 PM Page 347

348 Chapter 6 • WWW and Networking with Ruby
And, believe it or not, there’s even an upcoming game server developed for
MUD/RPG games called MUES (pronounced “muse”)–check it out at
http://mues.faeriemud.org.
Building your own Web server can be extremely simple and fulfilling as well.
A good place to start would be by looking at the httpd code as well as the
httpserv code. Let’s take a quick look at the httpserv code as an example.
#! /usr/bin/env ruby
# A simple HTTP-server
# $Id: httpserv.rb,v 1.5 2001/06/02 11:46:58 michael Exp $
# Michael Neumann (neumann@s-direktnet.de)
# -- required classes
require 'cgi'
require 'socket'
# -- for some weird reason, I needed to copy mime to the
# -- Ruby library directory for it to work.
require 'mime'
# -- load config file
unless ARGV.size == 1
puts "USAGE: #$0 config-file"
exit 1
else
begin
load ARGV[0]
rescue LoadError => err
puts "Couln't load config-file #{err.to_s}"
exit 2
end
end
Thread.abort_on_exception = true
# -- declare our header versions
www.syngress.com
183RubyC06.qxd 1/7/02 2:50 PM Page 348

WWW and Networking with Ruby • Chapter 6 349
SERVER_SOFTWARE = "httpserv (1.0)"
CGI_VERSION = "CGI/1.1"
HTTP_PROTOCOL = "HTTP/1.0"
ENDL = "\r\n"
# -- notice how the environment variable is
# -- read from the Config file
ENV["DOCUMENT_ROOT"] = Config::DOCUMENT_ROOT
ENV["GATEWAY_INTERFACE"] = CGI_VERSION
ENV["SERVER_NAME"] = "localhost"
# -- again, the SERVER_PORT variable is
# -- read from the Config file
ENV["SERVER_PORT"] = Config::HTTP_PORT.to_s
ENV["SERVER_PROTOCOL"] = HTTP_PROTOCOL
ENV["SERVER_SOFTWARE"] = SERVER_SOFTWARE
ENV["REMOTE_HOST"] = ""
ENV["REMOTE_ADDR"] = ""
ENV["REMOTE_IDENT"] = ""
ENV["AUTH_TYPE"] = ""
ENV["PATH_INFO"] = "" # Not Used
# -- Get the MIME types supported on the server
$mime = MIME::open(Config::MIMETYPES_FILE)
# returns true if line is empty
def empty_line? (line)
line == nil or line =~ /^(\n|\r)/
end
def _header(status_nr, status_code, header_hash)
buf = format("%s %d %s", HTTP_PROTOCOL, status_nr, status_code) + ENDL
www.syngress.com
183RubyC06.qxd 1/7/02 2:50 PM Page 349

350 Chapter 6 • WWW and Networking with Ruby
header_hash.each do |key,val|
buf += format("%s: %s", key, val) + ENDL if val != nil
end
return buf
end
def header( mime_type, length = nil )
_header(200, "OK", {
"Content-Type" => mime_type,
"Content-Length" => length,
"Server" => SERVER_SOFTWARE,
"Connection" => "close",
"Date" => CGI::rfc1123_date(Time.now)
})
end
# f, sock
def copy_data_from_to(from, to)
while (buf=from.read 1)
to.write buf
print buf if $DEBUG
#while ! from.eof?
# buf = from.read 1 #1024
# to.write buf
# print buf if $DEBUG
end
end
def process_request( command, path, protocol, hash, sock )
ENV["CONTENT_TYPE"] = hash["CONTENT-TYPE"] || ""
ENV["CONTENT_LENGTH"] = hash["CONTENT-LENGTH"] || ""
www.syngress.com
183RubyC06.qxd 1/7/02 2:50 PM Page 350

WWW and Networking with Ruby • Chapter 6 351
ENV["HTTP_ACCEPT"] = hash["ACCEPT"] || ""
ENV["HTTP_REFERER"] = hash["REFERER"] || ""
ENV["HTTP_USER_AGENT"] = hash["USER-AGENT"] || ""
ENV["REQUEST_METHOD"] = command
Config::URL_MAPPING.each do |map_re, map_url|
# mostly a string is used => convert it into Regexp
if map_re.is_a? String
map_re = /^#{Regexp.escape(map_re)}/
end
if path =~ map_re then
ENV["REQUEST_URI"] = path
path = map_url
break # only one mapping
end
end
path =~ /^(.*?)(\?(.*))?$/
whole_path = $1
query = $3 || ""
whole_path =~ /^(.*?)\/([^\/]*)$/
only_path = $1
script_name = $2
ENV["QUERY_STRING"] = query
ENV["SCRIPT_NAME"] = script_name
path_translated = Config::DOCUMENT_ROOT + only_path.gsub("/"
, Config::PATH_SEP)
ENV["PATH_TRANSLATED"] = path_translated
file = path_translated + Config::PATH_SEP + script_name
www.syngress.com
183RubyC06.qxd 1/7/02 2:50 PM Page 351

352 Chapter 6 • WWW and Networking with Ruby
script_name =~ /\.([^\.]*)$/
file_ext = $1 || ""
mime_type = $mime.mimetype_for_extension(file_ext) || "unknown"
if $DEBUG then
puts "path: #{path}"
puts "whole_path: #{whole_path}"
puts "query: #{query}"
puts "only_path: #{only_path}"
puts "script_name: #{script_name}"
puts "path_translated: #{path_translated}"
puts "file: #{file}"
puts "file_ext: #{file_ext}"
puts "mime_type: #{mime_type}"
end
# file is a script (recognize later by mime-type)
if ["rb", "cgi"].include? file_ext then
# examine first line of the script #!...
prog = ""
File.open(file,"r") do |f|
if f.readline =~ /^#!(.*)$/ then
prog = $1
else
# Error!
end
end
puts "prog: #{prog}" if $DEBUG
# executes the script and prints its output into the socket
pipe = IO::popen("#{prog} #{file}", "r+")
if command == "POST" then
pipe.print sock.read(ENV["CONTENT_LENGTH"].to_i)
end
www.syngress.com
183RubyC06.qxd 1/7/02 2:50 PM Page 352

WWW and Networking with Ruby • Chapter 6 353
if script_name =~ /^nph/ then
copy_data_from_to(pipe, sock)
else
data_from_pipe = pipe.read
puts data_from_pipe if $DEBUG
sock.print data_from_pipe
end
else
size = File::size(file)
puts "size: #{size}" if $DEBUG
head = header( mime_type, size )
puts head if $DEBUG
p sock if $DEBUG
sock.print head
sock.print ENDL
# returns the whole file
File::open(file,"r") {|f|
f.binmode
copy_data_from_to(f, sock)
}
end
end
def handle_request(new_sock)
begin
sock = new_sock
hostname, ip_addr = sock.addr[2..3]
# read first line and parse it
www.syngress.com
183RubyC06.qxd 1/7/02 2:50 PM Page 353

354 Chapter 6 • WWW and Networking with Ruby
line = sock.readline
if line =~ /^(\S+)\s+(\S+)\s+(\S+)/
puts "command: #{$1}, path: #{$2}, protocol: #{$3}" if $DEBUG
command = $1
path = $2
protocol = $3
end
hash = {}
# params which goes over more than one line not yet implemented!
# read all parameter
while not empty_line?(line=sock.readline)
if line =~ /^([\w-]+):\s*(.*)$/
hash[$1.upcase] = $2.strip
#elsif line =~ /^\s+(.*)$/
end
end
process_request( command, path, protocol, hash, sock )
sock.close
print sock, " closed\n" if $DEBUG
rescue
print "Internal Server Error\n"
p sock
p path
puts $!
puts $@
#exit
end
end
puts "host: #{Config::HTTP_HOST}, port: #{Config::HTTP_PORT}"
server = TCPserver.open(Config::HTTP_HOST, Config::HTTP_PORT)
www.syngress.com
183RubyC06.qxd 1/7/02 2:50 PM Page 354

WWW and Networking with Ruby • Chapter 6 355
print "wait for connections...\n\n"
while true do
new_sock = server.accept
print new_sock, " accepted\n" if $DEBUG
if Config::THREADED
Thread.start { handle_request(new_sock) }
else
handle_request(new_sock)
end
end
Using Ruby on the Web
Now that we have taken a look at how Ruby can work with the functionality
that the Web offers, such as network connections, FTP clients, and Web servers,
we can start looking at how Ruby can be used to provide Web content and
dynamic interaction to Web clients.This perhaps illustrates Ruby’s versatility
better than the networking protocols Ruby supports.
Perl and CGI, by nature, are stand-alone applications that are scripted, exactly
like Ruby. However, since Ruby is a full OOP language, it can take advantage of
its flexible structure and apply itself to any existing system of Web application
development, such as scripting or templating.
As a scripting language, Ruby provides several approaches for generating
HTML for Web sites that PHP can not perform. In this section we’ll take a look
at these solutions briefly. Specifically, we are going to take a look at solutions that
Ruby can use to generate, to provide a scripting language, and to provide a tem-
plate solution for HTML.
NOTE
The programmatic or code-embedding solutions are not usable for larger
projects or Web sites for which the programmer and designer are two
different individuals. Also of note is that many of the items we are going
to look at as far as scripting and templates are still in some sort of devel-
opmental phase. If you want to use them, make sure it is on a non-
essential server and running Linux for best results.
www.syngress.com
183RubyC06.qxd 1/7/02 2:50 PM Page 355

356 Chapter 6 • WWW and Networking with Ruby
Generating HTML with Ruby
Ruby can generate HTML in any number of ways, the most basic of which is
just like a standard CGI script; just run a Ruby file that has the information in it
to generate the HTML page. If you are accustomed to CGI, however, Ruby has a
built-in class library containing CGI methods that can be used to maximize your
capabilities on a Linux/Unix machine. Let’s use both standard Ruby and the
Ruby CGI class to generate a simple HTML page that reads “Hello World” with
the following structure:
<HTML>
<HEAD>
<TITLE>Generated World HTML</Title>
</HEAD>
<BODY>
HELLO WORLD!
</BODY>
</HTML>
Ruby HTML Code Generation
Ruby can generate HTML easily by using the standard IO, print. Figure 6.6 displays
our simple code (found at www.syngress.com/solutions in the hello1.rb file in the
html directory):
www.syngress.com
Figure 6.6 Ruby HTML Code Generation (hello1.rb)
print "HTTP/1.0 200 OK\r\n"
print "Content-type: text/html\r\n\r\n"
print "<html>"
print "<head>"
print "<title>Hello World – Pure Ruby!</title>"
print "</head>"
print "<body>"
print "Hello World!"
print "</body>"
print "</html>"
183RubyC06.qxd 1/7/02 2:50 PM Page 356

WWW and Networking with Ruby • Chapter 6 357
Ruby CGI HTML Generation
You can also use Ruby’s CGI class to generate and interact with users of your
Web page.The CGI class functions with a very “natural” flow: Each section of a
standard HTML page when passed with the CGI class is a method that returns
the output of the method, and they follow a specific order. For example:
cgi.out #--all the stuff under here is printed
{
cgi.html #-- the <HTML> tag start point
{
cgi.head #-- the <head> tag
{
#head-relevant code here
} #-- close <head> tag
cgi.body #-- the <body> tag
{
#body-relevant code here
} #-- close <body> tag
} #-- close <html> tag
} #-- close cgi output
Instead of kicking out a simple “Hello World” page, let’s present the user with
a form page that can display a certain form or message depending on whether or
not the Submit button is pressed; if the button is pressed that means that a mes-
sage has been input and a new page will be displayed with the new message and
no visible form. Notice the use of string concatenation with the different CGI
methods after the use of cgi.html.
require "cgi"
cgi = CGI.new("html3")
#-- let's see if the "text" variable has been filled
# if it's been filled then we can assume the form
# has been filled out. This can be implemented better
# but works as a visible action example.
cgi.out
www.syngress.com
183RubyC06.qxd 1/7/02 2:50 PM Page 357

358 Chapter 6 • WWW and Networking with Ruby
{
cgi.html
{
cgi.head{ "\n"+cgi.title{"CGI Form Page"} +
cgi.body
{
if cgi['text'] == ""
cgi.form
{
cgi.h2 {"form area"} +
cgi.textarea("text") +
cgi.br +
cgi.submit
}
else
cgi.h2 {"The text is: "} +
cgi.br +
cgi.h1 { cgi['text'] }
end
}
}
}
Scripting With Ruby Using eruby and ERb
As we mentioned earlier, Ruby can be used as a scripting language in a variety of
ways. Eruby and ERb allow you to embed your Ruby code within an HTML
file, like PHP or ASP; it essentially allows Ruby to be treated as a script file.
Eruby files end with the .rhtml extension.A simple eruby file may look like this:
<HTML>
<HEAD>
<TITLE>ERuby Sample</TITLE>
</HEAD>
<BODY>
Hello <% print "coder!" %>
www.syngress.com
183RubyC06.qxd 1/7/02 2:50 PM Page 358

WWW and Networking with Ruby • Chapter 6 359
</BODY>
</HTML>
Eruby does not only need “<%” in order to work; you can start a line with
the prefix “%” and Ruby will automatically compile the line information and
display the output. In our previous code we used <% print “coder!” %> after
Hello to display an HTML page that read “Hello coder!” Let’s try to do it again,
but let’s see how it would look like with the simple “%”:
<HTML>
<HEAD>
<TITLE>ERuby Sample</TITLE>
</HEAD>
<BODY>
% print "Hello Coder!"
</BODY>
</HTML>
Obviously you need to be careful with how you use the percentage symbol
when working with eruby!
Templating With Ruby
Templating is a method that allows you to separate your Ruby code from your
HTML code yet be able to access it through tags on your HTML page; this cre-
ates an abstraction layer between presentation (HTML files, or templates) and the
actual content (Ruby code). Some templating solutions have the Ruby code
inline while other templating solutions have a Ruby file which in turns calls the
HTML file.
Using the HTML/Template Extension
HTML/Template has been coded by Tomohiro Ikebe and it is currently in
version 0.15 beta (it will work fine if you are testing it out, but don’t test it
on important items). It can be found at the RAA in the Library section
under HTML.
HTML/Template works by referencing the Ruby file with the HTML/
Template code, which in turn references the HTML file where the “template” of
the output is stored. Let’s take a look at “Hello,World” with HTML/Template,
shown in Figures 6.7 and 6.8.
www.syngress.com
183RubyC06.qxd 1/7/02 2:50 PM Page 359

360 Chapter 6 • WWW and Networking with Ruby
Figure 6.7 Hellot.rb
require "html/template"
# -- it's good coding practice with HTML/Template
# to name the HTML file the same as the
# Ruby source.
hellot = HTML::Template.new("hellot.html")
# -- this is where you declare any variables that
# are viewed
hellot.param
(
{
"msg" => "Hello World!"
}
)
# -- let's output the file
# HTML/Template will read the HTML file
# and output the Ruby code according to
# the way it's presented in the HTML file.
print "Content-Type: text/html\n\n"
print hellot.output
Figure 6.8 Hellot.html
<HTML>
<HEAD><TITLE>Hello World, HTML/Template Style!</TITLE></HEAD>
<BODY>
<FONT FACE="Arial, Helvetica" Size="2"><!var:msg></FONT>
</BODY>
</HTML>
www.syngress.com
183RubyC06.qxd 1/7/02 2:50 PM Page 360

WWW and Networking with Ruby • Chapter 6 361
Using Ruby-tmpl
Ruby-tmpl can work alone or can be combined with mod_ruby to provide
slightly faster results. Just like HTML/Template, it provides an abstraction layer
between content and templates. Ruby-tmpl includes the following features:
■Recursive file includes
■Custom error messages
■Removal of whitespace from output (munging)
■Default values for variable substitution
■XML-compliant template tag syntax
It was written by Sean Chittenden and can be found at the RAA in the
Library section under WWW/textproc.
Putting It All Together
Web templating and scripting solutions for Ruby allow us to create robust and
exciting applications online that previously may have been limited. It’s also very
nice to have an alternative to PERL/CGI come out in the last couple of years
that has already shown that it can handle the rigors we usually place on those
languages. Let’s take a look at an online shopping application using various Ruby
applications we have worked with.
Implementing an Online
Shopping Application
In this section we’ll implement a CGI and FastCGI-based online shop.We’ll use
a PostgreSQL database to store the articles, orders, and customers, and use sessions
and cookies to hold information about the articles in the shopping cart across
multiple requests. Figure 6.9 illustrates our sample application.All examples and
files shown in this section can also be found on the accompanying CD in the
online-shop directory; the Ruby source files and CGI scripts reside in the src sub-
directory, the SQL scripts in the sql subdirectory, and the images in the images
subdirectory.
www.syngress.com
183RubyC06.qxd 1/7/02 2:50 PM Page 361

362 Chapter 6 • WWW and Networking with Ruby
Designing the Data Model
The organization of the tables (the data model) used by the online shop applica-
tion is shown in Figure 6.10.A customer can place an arbitrary number of orders.
Each order consists of at least one order item.An order item stores the ID of the
ordered article and the quantity ordered.The inventory stores the current stock of
an article, whereas the article stores the name, description, and price, and a link to
the picture of the article.
Figure 6.11 lists the SQL script for PostgreSQL (file sql/create.sql) that cre-
ates the necessary tables and sequences. Note that all table and column names
should be lowercase when using a PostgreSQL database; if this is not the case, you
have to surround them with double quotes whenever you use them in an SQL
statement.We attended to this implementation detail of PostgreSQL and con-
verted the table and column names as used in Figure 6.10 to lowercase, and
inserted underscores whenever the case changes.
www.syngress.com
Figure 6.9 The Online Shop Example
183RubyC06.qxd 1/7/02 2:50 PM Page 362
WWW and Networking with Ruby • Chapter 6 363
www.syngress.com
Figure 6.10 Data Model of the Online Shop
Figure 6.11 SQL Script to Create Tables and Sequences (sql/create.sql)
CREATE SEQUENCE seq_customer_id;
CREATE SEQUENCE seq_picture_id;
CREATE SEQUENCE seq_article_id;
CREATE SEQUENCE seq_inventory_id;
CREATE SEQUENCE seq_order_no;
CREATE SEQUENCE seq_order_item;
CREATE TABLE customer (
-- Columns
Continued
183RubyC06.qxd 1/7/02 2:50 PM Page 363

364 Chapter 6 • WWW and Networking with Ruby
www.syngress.com
Figure 6.11 Continued
customer_id INTEGER NOT NULL DEFAULT NEXTVAL('seq_customer_id'),
address VARCHAR(100) NOT NULL,
email VARCHAR(50) NOT NULL,
password VARCHAR(10) NOT NULL,
-- Constraints
CONSTRAINT pk_customer_id PRIMARY KEY (customer_id),
CONSTRAINT unq_email UNIQUE (email)
);
CREATE TABLE picture (
-- Columns
picture_id INTEGER NOT NULL DEFAULT NEXTVAL('seq_picture_id'),
content_type VARCHAR(20) NOT NULL,
data OID,
-- Constraints
CONSTRAINT pk_picture_id PRIMARY KEY (picture_id)
);
CREATE TABLE article (
-- Columns
article_id INTEGER NOT NULL DEFAULT NEXTVAL('seq_article_id'),
name VARCHAR(30) NOT NULL,
description VARCHAR(255),
cost DECIMAL(6,2) NOT NULL,
picture_id INTEGER,
-- Constraints
CONSTRAINT pk_article_id PRIMARY KEY (article_id),
CONSTRAINT fk_picture_id FOREIGN KEY (picture_id)
REFERENCES picture,
CONSTRAINT chk_cost CHECK (cost::FLOAT >= 0.0)
);
CREATE TABLE inventory (
-- Columns
inventory_id INTEGER NOT NULL DEFAULT NEXTVAL('seq_inventory_id'),
Continued
183RubyC06.qxd 1/7/02 2:50 PM Page 364

WWW and Networking with Ruby • Chapter 6 365
www.syngress.com
Figure 6.11 Continued
article_id INTEGER NOT NULL,
current_stock INTEGER NOT NULL,
-- Constraints
CONSTRAINT pk_inventory_id PRIMARY KEY (inventory_id),
CONSTRAINT fk_article_id FOREIGN KEY (article_id)
REFERENCES article,
CONSTRAINT unq_article_id UNIQUE (article_id),
CONSTRAINT chk_current_stock CHECK (current_stock >= 0)
);
CREATE TABLE "order" (
-- Columns
order_no INTEGER NOT NULL DEFAULT NEXTVAL('seq_order_no'),
customer_id INTEGER NOT NULL,
date_received DATE NOT NULL DEFAULT 'now',
-- Constraints
CONSTRAINT pk_order_no PRIMARY KEY (order_no),
CONSTRAINT fk_customer_id FOREIGN KEY (customer_id)
REFERENCES customer
);
CREATE TABLE order_item (
-- Columns
order_item_id INTEGER NOT NULL DEFAULT NEXTVAL('seq_order_item'),
order_no INTEGER NOT NULL,
article_id INTEGER NOT NULL,
quantity INTEGER NOT NULL,
-- Constraints
CONSTRAINT pk_order_item_id PRIMARY KEY (order_item_id),
CONSTRAINT fk_order_no FOREIGN KEY (order_no)
REFERENCES "order",
CONSTRAINT fk_article_id FOREIGN KEY (article_id)
REFERENCES article,
CONSTRAINT chk_quantity CHECK (quantity > 0)
);
183RubyC06.qxd 1/7/02 2:50 PM Page 365

366 Chapter 6 • WWW and Networking with Ruby
The Database Access Layer
We use a single class that handles all interaction with the database tables.This is
the DB class defined in file src/db.rb (see Figure 6.12). It provides several methods
that we’ll use later to insert new customers, orders, or articles into the database or
for querying the same:
■new_article:This method first inserts the supplied image into the pic-
ture table, then inserts a new row into the article table, and finally one
row into the inventory table. If any action should fail, all operations are
rolled back.
■new_customer: Creates a new customer.
■new_order: Places a new order.Touches the order and order_item tables.
■get_customer_id: Returns the customer’s ID that matches the supplied
e-mail and password.
■get_articles_in_inventory: Returns all articles of the inventory.
To make the same work with a MySQL database or any other database, you
probably have only to change the private method next_val.This method returns
the next value of the sequence specified by the parameter. Using a MySQL
database, you have to use here in the SQL statement last_insert_id and a column
type of auto_increment or something similar.
www.syngress.com
Figure 6.12 The Database Access Layer, Class DB (src/db.rb)
require "dbi"
require "config"
require "forwardable"
class DB
attr_reader :connection
def DB.connect(url = DB_URL, user = DB_USER, pass = DB_PASS)
DBI.connect(url, user, pass, 'AutoCommit' => false) do |dbh|
# create new instance of class DB and yield it to outer program
yield DB.new(dbh)
Continued
183RubyC06.qxd 1/7/02 2:50 PM Page 366

WWW and Networking with Ruby • Chapter 6 367
www.syngress.com
Figure 6.12 Continued
end
end
def initialize(connection)
@connection = connection
end
def new_article(name, description, cost, current_stock,
picture_content_type, picture_data)
transaction do
# 1. insert picture
execute(
sql_insert_into('picture', :picture_id, :content_type, :data),
picture_id = next_val('seq_picture_id'),
picture_content_type, DBI::Binary.new(picture_data) )
# 2. insert article
execute(
sql_insert_into('article', :article_id, :name, :description,
:cost, :picture_id),
article_id = next_val('seq_article_id'),
name, description, cost, picture_id )
# 3. insert inventory
execute(
sql_insert_into('inventory', :inventory_id, :article_id,
:current_stock),
inventory_id = next_val('seq_inventory_id'),
article_id, current_stock )
end
end
Continued
183RubyC06.qxd 1/7/02 2:50 PM Page 367

368 Chapter 6 • WWW and Networking with Ruby
www.syngress.com
Figure 6.12 Continued
def new_customer(address, email, password)
transaction do
execute(
sql_insert_into('customer', :customer_id, :address,
:email, :password),
customer_id = next_val('seq_customer_id'),
address, email, password )
end
end
def new_order(customer_id, article_id_quant)
transaction do
execute(
sql_insert_into('"order"', :order_no, :customer_id),
order_no = next_val('seq_order_no'),
customer_id )
article_id_quant.each do |id, quant|
execute(
sql_insert_into("order_item", :order_no, :article_id,
:quantity),
order_no, id, quant )
end
end
end
def get_customer_id(email, password)
connection.select_one("SELECT customer_id FROM customer
WHERE email=? AND password=?", email, password)[0]
end
def get_articles_in_inventory
Continued
183RubyC06.qxd 1/7/02 2:50 PM Page 368

WWW and Networking with Ruby • Chapter 6 369
Initializing the Database
Now it’s time to insert some customers and articles into the empty database. But
before we can do this, we have to execute the SQL script shown in Figure 6.11.
To do this, invoke Ruby/DBI’s interactive SQL shell sqlsh.rb as shown below
(modify database name, user, and password):
echo "\q" | ruby sqlsh.rb dbi:Pg:db —file sql/create.sql user pass
The echo “\q” is necessary in order to leave sqlsh.rb after the SQL script is
executed. For convenience, we wrote a Makefile (see Figure 6.13) that does this
www.syngress.com
Figure 6.12 Continued
sql = "SELECT a.* FROM article a, inventory i
WHERE a.article_id = i.article_id"
connection.select_all(sql)
end
private
def next_val(sequence)
connection.select_one("SELECT NEXTVAL('#{sequence}')")[0]
end
def sql_insert_into( table, *fields )
"INSERT INTO #{ table } (" +
fields.map{|f| f.to_s}.join(",") +
") VALUES (" +
fields.map{'?'}.join(",") +
")"
end
extend Forwardable
def_delegators(:@connection, :execute, :execute)
def_delegators(:@connection, :transaction, :transaction)
end
183RubyC06.qxd 1/7/02 2:50 PM Page 369

370 Chapter 6 • WWW and Networking with Ruby
job—and much more—with a simple make create.The src/config.rb file which
is included by the Makefile (and by the online shop application) is listed below;
you have to modify it appropriately to match your database settings. Also modify
the second and third line of the Makefile.
# file: src/config.rb
# modify these values to your database settings
DB_URL = 'dbi:Pg:michael'
DB_USER = 'michael'
DB_PASS = 'michael'
After having initialized the database (with make create), we insert some
customers and articles into it; For this purpose we write a Ruby script
(src/db-init.rb at www.syngress.com/solutions), shown in Figure 6.14. Execute
it by invoking the Makefile with make db-init or change into the src direc-
tory and execute ruby db-init.rb.
www.syngress.com
Figure 6.13 Makefile
include src/config.rb
SQLSH=/usr/local/bin/sqlsh.rb # modify
TARGET=/home/michael/htdocs # modify
CGI_FILES = src/shop.cgi src/shop2.cgi src/show_image.cgi
FCGI_FILES = src/shop.fcgi src/show_image.fcgi
RB_FILES = src/components.rb src/config.rb src/db.rb src/session.rb
all: db-init install
install:
cp ${CGI_FILES} ${TARGET}/cgi-bin
cp ${FCGI_FILES} ${TARGET}/cgi-bin
cp ${RB_FILES} ${TARGET}/cgi-bin
cp images/trolley.gif ${TARGET}
Continued
183RubyC06.qxd 1/7/02 2:50 PM Page 370

WWW and Networking with Ruby • Chapter 6 371
www.syngress.com
Figure 6.13 Continued
db-init: drop create
(cd src; ruby db-init.rb)
drop:
echo "\q" | ${SQLSH} ${DB_URL} --file sql/$@.sql \
${DB_USER} ${DB_PASS}
create:
echo "\q" | ${SQLSH} ${DB_URL} --file sql/$@.sql \
${DB_USER} ${DB_PASS}
Figure 6.14 The Database Initialization Script (db-init.rb)
require "db"
DB.connect do |db|
# add two customers
db.new_customer(
'John Smith, Downing Street 1, Little Rock, Arkansas',
'jsmith@msn.com',
'123'
)
db.new_customer('James Last', 'last@yahoo.com', 'secret')
# add three articles
db.new_article(
'Lego Mindstorms', 'Building Robots with Lego Mindstorms...',
19.95, 1000,
'image/gif', File.readlines('../images/mindstorm.gif').to_s
)
db.new_article(
'ASP.NET', "ASP.NET Web Developer's Guide...",
32.95, 500,
Continued
183RubyC06.qxd 1/7/02 2:50 PM Page 371

372 Chapter 6 • WWW and Networking with Ruby
Developing the Web Interface
This section develops the view and controller of our online shop application. It
mainly consists of the two files shop.cgi (Figure 6.15) and components.rb (Figure
6.16).The first is the CGI script that is directly invoked by the Web server when
the user opens up his or her browser at http://yourhost/cgi-bin/shop.cgi.The
second implements classes that generate the HTML code and react on user
actions:
■Component: Is the base class of all other classes.
■Article: Generates the output of one article.
■ArticleList: Uses the Article class to output multiple articles.
■Cart: Displays the HTML code for the shopping cart on the right.
■MainPage: Outputs the whole page using the ArticleList and Cart classes.
■Controller:This class is special because it does not generate HTML code.
Instead it performs actions like adding an article to the shopping cart, or
performing an order when the user clicks one of the Add to shopping
cart links, clicks on the Xto remove an article from the cart, or on the
Order button on the right side.As we don’t want to see something like
“shop.cgi?add=1” in the URL of our browser, we redirect after per-
forming an action to shop.cgi.
We use a session object to hold the articles in the cart, and pass the session ID
around using cookies. In file session.rb (Figure 6.17) we extend the standard ses-
www.syngress.com
Figure 6.14 Continued
'image/jpg', File.readlines('../images/aspnet.jpg').to_s
)
db.new_article(
"Ruby Developer's Guide", 'A book about Ruby in Real World
Applications...',
49.95, 1200,
'image/jpg', File.readlines('../images/rdg.jpg').to_s
)
end
183RubyC06.qxd 1/7/02 2:50 PM Page 372

WWW and Networking with Ruby • Chapter 6 373
sion class CGI::Session and enable it to store marshaled Ruby objects instead of
just strings.
There’s one further CGI script, show_image.cgi (Figure 6.18), which you’ll rec-
ognize if you’ve read Chapter 3. Its purpose is to view an article’s picture, which
is stored in the database in the picture table. It will respond with the image data
when it is passed the picture’s ID.
Before you can open up your browser to see the online shop in action, you’ll
have to install the CGI scripts and the Ruby files into your Web server’s cgi-bin
directory. Do this by invoking the already introduced Makefile (Figure 6.13) with
make install.Also make sure that the CGI scripts are world readable and exe-
cutable (chmod 755 *.cgi), otherwise it will not work. Now open up your
browser, point it to http://yourhost/cgi-bin/shop.cgi, and enjoy!
www.syngress.com
Figure 6.15 The Online Shop CGI Script (file src/shop.cgi)
#!/usr/bin/env ruby
require "session"
require "components"
session = Session.new(cgi = CGI.new("html4"), SESSION_PARAMS)
puts Controller.new(cgi, session).output
Figure 6.16 Implement the View and Controller (src/components.rb)
require "db"
class Component
attr_reader :cgi, :session
def initialize(cgi, session)
@cgi, @session = cgi, session
end
def url(path, params={})
str = params.collect {|k, v| "#{k}=#{v}"}.join('&')
if str.empty?
Continued
183RubyC06.qxd 1/7/02 2:50 PM Page 373

374 Chapter 6 • WWW and Networking with Ruby
www.syngress.com
Figure 6.16 Continued
path
else
path + "?" + str
end
end
def script_name(params={})
url(cgi.script_name, params)
end
end
class Article < Component
attr_accessor :row
def output
img_url = url('show_image.cgi', 'id' => row[:picture_id])
cart_url = script_name('add' => row[:article_id])
trolley_url = '/trolley.gif'
cgi.table { cgi.tr {
cgi.td {
cgi.a('target' => '_new', 'href' => img_url) {
cgi.img('src' => img_url, 'width' => '90',
'height' => '113', 'border' => '0') }
} +
cgi.td {
cgi.i {row[:name] } + cgi.br + row[:description] + cgi.br +
cgi.br + cgi.b { 'Price: ' } + "$#{ row[:cost] }" +
cgi.br + cgi.a('href' => cart_url) {
cgi.img('src' => trolley_url, 'border' => '0') +
'add to shopping cart' } }
}
Continued
183RubyC06.qxd 1/7/02 2:50 PM Page 374

WWW and Networking with Ruby • Chapter 6 375
www.syngress.com
Figure 6.16 Continued
}
end
end
class Cart < Component
attr_accessor :articles
def output
article_ids = {}
articles.each { |i| article_ids[ i[:article_id] ] = i }
cart = session['cart'] || {}
cgi.table {
cart.map do |id, count|
cgi.tr {
a = article_ids[id]
cgi.td { cgi.b {"#{ count }x"} } +
cgi.td { a[:name] } +
cgi.td { '$' + a[:cost] } +
cgi.td {
cgi.a('href' => script_name('drop' => id)) {'X'}
}
}
end.to_s
} +
cgi.hr +
cgi.form('action' => script_name()) {
'email: ' + cgi.text_field('name' => 'email') + cgi.br +
'passw: ' + cgi.password_field('name' => 'password') + cgi.br +
cgi.br + cgi.submit('value' => 'Order Now', 'name' => 'order')
} + cgi.hr
end
end
Continued
183RubyC06.qxd 1/7/02 2:50 PM Page 375

376 Chapter 6 • WWW and Networking with Ruby
www.syngress.com
Figure 6.16 Continued
class ArticleList < Component
attr_accessor :articles
def output
article = Article.new(@cgi, @session)
articles.collect do | row |
article.row = row
article.output
end.join("")
end
end
class MainPage < Component
attr_accessor :articles
def output
cgi.html {
cgi.head { cgi.title {'Online-Shop'} } +
cgi.body {
cgi.h1 {'Online-Shop' } +
cgi.table {
cgi.tr {
cgi.td('valign' => 'top', 'width' => '50%') {
al = ArticleList.new(cgi, session)
al.articles = articles
al.output
} +
cgi.td('bgcolor' => '#CCCCCC', 'valign' => 'top',
'width' => '25%') {
c = Cart.new(cgi, session)
c.articles = articles
c.output
} } } } }
end
end
Continued
183RubyC06.qxd 1/7/02 2:50 PM Page 376

WWW and Networking with Ruby • Chapter 6 377
www.syngress.com
Figure 6.16 Continued
class Controller < Component
def output
cart = session['cart'] || Hash.new(0)
if id = cgi['add'][0]
# add article to cart
cart[id.to_i] += 1
elsif id = cgi['drop'][0]
# drop article from cart
cart.delete(id.to_i)
elsif cgi['order'][0]
# place order
DB.connect do |db|
cust_id =
db.get_customer_id(cgi['email'][0],cgi['password'][0])
db.new_order(cust_id, cart)
end
cart = nil # empty the cart
else
# show the online-shop
mp = MainPage.new(cgi, session)
mp.articles = DB.connect { |db| db.get_articles_in_inventory }
return cgi.header('pragma' => 'no-cache') + mp.output
end
# store the cart back to the session and redirect
session['cart'] = cart
cgi.header('status' => 'REDIRECT', 'Location' => script_name())
end
end
183RubyC06.qxd 1/7/02 2:50 PM Page 377

378 Chapter 6 • WWW and Networking with Ruby
www.syngress.com
Figure 6.17 Extended Session Class (src/session.rb)
require "cgi/session"
SESSION_PARAMS = {
'session_key' => 'sid',
'prefix' => 'online-shop'
}
class Session < CGI::Session
def [](key)
if val = super then Marshal.load(val) else val end
end
def []=(key, val)
super(key, Marshal.dump(val))
end
end
Figure 6.18 Display an Article’s Image Stored in the Database
(src/show_image.cgi)
#!/usr/bin/env ruby
require "cgi"
require "db"
BLK_SIZE = 8 * 1024
cgi = CGI.new
id = cgi["id"][0].to_i
DB.connect do |db|
dbh = db.connection
row = dbh.select_one("SELECT data, content_type FROM picture WHERE " +
"picture_id = ?", id)
Continued
183RubyC06.qxd 1/7/02 2:50 PM Page 378

WWW and Networking with Ruby • Chapter 6 379
Improving the Online Shop
There are lots of things we can do to improve the online shop. Here is a short
“wish list:”
■Use URL-rewriting (make the session ID a part of the URL) instead of
cookies to pass the session ID between multiple requests, like many
online shops.
■Use FastCGI instead of CGI to increase performance.
■Use a templating toolkit instead of class CGI to generate the HTML
code.
■Extend the data model.Add a category table and extend the article table to
store more information about an article.Also decrement the current_stock
field of the inventory table when fulfilling an order.
In the following we’ll implement the first two points. Because we designed
our application so carefully, the first point is very easy to implement.All we have
to do is to modify method script_name of the Component class and add the session
ID to the URL:
www.syngress.com
Figure 6.18 Continued
stream = dbh.func(:blob_open, row['data'])
puts "Content-Type: %s" % row['content_type']
puts "Content-Length: %s" % stream.size
puts "Date: %s" % Time.now
puts "Expires: %s" % (Time.now + 3*60) # cache images three
# minutes
puts
loop {
data = stream.read(BLK_SIZE)
print data; $stdout.flush
break if data.size != BLK_SIZE
}
stream.close
end
183RubyC06.qxd 1/7/02 2:50 PM Page 379

380 Chapter 6 • WWW and Networking with Ruby
class Component
alias old_script_name script_name
def script_name(params={})
params[ SESSION_PARAMS['session_key'] ] = session.session_id
old_script_name(params)
end
end
This results in the file shop2.cgi shown in Figure 6.19. Now our online shop
works with every browser, whether cookies are enabled or not, even in a text-
mode browser like w3m or Links.
The second item in our “wish list” was to make our online shop work with
FastCGI as a protocol instead of CGI. FastCGI is much faster, due to the lack of
process creation and because we can hold the session data in memory instead of
storing it to disk.
File shop.fcgi (see Figure 6.20) implements the FastCGI version of our online
shop. Some important tasks we must address include the following:
www.syngress.com
Figure 6.19 Online Shop with URL Rewriting (src/shop2.cgi)
#!/usr/bin/env ruby
require "session"
require "components"
class Component
alias old_script_name script_name
def script_name(params={})
params[ SESSION_PARAMS['session_key'] ] = session.session_id
old_script_name(params)
end
end
session = Session.new(cgi = CGI.new("html4"), SESSION_PARAMS)
puts Controller.new(cgi, session).output
183RubyC06.qxd 1/7/02 2:50 PM Page 380

WWW and Networking with Ruby • Chapter 6 381
1. Use CGI::Session::MemoryStore instead of the default database manager
for storing sessions.
2. Assign f.in to $stdin.
3. Add a singleton method binmode to $stdin.This is only required when you
use the CGI class and the script is invoked with the HTTP POST method
(as is the case in our example when the user presses the Order button).
4. Remove the CGI_PARAMS and CGI_COOKIES constants from the
CGI class.
Finally, Figure 6.21 implements show_image.fcgi, the FastCGI version of
show_image.cgi (Figure 6.18). It uses one connection to the database for all requests,
instead of one for each picture as with the CGI version.Also, don’t forget to
modify file components.rb where you’ll change the URL to the FastCGI version.
www.syngress.com
Figure 6.20 FastCGI Version of the Online Shop (src/shop.fcgi)
#!/usr/bin/env ruby
require "session"
require "components"
require "fcgi" # or "fastcgi"
SESSION_PARAMS['database_manager'] = CGI::Session::MemoryStore
FCGI.each_request {|f|
$stdin = f.in
def $stdin.binmode() end # required for HTTP POST method
session = Session.new(cgi = CGI.new("html4"), SESSION_PARAMS)
f.out << Controller.new(cgi, session).output
# remove constants of class CGI
class CGI
remove_const :CGI_PARAMS
remove_const :CGI_COOKIES
end
}
183RubyC06.qxd 1/7/02 2:50 PM Page 381

382 Chapter 6 • WWW and Networking with Ruby
www.syngress.com
Figure 6.21 FastCGI Version of show_image.cgi (src/show_image.fcgi)
#!/usr/bin/env ruby
require "db"
require "fcgi" # or "fastcgi"
BLK_SIZE = 8 * 1024
DB.connect do |db|
dbh = db.connection
FCGI.each_request do |f|
id = ENV['QUERY_STRING'].split("=")[1].to_i
row = dbh.select_one("SELECT data, content_type FROM picture
WHERE picture_id = ?", id)
stream = dbh.func(:blob_open, row['data'])
f.out << "Content-Type: %s\r\n" % row['content_type']
f.out << "Content-Length: %s\r\n" % stream.size
f.out << "Date: %s\r\n" % Time.now
f.out << "Expires: %s\r\n" % (Time.now + 3*60)
f.out << "\r\n"
loop {
data = stream.read(BLK_SIZE)
f.out << data; f.out.flush
break if data.size != BLK_SIZE
}
stream.close
end
end
183RubyC06.qxd 1/7/02 2:50 PM Page 382

WWW and Networking with Ruby • Chapter 6 383
Using mod_ruby and eruby
The mod_ruby package embeds the Ruby interpreter into the Apache Web
server similar to mod_perl or mod_php for Perl and Php respectively. It allows
Ruby scripts to be executed natively without creating a new process as is the case
for CGI scripts.This increases performance significantly.
www.syngress.com
Installing FastCGI For Ruby
There are two different FastCGI implementations for Ruby, an imple-
mentation in C and one written in pure Ruby.
Both are available from Eli Green’s home page at http://fenris
.codedogs.ca/~eli/fastcgi.html (or in the RAA in the Library section
under WWW). The pure Ruby implementation even supports multi-
plexing, which means that the FastCGI adaptor communicates with
multiple FastCGI applications through one socket.
The pure Ruby version requires the stringio module, which you can
download from the same page. To compile the C version, you’ll also
need the devkit from FastCGI’s homepage at www.fastcgi.com.
In any case, you need mod_fastcgi when using an Apache Web
server. After installing it, modify Apache’s httpd.conf configuration file
and add these two lines at the very beginning:
LoadModule fastcgi_module lib/httpd/mod_fastcgi.so
AddModule mod_fastcgi.c
To let Apache handle all files ending with .fcgi, add one more line:
AddHandler fastcgi_script .fcgi
Alternatively, use SetHandler inside a location:
SetHandler fastcgi_script
See mod_fastcgi’s documentation (on UNIX, usually: /usr/local/share/
httpd/htdocs/manual/mod/mod_fastcgi.html) for more information.
Developing & Deploying…
183RubyC06.qxd 1/7/02 2:50 PM Page 383

384 Chapter 6 • WWW and Networking with Ruby
Installing and Configuring mod_ruby
Download the mod_ruby package from www.modruby.net. Unpack the archive,
then issue the following command:
./configure.rb
If Apache’s apxs tool cannot be found, specify it explicitly:
./configure.rb —with-apxs=/path/to/apxs
You can also build mod_ruby with support for eruby (Ruby code embedded
in HTML).To do this, first download the eruby archive from www.modruby.net,
and compile and install it with the three commands ./configure.rb,make, and
make install.Then configure mod_ruby as shown below (modify the path to
eruby’s libraries/header files if necessary):
./configure.rb —enable-eruby \
—with-eruby-includes=/usr/local/include \
—with-eruby-libraries=/usr/local/lib
Then compile and install mod_ruby:
make
make install
Now edit Apache’s httpd.conf configuration file and add the following lines to
it (modify the path to mod_ruby.so if necessary):
LoadModule ruby_module /usr/local/apache/libexec/mod_ruby.so
AddModule mod_ruby.c
This will tell Apache to load mod_ruby, after restarting.
To execute all files under the /ruby directory (for example,
http://yourhost/ruby/myscript) as Ruby scripts, as well as all files ending in .rbx,
add the following to httpd.conf:
<IfModule mod_ruby.c>
RubyRequire apache/ruby-run
<Location /ruby>
SetHandler ruby-object
RubyHandler Apache::RubyRun.instance
www.syngress.com
183RubyC06.qxd 1/7/02 2:50 PM Page 384

WWW and Networking with Ruby • Chapter 6 385
Options ExecCGI
</Location>
<Files *.rbx>
SetHandler ruby-object
RubyHandler Apache::RubyRun.instance
</Files>
</IfModule>
If you want to execute Ruby code embedded in HTML, in addition, add one
of the following sections. For eruby, this is:
<IfModule mod_ruby.c>
RubyRequire apache/eruby-run
# handle files under /eruby as eRuby files by eruby
<Location /eruby>
SetHandler ruby-object
RubyHandler Apache::ERubyRun.instance
Options ExecCGI
</Location>
# handle *.rhtml as eruby files.
<Files *.rhtml>
SetHandler ruby-object
RubyHandler Apache::ERubyRun.instance
</Files>
</IfModule>
And for ERb, eruby’s equivalent written in pure Ruby, this is:
<IfModule mod_ruby.c>
RubyRequire apache/erb-run
# handle files under /erb as eRuby files by ERb.
<Location /erb>
SetHandler ruby-object
www.syngress.com
183RubyC06.qxd 1/7/02 2:50 PM Page 385

386 Chapter 6 • WWW and Networking with Ruby
RubyHandler Apache::ERbRun.instance
Options ExecCGI
</Location>
# handle *.rhtml as eRuby files by ERb.
<Files *.rhtml>
SetHandler ruby-object
RubyHandler Apache::ERbRun.instance
</Files>
</IfModule>
When developing mod_ruby scripts, a last directive is very useful, too:
RubyRequire auto-reload
Put this anywhere in one of the above sections.This will reload modified
scripts that you load into your script using Ruby’s require directive. Alternatively,
use load instead of require.
Before you can use mod_ruby, make sure to restart the Apache Web server:
apachectl restart
If you are still running mod_ruby, a restart will not free the resources held by
the embedded Ruby interpreter.Therefore, you’d better stop and then start
Apache again, with the following:
apachectl stop
apachectl start
Using mod_ruby and eruby in the
Online Shop Example
In this section we’ll rewrite the Web interface of our online shop application
from the previous sections, this time using mod_ruby instead of CGI or FastCGI.
Also, instead of generating HTML with the CGI class, we’ll embed our Ruby
code into HTML using eruby. Note that the database model stays the same, as
well as the database access layer (file src/db.rb shown in Figure 6.12).
You’ll find the source codes shown in this section in directory mod_ruby-shop
at www.syngress.com/solutions.The Ruby sourcefiles reside there in subdirectory
src.Again, for convenient installation, there is a Makefile available (Figure 6.22).
www.syngress.com
183RubyC06.qxd 1/7/02 2:50 PM Page 386

Let’s first rewrite the show_image.cgi application, resulting in show_image.rbx
(Figure 6.23). For this one we don’t need to use eruby, because we will output
image data, not HTML.
www.syngress.com
WWW and Networking with Ruby • Chapter 6 387
Figure 6.22 Makefile
TARGET=/home/michael/htdocs # modify
RB_FILES = src/config.rb src/db.rb src/session.rb
RBX_FILES = src/show_image.rbx src/action.rbx
RHTML_FILES = src/articles.rhtml src/cart.rhtml src/shop.rhtml
FILES = ${RB_FILES} ${RBX_FILES} ${RHTML_FILES}
install:
cp ${FILES} ${TARGET}
Figure 6.23 Show_image.rbx
#!/usr/bin/env ruby
require "db"
require "cgi"
BLK_SIZE = 8 * 1024
req = Apache::request
id = CGI.parse(req.args)["id"][0].to_i
DB.connect do |db|
dbh = db.connection
row = dbh.select_one("SELECT data, content_type FROM picture
WHERE picture_id = ?", id)
stream = dbh.func(:blob_open, row['data'])
Continued
183RubyC06.qxd 1/7/02 2:50 PM Page 387

388 Chapter 6 • WWW and Networking with Ruby
At the beginning, we invoke Apache::request to get an object representing the
current request.This object provides the method for querying the request infor-
mation and for generating a response.Then we call the args method of the
request object to get the arguments passed in the URL (everything after the “?”,
which in our case is “id=ImageID”).We pass its return value to CGI.parse, which
in turn returns a hash, similar to the return value of CGI class’s instance method
params.
After opening the database connection and executing the SQL statement to
get the OID, (we need to open the image data stream), we create the response
header.With the status method, we set the HTTP status code to 200 (OK) and
set the content type with the content_type method.The other HTTP headers we
set using headers_out. Note that to access the HTTP headers of the request, we
use headers_in. Finally we send the headers to the Web server by calling the
send_http_header method; do this before you send any response data.The response
data is sent using the << method; alternatively, you can use the write or print
methods of the Apache::Request object.
Note that mod_ruby will not recognize the first line of Figure 6.23 as is the
case for CGI scripts:
#!/usr/bin/env ruby
www.syngress.com
Figure 6.23 Continued
req.status = 200
req.content_type = row['content_type']
req.headers_out["Content-length"] = stream.size.to_s
req.headers_out["Date"] = Time.now.to_s
req.headers_out["Expires"] = (Time.now + 3*60).to_s
req.send_http_header
loop {
data = stream.read(BLK_SIZE)
req << data
break if data.size != BLK_SIZE
}
stream.close
end
183RubyC06.qxd 1/7/02 2:50 PM Page 388

WWW and Networking with Ruby • Chapter 6 389
Nevertheless it is useful, because some editors (such as VIM) will use it to
determine the type of language used in the file—Ruby in our case—so that it
can correctly syntax-highlight it without your having to modify any of its config-
uration files.
After testing that show_image.rbx works correctly, let’s proceed with the view
of our Online shop.This consists of three eruby files, shop.rhtml (Figure 6.24),
articles.rhtml (Figure 6.25), and cart.rhtml (Figure 6.26).The first is the main script,
directly invoked by the user by specifying the URL http://yourhost/shop.rhtml.
It inclues the two other eruby files (by calling ERuby.import); this makes the
whole application easier to read and easier to maintain.
www.syngress.com
Using DRbSession as Database
Manager for Storing Sessions
DRbSession is a database manager you may use with the CGI::Session
class instead of the two managers FileStore and MemoryStore that come
with Ruby by default. DRbSession consists of two parts, a client compo-
nent (CGI::Session::DRbSession class) and a server component (session-
server) that stores the session data in memory and exposes it via DRb
(see the DRb section in Chapter 5 for more information).
To install it, download the package (from the RAA in the Library sec-
tion under WWW), unpack the archive, and copy the drbsession.rb file
into the same directory where the cgi/session feature resides (for
example, /usr/local/lib/ruby/1.6/cgi). Then add two key/value pairs to the
hash you pass to Session.new for the second option parameter:
'drbsession_uri' => 'druby://localhost:4999',
'database_manager' => CGI::Session::DRbSession
Also, do not forget to require cgi/drbsession, and make sure that
DRb is installed. Then run the session server:
./sessionserver
To modify the URI under which the session server is available (this
is druby://localhost:4999 by default), edit the sessionserver file and
modify the SERVER_URI constant appropriately.
Developing & Deploying…
183RubyC06.qxd 1/7/02 2:50 PM Page 389

390 Chapter 6 • WWW and Networking with Ruby
Obviously then, articles.rhtml displays the articles (Article and ArticleList classes
in the CGI version of the online shop) while cart.rhtml generates the HTML for
the cart on the right (the Cart class in the CGI version of the online shop).
We use a slightly modified session class compared to the one we used in the
CGI version of the online shop.We added one url method to it that returns the
“session_key=session_id” string.We use this to pass the session ID inside the URL
instead of passing it as a cookie.The class is implemented in the session.rb file
shown in Figure 6.27.
Notice that we call session.close at the end of shop.rhtml (and action.rbx).This is
absolutely neccessary because the FileStore manager that stores the content of a
session on disk will not unlock the session file until the session object is garbage
collected, or the close method is called.This is no problem using CGI scripts,
because the Ruby interpreter terminates after each request and therefore will
garbage collect all objects, but using mod_ruby the Ruby interpreter will (almost)
never terminate!
An additional piece of advice is not to use class MemoryStore for storing ses-
sions in memory, as mod_ruby does not make the assumption that each request is
handled by the same instance of the Ruby interpreter. But you can safely use
DRbSession (available at the RAA in the Library section under WWW), which
also works for CGI scripts.
www.syngress.com
Figure 6.24 Shop.rhtml
<%
require "db"
require "session"
session = Session.new(CGI.new, SESSION_PARAMS)
articles = DB.connect {|db| db.get_articles_in_inventory }
%>
<html>
<head><title>Online-Shop</title></head>
<body>
<h1>Online-Shop</h1>
Continued
183RubyC06.qxd 1/7/02 2:50 PM Page 390

WWW and Networking with Ruby • Chapter 6 391
www.syngress.com
Figure 6.24 Continued
<table><tr><td valign="top" width="50%">
<% ERuby.import "articles.rhtml" %>
</td><td bgcolor="#CCCCCC" valign="top" width="25%">
<% ERuby.import "cart.rhtml" %>
</td></tr></table>
</body>
</html>
<% session.close %>
Figure 6.25 Articles.rhtml
<table>
<% articles.each do |row| %><tr>
<td>
<% img_url = "show_image.rbx?id=" + row[:picture_id].to_s %>
<a target="_new" href="<%= img_url %>"><img src="<%= img_url %>"
width="90" height="113" border="0"></a></td>
<td>
<i><%= row[:name] %></i><br><%= row[:description] %><br><br>
<b>Price: </b>$<%= row[:cost] %><br>
<a href="action.rbx?add=<%= row[:article_id] %>&<%= session.url %>">
<img src="/trolley.gif" border="0">add to shopping cart</a>
</td></tr>
<% end %>
</table>
183RubyC06.qxd 1/7/02 2:50 PM Page 391

392 Chapter 6 • WWW and Networking with Ruby
www.syngress.com
Figure 6.26 Cart.rhtml
<%
cart = session['cart'] || {}
article_ids = {}
articles.each { |i| article_ids[ i[:article_id] ] = i }
%>
<% unless cart.empty? %>
<table>
<% cart.each do |id, count| %>
<% a = article_ids[id] %>
<tr>
<td><b><%= count %>x</td>
<td><%= a[:name] %></td>
<td>$<%= a[:cost] %></td>
<td><a href="action.rbx?drop=<%= id %>&<%= session.url
%>">X</a></td>
</tr>
<% end %>
</table>
<hr>
<form action="action.rbx" method="POST">
email: <input type="text" name="email"><br>
passw: <input type="password" name="password"><br>
<br><input type="submit" name="order" value="Order Now">
</form>
<hr>
<% end %>
183RubyC06.qxd 1/7/02 2:50 PM Page 392

WWW and Networking with Ruby • Chapter 6 393
If you click any of the Add to shopping cart links, click the Xto remove
an item from the cart, or if you press the Order button to order the items in the
cart, the action.rbx script (Figure 6.28) will be invoked. Its purpose is very similar
to that class Controller of file components.rb in the CGI version of the online
shop. It either adds or removes an article from the cart or inserts an order into
the database.Then it redirects the browser back to shop.rhtml. Redirecting is
done in mod_ruby using the following two lines:
www.syngress.com
Figure 6.27 Session Class (session.rb)
require "cgi/session"
SESSION_PARAMS = {
'session_key' => 'sid',
'prefix' => 'online-shop'
}
class Session < CGI::Session
def initialize(req, option={})
@opt = option; super
end
def url
[@opt['session_key'] || '_session_id', session_id].join("=")
end
def [](key)
if val = super then Marshal.load(val) else val end
end
def []=(key, val)
super(key, Marshal.dump(val))
end
end
183RubyC06.qxd 1/7/02 2:50 PM Page 393

394 Chapter 6 • WWW and Networking with Ruby
Apache::request.headers_out["Location"] = "/url/to/redirect"
exit Apache::REDIRECT
or with:
Apache::request.status = 302
Apache::request.headers_out["Location"] = "/url/to/redirect"
Apache::request.send_http_header
www.syngress.com
Figure 6.28 Action.rbx
#!/usr/bin/env ruby
require "db"
require "session"
session = Session.new(cgi = CGI.new, SESSION_PARAMS)
cart = session['cart'] || Hash.new(0)
if id = cgi['add'][0]
# add article to cart
cart[id.to_i] += 1
elsif id = cgi['drop'][0]
# drop article from cart
cart.delete(id.to_i)
elsif cgi['order'][0]
# place order
DB.connect do |db|
cust_id = db.get_customer_id(cgi['email'][0], cgi['password'][0])
db.new_order(cust_id, cart)
end
cart = nil # empty the cart
end
# store the cart back to the session and redirect
Continued
183RubyC06.qxd 1/7/02 2:50 PM Page 394

WWW and Networking with Ruby • Chapter 6 395
Dynamically Generating XML with eruby
You can also generate XML with eruby and mod_ruby.This is useful, for
example, if you want to deliver XML to the browser, which then (on the client-
side) invokes an XSLT script to transform it to HTML. Not many browsers sup-
port this; in fact only Microsoft’s Internet Explorer can do this for certain. Make
sure you have MSXML 3.0 (Microsoft’s XML parser package) installed, so that
you can use a full-fledged XSLT processor for your XSLT scripts, otherwise you
can’t do anything particularly useful with it.
Below is an eruby script that creates XML, for use with mod_ruby:
<%
ERuby.noheader = true
req = Apache.request
req.content_type = "text/xml"
req.send_http_header
%><?xml version="1.0"?>
<root>
<% [1,2,3].each do |r| %>
<row id="<%= r %>">
<% [1, 2].each { |c| %> <col id="<%= c %>"/> <% } %>
</row>
<% end %>
</root>
This would output the following XML document:
www.syngress.com
Figure 6.28 Continued
session['cart'] = cart
session.close
# redirect
Apache::request.headers_out["Location"] = "shop.rhtml?" + session.url
exit Apache::REDIRECT
183RubyC06.qxd 1/7/02 2:50 PM Page 395

396 Chapter 6 • WWW and Networking with Ruby
<?xml version="1.0"?>
<root>
<row id="1">
<col id="1"/> <col id="2"/>
</row>
<row id="2">
<col id="1"/> <col id="2"/>
</row>
<row id="3">
<col id="1"/> <col id="2"/>
</row>
</root>
Note that for some XML parsers, it is necessary that the <?xml?> processing
instruction comes first; they do not accept a new line before it.This is why we
put it after the closing “%>”:
%><?xml version="1.0"?>
Displaying RSS News Channels
In this section, we’ll implement an eruby component that renders an RDF Site
Summary (RSS) news channel to HTML. Note that Ruby/RSS only supports
RSS version 0.91 (or older).The location of the RSS channel can be given by
an URI; our component will support the HTTP and FTP protocols.The
source code for these files are available on the accompanying CD in the rss-view
directory.
For parsing the RSS in XML format, we use Chad Fowler’s Ruby/RSS
library.This is dependent on Yoshida Masato’s XMLParser and Uconv module,
which implement UTF-16 and UTF-8 conversion. (All are available from the
RAA’s Library section: Ruby/RSS and XMLParser under XML and Uconv
under I18N.) To install Ruby/RSS, simply copy the rss.rb file into your site_ruby
directory (for example, /usr/local/lib/ruby/site_ruby/1.6).
www.syngress.com
183RubyC06.qxd 1/7/02 2:50 PM Page 396

WWW and Networking with Ruby • Chapter 6 397
To parse the URIs, we make use of Akira Yamada’s URI package called URb
(found in the RAA’s Library section under Net, or available directly from
http://arika.org/ruby/uri.html.en).
First, we develop a RSSModel class (see Figure 6.29), which fetches an RSS
file from a given HTTP or FTP URI, and parses it. Note that we add an ele-
ment_accessor to the RSS::Item class.This tells the RSS library to recognize an
item’s <description> tag and makes its content accessible through the description
method.After calling fetchFile to fetch the RSS file from the given URI, we pass
the RSS data to the from_xml method (included in the RSS module) to parse it.
Next we develop a HTML view for the RSSModel class, resulting in the
RSSView class, as shown in Figure 6.30. Last, we write an eruby application (see
Figure 6.31) that outputs two channels.The result is shown in Figure 6.32.
www.syngress.com
Figure 6.29 The RSSModel Class (rssmodel.rb)
require "uri"
require "net/http"
require "net/ftp"
require "rss"
module RSS
class Item
element_accessor :description
end
end
class RSSModel
include RSS
attr_reader :rss
def initialize(uri)
@uri = uri
@rss = from_xml(fetchFile(@uri))
end
private
Continued
183RubyC06.qxd 1/7/02 2:50 PM Page 397

398 Chapter 6 • WWW and Networking with Ruby
www.syngress.com
Figure 6.29 Continued
def fetchFile(uri)
case uri = URI.parse(uri)
when URI::HTTP
http = Net::HTTP.new(uri.host, uri.port)
resp = http.get2(uri.request_uri)
if resp.code =~ /^2\d\d$/ # 2xx
resp.body
elsif resp.code == "301" # REDIRECT
fetchFile(resp['location'])
else
raise "Could not fetch file! #{ resp.code }"
end
when URI::FTP
ftp = Net::FTP.new(uri.host)
ftp.login(uri.user || 'anonymous', uri.password)
data = ""
ftp.gettextfile(uri.path, '/dev/null') {|line| data << line}
data
else
raise "URI class not supported"
end
end
end
Figure 6.30 The RSSView Class (rssview.rhtml)
<%
require "rssmodel"
class RSSView
def initialize(modelOrURI)
modelOrURI = RSSModel.new(modelOrURI) if modelOrURI.kind_of? String
Continued
183RubyC06.qxd 1/7/02 2:50 PM Page 398

WWW and Networking with Ruby • Chapter 6 399
www.syngress.com
Figure 6.30 Continued
@rss = modelOrURI.rss
end
def toHTML
%>
<table>
<tr><td>
<!-- display image -->
<% unless @rss.image == [] %>
<a href="<%= @rss.image.link %>"><img src="<%= @rss.image.url %>"
title="<% @rss.image.title %>" width="<%= @rss.image.width %>"
height="<%= @rss.image.height %>" border="0"></a>
<% end %>
<!-- display title -->
<font size="+2"><b><a href="<%= @rss.link %>"><%= @rss.title %></a>
</b></font>
</td></tr>
<!-- display items -->
<% @rss.each_item do | item | %>
<tr><td bgcolor="#DDCCD0">
<a href="<%= item.link %>"><%= item.title %></a>
</td></tr>
<tr><td>
<%= item.description || "" %>
<td></tr>
<% end %>
</table>
<% end end %>
183RubyC06.qxd 1/7/02 2:50 PM Page 399
400 Chapter 6 • WWW and Networking with Ruby
Installing and Configuring IOWA
Interpreted Objects for Web Applications (IOWA) is a powerful, truly object-ori-
ented application server written in pure Ruby by Avi Bryant. Its architecture is
similar to that of Apple’s WebObjects, but uses an interpreted language (Ruby)
instead of a compiled one (Objective-C or Java, in the case of WebObjects).
www.syngress.com
Figure 6.31 The RSS Demo-Viewer (test.rhtml)
<% ERuby.import "rssview.rhtml" %>
<% URI1 = 'http://linuxcentral.com/backend/lcnew.rdf' %>
<% URI2 = 'http://www.multiagent.com/mynetscape.rdf' %>
<html>
<body>
<table><tr>
<td valign="top">
<% RSSView.new(URI1).toHTML %></td>
<td valign="top">
<% RSSView.new(URI2).toHTML %></td>
</tr></table>
</body>
Figure 6.32 Output of test.rhtml
183RubyC06.qxd 1/7/02 2:50 PM Page 400

WWW and Networking with Ruby • Chapter 6 401
Some features of IOWA include the following:
■IOWA separates logic (model and controller) from presentation (view),
so that the HTML designer and programmer can do their work inde-
pendently. Both parts, code and HTML, are joined together using an
optional bindings-section, freeing both from using specified names.Also,
this makes changes in both HTML and code easier to maintain.
■It offers intuitive program flow.
■IOWA pages are stateful objects.
■It provides reusable components.
NOTE
For an introduction to the basics of IOWA, have a look through IOWA’s
tutorial (www.beta4.com/iowa), or, for more in-depth information about
the concepts behind it, see the documentation and tutorials for Apple’s
WebObjects available at http://developer.apple.com.
Let’s have a look at two more advanced IOWA applications, the Online Shop
introduced earlier in this chapter, and a reusable tree-view component with
which we will build a file-viewer application.
As IOWA is a pure Ruby solution, it is very simple to install. Download it
from www.beta4.com/iowa (use the 0.14a version) and extract the archive (use
tar –xvzf iowa-0-14.tar.gz on UNIX or use a program like PowerArchiver or
WinZip on Windows).Then install the IOWA sources with a simple ruby
install.rb. Easy? Well, that was the first step!
Next, you have to install the IOWA adaptor for your Web server.This passes
requests through a Unix socket to the long-running IOWA-applications and
delivers the response back to the Web server. By taking this approach, IOWA is
capable to work with (almost) every Web server.The adaptor need not to be
written in Ruby itself—C, Perl, or any other language that can handle Unix
sockets would also work.
For the adaptor, we can currently choose between three different implemen-
tations/approaches:
■The CGI adaptor iowa.cgi This should work with every Web server
that can handle CGIs and which is able to forward requests of a specific
www.syngress.com
183RubyC06.qxd 1/7/02 2:50 PM Page 401

402 Chapter 6 • WWW and Networking with Ruby
URL to the handler (for example, a CGI script). I tried it with Apache
and with the pure Ruby Web server httpserv (found at the RAA in the
Application section under WWW). Both worked, even on Windows!
■The Apache module mod_iowa This only works for Apache Web
servers.
■The IOWAServlet This is for use with the pure Ruby Web server
framework WEBrick.With this, the only requirement is an installed
Ruby interpreter plus the WEBrick and IOWA libraries.
We’ll not discuss how to install the Apache module mod_iowa, because it may
not work for some systems; see the README document of the IOWA package
for installation instructions.
To access IOWA applications using the CGI adaptor, simply put the iowa.cgi
script which is delivered with IOWA into your Web server’s cgi-bin directory.
Then, for an Apache Web server, edit its configuration file httpd.conf and add the
following four lines:
Action iowa /cgi-bin/iowa.cgi
<Location /iowa>
SetHandler iowa
</Location>
After making the changes to Apache, restart the server.
apachectl restart
To use the IOWAServlet adaptor, first download the WEBrick package (found
in the RAA’s Library section under Net) and install it via ruby install.rb.Then
invoke the Ruby file webrick-adaptor.rb (shown in Figure 6.33 and available at
www.syngress.com/solutions in the iowa-utils directory). Modify the
:DocumentRoot and :Port settings appropriately to match your needs.
NOTE
WEBrick supports SSL and authentification, and there are WEBrick
“servlets” or “plug-ins” available for XML-RPC and SOAP services.
Another full-featured Web server for Ruby is Yoshinori Toki’s wwwsrv,
which can be found at the RAA in the Application section under WWW.
Plug-ins for XML-RPC are available for this as well.
www.syngress.com
183RubyC06.qxd 1/7/02 2:50 PM Page 402

WWW and Networking with Ruby • Chapter 6 403
www.syngress.com
Figure 6.33 IOWA Adaptor for WEBrick (webrick-adaptor.rb)
require 'webrick'
require 'socket'
require 'iowa/config'
class IOWAServlet < WEBrick::HTTPServlet::AbstractServlet
def service(req, res)
url, = req.request_uri.to_s.split("?")
params = if req.request_method == "GET"
req.query_string || ""
else
req.body
end
url =~ ".*?/iowa/([^/]*)"
socket_name = "#{$tempDir}iowa_#{$1}"
socket = UNIXSocket.new(socket_name)
socket.putc(url.length)
socket.write(url)
socket.putc(params.length)
socket.write(params)
socket.shutdown(1)
body = ""
while (recv = socket.recv(1000)) != "" do
body << recv
end
res['Content-type'] = "text/html"
res.body = body
end
end
if __FILE__ == $0
Continued
183RubyC06.qxd 1/7/02 2:50 PM Page 403

404 Chapter 6 • WWW and Networking with Ruby
Using IOWA for the Online Shop Example
In this section we’ll rewrite the Web interface of the online shop application we
introduced earlier, but this time using IOWA instead of CGI, FastCGI, or
mod_ruby.Again, the database model, as well as the database access layer (file
db.rb, shown in Figure 6.12), are the same as for the CGI-based one.We’ll use
the show_image.cgi script (shown in Figure 6.18) to display an article’s image,
because with IOWA it is currently impossible to output anything other than
HTML data, due to a hard-coded HTTP content-type header (text/html) in the
IOWA adaptor.
You’ll find the source code of the files shown in this section in the iowa-shop
directory of the accompanying CD.
Let’s start by explaining the purpose of the shop.rb file, shown in Figure 6.34.
All definitions of this file are available in the IOWA components we’ll write (files
ending with .html). First we define our own MySession session class; this will be
used instead of the default Iowa::Session for all sessions of this application. It has
one attribute, cart, which will store the articles in the cart. Note that there is no
need to tell IOWA to use this class instead of the default one, because IOWA will
take notice of this when you subclass Iowa::Session, by overwriting the inherited
class method.The same applies to IOWA’s Iowa::Application class.
Next, we define our own application class, MyApplication.There will be
exactly one instance of this class; all components have access to it through their
application method. In its initialize method, we connect to the database, get all
information about the articles, and store them in @articles and @article_ids.The
www.syngress.com
Figure 6.33 Continued
s = WEBrick::HTTPServer.new(
:Port => 2000,
:DocumentRoot => '/home/michael/htdocs',
:Logger => WEBrick::Log::new($stderr, WEBrick::Log::DEBUG)
)
s.mount("/iowa", IOWAServlet)
trap("INT"){ s.shutdown }
s.start
end
183RubyC06.qxd 1/7/02 2:50 PM Page 404

WWW and Networking with Ruby • Chapter 6 405
reason for storing them in the application class is to improve performance; how-
ever, any changes to the articles in the database will not affect this application
unless you restart.To avoid a restart, we could also set up a thread that gets the
newest information about the articles out of the database every five minutes and
stores them in the application object—something similar to the following:
Thread.new {
loop {
@articles = DB.connect {|db| db.get_articles_in_inventory }
@article_ids = {}
@articles.each { |i| @article_ids[ i[:article_id] ] = i }
sleep 5*60
}
}
Still in shop.rb, we add two methods takeValueForKey and valueForKey to class
DBI::Row.This is necessary so that we can access the row’s columns using the dot
notation (for example, @row.name) in IOWA bindings.
Last, we invoke Iowa.run.This will start the application; you can access it in
your browser at the URL http://yourhost/iowa/shop.
www.syngress.com
Figure 6.34 Global Definitions, Startup File (shop.rb)
require "iowa"
require "db"
class MySession < Iowa::Session
attr_accessor :cart
def initialize(*args)
@cart = Hash.new(0)
super
end
# just to show you that it exists...
def handleRequest(context) super end
end
Continued
183RubyC06.qxd 1/7/02 2:50 PM Page 405

406 Chapter 6 • WWW and Networking with Ruby
The view of our online shop consists of three components:
■Main This is the start page; it uses the two other components to dis-
play the whole online shop (see Figure 6.35).
■Article This displays one article; it implements the addToShoppingCart
action (see Figure 6.36).
■Cart This displays the cart on the right; it implements the
removeFromCart and order actions (see Figure 6.37).
www.syngress.com
Figure 6.34 Continued
class MyApplication < Iowa::Application
attr_reader :articles, :article_ids
def initialize(*args)
@articles = DB.connect {|db| db.get_articles_in_inventory }
@article_ids = {}
@articles.each { |i| @article_ids[ i[:article_id] ] = i }
super
end
# just to show you that it exists...
def handleRequest(context) super end
end
module DBI
class Row
def takeValueForKey(value, key)
self[key] = value
end
def valueForKey(key)
self[key]
end
end
end
Iowa.run('shop')
183RubyC06.qxd 1/7/02 2:50 PM Page 406

WWW and Networking with Ruby • Chapter 6 407
You can see that the components are clearly structured, with well-defined,
intuitive responsibilities.This is one of the main advantages of using IOWA—this
is object-oriented Web development!
www.syngress.com
Figure 6.35 Main Component (Main.html)
<%
import "Article"
import "Cart"
class Main < Iowa::Component
attr_accessor :item
end
%>
<?
articleList : Repeat {
list = application.articles
item = item
}
article : Article {
row = item
}
?>
<html>
<head><title>Online-Shop</title></head>
<body>
<h1>Online-Shop</h1>
<table><tr><td valign="top" width="50%">
<repeat oid="articleList">
<Article oid="article"/>
</repeat>
</td><td bgcolor="#CCCCCC" valign="top" width="25%">
<Cart oid="cart"/>
</td></tr></table>
</body>
</html>
183RubyC06.qxd 1/7/02 2:50 PM Page 407

408 Chapter 6 • WWW and Networking with Ruby
www.syngress.com
Figure 6.36 Article Component (Article.html)
<%
class Article < Iowa::Component
attr_binding :row
def img_url
"/cgi-bin/show_image.cgi?id=" + row[:picture_id].to_s
end
def addToShoppingCart
session.cart[row[:article_id]] += 1
end
end
%>
<table>
<tr>
<td><a target="_new" href="@img_url"><img src="@img_url" width="90"
height="113" border="0"></a></td>
<td>
<i>@row.name</i><br>@row.description<br><br>
<b>Price: </b>$@row.cost<br>
<a oid="addToShoppingCart"><img src="/trolley.gif" border="0">add to
shopping cart</a>
</td></tr>
</table>
Figure 6.37 Cart Component (Cart.html)
<%
class Cart < Iowa::Component
attr_accessor :cartItem, :email, :password
def article
Continued
183RubyC06.qxd 1/7/02 2:50 PM Page 408

WWW and Networking with Ruby • Chapter 6 409
www.syngress.com
Figure 6.37 Continued
application.article_ids[cartItem[0]]
end
def removeFromCart
session.cart.delete(cartItem[0])
end
def cartNotEmpty
not session.cart.empty?
end
def order
DB.connect do |db|
cust_id = db.get_customer_id(email, password)
db.new_order(cust_id, session.cart)
end
session.cart = Hash.new(0) # empty cart
end
end
%>
<?
cartList {
list = session.cart
item = cartItem
}
?>
<table oid="cartList">
<tr>
<td><b>@cartItem.1</b></td>
<td>@article.name</td>
<td>$@article.cost</td>
<td><a oid="removeFromCart">X</a></td>
Continued
183RubyC06.qxd 1/7/02 2:50 PM Page 409

410 Chapter 6 • WWW and Networking with Ruby
Implementing a TreeView Component
Implementing a tree-view in HTML—impossible, you say? No, it is entirely pos-
sible, as we’ll demonstrate by implementing one here in this section.To get an
idea of what it will look like, see Figure 6.42 at the end of this section.
The tree-view we’ll develop is partitioned into three classes, TreeModel,
TreeController, and TreeView (Model View Controller [MVC] pattern). Only the
last class, the view, depends on IOWA, whereas the others are pure Ruby classes
(the TreeView class is also pure Ruby, but it’s an IOWA component) and could be
used elsewhere as well, such as for a GUI-TreeView component.
The TreeModel class (see Figure 6.38) is a simple, recursive data structure that
stores the nodes of the tree, together with additional information such as the
name of a node (this will be displayed later) and user-definable attributes.A
TreeModel either stores its children (subnodes) directly in an array, which is
optimal for trees with a less number of elements, or generates them on demand,
that is, lazily.The latter is especially useful if you want to display deeply nested
trees with lots of nodes (for example, the Unix filesystem—try iterating recur-
sively over each file starting at ‘/’!). Of course, it’s possible to mix both arbitrarily.
We implement the laziness using Proc objects that, when called, return an array
containing its children. Once you have requested the children of a TreeModel
object, they are stored internally and the next call will return them directly
www.syngress.com
Figure 6.37 Continued
</tr>
</table>
<if oid="cartNotEmpty">
<hr>
<form oid="order">
email: <input type="text" oid="email"><br>
passw: <input type="password" oid="password"><br>
<br><input type="submit" value="Order Now">
</form>
<hr>
</if>
183RubyC06.qxd 1/7/02 2:50 PM Page 410

WWW and Networking with Ruby • Chapter 6 411
without invoking the Proc object for a second time. Of course, we could free the
children of a subtree when it gets collapsed (and call the Proc object again when
requested the next time), but we won’t do that here, because we would lose the
information about which of the children (not being leaves) were expanded and
which were not.
Each instance of the TreeModel class can have its own controller object (it
should be of the TreeController class). Simply assign one using the controller=
attribute accessor. If no controller was assigned and you call the controller method,
it returns the controller of its parent, possibly recursive.This way, all subnodes
inherit the controller from the root node, if none was explicitly specified. Of
course you should make sure that at least the root node was assigned a controller,
otherwise an exception will result.
www.syngress.com
Figure 6.38 The Tree’s Model: Class TreeModel (TreeModel.rb)
class TreeModel
attr_accessor :name, :parent, :expanded, :attrs
attr_accessor :controller
def initialize(name, parent=nil, expanded=false, *childs,
&childs_proc)
@name, @parent, @expanded, = name, parent, expanded
@attrs = {}
if block_given?
@childs = nil
@childs_proc = childs_proc
else
@childs = childs
@childs.each {|c| c.parent = self}
@childs_proc = nil
end
end
def childs
if @childs.nil?
Continued
183RubyC06.qxd 1/7/02 2:50 PM Page 411

412 Chapter 6 • WWW and Networking with Ruby
www.syngress.com
Figure 6.3.8 Continued
@childs = @childs_proc.call
@childs.each {|c| c.parent = self}
else
@childs
end
end
def level
isRoot ? 0 : @parent.level + 1
end
def isLeaf
childs.empty?
end
def isRoot
@parent.nil?
end
def isLastChild
isRoot or (parent.childs[-1] == self)
end
def controller
if @controller.nil? and not isRoot
@parent.controller
else
@controller
end
end
end
183RubyC06.qxd 1/7/02 2:50 PM Page 412

WWW and Networking with Ruby • Chapter 6 413
The TreeController class (see Figure 6.39) implements the action that will be
performed when you click onto a node of the TreeView. If it’s not a leaf you click
on, then it will either expand and show its children, or will fold or collapse.You can
customize the action performed when clicking on it, either by inheriting from the
controller class, or, if this is not possible due to single-inheritance, by including the
TreeControllerMixin module into your class. In either case, you have to overwrite the
action method to implement your customized action. From here you should call the
original action method, either with super, or when mixing the TreeControllerMixin in;
then call __action (as we’ll do later in our sample application).
The TreeView IOWA component renders a TreeModel into HTML. If the
TreeView’s model is not a leaf, then it applies itself recursively to display all of its
children.The source code is shown in Figure 6.40 and is contained on the accom-
panying CD in the TreeView.html file.To use the TreeView component from
within another IOWA component, put the following into the HTML section:
<TreeView oid="treeview"/>
Then, in the bindings section (between <? and ?>), specify its model with the
following:
treeview : TreeView {
model = treeModel
}
www.syngress.com
Figure 6.39 The Tree’s Controller: The TreeController Class (TreeController.rb)
module TreeControllerMixin
def action(model, view)
model.expanded = ! model.expanded
end
alias __action action
end
class TreeController
include TreeControllerMixin
end
183RubyC06.qxd 1/7/02 2:50 PM Page 413

414 Chapter 6 • WWW and Networking with Ruby
This binding additionally requires a method defined in the “calling” compo-
nent, named treeModel, which returns an instance of the TreeModel class.
www.syngress.com
Figure 6.40 The TreeView Component (TreeView.html)
<%
class TreeView < Iowa::Component
attr_binding :model
attr_accessor :child
def action
model.controller.action(model, self)
end
# indentation of this components' parent
def parentIndent
model.isRoot ? "" : @parent.indent
end
# indentation for this components' childs
def indent
parentIndent +
if model.isLeaf
''
elsif model.isLastChild
'<img src="/images/blank.gif" width="16" height="22">'
else
'<img src="/images/vertline.gif" width="16" height="22">'
end
end
def getBranchIcon
name = 'node'
name = 'last' + name if model.isLastChild
Continued
183RubyC06.qxd 1/7/02 2:50 PM Page 414

WWW and Networking with Ruby • Chapter 6 415
www.syngress.com
Figure 6.40 Continued
name = (model.expanded ? 'm' : 'p') + name if not model.isLeaf
'/images/' + name + '.gif'
end
def getNodeIcon
name = if model.isLeaf
'doc'
elsif model.expanded
'folderopen'
else
'folderclosed'
end
'/images/' + name + '.gif'
end
end
%>
<?
nodeList : Repeat {
list = model.childs
item = child
}
subtree : TreeView {
model = child
}
?>
<table cellspacing="0" cellpadding="0" border="0"><tr>
<td nowrap>@parentIndent<a oid="action"><img border="0" width="16"
height="22" src="@getBranchIcon"><img border="0" width="24"
height="22" src="@getNodeIcon"></a></td>
Continued
183RubyC06.qxd 1/7/02 2:50 PM Page 415

416 Chapter 6 • WWW and Networking with Ruby
Now with the help of the TreeView component (and the TreeModel and
TreeController classes), we can simply implement the file viewer application as
shown in Figure 6.42.You can find the source code of this application (the file
Main.html, shown in Figure 6.41) and all files making up the TreeView compo-
nent (TreeView.html,TreeModel.rb, and TreeController.rb) at www.syngress
.com/solutions under the iowa-treeview directory.The images necessary to display
the tree can be found in the subdirectory images; put them into a directory
known by your Web server, so that they become available through the URL
/images/XXX where XXX is the name of the image.
To start the file viewer application, invoke Ruby from the iowa-treeview direc-
tory, as shown:
ruby –r iowa –e 'Iowa.run("fileviewer")'
Then point your browser to the URL http://yourhost/iowa/fileviewer, and
enjoy!
Figure 6.41 File Viewer Application (Main.html)
<%
require "TreeModel"
require "TreeController"
import "TreeView"
class Main < Iowa::Component
attr_reader :rootNode, :selected
include TreeControllerMixin
DIR = "/home/michael/devel"
Figure 6.40 Continued
<td valign="middle" nowrap>@model.name</td>
</tr></table>
<if oid="model.expanded">
<repeat oid="nodeList"><TreeView oid="subtree"/></repeat>
</if>
Continued
www.syngress.com
183RubyC06.qxd 1/7/02 2:50 PM Page 416

WWW and Networking with Ruby • Chapter 6 417
www.syngress.com
Figure 6.41 Continued
def action(model, view)
__action(model, view)
@selected = model
yield self # display page
end
def awake
@rootNode = TreeModel.new(DIR) { genNodes(DIR) }
@rootNode.attrs['filename'] = DIR
@rootNode.controller = self
@selected = @rootNode
end
def fileName
@selected.attrs['filename']
end
def fileContent
require "cgi"
if File.directory? fileName
CGI.escapeHTML `ls -la #{ fileName }`
else
CGI.escapeHTML File.readlines(fileName).to_s
end
end
private
def genNodes(path)
Dir[path+"/*"].collect do |name|
bn = File.basename(name)
n = if FileTest.directory? name
TreeModel.new(bn) { genNodes(name) }
Continued
183RubyC06.qxd 1/7/02 2:50 PM Page 417

418 Chapter 6 • WWW and Networking with Ruby
www.syngress.com
Figure 6.41 Continued
else
TreeModel.new(bn)
end
n.attrs['filename'] = name
n
end
end
end
%>
<?
nd : TreeView {
model = rootNode
}
?>
<html>
<head><title>File Viewer</title></head>
<body>
<table cellspacing="5">
<tr>
<td valign="top">
<TreeView oid="nd"/>
</td>
<td valign="top" bgcolor=#BBBBBB>
<b>@fileName</b>
<pre>@fileContent</pre>
</td>
</tr>
</table>
</body>
</html>
183RubyC06.qxd 1/7/02 2:50 PM Page 418

WWW and Networking with Ruby • Chapter 6 419
www.syngress.com
Figure 6.42 File Viewer Application Using the TreeView Component for IOWA
183RubyC06.qxd 1/7/02 2:50 PM Page 419

420 Chapter 6 • WWW and Networking with Ruby
Summary
Ruby’s full Web ability is still in development in many areas, so just how much of
an impact it will develop on the Internet side of the open source programming
field is still to be determined; however, it is already a strong Web language alter-
native.
The Socket class contains everything the Ruby programmer will need to work
with the low-level networking/Web services, such as TCP/IP and raw socket
creation. If all you need to do, however, is work with a server or create a thin
HTTP client, you can always use the Net class, which contains pre-built high-
level Internet objects that handle many of the popular protocols, such as HTTP
and FTP.
Ruby does not always need to stand alone as a CGI/Perl language; with some
modifications, Ruby has been able to work together with PHP as an embedded
scripting language and can be optimized through mod_ruby. IOWA provides
Ruby programmers with yet another alternative by creating a framework that has
Ruby as its central language.
Through our example in this chapter using the online shop component, we
have been able to see that Ruby is not only a language for desktop applications.
It is also a full-bodied Web language that can stand alone or work with any
existing scripting language. Ruby can interact easily with database components as
well, showing that Ruby is just as flexible as the other languages available.
Solutions Fast Track
Connecting to the Web with Ruby
;The NET package stores the functionality that you will need to create
high-level applications, such as HTTP clients and FTP clients.
;The SOCKET package stores the functionality that you will need to
create low-level connections, such as raw TCP/IP sockets or UDP
sockets.
Using Ruby on the Web
;You can use Ruby’s CGI class to generate and interact with users of
your Web page.
www.syngress.com
183RubyC06.qxd 1/7/02 2:50 PM Page 420

WWW and Networking with Ruby • Chapter 6 421
;Templating is a method that allows you to separate your Ruby code
from your HTML code yet be able to access it through tags on your
HTML page. Some templating solutions have the Ruby code inline
while other templating solutions have a Ruby file which in turns calls
the HTML file.
;HTML/Template and Ruby-tmpl are templating extensions for Ruby.
Implementing an Online Shop
;CGI and FastCGI, while standards of programming, required more
coding than the Ruby and eruby counterparts.
;Mod_Ruby is an excellent utility for speeding up the programming
process of Ruby.
;Eruby, a scripting language for Ruby, can also take advantage of the
resources provided by mod_Ruby.
Using mod_ruby and eruby
;Ruby is not limited to being just like a CGI/Perl file.
;Using the eruby module, Ruby can be interwoven with HTML and
PHP to create a style that incorporates not only one scripting language,
but three different languages.
;Mod_ruby can speed up the speed of your Ruby (*.rb) files by
optimizing the compiler.
Installing and Configuring IOWA
;IOWA installation is as easy as running the setup.rb file from the
command line.
;IOWA works best with an Apache Web server, but does not depend on
an Unix server. It can even run on a Windows 2000 machine.
www.syngress.com
183RubyC06.qxd 1/7/02 2:50 PM Page 421

422 Chapter 6 • WWW and Networking with Ruby
Frequently Asked Questions
The following Frequently Asked Questions, answered by the authors of this book,
are designed to both measure your understanding of the concepts presented in
this chapter and to assist you with real-life implementation of these concepts. To
have your questions about this chapter answered by the author, browse to
www.syngress.com/solutions and click on the “Ask the Author” form.
Q: Are the Socket and Net class extra modules?
A: No, the Socket and Net class are part of the standard Ruby installation.
Q: It seems as though it is difficult to install some of these applications on
Windows. Is there a way to facilitate this?
A: Many of the module programmers have released versions for Windows DOS
and they have been able to install without any problems.To get the best out
of these modules under Windows it is best to stay with either Windows 98 SE
or Windows 2000;Windows ME and Windows XP remove the user interface
with DOS.
Q: I am having trouble running IOWA on a Windows 2000 machine running
Apache;Windows says I am not authorized to work with these files.Where
could the trouble be?
A: Check the ownership of the IOWA and Apache files and see if you have per-
mission to access them.
Q: Are there any other types of server architectures?
A: Recently there has been talk of G-Server Architecture but it has been imple-
mented on only one Ruby application so far.The majority of the servers
widely used today use one of the three implementations mentioned in this
chapter.
www.syngress.com
183RubyC06.qxd 1/7/02 2:50 PM Page 422

Miscellaneous
Libraries and Tools
Solutions in this chapter:
■Graphics Programming in Ruby
■Mathematical Programming in Ruby
■Using C/S Data-Structure Tools
■Using Random Numbers, Genetic
Algorithms, and Neural Nets
■Working with Ruby and Windows
■Using OOP-Related Tools
■Using Text-Processing, Date, and Calendar
Tools
■Using Language Bindings
;Summary
;Solutions Fast Track
;Frequently Asked Questions
Chapter 7
423
183RubyC07.qxd 1/7/02 1:15 PM Page 423

424 Chapter 7 • Miscellaneous Libraries and Tools
Introduction
Ruby is a new, exciting, object-oriented scripting language—but due to its status
as a relative newcomer to the world of programming, one might expect that
there is little support in the way of libraries and packages. On the contrary,
because of Ruby’s ease of extendibility, there exists a rapidly growing list of
libraries and extensions. In this chapter we explore a small subset of that list, with
the hope of both being immediately applied to current projects and also encour-
aging the reader to explore the marvelous contributions out there.
In this chapter we discuss five broad categories of topics.The first topic we
describe will be graphics. Since the topic is rather broad and involved, we will
expend our energy exposing some methodology.The second topic is algorithms
and data structures; this will be broken up into two groups, those that deal with
primarily mathematical notions and those that are of a more computer-science
nature.The third topic to be discussed involves Ruby and Windows. Since we
discussed GUI development in Chapter 2, we can focus here on other topics,
such as COM and Active Script.The fourth topic is an examination of some
convenient libraries which aid in object-oriented development.The final topic
discusses cutting edge technologies that allow Ruby to interface with code
written in other languages.This gives us as developers the ability to take advan-
tage of the ease of Ruby development inside other environments such as Java
and Python.
NOTE
There are basically two types of libraries, those written in pure Ruby, and
those that are C extensions to Ruby. Generally, pure Ruby extensions only
require being on the search path. The C extensions to Ruby are usually
installed by unzipping or untarring, and then at the command line
typing ruby extconf.rb, which builds a Makefile. A make is then per-
formed, followed often by a make site-install or make install.
Graphics Programming in Ruby
There are many different graphics-related packages that are supported in Ruby.
For example, inside the Library section under Graphics in the Ruby Application
www.syngress.com
183RubyC07.qxd 1/7/02 1:15 PM Page 424

Miscellaneous Libraries and Tools • Chapter 7 425
Archives (RAA), you can find support for OpenGL, GD, GD::Graph, PGPlot and
Imlib2 (http://ruby-lang.org/en/raa.html). In this section we will discuss Ruby
support for both OpenGL and GD Graph.
Using OpenGL in Ruby
OpenGL is probably one of the most well-known and powerful graphics
library in the programming community.To this end, an OpenGL interface
module has been developed by Yoshiyuki Kusano. In the sections that follow,
we will create a simple application that will illustrate how to use OpenGL in a
Ruby environment.
Defining the Goal and the Strategy
First let’s define the goal of our sample application.The return on treasuries
(bonds) maturing at different times generates a curve called a yield curve, which
will be the focus of our application.The rate of return for long-term bonds is
usually better than the rate of return for short-term bonds. However, the shape of
this curve varies over time, and a bond trader may be interested in seeing how
the shape has evolved over the last 12 months. Our example involves plotting and
comparing 12 different curves (one for each month).What we want to do is to
line these curves up next to each other, forming a three-dimensional picture. (We
might want to do the same thing to analyze a spectrogram, the evolution of the
frequency distribution over time of a voice sample) The general problem is to
create a sequence of 2D graphs lined up against each other; since several sample
programs are included with the OpenGL package, it seems reasonable to start
with one of the samples and evolve it in such a way that it eventually satisfies our
desired requirements.
Starting with a Sample Program
The first thing we do is to peruse the collection of samples that have been
included with the OpenGL interface. Some, such as teapot.rb, are quite striking.
But remember, what we want to do is represent a sequence of curves. If we can
represent a single curve, then we should be able to replicate it.A curve is easier to
see if we fill the area below the curve, and since this curve is to reside in three
dimensions, it should probably have a thickness. Looking at the sample programs,
the closest and simplest thing that is similar is cube.rb.When we run ruby
cube.rb from the command line we will see a window similar to that shown in
Figure 7.1.
www.syngress.com
183RubyC07.qxd 1/7/02 1:15 PM Page 425

426 Chapter 7 • Miscellaneous Libraries and Tools
Although this is not the most exciting figure, it is a start.What we will do is
create our curve by piecing blocks together to form a row.The blocks will vary
in height, and thus trace out the value of the curve. So let’s first examine the
code of cube.rb (shown in Figure 7.2 and found at www.syngress.com/
solutions).
www.syngress.com
Figure 7.1 Ruby cube.rb Image
Figure 7.2 cube.rb
require "opengl"
require "glut"
$light_diffuse = [1.0, 0.7, 0.7, 1.0]
$light_position = [1.0, 1.0, 1.0, 0.0]
$n = [
[-1.0, 0.0, 0.0], [0.0, 1.0, 0.0], [1.0, 0.0, 0.0],
[0.0, -1.0, 0.0], [0.0, 0.0, 1.0], [0.0, 0.0, -1.0] ]
Continued
183RubyC07.qxd 1/7/02 1:15 PM Page 426

Miscellaneous Libraries and Tools • Chapter 7 427
www.syngress.com
Figure 7.2 Continued
$faces = [
[0, 1, 2, 3], [3, 2, 6, 7], [7, 6, 5, 4],
[4, 5, 1, 0], [5, 6, 2, 1], [7, 4, 0, 3] ]
def drawBox
for i in (0..5)
GL.Begin(GL::QUADS)
GL.Normal(*($n[i]))
# GL.Vertex3f(*$v[$faces[i][0]])
# GL.Vertex3f(*$v[$faces[i][1]])
# GL.Vertex3f(*$v[$faces[i][2]])
# GL.Vertex3f(*$v[$faces[i][3]])
GL.Vertex($v[$faces[i][0]])
GL.Vertex($v[$faces[i][1]])
GL.Vertex($v[$faces[i][2]])
GL.Vertex($v[$faces[i][3]])
GL.End()
end
end
display = Proc.new {
GL.Clear(GL::COLOR_BUFFER_BIT | GL::DEPTH_BUFFER_BIT)
drawBox
GLUT.SwapBuffers
}
def myinit
# $v[0,0] = $v[1,0] = $v[2,0] = $v[3,0] = -1;
# $v[4,0] = $v[5,0] = $v[6,0] = $v[7,0] = 1;
# $v[0,1] = $v[1,1] = $v[4,1] = $v[5,1] = -1;
Continued
183RubyC07.qxd 1/7/02 1:15 PM Page 427

428 Chapter 7 • Miscellaneous Libraries and Tools
This code can be described in roughly five pieces.The first piece defines
some constants to be used later.The second piece, drawBox, is a drawing routine
that draws a box.The third piece defines a process, display, which calls the
drawBox method.The fourth piece, myinit, is an initialization method which sets
www.syngress.com
Figure 7.2 Continued
# $v[2,1] = $v[3,1] = $v[6,1] = $v[7,1] = 1;
# $v[0,2] = $v[3,2] = $v[4,2] = $v[7,2] = 1;
# $v[1,2] = $v[2,2] = $v[5,2] = $v[6,2] = -1;
$v = [[-1, -1,1],[-1, -1,-1], [-1,1,-1], [-1,1,1], [1, -1,1],
[1, -1,-1], [1, 1,-1], [1,1,1]]
GL.Light(GL::LIGHT0, GL::DIFFUSE, $light_diffuse)
GL.Light(GL::LIGHT0, GL::POSITION, $light_position)
GL.Enable(GL::LIGHT0)
GL.Enable(GL::LIGHTING)
GL.Enable(GL::DEPTH_TEST)
GL.MatrixMode(GL::PROJECTION)
GLU.Perspective(40.0, 1.0, 1.0, 10.0)
GL.MatrixMode(GL::MODELVIEW)
GLU.LookAt(0.0, 0.0, 5.0, 0.0, 0.0, 0.0, 0.0, 1.0, 0.0)
GL.Translate(0.0, 0.0, -1.0)
GL.Rotate(60, 1.0, 0.0, 0.0)
GL.Rotate(-20, 0.0, 0.0, 1.0)
end
GLUT.Init
GLUT.InitDisplayMode(GLUT::DOUBLE | GLUT::RGB | GLUT::DEPTH)
GLUT.CreateWindow("red 3D lighted cube")
GLUT.DisplayFunc(display)
myinit
GLUT.MainLoop()
183RubyC07.qxd 1/7/02 1:15 PM Page 428

Miscellaneous Libraries and Tools • Chapter 7 429
up some lighting and perspectives.The final piece does some more initialization,
calls the myinit, creates the window via CreateWindow, and runs the MainLoop.
We will keep the general form, but replace drawBox with draw, which will call
makeRow and drawRow. The row can be thought of as being composed of 20
rectangular-based columns, with a rectangular front and back, and with trapezoids
on the sides.We fill a row with data inside makeRow and we render that data
inside drawRow. Actually, drawRow will have to draw its top and four sides: top,
front, back, left and right.This is accomplished by calling drawFront,drawBack,
drawSide, and drawTop. Now the front and back faces are just rectangular sides like
the cube.We note that in addition to the corners, we must provide an outward-
pointing normal vector (that is, a vector perpendicular to the surface). For the
front, back, and sides, it’s pretty easy to figure out what the normal vector is, but
for the top we must compute it.This is done by taking the cross product of the
vector, determined by two adjacent edges.The sides are composed of trapezoids.
Now, it would be tempting to use GL::POLYGON for the sides and do it in one
step, but GL::POLYGON requires that the shape of the polygon is convex,
which will generally not be the case.Thus, the sides need to be pieced together
as 20 individual trapezoidal strips. Fortunately, there is a relatively easy way to do
this, namely to use QUAD::STRIP.Thinking of zas a function of xand y,it
seems appropriate to have the z-axis pointing upward. However, by default
OpenGL has the z-axis point out of the screen.Therefore, at the end of our
myinit we perform a couple of rotations.We also edit the constants to create a
change in the lighting. Putting it all together, we have the code shown in Figure
7.3 (this is the ParabolaGraph.rb file at www.syngress.com/solutions).
www.syngress.com
Figure 7.3 ParabolaGraph.rb
require "opengl"
require "glut"
$light_diffuse = [0.0, 1.0, 1.0, 1.0]
$light_position = [1.0, 1.0, 1.0, 0.0]
$light_ambient = [0.3, 0.0, 0.2, 1.0]
$material_specular = [0.7, 0.9, 0.9, 1.0]
$material_emitted = [0.7, 0.7, 0.7, 1.0]
$material_specular = [0.7, 0.7, 0.7, 1.0]
Continued
183RubyC07.qxd 1/7/02 1:15 PM Page 429

430 Chapter 7 • Miscellaneous Libraries and Tools
www.syngress.com
Figure 7.3 Continued
shininess = 0.7
nTheta = 70
nPhi = 30
def drawTop( row, width)
x1,y1,z1=row[0]
x2=x1+width
(1...row.length).each do |i|
y2, z2 = row[i][1], row[i][2]
normal = [0.0, z1-z2, y2-y1]
l = Math.sqrt( normal[1]*normal[1]+normal[2]*normal[2])
normal.collect!{ |x| x=x/l }
GL.Begin(GL::POLYGON)
GL.Normal(*normal)
GL.Vertex(x1,y1,z1)
GL.Vertex(x1,y2,z2)
GL.Vertex(x2,y2,z2)
GL.Vertex(x2,y1,z1)
GL.End
y1, z1 = y2, z2
end
end
def drawSide( row, width=0.0, side = 1.0)
x=row[0][0]+width
GL.Begin(GL::QUAD_STRIP)
normal = [side, 0.0, 0.0]
GL.Normal(*normal)
(0...row.length).each do |i|
y, z = row[i][1], row[i][2]
GL.Vertex(x,y,0.0)
GL.Vertex(x,y,z)
Continued
183RubyC07.qxd 1/7/02 1:15 PM Page 430

Miscellaneous Libraries and Tools • Chapter 7 431
www.syngress.com
Figure 7.3 Continued
end
GL.End
end
def drawFront(row, width)
normal = [0.0, 1.0, 0.0]
x, y, z = row.last
GL.Begin(GL::QUADS)
GL.Normal(*normal)
GL.Vertex(x,y,0.0)
GL.Vertex(x,y,z)
GL.Vertex(x+width,y,z)
GL.Vertex(x+width,y,0.0)
GL.End
end
def drawBack(row, width)
normal = [0.0, -1.0, 0.0]
x, y, z = row.first
GL.Begin(GL::QUADS)
GL.Normal(*normal)
GL.Vertex(x,y,0.0)
GL.Vertex(x,y,z)
GL.Vertex(x+width,y,z)
GL.Vertex(x+width,y,0.0)
GL.End
end
def drawRow row
dx=.3
drawTop( row, dx )
drawSide(row, dx , 1.0) #left
drawSide(row, 0.0, 1.0) #right
Continued
183RubyC07.qxd 1/7/02 1:15 PM Page 431

432 Chapter 7 • Miscellaneous Libraries and Tools
www.syngress.com
Figure 7.3 Continued
drawFront(row, dx)
drawBack(row, dx)
end
def makeRow
dy=.1
row= []
x, y = 0.0, -1.0
(-10..10).each do |i|
z = y*y
row << [x, y, z]
y = y+dy
end
return row
end
def draw
row = makeRow
drawRow row
end
display = Proc.new {
GL.Clear(GL::COLOR_BUFFER_BIT | GL::DEPTH_BUFFER_BIT)
draw # this is where we do the drawing
GLUT.SwapBuffers
}
def myinit
GL.Light(GL::LIGHT0, GL::DIFFUSE, $light_diffuse)
GL.Light(GL::LIGHT0, GL::POSITION, $light_position)
GL.Light(GL::LIGHT0, GL::SPECULAR, $material_specular)
GL.Material(GL::FRONT, GL::SPECULAR, $material_specular)
Continued
183RubyC07.qxd 1/7/02 1:15 PM Page 432

Miscellaneous Libraries and Tools • Chapter 7 433
www.syngress.com
Figure 7.3 Continued
GL.Material(GL::FRONT, GL::SPECULAR, $material_specular)
GL.Material(GL::BACK, GL::SPECULAR, $material_specular)
GL.Material(GL::BACK, GL::SPECULAR, $material_specular)
GL.Enable(GL::LIGHT0)
GL.Enable(GL::LIGHTING)
GL.Enable(GL::DEPTH_TEST)
GL.MatrixMode(GL::PROJECTION)
GLU.Perspective(40.0, 1.0, 1.0, 10.0)
GL.MatrixMode(GL::MODELVIEW)
GLU.LookAt(0.0, 0.0, 5.0, 0.0, 0.0, 0.0, 0.0, 1.0, 0.0)
# standardize the coordinates so that z iR pointing up
# and use spherical coord phi and theta, where phi == 0
# means the z axis is pointing up: and if in adition theta ==0
# then the y axis is pointing directly at the viewer
phi = 20 # phi is the angle between the z-axis and the eyeball
theta = -30 # theta is the rotation of the about the z axis
GL.Rotate(phi-90.0, 1.0, 0.0, 0.0)
GL.Rotate(theta-90.0, 0.0, 0.0, 1.0)
end
GLUT.Init
GLUT.InitDisplayMode(GLUT::DOUBLE | GLUT::RGB | GLUT::DEPTH)
GLUT.CreateWindow("graph test")
GLUT.DisplayFunc(display) # this sets the display rendering function
myinit
GLUT.MainLoop()
183RubyC07.qxd 1/7/02 1:15 PM Page 433

434 Chapter 7 • Miscellaneous Libraries and Tools
This produces an image similar to the one seen in Figure 7.4.
Creating Multiple Curves
Now we adjust the code to create several curves at once by replacing makeRow
with makeRows:
def makeRows
dy=.1
row1, row2, row3 = [], [], []
x1, x2, x3, y = 0.0, 0.4, 0.8, -1.0
(-10..10).each do |i|
z = 0.5-y/2.0
row1 << [x1, y, z]
z= y* y
row2 << [x2, y, z]
z= 3.0/8.0 + y*(y-1.0)*(y+1.0)
row3 << [x3, y, z]
y = y+dy
www.syngress.com
Figure 7.4 Ruby 3-D Parabola Image
183RubyC07.qxd 1/7/02 1:15 PM Page 434

Miscellaneous Libraries and Tools • Chapter 7 435
end
return row1, row2, row3
end
def draw
rows = makeRows
rows.each{ |row| drawRow row }
end
This produces our graph test, similar to the image seen in Figure 7.5.
For a final touch, we will set the amplitude of the curves to be radially sinu-
soidal and modulate by an exponential of the radius. Additionally, we touch up
some of the surface lighting.The complete listing is shown in Figure 7.6. and can
be found in the ExpModCos.rb file at www.syngress.com/solutions.
www.syngress.com
Figure 7.5 Ruby 3-D Multi BarGraph
183RubyC07.qxd 1/7/02 1:15 PM Page 435

436 Chapter 7 • Miscellaneous Libraries and Tools
www.syngress.com
Figure 7.6 ExpModCos.rb
require "opengl"
require "glut"
$light_diffuse = [0.0, 0.5, 0.5, 1.0]
$light_position = [1.0, 1.0, 1.0, 0.0]
$light_ambient = [0.3, 0.1, 0.2, 1.0]
$light_specular = [0.6, 0.7, 0.9, 1.0]
$material_specular = [0.5, 0.5, 0.7, 1.0]
$shininess = 0.7
Pi = 3.14
def drawTop( row, width)
x1,y1,z1=row[0]
x2=x1+width
(1...row.length).each do |i|
y2, z2 = row[i][1], row[i][2]
normal = [0.0, z1-z2, y2-y1]
l = Math.sqrt( normal[1]*normal[1]+normal[2]*normal[2])
normal.collect!{ |x| x=x/l }
GL.Begin(GL::POLYGON)
GL.Normal(*normal)
GL.Vertex(x1,y1,z1)
GL.Vertex(x1,y2,z2)
GL.Vertex(x2,y2,z2)
GL.Vertex(x2,y1,z1)
GL.End
y1, z1 = y2, z2
end
end
def drawSide( row, width=0.0, side = 1.0)
x=row[0][0]+width
GL.Begin(GL::QUAD_STRIP)
Continued
183RubyC07.qxd 1/7/02 1:15 PM Page 436

Miscellaneous Libraries and Tools • Chapter 7 437
www.syngress.com
Figure 7.6 Continued
normal = [side, 0.0, 0.0]
GL.Normal(*normal)
(0...row.length).each do |i|
y, z = row[i][1], row[i][2]
GL.Vertex(x,y,0.0)
GL.Vertex(x,y,z)
end
GL.End
end
def drawFront(row, width)
normal = [0.0, 1.0, 0.0]
x, y, z = row.last
GL.Begin(GL::QUADS)
GL.Normal(*normal)
GL.Vertex(x,y,0.0)
GL.Vertex(x,y,z)
GL.Vertex(x+width,y,z)
GL.Vertex(x+width,y,0.0)
GL.End
end
def drawBack(row, width)
normal = [0.0, -1.0, 0.0]
x, y, z = row.first
GL.Begin(GL::QUADS)
GL.Normal(*normal)
GL.Vertex(x,y,0.0)
GL.Vertex(x,y,z)
GL.Vertex(x+width,y,z)
GL.Vertex(x+width,y,0.0)
GL.End
end
Continued
183RubyC07.qxd 1/7/02 1:15 PM Page 437

438 Chapter 7 • Miscellaneous Libraries and Tools
www.syngress.com
Figure 7.6 Continued
def drawRow row
dx=.1
drawTop( row, dx )
drawSide(row, dx , 1.0) #left
drawSide(row, 0.0, 1.0) #right
drawFront(row, dx)
drawBack(row, dx)
end
def makeRow( x )
dy=.05
row = []
y = -1.0
(-20..20).each do |i|
z = yield(y)
row << [x, y, z]
y = y+dy
end
return row
end
def makeRows
rows=[]
(-20..20).each{ |i|
x=.1*i
rows<<makeRow(x){ |y|
.5*(1+Math.cos(Math.sqrt(x*x+y*y)*2*3.14 ))*
Math.exp(-(x*x+y*y))
}
return rows
end
def draw
Continued
183RubyC07.qxd 1/7/02 1:15 PM Page 438

Miscellaneous Libraries and Tools • Chapter 7 439
www.syngress.com
Figure 7.6 Continued
rows = makeRows
rows.each{ |row| drawRow row }
end
display = Proc.new {
GL.Clear(GL::COLOR_BUFFER_BIT | GL::DEPTH_BUFFER_BIT)
draw # this is where we do the drawing
GLUT.SwapBuffers
}
def myinit
GL.Light(GL::LIGHT0, GL::DIFFUSE, $light_diffuse)
GL.Light(GL::LIGHT0, GL::POSITION, $light_position)
GL.Light(GL::LIGHT0, GL::SPECULAR, $material_specular)
GL.Material(GL::FRONT, GL::SPECULAR, $material_specular)
GL.Material(GL::FRONT, GL::SHININESS, $shininess)
GL.Enable(GL::LIGHT0)
GL.Enable(GL::LIGHTING)
GL.Enable(GL::DEPTH_TEST)
GL.MatrixMode(GL::PROJECTION)
GLU.Perspective(40.0, 1.0, 1.0, 10.0)
GL.MatrixMode(GL::MODELVIEW)
GLU.LookAt(0.0, 0.0, 5.0, 0.0, 0.0, 0.0, 0.0, 1.0, 0.0)
# standardize the coordinates so that z iR pointing up
# and use spherical coord phi and theta, where phi == 0
# means the z axis is pointing up: and if in adition theta ==0
# then the y axis is pointing directly at the viewer
phi = 20 # phi is the angle between the z-axis and the eyeball
Continued
183RubyC07.qxd 1/7/02 1:15 PM Page 439

440 Chapter 7 • Miscellaneous Libraries and Tools
The final result looks like the image seen in Figure 7.7.
www.syngress.com
Figure 7.6 Continued
theta = -30 # theta is the rotation of the about the z axis
GL.Rotate(phi-90.0, 1.0, 0.0, 0.0)
GL.Rotate(theta-90.0, 0.0, 0.0, 1.0)
GL.Translate(0.0, 0.0, -0.5)
end
GLUT.Init
GLUT.InitDisplayMode(GLUT::DOUBLE | GLUT::RGB | GLUT::DEPTH)
GLUT.CreateWindow("graph test")
GLUT.DisplayFunc(display) # this sets the display rendering function
myinit
GLUT.MainLoop()
Figure 7.7 Ruby 3D-Exponentially Modulated Cosine
183RubyC07.qxd 1/7/02 1:16 PM Page 440

Miscellaneous Libraries and Tools • Chapter 7 441
Generating Diagrams with GD::Graph
GD::Graph is a wrapper around Perl’s GD::Graph and GD::Graph3D libraries
written in Ruby. Because the two Perl libraries depend only on the widely used
library GD.pm, they are easy to install and very portable.
Effectively, GD::Graph does nothing more than to convert the method calls it
receives to appropriate Perl code, fork a Perl interpreter, and feed that with the
generated Perl code.The Perl code gets executed and sends the picture data back
through a pipe, and finally the picture arrives by the Ruby application calling the
GD::Graph library.
You can download GD::Graph from the RAA in the Library section under
Graphics.Additionally, you will need a Perl interpreter, GD.pm, and at least one of
the Perl libraries (GD::Graph or GD::Graph3D).
The code shown in Figure 7.8 generates a very simple three-dimensional bar-
diagram with two data sets (seee the gdBarGraph.rb file at www.syngress.com/
solutions).
www.syngress.com
Figure 7.8 gdBarGraph.rb
require 'gd/graph'
# create new diagram object
graph = GD::Graph::Bars3d(400,200) # widht, height
# set some options
graph.set(
:x_label => 'Day of week', # x-axis label
:y_label => 'Number of hits', # y-axis label
:title => 'Diagram Title' # diagram title
# you may set here any other options available
# in Perl's GD::Graph or GD::Graph3d
)
# plot the diagram...
graph.plot([
# x-axis values
Continued
183RubyC07.qxd 1/7/02 1:16 PM Page 441

442 Chapter 7 • Miscellaneous Libraries and Tools
Use the methods png and gif to create .png or .gif images instead of .jpegs.
Ruby’s GD::Graph library currently supports the Bars,Lines,Points,
LinesPoints,Area,Mixed,Pie,Bars3d,Lines3d, and Pie3d diagram types, all classes
under module GD::Graph.They work in the same way as shown in Figure 7.8.
For more information consult the man pages of Perl’s GD::Graph or
GD::Graph3D.
Mathematical Programming in Ruby
In this section we will discuss NArray, an array handling package, and BigFloat, a
package for dealing with floats of almost unlimited size, as well as Polynomial, a
package which deals with prime factorizations, polynomials, and infinitesimals.
Last, we’ll take a look at a package called Algebra, which deals with algebraic
mathematical concepts such as rings, matrices, polynomial factorization and
Gaussian elimination.
Using the NArray Library
Suppose that you are working on a project that requires the addition of two vec-
tors. If it’s sufficiently late at night and you are sufficiently sleepy, you might be
tempted to try something like this:
[1,2]+[3,4]
But you shouldn’t be too surprised if instead of [4,6], Ruby returns:
>> [1,2,3,4]
www.syngress.com
Figure 7.6 Continued
['Sun', 'Mon', 'Tue', 'Wed', 'Thu', 'Fri', 'Sat'],
# data-sets
[123, 555, 1200, 7, 4000, 401, 1913],
[339, 8393, 421, 876, 5143, 56, 737]
])
# ... and save it as image
f = File.new("my_diag.jpg", "w+")
graph.jpeg(f)
f.close
183RubyC07.qxd 1/7/02 1:16 PM Page 442

Miscellaneous Libraries and Tools • Chapter 7 443
Obviously, you wanted component-wise addition instead of concatenation.
Now, clearly you can overload +for the Array class, but this is rather haz-
ardous, since it might break a lot of other code that relies on the Array class.
You could define a new member method for the Array class, called, for
example, plus. However, this is not elegant and one might wonder what should
happen when the components are not numeric.The most satisfactory choice is
to construct a numerical array class.This new array class could contain all sorts
of methods besides just +; in addition, since you would like this class to per-
form its operations quickly, this numerical array library should interface with
native C code. Fortunately, there is already such a numerical array library,
namely NArray.To demonstrate, we will use it to write a small piece of code
to add two vectors:
require 'narray'
a= NArray.int(2)
b= NArray.int(2)
a[0]=1
a[1]=2
p a
b[0]=3
b[1]=4
p b
p a+b
This results with an output of:
NArray.int(2):
[ 1, 2 ]
NArray.int(2):
[ 3, 4 ]
NArray.int(2):
[ 4, 6 ]
So NArray certainly satisfies the minimal functionality demanded—and in
fact, it does much more: It is a general matrix-processing library.The following
code sample exhibits some of the basic matrix operations:
require 'narray'
require 'irb/xmp'
www.syngress.com
183RubyC07.qxd 1/7/02 1:16 PM Page 443

444 Chapter 7 • Miscellaneous Libraries and Tools
# xmp :: http://www.ruby-lang.org/en/raa-list.rhtml?name=xmp
m1 = NMatrix.float(2,2).indgen!
m2 = NMatrix[[0,1.2],[1.5,0]]
v1 = NVector[0.5,1.5]
v2 = NVector.float(2,2).indgen!
a = NArray.float(2,2).indgen!
xmp 'm1'
xmp 'm1.inverse'
xmp 'm2'
xmp 'm1*m2'
xmp 'm2*m1'
xmp 'm1+m2'
xmp '3.14*m1'
xmp 'm2*1.25'
xmp 'v1'
xmp 'v2'
xmp '1.25*v1'
xmp 'NMath.sqrt(v2**2)'
xmp 'v1*v2'
xmp 'm1*v1'
xmp 'v2*m2'
xmp 'm1.diagonal([98,99])'
xmp 'NMatrix.float(4,3).unit'
The resulting output is as follows:
m1
==>NMatrix.float(2,2):
[ [ 0.0, 1.0 ],
[ 2.0, 3.0 ] ]
m1.inverse
==>NMatrix.float(2,2):
www.syngress.com
183RubyC07.qxd 1/7/02 1:16 PM Page 444

Miscellaneous Libraries and Tools • Chapter 7 445
[ [ -1.5, 0.5 ],
[ 1.0, 0.0 ] ]
m2
==>NMatrix.float(2,2):
[ [ 0.0, 1.2 ],
[ 1.5, 0.0 ] ]
m1*m2
==>NMatrix.float(2,2):
[ [ 1.5, 0.0 ],
[ 4.5, 2.4 ] ]
m2*m1
==>NMatrix.float(2,2):
[ [ 2.4, 3.6 ],
[ 0.0, 1.5 ] ]
m1+m2
==>NMatrix.float(2,2):
[ [ 0.0, 2.2 ],
[ 3.5, 3.0 ] ]
3.14*m1
==>NMatrix.float(2,2):
[ [ 0.0, 3.14 ],
[ 6.28, 9.42 ] ]
m2*1.25
==>NMatrix.float(2,2):
[ [ 0.0, 1.5 ],
[ 1.875, 0.0 ] ]
v1
==>NVector.float(2):
[ 0.5, 1.5 ]
v2
==>NVector.float(2,2):
[ [ 0.0, 1.0 ],
[ 2.0, 3.0 ] ]
1.25*v1
www.syngress.com
183RubyC07.qxd 1/7/02 1:16 PM Page 445

446 Chapter 7 • Miscellaneous Libraries and Tools
==>NVector.float(2):
[ 0.625, 1.875 ]
NMath.sqrt(v2**2)
==>NArray.float(2):
[ 1.0, 3.60555 ]
v1*v2
==>NArray.float(2):
[ 1.5, 5.5 ]
m1*v1
==>NVector.float(2):
[ 1.5, 5.5 ]
v2*m2
==>NVector.float(2,2):
[ [ 1.5, 0.0 ],
[ 4.5, 2.4 ] ]
m1.diagonal([98,99])
==>NMatrix.float(2,2):
[ [ 98.0, 1.0 ],
[ 2.0, 99.0 ] ]
NMatrix.float(4,3).unit
==>NMatrix.float(4,3):
[ [ 1.0, 0.0, 0.0, 0.0 ],
[ 0.0, 1.0, 0.0, 0.0 ],
[ 0.0, 0.0, 1.0, 0.0 ] ]
You can see that matrix addition, multiplication, and inverse are supported
(and also transpose—not shown). Of course, in matrix algebra, the dimensions of
the matrices involved must be taken into account. For example, to perform addi-
tion of matrices, the dimensions should match.This means if we try to add two
matrices whose dimensions do not match, an exception should be thrown. For
example, if we append the following lines to the above code:
puts "\n=== following will fail ...\n"
xmp 'm1+v1'
xmp 'm1+1'
then an “Illegal operation: NMatrix + NVector” exception will be thrown. Using
xmp, the error will be recorded by an output similar to this:
www.syngress.com
183RubyC07.qxd 1/7/02 1:16 PM Page 446

Miscellaneous Libraries and Tools • Chapter 7 447
=== following will fail ...
m1+v1
TypeError: Illegal operation: NMatrix + NVector/...
/1m1+1
TypeError: Illegal operation: NMatrix + Fixnum/...
Here we used “…” to indicate that we have truncated the message.
NArray is a C extension of Ruby, which gives it a significant performance
advantage over pure Ruby libraries such as Vector and Matrix.Additionally,
NArray includes support of basic statistical operations such as mean, median, stan-
dard deviation (hence variance), covariance, etc. NArray also includes support for
LU factorization and Fast Fourier Transforms. NArray is authored by Masahiro
Tanaka and available through the RAA in the Library section under Numerical.It
is a requirement for several other packages, such as Pgplot.
Using the BigFloat Library
As the name suggests, BigFloat is a library for handling big floating-point num-
bers. It is a C extension to Ruby developed by Shigeo Kobayashi. It is available in
the RAA in the Library section under Numerical.This short example illustrates its
usage:
require 'BigFloat'
bf1 = BigFloat.new("01111111111.11111")
puts 'bf1=BigFloat.new("01111111111.11111")',bf1
bf2 = BigFloat.new("09999999999.99999")
puts 'bf2=BigFloat.new("09999999999.99999")',bf2
bf3 = bf2 * bf1
puts 'bf3 = bf2 * bf1',bf3
bf4 = bf2 + bf1
puts 'bf4 = bf2 + bf1',bf4
bf5 = bf2.power(5)
puts 'bf5 = bf2.power(5)',bf5
www.syngress.com
183RubyC07.qxd 1/7/02 1:16 PM Page 447

448 Chapter 7 • Miscellaneous Libraries and Tools
bf6 = BigFloat.new("")
puts 'bf6 = BigFloat.new("")',bf6
bf7 = BigFloat.new("xyzabc")
puts 'bf7 = BigFloat.new("xyzabc")',bf7
The resulting output is:
bf1=BigFloat.new("01111111111.11111")
0.111111111111111000E10
bf2=BigFloat.new("09999999999.99999")
0.999999999999999000E10
bf3 = bf2 * bf1
0.11111111111111088888888888888900E20
bf4 = bf2 + bf1
0.111111111111111E11
bf5 = bf2.power(5)
0.99999999999999500000000000000998999999999999401000E50
bf6 = BigFloat.new("")
0.0
bf7 = BigFloat.new("xyzabc")
0.0
The constructor for BigFloat requires a string representation of a float. If the
string does not represent a legitimate float, then 0.0 is assumed.
Using the Polynomial Library
Polynomial, developed by K. Kodama (also found in the RAA in the Library sec-
tion under Numerical), is written in pure Ruby. It consists of several pieces, and is
designed to give a synthetic approach to differentiation by use of non-standard
analysis or hyperreals.The idea is simple:The real numbers (reals) are extended to
include infinitesimals, so that differentiation may be performed by algebraic
manipulations and then taking the standard part.
To explain further, in non-standard analysis, hyperreals are created when we
extend the real numbers to include infinitesimals. Just as each complex number
can be decomposed into an imaginary and real part, each finite hyperreal can be
decomposed uniquely into the sum of a standard part (an ordinary real) and a
www.syngress.com
183RubyC07.qxd 1/7/02 1:16 PM Page 448

Miscellaneous Libraries and Tools • Chapter 7 449
non-standard part (an infinitesimal).A hyperreal, ε, is infinitesimal provided that
ε> 0 and ε< 1/n for every standard positive natural number n.Thus, if εis an
infinitesimal, then 0<ε<1, 0<ε<1/2, 0<ε<1/3, etc.With infinitesimals available,
limits are no longer necessary in expressing differentiation. For a standard real x
and a function F, the derivative of F evaluated at x, denoted by F’(x), is given by
the standard part of:
[F(x+ε)-F(x)] / ε
Here εis an infinitesimal. For example, if F(x) is squaring function x*x, then
we see by doing the algebra that F’(2) is just the standard part of:
[F(2+ε)-F(2)] / ε= [ 4+4*ε+ ε*ε– 4]/ ε= 4+ε
But the standard part of 4+εis just 4, so F’(2)=4.This is a special case of a
more general problem; compute the limit as happroaches 0of a function
G(x+h).The non-standard solution is to plug in x+εwhere εis an infinitesimal.
This process has been codified inside Polynomial.To demonstrate the non-stan-
dard approach more explicitly, consider the problem of computing the limit of
rational polynomial:
(x-1)(3x+2)/(x-1)(2x+1)
as x approaches 1.The astute reader will note that plugging in 1 for x gives 0/0.
In the non-standard approach, we plug in 1+εfor xwhere εis an infinitesimal
and take the standard part.This is precisely what is done in the following code
fragment:
require "hyperreal" # Non-standard real class
require "mathext" # extension for math.
def f1(x)
return (3*x**2-x-2)/(2*x**2-x-1)
# (x-1)(3x+2)/(x-1)(2x+1)
end
print "-- Let f1=(3*x**2-x-2)/(2*x**2-x-1).\n"
x=1+HyperReal::Epsilon
printf "f1(%s)=%s\n",x, f1(x)
Here the function f1 is given by the following equation:
www.syngress.com
183RubyC07.qxd 1/7/02 1:16 PM Page 449

450 Chapter 7 • Miscellaneous Libraries and Tools
And in order to compute lim x→1f(x), we simply evaluate f(1+ε) where εis
an infinitesimal, and take the standard part. In the code, HyperReal::Epsilon is ε.
Also note that print automatically extracts the standard part of an expression.The
output is:
-- Let f1=(3*x**2-x-2)/(2*x**2-x-1).
f1(1)=5/3
If
ε
is an infinitesimal, 1divided by εis infinitely large, thus plugging in
infinity=1/εgives us the limit as h approaches infinity.We demonstrate this in the
following code fragment:
x=HyperReal::Infinity # infinity
printf "f1(%s)=%s\n",x, f1(x)
This results with the output of:
f1(Infinity)=3/2
The following code exhibits both the polynomial algebraic manipulations and
utilizes the non-standard approach to differentiation. Here, two rational polyno-
mials are constructed, symbolically manipulated, and then differentiated:
require "rationalpoly"
# require "complex" # Complex coefficients
def sampleRationalPoly
r1=RationalPoly("x^2+1","x+2")
r2=RationalPoly("x+2","x+1")
printf "%s+%s = %s\n",r1,r2,r1+r2
printf "%s-%s = %s\n",r1,r2,r1-r2
printf "%s*%s = %s\n",r1,r2,r1*r2
print "-- We need to write reduction explicitly.\n"
printf "%s*%s = %s\n",r1,r2,(r1*r2).reduce
printf "%s/%s = %s\n",r1,r2,r1/r2
printf "(%s)**2=%s\n",r2,r2**(2)
f1(x) = 3x 2-x-2
2x2-x-1
www.syngress.com
183RubyC07.qxd 1/7/02 1:16 PM Page 450

Miscellaneous Libraries and Tools • Chapter 7 451
q,r=r1.divmod(r2)
printf "(%s).divmod(%s)=%s...%s\n",r1,r2,q,r
printf "(%s)'= %s\n",r1,r1.derivative
printf "(%s)''= %s\n",r1,r1.derivative(2)
printf "(%s)'''= %s\n",r1,r1.derivative(3)
end
sampleRationalPoly
The resulting output is:
(x^(2)+1)/(x+2)+(x+2)/(x+1) = (x^(3)+2x^(2)+5x+5)/(x^(2)+3x+2)
(x^(2)+1)/(x+2)-(x+2)/(x+1) = (x^(3)-3x-3)/(x^(2)+3x+2)
(x^(2)+1)/(x+2)*(x+2)/(x+1) = (x^(3)+2x^(2)+x+2)/(x^(2)+3x+2)
-- We need to write reduction explicitly.
(x^(2)+1)/(x+2)*(x+2)/(x+1) = (x^(2)+1)/(x+1)
(x^(2)+1)/(x+2)/(x+2)/(x+1) = (x^(3)+x^(2)+x+1)/(x^(2)+4x+4)
((x+2)/(x+1))**2=(x^(2)+4x+4)/(x^(2)+2x+1)
((x^(2)+1)/(x+2)).divmod((x+2)/(x+1))=x-3...(9x+13)/(x^(2)+3x+2)
((x^(2)+1)/(x+2))'= (x^(2)+4x-1)/(x^(2)+4x+4)
((x^(2)+1)/(x+2))''= (10)/(x^(3)+6x^(2)+12x+8)
((x^(2)+1)/(x+2))'''= (-30)/(x^(4)+8x^(3)+24x^(2)+32x+16)
Note the first, second, and third derivatives of the rational polynomial r1 are
transparently computed. For more information on non-standard analysis and
hyperreals, see Robert Goldblatt’s Lectures on the Hyperreals, volume 188 of the
Graduate Texts in Mathematics Series published by Springer Verlag, or see Nigel
Cutland’s Nonstandard Analysis and its Applications, volume 10 of the London
Mathematical Society Student Texts published by Cambridge University Press.Also
worth mentioning is J.E. Rubio’s Optimization and Nonstandard Analysis published
by Marcel Dekker.
Let’s discuss briefly the Number module, which is also included in the
Polynomial package.An example of the usage of Number is as follows:
require "number"
include Number
www.syngress.com
183RubyC07.qxd 1/7/02 1:16 PM Page 451

452 Chapter 7 • Miscellaneous Libraries and Tools
pr=7;n=5;
# inverse of n mod pr is given by inv(n, pr)
puts "#{n}*#{inv(n,pr)}= 1 (mod #{pr})"
# factorial is given by factorial
puts "#{n}!=#{factorial(n)}"
# lcm give the least common multiple
a = [24,81,56]
s=a.join(',')
theLCM=lcm(a)
puts "lcm(#{s})=#{theLCM}"
# gcd2 gives the greatest common divisor and some other info
theGCD,*aj=gcd2(a)
arr=[]
a.each_index{ |i| arr<<"(#{a[i]})*(#{aj[i]})" }
srr= arr.join('+')
puts "gcd(#{s}) = #{theGCD} = #{srr}"
# prime number test is given by
n=10000000019
puts "prime?(#{n})=#{prime?(n)}"
n=10000000017
puts "prime?(#{n})=#{prime?(n)}"
puts "Factorization of #{n} is given by"+
#{n}=#{factor2s(factorize(n),'*')}"
puts "---converting notational base---\n"
n=14;
b=2;
c=Number.i_to_notation_array(n,b)
puts "#{n} (base 10) = #{c.reverse} (base #{b})"
b=3;
c=Number.i_to_notation_array(n,b)
puts "#{n} (base 10) = #{c.reverse} (base #{b})"
www.syngress.com
183RubyC07.qxd 1/7/02 1:16 PM Page 452

Miscellaneous Libraries and Tools • Chapter 7 453
c=Number.i_to_notation_factorial(n); c.shift
printf "%d=%s(factorial)\n",n, c.reverse.join(",")
str="1010"
b=2; a=Number.notation_str_to_i(str,b)
puts "#{str} (base #{b}) = #{a} (base 10)"
b=3; a=Number.notation_str_to_i(str,b)
puts "#{str} (base #{b}) = #{a} (base 10)"
print "----first 10 primes above 10**10 ----\n"
pr=10**10
10.times{ pr = nextPrime(pr); puts pr }
The output is as follows:
5*3= 1 (mod 7)
5!=120
lcm(24,81,56)=4536
gcd(24,81,56) = 1 = (24)*(-190)+(81)*(57)+(56)*(-1)
prime?(10000000019)=true
prime?(10000000017)=false
Factorization of 10000000017 is given by
10000000017=3*3*3*7*7*7*1079797
----converting notational base----
14 (base 10) = 1110 (base 2)
14 (base 10) = 112 (base 3)
14=2,1,0(factorial)
1010 (base 2) = 10 (base 10)
1010 (base 3) = 30 (base 10)
----first 10 primes above 10**10 ----
10000000019
10000000033
10000000061
10000000069
10000000097
10000000103
www.syngress.com
183RubyC07.qxd 1/7/02 1:16 PM Page 453

454 Chapter 7 • Miscellaneous Libraries and Tools
10000000121
10000000141
10000000147
10000000207
Using the Algebra Extension
Algebra is a pure Ruby package devoted to algebraic tools. Authored by Shin-
ichiro Hara, it includes such diverse topics as multi-variate polynomials, quotient
fields, and matrix manipulations.This package is well documented with a series of
Web pages. Being pure Ruby, it is easy to install and extend. Algebra is available in
the RAA in the Library section under Math.The following sections show a few
examples of its usage.
Working with Polynomials
Both monomials and multi-variate polynomials are supported.As a simple
example, consider the following:
# testPoly1
require "algebra"
P = Polynomial(Integer, "y", "x")
y, x = P.vars
a=x+y
b=x-y
c=a*b
puts "(#{a})*(#{b})=#{c}"
Here Integer is the base ring whose role is to provide the coefficients of the
polynomial, and x and y are the variables. (A ring is a structure with + and *
appropriately defined.) We reversed the order of x and y (that is,“y”,“x”) since
the last element appears as the first in the output and we wanted x to be first.
The output is:
(x + y)*(x - y)=x^2 - y^2
Exponentiation is easily handled as shown by the following:
# testPoly2
require "algebra"
www.syngress.com
183RubyC07.qxd 1/7/02 1:16 PM Page 454

Miscellaneous Libraries and Tools • Chapter 7 455
P = Polynomial(Integer, "x")
x = P.var
a = x + 1
puts "(#{a})^3=#{a**3}"
Which gives an output of:
(x + 1)^3=x^3 + 3x^2 + 3x + 1
What makes this interesting is that we can replace Integer with any ring. For
example, consider Z3.This ring embodies integer arithmetic mod 3. (Actually,
since 3 is prime, all non-zero elements have inverses and hence this is called a
field.) We modify the above code to use Z3for coefficients, as follows:
# testPoly3
require "algebra"
Z3 = ResidueClassRing(Integer, 3)
P = Polynomial(Z3, "x")
x = P.var
a, b = x + 1, x+2
puts "(#{a})^3=#{a**3}"
puts "(#{a})^5=#{a**5}"
puts "(#{b})/2 =#{b/2}"
Since 3 ≡0 (mod 3), 2≡-1 (mod 3) and 2 * 2≡1 (mod 3), the result
becomes:
(x + 1)^3=x^3 + 1
(x + 1)^5=x^5 - x^4 + x^3 + x^2 - x + 1
(x + 2)/2 =-x + 1
Working with Matrices
Algebra similarly supports matrices.We form a class of matrices by supplying both
the dimension (number of rows and number of columns) and the ring from
which the matrix elements are to be drawn.A simple example demonstrating
matrix multiplication is shown as follows:
# testMatrix1
require "algebra"
www.syngress.com
183RubyC07.qxd 1/7/02 1:16 PM Page 455

456 Chapter 7 • Miscellaneous Libraries and Tools
M54 = MatrixAlgebra(Rational, 5, 4)
M43 = MatrixAlgebra(Rational, 4, 3)
a = M54.matrix{|i, j| i + j}
b= M43.matrix{|i, j| i + j}
puts " a is"
a.display
puts " b is"
b.display
c=a*b
puts "a*b is"
c.display
The resulting output is:
a is
0, 1, 2, 3
1, 2, 3, 4
2, 3, 4, 5
3, 4, 5, 6
4, 5, 6, 7
b is
0, 1, 2
1, 2, 3
2, 3, 4
3, 4, 5
a*b is
14, 20, 26
20, 30, 40
26, 40, 54
32, 50, 68
38, 60, 82
Again we can choose the ring elements to be something more interesting,
such as Z2, and the integers mod 2:
# testMatrix2
require "algebra"
www.syngress.com
183RubyC07.qxd 1/7/02 1:16 PM Page 456

Miscellaneous Libraries and Tools • Chapter 7 457
Z2 = ResidueClassRing(Integer, 2)
M = SquareMatrix(Z2, 2)
a = M[[1,1], [1,1]]
puts " a is"
a.display
c=a*a
puts "a*a is"
c.display
Which, since 1+1 ≡0 (mod 2), gives an output of:
a is
1, 1
1, 1
a*a is
0, 0
0, 0
Now, matrices form a ring, so we may use them as coefficients of a polyno-
mial. Here we multiply two polynomials whose coefficients are drawn from the
ring of 2 by 2 matrices with entries in Z3(integers mod 3):
# testMatrix3
require "algebra"
Z3 = ResidueClassRing(Integer, 3)
M = SquareMatrix(Z3, 2)
c1 = M[[1,0], [1,1]]
c2 = M[[0,1], [1,1]]
puts " c1 is #{c1}"
puts " c2 is #{c2}"
P = Polynomial(M, "x")
x = P.var
a, b = c1*x + 1, x+c2
puts "a=#{a}"
puts "b=#{b}"
puts "a*b=#{a*b}"
www.syngress.com
183RubyC07.qxd 1/7/02 1:16 PM Page 457

458 Chapter 7 • Miscellaneous Libraries and Tools
The result is:
c1 is [[1, 0], [1, 1]]
c2 is [[0, 1], [1, 1]]
a=([[1, 0], [1, 1]])x + [[1, 0], [0, 1]]
b=([[1, 0], [0, 1]])x + [[0, 1], [1, 1]]
a*b=([[1, 0], [1, 1]])x^2 + ([[1, 1], [1, 0]])x + [[0, 1], [1, 1]]
At this point, everyone should agree that the algebra package is extremely
flexible!
However, any discussion of matrices would be remiss if we did not address
the eigenvector problem and diagonalization.To give a concrete example, con-
sider the engineering problem consisting of two first order linear differential
equations given by:
d(Y1 )/dt = -7 Y1+ -6 Y2
d(Y2)/dt = 18 Y1+ 14 Y2
This can be put into a matrix form as Y’ = A Y, where Y = [Y1,Y2] and A=[
[-7, -6], [18, 14] ].We solve this by finding a matrix P such that D=P-1 A P is
diagonal.Then the problem becomes Z’= DZ, which we can solve readily. Now
the solution for Y can be gotten as Y=PZ, since Y’=(PZ)’=P(Z)’=P(DZ)=PP-
1APZ=APZ=AY. Or if you prefer, you can think of this as a coordinate transfor-
mation by P into a system where the original differential equations become
transformed into a system with no interdependence. In any case, the vector Z is
given by Z=[ C1exp( λ1t), C2exp( λ2) ] where λ1,λ2are the eigenvalues of A, and
columns of P are the corresponding eigenvectors e1,e
2of A. (As usual, C1,C
2are
arbitrary constants to be determined by appropriate initial conditions.) In order
to solve the original problem, we compute the eigenvalues and corresponding
eigenvectors of A. Using the eigenvalues, we form the vector Z. Using the eigen-
vectors, we form the matrix P.The solution Y is the product Y=PZ. Now, enough
talk, let’s do it!
require "algebra"
eq1 = "d(y1)/dt = -7 y1 + -6 y2"
eq2 = "d(y2)/dt = 18 y1 + 14 y2"
def makerow eq
www.syngress.com
183RubyC07.qxd 1/7/02 1:16 PM Page 458

Miscellaneous Libraries and Tools • Chapter 7 459
r = eq.split
return [r[2].to_i, r[5].to_i]
end
M = SquareMatrix(Rational, 2)
r1 = makerow(eq1)
r2 = makerow(eq2)
a = M[r1, r2]
puts "A = "; a.display; puts
extfield, roots, tmatrix, eigenvalues, addelms, eigenvectors, espaces,
charactoristic_polynomial, facts = a.diagonalize
puts "eigenvalues are"
p eigenvalues
puts "eigenvectors are"
p eigenvectors
l = eigenvalues.collect{|x| x.to_f}
e = eigenvectors.collect{ |e| e.collect{|x| x.to_f}}
puts "\n\nsolutions are"
puts "y1= #{e[0][0]} C1 exp(#{l[0]} t)+ #{e[1][0]} C2 exp(#{l[1]} t)"
puts "y2= #{e[0][1]} C1 exp(#{l[0]} t)+ #{e[1][1]} C2 exp(#{l[1]} t)"
Let’s walk our way through the code. First, using makerow we parse the text
eq1, eq2 to create the matrix A. Next, we display the matrix, then diagonalize it,
and display the eigenvalues and eigenvectors.Then we convert the Rational
entries in eigenvalues and eigenvectors into floats. Finally we write down the
solutions.The output is as follows:
A =
-7, -6
18, 14
www.syngress.com
183RubyC07.qxd 1/7/02 1:16 PM Page 459

460 Chapter 7 • Miscellaneous Libraries and Tools
eigenvalues are
[Rational(5, 1), Rational(2, 1)]
eigenvectors are
[[Rational(-1, 2), Rational(1, 1)], [Rational(-2, 3), Rational(1, 1)]]
The solutions are:
y1= -0.5 C1 exp(5.0 t)+ -0.6666666667 C2 exp(2.0 t)
y2= 1.0 C1 exp(5.0 t)+ 1.0 C2 exp(2.0 t)
There is great deal more to this package and the reader is encourage to
explore the possibilities. For references on algebra, consider Trefethen and Bau’s
Numerical Linear Algebra published by the Society for Industrial and Applied
Mathematics (SIAM), or Gilbert Strang’s Linear Algebra and its Applications pub-
lished by Harcourt Brace Jovanovich.
Exploring C/S Data-Structure Tools
The Computer Science-related data structure packages we introduce here are
BinaryTree and BitVector.You may recall from your first computer science course
on data structures that a binary tree is a finite set of nodes which either is empty,
or consists of a root and two disjoint binary trees called the left and right subtrees
of the root node.A bit vector, also called a dyadic sequence, is a finite sequence of
0s and 1s.We begin our discussion with BinaryTree.
Using the BinaryTree Extension
BinaryTree is authored by Toki Yoshinori and is available at www.freedom.ne.jp/
toki/ruby.html.This pure Ruby package consists of several pieces.The core func-
tionality of the tree class is given in the file base.rb, and additional functionality is
added requiring binary.rb. Binary.rb requires base.rb. Both avl.rb and splay require
both base.rb and binary.rb.This layout demonstrates that we can add additional
functionality to a class in Ruby by just requiring more files which contain that
functionality—this is in distinction to Java or C++, where if we had a base class
and wanted to add additional functionality by including (importing) more files,
then we must resort to adding the desired functionality to a derived class of the
base class and not to the base class itself.The package is very well written and
comes complete with a test program that provides a series of tests.The five parts
of the program and what they contain are:
www.syngress.com
183RubyC07.qxd 1/7/02 1:16 PM Page 460

Miscellaneous Libraries and Tools • Chapter 7 461
■Tree/Base:Tree interface and parts classes
■Tree/Binary: Simple and basic binary search tree algorithm
■Tree/AVL: Balanced AVL tree algorithm
■Tree/splay: Self-adjustment splay tree algorithm
■Tree/Lock:Tree lock of multithreaded access
We demonstrate a simple application of the BinaryTree package by a simple
(albeit contrived) example. Suppose we have a collection of farm animals.We
want to maintain a record of the each animal’s weight by modeling this with a
binary tree, using the animal names as the keys and their weights as the values.We
begin by entering the names and weights of our farm animals into a binary tree
and then we display the list sorted by name.
require "tree/binary"
tree = Tree.new_binary
farm_animals=[ ['dog', 13.5], ['old cat', 10.2], ['bird', 3.4],
[ 'young kitten', 3.5], ['bull', 978.3],
['pig', 304.4], ['cow', 800.3], ['chicken', 3.2],
['horse', 663.9], ['donkey', 356.6] ]
# now add all the animals
farm_animals.each do |key, value|
tree.put(key,value)
end
# now lets see the tree (without traversing)
tree.each_with_index do |(key, value), i|
puts "index=#{i} key=#{key} value=#{value} "
end
This results in the following output:
index=0 key=bird value=3.4
index=1 key=bull value=978.3
index=2 key=chicken value=3.2
www.syngress.com
183RubyC07.qxd 1/7/02 1:16 PM Page 461

462 Chapter 7 • Miscellaneous Libraries and Tools
index=3 key=cow value=800.3
index=4 key=dog value=13.5
index=5 key=donkey value=356.6
index=6 key=horse value=663.9
index=7 key=old cat value=10.2
index=8 key=pig value=304.4
index=9 key=young kitten value=3.5
We note that internally the tree looks like an array, and that it’s not sorted.We
want to see the resulting tree sorted by name, so we add the following code:
# now we traverse the tree
tree.each_pair{ |key, value|
puts "key=#{key} value=#{value} "
}
This will produce the output:
key=bird value=3.4
key=bull value=978.3
key=chicken value=3.2
key=cow value=800.3
key=dog value=13.5
key=donkey value=356.6
key=horse value=663.9
key=old cat value=10.2
key=pig value=304.4
key=young kitten value=3.5
Now, alas, the old cat passes away, and after the funeral, we need to remove
him from our list.This is accomplished by adding the following code snippet:
# old cat has died, we delete him from the tree
tree.delete('old cat')
We decide to convert the weight from pounds to kilos. Since 2.2 pounds
equals 1 kilo, we divide each weight by 2.2.We also decide to change the format
of the names to uppercase.
# now convert the weight from pounds to kilos
www.syngress.com
183RubyC07.qxd 1/7/02 1:16 PM Page 462

Miscellaneous Libraries and Tools • Chapter 7 463
# and change the names to upper case
tree.collect!{ |key, value| key.upcase!; value/=2.2 ;}
# traversing tree to see our animals in order
tree.each_pair{ |key, value|
puts "key=#{key} value=#{value} "
}
This results in:
key=BIRD value=1.545454545
key=BULL value=444.6818182
key=CHICKEN value=1.454545455
key=COW value=363.7727273
key=DOG value=6.136363636
key=DONKEY value=162.0909091
key=HORSE value=301.7727273
key=PIG value=138.3636364
key=YOUNG KITTEN value=1.590909091
We leave town for the weekend, and the automatic feeder breaks.The animals
get hungry and break into our computer and post a protest message.
# Animal protest hunger
tree.fill('I am hungry')
# traversing tree to see our animals in order
tree.each_pair{ |key, value|
puts "traversing key=#{key} value=#{value} "
}
This results in the following:
traversing key=BIRD value=I am hungry
traversing key=BULL value=I am hungry
traversing key=CHICKEN value=I am hungry
traversing key=COW value=I am hungry
traversing key=DOG value=I am hungry
traversing key=DONKEY value=I am hungry
traversing key=HORSE value=I am hungry
traversing key=PIG value=I am hungry
www.syngress.com
183RubyC07.qxd 1/7/02 1:16 PM Page 463

464 Chapter 7 • Miscellaneous Libraries and Tools
traversing key=YOUNG KITTEN value=I am hungry
Although somewhat silly, this example should be sufficient to get started. If
you prefer a more serious example, think of the animals as bank customers and
the weights as account balances.
Also included in this library is support for dynamically balanced AVL trees.
Additionally, we have support for the splay tree algorithm, which shifts an
accessed node and its neighborhood nodes to the root direction to transform the
tree structor in order to more quickly access recently used nodes. Finally, when
you separate threads, there is a tree lock mechanism that should be used.
For more information on trees, see Aho, HopCroft, and Ullman’s The Design
and Analysis of Computer Algorithms, or Knuth’s classic Fundamental Algorithms, both
published by Addison Wesley.
Using the BitVector Extension
BitVector is a C extension to Ruby. It was developed by Robert Feldt and is avail-
able at the RAA in the Library section under Datastructure. It is fairly extensive
and fast, handling sequences of up to 2**31-1 bits. It is implemented as a wrapper
around Bit::Vector version 6.0 by Steffen Beyer. It is very similar to the Perl class
Bit::Vector. BitVector comes with a convenient test suite.We begin our exploration
of this library by examining the constructor BitVector.new(n, s=””).The first argu-
ment nrepresents the total number of digits that is to be allocated to the bit
vector.The second argument, s, is an optional string which represents the data that
is to be right-aligned within the BitVector. If the length of the string sis less than
number n, padding of 0s occurs on the left. If the string s is of length greater than
n, the most significant bits of the string are lost. Hence it is prudent to have
n>=s.length.This is demonstrated by the following code fragment:
require 'bitvector'
b = BitVector.new(30)
puts "b=#{b.inspect}"
b = BitVector.new(2, "1011")
puts "b=#{b.inspect}"
b = BitVector.new(30, "1011")
puts "b=#{b.inspect}"
www.syngress.com
183RubyC07.qxd 1/7/02 1:16 PM Page 464

Miscellaneous Libraries and Tools • Chapter 7 465
Which produces the following:
b=000000000000000000000000000000
b=11
b=000000000000000000000000001011
Of course, any package that deals with bits must supply some basic methods
for manipulating these bits.The following code snippet demonstrates unary bit-
wise operations:
require 'bitvector'
b1 = BitVector.new(16, "10011011")
puts " b1 =#{b1.inspect}"
puts " b1.flip =#{(b1.flip).inspect} (reverses bits)"
puts " b1 =#{b1.inspect}"
puts " b1.rotate_left =#{(b1.rotate_left).inspect}"
puts " b1 =#{b1.inspect}"
puts " b1.rotate_right =#{(b1.rotate_right).inspect}"
puts " b1 =#{b1.inspect}"
puts " b1.randomize =#{(b1.randomize).inspect}"
puts " b1 =#{b1.inspect}"
puts " b1.to_i =#{b1.to_i} (as an integer)"
puts " b1 =#{b1.inspect}"
This produces the following:
b1 =0000000010011011
b1.flip =1111111101100100 (reverses bits)
b1 =1111111101100100
b1.rotate_left =1
b1 =1111111011001001
b1.rotate_right =1
b1 =1111111101100100
b1.randomize =1100110101011001
b1 =1100110101011001
b1.to_i =-12967 (as an integer)
b1 =1100110101011001
www.syngress.com
183RubyC07.qxd 1/7/02 1:16 PM Page 465

466 Chapter 7 • Miscellaneous Libraries and Tools
Note that all of the above operations change the value of b1, and all except
rotate_left, and rotate_right return the current value of b1.The bit which was
rotated is returned by rotate_left, and rotate_right.
However binary bit-wise operations do not change the value of the partici-
pants, and are demonstrated in the following code:
require 'bitvector'
b1 = BitVector.new(16, "10011011")
b2 = BitVector.new(16, "10111001")
puts " b1 =#{b1.inspect}"
puts " b2 =#{b2.inspect}"
puts " b1^b2 =#{(b1^b2).inspect} (Xor)"
puts " b1*b2 =#{(b1*b2).inspect} (multiplication)"
puts " b1/b2 =#{(b1/b2).inspect} (division)"
puts " b1.difference b2 =#{(b1.difference b2).inspect} (set difference)"
puts " b1+b2 =#{(b1+b2).inspect} (add)"
puts " b1-b2 =#{(b1-b2).inspect} (subtract)"
This produces the following output:
b1 =0000000010011011
b2 =0000000010111001
b1^b2 =0000000000100010 (Xor)
b1*b2 =00000000000000000111000000000011 (multiplication)
b1/b2 =0000000000000000 (division)
b1.difference b2 =0000000000000010 (set difference)
b1+b2 =0000000101010100 (add)
b1-b2 =1111111111100010 (subtract)
The position of the digits 1 or 0 in a BitVector can be gotten rather easily,
namely:
require 'bitvector'
b1 = BitVector.new(16, "10011011")
puts " b1 =#{b1.inspect}"
puts " b1.ones =#{(b1.ones).inspect}"
puts " b1.zeroes =#{(b1.zeroes).inspect}"
www.syngress.com
183RubyC07.qxd 1/7/02 1:16 PM Page 466

Miscellaneous Libraries and Tools • Chapter 7 467
which produces:
b1 =0000000010011011
b1.ones =[0, 1, 3, 4, 7]
b1.zeroes =[2, 5, 6, 8, 9, 10, 11, 12, 13, 14, 15]
It should be noted that the position is given from left to right.That is, in the
above, 0in b1.ones indicates that the least significant bit is a 1.
This is just a sampling of the methods available to BitVector; for further
information, see www.ce.chalmers.se/~feldt/ruby/extensions/bitvector.
Using Random Numbers, Genetic
Algorithms, and Neural Nets
In this section we discuss some packages that implement some sophisticated algo-
rithms. In particular, we explore a random-number generator package called
RandomR, a genetic programming package called Ruby/GP, and a neural net
package called LibNeural.
Working with a Random-Number Generator
In this section we introduce Robert Feldt’s RandomR, which is a wrapper
around Mersenne Twister, a fast random number generator written in C. Developed
in 1997 by Makoto Matsumoto and Takuji Nishimura, this algorithm was origi-
nally called Primitive Twisted Generalized Feedback Shift Register Sequence.
Subsequently it has been renamed to the less verbose Mersenne Twister. Since it is
written in C and is divide- and mod-free, it is four times faster than the standard
rand. It has a period of 2^199937-1 and gives a sequence that is 623-dimension-
ally equi-distributed.The installation is quite easy and usage is equally easy, as
shown in the following example:
require 'random/mersenne_twister'
mt = Random::MersenneTwister.new 4357
puts "Random reals"
(0..10).each{ |x| puts mt.rand(0) }
puts "Rand integers"
(0..10).each{ |x| puts mt.rand(100) }
www.syngress.com
183RubyC07.qxd 1/7/02 1:16 PM Page 467

468 Chapter 7 • Miscellaneous Libraries and Tools
The output is as follows:
Random reals
0.6675764778
0.3690838726
0.7248306949
0.6877586338
0.5736469451
0.8107781868
0.27108403
0.8377701905
0.1373637365
0.9574540583
0.1786079517
Rand integers
57
12
84
25
88
24
31
0
12
46
RandomR is available at http://rubyvm.sourceforge.net/subprojects/randomr
or in the RAA in the Library section under Math.
Genetic Programming in Ruby
Genetic Programming (GP) is a very nice package in Ruby dedicated to genetic
programming, written by Akimichi Tatsukawa. Genetic programming is the art of
applying genetic algorithms to solve programming problems that involve some opti-
mization (by this we mean finding the xsuch that f(x) is a minimum, or max-
imum).This is similar to evolution as it occurs in nature, whereby a population
evolves over time to produce individuals that are best fit to a given environment.
www.syngress.com
183RubyC07.qxd 1/7/02 1:16 PM Page 468

Miscellaneous Libraries and Tools • Chapter 7 469
More specifically, the first step is to randomly generate a fixed number Nof an
initial population consisting of a collection of individuals or chromosomes.
Historically, the chromosomes are often characterized as binary sequences.The
next generation of the population is generated by gene splicing (called crossover)
and mutation. Each member of the new population is evaluated (or ranked)
according to some fitness criteria.The population is then reduced until the popu-
lation is again of size N.The reduction in population is done more or less by lot-
tery, where those who are most fit have a better chance of survival. Generation
after generation evolves until there is no significant improvement in the best indi-
viduals in subsequent generations.At this time the process stops and the most fit
individual is returned as the optimal solution.
Given a maximization (or minimization) problem, we can turn it into a
genetic algorithm, as follows. Suppose the problem is to find xsuch that f(x) is a
maximum.Then xplays the role of the chromosome, and fis the fitness function.
The problem becomes to find a chromosome that is most fit.
The GP package (available in the RAA in the Library section under AI) has
several sample programs included with its distribution. Let’s consider the fol-
lowing program, called Logic.rb.The stated purpose of Logic.rb is to perform a
symbolic regression of a Boolean function.The quest is to create a Boolean
expression, whose valuation A is identical that given by the truth table seen in
Table 7.1.
Table 7.1 Truth Table
Truth Table
P True True True True False False False False
Q True True False False True True False False
R True False True False True False True False
A False True False True False True False False
By this we mean we want to find some Boolean expression like (not P or
Q) and R which is equivalent to A, where the behavior of A relative to P, Q,
and R is given above.To be more machine-friendly, we use Polish notation—that
is, we will write and( or( not(P), Q), R) instead of (not P or Q) and R.
Our chromosomes, in this case, should be well formed expressions such as
and( or( not(P), Q), R) which will be evaluated across each case (vertical
column in the Truth Table) to give a measure of fitness.Actually, all we need to
www.syngress.com
183RubyC07.qxd 1/7/02 1:16 PM Page 469

470 Chapter 7 • Miscellaneous Libraries and Tools
do is to count the number of disagreements of a given expression (chromosome)
with the desired value of A. In this case, the lower the number, the more fit the
individual. Expressions that are not well-formed are rejected as unfit.
We are now ready to examine the code for Logic.rb (shown in Figure 7.9 and
at www.syngress.com/solutions).The first class in the file is GPIndividual.
GPIndividual is just a wrapper around the individual’s chromosomes, which is
called genome and defined originally in gpsystem.rb.What we see in Logic.rb in
Figure 7.9 is a fitness function, evaluate_standardized_fitness, which must be supplied
for every application using genetic algorithms. Each case that we loop around
www.syngress.com
Figure 7.9 Logic.rb
class GPIndividual
def evaluate_standardized_fitness() # should be the smaller the better
fitness = 0.0
GPSystem.fitness_cases.case_size.times do |the_case|
GPSystem.fitness_cases.inputs.each{|variable,value|
GPSystem.table.set_variable_value(variable,value[the_case])
}
output = GPSystem.fitness_cases.output(the_case)
@genome.each do |gene|
fitness += 1 if (output != gene.evaluate())
gene_length = gene.length()
if (gene_length > 30) # to supress huge genes
fitness += gene_length * gene_length * 0.1
end
end
end
return @standardized_fitness = fitness
end
end
183RubyC07.qxd 1/7/02 1:16 PM Page 470

corresponds to a column in the table; all we are doing is counting the number of
disagreements between Aand the evaluation using the individuals genome.
Next we add the code that tells GPSystem how to evaluate the genome:
# table setting
GPSystem.table.add_function("and",2,Proc.new{|arg1,arg2| arg1 && arg2})
GPSystem.table.add_function("or",2,Proc.new{|arg1,arg2| arg1 || arg2})
GPSystem.table.add_function("not",1,Proc.new{|arg| !arg})
GPSystem.table.add_function("->",2,Proc.new{|arg1,arg2|
if (arg1 == true and arg2 == false)
false
else
true
end})
GPSystem.table.add_variable("P")
GPSystem.table.add_variable("Q")
GPSystem.table.add_variable("R")
Now we set some parameters used in the evolutionary process:
# GP parameters setting
GPSystem.population_size = 120
GPSystem.max_generations = 30
GPSystem.probability_of_crossover = 0.9
GPSystem.probability_of_mutation = 0.1
GPSystem.grow_method = GPGlobal::GROW
GPSystem.max_depth_of_tree = 5
GPSystem.genome_size = 1
GPSystem.allow_const = false
# now set selection pressure in the argument of new method.
GPSystem.selection_strategy = GPTruncationRandomly.new(3)
Most of the parameters should be self-explanatory. For example,
GPSystem.probability_of_mutation = 0.1 means that we expect some mutation of
the genome to occur one-tenth of the time.What this means is that an “or” may
be replaced by an “and,” or maybe a “P” is replaced by a “Q.”We also set a condi-
tion for early termination—that is, if we find an expression which is equivalent
www.syngress.com
Miscellaneous Libraries and Tools • Chapter 7 471
183RubyC07.qxd 1/7/02 1:16 PM Page 471

472 Chapter 7 • Miscellaneous Libraries and Tools
under all cases, then quit the evolution, and return that expression.This is what is
done in the next code snippet:
# the condition of early termination
def GPSystem.terminate_early(best_individual)
return (best_individual.adjusted_fitness == 5.0)
end
Finally, we input the truth table:
# the configuration for the fitness cases
fitness_cases = GPCases.new()
rowP = [true,true,true,true,false,false,false,false]
rowQ = [true,true,false,false,true,true,false,false]
rowR = [true,false,true,false,true,false,true,false]
rowA = [false,true,false,true,false,true,false,false]
fitness_cases.set_inputs("P", rowP)
fitness_cases.set_inputs("Q", rowQ)
fitness_cases.set_inputs("R", rowR)
fitness_cases.set_outputs(rowA)
# now register the fitness_cases to the GPSystem
GPSystem.fitness_cases = fitness_cases
The easiest way to run this is from another script, testLogic.rb, which contains
the code shown in Figure 7.10 (also included at www.syngress.com/solutions).
Alternatively, add the following to the beginning of Logic.rb:
require "gp/gpsystem"
gpMAIN = GPSystem.new
www.syngress.com
Figure 7.10 testLogic.rb
require "gp/gpsystem"
gpMAIN = GPSystem.new
gpMAIN.startup("Logic.rb")
gpMAIN.run
183RubyC07.qxd 1/7/02 1:16 PM Page 472

Miscellaneous Libraries and Tools • Chapter 7 473
and this to the end of Logic.rb:
gpMAIN.report_config()
gpMAIN.create_population()
gpMAIN.run()
Then save it as Logic2.rb and just run via ruby Logic2.rb. Both alternatives are
included on the CD.
Running this, we get an output similar to the following (I say similar to,
because Genetic Algorithms have a random ingredient):
<<The configulation of the genetic programming library >>
population_size = 120
max_generations = 30
probability_of_crossover = 0.9
probability_of_mutation = 0.1
max_depth_of_tree = 5
selection_strategy = truncation according to the selection
pressure 3 after overproduced randomly
grow_method = 0
genome_size = 1
allow_const = false
<<The report of the current run >>
The best of the generation 1 is:
standardized_fitness: 1.0
adjusted_fitness : 0.5
normalized_fitness :
genome:
(not R)
The best of the run so far is:
standardized_fitness: 1.0
adjusted_fitness : 0.5
www.syngress.com
183RubyC07.qxd 1/7/02 1:16 PM Page 473

474 Chapter 7 • Miscellaneous Libraries and Tools
normalized_fitness :
genome:
(not R)
<<The report of the current run >>
The best of the generation 2 is:
standardized_fitness: 1.0
adjusted_fitness : 0.5
normalized_fitness :
genome:
(not (and (-> R R) (and R R)))
The best of the run so far is:
standardized_fitness: 1.0
adjusted_fitness : 0.5
normalized_fitness :
genome:
(not R)
<<The total report of the run>>
The best of the run is acquired at 3th generation:
standardized_fitness: 0.0
adjusted_fitness : 1.0
normalized_fitness :
genome:
(not (-> (and (-> R Q) (-> (or R (-> P Q)) Q)) (not (not
R))))
As you can see, the best was found at the third generation.To interpret this,
we see that we have (not R) and ( Q or P).A quick check of the table shows we
have a match.
www.syngress.com
183RubyC07.qxd 1/7/02 1:16 PM Page 474

Miscellaneous Libraries and Tools • Chapter 7 475
Genetic Algorithms is an interesting technology that has been used for the
study of non-linear dynamical systems, neural nets, robotics, and more. For fur-
ther information, start with Lawrence Davis’s Handbook of Genetic Algorithms pub-
lished by Van Nostrand Reinhold.
Neural Nets
Written by Akimichi Tatsu, Ruby-LibNeural is a wrapper around the C-based
neural net library, LibNeural, originally written by Daniel Franklin.
Neural nets are used for both prediction and pattern classification. Common
uses are speech recognition, fingerprint identification, character recognition,
financial market prediction, credit risk, detection of money laundering, and diag-
nostics for X-rays, ultrasounds, electrocardiograms (ECGs), and electroencephalo-
grams (EEGs).
LibNeural is a three-layered back-prop model.That means there is an input
layer, a hidden layer, and an output layer. Each layer consists of nodes. Each node
of the input layer feeds into each node of the hidden layer, and each node of the
hidden layer feeds into each node of the output layer.Weights are attached to the
connects between the node. It is often visualized as shown in Figure 7.11.
The network can be thought of as a function: Patterns of values are input
into the nodes of the input layer and values are extracted from the nodes of
output layer. Each node of the hidden layer and of the output layer performs a
computation by taking the weighted sum of its inputs (coming from the nodes
feeding into it), and applying a squashing function (sigmoid) to obtain an output.
It is well-known that the standard feed-forward network architectures using arbi-
trary squashing functions can approximate virtually any continuous function of
www.syngress.com
Figure 7.11 Three Layer Neural Net
Output Layer
Hidden Layer
Input Layer
183RubyC07.qxd 1/7/02 1:16 PM Page 475

476 Chapter 7 • Miscellaneous Libraries and Tools
interest to any degree of accuracy, provided a sufficient number of hidden units
are available.Thus, the only question is to find the appropriate weights.That is
what training (in our case, this is called backpropagation) is about.Weights are ini-
tially selected at random. Sample patterns are given as inputs to the network, and
the outputs are observed and graded.The weights are adjusted to improve the
network’s performance.When the performance is sufficient, training halts and the
network is ready to use. Rather than going into further detail, let’s consider a
sample problem.
We will choose a rather simplistic problem to illustrate our neural net. Our
goal will be to classify a curve as being either a straight line (linear), a parabola
(quadratic), or cubic.The first question that comes to mind is:What do we want
as an input? One obvious choice is to take the values of the curve at fixed set
points.We will do this using the values at the seven points, from x = -3 to x = 3.
The next question is: How do we want our neural net to indicate which type
of curve a given curve belongs to? Since we have three possibilities, one way is to
use three output nodes. If node one is active, it is to be linear; if node 2 is active,
it is to be quadratic; and if node three is active, then it will be cubic.The output
of a given neuron is limited to be strictly between 0 and 1, so we will settle for a
value of 0.8 to be considered active (on), and a value of 0.2 to be considered inac-
tive (off). In this case, linear corresponds to an output of [0.8, 0.2, 0.2]. Putting
the last two pieces together we see that we will want a neural net with seven
input nodes and three output nodes.
We now appeal to a little intuition, and will try five nodes for the hidden
layer. Before doing any coding, however, let’s review our strategy. First we will
train the neural net on a set of data, which we will call the training data. In order
to decide when the training is sufficient enough that we may stop, we need to
test the net against some data. However, it is inappropriate to test the net against
the same data as was used for training (all that proves is that it can recognize the
specific examples shown to it during the training).What we require of the neural
net is the ability to generalize from the training samples presented to it and see
the patterns we are looking for. In fact, we want to avoid over-training (also
called over-fitting), otherwise we risk the net losing its ability to generalize. For
this reason, we use a set of data called the testing set, which is not used in the
training process to determine the stopping criteria. Finally, when we are finished
with training and testing, we wish to validate the nets with a measure of perfor-
mance on how well it can deal with completely new data. For this, a third set of
data, called the final validation data, is to be used.
www.syngress.com
183RubyC07.qxd 1/7/02 1:16 PM Page 476

Miscellaneous Libraries and Tools • Chapter 7 477
www.syngress.com
Now we begin by creating the data we want to use (code for this example is
included at www.syngress.com/solutions in the curveClassifer.rb file):
# We create a class to Build Data Sets
class DataSet < Array
def initialize aCoffArry, bCoffArry
for a in aCoffArry
for b in bCoffArry
self << (-3..3).collect{ |i| yield( i.to_f, a, b) }
end
end
end
end
# Now build the data sets
linearTrainingSet = DataSet.new( [1.0, 2.0, 3.0], [0.0] ) {
|x, a, b| a * x + b }
quadradicTrainingSet = DataSet.new( [1.0, 2.0, 3.0], [0.0] ){
|x, a, b| a * x * x + b }
qubicTrainingSet = DataSet.new( [1.0, 2.0, 3.0], [0.0] ){
|x, a, b| a * x * x * x+ b }
linearTestingSet = DataSet.new( [1.2, 3.2, ], [0.0] ){
|x, a, b| a * x + b }
quadradicTestingSet = DataSet.new( [1.2, 3.2, ], [0.0] ){
|x, a, b| a * x * x + b }
qubicTestingSet = DataSet.new( [1.2, 3.2, ], [0.0] ){
|x, a, b| a * x * x * x+ b }
linearValidationSet = DataSet.new( [1.1, 3.1], [0.0] ){
|x, a, b| a * x + b }
quadradicValidationSet = DataSet.new( [1.1, 3.1], [0.0] ){
|x, a, b| a * x * x + b }
qubicValidationSet = DataSet.new( [1.1, 3.1], [0.0] ){
|x, a, b| a * x * x * x+ b }
183RubyC07.qxd 1/7/02 1:16 PM Page 477

478 Chapter 7 • Miscellaneous Libraries and Tools
trainingSets =[ linearTrainingSet, quadradicTrainingSet,
qubicTrainingSet]
testingSets =[ linearTestingSet, quadradicTestingSet,
qubicTestingSet]
validationSets=[ linearValidationSet, quadradricValidationSet,
qubicValidationSet]
Here we have limited ourselves to polynomials whose leading coefficient is
positive and has a 0 y-intercept.Typically, in real world applications, the data is
preprocessed. So in our case, we would preprocess the real world data by sub-
tracting off the y-intercept whenever necessary, and maybe reflecting if the
global behavior is decreasing, etc. In any case, we are now ready to set up our
desired or targeted outputs.That is, the system should respond with approxi-
mately [.8, .2, .2] if the curve is linear, [2., .8, .2] if the curve is quadratic, etc.
Also we need to include some helper functions to measure how close we are to
the targeted output.
# set up the desired target outputs
linTarget = [.8, .2, .2]
quadTarget = [.2, .8, .2]
qubicTarget = [.2, .2, .8]
Targets = [linTarget, quadTarget, qubicTarget]
# Mean Square Error of a result with a given target
def Targets.MSError(whichOne, result)
t = self[whichOne]
s=0.0
for i in (0...t.length)
d=result[i]-t[i]
s=s+d*d
end
return s
end
def testMSError( nnBrain , tsSets)
# test if good enough
totError=0.0
www.syngress.com
183RubyC07.qxd 1/7/02 1:16 PM Page 478

Miscellaneous Libraries and Tools • Chapter 7 479
for indx in (0...tsSets.length)
ts=tsSets[indx]
targ= Targets[indx]
for i in (0..1)
result = nnBrain.work(ts[i])
err = Targets.MSError(indx, result)
totError=totError+err
return true if totError > .01
end
end
false
end
Next we create the net and do the actual training.The net is constructed in a
single statement specifying the number of input nodes, hidden nodes, and output
nodes.The training is accomplished by a call to Neural#learn(input training vector,
output target vector, tolerance, eta). Input training vector is the sequence of values to be
applied to the input nodes, output target vector is the sequence which is the desired
output for that sequence, and tolerance is the root mean square error allow for that
output. Finally, eta is the learning rate parameter η, which arises in the optimiza-
tion of the least mean square error.
# create a new neural net with 7 inputs, 5 hidden nodes and 3 outputs
brain = Neural.new(7,5,3)
more = true
while more do
for i in (0..2)
for indx in (0...trainingSets.length)
ts=trainingSets[indx]
targ= Targets[indx]
brain.learn(ts[i], targ, 0.0005, 0.2)
end
end
more = testMSError(brain, testingSets)
end
www.syngress.com
183RubyC07.qxd 1/7/02 1:16 PM Page 479

480 Chapter 7 • Miscellaneous Libraries and Tools
Note that when a neural net is first constructed, weights are selected at
random. Sometimes the initial weights are not very good, and take a long time to
converge at an acceptable solution, so we restart with a different set if it fails to
converge quickly enough. (In fact, genetic algorithms are applied to facilitate a
faster convergence.) Finally we give our results:
# Just for curiosities sake, let's see how it does on the training data
puts "on trainingData"
for vs in trainingSets
puts "*"*8
for data in vs
result=brain.work(data)
p result
end
puts
end
# Now check the validation
indx=0
puts "validationSets"
for vs in validationSets
puts "*"*8
for data in vs
result=brain.work(data)
p result
end
puts
end
We see this output:
on trainingData
********
[0.7467244864, 0.2234046161, 0.2251292616]
[0.7764865756, 0.2254813612, 0.194798857]
www.syngress.com
183RubyC07.qxd 1/7/02 1:16 PM Page 480

Miscellaneous Libraries and Tools • Chapter 7 481
[0.7790427804, 0.2257776409, 0.1922256351]
********
[0.2256926745, 0.7805635929, 0.1958302706]
[0.2251456231, 0.7814783454, 0.1951233]
[0.2251440585, 0.7814799547, 0.1951220185]
********
[0.2234400213, 0.1783940196, 0.7954290509]
[0.2225975692, 0.178310141, 0.7963095903]
[0.2225959301, 0.178309992, 0.7963113189]
validationSets
********
[0.7535769343, 0.2236442566, 0.2180884331]
[0.7790927887, 0.2257836014, 0.1921753436]
********
[0.2254521549, 0.7810022831, 0.1954940706]
[0.2251440585, 0.7814799547, 0.1951220185]
********
[0.2230481505, 0.1783550382, 0.795838654]
[0.2225959301, 0.178309992, 0.7963113189]
As stopping is a criterion for the training, we checked against our testing set
(which was not seen during training) to determine if the mean square error was
sufficiently small.This suffices for our purposes, but it is a bit simple; we should
note that another approach is to continue training until performance on the
testing set becomes worse—at which point we stop, back up, and use the weights
of the previous iteration. Remember, the goal is to preserve the ability of the net
to generalize, that is, to avoid over-training.Additionally, the number of nodes in
the hidden layer can be adjusted by successively building and training nets with a
decreasing number of hidden nodes until performance deteriorates.That proce-
dure is justified by the belief that fewer hidden nodes allow better generalization,
but that is usually computationally expensive. Be aware that some practitioners
may only use two data sets, and call the set used for the stopping criteria the vali-
dation set.
For further information about neural nets, consult Simon Haykin’s Neural
Networks, published by Macmillan, or Robert Hect-Nielsen’s Neurocomputing,
published by Addison Wesley.
www.syngress.com
183RubyC07.qxd 1/7/02 1:16 PM Page 481
482 Chapter 7 • Miscellaneous Libraries and Tools
Working with Ruby and Windows
There are several alternatives to writing Windows programs with Ruby. In
Chapter 2 we saw several interesting toolkits for building GUIs with Ruby that
will run on a Windows-based platform. In this section we will discuss
ActiveScript and Win OLE, two more alternatives for exploiting the Windows
environment using Ruby.
Using ActiveScript in Ruby
ActiveScriptRuby can live inside your Internet Explorer. Just download it from
the RAA from the Application section under devel, and do a one-click install. Of
course, you need a Windows Scripting Host (WSH) installed—if you have Internet
Explorer 4.0 or later on your system, then you already have one installed.
ActiveScriptRuby is a Win32 ActiveScripting bridge component, and is sup-
ported by Anton.The example in Figure 7.12 is a variant of a script attributable
to Yo-Ko-So.
www.syngress.com
Figure 7.12 The ActiveScriptRuby inside Internet Explorer
183RubyC07.qxd 1/7/02 1:16 PM Page 482

Miscellaneous Libraries and Tools • Chapter 7 483
The script has such a nice appearance that we are compelled to examine the
source—see Figure 7.13 (it can also be found at www.syngress.com/solutions).
www.syngress.com
Figure 7.13 ActiveRuby.html
<html>
<head>
<title>Yo-Ko-So ! Active Ruby World !</title>
<script language="RubyScript">
ActiveScriptRuby.settrace false
@ctbl = %w(red firebrick deeppink hotpink lightpink darksalmon
darkorange coral crimson)
@stbl = %w(x-small small medium large x-large xx-large)
@ftbl = %w(Times\ New\ Roman Modern Tahoma Arial Century
Courier\ New)
def timeout(meth, arg)
@window.setTimeout("#{meth}(#{arg})", rand(1000) + 1, "RubyScript")
end
def changeColor(s)
@window.document.all(s).style.color = @ctbl[rand(@ctbl.length)]
timeout('changeColor', s)
end
def changeFont(s)
@window.document.all(s).style.fontFamily = @ftbl[rand(@ftbl.length)]
timeout('changeFont', s)
end
def changeSize(s)
@window.document.all(s).style.fontSize = @stbl[rand(@stbl.length)]
Continued
183RubyC07.qxd 1/7/02 1:16 PM Page 483

484 Chapter 7 • Miscellaneous Libraries and Tools
It’s actually pretty self-explanatory, it uses setTimeout to randomly pop up the
word “Active Ruby” in different fonts, colors, and locations on the screen.
Using WinOLE in Ruby
OLE automation is supported in Ruby. Unless you built Ruby from the source,
you probably obtained OLE support when you downloaded the Pragmatic
Programmer’s Windows installer. If for some reason, you do not have OLE
automation support, you can get the necessary download at the RAA.
Win32OLE (found at the RAA in the Library section under Win32) is main-
tained by Masaki Suketa.
www.syngress.com
Figure 7.13 Continued
timeout('changeSize', s)
end
def changePos(s)
style = @window.document.all(s).style
style.posTop = rand(@window.screen.availHeight)
style.posLeft = rand(@window.screen.availWidth)
timeout('changePos', s)
end
def run
@window.document.body.innerHTML = (1..7).collect do |s|
%w(Color Font Size Pos).each {|m| timeout("change#{m}", s) }
"<SPAN ID=#{s} style='position:absolute'>Active Ruby</SPAN>"
end.to_s
end
</script>
</head>
<body language="RubyScript" onload="run" bgcolor="black">
</body>
</html>
183RubyC07.qxd 1/7/02 1:16 PM Page 484

Miscellaneous Libraries and Tools • Chapter 7 485
OLE automation is easy to use. Consider the example shown in Figure 7.14
(and available at www.syngress.com/solutions).
This produces an output similar to the image seen in Figure 7.15.
Examining the code we first wake up Excel by calling:
excel = WIN32OLE.new("excel.application")
excel['Visible'] = true
www.syngress.com
Figure 7.14 Excel.rb
require 'win32ole'
# Creates OLE object to Excel
excel = WIN32OLE.new("excel.application")
excel['Visible'] = true
workbook = excel.Workbooks.Add(1)
worksheet= workbook.Worksheets("Sheet1")
worksheet.name="Ruby Greetings"
worksheet.Cells(1, 1)['Value']='Hello Ruby Fans'
worksheet.Cells(1, 1).Font['Bold']=true
worksheet.Cells(1, 1).font['size']=18
# Now add some more sheets
for name in ['dog', 'cat', 'rabbit', 'bird']
worksheet = workbook.Worksheets.Add
worksheet.name=name
for row in 2..6
for col in 2..10
worksheet.Cells(row, col)['Value']="(#{row}, #{col})"
end
end
for col in 2..10
worksheet.Columns(col).AutoFit
end
end
183RubyC07.qxd 1/7/02 1:16 PM Page 485
486 Chapter 7 • Miscellaneous Libraries and Tools
We then add a workbook and grab the first worksheet from that workbook
called “Sheet1” and rename it “Ruby Greetings” by calling:
worksheet= workbook.Worksheets("Sheet1")
worksheet.name="Ruby Greetings"
We next set the text of the first cell of that first sheet:
worksheet.Cells(1, 1)['Value']='Hello Ruby Fans'
We set the font and size:
worksheet.Cells(1, 1).Font['Bold']=true
worksheet.Cells(1, 1).font['size']=18
We then loop around adding more sheets:
worksheet = workbook.Worksheets.Add
We name each sheet:
worksheet.name=name
We fill the cells of that sheet:
worksheet.Cells(row, col)['Value']="(#{row}, #{col})"
www.syngress.com
Figure 7.15 Ruby meets Excel
183RubyC07.qxd 1/7/02 1:16 PM Page 486
Miscellaneous Libraries and Tools • Chapter 7 487
Finally we adjust the width of each column to fit the data in that column:
worksheet.Columns(col).AutoFit
The same techniques can be applied to a Microsoft Word document. For
example, consider the following code snippet:
require 'win32ole'
# Creates OLE object to word
word = WIN32OLE.new("word.application")
word['Visible'] = TRUE;
word.documents.Add
0.upto(10){
word.selection.TypeText(Text="Hello Ruby Relatives!")
word.selection.TypeParagraph
}
#word.close()
A quick inspection of the code reveals that it opens a new Word document
and places ten lines of the text “Hello Ruby Relatives!” Note the code to close
the document has been commented out, so the document will remain open after
the program exits. Running this will result in the document shown in Figure 7.16.
www.syngress.com
Figure 7.16 Ruby Running Word
183RubyC07.qxd 1/7/02 1:16 PM Page 487

488 Chapter 7 • Miscellaneous Libraries and Tools
NOTE
Call #ole_methods to obtain a list of OLE methods.
Using OOP-Related Tools
It should not be surprising that Object-Oriented Programming (OOP) is a cen-
tral theme in the Ruby community.The nature of the language makes it easy to
extend Ruby with additional OO features as needed. In this section we explore
some of those extensions, which are written in pure Ruby.These extensions can
be both useful in themselves and can serve as a model for the developer when
the need arises for some possibly exotic future OO programming requirement.
Using the EachDelegator Library
EachDelegator is a pure Ruby library that adds enumerable capabilities to itera-
tors. (EachDelegator is written by Okada Jun and can be found in the Ruby
Archives in the Library section under Syntax.)
For example, consider the following:
require 'eachdelegator'
p "hoge".each_byte.each_with_index.collect{|a, i| [ i, a ]}
The output will be:
[[0, 104], [1, 111], [2, 103], [3, 101]]
Here’s another example:
require 'eachdelegator'
class Array
def all_pair
for i in 0..(size/2-1)
yield at(i), at(size - i-1)
end
self
end
each_delegator :all_pair
www.syngress.com
183RubyC07.qxd 1/7/02 1:16 PM Page 488

Miscellaneous Libraries and Tools • Chapter 7 489
end
p [1, 2, 3, 4, 5, 6].all_pair.collect{|a, b| b + a}
Here the addition is applied pair-wise, so the result is:
[7, 7, 7]
Using the Preserved, Forwardable,
and Finalize Modules
In C++ and Java, a class definition occurs in exactly one place, and that class def-
inition cannot directly be augmented or enhanced by additional methods in any
other place.And certainly any method’s implementation cannot be redefined at a
later time. Ruby, as we all know, breaks this rule.We may define a class method
such as this:
class Furry
def list_it(a)
a.each{ |x| puts x }
end
end
However, you could later decide to alter the method’s implementation by
using the following:
class Furry
def list_it(a) return [a] end
end
In fact, the code defining these methods may reside in different files.While
this gives the developer great freedom, this is not always desirable. Sometimes we
would like to define a method and disallow any subsequent modifications of its
behavior. In particular, two developers might accidentally use the same name to
extend a class but with completely different desired behaviors, causing the code
to break or produce bad results.We prevent this by guaranteeing our method’s
behavior is preserved when we use the preserved module. Using it is just a matter
of declaring the preserved method, as shown in the following code:
require "preserved"
class MyPets
www.syngress.com
183RubyC07.qxd 1/7/02 1:16 PM Page 489

490 Chapter 7 • Miscellaneous Libraries and Tools
def dog_sound
puts "bow wow"
end
def cat_sound
puts "meow"
end
def bird_sound
puts "chirp chirp"
end
preserved :dog_sound, :cat_sound
end
Here both dog_sound and cat_sound are preserved, but bird_sound is not.What
this means is that we can alter the behavior of bird_sound by including this code:
class MyPets
def bird_sound
puts "tweet tweet"
end
end
But any similar attempt to alter dog_sound or cat _sound will generate an error
that is something like:
./preserved.rb:67:in `method_added':
preserved method `dog_sound' redefined
for class MyPets (NameError)
A list of the preserved methods of an object is easily obtained by using the
preserved_methods method, as shown in the following:
p MyPets.preserved_methods
Which returns this:
["dog_sound", "cat_sound"]
One final note: preserved applies only to class methods; singleton methods can
override the behavior of a preserved class method.
Forwardable.rb allows an object to forward or delegate tasks to another object.
As an example, consider the following:
www.syngress.com
183RubyC07.qxd 1/7/02 1:16 PM Page 490

Miscellaneous Libraries and Tools • Chapter 7 491
require "forwardable"
class Programmer
def work(n)
puts "work "*n
end
end
class Manager
extend Forwardable
def initialize
@employee = Programmer.new
end
def_delegator("@employee", "work", "project")
end
manager = Manager.new
manager.project 3
Here the manager is assigned the project and his programmer does the actual
work, as evidenced in the output:
work work work
Ruby’s define_finalizer is augmented by the finalize.rb library. Generally, in
finalize.rb we send notification of an object’s eminent demise to another object
so that it may handle any necessary cleanup (such as closing sockets, database
connections, and so on). One way to do this is to use the FinalObservable module
as shown below:
require "finalize"
class Foo
include FinalObservable
end
class Bar
def initialize
www.syngress.com
183RubyC07.qxd 1/7/02 1:16 PM Page 491

492 Chapter 7 • Miscellaneous Libraries and Tools
foo = Foo.new
@foo_id = foo.id
foo.add_final_observer(self)
end
def terminate(theId)
puts "inside bar terminating id=#{theId}"
puts "bye bye foo" if theId == @foo_id
end
end
bar = Bar.new
GC.start
puts "bar type=#{bar.type}"
What is interesting here is that when a new bar object is created, its initializer
creates a new foo, which then adds bar as a final observer of foo.When leaving the
initializer of bar,foo is released. Bar is notified of foo’s eminent disappearance by a
call to bar’s terminate.The output thus becomes:
inside bar terminating id=83984164
bye bye foo
bar type=Bar
An alternative approach is to use the Finalizer module directly. Consider this
example:
require "finalize"
dog="bow wow"
cat="meow"
Dog_id = dog.id
def cat.terminate id
puts self
puts "dog gone" if id == Dog_id
end
Finalizer.add(dog, cat)
dog = nil
www.syngress.com
183RubyC07.qxd 1/7/02 1:16 PM Page 492

Miscellaneous Libraries and Tools • Chapter 7 493
Here Finalizer#add adds dog to the list of objects to be notified upon cat’s
eminent departure.Thus the output becomes:
meow
dog gone
Using Text-Processing, Date, and
Calendar Tools
In this section we’ll examine several new tools for handling different sorts of
Date Logic: Soundex (a text processing tool), Date, and Calendar.
Using the Soundex Extension
Soundex is a pure Ruby extension of the Soundex algorithm. Soundex can be
obtained in the RAA in the Library section under Text, and is written by
Michael Neumann.
The Soundex algorithm was first applied in the 1880 census. Its purpose is to
consolidate disparate spellings of surnames in census reports. Soundex is a pho-
netic index; its key feature is that it codes surnames (last names) based on the way
a name sounds rather than how it is spelled.The intent is to allow one to quickly
find the surname even if the spelling has changed (not an unusual occurrence).
Names like Smith and Smyth are indexed together, that is, they have the same
Soundex code.A Soundex code consists of one letter followed by three numbers.
The algorithm is as follows:
1. Drop spaces, punctuations, accents, and other marks.
2. Drop the vowels A, E, I, O, and U, and the letters H,W, and Y.
3. Drop the second letter of any duplicate characters.
4. Drop the second letter of adjacent characters with the same Soundex
numbering.
5. Convert remaining characters in positions 2 to 4 to numbers via
Soundex numbering.
6. Truncate or pad with 0 to make the result of length 4.
Soundex numbers are coded as follows:The letters B, P, F, and V are numbered
1; the letters C, S, K, G, J, Q, X, and Z are numbered 2; the letters D and T are
numbered 3; the letters M and N are numbered 5; the letter R is numbered 6.
www.syngress.com
183RubyC07.qxd 1/7/02 1:16 PM Page 493

494 Chapter 7 • Miscellaneous Libraries and Tools
Consider the following example:
require "soundex"
include Text::Soundex
x = "Smith"
puts "Soundex code for #{x} #{soundex(x)}"
x = "Smyth"
puts "Soundex code for #{x} #{soundex(x)}"
This results in the following:
Soundex code for Smith S530
Soundex code for Smyth S530
A possible application of Soundex might be to assist a telephone operator to
look up telephone numbers quickly.
Using the Date2 and Date3 Extensions
Date2 and Date3 are pure Ruby extensions, which add more sophisticated date
operations to include holidays of various sorts.These extension are written by
Tadayoshi Funaba and are included together under date2 in the RAA, in the
Library section under Date. Included in this release are several sample programs,
the simplest of which is daylight, which calculates when daylight savings time
occurs in the US.
#! /usr/bin/env ruby
# daylight.rb: Written by Tadayoshi Funaba 1998, 2000
# $Id: daylight.rb,v 1.3 2000-07-16 10:28:50+09 tadf Exp $
require 'date2'
require 'holiday'
year = Date.today.year
[[ 4, 1, 0, 'US Daylight Saving Time begins'], # first Sunday in April
[10, -1, 0, 'US Daylight Saving Time ends']]. # last Sunday in October
each do |mon, n, k, event|
puts (Date.nth_kday(n, k, year, mon).to_s + ' ' + event)
end
www.syngress.com
183RubyC07.qxd 1/7/02 1:16 PM Page 494

Miscellaneous Libraries and Tools • Chapter 7 495
www.syngress.com
The current year is obtained by a call to Date.today.year; the date is gotten by
specifying the week, day of the week, year, and month.Another interesting
example illustrates the call to Date.easter that is included in goodfriday.rb:
#! /usr/bin/env ruby
# goodfriday.rb: Written by Tadayoshi Funaba 1998, 2000
# $Id: goodfriday.rb,v 1.4 2000-07-16 10:28:50+09 tadf Exp $
require 'date2'
require 'holiday'
es = Date.easter(Date.today.year)
[[-9*7, 'Septuagesima Sunday'],
[-8*7, 'Sexagesima Sunday'],
[-7*7, 'Quinquagesima Sunday (Shrove Sunday)'],
[-48, 'Shrove Monday'],
[-47, 'Shrove Tuesday'],
[-46, 'Ash Wednesday'],
[-6*7, 'Quadragesima Sunday'],
[-3*7, 'Mothering Sunday'],
[-2*7, 'Passion Sunday'],
[-7, 'Palm Sunday'],
[-3, 'Maunday Thursday'],
[-2, 'Good Friday'],
[-1, 'Easter Eve'],
[0, 'Easter Day'],
[1, 'Easter Monday'],
[7, 'Low Sunday'],
[5*7, 'Rogation Sunday'],
[39, 'Ascension Day (Holy Thursday)'],
[42, 'Sunday after Ascension Day'],
[7*7, 'Pentecost (Whitsunday)'],
[50, 'Whitmonday'],
[8*7, 'Trinity Sunday'],
[60, 'Corpus Christi (Thursday after Trinity)']].
183RubyC07.qxd 1/7/02 1:16 PM Page 495

496 Chapter 7 • Miscellaneous Libraries and Tools
each do |xs|
puts ((es + xs.shift).to_s + ' ' + xs.shift)
end
This gives the following output:
2001-02-11 Septuagesima Sunday
2001-02-18 Sexagesima Sunday
2001-02-25 Quinquagesima Sunday (Shrove Sunday)
2001-02-26 Shrove Monday
2001-02-27 Shrove Tuesday
2001-02-28 Ash Wednesday
2001-03-04 Quadragesima Sunday
2001-03-25 Mothering Sunday
2001-04-01 Passion Sunday
2001-04-08 Palm Sunday
2001-04-12 Maunday Thursday
2001-04-13 Good Friday
2001-04-14 Easter Eve
2001-04-15 Easter Day
2001-04-16 Easter Monday
2001-04-22 Low Sunday
2001-05-20 Rogation Sunday
2001-05-24 Ascension Day (Holy Thursday)
2001-05-27 Sunday after Ascension Day
2001-06-03 Pentecost (Whitsunday)
2001-06-04 Whitmonday
2001-06-10 Trinity Sunday
2001-06-14 Corpus Christi (Thursday after Trinity)
Finally, we should note that Date3 has an advantage over Date and Date2 by
allowing us to include a time portion with our date.
Using the Calendar Extension
Calendar is a C extension of Ruby, which features various international calendars
and operations. It features the Julian, Gregorian, Islamic, Hebrew, and Kyureki
www.syngress.com
183RubyC07.qxd 1/7/02 1:16 PM Page 496

Miscellaneous Libraries and Tools • Chapter 7 497
calendars. Calendar is authored by Tadayoshi Funaba and can be found in the
RAA in the Library section under Calendar.
A simple example is “cal.rb”:
require 'calendar'
include Calendar
def cal(m, y)
printf(" %s %d\n", MONTH_NAMES[m], y)
printf(" S M Tu W Th F S\n")
fst = absolute_from_gregorian(m, 1, y)
print(' ' * day_of_week_from_absolute(fst))
days = gregorian_last_day_of_month(m, y)
for i in 1..days
printf('%2d', i)
if day_of_week_from_absolute(fst + i) != 0
print(' ')
else
print("\n")
end
end
if ((day_of_week_from_absolute(fst) + days) / 7) < 5
print("\n")
end
print("\n")
end
def main()
if $*.length > 2
printf($stderr, "usage: cal [ month [year] ]\n")
exit(1)
end
now = Time.now
m = now.mon
y = now.year
www.syngress.com
183RubyC07.qxd 1/7/02 1:16 PM Page 497

498 Chapter 7 • Miscellaneous Libraries and Tools
m = $*[0].to_i if $*.length >= 1
y = $*[1].to_i if $*.length >= 2
cal(m, y)
end
main()
The year and month are taken from the current time: Time.now.When run,
the output appears as the following:
November 2001
S M Tu W Th F S
1 2 3
4 5 6 7 8 9 10
11 12 13 14 15 16 17
18 19 20 21 22 23 24
25 26 27 28 29 30
Using Language Bindings
Language bindings is a general term for how we call code written in one language
from another.The most familiar example to any Ruby master is Ruby and C.
The fact that Ruby can interface with C should not be too surprising, since
Ruby was in C.All of the C library extensions presented in this chapter are
examples of calling C from Ruby. In Chapter 10, we will see how Ruby can call
C programs and how C programs can call Ruby.What this means is that any
language that can interface with C can interface with Ruby by going through
C. Using this technique, bindings have been written for Java, Perl, and Python,
among others. But there is another technique—namely, Ruby has been recently
rewritten in Java.This makes it very easy for Ruby to call Java and for Java to
call Ruby.
Using JRuby
Probably one of the most exciting recent developments in the growth of Ruby is
the introduction of JRuby, which is a pure Java implementation of Ruby.This
provides a seamless way of accessing Ruby from Java and Java from Ruby. JRuby
can be obtained at http://JRuby.sourceforge.net.
www.syngress.com
183RubyC07.qxd 1/7/02 1:16 PM Page 498

Miscellaneous Libraries and Tools • Chapter 7 499
Ruby Calling Java
Ruby can call Java effortlessly. Moreover, we can write a swing application com-
pletely inside of Ruby. Consider the following example:
JavaObject.load_class "javax.swing.JFrame"
JavaObject.load_class "javax.swing.JLabel"
JavaObject.load_class "javax.swing.JButton"
JavaObject.load_class "javax.swing.JList"
JavaObject.load_class "java.awt.BorderLayout"
frame = JFrame.new("Java loves Ruby")
label = JLabel.new("Cats have nine lives")
button = JButton.new("press me")
listContents=[]
(1..9).each{ |x| listContents<<("cat number "+x.to_s)}
alist = JList.new(listContents)
frame.getContentPane().add(button,BorderLayout::SOUTH)
frame.getContentPane().add(alist,BorderLayout::CENTER)
frame.getContentPane().add(label,BorderLayout::NORTH)
frame.setDefaultCloseOperation(JFrame::EXIT_ON_CLOSE)
frame.pack()
frame.setVisible(true)
We can make several observations from this example. Importing a Java class
XXX in a Java program corresponds to loading the corresponding Java object
in JRuby, which is done by JavaObject.load_class(XXX). More generally,
JavaObject.load_class may take two arguments:The first is still the name of the
Java class, while the second may specify the Ruby name of the class when it is
to differ from the Java name (by default, the Ruby name is the Java name
without the package). Each Java object is loaded individually—that is, we don’t
load all of javax.swing. Ruby strings correspond to Java strings, and a Ruby list
is passed directly into the constructor of the JList. JavaObjects have the same
methods as in Java, so we can use JDK documentation to look up the methods.
www.syngress.com
183RubyC07.qxd 1/7/02 1:16 PM Page 499
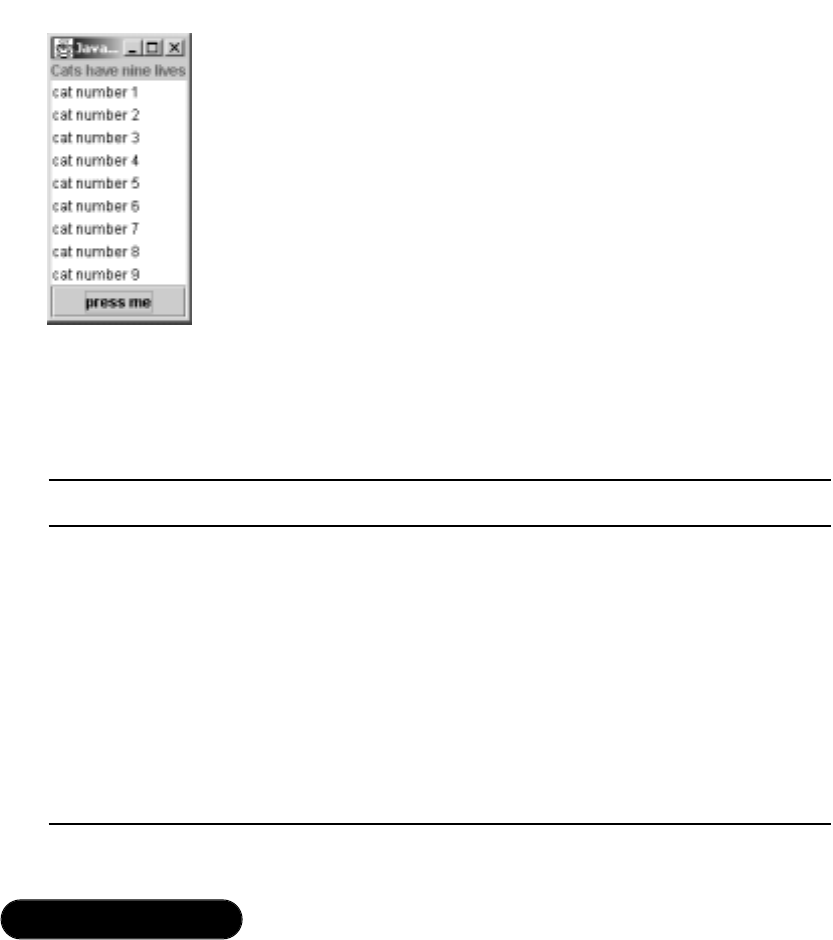
500 Chapter 7 • Miscellaneous Libraries and Tools
For example, setDefaultCloseOperation is a method of JFrame in the JDK.Also
JFrame.EXIT_ON_CLOSE becomes JFrame::EXIT_ON_CLOSE in Ruby.
Putting it all together, we run the program from the command line by
invoking the following:
java –jar jruby.jar RubyToJava.rb
This produces the resulting swing application window seen in Figure 7.17.
Note that arguments are converted from Ruby to Java types, as shown in
Table 7.2.
Table 7.2 Ruby and Java Type Conversion
Ruby Type Java Type
nil (NilClass) null (Object)
true (TrueClass) true (boolean/Boolean)
false (FalseClass) false (boolean/Boolean)
Fixnum Int/long/Integer/Long
Float Float/Double/float/double
String String
JavaObject Object
Fixnum Char
Array Java array object (for example Object[] or String[])
www.syngress.com
Figure 7.17 A Ruby Swing Application
183RubyC07.qxd 1/7/02 1:16 PM Page 500

Miscellaneous Libraries and Tools • Chapter 7 501
Now since we have a button labeled press me, it would be nice if when we
pressed it, something happened. So our next goal is to add an ActionListener.We
will do this by adding the call:
button.addActionListener(JavaInterface.listener "ActionListener",
"actionPerformed", action)
Here action is a Proc object which will handle the response to an action per-
formed on our button.The action we choose to perform will be to pop up a
dialog box with a message from Ruby telling us what action was performed.To
this end, we will add the following:
action = Proc.new() do |evt|
JOptionPane.showMessageDialog NIL,
"Hello from Jruby. The button was:"+evt.getActionCommand
end
And while we’re at it, we can drop the javax.swing from the
JavaObject.load_class statements, provided we import swing via a JavaObject.import
statement.We likewise can drop java.awt from the JavaObject.load_class. Putting
this together, we get a complete listing, as shown in Figure 7.18.
www.syngress.com
Figure 7.18 Ruby2Java.rb
JavaObject.import "java.awt"
JavaObject.import "javax.swing"
JavaObject.import "java.awt.event"
JavaObject.load_class "JFrame"
JavaObject.load_class "JLabel"
JavaObject.load_class "JButton"
JavaObject.load_class "JList"
JavaObject.load_class "BorderLayout"
JavaObject.load_class "JOptionPane"
# create frame
frame = JFrame.new("Java loves Ruby")
Continued
183RubyC07.qxd 1/7/02 1:16 PM Page 501

502 Chapter 7 • Miscellaneous Libraries and Tools
We run as before; however, this time when we push the button, we get what’s
shown in Figure 7.19.
www.syngress.com
Figure 7.18 Continued
# create label
label = JLabel.new("Cats have nine lives")
# create button
button = JButton.new("press me")
# create proc object to show MessageDialog box
action = Proc.new() do |evt|
JOptionPane.showMessageDialog NIL,
"Hello from JRuby\n Responding button: "+evt.getActionCommand
end
# add an action to the button
button.addActionListener(JavaInterface.listener "ActionListener",
"actionPerformed", action)
# create contents
listContents=[]
(1..9).each{ |x| listContents<<("cat number "+x.to_s)}
alist = JList .new(listContents)
frame.getContentPane().add(button,BorderLayout::SOUTH)
frame.getContentPane().add(alist,BorderLayout::CENTER)
frame.getContentPane().add(label,BorderLayout::NORTH)
frame.setDefaultCloseOperation(JFrame::EXIT_ON_CLOSE)
frame.pack()
frame.setVisible(true)
183RubyC07.qxd 1/7/02 1:16 PM Page 502

Miscellaneous Libraries and Tools • Chapter 7 503
WARNING
Be aware that subclassing a JavaObject or extending that object via an
instance method may not always work.
Java Calling Ruby
In the previous example, Ruby called Java to implement a swing application.The
JList in that application had its contents generated by ordinary Ruby code.
Turning the problem around, we want to call Ruby from a Java program. More
specifically, we will transform the Ruby swing application, Ruby2Java.rb, into a
Java swing application, Java2Ruby.java, with Java calling Ruby to again generate
the contents of the JList.This provides a nice insight on how to invoke Ruby
from Java.We will proceed in two steps: First we begin by creating the Java-only
portion of the program, then we will add the call to Ruby.The Java-only portion
follows:
import javax.swing.JFrame;
import javax.swing.JLabel;
import javax.swing.JButton;
import javax.swing.JList;
import java.awt.BorderLayout;
public class Java2Ruby{
public static void main(String[] args){
JFrame frame = new JFrame("Java loves Ruby");
www.syngress.com
Figure 7.19 Resulting Action from Pressing Button
183RubyC07.qxd 1/7/02 1:16 PM Page 503

504 Chapter 7 • Miscellaneous Libraries and Tools
JLabel label = new JLabel("Cats have nine lives");
JButton button = new JButton("press me");
//add an action to the button
button.addActionListener( new ActionListener(){
public void actionPerformed(ActionEvent evt){
JOptionPane.showMessageDialog( null,
"Hello from Java\n Responding button:" +
evt.getActionCommand());
};
}
);
// The next 2 lines will be replaced by ruby code
String[] listContents = new String[1];
listContents[0]="temporary filler";
JList alist = new JList(listContents);
frame.getContentPane().add(button,BorderLayout.SOUTH);
frame.getContentPane().add(alist,BorderLayout.CENTER);
frame.getContentPane().add(label,BorderLayout.NORTH);
frame.setDefaultCloseOperation(JFrame.EXIT_ON_CLOSE);
frame.pack();
frame.setVisible(true);
}
}
Here we have temporarily placed a single string into the listContents so that
we can test it and make sure that the Java only portion works properly. Running
this we see the result shown in Figure 7.20.
www.syngress.com
Figure 7.20 The Swing Application with No Ruby
183RubyC07.qxd 1/7/02 1:16 PM Page 504

Miscellaneous Libraries and Tools • Chapter 7 505
www.syngress.com
We now want to remove the two lines:
// The next 2 lines will be replaced by ruby code
String[] listContents = new String[1];
listContents[0]="temporary filler";
and replace them by Ruby code. Now the first thing is to create a JRuby run-
time object.This is accomplished as follows:
// Create and initialize Ruby intpreter
Ruby ruby = Ruby.getDefaultInstance(GNURegexpAdapter.class);
Or alternatively by this:
// Create a new JRuby runtime object
Ruby ruby = new Ruby();
// set the Rexexp class
ruby.setRegexpAdapterClass(GNURegexpAdapter.class);
// initialize the JRuby runtime
ruby.init();
We next form a string which embodies what we want to do inside of Ruby:
String rubySource = "listContents=[]\n"+
"(1..9).each{ |x| listContents << (\"cat number \"+x.to_s)}\n";
Evaluating the string is simply a call to method evalScript:
String[] listContents = (String[])ruby.evalScript(rubySource,
String[].class);
Adding the appropriate headers, the complete listing looks like this:
import javax.swing.JFrame;
import javax.swing.JLabel;
import javax.swing.JButton;
import javax.swing.JList;
import java.awt.BorderLayout;
import org.jruby.*;
import org.jruby.regexp.*;
import org.jruby.javasupport.*;
public class Java2Ruby{
183RubyC07.qxd 1/7/02 1:16 PM Page 505

506 Chapter 7 • Miscellaneous Libraries and Tools
public static void main(String[] args){
JFrame frame = new JFrame("Java loves Ruby");
JLabel label = new JLabel("Cats have nine lives");
JButton button = new JButton("press me");
// Create and initialize Ruby intpreter
Ruby ruby = Ruby.getDefaultInstance(GNURegexpAdapter.class);
//add an action to the button
button.addActionListener( new ActionListener(){
public void actionPerformed(ActionEvent evt){
JOptionPane.showMessageDialog( null,
"Hello from Java\n Responding button:" +
evt.getActionCommand() );
};
});
String rubySource = "listContents=[]\n"+
"(1..9).each{|x| listContents << (\"cat number \"+x.to_s)}\n";
String[] listContents = (String[])ruby.evalScript(rubySource,
String[].class);
JList alist = new JList(listContents);
frame.getContentPane().add(button,BorderLayout.SOUTH);
frame.getContentPane().add(alist,BorderLayout.CENTER);
frame.getContentPane().add(label,BorderLayout.NORTH);
frame.setDefaultCloseOperation(JFrame.EXIT_ON_CLOSE);
frame.pack();
frame.setVisible(true);
}
}
Running this, we see the screen shown in Figure 7.21.
www.syngress.com
183RubyC07.qxd 1/7/02 1:16 PM Page 506

Miscellaneous Libraries and Tools • Chapter 7 507
There are two other approaches to call Ruby from Java:The first allows for
greater power, but is more involved: Instead of using eval, it calls all the Ruby
methods directly.The second approach, which is to use Bean Scripting Framework
(BSF), is much easier, but does not allow as much control (information on the
Bean Scripting Framework can be found at www-124.ibm.com/developerworks/
project/bsf and http://jruby.sourceforge.net/docs_bsf.html).
The JRuby development team includes Jan Arne Petersen,Alan Moore, Chad
Fowler, Benoit Cerrina, and Stefan Matthias Aust.
Using the Ruby/Python Extension
Ruby/Python is a C extension of Ruby, which allows Ruby to easily access
Python. Consider the following simple example:
require 'python'
require 'python/sys'
Py::Sys.stdout.write("Hello python world!\n")
Py.eval 'sys.stdout.write("Hello ruby world!\n")'
x = 1+2
line = "Ruby computes 1+2=#{x}"
www.syngress.com
Figure 7.21 Swing Application calling Ruby
183RubyC07.qxd 1/7/02 1:16 PM Page 507

508 Chapter 7 • Miscellaneous Libraries and Tools
puts line
x= Py.eval("1+2")
line = "Python computes 1+2=#{x}"
puts line
This produces the following output:
Hello python world!
Hello ruby world!
Ruby computes 1+2=3
Python computes 1+2=3
Note that we invoke the Python interpreter to add 1+2 using the Py.eval
command. In general, a Python import xxx statement translates to a Ruby require
‘python/xxx’ statement, and a Python XXX.xxx() method becomes a Ruby
Py::XXX::xxx(). To demonstrate the translation, consider the following sample
Python program, Html.py, which is bundled with the Ruby/Python distribution.
This program displays a formatted Web page.
import httplib
import htmllib
import formatter
import re, sys
match = None
if len(sys.argv) > 1:
url = sys.argv[1]
match = re.match('^http:\/\/([^\/]+)(\/.*)$', url)
if match:
host, path = match.groups()
else:
print "Usage: python ", sys.argv[0], " http://host/[path]"
sys.exit(1)
h = httplib.HTTP(host)
h.putrequest('GET', path)
h.putheader('Accept', 'text/html')
www.syngress.com
183RubyC07.qxd 1/7/02 1:16 PM Page 508

Miscellaneous Libraries and Tools • Chapter 7 509
www.syngress.com
h.putheader('Accept', 'text/plain')
h.endheaders()
errcode, errmsg, headers = h.getreply()
if errcode == 200:
data = h.getfile().read()
f = formatter.AbstractFormatter(formatter.DumbWriter())
parser = htmllib.HTMLParser(f)
parser.feed(data)
parser.close()
else:
print errcode, ": Failed to fetch", url
sys.exit(1)
Html.py is a pure Python program, and is to be invoked from the command
line with a Web page as an argument. For example, if we are running Linux with
an Apache Web server, we might type the following at the command line to see a
formatted text version of that Web page:
python Html.py http://localhost/
The Ruby/Python version that is bundled with the distribution, Html.rb, is
almost a direct translation:
require 'python'
require 'python/httplib'
require 'python/htmllib'
require 'python/formatter'
url = ARGV.shift
if url != nil && url =~ /^http:\/\/([^\/]+)(\/.*)$/
host, path = $1, $2
else
print "Usage: ruby ", $0, " http://host/[path]\n"
exit(1)
end
183RubyC07.qxd 1/7/02 1:16 PM Page 509

510 Chapter 7 • Miscellaneous Libraries and Tools
h = Py::Httplib::HTTP.new(host)
h.putrequest('GET', path)
h.putheader('Accept', 'text/html')
h.putheader('Accept', 'text/plain')
h.endheaders()
errcode, errmsg, headers = h.getreply().to_a
if errcode == 200
data = h.getfile().read()
f =
Py::Formatter::AbstractFormatter.new(Py::Formatter::DumbWriter.new())
parser = Py::Htmllib::HTMLParser.new(f)
parser.feed(data)
parser.close()
else
print errcode, ": Failed to fetch ", url, "\n"
exit(1)
end
Similarly, Html.rb is invoked from the command line:
ruby Html.rb http://localhost/
The Ruby/Python extension allows us to leverage existing Python libraries
and code with incredible ease.The Ruby/Python extension is due to Masaki
Fukushima and can be found in the RAA in the Library section under Language.
www.syngress.com
183RubyC07.qxd 1/7/02 1:16 PM Page 510

Miscellaneous Libraries and Tools • Chapter 7 511
Summary
In general, Ruby extensions are either written in pure Ruby or are Ruby wrappers
around C code. Pure Ruby extensions are easy to install, easy to read, and easy to
customize.Wrapping Ruby around C code allows us to have the ease of develop-
ment that is inherent in Ruby while efficiently utilizing existing C libraries.
In this chapter we discussed using Ruby to create graphics. In particular, we
discussed the OpenGL Interface package and also the GD Graph package.We sur-
veyed some mathematical packages, for array manipulation, some of which were C-
extensions (such as NArray) and some of which were pure Ruby extensions (such
as Algebra).We discovered that Polynomial had an implementation of infinitesimals,
an alternative to the theory of limits.We explored BigFloat, which allowed us to
efficiently manipulate very large floating point numbers to a high degree of accu-
racy. More related to computer science, we found BitVector would allow to do bit-
wise operations on large sequences of bit (or 0’s and 1’s).We built a binary tree
using the BinaryTree package, and discovered how to use RandomR for random
number generation.We explored genetic algorithms and artificial neural nets using
the packages GP and LibNeural.We interfaced with Windows applications using
OLEWin32 and ActiveScriptRuby. We explored Date and Calendar libraries for date
manipulation and discovered how SoundEx maps the sounds of surnames into
Soundex codes.We explored tools to aid Object-Oriented Programming, namely
EachDelegator,Perserved,Forwardable, and Finalize. Finally we saw that we can inte-
grate Ruby with Python and Java by exploring the JRuby package, which is Ruby
written in Java.
The Ruby community is one of the most exciting and fastest growing com-
munities of software developers and the tools to develop new and innovative
technologies is mushrooming. In this chapter we covered just a small portion of
the publicly available solutions.What we discovered is that Ruby makes develop-
ment for such diverse areas as OpenGL and Java transparently easy.
Solutions Fast Track
Graphics Programming in Ruby
;There are several outstanding alternatives for manipulating graphics in
Ruby. OpenGL is high on that list since it is relatively well known and
highly portable.
;The Ruby-OpenGL package allows full support of OpenGL. Usage is
quite straightforward, and somewhat easier than in C.
www.syngress.com
183RubyC07.qxd 1/7/02 1:16 PM Page 511

512 Chapter 7 • Miscellaneous Libraries and Tools
;The Ruby-GD Graph package allows full support of Perl-based GD
Graph.
Mathematical Programming in Ruby
;NArray is standard array package that allows for rapid array manipula-
tions and is used by several other packages, such as PGPlot.
;BigFloat is a package dedicated to the manipulation of very large
floating point numbers.
;Polynomial is a pure Ruby package that performs polynomial operations
and differentiation using infinitesimals.
;Algebra is a package that performs all of the usual linear algebra opera-
tions, but has the additional capability of handling exotic fields and rings.
Using C/S Data-Structure Tools
;Binary Tree contains support for binary trees, avl trees, splay, and lock.
;Bit Vector supports 0-1 sequences of almost unlimited length.
Using Random Numbers, Genetic
Algorithms, and Neural Nets
;RandomR is a sophisticated, but easy-to-use random number generator.
It is well-suited when a large degree of randomness is necessary.
;GP is an extensive genetic algorithms programming toolkit.
;LibNeural is a very easy-to-use three-layered back propagation neural
net engine.
Working with Ruby and Windows
;ActiveScriptRuby adds Active Script support to Ruby.
;Win32OLE makes working with OLE automation easy.
Using OOP-Related Tools
;EachDelegator is a delegator that adds Enumerable capabilities to iterators.
www.syngress.com
183RubyC07.qxd 1/7/02 1:16 PM Page 512

Miscellaneous Libraries and Tools • Chapter 7 513
;Preserved.rb allows for preserving the definition of method—that is,
protecting it from accidental change.
;Forwardable.rb allows an object to forward or delegate tasks to another
object.
;Finalize.rb is an object-oriented enhancement of Ruby’s define_finalizer
method.
Using Text-Processing, Date, and Calendar Tools
;Soundex.rb is a program that codes names by one character and 3 digits,
which are to represent the sound of the name as opposed to its spelling.
;Date2 and Date3 provide date manipulation programming with holiday
support.
;Calendar features different international calendars.
Using Language Bindings
;JRuby is Ruby written in Java. It allows for easy access of Ruby from
Java or Java from Ruby. It is easy to install, and one can rapidly develop
code using Ruby within a Java environment.
;Ruby/Python allows for the Ruby programmer to call Python routines
and libraries easily.
www.syngress.com
183RubyC07.qxd 1/7/02 1:16 PM Page 513

514 Chapter 7 • Miscellaneous Libraries and Tools
Q: I just found the latest and greatest tool, but the documentation is in Japanese.
Where will I find a translation?
A: If the documentation is on a Web page, go to http://world.altavista.com and
paste the message into Babel Fish, an online language translation program. If
it’s in code, or in a text file, then there are three possible formats (that are not
Unicode). Copy the text from the source and place it into a Web page (set up
for Japanese encoding) and display in your Web browser.Then copy from the
Web browser and paste into Babel Fish and translate.
Q: I’m running Windows, and I want to use a Ruby extension, but it requires a
C compiler—what do I do?
A: Try downloading and installing Cygwin from http://cygwin.com.The com-
plete Cygwin package comes with gcc and f77. If you are using a pre-built
version of Ruby for Windows that is Cygwin-based, take care that you do
not have conflicting versions of the cygwin.dll on your path. I found that
removing the cygwin.dll that came with Ruby (for Windows) seems to work.
Q: I want to use OLE automation to create some Excel spreadsheets, but I don’t
know the Ruby-OLE automation command for one of the operations I want
to perform.Where can I find it?
A: Go to Excel, and record a macro for that operation.Then open the macro
editor and read what was recorded.That will be sufficient to tell you what
the appropriate Ruby script should be.
www.syngress.com
Frequently Asked Questions
The following Frequently Asked Questions, answered by the authors of this book,
are designed to both measure your understanding of the concepts presented in
this chapter and to assist you with real-life implementation of these concepts. To
have your questions about this chapter answered by the author, browse to
www.syngress.com/solutions and click on the “Ask the Author” form.
183RubyC07.qxd 1/7/02 1:16 PM Page 514

Profiling and
Performance Tuning
Solutions in this chapter:
■Analyzing the Complexity of Algorithms
■Improving Performance by Profiling
■Comparing the Speed of Ruby Constructs
■Further Performance Enhancements
;Summary
;Solutions Fast Track
;Frequently Asked Questions
Chapter 8
515
183RubyC08.qxd 1/7/02 1:17 PM Page 515

516 Chapter 8 • Profiling and Performance Tuning
Introduction
Believe it or not, performance should not be the first thing on your mind when
designing and writing programs. If you prematurely optimize your programs or
designs, they will tend to be more complex and error-prone, harder to under-
stand, and more difficult to maintain. Concentrate first on getting a given pro-
gram to work and adding in the needed features before shifting your focus to
how fast it will execute. Otherwise, you can prematurely alter your program by
changing the algorithm, adding code to cache results or using different data
structures.Another reason not to start optimizing early is that you simply will not
know what parts of your program take the most time. Chances are, you’ll have to
focus on performance at some point because your program is too slow, but that
should come later.
If you discover that the application you’ve developed is slow, the first thing to
ask yourself is: Does it really matter? It does if endless tweaking causes your pro-
gram to ship too late to be useful or if it does not arrive at all. But often, poor
performance is more of a nuisance than a disaster.To settle this, you have to time
your program using realistic input data, and you have to keep in mind that next
year’s computers will be twice as fast. If you put your efforts into performance
instead of adding needed features and weeding out bugs, you may end up with a
fast but useless program.
When you are sure your program has a performance problem, you need to
understand why this is so. A good first step is to use a profiler to analyze where
time is being spent.The standard Ruby distribution comes with a profiler that
gives you information on the amount of time spent in each method. Armed with
this knowledge, you can find the hot spots in your program, which are the lines
of code where the majority of time is wasted. By using this information and
thinking about the algorithms in your program, you can understand why the pro-
gram executes slower than you’d expected.
There is a general strategy for improving performance: reduce the total number
of steps the computer needs to go through. Often you will get the largest performance
increase by considering your program’s algorithms.This is because they are the
factor that most affects the steps through which the computer must go.They
affect a larger part of your program than detailed decisions, such as whether you
should add elements to an array using push or concat. By considering the algo-
rithm, you think about what your program actually does. Maybe you will find
redundant computations that can be eliminated; or you will find that you’re using
data structures that allocate too much memory.
www.syngress.com
183RubyC08.qxd 1/7/02 1:17 PM Page 516

Profiling and Performance Tuning • Chapter 8 517
When you have worked on the “what” of your design and feel you cannot
eliminate more of your program’s steps, you may have to focus on smaller-scale
issues.There are some Ruby constructs that you might prefer if you need that
extra performance; we’ll take a look at some of them and compare them in this
chapter. First, let’s start at the highest level: the algorithm.
Analyzing the Complexity of Algorithms
Your program describes a sequence of instructions for the computer to execute. It
has lots of details to describe exactly how and where the computer should read
data, calculate new values, call methods and store the results. In order to under-
stand the time it takes for your program to perform its tasks, you would have to
take all this information into account.You would also need to understand how
these instructions interact during the run, the speed of the computer, and so on.
To simplify things, study the general properties of programs and the complexity
of their algorithms.
The algorithm is the essence of your program—what it does and in what
order. It is basically a sequence of steps.The number of steps needed often grows
as the size of the input grows. For example, look at the following Ruby code for
sorting an array using the Bubblesort algorithm:
def bubble_sort(ary)
0.upto(ary.length-2) do |i| # Outer loop
(ary.length-2).downto(i) do |j| # Inner loop
if ary[j+1] < ary[j]
ary[j], ary[j+1] = ary[j+1], ary[j]
end
end # end of inner
end # end of outer
ary
end
Let’s call the length of ary “N” and see how the number of steps (and thus the
execution time) of the algorithm increases as N does.The inner loop will be exe-
cuted N-1 times.The statement in the inner loop will be executed N-1 times the
first time, N-2 times the second time and so on down to 1 time for the last instance.
In total it will be executed N-1 + N-2 + ... + 1 = N*(N-1)/2 = (N^2 – N)/2
times.
www.syngress.com
183RubyC08.qxd 1/7/02 1:17 PM Page 517

518 Chapter 8 • Profiling and Performance Tuning
When the inner loop statement is executed there is always a comparison and
then sometimes, based on the outcome, two assignments. So if we want to predict
the time, T(N), that it will take to do a Bubblesort, we could use an expression of
the following form:
T(N) = (N^2-N)/2*(Tcomp + Pswap * Tswap)
where Pswap is the probability that a swap is needed, Tswap is the time to per-
form the swap and Tcomp is the time to perform the comparison. But note that
even at this detailed level there are lots of things we haven’t considered; we have
not included any time to set up the loops, nor any time to check the loop condi-
tions and decide if we need to continue looping.
In general, you don’t need this level of detail.You want an approximate mea-
sure to characterize and compare different algorithms, and that is independent of
the actual computer and input data. If we skip the Ts and P from the equation
above, we can say that “Bubblesort typically uses (N^2-N)/2 steps.”When N
grows larger, the N^2 term totally dominates the expression so we could simplify
even more and say “Bubblesort needs on the order of N^2 steps”. Formally, this is
called the time complexity of the Bubblesort algorithm, which is denoted
O(N^2) in the ordo notation and spelled “ordo-N-two”.
The Ruby extension benchmark.rb by Goto Kentaro can be found in the
Ruby Application Archive (RAA) at www.ruby-lang.org/en/raa.html, in the
Library section under devel; it provides a simple way to time Ruby code.
It times how much user, system, total and wall clock (real) time is spent
while executing a block of Ruby code.The method bm can be used to compare
several blocks of code. Let’s use it to call Bubblesort on some random arrays of
different sizes:
require 'benchmark'
include Benchmark
array_generator = proc{|n| Array.new(n).map!{rand(n)}}
bm(12) do |t|
t.report("N = 50") { bubblesort(array_generator.call(50)) }
t.report("N = 500") { bubblesort(array_generator.call(500)) }
t.report("N = 5000") { bubblesort(array_generator.call(5000)) }
end
www.syngress.com
183RubyC08.qxd 1/7/02 1:17 PM Page 518

Profiling and Performance Tuning • Chapter 8 519
which, when run, will report the following:
user system total real
N = 50 0.030000 0.000000 0.030000 ( 0.030000)
N = 500 2.493000 0.000000 2.493000 ( 2.574000)
N = 5000 257.591000 0.010000 257.601000 (271.560000)
The argument given to bm is simply the width (in number of characters), of
the leftmost column of labels.
When increasing N from 50 to 500, one would expect a 100-fold increase in
the running time of the algorithm, since it is O(N^2) and 500*500/50*50 =
100.This is indeed what we observe with benchmark.rb.There is a 83-fold increase
(2.49/0.03).And when increasing N from 500 to 5000 there is a 103-fold
increase (257.591/2.493) so the ordo notation seems to capture the essence of
the algorithm’s behavior.
What are your options if you need to speed up the sorting? You could go
into the details of how Ruby will interpret the Bubblesort code and find ways to
speed its execution up, but typically you can only gain a a factor of 1-2 with such
low-level tuning.
Of course, this can be substantial in many applications, you should definitely
try it if you need to squeeze that extra performance out of your program.You
could also gain some speed by terminating the sorting when no swaps have
occurred in the inner loop. However, a better alternative is often to try to find a
faster algorithm.
Divide-and-conquer algorithms, which divide the input into smaller pieces,
work on the pieces, and then assemble the solution from the pieces, often have
good performance.The Quicksort algorithm is the canonical example of a
divide-and-conquer algorithm, and is shown below in Ruby code:
def qsort(a)
return a if a.length <= 1
m, *r = a
qsort(r.select{|x| x<=m}).push(m).concat(qsort(r.select{|x| x>m}))
end
The idea is to guess the median value mand then recursively sort the ele-
ments that are smaller and larger than the median.The version above simply takes
the first element to be the median. Quicksort’s complexity depends on how well
www.syngress.com
183RubyC08.qxd 1/7/02 1:17 PM Page 519

520 Chapter 8 • Profiling and Performance Tuning
you can guess the median. If you come close to the actual median, the array is
effectively partitioned into two parts of equal size and you will need fewer recur-
sive calls. Even if you make some bad guesses during the run, Quicksort is known
to show good performance. Since it ideally halves the size of the array left to be
sorted in each step, there will be on the order of log(N) steps. On average the
complexity of Quicksort is O(NlogN).
Comparing Algorithms
In comparing Quicksort and Bubblesort, we will also include Array#sort, which
would be the natural way to sort an array in Ruby. Array#sort is actually a
heavily optimized Quicksort coded in C.
We want to compare the average behavior of the algorithms on arrays of dif-
ferent sizes.To get the average behavior we repeat the timing measurements sev-
eral times for each size.We extend the Benchmark extension with ordo_compare to
get a general way to compare algorithms:
def ordo_compare(inputSizes, generator, procHash, iterations = 10)
width = procHash.keys.map{|k| k.length}.max
inputSizes.each do |n|
puts "\nN = #{n}"
bm(width + 8) do |t|
inputs = Array.new(iterations).map {generator.call(n)}
procHash.keys.sort.each do |desc|
p = proc do
iterations.times {|i| procHash[desc].call(inputs[i].clone)}
end
t.report(desc, &p)
end
end
end
end
There are four parameters to ordo_compare.The first is an array with the input
sizes (the Ns) that should be used to compare the algorithms.The second param-
eter is a proc that will generate an input of a given size. Code to invoke each
algorithm is supplied in the third parameter, which is a hash that maps descriptive
www.syngress.com
183RubyC08.qxd 1/7/02 1:17 PM Page 520

Profiling and Performance Tuning • Chapter 8 521
strings to procs. Finally, the fourth parameter specifies the number of times to
repeat the timings for each input size.
For example, when called as
ordo_compare([100, 1000, 10_000], array_generator,
{ "bubblesort" => proc{|i| bubblesort(i)},
"quicksort" => proc{|i| qsort(i)},
"Array#sort" => proc{|i| i.sort} }
)
it will report (depending on the speed of your machine) as follows:
N = 100
user system total real
Array#sort 0.000000 0.000000 0.000000 ( 0.000000)
bubblesort 0.981000 0.000000 0.981000 ( 1.082000)
quicksort 0.090000 0.000000 0.090000 ( 0.100000)
N = 1000
user system total real
Array#sort 0.010000 0.000000 0.010000 ( 0.010000)
bubblesort 103.870000 0.020000 103.890000 (110.088000)
quicksort 1.372000 0.000000 1.372000 ( 1.382000)
N = 10000
user system total real
Array#sort 0.160000 0.000000 0.160000 ( 0.161000)
bubblesort 12004.502000 1.221000 12005.723000 (30247.427000)
quicksort 19.668000 0.000000 19.668000 ( 20.320000)
From this you can see that, even for arrays with as few as 100 elements, the
difference between Bubblesort and Quicksort is noticeable: Bubblesort is slower
by a factor of 10. For 1000 and 10,000 elements, the difference is enormous.The
difference between O(N^2) and O(NlogN) is a very important one.
It is also worth noting that Array#sort is more than 100 times faster than
Quicksort. Even if this kind of increase in speed is not what you can normally
expect when rewriting your Ruby methods in C, it can give a hint as to the dif-
ference between unoptimized Ruby code and highly optimized C code.
www.syngress.com
183RubyC08.qxd 1/7/02 1:17 PM Page 521

522 Chapter 8 • Profiling and Performance Tuning
However, you should know that Array#sort is made out of more than 150
lines of C code, compared to the five lines of Ruby above.This highlights the
fact that when optimizing for speed you often sacrifice the clarity and main-
tainability of your program. I can assure you that the more than 150 lines of C
code took a considerably longer time to develop and debug than our 5 lines
above!
The Different “Ordos”
There is a hierarchy of different algorithm complexities (ordos) you will fre-
quently encounter when analyzing your algorithms:
■O(1) when something takes a constant time regardless of the size of the
input. O(1) algorithms are very fast but very rare except for atomic
operations such as accessing an array or hash element.
■O(N) or linear complexity. Linear algorithms are fast, but you will rarely
find one for difficult problems.
■O(NlogN) or logarithmic complexity algorithms typically apply some kind
of divide-and-conquer strategy, that is, they recursively divide the input
into smaller pieces, work on them separately and assemble the solution
from the pieces.The running time is often good even for large inputs.
■O(N^2) or quadratic complexity algorithms are acceptable for difficult
problems or when the input is relatively small.
■O(N^3) or cubic complexity algorithms is rarely acceptable in practice for
medium to large input sizes.
■O(b^N) for some b(typically 2 but sometimes N!) or exponential com-
plexity algorithms are intractable and you will typically not have the time
to wait for their result even for relatively small input.
In Figure 8.1 you can see the number of steps needed by algorithms of dif-
ferent complexities as N grows.To understand what this means in terms of sec-
onds, let’s assume that each step takes 10e-6 seconds (say 1000 CPU cycles per
step on a 1 GHz machine).With an input size of 1000, it would take 0.001 sec-
onds with an O(N), 0.007 seconds with an O(NlogN), 1 second with an
O(N^2) and about 16 minutes with an O(N^3) complexity algorithm. For an
O(2^N) algorithm you’d have to wait until the end of the universe, or
3.4E+284 millennia!
www.syngress.com
183RubyC08.qxd 1/7/02 1:17 PM Page 522
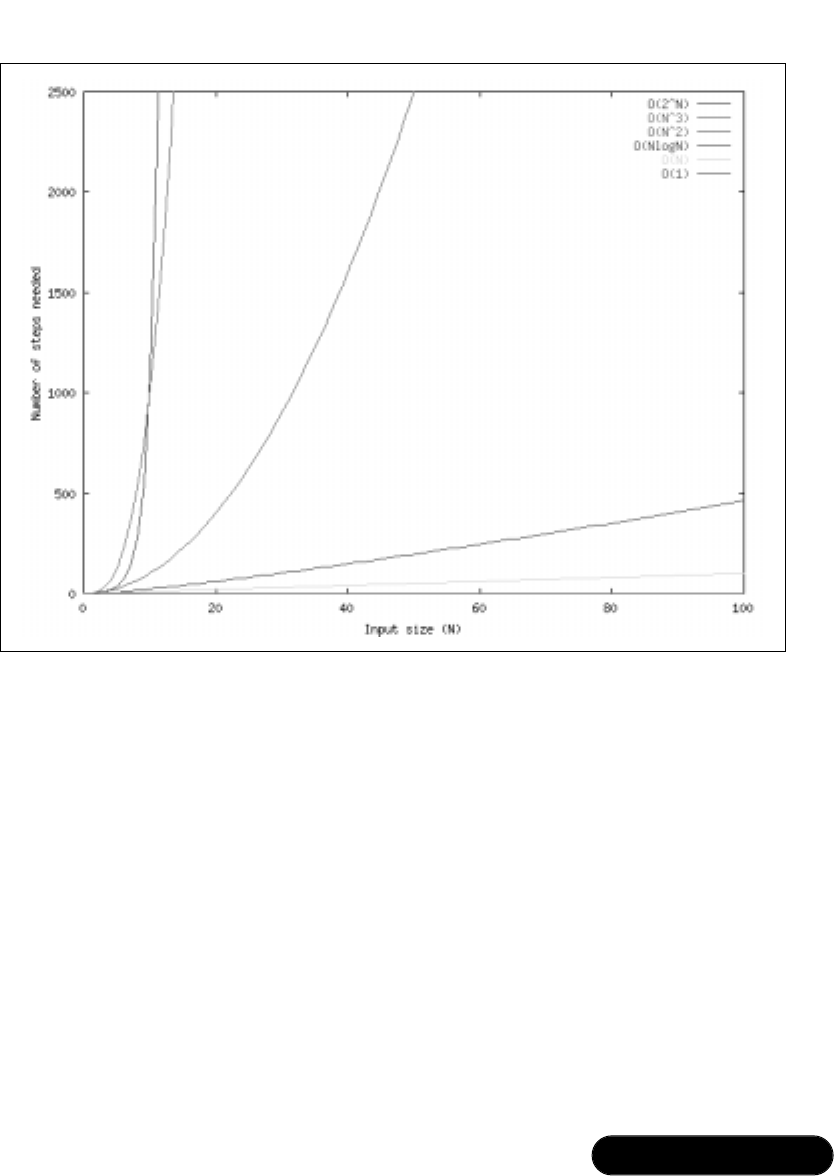
Profiling and Performance Tuning • Chapter 8 523
Average and Worst-case Complexity
Note the difference between average and worst-case complexity. If we give our
implementation of Quicksort an already sorted array it will partition it into one
part of size 1 and another one of size N-1.There will be no halving, so we will
need on the order of O(N^2) steps. Since this is the worst-case behavior of
Quicksort it is said to have a quadratic worst-case complexity (even if we choose
the median in a different way, there will always be some input vectors giving
quadratic behavior).This situation is rare and on average there will be some bad
and some good guesses at the median. However, if you’re doing a time-critical
application where you cannot tolerate bad behavior, no matter how rare, you will
have to pay attention to these kinds of details. Luckily, there are sorting algorithms
with a worst-case complexity of O(NlogN), of which Mergesort is one example.
Instead of partitioning the array by making a guess at the median, we simply halve
it and sort the halves.Then we merge them together to get the sorted array.
www.syngress.com
Figure 8.1 Comparison of Algorithm Complexities for Increasing the Size of
the Input Data
183RubyC08.qxd 1/7/02 1:17 PM Page 523

524 Chapter 8 • Profiling and Performance Tuning
NOTE
There is often a trade-off between the memory used by your programs
(space) and the time they take to complete. By using more memory you
can save previously calculated results, and need not recalculate them.
Thus the total time taken by your program decreases while the memory
used during the run increases. Conversely, you can often re-calculate
results instead of saving them in memory. Thus, you can decrease the
amount of memory used at the expense of more time.
www.syngress.com
Choosing an Algorithm
Keep in mind that the ordo notation gives an approximation of your
algorithm’s order of growth . You should never trust it blindly. There will
typically be hidden constants that it does not reflect. For example, algo-
rithms with exact time expressions 80*N^2+10*N and N^2+5 would
both be characterized as O(N^2), although the latter would be superior
for all N. If you only compared them using the ordo notation, you might
come to the erroneous conclusion that you can choose either of them.
You cannot even be sure that an algorithm with lower algorithmic
complexity is always the best choice. An O(N^3) algorithm might some-
times be a better alternative than an O(N) algorithm if the latter has
higher hidden constants and your input is typically small. However, note
that these situations are unusual. In general you should go for the algo-
rithm with the lowest complexity, especially as your input is probably
not very small or you wouldn’t be worrying about performance in the
first place.
When comparing algorithmic complexities, you must also pay
attention to the issue of worst-case versus average complexity. For
example, from the discussion on sort algorithms, you might conclude
that Mergesort would be a better alternative than Quicksort since the
latter will take a very long time for some inputs. Since they both have
the same average complexity, Mergesort looks like a more attractive
choice. However, there are hidden costs in Mergesort so that it will typ-
ically take a longer time than Quicksort.
Developing & Deploying…
183RubyC08.qxd 1/7/02 1:17 PM Page 524

Profiling and Performance Tuning • Chapter 8 525
The general property of your program’s memory use is called its
space complexity. Space complexity is analyzed in much the same way as
time complexity. Later in this chapter we will discuss the performance
enhancement technique called result caching which gives you the power
to trade space for time in a simple way.
Improving Performance by Profiling
If algorithm complexity is a theoretic approach to assessing and improving pro-
gram performance, then profiling is its pragmatic sibling. Profiling harnesses
unused CPU cycles to see where the program spends its time.
There are at least two solutions available for profiling in Ruby: profile.rb,
found in the standard Ruby distribution, and RbProf, which is part of the AspectR
extension.The former is easier to use, while the latter is faster and can give you
more detailed information.
In the profiling examples that follow, we will use the following scenario as an
example:You are developing a Ruby program where you have lots of large strings
that need to be written to disc.You would like to compress them to save on disc
space. Since you want your program to run on many different platforms, you do
not want to assume there are any compression programs available.You will therefore
need to compress the strings internally within your program.After doing some
Internet searches on compression, you decide on the simplest possible solution:
Huffman compression.You create a Ruby class and write the main compression loop:
class Huffman
def compress(aString)
count_symbols(@data = aString)
build_tree
@code = Hash.new
assign_char_codes(0, @tree, 0)
encode
Marshal.dump([@tree, @bits, @data.length])
end
end
The overall function of Huffman compression is to count the symbols in the
data, build a binary tree with the symbols at the leaves, walk the tree to get the
www.syngress.com
183RubyC08.qxd 1/7/02 1:17 PM Page 525
526 Chapter 8 • Profiling and Performance Tuning
bit string to code for each symbol and finally encode the data by replacing each
symbol by its code. Since we want to compress strings, it’s natural to let each
character be a symbol (depending on what you’d like to compress, you might get
better compression ratios by trying other string-to-symbol mappings).
We thus count the symbols:
def count_symbols(data)
@counts = Hash.new(0)
data.each_byte {|c| @counts[c] += 1}
end
The substance of the Huffman encoding is in the construction of the binary
tree. Huffman compression exploits the fact that some symbols appear more fre-
quently than others. By coding those symbols with fewer bits, we can reduce the
total number of bits needed to encode the data. So in Huffman codes there is
one unique code for each symbol.The binary tree represents all of these codes.
We get the code of a symbol by going from the root node to the leaf with the
symbol and recording a zero (0) when going left, and a one (1) when going
right. In the example in Figure 8.2 there are three symbols: a(char value 97), b
(98) and c(99). From the tree we can see that they have the codes 1, 00 and 01
respectively. So the original string aaabbc would be coded as the bit string
111000001; a compression from 6*8=48 bits down to 9 bits (but we would also
need to include the tree so that the string can be unpacked).
www.syngress.com
Figure 8.2 Huffman Tree for Coding the Symbols a(97), b(98) and c(99)
Start
97
0
98 99
01
01
183RubyC08.qxd 1/7/02 1:17 PM Page 526

Profiling and Performance Tuning • Chapter 8 527
The tree is constructed iteratively by merging the two subtrees that have the
smallest frequency counts.The count for the new tree is the sum of counts for its
subtrees. If we represent the tree as an array of subtrees (array if a tree, or a
symbol if a leaf) we can build the tree like this:
def build_tree
pq = @counts.to_a.sort{|a,b| b[1] <=> a[1]}.map {|e| e.push 0}
while pq.length > 1
(e1, cnt1, depth1), (e2, cnt2, depth2) = pq.pop, pq.pop
insert_sorted([e1, e2], cnt1+cnt2, [depth1, depth2].max+1, pq)
end
@tree, @max_length = pq.first.first, pq.first.last
end
def insert_sorted(elements, count, depth, priorityQueue)
(priorityQueue.length+1).times do |i|
if i == priorityQueue.length or count >= priorityQueue[i][1]
return (priorityQueue[i,0] = [[elements, count, depth]])
end
end
end
We save the codes as an integer value and its number of bits and hold them in
a hash.To get the code for each symbol, we simply traverse the tree in a recursive
fashion.To encode the original data we simply loop over it and shift in the corre-
sponding bits. Finally, we use a Bignum to represent the bitstring since it is simple.
def assign_char_codes(val, element, len)
if element.kind_of?(Array)
assign_char_codes(val, element[0], len+1)
assign_char_codes(val + (1 << len), element[1], len+1)
else
@code[element] = [val, len]
end
end
def encode
@bits = 0 # Use Bignum for bitstring
www.syngress.com
183RubyC08.qxd 1/7/02 1:17 PM Page 527

528 Chapter 8 • Profiling and Performance Tuning
@data.reverse.each_byte do |symbol|
@bits = (@bits << @code[symbol][1]) + @code[symbol][0]
end
end
There it is—Huffman compression in 43 lines of Ruby code (the code can
also be found on the CD accompanying the book, in the file huffman.rb).To
decompress, we’ll need some more lines:
def decompress(string)
(array_tree, bits, length), decompressed = Marshal.load(string), ""
length.times do
element = array_tree
while element.kind_of?(Array)
element = element[bits & 1]
bits >>= 1
end
decompressed << element
end
decompressed
end
We simply use the bits in the string to choose between left and right in the
tree.When we get to a leaf, we have found the symbol.
After testing the Huffman class on some short strings, you can plug it into
your program and try it in its real setting.You will quickly realize that your pro-
gram takes forever to return a value.A bug! After some poking around, you’ll
notice that there are no bugs. Compression simply takes too long.Testing the
codec on some strings of different sizes will return the following:
user system total real
N = 10000 11.557000 0.511000 12.068000 ( 12.138000)
N = 30000 94.045000 1.923000 95.968000 ( 97.400000)
N = 100000 1116.536000 10.044000 1126.580000 (1135.393000)
The time complexity seems to be quadratic in the length of the string.This
was unexpected since the number of steps of the algorithms should be loga-
rithmic according to the number of different symbols.We need some profiling to
understand this!
www.syngress.com
183RubyC08.qxd 1/7/02 1:17 PM Page 528

Profiling and Performance Tuning • Chapter 8 529
Profiling Using profile.rb
Ruby’s standard profiling solution is profile.rb which is included in the standard
distribution.The simplest way to invoke the standard profiler is to simply require
it on the command line when invoking Ruby:
ruby –r profile huffman.rb 1000
You can also require it from within your program:
require 'profile'
#... rest of the 'huffman.rb' file
In any case, the profiler will install itself and collect profiling information.
When your program has finished, the profiler will print a report to StdErr.
Here is the report when compressing and then decompressing a string of
length 1000 (only the top 25 entries are shown):
% cumulative self self total
time seconds seconds calls ms/call ms/call name
51.06 15.29 15.29 254 60.21 90.64 Fixnum#times
10.40 18.41 3.11 23414 0.13 0.13 Array#[]
7.39 20.62 2.21 2 1107.00 1617.00 String#each_byte
3.51 21.67 1.05 9340 0.11 0.11 Kernel.kind_of?
3.31 22.66 0.99 7803 0.13 0.13 Bignum#>>
3.28 23.65 0.98 505 1.94 19.10 Huffman#assign_
char_codes
2.84 24.50 0.85 7803 0.11 0.11 Bignum#&
2.48 25.24 0.74 1 742.00 1052.00 Array#sort
2.44 25.97 0.73 6133 0.12 0.12 Array#length
2.37 26.68 0.71 5626 0.13 0.13 Fixnum#>=
2.04 27.29 0.61 5627 0.11 0.11 Fixnum#==
1.61 27.77 0.48 1 482.00 12598.00 Huffman#build_
tree
1.57 28.24 0.47 3000 0.16 0.16 Hash#[]
1.50 28.69 0.45 252 1.79 42.36 Huffman#insert_
sorted
0.53 28.85 0.16 253 0.63 0.75 Array#each
0.50 29.00 0.15 2516 0.06 0.06 Fixnum#+
www.syngress.com
183RubyC08.qxd 1/7/02 1:17 PM Page 529

530 Chapter 8 • Profiling and Performance Tuning
0.50 29.15 0.15 2000 0.08 0.08 String#<<
0.47 29.29 0.14 1253 0.11 0.11 Hash#[]=
0.40 29.41 0.12 996 0.12 0.12 Bignum#+
0.37 29.52 0.11 1163 0.09 0.09 Fixnum#<=>
0.30 29.61 0.09 1000 0.09 0.09 Kernel.rand
0.30 29.70 0.09 995 0.09 0.09 Bignum#<<
0.20 29.76 0.06 252 0.24 0.56 Enumerable.max
0.17 29.81 0.05 504 0.10 0.10 Array#pop
0.13 29.85 0.04 252 0.16 0.16 Array#[]=
...
The profile report is a table of data with a row for each method that was
invoked during the run of your program. It is sorted on the total time spent
inside each method (not counting the time spent in yet other methods called
from the one in question).All times measured are the amounts of user CPU time.
The first column shows the percentage of the total time that was spent in the
method.The third column shows the total time (absolute).The second column is
the cumulative for the methods up to and including the current one.The fourth
column gives the number of calls to the method.The fifth column is the time
spent in the method on each call (the ratio between columns 4 and 3) and the
sixth column is the total time for each call (including the time spent in called
methods). Note that the last two columns report time in microseconds while
columns 2 and 3 report seconds.
So what can we learn from this profile? The majority of the time is spent in
Fixnum#times.This is a bit surprising since Fixnum#times really only calls a block
a certain number of times. However, the time spent in the block is not measured
since it is invoked with a yield and not via a method call.An additional problem
is that Fixnum#times is called from two places in the program: insert_sorted and
Huffman#decompress. It is not obvious which one of these takes the most time, but
we need to know that in order to focus our efforts and enhance performance.We
have the same problem with the next two entries in the profile: Array#[] is used
all over our program and String#each_byte is used both when counting the sym-
bols and when encoding.
This problem of not knowing the caller of a method occurs frequently when
using the standard profiler. It will often be the case that the common Ruby
methods you use take up the majority of the time.This may be normal, but it will
not help you decide what part of your program to try speeding up. One solution
www.syngress.com
183RubyC08.qxd 1/7/02 1:17 PM Page 530

Profiling and Performance Tuning • Chapter 8 531
may be to look at the total times spent in the methods you have defined yourself.
By multiplying column 4 and 6 we can see that 12.6 seconds are spent while exe-
cuting in Huffman#build_tree, 12.1 in Huffman#decompress and 9.6 seconds in
Huffman#assign_char_codes. In this case we don’t gain much from this information,
since the times are pretty similar, but in general it can be a good way forward.
One thing to notice is that the times reported do not seem to add up.The
profiler reports that we spent 17.7 seconds executing within Huffman#compress of
which we used 1 second in count_symbols, 12.6 in build_tree, 9.6 in
assign_char_codes and 2.1 in encode for a total of 25.3 seconds! This is probably
because of inaccuracies in how time is measured, or because the normal flow of
control is altered in order to profile the code.
WARNING
There is a law in physics called the Heisenberg Uncertainty Principle,
which unfortunately has a counterpart that applies to profiling: You
cannot profile a program without affecting it in a way that makes you
unsure if you can trust your measurements!
Whatever causes this phenomenon, it should make you aware of the fact that
profiling is not an exact science.Take all output from profilers with a grain of salt
and interpret it in the context of your program.A general rule is to trust only
large differences while disregarding smaller ones. In the profile above we can
safely assume that there is potential to speed up the two uses of Fixnum#times
and that we might have to check on our use of arrays.We shouldn’t conclude
from the profile that Kernel#kind_of? takes a longer time than Bignum#>>; the
times reported for them are very similar.
Profiling with the standard profiler takes a long time.Without profiling, exe-
cuting the Huffman program above with an input size of 1000 takes less than half
a second, whereas it takes around half a minute when profiling.This is not
because of some special property of the Huffman program; you will typically see
slow-downs of a factor of 50-100 when using the standard profiler.
To understand why this is so we need to see how the standard profiler works.
How the Standard Profiler Works
The standard profiler installs a trace function (using set_trace_func) that traps calls
to, and returns from, methods.The trace function is a Ruby Proc object.The
www.syngress.com
183RubyC08.qxd 1/7/02 1:17 PM Page 531

532 Chapter 8 • Profiling and Performance Tuning
interpreter invokes the trace function every time an evaluation event occurs.
There are eight different events identified by strings:
■class Start a class or module definition
■end Finish a class or module definition
■call Call a method (written in Ruby)
■return Return from a method (written in Ruby)
■c-call Call a method (written in C)
■c-return Call a method (written in C)
■line Execute code on a new line
■raise Raise an exception
Most of them are self-explanatory, but line might be a bit hard to understand.
A trace function will be invoked with the line event each time the Ruby inter-
preter is about to execute a separate piece of code on a new line in a program.
So the code
1.times { ablock }
would invoke a trace function two times: one for the line’s 1.times portion and
one for the block portion.
When a method is called, the profiler’s trace function saves the start time
(using Time.times.utime or Process.times.utime in Ruby version 1.7 and later)on
an invocation stack. Later, when the program returns from the method in
question, the trace function notes the end time, pops the start time from the
invocation stack and calculates the time spent in the method. Information on
the number of invocations and times spent in each method is saved in a hash.
When the program is about to end and return back to the command line, the
profiler summarizes the information in the hash and prints the profile to
StdErr.
As you know from the profiles printed by profile.rb, both the self ms/calls and
total ms/calls times are reported.The profiler handles this by saving extra infor-
mation on the invocation stack: each time you return from a method, it adds
the time spent in there to the entry for the caller. By subtracting the time spent
in calls from the total time, you know how much time was spent in the method
itself.
www.syngress.com
183RubyC08.qxd 1/7/02 1:17 PM Page 532

Profiling and Performance Tuning • Chapter 8 533
Drawbacks with the Standard Profiler
There are a number of drawbacks with the standard profiler:
■It adds a lot of time to the execution of the program.
■You cannot control which methods are profiled .
■You do not get any information on the callers of a method.
Using a trace function is very costly in terms of time, since it is called on
each line executed in your program.The trace function used for profiling slows
down your program by a factor of between 10 and 200, depending on your pro-
gram.When you need to profile your code it typically takes a considerable
amount of time in itself so a factor of 10 or more can be tedious to say the least.
A faster profiling solution would be preferable.
When you use the standard profiler, the top entries in the profile will fre-
quently be Ruby core methods such as Array#each,Array#[] and Object#==.
However you’re primarily interested in the methods you have written yourself
since they are in your “circle of influence”. It would be useful if you could
specify which methods should be profiled.
If you got information on the callers of a frequently executed method you
could focus your profiling and performance enhancement efforts.The standard
profiler does not give you such information.
Profiling Using RbProf in AspectR
RbProf is a part of AspectR—the Ruby extension for aspect-oriented program-
ming. It is faster than the standard profiler and can be told to profile the parts of
a program you’re interested in. RbProf also gathers more information than the
standard profiler, and will tell you which methods called each other and, option-
ally, the distribution of arguments supplied when calling a method.
You use RbProf in much the same way as the standard profiler. Once you
have installed AspectR and RbProf you can simply write:
ruby –r rbprof your_program.rb
and the profile will be printed on StdErr. In its default mode, RbProf gathers
information only on the methods you have defined in your program. It will not
profile Ruby’s base methods (unless you have redefined them in your program).
However you can add base methods in which you are interested.To accomplish
this you have to invoke the profiler from within your program:
www.syngress.com
183RubyC08.qxd 1/7/02 1:17 PM Page 533

534 Chapter 8 • Profiling and Performance Tuning
require 'rbprof'
$profiler.profile_method(:times, Fixnum)
# rest of your_program.rb follows here...
The profile_method method takes three arguments.The first one is the symbol
ID of the method to be profiled, whereas the second one is the class in which
the method is found.The third parameter is optional and specifies what kind of
information should be gathered during the profiling of the method. It can be any
combinations of the constants:
■TIME Time in each method
■CALL_SITES Count the number of times and from where this
method is called
■UNIQUE_ARGUMENTS Count the number of unique arguments
used when calling the method
■UNIQUE_ARG_INSPECTS Count the number of unique arguments
used when calling this method and base uniqueness on the inspect of
the arguments
■LINE_PROFILE Profile the time spent on each line of the method
The default value for the third parameter is TIME + CALL_SITES, that is,
RbProf will time each method invocation and save information on from where
the method is called.The three other alternatives are experimental, and you
should consult the RbProf documentation to see to what degree they are cur-
rently supported. Basically, the UNIQUE_ARGUMENTS and
UNIQUE_ARG_INSPECTS can be used to assess if result caching would speed
up a method.They report how large a percentage of the calls to any given
method have parameters that have been previously used in calls to that method.
The LINE_PROFILE constant specifies that a detailed line-by-line profile of the
method should be conducted.
RbProf is faster than the standard profiler, and this allows you to use more
realistic input sets. Profiling the Huffman compression of a 30000 byte string
with the standard profiler takes a little more than 16 minutes on my machine.
With RbProf it takes 93 seconds, and without any profiling, it runs in 87 sec-
onds. So the overhead with RbProf is less than 10 percent. Let’s look at the pro-
file from RbProf:
www.syngress.com
183RubyC08.qxd 1/7/02 1:17 PM Page 534

Profiling and Performance Tuning • Chapter 8 535
Profiling summary
*****************
for profile taken: Sat Aug 25 10:57:01 GMT+1:00 2001
for program huffman.rb with args '30000'
Total elapsed time: 92.823 seconds
Time in profiled methods:
%% cumulative self # self total
time seconds seconds calls ms/call ms/call name
---------------------------------------------------------------
87.74 81.45 81.45 1 81447.00 81447.00
Huffman#decompress
Call sites:
1 100.0% Object#compress_and_compare
11.62 92.23 10.79 1 10786.00 10786.00 Huffman#encode
Call sites:
1 100.0% Huffman#compress
0.22 92.43 0.20 1 200.00 92823.00 TOPLEVEL
0.18 92.60 0.17 1 170.00 170.00
Huffman#count_symbols
Call sites:
1 100.0% Huffman#compress
0.09 92.68 0.08 511 0.16 1.15
Huffman#assign_char_codes
Call sites:
510 100.0% Huffman#assign_char_codes
1 0.0% Huffman#compress
0.06 92.74 0.06 255 0.24 0.24
Huffman#insert_sorted
Call sites:
255 100.0% Huffman#build_tree
0.04 92.78 0.04 1 40.00 11156.00
Huffman#compress
Call sites:
www.syngress.com
183RubyC08.qxd 1/7/02 1:17 PM Page 535

536 Chapter 8 • Profiling and Performance Tuning
1 100.0% Object#compress_and_compare
0.02 92.80 0.02 1 20.00 80.00
Huffman#build_tree
Call sites:
1 100.0% Huffman#compress
0.02 92.82 0.02 1 20.00 92623.00
Object#compress_and_compare
Call sites:
1 100.0% TOPLEVEL
As you can see, the information is much the same as from the standard pro-
filer, but with some notable exceptions: since only the methods we defined have
been profiled, there are fewer entries. For example, Array#[] is not in this profile
even though it was the top method in the previous profile.
Another difference is that we can see a method’s callers and how many times
they called the method. If there are more than one caller (as for
Huffman#assign_char_codes), the percentage of the total time spent in the method
caused by calls from each site is shown.This information is not very useful for
the profile above, but if we specify that RbProf should profile Fixnum#times,as
shown earlier, the top of that profile reads:
%% cumulative self # self total
time seconds seconds calls ms/call ms/call name
--------------------------------------------------------------
87.92 82.04 82.04 257 319.21 319.21 Fixnum#times
Call sites:
1 99.8% Huffman#decompress
1 0.2% TOPLEVEL
255 0.0% Huffman#insert_sorted
We can immediately see that it is the call from decompress that takes up the
majority (99.8%) of the time spent in Fixnum#times. For larger programs with
lots of methods, this kind of information can be crucial.
So, we learn from the profile that we should focus on speeding up decom-
pression, since over 80% of our time is spent there. Note that this fact was not
clear from the profiles we did with the standard profiler. One reason for this is
probably that we have now profiled while compressing a larger string. For shorter
strings, the methods calculating the Huffman codes dominate the profiles.When
www.syngress.com
183RubyC08.qxd 1/7/02 1:17 PM Page 536

Profiling and Performance Tuning • Chapter 8 537
profiling you should always try to use the most realistic input data possible; other-
wise you might arrive at wrong conclusions. Since the standard profiler is slow
you might be tempted to use smaller inputs, but you should avoid doing so.
While searching the Internet for Huffman compression algorithms you might
come across the paper “Sub-linear Decoding of Huffman Codes Almost In-
Place” by Andrej Brodnik and Svante Carlsson
(www.iskrasistemi.se/~brodnik/Andrej/research.htm). It presents an efficient way
to mutate the Huffman tree in order to give code words that can be decoded
faster.We can code it up and profile it for a string of 30000 bytes (You can find
the source code on the CD that accompanies this book, in the file called
huffman_fasterdecode.rb).
Here’s the top three entries without any caller information:
%% cumulative self # self total
time seconds seconds calls ms/call ms/call name
--------------------------------------------------------------
49.09 11.57 11.57 1 11567.00 11567.00 Huffman#encode
48.28 22.94 11.38 1 11376.00 11376.00 Huffman#decompress
0.98 23.17 0.23 1 230.00 23563.00 TOPLEVEL
At the end of the profile, RbProf reports the timing differences from the pre-
vious profile (RbProf saves its profiles in binary form in the current directory
and compares a new profile to the latest one if there are similar profiles in the
current directory):
Compared to profile taken Sat Sep 01 11:21:40 GMT+1:00 2001
***********************************************************
New Old Diff
Total elapsed time 22.772 92.973 -75.51%
Huffman#decompress 11.066 81.547 -86.43%
Huffman#compress 0.01 0.04 -75.00%
Object#compress_and_compare 0.0 0.01 -100.00%
Huffman#insert_sorted 0.01 0.02 -50.00%
Huffman#count_symbols 0.17 0.17 -0.00%
Huffman#build_tree 0.05 0.05 0.00%
TOPLEVEL 0.22 0.2 10.00%
Huffman#encode 11.116 10.846 2.49%
www.syngress.com
183RubyC08.qxd 1/7/02 1:17 PM Page 537

538 Chapter 8 • Profiling and Performance Tuning
Such a report can be very handy when you iteratively update your program.
So the change in algorithm brought about a healthy 75 percent increase in
speed, but 23 seconds is still way too long. In the profile we see that encoding
and decompression are now the dominant methods.This is not surprising since
they both loop over all of the strings.To gain more detailed knowledge we could
use RbProf’s line profiler to see which lines are the real hot spots. However, the
line profiler has drawbacks similar to the standard profiler: since it installs a trace
function it will be quite slow.A better approach might be to manually specify
that the methods called from encode and decompress should be profiled.After
inspecting the code, we’ll add the following, since we suspect that the bit-shifting
and pushing of characters might be problematic:
$profiler.profile_method(:<<, Bignum)
$profiler.profile_method(:<<, String)
The top of the new profile validates our suspicion:
%% cumulative self # self total
time seconds seconds calls ms/call ms/call name
--------------------------------------------------------------
37.10 13.47 13.47 1 13471.00 15543.00
HuffmanDecodeSpec#decompress
Call sites:
1 100.0% TOPLEVEL
34.65 26.05 12.58 89996 0.14 0.14 Bignum#<<
Call sites:
29996 67.8% HuffmanDecodeSpec#encode
30000 16.5% HuffmanDecodeSpec#decompress
30000 15.8% TOPLEVEL
19.62 33.18 7.12 1 7123.00 15652.00
HuffmanDecodeSpec#encode
Call sites:
1 100.0% HuffmanDecodeSpec#compress
7.72 35.98 2.80 1 2805.00 36312.00 TOPLEVEL
Representing the bits in a Bignum does not seem to be a good idea, at least not
if we are going to shift all the bits whenever we need to add a few.An alternative
might be to use Robert Feldt’s BitVector extension from RAA (found in the Library
www.syngress.com
183RubyC08.qxd 1/7/02 1:17 PM Page 538

Profiling and Performance Tuning • Chapter 8 539
section under Datastructure). It is a Ruby wrapper class around a library of fast C
functions for arbitrary length bit vectors.The BitVector class has got methods for
writing to a block of consecutive bits in any position in the vector.This would
solve our problems. Download it from the RAA and install it, then update our
Huffman codec.The updated code can be found as huffman_bitvector.rb on the CD.
The time for compressing and decompressing a 30000 byte string is now down
to 1.2 seconds. Note that the change in data structure had a larger effect than we
would have expected from the profile above.The reason is that it not only affected
the bitshifting, but also all operations that are working with the bit string.
We have seen that the iterative and focused profiling supported by RbProf
can be a powerful tool.To understand how RbProf works, we need to understand
a little about aspect-oriented programming and AspectR.
Understanding AOP and AspectR
In essence, aspect-oriented programming (AOP) allows you to add code to
methods without having to copy-and-paste it there by hand. By giving a con-
trolled way to alter the behavior of your methods you can separate concerns even
more between your classes and flexibly add or delete functionality as needed.The
idea has been around for some time and has been given many different names;
but recently AOP has been popularized by a research group at Xerox Parc under
the leadership of Gregor Kinscalez.They have released a tool called AspectJ,
which supports AOP in Java.
The motivation for AOP is that when you design a program you often have
to extend your classes with code that is unrelated to their purpose. An example
would be a thread-safe (synchronized) queue.A queue is a data structure that
allows you to add and take away elements.Thread safety has nothing to do with
the queue in itself; sometimes you will need a thread-safe queue and sometimes
you will not.The code for a queue will be easier to understand, debug, and
maintain if it is separated from the synchronization code that is needed for a
thread-safe queue.AOP lets you separate the code and gives you a way to express
the bindings necessary to glue synchronization code onto a non-thread-safe
queue to make a thread-safe queue.
In AOP lingo the synchronization code would be written in an aspect and this
synchronization aspect would be woven into your queue.
The concept of AOP can be applied not only to synchronization but to most
situations where there is a clear separation between orthogonal functionalities
your classes need to support. Examples include:
www.syngress.com
183RubyC08.qxd 1/7/02 1:17 PM Page 539

540 Chapter 8 • Profiling and Performance Tuning
■Tracing and logging
■Transactions in database accesses
■Security
■Fault-tolerance
■Caching strategies
■Profiling
Using AspectR
Let’s see how we can add tracing to a class. Let’s say you have a class YourClass
and you want to log method entry and exit to trace the flow of events.
class YourClass
def method1
sleep 1
puts "Hello!"
[:t, "sd"]
end
def method2(*args)
raise NotImplementedError
end
end
In AspectR an aspect is simply a subclass of Aspect:
require 'aspectr'
include AspectR
class Tracer < Aspect
def tick
"#{Time.now.strftime('%Y-%m-%d %X')}"
end
def tracer_enter(method, object, exitstatus, *args)
puts "#{tick} #{self.class}##{method}: #{args.inspect}"
end
www.syngress.com
183RubyC08.qxd 1/7/02 1:17 PM Page 540

Profiling and Performance Tuning • Chapter 8 541
def tracer_exit(method, object, exitstatus, *args)
print "#{tick} #{self.class}##{method}: exited "
if exitstatus.kind_of?(Array)
puts "normally returning #{exitstatus[0].inspect}"
elsif exitstatus == true
puts "with exception '#{$!}'"
else
puts "normally"
end
end
end
The Tracer aspect contains two methods that can be added to other methods.
In AspectJ they would be called advices.tracer_enter should be added so that it exe-
cutes before (and tracer_exit after) the existing code.They will print the time,
method and arguments for the call.We see that the arguments to advice methods
are always the same: the ID for the method called, the object receiving the call,
the exitstatus of the method if it has finished, and the arguments in the call. In
advices that execute before the code in the base method (called pre-advices), the
exitstatus is always nil. In advices that execute after the code in the base method
(called post-advices), exitstatus is normally an array with the return values from the
method. If exitstatus has the value true, that means that an exception was raised.
The basic way to add advice methods to methods in a class is to use
Aspect#add_advice. For the example above this would be:
tracer = Tracer.new
tracer.add_advice(YourClass, PRE, :tracer_enter, :method1)
tracer.add_advice(YourClass, POST, :tracer_exit, :method1)
You simply specify the class, where to add the advice, ID for advice method,
and the method to add to. Since it is very common to add both a pre- and a
post-advice, the shorthand method Aspect#wrap can be used instead:
tracer.wrap(YourClass, :tracer_enter, :tracer_exit, :method1)
It is also common to want to wrap many methods with the same pre- and
post-advices. Aspect#wrap supports this by allowing a regexp as a method specifier.
The shortest way to add logging to both methods in YourClass would thus be:
tracer.wrap(YourClass, :tracer_enter, :tracer_exit, /method\d/)
www.syngress.com
183RubyC08.qxd 1/7/02 1:17 PM Page 541

542 Chapter 8 • Profiling and Performance Tuning
since /method\d/ matches both method1 and method2. If we now run the fol-
lowing code:
YourClass.new.method1
begin
YourClass.new.method2(1, true)
rescue Exception; end
we would get the output:
2001-06-15 14:36:17 Tracer#method1: args = []
Hello!
2001-06-15 14:36:18 Tracer#method1: exited normally returning [:t, "sd"]
2001-06-15 14:36:18 Tracer#method2: args = [1, true]
2001-06-15 14:36:18 Tracer#method2: exited with exception 'NotImplemen
tedError'
We can now see how AspectR can be used for profiling.We simply add a
pre-advice that saves the entry time to a stack, and a post-advice that calculates
the time elapsed and saves it in a database.When the program has finished, we go
through the database and summarize the information in a profile. Indeed, this is
how it is done even though some special tricks are used to decrease the overhead
introduced by AOP.
How AspectR Works
AspectR simply aliases the existing method and defines a new version of it that
calls advice methods before and after calling the original method. Here’s a tem-
plate for how it works:
class YourClass
alias old_method1 method1
def method1
begin
exitstatus = nil
# code to call pre advices
return exitstatus.push(old_method1).last
rescue Exception
exitstatus = true
ensure
# code to call post advices
www.syngress.com
183RubyC08.qxd 1/7/02 1:17 PM Page 542

Profiling and Performance Tuning • Chapter 8 543
end
end
end
Since AspectR calls methods on actual instances of aspects, it cannot simply call
them with static code inserted above. Instead, it saves aspect instances and informa-
tion on when and how they should be called in class variables in YourClass.So
when you wrap other advices around an already wrapped method they are simply
added to the class’ variables; there is no need to redefine the methods again.
The way AspectR is implemented means that it adds considerable overhead
to normal method dispatch.The authors of AspectR have traded speed for flexi-
bility and power. But the extension is still in development and there is the possi-
bility of doing the implementation in C to speed it up while retaining the power.
There has even been a discussion in the ruby-talk postings on how to add sup-
port to the Ruby interpreter for AOP-style wrapping. In future Ruby versions,
this might become part of Ruby itself since it supports so many powerful pro-
gramming concepts in one framework.
Comparing AspectR and AspectJ
AspectR is 300 lines of Ruby code and AspectJ is a multi KLOC Java program—
so how do they compare? AspectJ is actually a pre-processor for Java.You write
your aspects and bind them to your Java classes in a superset of Java.The program
is then parsed by AspectJ and turned into valid Java code that can be passed on to
a compiler or interpreter.With this in mind, you can understand why the wrap-
ping of advices is called weaving in AspectJ. Put another way, the tool helps you
do sophisticated cut-and-paste.The advice code is statically added to the source
code of the wrapped classes.
This is in stark contrast to AspectR, which makes heavy use of Ruby’s
dynamic features to redefine and extend methods.There is no cut-and-pasting of
Ruby code in AspectR, since Ruby gives you the tools to do more powerful
stuff. So there are a number of differences between the two. Here is a list of
AspectJ features that AspectR is currently missing:
■Join points additional to method entry and exit: when a method is called
and when an exception handler executes
■Composition of pointcut designators (you can specify several method
calls in different classes and objects)
■Precedence and specificity among advices and aspects
www.syngress.com
183RubyC08.qxd 1/7/02 1:17 PM Page 543

544 Chapter 8 • Profiling and Performance Tuning
AspectR only lets you add advices before and after the existing code. In
AspectJ you have more power and can, for example, specify that an advice should
be invoked each time a method calls other methods.
AspectJ has pointcut designator primitives to let you specify join points very
finely.The primitives can be combined with boolean operators to say things like
“Call this advice for all method calls in all methods that call both aand b”.
AspectR can only add advices to methods.
On the other hand,AspectJ does not support dynamically changing your
advices the way AspectR does. Much of this may change over the next little
while, as AspectR is still in development.
Comparing the Speed of Ruby Constructs
Ruby is a flexible language that gives you many ways to accomplish the same
thing. Ruby’s creator,Yukihiro Matsumoto, has sometimes quoted the motto of
Larry Wall, the developer of Perl:“There is more than one way to do it!” Ruby
certainly lives up to this motto.You can add elements to an array using push or
concat or +, you can create arrays with Array.new or [], there is a multitude of dif-
ferent ways to loop, and so on. In this section we will compare the speeds of
some of these alternatives.We will also introduce some tricks that can be used to
slightly increase the performance of your Ruby programs.
But first we need a method to time different Ruby constructs.There are a
number of things that can complicate things if we want to make accurate
comparisons:
■Garbage collection The GC might kick in and affect the timings.
■Timing inaccuracies Small constructs may execute so fast that the
resolution of the clock used to time them is not high enough.
■Memory allocation The first things you time can be adversely
affected because the GC needs to allocate memory for holding objects.
■Dependence on the input We should have general rules of thumb
pertaining towhat constructs to choose, independent of the input they
work on.
To combat these effects you should repeat your measurements a large number
of times and randomize as many things as possible.You should use randomly gen-
erated inputs.You should randomize the order in which you time the constructs
in order to decrease the probability of systematic errors introduced by garbage
www.syngress.com
183RubyC08.qxd 1/7/02 1:17 PM Page 544

Profiling and Performance Tuning • Chapter 8 545
collection. If you force garbage collection before the timings, you can further
decrease the probability of it affecting your timings.You should repeat each con-
struct many times so that there is no problem with the timing accuracy.You
should also repeat the timings many times.And finally you should skip the first
repetitions to lessen the effects of initial memory allocation.
On the accompanying CD you can find the file stat_bench.rb, which applies
all of these tricks. It contains the method stat_bench (which will report the
average time needed to execute each construct), the standard deviation for these
averages, a comparison of the averages, the number of outliers (outliers are
explained below) that have been deleted from the results, and the minimum and
maximum time observed. It takes three arguments: a label describing what is
being compared, a hash that maps descriptive strings to blocks with the constructs
to be compared, and an input generator that will generate random input.
Optionally you can also specify how many times to repeat the timings (M), the
different sizes to use for the input, if outliers among the timings should be
removed before calculating the average time, and finally, the number of repeated
calls (N) to the construct within one timing.
For each iteration of the timing loop, stat_bench will create N inputs by
repeatedly calling the input generator. It will then randomly choose a block and
measure how long it takes to call it with the N inputs. For each iteration, it will
also time N repeated calls to a baseline block.The baseline block is specified with
the descriptive string _base in the hash given as parameter number two to
stat_bench.This baseline time indicates how much time arises from support code
(repeated calls to a block, accessing the input and so on). By subtracting the base-
line block from the block timings, we get an estimate of the time to execute the
code in each block.This whole procedure is repeated M times to get an average
for different inputs.
Even though stat_bench applies many tricks to try to ensure that the timings
reported are as accurate as possible, you will have to be careful when using large
input since they will stress the Garbage Collector harder. If the GC kicks in, the
time taken will be considerably longer than normal (called an outlier).A statistical
procedure is used to eliminate these outliers.The number of such outliers that
were removed before calculating the average time, and the standard deviation, is
reported from stat_bench.
The key to accurate and reliable timings is to have a good, high-resolution
timer.The standard method for timing things in Ruby is to use the Time.times
method and compare the amount of user time used by the Ruby interpreter pro-
cess.This method is used both in the standard profiler and in RbProf. On many
www.syngress.com
183RubyC08.qxd 1/7/02 1:17 PM Page 545

546 Chapter 8 • Profiling and Performance Tuning
platforms, this timing method will only give a resolution of 0.01 seconds, or about
10 milliseconds.The stat_bench method will use an alternative timer available in
the PerfCtr extension, which is available from the RAA.This extension is currently
in a beta state and will only work on some platforms.The resolution of which
PerfCtr is capable depends on your computer hardware, but typically it can be a
number of microseconds or even better. If PerfCtr is not available, stat_bench will
use the standard method to try and overcome its limitations. If PerfCtr is available,
one can use a small N and disable the Garbage Collector while timing. Note that
there might be outliers in any case since PerfCtr is a wall-clock timer; on multi-
tasking operating systems, other processes might kick in and affect the timings.
Below you can find comparisons between different Ruby constructs for
common tasks.All of the timings were conducted with Ruby 1.6.4 (2001-06-04)
on an IBM ThinkPad 600E with 266MHz Pentium II and 128 MB of memory,
running Cygwin and Windows 2000 Workstation Professional . However, the
underlying machine and operating system should not affect the general conclu-
sions drawn in the sections below.The PerfCtr extension was installed and is used
in the timings below. In all timings, the Garbage Collector was enabled and out-
liers were deleted.
Adding Elements to Arrays
There are many ways to add elements to an array.You can push them, use concat,
<<,+=,element assignment, or you can even create a new array containing both
the old and the new elements. Since array manipulation is such a common task
there is potential for performance gains, so let’s try them out.We start with the
case in which we only add one element to an array:
one_element = {
"<<" => proc{|a, e| a << e},
"concat" => proc{|a, e| a.concat [e]},
"push" => proc{|a, e| a.push e},
"+=" => proc{|a, e| a += [e]},
"[,0]=" => proc{|a, e| a[a.length, 0] = [e]},
"_base" => proc{|a, e| a},
}
stat_bench("Adding one element to an array", one_element,
IntArrayGen.new + FixnumGen.new, [10, 500], 100, 10)
www.syngress.com
183RubyC08.qxd 1/7/02 1:17 PM Page 546

Profiling and Performance Tuning • Chapter 8 547
which specifies that the blocks in one_element should be timed 100 times each
with 10 invocations per timing.The procedure should be repeated two times for
input sizes of 10 and 500.Also, we should use a combined input generator that
generates an array of integers and a Fixnum object.When run it reports:
Input size: 10
Adding one element to an array
------------------------------
usec diff std.dev # outl. min max
push 21.30 2.997 4 17.04 32.13
<< 23.25 +9.2% 2.912 3 19.56 31.57
concat 42.38 +99.0% 2.915 1 36.32 51.68
[,0]= 60.47 +184.0% 4.437 5 53.92 75.15
+= 61.33 +188.0% 4.116 5 53.64 73.75
Input size: 500
Adding one element to an array
------------------------------
usec diff std.dev # outl. min max
push 26.43 6.625 2 15.37 48.33
<< 28.06 +6.2% 7.108 1 17.04 49.73
concat 51.34 +94.2% 6.443 4 39.39 68.17
[,0]= 70.39 +166.3% 9.402 3 53.64 99.45
+= 187.08 +607.9% 17.003 7 155.89 240.53
The difference between << and push is not large enough to be taken seri-
ously (look at the standard deviations). However, we can conclude that, from a
performance point of view, we should use them instead of concat, element assign-
ment, or +=. Note also that += is noticeably slower for larger input since it cre-
ates a new array with all elements.
If we have more than one element to add:
array_concat = {
"push" => proc{|a, es| a.push(*es)},
"concat" => proc{|a, es| a.concat es},
"loopeach <<" => proc{|a, es| es.each{|e| a << e}},
"+=" => proc{|a, es| a += es},
www.syngress.com
183RubyC08.qxd 1/7/02 1:17 PM Page 547

548 Chapter 8 • Profiling and Performance Tuning
"[,0]=" => proc{|a, es| a[a.length, 0] = es}
}
stat_bench("Array concatenation", array_concat,
IntArrayGen.new + IntArrayGen.new,
[[10, 5], [10, 50]], 100, 10)
Note that we did not specify a base-line construct. If we don’t, stat_bench will
insert one with the same number of arguments as those specified. It will simply
return the first argument.When run, stat_bench reports:
Input size: [10, 5]
Array concatenation
-------------------
usec diff std.dev # outl. min max
concat 28.03 3.165 5 22.63 36.88
push 28.82 +2.8% 3.132 4 23.75 40.23
[,0]= 44.99 +60.5% 3.739 3 39.39 55.59
+= 49.26 +75.7% 3.464 8 43.58 62.30
loopeach << 194.58 +594.2% 3.894 4 186.62 205.33
Input size: [10, 50]
Array concatenation
-------------------
usec diff std.dev # outl. min max
+= 60.13 4.712 12 52.24 75.71
concat 65.99 +9.8% 4.673 8 58.67 81.85
push 76.34 +27.0% 4.841 8 69.28 89.96
[,0]= 83.91 +39.6% 5.371 9 75.43 99.17
loopeach << 1630.96 +2612.6% 12.006 14 1613.33 1670.60
The picture is not as clear; the time needed depends on the size of the input,
even though the awkward way of looping and adding the elements by hand is
inferior.When the second array is larger += fares relatively better. Since the dif-
ference between += and concat is not significant, concat is probably the wisest gen-
eral choice, as it does not stress the GC to the same degree.
www.syngress.com
183RubyC08.qxd 1/7/02 1:17 PM Page 548

Profiling and Performance Tuning • Chapter 8 549
Concatenating Strings
Concatenating strings is another common task that can be implemented in dif-
ferent ways. Let’s compare a few of those ways:
string_concat = {
"<<" => proc{|s, ns| s << ns},
"+=" => proc{|s, ns| s += ns},
"join" => proc{|s, ns| [s, ns].join},
"_base" => proc{|s, ns| s},
}
stat_bench("String concatenation", string_concat,
StringGen.new + StringGen.new, [10], 100, 10)
which reports:
String concatenation
---------------------
usec diff std.dev # outl. min max
+= 46.59 3.131 11 40.23 55.31
<< 56.48 +21.2% 3.809 8 51.40 68.72
join 132.28 +183.9% 7.206 7 113.98 155.33
It is a bit surprising that += is faster than << since the former always creates
a new string while the latter appends to an existing one. However, there are
probably more checks to be made for the append method, while the adding one
simply creates a new instance and copies the existing characters.You shouldn’t
conclude from this that you should always use the former since its memory use
will typically be worse, so there will be costs later when the Garbage Collector
starts working. Our benchmarking method does not measure such memory
effects. In fact, it actively tries to avoid measuring them.
The method using join fares badly, but this may be attributed to the fact that
it has to create an array before calling the join method.This cost should go away
when you have lots of strings to concatenate. Let’s compare when the number of
strings grow:
string_concat_many = {
"<<" => proc do |str_ary|
www.syngress.com
183RubyC08.qxd 1/7/02 1:17 PM Page 549

550 Chapter 8 • Profiling and Performance Tuning
str = ""
for s in str_ary
str << s
end
str
end,
"+=" => proc do |str_ary|
str = ""
for s in str_ary
str += s
end
str
end,
"join" => proc{|str_ary| str_ary.join},
"_base" => proc{|str_ary| str_ary},
}
stat_bench("Concatenating many strings", string_concat,
ArrayOfGen.new(StringGen.new), [5, 25], 100, 10)
which gives the tables:
Input size: 5
Concatenating many strings
---------------------------
usec diff std.dev # outl. min max
join 158.45 7.526 7 146.67 183.54
+= 296.95 +87.4% 5.424 5 284.67 310.37
<< 312.26 +97.1% 7.806 8 289.70 328.25
Input size: 25
Concatenating many strings
---------------------------
usec diff std.dev # outl. min max
join 957.28 131.481 4 674.39 1164.11
<< 1667.14 +74.2% 147.983 2 1355.76 2122.34
+= 1817.37 +89.8% 33.172 10 1748.83 1911.42
www.syngress.com
183RubyC08.qxd 1/7/02 1:17 PM Page 550

Profiling and Performance Tuning • Chapter 8 551
Using join beats the other methods even when we have only 5 strings to
concatenate.We also see that when we have many strings to concatenate, the
method using += is slower than the one using <<.The larger number of
strings created when adding strings now overtakes the extra code needed to
append.
Predeclaring Variables
In Ruby, you do not have to declare variables.They are implicitly declared the
first time you assign to them. However, you can often speed up your program by
predeclaring variables.The gain is largest for iterator variables and variables used
inside loops:
predeclaring_vars = {
"no predecl" => proc do |n|
n.times do |i|
intermediate_res = i+1
end
end,
"predeclaring" => proc do |n|
i = intermediate_res = nil
n.times do |i|
intermediate_res = i+1
end
end,
"_base" => proc{|n| n.times{}},
}
stat_bench("Predeclaring iterator variables", predeclaring_vars,
SizeGen.new, [100], 100, 1)
which reports:
Predeclaring iterator variables
--------------------------------
usec diff std.dev # outl. min max
predeclaring 211.27 1.287 6 209.24 215.11
normal 252.44 +19.5% 1.228 15 250.59 255.90
www.syngress.com
183RubyC08.qxd 1/7/02 1:17 PM Page 551

552 Chapter 8 • Profiling and Performance Tuning
Iterating Over Array Elements
There are many ways to loop in Ruby. Some of the most common methods for
looping over an array are to use each, loop over the range from 0 to the length,
use length.times,use for-loops or while-loops:
iterating_over_array = {
"each" => proc{|a| a.each{|e| t=e}},
"each_with_index" => proc{|a| a.each_with_index{|e,i| t=e}},
"length.times" => proc{|a| a.length.times{|i| t=a[i]}},
"(0...length).each" => proc{|a| (0...a.length).each{|i| t=a[i]}},
"0.upto(length-1)" => proc{|a| 0.upto(a.length-1) {|i| t=a[i]}},
"for in" => proc{|a| for e in a do t=e end},
"while < length" => proc{|a| i = -1; while i < a.length
t=a[i+=1]
end},
"_base" => proc{|a| t = 1}
}
stat_bench("Iterating over array elements", iterating_over_array,
IntArrayGen.new, [10], 100, 10)
which reports:
Iterating over array elements
------------------------------
usec diff std.dev # outl. min max
for in 186.23 2.991 5 177.96 193.88
each 253.81 +36.3% 2.351 7 248.63 260.37
length.times 422.03 +126.6% 3.928 6 414.02 433.57
0.upto(length-1) 438.68 +135.6% 4.497 5 430.78 451.17
(0...length).each 506.26 +171.8% 7.097 12 494.20 530.51
each_with_index 636.22 +241.6% 12.001 16 605.94 668.52
while < length 668.01 +258.7% 3.837 4 659.58 679.70
Surprisingly, there is a benefit in using a for-loop instead of an each.
www.syngress.com
183RubyC08.qxd 1/7/02 1:17 PM Page 552

Profiling and Performance Tuning • Chapter 8 553
Iterating Over Array Elements with an Index
There is a special method for looping over all elements while simultaneously get-
ting an index to each one. Since the for-loop was the fastest above, we’ll compare
it to the dedicated method.The Array class also has a method for iterating over
the indices to its elements. For good measure , we include it as well. Note that
we predeclare variables so that this effect does not affect the measurements:
iterating_with_index = {
"each" => proc do |a|
e = i = -1
a.each{|e| t=e; j=(i+=1)}
end,
"each_index" => proc do |a|
e = i = -1
a.each_index {|i| t=a[i]; j=i}
end,
"each_with_index" => proc do |a|
e = i = -1
a.each_with_index {|e,i| t=e; j=i}
end,
"for in" => proc do |a|
e = i = -1
for e in a
t=e; j=(i+=1)
end
end,
}
stat_bench("Iterating with index over array elements",
iterating_with_index, IntArrayGen.new,
[10], 100, 10)
which reports:
Iterating with index over array elements
-----------------------------------------
www.syngress.com
183RubyC08.qxd 1/7/02 1:17 PM Page 553

554 Chapter 8 • Profiling and Performance Tuning
usec diff std.dev # outl. min max
for in 461.68 3.674 10 452.85 472.41
each_index 517.48 +12.1% 5.341 4 506.49 532.47
each 536.00 +16.1% 4.680 13 525.49 552.58
each_with_index 724.22 +56.9% 15.571 15 686.68 774.96
Surprisingly, each_with_index is significantly slower.To understand this behavior
we must look into the internals of Ruby. It turns out that Enumerable#each_with
_index will create a new array of length 2 for each iteration.There is also a small
overhead since each_with_index is not a method of Array, like each and each_index.
Destructive versus Non-destructive Methods
Destructive methods, such as sort!,flatten! and collect! can be faster than their non-
destructive variants.The reason is that, unlike the destructive methods, the non-
destructive variants simply clone and then use the destructive method on the clone.
destructive_vs_nondestructive = {
"sort" => proc{|a| b = a.sort},
"sort!" => proc{|a| a.sort!; b=a},
"clone and sort!" => proc{|a| b = a.clone; b.sort!},
}
stat_bench("Destructive vs non-destructive sort",
destructive_vs_nondestructive,
IntArrayGen.new, [10, 10000], 100, 1)
which reports:
Input size: 10
Destructive vs non-destructive sort
------------------------------------
usec diff std.dev # outl. min max
sort 10.82 1.031 14 8.94 13.41
clone and sort! 14.71 +35.9% 1.274 2 12.57 18.44
sort 15.45 +42.7% 0.977 16 13.69 18.16
Input size: 10000
Destructive vs non-destructive sort
www.syngress.com
183RubyC08.qxd 1/7/02 1:17 PM Page 554

Profiling and Performance Tuning • Chapter 8 555
------------------------------------
msec diff std.dev # outl. min max
sort 15.39 0.266 4 15.02 16.09
sort 15.63 +1.6% 0.227 5 15.28 16.28
clone and sort! 15.67 +1.8% 0.274 4 15.28 16.49
There is a difference between the two, though it decreases as the array gets
larger.This is because the time to clone the array does not grow as fast as the
time to sort it. However, from a performance point of view, you should use
destructive methods whenever possible.You will actually gain more than indi-
cated by the measurements above since you will decrease the amount of work for
the memory system and Garbage Collector.
Accessing the First Array Element
There are two obvious ways to access the first element of an array: use first or [0].
However, there is also the less obvious trick of using a multiple assignment:
accessing_first_element = {
"first" => proc{|a| b = a.first},
"[0]" => proc{|a| b = a[0]},
"massignment" => proc{|a| b, = a}
}
stat_bench("Accessing first array element", acessing_first_element,
IntArrayGen.new, [10], 100, 10)
which reports:
Accessing first array element
----------------------------
usec diff std.dev # outl. min max
massignment 6.46 1.784 7 3.35 11.17
first 12.62 +95.5% 1.690 7 9.22 17.32
[0] 18.35 +184.3% 1.327 11 15.92 22.63
It is not surprising that [0] is not very fast. Element reference is very general
and can take many different types of parameters; it also takes time to distinguish
between them. It is a bit of surprise that multiple assignment has such a large
edge, though.
www.syngress.com
183RubyC08.qxd 1/7/02 1:17 PM Page 555

556 Chapter 8 • Profiling and Performance Tuning
Creating Arrays and Hashes
There are syntactical shortcuts to creating arrays and hashes. Should we use them
instead of calling Array.new or Hash.new? Well, it turns out the shorthand are sig-
nificantly faster. For arrays:
creating_array = {
"Array.new" => proc{a = Array.new},
"[]" => proc{a = []},
"_base" => proc{a = 1}
}
stat_bench("Creating empty array", creating_array, ConstantGen.new([]),
[1], 100, 1)
which reports:
Creating empty array
---------------------
usec diff std.dev # outl. min max
[] 2.85 0.784 12 1.68 5.59
Array.new 9.46 +232.0% 0.799 8 8.10 12.29
The situation is not as acute for hashes but the difference is still significant:
creating_hash = {
"Hash.new" => proc{h = Hash.new},
"{}" => proc{h = {}},
"_base" => proc{h = 1}
}
stat_bench("Creating hash", creating_hash, ConstantGen.new([]),
[1], 100, 1)
which reports:
Creating hash
--------------
usec diff std.dev # outl. min max
{} 5.04 0.865 5 3.35 7.82
Hash.new 11.06 +119.5% 0.846 4 9.50 13.69
www.syngress.com
183RubyC08.qxd 1/7/02 1:17 PM Page 556

Profiling and Performance Tuning • Chapter 8 557
Calling Methods and Proc Objects
In Ruby, you can call methods dynamically by using Method#call or
Object#send. Let’s compare how efficient this is compared to an ordinary static
call.We also include a call to a proc object implementing the same functionality
as the method:
class T
def m(a)
a
end
end
t = T.new
m_method = t.method(:m)
m_proc = proc{|a| a}
calling_method = {
"std call" => proc{|a| t.m(a)},
"Method#call" => proc{|a| m_method.call(a)},
"Object#send" => proc{|a| t.send(:m, a)},
"proc" => proc{|a| m_proc.call(a)},
"_base" => proc{|a| a},
}
stat_bench("Calling a method", calling_method,
FixnumGen.new, [1], 100, 10)
which reports:
Calling a method
-----------------
usec diff std.dev # outl. min max
std call 33.56 1.471 4 30.73 37.71
Object#send 47.73 +42.3% 1.296 11 45.26 51.96
Method#call 49.24 +46.8% 1.714 6 46.10 54.20
proc 65.05 +93.9% 2.263 11 60.06 71.24
www.syngress.com
183RubyC08.qxd 1/7/02 1:17 PM Page 557

558 Chapter 8 • Profiling and Performance Tuning
As expected, the ordinary call is the fastest. Somewhat surprisingly, however,
the dynamic method calls are not much more expensive. Note that the signifi-
cance of these differences will decrease when the code inside the method (or
proc) is more complex.
Further Performance Enhancements
The techniques we used in comparing Ruby constructs above should help you
decide which Ruby constructs you’d prefer from a performance standpoint. Such
a choice affects your Ruby program on a low-level, line-by-line basis. In this sec-
tion we look at techniques that have a wider scope.We take a look at how we
can trade memory for speed by caching results, we discuss how the Garbage
Collector affects performance and, finally, what effects to expect if you rewrite
parts of your program in C.
Caching Results
A simple technique that can speed up some types of programs is result caching or
memoizing.The idea is to save previously calculated results so that they can later
be looked up instead of recalculated.The cache is typically a hash that maps the
arguments to the return value(s).
One situation in which this is effective is with recursive and compute-inten-
sive functions. Let’s see how we can speed-up the fibonacci function with this
technique:
$cache = Hash.new
def fibonacci_rc(n)
if (t = $cache[n])
return t
end
if n <= 1
res = 1
else
res = fibonacci_rc(n-2) + fibonacci_rc(n-1)
end
$cache[n] = res
end
www.syngress.com
183RubyC08.qxd 1/7/02 1:17 PM Page 558

Profiling and Performance Tuning • Chapter 8 559
If we compare the speed of this version of fibonacci to the standard recursive
one without result caching, the speed-up is substantial. fibonacci(30) takes over
15 seconds while fibonacci_rc(10000) takes about a second. But note that this is
a special case that is very well suited to result caching. In general, you will not
see these kinds of speed-ups. In fact, for methods that are seldom called with the
same arguments, you will actually see a slowdown.To help you decide when to
apply result caching, you might use RbProf’s aforementioned argument sum-
mary feature.
Hand-coding result caching is a bit tedious and can clutter up your code.
However, there is an extension in RAA to help you out. Memoize (found at the
RAA in the Library section under devel) gives you an easy-to-use directive that
modifies your methods to add result caching. Here’s how we can use it on the
fibonacci function:
require 'memoize'
def fibonacci(n)
if n == 0 or n == 1
1
else
fibonacci(n-2) + fibonacci(n-1)
end
end
memoize :fibonacci
You can also use memoize inside a class definition:
class Fibonacci
def calc(n)
# calculation here...
end
memoize :calc
end
The unmemoize directive will take away result caching and restore a method
to its normal state:
unmemoize :fibonacci
www.syngress.com
183RubyC08.qxd 1/7/02 1:17 PM Page 559

560 Chapter 8 • Profiling and Performance Tuning
As a memoize option, you can specify the cache to be used. Use this feature to
implement different expiration policies (when values in the cache should expire
and require recalculation).Thus you can fine-tune the result caching behavior.
Valid cache objects are objects that respond to the basic hash methods assignment
([]) and reference ([]=). One example is the BoundeLruCache that is included with
memoize. It gives you a hash with a fixed maximum size that will delete the least
recently used key-value pair when the hash is full.This way you can limit the
memory used for caching results.To use a hash that can hold a maximum of 50
pairs for fibonacci you would execute:
memoize :fibonacci, BoundedLruCache.new(50)
The BoundedLruCache is a very simple example of a customized cache; you
can implement more sophisticated schemes if you need them. For example, one
possibility would be to write a persistent cache that will save results on disc
between successive uses of the program.
When Not To Use Result Caching
You should not use result caching for methods that:
■Have side effects, such as printing output or writing to file, since the side
effect will not be seen on successive calls.
■Depend on state other than its arguments.
■Return a data structure that is modified by its caller.
If you were to use memoize on methods with side effects, the side effect will
not be seen on calls with previously used parameters. Since the result can be
found in the cache, there is no need to execute the body of the method.
If a method depends on states other than the parameters, they cannot safely
be used as keys in the cache. Subsequent calls with the same parameters will
return the previously calculated result even though the state might have changed.
Note that the last two limitations above are due to the current implementa-
tion of memoize. If we write the code by hand we can overcome them.A fix for
the last limitation would be to clone the cached value before returning it.To
handle the situation with dependence on state, not in the parameters, we could
include the actual state in the key in the cache.There are proposals to add these
features to future versions of memoize.You should check the README file in the
latest version for the most up-to-date information.
www.syngress.com
183RubyC08.qxd 1/7/02 1:17 PM Page 560

Profiling and Performance Tuning • Chapter 8 561
How Memoize Works
By now we are quite familiar with Ruby code that aliases and redefines methods
to alter their behavior. As you have probably guessed, memoize is yet another
example of this. It simply wraps code around your method to implement the
caching behavior we wrote by hand in the example above and the caches are
kept in a class variable. In fact, memoize can be seen as yet another aspect; it will
actually be part of AspectR in a future release.
However, there is one interesting feature of memoize that we should probe
some more.The memoize directive modifies methods, and it works both inside
classes and in the top-level. How can we accomplish this?
When we are in a class definition, self is the class we are defining. So a direc-
tive should be an instance method of the Class class. Since we would also like our
directives to be available when writing modules we add it to the Module class,
which Class inherits from.
module MyDirective
def my_directive(*args)
args.each {|m| puts m}
end
end
class Module
include MyDirective
end
class T
my_directive :m # => "m"
end
To make your directive available at the top level simply include MyDirective:
include MyDirective
my_directive :t # => "t"
Disabling the Garbage Collector
Disabling the Garbage Collector is a thing you should probably never do. By dis-
abling the GC you leave the cozy and safe virtual room that is Ruby and enter a
www.syngress.com
183RubyC08.qxd 1/7/02 1:17 PM Page 561

562 Chapter 8 • Profiling and Performance Tuning
world full of evil goblins! If your program needs lots of memory while the GC is
disabled, it will continue allocating it until the OS says no or starts swapping to
disc. If this occurs on some operating systems, your whole system might come to
a halt.
Ruby 1.6.4 has a conservative mark and sweep garbage collection algorithm.
This algorithm will traverse all objects that are alive and mark them. It will then
sweep all objects without a mark, (that are not alive). So the cost for garbage
collection will be high if there are many objects alive and only a few of them
die between each garbage collection.The following dummy code illustrates the
problem:
h = {}
GC.disable if ARGV[0]
5e5.to_i.times {|i| h[i] = "dummy"}
h = nil
GC.enable
GC.start
It will create 500,000 strings and keep them in a hash until all of them have
been created. It will then garbage collect all of the strings and the hash.This takes
more than 16 seconds when run on my machine in Ruby 1.6.4 without dis-
abling the GC. However, with the GC disabled it takes less than 5 seconds.
One situation where this technique might be called for is if you need to
quickly get back with an answer, and you will then have lots of idle time where
the Garbage Collector can get to work. One example of this sort of situation
would be an interactive application where the user is waiting for your answer but
there is plenty of time between user requests (while he or she is typing, for
example).The technique might also be valid if you are sure that your program’s
total memory requirement is lower than the available memory on the computers
where it will be run. However, it is very difficult to ensure this for all computers
and in all situations where your program might run.
A major disadvantage with disabling the GC is that your program will not
benefit from GC advances in the interpreter.A new Garbage Collector has been
introduced in the Ruby 1.7 development series that will lead up to Ruby 1.8. It is
a compacting, generational collector that shows better performance in general.
Running the above program, without disabling the Garbage Collector, in Ruby
version 1.7.1 2001-09-10 took 5 seconds which is about the same as with the GC
disabled in 1.6.4. Disabling the GC only speeds execution up by 0.5 seconds
www.syngress.com
183RubyC08.qxd 1/7/02 1:17 PM Page 562

(10%). If you disable garbage collection you take a risk of running out of memory
even though advances in the interpreter may speed up your program anyway.
Writing a C Extension
And now for the method of last resort: abandoning Ruby and rewriting parts
of your program in C. If you are sure that performance of your program is a
www.syngress.com
A Process for Program Optimization
1. Question the need!
■Is performance your highest priority at this stage?
■Premature optimization is the root of much evil. Focus on
correctness and maintainability first.
2. Look at the big picture!
■Are you doing stuff that is not needed? Are you using the
best available algorithms?
■Changes at the highest level give the largest effect.
3. Find the hot-spots!
■Where does the program spend its time?
■Profile to find the 10% of the code using 90% of the time.
4. Check structure and data!
■How is your data stored and accessed?
■Implicit choices related to data, its generation and manage-
ment is often the key.
5. Dig deep!
■Can you use combinations of built-in methods instead of
writing your own? Can you rewrite a method or a statement
to execute faster?
■Know your Ruby environment and use it wisely.
Developing & Deploying…
Profiling and Performance Tuning • Chapter 8 563
183RubyC08.qxd 1/7/02 1:17 PM Page 563

564 Chapter 8 • Profiling and Performance Tuning
problem, that you are using the best algorithm, and that you have tuned the
implementation by using the speediest Ruby constructs, and your program is
still not fast enough, there is no other way out. Luckily, Ruby has great sup-
port for integrating with C code. How you write and use a C extension from
Ruby is covered in Chapter 10. However, some special issues arise in this
context.
One problem is that your design often restricts your options since the inter-
face to your methods is defined and may be difficult to change, and your data is
in Ruby data structures (arrays and hashes, for example). Since your C-imple-
mented method needs to take the same type of input as the Ruby-imple-
mented one, you might end up writing Ruby in C — that is, you call the C
variants of the Ruby methods you use in the Ruby-implemented code.This
limits the performance gain compared to a pure C implementation that works
with C data and then converts the result to a Ruby object. Beware of this situ-
ation and try to rethink your class. Often you can find an atomic method
working on some basic Ruby data structure that will be the key to better per-
formance. Or you can implement a custom data structure in C and use it
throughout your program.
www.syngress.com
183RubyC08.qxd 1/7/02 1:17 PM Page 564

Profiling and Performance Tuning • Chapter 8 565
Summary
If your program runs too slowly you should first think about it at the highest
level.What does it do and in what order? By looking at the overall algorithm you
may find redundant computations or steps whose results are never used. Or
maybe there is a totally different approach that will be faster.Try to think out of
the box to find new ways of accomplishing the program’s goals.
To compare algorithms you should know how to analyze their complexity.
The ordo notation helps you to quickly characterize the growth rate of the exe-
cution time as the input data grows larger. It is a powerful tool that will help you
choose between alternative algorithms.
Another powerful tool is a profiler that shows you your program’s hot spots
— that is, the handful of methods where the majority of time is spent. Use a pro-
filer to focus your efforts and measure your progress. It is important that you use
input data that is as realistic as possible. If not, the reported timings might lead
you to the wrong conclusions so that you try to speed up the wrong methods,
those that have little effect. For profiling, you can either use the standard profiler
or RbProf in AspectR.The latter is faster and gives you additional information
on the call graph and on the opportunity for result caching. However, both pro-
filers rely on Time.times.utime. For small methods, its resolution might not be
good enough to enable meaningful timings.
It is not easy to compare different Ruby constructs in a fair way.You have to
make sure the Garbage Collector does not invalidate your timings; you should
beware of timing inaccuracies; and you should repeat the timings many times on
different inputs. It can often be very misleading to take out small portions of
large programs and compare them.Always try to compare constructs in their real-
world context and with realistic input.Also, ask yourself if the time you spend on
getting that extra percentage of performance is worth it in the long run. Maybe
it’s better if you spend the time on extending the program or ensuring that it is
bug-free.
Result caching trades space for time: by caching previously calculated results,
you do not have to recalculate them later.The memoize extension provides an
easy interface to result caching.
As a last resort you may have to consider writing a crucial part of you pro-
gram in C to reach the desired performance levels.Try to avoid doing this before
you really know which part of your program is the bottleneck.With a thorough
understanding of the algorithm, and after doing a few profiles, you’re in good
shape to decide if and where you need to use lower-level languages.
www.syngress.com
183RubyC08.qxd 1/7/02 1:17 PM Page 565

566 Chapter 8 • Profiling and Performance Tuning
Solutions Fast Track
Analyzing the Complexity of Algorithms
;The algorithm complexity gives an approximate measure of how the
number of steps needed to execute an algorithm grows with increasing
size of the input data. It is a basis for comparing and choosing between
algorithms.
;The ordo notation gives a short-hand for describing algorithm com-
plexity. O(1) is very fast, O(N) good, O(N*logN) acceptable, O(N^2)
tedious, O(N^3) slow and O(N^N) infeasible.
;Remember that the big-O notation is a simplification and that you
might sometimes have to take the “hidden constants” into account. One
algorithm may be faster for your use than another one with better
complexity.
Improving Performance by Profiling
;Profile your program to understand why its performance is not good
enough.Then use the profiling information to focus your performance
enhancement efforts.
;The standard profiler profile.rb is simple and easy to use. However, it is
slow and does not give you information on the callers of often-used
methods.
;The AspectR extension contains the profiler RbProf, which is faster than
the standard profiler. It can show you how methods call each other and
if methods are repeatedly called with the same arguments.
Comparing the Speed of Ruby Constructs
;Benchmarking different Ruby constructs in a fair way is difficult. Be
sure to try them all before starting to time them. If possible, turn off
garbage collection while timing, repeat the timings many times, repeat
the constructs many times within the timing to avoid timing inaccura-
cies, randomize the order of invoking the constructs, and try on many
different inputs of different sizes.
www.syngress.com
183RubyC08.qxd 1/7/02 1:17 PM Page 566

Profiling and Performance Tuning • Chapter 8 567
;Use push or << for adding an element to an Array.
;Use for-in loops instead of each to loop over the elements in an Array.
;Use join when concatenating many strings.
;Pre-declare loop variables.
;Use destructive methods.They are faster and put less stress on memory
system and Garbage Collector.
Further Performance Enhancements
;Understand your algorithm and its complexity, and try to devise or find
a better one with lower complexity.
;Do not change many different things at a time.You need to know how
each one affects performance.
;By caching the results from your methods (memoizing a method) you
can speed up algorithms that repeatedly call a method with the same
arguments.You trade some memory for more speed.
;Reduce the number of temporary objects created in your program since
a lot of time might go into allocating and garbage collecting them. If
you cannot avoid creating them you should try to reuse them.
;If you really need speed consider implementing the central part of your
program in a C extension. It can buy you the extra speed you need at
the expense of a less maintainable, less portable and more error-prone
program that is harder to install.
www.syngress.com
183RubyC08.qxd 1/7/02 1:17 PM Page 567

568 Chapter 8 • Profiling and Performance Tuning
Q: The hot spots in my program reported by the standard profiler are all Ruby
base methods. I use them all over so the profile doesn’t tell me very much.
What can I do?
A: Look at the column marked “total ms/calls” to see which of your own
methods take majority of the time.The calls to the top base methods prob-
ably arise from within your hot spots, so focus your efforts there.As an alter-
native try RbProf and tell it to only benchmark your own methods.
Q: Which is the fastest way to loop over the elements of an array?
A: A for-in-loop is faster than using iterators or manually updating an index.
Q: Should I create an empty Array using Array.new or []?
A: The shorthand, [], is faster.The same goes for hashes.
www.syngress.com
Frequently Asked Questions
The following Frequently Asked Questions, answered by the authors of this book,
are designed to both measure your understanding of the concepts presented in
this chapter and to assist you with real-life implementation of these concepts. To
have your questions about this chapter answered by the author, browse to
www.syngress.com/solutions and click on the “Ask the Author” form.
183RubyC08.qxd 1/7/02 1:17 PM Page 568

Parser
Generators
Solutions in this chapter:
■Creating the Parsing Library of your
Dreams
■Parsing in Ruby with Rockit
■Parsing in Ruby with Racc
;Summary
;Solutions Fast Track
;Frequently Asked Questions
Chapter 9
569
183RubyC09.qxd 1/7/02 3:13 PM Page 569

570 Chapter 9 • Parser Generators
Introduction
When you program computers, you will sooner or later need to parse a text into
something that your program can directly manipulate. Even though you will
probably not write a compiler for a full programming language, there are count-
less other situations in which a parser would help you: extracting options speci-
fied in command-line arguments, reading configuration files, building a contact
database from mails, or extracting information from XML documents. For
common tasks there are often specialized solutions (there are ways to parse XML
documents, for example, which are covered in Chapter 4, and there is the optparse
extension for handling command-line arguments, which can be downloaded
from RAA). However, when specialized tools do not address your problem, you
will need to produce a parser for your needs. In this chapter we’ll take a look at
your options.
In general, to parse is to reconstruct the structure of some data in a linear
form according to a grammar.The linear form is often ASCII text but can be any
linear data such as binary data or Unicode text.The grammar is a description of
all the valid forms the linear data can take and, at the same time, a description of
the structure of the data.
You have two main options in producing a parser.You can write manually
or you can use a parser generator that will generate a parser from the
grammar.The benefits from writing your parser manually are that it can be
very fast, you understand all aspects of it, and, most important, you can get a
parser no matter how your grammar looks.The drawbacks to writing your
parser manually are that it is more error-prone, you have to write code that
can be automatically generated, and it is more time-consuming when there are
changes in the grammar. Parser generators address these issues, but they force
you to write your grammar in a form they understand and the resulting parser
can be slower.
In Ruby there are many different packages for creating parsers. Racc and
RBison are two solutions that mimic the GNU Bison program commonly used
to generate table-driven parsers. Rockit is the more recent arrival with some new
approaches to the parsing problem. In this chapter, we will focus on Racc and
Rockit—the former because it is a very mature, tried-and-tested solution that
can handle Yacc grammars, which are in common supply, and Rockit because it
differs the most from the other two.
Let us start with the most important question:What kind of support have you
been dreaming of getting from a parser extension?
www.syngress.com
183RubyC09.qxd 1/7/02 3:13 PM Page 570

Parser Generators • Chapter 9 571
Creating the Parsing Library
of your Dreams
A parser is an object that analyses the structure of a given string and returns
objects that reflects this structure. Instead of taking such an abstract sentence and
idea any further, let’s try a more hands-on description.The most hands-on thing I
can think of is Ruby, of course, so let’s describe our parsers and how they should
work in pseudo-Ruby code. Even if we can’t actually execute the code, it will act
as a kind of requirements specification on how we want parsers in Ruby to work.
For the purpose of having a goal in mind for our illustration, I’ve chosen
Basic—it was my first programming language with which I got programs to run
and print output on the Commodore 128’s Basic Interpreter (let’s call it CBI).
The full description of CBI can now be found on the Web at
http://members.tripod.com/~rvbelzen/c128sg/index.html. Since we will not be
implementing the full language supported by CBI we make our own. Let’s write
a parser for RdgBasic (Ruby Developer’s Guide Basic)! We can decide how much
to include as we go along.
To begin: what’s the simplest parser we can start with? If we are going to ana-
lyze strings, we would need to be able to create parsers for substrings. How can
we analyze a string without taking it to pieces? Since perhaps the most elemen-
tary Basic command is PRINT, let’s try something like the following:
print_command = string_parser "PRINT"
In the parser library of our dreams, this would mean that we get a parser for
strings looking like PRINT in the variable print_command. So string_parser is a
function that generates a parser that matches the string we supply to it. It would
be kind of awkward if we had to append _parser to every parser generation func-
tion, so let’s assume there is a Parse module where the parser generators reside.We
also include our dream parser library so that the earlier code would look like this:
require 'ploods'
include Parse
print_command = string "PRINT"
Nice! How should we use our parser? The simplest thing I can think of is that
we call a parse method and supply a string, and the parser returns the string if
there was a match, or returns an error otherwise. So we would have the following:
www.syngress.com
183RubyC09.qxd 1/7/02 3:13 PM Page 571

572 Chapter 9 • Parser Generators
print_command.parse "PRINT" #=> "PRINT"
print_command.parse "Print" # Oh yes, all caps. What now?
But what kind of error message should we get on the second line?
Remember, this is the parser library of our dreams, so nothing should hold us
back! It would sure be handy to get the position of the offending character, a
description of what went wrong, and a suggestion of what would have been a
valid input. So when executing the second line above, we would instead get a
ParseError which would read as follows when printed:
parse error at (line 1, column 2):
unexpected "r" when expecting "R" (trying to parse "PRINT")
That’s what I would call a useful error message. But we’re on a mission to an
RdgBasic “Hello World,” so let’s press on! We need a way to specify a parser for
string literals because we could combine it with our previously mentioned
print_command and parse our first program.
A string literal in Basic is a sequence of characters enclosed in double quotes.
Something like the following:
dquote = string '"'
string_literal = seq(dquote, mult(string_character), dquote)
would be natural if mult(x) meant “a parser repeatedly applying the parser xzero
or more times” and if seq(*parsers) meant “apply the parsers given as arguments in
turn and return their results in an array.” It’s good if mult returns the empty string
if xdidn’t match at all, since our parser would then parse empty Basic strings
(“”). Note that mult has the same meaning as ‘*’ in Regexps. For example, /\d*a/
would match zero or more digits followed by an ‘a’.
However, we need to specify a parser for string characters in Basic before
this will really fly.We couldn’t find a full specification of what characters are
valid, but as a first approximation we’ll start with ASCII values from 0x20
(space) up to 0x7E (~).To keep things simple we exclude the quote itself (or our
strings will never end) and the backslash (or we will forget that RdgBasic is not
Ruby and think the backslash could give us a string with a double quote in it).
To specify a parser for this we could of course create a seq and write the 93
(0x7E-0x20-2+1) string parsers for all the different ASCII values. Or we could
do the following:
valid_ascii = (0x20..0x7e).to_a.select {|c| c != ?" and c != ?\}
string_character = choice(valid_ascii.map{|c| string(c.chr)})
www.syngress.com
183RubyC09.qxd 1/7/02 3:13 PM Page 572

Parser Generators • Chapter 9 573
where choice(*parsers) would try each of the parsers in turn and return the result
from the first one matching the input—definitely nicer.This would be a major
strength of the parser library of our dreams—it is “embedded” in Ruby so we
have the full Ruby language to lean on.
Let’s add some more parsers so that we have a “full” grammar (for our very
limited language) and can try it out.We need to sequence this:
white_space = skip(mult(choice(string(" "), string("\t"))))
command = seq(print_command, white_space, string_literal)
RdgBasicParser = command
p RdgBasicParser.parse 'PRINT "Hello, World!"'
where we use the new parser generator skip(p), which matches if pmatches but
discards the parse result returned from p.We should probably skip the double-
quotes around string literals also.After these updates the script evaluates to:
["PRINT", "Hello, World!"]
We can now add an evaluator and a print-eval loop to get an interactive inter-
preter. Let’s call it iba (Interactive rdg BAsic):
class RdgBasicEvaluator
def eval(res)
if Array === res && res[0] == "PRINT"
puts res[1]
end
end
end
def print_eval_loop(parser, evaluator, prompt = "rdg_basic")
while true
print "<#{prompt}> "
prg = STDIN.gets.chomp
exit if prg == ":quit"
begin
puts "#{evaluator.eval(parser.parse(prg))}"
rescue Exception => e
puts e.message
end
www.syngress.com
183RubyC09.qxd 1/7/02 3:13 PM Page 573

574 Chapter 9 • Parser Generators
end
end
if $0 == __FILE__
puts "Welcome to Rdg Basic version 0.1.0\n\n"
parser = RdgBasicParser
print_eval_loop(RdgBasicParser, RdgBasicEvaluator.new)
end
Here’s what a sample session could look like:
$ ruby iba.rb
Welcome to Rdg Basic version 0.1.0
<rdg basic> PRINT "Hello, World!"
Hello, World!
<rdg basic> :quit
$
It’s really very simple (basic!) but it’s what we needed—we can now start
adding to it. Natural additions are more literals, variables, assignment, and some
control structure. If we add the INPUT command, we should be able to do
quite complex programs with I/O and calculations.
However, before we start extending, we had better think of the structure of
our parser and the evaluator. Sure, it gets the work done, but in many ways it is
awkward and not easily extendable. One problem is that we have to make calls
to string all over the place. If you are a slow typist, this is not optimal. Also, each
character that isn’t essential shouldn’t be there, as it might cloud the important
things and make them harder to grasp. Fortunately this is easy to fix:All parser
generator functions should create string parsers from all arguments that are
strings. It should also create parsers from ranges of strings so that we can easily
give a range of allowed characters. An example would be “0”...”9” for a parser
for digits.
A similar problem is that it is rather awkward to have to use seq and choice all
the time since they are used a lot.What if parsers could be chained with “&” and
“|”? The former would correspond to seq and the latter to choice.Then we could
write our parsers in a clearer way.We could even define String#| and String#& to
generate string parsers from themselves. Look at this in code:
www.syngress.com
183RubyC09.qxd 1/7/02 3:13 PM Page 574

Parser Generators • Chapter 9 575
class String
def to_parser
Parse::string(self)
end
def |(o)
self.to_parser | o
end
def &(o)
self.to_parser & o
end
end
A more serious problem with our current dream library is regarding the data
structure returned from the parser. Currently it is an array with the parsed
strings.We cannot simply push to this array when introducing more commands.
If we do, we might loose the structure we are trying to restore from the linear
representation in the string.
One solution would be to return an array of arrays indicating the structure in
the input. So if:
integer = plus( "0".."9" ) # One or more digit chars
expression = integer & "+" & integer
identifier = plus( "a".."z" | "A".."Z" )
assignment = identifier & "=" & expression
and we parse the string “temp=1+2” with the assignment parser, it would return:
["temp", "=", ["1", "+", "2"]]
which is adequate since the structure is still there.And it is basically a tree with
the expression part in a subtree. But consider what would happen if we add alter-
native ways of constructing expressions.A single integer should also be an expres-
sion, but if we parse a string like “temp=1” we would get [“temp”,“=”, [“1”]]
and we would have to check position 1 in the inner array to understand what
kind of expression it was.This constitutes a kind of parsing yet again and we
shouldn’t have to do it.The solution is to build syntax trees as we go along. But
www.syngress.com
183RubyC09.qxd 1/7/02 3:13 PM Page 575

576 Chapter 9 • Parser Generators
before going in that direction, let’s address a concern you might have with all this
parsing.
Why Not Use Regexps?
You may have noticed that some of our parsers look very much like Regexps.A
valid question at this stage might be to ask why we can’t simply use Regexps.
They are well-known, mature, reliable, and available in Ruby proper.
The answer is that they will not be strong enough for the things we want to
do.The canonical example would be nested parentheses.There is no way to
match nested parentheses (or any nested constructs) with a single Regexp. It can
be done with two Regexps and some supporting code, but it will take multiple
passes over the string to be matched and it will be hard to understand.
With the parser library of our dreams we would do this:
parens = recursive("(" & maybe(recurse) & ")")
and have recurse mean the parser we are currently defining. If we’d try it as follows:
parens.parse "((()))" #=> "((()))"
parens.parse "((()"
then the second line should raise a ParseError with this message:
parse error at (line 1, column 5):
unexpected end of input
expected "))"
Getting this behavior when using Regexps would be considerably harder.
The question has real merit, though. Before starting to write a parser you
should consider whether or not your task would lend itself to a concise solution
using solely Regexps. Extracting information out of a larger body of text is the
classic situation where Regexps will do. Examples could be to extract the com-
ments out of Ruby programs, finding a certain entry in an XML document or
finding the function signatures in a C program.
If a Regexp solution will suffice, it will generally be both faster and simpler
than writing the full parser. However, you have to be on your guard so that the
Regexp solutions do not grow with the requirements and match larger parts of
the data until it gets unwieldy. If this happens you might be better off writing the
full parser, which will typically give you a simple and more easily maintainable
www.syngress.com
183RubyC09.qxd 1/7/02 3:13 PM Page 576

Parser Generators • Chapter 9 577
program. It is always up to you and your assessment of the problem. Now let’s
grow some trees!
Representing Recovered Structures with
Abstract Syntax Trees
A natural way to represent the structure we recover when parsing is with a syntax
tree. Each parsed item is a node; links between the nodes show how the parsed
items relate to each other. Figure 9.1 shows an example of a parse tree used to
represent the structure recovered from the string “temp=a+b”.
The top node is an assignment since that is the main characteristic of the
string.The assignment node has two children: one is the variable assigned to and
the other one is the value being assigned.The value is another tree because it is
an expression saying that ‘a’ should be added to ‘b’.The tree in Figure 9.1 is not
the only one that we could use to represent the structure of the string. One alter-
native would be a general expression node with the Plus operator indicated in a
child to the expression node, maybe on a link labeled “operator”.
In this simple example it may not be obvious what we have gained by using a
tree representation instead of simply arrays of arrays. However, the extra informa-
tion added by having nodes of different types is crucial when we later work with
www.syngress.com
Figure 9.1 Example Abstract Syntax Tree for the String “temp=a+b”
Variable Value
Left Right
Assignment
Identifier: 'temp' Plus
Identifier: 'a' Identifier: 'b'
183RubyC09.qxd 1/7/02 3:13 PM Page 577

578 Chapter 9 • Parser Generators
the result from our parser.We can choose what actions to take based on the type
instead of having to check the internals of the arrays. Another benefit is that we
can give names to the children and access them by name instead of with an
index.These advantages will become increasingly important as the strings we
parse (and our trees!) grow larger.
Before we go on to decide how to describe and use these trees in our ideal
parsing library, I had better explain why these trees are called abstract.The reason
is simply that we throw away information that is superfluous and that can be
easily inferred from the node types. For example, it could be a parser for a class
declaration in Ruby.A class declaration is the string class, followed by the name of
the class, an optional part specifying the super class, a set of statements inside the
class, and the string end. In an abstract syntax tree we throw away the strings class,
end and <(if there is a superclass specification);since we know that they should
be there, having them in the tree would not add any information.
Okay, so we want to build trees that are typed and have named children.
How should we use this from inside the Ruby code? Well, the natural way to
represent the type of the nodes is to have each node type be a unique class.
Then we can access its children by using attribute readers. For example, some-
thing like the following:
class Assignment < Tree
attr_reader :variable, :value
def initialize(var, val)
@variable, @value = var, val
end
end
would be a straightforward way to encode assignment nodes like the one used
above. However, since there may be a large number of node types, and the code
would be kind of boring to write each time, it would be better if we could
simply write:
Assignment = Tree.new_subclass(:Assignment, :variable, :value)
And now for the really fun part: How should our parsers build these parse
trees? We want them to return trees instead of strings, so we should modify them
in some way. One simple way would be to call a method and supply the class of
the tree to be built. For the assignment operator:
www.syngress.com
183RubyC09.qxd 1/7/02 3:13 PM Page 578

Parser Generators • Chapter 9 579
assignment = (variable & skip("=") & expression).build(Assignment)
With this new power let’s modify our previous parsers and add some new
parsers so that we can get some input from the user.
Int = Tree.new_sub_class(:Int, :lexeme)
Identifier = Tree.new_sub_class(:Identifier, :lexeme)
StringLit = Tree.new_sub_class(:StringLit, :lexeme)
Print = Tree.new_sub_class(:Print, :expr)
PrintLn = Tree.new_sub_class(:PrintLn)
Read = Tree.new_sub_class(:Read, :identifier)
newline = skip("\r\n" | "\n")
identifier = plus(choice("a".."z", "A".."Z")).build(Identifier)
expr = integer.build(Int) \
| identifier \
| string_literal.build(StringLit)
statement = (skip('PRINT') & ws & expr & newline).build(Print) \
| (skip('READ') & ws & identifier & newline).build(Read) \
| skip('PRINTLN').build(PrintLn)
RdgBasicParser = plus(statement)
We also modify iba into an RdgBasic interpreter called bint:
class RdgBasicEvaluator
def initialize
@variables = Hash.new
end
def evaluate(res)
case res
when Array
res.each {|s| evaluate(s)}
when PrintLn
puts ""; STDOUT.flush
www.syngress.com
183RubyC09.qxd 1/7/02 3:13 PM Page 579

580 Chapter 9 • Parser Generators
when Read
print "? "; STDOUT.flush
@variables[res.identifier.lexeme] = STDIN.gets.strip
when Print
print evaluate(res.expr)
when Int
res.lexeme.to_i
when Identifier
@variables[res.lexeme]
when StringLit
res.lexeme
end
end
end
if $0 == __FILE__
File.open(ARGV[0], "r") do |f|
ast = RdgBasicParser.parse(f.read)
RdgBasicEvaluator.new.evaluate(ast)
end
end
We can now write small basic programs and run them. Here’s a simple one:
PRINT "What is your name"
READ name
PRINT "Hello "
PRINT name
PRINT "!"
PRINTLN
And here’s what a sample session should look like:
$ ruby bint.rb name.bas
What is your name? Robert
Hello Robert!
$
www.syngress.com
183RubyC09.qxd 1/7/02 3:13 PM Page 580

Parser Generators • Chapter 9 581
We now have the rudimentary machinery to continue building our RdgBasic
parser.With a pretty good feeling of how this library of our dreams should work,
it’s time to look at our options for building a parser in Ruby with the available
tools. Let’s start with Rockit and then tackle Racc.
Parsing in Ruby with Rockit
Perhaps this was obvious, but Rockit is the parser library of this author’s dreams.
When I designed it I thought much like we did in the previous section about
what would be the simplest way to write parsers in Ruby.The result was the
parser generators and combinators we used earlier—with only a few modifica-
tions, the basic parsers and interpreters program we built in that section will actu-
ally work. Let’s start with the basics:What exactly is Rockit?
Ruby Object-oriented Compiler construction toolKIT (Rockit) is a Ruby
extension available from RAA, or at http://rockit.sourceforge.net/. It was started
as part of the vision to build a set of Ruby components to execute Ruby pro-
grams. Rockit will support this aim by supplying the basic building blocks
needed to assemble parsers, interpreters, and compilers.
As it happens, parsing Ruby is not the easiest thing you can do—the
grammar is context-sensitive and quite large.The parse.y file used to generate the
parser for Ruby 1.6.5 is over 8000 lines long, and although all of it isn’t doing
parsing, a majority of it is. Matz’s vision of human-oriented programming has led
him to a parser that can almost guess what you mean. In the development effort
to parse Ruby in Ruby code, Rockit has developed into a pretty competent tool
in its own right. It might well be the parsing tool you need.
Rockit’s main features include the following:
■Parsers are written in Ruby code and are first-class objects.
■It has basic parser building blocks and combinators that build larger
parsers from basic ones.
■Both lexical analyzers and syntactical analyzers are built with the same
building blocks. In fact, there is no need to separate lexical and syntac-
tical analysis, unless you want to.
■All input to the parsers are via symbol streams so that Rockit can handle
strings, Unicode, and binary input.
■Parsers produce either abstract syntax trees (ASTs) or call actions as parts
are parsed (event-based).
www.syngress.com
183RubyC09.qxd 1/7/02 3:13 PM Page 581

582 Chapter 9 • Parser Generators
■The abstract syntax trees can be dumped to many graphics formats such
as .png, .tif, Postscript, and .jpg (if you have installed ‘dot’ from AT&T’s
GraphViz package).
■It supports non-context free languages; for example, it can parse nested
comments.
■It has an extensive error detection and reporting system with reasonable
automatic error messages and support for customized error messages as
needed.
At the time of this writing the current version of Rockit is 0.4. It is still in
alpha and some things might change as new ideas and implementation solutions
are encountered. So far the development has focused on finding the Ruby way to
specify and use parsers—that is, to get the syntax and semantics laid out.Almost
no time has gone into getting good performance.
Older Rockit versions used a totally different parsing model which was even
stronger in theory and had many nice properties, but it was slow and had poor
error reporting. For compatibility reasons it is still supported but it is unclear if
future Rockit versions will still support it. Maybe there is a good way to merge
the two approaches and they will both be supported. However, the official way to
use Rockit for constructing parsers is now with the combinator approach as
shown earlier.You should avoid using the older style for new projects unless you
have really good reasons for doing so.
Deviations from the Parsing
Library of Our Dreams
Well, now you know that I was “cheating” and that the “parsing library of our
dreams” is how it will look and feel when you build parsers in Ruby. But there
are some differences between our RdgBasic and Rockit:
■You should require ‘rockit/parse/combinator_parsers’ and not ‘ploods’.
■The combinators are in Rockit::Parse so if you want to access them
directly you should include that module.
■The class for syntax trees (called Tree above) is called Te r m in Rockit. It
supports pattern matching and simple pretty-printing.
■There is a standard library of parsers derived from the basic ones in
std_library.
www.syngress.com
183RubyC09.qxd 1/7/02 3:13 PM Page 582

Parser Generators • Chapter 9 583
To show you a larger example, look at this larger grammar for RdgBasic as it
would look in Rockit version 0.4:
require 'rockit/parse/combinator_parsers'
require 'rockit/parse/std_library'
include Rockit::Parse
class RdgBasicGrammar < Grammar
language "RDG Basic"
version "1.0"
WhiteSpace = mult(" " | "\t" | "\f" | "\v")
Comments = nest( "/*", "*/", mult(AnyChar) )
Ident = Upper & mult(Upper | Digit) ^
(Identifier = term(:Identifier, :lexeme))
Num = plus(Digit) ^
(Number = term(:Number, :lexeme))
valid_ascii = (0x20..0x7e).to_a.select {|c| c != %q{"} and c != ?\}
string_char = one_of(valid_ascii.pack("c*"))
StringP = skip('"') & mult(string_character) & skip('"') ^
(StringLit = term(:StringLit, :lexeme))
BinExpr = term(:BinExpr, :left, :op, :right)
Expr = expression_parser([
[['*', :Left, BinExpr], ['/', :Left, BinExpr],
['MOD', :Left, BinExpr]],
[['+', :Left, BinExpr], ['-', :Left, BinExpr]]],
Num > Ident > "(" & recurse & ")" ^ lift(1))
Cond = Expr & ('<' | '>' | '=') & Expr ^
(Condition = term(:Condition, :left, :op, :right)
Statement =
'IF' & Condition & 'THEN' & Newline &
www.syngress.com
183RubyC09.qxd 1/7/02 3:13 PM Page 583

584 Chapter 9 • Parser Generators
Statements &
maybe('ELSE' & Newline & Statements > term)
'ENDIF' & Newline ^
(If = term(:If, :_, :condition,:_,:_, :statements, :optelse)) \
> 'FOR' & Identifier & ':=' & Expr & 'TO' & Expr & Newline &
Statements &
'NEXT' & Newline ^
(For = term(:For, :_, :ident,:_, :from,:_, :to,:_,:statements) \
> 'READ' & Identifier & Newline ^
(Read = term(:Read, :_, :ident)) \
> 'PRINT' & (Expr | String) & Newline ^
(Print = term(:Print,:_,:message,:_)) \
> 'PRINTLN' & Newline ^
(PrintLn = term(:PrintLn, :_)) \
> Identifier & ':=' & Expr & Newline ^
(Assignment = term(:Assignment, :ident,:_,:expression))
Statement.set_separator(skip(maybe(WhiteSpace | Comment)),
[Ident, Num, StringP])
BasicProgram = plus(Statement) ^
(Program = term(:Program, :statements))
start BasicProgram
end
There are a number of new techniques used here:
■It is customary, but not required, to define your Rockit grammar in a
separate class derived from Grammar. It is a nice way to collect things
together.The grammar class also gives you a number of methods for
specifying the language and setting the start symbol (the parser to start
parsing with when you call Grammar#parse). Note that even though only
one parser can be the start parser, intermediate parsers can still be
accessed from the outside if they are defined as constants (for example,
RdgBasicGrammar::Identifier for parsing the identifier in RdgBasic).
www.syngress.com
183RubyC09.qxd 1/7/02 3:13 PM Page 584

Parser Generators • Chapter 9 585
Parsers that you don’t want to export in this way can be specified as
local variables (string_character above).
■Parsers are specified on the form “parser ^ (Term = term(:Term, ...))”
instead of the previously used “(parser).build(:Term, ...)” which allows us
to drop the parentheses around the parser and save the term class for later
use in evaluators. Since “^” has lower priority than “&”, it can be used
without parentheses.We also define “>” as an alias for “|”. Since “>” has
lower precedence than both “&” and “^” we can stack alternatives after
each other without parentheses.
■Instead of explicitly marking all sub-parsers that should be skipped, one
can specify this in the term function.The trick is to give the corre-
sponding children the name “:_”.When building the term, all results for
children having that name will be skipped.
■A special parser generator can handle binary expressions (Expr Op Expr)
with operators of different precedence and associativity.You can find
more details in the reference material below.
■You can specify a separator parser that is allowed between “tokens” in
parsers producing terms. In this way you do not have to add whitespace
and comments parsers between every token parser in your grammar.The
specified separator will be recursively applied to sub-parsers but will not
affect parsers that you explicitly say are token parsers. Note that parsers
specified as strings are always token parsers (that is, indivisible).
■The standard library contains predefined parsers for many situations.
Examples in the grammar above include Digit,AnyChar, and nest.
With the parser above we can now execute relatively complex RdgBasic pro-
grams.We only have to extend the evaluator in bint to evaluate the new terms:
class RdgBasicEvaluator
alias old_eval evaluator
def evaluator(ast)
case ast
when Statements
ast.statements.each {|stmt| mb_eval(stmt)}
when If
if evaluator(ast.condition)
www.syngress.com
183RubyC09.qxd 1/7/02 3:13 PM Page 585

586 Chapter 9 • Parser Generators
evaluator(ast.statements)
elsif ast.optelse
evaluator(ast.optelse[2])
end
when For
for i in (evaluator(ast.from)..evaluator(ast.to))
@variables[ast.ident.lexeme] = i
evaluator(ast.statements)
end
when "Read"
print "? "; STDOUT.flush
input = STDIN.gets
input = input.to_i if (?0..?9).include?(input[0])
@variables[ast.ident.lexeme] = input
when Assignment
@variables[ast.ident.lexeme] = evaluate(ast.expression)
when Condition, BinExpr
map = {">" => :>, "<" => :<, "=" => :==, "+" => :+, "-" => :-,
"*" => :*, "/" => "/".intern, "MOD" => "%".intern}
evaluate(ast.left).send(map[ast.op.lexeme], evaluate(ast.right))
else
old_eval(res)
end
end
end
Let’s try the program.
/* Sum even numbers between two user-supplied limits */
PRINT "I can sum even numbers."
PRINTLN
PRINT "At what number should I start summing"
READ START
PRINT "At what number should I stop"
READ STOP
SUM := 0
www.syngress.com
183RubyC09.qxd 1/7/02 3:13 PM Page 586

Parser Generators • Chapter 9 587
FOR I := START TO STOP
IF (I MOD 2) = 0 THEN
SUM := (SUM + I)
ENDIF
NEXT
PRINT "The sum of all even numbers between (inclusive) "
PRINT START
PRINT " and "
PRINT STOP
PRINT " is = "
PRINT SUM
Here’s a sample session:
$ ruby bint2.rb sumeven.rdb
I can sum even numbers.
At what number should I start summing? 10
At what number should I stop? 18
The sum of all even numbers between (inclusive) 10 and 18 is 80
$
If you want to play around with this parser and evaluator yourself you can
find the latest versions of these files at www.syngress.com/solutions.
Using Rockit as a Parser Generator
If you think the combinator approach to parsing is cool but would like to write
your grammars in even cleaner form, Rockit can also be used as a traditional
parser generator. Note, however, that this feature was how Rockit was used prior
to version 0.4.This old model and the new model are both supported in Rockit
0.4 but there may be changes in future Rockit versions. Here’s what our
RdgBasic grammar would look like:
Grammar RdgBasic
Version = "1.0"
Date = "2001-10-06"
Tokens
Blank = /(( )|(\t)|(\v))+/ [:Skip]
Identifier = /[A-Z]([A-Z]|\d)*/
www.syngress.com
183RubyC09.qxd 1/7/02 3:13 PM Page 587

588 Chapter 9 • Parser Generators
Number = /\d+/
String = /"[^\r\n]*"/
Newline = /(\r\n)|(\r)|(\n)/
Productions
Statements -> Statement+ [Statements: statements]
Statement -> 'IF' Condition 'THEN' Newline
Statements
('ELSE' Newline Statements)?
'ENDIF' Newline [If: _,condition,_,_,
statements,optelse,
_,_]
| 'FOR' Identifier ':=' Expr 'TO' Expr Newline
Statements
'NEXT' Newline [For: _,ident,_,from,_,
to,_,statements,_,_]
| 'READ' Identifier Newline
[Read: _,ident,_]
| 'PRINT' (Expr | String) Newline
[Print: _,message,_]
| 'PRINTLN' Newline [PrintLn]
| Identifier ':=' Expr Newline
[Assignment: ident,_,expression,_]
Condition -> Expr ('<' | '>' | '=') Expr
[Condition: left, op, right]
Expr -> Number [^]
| Identifier [^]
| '(' Expr ')' [^: _,expr,_]
| Expr '+' Expr [Plus: left, _, right]
| Expr '-' Expr [Minus: left, _, right]
| Expr '*' Expr [Mult: left, _, right]
| Expr '/' Expr [Div: left, _, right]
| Expr 'MOD' Expr [Mod: left, _, right]
Priorities
Mult = Div = Mod > Plus = Minus
www.syngress.com
183RubyC09.qxd 1/7/02 3:13 PM Page 588

Parser Generators • Chapter 9 589
The following lists the most prominent features of this grammar format:
■Tokens are specified with Regexps.
■You specify the trees to be built with arrays to the right or below the
corresponding rule.
■The first component of a tree specification is the name of the term
(AST node to be created).The rest of the components are the children’s
names. Children to be skipped are given the name “:_”.
■Precedence is specified by giving the relative priority of productions. In
the earlier example we stated that multiplication, division, and module
should have the same precedence and a higher precedence than plus and
minus.
Case-Insensitive Parsing
In some grammars you don’t care about the case-sensitivity of matched tokens. It
would be cumbersome if you had to manually insert alternatives for each char-
acter. Fortunately, all Rockit parsers have an accessor named case_sensitive.By
default its value is true but if you set it to false it will allow both uppercase and
lowercase characters. For example:
p = string "query"
p.case_sensitive = false
p.parse "query" #=> "query" as usual
p.parse "QUERY" #=> "QUERY"
Note that this is applied at the character level. So although pis a string parser, if
it is case insensitive, it will also parse “QuEry”,“quERY” and any other combina-
tion of uppercase and lowercase characters.
Customizing Your Parser
There are four main groups of parser building blocks: generators,combinators,trans-
formers, and error-related. In many of the groups there are both basic and derived
building blocks.When you build a parser you can use and combine these basic
and derived building blocks in any way you want, without thinking about their
status. Below we separate them and show how the derived ones can be imple-
mented with the basic ones. Note that you cannot assume that this is the way it is
done in Rockit; for performance reasons they may be implemented in other
www.syngress.com
183RubyC09.qxd 1/7/02 3:13 PM Page 589

590 Chapter 9 • Parser Generators
ways. However, by showing the actual definitions of the derived building blocks,
you can see some examples of how to write your own, tailored to your grammar
and problem.
Parser Generators
In this section we’ll take a look at the following building blocks: symbol, for
matching one or more symbols in the input; none_of, for matching any character
but the specified ones; and succeed, for always returning a result without con-
suming any input.
The most basic parser building block is one that matches a symbol in the
output:
symbol("a") # Matches a single "a"
but since it is so common to allow more than one symbol in a position, symbol is
actually a derived building block implemented with the symbols parser generator:
def symbol(aSymbol)
symbols(aSymbol)
end
Symbols can take a symbol, a range of symbols, or any combination of them
as exemplified by the following:
symbols("a") # Matches a single "a"
symbols("0".."9") # Matches a single digit
symbols("0".."9", "a".."f") # Matches a single hexadecimal digit
symbols("a", "c".."d", "k") # Matches one of "a", "c", "d" or "k"
The none_of generator is specific to strings of characters.The characters that
will not be matched are specified in a string.There is a corresponding version for
positive parsing called one_of but there is no need to use it since symbols will use
it if needed. Here’s an example of using none_of (the parser will match any char-
acter but “a” or “b”):
p = none_of "ab"
You can use the succeed parser generator when building larger parsers, even
though it’s not very useful on its own. It will simply return the result specified by
you when calling the generator and will not consume any input. So the parser p
defined as follows:
www.syngress.com
183RubyC09.qxd 1/7/02 3:13 PM Page 590

Parser Generators • Chapter 9 591
p = succeed("Yes")
p.parse "No" # Matches and returns "Yes"
will return “Yes” regardless of the input.
Parser Combinators
The basic way to combine parsers is to have two or more of them in sequence,
or to allow a choice between two or more of them. In Rockit, the former is
expressed with the seq function.The latter is expressed either with choice or with
alt (short for alternatives).They have slight differences in semantics. For perfor-
mance reasons you should use choice whenever possible.
With seq you can combine parsers in a sequence, stacking parsers after
each other.The combined parser only matches if all of its component parsers
match:
seq(symbols("a"), symbols("b")) # Matches the string "ab"
To simplify the encoding of parsers, all of the parser combinators allow sym-
bols as parameters. So the parser above could equally well be written as:
seq("a", "b") # Matches the string "ab"
This is implemented by simply calling symbols on every parameter that is not
a parser so you can use ranges and combinations of ranges and symbols as shown
above.This means that the following:
seq("a".."d", "k") # Matches string /[a-d]k/
matches any string that matches the Regexp /[a-d]k/ and not the string “abcdk”.
In the rest of this chapter we use symbols or ranges of symbols without further
mentioning the intermediate calls to the symbols generator.
With seq and symbols we can now build a derived parser building block
which is very handy: a parser generator for strings:
string("def") # Matches the string "def"
string("'\"'") # Matches the string "'\"'"
The implementation is straightforward but shows the strength of Rockit’s
model of specifying parsers in Ruby itself:
def string(aString)
seq(*aString.split(""))
end
www.syngress.com
183RubyC09.qxd 1/7/02 3:13 PM Page 591

592 Chapter 9 • Parser Generators
As a matter of fact, the parser combinators accepts strings as well as symbols
and symbol ranges. For strings they call the string parser generator, and for sym-
bols and ranges they call symbols.A contrived example showing these possibilities
would be:
seq("code", " ", "a".."z") # Matches strings /code [a-z]/
The choice combinator is a deterministic way to specify a choice between
parsers.The parsers given as parameters are tried in order.When the first one
matches, its result is returned and none of the latter parsers are tried. If there is
no match when all the alternatives have been tried, the choice parser fails. Here
are some examples:
digit = symbols("0".."9")
choice(digit, seq("a", digit)) # Matches strings /a?\d/
choice(seq(digit, ".", digit), digit) # Matches strings /\d(\.\d)?/
When the latter parser is applied to a string “3.4”, it will return “3.4” even
though the digit parser, being the second parameter, would also match and return
“3”—the choice parser will never apply the second parameter when the first one
matches.
Next we’ll consider the repeat parser, which specifies a range for the number
of times a parser should apply. It is very common that a pattern matched by a
parser repeats many times.The simplest example is probably a word which is
constructed from one or more letters.The repeat parser combinator gives a gen-
eral way to express such repetition. It takes a parser and two optional range limits:
min (the minimum number of times the parser should match) and max (the max-
imum number of times it should match).Their default values are 0 and positive
infinity. Some examples follow:
repeat(digit) # Matches zero or more digits
repeat(digit, 1) # Matches one or more digits
repeat(digit, 0, 1) # Matches zero or one digit
repeat(digit, 2, 4) # Matches two, three or four digits
With this parser combinator we can easily define the repeat constructs used
in extended Backus-Naur Form (BNF) grammars and Regexps:
def maybe(parser)
repeat(parser, 0, 1)
end
www.syngress.com
183RubyC09.qxd 1/7/02 3:13 PM Page 592

Parser Generators • Chapter 9 593
def mult(parser)
repeat(parser, 0)
end
alias many mult
def plus(parser)
repeat(parser, 1)
end
alias many1 plus
We introduced the aliases since they are commonly used.The plus and mult is
closer to Regexp usage, where they are specified with ‘+’ and ‘*’ respectively. For
example, many1 is taken to mean “many but at least one repetitions of a parser.”
Parser Transformers
In addition to building basic parsers and combining them, we can also transform
parsers to change what they return or how they work.This is most commonly
used to construct the parse tree but also to skip whitespace, keep track of the
position, and so forth.We’ll describe the parser transformers build and term for
building a term for the abstract syntax tree; apply for applying a function to the
result and parse state; look_ahead and look_back for context-sensitive parsing; and
capture and ref for saving a parse result and referring to it later.
First we’ll look at build and term.You can transform the result of a parser
into a term for the AST.Terms are specified by giving their term class name as
a symbol, followed by the children’s names as symbols. Children’s name in
position 1 corresponds to the first parser in a sequence, children’s name in
position 2 to the second parser etc. If a children’s name is “:_ “, the result from
the corresponding parser is skipped when building the term. For example, the
parser:
p = seq(plus(digit), "+", plus(digit)).build(:Plus, :left, :_, :right)
would return the term Plus[1,2] when applied to the string “1+2”. Often you
want to keep a reference to the Ter m class used to create terms. If so, you can tell
a parser to send its results to a term class, thus producing a term.The following
code has the same effect as the one above:
p = seq(plus(digit), "+", plus(digit)) ^ term(:Plus, :left, :_, :right)
but it allows you to save a reference to the term so that you can use it later:
www.syngress.com
183RubyC09.qxd 1/7/02 3:13 PM Page 593

594 Chapter 9 • Parser Generators
p = seq(plus(digit), "+", plus(digit)) ^
(Plus = term(:Plus, :left, :_, :right))
Apply is a powerful transformer that allows you to apply a function to the results
of a parser. It is not common to use apply directly; its main use is in imple-
menting other transformers. As an example, here is the implementation of the
build transformer from earlier:
class BuildTerm < ResultMappingFunction
def initialize(aTermClass)
@term_class = aTermClass
end
def call(aParseResult, aParseState, aPosition)
if Array === aParseResult
@term_class[*aParseResult]
else
@term_class[aParseResult]
end
end
end
class Parser
def build(aTermClass)
self.apply(BuildTerm.new(aTermClass))
end
end
We see that apply takes an object that is a kind of ResultMappingFunction.This is a
long name for a simple concept: RMFs take a parse result, the parse state, and a posi-
tion, and return a new parse result. Because it has access to the state of the parse, it
can perform powerful operations such as rolling back the position or skipping ahead.
A common example of using apply would be to map an integer string to its
integer value.
The parser transformers look_ahead and look_back are used to test the context of
a parser but without matching any of its input. Essentially they peek into the future
or history of the input sequence to check that some conditions apply, but they
won’t consume any input or alter the position in the sequence. Both transformers
www.syngress.com
183RubyC09.qxd 1/7/02 3:13 PM Page 594

Parser Generators • Chapter 9 595
take a parser as an argument but the parsers supplied to look_back must have a con-
stant length.The typical example would be a string.We need this restriction since
we would otherwise not know where to start trying to match the parser.There is
no such restriction on the parsers that can be transformed by look_ahead.
The parser building blocks capture and ref are also related to context-sensitivity.
They can be used to capture the result from a parser and use it later.The capture
transformer corresponds to using parentheses in a Regexp and ref corresponds to
using a back-reference (\1 for the first parenthesized match, etc).The difference
here is that the captured substring can be named by giving an object as the second
parameter to capture. Here’s an example for parsing a (simplified) XML block:
xml_block =
capture("<" & Identifier & ">", :block_name) &
plus(none_of("<")) &
ref(:block_name)
Error-related Building Blocks
There are a number of transformers that relate to error handling, including
.expecting() and .or_raises (also .raises).
Remember that everything in Ruby is an object, right? So are our parsers;
what the building blocks are actually doing is constructing parser objects. All
parsers are subclasses of the Parser class with an instance method named expecting.
You use expecting to describe what you expect to parse with a parser.This infor-
mation will be used to give meaningful error messages in case of a syntax error
during parsing. in the following example we redefine digit:
digit = symbols("0".."9").expecting("a digit")
Here we are saying that when digit is used to parse you are expecting to see a
digit on the input.The parser will still parse the same strings so you will only
notice the difference when there is an error. If you try to parse the string “a”
with the digit parser, Rockit will give you this error:
Parse error at (line = 1, column = 1):
unexpected 'a' when expecting a digit
Even if you hadn’t specified what you were expecting, Rockit will give some
indication. If you tried to parse the “a” string with the parser:
digit_plain = symbols("0".."9")
www.syngress.com
183RubyC09.qxd 1/7/02 3:13 PM Page 595

596 Chapter 9 • Parser Generators
Rockit would report this:
ParseError at (line = 1, column = 1):
unexpected 'a'
when expecting '0', '1', '2', '3', '4', '5', '6', '7', '8' or '9'
When you nest parsers the error messages at the higher levels override error
messages at lower levels.Thus if we try to parse the string “*” with the parser:
hexdigit = choice(digit, "a".."z", "A".."Z").expecting("a
hexdigit")
Rockit would report that it was expecting “a hexdigit” and not “a digit,‘a’,
‘b’, ...,‘z’,‘A’, ...,‘Z’” as when we hadn’t specified the top-level error message. For
alternatives the error messages are merged so that the alphanum parser defined as
the following:
alpha = symbols("a".."z", "A".."Z").expecting("an alpha
character")
alphanum = choice(digit, alpha)
would report “expecting a digit or an alpha character.”
The .or_raises parser transformer raises Parse errors unless (and .raises if) a
parser matches.They take a string as parameter and use it as the error message.A
typical use of or_raises is when we have parsed a prefix and now the rest of the
string must match a certain parser—if it doesn’t, we should raise an error.As an
example let’s look at a parser for lexing hexadecimal literals in Ruby (there is no
difference between lexing and parsing for Rockit):
errorMessage = "numeric literal without digits"
hexlit = maybe("+"|"-") & ("0"&("x"|"X")) &
plus(mult("_"), plus(hexdigit)).or_raises(errorMessage)
When we have seen 0x we know that it must be a hex literal so if there is an
error when trying to parse the digits we should raise an error. In this case we can
see that an error can only arise if there are no digits, so we tailor the error mes-
sage to this situation.
Parsing in Ruby with Racc
Racc is a pure-Ruby implementation of the famous GNU Bison parser gener-
ator. Bison is based on Yacc (Yet Another Compiler Compiler) which is the most
www.syngress.com
183RubyC09.qxd 1/7/02 3:13 PM Page 596

Parser Generators • Chapter 9 597
used parser generator in the Unix world. It is a proven technology and has been
used in countless projects over many years.
You describe your grammar in a file. Racc reads the file, calculates parser
tables that will be used during the parsing, and outputs a file with your parser. By
default the file is a pure-Ruby parser, but a nice feature is that you can choose to
output C code and get a Ruby C extension with the parser.This will give you a
faster parser with exactly the same interface as a pure-Ruby parser.
Racc’s grammar files are basically Ruby variants of Yacc grammar files.They
have up to four main sections: the grammar, a header section, an inner section,
and a footer section.The header (or footer) goes to the head (or foot) of the gen-
erated file and the inner section is inserted into the parser class generated from
the grammar.A typical use of the inner section is to add methods to connect the
parser class to a lexical analyzer (or lexer for short). If the lexical analyzer is small,
you can even write it directly in the inner section.
Here’s an example Racc grammar file for simple numerical expressions:
class CalcParser
prechigh
nonassoc UMINUS
left '*' '/'
left '+' '-'
preclow
token NUMBER
rule
target: exp
| /* none */ { result = 0 }
;
exp: exp '+' exp { result += val[2] }
| exp '-' exp { result -= val[2] }
| exp '*' exp { result *= val[2] }
| exp '/' exp { result /= val[2] }
| '(' exp ')' { result = val[1] }
| '-' NUMBER = UMINUS { result = -val[1] }
| NUMBER
;
end
www.syngress.com
183RubyC09.qxd 1/7/02 3:13 PM Page 597

598 Chapter 9 • Parser Generators
The grammar section looks like a class declaration with the class name speci-
fying the name of the parser class to be generated. If you use “::” notation in the
class name, Racc will output modules around your parser class. For example, if
you give the name Java::Parser, Racc will generate code like this:
module Java
class Parser
# parser code here...
end
end
There are two main sections inside the “class”: a meta section (with the
prechigh..preclow declaration) and a rule section.The latter contains the grammar
rules in Yacc-style BNF format with action code in blocks. Note that the code in
the blocks should be valid Ruby code because it will be copied directly into the
generated parser.
The meta section can be further divided into a precedence table (as shown
earlier), token declarations, the expected number of shift/reduce conflicts,
options, semantic value conversion, and a start rule specification.All of them are
optional and need only be present when you do not want the default behavior.
We’ll briefly describe the most often used meta sections here; in the next chapter
we’ll dive into the details of writing the grammar rules.
The precedence section lists the precedence of your operators from high to
low (or vice versa, which is less intuitive).You can also state their associativity by
specifying left,right, or nonassoc.The associativity decides how repeated uses of an
operator nests.The sequence x op y op z would be parsed as (x op y) op z for
a left-associative operator and as x op (y op z) for a right associative.The prece-
dence of an operator defines how tightly the operator binds. Operators with
higher precedence bind tighter than operators with lower precedence.The
grammar earlier in this section also shows an example of specifying the prece-
dence of a particular rule. UMINUS is not a token in the grammar, it’s a name
given to the precedence level of the rule for unary minus.
The token declaration section lists all tokens in the grammar. It is customary
to write the tokens in all uppercase letters, but you can also use lowercase letters,
underscores, and strings.When you use strings, the lexer must return the string
itself, whereas for the non-string tokens the lexer should return the corre-
sponding symbol (that is, :NUMBER for the NUMBER token shown above). It
is considered good style to declare your tokens in the token declaration section,
although not mandatory.
www.syngress.com
183RubyC09.qxd 1/7/02 3:13 PM Page 598

Parser Generators • Chapter 9 599
Your action code can often be simplified if you specify the no_result_var
option in the options section.This way you do not have to explicitly assign to the
result variable upon exit from the action block. Examples of this are given in the
next section.
Writing the Grammar Rules
In the rules section of a Racc grammar you specify the rules for how non-termi-
nals are constructed from tokens and other non-terminals.You can also specify
actions to be taken when a rule is matched against the input.The rules are
written in BNF and are terminated by a semi-colon (;).They consist of a left-
hand side with one non-terminal, a colon (:), and a right-hand side of symbols.
Alternative rules for a non-terminal can be separated by a pipes (|) or given in
multiple rules.
You can write actions after or in between the right-hand side symbols of a
rule. An action looks like a Ruby block without input parameters.There are a
few differences from ordinary Ruby blocks though:You cannot use %-delimited
strings or %r-delimited Regexps or here documents, so stay with ordinary single-
or double-quoted strings and /-delimited Regexps.
You can access the values that have been matched by the right-hand side
symbols.They are available in the val array; the first element (val[0]) is the value
matched by the first symbol on the right-hand side, and so forth. Note that if you
have written actions in between right-hand symbols, their result will be inserted
into the val array.
In your action code you can explicitly set the result to return as the value of
the left-hand side non-terminal: Simply assign to the variable result. However, if
you have specified the no_result_var option in the options section, the return
value from the block will automatically be used as the result value.This is often
quite handy because it enables you to write one-line actions.
When writing a grammar for Racc you cannot use the EBNF constructs that
you can use in Regexps and Rockit (such as one-or-more,many, or maybe); instead,
you will have to convert your grammar to a form suitable for Racc. Below we
show some common patterns in doing these translations.
Repetition is very common in grammars. If you want one or more repeti-
tions of a token (plus(token) in Rockit), this must be written as two rules:
nonterminal : TOKEN
| nonterminal TOKEN
;
www.syngress.com
183RubyC09.qxd 1/7/02 3:13 PM Page 599

600 Chapter 9 • Parser Generators
If you want zero or more repetitions (mult(TOKEN) in Rockit) you also need
two rules. But this time you leave one of the right-hand sides empty. It is cus-
tomary, but not necessary, to insert a comment saying that the right-hand side is
empty, as in the following:
nonterminal : /* none */
| nonterminal TOKEN
;
We see that Racc understands C-style comments with text surrounded by /*
and */.You can also use Ruby #-style comments.
The above pattern also gives us the pattern to write optional tokens
(maybe(token) in Rockit) by simply omitting the recursive reference:
nonterminal : /* none */
| TOKEN
;
These translations seem simple enough; the problems arise when there are
multiple symbols in a rule that has repetition constructs. Expanding to new rules
results in a state explosion and you need to write a large number of rules—
unfortunately, there is no way to get away from this.
Writing a Lexical Analyzer for Use with Racc
You have to write a lexer by hand when using Racc.You will get adequate per-
formance by creating a state machine and then stepping over the characters until
a unique token has been matched. However, you might get a faster lexer if you
use Regexps. Even though you might need multiple traversals over the input
string, Regexps are significantly faster than Ruby code since they are imple-
mented in C (actually, they are implemented in a kind of “virtual machine,” but it
is code in C and is pretty fast).
The interface between a Racc-generated parser and your hand-coded lexer is
via the next_token method.You need to define it on the parser class generated by
Racc.The simplest way is to do it is in the inner section. If the lexer is small you
can even write your lexer directly in the inner section. However, it is probably
easier to maintain your code if you separate the lexer from the parser and write it
in a class on its own.Then you can instantiate the parser class with the lexer class,
as in the following:
www.syngress.com
183RubyC09.qxd 1/7/02 3:13 PM Page 600

Parser Generators • Chapter 9 601
---- inner ----
def initialize(lexerClass)
@lexer_class = lexerClass
end
def parse(aString)
@lexer = @lexer_class.new(aString)
do_parse # Let's parse!
end
def next_token
@lexer.next_token
end
To begin with, let’s write a simple lexer using Regexps:
class LexerError < Exception; end
class Lexer
def initialize(aString)
@str = aString
end
def next_token
token = nil
until token
if @str =~ /\A(\d+)/
token = [:NUMBER, $1.to_i]
elsif @str =~ /\A\s+/
# do nothing => iterates once more since token still nil
elsif @str =~ /\A(\+|-|\*|\/|\(|\))/ #\+|-|\*|\/|\(|\))/
token = [$1, $1]
elsif @str.length > 0
raise LexerError, "Invalid token at: '#{@str[0,10]}'"
else
token = [false, :end]
end
www.syngress.com
183RubyC09.qxd 1/7/02 3:13 PM Page 601

602 Chapter 9 • Parser Generators
@str = $'
end
token
end
end
We simply try a number of Regexps in order until one matches.We then
update the @str instance variable to hold the unmatched rest of the string. Note
the special treatment of whitespace; since the token variable is not updated we
will loop another time and try to match the Regexps once more. Since we
update @str also after matching whitespace, the next unmatched character will
not be a whitespace character.
The above solution works pretty well for small grammars; however, it might
not provide strong enough performance for larger grammars with a large number
of token types.The performance problem has two main sources: $’ will make a
new string on each invocation and you might have to apply a large number of
Regexps to the same position in the string until one matches. Let’s address each
part of the problem in turn.
The assignment “@str = $’” creates a new string from the unmatched part of
@str and assigns it to the instance variable.This puts a heavy burden on the
memory allocator and Garbage Collector. Let’s say the string to be lexed is 10
KB large and that the average length of a token is 4 characters (since many will
simply be short sequences of whitespace, this is probably close to reality).This
means we will create 10000/4 strings of an average length of 5 KB, thus using
over 10 MB of memory (5000*10000/4) that will have to be allocated and
garbage-collected! We need some way to keep a pointer to the character we are
currently at and then start matching at that position without having to allocate
any new strings. Fortunately there is an excellent extension in RAA that can help
us, called strscan, which was written by Minero Aoki (who also created Racc).
Strscan gives you the StringScanner class, which is simply a string with a
pointer.When you match a Regexp to it you’ll get the matching substring, and
StringScanner will update its internal pointer to the start of the unmatched por-
tion of the string.There is no allocation going on behind the scenes so there is
no additional load on the memory system. Here’s an implementation of the lexer
shown earlier, using strscan to speed things up:
require 'strscan'
class StrScanLexer < Lexer
www.syngress.com
183RubyC09.qxd 1/7/02 3:13 PM Page 602

Parser Generators • Chapter 9 603
def initialize(aString)
@str = StringScanner.new(aString)
end
def next_token
@str.skip(/\s+/) # Skip white space
if @str.scan /\d+/
[:NUMBER, @str.matched.to_i]
elsif @str.scan /\+|-|\*|\/|\(|\)/ # /\+|-|\*|\/|\(|\)/
[@str.matched, @str.matched]
elsif @str.rest_size > 0
raise LexerError, "Invalid token at: '#{@str.rest[0,10]}...'"
else
[false, :end]
end
end
end
The three methods you will probably use the most are scan,skip, and matched.
Scan tries to match a Regexp at the current position in the string. If a match is
possible, the matched substring is returned; if no match is possible, nil is returned.
Skip works the same way but returns the length of the matched substring instead
of the matched string.This is more efficient if you don’t care about the matched
substring (as when skipping whitespace). If there is a match when calling scan, the
matched string can be accessed with the matched method.
Let’s generate some strings of different length and compare the speed of the
lexers above to get a feel of the kind of speed ups involved.We need a way to
generate random valid expressions on the form accepted by the grammar:
def random_string(chars, maxLength)
Array.new(1+rand(maxLength)).map do
chars[rand(chars.length)]
end.pack("c*")
end
Digits = (0..9).map {|d| ?0 + d}
def random_expression_string(maxStringLength)
www.syngress.com
183RubyC09.qxd 1/7/02 3:13 PM Page 603

604 Chapter 9 • Parser Generators
str = ""
while str.length < maxStringLength - 10
str << "-" if rand < 0.05
str << random_string(Digits, 6)
str << random_string([? , ?\t, ?\n], 2)
str << random_string([?+, ?-, ?*, ?/], 1)
str << random_string([? , ?\t], 3)
end
str << random_string(Digits, 6)
str
end
Then we can use the Benchmark extension to compare the times to lex:
require 'benchmark'
include Benchmark
bm(15) do |x|
s = random_expression_string(10000)
l = Lexer.new s
sl = StrScanLexer.new(s)
x.report("StrScanLexer") {sl.lex}
x.report("Lexer") {l.lex }
end
I tried this for some different string lengths on my machine.The results can
be seen in Table 9.1.The conclusion is clear: the lexer based on strscan is signifi-
cantly faster, and the speed increases with the growth of the strings.The growth
seems to be linear in the length of the string while the non-strscan-based lexer
shows non-linear behavior.
When the number of token types to match grows larger, the performance
might suffer even if you use strscan.This is because we repeatedly apply Regexps
until one matches.You are left with the option of writing your own lexer as a
state machine using the current unmatched character to guide the state transi-
tions. Even if you take this approach, you should try to use strscan and Regexps
as much as possible because your code will then execute in C.You can also con-
template using the current character as a look-ahead to divide the set of possible
Regexps to match and then write the “smaller” lexers in the style above.
www.syngress.com
183RubyC09.qxd 1/7/02 3:13 PM Page 604

Parser Generators • Chapter 9 605
Table 9.1 Speed to Perform Lexical Analysis with and without the strscan
Extension
String Size StrScanLexer Time Lexer Time Times Slower
1000 0.01 0.04 4.00
10000 0.11 0.52 4.73
25000 0.23 2.92 12.69
50000 0.511 12.56 24.63
100000 1.10 61.00 55.45
Another option would be to write your lexer in Rockit. In its current state,
the lexers produced by Rockit will likely not be fast enough to beat a hand-
coded lexer but there are a number of optimizations techniques that will be
applied in the next major version of Rockit.As always, you will have to follow
the developments in the Ruby community to stay on top of the situation!
Invoking the Racc Command Line Tool
When you download and install Racc it will install a command line tool called
racc, which is the command to use when you want to turn your grammar file into
a parser. In the simplest case you supply the grammar file name as the sole argu-
ment to racc, as follows:
$ racc calc.y
This will produce the parser in the file calc.tab.rb.The tab stands for table and
indicates that Racc produces a table-driven parser.The name of the output file can
be changed by giving the ‘o’ or ‘--output-file’ flag and supplying an alternative name.
The first line in the produced file loads the Racc runtime support code
needed when using the parser. If you want to create a stand-alone parser that
anyone can use without having Racc installed, you need to give the ‘E’or
‘--embedded’ flag. Here’s a comparison:
$ racc calc.y
$ wc –l calc.tab.rb
226 calc.tab.rb
$ racc –-embedded –-output-file calc.rb calc.y
$ wc –l calc.rb
705 calc.rb
www.syngress.com
183RubyC09.qxd 1/7/02 3:13 PM Page 605

606 Chapter 9 • Parser Generators
We see that the file is considerably larger because the Racc runtime is now
included.
There are many more options for Racc but the above-mentioned ones will
cover most of your usage. Check out Racc’s documentation for complete reference.
Building Abstract Syntax Trees with
Racc-generated Parsers
If you want to get an abstract syntax tree from a Racc-generated parser you will
have to write the action code that builds the AST.To represent the AST you may
use Structs (since they are built in Ruby), roll your own AST class, or use the
Ter m class in Rockit.The advantage of using the Te r m class in Rockit is that you
can create the Ter m classes in a hierarchy (which is not directly supported by
Structs) and that you have support for pattern matching terms, traversing with
visitors, and pretty-printing them.The advantage of using Structs is that they are
available in all Ruby environments and well known by all Ruby programmers.
Once you have decided on a strategy for the term classes you need to write
the action code in the grammar for building the ASTs. If you want a really flex-
ible parser that you will not need to change for different outputs, you can intro-
duce another level of indirection:The parser is initialized with an actions object
and calls methods on it in response to matching a rule.The default actions object
builds an AST, but if you want other behavior you simply instantiate the parser
with your custom actions object.This technique is used in Rulator, a hybrid
parser written in Ruby using both Racc and Rockit; it buys you flexibility while
sacrificing some performance. Let’s modify the calcparser to use an action object:
class CalcParser
prechigh
nonassoc UMINUS
left '*' '/'
left '+' '-'
preclow
no_result_var # So we don't need to assign to result in actions
rule
exp: exp '+' exp { @actions.on_plus(val) }
| exp '-' exp { @actions.on_minus(val) }
www.syngress.com
183RubyC09.qxd 1/7/02 3:13 PM Page 606

Parser Generators • Chapter 9 607
| exp '*' exp { @actions.on_mult(val) }
| exp '/' exp { @actions.on_div(val) }
| '(' exp ')' { val[1] }
| '-' NUMBER = UMINUS { @actions.on_uminus(val) }
| NUMBER { @actions.on_number(val) }
;
end
---- inner ----
def initialize(actionsObject = CalcAstBuilder.new,
lexerClass = CalcLexer)
@actions, @lexer_class = actionsObject, lexerClass
end
def parse(aString)
@actions.reset(aString)
@lexer = @lexer_class.new(aString)
do_parse
end
def next_token
@lexer.next_token
end
We are now free to change how the parser is used without having to change
the parser itself.This may not seem like a big win in this small example, but it
can be very powerful when the grammar is large.You simply subclass the actions
class and define the methods for the events you want to detect and get an event
parser for your grammar.To accomplish this we need to define a base class for
actions objects that simply do nothing:
class CalcActions
def reset(aString); end
def on_plus; end
def on_minus; end
def on_mult; end
www.syngress.com
183RubyC09.qxd 1/7/02 3:13 PM Page 607

608 Chapter 9 • Parser Generators
def on_div; end
def on_uminus; end
def on_number; end
end
Now we can easily get a parser building abstract syntax trees:
require 'rockit/term/term'
include Rockit
Plus = Term.new_subclass(:Plus, :left, :right)
Minus = Term.new_subclass(:Minus, :left, :right)
Mult = Term.new_subclass(:Mult, :left, :right)
Div = Term.new_subclass(:Div, :left, :right)
UnaryMinus = Term.new_subclass(:UnaryMinus, :number)
class CalcAstBuilder < CalcActions
def on_plus(results); Plus[*results.indices(0,2)]; end
def on_minus(results); Minus[*results.indices(0,2)]; end
def on_mult(results); Mult[*results.indices(0,2)]; end
def on_div(results); Div[*results.indices(0,2)]; end
def on_uminus(results); UnaryMinus[results[1]]; end
def on_number(results); results[0]; end
end
We can also use the calc parser as an event parser by simply overriding the
method handling of the event we are interested in. Here’s an example for
counting the numbers in the input.
class CountingNumbers < CalcActions
attr_reader :count
def reset(aString)
@count, @str = 0, aString
end
def on_number(results); @count += 1; end
www.syngress.com
183RubyC09.qxd 1/7/02 3:13 PM Page 608

Parser Generators • Chapter 9 609
def inspect
"The string '#{@str}' contains #{count} numbers"
end
end
Comparing Racc and Rockit
We’ve covered a lot of ground in this section.The following list summarizes some
of the differences between Racc and Rockit.
■Racc is more stable than Rockit. Racc has existed for several years and
many bug fixes have been made. Rockit is recent and has changed since
its inception.
■The Bison algorithms used in Racc have been well studied since the
1970’s. Rockit’s parser combinator approach is relatively recent and from
the functional programming area.
■Rockit’s parsers are first-class objects in Ruby and ordinary Ruby code
can be used when defining them, so you have the power of Ruby at
your fingertips while writing your grammars.
■Racc’s grammar cannot use repetition operators (+, * and ?) so you will
have to rewrite your grammar in a form that Racc can understand. It is
awkward, error-prone, and time consuming, but not particularly difficult.
Rockit can use repetitions operators. It can also be used to parse con-
text-sensitive constructs.
■Racc is used off-line and generates a Ruby file with a parser corre-
sponding to a grammar given in a file. Rockit can be used both as an
off-line parser generator and on-line from inside Ruby programs.
■The parsers generated by Racc are fast and show linear behavior as the
input grows larger. Rockit’s parsers have not yet been optimized for
speed and are slower.
www.syngress.com
183RubyC09.qxd 1/7/02 3:13 PM Page 609

610 Chapter 9 • Parser Generators
Summary
Parsing is about finding the structure in some text. It is a common task that you
frequently encounter no matter what problem you’re attacking. Parsing is fre-
quently divided into lexical analysis and syntactical analysis. During lexical anal-
ysis the stream of characters is chopped up into consecutive lexical tokens.
Syntactical analysis collects valid sequences of tokens together until no more
input can be matched. Lexical analysis is frequently called scanning or tokenizing
and the object doing the analysis is called a lexer,scanner, or tokenizer.The object
doing the syntactical analysis is simply called the parser.
The standard solution to get a parser is to write the grammar in a file and
give it to a parser generator which will create a parser for the grammar.There are
two tried-and-tested Ruby solutions in taking this approach: Racc and RBison.
They are very similar in features but totally different in implementation. Racc is
the most updated and mature one, so we recommend you use it to get fast
parsers.You should be aware that you will have to hand-code your lexer though,
since Racc will only give you a parser.
In contrast to the parser generating programs, Rockit will allow you to define
parsers as objects directly from within Ruby. It supplies a set of “building blocks”
so you can build parsers from simple strings that can be combined in sequences,
alternations, etc.The approach is very flexible and gives you a lot of control. It
can also parse a larger class of languages than can Racc. However, Rockit is not as
mature as Racc and the parsers it produces are not as fast.
Which solution you use is up to your application and needs—in fact, they
can work very well together. For example, you could use Rockit to generate a
lexer for a Racc-generated parser.
Solutions Fast Track
Creating the Parsing Library of your Dreams
;If you simply need to extract some information out of a larger text
body, consider using some specialized Regexps and code to process what
they match.
;If you have an existing Yacc grammar and want to get a parser for it, use
Racc or RBison from the RAA.They are compatible with Yacc and
www.syngress.com
183RubyC09.qxd 1/7/02 3:13 PM Page 610

Parser Generators • Chapter 9 611
Bison and will work as you would expect.Write your actions as Ruby
code and hand-code your lexer.
;If you need to write a new parser, or need to parse non-regular features
such as nested comments or parentheses, consider using the simple
parsing combinators of Rockit.
Parsing Ruby with Rockit
;In Rockit you write your parsers directly in Ruby code by combining
simple building blocks into larger parsers.
;You can use the same parser generators and combinators for specifying lexer
and parsers. In fact, you don’t even have to separate lexing from parsing.
;You can use extended BNF constructs such as one-or-more,many, and
maybe, so your parser is closer to the grammar you have in mind.
Parsing Ruby with Racc
;Racc is a mature application for generating fast Ruby parsers. It is based
on Yacc and on Bison, which has been used successfully in a large
number of parsers since the 1970’s.
;Racc generates a pure-Ruby parser or a C parser that interfaces to Ruby.
;You can not use extended BNF operators but will have to rewrite your
grammar to get repetition and other common constructs.
www.syngress.com
183RubyC09.qxd 1/7/02 3:13 PM Page 611

612 Chapter 9 • Parser Generators
Q: I have to match nested parentheses but I don’t need a full parser.What can
I do?
A: Using Rockit you can specify this with a one-liner in pure-Ruby code. It is
simple and fast.
Q: I need to extract some information out of a larger portion of text. How
should I proceed?
A: Try specifying a Regexp for the text you need to extract, read the text in,
and match to the Regexp.This is much simpler and faster than writing a full
parser.
Q: I have a Yacc grammar that I need to port to Ruby.What tool should I use?
A: If you use Racc, you can use the file as is.You only have to rewrite the C
code in the actions in Ruby.
Q: I find the Yacc style of writing grammars inflexible, and I cannot parse non-
regular features such as XML tags without preprocessing the result. Is there a
better way?
A: Rockit allows you to handle such non-regular features directly.
www.syngress.com
Frequently Asked Questions
The following Frequently Asked Questions, answered by the authors of this book,
are designed to both measure your understanding of the concepts presented in
this chapter and to assist you with real-life implementation of these concepts. To
have your questions about this chapter answered by the author, browse to
www.syngress.com/solutions and click on the “Ask the Author” form.
183RubyC09.qxd 1/7/02 3:13 PM Page 612

Extending and
Embedding Ruby
Solutions in this chapter:
■Writing C/C++ Extensions
■Using SWIG
■Embedding Ruby
■Configuring Extensions with Mkmf
;Summary
;Solutions Fast Track
;Frequently Asked Questions
Chapter 10
613
183RubyC10.qxd 1/7/02 3:19 PM Page 613

614 Chapter 10 • Extending and Embedding Ruby
Introduction
You already know how to extend Ruby’s built-in functionality by importing
modules with the require statement.Although these extension modules are often
written in Ruby, they can also be written in C (or C++) and then compiled into
dynamically-loadable shared libraries that look like regular Ruby modules to the
Ruby interpreter. Like regular Ruby modules, C extension modules can expose
constants, methods, and classes to the Ruby interpreter. Several modules in the
standard Ruby library (including socket,tk, and Win32API) are implemented as C
extensions, and a survey through the Ruby Application Archive reveals a number
of other popular Ruby extensions implemented using C/C++ code.
You might well ask why you would want to write a Ruby extension module
in C/C++ instead of Ruby; after all, you’ve probably turned to Ruby as a more
flexible and powerful alternative to traditional programming languages like
C/C++. Nevertheless, there are two primary reasons for implementing an exten-
sion in C/C++:
■Performance For some applications, the performance requirements for
your extension module may necessitate a C/C++ implementation. For
example, the standard Ruby library’s Matrix and Vector classes (defined by
the matrix.rb module) don’t perform well for large-scale numerical com-
puting applications.Third-party extensions such as NArray have been
developed to fill this gap.
■Interfaces to already-available C/C++ libraries If a library of
useful C/C++ code already exists, it is generally quicker to develop an
interface from Ruby to that library instead of reimplementing that
library in Ruby.This is especially true when using a code generation
tool like SWIG (discussed later in this chapter) that automates a lot of
the tedious parts of the process.
A subject closely related to writing Ruby extensions in C is the practice of
embedding the Ruby interpreter into your C/C++ applications.This is an
increasingly popular choice for application developers who want to provide a
scripting language for their application end-users, to allow them to easily write
“plug-in” code modules that can run alongside the main application and
extend its functionality. Ruby is a natural fit for this kind of application,
because the Ruby interpreter is already packaged as a C library with APIs to
facilitate embedding.
www.syngress.com
183RubyC10.qxd 1/7/02 3:19 PM Page 614

Extending and Embedding Ruby • Chapter 10 615
Writing C/C++ Extensions
A Ruby extension module, in its final form, is just a shared library that Ruby can
load dynamically at runtime.Whereas Ruby modules written in Ruby will have
file names that end with the “.rb” extension, C extension modules are compiled
into shared library files that usually end with a “.so” extension (for shared object).
When the Ruby interpreter encounters a statement like require ‘featurename’ in a
Ruby program, it first searches its load path (the global array “$:”or
“$LOAD_PATH”) for a file named “featurename.rb” to load. If it can’t find “fea-
turename.rb,” it will instead try to find a shared library by that name (for
example,“featurename.so,” or “featurename.dll”).As we’ll see later in an example,
it’s a good practice to omit the “.rb” or “.so” extension from a feature name, even
if you know how the extension module is packaged. By leaving the file extension
unspecified, you give yourself the flexibility to quickly develop a Ruby imple-
mentation of the module and later replace it with a C implementation, without
changing any of the other code that uses that module.
At a high level, the C source code making up a Ruby extension module con-
sists of two major pieces: a feature initialization function and a number of C
functions that implement the module’s functionality.The initialization function
name must be of the form Init_featurename; for example, a feature named shapes
should have an initialization function declared like so:
#ifdef __cplusplus
extern "C"
#endif
void Init_shapes() {
/* module initialization code goes here */
}
One of the first steps in the initialization function is to define a module using
either the rb_define_module() or rb_define_module_under() function. Remember, in
Ruby a module is itself an object: it is an instance of the Ruby class named
Module. Both rb_define_module() and rb_define_module_under() return a Ruby
VALUE, which is a reference to the new module; you’ll use this variable in sub-
sequent function calls. It’s also important to point out at this point that strictly
speaking, it’s not necessary to define a module for your code to live in at all.
Most Ruby APIs have variations that allow you to define classes, constants, and
methods at the global level, and if you study a lot of Ruby extension modules
www.syngress.com
183RubyC10.qxd 1/7/02 3:19 PM Page 615

616 Chapter 10 • Extending and Embedding Ruby
you’ll see that many of them follow this practice. For a lot of reasons (most
notably, avoiding name clashes with other modules) it’s a good practice to put
related code into a self-contained module, and so for this example (and the fol-
lowing one) I’ll take that approach.
So, continuing to build up our imaginary module, we’d add the code:
#ifdef __cplusplus
extern "C"
#endif
void Init_shapes() {
VALUE mShapes;
mShapes = rb_define_module("Shapes");
/* more to follow */
}
The next step is to start creating classes and constants that live in this module.
Let’s suppose that the Shapes module defines a base class, Shape, and three sub-
classes, Circle,Rectangle, and Triangle.We can add to the initialization function (the
new lines are shown in bold):
#ifdef __cplusplus
extern "C"
#endif
void Init_shapes() {
VALUE mShapes;
VALUE cShape, cCircle, cRectangle, cTriangle;
mShapes = rb_define_module("Shapes");
cShape = rb_define_class_under(mShapes, "Shape", rb_cObject);
cCircle = rb_define_class_under(mShapes, "Circle", cShape);
cRectangle = rb_define_class_under(mShapes, "Rectangle", cShape);
cTriangle = rb_define_class_under(mShapes, "Triangle", cShape);
}
Here we’ve used the rb_define_class_under() function to define the four classes.
This function takes three arguments; the first is the module under which to
define the class, the second is the class name, and the third is the base class for
this class. Since Shape is a top-level class, we pass rb_cObject as its base class; this is
a predefined global variable corresponding to Ruby’s Object class. For the other
www.syngress.com
183RubyC10.qxd 1/7/02 3:19 PM Page 616

Extending and Embedding Ruby • Chapter 10 617
three classes, Shape is the base class and so we pass cShape as the third argument to
rb_define_class_under().
Next, we need to define some methods for these classes to make them useful.
At a minimum, you’ll probably want to define an initialize function for each class;
Ruby calls this function whenever you create a new instance of that class (for
example, with Circle.new). Let’s assume that we’d also like each shape class to pro-
vide an area method that returns the shape’s area.You can define instance
methods for a class using the rb_define_method() function:
void rb_define_method(VALUE rubyClass,
const char * methodName,
VALUE(*)(…) cFunc,
int numArgs)
where rubyClass is a VALUE representing a module or class object, as might be
returned from the rb_define_class_under() function; methodName is a string containing
the method name; cFunc is the C function that implements this method; and
numArgs is the number of arguments for the method. Let’s say that Circle#initialize
takes three arguments (x,y, and radius), Rectangle#initialize takes four arguments (x,
y,width, and height) and Triangle#initialize takes six arguments (x0,y0,x1,y1,x2, and
y2).The area method for each of these classes doesn’t require any arguments.To reg-
ister these methods for our classes, we’d further extend the initialization function as
follows (again, with changes shown in bold):
#ifdef __cplusplus
extern "C"
#endif
void Init_shapes() {
VALUE mShapes;
VALUE cShape, cCircle, cRectangle, cTriangle;
mShapes = rb_define_module("Shapes");
cShape = rb_define_class_under(mShapes, "Shape", rb_cObject);
cCircle = rb_define_class_under(mShapes, "Circle", cShape);
rb_define_method(cCircle, "initialize", Circle_initialize, 3);
rb_define_method(cCircle, "area", Circle_area, 0);
cRectangle = rb_define_class_under(mShapes, "Rectangle", cShape);
rb_define_method(cRectangle, "initialize", Rectangle_initialize, 4);
rb_define_method(cRectangle, "area", Rectangle_area, 0);
www.syngress.com
183RubyC10.qxd 1/7/02 3:19 PM Page 617

618 Chapter 10 • Extending and Embedding Ruby
cTriangle = rb_define_class_under(mShapes, "Triangle", cShape);
rb_define_method(cTriangle, "initialize", Triangle_initialize, 6);
rb_define_method(cTriangle, "area", Triangle_area, 0);
}
The C functions that implement these instance methods (like Rectangle_area)
are functions that you will need to write, but we’ll save that for later. For now, it’s
sufficient to understand that we’re telling Ruby that when a user of your Shapes
module creates a Rectangle object and calls its area method, Ruby should hand
that off to a C function named Rectangle_area.
Working with Datatype Conversions
A significant part of writing Ruby extensions in C involves conversions between
Ruby and C datatypes.You’ll use the VALUE type (defined in ruby.h) for all
Ruby variable declarations; it more or less works like a pointer to a Ruby object.
As you’ll see in the following sections, the Ruby/C API includes a number of
functions to create new Ruby objects (like strings and arrays); these functions
always return a VALUE.
Working with Objects
Ruby is a highly object-oriented language, and most every “thing” in your Ruby
programs is some kind of object. Ruby’s Object class is the base class for all of
these objects’ classes, and Table 10.1 lists some of the functions that Ruby’s C API
provides for working with objects.
Table 10.1 Functions for Working with Objects
C Function/Macro Description
void rb_obj_call_init Calls the object’s initialize method, passing
(VALUE obj, int argc, the array of arguments, argv, with length
VALUE *argv) argc.
VALUE rb_obj_is_instance_of Returns Qtrue (the C constant for Ruby’s
(VALUE obj, VALUE klass) true) if obj is an instance of class klass.
VALUE rb_obj_is_kind_of Returns Qtrue is obj is an instance of class
(VALUE obj, VALUE klass) klass or one of its subclasses.
VALUE rb_obj_clone Returns the result of calling the object’s
(VALUE obj) clone method.
www.syngress.com
Continued
183RubyC10.qxd 1/7/02 3:19 PM Page 618

Extending and Embedding Ruby • Chapter 10 619
Table 10.1 Continued
C Function/Macro Description
VALUE rb_obj_dup Returns the result of calling the object’s dup
(VALUE obj) method.
VALUE rb_any_to_s Returns a string containing information
(VALUE obj) about the object (the default to_s method
from Ruby’s Kernel module).
VALUE rb_obj_as_string Returns a string representation of obj by
(VALUE obj) first calling the object’s to_s method or, if
that fails, by calling rb_any_to_s() on obj.
VALUE rb_inspect Returns the result of calling the object’s
(VALUE obj) inspect method.
Working with Numbers
The three numeric types used by Ruby are Fixnum (for integers that can be
stored in all but the most significant bit of a system’s unsigned long type), Bignum
(for larger, arbitrary-length integers), and Float (for double-precision floating
point values).To convert from Ruby numeric types into C numeric types you’ll
use the functions and macros shown in Table 10.2.
Table 10.2 Functions for Conversion from Ruby Numeric Types into C
Numeric Types
C Function/Macro Description
int NUM2INT Converts the input Numeric value to a C int.
(VALUE aNumeric) If you know that the input value is a
Fixnum, use the faster FIX2INT macro.
int FIX2INT(VALUE aFixnum) Converts the input Fixnum value to a C int.
unsigned int NUM2UINT Converts the input Numeric value to a C
(VALUE aNumeric) unsigned int. If you know that the input value
is a Fixnum, use the faster FIX2UINT macro.
unsigned int FIX2UINT Converts the input Fixnum value to a C
(VALUE aFixnum) unsigned int.
long NUM2LONG Converts the input Numeric value to a C
(VALUE aNumeric) long. If you know that the input value is a
Fixnum, use the faster FIX2LONG macro.
www.syngress.com
Continued
183RubyC10.qxd 1/7/02 3:19 PM Page 619

620 Chapter 10 • Extending and Embedding Ruby
Table 10.2 Continued
C Function/Macro Description
long FIX2LONG Converts the input Fixnum value to a C
(VALUE aFixnum) long.
unsigned long NUM2ULONG Converts the input Numeric value to a C
(VALUE aNumeric) unsigned long.
char NUM2CHR Converts the input Numeric value to a C
(VALUE aNumeric) char.
double NUM2DBL Converts the input Numeric value to a C
(VALUE aNumeric) double.
Similarly, to convert from C numeric types into Ruby numeric types, you’ll
use the functions and macros shown in Table 10.3.
Table 10.3 Functions for Conversion from C Numeric Types into Ruby
Numeric Types
C Function/Macro Descriptions
VALUE INT2NUM(int i) or Converts the input int or long value into
VALUE INT2NUM(long l) either a Fixnum or Bignum instance,
depending on its size.
VALUE INT2FIX(int i) or Converts the input int or long value into a
VALUE INT2FIX(long l) Fixnum. If you’re sure that the input value
will “fit” into a Fixnum, this macro is a little
faster than the INT2NUM macro.
VALUE CHR2FIX(char c) Converts the input char value into a Fixnum.
VALUE rb_float_new(double f) Converts the input double value into a Float.
Working with Strings
Ruby strings are not strictly identical to C strings. In C, a “string” is just an array
of characters that is assumed to be terminated by a NULL character, and the
length of a C string is implicit; the number of characters appearing before the
NULL terminator is the string’s length. Since Ruby strings can contain
embedded NULL bytes (making them useful as general memory buffers), some
additional information about the actual string length is stored.
To extract the contents of a Ruby string as a C string, use the STR2CSTR
macro:
www.syngress.com
183RubyC10.qxd 1/7/02 3:19 PM Page 620

Extending and Embedding Ruby • Chapter 10 621
VALUE stringObj;
char *cstr;
cstr = STR2CSTR(stringObj);
Note that this macro returns a pointer to the actual string data stored by
Ruby (and not a copy) so you should take care not to modify its contents unless
you know what you’re doing.Along those lines, since Ruby “owns” the memory
pointed to by this string, you shouldn’t attempt to free() it. Finally, if the Ruby
string contains embedded NULL bytes, and if you’re running Ruby in “verbose”
mode (that is, with the -w command-line option), Ruby will warn you about this
potential hazard. If you need to know the true length of a Ruby string (NULL
bytes and all), you can use the alternate function rb_str2cstr():
VALUE stringObj;
char *cstr;
int stringLength;
cstr = rb_str2cstr(stringObj, &stringLength);
As with the STR2CSTR macro, the rb_str2cstr() function returns a pointer to
the actual string data stored by Ruby. It also modifies the value of its stringLength
argument to hold the length of the string.Another slightly less safe (but faster)
way to determine the string’s length is to access the underlying C struct field
directly using the RSTRING macro:
VALUE stringObj;
int stringLength;
stringLength = RSTRING(stringObj)->len;
To create a new string, use one of the functions listed in Table 10.4.
Table 10.4 Functions for Creating a New String
C Function Description
VALUE rb_str_new Returns a new string whose contents are
(const char *str, long size) copied from the first size characters pointed
to by str.
VALUE rb_str_new2 Returns a new Ruby string whose contents
(const char *cstr) are copied from the NULL-terminated C
string cstr.
www.syngress.com
183RubyC10.qxd 1/7/02 3:19 PM Page 621

622 Chapter 10 • Extending and Embedding Ruby
Table 10.5 lists other useful functions for working with strings.
Table 10.5 Functions for Working with Strings
Equivalent
C Function Ruby Statement Description
VALUE rb_str_to_str obj.to_str Attempts to convert the original
(VALUE obj) object to a string by calling its
to_str method.
VALUE rb_str_dup String.new Returns a new string that is a
(VALUE str) (str) duplicate of the original.
VALUE rb_str_plus str1 + Returns a new string formed by
(VALUE str1, str2.to_str concatenating the contents of str1
VALUE str2) and str2; neither of the original
strings is modified. Note that if
str2 is not a string but is a string-
like object that implements a to_str
method, Ruby will first call that
object’s to_str method to get a
string representation of str2,
VALUE rb_str_times str * count Returns a new string which is
(VALUE str, VALUE formed by repeating the original
count) string count times.
VALUE rb_str_substr str[start, Returns a new string which is the
(VALUE str, long start, length] substring of str, beginning at
long length) position start and with specified
length.
VALUE rb_str_cat str += Modifies the original string by
(VALUE str, const “another adding the first size characters
char *str, long size) string” pointed to by str to the end of this
string. Returns a reference to the
modified string.
VALUE rb_str_cat2 Same as rb_str_cat(), but assumes
(VALUE str, const that cstr is a NULL- terminated
char *cstr) C string.
VALUE rb_str_append str1 += Modifies str1 by appending str2 to
(VALUE str1, str2.to_str it. Note that if str2 is not a string
VALUE str2) but is a string-like object that
implements a to_str method, Ruby
will first call that object’s to_str
method to get a string representa-
tion of str2,
www.syngress.com
Continued
183RubyC10.qxd 1/7/02 3:19 PM Page 622

Extending and Embedding Ruby • Chapter 10 623
Table 10.5 Continued
Equivalent
C Function Ruby Statement Description
VALUE rb_str_concat str1 << Modifies str1 by concatenating it
(VALUE str1, str2 with str2. If str2 is a Fixnum, it is
VALUE str2) interpreted as an ASCII character
code; otherwise, the same rules
used for rb_str_append() apply.
int rb_str_hash str.hash Returns the hash code for str.
(VALUE str)
int rb_str_cmp str1 <=> Compares the contents of the two
(VALUE str1, str2 strings and returns –1 if str1 is
VALUE str2) lexicographically “less than” str2, 1
if str1 is “greater than” str2, or 0 if
they are equal.
VALUE rb_str_match str =~ Uses obj as a pattern to match
(VALUE str, obj against str. If obj is either a Regexp
VALUE obj) or String instance, rb_str_match()
will return a Fixnum containing the
match position or Qnil if no match is
found. If obj is some other type that
doesn’t implement a =~ method,
rb_str_match() will return Qfalse.
VALUE rb_str_split str.split Returns a new array formed by
(VALUE str, const (pattern) splitting the input string at
char *pattern) delimiters specified in the pattern
string. If pattern is not a single
character string (for example, a
comma) it is evaluated as a regular
expression.
VALUE rb_str_length str.length Returns the length of str.
(VALUE str)
VALUE rb_str_empty str.empty? Returns Qtrue if str is empty (its size
(VALUE str) = 0), otherwise it returns Qfalse.
Working with Arrays
In addition to the more basic datatypes like numbers and strings, you’ll use Ruby’s
built-in Array and Hash classes in any significant program.To create a new array,
use one of the functions listed in Table 10.6.
www.syngress.com
183RubyC10.qxd 1/7/02 3:19 PM Page 623

624 Chapter 10 • Extending and Embedding Ruby
Table 10.6 Functions for Creating a New Array
Equivalent
C Function Ruby Statement Description
VALUE rb_ary_new() anArray = [] (or Returns a new empty
anArray = array.
Array.new())
VALUE rb_ary_new2 anArray = Returns a new array with
(long size) Array.new(size) size elements; each ele-
ment is initialized to Qnil
(Ruby’s nil).
VALUE rb_ary_new3 anArray = [arg1, Returns a new array with
(long size, VALUE arg2, …] size elements; each
arg1, VALUE arg2, …) element is initialized with
the corresponding argu-
ment passed into
rb_ary_new3().
VALUE rb_ary_new4 anArray = [“this,” Returns a new array
(long size, “that,” “other”] with size elements;
VALUE *values) each element is initialized
with the corresponding
element in the values
array.
The primary difference between the first two functions (rb_ary_new() and
rb_ary_new2()) has to do with runtime efficiency. In Ruby’s internals, there is a
distinction between an array’s length and its capacity: An array’s length is related to
the index of the last array element currently in use, while an array’s capacity is the
amount of memory that has actually been allocated for that array.The first array
creation function, rb_ary_new(), actually creates an array with the default capacity
(currently, 16 elements). If you have some knowledge of the eventual size of an
array, you can make your code more efficient by creating the array with
rb_ary_new2().This is true whether the number of elements is small or large; if
the array size is less than Ruby’s default capacity you will save yourself some
potentially wasted memory, and if the array size is larger than the default capacity,
you’ll save yourself some time that would have been required to resize the array
as you added new elements.
Table 10.7 lists some other useful functions for working with arrays.
www.syngress.com
183RubyC10.qxd 1/7/02 3:19 PM Page 624

Extending and Embedding Ruby • Chapter 10 625
Table 10.7 Functions for Working with Arrays
Equivalent
C Function Ruby Statement Description
VALUE rb_ary_aref value = array[index] This is the implementation of the
(int argc, VALUE value = array[start, Array class’ [] method and
*argv, VALUE array) length] accepts three different forms of
value = array[range] inputs; here, argv is a C array of
the input argument values and
argc is the number of arguments
in that array. If there’s only one
input argument, it’s evaluated as
either a Fixnum index into the
array or a Range of indices. If
there are two arguments, they are
evaluated as Fixnums indicating
the starting index and length of
the subarray.
void rb_ary_store array[index] = value Stores value in the specified
(VALUE array, long array slot (where index is
index, VALUE value) zero-based).
VALUE rb_ary_entry value = array[index] Returns a reference to the
(VALUE array, long specifiedarray element at
index) position index.
VALUE rb_ary_push array.push(value) Pushes value onto the end of
(VALUE array, array and returns a reference
VALUE value) to it.
VALUE rb_ary_pop value = array.pop Pops value off the end of array
(VALUE array) and returns a reference to it.
VALUE rb_ary_shift array.shift Removes and returns the first
(VALUE array) element from array.
VALUE rb_ary_unshift array.unshift(value) Pushes value onto the front of
(VALUE array, array and returns a reference
VALUE value) to value.
VALUE rb_ary_each array.each Calls rb_yield() on each element
(VALUE array) of the array in turn and returns a
reference to the array as its result.
VALUE rb_ary_join array.join(sep) Returns a new string whose
(VALUE array, contents are formed by joining
VALUE sep) the array elements with the speci-
fied separator string sep.
www.syngress.com
Continued
183RubyC10.qxd 1/7/02 3:19 PM Page 625

626 Chapter 10 • Extending and Embedding Ruby
Table 10.7 Continued
Equivalent
C Function Ruby Statement Description
VALUE rb_ary_reverse array.reverse Returns a reference to a new array
(VALUE array) whose elements are the same as
those of array, in reverse order.
VALUE rb_ary_sort array.sort Returns a reference to a new array
(VALUE array) whose elements are the same as
those of array, in sorted order.
VALUE rb_ary_sort_ array.sort! Performs an in-place sort of array
bang(VALUE array) and returns a reference to the array.
VALUE rb_ary_delete array.delete(value) Deletes all occurrences of value
(VALUE array, from array and returns a reference
VALUE value) to value.
VALUE rb_ary_delete_at array.delete_at(index) Deletes the array element at the
(VALUE array, long index) specified index.
VALUE rb_ary_clear array.clear Removes all elements from array
(VALUE array) and returns a reference to the array.
VALUE rb_ary_plus array + other Creates a new array by concatena-
(VALUE array, ting the contents of array and
VALUE other) other; returns a reference to the
new array. Does not modify either
of the original arrays.
VALUE rb_ary_concat array.concat(other) Adds the contents of other onto
(VALUE array, the end of array and returns a
VALUE other) reference to the array. Unlike
rb_ary_plus(), this function does
modify the first array.
VALUE rb_ary_includes array.include?(value) Returns Qtrue or Qfalse, depending
(VALUE array, on whether value is found in array.
VALUE value)
VALUE rb_ary_length array.length Returns the length of the array as
(VALUE array) a Fixnum. An alternative method
for determining the length of an
array is to use RARRAY(array)->len.
VALUE rb_ary_empty_p array.empty? Returns Qtrue if the array length
(VALUE array) is zero, Qfalse otherwise. An alter-
native is to check the array length
directly with RARRAY(array)->len.
www.syngress.com
183RubyC10.qxd 1/7/02 3:19 PM Page 626

Extending and Embedding Ruby • Chapter 10 627
Working with Hashes
To create a new hash, you can call the C function rb_hash_new():
VALUE aHash;
aHash = rb_hash_new();
This function returns a reference to a new (empty) hash; this is equivalent to
the Ruby statement:
aHash = {}
To add new (key, value) pairs to the hash, use rb_hash_aset(), for example:
VALUE aHash, aKey, aValue;
aHash = rb_hash_new();
aKey = rb_str_new2("Oscar");
aValue = INT2NUM(6);
rb_hash_aset(aHash, aKey, aValue);
To retrieve previously stored values from the hash, use rb_hash_aref():
int age;
aValue = rb_hash_aref(aHash, aKey);
age = NUM2INT(aValue); /* should return 6 */
Note that rb_hash_aref() returns Qnil if the specified key is not found in the
hash. Don’t forget that arguments to rb_hash_aset() and rb_hash_aref() must have
type VALUE. So, for example, if your hash uses string keys, this means that you’ll
need to first convert your C strings into Ruby strings before passing them into
these functions:
VALUE aStringKey, aValue;
aStringKey = rb_str_new2("Some Key");
aValue = rb_hash_aref(aHash, aStringKey);
Working with C/C++ Data Wrappers
The last datatype that we’ll look at is one that’s especially useful for C/C++
extension writers. Ruby’s C API provides a special internal Data type that you can
use to “wrap” a pointer to a block of C/C++ memory in what looks like a Ruby
www.syngress.com
183RubyC10.qxd 1/7/02 3:19 PM Page 627

628 Chapter 10 • Extending and Embedding Ruby
class instance to the Ruby interpreter.You’ve already seen that most arguments and
return values for Ruby C API are of type VALUE, and so the first function (actu-
ally, a macro) associated with wrapping C datatypes serves that purpose:
VALUE Data_Wrap_Struct(VALUE class,
void (*mark_func)(void *),
void (*free_func)(void *),
void *ptr);
The Data_Wrap_Struct() macro takes a pointer to already-allocated memory,
and so a typical sequence for its use in your extension code might look like:
CompoundShape *ptr;
VALUE obj;
ptr = CreateCompoundShape();
obj = Data_Wrap_Struct(cCompoundShape,
CompoundShape_mark,
CompoundShape_free,
ptr);
We’ll discuss the meaning of the mark_func and free_func arguments shortly.An
alternate form of this macro first allocates a new instance of your C struct and
then performs the same actions as Data_Wrap_Struct() would have:
VALUE Data_Make_Struct(VALUE class,
type,
void (*mark_func)(void *),
void (*free_func)(void *),
void *ptr);
With Data_Make_Struct(), the memory is allocated using Ruby’s ALLOC
macro.This macro does a little more work on your behalf than would calling
malloc() directly; if memory is limited it invokes Ruby’s Garbage Collector to
attempt to free up some memory before calling malloc(). Be sure to eventually free
this memory using free().
The flip side of these two macros is the case that you want to extract a
C/C++ pointer from a Data object. For this, Ruby provides the
Data_Get_Struct() macro:
www.syngress.com
183RubyC10.qxd 1/7/02 3:19 PM Page 628

Extending and Embedding Ruby • Chapter 10 629
void Data_Get_Struct(VALUE obj,
type,
type *ptr);
And your C extension code might use it thus:
VALUE CompoundShape_area(VALUE self) {
CompoundShape *ptr;
Data_Get_Struct(self, CompoundShape, ptr);
…
}
Now let’s return to the mark_func and free_func arguments that we saw for
Data_Wrap_Struct() and Data_Make_Struct().The purpose of these functions is to
ensure that your wrapped objects properly interact with Ruby’s Garbage
Collector. Specifically, we’re concerned with two things:
■First, ensuring that all of the Ruby objects known by (owning a refer-
ence to) your Data object(s) are marked as in-use by the Garbage
Collector; and,
■Second, that when your Data object is finally garbage-collected, any
dynamically-allocated memory associated with the underlying C data
structures is also freed.
As you might have guessed by now, Ruby can’t handle either of these tasks
without your help.Therefore, every time you use Data_Wrap_Struct() or
Data_Make_Struct() to create a Data object, you can pass in pointers to C func-
tions to handle the “mark” and “free” phases of the Garbage Collector. If the
Data object doesn’t hold any references to other Ruby objects, you can pass
NULL for the mark_func argument. Similarly, if there’s some reason not to free
the memory associated with the Data object, you can pass NULL for the free_func
argument.
As an example, let’s consider a CompoundShape class (implemented as a C
extension) whose member data includes an array of other Shape objects:
typedef struct CompoundShape {
int nshapes;
VALUE *shapes;
} CompoundShape;
www.syngress.com
183RubyC10.qxd 1/7/02 3:19 PM Page 629

630 Chapter 10 • Extending and Embedding Ruby
A likely interface for this class will include one or more methods that
return references to the shapes making up this CompoundShape. But a potential
problem arises if your Ruby code gets hold of one of these references and later
discards it:
cshape = CompoundShape.new(Circle.new(0.0, 0.0, 3.0),
Rectangle.new(0.5, 0.5, 4.0, 5.0))
totalArea = 0.0
cshape.each { |shape|
totalArea += shape.area
}
The each iterator method for this CompoundShape class serves up references to
its constituent Shape objects. On the first pass through the code block, shape will
be assigned a reference to the Circle object we passed into CompoundShape.new.
On the second pass, shape is assigned a reference to the Rectangle object.As far as
the Ruby interpreter knows, there are no other outstanding references to the
Circle that shape pointed to on the first pass; what’s to stop the Garbage Collector
from destroying that object?
This is the purpose for the “mark” function we’ve learned about. Since
CompoundShape does in fact “know” about that Circle and Rectangle, it has the
responsibility for informing the Ruby interpreter of that fact.You can do this by
calling the rb_gc_mark() function in your “mark” function, passing in a VALUE
that refers to the known object:
void CompoundShape_mark(void *ptr) {
CompoundShape *cshape;
int i;
cshape = (CompoundShape *) ptr;
for (i = 0; i < cshape->nshapes; i++)
rb_gc_mark(cshape->shapes[i]);
}
The other issue to consider is what happens when a CompoundShape is itself
garbage-collected. Ruby will take care of freeing the Ruby interpreter-side data
structures associated with the Data object, but it can’t automatically free the
memory used by CompoundShape.There’s no way for Ruby to know, for example,
that there’s an array of shapes to worry about, and this is why we’d also want to
provide a “free” function:
www.syngress.com
183RubyC10.qxd 1/7/02 3:19 PM Page 630

Extending and Embedding Ruby • Chapter 10 631
void CompoundShape_free(void *ptr) {
CompoundShape *cshape = (CompoundShape *) ptr;
free((void *) cshape->shapes);
free((void *) cshape);
}
At first glance, something might look wrong with this function. It’s true that
we freed the CompoundShape’s shapes array, but what’s going to happen to the
individual shapes that its elements pointed to? To be sure, the issues of object
ownership in Ruby are very tricky and require careful consideration.Your first
instinct might have been to write CompoundShape_free() like so:
void CompoundShape_free(void *ptr) {
CompoundShape *cshape;
int i;
cshape = (CompoundShape *) ptr;
for (i = 0; i < cshape->nshapes; i++) {
Shape *s;
Data_Get_Struct(cshape->shapes[i], Shape, s);
free((void *) s); /* Don't do this! */
}
free((void *) cshape->shapes);
free((void *) cshape);
}
After all, in the “mark” phase we took the trouble to loop over all the shapes
and mark them. Doesn’t it make sense to do something parallel for the “free”
phase? Well, in this case the answer is no.We’ve already established that at least
some methods in CompoundShape’s interface return references to its constituent
shapes, such as:
thirdShape = cshape.getShape(2)
For argument’s sake, let’s assume that thirdShape’s scope is such that it “out-
lives” cshape. Since thirdShape still holds a reference to one of the shapes making
up a CompoundShape, we definitely don’t want to destroy the C data backing up
that shape.As any experienced C programmer can testify, all kinds of very bad
things can happen when you try to use pointers to memory that’s already been
freed.
www.syngress.com
183RubyC10.qxd 1/7/02 3:19 PM Page 631

632 Chapter 10 • Extending and Embedding Ruby
This still begs the question: How is the data wrapped by the Shape for
thirdShape ever going to be accounted for? But you already know the answer to
that question, don’t you? It’s handled by the “free” function for that shape’s Data
object, for example:
void Rectangle_free(void *ptr) {
free(ptr);
}
To properly associate this “free” function with the Rectangle instances that you
create, you’d want to pass Rectangle_free() in as the third argument to
Data_Wrap_Struct(), for example:
Rectangle *rect;
VALUE obj;
rect = CreateRectangle();
obj = Data_Wrap_Struct(cRectangle,
Rectangle_mark,
Rectangle_free,
rect);
When thirdShape finally goes out of scope, or is assigned a reference to
some other object, the Ruby garbage collector should soon discover that there
are no other references to that Shape; remember, we’re assuming that this par-
ticular object has outlived the CompoundShape it was originally a part of. Since
Rectangle_free() is registered as the “free” function for this Rectangle, the
memory that was dynamically allocated from your C extension should get
freed as well.
Implementing Methods
Now that we’ve seen how to work with some of Ruby’s built-in datatypes, we
can return to the Shapes module example and see how to actually implement the
instance methods for the Circle,Rectangle, and Triangle classes. Recall that we reg-
istered both the initialize and area methods for each of these classes using the C
function rb_define_method(), and two of the arguments passed to that function
were a pointer to the C function that implements the Ruby method and the
number of arguments expected by that Ruby method.We’ll start with the easiest
www.syngress.com
183RubyC10.qxd 1/7/02 3:19 PM Page 632

Extending and Embedding Ruby • Chapter 10 633
function, Rectangle_area(); it should calculate the area of the Rectangle instance and
return the result as a Float:
VALUE Rectangle_area(VALUE self) {
VALUE width, height;
double doubleWidth, doubleHeight, doubleResult;
width = rb_iv_get(self, "@width");
height = rb_iv_get(self, "@height");
doubleWidth = NUM2DBL(width);
doubleHeight = NUM2DBL(height);
doubleResult = doubleWidth*doubleHeight;
return rb_float_new(doubleResult);
}
The first discrepancy you’ll probably notice is that even though the corre-
sponding Ruby instance method (Rectangle#area) doesn’t take any arguments, this
C function takes one. For any instance method, you should always write the cor-
responding C function assuming that the number of arguments will be one more
than is required to call it from your Ruby code, and the very first argument
passed will be a reference to the instance itself (Ruby’s self). By convention, the C
variable is usually named self, but that’s up to you.
Since the rectangle’s area is computed by multiplying its width by its height,
the first step is to determine this rectangle’s width and height. Let’s assume that
those two quantities are stored in the instance variables @width and @height.We
can use the C API function rb_iv_get() to retrieve the current values of those
instance variables:
width = rb_iv_get(self, "@width");
height = rb_iv_get(self, "@height");
The first important thing to note here is that rb_iv_get() returns a VALUE,
which, as we said earlier, serves as a reference to some Ruby object. Because we’re
the extension writers, we can trust that the type of both these instance variables is
Float, but in some cases you may want to test the types to be sure.The other impor-
tant thing to note is that because these are instance variables we need to be sure to
include the “@” sign in front of the variables’ names; if we had instead written this:
width = rb_iv_get(self, "width");
www.syngress.com
183RubyC10.qxd 1/7/02 3:19 PM Page 633

634 Chapter 10 • Extending and Embedding Ruby
the call would fail. Now that we’ve got the current rectangle width and height as
Floats, we need to convert it to C doubles so that we can multiply the two dimen-
sions together:
doubleWidth = NUM2DBL(width);
doubleHeight = NUM2DBL(height);
The NUM2DBL macro takes a VALUE which should be a reference to some
kind of Numeric object, and returns its value as a C double. In our case we expect
the VALUE to be a reference to a Float, but this code would also work if the
VALUE referred to a Fixnum or Bignum.The final steps of this function compute
the result and return it as a Float:
doubleResult = doubleWidth*doubleHeight;
return rb_float_new(doubleResult);
Believe it or not, that’s all there is to it (for this simple function, anyway).
Most of Ruby’s C API is similarly lean and straightforward, and you can usually
write C extension code in a manner similar to writing the corresponding Ruby
code. Next, let’s take a look at implementation for the Rectangle class’ initialize
method:
VALUE Rectangle_initialize(VALUE self, VALUE x, VALUE y,
VALUE width, VALUE height) {
rb_iv_set(self, "@x", x);
rb_iv_set(self, "@y", y);
rb_iv_set(self, "@width", width);
rb_iv_set(self, "@height", height);
return self;
}
You’ll recall that earlier, when we registered this function with a call to
rb_define_method(), we specified that the Rectangle#initialize method has four argu-
ments (x,y,width, and height). But since all Ruby instance methods include a ref-
erence to the object instance as the first argument, this C function actually has
five arguments.We use the rb_iv_set() C API function to initialize these instance
variables’ values.
The area and initialize methods for the other two classes (Circle and Triangle)
would follow similar patterns to those shown for the Rectangle class.The purpose
of this quick run-through was to introduce the basics of writing a C extension
www.syngress.com
183RubyC10.qxd 1/7/02 3:19 PM Page 634

Extending and Embedding Ruby • Chapter 10 635
for Ruby and some of the C API functions you’ll use. In the next section, we’ll
look at a more complex example for a C extension module.
An Example: K-D Trees
A k-d tree (or k-dimensional tree) is a spatial data structure for representing points
in k-dimensional space; it is a kind of generalization of regular binary search trees
useful for many applications. In this section we’ll consider two implementations
of a k-d tree for Ruby.The first implementation is written entirely in Ruby,
requires less than 100 lines of Ruby code, and is fairly easy to understand.The
second implementation is written in C, as a Ruby extension module.
For the purposes of this example, we’ll keep the k-d tree class interface very
simple: we’ll have an insert method, to insert a new point into the tree, and a find
method to search the tree for a specific point. Following the standard k-d tree
algorithms, Figure 10.1 shows a pseudocode version of the procedure we’ll use to
insert a new point into the k-d tree, and Figure 10.2 shows the procedure to
then find a point.
Figure 10.1 Pseudocode for the K-D Tree insert Algorithm
procedure insert(point)
depth = 0
if (no root node yet)
create the root node and store this point
else
initialize current node to root node
begin
determine which point coordinates to use as keys for current depth
compare the new point's key to the next point's key
if (new point's key > next point's key)
set current to the root of the right subtree
else
set current to the root of the left subtree
end
depth = depth + 1
end while (current node is not nil)
www.syngress.com
Continued
183RubyC10.qxd 1/7/02 3:19 PM Page 635

636 Chapter 10 • Extending and Embedding Ruby
if (new point's key > next point's key)
create a new node for the right subtree
else
create a new node for the left subtree
end
end
end
Figure 10.2 Pseudocode for the K-D Tree find Algorithm
procedure find(current, point)
if (current node is nil)
return nil (no match found)
else if (point stored at current node == search point)
return current node
else if (key value for point > key value at current node)
search the right subtree recursively
else
search the left subtree recursively
end
end
Ruby Implementation of the K-D Tree
Figure 10.3 shows the driver program we’ll use to demonstrate the k-d tree
implementations.
Figure 10.3 Driver Program for K-D TREE Modules
require 'kdtree'
MAX_POINTS = 1024
# Generate a list of random points
www.syngress.com
Continued
Figure 10.1 Continued
183RubyC10.qxd 1/7/02 3:19 PM Page 636

Extending and Embedding Ruby • Chapter 10 637
points = Array.new(MAX_POINTS).map! { [rand, rand, rand] }
# Construct an empty tree
kdTree = KDTree::KDTree.new
# Insert each of the points into this k-d tree
startTime = Time.now
points.each do |point|
kdTree.insert(point)
end
insertTime = 1000.0 * (Time.now - startTime)
puts("Time to insert #{MAX_POINTS} points: #{insertTime} ms")
# Compute average lookup time
startTime = Time.now
points.each do |point|
kdTree.find(point)
end
avgTime = 1000.0 * (Time.now - startTime) / MAX_POINTS
puts("Average lookup time: #{avgTime} ms")
It begins by requiring the kdtree feature:
require 'kdtree'
Note that we didn’t specify a “.rb” extension for the feature file name; this
will allow us to later replace the original Ruby implementation of the KDTree
module with a C extension module of the same name. Next, we define a con-
stant MAX_POINTS to represent the number of points that will be inserted
into the tree and then generate an array containing MAX_POINTS randomly
located points:
MAX_POINTS = 1024
# Generate a list of random points
points = Array.new(MAX_POINTS).map! { [rand, rand, rand] }
www.syngress.com
Figure 10.3 Continued
183RubyC10.qxd 1/7/02 3:19 PM Page 637

638 Chapter 10 • Extending and Embedding Ruby
We’re using Ruby arrays (of length 3) to store the three-dimensional point
coordinates.The built-in rand function generates pseudo-random numbers, which
is good enough for the purposes of this demonstration. For a real application, the
point coordinates would probably be read from some external data source.After
acquiring the point coordinates, we proceed to construct a new k-d tree instance
and then insert each of the points into the tree:
# Construct an empty tree
kdTree = KDTree::KDTree.new
# Insert each of the points into this k-d tree
startTime = Time.now
points.each do |point|
kdTree.insert(point)
end
insertTime = 1000.0 * (Time.now – startTime)
puts("Time to insert #{MAX_POINTS} points: #{insertTime} ms")
In order to compare the performance of the Ruby k-d tree implementation
to that of the C implementation, we’ll first measure the time required to insert all
of the points into the tree. Ruby’s standard library provides the Time class, which
we make use of here; the Time.now singleton method returns a Time instance for
the current system time (in seconds), and so we can compute the difference
between system times before and after inserting the points.An even more signifi-
cant measure of our k-d tree’s performance is the average time required to find a
point in the tree, and so we’ll measure that next:
# Compute average lookup time
startTime = Time.now
points.each do |point|
kdTree.find(point)
end
avgTime = 1000.0 * (Time.now – startTime) / MAX_POINTS
puts("Average lookup time: #{avgTime} ms")
Now we’ll move on to the Ruby implementation of the k-d tree, shown in
its entirety in Figure 10.4.
www.syngress.com
183RubyC10.qxd 1/7/02 3:19 PM Page 638

Extending and Embedding Ruby • Chapter 10 639
Figure 10.4 Ruby Implementation of the K-D Tree Module
module KDTree
class KDNode
attr_reader :point
attr_accessor :left, :right
def initialize(point)
@point, @left, @right = point, nil, nil
end
end
class KDTree
def initialize
@root = nil
end
# Insert a new point into the tree
def insert(point)
depth = 0
if @root.nil?
@root = KDNode.new(point)
else
curNode = @root
begin
tmpNode = curNode
discriminator = depth % point.length
ordinate1 = point[discriminator]
ordinate2 = tmpNode.point[discriminator]
if ordinate1 > ordinate2
curNode = tmpNode.right
else
curNode = tmpNode.left
end
depth += 1
end while (curNode != nil)
www.syngress.com
Continued
183RubyC10.qxd 1/7/02 3:19 PM Page 639

640 Chapter 10 • Extending and Embedding Ruby
if ordinate1 > ordinate2
tmpNode.right = KDNode.new(point)
else
tmpNode.left = KDNode.new(point)
end
end
end
def distance(pt1, pt2)
r2 = 0.0
pt1.each_index { |i| r2 += (pt2[i] - pt1[i])**2 }
Math.sqrt(r2)
end
def find2(root, depth, point, eps)
d = depth % point.length
if root.nil?
nil
elsif (distance(point, root.point) < eps)
root
elsif (point[d] > root.point[d])
find2(root.right, depth+1, point, eps)
else
find2(root.left, depth+1, point, eps)
end
end
def find(point, eps=1.0e-6)
find2(@root, 0, point, eps)
end
end
end
www.syngress.com
Figure 10.4 Continued
183RubyC10.qxd 1/7/02 3:19 PM Page 640

Extending and Embedding Ruby • Chapter 10 641
For this implementation, we’ll define two classes, KDNode and KDTree.The
KDNode class describes a single node in the tree, and its definition is straightforward:
class KDNode
attr_reader :point
attr_accessor :left, :right
def initialize(point)
@point, @left, @right = point, nil, nil
end
end
Here, point is the array of point coordinates and left and right are “pointers” to
the left and right child nodes for this tree node.The KDTree class holds a refer-
ence to the root of the tree and provides methods for inserting a node into the
tree (insert) and searching the tree for a point (find).The initialize method for our
KDTree class just initializes the root node (an instance variable, which we’re
calling @root) to nil:
class KDTree
def initialize
@root = nil
end
The insert method for KDTree more or less mirrors our previous pseudo-code
description; its single input argument is an array (point) containing the point
coordinates:
# Insert a new point into the tree
def insert(point)
depth = 0
if @root.nil?
@root = KDNode.new(point)
else
curNode = @root
begin
tmpNode = curNode
discriminator = depth % point.length
www.syngress.com
183RubyC10.qxd 1/7/02 3:19 PM Page 641

642 Chapter 10 • Extending and Embedding Ruby
ordinate1 = point[discriminator]
ordinate2 = tmpNode.point[discriminator]
if ordinate1 > ordinate2
curNode = tmpNode.right
else
curNode = tmpNode.left
end
depth += 1
end while (curNode != nil)
if ordinate1 > ordinate2
tmpNode.right = KDNode.new(point)
else
tmpNode.left = KDNode.new(point)
end
end
end
The last method we’ll show for the Ruby implementation of KDTree is the
find method.The public interface to this function takes a single input argu-
ment, an array containing the point coordinates. Under the hood, it uses two
additional helper functions: distance, to compute the distance between two
points, and find2, which calls itself recursively to search through the tree for
the desired point:
# Compute the Euclidean distance between two points
def distance(pt1, pt2)
r2 = 0.0
pt1.each_index { |i| r2 += (pt2[i] - pt1[i])**2 }
Math.sqrt(r2)
end
def find2(root, depth, point, eps)
d = depth % point.length
if root.nil?
www.syngress.com
183RubyC10.qxd 1/7/02 3:19 PM Page 642

Extending and Embedding Ruby • Chapter 10 643
nil
elsif (distance(point, root.point) < eps)
root
elsif (point[d] > root.point[d])
find2(root.right, depth+1, point, eps)
else
find2(root.left, depth+1, point, eps)
end
end
def find(point, eps=1.0e-6)
find2(@root, 0, point, eps)
end
Note that find (and find2) include an eps argument that specifies the tolerance
used in comparing two points. It’s rarely useful to compare floating-point values
directly and so we instead compute the distance between the current point and
the point we’re searching for. If the distance between these two points is suffi-
ciently small (less than eps) we assume that we’ve found a match.
C Implementation of the K-D Tree
Next, we’ll take a look at a C implementation for the k-d tree (see
Figure 10.5). Just like the Ruby implementation, we’ll make use of data struc-
tures to represent both the tree itself and nodes in the tree.To simplify the
implementation, however, we’re going to make some assumptions about the
tree data:
■The tree dimensionality (that is, the kvalue) is fixed at 3. A more general
implementation of this C extension module could support arbitrary
dimensionality, but we’re trying to keep it simple here.
■The point coordinates are stored internally as C double arrays. For the
Ruby implementation, the coordinates could be any arbitrary Numeric
type.
■References to tree nodes that are returned by the tree’s find method are
only “borrowed” references, and they become invalid once the tree is
garbage-collected.
www.syngress.com
183RubyC10.qxd 1/7/02 3:19 PM Page 643

644 Chapter 10 • Extending and Embedding Ruby
Figure 10.5 C Implementation for the K-D Tree Module
/**
* C implementation of k-d Tree for Ruby.
*/
#include <stdlib.h>
#include <math.h>
#include "ruby.h"
/* We're only interested in 3-D */
#define DIMENSIONS 3
/* A node in the K-D tree */
typedef struct KDNode {
double point[DIMENSIONS];
struct KDNode *left;
struct KDNode *right;
} KDNode;
/* Each tree has a root node */
typedef struct KDTree {
KDNode *root;
} KDTree;
static VALUE cKDNode;
/* Helper: returns a new node */
KDNode* new_node(double point[DIMENSIONS])
{
KDNode *p;
int i;
www.syngress.com
Continued
183RubyC10.qxd 1/7/02 3:19 PM Page 644

Extending and Embedding Ruby • Chapter 10 645
p = (KDNode *) malloc(sizeof(KDNode));
for (i = 0; i < DIMENSIONS; i++)
p->point[i] = point[i];
p->left = NULL;
p->right = NULL;
}
/* Helper: Converts a Ruby array of Floats to C array of doubles */
void array2point(VALUE array, double point[DIMENSIONS])
{
int i;
for (i = 0; i < DIMENSIONS; i++)
point[i] = NUM2DBL(rb_ary_entry(array, i));
}
/* Helper: Converts a C array of doubles to Ruby array of Floats */
VALUE point2array(double point[DIMENSIONS])
{
int i;
VALUE array;
array = rb_ary_new2(DIMENSIONS);
for (i = 0; i < DIMENSIONS; i++)
rb_ary_store(array, i, rb_float_new(point[i]));
return array;
}
/* Helper: Compute the distance between two points */
double distance(double pt1[DIMENSIONS], double pt2[DIMENSIONS])
{
int i;
www.syngress.com
Continued
Figure 10.5 Continued
183RubyC10.qxd 1/7/02 3:19 PM Page 645

646 Chapter 10 • Extending and Embedding Ruby
double r2 = 0.0;
for (i = 0; i < DIMENSIONS; i++)
r2 += pow(pt2[i] - pt1[i], 2.0);
return sqrt(r2);
}
/* Free this node */
void node_free(KDNode *node)
{
if (node->left) {
node_free(node->left);
node->left = NULL;
}
if (node->right) {
node_free(node->right);
node->right = NULL;
}
free((void *) node);
}
/* Free the tree */
void tree_free(KDTree *tree)
{
if (tree->root) {
node_free(tree->root);
tree->root = NULL;
}
free((void *) tree);
}
/* Create a new tree */
VALUE kdtree_new(VALUE class)
www.syngress.com
Figure 10.5 Continued
Continued
183RubyC10.qxd 1/7/02 3:19 PM Page 646

Extending and Embedding Ruby • Chapter 10 647
{
KDTree *tree = (KDTree *) malloc(sizeof(KDTree));
tree->root = NULL;
return Data_Wrap_Struct(class, 0, tree_free, tree);
}
/* Insert a point into the tree */
VALUE kdtree_insert(VALUE self, VALUE array)
{
KDTree *tree;
KDNode *curNode, *prevNode;
int depth, discriminator;
double point[DIMENSIONS];
/* Extract pointer to the KDTree */
Data_Get_Struct(self, KDTree, tree);
/* Convert the Ruby array into a C array */
array2point(array, point);
if (tree->root == NULL) {
tree->root = new_node(point);
} else {
curNode = tree->root;
depth = 0;
do {
prevNode = curNode;
discriminator = depth % DIMENSIONS;
if (point[discriminator] > prevNode->point[discriminator])
curNode = prevNode->right;
else
curNode = prevNode->left;
www.syngress.com
Figure 10.5 Continued
Continued
183RubyC10.qxd 1/7/02 3:19 PM Page 647

648 Chapter 10 • Extending and Embedding Ruby
depth++;
} while (curNode != NULL);
if (point[discriminator] > prevNode->point[discriminator])
prevNode->right = new_node(point);
else
prevNode->left = new_node(point);
}
return Qnil;
}
#define EPS 1.0e-6
VALUE kdtree_find2(KDNode *root, int depth, double point[DIMENSIONS])
{
int d = depth % DIMENSIONS;
if (root == NULL)
return Qnil;
else if (distance(root->point, point) < EPS)
return Data_Wrap_Struct(cKDNode, 0, 0, root);
else if (point[d] > root->point[d])
return kdtree_find2(root->right, depth + 1, point);
else
return kdtree_find2(root->left, depth + 1, point);
}
VALUE kdtree_find(VALUE self, VALUE arr)
{
KDTree *tree;
double point[DIMENSIONS];
/* Extract pointer to the KDTree */
www.syngress.com
Figure 10.5 Continued
Continued
183RubyC10.qxd 1/7/02 3:19 PM Page 648

Extending and Embedding Ruby • Chapter 10 649
Data_Get_Struct(self, KDTree, tree);
/* Convert the Ruby array to a C array */
array2point(arr, point);
/* Recursively call kdtree_find2() */
return kdtree_find2(tree->root, 0, point);
}
#ifdef __cplusplus
extern "C"
#endif
void Init_kdtree()
{
VALUE mKDTree;
VALUE cKDTree;
mKDTree = rb_define_module("KDTree");
cKDTree = rb_define_class_under(mKDTree, "KDTree", rb_cObject);
rb_define_singleton_method(cKDTree, "new", kdtree_new, 0);
rb_define_method(cKDTree, "insert", kdtree_insert, 1);
rb_define_method(cKDTree, "find", kdtree_find, 1);
cKDNode = rb_define_class_under(mKDTree, "KDNode", rb_cObject);
}
The code begins by including two standard C header files as well as the
Ruby header file,“ruby.h”:
#include <stdlib.h>
#include <math.h>
#include "ruby.h"
www.syngress.com
Figure 10.5 Continued
183RubyC10.qxd 1/7/02 3:19 PM Page 649

650 Chapter 10 • Extending and Embedding Ruby
Next we’ll define a constant DIMENSIONS that specifies the dimensionality
of the tree, and the two C structs that represent a tree node (KDNode) and the
tree itself (KDTree).We’ll also declare a global (static) constant to hold the Ruby
Class object for our KDNode class; we’ll need that to create new KDNode
instances later:
/* We're only interested in 3-D */
#define DIMENSIONS 3
/* A node in the K-D tree */
typedef struct KDNode {
double point[DIMENSIONS];
struct KDNode *left;
struct KDNode *right;
} KDNode;
/* Each tree has a root node */
typedef struct KDTree {
KDNode *root;
} KDTree;
static VALUE cKDNode;
Next we’ll define a few helper functions that are used later in the extension
module’s implementation.These functions aren’t called directly from Ruby, but
they make the code more readable and easier to maintain.The first function is a
“constructor” for KDNode instances that allocates memory for a new KDNode
and initializes its members:
KDNode* new_node(double point[DIMENSIONS])
{
KDNode *p;
int i;
p = (KDNode *) malloc(sizeof(KDNode));
for (i = 0; i < DIMENSIONS; i++)
p->point[i] = point[i];
www.syngress.com
183RubyC10.qxd 1/7/02 3:19 PM Page 650

Extending and Embedding Ruby • Chapter 10 651
p->left = NULL;
p->right = NULL;
}
The next pair of helper functions convert between Ruby arrays of Floats and
C arrays of doubles:
void array2point(VALUE array, double point[DIMENSIONS])
{
int i;
for (i = 0; i < DIMENSIONS; i++)
point[i] = NUM2DBL(rb_ary_entry(array, i));
}
VALUE point2array(double point[DIMENSIONS])
{
int i;
VALUE array;
array = rb_ary_new2(DIMENSIONS);
for (i = 0; i < DIMENSIONS; i++)
rb_ary_store(array, i, rb_float_new(point[i]));
return array;
}
The last helper just computes the distance between two points represented by
C double arrays:
double distance(double pt1[DIMENSIONS], double pt2[DIMENSIONS])
{
int i;
double r2 = 0.0;
for (i = 0; i < DIMENSIONS; i++)
r2 += pow(pt2[i] - pt1[i], 2.0);
return sqrt(r2);
}
www.syngress.com
183RubyC10.qxd 1/7/02 3:19 PM Page 651

652 Chapter 10 • Extending and Embedding Ruby
Now, before getting to the core of the implementation, let’s jump ahead and
see the module initialization function. Since the feature name (the file name used
in the require statement) is “kdtree,” the initialization function’s name should be
Init_kdtree(). Its implementation follows:
#ifdef __cplusplus
extern "C"
#endif
void Init_kdtree()
{
VALUE mKDTree;
VALUE cKDTree;
mKDTree = rb_define_module("KDTree");
cKDTree = rb_define_class_under(mKDTree, "KDTree", rb_cObject);
rb_define_singleton_method(cKDTree, "new", kdtree_new, 0);
rb_define_method(cKDTree, "insert", kdtree_insert, 1);
rb_define_method(cKDTree, "find", kdtree_find, 1);
cKDNode = rb_define_class_under(mKDTree, "KDNode", rb_cObject);
}
From our experience with the previous Shapes module example, we can see
that we’re going to need to provide C implementations for three functions
(kdtree_new(),kdtree_insert() and kdtree_find()).We’ll start with the kdtree_new()
function:
/* Create a new tree */
VALUE kdtree_new(VALUE class)
{
KDTree *tree = (KDTree *) malloc(sizeof(KDTree));
tree->root = NULL;
return Data_Wrap_Struct(class, 0, tree_free, tree);
}
Because this is a singleton method, the first argument is a reference to the
KDTree class object (which is itself an instance of the Class class).As discussed
previously, we’re using a Ruby Data object (created by Data_Wrap_Struct) that
www.syngress.com
183RubyC10.qxd 1/7/02 3:19 PM Page 652

Extending and Embedding Ruby • Chapter 10 653
“wraps” around a C struct instance but looks like a Ruby KDTree instance to the
Ruby interpreter.
This example illustrates the purpose of the third argument to Data_Wrap_Struct,
the “free” function.When the Ruby KDTree instance is garbage-collected we need
to make sure that the memory allocated for this tree (and all of the tree nodes
under it) is properly released. Many programmers assume that Ruby will take care
of this for them, but it’s not as simple as it may seem. One problem is that Ruby
doesn’t know how the memory was originally allocated. For example, while
memory for C extensions is typically allocated using malloc() and subsequently
released with free(), objects in C++ extensions will typically use operator new() and
delete.Another problem is that the object being freed may itself be responsible for
other dynamically-allocated memory which it needs to free before it can be
released.This is especially true in C++ classes, where such “cleanup” code is placed
in the class destructor, but here we see an example of it in our KDTree extension
module: Before calling free() on the KDTree pointer, we need to recursively traverse
the tree and free the memory occupied by its child nodes:
/* Free this node */
void node_free(KDNode *node)
{
if (node->left) {
node_free(node->left);
node->left = NULL;
}
if (node->right) {
node_free(node->right);
node->right = NULL;
}
free((void *) node);
}
/* Free the tree */
void tree_free(KDTree *tree)
{
if (tree->root) {
node_free(tree->root);
www.syngress.com
183RubyC10.qxd 1/7/02 3:19 PM Page 653

654 Chapter 10 • Extending and Embedding Ruby
tree->root = NULL;
}
free((void *) tree);
}
The last two functions we’ll examine implement the majority of the tree’s
functionality.What you’ll discover, however, is that the code for these functions
looks remarkably similar to the corresponding Ruby implementations in terms of
structure. In fact, the only Ruby-specific code for these functions comes in
around the “edges,” as we convert function arguments from Ruby types into C
types and then convert results back from C to Ruby. Let’s start with the
kdtree_insert() function:
/* Insert a point into the tree */
VALUE kdtree_insert(VALUE self, VALUE array)
{
KDTree *tree;
KDNode *curNode, *prevNode;
int depth, discriminator;
double point[DIMENSIONS];
/* Extract pointer to the KDTree */
Data_Get_Struct(self, KDTree, tree);
/* Convert the Ruby array into a C array */
array2point(array, point);
if (tree->root == NULL) {
tree->root = new_node(point);
} else {
curNode = tree->root;
depth = 0;
do {
prevNode = curNode;
discriminator = depth % DIMENSIONS;
if (point[discriminator] > prevNode->point[discriminator])
www.syngress.com
183RubyC10.qxd 1/7/02 3:19 PM Page 654

Extending and Embedding Ruby • Chapter 10 655
curNode = prevNode->right;
else
curNode = prevNode->left;
depth++;
} while (curNode != NULL);
if (point[discriminator] > prevNode->point[discriminator])
prevNode->right = new_node(point);
else
prevNode->left = new_node(point);
}
return Qnil;
}
Take a moment to observe how little Ruby’s C API “gets in the way” of
writing this function. Since the Ruby interface to our kdtree_insert() function
takes one argument (an array of Floats) we know that this C function will have
two arguments. Since the KDTree instance (self) is just a wrapper around a C
KDTree struct, we extract the C struct pointer using the Data_Get_Struct macro:
KDTree *tree;
Data_Get_Struct(self, KDTree, tree);
Since we want to work with the point coordinates as a C array of doubles
instead of a Ruby array of Floats, we use our previously defined helper function
array2point() to convert that data:
double point[DIMENSIONS];
array2point(array, point);
The bulk of this function, which actually searches the tree for the correct
insertion point and so on, doesn’t include any Ruby API calls.As we’ll see later
when we compare the runtimes for the Ruby and C implementations of the k-d
tree, these factors allow you to take advantage of both C’s speed and Ruby’s ease
of use. Finally, since all Ruby methods must have a return value, kdtree_insert()
ends by returning Qnil (the C constant for Ruby’s nil).
The last function is kdtree_find(), and as with the Ruby implementation, it
actually uses recursive calls to a helper function, kdtree_find2(), to do the dirty
work:
www.syngress.com
183RubyC10.qxd 1/7/02 3:19 PM Page 655

656 Chapter 10 • Extending and Embedding Ruby
#define EPS 1.0e-6
VALUE kdtree_find2(KDNode *root, int depth, double point[DIMENSIONS])
{
int d = depth % DIMENSIONS;
if (root == NULL)
return Qnil;
else if (distance(root->point, point) < EPS)
return Data_Wrap_Struct(cKDNode, 0, 0, root);
else if (point [d] > root->point[d])
return kdtree_find2(root->right, depth + 1, point);
else
return kdtree_find2(root->left, depth + 1, point);
}
VALUE kdtree_find(VALUE self, VALUE arr)
{
KDTree *tree;
double point[DIMENSIONS];
/* Extract pointer to the KDTree */
Data_Get_Struct(self, KDTree, tree);
/* Convert the Ruby array to a C array */
array2point(arr, point);
/* Recursively call kdtree_find2() */
return kdtree_find2(tree->root, 0, point);
}
Compiling the C Implementation of the K-D Tree
In order to use this C implementation of the k-d tree, we need to compile it into
a shared library that can be loaded at runtime by the Ruby interpreter. Ruby’s
standard library provides several modules to facilitate this, and we’ll cover those in
more detail in the “Configuring Extensions with Mkmf” section later in this
chapter. For now, just type:
www.syngress.com
183RubyC10.qxd 1/7/02 3:19 PM Page 656

Extending and Embedding Ruby • Chapter 10 657
ruby –r mkmf –e "create_makefile('kdtree')"
at the shell prompt.This instructs Ruby to first require the standard mkmf module
and then execute the statement:
create_makefile('kdtree')
The result of this should be a Makefile that you can use to build the exten-
sion module.To do that, type:
make
Assuming that the extension builds properly, you should now have a shared
library in the current directory with a file name like “kdtree.so”.
Comparing the Results
It’s all well and good to see the Ruby and C implementations of a k-d tree side
by side, but there’s still no compelling argument for choosing the C version over
the Ruby version.After all, compared to the Ruby version, the C version requires
more lines of code, will be harder to understand and maintain, and must be com-
piled into a system-dependent shared library. One of the principal reasons for
moving extension modules to C code is for performance reasons, and this
example demonstrates that point.
Table 10.8 shows the time required to insert npoints into the tree, as well as
the average lookup time, for both the Ruby and C implementations of our k-d
tree.We can see that for small numbers of points the performance difference
between the two implementations is negligible, but for larger point sets that the
C implementation is much faster (remember, lower times indicate “faster” for
this case).
Table 10.8 Runtime Comparison of Ruby and C Implementations
Insertion Insertion Average Average
Number of Time Time Lookup Time Lookup Time
Points (Ruby) (ms) (C) (ms) (Ruby) (ms) (C) (ms)
1,024 120 0 0.538 0.0195
2,048 240 10 0.743 0.0195
4,096 571 30 1.122 0.0195
8,192 1242 50 1.816 0.0258
16,384 2884 150 3.713 0.0262
www.syngress.com
183RubyC10.qxd 1/7/02 3:19 PM Page 657

658 Chapter 10 • Extending and Embedding Ruby
Using SWIG
The Simplified Wrapper and Interface Generator (SWIG) was developed by
David Beazley (see www.swig.org). It is a code generation tool intended to help
you develop scripting language interfaces to C/C++ code.Although the release
version of SWIG (version 1.1) doesn’t provide any support for Ruby, the devel-
opment version (currently at release 1.3.9) does, and that’s the version we’ll be
describing in this section. It must also be pointed out that the SWIG documenta-
tion has not yet been updated to reflect changes in the development version, and
as a result does not specifically discuss the Ruby language module for SWIG.
Despite this discrepancy, most of the information presented in the SWIG 1.1
documentation is still relevant for the development version and will take you a
long way in using SWIG to develop extensions for Ruby.
A Simple SWIG Example in C
At the risk of duplicating information you’ll also find in the SWIG documenta-
tion, we’ll briefly look at what’s involved in writing a SWIG interface file and
then running SWIG to generate C source code for a Ruby extension module.
Let’s suppose that we have a C library with functions for use with investment-
tracking applications. One function provided by this library retrieves the current
stock price for a given ticker symbol:
double get_current_stock_price(const char *ticker_symbol);
We’d like to be able to call this function from Ruby code:
def get_prices(symbols)
prices = {}
symbols.each { |symbol|
prices[symbol] = get_current_stock_price(symbol)
}
prices
end
We certainly already have the skills to write a C extension module by hand
that will accomplish this task. It’s not difficult, but it is tedious to write a module
initialization function that defines this method, write the C function that wraps
this function call, converting the arguments and return values appropriately, etc. If
nothing else, you’ll probably forget the argument lists for some of Ruby’s C API
functions and have to track those down.
www.syngress.com
183RubyC10.qxd 1/7/02 3:19 PM Page 658

Extending and Embedding Ruby • Chapter 10 659
SWIG takes all of this (mostly mechanical) work off of your hands and lets
you focus on developing a well-thought-out interface to a C code library.Your
job is to write a SWIG interface file that describes the classes, constants, and
functions for which you want to generate wrapper code. For the example at
hand, we might write this SWIG interface file:
%module invest
%{
#include "invest.h"
%}
double get_current_stock_price(const char *ticker_symbol);
As you can see, SWIG interface files consist of SWIG directives interspersed
with C-like declarations.The %module directive specifies the module name for
this Ruby module. It’s also the name that will be used as the feature name (for
the module initialization function) unless you override this default with the –fea-
ture command line option to SWIG.The code between the “%{“ and “%}” pair
is code that should be copied verbatim into the generated C extension code,
before any of the SWIG-generated function “wrappers.”The last line (the func-
tion declaration) directs SWIG to generate a wrapper function for the get_cur-
rent_stock_price() function.
By convention, SWIG interface filenames end with an “.i” extension.Assuming
the above interface file is named “invest.i,” we’d run SWIG on it as follows:
$ swig –ruby invest.i
The –ruby command line option instructs SWIG to generate Ruby wrapper
code. In many cases (especially when you’ve planned ahead), the same SWIG
interface files can be used to generate wrapper code for any of the programming
languages supported by SWIG. On such a small interface file, SWIG will finish its
work quickly and produce a new C file named invest_wrap.c. Given what we
already know about writing Ruby extension modules, let’s take a look at some of
the code SWIG generated. First, the module initialization function:
#ifdef __cplusplus
extern "C"
#endif
www.syngress.com
183RubyC10.qxd 1/7/02 3:19 PM Page 659

660 Chapter 10 • Extending and Embedding Ruby
void Init_invest(void) {
int i;
mInvest = rb_define_module("Invest");
_mSWIG = rb_define_module_under(mInvest, "SWIG");
for (i = 0; swig_types_initial[i]; i++) {
swig_types[i] = SWIG_TypeRegister(swig_types_initial[i]);
SWIG_define_class(swig_types[i]);
}
rb_define_module_function(mInvest, "get_current_stock_price",
_wrap_get_current_stock_price, 1);
}
There are a few unfamiliar lines in this function, mostly related to SWIG’s
runtime type-checking system, but we can pick out the important bits.There’s a
call to rb_define_module() to define the “Invest” module and assign it to a global
variable, mInvest; and there’s a call to rb_define_module_function(), to register the
get_current_stock_price module method. Let’s see how SWIG did with the wrapper
function for get_current_stock_price():
static VALUE
_wrap_get_current_stock_price(VALUE self, VALUE varg0) {
char *arg0 ;
double result ;
VALUE vresult = Qnil;
arg0 = STR2CSTR(varg0);
result = (double )get_current_stock_price((char const *)arg0);
vresult = rb_float_new(result);
return vresult;
}
As with the module initialization function, we probably could have written
shorter and more legible code if we’d done it “by hand.” But consider all the
work that SWIG has done for you in generating this wrapper code:
www.syngress.com
183RubyC10.qxd 1/7/02 3:19 PM Page 660

■It determined the number of arguments required to call the function (in
this case, one).
■It recognized that the input to this function (the ticker symbol) was a C
string, and that the Ruby interface would therefore expect a Ruby String
as its input.
■It selected the appropriate type-conversion macro (STR2CSTR)
to convert the Ruby String into a C string needed to call the C
function.
■It recognized that the return value was a C double, and therefore Ruby
code would be expecting a Float as the return value.
■It selected the appropriate type-conversion function (rb_float_new()) to
convert the C function’s return value from a double into a Float.
Using SWIG With C++
Now we’ll look at a slightly more involved example, this time using SWIG to
generate extension module code for a C++ class. Figure 10.6 shows the declara-
tion of a simple C++ class we’ll use for this example.
Figure 10.6 Declaration for the Point class
class Point
{
public:
double x
double y;
public:
// Constructor
Point(double xpos = 0.0, double ypos = 0.0);
};
Figure 10.7 shows the SWIG interface file that we’ll use for this module.
Note that it is almost identical to the original C++ header file.
www.syngress.com
Extending and Embedding Ruby • Chapter 10 661
183RubyC10.qxd 1/7/02 3:19 PM Page 661

662 Chapter 10 • Extending and Embedding Ruby
Figure 10.7 SWIG Interface File for the Point Module
%module point
%{
#include "point.h"
%}
class Point
{
public:
double x;
double y;
public:
Point(double xpos = 0.0, double ypos = 0.0);
};
To generate the wrapper code corresponding to this SWIG interface file, we
need to run SWIG with the appropriate command-line arguments:
swig –c++ -ruby point.i
The -c++ option for SWIG tells the SWIG parser that the interface file
includes C++ (and not C) syntax. It also instructs SWIG to use C++ code in the
wrapper code it generates.After processing the information in the interface file,
SWIG will generate a new C++ source code file named “point_wrap.cxx” in the
current working directory.You can next create a platform-dependent Makefile for
this extension by typing:
ruby –r mkmf –e "create_makefile('point')"
and then compile the code into a dynamically-loadable Ruby extension by
typing:
make
Now let’s load this extension into Ruby and test it out. Start the interactive
Ruby shell (irb) and at the irb prompt, type:
www.syngress.com
183RubyC10.qxd 1/7/02 3:19 PM Page 662

Extending and Embedding Ruby • Chapter 10 663
require 'point'
to load the extension into the Ruby interpreter.The shell should respond true to
indicate that the extension was successfully loaded. Next, create a Point instance
with coordinates (3, 4) by typing:
p1 = Point::Point.new(3, 4)
Note that since the Point belongs to the Point, we need to use the fully
qualified class name Point::Point.We can already see that SWIG generated a new
singleton method for the Point class based on the C++ constructor declaration
from the interface file.We can also take advantage of the constructor’s default
argument values to create a Point instance with coordinates (0, 0) by simply
typing:
p2 = Point::Point.new
Now let’s create a third Point instance with a different set of coordinates:
p3 = Point::Point.new(5, 6)
SWIG automatically generates “get” and “set” accessor methods for all of the
publicly accessible fields in a class or struct.We can use these accessor methods to
get and set the points’ x and y coordinates. For example, at the irb prompt we
could now type:
"Point 1 coordinates: (#{p1.x}, #{p1.y})"
and Ruby should respond with:
"Point 1 coordinates: (3.0, 4.0)"
Well, we’ve suddenly run out of fun things to do with our Point class. One
especially useful feature of SWIG is its ability to augment the scripting language
interface to your C/C++ code using the %addmethods directive. One simple
example would be adding a to_s instance method for our Point class. It’s a stan-
dard Ruby idiom for classes to implement a to_s method to provide a string rep-
resentation of their contents, but the default implementation isn’t too
informative.With our current Point class, the to_s method returns an uninspiring
string like “#<Point::Point:0xa0a0bf0>”.
Figure 10.8 shows a modified version of our previous SWIG interface file.
Note that this version adds a new section, set off by the SWIG %addmethods
directive.
www.syngress.com
183RubyC10.qxd 1/7/02 3:19 PM Page 663

664 Chapter 10 • Extending and Embedding Ruby
Figure 10.8 Modified SWIG Interface File for the Point Module
%module point
%{
#include "point.h"
%}
class Point
{
public:
double x;
double y;
public:
Point(double xpos = 0.0, double ypos = 0.0);
%addmethods {
const char *to_s() const {
static char str[64];
sprintf(str, "(%lg, %lg)", self->x, self->y);
return str;
}
}
};
After rerunning SWIG and recompiling the extension module code as before,
we can try out this new to_s method in the irb shell by typing:
p1.to_s
to which Ruby should respond “(3, 4)”. It’s important to note that we haven’t
modified the original C++ code for the Point class at all.Within the C++ code for
your added methods, you can use the self parameter to refer to the current class
instance (similar to the normal C++ this pointer). For example, in this added to_s
method, we use self->x and self->y to refer to the current point’s x and y coordinates.
With creative uses of the %addmethods directive (and other SWIG features we
won’t cover here) you can do a lot to improve the utility of your Ruby exten-
www.syngress.com
183RubyC10.qxd 1/7/02 3:19 PM Page 664

Extending and Embedding Ruby • Chapter 10 665
sions’ interfaces. As one last example, let’s add an instance method that allows us
to add two points together. Figure 10.9 shows the further modified version of
our SWIG interface file.
Figure 10.9 Further Modified SWIG Interface File for the Point Module
%module point
%{
#include "point.h"
%}
class Point
{
public:
double x;
double y;
public:
Point(double xpos = 0.0, double ypos = 0.0);
%addmethods {
const char *to_s() const {
static char str[64];
sprintf(str, "(%lg, %lg)", self->x, self->y);
return str;
}
Point __add__(const Point& aPoint) const {
return Point(self->x + aPoint.x, self->y + aPoint.y);
}
}
};
For this case, we’re using a special “magic” method named __add__.When
SWIG sees this method name it internally renames it to “+”, the standard Ruby
message for addition.When you once again rebuild the extension and test it out
www.syngress.com
183RubyC10.qxd 1/7/02 3:19 PM Page 665

666 Chapter 10 • Extending and Embedding Ruby
in irb, you should now be able to create new Point instances by adding points
together. For example, try typing:
(p1 + p3).to_s
and you should see “(8, 10)”, the string representation of the Point created when
you add p1 and p3 together.
Choosing SWIG
For very small extension modules (that is, those that only expose a handful of
functions) using SWIG may be overkill. But for modules with large numbers of
functions, constants, and classes, maintaining the C source code for the extension
may become more work than you’d like. It becomes especially significant if
you’re trying to maintain “wrapper” code for additional programming languages
(such as Python and Perl); every time a new function is added to the interface,
you’ll end up modifying multiple source code files. SWIG is an ideal develop-
ment tool for these kinds of situations.
This introduction just scratches the surface of what’s possible with SWIG. In
particular, SWIG is able to parse C++ class declarations in SWIG interface files
and generate wrapper code for large C++ class hierarchies.A number of complex
extension modules in the Ruby Application Archive (RAA) use SWIG in their
development and can provide you further examples of how to design SWIG
interface files for your C and C++ code libraries.
Embedding Ruby
When you make use of Ruby extension modules it is usually the case that Ruby is
“on top;” that is to say, the controlling process for the application is the Ruby inter-
preter.Another valuable technique is to instead embed the Ruby interpreter into a
C/C++ application as an extension language.As with C extension modules, code
that embeds the Ruby interpreter needs to include the standard “ruby.h” header file.
Your application’s executable will also need to link against the Ruby library.
It turns out that the premiere example for embedding Ruby is Ruby itself.
The command-line Ruby interpreter that you use to run your Ruby programs is
itself little more than a “skeleton” main program that embeds the Ruby inter-
preter library, does a little bit of setup, and then starts running your program. If
you take a look at the “main.c” file from the Ruby source code distribution,
you’ll see that, after cutting through various platform dependencies, the main()
function consists entirely of four function calls:
www.syngress.com
183RubyC10.qxd 1/7/02 3:19 PM Page 666

Extending and Embedding Ruby • Chapter 10 667
#include "ruby.h"
int
main(argc, argv, envp)
int argc;
char **argv, **envp;
{
#if defined(NT)
NtInitialize(&argc, &argv);
#endif
#if defined(__MACOS__) && defined(__MWERKS__)
argc = ccommand(&argv);
#endif
ruby_init();
ruby_options(argc, argv);
ruby_run();
return 0;
}
These are, more or less, the contents of main() from the Ruby 1.6.4 source
distribution.After some platform-specific initialization rituals for Windows NT
and MacOS, the Ruby interpreter is initialized by a call to the ruby_init() func-
tion. It’s only necessary to call this function once, but it must be done before you
make any other calls into the Ruby library.This is followed up by a call to
ruby_options(), which scans the command-line arguments array for Ruby-specific
switches (like “-w” to turn on warning messages).The final call for this example
is to ruby_run(), which begins parsing and running the current Ruby program.
The following example demonstrates how to embed Ruby into an existing
application. Shown in the example and illustrated in Figure 10.10 is a GUI applica-
tion in C++ created with the GUI-builder “fluid” from Fast Light Tool Kit (see
www.fltk.org). Clicking the OK button (function cb_Ok()) invokes a Ruby method
getStockQuote which calls a SOAP service to get the stock quote of the symbol
entered in the input field.The stock quote is then displayed in the output field.
Again we initialize the Ruby interpreter with a call to the ruby_init() function,
but then we call ruby_init_loadpath() instead of ruby_options() to setup Ruby’s load
path, so that rb_require() in the next line can find the required Ruby source file.
www.syngress.com
183RubyC10.qxd 1/7/02 3:19 PM Page 667

668 Chapter 10 • Extending and Embedding Ruby
// file: stock.cxx
#include <FL/Fl.H>
#include <FL/Fl_Window.H>
#include <FL/Fl_Input.H>
#include <FL/Fl_Output.H>
#include <FL/Fl_Button.H>
#include <FL/Fl_Return_Button.H>
#include <stdlib.h>
#include "ruby.h"
Fl_Input *symbol=(Fl_Input *)0;
Fl_Output *quote=(Fl_Output *)0;
static void cb_Ok(Fl_Return_Button*, void*)
{
VALUE sym, res;
sym = rb_str_new2(symbol->value());
res = rb_funcall2(rb_eval_string("StockQuote.new"),
rb_intern("getStockQuote"), 1, &sym);
quote->value(res == Qnil ? "n/a" : STR2CSTR(res));
}
static void cb_Exit(Fl_Button*, void*)
{
exit(0);
}
Fl_Window* make_window()
{
Fl_Window* w;
{ Fl_Window* o = new Fl_Window(190, 128, "Stock Quote");
w = o;
symbol = new Fl_Input(60, 10, 120, 25, "Symbol:");
quote = new Fl_Output(60, 45, 120, 25, "Quote:");
www.syngress.com
183RubyC10.qxd 1/7/02 3:19 PM Page 668

Extending and Embedding Ruby • Chapter 10 669
{ Fl_Return_Button* o = new Fl_Return_Button(100, 95,
80, 25, "Ok");
o->callback((Fl_Callback*)cb_Ok);
}
{ Fl_Button* o = new Fl_Button(10, 95, 80, 25,"Exit");
o->callback((Fl_Callback*)cb_Exit);
}
o->end();
}
return w;
}
int main(int argc, char **argv)
{
ruby_init();
ruby_init_loadpath();
rb_require("./stock.rb");
make_window()->show(argc, argv);
return Fl::run();
}
The Ruby source code file uses SOAP4R (see Chapter 5) and is shown
below:
# file: stock.rb
require "soap/driver"
class StockQuote < SOAP::Driver
URL = "http://soaptest.activestate.com:8080/PerlEx/soap.plex"
NS = "http://activestate.com/"
ACT = "urn:activestate"
def initialize
super(nil, nil, NS, URL, nil, ACT)
addMethod('StockQuoteInCountry', 'Symbol', 'Country')
end
www.syngress.com
183RubyC10.qxd 1/7/02 3:19 PM Page 669

670 Chapter 10 • Extending and Embedding Ruby
def getStockQuote(symbol)
StockQuoteInCountry(symbol, 'US') + "$"
rescue Exception => err
STDERR.puts err.inspect
end
end
Finally we need to compile the application.We do this with the following
Makefile (note that you possibly have to change some library or header paths to
get it to work):
TARGET = stock
OBJS = stock.o
LIBS = -rdynamic -L/usr/local/lib/ruby/1.6/i386-linux \
-L/usr/X11R6/lib -lfltk -lX11 -lruby -lcrypt -lm
CFLAGS = -O2 -fpic -I/usr/local/lib/ruby/1.6/i386-linux \
-I/usr/X11R6/include
CC = cc
${TARGET}: ${OBJS}
${CC} -o $@ ${OBJS} ${LIBS}
clean:
rm ${OBJS} ${TARGET}
.cxx.o:
${CC} -c -o $@ ${CFLAGS} $<
www.syngress.com
Figure 10.10 C++ GUI Application Which Embeds Ruby to Invoke a
SOAP Service
183RubyC10.qxd 1/7/02 3:19 PM Page 670

Extending and Embedding Ruby • Chapter 10 671
Configuring Extensions with Mkmf
After you’ve developed an extension module for Ruby, you may wish to distribute
it to the Ruby community. One of the drawbacks of C extension modules, how-
ever, is that they exist as system-dependent shared libraries.The shared library
required to use your extension module under the Linux operating system is going
to be different from the shared library required under Windows.Thus, the standard
practice is to just distribute your extension module as C source code, and let the
end-user compile and install the shared library on his or her own system.
Of course, it’s not that simple. Different versions of Ruby for different plat-
forms are compiled using system-specific and compiler-specific settings.The
Ruby library and header files may be installed under /usr/local on one user’s
Linux workstation, but under /home/ruby on another’s; and you can’t count on
the user knowing where those files are in the first place. Because there are so
many variables to consider when configuring the build and installation process
for a C extension module, the standard Ruby library provides the mkmf (short for
make makefile) module to help you do this.
Most C extension modules include a Ruby script, named extconf.rb by con-
vention, that uses code from the mkmf module to detect system settings and auto-
matically generate a Makefile for the shared library.You’ll also want to write an
extconf.rb for your extension modules as well, and it’s not all that hard.The sim-
plest extconf.rb script is only a few lines long:
require 'mkmf'
create_makefile('kdtree')
The create_makefile method is provided by the mkmf module, and it generates
a Makefile that compiles all of the C source code files in the current directory,
filling in the appropriate compiler settings, and links the resulting object files into
a shared library.The string passed to create_makefile should be the feature name
and thus the resulting shared library’s file name, and the name used in your
module’s initialization function. For the two-line extconf.rb script shown above,
make should end up building a shared library named “kdtree.so” and Ruby will
expect to find an Init_kdtree() function somewhere in the mix.
For more complicated extension modules, the mkmf module provides a
number of other methods to assist you in configuring the build. For example, if
the extension module depends on the OpenGL library (named libGL.so on most
Linux systems), you can use the have_library method to check for its presence:
www.syngress.com
183RubyC10.qxd 1/7/02 3:19 PM Page 671

672 Chapter 10 • Extending and Embedding Ruby
if have_library("GL", "glBegin")
# libGL.so was found; it will be added to the list
# of libraries linked with this extension.
end
The have_library method depends on finding the library the standard library
search path. If you need the option of searching specific directories (not neces-
sarily on the standard library path), you might opt for the find_library method
instead:
if find_library("GL", "glXCreateContext",
"/usr/X11R6/lib", "/usr/openwin/lib", "/usr/local/lib")
# libGL.so was found in either a standard library directory or
# one of these three directories.
end
Here, the first two arguments are the same as those for have_library, but the
remaining arguments are the names of non-standard directories in which to search.
As with have_library, if the library is found and it exports the named function, it will
be added to the list of libraries linked with the extension module’s shared library.
A similar configuration issue is checking for the presence or absence of a
function somewhere in the standard libraries. For example, some C libraries include
a strcasecmp() function (for case-insensitive string comparisons) while others do
not. In this case, you could use the mkmf module’s have_func method:
if have_func("strcasecmp")
# –DHAVE_STRCASECMP will be added to the
# compiler flags in the Makefile
end
If your compiler requires function prototypes, and you know which header
file contains the correct prototype, you can specify that header file name as the
second argument to have_func:
if have_func("strcasecmp", "string.h")
# as before
end
To check for the presence or absence of a specific header file, use the
have_header method:
www.syngress.com
183RubyC10.qxd 1/7/02 3:19 PM Page 672

Extending and Embedding Ruby • Chapter 10 673
if have_header("png.h")
# -DHAVE_PNG_H will be added to the compiler flags in the Makefile
end
Finally, your extconf.rb script can support command-line arguments of the
form --with-name-include=directory and --with-name-lib=directory if you include a call
to the dir_config method:
dir_config("foo")
This call in your extconf.rb script would result in a scan of the command-
line arguments for the aforementioned options and modification of the include
files and library path for the Makefile accordingly. For example, running the
extconf.rb thus:
$ ruby extconf.rb -–with-foo-include=/home/foo/include \
–-with-fox-lib=/home/foo/lib
would cause /home/foo/include to be added to the include files path, and
/home/foo/lib to be added to the library files path. In fact, for this particular case,
you could shorten the command-line options to simply:
$ ruby extconf.rb –-with-foo-dir=/home/foo
Although many Ruby extension modules consist of a single file, it is more
likely that you’ll want to distribute a package of files that includes source code
for the extension module as well as supporting data files and scripts. Minero
Aoki’s setup.rb script provides one solution for distributing these kinds of Ruby
packages. His system categorizes the files in a package into four basic groups:
source code for C extension modules, pure Ruby code files, shared data files, and
executable Ruby scripts.
To make use of the setup.rb script, you’ll need to organize your extension
module distribution into a specific directory structure; the details are provided in
the documentation for setup.rb. Note that this system isn’t a replacement for
extconf.rb scripts and the mkmf module, but instead builds on them. In particular,
each of the C extension modules in the package you’re distributing will need to
provide its own extconf.rb script.
For a link to the home page, and the latest version of setup.rb, check the
RAA.
www.syngress.com
183RubyC10.qxd 1/7/02 3:19 PM Page 673

674 Chapter 10 • Extending and Embedding Ruby
Summary
The ability to write Ruby extension modules in C or C++ truly provides appli-
cation developers the best of both worlds:The rapid application development and
quick turnaround of Ruby combined with the speed and universality of C/C++
creates opportunities for developing very powerful applications.
Ruby’s C API offers a number of easy-to-understand functions for registering
new classes, constants, and methods with the Ruby interpreter, as well as converting
between C and Ruby datatypes.The API is so well-designed that you can typically
write C code that looks similar to the corresponding Ruby code.A cookbook tech-
nique for developing new C/C++ extension modules was described in this chapter,
along with several examples, and performance results for an advanced example.
SWIG is a must-have free software utility for Ruby extension module devel-
opers.While some consider SWIG to have a somewhat steep learning curve, you
may find that the time you invest to learn SWIG will pay off in terms of mainte-
nance and development costs, especially for larger extension modules.
It’s an increasingly common need to enable end-users to customize applica-
tions using their own code “plug-ins”. Microsoft made this feature somewhat
popular by providing scripting capabilities for its Office applications suite, but
they certainly weren’t the first. Almost all the popular so-called “scripting” lan-
guages (including Ruby) provide lots of functionality for embedding in other
applications as a scripting engine.
It’s no fun to write a Ruby extension module that can’t be used by a wide
variety of people.At the same time, the wide variation in compilers and develop-
ment environments and platforms makes it difficult for individual developers to
come up with a consistent build and installation process.The Ruby standard
library provides the useful mkmf module for this very purpose, and Ruby’s devel-
oper has outlined the standard procedure for making use of this module’s func-
tionality: the extconf.rb script.
Solutions Fast Track
Writing C/C++ Extensions
;For various reasons, Ruby alone may not provide the speed or function-
ality required for your Ruby applications.When this is true, you can
write extension modules in C or C++ that look like regular modules to
the Ruby interpreter.
www.syngress.com
183RubyC10.qxd 1/7/02 3:19 PM Page 674

Extending and Embedding Ruby • Chapter 10 675
;Ruby’s C API provides a wide variety of functions that assist extension
writers in defining modules, classes, and constants, and converting back
and forth between C and Ruby datatypes.
;It’s a good development strategy to prototype new modules in pure
Ruby.This approach allows you to work out practical interfaces, confirm
that the basic algorithms are sound, and develop test cases. Once the
Ruby implementation is solid, if performance is still an issue, you can
consider moving the code to a C extension.
Using SWIG
;SWIG is an open-source, free software development tool that can greatly
reduce the time required to develop Ruby interfaces to C and C++
code libraries.
;Although the code generated by SWIG is typically much longer and less
readable than code you’d write by hand, it’s worth the time saved.
Embedding Ruby
;Ruby makes a nice extension language for C or C++ applications that
would benefit from end-user customization. Most users will appreciate
the convenience of being able to extend the application’s functionality
by writing scripts in a high-level programming language like Ruby
instead of a systems programming language like C.
Configuring Extensions with Mkmf
;Most Ruby extension modules intended for widespread use are dis-
tributed in source code form, for the user to compile and install locally
on his or her workstation. By providing an extconf.rb script for your
extension modules, you immediately lower the “acceptance” threshold
since it facilitates a very familiar build and installation process.
;The standard Ruby library’s mkmf module provides a number of useful
methods for detecting system-specific resources (such as header files and
libraries).
;For more complex Ruby code packages, third-party solutions like the
setup.rb script can build on the mkmf module’s functionality to provide
an equally easy and familiar build and installation process.
www.syngress.com
183RubyC10.qxd 1/7/02 3:19 PM Page 675

676 Chapter 10 • Extending and Embedding Ruby
Frequently Asked Questions
The following Frequently Asked Questions, answered by the authors of this book,
are designed to both measure your understanding of the concepts presented in
this chapter and to assist you with real-life implementation of these concepts. To
have your questions about this chapter answered by the author, browse to
www.syngress.com/solutions and click on the “Ask the Author” form.
Q: I’ve compiled a simple Ruby extension for use with the Microsoft Visual
C++ build of Ruby, but the program crashes when I try to import and use
the extension. I don’t think I’ve made any programming errors, so what else
could be the problem?
A: If you’re using a Makefile generated by running an extconf.rb script (as
described in this chapter), the correct compiler and linker options should have
been written into that Makefile. If you have instead written your own
Makefile, you may have omitted some important flags. First of all, be sure to
define the NT and IMPORT symbols for the C preprocessor when compiling
the extension source code; you can do this by passing the /DNT and /DIM-
PORT flags to the compiler.You’ll also need to tell the compiler to compile
your code to use the “multithreaded DLL” version of the C and C++ runtime
libraries; you can do this by passing the /MD flag to the compiler.
Q: I’m getting some unusual compiler errors when trying to compile my C/C++
extension code. For example, when my extension code calls the Ruby func-
tion rb_gc_mark() the compiler stops with an error message that includes the
text “too many arguments to function rb_gc_mark().”I am sure that I’m calling
this function with the correct number of arguments, so what is wrong?
A: A large number of functions declared in the Ruby header files (“ruby.h” and
others) use older, non-ANSI style C function declarations. If you’re compiling
your extension code with a C++ compiler, or a C compiler that doesn’t
allow non-ANSI declarations, you will definitely run into these kinds of
errors. Matz has corrected these declarations in the Ruby 1.8 header files, but
they will probably not be corrected for the Ruby 1.6 header files.There are
two workarounds for dealing with this problem.The first is to study the doc-
umentation for your C/C++ compiler to see if it provides a command-line
switch to support non-ANSI declarations. For example, versions 2.95 and ear-
lier of GCC offered the –fno-strict-prototype option for this purpose.Another
more drastic option is to actually patch your installation’s Ruby header files
to use ANSI C declarations for the offending function(s).
www.syngress.com
183RubyC10.qxd 1/7/02 3:19 PM Page 676

Index
A
about_clicked, 122
Abstract syntax trees (AST)
construction, Racc-generated
parsers (usage), 606–609
dumping, 582
node, 589
usage, 577–581
Accelerator key combination,
92
Access control, 34–35
Access Control List (ACL), 333
ACID. See Atomicity
Consistency Isolation
Durability
ACL. See Access Control List
ActionListener, 501
ActiveScript, usage, 482–484
ActiveX Data Objects (ADO),
136, 140
addComponent (method), 284
addControl, 118
addItemLast, 110
addMethod (method), 293, 294
addPanedControl (method), 121
add_port (method), 230
addToShoppingCart, 406
ADO. See ActiveX Data Objects
aForm, 119
Algebra extension, usage,
454–460
Algorithm, 424. See also
Bubblesort; Divide-and-
conquer algorithms;
Encryption algorithm;
Layout; Quicksort
choice, 524
comparison, 520–522
complexity (ordos), 522–523
analysis, 517–525
usage. See Genetic algorithms
ALLOC macro, 628
AnyChar (parser), 585
Aoki, Minero, 602, 673
AOP. See Aspect-oriented
programming
Apache
error log file, 190
module mod_iowa, 402
Web server, 270, 347, 383
restarting, 386
APIs. See Application
Programming Interfaces
Apollo, 128
Apple. See WebObjects
Application Programming
Interfaces (APIs),
218–220
Applications
code, 44
debugging, debug.rb usage.
See Ruby
execution, tracing. See
Database Interface
installation, RAA usage, 8–10
statistically compiled, 234
applyStylesheet method, 187
Arbitrary-length integers, 619
Arguments, number
determination, 661
ARGV array, 92
arr (variable), 22
Array
class, 443, 623
object, 335
array system.listMethods(), 269
array system.methodSignature(s
tring methodName), 269
Arrays, 28, 35–36. See also
ARGV array; C;Two-
element array
creation, 556
datatype, 262
elements
accessing. See First array
element
addition, 546–548
iterating, 552–554
manipulation, 546
usage, 623–626
Article, 372
(component), 406
ArticleList, 372
ASCII
text, 570
values, 572
ASCII-8, encoding support, 240
AspectJ, comparison. See
AspectR
Aspect-oriented programming
(AOP)
AOP-style wrapping, 543
understanding, 539–540
AspectR, 533–544
AspectJ, comparison, 543–544
extension, 525
function, explanation,
542–543
module, 166
understanding, 539–540
usage, 540–542. See also
Profiling
Assignment operator, 578–579
AST. See Abstract syntax trees
Asynchronous method, 266
Asynchronous RPCs, 263
Atomicity Consistency Isolation
Durability (ACID), 162
AT&T. See GraphViz
attach (method), 74, 75
ATTLIST tag, 241
Attribute readers, usage, 578
auth (parameter), 145–146
Authentication. See HyperText
Transfer Protocol
server. See Simple Object
Access Protocol
Autocommit mode,
enabling/disabling,
163–164
AutoCommit (option), 146, 163
Average complexity, 523–525
AVL trees, 464
B
B+ tree, 201
BabelFish, 289, 293
Backpropagration, 476
Base64 (datatype), 262
Batch mode, 44
BDB::Btree, 201
BDB::Hash, 201
BDB::Queue, 201
BDB::Recno, 201
Bean Scripting Framework
(BSF), 507
Beazley, David, 658
Beck, Kent, 38
Benchmark extension, 520
BeOS, 3, 27
Berkeley DB
database system, 199
Interface BDB, usage, 199,
201–204
677
183Ruby_index.qxd 1/7/02 5:15 PM Page 677
678 Index
Berkeley DBM file databases,
136
usage, 199–201
Beyer, Steffen, 464
BigFloat library, usage, 447–448
Binary Large OBject (BLOB),
171–173, 178
Binary input, 581
Binary objects, retrieval. See
Databases
Binary tree, 461
binary.rb, 460
BinaryTree extension, usage,
460–464
bind (command), 49
bin/proxy-server directory, 174
Bit-shifting, 538
BitVector, 465–467
extension, usage, 464–467,
538
Bit::Vector, 464
Bit-wise operation, 466
Blessed class, 33
BLK_SIZE, 178
BLOB. See Binary Large
OBject
Block local variables, 26
BLT, usage, 68
Boolean datatype, 262
Boolean expression, 469
Bootup, 1
FAQs, 41
introduction, 2
solutions, 39–40
Borrowed references, 643
bottom (argument), 75
BoundeLruCache, 560
Brodnik, Andrej, 537
Bryant,Avi, 87, 400
BSF. See Bean Scripting
Framework
Bubblesort, 518
algorithm, 517
code, 519
Quicksort, contrast, 521
Build-in Ruby object,
conversion, 304
Bullet Proof FTP, 5
ButtonRelease event, 49, 63
Buttons, 45, 48, 114
entries. See Checkbutton
entries; Radiobutton
entries
Byte code. See Java
C
C, 26, 37, 206
API. See Ruby
applications, 614
arrays, 651
code, 521, 522, 663
library, 659
data structures, 629
datatypes, 618
double arrays, 643, 651
extensions, 141, 424, 447, 583
module, 643
writing, 563–564
function, return value, 661
header file, 649
system, 221
implementation, 643, 652,
657
compiling. See K-
Dimensional trees
library, 614
memory, 627
numeric types, 619, 620
source code, 615
files, 671
string, 661
SWIG example, 658–661
usage, 111
C++, 2–3, 26, 460
API. See Free Objects for X
applications, 614
class, 661
code, 663
constructor declaration, 663
extension, 653
module, 91
header file system, 221
memory, 627
source code, 38
SWIG usage, 661–666
Caching
results, 558–561
strategies, 584
usage decision. See Result
caching
Calc parser, usage, 608
Calendar, 45
extension, usage, 496–498
tools, usage, 493–498
Call actions, 581
call (method), 266
call (string), 532
call2 (method), 266
call2_async (method), 266
call_async (method), 266
Callbacks, 50. See command
response creation. See Tk
Calling methods, 557–558
CALL_SITES (constant), 534
cancel_button, 84
Captions, support, 117
Carlsson, Svante, 537
Cart, 372
(component), 406
Cascade, 61
Case-insensitive parsing, 589
Case-insensitive string
comparisons, 672
Cavity space, 53
C/C++
data wrappers, usage, 627–632
extensions, writing, 615–657
libraries, interface, 614
c-call (string), 532
CGI. See Common Gateway
Interface
CGI_COOKIES, 381
CGI_PARAMS, 381
CGI::Session, 373
Chaplin, Damon, 87
Character Large OBject
(CLOB), 179
Checkbutton entries, 61
Child
controls, 117
nodes, 213, 641
windows, 45
Circle, 616, 630
class, 632, 634
Clark, James, 234
Class
class, 561, 652
definition, 489
name, 23
inputting, 14
class (string), 532
Client/server SOAP
application, 286
Client-side logging, 295–297
Client-side support, 280–281
CLOB. See Character Large
OBject
Code. See Applications; Ruby;
Shared code; Structured
Query Language;
Unicode
block, 22–24, 50, 62–63, 193.
See also Passed code
block; Ruby
183Ruby_index.qxd 1/7/02 5:15 PM Page 678
Index 679
providing, 49
usage, 196
creation. See Functional code
fragment, 48, 145, 465, 472
generation. See Ruby
tool, 614
usage. See Ruby
Code-compile-test cycle, 44
Code-embedding solutions, 355
CodeWright, 12
Coding, problems, 212
cols_in_row_tag, 180
Columns
interaction. See Row-tag
tag, 180
Combinators, 581, 582, 589. See
also Parser
command
callback, 50
(method), 48, 62
Command line tool, invoking.
See Racc
Comma-separated value (CSV)
files, 136
reading/writing, 199–200
Comments. See Trailing
comment
parsing. See Nested comments
usage, 22–23
COMMIT (command), 163
Common Gateway Interface
(CGI), 263, 340. See also
FastCGI
adaptor iowa.cgi, 401–402
application, 177, 180, 189,
325
CGI-based server, 299
HTML generation. See Ruby
scripts, 190, 328, 356
acceleration, DRb usage,
325–328
usage, 390
server, 270, 298
support, 347
usage, 379
Common Object Request
Broker Architecture
(CORBA), 284–285
Complexity. See Average
complexity;Worst-case
complexity
analysis. See Algorithm
Component, 372
class, 379
Composite pattern, 45
CompoundShape, 632
class, 629, 630
interface, 631
shapes array, 631
Compression, 528. See also
Huffman compression
Compute-intensive functions,
558
Computer Science (C/S) data-
structure tools, 460–467
Concurrent behavior, 265, 266
Concurrent Versions System
(CVS), 5, 140
installation, 6–7
Config::ENABLE_MARSHAL
LING, 278
Config::ENABLE_NIL_CREA
TE, 278
connect (method), 144
connection (attribute), 188
Connection pooling, usage, 190
Connection refused error, 324
connection-alive, 263
Consistency. See Atomicity
Consistency Isolation
Durability
construct (method), 121
Constructor, 650
declaration. See C++
Constructs, speed comparison.
See Ruby
Context-sensitive parsing, 593
Control characters, 106
Controller, 372
controller (method), 411
Conway, Jonathan, 67
Cookies, 372, 390
CORBA. See Common Object
Request Broker
Architecture
Count(), 218
create (method), 93
CREATE TABLE, 148
CREATE USER, 148
CREATE VIEW, 148
createAttributesTable method,
108
createMenubar (method), 83, 85
c-return (string), 532
Cross platform development, 27
Cross-platform GUI toolkit,
127
C/S. See Computer Science
C-style components, 600
CSV. See Comma-separated
value
current_stock field, 379
curselection (method), 64
curveClassifier.rb file, 477
Curves, creation. See Multiple
curves
Cutland, Nigel, 451
CVS. See Concurrent Versions
System
Cygwin
DLL, 7
instance creation, 8
running, 546
D
DALnet, 10
Data
conversion, 217
facets, 217
(field), 205
model
design, 362–365
expansion, 379
objects, 629
patterns, 217
structure, 424. See also C;
Interpreter-side data
structures
returning, 560
wrappers, usage. See C/C++
Data Control Language (DCL),
138, 148
DCL-SQL statements, 151
Data Definition Language
(DDL), 138, 148
Data Manipulation Language
(DML), 138, 148
SQL statements, 154
Database access
layer, 366–369
Ruby usage, 135
FAQs, 209
introduction, 136
solutions, 208–209
Ruby/DBI, usage, 136–190
Ruby/ODBC, usage,
190–195
transactions, 584
Database Driver (DBD), 137,
144, 171. See also Oracle
Database Interface (DBI), 144,
145, 156–158. See also
Ruby/DBI
183Ruby_index.qxd 1/7/02 5:15 PM Page 679
680 Index
applications execution,
tracing, 166–169
connections string, 188
implementation details, 164
DatabaseDriver class, 169
DatabaseHandle, 144, 154
class, 149, 162, 173
object, 166
Database-related options, 146
Databases. See mSQL; MySql;
PostgreSQL
binary objects, retrieval,
176–179
connection, 144–146
initialization, 369–372
manager, usage, 389
remote access, DBD::Proxy,
usage, 174
table, 205
data, copying, 175–176
usage. See Execution plan
creation
Data_Get_Struct(), 628
Data_Get_Struct macro, 655
Data_Make_Struct(), 629
Datasource name (DSN), 137,
175
usage, 146–148
Datastructure, 464, 539
Data-structure tools. See
Computer Science
Datatypes. See PostgreSQL;
Simple Object Access
Protocol; User-defined
datatypes; XML-RPC
conversions, usage, 618–632
Data_Wrap_Struct(), 628, 629,
652
Date
Date2/Date3 extensions,
usage, 494–496
tools, usage, 493–498
DateTime (datatype), 262
Davis, Lawrence, 475
DB2, 136, 140
DBD. See Database Driver
DBD::Proxy, usage. See
Databases
DBI. See Database Interface
DBI.available.drivers, 148
DBI::Binary, 151
DBI.connect, 163
DBI::DatabaseError, 165
DBI.data_sources, 148
DBI.disconnect.all (method),
146
DBI::Error, 165
DBI::Handle#trace, 166
DBI::InterfaceError, 164, 165
DBI::NotImplementedError,
165
DBI::Row
class, 158, 160
object, 159, 180
DBI::SQL_XXX constants, 169
DBI.trace (method), 166, 167
DBI::Utils::XMLFormatter, 179
module, 182
DBI::Warning, 164
dbm, 199
DBM class, 200, 201
dbserver.rb, 301
DCL. See Data Control
Language
DDL. See Data Definition
Language
Debian Linux, 7, 140
Debugger, invoking, 18
debug.rb, 13
usage. See Ruby
default (attribute), 170
Default type-mapping,
changing, 308–310
DEFAULT_SPACING, 97
define_finalizer, 491
Dekker, Marcel, 451
DELETE, 148
delete_event, 83
Delimiters, 106
Delphi. SeeVisual Component
Library
Department information, 221
Destructive methods, non-
destructive methods
(contrast), 554–555
Details, 49
DevelopMentor, 285
Diagonalization, 458
Diagram generation,
GD::Graph usage,
441–442
Dialog boxes, usage, 46
Digit (parser), 585
digit, redefining, 595
DIMENSIONS, 650
disconnect (method), 142, 145,
164
Disconnect, transaction
behavior, 164
Display space, 53
Distinguished name,
modification, 197
Distributed Ruby (DRb)
FAQs, 337
introduction, 262
name server, 324–325
project, 274–276
security considerations,
333–335
solutions, 336
usage, 321–335. See also
Common Gateway
Interface
Distributed TupleSpaces, usage,
328–332
Divide-and-conquer
algorithms, 519
DML. See Data Manipulation
Language
DOCTYPE
definition, 215
element, 215
Document Type Definition
(DTD)
support, 241
validation, 214–216
DOM, usage. See Simple API
for XML
DOM-style interfaces, 219
DOS, 3, 27, 344
Double arrays. See C
drawBox, 428
drawRow, 429
drawSide, 429
drawTop, 429
DRb. See Distributed Ruby
DRb::DrbServer, 323
DRbObject, 321
DRbSession, usage, 389
DRb.start_service, 322
DrbUndump module, 321
Driver URLs, usage, 146–148
Driver-based architecture, 143
DriverHandle, 144
class, 173
Driver-specific
functions/attributes,
usage, 171–174
DSN. See Datasource name
dsn (parameter), 145–146
DTD. See Document Type
Definition
Dumbill, Edd, 268
dumpDev (parameter), 296
183Ruby_index.qxd 1/7/02 5:15 PM Page 680
Index 681
Durability. See Atomicity
Consistency Isolation
Durability
Dynamic typing, 3, 28
Dynamically allocated memory,
629
E
-e (command line option), 32
EachDelegator library, usage,
488–489
each_index, 554
Editors, 12
support. See Ruby
EGNF constructs, 599
Eiffel, 26
Eigenvalues, 459
Eigenvectors, 459
problem, 458
ELEMENT tag, 241
Emacs, 11
support, 15
Embedding. See Ruby
Encoding rules, 310
Encryption algorithm, 313
end (string), 532
end_Host method, 230
English-language
documentation, 112
Enterprise computing, 27
ERb, usage, 358. See also
Scripting
err (method), 165
Error-related building blocks,
589, 595–596
Errors
detection, 582
handling, 164–166, 199
messages, 361, 582
errstr (method), 165
eruby
archive, 384
files, 389
usage, 358, 383–400. See
Scripting
Event-driven applications, 22
Event-driven programs, 44
Events
handling, 118–119
parser, 607
response creation. See Tk
types. See X11 event types
execute (method), 153–155
Execution plan creation,
databases usage, 154
exitstatus (method), 541
expat
header file, 235
installation, 235
ExpModCos.rb file, 435
extconf.rb installation
procedure, 9
extended_row method, 180
eXtensible Markup Language
(XML), 211, 212. See also
Ruby Electric XML
conformance, 234
document, 66, 109, 183, 311
entry, 576
nodes, 61
dynamic generation, 395–396
Editor, 105
entity, 86
FAQs, 258–259
files, 213, 220, 224
introduction, 212
management, 214–218
parser, 65, 85, 109, 181
architectures, 218–220
package, 395
parsing/creation, Ruby
(usage), 221–253
representation, 312
Schema Definitions, 304
schemas, usage. See Validation
solutions, 257–258
SQL-query results
transformation, 179–190
tag, 182
usage. See Not Quite XML;
REXML
reasons, 212–218
viewer, 45
XML-compliant template tag
syntax, 361
XMLParser
installation. See Unix
stability/speed, 234
usage, 234–240
eXtensible Stylesheet Language
Transformation (XSLT),
214
processor, 183, 395
stylesheet, application, 187
usage, 254–255
XSLT4R, 183, 254–255
Extensions. See C
code, 628
configuring, Mkmf (usage),
671–673
module. See C++
support. See Introspection
extensions; multiCall
extensions
usage. See BinaryTree
extension; BitVector
extension; Calendar;
Date; Ruby/Python
extension; Soundex
extension; SWin;VRuby
writing. See C/C++
External applications,
requirement, 241
External references, 241
Extreme Programming, 9
F
Fast Light Toolkit (FLTK), 127
FastCGI, 190, 263, 340
installation, 383
protocol, 380
usage, 190, 300, 379
FastCGI-based server, 270, 272,
298
Fault tolerance, 584
faultString (tag), 303
Feldt, Robert, 166, 464, 467,
538
fetch_all (method), 159
fetchURL method, 187
fibonacci function, 558
File classes, 167
File system. See Local file
system
File Transfer Protocol (FTP),
342–344. See also Bullet
Proof FTP
connections, 340
installation, 5
fileBase_SOAPmethodName_re
quest.xml, 296
fileBase_SOAPmethodName_re
sponse.xml, 296
fileMenuItem, 82
File-open dialog, 46
fill (parameter), 53
Final validation data, 476
Finalize module, usage,
489–493
find_library (method), 672
finish (method), 230
First array element, accessing,
555
183Ruby_index.qxd 1/7/02 5:15 PM Page 681
682 Index
First-class objects, 581
Fixed length records, 201
Float
(datatype), 262
(return value), 661
FLTK. See Fast Light Toolkit
Forking. See Server
for-loops, 552, 553
Fortran, 37
Forwardable module, usage,
489–493
FOX. See Free Objects for X
fox-xmlviewer.rb, 99
Franklin, Daniel, 475
free(), 653
Free Objects for X (FOX)
application, 95
C++ API, 91
layout manager, usage, 95–99
library, 91, 104
look-and-feel, 128
sample application, 99–111
support, 7
toolkit, usage, 45, 90–111
usage, 90–91
FreeBSD, 3, 7, 27, 140
Front server architecture, 321
FTP. See File Transfer Protocol
Funaba,Tadayoshi, 494, 497
Functional code, creation, 25
FX4Splitter, 96
FXApp, 93
FXButton, 93, 94
FXFileDialog object, 109
FXHorizontalFrame, 95, 96, 98
FXLabel, 94
FXList instance, 93
FXMainWindow::ID_LAST,
105
FXMAPFUNC method, 105
FXMAP-FUNC (method), 94
FXMatrix, 95–96, 98–99
layout manager, 108
FXMenubar, 106
FXMenuCommand, 106
FXMenuPane, 107
FXMenuSeparator, 107
FXMenuTitle, 106
FXMessageBox.error, 109
FXObject, 93
FXPacker, 95, 96
FXRuby
basics, 91–93
obtaining, 90–91
version, 46
fxruby-xmlviewer.rb, 46
FXSplitter, 96
FXSwitcher, 96
FXTreeList, 107, 108, 110
FXVerticalFrame, 95–96, 98,
107–108
G
Garbage collection (GC), 27,
544
Garbage Collector (GC), 549,
555, 602. See also Mark-
and-sweep garbage
collector
disabling, 546, 561–563
impact. See Performance
usage, 629
GC. See Garbage collection;
Garbage Collector
GCC, 8
GDBM, 199, 200, 201
GD::Graph, usage. See Diagram
generation
Generators, 589. See also Parser
generators
Genetic algorithms, usage,
467–481
Genetic programming (GP),
468–475
Geometry management
options, 45
Geometry method. See TkRoot
title/geometry method
Geometry-layout managers, 46
getAllListings, 267
get_articles_in_inventory, 366
get_attributes, 198
getComponents (method), 283
get_customer_id, 366
getInfoFromName, 267
getStylesheet method, 188
Glade GUI builder, usage,
87–90
GladeXML, 87
class, 88
object, 90
Global variables, 660
GL::POLYGON, 429
GNOME. See GNU Network
Object Model
Environment
GNU Bison, 570, 596
GNU Network Object Model
Environment
(GNOME), 69, 87
library, 84
Goldblatt, Robert, 451
Google, 10, 344
GP. See Genetic programming
GPSystem, 471
gpsystem.rb, 470
Grammar
class, 584
rules, writing, 598–600
Grammar#parse, 584
GRANT, 148
Graphical User Interface (GUI)
applications, 44, 46, 61
builder, 51
usage. See Glade GUI
builder; SpecTcl
construction, 60
GUI-TreeView component,
410
native look-and-feel, 128
programming idioms, 45
testing, 67
toolkits, 43–45, 108, 116,
127–128. See also Cross-
platform GUI toolkit
choice, 128
FAQs, 132–133
introduction, 44–46
solutions, 130–132
usage, 46–68
Graphics programming,
424–442
GraphViz (AT&T) package, 582
Green, Eli, 272, 383
Grid layout manager, 52
GServer, 271
GTK
basics, 70–71
layout managers, usage, 72–76
obtaining, 69–70
sample applications, 32–66,
76–86
source code, 70
GTK+
main event loop, 71
toolkit, usage, 45, 68–90
Gtk::Button::SIGNAL_CLICK
ED signal, 71–72
Gtk::CList, 82
object, 86
gtk+devel package, 69
GTK_EXPAND, 75
Gtk::FileSelection, 84
GTK_FILL, 75
Gtk::HBox, 72, 73
183Ruby_index.qxd 1/7/02 5:15 PM Page 682
Index 683
Gtk::Item::SIGNAL_SELECT
signal, 86
Gtk::MenuItem, 81, 85
GtkRi, 15
Gtk::Table, 74, 75
Gtk::Table#attach, 75
Gtk::Tree, 85
Gtk::TreeItem, 85
Gtk::VBox, 74
Gtk::WINDOW_DIALOG, 81
Gtk::WINDOW_POPUP, 81
Gtk::WINDOW_TOPLEVEL,
81
gtk-xmlviewer.rb, 46, 76
GUI. See Graphical User
Interface
H
Hand-coded parser, 214
Hash class, 200, 623
Hashes, 35–36
creation, 556
datatype, 262
usage, 627
Hashing, 201
Haykin, Simon, 481
Header paths, 670
Hect-Nielsen, Robert, 481
Help button, 49
help (h) option, 18
Henstridge, James, 87
Hidden constants, 524
Hierarchical list, 68
High-level functions, 341–344
Hiroshi, Nakamura, 199
Horizontal packing box, 72
host, 147
Host (class), 228
defining/implementing, 229
hosts (complex type), 221
HTML. See HyperText Markup
Language
HTTP. See HyperText Transfer
Protocol
httpd, 347
httpserv, 347, 402
Huffman codes, 526, 536
Huffman compression, 525, 528
algorithms, 537
Huffman program, 531
Hunt,Andrew, 3, 12, 38
HyperReal::Epsilon, 450
Hyperreals, 448, 449
HyperText Markup Language
(HTML), 214, 413
code, 372
generation, 379. See also
Ruby
document, 215
files, 359
generation, 356–358
HTML/template extension,
usage, 359–361
templates, 359
HyperText Transfer Protocol
(HTTP), 342
authentication, 263, 313
authentication-capable Web
server, 281
daemons, 295
header, 289
POST method, 381
protocol layer, 313
requests, 296
responses, 296
server, 295
framework, 271
status code, 388
I
icon (attribute), 65
ID_ABOUT, 105
IDE. See Integrated
Development
Environment
ID/IDREF pairs, 219
ID_OPEN, 105
ID_OPEN_FILE identifier, 94
ID-to-object converter, 333
ID_TREELIST, 105
Ikebe,Tomohiro, 359
Image data, outputting, 387
in (operation), 328
in (parameter), 294
include-nulls (attribute), 189
Indentation, 24–25
Index, 553–554
indexed (attribute), 170
Infinitesimals, 442
Inheritance, 33–34. See also
Multiple inheritance;
Single inheritance
determination, 2
initAuth (method), 315
Initialization function, 616, 617
initialize
(function), 94, 107
(method), 60, 81
Init_kdtree() function, 671
inout (parameter), 294, 299
Input
argument, 642
dependency, 544
vectors, 523
INPUT command, 574
INSERT, 148
Instance method, 119
implementation, 632–635
Instance variable, 641
IntArray class, 309
Integers, 28, 262, 454–455. See
also Arbitrary-length
integers
representation, 169
Integrated Development
Environment (IDE), 12
support. See Ruby
Interactive Ruby (IRb), 13,
15–17
Interactive SQL shell,
development/deploymen
t. See Ruby/DBI
InterBase, 136, 141
Interdependence, 458
International characters, 240
Internet Protocol (IP) address,
322
Interpreted Objects for Web
Application (IOWA), 340
components, 404
installation/configuration,
400–419
IOWAServlet, 402
pages, 401
usage, 404–410
Interpreter, 28. See also Ruby
Interpreter-side data structures,
630
Introspection extensions,
support, 263
Introspection-enabled XML-
RPC server, 269
IO classes, 167
IOWA. See Interpreted Objects
for Web Application
IP. See Internet Protocol
IRb. See Interactive Ruby
IRC, 10
Isolation. See Atomicity
Consistency Isolation
Durability
183Ruby_index.qxd 1/7/02 5:15 PM Page 683
684 Index
Iterators, 24–26, 36–37, 219
variables, 551
J
Java, 26–32, 37, 460
byte code, 28
class, 499
environment, 27
StringReplace, invoking, 30
Java calling Ruby, 503–507
JavaObject.import, 501
JavaObject.load_class, 499
statement, 501
Java::Parser, 598
JED, 12
JEdit, 12
Jeffries, Ron, 38
JFrame::EXIT_ON_CLOSE,
500
JRE, 30
JRuby
runtime object, 505
usage, 498–507
Jun, Okada, 488
JUnit, 9
K
Kate, 12
Katsuhiro, Ueno, 250
Kazuhiro,Yoshida, 128
KDE desktop. See Linux
K-Dimensional (K-D) trees,
635–657
C implementation,
compiling, 656–657
implementation, Ruby
(usage), 636–656
KDNode, 641, 650
KDTree, 641
class object, 652
pointer, 653
kdtree_insert() function, 654,
655
Kentaro, Goto, 518
Kernel#method, 88
Keyboard character, 49
Key-value pairs, 36, 560
Key/value pairs, 146
parsing, 188
keyValuePairsToHash method,
188
Kidd, Eric, 268
Kinscalez, Gregor, 539
Kobayashi, Shigeo, 447
Kodama, K., 448
Kylix, 128
L
Labels, 45, 114
Language. See Procedural
language; Scripting
language; Static language
bindings, usage, 498–510
constructs, 32–37
features, 27
specification, 584
support. See Non-context free
language
Layout
algorithm, 53
management options, 45
managers, 72, 95, 116–118.
See also FXMatrix; Grid
layout manager
usage. See Free Objects for
X; GTK; Ruby;Tk
LAYOUT_BOTTOM, 98
LAYOUT_CENTER_X, 98
LAYOUT_CENTER_Y, 98
LAYOUT_EXPLICIT, 97
LAYOUT_FILL_X, 98
LAYOUT_FILL_Y, 98
LAYOUT_FIX options, 97
LAYOUT_FIX_HEIGHT, 97,
98
LAYOUT_FIX_WIDTH, 97,
98
LAYOUT_FIX_X, 97
LAYOUT_FIX_Y, 97
LAYOUT_RIGHT, 98
LAYOUT_SIDE_BOTTOM,
98
LAYOUT_SIDE_LEFT, 98
LAYOUT_SIDE_RIGHT, 98
LAYOUT_SIDE_TOP, 98
LCG. See Linear Congruence
Generator
LDAP. See Lightweight
Directory Access
Protocol
LDAP::Entry class, 198
LDAP_SCOPE_BASE, 198
LDAP_SCOPE_ONELEVEL,
198
LDAP_SCOPE_SUBTREE,
198
LDIFF format, 197
Least Surprise. See Principle of
Least Surprise
left (argument), 75
Lexical analyzers, 581
writing, 600–605
Libgdome-ruby, 235
libglade (library), 87
LibNeural, 467, 475
Libraries. See Parser
creation. See Parsing library
deviation. See Parsing library
FAQs, 589–590
file, 235
installation, RAA usage, 8–10
interface. See C/C++
introduction, 424
methods. See Ruby
solutions, 587–589
usage. See BigFloat library;
Each Delegator library;
NArray library;
Polynomial library
Lightweight Directory Access
Protocol (LDAP), 136
directory access, Ruby/LDAP
usage, 195–199
entry
addition, 196
deletion, 197
modification, 196
line (string), 532
Linear Congruence Generator
(LCG), 313
Linear constraints, 219
LINE_PROFILE (constant),
534
Linux, 46. See also Debian
Linux; Red Hat Linux
KDE desktop, 127
operating system, 671
list (l) option, 19, 20
listContents, 504
listview, 122
Literals. See Strings
Load-balancing, 331–332
loadDocument, 64, 109
Local file system, 187
Local variables, 585. See also
Block local variables
listing, 21
methods, comparison, 25
Logging, 584
Logic, separation, 401
Logic2.rb, 473
Logic.rb, 470, 472
look_ahead, 594
183Ruby_index.qxd 1/7/02 5:15 PM Page 684
Index 685
Look-and-feel, 128. See also
Free Objects for X
look_back, 594
Lotus, 285
Low-level events, 71
Low-level functions, 340–341
Lucent project, 38
M
MacOS X, 127
Macintosh, support, 128
MacOS, 3
Macros, 10
Main (component), 406
MainPage, 372
mainWindow, 121
Makefile, 369, 370, 424, 657,
671. See also Platform-
dependent Makefile
makeRow, 434
Management
options. See Layout
Ruby usage, 37–38
mappingRegistry, setting, 308
Mark-and-sweep garbage
collector, 3
Marshal.dump_response, 279
Marshaled objects, storage. See
Relational database
Marshalling format, SOAP
usage, 310–312
Marshal.load_response, 279
Masato,Yoshida, 234, 286
matched (method), 603
Mathematical programming,
442–460
Matrices
addition, 446
usage, 455–460
Matrix class, 614
MATRIX_BY_COLUMNS,
99
MATRIX_BY_ROWS, 99
Matrix-processing library, 443
matrix.rb module, 614
Matsumoto, Makoto, 467
Matsumoto,Yukihiro, 2, 26, 69,
544
MAX_POINTS, 637
MB_ICONEXCLAMATION,
120
MB_ICONINFORMATION,
120
MB_OK, 120
MBOX, 110
MD5 checksum, 274
Media tag, recognition. See
?xml-stylesheet?
Memorize, function
explanation, 561
Memory. See C; C++;
Dynamically allocated
memory
allocation, 544
system, 555
trade-off, 568
MemoryStore, 390
Menard, Jim, 45, 263, 286
Menu bar, display, 46
Menu commands, 83
Mergesort, 523, 524
Message Passing Interface
(MPI), 285
Messages, 93–95
Metadata, access, 169–171
Method. See Private method;
Public method
comparison. See Local
variables
implementation. See Instance
methods
name, 15
object, 87
specifier, 541
Method Namespace URI, 289
methodDef (method), 298
method_missing (method), 268
Mixins, 3, 33
Mkmf, usage. See Extensions
Modifiers, 49
modrdn method, 197
mod_ruby
configuration, 384–386
servers, 263
usage, 383–400
mod_ruby-based servers, 270
MoonWolf, 250
MPI. See Message Passing
Interface
mSQL, 136, 141
mSQL databases, 161
MUD/RPG games, 348
MUES, 348
multiCall extensions
support, 263
usage, 268
multicall (method), 266
multicall2 (method), 266
multicall2_async (method), 266
multicall_async (method), 266
Multi-dimensional SOAP
arrays, creation, 306
Multiple curves, creation,
434–440
Multiple inheritance, 2, 33
Munging, 361
Mutex, 301
MySQL
databases, 366
MySql, 136, 141
databases, 161
usage, 173
MySQL interface, 3
N
Nagai, Hidetoshi, 68
Nakamura, Hiroshi, 286
name (attribute), 169, 221. See
also type_name
NameError, 24
exception, 72
Namespaces, 34
clashing, 33
support, 234
Naming, 23
NArray library, usage, 442–447
NEdit, 12
nest (parser), 585
Nested comments, parsing, 582
Net class, 340–344
NetBSD, 7, 140
Net::HTTP object, 266, 342
Net::POPMail, 342
Network Interace Card (NIC),
340
Networking
FAQs, 422
introduction, 340
solutions, 420–421
Neumann, Michael, 250, 254,
263, 347, 493
Neural nets, usage, 467,
475–481
new (method), 152
new_article, 366
new_customer, 366
newform (method), 120
newMenu, 122
new_order, 366
News channels, displaying. See
RDF Site Summary
Newsgroups, 10
next_token (method), 600
next_val (private method), 366
183Ruby_index.qxd 1/7/02 5:15 PM Page 685
686 Index
NIC. See Network Interface
Card
Nil
(datatype), 262
(method), 265
Nishimura,Takuji, 467
N-keys, 205
Node. See Abstract syntax trees
types, 578
Non-cascading menus, 122
Non-context free language,
support, 582
Non-destructive methods,
contrast. See Destructive
methods
none_of generator, 590
Non-source platform, 27
Non-standard analysis, 448
Non-standard approach, 449,
450
Non-standard directories, 672
Non-zero elements, 455
Not Quite XML (NQXML),
219, 228, 286, 288
advantages, 241
disadvantages, 240–241
installation, 241–250
module, 45, 60
usage, 240–253
writer, 230
NOTATION tag, 241
Notepad, 10
replacement, 12
NQXML. See Not Quite XML
NQXML::Document object,
65, 109
NQXMLTreeParser, 282
NULL, 161, 189
allowing, 170
bytes, 620, 621
character, 620
passing, 629
terminator, 620
nullable (attribute), 170
NUM2DBL, 634
NUMBER token, 598
Numbers, usage, 619–620
Numeric type coordinates, 643
Numerical array library, 443
O
Object identifier (OID), 171,
388
type, 177
Object tree interfaces, 219
Object-orientation, 27
Object-oriented development,
38
Object-oriented programming
(OOP), 33–34
language, 355
OOP-related tools, usage,
488–493
Object-oriented system, 2
Object-oriented toolkit, 94
Object-oriented Web
development, 407
Objects, usage, 618–619
Obj_id, 205
ODBC. See Open DataBase
Connectivity
OID. See Object identifier
ok_button, 84
onCmdTreeList method, 107
One-liner, 280
one_of generator, 590, 591
Online shop
example, 386–395, 404–410
improvement, 379–383
Online shopping application,
implementation, 361–383
onOpenFile (method), 95
OOP. See Object-oriented
programming
Open (command), 61
Open DataBase Connectivity
(ODBC), 136, 141, 158
libraries, 191
usage, 174. See also Database
access
OpenBSD, 7
open_clicked, 122
openDocument (method), 64,
84
OpenFilenameDialog (method),
123
OpenGL
interface, 425
support, 425
usage, 425–440
goal/strategy, defining, 425
sample program, 425–434
OpenGL-based applications,
127
Operator, 577
Optimization, process. See
Program optimization
opts, 97
Oracle, 136, 141, 179
databases, 206, 326
DBD, 165
ORA-XXXX error message,
165
Order of growth, 524
Ordos. See Algorithm
notation, 524
out (operation), 328
out (parameter), 299
Outliers, 545
Output target vector, 479
Over-fitting, 476
Owner information, 221
P
Package, 34
pack_end (argument), 73, 74
Packer, 52
Packing space, 53
pack_start (argument), 73, 74,
82
PACK_UNIFORM_HEIGHT,
98
PACK_UNIFORM_WIDTH,
98
Parallel Virtual Machine
(PVM), 285
Parameter markers
concrete values, binding, 155
usage, 151–152
Parameters, substitution, 183
params (parameter), 146
Parent node, 213
Parent-child composition, 45
Parent-child terminology, 64
Parentheses, 24–25
dropping, 585
Parse error, 26
Parser. See Hand-coded parser;
Predefined parsers; Ruby;
Tokens
architectures. See eXtensible
Markup Language
building blocks, 581
combinators, 591–593
creation, 574
customization, 589–596
exporting, 585
library, 582
marking. See Sub-parsers
transformers, 593–595
usage. See Abstract syntax
trees
Parser generators, 590–591. See
also Strings
183Ruby_index.qxd 1/7/02 5:15 PM Page 686
Index 687
FAQs, 611–612
introduction, 570
Rockit, usage, 587–589
solutions, 610–611
Parsing. See Case-insensitive
parsing
system, 253
Parsing library
creation, 571–581
deviation, 582–587
Passed code block, 36
Performance, 614
deterioration, 481
enhancements, 558–564
Garbage Collector, impact,
558
improvement, 525–544
Performance tuning
FAQs, 567–568
introduction, 516–517
solutions, 566–567
Perl, 26, 32, 46, 155, 401
class, 464
code, 159, 441
DBI, 141, 143, 167
Ruby, contrast, 142
usage, 498
version 5 (Perl 5), 33
Peters,Tobias, 235
Petri Networks, 328
PHP, 355, 358
-pi (command line option), 32
pi (method), 20
Placer, 51
Platform-dependent Makefile,
662
Platform-specific initialization
rituals, 667
Plug-in code modules, 614
Point
class, 663, 664
coordinates, 643
Pointcut designator primitives,
544
Polynomial library, usage,
448–454
Polynomials, 442. See also
Rational polynomials
usage, 454–455
POP. See Post Office Protocol
populateList, 65
populateTreeList, 85, 110
port, 147
Port (class), 228
defining/implementing, 229
port (information), 221
Port-scanning tool, 221
Position(), 218
POST method. See HyperText
Transfer Protocol
Post Office Protocol (POP),
341–342
Post-advice, 540, 542
PostgreSQL, 136, 141, 163, 177
database, 169, 178
datatypes, 161
interface, 3
usage, 171–173
Postscript, 582
Pragmatic Programmers, 3, 38
site, 46–47, 69
Windows Installer, 201
Pre-advice, 540, 542
precision (attribute), 169
Predefined parsers, 585
Pre-forking. See Server
prepare (method), 154
preserved (module), 489
Preserved module, usage,
489–493
preserved_methods (method),
490
primary (attribute), 170
primary ip (attribute), 221
Prime factorizations, 442
Principle of Least Surprise, 2
Private method, 34
Proc objects, 87, 557–558
Procedural language, 33
processQueries method, 187
profile_method (method), 534
Profiler, usage. See Standard
profiler
profile.rb, usage. See Profiling
Profiling, 584
AspectR, usage, 577–588
FAQs, 567–568
introduction, 516–517
profile.rb, usage, 529–533
RbProf, usage, 533–544
solutions, 566–567
usage, 569–588
Program flow, intuition, 401
Program optimization, process,
563
Programmatic solutions, 355
Proxy, 136, 141
proxy (method), 266, 268
proxy2 (method), 266, 268
proxy2_async (method), 266,
268
proxy_async (method), 266–268
Pseudo-code description, 641
Pseudo-english, 254
Pseudo-Ruby code, 571
Public method, 34
Pure-Ruby parser, 597
Pure-Ruby XML parser, 286
PVM. See Parallel Virtual
Machine
Python, 38, 46, 498. See also
xmlrpclib
API, 143
DB API 2.0, 141, 143
extension, usage. See
Ruby/Python extension
interpreter, 508
program, 509
script, 279
Q
Qt, 127
Queue, 539
Quicksort, 520, 524
algorithm, 519
contrast. See Bubblesort
Quit (menu command), 123
quit_clicked, 122
R
-r debug (option), 17
RAA. See Ruby Application
Archive
Racc, 596–597
command line tool, invoking,
605–606
grammar, 599
Rockit, comparison, 609
usage, 600–605. See also Ruby
Racc-generated parsers, usage.
See Abstract syntax trees
Radiobutton entries, 61
raise (string), 532
rand (function), 638
Random numbers
generator, 313, 467–468
usage, 467–481
RandomR, 467
Rational polynomials, 450
rb_ary_new(), 624
rb_ary_new2(), 624
rb_define_method() function,
617, 632
183Ruby_index.qxd 1/7/02 5:15 PM Page 687
688 Index
rb_float_new(), 661
rb_hash_aref(), 627
rb_iv_set() C API function, 634
RbProf, 525
usage. See Profiling
rb_str2cstr() function, 621
rd (operation), 328
RDBMS, 196
RDE. See Ruby Development
Environment
RDF Site Summary (RSS), 340
library, 397
news channels, displaying,
396–400
RdgBasic, 572
grammar, 587
interpreter, 579
Rockit, contrast, 582
RdgBasicGrammar::Identifier,
582
README
document, 402
files, 8, 560
Recovered structures,
representation, 577–581
Rectangle, 616, 630
class, 632, 634
Rectangle_area(), 633
Recursive file includes, 361
Recursive functions, 558
Red Hat Linux, 69
Regexps, 589, 599
applying, 604
matching, 603
testing, 602
usage, 576–577
Relational database
marshaled objects, storage,
199
Ruby objects, storage,
205–207
Remote Method Invocation
(RMI), 321
Remote Procedure Call (RPC),
263
REMOTE_DSN, 174
repeat parser combinator, 592
Replacement word, 29
replicate_table (method), 175,
176
Report (class),
defining/implementing,
230–233
Reporting system, 582
Responder module, 105
Response creation. See Tk
Result caching, 559
usage decision, 560
ResultMappingFunction
(RMF), 594
Result-set, 187
nonusage/usage. See
Statements
return (string), 532
Return value convention, 265,
266
Reusable components, 401
REVOKE, 148
REXML. See Ruby Electric
XML
Ri. See Ruby Interactive
Richter, Frank, 202
right (argument), 75
Rinda, usage, 328–332
Ring elements, 456
ringo, 347
RMF. See
ResultMappingFunction
RMI. See Remote Method
Invocation
Rockit. See Ruby Object-
oriented Compiler
construction toolKit
Rockit::Parse, 582
ROLLBACK (command), 163
Root tag, 221
RoundObject, 33
Row Processed Count (RPC),
153. See also XML-RPC
representation, 310
row-element (attribute), 189
rowset-element (attribute), 188
Row-tag
atributes, 180
columns interaction, 180
row-to_xml (method), 182
RPC. See Remote Procedure
Call; Row Processed
Count
RSS. See RDF Site Summary
Rubio, J.E., 451
Ruby. See Distributed Ruby
application debugging,
debug.rb usage, 17–22
basics, 47–48, 70–71
C API, 624–628, 658
CGI HTML generation,
357–358
code, 22, 385, 581, 635, 658
block, 142
comparison, 26–37
configuration script, 9
constructs, speed comparison,
544–558
contrast. See Perl
datatypes, 618
distribution, 516
editor support, 10–13
extension module, 614, 635
header file, 649
HTML code generation, 356
IDE support, 10–13
installation, 3–22. See also
Unix;Windows
packages, usage, 7
source code, usage, 5–7
interface, 661
interpreter, 6, 270, 383, 614
layout managers, usage,
50–52, 72–76
library methods, 23
objects, 629
conversion. See Build-in
Ruby object
storage. See Relational
database
obtaining, 69–70
overview, 2–3
parser, 24
parsing
Racc, usage, 596–609
Rockit usage, 581–609
pitfalls, 25–26
sample applications, 54–66,
76–86
scripts, 44
session. See specRuby session
source code, 70
distribution, 47
file, 669
source files, 361
syntax, support, 10
tools, 13–22
usage, 482–488. See also
Database access;
eXtensible Markup
Language; JRuby; K-
Dimensional trees;
Management;World
Wide Web
version, 46
183Ruby_index.qxd 1/7/02 5:15 PM Page 688
Index 689
Ruby Application Archive
(RAA), 3, 38, 127, 441
entry, 140, 300
extension modules, 666
knowledge, 8
usage. See Applications;
Libraries installation
Ruby calling Java, 499–503
Ruby Development
Environment (RDE), 13
Ruby Electric XML
(REXML), 181, 183, 228
usage, 251–253
Ruby, embedding, 666–670
FAQs, 676
introduction, 614
solutions, 674–675
ruby extconf.rb, 424
Ruby, extending
FAQs, 676
introduction, 614
solutions, 674–675
Ruby Interactive (Ri), 13–15.
See also GtkRi
Ruby Object-oriented
Compiler construction
toolKit (Rockit), 570
comparison. See Racc
contrast. See RdgBasic
grammar, defining, 584
usage. See Parser generators;
Ruby
Ruby2Java.rb, 503
Ruby/DBI, 183
architecture/terminology,
understanding, 143–146
installation, 140–141
interactive SQL shell,
development/deploymen
t, 137–139
obtaining, 140–141
programming, 141–174
usage. See Database access
ruby-gtk-0.25.tar.gz, 69
Ruby-implemented code, 564
ruby_init() function, 667
Ruby/LDAP, usage, 195–199.
See also Lightweight
Directory Access
Protocol
Ruby/ODBC, usage. See
Database access
Ruby/Python extension, usage,
507–510
Ruby-Sablotron, 254
RubyWin, 12–13
Ruby/zlib module, 274
RuntimeError, 164, 295
Russell, Sean, 181, 251
S
Sample applications, 45–46. See
also FOX; GTK; Ruby;
VRuby
SandStorm component
architecture, 283–284
SAX. See Simple API for XML
scale (attribute), 170
Schema, 214–217
Scripting
eruby/eRb, usage, 358–359
language, 28
SDBM, 199, 200, 201
Search
engine, 344
performing, 197–198
word, 29
Secure Sockets Layer (SSL),
263, 280
Security, 584
Segfault errors, generation, 234
Seki, Masatoshi, 321
SEL_COMMAND message,
94, 95, 105, 107
generation, 108
sending, 108
SELECT, 148
statement, 179, 182
select_all (method), 142
selectall_arrayref (method), 142
selectmode (attribute), 62
Self-authentication, 333
self.methodName, 25
SELID (function), 95
SEL_LEFTBUTTONPRESS
message, 94
SEL_name, 94
SELTYPE (function), 95
Separators, 61
Server. See mod_ruby;World
Wide Web
architectures, models,
345–347
forking
inclusion, 346
noninclusion, 345–346
pre-forking, inclusion, 347
writing, 345–355
servers (root tag), 221
Server-side code, 331
Server-side logging, 303
Server-side support, 281
server.xml file, 230
service (complex type), 221
Service methods
namespace, 289
names/parameters, 289
Service-handler, 276
Session ID, passing, 379
Sessions, storage, 389
set_column_title (method), 82
setDefaultCloseOperation, 500
set_service_hook (method), 273
setTimeout, 484
setWireDumpDev (method),
296
Shapes module, 616
Shared code, 228–233
Shareware, 5
Shell accounts, 344
Shopping cart links, 393
show_image.cgi, 373
show_image.rbx, 387
showMessageBox, 83, 85
SIAM. See Society for Industrial
and Applied Mathematics
Side effects, 560
SIGHUP signal, 272, 303
Sigmoid, 475
Signal handlers, programming,
71–72
Signal_connect (method), 71
Signals, programming, 71–72
Simple API for XML (SAX)
driver. See XMLParser
interface, 219
SAX/DOM, combination
usage, 220
Simple Mail Transfer Protocol
(SMTP), 341–342
Simple Object Access Protocol
for Ruby (SOAP4R)
clients
exceptions, 295
writing, 289–297
client/server applications,
writing, 286–303
obtaining/installing, 286
services
exceptions, 303
writing, 298–303
types, conversion, 304
usage, 669
183Ruby_index.qxd 1/7/02 5:15 PM Page 689
690 Index
Simple Object Access Protocol
(SOAP), 262
application. See Client/server
SOAP application
arrays, creation. See Multi-
dimensional SOAP
arrays;Typed SOAP
arrays
authentication server,
313–321
datatypes, 303–310
Endpoint URL, 289
envelope, 310
project, 313–321
request, 288
service, URL, 289
type-conversion, 303–310
usage, 284–321. See also
Marshalling format
Simplified Wrapper and
Interface Generator
(SWIG), 614
choice, 666
example. See C
usage, 658–666. See also C++
Single inheritance, 2, 27
Single-level menus, 122
Small, John, 271
Smalltalk, 2, 26
Smith, Kevin, 127
SMTP. See Simple Mail Transfer
Protocol
SOAP. See Simple Object
Access Protocol
SOAP4R. See Simple Object
Access Protocol for
Ruby
SOAPAction field, 289
SOAPArray, 304
SOAP::CGIStub, 298
SOAP::Driver, 293, 308
class, 292
SOAPInt, 304
SOAP::Marshallable, 308
SOAP::RPCServerException,
295
SOAP::RPCUtils.ary2md, 306
SOAP::RPCUtils::MappingRe
gistry::UserMapping
array, extending, 308
SOAP::Server, 308
class, 303
SOAP::StandaloneServer, 298
SOAPString, 304
SOAPStruct, 308
Society for Industrial and
Applied Mathematics
(SIAM), 460
Socket class, 340–341
Software licensing issues, 128
Solaris, 3, 27
Soundex extension, usage,
493–494
Source code, 54, 68, 184, 202,
269. See also C; C++;
GTK; Ruby
distribution. See Ruby
marking, 329
usage. See Ruby
Space complexity, 525
Spacing, 24–25
specRuby session, 67
SpecTcl, 67
GUI builder, usage, 67–68
Speed, improvement, 190
SportsItem, 33
Spreadsheets, 45
SQL. See Structured Query
Language
SQL-query results,
transformation. See
eXtensible Markup
Language
sqlsh.rb, 137
sql_type (attribute), 169
SSL. See Secure Sockets Layer
Standalone, 298
Standalone servers, 263, 270
Standard deviation, 547
Standard profiler
drawbacks, 533
usage, 531–532
start_Host method, 230
stat_bench, 545, 546
reports, 548
state (method), 165
StatementHandle, 144
class, 149, 151, 153, 155
object, 166
returning, 154
support, 155
Statements, execution. See
Structured Query
Language
preparation, usage, 154–156
Result-set
nonusage, 152–153
usage, 153–154
Static language, 3
StdErr, 529, 533
Stdin, 139
std_library, 582
Storage solutions, utilization,
199–207
STR2CSTR, 621, 661
strcasecmp() function, 672
Stream interfaces, 219
string replace (application), 28
string system.methodHelp(strin
g methodName), 269
StringReplace
invoking. See Java
Java version, 31
program, 29
Perl version, 32
Strings, 28, 165. See also C
concatenation, 549–551
datatype, 262
handling, 581
literals, 573
object, 172
parser generator, 592
representation, 169
usage, 620–623
StringScanner, 602
String-to-symbol mappings,
526
Struct, returning, 308
Struct::Human_type, 310
Structured Query Language
(SQL)
queries, 180
execution, 183
results, retrieval, 156–162
script, 362, 369
shell, 138
SQLite, 136, 141
SQLRelay, 136, 141
SQLSTATE code, 165
statements, 187. See also Data
Control Language; Data
Manipulation Language
preparation/execution,
148–156
Sub-classes, 34
Sub-parsers, marking, 585
subTree, 85
Subtrees, usage, 527
Suketa, Masaki, 484
Sun Microsystems, 67
SUnit, 9
183Ruby_index.qxd 1/7/02 5:15 PM Page 690
Index 691
SWIG. See Simplified Wrapper
and Interface Generator
SWin
extensions, usage, 111–127
obtaining, 112
toolkit, 45
SWin::Window class, 123
sybase-ctlib, 136
Symbolic constants, 83
usage, 72
Symbols, 590
generator, 591
Synchronization code, 539
Synchronous method, 266
Syntactical analyzers, 581
Syntactical shortcuts, 556
Syntax
highlight, 389
highlighting, support, 10
style, guide, 22–25
support. See Ruby
Syntax trees
class, 582
usage. See Abstract syntax
trees
System fonts, 51
System-dependent shared
library, 657
system.multicall (method), 268
T
Tab completion, 16
module, 17
Table data, copying. See
Databases
Table schemas, emitting, 190
Table-driven parsers, 570, 605
Tags, supplying, 190
takeValueForKey, 405
Tarball, 6
Target-message system, 93
Targets, 93–95
Tateishi,Takaaki, 127
Tatsu,Akimichi, 475
Tatsukawa,Akimichi, 468
Tcl/Tk, 49
application, 67
TCP/IP. See Transmission
Control
Protocol/Internet
Protocol
TCPServer, 271, 321, 341
TCPSocket, 341
TCPSocketPipe, 262
Telnet, 341, 344
Template
extension, usage. See
HyperText Markup
Language
generators, 38
Templating, 359–361
toolkit, usage, 379
Term class, 606
Testing set, 476
Text
editors, 14, 45
fields, 45, 114
processing tools, usage,
493–498
TEXT column type, 177
TextPad, 12
Theme-able toolkits, 128
ThinkPad 600E (IBM), 546
Third-party extensions, 614
Thomas, Dave, 3
Three-dimensional bar-
diagram, 441
Time class, 638
TIME (constant), 534
time= (method), 152
Timing, inaccuracies, 544
Title method. See TkRoot
title/geometry method
Tix, usage, 68
Tk
basics, 47–48
callbacks, response creation,
48–50
events, response creation,
48–50
extensions, obtaining, 68
layout managers, usage, 50–52
module, 60
obtaining, 46–47
ports, 49
sample application, 54–66
standard, 44
support, 7
toolkit, 45
version, 46
Tk Interface Extension, 68
TkCanvas, 50
TkEntry class, 47
Tk.getOpenfile, 64
Tk.getSaveFile, 64
TkGrid.forget, 64
TkGrid.slaves, 64
TkListbox, 50
instance, 62
Tk.mainloop, 48
TkMenu, 60
TkMenubutton, 60, 61
Tk.messageBox module
method, 65
TkRoot title/geometry
method, 60
TkText, 50
tk-xmlviewer.rb, 46, 54
TNS. See Transparent Network
Substrate
Tokens, 585, 599–600
parsers, 585
specification, 589
types, 604
Toki,Yoshinori, 347
Tolerance, 479
Toolkits. See GUI toolkits;
Object-oriented toolkit
usage. See Free Objects for X;
GTK+
Tools
FAQs, 589–590
introduction, 424
solutions, 587–589
usage. See Calendar; Date;
Object-oriented
programming;Text
top (argument), 75
Top-level class, 616
Top-level main window, 23, 70
Top-level root window, 51
Top-level window, 47, 88
trace.log file, 168
Tracing, 584
level, 166
Trailing comment, 23
Training data, 476
Transactions
behavior. See Disconnect
performing, 162–164
Transformers, 589. See also
Parser
Transmission Control
Protocol/Internet
Protocol (TCP/IP), 136
connections, 174, 278
TCP/IP-based services,
monitoring, 262
Transparent Network Substrate
(TNS), 137
TreeController, 410–413
TreeControllerMixin, 413
TreeModel, 410, 411, 413
Trees. See K-Dimensional trees
dimensionality, 643
183Ruby_index.qxd 1/7/02 5:15 PM Page 691
692 Index
interfaces. See Object tree
interfaces
specification, 589
usage. See Abstract syntax
trees
TreeView component,
implementation, 410–419
Triangle, 616
class, 632, 634
TupleSpace, distribution, 330,
331
Two-element array, 122
Type mapping, changing. See
Default type-mapping
Type name, 307
finding, 308
Type namespace, 307
Type-conversion. See Simple
Object Access Protocol
function, 661
macro, 661
Typed SOAP arrays, creation,
306
type_name (attribute), 169
Typing. See Dynamic typing
U
UMINUS, 598
Unices system, 27
Unicode, 581
Unicode Transformation
Format (UTF), 241
UTF-8/UTF-16, 240, 396
Uniform Resource Indicator
(URI), 218, 280, 330
Uniform Resource Locator
(URL), 218, 372, 416
arguments, 388
rewriting, 379
unique (attribute), 170
UNIQUE_ARG_INSPECTS
(constant), 534
UNIQUE_ARRANGEMENT
S (constant), 534
Unix, 27
development toolbox, 5
file system, 410
flavors, 3
machines, 12
operating system, 49
platform, 127
Ruby installation, 5–7
users, 141
XMLParser installation,
234–240
unscanned_host (method), 230
UPDATE, 148
URI. See Uniform Resource
Indicator
URL, 187. See also Uniform
Resource Locator
User interface, 88
controls, 115
creation, 87
objects, 45
windows, 45
User intervention, 44
user (parameter), 145–146
User-defined datatypes, 278
creation, 306–308
UserLand, 285
Username, 313
UTF. See Unicode
Transformation Format
V
validateAuth (method), 315,
318
Validation data. See Final
validation data
Validation, XML-Schemas
(usage), 216–218
VALUE, 633, 634
valueForKey, 405
van Beers, Martijn, 87
van de Ven, Michael, 347
van der Zijp, Jeroen, 90
Variable length records, 201
Variables. See Block local
variables; Iterators; Local
variables
predeclaring, 551
substitution, default values,
361
usage, 551
VCL. SeeVisual Component
Library
Vector class, 614
Vertical packing box, 72
Vi iMproved (VIM), 12, 14, 389
VIM. SeeVi iMproved
Virtual Private Network
(VPN), 174
Visual Component Library
(VCL) (Delphi), 128
Visual SlickEdit, 12
Visual Tools, 26
Voice sample, 425
VPN. See Virtual Private
Network
VRForm, 112, 118
class, 123
VRGridLayoutManager, 116,
117
VRGridLayoutManager#addC
ontrol, 118
VRGridLayoutManager#setDi
mension, 117
VRHorizLayoutManager, 116,
117
VRHorizLayoutManager#addC
ontrol, 117
VRHorizTwoPane module, 121
VRLocalScreen, 120, 121
VRMenuUseable module, 121
VRPanel, 117, 118
VRScreen, 112, 121
VRuby
API, 111
extensions, usage, 111–127
library basics, 112–116
obtaining, 112
sample application, 120–127
toolkit, 45
version, 46
vruby-xmlviewer.rb, 46, 120
VRVertLayoutManager, 116,
117
VRVertLayoutManager#addCo
ntrol, 117
W
W3C. See World Wide Web
Consortium
Wall, Larry, 32
Watch-point, 20
Web server, 187
Web Service Description
Language (WSDL), 289
Web services
FAQs, 337
introduction, 262
project, 274–276
solutions, 336
WebObjects (Apple), 400
Websphere Application Server,
285
Well-formed documents,
checking, 241
while-loops, 552
White space, creation, 24
Whitespace
issues, 25–26
removal, 361
Wiki format, 11
183Ruby_index.qxd 1/7/02 5:15 PM Page 692
Index 693
Wilson, Mike, 344
Win32, 3
API, 111, 112, 614
Win32OLE, 484
Window decorations, 105
Windows
system, Ruby installation,
7–10
usage, 482–488
Windows Scripting Host
(WSH), 482
WinOLE, usage, 482, 484–488
WinRAR, 241
WinZIP, 241
Word document, 487
World Wide Web Consortium
(W3C), 285
World Wide Web (WWW /
Web)
application development, 355
connection, Ruby (usage),
340–355
development. See Object-
oriented Web
development
FAQs, 422
interface, development,
372–379
introduction, 340
Ruby, usage, 355–361
servers, 347–355, 416. See also
HyperText Transfer
Protocol
services, 262
solutions, 420–421
Worst-case complexity,
523–525
Wrapper, 241
WSDL. See Web Service
Description Language
WSH. See Windows Scripting
Host
WStyle::BS_PUSHBUTTON,
117
WStyle::WS_VISIBLE, 117
wwwd, 347
wwwsrv.rb, 347
X
X11 event types, 49
Xerox Parc, 539
XML parser, choice, 288
XMLParse, 253
XMLParser, 219, 228, 286, 288.
See also eXtensible
Markup Language
SAX driver, 288
XML-RPC
clients, writing, 264–270
datatypes, 276–278
messages, dumping/loading,
278–280
performance comparisons,
281–283
servers. See Introspection-
enabled XML-RPC
server
introspecting, 268–270
writing, 270–273
services, securing, 280–281
usage, 262–284
xmlrpc4r
configuration, 263–264
obtaining/installing, 263
XMLRPC::Base64 object, 277
XMLRPC::BasicServer
superclass, 271
XMLRPC::CGIServer, 270
XMLRPC::Client
class, 265
object, 266
XMLRPC::DateTime, 277
XMLRPC::FaultException,
266, 277
xmlrpclib (Python),
communication, 279–280
XMLRPC::Marshallable
module, 278
XMLRPC::ModRubyServer,
270
XMLRPC::Proxy object, 267,
268
XMLRPC::Server, 270
class, 271
Xmlscan, 250
XMLStreamParser, 282
?xml-stylesheet?, 188
media tag, recognition, 190
XMLTreeParser, 282
XMLViewer, 105
class, 64, 83
definition, 81
method, 64
subclass, 81
XMLViewerForm class, 120
XMLViewer::ID_ABOUT, 105
XMLViewer::ID_TREELIST,
107
xopts (argument), 75
XPath, 214, 218
XPointer, 214
xscrollcommand (method), 50
xsi:type (argument), 308
xsl:if tag, supplying, 190
XSLT. See eXtensible Stylesheet
Language Transformation
XSLT4R. See eXtensible
Stylesheet Language
Transformation
XSQL, 183
class, 187
file, connections, 190
object, 188
xsql directory, 182
xsql:for-each-row tag,
supplying, 190
xsql:param-for-stylesheet tag,
supplying, 190
xsql:query tag, 183, 187, 188
extension, 190
XSQL-XML document, 184,
188
Y
Yacc. See Yet Another Compiler
Compiler
Yamada,Akira, 397
Yet Another Compiler
Compiler (Yacc), 596
yield, usage, 36
Y-intercept, 478
yopts (argument), 75
Yoshinori,Toki, 460
yscrollcommand (method), 50,
62
Z
Zip archive, 6
183Ruby_index.qxd 1/7/02 5:15 PM Page 693
SYNGRESS SOLUTIONS…
solutions@syngress.com
Bluetooth Application Developer’s Guide
This book will teach you what Bluetooth technology is all about and show you
how to write Bluetooth applications for several popular operating systems. This
is a technical book, and it assumes that the reader has a solid background in
application development and a reasonable understanding of the issues involved
in creating communications applications.
ISBN: 1-928994-42-3
Price: $49.95 US, $77.95 CAN
AVAILABLE NOW
ORDER at
www.syngress.com
.NET Mobile Web Developer’s Guide
The .NET Mobile Web Developer’s Guide provides a solid foundation for
developing mobile applications using Microsoft technologies. With a
focus on using ASP.NET and the .NET Mobile Internet Toolkit, .NET
Mobile Web Developer’s Guide will give you the insight to use Microsoft
technologies for developing mobile applications. This book will also show
how to avoid having to customize the output of your application.
ISBN: 1-928994-56-3
Price: $49.95 US, $77.95 CAN
AVAILABLE NOW
ORDER at
www.syngress.com
Palm OS Web Application Developer’s Guide
With an 80% hand-held device market-share, the Palm Organizer is the
platform of choice for Mobile Internet application developers. The latest
generation of devices (Palm VII and above) are engineered to support
direct browsing of Internet sites through Palm Query Applications
(PQAs), which can only be developed with Web Clipping.
ISBN: 1-928994-32-6
Price: $49.95 US, $77.95 CAN
AVAILABLE NOW
ORDER at
www.syngress.com
183Ruby_index.qxd 1/7/02 5:15 PM Page 694
