Travel Planner User Manual
User Manual: Pdf
Open the PDF directly: View PDF ![]() .
.
Page Count: 12

Travel Planner
User Manual
MAREK GRZYBEK
Table of Contents
1. Sign up ............................................................................................................................................. 2
2. Login ................................................................................................................................................ 4
3. Dashboard ....................................................................................................................................... 4
4. Trips Calendar ................................................................................................................................. 8
5. User Management .......................................................................................................................... 9
6. Admin panel .................................................................................................................................. 10
1. Sign up
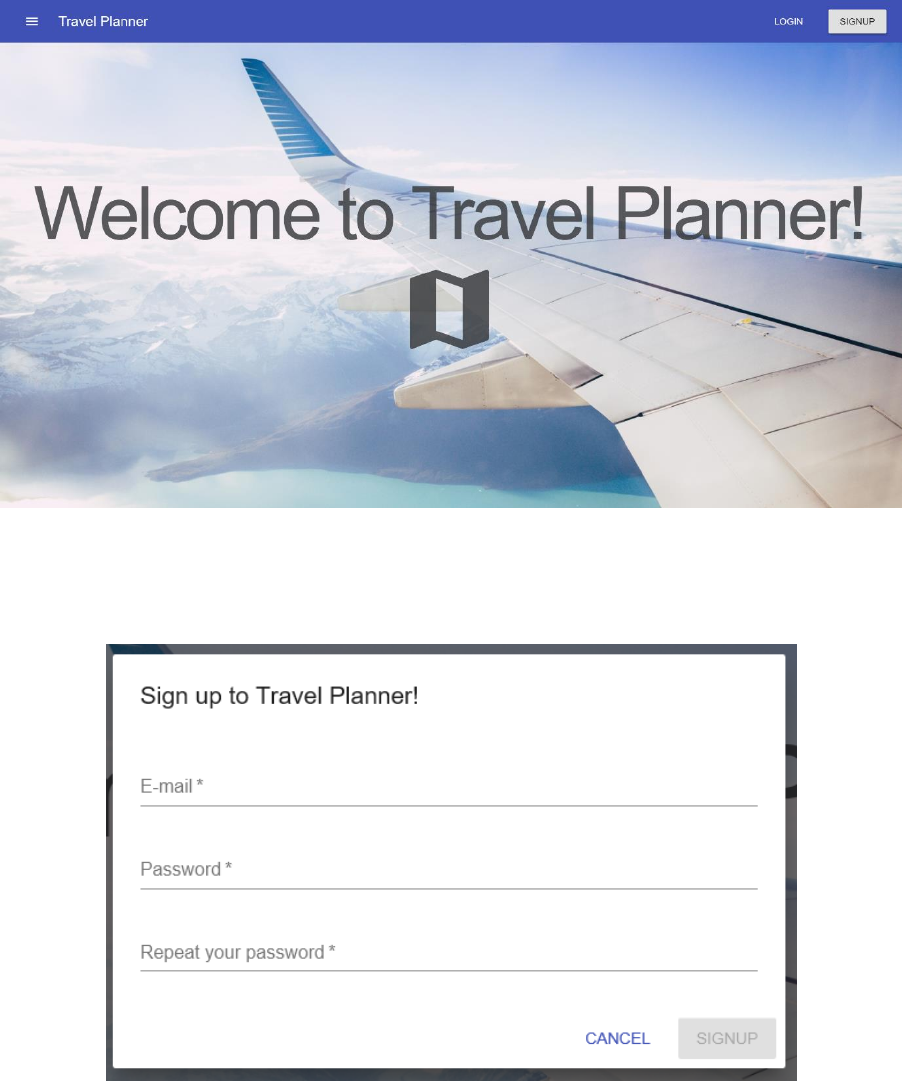
When first visiting the Travel Planner website you are being welcomed by the Landing page showed
below. You can sign up using the button in the top right corner.
After clicking sign up button, a modal window appears where you can fill in all the necessary
information to sign up.
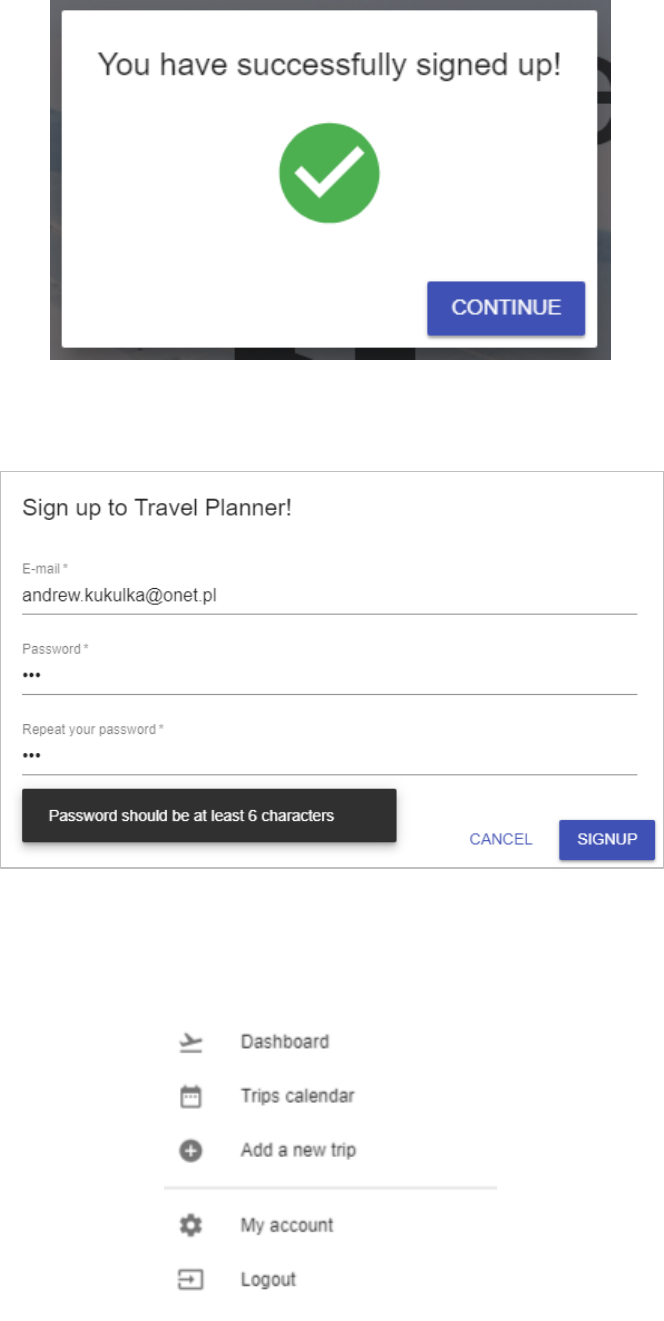
If the data you provided is valid, you will see a sign-up confirmation. Now you can use the
application.
In case of any errors, they will be displayed in the lower left corner of the modal.
After you sign up, you can navigate throughout the application using side menu on the left. It opens
by clicking the so-called hamburger menu on the top bar.
2. Login
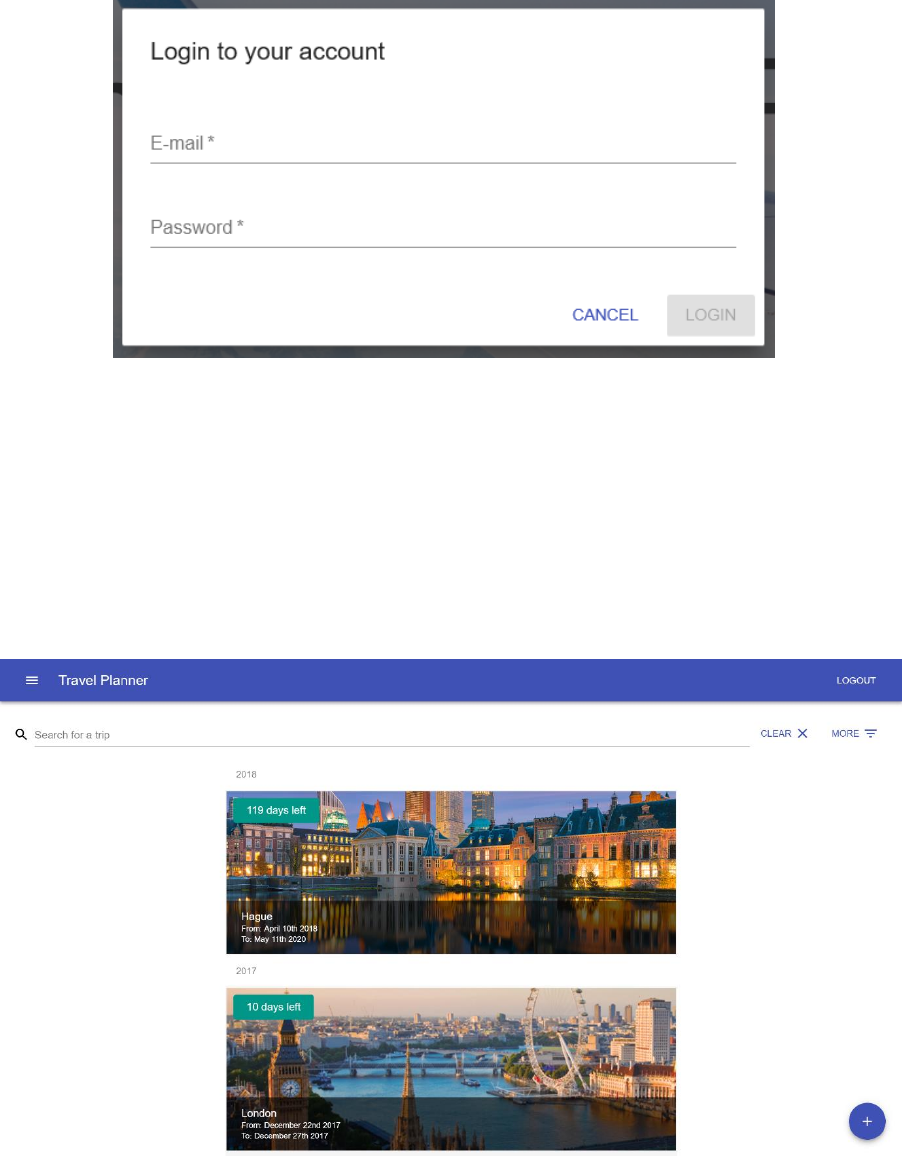
You can log in using the button in the top right corner or side menu on the left. The following modal
window will appear:
After you log in you can use the side menu to navigate throughout the application.
3. Dashboard
Dashboard presents you the list of all your trips. From here you can add new trips, edit or delete the
existing ones and see at glance what is coming.
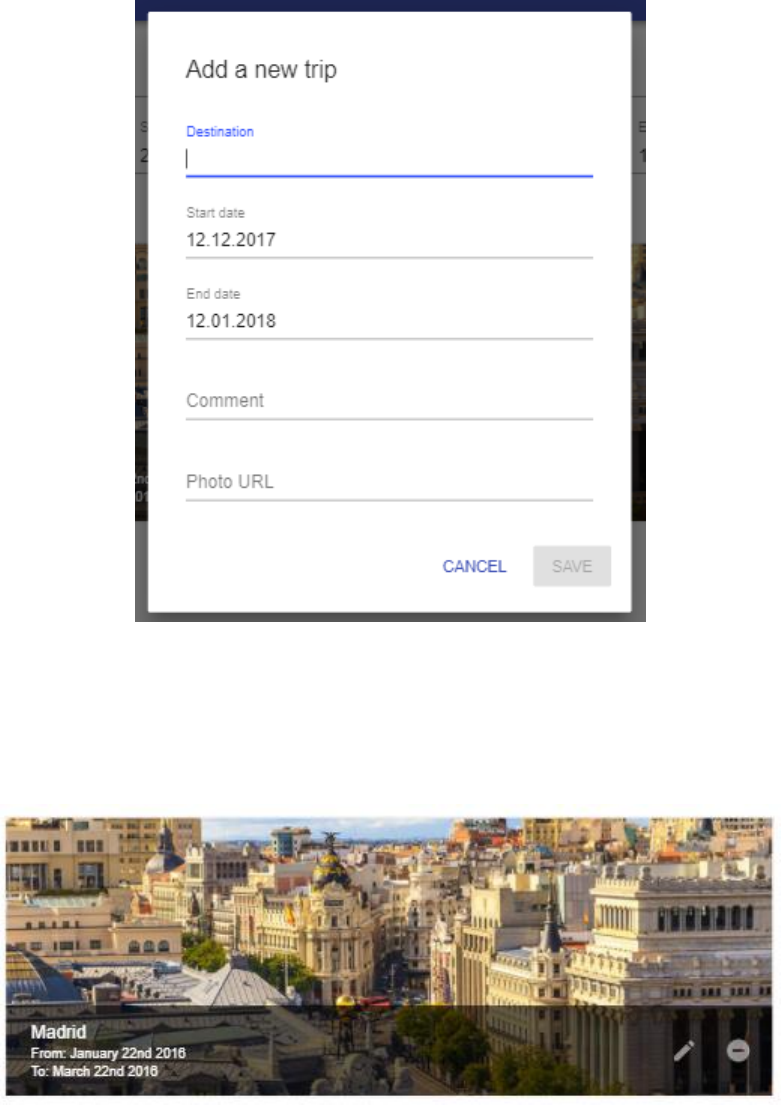
To add a new trip, click the + button on the bottom right corner or choose the appropriate option
from the side menu. A modal window with input fields will appear
After you fill everything in, you can click Save button to add a new trip.
To edit an existing trip, hover your cursor over the trip tile. You’ll see action button on the bottom
right. Click the pencil icon to open trip edit modal.
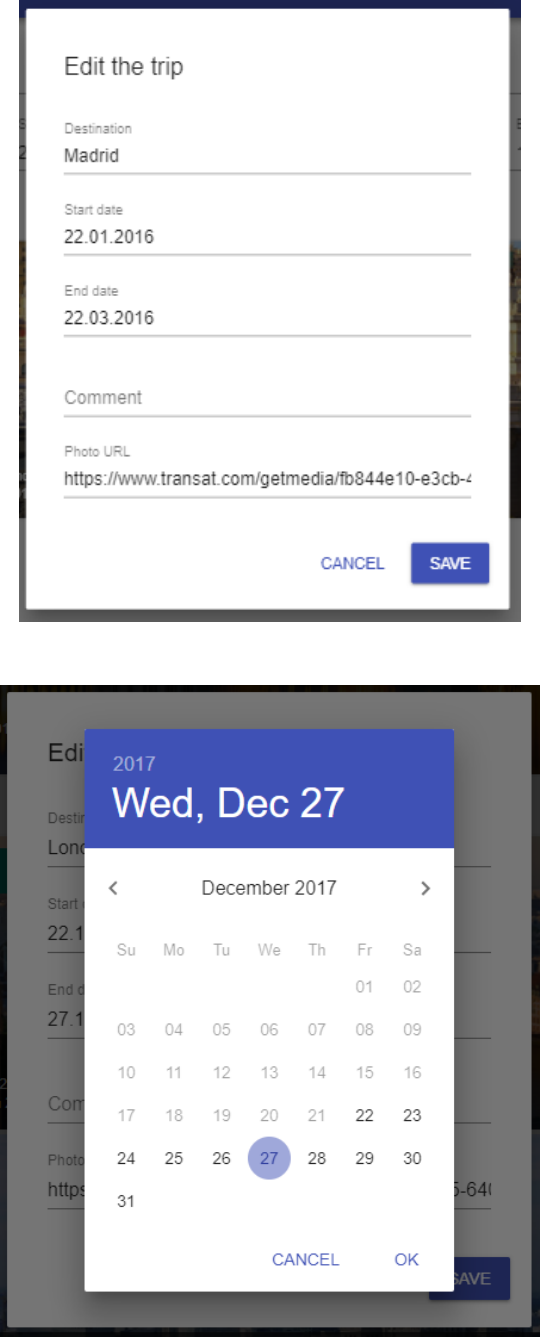
The form contains the same inputs as the Add Trip form.
To edit a date, simply click the date field and a date picker will appear.
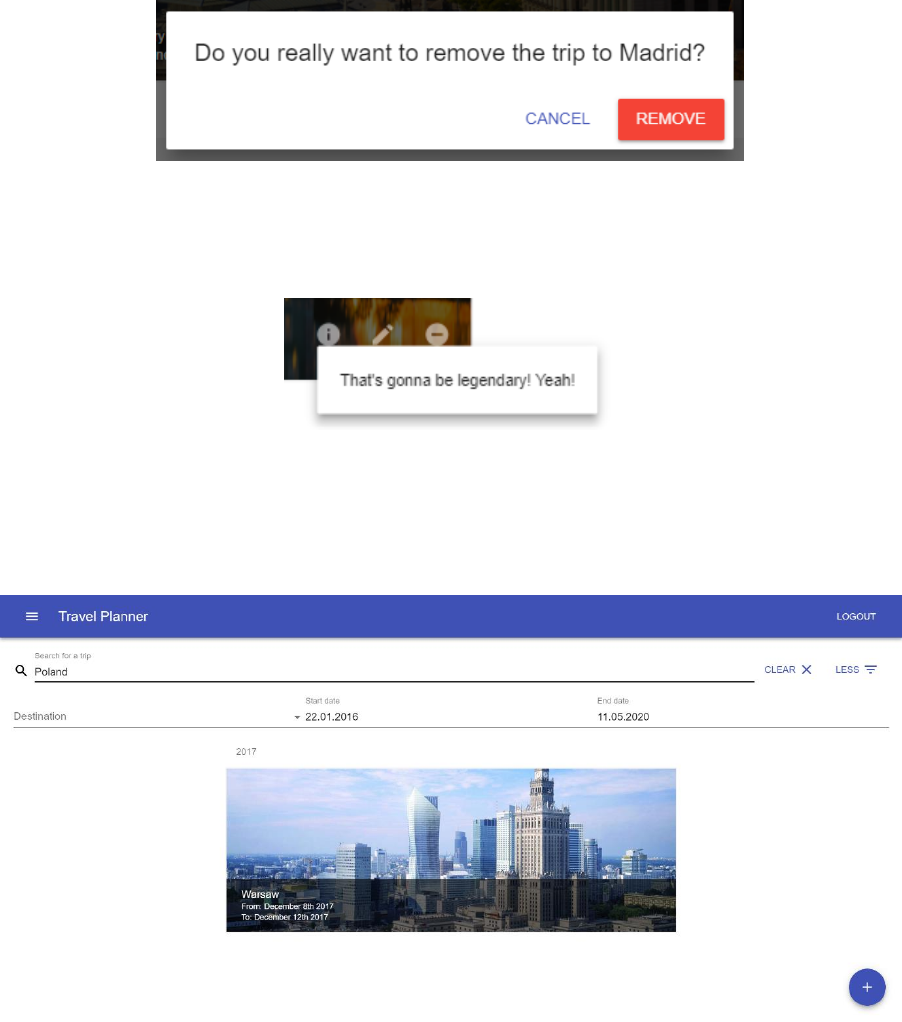
To remove a trip, click the Remove icon next to the Edit icon. You need to confirm your action to
finish the operation.
If a trip contains a comment, an additional icon appears next to the Edit icon. After clicking it a
popover with the comment’s content appears.
The dashboard also contains trips filter so that you can faster find what you are looking for. Typing in
the main text field searches trip’s destination and comments values. Additionally, you can use extra
filters to perform more detailed and customized searches.
4. Trips Calendar
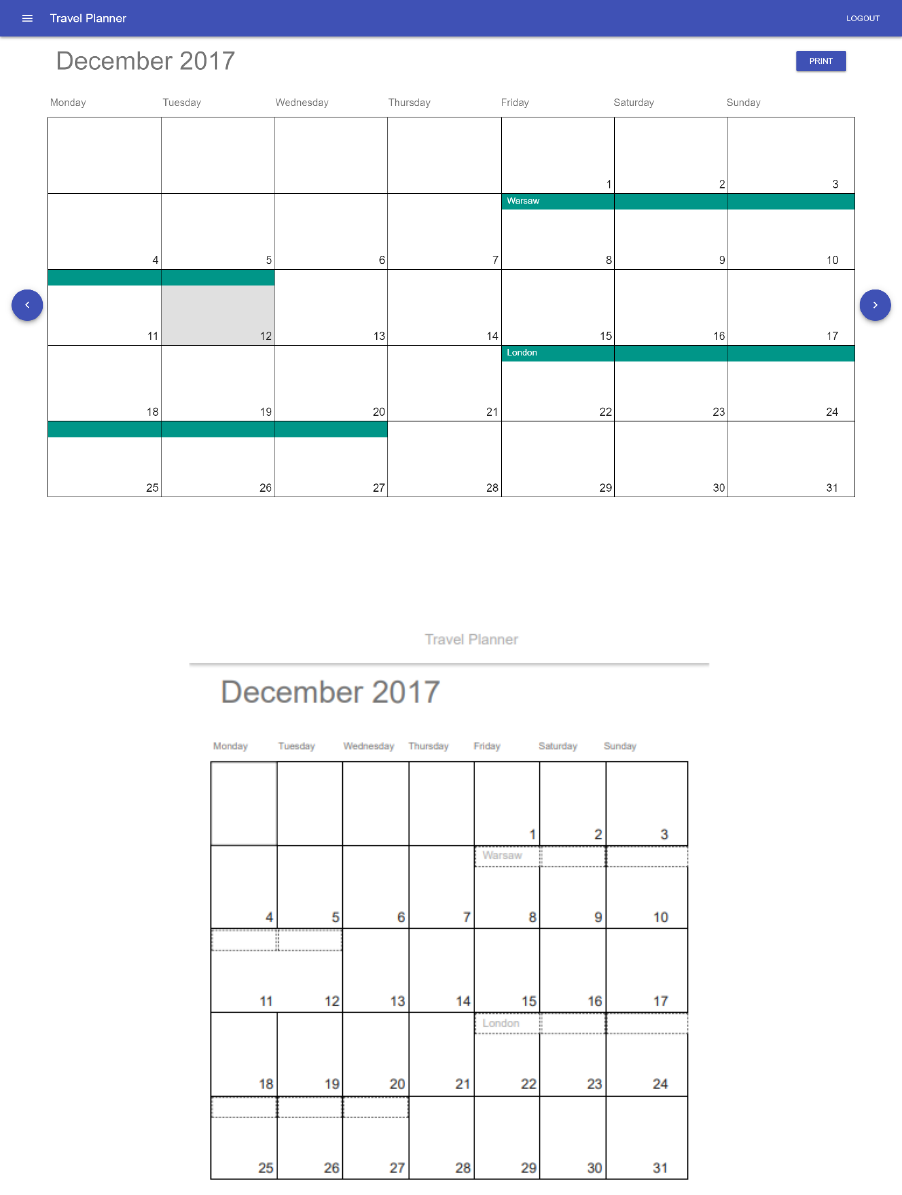
To explore your trips in a calendar view, there is a special page called Trips calendar. There you can
see all the trips in a month. To change months simply use arrow buttons on the left and right of the
screen
To print the trips plan for a given month click the Print button on the top right corner of the view. A
print prompt with preview will appear.

5. User Management
If you have a special role of user manager, you have access to the user management page. To access
it simply click the Manage users option in the side menu.
The user management page looks as follow:
From there you can add, edit and remove users.
To edit a user, click the pencil icon on the right.
You don’t have to fill all fields, only non-empty fields will be applied as changes.
To add a new user, you should click the button on the bottom of the page. A modal window very
similar to Edit one will appear.
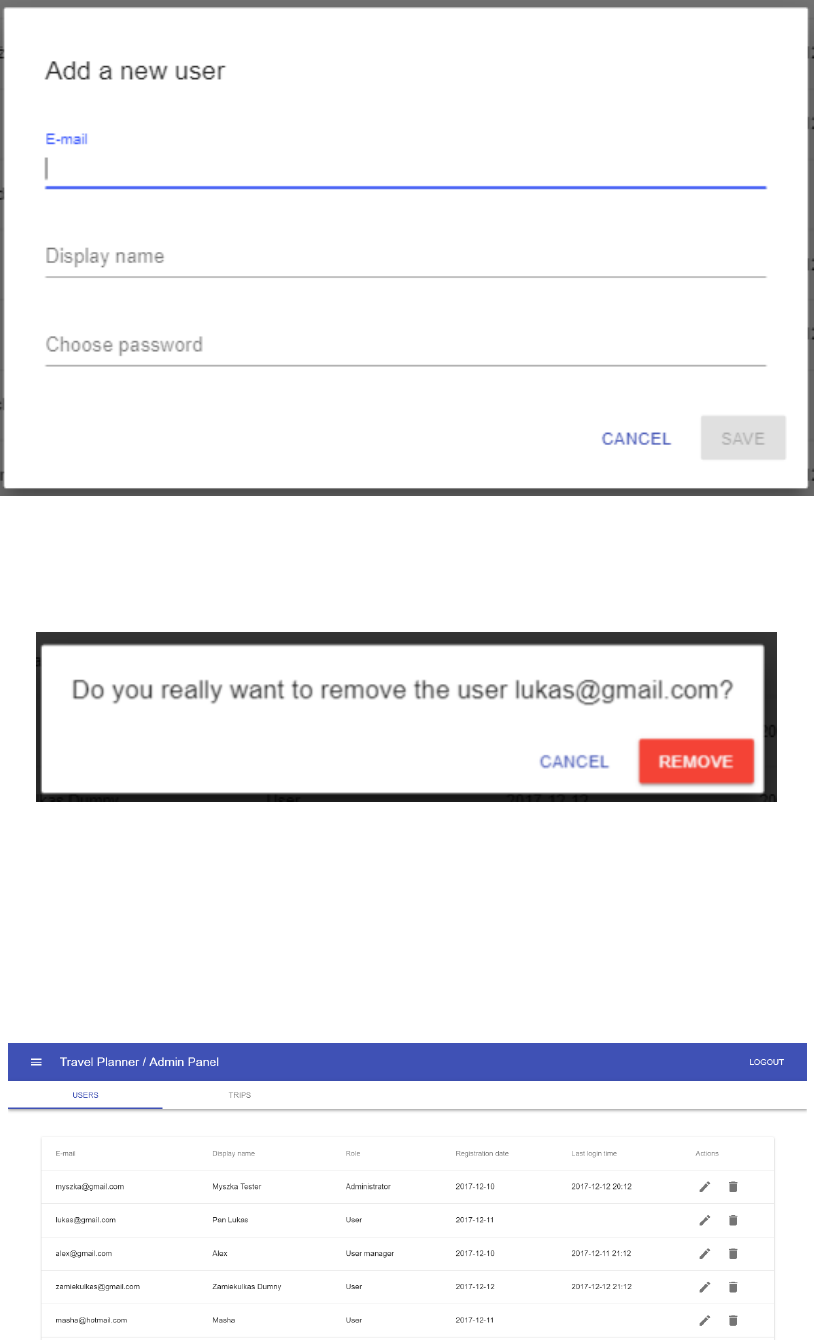
To remove a user, click the bin icon on the right. A confirmation alert appears where you can submit
the operation.
6. Admin panel
If you have an admin role, you have access to the admin panel page. This gives you full control over
the application. All functionalities are divided into tabs on the top, just below the main top bar. The
Users tab is very similar to the user management page described in the previous section.
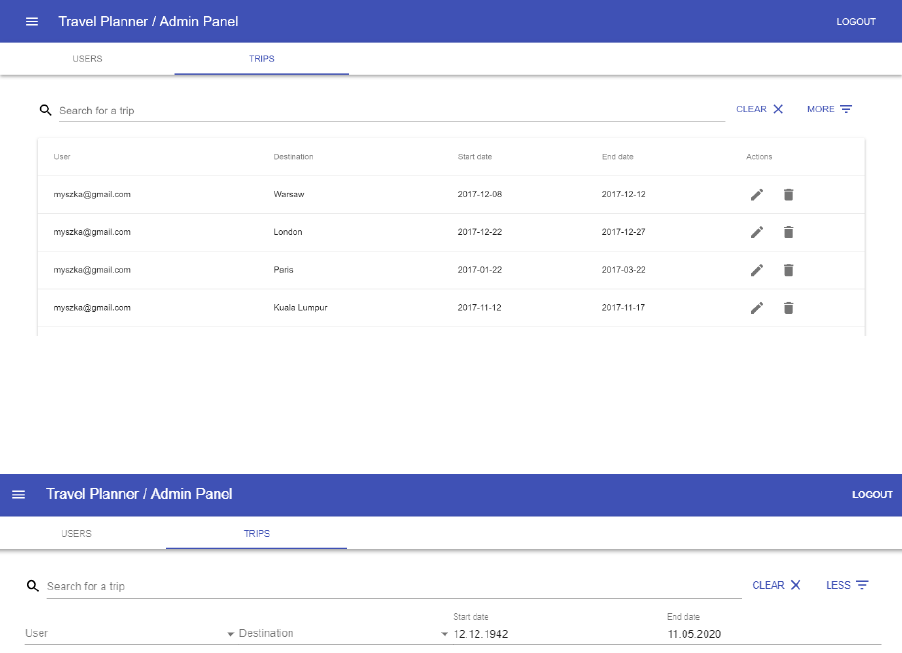
The Trips tab contains a list of all trips from all users. User can perform all the operations like adding,
editing and removing trips. The flow is very similar to the operations on you own trips in the
Dashboard view.
You can also filter the trips using filter bar on top. It is also very similar to the one from Dashboard
page, except it also allows filtering by user.
