User Manual Android Team4
User Manual: Pdf
Open the PDF directly: View PDF ![]() .
.
Page Count: 51

Android
User Manual

Log In

To login, enter given username and password, then press login

Clerk

1. Check
Notifications
To check notifications, first click the notifications button on the
dashboard
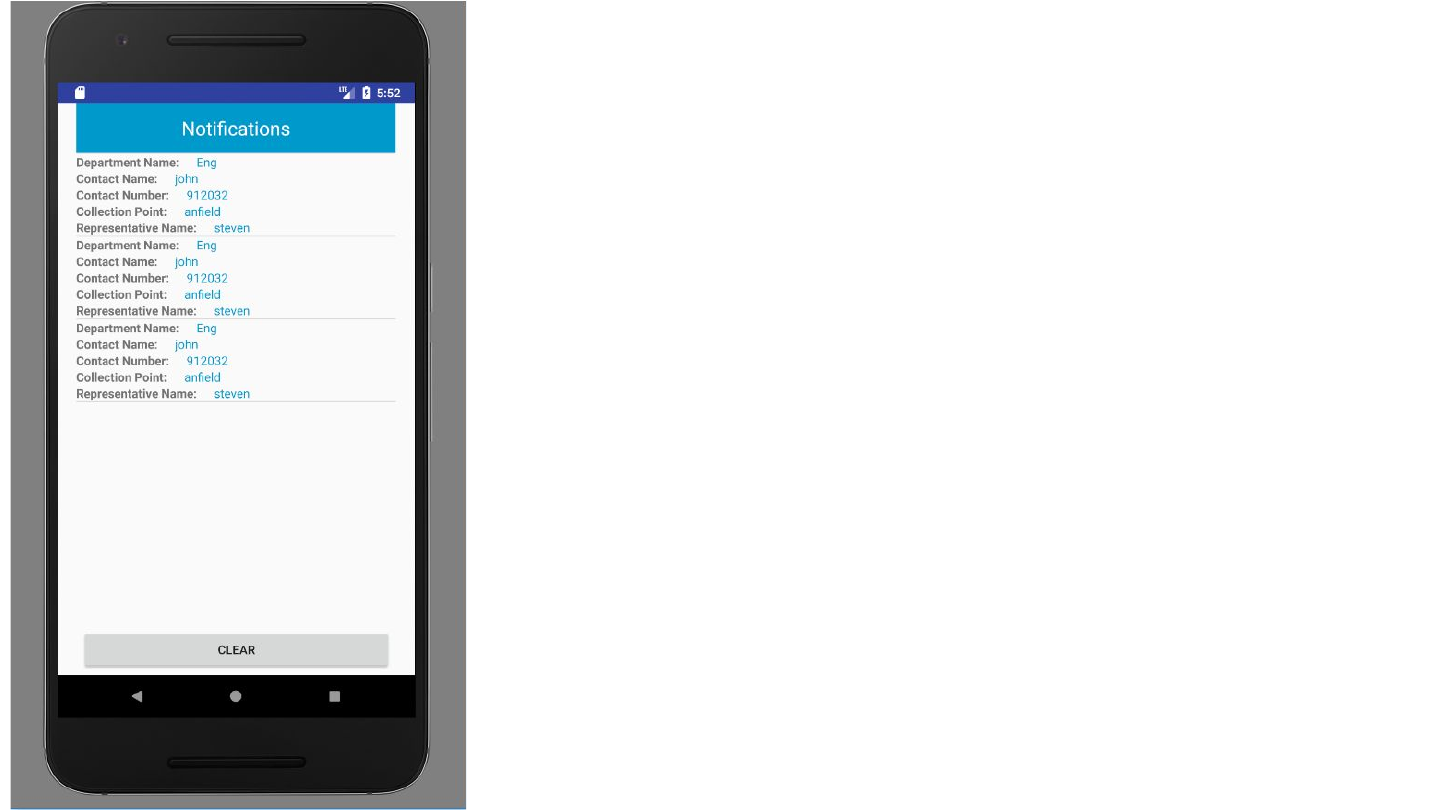
1. Check notifications
continued..
A list of notifications will be displayed
To clear the notifications, click the ‘clear’
button at the bottom of the screen

2.View Department
List
To view department list details, first click on the ‘department list’
button on the dashboard

2. View Department List
continued..
A list of the departments and their details
will be displayed.
The search function at the top of the
screen can be used to search for any of
the desired details.

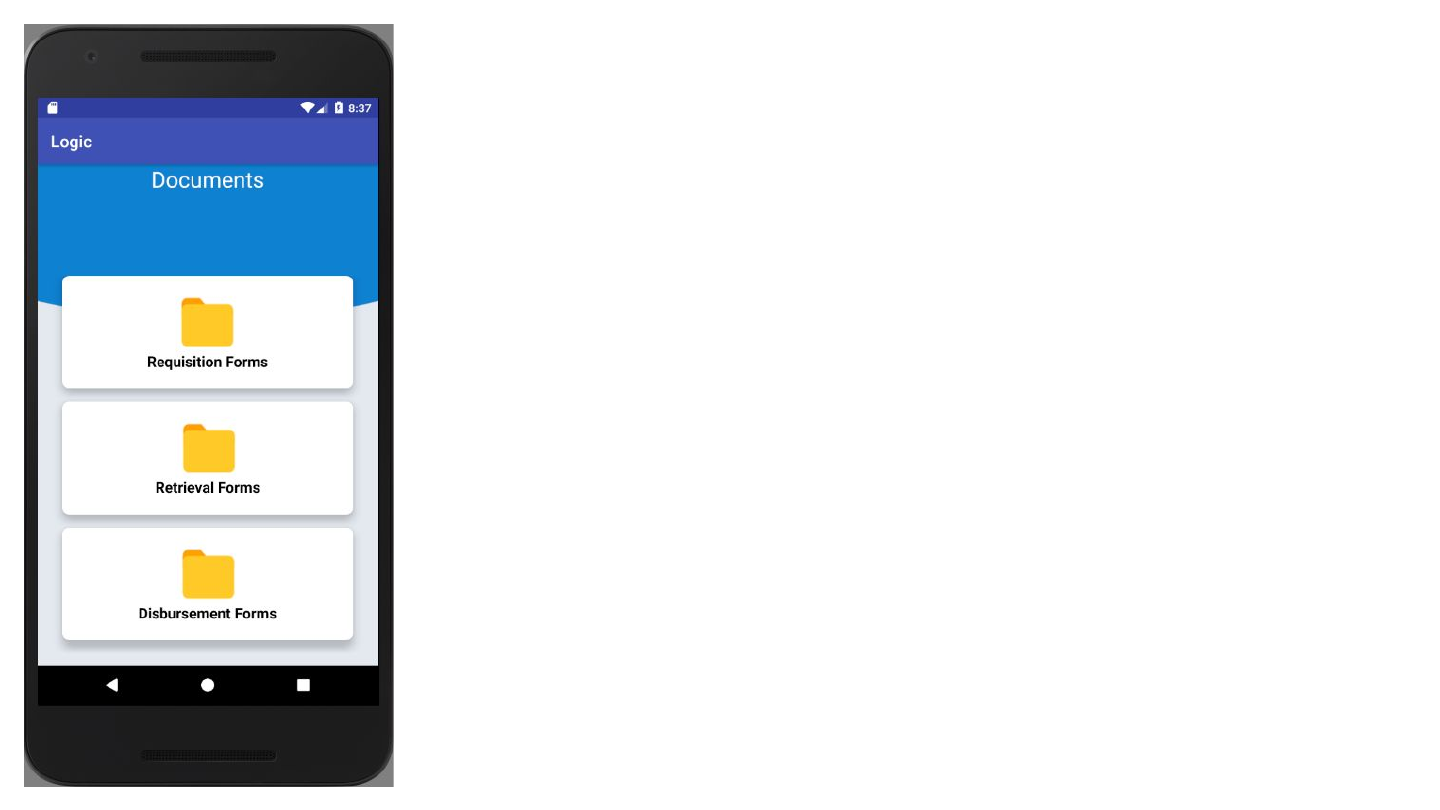
3. Forms
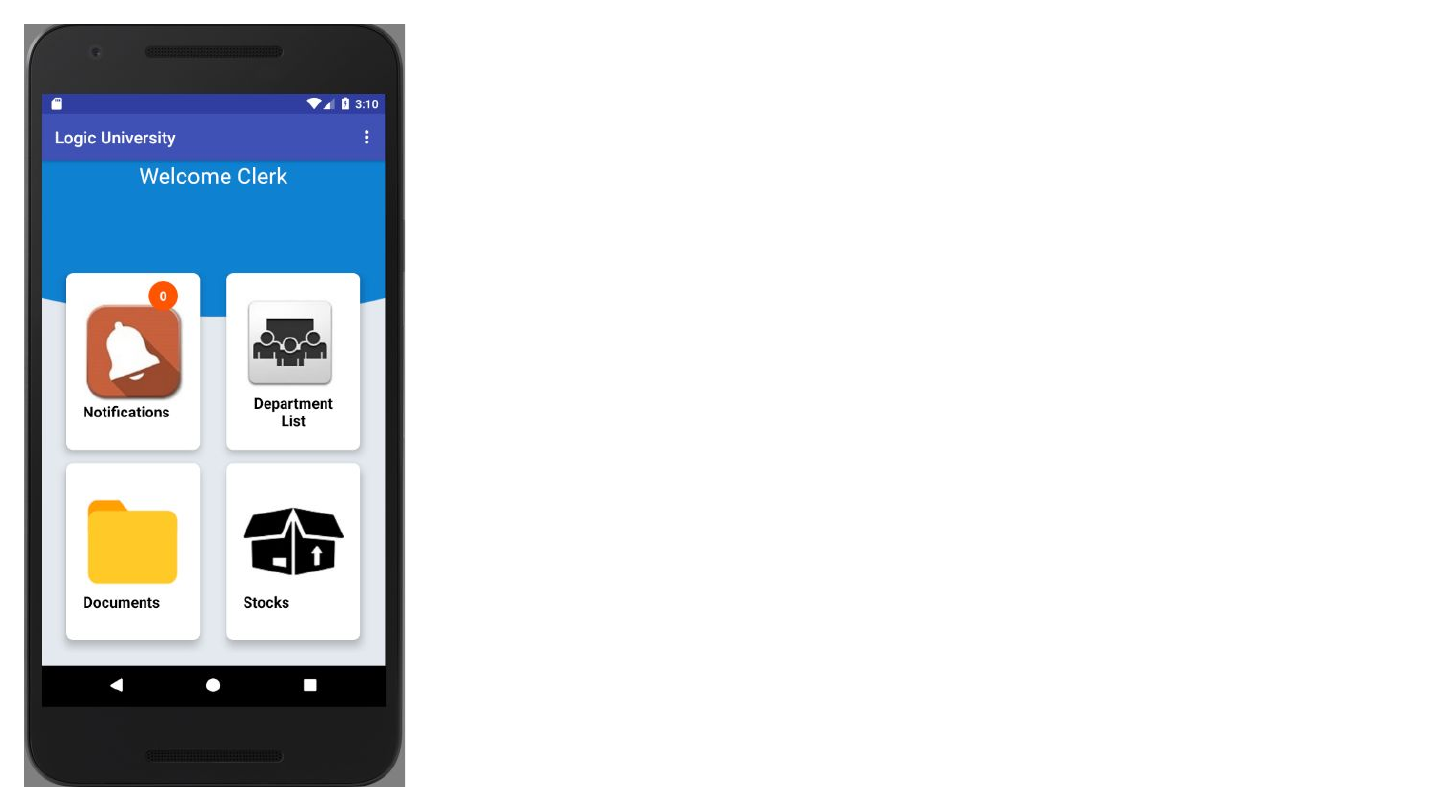
3. View Forms
To view all forms,, first click on the ‘documents’ button on the
dashboard

3.1.View Requisitions
Click on Requisition Forms

3.1.View Requisitions
continued..
Click on a Requisition Form of choice.
Search for the required Requisition Form
in the search field.

3.1.View Requisitions
continued..
The details of the chosen form are as
shown.
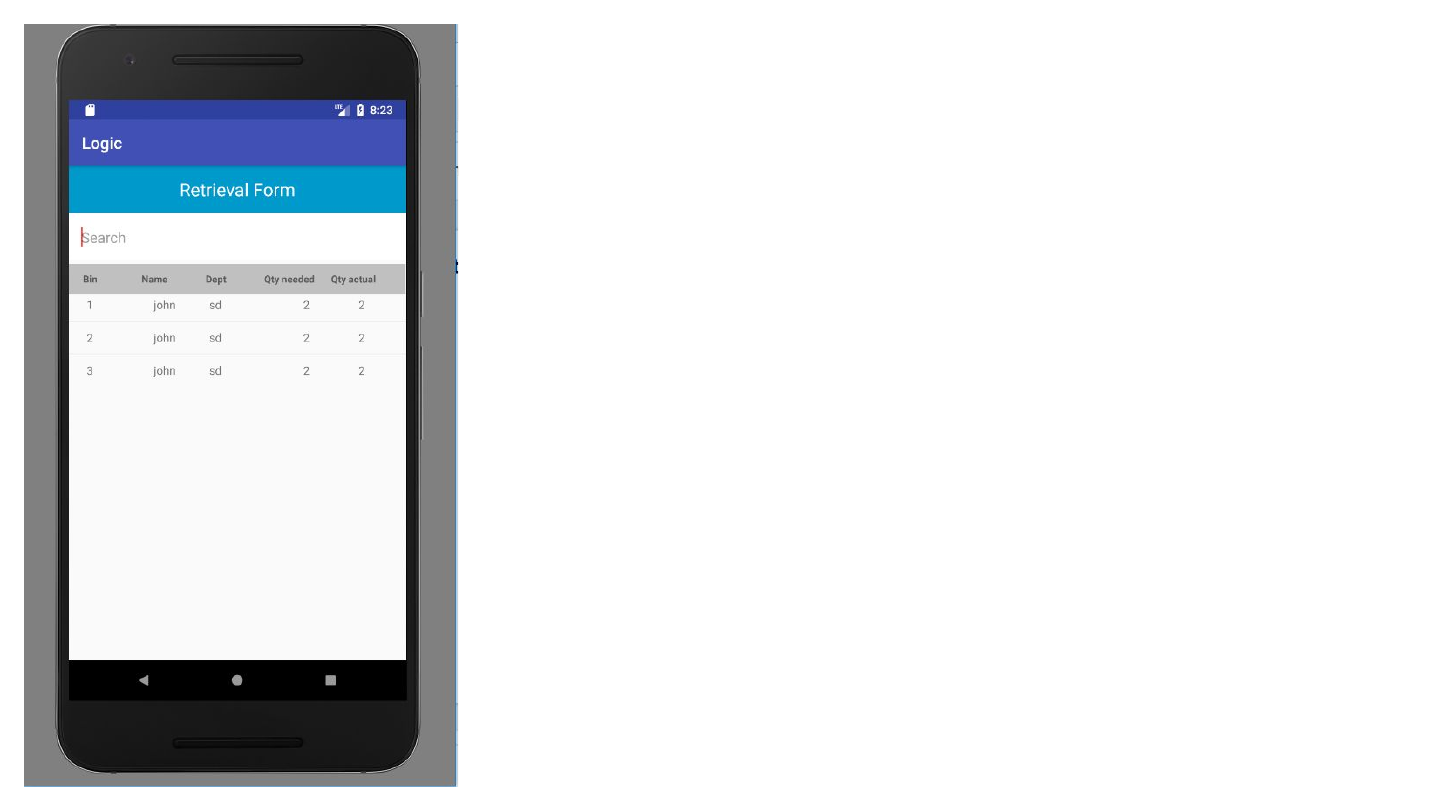
To view Retrieval Forms, first click on the
‘Retrieval Forms’ button on the dashboard
3.2.View Retrieval Forms

Click on a Retrieval form list item
Retrieval form can be searched for in the
search field.
3.2.View Retrievals
continued..
Retrieval form list items are shown.
Enter the form field details in the search
field to search for items.
3.2.View Retrievals
continued..

Click on disbursement forms
3.3.View disbursement forms

Click on disbursement list item
Search for the required disbursement
form in the search field
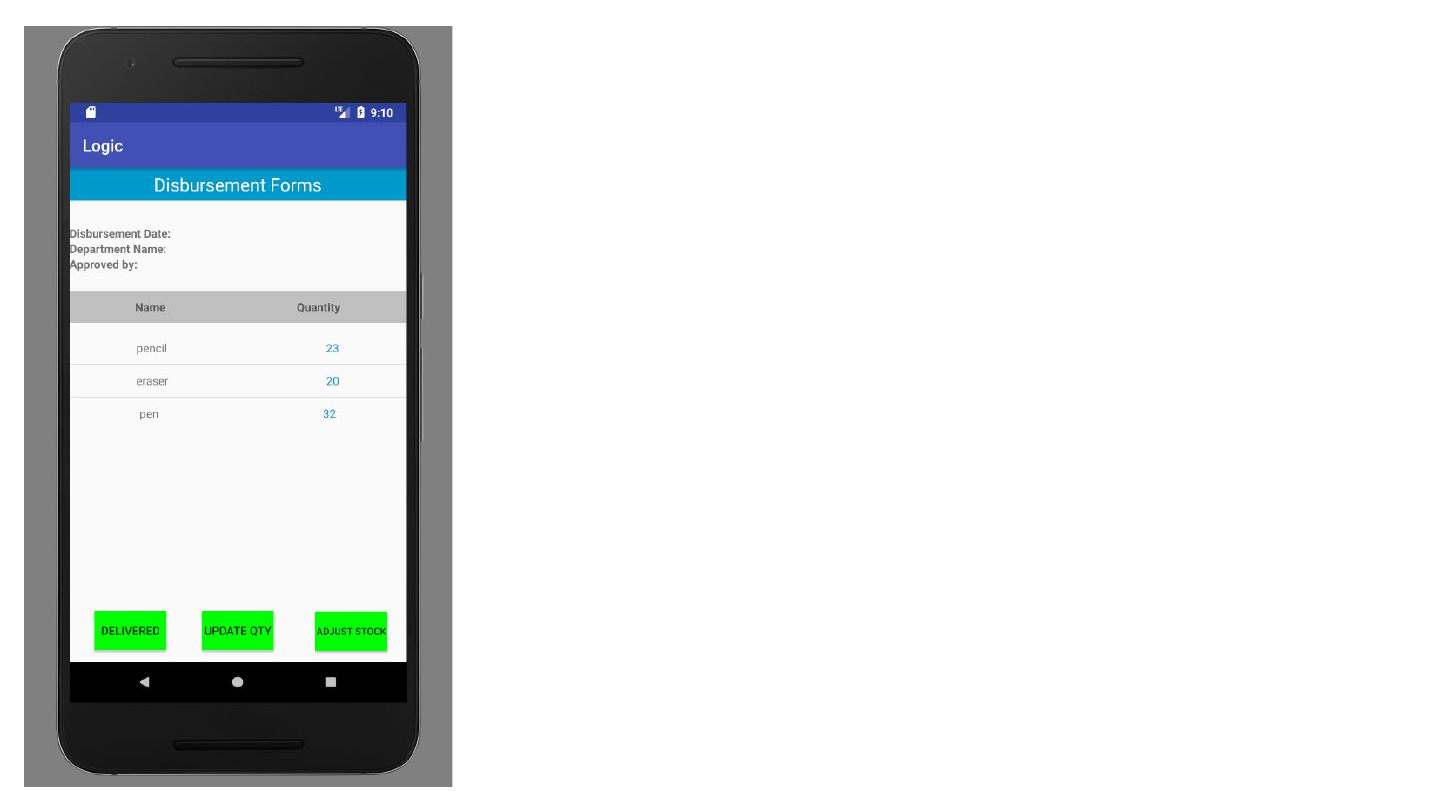
3.3.View Disbursement
continued..

Disbursement form details are as shown.
Click on delivered when items are
delivered to department rep.
Click on update quantity when all items in
the quantity are correct as of latest time.
3.3.View Disbursement
continued..
Click on disbursement list item.
3.3.1. Adjust disbursement
quantity
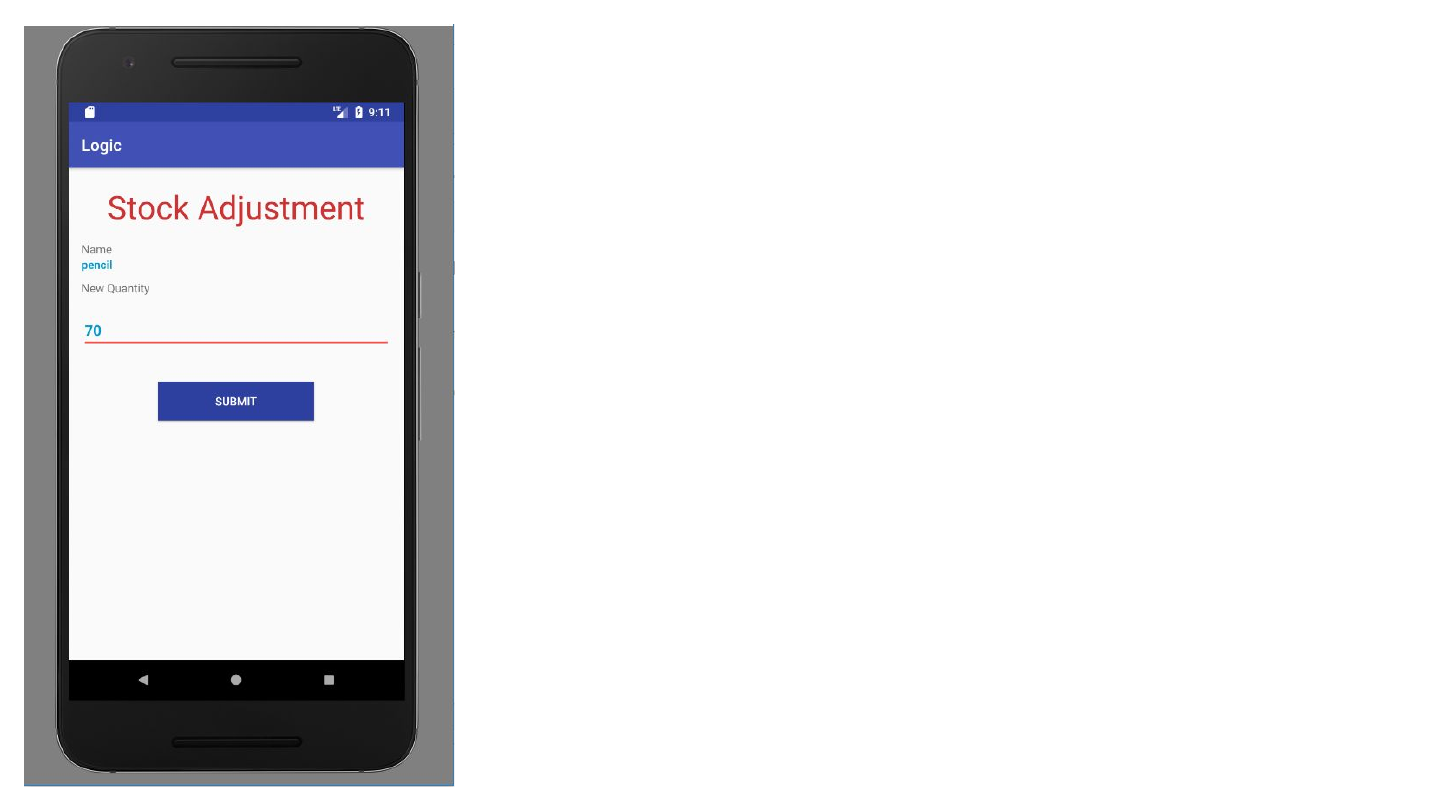
Enter the new quantity under the field
“New Quantity”
Click submit to make changes.
3.3.1. Adjust disbursement
quantity

The new changes are made.
3.3.1. Adjust disbursement
quantity

4. Stock Adjustment

4. Stock adjustment
To make stock adjustments, click on the icon stocks.
4. Stock adjustment
continued..
Click on update quantity
4. Stock adjustment
continued..
Click on “Get Item” to get the list of items
from the catalogue that needs to be
adjusted.

4. Stock adjustment
continued..
Search for the item in the catalogue.
Click on the item that needs to have
quantity adjusted.

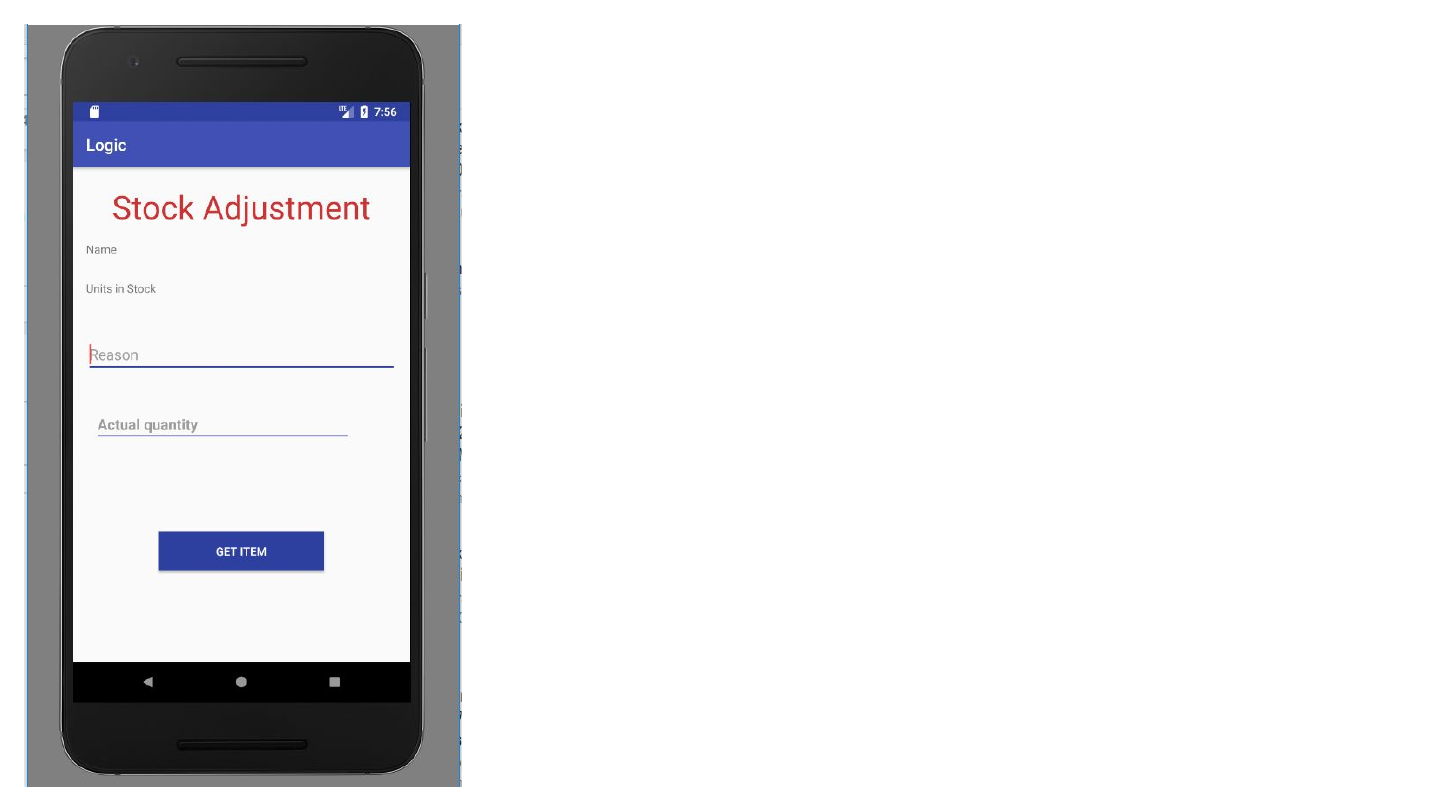
4. Stock adjustment
continued..
Enter the reason for adjustment
Enter the current number of items in the
inventory store.
Click submit.
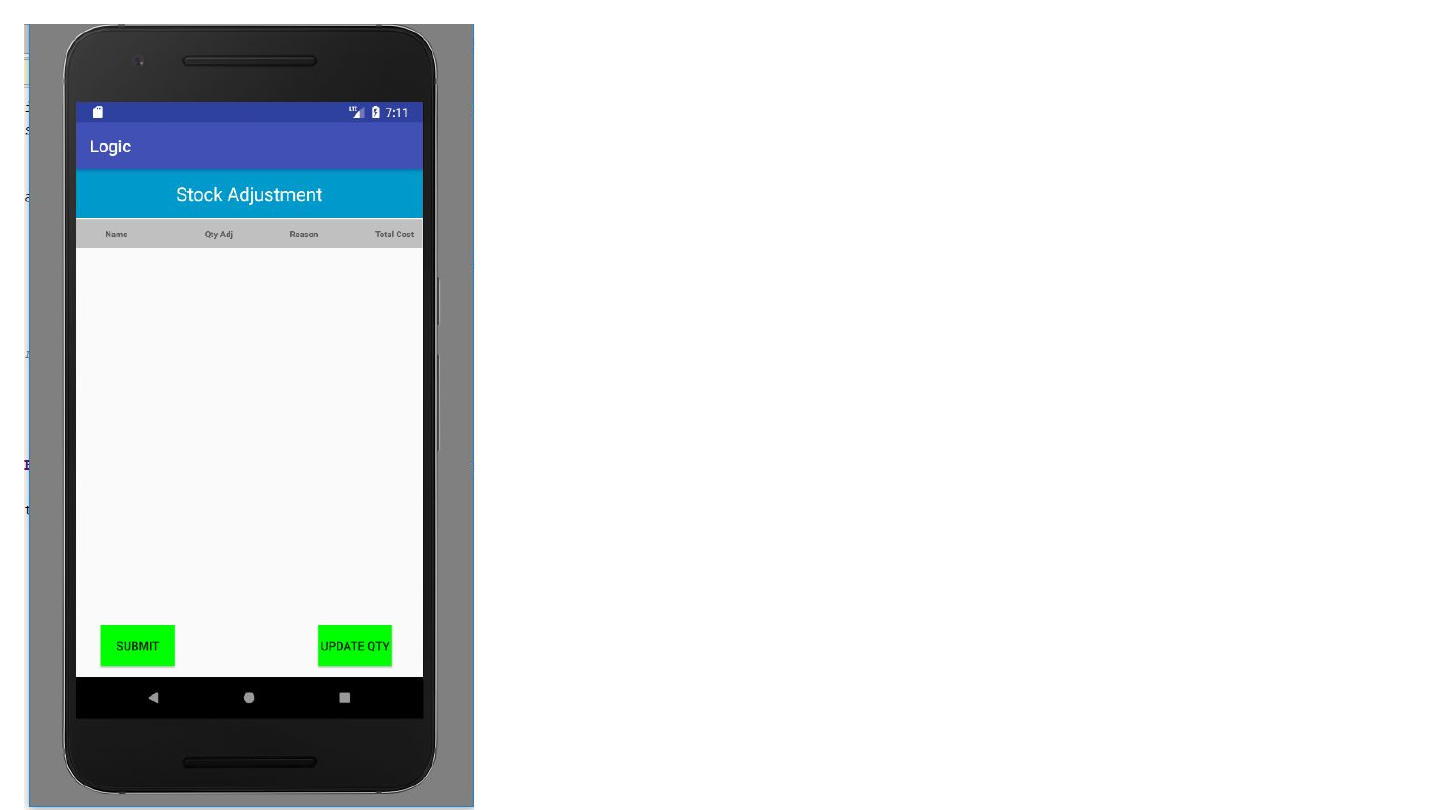
4. Stock adjustment
continued..
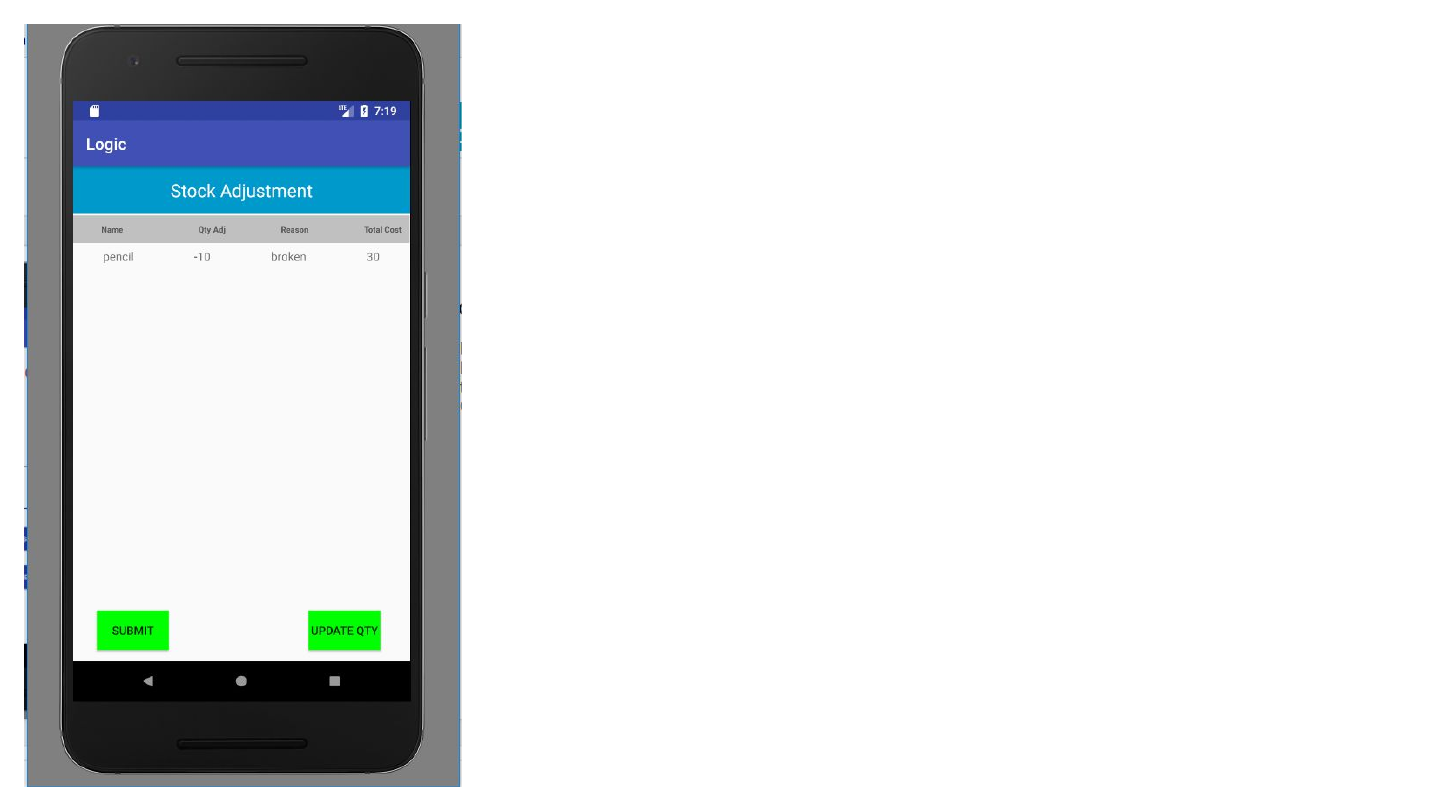
The fields are updated.
Qty Adj field shows the difference
between the units in stock and the actual
quantity in the store.
Total cost is computed based on the
actual qty adjusted.
Click on submit button.
If items cost more than $250, a
notification will be sent to the manager.
If items cost less than $250, a notification
will be sent to the supervisor.

Department Head

To approve/reject new requisition requests, first click the new
requests button on the dashboard.
The notification displays how many requests are pending
1. New
Requests

Next, click on the desired
form, as shown in screen 1.
This will open up screen 2,
where details of the
requisition request can be
viewed. Here, approve or
reject can be selected. If
desired, the remarks for
approving/rejecting the
requisition can be entered in
the textbox above the
approve/reject buttons
1. 2.
1.New Requests
continued..

2. Appoint Department
Rep
To appoint a department rep, first click on the appoint dept rep
button on the dashboard
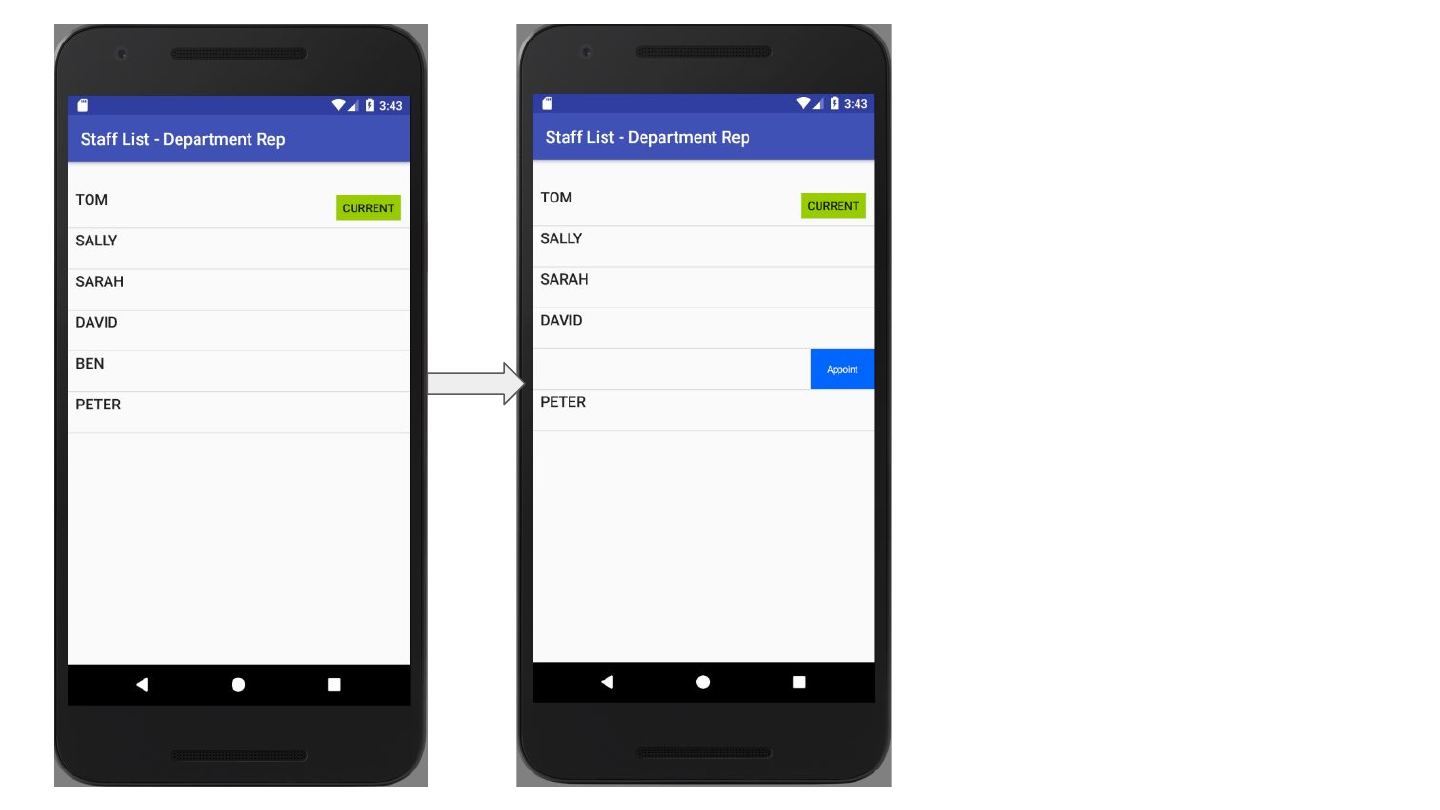
1. 2. 2.Appoint Department Rep
continued..
The current department rep will
have a label beside the name, as
shown in screen 1.
To change the rep, swipe left on the
desire row and click appoint, as
shown in screen 2.

Department Rep

To view notifications, first click on the ‘notifications’ button on the
dashboard.
1. Check
Notifications
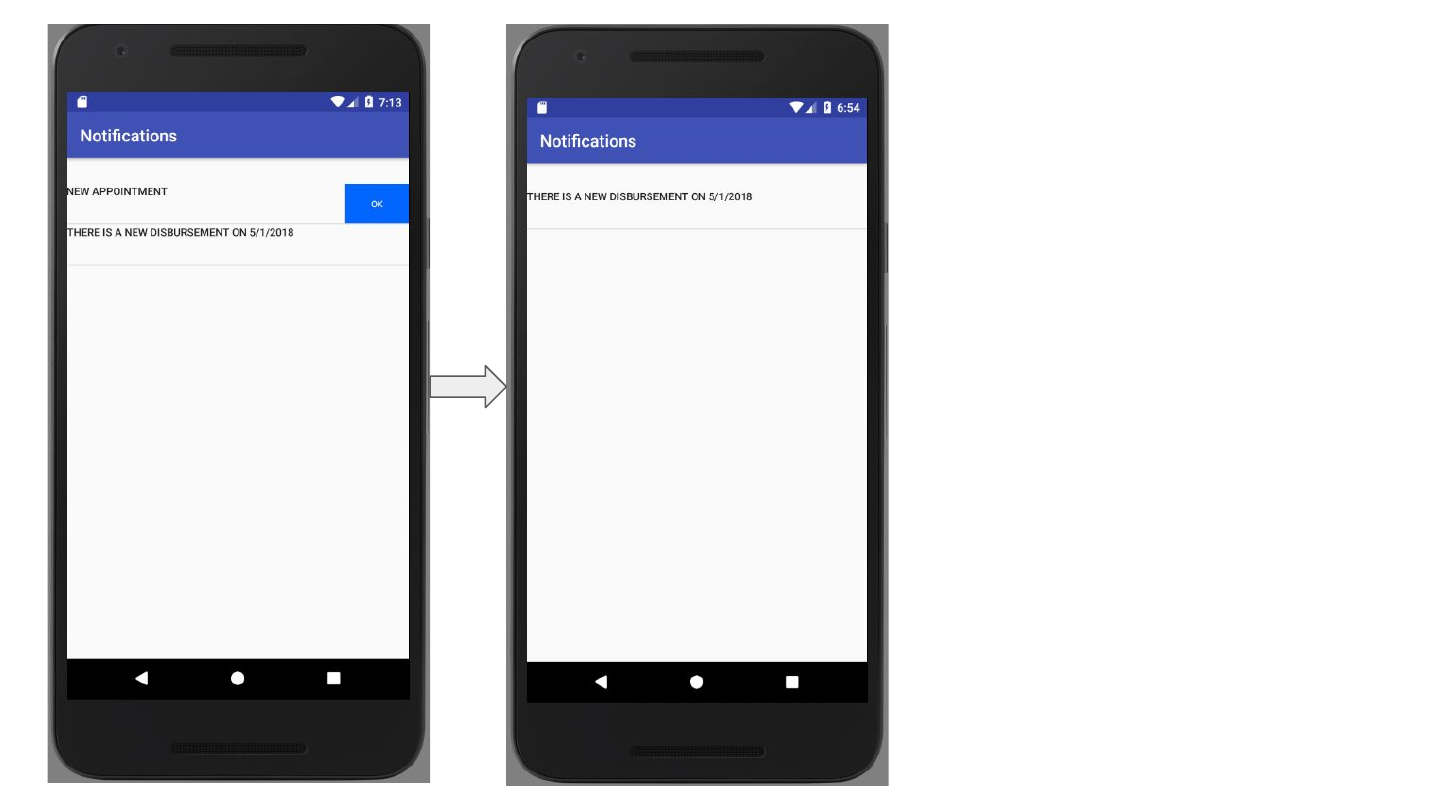
1. Check Notifications
continued..
All notifications will be displayed in this
page.
To clear the notification, swipe left on the
row and click the ‘ok’ button.
If the notification is about collections,
clearing the notification will provide
affirmation that the collection has been
done.
1. 2.

To change the collection point, first click on the ‘change collection
point’ button on the dashboard
2. Change Collection
Point

2. Change Collection Point
continued..
The current collection point will be
displayed at the top of the screen, under
‘current collection point’.
Select a new collection point from the
spinner and click select to choose a new
collection point.

Department Staff
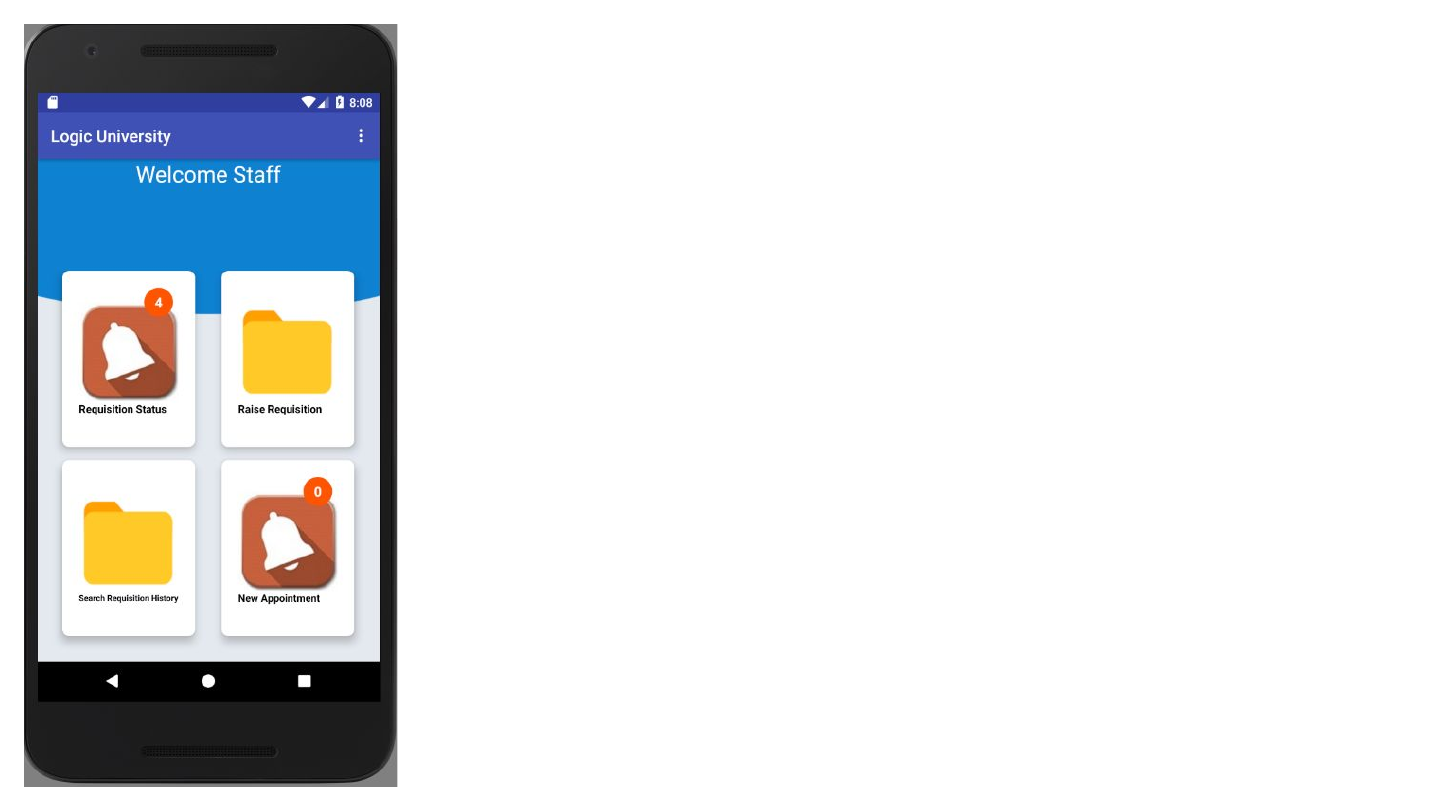
Clicking on the ‘new appointment’ button on the dashboard will
display a notification of new appointment, if there is any
1. New
Appointment

To view notification of requisition status, first click on the ‘requisition
status’ button on the dashboard
2. Requisition
Status
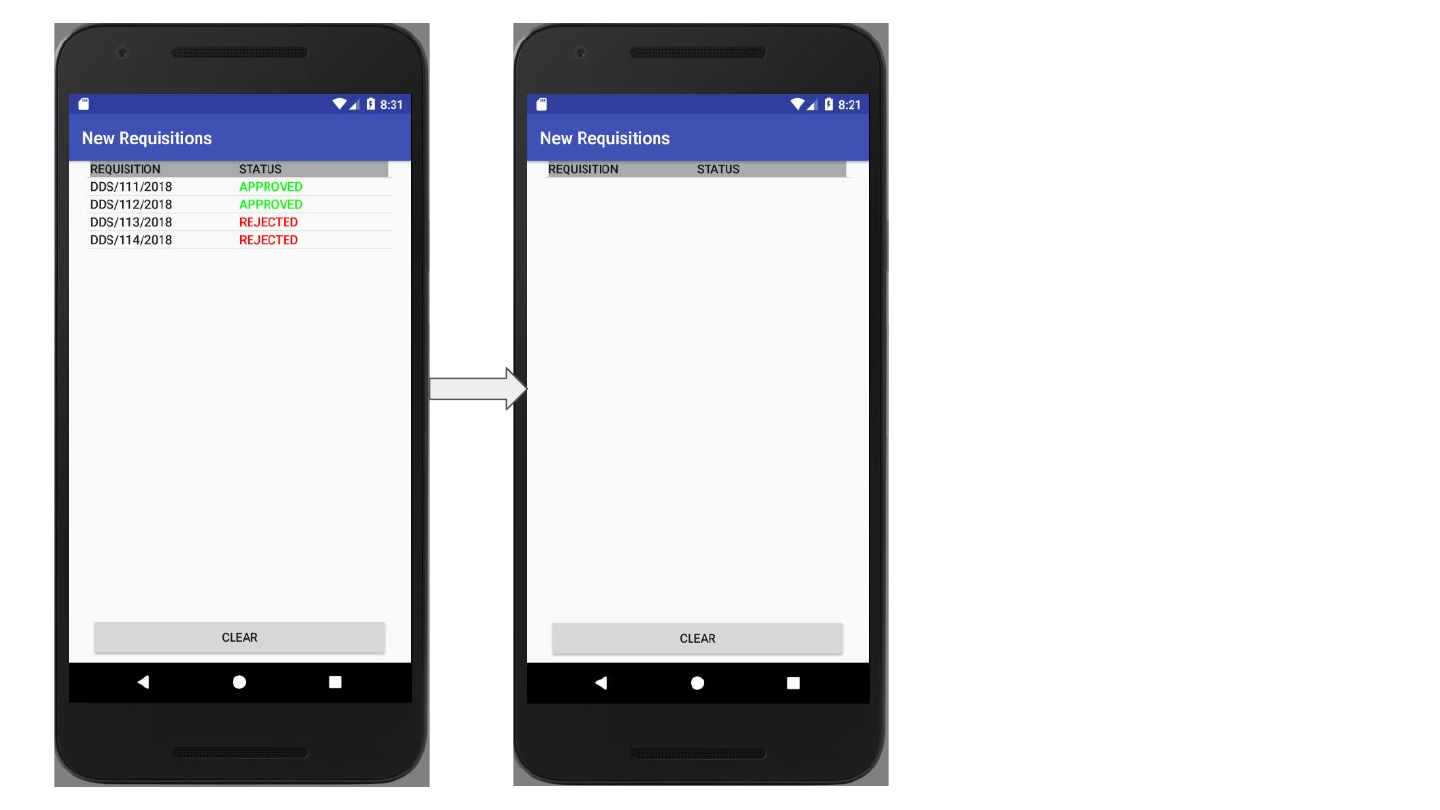
2. Requisition Status
continued..
A list of new requisitions which have been
approved or rejected will be displayed
To clear the notifications, click the ‘clear’
button at the bottom of the screen
1. 2.

To view requisition history, first click on the ‘search requisition
history’ button on the dashboard
3. Search Requisition History
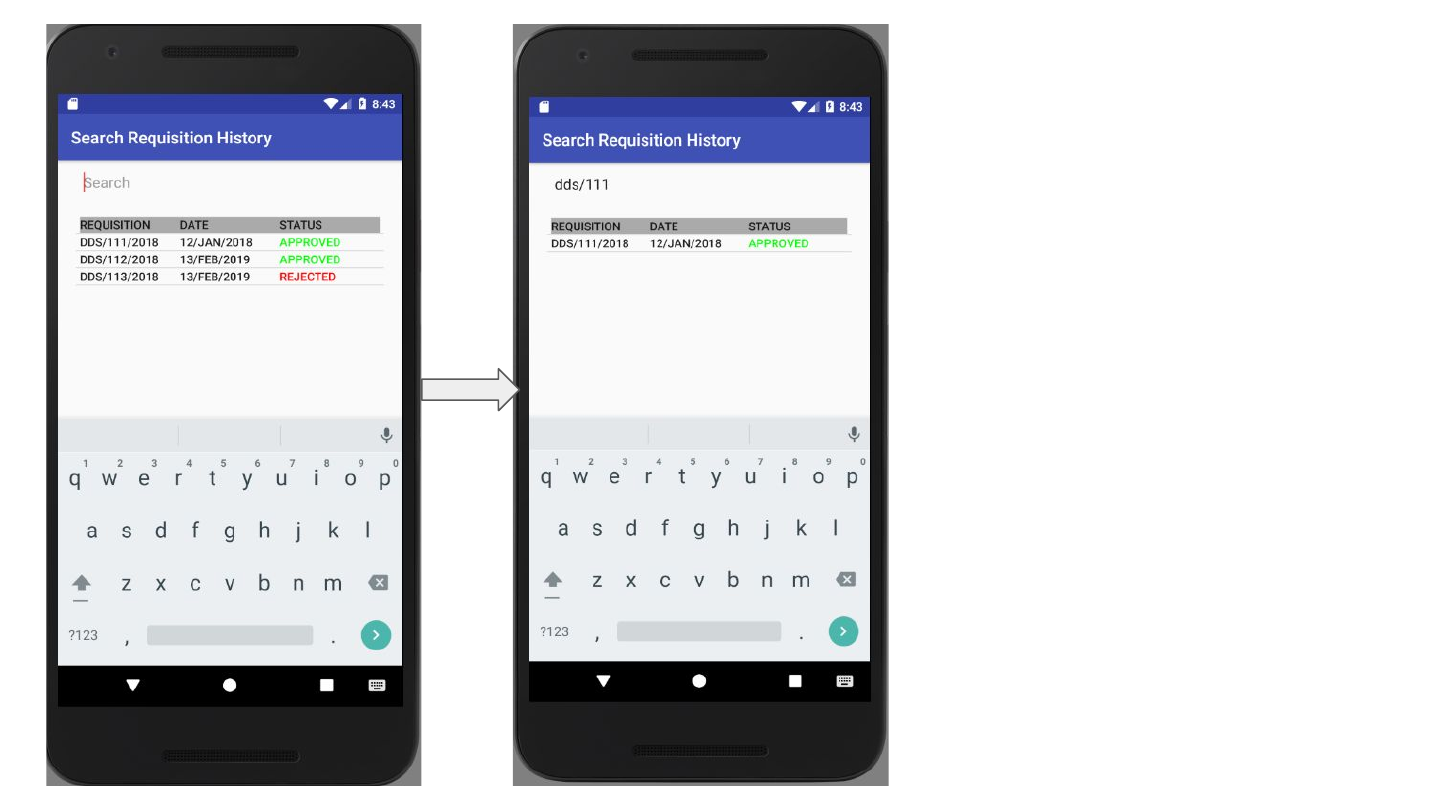
3. Search Requisition History
continued..
A list of all previous requisitions will be
displayed.
The search function at the top of the
screen can be used to search based on
any of the columns.
1. 2.

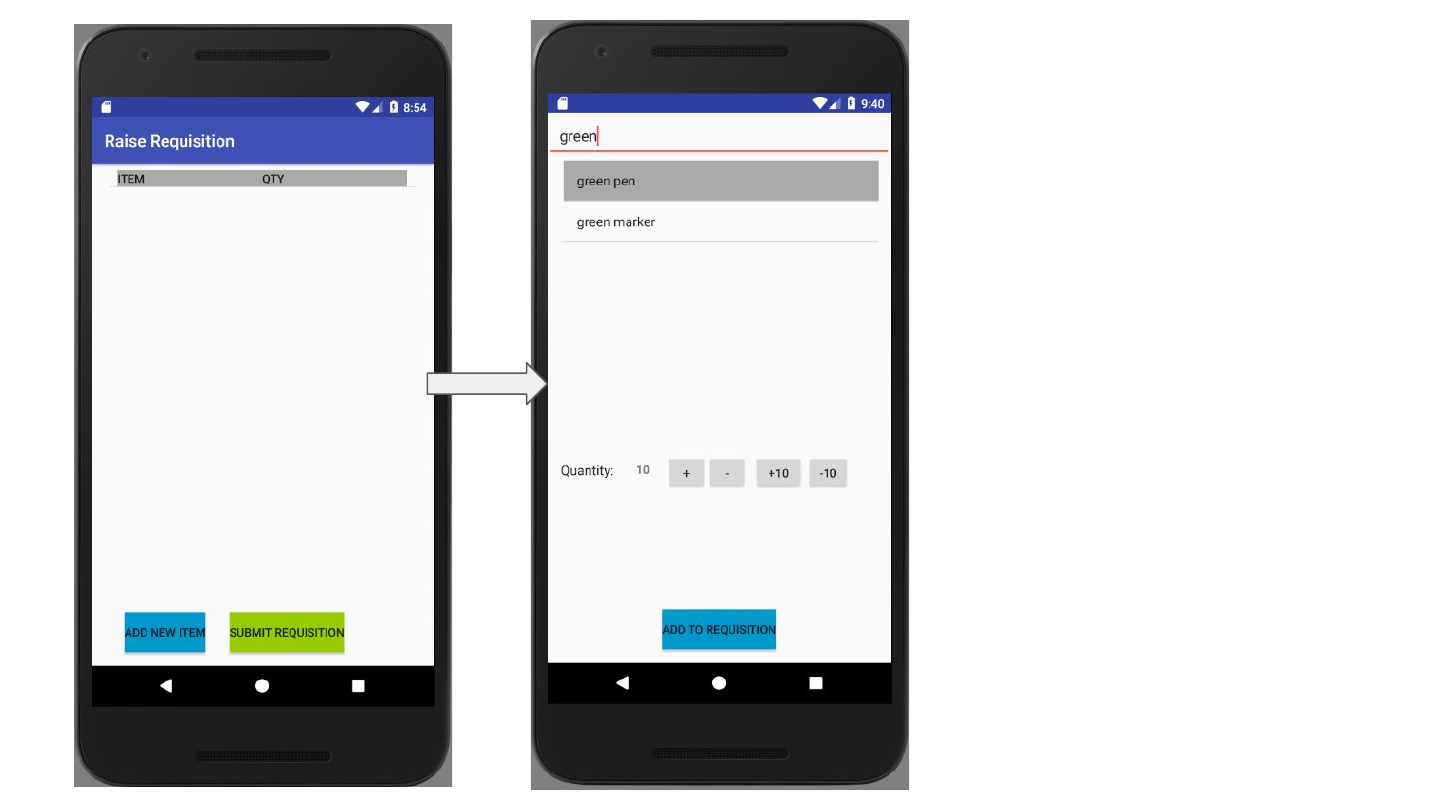
To view raise a new requisition, first click on the ‘raise requisition’
button on the dashboard
4. Raise Requisition
1. 2.
4. Raise Requisition
continued..
An empty list will first be displayed,
as shown in screen 1. To add an
item, click on the ‘add new item’
button at the bottom of the screen.
Next search for the desired item and
select the item and quantity. Then
click on the ‘add to requisition’ button
at the bottom of the screen, as
shown in screen 2.
4. Raise Requisition
continued..
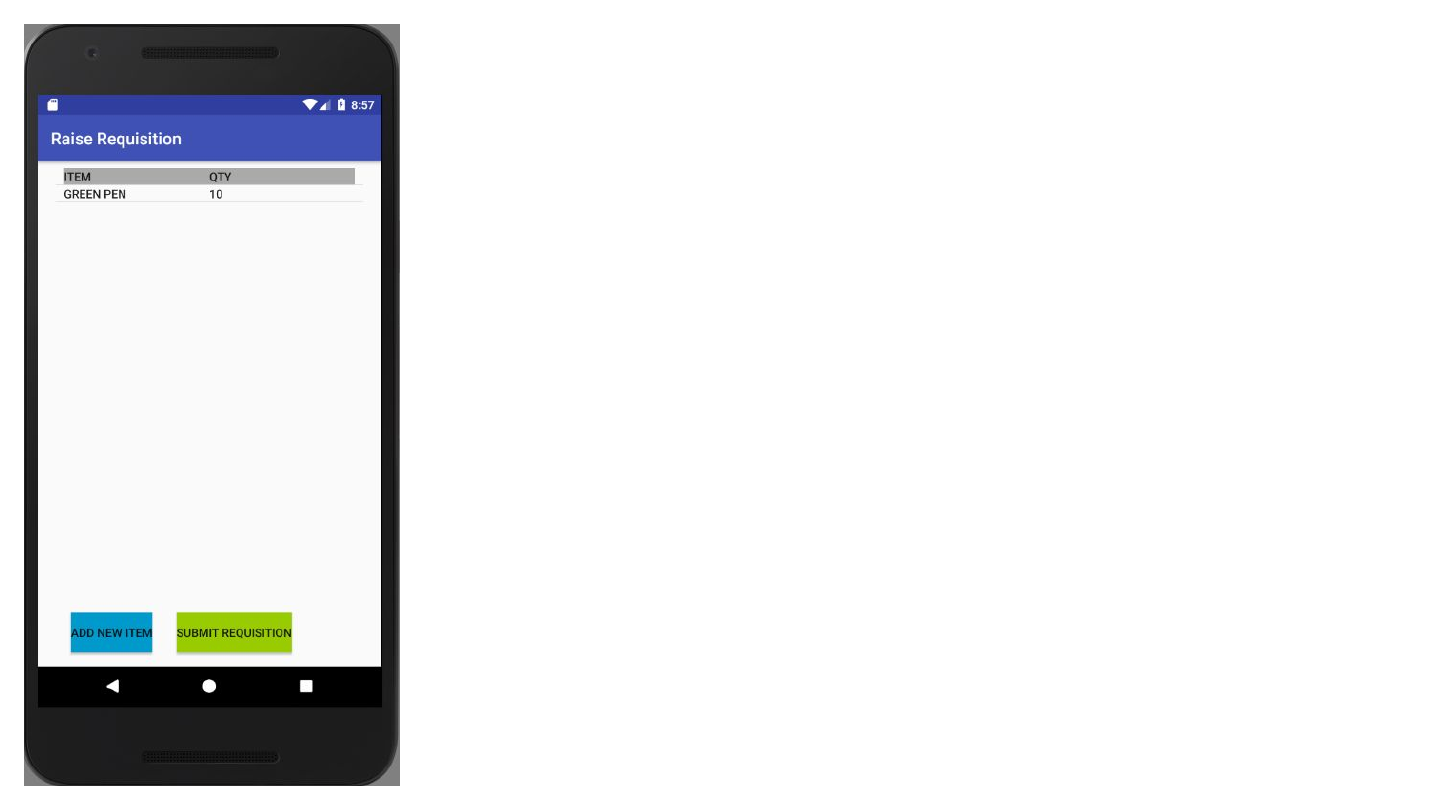
The selected item will be added to the list. To add another
item, click the ‘add new item’ button at the bottom of the
screen and repeat the previous process.
If all desired items have been added, click the ‘submit
requisition’ button at the bottom of the screen to submit the
requisition for approval.
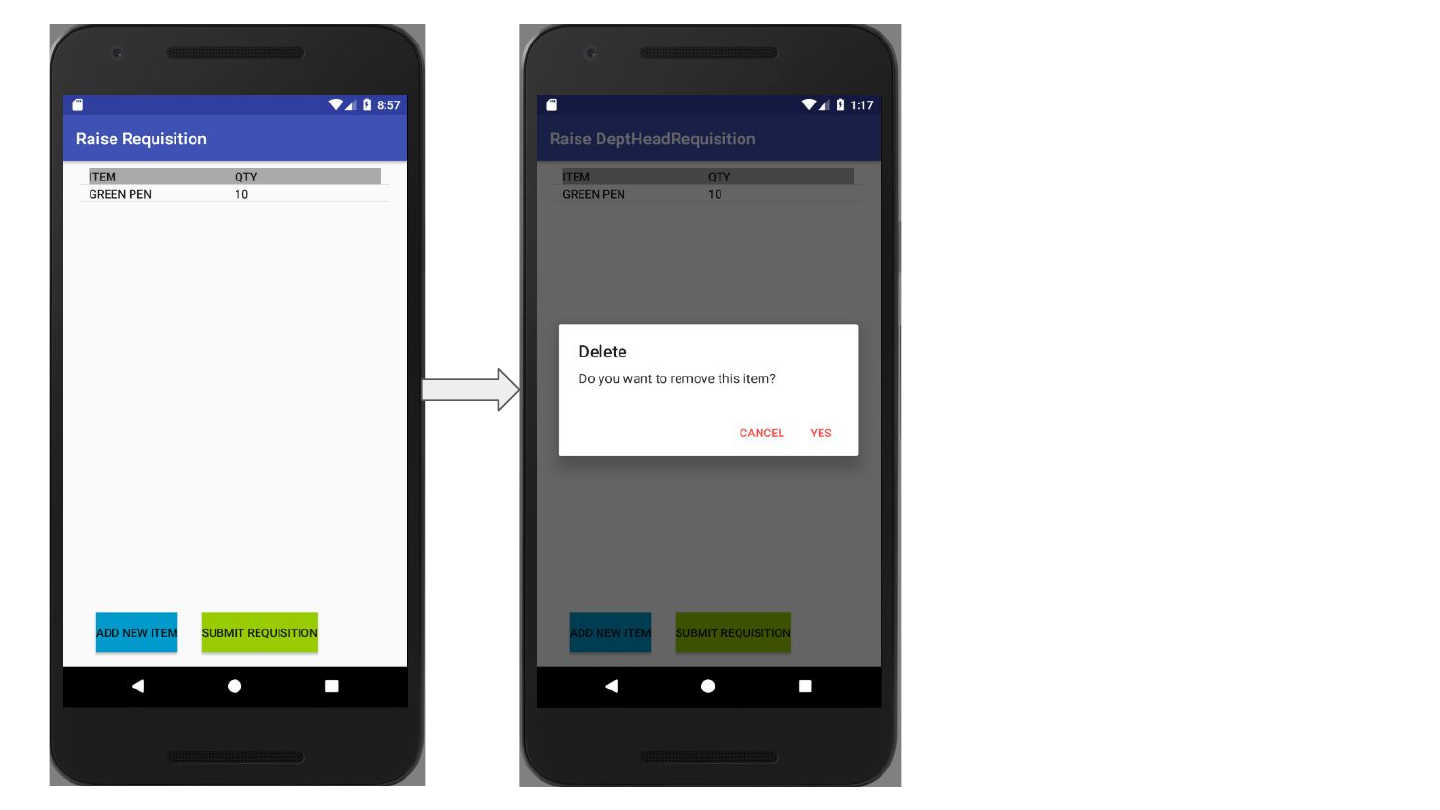
4. Raise Requisition
continued..
To remove an item,
long click on the item and select ‘yes’.
1. 2.

Log Out
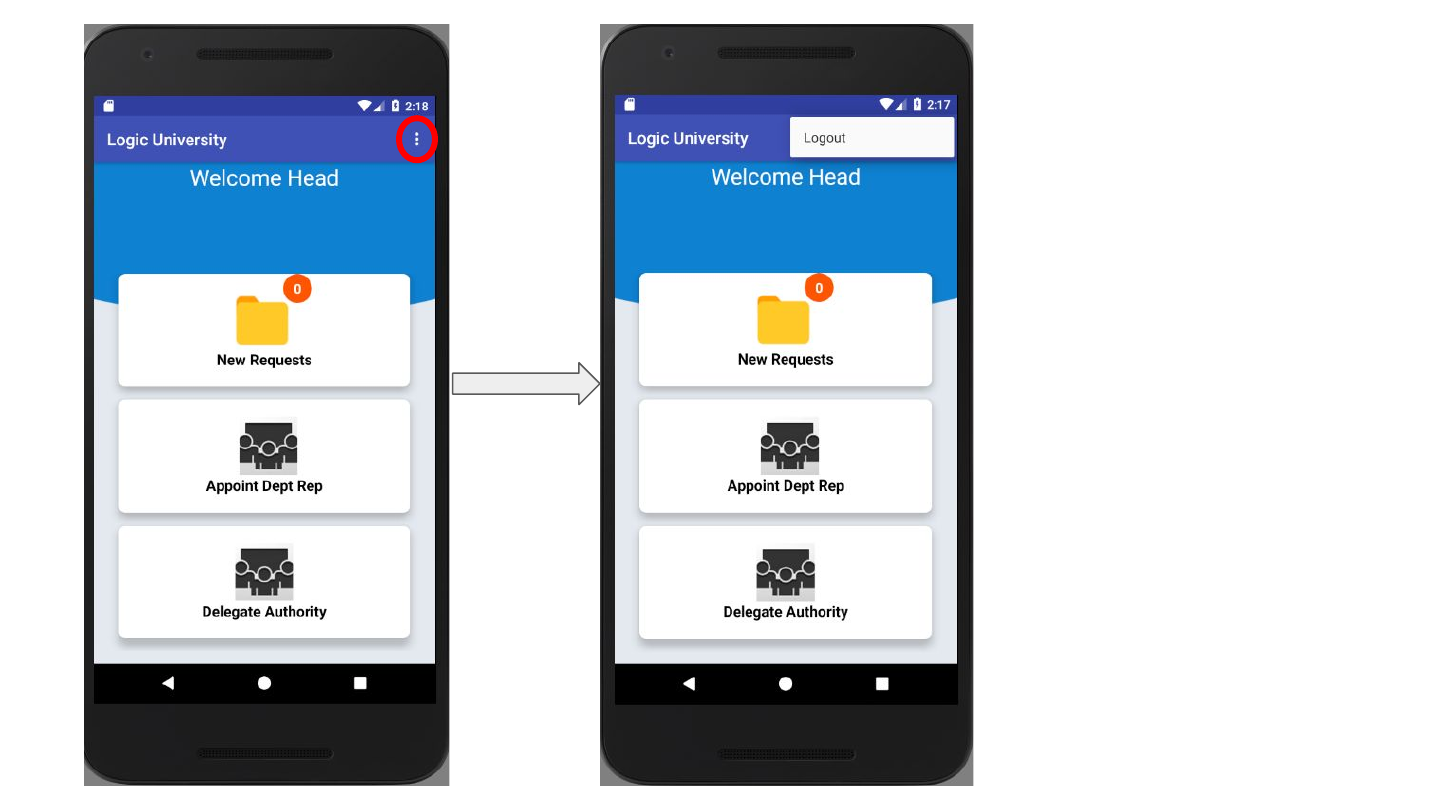
To logout, click the
menu option as
shown in screen 1,
then click logout, as
shown in screen 2.
1. 2.
