C YAESU VR 120D User Manual
User Manual: Pdf YAESU--VR-120D-User-Manual
Open the PDF directly: View PDF ![]() .
.
Page Count: 44

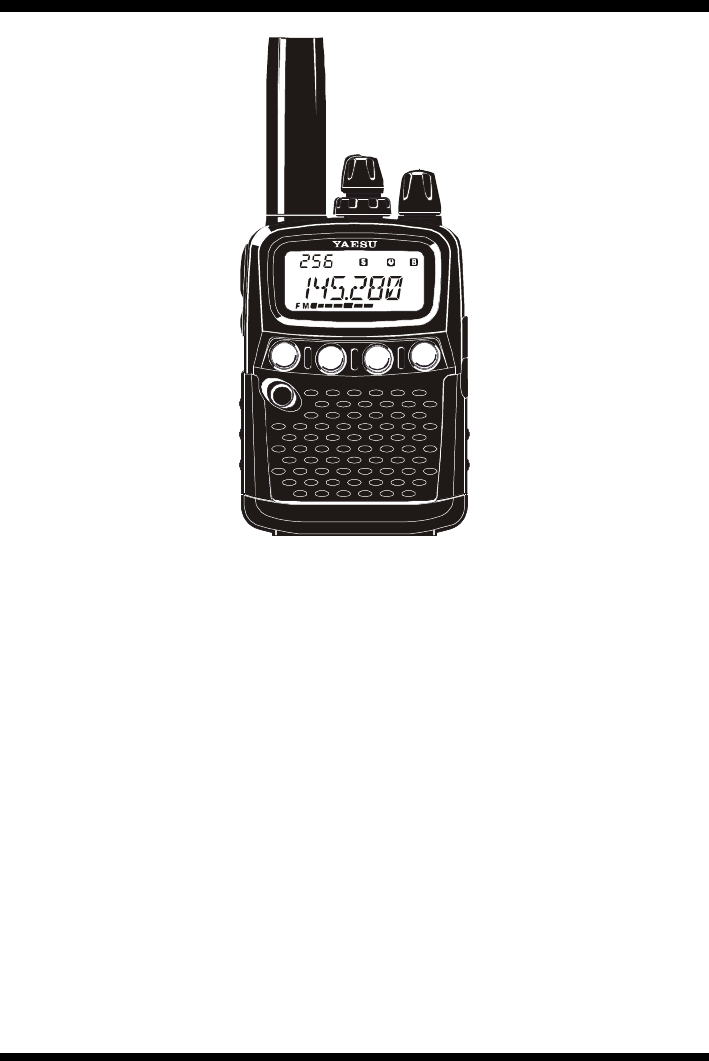
1VR-120D OPERATING MANUAL
COMMUNICATIONS RECEIVER
VR-120D
OPERATING MANUAL
VERTEX STANDARD CO., LTD.
4-8-8 Nakameguro, Meguro-Ku, Tokyo 153-8644, Japan
VERTEX STANDARD
US Headquarters
17210 Edwards Rd., Cerritos, CA 90703, U.S.A.
International Division
8350 N.W. 52nd Terrace, Suite 201, Miami, FL 33166, U.S.A.
YAESU EUROPE B.V.
P.O. Box 75525, 1118 ZN Schiphol, The Netherlands
YAESU UK LTD.
Unit 12, Sun Valley Business Park, Winnall Close
Winchester, Hampshire, SO23 0LB, U.K.
VERTEX STANDARD HK LTD.
Unit 5, 20/F., Seaview Centre, 139-141 Hoi Bun Road,
Kwun Tong, Kowloon, Hong Kong

2VR-120D OPERATING MANUAL
Contents
Introduction ..............................................................3
Controls & Connections ..........................................4
Display Icons & Indicators .....................................5
Keypad Functions .....................................................6
Accessories & Options .............................................7
Installation of Accessories .......................................8
Battery Installation ........................................... 8
FNB-79 Battery Pack (Option) Charging ........... 8
Low Battery Indication ..................................... 8
AC Operation using the optional
PA-30 AC Adapter .............. 9
Antenna Installation ......................................... 9
Belt Clip Installation ........................................ 9
Basic Operation ......................................................10
Turning the Power On/Off .............................. 10
Adjusting the Volume and Squelch ................. 10
Band Selection ............................................... 10
Mode Selection .............................................. 10
Battery Saver ................................................. 11
Frequency Navigation .................................... 11
VFO Search ................................................... 12
Changing the Direction of VFO
Search Scanning .................................... 12
How to Skip (Omit) a Frequency
During VFO Search ............................... 13
Pre-Programmable Frequency Search .......... 14
Changing the Channel Steps ........................... 16
Preset Mode .................................................. 17
Receiving Short-Wave Broadcast Stations ....... 18
Memory Mode .........................................................20
Memory Storage ............................................ 20
Simple Storage ........................................... 20
Designated Memory Storage ....................... 21
Memory Recall .............................................. 22
Labeling Memories ........................................ 22
Memory Channel Scan ................................... 23
Preferential Memory Scan (PMS) ................ 23
Memory Bank Scanning ............................. 24
Deleting Memory Channels ............................ 25
Clearing of a Memory Bank............................ 25
One-Touch Memory ...............................................26
Channel Counter ....................................................27
Dual Watch..............................................................28
Priority Monitoring ................................................30
Smart SearchTM ......................................................31
Reset Procedures ....................................................32
System Reset ................................................. 32
All Reset ....................................................... 32
Set Mode ..................................................................33
Cloning .....................................................................40
“AUTO” Mode Preset Operating Parameters ...41
Specifications ...........................................................42
3VR-120D OPERATING MANUAL
Installation
The YAESU VR-120D is a high-performance miniature communications receiver provid-
ing general coverage reception from 100 kHz to 1299.995 MHz on the AM and FM (Wide
and Narrow bandwidths) modes; this coverage includes the AM and FM broadcast bands,
HF Short-wave Bands, VHF and UHF TV bands, the VHF AM aircraft band, and a wide
range of commercial and public safety frequencies!
The VR-120D's small size allows you to take it anywhere - hiking, skiing, or while walk-
ing around town, and its operating flexibility brings the user many avenues of operating
enjoyment.
Operation of the VR-120D can be greatly simplified by utilizing the "PRESET" mode.
The "PRESET" mode provides twelve "starting point" frequencies (one frequency in each
of twelve popular listening bands), from which you may then begin manual tuning. Exten-
sive Memory features, including special Shortwave Broadcast memories, make worldwide
listening enjoyable and effortless.
We appreciate your purchase of the VR-120D, and encourage you to read this manual
thoroughly, so as to learn about the many exciting features of your exciting new YAESU
communications receiver!
4VR-120D OPERATING MANUAL
Controls & Connections
ANTENNA Jack
Connect the supplied rub-
ber flex antenna (or an-
other antenna presenting a
50-Ohm impedance) here.
VOL Knob
This control adjusts the
receiver's audio volume
level, and also the keypad's
Beeper level. Clockwise ro-
tation increases the audio
volume level.
SQL Knob
This control sets the
threshold level at which re-
ceived signals (or noise)
open the "Squelch." It
should be advanced clock-
wise just to the point where
background noise is si-
lenced, so as to provide the
best sensitivity to weak sig-
nals.
DIAL Knob
This 20-position detented
rotary switch is the main
tuning dial for the radio. It
used for most tuning,
memory selection, and
function-setting tasks on
the radio.
SP Jack
This 2-conductor, 3.5-mm
miniature phone jack pro-
vides audio output for an
earphone. The internal
loudspeaker is disabled
when this jack is used.
Note: The protective rubber
cover over this jack must
be pulled up to access it.
Press it back.
over the jack when not
in use, to protect the inside
of the radio from dust and
water.
KEYPAD
These 4 keys select many
of the most important op-
erating features on the VR-
120D. The functions of the
keys are described in de-
tail on pages 6.
[FUNC] Key
Press and hold in this key,
then press one of the
keypad's buttons, to acti-
vate the "Secondary" key
mode.
[MONI (LOCK)] Key
Press this key momentarily
to "Open" the squelch
manually, allowing you to
listen for very weak signals.
Press this key while hold-
ing in the [FUNC] key to
activate the "Key Lock"
Feature.
[PWR] Key
Press and hold in this key
for two seconds to toggle
the radio's power on and
off.
EXT DC Jack
This coaxial DC jack allows
connection to an external
AC power supply.
Note: The protective rubber
cover over this jack must
be pulled up to access it.
Press it back over the jack
when not in use, to protect
the inside of the radio from
dust and water.
5VR-120D OPERATING MANUAL
Display Icons & Indicators
Preferential Memory Activated
/ Preset Mode Activated
/ Set Mode Activated
Memory Channel Number
Dual Watch Activated
Battery Save Activated
Attenuator Activated
OFF Timer Activated
Key Lock Activated
Frequency / Data Field
Low Battery
S-Meter
Operating Mode
Scan Skip Memory Activated

6VR-120D OPERATING MANUAL
Keypad Functions
BAND V/M SCAN MODE
Press Key
Selects the operating
(receiving) band
(toward a higher
frequency band).
Selects the operating
VFO/Memory mode .
Starts scanning. Selects the operating
(receiving) mode, or
toggles the display
labels between the
frequency and name
tag formats.
Press [F]+
Selects the operating
(receiving) band
(toward a lower
frequency band).
Stores the VFO
frequency into a
memory, or deletes
the current memory
channel's data.Stores
the VFO frequency
into a "Scan Skip"
memory, or deletes
the "Scan Skip"
memory channel data.
Activates the "Set"
(Menu) mode, or
enables program-
ming of the name tag
for the current memory
channel.
Engages the receiver
front-end attenuator.
Press Key
for 2 Seconds
Toggles the operating
mode between the
"Preset Mode" and
the "Normal Mode."
Activates the Priority
Watch and Dual
Watch features.
Activates the Smart
SearchTM
mode, or
Programs and
activates Preferential
Memory Scan
operation.
Activates the channel
frequency counter
mode.
Hold in [F] ,
Press Key
for 2 Seconds
Stores the Preset
frequency into the
memory.
Stores the frequency
into the Priority
memory Channel, or
stores the VFO
frequency pair for the
Dual Watch feature
into the Dual Watch
Memory channel.
Stores the Scan
frequency and Smart
SearchTM channels
into the memory. ........
7VR-120D OPERATING MANUAL
Accessories & Options
ACCESSORIES SUPPLIED WITH THE VR-120D
•Operating Manual
•Warranty Card
AVAILABLE OPTIONS FOR YOUR VR-120D
Availability of accessories may vary. Some accessories are supplied as standard per local
requirements, while others may be unavailable in some regions. Consult your Yaesu Dealer
for details regarding these and any newly-available options. Connection of any non-YAESU-
approved accessory, should it cause damage, may void the Limited Warranty on this appa-
ratus.
CSC-76
Soft Case CT-35
Cloning Cable
Antenna Hand Strap
Belt Clip
FNB-79
Ni-Cd Battery Pack E-DC-15
DC Cable w/Noise
Filter
NC-82
Charger Stand CA-34
Charger Sleeve
PA-30B / C / U
AC Adapter
8VR-120D OPERATING MANUAL
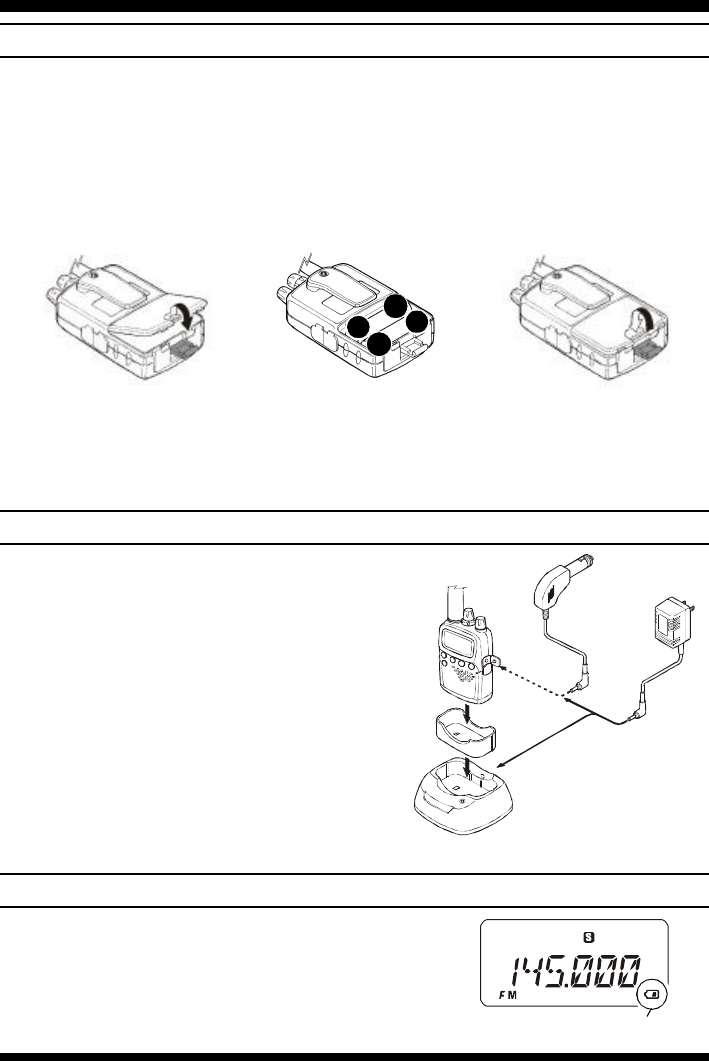
Installation of Accessories
BATTERY INSTALLATION
rReferring to Figure 1, unlock the plate by pushing the latch in the "Open" direction.
rRemove the Battery Cover from the receiver.
rReferring to Figure 2, insert 2 fresh AA batteries into the Battery Holder. When
installing batteries, insert the (-) end first, then press in the (+) end so the battery snaps
into place. Always replace two batteries at the same time.
rReferring to Figure 3, replace the Battery Cover, then re-lock the bottom plate by
carefully pressing the hinged latch cover back into its normal operating position.
Figure 1 Figure 2 Figure 3
Note: If you do not use the VR-120D for a long time, remove the batteries from the radio,
as battery leakage could cause damage to the VR-120D.
LOW BATTERY INDICATION
When the battery voltage becomes too low, the "Battery"
icon will appear in the display; indicating the batteries
should be replaced. As battery voltage drops further, the
VR-120D will shut off. "Battery" icon
FNB-79 BATTERY PACK (OPTION) CHARGING
Please see the Instruction Sheet accompanying the
FNB-79 for installation information.
rIf the FNB-79 battery pack never been used,
or its charge is depleted, it may be charged by
connecting the PA-30 AC Adapter and NC-
82 Charger stand (requires CA-34 Charger
sleeve), as shown in the illustration, to the EXT
DC jack.
rAllow a minimum of 15 hours (with NC-82,
otherwise; 20 hours) for the FNB-79 to reach
full charge.
−
+
+
−
AC ine
PA-30
(Option)
E-DC-15
(Option)
NC-82
(Option)
CA-34
(Option)
9VR-120D OPERATING MANUAL
Installation of Accessories
BELT CLIP INSTALLATION
To install the Belt Clip, first place the loop of the Hand Strap into the groove at the top of the
Belt Clip, and run the loop of the strap around the round mounting ridge for the Belt Clip. Now
insert the mounting screw through the belt clip, and affix it snugly to the mounting hole on the
back of the VR-120D, being careful not to allow the Hand Strap to become mis-aligned.
rTo attach the supplied antenna to the VR-120D, grasp the base of
the antenna firmly, and exert a moderate "pinching" pressure on the
base as you press the antenna onto the radio's antenna connector.
While exerting this pressure, rotate the antenna clockwise 1/4 turn
to lock the antenna in place.
rTo remove the antenna from the VR-120D, grasp the base of the
antenna firmly, and pinch the base of the antenna while rotating the
antenna counter-clockwise 1/4 turn. You may now lift the antenna
away from the radio.
Important Note!!
Do not install the supplied Belt Clip
Mounting Screw if you are not install-
ing the Belt Clip! Also, do not use an
improper screw for mounting the Belt
Clip! An improper screw may cause
a "short circuit" to the internal cir-
cuitry, causing serious damage!
ANTENNA INSTALLATION
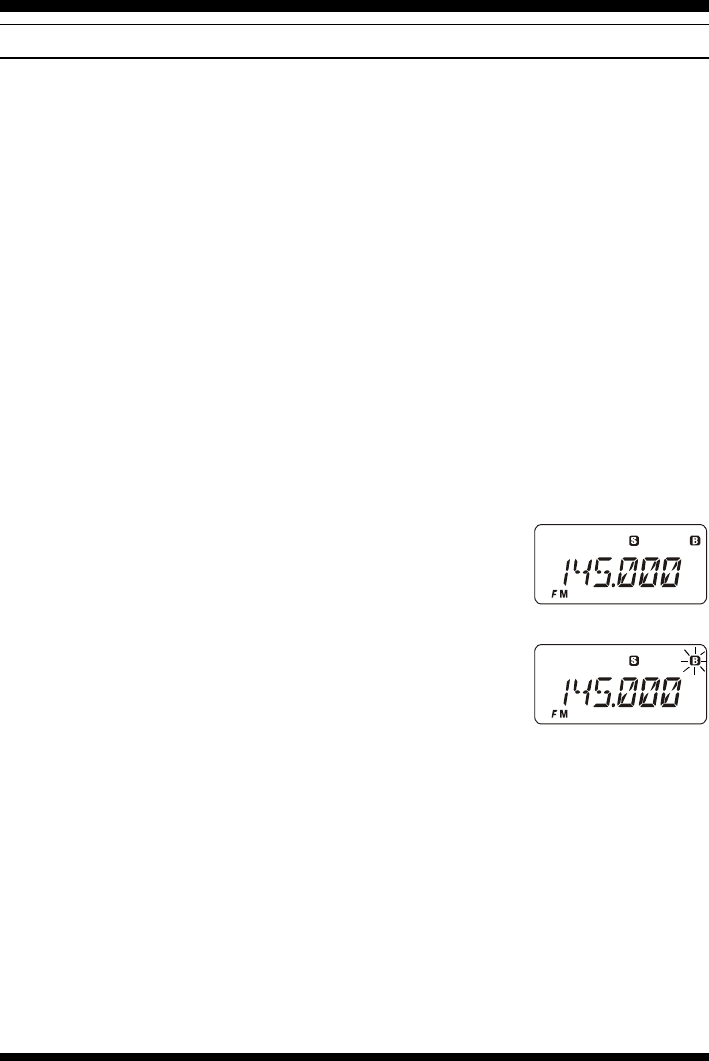
AC OPERATION USING THE OPTIONAL PA-30 AC ADAPTER
The VR-120D may be operated from your house
current by use of the optional PA-30 AC Adapter.
To use the PA-30, turn the radio off, then plug the
miniature connector of the AC Adapter into the
EXT DC jack on the side of the radio. Now plug
the AC Adapter into the wall outlet. You may now
turn on the radio.
Important Note!!
Do not leave the charger connected to the Receiver for continuous periods in excess of 30
hours. Long term overcharging can degrade the Ni-Cd battery pack and significantly
shorten its useful life.
to AC line outlrt
PA-30
(Option)
E-DC-15
(Option)
to Cigarette lighter

10 VR-120D OPERATING MANUAL
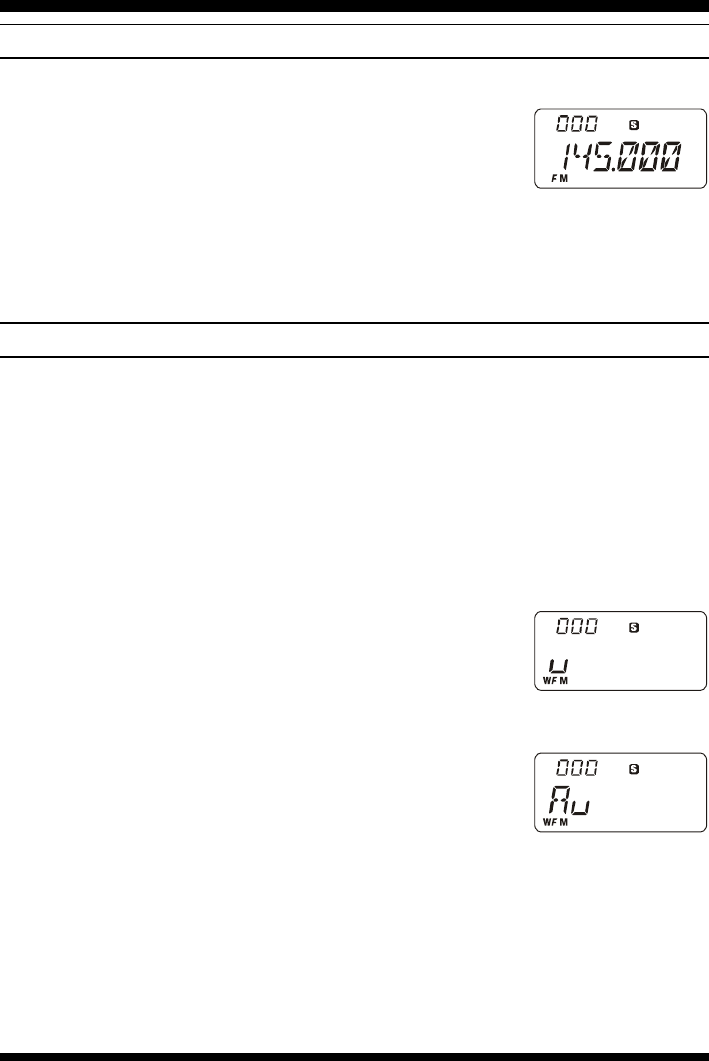
TURNING THE POWER ON/OFF
1. Press and hold the orange [PWR] Key for two seconds to turn the radio on or off.
2. When you turn on the radio, a "VR-120" greeting message will appear on the display
for two seconds. After this interval, the frequency display will appear.
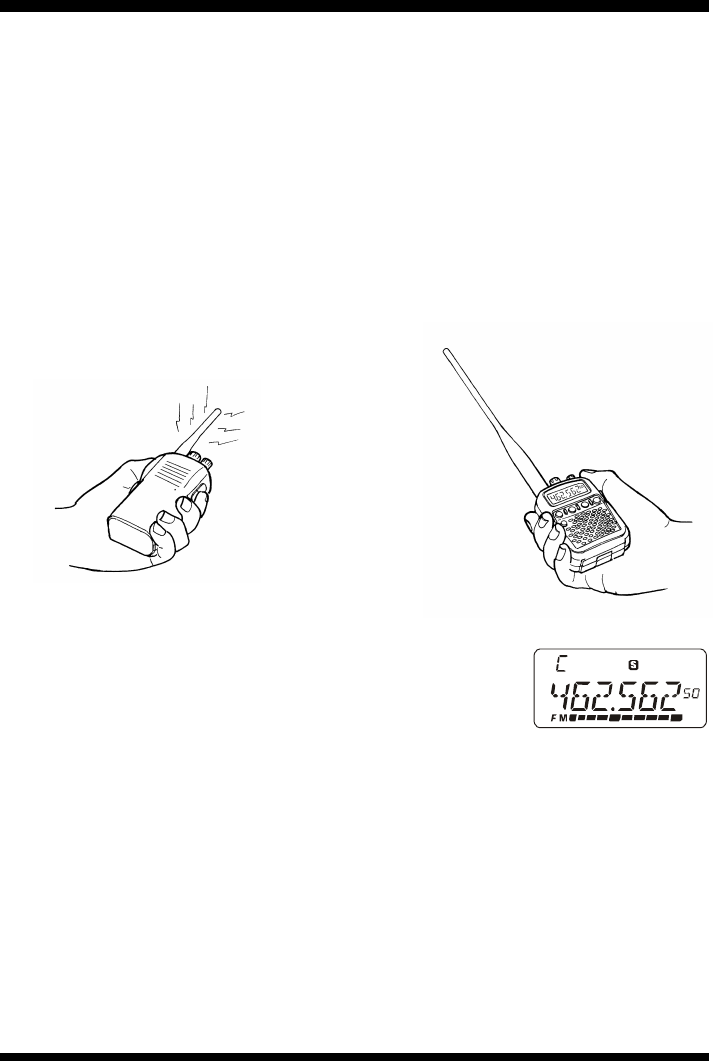
ADJUSTING THE VOLUME AND SQUELCH
1. Rotate the VOL knob to adjust the receiver's audio volume. Clockwise rotation of the
VOL knob increases the volume level.
2. A The VR-120D's Squelch system allows you to mute the receiver's audio output
when no signals are being received. This reduces battery consumption, and reduces
annoying background noise.
3. To set the squelch, turn the SQL knob fully counter-clockwise, then turn it clockwise
just past the point where background noise is silenced. Do not rotate the SQL knob
much beyond this threshold point; if you do, the receiver will not respond to weak
signals.
BAND SELECTION
The VR-120D automatically selects a default receiving band according to the frequency
band on which you are operating.
If you want to change the receiving band, press the [BNDs] key. The receiving bands
available are:
BC band ß SW band ß 50MHz Ham band ß FM band ß
ß AIR band ß144MHz Ham band ß VHF-TV band ß ACT-1 band ß
ß 430MHz Ham band ß UHF-TV band ß ACT-2 band ß
ß 1200MHz Ham band ß BC band ß SW band ß . . .
MODE SELECTION
The VR-120D automatically selects a default receiving mode according to the frequency
band on which you are operating.
If you want to change the receiving mode, press the [MODE] key. The receiving modes
available are:
FM ß WFM ß AM ß AUTO ß FM ß . . .
Basic Operation

11VR-120D OPERATING MANUAL
Basic Operation
BATTERY SAVER
The VR-120D includes a useful "Battery Saver" feature, which significantly reduces bat-
tery consumption during operating sessions where little incoming traffic is being received.
The Battery Saver "puts the radio to sleep" for a time interval programmed via the Menu;
periodically, the radio will "wake up" and check briefly (250 ms.) for activity on the cur-
rent operating frequency. If a station is found, full operation of the radio will resume.
To engage the Battery Saver, we use the radio's "Set" (Menu) mode, described in detail on
page 34:
1. Be certain the VR-120D is in the "VFO" mode. Press the [V/M] key, if not in the VFO
mode.
2. Press and hold in the [FUNC] key; while holding it in, press the [SCAN] key to
activate the "Set" (Menu) mode.
3. Rotate the DIAL knob to select Menu #3 [SAVE].
4. Press and hold in the [FUNC] key; while holding it in, rotate the DIAL knob to select
the desired "Sleep" time for the Battery Saver. The selections include 1/3/5/7/9 sec-
onds, and "Off."
5. Press and hold in the [FUNC] key; while holding it in, press the [SCAN] key to exit to
the VFO mode.
Longer "Sleep" times will reduce battery consumption. However, longer "Sleep" times
also increase the possibility that you might miss a brief transmission.
FREQUENCY NAVIGATION
Rotating the DIAL allows frequency tuning in steps pre-programmed at the factory. Clock-
wise rotation of the DIAL causes the radio to be tuned to toward a higher frequency, while
counter-clockwise rotation will lower the operating frequency.
If you rotate the DIAL while pressing the [FUNC] key, the frequency will change in 1 MHz
steps. This feature is extremely useful for making rapid frequency excursions over the
wide tuning range of the radio. This step size (1 MHz) can be changed; see the "Changing
the Channel Steps" section on page 15 for details.
12 VR-120D OPERATING MANUAL
VFO SEARCH
The VFO Search feature causes the radio to scan the band, looking for active frequencies.
Before initiating a VFO Search, set the Squelch so that background noise is silenced. If
you are hearing background noise, the VFO Search feature will not initiate scanning.
From the VFO mode, press the [SCAN] key. The radio will initiate a VFO Search, tuning
toward a higher frequency, and will stop when it receives a signal strong enough to break
through the Squelch threshold. The radio will then hold on that frequency according to the
setup of the "RESUME" mode.
To verify and/or modify the "RESUME" mode, again press the [SCAN] key. The current
"RESUME" mode is indicated at the top of the Display (except for "Pause," which is the
default setting).
The following "RESUME" modes are available:
Pause ß Busy ß Hold ß Pause ß . . .
Pause (Default): In this mode, the VFO search will halt on a signal it encounters, and will hold there for 5
seconds. If you do not take action to disable the VFO search within that time period, the
VFO search will resume even if the station is still active.
Busy:In this mode, the VFO search will halt on a signal it encoun-
ters. Two seconds after the carrier has dropped because the
other station(s) ceased transmission, the VFO search will re-
sume. In this mode, the "B" icon will appear (not blinking)
at the top of the display.
Hold:In this mode, the VFO search will halt on a signal it encoun-
ters. It will not restart unless you re-initiate a VFO search. In
this mode, the "B" icon will blink at the top of the display.
To stop the VFO search manually, just rotate the DIAL one click.
Changing the Direction of VFO Search Scanning
If you wish to reverse the direction of the scan (i.e. toward a lower frequency, instead of a
higher frequency), rotate the DIAL one click to stop the VFO search, then rotate the DIAL
one click in the counter-clockwise direction. The VFO search direction will be reversed.
Note: If VFO Search has "paused" on a busy channel, it is only necessary to rotate the
DIAL one click in the counter-clockwise direction.
To revert to VFO search toward a higher frequency once more, rotate the DIAL one click, then
rotate it one click clockwise. If paused on a busy channel, just rotate the DIAL one click clockwise.
Press the [V/M] key to cancel the VFO search.
Basic Operation

13VR-120D OPERATING MANUAL
Basic Operation
How to Skip (Omit) a Frequency During VFO Search
If the VFO search stops on a frequency or frequencies that you do not need (such as a
spurious radiation from a television), such frequencies can be "skipped" during VFO Search
scanning. This is accomplished by storing these frequencies in a special "Frequency Skip
Memory Bank" reserved for this purpose.
To skip a frequency during VFO Search scanning:
1. Press and hold in the [FUNC] key; while holding it in, press the [SCAN] key momen-
tarily to activate the "Set"(Menu) mode.
2. Rotate the DIAL knob to select Menu #13 [MEMORY].
3. Press and hold in the [FUNC] key; while holding it in, rotate the DIAL knob to select
"SKIP" (the VFO Skip mode).
4. Press and hold in the [FUNC] key; while holding it in, press the [SCAN] key momen-
tarily to exit to the VFO mode.
5. Press the [SCAN] key to initiate scanning.
6. When VFO Search is stops on a frequency that you do not
need, press the [V/M] key momentarily while pressing the
[FUNC] key. The display will indicate " WRITE" as a re-
quest for command confirmation (see next step).
7. Now, press the [V/M] key momentarily while pressing the [FUNC] key again to store
the frequency into the VFO Frequency Skip Memory (VFO Frequency Skip Memory
Write); henceforth, it will be ignored during VFO search.
8. When you have stored all the frequencies you wish to be skipped during VFO Search
scanning, return the setting of Menu #13 to "VFO" instead of "SKIP."
Note that the VR-120D has 64 VFO Frequency Skip Memory Channels (channels num-
bered 00 ~ 63. If your radio seems to have only 64 memories, you need to re-set Menu #13
to the "VFO" option.
To re-institute a frequency into the VFO search loop:
1. Press and hold in the [FUNC] key; while holding it in, press the [SCAN] key to
activate the "Set"(Menu) mode.
2. Rotate the DIAL knob to select Menu #13 [MEMORY].
3. Press and hold in the [FUNC] key; while holding it in, rotate the DIAL knob to select
"SKIP" (the VFO Skip mode).
4. Press and hold in the [FUNC] key; while holding it in, press the [SCAN] key momen-
tarily to exit to the VFO mode.
5. Press the [V/M] key, repeatedly if necessary, to recall the VFO Frequency Skip Memory
mode (an arrow plus the memory register number of the skipped frequency will appear
at the left side of the display).
6. Rotate the DIAL knob to select the channel to be re-instituted.
14 VR-120D OPERATING MANUAL
7. Press the [V/M] key while pressing the [FUNC] key. The
display will indicate "CLEAR" as a request for command
confirmation (see next step).
8. Now, press the [V/M] key while pressing the [FUNC] key
again; this action will delete the channel from the VFO Frequency Skip Memory, so as
to re-institute the frequency into the VFO Search scanning loop.
Pre-Programmed Frequency Search
The VR-120D allows you to program up to eight band segments within which VFO Search
scanning can be limited. This allows your radio's search to be concentrated on the most active
band segments in your local area, without wasting time in unused frequency segments.
To confine your search within one of the pre-programmed segments, you must first set
Menu #11 ("[SEARCH]") to the "LIMIT" option, per the following procedure:
1. Press and hold in the [FUNC] key; while holding it in, press the [SCAN] key to
activate the "Set"(Menu) mode.
2. Rotate the DIAL knob to select Menu #11 [SEARCH].
3. Press and hold in the [FUNC] key; while holding it in, rotate the DIAL knob to select
"LIMIT" as the VFO Search mode.
4. Press and hold in the [FUNC] key; while holding it in, press the [SCAN] key to exit to
the VFO mode.
The VR-120D has been pre-programmed at the factory with default band limits. These are
grouped as "Search Band Memories" per the list below.
Basic Operation
Search Band
Memory # Pre-Programmed
Frequency Range Search Band
Memory # Pre-Programmed
Frequency Range
L00 0.5200 ~ 1.8000 MHz L05 50.5000 ~ 54.0000 MHz
L01 1.8000 ~ 3.6000 MHz L06 88.0000 ~ 108.0000 MHz
L02 3.6000 ~ 10.5000 MHz L07 0.1000 ~ 1299.9950 MHz
L03 10.5000 ~ 21.0000 MHz L- - * 0.1000 ~ 1299.9950 MHz
(Default)
L04 21.0000 ~ 30.0000 MHz
*: You can Customize this Pre-Programmed Frequency Range (see next Page)
Here is the procedure for initiating VFO Search Scanning within one of the above bands:
1. Press the [SCAN] key; the radio will begin VFO Search Scanning (at this point, the
frequency range is unimportant).As soon as scanning begins, you will notice "Lnn"
appearing in the upper left hand area of the display; this indicates that you are now
scanning within one of the band limits.
2. While VFO Search is active, press and hold in the [FUNC] key; while holding it in,
rotate the DIAL knob to select the Search Band Memory as shown above. The VFO
Search will now shift to the band segment within the Pre-Programmed Frequency Range
associated with that memory number.

15VR-120D OPERATING MANUAL
Basic Operation
For example, while you press and hold in the [FUNC] key, rotate the DIAL knob to
select Search Band Memory "L 05." After initiating VFO Search Scanning, the search
will be limited to the frequency range 50.5-54.0 MHz. While VFO Search Scanning is
in progress, you may change ranges by just pressing and holding in the [FUNC] key;
while holding it in, rotate the DIAL knob, and the radio will jump to that range instan-
taneously, and will immediately begin VFO Search Scanning inside the new range.
3.Other aspects of the VFO Search feature within the pre-programmed band limits, such
as the "Resume" mode, are the same as during "regular" VFO Search Scanning.
4. Press the [V/M] key to halt the search and return to manual tuning via the DIAL knob.
You can customize the Pre-Programmed Frequency Range for any of the bands shown on
the previous page, so as to allow you to scan just the band segments you want.
To program the Pre-Programmed Frequency Ranges :
1. Select the frequency you want to be the Lower Frequency Limit for the Pre-Programmed
Frequency Range by rotating the main tuning DIAL.
2. Press and hold in the [FUNC] key; while holding it in, press the [SCAN] key for 2 sec-
onds. The display will indicate "SCH A W" briefly, then the frequency display will return.
3. Next, select the frequency you want to be the Higher Frequency Limit for the Pre-
Programmed Frequency range.
4. Press and hold in the [FUNC] key; while holding it in, press the [SCAN] key for 2
seconds. The display will indicate "SCH B W."
5. Now press the [SCAN] key. This activates the VFO Search Scanning mode.
6. Now store this Pre-Programmed Frequency Range into one of the eight available Search
Band Memories. Press and hold in the [FUNC] key (while you are still scanning).
While holding in the [FUNC] key, press and hold in the [SCAN] key for two seconds.
7. Scanning will now have stopped. Continue to hold in the [FUNC] key, and rotate the DIAL knob
to select the Search Band Memory into which you wish to store the just-programmed band limits.
8. While holding in the [FUNC] key, press and hold in the [SCAN] key for two seconds.
This stores the frequency range into the designated Search Band Memory.
You can check the frequency ranges of the Search Band Memories quickly, to see if you
want to re-program other ranges. To do this:
1. From the VFO mode, press the [SCAN] key while holding in the [FUNC] key to
activate the "Set" (Menu) mode.
2. Rotate the DIAL knob to select Menu #12 [SCHMEM].
3. Rotate the DIAL knob while pressing the [FUNC] key to review the programming of
the Search Band Memories. The Search Band Number (0 ~ 7) will appear at the left
side of the display, while the current frequency range for that Search Band Memory
will appear at the right side of the display.
4. Press the [SCAN] key while pressing the [FUNC] key to exit to normal operation.

16 VR-120D OPERATING MANUAL
Basic Operation
CHANGING THE CHANNEL STEPS
This radio's synthesizer provides the option of utilizing channel steps of 5/6.25/9/10/12.5/
15/20/25/30/50/100 kHz per step, as well as an automatic step selection based on the
current listening frequency ("AUTO"). Additionally, the digit of the frequency to be changed
during "Fast" tuning may be selected, so as to allow rapid frequency excursions at the rate
you prefer.
To change the channel steps:
1. Press the [SCAN] key while pressing the [FUNC] key to activate the "Set" (Menu)
mode.
2. Rotate the DIAL knob to select Menu #00 [STEP].
3. Rotate the DIAL knob while pressing the [FUNC] key to se-
lect the desired frequency step size for normal tuning via the
DIAL knob.
4. If you want to change the frequency digit which changes dur-
ing "Fast" tuning, rotate the DIAL knob to select Menu #01
[F STEP]; press and hold in the [FUNC] key; while holding
it in, rotate the DIAL knob to select the changed during fast
tuning.
5. Press the [SCAN] key while pressing the [FUNC] key to save the new setting and exit
to normal operation.
17VR-120D OPERATING MANUAL
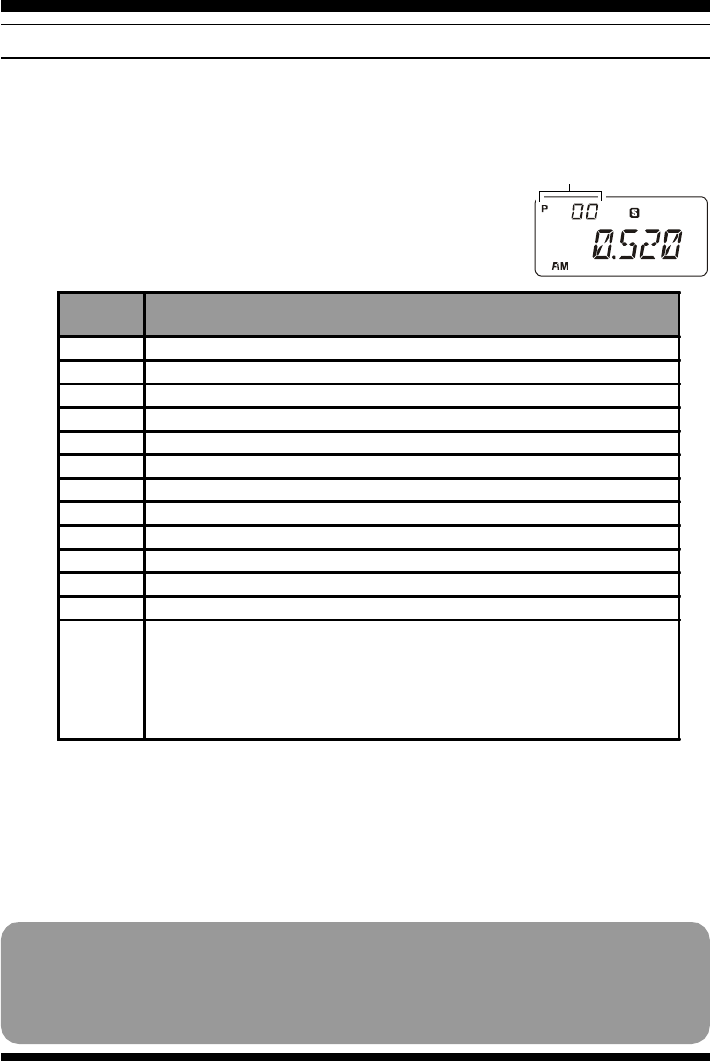
Channel
Number Pre-Programmed Frequency
0 0.520MHz (AM)
1 1.800MHz (AM)
2 3.600MHz (AM)
3 7.000MHz (AM)
4 10.500MHz (AM)
5 21.000MHz (AM)
6 50.500MHz (FM)
7 88.000MHz (WFM)
8 144.000MHz (FM)
9 430.000MHz (FM)
10 1240.000MHz (FM)
11 Weather Channels (WX-01 ~ WX-10)
12
Recalls Memory Group "0" (Memory Channels 800 - 831)
Rotate the DIAL knob to select one of the frequencies for the stations in
Memory Group 0.
Press the [MODE] key to view the actual frequency.
The Memory Group can be changed using Set mode #10, allowing you
access to other groups of Shortwave Broadcast stations.
PRESET MODE
Operation of the VR-120D can be greatly simplified by utilizing the "PRESET" mode.
The PRESET mode provides twelve "starting point" frequencies (one frequency in each of
twelve popular listening bands), from which you may then begin manual tuning.
To operate in the PRESET mode:
1. Press the [BNDs] key for 2 seconds to change the VR-120D
operating mode to PRESET.
2. Press the [BNDs] key to toggle through the following Pre-
Programmed Frequencies.
Basic Operation
Channel Number
3. Once you have chosen a PRESET band segment, you can move off of the Pre-Pro-
grammed Frequency by rotating the DIAL knob. If a particular frequency is of interest
to you for later use, you should store it into a Memory channel, as the Preset frequency
bank resets to its original (default) value if you change banks or exit the Preset mode.
4. Press the [BNDs] key for 2 seconds to disable the PRESET mode and return to
normal operation.
Note: When using the PRESET mode, it isn't possible to utilize the following operations.
• Set Mode 13 ~ Set Mode 25
• Memory Operation
• Search Band Memory
• Memory Scan
• Channel Counter
• Dual Watch
• Priority Monitoring
• Smart Search
18 VR-120D OPERATING MANUAL
Basic Operation
RECEIVING SHORT-WAVE BROADCAST STATIONS
A special bank of prominent Short-wave Broadcast stations has been pre-programmed at
the factory, for quick tuning. Each station selection will have been programmed with four
of its most-often used frequencies, representing both night-time frequencies (generally
below 10 MHz) and day-time frequencies (generally above 10 MHz).
Of course, you are not "required" to listen just to these stations; many other stations will be
found in the frequencies adjacent to those stored in the special Short-wave Broadcast
Memory Bank. However, the pre-programmed stations will provide a "quick start" to your
Short-wave listening enjoyment!
The frequencies of a number of broadcasting stations have been stored in the memory
banks beginning with "8" and "9" (Memory Channels 800 ~ 963).
To utilize the pre-programmed Short-wave Broadcast Memory Channels (Memory Banks):
1. Press the [V/M] key to enter the Memory mode. The memory channel number will
appear in the top left-hand corner of the display, indicating that you are now operating
in the Memory Recall mode.
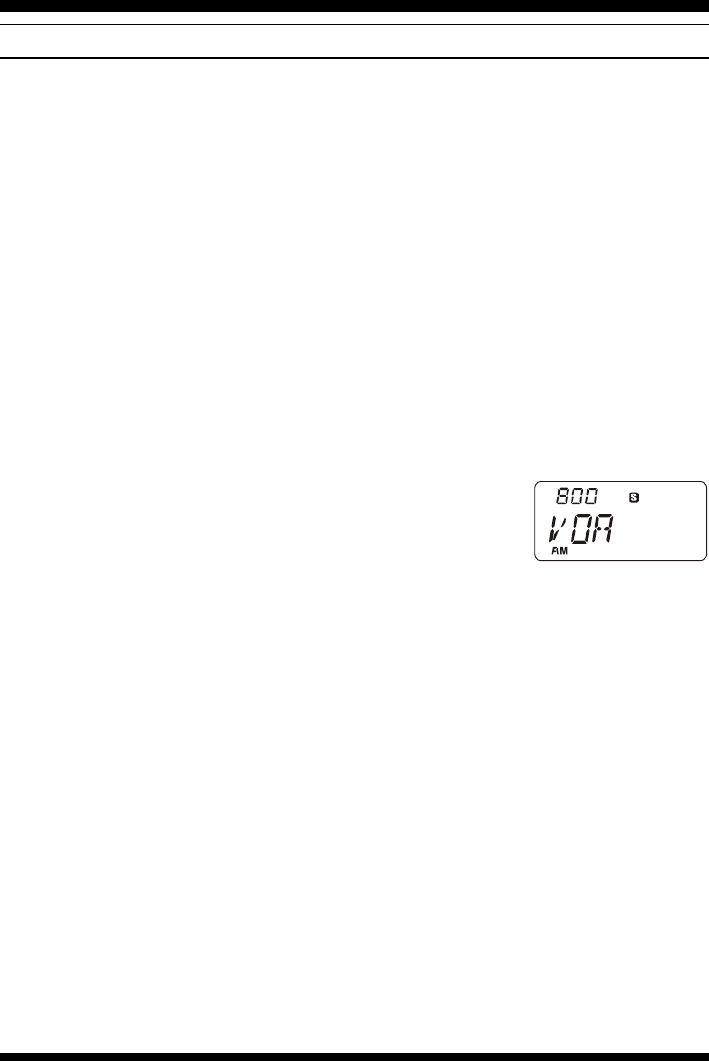
If no other memories have been programmed by you, the
"VOA" broadcast station frequency bank, the first channel
of which is stored on memory channel 800, is displayed in
the display.
Note: The actual operating frequency can be seen by pressing the [MODE] key. If
you press it once more, the broadcast station name will again be displayed on
the LCD.
2. A Rotate the DIAL knob to select from the various Shortwave Broadcast stations.
Because there are several frequencies available for each station, the broadcast station
names will not change upon each click of the DIAL knob.
3. To return to the VFO mode from the Memory mode, just press the [V/M] key.
Because the shortwave broadcast stations schedule their transmissions to different areas of
the world at different times of day, not all frequencies in the list will yield successful
listening. Generally, frequencies below 10 MHz are better at night, while frequencies above
10 MHz are better during the day. Consult the broadcast station's schedule for current
information; this may be found in a shortwave listener's magazine, or on the broadcast
station's Web site.
19VR-120D OPERATING MANUAL
Basic Operation
Display Memory
Channel Frequency
(MHz) Display Memory
Channel Frequency
(MHz) Display Memory
Channel Frequency
(MHz) Display Memory
Channel Frequency
(MHz)
VOA
800 6.030
ITALY
842 6.060
DENMAR
910 9.590
INDIA
942 6.045
801 6.160 843 7.175 911 9.985 943 9.595
802 9.760 844 9.515 912 13.800 944 11.620
803 11.930 845 17.710 913 15.735 945 15.020
CANADA
805 5.995
BELGIU
848 5.985
NORWAY
916 7.485
CHINA
948 7.190
806 7.235 849 9.925 917 9.590 949 5.250
807 9.735 850 11.780 918 9.985 950 9.855
808 11.705 851 13.740 919 13.800 951 11.685
PORTUG
816 9.780
NEDERL
853 5.955
SWEDEN
921 6.065
KOREA
952 5.975
817 11.960 854 6.020 922 9.490 953 7.275
818 15.555 855 9.895 923 13.625 954 9.570
819 21.655 856 11.655 924 17.505 955 13.670
SPAIN
821 7.270
LUXEMB
858 6.090
FINLAN
926 6.120
JAPAN
956 6.155
822 9.520 - - 927 9.630 957 7.200
823 11.920 - - 928 11.755 958 9.750
824 15.585 - - 929 9.795 959 11.850
BBC
832 6.195
WELLE
900 3.955
RUSSIA
932 5.940
AUSTRA
960 5.995
833 9.410 901 6.075 933 5.920 961 9.580
834 12.095 902 9.545 934 7.205 962 9.660
835 15.310 903 9.735 935 12.030 963 12.080
FRANCE
837 6.045
SWISS
905 3.985
ISRAEL
937 9.435
-
- -
838 9.790 906 6.165 938 11.585 - -
839 11.670 907 9.885 939 15.615 - -
840 15.525 908 15.220 940 17.545 - -
Short-wave Broadcast Station List
You can change the frequencies of stations in the above frequency list, if the station's
schedule and/or channel frequency should change. Here is the procedure:
1. Tune the radio to the new frequency of the Broadcast Station.
2. Press the [V/M] key to enter the Memory mode.
3. Rotate the DIAL knob to select the memory channel on which you wish to store the
change.
4. Press the [FUNC] key, then press [V/M] key.
"WRITE" will appear on the display, to confirm the updating of the memory channel re-
flecting the new frequency.
Note: If you perform a complete system reset of the radio's microprocessor, the frequency
list will revert to the original factory-programmed configuration, as shown below.
20 VR-120D OPERATING MANUAL
Memory Mode
The VR-120D provides 640 "standard" memory channels, numbered "000" through "963"
Memory channels may be used to store frequencies of particular interest, for convenient
recall without the need to scan through an entire operating band.
These memories are partitioned into ten Memory Banks, each
holding up to 64 memory channels. The Memory Bank number is
the first digit of the Memory Channel number, so Memory Chan-
nel 005 is in Memory bank "0", while Memory Channel 425 is in
Memory Bank "4."
Note: Do not operate in the Memory Mode while Menu #13's setting is "SKIP." The
"SKIP" memory bank is limited to 64 channels (total).
MEMORY STORAGE
Two forms of memory storage are available on the VR-120D:
1. "Simple" memory storage automatically memorizes the desired frequency into the next-
available unused memory channel register (without regard to any particular memory
channel number).
2. "Designated" memory storage allows you to assign the frequency data to any desired
memory channel number.
Simple Storage
1. While operating in the VFO mode, select the desired frequency and reception mode
(AM, FM, W-FM) for the station to be memorized.
2. Press and hold in the [FUNC] key, then press the [V/M] key
momentarily. The microprocessor will automatically select
the next-available "open" memory channel (a memory regis-
ter on which no data has been stored). On the left upper side
of the display, a three-digit number will appear, indicating
the channel number which will be used for channel data storage. On the right side,
"MW NAM" will appear ("MW" stands for "Memory Write").
3. If you wish to append an alpha-numeric label (name) to the channel, press and hold in
the [FUNC] key, then press the [SCAN] key. Now skip to step (3.) of the Labeling
Memories section below, and perform steps (3.) through (6.).
4. Now, press the [V/M] key once more while still holding in
the [FUNC] key. This stores the frequency into the memory.
"WRITE" will appear of the display, to confirm that the fre-
quency data was successfully stored.
Note: You must press the [V/M] key per this step whether or not you are appending an
alpha-numeric label to a memory.
“open” Memory Channel
Memory Channel “425”
Memory Bank “4”

21VR-120D OPERATING MANUAL
Memory Mode
Designated Memory Storage
If you wish to store the frequency into a particular memory channel number, use the "Des-
ignated Memory" storage procedure:
Example: Store 162.450 MHz into Memory Channel 010, and append the label
"NOA450" to the channel data:
1. While operating in the VFO mode, rotate the DIAL knob to select 162.450 MHz.
2. Press and hold the [FUNC] key; while holding it in, then press the [V/M] key. A chan-
nel will appear at the left upper side of the display, and "MW NAM" will appear.
3. Rotate the DIAL knob to select memory # 010.
4. Press the [FUNC] key, then press [SCAN]. You may now release the [FUNC] key.
5. You will observe a space blinking on the LCD; this indicates that you are in the alpha-
numeric label entry mode.
6. Rotate the DIAL knob to select the "N" character.
7. Now press the [FUNC] key; while holding it in, rotate the DIAL one click clockwise to
move on to the next digit. Release the [FUNC] key.
8. Rotate the DIAL knob to select the "O" character.
9. Now press the [FUNC] key; while holding it in, rotate the DIAL one click clockwise to
move on to the next digit. Release the [FUNC] key.
10. Rotate the DIAL knob to select the "A" character.
11. Now press the [FUNC] key; while holding it in, rotate the DIAL one click clockwise to
move on to the next digit. Release the [FUNC] key.
12. Rotate the DIAL knob to select the "4" character.
13. Now press the [FUNC] key; while holding it in, rotate the DIAL one click clockwise to
move on to the next digit. Release the [FUNC] key.
14. Rotate the DIAL knob to select the "5" character.
15. Now press the [FUNC] key; while holding it in, rotate the DIAL one click clockwise to
move on to the next digit. Release the [FUNC] key.
16. Rotate the DIAL knob to select the "0" character.
17. Press the [V/M] key while pressing the [FUNC] key to save the alpha-numeric infor-
mation.
18. Now, press the [V/M] key once more while still holding in the [FUNC] key. This
stores the frequency into the memory. "WRITE" will appear of the display, to confirm
that the frequency data was successfully stored.
You still are operating in the VFO mode, and you may store other channel frequencies into
other memory channel registers in the same manner. To recall these memories, proceed to
the next section.
22 VR-120D OPERATING MANUAL
Memory Mode
MEMORY RECALL
Recall of memorized channels is very simple:
1. Press the [V/M] key to enter the Memory mode. The memory
number will appear in the top left-hand corner of the display,
indicating that you are now operating in the Memory Recall
mode.
2. Rotate the DIAL knob to select the desired memory channel.
3. Rotate the DIAL knob, while pressing the [FUNC] key, to recall the first memory
channel of each memory bank.
4. To return to the VFO mode from the Memory mode, just press the [V/M] key.
LABELING MEMORIES
You may wish to append an alpha-numeric "Tag" (label) to a memory or memories, to aid
in recollection of the channel frequency's significance (such as a Broadcast Station name,
etc.). Alpha-numeric labels may be appended at the time of storage of the frequency data,
or at a later time. In either case, the storage process is basically identical.
An example of alpha-numeric label programming was presented earlier in detailed form.
The section to follow will summarize the process.
To label a previously-stored memory channel:
1. Recall the memory channel on which you wish to append a label.
2. Press the [SCAN] key while pressing the [FUNC] key to
enable programming of the name tag. You will notice the first
entry's place blink.
3. Rotate the DIAL to select the first digit of the desired label.
4. Rotate the DIAL knob clockwise while pressing the [FUNC]
key to move the next character. Now release the [FUNC]
key.
5. Repeat steps (3.) to (4.) to program the remaining letters or
numbers of the desired label. A total of six characters may be used in the creation of a
label.
6. When you have completed the creation of the label, press the [V/M] key, while press-
ing the [FUNC] key, to save the label.
space Þ A ・・・ZÞ 0 ・・・9 Þ * Þ + Þ − Þ / Þ < Þ > Þ _ Þ space Þ A ・・・Z・・・
23VR-120D OPERATING MANUAL
Memory Mode
MEMORY CHANNEL SCAN
While using the Memory mode, press the [SCAN] key to initiate Memory Channel Scan-
ning. As with VFO Search, the scanner will halt on any signal encountered that is strong
enough to open the squelch; it will then resume scanning according to the setting of the
"RESUME" mode, described previously. Press the [V/M] key to halt the scan manually.
Preferential Memory Scan (PMS)
This radio also allows you to set up a "Preferential Scan List" of channels which you can
"flag" within the memory system. These channels are designated by a "PS" icon when you
have selected them, one by one, for the Preferential Scan List.
Here is the procedure for setting up the Preferential Scan List:
1. Press the [V/M] key to enter the Memory mode, if you are not using memories already.
2. Rotate the DIAL knob to select the channel which you wish to add to the Preferential
Scan List.
3. Press the [SCAN] key for 2 seconds. The "PS" icon will ap-
pear at the top left corner of the display, indicating that the
channel is now in the Preferential Scan List.
To remove a channel from the Preferential Scan List, repeat the above procedure: rotate
the DIAL knob to select the channel which you wish to delete from the Preferential Scan
List, then press the [SCAN] key for 2 seconds (the "PS" icon will disappear).
To initiate Preferential Memory Scan:
1. Press the [SCAN] key to begin Memory Channel Scanning.
2. Once you have engaged Memory Channel Scanning, press
the [SCAN] key for 2 seconds to initiate Preferential Memory
Scanning (the "P.S" icon will appear). Only the channels which
have a "P.S" icon appended to the channel number will now
be scanned.
3. To return to normal Memory Channel Scanning, just press the [SCAN] key for 2
seconds (the scanner will again scan all memory channels).
4. Press the [V/M] key to cancel Preferential Memory Scanning.
24 VR-120D OPERATING MANUAL
Memory Mode
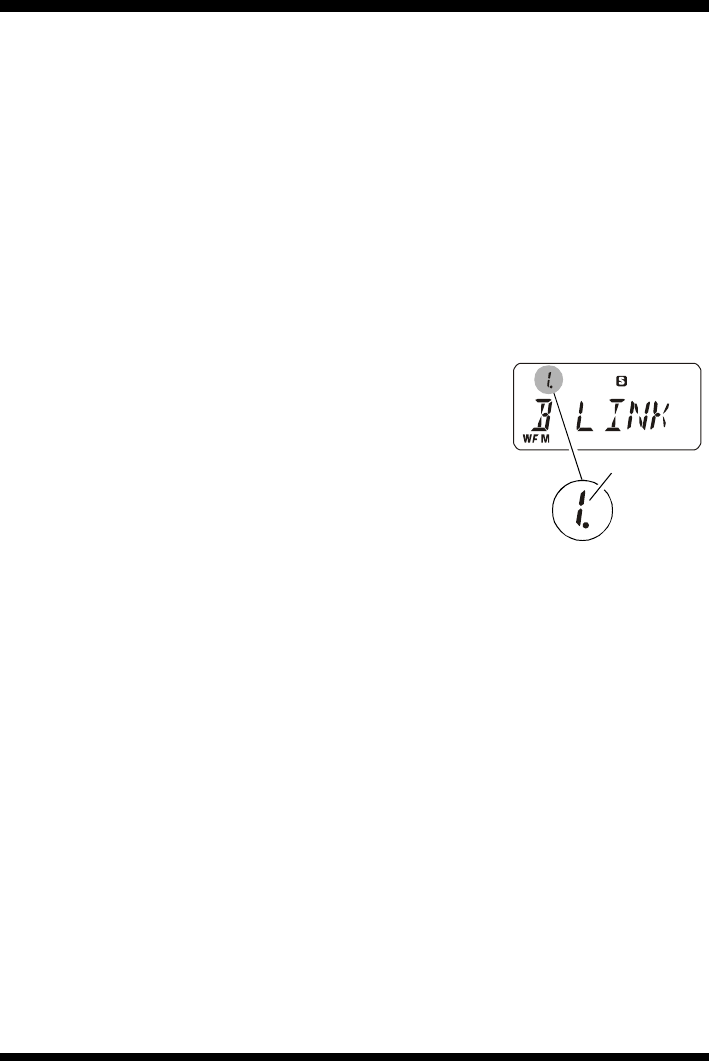
Memory Bank Scanning
This feature allows you to scan one or more Memory Banks during Memory Channel
Scanning, while ignoring other banks. For example, you may wish to load broadcast sta-
tions into certain Memory Banks for convenient recall, but ignore them during scanning
(as they are always active, the scanner will halt on every such station).
To set up scanning of certain Memory Banks:
1. If you are in the Memory mode, change to the VFO mode by pressing the [V/M] key.
2. Press the [SCAN] key while pressing the [FUNC] key to activate the "Set" (Menu)
mode.
3. Rotate the DIAL knob to select Menu #14 [SCAN].
4. Press and hold in the [FUNC] key; while holding it in, rotate the DIAL knob to select
"BANK" as the Memory Bank mode.
5. Now rotate the DIAL knob to select Menu #15 [B LINK].
6. Rotate the DIAL knob while pressing the [FUNC] key to
select the Memory Bank which you wish to include while
scanning. Now release the [FUNC] key.
7. Rotate the DIAL knob a few clicks; you will observe an
(".") icon toggling on and off below the Memory Bank
number. The "." indicates that the Memory Bank is now in
the Preferential Bank Scanning List.
Now again press and hold in the [FUNC] key, and rotate the DIAL knob to select other
Memory Banks to be included in (or excluded from) the Preferential Bank Scanning List.
Release the [FUNC] key, and rotate the DIAL knob to apply or remove the "." from the
selected Memory Bank. Press the [SCAN] key while pressing the [FUNC] key when all
Bank selections have been made.
8. Again press the [SCAN] key while pressing the [FUNC] key to exit the Menu mode
and return to normal operation.
Press the [SCAN] key while pressing the [FUNC] key to exit the Menu mode and
return to normal operation.
9. Press the [V/M] key to enter the Memory mode.
10. Press the [SCAN] key to initiate Memory Bank Scanning. Only the channels in the
Memory Bank which have an "." below the Memory Bank number will be scanned.
11. To return to normal Memory Channel Scanning, first press the [V/M] key to return to the
VFO mode, then re-enter the "Set" (Menu) mode by pressing the [SCAN] key while
holding in the [FUNC] key. Rotate the DIAL knob to select Menu #14, and set Menu #14
to "ALL" by pressing the [FUNC] key and rotating the DIAL knob one click .
12. Press the [SCAN] key while pressing the [FUNC] key to exit the Menu mode.
Memory Bank Number

25VR-120D OPERATING MANUAL
Memory Mode
DELETING MEMORY CHANNELS
You may wish to delete a certain Memory Channel's data, when you no longer have a
reason to recall that channel.
To delete a channel's data:
1. Recall the Memory Channel to be deleted.
2. Press the [V/M] key while pressing the [FUNC] key. You
will observe "CLEAR" on the display.
3. Press the [V/M] key again, while pressing the [FUNC] key,
to delete the Memory Channel.
Important Note:Deleted Memory Channel data cannot be restored.
CLEARING OF A MEMORY BANK
This feature allows you to clear (discard) the data from all memory channels in a desired
memory bank at the same time.
1. Set the radio to the VFO mode by pressing the [V/M] key.
2. Press the [SCAN] key, while pressing the [FUNC] key, to activate the "Set" (Menu)
mode.
3. Rotate the DIAL knob to select Menu #16 [BANKCL].
4. Rotate the DIAL knob one click clockwise while pressing the [FUNC] key to select
the desired Memory Bank.
5. The display will now indicate "CLEAR" for about four seconds. Thereafter, clearing
of the prescribed Memory Bank will be complete.
6. Press the [SCAN] key while pressing the [FUNC] key to exit to normal operation.
Important Note:A cleared Memory Bank can not have its channels' data restored. All
data for that bank will have to be re-entered.
26 VR-120D OPERATING MANUAL
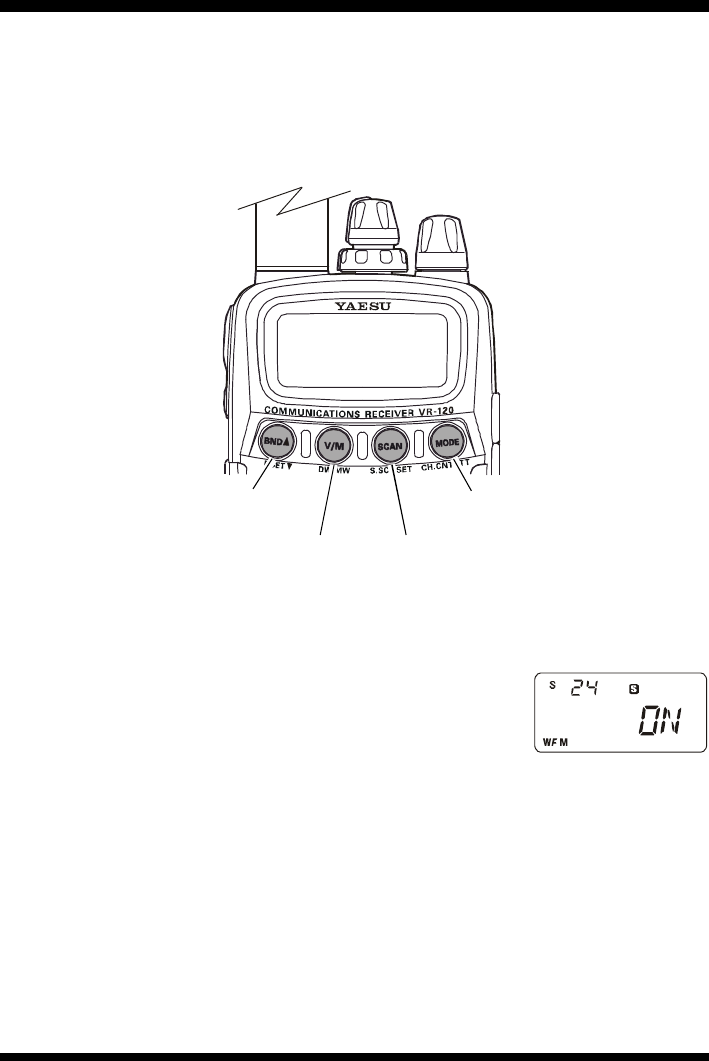
One-Touch Memory
When you activate the OTM feature, you can recall up to four favorite frequencies directly
via the [BNDs], [V/M], [SCAN] and [MODE] keys. Memory channels "060," "061,"
"062," and "063" are assigned as "shortcuts" to the aforementioned panel keys, and data
for these channels should be stored as described previously. Therefore, the [BNDs], [V/
M], [SCAN] and [MODE] keys become shortcut keys which recall memory channels "060,"
"061," "062," and "063" for quick access to those channels.
1. Set the radio to the VFO mode by pressing the [V/M] key.
2. Press the [SCAN] key while pressing the [FUNC] key to activate the "Set" (Menu)
mode.
3. Rotate the DIAL knob to select Menu #24 [O T M].
4. Rotate the DIAL knob one click clockwise while pressing
the [FUNC] key to select "ON."
5. Press the [SCAN] key while pressing the [FUNC] key. One
touch memory now becomes operational.
Notes: lWhen using OTM, only the ATT key can be used among the operating feature
keys.
lWhen using OTM, it isn't possible to operate using the DIAL.
lTo cancel OTM, return to step (2) above, and select "OFF" when you get to
Menu #24.
Memory channel
060
Memory channel
061 Memory channel
062
Memory channel
063
27VR-120D OPERATING MANUAL
Channel Counter
The Channel Counter allows measuring of the frequency of a nearby transmitter, without
knowing that frequency in advance. The frequency can be measured by bringing the VR-
120D close to the transceiver which is transmitting.
The VR-120D performs a high-speed search within a ±50 MHz range from the frequency
displayed on the LCD. When the strongest signal in that range is identified, the VR-120D
displays the frequency of that (strongest) signal, and writes it into the special "channel
counter memory.
Note: This channel counter is designed to provide an indication of the operating fre-
quency of the incoming signal, one that is close enough to allow the user to tune
precisely to the other station's frequency. This feature is not, however, designed to
provide a precise determination of the other station's frequency.
1. Set the radio to the VFO mode by pressing the [V/M] key.
2. Bring VR-120D into close proximity to the transmitter to be measured.
3. Press the [MODE] key for 2 seconds.
lWhile searching, a "count-down" display will appear
(COUNT4 · · · COUNT1), and then the frequency of the
nearby station will be displayed after the search ends.
lWhen the channel counter is active, the antenna circuit is detached. Therefore, only
stations in close proximity may have their frequencies measured using this feature.
lWhen it isn't possible to determine the signal's frequency, "--NO--" will be dis-
played on the LCD, and the VR-120D will return to the VFO mode.
lThe search width of the Channel Counter can be changed via the Menu mode (item
#20).
lWhen the incoming signal level from the other station is extraordinarily high, you
may need to increase the distance between the VR-120D and the other station, in
order to get correct indication of the frequency.
4. Press the [V/M] key. The radio will exit from Channel Counter operation.
The memory of the Channel Counter is deleted each time a new search takes place.
28 VR-120D OPERATING MANUAL
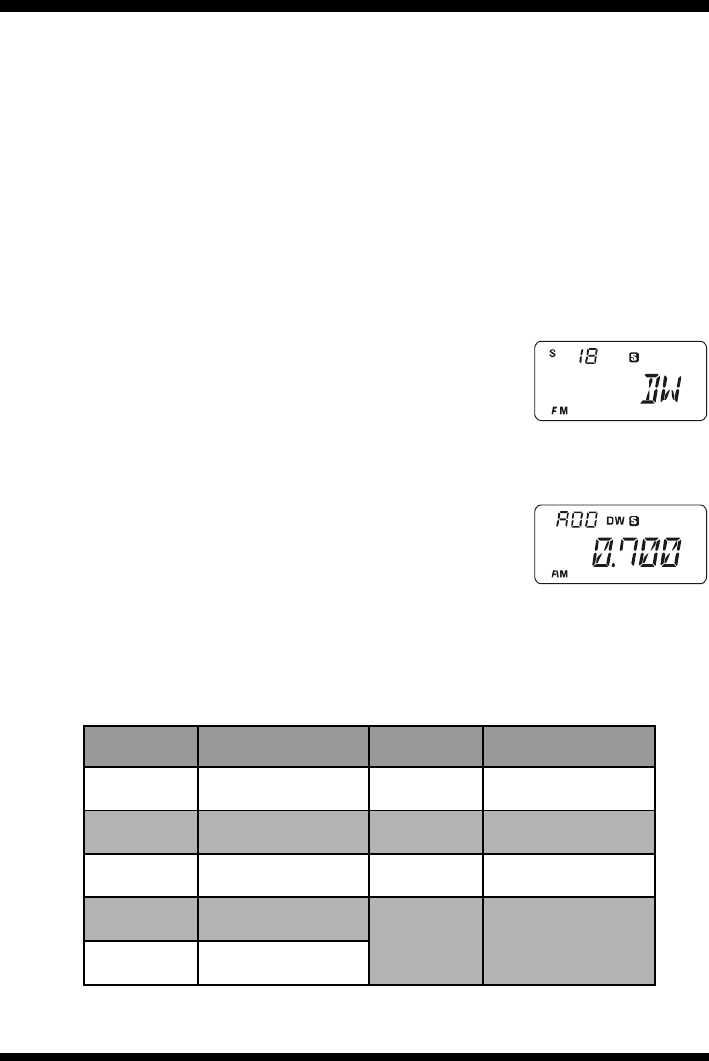
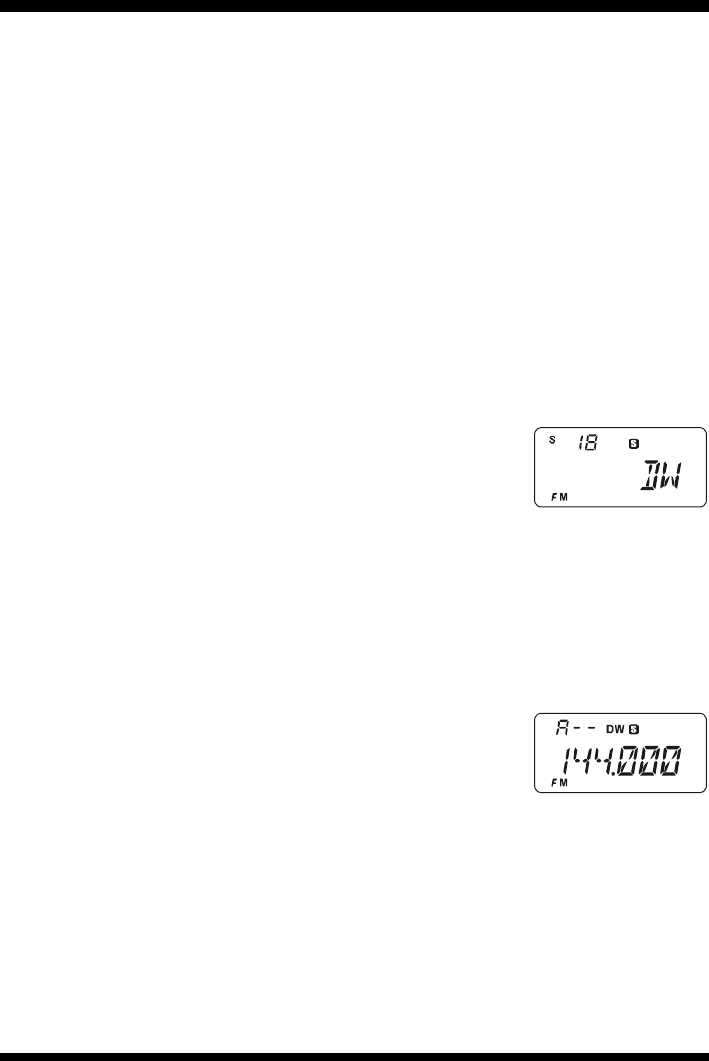
Dual Watch
The Dual Watch feature allows you to monitor two frequencies, with the radio rapidly
switching between the two channels, looking for activity. As with scanning operation, the
VR-120D will halt when one of the channels becomes occupied by a signal strong enough
to open the Squelch.
The Dual Watch system includes the option to use a bank of special memories which can
store up to ten pairs of Dual Watch frequencies. These memories are pre-programmed at
the factory, but can quickly be programmed by you for monitoring of your favorite fre-
quencies on a priority basis.
To activate Dual Watch:
1. Press the [SCAN] key, while pressing the [FUNC] key, to activate the "Set" (Menu)
mode.
2. Rotate the DIAL knob to select Menu #18 [DW/PW].
3. Press and hold in the [FUNC] key; while holding it in, rotate
the DIAL knob to select "DW" as the Priority Monitoring
mode.
4. Press the [SCAN] key, while pressing the [FUNC] key, to save the new setting and
exit to normal operation.
5. Press and hold in the [V/M] key for 2 seconds. The radio will
begin Dual Watch operation.
6. Once you have initiated Dual Watch operation, press and hold
in the [FUNC] key; while holding it in, rotate the DIAL knob
to the Dual Watch Memory as shown below. Dual Watch will cause the radio to switch
back and forth (rapidly) between the Pre-Programmable Frequency pair selected (for
example, if you rotate the DIAL knob to [A06], Dual Watch will switch every 0.5
second between 121.500 MHz and 146.940 MHz).
*: You can Customize the Pre-programmed Frequency Pair.
Dual Watch
Memories
Pre-Programmed
Frequency Pair
Dual Watch
Memories
Pre-Programmed
Frequency Pair
A00
b00
0.7000 AM
1.0000 AM
A05
b05
52.5250 FM
75.0000 FM
A01
b01
2.1820 AM
2.5000 AM
A06
b06
121.5000 AM
146.9400 FM
A02
b02
6.1950 AM
9.7400 AM
A07
b07
156.8000 FM
446.0000 FM
A03
b03
11.8500 AM
17.8250 AM A- -
b- -
121.5000 AM
156.8000 FM
(Default)
A04
b04
21.6550 AM
29.6000 FM
29VR-120D OPERATING MANUAL
Dual Watch
7. Dual Watch will halt when the VR-120D receives a signal strong enough to break
through the Squelch threshold. The radio will then hold on that frequency according to
the setting of the "RESUME" mode, described previously.
8. To stop Dual Watch manually, just rotate the DIAL knob one click. If you like, you can
then tune manually back and forth between the two Dual Watch memories by rotating
the DIAL knob.
9. Press the [V/M] key to cancel Dual Watch operation and return to the previous operat-
ing mode (VFO or Memory).
You can change any or all of the Dual Watch pre-programmed frequency pairs in accor-
dance with your operating preferences.
To program a Dual Watch Memory frequency pair:
1. Press the [SCAN] key, while pressing the [FUNC] key, to activate the "Set" (Menu)
mode.
2. Rotate the DIAL knob to select Menu #18 [DW/PW].
3. Press and hold in the [FUNC] key; while holding it in, rotate
the DIAL knob to select "DW" as the Priority Monitoring
mode.
4. Press the [SCAN] key while pressing the [FUNC] key to
save the new setting and exit to normal operation.
5. Select one of the frequencies you wish to utilize for Dual Watch, using the main DIAL.
6. Press and hold in the [V/M] key for 2 seconds while pressing the [FUNC] key. "DWA
W" (Dual Watch Channel "A") will appear on the display.
7. Now select the second frequency you wish to utilize for Dual Watch.
8. Press and hold in the [V/M] key for 2 seconds while pressing the [FUNC] key. "DWB
W" (Dual Watch Channel "B") will appear on the display.
9. Press and hold in the [V/M] key for 2 seconds to activate
Dual Watch between the above frequency pair.
10. Press and hold in the [V/M] key for 2 seconds while pressing
the [FUNC] key.
11. Now, store this frequency pair into one of the eight available Dual Watch Memory
registers. Just press and hold in the [FUNC] key; while holding it in, rotate the DIAL
knob to the Dual Watch Memory register into which you want to store this frequency
pair.
12. Press and hold in the [V/M] key for 2 seconds while pressing the [FUNC] key.
30 VR-120D OPERATING MANUAL
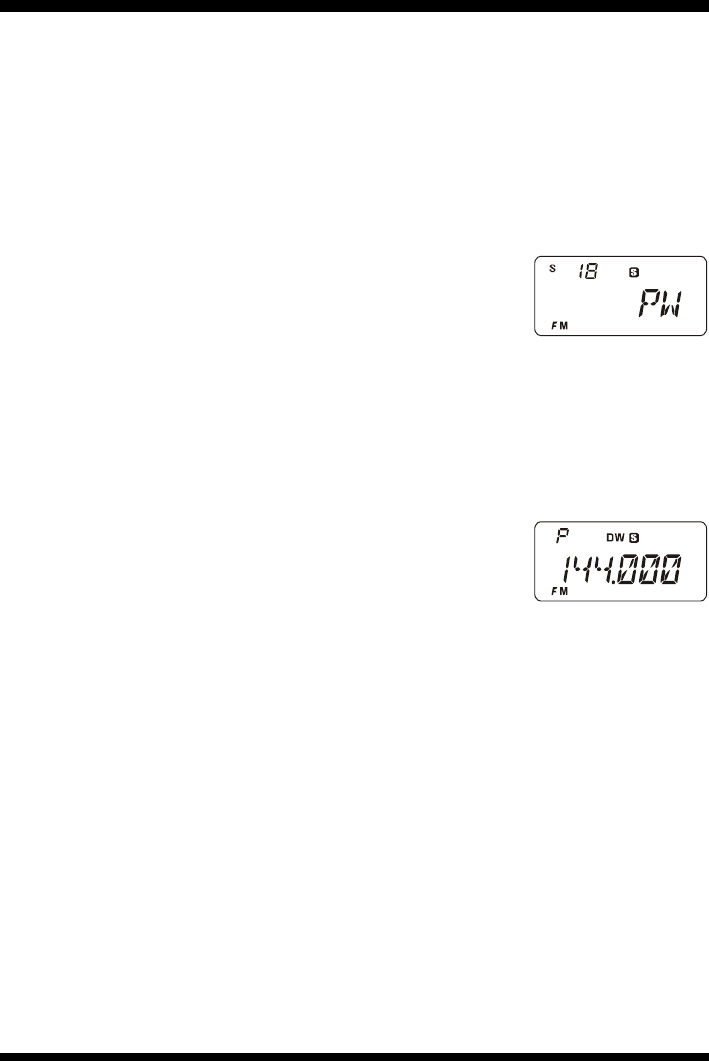
Priority Monitoring
The "Priority" feature, which is somewhat similar to Dual Watch, allows you to monitor a
VFO frequency while checking a "Priority Memory" channel every five seconds for activ-
ity. If the Priority Memory channel becomes active with a signal strong enough to open the
Squelch, the radio will halt on that frequency and will hold there in accordance with the
setting of the "RESUME" mode, described previously.
To set up Priority Monitoring:
1. Press the [SCAN] key, while pressing the [FUNC] key, to activate the "Set" (Menu)
mode.
2. Rotate the DIAL knob to select Menu #18 [DW/PW].
3. Press and hold in the [FUNC] key; while holding it in, rotate
the DIAL knob to select "PW" as the Priority Monitoring
mode.
4. Press the [SCAN] key while pressing the [FUNC] key to save the new setting and exit
to normal operation.
5. Select the frequency you wish to be the "Priority" frequency, using the main DIAL.
6. Press and hold in the [V/M] key for 2 seconds, while holding in the [FUNC] key, to
store the frequency into the Priority Memory Channel.
7. Select the desired "main monitoring" frequency on the VFO.
8. Press and hold in the [V/M] key for 2 seconds to activate
Priority Channel monitoring. "P" and "DW" will appear in
the display and "Priority" will be activated. If activity ap-
pears on the Priority Memory, the radio will hold on that fre-
quency per the programming of the "RESUME" mode.
9. Press the [V/M] key to cancel Priority Monitoring operation.

31VR-120D OPERATING MANUAL
Smart SearchTM
The Smart SearchTM feature allows you to load frequencies automatically according to where
activity is encountered by your radio. This feature is especially helpful when visiting a new city,
where you may not know the frequencies of active stations. The VR-120D includes a special 21-
channel Smart SearchTM Memory Bank which is separate from the main memory system.
To set up Smart SearchTM operation:
1. Set the radio to the VFO mode by pressing the [V/M] key, if necessary.
2. Tune the radio to the frequency you wish to use as the lower frequency limit for the
Smart SearchTM sweep.
3. Press and hold in the [SCAN] key for 2 seconds ("S-" will be shown in the top of the
display; this means that Smart SearchTM is enabled), then rotate the DIAL knob one
click clockwise to select the Smart SearchTM "SL" memory. If you have stored a fre-
quency into the "SL" memory already, its frequency will be displayed.)
4. Press and hold in the [SCAN] key for 2 seconds while pressing the [FUNC] key.
This stores the lower frequency limit into the Smart SearchTM "SL" memory ("LOW
W" will appear on the display).
5. Now tune the radio to the frequency you wish to use as the starting frequency for the Smart
SearchTM sweep. This frequency must be different from the upper and lower limits.
6. Press and hold in the [SCAN] key for 2 seconds ("S-" will be shown in the top of the
display; this means that Smart SearchTM is enabled), then rotate the DIAL knob two
clicks clockwise to select the Smart SearchTM "SS" memory. If you have stored a fre-
quency into the "SS" memory already, its frequency will be displayed.
7. Press and hold in the [SCAN] key for 2 seconds while pressing the [FUNC] key.
This stores the lower frequency limit into the Smart SearchTM "SS" memory ("ST W"
will appear on the display).
8. Tune the radio to the frequency you wish to use as the upper frequency limit for the
Smart SearchTM sweep.
9. Press and hold in the [SCAN] key for 2 seconds ("S-" will be shown in the top of the
display; this means that Smart SearchTM is enabled), then rotate the DIAL knob three
clicks clockwise to select the Smart SearchTM "SU" memory. If you have stored a
frequency into the "SU" memory already, its frequency will be displayed.
10. Press and hold in the [SCAN] key for 2 seconds while pressing the [FUNC] key.
This stores the upper frequency limit into the Smart SearchTM "SU" memory ("UP W"
will appear on the display).
To initiate Smart Search operation:
1. Be sure that the SQL control is set such that the background noise is silenced.
2. Press and hold in the [SCAN] key for 2 seconds to enter the Smart SearchTM mode,
then again press and hold in the [SCAN] key for 2 seconds. Smart SearchTM scanning
will now begin. All channels where activity is present (up to 10 in each direction) will
be loaded into the Smart SearchTM memories. Whether or not all 21 memories are
filled, the Smart SearchTM scan will stop after one sweep in each direction.
3. Now you can turn the DIAL to select the Smart SearchTM memories.
4. To disable Smart SearchTM operation, press the [V/M] key.

32 VR-120D OPERATING MANUAL
Occasionally, a static discharge or other anomaly will cause the microprocessor to go into
erratic behavior. This can frequently be corrected by a "System Reset" whereby the micro-
processor is cleared of all "soft" data. If you just want to clear the Menu and Function
Mode settings to their factory defaults, without losing your frequency memories, use the
"Function/Menu Reset" procedure.
SYSTEM RESET
(To reset the Function mode and Set (Menu) mode settings to their factory defaults)
1. Turn the radio off.
2. Press and hold in the [FUNC] and [MONI] keys while turning the radio on (press the
[V/M] key at this time to cancel the Reset procedure).
3. Press the [V/M] key, while pressing the [FUNC] key, to reset the all settings to their
factory defaults.
ALL RESET
(To clear all memories and other settings to factory defaults)
1. Turn the radio off.
2. Press and hold the [FUNC], [MONI] and [BNDs] keys while turning the radio on
(press the [V/M] key at this time to cancel the Reset procedure).
3. Press the [V/M] key, while pressing the [FUNC] key, to reset the all settings to their
factory defaults.
Reset Procedures

33VR-120D OPERATING MANUAL
Set Mode
The VR-120D "Set" mode is an easy-to-use Menu system, which allows customization of
many VR-120D configuration parameters.
Use the following "generic" procedure to engage the "Set" (Menu) mode:
1. Set the radio to the VFO mode by pressing the [V/M] key.
You cannot access the Menu while in the Memory mode.
2. Press the [SCAN] key, while pressing the [FUNC] key, to activate the "Set" (Menu) mode.
The Menu Item number and a brief title for the Menu Item will appear on the display.
3. Rotate the DIAL knob to select the Menu Item you wish to work on.
4. Rotate the DIAL knob, while pressing the [FUNC] key, to change the value or condi-
tion for the selected Menu Item.
5. Press the [SCAN] key, while pressing the [FUNC] key, to save the new setting and
exit to normal operation.
Menu item Function Default
00 STEP Channel Steps AUTO
01 F STEP Selects the desired "Fast" Channel Steps 1 MHz
02 LAMP Selects the LCD Lamp Mode AUTO
03 SAVE Selects the Battery Save Interval ("sleep" ratio) 1 sec (1:4)
04 OFFTIM Sets the "Sleep Timer" Time OFF
05 PAUSE Sets the Delay time for scanning 5 sec
06 BEEP Enables/Disables the Keypad Beeper ON
07 VOLT Checks Battery Voltage (1.9 ~ 3.5 V) -
08 SM SEN The setting of S-meter sensitivity NORMAL
09 SM BUZ Enable/Disables the S-Meter Buzzer OFF
10 GROUP Selects the Preset Mode (# P12) GROUP0
11 SEARCH Selects the VFO Scan Type VFO
12 SCHMEM Displays the "Search Band" Memory frequency pair -
13 MEMORY Selects Memory Channel operation mode between the
"regular" memories (VFO) or "skipped" memory (SKIP). VFO
14 SCAN Enables/Disables Memory Bank Scanning ALL
15 B LINK Sets up the Bank Link Feature -
16 BANKCL Clears (masks) all the Memory Channels in a particular
Memory Bank. -
17 SKIPCL Clears all Memory Channels in "Skip" Memory -
18 DW/PW Dual Watch / Priority Monitoring DW
19 S SCH Selects the Smart Search operating mode SINGLE
20 CH CNT Channel Counter Search Width 50 MHz
21 FLEX S Enables/Disables the "flexible" frequency step feature ON
22 AM ANT Selection of the antenna used in the AM mode EXT
23 FM ANT Selection of the antenna used in the FM mode EXT
24 O T M Activation of One touch Memory OFF
25 GAME This VR-120D includes a simple "slot machine" game in
which three digits scroll in a random fashion. -
±

34 VR-120D OPERATING MANUAL
Set Mode
Set Item 00 [STEP]
Function: Channel Steps
Available Values: AUTO / 5 / 6.25 / 9 / 10 / 12.5 / 15 / 20 / 25 / 30 / 50 / 100 kHz
Default: AUTO
Set Item 01 [F STEP]
Function: Selects the desired "Fast" Channel Steps
Available Values: 10 k / 100 k / 1M / 10 M / 100 MHz
Default: 1 MHz
Set Item 02 [LAMP]
Function: Selects the LCD Lamp Mode
Available Values: AUTO / ON /OFF
AUTO: Illuminates the LCD/Keypad lamp for 5 seconds when
any key is pressed.
ON: Pressing the LAMP key toggles LCD/Keypad lamp On/
Off.
OFF: Disables the LCD/Keypad lamp.
Default: AUTO
Set Item 03 [SAVE]
Function: Selects the Battery Save Interval ("sleep" ratio)
Available Values: OFF / 1:4 (1 sec) / 1:12 (3 sec) / 1:20 (5 sec) / 1:28 (7 sec)
/ 1:36 (9 sec)
Default: 1:4 (1 sec)
The VR-120D will be turned off for the interval programmed via this Menu item, then it
will check the current frequency for 250 ms, looking for activity.
Set Item 04 [OFFTIM]
Function: Sets the "Sleep Timer" Time
Available Values: OFF / 30 / 60 / 90 min.
Default: OFF
Set Item 05 [PAUSE]
Function: Sets the Delay time for scanning
Available Values: 1sec ~ 12sec
Default: 5 sec
This Menu Item defines the length of time the scanner will hold on a frequency.

35VR-120D OPERATING MANUAL
Set Item 06 [BEEP]
Function: Enables/Disables the Keypad Beeper
Available Values: ON/OFF
Default: ON
Set Item 07 [VOLT]
Function: Checks Battery Voltage (1.9 ~ 3.5 V)
Set Item 08 [SM SEN]
Function: The setting of S-meter sensitivity
Available Values: NORMAL / LOW (FM only)
NORMAL: Makes the sensitivity of the S meter "Normal."
LOW: Lowers the sensitivity of the S meter. (FM only)
Default: NORMAL
Set Item 09 [SM BUZ]
Function: Enables/Disables the S-Meter Beeper; when the Beeper is engaged,
the moving S-meter is disabled.
Available Values: OFF/BUZZER
Default: OFF
Set Item 10 [GROUP]
Function: Selects the Preset Mode's Memory Group for Preset Channel 12
Available Values: GROUP0 / GROUP1 / GROUP2 / GROUP3
/ GRPEX0 / GRPEX 1 / GRPEX2 / GRPEX3 / GRPEX4
/ GRPEX5 / GRPEX6 / GRPEX7
GROUP0: Memory Channel 800 ~ 831
GROUP1: Memory Channel 832 ~ 863
GROUP2: Memory Channel 900 ~ 931
GROUP3: Memory Channel 932 ~ 963
GRPEX0: Memory Channel 800 ~ 815
GRPEX1: Memory Channel 816 ~ 831
GRPEX2: Memory Channel 832 ~ 847
GRPEX3: Memory Channel 848 ~ 863
GRPEX4: Memory Channel 900 ~ 915
GRPEX5: Memory Channel 916 ~ 931
GRPEX6: Memory Channel 932 ~ 947
GRPEX7: Memory Channel 948 ~ 963
Default: GROUP0
Set Mode

36 VR-120D OPERATING MANUAL
Set Mode
Set Item 11 [SEARCH]
Function: Selects the VFO Scan Type
Available Values: VFO/LIMIT
VFO: The VFO scanner scans frequencies between the 0.1 MHz and 1300
MHz.
LIMIT: The VFO scanner scans frequencies between the pre-programmed
frequency limits.
Default: VFO
Set Item 12 [SCHMEM]
Function: Displays the "Search Band" Memory frequency pair
1. Recall Set Item 12, then rotate the DIAL knob while pressing the
[FUNC] key.
2. As you rotate the DIAL knob, the nine numbered "Search Band
Memory" numbers will be displayed, along with the frequencies
contained in those memories.
3. Press the [SCAN] key while pressing the [FUNC] key to return
to the Menu item selection mode.
Set Item 13 [MEMORY]
Function: Selects Memory Channel operation mode between the "regular"
memories (VFO) or "skipped" memory (SKIP).
Available Values: VFO / SKIP
Default: VFO
Important Note: If not specifically working with the "Skipped" memories, this Menu Item
should be set to "VFO." The "regular" memories are not available for
use in the "SKIP" mode.
Set Item 14 [SCAN]
Function: Enables / Disables Memory Bank Scanning
Available Values: ALL / BANK
ALL: Enables Memory Bank (only) Scanning
BANK: Disables Memory Bank Scanning
Default: ALL
Set Item 15 [B LINK]
Function: Sets up the Bank Link Feature

37VR-120D OPERATING MANUAL
Set Item 16 [BANKCL]
Function: Clears (masks) all the Memory Channels in a particular Memory Bank.
1. After selecting Set Item 16, rotate the DIAL knob while pressing
the [FUNC] key to select the Memory Bank number. The display
will indicate "CLEAR" as a request for command confirmation.
2. Press the [SCAN] key, while pressing the [FUNC] key, to return
to the Menu item selection mode.
Set Item 17 [SKIPCL]
Function: Clears all Memory Channels in "Skip" Memory
1. After selecting Set Item 17, rotate the DIAL knob one click clock-
wise while pressing the [FUNC] key to Skip Memory. The display
will indicate "CLEAR" as a request for command confirmation.
2. Press the [V/M] key while pressing the [FUNC] key again; this
action will clear all the "Skip" Memories.
Set Item 18 [DW/PW]
Function: Dual Watch / Priority Monitoring
Available Values: DW / PW
DW: The Dual Watch feature allows you to monitor two fre-
quencies.
PW: The "Priority" feature, which is somewhat similar to
Dual Watch, allows you to monitor a VFO frequency
while checking a "Priority Memory" channel every five
seconds for activity.
Default: DW
Set Item 19 [S SCH]
Function: Selects the Smart SearchTM operating mode
Available Values: SINGLE/CONTINUE
SINGLE: The VR-120D sweeps once in each direction starting
on the current frequency. All channels where activity
is present are loaded into the Smart SearchTM memo-
ries. Whether or not all memories are filled, the search
stops after one sweep in each direction.
CONTINUE: The VR-120D makes a sweep in each direction as with
the "SINGLE" mode, but if all channels not filled after
the first sweep, the VR-120D continues sweeping un-
til they are all filled.
Default: SINGLE
Set Mode

38 VR-120D OPERATING MANUAL
Set Mode
Set Item 20 [CH CNT]
Function: Channel Counter Search Width
Available Values: ± 5 / ± 10 / ± 50 / ± 100 MHz
Default: ± 50 MHz
Set Item 21 [FLEX S]
Function: Enables/Disables the "flexible" frequency step feature
Available Values: ON/OFF
OFF: When you change the receive mode, the channel steps
remain the same.
ON: When you change the receive mode, the VFO frequency
will increment according to the current receive mode.
Default: ON
Set Item 22 [AM ANT]
Function: Selection of the antenna used in the AM mode
Available Values: EXT/BAR
EXT: Selects the rubber flex Antenna
BAR: Selects the internal Bar Antenna.
The Bar antenna is directional; rotate the VR-120D for best recep-
tion.
Default: EXT
Set Item 23 [FM ANT]
Function: Selection of the antenna used in the FM mode
Available Values: EXT /EARPHO
EXT: Selects the rubber flex Antenna
EARPHO: Selects the Earphone Antenna. When receiving a weak
signal, reception may be noisy.
Default: EXT
Set Item 24 [O T M]
Function: Activation of One touch Memory
Available Values:OFF /ON
OFF: One Touch Memory is disabled.
ON: The [BNDs], [V/M], [SCAN] and [MODE] function
as One-Touch Memory Recall keys.
Default: OFF

39VR-120D OPERATING MANUAL
Set Item 25 [GAME]
Function: This VR-120D includes a simple "slot machine" game in which three
digits scroll in a random fashion. You manually stop each digit in
sequence, with the object being to get all three numbers to match.
1. After selecting Set Item 25, rotate the DIAL knob one click clock-
wise while pressing the [FUNC] key to engage the game mode.
The display will indicate "READY" as a request for command
confirmation.
2. Press the [BNDs] key to start the slot machine game.
Three digits will scroll in in random fashion on the display.
3. Press the [V/M] key to stop the left digit.
4. Next, press the [SCAN] key to stop the center digit.
5. Finally, press the [MODE] key to stop the right digit.
6. If all three digits match, digits (such as 777, 555, 333, etc.) you
win! Regrettably, no cash prizes are available in this mode!
7. If you wish to play again, press the [BNDs] key.
Set Mode
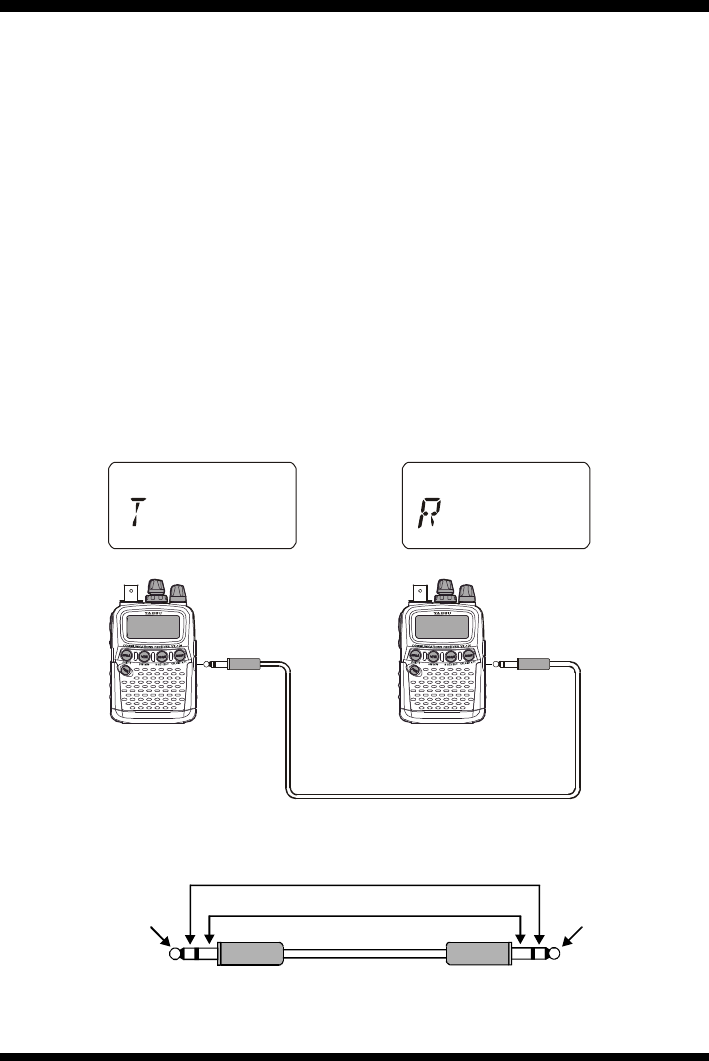
40 VR-120D OPERATING MANUAL
The VR-120D includes a convenient "Clone" feature, which allows the memory and con-
figuration data from one radio to be transferred to another VR-120D. Here is the proce-
dure for Cloning one radio's data to another:
1. Turn both radios off.
2. Connect the optional CT-35 cloning cable between the SP jacks of the two radios.
3. Press and hold in the [FUNC] and [BADs] keys while turning the radio on. Do this
for both radios (the order of the switch-on does not matter).
4. On the Destination radio, press the [SCAN] key.
5. Now, on the Source radio, press the [MODE] key.
If there is a problem during the cloning process, "ERROR" or "WAR" will be dis-
played. Check your cable connections and battery voltage, and try again.
6. If the data transfer is successful, "PASS" will appear on the displays of both radios.
Press any key to exit to normal operation.
7. Turn both radios off and disconnect the CT-35.
Cloning
Source radio Destination radio
CT-35 cloning cable schematic
3.5 mm 3-contact Plug
It connects
It connects
It doesn't connect
It doesn't connect
3.5 mm 3-contact Plug
SP jack
Þ
SP jack
Þ
CT-35 cloning cable

41VR-120D OPERATING MANUAL
“AUTO” Mode Preset Operating Parameters
Frequency Range (MHz) MODE STEP (kHz) Frequency Range (MHz) MODE STEP (kHz)
0.1000 ~ 0.2850 FM 5162.9000 ~ 174.0000 FM 12.5
0.2850 ~ 0.5200 AM 5174.0000 ~ 216.0000 WFM 50
0.5200 ~ 1.7100 AM 10 216.0000 ~ 225.0000 FM 5
1.7100 ~ 50.5000 FM 5225.0000 ~ 262.0000 AM 100
50.5000 ~ 54.0000 FM 5262.0000 ~ 270.0000 FM 12.5
54.0000 ~ 108.0000 WFM 50 270.0000 ~ 271.0000 AM 100
108.0000 ~ 142.0000 AM 25 271.0000 ~ 275.0000 FM 12.5
142.0000 ~ 144.0000 FM 12.5 275.0000 ~ 336.0000 AM 100
144.0000 ~ 148.0000 FM 5336.0000 ~ 420.0000 FM 12.5
148.0000 ~ 156.0000 FM 12.5 420.0000 ~ 450.0000 FM 25
156.0000 ~ 157.4500 FM 25 450.0000 ~ 470.0000 FM 12.5
157.4500 ~ 160.6000 FM 12.5 470.0000 ~ 770.0000 WFM 50
160.6000 ~ 160.9750 FM 25 770.0000 ~ 1240.0000 FM 25
160.975 ~ 161.50000 FM 12.5 1240.0000 ~ 1300.0000 FM 25
161.5000 ~ 162.9000 FM 25 - - -

42 VR-120D OPERATING MANUAL
Frequency Range: 100 kHz ~ 1299.995 MHz (Cellular Blocked)
Receiving Mode: AM/FM/WFM
Circuit Type: Triple Super-heterodyne
Memory Channels: 640 Channels
Memory Bank: 10 Banks (@ 64 Channels)
Antenna Impedance: 50-ohm unbalanced, BNC receptacle
Intermediate Frequencies: 248.45 MHz, 15 MHz, 450 kHz
Sensitivity (Typical): 200kHz ~ 5 MHz: AM 3.5 dBµ (1.5 µV)
5 ~ 160 MHz: AM -4.4 dBµ (0.6 µV)
FM -10.4 dBµ (0.3 µV)
WFM -1.0 dBµ (0.9 µV)
160 ~ 370 MHz: AM -4.4 dBµ (0.6 µV)
FM -10.4 dBµ (0.3 µV)
WFM -4.4 dBµ (0.6 µV)
370 ~ 520 MHz: FM -10.4 dBµ (0.3 µV)
WFM 0 dBµ (1.0 µV)
520 ~ 1300 MHz: FM -3.0 dBµ (0.7 µV)
WFM 9.5 dBµ (3.0 µV)
Selectivity: WFM: 200 kHz/-6 dB
AM/FM: 16 kHz/-6 dB
Conducted Spurious Emission: Less than -54 dBm
Supply Voltage: 2.2 ~ 3.5 V DC; Internal Battery (Nominal: 3.0 V DC)
5.5 ~ 10.0 V DC (EXT DC)
Current Consumption: Approx. 95 mA (Receive, AF Output 50 mW, 8-ohm)
Approx. 15 mA (Standby, Saver 1:4 on)
Approx. 55 mA (Standby, Saver off)
Operating Temp.: -10 °C ~ +50 °C
AF Output: Approx. 80 mW (8-ohm)
Case Size: 85 x 59 x 26 mm (H x W x D) w/o knob
Weight: Approx. 195 g w/battery & antenna
Specifications are subject to change without notice.
Specifications

43VR-120D OPERATING MANUAL
1. Changes or modifications to this device not expressly approved by VERTEX
STANDARD could void the user's authorization to operate this device.
2. This device complies with part 15 of the FCC Rules. Operation is subject to the
following two conditions; (1) this device may not cause harmful interference, and
(2) this device must accept any interference including interference that may cause
undesired operation.
3. The scanning receiver in this equipment is incapable of tuning, or readily being
altered, by the User to operate within the frequency bands allocated to the
Domestic public Cellular Telecommunications Service in Part 22.
This device complies with RSS-210 of Industry Canada. Operation is subject to the
following two conditions: (1) this device may not cause interference; and (2) this
device must accept any interference, including interference that may cause
undesirable operation of this device.

44 VR-120D OPERATING MANUAL
Printed in Japan
Copyright 2001
VERTEX STANDARD CO., LTD.
All rights reserved.
No portion of this manual
may be reproduced
without the permission of
VERTEX STANDARD CO., LTD.
EH011M1 0 0
0112J-0Y
