Design Yu ME Manual
YuME%20Manual
YuME%20Manual
YuME%20Manual
YuME%20Manual
YuME%20Manual
User Manual: Pdf
Open the PDF directly: View PDF ![]() .
.
Page Count: 21

YuME: Yuponic Map Editor
Version: 1.04:
▪ Prefab Sampler
o A tool to allow you to select a series of objects in a scene and generate a prefab
o Created prefabs can be easily converted into YuME tiles
▪ Bug fix for the append name on the converter not being applied.
Previous version change list
Version: 1.03
▪ Selective layer freezing
o Layers can be set to be frozen or dynamic
o Unfrozen tiles can be set static or dynamic
▪ Flexible grid canvas:
o The grid canvas can now be moved to anywhere in your scene
o A default position for the grid can be set in the editor config
Version: 1.02
▪ Updates to the converter, including:
o Full conversion of the source prefab, including lights etc.
o Added a reimport option for adding new tiles to a tileset without losing transform values
o Removed the options for collision, shadows, and static setting to increase compatibility
o Bug Fix: Incorrect append name was being use
o Bug Fix: Incorrect custom brush folder was being used
▪ Updates to the Freeze Map function, including:
o Freezing now copies any lights that were part of prefabs into the frozen map
o All frozen map objects are set to static
o Bug: Incorrect material was something being applied
Version: 1.01
▪ Added global scale setting
▪ Added an invert mouse wheel for moving the grid
▪ Bug fix for Converting tiles with no collision
Version 1.0
▪ Initial release
2/21 Yuponic Ltd.
1. YuME: Yuponic Map Editor
1.1. Introduction
The Yuponic Map Editor (YuME) is a Unity Editor Extension created to allow level designer
to rapidly prototype game levels and environments using 3D Tiles, or blocks.
YuME allows you to create your own tilesets and import them in an intuitive way for use
in the tool and your game. You can also convert existing tile-based assets for use in the
tool.
1.1.1. Why did we create this tool?
Unity is a fantastic game engine that allows amateurs and pro’s alike to create the
game of their dreams. However, in catering for all possible game types, from
MMOs to Flappy Birds, the editor needs to function is a genre neutral way.
Building game levels in Unity can be time consuming and fiddly due to limited grid
snapping and the time-consuming placement of prefabs.
YuME allows designers to build levels in a more natural way by using a set of prefab
brushes and painting them directly into a grid snapped scene.
This approach will be very familiar to 2D game creators, and with YuME I wanted
to bring the speed and flexibly of a 2D Tile Mapper to 3D games.
1.1.2. A little history
3D Tiles form a large part of my history in the games industry. I’ve been fortunate
enough to have making games professionally for over 23 years, and throughout
that time the techniques and tools for game creation have changed dramatically,
but in other ways have also come full circle.
I first worked with a 3D tile based editor on the game Vortex for the Super
Nintendo. Back then the maps were built in D-Paint (an industry standard bitmap
editor). We had a limit palette which represented game objects and dropping a
color on a 64x64 bitmap to place an object in the scene.
A few years later I started working on a concept for a 3D Platform Game that
became Croc: Legend of the Gobbos. Realizing we needed a tool to build the levels
we ended up creating CrocEd, which used 3D tiles that were placed within a cube
grid to build the world.
Although the CrocEd was ultimately limited by what we could create on the
Playstation, the tool allowed the design team to be incredibly creative and iterate
quickly on levels for the game.
The CrocEd and engine went on a power a bunch of different games, from Disney’s
Aladdin to Harry Potter.

3/21 Yuponic Ltd.
As the trend to realism kicked in throughout the PS2/PS3 years, tile based games
fell out of favor. That is until recently.
As the market broadened I started to see a lot more games go back to using
techniques we developed for Croc. Even Nintendo moved over to a more tile-
based approach with games like Super Mario 3D World and Captain Toad Treasure
Tracker.
These days it’s an artistic choice rather than a limitation of technology. And for
me, it’s a fast and creative way to try out ideas without having to build geometry
and hand place it in the scene.
1.1.3. Suitability
YuME is the perfect tool for creating focused, level based games. These can be
strategy games, platform games, arena based FPS games, etc.
It’s probably better to focus on games YuME isn’t so suited to.
If you’re looking to create a vast open world game with a naturalistic environment,
be it a mystic forest or the streets a cyber-Singapore then YuME isn’t going to get
you to your end goal. There are tools and techniques better suited to creating
those kind of games, and I probably owe you a refund ☺
1.2. Use Cases
There are a few use cases where I can see YuME being the most useful:
▪ Tile Based Games:
Where game environments are designed around the concept of tile prefabs.
Suggested games to look at include Captain Toad Treasure Tracker, Atlas Reactor,
and the latest batch of Pokémon games for the 3DS.
▪ Level Prototypes:
Where a level designer wants to quickly build out the structure of the level with
an eye to an art team taking the basic structure and doing an art pass.
▪ Game Jams and Prototypes:
Where you quickly want to try out ideas and mechanics and make rapid progress.
For some games, YuME will be the only tool you use to build levels. For others, it will be
the start of the tool chain to help you get up and running quickly and efficiently.
1.3. Feature requests and Bugs
We’re always looking for suggests on how to improve YuME, and we’re also keen to squash
any bug you discover. If you have any suggestions or bugs to report, either drop by the
forums at https://www.facebook.com/groups/723432771140117 or drop me an email on
info@yuponic.com
4/21 Yuponic Ltd.
2. Getting Started
2.1. Importing YuME
Once purchased from the Unity Asset Store you’ll be prompted to import two key folders,
one name Yuponic and the other Gizmos.
The Yuponic folder is the home of YuME and the source for the editor and prototype
tileset. The Gizmos folder contains a single image which is used as a guide to where tiles
are located in the scene.
YuME has been designed so that folders are not hard-coded. This means that after import
you can move the Yuponic folder into a sub-folder of you wish. For example, I like to move
my 3rd party assets into a specific folder to keep the root of the project tidy.
2.1.1. A note on Gizmos
Publishing to the Unity Asset store means that all files and assets need to be within
a specific folder, for example our Yuponic folder. However, this means that any
scene gizmos cannot be included because the Gizmos folder still needs to be in the
root of the project.
We’ve included a Gizmos folder inside Yuponic/YuME. Please copy this folder to
the root of the project.
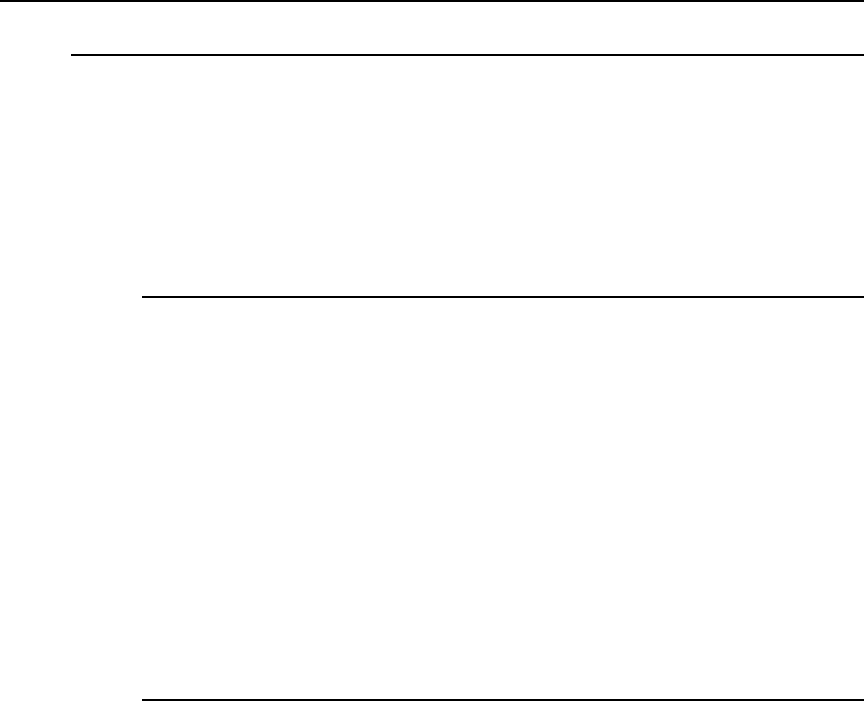
2.2. Opening the Map Editor
Once imported the window drop down will have a new entry named Yuponic. Instead the
Yuponic drop down you’ll see three items and a sub-folder. Selecting ‘YuME: Map Editor’
opens the map editor.
The map editor window can be docked or left floating if based on your preference.
2.3. Adding YuME to a Scene
YuME needs to add a couple of game objects
to your scene. One object handles the grid and
is not active in play mode. The other acts as a
container for the tiles you’ll be dropping into
the scene.
To add these objects to the scene, click on the
‘Add YuME Map Editor Objects’ button in the
map editor window.
5/21 Yuponic Ltd.
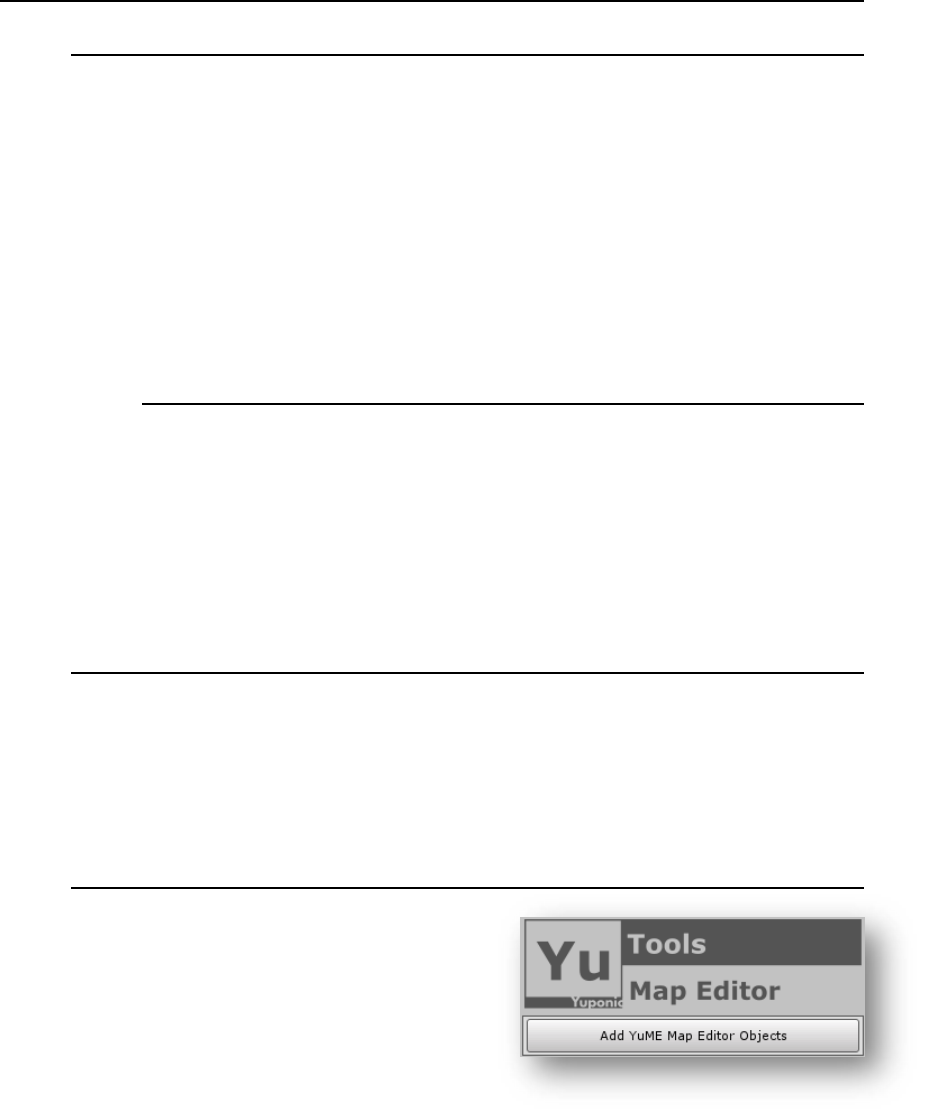
The scene will now have two new
objects:
▪ YuME_MapEditorObject
▪ YuME_MapData
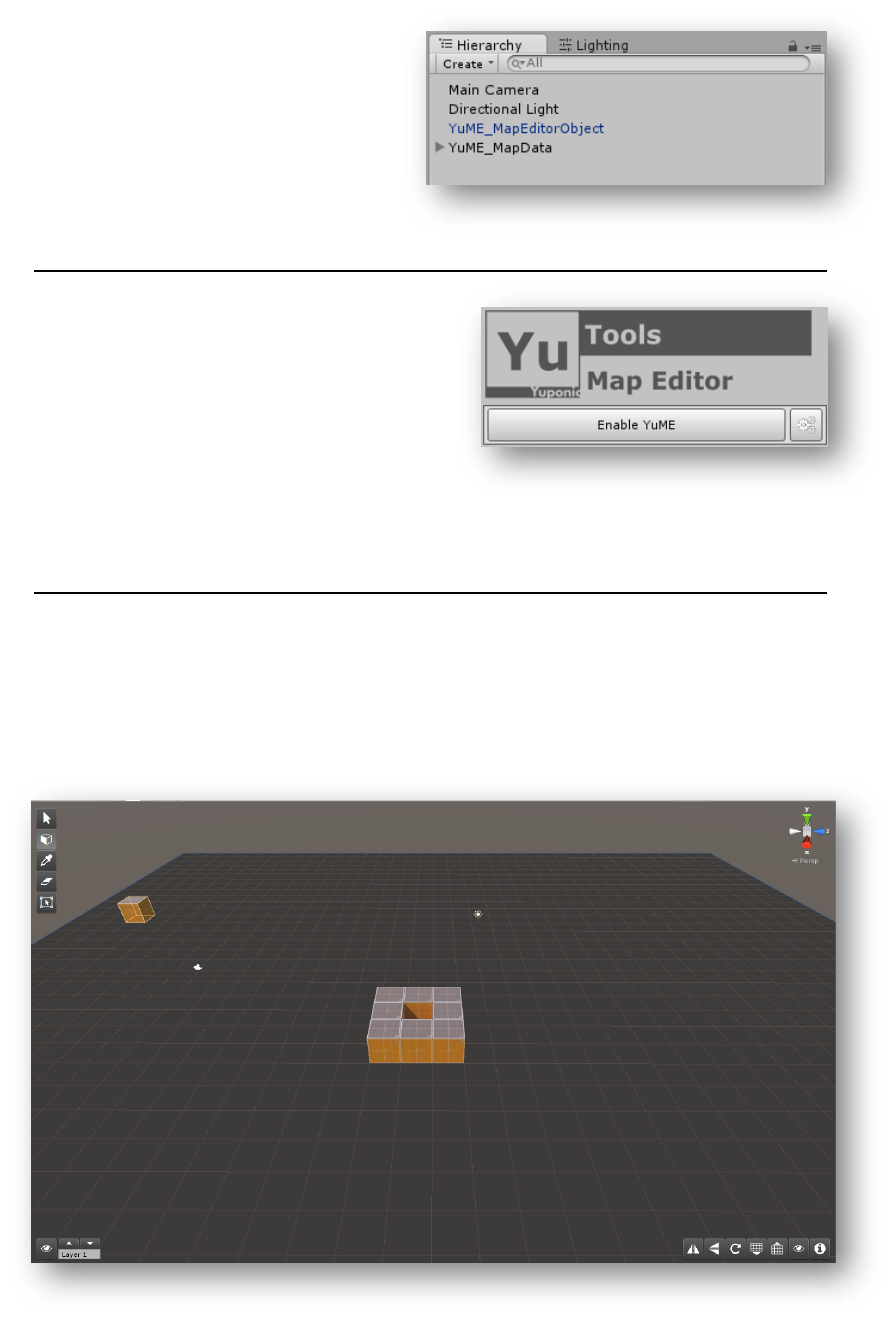
2.4. Enabling YuME
Once the scene as the necessary files added
to the scene the main map editor interface is
displayed.
To start using YuME, click the ‘Enable YuME’.
The YuME grid and tool bars will appear in the
scene view and you are ready to start building
your level.
2.5. Building Levels
By default, the Paint Tool (3D cube icon) is active. Using this tool, you can paint the
currently selected tile onto the grid.
If this is the first time you’ve used YuME, the prototype tileset will be set as the current
tileset.
6/21 Yuponic Ltd.
As you cursor over the scene you’ll see a highlighted copy of the currently selected tile
move across grid. To begin painting tiles in the scene simply press or hold the left mouse
button.
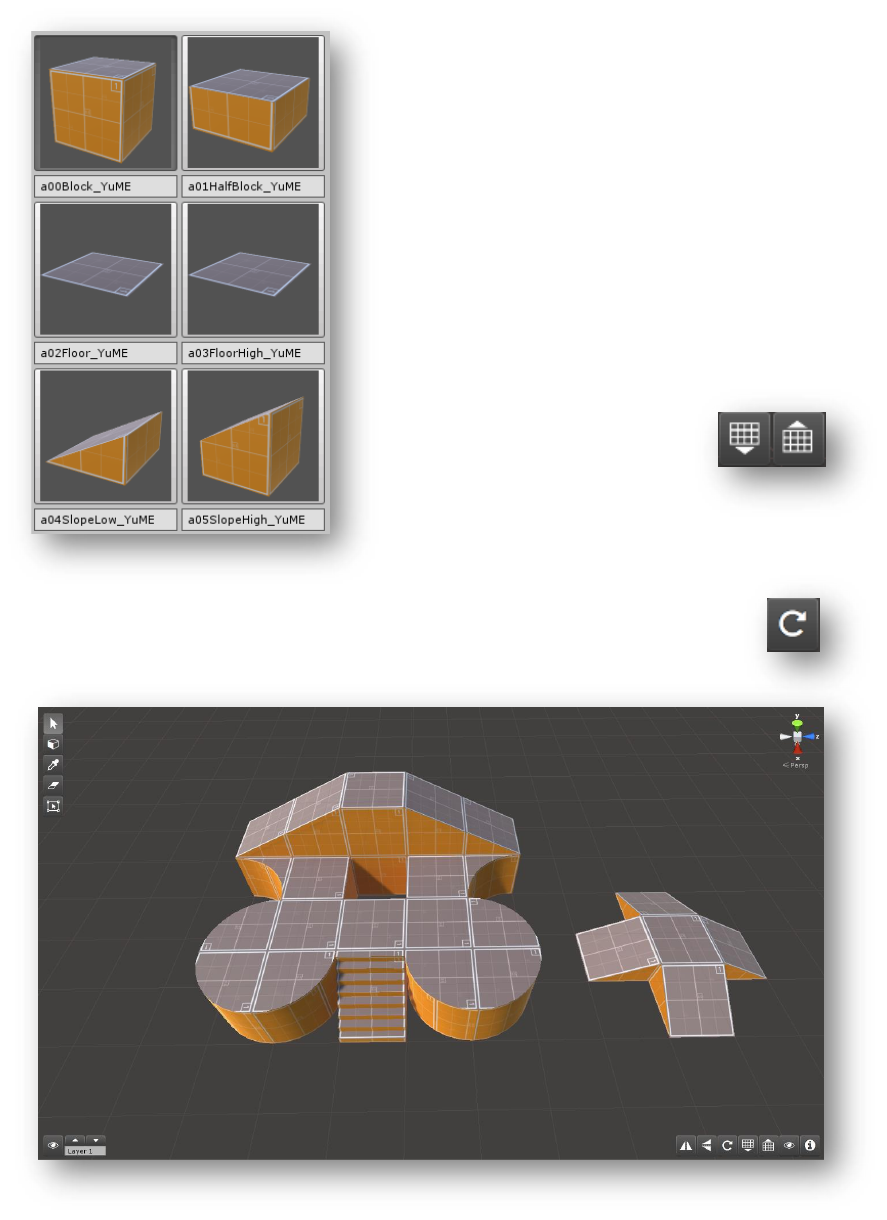
To change the tile that forms the brush simply
select a tile from the palette in the map editor
window.
The palette window is a great way to preview the
content you can build your levels with. However,
if you want to quickly scroll through the available
tiles, hold SHIFT and CONTROL and scroll the
Mouse Wheel.
With every scroll of the mouse wheel the brush
cursor updates allowing you to stay focused on
the scene view as you create your levels.
To build on different levels you
can move the grid up and
down. This can be done by
either clicking on the grid icons
or by holding SHIFT and
scrolling the Mouse Wheel.
Often, you’ll want to rotate tiles that are none symmetrical. To rotate the tile,
you can either click on the rotate icon or use the Z and X key to rotate
clockwise and counter-clockwise.
7/21 Yuponic Ltd.
Tiles can also be flipped, allowing
for the maximum reuse of the
minimum about of tiles.
To flip a tile horizontally or
vertically simply click on the flip
icons.
If you want to paint more than one tile at a time you can adjust the brush size. There are
a couple of different ways to do this. To simply 2D scale up the brush, use the [ and ] keys.
You can also independently scale
the brush on all axis.
Cursor Left/Right scales the brush
on the X axis.
Cursor Up/Down scales the brush
on the Z axis. Shift and cursor
Up/Down scales the brush on the
Y axis.
Scaling on the X and Y always scales to odd numbers (for example 1,3,5,7) to keep the
brush centered on the grid. Scaling on the Y is purely incremental.
To reset the brush press Enter/Return.
8/21 Yuponic Ltd.
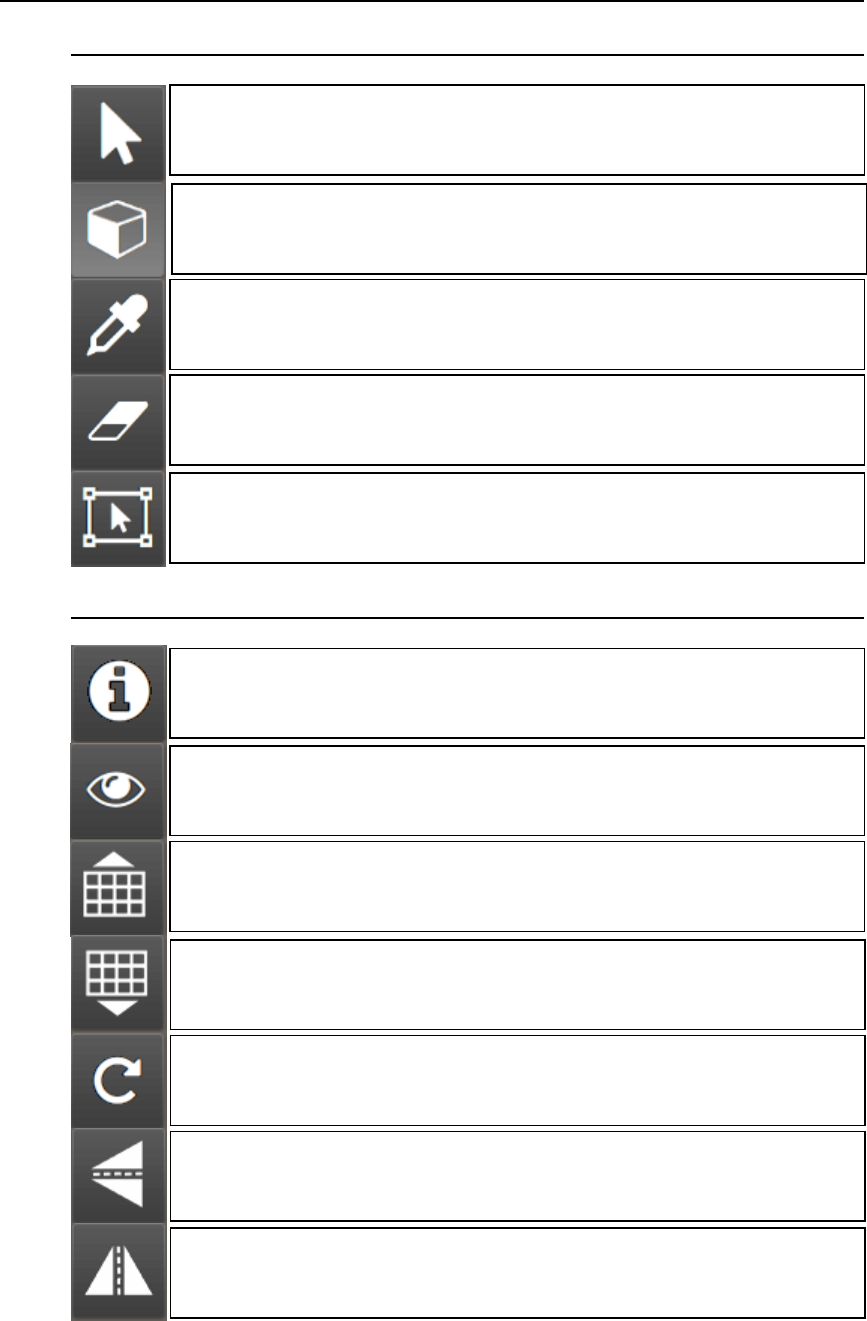
3. Tools Overview
3.1. Primary Tool Bar
3.2. Secondary Tool Bar
Standard Tools:
Defaults back to the standard unity tools.
Tool shortcut: ESC
Paint Tool:
Paint Tiles into the scene. LMB to Paint the current brush.
Tool shortcut: A
Pick Tool:
Pick a tile in the scene and make it the current brush. LMB to pick tile.
Tool shortcut: S
Erase Tool:
Erase the tile under the brush. LMB to erase the tile.
Tool shortcut: D
Select Tool:
Select the tile under the brush. LMB to select the tile. ALT + LMB to deselect.
Info Tool:
Show a helper gizmo that identifies the tile pivot. If tiles are selected, additional
information about their layer, name, and grid level is shown.
Isolate Grid Tool:
Hides all tiles not on the current gird level.
Grid Up Tool:
Move the grid up 1 position. ALT + click moves the grid 0.25.
Tool shortcut: = or SHIFT + Mouse Wheel Up
Grid Down Tool:
Move the grid down 1 position. ALT + click moves the grid 0.25.
Tool shortcut: - or SHIFT + Mouse Wheel Down
Rotate Tool:
Rotate the current brush 90 degrees.
Tool shortcut: Z / X to rotate clockwise / counter-clockwise
Flip Z Tool:
Flips the brush in the Z axis.
Flip X Tool:
Flips the brush in the X axis.
9/21 Yuponic Ltd.
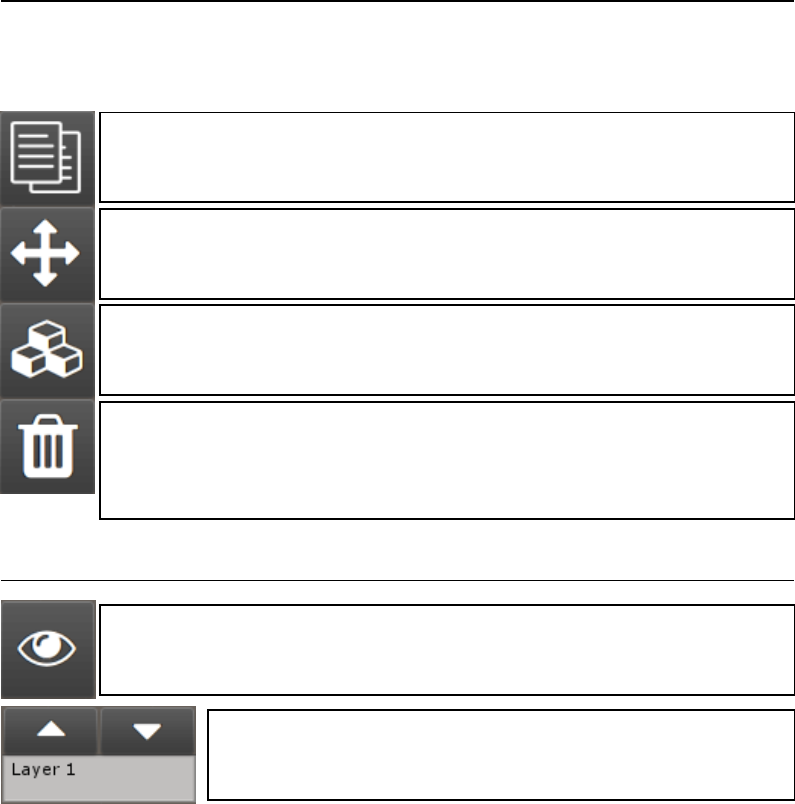
3.3. Select Toolbar
The select toolbar is only active when a tile is selected. To select tiles, use the Select Tool
or the standard unity tools.
3.4. Layer Toolbar
Copy Brush Tool:
Copies the currently selected tiles and makes them the active brush.
Cut Brush Tool:
Cuts the currently selected tiles and makes them the active brush.
Custom Brush Tool:
Creates a saved copy of the selected tile and stores them in the custom brush tab
and folder.
Erase Selected Tiles Tool:
Deletes the selected tiles from the scene. Important. When selecting with the
default unity tools you should always use the erase tool to prevent additional game
objects from being delete.
Layer Isolate Tool:
Hide all tiles that are not on the current layer.
Layer Select Tool:
Use the arrows to select the current layer. Note: Layer names can be
edited in the settings window.
10/21 Yuponic Ltd.
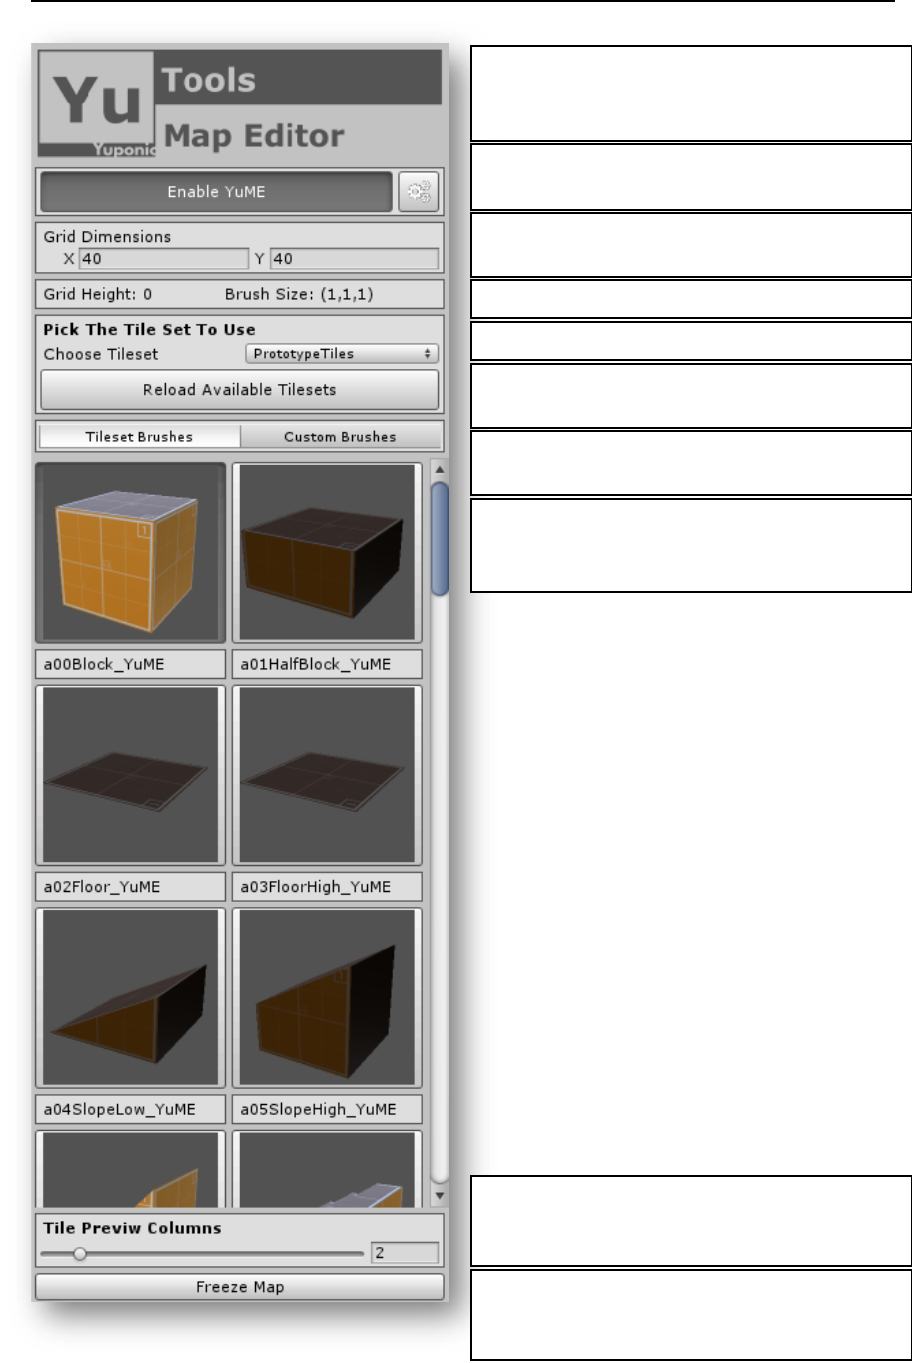
4. Map Editor Window
Enable YuME:
Activates the editor in scene. In an off state, all
standard Unity functionality is restored
Open Settings:
Opens the settings window.
Grid Dimensions:
Change the size of the YuME grid.
Scene Info: Current grid height and brush size.
Choose Tileset: Pick the active tileset dropdown.
Reload Tilesets:
Refreshes the available tileset. Used after import.
Brush Types:
Choose standard tiles or custom brushes
Brush Palette:
Previews of all the current tiles in a tileset. Click
select to make a tile the active brush.
Preview Columns:
Change the width of the palette to suit your editor
setup.
Freeze Map:
Consolidate the map into a single, un-editable
mesh.
11/21 Yuponic Ltd.
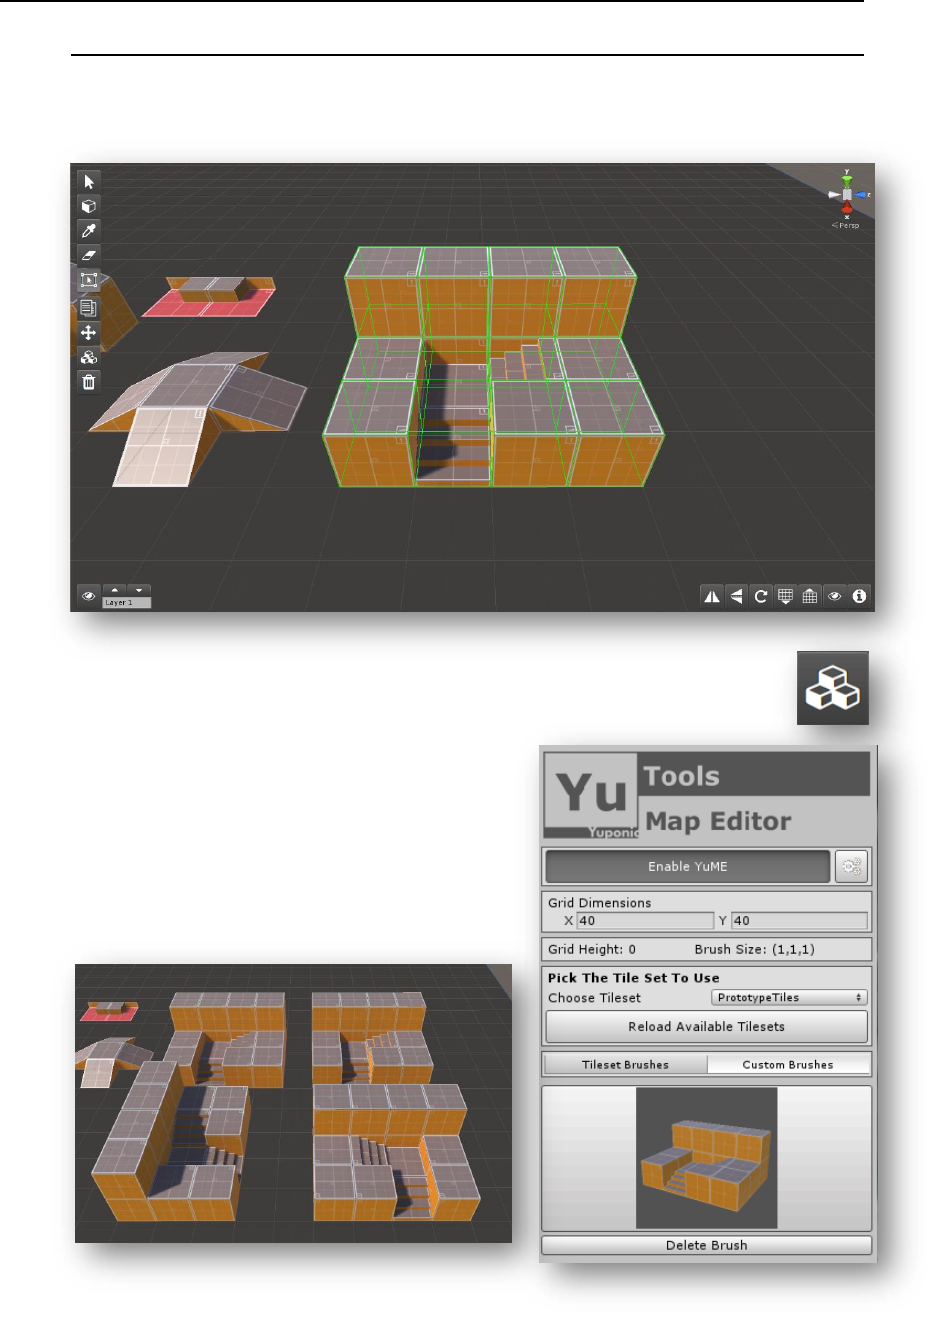
5. Custom Brushes
5.1. Creating a custom brush
Often, you’ll find yourself repeating specific tile configurations. To save time in level
building you can save a selection of tiles and store them as a custom brush.
Select the tiles you want to store either using the Select Tool of the standard
unity selection tools. Once selected click on the Custom Brush icon.
The custom brush will now be available in the
custom brush tab of the main YuME editor
window.
To use the custom brush simply select. Custom
brushes can be rotated and flipped just like
standard tiles.
If the brush is no longer needed it can be delete
in the editor window.
12/21 Yuponic Ltd.
5.1.1. Note on Custom Brushes from multiple tilesets
In YuME you can build your map from multiple tilesets at the same time. However,
there is an issue concerning custom bushes and tiles from different tilesets.
If you create a custom brush, when it comes to painting it back into the scene it
will only draw tiles from the current tileset. This is a limitation of Unity. At the
moment Unity does not allow nested prefabs. This means a custom brush is stored
as a template, not a complete copy of all the prefabs that make up the brush.
When you paste the custom brush, YuME looks for prefabs in the current tileset
to drop into the scene. If it can’t find them it will simply not paint them.
We will look into alternative ways of handling custom brushes in a future update.
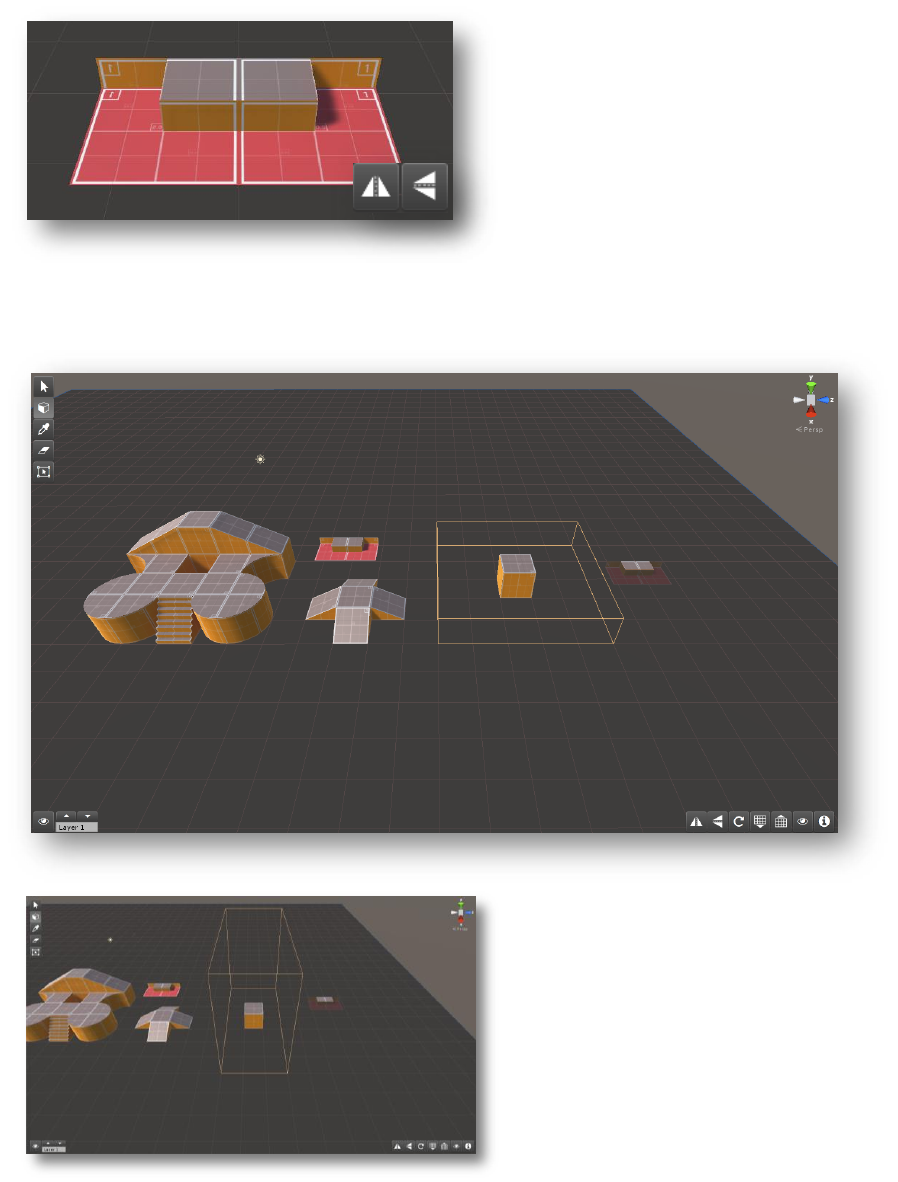
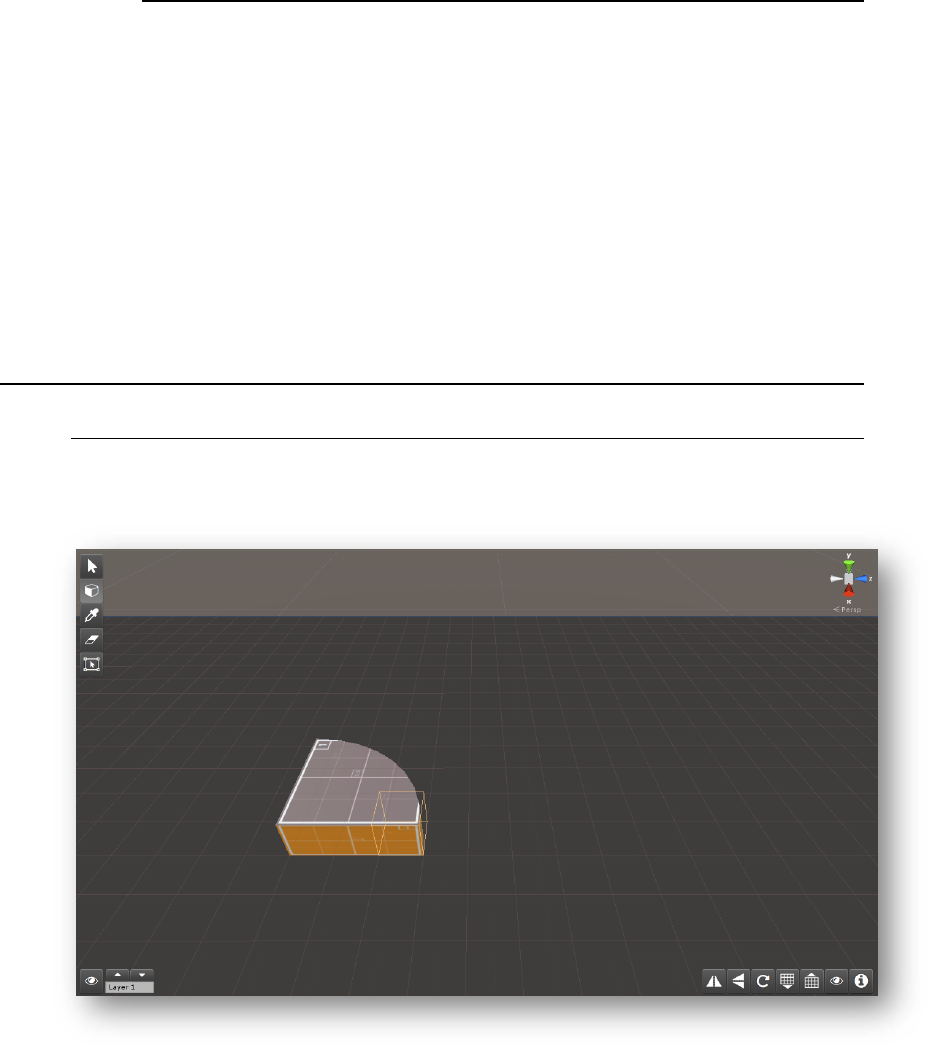
6. Non-standard Tiles
6.1. Considerations for non-standard tiles
YuME is designed to work with tiles built around a 1x1x1 cube. However, tiles of different
sizes can be used in YuME with some minor caveats.
In the example above we have a 3x1x3 tile. If you look closely at the cursor you can see it’s
pivot is the right-side corner. If you wish to delete or pick the tile, then this corner position
is the only selectable point on the tile.
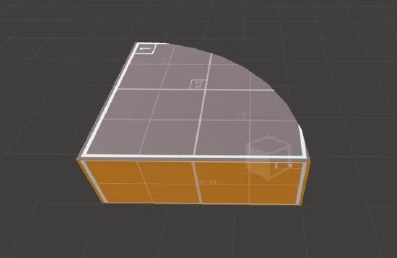
To make it easier to see where the pivot point on a placed tile is location you can use the
information tool.
13/21 Yuponic Ltd.
Turning on the information places a unity
gizmo at the pivot point of each tile in the
scene.
Where possible it’s best practice to build
larger blocks as custom brushes. However,
there are obviously cases where this is
inefficient or impractical.
14/21 Yuponic Ltd.
7. Freezing a Map
7.1. Using Freeze Map in production
At the bottom of main editor window there is a button named Freeze Map. Clicking this
takes all the tiles in a level and combines them into a single, un-editable, mesh.
This is useful in several different situations.
While static batching is set as default when importing a new tileset through the Tile
Importer tool, maps built in YuME can contain thousands if individual prefabs which could
have an effect on performance.
Another reason to freeze a map is if you want to bake Ambient Occlusion into the vertex
colors using a tool such as Mesh Materializer or Vertex Dirt. These tools can bake AO into
a mesh instead of using a post process effect and is ideal for mobile development.
You can switch back and forth between active and frozen maps at any time by simply un-
freezing the map.
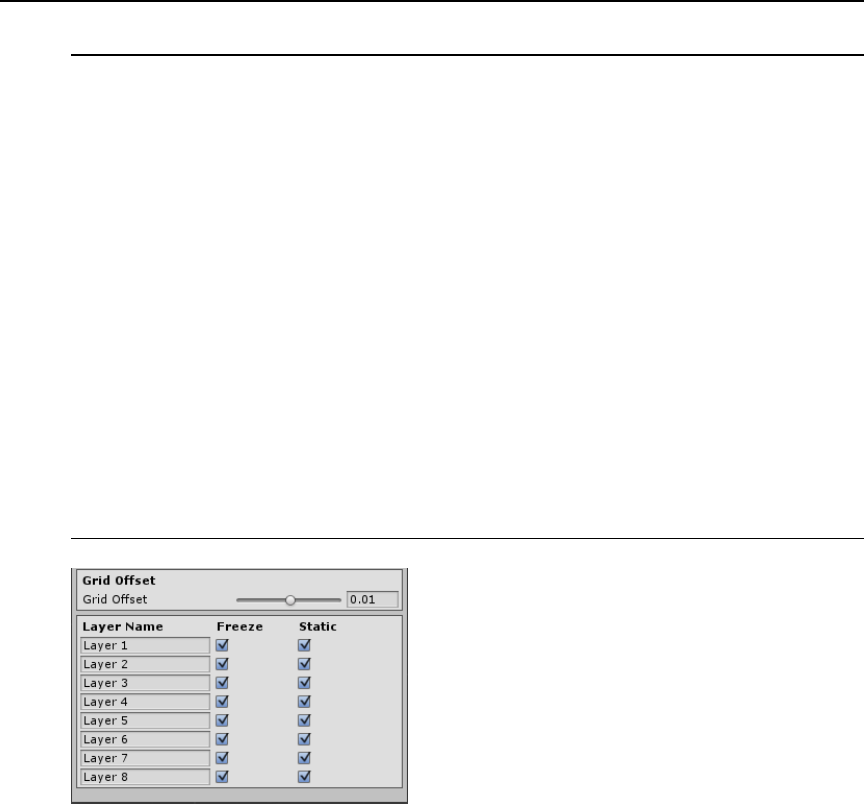
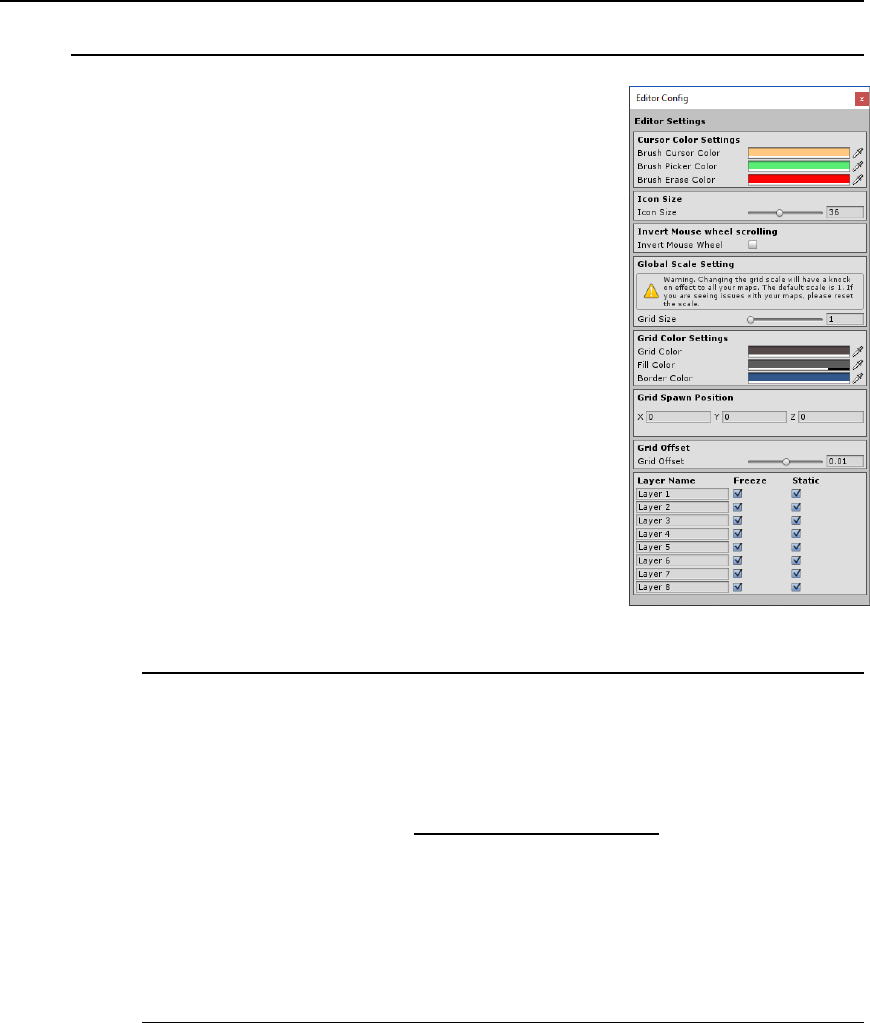
7.2. Selective Freezing
You can choose which layers get frozen and which
are left dynamic. Opening the editor config allows
you set the dynamic state of each layer.
Unticking the freeze option will make retain the
tiles as individual objects. Unticking static will set
the tiles as dynamic so that they can be moved
during gameplay.
15/21 Yuponic Ltd.
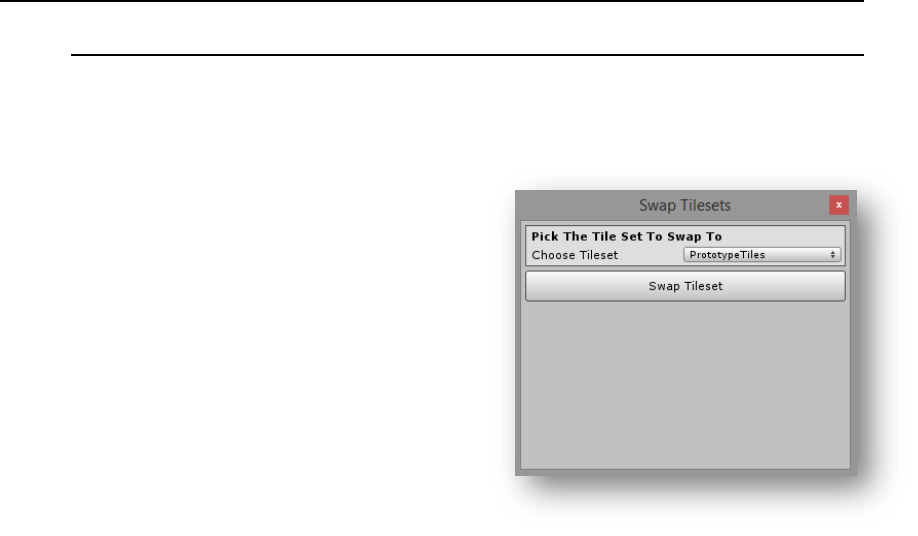
8. Swapping Tilesets
8.1. Move your map over to a new set of tiles
As part of your production process you might want to build all your levels using a generic
set of tiles, such as the prototype tileset included with YuME. If you had to rebuild your
level once a level specific tileset was available, that would be bad – right?
In YuME you can swap out tilesets using a tool
location in the Windows menu under
Yuponic/Utils.
This simple tool allows you to select a tileset
that has previously been imported into YuME
and replace any tiles in the map with tiles in
the new tileset that match their name.
16/21 Yuponic Ltd.
9. YuME Settings
9.1. Changing the editor settings
Various aspects of YuME can be customized in the Editor
Config window. The window can be accessed by clicking on
the config button next the ‘Enable YuME’ button.
Once the editor config is open you can select colors for the
brush cursor, the editor icon size, and the grid colors and
opacity.
Grid offset allows you to fine tune the offset of the grid. This
is useful for certain tilesets that either sit under or over the
normal grid position.
You can rename the YuME’s layers. This can be very useful
for projects where specific tiles need to be dropped on set
layers.
New in v1.01 is the option to change the global scale (see
notes on global scale below), as well as invert the mouse
wheel scroll when changing the grid height.
9.1.1. Global Scale
In the config window, you can change the global scale. This allows you to set a
base scale of YuME to better match your existing assets. For example, a global
scale setting if 2.5 makes YuME play nice with UFPS.
The global scale should be set at the start of your project. Loading up a map built
on a different scale will result in editing issues, such as not being able to select
tiles that have already been placed.
It’s worth experimenting with the global scale to find a value that suits your project
before getting too deep into map building.
9.1.2. Grid Spawn Position
Grid Spawn Position allows you to set where you wish YuME to create the grid
when you add it to the scene.
The spawn position will snap to the nearest 0.5. This means that a value of 100.5,
0, 51.5 is valid. However, a value of 100.25, 0.125, 12.95 is not valid.
17/21 Yuponic Ltd.
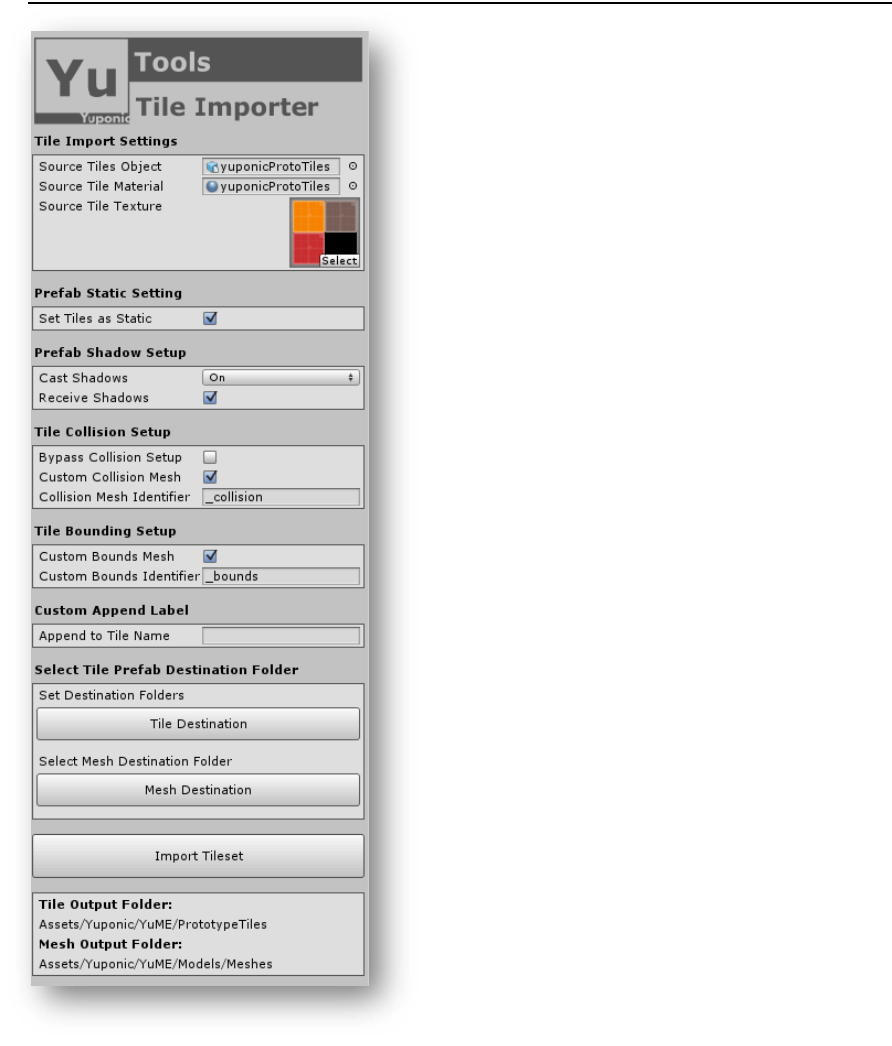
10. YuME Tile Importer
The YuME Tile Importer is found under
Window/Yuponic. This tool allows you to import
your own artwork and tiles into YuME.
Once you have created your tileset, drag it into the
Source Tile Object.
To assign a material to the tileset you can either
drag in the texture you want to use or a predefined
material. If you simply add the texture a standard
shader will be created in the destination folder of
the tileset.
Once you have your assets in place you can change
various import option such setting the tiles as
static, their shadow and collision settings.
The importer allows you to setup a custom collision
mesh in your source file. This will be named the
same as the object you are building collision for
with an added extension, such as _collision (the
default). If you wish to use a different collision
extension name you can customize it here.
The importer automatically moves all objects to the
origin. If you have an object that needs to be offset
from the origin you can create a custom bounds
object in your source file. In the same way collision
is setup, the bounds need to be named the same as
the source object with the extension _bounds
(default).
If you wish to append a name to the imported
tileset you can add one in the Append to Tile Name.
Finally, you need to setup the destination for the
tile prefabs as well as the destination the new
meshes that the importer creates.
Once you are happy with the settings simply press the Import Tileset button to create your YuME
tiles.

18/21 Yuponic Ltd.
11. Creating Tilesets
Tilesets in YuME are created from a single scene file that contains multiple objects. This process
for creation is useful because when creating modular tilesets you often want to reference existing
tiles to make sure they line up perfectly.
When creating your first tilesets it’s useful to use the Prototype Tiles that come with YuME as a
reference. The source .obj file is found in the folder Yuponic/YuME/Models.
19/21 Yuponic Ltd.
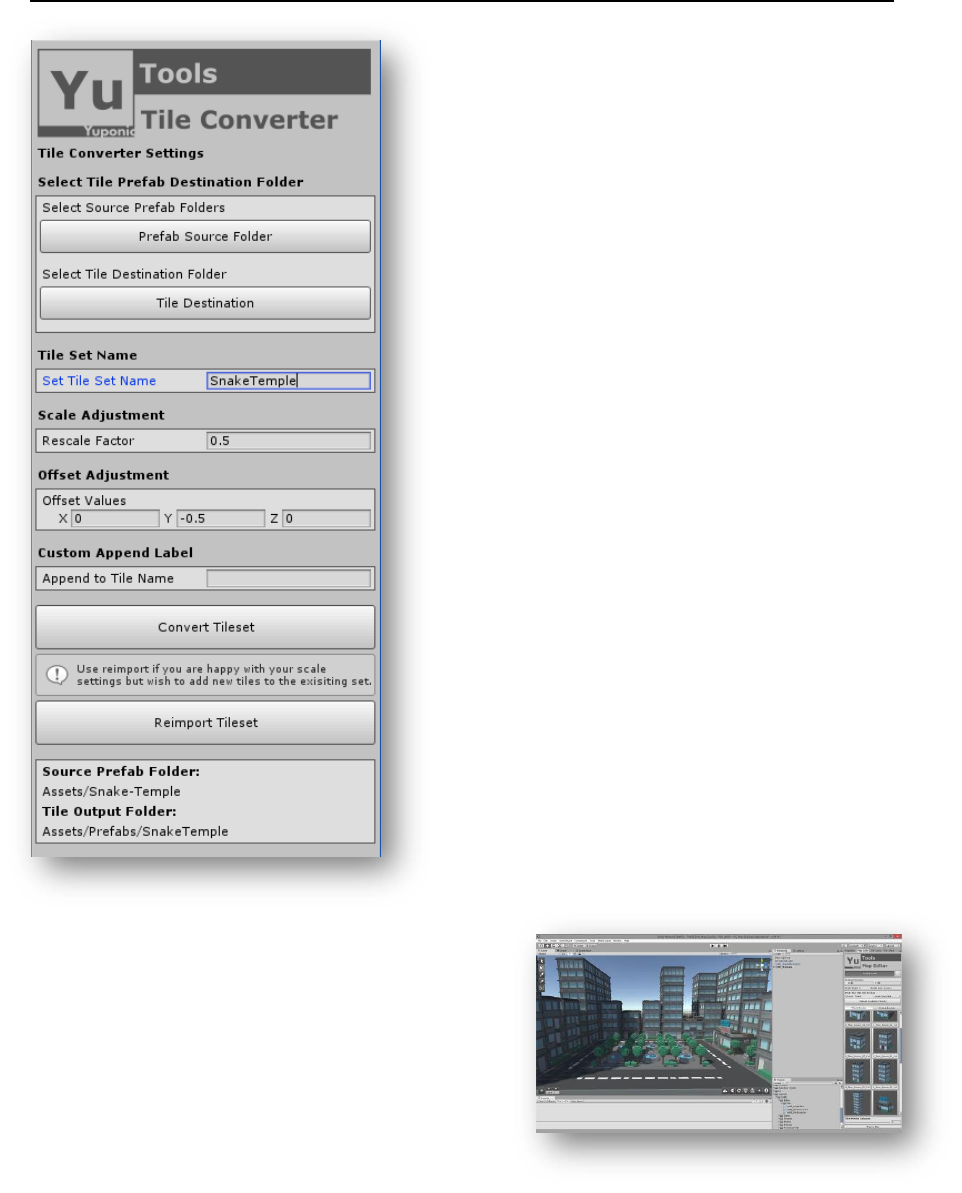
12. YuME Tile Convertor
Often, you’ll have pre-existing assets that you
want to use in YuME. To bring these assets into
YuME you can use the Tile Convertor.
It needs to be said that the Tile Convertor is not a
magic bullet that automatically converts any type
of object into a usable tile. Assets need to be tile
based, so built to be modular and placed on a grid.
Also, some tiles that look like they should be
suitable are built with little regard for pivots and
grid snapping.
We’ll keep on updating the converter to try and
deal with difficult tilesets.
To begin converting a tileset you first need to tell
the converter where the source files are located.
Secondly, we need to set a destination folder for
the created tiles.
Finally, you can assign a unique name that will be
referenced by the main map editor.
The next set of options allow you to adjust the
scale and offset values for the created tiles. Often,
you’ll find the overall scale of converted tiles to be
too larger. You can change the scale value until
they fit perfectly on the YuME grid.
You may also find that tiles are offset from the
grid. You can change the offset values to make the
tile align with the grid.
If you want to append a name to the tiles you can
add it here.
Once you’re happy with the settings, click on the
Convert Tileset button to bring the tiles into the
editor.
It might take a few attempts to get the settings just
right so keep tuning the conversion until you’re
happy.
If you decide to add new prefabs to the tileset but want to keep all the setting for the originally
imported tiles, use the Reimport Tileset button instead of the Convert button. This will only affect
any new tiles the Converter finds.
20/21 Yuponic Ltd.
13. Prefab Sampler
In 1.04 we introduced a new tool that allows you to select objects in a scene and create a new
prefab from them so they can later be converted into YuME tiles.
An example of how this tool can be used with YuME can be found on our YouTube channel:
https://www.youtube.com/watch?v=s3xYoNdMzWc
Note: This video uses an Alpha version on the tool.
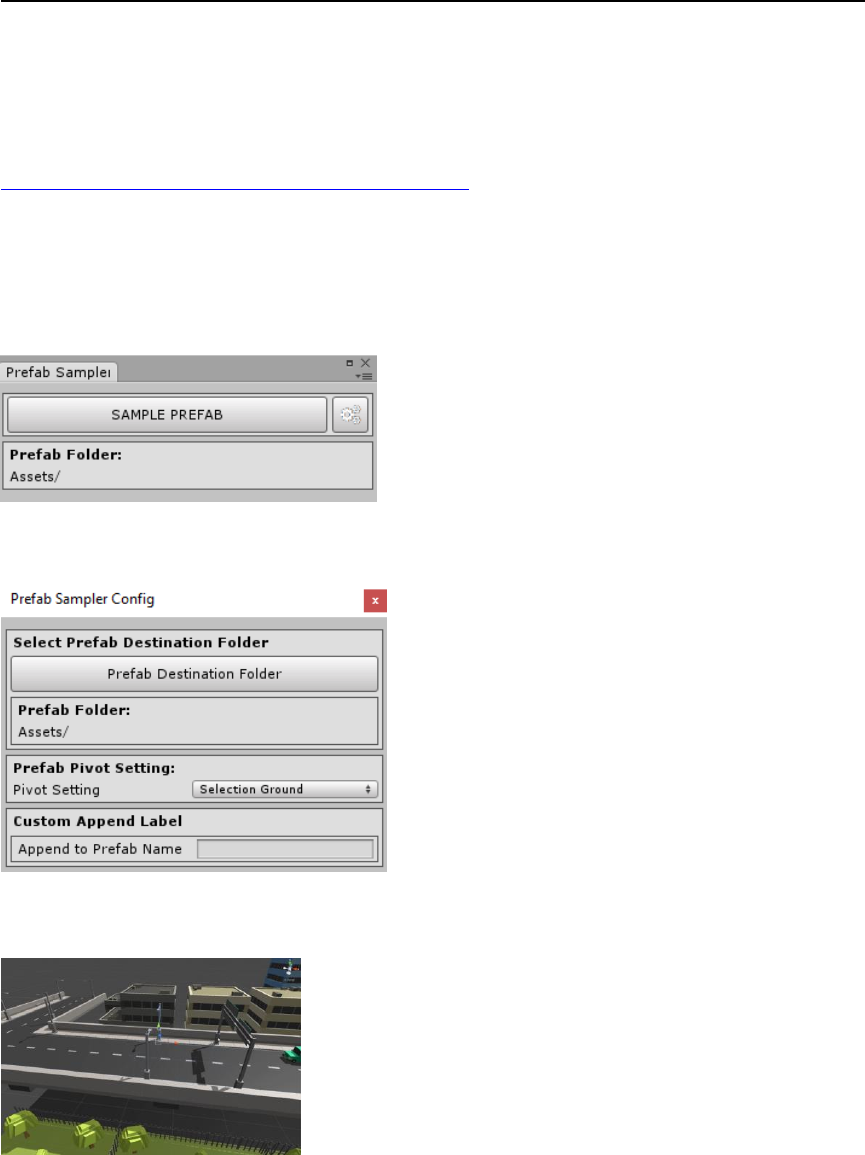
The Prefab Sampler is found under Window/Yuponic/YuME: Prefab Sampler. The default window
looks like this:
On first use we recommend clicking on the config button to customize how the tool works.
The first option is a set a folder where the sampled
prefabs will be saved. The current folder is shown
below the button.
Second you can set where you want the Y pivot.
Options are:
▪ Zero Y: Pivot it always a 0
▪ Selection Ground: Pivot is set to the bottom of
the selected objects
▪ Selection Middle: Pivot is set to the middle of the
selected objects
Finally, you can append a custom name to the prefab.
With the settings complete you can now use the tool to
sample objects in a scene and create prefabs. Simply select the
objects and then click on the SAMPLE PREFAB button.
By default, the prefabs are named the same as the first
selected object (plus any append name you have added).
These prefabs can be renamed in Unity once created.

21/21 Yuponic Ltd.
14. Shortcuts
Select Tool: ESC key
Paint Tool: A
Pick Tool: S or Paint Tool + CONTROL
Erase Tool: D or Paint Tool + SHIFT
Cycle through Tiles: SHIFT + CONTROL + Mouse Wheel
Grid Up/Down: = - or SHIFT + Mouse Wheel
Grid Up/Down 0.25: SHIFT + ALT + Mouse Wheel
Brush Size 2D: [ ]
Brush Size +X: Cursor Right
Brush Size -X: Cursor Left
Brush Size +Z: Cursor Up
Brush Size -Z: Cursor Down
Brush Size +Y: SHIFT + Cursor Up
Brush Size -Y: SHIFT + Cursor Down
Reset Brush: Enter/Return
