Setting Up Published Desktops And Applications In Horizon 7 VMware 7.3 73
User Manual: Pdf Horizon 7.3 - Setting Up Published Desktops and Applications in Horizon 7 User Guide for VMware Horizon Software, Free Instruction Manual
Open the PDF directly: View PDF ![]() .
.
Page Count: 89
- Setting Up Published Desktops and Applications in Horizon 7
- Contents
- Setting Up Published Desktops and Applications in Horizon 7
- Introduction to Published Desktops and Applications
- Setting Up Remote Desktop Services Hosts
- Remote Desktop Services Hosts
- Install Remote Desktop Services on Windows Server 2008 R2
- Install Remote Desktop Services on Windows Server 2012 or 2012 R2
- Install Desktop Experience on Windows Server 2008 R2
- Install Desktop Experience on Windows Server 2012, 2012 R2, or 2016
- Restrict Users to a Single Session
- Install Horizon Agent on a Remote Desktop Services Host
- Printing From a Remote Application Launched Inside a Nested Session
- Enable Time Zone Redirection for RDS Desktop and Application Sessions
- Enable Windows Basic Theme for Applications
- Configure Group Policy to Start Runonce.exe
- RDS Host Performance Options
- Configuring 3D Graphics for RDS Hosts
- Configure RDS Per Device Client Access License Storage
- Creating Farms
- Creating RDS Desktop Pools
- Creating Application Pools
- Managing Application Pools, Farms, and RDS Hosts
- Managing Application Pools
- Managing Farms
- Managing RDS Hosts
- Manage Published Desktop and Application Sessions
- Configuring Load Balancing for RDS Hosts
- Load Values and Mapped Load Preferences
- Load Balancing Feature Constraints
- Writing a Load Balancing Script for an RDS Host
- Enable the VMware Horizon View Script Host Service on an RDS Host
- Configure a Load Balancing Script on an RDS Host
- Verify a Load Balancing Script
- Load Balancing Session Placement Examples
- Configure an Anti-Affinity Rule for an Application Pool
- Entitling Users and Groups
- Add Entitlements to a Desktop or Application Pool
- Remove Entitlements from a Desktop or Application Pool
- Review Desktop or Application Pool Entitlements
- Configuring Start Menu Shortcuts for Desktop and Application Pools
- Implementing Client Restrictions for Desktop and Application Pools
- Restricting Desktop or Application Access
- Restricting Remote Desktop Access Outside the Network

Setting Up Published
Desktops and
Applications in Horizon 7
Modified for Horizon 7 7.3.2
VMware Horizon 7 7.3
Setting Up Published Desktops and Applications in Horizon 7
VMware, Inc. 2
You can find the most up-to-date technical documentation on the VMware website at:
https://docs.vmware.com/
If you have comments about this documentation, submit your feedback to
docfeedback@vmware.com
Copyright © 2017 VMware, Inc. All rights reserved. Copyright and trademark information.
VMware, Inc.
3401 Hillview Ave.
Palo Alto, CA 94304
www.vmware.com
Contents
1Setting Up Published Desktops and Applications in Horizon 7 5
2Introduction to Published Desktops and Applications 6
Farms, RDS Hosts, and Published Desktops and Applications 6
Advantages of RDS Desktop Pools 7
Advantages of Application Pools 7
3Setting Up Remote Desktop Services Hosts 9
Remote Desktop Services Hosts 10
Install Remote Desktop Services on Windows Server 2008 R2 11
Install Remote Desktop Services on Windows Server 2012 or 2012 R2 12
Install Desktop Experience on Windows Server 2008 R2 13
Install Desktop Experience on Windows Server 2012, 2012 R2, or 2016 13
Restrict Users to a Single Session 14
Install Horizon Agent on a Remote Desktop Services Host 14
Printing From a Remote Application Launched Inside a Nested Session 21
Enable Time Zone Redirection for RDS Desktop and Application Sessions 22
Enable Windows Basic Theme for Applications 22
Configure Group Policy to Start Runonce.exe 23
RDS Host Performance Options 23
Configuring 3D Graphics for RDS Hosts 24
Configure RDS Per Device Client Access License Storage 26
4Creating Farms 28
Farms 28
Preparing a Parent Virtual Machine for an Automated Farm 29
Worksheet for Creating a Manual Farm 33
Worksheet for Creating an Automated Linked-Clone Farm 34
Worksheet for Creating an Automated Instant-Clone Farm 40
Create a Manual Farm 44
Create an Automated Linked-Clone Farm 44
Create an Automated Instant-Clone Farm 45
5Creating RDS Desktop Pools 47
Understanding RDS Desktop Pools 47
Create an RDS Desktop Pool 48
Desktop Pool Settings for RDS Desktop Pools 49
Troubleshooting Instant Clones in the Internal VM Debug Mode 50
VMware, Inc. 3
Adobe Flash Quality and Throttling 51
Configure Adobe Flash Throttling with Internet Explorer for RDS Desktop Pools 52
6Creating Application Pools 53
Application Pools 53
Worksheet for Creating an Application Pool Manually 54
Create an Application Pool 55
7Managing Application Pools, Farms, and RDS Hosts 57
Managing Application Pools 57
Managing Farms 58
Managing RDS Hosts 64
Manage Published Desktop and Application Sessions 68
Configuring Load Balancing for RDS Hosts 69
Configure an Anti-Affinity Rule for an Application Pool 76
8Entitling Users and Groups 78
Add Entitlements to a Desktop or Application Pool 78
Remove Entitlements from a Desktop or Application Pool 79
Review Desktop or Application Pool Entitlements 79
Configuring Start Menu Shortcuts for Desktop and Application Pools 80
Implementing Client Restrictions for Desktop and Application Pools 83
Restricting Desktop or Application Access 83
Restricting Remote Desktop Access Outside the Network 88
Setting Up Published Desktops and Applications in Horizon 7
VMware, Inc. 4
Setting Up Published Desktops
and Applications in Horizon 7 1
Setting Up Published Desktops and Applications in Horizon 7describes how to create, and deploy pools
of desktops and applications that run on Microsoft Remote Desktop Services (RDS) hosts. It includes
information about configuring policies, entitling users and groups, and configuring remote application
features.
Intended Audience
This information is intended for anyone who wants to create and provision desktop and application pools.
The information is written for Windows system administrators who are familiar with virtual machine
technology and data center operations.
VMware, Inc. 5
Introduction to Published
Desktops and Applications 2
With Horizon 7, you can create published desktops associated with a farm, which is a group of Windows
Remote Desktop Services (RDS) hosts. You can also deliver a published application to many users by
creating application pools. The published applications in application pools run on a farm of RDS hosts.
This section includes the following topics:
nFarms, RDS Hosts, and Published Desktops and Applications
nAdvantages of RDS Desktop Pools
nAdvantages of Application Pools
Farms, RDS Hosts, and Published Desktops and
Applications
You can use Microsoft Remote Desktop Services (RDS) to provide users with desktop sessions on RDS
hosts and deliver applications to many users.
RDS Host
RDS hosts are server computers that have Windows Remote Desktop Services and Horizon Agent
installed. These servers host applications that users can access remotely. To access RDS applications,
Horizon Client 3.0 or later is required.
Farms
Farms are collections of RDS hosts and facilitate the management of those hosts. Farms can have a
variable number of RDS hosts and provide a common set of published applications or RDS published
desktops to users. When you create an RDS application pool, you must specify a farm. The RDS hosts in
the farm provide application sessions to users. A farm can contain up to 200 RDS host servers.
Published Desktops
Published desktops are RDS desktop pools, which provide users with desktop sessions on RDS hosts.
Multiple users can have desktop sessions on an RDS host simultaneously.
VMware, Inc. 6
Published Applications
Published applications are application pools that run on a farm of RDS hosts. Published applications let
you deliver seamless applications to many users.
Advantages of RDS Desktop Pools
Horizon 7 offers the ability to create RDS desktop pools as its basis of centralized management.
You can create an RDS desktop pool from a physical system such as an RDS host. Use RDS desktop
pools to provide multiple users with desktop sessions on an RDS host.
Advantages of Application Pools
With application pools, you give users access to applications that run on servers in a data center instead
of on their personal computers or devices.
Application pools offer several important benefits:
nAccessibility
Users can access applications from anywhere on the network. You can also configure secure network
access.
nDevice independence
With application pools, you can support a range of client devices, such as smart phones, tablets,
laptops, thin clients, and personal computers. The client devices can run various operating systems,
such as Windows, iOS, Mac OS, or Android.
nAccess control
You can easily and quickly grant or remove access to applications for one user or a group of users.
nAccelerated deployment
With application pools, deploying applications can be accelerated because you only deploy
applications on servers in a data center and each server can support multiple users.
nManageability
Managing software that is deployed on client computers and devices typically requires significant
resources. Management tasks include deployment, configuration, maintenance, support, and
upgrades. With application pools, you can simplify software management in an enterprise because
the software runs on servers in a data center, which requires fewer installed copies.
nSecurity and regulatory compliance
With application pools, you can improve security because applications and their associated data are
centrally located in a data center. Centralized data can address security concerns and regulatory
compliance issues.
nReduced cost
Setting Up Published Desktops and Applications in Horizon 7
VMware, Inc. 7
Depending on software license agreements, hosting applications in a data center can be more cost-
effective. Other factors, including accelerated deployment and improved manageability, can also
reduce the cost of software in an enterprise.
Setting Up Published Desktops and Applications in Horizon 7
VMware, Inc. 8
Setting Up Remote Desktop
Services Hosts 3
Microsoft Remote Desktop Services (RDS) hosts provide desktop sessions and applications that users
can access from client devices. If you plan to create RDS desktop pools or application pools, you must
first set up RDS hosts.
This section includes the following topics:
nRemote Desktop Services Hosts
nInstall Remote Desktop Services on Windows Server 2008 R2
nInstall Remote Desktop Services on Windows Server 2012 or 2012 R2
nInstall Desktop Experience on Windows Server 2008 R2
nInstall Desktop Experience on Windows Server 2012, 2012 R2, or 2016
nRestrict Users to a Single Session
nInstall Horizon Agent on a Remote Desktop Services Host
nPrinting From a Remote Application Launched Inside a Nested Session
nEnable Time Zone Redirection for RDS Desktop and Application Sessions
nEnable Windows Basic Theme for Applications
nConfigure Group Policy to Start Runonce.exe
nRDS Host Performance Options
nConfiguring 3D Graphics for RDS Hosts
nConfigure RDS Per Device Client Access License Storage
VMware, Inc. 9
Remote Desktop Services Hosts
An RDS host is a server computer that hosts applications and desktop sessions for remote access. An
RDS host can be a virtual machine or a physical server.
An RDS host has the Microsoft Remote Desktop Services role, the Microsoft Remote Desktop Session
Host service, and Horizon Agent installed. Remote Desktop Services was previously known as Terminal
Services. The Remote Desktop Session Host service allows a server to host applications and remote
desktop sessions. With Horizon Agent installed on an RDS host, users can connect to applications and
desktop sessions by using the display protocol PCoIP or Blast Extreme. Both protocols provide an
optimized user experience for the delivery of remote content, including images, audio and video.
The performance of an RDS host depends on many factors. For information on how to tune the
performance of different versions of Windows Server, see
http://msdn.microsoft.com/library/windows/hardware/gg463392.aspx.
Horizon 7 supports at most one desktop session and one application session per user on an RDS host.
Horizon 7 supports both local printer redirection and native network printers.
Local printer redirection is designed for the following use cases:
nPrinters directly connected to USB or serial ports on the client device
nSpecialized printers such as bar code printers and label printers connected to the client
nNetwork printers on a remote network that are not addressable from the virtual session
Network printers are managed using corporate print servers, which allows for greater management and
control of printer resources. Native printer drivers for all possible printers need to be installed on the
virtual machine or RDSH host. If you consider this challenging, there are third-party options such as
advanced versions of ThinPrint that can provide network printing without the need to install additional
printer drivers on each virtual machine or RDSH host. The Print and Document Services option included
with Microsoft Windows Server is another option for managing your network printers.
If a user launches an application and also an RDS desktop, and both are hosted on the same RDS host,
they share the same user profile. If the user launches an application from the desktop, conflicts may
result if both applications try to access or modify the same parts of the user profile, and one of the
applications may fail to run properly.
The process of setting up applications or RDS desktops for remote access involves the following tasks:
1 Set up RDS hosts.
2 Create a farm. See Chapter 4 Creating Farms.
3 Create an application pool or an RDS desktop pool. See Chapter 6 Creating Application Pools or
Chapter 5 Creating RDS Desktop Pools.
4 Entitle users and groups. See Chapter 8 Entitling Users and Groups.
Setting Up Published Desktops and Applications in Horizon 7
VMware, Inc. 10

5 (Optional) Enable time zone redirection for RDS desktop and application sessions. See Enable Time
Zone Redirection for RDS Desktop and Application Sessions.
Note If smart card authentication is enabled, make sure that the Smart Card service is disabled on RDS
hosts. Otherwise, authentication might fail. By default, this service is disabled.
Caution When a user launches an application, for example, a Web browser, it is possible for a user to
gain access to the local drives on the RDS host that is hosting the application. This can happen if the
application provides functions that cause Windows Explorer to run. To prevent this type of access to the
RDS host, follow the procedure that is described in http://support.microsoft.com/kb/179221 to prevent an
application from running Windows Explorer.
Because the procedure described in http://support.microsoft.com/kb/179221 affects both desktop and
application sessions, it is recommended that you do not create RDS desktop pools and application pools
on the same farm if you plan to follow the procedure in the Microsoft KB article, so that desktop sessions
are not affected.
Installing Applications
If you plan to create application pools, you must install the applications on the RDS hosts. If you want
Horizon 7 to automatically display the list of installed applications, you must install the applications so that
they are available to all users from the Start menu. You can install an application at any time before you
create the application pool. If you plan to manually specify an application, you can install the application
at any time, either before or after creating an application pool.
Important When you install an application, you must install it on all the RDS hosts in a farm and in the
same location on each RDS host. If you do not, a health warning will appear on the View Administrator
dashboard. In such a situation, if you create an application pool, users might encounter an error when
they try to run the application.
When you create an application pool, Horizon 7 automatically displays the applications that are available
to all users rather than individual users from the Start menu on all of the RDS hosts in a farm. You can
choose any applications from that list. In addition, you can manually specify an application that is not
available to all users from the Start menu. There is no limit on the number of applications that you can
install on an RDS host.
Install Remote Desktop Services on Windows Server
2008 R2
Remote Desktop Services (RDS) is one of the roles that a Windows Server can have. You must install
this role to set up an RDS host that runs Windows Server 2008 R2.
Prerequisites
nVerify that the RDS host is running Windows Server 2008 R2 Service Pack 1 (SP1).
nVerify that the RDS host is part of the Active Directory domain for the Horizon 7 deployment.
Setting Up Published Desktops and Applications in Horizon 7
VMware, Inc. 11
nInstall the Microsoft hotfix rollup that is documented in http://support.microsoft.com/kb/2775511.
nInstall the Microsoft update https://support.microsoft.com/en-us/kb/2973201.
Procedure
1Log in to the RDS host as an administrator.
2Start Server Manager.
3Select Roles in the navigation tree.
4Click Add Roles to start the Add Role wizard.
5Select the role Remote Desktop Services.
6On the Select Role Services page, select Remote Desktop Session Host.
7On the Specify Authentication Method page, select either Require Network Level Authentication or
Do not require Network Level Authentication, whichever is appropriate.
8On the Configure Client Experience page, select the functionality that you want to provide to users.
9Follow the prompts and finish the installation.
What to do next
If you plan to use HTML Access or scanner redirection, install the Desktop Experience feature. The steps
for installing Desktop Experience differ on Windows Server 2008 R2 and Windows Server 2012 or 2012
R2.
Restrict users to a single desktop session. See Restrict Users to a Single Session.
Install Remote Desktop Services on Windows Server 2012
or 2012 R2
Remote Desktop Services is one of the roles that a Windows Server 2012 or 2012 R2 can have. You
must install this role to set up an RDS host.
Prerequisites
nVerify that the RDS host is running Windows Server 2012 or Windows Server 2012 R2.
nVerify that the RDS host is part of the Active Directory domain for the Horizon 7 deployment.
Procedure
1Log in to the RDS host as an administrator.
2Start Server Manager.
3Select Add roles and features.
4On the Select Installation Type page, select Role-based or feature-based installation.
5On the Select Destination Server page, select a server.
6On the Select Server Roles page, select Remote Desktop Services.
Setting Up Published Desktops and Applications in Horizon 7
VMware, Inc. 12
7On the Select Features page, accept the defaults.
8On the Select Role Services page, select Remote Desktop Session Host.
9Follow the prompts and finish the installation.
What to do next
If you plan to use HTML Access or scanner redirection, install the Desktop Experience feature. The steps
for installing Desktop Experience differ on Windows Server 2008 R2 and Windows Server 2012 or 2012
R2.
Restrict users to a single desktop session. See Restrict Users to a Single Session.
Install Desktop Experience on Windows Server 2008 R2
For RDS desktops and applications, and for VDI desktops that are deployed on single-user virtual
machines that run Windows Server, scanner redirection requires that you install the Desktop Experience
feature on the RDS hosts and the single-user virtual machines.
Procedure
1Log in as an administrator.
2Start Server Manager.
3Click Features.
4Click Add Features.
5On the Select Features page, select the Desktop Experience checkbox.
6Review the information about other features that are required by the Desktop Experience feature, and
click Add Required Features.
7Follow the prompts and finish the installation.
Install Desktop Experience on Windows Server 2012, 2012
R2, or 2016
For RDS desktops and applications, and for VDI desktops that are deployed on single-user virtual
machines that run Windows Server, scanner redirection requires that you install the Desktop Experience
feature on the RDS hosts and the single-user virtual machines.
Windows Server 2012, Windows Server 2012 R2, and Windows Server 2016 are supported on machines
that are used as RDS hosts. Windows Server 2012 R2 is supported on single-user virtual machines.
Procedure
1Log in as an administrator.
2Start Server Manager.
3Select Add roles and features.
Setting Up Published Desktops and Applications in Horizon 7
VMware, Inc. 13
4On the Select Installation Type page, select Role-based or feature-based installation.
5On the Select Destination Server page, select a server.
6On the Select Server Roles page, accept the default selection and click Next.
7On the Select Features page, under User Interfaces and Infrastructure, select Desktop
Experience.
8Follow the prompts and finish the installation.
Restrict Users to a Single Session
Horizon 7 supports at most one desktop session and one application session per user on an RDS host.
You must configure the RDS host to restrict users to a single session. For Windows Server 2008 R2,
Windows Server 2012, and Windows Server 2012 R2, you can can restrict users to a single session by
enabling the group policy setting
Restrict Remote Desktop Services users to a single Remote Desktop Services session.
This setting is located in the folder Computer Configuration\Administrative Templates\Windows
Components\Remote Desktop Services\Remote Desktop Session Host\Connections. For
Windows Server 2008 R2, you can also use the following procedure to restrict users to a single session.
Prerequisites
nInstall the Remote Desktop Services role as described in Install Remote Desktop Services on
Windows Server 2008 R2.
Procedure
1Click Start > Administrative Tools > Remote Desktop Services > Remote Desktop Session Host
Configuration.
2On the Edit Settings pane, under General, double-click Restrict each user to a single session.
3In the Properties dialog box, on the General tab, select Restrict each user to a single session and
click OK.
What to do next
Install Horizon Agent on the RDS host. See Install Horizon Agent on a Remote Desktop Services Host.
Install Horizon Agent on a Remote Desktop Services Host
Horizon Agent communicates with Connection Server and supports the display protocols PCoIP and Blast
Extreme. You must install Horizon Agent on an RDS Host.
Prerequisites
nVerify that you have prepared Active Directory. See the View Installation document.
nInstall the Remote Desktop Services role as described in Install Remote Desktop Services on
Windows Server 2008 R2 or Install Remote Desktop Services on Windows Server 2012 or 2012 R2.
Setting Up Published Desktops and Applications in Horizon 7
VMware, Inc. 14

nRestrict users to a single desktop session. See Restrict Users to a Single Session.
nFamiliarize yourself with the Horizon Agent custom setup options. See Horizon Agent Custom Setup
Options for an RDS Host.
nIf the machine has the Microsoft Visual C++ Redistributable package installed, verify that the version
of the package is 2005 SP1 or later. If the package version is 2005 or earlier, you can either upgrade
or uninstall the package.
nDownload the Horizon Agent installer file from the VMware product page at
http://www.vmware.com/go/downloadview.
Procedure
1Log in as an administrator.
2To start the Horizon Agent installation program, double-click the installer file.
The installer filename is VMware-viewagent-x86_64-y.y.y-xxxxxx.exe, where y.y.y is the version
number and xxxxxx is the build number.
3Select the Internet Protocol (IP) version, IPv4 or IPv6.
You must install all View components with the same IP version.
4Select your custom setup options.
Do not select the View Composer Agent option if you are installing Horizon Agent on an RDS host
that will be in a manual farm.
5In the Server text box, type the host name or IP address of a Connection Server host.
During installation, the installer registers the RDS host with this Connection Server instance. After
registration, the specified Connection Server instance, and any additional instances in the same
Connection Server group, can communicate with the RDS host.
6Select an authentication method to register the RDS host with the Connection Server instance.
Option Description
Authenticate as the currently logged in
user
The Username and Password text boxes are disabled and you are logged in to
the Connection Server instance with your current username and password.
Specify administrator credentials You must provide the username and password of a Connection Server
administrator in the Username and Password text boxes.
The user account must be a domain user with access to View LDAP on the View Connection Server
instance. A local user does not work.
7Follow the prompts and finish the installation.
What to do next
Create a farm. See Chapter 4 Creating Farms.
Setting Up Published Desktops and Applications in Horizon 7
VMware, Inc. 15

Horizon Agent Custom Setup Options for an RDS Host
When you install Horizon Agent on an RDS host, you can select custom setup options. In addition,
Horizon Agent installs certain features automatically on all guest operating systems on which they are
supported. These features are not optional.
To change custom setup options after you install the latest Horizon Agent version, you must uninstall and
reinstall Horizon Agent. For patches and upgrades, you can run the new Horizon Agent installer and
select a new set of options without uninstalling the previous version.
Table 3‑1. Horizon Agent Custom Setup Options for an RDS Host in an IPv4 Environment
Option Description
USB Redirection Gives users access to locally connected USB storage devices.
Specifically, redirection of USB flash drives and hard disks is supported in RDS desktops and
applications. Redirection of other types of USB devices, and other types of USB storage devices such
as security storage drives and USB CD-ROM, is not supported in RDS desktops and applications.
This setup option is not selected by default. You must select the option to install it. This option is
available on RDS hosts that run Windows Server 2012 or 2012 R2 but not Windows Server 2008 R2.
For information about using USB redirection securely, see the View Security document. For example,
you can use group policy settings to disable USB redirection for specific users.
HTML Access Enables users to connect to RDS desktops and applications by using HTML Access. The
HTML Access Agent is installed when this setup option is selected. This agent must be installed on
RDS hosts to enable users to make connections with HTML Access
3D RDSH Provides 3D graphics support to applications that run on this RDS host.
View Composer Agent Select this option if this machine is a parent virtual machine for the creation of an automated farm. Do
not select this option if this machine is an RDS host in a manual farm.
Client Drive Redirection Enables Horizon Client users to share local drives with their RDS desktops and applications.
After this setup option is installed, no further configuration is required on the RDS host.
Client drive redirection is also supported on remote desktops that run on single-user virtual machines
and on unmanaged machines.
Virtual Printing Enables users to print to any printer available on their client computers. Users do not need to install
additional drivers on their desktops.
Virtual printing is supported on the following remote desktops and applications:
nDesktops that are deployed on single-user machines, including Windows desktop and Windows
Server machines.
nDesktops that are deployed on RDS hosts, where the RDS hosts are virtual machines.
nRemote applications.
nRemote applications that are launched from Horizon Client inside remote desktops (nested
sessions).
The virtual printing feature is supported only when you install it from Horizon Agent. If you install it with
VMware Tools, it is not supported.
vRealize Operations
Desktop Agent
Enables vRealize Operations Manager to work with vRealize Operations Manager for Horizon.
Setting Up Published Desktops and Applications in Horizon 7
VMware, Inc. 16

Table 3‑1. Horizon Agent Custom Setup Options for an RDS Host in an IPv4 Environment
(Continued)
Option Description
Scanner Redirection Redirects scanning devices that are connected to the client system so that they can be used on the
RDS desktop or application.
You must install the Desktop Experience feature in the Windows Server operating system on the RDS
hosts to make this option available in the Horizon Agent installer.
This setup option is not installed by default on Windows Server guest operating systems. You must
select the option to install it.
HTML5 Multimedia
Redirection
Redirects HTML5 multimedia content in a Chrome browser to the client for performance optimization.
This setup option is not installed by default. You must select the option to install it.
VMware Client IP
Transparency
Enables remote connections to Internet Explorer to use the client's IP address instead of the remote
desktop machine's IP address.
This setup option is not selected by default. You must select the option to install it.
Instant Clone Enables the creation of instant-clone virtual machines on a farm of RDS hosts.
This setup option is not installed by default on Windows Server guest operating systems. You must
select the option to install it.
In an IPv6 environment, the setup options are similar to IPv6.
Table 3‑2. Horizon Agent Features That Are Installed Automatically on an RDS Host
Option Description
PCoIP Agent Enables users to use the PCoIP display protocol to connect to applications and RDS desktops.
Windows Media Multimedia
Redirection (MMR)
Provides multimedia redirection for RDS desktops. This feature delivers a multimedia stream directly
to the client computer, which enables the multimedia stream to be processed on the client hardware
instead of on the remote ESXi host.
Unity Touch Enables tablet and smart phone users to interact with Windows applications that run on the remote
desktop. Users can browse, search, and open Windows applications and files, choose favorite
applications and files, and switch between running applications without using the Start menu or
Taskbar.
PSG Agent Installs the PCoIP Secure Gateway on RDS hosts to implement the PCoIP display protocol for
desktop and application sessions that run on RDS hosts.
VMwareRDS Provides the VMware implementation of Remote Desktop Services functionality.
In an IPv6 environment, the automatically installed features are PCoIP Agent, PSG Agent, and
VMwareRDS.
For additional features that are supported on RDS hosts, see "Feature Support Matrix for Horizon Agent"
in the View Architecture Planning document.
Silent Installation Properties for Horizon Agent
You can include specific properties when you silently install Horizon Agent from the command line. You
must use a PROPERTY=value format so that Microsoft Windows Installer (MSI) can interpret the properties
and values.
Table 3‑3 shows the Horizon Agent silent installation properties that you can use at the command-line.
Setting Up Published Desktops and Applications in Horizon 7
VMware, Inc. 17

Table 3‑3. MSI Properties for Silently Installing Horizon Agent
MSI Property Description Default Value
INSTALLDIR The path and folder in which the Horizon Agent software is
installed.
For example: INSTALLDIR=""D:\abc\my folder""
The sets of two double quotes that enclose the path permit the MSI
installer to ignore the space in the path.
This MSI property is optional.
%ProgramFiles
%\VMware\VMware
View\Agent
RDP_CHOICE Determines whether to enable Remote Desktop Protocol (RDP) on
the desktop.
A value of 1 enables RDP. A value of 0 leaves the RDP setting
disabled.
This MSI property is optional.
1
SUPPRESS_RUNONCE_CHECK Ignores pending Windows Update tasks scheduled at the next OS
reboot in
HKLM\SOFTWARE\Microsoft\Windows\CurrentVersion\RunOnce
and RunOnceEx keys. Using this flag allows concurrent installation
but does not guarantee the installation outcome when the system
updates affect the Horizon Agent run-time dependencies.
This MSI property is optional.
None
URL_FILTERING_ENABLED Specifies whether the URL Content Redirection feature is installed.
A value of 1 installs the feature. You must then use group policy
settings to configure which URLs to redirect. See "Configuring URL
Content Redirection in the Configuring Remote Desktop Features
in Horizon 7 document.
This MSI property is optional.
0
VDM_SKIP_BROKER_REGISTRATION A value of 1 skips unmanaged desktops. None
VDM_VC_MANAGED_AGENT Determines whether vCenter Server manages the virtual machine
on which Horizon Agent is installed.
A value of 1 configures the desktop as a vCenter Server-managed
virtual machine.
A value of 0 configures the desktop as unmanaged by vCenter
Server.
This MSI property is required.
None
VDM_SERVER_NAME The host name or IP address of the View Connection Server
computer on which the Horizon Agent installer registers an
unmanaged desktop. This property applies to unmanaged desktops
only.
For example: VDM_SERVER_NAME=10.123.01.01
This MSI property is required for unmanaged desktops.
Do not use this MSI property for virtual-machine desktops that are
managed by vCenter Server.
None
Setting Up Published Desktops and Applications in Horizon 7
VMware, Inc. 18

Table 3‑3. MSI Properties for Silently Installing Horizon Agent (Continued)
MSI Property Description Default Value
VDM_SERVER_USERNAME The user name of the administrator on the View Connection Server
computer. This MSI property applies to unmanaged desktops only.
For example: VDM_SERVER_USERNAME=domain\username
This MSI property is required for unmanaged desktops.
Do not use this MSI property for virtual-machine desktops that are
managed by vCenter Server.
None
VDM_SERVER_PASSWORD The View Connection Server administrator user password.
For example: VDM_SERVER_PASSWORD=secret
This MSI property is required for unmanaged desktops.
Do not use this MSI property for virtual-machine desktops that are
managed by vCenter Server.
None
VDM_IP_PROTOCOL_USAGE Specifies the IP version that Horizon Agent uses. The possible
values are IPv4 and IPv6.
IPv4
VDM_FIPS_ENABLED Specifies whether to enable or disable FIPS mode. A value of 1
enables FIPS mode. A value of 0 disables FIPS mode. If this
property is set to 1 and Windows is not in FIPS mode, the installer
will abort.
0
VDM_FLASH_URL_REDIRECTION Determines whether Horizon Agent can install the Flash URL
redirection feature. Specify 1 to enable installation or 0 to disable
installation.
This MSI property is optional.
0
INSTALL_VDISPLAY_DRIVER Configures the Horizon WDDM display driver. A value of 1 enables
the driver installation. A value of 0 or empty disables the driver
installation
0
In a silent installation command, you can use the MSI property, ADDLOCAL=, to specify options that the
Horizon Agent installer configures.
Table 3‑4 shows the Horizon Agent options you can type at the command line. These options have
corresponding setup options that you can deselect or select during an interactive installation.
For details about the custom setup options, see Horizon Agent Custom Setup Options for an RDS Host.
When you do not use the ADDLOCAL property at the command line, Horizon Agent installs all options that
are installed by default during an interactive installation, if they are supported on the guest operating
system. When you use ADDLOCAL=ALL, Horizon Agent installs all of the following options, both on-by-
default and off-by-default, if they are supported on the guest operating system, except NGVC. NGVC and
SVIAgent are mutually exclusive. To install NGVC, you must specify it explicitly.
For details, see the ADDLOCAL table entry in Microsoft Windows Installer Command-Line Options in
Setting Up Virtual Desktops in Horizon 7
Setting Up Published Desktops and Applications in Horizon 7
VMware, Inc. 19

Table 3‑4. Horizon Agent Silent Installation Options and Interactive Custom Setup Options
Silent Installation Option
Custom Setup Option in an Interactive
Installation
Installed by Default Interactively or When
ADDLOCAL Is Not Used
Core Core Yes
USB USB Redirection No
SVIAgent View Composer Agent Yes
NGVC Instant Clone Agent No
RTAV Real-Time Audio-Video Yes
ClientDriveRedirection Client Drive Redirection Yes
SerialPortRedirection Serial Port Redirection No
ScannerRedirection Scanner Redirection No
FlashURLRedirection Flash URL Redirection
This feature is hidden unless you use the
VDM_FLASH_URL_REDIRECTION=1 property on
the command line.
No
ThinPrint Virtual Printing Yes
V4V vRealize Operations Desktop Agent Yes
VPA View Persona Management Yes
SmartCard PCoIP Smartcard. This feature is not installed by
default in an interactive installation.
No
VmwVaudio VMware Audio (virtual audio driver) Yes
TSMMR Windows Media Multimedia Redirection (MMR) Yes
RDP This feature enables RDP in the registry if you
use the RDP_CHOICE=1 property on the command
line or select RDP as the default display protocol
when you create or edit a desktop pool in View
Administrator.
This feature is hidden during interactive
installations.
Yes
VMWMediaProviderProxy VMware Virtualization Pack for Skype for
Business feature.
No
If you use ADDLOCAL to specify features individually, that is, you do not specify ADDLOCAL=ALL, you must
always specify Core.
Table 3‑5. Horizon Agent Silent Installation Features That Are Installed Automatically
Silent Installation Feature Description
Core The core Horizon Agent functions.
If you specify ADDLOCAL=ALL, the Core features are installed.
BlastProtocol VMware Blast
PCoIP PCoIP Protocol Agent
Setting Up Published Desktops and Applications in Horizon 7
VMware, Inc. 20

Table 3‑5. Horizon Agent Silent Installation Features That Are Installed Automatically
(Continued)
Silent Installation Feature Description
VmVideo Virtual video driver
UnityTouch Unity Touch
PSG This features sets a registry entry that tells Connection Server whether
Horizon Agent is using IPv4 or IPv6.
You install the Flash URL Redirection feature by using the VDM_FLASH_URL_REDIRECTION=1 property in a
silent installation. This feature is not installed during an interactive installation or by using ADDLOCAL=ALL
in a silent installation.
For example: VMware-viewagent-y.y.y-xxxxxx.exe /s /v"/qn VDM_VC_MANAGED_AGENT=1
VDM_FLASH_URL_REDIRECTION=1
ADDLOCAL=Core,SVIAgent,ThinPrint,USB,FlashURLRedirection,RTAV"
Printing From a Remote Application Launched Inside a
Nested Session
When you enable the Virtual Printing option during Horizon Agent installation, users can print from remote
applications that they launch from Horizon Client inside remote desktops (nested sessions) to printers on
their local client machine.
Beginning with Horizon 7 version 7.0.2, users can print from remote applications launched inside a nested
session to printers connected to the remote desktop machine rather than to printers connected to their
local client machine. To enable this feature, change the Thinprint session-in-session mode on the remote
desktop machine by changing the value of SiSActive to 0 in
HKEY_LOCAL_MACHINE\SOFTWARE\ThinPrint\TPClnRDP.
Note When SiSActive is set to 0 on the remote desktop machine, users can no longer print from
remote applications launched inside nested sessions to printers connected to their local client machine.
To reenable the default ThinPrint session-in-session mode, change the value of SiSActive to 1 in
HKEY_LOCAL_MACHINE\SOFTWARE\ThinPrint\TPClnRDP on the remote desktop machine.
For information about enabling the Virtual Printing option during Horizon Agent installation, see Horizon
Agent Custom Setup Options for an RDS Host.
Setting Up Published Desktops and Applications in Horizon 7
VMware, Inc. 21
Enable Time Zone Redirection for RDS Desktop and
Application Sessions
If an RDS host is in one time zone and a user is in another time zone, by default, when the user connects
to an RDS desktop, the desktop displays time that is in the time zone of the RDS host. You can enable
the Time Zone Redirection group policy setting to make the RDS desktop display time in the local time
zone. This policy setting applies to application sessions as well.
Prerequisites
nVerify that the Group Policy Management feature is available on your Active Directory server.
The steps for opening the Group Policy Management Console differ in the Windows 2012, Windows
2008, and Windows 2003 Active Directory versions. See "Create GPOs for Horizon Group Policies" in
the Configuring Remote Desktop Features in Horizon 7 document.
nVerify that the Horizon 7 RDS ADMX files are added to Active Directory. See "Add the Remote
Desktop Services ADMX Files to Active Directory" in the Configuring Remote Desktop Features in
Horizon 7 document.
nFamiliarize yourself with the group policy settings. See " RDS Device and Resource Redirection
Settings" in the Configuring Remote Desktop Features in Horizon 7 document.
Procedure
1On the Active Directory server, open the Group Policy Management Console.
2Expand your domain and Group Policy Objects.
3Right-click the GPO that you created for the group policy settings and select Edit.
4In the Group Policy Management Editor, navigate to Computer Configuration > Policies >
Administrative Templates > Windows Components > Remote Desktop Services > Remote
Desktop Session Host > Device and Resource Redirection.
5Enable the setting Allow time zone redirection.
Enable Windows Basic Theme for Applications
If a user has never connected to a desktop on an RDS host, and the user launches an application that is
hosted on the RDS host, the Windows basic theme is not applied to the application even if a GPO setting
is configured to load the Aero-styled theme. Horizon 7 does not support the Aero-styled theme but
supports the Windows basic theme. To make the Windows basic theme apply to the application, you must
configure another GPO setting.
Prerequisites
nVerify that the Group Policy Management feature is available on your Active Directory server.
Setting Up Published Desktops and Applications in Horizon 7
VMware, Inc. 22
The steps for opening the Group Policy Management Console differ in the Windows 2012, Windows
2008, and Windows 2003 Active Directory versions. See "Create GPOs for Horizon 7 Group Policies"
in the Configuring Remote Desktop Features in Horizon 7 document.
Procedure
1On the Active Directory server, open the Group Policy Management Console.
2Expand your domain and Group Policy Objects.
3Right-click the GPO that you created for the group policy settings and select Edit.
4In the Group Policy Management Editor, navigate to User Configuration > Policies >
Administrative Templates > Control Panel > Personalization.
5Enable the setting Force a specific visual style file or force Windows classic and set the Path to
Visual Style as %windir%\resources\Themes\Aero\aero.msstyles.
Configure Group Policy to Start Runonce.exe
By default, some applications that rely on the Explorer.exe file may not run in an application session. To
avoid this issue, you must configure a GPO setting to start runonce.exe.
Prerequisites
nVerify that the Group Policy Management feature is available on your Active Directory server.
The steps for opening the Group Policy Management Console differ in the Windows 2012, Windows
2008, and Windows 2003 Active Directory versions. See "Create GPOs for Horizon 7 Group Policies"
in the Configuring Remote Desktop Features in Horizon 7 document.
Procedure
1On the Active Directory server, open the Group Policy Management Console.
2Expand your domain and Group Policy Objects.
3Right-click the GPO that you created for the group policy settings and select Edit.
4In the Group Policy Management Editor, navigate to User Configuration > Policies > Windows
Settings > Scripts (Logon/Logoff).
5Double-click Logon and click Add.
6In the Script Name box, type runonce.exe.
7In the Script Parameters box, type /AlternateShellStartup.
RDS Host Performance Options
You can optimize Windows for either foreground programs or background services by setting
performance options. By default, Horizon 7 disables certain performance options for RDS hosts for all
supported versions of Windows Server.
The following table shows the performance options that are disabled by Horizon 7.
Setting Up Published Desktops and Applications in Horizon 7
VMware, Inc. 23
Table 3‑6. Performance Options Disabled by Horizon 7
Performance Options Disabled by Horizon 7
Animate windows when minimizing and maximizing
Show shadows under mouse pointer
Show shadows under windows
Use drop shadow for icon labels on the desktop
Show windows contents while dragging
The five performance options that are disabled by Horizon 7 correspond to four Horizon 7 settings in the
registry. The following table shows the Horizon 7 settings and their default registry values. The registry
values are all located in the registry subkey HKEY_LOCAL_MACHINE\Software\VMware, Inc.\VMware
VDM\Agent\Configuration. You can re-enable the performance options by setting one or more of the
Horizon 7 registry values to false.
Table 3‑7. Horizon 7 Settings Related to Windows Performance Options
Horizon 7 Setting Registry Value
Disable cursor shadow DisableMouseShadows
Disable full window drag DisableFullWindowDrag
Disable ListView shadow DisableListViewShadow
Disable Window Animation DisableWindowAnimation
Configuring 3D Graphics for RDS Hosts
With 3D graphics configured for RDS hosts, both applications in application pools and applications
running on RDS desktops can display 3D graphics.
The following 3D graphics options are available:
NVIDIA GRID vGPU
(shared GPU hardware
acceleration)
A physical GPU on an ESXi host is shared among multiple virtual
machines. Requires ESXi 6.0 or later.
AMD Multiuser GPU
using vDGA
A physical GPU on an ESXi host is shared among multiple virtual
machines. Requires ESXi 6.0 or later.
Virtual Dedicated
Graphics Acceleration
(vDGA)
A physical GPU on an ESXi host is dedicated to a single virtual machine.
Requires ESXi 5.5 or later.
Note Some Intel vDGA cards require a certain vSphere 6 version. See the
VMware Hardware Compatibility List at
http://www.vmware.com/resources/compatibility/search.php. Also, for Intel
vDGA, the Intel integrated GPU is used rather than discrete GPUs, as is
the case with other vendors.
Setting Up Published Desktops and Applications in Horizon 7
VMware, Inc. 24

With vDGA, you allocate an entire GPU to a single machine for maximum performance. The RDS host
must be in a manual farm.
With AMD Multiuser GPU using vDGA, you can share an AMD GPU between multiple RDS hosts by
making it appear as multiple PCI passthrough devices. The RDS host must be in a manual farm.
With NVIDIA GRID vGPU, each graphics card can support multiple RDS hosts and the RDS hosts must
be in a manual farm. If an ESXi host has multiple physical GPUs, you can also configure the way the
ESXi host assigns virtual machines to the GPUs. By default, the ESXi host assigns virtual machines to
the physical GPU with the fewest virtual machines already assigned. This is called performance mode.
You can also choose consolidation mode, where the ESXi host assign virtual machines to the same
physical GPU until the maximum number of virtual machines is reached before placing virtual machines
on the next physical GPU. To configure consolidation mode, edit the /etc/vmware/config file on the
ESXi host and add the following entry:
vGPU.consolidation = "true"
3D graphics is only supported when you use the PCoIP or VMware Blast protocol. Therefore, the farm
must use PCoIP or VMware Blast as the default protocol and users must not be allowed to choose the
protocol.
Overview of Steps for Configuring 3D Graphics
This overview describes tasks that you must perform in vSphere and Horizon 7 to configure 3D graphics.
For more information about setting up NVIDIA GRID vGPU, see the document NVIDIA GRID vGPU
Deployment Guide for VMware Horizon 6.1. For more information about setting up vDGA, see the
document Graphics Acceleration in View Virtual Desktops. For more information about setting up AMD
Multiuser GPU using vDGA, see the Setting Up Virtual Machine Desktops in Horizon 7 guide.
1 Set up an RDS host virtual machine. For more information, see Chapter 3 Setting Up Remote
Desktop Services Hosts.
2 Add the graphics PCI device to the virtual machine. See "Other Virtual Machine Device Configuration"
in the chapter "Configuring Virtual machine Hardware" in the vSphere Virtual Machine Administration
document. Be sure to click Reserve all memory when adding the device.
3 On the virtual machine, install the device driver for the graphics card.
4 Add the RDS host to a manual farm, create an RDS desktop pool, connect to the desktop using
PCoIP, and activate the display adapter.
You do not need to configure 3D graphics for RDS hosts in View Administrator. Selecting the option 3D
RDSH when you install Horizon Agent is sufficient. By default, this option is not selected and 3D graphics
is disabled.
Setting Up Published Desktops and Applications in Horizon 7
VMware, Inc. 25

Configure RDS Per Device Client Access License Storage
When a client device connects to a published desktop or application on an RDS host, it receives an RDS
Per Device Client Access License (CAL), if the Per Device licensing mode is configured. You can store
the CAL on client devices and the Connection Server host, or only on the Connection Server host, by
configuring a global setting in Horizon Administrator.
Storing the CAL makes CAL usage efficient in RDS deployments and prevents the following problems.
nIf you deploy multiple license servers, and users run multiple sessions from a client device that
connects to different RDS hosts that use different license servers, each license server can potentially
issue a separate RDS Per Device CAL to the same client device. If a license server services both
Windows Server 2008 R2 RDS hosts and Windows Server 2012 or Windows Server 2012 R2 RDS
hosts (issuing both Windows Server 2008 R2 CALs and Windows Server 2012 or 2012 R2 CALs), a
single client device can use up as many as two CALs for each license server in your deployment.
nIf you have Windows 2012 or 2012 R2 CALs installed on a Windows Server 2012 license server, a
client device that makes a PCoIP or VMware Blast connection to a Windows Server 2008 R2 RDS
host is always issued a temporary license, even after multiple connections are made. A permanent
license is never issued for the client.
Storage of Per-Device CALs is supported only on Windows clients. Windows Zero clients and non-
Windows clients do not support this feature. For clients that do not support this feature, you can store
CALs only on the Connection Server host.
Prerequisites
Verify that the Per Device licensing mode is configured for the RDS host. You set the licensing mode by
configuring the Set the Remote Desktop licensing mode group policy setting. For more information, see
"RDS Licensing Settings" in the Configuring Remote Desktop Features in Horizon 7 document.
Procedure
1In Horizon Administrator, select View Configuration > Global Settings.
2In the General pane, click Edit.
3From the RDS Per Device CAL Storage Options drop-down menu, select a CAL storage option.
Option Description
Save only on Broker Store the CAL only on the Connection Server host.
This option sets the View LDAP entries cs-enablerdslicensing=true and
sendRdsLicense=false.
Save on both Clients and Broker Store the CAL on client devices and on the Connection Server host.
This option sets the View LDAP entries cs-enablerdslicensing=true and
sendRdsLicense=true.
Don't save the Per Device CAL Do not store the CAL.
This option sets the View LDAP entries cs-enablerdslicensing=false and
sendRdsLicense=false.
Setting Up Published Desktops and Applications in Horizon 7
VMware, Inc. 26
4Click OK to save your changes.
Setting Up Published Desktops and Applications in Horizon 7
VMware, Inc. 27
Creating Farms 4
A farm is a group of RDS hosts that provides a common set of applications or RDS desktops to users.
This section includes the following topics:
nFarms
nPreparing a Parent Virtual Machine for an Automated Farm
nWorksheet for Creating a Manual Farm
nWorksheet for Creating an Automated Linked-Clone Farm
nWorksheet for Creating an Automated Instant-Clone Farm
nCreate a Manual Farm
nCreate an Automated Linked-Clone Farm
nCreate an Automated Instant-Clone Farm
Farms
Farms simplify the task of managing RDS hosts, RDS desktops, and applications in an enterprise. You
can create manual or automated farms to serve groups of users that vary in size or have different desktop
or application requirements.
A manual farm consists of RDS hosts that already exist. The RDS hosts can be physical or virtual
machines. You manually add the RDS hosts when you create the farm.
An automated farm consists of RDS hosts that are instant-clone or linked-clone virtual machines in
vCenter Server.
Connection Server creates the instant-clone virtual machines based on the parameters that you specify
when you create the farm. Instant clones share a virtual disk of a parent VM and therefore consume less
storage than full virtual machines. In addition, instant clones share the memory of a parent VM and are
created using the vmFork technology.
View Composer creates the linked-clone virtual machines based on the parameters that you specify when
you create the farm. The virtual machines are cloned from a single parent virtual machine and are linked
to the parent in a mechanism that reduces the amount of storage that the virtual machines require.
VMware, Inc. 28

When you create an application pool or an RDS desktop pool, you must specify one and only one farm.
The RDS hosts in a farm can host RDS desktops, applications, or both. A farm can support at most one
RDS desktop pool, but it can support multiple application pools. A farm can support both types of pools
simultaneously.
Farms provide the following conveniences:
nLoad balancing
By default, Horizon 7 balances the load of the RDS desktop sessions and the application sessions
across all the RDS hosts in the farm. You can control the placement of new application sessions by
writing and configuring load balancing scripts. For more information, see "Configuring Load Balancing
for RDS Hosts" in the View Administration document.
nRedundancy
If one RDS host in a farm is offline, the other RDS hosts in the farm continue to provide applications
and desktops to users.
nScalability
A farm can have a variable number of RDS hosts. You can create farms with different numbers of
RDS hosts to serve user groups of different sizes.
Farms have the following properties:
nA Horizon 7 pod can have a maximum of 200 farms.
nA farm can have a maximum of 200 RDS hosts.
nThe RDS hosts in a farm can run any supported version of Windows Server. See "System
Requirements for Guest Operating Systems" in the View Installation document.
nAutomated linked-clone farms support the View Composer recompose operation but do not support
the refresh or rebalance operation. You can recompose an automated farm but not a subset of the
RDS hosts in the farm.
Important Microsoft recommends that you configure roaming profiles for users separately for each farm.
The profiles should not be shared between farms or users' physical desktops since profile corruption and
data loss may occur if a user is simultaneously logged in to two machines that load the same profile.
Preparing a Parent Virtual Machine for an Automated
Farm
To create an automated farm, you must first prepare a parent virtual machine. View Composer or
Connection Server uses this parent virtual machine to create linked-clone or instant-clone virtual
machines, which are the RDS hosts in the farm.
nPrepare an RDS Host Parent Virtual Machine
Both Connection Server and View Composer require a parent virtual machine from which you
generate a base image for creating instant clones or linked clones.
Setting Up Published Desktops and Applications in Horizon 7
VMware, Inc. 29

nActivating Windows on Linked-Clone RDS Hosts
To make sure that View Composer properly activates Windows Server operating systems on linked-
clone RDS hosts, you must use Microsoft volume activation on the parent virtual machine. The
volume-activation technology requires a volume license key.
nDisable Windows Hibernation in the Parent Virtual Machine
The Windows hibernation feature creates a hidden system file, Hiberfil.sys and uses this file to
store information that is needed for hybrid sleep. Disabling hibernation reduces the size of an instant
clone's or a View Composer linked clone's virtual disk.
Prepare an RDS Host Parent Virtual Machine
Both Connection Server and View Composer require a parent virtual machine from which you generate a
base image for creating instant clones or linked clones.
Prerequisites
nVerify that an RDS host virtual machine is set up. See Chapter 3 Setting Up Remote Desktop
Services Hosts. To set up the RDS host, be sure not to use a virtual machine that was previously
registered to View Connection Server.
A parent virtual machine that you use for View Composer must either belong to the same Active
Directory domain as the domain that the linked-clone machines will join or be a member of the local
WORKGROUP.
nVerify that the virtual machine was not converted from a View Composer linked clone. A virtual
machine that is converted from a linked clone has the clone's internal disk and state information. A
parent virtual machine cannot have state information.
Important Linked clones and virtual machines that were converted from linked clones are not
supported as parent virtual machines.
nTo create an automated instant-clone farm, you must select the Instant Clone option when you install
Horizon Agent on the parent virtual machine. See Install Horizon Agent on a Remote Desktop
Services Host.
nVerify that the virtual switch that the instant-clone VMs connect to has enough ports to support the
expected number of VMs. Each network card on a VM requires one port.
nVerify that you added an instant-clone domain administrator in Horizon Administrator.
nTo create an automated linked-clone farm, you must select the View Composer Agent option when
you install Horizon Agent on the parent virtual machine.
Setting Up Published Desktops and Applications in Horizon 7
VMware, Inc. 30

To update Horizon Agent in a large environment, you can use standard Windows update mechanisms
such as Altiris, SMS, LanDesk, BMC, or other systems management software. You can also use the
recompose operation to update Horizon Agent.
Note Do not change the log on account for the VMware View Composer Guest Agent Server service
in a parent virtual machine. By default, this is the Local System account. If you change this account,
the linked clones created from the parent do not start.
nTo deploy Windows machines, configure a volume license key and activate the parent virtual
machine's operating system with volume activation. See " Activating Windows on Instant Clones and
View Composer Linked Clones" in the Setting Up Virtual Desktops in Horizon 7 document.
nFamiliarize yourself with the procedure for disabling searching Windows Update for device drivers.
See the Microsoft Technet article, "Disable Searching Windows Update for Device Drivers" at
http://technet.microsoft.com/en-us/library/cc730606(v=ws.10).aspx.
nTo implement the RDS host load balancing feature, modify the RDS host parent virtual machine as
described in "Configuring Load Balancing for RDS Hosts" in the View Administration document.
Procedure
nRemove the DHCP lease on the parent virtual machine to avoid copying a leased IP address to the
linked clones in the farm.
a On the parent virtual machine, open a command prompt.
b Type the ipconfig /release command.
nVerify that the system disk contains a single volume.
You cannot deploy linked clones from a parent virtual machine that contains more than one volume.
The View Composer service does not support multiple disk partitions. Multiple virtual disks are
supported.
nVerify that the virtual machine does not contain an independent disk.
An independent disk is excluded when you take a snapshot of the virtual machine. Linked clones that
are created or recomposed from the virtual machine will not contain the independent disk.
nDisable the hibernation option to reduce the size of linked-clone OS disks that are created from the
parent virtual machine.
nBefore you take a snapshot of the parent virtual machine, disable searching Windows Update for
device drivers.
This Windows feature can interfere with the customization of linked-clone machines. As each linked
clone is customized, Windows might search for the best drivers on the Internet for that clone,
resulting in repeated searches and customization delays.
nIn vSphere Client, disable the vApp Options setting on the parent virtual machine.
Setting Up Published Desktops and Applications in Horizon 7
VMware, Inc. 31

nOn Windows Server 2008 R2 and Windows Server 2012 R2 machines, disable the scheduled
maintenance task that recovers disk space by removing unused features.
For example: Schtasks.exe /change /disable /tn
"\Microsoft\Windows\AppxDeploymentClient\Pre-staged app cleanup"
If left enabled, this maintenance task can remove the Sysprep customization script after the linked
clones are created, which would cause subsequent recompose operations to fail with customization
operation timeout errors. For more information, see the Microsoft KB article available at
http://support.microsoft.com/kb/2928948.
nOn Windows Server 2012 machines, apply the Microsoft hotfix available at
https://support.microsoft.com/en-us/kb/3020396.
This hotfix allows Sysprep to customize a Windows Server 2012 virtual machine that has the RDS
role enabled. Without the hotfix, Sysprep customization will fail on the Windows Server 2012 linked-
clone machines that are deployed in an automated farm.
What to do next
Use vSphere Client or vSphere Web Client to take a snapshot of the parent virtual machine in its
powered-down state. This snapshot is used as the baseline configuration for the first set of linked-clone
machines that are anchored to the parent virtual machine.
Important Before you take a snapshot, completely shut down the parent virtual machine by using the
Shut Down command in the guest operating system.
Activating Windows on Linked-Clone RDS Hosts
To make sure that View Composer properly activates Windows Server operating systems on linked-clone
RDS hosts, you must use Microsoft volume activation on the parent virtual machine. The volume-
activation technology requires a volume license key.
To activate Windows with volume activation, you use Key Management Service (KMS), which requires a
KMS license key. See your Microsoft dealer to acquire a volume license key and configure volume
activation.
Note View Composer does not support Multiple Activation Key (MAK) licensing.
Before you create linked-clone machines with View Composer, you must use volume activation to activate
the operating system on the parent virtual machine.
When a linked-clone machine is created, and each time the linked clone is recomposed, the View
Composer agent uses the parent virtual machine's KMS server to activate the operating system on the
linked clone.
For KMS licensing, View Composer uses the KMS server that is configured to activate the parent virtual
machine. The KMS server treats an activated linked clone as a computer with a newly issued license.
Setting Up Published Desktops and Applications in Horizon 7
VMware, Inc. 32

Disable Windows Hibernation in the Parent Virtual Machine
The Windows hibernation feature creates a hidden system file, Hiberfil.sys and uses this file to store
information that is needed for hybrid sleep. Disabling hibernation reduces the size of an instant clone's or
a View Composer linked clone's virtual disk.
Caution When you make hibernation unavailable, hybrid sleep does not work. Users can lose data if a
power loss occurs.
Procedure
1In vSphere Client, select the parent virtual machine and select Open Console.
2Log in as an administrator.
3Disable the hibernation option.
a Click Start and type cmd in the Start Search box.
b In the search results list, right-click Command Prompt and click Run as Administrator.
c At the User Account Control prompt, click Continue.
d At the command prompt, type powercfg.exe /hibernate off and press Enter.
e Type exit and press Enter.
Worksheet for Creating a Manual Farm
When you create a manual farm, the Add Farm wizard prompts you to configure certain settings.
You can print this worksheet and write down the values you want to specify when you run the Add Farm
wizard.
Table 4‑1. Worksheet: Configuration Settings for Creating a Manual Farm
Setting Description
Fill in Your Value
Here
ID Unique name that identifies the farm in View Administrator.
Description Description of this farm.
Access group Access group in which to place all the pools in this farm.
For more information about access groups, see the role-based delegated
administration chapter in the View Administration document.
Default display protocol Select VMware Blast, PCoIP or RDP. RDP applies to desktop pools only.
The display protocol for application pools is always VMware Blast or
PCoIP. If you select RDP and you plan to use this farm to host application
pools, you must set Allow users to choose protocol to Yes. The default is
PCoIP.
Allow users to choose
protocol
Select Yes or No. This setting applies to RDS desktop pools only. If you
select Yes, users can choose the display protocol when they connect to an
RDS desktop from Horizon Client. The default is Yes.
Setting Up Published Desktops and Applications in Horizon 7
VMware, Inc. 33

Table 4‑1. Worksheet: Configuration Settings for Creating a Manual Farm (Continued)
Setting Description
Fill in Your Value
Here
Pre-launch session
timeout (applications only)
Determines the amount of time that an application configured for pre-launch
is kept open. The default is 10 minutes.
If the end-user does not start any application in Horizon Client, the
application session is disconnected if the idle session times out or if pre-
launch session times out.
If you want to end the pre-launch session after timeout, you must set the
Log off disconnected session option to Immediate.
Empty session timeout
(applications only)
Determines the amount of time that an empty application session is kept
open. An application session is empty when all the applications that run in
the session are closed. While the session is open, users can open
applications faster. You can save system resources if you disconnect or log
off empty application sessions. Select Never or set the number of minutes
as the timeout value. The default is After 1 minute.
When timeout occurs Determines whether an empty application session is disconnected or logged
off after the Empty session timeout limit is reached. Select Disconnect or
Log off. A session that is logged off frees up resources, but opening an
application takes longer. The default is Disconnect.
Log off disconnected
session
Determines when a disconnected session is logged off. This setting applies
to both desktop and application sessions. Select Never, Immediate, or
After ... minutes. Use caution when you select Immediate or After ...
minutes. When a disconnected session is logged off, the session is lost.
The default is Never.
Allow HTML Access to
desktops and applications
on this farm
Determines whether HTML Access to RDS desktops and applications is
allowed. Check the Enabled box to allow HTML Access to RDS desktops
and applications. When you edit this setting after a farm is created, the new
value applies to existing desktops and applications as well as new ones.
Note Unlike an automated farm, a manual farm does not have the setting Max sessions per RDS
server, because a manual farm can have RDS hosts that are not identical. For RDS hosts in a manual
farm, you can edit individual RDS hosts and change the equivalent setting Number of connections.
Worksheet for Creating an Automated Linked-Clone Farm
When you create an automated linked-clone farm, the Add Farm wizard prompts you to configure certain
settings.
You can print this worksheet and write down the values you want to specify when you run the Add Farm
wizard.
Table 4‑2. Worksheet: Configuration Settings for Creating an Automated Linked-Clone Farm
Setting Description
Fill in Your Value
Here
ID Unique name that identifies the farm in Horizon Administrator.
Description Description of this farm.
Setting Up Published Desktops and Applications in Horizon 7
VMware, Inc. 34

Table 4‑2. Worksheet: Configuration Settings for Creating an Automated Linked-Clone Farm
(Continued)
Setting Description
Fill in Your Value
Here
Access group Access group in which to place all the pools in this farm.
For more information about access groups, see the role-based delegated
administration chapter in the View Administration document.
Default display protocol Select VMware Blast, PCoIP or RDP. RDP applies to desktop pools only.
The display protocol for application pools is always VMware Blast or
PCoIP. If you select RDP and you plan to use this farm to host application
pools, you must set Allow users to choose protocol to Yes. The default is
PCoIP.
Allow users to choose
protocol
Select Yes or No. This setting applies to RDS desktop pools only. If you
select Yes, users can choose the display protocol when they connect to an
RDS desktop from Horizon Client. The default is Yes.
Pre-launch session
timeout (applications only)
Determines the amount of time that an application configured for pre-launch
is kept open. The default is 10 minutes.
If the end-user does not start any application in Horizon Client, the
application session is disconnected if the idle session times out or if pre-
launch session times out.
If you want to end the pre-launch session after timeout, you must set the
Log off disconnected session option to Immediate.
Empty session timeout
(applications only)
Determines the amount of time that an empty application session is kept
open. An application session is empty when all the applications that run in
the session are closed. While the session is open, users can open
applications faster. You can save system resources if you disconnect or log
off empty application sessions. Select Never or set the number of minutes
as the timeout value. The default is After 1 minute.
When timeout occurs Determines whether an empty application session is disconnected or logged
off after the Empty session timeout limit is reached. Select Disconnect or
Log off. A session that is logged off frees up resources, but opening an
application takes longer. The default is Disconnect.
Log off disconnected
session
Determines when a disconnected session is logged off. This setting applies
to both desktop and application sessions. Select Never, Immediate, or
After ... minutes. Use caution when you select Immediate or After ...
minutes. When a disconnected session is logged off, the session is lost.
The default is Never.
Allow HTML Access to
desktops and applications
on this farm
Determines whether HTML Access to RDS desktops and applications is
allowed. Check the Enabled box to allow HTML Access to RDS desktops
and applications. When you edit this setting after a farm is created, the new
value applies to existing desktops and applications as well as new ones.
Max sessions per RDS
server
Determines the maximum number of sessions that an RDS host can
support. Select Unlimited or No More Than .... The default is Unlimited.
Enable provisioning Select this checkbox to enable provisioning after you finish this wizard. This
box is checked by default.
Stop provisioning on error Select this checkbox to stop provisioning when a provisioning error occurs.
This box is checked by default.
Setting Up Published Desktops and Applications in Horizon 7
VMware, Inc. 35

Table 4‑2. Worksheet: Configuration Settings for Creating an Automated Linked-Clone Farm
(Continued)
Setting Description
Fill in Your Value
Here
Naming pattern Specify a prefix or a name format. Horizon 7 will append or insert an
automatically generated number starting with 1 to form the machine name. If
you want the number at the end, simply specify a prefix. Otherwise, specify
{n} anywhere in a character string and {n} will be replaced by the number.
You can also specify {n:fixed=<number of digits>}, where fixed=<number
of digits> indicates the number of digits to be used for the number. For
example, specify vm-{n:fixed=3}-sales and the machine names will be
vm-001-sales, vm-002-sales, and so on.
Note Each machine name, including the automatically generated number,
has a 15-character limit.
Max number of machines The number of machines to be provisioned.
Minimum number of ready
(provisioned) machines
during View Composer
maintenance operations
This setting lets you keep the specified number of machines available to
accept connection requests while View Composer recomposes the
machines in the farm.
Use vSphere Virtual SAN Specify whether to use VMware Virtual SAN, if available. Virtual SAN is a
software-defined storage tier that virtualizes the local physical storage disks
available on a cluster of ESXi hosts. For more information, see "Using
Virtual SAN for High-Performance Storage and Policy-Based Management"
in the Setting Up Virtual Desktops in Horizon 7 document.
Select separate
datastores for replica and
OS disks
(Available only if you do not use Virtual SAN) You can place replica and OS
disks on different datastores for performance or other reasons.
Parent VM Select a parent virtual machine from the list. Be aware that the list includes
virtual machines that do not have View Composer Agent installed. You must
not select any of those machines because View Composer Agent is
required. A good practice is to use a naming convention that indicates
whether a virtual machine has View Composer Agent installed.
Snapshot Select the snapshot of the parent virtual machine to use as the base image
for the farm.
Do not delete the snapshot and parent virtual machine from vCenter Server,
unless no linked clones in the farm use the default image, and no more
linked clones will be created from this default image. The system requires
the parent virtual machine and snapshot to provision new linked clones in
the farm, according to farm policies. The parent virtual machine and
snapshot are also required for View Composer maintenance operations.
VM folder location Select the folder in vCenter Server in which the farm resides.
Setting Up Published Desktops and Applications in Horizon 7
VMware, Inc. 36

Table 4‑2. Worksheet: Configuration Settings for Creating an Automated Linked-Clone Farm
(Continued)
Setting Description
Fill in Your Value
Here
Cluster Select the ESXi host or cluster on which the desktop virtual machines run.
With Virtual SAN datastores (a vSphere 5.5 Update 1 feature), you can
select a cluster with up to 20 ESXi hosts. With Virtual Volumes datastores (a
vSphere 6.0 feature), you can select a cluster with up to 32 ESXi hosts.
In vSphere 5.1 or later, you can select a cluster with up to 32 ESXi hosts if
the replicas are stored on VMFS5 or later datastores or NFS datastores. If
you store replicas on a VMFS version earlier than VMFS5, a cluster can
have at most eight hosts.
In vSphere 5.0, you can select a cluster with more than eight ESXi hosts if
the replicas are stored on NFS datastores. If you store replicas on VMFS
datastores, a cluster can have at most eight hosts.
Resource pool Select the vCenter Server resource pool in which the farm resides.
Datastores Select one or more datastores on which to store the farm.
A table on the Select Linked Clone Datastores page of the Add Farm
wizard provides high-level guidelines for estimating the farm's storage
requirements. These guidelines can help you determine which datastores
are large enough to store the linked-clone disks. For details, see "Storage
Sizing for Instant-Clone and Linked-Clone Desktop Pools" in the Setting Up
Virtual Desktops in Horizon 7 document.
You can use shared or local datastores for an individual ESXi host or for
ESXi clusters. If you use local datastores in an ESXi cluster, you must
consider the vSphere infrastructure constraints that are imposed on your
desktop deployment. For details, see "Storing Linked Clones on Local
Datastores" in the Setting Up Virtual Desktops in Horizon 7 document..
Note If you use Virtual SAN, select only one datastore.
Storage Overcommit Determine the storage-overcommit level at which linked-clones are created
on each datastore.
As the level increases, more linked clones fit on the datastore and less
space is reserved to let individual clones grow. A high storage-overcommit
level lets you create linked clones that have a total logical size larger than
the physical storage limit of the datastore. For details, see "Storage
Overcommit for View Composer Linked-Clone Virtual Machines" in the
Setting Up Virtual Desktops in Horizon 7 document.
Note This setting has no effect if you use Virtual SAN.
Setting Up Published Desktops and Applications in Horizon 7
VMware, Inc. 37

Table 4‑2. Worksheet: Configuration Settings for Creating an Automated Linked-Clone Farm
(Continued)
Setting Description
Fill in Your Value
Here
Use native NFS
snapshots (VAAI)
(Available only if you do not use Virtual SAN) If your deployment includes
NAS devices that support the vStorage APIs for Array Integration (VAAI),
you can use native snapshot technology to clone virtual machines.
You can use this feature only if you select datastores that reside on NAS
devices that support native cloning operations through VAAI.
You cannot use this feature if you store replicas and OS disks on separate
datastores. You cannot use this feature on virtual machines with space-
efficient disks.
This feature is supported on vSphere 5.0 and later.
For details, see "Using VAAI Storage for View Composer Linked Clones" in
the Setting Up Virtual Desktops in Horizon 7 document..
Reclaim VM disk space (Available only if you do not use Virtual SAN or Virtual Volumes) Determine
whether to allow ESXi hosts to reclaim unused disk space on linked clones
that are created in space-efficient disk format. The space reclamation
feature reduces the total storage space required for linked-clone desktops.
This feature is supported on vSphere 5.1 and later. The linked-clone virtual
machines must be virtual hardware version 9 or later.
For details, see "Reclaim Disk Space on Linked-Clone Virtual Machines" in
the Setting Up Virtual Desktops in Horizon 7 document.
Initiate reclamation when
unused space on VM
exceeds:
(Available only if you do not use Virtual SAN or Virtual Volumes) Type the
minimum amount of unused disk space, in gigabytes, that must accumulate
on a linked-clone OS disk to trigger space reclamation. When the unused
disk space exceeds this threshold, View initiates the operation that directs
the ESXi host to reclaim space on the OS disk.
This value is measured per virtual machine. The unused disk space must
exceed the specified threshold on an individual virtual machine before View
starts the space reclamation process on that machine.
For example: 2 GB.
The default value is 1 GB.
Blackout Times Configure days and times during which the reclamation of virtual machine
disk space do not take place.
To ensure that ESXi resources are dedicated to foreground tasks when
necessary, you can prevent the ESXi hosts from performing these
operations during specified periods of time on specified days.
For details, see " Set Storage Accelerator and Space Reclamation Blackout
Times for View Composer Linked Clones" in the Setting Up Virtual Desktops
in Horizon 7 document.
Setting Up Published Desktops and Applications in Horizon 7
VMware, Inc. 38

Table 4‑2. Worksheet: Configuration Settings for Creating an Automated Linked-Clone Farm
(Continued)
Setting Description
Fill in Your Value
Here
Transparent Page
Sharing Scope
Select the level at which to allow transparent page sharing (TPS). The
choices are Virtual Machine (the default), Farm, Pod, or Global. If you turn
on TPS for all the machines in the farm, pod, or globally, the ESXi host
eliminates redundant copies of memory pages that result if the machines
use the same guest operating system or applications.
Page sharing happens on the ESXi host. For example, if you enable TPS at
the farm level but the farm is spread across multiple ESXi hosts, only virtual
machines on the same host and within the same farm will share pages. At
the global level, all machines managed by View on the same ESXi host can
share memory pages, regardless of which farm the machines reside in.
Note The default setting is not to share memory pages among machines
because TPS can pose a security risk. Research indicates that TPS could
possibly be abused to gain unauthorized access to data in very limited
configuration scenarios.
Domain Select the Active Directory domain and user name.
View Composer requires certain user privileges to farm. The domain and
user account are used by Sysprep to customize the linked-clone machines.
You specify this user when you configure View Composer settings for
vCenter Server. You can specify multiple domains and users when you
configure View Composer settings. When you use the Add Farm wizard to
create a farm, you must select one domain and user from the list.
For information about configuring View Composer, see the View
Administration document.
AD container Provide the Active Directory container relative distinguished name.
For example: CN=Computers
When you run the Add Farm wizard, you can browse your Active Directory
tree for the container.
Allow reuse of pre-
existing computer
accounts
Select this setting to use existing computer accounts in Active Directory for
linked clones that are provisioned by View Composer. This setting lets you
control the computer accounts that are created in Active Directory.
When a linked clone is provisioned, if an existing AD computer account
name matches the linked clone machine name, View Composer uses the
existing computer account. Otherwise, a new computer account is created.
The existing computer accounts must be located in the Active Directory
container that you specify with the Active Directory container setting.
When this setting is disabled, a new AD computer account is created when
View Composer provisions a linked clone. This setting is disabled by default.
For details, see "Use Existing Active Directory Computer Accounts for
Linked Clones" in the Setting Up Virtual Desktops in Horizon 7 document.
Use a customization
specification (Sysprep)
Provide a Sysprep customization specification to customize the virtual
machines.
Setting Up Published Desktops and Applications in Horizon 7
VMware, Inc. 39

Worksheet for Creating an Automated Instant-Clone Farm
When you create an automated instant-clone farm, the Add Farm wizard prompts you to configure certain
settings.
You can print this worksheet and write down the values you want to specify when you run the Add Farm
wizard.
Table 4‑3. Worksheet: Configuration Settings for Creating an Automated Instant-Clone Farm
Setting Description
Fill in Your Value
Here
ID Unique name that identifies the farm in Horizon Administrator.
Description Description of this farm.
Access group Access group in which to place all the pools in this farm.
For more information about access groups, see the role-based delegated
administration chapter in the View Administration document.
Default display protocol Select VMware Blast, PCoIP or RDP. RDP applies to desktop pools only.
The display protocol for application pools is always VMware Blast or
PCoIP. If you select RDP and you plan to use this farm to host application
pools, you must set Allow users to choose protocol to Yes. The default is
PCoIP.
Allow users to choose
protocol
Select Yes or No. This setting applies to RDS desktop pools only. If you
select Yes, users can choose the display protocol when they connect to an
RDS desktop from Horizon Client. The default is Yes.
Pre-launch session
timeout (applications only)
Determines the amount of time that an application configured for pre-launch
is kept open. The default is 10 minutes.
If the end-user does not start any application in Horizon Client, the
application session is disconnected if the idle session times out or if pre-
launch session times out.
If you want to end the pre-launch session after timeout, you must set the
Log off disconnected session option to Immediate.
Empty session timeout
(applications only)
Determines the amount of time that an empty application session is kept
open. An application session is empty when all the applications that run in
the session are closed. While the session is open, users can open
applications faster. You can save system resources if you disconnect or log
off empty application sessions. Select Never or set the number of minutes
as the timeout value. The default is After 1 minute.
When timeout occurs Determines whether an empty application session is disconnected or logged
off after the Empty session timeout limit is reached. Select Disconnect or
Log off. A session that is logged off frees up resources, but opening an
application takes longer. The default is Disconnect.
Log off disconnected
session
Determines when a disconnected session is logged off. This setting applies
to both desktop and application sessions. Select Never, Immediate, or
After ... minutes. Use caution when you select Immediate or After ...
minutes. When a disconnected session is logged off, the session is lost.
The default is Never.
Setting Up Published Desktops and Applications in Horizon 7
VMware, Inc. 40

Table 4‑3. Worksheet: Configuration Settings for Creating an Automated Instant-Clone Farm
(Continued)
Setting Description
Fill in Your Value
Here
Allow HTML Access to
desktops and applications
on this farm
Determines whether HTML Access to RDS desktops and applications is
allowed. Check the Enabled box to allow HTML Access to RDS desktops
and applications. When you edit this setting after a farm is created, the new
value applies to existing desktops and applications as well as new ones.
Max sessions per RDS
server
Determines the maximum number of sessions that an RDS host can
support. Select Unlimited or No More Than .... The default is Unlimited.
Enable provisioning Select this checkbox to enable provisioning after you finish this wizard. This
box is checked by default.
Stop provisioning on error Select this checkbox to stop provisioning when a provisioning error occurs.
This box is checked by default.
Naming pattern Specify a prefix or a name format. Horizon 7 will append or insert an
automatically generated number starting with 1 to form the machine name. If
you want the number at the end, simply specify a prefix. Otherwise, specify
{n} anywhere in a character string and {n} will be replaced by the number.
You can also specify {n:fixed=<number of digits>}, where fixed=<number
of digits> indicates the number of digits to be used for the number. For
example, specify vm-{n:fixed=3}-sales and the machine names will be
vm-001-sales, vm-002-sales, and so on.
Note Each machine name, including the automatically generated number,
has a 15-character limit.
Max number of machines The number of machines to be provisioned.
Minimum number of ready
(provisioned) machines
during Instant Clone
maintenance operations
This setting lets you keep the specified number of machines available to
accept connection requests while Connection Server performs maintenance
operations on the machines in the farm. This setting is not honored if you
schedule immediate maintenance.
Use vSphere Virtual SAN Specify whether to use VMware Virtual SAN, if available. Virtual SAN is a
software-defined storage tier that virtualizes the local physical storage disks
available on a cluster of ESXi hosts. For more information, see "Using
Virtual SAN for High-Performance Storage and Policy-Based Management"
in the Setting Up Virtual Desktops in Horizon 7 document.
Select separate
datastores for replica and
OS disks
(Available only if you do not use Virtual SAN) You can place replica and OS
disks on different datastores for performance or other reasons.
If you select this option, you can select the options to select one or more
instant-clone datastores or replica disk datastores.
Parent VM Select a parent virtual machine from the list. Be aware that the list includes
virtual machines that do not have View Composer Agent installed. You must
not select any of those machines because View Composer Agent is
required. A good practice is to use a naming convention that indicates
whether a virtual machine has View Composer Agent installed.
Setting Up Published Desktops and Applications in Horizon 7
VMware, Inc. 41

Table 4‑3. Worksheet: Configuration Settings for Creating an Automated Instant-Clone Farm
(Continued)
Setting Description
Fill in Your Value
Here
Snapshot Select the snapshot of the parent virtual machine to use as the base image
for the farm.
Do not delete the snapshot and parent virtual machine from vCenter Server,
unless no instant clones in the farm use the default image, and no more
instant clones will be created from this default image. The system requires
the parent virtual machine and snapshot to provision new instant clones in
the farm, according to farm policies. The parent virtual machine and
snapshot are also required for Connection Server maintenance operations.
VM folder location Select the folder in vCenter Server in which the farm resides.
Cluster Select the ESXi host or cluster on which the desktop virtual machines run.
With Virtual SAN datastores (a vSphere 5.5 Update 1 feature), you can
select a cluster with up to 20 ESXi hosts. With Virtual Volumes datastores (a
vSphere 6.0 feature), you can select a cluster with up to 32 ESXi hosts.
In vSphere 5.1 or later, you can select a cluster with up to 32 ESXi hosts if
the replicas are stored on VMFS5 or later datastores or NFS datastores. If
you store replicas on a VMFS version earlier than VMFS5, a cluster can
have at most eight hosts.
In vSphere 5.0, you can select a cluster with more than eight ESXi hosts if
the replicas are stored on NFS datastores. If you store replicas on VMFS
datastores, a cluster can have at most eight hosts.
Resource pool Select the vCenter Server resource pool in which the farm resides.
Datastores Select one or more datastores on which to store the farm.
A table on the Select Instant Clone Datastores page of the Add Farm
wizard provides high-level guidelines for estimating the farm's storage
requirements. These guidelines can help you determine which datastores
are large enough to store the instant-clones. The Storage Overcommit value
is always set to Unbounded and is not configurable. For details, see
"Storage Sizing for Instant-Clone and Linked-Clone Desktop Pools" in the
Setting Up Virtual Desktops in Horizon 7 document.
Note If you use Virtual SAN, select only one datastore.
Replica disk datastores Select one or more replica disk datastores on which to store the instant-
clones. This option appears if you select separate datastores for replica and
OS disks.
A table on the Select Replica Disk Datastores page of the Add Farm
wizard provides high-level guidelines for estimate the farm's storage
requirements. These guidelines can help you determine which replica disk
datastores are enough to store the instant-clones.
Networks Select the networks to use for the automated instant-clone farm. You can
select multiple vLAN networks to create a larger instant-clone desktop pool.
The default setting uses the network from the current parent VM image.
A table on the Select Networks wizard provides the networks, ports, and
port bindings that are available to use. To use multiple networks, you must
unselect Use network from current parent VM and then select the
networks to use with the instant-clone farm.
Setting Up Published Desktops and Applications in Horizon 7
VMware, Inc. 42

Table 4‑3. Worksheet: Configuration Settings for Creating an Automated Instant-Clone Farm
(Continued)
Setting Description
Fill in Your Value
Here
Domain Select the Active Directory domain and user name.
Connection Server requires certain user privileges to farm. The domain and
user account are used by ClonePrep to customize the instant-clone
machines.
You specify this user when you configure Connection Server settings for
vCenter Server. You can specify multiple domains and users when you
configure Connection Server settings. When you use the Add Farm wizard
to create a farm, you must select one domain and user from the list.
For information about configuring Connection Server, see the View
Administration document.
AD container Provide the Active Directory container relative distinguished name.
For example: CN=Computers
When you run the Add Farm wizard, you can browse your Active Directory
tree for the container. You can cut, copy, or paste in the container name.
Allow reuse of pre-
existing computer
accounts
Select this option to use existing computer accounts in Active Directory
when the virtual machine names of new instant clones match the existing
computer account names.
When an instant clone is created, if an existing AD computer account name
matches the instant-clone virtual machine name, Horizon 7 uses the existing
computer account. Otherwise, a new computer account is created.
The existing computer accounts must be located in the Active Directory
container that you specify with the AD container setting.
When this option is disabled, a new AD computer account is created when
Horizon 7 creates an instant clone. This option is disabled by default.
Use ClonePrep Provide a ClonePrep customization specification to customize the virtual
machines.
nPower-off script name. Name of the customization script that
ClonePrep runs on instant-clone machines before they are powered off.
Provide the path to the script on the parent virtual machine.
nPower-off script parameters. Provide parameters that ClonePrep can
use to run a customization script on instant-clone machines before they
are powered off. For example, use p1.
nPost-synchronization script name. Name of the customization script
that ClonePrep runs on instant-clone machines after they are created or
an image has been pushed to them. Provide the path to the script on the
parent virtual machine.
nPost-synchronization script parameters. Provide parameters for the
script that ClonePrep runs on instant-clone machines after they are
created or an image has been pushed to them. For example, use p2.
For details on how ClonePrep runs customization scripts, see "ClonePrep
Guest Customization" in the Setting Up Virtual Desktops in Horizon 7
document.
Ready to Complete Review the settings for the automated instant-clone farm.
Setting Up Published Desktops and Applications in Horizon 7
VMware, Inc. 43
Create a Manual Farm
You create a manual farm as part of the process to give users access to applications or RDS desktops.
Prerequisites
nSet up the RDS hosts that belong to the farm. See Chapter 3 Setting Up Remote Desktop Services
Hosts.
nVerify that all the RDS hosts have the Available status. In View Administrator, select View
Configuration > Registered Machines and check the status of each RDS host on the RDS Hosts
tab.
nGather the configuration information you must provide to create the farm. See Worksheet for Creating
a Manual Farm.
Procedure
1In View Administrator, click Resources > Farms.
2Click Add to enter the configuration information that you gathered in the worksheet.
3Select Manual Farm.
4Follow the prompts in the wizard to create the farm.
Use the configuration information that you gathered in the worksheet. You can go directly back to any
wizard page that you completed by clicking the page name in the navigation panel.
5Select the RDS hosts to add to the farm and click Next.
6Click Finish.
In View Administrator, you can now view the farm by clicking Resources > Farms.
What to do next
Create an application pool or an RDS desktop pool. See Chapter 6 Creating Application Pools or
Chapter 5 Creating RDS Desktop Pools.
Create an Automated Linked-Clone Farm
You create an automated linked-clone farm as part of the process to give users access to applications or
RDS desktops.
Prerequisites
nVerify that the View Composer service is installed. See the View Installation document.
nVerify that View Composer settings for vCenter Server are configured in Horizon Administrator. See
the View Administration document.
Setting Up Published Desktops and Applications in Horizon 7
VMware, Inc. 44

nVerify that you have a sufficient number of ports on the ESXi virtual switch that is used for the virtual
machines that are used as remote desktops. The default value might not be sufficient if you create
large desktop pools. The number of virtual switch ports on the ESXi host must equal or exceed the
number of virtual machines multiplied by the number of virtual NICs per virtual machine.
nVerify that you prepared a parent virtual machine. Both Horizon Agent and View Composer Agent
must be installed on the parent virtual machine. See Preparing a Parent Virtual Machine for an
Automated Farm.
nTake a snapshot of the parent virtual machine in vCenter Server. You must shut down the parent
virtual machine before you take the snapshot. View Composer uses the snapshot as the base image
from which the clones are created.
Note You cannot create a linked-clone pool from a virtual machine template.
nGather the configuration information you must provide to create the farm. See Worksheet for Creating
an Automated Linked-Clone Farm.
Procedure
1In Horizon Administrator, click Resources > Farms.
2Click Add to enter the configuration information that you gathered in the worksheet.
3Select Automated Farm and click Next.
4Select View Composer linked clones and click Next.
5Follow the prompts in the wizard to create the farm.
Use the configuration information that you gathered in the worksheet. You can go directly back to any
wizard page that you completed by clicking the page name in the navigation panel.
In Horizon Administrator, you can now view the farm by clicking Resources > Farms.
What to do next
Create an application pool or an RDS desktop pool. See Chapter 6 Creating Application Pools or
Chapter 5 Creating RDS Desktop Pools.
Create an Automated Instant-Clone Farm
You create an automated instant-clone farm as part of the process to give users access to applications or
RDS desktops.
Prerequisites
nVerify that Connection Server is installed. See the View Installation document.
nVerify that Connection Server settings for vCenter Server are configured in Horizon Administrator.
See the View Administration document.
Setting Up Published Desktops and Applications in Horizon 7
VMware, Inc. 45
nVerify that you have a sufficient number of ports on the ESXi virtual switch that is used for the virtual
machines that are used as remote desktops. The default value might not be sufficient if you create
large desktop pools.
nVerify that you prepared a parent virtual machine. Horizon Agent must be installed on the parent
virtual machine. See Preparing a Parent Virtual Machine for an Automated Farm.
nTake a snapshot of the parent virtual machine in vCenter Server. You must shut down the parent
virtual machine before you take the snapshot. Connection Server uses the snapshot as the base
image from which the clones are created.
nGather the configuration information you must provide to create the farm. See Worksheet for Creating
an Automated Instant-Clone Farm.
Procedure
1In Horizon Administrator, click Resources > Farms.
2Click Add to enter the configuration information that you gathered in the worksheet.
3Select Automated Farm and click Next.
4Select Instant clones and click Next.
5Follow the prompts in the wizard to create the farm.
Use the configuration information that you gathered in the worksheet. You can go directly back to any
wizard page that you completed by clicking the page name in the navigation panel.
In Horizon Administrator, you can now view the farm by clicking Resources > Farms.
What to do next
Create an application pool or an RDS desktop pool. See Chapter 6 Creating Application Pools or
Chapter 5 Creating RDS Desktop Pools.
Setting Up Published Desktops and Applications in Horizon 7
VMware, Inc. 46
Creating RDS Desktop Pools 5
One of the tasks that you perform to give users remote access to session-based desktops is to create a
Remote Desktop Services (RDS) desktop pool. An RDS desktop pool has properties that can satisfy
some specific needs of a remote desktop deployment.
This section includes the following topics:
nUnderstanding RDS Desktop Pools
nCreate an RDS Desktop Pool
nDesktop Pool Settings for RDS Desktop Pools
nTroubleshooting Instant Clones in the Internal VM Debug Mode
nAdobe Flash Quality and Throttling
nConfigure Adobe Flash Throttling with Internet Explorer for RDS Desktop Pools
Understanding RDS Desktop Pools
An RDS desktop pool is one of three types of desktop pools that you can create. This type of pool was
known as a Microsoft Terminal Services pool in previous View releases.
An RDS desktop pool and an RDS desktop have the following characteristics:
nAn RDS desktop pool is associated with a farm, which is a group of RDS hosts. Each RDS host is a
Windows server that can host multiple RDS desktops.
nAn RDS desktop is based on a session to an RDS host. In contrast, a desktop in an automated
desktop pool is based on a virtual machine, and a desktop in a manual desktop pool is based on a
virtual or physical machine.
nAn RDS desktop supports the RDP, PCoIP, and VMware Blast display protocols. To enable HTML
Access, see "Prepare Desktops, Pools, and Farms for HTML Access," in the "Setup and Installation"
chapter in the Using HTML Access document, available from
https://www.vmware.com/support/viewclients/doc/viewclients_pubs.html.
nAn RDS desktop pool is only supported on Windows Server operating systems that support the RDS
role and are supported by View. See "System Requirements for Guest Operating Systems" in the
View Installation document.
VMware, Inc. 47
nView provides load balancing of the RDS hosts in a farm by directing connection requests to the RDS
host that has the least number of active sessions.
nBecause an RDS desktop pool provides session-based desktops, it does not support operations that
are specific to a linked-clone desktop pool, such as refresh, recompose, and rebalance.
nIf an RDS host is a virtual machine that is managed by vCenter Server, you can use snapshots as
base images. You can use vCenter Server to manage the snapshots. The use of snapshots on RDS
host virtual machines is transparent to View.
nRDS desktops do not support View Persona Management.
nThe copy and paste feature is disabled by default for HTML Access. To enable the feature, see
"HTML Access Group Policy Settings" in the chapter "Configuring HTML Access for End Users" in the
Using HTML Access document, available from
https://www.vmware.com/support/viewclients/doc/viewclients_pubs.html.
Create an RDS Desktop Pool
You create an RDS desktop pool as part of the process to give users access to RDS desktops.
Prerequisites
nSet up RDS hosts. See Chapter 3 Setting Up Remote Desktop Services Hosts.
nCreate a farm that contains the RDS hosts. See Chapter 4 Creating Farms.
nDecide how to configure the pool settings. See Desktop Pool Settings for RDS Desktop Pools.
Procedure
1In Horizon Administrator, select Catalog > Desktop Pools.
2Click Add.
3Select RDS Desktop Pool.
4Provide a pool ID, display name, and description.
The pool ID is the unique name that identifies the pool in Horizon Administrator. The display name is
the name of the RDS desktop pool that users see when they log in to Horizon Client. If you do not
specify a display name, it will be the same as the pool ID.
5Select pool settings.
6Select or create a farm for this pool.
In Horizon Administrator, you can now view the RDS desktop pool by selecting Catalog > Desktop
Pools.
Setting Up Published Desktops and Applications in Horizon 7
VMware, Inc. 48

What to do next
Entitle users to access the pool. See Add Entitlements to a Desktop or Application Pool.
Make sure that your end users have access to Horizon Client 3.0 or later software, which is required to
support RDS desktop pools.
Desktop Pool Settings for RDS Desktop Pools
You can specify certain pool settings when you create an RDS desktop pool. Not all pool settings apply to
all types of desktop pools.
For descriptions of all pool settings, see "Desktop and Pool Settings for All Desktop Pools Types" in the
Setting Up Virtual Desktops in Horizon 7 document. The following pool settings apply to an RDS desktop
pool.
Table 5‑1. Settings for an RDS Desktop Pool
Setting Description Default Value
State nEnabled. After being created, the desktop pool is
enabled and ready for immediate use.
nDisabled. After being created, the desktop pool
is disabled and unavailable for use, and
provisioning is stopped for the pool. This is an
appropriate setting if you want to conduct post
deployment activities such as testing or other
forms of baseline maintenance.
When this state is in effect, remote desktops are
unavailable for use.
Enabled
Connection Server restrictions You can restrict access to the desktop pool to certain
Connection Servers by clicking Browse and selecting
one or more Connection Servers.
If you intend to provide access to desktops through
VMware Identity Manager, and you configure
Connection Server restrictions, the VMware Identity
Manager application might display desktops to users
when those desktops are actually restricted. VMware
Identity Manager users will be unable to launch these
desktops.
None
Category Folder Specifies the name of the category folder that
contains a Start menu shortcut for the desktop pool
entitlement on Windows client devices. For more
information, see Configuring Start Menu Shortcuts for
Desktop and Application Pools.
Disabled
Client Restrictions Select whether to restrict access to entitled desktop
pools from certain client computers.
You must add the names of the computers that are
allowed to access the desktop pool in an Active
Directory security group. You can select this security
group when you add users or groups to the desktop
pool entitlement.
Disabled
Setting Up Published Desktops and Applications in Horizon 7
VMware, Inc. 49

Table 5‑1. Settings for an RDS Desktop Pool (Continued)
Setting Description Default Value
Adobe Flash quality Determines the quality of Adobe Flash content that is
displayed on Web pages.
nDo not control. Quality is determined by Web
page settings.
nLow. This setting results in the most bandwidth
savings. If no quality level is specified, the system
defaults to Low.
nMedium. This setting results in moderate
bandwidth savings.
nHigh. This setting results in the least bandwidth
savings.
For more information, see Adobe Flash Quality and
Throttling.
Do not control
Adobe Flash throttling Determines the frame rate of Adobe Flash movies. If
you enable this setting, you can reduce or increase
the number of frames displayed per second by
selecting an aggressiveness level.
nDisabled. No throttling is performed. The timer
interval is not modified.
nConservative. Timer interval is 100 milliseconds.
This setting results in the lowest number of
dropped frames.
nModerate. Timer interval is 500 milliseconds.
nAggressive. Timer interval is 2500 milliseconds.
This setting results in the highest number of
dropped frames.
For more information, see Adobe Flash Quality and
Throttling.
Disabled
Troubleshooting Instant Clones in the Internal VM Debug
Mode
You can use the internal VM debug mode to troubleshoot internal virtual machines in instant-clone farms.
With the internal VM debug mode, you can analyze failed internal virtual machines before these virtual
machines are deleted. You must enable the internal VM debug mode before you create an instant-clone
farm.
Procedure
1In the vSphere Web Client, select the master VM, and click Manage > Configure > VM Options >
Edit > VM Options > Advanced > Edit Configuration.
The Configuration Parameters window displays a list of parameter names and values.
Setting Up Published Desktops and Applications in Horizon 7
VMware, Inc. 50

2In the Configuration Parameters window, search for the cloneprep.debug.mode parameter.
If the master VM does not have the cloneprep.debug.mode parameter, you must add
cloneprep.debug.mode as the parameter name and add a value of ON or OFF. If the master VM
has the cloneprep.debug.mode parameter, you can change the value of the parameter to ON or
OFF.
3Enable or disable the internal VM debug mode for internal VMs.
nTo enable the internal VM debug mode, set the value of cloneprep.debug.mode to ON. If you
enable the internal VM debug mode, the internal VMs are not locked and cannot be deleted by
Horizon Server.
nTo disable the internal VM debug mode, set the value of cloneprep.debug.mode to OFF. If you
disable the internal VM debug mode, the internal VMs are locked and can be deleted by Horizon
Server.
For instant clones actions such as prime, provision, resync, or unprime, the internal virtual machines
use the value set in the master virtual machine. If you do not disable the internal VM debug mode,
then the VMs remain in vSphere till you delete the VMs.
Adobe Flash Quality and Throttling
You can specify a maximum allowable level of quality for Adobe Flash content that overrides Web page
settings. If Adobe Flash quality for a Web page is higher than the maximum level allowed, quality is
reduced to the specified maximum. Lower quality results in more bandwidth savings.
To make use of Adobe Flash bandwidth-reduction settings, Adobe Flash must not be running in full
screen mode.
Table 5‑2 shows the available Adobe Flash render-quality settings.
Table 5‑2. Adobe Flash Quality Settings
Quality Setting Description
Do not control Quality is determined by Web page settings.
Low This setting results in the most bandwidth savings.
Medium This setting results in moderate bandwidth savings.
High This setting results in the least bandwidth savings.
If no maximum level of quality is specified, the system defaults to a value of Low.
Adobe Flash uses timer services to update what is shown on the screen at a given time. A typical Adobe
Flash timer interval value is between 4 and 50 milliseconds. By throttling, or prolonging, the interval, you
can reduce the frame rate and thereby reduce bandwidth.
Table 5‑3 shows the available Adobe Flash throttling settings.
Setting Up Published Desktops and Applications in Horizon 7
VMware, Inc. 51

Table 5‑3. Adobe Flash Throttling Settings
Throttling Setting Description
Disabled No throttling is performed. The timer interval is not modified.
Conservative Timer interval is 100 milliseconds. This setting results in the lowest number of dropped
frames.
Moderate Timer interval is 500 milliseconds.
Aggressive Timer interval is 2500 milliseconds. This setting results in the highest number of dropped
frames.
Audio speed remains constant regardless of which throttling setting you select.
Configure Adobe Flash Throttling with Internet Explorer
for RDS Desktop Pools
To ensure that Adobe Flash throttling works with Internet Explorer in RDS desktops, users must enable
third-party browser extensions.
Procedure
1Start Horizon Client and log in to a user's desktop.
2In Internet Explorer, click Tools > Internet Options.
3Click the Advanced tab, select Enable third-party browser extensions, and click OK.
4Restart Internet Explorer.
Setting Up Published Desktops and Applications in Horizon 7
VMware, Inc. 52
Creating Application Pools 6
One of the tasks that you perform to give users remote access to an application is to create an application
pool. Users who are entitled to an application pool can access the application remotely from a variety of
client devices.
This section includes the following topics:
nApplication Pools
nWorksheet for Creating an Application Pool Manually
nCreate an Application Pool
Application Pools
With application pools, you can deliver a single application to many users. The application runs on a farm
of RDS hosts.
When you create an application pool, you deploy an application in the data center that users can access
from anywhere on the network.
An application pool has a single application and is associated with a single farm. To avoid errors, you
must install the application on all of the RDS hosts in the farm.
When you create an application pool, Horizon 7 automatically displays the applications that are available
to all users rather than individual users from the Start menu on all the RDS hosts in the farm. You can
select one or more applications from the list. If you select multiple applications from the list, a separate
application pool is created for each application. You can also manually specify an application that is not
on the list. If an application that you want to manually specify is not already installed, Horizon 7 displays a
warning message.
When you create an application pool, you cannot specify the access group in which to place the pool. For
application pools and RDS desktop pools, you specify the access group when you create a farm.
An application supports the PCoIP and VMware Blast display protocols. To enable HTML Access, see
"Prepare Desktops, Pools, and Farms for HTML Access," in the "Setup and Installation" chapter in the
Using HTML Access document, available from
https://www.vmware.com/support/viewclients/doc/viewclients_pubs.html.
VMware, Inc. 53

Worksheet for Creating an Application Pool Manually
When you create an application pool and manually specify an application, the Add Application Pools
wizard prompts you for information about the application. It is not a requirement that the application is
already installed on any RDS host.
You can print this worksheet and write down the properties of an application when you specify the
application manually.
Table 6‑1. Worksheet: Application Properties for Creating an Application Pool Manually
Property Description Fill in Your Value Here
ID Unique name that identifies the pool in Horizon
Administrator. This field is required.
Display Name Pool name that users see when they log in to
Horizon Client. If you do not specify a display
name, it will be the same as ID.
Version Version of the application.
Publisher Publisher of the application.
Path Full pathname of the application. For example,
C:\Program Files\app1.exe. This field is
required.
Start Folder Full pathname of the starting directory for the
application.
Parameters Parameters to pass to the application when it
starts. For example, you can specify -username
user1 -loglevel 3.
Description Description of this application pool.
Pre-launch Select this option to configure an application so
that an application session is launched before a
user opens the application in Horizon Client. When
a published application is launched, the application
opens more quickly in Horizon Client.
If you enable this option, the configured application
session is launched before a user opens the
application in Horizon Client regardless of how the
user connects to the server from Horizon Client.
Note Application sessions can be disconnected
when the Pre-launch session timeout
(applications only) option is set when you add or
edit the application farm.
Setting Up Published Desktops and Applications in Horizon 7
VMware, Inc. 54

Table 6‑1. Worksheet: Application Properties for Creating an Application Pool Manually
(Continued)
Property Description Fill in Your Value Here
Connection Server Restrictions You can restrict access to the application pool to
certain Connection Servers by clicking Browse
and selecting one or more Connection Servers.
If you intend to provide access to desktops
through VMware Identity Manager, and you
configure Connection Server restrictions, the
VMware Identity Manager application might
display desktops to users when those desktops
are actually restricted. VMware Identity Manager
users will be unable to launch these desktops.
Category Folder Specifies the name of the category folder that
contains a Start menu shortcut for the application
pool entitlement on Windows client devices. For
more information, see Configuring Start Menu
Shortcuts for Desktop and Application Pools.
Client Restrictions Select whether to restrict access to entitled
application pools from certain client computers.
You must add the names of the computers that are
allowed to access the application pool in an Active
Directory security group. You can select this
security group when you add users or groups to
the application pool entitlement.
Create an Application Pool
You create an application pool as part of the process to give users access to an application that runs on
RDS hosts.
Prerequisites
nSet up RDS hosts. See Chapter 3 Setting Up Remote Desktop Services Hosts.
nCreate a farm that contains the RDS hosts. See Chapter 4 Creating Farms.
nIf you plan to add the application pool manually, gather information about the application. See
Worksheet for Creating an Application Pool Manually.
Procedure
1In Horizon Administrator, click Catalog > Application Pools.
2Click Add.
3Follow the prompts in the wizard to create the pool.
If you choose to add an application pool manually, use the configuration information you gathered in
the worksheet. If you select applications from the list that Horizon Administrator displays, you can
select multiple applications. A separate pool is created for each application.
Setting Up Published Desktops and Applications in Horizon 7
VMware, Inc. 55
In Horizon Administrator, you can now view the application pool by clicking Catalog > Application Pools.
What to do next
Entitle users to access the pool. See Chapter 8 Entitling Users and Groups.
Make sure that your end users have access to Horizon Client 3.0 or later software, which is required to
support RDS applications.
If you need to ensure that Connection Server launches the application only on RDS hosts that have
sufficient resources to run the application, configure an anti-affinity rule for the application pool. For more
information, see "Configure an Anti-Affinity Rule for an Application Pool" in the View Administration
document.
Setting Up Published Desktops and Applications in Horizon 7
VMware, Inc. 56
Managing Application Pools,
Farms, and RDS Hosts 7
In Horizon Administrator, you can perform management operations such as configuring or deleting
desktop pools, farms, or RDS hosts.
This section includes the following topics:
nManaging Application Pools
nManaging Farms
nManaging RDS Hosts
nManage Published Desktop and Application Sessions
nConfiguring Load Balancing for RDS Hosts
nConfigure an Anti-Affinity Rule for an Application Pool
Managing Application Pools
You can add, edit, delete, or entitle application pools in Horizon Administrator.
To add an application pool, see Create an Application Pool. To entitle an application pool, see Add
Entitlements to a Desktop or Application Pool.
Edit an Application Pool
You can edit an existing application pool to configure settings such as display name, version, publisher,
path, start folder, parameters, and description. You cannot change the ID or access group of an
application pool.
If you need to ensure that View Connection Server launches the application only on RDS hosts that have
sufficient resources to run the application, see Configure an Anti-Affinity Rule for an Application Pool.
Prerequisites
Familiarize yourself with the settings of an application pool. See Create an Application Pool.
Procedure
1In Horizon Administrator, select Catalog > Application Pools.
2Select a pool and click Edit.
VMware, Inc. 57
3Make changes to the pool settings.
4Click OK.
Delete an Application Pool
When you delete an application pool, users can no longer launch the application in the pool.
You can delete an application pool even if users are currently accessing the application. After the users
close the application, they can no longer access the application.
Procedure
1In Horizon Administrator, select Catalog > Application Pools.
2Select one or more application pools and click Delete.
3Click OK to confirm.
Managing Farms
In Horizon Administrator, you can add, edit, delete, enable, and disable farms.
To add a farm, see Farms. For information on access groups, see "Configuring Role-Based Delegated
Administration" in the View Administration document.
After you create a farm, you can add or remove RDS hosts to support more or fewer users.
Edit a Farm
For an existing farm, you can make changes to the configuration settings.
Prerequisites
Familiarize yourself with the settings of a farm. See Farms.
Procedure
1In Horizon Administrator, select Resources > Farms.
2Select a farm and click Edit.
3Make changes to the farm settings.
4Click OK.
Delete a Farm
You can delete a farm if you no longer need it or if you want to create a new one with different RDS hosts.
You can only delete a farm that is not associated with an RDS desktop pool or an application pool.
Prerequisites
Verify that the farm is not associated with any RDS desktop pool or application pool.
Setting Up Published Desktops and Applications in Horizon 7
VMware, Inc. 58
Procedure
1In Horizon Administrator, select Resources > Farms.
2Select one or more farms and click Delete.
3Click OK to confirm.
Disable or Enable a Farm
When you disable a farm, users can no longer launch RDS desktops or applications from the RDS
desktop pools and the application pools that are associated with the farm. Users can continue to use RDS
desktops and applications that are currently open.
You can disable a farm if you plan to do maintenance on the RDS hosts in the farm or on the RDS
desktop and application pools that are associated with the farm. After you disable a farm, some users
might still be using RDS desktops or applications that they opened before you disable the farm.
Procedure
1In Horizon Administrator, select Resources > Farms.
2Select one or more farms and click More Commands.
3Click Enable or Disable.
4Click OK to confirm.
The status of the RDS desktop pools and application pools that are associated with the farm are now
Unavailable. You can view the status of the pools by selecting Catalog > Desktop Pools or Catalog >
Application Pools.
Recompose an Automated Linked-Clone Farm
With the View Composer recompose operation, you can update the machine image of all the RDS hosts
in an automated linked-clone farm. You can update the hardware settings or the software of the parent
virtual machine and run the recompose operation to have the changes propagated to all the RDS hosts in
the farm.
You can make changes to the parent virtual machine without affecting the RDS host linked clones
because the clones are linked to a replica of the parent. The recompose operation deletes the old replica
and creates a new one for the clones to link to. The recompose creates new linked clones, which typically
use less storage because the disk files of linked clones usually grow in size over time.
You can recompose an automated farm but not individual RDS hosts in the farm. You cannot recompose
linked clones to a lower hardware version than their current hardware version.
If possible, schedule recompose operations during off-peak hours because the operation can be time
consuming.
Setting Up Published Desktops and Applications in Horizon 7
VMware, Inc. 59
Prerequisites
nVerify that you have a snapshot of a parent virtual machine. You must specify a snapshot when you
recompose. The snapshot can be on the current parent virtual machine or a different one.
nDecide when to schedule the recompose operation. By default, View Composer starts the operation
immediately.
You can schedule only one recompose operation at a time for a farm. You can recompose multiple
farms concurrently.
nDecide whether to force all users to log off as soon as the recompose operation begins or wait for
each user to log off before recomposing that user's machine.
If you force users to log off, Horizon 7 notifies users before they are disconnected and allows them to
close their applications and log off.
nDecide whether to stop provisioning at first error. If you select this option and an error occurs when
View Composer provisions a linked clone, provisioning stops. You can select this option to ensure
that resources such as storage are not consumed unnecessarily.
Selecting the Stop at first error option does not affect customization. If a customization error occurs
on a linked clone, other clones continue to be provisioned and customized.
nVerify that provisioning is enabled. When provisioning is disabled, Horizon 7 stops the machines from
being customized after they are recomposed.
nIf your deployment includes replicated Connection Server instances, verify that all instances are the
same version.
Procedure
1In Horizon Administrator, select Resources > Farms.
2Double-click the pool ID of the farm that you want to recompose.
3Click Recompose.
4(Optional) Click Change to change the parent virtual machine.
The new parent virtual machine must run the same version of the operating system as the current
parent virtual machine.
5Select a snapshot.
6(Optional) Click Snapshot Details to display details about the snapshot.
7Click Next.
8(Optional) Schedule a start time.
The current time is filled in by default.
9(Optional) Specify whether to force users to log off or wait for users to log off.
The option to force users to log off is selected by default.
Setting Up Published Desktops and Applications in Horizon 7
VMware, Inc. 60

10 (Optional) Specify whether to stop provisioning at first error.
This option is selected by default.
11 Click Next.
The Ready to Complete page is displayed.
12 (Optional) Click Show Details to display details of the recompose operation.
13 Click Finish.
In vCenter Server, you can monitor the progress of the recompose operation on the linked-clone virtual
machines.
Note During the recompose operation, View Composer runs Sysprep again on the linked clones. New
SIDs and third-party GUIDs might be generated for the recomposed virtual machines. For details, see
"Recomposing Linked Clones Customized with Sysprep" in the Setting Up Virtual Desktops in Horizon 7
document.
Schedule Maintenance for an Automated Instant-Clone Farm
With the maintenance operation, you can schedule recurring or immediate maintenance of all the RDS
hosts in an automated instant-clone farm. During each maintenance cycle, all the RDS hosts are
refreshed from the parent virtual machine.
You can make changes to the parent virtual machine without affecting the RDS host instant clones
because the snapshot of the current parent VM is used for maintenance. The instant clones created in the
automated farm use the information in the parent VM for their system configuration.
You can schedule maintenance on an automated farm but not on individual RDS hosts in the farm.
If possible, schedule maintenance operations during off-peak hours to ensure all that RDS hosts have
finished maintenance and are available during peak hours.
Prerequisites
nDecide when to schedule the maintenance operation. By default, Connection Server starts the
operation immediately.
You can schedule an immediate maintenance or recurring maintenance or both for a farm. You can
schedule maintenance operations on multiple farms concurrently.
nDecide whether to force all users to log off when the maintenance operation begins or wait for each
user to log off before refreshing that user's machine.
If you force users to log off, Horizon 7 notifies users before they are disconnected and allows them to
close their applications and log off.
Setting Up Published Desktops and Applications in Horizon 7
VMware, Inc. 61
nDecide the minimum farm size. The minimum farm size is the number of RDS hosts that are kept
available at all times to allow users to continue to use the farm. For example, if the farm size is ten
and the minimum farm size is two, then maintenance will be performed on eight RDS hosts. As each
RDS host becomes available again then the remaining hosts will go through maintenance. All RDS
hosts are managed individually, so as one host becomes available then one of the remaining hosts
will be put into maintenance.
However, if you schedule immediate maintenance, then all the RDS hosts in the farm will be put into
maintenance.
All RDS hosts will also be subject to policy and will wait for logoff or force users to logoff depending
upon what policy is configured.
nDecide whether to stop provisioning at first error. If you select this option and an error occurs when
Connection Server provisions an instant-clone, provisioning stops. You can select this option to
ensure that resources such as storage are not consumed unnecessarily.
Selecting the Stop at first error option does not affect customization. If a customization error occurs
on an instant-clone, other clones continue to be provisioned and customized.
nVerify that provisioning is enabled. When provisioning is disabled, Horizon 7 stops the machines from
being customized after they are refreshed.
nIf your deployment includes replicated Connection Server instances, verify that all instances are the
same version.
Procedure
1In Horizon Administrator, select Resources > Farms.
2Double-click the pool ID of the farm for which you want to schedule a maintenance.
3Click Maintenance > Schedule.
Setting Up Published Desktops and Applications in Horizon 7
VMware, Inc. 62

4In the Schedule Recurring Maintenance wizard, choose a maintenance mode.
uOption Action
Recurring Schedules periodic maintenance of all the RDS host
servers in a farm.
nSelect a date and time from which the maintenance is
effective.
nSelect a maintenance period. You can select daily,
monthly, or weekly maintenance periods.
nSelect a repeat interval in days for the maintenance
operation to recur.
If an immediate maintenance is scheduled on a farm, then
the immediate maintenance date becomes the effective
date for any recurring maintenance. If you cancel the
immediate maintenance, then the current date becomes
the effective date for recurring maintenance.
Immediate Schedules immediate maintenance of all the RDS host
servers in a farm. Immediate maintenance creates a one-
time maintenance schedule for immediate or near future
maintenance. Use immediate maintenance to refresh the
farm from a new parent VM image or snapshot when you
want to apply urgent security patches.
Select an immediate maintenance configuration.
nSelect Start Now to start the maintenance operation
instantly.
nSelect Start at to start the maintenance operation at a
near future date and time. Enter the date and Web
browser local time.
Note Recurring maintenance will be put on hold until
immediate maintenance is complete.
5Click Next.
6(Optional) Click Change to change the parent virtual machine.
7Select a snapshot.
You cannot select a different snapshot unless you clear the Use current parent VM image checkbox.
8(Optional) Click Snapshot Details to display details about the snapshot.
9Click Next.
10 (Optional) Specify whether to force users to log off or wait for users to log off.
The option to force users to log off is selected by default.
11 (Optional) Specify whether to stop provisioning at first error.
This option is selected by default.
12 Click Next.
The Ready to Complete page is displayed.
Setting Up Published Desktops and Applications in Horizon 7
VMware, Inc. 63
13 Click Finish.
Managing RDS Hosts
You can manage RDS hosts that you set up manually and RDS hosts that are created automatically when
you add an automated farm.
When you manually set up an RDS host, it automatically registers with Horizon Connection Server. You
cannot manually register an RDS host with Connection Server. See Remote Desktop Services Hosts. For
an RDS host that you set up manually, you can perform the following management tasks:
nEdit the RDS host.
nAdd the RDS host to a manual farm.
nRemove the RDS host from a farm.
nEnable the RDS host.
nDisable the RDS host.
For an RDS host that is created automatically when you add an automated farm, you can perform the
following management tasks:
nRemove the RDS host from a farm.
nEnable the RDS host.
nDisable the RDS host.
Edit an RDS Host
You can change the number of connections that an RDS host can support. This setting is the only one
that you can change. The default value is 150. You can set it to any positive number, or to unlimited.
You can only edit an RDS host that you set up manually, but not an RDS host that is in an automated
farm.
Procedure
1In View Administrator, select View Configuration > Registered Machines.
2Select an RDS host and click Edit.
3Specify a value for the setting Number of connections.
4Click OK.
Add an RDS Host to a Manual Farm
You can add an RDS host that you set up manually to a manual farm to increase the scale of the farm or
for other reasons. You can only add RDS hosts to a manual farm.
Procedure
1In View Administrator, select Resources > Farms.
Setting Up Published Desktops and Applications in Horizon 7
VMware, Inc. 64
2Double-click the pool ID of the farm.
3Select the RDS Hosts tab.
4Select one or more RDS hosts.
5Click OK.
Remove an RDS Host from a Farm
You can remove an RDS host from a manual farm to reduce the scale of the farm, to perform
maintenance on the RDS host, or for other reasons. As a best practice, disable the RDS host and ensure
that users are logged off from active sessions before you remove a host from a farm.
If users have application or desktop sessions on hosts that you remove, the sessions remain active, but
View no longer keeps track of them. A user who disconnects from a session will be unable to reconnect to
it, and any unsaved data might be lost.
You can also remove an RDS host from an automated farm. One possible reason might be that the RDS
host is in an unrecoverable error state. View Composer automatically creates a new RDS host to replace
the one that you remove.
Procedure
1In View Administrator, select Resources > Farms.
2Double-click the pool ID.
3Select the RDS Hosts tab.
4Select one or more RDS hosts.
5Click Remove from farm.
6Click OK.
Remove an RDS Host from Horizon 7
You can remove from Horizon 7 an RDS host that you set up manually and that you no longer plan to use.
The RDS host must not currently be in a manual farm.
Prerequisites
Verify that the RDS host does not belong to a farm.
Procedure
1In Horizon Administrator, select View Configuration > Registered Machines.
2Select an RDS host and click Remove.
3Click OK.
After you remove an RDS host, to use it again, you must reinstall Horizon Agent. See Remote Desktop
Services Hosts.
Setting Up Published Desktops and Applications in Horizon 7
VMware, Inc. 65
Disable or Enable an RDS Host
When you disable an RDS host, View no longer uses it to host new RDS desktops or applications. Users
can continue to use RDS desktops and applications that are currently open.
Procedure
1In View Administrator, select Resources > Farms.
2Double-click the pool ID of a farm.
3Select the RDS Hosts tab.
4Select an RDS host and click More Commands.
5Click Enable or Disable.
6Click OK.
If you enable the RDS host, a check mark appears in the Enabled column, and Available appears in the
Status column. If you disable the RDS host, the Enabled column is empty and Disabled appears in the
Status column.
Monitor RDS Hosts
You can monitor the status and view the properties of RDS hosts in View Administrator.
Procedure
uIn View Administrator, navigate to the page that displays the properties that you want to view.
Properties Action
RDS Host, Farm, Desktop Pool, Agent
Version, Sessions, Status
nIn View Administrator, select Resources > Machines.
nClick the RDS Hosts tab. Both linked-clone RDS hosts and RDS hosts that
are set up manually are displayed.
DNS Name, Type, RDS Farm, Max
Number of Connections, Agent
Version, Enabled, Status
nIn View Administrator, select View Configuration > Registered Machines.
nClick the RDS Hosts tab. Only RDS hosts that are set up manually are
displayed.
The properties are displayed and have the following meanings:
Property Description
RDS Host Name of the RDS host.
Farm Farm to which the RDS host belongs.
Desktop Pool RDS desktop pool associated with the farm.
Agent Version Version of View Agent or Horizon Agent that runs on the RDS host.
Sessions Number of client sessions.
DNS Name DNS name of the RDS host.
Setting Up Published Desktops and Applications in Horizon 7
VMware, Inc. 66

Property Description
Type Version of Windows Server that runs on the RDS host.
RDS Farm Farm to which the RDS host belongs.
Max Number of Connections Maximum number of connections that the RDS host can support.
Enabled Whether the RDS host is enabled.
Status State of the RDS host. See Status of RDS Hosts for a description of the possible
states.
Status of RDS Hosts
An RDS host can be in various states from the time that it is initialized. As a best practice, check that RDS
hosts are in the state that you expect them to be in before and after you perform tasks or operations on
them.
Table 7‑1. Status of an RDS Host
Status Description
Startup View Agent or Horizon Agent has started on the RDS host, but other required services such as the
display protocol are still starting. The agent startup period also allows other processes such as
protocol services to start up.
Disable in progress RDS host is in the process of being disabled while sessions are still running on the host. When
the sessions end, the status changes to Disabled.
Disabled Process of disabling the RDS host is complete.
Validating Occurs after View Connection Server first becomes aware of the RDS host, typically after View
Connection Server is started or restarted, and before the first successful communication with View
Agent or Horizon Agent on the RDS host. Typically, this state is transient. This state is not the
same as the Agent unreachable state, which indicates a communication problem.
Agent disabled Occurs if View Connection Server disables View Agent or Horizon Agent. This state ensures that
a new desktop or application session cannot be started on the RDS host.
Agent unreachable View Connection Server cannot establish communication with View Agent or Horizon Agent on an
RDS host.
Invalid IP Subnet mask registry setting is configured on the RDS host, and no active network adapters have
an IP address within the configured range.
Agent needs reboot View component was upgraded, and the RDS host must be restarted to allow View Agent or
Horizon Agent to operate with the upgraded component.
Protocol failure The RDP display protocol is not running correctly. If RDP is not running and PCoIP is running,
clients cannot connect using either RDP or PCoIP. However, if RDP is running and PCoIP is not
running, clients can connect using RDP.
Domain failure RDS host encountered a problem reaching the domain. The domain server was not accessible, or
the domain authentication failed.
Configuration error RDS role is not enabled on the server.
Unknown RDS host is in an unknown state.
Available RDS host is available. If the host is in a farm, and the farm is associated with an RDS or
application pool, it will be used to deliver RDS desktops or applications to users.
Setting Up Published Desktops and Applications in Horizon 7
VMware, Inc. 67

Table 7‑1. Status of an RDS Host (Continued)
Status Description
Provisioning (For linked-clone RDS hosts only) Provisioning of the virtual machine is in progress.
Customizing (For linked-clone RDS hosts only) Customization of the virtual machine is in progress.
Deleting (For linked-clone RDS hosts only) Deletion of the virtual machine is in progress.
Waiting for Agent (For linked-clone RDS hosts only) View Connection Server is waiting to establish communication
with View Agent or Horizon Agent.
Maintenance Mode (For linked-clone RDS hosts only) The virtual machine is in maintenance mode and is not
available to users.
Provisioned (For linked-clone RDS hosts only) Provisioning of the virtual machine is complete.
Provisioning Error (For linked-clone RDS hosts only) An error occurred during provisioning.
Error (For linked-clone RDS hosts only) An unknown error occurred in the virtual machine.
Configure Adobe Flash Throttling with Internet Explorer in RDS
Desktops
To ensure that Adobe Flash throttling works with Internet Explorer in RDS desktops, users must enable
third-party browser extensions.
Procedure
1Start Horizon Client and log in to a user's remote desktop.
2In Internet Explorer, click Tools > Internet Options.
3Click the Advanced tab, select Enable third-party browser extensions, and click OK.
4Restart Internet Explorer.
Manage Published Desktop and Application Sessions
When a user launches a published desktop or application, a session is created. You can disconnect and
log off sessions, send messages to clients, reset, and restart virtual machines.
Procedure
1In Horizon Administrator, navigate to where session information is displayed.
Session Type Navigation
Remote desktop sessions Select Catalog > Desktop Pools, double-click a pool's ID, and click the
Sessions tab.
Remote desktop and application
sessions
Select Monitoring > Sessions.
Sessions associated with a user or
user group
nSelect Users and Groups.
nDouble-click a user's name or a user group's name.
nClick on the Sessions tab.
Setting Up Published Desktops and Applications in Horizon 7
VMware, Inc. 68

2Select a session.
To send a message to users, you can select multiple sessions. You can perform the other operations
on only one session at a time.
3Choose whether to disconnect, log off, or send a message, or reset a virtual machine.
Option Description
Disconnect Session Disconnects the user from the session.
Logoff Session Logs the user off the session. Data that is not saved is lost.
Send Message Send a message to Horizon Client. You can label the message as Info, Warning,
or Error.
4Click OK.
Configuring Load Balancing for RDS Hosts
By default, View Connection Server uses the current session count and limit to balance the placement of
new application sessions on RDS hosts. You can override this default behavior and control the placement
of new application sessions by writing and configuring load balancing scripts.
A load balancing script returns a load value. The load value can be based on any host metric, such as
CPU utilization or memory utilization. Horizon Agent maps the load value to a load preference, and
reports the load preference to View Connection Server. View Connection Server uses reported load
preferences to determine where to place new application sessions.
You can write your own load balancing scripts, or you can use one of the sample load balancing scripts
provided with Horizon Agent.
Configuring load balancing scripts involves enabling the VMware Horizon View Script Host service and
setting a registry key on each RDS host in a farm.
Load Values and Mapped Load Preferences
Horizon Agent maps the load value that a load balancing script returns to a load preference. View
Connection server uses reported load preferences to determine where to place new application sessions.
The following table lists the valid load values that a load balancing script can return and describes the
associated load preferences.
Table 7‑2. Valid Load Values and Mapped Load Preferences
Valid Load Value
Load Preference Reported
by Horizon Agent Description
0 BLOCK Do not choose this RDS host.
1 LOW Low preference/high load.
2 MED Medium preference/normal load.
3 HIGH High preference/light load.
Setting Up Published Desktops and Applications in Horizon 7
VMware, Inc. 69
Load Balancing Feature Constraints
The RDS host load balancing feature has certain constraints.
nAnti-infinity rules can prevent an application from being placed on an RDS host, regardless of the
reported load preference. For more information, see Configure an Anti-Affinity Rule for an Application
Pool.
nLoad balancing affects new application sessions only. An RDS host that contains sessions in which a
user has previously run an application is always reused for the same application. This behavior
overrides reported load preferences and anti-affinity rules.
nApplications are launched on an RDS host where a user already has an existing session, even if the
RDS host reports a BLOCK load preference.
nRDS session limits prevent application sessions from being created, regardless of the reported load
preference.
Writing a Load Balancing Script for an RDS Host
You can write a load balancing script to generate a load value based on any RDS host metric that you
want to use for load balancing. You can also write a simple load balancing script that returns a fixed load
value.
Your load balancing script must return a single number from 0 to 3. For descriptions of the valid load
values, see Load Values and Mapped Load Preferences.
If at least one RDS host in the farm returns a valid load value, View Connection Server assumes a load
value of 2 (mapped load preference of MED) for the other RDS hosts in farm until their load balancing
scripts return valid values. If no RDS host in the farm returns a valid load value, the load balancing
feature is disabled for the farm.
If your load balancing script returns an invalid load value or does not finish running within 10 seconds,
Horizon Agent sets the load preference to BLOCK and the RDS host state to configuration error. These
values effectively remove the RDS host from the list of RDS hosts available for new sessions.
Copy your load balancing script to the Horizon Agent scripts directory (C:\Program
Files\VMware\VMware View\Agent\scripts) on each RDS host in the farm. You must copy the same
script to every RDS host in the farm.
For an example how to write a load balancing script, see the sample scripts in the Horizon Agent scripts
directory. For more information, see Sample Load Balancing Scripts for RDS Hosts.
Setting Up Published Desktops and Applications in Horizon 7
VMware, Inc. 70

Sample Load Balancing Scripts for RDS Hosts
When you install Horizon Agent on an RDS host, the installer places sample load balancing scripts in the
Horizon Agent scripts directory (C:\Program Files\VMware\VMware View\Agent\scripts).
Table 7‑3. Sample Load Balancing Scripts
Name Description
cpuutilisation.vbs Reads the percentage of CPU that has been utilized from the registry and returns the
following load values:
n0, if CPU utilization is greater than 90 percent
n1, if CPU utilization is greater than 75 percent
n2, if CPU utlization is greater than 25 percent
n3, if CPU utilization is less or equal to 25 percent
memoryutilisation.vbs Calculates the percentage of memory that has been utilized and returns the following load
values:
n0, if memory utilization is greater than 90 percent
n1, if memory utilization is greater than 75 percent
n2, if memory utlization is greater than 25 percent
n3, if memory utilization is less or equal to 25 percent
Note Because the cpuutilisation.vbs script uses rolling average data that is sampled every five
minutes, short-term high-utilization events might not be reflected in reported load preferences. You can
reduce the sampling period to a minimum of two minutes, but performance might be affected on the RDS
host. The sampling interval is controlled by the registry entry HKEY_LOCAL_MACHINE\SOFTWARE\VMware,
Inc.\VMware VDM\Performance Stats\SamplingIntervalSeconds. The default is 300 seconds.
Enable the VMware Horizon View Script Host Service on an RDS
Host
You must enable the VMware Horizon View Script Host service on an RDS host before you configure a
load balancing script. The VMware Horizon View Script Host service is disabled by default.
Procedure
1Log in to the RDS host as an administrator.
2Start Server Manager.
3Select Tools > Services and navigate to the VMware Horizon View Script Host service.
4Right-click VMware Horizon View Script Host and select Properties.
5In the Properties dialog box, select Automatic from the Startup type drop-down menu and click OK
to save your changes.
6Right-click VMware Horizon View Script Host and select Start to start the VMware Horizon View
Script Host service.
Setting Up Published Desktops and Applications in Horizon 7
VMware, Inc. 71

The VMware Horizon View Script Host service restarts automatically each time the RDS host starts.
What to do next
Configure your load balancing script on each RDS host in the farm. See Configure a Load Balancing
Script on an RDS Host.
Configure a Load Balancing Script on an RDS Host
You must configure the same load balancing script on every RDS host in the farm. Configuring a load
balancing script involves setting a registry key on the RDS host.
If you are using an automated farm, you perform this procedure on the parent virtual machine for the
automated farm.
Important You must configure the load balancing script on all of the RDS hosts in a farm or on none of
the RDS hosts in a farm. If you configure a load balancing script on only some of the RDS hosts in a farm,
View Administrator sets the health of the farm to yellow.
Prerequisites
nWrite a load balancing script and copy the same script to the Horizon Agent scripts directory on
each RDS host in the farm. See Writing a Load Balancing Script for an RDS Host.
nEnable the VMware Horizon View Script Host service on the RDS host. See Enable the VMware
Horizon View Script Host Service on an RDS Host
Procedure
1Log in to the RDS host as an administrator.
2Start Server Manager.
3Select Tools > System Configuration, click the Tools tab, and launch the Registry Editor.
4In the registry, navigate to HKEY_LOCAL_MACHINE\SOFTWARE\VMware, Inc.\VMware
VDM\ScriptEvents.
5In the navigation area, select the RdshLoad key.
The values for the RdshLoad key, if any, appear in the topic area (the right pane).
6Right-click in the topic area for the RdshLoad key, select New > String Value, and create a new
string value.
As a best practice, use a name that represents the load balancing script to be run, for example,
cpuutilisationScript for the cpuutilisation.vbs script.
7Right-click the entry for the new string value you created and select Modify.
Setting Up Published Desktops and Applications in Horizon 7
VMware, Inc. 72
8In the Value data text box, type the command line that invokes your load balancing script and click
OK.
Type the full path to your load balancing script.
For example: cscript.exe "C:\Program Files\VMware\VMware View
Agent\scripts\cpuutilisation.vbs"
9Restart the Horizon Agent service on the RDS host to make your changes take effect.
Your load balancing script begins to run on the RDS host.
What to do next
Repeat this procedure on each RDS host in the farm. If you performed this procedure on the parent
virtual machine for an automated farm, provision the automated farm.
To verify that your load balancing script is working correctly, see Verify a Load Balancing Script.
Verify a Load Balancing Script
You can verify that your load balancing script is working correctly by viewing RDS farm and RDS host
information in View Administrator.
Procedure
1In View Administrator, click Dashboard and expand RDS Farms in the System Health pane.
2View the health of the farm that contains the RDS hosts.
The health of the farm should be green. If a load balancing script is configured on only some of the
RDS hosts in a farm, View Administrator sets the health of the farm to yellow. You must configure the
load balancing script on all of the RDS hosts in a farm or on none of the RDS hosts in a farm.
3Expand the farm and click the name of each RDS host to view its load preference.
The Server load field in the details dialog box shows the load preference reported by Horizon Agent,
for example, Light load, new sessions okay. If Horizon Agent did not report a load preference,
the Server load field shows Load not reported.
What to do next
If load balancing is not working as you expected, verify the content of your load balancing script. If the
script is written correctly, verify that the VMware Horizon View Script Host service is running and that the
same load balancing script is configured on each RDS host in the farm.
Setting Up Published Desktops and Applications in Horizon 7
VMware, Inc. 73

Load Balancing Session Placement Examples
These examples illustrate two load balancing session placement scenarios.
Example 1: No Existing User Session
This example illustrates how session placement might occur for a farm that contains six RDS hosts when
a user session does not currently exist on any of the RDS hosts.
1 Horizon Agent reports the following load preferences for each RDS host in the farm.
RDS Host Load Preference
1 HIGH
2 LOW
3 HIGH
4 MED
5 BLOCK
6 LOW
2 View sorts the RDS hosts into three buckets according to load preference. View discards RDS host 5
because Horizon Agent reported a load preference of BLOCK.
Bucket Load Preference RDS Host
1 HIGH
HIGH
1
3
2 MED 4
3 LOW
LOW
2
6
3 Because bucket 2 has only one RDS host, View combines bucket 2 and bucket 3
Bucket Load Preference RDS Host
1 HIGH
HIGH
MED
1
3
4
2 LOW
LOW
2
6
Setting Up Published Desktops and Applications in Horizon 7
VMware, Inc. 74
4 View randomizes the bucket order.
Bucket Load Preference RDS Host
1 MED
HIGH
MED
4
3
1
2 LOW
LOW
6
2
5 View Connection Server attempts to place a new application session on RDS host 4 first, followed by
RDS host 3, and so on.
RDS Host Session Placement Order
4
3
1
6
2
Note Anti-infinity rules can prevent an application from being placed on an RDS host, regardless of
the reported load preference. For more information, see Configure an Anti-Affinity Rule for an
Application Pool.
Example 2: Existing User Session
This example illustrates how session placement might occur for a farm that contains six RDS hosts when
a user session currently exists on one of the RDS hosts. An RDS host that contains a session in which a
user has previously run an application is always reused for the same application.
1 A user session already exists on RDS host 3. RDS host 3 has a load preference of MED. The
remaining RDS in the hosts in the farm (the spare list) have the following load preferences.
RDS Host Load Preference
1 MED
2 LOW
4 HIGH
5 LOW
6 BLOCK
Setting Up Published Desktops and Applications in Horizon 7
VMware, Inc. 75

2 View sorts the RDS hosts in the spare list into two buckets according to load preference. View
discards RDS host 6 because Horizon Agent reported a load preference of BLOCK.
Bucket Load Preference RDS Host
1 HIGH
MED
4
1
2 LOW
LOW
2
5
3 View randomizes the bucket order.
Bucket Load Preference RDS Host
1 HIGH
MED
4
1
2 LOW
LOW
5
2
4 View adds the RDS host that contains the existing session to the top of the new bucket ordered list.
RDS Host Session Placement Order
3
4
1
5
2
Configure an Anti-Anity Rule for an Application Pool
When you configure an anti-affinity rule for an application pool, Horizon Connection Server attempts to
launch the application only on RDS hosts that have sufficient resources to run the application. This
feature can be useful for controlling applications that consume large amounts of CPU or memory
resources.
An anti-affinity rule consists of an application matching pattern and a maximum count. For example, the
application matching pattern might be autocad.exe and the maximum count might be 2.
Connection Server sends the anti-affinity rule to Horizon Agent on an RDS host. If any applications
running on the RDS host have process names that match the application matching pattern, Horizon Agent
counts the current number of instances of those applications and compares the number to the maximum
count. If the maximum count is exceeded, Connection Server skips that RDS host when it selects an RDS
host to run new sessions of the application.
Prerequisites
nCreate the application pool. See Create an Application Pool.
nBecome familiar with the constraints of the anti-affinity feature. See Anti-Affinity Feature Constraints.
Setting Up Published Desktops and Applications in Horizon 7
VMware, Inc. 76

Procedure
1In Horizon Administrator, select Catalog > Application Pools.
2Select the pool to modify and click Edit.
3In the Anti-Affinity Patterns text box, type a comma-separated list of patterns to match against the
process names of other applications running on RDS hosts.
The pattern string can include the asterisk (*) and question mark (?) wildcard characters. An asterisk
matches zero or more characters and a question mark matches any single character.
For example, *pad.exe,*notepad.??? matches wordpad.exe, notepad.exe, and notepad.bat,
but it does not match wordpad.bat or notepad.script.
Note Horizon 7 counts multiple patterns that match for an application in a single session as a single
match.
4In the Anti-Affinity Count text box, type the maximum number of other applications that can be
running on the RDS host before the RDS host is rejected for new application sessions.
The maximum count can be an integer from 1 to 20.
5Click OK to save your changes.
Anti-Anity Feature Constraints
The anti-affinity feature has certain constraints.
nAnti-affinity rules affect new application sessions only. An RDS host that contains sessions in which a
user has previously run an application is always reused for the same application. This behavior
overrides reported load preferences and anti-affinity rules.
nAniti-affinity rules do not affect application launches from within an RDS desktop session.
nRDS session limits prevent application sessions from being created, regardless of anti-affinity rules.
nIn certain circumstances, the instances of applications on the RDS host might not be restricted to the
maximum count that you specify. For example, View cannot determine the exact instance count if
other applications for other pending sessions are in the process of being launched.
nInter-application anti-affinity rules are not supported. For example, large application classes, such as
Autocad and Visual Studio instances, cannot be counted in a single rule.
nDo not use anti-affinity rules in environments where end-users use Horizon Client on mobile clients.
Anti-affinity rules can result in multiple sessions in the same farm for an end user. Reconnecting to
multiple sessions on mobile clients can result in indeterminate behavior.
Setting Up Published Desktops and Applications in Horizon 7
VMware, Inc. 77
Entitling Users and Groups 8
You configure entitlements to control which remote desktops and applications your users can access. You
can configure the restricted entitlements feature to control desktop access based on the View Connection
Server instance that users connect to when they select remote desktops. You can also restrict access to a
set of users outside the network from connecting to remote desktops and applications within the network.
In a Cloud Pod Architecture environment, you create global entitlements to entitle users or groups to
multiple desktops across multiple pods in a pod federation. When you use global entitlements, you do not
need to configure and manage local entitlements for remote desktops. For information about global
entitlements and setting up a Cloud Pod Architecture environment, see the Administering View Cloud Pod
Architecture document.
This section includes the following topics:
nAdd Entitlements to a Desktop or Application Pool
nRemove Entitlements from a Desktop or Application Pool
nReview Desktop or Application Pool Entitlements
nConfiguring Start Menu Shortcuts for Desktop and Application Pools
nImplementing Client Restrictions for Desktop and Application Pools
nRestricting Desktop or Application Access
nRestricting Remote Desktop Access Outside the Network
Add Entitlements to a Desktop or Application Pool
Before users can access remote desktops or applications, they must be entitled to use a desktop or
application pool.
Prerequisites
Create a desktop or application pool.
VMware, Inc. 78

Procedure
1Select the desktop or application pool.
Option Action
Add an entitlement for a desktop pool In Horizon Administrator, select Catalog > Desktop Pools and click the name of
the desktop pool.
Add an entitlement for an application
pool
In Horizon Administrator, select Catalog > Application Pools and click the name
of the application pool.
2Select Add entitlement from the Entitlements drop-down menu.
3Click Add, select one or more search criteria, and click Find to find users or groups based on your
search criteria.
Note Domain local groups are filtered out of search results for mixed-mode domains. You cannot
entitle users in domain local groups if your domain is configured in mixed mode.
4Select the users or groups you want to entitle to the desktops or applications in the pool and click OK.
5Click OK to save your changes.
Remove Entitlements from a Desktop or Application Pool
You can remove entitlements from a desktop or application pool to prevent specific users or groups from
accessing a desktop or application.
Procedure
1Select the desktop or application pool.
Option Description
Remove an entitlement for a desktop
pool
In Horizon Administrator, select Catalog > Desktop Pools and click the name of
the desktop pool.
Remove an entitlement for an
application pool
In Horizon Administrator, select Catalog > Application Pools and click the name
of the application pool.
2Select Remove entitlement from the Entitlements drop-down menu.
3Select the user or group whose entitlement you want to remove and click Remove.
4Click OK to save your changes.
Review Desktop or Application Pool Entitlements
You can review the desktop or application pools to which a user or group is entitled.
Procedure
1In Horizon Administrator, select Users and Groups and click the name of the user or group.
Setting Up Published Desktops and Applications in Horizon 7
VMware, Inc. 79

2Click the Entitlements tab and review the desktop or application pools to which the user or group is
entitled.
Option Action
List the desktop pools to which the
user or group is entitled
Click Desktop Pools.
List the application pools to which the
user or group is entitled
Click Application Pools.
Configuring Start Menu Shortcuts for Desktop and
Application Pools
You can configure Windows start menu shortcuts for entitled desktop and application pools. When an
entitled user connects to a Connection Server, Horizon Client for Windows places these shortcuts in the
Start menu on the user's Windows client device.
You can configure a Start menu shortcut when you create or modify a desktop pool or application pool.
You must select a category folder, or the root (/) folder, during shortcut configuration. You can add and
name your own category folders. For example, you might add a category folder named Office and select
that folder for all work-related applications, such as Microsoft Office and Microsoft PowerPoint.
You can also configure a Start menu shortcut when you create or modify a global entitlement. For more
information on global entitlements, see the Administering Cloud Pod Architecture in Horizon 7document.
On Windows 7 client devices, Horizon Client places category folders and shortcuts in the VMware
Applications folder in the Start menu. If you select the root (/) folder for a shortcut, Horizon Client places
the shortcut directly in the VMware Applications folder.
On Windows 8 and Windows 10 client devices, Horizon Client places category folders and shortcuts in
the Apps list. If you select the root (/) folder for a shortcut, Horizon Client places the shortcut in the
Desktop category in the Apps list.
After you create a shortcut, a check mark appears in the App Shortcut column for the desktop or
application pool on the Desktop Pools or Application Pools page in Horizon Administrator.
By default, Horizon Client prompts entitled users to install shortcuts the first time they connect to a server.
You can configure Horizon Client to install shortcuts automatically, or to never install shortcuts, by
modifying the Automatically install shortcuts when configured on the Horizon server group policy
setting. For more information, see the VMware Horizon Client for Windows Installation and Setup Guide
document.
By default, changes that you make to shortcuts are synchronized on a user's client device each time the
user connects to the server. Users can disable the shortcut synchronization feature in Horizon Client. For
more information, see the VMware Horizon Client for Windows Installation and Setup Guide document.
This feature requires Horizon Client 4.6 for Windows or later.
Setting Up Published Desktops and Applications in Horizon 7
VMware, Inc. 80
Create Start Menu Shortcuts for Desktop Pools
You can create Windows Start menu shortcuts for entitled desktop pools in Horizon Administrator so that
the desktop pools appear in the Start menu on the user's Windows client device. You can create Start
menu shortcuts when you create a desktop pool. You can also create Start menu shortcuts when you edit
the desktop pool.
Prerequisites
nDecide how to configure the pool settings based on the type of desktop pool you want to create. For
creating desktop pools for virtual desktops, see the Setting Up Virtual Desktops in Horizon 7
document. For creating desktop pools for published desktops, see the Setting Up Published Desktops
and Applications in Horizon 7 document.
Procedure
1In Horizon Administrator, click Catalog > Desktop Pools and click Add.
2In the Add Desktop Pool wizard, select the type of desktop pool you want to create, and click Next.
3Follow the wizard prompts to the Desktop Pool Settings page.
4To create a Windows Start menu shortcut for the desktop pool, click the Category Folder Browse
button, select Select a category folder from the folder list, select a category folder from the list,
and click OK.
You can create a new category folder by typing a folder name in the New Folder text box and clicking
Add.
5Follow the wizard prompts to the Ready to Complete page and select Entitle users after this
wizard finishes and click Finish.
6In the Add Entitlements wizard, click Add, select one or more search criteria, and click Find to find
users or groups based on your search criteria, select the users or groups you want to entitle to the
desktops in the pool and click OK.
A check mark appears in the App Shortcut column for the desktop pool on the Desktop Pools page.
What to do next
Connection Server places these shortcuts in the Start menu on the user's Windows client device. Log in
to Horizon Client for Windows to view the desktop shortcuts in the Start menu.
Setting Up Published Desktops and Applications in Horizon 7
VMware, Inc. 81

Create Start Menu Shortcuts for Application Pools
You can create Windows Start menu shortcuts for entitled applications in Horizon Administrator so that
the shortcuts appear in the Start menu on the user's Windows client device. You can create Start menu
shortcuts when you create an application pool. You can also create Start menu shortcuts when you edit
the application pool.
Prerequisites
nSet up RDS hosts. See Chapter 3 Setting Up Remote Desktop Services Hosts.
nCreate a farm that contains the RDS hosts. See Chapter 4 Creating Farms.
nIf you plan to add the application pool manually, gather information about the application. See
Worksheet for Creating an Application Pool Manually.
nHorizon Client 4.6 for Windows or later.
Procedure
1In Horizon Administrator, click Catalog > Application Pools and click Add.
2In the Add Application Pool wizard, select an RDS farm.
3Select the type of application pool you want to create.
Option Description
Add application pool manually Enter the information about the application. See Worksheet for Creating an
Application Pool Manually.
Select installed applications Filter to find applications by name, installed path, or application type, or select
from a list of installed applications. For information about configuring additional
options, see Worksheet for Creating an Application Pool Manually.
4To create a Windows Start menu shortcut for the application pool, click the Category Folder Browse
button, select Select a category folder from the folder list, select a category folder from the list,
and click OK.
You can create a new category folder by typing a folder name in the New Folder text box and clicking
Add.
5Click Next.
6Select Entitle users after this wizard finishes.
7In the Add Entitlements wizard, click Add, select one or more search criteria, and click Find to find
users or groups based on your search criteria, select the users or groups you want to entitle to the
desktops in the pool and click OK.
A check mark appears in the App Shortcut column for the application pool on the Application Pools
page.
Setting Up Published Desktops and Applications in Horizon 7
VMware, Inc. 82
What to do next
Connection Server places these shortcuts in the Start menu on the user's Windows client device. Log in
to Horizon Client for Windows to view the applications shortcuts in the Start menu.
Implementing Client Restrictions for Desktop and
Application Pools
You can restrict access to entitled published desktop and application pools to specific client computers. To
restrict access, you must add the names of the client computers that are allowed to access the published
desktops or applications in an Active Directory security group and then entitle this group to a pool.
The client restrictions features has certain requirements and limitations.
nYou must enable the client restrictions policy when you create or modify the published desktop or
application pool. By default, the client restrictions policy is disabled. For published desktop pool
settings, see Desktop Pool Settings for RDS Desktop Pools. For application pool settings, see
Worksheet for Creating an Application Pool Manually.
nWhen you create or modify entitlements for the published desktop or application pool, you must add
the Active Directory security group that contains the names of the client computers that are allowed to
access the published desktop or application pool.
nThe client restrictions feature allows only specific client computers to access published desktop and
application pools. It does not give users access to non-entitled desktop and application pools. For
example, if a user is not included in an application pool entitlement (either as a user or as a member
of a user group), the user cannot access the application pool, even if the user's client computer is part
of the AD security group that is entitled to the application pool.
nThe client restrictions feature is supported only with Windows client computers in this release.
Horizon Client 4.6 for Windows or later is required on the client computers.
nWhen the client restrictions policy is enabled for published desktop or application pools, non-Windows
clients, Windows clients running pre-4.6 versions of Horizon Client for Windows, and HTML Access
clients cannot launch the desktops or applications from the restricted pools.
nThe client restrictions feature only restricts new sessions from Windows clients. This feature does not
restrict existing application session connections from previous user sessions.
Restricting Desktop or Application Access
You can configure the restricted entitlements feature to restrict remote desktop access based on the
Connection Server instance to which users connect when they select desktops. You can also restrict
access to published applications based on the Connection Server instance to which users connect to
when they select applications.
With restricted entitlements, you assign one or more tags to a Connection Server instance. When you
configure a desktop or application pool, you select the tags of the Connection Server instances that you
want to have access to the desktop or application.
Setting Up Published Desktops and Applications in Horizon 7
VMware, Inc. 83
When users log in to a tagged Connection Server instance, they can access only those desktop or
application pools that have at least one matching tag or no tags.
For information about using tags to restrict access to global entitlements in a Cloud Pod Architecture
environment, see the Administering Cloud Pod Architecture in Horizon 7 document.
nRestricted Entitlement Example
This example shows a Horizon deployment that includes two Connection Server instances. The first
instance supports internal users. The second instance is paired with a security server and supports
external users.
nTag Matching
The restricted entitlements feature uses tag matching to determine whether a Connection Server
instance can access a particular desktop pool.
nConsiderations and Limitations for Restricted Entitlements
Before implementing restricted entitlements, you must be aware of certain considerations and
limitations.
nAssign a Tag to a Connection Server Instance
When you assign a tag to a Connection Server instance, users who connect to that Connection
Server instance can access only those desktop pools that have a matching tag or no tags.
nAssign a Tag to a Desktop Pool
When you assign a tag to a desktop pool, only users who connect to a Connection Server instance
that has a matching tag can access the desktops in that pool.
nAssign a Tag to an Application Pool
When you assign a tag to an application pool, only users who connect to a Connection Server
instance that has a matching tag can access the applications in that pool.
Restricted Entitlement Example
This example shows a Horizon deployment that includes two Connection Server instances. The first
instance supports internal users. The second instance is paired with a security server and supports
external users.
To prevent external users from accessing certain desktops, you could set up restricted entitlements as
follows:
nAssign the tag "Internal" to the Connection Server instance that supports your internal users.
nAssign the tag "External" to the Connection Server instance that is paired with the security server and
supports your external users.
nAssign the "Internal" tag to the desktop pools that should be accessible only to internal users.
nAssign the "External" tag to the desktop pools that should be accessible only to external users.
Setting Up Published Desktops and Applications in Horizon 7
VMware, Inc. 84
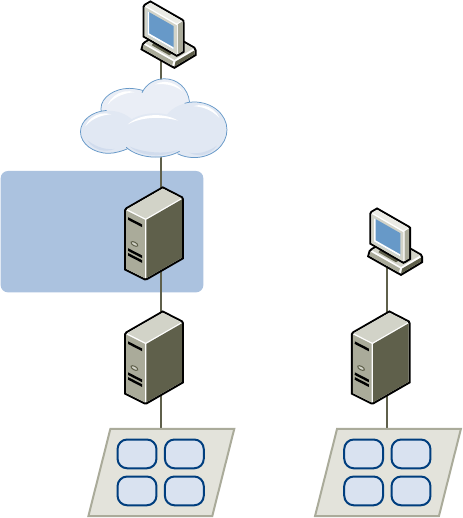
External users cannot see the desktop pools tagged as Internal because they log in through the
Connection Server instance that is tagged as External, and internal users cannot see the desktop pools
tagged as External because they log in through the Connection Server instance that is tagged as Internal.
Figure 8‑1 illustrates this configuration.
Figure 8‑1. Restricted Entitlement Configuration
DMZ
client device
View
Connection
Server
Tag: “External”
desktop pool A
Tag: “External”
View
Security
Server
VM VM
VM VM
client device
View
Connection
Server
Tag: “Internal”
desktop pool B
Tag: “Internal”
VM VM
VM VM
external
network
You can also use restricted entitlements to control desktop access based on the user-authentication
method that you configure for a particular Connection Server instance. For example, you can make
certain desktop pools available only to users who have authenticated with a smart card.
Tag Matching
The restricted entitlements feature uses tag matching to determine whether a Connection Server instance
can access a particular desktop pool.
At the most basic level, tag matching determines that a Connection Server instance that has a specific
tag can access a desktop pool that has the same tag.
The absence of tag assignments can also affect whether a Connection Server instance can access a
desktop pool. For example, Connection Server instances that do not have any tags can access only
desktop pools that also do not have any tags.
Table 8‑1 shows how the restricted entitlement feature determines when a Connection Server can access
a desktop pool.
Setting Up Published Desktops and Applications in Horizon 7
VMware, Inc. 85

Table 8‑1. Tag Matching Rules
View Connection Server Desktop Pool Access Permitted?
No tags No tags Yes
No tags One or more tags No
One or more tags No tags Yes
One or more tags One or more tags Only when tags match
The restricted entitlements feature only enforces tag matching. You must design your network topology to
force certain clients to connect through a particular Connection Server instance.
Considerations and Limitations for Restricted Entitlements
Before implementing restricted entitlements, you must be aware of certain considerations and limitations.
nA single Connection Server instance or desktop pool can have multiple tags.
nMultiple Connection Server instances and desktop pools can have the same tag.
nAny Connection Server instance can access a desktop pool that does not have any tags.
nConnection Server instances that do not have any tags can access only desktop pools that also do
not have any tags.
nIf you use a security server, you must configure restricted entitlements on the Connection Server
instance with which the security server is paired. You cannot configure restricted entitlements on a
security server.
nYou cannot modify or remove a tag from a Connection Server instance if that tag is still assigned to a
desktop pool and no other Connection Server instances have a matching tag.
nRestricted entitlements take precedence over other desktop entitlements or assignments. For
example, even if a user is assigned to a particular machine, the user cannot access that machine if
the tag assigned to the desktop pool does not match the tag assigned to the Connection Server
instance to which the user is connected.
nIf you intend to provide access to your desktops through VMware Identity Manager and you configure
Connection Server restrictions, the VMware Identity Manager app might display desktops to users
when those desktops are actually restricted. When a VMware Identity Manager user attempts to log in
to a desktop, the desktop does not start if the tag assigned to the desktop pool does not match the
tag assigned to the Connection Server instance to which the user is connected.
Assign a Tag to a Connection Server Instance
When you assign a tag to a Connection Server instance, users who connect to that Connection Server
instance can access only those desktop pools that have a matching tag or no tags.
Procedure
1In Horizon Administrator, select View Configuration > Servers.
Setting Up Published Desktops and Applications in Horizon 7
VMware, Inc. 86

2Click the Connection Servers tab, select the Connection Server instance, and click Edit.
3Type one or more tags in the Tags text box.
Separate multiple tags with a comma or semicolon.
4Click OK to save your changes.
What to do next
Assign the tag to desktop pools. See Assign a Tag to a Desktop Pool.
Assign the tag to application pools. See Assign a Tag to an Application Pool.
Assign a Tag to a Desktop Pool
When you assign a tag to a desktop pool, only users who connect to a Connection Server instance that
has a matching tag can access the desktops in that pool.
You can assign a tag when you add or edit a desktop pool.
Prerequisites
Assign tags to one or more Connection Server instances.
Procedure
1In Horizon Administrator, select Catalog > Desktop Pools.
2Select the desktop pool.
Option Action
Assign a tag to a new pool Click Add to start the Add Desktop Pool wizard and define and identify the pool.
Assign a tag to an existing pool Select the pool and click Edit.
3Go to the Desktop Pool Settings page.
Option Action
Pool settings for a new pool Click Desktop Pool Settings in the Add Desktop Pool wizard.
Pool settings for an existing pool Click the Desktop Pool Settings tab.
4Click Browse next to Connection Server restrictions and configure the Connection Server
instances that can access the desktop pool.
Option Action
Make the pool accessible to any
Connection Server instance
Select No Restrictions.
Make the pool accessible only to
Connection Server instances that have
those tags
Select Restricted to these tags and select one or more tags. You can use the
check boxes to select multiple tags.
5Click OK to save your changes.
Setting Up Published Desktops and Applications in Horizon 7
VMware, Inc. 87

Assign a Tag to an Application Pool
When you assign a tag to an application pool, only users who connect to a Connection Server instance
that has a matching tag can access the applications in that pool.
You can assign a tag when you add or edit an application pool.
Prerequisites
Assign tags to one or more Connection Server instances.
Procedure
1In Horizon Administrator, select Catalog > Application Pools.
2Select the application pool.
Option Action
Assign a tag to a new pool Click Add to start the Add Application Pool wizard and define and identify the
pool.
Assign a tag to an existing pool Select the pool and click Edit.
3Click Browse next to Connection Server restrictions and configure the Connection Server
instances that can access the application pool.
Option Action
Make the pool accessible to any
Connection Server instance
Select No Restrictions.
Make the pool accessible only to
Connection Server instances that have
those tags
Select Restricted to these tags and select one or more tags. You can use the
check boxes to select multiple tags.
4Click OK to save your changes.
Restricting Remote Desktop Access Outside the Network
You can allow access to specific entitled users and groups from an external network while restricting
access to other entitled users and groups. All entitled users will have access to desktops and applications
from within the internal network. If you choose not to restrict access to specific users from the external
network, then all entitled users will have access from the external network.
For security reasons, administrators might need to restrict users and groups outside the network from
accessing remote desktops and applications inside the network. When a restricted user accesses the
system from an external network, a message stating that the user is not entitled to use the system
appears. The user must be inside the internal network to get access to desktop and application pool
entitlements.
Setting Up Published Desktops and Applications in Horizon 7
VMware, Inc. 88
Restrict Users Outside the Network
You can allow access to the View Connection Server instance from outside the network to users and
groups while restricting access for other users and groups.
Prerequisites
nAn Access Point appliance, security server, or load balancer must be deployed outside the network
as a gateway to the View Connection Server instance to which the user is entitled. For more
information about deploying an Access Point appliance, see the Deploying and Configuring Access
Point document.
nThe users who get remote access must be entitled to desktop or application pools.
Procedure
1In View Administrator, select Users and Groups.
2Click the Remote Access tab.
3Click Add and select one or more search criteria, and click Find to find users or groups based on
your search criteria.
4To provide remote access for a user or group, select a user or group and click OK.
5To remove a user or group from remote access, select the user or group, click Delete, and click OK.
Setting Up Published Desktops and Applications in Horizon 7
VMware, Inc. 89
