Installation Instructions
User Manual: Pdf
Open the PDF directly: View PDF ![]() .
.
Page Count: 2
4/1/2018 proquestcombo.safaribooksonline.com.ezproxy.torontopubliclibrary.ca/print?xmlid=9781491962282%2Fidm139991228904080_html
http://proquestcombo.safaribooksonline.com.ezproxy.torontopubliclibrary.ca/print?xmlid=9781491962282%2Fidm139991228904080_html 1/2
Username: Toronto Public Library Book: Hands-On Machine Learning with Scikit-Learn and TensorFlow. No part of any chapter or book may be reproduced or
transmitted in any form by any means without the prior written permission for reprints and excerpts from the publisher of the book or chapter. Redistribution or
other use that violates the fair use privilege under U.S. copyright laws (see 17 USC107) or that otherwise violates these Terms of Service is strictly prohibited.
Violators will be prosecuted to the full extent of U.S. Federal and Massachusetts laws.
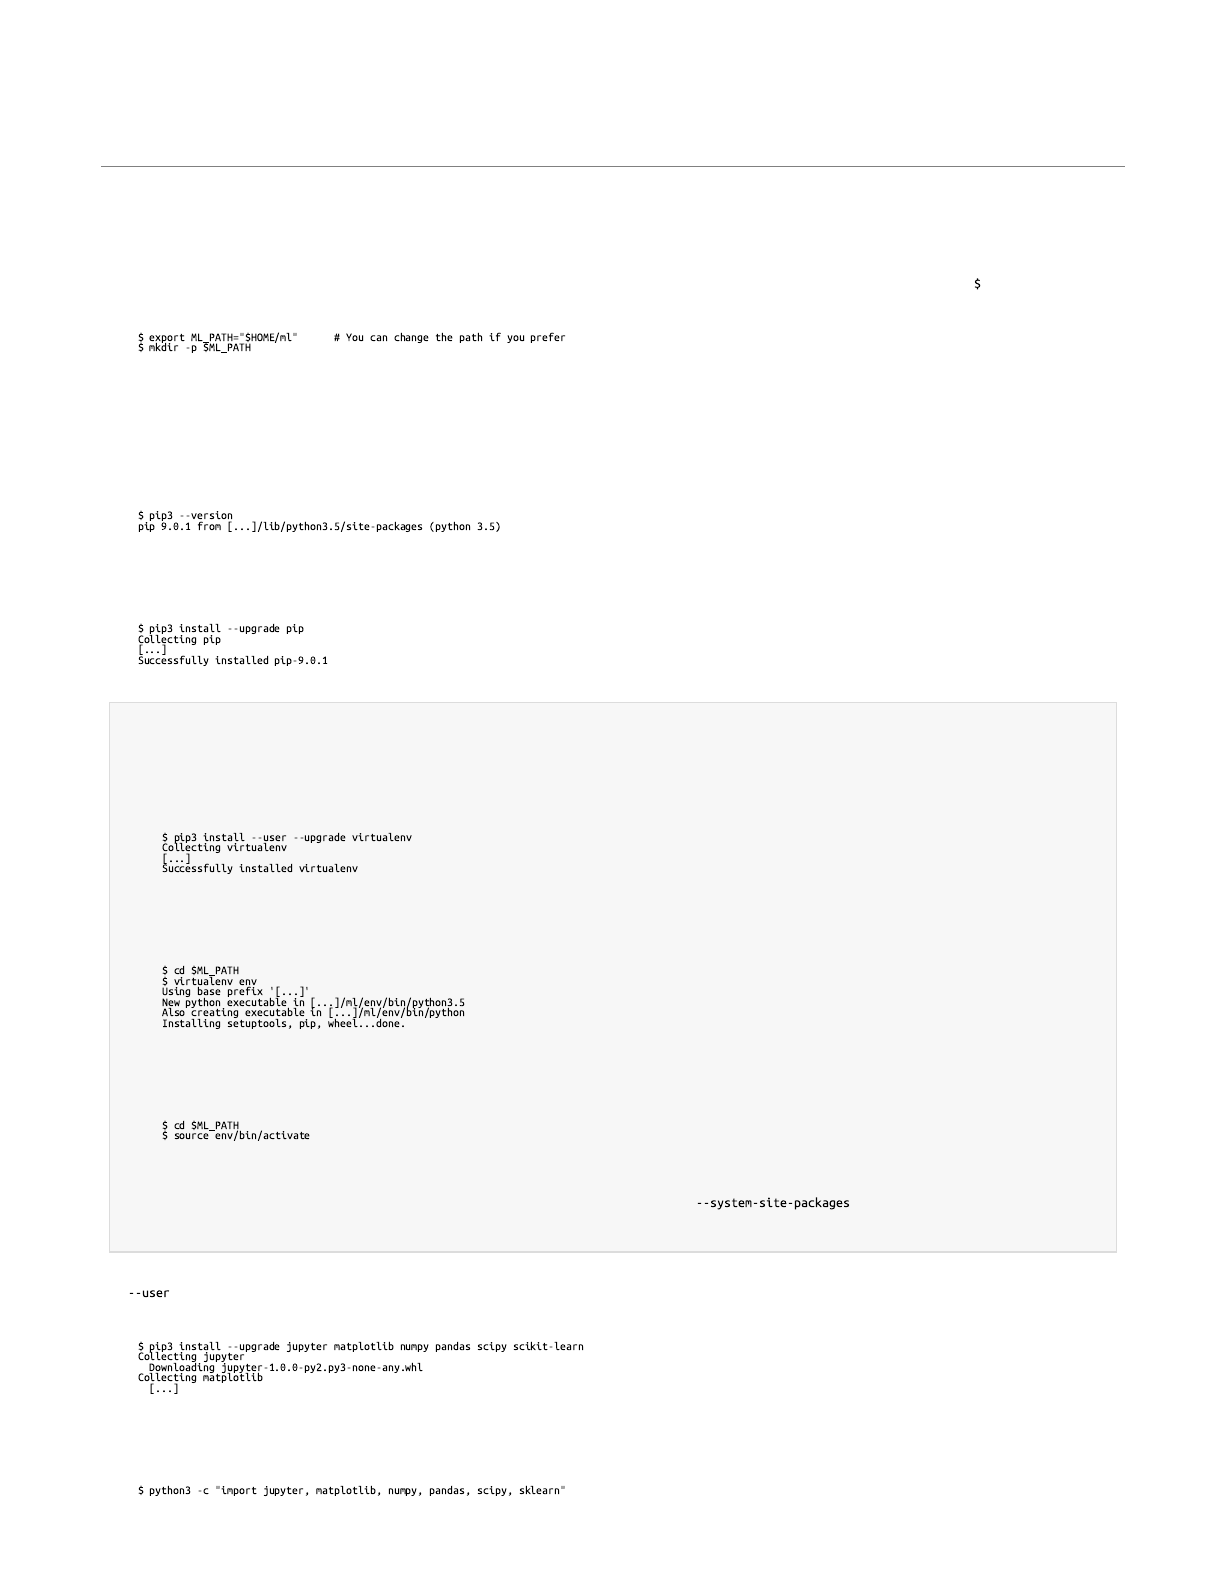
Create the Workspace
First you will need to have Python installed. It is probably already installed on your system. If not, you can get it at https://www.python.org/.
Next you need to create a workspace directory for your Machine Learning code and datasets. Open a terminal and type the following commands (after the prompts):
You will need a number of Python modules: Jupyter, NumPy, Pandas, Matplotlib, and Scikit-Learn. If you already have Jupyter running with all these modules installed, you can
safely skip to “Download the Data”. If you don’t have them yet, there are many ways to install them (and their dependencies). You can use your system’s packaging system (e.g.,
apt-get on Ubuntu, or MacPorts or HomeBrew on macOS), install a Scientific Python distribution such as Anaconda and use its packaging system, or just use Python’s own
packaging system, pip, which is included by default with the Python binary installers (since Python 2.7.9). You can check to see if pip is installed by typing the following
command:
You should make sure you have a recent version of pip installed, at the very least >1.4 to support binary module installation (a.k.a. wheels). To upgrade the pip module, type:
C R E AT I N G A N I S O L AT E D E N V I R O N M E N T
If you would like to work in an isolated environment (which is strongly recommended so you can work on different projects without having conflicting library versions),
install virtualenv by running the following pip command:
Now you can create an isolated Python environment by typing:
Now every time you want to activate this environment, just open a terminal and type:
While the environment is active, any package you install using pip will be installed in this isolated environment, and Python will only have access to these packages (if you
also want access to the system’s site packages, you should create the environment using virtualenv’s option). Check out virtualenv’s
documentation for more information.
Now you can install all the required modules and their dependencies using this simple pip command (if you are not using a virtualenv, you will need administrator rights, or to add
the option):
To check your installation, try to import every module like this:
5
6
7
4/1/2018 proquestcombo.safaribooksonline.com.ezproxy.torontopubliclibrary.ca/print?xmlid=9781491962282%2Fidm139991228904080_html
http://proquestcombo.safaribooksonline.com.ezproxy.torontopubliclibrary.ca/print?xmlid=9781491962282%2Fidm139991228904080_html 2/2
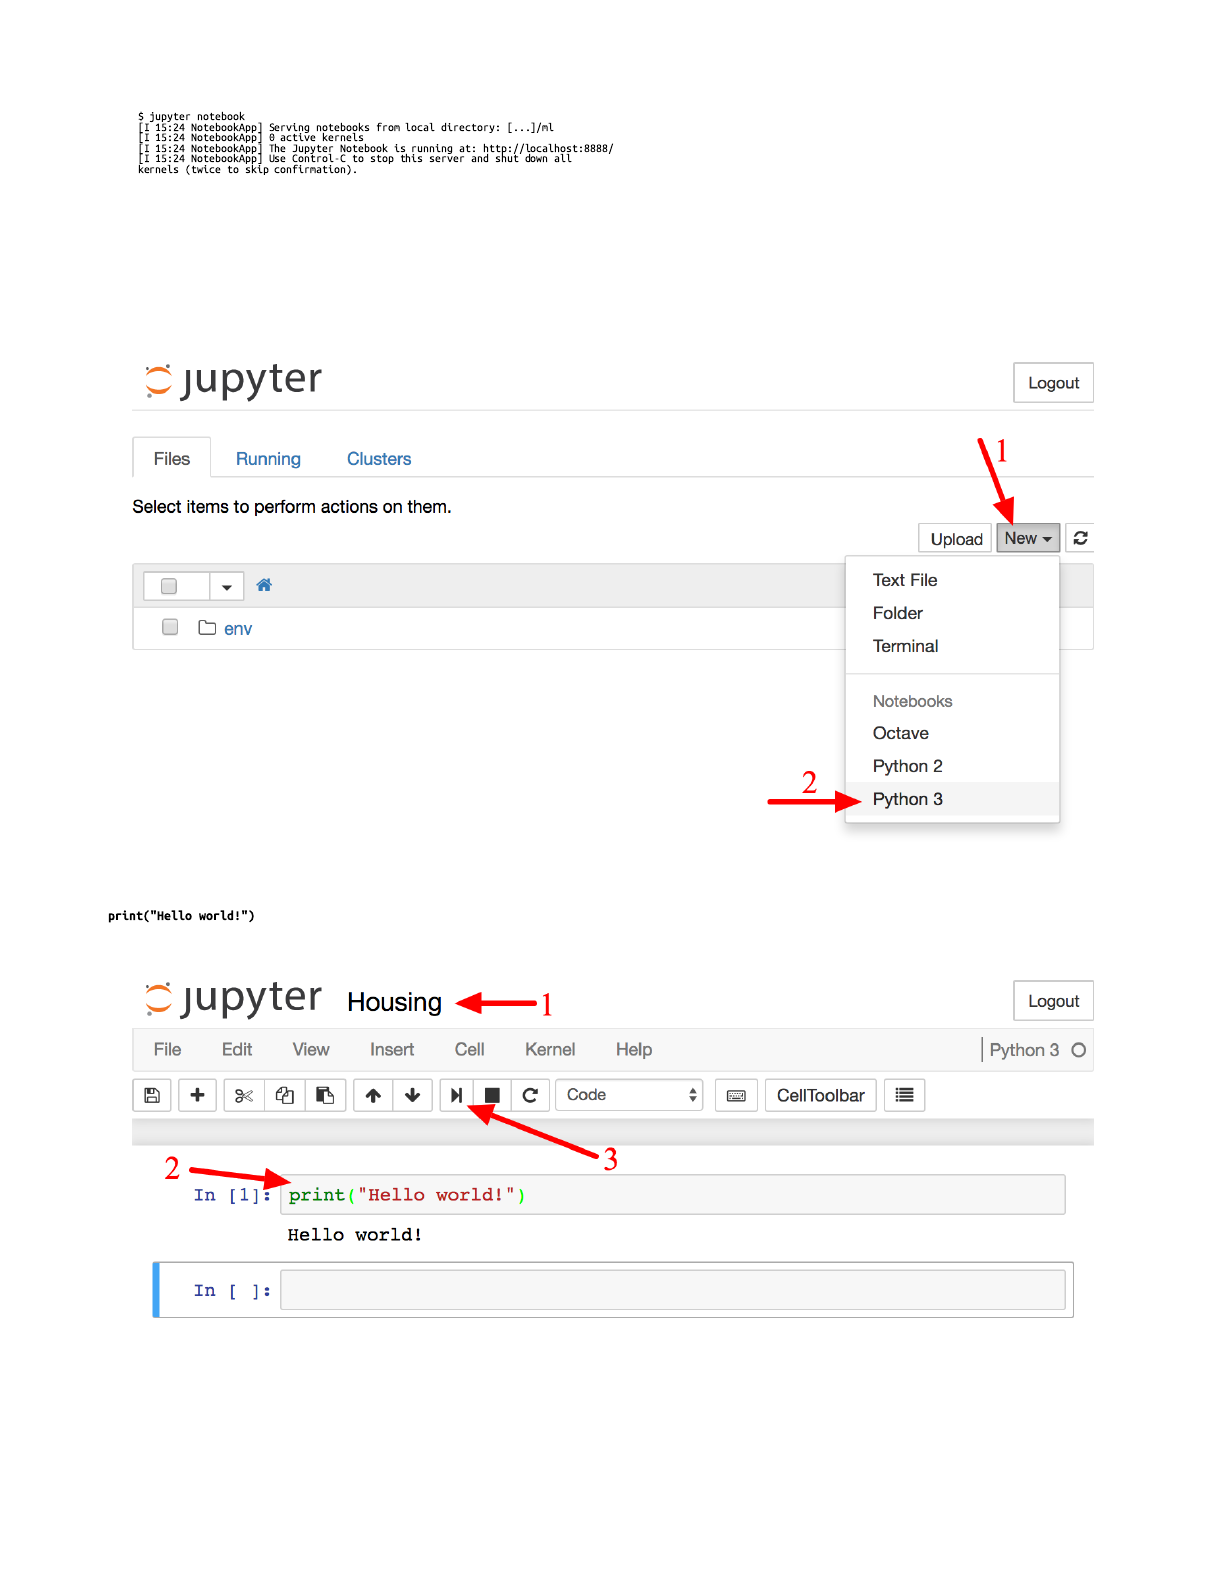
There should be no output and no error. Now you can fire up Jupyter by typing:
A Jupyter server is now running in your terminal, listening to port 8888. You can visit this server by opening your web browser to http://localhost:8888/ (this usually happens
automatically when the server starts). You should see your empty workspace directory (containing only the env directory if you followed the preceding virtualenv instructions).
Now create a new Python notebook by clicking on the New button and selecting the appropriate Python version (see Figure2-3).
This does three things: first, it creates a new notebook file called Untitled.ipynb in your workspace; second, it starts a Jupyter Python kernel to run this notebook; and third, it opens
this notebook in a new tab. You should start by renaming this notebook to “Housing” (this will automatically rename the file to Housing.ipynb) by clicking Untitled and typing the
new name.
Figure 2-3. Your workspace in Jupyter
A notebook contains a list of cells. Each cell can contain executable code or formatted text. Right now the notebook contains only one empty code cell, labeled “In [1]:”. Try typing
in the cell, and click on the play button (see Figure2-4) or press Shift-Enter. This sends the current cell to this notebook’s Python kernel, which runs it
and returns the output. The result is displayed below the cell, and since we reached the end of the notebook, a new cell is automatically created. Go through the User Interface Tour
from Jupyter’s Help menu to learn the basics.
Figure 2-4. Hello world Python notebook
8
