Sentinel Mac OS Installation Guide
User Manual: Pdf
Open the PDF directly: View PDF ![]() .
.
Page Count: 11
SENTINEL
VPN instructions for Mac OS X
This has been tested on a new Mac running 10.13.4 in an administrator’s account (i.e
not a standard Mac OS account)
1. First, download the latest Sentinel alpha client from here:
https://github.com/sentinel-official/sentinel/releases
This worked with version 0.0.32 Alpha as stated.
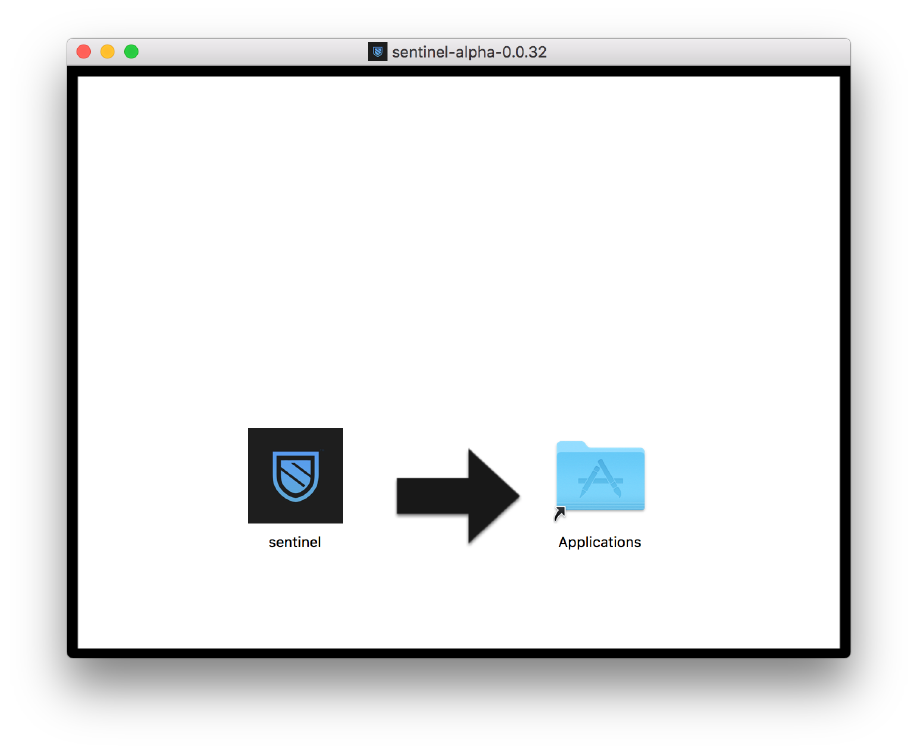
2. After downloading you should see the following window. Drag the application to the
Applications folder.
3. Download Home-brew by visiting https://brew.sh/ and copying (command-c) the
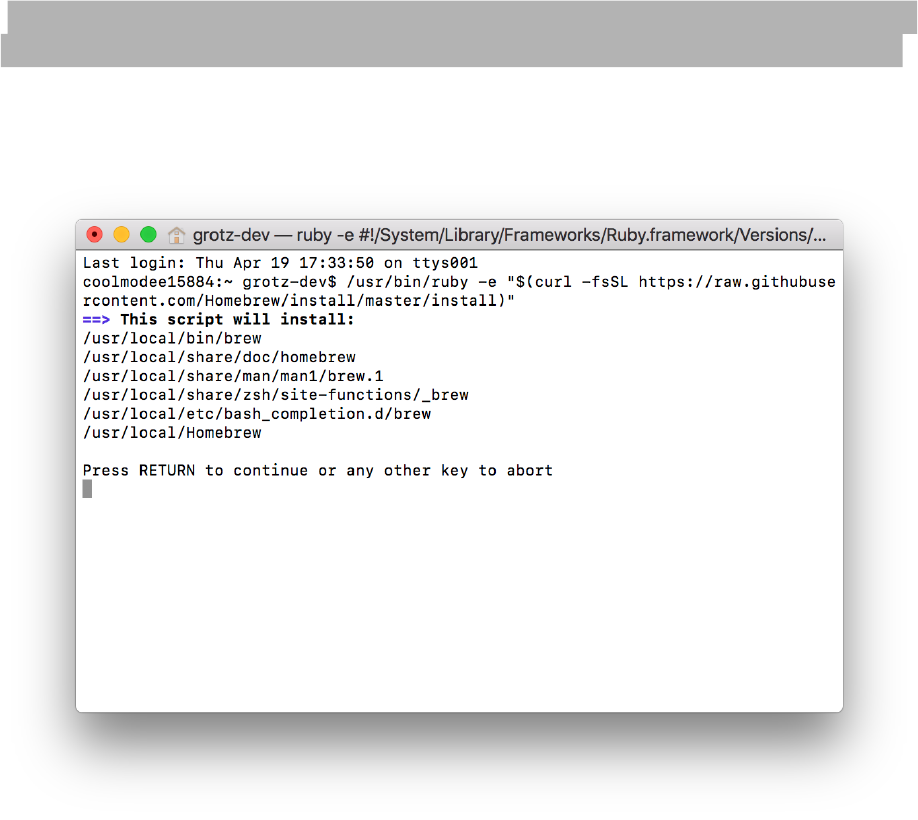
command listed under “Install Homebrew”:
Currently it is this:
/usr/bin/ruby -e "$(curl -fsSL https://
raw.githubusercontent.com/Homebrew/install/master/install)"
4. Open Terminal located in Applications->Utilities and paste the selected text in an
empty window. You should see text output similar to this:
Hit RETURN and authenticate with your admin password when asked.
The program may also install OS X Command Line tools. Once this is completed, feel
free to quit Terminal.
5. Open the Applications folder and right click on the Sentinel application and select
Show Package Contents
6. Then, open Contents —> MacOS and run the package called sentinel.
***IMPORANT*** this will also launch a Terminal window in the background. Do
not close this window or the associated process will fail!
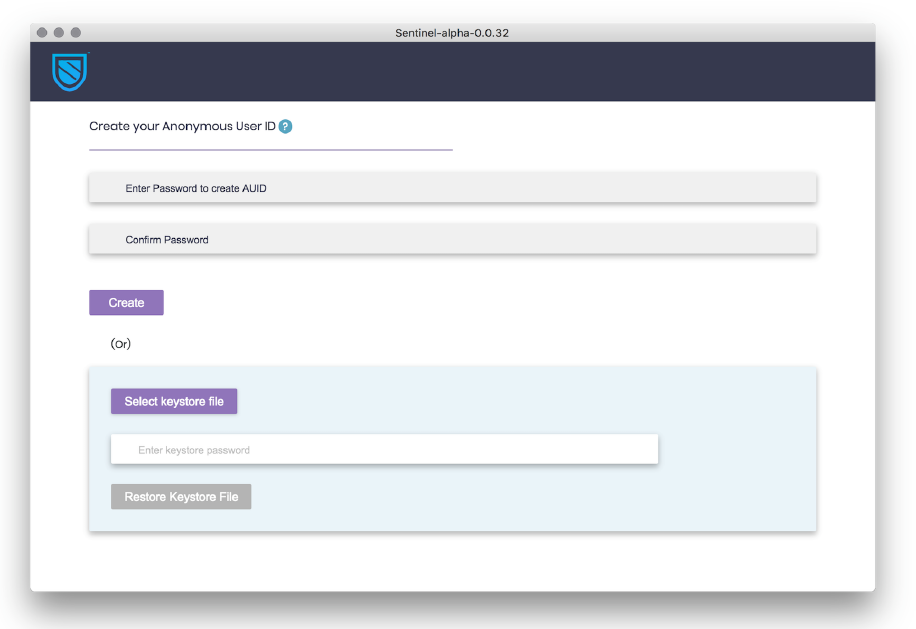
7. Upon initial launch, you’ll see the following, where you’ll be promoted to create or

restore a wallet.
8. Click create/restore and you’ll be presented with the following. Remember your
password on this one, as you’ll need it each time you run Sentinel VPN:
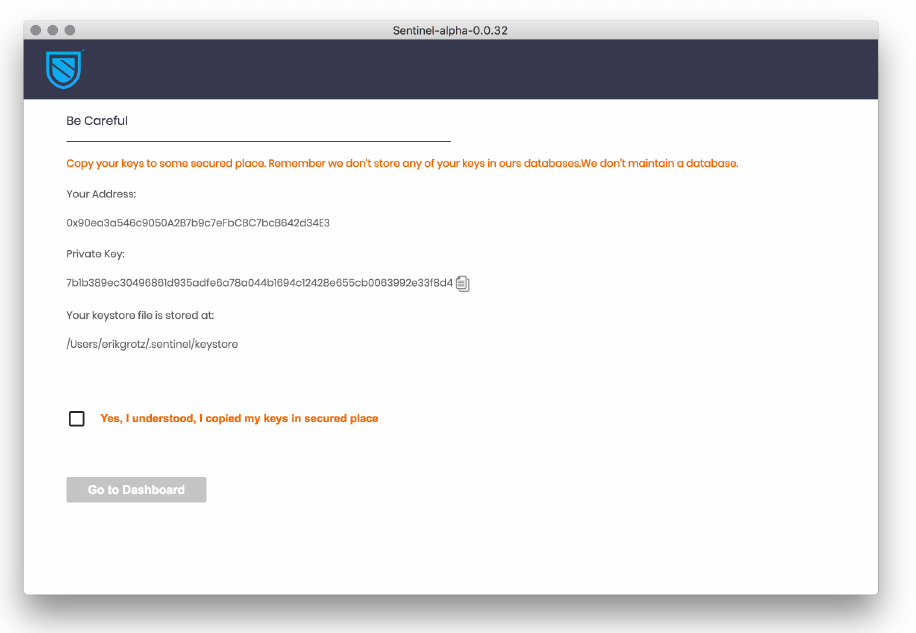
9. The next screen shows you your address, private keys and location of your keystone
file should you need to restore the wallet. Once key/wallet is copied, click yes and
continue to dashboard
10. Once complete, you should see the following screen:
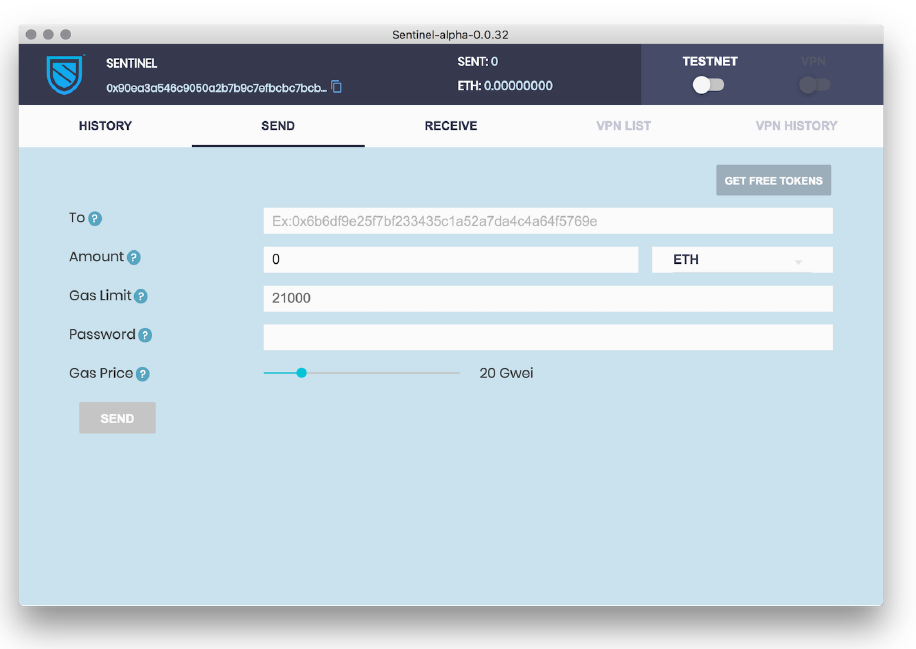
11. Now it’s time to get some TEST SENT to allow us to use the VPN.
Click on the Send screen, enable TESTNET (at the top) and click “GET FREE
TOKENS” and wait a few minutes to receive the tokens:
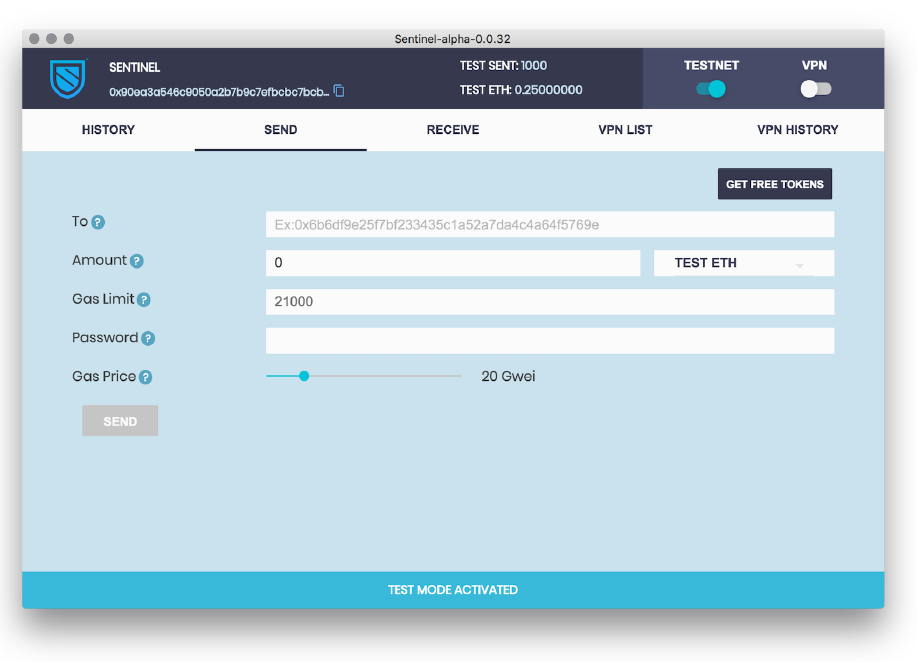
To make sure tokens were received, feel free to disable, then re-enable the TESTNET.
You should see a balance of approximately 1000 TEST SENT.
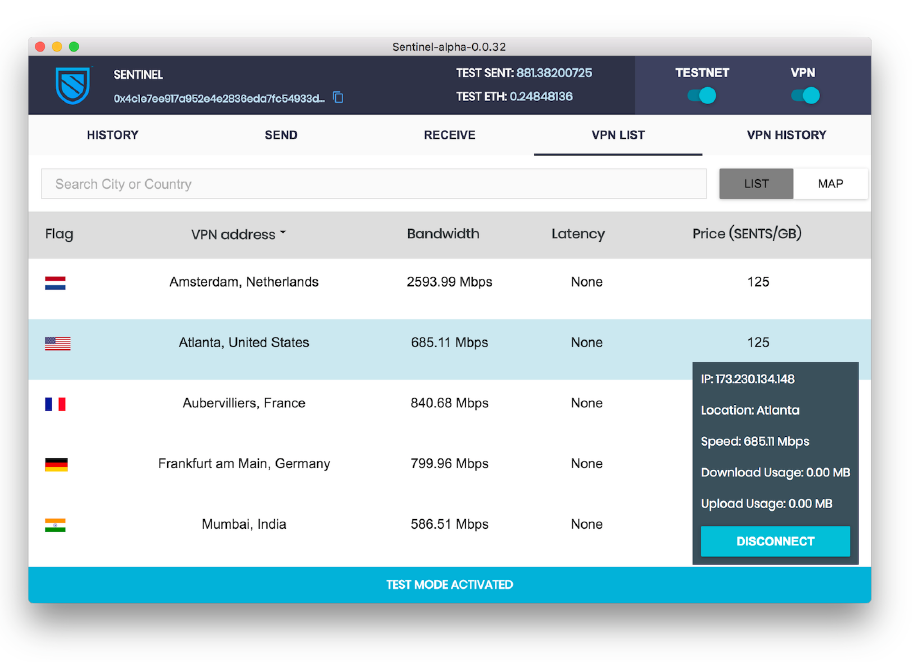
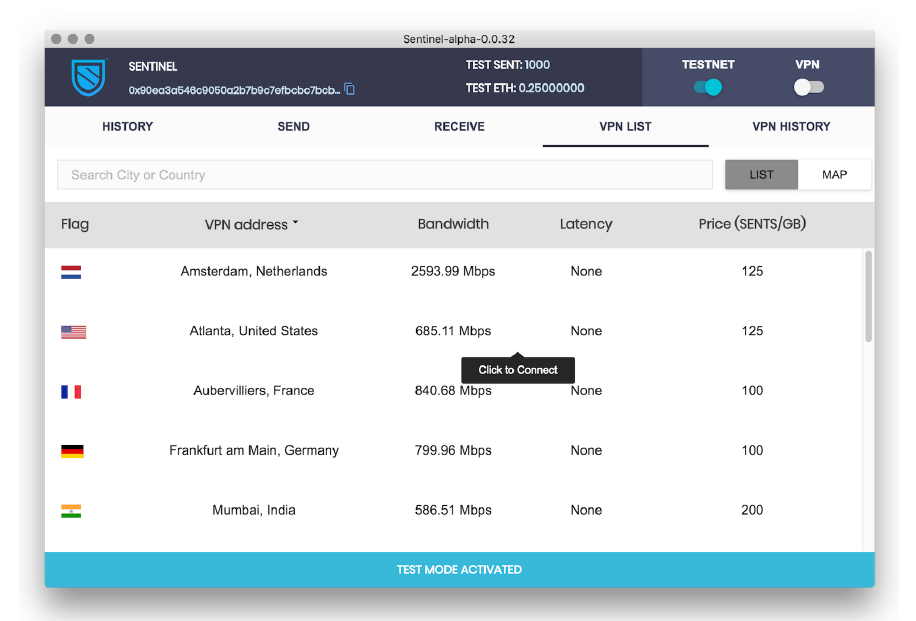
12. Click on the VPN slider at top where you’ll be presented with a list of available VPN
locations: Choose anyone you like at this point, then choose CONNECT:

13. You will be prompted to send 100 TEST SENT tokens, and be back at the SEND
screen:

Go ahead and click PAY and wait a few minutes for the transaction to go through. You
should notice your TEST SENT balance is now at 900.
13. Click the VPN slider (at top) again and you’ll now be presented with the same list of
VPN options. You may choose any VPN in the list but keep in mind that the closer they
are the faster the connection:
Click CONNECT and you should eventually see a corner popup notifying you of your
connection status: