PerComm 1100 e80 2-way pager User Manual E80 Reference R2
PerComm Inc e80 2-way pager E80 Reference R2
PerComm >
Contents
- 1. Quick Guide
- 2. Reference Manual
Reference Manual
REVISION 2: 3/10/03
e80 Personal Messaging Device
Reference Guide

e80 Personal Messaging Device Reference Guide
2 REVISION 2: 3/10/03 © 2003 PerComm, Inc.
© Copyright 2003 PerComm, Inc. All rights reserved.

e80 Personal Messaging Device Reference Guide
© 2003 PerComm, Inc. REVISION 2: 3/10/03 3
Contents
1. Safety Information and FCC
Compliance........................................... 4
1.1 RF Operational Characteristics .................... 4
1.2 Exposure to Radio Frequency Energy ......... 4
1.3 e80 Device Operation and EME Exposure .. 4
1.4 Safety and General Information ................... 5
1.5 Operational Warnings................................... 5
1.6 Operational Cautions.................................... 6
1.7 FCC Compliance .......................................... 6
2. Getting Started .....................................7
2.1 Unpacking Your e80 Device......................... 7
2.2 Installing the Battery..................................... 7
2.3 Charging the Battery .................................... 8
2.4 Attaching the Lanyard .................................. 8
3. About Your e80 Personal Messaging
Device ................................................... 9
3.1 The External Connector ............................... 9
3.2 The Back Light ............................................. 9
3.3 The LCD Display ........................................ 10
3.4 The Joystick: Navigating in Different Modes11
3.5 The Keyboard............................................. 12
3.6 Navigation Conventions in this Manual ...... 13
4. Setting Up Your e80 Device .............. 14
4.1 Viewing System Information....................... 14
4.2 Entering Owner Information ....................... 15
4.3 Setting Date and Time................................ 15
4.4 Turning Your e80 Device Off and On......... 16
5. Sending Messages............................. 17
5.1 Entering an Address Manually ................... 17
5.2 Selecting a Contact from the Address Book17
5.3 Editing or Adding a Manual Address Entry 18
5.4 Composing your Message.......................... 18
5.5 Sending your Message............................... 19
6. Managing Incoming Messages .........20
6.1 Reading a Message ................................... 20
6.2 Replying to a Message............................... 20
6.3 Forwarding a Message............................... 21
6.4 Deleting Messages..................................... 21
7. Managing Outgoing Messages .........22
7.1 Reviewing Sent Messages......................... 22
7.2 Canceling a Sent Message ........................ 22
7.3 Resending a Message................................ 22
7.4 Deleting Messages..................................... 22
8. Other Messaging Options................. 23
8.1 Creating Quick Text for Messages..............23
8.2 Customizing the New Message Alert..........24
8.3 Setting a Message Timestamp ...................25
8.4 Creating an Automatic Signature................25
8.5 Saving Messages in the Personal Folder ...26
9. Managing the Address Book ............ 27
9.1 Adding a Contact to the Address Book.......27
9.2 Adding a Group to the Address Book .........28
9.3 Viewing Contact or Group Information........29
9.4 Editing a Contact or Group .........................29
9.5 Deleting a Contact or Group .......................30
9.6 Forwarding a Contact..................................30
9.7 Customizing your Address Book.................30
10. Reading News .................................... 32
10.1 Reading a News Message ..........................32
10.2 Forwarding News ........................................32
10.3 Deleting News .............................................32
10.4 Reordering News Folders ...........................34
10.5 Customizing News Alerts ............................34
10.6 Saving News in the News Archive Folder...35
11. Creating and Managing Memos ....... 36
11.1 Creating a Memo.........................................36
11.2 Viewing a Memo..........................................36
11.3 Editing a Memo ...........................................36
11.4 Deleting a Memo.........................................37
11.5 Inserting a Memo into a Message...............37
12. Managing Personal Folders.............. 38
12.1 Creating a New Subfolder for Mail or News
Messages....................................................38
12.2 Editing a Subfolder Name ...........................39
12.3 Deleting Subfolders.....................................39
13. Setting Personal Options.................. 40
13.1 Setting Up the Alarm Clock.........................40
13.2 Alarm Alerts.................................................41
13.3 Setting Private Time....................................42
13.4 Customizing Display Features ....................42
14. Maintenance....................................... 44
14.1 General Care...............................................44
14.2 Battery Care................................................44
14.3 Charging the Battery ...................................44
14.4 Removing and Replacing the Battery .........44
15. Troubleshooting ................................ 46
16. Index ................................................... 47

e80 Personal Messaging Device Reference Guide
4 REVISION 2: 3/10/03 © 2003 PerComm, Inc.
1. Safety Information and FCC Compliance
IMPORTANT INFORMATION ON SAFE AND EFFICIENT OPERATION.
READ THIS INFORMATION BEFORE USING YOUR e80 PERSONAL MESSAGING DEVICE.
1.1 RF Operational Characteristics
Your e80 Personal Messaging Device contains a transmitter and a receiver. When it is ON, it receives
and transmits radio frequency (RF) energy. The e80 device operates in the frequency range of 900 MHz
to 1990 MHz and employs digital modulation techniques.
When you communicate with your e80 device, the system handling your call controls the power level at
which your e80 device transmits. The output power level typically may vary over a range from 0.063
watts to 1.58 watts.
1.2 Exposure to Radio Frequency Energy
Your e80 device is designed to comply with the United States Federal Communications Commission,
Code of Federal Regulations; 47 CFR part 2 sub-part J guidelines regarding exposure of human beings to
radio frequency electromagnetic energy:
To assure optimal e80 device performance and make sure human exposure to radio frequency
electromagnetic energy is within the guidelines set forth in the above standards, always adhere to the
following procedures:
1.3 e80 Device Operation and EME Exposure
Body-worn Operation
To maintain compliance with FCC RF exposure guidelines, if you wear an e80 device on your body when
transmitting, always place the e80 device in a PerComm supplied or approved holster. Use of non-
PerComm-approved accessories may exceed FCC RF exposure guidelines. If you do not use a body-
worn accessory, ensure the device is at least 0.5 cm from your body when transmitting.
Electromagnetic Interference/Compatibility
Note: Nearly every electronic device is susceptible to electromagnetic interference (EMI) if inadequately
shielded, designed or otherwise configured for electromagnetic compatibility.
• PUBLIC FACILITIES
To avoid electromagnetic interference and/or compatibility conflicts, turn off your e80 device in any
facility where posted notices instruct you to do so. Hospitals or health care facilities may be using
equipment that is sensitive to external RF energy.
• AIRCRAFT
When instructed to do so, turn off your e80 device when on board an aircraft. Any use of an e80
device must be in accordance with applicable regulations per airline crew instructions.
• MEDICAL DEVICES
Pacemakers: The Health Industry Manufacturers Association recommends that a minimum
separation of 6 inches (15 centimeters) be maintained between a handheld wireless communication
device and a pacemaker. These recommendations are consistent with the independent research by,
and recommendations of, Wireless Technology Research.
Persons with pacemakers should:

e80 Personal Messaging Device Reference Guide
© 2003 PerComm, Inc. REVISION 2: 3/10/03
5
• ALWAYS keep the e80 device more than six inches (15 centimeters) from their pacemaker when
the e80 device is turned ON.
• Not carry the e80 device in the breast pocket.
• Use the ear opposite the pacemaker to minimize the potential for interference.
• Turn the e80 device OFF immediately if you have any reason to suspect that interference is
taking place.
Hearing Aids: Some digital wireless e80 devices may interfere with some hearing aids. In the event
of such interference, you may want to consult your hearing aid manufacturer to discuss alternatives.
Other Medical Devices: If you use any other personal medical device, consult the manufacturer of
your device to determine if it is adequately shielded from RF energy. Your physician may be able to
assist you in obtaining this information.
1.4 Safety and General Information
Use While Driving
Check the laws and regulations on the use of wireless communication devices in the area where you
drive. Always obey them. When using your e80 device while driving, please:
• Give full attention to driving and to the road.
• Pull off the road and park before sending or responding to a message.
1.5 Operational Warnings
For Vehicles with an Air Bag
Do not place a portable e80 device in the area over an air bag or in the air bag deployment area. Air bags
inflate with great force. If the e80 device is placed in the air bag deployment area and the air bag inflates,
the e80 device may be propelled with great force and cause serious injury to occupants of the vehicle.
Potentially Explosive Atmospheres
Turn off your e80 device prior to entering any area with a potentially explosive atmosphere. Do not
remove, install, or charge batteries in such areas. Sparks in a potentially explosive atmosphere can cause
an explosion or fire resulting in bodily injury or even death.
Important: The areas with potentially explosive atmospheres referred to above include fueling areas
such as below decks on boats, fuel or chemical transfer or storage facilities, areas where the air contains
chemicals or particles, such as grain, dust or metal powders, and any other area where you would
normally be advised to turn off your vehicle engine. Areas with potentially explosive atmospheres are
often but not always posted.
Blasting Caps and Blasting Areas
To avoid possible interference with blasting operations, turn off your e80 device when you are near
electrical blasting caps, in a blasting area, or in areas posted: “Turn off two-way radio.” Obey all signs and
instructions.

e80 Personal Messaging Device Reference Guide
6 REVISION 2: 3/10/03 © 2003 PerComm, Inc.
1.6 Operational Cautions
Batteries
The PerComm lithium ion battery contains a built-in protection circuit, however, all batteries can cause
property damage and/or bodily injury such as burns if a conductive material such as jewelry, keys, or
beaded chains touches exposed terminals. The conductive material may complete an electrical circuit
(short circuit) and become quite hot. Exercise care in handling any charged battery, particularly when
placing it inside a pocket, purse, or other container with metal objects.
1.7 FCC Compliance
This device complies with part 15 of the FCC Rules. Operation is subject to the following two conditions:
1. This device may not cause harmful interference
2. This device must accept any interference received, including interference that may cause
undesired operation.
This device has been tested and found to comply with the limits for a Class B digital device, pursuant to
part 15 of the FCC Rules. These limits are designed to provide reasonable protection against harmful
interference in a residential installation. This device generates, uses and can radiate readio frequency
energy and, if not setup and used in accordance with the instructions, may cause harmful interference to
radio communications. However, there is no guarantee that interference will not occur due to a particular
use of the device. If this device does cause harmful interference to radio or television reception, which
can be determined by turning the device off and on, the user is encouraged to try to correct the
interference by one or more of the following measures:
• Reorient or relocate the receiving antenna
• Increase the separation between the device and receiver
• Connect the device into an outlet on a circuit different from that which the receiver is connected
• Consult the dealer or an experienced radio/TV technician for help.

e80 Personal Messaging Device Reference Guide
© 2003 PerComm, Inc. REVISION 2: 3/10/03
7
2. Getting Started
2.1 Unpacking Your e80 Device
Figure showing
E80 parts and
accessories
Your e80 device comes with the following parts and accessories:
• PerComm 3.6V lithium ion battery
• Wall mount charger and power cable
• Holster
• Lanyard cord
• CD-ROM
• e80 Device Quick Start Guide
• Optional RS232-compatible serial cable.
2.2 Installing the Battery
The battery cabinet is protected by a battery cover that can be removed by pressing down on the thumb
grip and sliding outwards. The cabinet itself is designed expressly for PerComm lithium ion batteries, and
does not accept any other type of battery. Attempting to use any other type of battery will cause damage
to your e80 device.
Figure showing
battery cover
being removed
1. On the rear side of the e80 device, remove the battery cover by
pressing down and outwards (in the direction of the arrows
imprinted on the cover) on the cover thumb grip.
Figure showing
battery being
installed
2. Position the PerComm lithium ion battery in the cabinet opening as
follows:
• the metal contacts on the back of the battery line up with the
metal contacts inside the cabinet
• the label is facing upwards
• the battery is at a 30° angle, the lower edge against the L-
shaped spring mechanism inside the battery cabinet.
Figure showing
battery being
installed
3. Press downwards with one finger or thumb on the word
“PERCOMM” on the battery, and with the other hand push the upper
edge of the battery down and into the cabinet, so that the tabs on
the edges of the battery fit into the appropriate cabinet slots. The
battery should snap into place, with the labeled side facing
upwards.
CAUTION: Do not force the battery in; if properly lined up it should slide
in easily.
Figure showing
battery cover
being replaced
4. Place the battery cover on top of the battery with the cover lugs
fitting into the cabinet slots and leaving a gap of approximately 0.2”
(0.5 cm) between the leading edge of the cover and the cabinet,
and then push the cover tongue into place.
When a charged PerComm battery is installed, the e80 device turns on
automatically and the Main Menu appears in the LCD display.
CAUTION: You can only use a PerComm battery in your e80 device. Use of any other type of battery
may cause damage to your e80 device.

e80 Personal Messaging Device Reference Guide
8 REVISION 2: 3/10/03 © 2003 PerComm, Inc.
2.3 Charging the Battery
You must charge the PerComm battery before using the e80 device for the first time.
Figure showing
power cord being
inserted
5. Plug the power cable into the right side of the external connector on
your e80 device.
The power cable has a special connector specifically for the power
connector on the e80 device (see Figure 1 on page 9).
6. Plug the power supply into any 110 AC power outlet.
The Battery Charging screen will appear on the LCD display. It will
show the progress of the battery charging and indicate when
charging is complete.
Figure showing
battery charging
indicator
7. When charging is complete, unplug the e80 device from the power
cable by tilting the connector plug up or down before pulling it out.
The plug comes out easily when snapped up or down; it is designed
not to come out easily when pulled away from the e80 connector.
You are now ready to begin using your e80 device.
2.4 Attaching the Lanyard
A post is provided on the left side edge of the e80 device (with the display and keyboard facing towards
you) for attaching the lanyard.
e80 Personal Messaging Device Reference Guide
© 2003 PerComm, Inc. REVISION 2: 3/10/03
9
3. About Your e80 Personal Messaging Device
The main features of your e80 device are the LCD display and the keyboard on the front panel, the
external connector on the front edge, and the battery cabinet on the rear. Figure 1 below shows the front
panel and front and side edges of the e80 device.
LCD display
PerComm
ENTER
ESCMENUDELALT
CAPS
SPACE
QWE
AS
RT
G
F
VB
H
YUI
K
N
L
,
M
J
OP
.
C
ZX
D
Lanyard
attachment post
Serial connector uses
entire external connector
Joystick
Power
connector here
Figure 1: e80 Device Front Panel
3.1 The External Connector
An external connector is located on the front edge of your e80 device. You can plug in either the AC/DC
power transformer cable to charge or recharge your battery, or the serial cable to connect to a PC to
exchange information between your e80 device and the computer. The serial connector plug uses the
entire external connector; the power connector plug only uses the right side.
3.2 The Back Light
The LCD display and keyboard keys can be backlit for use in low light conditions. Use the ESC key to turn
the back light on and off.
1. To turn ON the back light, press ESC and hold down for 2 sec. Until the back light appears.
The LCD display and all key labels are clearly visible even in complete darkness.
2. To turn OFF the back light, press ESC and hold down 2 sec. until back light disappears.
The back light will turn off automatically after the device has been in idle mode for a period of time (you
can specify the idle time length in the Preferences menu).
e80 Personal Messaging Device Reference Guide
10 REVISION 2: 3/10/03 © 2003 PerComm, Inc.
3.3 The LCD Display
As soon as you insert a charged PerComm battery in your e80 device, the LCD screen will show a
display of icons in two groups. The larger icons to the left are the Main Menu; the smaller icons to the
right are the Status Indicators.
The Main Menu
The Main Menu displays icons that allow you to select the different functions of your e80 device. In the
order that they appear (left to right, top to bottom), the icons represent the following functions:
Selecting this Icon… displays….
SEND A MESSAGE The compose message screen
INBOX The contents of the Message Inbox (received messages)
NEWS The News submenu (News folders)
OUTBOX The contents of the message Outbox (sent messages)
FOLDER The Folders submenu of main folders
ADDRESS BOOK The Address Book list of contacts and groups
PREFERENCES The Preferences menu
POWER OFF Turns the e80 device OFF.
System Status Indicators
Status indicators are smaller icons on the right side of the LCD display screen. Their appearance tells you
important status information about your e80 device. In the order that they appear (top to bottom, left to
right), the indicator icons provide the following status information:
This Indicator… tells you….
icon Coverage No Coverage, 1-Way, or 2-Way
icon Battery Life % battery charge remaining
icon Alert Setting Silent, Vibrate or Tone
icon Signal Strength Optional: forward channel signal strength
icon Unread Inbox
Messages
Flashes when there are new messages.
icon Alarm#1 The time set and repeat frequency (once, daily, weekly, etc.) for Alarm #1.
Flashes when in Snooze Mode.
icon Alarm #2 The time set and repeat frequency (once, daily, weekly, etc.) for Alarm #2.
Flashes when in Snooze Mode.
icon
Message
Transmission
Status
Only appears when transmissions are occurring; indicates number of
message transmissions pending, and whether transmission was successful.
e80 Personal Messaging Device Reference Guide
© 2003 PerComm, Inc. REVISION 2: 3/10/03
11
Device Mode Indicators
Device mode indicators appear in the upper right corner of the LCD display when certain device modes
are in effect. For example, if Caps Lock is on, that will be displayed on screen.
This Indicator… tells you…
/ Shift or Caps Lock is on (for typing a single uppercase letter,
or multiple uppercase letters).
/ Alt or Alt Lock is on (for typing a single number or special
character, or multiple numbers/special characters).
You can scroll upward to view more text or menu items.
You can scroll downward to view more text or menu items.
3.4 The Joystick: Navigating in Different Modes
The joystick can be pressed (pressed into the device, or “clicked”), and pushed left (), right (), up ( −
toward the LCD display) and down ( − away from the LCD display).
Depending on whether a menu, a message, or a set of fields or checkboxes is currently being displayed,
the joystick can perform different functions. The primary behavior and exceptions for each joystick action
are described below.
Do this …to do this …or press this key:
→ Return to previous menu ESC
Except in: Main Menu − Move one icon left none
View Message Mode − View previous message none
Push joystick
(left)
Edit Text Mode − Move one character left none
→ Display a popup menu on the right MENU
Except in: Main Menu − Move one icon right none
View Message Mode − Display next message none
Push joystick
(right)
Edit Text Mode − Move one character right none
→ Move one line, icon or checkbox up or down none
Push joystick
or
(up or down) Except in: Option Fields − Move to previous or next field none
→ Display selected menu, screen or message ENTER
Except in: View Message Mode − Display a popup menu on the right MENU
Edit Text Mode − Display a popup menu on the right MENU
Option Fields
− Display next option in field ENTER
Press joystick
Checkboxes
− Select or clear checkbox ENTER
Press ENTER In: View Message Mode − To display next page of message
The MENU key always displays a popup menu on the right, if one is available.
The ESC key always exits from the current display to the previous menu or screen.
e80 Personal Messaging Device Reference Guide
12 REVISION 2: 3/10/03 © 2003 PerComm, Inc.
3.5 The Keyboard
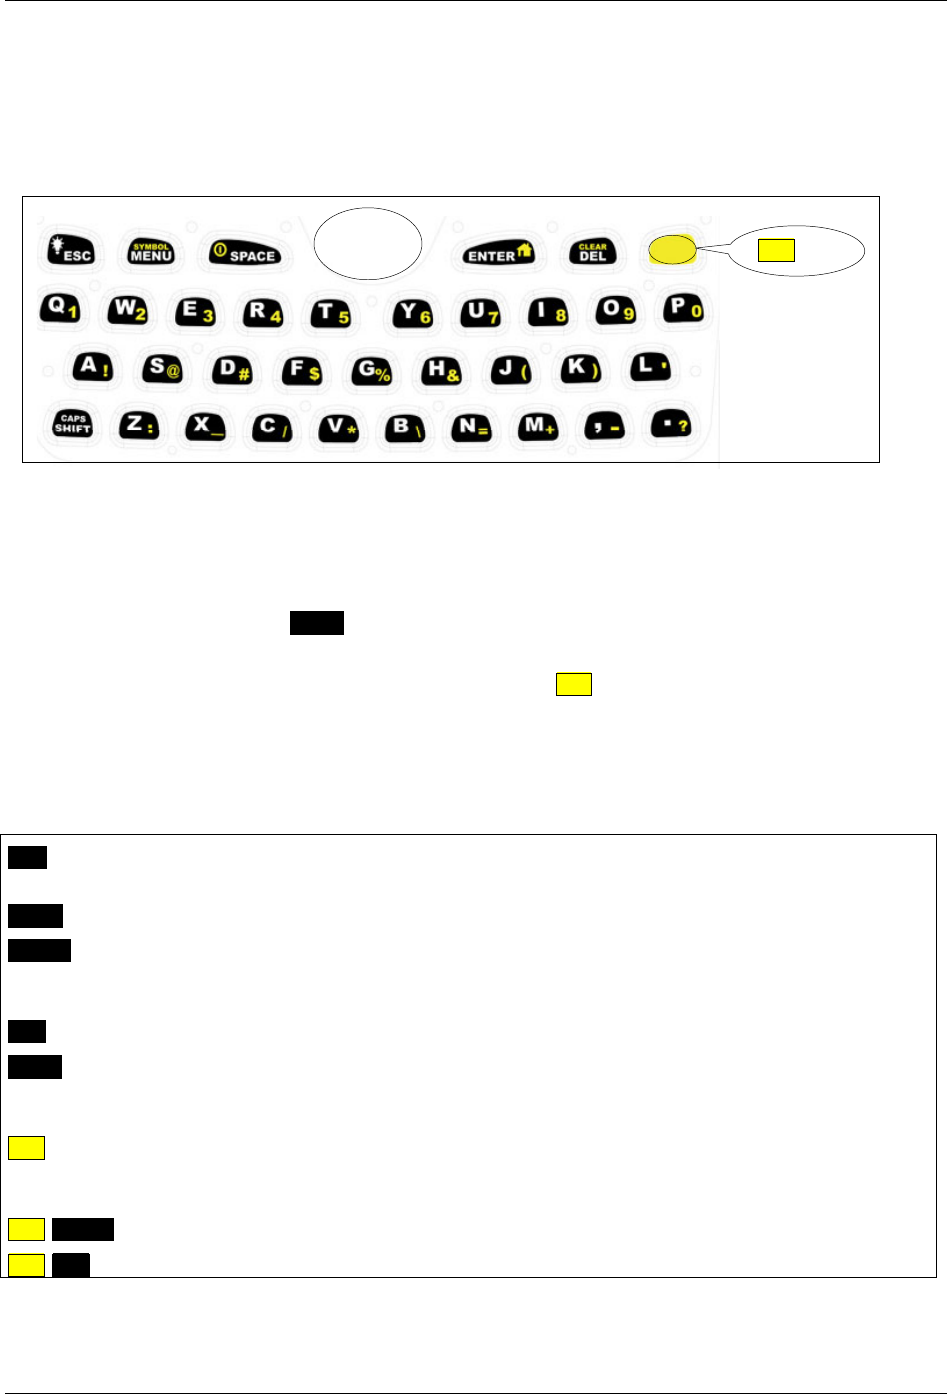
The keyboard contains two different kinds of keys:
• Text entry keys
• Control (function) keys.
Figure 2: The Keyboard: Control and Text Keys
Text Entry Keys
Each regular keyboard key is capable of producing 3 kinds of text:
• Uppercase characters (use SHIFT to access them)
• Lowercase characters
• Special characters (appear yellow on text entry keys, use ALT to access them).
Control Keys
Control keys provide more control and navigation options:
Press this key… to do this….
ESC Once to exit from current submenu or text screen.
Press and hold to turn backlight on or off.
MENU Display a popup menu on the right side of the screen.
ENTER In most modes, same as pressing the joystick.
In Edit Text Mode: enter a Carriage Return (start a new line of text).
In View Message Mode: go to the next screen (page) of the message.
DEL Delete one character to the left of the cursor.
SHIFT Once to type an uppercase letter;
Twice for Caps Lock (all uppercase);
Once again to return to lowercase characters.
ALT Once to type a number or special character shown in yellow on a text entry key;
Twice for Alt Lock (all numbers or special characters);
Once again to return to normal characters.
ALT-ENTER Return to Main Menu.
ALT-DEL Clear (delete) all characters to the left of the cursor.
ALT key
Jo
y
stick
e80 Personal Messaging Device Reference Guide
© 2003 PerComm, Inc. REVISION 2: 3/10/03
13
3.6 Navigation Conventions in this Manual
In this manual various operations are described using the navigation conventions described below.
This… means….
Go to PREFERENCES → Options 1. In the Main Menu, push the joystick until the
PREFERENCES icon is highlighted, then press the joystick
(or press ENTER) to display the Preferences menu.
2. Then push the joystick (up) or (down) until the
>Options item is highlighted and press the joystick to
display the Options submenu.
Select >New Folder Push the joystick (up) or (down) until the >New
Folder item in a menu is highlighted, then press the joystick
to display the New Folder screen.
Set to “Yes” In an option field, press the joystick until “Yes” is displayed.
Open a popup menu Press MENU or push the joystick .
In Edit Text or View Message Modes, you cannot push the
joystick to open the popup menu, but you can always press
MENU to open a popup.
e80 Personal Messaging Device Reference Guide
14 REVISION 2: 3/10/03 © 2003 PerComm, Inc.
4. Setting Up Your e80 Device
Your e80 device comes with certain options already set for you. You can change any of the options listed
in the Preferences Menu, save them, or reset to the original (factory default) settings. Some settings,
such as Owner Information, are not set in advance, so you will want to configure that as soon as possible.
4.1 Viewing System Information
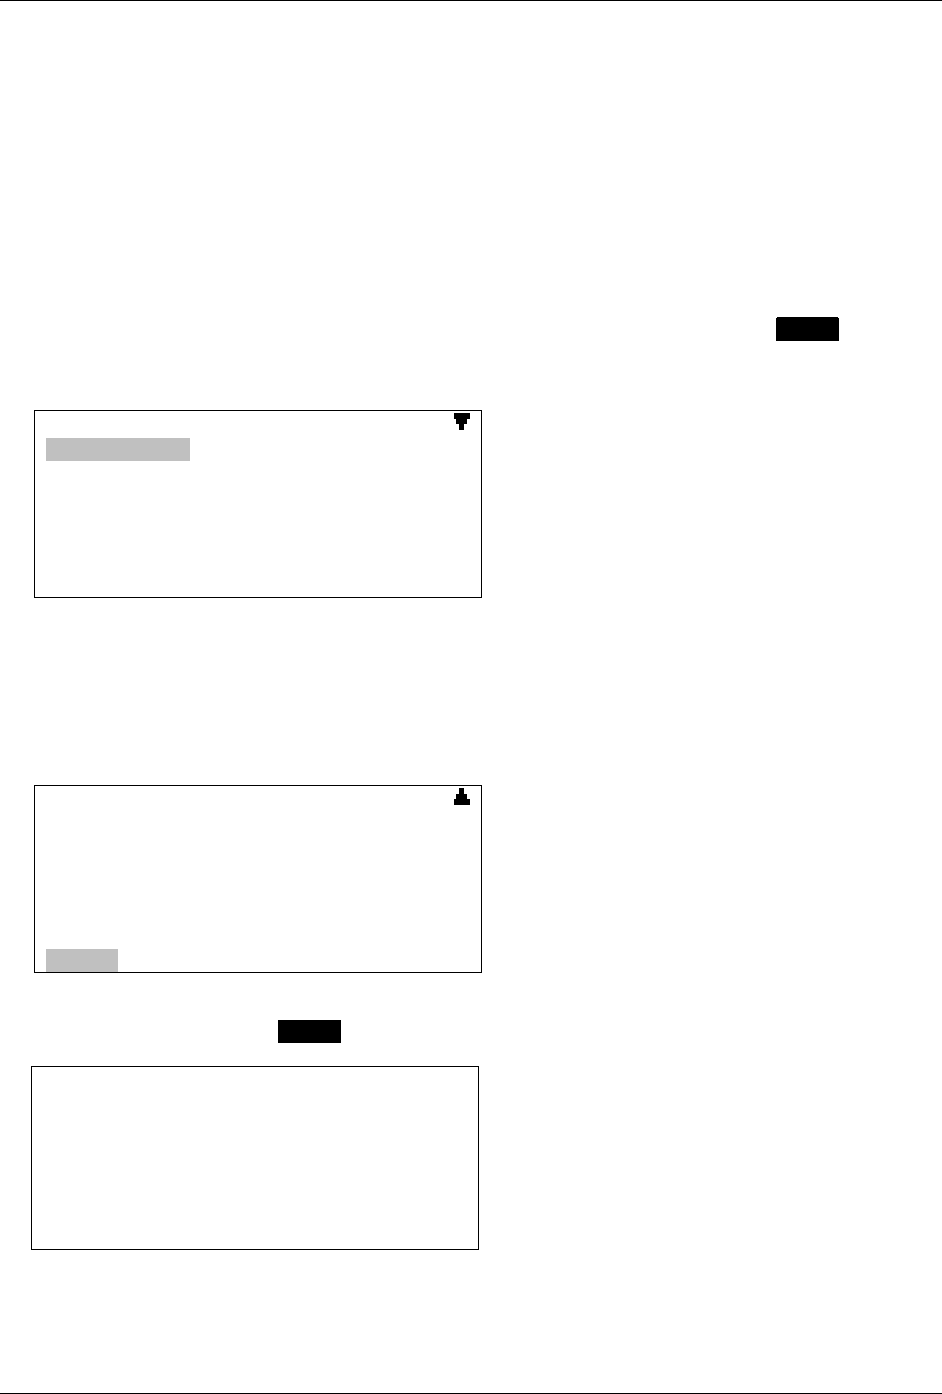
Now try out a Main Menu option. To view useful system information about your e80 device:
1. Select the
PREFERENCES icon in the Main Menu.
Push the joystick to move to the Preferences icon, then press the joystick (or press ENTER) to select
it.
The Preferences menu appears in the LCD display.
PREFERENCES
>Alarm Clock
>Date and Time
>Mailbox Alerts
>Options
>Owner Information
>Private Time
>Message Timestamp
Indicates that there are more options below, use
the joystick to scroll downward.
This view and others in the manual show an 8-line display; for a larger font you can also set your e80
device to display only 5 lines. See Customizing Display Features on page 42.
2. Select >About from the Preferences menu.
Push the joystick (down, or away from the LCD display) until >About appears in the display and
is highlighted:
PREFERENCES
>Owner Information
>Private Time
>Message Timestamp
>Quick Text
>Address Book Options
>Signature
>About
Indicates that there are more options above, use
the joystick to scroll upward.
3. Press the joystick or press ENTER to select the About screen:
S/W version: v2.0.3
MSN: 123456
H/W Version: B
Coverage: Send and Receive
Battery: 76%
AA Memory Used: 55%
BB Memory Used: 45%
CC Memory Used: 25%
- software version number
- device serial number
- hardware version number
- network service level
- % battery charge level
- % used of memory available for address book
- % used of memory available for news messages
- % used of memory available for messages and
folders
4. When finished, push the joystick to exit from the About display and return to the Preferences menu.

e80 Personal Messaging Device Reference Guide
© 2003 PerComm, Inc. REVISION 2: 3/10/03
15
4.2 Entering Owner Information
To enter personal contact information:
1. Go to
PREFERENCES → Owner Information.
The Owner Information screen appears.
You can move between each entry by pushing the joystick or .
2. Enter text, using the keyboard:
Owner Information
Name: .
Phone:
Comment:
3. Press ESC to save text and exit from the Owner Information screen.
The Preferences submenu is displayed.
4.3 Setting Date and Time
To set the correct date and time on your e80 device:
1. Go to
PREFERENCES → Date and Time.
The Date and Time submenu is displayed.
Date and Time
Time Format: 12hr
Time: 04 39 PM
Date: Feb 28 2003
- if Time Format is set to 24hr, then PM or AM
will not be displayed.
2. Push the joystick or to move from one field to another, and press the joystick to change options
in each selectable field.
Note that you cannot push the joystick or to move left and right,
you must push to move left and to move right.
3. Set Time Format to “24hr” (for 24-hour clock format) or “12hr” (for 12-hour clock format only).
4. Set the current Time:
HH (00–23 for 24-hour format, or 01–12 for 12-hour format)
MM (not changeable: set automatically by system)
AM/PM (only if 12hr format selected).
If 24-hour format has been selected, then nothing is displayed in the AM/PM field.
5. Set the current Date:
MMM (“Jan”, “Feb”, “Mar”, etc.)
DD (01–31)
YYYY (4 digits for year, for example: “2003”).
6. Push the joystick to save and exit from Date and Time.

e80 Personal Messaging Device Reference Guide
16 REVISION 2: 3/10/03 © 2003 PerComm, Inc.
4.4 Turning Your e80 Device Off and On
You can turn off your e80 device by selecting POWER OFF in the Main Menu.
Turn it back on by pressing and holding the ENTER key until the Main Menu icons appear in the LCD
display.
e80 Personal Messaging Device Reference Guide
© 2003 PerComm, Inc. REVISION 2: 3/10/03
17
5. Sending Messages
You can compose and send messages to other wireless and email addresses.
To start, select SEND A MESSAGE in the Main Menu.
The Send A Message screen is displayed:
SEND A MESSAGE
To: .
Msg:
Cursor is in the To field.
5.1 Entering an Address Manually
Type a wireless or email address in the To field.
NOTE: You can only type one address. If you want to send a message to more than one address, select
>Add Contact.
5.2 Selecting a Contact from the Address Book
1. Press MENU to open the Message Options popup menu.
SEND A MESSA
To:
Msg:
MESSAGE OPTIONS
>Manual Entry
>Add Contact
>View Selected
2. Select >Add Contact. The Address Book contact list is displayed.
ADDRESS BOOK
7ÆSally Doe
7ÆTom Brown
ÆZac Lee
Alice Anka
7 Indicates that this contact has been selected.
Æ Indicates that this contact has a “Frequent”
setting, which puts the name at the top of the
Address Book list of contacts
3. Select one or more names from the Address Book.
A checkbox will be selected when you press the joystick for that name. You can select as many
names as you like.
e80 Personal Messaging Device Reference Guide
18 REVISION 2: 3/10/03 © 2003 PerComm, Inc.
4. Push the joystick to exit the Address Book.
The name(s) you have selected will appear in the To field.
There is only one display line for the To field, so if several contacts were selected, they may not all fit on
the display.
5. Press MENU to open the Message Options popup menu again.
6. Select >View Selected in the popup menu to display a complete list of contacts that have been
added to the To field.
SELECTED ADDRESSES
Manual.entry@abc.com
Sally@work.com
Tom@hotmail.com
5.3 Editing or Adding a Manual Address Entry
If you wish to edit a manual address you have already entered, or enter a manual address if you have not
already done so, Then:
1. Press MENU to open the Message Options popup menu and select >Manual Entry.
2. Type your changes or new entry.
MANUAL ENTRY
To: manual.
3. Press ESC to save text and exit the Manual Entry screen.
5.4 Composing your Message
Move the cursor (push the joystick ) to the Msg field and enter your message.

e80 Personal Messaging Device Reference Guide
© 2003 PerComm, Inc. REVISION 2: 3/10/03
19
Compose a Message using Quick Text
You can use preset phrases (Quick Text) in your outgoing message. This is text you have created using
the Quick Text option (see Creating Quick Text for Messages on page 23).
1. With the cursor in the Msg field, press MENU to open the Message Options popup menu.
SEND A MESSA
To: Tom@hotm
Msg:
Tom, Sally:
.
MESSAGE OPTIONS
>Send
>Insert Quick Text
>Insert Memo
>Save to Draft
2. Select >Insert Quick Text from the popup menu.
A list of predefined Quick Text messages is displayed.
3. Select the desired Quick Text from the list.
The list closes and the Quick Text is inserted at the cursor in the message area.
You can also insert memos, by selecting >Insert Memo from the popup menu (see Creating a Memo on
page 36).
Save a Draft of your Message
At any time you can save your message for completing later.
1. While editing your message, press MENU to open the Message Options popup menu.
2. Select >Save to Draft.
The message will be saved in your \Draft folder (see Managing Personal Folders on page 38).
5.5 Sending your Message
3. When you have completed your message, press MENU to open the Message Options popup menu.
4. Select >Send.
The message display and popup menu close automatically and the Main Menu is displayed.
You will see the Message Transmission status symbol flashing until the message transmission is
completed. Your sent message will be saved in the OUTBOX.
e80 Personal Messaging Device Reference Guide
20 REVISION 2: 3/10/03 © 2003 PerComm, Inc.
6. Managing Incoming Messages
6.1 Reading a Message
If a Quickview New Message Received popup is displayed, select “Yes” in the popup to display the
message.
Or:
1. Select
INBOX in the Main Menu.
A listing is displayed of all messages in your Inbox, organized from the newest (at the top) to the
oldest.
INBOX
Æ >Steve@infoserve.net Got your mes
Æ >Ellie@home.com We’ve finally dec
Æ >Can you pick up groceries on you
Æ >Tom@hotmail.com Bring your pack
[with you when you come. Jay ]
[ ]
Æ Symbol indicating message status: Read,
Unread, Forwarded, Replied To, Reply Failed.
Open highlighted message by pressing joystick.
Preview of highlighted message text.
2. Scroll through the Inbox menu of received messages to the desired message.
3. Press the joystick to select and open the message for viewing.
4. Press ESC to return to the Inbox when finished reading the message.
6.2 Replying to a Message
1. Scroll to the desired message in your INBOX and press MENU to open the Inbox Options popup
menu.
INBOX
Æ >Steve@inf
Æ >Ellie@hom
Æ >Can you p
Æ >Tom@hotma
[with you wh
[
INBOX OPTIONS
>Reply
>Forward
>Delete
>Move to Folder
>Mark as Unread
>Delete Read Messages
>Delete All Messages
You can press MENU at any time to open a popup menu. If you open the Inbox Options popup after
opening a message, the menu will have different options listed than if you open the popup menu
before opening the message.
e80 Personal Messaging Device Reference Guide
© 2003 PerComm, Inc. REVISION 2: 3/10/03
21
2. Select >Reply to open the Reply Options menu.
REPLY OPTIONS
>Compose Reply
MORE
Yes
No
On my way
Will call later
See you in 15 minutes
An MCR: system “canned message”
An automatic response
3. Select >Compose Reply to open the Compose Reply screen;
Or:
Select an automatic response (any of the other selections in the Reply Options menu) to
automatically send the selected reply message.
“MORE” is a system-generated automatic response (MCR) that prompts the system to send the next
portion of the message. You can continue to select “MORE” until the entire message has been
received.
4. If >Compose was selected, type your message, then press MENU to open the popup menu for more
options:
Reply: I loo
Regards, Ton
MESSAGE OPTIONS
>Send
>Insert Quick Text
>Insert Memo
>Save to Draft
6.3 Forwarding a Message
1. Scroll to a message in the INBOX menu and press MENU to open the Inbox Options popup menu.
2. Select >Forward from the popup menu.
3. Type an address in the To field, or,
select one or more names from the Address Book (see Selecting a Contact from the Address Book
on page 17).
4. Add any text to the Msg field to preface the forwarded message.
5. Press MENU to open the Message Options popup menu and select >Send.
The message display and popup menu close automatically and the message is sent.
6.4 Deleting Messages
1. Scroll to the message you want to delete.
2. Press MENU to open the Inbox Options popup menu and select one of:
>Delete to delete a single selected message;
>Delete All Messages to delete all messages in your Inbox;
>Delete Read Messages to delete all messages that are marked as Read. Messages marked as
“Unread” will not be deleted.

e80 Personal Messaging Device Reference Guide
22 REVISION 2: 3/10/03 © 2003 PerComm, Inc.
7. Managing Outgoing Messages
7.1 Reviewing Sent Messages
You can read messages that you have sent in the same way that you read new messages:
1. Select
OUTBOX in the Main Menu and scroll to the desired message.
2. Press the joystick to select and open the message for viewing.
7.2 Canceling a Sent Message
You can cancel a message after you have sent it and before it has been successfully sent. This is useful
if the network is busy and you decide to cancel the Send operation and retry later.
While the message transmission indicator is flashing (in the Main Menu screen):
1. Open the
OUTBOX and select the message you wish to cancel.
2. Press MENU to open the Outbox Options popup menu and select >Cancel.
7.3 Resending a Message
You can resend a message that was not sent successfully.
1. Select
OUTBOX in the Main Menu to view messages that you have sent.
2. Scroll to the message you wish to resend.
3. Press MENU to open the Outbox Options popup menu and select >Resend to resend the message to
the same recipients as before.
7.4 Deleting Messages
Any message can be deleted from the Outbox.
3. Select
OUTBOX in the Main Menu, and scroll to the message you want to delete.
4. Press MENU to open the Outbox Options popup menu and select one of:
>Delete to delete a single selected message;
>Delete All Messages to delete all messages in your Outbox.
e80 Personal Messaging Device Reference Guide
© 2003 PerComm, Inc. REVISION 2: 3/10/03
23
8. Other Messaging Options
8.1 Creating Quick Text for Messages
Quick Text can be saved in your e80 device for reuse when composing messages or memos. This is a
way to create shortcuts for frequently used sentences or phrases. You can add or delete text items in the
Quick Text menu.
Add a new Quick Text Item
1. Go to
PREFERENCES → Quick Text.
QUICK TEXT
txt:Where shall we meet?
txt:Who will be there?
txt:Thanks for your help.
2. Press MENU to open the Quick Text options popup menu.
QUICK TEXT
txt:Where sha
txt:Who will
txt:Thanks fo
QUICK TEXT OPTIONS
>New Quick Text
>Edit
>Delete
>Delete All
3. Select >New Quick Text and enter the text in the Quick Text screen.
QUICK TEXT
Text:
Meet me for lunch..
4. When done, push the joystick to save and exit.
When text is saved in Quick Text, it is added to the bottom of the current list of phrases or sentences in
the Quick Text menu. You can view your saved text by scrolling down through the menu.
Edit an Existing Quick Text Item
1. In the Quick Text submenu, select the Quick Text item to be edited.
2. Press MENU to open the Quick Text Options popup menu and select >Edit.
e80 Personal Messaging Device Reference Guide
24 REVISION 2: 3/10/03 © 2003 PerComm, Inc.
Quick Text
txt:Where sha
txt:Who will
txt:Thanks fo
txt:Meet me f
QUICK TEXT OPTIONS
>New Quick Text
>Edit
>Delete
>Delete All
3. Make changes to the text in the Quick Text screen and push the joystick to save and exit.
When the edited text is saved in Quick Text, you can view the new version of the text by scrolling down
through the menu.
Delete an Existing Quick Text Item
1. In the Quick Text submenu, select the item to be deleted.
2. Press MENU to open the Quick Text Options popup menu and select >Delete.
3. Verify the deletion in the confirmation message that appears by selecting “Yes”.
The deleted text item no longer appears in the Quick Text submenu.
8.2 Customizing the New Message Alert
You can change your Inbox Alert settings or turn the alert on or off.
1. Go to
PREFERENCES → Mailbox Alerts.
The Mailbox Alerts submenu is displayed.
M
ailbox Alerts
A
lerts: Yes
V
olume: Mediu
m
>Inbox
>Weather
>Stock Market
>Entertainment
>News Events
You can scroll down to see more alerts.
2. Set Alerts to “Yes” (ON) or “No” (OFF).
3. Set the Volume level to one of “Low”, “Medium”, or “High”.
4. Select >Inbox.
The Inbox Alert submenu is displayed.
Inbox Alert
Type: 1 Beep
Rebeep
Repeat: 2 times
Interval: 1 min
Quickview: Yes

e80 Personal Messaging Device Reference Guide
© 2003 PerComm, Inc. REVISION 2: 3/10/03
25
5. Set Type to your desired option. This may be one of Silent, Vibrate, or a selection of alerts provided
by your network carrier.
6. Set Rebeep Repeat to one of: “None”, a number from 1 to 5, or “Forever”.
7. Set Rebeep Interval to one of: ”30 sec”, “1 min”, “2 min”, “5 min”, or “10 min”.
8. Set Quickview to “Yes” or “No”.
If Quickview is set to “Yes”, then a New Message Received popup appears on the LCD display when
a new message arrives. You can open the new message by selecting “Yes” in the popup, or you can
close the popup by pressing any key.
9. Push the joystick to save and exit from Inbox Alert.
8.3 Setting a Message Timestamp
Messages are timestamped by the system when they are received on your e80 device. You can also
have your e80 device timestamp messages:
1. Go to
PREFERENCES → Timestamp.
The Timestamp submenu is displayed.
Message Timestamp
Timestamp: Yes
Time: 24hr
Date: Full
2. Set Timestamp to “Yes” (ON).
3. Set Time to “12hr” for 12-hour time format
or “24hr” for 24-hour time format.
4. Set Date to one of: “Full” (Feb 28, 2003),
“dd/mm/yyyy” (28/03/2003) or
“mm/dd/yyyy” (03/28/2003).
5. Push the joystick to save and exit from Timestamp.
8.4 Creating an Automatic Signature
You can create a personal signature and add it automatically to any outgoing message.
1. Go to
PREFERENCES → Signature.
Signature
Append to Msg: Yes
Signature:

e80 Personal Messaging Device Reference Guide
26 REVISION 2: 3/10/03 © 2003 PerComm, Inc.
2. In the Append to Msg field, select “Yes”.
3. Enter text for your personal signature in the next 4 lines.
All 4 lines will be added to new messages, only the first line will be added to reply messages, so it is a
good idea to put your name in the first line and optional text (job title, company, address, etc.) in the
following lines.
4. Push the joystick to save and exit from Signature.
8.5 Saving Messages in the Personal Folder
You can save any message in your Personal folder in FOLDERS. For more information on folders, see
Managing Personal Folders on page 38.
1. Select
INBOX or OUTBOX in the Main Menu, and scroll to the message you want to move.
2. Open the Inbox (or Outbox) Options popup menu and select >Move to Folder.
If there are no subfolders in your Personal Folder, the message will be stored there automatically.
Otherwise, a list of all your Personal subfolders will be displayed.
3. Scroll to the subfolder you wish to store your message in and press the joystick to move the message
into that folder.
The LCD display will return to the Inbox (or Outbox) list and the saved message will no longer be
listed there.
e80 Personal Messaging Device Reference Guide
© 2003 PerComm, Inc. REVISION 2: 3/10/03
27
9. Managing the Address Book
You can store names and email or wireless addresses on your e80 device for quick access when sending
messages. You can also create group lists to send messages to multiple recipients with a single address
entry.
Select ADDRESS BOOK in the Main Menu to display the Address Book list of contacts.
9.1 Adding a Contact to the Address Book
1. In the Address Book, press MENU to open the Options popup menu.
ADDRESS BOOK
ÆSally Doe
ÆTom Brown
ÆZac Lee
Alice Anka
OPTIONS
>New Contact
>New Group
2. , Select >New Contact to display the New Contact screen and type the person’s first name Scin the
First Name field:
EDIT CONTACT
First Name: Ed.
Last Name:
Title:
Wireless Addr:
You can scroll down to see more fields to edit.
3. Continue to move down to each field and enter the appropriate text.
4. Select the checkbox for each wireless or email address or phone number that can be used in a
message To field.
• Phone numbers can only be used if enabled by the carrier.
• If no checkbox is selected, then this contact cannot be used in a message To field and is for
information purposes only.
5. Set the Usage option field to “Normal” or “Frequent”.
You can set Usage to “Frequent” for up to 10 contacts that are used most often. This will put the
contact name at the top of the Address Book list, and it will also appear in the regular portion of the
list.
e80 Personal Messaging Device Reference Guide
28 REVISION 2: 3/10/03 © 2003 PerComm, Inc.
6. When done, press MENU to open the Options popup menu and select:
>Save to save the new contact and return to the Address Book;
>Delete to discard the new contact and return to the Address Book.
ADDRESS BOOK
First Name: E
Last Name: Br
Title: Servic
7Wireless Ad
Home Email:
Work Email:
Home Phone:
OPTIONS
>Save
>Delete
9.2 Adding a Group to the Address Book
1. In the Address Book, press MENU to open the Options popup menu and select >New Group.
2. In the New Group screen type a name for the group in the Name field.
3. Set Usage to “Normal” or “Frequent” (groups that are used most often and should appear at the top
of the Address Book list).
4. Press MENU to open the Options popup menu and select >Edit Contact List to view a list of existing
contacts (but not groups) in your Address Book.
5. Scroll down the list and select the checkbox for each contact that you wish to add to the group.
CONTACT LIST
7ÆSally Doe
7ÆTom Brown
ÆZac Lee
Alice Anka
You cannot add addresses manually; you can only add contacts that you have already created in
your Address Book.
6. You can add a contact to your Address Book now by opening the Options popup menu and selecting
>New Contact.
Or:
You can view more information about a highlighted contact by selecting >View Contact.
CONTACT LIST
7ÆSally Doe
7ÆTom Brown
ÆZac Lee
Alice Anka
OPTIONS
>New Contact
>View Contact
A screen will be displayed with the detailed Contact information:
e80 Personal Messaging Device Reference Guide
© 2003 PerComm, Inc. REVISION 2: 3/10/03
29
Sally Doe
General Motors
Home: 604-555-4567
Work: 888-555-9876
7WA: sally.doe@wireless.com
HR: sdoe@home.com
WE: sally.doe@work.com
Service Technician
7. If necessary, edit the information displayed (select >Edit in popup menu) and select:
>Save to return to the contact list, or
>View Contact to display more detailed information about that contact.
8. When done adding contacts to the group, exit and save the new group in your Address Book.
9.3 Viewing Contact or Group Information
1. In the Address Book, scroll to a contact or group you wish to view.
The contact or group name is highlighted.
2. Press the joystick to display address information for that contact or group.
3. You can press MENU and select >Edit in the Options popup menu to edit the contact information.
Ed Brown
Ford Motor Co
Home: 604-555
Work: 888-555
7WA: ed.brow
HE: eddy@ho
WE: ebrown@
Servicing Cle
OPTIONS
>Edit
>Forward
9.4 Editing a Contact or Group
1. In the Address Book, scroll down to the contact or group that you wish to edit.
The contact or group name is highlighted.
2. Press MENU to open the Options popup menu and select >Edit Contact or >Edit Group.
The Edit Contact or Edit Group screen is displayed.
3. In the Edit Contact screen, scroll down through the fields in the display and make changes as
needed.
In the Edit Group screen, press MENU to open the Options popup menu and select >Edit Contact
List.
Choir
Usage: Normal
Ed Brown
Mary Clancy
Lena Ng
OPTIONS
>Save
>Edit Contact List
e80 Personal Messaging Device Reference Guide
30 REVISION 2: 3/10/03 © 2003 PerComm, Inc.
Make changes as required in the displayed contact list and select >Save in the Options popup to
return to the Edit Group screen.
4. Press MENU to open the Options popup menu again and select:
>Save to save changes and return to Address Book
>Delete to discard changes and return to the Address Book.
9.5 Deleting a Contact or Group
1. In the Address Book, scroll to the contact or group name that you wish to delete.
The contact or group name is highlighted.
2. Press MENU to open the Options popup menu and select >Delete Contact or >Delete Group and
then “Yes” in the Delete Confirmation screen.
The contact or group is deleted from the Address Book contact list.
9.6 Forwarding a Contact
You can send information about any of the contacts in your Address Book to another address.
1. While viewing a contact, press MENU to open the View Options popup menu and select >Forward.
A Send Message screen is displayed with the contact information in the Msg field.
2. Type an address in the To field or add a contact from the Address Book.
3. Press MENU to open the Message Options popup menu and select >Send.
9.7 Customizing your Address Book
Go to PREFERENCES → Address Book to view the Address Book Options submenu:
Address Book Options
Contact List Sort: Last Name
Contact Field 1: [ Misc 1]
Contact Field 1: [ Misc 2]
Change the Sorting Order
The list of contacts in the Address Book can be sorted by First or Last Name.
1. Select Contact List Sort in the Address Book Options submenu.
2. Select either “First Name” or “Last Name".
3. Push the joystick to save and exit from Address Book Options.
The next time you open the Address Book, the entries will be listed alphabetically by first or last
name, depending on your selection.
Add a Contact Label
Each contact entry in the Address Book has two additional fields whose labels can be modified:
• Misc 1 (default label)
• Misc 2 (default label).

e80 Personal Messaging Device Reference Guide
© 2003 PerComm, Inc. REVISION 2: 3/10/03
31
1. Select Contact Field 1 (or 2) in the Address Book Options submenu.
2. Type a new label for that field.
The label will be updated in all of the Address Book entries.
3. Push the joystick to save and exit.
e80 Personal Messaging Device Reference Guide
32 REVISION 2: 3/10/03 © 2003 PerComm, Inc.
10. Reading News
If you are subscribed to one or more news services, you can receive, read, forward, delete and save
news messages.
10.1 Reading a News Message
If the Quickview popup is displayed, then select the News message you wish to read and press the
joystick.
Or:
1. Select
NEWS in the Main Menu.
2. Select a News folder in the News submenu.
3. Highlight the message you wish to read and press the joystick to display it.
The News message is displayed. Alternately, you can highlight the desired message in the News
submenu and then press MENU to open the News Options popup menu and select >View Message.
Stock Market
Æ *Market Up
Æ *Market Up
Æ *Market Up
Æ *Market Up
Æ *Market Up
[date*---Dow
[Indu 2293.90
NEWS OPTIONS
>View Message
>Forward Message
>Delete Message
>Move to Folder
>Delete Read Messages
>Delete All Messages
10.2 Forwarding News
1. While the News message is displayed, press MENU to open the News Options popup menu and
select >Forward Message.
The Forward A Message screen is displayed.
2. Enter an address in the To field. You can do this manually or by selecting contacts from your Address
Book (in the Message Options popup menu).
3. Add any text to the Msg field to preface the forwarded News message.
4. Press MENU to open the Message Options popup menu again and select >Send.
The News message is sent to the addressee(s) and the display changes to the Main Menu screen.
10.3 Deleting News
You can delete any or all News messages. News messages will also be deleted automatically when a
new message is received and your News folder is already full.
Automatic Deletion when News is Full
When your News folders become full, your e80 device will automatically delete News messages to make
room for a new incoming News message. The order of priority for automatic message deletion is:
1. The oldest messages marked as Read are deleted first.
2. If all Read messages have been deleted, then the oldest Unread messages will be deleted.
e80 Personal Messaging Device Reference Guide
© 2003 PerComm, Inc. REVISION 2: 3/10/03
33
Note that any News messages saved in the \News Archive folder will not be deleted.
Delete News Messages while in a News Subfolder
To delete News messages yourself:
1. While a News message is highlighted in the News menu, press MENU to open the News Options
popup menu and select one of:
>Delete Message delete the selected message
>Delete Read Messages delete all messages marked as Read in this folder
>Delete All Messages delete all messages in this folder.
Stock Market
Æ *Market Up
Æ *Market Up
Æ *Market Up
Æ *Market Up
Æ *Market Up
Æ *Market Up
Æ *Market Up
NEWS OPTIONS
>View Message
>Forward Message
>Delete Message
>Move to Folder
>Delete Read Messages
>Delete All Messages
Or:
After opening a News message for viewing, press MENU to open the News Options popup menu and
select >Delete Message.
2. Select “Yes” in the Confirmation message.
Depending on the option selected, the selected News message, all News messages marked as Read, or
all messages will be deleted.
Delete News Messages while in the News Menu
Alternately, you can delete messages as follows:
1. While a News folder is highlighted in the News menu, press MENU to open the News Options popup
menu and select one of:
>Delete All Read - delete all messages marked as Read in this News folder
>Delete All Msgs - delete all messages in this News folder
>Del All Read Msgs - delete all messages marked as Read in all News folders
>Del All News Msgs - delete all messages in all News folders.
NEWS
\Entertainment
\Market
\Weather
\Sports
NEWS OPTIONS
>Move Folder Up
>Move Folder Down
>Delete All Read
>Delete All Msgs
>Del All News Msgs
>Del All News Read
Note that News messages saved in the \News Archive folder in FOLDERS will not be deleted using
any of these Delete options.
2. Select “Yes” in the Confirmation message.
Depending on the option selected, all News messages or all marked as Read, will be deleted in the
selected folder, or in all folders (but not in the \News Archive folder).
e80 Personal Messaging Device Reference Guide
34 REVISION 2: 3/10/03 © 2003 PerComm, Inc.
10.4 Reordering News Folders
1. Select a News folder, press MENU to open the News Options popup menu and select one of:
>Move Folder Up
>Move Folder Down.
2. When you have finished moving folders, select >Back in the News Options popup menu to close the
popup.
10.5 Customizing News Alerts
You can turn alerts on or off and change the volume for all alerts (both News and Inbox), or modify the
type of alert for different kinds of messages.
1. Go to
PREFERENCES → Mailbox Alerts.
The Mailbox Alerts submenu is displayed.
Mailbox Alerts
Alerts: Yes
Volume: Medium
>Inbox
>Weather
>Stock Market
>Entertainment
>News Events
You can scroll down to see more alerts.
2. Set Alerts to “Yes” (ON) or “No” (OFF) and set the Volume level to one of “Low”, “Medium”, or
“High”.
Note that this affects both Inbox and News messages; do not make changes to these two items
unless you intend them for all message alerts.
3. Select one of the News types (Weather, Stock Market, etc.) that you wish to set an alert for. The
News Alert Options submenu is displayed.
News Alert #1
Service: Yes
Type: Vibrate
Quickview: Yes
History: 10
Set News Alert Options
1. Set Service to either:
“Yes” (receive a message and create folder for it) or
“No” (message will not be received and associated folder will be deleted).
2. Set Type to your desired option. This may be one of Silent, Vibrate, or a selection of alerts provided
by your network carrier.
3. Set Quickview to either:
“Yes” (a popup display of the new News message will appear automatically) or
“No” (no popup display).
In the Quickview popup you can choose to display the new message by pressing the joystick, or close
the popup by pressing any other key. If no choice is made, the popup will eventually close by itself.

e80 Personal Messaging Device Reference Guide
© 2003 PerComm, Inc. REVISION 2: 3/10/03
35
4. Set History to a number from 1 to 20 or “No Limit”, for the maximum number of messages to be
stored in the folder.
When the maximum number for a folder is reached, then your e80 device will automatically delete
messages from that folder according to the deletion rules for Automatic Deletion when News is Full
on page 32. Messages will also be deleted when the e80 device runs out of News message memory.
10.6 Saving News in the News Archive Folder
You can archive any news message in your News Archive folder in FOLDERS. For more information on
folders, see Managing Personal Folders on page 38.
1. After selecting the News message for viewing, press MENU to open the News Options popup menu
and select >Move to Folder.
If there are subfolders in the \News Archive folder, a menu of all those subfolders will be displayed.
If there are no subfolders, then the News message is moved to the \News Archive folder and no
further action is necessary.
2. Scroll to the folder or subfolder you wish to store your message in and press the joystick to move the
message into that folder.
The message will be deleted automatically from your News.
e80 Personal Messaging Device Reference Guide
36 REVISION 2: 3/10/03 © 2003 PerComm, Inc.
11. Creating and Managing Memos
You can create and save text files on your e80 device. These can also be added to mail messages that
you send out.
11.1 Creating a Memo
You can create and store memos in FOLDERS on your e80 device.
1. Go to FOLDERS → \Memos and press MENU to open the Memo Options popup menu.
MEMOS
Budget
To Do List
Sparks
MEMO OPTIONS
>New Memo
>Edit
>Delete
>Delete All
2. Select >New Memo to open the New Memo screen.
MEMO
Label: .
Text:
3. Enter a name for your memo in the Label field. For example: Shopping.
4. Enter the memo text in the Text field. For example: Pickup tomato sauce, noodles, peppers.
5. Press MENU to open the Memo Options popup menu and select >Save.
The memo and the popup menu close and the memo label (Shopping) appears in the Memos folder.
11.2 Viewing a Memo
To read a memo you have already created:
1. Go to
FOLDERS → \Memos And scroll to the desired memo.
2. Press the joystick to display the memo text.
11.3 Editing a Memo
1. Go to FOLDERS → \Memos and scroll to the memo to be edited.
2. Press MENU to open the Memo Options popup menu and select >Edit.
3. Make any changes in the Edit Memo screen.
4. Press MENU to open the Memos Options popup menu again and select >Save.
The changes are saved and the memo and popup menu are closed.
e80 Personal Messaging Device Reference Guide
© 2003 PerComm, Inc. REVISION 2: 3/10/03
37
11.4 Deleting a Memo
1. Go to FOLDERS → \Memos and scroll to the memo to be deleted.
2. Press MENU to open the Memo Options popup menu and select >Delete.
A confirmation message appears; select “Yes” in the message.
The memo is deleted from the folder submenu.
11.5 Inserting a Memo into a Message
You can insert a memo into an outgoing message (in SEND A MESSAGE).
1. With the cursor in the Msg field of a new outgoing message, press MENU to open the Message
Options popup menu.
SEND A MESSA
To: Tom@hotm
Msg:
Tom, Sally:
.
MESSAGE OPTIONS
>Send
>Insert Quick Text
>Insert Memo
>Save to Draft
2. Select >Insert Memo from the popup menu.
A list of saved memos is displayed.
3. Select the desired memo from the list.
The list closes and the text of the memo is inserted at the cursor in the message field.
4. When done, press MENU to open the Message Options popup menu and select >Send.
e80 Personal Messaging Device Reference Guide
38 REVISION 2: 3/10/03 © 2003 PerComm, Inc.
12. Managing Personal Folders
You can store messages, news, memos and any text files in your e80 device Folders. You can create
subfolders in the News Archive and Personal subfolders for organizing the messages that you save there.
When you select FOLDERS from the Main Menu, 4 subfolders are displayed:
• \Draft - for messages being created or edited
• \Memos - for memos that you create
• \News Archive - for storing news messages
• \Personal - for storing mail messages.
12.1 Creating a New Subfolder for Mail or News Messages
You can only create subfolders in the Personal and News Archive folders for organizing your saved mail
or news messages.
1. Select
FOLDERS in the Main Menu.
2. Select the \News Archive or \Personal folder.
You cannot create new subfolders in the Draft or Memos folders.
3. Select >New Folder and press MENU to open the Folder Options popup menu.
FOLDERS
>New Folder
\Home
\Business
FOLDER OPTIONS
>New Folder
>Edit Name
>Delete
>Delete All
4. Select >New Folder in the popup menu to open the New Folder screen.
FOLDERS
Folder Name: A
5. Enter a name for the new subfolder.
6. Press MENU to open the Folder Options popup menu again and select >Save.
The New Folder submenu closes and the new subfolder appears in the Personal folder submenu.

e80 Personal Messaging Device Reference Guide
© 2003 PerComm, Inc. REVISION 2: 3/10/03
39
FOLDERS
>New Folder
\Home
\Business
\Appointments
12.2 Editing a Subfolder Name
You can change any subfolder name by selecting it in the Folders menu, pressing MENU to open the
Folder Options popup menu, and selecting >Edit Name.
12.3 Deleting Subfolders
You can delete a subfolder by selecting >Delete in the popup menu, or delete all subfolders by selecting
>Delete All.
e80 Personal Messaging Device Reference Guide
40 REVISION 2: 3/10/03 © 2003 PerComm, Inc.
13. Setting Personal Options
Your e80 device comes with certain options already set for you. You can change any of the options listed
in the Preferences Menu, save them, or reset to the original (factory default) settings.
To start, select PREFERENCES in the Main Menu.
PREFERENCES
>Alarm Clock
>Date and Time
>Mailbox Alerts
>Options
>Owner Information
>Private Time
>Quick Text
Scroll down to see more.
“Alarm Clock” settings described below.
See page 15 for “Date and Time” settings.
See page 24 for “Mailbox Alerts” settings.
See page 42 for “Options” settings.
See page 15 for “Owner Information” settings.
PREFERENCES
>Options
>Owner Information
>Private Time
>Quick Text
>Address Book
>Signature
>About
Scroll up to see more.
See page 42 for “Private Time” settings.
See page 23 for “Quick Text” settings.
See page 30 for “Address Book Options” settings.
See page 25 for “Signature” settings.
See page 14 for “About” information.
13.1 Setting Up the Alarm Clock
You can set one or two alarms on your e80 device. For example, you may set Alarm #1 for a wake-up
time on weekdays and Alarm #2 for a weekend wake-up time.
1. Go to
PREFERENCES → Alarm Clock.
The Alarm Clock menu is displayed.
Alarm Clock
Alert Volume: Medium
>Alarm #1: OFF
>Alarm #2: ON
2. Set Alert Volume to one of “High”, “Medium”, or “Low”.
In the Alarm Clock menu, you can see whether either alarm is set ON or OFF. To set an alarm that is
currently OFF, do the following:
e80 Personal Messaging Device Reference Guide
© 2003 PerComm, Inc. REVISION 2: 3/10/03
41
3. Select >Alarm #1 (which is currently set OFF) to open the Set Alarm #1 submenu.
Set Alarm #1
Alarm Clock: No
Frequency: Once
Time: [HH] :[MM] [AM]
Alert Type: Beep 1
Snooze: Yes
Comment:
4. In the Alarm #1 submenu you can make the following changes:
• Alarm Clock: set to “Yes” to turn ON, or “No” to turn OFF
• Frequency: set alarm alert to sound “Once” (once only), ”Daily” (every day), ”Weekday” (every
weekday), or ”Weekend” (every Saturday and Sunday), at the specified time
• Time: set the hour (00–12), minute (00–59) and AM or PM (only if “Time and Date” has been set
to 12-hour format) for the alarm alert
• Alert Type: set to your desired option. This may be one of Silent, Vibrate, or a selection of alerts
provided by your network carrier.
• Snooze: “Yes” (alarm alert will sound up to 3 more times at 10 minute intervals) or
“No” (only one alarm alert)
• Comment: enter text to describe Alarm (e.g., Dental appointment); this will appear in the Alarm
Alert popup.
5. When done, save and exit from the Alarm #1 submenu and return to the Alarm Clock menu.
6. You can select >Alarm #2 and make similar changes there as well.
7. Push the joystick to save and exit from Alarm Clock.
13.2 Alarm Alerts
When the alarm alert is triggered, an alarm alert screen appears on top of whatever was currently being
displayed. Press any key to stop the alarm, but the popup remains onscreen until you close it or turn off
the alarm.
Alarm #1: Dental Appointment
9.30AM Sep 28 Wed
>Close
>Turn off Alarm #1
Close the Alarm Alert Popup
Select >Close from the Alarm Alert popup menu.
• If Snooze is ON (set to “Yes” in Alarm #1 or #2 submenu), then the popup will reappear when the
alarm alert is repeated in 10 min. You cannot turn off the alarm until the popup reappears.
• If Snooze is OFF (set to “No” in Alarm #1 or #2 submenu), then the popup will not reappear.
e80 Personal Messaging Device Reference Guide
42 REVISION 2: 3/10/03 © 2003 PerComm, Inc.
Turn Off and Reset the Alarm
Select >Turn Off Alarm from the popup menu.
• The alarm is set to the next alarm time, if any (for example, next day at same time) and the popup is
closed.
13.3 Setting Private Time
Private Time allows you to turn off Message Alerts for a specified period of time every day (for example,
when you are asleep at night). To configure Private Time:
1. Go to
PREFERENCES → Private Time.
The Private Time submenu opens and you can make changes by pushing the joystick ↑ or ↓ to move
from field to field.
Private Time
Private Time: No
Start Time: [HH] :[MM] {AM]
End Time: [HH] :[MM] {AM]
Alert at End: Yes
2. Set Private Time to “Yes” to turn on Private Time.
3. Enter the Start Time by clicking in each field until the desired number or option appears:
hours (01–12), minutes (00–59) and AM/PM (only if Time and Date is set to 12-hour format in the
Preferences menu)
4. Enter the End Time by clicking in each field until the desired number or option appears:
hours (01–12), minutes (00–59) and AM/PM (only if Time and Date is set to 12-hour format in the
Preferences menu)
5. Set Alert at End to “Yes” (default) or “No”.
When set to Yes, an alert sounds at the end of Private Time if new messages have been received
since the start of Private Time.
6. Push the joystick to save and exit from Private Time. Private Time is now turned on and will go into
effect for the selected time period (from Start Time to End Time).
13.4 Customizing Display Features
You can customize your e80 device display with a number of display options.
1. Go to
PREFERENCES → Options to open the Options submenu.
Options
Contrast: Low
Confirm Delete: Yes
Erred Msg Alert: No
Font Size: 8-line
Keyclick: No
Screen Timeout: 30 sec
Message Privacy: No
You can scroll down to see more menu options.

e80 Personal Messaging Device Reference Guide
© 2003 PerComm, Inc. REVISION 2: 3/10/03
43
Options
Confirm Delete: Yes
Erred Msg Alert: No
Font Size: 8-line
Keyclick: No
Screen Timeout: 30 sec
Message Privacy: No
Timestamp: No
You can scroll up to see more menu options.
2. Make changes in the Options submenu as desired. Push the joystick or to move from field to
field, and press the joystick to change options in each field.
Contrast: Set the LCD display contrast to one of “Low” (default), “Medium”, or “High”.
Confirm Delete: for a confirmation message whenever you delete a message or other item on your
e80 device, set to “Yes” (default: confirmation message will be displayed),
or “No” (no confirmation message will be displayed).
Erred Msg Alert: Set to “Yes” to sound an alert when an erred message is received,
or “No” (no erred messages received, no alert required).
An erred message is a message with transmission errors. If your e80 device is enabled for accepting
erred messages, then turning on the Erred Msg Alert option will set an alert whenever such a
message is received. As soon as a corrected version of the message is received it will replace the
erred version.
Font Size: Set to “5-line” for larger font or “8-line” (default) for smaller font.
Keyclick: Set to “Yes” for an audible click whenever the joystick or any key is pressed,
or “No” (default) for no click.
Screen Timeout: Set to “30 sec” (default) or “60 sec”.
After the e80 device has been idle for the selected length of time, the LCD screen will go blank to
conserve energy.
Message Privacy: If your e80 device is enabled for Message Privacy, then you can set this option
to “Yes” for no signal or alert for a new message,
or “No” for an alert when a new message is received.
Timestamp: Set to “Yes” to display device timestamp at the end of Inbox and News messages,
or “No” (default) to not display device timestamp.
If the network sends a timestamp with the message and Timestamp is set to “Yes”, then two
timestamps will be displayed.
3. Push the joystick to save and exit from Options.

e80 Personal Messaging Device Reference Guide
44 REVISION 2: 3/10/03 © 2003 PerComm, Inc.
14. Maintenance
14.1 General Care
Clean with a soft cloth dampened with soap and water.
Do not immerse in water. Do not use alcohol or other cleaning solutions.
Do not expose to excessive heat or extreme shock or moisture.
14.2 Battery Care
The Battery Life Status Indicator will flash on the e80 LCD display screen when the battery needs
recharging.
14.3 Charging the Battery
Figure showing
power cord being
inserted
1. Plug the power cable into the right side of the external connector on
your e80 device.
The power cable has a special connector specifically for the power
connector on the e80 device (see Figure 1 on page 9).
2. Plug the power supply into any 110 AC power outlet.
The Battery Charging screen will appear on the LCD display. It will
show the progress of the battery charging and indicate when
charging is complete.
Figure showing
battery charging
indicator
3. When charging is complete, unplug the e80 device from the power
cable by tilting the connector plug up or down before pulling it out.
The plug comes out easily when snapped up or down; it is designed
not to come out easily when pulled away from the e80 connector.
14.4 Removing and Replacing the Battery
Under normal circumstances your PerComm lithium ion battery should not need replacing for many years.
If you do need to replace it, follow these instructions.
First, removed the battery from the battery cabinet:
Figure showing
battery cover
being removed
1. On the rear side of the e80 device, remove the battery cover by
pressing down and outwards (in the direction of the arrows
imprinted on the cover) on the cover thumb grip.
2. Grip the battery at the thumb hole on the lower side of the battery
cabinet and pull the battery upwards and out.
Now, replace the battery in the battery cabinet:
Figure showing
battery being
installed
3. Position the PerComm lithium ion battery in the cabinet opening as
follows:
• the metal contacts on the back of the battery line up with the
metal contacts inside the cabinet
• the label is facing upwards

e80 Personal Messaging Device Reference Guide
© 2003 PerComm, Inc. REVISION 2: 3/10/03
45
• the battery is at a 30° angle, the lower edge against the L-
shaped spring mechanism inside the battery cabinet.
Figure showing
battery being
installed
4. Press downwards with one finger or thumb on the word
“PERCOMM” on the battery, and with the other hand push the upper
edge of the battery down and into the cabinet, so that the tabs on
the edges of the battery fit into the appropriate cabinet slots. The
battery should snap into place, with the labeled side facing
upwards.
CAUTION: Do not force the battery in; if properly lined up it should slide
in easily.
Figure showing
battery cover
being replaced
5. Place the battery cover on top of the battery with the cover lugs
fitting into the cabinet slots and leaving a gap of approximately 0.2”
(0.5 cm) between the leading edge of the cover and the cabinet,
and then push the cover tongue into place.
When a charged PerComm battery is installed, the e80 device turns on
automatically and the Main Menu appears in the LCD display.
CAUTION: You can only use a PerComm battery in your e80 device. Use of any other type of battery
may cause damage to your e80 device.

e80 Personal Messaging Device Reference Guide
46 REVISION 2: 3/10/03 © 2003 PerComm, Inc.
15. Troubleshooting
e80 device does not turn on Check the battery. Is it charged, properly fitted, and are the contacts
clean and dry?
You can’t send messages Check the signal strength meter. If the signal is weak, move to an
open space or, if in a building, move close to a window.
Check your coverage setting. Are restrictions set?
You can’t receive messages Check the signal strength meter. If the signal is weak, move to an
open space or, if in a building, move closer to a window.
The battery won’t charge Check the charger. Is it properly connected? Are its contacts clean
and dry?
Check the battery contacts. Are they clean and dry?
Check the battery temperature. If it is warm, let it cool before
recharging.
Is it an old battery? Replace the battery.
Are you using a PerComm original battery? The e80 device is only
designed to work with PerComm lithium ion batteries.
The battery loses charge
faster than normal
Are you in an area of variable coverage? This uses extra battery
power.
Is it a new battery? A new battery needs two to three
charge/discharge cycles to attain normal performance.
Is it an old battery? Battery performance declines after several
years of use.
Are you using your e80 device in extreme temperatures? At
extreme hot or cold temperatures, battery performance is
significantly reduced.

e80 Personal Messaging Device Reference Guide
© 2003 PerComm, Inc. REVISION 2: 3/10/03
47
16. Index
about the e80, 9, 14
address book, 27
adding a contact field label, 30
adding a new contact, 27
adding a new group, 28
changing the sort order, 30
customizing, 30
deleting a contact, 30
deleting a group, 30
editing a contact, 29
editing a group, 29
forwarding contact information, 30
viewing contact information, 29
aircraft and EMI, 4
alarm clock, setting up, 40
alerts
alarm, 41
erred message, 43
inbox, 24
news, 34
automatic message signature, setting an, 25
back light, turning it on/off, 9
battery
care of, 44
charging, 8, 44
installing, 7
loses charge too fast, 46
removing and replacing, 44
safety, 6
won't charge, 46
canceling a sent message, 22
characters, typing numbers, special, uppercase,
lowercase, 12
charging the battery, 8, 44
cleaning your e80 device, 44
confirm delete popup, setting, 43
control keys, 12
conventions used in this manual, 13
customizing display features, 42
deleting messages, 21, 22
device mode indicators on the LCD display, 11
display contrast, setting, 43
display light, turning it on/off, 9
e80 device won't turn on, 46
electromagnetic interference (EMI), 4
erred message alert, setting, 43
external connector, 9
FCC compliance, 4, 6
folders
creating a subfolder, 38
deleting a memo, 37
deleting subfolders, 39
editing a subfolder name, 39
insert memo in message, 37
moving mail messages to, 26
moving news messages to the news archive
folder, 35
new memo, 36
viewing a memo, 36
font size, setting, 43
forwarding messages, 21
function keys, 12
general care, 44
inbox, 20
customizing incoming message alert, 24
deleting messages, 21
forwarding a message, 21
reading a message, 20
replying to a message, 20
installing the battery, 7
joystick, using the, 11
keyboard, using the, 12
keyclick, setting, 43
lanyard, attaching, 8
LCD display, 10
contrast adjustment, 43
customizing, 42
device mode indicators, 11
status indicators, 10
turning back light on/off, 9
main menu, 10
maintenance, 44
managing incoming messages, 20
managing outgoing messages, 22
medical devices and EMI, 4
memos
creating, 36
deleting, 37
inserting in messages, 37
viewing, 36
message privacy, setting, 43
message timestamp, 25
messages
canceling sent, 22

e80 Personal Messaging Device Reference Guide
48 REVISION 2: 3/10/03 © 2003 PerComm, Inc.
can't receive, 46
can't send, 46
deleting, 21, 22
forwarding, 21
incoming, 20
outgoing, 22
reading, 20, 22
replying to, 20
resending, 22
saving, 26
saving a draft, 19
sending. See sending messages
navigating the e80 menus, 11
news
automatic deletion when news is full, 32
customizing news alerts, 34
deleting, 32
forwarding a news message, 32
reading a message, 32
reordering news folders, 34
saving messages in the news archive folder,
35
numbers, typing, 12
outbox, 22
canceling a sent message, 22
deleting messages, 22
resending a message, 22
reviewing sent messages, 22
owner information, 15
power connector, 9
preferences menu, 40
about, 14
address book options, 30
alarm clock, 40
mailbox alerts, 24, 34
options, 42
owner information, 15
private time, 42
signature, 25
timestamp, 25
private time, setting up, 42
quick text
creating, 23
deleting, 24
editing, 23
using in a message, 19
radio frequency. See RF exposure
reading a message, 20
reading a news message, 32
removing/replacing the battery, 44
replying to a message, 20
resending a message, 22
reviewing sent messages, 22
RF exposure
body-worn operation, 4
operational characteristics, 4
safety information, 4
batteries, 6
blasting areas, 5
EMI, 4
medical devices, 4
RF exposure, 4
while driving, 5
saving messages in the personal folder, 26
sending messages, 17
adding a contact from the address book, 17
composing, 18
editing manual entries, 18
inserting a memo, 37
manual address entry, 17
saving a draft, 19
serial connector, 9
setting personal options, 40
setting up your e80, 14
signature, creating a, 25
special characters, typing, 12
status indicators on the LCD display, 10
subfolders. See folders
timeout, setting screen, 43
timestamp, setting, 43
timestamp, setting a message, 25
troubleshooting, 46
unpacking the e80, 7
uppercase/lowercase characters, typing, 12
viewing system information, 14