Pg Music Band In A Box Realband User Guide PowerTracks Pro Audio
Band in a Box - RealBand - User Guide RealBand_2010_5_windows_en Free User Guide for Band in a Box Software, Manual
2015-07-27
: Pg-Music Pg-Music-Band-In-A-Box-Realband-User-Guide-778390 pg-music-band-in-a-box-realband-user-guide-778390 pg-music pdf
Open the PDF directly: View PDF ![]() .
.
Page Count: 296 [warning: Documents this large are best viewed by clicking the View PDF Link!]
- PG Music Inc. License Agreement
- Table of Contents
- Chapter 1: Welcome
- Chapter 2: New Features in RealBand 2010.5
- Chapter 3: Tutorial – Guided Tour of RealBand
- Chapter 4: The Main Screen
- Chapter 5: Using MIDI Features
- Chapter 6: BB Tracks and MIDI tracks
- Chapter 7: Digital Audio Features
- Chapter 8: Audio Production
- Chapter 9: Notation and Printing
- Chapter 10: Piano Roll Window
- Chapter 11: Mixer Window
- Chapter 12: Wizards, Tools, and Plug-Ins
- Chapter 13: Reference
- Appendix A: PG Music DirectX Plug-Ins
- Appendix B: Keystroke Commands
- Appendix C: MIDI Controller Numbers
- PG Music Inc.
- Index
- Registration Form
®
®
V
Ve
er
rs
si
io
on
n
2
20
01
10
0.
.5
5
f
fo
or
r
W
Wi
in
nd
do
ow
ws
s®
Copyright © PG Music Inc. 2010. All rights reserved.
PG Music Inc. License Agreement
2
PG Music Inc. License Agreement
CAREFULLY READ THE FOLLOWING TERMS AND CONDITIONS BEFORE COMPLETING THE
INSTALLATION OF THIS SOFTWARE. USAGE OF THE SOFTWARE INDICATES YOUR ACCEPTANCE
OF THE FOLLOWING TERMS AND CONDITIONS.
LICENSE
A. The program may only be used on a single machine.
B. You may transfer the program and license to another party if the other party agrees to accept the terms of
this Agreement. If you transfer the program, you must either transfer all copies, whether in printed or
machine readable form, to the same party, or, destroy all copies not transferred. This includes all
modifications and/or portions of the program merged into other programs.
C. You may receive the program in more than one media. Regardless of the type or size of media you receive,
you may install or use the media on a single machine.
D. The program (including any images, “applets,” photographs, animations, video, audio, music, and text
incorporated into the program) is owned by PG Music Inc. or its suppliers, and is protected by international
copyright laws and international treaty provisions.
You may not use, copy, or transfer the program, or any copy, modification or merged portion of the program, in
whole or in part, except as expressly provided for in this license. If you transfer possession of any copy,
modification or merged portion of the program to another party, your license is automatically terminated.
LIMITATION OF REMEDIES
PG Music Inc.’s entire liability and your exclusive remedy shall be:
A. The replacement of any media not meeting PG Music Inc.’s “Limited Warranty,” which are returned to PG
Music Inc., or an authorized PG Music Inc. dealer, with a copy of your receipt.
B. If PG Music Inc. or the authorized dealer is unable to deliver replacement media which is free of defects in
materials or workmanship, you may terminate this agreement, and your money will be refunded.
In no event will PG Music Inc. be liable to you for any damages, including but not limited to lost profits, lost
savings, or other incidental or consequential damages arising out of the use or the inability to use such program,
even if PG Music Inc. or an authorized PG Music Inc. dealer has been advised of the possibility of such damages, or
for any claim by any other party. TRADEMARKS
Band-in-a-Box®, CloudTracks™, CopyMe®, GuitarStar®, JazzU®, PG Music®, PowerTracks Pro®, RealBand®,
RealDrums®, and RealTracks® are either the trademarks or registered trademarks of PG Music Inc. in the United
States, Canada, and other countries. Microsoft® and Windows® are either registered trademarks or trademarks of
Microsoft Corporation in the United States and/or other countries. Apple®, the Apple logo, Leopard®,
Macintosh®, Mac®, Panther®, Power Mac®, QuickTime®, Snow Leopard®,Tiger®, and TrueType® are
trademarks of Apple Computer, Inc., registered in the U.S. and other countries. IBM® is the registered trademark of
International Business Machines Corporation. Roland® and “Roland” Logo, EDIROL® and “EDIROL” Logo,
GS® and “GS” Logo, are registered trademarks and “MIDI2” Logo, EDIROL Virtual Sound Canvas Multi Pack,
VSC-MP1™ are trademarks of Roland Corporation. ASIO is a trademark and software of Steinberg Media
Technologies GmbH. VST is a trademark of Steinberg Media Technologies GmbH. Other brands and their
products are trademarks or registered trademarks of their respective holders and should be noted as such.
PATENTS
Band-in-a-Box is protected under US Patent 5990407. The TC-Helicon Harmony feature in Band-in-a-Box and
PowerTracks Pro Audio is protected under US Patents 5567901, 5641926, 5986198, 34583, 296.80.173.9,
PI9603819.5, 0368046, 0750776, 6,046,395, and patents pending.
Printed in Canada
Table of Contents 3
Table of Contents
PG Music Inc. License Agreement .................................................Error! Bookmark not defined.
Table of Contents.......................................................................................................................... 3
Chapter 1: Welcome ..................................................................................................................... 7
About RealBand ........................................................................................................................................................7
Installation .................................................................................................................................................................8
Setup and Configuration............................................................................................................................................8
Audio Drivers Tutorial ............................................................................................................................................15
Chapter 2: New Features in RealBand 2010 ........................................................................... 19
Chapter 3: Tutorial – Guided Tour of RealBand .................................................................... 21
What is RealBand? ..................................................................................................................................................21
Getting Started.........................................................................................................................................................21
Introduction to the Tracks and Mixer Windows ......................................................................................................23
Creating a New Song Arrangement.........................................................................................................................24
Importing Songs ......................................................................................................................................................33
Mixing in RealBand.................................................................................................................................................36
Chapter 4: The Main Screen..................................................................................................... 38
The Status Bar .........................................................................................................................................................38
The Menu Bar..........................................................................................................................................................38
Toolbars...................................................................................................................................................................38
The Piano Keyboard ................................................................................................................................................43
Windows..................................................................................................................................................................44
Chapter 5: Using MIDI Features............................................................................................... 51
Overview .................................................................................................................................................................51
Using DXi and VSTi Synthesizers ..........................................................................................................................51
Loading and Playing MIDI Songs ...........................................................................................................................53
Conductor Window..................................................................................................................................................58
Tracks Window........................................................................................................................................................61
Chapter 6: BB Tracks and MIDI tracks................................................................................... 70
Overview .................................................................................................................................................................70
Creating a New Song Arrangement.........................................................................................................................70
Table of Contents
4
Recording Your Own MIDI Tracks.........................................................................................................................76
Editing BB Tracks and MIDI tracks........................................................................................................................79
Split MIDI drums.....................................................................................................................................................83
Chapter 7: Digital Audio Features............................................................................................ 84
Overview .................................................................................................................................................................84
Loading and Playing Audio Files ............................................................................................................................84
Real Time Effects Plug-Ins......................................................................................................................................86
Chapter 8: Audio Production .................................................................................................... 91
Overview .................................................................................................................................................................91
Generating RealTracks ............................................................................................................................................91
Generating RealDrums ............................................................................................................................................94
Recording Audio Tracks..........................................................................................................................................96
Rendering MIDI Tracks to Audio............................................................................................................................99
Audio Menu Commands..........................................................................................................................................99
Editing Audio Tracks.............................................................................................................................................101
Saving Audio Files ................................................................................................................................................108
Auto-Backup of .SEQ Files ...................................................................................................................................108
Wave Files.............................................................................................................................................................108
Chapter 9: Notation and Printing ........................................................................................... 110
Notation .................................................................................................................................................................110
Lead Sheet Notation Window................................................................................................................................124
Printing ..................................................................................................................................................................129
Chapter 10: Piano Roll Window............................................................................................. 132
Overview ...............................................................................................................................................................132
Note Panel .............................................................................................................................................................134
Graphic Event Panel ..............................................................................................................................................135
Right-click Contextual Menu ................................................................................................................................136
Display Controls....................................................................................................................................................137
Chapter 11: Mixer Window.................................................................................................... 139
Overview ...............................................................................................................................................................139
Track Controls .......................................................................................................................................................140
Master Controls and Mixer Utilities ......................................................................................................................142
Creating Audio Subgroups in the Mixer................................................................................................................143
Real Time Audio Effects .......................................................................................................................................144
Table of Contents 5
Chapter 12: Wizards, Tools, and Plug-Ins ............................................................................. 147
Audio Chord Wizard .............................................................................................................................................147
Conductor Window................................................................................................................................................154
TranzPort Support - Wireless Remote Control......................................................................................................158
Pitch to MIDI Converter........................................................................................................................................160
MIDI Guitar Cleanup.............................................................................................................................................162
Convert to WMA (Windows Media Audio) ..........................................................................................................162
Miniburn................................................................................................................................................................163
DirectX (Windows Audio Plug-In Format) ...........................................................................................................165
Dynamic 3D Drum Kit Window............................................................................................................................165
Guitar Tuner ..........................................................................................................................................................169
MIDI Monitor........................................................................................................................................................172
Chapter 13: Reference.............................................................................................................. 177
The File Menu .......................................................................................................................................................177
The Edit Menu.......................................................................................................................................................183
The Audio Menu....................................................................................................................................................199
The Track Menu ....................................................................................................................................................202
The Action Menu...................................................................................................................................................206
The Block Menu ....................................................................................................................................................214
The Options Menu.................................................................................................................................................215
The Window Menu................................................................................................................................................234
The Help Menu......................................................................................................................................................259
Appendix A: PG Music DirectX Plug-Ins............................................................................... 262
PG Reverb .............................................................................................................................................................262
PG Echo Chorus ....................................................................................................................................................262
PG Peak Limit .......................................................................................................................................................263
PG Dynamics.........................................................................................................................................................265
PG Ten Band EQ ...................................................................................................................................................267
PG Five Band EQ ..................................................................................................................................................268
PG Flanger.............................................................................................................................................................269
PG AutoWah .........................................................................................................................................................270
PG Distortion.........................................................................................................................................................270
PG RingMod..........................................................................................................................................................271
PG Tremolo ...........................................................................................................................................................272
PG Real Time Analyzer.........................................................................................................................................272
Chapter 1: Welcome
6
PG Vinyl Tool .......................................................................................................................................................274
PG Vocal Remover................................................................................................................................................279
Appendix B: Keystroke Commands........................................................................................ 282
Appendix C: MIDI Controller Numbers............................................................................... 284
PG Music Inc............................................................................................................................. 286
Index........................................................................................................................................... 287
Registration Form..................................................................................................................... 296
How to Register.....................................................................................................................................................296

Chapter 1: Welcome 7
Chapter 1: Welcome
Congratulations, and thank you for your purchase of RealBand, your all-in-one
audio workstation and accompaniment program!
RealBand is a program that combines the most popular features from PG Music’s PowerTracks
Pro Audio and Band-in-a-Box programs into an all-in-one sequencing program with automatic
accompaniment.
RealBand offers powerful features for musicians, students, and songwriters. With intelligent
automatic arrangements, RealTracks live instrument tracks, RealDrums live drum tracks, the
amazing Audio Chord Wizard, seamlessly integrated digital audio/MIDI recording, built-in
DirectX effects, and notation, RealBand turns a typical PC into a music production powerhouse.
This documentation will provide you with information on how to get the most out of the great
features that RealBand has to offer.
Updates and improvements to this version of the program are ongoing and are freely available at
www.pgmusic.com.
About RealBand
RealBand is a fully-featured and powerful music arranging, sequencing, and digital recording
program. RealBand is the perfect tool for musicians, students, and songwriters alike.
Features included in RealBand
• Intelligent automatic accompaniment by Band-in-a-Box.
• RealTracks and RealDrums – automatic live instrument parts.
• Audio Chord Wizard interprets chords from audio files.
• 48-track MIDI/audio mixer with multiple FX busses (up to 16 effects per track).
• Support for popular audio file formats – MP3, WMA, WMV, WAV, and CDA.
• Built-in DirectX audio effects.
• DirectX and VST plug-ins supported.
• Band-in-a-Box files load directly.
• Compatible with all Band-in-a-Box styles and Real instruments.
• Shares native .SEQ file type with PowerTracks Pro Audio, directly compatible.
• Support for MIDI and Karaoke files.
• Karaoke lyrics window.
• Piano roll window with graphic controller editing.
• Onscreen notation and lead sheet style printout.
• Virtual guitar fretboard and piano keyboard.
• …and much more!
Have fun!
Chapter 1: Welcome
8
Installation
Minimum System Requirements
- Windows® 9x/ME/NT/2000/XP/Vista/7.
- Windows XP or higher is required for some features.
- 128 MB RAM.
- Digital audio features require a fast Pentium processor. May run on slower computers (untested). MIDI
features require a 486 (or better).
- 75MB hard drive space (much more if recording digital audio).
- MIDI system (MIDI interface/MIDI synthesizer) or PC sound card.
- Digital audio system (16-bit Windows compatible sound card).
- Headphones or amplified speaker system.
Installing the Program
Use any of the three methods described. SETUP.EXE will copy all of the program files to your RealBand folder
(usually C:\RealBand) and install icons to a RealBand program group. Click on the RealBand icon or run
RealBand.exe to open the program and configure the setup.
Method 1 – Auto Run.
1. Insert the program CD-ROM into the CD drive.
2. In a few seconds, a browser window will open listing the CD contents.
3. Double click on SETUP.EXE to run the installation program.
Method 2 – My Computer.
1. Insert the program CD-ROM into the CD drive.
2. Access your CD-ROM drive from the Windows desktop by double clicking on the My Computer icon.
3. Then, double-click on the CD-ROM drive icon and double-click again on the SETUP.EXE program found in
the root or main folder of the CD-ROM.
Method 3 – Start Menu.
1. Insert the program CD-ROM into the CD drive.
2. From the Windows [Start] button select Run.
3. Type D:\SETUP in the “Open:” command line box. If your CD-ROM drive uses another drive letter type the
appropriate letter, e.g., E:\SETUP.
4. If you don’t know the drive letter for your CD-ROM you can use the [Browse…] button to find it.
When installation completes you can select the option to “Launch RealBand” and continue with configuring it to run
on your computer system.
Setup and Configuration
Step One - MIDI Setup
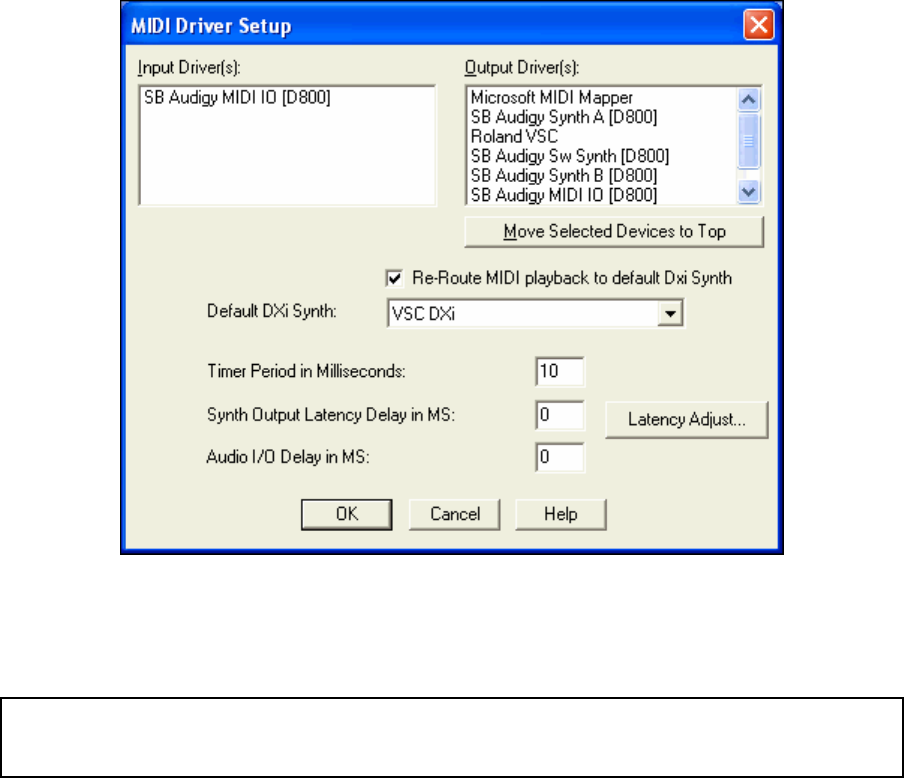
The first time the program runs you will be prompted to select a MIDI device from a list of currently installed
devices (e.g., SB Audigy MIDI IO, Microsoft GS Wavetable SW Synth, etc.). If you don’t see the MIDI Driver
Setup dialog automatically it can be reached by selecting MIDI Devices from the Options pull-down menu. Select
the MIDI device (or devices) that you want to use with RealBand (optionally) set the internal MIDI clock/timer in
milliseconds.
This clock/timer setting determines how often the computer should reset its “MIDI watch.” If you ever find you
need an even higher degree of MIDI accuracy (and your system is extremely fast) you can decrease this number, say
to 5, and the MIDI clock will be checked and reset twice as often. The default is 10 milliseconds (1/100th of a
second) –which is fine for most systems.
Chapter 1: Welcome 9
A MIDI setup using the sound card for MIDI Input with MIDI Output re-routed to a DXi synth.
The MIDI Input Driver is the port that your MIDI controller, for example a MIDI keyboard or MIDI guitar
controller, is attached to.
The MIDI Output Driver selection is the port that your MIDI synthesizer (e.g. Sound Canvas) or an internal sound
card, DXi, or VSTi synth is connected to.
Note: This is a straightforward procedure and you should encounter no difficulties selecting a MIDI driver. However, if you
do experience any difficulties selecting a MIDI driver, or you do not see your sound card’s internal synth or MIDI interface
listed in the MIDI Driver Setup dialog, you may not have the appropriate MIDI drivers installed or configured in your
Windows System.
Software Synthesizers
RealBand supports both DirectX (DXi) and VSTi software synthesizers, which allow RealBand to play high quality
sounds directly through your computer sound card, without requiring any external MIDI hardware.
DXi Synthesizer Support
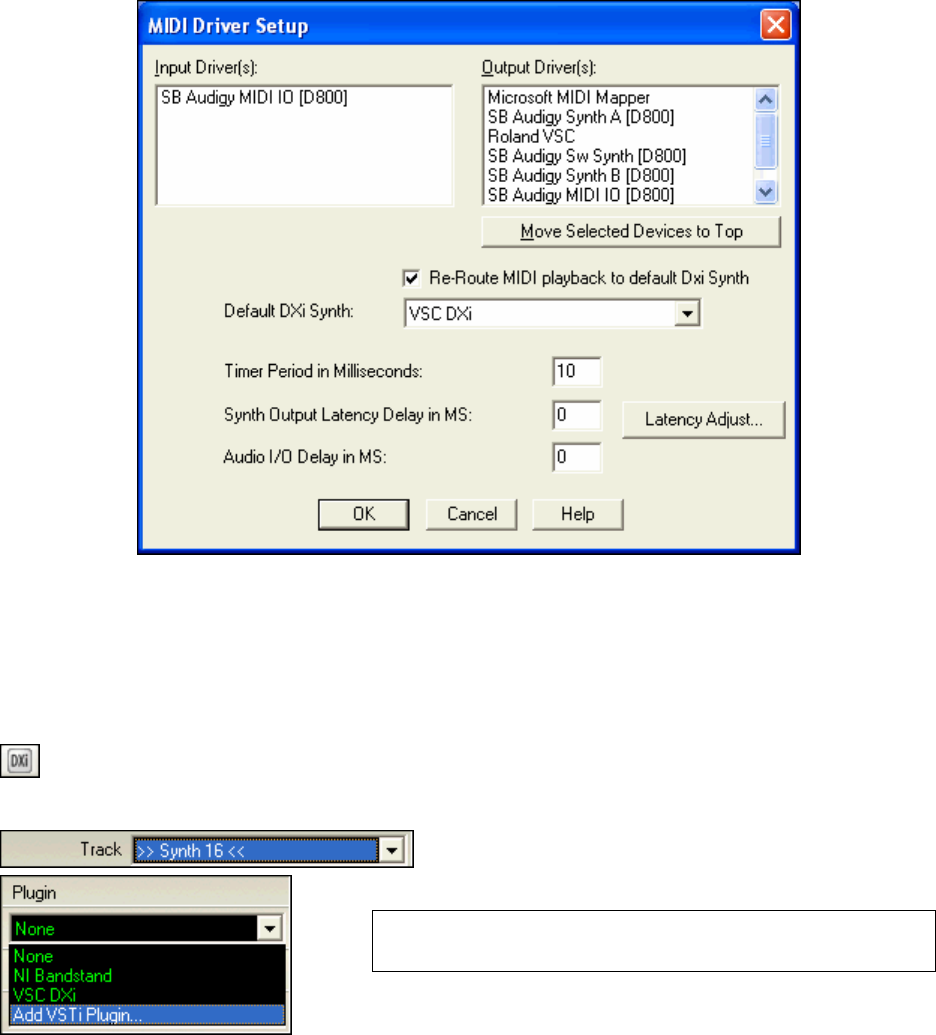
To use DXi (DirectX instrument) synthesizers with RealBand, you can think of the DXi as a type of “MIDI Output
Driver.” As such, you can either visit the MIDI Driver Setup dialog (Options | MIDI Devices) and select the “Re-
Route MIDI Playback to Default DXi Synth” checkbox to send all MIDI playback to the default DXi synth, or you
can assign DXi synths to individual tracks in the Tracks window.
Routing to Default DXi Synth
The “Default DXi Synth:” combo box lets you select which DXi (or VSTi) synth is used as the default software
synth.
Chapter 1: Welcome
10
The “Re-Route MIDI playback to default DXi Synth” setting will cause RealBand to re-route all MIDI playback to
the default DXi or VSTi synth. This is the easiest way to use a DXi softsynth for playback.
If this option is checked, then all MIDI tracks’ playback output will be routed to the default DXi/VST synth
regardless of the individual track’s port number.
VSTi Synthesizer Support
Installing a VSTi Synthesizer
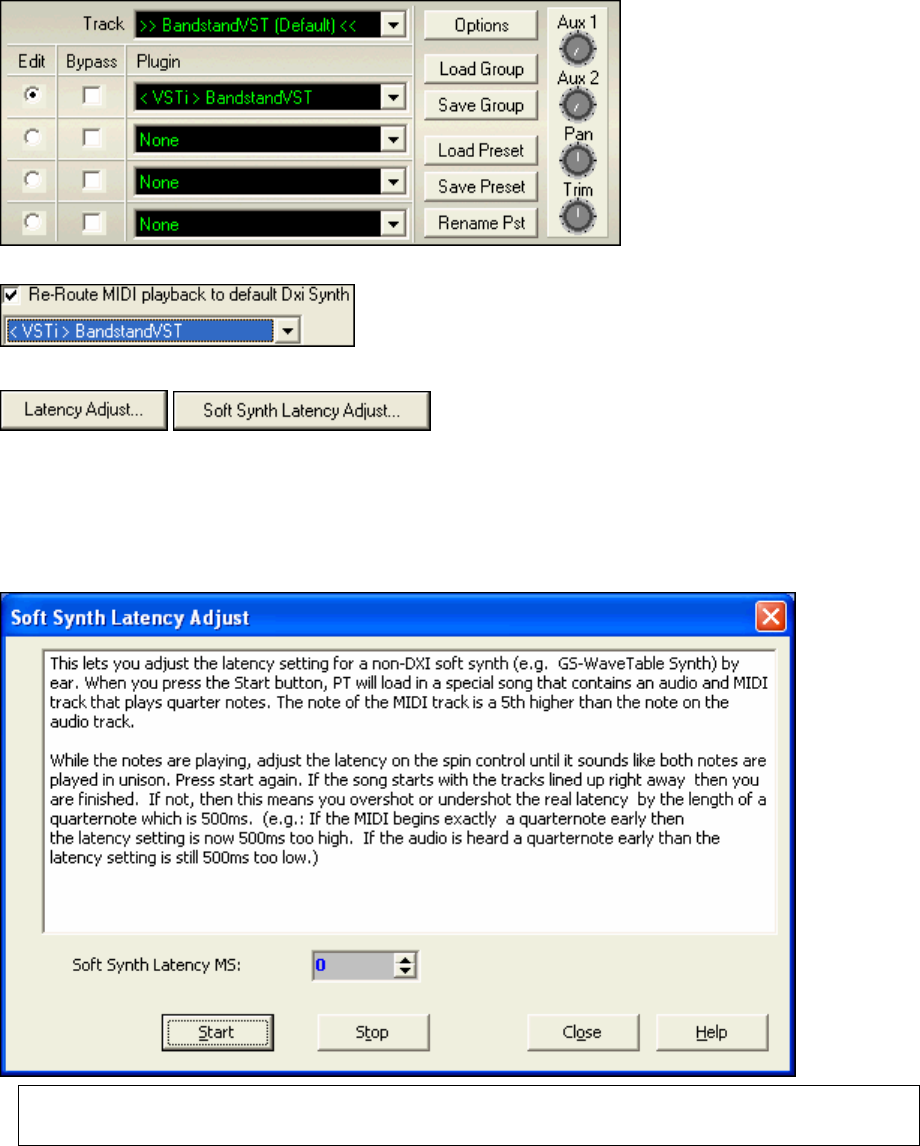
To select a VSTi synthesizer for the first time, click on the [DXi] toolbar button to open the
DirectX/VST Window.
Select >> Synth 16<< in the Track list.
In the Plugin list, select “Add VSTi Plugin...” at the bottom of the list.
Note: VSTi synthesizer plug-ins have the text “<VSTi>“ prepended to the
plug-in name, and VST effects plug-ins have “<VST>“ prepended to the
plug-in name.
VST/VSTi plug-ins are often located in the Program Files folder in a subfolder named VST plug-ins, but they
could also be in a folder named Steinberg, or wherever else they have been installed on the hard drive.
Select a VSTi plug-in .dll file in the following Select a VST plug-in dialog, and it is added to the plug-in list. After
you add each VST, the plug-in is permanently added to the list. You only have to add each plug-in one time.
Chapter 1: Welcome 11
Now your VSTi synthesizer will be available along with the DXi Synth selections in the MIDI Driver Setup dialog.
Latency Adjustment
Pressing the [Latency Adjust] button in MIDI Driver Setup or the [Soft Synth Latency Adjust] in Options |
Preferences | Audio opens the Soft Synth Latency Adjust dialog. This lets you adjust for fine tuning latency
settings for MIDI (non-DXi, and non-VSTi) soft synths.
This works by playing a song called LatencyAdjust.SEQ (included with RealBand) which contains a MIDI note and
audio note. Pressing the [Start] button starts the playback; you can then tweak the Soft Synth Latency MS setting
until you hear the MIDI and audio tracks are in sync.
Note: If the notes sound in sync but you later play a song and the MIDI and audio still sound like they are out of sync, then
likely you overshot the correct MS setting by 500ms. If this happens, we recommend starting the adjustment again at a
value of zero and increasing it until you hear the MIDI and audio notes in sync.
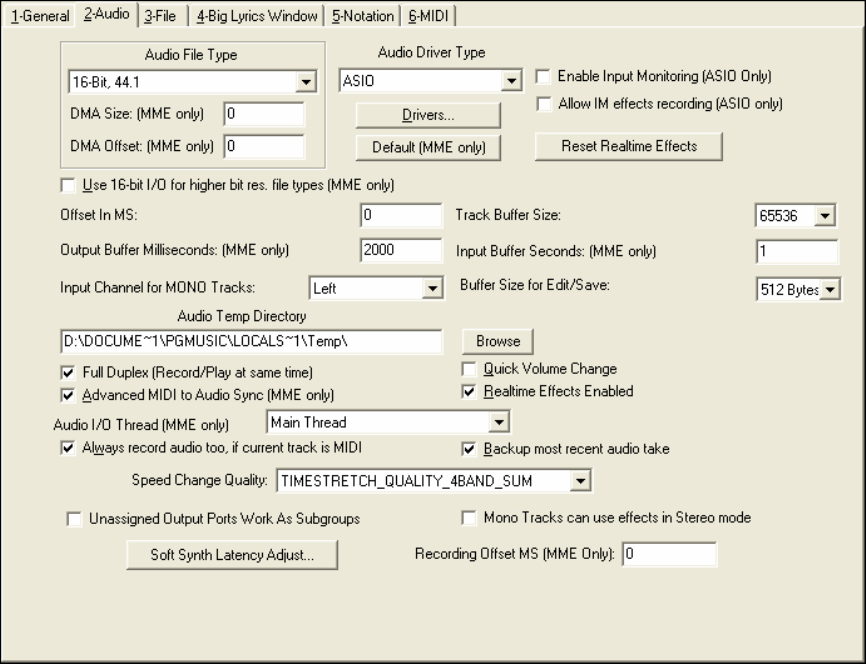
Step Two - Digital Audio Setup
RealBand includes an auto-configuration utility to profile your computer’s sound card and install optimal parameters
to use when recording and playing back digital audio. Go to Options | Preferences and select the Audio tab to view
and edit these settings. You will see the Audio dialog.
Chapter 1: Welcome
12
Pressing the [Default (MME only)] button instructs the program to analyze your sound card and apply the optimal
values for your system if you are using the standard MME audio drivers. These settings normally don’t need to be
changed.
Project Recording Options
The options you may need to manually adjust in this dialog are:
1.) The “Audio File Type” shown at the top of this dialog. Select the 96 kHz, 48 kHz, 44.1 kHz or 22.05 kHz
sample rate option at either 16-bit or 24-bit depth, depending on your system’s speed and storage capacity,
on the number of tracks, and on the fidelity you wish to record. For CD audio use the 16-bit, 44.1 kHz
setting. If you experience sluggish performance from your computer you could try the 22.05 kHz setting.
2.) The “Audio Driver Type” is MME by default, but if your sound card supports ASIO drivers you can choose
this type. ASIO is an alternate driver system developed by Steinberg. It allows for much lower latency
than ordinary MME drivers. When RealBand detects ASIO drivers it will prompt you to ask if you want to
use them.
3.) The [Drivers] button will bring up either the Audio Drivers dialog if the driver type is set to MME or the
ASIO Audio Drivers dialog if the driver type is ASIO.
If using MME, the Microsoft Sound Mapper is selected by default for both input and output. If you have
multiple sound cards, or a multiple I/O card, you can select more than one input or output. This will affect
the computer performance when recording or playing audio tracks. The more ports that are selected, the
more demand is placed on your computer. This may require a very fast computer.
4.) “Input Channel for MONO Tracks” - Left/Right/L+R (2 Tracks). Since most digital audio sound cards are
stereo you have the option of recording to your project using the left channel, the right channel, or both. To
determine the best setting for your recordings you must consider the audio source being recorded. For
example, if you are recording a single voice with a mono-microphone you would choose either Left or
Chapter 1: Welcome 13
Right channel to record. If your recording source is stereo, such as a guitar preamp or a synthesizer with
stereo outputs, you should select L+R (2 Tracks) from the “Input Channel for MONO Tracks” list box.
Note: If you are using multiple sound cards this setting must be set to L+R (2 Tracks). Also, if performance is sluggish with
multiple sound cards selected you should disable some of the sound cards to free up system resources.
5.) The text box that displays the path of your “Audio Temp Directory” is another important setting.
If you have only one hard drive then you do not need to worry about this setting, just leave it on the default
setting of C:\windows\temp.
If you have multiple hard drives or multiple partitions you should use the [Browse] button to point to the
best performing drive with the most available disk space.
If you don’t know what your “best” hard drive is, we have also included a special hard drive benchmarking utility so
that you can test your hard drive(s) for their audio-recording capabilities to aid you in making this selection.
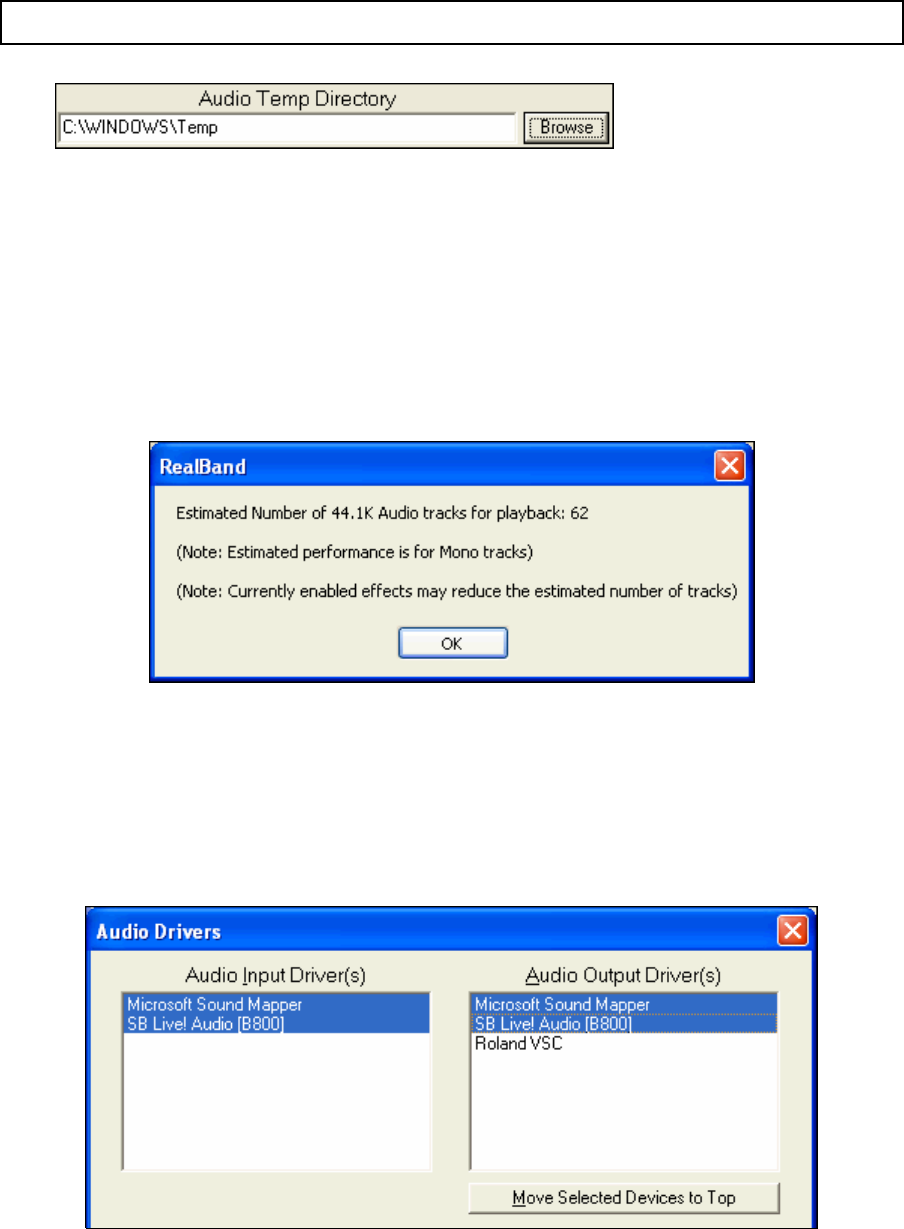
To test your hard drive(s) for their audio capabilities select the Test Audio Performance option from the Action
menu. This will test your system and give you its findings on the digital audio recording capabilities.
To reapply this benchmark with another drive revisit the Audio dialog and change the path of the “Audio Temp
Directory” to another drive, D:\temp for instance. Then select Test Audio Performance from the Action menu again
and note the difference in the estimated number of tracks for each drive.
Audio performance benchmark results.
Setup for Multiple Sound Cards or Multi –Port Audio Cards
RealBand has the ability to input and output tracks of digital audio through separate channels of multiple sound
cards or multiple ports of a multichannel card. If your computer system has multiple sound cards, or if you have a
multiple channel audio card, you can configure RealBand for digital audio production through a mixer or other
multi-channel system such as the front and rear speakers of a surround sound setup.
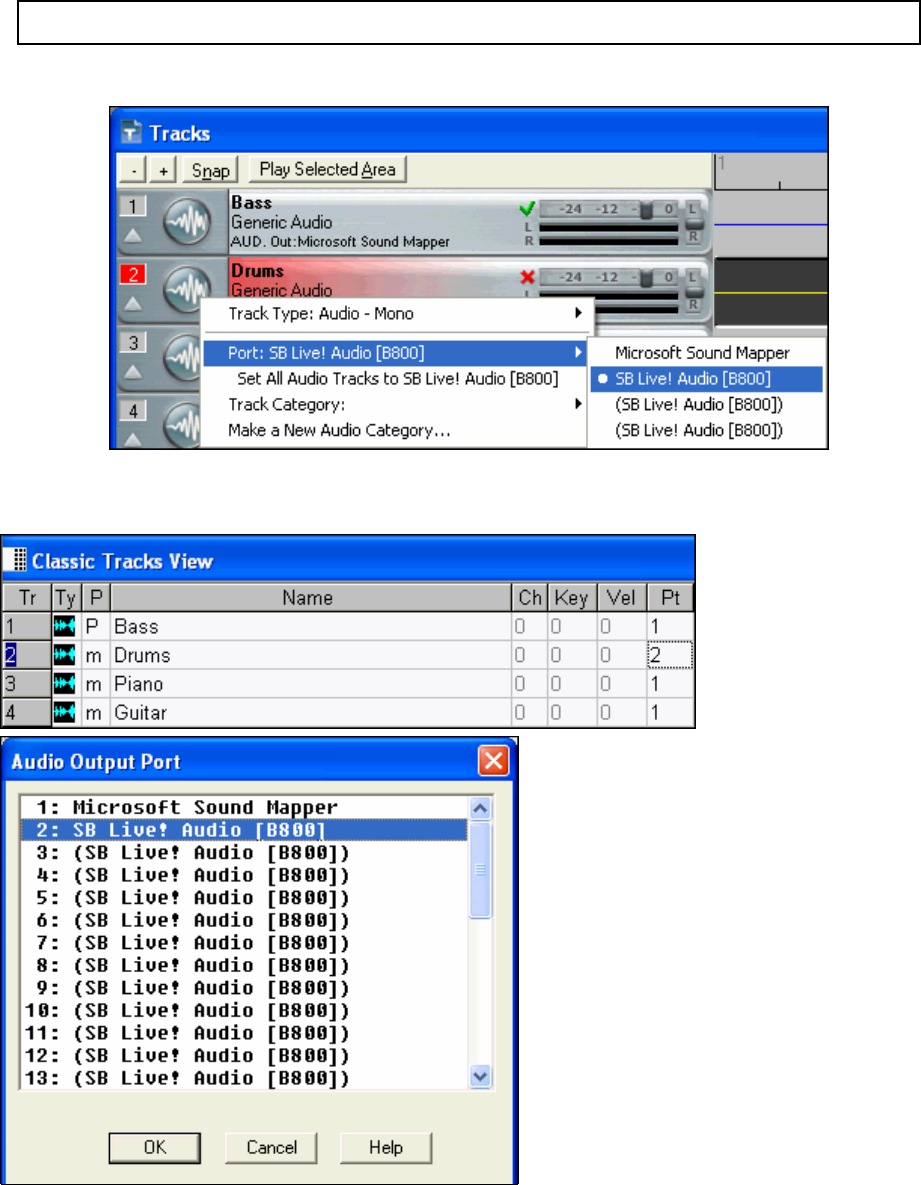
1.) To configure for multiple sound cards choose the [Drivers] button from the Audio dialog to bring up the
Audio Drivers dialog.
Chapter 1: Welcome
14
2.) Choose the input and output digital audio devices that you want to use.
Note: The Microsoft Sound Mapper driver option refers to the default Windows sound card setup as configured in the
Windows Control Panel.
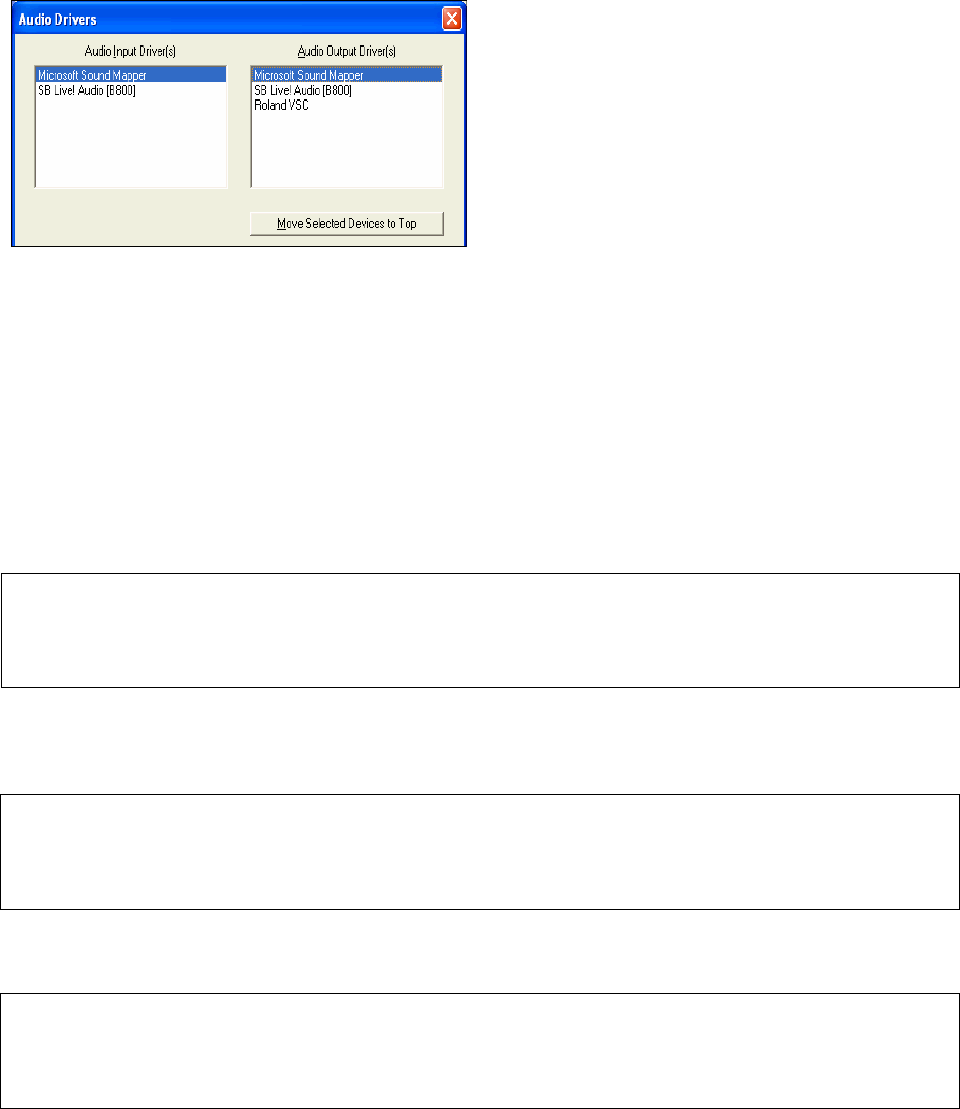
3.) In the Tracks window you can choose which sound card to output each track of audio on by clicking on the
track type icon and selecting one of the ports that you activated in the Audio Drivers dialog.
In the Classic Tracks View window you can choose which sound card to output a given track of digital audio on by
double-clicking the Pt column for any given audio track. Here, we have set the Bass, Piano, and Guitar tracks to be
output through the Pt 1 sound card, and the Drums to be output through the Pt 2 sound card.
The Audio Output Port dialog is presented
when the Pt column is double-clicked.
The sound cards/drivers selected in this dialog
will correspond to the number shown to the left
of the driver name and in the Pt column in the
Classic Tracks window.
The Safe boot-up option gives the user the chance to boot-up RealBand with clean configuration and INI files if a
crash occurred during the most recent session. This runs automatically on launching the program after a crash.
Chapter 1: Welcome 15
Audio Drivers Tutorial
MME Audio Drivers
The [Drivers…] button in the Options | Preferences Audio dialog brings the Audio Drivers dialog, which lets you
select Audio Input and Audio Output drivers. This dialog is for MME drivers, and not ASIO.
By default, the Microsoft Sound Mapper is selected for both input and output. If you have multiple sound cards, or
a multiple I/O card, you can select more than one input or output. This affects computer performance; the more
ports that are selected, the more demand is placed on your computer.
Order of Audio Ports
The [Move Selected Devices to Top] button lets you adjust the order of the Audio Output ports. You can choose
which Audio Output devices appear as Port 1, Port 2, etc. within RealBand, and not be stuck with the default
ordering for the ports determined by the Windows operating system.
If the ports are in a different order than the order you want, you can select (highlight) one or more ports, and press
the [Move Selected Devices to Top] button. This will move the highlighted ports to the top of the list.
When you launch the Audio Drivers dialog, all the highlighted ports will always be shown at the top. They will be
in the same order they were before, relative to each other. For example, let’s say you have 4 ports on your system,
and, by default they show up sequentially:
Driver A
Driver B
Driver C
Driver D
In the preceding picture, none are highlighted. Now, let’s say that you highlight the 4th port (Driver D), and move it
to the top, and then you highlight the last port in the list (which is now Driver C, since Driver D was moved to the
top). You now have 2 ports selected, (Driver D at the top and Driver C at the bottom). Driver D and Driver C will
be ports 1 and 2 within RealBand.
Driver D
Driver A
Driver B
Driver C
The next time you launch the Audio Drivers dialog, you’ll see Driver D and Driver C at the top, followed by the
other two un-highlighted ports. The important point here is that the chosen order of the highlighted ports Driver D
followed by Driver C was preserved, as shown in the picture below.
Driver D
Driver C
Driver A
Driver B
The Microsoft Sound Mapper will use the sound card selected as the preferred device in the Control Panel | Sounds
and Audio Devices | Audio tab. You should not select both the Microsoft Sound Mapper and the device it uses. For
Chapter 1: Welcome
16
example, if the preferred output device in the Audio Tab of the Multimedia settings in Control Panel is set to “AWE
64 Wave Out” you should NOT select both the “Microsoft Sound Mapper” and the “AWE 64 Wave Out” as two
output ports in RealBand. You would just select one or the other, but not both. If you selected both you would get
an error message saying you couldn’t open one of the devices.
Recording Tracks in Stereo or Mono
Each Input and Output port is a Stereo pair, with a left and right channel. For example, if you select 4 Input Ports
and 4 Output Ports, then you would be actually getting 8 input and 8 output channels, since each audio port has both
a left and right channel. In the Tracks window, you can select the output port for each track, and in the Mixer
window you can use the pan setting for the track to control where the output gets sent (left or right channel for the
port).
When recording to a stereo audio track, the track will contain both the left and right channels. If you’ve selected
multiple input ports, RealBand will record to multiple stereo tracks and offer to insert stereo track(s) if necessary.
MONO tracks contain only 1 channel per track, but you could record mono tracks in pairs if you’ve set the “Input
Channel for MONO Tracks” to L+R in the Options | Preferences | Audio settings.
When recording to MONO tracks, multiple ports are only utilized if the Input Channel for MONO tracks in the
Options | Preferences | Audio settings is set to “L+R.” This will be set to “L+R” automatically if you select multiple
input ports. The audio data will be recorded as 1 L+R pair per input port with all the data recorded on adjacent
available tracks. Tracks will be inserted if necessary (same method as when recording L+R with a single port).
See the Options - Audio Preferences help topic for more information on stereo recording. Multi-port recording
works the same as stereo recording, except there is more than one pair of stereo tracks being recorded by RealBand.
If the Record Channel is set to “Left” or “Right” only Input Port number 1 (the first input port in the list that was
selected by you in the Audio Drivers dialog) will be recorded onto a MONO track.
Note: Port number 1 is used as a source of timing when syncing MIDI to digital audio. If you are attempting to use two
different brands of sound cards together on one computer as two separate ports, there may be timing problems if the cards
have different DMA buffer sizes, but it is possible you may not encounter any noticeable timing issues. The multi-port feature
is mainly meant for multi-port cards. Feel free to try multiple sound cards, but your results may vary.
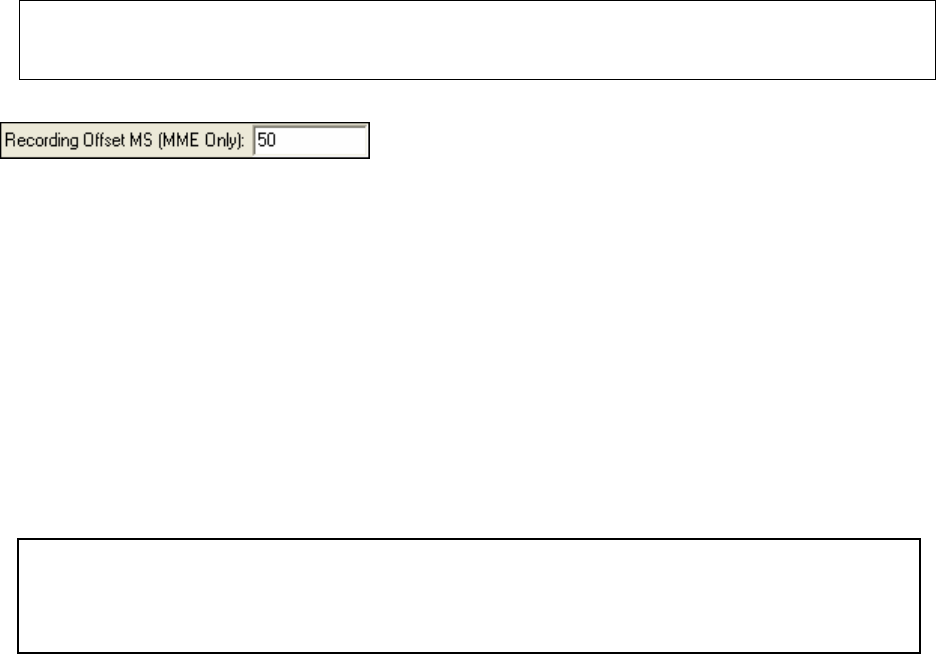
MME Recording Offset
The “Recording Offset MS (MME Only)”setting is found in the Options | Preferences Audio dialog. It can be used
to correct an MME timing issue under Windows Vista that can cause recorded tracks to be delayed in time. Should
that happen, you can increase the offset to a setting greater than zero. Usually the delay is around 50 to 60ms.
ASIO Audio Drivers
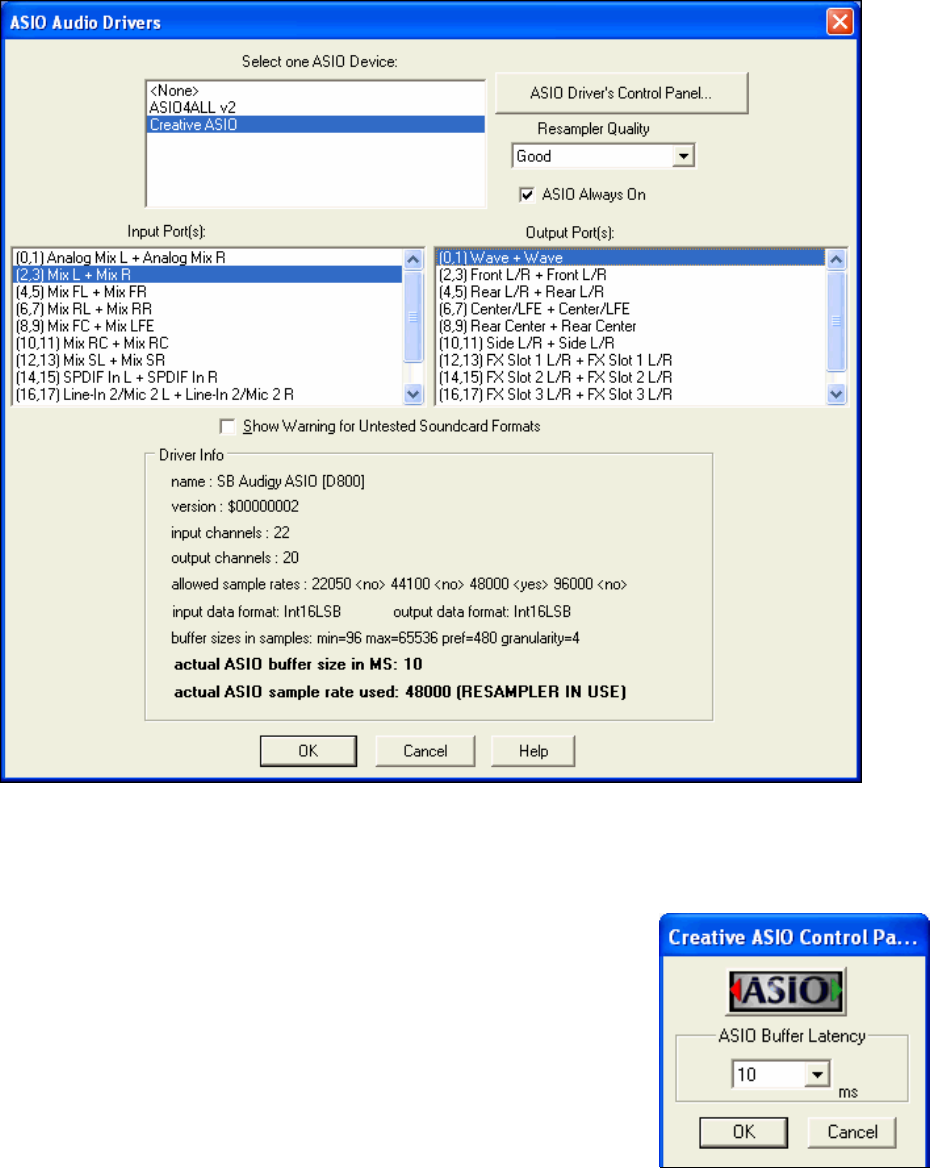
This dialog lets you choose an ASIO driver. ASIO is an alternate driver system developed by Steinberg. It has
much lower latency than ordinary MME drivers.
You can arrive at this dialog in 3 different ways:
1) If you haven’t used ASIO drivers, but RealBand detected them, and you answered “Yes” when asked if you want
to use an ASIO driver.
2) If, within the Audio Preferences, you change the audio Driver Type from MME to ASIO.
3) If the audio Driver Type is already set to ASIO, but you later press the Drivers button in the Audio Preferences.
The Select one ASIO Driver list box lets you select an ASIO driver to use. You can only select one ASIO driver at
a time.
ASIO4All Driver Warning
There is a warning if the ASIO4All driver is “not connected”
Sometimes the ASIO4All driver will not be connected to an audio driver and output will be silent. This is usually due to a
soft synth already using the audio driver. If RealBand detects that ASIO4ALL isn’t connected, it will warn you about this, so
you are aware of why the audio is silent.
Chapter 1: Welcome 17
Once you have selected an ASIO driver, you will see the Input Port(s) and Output Port(s) list boxes filled with
your driver’s input and output ports. By default, the first of each will be selected. You are allowed to select
multiple ports with a Ctrl+click on the ports you choose in the list, and all the ports you select will be available for
output within RealBand. If you do not hear input or output, then you may need to try different ports than the
defaults. You may need to read your sound card’s instructions to determine the correct ports to use.
The [ASIO Driver’s Control Panel] button launches a settings dialog
specifically provided by your driver manufacturer. This usually lets you adjust
the latency by letting you choose different buffer sizes in milliseconds.
Some drivers might let you choose the buffer size in samples, which is less
convenient than milliseconds.
The smaller the buffer size, the lower the latency, and the faster the response. Smaller buffers require more CPU
power and if you hear dropouts or artifacts, you may need to increase the buffer size.
Since many ASIO drivers do not support multiple sample rates, RealBand has a built-in resampler which lets you
play and record songs that have a different sampling rate than the rate(s) directly supported by your ASIO driver.

Chapter 1: Welcome
18
The Resampler Quality combo lets you choose Fast, Good, Better, or Best. Fast is the quickest but is the lowest of
the four levels of quality. Best is the slowest (uses more CPU time) but the most transparent and accurate quality.
See the following Understanding Latency section.
ASIO always on is normally selected, but it can be disabled if a driver has trouble running ASIO constantly. When
this setting is turned off (unchecked), the ASIO driver is only used for playback and recording and MIDI Thru will
be routed to the default MIDI Output destination as selected in the MIDI Driver Setup. This minimizes MIDI Thru
latency when ASIO is not on, and it is the same way MIDI Thru behaves with high-latency MME drivers.
The Driver Info field shows various characteristics of your driver.
The Name is the driver’s name.
The Version is the version number of your driver.
Input Channels is the total number of mono input channels that your sound card has. (Note: RealBand groups
these into stereo pairs.)
Output Channels is the total number of mono output channels that your sound card has. (Note: RealBand groups
these into stereo pairs.)
The Allowed Sample Rates field shows the sample rates allowed by your sound card’s ASIO driver. RealBand has
a built-in resampler which lets you play and record files that aren’t directly supported by your ASIO driver.
Input data format and output data format is the format of the data that the ASIO driver uses (such as integer or
float, 16 or 32 bit, LSB or MSB which is the ordering of the bytes).
The Buffer Sizes In Samples shows a range of allowed buffer sizes. The Pref is the preferred size, and this is the
size that RealBand uses. Your driver may alter the preferred size if you’ve launched the ASIO Driver Control Panel
and have selected a new buffer size from within the driver’s Control Panel. If your driver changes the preferred
size, then RealBand will be aware of the new preferred size.
Actual ASIO buffer size in MS is the length of an ASIO buffer in milliseconds.
Actual ASIO sample rate used is the sample rate of the ASIO driver itself. If it says (RESAMPLER IN USE) then
the .SEQ file is a different sample rate than the ASIO driver. If it says (RESAMPLER NOT IN USE) then the .SEQ
file and ASIO driver both are using the same sample rate.
Understanding Latency
Latency is based on the buffer sizes. The smaller the buffer sizes the lower the latency. Lower latency lets you hear
mixer volume changes quickly, as well as hear MIDI thru echoed out via a DXi soft synth practically in real time.
The latency, in MS is determined by the buffer size in samples, as well as the driver’s sampling rate.
Note: If your ASIO Driver’s control panel lets you select the buffer size in MS, then you don’t have to pay much attention to
the part of this discussion about converting samples to MS.
Converting Samples to MS: For example, suppose the driver’s sample rate is 48K. A 48K sampling rate means
that it is playing at 48,000 samples per second. If the buffer size were 48000 samples, then the latency would be 1
second, or 1000ms (which is very large and slow, and usually not allowed in ASIO). If the buffer size were 4800
samples, which is 1/10 second, then the latency would be 100ms. If the buffer size were 2400 samples, which is
1/20 second, the latency would be 50 ms. If the buffer size were 240 samples, which is 1/200 second, the latency
would be a mere 5ms which is incredibly low and very fast.
Normally, you can change your driver’s latency by pressing the [ASIO Driver’s Control Panel] button. Normally,
the driver specifies the buffer sizes in milliseconds, which equals the latency.
Low latency is faster and more responsive, but uses more CPU power.
Depending on the speed of your computer, you may find that the playback has dropouts, clicks/pops, or other
artifacts if you set the buffer sizes too small. This is because smaller buffers use more CPU power and if your
computer can’t handle the low latency you will hear artifacts. If this happens, you would need to use larger buffer
sizes. You may need to experiment to find what works well. You may be able to use smaller buffers with songs that
don’t have a lot of tracks and effects, but may find that you need to use larger buffers with songs that have more
tracks and use more effects. This is because more tracks and more effects use more CPU power, which leaves less
CPU power available for the audio routines to keep up with lower latencies.

Chapter 2: New Features in RealBand 2010.5 19
Chapter 2: New Features in RealBand 2010.5
Over 30 New Features!
RealBand 2010 added over 30 cool new features to RealBand 2009, and now the update to version 2010.5 adds
many more!
Here are the major new features added in RealBand 2010.5:
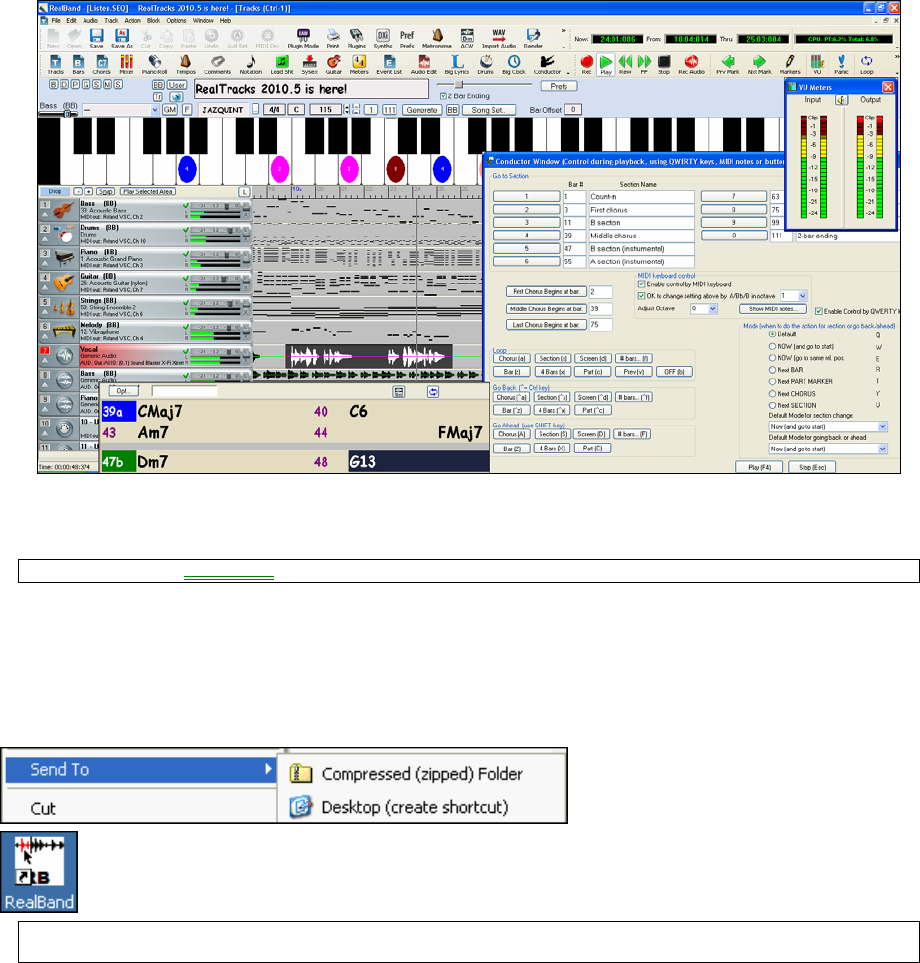
Conductor - Live Looping/Playback Control
As the song is playing, many "single key" hot keys are now available to control the playback and looping of the
song. This is ideal for live performance or "jam sessions" where you want full control of playback. The loops
happen seamlessly, so are suitable for the "dance floor." In addition, you can control PowerTracks from a standard
MIDI keyboard, pressing MIDI keys that correspond to each of the functions. There are over 80 conductor functions
in all. 2) Shift click
Tempo mapping for MIDI Tracks
Tempo mapping allows you to align a freely recorded MIDI performance (i.e., not recorded to a click track) such
that it displays properly in notation and follows the bar lines correctly, but still sounds exactly the same as how you
recorded it. To do this, select "Align Music to click track" from the Track menu, and choose the option to "Insert
tempo changes."
Plus…
- Double/Half time feature in RealTracks dialog.
- Forced accidentals supported in notation.
- Shift-click extends the highlighted area in the Chords window.
Note: RealBand 2010.5 is a free upgrade for owners of RealBand 2010.
New Features in RealBand 2010
These new features were introduced in RealBand 2010.
There’s a new "Plug-in" mode, allowing you to simply Drag-n-Drop tracks between RealBand and another
sequencer (Sonar, Reaper, ProTools, FL-Studio, Nuendo and more). RealTracks now support Shots, Holds, and
Pushes. Endings are improved, and RealTracks endings are now 4 bars long, giving time for the natural decay of the
instruments.
The New Features in RealBand 2010 for Windows are...
There now is a "Plug-in" mode for use with RealBand and another sequencer (Sonar, Reaper, ProTools, FL-
Studio, Nuendo and more). With the new plug-in mode, RealBand is open as a small always-on-top window, and
acts as a plug-in for your favorite DAW/sequencer, so that you can Drag-n-Drop MIDI and audio (WAV) tracks
from RealBand to another sequencer (or to Explorer). Work in another sequencer, type a progression in
RealBand, and then simply drag the track from RealBand -in-a-Box to your sequencer's track at the desired track
and bar location.
RealTracks now support new features, including Shots, Holds, and Pushes. Simply type in the chords as you
normally would, adding periods (…) for shots and holds, and the RealTracks will play them.
RealTracks endings have been enhanced, and are now 4 bar endings instead of 2 bar, allowing time for a natural
decay of the instruments.
RealBand main window is now sizable, when size changes, chord sheet, notation, and other windows redraw in
proportion to the new size. This allows you to have BB open as a small window on screen with other programs, and
you still see a full chord sheet. The screen size is remembered between sessions
Double time and half-time support for RealTracks added. Now you can play any RealTracks at half-time or
double time. This allows you to, for example, in a ballad at tempo of 70, to add a RealTracks Sax solo with tempo of
140, and play it as a double time, which will match the ballad tempo of 70. So now all of your existing RealTracks
can be used at 3 different tempos. (normal, half-time, double time)
Chapter 2: New Features in RealBand 2010.5
20
Automatic Tempo swapping of similar RealTracks. If you have similar RealTracks available at different tempos,
BB will automatically choose the best one to use. For example, if you have a ballad loaded, with an Acoustic Bass
RealTracks at tempo of 60, and you speed up the tempo to 140, and press play, BB will automatically choose an
Acoustic Bass RealTracks closer to tempo of 140, if it is the same genre and feel. This means you can use a simple
Jazz style, and play it at various tempos, without having to set the best RealTracks based on tempos.
RealDrums picker dialog has been enhanced, with information about Artist name, Artist bio, and Real Drums
Set number.
Support enhanced for non-concert instruments (Bb/Eb sax, trumpet etc.). Now when chord sheet is transposed,
you can type in chords in the transposed key, and they will show up as you have entered them, instead of
requiring you to enter the chords in the concert key.
Lyrics enhanced
Undo added for entry of individual lyrics
‘Enter’ and ‘Close’ button added to lyric entry.
More Soloists are now available, up to 2000.
RealTracks Picker dialog enhanced :
- opens up faster.
- New Columns added (tempo swappable, holds type)
StylePicker is enhanced. Favorites and Recent styles now appear in this dialog as separate lists. It now has the
ability to add/remove styles as favorites. A Favorite Style indication (F) shows up for each style. You can filter any
list by only showing favorite styles. Over time, you can build up a list of favorite styles, and only show them when
needed.
Many messages changed to “yellow alerts” at top right of screen, so that you don’t have to respond to the
message, interrupting work flow.
Delete Key (DEL) for Notation Window deletes currently highlighted section.
Comments window stays on top and has selectable font size, useful for pasting/reading lyrics or comments.
Jukebox now supports BB files (MGU and SGU)
Repeat signs now displayed on notation and leadsheet windows.
Big Clock window has setting to not show ticks or milliseconds during playback. During play, will only show
bars:beats, but while stopped shows bars:beats:ticks
Chapter 3: Tutorial – Guided Tour of RealBand 21
Chapter 3: Tutorial – Guided Tour of RealBand
What is RealBand?
RealBand is your all-in-one audio workstation and accompaniment program!
You may be familiar with PG Music’s award-winning Band-in-a-Box program for intelligent automatic music
accompaniment in a great variety of styles, and also with our PowerTracks Pro Audio DAW program for solid
sequencing of both MIDI and digital audio at an incredible price. RealBand takes the main features of both
programs and combines them into a full-featured sequencer with automatic accompaniment.
The other chapters in this guide provide detailed instructions and information on RealBand’s features, but if you
want to make real music now this tutorial will show you how to get started with RealBand, how to use its main
features, and how to enjoy it.
Note: References to Help Topics are highlighted in bold green text throughout this tutorial.
Getting Started
RealBand will install by default to its own folder, usually c:\RealBand. To start the program, double click on the
application file RealBand.exe in this folder.
To place a convenient shortcut on your desktop you can right-click on the file name RealBand.exe for a menu of
options. Select Send To and then Desktop (create shortcut).
You can then open RealBand directly from your desktop by double-clicking on the icon, like
any other Windows program.
Note: If RealBand is already installed and set up on your computer you can now jump ahead to the next topic and get
ready to make real music.
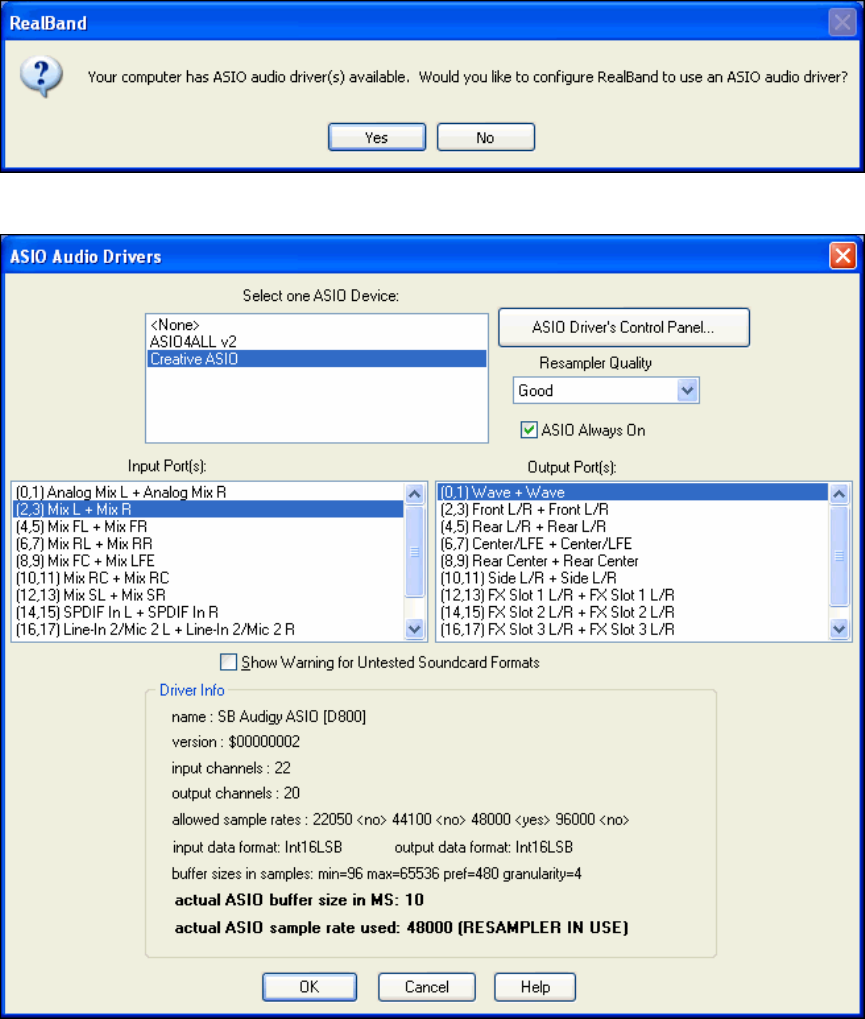
The first time that RealBand runs, it will look for ASIO audio drivers on your system and open this prompt screen if
ASIO drivers are found. If no ASIO drivers are present the standard Windows MME driver will be selected by
default.
Chapter 3: Tutorial – Guided Tour of RealBand
22
Select [Yes] to open the ASIO Audio Drivers dialog and configure your audio setup, or [No] to use the default
MME drivers.
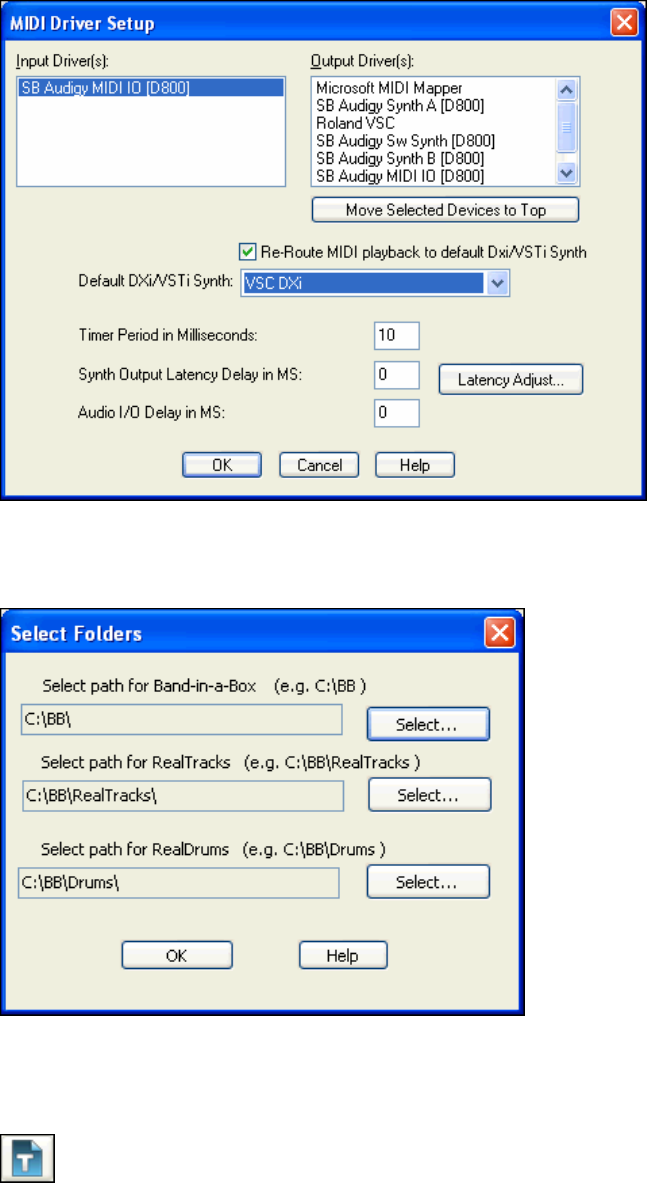
Click on [OK] when you have made your selections, and RealBand will then prompt you to select your MIDI drivers
in the MIDI Driver Setup dialog. If you have DXi or VSTi software synthesizers installed you can choose to send
your MIDI output to the software synth of your choice.
Chapter 3: Tutorial – Guided Tour of RealBand 23
RealBand then prompts you to select the folders for Band-in-a-Box, RealTracks, and RealDrums. These are
important settings, as they enable you to use all of Band-in-a-Box styles, RealDrums, and RealTracks that you have
installed on your system. So if you have the latest Band-in-a-Box SuperPAK, then you also have access to every
style, RealDrums set, and RealTracks instrument there is for use in RealBand too.
Now that RealBand has guided you through the initial setup you can start to have fun. For a start, we could look at
two of the main workspaces, the Tracks window and the Mixer window.
Introduction to the Tracks and Mixer Windows
Although there are many windows you can work in, RealBand defaults to the Tracks window,
which you can also open with the [T] tool bar button, with the hot key combination Ctrl+1, or
with the menu command Window | Tracks.
This window has 48 tracks, each of which can be designated as a MIDI track, a mono audio track, or a stereo audio
track. When starting a new file, any track can be set to any track type in the Tracks window.
Chapter 3: Tutorial – Guided Tour of RealBand
24
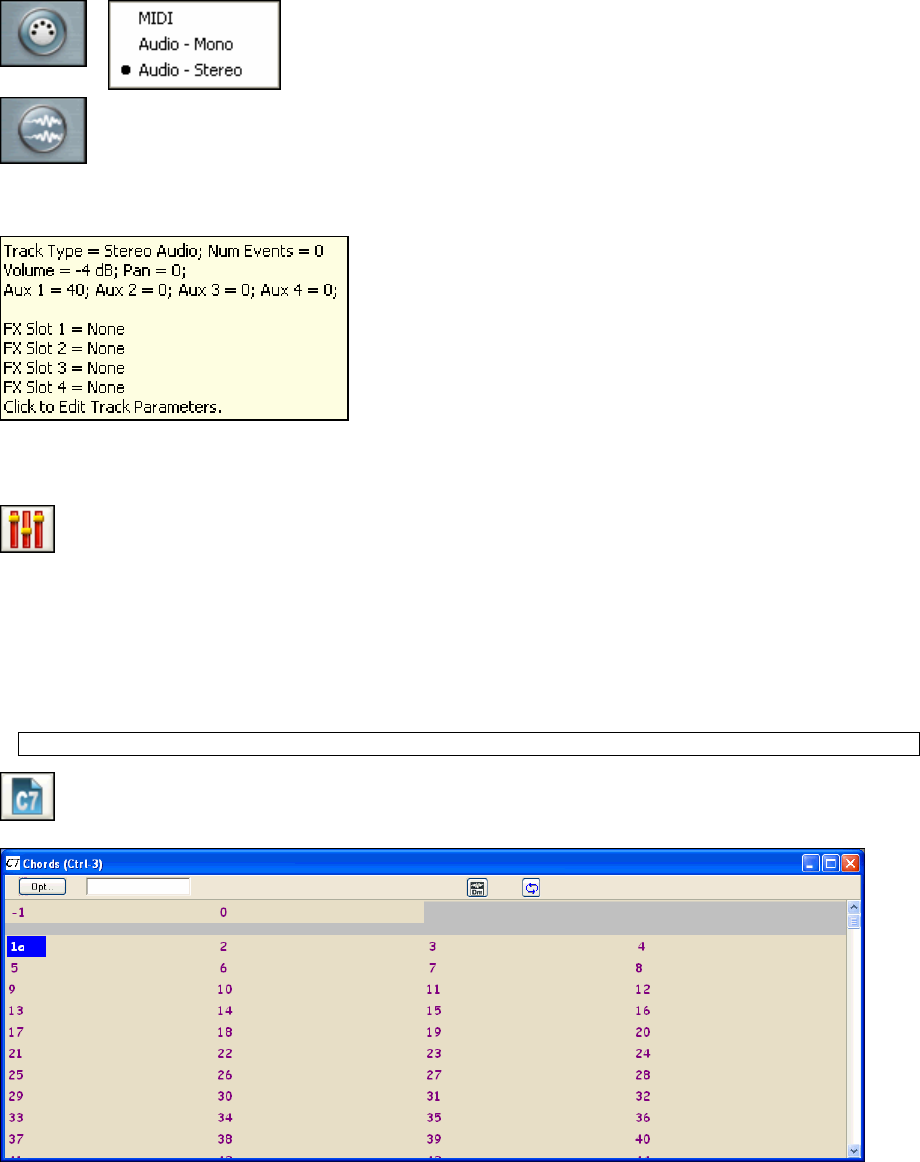
The default track type is MIDI, as indicated by the MIDI plug icon.
A right mouse click on the track type button opens a whole menu of
track options, and we will reset the track to be a stereo audio track.
The track icon changes to show a pair of audio wave forms. (A mono audio track would show
a single audio waveform.)
The track settings are described in detail in the Tracks Window help topic.
For a quick look at the settings for any track just hover the mouse cursor over the track type icon and a pop-up will
give a summary of the current settings.
You’ll have a great time recording your own audio and MIDI tracks in this window, and you can also import wave
files, MP3s, WMA files, MIDI files, and Karaoke files. You’ll find your Tracks window settings duplicated in the
Mixer window, where you will usually spend more time in the later stages of song production.
The Mixer window opens with the mixer icon, or with the hot key combination Ctrl+8, or with
the menu command Window | Mixer.
A right mouse click on any track strip brings up the same menu of track settings as in the Tracks window. These
settings are explained completely in the Mixer Window help topic. There are many additional, and powerful,
features in the mixer including real time audio effects with lots of routing options. This is where you will put the
professional finishing touches on your song productions. The Chords window is where automatic song
arrangements begin.
Creating a New Song Arrangement
Note: This follows the RealBand tutorial video and expands on some of the topics found there.
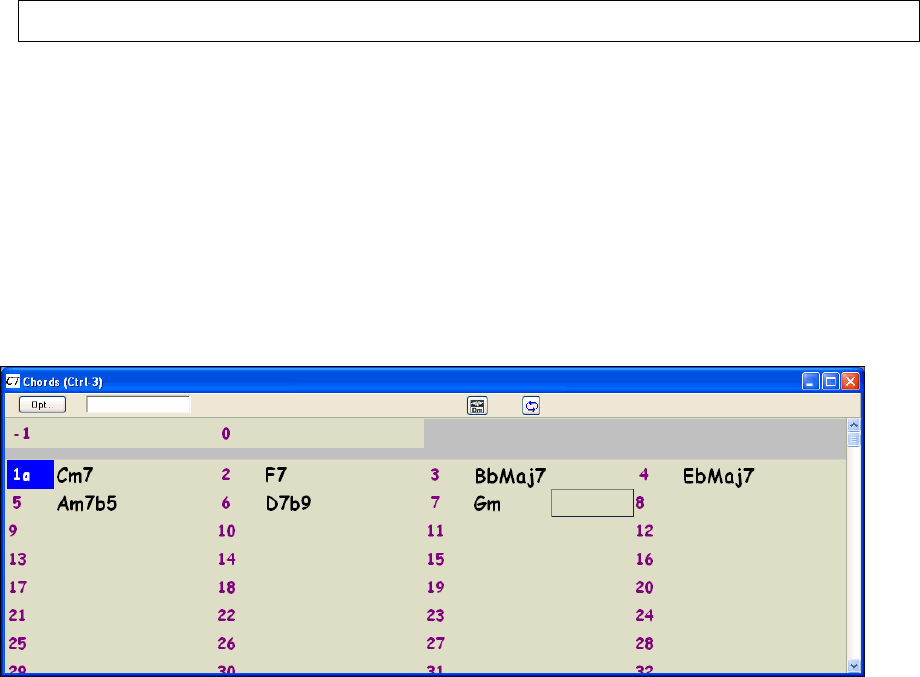
To generate a new song arrangement you begin by typing the chords into the Chords window
using standard chord symbols. This window opens with the [C7] button, the hot key combination
Ctrl+3, or the menu command Window | Chords. (Band-in-a-Box users will feel right at home.)
You’ll see the bars of the song displayed in rows. If a bar contains chord symbols they will be displayed to the right
of the bar number.
Chapter 3: Tutorial – Guided Tour of RealBand 25
Entering chords
Enter the chords for your song by typing them in using standard chord symbols such as C, or Fm7, or Bb7, or
Bb13#9/E. For example type c6 to get the C6 chord. Note that you should never have to use the Shift key, as
RealBand will sort this out for you.
- Use b for a flat, e.g. Bb7.
- Use # or 3 for a sharp, e.g. F#7. (# is the uppercase symbol of 3, so you can actually type F37 to get F#7 -
RealBand will sort out the case, saving you the effort of using <SHIFT>3 to type the # symbol.
- Use / for Slash Chords with alternate Roots such as C7/E (C7 with E bass)
- Use a comma to enter 2 chords in a row. In the example below, we would type Ab9,G9 to enter 2 chords at a time
(on beat 3 and 4 of bar 2)
You can use the Delete key to delete a chord, or type a comma and press Enter.
Each measure is divided into Beat Groups, indicated by a highlight cell. A Beat Group consists of two beats. If a
song is in 4/4, then each measure will contain two beat groups. The current beat group will have a rectangle drawn
around it. You can type two chords into the current beat group. For example if you type this: “C7,G7” (without the
quotes) you’ll see the text you’re typing in the white rectangular panel on the toolbar. If you then hit <Enter> you’ll
see the C7 and G7 chords appear within the current beat group, and the input rectangle will automatically advance to
the next beat group. When you’re in the middle of typing chord symbols, you can use the backspace key to correct a
mistake.
The Left Arrow and Right Arrow keys let you move the input rectangle to a different beat group without entering
chords. You can also click the mouse on a different beat group to move the input rectangle to a new location.
Note: Don’t use the mouse in a situation where you’ve just typed a chord symbol but haven’t yet pressed enter or pressed
the left arrow unless you want your input to go into another beat group.
The help topic Entering Chord Symbols has additional information and a list of the chord spellings that are
recognized by RealBand. The Chords Window topic explains how to enter breaks such as rests and pushes, and how
to copy chords.
Let’s enter some chords in the chord sheet.
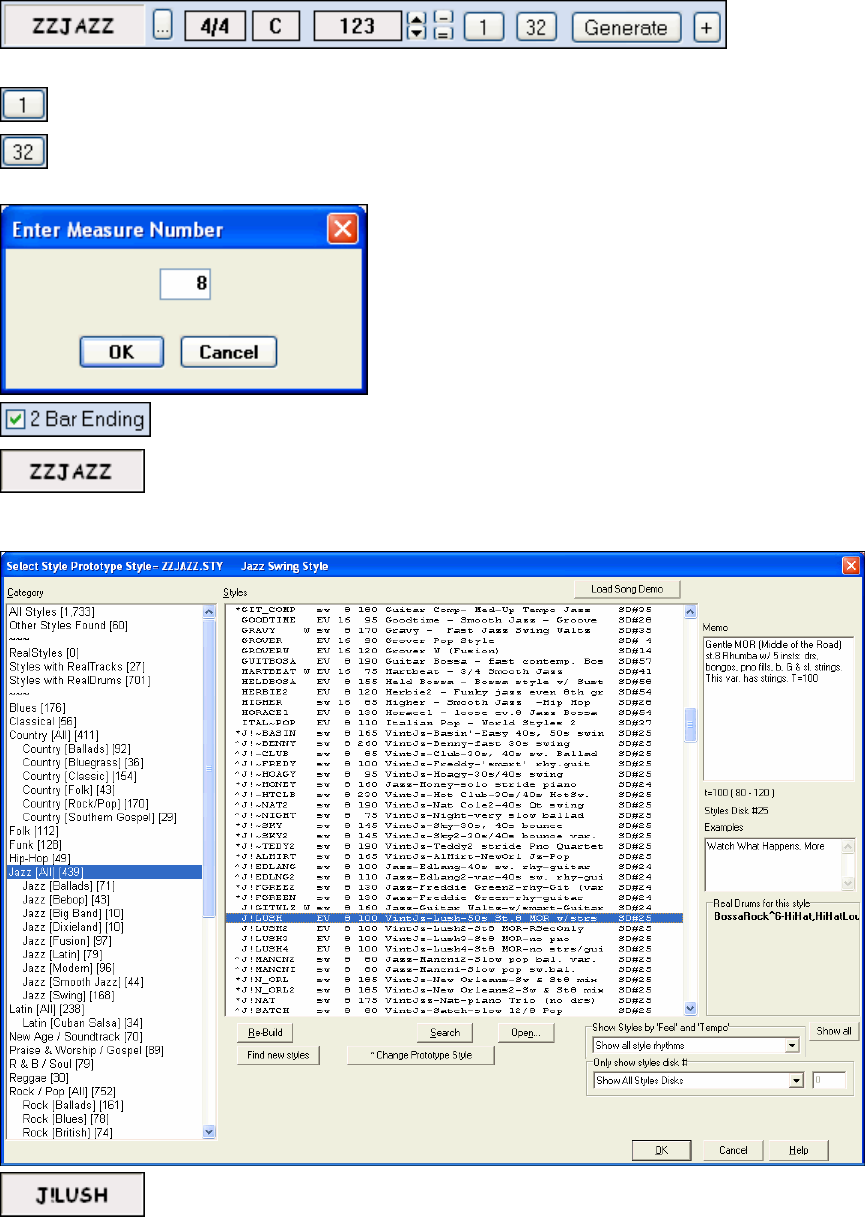
We’ll put our highlight cell in the first beat group of bar and type the letters cm7. Press the Enter key and the chord
symbol Cm7 is entered at the start of bar 1.
Press the Enter key again and the highlight cell moves to bar 2. Type f7 for an F seventh chord and press Enter.
Now we’ll use some chord shortcuts. The letter “j” is the shortcut for a major seventh chord. Type bbj and press
Enter to write the chord symbol BbMaj7 on the chord sheet. Move to the next bar and type ebj to write EbMaj7 in
that bar. Advance to the next bar and type the letters ah to write Am7b5 – the h is for a half-diminished chord. In
the next bar type df and the chord symbol D7b9 will be entered, then enter gm for a G minor chord in bar 7. We’ll
stop there for purposes of this tutorial, and here is what our Chord window looks like now.
Now we’ll move on to the arranger toolbar to generate our RealBand song arrangement.
Chapter 3: Tutorial – Guided Tour of RealBand
26
Arranger settings
For our short tutorial song we’ll start at bar 1 and end at bar 8.
The Start of Song Chorus button is set at one by default, so it will stay the same.
The End of Song Chorus button defaults to 32, so we’ll click on the button and type in the number of the new
end-of-chorus bar in the Enter Measure Number box.
We’d like RealBand to add a 2-bar ending to our song, so we’ll check the 2 Bar Ending box.
Next we’ll choose a style for our song by clicking on the style name to open the StylePicker
window. You aren’t required to have Band-in-a-Box for your RealBand styles, but if you do you will see that all of
your styles are available here.
From the Jazz category select the J!Lush style (or any other style of your choosing) and you’ll
see that the style selection box has been updated with its name.
Chapter 3: Tutorial – Guided Tour of RealBand 27
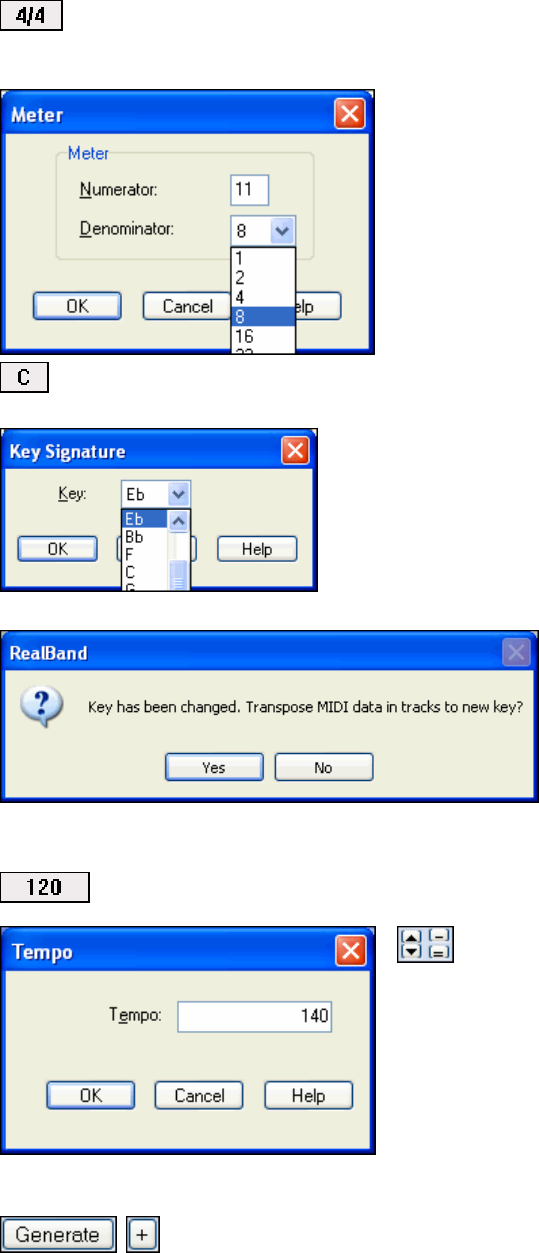
The time signature defaults to 4/4, but a new time signature can be set by clicking in this box to open the
Meter dialog. Compound time signatures are supported; in fact the numerator can be any number from 1 to 99. The
denominator is selected from the drop down combo box.
Our song is in C minor, so we could select the relative major key signature of Eb for fewer accidentals in the
notation display. Click in the key box to open the Key Signature dialog.
Real Band will prompt to ask if you also want to transpose the MIDI tracks for your song to the new key.
In this instance we do not want to transpose the MIDI tracks; we just want to change the key signature. Select [No].
Just before we play our song we can set a tempo.
The tempo box has a setting of 120 bpm. To change it to 140 we’ll click in the box to open the
Tempo dialog and type in 140.
We could also set the tempo with the up and down scroll
arrows, or even tap in a tempo with the minus and equals buttons.
Tempo Calculator (File | File Utilities)
The length of a song depends on tempo and number of bars. With
this calculator, found in the File menu under File Utilities, you can
enter 2 of the 3 variables (length of song in seconds, tempo,
number of bars) and the program calculates the third variable for
you.
So we’ve entered our chords in the Chords window, set the length of our song and added a 2-bar ending, chosen a
Band-in-a-Box style, and set the tempo.
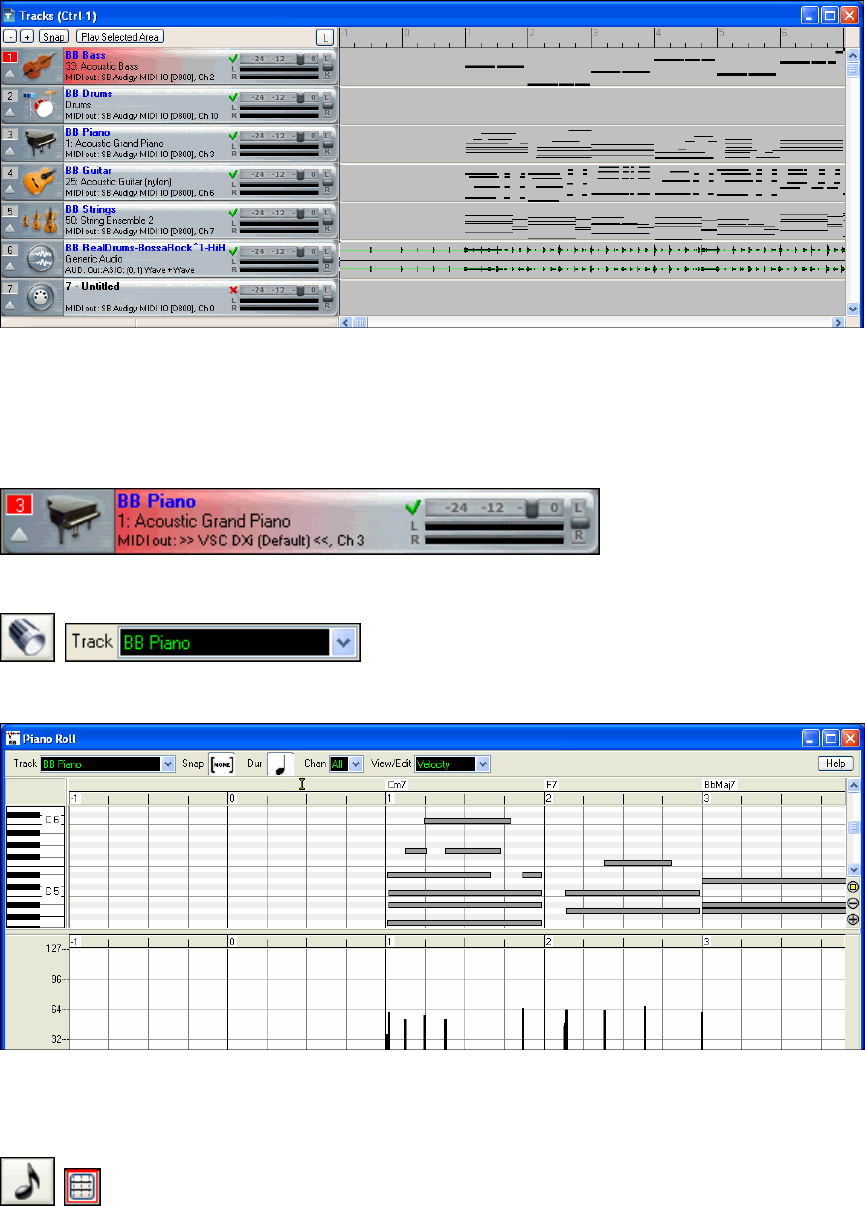
We’re ready to generate an automatic arrangement with BB tracks. RealBand can either
generate the whole song or selected portions of the song when the [Generate] button is pressed, but if you use the [+]
Chapter 3: Tutorial – Guided Tour of RealBand
28
button it will always generate the complete song. When either button is pressed we’ll see our new tracks in the
Tracks window.
The track overview shows us that we have five MIDI tracks playing the parts generated by the J!Lush style, and
because RealDrums are allowed in the Preferences | Song Generation settings the BB Drums track is empty and we
have a RealDrums audio track. Notice that the BB track names are in blue, whereas user track names are in black.
BB tracks cannot be moved or renamed, but you can change any of the settings with the right-click menu – for
example the patch, MIDI port, or MIDI channel. These tracks can also be edited in the track overview and in the
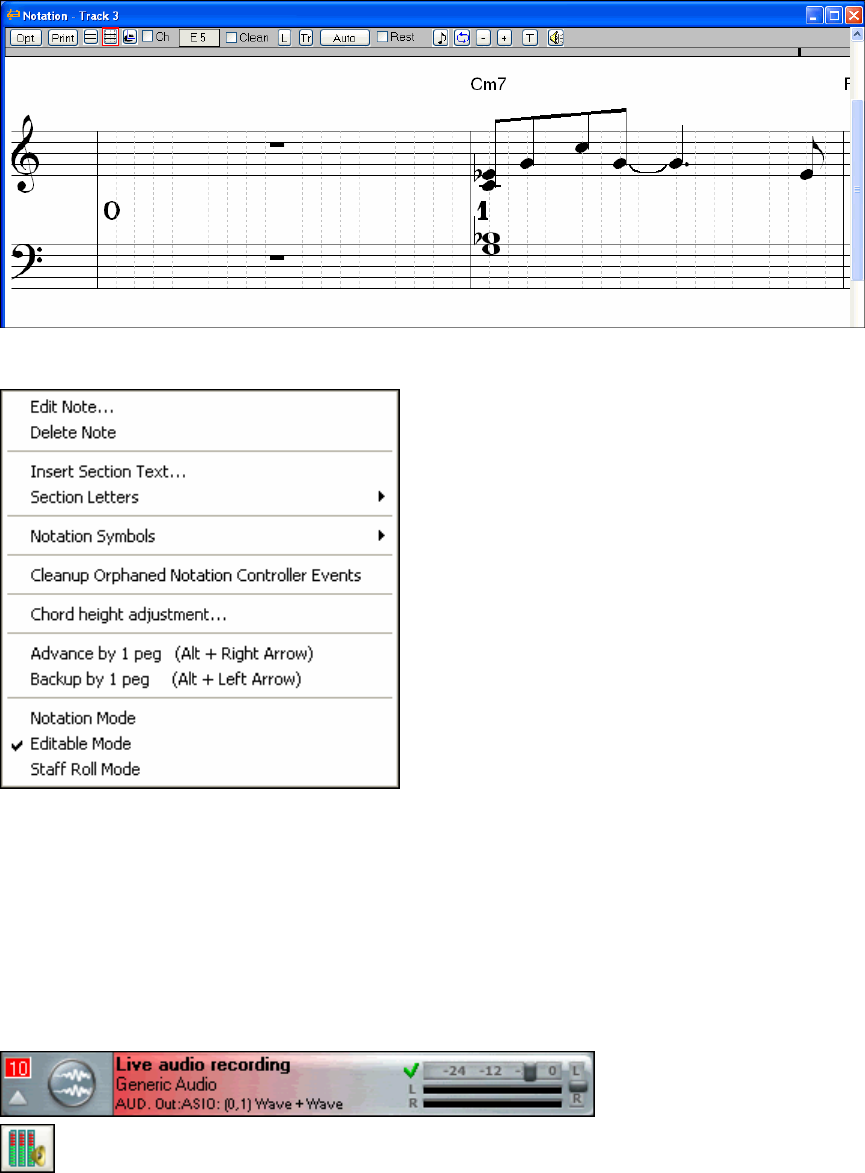
Piano Roll or Notation windows. Let’s examine the BB Piano track in the Piano Roll window.
We can select the BB Piano track while
still in the Tracks window, or we can open the Piano Roll window with the piano roll button and then select BB
Piano from the track list.
In the Piano Roll window notes can be dragged and dropped, shortened or lengthened in the Note Panel, which is the
upper part of the window.
The lower panel is for graphic editing of the selected parameter in the View/Edit list. Note velocity is shown, but
parameters such as pitch bend, channel aftertouch, and MIDI controllers can be edited in this panel as well. Please
see the Piano Roll Window help topic for more on this very useful feature. The BB tracks can also be edited in the
Editable Notation window.
Click on the eighth note toolbar button to open the Notation. In the Notation window toolbar, there
are three buttons for different notation modes. Editable notation is the button with dotted vertical
lines crossing the staff lines.
Chapter 3: Tutorial – Guided Tour of RealBand 29
In this notation window notes can be inserted or deleted, and dragged and dropped. By right-clicking on any note
head all parameters of the note can be edited and symbols and text can be added.
These features are covered in detail in the Notation Window topic.
Now that you have a RealBand accompaniment, your next step might be to record some audio tracks along with the
BB tracks. The audio tracks could be vocals, live instruments, or the line output from a keyboard, mixer, or direct
box, or digital audio if your sound card has that capability.
Audio Recording
As long as your audio drivers have been set up audio recording is simple and straightforward. If you wish you can
configure the destination track as described in the Tracks Window topic, but if you select any blank track and start
recording RealBand will automatically change it to an audio track with the default audio settings.
To begin, select the track you wish to record in either the Tracks or Mixer window.
}
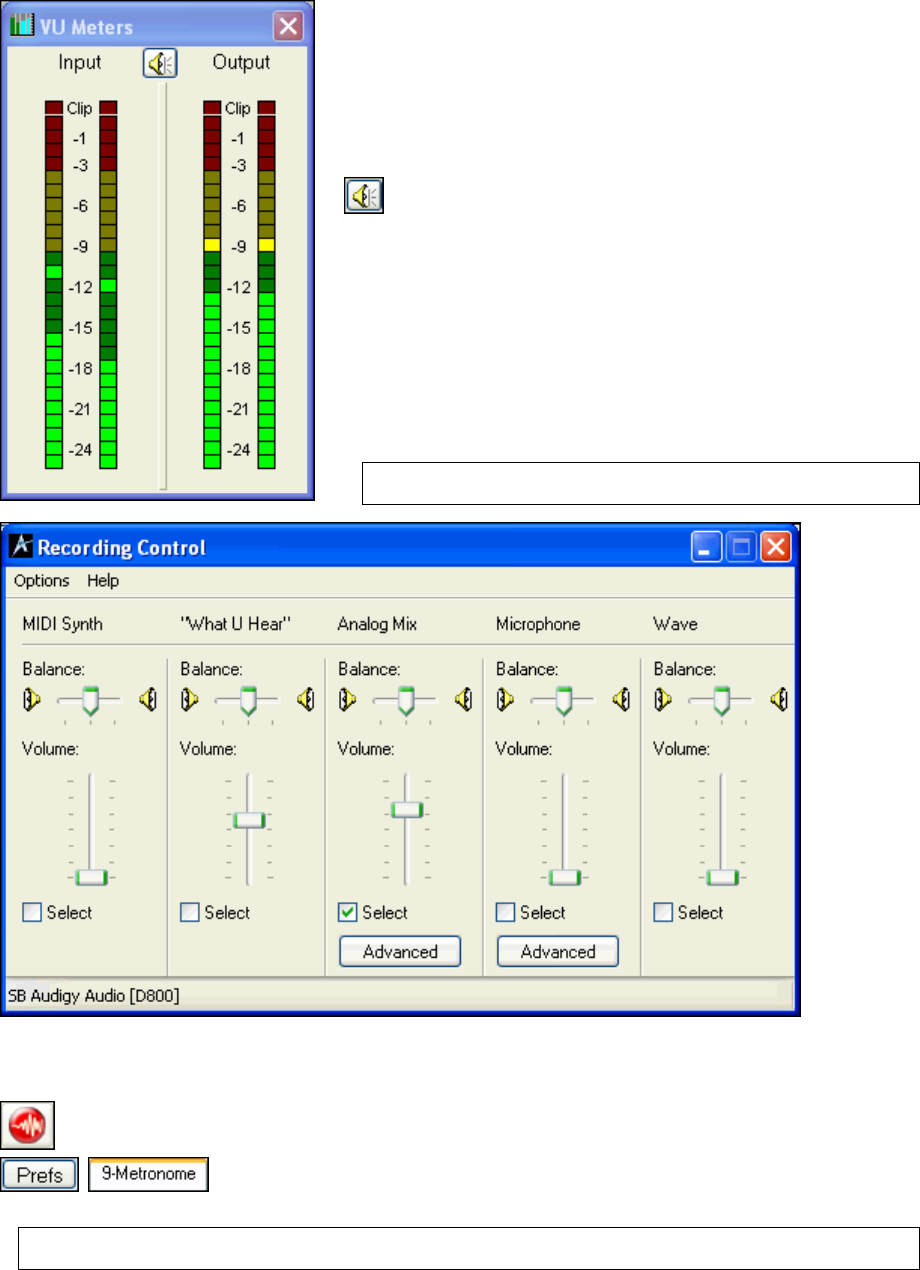
Check your recording level with the built-in VU meters, which open with the meter button on the toolbar.
The meters are resizable and can be dragged to any convenient location on the screen.
Chapter 3: Tutorial – Guided Tour of RealBand
30
The VU Meters window can be left open for monitoring during
recording.
The input levels should normally be active in the mid-range of green
segments with transient peaks in the yellow range. Red indicates levels
that are too high and in danger of clipping, which adds a cracking sound
to your track. When that happens, the top red segment marked “Clip”
will light up. You’ll need to adjust the input level.
To adjust input levels that are either too low or too high just click on this
speaker icon to open the recording control window.
Note: The appearance of this window is different for different sound cards.
The example shown is for a typical Sound Blaster Audigy card.
Our recording input is the analog mix from an external mixer. If you were to select “What U Hear” as your input
you would also be recording the output of the BB tracks to your new track, which is not something your would
normally want to do.
When you’re ready, press on the audio recording button in the toolbar and record your part as the
RealBand accompaniment plays.
You also have the option of using a metronome to count you in and keep time during the
recording using the settings that you choose under the Metronome tab in the Preferences.
Note: During recording, you could follow along with the chord changes in the Chords window, or with a notation part in
either the Notation or Lead Sheet windows.
Chapter 3: Tutorial – Guided Tour of RealBand 31
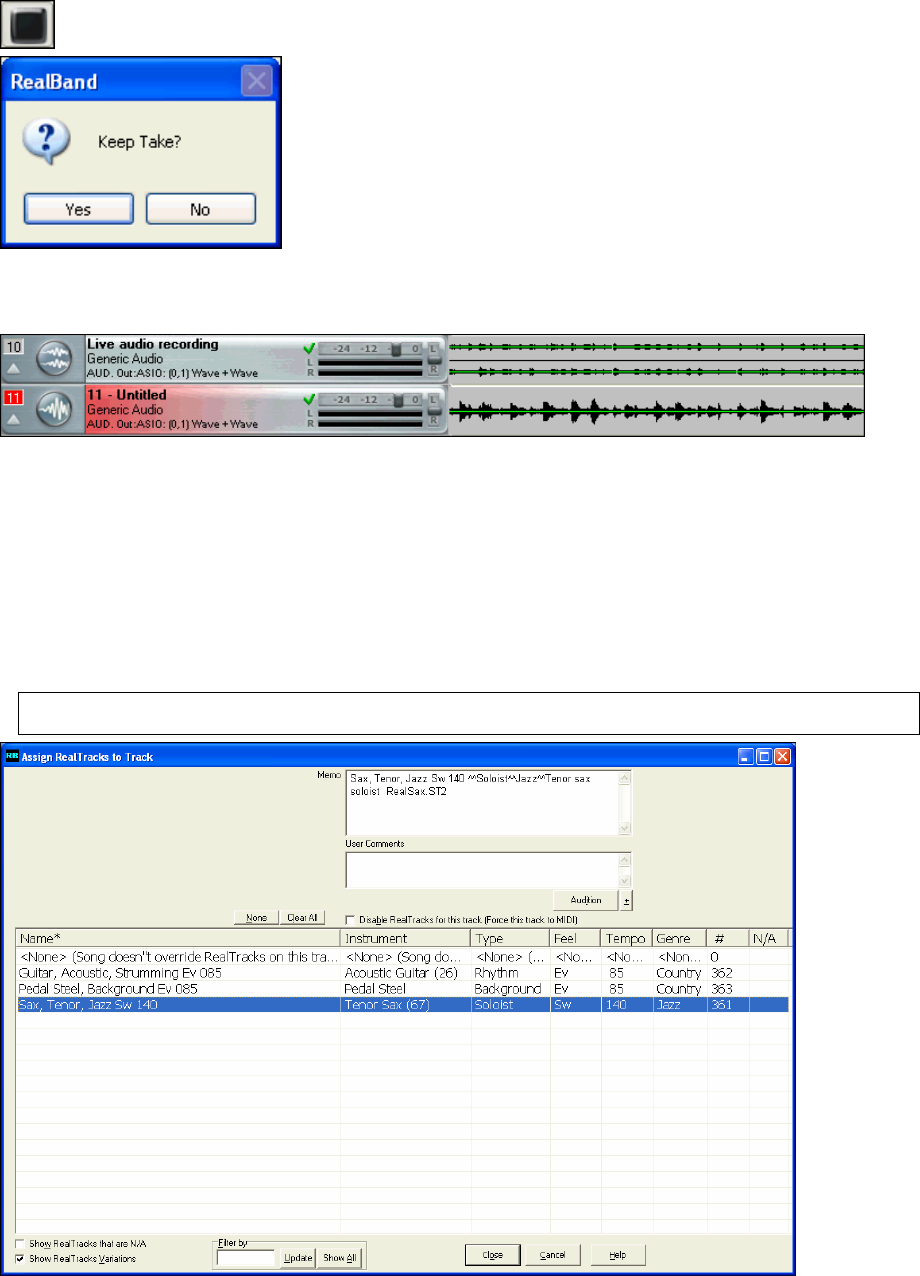
When you’ve finished recording, press the stop button on the toolbar. RealBand will prompt you
to either keep or discard the take.
You can keep recording as many audio tracks as you want up to the limit of the 48 available tracks in RealBand.
Here’s the Tracks window showing an overview of our first recording on track 10 and a second audio recording on
track 11.
“Audio – Stereo” was specified as the track type for track 10 in the right-click Track window menu, but you’ll
notice that Track 11 is a mono audio track. That is because we did not specify any audio settings for this track and
RealBand automatically applied the default audio settings.
If you change your mind about an audio take you can use the Edit | Undo (Keep Take) menu command to clear it.
Or, if you want to remove it at a later session, use the Track | Erase command.
Adding RealTracks
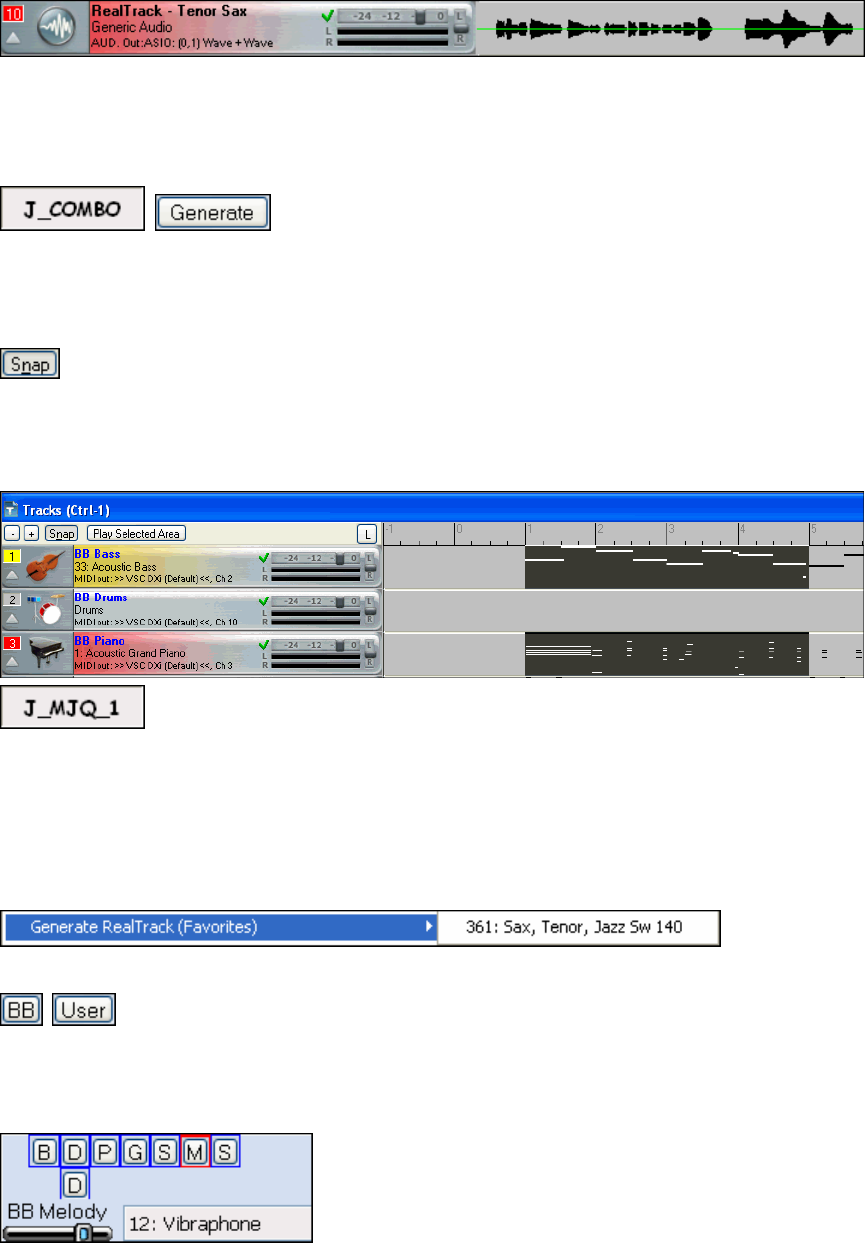
Another way to add live instrumental audio tracks is with RealTracks. To start, right click on any blank track in the
Tracks window. In the menu that opens, click on Select and Generate RealTrack. This opens the Assign
RealTracks to Track dialog.
Note that this is a minimal set of RealTracks for demonstration purposes. There are dozens of RealTracks instruments
available, with many more to come.
Chapter 3: Tutorial – Guided Tour of RealBand
32
We’ve selected Tenor Sax for our RealTrack. Click on the [Close] button and the RealTrack will be generated.
Your RealTracks players never complain about do-overs, so if you don’t get what you want the first time a
RealTrack is generated just generate another one. Or generate several more on different tracks and use the one you
like best, or use the choice sections of different tracks, or layer multiple versions.
Regenerating BB Tracks
You can always generate new BB tracks by choosing a new style and
pressing the [Generate] button. Try as many as you like.
But what if there are tracks, or even parts of tracks, that you want to keep? RealBand lets you keep the parts you
like and just regenerate selected bars on selected tracks. You can keep the same style or use a different style all
together. Here’s an example.
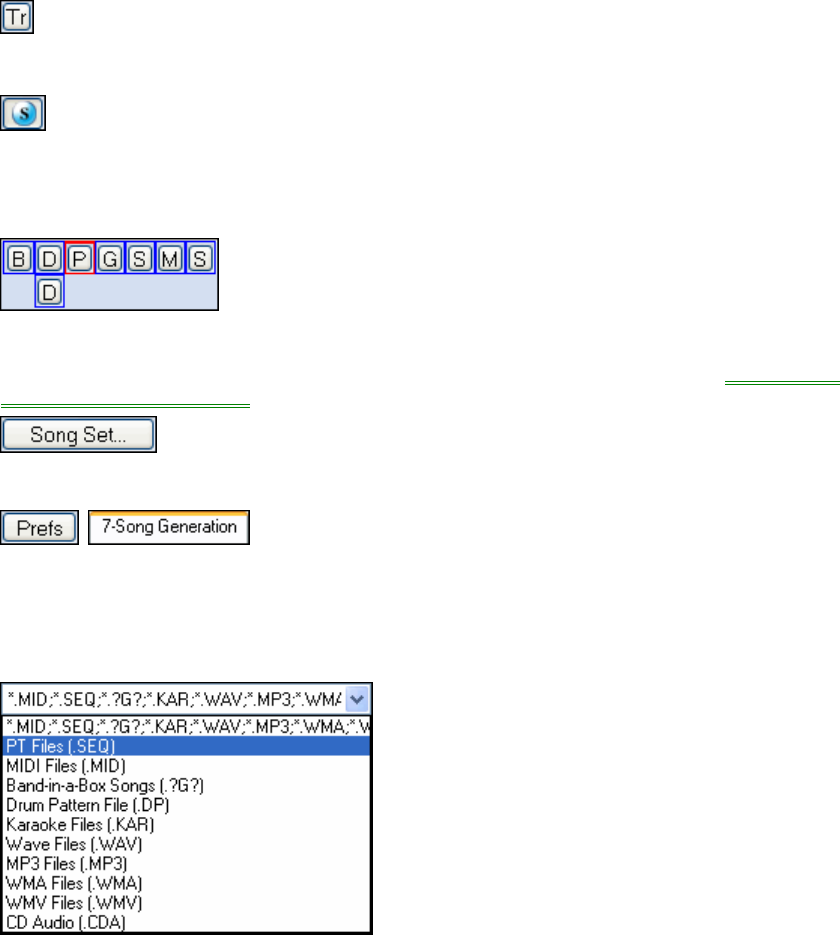
We’ll substitute the first 5 bars of the BB Bass and BB Piano tracks by regenerating them in a different style.
Before selecting the region to regenerate, click on the [Snap] button in the Tracks window. With [Snap]
enabled, RealBand will automatically snap to exact beat and bar line boundaries as you drag your mouse in the track
overview to make your selection.
We’ll select the region we want in the BB Bass track overview. Then that exact same region can be selected in the
BB Piano track with a Ctrl+click on the track name.
Now we can pick another style and only the highlighted areas will be regenerated using that
style. The rest of the arrangement will be unchanged. This is a very powerful feature for customizing and tweaking
your arrangements, especially if you have the full collection of Band-in-a-Box styles.
This feature is not limited to BB tracks. You can use it on RealTracks and RealDrums tracks too. This is especially
useful to generate specific RealTracks passages or fills for your song. To do that, use a blank track in the Tracks
window and highlight the range of beats or bars that you want to fill. Then right click on the track and select either
Select and Generate RealTrack to choose an instrument from your full list or Generate RealTrack (Favorites) to
select from a list of recently used Real instruments.
Navigating Tracks
When your song has BB tracks the first eight rows in the Tracks window are reserved for them. Track 9 is used for
RealDrums. This is not always convenient when you have lots of tracks of your own farther down in the window.
The [BB] and [User] buttons will take you directly to either group of tracks without the need to scroll up and down
in the window.
Chapter 3: Tutorial – Guided Tour of RealBand 33
This group of buttons will take you directly to the selected BB track in the Tracks, Mixer, or Notation windows.
The letters stand for the track name,
B = bass,
D = drums, the second [D] below indicates that RealDrums are present,
P = piano,
G = guitar,
S = strings,
M = melody,
S = solo.
The name of the BB track is displayed along with the instrument patch assigned to that track. There is a volume
slider that will affect only the selected track. This is a quick and convenient way to adjust BB volume levels while
other tracks are playing.
The [Tr] button opens a drop-down list of all track numbers and names. Just click on the track to make it the active
track in the Tracks or Mixer windows.
The [S] button enables soloing of tracks. When it is engaged only the current track is heard. You can have the song
playing with this button pressed and solo different tracks just by clicking on them while the song plays. Ctrl+click
on additional track names will add or remove them from the soloing selection, so it is possible to audition a few
tracks together.
Solo tracks can also be selected with the BB track buttons.
Song Settings and Song Generation Preferences
There are two types of settings that affect how your songs are generated by RealBand, the Song Settings and the
Song Generation Preferences.
Song Settings are accessed from the [Song Set…] toolbar button. These settings apply only to
the current song, including enabling or disabling RealTracks and RealDrums and specifying a particular RealDrums
set for the song.
Song Generation preferences are found in the Preferences dialog. These settings
affect all songs and also include the path to your \bb RealTracks and RealDrums folders.
Importing Songs
As you can see in the File | Open dialogue, RealBand supports all major audio and MIDI file types, including PG
Music’s PowerTracks Pro Audio files (*.SEQ) and Band-in-a-Box files (*.?G?)
Once you’ve opened your song file in RealBand you can use the full power of the program to add parts, edit, mix,
and finally produce a professional finished recording.
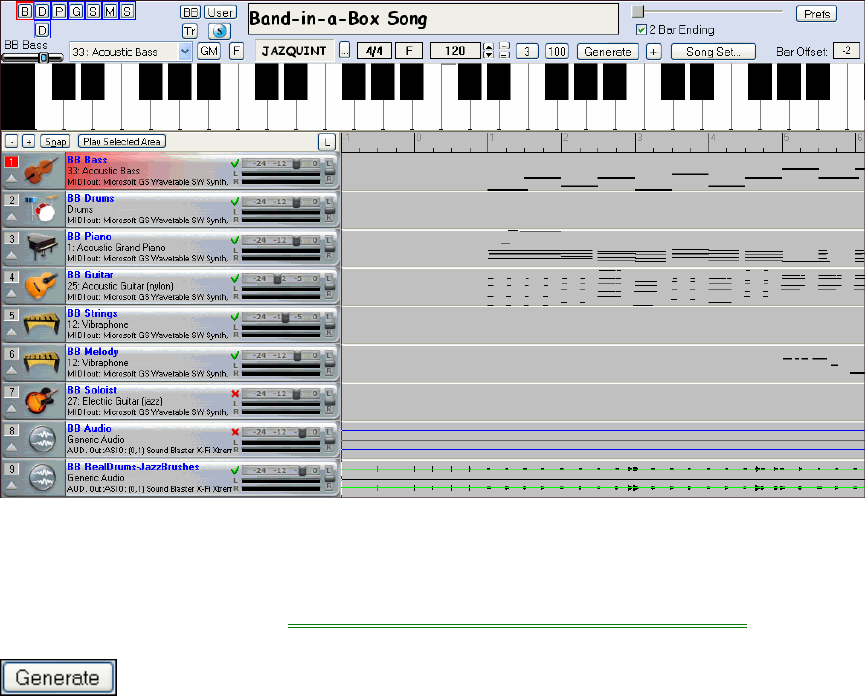
Chapter 3: Tutorial – Guided Tour of RealBand
34
PowerTracks Pro Audio Songs
The PowerTracks Pro Audio .SEQ file is also the native format for RealBand files, so PowerTracks files load and
play exactly as they would in that program.
Band-in-a-Box Songs
When importing a Band-in-a-Box file you have the choice of playing it “as-is” with the arrangement as created by
Band-in-a-Box, or of generating a new arrangement in RealBand.
In this illustration, we see a Band-in-a-Box file that has been opened directly in RealBand. All of the parts,
including the RealDrums track, are present in the blue-labeled BB tracks, 1 through 9.
This arrangement will play exactly as it did the last time it was generated in Band-in-a-Box, which is worth
remembering if you have an arrangement that you particularly liked. To keep it unchanged, you could save all of
your BB tracks as user tracks with the Track menu command Make all BB tracks regular tracks. Or save the song
as a .SEQ (sequence) file in RealBand.
Another option would be to use the Auto Convert Individual MIDI Track to Audio Track feature to render the
MIDI tracks to audio and then save the song as a .SEQ file.
Of course, you can generate a new arrangement with any style and regenerate selected regions, add RealTracks, and
record your own audio tracks, remix, and add effects once your Band-in-a-Box song is in RealBand.
You can see by comparing the BB tracks in this image with the previous one that new BB tracks have been
generated. Both versions use the JAZQUINT style, but any style could be used.
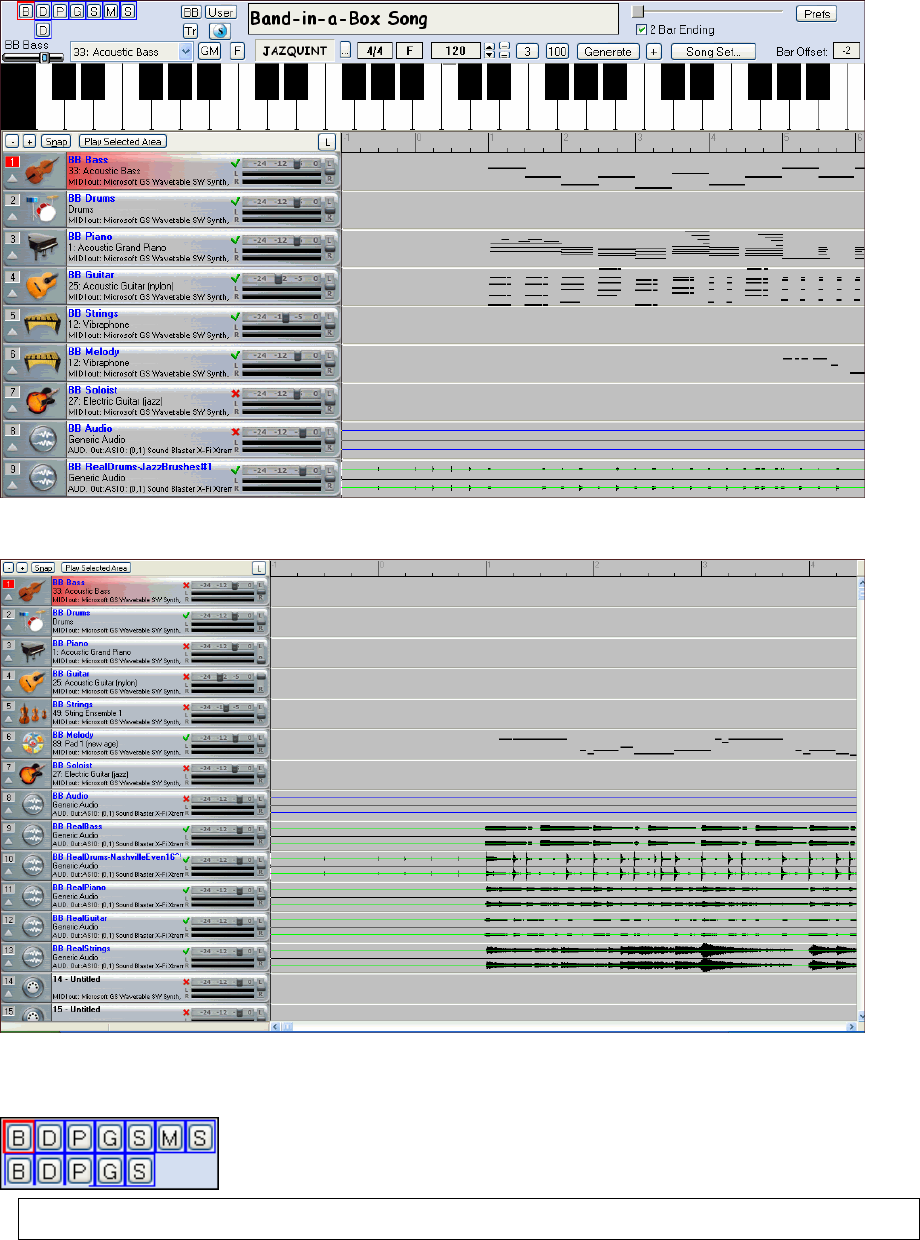
Chapter 3: Tutorial – Guided Tour of RealBand 35
If your Band-in-a-Box song has RealTracks they will be generated in RealBand when you open the file. Here is a
Band-in-a-Box song with an “all RealTracks” style that has been opened in RealBand.
The BB tracks, except for the MIDI Melody track, are empty and there are additional blue-labeled BB RealTracks
starting at track 9. The track buttons now show a row of RealTracks buttons below the BB tracks buttons for the
Bass, Drums, Piano, Guitar, and Strings parts.
Note: The instrument on a BB track or BB RealTrack can be different than the track name. For example, the Piano track
might have an acoustic guitar playing if there is no piano part in the style.
This RealTracks arrangement can be regenerated using any RealTracks style, or you could even generate an
arrangement with a regular Band-in-a-Box style and add BB tracks to the existing RealTracks.
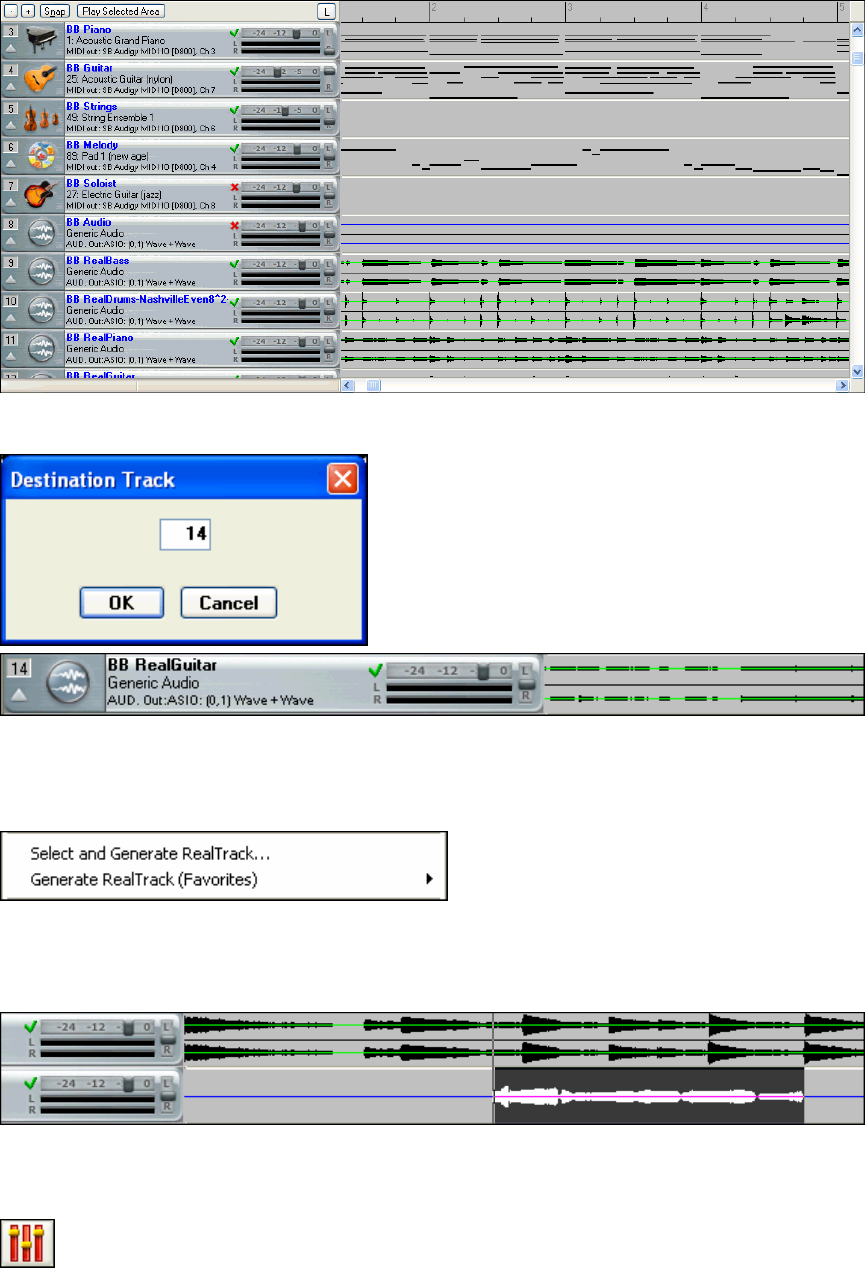
Chapter 3: Tutorial – Guided Tour of RealBand
36
If there are any RealTracks that you want to preserve when regenerating the arrangement you can use the Track |
Duplicate feature to make a copy on a blank track.
This copy will be a user track (as indicated by the name in black type) and will not be affected by generating a new
arrangement.
This is a useful way to generate multiple versions of a Real instrument part and then choose the one you like best, or
edit together your favorite parts from different tracks, or even layer multiple tracks.
Additional RealTracks can be added to your song by right-
clicking on any blank track and selecting one of the two options for generating RealTracks from the track options
menu.
You can also highlight a region of a track and generate your RealTrack for just that region to “drop in” a Real
instrument lick.
Finally, you’ll want to mix your tracks into a finished recording.
Mixing in RealBand
The Mixer window provides real time control of volume and effects. You can launch it with the fader
button on the toolbar or by typing ALT+WÆ8.
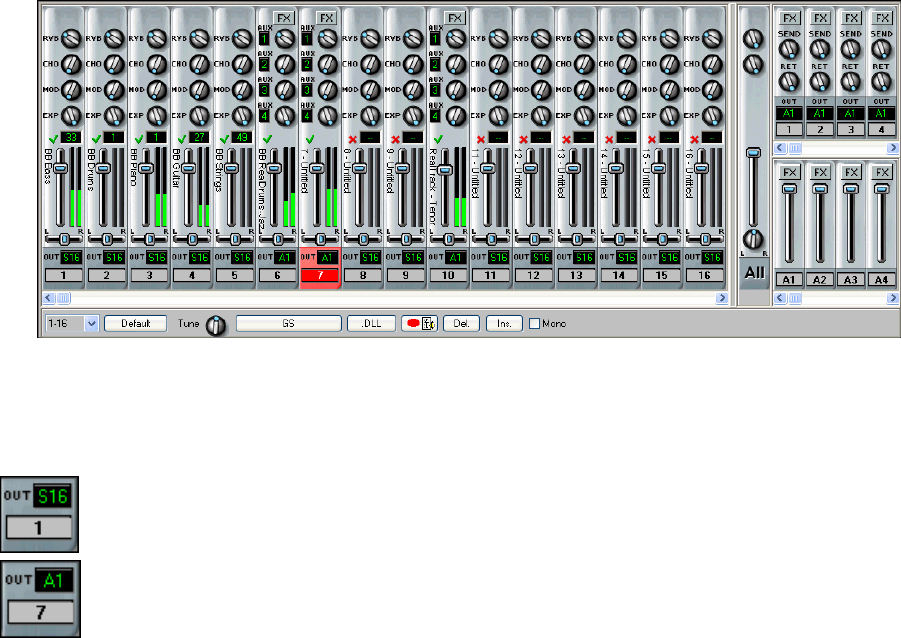
Chapter 3: Tutorial – Guided Tour of RealBand 37
With its own real time effects and support for all other DirectX and VST plug-ins, the RealBand mixer is a powerful
production tool. It offers great flexibility in applying these effects to individual tracks, to sub-mixes, and to the final
audio output.
This is an integrated mixer that controls both MIDI and audio tracks. There are sliders for all 48 tracks, 8 auxiliary
effects (Aux) busses, and a combined total of 16 audio output ports or audio subgroups.
The Mixer track strips conveniently show the track name vertically to the left of the volume sliders. This is the track
name that is assigned in the Tracks window, go to that window to add or change track strip names.
When the mouse cursor is positioned over a track number in the Mixer window a popup box will display all of the
Track windows settings for the track - the track name and type, patch name, volume and pan settings, and effects
settings.
MIDI tracks show an output port with an “M” prefix for a MIDI port or an “S” for a software
synthesizer. They have controls for volume, pan, reverb, chorus, modulation, and expression plus a VU
meter, a MIDI patch selection box, and a mute/unmute button.
Audio tracks either have a prefix of “A,” for an audio output, or “G,” for an audio subgroup, on their
output ports. They have volume and pan controls, a stereo VU meter, a mute/unmute button, four
assignable auxiliary sends, and a track-specific FX insert.
In addition to the track specific effects, there are eight global busses that can each have four chained effects each.
You can assign each audio track to four different Aux busses and adjust the amount that each audio track uses the
effects in each assigned bus. If that isn’t enough, you can add four chained effects to each audio subgroup and also
to the main output - this will affect all tracks.
For a full description of the Mixer and the use of its features please refer to the Mixer Window help topic.
Having more fun with RealBand!
You’ve seen how easily you can create music from start to finish with RealBand. But don’t forget that this powerful
program has many more features and configurable settings which are discussed in later chapters.
These features give you the ability to produce great sounding music in your own home “studio” with production
values and effects that once required expensive studio time.
Have fun making your music with RealBand!
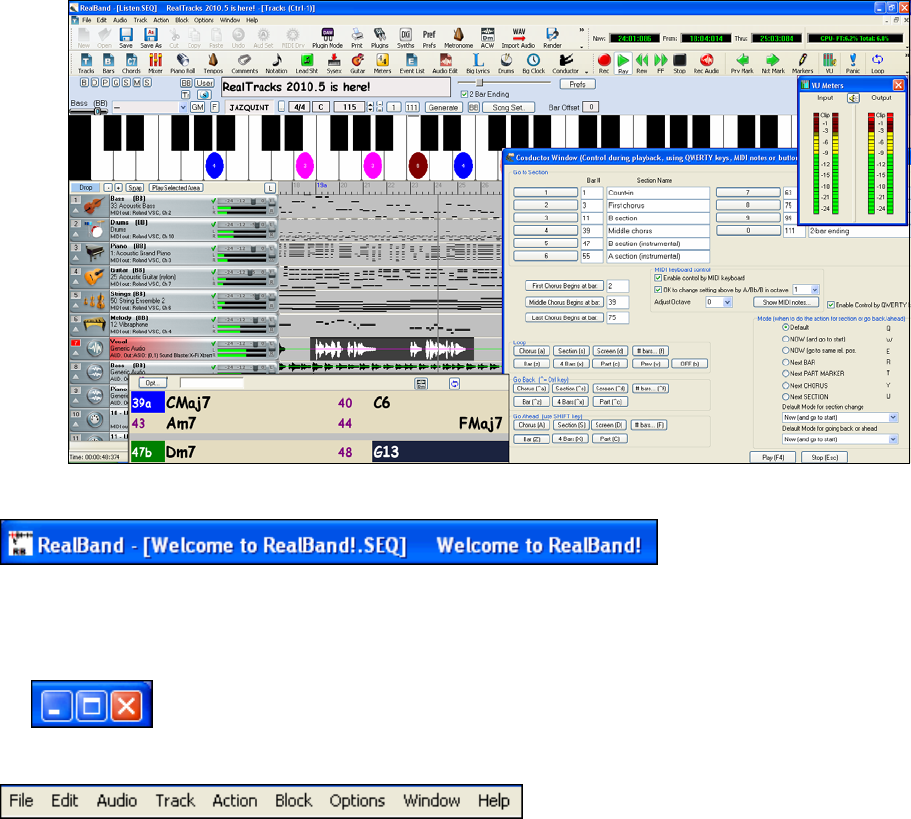
Chapter 4: The Main Screen
38
Chapter 4: The Main Screen
There are five parts to the RealBand main screen.
1. The Status Bar shows information about the current project.
2. The Menu Bar is where menus and commands are accessed.
3. The Toolbars give information and access to program functions.
4. The Piano Keyboard displays, and can input, MIDI notes.
5. The Windows area, the main workspace for all program windows.
1 –
2 –
3 –
4 –
5 –
The Status Bar
The status bar is the colored header across the top of the screen.
RealBand shows the file name for the currently loaded song in the status bar. It also shows the song title if the song
has been given one, and the name of the current window, e.g., Chords, if the window is maximized. When the
jukebox is playing then Juke Box mode is displayed in the status bar.
The buttons to minimize, maximize, and close the program appear at the right side of the
status bar.
The Menu Bar
Like most Windows applications, RealBand has a pull-down menu interface. You can access the menus by pressing
Alt+<letter> with the letter being the first letter of the menu you wish to activate, e.g., Alt+F for the File menu.
You can also activate a menu by clicking the left mouse button with the mouse cursor positioned directly over the
menu name on the Menu Bar.
The menus list many operations that can be controlled with key strokes. These can save time and it is a good idea to
memorize the ones you use regularly.
Toolbars
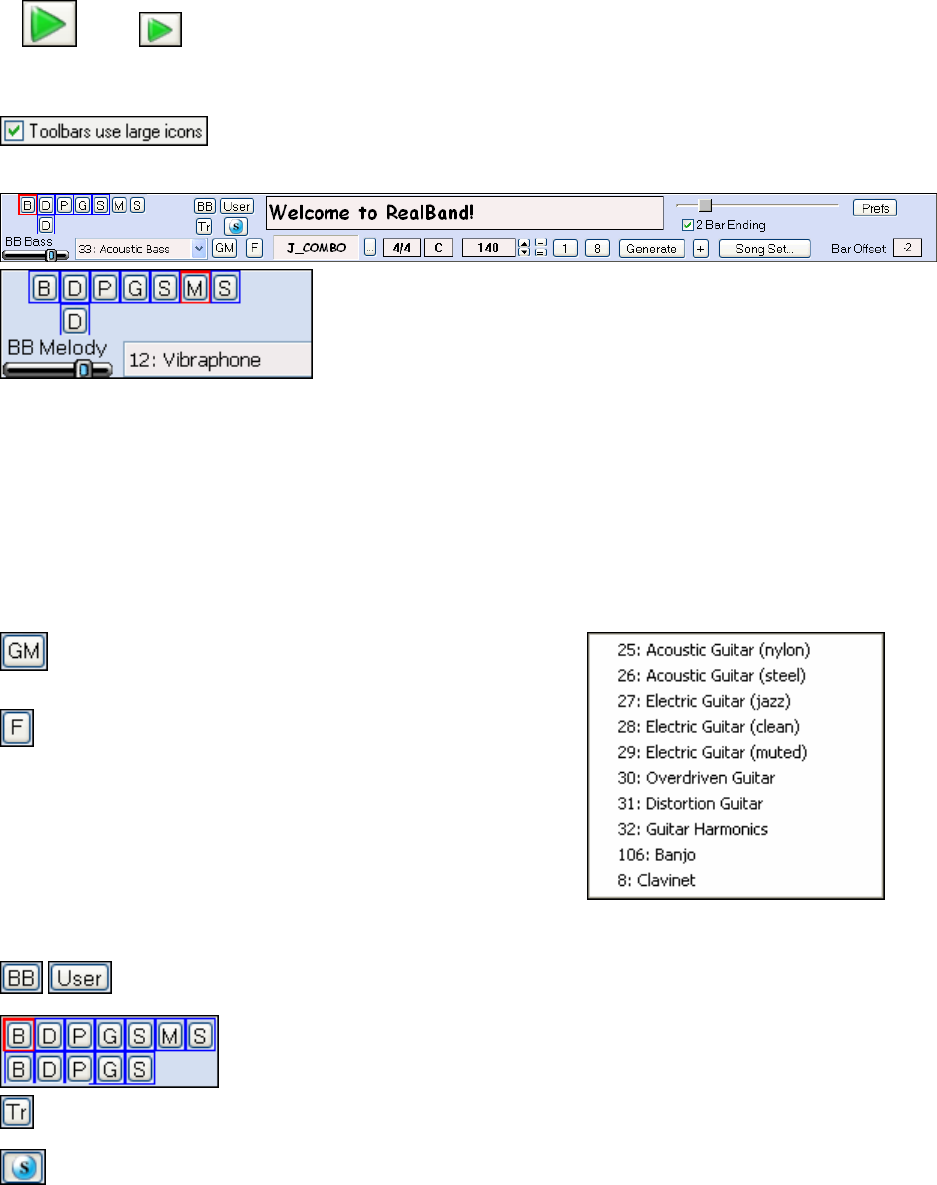
Chapter 4: The Main Screen 39
Toolbars provide control of the program and access to many of its features.
Toolbars have a choice of 24x24 or 16x16 icon sizes.
24x24 16x16
To select the icon size, go to Options | Preferences and in the General dialog check “Toolbars use large icons”
for 24x24 icons or clear the checkbox for 16x16 icons.
Main Toolbar
This group of buttons will take you directly to the selected BB track in the
Tracks, Mixer, or Notation windows. The letters stand for the track name,
B = bass,
D = drums, the second [D] below indicates that RealDrums are present,
P = piano,
G = guitar,
S = strings,
M = melody,
S = solo.
The name of the BB track is displayed along with the instrument patch assigned to that track. There is a volume
slider that will affect only the selected track. This is a quick and convenient way to adjust BB volume levels while
other tracks are playing.
The [GM] button opens the list of General MIDI
instruments. Click on the name of an instrument in the list
assign it to the current track (highlighted button).
The [F] button opens a short list of favorite instrument
patches for the current track. For instance, this list is for the
Guitar or [G] track.
When your song has BB tracks the first eight rows in the Tracks window are reserved for them. Track 9 is used for
RealDrums. This is not always convenient when you have lots of tracks of your own farther down in the window.
The [BB] and [User] buttons will take you directly to either group of tracks without the need to
scroll up and down in the window.
When using BB styles with RealTracks there will be a button for each RealTrack
below the corresponding button for the BB track, as shown here.
The [Tr] button opens a drop-down list of all track numbers and names. Just click on the track to make it the
active track in the Tracks or Mixer windows.
The [S] button enables soloing of tracks. When it is engaged only the current track is heard. You can have
the song playing with this button pressed and solo different tracks by clicking on them while the song plays.
Ctrl+click on additional track names will add or remove them from the soloing selection, so it is possible to
audition a few tracks together.
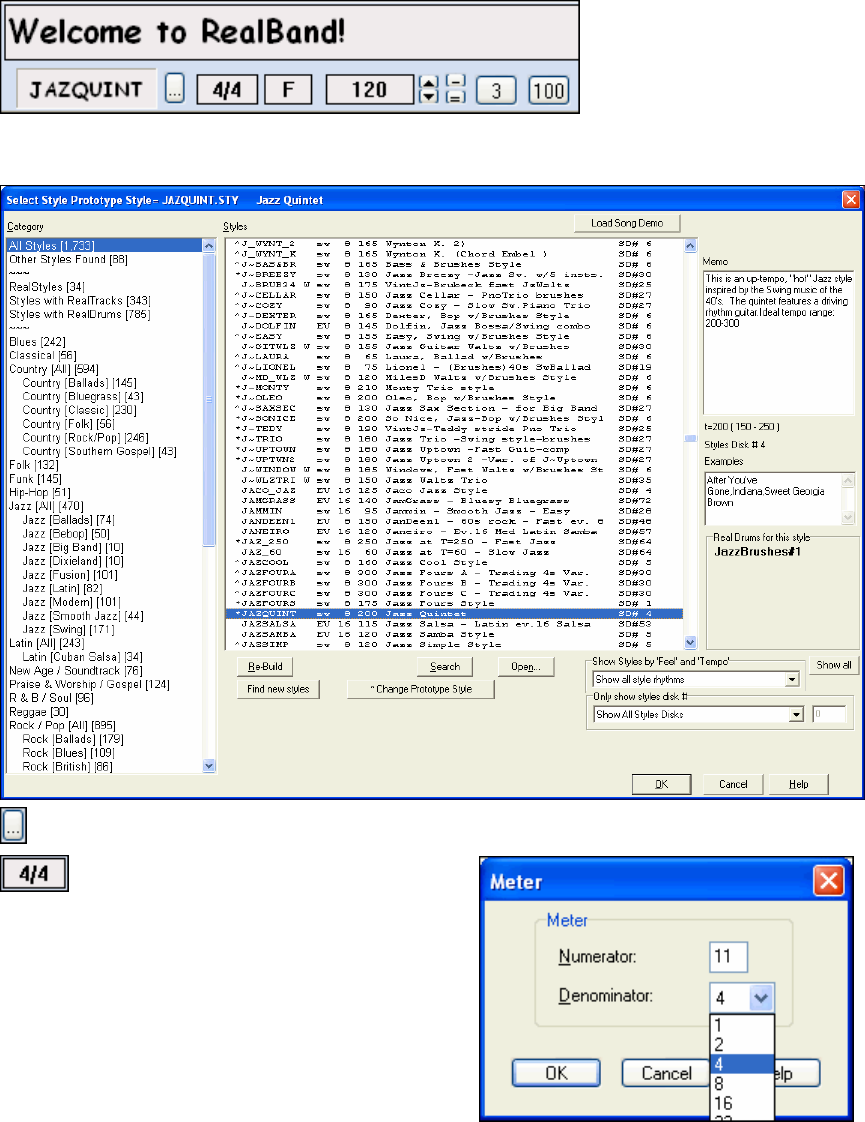
Chapter 4: The Main Screen
40
The next group of controls is for song
settings such as title, style, time
signature, key, and tempo.
The title is typed in to the title window as
regular text.
Click on the style name box to open the StylePicker, where you can choose from any of your installed Band-in-a-
Box styles.
Use this button to load a style (.STY file) from disk.
Double click the mouse in this box to open the
Meter dialog. Odd time signatures such as 5/4, 7/4,
9/16, 11/4, etc. are supported.
The key signature and tempo are set by double clicking in those boxes to open the selection dialog.
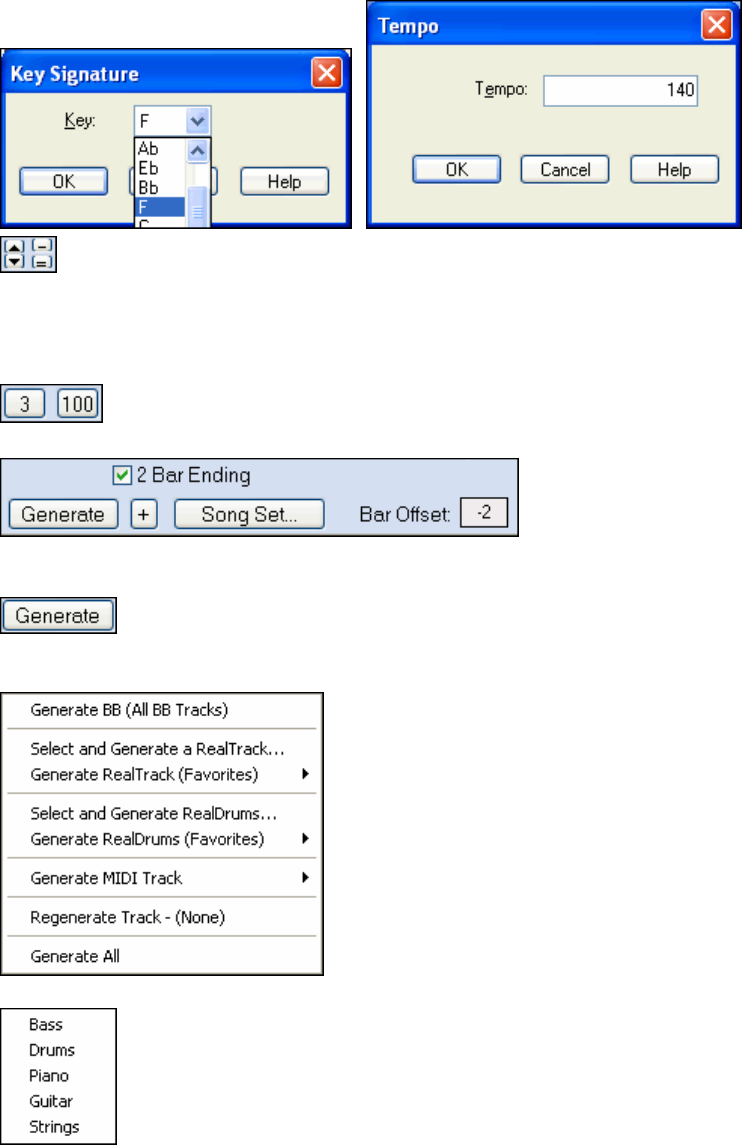
Chapter 4: The Main Screen 41
The tempo can also be adjusted with these buttons. Hold down the up or down arrows to scroll the tempo
up or down, or click on the arrow to increase or decrease the tempo in single increments.
Tap tempos with the minus [-] and equals [=] buttons. Tapping on the minus sign four times will set the tempo just
as if you had counted it in. Tapping on the equals sign four times will set the tempo at the average speed you tapped
and then automatically begin song playback at that tempo.
These buttons set the beginning and end of the song chorus, which particularly affects how endings are
played. Double click on the button to open a selection dialog.
This group of settings controls how the song arrangement is generated. It is possible to generate the complete song
or just a selected range.
The [Generate] button will generate a complete arrangement if the From: and Thru: settings are both
the same (e.g. -1:01:000). If a partial range is selected only that range will be generated. When the button is pressed
a popup menu of options opens.
Generate BB (All BB Tracks) generates new Band-in-a-Box tracks
using the current style.
Select and Generate RealTrack opens the RB Assign RealTracks to
Tracks dialog for Real instrument selection and options for the
generation of the audio RealTrack.
Generate RealTrack (Favorites) opens a list of recently used Real
instruments for quick selection and generation.
Select and Generate RealDrums opens the RB RealDrums Picker for
selection of a RealDrums style and options for the generation of the
audio RealDrums.
Generate RealDrums (Favorites) opens a list of recently used
RealDrums styles for quick selection and generation.
Generate MIDI Track opens a list box to select the part for a MIDI
track to be generated on the current track.
Regenerate Track
Use this to regenerate an existing track. If a track is a non-BB track, but it was generated individually from one of
the generation options in Tracks window popup menu, or from one of the generation options on the Generate Button
popup menu, then the track name will be displayed in green.
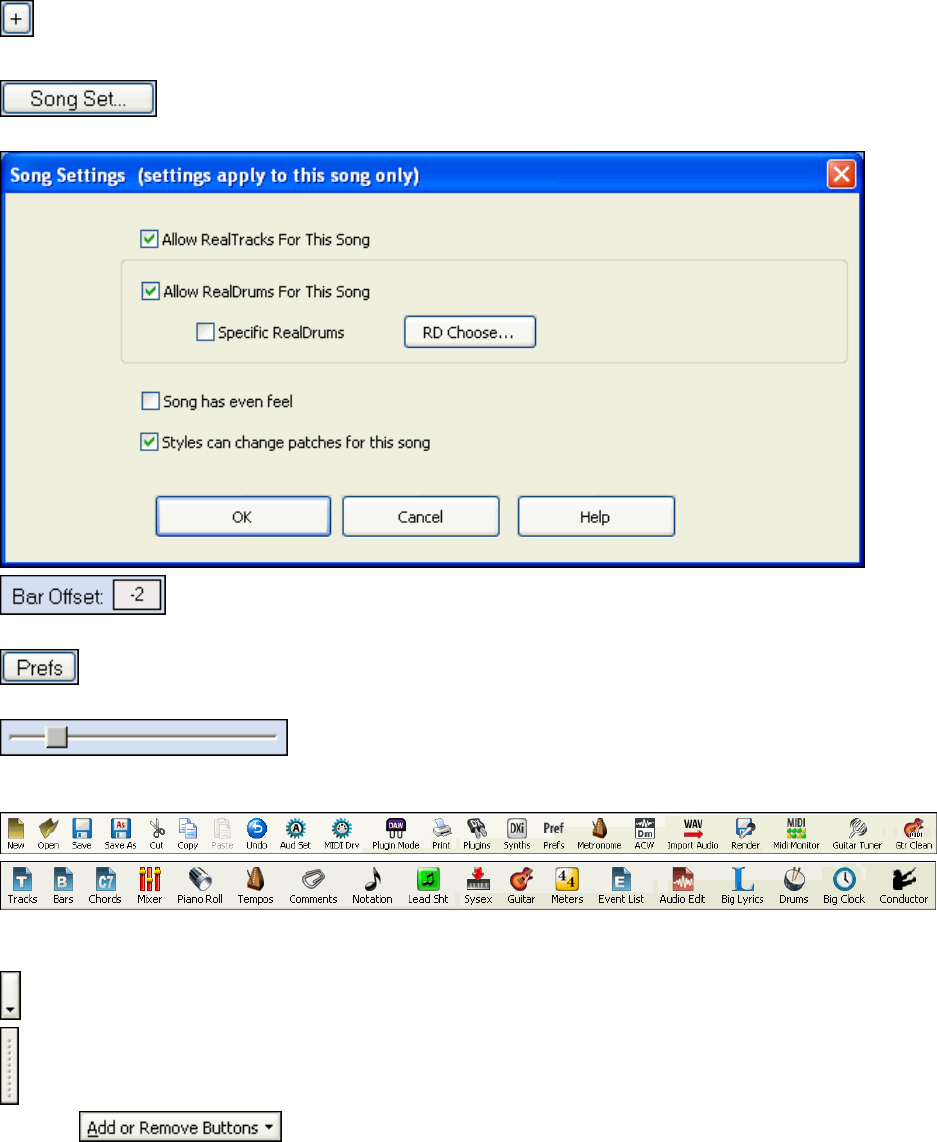
Chapter 4: The Main Screen
42
The track name being displayed in green or blue means that the track can be regenerated using this command. This
feature is useful to regenerate, if you had changed the song’s tempo, or just to generate fresh material.
Generate All
This command will regenerate all Blue and Green tracks automatically, including RealDrums.
The [+] button always generates all of the song.
If the “2 Bar Ending” checkbox is selected RealBand will automatically generate a 2-bar ending for the song.
The [Song Set] button opens a dialog of Song Settings with options that apply only to the
current song.
This song measure offset also affects lead-in generation. For example, if set to -2 the song
will be generated with a 2-bar lead-in.
This button opens the Song Generation Preferences where global settings that apply to all songs can be
made.
The song location slider moves directly to a new place in the song.
Dockable Toolbars
The user can personalize the explorer-style dockable/undockable toolbars. There is also an option to Hide/Show
Toolbar in the Options menu.
To add or remove buttons from a toolbar click on the More Buttons arrow at the right end of the toolbar.
Click and drag on the vertical divider strips to resize the toolbar and hide or reveal additional toolbar
buttons. This may not be necessary with larger widescreen monitors.
Click on to open a list of the available buttons for that toolbar. Each button is named or
described in the list.
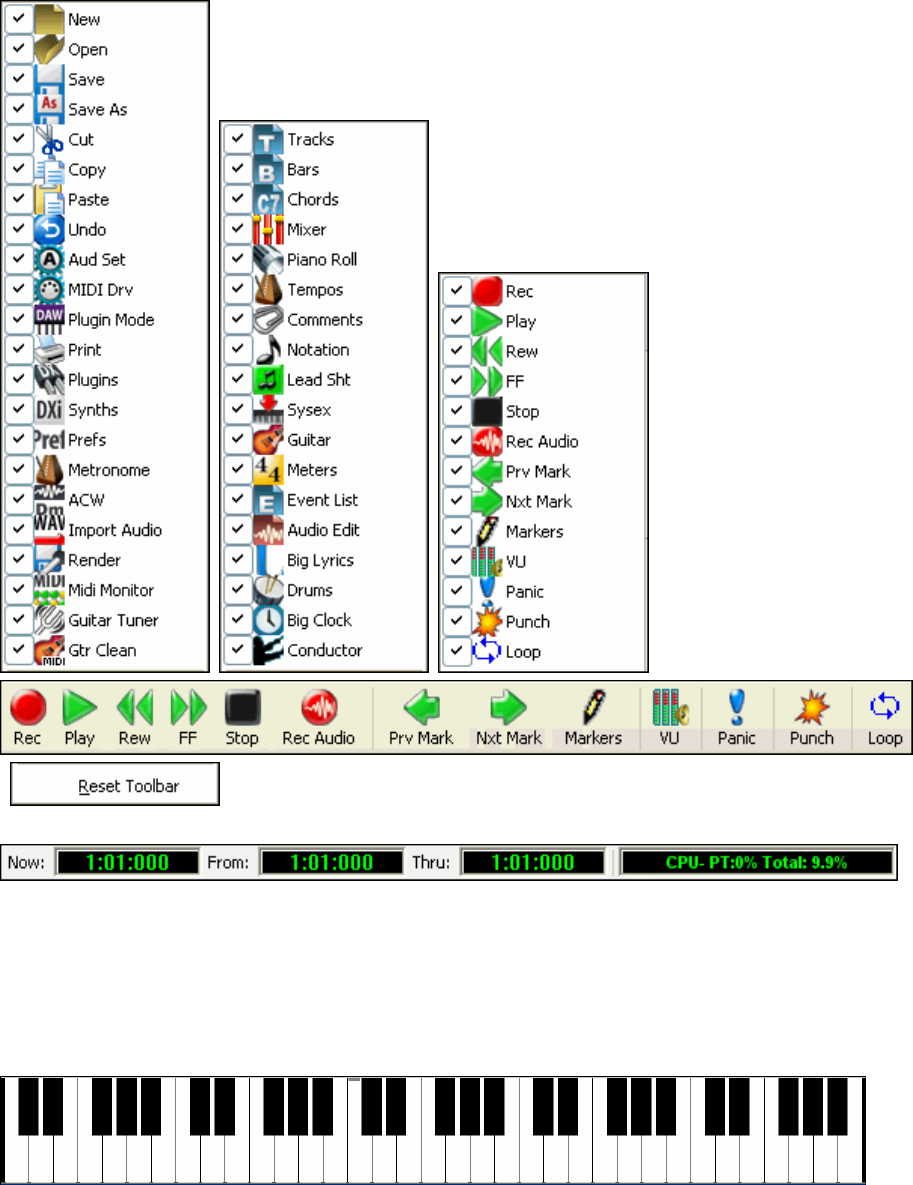
Chapter 4: The Main Screen 43
Buttons with a check mark in the check box will be displayed on the toolbar. Clear the checkbox to remove a button
from the toolbar.
Click on “Reset Toolbar” to restore the default toolbar settings.
“Now” is the current location in MIDI format - bars:beats:ticks. The “From” and “Thru” values indicate the range
of bars currently selected for editing operations. You can double click in these fields to type in new locations.
When From: and Thru: are set to the same value RealBand always generates a complete song. If they are set to
different values RealBand will generate that specific range.
The CPU Usage Indicator shows total CPU usage and PT (RealBand) usage.
The Piano Keyboard
The re-sizeable piano keyboard is located below the toolbar. There is a setting to Hide/Show Piano in the Options
menu.
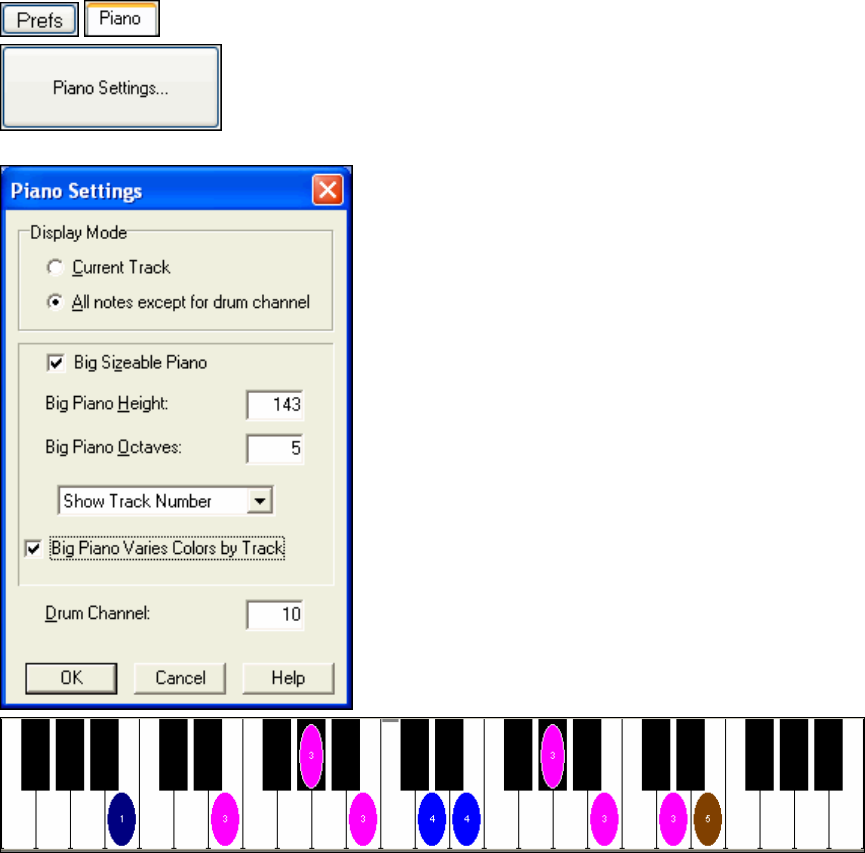
Chapter 4: The Main Screen
44
The piano can be “played” by clicking with the mouse, either while a song is playing or when it is stopped, and
clicking on a note while in Editable Notation mode enters that note in the selected track at the current time location.
There is a 1-peg hot key in the Notation window to move current time forward or backward by 1 peg (normally a
16th note). Alt+left arrow moves the current time backward by 1 peg. Alt+right arrow moves it forward by 1 peg.
This makes it easier if you are using the on-screen piano for entering notes into the Notation window.
The on-screen piano also responds to mouse clicks if the current track is an audio track. This is useful if you want to
hear a note played as a reference without having to change the current track to a MIDI track.
You can vertically resize the Big Piano by placing the mouse on the bottom edge of the piano and then clicking and
dragging the mouse up or down.
The Piano Settings are found under the Piano tab in the Preferences.
They include settings for the display mode and the size of the keyboard.
When the display mode is set to “Current Track,” the piano will
display notes as they are being played from the current track. If the
display mode is set to “All notes except for drum channel” the piano
will display notes that are played from all the tracks except for notes
that are on the drum channel.
When the “Big Sizeable Piano” setting is enabled, RealBand will
show a bigger piano below the toolbar, instead of the smaller piano.
For the Big Sizeable Piano, there is also a setting that gives you a
choice of Show Track Number (drawn as a tiny number within the
notes), Show MIDI Channel, or Show No Text.
If “Big Piano Varies Colors By Track” is enabled, then the colors of
the notes drawn on the big piano will vary depending on the track
number. For tracks 1 through 10, RealBand uses 10 different colors,
then repeats these colors for higher track numbers.
These settings are automatically saved to RBW.INI and RB.CFG so that they will remain in effect the next time you
use RealBand.
Windows
Most of the main screen is used for the windows workspace. There are many window views to choose from and you
can open as many as you wish to. The Tracks window is the default view.
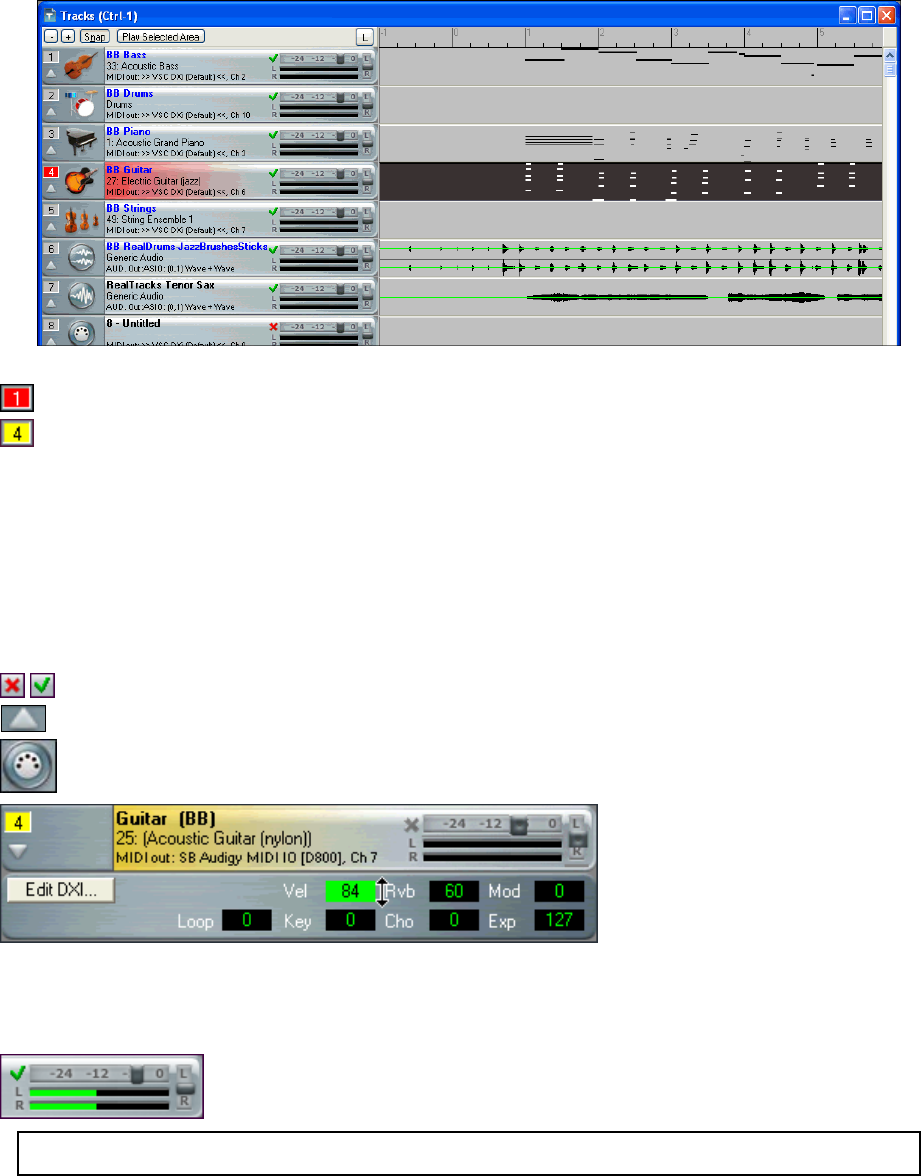
Chapter 4: The Main Screen 45
Tracks Window
The Tracks window shows the track names, track type (MIDI or audio), instrument settings, and an overview
section showing either MIDI or audio data. This window is described in full detail in the
The Track Number field shows the track number.
If the track is the current track it will be highlighted in red.
When multiple tracks are selected, the track numbers will be highlighted in yellow for tracks other than the
current track. If the track is not selected it will be gray.
Click on the track number field to make a track the current track.
If you click on the track number field while holding the Shift key, this will select a range of tracks from the current
track through the number you clicked on. For example, if track 1 is the current track, and you hold the shift key and
then click on the number field for Track 4, this will make tracks 1 through 4 selected. Track 1 will still be the
current track and tracks 2, 3, and 4 will be highlighted in yellow. You can select/deselect individual tracks by
clicking on a track’s number field while holding down the Ctrl key.
The Track Name field shows the track’s name. You can edit a track name by right clicking on the track name field,
or by double-clicking on it. After you’re done editing, then press Enter.
The Mute button lets you mute or unmute a track.
The Disclosure Triangle will reveal more information about a track by making the track row height taller.
If a track is a MIDI track, you’ll see Vel (velocity offset), Rvb (reverb), Mod (modulation), Loop, Key
(key transpose), Cho (chorus), and Exp (expression) settings.
You can make changes to these
settings by clicking on the edit fields
with the left mouse button, and then
moving the mouse up or down while
holding the mouse button down.
The [Edit DXi] button launches the DirectX Window dialog and will display the settings panel for either the
Default DXi Synth (16th DXi synth slot which is MIDI port 32) or the current DXi port number if the track is set to a
valid DXi port (17-32). Any track’s MIDI Output Port can be set to send to one of the 16 available DXi synth ports
or to any other available MIDI port.
The Volume and Pan sliders let you adjust a track’s volume and pan settings without
having to go into the Mixer window. Below the Volume slider you’ll see two VU
level meters. These give you a general idea of a track’s level during playback.
NOTE: If a track is an audio track, the meter display will be delayed by the size of the audio Output Buffer Milliseconds
setting in the audio settings dialog.
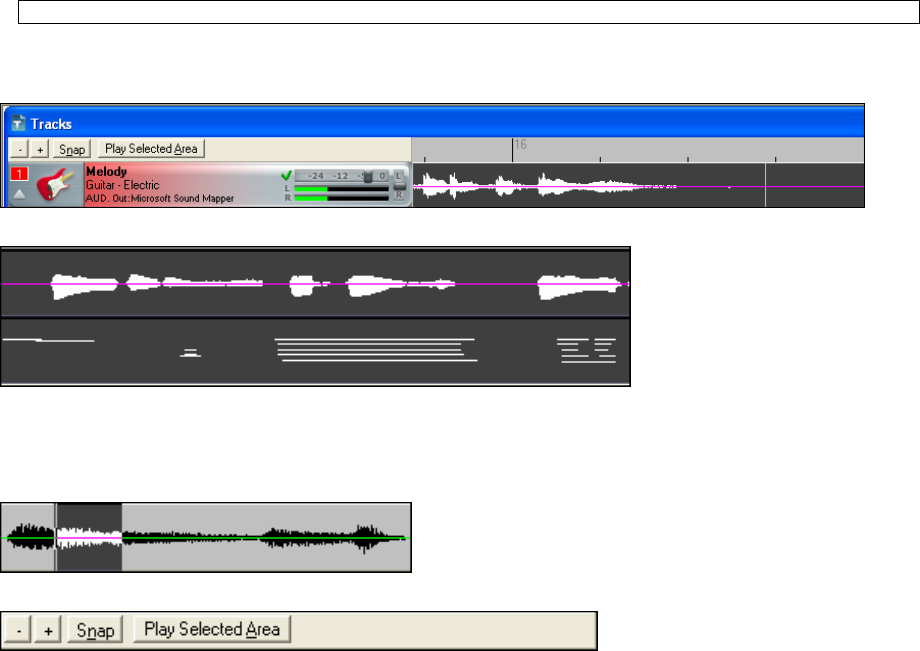
Chapter 4: The Main Screen
46
Drag and Drop Editing
RealBand supports drag-and-drop editing in the Tracks and Audio Edit windows.
In the Tracks window you can easily move tracks up or down in relation to each other by drag ‘n’ drop using the
mouse, e.g., drag track 1 below track 2 to change the order of the tracks.
You can move a highlighted region by holding down the Ctrl key with the left mouse button pressed, and drag the
region to a new location in the song.
After releasing the mouse button, you have four options:
1. Move to new location and overwrite
2. Move to new location and merge
3. Copy to new location and overwrite
4. Copy to new location and merge.
Drag/Drop MIDI or Audio Files Into The Tracks Window
You can drag a file, such as a .WAV file, from a folder directly onto the Tracks window. The file will be placed on
the track you dropped it on, at the location onto which you dropped the file. The types of files that are supported are
the audio files supported by RealBand, such as .MP3, .WAV, and WMV.
In addition to audio files, .MID files can be dropped onto the tracks window too. If the file is a multi-track .MID it
will be imported onto free tracks beyond the highest occupied track.
If you hold the Ctrl key when dropping the file, then the file will be inserted at the time location, and any existing
data moved beyond the end of the file that is being inserted, rather than overwriting any existing data.
NOTE: this feature will only insert files on measure boundaries.
Track Overview Display
To the right of the track info panels, you’ll see the overview display.
This lets you view MIDI or audio data, and select sections for editing.
You can click and drag to highlight a section of the song for editing.
If the Alt key is held when left-mouse clicking on the overview section of the Tracks window the time will be
changed without affecting the currently highlighted region. This lets you quickly adjust the current time without
having to worry about accidentally changing the highlighted region.
Click on [Play Selected Area] to hear the highlighted section being edited.
The [-] and [+] buttons (upper far left corner of the Tracks window) let you zoom in or zoom out the overview
section.
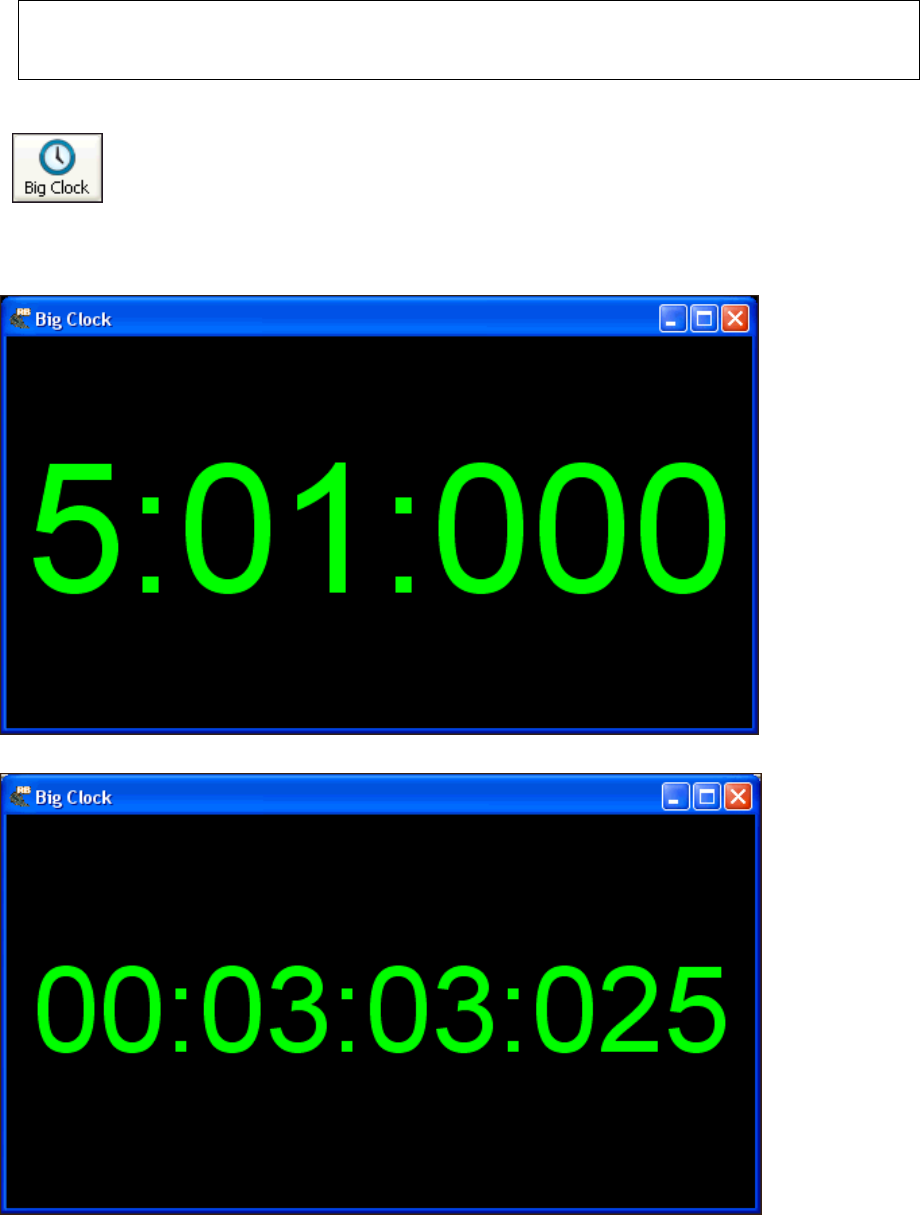
Chapter 4: The Main Screen 47
The [Snap] button causes the time indicator to snap to the nearest beat when changing the time location or when
highlighting a region for editing.
Note: If you have selected non-consecutive multiple tracks (e.g., 2, 3, and 5) for editing, you should not click on the track
overview section area directly, since it will cause your track selections to be lost. If you only want to change the edit
From/Thru settings, then you can click on the timeline (immediately above the track overviews) with the mouse, and then
press the F7 key to set the From: location, and then click on the timeline again and press F8 to select the Thru: location.
Big Clock Window
This is accessible from an icon on the toolbar (same section of the toolbar that has the
Tracks, Bars, Chords buttons, etc.).
This window displays the current time location in a large text. It will show Measures:Beats:Ticks, or
Hours:Minutes:Seconds:Hundredths, or Samples. Clicking on the window will toggle the display mode.
Measures:Beats:Ticks
Hours:Minutes:Seconds:Hundredths
Chapter 4: The Main Screen
48
Samples
If you resize the window, then the size of the font will adjust to the new window size.
Other Program Windows
These program windows can be launched by selection in the Windows menu or by clicking on their buttons in the
Toolbar.
Bars The Bars window shows the bars (or measures) of the song. Bars with MIDI data will
be shaded, while bars with audio will show the audio waveform in miniature.
Chords The Chords window displays the chord symbols of a song. You’ll see the bars of the
song displayed in rows.
Mixer The Mixer window is a graphical mixer that lets you control the 48 tracks in RealBand.
Piano Roll The Piano Roll window allows editing of MIDI notes and graphic editing of controllers.
Tempo Map The Tempo Map is a list of all the tempo changes that occur during the course of the
song.
Comments The Comments window is a simple text editor, which allows you to edit or view
comments.
Notation The Notation window displays the notes of a MIDI track on a staff and lets you print
music on your printer.
Lead Sheet The Lead Sheet window is similar to the Notation window, except that it can display
multiple staves.
Chapter 4: The Main Screen 49
SysEx The SysEx window is a built-in system exclusive (SysEx) librarian to transmit or receive
SysEx data.
Guitar The Guitar window displays notes played in the current track or MIDI Thru on a guitar
fretboard.
Meter Map The Meter Map is a list of all the meter changes that occur during the course of the
song.
Event List The Event List window is an event editor that lets you insert, delete, or change MIDI
events.
Audio Edit The Audio Edit window shows audio data as a waveform. Select a region to edit by
mouse clicking on the waveform and dragging the mouse to the right.
Big Lyrics The Big Lyrics window will display any existing lyrics in a track and can be resized.
The lyrics highlight and scroll, great for singing along.
Drums The Drum button launches the built-in 3-D animated Drum Kit plug-in.
Big Clock The Big Clock window displays the current time location in a large text.
Conductor This opens the Conductor window for live playback and looping control.
RealBand’s Classic Tracks View is available in the Window menu or with the keystrokes Ctrl+9.
The menu command Window | Show Tools Panel gives quick access to the basic File menu
and Edit menu commands.
The Icon Row
There is a row of icons at the bottom of the main screen window. They give quick access to the most commonly
used windows, and when you minimize any window it appears in the icon row, which makes it easy to restore when
you want to work in that window again. Double click on the icon or use the standard Windows buttons to open a
window from the icon row.

Chapter 4: The Main Screen
50
Other Plug-Ins and Utilities
RealBand includes many more powerful and helpful utilities that are launched by their own toolbar buttons.
In Plugin Mode audio or MIDI content can be dragged and dropped to other DAWs.
The Plugins button opens the Direct/VST window where DX and VST plug-ins are assigned.
Open the control panel for your current DXi of VSTi softsynth with the Synths button.
The Metronome button opens the programmable metronome for playback and/or recording.
Launch the Audio Chord Wizard to automatically figure out the chords from audio files (WAV, MP3,
WMA, SEQ, CDA).
The MIDI button launches the MIDI Monitor plug-in with detailed MIDI data.
The Tuner button launches the built-in Guitar Tuner plug-in.
This launches the MIDI Guitar Cleanup dialog for de-glitching and adjusting latency.
The Markers window, where song markers can be inserted, also opens with the menu command Window |
Show Markers Window.
The VU button opens the VU meters to show Input and Output levels for digital audio.
The Panic! button attempts to shut off any hung MIDI notes.
The Punch button is for punch-in recording to audio and MIDI tracks.
Loop button opens the Endless Loop dialog. When this option is enabled, RealBand will automatically
loop through a section of the song.
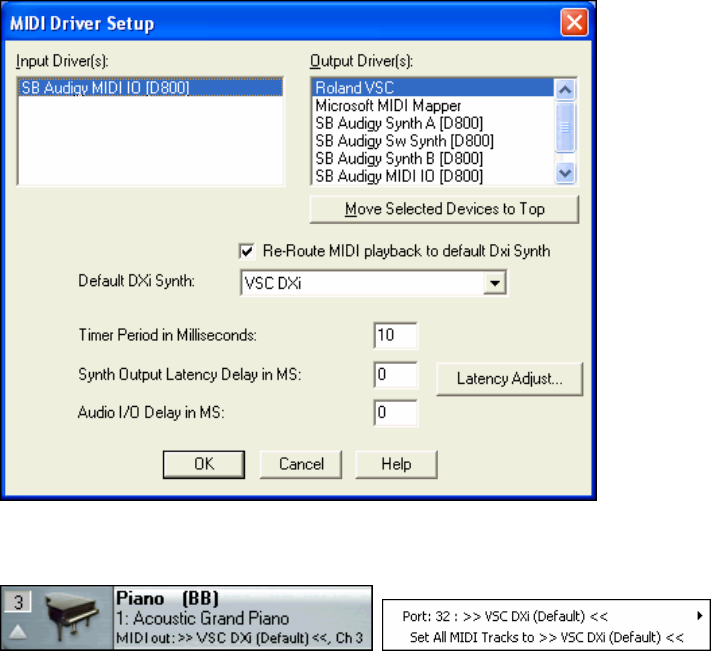
Chapter 5: Using MIDI Features 51
Chapter 5: Using MIDI Features
Overview
RealBand is a full-featured MIDI sequencer for Windows with the added ability to create automatic
accompaniments in its BB Tracks. If you want to know how to create MIDI tracks and BB Tracks please see the BB
Tracks and MIDI tracks chapter. This chapter has instructions for using the many powerful MIDI features in
RealBand.
Record and edit music for playback through your sound card or MIDI synthesizer as configured in the MIDI Driver
Setup (see MIDI Setup, Ch. 1). MIDI music can be displayed in standard music notation on the screen, and also
with the on-screen piano keyboard or guitar fretboard. RealBand MIDI sequences are saved in its native sequence
file format with the file extension .SEQ. RealBand also includes full support for saving, playing, and editing
Standard MIDI files (*.MID) and Karaoke files (*.KAR).
Using DXi and VSTi Synthesizers
DXi and VSTi software synthesizers allow RealBand to play high quality sounds directly through your computer’s
sound system without external MIDI hardware. Connecting RealBand to the software synth as a plug-in has several
advantages over connecting as a MIDI driver.
The plug-in allows RealBand to merge/sync in any existing audio file (vocals etc.) with the synth output. You can
also directly render your performance to a .WAV file using the DXi or VSTi plug-in.
To use DXi/VSTi softsynths with RealBand, you can think of them as a type of “MIDI Output Driver.”
You can either visit the MIDI Driver Setup dialog (Options | Preferences MIDI tab, [MIDI Devices] button) and
select the “Re-Route MIDI Playback to Default DXi Synth” checkbox to send all MIDI playback to the default DXi
synth, or you can assign DXi synths to individual tracks with the option to set all MIDI tracks to the same port.
Routing to Default DXi Synth
The Default DXi Synth: combo box lets you select which DXi or VSTi synth is used as the default DXi synth.
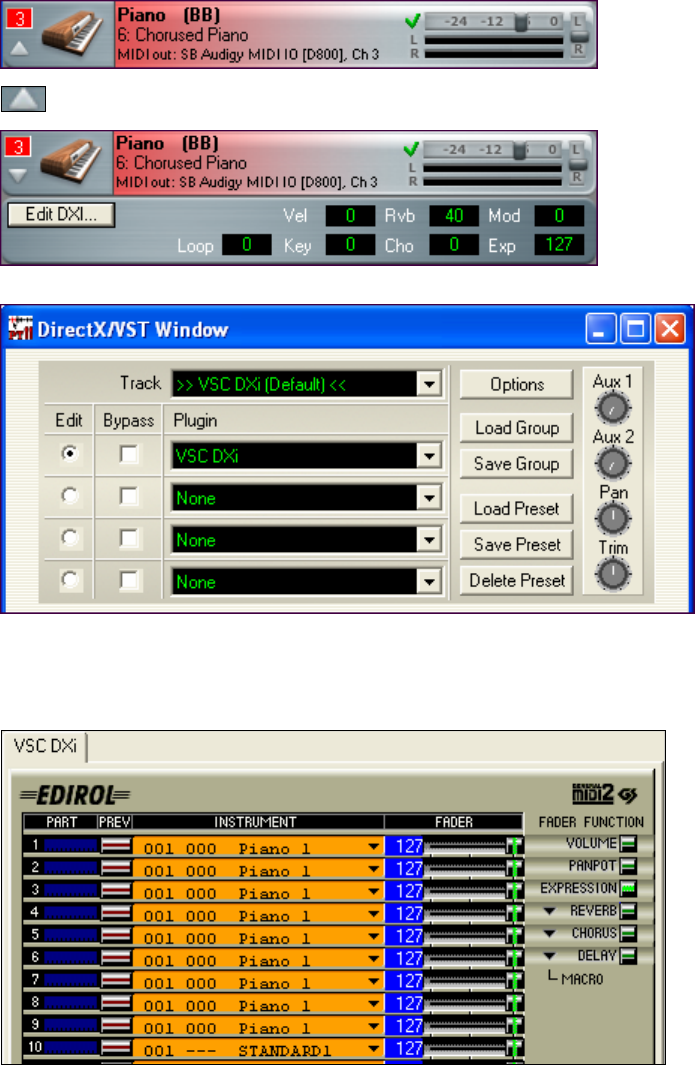
Chapter 5: Using MIDI Features
52
The Re-Route MIDI Playback to Default DXi Synth setting will cause RealBand to re-route all MIDI playback to
the Default DXi synth. This is the easiest way to use a DXi or VSTi softsynth for playback. If this option is
checked, then all MIDI playback output will be routed to the default DXi synth regardless of the MIDI track’s port
number.
Assigning DXi or VSTi Synths to Tracks
To assign a DXi/VSTi synth to a particular MIDI track, select the track in the Tracks window and then click on the
Disclosure Triangle.
The Disclosure Triangle will reveal more information about a track by
making the track row height taller.
The [Edit DXi] button launches the DirectX/VST Window.
In the DirectX/VST Window you can select the type of DXi/VSTi softsynth to use and also see a control panel
display of the softsynth that allows you to make settings directly for your DXi or VSTi synth.
The settings panel that opens is either for the default DXi synth (16th DXi synth slot which is MIDI port 32) or the
current DXi port number if the track is set to a valid DXi port (17-32).
Chapter 5: Using MIDI Features 53
The DXi/VSTi softsynth will convert the MIDI information to audio, which RealBand will play back through your
sound card to audio speakers.
Note: If using MME drivers, only the MIDI playback output can use softsynths. MIDI Thru, MIDI metronome, scrub mode,
and chord advance/backup will default to a regular MIDI port. With ASIO drivers, MIDI Thru will play through softsynths.
Rendering Songs to Audio with DXi
Rendering songs to audio in RealBand is much easier if the MIDI tracks are using a DXi (or VSTi) synth.
Rendering DXi MIDI tracks to audio is as simple as selecting the Audio | Merge Audio and DXi Tracks to Stereo
Wave File menu command. You will be prompted for a wave file name, and then RealBand will render to the
.WAV file. It’s as simple as that.
Remember that audio tracks will also be rendered, so if you only want to render MIDI, then be sure to mute all audio
tracks first.
Rendering Individual Tracks to Audio
Right-click in the Tracks window to access these audio rendering commands.
Auto Convert Individual MIDI Track to WAV File
Choose this command to convert any MIDI track to a .WAV file. RealBand will automatically render using a DXi
or VSTi synth. WAV files can be exported to other sequencers or Windows Media Player.
Auto Convert Individual MIDI Track to Audio Track
It is easy to convert any MIDI track to an audio track. RealBand will automatically render using a DXi or VSTi
synth and import the audio into the first available track in the Tracks window.
Loading and Playing MIDI Songs
Loading a Song
To load in a new song choose File | Open. You will then see a list of files available for use with the program.
To see the custom Open dialog, go to Options | Preferences (Ctrl+F5) and select the checkbox for “Long File
Names use custom open/save dialog.”
This lets you use a more advanced custom file dialog.
Chapter 5: Using MIDI Features
54
This dialog lets you choose a font, and it will remember the dialog’s window size and placement along with the
currently selected font. It also has a tree button that lets you view the directory structure, and a button that lets you
chose between details mode and list mode. RealBand will remember these settings the next time you load or save a
file using the custom file dialog.
The font selection button lets you use any font on your system for the file dialog, in your choice of
font size and style.
The find button in the custom Open dialog lets you search for a file within the current folder,
useful when a folder has many files.
The favorite folders button in the custom Open dialog will let you quickly change the current
folder by selecting from a list of “favorite” folders.
RealBand will remember up to 25 folders from which you had previously loaded files. You can quickly select a
folder and instantly go there without having to navigate through the Windows tree structure.
Let’s load in the demo song I Said It Before. The file name is i_said.seq. Open the song as you
would any file, either with a double mouse click on the file name or by selecting the file name
in the dialog and then clicking on the [Open] button.
The song title and file name appear in the status bar at the top of the screen.
The song’s time signature and key signature are seen below the song title and directly above
the on-screen piano keyboard.
The song tempo is seen to the right of the time signature and key signature. Click in the
tempo field to open the Tempo dialog and type in the tempo in beats-per-minute (bpm).
Use the up/down scroll arrows to change the tempo without typing it in again, or click the [-] button four times in
tempo and RealBand will set its tempo to the four beats (three for a waltz) that you just tapped.
If you click the [=] button four times it will set the tempo and start the song playing. You can also use the minus
and equals keys on the computer keyboard to do this.
Use the square bracket [ ] keys to change the tempo by +/- 5 bpm.
Precise “Floating Point” Tempos
RealBand supports precise floating-point tempos, such as 120.514 BPM. This makes it easier to sync MIDI tracks
to prerecorded audio tracks if the audio tracks weren’t recorded exactly at an integer tempo. This also is what lets
RealBand play a song in sync to an existing audio track after the Audio Chord Wizard has worked its magic.
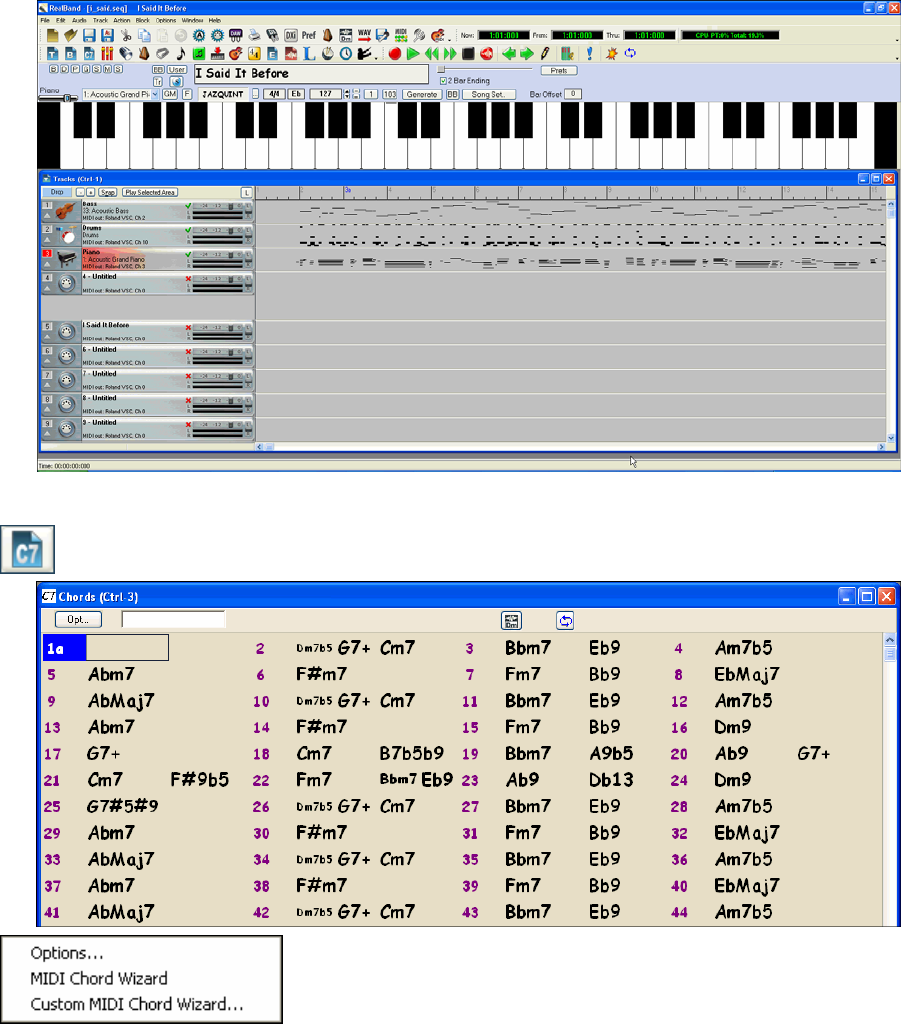
Chapter 5: Using MIDI Features 55
Chord Wizard
The Chord Wizard is located in the Chords window, which opens with the [C7] toolbar button. Right
click anywhere in the window to open the MIDI Chord Wizard menu.
If you choose MIDI Chord Wizard, RealBand will attempt to automatically detect the chords in the song. You can
use the Undo command if you want to undo this.
The Custom Chord Wizard command works the same as the MIDI Chord Wizard command except that it launches
the Chord Wizard dialog, which lets you customize the settings for chord detection.
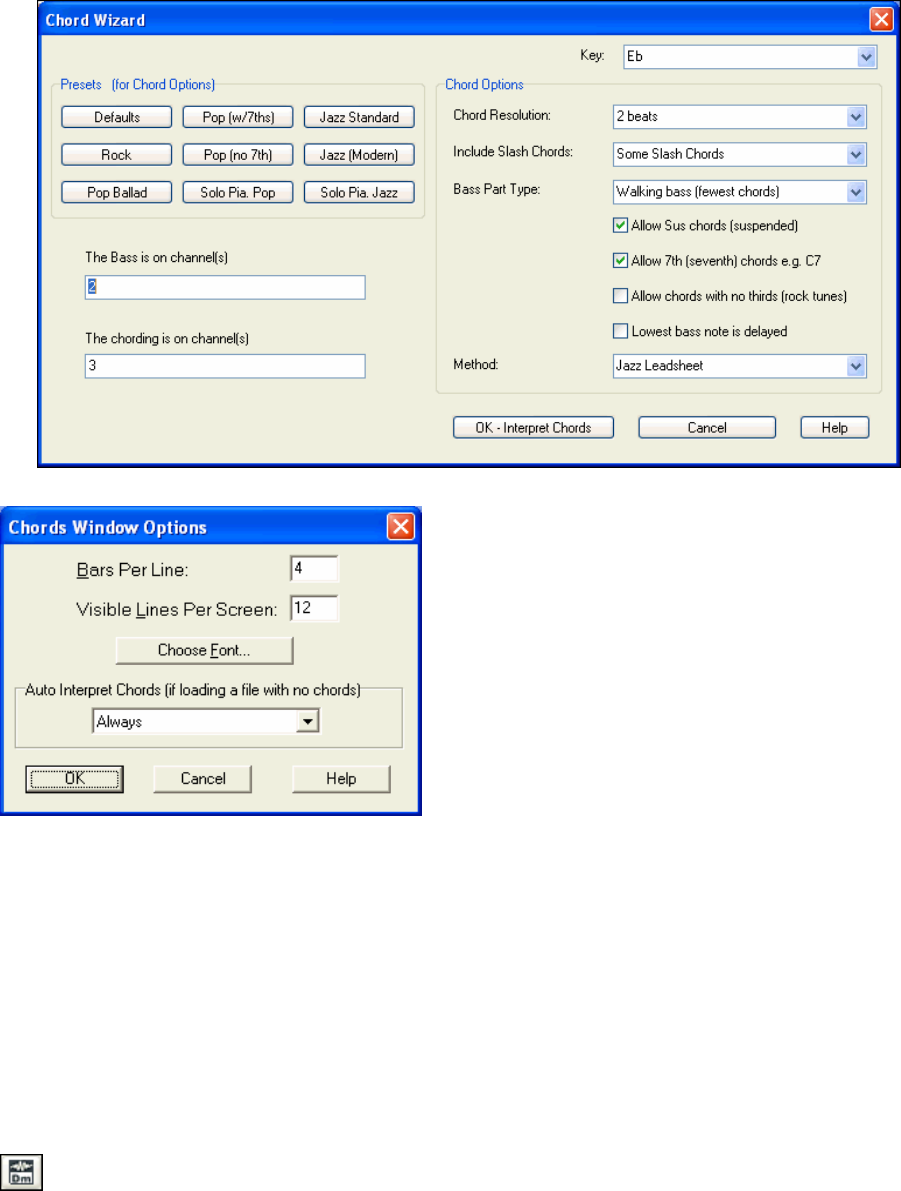
Chapter 5: Using MIDI Features
56
The Options menu item launches the Chords Window Options dialog.
The “Bars Per Line” setting determines how many measures will be drawn per line in the Chords window.
The “Visible Lines Per Screen:” setting determines how many lines (rows) of chords are will be visible per screen.
Each screen will always have 125 lines per screen in the Chords window, but the Visible Lines Per Screen setting
controls how many lines will be visible without scrolling.
The [Choose Font…] button lets you select a font for the Chords window. The font’s overall size will be determined
by the amount of Visible Lines Per Screen, as well as the height of the Chords window.
The “Auto-Interpret Chords” setting is useful in a situation where a file is loaded, but the file doesn’t already contain
any chord symbols. If you set this to “Always,” then RealBand will always attempt to automatically interpret the
chord symbols using the Chord Wizard. If set to “Ask First,” then RealBand will ask before attempting to
automatically interpret chord symbols. If set to “Never,” then RealBand will just load the file without attempting to
figure out the Chord Symbols.
Audio Chord Wizard
The Audio Chord Wizard is an extremely powerful feature that automatically finds chord symbols (C, Fm7
etc.) by analyzing the audio content of a song and displays them in a chord sheet window.
The song can be in a digital file format (MP3, WAV, WMA, or CD audio file), one that you created in RealBand, or
directly loaded from a CD.
In addition to the chords, the Audio Chord Wizard also automatically determines the bar lines and a Tempo map.
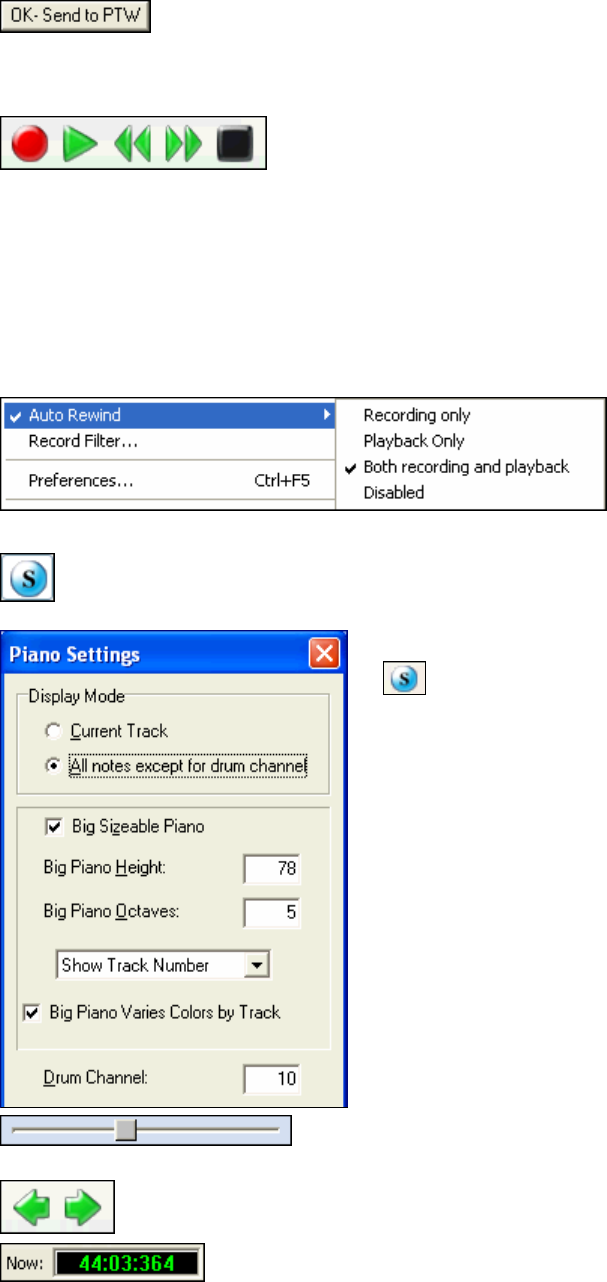
Chapter 5: Using MIDI Features 57
The Audio Chord Wizard imports chord symbols it finds into the Chords window.
Use this feature to instantly play along to your favorite songs, by reading and printing the chord symbols.
Playing a Song
Use the familiar “tape deck” control buttons to Record, Play, Rewind to the
start, Fast
Forward to the end, and Stop song playback.
Playback can be stopped and started anywhere in the song. The fast-forward and rewind buttons jump to either the
end or the beginning of the song.
The red circle indicates the Record button for recording MIDI tracks.
Auto Rewind
Auto Rewind is found in the Options menu. When enabled, RealBand will automatically rewind to the location that
playback or recording was started. The choices are “Recording Only,”“Playback Only,”“Both Recording and
Playback,” or “Disabled.”
Soloing Tracks
You can solo any track or any combination of tracks by pressing the [Solo] button on the toolbar. The
track selection can be changed while the song is playing. Select multiple tracks by holding down the
Shift key and clicking on the track numbers.
Auto-Solo Bass and Drums
If you press the Ctrl key when activating the Solo button,
RealBand will solo the Bass and Drum tracks.
RealBand will detect the drum track based on the Drum channel in the
Piano Settings dialog, located in Preferences under the Piano tab.
RealBand will detect the bass track using an algorithm that looks at
the number of notes vs. chords in a track as well as the average pitch.
In addition, if a track has “Bass” in the name or patch name, then it
will be considered a bass track as well.
Use the slider on the main toolbar to jump to a new song location. Markers
can be inserted anywhere in the song to mark sections, such as Intro, Verse, and Chorus using the Window | Show
Markers Window option. These buttons are used to jump to the next marker in either direction
from the current location.
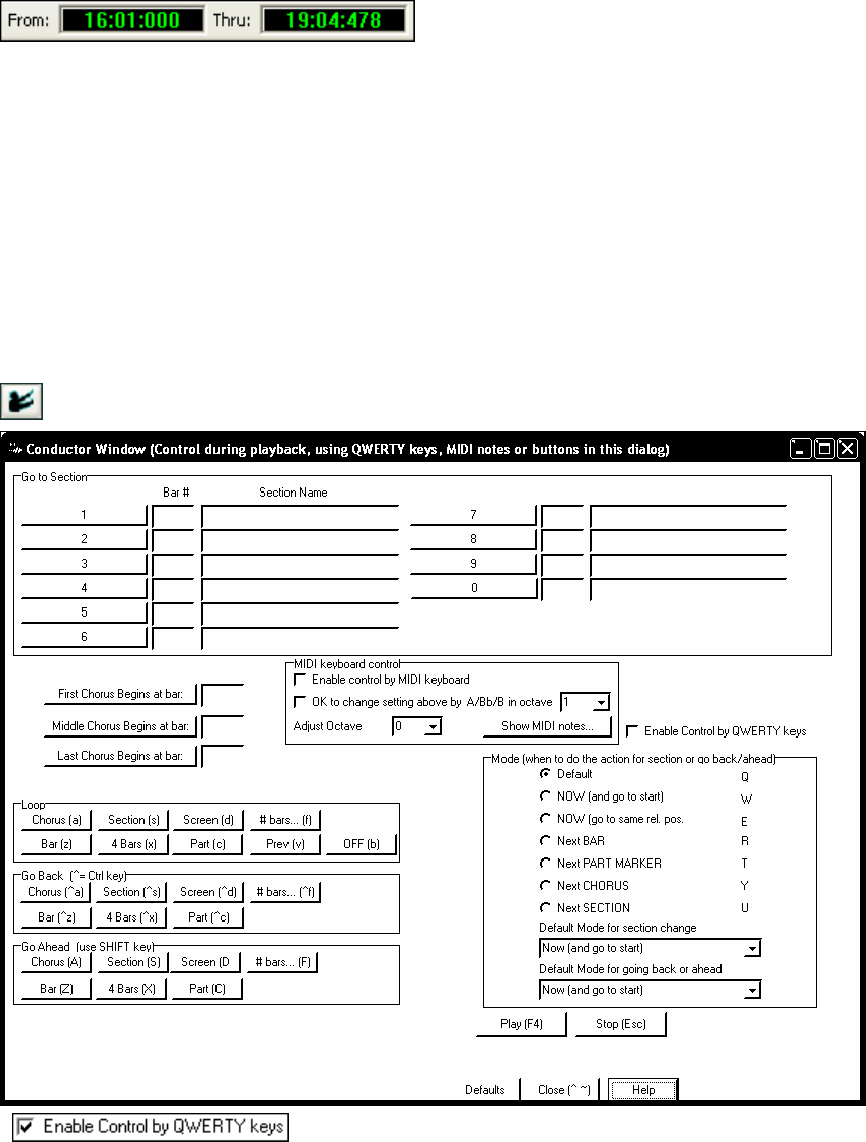
Chapter 5: Using MIDI Features
58
The Now: readout gives the current location in the song file. The Now: location is in bars, beats, and MIDI clock
ticks according to the current resolution setting, which could range from 48 to 3840 system clock ticks per quarter
note (ppq).
The From: and Thru: locations define the range of bars and beats that will be affected by the various Edit menu
operations. The settings are made in the Block menu, or by selecting a range of bars in the Bars window, the Audio
Edit window, or the track overview in the Tracks window.
RealBand defaults to showing the Tracks window. Each row in the Tracks window represents a different track of
the song.
Conductor Window
“Conductor”- Live Looping/Playback Control
As the song is playing, there are options to control the flow of playback by one of three methods:
1. Conductor window
2. QWERTY hot keys
3. MIDI keyboard
The Conductor is launched with the Conductor button on the toolbar.
You must enable the QWERTY keys to be active for the Conductor during playback. This is done by selecting the
“Enable Control by QWERTY keys” checkbox on the Conductor Window.
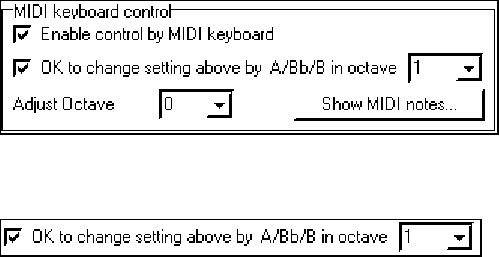
Chapter 5: Using MIDI Features 59
If you want to control the Conductor using the MIDI keyboard, you need to enable this by selecting the checkbox
“Enable control by MIDI keyboard.” in the MIDI keyboard control box. When this setting is enabled, any MIDI
input will be interpreted as a hot key for the Conductor, and you won’t hear MIDI thru.
If you’d like the ability to switch your MIDI keyboard between Conductor mode and regular playing mode, you
can do this using the lowest “A-natural” MIDI note on your keyboard. This is A1 on an 88-note keyboard. Note
A1 will turn the Conductor off, Bb1 turns it on, and B1 will toggle the Conductor on only when the Bb1 note is
held down. If you don’t have an 88-note keyboard, you can set the octave setting to a number higher than 1, for
example if you set it to “3,” then notes A3/Bb3/B3 will turn the Conductor Off/On/Toggled.
Using the Conductor QWERTY or MIDI keys, you can:
- Define and jump to up to 10 user defined sections in the song,
- Jump back 1 bar/4 bars/# of bars/screen/part/chorus/section,
- Jump ahead 1 bar/4 bars/# of bars/screen/part/chorus/section,
- Loop 1 bar/4 bars/# of bars/screen/part/chorus/section,
- Pause/stop the song.
In addition, using the MIDI keyboard, you can also use the Conductor to:
A1 (note#21) Turn MIDI Conductor OFF
Bb1 Turn MIDI Conductor ON
B1 Turn MIDI Conductor ON only as note is held down
The various functions of the Conductor are available with MIDI keys and QWERTY hot keys, as listed in the
Wizards, Tools, and Plug-Ins chapter.
Customizing the Sections
Sections: This allows you to define up to 10 points in the song that are sections. By default, the following sections
are defined for each song.
- Section 1: Start of song
- Section 2: Intro
- Section 3: First Chorus
- Section 4 :Middle Chorus (i.e. start of chorus #2)
- Section 5: Last Chorus
- Section 6: Ending
- Sections 7-10 are user definable. To do this, type in any bar # using the bar/chorus format (e.g. 21/2 would be
bar 21, chorus 2).
If you prefer to enter custom values for the section numbers, you can do this if you check the “custom” checkbox,
and then type in up to 10 bar numbers for each section.
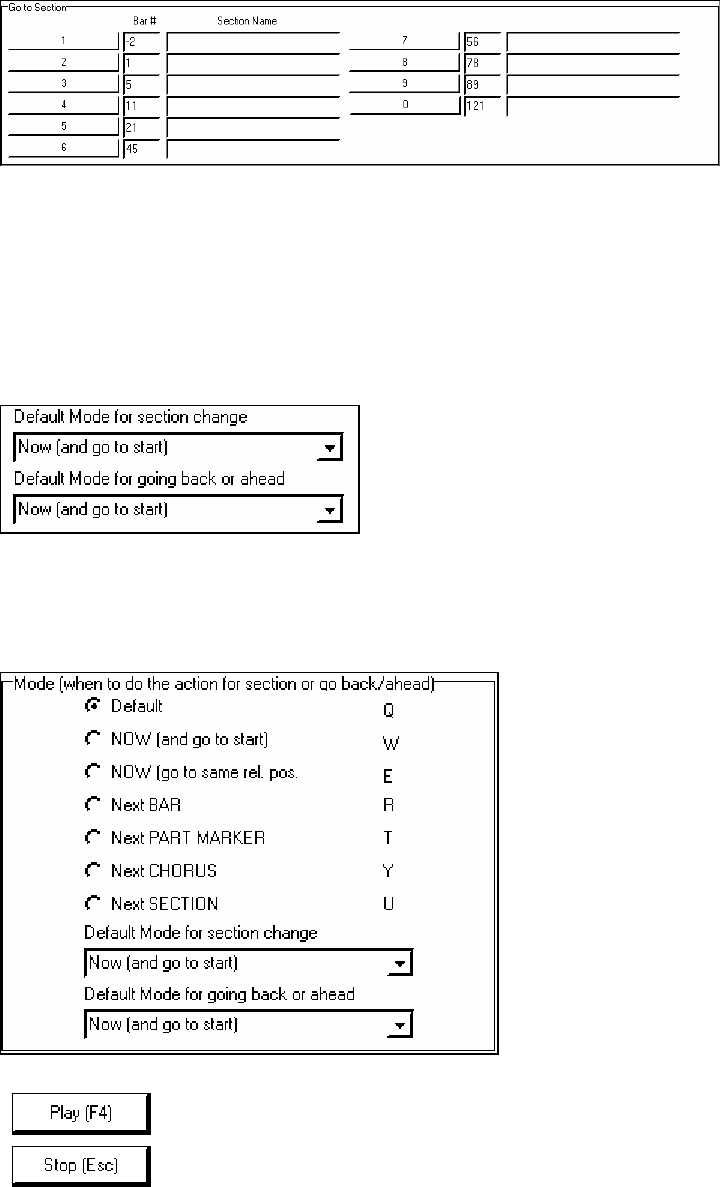
Chapter 5: Using MIDI Features
60
The section numbers are saved with the song. Once you have defined the sections, you can jump to a certain section
of the song as the song is playing, simply by:
1. Pressing the 1-9 or 0 key on the QWERTY keyboard or,
2. Opening the Conductor window (~ hot key) and clicking on the section button or,
3. Pressing MIDI keys 77-86 (F6 to D7) corresponding to sections 1-10.
Mode (when to do the action).
By pressing a QWERTY hot key prior to an action, you can control when the action will take place. If no mode hot
key is pressed prior to an action, the default mode will occur.
The default is set in the “Default Mode for section change” or “Default Mode for going back or ahead” combo box.
For example, by default, the section change will occur as soon as you press the key, and it will go to the equivalent
place in the bar immediately before the beginning of the target section (so that the music stays in time, and the next
section begins at the end of the bar). But you can change the default for the action to take place at the end of the
current bar or current part marker etc.
Play Control Buttons
This plays the song. Hot key = F4, MIDI note = F4.
This stops playback. Hot key = Esc, MIDI note = F#4.
Example uses of the Conductor:
In this example, we don’t have custom sections set, so the default sections apply (middle chorus = section 4 etc.).
- Jump to the start of middle choruses during playback (press “4”).
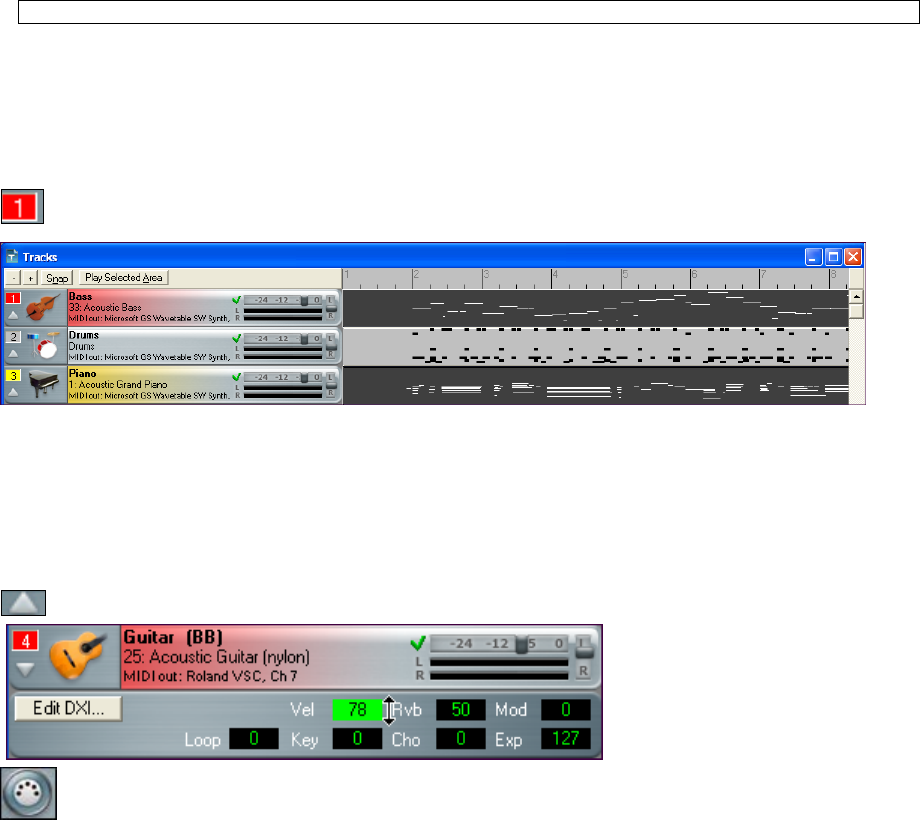
Chapter 5: Using MIDI Features 61
- Loop the middle chorus (press S, which is Loop Section).
- Jump to the end of the song (press 6 ).
- Go back 1 chorus (Ctrl+A).
- Go ahead 1 chorus (Shift+A).
At the end of the current chorus, go back 1 section, press Y then Ctrl+S.
Note: Pressing the Y sets the mode to do the action at the end of the current chorus
These actions can also be done with the MIDI keyboard. See the section on Conductor Functions with MIDI and
QWERTY Hot Keys in the Wizards, Tools, and Plug-Ins chapter.
Tracks Window
The Tracks window shows the track names, track type (MIDI or audio), instrument settings, and an overview
section showing either MIDI or audio data.
The Track Number field shows the track number. If the track is the current Track it will be highlighted in
red.
If the track is selected the number will be highlighted in yellow. If the track is not selected it will be gray. You can
click on the track number field to make a track the current track (highlighted in red).
If you click on the track number field while holding the Shift key, this will select a range of tracks from the current
track through the number you clicked on. For example, if track 2 is the Current Track, and you hold the Shift key
and then click on the number field for Track 4, this will make tracks 2 through 4 selected. Track 2 will still be the
Current Track and tracks 3 and 4 will be highlighted in yellow. You can select/deselect individual tracks by clicking
on a Track’s number field while holding down the Ctrl key.
The Disclosure Triangle will reveal more information about a track by making the track row height taller.
If a track is a MIDI track, then you’ll see the Vel (velocity offset), Rvb (reverb), Mod (modulation), Loop,
Key (key transpose), Cho (Chorus), and Exp (expression) settings.
You can make changes to these settings by clicking on the edit fields with the left mouse button, and then moving
the mouse up or down while holding the mouse button down. The [Edit DXi] button launches the DirectX
Window dialog and will display the settings panel for either the Default DXi Synth (16th DXi synth slot which is
MIDI port 32) or the current DXi port number if the track is set to a valid DXi port (17-32). Any track’s MIDI
Output Port can be set to send to one of the 16 available DXi synth ports or to any other available MIDI port.
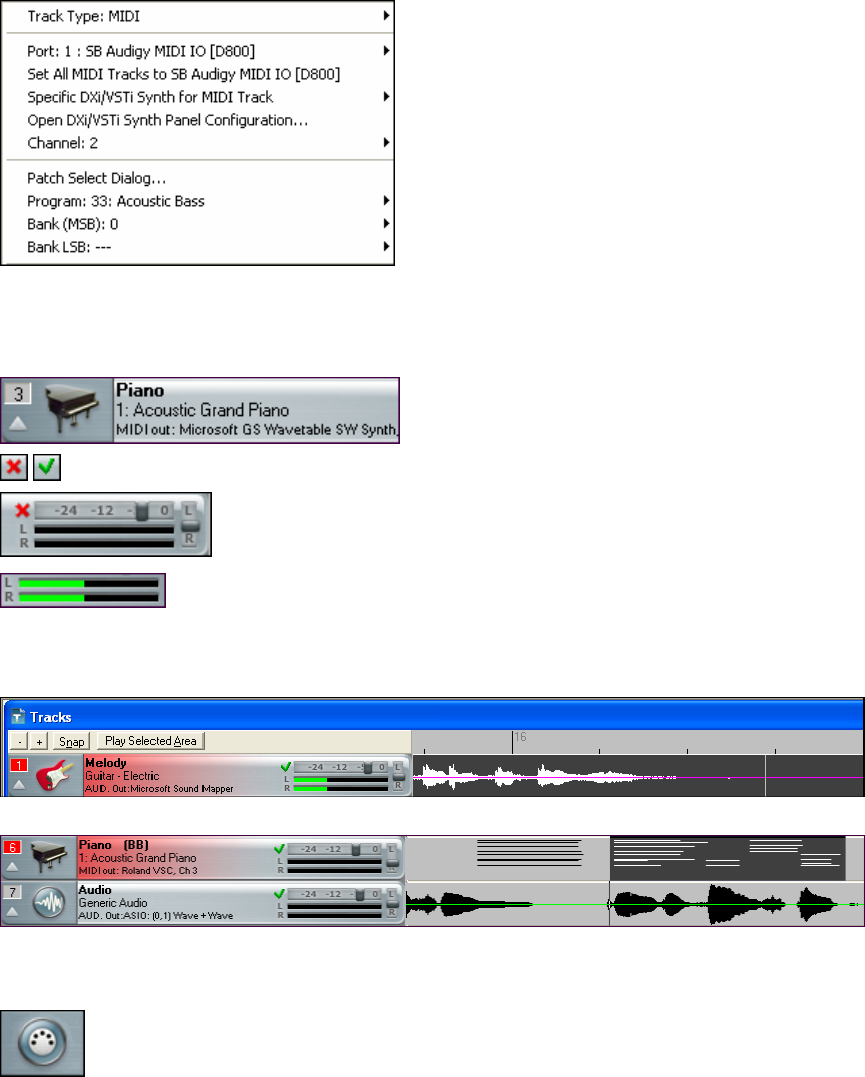
Chapter 5: Using MIDI Features
62
When you right-click your mouse on a MIDI icon you’ll see a
pop-up menu that lets you set the MIDI Output Port, Program
(Patch) setting, and Bank (MSB) and Bank LSB settings.
Immediately below the Port: menu item is a menu command
that lets you Set All Midi Tracks to the same port used by the
track you are adjusting.
There is also a menu item Patch Select Dialog that launches a
patch selection dialog, which lets you select patches and
variations as well as allowing you to change the track’s patch
list. If the patch list is set to General MIDI, Roland GS, or
Yamaha XG, the track will display an instrument icon
corresponding to the patch. Otherwise, you’ll see the patch
number displayed instead of an icon.
The Track Name field shows the track’s name, which is edited by right-clicking or double-clicking on the track
name field. Type the name and press Enter.
When using the General MIDI patch map the program will
automatically display an icon for the instrument selected.
The Mute button lets you mute or unmute a track.
The Volume and Pan sliders let you adjust a track’s volume and pan settings without
opening the Mixer window. Right-clicking on the Volume or Pan controls will let you
edit the setting by typing in a number.
Below the Volume slider stereo VU meters give you a general idea of a track’s level
during playback.
Track Overview Display
To the right of the track info panels, you’ll see the overview display.
This lets you view MIDI or audio data, and select sections for editing.
Right click anywhere on the track to see more track options.
Right Click Menu for MIDI Tracks
If a track is a MIDI track, and you right click on the track you’ll see a pop-up menu that lets you set
the MIDI Output Port, Channel, Program (Patch) setting, and Bank (MSB) and Bank LSB
settings.
This menu will also open with a left click on the track type icon if “Left click on track-type icon in Tracks Window
shows pop-up menu” has been selected (checked) in the Options | Preferences General dialog.
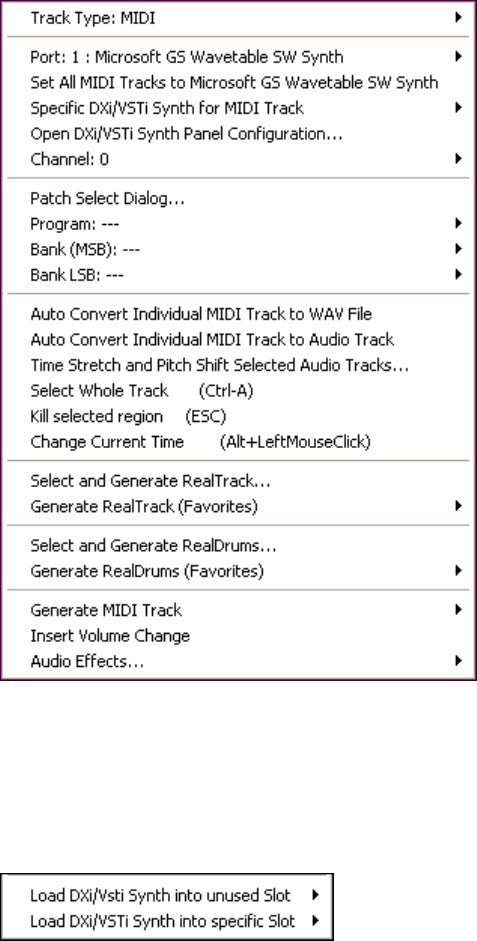
Chapter 5: Using MIDI Features 63
There are 32 MIDI Output ports. You can think of each of port as route that the track takes to output sound, whether
through an onboard sound card, software synthesizer, or an external MIDI keyboard or sound module.
The first 16 ports are for either onboard synthesizers or external MIDI I/O connections. Ports 17 through 32 are for
DirectX (DXi) or Virtual Studio Technology (VSTi) instruments. Mouse over the Port menu item to see a list of all
available ports.
At the bottom of the Port submenu, there are additional menu items to Load DXi/VSTi Synth into unused Slot and
Load DXi/VSTi Synth into specific Slot.
Load DXi/VSTi Synth into unused Slot loads in synth into the next available slot (port) and automatically assigns
the track to that port. However, if the synth is already loaded into a port, it will assign the track to that port rather
than loading another instance of the same plug-in. So this command is basically the same as “Specific Synth for
MIDI track.”
Load DXi/VSTi Synth into specific Slot allows you to select the port to load the synth into, and it loads another
instance of the synth.
Immediately below the Port menu item is a menu command that lets you Set ALL MIDI Tracks to>> the same
port as used by the track you are adjusting.
With Specific DXi/VSTi Synth for MIDI track you can assign each track to a specific DXi or VSTi synth. This
allows you to use multiple synths in the same song. Point to Specific DXi/VSTi Synth for MIDI track then select
the synth you want to use from the submenu.

Chapter 5: Using MIDI Features
64
Open DXi/VSTi Synth Panel Configuration opens the DirectX/VST Window. This allows you complete control
over assigning DXi or VSTi synths to ports, processing the synth output with DX or VST audio effects, and working
inside your synth’s control panel.
The help topic Tutorial: Using DXi and VSTi synths with RealBand provides detailed instructions for installing
and selecting these high quality music synthesizers.
There is also a Patch Select Dialog menu item that launches a patch selection dialog (which lets you select patches
and variations as well as allowing you to change the track’s patch list). As long a track’s Patch List is set to General
MIDI, Roland GS, or Yamaha XG, then the track will display instrument icon corresponding to the patch.
Otherwise, you’ll see the patch number displayed instead of an icon.
In the right-click Tracks window menu, MIDI tracks can quickly be rendered to audio with the commands Auto
Convert Individual MIDI Track to WAV file and Auto Convert Individual MIDI Track to Audio Track as long as the
track is assigned to a DXi or VSTi synth.
Time Stretch and Pitch Shift is an audio feature that lets you stretch (or reduce) the length of the highlighted
section of audio tracks.
Select Whole Track command will select the entire track for editing.
Kill Selected Region will deselect a selected region of a MIDI (or audio) track.
Change Current Time (Alt+Left Mouse Click) – will change the current time without affecting the highlighting of
tracks. This ensures you don’t accidentally de-select a region.
Select and Generate RealTrack opens the RB Assign RealTracks to Tracks dialog for Real instrument selection
and options for the generation of the audio RealTrack. Track names for generated non-BB tracks are displayed in
green. For example, if you had generated a track by right clicking on it and selecting “Generate RealTrack” then the
track name of that track will be displayed in green.
Generate RealTrack (Favorites) opens a list of recently used Real instruments for quick selection and generation.
Select and Generate RealDrums opens the RB RealDrums Picker for selection of a RealDrums style and options
for the generation of the audio RealDrums. Track names for generated non-BB tracks are displayed in green.
Generate RealDrums (Favorites) opens a list of recently used RealDrums styles for quick selection and
generation.
Generate MIDI Track opens a list box to select the part for a MIDI track to be generated on the current track.
Insert Volume Change will insert a MIDI controller into the track at the current location. If a highlighted region
exists, then the program will ask if you want to apply this change to the highlighted region (as opposed to a change
at the location you clicked). If applying the change to a region, then program will insert a volume change at the
beginning of the region, and a 2nd volume change at the end to restore the prior volume.
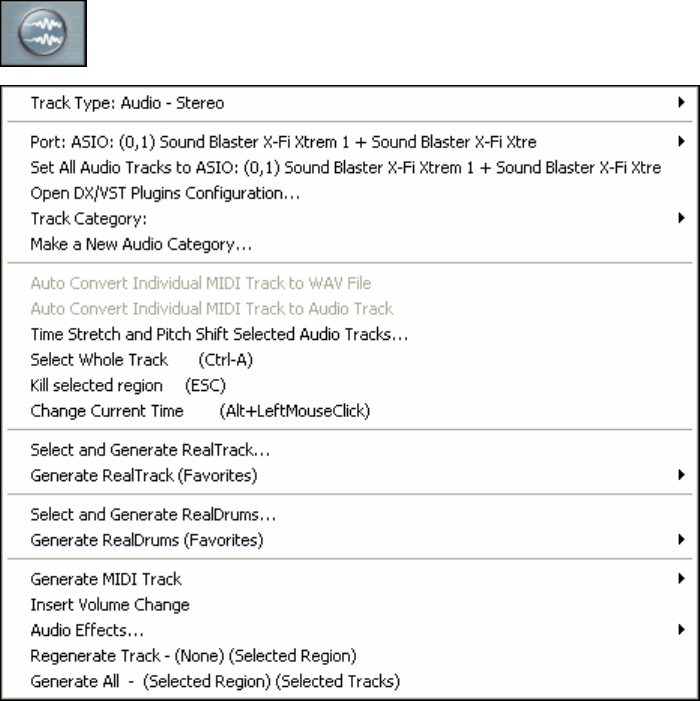
Chapter 5: Using MIDI Features 65
If necessary, the program will insert a controller at the very beginning of the song to preserve the original volume
if you insert a volume change beyond the start of the track. This will normally be done the first time you insert a
volume change into a track beyond the tracks’ beginning.
Audio Effects opens the selection list of built-in PG Music audio effects.
Right-Click Menu for Audio Tracks
If a track is an Audio track and you right-click on the track, this pop-up menu opens. This menu will
also open with a left click on the track type icon if “Left click on track-type icon in Tracks Window
shows pop-up menu” has been selected (checked) in the Options | Preferences General dialog.
The Track Type and audio Port settings can be assigned.
Open DX/VST Plugins Configuration opens the DirectX/VST Window where plug-ins can be applied and edited.
The Track Category item lets you select preset groups of audio effects for the particular category such as guitar,
vocal, keyboard, or your own user assigned effects groups.
Make a New Audio Category opens a dialog where you can name a new category, select an image for its icon, and
assign an audio effects group (*.TGS) preset.
Time Stretch and Pitch Shiftis a dialog that lets you stretch (or reduce) the length of the highlighted section of
audio tracks.
Select Whole Track command will select the entire track for editing.
Kill Selected Region will deselect a selected region of an audio (or MIDI) track.
Change Current Time will change the current time without affecting the highlighting of tracks. This ensures you
don’t accidentally de-select a region.
Select and Generate RealTrack opens the Assign RealTracks to Tracks dialog to select a RealTracks instrument
and generate a RealTrack. Track names for generated non-BB tracks are displayed
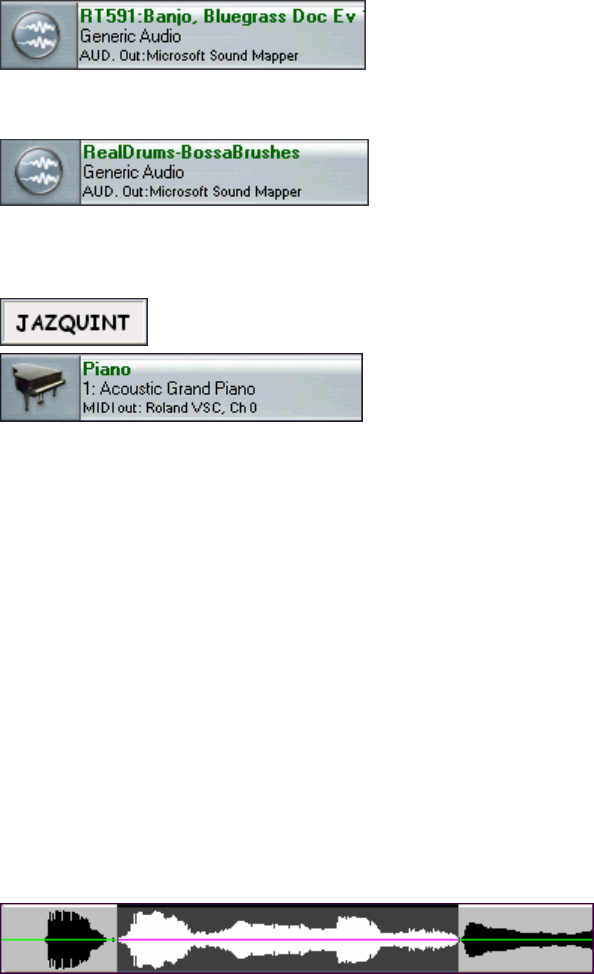
Chapter 5: Using MIDI Features
66
in green. For example, if you had generated a track by right
clicking on it and selecting “Generate RealTrack” then the track
name of that track will be displayed in green.
Generate RealTrack (Favorites) shows a list of recently used RealTracks.
Select and Generate RealDrums opens the RealDrums Picker to choose a
RealDrums set and create a RealDrums track. Track names for
generated non-BB tracks are displayed in green.
Generate RealDrums (Favorites) shows a list of recently used RealDrums.
Generate MIDI Track opens a list box to choose which Band-in-a-Box part to generate for the track – Bass,
Drums, Piano, Guitar, or Strings. When a part is chosen from the list it will
automatically be generated using the current Band-in-a-Box style in use. You can create
tracks in different styles in the same song.
The track name of the generated non-BB MIDI track will be
colored green.
Insert Volume Change will insert a MIDI controller into the track at the current location. If a highlighted region
exists, then the program will ask if you want to apply this change to the highlighted region (as opposed to a change
at the location you clicked). If applying the change to a region, then program will insert a volume change at the
beginning of the region, and a 2nd volume change at the end to restore the prior volume.
If necessary, the program will insert a controller at the very beginning of the song to preserve the original volume if
you insert a volume change beyond the start of the track. This will normally be done the first time you insert a
volume change into a track beyond the tracks’ beginning.
Audio Effects opens a submenu that is the same as the Edit | Audio Effects window. This submenu also contains
Fade In and Fade Out menu items, which launches a FlashMessage w/ instructions, and then launches the GAIN
dialog.
Regenerate Track will regenerate an existing track. If a track is a non-BB track, but it was generated individually
from one of the generation options in Tracks Window popup menu, or from one of the generation options on the
Generate Button popup menu, then the track name will be displayed in green. The track name being displayed in
green or blue means that the track can be regenerated using this command. This feature is useful to regenerate, if
you had changed the song’s tempo, or just to generate fresh material.
Generate All will regenerate all Blue and Green tracks automatically.
Select Area
You can click and drag to highlight a section of the song for editing.
Shift+click (Shift key + left mouse button) support makes it easy to tweak the beginning or end of the highlighted
area.
- If you Shift+click before the start of the From/Thru range, or after the end of the From/Thru range, the
highlighted area will be extended.
- If you Shift+click within the From/Thru range, the range will be reduced, and the location you clicked on
will become either From or Thru depending on which boundary was closer to where you Shift+clicked the
mouse.
- If you keep the left mouse button held after the Shift+click, and you move the mouse you can adjust the
boundary of the range while moving the mouse.
Click on [Play Selected Area] to hear the highlighted section being edited.
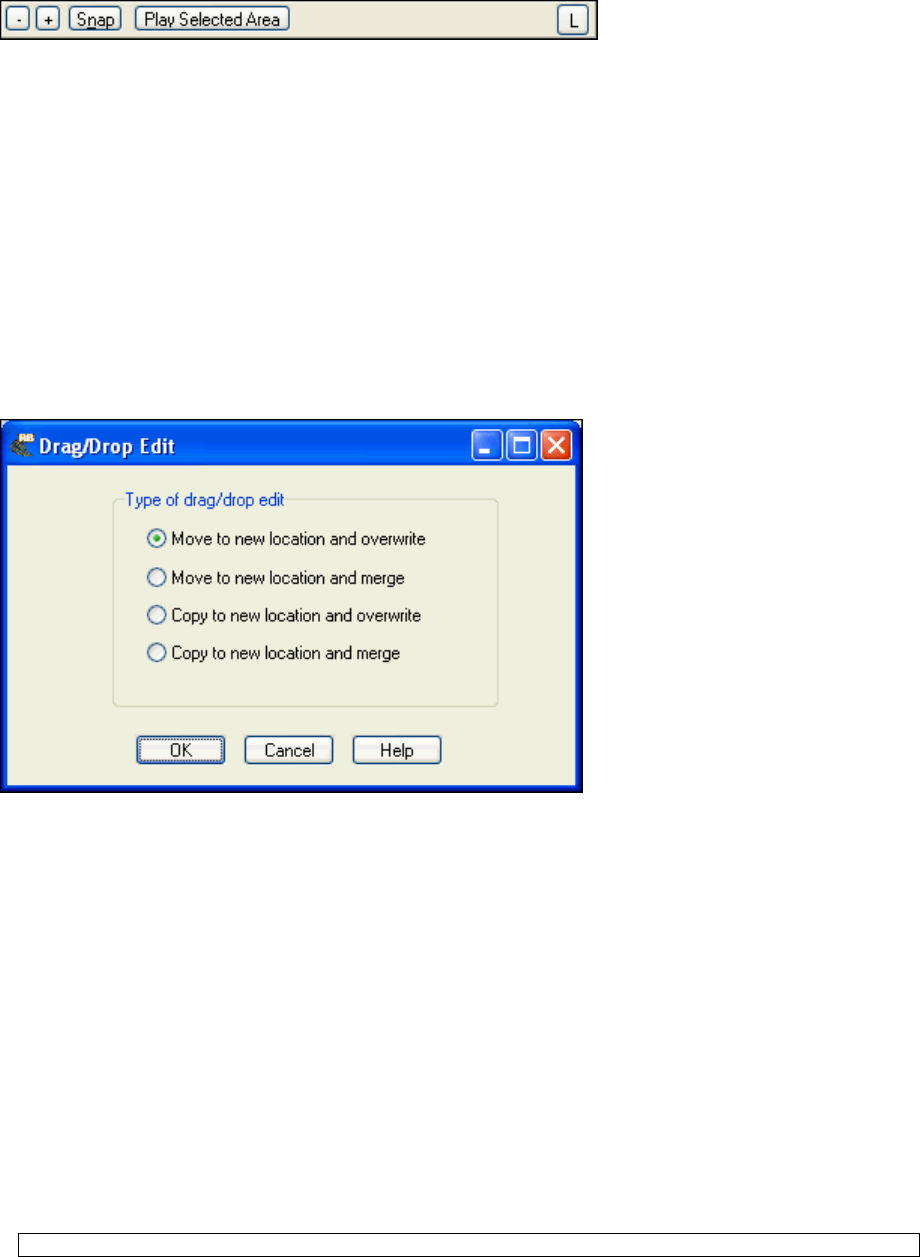
Chapter 5: Using MIDI Features 67
The [-] and [+] buttons (upper far left corner of the Tracks window) let you zoom in or zoom out the overview
section.
The [Snap] button causes the time indicator to snap to the nearest beat when changing the time location or when
highlighting a region for editing.
The [L] button locks the From: and Thru: settings from being changed by the mouse. This prevents accidental
changes to a selected area.
Drag and Drop Features
RealBand supports drag-and-drop editing in the Tracks and Audio Edit windows.
In the Tracks window you can easily move tracks up or down in relation to each other by drag ‘n’ drop using the
mouse, e.g., drag track 1 below track 2 to change the order of the tracks.
You can move a highlighted region by holding down the Ctrl key with the left mouse button pressed, and drag the
region to a new location in the song.
After releasing the mouse button, you have four options:
1. Move to new location and overwrite removes the selected region from the original source track and places it on
the destination track. Existing content on the destination track is overwritten.
2. Move to new location and merge removes the selected region from the original source track and merges it with
the existing content on the destination track.
3. Copy to new location and overwrite copies the selected area and places it on the destination track. Existing
content on the destination track is overwritten. The original source track is left intact.
4. Copy to new location and merge copies the selected area and merges it with the existing content on the
destination track. The original source track is left intact.
Drag And Drop MIDI Or Audio Files Into The Tracks Window
You can drag a file, such as a .WAV file, from a folder directly onto the Tracks window. The file will be placed on
the track you dropped it on, at the location onto which you dropped the file. The types of files that are supported are
the audio files supported by RealBand, such as .MP3, .WAV, and WMV.
In addition to audio files, .MID files can be dropped onto the tracks window too. If the file is a multi-track .MID it
will be imported onto free tracks beyond the highest occupied track.
If you hold the Ctrl key when dropping the file, then the file will be inserted at the time location, and any existing
data moved beyond the end of the file that is being inserted, rather than overwriting any existing data.
NOTE: this feature will only insert files on measure boundaries.
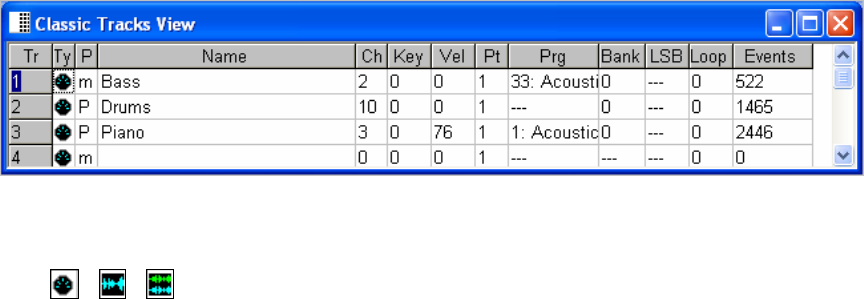
Chapter 5: Using MIDI Features
68
Classic Tracks View Settings
Click your mouse anywhere on a row to select that track. The number of the currently selected track (Tr) is
highlighted in blue.
Ty = Type.
MIDI Audio Stereo
The type field determines the track type: MIDI, Mono Audio, and Stereo
Audio. You can’t change the track type if a track already has data in it.
P = Play Status. The Play Status field shows the status of the track as Play (P), Muted (m).
Name = Track Name. This is any name you want to give to the track.
Ch = Forced MIDI channel. When not set to zero, all events in a track will be sent out over the selected
channel.
Key = Forced Key Transposition. This setting transposes the events in a track up or down by the number of
semitones you specify.
Vel = Forced Velocity transposition. This setting increases or decreases the velocity of the notes in a track by the
amount you specify.
Pt = Port. Determines the MIDI port, or audio port, through which the data in a track is
sent out.
Prg = Program change. When this setting is enabled a MIDI patch change will be sent at the start of
the song. When you change this setting, a MIDI program change is sent.
Bank = Bank change. This is the MSB (Most Significant Byte) portion of the bank change,
controller number 0.
LSB. This is the Least Significant Byte (controller number 32) portion of the bank change. Some synths
use LSB instead of MSB, and some synths use a combination of the LSB and the MSB.
Loop. When this setting is enabled, the track will automatically repeat for the number of times specified.
Events. The number of events in a track.
Selecting MIDI Patches
A double mouse click in the Prg (Program Change) field for any track will launch the Select Patch dialog.
This dialog lets you select a patch from the current patch list shown in the Patch List combo box. For example, if
you select “General MIDI” then the patch list used for current track will be the General MIDI patch list. RealBand
saves the most recently selected Patch List for each track in its native .SEQ files. This example shows Roland GS,
which is an extension of the General MIDI list with variations (alternate choices) for many instruments.
To select a patch, simply click on the patch in the main list box then hit the [OK] button to exit the dialog. The
“Variations” list box shows the variations, which are patches in other banks that have the same number as the
selected patch.
If the “Always Show Bank 0 Names” checkbox is checked, the main list box will be filled with the patches of the
default bank (those patches with both the bank MSB and LSB being 0), and the highlighted variation is the actual
patch that is selected. If the checkbox is unchecked, then the patches in the list box will change to those of the bank
number of the current variation.
Only patches that have names will be in the list box, e.g., if there are only 9 named patches in the current bank, the
list box will only be filled with 9 patches. When you select a patch in the list box, the number of the patch will
appear in the “Patch” edit control.
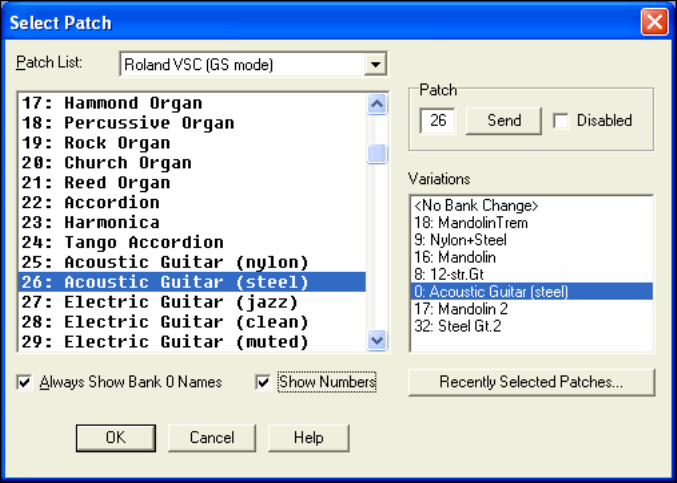
Chapter 5: Using MIDI Features 69
You can select any patch by number by typing the number in the “Patch” edit control. You can press the send
button to send the patch change you just typed without having to exit the dialog. The disabled checkbox simply
means no patch change is selected for the current track, and a value of “---” will show in the Prg column of the
Classic Tracks View window.
The [Recently Selected Patches…] button brings up a dialog with a list of the 20 most recently selected patches, if
any recently selected patches exist.
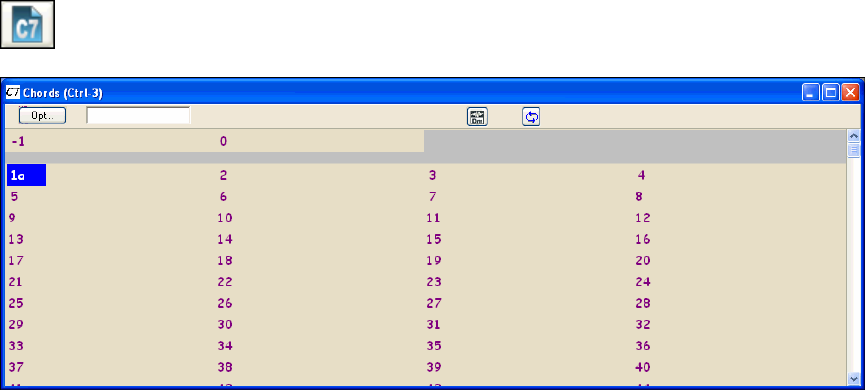
Chapter 6: BB Tracks and MIDI tracks
70
Chapter 6: BB Tracks and MIDI tracks
Overview
As discussed elsewhere, any one of RealBand’s 48 tracks can be either a MIDI or audio track. And for either type
you have the option of recording and creating your own parts or using the musical intelligence of RealBand to create
professional tracks for you. When working with MIDI tracks, RealBand uses its Band-in-a-Box components to
generate tracks in any of the Band-in-a-Box styles that you have installed on your computer.
RealBand also lets you generate selected sections of tracks and regenerate either complete tracks or selected parts as
often as you want to – and with any style you want to use. This means that your BB Tracks can be assembled from
any number of different styles to add variety and fine-tune the arrangement.
Creating a New Song Arrangement
To generate a new song arrangement you begin by typing the chords into the Chords window
using standard chord symbols. This window opens with the [C7] button, the hot key combination
Ctrl+3, or the menu command Window | Chords. Band-in-a-Box users will feel right at home.
You’ll see the bars of the song displayed in rows. If a bar contains chord symbols they will be displayed to the right
of the bar number.
Enter the chords for your song by typing them in using standard chord symbols such as C, or Fm7, or Bb7, or
Bb13#9/E. For example type c6 to get the C6 chord. Note that you should never have to use the Shift key, as
RealBand will sort this out for you.
- Use b for a flat, e.g. Bb7.
- Use # or 3 for a sharp, e.g. F#7. (# is the uppercase symbol of 3, so you can actually type F37 to get F#7 -
RealBand will sort out the case, saving you the effort of using <SHIFT>3 to type the # symbol.
- Use / for Slash Chords with alternate Roots such as C7/E (C7 with E bass)
- Use a comma to enter 2 chords in a row. In the example below, we would type Ab9,G9 to enter 2 chords at a time
(on beat 3 and 4 of bar 2)
You can use the Delete key to delete a chord, or type a comma and press Enter.
Each measure is divided into Beat Groups, indicated by a highlight cell. A Beat Group consists of two beats. If a
song is in 4/4, then each measure will contain two beat groups. The current beat group will have a rectangle drawn
around it. You can type two chords into the current beat group. For example if you type this: “C7,G7” (without the
quotes) you’ll see the text you’re typing in the white rectangular panel on the toolbar. If you then hit <Enter> you’ll
see the C7 and G7 chords appear within the current beat group, and the input rectangle will automatically advance to
the next beat group. When you’re in the middle of typing chord symbols, you can use the backspace key to correct a
mistake.
The Left Arrow and Right Arrow keys let you move the input rectangle to a different beat group without entering
chords. You can also click the mouse on a different beat group to move the input rectangle to a new location.
For a list of the chord spellings that are recognized by RealBand see the help topic Entering Chord Symbols.
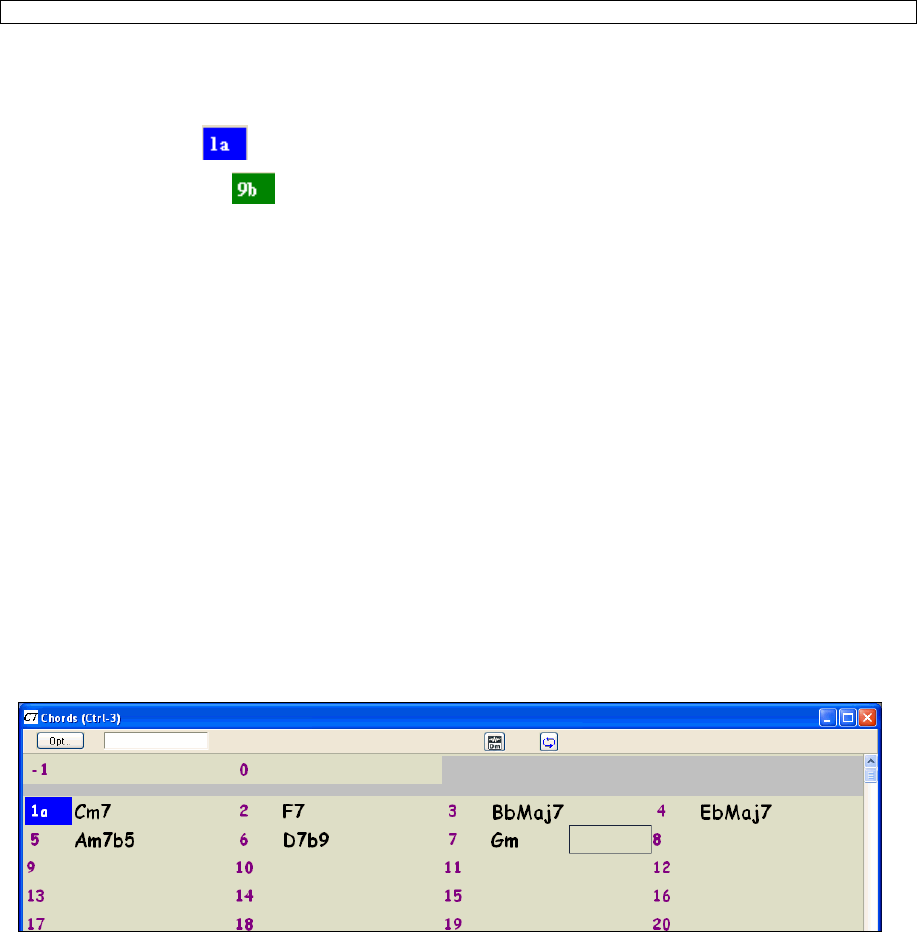
Chapter 6: BB Tracks and MIDI tracks 71
Rests/Shot/Held Chord/Pushes
Rests, Shot, Held Chord, and Pushes are supported by the RealBand generation routines:
A chord can be specified as a Rest by adding a period after the chord.
e.g. “C.” indicates a C chord that is a Rest.
A chord can be specified as a Shot by adding two periods after the chord.
e.g. “C..” indicates a C chord that is a Shot.
A chord can be specified as a Held Chord by adding three periods after the chord.
e.g. “C…” indicates a C chord that is a Held Chord.
Pushes:
^C = 8th push
^^C = 16th push
Note: Pushes, Shots, Rests, Hold Chords can ONLY be entered in the Chords Window.
Part Markers
If you click directly on a bar number, the number will change into a Part Marker. There are two kinds of part
markers:
- an “a” part marker (blue) ,
- and a “b” part marker (green).
The part markers choose one of the two substyles available for BB Tracks arrangements. In general these substyles
correspond to the “a” and “b” sections of a song.
Clicking once on the bar number that currently has no part marker will set the bar to “a” part marker. Clicking again
will set it to a “b” part marker. Clicking again would set the bar so it would be back to having no part marker.
The Chords window allows you to toggle the part marker type for a measure during playback. This can be done the
usual way, which is to click on the measure number with the mouse. In addition, you can also toggle a part marker
for the current measure by pressing the 'M' key on your keyboard when the Chords window is the currently active
window (and when not already in the middle of entering a chord within the Chords window).
Entering Chords
Let’s enter some chords in the chord sheet.
We’ll put our highlight cell in the first beat group of bar and type the letters cm7. Press the Enter key and the chord
symbol Cm7 is entered at the start of bar 1.
Press the Enter key again and the highlight cell moves to bar 2. Type f7 for an F seventh chord and press Enter.
Now we’ll use some chord shortcuts. The letter “j” is the shortcut for a major seventh chord. Type bbj and press
Enter to write the chord symbol BbMaj7 on the chord sheet. Move to the next bar and type ebj to write EbMaj7 in
that bar. Advance to the next bar and type the letters ah to write Am7b5 – the h is for a half-diminished chord. In
the next bar type df and the chord symbol D7b9 will be entered, then enter gm for a G minor chord in bar 7. We’ll
stop there for purposes of this tutorial, and here is what our Chord window looks like now.
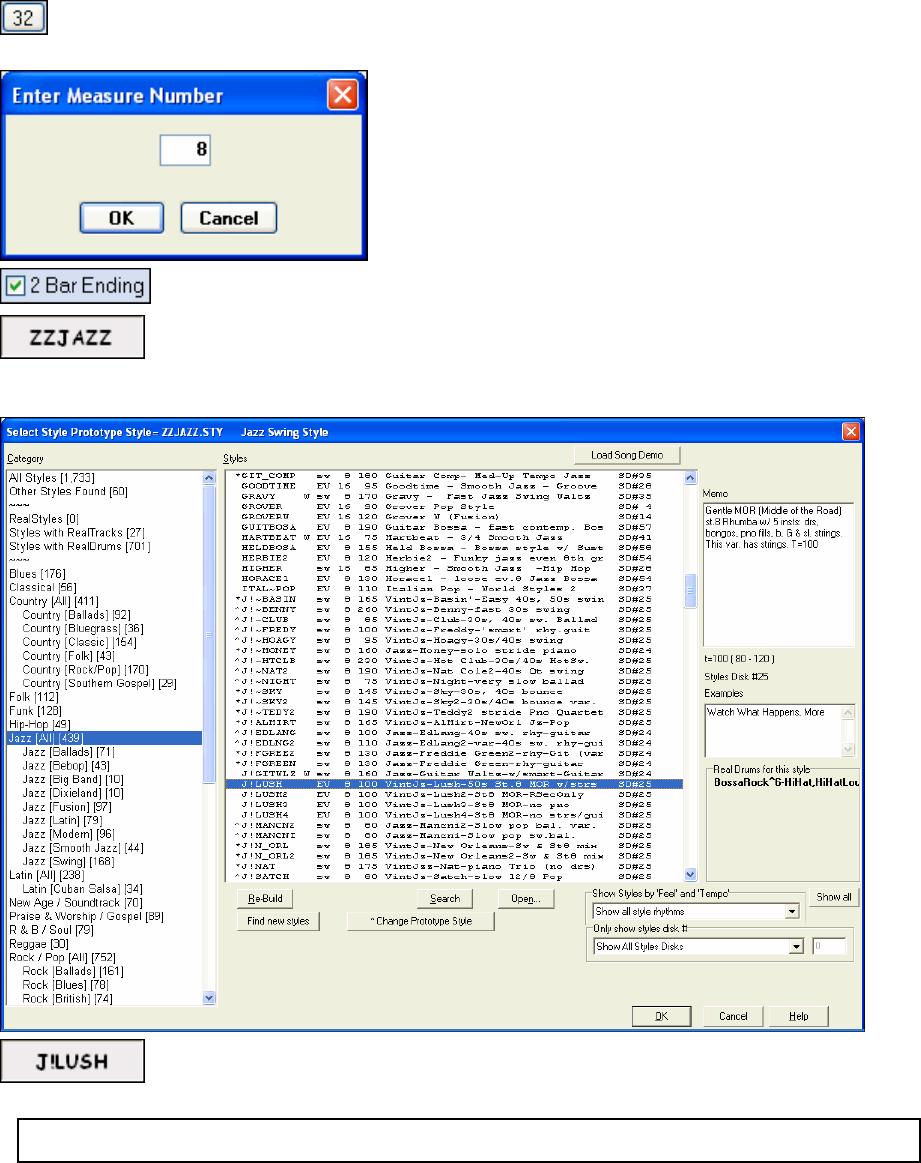
Chapter 6: BB Tracks and MIDI tracks
72
Generating the BB Tracks
Now we’ll move on to the arranger toolbar to generate our RealBand song arrangement.
The next thing to do is reset the default song length of 32 bars to 8 bars. We’ll leave the start-of-song chorus
set at bar 1 and click on the end-of-chorus button to type in the number of the new end-of-chorus bar.
For our short tutorial song we’ll start at bar 1 and end at bar 8.
We’d like RealBand to add a 2-bar ending to our song, so we’ll check the 2 Bar Ending box.
Next we’ll choose a style for our song by clicking on the style name to open the StylePicker
window. You aren’t required to have Band-in-a-Box for your RealBand styles, but if you do you will see that all of
your styles are available here.
From the Jazz category select the J!Lush style (or any other style of your choosing) and you’ll
see that the style selection box has been updated with its name.
Note: There is a special feature that will instruct RealBand to change the style selection at any bar. The setting is made by
pressing the F5 function key. It is described under “About BB Tracks.”
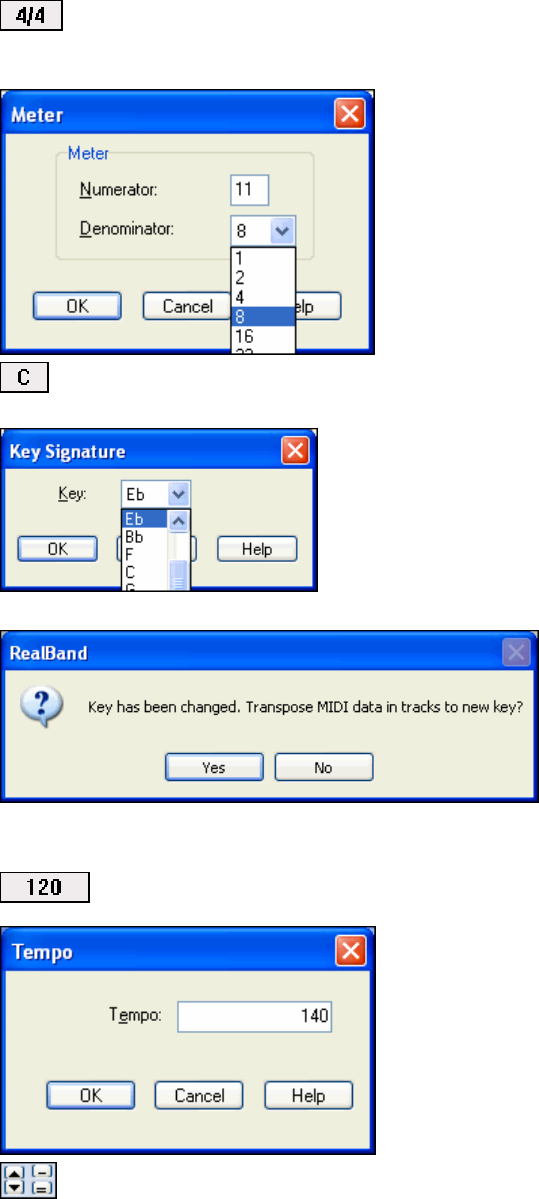
Chapter 6: BB Tracks and MIDI tracks 73
The time signature defaults to 4/4, but a new time signature can be set by clicking in this box to open the
Meter dialog. Compound time signatures are supported. In fact, the numerator can be any number from 1 to 99.
The denominator is selected from the drop down combo box.
Our song is in C minor, so we could select the relative major key signature of Eb for fewer accidentals in the
notation display. Click in the key box to open the Key Signature dialog.
Real Band will prompt to ask if you also want to transpose the MIDI tracks for your song to the new key.
In this instance we do not want to transpose the MIDI tracks; we just want to change the key signature. Select [No].
Just before we play our song we can set a tempo.
The tempo box has a setting of 120 bpm. To change it to 140 we’ll click in the box to open the
Tempo dialog and type in 140.
We could also set the tempo with the up and down scroll arrows, or even tap in a tempo with the minus
and equals buttons.
Tempo Calculator (File | File Utilities)
The length of a song depends on tempo and number of bars. With this calculator, found in the File menu under
File Utilities, you can enter 2 of the 3 variables (length of song in seconds, tempo, number of bars) and the
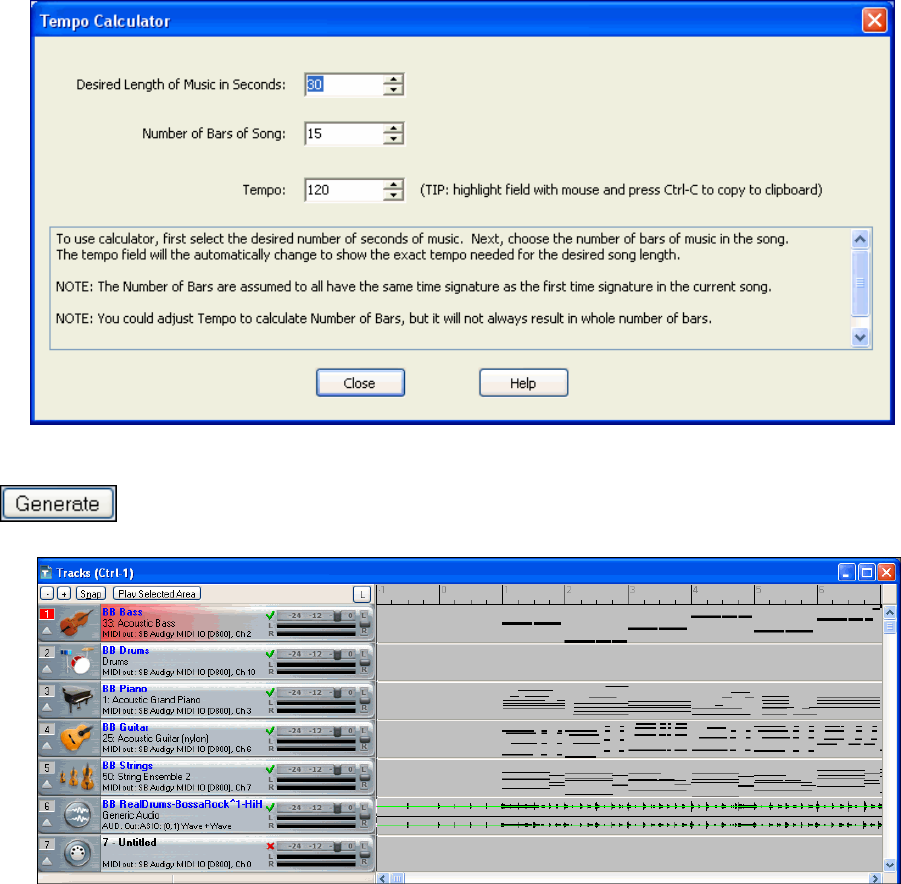
Chapter 6: BB Tracks and MIDI tracks
74
program calculates the third variable for you. So, for example, if you need a piece of music lasting 60.00 seconds,
and it is 45 bars, you can use the calculator to find the tempo that will achieve that.
So we’ve entered our chords in the Chords window, set the length of our song and added a 2-bar ending, chosen a
Band-in-a-Box style, and set the tempo.
We’re ready to generate an automatic arrangement with BB tracks, and we’ll see them in the Tracks
window when we press the [Generate] button to create our song.
The track overview shows us that we have five MIDI tracks playing the parts generated by the J!Lush style, and
because RealDrums are allowed in the Preferences | Song Generation settings the BB Drums track is empty and we
have a RealDrums audio track. Notice that the BB Track names are in blue, whereas user track names are in black.
About BB Tracks
BB Tracks are MIDI tracks so they can be edited like any other MIDI track with the features described in the
following section. BB tracks cannot be moved or renamed, but you can change any of the settings with the right-
click menu – for example the patch, MIDI port, or MIDI channel.
Settings for Bar
BB Tracks can be generated using more than one style, with volume changes, and with repeats. In the Chords
window, click on the bar where you want to make changes and press on the F5 function key. This opens the
Settings for Bar dialog.
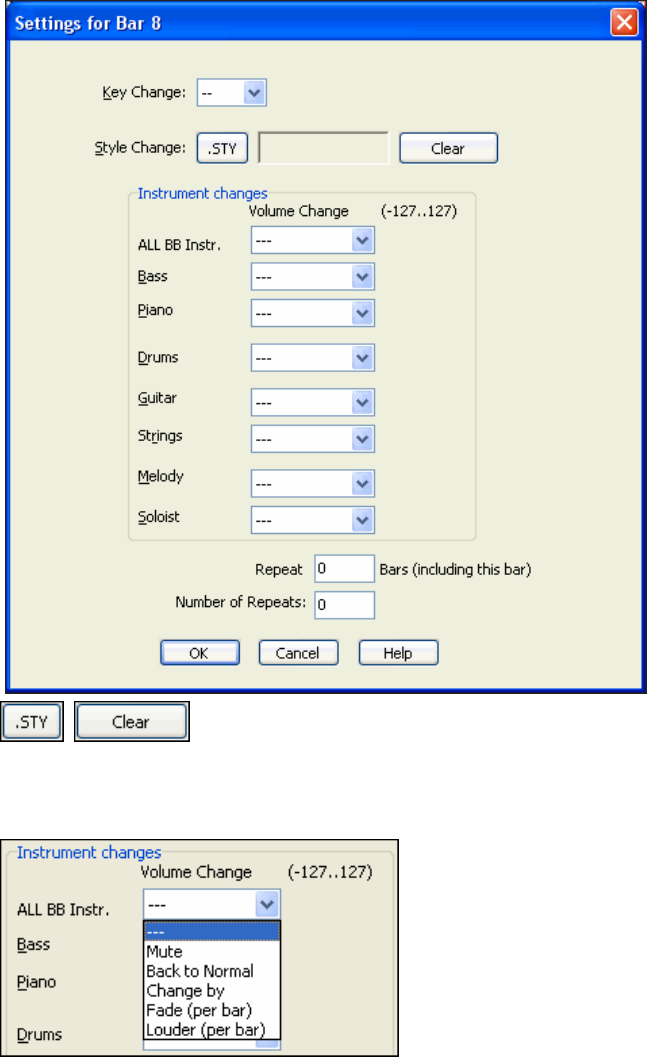
Chapter 6: BB Tracks and MIDI tracks 75
Use the [STY] button to open the StylePicker and make your selection, and use the [Clear]
button to remove the selection. When the song is generated your new style will be heard playing at that bar. This
feature can be used any number of times in a song.
Volume Changes
Volume changes can be applied at any bar to all BB tracks together, or just to selected instruments. The options are:
Mute, to silence the track.
Back to Normal, to undo a previous change and restore the normal track volume.
Change by, to enter a value in the range of -127 to 127.
Fade or increase volume.
Repeats
You can add repeats to an arrangement.
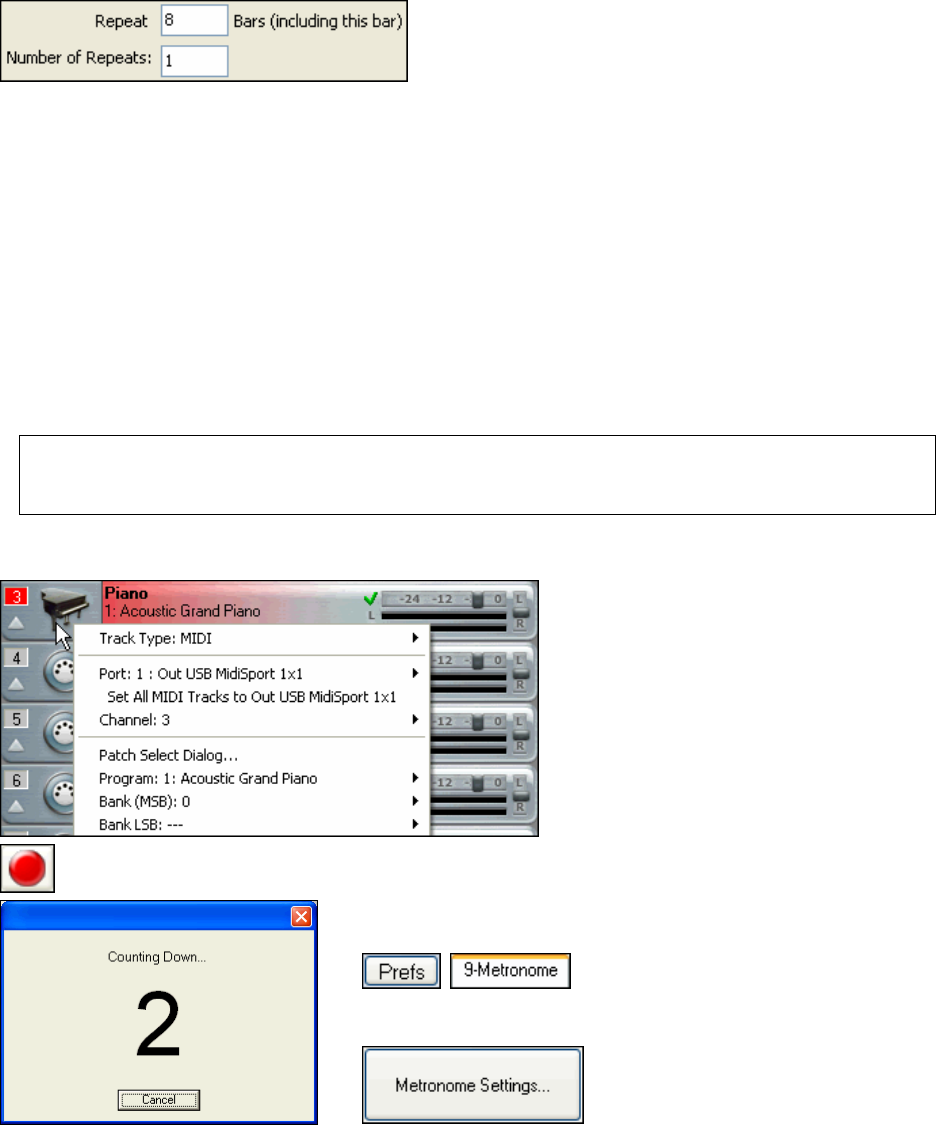
Chapter 6: BB Tracks and MIDI tracks
76
The repeats display on the Chords window, and both audio/MIDI play with the repeats. When the number in
“Repeat _ Bars” is greater than zero, a repeat will be enabled, and repeat signs shown in the Chords window.
Now that you have generated BB Tracks for the chords you entered in the Chords window, your next step might be
to record some additional MIDI tracks along with the BB tracks.
Recording Your Own MIDI Tracks
In addition to BB Tracks, MIDI data can be recorded on any track in RealBand. Just select the track by clicking on
the track number, and make sure that the track type is set to MIDI.
MIDI is recorded with the Input driver that is selected in the MIDI Driver Setup dialog. (Go to Options | MIDI
Devices to open the dialog.) If more than one Input Driver is available then choose the one that is connected to your
MIDI keyboard or controller.
Before you start, you might want to select a higher resolution for greater precision. RealBand supports note
resolutions as high as 3840 PPQ.
Note: Higher note resolution reduces the maximum allowed song length, as well as reducing the maximum allowed note
duration length. At 3840 PPQ, the maximum song length of a 4/4 song is around 35 minutes long at a tempo of 120, less at
faster tempos. At 3840 PPQ and a 4/4 time signature the maximum allowed note duration length is around 17 beats
regardless of the tempo.
Then make the necessary settings in the Tracks window to select the port, MIDI channel, patch, etc. for the part you
are recording.
Start recording with the Record button, by pressing the R key on the computer keyboard, or with the
menu command Action | Record.
The Record command starts the count-in according to the settings that
you have made in the Metronome Settings dialog.
To open the metronome settings, go to
Preferences and select the Metronome tab. Click on the [Metronome
Settings] button.
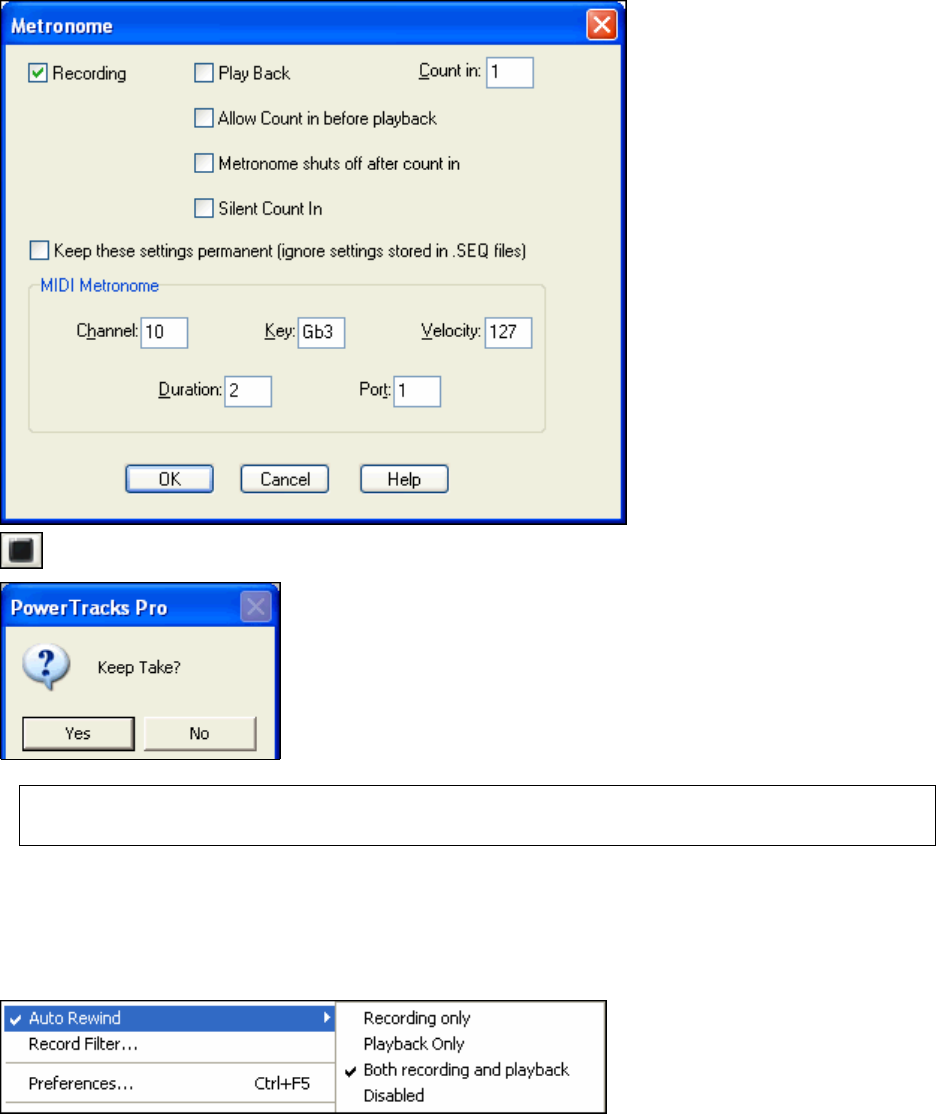
Chapter 6: BB Tracks and MIDI tracks 77
In addition to the on-screen
countdown, there is an option for a
MIDI drum count-in on any drum
kit instrument. The default note is
F#3, hi-hat.
There is a setting in the
Metronome Settings dialog,
“Keep these settings permanent
(ignore settings stored in .SEQ
files),” that will cause RealBand to
remember the current metronome
settings and ignore any settings
stored in .SEQ files.
Recording is stopped by hitting the spacebar or pressing the Stop button.
When recording is stopped you will be asked whether or not you wish to
keep the take.
Remember that with MIDI recording small glitches are easily corrected; so
you don’t need to discard an otherwise good take because of a minor slip.
Note: If you see a message that audio data was recorded that is because “Always Record Audio too, if current track is MIDI”
has been enabled in the Audio preferences dialog. This is an automatic backup feature in case you wanted to record audio,
but accidentally selected the current track as a MIDI track.
Auto Rewind
Auto Rewind is found in the Options menu. When enabled, RealBand will automatically rewind to the location that
playback or recording was started. The choices are “Recording Only,”“Playback Only,”“Both Recording and
Playback,” or “Disabled.”
It is convenient to rewind to the start of a recording after a take so that you can listen to the result immediately.
Overdubs
If there is MIDI data on the selected track it will be overdubbed, i.e., the existing MIDI notes will not be erased as
the new ones are recorded. This is sometimes useful, but a better way to make overdubs is to select a blank track
and give it the same settings as the track you want to overdub. Then record the overdub part on the new track, using
as many tracks as you need for additional overdubs or layers. This is a great way to overdub drum fills or layer
string parts.
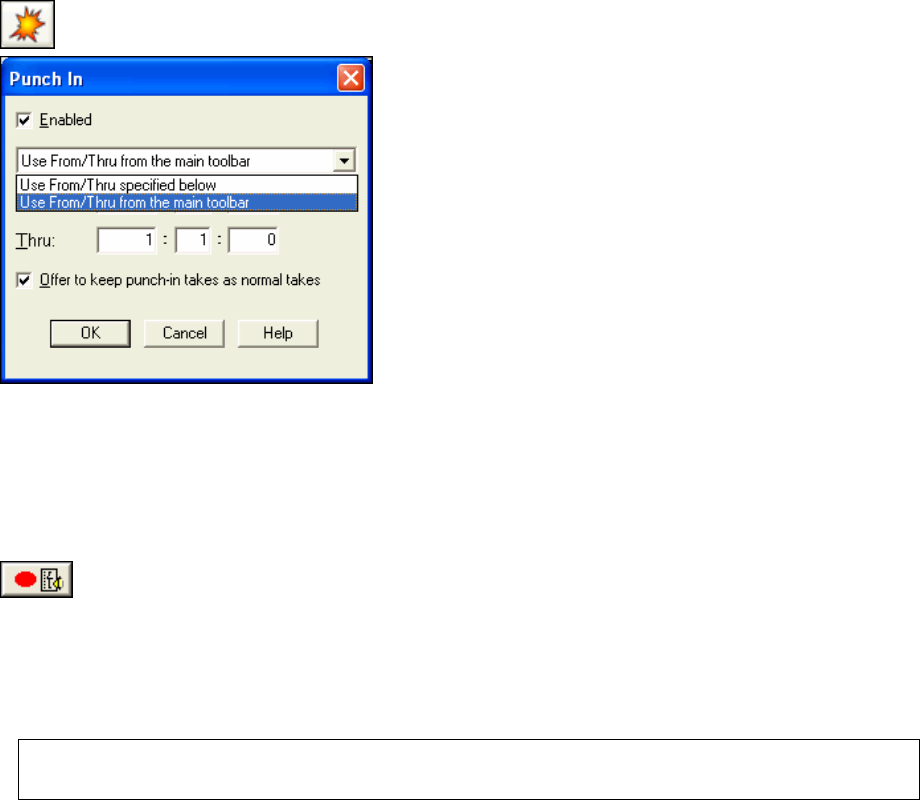
Chapter 6: BB Tracks and MIDI tracks
78
Then you can delete, edit, or re-record each separate overdub without affecting the original track. Use Track |
Merge to combine all of the overdubs onto a single track.
To clear any previously recorded material from a track go to Track | Erase Data Only. This will erase the recorded
MIDI data on the track, but will preserve all of the other track settings such as volume, patch, and channel.
Punch-In
The Punch-In button allows you to enable or disable Punch-In. If Punch-In mode is active, recording will
erase previously recorded MIDI data in the Punch In range without the need to erase the old MIDI data.
Pressing the Ctrl key while clicking on the Punch button allows
you to enable or disable punch-in mode without having to go into
the Punch In setting dialog.
When Punch In is enabled, recording will take place during the
period between From: and Thru: and will overwrite any existing
events during that time.
The From: and Thru: settings for punch-in recording can be set
in the Punch In dialog, or they can be the settings from the main
toolbar.
When Punch-In is disabled, recording may occur at any time
within the song and data will be merged with any existing events
if the track is a MIDI track, or the data will overwrite existing
data if the track is an Audio track.
Recording Mixer Moves
Any volume, pan, chorus, and reverb mixer adjustments made during recording will be recorded in real time as
MIDI controller messages. Adjustments made in the All column of the mixer will not be recorded, however.
When recording mixer moves for audio tracks, you must move the slider for the current track in order to record the
mixer moves. For MIDI tracks, you could move any slider and the data will get recorded onto the current track, but
normally you’ll move the slider of the current track.
There is a special “Record Mixer Moves” button in the mixer, which will let you record ONLY mixer
moves.
This special button will also let you record mixer moves onto an audio track without the audio being silent during
recording.
In order for the recording of mixer moves to work correctly for MIDI tracks, please make sure each track has its
own unique MIDI channel in the Tracks window. Also, keep in mind that mixer moves will only be recorded onto
the current track, so you can only record mixer moves for one track at a time.
Note: If a track is an audio track, and the regular “Keep Take” is selected, the audio will be deleted for the section of the
track where mixer moves were recorded. You’re better off using the “record ONLY mixer moves” button in the Mixer
window to start recording, and you can then concentrate on recording ONLY mixer moves.
For audio tracks, recorded Mixer moves show up as control changes in the Event List for that track. For example, if
you used the volume slider to fade the song out you will see a series of Controller 7 (volume) changes in the Event
List.
Alternatively, you could just use the Edit | Fill command or insert MIDI controller events into the Event List for the
particular audio track.
SysEx MIDI Events
You can insert System Exclusive data directly into a MIDI track as MIDI events. You can record SysEx data in
real time and when you keep a take, the SysEx data will be added to a MIDI track as SysEx events. You could also
load SysEx data into a SysEx MIDI event by receiving SysEx data from your synth, or by loading the SysEx data
from a file. SysEx MIDI events can also be edited.
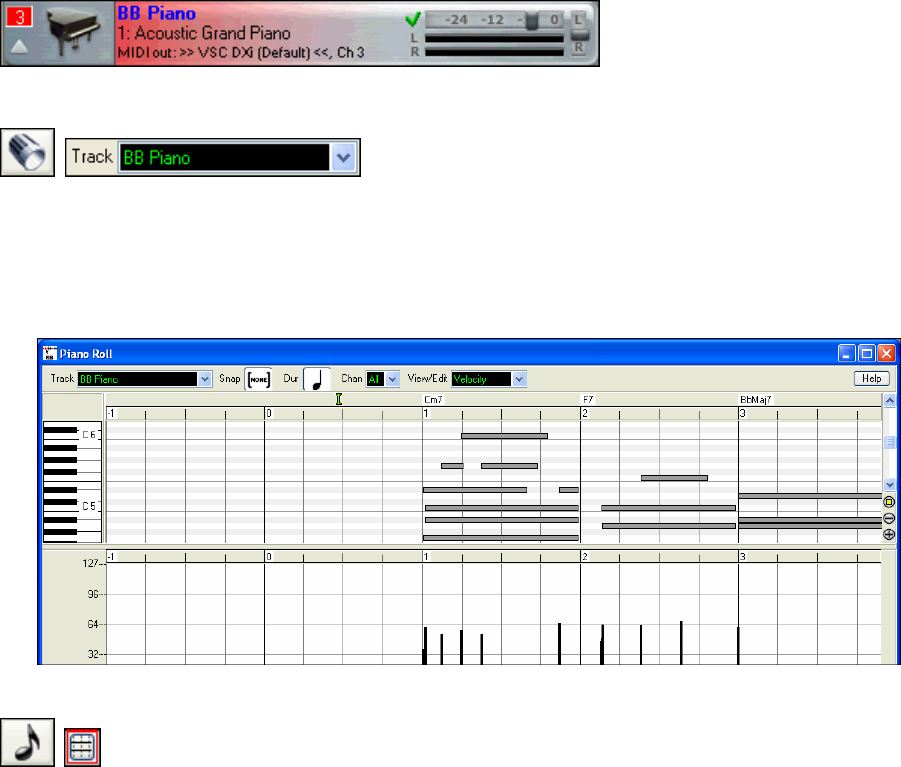
Chapter 6: BB Tracks and MIDI tracks 79
Editing BB Tracks and MIDI tracks
Edit Menu
The Edit menu lists all of the regular editing commands like Cut, Copy, and Paste plus many features that are unique
to RealBand. All editing commands are fully described in the Reference chapter.
Piano Roll Editing
Let’s examine the BB Piano track in the Piano Roll window.
We can select the BB Piano track while still in the Tracks window, or we can open the Piano Roll window with the
piano roll button and then select BB Piano from the track list.
In the Piano Roll window notes can be dragged and dropped, shortened or lengthened in the Note Panel, which is the
upper part of the window.
The lower panel is for graphic editing of the selected parameter in the View/Edit list. Note velocity is shown, but
parameters such as pitch bend, channel aftertouch, and MIDI controllers can be edited in this panel as well. Please
see the chapter titled Piano Roll Window for more on this very useful feature. The BB Tracks and MIDI tracks can
also be edited in the Editable Notation window.
Editable Notation
Click on the eighth note toolbar button to open the Notation. In the Notation window toolbar, there
are three buttons for different notation modes. Editable notation is the button with dotted vertical
lines crossing the staff lines.
In the Editable Notation mode notes can be inserted by clicking on the Notation window with the left mouse button,
moved by dragging with the left mouse button, or edited by clicking on a note head with the right mouse button.
Broken vertical gray lines are shown across the staff to show each note subdivision for either eighth note triplets or
sixteenth notes.
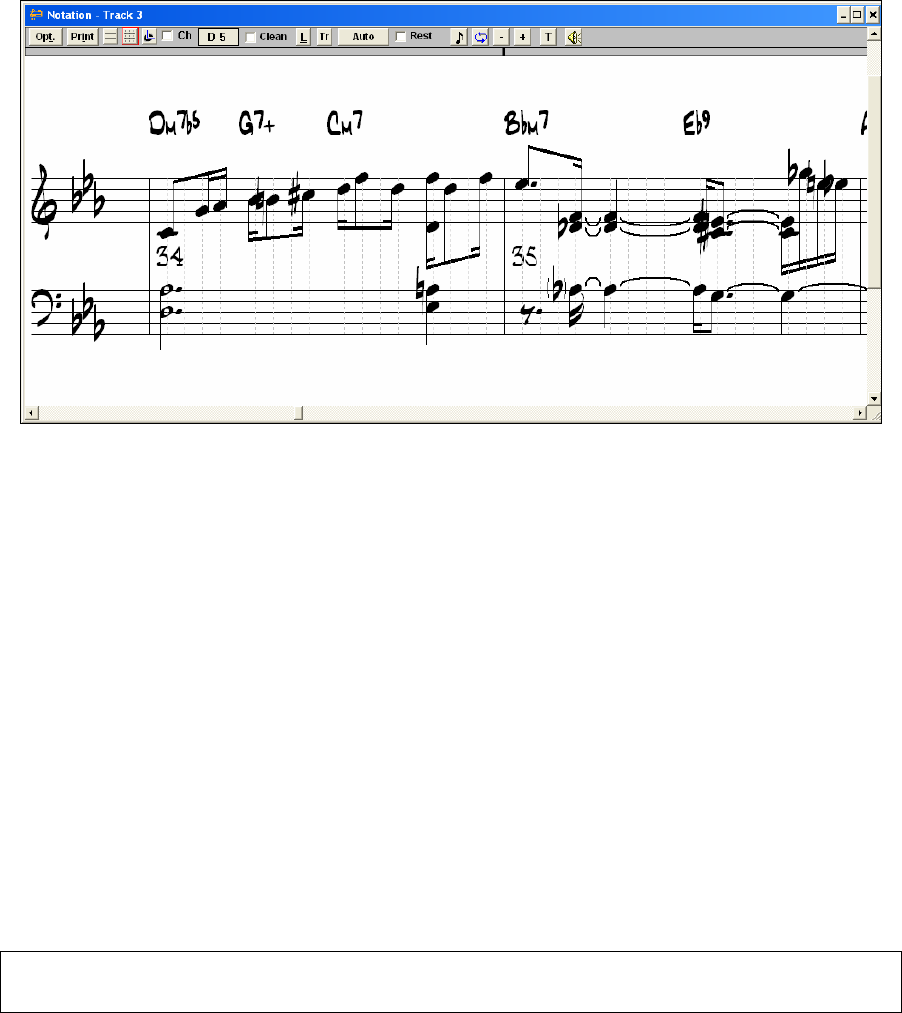
Chapter 6: BB Tracks and MIDI tracks
80
Editable Notation window in 16th note (even) resolution.
Moving Notes (Drag and Drop)
To move a note, move the mouse cursor over an existing note and then click and hold the left mouse button. The
mouse cursor will change to a different shape. While keeping the mouse button pressed, move the mouse cursor
over to the location you wish to drop the note and then let go of the mouse button. The note will be moved to the
place you dropped it. Certain areas of the screen are not valid locations to drop a note. The mouse cursor will
change to a circle with line through it to indicate an invalid location.
When you click and drag a note with the left mouse button you will hear the note being played as you move it up
and down the screen. The note’s pitch will be increased or decreased chromatically as you move it up/down the
screen.
Entering Notes
Notes can be inserted simply by clicking on the staff in an appropriate location. You will see the name and octave
of the current note location in a box at the top of the window, helpful for inserting a note above or below the grand
staff.
When inserting a note, holding down the mouse button and then pressing the Shift key (click+Shift) will make the
note 1 half-step sharper than the position that you click on. Holding down the Ctrl key and then clicking
(Ctrl+click) will make the note 1 half-step flatter, and holding down the Alt key will make the note a natural. Hold
the key down until after you release the mouse button.
You can also insert notes by clicking on the Piano or the Guitar window. Notes will be inserted at the current
location in the Notation window.
Note: By default, you must hold the Ctrl key before clicking on the Guitar fretboard to insert a note into a Notation window.
If the “Send Notes To Notation Windows” option in the Guitar Settings dialog is enabled, holding the Ctrl key won't be
required, but be careful not to accidentally insert a note when using the mouse to switch to the Guitar window.
Notes can be deleted by holding down the Delete key and then clicking over the note you wish to delete.
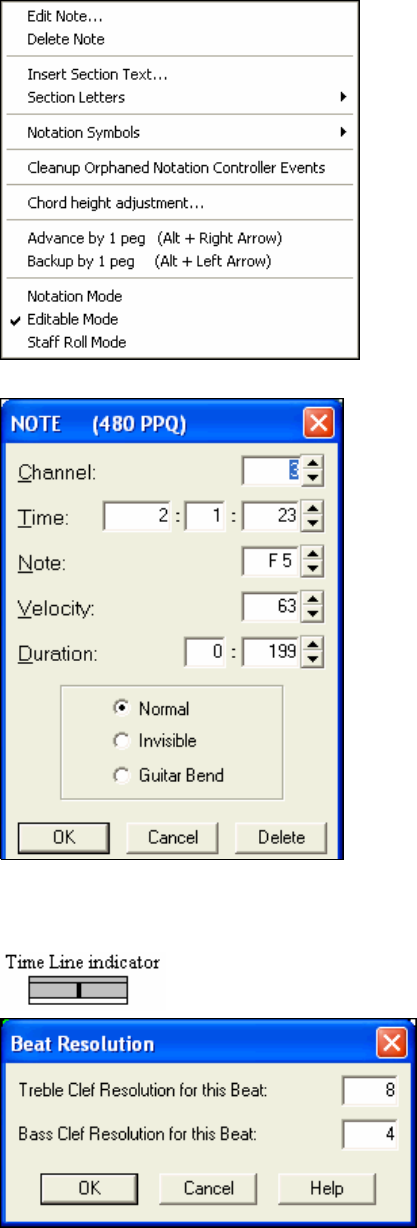
Chapter 6: BB Tracks and MIDI tracks 81
Editing Notes
Notes can be edited with a right click directly on the note with to
launch a menu of Editable Notation commands.
In addition to editing or deleting note events, this menu has
commands for adding section text and notation symbols.
There is also a cleanup tool for controller events and 1 peg
advance/backup to pinpoint the location of inserted notes.
The Notation chapter has full descriptions of these commands.
Click on Edit Note to open the NOTE editing dialog.
The NOTE dialog allows editing of:
− The MIDI channel for the note.
− The exact time location.
− Note name.
− Velocity of the note.
− Duration of the note in beats and ppq.
Notes can be Normal, Invisible, or a Guitar Bend.
The [Delete] button removes the note.
Micro-Resolutions
You can change the resolution for any individual beat of a song to a different resolution by clicking with the right
mouse button above that beat on the Notation window’s time line.
For example, if you click on the time line above the 2nd beat in a measure, a dialog box will
pop which will let you set the resolution of the current beat for both clefs.
If you select a resolution of 8, then 32nd notes can be
displayed. You can even select a resolution as high as 32,
which would allow 128th notes to be shown.
When you choose a micro-resolution RealBand will insert a
special controller event into the track as a means of storing
the resolution.
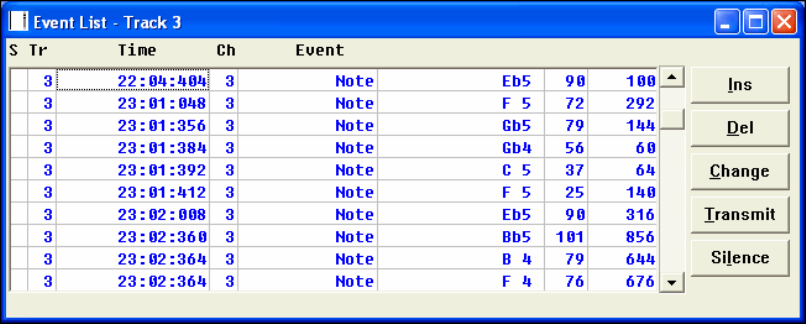
Chapter 6: BB Tracks and MIDI tracks
82
Highlighting a section of the Notation window.
When the Notation window is in Editable Notation Mode, you can highlight a section of the Notation window, so
that you can cut or copy the section.
To highlight a section of the Notation window:
1) Click and hold the left mouse button at the upper right corner of the rectangular section you want to highlight.
Make sure you don’t click on any existing notes, and make sure you don’t release the left mouse button until
you are finished highlighting.
2) Move the mouse down and to the right to form a rectangle. You will see a rectangular section of the Notation
Window become highlighted in reverse.
3) When you’ve finished highlighting release the left mouse button.
During the process of highlighting a section, you can highlight a section beyond the current notation screen by
moving the mouse cursor beyond the right edge of the notation window. When you do this, the Notation window
will advance to the next screen. The Notation window will continue advancing until you move the mouse cursor
back inside of the Notation window. You should move the mouse cursor back inside the notation window when it
has reached the screen that contains the last measure of the section you wish to highlight. Then you can move the
mouse cursor to the left or right within the Notation window to adjust to make any final adjustments to the
highlighted section.
Event List Editing
An Event List window is an event editor that lets you insert or delete MIDI events, and lets you make changes to
existing events. A list of events is displayed vertically in a window, with each line in the list representing an
individual event. Each event is shown with its track number, time, MIDI channel number, the kind of the event, and
the parameters of the event. The [Ins], [Del], and [Change] buttons may be used to insert, delete, and change events.
You can also type directly in the Ch, Time, and Event fields to change the values of an event.
When an Event List is created by pressing the F2 key, or by using the Window | New | Event List menu, it is based
on the tracks that are currently selected. For example, if only track 1 is selected, and you use the New command to
create an Event List window, it will only deal with events that occur in track 1.
You can also open an Event List while multiple tracks are selected. In this case the Event List will deal with events
in all the tracks which where selected at the time of the creation of the Event List window. For example, if tracks 1
through 3 were selected when you created an Event List window, the Event List will deal with events occurring in
those 3 tracks regardless of what tracks you've selected after it was created.
Events may be inserted by pressing the computer keyboard’s Insert key. After pressing Insert, a menu will pop up,
and you may choose which type of event to insert. After picking the kind of event to insert, an entry box will pop up
which will let you choose the MIDI channel, time, and any other parameters of the event. Events may be deleted
simply by pressing the computer’s Delete key.
Existing events may be edited by pressing the [Change] button. A dialog box will pop up, and you may make
changes to the event. You can also type directly in the Time, Ch, and Event fields in the Event List window. You
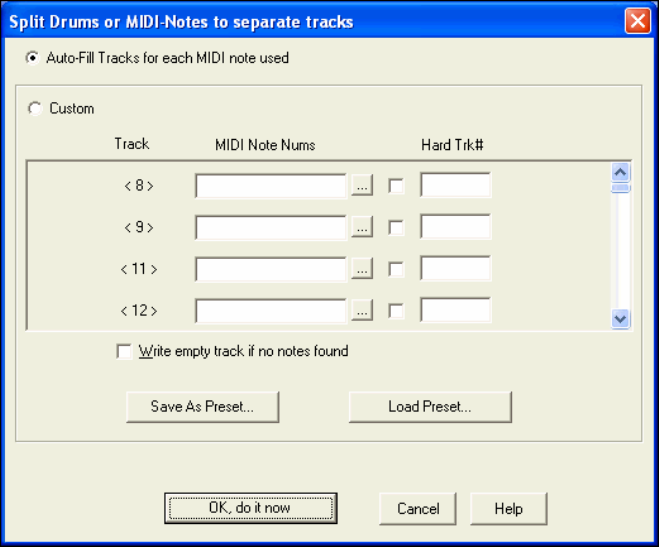
Chapter 6: BB Tracks and MIDI tracks 83
can use either the period (.) or colon (:) key to separate the Measures:Beats:Ticks (or the
Hours:Minutes:Seconds:Frames when the SMPTE display mode is enabled).
Notes can be made into “invisible notes” using the radio button in the edit entry box. Invisible notes will be
invisible in the Notation window when in non-editable notation mode.
You can play events one at a time by pressing the Transmit button. If the event you're playing isn't a note, the cursor
will be advanced to the next event, but if the event is a note, it will be sustained until any other key is pressed. You
can stop a sustained note from sounding by pressing the Silence button. The sustained note will also stop in other
situations, such as when you switch to a different window or choose a different event list command.
Split MIDI drums
The Edit | Split MIDI drums command will split a MIDI drum track to separate tracks, which allows for precise
editing of drum kit balance and dynamics. The “Custom” settings allow you to control which notes go to which
track. This feature acts upon the current track, and is not necessarily limited to drum tracks.
If the “Auto-Fill Tracks for each MIDI note used setting” is enabled, then RealBand will automatically move each
MIDI note over to a new blank track.
If the Custom setting is enabled, you can specify which midi notes go to which track. On the left column of the
Custom section, you will see the track numbers that notes will be placed onto. You can type the note numbers into
MIDI Note Nums edit field, separated by commas. For example, “62,65” would mean that MIDI note numbers 62
and 65 will go onto the track specified on the left field E.g. <7>.
If you press the “...” button a list box will pop up that makes it easier to specify the note numbers. The Note Name
Octave number of each note is shown (e.g. E 5) and, for notes in the GM drum range, the GM drum sound names for
GM drums are shown (e.g. Acoustic Snare, Closed High Hat, etc) .
You could override the track number by enabling the checkbox next to the “Hard Trk” field and typing another track
number in the hard track field. The Hard Track can be any MIDI or blank track that you specify.
Auto-Backup of .SEQ Files
When you save a file, RealBand saves a backup of the file in a c:\RealBand\RBBACKUP folder. This doesn’t add
any time to the file-save command, and the number of backups is configurable. So the next time that you
mistakenly overwrite a file when saving, go the backup folder to look for a saved previous copy!
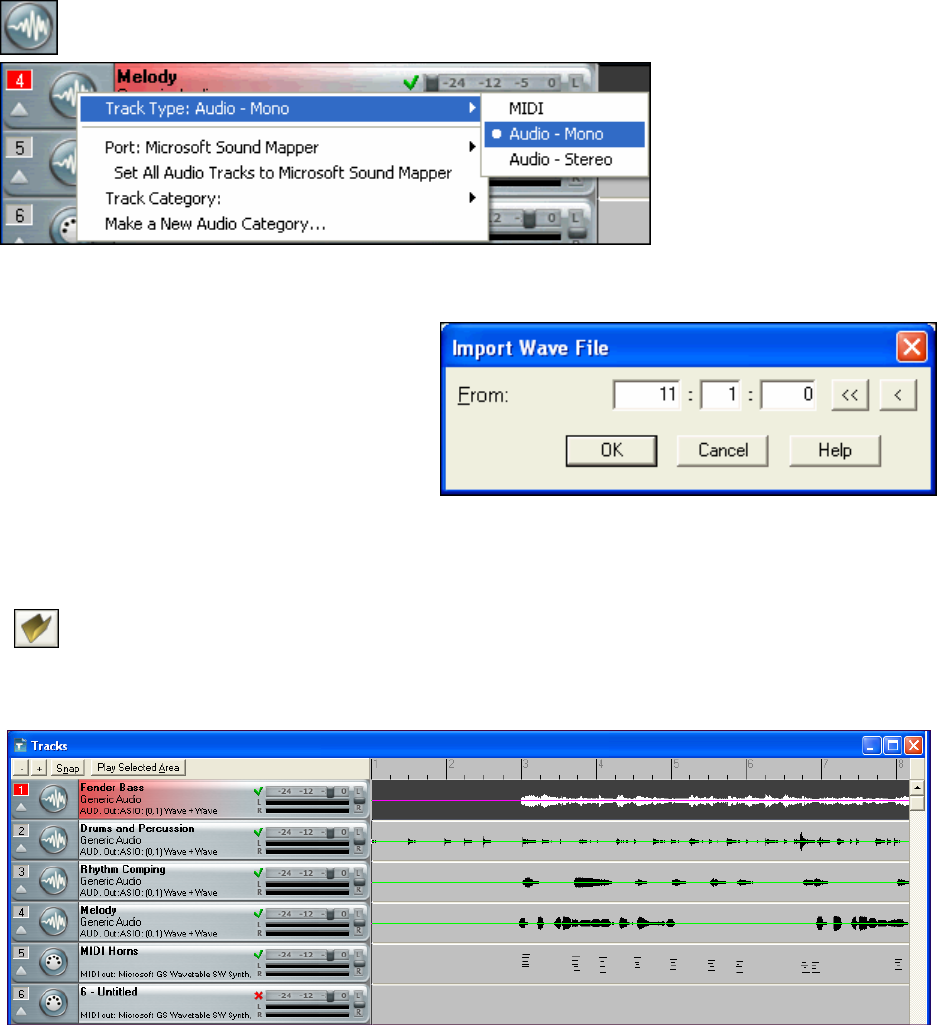
Chapter 7: Digital Audio Features
84
Chapter 7: Digital Audio Features
Overview
Audio tracks are great for recording live performances; they work much like tracks on a tape recorder. They are also
used for RealTracks and RealDrums since these parts are created from live audio recordings of studio musicians.
You can edit audio data by cutting and pasting in the Bars window or the Audio Edit window, you can import
.WAV, .MP3, .WMA, .WMV, and .CDA files to be inserted into audio tracks, and you can also process audio tracks
with the professional effects included with RealBand.
Any track of RealBand’s 48 tracks can be designated as an audio track - mono or stereo. Click on the
track icon to set the track type.
Other Audio Formats
RealBand supports .WAV, .WMA, .WMV, .CDA, and .MP3 audio file formats.
These files can be loaded directly with the File |
Open menu option, or they can be imported to an
exact location in a specific track with the Audio |
Import Wave File… command (Ctrl+F3).
Loading and Playing Audio Files
Let’s load an audio wave file and explore the audio features of RealBand. RealBand files have the .SEQ (sequence)
file extension and open in the same way as a MIDI file.
Use the “Open a File” button or the menu command File | Open to go to the RealBand directory. In the
“Samples” folder choose the file tutor2.seq.
Tracks Window
Here’s how the Tracks window looks when the audio file is loaded.
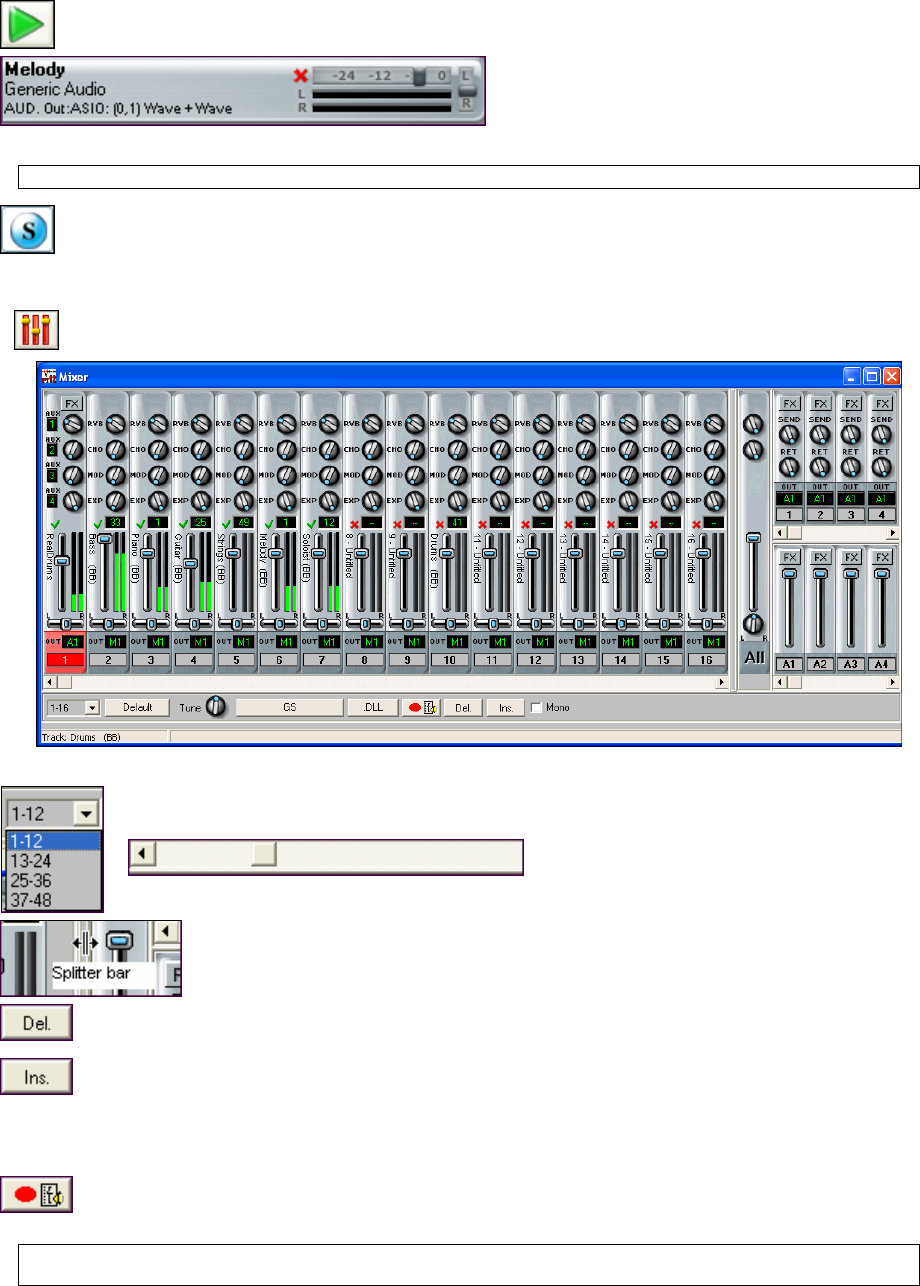
Chapter 7: Digital Audio Features 85
Press the Play button. You should now be hearing the demo song playing through your computer’s sound
system. What you’re hearing are four discrete tracks of digital audio.
To mute any track, click on the green check mark to
the right of the track name. When you see a red “X”
the track is muted.
Note: If you wanted to add MIDI data to this project you would select one of the empty tracks and press the record button.
You can solo any track or any combination of tracks by pressing the [Solo] button on the toolbar. Select
multiple tracks by holding down either the Shift key or the Ctrl key and clicking on the track numbers.
Mixer Window
To adjust track volume level and panning controls, open the Mixer window by selecting the Window |
Mixer menu item or by clicking the Mixer button on the toolbar palette.
Here, you can change things such as track levels and panning to the left or right speaker as the song is playing.
Select a track view range from the combo list, or use the Mixer window left/right scroll bar directly
above to scroll horizontally across the mixer layout.
The vertical splitter bar between the track strips and the bus strips can be moved right or
left to make a custom mixer view.
The Delete button in the mixer will automatically delete all mixer events (volume, reverb, pan,
chorus) that are currently embedded within the song's selected tracks.
The mixer’s Insert button will automatically insert mixer events (volume, reverb, pan, chorus) into
the song’s non-blank tracks.
The Ctrl+M and Ctrl+U hot keys are a convenient way to mute or unmute any track within the Bars or Mixer
window.
Mixer moves can be recorded as the song is playing. There is a special “Record Mixer Moves”
button in the mixer that will let you record ONLY mixer moves. This special button also lets you
record mixer moves onto an audio track without the audio being silent during recording.
Note: This mixer is a combination mixer that controls audio and MIDI data in one integrated console. Therefore, MIDI
tracks have reverb, chorus, modulation and expression controls in place of the Aux sends, and there is no [FX] button.
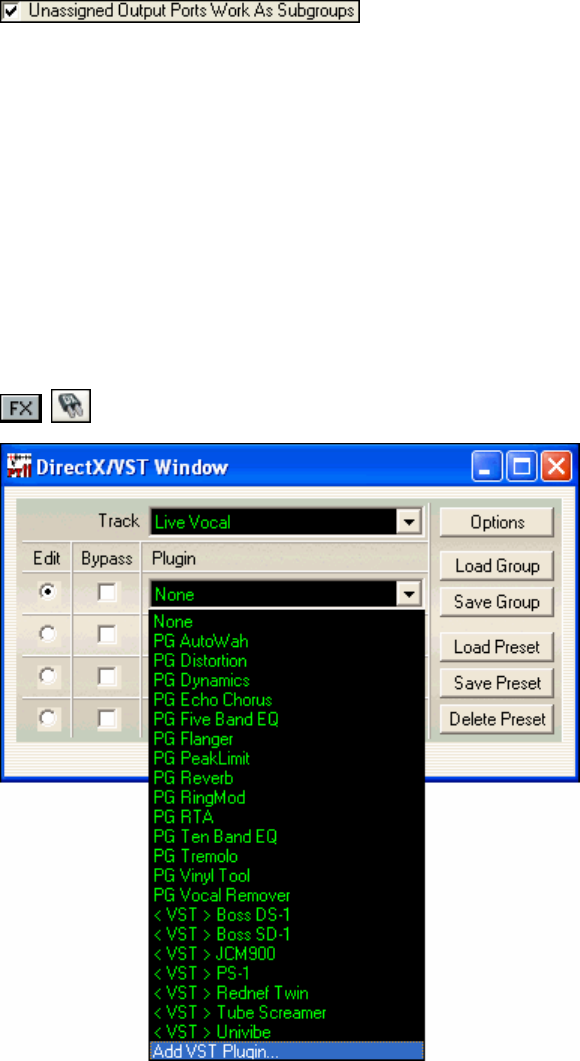
Chapter 7: Digital Audio Features
86
Creating Audio Subgroups in the Mixer
Unassigned Outputs Work As Subgroups
When this checkbox is enabled in the Audio preferences dialog, any
audio output ports that do not currently have a driver port assigned to them will function as subgroups. A subgroup
is a bus or signal path that gives you the ability to control several tracks as a group.
The Mixer Window chapter has full instructions for creating audio subgroups.
Real Time Effects Plug-Ins
RealBand supports DirectX and VST effects, which you can apply in real time to the audio tracks. A full range of
PG Music effects is included with the program; you can also use any other third party DirectX or VST effects to add
effects in real time without permanently altering the actual track data.
Installing DirectX Effects Plug-Ins
DirectX effects are installed by default in the Program Files folder on Windows computers. They will be present in
the “Plugin” list in the DirectX/VST window. There is a “Scan” feature in the DirectX/VST Options that will
search for newly installed DirectX plug-ins not on the list.
Installing a VST Effects Plug-In
Click on the [FX] button in the Mixer window or the DX Plug-Ins button on the toolbar to open the
DirectX/VST Window.
In the Plugin list, select the “Add VST Plugin...” item at the bottom of the list.
Select a VST plug-in .dll file in the following Select a VST plug-in dialog, and it is added to the plug-in list. After
you add each VST, the plug-in is permanently added to the list. You only have to add each plug-in one time.
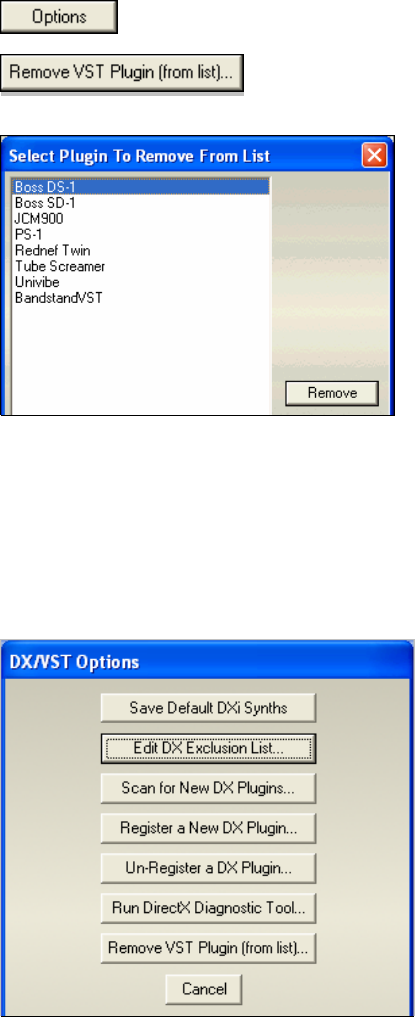
Chapter 7: Digital Audio Features 87
Remove VST/VSTi Plug-In
You can remove a VSTi or VST plug-in that you have installed. This only removes the VST/VSTi plug-in from
RealBand' list of remembered VST plug-ins. The feature does not uninstall a plug-in or delete any plug-in files.
After you remove a plug-in from view in RealBand, that plug-in still remains usable to any other VST program
where you prefer to have it available.
To remove a VSTi or VST plug-in from RealBand:
Click on the [Options] button in the DirectX/VST Window to launch the DX/VST Options
dialog.
Select the [Remove VST Plugin (from list)…] button.
Select the plug-in to remove so it is highlighted in the list, then click the [Remove] button.
Uninstall a VST/VSTi Plug-In
If you want to permanently delete a VST/VSTi plug-in from your computer, first check if the plug-in has an
uninstaller in the Windows menu “Start | Settings | Control Panel | Add or Remove Programs.” If an uninstaller is
available, that is the best way to get a clean plug-in uninstall.
With plug-ins that do not have an uninstaller, it is safe to drag the plug-in's DLL and any other plug-in support files
to the Windows Recycle folder.
DX/VST Options
The [Options] button brings up the DX/VST Options
dialog where you can manage your real time effects plug-
ins.
[Save Default DXi Synths] saves your plug-in default
settings.
The [Edit DX Exclusion List…] button lets you edit the list of plug-ins to include or exclude in the DirectX editor.
This is useful if you have some plug-ins which were found and which aren’t compatible with RealBand. If you edit
the exclusion list, you’ll see a dialog box with the left side displaying the included plug-ins and the right side
displaying the excluded plug-ins:
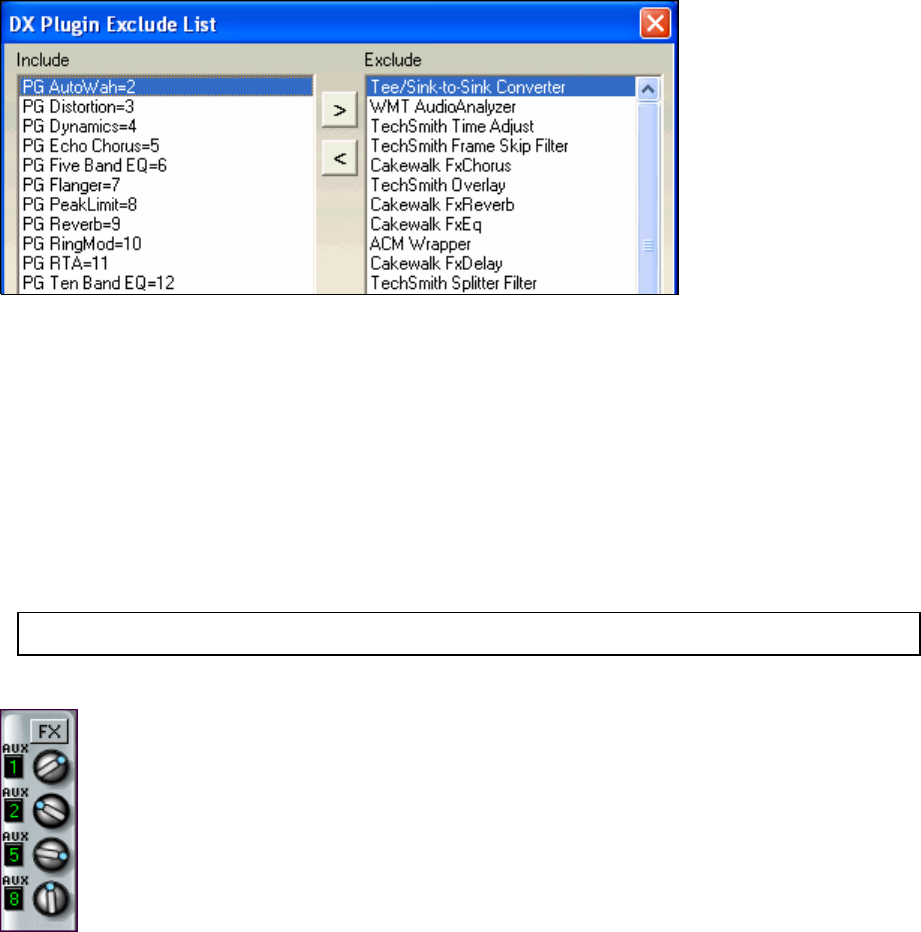
Chapter 7: Digital Audio Features
88
- The [>] button moves a plug-in from the Include to the Exclude list.
- The [<] button moves a plug-in from the Exclude to the Include list.
The [Scan for New Plug-Ins…] button will cause RealBand to scan for newly installed plug-ins.
The [Register a New Plug-In…] button can be used to register a plug-in with DirectX, so that audio applications
such as RealBand can use the plug-in if you have a plug-in that doesn’t automatically register itself.
The [Unregister a Plug-In…] button removes a plug-in from DirectX so that audio applications will no longer be
able to use this plug-in.
The [Run DirectX Diagnostic Tool…] button will run the Microsoft Direct X Diagnostic tool, which checks for
problems with DirectX.
Select the [Remove VST Plugin (from list)…] button to remove a VST plug-in so that it is no longer included in the
“Plugin” list in the DirectX/VST Window.
Note: VST/VSTi plug-ins are added manually to the Plugin list in the DirectX/VST Window. Once added, a VST/VSTi
plug-in is available on the list until removed.
Effects Controls
Track Settings
The [FX] track insert button assigns effects to the specific track alone. Up to four effects can be chained
on the FX insert.
Each of the four Aux control knobs can be assigned to one of the eight auxiliary effects busses. The
position of the control knob determines the amount of the signal that is routed through the auxiliary bus
and how much of the “dry” signal goes directly to the audio output bus.
Auxiliary Effects Busses
Each of the eight Aux busses can have a chain of up to four real time effects. These can be any DirectX or VST
effects that you have installed on your system, either the included PG Music effects or third party effects.
The effects on each bus or insert are chained (in sequence), which means that the processed signal from each plug-in
is then further processed by the chain’s next plug-in. There are no hard-and-fast rules, but a typical effects chain
might start with effects that condition the incoming signal (noise gate, EQ, dynamics), then add effects that alter the
tonal qualities of the sound (chorus, distortion, modulation) and then time-based effects (reverb, delay).
To run effects in parallel, rather than chained, you can assign them to any of the eight auxiliary busses and route
each track individually through any four effects.
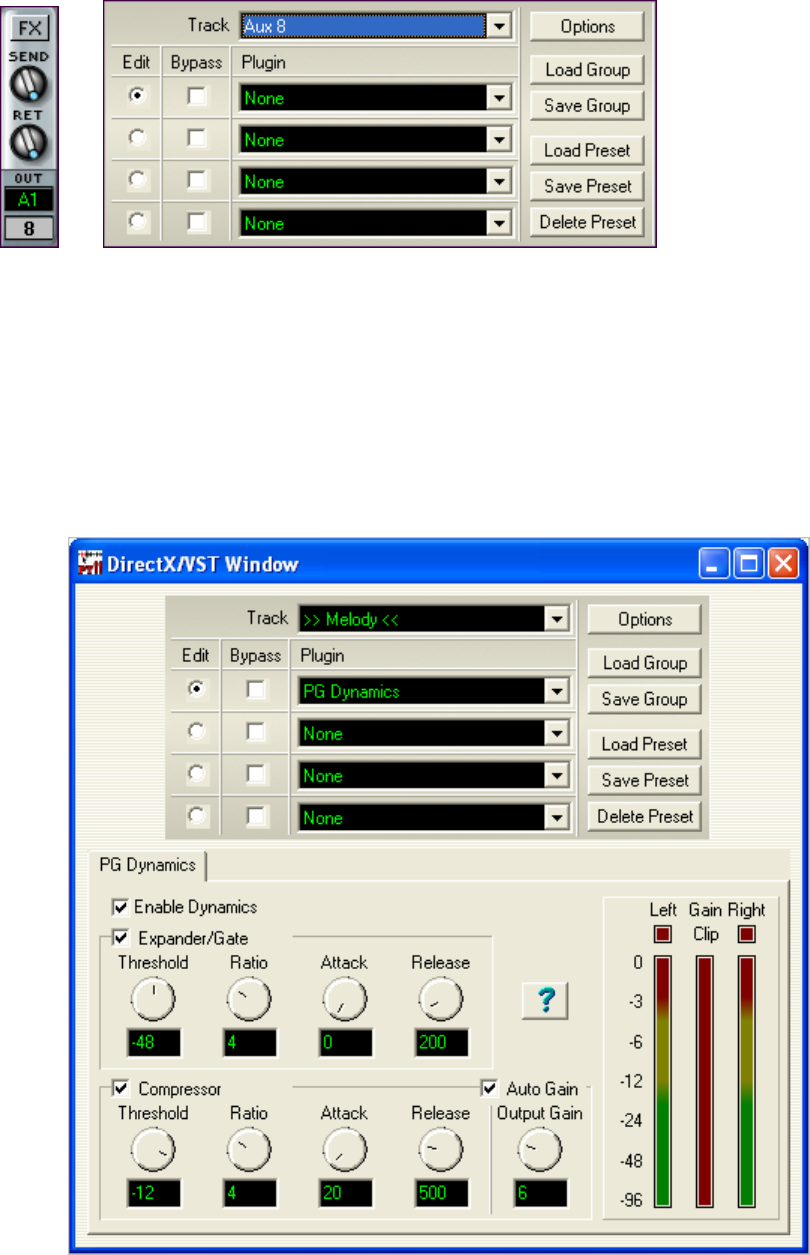
Chapter 7: Digital Audio Features 89
Aux Bus FX insert window
Choosing and Editing DirectX/VST Effects
The Track field of the DirectX/VST window lets you choose a track in which to select or edit effects. A “track” can
be a Track Insert, an Aux bus, or an Output Insert.
The “Edit” radio buttons let you choose which of the four effects to edit in the group of effects available in each
track. The “Bypass” checkboxes lets you bypass any of the four effects in a group.
In the example, the Melody is the currently selected Track and slot 1 (PG Dynamics) is selected for editing.
The [Load Group] and [Save Group] buttons let you load and save the effects settings for the currently selected
track. The [Load Preset] and [Save Preset] buttons let you save and load presets for the current effect. The [Delete
Preset] button lets you remove a preset from the list of already saved presets.
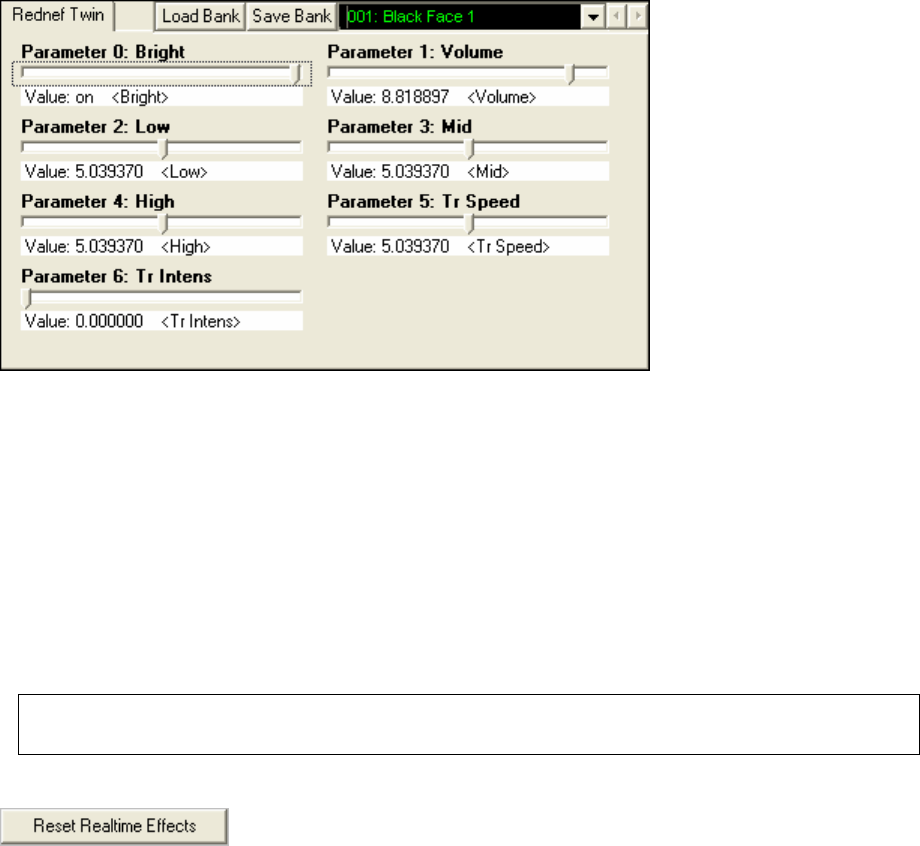
Chapter 7: Digital Audio Features
90
VST/VSTi Additional Panel Controls
VST is necessarily different from DirectX/DXi, and some extra controls are available for VST plug-ins.
DirectX/DXi plug-ins save their presets to the Windows Registry and only one setting is “alive” at a time.
VST/VSTi plug-ins save their presets to disk files. VST/VSTi plug-ins contain a bank of presets in memory. You
can switch between presets while editing, and each edited preset is remembered in the current bank.
VST Generic User Interface
VST/VSTi plug-ins are not required to have a fancy graphic control panel. There are many “faceless” VST plug-ins
that have many adjustable parameters, but no fancy control panel. When you open such a plug-in, the control panel
will look like this example. RealBand presents one “generic” slider for each adjustable parameter in the plug-in.
Parameter Name: Simply the name of each adjustable parameter.
Value Slider: Move the slider to adjust the parameter value.
Value Indication Text: Displays the value of the slider, as interpreted by the plug-in. In the above example,
Parameter 0: Bright is interpreted as an ON/OFF switch, but Parameter 1: Volume is interpreted as a value from 0 to
10.
The number of real time effects that you can expect to activate at a time without stressing the system depends on the
speed of your computer. Normally you would mostly be using the Aux busses, since the effects used in the Aux
busses can be applied to multiple tracks efficiently. In other words, it isn’t very taxing on the CPU to apply an Aux
effect to multiple tracks. For example, let’s say you were to select a reverb in the Aux 1 section of the mixer, and
you adjust the Aux1 send knobs for 5 tracks so that they were all using Aux 1 for reverb. In this case, there would
only be one instance of this reverb plug-in active in RealBand, regardless of the number of tracks (5) that were
utilizing the Aux1 bus. What’s nice about this is that you can apply completely different amounts of the same effect
to different tracks, so some tracks can be very “wet” with lots of reverb, while others can be relatively “dry” with
very little reverb.
If you use Track Inserts on multiple-tracks, you will use up CPU processing power relatively quickly and your
computer may have trouble handling this depending on the speed of your CPU. The reason for this is that the Track
Inserts each involve the usage of a unique instance of each effect, since each Track Insert is a unique signal path for
each track.
Note: The more effects you chain together within each Aux bus, Track Insert, or Output Insert, the more CPU power will be
required. For example, an Aux bus with just an EQ will require a lot less CPU power than an Aux bus with chain of 4 effects
such as (Compressor – EQ – Chorus – Reverb).
Reset Effects
The [Reset Realtime Effects] button is found in the Audio preferences dialog. It
removes all real time effects from your project so you can remix your project from
scratch.
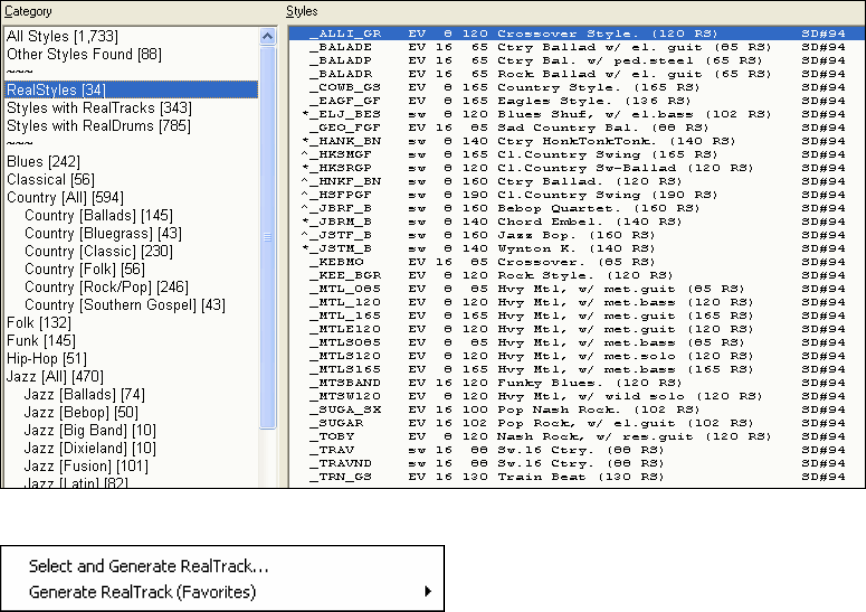
Chapter 8: Audio Production 91
Chapter 8: Audio Production
Overview
The audio production options available in RealBand include RealTracks, RealDrums, and audio tracks plus powerful
audio effects and editing features.
RealTracks are audio tracks generated automatically following the chord changes you enter in the Chords window.
They use the exciting Real Instruments, live recordings of top session musicians. This is the same feature found in
Band-in-a-Box.
RealDrums, also found in Band-in-a-Box, are similar to RealTracks, except that they are generated from live
recordings of top studio drummers.
You don’t need to have Band-in-a-Box to generate RealTracks and RealDrums, but if you have a copy you can use
all of your RealTracks and RealDrums from Band-in-a-Box in RealBand.
Audio tracks are for your own live recordings - such as a person singing or playing guitar – or for imported audio
files in the many formats supported by RealBand.
RealStyles - Styles with RealTracks
Some styles, called RealStyles, use only Real instruments. Every track generated by these styles is a RealTrack,
playing audio from live recording sessions. If you have RealStyles on your system (usually in Band-in-a-Box) they
will appear in a separate list in the StylePicker.
Generating RealTracks
This feature lets you generate realistic instrument tracks using Real instruments. It is selected from the right-click
menu in the Tracks window. You can generate complete tracks or just selected sections of tracks, and you can use
more than one Real instrument in a single RealTrack.
Select an open track for your RealTracks, then right-click and choose either Select and Generate RealTracks or
Generate RealTracks (Favorites).
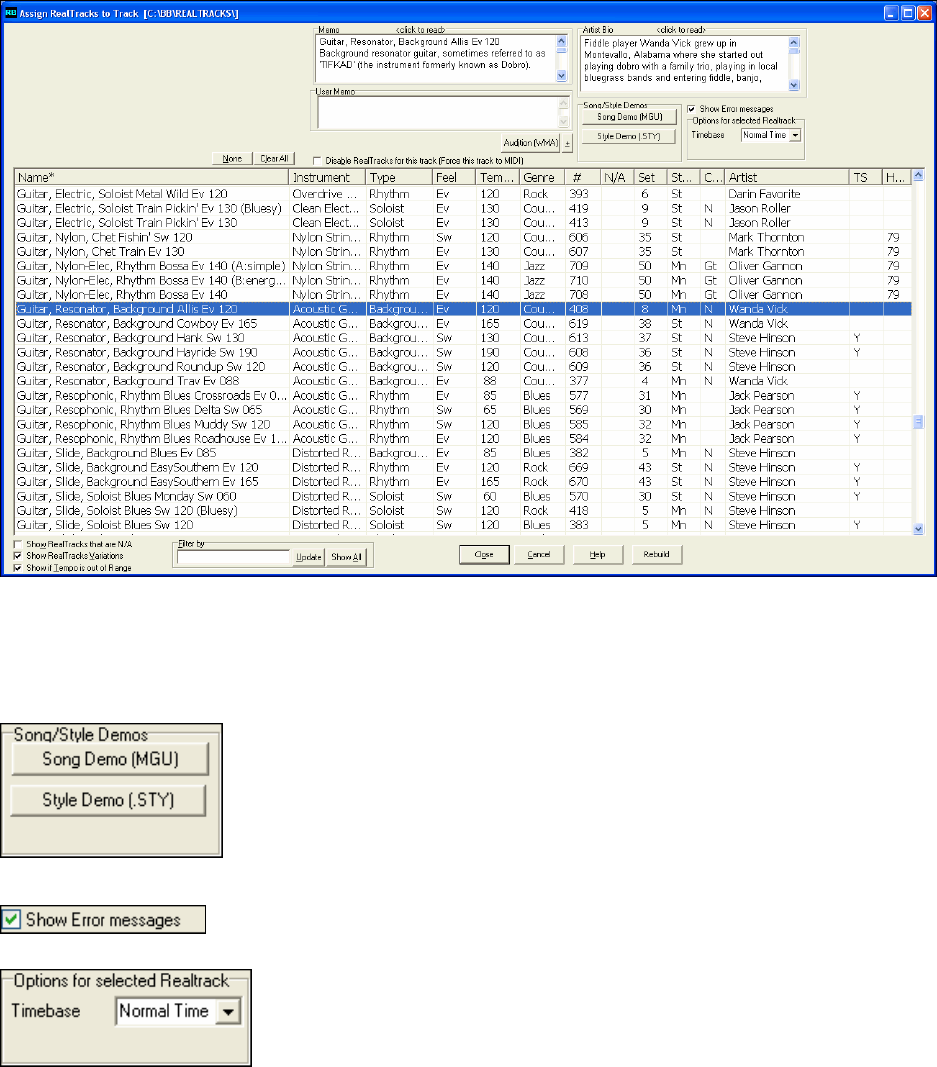
Chapter 8: Audio Production
92
Select and Generate RealTracks
This command opens the RB Assign RealTracks to Track dialog. It shows a list of all available RealTracks,
including the RealTracks you have installed in Band-in-a-Box if you have specified your bb\RealTracks folder as
the path for RealTracks in the Song Generation preferences.
When you click on a RealTrack in the list a Memo appears with information about the selected instrument.
The RealTracks have been recorded by top studio musicians. The Artist Bio displays the names and bios for the
RealTracks artist. Double click here to view the full memo.
You can enter your own comments about any style in the User Memo field. The comments are saved in
RTUserMemos.txt
Use the song and style demos to audition RealTracks.
The [Song Demo (MGU)] button will display a list of songs in the bb\RealTracks –
Demos folder that use the selected RealTrack instrument. Click on the song name
and then press the [Play] button to hear it.
The [Style Demo (.STY)] button shows a list of styles that use the currently
highlighted RealTracks instrument. Clicking on a style name will load the style into the current Band-in-a-Box
song. Press [Play] to hear your current song played with the RealTracks style that you want to audition.
This will display installation errors of RealTracks when you open the dialog. Press the
[Rebuild] button for more information, or after you have installed new RealTracks.
With the Timebase option you can play any RealTracks at normal, half-time, or
double time. Half time is used for fast tempo songs when a much slower tempo
RealTrack has been chosen. Double time is used for slow tempo songs (e.g.
ballads) when a much faster tempo RealTrack is chosen. This allows you, for
example, in a ballad at a tempo of 70, to add a RealTracks Sax solo with a tempo of 140, and play it as a double
time, which will match the ballad tempo of 70. All of your existing RealTracks can be used at three different
tempos (normal, half-time, double time).
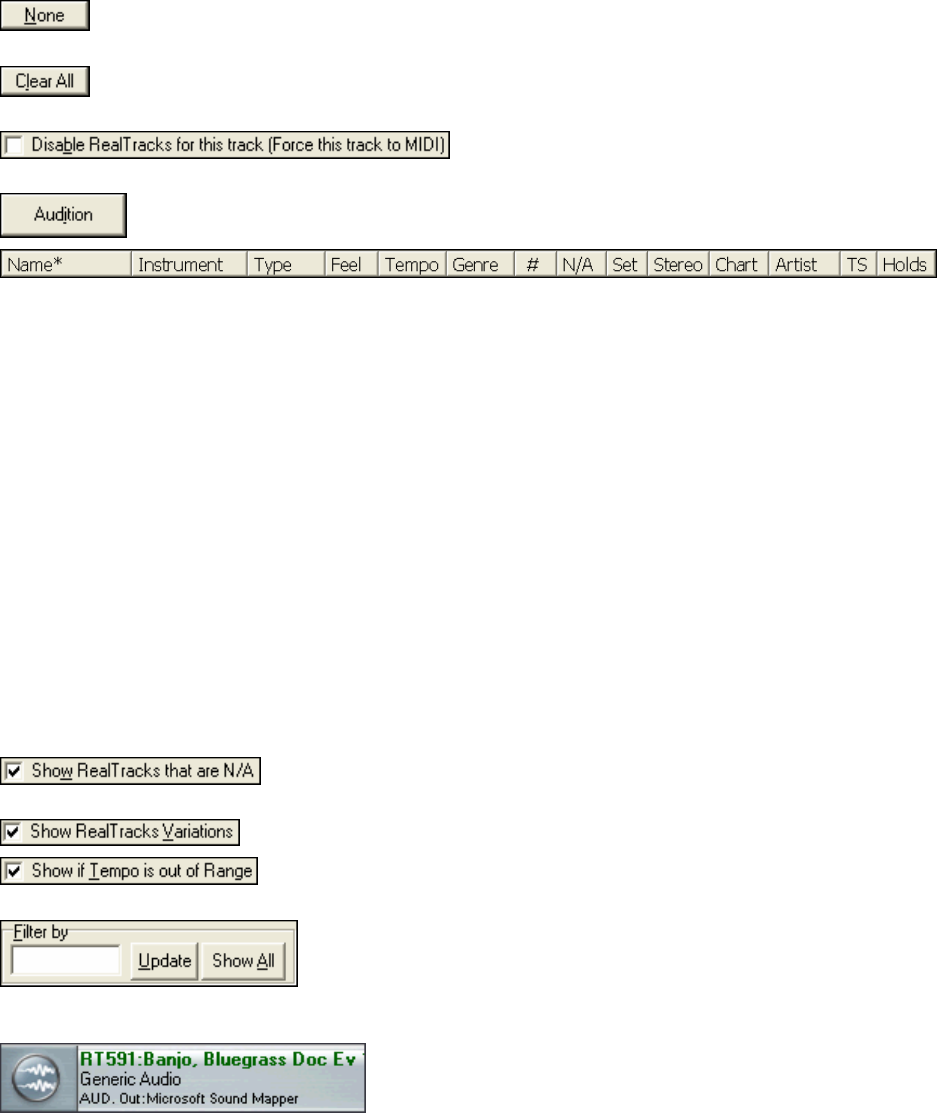
Chapter 8: Audio Production 93
The [None] button sets the current instrument to have no override of RealTracks for the song. The style
may still have a RealTrack in it for the instrument.
The [Clear All] button sets all RealTracks for the song to “None.” It will also optionally disable
RealTracks present in the style for the song.
Since RealTracks can be stored in a style you need to set
this checkbox to “Disable” to ensure that the current part will have its RealTracks disabled.
This plays a .WMA demo of the currently selected RealTrack.
To help make your selection you can sort the list by clicking on any of the column headings. As well as Name,
Instrument, Type (Rhythm or Soloist), Feel (Even or Swing), Tempo, Genre, and Number there are more columns
with additional information about each RealTrack instrument.
The tempo shown is the “base” (or typical) tempo for the RealTracks instrument as it is played, but RealTracks have
a tempo stretching capability that enables their application over a wide range of tempos. If saving a song with
RealTracks and the audio base tempo is different than the song tempo, a warning message will show, asking you to
confirm that you want to save it like this.
- The “N/A” column shows “N/A” for RealTracks that you have not installed yet or haven’t purchased, if “Show
RealTracks that are N/A” is checked.
- “Set” is the number of the RealTracks set that includes the instrument.
- The “Stereo” column shows whether the instrument playback is stereo or mono.
- Instruments with an “N” or “Gt” in the “Chart” column will display the RealTrack in notation.
- The “Artist” column has the name of the musician playing on the RealTrack instrument. See the “Artist Bio” box
for information about the player.
- The letter “Y” in the “TS” column means that Tempo Swapping is supported for the instrument. If you have
similar RealTracks available at different tempos, Band-in-a-Box automatically chooses the best one to use.
- “Holds” indicates whether that RealTrack supports shots, holds, and pushes. If there is a number there (other than
a blank field), then they are all supported.
This will show RealTracks that you do not have installed yet, or may not have
purchased. The missing RealTracks will be marked in the N/A column.
Variations of RealTracks use the same performances but with different settings.
This will show RealTracks that wouldn’t work well at the current tempo. The
acceptable range is -15% and +40% of the source tempo of the RealTracks.
The filter is another feature that makes it easier to select a RealTracks
instrument. For example, type “Blues” in the edit control box and press the
[Update] button to see a list of Blues instruments available, including
instruments from other genres that are suitable. The [Show All] button clears any filter and shows all available
RealTracks.
Track names for generated non-BB tracks are displayed in green.
For example, if you had generated a track by right clicking on it
and selecting “Generate RealTrack” then the track name of that
track will be displayed in green.
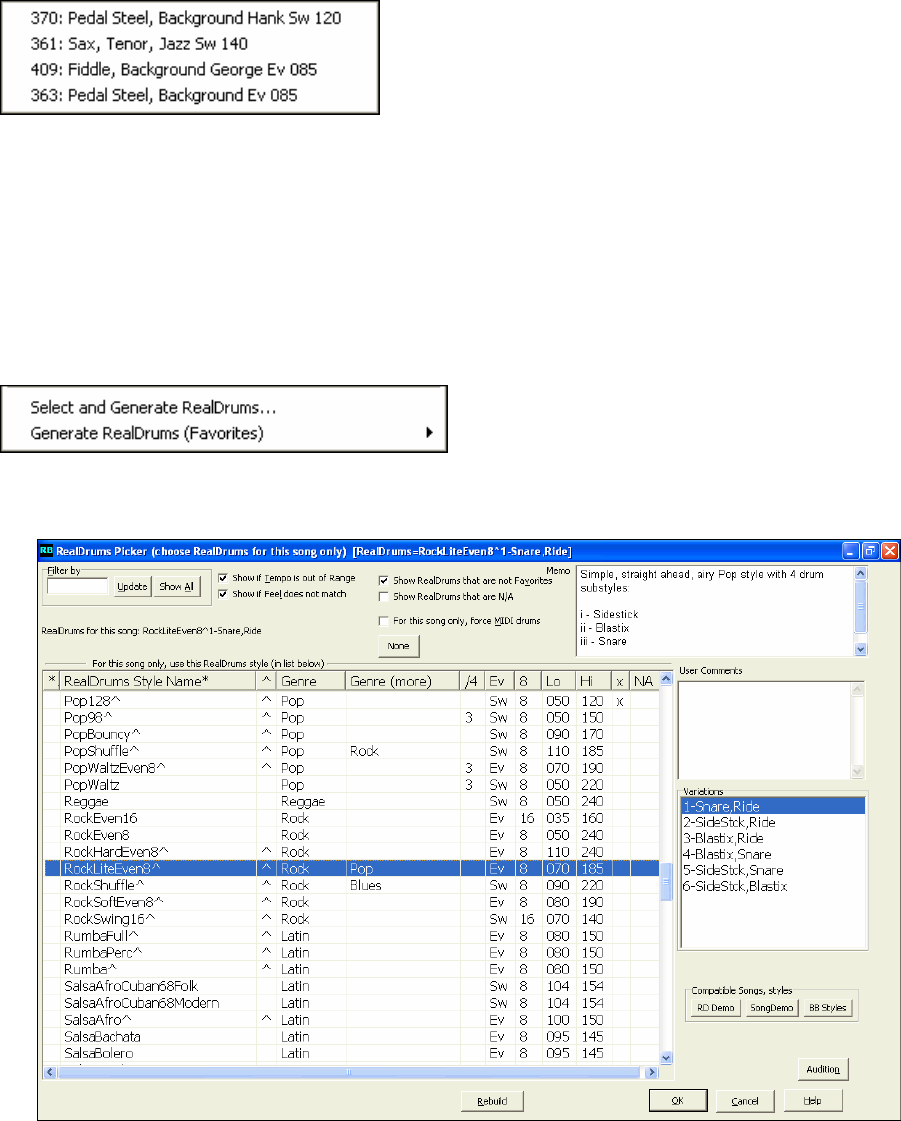
Chapter 8: Audio Production
94
Generate RealTracks (Favorites)
This command opens a short list of the most recently used
RealTracks for a quick and convenient selection. Click on your
choice in the list to begin generating the RealTrack.
You can press the Escape key to cancel generation of the track.
Regenerate Track
This will regenerate an existing track. If a track is a non-BB track, but it was generated individually from one of the
generation options in Tracks window popup menu, or from one of the generation options on the [Generate] button
popup menu, then the track name will be displayed in green. The track name being displayed in green or blue means
that the track can be regenerated using this command. This feature is useful to regenerate, if you had changed the
song’s tempo, or just to generate fresh material.
Generate All will regenerate all Blue and Green tracks automatically.
Generating RealDrums
This feature lets you generate realistic drum tracks using
RealDrums styles. It is selected from the right-click
menu in the Tracks window. You can generate a full
track or any part of a track, and you can use different RealDrums styles for different sections of a track.
Select an open track for your RealDrums, then right-click and choose either Select and Generate RealDrums or
Generate RealDrums (Favorites).
Generate RealDrums
This command opens the RB RealDrums Picker dialog. You will see a list of all of your available RealDrums
styles. If you have Band-in-a-Box installed on your computer you can use all of your Band-in-a-Box RealDrums
styles if you have set the path for RealDrums to your bb\Drums folder in the Song Generation preferences.
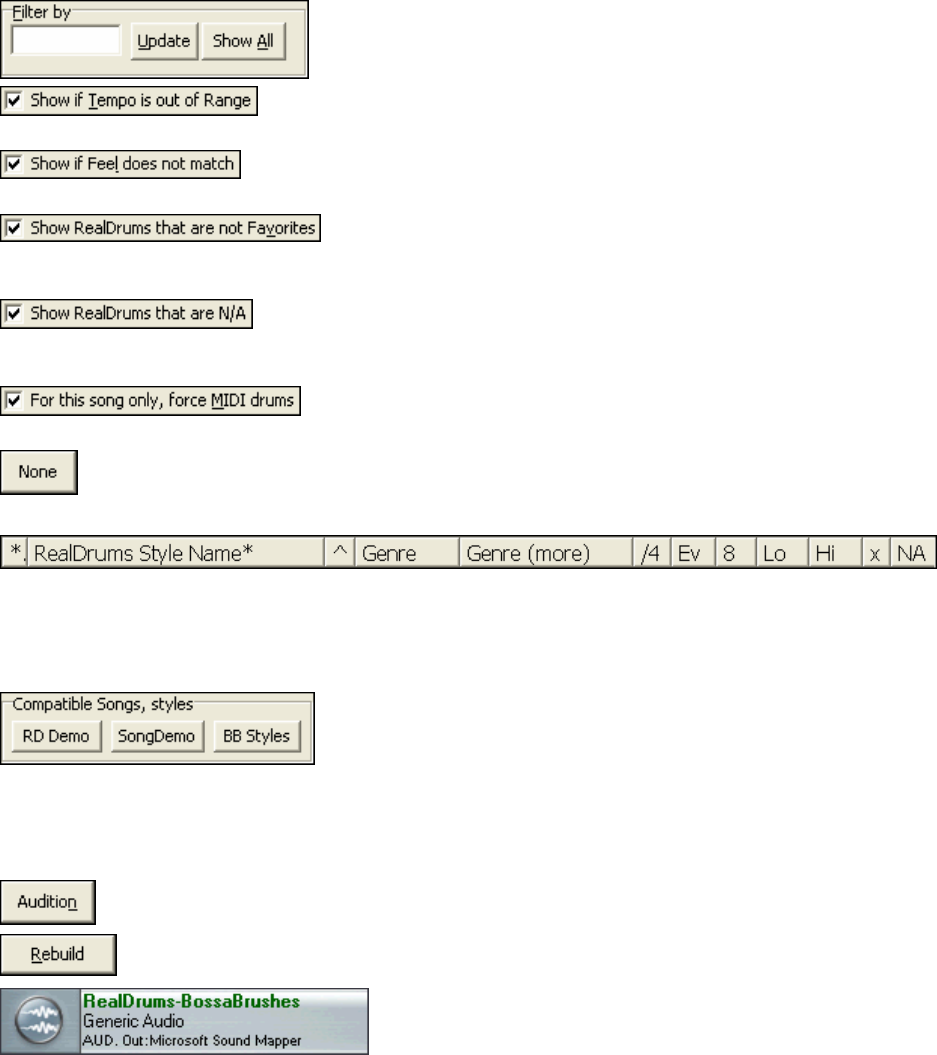
Chapter 8: Audio Production 95
The RealDrums Picker has many features to help you choose your RealDrum style.
Enter a filter string like Salsa, Jazz, or congas and the displayed list of styles will be limited to styles/genres
including that name.
The [Update] button applies the current filter in the edit field. [Show All]
clears the filter and shows all styles in the list.
This will show styles that wouldn’t work well at the current song tempo. The
acceptable range is shown in the Lo | Hi columns for the list of styles.
This will show a song where the drums are in Even feel and the style is Swing, or
vice versa.
You can assign a style as one of your favorites by clicking in the first
column on the left, which is headed with an asterisk *. This will place an asterisk to the left of the style name. Then
you can sort by favorites or use this option to only see favorites.
These are styles not found in the \drums folder, likely because they are add-on
styles not purchased yet. If you think that styles that show as N/A should be present press the [Rebuild] button and
confirm the path for the drums folder in the Song Generation preferences.
Set this if you want to use MIDI drums and want to override a RealDrums
that is embedded in the style.
This sets the drums to no RealDrums override for the song, and optionally also forces MIDI drums (i.e.
no RealDrums for style either).
When a RealDrums style is picked in the list a descriptive Memo opens.
Click on the heading for any column in the list to sort the list by that column, such as by name, genre, or feel.
The User Comments field is where you can type in and save your own notes about a RealDrum style.
RealDrums styles ending in a caret ^ have Variations available. These are shown in the list here. For style names
with two variations - such as Brushes, Sticks - the first refers to the “a” substyle and the second is the “b” substyle.
Use these buttons to find compatible RealDrums styles. The [RD Demo]
button loads and plays a demo of the chosen RealDrums style. A list of
demos for the chose style will be displayed.
The [Song Demo] button shows BB styles that will use this RealDrums style. The song demo for the style will get
loaded.
The [BB Styles] button shows BB styles that will use this RealDrums style. The style will get loaded if the menu
selection is made.
The [Audition] button doesn’t load the style, but instead uses Media Player to play a demo .WAV
file for the style.
Use the [Rebuild] button to build the list of RealDrums styles present in the \drums folder. If you
add new drum styles, press this button to update the list.
Track names for generated non-BB tracks are displayed in green.
Generate RealDrums (Favorites)
This command opens a short list of the most recently used RealDrums for a quick and convenient selection. Click
on your choice in the list to begin generating the RealDrums track.
Chapter 8: Audio Production
96
Press Escape to cancel generation of the track.
Regenerate Track
This will regenerate an existing track. If a track is a non-BB track, but it was generated individually from one of the
generation options in Tracks window popup menu, or from one of the generation options on the [Generate] button
popup menu, then the track name will be displayed in green. The track name being displayed in green or blue means
that the track can be regenerated using this command. This feature is useful to regenerate, if you had changed the
song’s tempo, or just to generate fresh material.
Generate All will regenerate all Blue and Green tracks automatically.
RealDrums Variations, Fills, and Accents
There are “a” and “b” variations for each RealDrums style. They are determined by the part markers assigned in the
Chords window.
To assign the substyles for your song, click on the Chords button to open the Chords window and insert “a”
or “b” part markers.
Click on the desired bar numbers to toggle through the a/b selection or to clear a marker.
Rests, shots, and pushes are supported by the RealDrums generation routines. They are entered in the Chords
window.
Rests and shots are set by adding periods to the chord name.
A chord can be specified as a Rest by adding a period after the chord.
e.g. “C.” indicates a C chord that is a Rest.
A chord can be specified as a Shot by adding two periods after the chord.
e.g. “C..” indicates a C chord that is a Shot.
Pushes are set by entering carets in front of the chord symbol.
^C = 8th push
^^C = 16th push
Note: Rests, shots, and pushes can ONLY be entered in the Chords window.
Recording Audio Tracks
Audio tracks are great for recording live sounds such as a person singing or playing guitar, in a similar manner to
tracks on a tape recorder. You can edit audio data by cutting and pasting in the Bars window or the Audio Edit
window. You can import .WAV files to be inserted into audio tracks. You can also process audio tracks with
effects in the Edit | Audio Effects menu.
Recording will occur over the current track selection, i.e., the track number that is highlighted in the Tracks window.
The track type must be set to “Audio.”
The “Always Record Audio too, if current track is MIDI” setting in the Audio Options dialog (Options |
Preferences | Audio) will cause RealBand to record audio even when the current track type is MIDI. RealBand will
offer to keep the audio take on the nearest available blank track. This can be a “lifesaver” in those situations where
you wanted to record audio, but you accidentally selected the current track as a MIDI track.
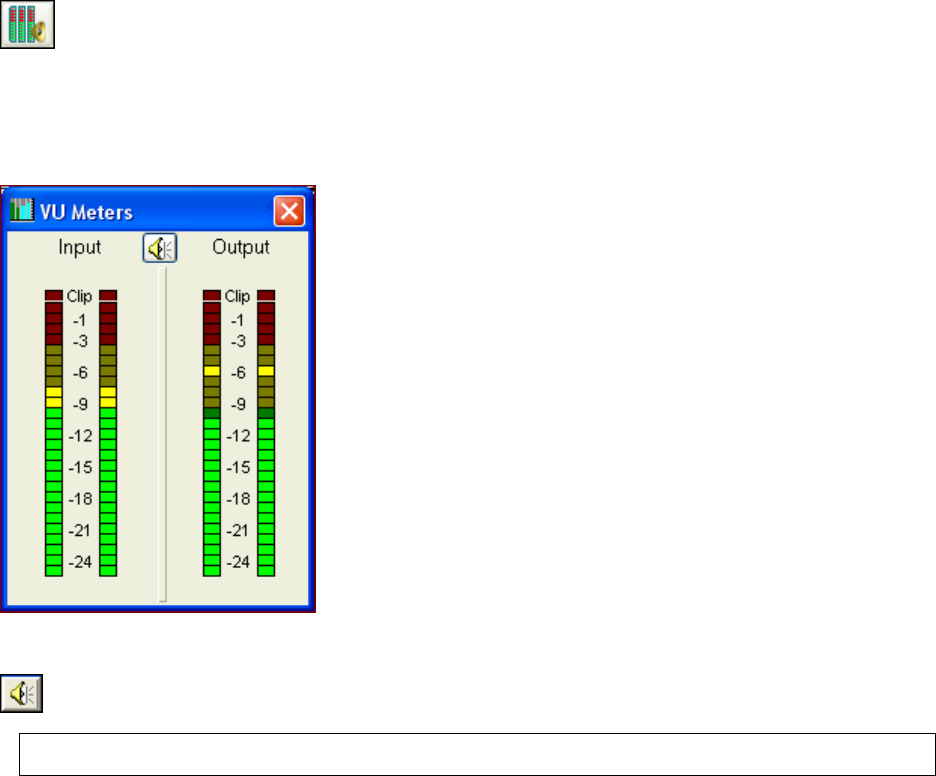
Chapter 8: Audio Production 97
The “Backup Most Recent Audio Take” setting in the Audio Options dialog, when enabled, will always backup the
most recent audio take. This can be helpful if you accidentally recorded audio onto the WRONG audio track, or you
accidentally punched-in instead of recording a regular take. If this happens you can undo the keeping of the most
recent take and then use the Audio | Import Wave File command to insert the recorded audio onto a different track,
by importing the RBBAKx.WAV file from the Temporary Audio Directory.
Setting Audio Levels
There are 2 pairs of VU meters, one pair for audio input, and one pair for audio output. If you re-size the
VU Meters window vertically the height of the meters will expand or shrink to match the new window
height.
The clipping indicator at the top of the meters indicates that clipping has occurred. Try to keep the levels low
enough so they’re safely below 0 db, and so that the clipping indicator doesn’t light up.
To be on the safe side, it’s probably a good idea to adjust the levels so that the meters don’t get close to 0 db even if
the clipping indicator hasn’t yet lit up.
The VU meters have an automatic peak-hold feature with gradual peak
fallback, so it will be easy to see the transient peak levels if you’ve got
your eye on the meters.
For the Output, you may have to adjust your mixer settings within RealBand to keep the levels within a reasonable
range.
For the Input, you may have to press the speaker button to launch the Windows Recording Control
properties and adjust the input level.
Note: The appearance of this window is different for different sound cards. The example shown is for a typical Sound Blaster
Audigy card.
In the example shown of the Recording properties, “Microphone” is the selected audio input for the SB Audigy
Audio device and the Volume fader is at 70% of the maximum level.
If the Input meter were too high, either clipping or getting close to 0 db, then lowering the Microphone volume level
would correct this.
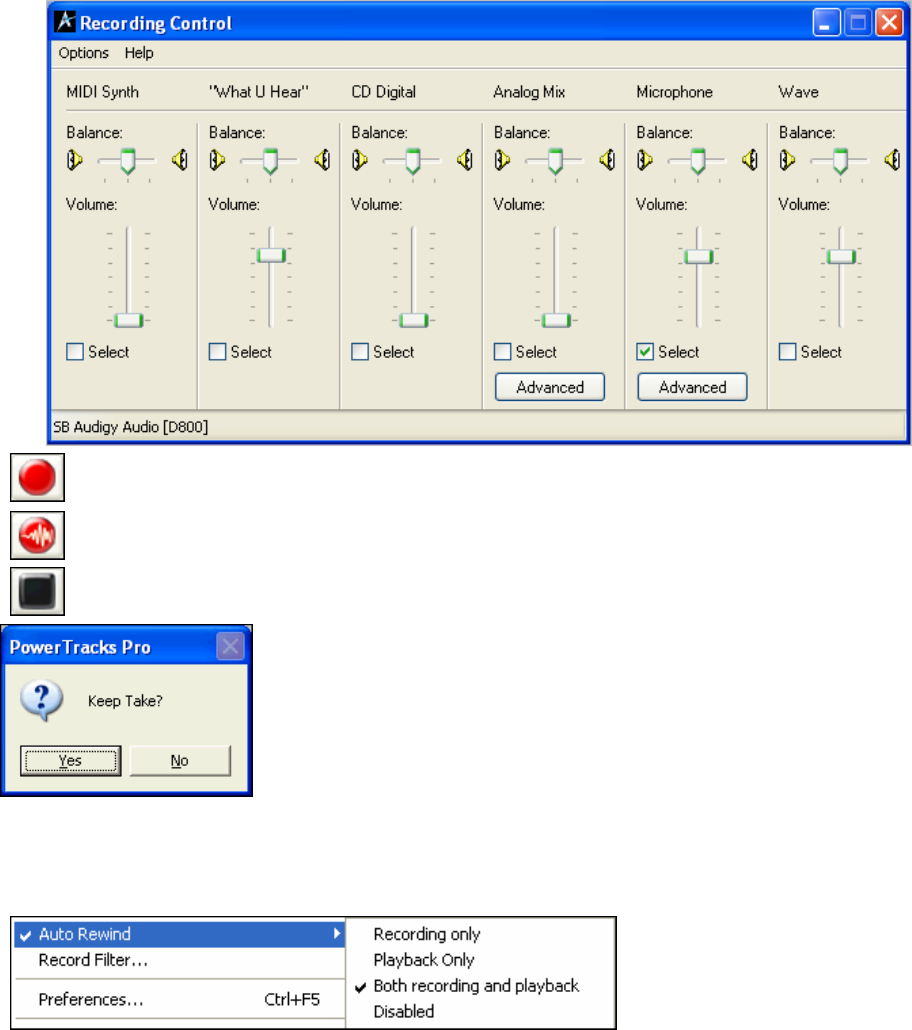
Chapter 8: Audio Production
98
Start recording by pressing the Record button.
You can press the record audio button instead of record; it will automatically change a MIDI track type to
Audio if the track is blank.
Stop recording by pressing the Stop button or the <SPACE> bar.
When recording is stopped a “Keep Take?” dialog appears that gives you the
option to keep or reject the take.
If you choose [Yes] the audio wave file will be saved and you will see an
added event in the Events column for the track (Classic view).
Auto Rewind
Auto Rewind is found in the Options menu. When enabled, RealBand will automatically rewind to the location that
playback or recording was started. The choices are “Recording Only, Playback Only, Both Recording and
Playback,” or “Disabled.”
Audio Editing
Any of the forty-eight tracks within RealBand can be designated as either mono audio or stereo audio. If you edit a
stereo track in the Audio Edit window, you will see two channels (waveforms) in the window.
The Audio Edit window lets you edit only the left or right channels of a stereo track instead of always editing both
channels. This lets you Cut/Paste just the left or right channel, or you can apply a non-real time effect (Edit | Audio
Effects) to just the left or right channel.
Stereo tracks are normally panned to the center so the stereo signal is centered.
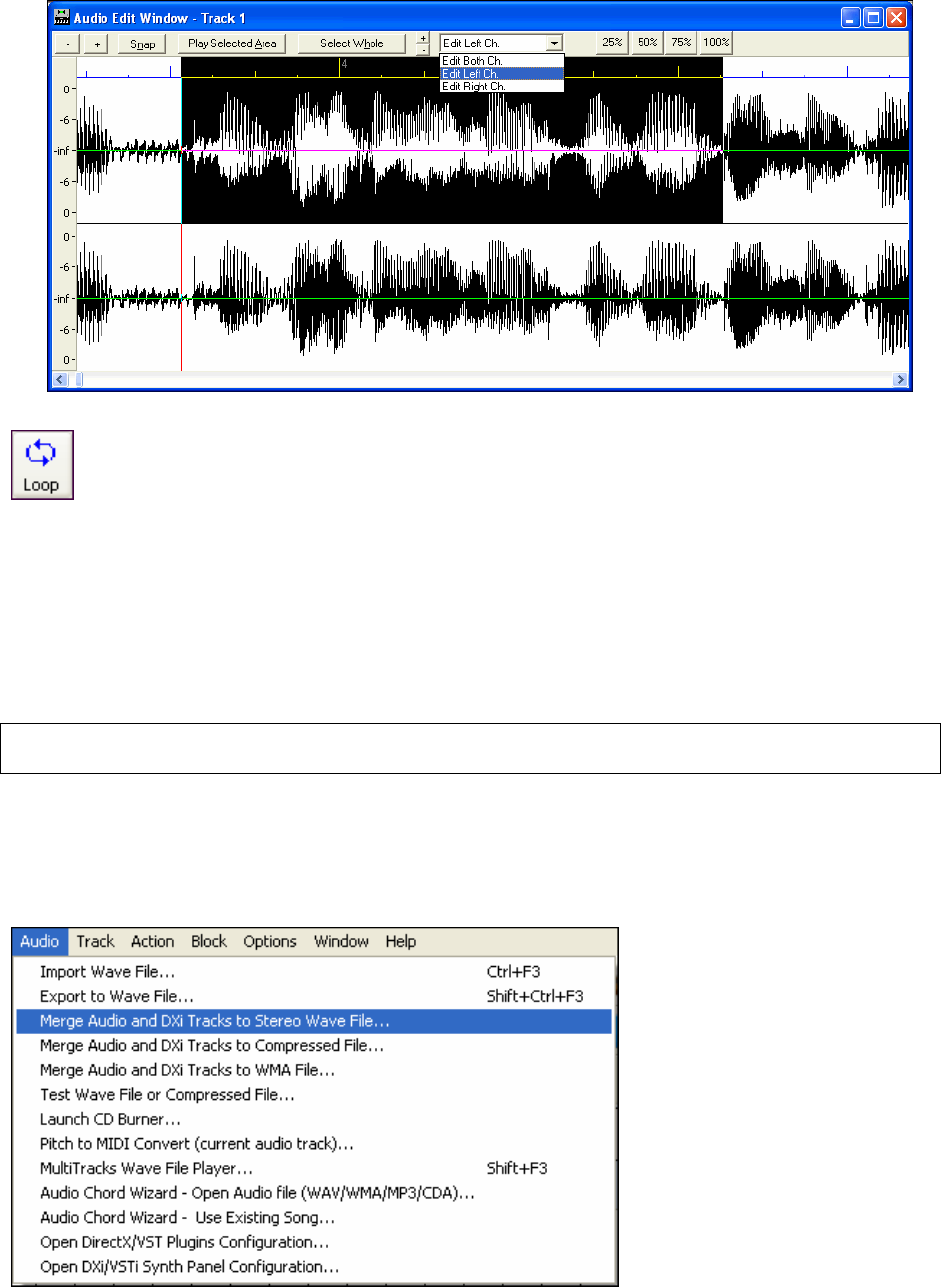
Chapter 8: Audio Production 99
Loop Record
If you record while in Loop mode (which is activated using the loop button) the music will loop when
recording is started with the Record button. The music that is recording during each loop can be put onto
individual tracks after recording is finished, or the entire take can be put onto a single track like an
ordinary recorded take.
A dialog will pop up giving you a choice of whether the recorded audio will go on separate tracks or on the same
track. If you choose the latter, the take will be kept the same way an ordinary take is normally kept. If you choose
to have the loops put on separate tracks, the program will put each loop on any available track that is greater than
or equal to the Current Track. For example if there are 10 audio loops recorded then program will put the takes
onto 10 audio tracks. If you don’t want to overwrite existing tracks, then make sure the current track, and any
tracks with a higher number than the current track, are blank before recording. For example, if the song already
has 10 tracks used, then start recording on track 11 and the loops will be placed on track 11 and beyond. If the
program runs out of tracks it will attempt to put remaining loops onto the last track.
NOTE: Loop recording will always begin at the start of a loop.
NOTE: Punch-in mode will automatically be deactivated by the program since it is incompatible with loop recording mode.
Rendering MIDI Tracks to Audio
Audio Menu Commands
The Audio menu on the main menu bar has commands to automatically render entire sequences to audio files, or to
export selected tracks to WAV files.

Chapter 8: Audio Production
100
Rendering MIDI to audio is virtually automatic when using the DXi/VSTi synthesizer support in RealBand. Just go
to the Audio menu and choose Merge Audio and DXi Tracks to Stereo Wave File, or to a WMA file, or to any
compressed format (such as .MP3) that is supported by your computer.
Note: If no audio tracks are present the MIDI tracks will still be rendered to audio using the DXi synthesizer. This feature
requires that you have a DXi software synth assigned to the MIDI track(s) you are rendering.
All levels and effects settings will be rendered exactly as they are in the Tracks and/or Mixer windows.
Auto Convert Individual MIDI Track to WAV File
Invoke this command by right-clicking on the track in the Tracks window and easily convert any MIDI track to a
.WAV file. RealBand will automatically render using a DXi or VSTi synth.
Auto Convert Individual MIDI Track to Audio Track
It is easy to convert any MIDI track to an audio track. RealBand will automatically render using a DXi or VSTi
synth. This command is accessible by right-clicking on the track in the Tracks window.
Manual Rendering of MIDI to Audio
MIDI tracks can easily be rendered (recorded) to audio using your system’s sound card and its onboard MIDI
synthesizer or by recording the audio output from an external MIDI device.
To render MIDI tracks to audio with the internal system sound device:
1. Load the source MIDI file into RealBand.
2. In the Tracks window select a blank track and set the track type to stereo audio.
3. In Options | MIDI Devices verify that the internal MIDI synthesizer is selected. This could be the Microsoft GS
Wavetable SW Synthesizer, any model of Sound Blaster, or another onboard sound device.
4. Click on the VU Meters button on the Tool Bar.
5. In the VU Meters window click on the Windows mixer button to open the Volume Control (see note following).
To see the Recording Control select Options | Properties in the Volume Control window.
6. In the Recording Control select the input source by checking the Select checkbox. Different systems and sound
cards use different labels; you might be selecting “MIDI” as the input source, or “What You Hear,” or “Stereo
Mix.” If you aren’t sure which source to choose, start by eliminating the obvious like CD Player, Microphone,
or Line In.
7. Play the MIDI file and monitor the levels on the Input VU meter. Levels can be adjusted in both the Recording
Control and the Volume (or Playback) control. The levels can occasionally go into the yellow zone, and a
transient peak in the red zone is OK. Consistent readings in the red or lighting up the clip indicator means your
levels are set too high.
8. Unless you want to record the metronome, check to be sure it is disabled in Options | Metronome.
9. Click on the Record Audio button to record the song. The Input VU meters will become active during
recording.
10. When done, click the Stop button and choose to “Keep Take” when prompted. A stereo track will have been
recorded.
You could then use the menu command Track | Save Track to File… to save the recorded audio track as a .WAV
file.
Note: RealBand attempts to open the Recording Control panel associated with the Windows mixer. If you get an error
message when the Windows Mixer button is pressed you probably have a sound card with its own control panel and mixer.
In that case, you need to open the sound card’s software separately to adjust the recording properties.
To render MIDI to audio when you’re using an external synthesizer or sound module you connect its audio output to
the Line In of your sound card and select Line In as your input source in the Windows Recording Control.
Rendering when you’re using an external synthesizer:
1. Load the source MIDI file into RealBand.
2. In the Tracks window select a blank track and set the track type to stereo audio.
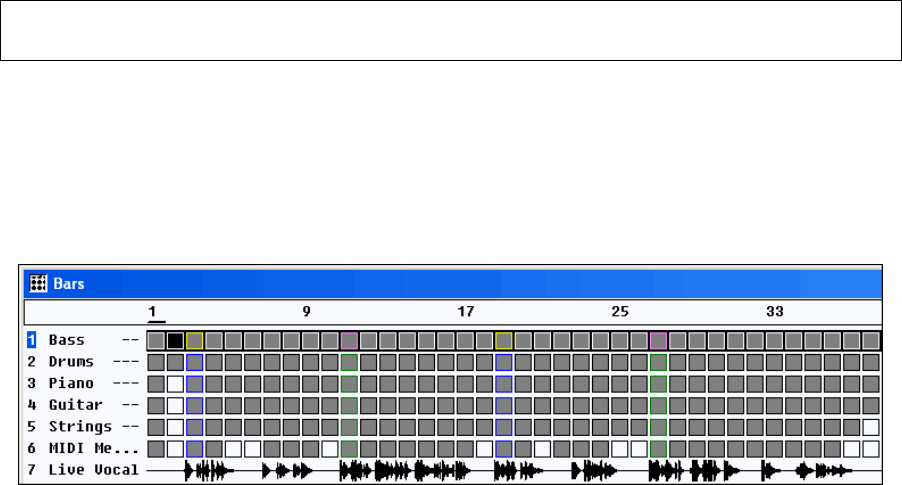
Chapter 8: Audio Production 101
3. In Options | MIDI Devices verify that the external MIDI driver is selected. It could be named MPU-401, MIDI
Out Port or another name with the word “out” such as SB Live MIDI Out, or MIDI IO (input/output).
4. Click on the VU Meters button on the Tool Bar.
5. In the VU Meters window click on the Windows mixer button to open the Volume Control. To see the
Recording Control select Options | Properties in the Volume Control window.
6. In the Recording Control select “Line In” as the input source by checking the Select checkbox. Make sure that
the audio output of your MIDI synthesizer or sound module is connected to your computer’s Line In jack.
7. Play the MIDI file and monitor the levels on the Input VU meter. Levels can be adjusted in both the Recording
Control and the Volume (or Playback) Control, the levels can occasionally go into the yellow zone, and a
transient peak in the red zone is OK. Consistent readings in the red or lighting up the clip indicator means that
your levels are set too high.
8. Unless you want to record the metronome, check to be sure it is disabled in Options | Metronome.
9. Click on the Record Audio button to record the song. The Input VU meters will become active during
recording.
10. When done, click the Stop button and choose to “Keep Take” when prompted. A stereo track will have been
recorded.
You could then use the menu command Track | Save Track to File… to save the recorded audio track as a .WAV
file.
Note: While recording (rendering) the MIDI tracks you can perform real time mixer moves, such as fading volume levels up
or down, which will be recorded to the audio track. These changes cannot be undone, but the tracks could be re-rendered if
necessary.
Editing Audio Tracks
By default the program uses the Windows/Temp directory for temporary audio files created during editing. You can
change the directory in the Options | Preferences dialog under the Audio tab.
Bars Window
The Bars window provides an overview of the data (WAV and/or MIDI) in a song file. This view makes it easy to
select a large region of a track for editing.
Bars view displaying a song with both digital audio and MIDI tracks.
You’ll see that as the song plays the Bars window scrolls along, showing graphical representations of the
waveforms that are contained in the individual tracks. A small cursor at the top of the window indicates the current
bar and the numbers indicate the bar numbers of the song.
If the Alt key is held when left-mouse clicking on the overview section of the Bars window the time will be changed
without affecting the currently highlighted region. This lets you quickly adjust the current time without having to
worry about accidentally changing the highlighted region.
Audio Edit Window
You can open an Audio Edit window for any track that contains WAV data. To view the waveforms of the
individual tracks click on the track that you want and choose Window | New | Audio Edit Window (Ctrl+F2) to
launch the Audio Edit window. This window lets you view audio data as a waveform.
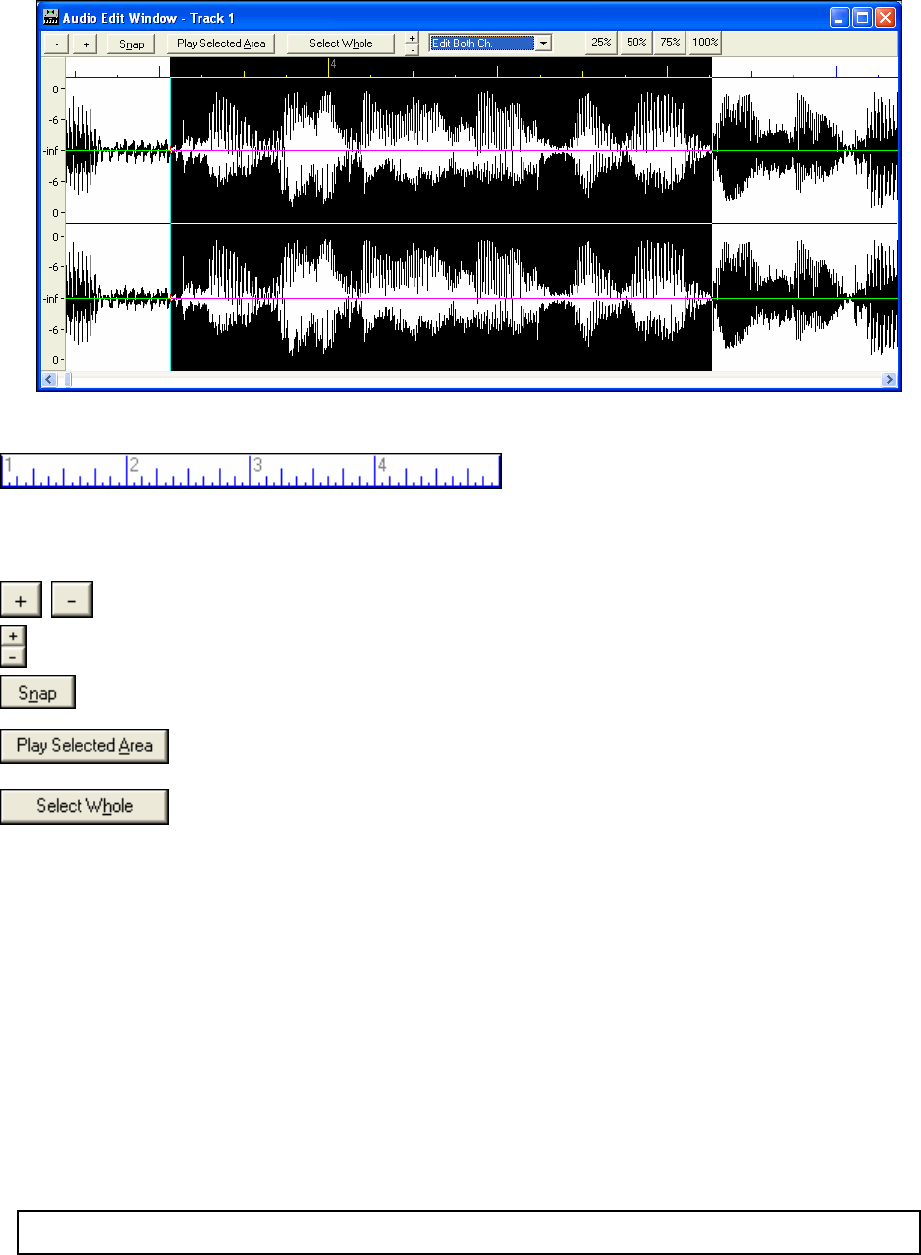
Chapter 8: Audio Production
102
The Audio Edit window shows graphical representations of the waveforms on the selected track. It scrolls as the
song plays, with a thin red vertical stripe to mark the current song position.
The number-ruler at the top of the window denotes the bar numbers of the current song. Small vertical lines are
displayed at 8th and 16th note boundaries. This makes it easier to align audio to correct timing issues.
The dB Scale on the left side of the Audio Edit window gives you a better idea of the level of an audio track.
By clicking on the [+] and [-] buttons you can “zoom” in or out on the waveform to facilitate very
precise waveform editing.
The large +/- buttons zoom horizontally, the smaller set zooms vertically.
The Snap button will cause the highlighted region to snap to the nearest beat when selecting a region
with the mouse.
The Play Selected Area button will play the highlighted area to let you hear what was
selected.
The Select Whole button selects the whole audio track.
The current time within the song, if visible within the Audio Edit window, will be shown as a vertical line in red.
This will be drawn in reverse video if the current time is within the selected region.
You can select a region to edit with the mouse by clicking on the waveform and dragging the mouse to the right.
Shift+click (Shift key + left mouse button) support makes it easy to tweak the beginning or end of the highlighted
area.
- If you Shift+click before the start of the From/Thru range, or after the end of the From/Thru range, the
highlighted area will be extended.
- If you Shift+click within the From/Thru range, the range will be reduced, and the location you clicked on will
become either From or Thru depending on which boundary was closer to where you Shift+clicked the mouse.
- If you keep the left mouse button held after the Shift+click, and you move the mouse you can adjust the
boundary of the range while moving the mouse.
Alt+click is supported the same way as for the overview section of the Tracks window. In other words, Alt+click
will ONLY move the time marker, which ensures you don't accidentally alter the current selected area.
After selecting a region you can then execute Cut, or one of the audio effects in the Edit menu.
Note: RealBand has support for resolutions as high as 3840 PPQ, which allows for more precise audio editing, since at
higher resolutions each tick spans a finer section of audio. Go to Options | Resolution to make this setting.
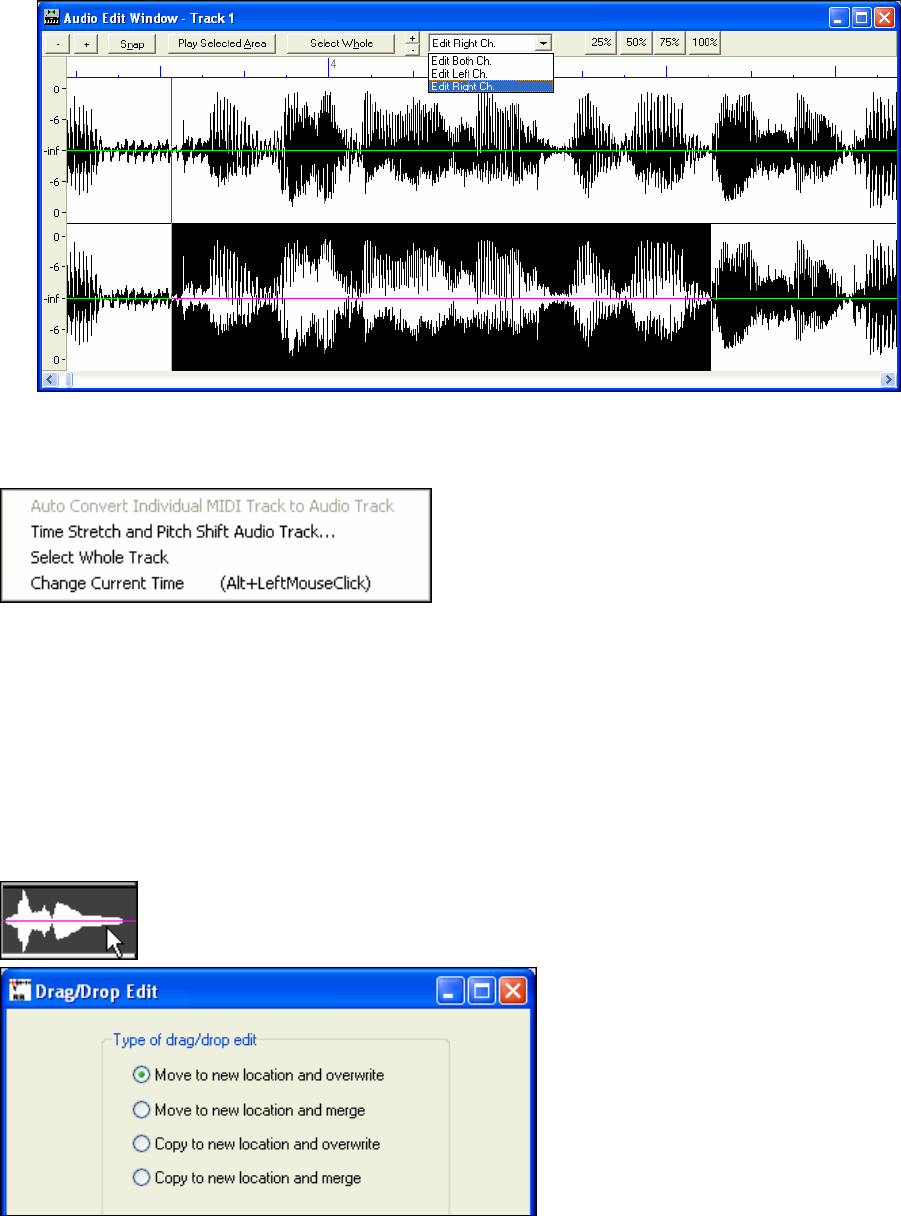
Chapter 8: Audio Production 103
The Audio Edit window lets you edit only the left or right channels of a Stereo track instead of editing both
channels. This lets you cut/paste or apply a non-real time effect (Edit | Audio Effects) to just the left or right
channel.
RealBand supports drag-and-drop editing in the Audio Edit windows. Select the highlighted region by holding
down the Ctrl key with the left mouse button pressed, and then drag the region to a new location in the song.
Right-Click Audio Edit Menu
The right-click menu in the Audio Edit Window is similar to the right-click menu in the Tracks window.
The Time Stretch and Pitch Shift Audio Track feature allows you to permanently change the duration and pitch
of individual audio tracks, or change the speed and pitch of the entire RealBand mix.
Select Whole Track makes it easy to select the whole track for editing.
Change Current Time sets the time to the position where the menu is opened.
Tracks Window Editing
Audio edits can also be performed directly in the Tracks window, although the Audio Edit window offers a larger
view for precision editing.
Drag and drop audio editing in the Tracks window makes it easy to drag a clip from one track to another.
You can select a highlighted region by holding down the Ctrl key with the left mouse
button pressed, and drag the region to a new location in the song.
After releasing the mouse button, you have
four options:
1. Move to new location and overwrite.
2. Move to new location and merge.
3. Copy to new location and overwrite.
4. Copy to new location and merge.
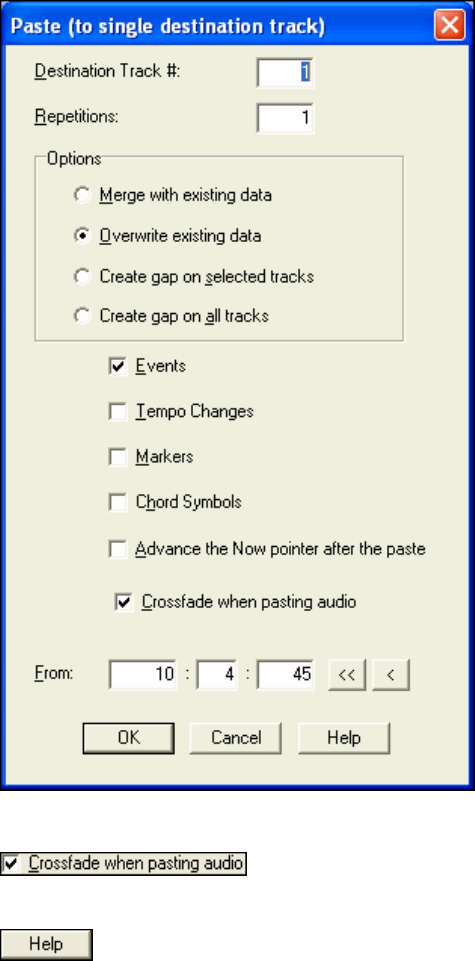
Chapter 8: Audio Production
104
Audio Edit Commands
Audio editing uses the Edit menu commands. You can Cut, Copy, and Paste audio data just as if it were text.
Each action brings up its own dialog, which can be launched with the standard Windows keystroke commands
Ctrl+X for Cut, Ctrl+C for Copy, and Ctrl+V for Paste.
The cross fade option when pasting audio smoothes out a paste, so that no audible “clicks” are heard at splice points
of pastes.
Click on the [Help] button in each edit dialog for detailed instructions on the settings and commands.
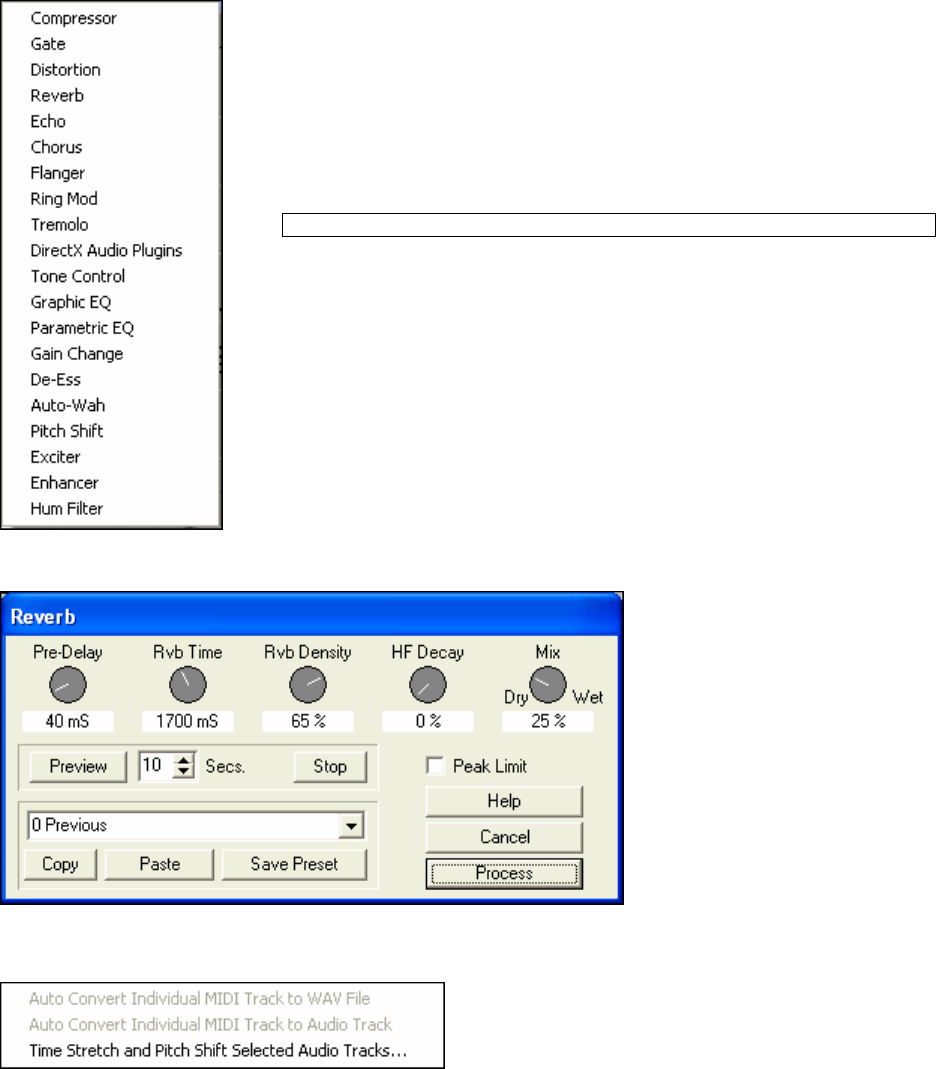
Chapter 8: Audio Production 105
Audio Effects
This is a submenu that contains all of the permanent audio effects for RealBand.
The audio effects in this submenu are actually external plug-ins that are
transparently integrated with RealBand, but actually aren’t built-in to the program
itself. You’ll be able to use them just as if they were built-in to RealBand.
Unlike the effects that are added in the Mixer window on the FX track insert and
the Aux busses, when the effects in the Audio Effects submenu are applied the
content of the audio track is permanently altered. The effect can be removed with
the Edit | Undo command.
Note: Once the file has been saved the effect cannot be undone.
This command will undo the last edit command executed and restore the track to its
previous state. The number of Undo Levels is adjustable from 1 to 100 in the
General section of the Options | Preferences dialog.
Each effect has its own dialog with custom settings and commands. Click on the [Help] button for a detailed
explanation of the settings and a concise tutorial on how to apply the effect.
Time Stretch and Pitch Shift
This feature is available from the Tracks window by right-clicking with the mouse on any audio track.
It allows you to permanently change the duration and pitch of individual audio tracks, or change the speed and pitch
of the entire RealBand mix.
If an audio track has been inadvertently recorded too flat or too sharp, you can easily modify the pitch without
affecting the track's duration. If the duration of an audio track is incorrect RealBand can change the tempo of the
audio track without affecting the pitch. Tempo can be adjusted from 1/4 speed to 4X speed. Pitch can be adjusted
+/- one Octave, in one Cent increments (a Cent is 1/100 of a Semitone).
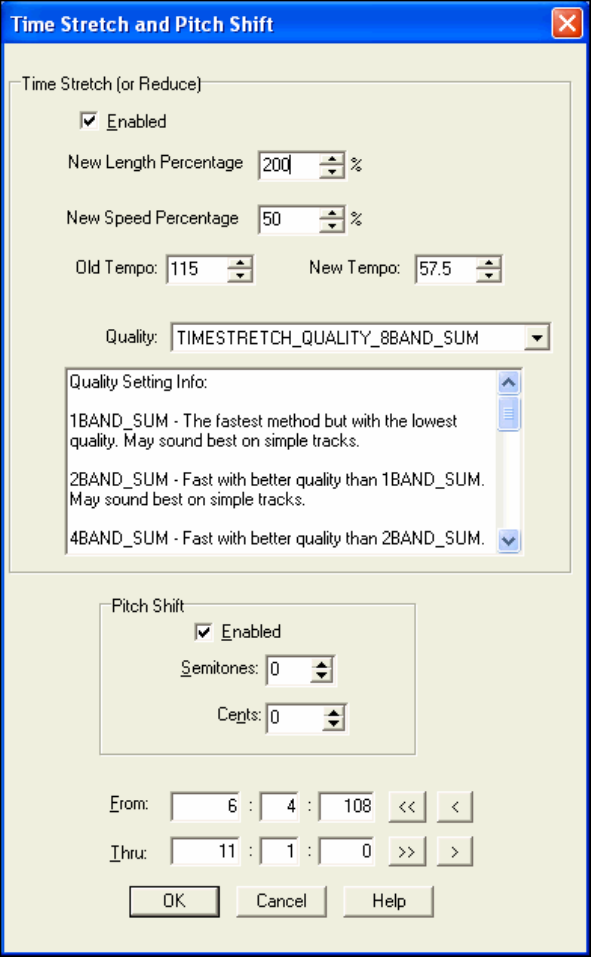
Chapter 8: Audio Production
106
These features are also useful for learning your favorite up-tempo song. Load the file and play it back at half speed.
If the song is in the key of F but you would rather learn it in Eb, transpose it down 2 semitones and continue playing
at half-speed. As you master the song, you can gradually increase the tempo until you can play along at full speed.
The Time Stretch and Pitch Shift dialog lets you stretch (or reduce) the length of the highlighted section of audio
tracks.
Time Stretch (or Reduce)
Enabled: if checked, then RealBand will change the length based on the following settings:
New Length Percentage: The new length as a percentage relative to the original length. For example, a new
length percentage of 200% will result in the section being double the original length.
New Speed Percentage: Time stretching (or reduction) will also cause the section to be played faster or slower. If
you are stretching a section of the song, it will play slower. If you are reducing a section it will play faster. This
Chapter 8: Audio Production 107
setting is the inverse of the New Length Percentage. For example, a New Speed Percentage of 50% (half speed) will
result in a New Length Percentage of 200% (double length).
Old Tempo and New Tempo: If you specify old and new tempos, this is another way of adjusting the speed, but
this method lets you think in terms of a change in tempo rather than a change in speed as a percentage.
Quality: There are 8 different choices here. The “best” choice depends on the source material. You may need to
experiment to determine the best choice for tracks you are working with. See the explanation that follows.
Pitch Shift
Enabled: If checked, then RealBand will pitch shift based on the following settings:
Semitones: Amount of semitones to pitch shift up or down. There are 12 semitones per octave.
Cents: Amount of cents to pitch shift up or down. There are 100 cents per semitone.
Explanation of Time Stretch Quality
The simplest way to change audio duration is to change the playback rate, exactly like changing the speed of a tape
recorder. Unfortunately, pitch is changed along with the playback rate.
To change audio duration without changing pitch, small snips of audio must be periodically inserted (for longer
duration) or removed (for shorter duration), so that the duration can be modified without changing the pitch.
To transpose audio pitch while maintaining the same playback rate, it is still necessary to change audio duration. To
transpose pitch upward, we can play the audio faster, but playing faster will reduce the song duration. One must
Time Stretch before changing the Pitch, if you want a 3 minute song to take 3 minutes to play after it has been
transposed.
RealBand's Time Stretch and Pitch Shift features work together. You can change duration while keeping pitch
constant, change pitch while keeping duration constant, or change both pitch and duration. Just select what you
want and RealBand will work out the details.
Large changes in pitch or duration have more noticeable artifacts. If you only need to change duration a small
amount, or repair an out-of-tune track by pitch-shifting a few cents, even the fastest methods could be virtually
artifact-free. But large pitch/duration changes are likely to have some artifacts regardless of the stretch method.
Solo acoustic piano may be the most problematic instrument. Piano can be stretched small amounts without much
grief, but it is difficult to get a clean result on extreme piano processing.
Additional time stretch methods may be added in the future, but currently two basic methods are available - SUM
and AUTOCORR.
SUM is a fast loop-finding method which can work well on monophonic tracks, or with multi-band processing.
SUM is pretty smooth with minimal echo-click artifacts. SUM's Achilles’ heel is a fluttery tremolo effect.
AUTOCORR is slow, but finds better loops. AUTOCORR has less tremolo effect than SUM. AUTOCORR's
Achilles’ heel is a hard-edged short-echo artifact, most noticeable on percussive tracks such as drum, guitar, or
piano. The artifacts may not be noticeable on smoother tracks such as vocal or horn.
If multi-band processing is applied to a simple audio track, you may like the effect because if could make a track
sound “fatter.” But if single-band processing doesn't exhibit undesirable artifacts, single band processing on a
simple track may sound more faithful to the original.
1-band, 2-band, 4-band, 8-band, defines how many frequency bands are independently time stretched. Band splits
might add a slight “comb filter” effect. For instance, on guitar, a 2-band method may sound more coherent than a 4-
band method. But the 4-band method may sound smoother than the 2-band method.
1-BAND_SUM: The fastest method but with the lowest quality. May sound best on simple tracks.
2-BAND_SUM: Fast with better quality than 1BAND_SUM. May sound best on simple tracks.
4-BAND_SUM: Fast with better quality than 2BAND_SUM. Good for simple tracks or mixes.
8-BAND_SUM: This is the best-sounding Fast method, likely to sound good on either simple tracks or mixes.
2-BAND_AUTOCORR: Noticeably slower than the above methods. It may sound much better than 8BAND_SUM
on simple tracks, but it probably will not sound better than 8BAND_SUM on mixes.

Chapter 8: Audio Production
108
3-BAND_AUTOCORR: Even slower. It may sound much better than the above on simple tracks, but it may not
sound better than 8BAND_SUM on mixes.
4-BAND_AUTOCORR: This method is slow, about the same speed as 8-BANDSUM_HYBRID. It may sound
better than 8-BANDSUM_HYBRID on simple tracks.
8-BANDSUM_HYBRID: This method is about the same speed as 4-BAND_AUTOCORR. If processing speed is
not an issue, 8-BANDSUM_HYBRID is likely to be the best choice for full mixes. It uses AUTOCORR on low
audio bands, and SUM on the high audio bands.
Saving Audio Files
RealBand files are saved in the .SEQ (sequence) file format, which can include both audio and MIDI tracks in the
same file. So you could import a Band-in-a-Box MIDI file into RealBand and then record live parts along with the
Band-in-a-Box accompaniment.
Auto-Backup of .SEQ Files
When you save a file, RealBand now saves a backup of the file in a c:\RealBand\RBBACKUP folder. This doesn’t
add any time to the file-save command, and the number of backups is configurable. So the next time that you
mistakenly overwrite a file when saving, go the backup folder to look for a saved previous copy.
When the Create backup file when overwriting a .SEQ file setting is enabled, RealBand will always create a backup
file (BKS file) when a .SEQ file is overwritten. For songs saved into the same hard drive where RealBand is
installed, the backups are placed into an RBBACKUP subfolder of the RealBand folder. For songs that are saved to
a different hard drive, the backups are placed in an RBBACKUP folder which is off of the root (e.g.
D:\RBBACKUP) The max backups per song setting determines the maximum number of backups to be kept for
each song. If this limit is reached, then RealBand will delete the oldest backup of the song you are overwriting and
create a newer backup. The “Max backups per hard drive:” setting is the maximum total backups allowed per hard
drive. If this limit is reached, then RealBand will delete the oldest backup file. There is also on option for moving
the older backups into the Recycle Bin instead of deleting them when either of the two limits is reached.
Wave Files
To make a .WAV file, and even burn a CD of the song, you can render the MIDI tracks to audio and export the
whole song to a wave file.
RealBand offers a number of options to save or export audio files in different formats. These options are found in
the Audio menu.
Export to Wave File
This command will export the highlighted section of the current track to a wave file, if the current track is an audio
track.
Unlike the Merge Audio and DXi Tracks to Stereo Wave File... command, this command will generate as small a
.WAV file as possible. For example, if you highlight the whole track and there is no audio data until measure
number 12, the wave that is exported is going to begin at measure 12 rather than being padded with 11 measures of
blank audio.
Only the raw wave data is saved, mixer settings and effects are not rendered.
Merge Audio and DXi/VSTi Tracks to Stereo Wave File...
This is an export command that will merge all the audio tracks to a stereo wave file while simultaneously rendering
and merging the MIDI tracks to audio if you have a DXi or VSTi software synth. When played in a wave file player
the file will sound the same as if the audio tracks of the song were being played by RealBand. The volume, mute,
pan, etc. settings of the track will affect the sound of the merged stereo wave file.
Chapter 8: Audio Production 109
Merge Audio and DXi Tracks to Compressed File...
This command works the same as the Merge Audio and DXi Tracks to Stereo Wave File... command, except that this
will compress the file. When you execute this command, RealBand generates a temporary stereo PCM file, and then
a dialog will pop up which will prompt you to select an audio output format. After you select a format and press
OK, the program will compress the file. If you select an MPEG layer-3 format, RealBand will save the file with an
.MP3 extension instead of .WAV. This format requires that your system have an .MP3 compression codec installed.
Merge Audio and DXi Tracks to WMA File
This command works the same as the Merge Audio and DXi Tracks to Stereo Wave File... command, except that
this will compress the file. When you execute this command, RealBand first generates a temporary stereo PCM file,
a dialog will pop up which will let you save to a .WMA file (Windows Media Audio).
!
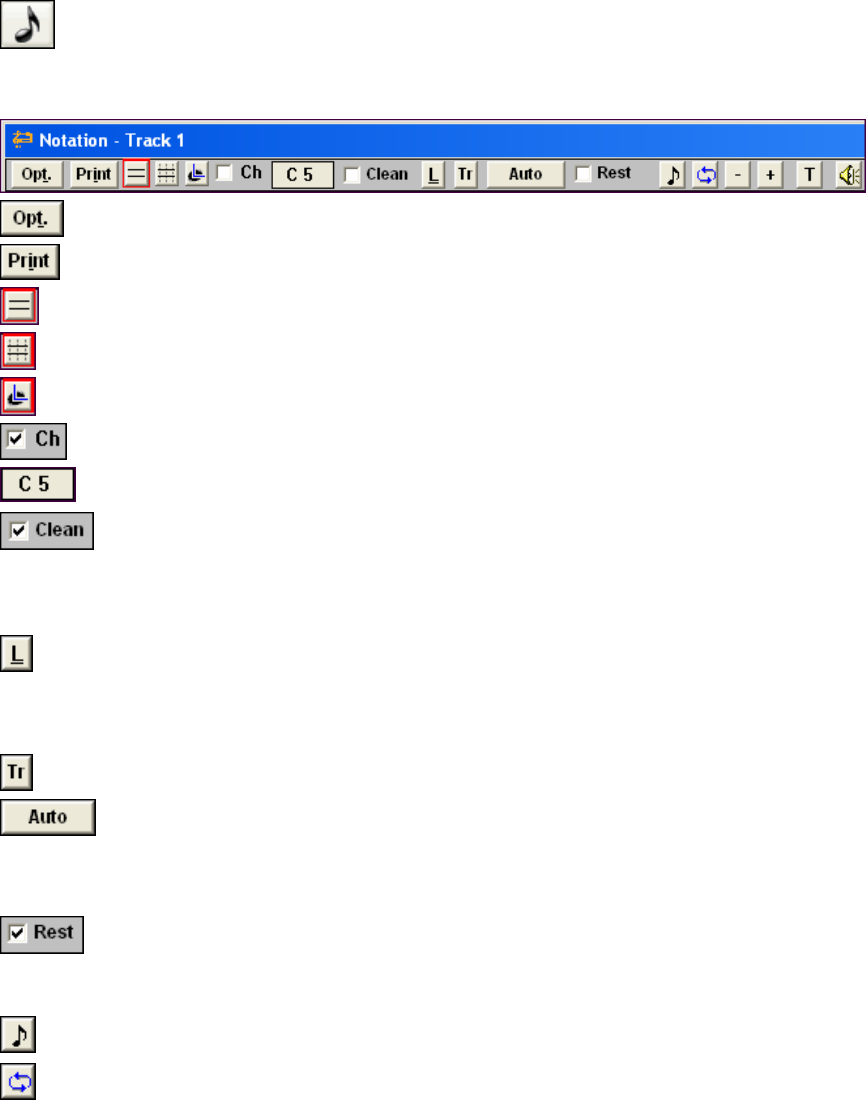
Chapter 9: Notation and Printing
110
Chapter 9: Notation and Printing
Notation
Overview
The Notation window displays the notes of a MIDI track on a staff and lets you print music on your
printer. Open the Notation window with
the “eighth-note” button, with the Window | New | Notation menu option, or with the keystrokes Alt+F2.
Notation Window Tool Bar
Opens the Notation Window Options dialog where user settings and preferences are made.
Launches the Print Options dialog to print music.
Opens the Standard notation mode window.
Opens the Editable notation mode window.
Opens the Staff Roll notation mode window.
Enables Chord Entry mode to type chords in the notation.
Name of the current note or the note that will be entered.
The Clean checkbox put the standard notation into Clean Mode. Clean Mode will clean up the
notation in certain situations where there are notes played very close together and are within a
certain interval of each other. The clean option makes the notation more readable when there are a
lot of grace notes (notes leading up or down to the next note) or glitch notes, which are notes that
are short in duration and have a low velocity.
Opens Lyric Edit mode. In the Notation window, lyrics can be entered into a track that already
contains the notes of a melody. When you switch into Lyric Edit mode, a gray edit box will appear
near the top of the Notation window. The closest note or chord to the current time location will be
highlighted.
The Track button lets you choose which track to view.
The Duration Button lets you select the duration of the note. The default duration is Auto. If Auto
is the currently selected duration, the duration will be automatically set by the program so the
note’s duration lasts up to the next note in the measure or to the end of the measure, which ever is
closer.
The Rest checkbox lets you insert a hard rest onto the notation window to force a rest to be shown
at a particular location. For example, if there is a half note at the beginning of a measure, you can
cause it to be displayed as quarter note by inserting a hard-rest on the 2nd beat of the measure.
Hard rests are shown in blue. The Rest checkbox only remains checked until you insert a rest.
Switch between a Notation Window and a Lead Sheet Window.
The Loop Screen button will play the music of the current notation screen in a loop.
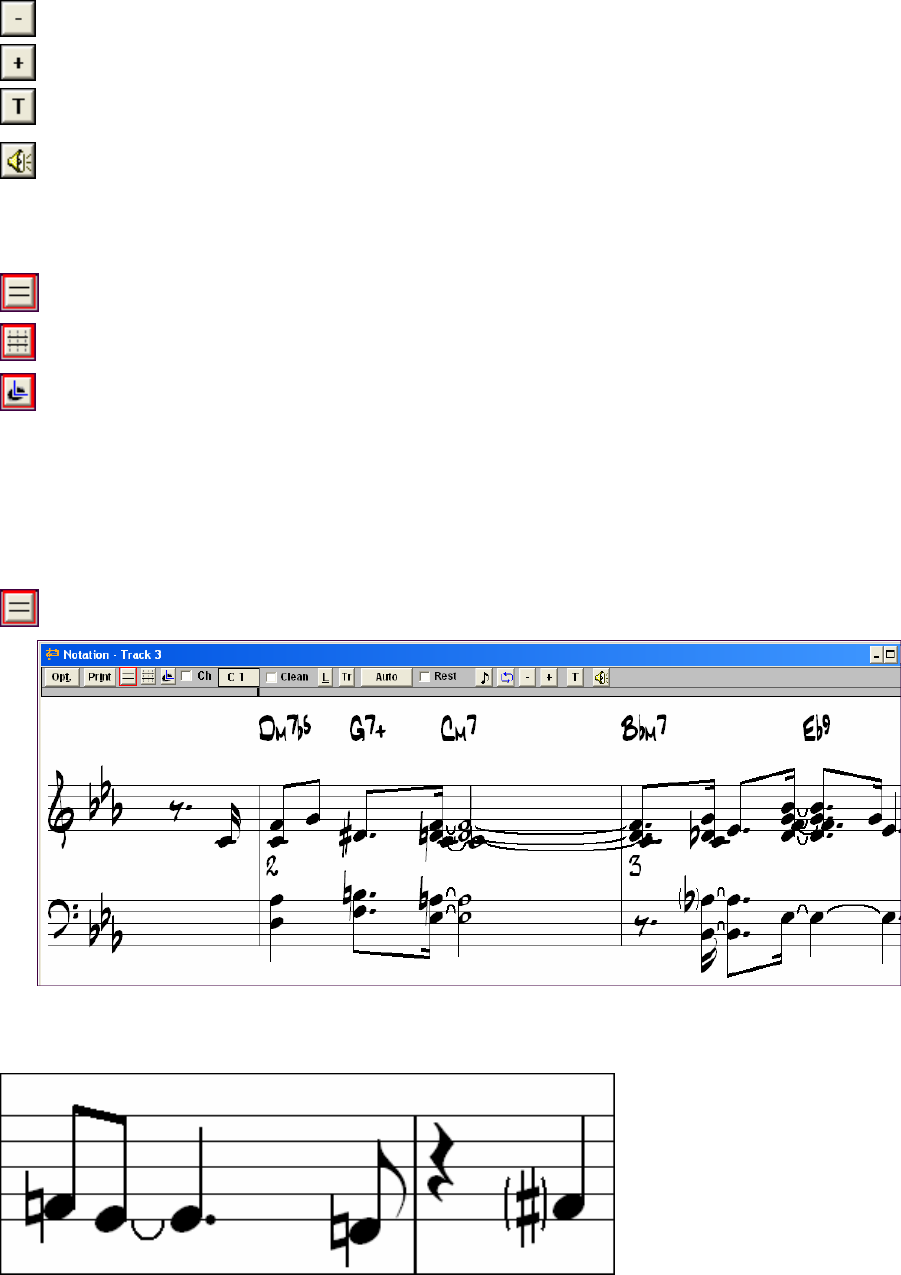
Chapter 9: Notation and Printing 111
The Zoom Out button reduces the size of the Notation Window’s font.
The Zoom In button increases the size of the Notation Window’s font.
The Section Text button lets you place a text event at any location on the staff window. When you
press this button, you’ll see a dialog box with a list of any existing text events.
The Scrub Mode button plays the notes in the song as you drag the mouse horizontally over the
notation. This can be helpful for learning difficult parts, or for examining recorded tracks for
glitches or wrong notes. Click the scrub mode button and the mouse cursor will change to speaker
icon.
There are three Notation window modes, each with its own toolbar button.
Standard Notation mode,
Editable Notation mode, and
Staff Roll Notation mode.
By default, the Notation window is in Standard Notation mode, which displays the notes as regular music with chord
symbols and lyrics.
Editable Notation mode also displays standard notation but allows you to edit the notation. You will see standard
notation with vertical gray lines that represent possible note locations, either eighth note triplets or sixteenth notes.
The Staff roll mode displays the notes as note heads (no stems) with optional duration and velocity lines. The Staff
roll mode also contains gray vertical lines across the staff.
Standard Notation Mode
RealBand Notation window in Standard Notation mode.
Standard Notation mode is a convenient way of displaying a track as regular music on a staff with chord symbols
and lyrics.
The Notation window will draw
brackets around an accidental (#)
in a situation where the same note in
the previous bar was an accidental
outside the current key.
Chapter 9: Notation and Printing
112
This is a courtesy which helps to remind you that the note is now played as expected within the current key.
Entering Chord Symbols
Chords symbols can be entered in the notation for each beat of a song. A beat is equal to the numerator of the
current time signature. For example, if the song is 2/4, you could enter up to 2 chord symbols per bar. If a song is
6/8, you could enter up to 6 chords per bar (although you likely won’t want to enter that many).
Chords are typed in from the computer keyboard using standard chord symbols like C or Fm7 or Bb7 or Bb13#9/E.
Chord entry is enabled when the “Ch” checkbox is checked in the Notation window.
Note: Chords can also be entered by typing them in the Chords window.
To start typing in chords in a Notation Window:
− Rewind to the beginning of the song.
− Enable chord entry by clicking on the “Ch” checkbox.
− You may move around by cursor arrow Keys, Enter key, or mouse pointer click on the time indicator at the top
of the Notation Window. The time line moves 2 beats at a time in response to the left and right cursor keys.
When you have the time indicator at or close to the beat where you want to enter a chord, you then type the name of
the chord. Note that the chord entry works the same as Band-in-a-Box in that the chord you type will go to the first
beat in a 2 beat “cell.” For example, if the time is 1:02:00 and you type the letter c the C chord will be placed on
beat 1. You can enter a chord on beat 2:00:00 with a comma as discussed below.
For example type c6 to get the C6 chord. Note that you should never have to use the Shift key, as RealBand will
sort this out for you.
− Use b for a flat, e.g., Bb7.
− Use # or 3 for a sharp, e.g., F#7. You can actually type F37 to get F#7; RealBand will sort out the case, saving
you the effort of using Shift+3 to type the # symbol.
− Use / for slash chords with alternate roots such as C7/E, C7 with E bass.
− Use a comma to enter two chords in a row. For example, we would type Ab9, G9 to enter two chords on
consecutive beats.
− You can use Ctrl+Delete or the comma key to delete a chord.
The chords are shown in the Notation window above the treble clef:
| C6 AM7 | DM7 Ab9 G9 | C6/E | A7#9 |
In the above example, the | symbol shows roughly where the bar lines would be if these chords were entered in a
Notation window. The sequence of keystrokes to enter all the chords in the above line would be:
w c6> am7> dm7> ab9,g9> c6/e> > a739 Enter
W indicates rewind, the > indicates cursor key to the right, and Enter indicates pressing the Enter key.
Hint: The fastest way to type in chords is to use your left hand to type in the chords. Your right hand stays on the cursor
keys (or mouse) to advance the time indicator to the next bar/beat after you've typed in the chords
Entering Lyrics
The [L] button in the Notation window puts the notation into a mode in which you can enter lyrics. Lyrics are
stored as individual track events, which can be accessed in the Event List window like any other events.
In the Notation window, lyrics can be entered into a track that already contains the notes of a melody. In Lyric Edit
mode, a gray edit box will appear near the top of the Notation window. The closest note or chord to the current time
location will be highlighted.
Lyrics are entered by typing a word in the edit box and then pressing Enter. When Enter or Tab is pressed, the
Notation window will advance to the next note or chord of the melody. You can then continue typing lyrics and
pressing Enter to advance forward into the melody. Ctrl+ ← (left cursor arrow) lets you back up to the previous
note or chord, and Ctrl+ → (right cursor arrow) lets you advance to the next chord without saving the contents of
the edit control.
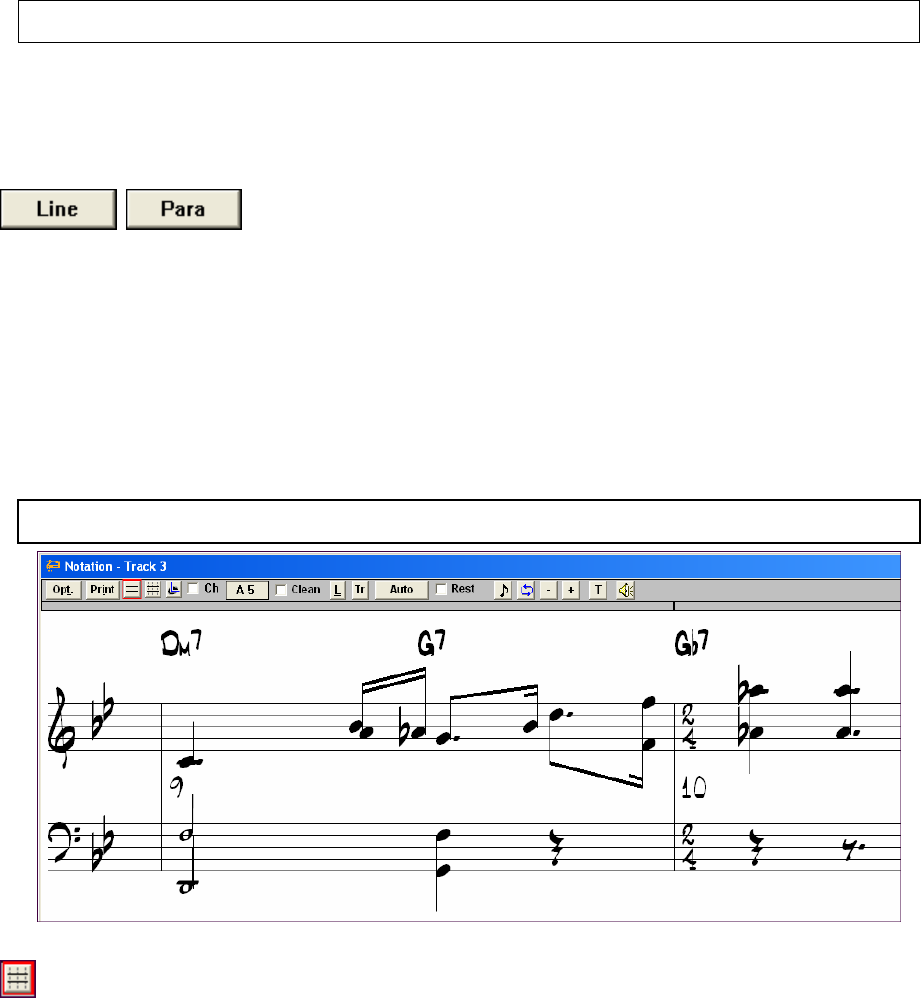
Chapter 9: Notation and Printing 113
Note: When creating .KAR files you enter lyrics in RealBand as usual, and if you save as a .KAR file the lyrics will be
converted to the KAR format.
Unlike the .KAR format RealBand lyrics should not be preceded by spaces. Syllables are indicated with dashes, and
paragraphs and lines are indicated with backslashes and forward slashes at the end of a line or paragraph.
Multi-Syllable Words: If a word has two or more syllables, you should follow the syllable with a dash. For
example, the word “crazy” would be entered as two separate lyric events, cra- and zy.
Ending a line when lyrics are displayed in Big Lyrics window:
The Line and Para buttons appear when Lyrics mode is selected in the Notation window. These two convenient
buttons let you enter line breaks (/) or paragraph breaks (\) when entering lyrics.
To end a line and start a new line, enter a break (line or para) at the end of the last lyric in a line. For example, if a
word ends with a backslash, e.g., “town\,” then the next lyric after “town” will be displayed on a new line in the Big
Lyrics window.
If you plan on saving as a .KAR file, you can use a “Para” backslash to indicate the end of a paragraph, and a “Line”
forward slash to indicate the end of a line. In RealBand and in some Karaoke players, both the \ and / characters are
treated the same way.
Time signature display: Time signature changes that occur during the song (1/4 through 4/4) will be displayed in
the Notation window, Lead Sheet window, or printout.
Note: Time signature display works in non-editable Notation mode with engraver spacing enabled. Time signatures are not
displayed in Staff Roll mode.
Time signature change at bar 10 in Standard notation display.
Editable Notation Mode
Editable Notation mode is the same as Standard Notation mode, but notes can be inserted by clicking on the staff
with the left mouse button, moved by dragging with the left mouse button, or edited by clicking on a note head with
the right mouse button.
Broken vertical gray lines across the staff show the position for each note subdivision in either eighth note triplets or
sixteenth notes.
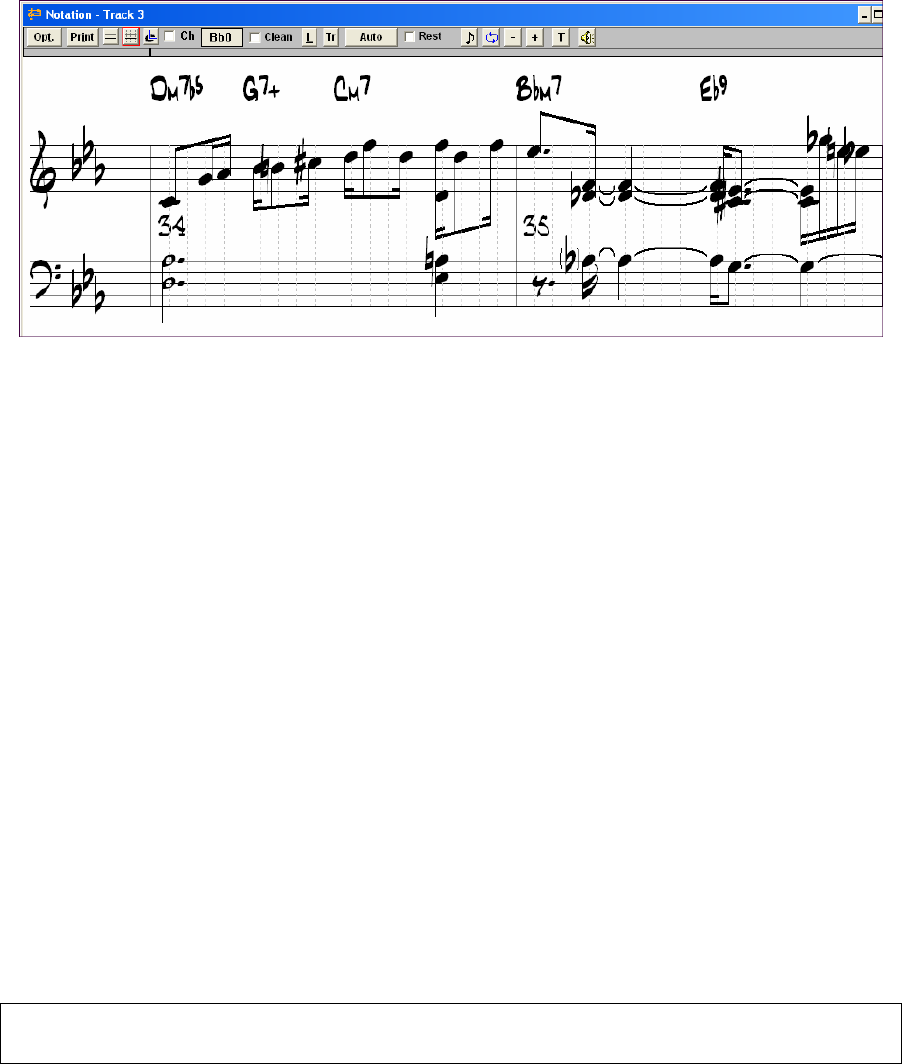
Chapter 9: Notation and Printing
114
Editable Notation window in 16th note (even) resolution.
Moving Notes
Notes can be moved via drag and drop. To move a note, move the mouse cursor over an existing note and then click
and hold the left mouse button. The mouse cursor will change to a different shape.
While keeping the mouse button pressed, move the mouse cursor over to the location you wish to drop the note and
then let go of the mouse button. The note will be moved to the place you dropped it. Certain areas of the screen are
not valid locations to drop a note. The mouse cursor will change to a circle with line through it to indicate an invalid
location. If you try to drop a note in an invalid location, nothing will happen.
When you click on a note with the left mouse button, and drag the mouse without releasing the left mouse button,
you will hear the note being played as you move it up and down the screen. The note’s pitch will be increased or
decreased chromatically as you move it up/down the screen.
Entering Notes
Notes can be inserted simply by clicking on the staff in an appropriate location. You will see the name and octave
of the current note location in a box at the top of the window. This helps if you are inserting a note above or below
the grand staff. You can also insert notes via the Piano or Guitar window as discussed later in this section.
When inserting a note, holding down the mouse button and then pressing the Shift key (click+Shift) will make the
note 1 half-step sharper than the position that you click on. Holding down the Ctrl key and then clicking
(Ctrl+click) will make the note 1 half-step flatter, and holding down the Alt key will make the note a natural. Hold
the key down until after you release the mouse button.
You can also insert notes by clicking on the Piano or the Guitar window. If you click on the Piano or Guitar
window, notes will be inserted into any open Notation window at the current location in the Notation window. For
example, if you click on middle C of the Piano keyboard, a middle C will be inserted into the Notation window.
There is a 1-peg hot key in the Notation window to move current time forward or backward by 1 peg (normally a
16th note). Alt+left arrow moves the current time backward by 1 peg. Alt+right arrow moves it forward by 1 peg.
This makes it easier if you are using the on-screen piano for entering notes into the Notation window.
Note: By default, you must hold the Ctrl key before clicking on the Guitar fretboard to insert a note into a Notation window.
If the “Send Notes To Notation Windows” option in the Guitar Settings dialog is enabled, holding the Ctrl key won't be
required, but be careful not to accidentally insert a note when using the mouse to switch to the Guitar window.
Notes can be deleted by holding down the Delete key and then clicking over the note you wish to delete.
Editing Notes
Notes can be edited by clicking on the note with the right mouse button to launch a menu of editing commands.
Select Edit Note to open the NOTE dialog.
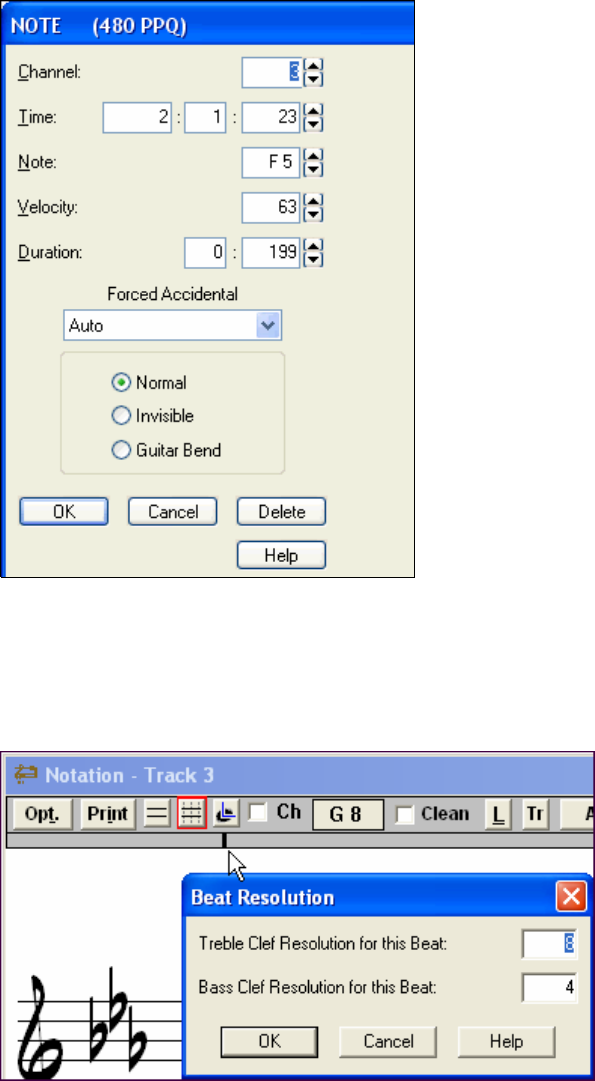
Chapter 9: Notation and Printing 115
This dialog allows editing of:
− The MIDI channel for the note.
− The exact time location.
− Note name.
− Velocity of the note.
− Duration of the note in beats and ppq.
Forced Accidental - If a note is being displayed as a sharp, but
you want it to appear as a flat (or vice versa), you can force
that here.
Note Type - You can choose for the note to be Normal,
Invisible (note will sound but will not appear in regular
notation), or Guitar Bend (a B will appear above the note).
Note that the guitar bend is for notation only and does not
affect the sound of the note.
The [Delete] button removes the note.
Micro-Resolutions
You can change the resolution for any individual beat of a song to a different resolution by clicking with the right
mouse button above that beat on the Notation window’s time line. For example, if you click on the time line above
the 2nd beat in a measure, a dialog box will pop up which will let you set the resolution of the current beat for both
clefs. If you select a resolution of 8, then 32nd notes can be displayed. You can even select a resolution as high as
32, which would allow 128th notes to be shown.
When you choose a micro-resolution RealBand will insert a special controller event into the track as a means of
storing the resolution. If you set the resolution to the same setting as the Options dialog’s resolution setting, then
micro-resolutions won’t be used, and the special controller for the current beat and clef will be deleted.
Highlighting a section of the Notation window
When the Notation window is in Editable Notation Mode, you can highlight a section of the Notation window, so
that you can cut or copy the section.
To highlight a section of the Notation window:
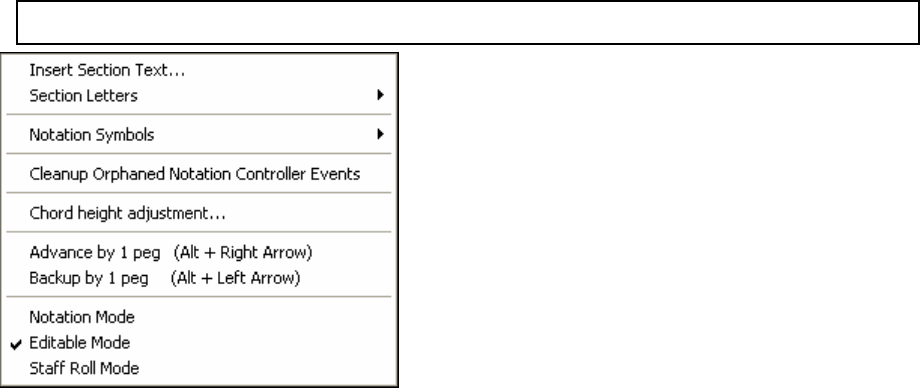
Chapter 9: Notation and Printing
116
1. Click and hold the left mouse button at the upper right corner of the rectangular section you want to highlight.
Make sure you don’t click on any existing notes, and make sure you don’t release the left mouse button until
you are finished highlighting.
2. Move the mouse down and to the right to form a rectangle. You will see a rectangular section of the Notation
window become highlighted in reverse.
3. When you’ve finished highlighting release the left mouse button.
During the process of highlighting a section, you can highlight a section beyond the current notation screen by
moving the mouse cursor beyond the right edge of the Notation window. When you do this, the Notation window
will advance to the next screen. The Notation window will continue advancing until you move the mouse cursor
back inside of the Notation window. You should move the mouse cursor back inside the notation window when it
has reached the screen that contains the last measure of the section you wish to highlight. Then you can move the
mouse cursor to the left or right within the Notation window to adjust to make any final adjustments to the
highlighted section.
The highlighted area will include any notes on the first and last pegs (vertical beat division lines) of the highlighted
section. The minimum highlighted section contains two pegs.
Shift+click to adjust the highlighted section of notation
Shift+click (Shift key + left mouse button) support makes it easy to tweak the beginning or end of the highlighted
area.
- If you Shift+click before the start of the From/Thru range, or after the end of the From/Thru range, the
highlighted area will be extended.
- If you Shift+click within the From/Thru range, the range will be reduced, and the location you clicked on will
become either From or Thru depending on which boundary was closer to where you Shift+clicked the mouse.
- If you keep the left mouse button held after the Shift+click, and you move the mouse you can adjust the
boundary of the range while moving the mouse.
Shift+click works in terms of adjusting the top and bottom of the highlighted area, and this affects the range of
notes selected.
Once you have highlighted a section of the Notation Window, you can use the Edit | Cut or Edit | Copy commands
to cut/copy a section of notation. The From/Thru values in the Cut or Copy dialog will automatically be set to
reflect the highlighted area. You can then cut or copy as you would normally.
When you cut or copy after having selected a section of the Notation window and you press [OK], RealBand will
ask you if you wish to apply a Data Filter based on the highlighted range of notes. If you answer “Yes” a Data
Filter will pop up which will be set to include notes based on the vertical highlighted range in the Notation window.
Right Click Pop-Up Menu
This menu of notation commands pops up when you right click on the Editable Notation window.
Note: If you right-click on a note head you will see this menu with two additional commands at the top, Edit Note and
Delete Note.
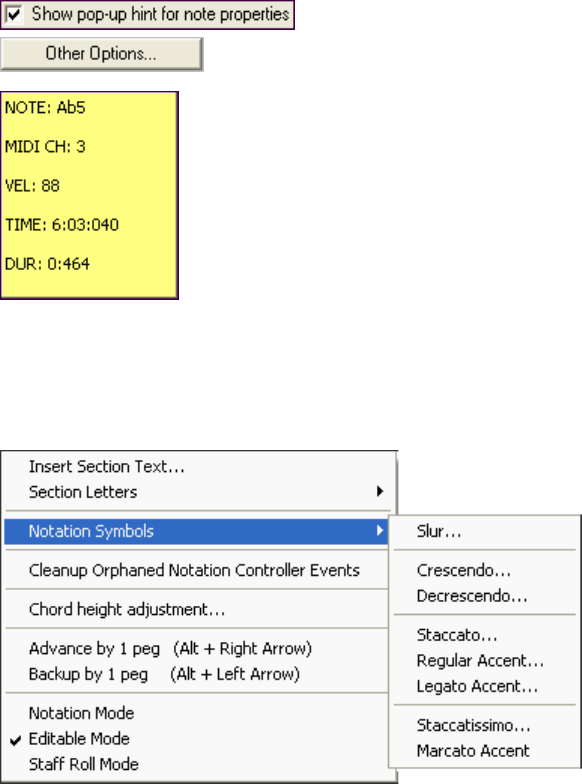
Chapter 9: Notation and Printing 117
Insert Section Text – Launches a dialog that lets you insert a Section Text event.
Section Letters – A submenu will let you select a section letter from A – Z, or Remove, which removes the
nearest section letter to where you right-clicked.
Cleanup Orphaned Notation Controller Events – This will automatically remove stray notation
controller events, such as any that no longer have notes associated with them.
Chord Height Adjustment – Lets you make an adjustment to the vertical position of the chord symbol at
the current beat.
Advance by 1 Peg – Advance the time by 1 peg.
Backup by 1 Peg – backup the time by 1 peg.
If you right clicked on a note, there will also be a menu item at the top that lets you edit the note.
“1-Peg” Notation Hot Key
There is a 1-peg hot key in the Notation window to move current time forward or backward by 1 peg (normally a
16th note). Alt+left arrow moves the current time backward by 1 peg. Alt+right arrow moves it forward by 1
peg. This makes it easier if you are using the on-screen piano for entering notes into the Notation window.
Pop-Up Note Properties Display
When in Editable Notation mode,
if the Show pop-up hint for note properties setting is enabled in the
Other Notation Options a pop-up hint will appear if you move the mouse
cursor over a note and stop.
The hint window shows the note's properties - note name, MIDI channel, velocity, start
time, and duration.
This lets you quickly see a note's properties without having to bring up the edit dialog by
right-clicking on the note.
Notation Symbols for Expression and Articulation
The Notation window now supports many new symbols including section letters [A, B, etc.], slurs, legato, accents,
staccatos, crescendos and more!
The Notation Symbols are entered from the Notation Event dialog, which is accessed from the right-click menu in
the Editable Notation window.
This dialog lets you insert (or remove) notation symbols.
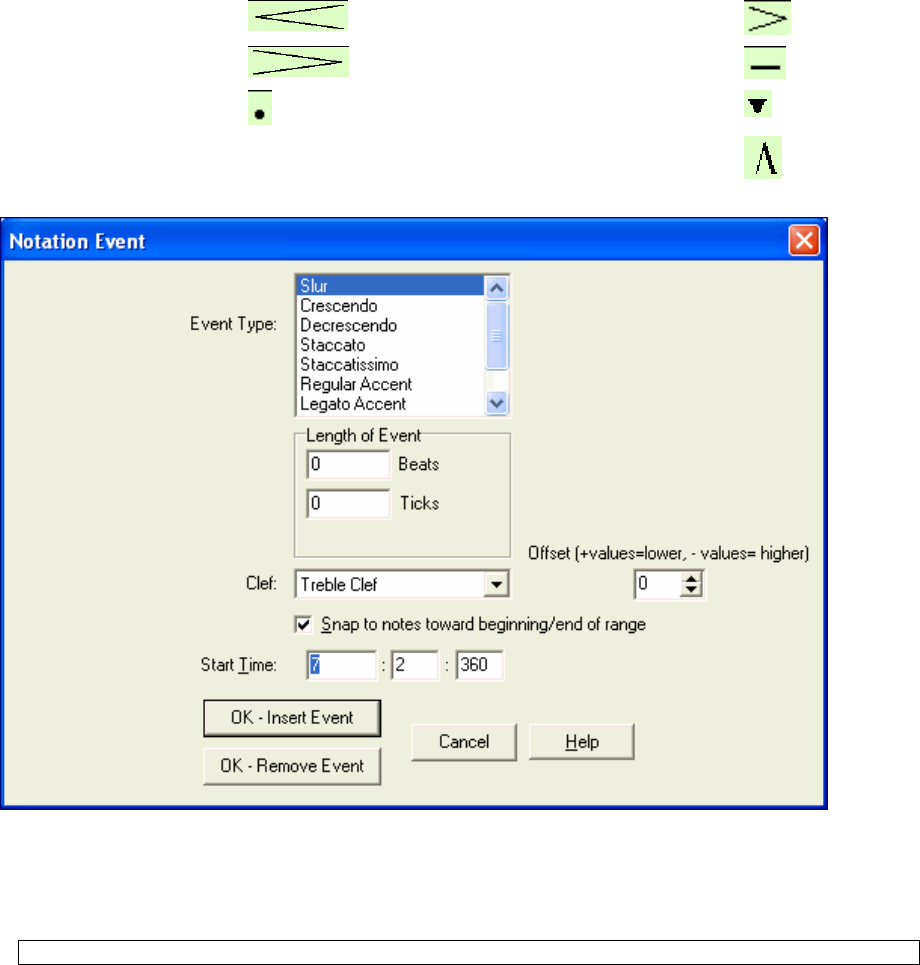
Chapter 9: Notation and Printing
118
The symbols supported are:
Slurs And other accents:
Crescendo − Regular
Decrescendo − Legato
Staccato − Staccatissimo
− Marcato
Choose the event type (slur, decrescendo, etc.) in the Notation Event list box.
The Length of Event field determines the length of a slur, crescendo, or decrescendo. The length is specified in
beats and ticks. If an event is a “single-peg” event, such as a staccato or accent, then this field will cause multiple
events to be inserted if the range is greater than zero (and the range spans multiple pegs). If you had highlighted an
area of the Notation window prior to right-clicking on it (to launch the pop-up menu and choose the notation
symbols menu item) then this field is set based on the length of the highlighted area.
Note: The highlighted area does not actually include the very last peg at the very edge of the highlighted area.
The Clef field, if present, indicates the clef in which the event will be inserted (or removed from). Most events
affect only one clef at a time, and therefore you must choose the clef and this field will be preset based on where you
had initially right-clicked with the mouse on the Notation window (you did this to get the pop-up menu that launches
this dialog). For example, if you had right-clicked on the treble clef, then this will be set to treble.
The Offset field, if present, lets you make adjustments to the vertical position of an event.
The Start Time field is the start time of the event (in measures:beats:ticks).
OK – Insert Event – exits this dialog and then inserts the event into the notation track.
OK – Remove Event – exits this dialog and then REMOVES the event (if it exists in the specified time range) from
the notation track.
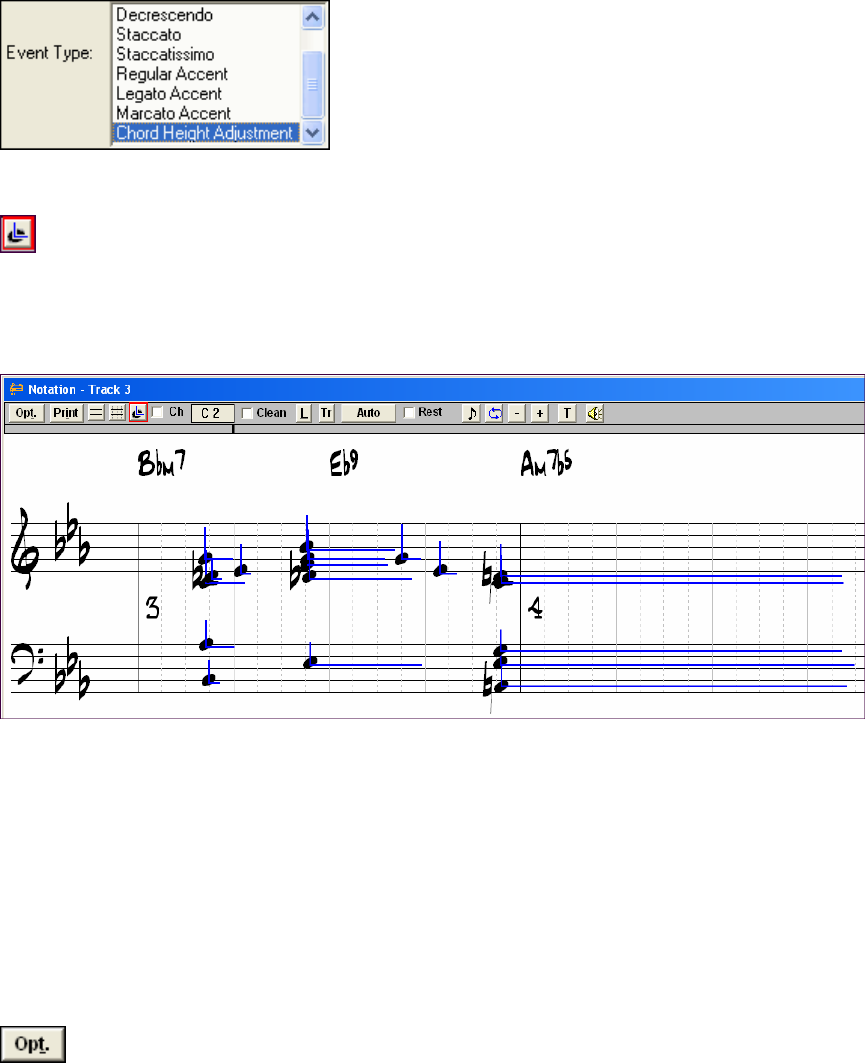
Chapter 9: Notation and Printing 119
Chord Height Adjustment
The Notation Event dialog also lets you make an adjustment to the chord symbol height for a beat, by choosing the
Chord Height Adjustment event type.
This setting allows for adjustment of the vertical position of individual chord symbols. This is useful when chord
symbols overlap other aspects of the notation.
Staff Roll Notation Mode
Staff Roll mode is similar to a piano roll, except the notes are shown on a grand staff. Its purpose is to allow for
easy graphical editing of notes, with the Staff Roll you will be able to graphically edit sequences much easier than if
you were using a regular piano roll or an ordinary notation window.
Notes are shown as black dots (note heads) on the staff. Note stems are NOT shown.
If the Show Note Durations option is enabled, the durations of the notes are shown as horizontal lines. The
horizontal duration lines are drawn a little higher or lower if the note is a sharp or a flat, which helps you be aware
of rare situations where notes a half step apart overlap each other. Notes are shown with sharp, flat, or natural
symbols depending on the key signature of the song. Notes are shown exactly where they occur. They are not
quantized.
You can adjust the velocity and duration of a note by clicking on a note head with the right mouse button and then,
while holding the button down, dragging the mouse cursor either vertically or horizontally. The velocity or duration
will be changed based on the location where you release the right mouse button.
You can step forward or backward in the song by one chord by pressing the keypad period (.) and keypad zero (0)
keys. The notes will be highlighted in red and sustained.
Notation Window Options
The Options button launches the Notation Window Options dialog.
The “Bars Per Line – Song” setting determines the horizontal resolution of the screen. For example, with 2 Bars Per
Line, the width of the screen is equal to 2 Bars in length. You can increase this setting to 16 Bars Per Line, although
the screen may look unusual at this extreme since the size of the note heads remains the same regardless of this
setting.
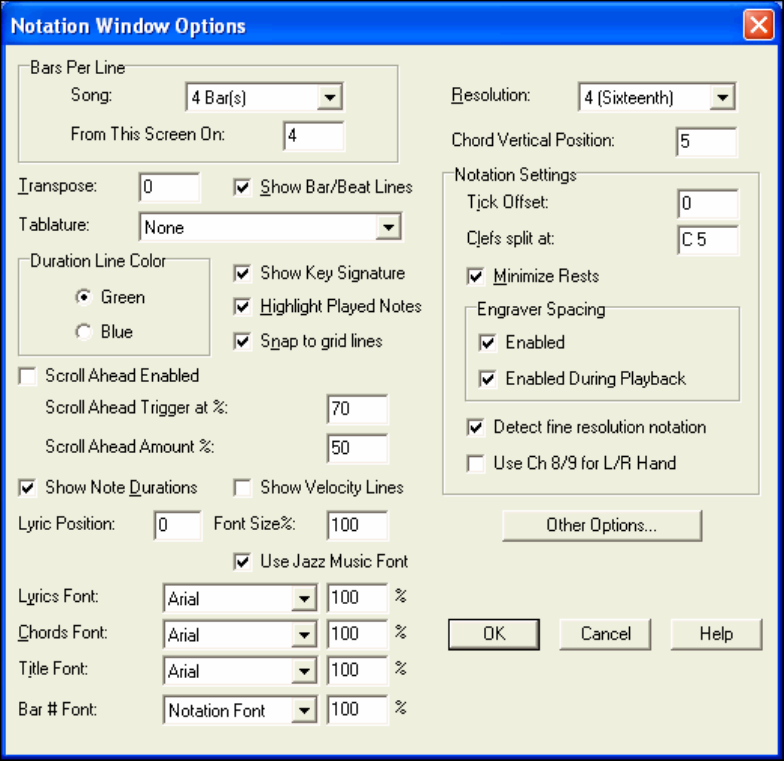
Chapter 9: Notation and Printing
120
You can also use this setting to make the resolution equal to between 1 and 4 beats rather than complete bars. This
is mainly for editing purposes. If you use beats with this setting, the program will ignore any “Bars Per Line -| From
This Screen On” markers in order to display the partial bars.
The “Bars Per Line - From This Screen On” setting lets you change the horizontal resolution from this screen on.
This will cause the program to insert a special Bars Per Line marker (Controller Event) into the sequence. This is
useful if you have some sections of the song that you would like to be displayed with a different number of Bars Per
Line than the overall Song setting. The Notation window will then display the number of bars you selected from the
current screen on.
The “Resolution” setting determines how many vertical grid lines will be drawn for each beat. For example, with a
resolution of 1, just one line will be drawn per beat. With a resolution of 4, 4 lines will be drawn, with 1 line being
the beat line drawn in a solid color and the other lines being dashed lines representing sixteenth notes in 4/4. If
you're displaying Jazz Swing or Shuffle music that has a triplet feel to the eighth notes, make sure to set the
resolution to =3 (triplets). This will display the 8th notes and other aspects of Jazz Swing music correctly. You can
also set micro-resolutions by clicking on the time line above any beat with the right mouse button.
The “Chord Vertical Position” setting adjusts the vertical position in which the chord symbols are displayed, which
is useful when chord symbols overlap other notation. This setting can range from 1 to 10, with 1 being nearest to
the staff.
The “Transpose” setting lets you adjust the Notation window to display notes either higher or lower than their actual
pitches. For example, if you're working with guitar music, you could set this to +12 and the guitar music will be
displayed an octave higher, which is the way guitar music is normally notated.
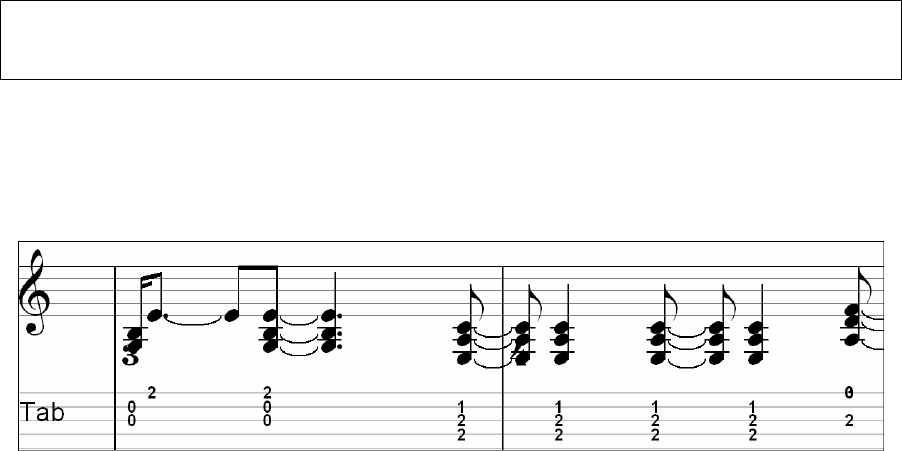
Chapter 9: Notation and Printing 121
Hint: This setting is also useful for displaying music for non-concert instruments such as trumpet or saxophone. Trumpet
players (and other Bb instruments) should set transpose to +2; Alto Saxophone (and other Eb instruments) should set the
transpose to -3. The music is then displayed in the correct key for the instrument, but plays in the concert key to the MIDI
card.
The “Show Beat/Bar Lines” checkbox, when unchecked, will cause the staff window to be drawn without beat or
bar lines (Staff Roll mode only, not in Standard Notation mode).
The “Tablature” box gives a choice of tablature for guitar and additional fretted instruments - bass, ukulele,
mandolin, and banjo. The fretboard tablature will show where the bass clef is normally located. Tablature is only
shown in Standard Notation and Editable Notation mode. A track displayed with tablature must be a valid multi-
channel guitar track, or the tablature won't be displayed properly.
Notation window showing banjo tablature.
“Duration Line” Color selects the color of the horizontal lines that represent note duration and the vertical lines for
note velocity in the Staff Roll notation mode.
The Key Signature is shown if the “Show Key Signature” option is enabled.
If the “Highlight Played Notes” checkbox is checked, notes will be highlighted in red as the notes are played when a
song is playing.
If the “Snap to grid lines” checkbox is checked, the inserted note will be lined up with the closest grid line
(quantized). The duration of inserted notes is determined by the “Inserted Note Defaults” settings in the Other
Notation Options.
The Notation window can be set to scroll ahead of the music without interfering with your view of the current
notation. Use the “Scroll Ahead Enabled” checkbox to toggle this feature on and off.
The “Scroll Ahead Trigger at %” setting adjusts the location where the screen will scroll. A setting of 70 would
cause the notation to scroll when the 70% of the current screen has played.
The “Scroll Ahead Amount %” determines how much the screen will scroll, based on the Bars Per Line setting. For
example, a setting of 50% with the Bars Per Line setting at 4 Bars would scroll the notation ahead by two bars.
If the “Show Note Durations” checkbox is checked, then in Staff Roll Mode the durations of notes will be shown as
either green or blue horizontal lines depending on whether the “Duration Line Color” is set to green or blue.
The “Show Velocity Lines” setting causes the Staff roll mode to display vertical lines in the same color as the
duration lines. These lines represent the velocity of the notes, the higher the velocity the longer the line. The
velocity lines are roughly the height of a staff when a note has a velocity of 127.
The “Lyric Position” lets you adjust the vertical position of the lyrics. When set to zero, the lyrics are drawn
between the staves. The range is -64 to 64.
The “Font Size” setting adjusts the size of the Notation window’s font. The default size is 100%. You can increase
or decrease the font size by changing this setting. You can also use the Zoom In [+] and Zoom Out [-] buttons at the
top of the Notation window.
The “Use Jazz Music Font” setting enables the Jazz Music font for notation instead of the standard font. The Jazz
font will give your lead sheets the appearance of a Jazz lead sheet rather than having a “Classical” appearance.
The “Lyrics Font,” “Chords Font,” and “Title Font” let you choose a different font for lyrics, chord symbols, and a
song title. The percentage fields are used by RealBand to determine the size of the font (rather than the size in the
font selection dialog).

Chapter 9: Notation and Printing
122
The Bar # Font setting lets you choose either the Notation Font, or a different font of your choice. The percentage
setting lets you adjust the percentage relative to the default size.
The following group of settings is for Standard Notation mode only, and don't have any effect in Staff roll mode:
The “Tick Offset” lets you display the music ahead or behind the beat. If you have a tendency to play the music
ahead of the beat, you can specify a setting from 1 to 120 to have the music displayed forward in time. A setting
from -1 to -120 will cause the music to be displayed ahead of the beat (but not before the beginning of the song).
120 ticks equal one quarter note for this setting regardless of the current PPQ setting. Generally you won't need to
use this setting since the notes are rounded when being displayed in standard notation.
Hint: The notation of Jazz Swing music will often be improved by a Tick Offset setting of about -5 because Jazz music is
typically played a little after the beat.
The “Clefs Split At” setting determines the split point for placing notes on the Bass or Treble clef. The default
setting is C5, which is middle C. For example, you can use a higher split point, such as C6 if you want some notes
up to a G above middle C to be displayed on the bass clef with ledger lines instead of on the treble clef. If the split
point is above middle C, and a note in the music is high enough that any of the ledger lines above the bass clef
would overwrite the treble clef, the note will be placed on the treble clef.
The “Minimize Rests” checkbox, when checked, will cause RealBand to display the music with minimal rests. Use
this setting if notes are displayed as shorter than you intended. For example, if eighth notes are displayed as
sixteenth notes because you recorded them staccato.
The “Engraver Spacing” setting, when enabled, will improve the appearance of the standard notation in situations
where the Notation window is crowded. However, you may notice a significant decrease in the speed of screen re-
draws. You may want to only enable this setting before printing if you find that the screen redraws too slowly on
your computer. When in Editable Notation, the spacing will not be drawn using engraver spacing.
There are now two Engraver Spacing settings, “Enabled” and “Enabled During Playback.” If the “Enabled”
checkbox is checked, then engraver spacing is enabled, but won’t be displayed during playback unless the “Enabled
During Playback” checkbox is checked. If the “Enabled” checkbox is unchecked then engraver spacing will be
totally deactivated.
The “Detect fine resolution notation” setting will allow the Notation window, in Standard Notation Mode (non-
editable mode) to detect micro-resolutions automatically. It will detect notes a short as 32nd notes in most
situations.
When this setting is enabled the program will count the number of distinct chords (or individual notes) per beat and
if there are more chords played in the beat than the current Resolution, the program will display the beat at a high
enough resolution to show all of them separately rather than lumped together.
For example, if the Resolution is set to 3 and 4 chords were played on a beat the program will display 4 chords as
16th note chords for that beat even though the song’s resolution is 3.
The “Use Ch 8/9 for Left/Right Hand” checkbox will cause the standard notation to display, within reason, notes on
channel 8 on the bass clef and the notes on channel 9 on the treble clef. Notes on channels other than 8 or 9 will be
displayed on the clef that they normally would be shown.
Other Notation Options
There are some additional settings that can be accessed by pressing the [Other Options…] button.
The “Duration %” setting causes the durations to be set to a percentage of the currently selected duration. For
example, if the current duration is Whole, and you set the percentage to 50, the duration will be 50% of a Whole
note.
The “Channel” and “Velocity” settings determine the MIDI Channel and velocity of inserted notes.
When the “Use Existing Channel” setting is enabled, and you insert a note in the Notation window, RealBand will
intelligently determine the channel number of inserted notes instead of using the Channel setting in the Other
Notation Options dialog. When this setting is disabled, the Channel field is used for inserted notes.
If this setting is enabled, and you then insert a note in the Notation window, RealBand will first try to use the forced
MIDI channel in the Tracks window to determine the channel of the note you're inserting. If there is a forced MIDI
channel setting for the track in the Tracks view, then RealBand will set the channel of the note you are currently
attempting to insert so that its channel is the same as the forced MIDI channel.
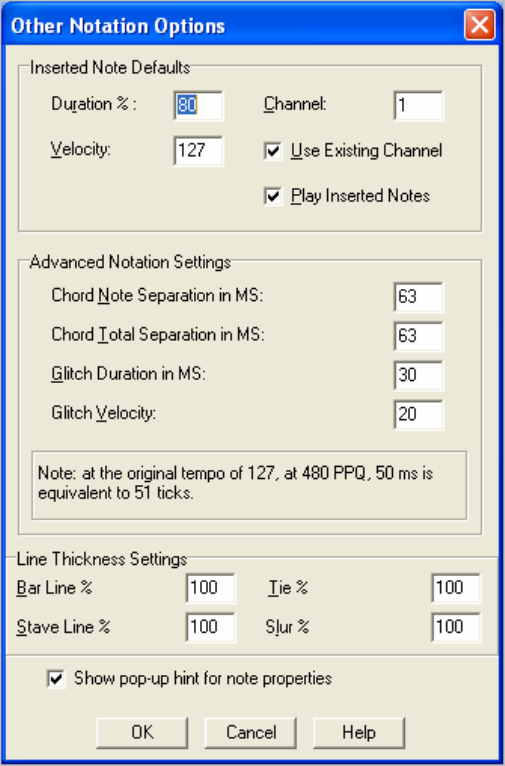
Chapter 9: Notation and Printing 123
If this setting is enabled, but there is no forced MIDI channel, i.e., the Ch field in the Tracks window is set to zero,
RealBand will search the track for the nearest MIDI event in the track that is located before the time of the note you
are currently attempting to insert. If a MIDI event was found in the track, then RealBand will set the channel of the
note you're currently attempting to insert so that its' MIDI channel matches the MIDI channel of the event which
was found.
If this setting is enabled, but there is no forced channel, and a MIDI event isn't found in the track, then RealBand
will use the “Channel” field of the “Inserted Note Defaults” section in the Other Notation Options dialog.
If the “Play Inserted Notes” checkbox is checked, notes that you insert will sound briefly as they are inserted so you
know that the note is correct.
These are advanced settings for standard notation mode:
- Chord Note Separation in MS is the maximum time span in milliseconds allowed for adjacent notes within a
chord when “Detect fine resolution notation” is enabled. The default setting is 63 milliseconds, around 15 ticks at
a tempo of 120 bpm and a resolution of 120 PPQ. In this case notes further than 15 ticks away will be detected as
separate chords. Increasing this setting will increase the amount of time allowed between notes within each
chord.
- Chord Total Separation in MS in the maximum time span in milliseconds allowed for the entire chords when
“Detect fine resolution notation is enabled.” The default setting is 63, about 15 ticks. In this case, any note
beyond 15 ticks from the earliest chord will be detected as a new chord.
Chapter 9: Notation and Printing
124
- Glitch Duration in MS is a setting used by the clean routine to determine which notes are glitches and which
notes are valid. Increasing this setting increases the likelihood that notes will be detected as glitches when clean
mode is checked and the notation is in non-editable Notation mode.
- Glitch Velocity is a setting used by the clean routine to determine which notes are glitches and which notes are
valid. Increasing this setting increases the likelihood that notes will be detected as glitches and not shown when
clean mode is checked and the notation is in non-editable Notation mode.
The Line Thickness Settings (Bar Line %, Stave Line%, Tie %, and Slur %) affect the thickness of the lines
drawn by RealBand. The settings are a percentage, with 100% being the regular thickness.
Notation Controllers
The Notation window’s advanced features use controllers. For example, when you insert a hard rest or change the
resolution of a beat to a “micro resolution” a controller event is inserted into the track. The Notation window
controllers are:
Controller Value Purpose
85 1 - 32 Bass clef micro resolutions.
85 34 Invisible Note (Affects note immediately before it in the track.)
85 37 Bass clef hard rest.
86 1 - 32 Treble clef micro resolutions.
86 37 Treble clef hard rest.
88 33 - 48 Bars Per Line From This Screen On (33 corresponds to 1 BPL while 48
corresponds to 16 BPL).
89 0 Slur
1 Crescendo
2 Decrescendo
3 Staccato
4 Staccatissimo
5 Regular Accent
6 Legato
7 Strong Accent (Marcato)
8 Chord Height Adjustment
9 Boxed Section Letter (A through Z)
90 Used to store notation data for events such as slurs, crescendo, etc.
You can prevent RealBand from sending these controllers by checking the “Disable Special Controllers” in the
Options | MIDI Out dialog.
Lead Sheet Notation Window
This window is similar to the Notation window, except that it can display a track in the form of a lead sheet, with
multiple staves per page.
Open the Lead Sheet window with the tool bar button, or the Window | New | Lead Sheet Window menu
option, or with the keystrokes Ctrl+Alt+F2.
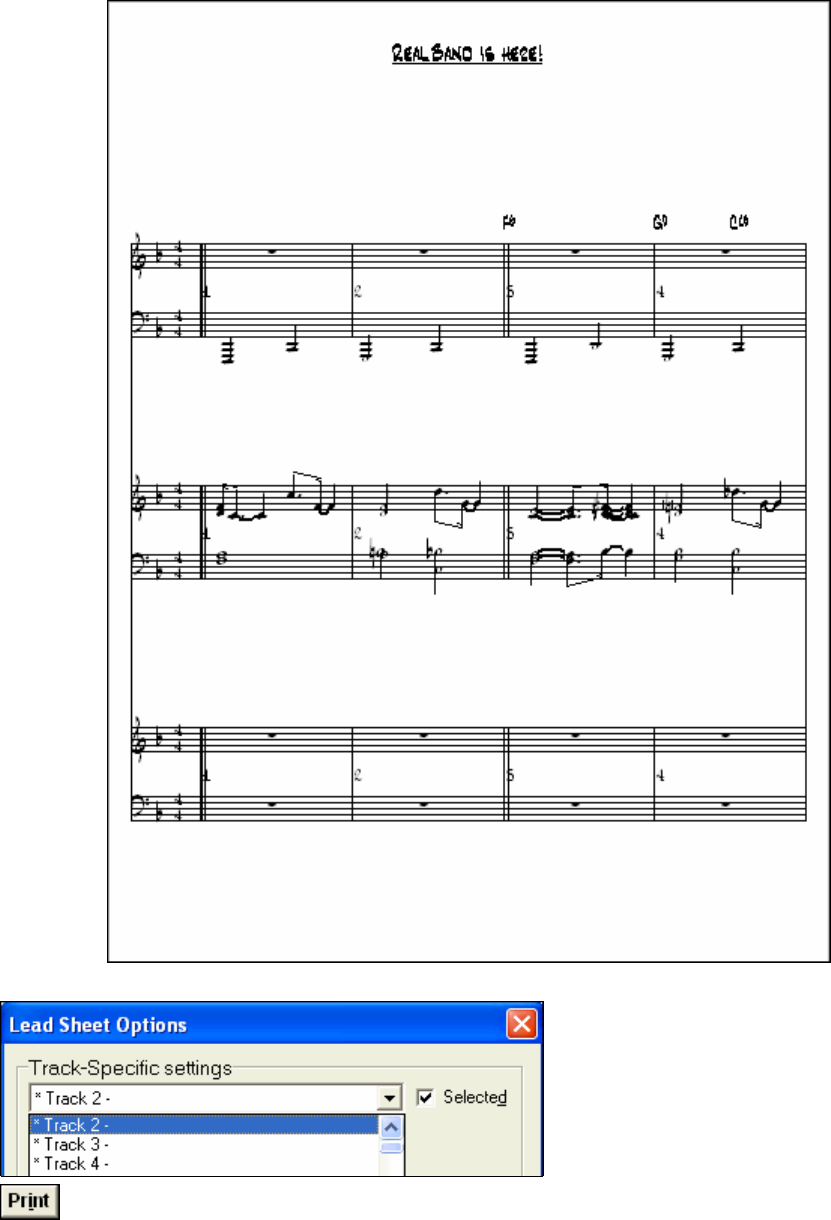
Chapter 9: Notation and Printing 125
The Lead Sheet window can display notation for up to seven tracks at the same time. In order to display multiple
tracks, you should first select the tracks in the Tracks window or Bars window and then open up a new Lead Sheet
window.
Another way to select multiple tracks is in the Lead Sheet Options window.
RealBand can also print notation with multiple tracks when you press the Print button at the top of a
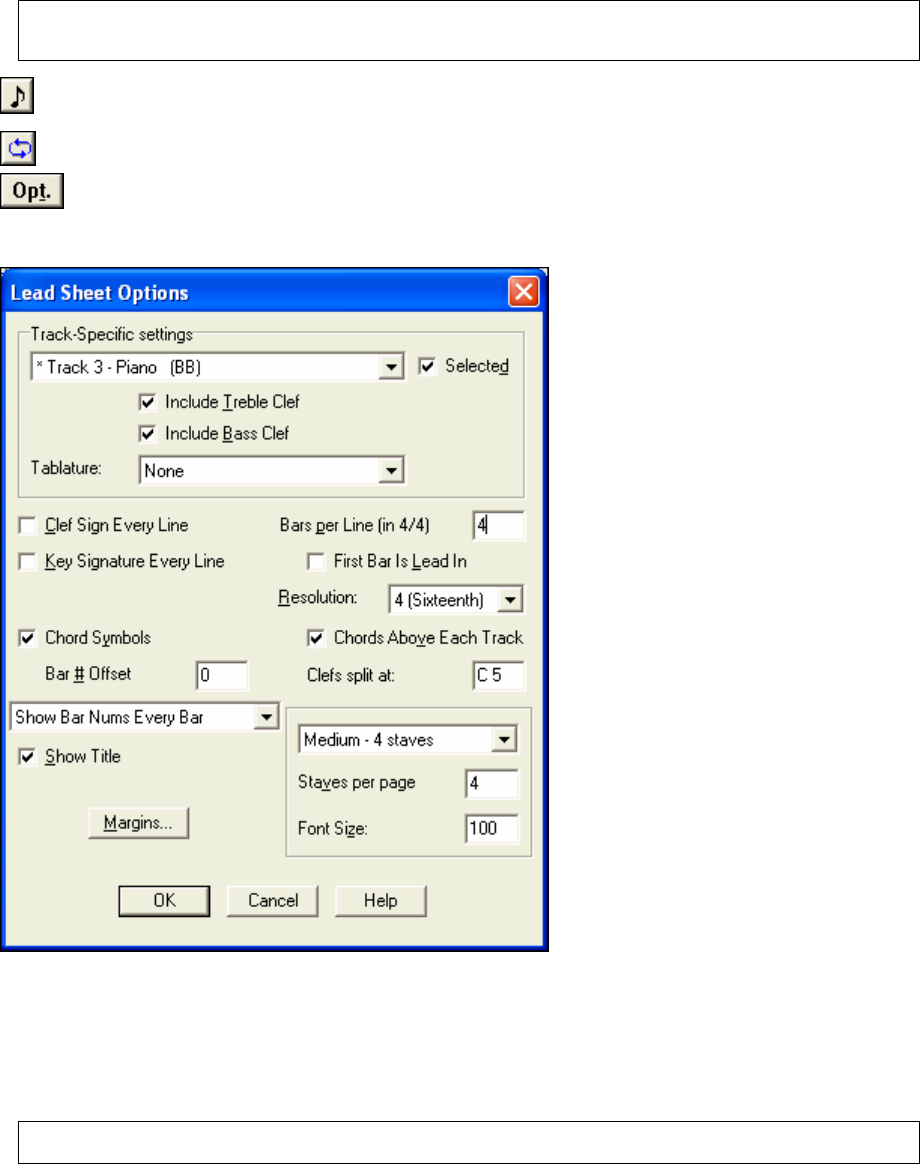
Chapter 9: Notation and Printing
126
Lead Sheet window that is currently displaying multiple tracks.
If you attempt to display multiple tracks and the lead sheet appears overcrowded, you should reduce the Font Size
setting in the Lead Sheet Options dialog. This will solve the problem of staves bumping into each other.
Note: When printing, the Font Size in the print options dialog controls the font size for printing. Generally, you’ll fit more
tracks at a 100% font size when printing than would fit in the Lead Sheet window, due to the different dimensions of a
printed page.
You can switch between the Lead Sheet window and a regular Notation window by pressing the eighth-
note button at the top of the Lead Sheet window.
The Loop Screen button will play the music of the current lead sheet screen in a loop.
Although the Lead Sheet window has its own Options dialog, many of the settings in the Notation
window’s Options dialog also affect the Lead Sheet window.
Lead Sheet Options
The “Track-Specific settings” section lets you adjust settings for individual tracks. The “Selected” checkbox
determines if a track is displayed in the current Lead Sheet window; use this to display multiple tracks of notation.
The combo box with the track numbers will show an asterisk (*) for tracks that are selected.
The “Include Bass Clef” and “Include Treble Clef” settings determine which of the clefs will be displayed for each
track.
The “Show Tablature” checkbox lets you enable or disable the display guitar tablature for each track.
Note: When a Lead Sheet window is launched the selected tracks will be based on the selected tracks in the Tracks
window.

Chapter 9: Notation and Printing 127
The “Clef Sign Every Line” and “Key Signature Every Line” checkboxes let you decide if the lead sheet should
show the clef sign and key signature on every line. These two settings are the same settings as found in the Print
Options dialog of the Notation window.
The “Bars Per Line” setting determines how many measures are drawn on each line of the lead sheet in 4/4. If the
Bars Per Line is set to 4, you will get 8 measures per line if the time signature is 2/4. Note: This setting is the same
setting as found in the Print Options dialog of the Notation window.
The “First Bar is Lead In” setting causes the program to display an extra bar of music on the first line of the first
page displayed. Use this setting in combination with the “Bar # Offset” setting if the song has a lead in. This setting
is the same setting as found in the Print Options dialog of the Notation window.
The “Resolution” setting determines the resolution of each beat. Normally you’ll keep this set to either 4 (sixteenth
notes) or 3 (triplets). In the Notation window you can select micro resolutions for each individual beat.
When the “Chord Symbols” checkbox is checked, the program will show the chord symbols of the song, if there are
any. This setting is the same setting as found in the Print Options dialog of the Notation window.
When “Chords Above Each Track” is checked the chord symbols (if present) will be seen above each track. This is
helpful for following the chord changes on tracks farther down the screen, but it makes the overall appearance of the
window “busier.” If left unchecked chords will only show above the top track.
The “Bar # Offset” setting is an advanced setting that you can use to decrease all the measure numbers of the lead
sheet. It decreases the numbers that are displayed at each measure. For example, if you specify a Bar # Offset of -2,
all the measures numbers will be shown as 2 less than their actual numbers. So, measure 3 would be shown with a
number of 1, and the number for measure number 4 would be shown as 2. Any number that is reduced to 0 or less
isn't shown, so in this case measures 1 and 2 would have no number, useful if the song has a 2-bar lead in. This
setting is the same setting as found in the Print Options dialog of the Notation window.
The “Clefs Split At” setting determines the split point for placing notes on the Bass or Treble clef. The default
setting is C5 that is middle C. For example, you can use a higher split point, such as C6 if you want some notes up
to a G above middle C to be displayed on the bass clef with ledger lines instead of on the treble clef. If the split
point is above middle C, and a note in the music is high enough that any of the ledger lines above the bass clef
would overwrite the treble clef, the note will be placed on the treble clef. This is identical to the Clefs Split At
setting in the Notation Options dialog.
The “Show Bar Nums” setting lets you choose how often bar numbers are displayed. This setting is the same setting
as found in the Print Options dialog of the Notation window.
The “Show Title” checkbox lets you see the song title on the top of the first page of the song.
The “Margins” button lets you adjust the margins of the Lead Sheet window.
You can select the “Staves per page” and “Font Size.” The bigger the font, the fewer staves you'll be able to fit on
each page. If you select a higher number of staves than will fit with the current font size, the Lead Sheet window
will only display the maximum number of staves that will actually fit on the page. Use the combo box to select from
several presets.
Double Bar Lines
Double bar lines supported in the Lead Sheet and for staff printout.
RealBand will automatically display double bar lines when a new part marker is reached.
Note: the part markers are entered in the Chords Window.
RealBand will display a double-fat bar line at the beginning of the 1st part marker, except when the First Bar Is
Lead-in Checkbox is enabled, in which case the double-fat bar line will be displayed at the beginning of bar 2.
RealBand will also display a double-fat bar line at the end of the printout. Double-bar lines of normal thickness will
be displayed at part-marker section changes in the middle of a printout.
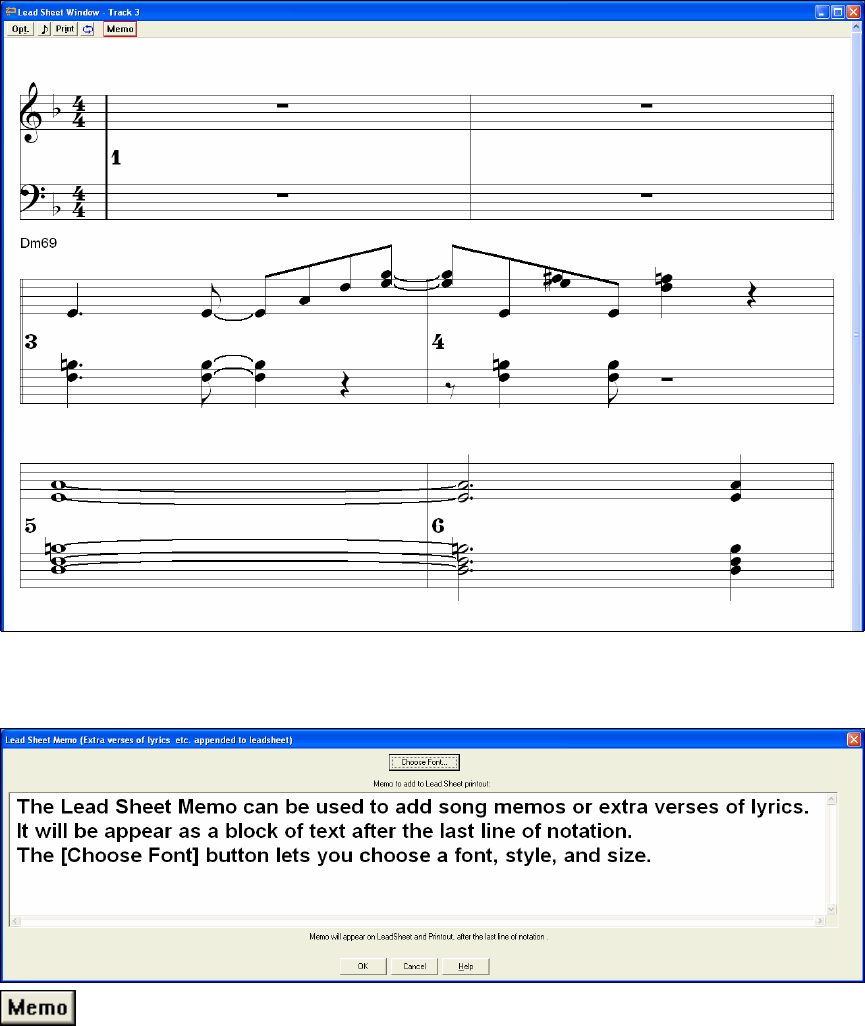
Chapter 9: Notation and Printing
128
Copy/Paste Song Lyrics to Lead Sheet
Easily copy and paste lyrics from other applications, to be appended to your lead sheet for display and printout,
with selectable font.
Pressing the Memo button on the Lead Sheet window will launch the Lead Sheet Memo Dialog.
In this dialog you can type in a memo, such as extra lyrics, etc. The memo will show up after the last line of
notation in Lead Sheet or notation printout. The Choose Font... button lets you choose which font is used to display
the memo.

Chapter 9: Notation and Printing 129
Printing
The [Print] button lets you print out music. When you press the print button, the Print Options dialog
will pop up.
Print Options Dialog
This dialog lets you change various settings that affect the printout. These settings will remain in effect until you
exit the program. Almost all of these settings are saved to RealBand .SEQ files.
The “Include Bass Clef” and “Include Treble Clef” checkboxes let you decide whether the printout should contain
the Bass Clef, Treble Clef, or both. Note that both the bass and treble clefs are always printed in Staff roll mode
regardless of these settings.
The “From” and “Thru” settings determine the range of measures that are printed. By default, “From” is set to 1 and
“Thru” is set to 1000. This will cause the entire song to be printed (unless the song really goes beyond 1000
measures). The program won't print beyond the end of the song. If there are sustained notes that go beyond the
measure in the “Thru” setting, the program may print extra measures. For example, if the “Thru” setting is set to
measure 5, and there is a note that is sustained until measure 6, the program will print measure 6.
The “Bars Per Line” setting determines how many measures are drawn on each line of the print out in 4/4. If the
“Bars Per Line” is set to 4, you will get 8 measures per line if the time signature is 2/4.
The “Clef Sign Every Line” and “Key Signature Every Line” checkboxes let you decide if the printout should print
the clef sign and key signature on every line.
The “First Bar is Lead In” setting causes the program to print an extra bar of music on the first line of the first page
printed. Use this setting in combination with the “Bar # Offset” setting if the song has a lead in.
The “Margins” setting lets you change the left and right margins of the printout in inches. When the margins are set
to 0, the program will print as wide as your printer will support. Therefore, there may still be margins if your printer
can't print on the edges of the paper.
The “Show Bar Nums” combo lets you choose where you want bar numbers to be printed.
When the “Include Notes” checkbox is checked, the program will print the notes of the track. The only reason for
un-checking this would be to print blank paper, with just the key signature. (You would also have to make sure the
Bars Per Line is set to 1, and un-check the Bar Numbers and Chord Symbols checkboxes.)
The “Staves Per Page” setting lets you determine how many staves will be printed per page. Normally, you'll want
to leave this at 10, but you can decrease this setting if the song has a lot of very high or very low notes so that there
is room between staves for them. If you increase this setting beyond 10, there may not be enough room for all the
staves on the paper depending on the size of the paper in your printer. If the printout has a song title, the first page
printed out will be limited to 8 staves so that there's room for the title.
When the “Chord Symbols” checkbox is checked, the program will print the chord symbols of the song, if there are
any.
The “Bar # Offset” setting is an advanced setting that you can use to decrease all the measure numbers of the
printout. It decreases the numbers that are printed at each measure. For example, if you specify a Bar # Offset of -2,
all the measures numbers will be printed as 2 less than their actual numbers. This setting is useful if the song has a
lead in, because, for example, a setting of -1 would cause the first measure to be printed with no number and the rest
of the measures will be printed with their numbers starting with 1.
The “Clefs Split At” setting determines the split point for placing notes on the Bass or Treble clef. The default
setting is C5, which is middle C. For example, you can use a higher split point, such as C6 if you want some notes
up to a G above middle C to be displayed on the bass clef with ledger lines instead of on the treble clef.
The “Title,” “Composer,” “Style,” and “Copyright” settings let you insert text onto the first page of the printout.
The “Title” field is for a song title. The “Composer” field is for the author's name, and will appear to the right of the
title. The “Style” field is for the style of the music such as Slow Blues, and will appear to the left of the title. The
“Copyright” field is for a copyright notice and will appear at the bottom of the first page of the printout.
The “Font Size” setting lets you adjust the size of the font used for the printout. A value of 100 % is normal size.
You can make the font smaller or larger by increasing or decreasing this setting.
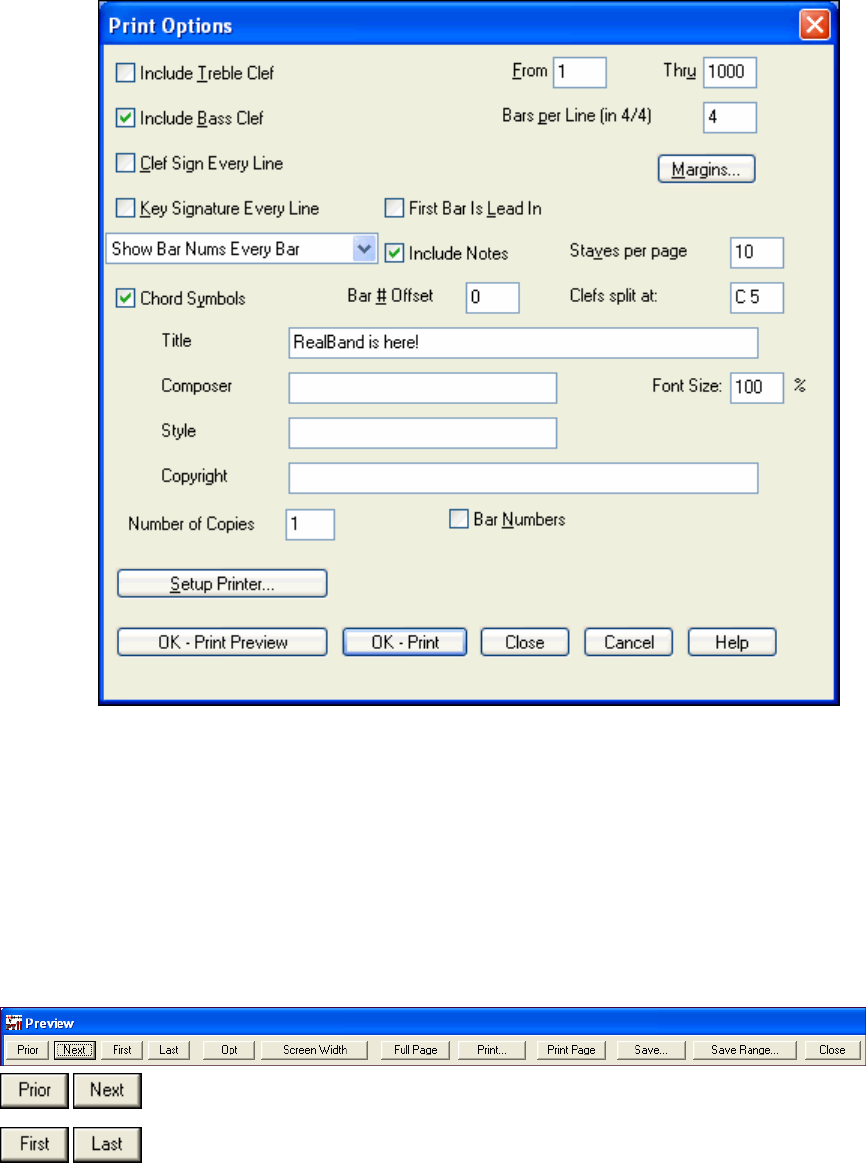
Chapter 9: Notation and Printing
130
The “Number of Copies” setting allows you to easily print out multiple copies of notation. You can print any
number of copies from 1 to 1000.
Select the “Bar Numbers” checkbox to print only the range of bars defined by the Print Options’ “From” and
“Thru” boxes.
The “Setup Printer” button lets you configure your printer. The changes to the printer configuration will be in effect
for printing music until you exit the program.
The “OK – Print Preview” button launches the Print Preview. Unlike most other dialogs, this one has a [Close]
button in addition to [Okay] and [Cancel]. The [Close] button works the same as [Cancel], except that any changes
you've made to the settings will be saved.
Print Preview
When you press the [Print] button to print from the Notation window, you can print to a Print Preview window.
This lets you view what the printout will look like without having to waste paper. To access the Print Preview
window, you print as you normally would, except you press the [OK- Print Preview] button. When you’ve pressed
the [OK – Print Preview] button, the Print Preview will be shown. At the top of the Print Preview window, you
will see a toolbar with various buttons.
The [Prior] and [Next] buttons will go to the prior page or next page of the
printout.
The [First] and [Last] buttons will jump to the first or last pages of the printout.
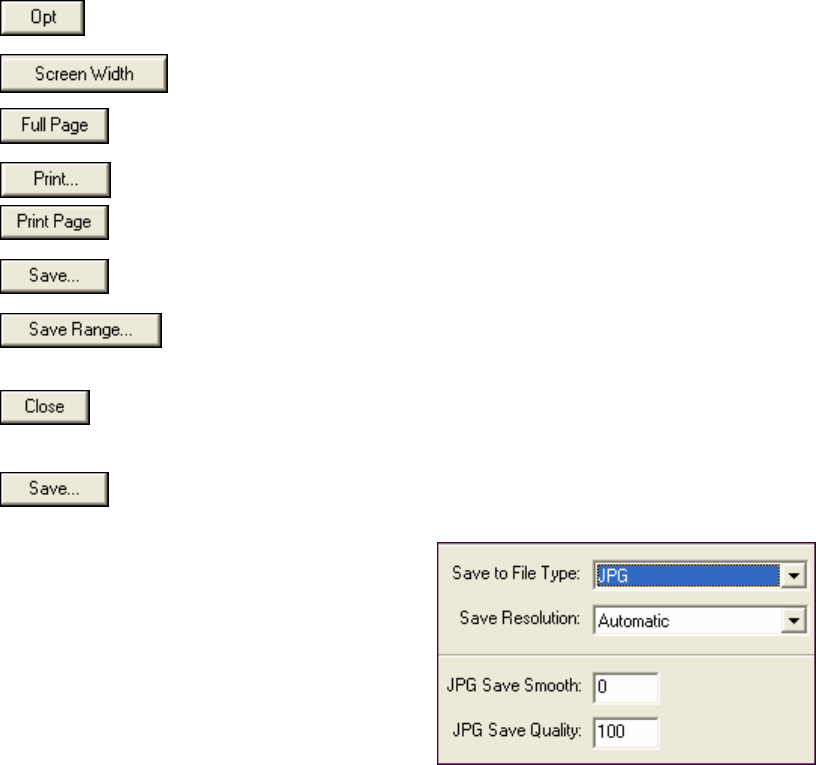
131
The [Opt] button will access the Preview Options, such as the bitmap
dimensions and the type of file used if you wish to save a page to a graphics file.
The [Screen Width] button will make the size of the pages in the preview equal
to the width of the screen.
The [Full Page] button will make the size of the pages just big enough to see the
entire image in proportion without having to do any scrolling.
The [Print…] button returns to the Print Options dialog.
The [Print Page] button prints the currently displayed page directly to the default
printer, unless you select a different printer in the Print Options dialog.
The [Save…] button lets you save the current page to a graphics file. You’ll see
a dialog with some of the same settings as the Options dialog.
The [Save Range…] button saves a range of pages. The pages will be named
SONGNAMEXXX.BMP with SONGNAME being the name of the song, and
XXX being the page number.
The [Close] button closes the Print Preview.
Print to Graphics Files
Use the [Save] button to save your song as a graphics file. Graphics files can be inserted into
documents, uploaded to the Internet, or sent as email attachments.
You can choose to print to BMP, JPG, TIF, and
other graphic formats as grayscale or color files
with either low or high resolution.
The JPG Save Smooth and JPG Save Quality
settings affect the quality of JPG files.
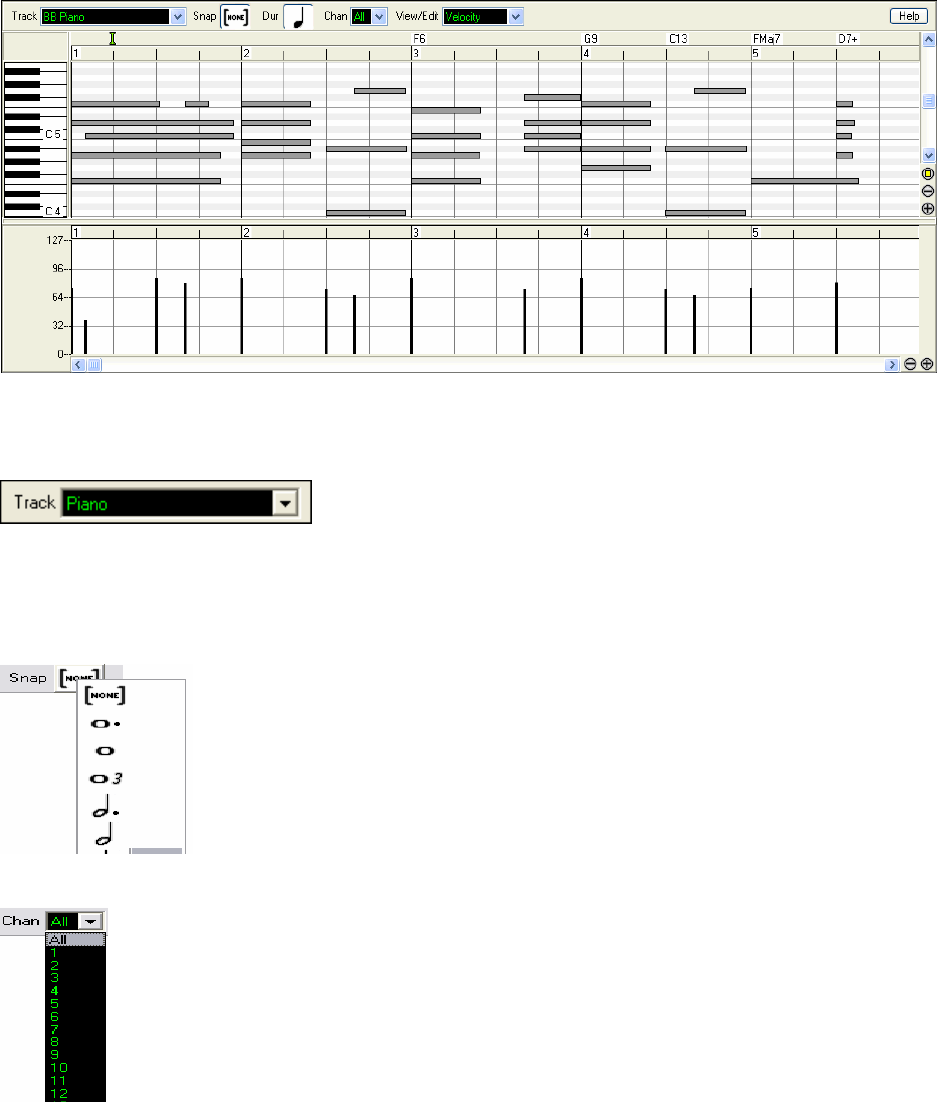
Chapter 10: Piano Roll Window
132
Chapter 10: Piano Roll Window
Overview
The Piano Roll window enables precise graphic editing of note timing and duration. You can also graphically edit
Note Velocity, Controllers, Program Changes, Channel Aftertouch, or Pitch Bend. There are 2 panes in the window
– one for notes and the other for controllers, velocity, and other data.
The Piano Roll may be opened as a movable window, which floats above the main RealBand window, or it may be
opened embedded, in the same position as the Chordsheet/Notation panels in the RealBand main window.
Track Selection
This is a window for editing notes and controllers on
MIDI tracks.
Click on the drop down arrow to choose a track to view and edit.
Audio tracks are edited in the Audio Edit window, but Audio Track Volume, Pan, and Aux Send automation can be
edited in the lower Graphic Data panel of the Piano Roll window.
Snap-to-Grid
Selections, Inserted Notes, or Edited Notes will snap to the grid spacing. If
you do not want snap-to-grid, select [NONE] in the drop-down menu.
View/Insert Channel
If a track contains multiple channels, “All” will display MIDI events on all channels.
Otherwise, select the Channel which you need to see. If “All” is selected, new MIDI events
are inserted on the RealBand track's assigned channel.
Except for perhaps multi-channel Guitar tracks, RealBand plays all track events on the
assigned track channel. Therefore, in almost all cases, the channel of track events does not
matter.
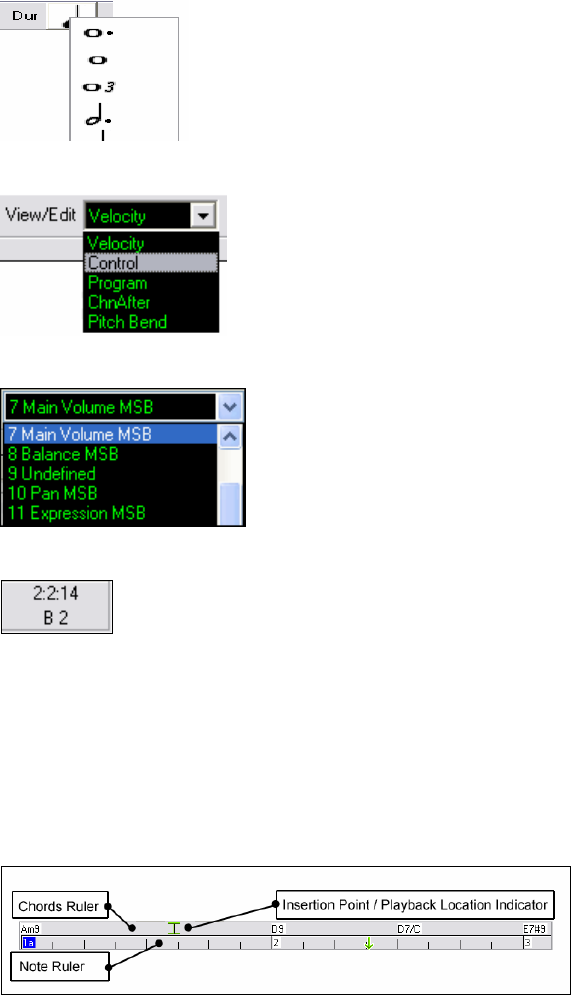
Chapter 10: Piano Roll Window 133
Note Duration
Set the default duration of new inserted notes. It is easy to mouse-edit a
note's duration after a note is inserted, so it is usually sufficient to select a
typical note duration that makes sense for your purposes and then mouse-
edit the duration of “exception” notes after they are inserted.
View/Edit Graphic Data
Determine what graphic data to view or edit in the bottom Graphic Data
panel. Choose Velocity, Controller, Program Change, Channel Aftertouch,
and Pitch Bend. If Chan is not set to “All,” only the selected channel events
are displayed.
Controller Type
If “View/Edit” is set to “Control,” the Controller Type becomes visible. The
Graphic Data panel will display the chosen controller type. If Chan is not set
to “All,” only the selected channel events are shown.
Cursor Location Info Panel
The Info Panel shows the cursor's Bar:Beat:Tick and MIDI note or controller value
(depending on the cursor location).
In cursor locations where a value would be nonsensical, this appears blank.
For instance, in the Note panel, Bar:Beat:Tick and Pitch are displayed. In the Ruler panels, only Bar:Beat:Tick is
displayed. In the left Piano panel, only Pitch is displayed. In the Graphic Event panel, Bar:Beat:Tick and Event
Value are displayed.
Chord Ruler and Note Time Ruler Panel
There are two top rulers. The top Chord Ruler displays chords and the Playback Location Indicator. The Note Time
Ruler displays bars and bar subdivisions. When zoomed-in, more subdivisions are displayed. When zoomed-out,
fewer subdivisions are displayed.
Click or drag in the Chords Ruler to set the Insertion Point (useful if you wish to use the menu Edit/Paste (Ctrl+V)
to paste into the Piano Roll). If a song is playing, a Chords Ruler click will stop playback.
Double-click the Chords Ruler to start playback at the indicated bar. You can also set the Insertion Point and then
tap Ctrl+G to start playback at the desired location.
Notes can be selected with the Note Ruler. However, the Note Ruler does not select non-note events such as
controllers or pitch bend.
1 Click+drag on the Note Ruler to select a time-range of notes.
2 Shift+click+drag to add a time-range of notes to the selection.
3 Ctrl+click+drag to invert the note selection of a time range.
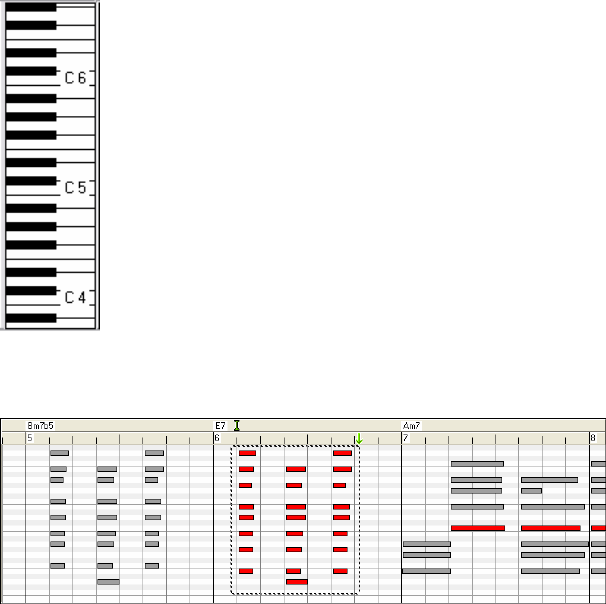
Chapter 10: Piano Roll Window
134
For instance, you could drag to select all notes in bars 2 thru 7. Then you could Ctrl+drag to toggle off note
selections in bar 4. By using the Shift and Ctrl keys, very flexible time selections can be made.
Keyboard Pitch Panel
1. Click on a single note of the keyboard to select all notes of the clicked pitch.
2. Click+drag on the keyboard to select all notes in a pitch range.
3. Shift+click+drag to add another set of notes to the selection.
4. Ctrl+click+drag to invert a pitch selection.
For instance, you could drag C5 thru C6 to select an octave of notes. Then Shift+click A3
to add all A3 notes to the selection. Then Ctrl+click F5 to remove all F5 notes from the
selection.
Note Panel
Horizontal bars represent notes. Notes can be selected, edited (start time, pitch, duration), inserted, and deleted.
Note Selection
Selected notes are Red.
1. Click on individual notes to select.
2. Shift+click on individual notes to add to the selection.
3. Ctrl+click on a note to invert (toggle) its selection.
Click on white space and then drag a rectangle select a group of notes. Only notes which start within the rectangle
are selected. If the left edge of a note is not inside the rectangle, it will not be selected. This is a feature, not a bug!
1. Shift+drag a rectangle to add another group of notes to the selection.
2. Ctrl+drag a rectangle to toggle the selection of the notes in the rectangle.
Note Editing
Edit Note Time Stamp (start time): Move the cursor over the left of a note. A left-right cursor appears. Then
horizontally click+drag the note to a new time.
If multiple events are selected, and you want to move all selected events, use Shift+click+drag. Otherwise a click
on a note will deselect the previous selection, and it will only select/edit the clicked note.
Edit Note Pitch: Move the cursor over the middle of a note. An up-down cursor appears. Then click+drag the
note pitch (vertical dragging).
If multiple events are selected, and you want to transpose all selected events, use Shift+click+drag. Otherwise a
click on a note will deselect the previous selection, and it will only select/transpose the clicked note.
Edit Note Duration: Move the cursor over the right of a note. A right-arrow cursor appears. Then click+drag
the note duration (horizontal dragging).

Chapter 10: Piano Roll Window 135
If multiple events are selected, and you want to change duration of all selected events, use Shift+click+drag.
Otherwise a click on a note will deselect the previous selection, and it will only select/edit the clicked note.
Insert a Note: Hold the Shift+Ctrl keys. The cursor becomes a pencil. Click where you want the note and it is
inserted with a duration from the Dur drop-down menu, and on the channel selected by the Chan drop-down menu.
If Snap is enabled, the note is inserted at the nearest grid boundary. For instance, if Snap is set to quarter note,
inserted notes will snap to the nearest quarter note boundary.
There are many on-screen visual cues to assist cursor positioning. The Cursor Position Time Markers in the Time
Rulers can assist time positioning. The Cursor Pitch Marker in the Keyboard can assist pitch positioning. The
Cursor Location Info Panel gives precise time and pitch info. Also, the Note Panel has time grid markings, and
pitch accidentals are marked in light gray on the background.
If you make a mistake inserting a note, you can hit the Delete key to remove the new note. Alternately, it is very
easy to immediately drag the note to correct mistakes in time, pitch, or duration.
Delete a Note: Select a note (or group of notes), then tap the Delete key. Alternately, select some notes, right-
click, and choose the “Delete Selected Events” item in the popup menu.
Splitter Bar
A vertical Splitter Bar sits between the Note Editing and Graphic Event panels. If you want to maximize the Note
Editing panel to see more notes, drag the Splitter down. If you want to maximize the Graphic Event panel for more
accurate event editing, drag the Splitter up.
Graphic Event Panel
Graphically display and edit non-note MIDI events. This panel only shows MIDI events specified in the Chan,
View/Edit, and Controller Type controls.
Except for Velocity data, the view is drawn staircased. Blue lines extend between events. This makes it easy to see
the persistent effect of events, if they occur to the left of your current viewing location.
Zero-value events are drawn as small hollow squares, making them easy to see.
With events such as Pitch Bend, or controllers like Modulation and Sustain, it is important to take care to end a
“gesture” with a zero-value event. Otherwise, subsequent notes will be affected, with an unwanted “hanging” Pitch
Bend, Vibrato, or Sustain Pedal locked down. To fix this, move the mouse cursor where the gesture should have
ended, and click in a single zero-value event.
Event Selection
Selected Events are red.
Graphic Event Ruler Time Selections:
The Graphic Event Ruler will only select non-note events. In addition, it will only select the type of MIDI events
specified in the Chan, View/Edit, and Controller Type controls. When you make a Ruler Time selection only the
visible events in this time range are selected. Click+drag on the Ruler to select a time range.
1 Shift+click+drag to add another time range to the selection.
2 Ctrl+click+drag to “invert” the selection of events in the time range.
For instance, you could drag to select bars 2 thru 7, then option-drag to toggle off selections for bar 4. It is very
flexible.
Individual Graphic Event Selections
1 Click on an event to select it.
2 Shift+click on an event to add it to the selection.
3 Ctrl+click on an event to invert (toggle) the selection of that event.
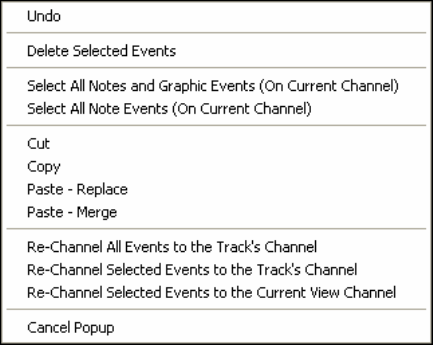
Chapter 10: Piano Roll Window
136
Edit Events
Edit Event Value: Move the cursor over the top half of an event. An up-down cursor appears. Click+drag
vertically to scale event values. To scale a selected group of events, Shift+click+drag vertically on one of the
events in the selection.
Edit Event Time: Move the cursor over the bottom half of an event. A left-right cursor appears. Click+drag
horizontally to slide the event in time. To slide a group of events, Click+drag on one of the events in the selection.
Insert Events
Line Tool: With no modifier keys, when the cursor is over “white space” in the Graphic Event panel, it becomes a
Line Tool. Move the cursor to white space and then click+drag to draw a line. When the mouse button is released,
a series of events are inserted which follow the line slope.
To avoid choking the MIDI stream, the maximum event density is one event per 10 ticks. Repeated events of the
same value are not inserted. Therefore, long gradual Line Tool fades have a lower density than short extreme Line
Tool fades.
Pencil Tool: Move the cursor over white space and hold the Shift+Ctrl keys. A Pencil Tool appears.
Shift+Ctrl+drag to freehand-draw a curve. If you don't get the curve right on the first pass, keep holding the mouse
button and move the mouse back-and-forth to draw your desired freehand curve. When the mouse button is
released, a series of events are inserted to follow the freehand curve.
To avoid choking the MIDI stream, the maximum event density is one event per 10 ticks. Repeated events of the
same value are not inserted.
Delete Events
Select events with the Ruler or by clicking on them, then tap the Delete key. Or right-click and choose the “Delete
Selected Events” item in the popup menu.
Right-click Contextual Menu
The popup menu can be accessed by right-clicking on the notes, graphic events, or any of the rulers.
Undo: Duplicates the RealBand Edit | Undo (or Ctrl+Z) action.
Delete Selected Events: Deletes any selected events (highlighted in red). This can also be accomplished by
tapping the Delete key.
Select All Notes and Graphic Events: If the Chan combo box is set to “All,” this item will select ALL EVENTS
on ALL CHANNELS (all events in the track). Otherwise, ALL EVENTS that match the CURRENT MIDI
CHANNEL are selected.
Select All Note Events (Of Current Channel): right-click the Note Panel or Note Ruler.
If the Chan combo box is set to “All,” this item will select all notes on all channels, but it will not select any non-
note events. Otherwise, all notes that match the current MIDI channel are selected.
Chapter 10: Piano Roll Window 137
Select All Graphic Events (Of Current Channel): right-click the Graphic Event Panel or Graphic Event Ruler.
If the Chan combo box is set to “All,” this item will select all graphic events of the current view/edit type on all
channels. Otherwise, all graphic events of the current view/edit type that match the current MIDI channel are
selected. For instance, you could select all channel 4 modulation events, then Delete, to easily remove all of those
events from the Track.
Cut: Copy selected events to the clipboard and then remove them from the track. If you wish, it is possible to Cut
from the Piano Roll, and then Paste into the Notation window, or vice-versa.
Copy: Copy selected events to the clipboard. If you wish, it is possible to Copy from the Piano Roll, and then
Paste into the Notation window, or vice-versa.
Paste - Replace: If no events are on the clipboard, this item is dimmed.
The Paste occurs at the time location of your right-click. Move the mouse cursor to the desired insert location.
Right-click on the Note Panel, the Graphic Event Panel, or any of the Rulers. Then choose this item from the popup
menu. Any previous event types in the paste range which match event types in the clipboard are removed before the
clipboard data is added to the track.
If the Chan combo box is set to “All,” pasted events keep their original (copied) MIDI channel. Otherwise, the
pasted events will be re-channeled to match the Chan combo box.
Paste - Merge: If no events are on the clipboard, this item is dimmed.
The Paste occurs at the time location of your right-click. Move the mouse cursor to the desired insert location.
Right-click on the Note Panel, the Graphic Event Panel, or any of the Rulers. Then choose this item from the popup
menu. Events from the clipboard are merged with whatever data may already exist in the track.
If the Chan combo box is set to “All,” pasted events keep their original (copied) MIDI channel. Otherwise, the
pasted events will be re-channeled to match the Chan combo box.
NOTE: If you use RealBand’s top Edit Menu Cut (Ctrl+X), Copy (Ctrl+C), or Paste (Ctrl+V) commands, the conventional
Cut, Copy, or Paste dialogs appear, with the Piano Roll Time Selection automatically entered. This gives you a choice of
two different styles of Cut, Copy, or Paste; either the conventional RealBand Cut-Copy-Paste dialogs which use a Time
Range, or the Piano Roll right-click menu Cut-Copy-Paste methods which use Selected Events.
Re-Channel All Events to the Track Channel
Re-channel all notes and graphic events (the entire track) to the MIDI output channel assigned for this track.
For instance, though the track output channel might be channel 4, meaning that RealBand transmits any events in the
track on channel 4, the actual events in the track might be channel 1, or a mixture of several channels.
Ordinarily it doesn't matter if the event channels are mixed up, as long as you have the View Channel set to ALL.
But if you wish to use Paste | Replace, this function is smart enough not to “stomp on” a track's events which differ
from the channels of the clipboard MIDI data. So if you force all events to the track channel, the Paste - Replace
function will always replace appropriately.
Re-Channel Selected Events to the Track Channel
Re-channel only the selected events to the track channel.
Re-Channel Selected Events to the View Channel
This command may be useful when editing a multi-channel guitar part or editing an imported multi-channel MIDI
file. Beware that it might initially appear confusing.
For instance, one might set the View Channel to ALL, and make a selection (intending to set these events to channel
12). Then set the View Channel to 12, and of course the selected events disappear (if the events had some other
MIDI Channel). But then when you invoke “Re-Channel Selected Events to the View Channel” the MIDI events
will re-appear on the Piano Roll.
Display Controls
Horizontal Scroll Bar, [+] and [-] Buttons
Scroll in time, and zoom the horizontal display.

Chapter 10: Piano Roll Window
138
Vertical Scroll Bar, [+] and [-] Buttons
Scroll to see different note ranges (does not scroll the Graphic Event Panel) and zoom the vertical display.
Zoom to Selection Button
Make a selection of notes, and then click the Zoom To Selection button. The vertical pitch range and
horizontal time range adjusts to fill the note panel with the selected notes.
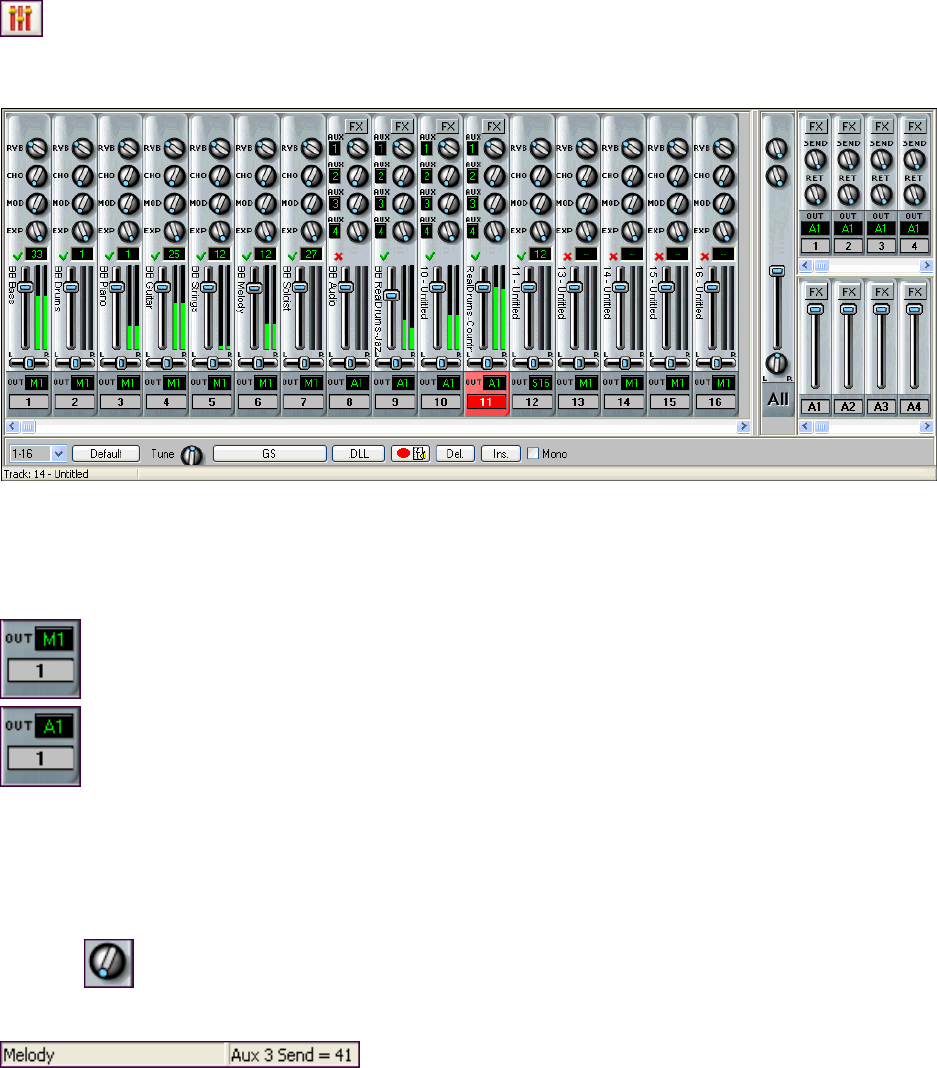
Chapter 11: Mixer Window 139
Chapter 11: Mixer Window
Overview
The Mixer window provides real time control of volume and effects. You can launch it with the toolbar
button or by typing ALT+WÆ8.
This is an integrated mixer that controls both MIDI and Audio tracks. There are sliders for all 48 tracks, 8 auxiliary
effects (Aux) busses, and a combined total of 16 audio output ports or audio subgroups.
The Mixer track strips conveniently show the track name vertically to the left of the volume sliders. This is the track
name that is assigned in the Tracks window, go to that window to add or change track strip names.
When the mouse cursor is positioned over a track number in the Mixer window a popup box will display all of the
Track windows settings for the track - the track name and type, patch name, volume and pan settings, and effects
settings.
MIDI tracks show an output port with an “M” prefix for a MIDI port or an “S” for a software
synthesizer. They have controls for volume, pan, reverb, chorus, modulation, and expression plus a VU
meter, a MIDI patch selection box, and a mute/unmute button.
Audio tracks either have a prefix of “A,” for an audio output, or “G,” for an audio subgroup, on their
output ports. They have volume and pan controls, a stereo VU meter, a mute/unmute button, four
assignable auxiliary sends, and a track-specific FX insert.
In addition to the track specific effects, there are eight global busses that can each have four chained effects each.
You can assign each audio track to four different Aux busses and adjust the amount that each audio track uses the
effects in each assigned bus. If that isn’t enough, you can add four chained effects to each audio subgroup and also
to the main output - this will affect all tracks.
Mixer Controls
Knobs
To use the knobs, click and hold the left mouse button while the mouse cursor is inside the knob
and move the mouse cursor in a circular motion. The knob’s pointer will follow your mouse
cursor movements. In this follow mode you can even move the mouse cursor off the knob so that it isn’t obscuring
your view of the pointer.
As you move any Mixer knob or slider a continuous readout of its
setting displays at the bottom of the window. At the desired position simply release the mouse button to set the
value.

Chapter 11: Mixer Window
140
Volume
Slider
To use the slider controls, simply click, hold and drag the control knob using the mouse
or click on the control strip above or below the knob to move the slider in small
increments. Holding the mouse button down on the control strip causes continuous
movement of the control in small increments until the mouse button is released.
Pan
Slider
If you need to see or edit the precise value of a knob or slider you can right mouse click on
the knob to pop up a dialog box which displays the exact setting as a number, allowing
you to manually type in a new numeric value (e.g., 80, 28, 12, etc.).
These knobs and sliders can be automated with MIDI controller messages for volume, pan, chorus, and reverb that
are present as events in a song.
Track Controls
The Mixer has different controls for MIDI tracks and audio tracks.
MIDI Track Strip
This is the Mixer strip for a MIDI track.
- control knobs for Reverb, Chorus, Modulation, and Expression effects have a smooth “real
feel” response. Right-click on these control knobs to type in an exact controller value.
- click on the green checkmark or red “x” above the fader to turn tracks on and off, i.e., to
toggle between active and mute states.
- click on the patch number box to see the Select Patch dialog where the name of the patch will
be highlighted. You can select a new patch from this dialog.
- right-click on the sliders to type in an exact fader level.
- the track name (from the Tracks window) is shown vertically to the left of the Volume slider.
- each track strip has its own stereo VU meter.
- the LR stereo pan slider also has a smooth, even response with the option to right-click and
type in an exact value.
- click in the “Out” box to assign the track to a MIDI output port. DXi and VSTi synths are
identified with an S. For example, the default DXi synth or VSTi synth is S16.
- selected tracks are highlighted in red or yellow, as in the Tracks window.
Hover the mouse over any track number to see a summary of the track settings (MIDI or audio).
A click in area around the track number will open the context menu with a full list of commands and
settings for the particular track. This is the same menu that opens with a right-click in the Tracks
window, so it reduces the need to switch back and forth between windows.
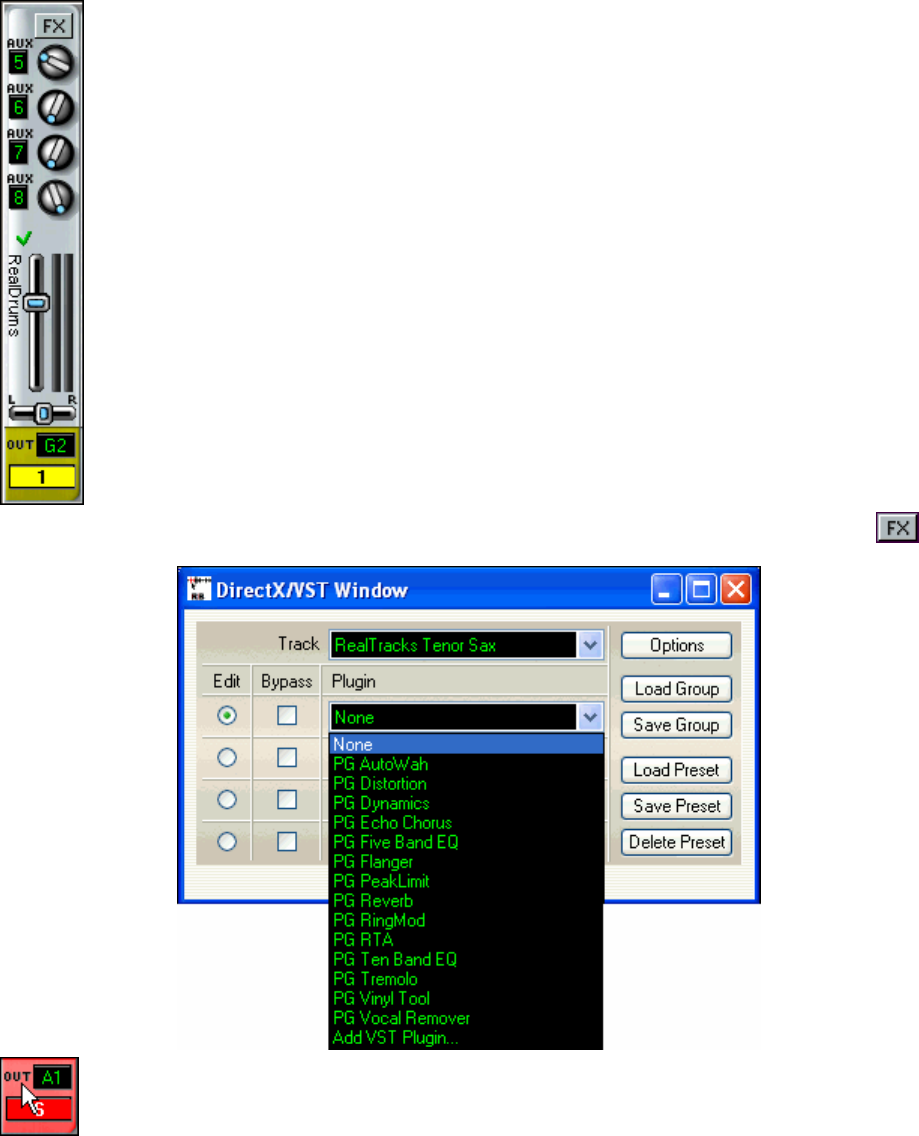
Chapter 11: Mixer Window 141
Audio Track Strip
This is the Mixer strip for an Audio track.
- the [FX] button opens the DirectX/VST Window where up to four real time effects can be
inserted into the track.
- each track has four auxiliary effects sends that can be assigned to any four of the eight
available Aux busses. Each Aux bus can have up to four chained effects.
- the rotary knobs set the send level to each Aux bus. Right-click on a knob to enter an exact
level for the send.
- use the green checkmark or red “x” above the fader to turn the track on and off, i.e., to toggle
between active and mute states.
- the track name displays vertically to the left of the volume slider. The track name is entered
in the Tracks window.
- right-click on the volume slider to enter an exact fader level.
- each track strip has its own stereo VU meter.
- the LR stereo pan slider also has a smooth, even response with the option to right-click and
type in an exact value.
- tracks can be assigned to audio subgroups using audio output ports that do not currently have
a driver port assigned. This track is assigned to subgroup 2.
- when using audio subgroups the Aux busses should also be sent to that subgroup, so auxiliary
busses 5, 6, 7, and 8 would be assigned to Subgroup 2 (G2) in this example.
Press the [FX] button to bring up the DirectX/VST Window, and you can select/edit the effects you
wish to insert.
A click in area around the track number will open the context menu with a full list of commands and
settings for the particular track. This is the same menu that opens with a right-click in the Tracks
window, so it reduces the need to switch back and forth between windows.
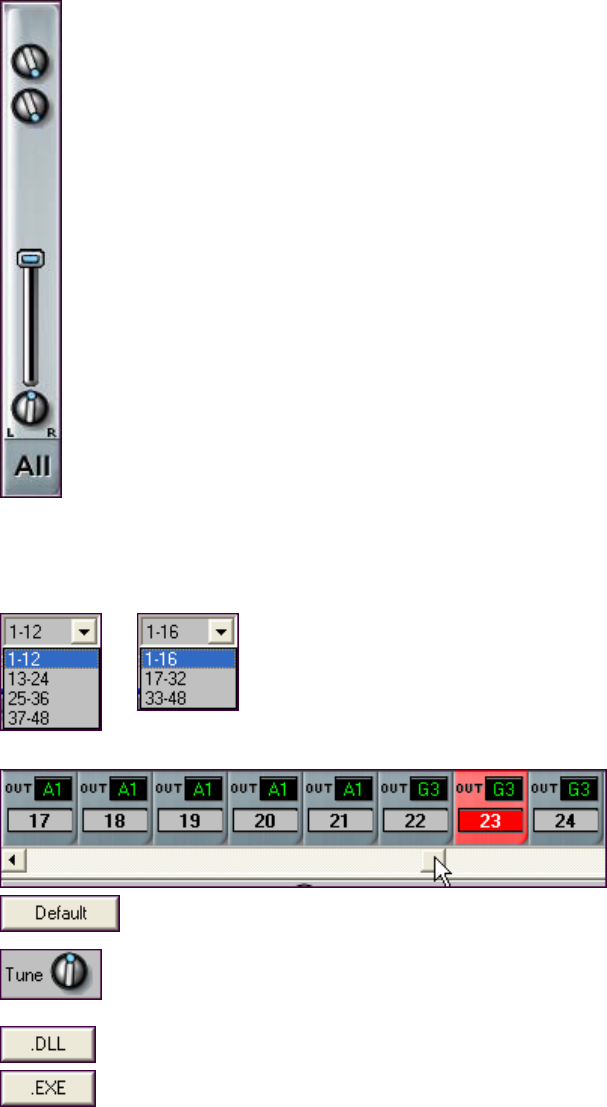
Chapter 11: Mixer Window
142
Master Controls and Mixer Utilities
The two knobs in the All column serve as master reverb and chorus settings. These controls will affect
the overall level of Reverb and Chorus without changing the settings on individual tracks.
◄ Reverb
◄ Chorus
The volume slider control in the All column is the master volume control.
The [Pan] control in the All column will change the settings for all 48 tracks at the same time.
When a .SEQ file is saved, all of the Mixer’s current volume, pan, chorus, and reverb settings are also
saved. These settings will be restored when the file is reloaded.
The current mixer track corresponds to the current/highlighted track in the Tracks and/or Bars windows. You can
change the current track in the Mixer window simply by clicking on the track number.
The Mixer’s Range Combo settings are determined by the display configuration you set with the splitter bar. These
two examples show the Range Combo settings with the splitter bar set to show 12 or 16 tracks at a time, but you
could use different settings depending on the size of your display or on what
combination of track strips, Aux busses, and output ports you want to see.
This panel is scrollable, so if you can’t see all of the faders just use the scroll bar to get to the one you want.
The [Default] button located on the lower-left of the Mixer will reset all mixer parameters to the
default settings.
The [Tune] knob lets you fine-tune your synth or MIDI sound source. When you click on the Tune
knob you’ll hear an “A” note sent out through the current part. Adjust the knob until the module is
set to the desired tuning and release the mouse button.
This button launches the Select .DLL or .EXE dialog that lets you select a .DLL or .EXE that was
written specifically to work with RealBand. The name of the button changes from .EXE to .DLL
depending on the plug-in that is running.
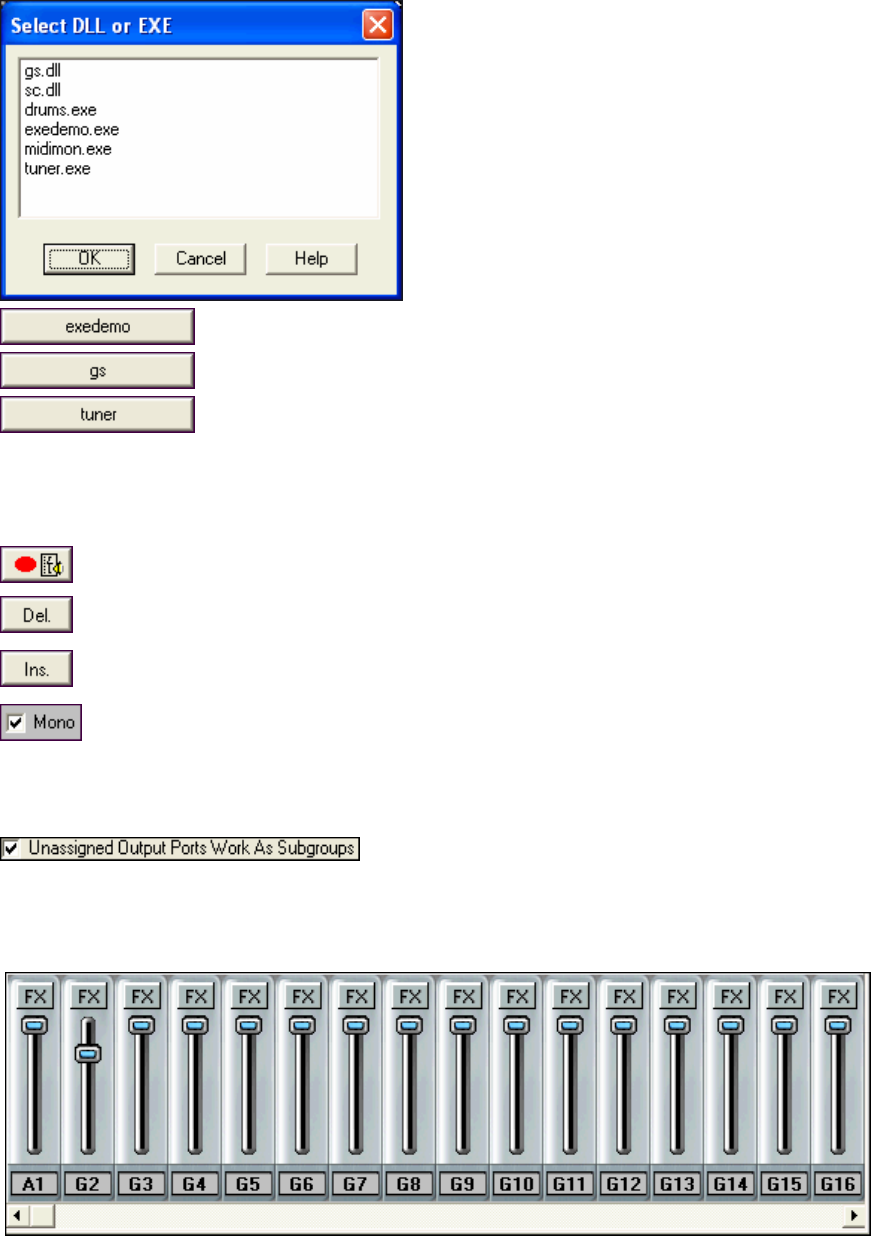
Chapter 11: Mixer Window 143
All .DLLs or .EXEs that begin with the “$” character, e.g.,
$GS.DLL, will show up in the dialog (without the “$”
character).
This run button (to the left of the [.EXE] [.DLL] button) changes to show the name of the
currently running .DLL or .EXE plug-in, such as the GS Settings dialog or the RealBand
built-in Tuner. Click on this button to open the window displaying the currently running
application.
These .DLLs and .EXEs are small plug-in programs that have been specifically designed to work with the program
to extend functionality and features, such as the .DLL plug-in that is used to edit Roland GS settings (gs.dll). All of
these special .DLL/EXE plug-in files should reside in the RealBand default directory, e.g., c:\RealBand. A list of all
plug-in files will be displayed automatically.
Clicking on the Record Mixer Moves button starts the song playing and lets you record only mixer
moves. The controller moves are saved as MIDI events in the selected track (including audio tracks).
The Delete button in the mixer will automatically delete all mixer events (volume, reverb, pan, chorus)
that are currently embedded within the song's selected tracks.
The Insert button in the mixer will automatically insert Mixer Events (volume, reverb, pan, chorus) into
song’s non-blank tracks.
Sometimes a stereo mix will have problems when it is played back in mono. Use this checkbox to hear
the mix in mono and check for problems such as flanging or canceling.
Creating Audio Subgroups in the Mixer
Unassigned Outputs Work As Subgroups
When this checkbox is enabled in the Audio preferences dialog, any
audio output ports that do not have a driver port assigned to them will function as subgroups. A subgroup is a bus or
signal path that gives you the ability to control several tracks as a group.
Let’s suppose you only have one audio Output Driver port installed in RealBand and you’ve enabled the
“Unassigned Outputs Work As Subgroups” checkbox. Audio Output Ports 2 -16 can then become subgroups.
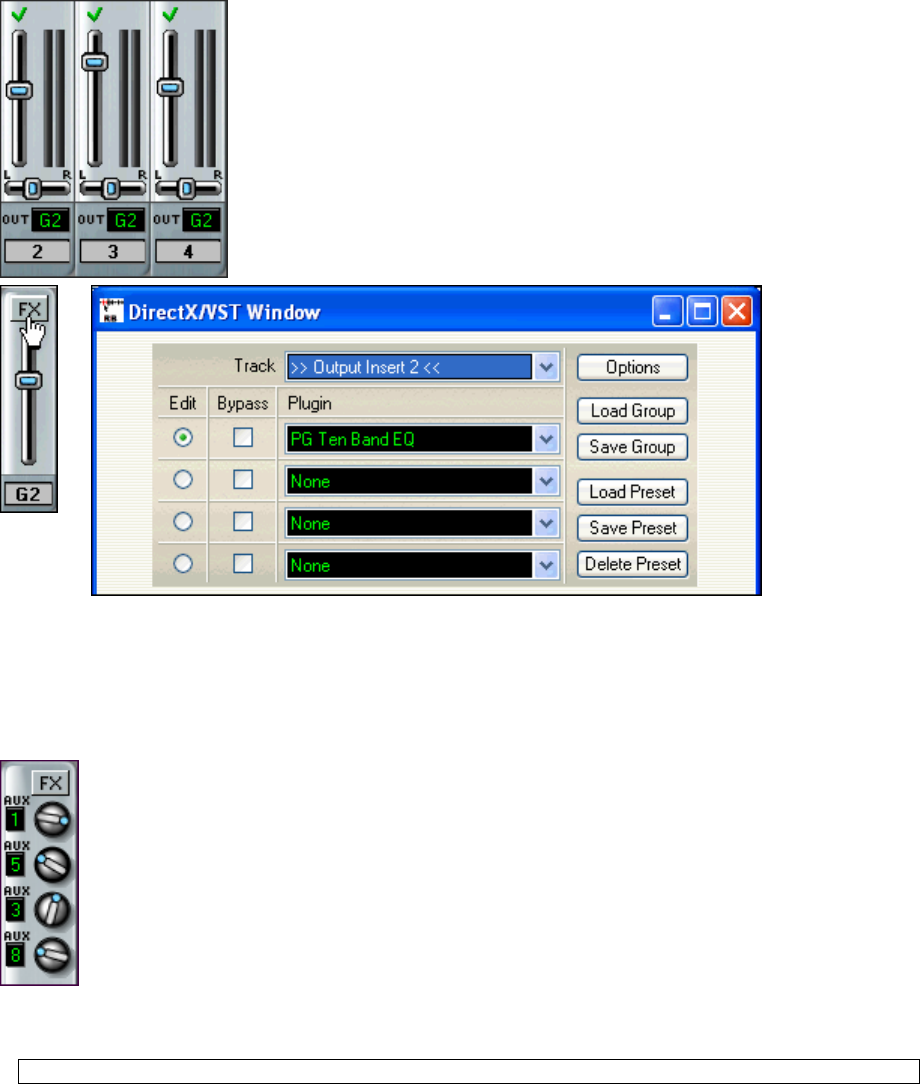
Chapter 11: Mixer Window
144
Note that this panel is scrollable, so if you can’t see all of the faders just use the ◄ ► scroll arrows to get to the one
you want.
If you were to then set the output ports of tracks 2, 3, and 4 to G2 (i.e., port 2, which
is now called Subgroup 2), and you were to adjust the volume of Subgroup 2 in the
mixer the same way you do for output ports, this will affect the volume of all 3 tracks
as a whole.
You could also add effects to the subgroup in the mixer the same way you do for
output ports. For example, you could apply an EQ to the subgroup as a whole.
The final output of the subgroup (G2) is sent to the audio output port (A1).
Real Time Audio Effects
Real time effects will let you add your favorite effects (such as chorus, reverb, EQ, etc.) at the same time that the
audio tracks are played without permanently altering the actual track data. You can apply real time DirectX and
VST effects to the audio tracks, Aux busses, audio subgroups, and audio output ports.
Track FX Inserts
On the mixer, there is an [FX] button at the top of each channel (track) strip of the mixer. Press the
[FX] button to bring up the DirectX/VST Window and you can select/edit a chain of up to four effects
plug-ins you wish to insert for just that particular track.
The “Track” field of the DirectX/VST Window lets you choose a track in which to select or edit
effects. The “Edit” radio buttons let you chose which of the four effects to edit in the group of effects
available in each Track.
DirectX/VST Window
In the illustration, the Melody is the currently selected Track, and slot 1 (PG Dynamics) is selected for editing.
Note: A “track” can be a track FX Insert, an Aux bus, or an Output insert.
Effects Groups and Presets
The [Load Group] and [Save Group] buttons let you load and save the effects settings for the currently selected
track. The [Load Preset] and [Save Preset] buttons let you save and load presets for the current effect (such as
Echo/Chorus). The [Delete Preset] button lets you remove a preset from the list of already saved presets.
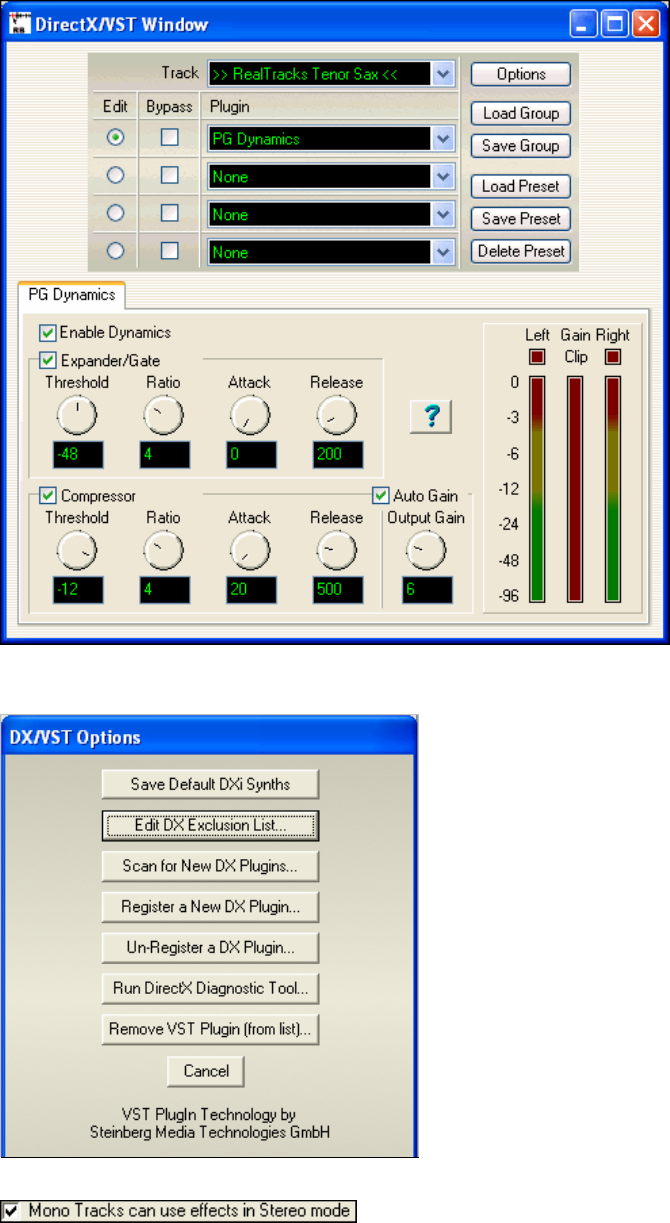
Chapter 11: Mixer Window 145
Options
The [Options] button brings up the DX/VST Options dialog:
These options are for managing the real time DirectX and
VST effects plug-ins on your system. The chapter on
Digital Audio Features has complete details.
Mono Tracks Can use effects in Stereo Mode
This setting in the Audio Options dialog allows mono audio tracks to
use the real time effects track inserts in stereo mode for better sounding mixes.
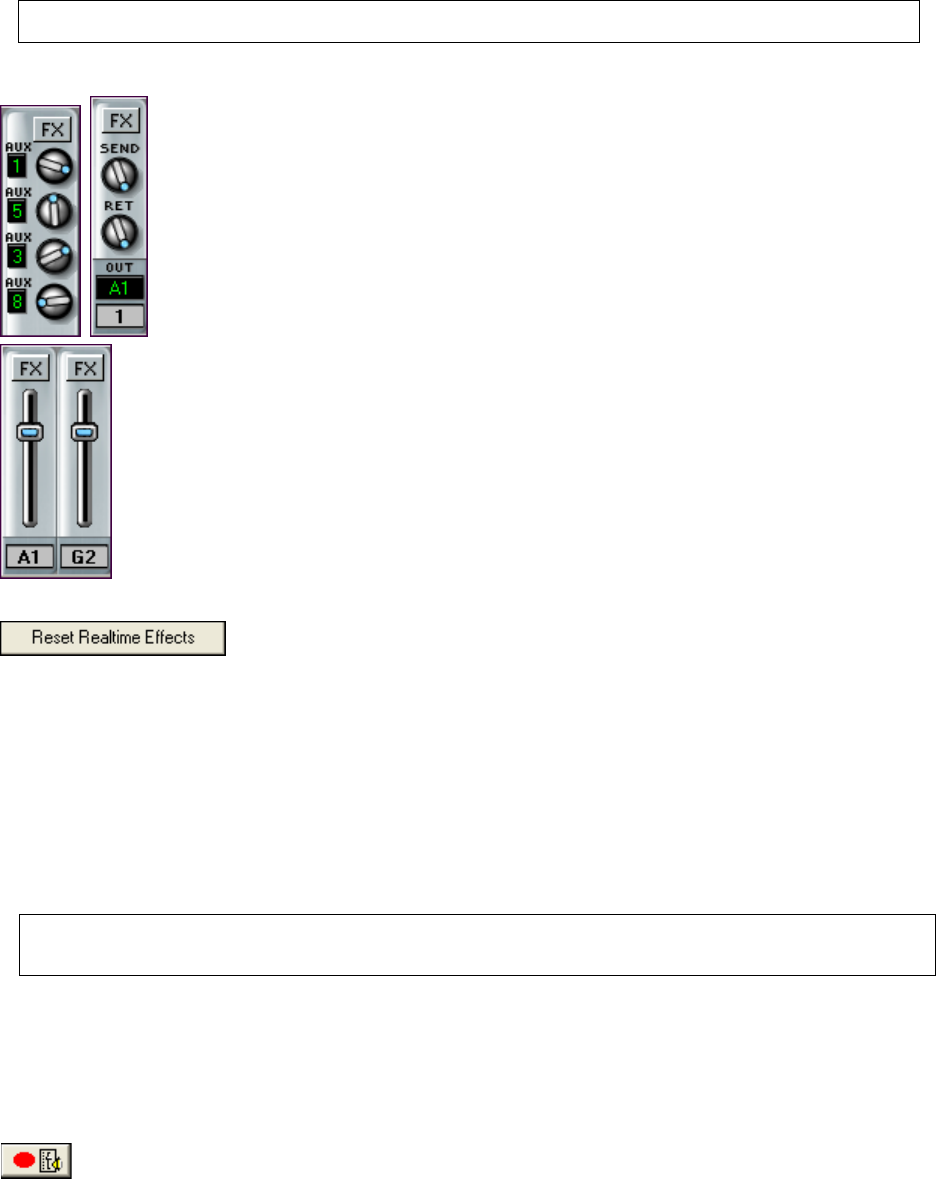
Chapter 11: Mixer Window
146
Note: This feature only applies to track effects inserts. Aux busses have always worked in stereo mode (if the effects were
stereo). This feature, when enabled, will also cause RealBand to use up more CPU processing power.
Aux Busses
Each track's mixer channel strip also has four assignable AUX knobs that let you individually
control the send levels for up to four auxiliary effects on each track.
There are eight Aux (auxiliary) effects busses in the Mixer window. Each allows a chain of
up to four effects.
You can adjust the Send level, Return level, and output port destination (audio port or
subgroup) for each bus.
The [FX] (effects) button at the top of each Aux strip brings up the DirectX/VST Window so
you can select effects or edit effects settings.
Effects can also be applied to the individual audio subgroups and output ports.
Each subgroup and audio port has an FX insert, with slots for four chained effects.
This is useful if you wish to apply special effects to a selected group of tracks, or apply them
globally to the final stereo output.
Real Time Effects Reset
The [Reset Realtime Effects] button is found in the Audio preferences dialog. It will
remove any real time effects from your project so you can begin remixing from
scratch.
Notes on Performance
The number of real time effects that you can expect to activate at a time without stressing the system depends on the
speed of your computer. Normally you would mostly be using the Aux busses, since the effects used in the Aux
busses can be applied to multiple tracks efficiently.
Let’s say you were to select a reverb in the Aux1 section of the mixer, and you adjust the Aux1 send knobs for five
tracks so that they were all using Aux1 for reverb. In this case, there would only be one instance of this reverb plug-
in active regardless of the number of tracks (5) that were utilizing the Aux1 bus, since the signals of all tracks
utilizing Aux1 share the same Aux1 signal path.
Note: The more effects you chain together within each Aux bus, Track Insert, or Output Insert, the more CPU power will be
required. For example, an Aux bus with just an EQ will require a lot less CPU power than an Aux bus with a chain of four
effects such as (Compressor – EQ – Chorus – Reverb).
Recordable Mixer Moves
Audio track mixer moves (Vol/Pan/Aux1/Aux2) are now recordable, and you can insert/delete/edit the associated
MIDI controller events in the Event List. To record Mixer moves the current track should be set to the track in
which you want to record the moves.
- Rehearse the Mixer move while playing the song, noting the “begin” and “end” points for the move. It’s often
useful to enable the metronome for reference during playback and recording.
- Start recording with the Mixer moves record button and perform the Mixer moves as rehearsed. Stop
recording.
- Answer [Yes] to “Keep Recorded Mixer Moves?” They will show up as a series of MIDI controller events in the
Event List for the selected track.
Alternatively, you could just use the Edit | Fill command or insert MIDI controller events into the event list for the
particular audio track.
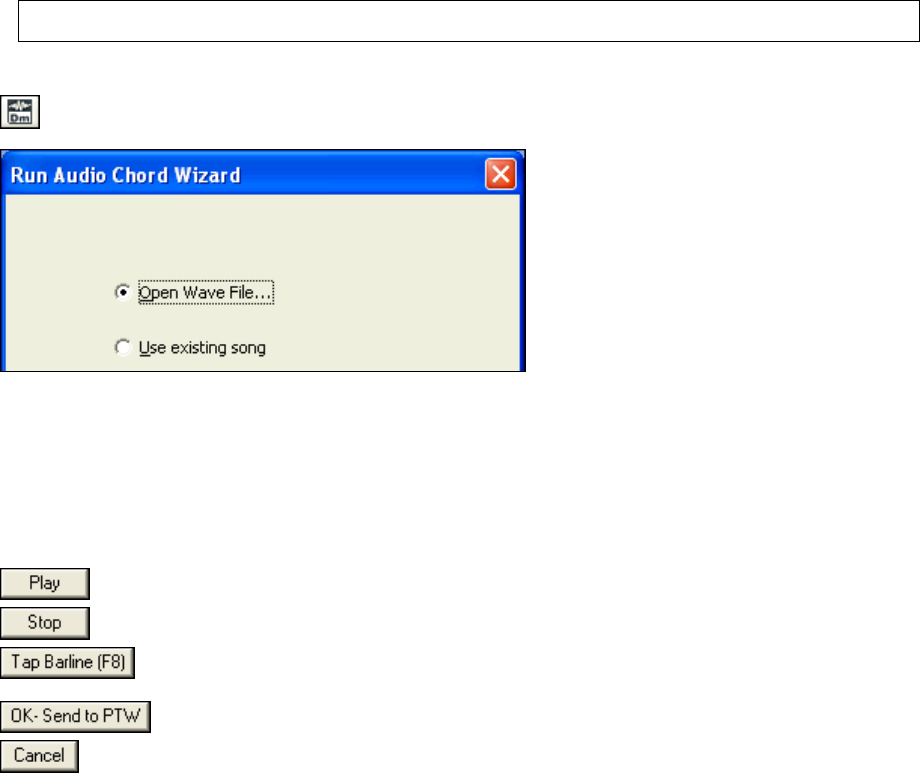
Chapter 12: Wizards, Tools, and Plug-Ins 147
Chapter 12: Wizards, Tools, and Plug-Ins
Audio Chord Wizard
Overview
The Audio Chord Wizard is an extremely powerful feature that automatically finds chord symbols (C, Fm7 etc.) by
analyzing the audio content of a song (MP3/WAV/WMA or CD-audio file). The song can be in a digital file format
(MP3/WMA/WAV), one that you created in RealBand, or directly loaded from a CD.
In addition to the chords, the Audio Chord Wizard also automatically determines the bar lines and a Tempo map.
Use this feature to instantly play along to your favorite songs, by reading and printing the chord symbols.
Improvements in Audio Chord Wizard 2.0 (from Version 1.0) include:
- Detection of up to 2 chords per bar
- Much improved chord detection accuracy
- Improved tempo tracking, ability to tap in a few bar lines during playback and tempo often locks to bar lines for
the whole song.
- Faster operation, including screen redraws and analysis.
The File | Open Audio w/Chords (WAV/WMA/MP3/CDA)... menu command will open an existing audio file into
RealBand, and then immediately launch the Audio Chord Wizard.
Note: The Audio Chord Wizard estimates the chord progression of an audio file. It is NOT an Audio-to-MIDI transcriber,
which would be a much more elaborate program.
Tutorial
The Audio Chord Wizard button on the toolbar launches the Audio Chord Wizard. This button will pop up
a dialog that gives you two choices: “Open Audio File” or “Use Existing Song.”
If you choose the “Use existing song” option, then RealBand will launch ACW using whatever song is currently
loaded into the program. You will also be asked a question about whether or not to preserve the existing bar lines.
If you choose to preserve existing bar lines, then ACW will only attempt to automatically detect chord symbols
rather than bar lines and tempo information. The Audio Chord Wizard opens the audio file and makes initial
calculations, finding audio beats and estimating a tempo map. And then Audio Chord Wizard displays your audio
file.
Primary Program Controls
Toggle Play/Pause (Space bar or Play/Pause key).
Stop play, rewind to start with Esc key.
Moves nearest bar line to current play position. F8 key or Enter key also set bar
lines.
Exit and send chords to RealBand.
Exit without sending chords to RealBand.
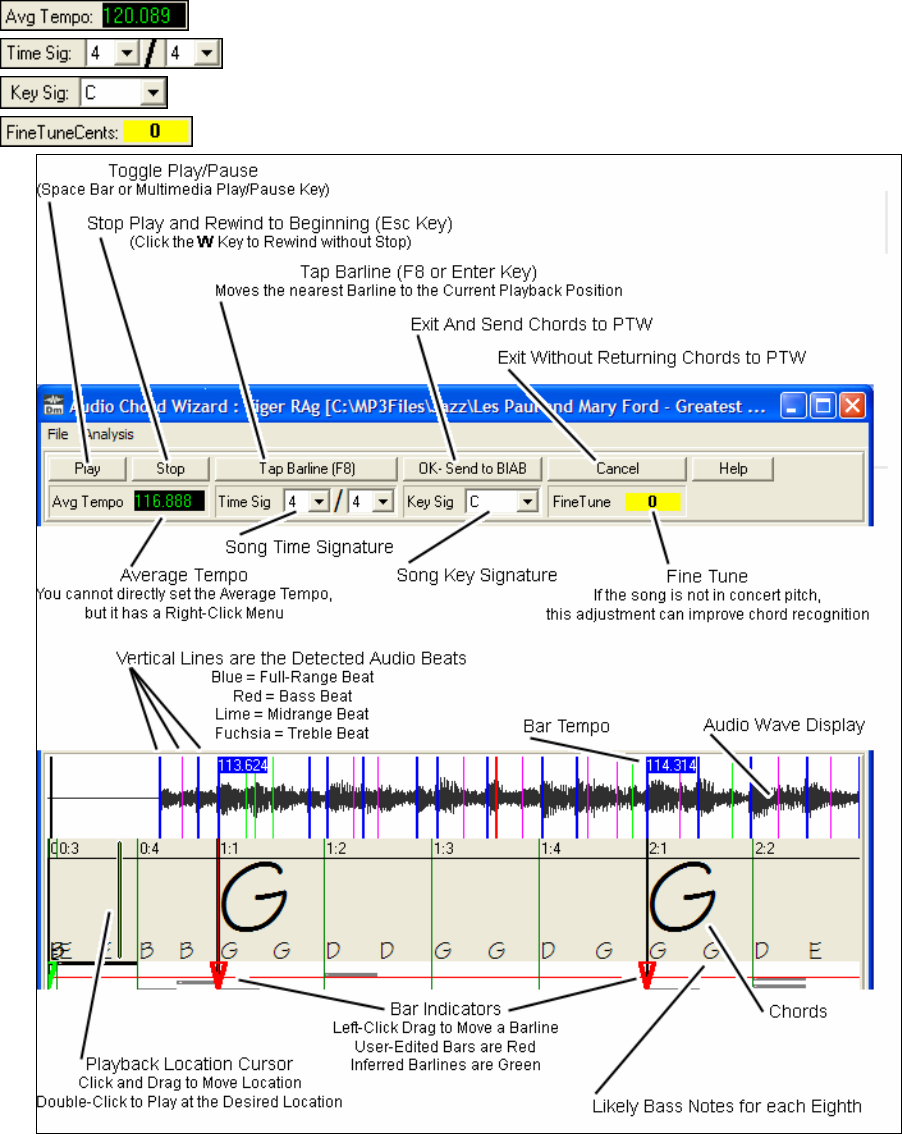
Chapter 12: Wizards, Tools, and Plug-Ins
148
Average tempo, right-click for options.
Song time signature, 2/4 to 12/8 supported.
Song key signature (set by user).
Use to correct pitch of song if necessary.
Chord Detection accuracy depends on the accuracy of the bar lines. If bar lines are not well-aligned then the Chord
Detection can be expected to be rather poor. It is quick and easy to align the bar lines on most songs, once you get
the hang of it.
The first task is to locate the beginning of Bar One. Since an audio file could have an arbitrary amount of silence at
the beginning of the song, and many songs begin with a pickup partial bar, ACW cannot easily guess the first bar
without a hint from you.
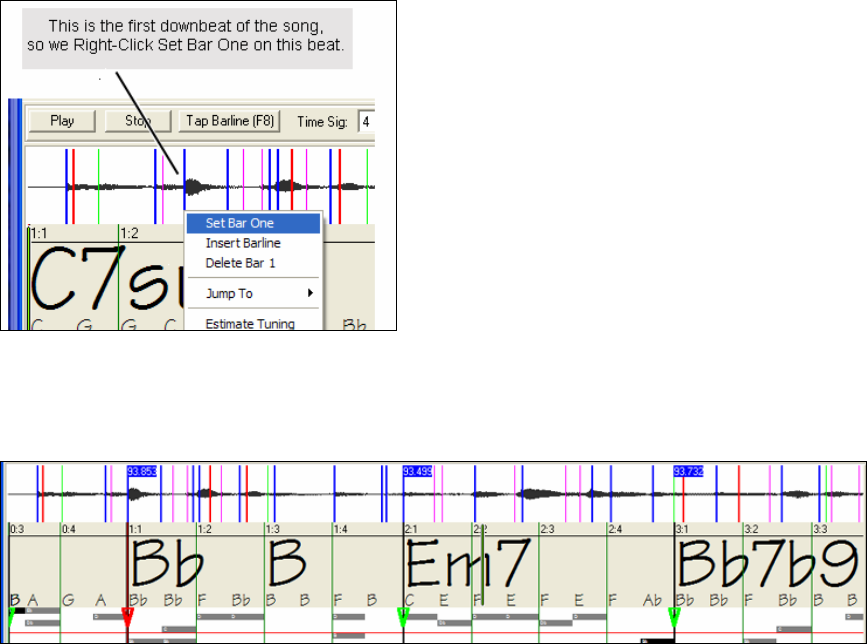
Chapter 12: Wizards, Tools, and Plug-Ins 149
The shortcut keys and mouse playback controls make it easy to find Bar One. Tap the space bar to begin play,
watch the Location Cursor, and listen for the downbeat. If the Location Cursor passes the downbeat and you were
not completely certain of the location, you can tap the W key to rewind to the song beginning and replay the first
part of the song, to audition the downbeat as many times as necessary to make sure of its location.
You can also single-click in the Chords panel to jump the playback position. If the rhythm is unusually complicated
near the downbeat, you could repeatedly click just a little before the suspected Bar One location, to zero-in on the
exact downbeat.
In the following example song, we have discovered the downbeat of Bar One, so we Right Click on that location to
Set Bar One.
Now the Bar One bar line is red (shown below). The red
Triangle bar indicator indicates that we have edited that
bar line. The Red Triangles are called Good Bar Lines
(GBL's). The green Triangle bar indicators are bar lines
which ACW has automatically inferred from its automatic
tempo detection PLUS your edited Good Bar Lines.
We call the green automatic bar lines Inferred Bar Lines (IBL's).
On this example song, the initial automatic tempo detection did a pretty good job. Simply setting Bar One has
caused the first four bars to be properly aligned to the music. On some songs, Set Bar One is the only action
necessary to get good bar alignment for the ENTIRE tune.
As playback continues in this example (below), we notice that ACW has made its first error approaching Bar 5.
Audio Chord Wizard has estimated the tempo of Bar 4 too slow. But that is easy to fix. If you prefer real-time
control, just tap F8 or the Enter key where the downbeat should actually be.
If you prefer stopped-time editing, you can either mouse-drag Bar 5 to its desired position, or drag the Playback
Location Cursor to the desired position and then tap F8 or the Enter key.
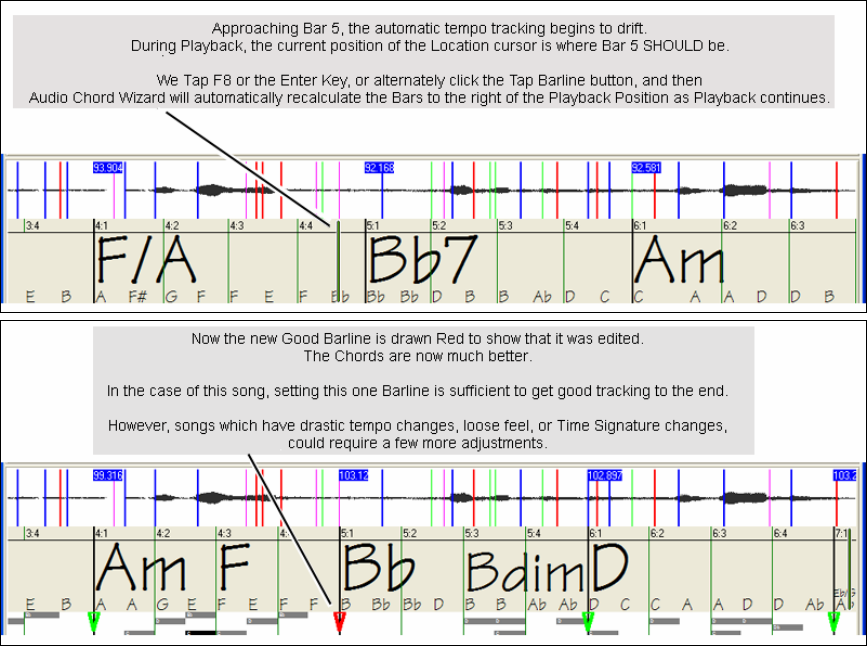
Chapter 12: Wizards, Tools, and Plug-Ins
150
When satisfied with the Bar lines and Chords, click the [OK] button to return the Chords and Tempo Map to Band-
In-a-Box or RealBand.
Keyboard Shortcuts
Keyboard shortcuts make it easier to navigate the song and tap in bar lines without having to work the mouse with
start/stop/scroll actions.
Play/Pause- SPACE BAR, or Multimedia keyboard PLAY/PAUSE key or (certain keyboards) PLAY key.
Stop- ESC key, or PAUSE key, or Multimedia keyboard STOP key
Tap Bar line- F8, or ENTER key
Jump To Song Start- W key, or HOME key
Jump To Song End- END key
Jump Forward One Bar- RIGHT ARROW key
Jump Back One Bar- LEFT ARROW key
Jump Forward Four Bars- PAGE DOWN key, or DOWN ARROW key, or Multimedia keyboard NEXT TRACK
key
Jump Back Four Bars- PAGE UP key, or UP ARROW key, or Multimedia keyboard PREVIOUS TRACK key
Special Cases
Time Signature:
If a song is not in the default 4/4 time signature, set the Time Signature very early before you do anything else.
Bad Initial Tempo Estimates:
Double/Half Tempo:
Sometimes Audio Chord Wizard will guess double or half of the tempo you might prefer.

Chapter 12: Wizards, Tools, and Plug-Ins 151
Slightly Wrong:
Sometimes syncopated songs can have musical anticipations which make ACW guess a tempo slightly too fast or
slightly too slow.
Completely, Horribly Wrong:
Some songs have rhythms difficult for a computer to understand. Sometimes a song's rhythmic beats are spaced in
such a way that a song with a perfect Tempo of 120, might mathematically BETTER fit the audio beats at some
simple (but wrong) related ratio such as 80, 100, 160, or 180 BPM.
If the initial Tempo Estimate is pretty good, the Tap Bar line function will be the easiest way to fix such errors,
requiring only a few keyboard taps during playback.
But if the initial tempo estimate happens to be horribly wrong, it helps to make the initial tempo “in the ballpark”
BEFORE you tap a few F8's to make it completely right.
Right-click the Avg Tempo control for some easy automatic fixes.
Note: If you want to use the Avg Tempo Menu functions, use the menu very soon after you have opened a song,
before you have done much bar editing. If you invoke the Avg Tempo Menu functions after you have laboriously
edited a lot of bar lines, the automatic nature of these functions can ruin your previous editing.
Note: Here is a good reason (in some cases) to initially set the tempo artificially slow by using the “Find Best Half
Tempo” function.
If the initial tempo estimate is considerably faster than the tempo which you want to tap-in, the Tap Bar line function
can mistakenly think that you want a very fast tempo, which fills the remainder of the song with unwanted fast-
tempo bars. In that case, if you initially set the tempo very slow, ACW will be unlikely to misinterpret your Tap Bar
Lines.
Set Key Signature
Once the chords look reasonable-- For instance if your song looks like it is probably in the key of F-- Set the Key
Signature control to F for better chord spelling. This only affects the cosmetic display of notes and chords (flats and
sharps). The Key Signature control does not currently affect the basic accuracy of Chord Detection.
Adjust Fine-Tuning
If a song is significantly mistuned from concert pitch, the notes are “in the cracks,” which makes Chord Detection
less accurate.
If your Chords look reasonable, there is no need to bother with Tuning. Most songs are recorded pretty close to
Concert Pitch.
But if you see numerous Chord errors, it may help to adjust the Fine Tuning control.
If you are playing along with a song on your keyboard, you might decide to make an ear-estimate of how far out-of-
tune is the song:
For instance, you could adjust the fine-tuning control on your keyboard until your keyboard matches the song's pitch
(according to your ear). Then you could look at your keyboard's tuning readout, and adjust ACW's Fine Tune
Control to match. Either click-drag ACW's Fine Tune control (like a slider control), or right-click the Fine Tune
control then type in a number.
The Fine Tune Control currently does not change the pitch of playback. Currently, the ACW's Fine Tune control
only improves Chord Detection on mistuned songs.
The Fine Tune control is calibrated in cents, 1/100th of a semitone. Therefore, if a song is perfectly in the key of C,
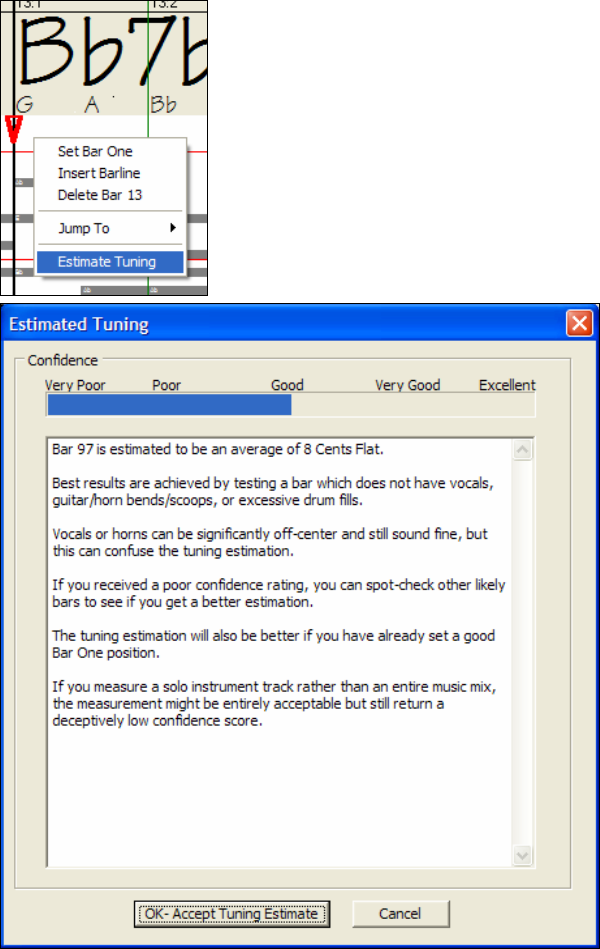
Chapter 12: Wizards, Tools, and Plug-Ins
152
but if you set Fine Tune to +100 Cents, ACW would display chords in the key of B. Similarly, if you set Fine Tune
to -100 Cents, it would display that song's chords in the key of C#.
That simple use of the Fine Tune control is just a backwards way to transpose the Chords. But if you set Fine-Tune
somewhere in the middle, ACW looks for notes that are somewhere “in the cracks” between the piano keys. For
instance, if your song SHOULD be in the key of C, but it was unfortunately recorded 50 Cents sharp--
There could be many reasons that a song was recorded off Concert Pitch. Maybe the recording studio had a broken
tape recorder, or the singer couldn't quite hit the highest note. Maybe the vinyl record cutter was off-speed, or some
Record Executive decided that the song was 10 seconds too long for airplay, and instructed the Mastering Engineer
to speed it up a little bit. In such cases ACW can get confused, misidentifying some pitches too high and other
pitches too low, detecting nonsense Chords.
So if your favorite song was unfortunately recorded 50 Cents sharp, you can set the Fine-Tune control to +50 Cents
so that ACW will properly display in the 'original' key.
Auto Estimate Tuning
ACW can automatically estimate the tuning, which helps in some cases. Since the
Estimation is math-intensive, ACW only analyzes one bar of music at a time.
Right-click somewhere inside a bar and pick the Estimate Tuning function.
After the process is finished, up pops the results dialog.
As advised in the dialog, results can be improved by carefully picking the bar. Bars
with relatively long notes are easier to analyze, compared to bars containing flashy
fast melodies.
It can be useful to spot-check a few bars. If several spot-checks give similar answers
(within a few cents), you have good confidence that the results are actually
meaningful, not being randomly affected by out-of-tune melodies or loud drums.
However, if the first estimate reads +43 and the next measurement reads -12, then it
probably means that your song is not a
good candidate for automatic Tuning
Estimation.
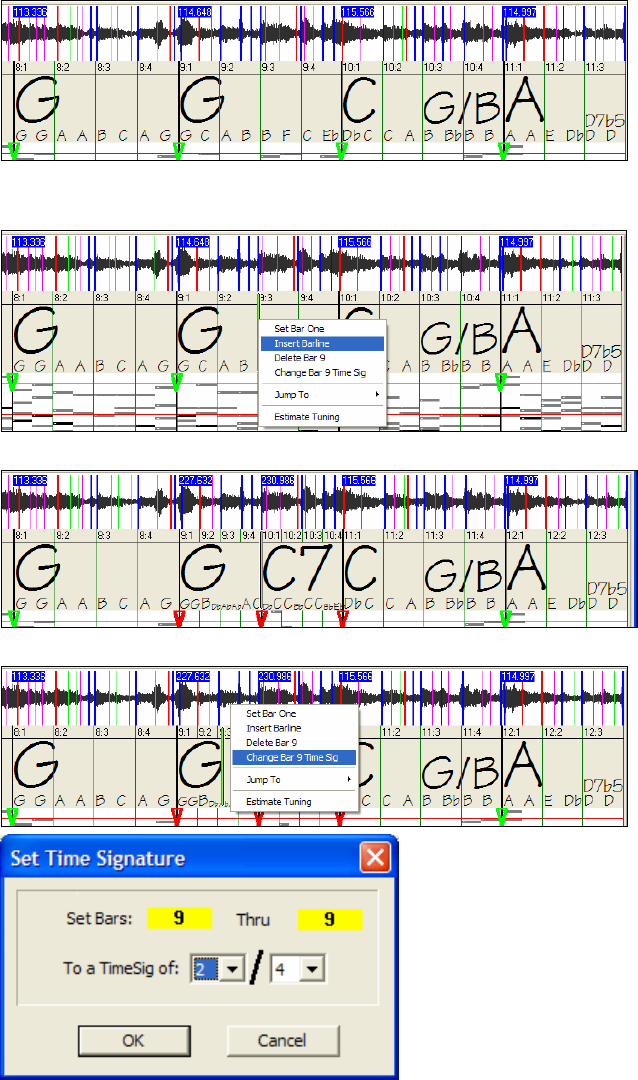
Chapter 12: Wizards, Tools, and Plug-Ins 153
Odd-Length Bars and Drastic Tempo Changes:
If a 4/4 song contains occasional bars of 3/4, 5/4, or whatever, or if there are sections where the music has an
extreme ritard or accelerando, sometimes you can just Tap Bar Lines to adjust it.
But it is sometimes more convenient to manually add or delete bar lines. The following example song has an overall
Time Signature of 4/4, but Bar 9 should have a time signature of 2/4. If you simply Tap Bar Line on 9:3 to shorten
the bar, then ACW will mistakenly decide that you wish to make all the following bar lines double-tempo 4/4.
Solution
First, Right-Click on the beat 9:3, and Insert a bar line.
Now a new bar line is added, and three new GBL bar lines are flagged red.
Right-Click on the new shortened Bar 9 and set the Time Signature to 2/4.
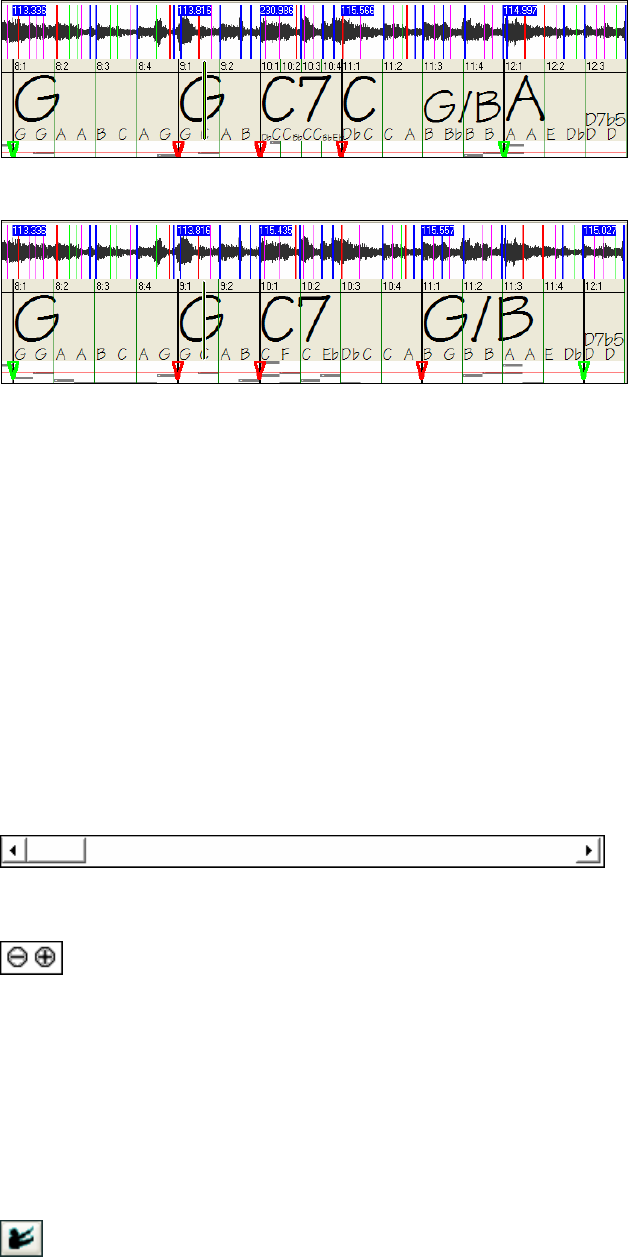
Chapter 12: Wizards, Tools, and Plug-Ins
154
Change Bar 10 to its desired duration. Hover the mouse over the red triangle marker at Bar 11, and the mouse
cursor becomes a drag cursor. Click and drag the bar line to the location marked 11:3
Now we have edited bar 9 to have its proper 2/4 Time Signature and preserved the song tempo on both sides of the
2/4 bar.
Precise “Floating Point” Tempos
RealBand supports precise floating-point tempos, such as 120.514 BPM. This makes it easier to sync MIDI tracks
to prerecorded audio tracks if the audio tracks weren’t recorded exactly at an integer tempo. This also is what lets
RealBand play a song in sync to an existing audio track after the Audio Chord Wizard has worked its magic.
Notes Display
The Notes Display looks like a MIDI Piano Roll, but it is not exactly the same as a MIDI Piano Roll. Audio Chord
wizard detects the strongest frequencies found in each eighth-note time slot, and displays them in the Notes Display.
Sometimes the displayed frequencies REALLY ARE instrument notes played in the audio file. But they could be
spurious information, such as the accidental loudest frequency of a drum beat. A midrange frequency note-bar
might be showing the sum of harmonics from several instruments, each instrument's harmonics contributing to the
strength of that frequency.
The Notes Display information is real and useful, but try not to assume that every displayed note-bar is a real note in
the audio.
Horizontal Scroll Bar
Scroll forward/back in the wave file.
Plus/Minus Zoom Buttons
Zoom the display to show more or less detail.
Conductor Window
“Conductor”- Live Looping/Playback Control
As the song is playing, there are options to control the flow of playback by one of three methods:
1. Conductor window
2. QWERTY hot keys
3. MIDI keyboard
The Conductor is launched with the Conductor button on the toolbar.
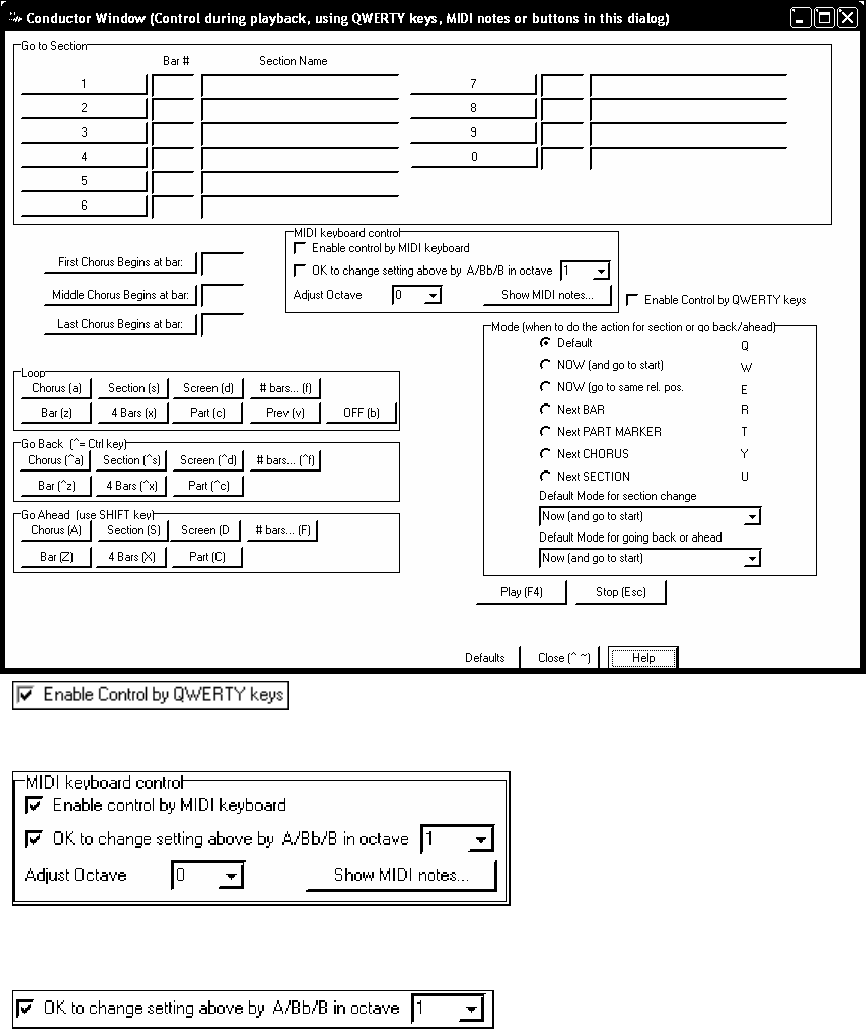
Chapter 12: Wizards, Tools, and Plug-Ins 155
You must enable the QWERTY keys to be active for the Conductor during playback. This is done by selecting the
“Enable Control by QWERTY keys” checkbox on the Conductor Window.
If you want to control the Conductor using the MIDI keyboard, you need to enable this by selecting the checkbox
“Enable control by MIDI keyboard.” in the MIDI keyboard control box. When this setting is enabled, any MIDI
input will be interpreted as a hot key for the Conductor, and you won’t hear MIDI thru.
If you’d like the ability to switch your MIDI keyboard between Conductor mode and regular playing mode, you
can do this using the lowest “A-natural” MIDI note on your keyboard. This is A1 on an 88-note keyboard. Note
A1 will turn the Conductor off, Bb1 turns it on, and B1 will toggle the Conductor on only when the Bb1 note is
held down. If you don’t have an 88-note keyboard, you can set the octave setting to a number higher than 1, for
example if you set it to “3,” then notes A3/Bb3/B3 will turn the Conductor Off/On/Toggled.
Using the Conductor QWERTY or MIDI keys, you can:
- Define and jump to up to 10 user defined sections in the song,
- Jump back 1 bar/4 bars/# of bars/screen/part/chorus/section,
- Jump ahead 1 bar/4 bars/# of bars/screen/part/chorus/section,
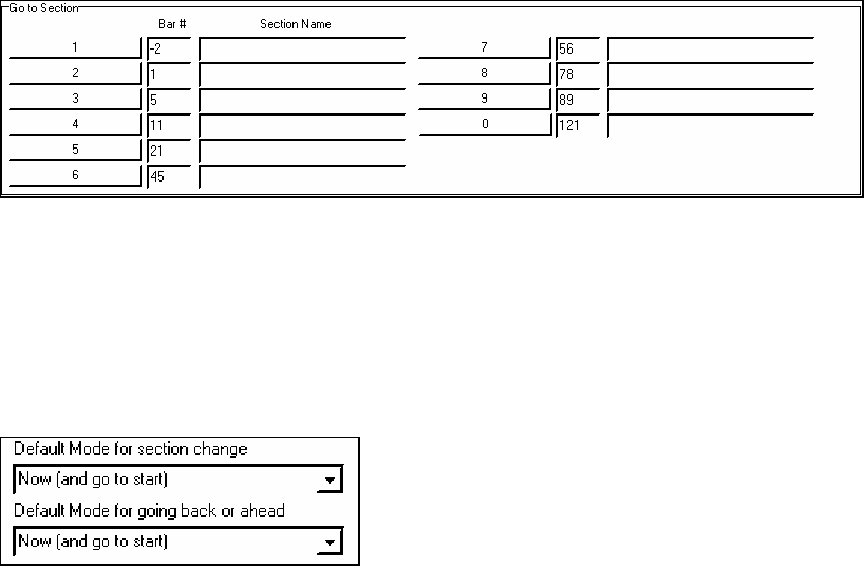
Chapter 12: Wizards, Tools, and Plug-Ins
156
- Loop 1 bar/4 bars/# of bars/screen/part/chorus/section,
- Pause/stop the song.
In addition, using the MIDI keyboard, you can also use the Conductor to:
A1 (note#21) Turn MIDI Conductor OFF
Bb1 Turn MIDI Conductor ON
B1 Turn MIDI Conductor ON only as note is held down
The various functions of the Conductor are also available with MIDI keys and QWERTY hot keys.
Customizing the Sections
Sections: This allows you to define up to 10 points in the song that are sections. By default, the following sections
are defined for each song.
- Section 1: Start of song
- Section 2: Intro
- Section 3: First Chorus
- Section 4 :Middle Chorus (i.e. start of chorus #2)
- Section 5: Last Chorus
- Section 6: Ending
- Sections 7-10 are user definable. To do this, type in any bar # using the bar/chorus format (e.g. 21/2 would be
bar 21, chorus 2).
If you prefer to enter custom values for the section numbers, you can do this if you check the “custom” checkbox,
and then type in up to 10 bar numbers for each section.
The section numbers are saved with the song. Once you have defined the sections, you can jump to a certain section
of the song as the song is playing, simply by:
1. Pressing the 1-9 or 0 key on the QWERTY keyboard or,
2. Opening the Conductor window (~ hot key) and clicking on the section button or,
3. Pressing MIDI keys 77-86 (F6 to D7) corresponding to sections 1-10.
Mode (when to do the action).
By pressing a QWERTY hot key prior to an action, you can control when the action will take place. If no mode hot
key is pressed prior to an action, the default mode will occur.
The default is set in the “Default Mode for section change” or “Default Mode for going back or ahead” combo box.
For example, by default, the section change will occur as soon as you press the key, and it will go to the equivalent
place in the bar immediately before the beginning of the target section (so that the music stays in time, and the next
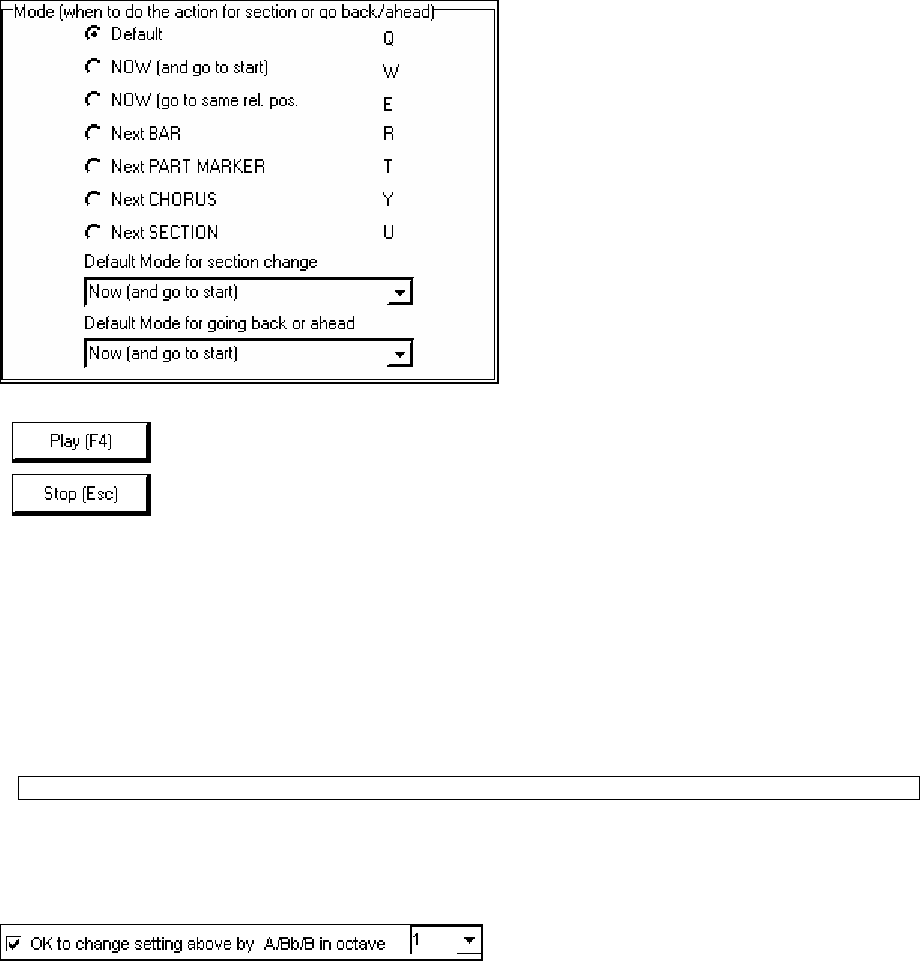
Chapter 12: Wizards, Tools, and Plug-Ins 157
section begins at the end of the bar). But you can change the default for the action to take place at the end of the
current bar or current part marker etc.
Play Control Buttons
This plays the song. Hot key = F4, MIDI note = F4.
This stops playback. Hot key = Esc, MIDI note = F#4.
Example uses of the Conductor:
In this example, we don’t have custom sections set, so the default sections apply (middle chorus = section 4 etc.).
- Jump to the start of middle choruses during playback (press “4”).
- Loop the middle chorus (press S, which is Loop Section).
- Jump to the end of the song (press 6 ).
- Go back 1 chorus (Ctrl+A).
- Go ahead 1 chorus (Shift+A).
At the end of the current chorus, go back 1 section, press Y then Ctrl+S.
Note: Pressing the Y sets the mode to do the action at the end of the current chorus
These actions can also be done with the MIDI keyboard.
Example using the MIDI keyboard:
Assume Charlie is a piano player who uses his MIDI keyboard with RealBand, and would like to play his keyboard,
but also use it to control RealBand.
He sets the conductor to allow his MIDI keyboard lowest notes A/Bb/B to turn the Conductor mode
OFF/ON/Toggled-when held.
When he turns it off (low A note), he can play his keyboard normally.
If he wants to pause the song, he holds down the low B3 note as he presses the MIDI key for pause, which is G4.
The song will pause, and the conductor mode turns off as he lets go of the B3 key, and he can resume his piano
playing. If Charlie didn’t plan on using the MIDI keyboard for piano playing, he could leave it in conductor mode
by turning it on with the A3 key.
Conductor Functions with MIDI and QWERTY Hot Keys
MIDI Note Function QWERTY Key
Chapter 12: Wizards, Tools, and Plug-Ins
158
F4 Play F4
F#4 Stop Escape
A4 MIDI panic F12
Bb4 Previous Jukebox song Ctrl+Shift+F8
B4 Next Jukebox song Shift+F8
Db5 Open Notation window Ctrl+W
D5 Lead Sheet window Alt+W
F6 to D7 Jump to sections 1-10 of the song 1-9 and 0
Eb7 Loop current chorus A
E7 Loop current section S
F7 Loop current bar Z
F#7 Loop current 4 bars X
G7 Loop current part C
Ab7 Looping ON, previous setting V
A7 Looping OFF B
Bb7 Go Back 1 Chorus Ctrl+A
B7 Go Back 1 Section Ctrl+S
C8 Go Back 1 Screen Ctrl+D
Db8 Go Back 1 Bar Ctrl+Z
D8 Go Back 4 Bars Ctrl+X
Eb8 Go Back 1 Part marker Ctrl+C
E8 Go Ahead 1 Chorus Shift+A
F8 Go Ahead 1 Section Shift+S
F#8 Go Ahead 1 Screen Shift+D
G8 Go Ahead 1 Bar Shift+Z
Ab8 Go Ahead 4 Bars Shift+X
A8 Go Ahead 1 Part marker Shift+C
In addition, using the MIDI keyboard, you can also use the Conductor to:
A1 (note#21)Turn MIDI Conductor OFF
Bb1 Turn MIDI Conductor ON
B1 Turn MIDI Conductor ON only as note is held down
TranzPort® Support - Wireless Remote Control
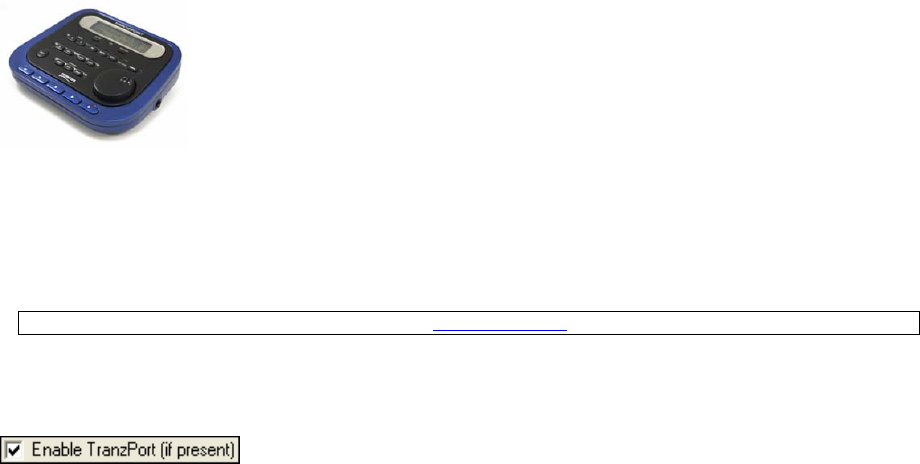
Chapter 12: Wizards, Tools, and Plug-Ins 159
TranzPort Support - Wireless Remote Control support for RealBand!
The Frontier Design TranzPort® is a wireless remote control hardware unit (Electronic
Musician Editors’ Choice 2006) that now allows you to control RealBand from 30 feet
away!
The backlit LCD provides a two line readout. Buttons and a wheel allow control of many RealBand features. Select
songs and control Play, Stop, Pause, and Loop. Select, Mute, and Solo tracks as well as Volume and Tempo
changes are all supported.
You can, for example, put the TranzPort unit on your piano at home (or your music stand on a gig) and
load/play/control songs, all while far away from your computer – all wirelessly up to 30 feet – even through walls!
The TranzPort also works “right-out-of-the-box” with Band-in-a-Box.
Note: the TranzPort is sold separately by PG Music Inc. www.pgmusic.com
Using TranzPort with RealBand
To use the MIDI TranzPort with RealBand, first make sure the Frontier USB wireless receiver is plugged into a
USB port of your computer.
The “Enable TranzPort (if present)” checkbox must be selected under the MIDI tab in Preferences. If this checkbox
is unchecked, then RealBand will not attempt to look for and initialize the TranzPort. By default this checkbox is
enabled, which means that, by default, RealBand will always try to find and initialize the TranzPort.
You should see a TranzPort icon on the Windows task bar. RealBand should then automatically connect to
TranzPort when you start-up RealBand.
To verify that the TranzPort is installed, you can visit the MIDI drivers dialog and see if TranzPort shows up as a
MIDI In and MIDI Out driver. Do NOT select the TranzPort in the MIDI drivers dialog.
To start using the TranzPort
While RealBand is running, “wake up” the TranzPort by pressing a key on the TranzPort (e.g. the STOP key). The
TranzPort display will show
- “Title of RB song” on top row of LCD
- <tempo> <Current Track Number> <track volume> <patch # (if track is MIDI)>
For example, the screen might say
“My Tune”
120 Tr=1 v=122 p=1
TranzPort Key Commands
- Track arrow keys - increase or decrease the current track in RealBand.
- Rec - begins recording.
- Solo - same as pressing solo button in RealBand.
- Undo - same as Edit - Undo in RealBand.
- IN - when a popup OK/Cancel or Yes/NO dialog is on the screen, IN will function as either an OK or Yes
answer.
- OUT - when a popup OK/Cancel or Yes/NO dialog is on the screen, OUT will function as either a Cancel or No
answer.
- Shift-IN - Load Previous Song.
- Shift-Out - Load Next Song.
- Punch - enables or disables punch-in mode in RealBand.
- Loop - enables or disables loop mode in RealBand.
- Wheel - change the tempo of a MIDI-only song.
- Shift+Wheel - Increase or Decrease volume of Current Track by 5.
- Prev+Wheel - Increase or Decrease volume of Current Track by 1.
Chapter 12: Wizards, Tools, and Plug-Ins
160
- Next+Wheel - Increase or Decrease MIDI Patch number for current track.
- Shift+Prev - jump to previous marker in RealBand.
- Shift+ Next - jump to previous marker in RealBand.
- Add - add a new marker at current song location.
- Rewind button – rewind.
- Fast fwd button - fast forward.
- Stop button – stop.
- Play button – play.
- Record button – record.
Pitch to MIDI Converter
Access the Pitch to MIDI Converter by selecting (highlighting) an audio track and choosing the Audio | Pitch to
MIDI Convert (current audio track) menu item.
The converter cannot recognize chords or mixes of music instruments. It gives the best results with single-note
melody lines, played very cleanly, and with very little background noise or hum.
For best results, use very plain playing technique and pure tone. Idiosyncratic playing technique or wide variation in
instrument tone can confuse the converter. When playing guitar or other stringed instruments try to avoid ringing
strings. A quietly ringing open string can also confuse the converter as it tries to determine the pitch of your
intended note. For vocals, try humming or singing all notes with a pure vowel sound such as “Oooh” or “Aaaah.”
As with other pitch-to-MIDI computer algorithms, this plug-in is not absolutely perfect. However, with careful
playing (or singing) and the right settings you can get good conversion results on most of the notes. You can also
expect to get a few “off the wall” notes, which must be edited, in the Notation or Event Edit screens.
Settings
Thresh - The Note On level threshold, in dB. Audio below the Note On threshold will not trigger notes. If Thresh
is set too low, the converter will try to convert noise and unintended notes to MIDI. If Thresh is set too high, the
converter might miss some of the intentional notes in the audio.
For best results use a fairly loud track. It is not necessary to have the audio recorded so loud that it distorts.
Re-Trig - Set the sensitivity for re-triggering identical note pitches. For instance, this control is useful to properly
detect guitar double-picking techniques. If the slider is too high, it will re-trigger too many notes, and if the slider is
too low it will miss some re-triggers. Some instruments might work better with minimal or no re-triggering (slider
all the way down). Soft attack instruments such as flute or sax might need the Re-Trig set fairly high in order to get
good performance on legato repeat notes.
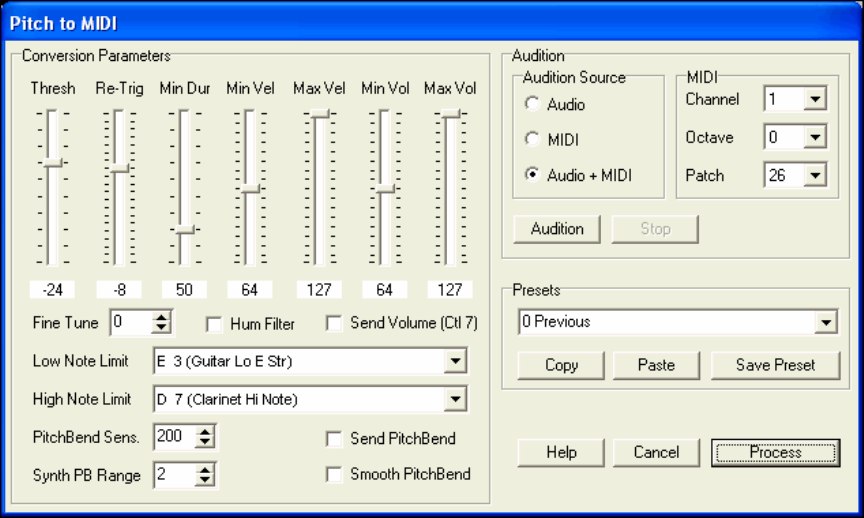
Chapter 12: Wizards, Tools, and Plug-Ins 161
Pitch to MIDI plug-in will analyze a monophonic audio track and create an equivalent MIDI track.
Min Dur - Minimum note duration (in milliseconds). This setting helps to ignore very short glitch notes, short
tracking errors within notes, and fixes tracking wobble on note decay. As notes decay and become very quiet the
note is not very loud compared to the noise in the track which means the converter will have more difficulty
measuring the pitch. If you get too many glitches increase the Min Dur setting. If you miss too many notes
decrease Min Dur.
Fine Tune - Compensate for an out-of-tune recording. If too many MIDI notes are playing a half step too high
adjust the Fine Tune setting upwards. If too many MIDI notes are playing a half step too low adjust it downwards.
Low Note Limit, High Note Limit - Set the expected note range of the source audio.
Min Vel, Max Vel - The Midi velocity range that corresponds to the audio note amplitude. An input Note that
reaches up to 0 dB will send the Max Vel, and a note that is barely above Thresh will send the Min Vel. For an
organ-type on-or-off response, set Max Vel and Min Vel to the same value. This will cause all MIDI notes to have
the same velocity.
Hum Filter Checkbox - Pre-process the audio thru a hum filter –in case the audio has too much hum (hum can
confuse the pitch detection).
Send Volume Checkbox - Insert Volume messages in the MIDI track.
This could be most useful with voice, violin, horns, or even guitar
A good way to use this setting would be to set a narrow velocity range– Perhaps Min Vel and Max Vel could be set
to 127, or perhaps Max Vel = 127 and Min Vel = 100. Then enable the Send Volume checkbox.
Each note’s MIDI volume is controlled by the instantaneous audio level rather than controlling the level by MIDI
velocity. You could use a long-decay synth patch, and each note will track the volume envelope of the underlying
audio. With “just the right settings” it will track gradual changes in dynamics on sustained instruments such as horn
or voice.
Min Vol, Max Vol - Adjust the volume message range (controller 7) that is transmitted according to the
instantaneous audio level of the source file.
Audition Button - Convert and then play the file.
Stop Button - End the audition playback.
Audition Source - Audition the source wav, the converted MIDI, or both at the same time. The timing is fairly tight
between audio and MIDI, but when auditioning Audio and MIDI simultaneously, there may be slight variations
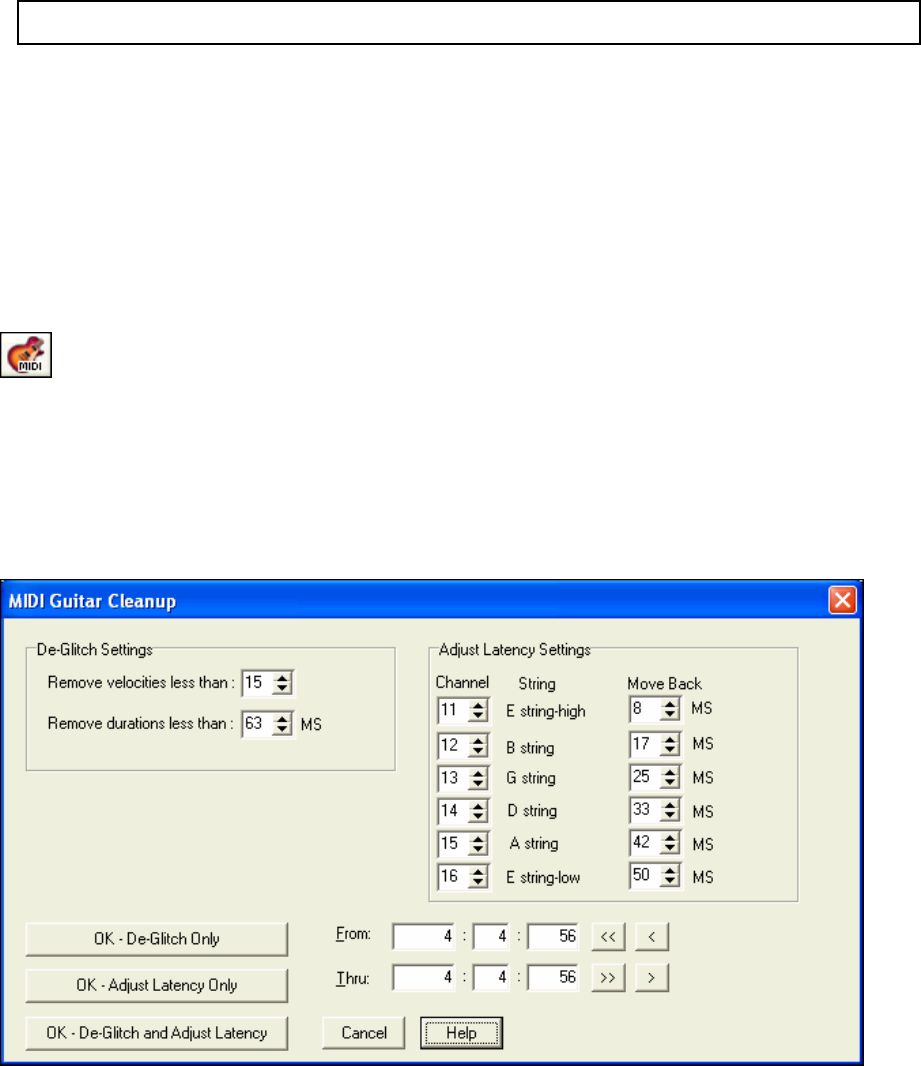
Chapter 12: Wizards, Tools, and Plug-Ins
162
depending on the MIDI latency and audio latency of your sound card. The playback timing will be much better once
the MIDI track has been exported back into RealBand.
Note: The audio audition uses the Windows default audio device, and the MIDI audition uses the Windows default MIDI
device.
MIDI Channel - The audition MIDI channel.
MIDI Octave - The audition octave. This only affects the octave of audition playback. It does not affect the pitch
of file output. Once the conversion has been exported back into RealBand you can adjust the octave of the track
here, if necessary.
MIDI Patch - The MIDI patch is used for Audition playback. This setting does not affect the patch assigned in
RealBand.
Cancel - Exit the Pitch to MIDI converter.
Process - Do the conversion and return to the host program (RealBand).
MIDI Guitar Cleanup
The MIDI guitar tool bar button launches the MIDI Guitar Cleanup dialog where you can clean up
MIDI tracks recorded on a MIDI guitar.
The De-Glitch routine will automatically remove glitch notes based on the Velocity and Duration settings in
milliseconds (ms). The Adjust Latency routine will automatically move the location of notes earlier to compensate
for MIDI guitar latency. You can specify the adjustments for each string in milliseconds if the default settings don’t
match your guitar's response times.
- OK – DeGlitch Only – This will process the track using the DeGlitch routines only.
- OK – Adjust Latency Only – This will process the track using the latency adjustment routines only.
- OK – DeGlitch and Adjust Latency – This will process the track using both sets of routines.
Convert to WMA (Windows® Media Audio™)
Us this plug-in feature to convert a .WAV file to Windows Media Audio format (*.WMA). There are options to
save the file to a specific filename and destination folder, to select a resolution (quality) for the file, and spaces to fill
in the appropriate Title, Author, Copyright, and song Description credits. This information will be embedded into
the resulting WMA file and will be viewable when the file is played in an appropriate media player.
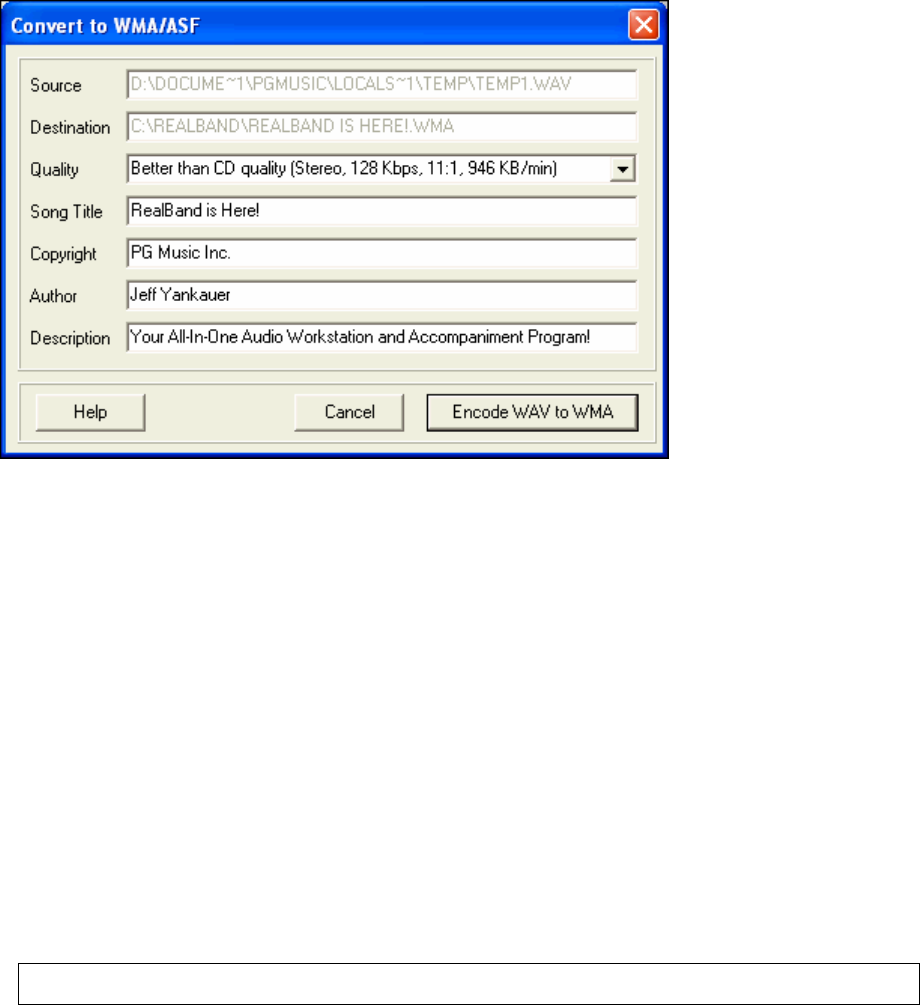
Chapter 12: Wizards, Tools, and Plug-Ins 163
To access this feature select Audio | Merge Audio and DXi Tracks to WMA file.
In the example we chose 160Kbps, since we want the file to sound as clear as possible. You can set this
quality/resolution parameter from a low of 6Kbps up to this 160Kbps rate. You might want to choose a setting of
around 32Kbps (modem speed) if you want to make a file that can “stream” on your web site.
Source – This field displays the source WAV file. It is for informational purposes only. This field cannot be edited.
Destination – This field displays the Destination filename and path. This can be edited if desired.
Quality – Set the bit rate of the compressed file. Higher bit rates have higher quality audio, while lower bit rates
make smaller files which take up less space on a hard drive (and are easier to stream over the Internet) at the
expense of sound quality.
Song Title – The Song Title which is encoded into the WMA file, and which is displayed by a WMA player.
Copyright – Copyright information encoded into the WMA file.
Author – Author information encoded into the WMA file.
Description – Additional information encoded into the WMA file.
As mentioned, the information you enter into the Song Title, Copyright, Author, and Description fields will be
viewable when the file is played in a supported media player.
Miniburn
The Audio | Launch CD Burner… plug-in feature renders the current project file to a stereo .WAV file and then
launches the CD Burner application.
Note: If your drive is not recognized by MiniBurn then you should burn the rendered .WAV file to CD using the software
supplied with the CD drive.
You can add songs to the CD-R at a later date if you don’t select (disable) the “Finalize” option. Any CD you create
won’t be playable in an audio CD player until the disc is finalized. Make sure that the disc is finalized when you
burn the CD for the last time.
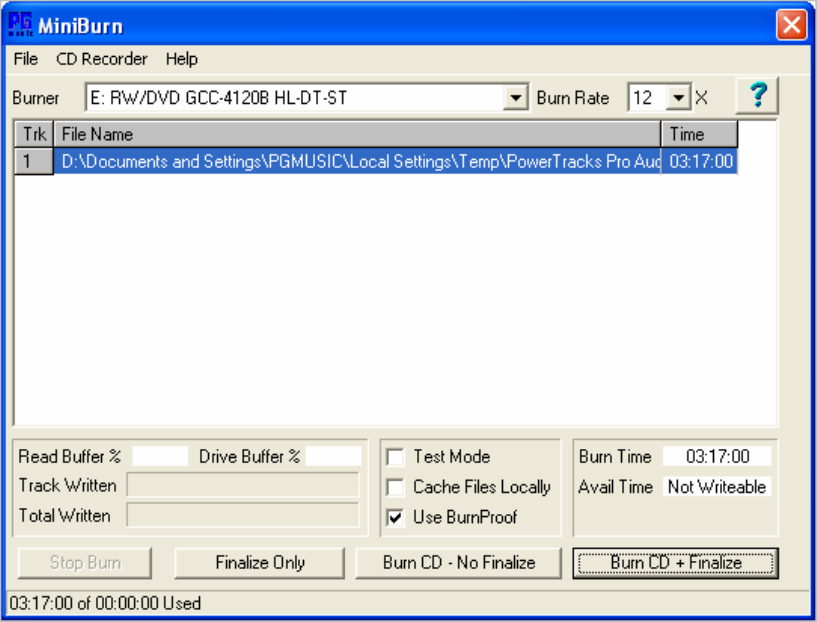
Chapter 12: Wizards, Tools, and Plug-Ins
164
MiniBurn details
The Burn List
Burn list files are displayed in MiniBurn’s central file list region.
Trk - Track Number
File Name - Path and name of Wave files
Time - Play time of each track, formatted in minutes:seconds:frames.
Burn Time indicates the sum of all the burn list track times.
Avail Time indicates the time available on the blank CDR, if a writeable CDR or CDRW has been inserted in the
CD Burner. If no disc has been inserted, or if an unwriteable disc has been inserted, Available Time reads “No
Disc.”
Add Files to the Burn List
- Use the menu item File | Add Track…
- Right-click on the Burn List and select Add Track from the pop-up menu.
- Drag wave files into the MiniBurn window from an open Windows folder.
Remove Files from the Burn List
- Left-click to select a track, then use File | Remove Selected Track.
- Left-click to select a track, then right-click on the Burn List and pick Remove Track from the pop-up menu.
Clear All Files from the Burn List
- Use the menu item File | Clear All Tracks From Burn List.
- Right-click on the burn list and select Clear All Tracks from the pop-up menu.
Change the Order of Tracks in the Burn List
- Left-click on the Trk column of the file you wish to move, and drag the file to a new location in the list.
Description of Filenames
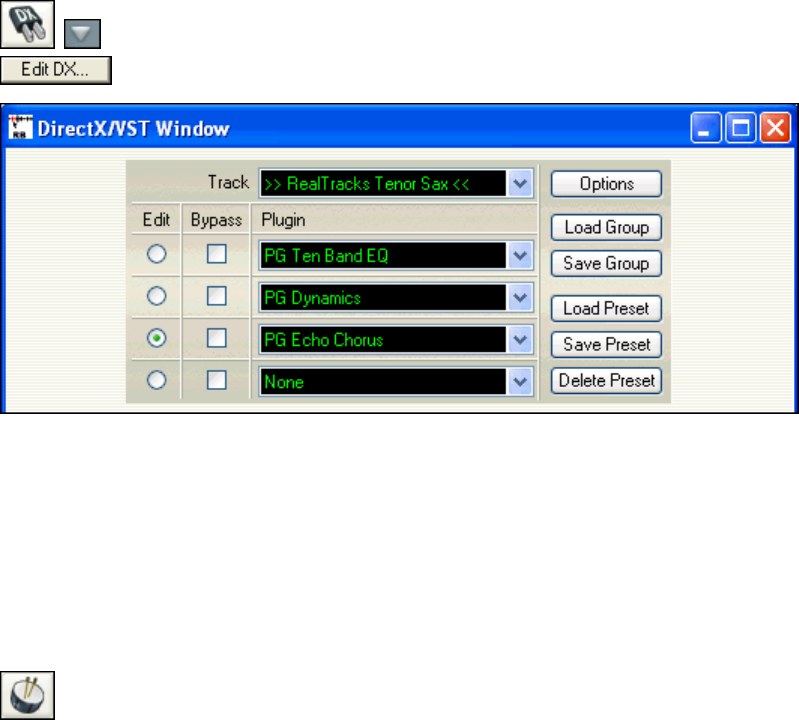
Chapter 12: Wizards, Tools, and Plug-Ins 165
miniburn.exe - Main program executable. This program can be run as a plug-in from within RealBand, or it can be
run stand-alone. Double-click this file (located in the main RealBand folder) to run Miniburn in stand-alone mode.
done.wav - This wave file (if present) will play when the burning operation is complete. You can use any standard
wave file – just save it as done.wav and the program will play that file when done.
burn.txt - The program automatically looks for and loads files specified in the burn.txt file at the beginning of a
burn session. A burn.txt file is made when the program is launched, adding the “current song” to the burn list
automatically.
acdwrite.ocx - An active X control that is registered and installed into the Windows OS. This file is required for the
burner software to operate.
DirectX (Windows® Audio Plug-In Format)
Use this feature to apply DirectX (DX) or VST audio plug-ins to a track.
Access the feature by clicking on the [DX] button in the toolbar and selecting a track from the list,
or in the Tracks window by clicking on the disclosure arrow for an audio track and then pressing
the [Edit DX…] button.
You can also select a track and then go to Edit | Audio Effects | DirectX Audio Plug-ins.
The DirectX feature requires that you have Microsoft DirectX installed in your OS. Note also that this
functionality will be of no use to you until you have at least one DirectX Audio plug-in installed into your system.
You can download the latest version of Microsoft DirectX from www.microsoft.com.
Dynamic 3D Drum Kit Window
This re-sizable drum window is an animated 3D display of a complete MIDI drum kit with all 61drum sounds
displayed on their respective instruments.
To launch the Drum Kit window, click the Drums button in the
toolbar. You can do several things with the Drum Kit window:
- Watch the drum part being played on the drum kit in real time.
- Play along with the drums in real time by mouse clicking on the drum instruments, or using the QWERTY keys.
The computer keyboard, the piano key number, and sound names can all (optionally) be made visible on the
hint line by moving your mouse cursor over a given instrument.
- Record a drum part into RealBand.
Drum Display
All the General MIDI percussion instruments are shown. Some percussion instruments are triggered by multiple
MIDI notes. When a sound is controlled by more than one MIDI note, a percussion instrument will show different
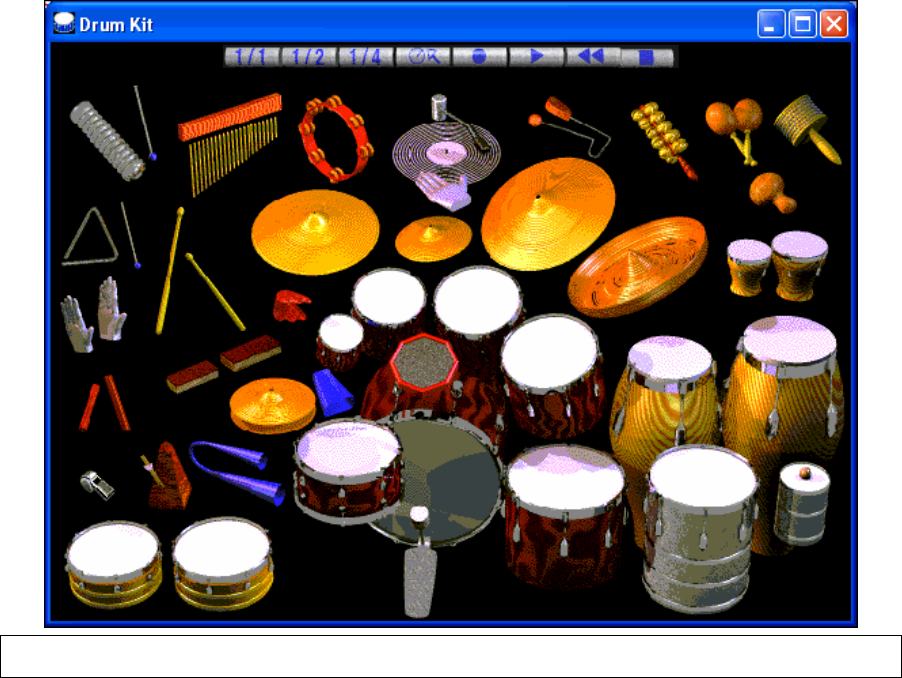
Chapter 12: Wizards, Tools, and Plug-Ins
166
behavior in response to the different notes. For instance, the Hi-Hat responds differently to Close Hat, Pedal Hat,
and Open Hat MIDI notes.
The on-screen instruments may be played by mouse clicking or by pressing the appropriate computer keys. When
playing by mouse click or computer keys, the Shift key can be used to switch the velocity between two user-
specified levels (i.e. loud=100 and soft=50). The multi-note instruments send different MIDI notes to your sound
source, depending on where you “click” on the instrument. For instance, the Kick Drum can send three different
notes: Ac. Bass Drum (MIDI note 35), Bass Drum 1 (MIDI note 36), and Square Kick (MIDI Note 32).
Tip: The hint line at the top of the window describes the current control under the mouse cursor. Use the hint line to learn
the mouse-responsive areas of each drum instrument.
Control Buttons:
- Record: Places RealBand in Record mode so drum instruments can be recorded.
- Play: Starts song playback (Space key).
- Rewind: Stop and return to song start (Return key).
- Stop: Stops song playback (Space key).
- Size Buttons 1/1 - 1/2 - 1/4: Clicking on these buttons changes the size of the Drum Kit window to full size,
half size, or quarter-size. (You can also resize the window to any size by dragging a window border.)
- Settings: Adjusts program behavior. See the Settings Dialog topic.
- Help: To launch the drum Help file, press F1.
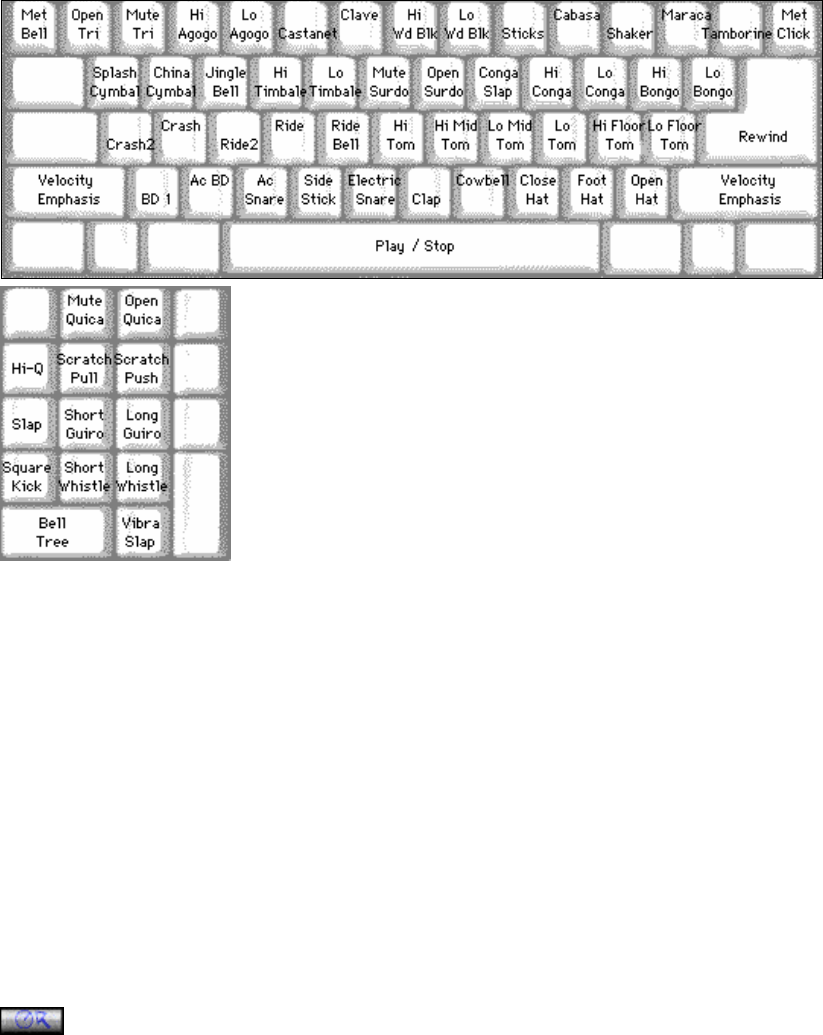
Chapter 12: Wizards, Tools, and Plug-Ins 167
Computer Keys
Press computer keys to play drums.
Drums are grouped on the computer keyboard by category. The kick, snare, and hi-
hat sounds are on the lowest keyboard row. The lower-middle row contains toms
and cymbals. The upper-middle row contains Latin drums, and the top row
contains Latin hand percussion. The Numpad keys contain the rest of the Latin
hand percussion plus the electronic tones.
Multi - Note Instruments
Kick Drum - Ac. Bass Drum, Bass Drum 1, Square Kick
Snare - Acoustic Snare, Side Stick
Hi-Hat - Closed, Pedal, Open
Floor Tom - Low, High
Electronic Pad - Multi-zoned for Hi-Q, Slap, Electric Snare
High Conga - Mute, Open
Surdo - Mute, Open
Cuica - Mute, Open
Metronome - Bell, Click
Whistle - Long, Short
Triangle - Mute, Open
Guiro - Long, Short
Scratch - Push, Pull
Settings Dialog
Press the Settings button (to the left of the Rewind button), to adjust the various Drums Settings.
The “Drum window is always on top” checkbox keeps the Drum Kit window on top of other program windows.
MIDI Settings
- “Drum MIDI Port” defaults to Port 1, but can be changed to use any of the ports available, i.e., the MIDI Output
drivers enabled in the MIDI Driver Setup.
- “Drum MIDI Channel” defaults to channel 10, which is the channel used by General MIDI instruments. If your
drum machine or MIDI device uses a different channel for drums you can set it here.
- “Drum Duration Boost” adds duration to drum notes with a range of 1-10.
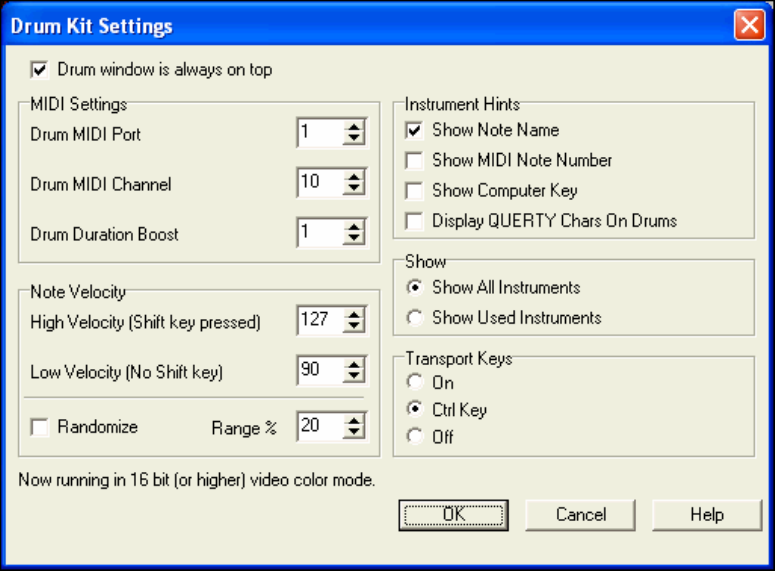
Chapter 12: Wizards, Tools, and Plug-Ins
168
Note Velocity
When playing drums with a mouse or computer keys, the Shift key toggles between two levels of note velocity. The
default velocity is 90, with a default shift key velocity of 127. The two velocity levels can be set any way desired.
For instance, if you want the Shift key to send quieter notes you can program the shift velocity lower than the non-
shift velocity.
- The “Randomize” checkbox enables the program to send random velocity levels when playing the drums. This
is handy when using non velocity-sensitive devices such as a mouse or computer keyboard.
- “Range” controls the amount of velocity randomization. Usually a small range works best, around 10% to 30%.
For example, if velocity is set to 127, and the random range is set to 20%, notes would randomly vary between a
maximum velocity of 127 and a minimum velocity of 102.
Instrument Hints
Customize the appearance of the Hint line.
- Show Note Name
- Show MIDI Note Number
- Show Computer Key
Show
- “Show All Instruments” shows all instruments in the drum window.
- “Show Used Instruments” displays the basic trap kit, but does not display any extra instruments unless they are
used in a song.
The drum window is cleared each time Play or Stop is pressed.
Transport Keys
- “On” - Control playback with the computer keyboard. Space key will toggle Play/Stop. Return key will halt and
return to the song beginning. Ctrl+Tab will enter Record mode.
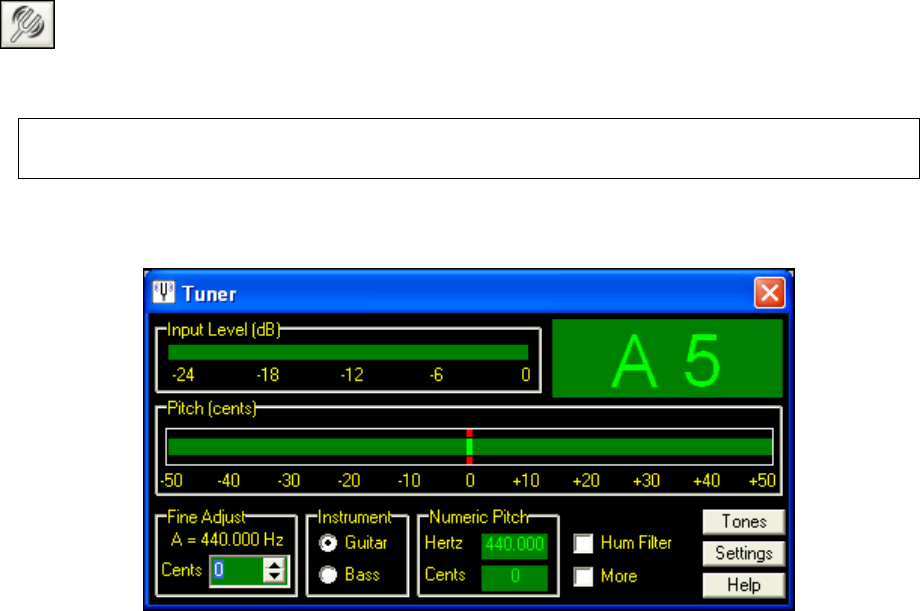
Chapter 12: Wizards, Tools, and Plug-Ins 169
- “Ctrl Key” - Sometimes it is distracting to play the drums with the computer keys, because if you accidentally
play the spacebar or Enter key, it halts playback. With this option enabled, playback is controlled by
Ctrl+space and Ctrl+Enter, so it is more difficult to accidentally stop playback.
- “Off” - Playback is not controlled by the computer keyboard.
Guitar Tuner
The Guitar Tuner is launched with the “tuning fork” button, which is found on the toolbar.
The Guitar Tuner is optimized for guitar and bass, although it is also useful with other acoustic instruments,
including voice.
Note: The Guitar Tuner must be able to receive audio from your instrument via the line input or microphone input of your
sound card. Please make sure that either the Microphone In or Line-In is enabled in the Recording Properties of the
Windows Mixer (or the appropriate Mixer application for your sound card).
To use the tuner, connect an electric guitar or bass to your computer’s sound card input, or tune an acoustic
instrument using a microphone connected to the sound card microphone input. Then, play a pitch, and the tuner will
“auto-range” to determine the nearest note and display the intonation of your instrument.
Main Window
Input Level: Displays the instrument Input Level in dB. For best results, the level should peak at least halfway up.
Quiet signals may be too noisy to properly recognize the pitch. Some inexpensive sound cards do not handle
clipping gracefully. If your card seems to misbehave on very loud signals you should try to avoid hitting the very
top of the level meter. On most sound cards, however, “going over the top” will not significantly affect the tuner’s
performance.
Input Note: The name of the most recent note detected by the tuner is shown in the upper right corner.
Pitch (cents): Displays the intonation of the note in cents (hundredths of a semitone). The note is in-tune (with the
current detected note) when the indicator is hovering near zero.
When the tuner has “locked on” to a recognizable pitch the indicator turns green and tracks the current pitch. If a
note is not loud enough, too noisy, or too unsteady for the tuner to measure, the indicator will turn red and freeze at
the last known good value.
It can sometimes take the tuner a moment to “lock on” to a pitch. You may need to play a note a couple of times in
succession before the tuner is well locked on to the note. This is most noticeable on very high or very low notes.
The display has quarter-cent resolution. Noise, hum, or bad strings can cause the pitch indicator to wobble. Guitar
“G” strings seem particularly prone to odd harmonics which wobble the pitch indicator.
Don’t be alarmed if the indicator is wobbling quite a bit. Center the average indicator motion around zero. The
resolution of the display magnifies pitch deviations that the ear may not notice. A deviation of a few cents is not
very obvious to the ear even though it is a large distance on the pitch display.

Chapter 12: Wizards, Tools, and Plug-Ins
170
Fine Adjust: Modify the tuner’s calibration. For instance, if Fine Adjust is set to 10 cents an instrument must be
tuned 10 cents higher than usual to measure in tune.
If you have access to a Strobotuner or other expensive tuner you could calibrate this Guitar Tuner program to agree
with the other tuner you use. The accuracy of this Guitar Tuner program should be within a few cents of standard on
most computers. However, the tuner program relies upon the audio clock stability of the sound card, so there may
be slight variations on different sound cards.
If you have a piano, organ, or other instrument you wish to use as reference you can likewise adjust the Tuner to
agree with your fixed-pitch instrument.
Instrument: Optimize the tuner for guitar or bass. Bass cannot be tuned at its best if the Guitar button is selected,
and guitar cannot be tuned at its best if the Bass button is selected.
In addition, the Fretboard display changes according to the selected instrument. The Guitar setting displays a
standard-tuned six string guitar. The Bass setting displays a standard-tuned six string bass. If tuning a four string
bass, you would look for the middle four strings in the display. If tuning a five string bass, ignore the “C” string.
Numeric Pitch (Hz): Display the frequency of the incoming signal. As with the Cents pitch display, if the pitch
becomes unreadable, this control will freeze and remember the last good reading.
Hum Filter: The tuner works best if you give it a signal with little hum or noise. Hum can make the pitch
measurement “jittery.” If you can’t keep your guitar from humming, then the hum filter may help.
Note: The Hum Filter nearly doubles the processing work that the program must accomplish so it may not work very well on
slower computers.
More: Opens a window that displays the most recently detected note on the piano keyboard and the guitar
fretboard.
The tuner program has no way to know what string you are playing, so non-open guitar notes may show up on the
wrong string in the display – though it will properly indicate the correct note pitch.
Tones: This button opens the Generate Tones dialog to create wave tones for audible tuning reference.
Generate Tones
Generate tone references for tuning by ear. This may be preferable if you do not have enough gain on a mic input,
or have an acoustic guitar or a guitar with dead strings. With dead strings or some acoustic guitars, the ear can
reconcile the out-of-tune harmonics in the string better than the Tuner program.
These tones are basically very accurate, but remember that the final accuracy depends upon the accuracy of the
sample clock in your sound card. The cards we have tested seem to be within a couple of cents of standard tuning,
but larger errors are possible with some sound cards.
Wave Shape - Sine wave is a very pure wave which only contains the listed fundamental frequency. Complex is a
filtered ramp wave, which contains the fundamental tone plus a healthy dose of even and odd harmonics.
The complex wave may be easier to tune against, since guitars and other instruments usually have a broad mix of
harmonics. Complex wave may also be less tiring to the ear.
In the low bass range, the sine wave can be difficult to hear unless you have a very good set of monitor speakers.
“Cents” - Fine-adjust the pitch in cents (hundredths of a semitone).
“Level” - The output level measured in dB. Zero dB is as loud as it gets, and negative numbers reduce the level.
“Frequency” - A read-only indication of the frequency of the tone. As you adjust Note, Octave, and Cents,
Frequency is calculated from the current settings.
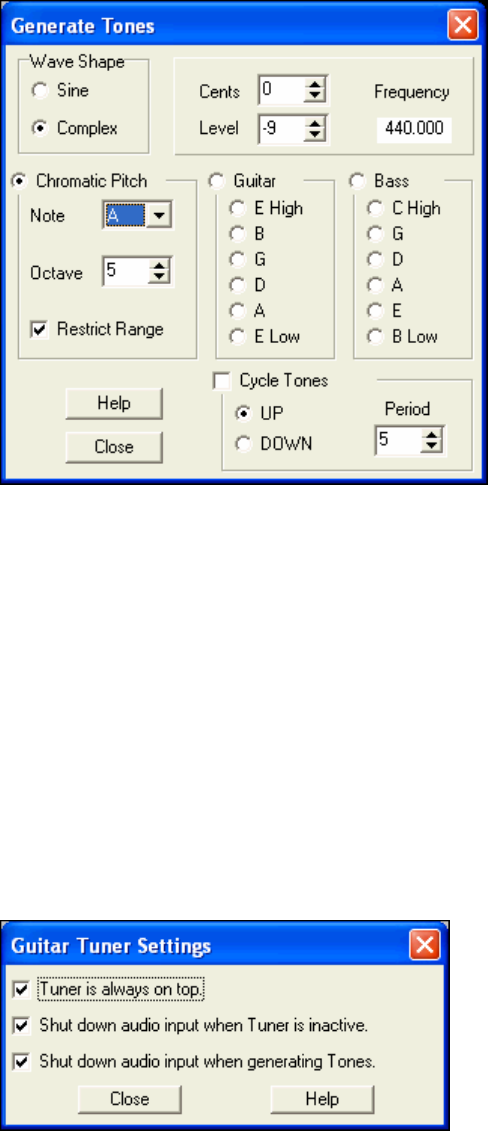
Chapter 12: Wizards, Tools, and Plug-Ins 171
Chromatic Pitch - Select this radio button to select
any desired note and octave.
“Note” - Pick the desired note.
“Octave” - Pick the desired octave.
“Restrict Range” - The reference tone can become
painful and possibly dangerous to speakers in the
very high range, if the playback system is set too
loud. Similarly, very low reference tones could
damage woofers.
If the “Restrict Range” checkbox is enabled, the
pitch range is limited to the mid and bass range
where the tone is not as hazardous to ears or
loudspeakers.
Guitar - Select this radio button to tune using standard guitar pitches.
Once a note has been selected in the Guitar group, you can switch between the different string pitches with the
cursor up and cursor down computer keys.
Bass - Select this radio button to tune using standard Bass pitches. These are the notes for six string bass. Use the
middle four pitches for four string bass, and use the bottom five pitches for five string bass.
Once a note has been selected in the Bass group, you can switch between the different string pitches with the cursor
up and cursor down computer keys.
Cycle Tones - This checkbox automatically plays the Guitar or Bass pitches in sequence, to make it easier to tune
guitar without touching the computer keyboard or mouse.
With “Cycle Tones” enabled, if the “Guitar” radio button is selected, the tuner will automatically play the guitar
pitches in sequence. If the “Bass” radio button is selected, the tuner will play the bass pitches in sequence.
The “UP” and “DOWN” buttons cycle the pitches either up or down.
“Period” is the sustain time of each pitch, in seconds. With the default period of five, each pitch will hold for five
seconds before cycling to the next pitch.
Settings
“Tuner is always on top” - The Tuner main window remains above all other windows on the screen.
Sometimes this option does not appear to “stick” after it is set. If the Tuner is set to “always on top” but doesn't stay
on top, close the Tuner and re-open it to get the desired behavior.
“Shut down audio input when Tuner is inactive” - When the Tuner window is not the active window, it will close
the sound input channel.
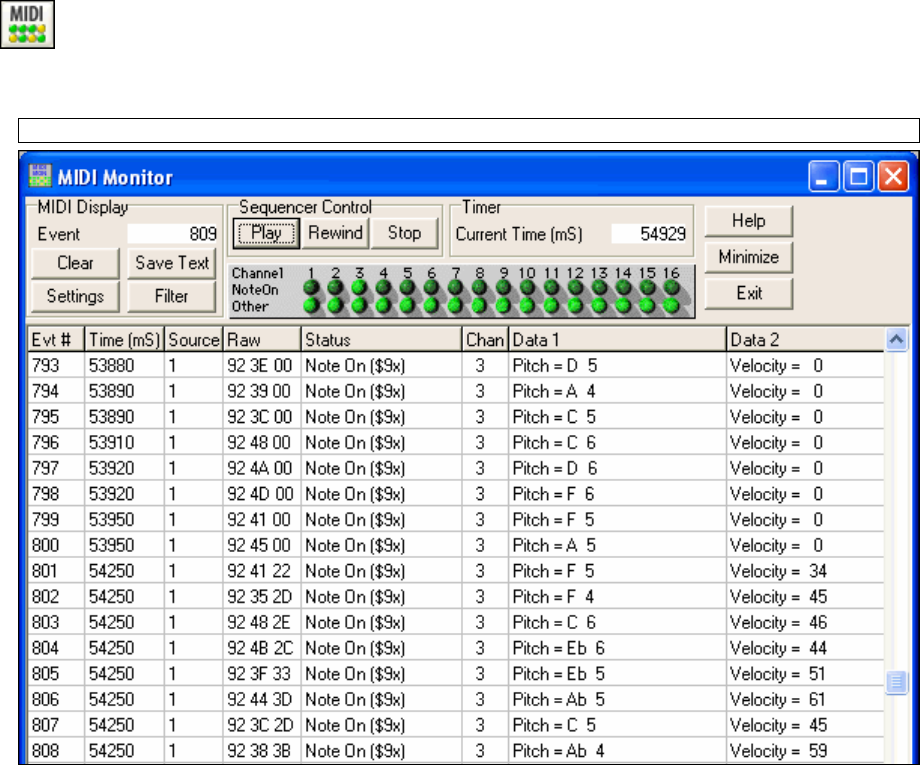
Chapter 12: Wizards, Tools, and Plug-Ins
172
This can help the Tuner work smoother on slow computers, or free up the sound input driver for other programs
which are running.
“Shut down audio input when generating Tones” - When the Generate Tones window is active, it will close the
sound input channel.
This can help the Tuner work smoother on slow computers. If the Audio Input continues to be processed while the
computer is generating tones, it makes more work for the program. This extra work might stall slow computers.
MIDI Monitor
The MIDI Monitor opens with the MIDI button, which is found in the View Panel.
The MIDI Monitor displays a listing of data received from computer MIDI Input and/or the RealBand MIDI output. This
plug-in program has been found to be very useful for educational and diagnostic purposes.
Note: To display the data received from the computer MIDI Input, the MIDI THRU option must be enabled in RealBand.
The MIDI Monitor provides details on all aspects of the MIDI data being transmitted and received.
MIDI Display Controls
Event: The current event number since the display was last cleared.
Clear: Clear the MIDI Display, Event counter, and Channel Activity panel.
Save Text: This feature will allow you to save a text file of the data in the MIDI display. The file can be opened
with a word processor or spreadsheet program, for printing or further study. Various Save Text options can be
adjusted in the Settings window.
Settings: Press to open the Settings dialog, which allows you to adjust various display behaviors. The display can
be modified to suit the task at hand.
Filter: This opens the Filter dialog, where receive settings can be adjusted.

Chapter 12: Wizards, Tools, and Plug-Ins 173
Sequencer Control: Standard transport controls: Play, Rewind, and Stop.
Timer: A millisecond timer useful for viewing timing relationships between MIDI messages. If the computer is
under a “light load,” this timer is fairly accurate. However, if the computer is under a “heavy load” the values can
be expected to be less than perfectly accurate.
You can record MIDI data in RealBand and examine the timing in the RealBand Event List window.
To use RealBand to measure correctly in milliseconds, set then RealBand’ PPQ resolution to 480 and RealBand’
tempo to 125 BPM. With this special resolution and tempo, tick values in the Event List window will correspond to
milliseconds.
Current Time: This is the millisecond count since the timer was last started. Click anywhere in the Timer area to
clear the Current time, setting it to zero.
The timer automatically starts when MIDI data is received. The period that the timer will run after MIDI activity
ceases can be adjusted in the Settings dialog.
Channel Activity Panel: The Channel Activity panel has an array of “LEDs” (light emitting diodes) to indicate
which channels are active. For example, if note information is received on a channel, the Note On LED will latch
on. If controller, pitch bend, or other channel events are received, the Other LED will latch on. Click anywhere on
the Channel Activity Panel to clear all the indicators.
MIDI Display Area
The MIDI Display area, located at the bottom of the main window, displays the data generated by RealBand and/or
data received at the computer MIDI input. Each row is a single MIDI event.
Evt #: Event number, starting from when the display was last cleared.
Time (mS): The time in milliseconds, from when the timer was last cleared.
Source: When set to “Int,” the event was generated by RealBand, and when it is reading “Ext,” the event was
generated by an external MIDI Device attached to the computer’s “MIDI In” port.
Note: To display data received from computer MIDI Input the MIDI THRU option must be enabled in RealBand.
Raw: This indicates the raw bytes representing each MIDI message. Most MIDI message types contain three bytes,
but some contain only one or two bytes. SysEx messages can contain an arbitrary number of bytes.
Note: This field is normally blank in the case of SysEx messages. With SysEx messages, up to 16 “raw” bytes are
displayed in the Data fields. Long SysEx messages are displayed on multiple lines, at 16 bytes per line.
Status: Show the text name of the Event type.
Chan: This displays the MIDI channel of an Event. This field is blank for System messages (values from $F0 to
$FF). System messages do not have an associated channel.
Data 1: Text name for the meaning of the first data byte of the MIDI message.
Data 2: Text name for the meaning of the second data byte of a MIDI Message.
Notes:
(1) For some messages such as Pitch Bend or Song Position Pointer, the value of both data bytes 1 and 2 are calculated
and displayed in Data 1.
(2) Some MIDI messages, such as Program Change or Channel Pressure, only have a single Data byte, and the Data 2
field will be blank. Also, some MIDI Messages have no data bytes, in which case both Data fields will be blank.
Settings Window
MIDI display options are adjusted in the MIDI Monitor Settings dialog.
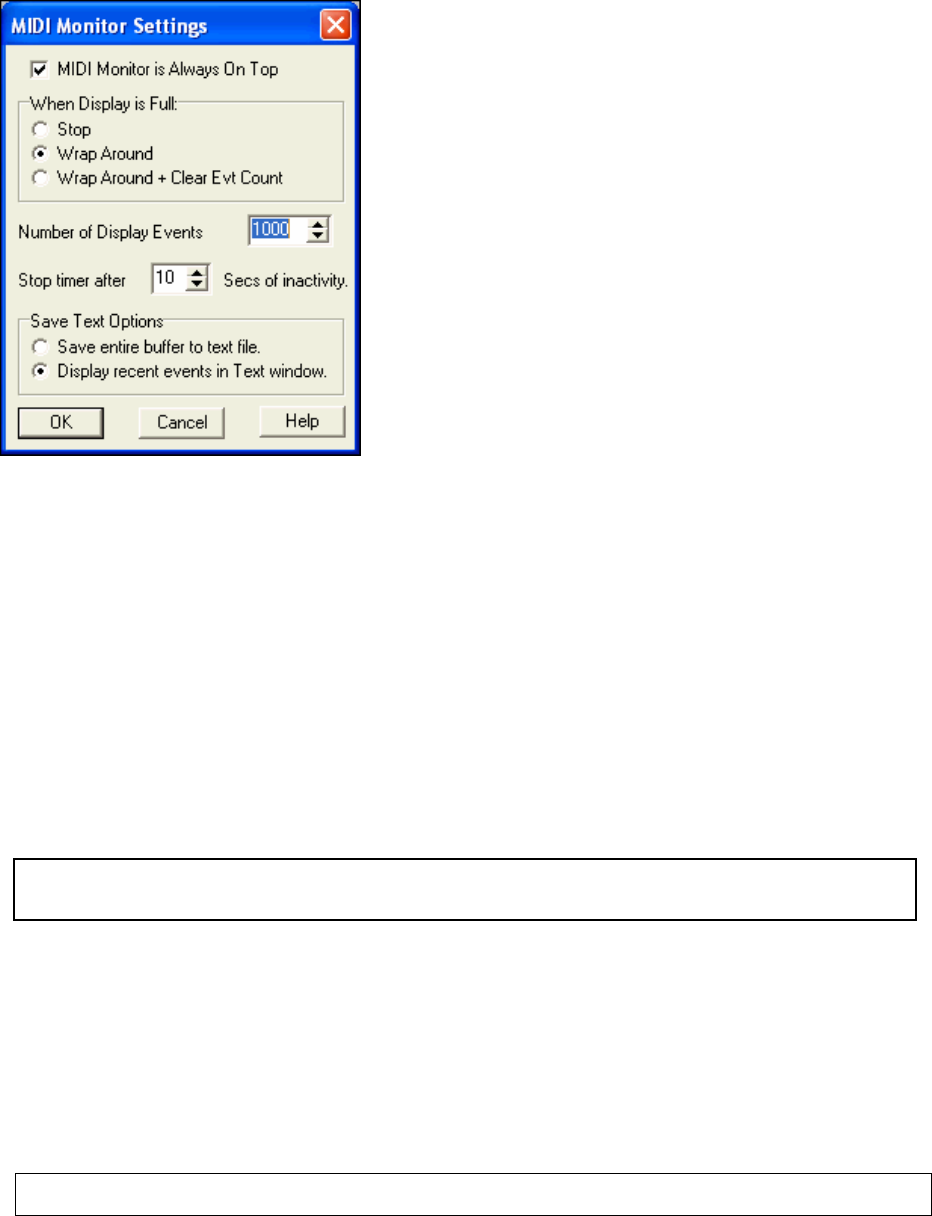
Chapter 12: Wizards, Tools, and Plug-Ins
174
“MIDI Monitor is Always On Top” - Check this item to keep the
MIDI Monitor window on top of other programs or windows.
When Display is Full:
The display buffer can record a maximum of 32000 events. There
are three options when the display gets full:
- “Stop” - Stop capturing events and turn off the timer.
- “Wrap Around” - When the display is full, begin over-writing it
from the start.
- “Wrap Around + Clear Evt Count” is like the “Wrap Around”
option, except the event count is cleared when the display wraps
around.
“Number of Displayed Events” - This box allows you to set the length of the capture buffer. The length can be set
as high as 32,000.
Stop Timer after “nnnn” Milliseconds of inactivity. It does no harm to let the timer free-run, but if you find this
irritating, you can set the timer to automatically stop after a period of no MIDI activity.
Save Text Options
These options help set the behavior when the [Save Text] button is pressed.
“Save entire buffer to text file” - To capture a listing of a large number of events, enable this option. This directly
saves the entire buffer to a disk text file.
“Display recent events in Text window” - A text listing of the most recent events will be created in a text window.
In this window unwanted events can be selected and deleted. You can also edit events or add comments. The
selected text in this window can be saved to a text file or copied to the Windows clipboard, where it can be pasted
into a word processor or spreadsheet program.
Display Filter
The Display Filter dialog allows you to select which events are to be recognized by the MIDI Monitor program.
Note: Virtually any combination of display events can be selected in the filter. It is therefore possible to select
combinations that do not display any MIDI events at all. The MIDI Monitor will warn you about the more obvious “nil”
combinations, but if you find that you are not receiving what you expected, review these filter settings.
Display
“Only” displays only the selected items chosen in the filter lists.
“All Except…” displays all data except the selected items in the filter lists.
Source
“Computer MIDI Input,” when enabled, displays data arriving on the computer’s MIDI Input (when MIDI Thru is
enabled in RealBand). To view data exactly as it is received, set RealBand’s “Thru Method” to Global. Also,
check the RealBand Record Filter to ensure that the desired events are enabled.
“Host Program Output” displays data generated by RealBand.
Note: If both inputs are disabled (in Display Only mode), or both inputs are enabled (in Display All Except mode), then no
MIDI data will be received.
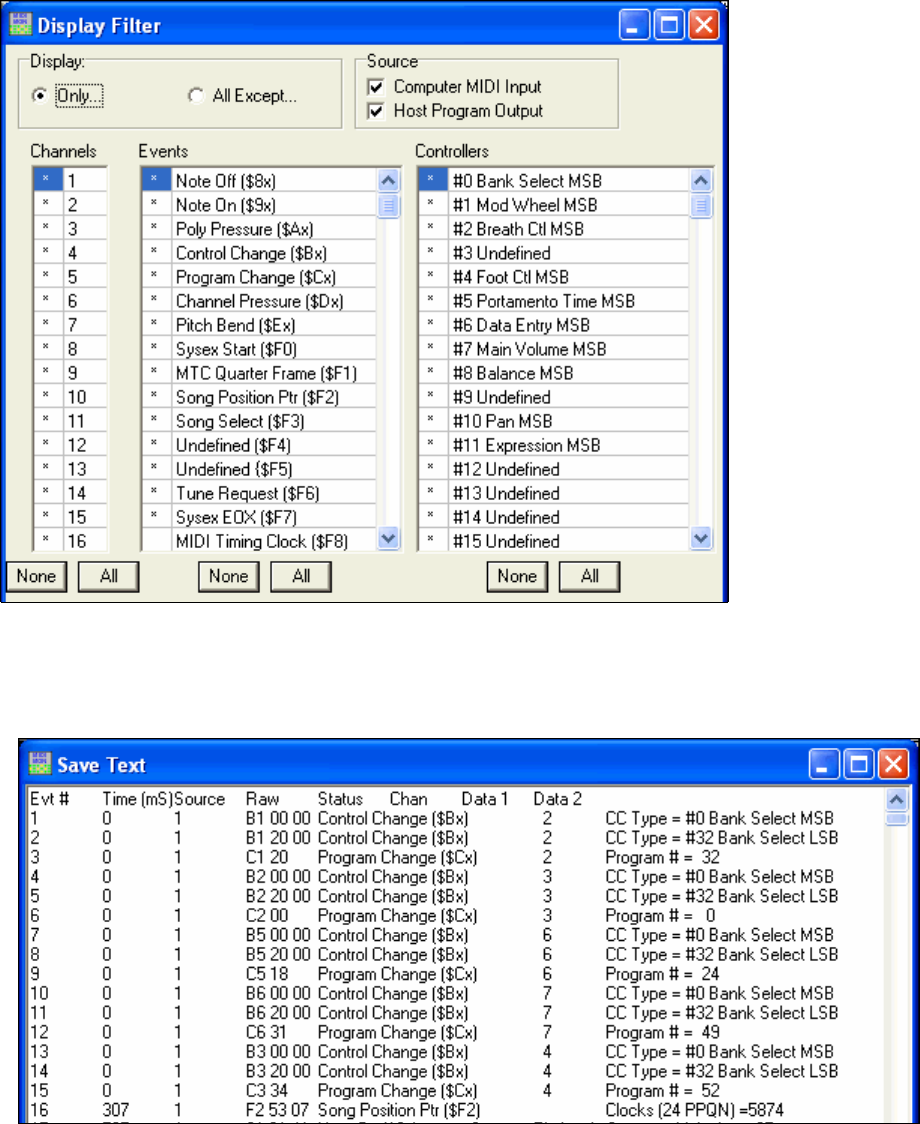
Chapter 12: Wizards, Tools, and Plug-Ins 175
Channels: Select which channels are received.
Events: Select which Event types are received.
Controllers: Select which Controller types are received.
Save Text Window
Capture the MIDI Monitor display contents to a text file for further analysis or printout.
When the [Save Text] button is pressed in the MIDI Monitor program’s main window, and the “Display recent
events in Text window” option has been enabled in the Settings dialog, the Save Text window will open, containing
the most recent MIDI events.
Select All: Selects all the text in the window.
Clear: Clears the selected text.

Chapter 12: Wizards, Tools, and Plug-Ins
176
Copy: Copies the selected text to the Windows clipboard.
Save: Saves all window text to a .TXT file.
You can also use the common Ctrl+X (cut), Ctrl+C (copy), Ctrl+V (paste), and Delete keys to edit the text.
Note: If column alignment of the text appears ragged adjust the font and tab spacing in your word processor, or the column
width in your spreadsheet program. We suggest 10 or 12 point System or Courier fonts.
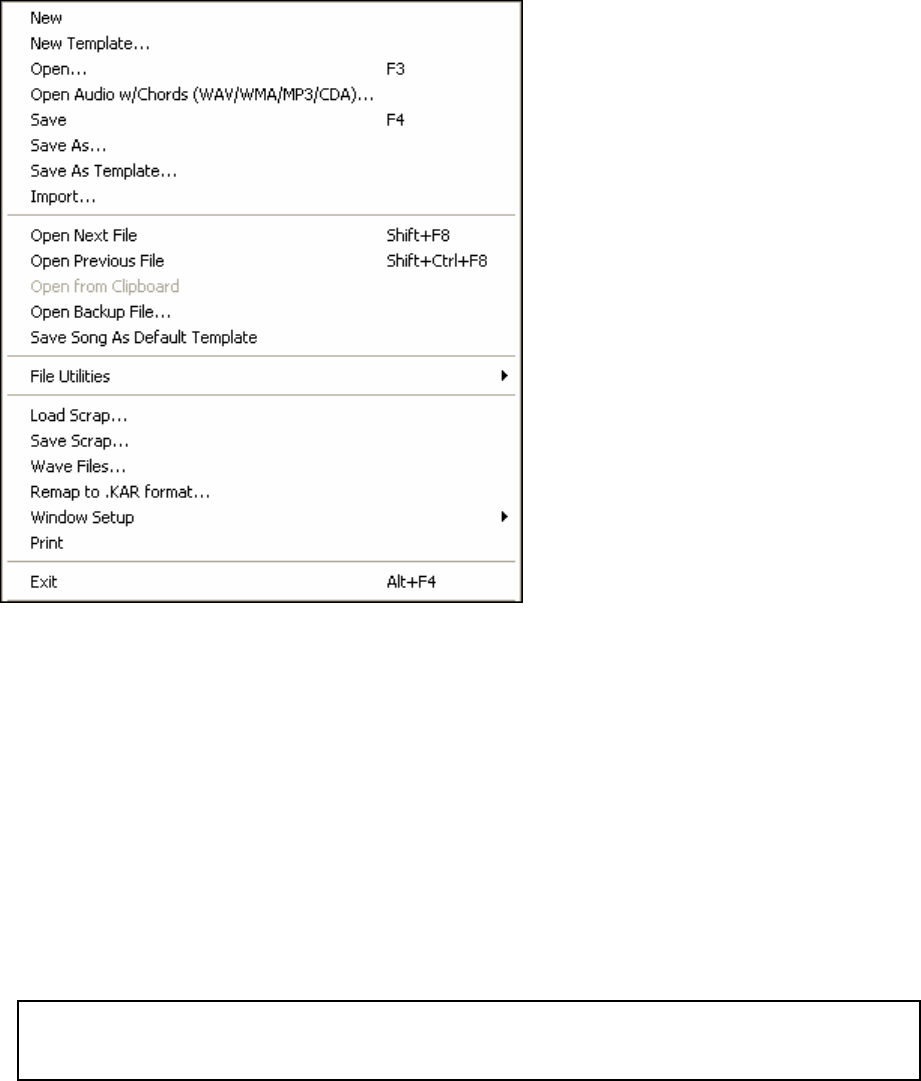
Chapter 13: Reference 177
Chapter 13: Reference
This chapter describes the pull-down menu commands in RealBand. The information discussed in this chapter is
divided into separate sections based on each menu.
The File Menu
The File Menu contains commands that are related to loading and saving files.
New
This command clears the current song from memory so that you can start a new song. If you’ve changed the current
song since you last saved it you will be prompted as to whether or not you wish to resave the file (with changes)
before clearing the file from memory.
New Template
This command will let you create a new song using a template. A template is a file that is used as a starting point
when creating a new song.
A Choose Template dialog box will pop up that shows a list of all available templates. Select one, and then start
working on your song.
Open
A dialog box will pop up which has two list boxes, one displaying all files with recognized extensions in the current
directory, and another displaying the different directories/folders.
Note to Band-in-a-Box Users: If you open a MIDI file that was generated with Band-in-a-Box the patch numbers,
channels, and even the chords are imported and displayed correctly in RealBand. Furthermore, if you recorded a WAV
audio track to go along with your Band-in-a-Box generated MIDI file the RealBand software will offer to automatically import
and align this data too.
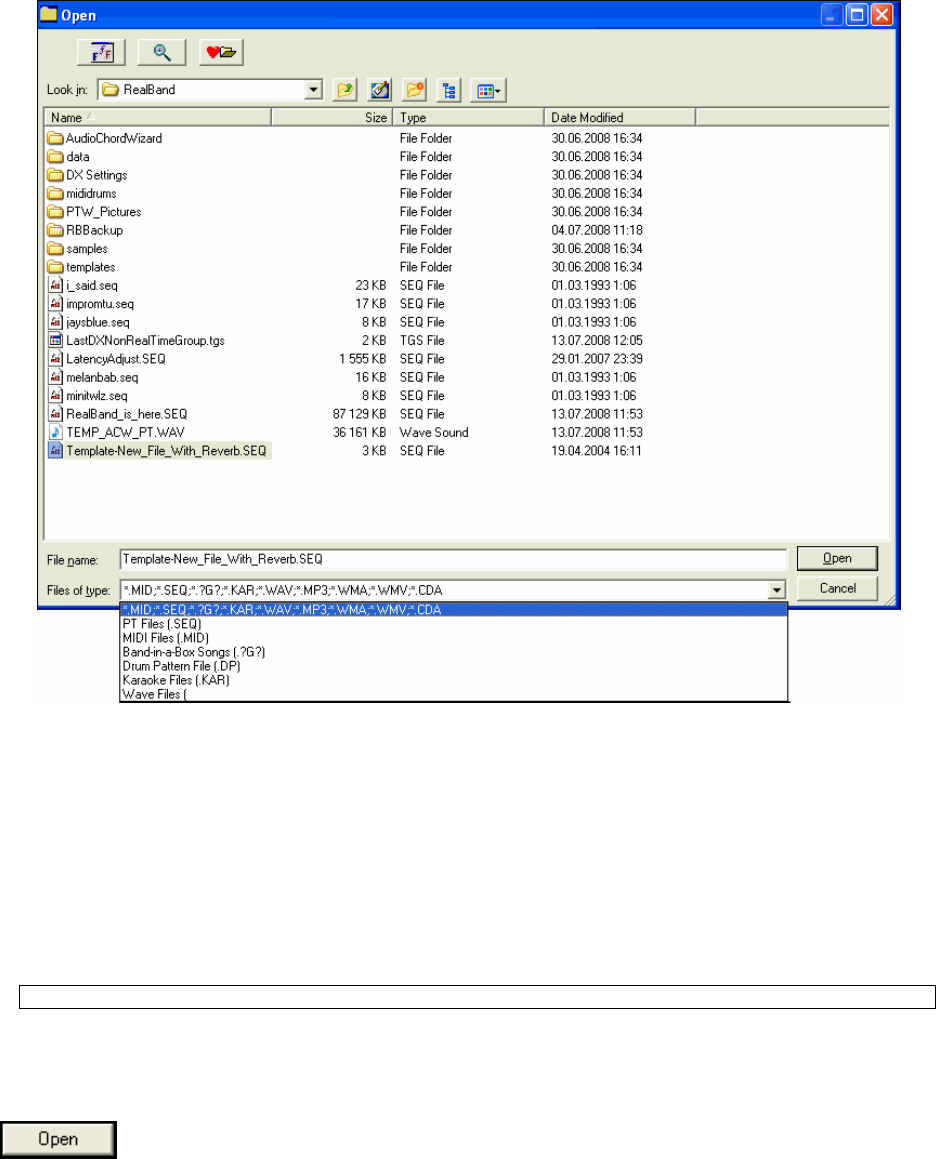
Chapter 13: Reference
178
You can selectively restrict the type of file you’re looking for. The “File of type” masks are as follows: RealBand
native files (.SEQ), MIDI files (.MID), Band-in-a-Box songs (.?G?) Drum Pattern files (.DP), Karaoke file (.KAR),
or Wave audio files (.WAV) as well as,
MP3 audio files (.MP3) provided the MP3 codec is present in your system.
WMA: Windows Media Audio, a compressed audio format developed by Microsoft.
WMV: Windows Media Video is a compressed video format developed by Microsoft. RealBand will load the
audio from a WMV.
CDA: CD Audio is the file extension used by Windows to make CD audio tracks available for loading into
programs like RealBand. Just put an audio CD into your CD-ROM, and then open a .CDA file from that drive
(usually drive D).
Note: This feature may not work unless running Windows XP or higher.
RealBand can also load most sizes and shapes of mono, stereo, or multitrack .WAV files. These are files that
contain only (WAV) audio data. When loading a .WAV file, the program will import the audio data to 1 or more
individual tracks (depending on the number of discrete tracks encountered in a given file) into the current song or
project.
To load a file move the highlight bar over the desired choice and either press Enter or click on the
[Open] button.
The Open dialog recalls the folder from the last time the dialog was used. This setting can be enabled or disabled in
the File tab of the Options | Preferences dialog.
A file can also be loaded by typing its name directly in the “File name:” field instead of using the list box. You can
also use the mouse to select a file by double-clicking on the file with the left-mouse button.
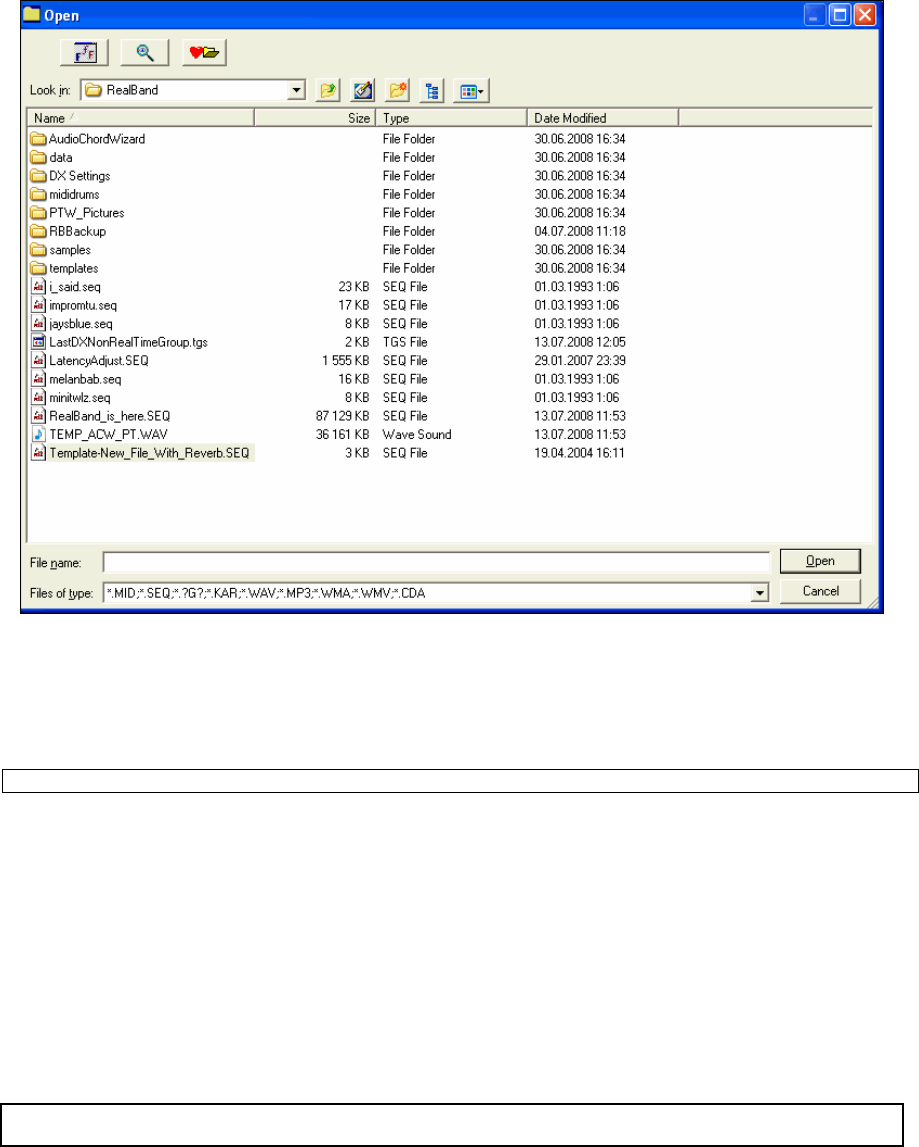
Chapter 13: Reference 179
Custom File Dialog
We’ve made a custom Open dialog for you with more features than the standard dialog. To see the custom Open
dialog, go to Options | Preferences (Ctrl+F5) and select the checkbox for “Long File Names use custom open/save
dialog.”
Custom file dialog is available to Open and Save files.
Save
This command will offer to save your work along with a name of your choosing. If a song has no name (untitled), a
dialog box will pop up when you choose this option so that you can choose a file name and format (e.g., .MID,
.SEQ, or .DP). See the Save As command for more information on choosing a file name and format.
Note: There are dedicated commands in the Audio menu for saving/exporting audio data to a .WAV file, etc.
Save As
The Save As command is similar in function to the Save command except that it also prompts you every time to
choose the name of a file before saving it.
The Save As dialog recalls the folder from the last time it was used. This setting can be enabled or disabled in the
File tab of the Options | Preferences dialog.
RealBand can save files either in .MID, Type 0 .MID (one track), Karaoke .KAR or .SEQ format. A dialog box that
looks similar to the File Open dialog allows you to choose the name of the file, directory, drive, and file type. If you
choose to save a file with a file name that already exists the program will prompt you to confirm that you want to
overwrite the pre-existing file.
You can also save MIDI data as .DP files. A .DP file is simply a .MID file renamed with the .DP extension. The
.DP files are used for storing drum patterns in order to differentiate them from a song (.MID) file.
Tip: To save your project as a .WAV file choose the Audio menu feature. If you have MIDI tracks you will need to “render”
them as wave data before exporting your project as a .WAV file.
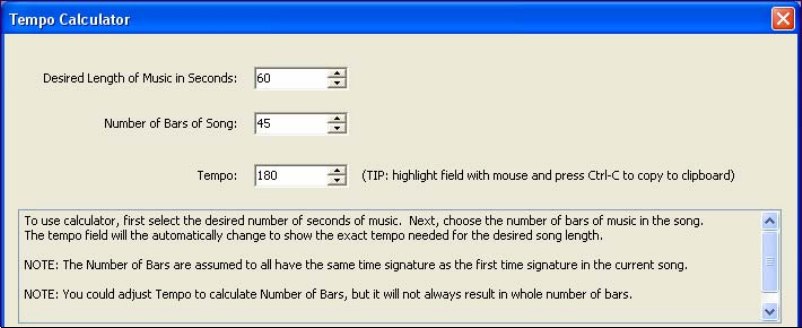
Chapter 13: Reference
180
Save As Template
File templates make it easier for you to begin new projects by selecting from a list of available templates (instead of
from a completely blank slate). The templates can contain preferred track layouts, preferred song settings, and,
since templates are stored in .SEQ format, they can even contain MIDI or audio backing tracks. You can create your
own custom templates simply by using the File | Save As Template command.
Since templates are stored in .SEQ format, they contain settings and song data. Templates are stored in the
\template subfolder of the RealBand main folder (usually C:\RealBand\templates).
Import
This lets you easily add a MIDI/ WAV/ SEQ/ or MGU file to an existing project (SEQ). This is handy when
combining media types to a new or existing project.
Open Next File
This feature will open the next file found in the current file directory or folder. The order is based on the alphabetic
order of the files. This command is useful when working with a group of files (e.g., a set list) and you need to edit a
number of them. This feature saves you the trouble of having to keep using the File | Open command and
repeatedly type in the file names.
Open Previous File
This feature will open the previous file found in the current file directory or folder. The order is based on the
alphabetic order of the files. This command is most useful when you’ve been using the Open Next File command
and you need to “go back” to a previously loaded file.
Open From Clipboard
If data is in the Windows Clipboard in the form of a Standard MIDI File the Open From Clipboard feature will use
the data to load the entire “file” from the Clipboard into RealBand. This is similar to loading a file from disk except
that the file is loaded from the Clipboard instead. This command provides a quick way of transferring an entire file
from another program (e.g., Band-in-a-Box) into RealBand.
Save Song as Default Template
This will save the song as $OPTIONS.SEQ so that the song will be loaded automatically whenever starting a new
song with the File | New command.
File Utilities Submenu
Change Directory (Path) – This command lets you change the current (working) directory for loading/saving files.
A dialog box will pop up prompting you to select a new directory.
Tempo Calculator - Tempo, Bars, Time (seconds).
The length of a song depends on tempo and number of bars. With this calculator, you can enter 2 of the 3 variables
(length of song in seconds, tempo, number of bars) and the program calculates the third variable for you. So, for
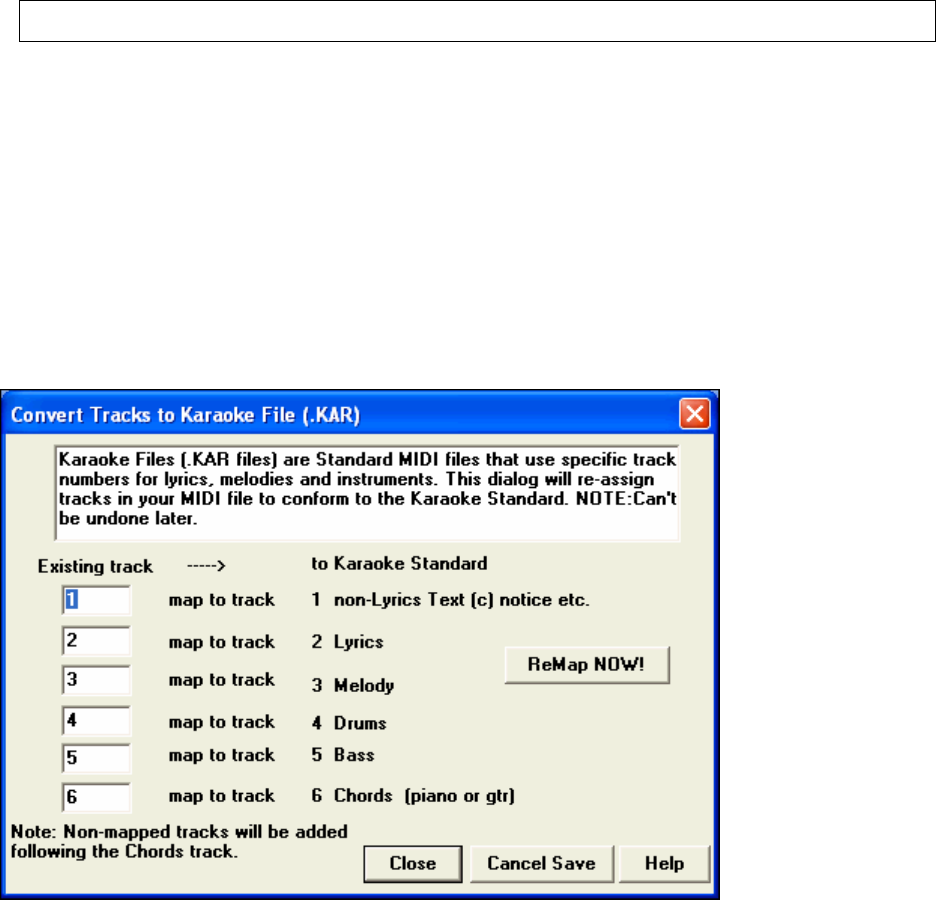
Chapter 13: Reference 181
example, if you need a piece of music lasting 60.00 seconds, and it is 45 bars, you can use the calculator to find the
tempo that will achieve that.
Load Scrap
The Load Scrap command works in the same way as the Open command except that a selected .MID or .SEQ file
is loaded into the scrap buffer instead of directly into a project. You can then paste the contents of this scrap buffer
anywhere within the song. This is useful for importing another file into your current project.
Load Scrap loads audio tracks into the scrap buffer, so they can be pasted into the current song. If the audio file
format of the .SEQ file doesn’t match the file format of the current song, the tracks in the file you’re loading will be
converted to match the audio file format of the current song.
Note: If you load a *.SEQ with both MIDI and audio tracks, check that both files have matching track types in order to ensure
that all the data will be pasted into the song when you use the Edit | Paste command.
If the existing song contains some blank tracks, then RealBand will automatically set the track types to the correct
track type. This won’t be done until you use the Edit | Paste command, if the scrap buffer contains data, and if the
corresponding tracks in the project are blank, but aren’t already set to the correct track type.
Save Scrap
This command works like the Save As command but is also used to save only the contents of the scrap buffer to a
separate .MID or .SEQ file. This is useful for exporting “part” of a project for use in another program, etc.
Wave Files Submenu
Wave file commands are now found in the Audio menu. When this menu item is selected the Audio menu opens.
Remap to .KAR (Karaoke Format)
This dialog will pop up when attempting to save a .MID or .SEQ file as a .KAR file, or if you select the Remap to
.KAR Format command.
This feature will remap the track numbers to conform to the .KAR (Karaoke) file format. In a .KAR file Track 1
and Track 2 only contain lyric events. Track 1 has lyric events for identification and copyright purposes. Track 2
contains the actual lyrics of the song.
In the 6 edit boxes you can enter the track numbers that should be moved to destination tracks in order to conform to
the standard. For example, if track 7 contains lyrics you would type 7 in the edit box for track 2. If the melody were

Chapter 13: Reference
182
on track 8 you would type an 8 for track 3, etc. If the lyrics and melody are both on the same track, for example
track 6, you would type a 6 for both the lyrics and melody track.
If there are any tracks such as non-lyrics text, bass, etc. that are not included in a given song you should type a 0 in
the edit controls for these.
Note: KAR files use a slightly different format than RealBand’s native files to store lyrics. When loading a .KAR file
RealBand will automatically convert KAR lyrics to the RealBand format, and when resaving to a .KAR it will automatically
save the lyrics back in the original .KAR format.
Pressing the ReMap Now button will cause tracks to be remapped to the Karaoke Standard Track Order. Any
tracks that are present in a sequence that wasn’t specified to be remapped will be placed after the chords track.
Only lyric events are re-mapped to Tracks 1 and 2. For example, if you’ve specified that track 3 should be
remapped to the lyrics track and it also contains MIDI data events, these won’t get remapped to Track 3 but will
instead be placed in a track after the chords track. The only exception is in the case where lyrics and melody are
both on the same track. In this case you would type the same track number for both lyrics and melody so that the
lyrics get mapped to track 2 and the melody goes over to Track 3.
If the tracks in a song are already in the proper order there is no need to remap, but pressing the REMAP NOW
button will cause the program to insert special identification events at the beginning of tracks 1 and 2 if they don’t
already exist.
If this dialog was popped up as a result of selecting the Remap to .KAR Format feature there will also be a Save
As button which will allow you to save the file as a .KAR file. Make sure you press the REMAP NOW button if
remapping is required in order to comply with the KAR specification.
If this dialog was popped up during a Save As operation there will be a CANCEL button which, when pressed, will
cancel the save operation.
Window Setup
This item is a special sub-menu for loading and saving .WS (Window Setup) files. See the proceeding three sections
(Load Window Setup, Save Window Setup, and Normalize Window Setup) for details on .WS files.
Window Setup - Load Window Setup
This feature allows you to load a .WS (Window Setup) file. When the .WS file is loaded RealBand will restore the
window locations and sizes that were in effect at the time of saving the .WS file. See the next section (Save
Window Setup) for more information about .WS files.
Window Setup - Save Window Setup
This feature allows you to save a .WS (Window Setup) file of your “current” program window setup. The current
window setup consists of the locations of any opened windows. Up to three Notation Staff, three Big Lyrics, and
three Event List window positions can be saved in each .WS file. The .WS files can also contain information such
as whether or not the Toolbar and Piano are “visible” or “hidden.”
RealBand will automatically save a file called DEFAULT.WS each time the program is exited. Then, each time the
program is started it will look for this DEFAULT.WS file in the RealBand directory (or the configuration directory–
such as C:\WINDOWS –if running under a network). If the program finds such a file it will restore the setup that
was stored in it, thus restoring your screen setup back to the way it was when you exited from your last session.
However, if you save a file called FAVORITE.WS to the .EXE directory RealBand will use the setup stored in this
file even if DEFAULT.WS exists. Saving a Window Setup file called FAVORITE.WS is a nice way to have
RealBand always start with your favorite setup. Take advantage of this feature if you would prefer to have
RealBand start out with a certain setup every time –rather than restoring the most recent/last setup. You could also
create a “blank” text file called FAVORITE.WS if you would prefer the program start out in an identical manner to
previous versions of RealBand.
Although .WS files can store information on whether or not a window is currently an icon/minimized, the exact
locations of these icons are not available to be recalled when a .WS file is loaded.
An Event List window that is displaying multiple tracks can also be restored when loading a .WS file (if it was part
of the window setup). However, when restored it will display all the tracks –regardless of which ones were being
displayed before. For example, if you have an Event List window open for Tracks 1, 2, and 3, and you proceed to
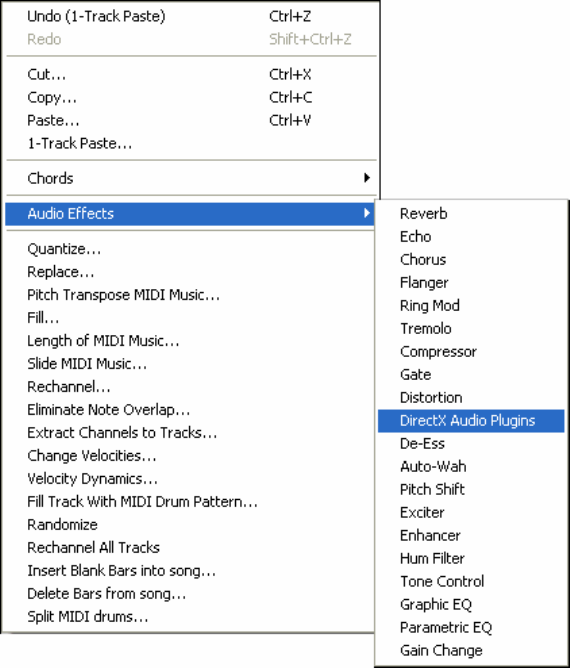
Chapter 13: Reference 183
save a .WS file, the Event List window would be restored when the .WS file is loaded. However, it will display all
the tracks –regardless of how many were displayed before.
Window Setup - Normalize Window Setup
This command resets all windows to the “factory defaults.” When selected, RealBand will restore the window
locations and sizes that were in effect when the program was first installed.
Print
This feature will send notation to your printer to be printed. This is the same as the print button in a Notation
window. A Notation window must be the currently active (highlighted) window in order to print. You can launch a
Notation window by clicking on the notation button or by pressing ALT+F2.
Exit
This command exits/quits the program. If you’ve changed your work since you last saved it the program will first
prompt you as to whether or not you wish to save your project before proceeding with the exit feature.
The Edit Menu
The Edit menu contains commands relating to editing (changing) a song. This menu has standard editing features
such as cutting, pasting, quantizing, etc. The editing commands normally affect the marked (highlighted) area of all
selected tracks.
Undo
Undo can be applied to most operations in RealBand –including audio effects processing, notation edits, and event-
level MIDI edits.
This feature will undo the last edit command executed from the lower portion of the Edit menu (excluding
commands in the chords submenu). It will restore the tracks that were affected by the last edit command to their
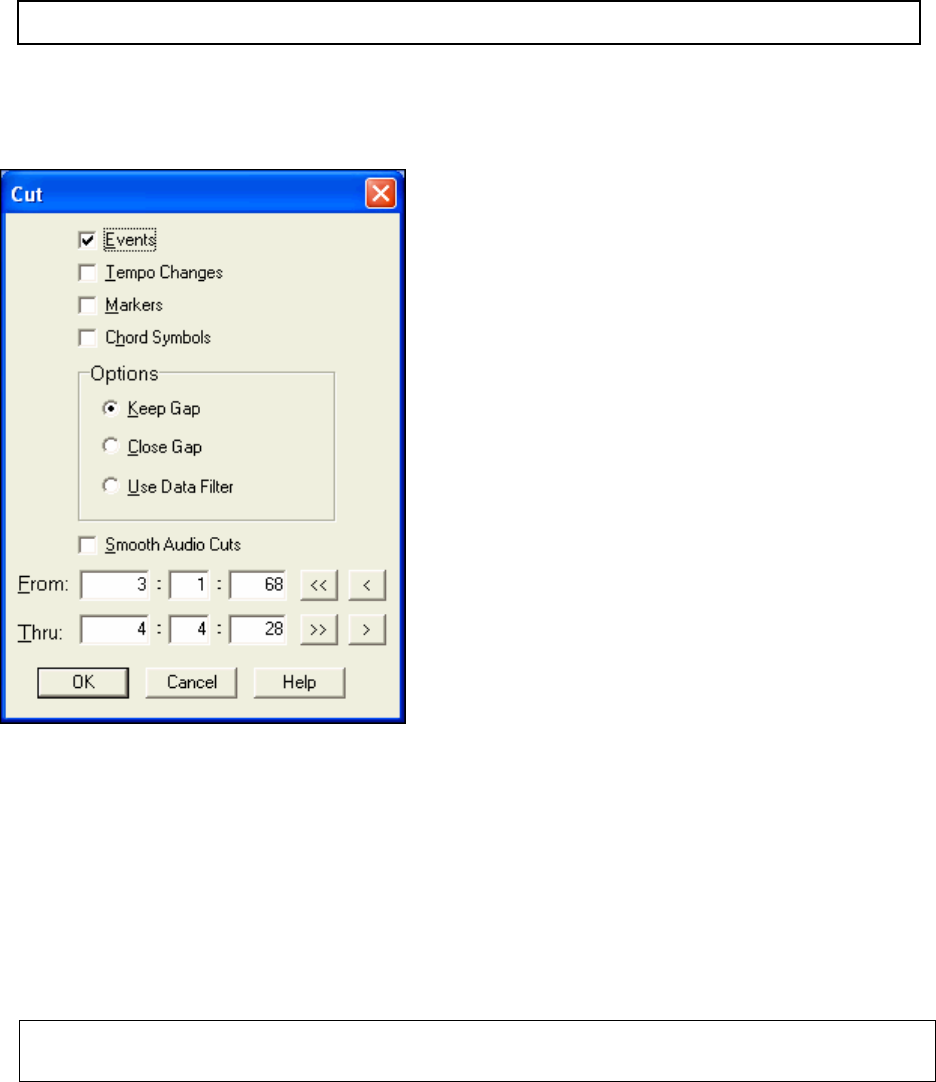
Chapter 13: Reference
184
previous state. If you are working in the Comments window, this will also undo the last text edit command.
RealBand supports up to 100 levels of Undo, the number is set in Options | Preferences | General.
Note: The Undo command itself can be undone. If you’ve just executed the Undo command it will appear in the menu as
“Redo.” The REDO command simply re-executes the command that was just undone.
If you execute a command for which there may not be enough memory to be able to issue the Undo command
RealBand will warn you beforehand. If you receive such a warning it might be a good idea to save your work to
disk before proceeding.
Cut
This command works in a few different ways – depending upon which window is active. If you are working in the
Comments window, this command will cut the selected text to the clipboard. Otherwise, it deletes MIDI events and
wave data from the marked area and moves them to the scrap buffer. As with copied events, cut events can later be
pasted to any location, or saved to a file with the Save Scrap command.
Events Checkbox: When this checkbox is enabled the Cut command will operate on MIDI events or WAV data in
the marked area of all selected tracks.
Tempo Changes Checkbox: When this checkbox is enabled the Cut command will operate on tempo changes in the
tempo map. If the first tempo map entry is within the marked area it will be copied instead of cut, and all other
entries will be cut. You can the paste the tempo changes to a different location in a song using the Paste command.
Options: When events are Cut a gap is created (by default) in the selected track(s) of a song. You can choose to
keep or close this gap.
Note: This command also will automatically place cut MIDI events into the Windows clipboard in MIDI format in order to be
able to paste the events into any Windows application that supports clipboard pasting. Only MIDI data (not audio data) can be
placed into the Windows clipboard from RealBand.
Use Data Filter:
The Data Filter is a filter that, when in use, determines which events will be affected by the current edit command.
RealBand will only allow the events that match the chosen characteristics to “pass through” the filter so that the
current edit command can act upon them. The filter has a separate row for all six types of MIDI events. Within
each row are settings that determine whether a type of event will pass through the filter, and the ranges and values of
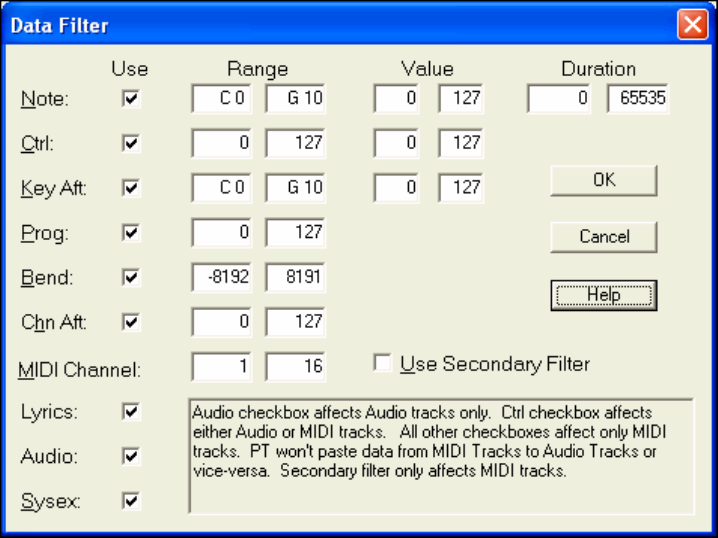
Chapter 13: Reference 185
the events that RealBand will allowed to pass through. There is also a row within the filter that lets you specify
which MIDI channels will pass through the filter.
The Use column determines whether or not an event type will pass through the filter. If the Use column is checked,
the event type will be used, but if it isn't checked the event won't pass through the filter. For example, if the use
column in the Note row is not checked then note events will not pass through the filter.
The Range column determines what range of events will pass through the filter. For example, if the minimum for
the note range is C1 and the maximum is C2 only notes that fall within the range of C1 through C2 will pass through
the filter. The current edit command will not affect any notes lower than C1 or higher than C2.
The Value column works in the same way as the range column, but will act upon note velocities, controller values,
or aftertouch values. Only events with values that fall within the specified values will pass through the filter. For
example, if the minimum note value is 50 and the maximum is 100, then only notes with a velocity of 50 up to a
velocity of 100 will be passed through the filter.
Duration allows you to specify that only notes with durations in a specified range will be affected by your edit.
A Secondary Filter is a second Data Filter that you can use in addition to the regular filter. If you check the “Use
Secondary Filter” option at the bottom of the filter, then a second filter will pop up after you're done editing the
regular filter. Events that pass through either the regular or Secondary Filter will be affected by the current edit
command.
The purpose of the Secondary Filter is to let you choose two separate sets of ranges. For example, you could specify
a note range of C1 to C2 in the regular filter, and a note range of C7 to C8 in the secondary filter. Notes that fall
within either range will be affected by the current edit command but notes that don't fall within either of these two
separate ranges won't be affected at all.
Smooth Audio Cuts Checkbox: This feature performs a very quick “fade-in” if there is audio data immediately
beyond the cut section. This will prevent any clicks or pops from occurring when the section beyond the cut is
played back.
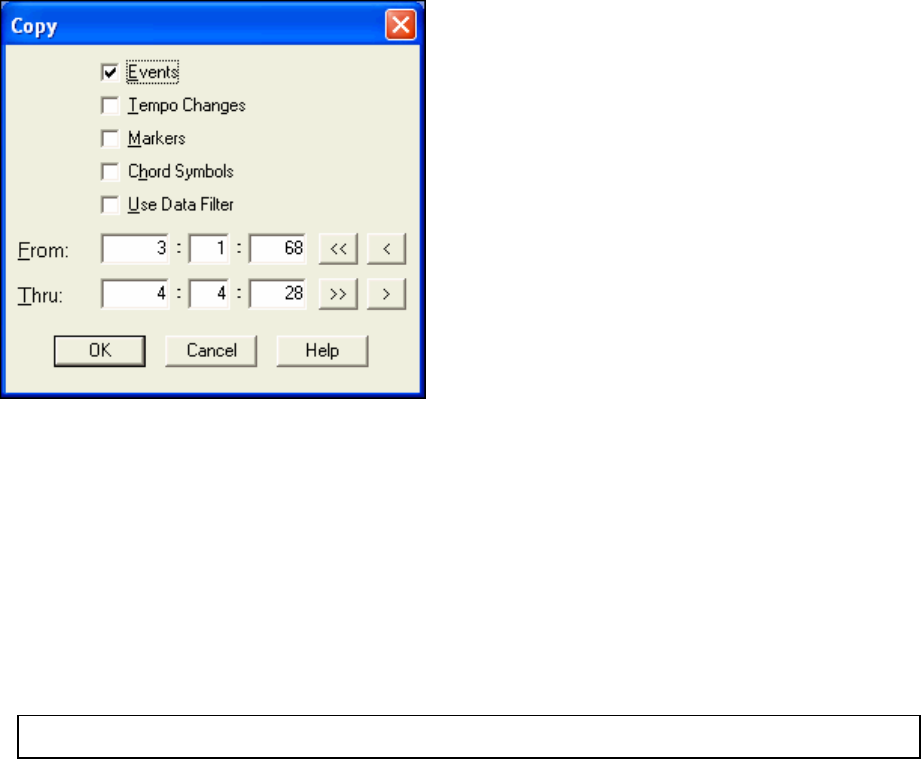
Chapter 13: Reference
186
Copy
This command works in different ways –depending upon which window is active. If you are working in the
Comments window, this command will copy the selected text to the clipboard. Otherwise, this command copies the
marked area of selected tracks, as specified by the From: and Thru: settings, and places the copied events in a scrap
buffer. You can then use the Paste command to paste the contents of the scrap buffer anywhere within the song, or
you may use the Save Scrap feature to save the contents of the buffer to a file. You can use the Data Filter to
determine which events to copy.
Events Checkbox: When this checkbox is enabled the Copy command will operate on MIDI events in the marked
area of all selected tracks.
Tempo Changes Checkbox: When this checkbox is enabled the Copy command will operate on tempo changes in
the tempo map. You can the paste the tempo changes to a different location in the song using the paste command.
This command also automatically copies MIDI events into the Windows clipboard so that you may paste the events
into another Windows application that supports pasting Standard MIDI Data to/from the clipboard.
Note: Only MIDI tracks can be copied to the Windows clipboard. Digital audio tracks (WAV data) are copied and pasted to
the program’s own internal clipboard/scrap buffer.
Markers and Chord Symbols will be copied if these boxes are checked.
Another option when working with MIDI tracks is to use the Data Filter to determine which events to copy. If you
use the Data Filter the program will copy some events and will leave others untouched, depending on whether or not
they “pass through” the filter. See the detailed description under the Cut topic.
Paste
The Paste command works differently depending upon which window is active. If you are working in the
Comments window the paste command will paste text from the Windows clipboard into the Comments section.
Otherwise, this command pastes the contents of the scrap buffer to the current location in the song, as specified in
the From: settings.
Paste automatically works the same way as 1-Track Paste if the scrap buffer only has data from 1 track.
Destination Track #
If you copy or cut from a single track, the Paste dialog will let you choose the destination track, with the current
track being the default value. Use the 1-Track Paste menu item if you wanted to paste multiple tracks onto a single
track.
The Repetitions option will cause the paste to repeat for as many times as you specify.
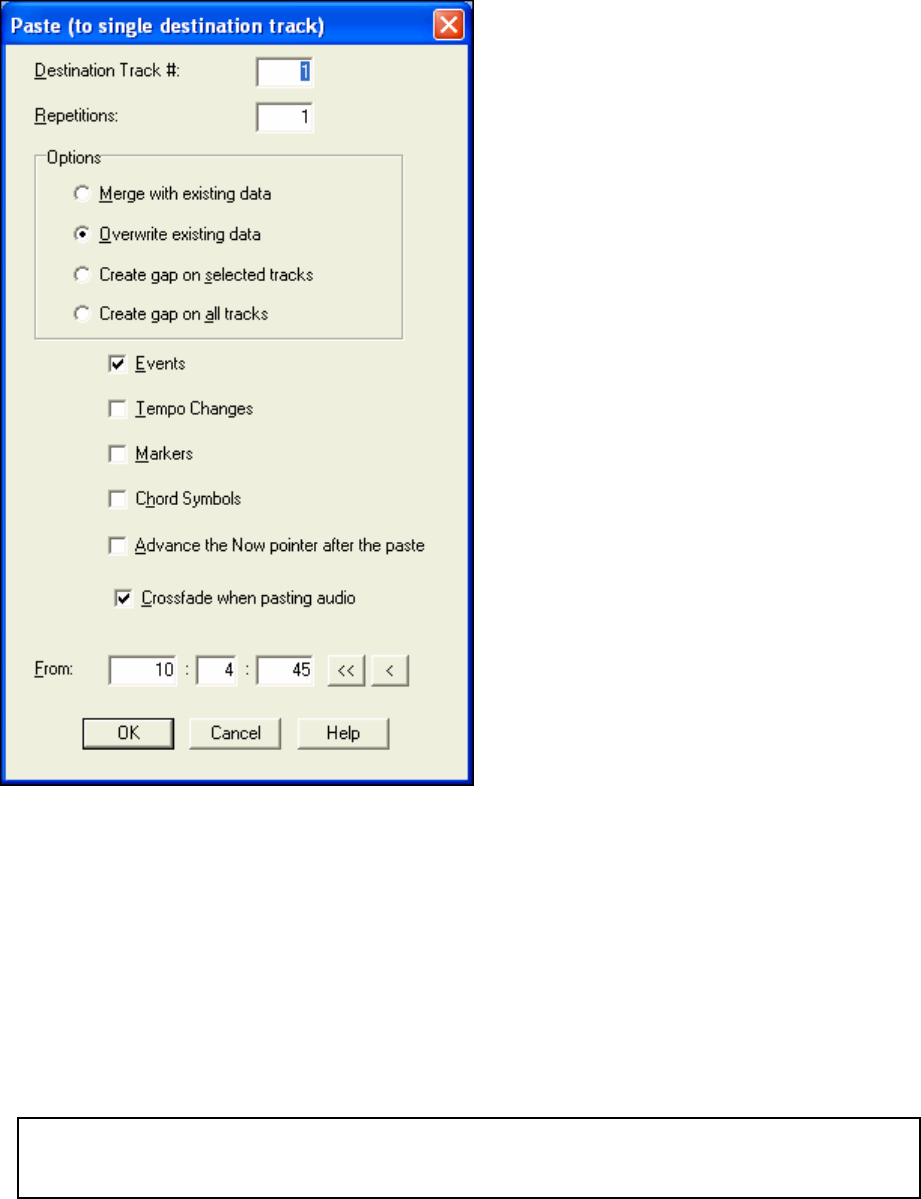
Chapter 13: Reference 187
The Options field gives you 4 choices:
1) Merge the Paste with existing data.
2) Overwrite Existing Data.
3) Create a Gap on the currently Selected Tracks.
4) Create a Gap on All Tracks.
Events Checkbox: When this checkbox is enabled this command will offer the ability to paste any Events that are
currently in the scrap buffer.
Tempo Changes Checkbox: When this checkbox is enabled the Paste command will paste any tempo changes that
were copied or Cut into the tempo scrap buffer. The Markers and Chord Symbols checkboxes have the same
function.
Advance the Now pointer after the paste advances the current time to the end of the pasted area. This is a useful
feature for when you plan to create a new track or song section from multiple Pastes.
Note: This command can also paste a Standard MIDI File/data from the Windows clipboard. If you’re using another MIDI
application capable of copying a Standard MIDI File/data to the clipboard (such as Band-in-a-Box), this can be a very
convenient feature to use to get MIDI data into your project quickly. Keep in mind, though, that this command does not
paste “meter” changes.
Crossfade when pasting audio smoothes out a paste, so that no audible “clicks” are heard at splice points of pastes.
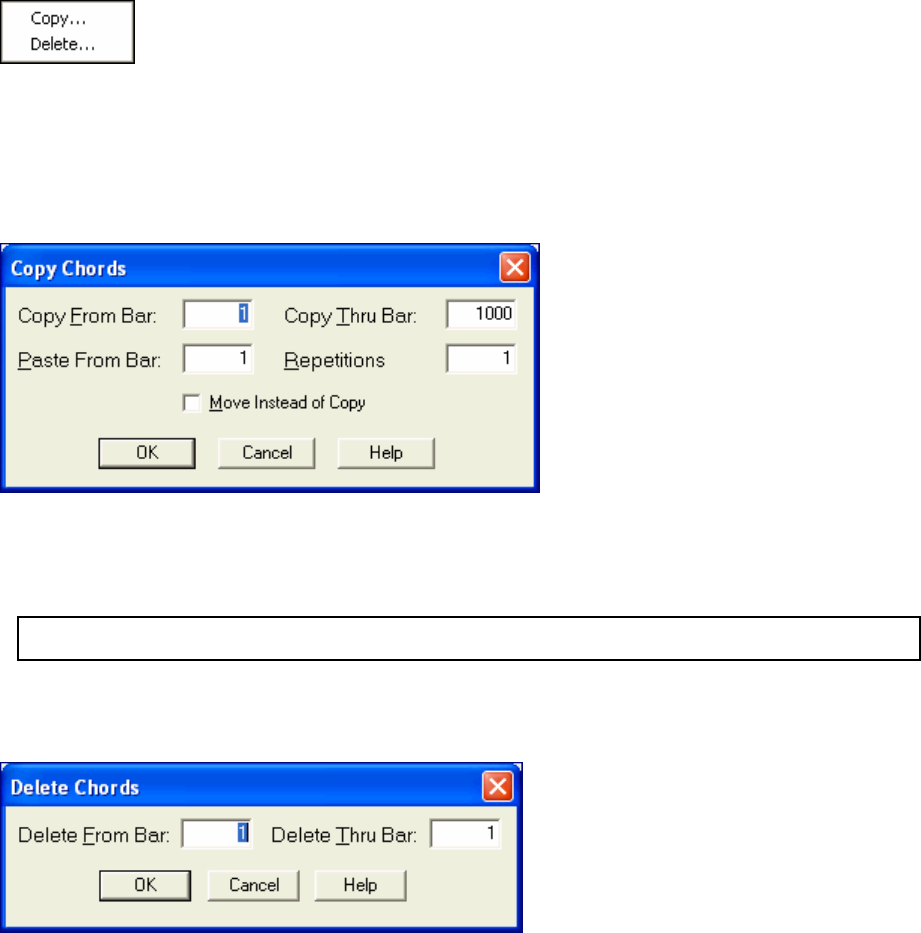
Chapter 13: Reference
188
1-Track Paste
This feature performs a similar function as the Paste command except that it pastes all the data onto one single
track. Therefore, you should select only one track as the destination track or this command can’t be performed.
This command will only paste MIDI data to a MIDI track and WAV data to an audio track. For example, if you 1-
Track Paste to an audio track, and there is also MIDI data in the scrap buffer, the MIDI data will be ignored.
If more than one audio track is in the scrap buffer RealBand will merge those tracks together automatically during
the 1-Track Paste procedure; but this will take a notably longer time to carry out.
Chords
This menu item contains a special sub-menu that allows you to delete or copy chord symbols
that are shown in the Chords or Notation window. The commands in this sub-menu do not affect
the MIDI playback of a song, but the song will be changed if BB tracks are regenerated.
Copy Chords
This feature lets you copy or move chord symbols that are shown in the Chords or Notation window to a different
location in one easy operation. This command does not affect the MIDI playback of a song, but it does affect the
generation of BB tracks..
The Copy From Bar and Copy Thru Bar settings provide you with the ability to select a range of bars (measures)
in which the chord symbols are copied.
The Paste From Bar setting offers a space to choose the bar number in which to paste the copied chord symbols.
If the Move Instead of Copy checkbox is enabled the chord symbols are moved instead of copied.
The Repetitions setting causes the program to paste the chord symbols by the amount shown in this setting. The
repetitions setting is ignored if the “Move Instead of Copy” checkbox is checked.
Note: This command can’t be undone later. A warning message box will give you one last chance to cancel the command
before it is carried out.
Delete Chords
This command deletes any chord symbols that are shown in the Notation window. This command does not affect
the MIDI Events of a song but it does affect the generation of BB tracks.
The Delete From Bar and Delete Thru Bar settings allow you to select a range of bars (measures) in which the
chord symbols are deleted. This command can’t be undone later. A warning message box will provide you with the
opportunity to cancel the command before it is performed.
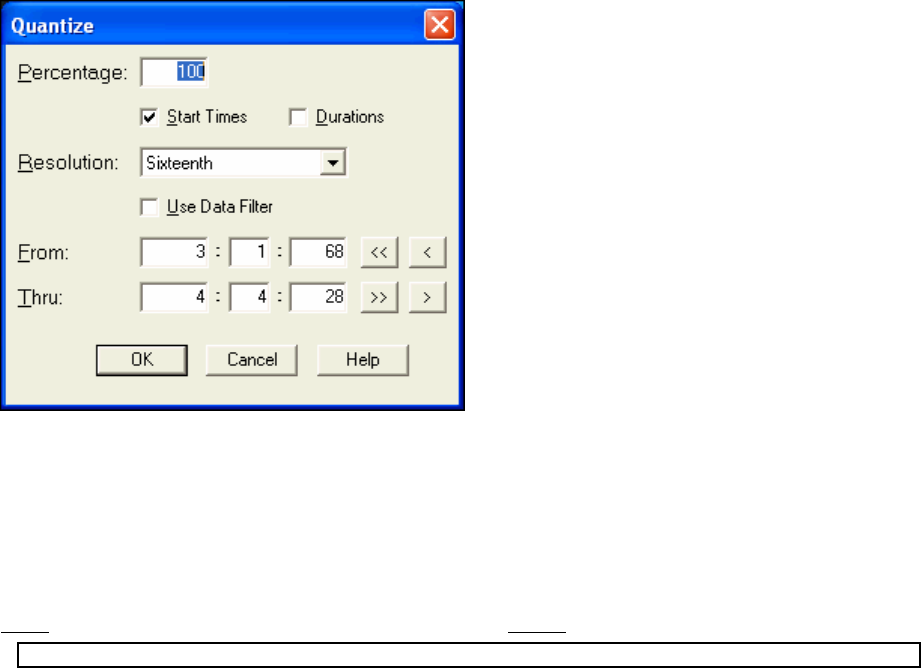
Chapter 13: Reference 189
You can delete chord symbols individually for a specific beat of a song by pressing Ctrl+Delete or the comma (,)
key while in the Notation window (only if the Ch checkbox in the Notation window is checked).
Edit - Audio Effects
This submenu contains all of the installed audio (DSP) effects that can be used with Wave Digital Audio Tracks (or
“rendered” MIDI tracks). The audio effects in this submenu are actually external “plug-ins” that are transparently
integrated with RealBand. You’ll be able to use them just as if they are built-in to the program since they work in a
manner similar to the standard editing commands. To access any DirectX or VST plug-ins you have installed in
your system, choose the “DirectX Audio Plugins” option and select the effect you want to use from the drop-down
list located in the DirectX plug-in dialog.
Each audio effect has its own [Help] button, which gives a detailed description of the effect parameters and their
use.
Quantize
The Quantize feature can be used on MIDI data only. This command “rounds” the times of notes to the nearest
user-specified time interval. This is very useful for correcting timing errors in your music performance(s). Both the
start times and durations of MIDI notes can be quantized. The resolution setting will determine the degree to which
the timing is rounded. For example, if you choose a resolution of a sixteenth note, the notes in the marked area will
be rounded off to the nearest sixteenth note. You may choose any resolution setting anywhere from a whole note
down to a 32nd note.
The percentage option will allow you to make the timing of your music more accurate without sounding too
mechanical. For example, if you chose an interval of a sixteenth note, a percentage of 50% will move the notes 50%
closer to the nearest sixteenth note instead of moving the notes exactly to the nearest sixteenth note.
Tip: You can also use the Data Filter to determine which notes will be affected by the Quantize command.
Replace
This command is for MIDI tracks only. It can search for any type of event you specify and replace the events that it
encounters with new ones. As with other edit commands, the replace command affects only the marked area of all
selected tracks.
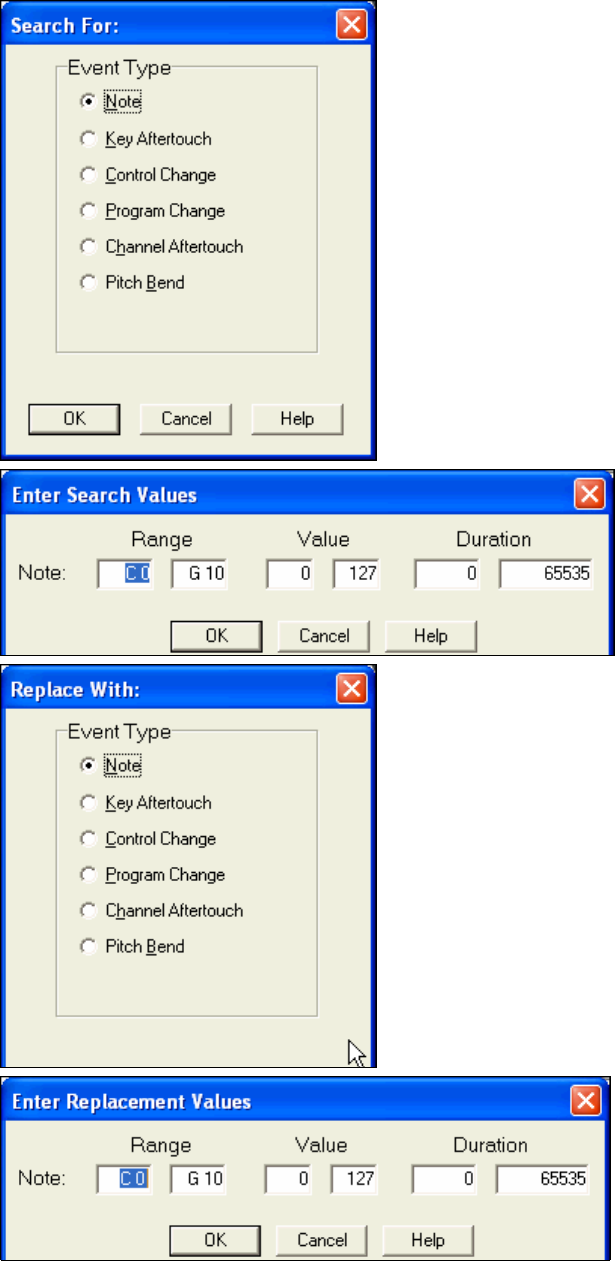
Chapter 13: Reference
190
When you select this command you will be prompted for the type
of event to search for, followed by the search ranges.
Next, you will be prompted for: 1) the type of event with which
to replace the found events, and 2) the replacement ranges.
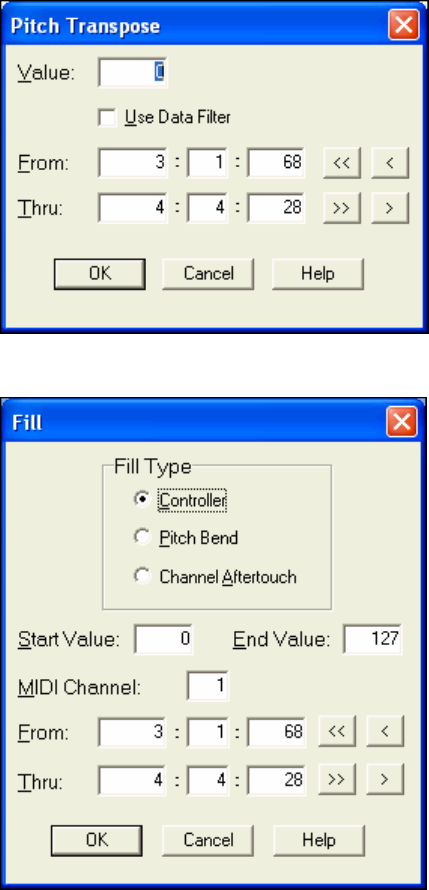
Chapter 13: Reference 191
Pressing the Esc key at any time will take you back to the previous step. The events that match the search criteria
will be changed to the kind of event you specified as the replacement event type (assuming you didn’t select the
same replacement type as the search type). In addition, the program will re-map the values of these events from the
search ranges in order to fall within the replacement ranges.
Pitch Transpose MIDI Music
This command transposes notes in the marked area of all
selected tracks by the specified value. For example, if
you specify a value of “-12” the notes will be transposed
down one octave. You can also use the Data Filter to
further refine the selection of notes to transpose.
Fill
This command will insert a stream of: the controller,
pitch bend, or channel aftertouch events. You can use
the Fill feature to perform various tricks such as fade-
ins, fade-outs, pitch bends, etc. The program will
prompt you for the type of event to fill and what the
From: (start) and Thru: (end) value should be. Then,
the events will be automatically inserted throughout the
marked area of the song. The values of the inserted
events will gradually increase or decrease from the start
value to the end value.
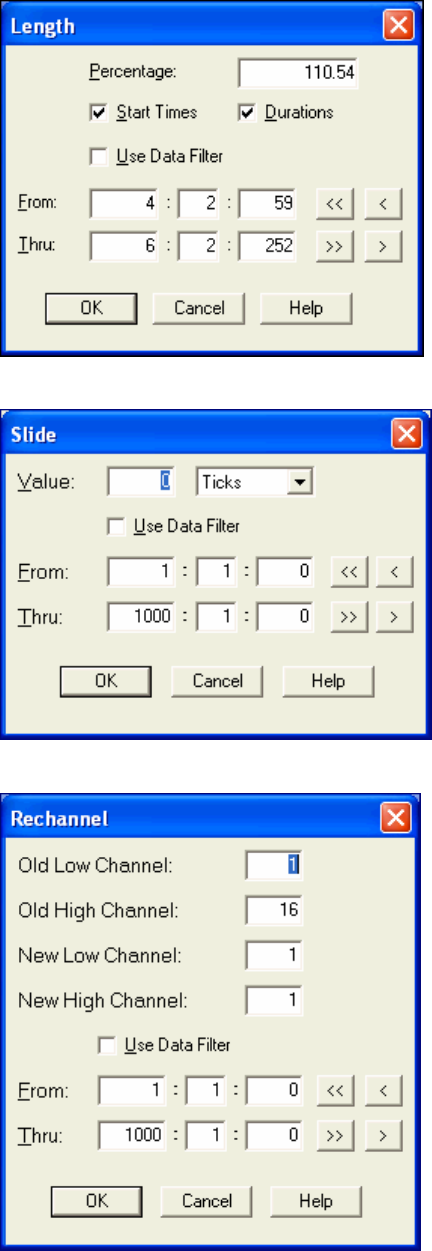
Chapter 13: Reference
192
Length of MIDI Music
This command alters the length of the marked area of all
selected tracks by the specified percentage. For example, a
setting of 50% will shorten the length by half. You can
also use the Data Filter to determine which events this
feature affects.
The Edit | Length of MIDI Music command supports
floating point percentages. You can specify a length
percentage as a floating-point number, such as 110.54%
Slide MIDI Music
This command shifts the time values of the events within
the marked area of all selected tracks by a user-specified
value. This value can be either positive or negative. A
positive value will slide the events forward in time and a
negative value will slide them backwards in time. This
feature can be set in terms of Ticks (i.e. PPQ) or MS
(milliseconds, 1000=1 second).
There is a combo box available next to the value field that
allows you to choose between these two time formats. The
Data Filter offers refinements to the selection of exactly
which type of MIDI events will be affected by the Slide
MIDI Music command.
Rechannel
This handy feature lets you make changes to the MIDI
channel(s) of the events in a marked area of any selected
tracks. The “Old Low Channel” and “Old High Channel”
fields allow you to specify a range of channels that will be
affected. Conversely, the “New Low Channel” and “New
High Channel” fields allow you to select the range within
which to re-map the events.
For example, let’s say you wanted to change all the events
in a marked region so that they are all on MIDI Channel 2.
First, choose an Old Low Channel of 1and an Old High
Channel of 16 (to encompass the all range of 1 through
16). Next, select both a New Low and New High Channel
of 2 (e.g., a range of 2 through 2). This would have the
desired result of all events in all MIDI channels remapped
to MIDI channel 2.
As another example suppose you have a multi-channel
MIDI guitar part ranging from channels 3 through 8 and
you wanted to change the part so it is played on MIDI
channels 11 through 16 (the standard MIDI guitar
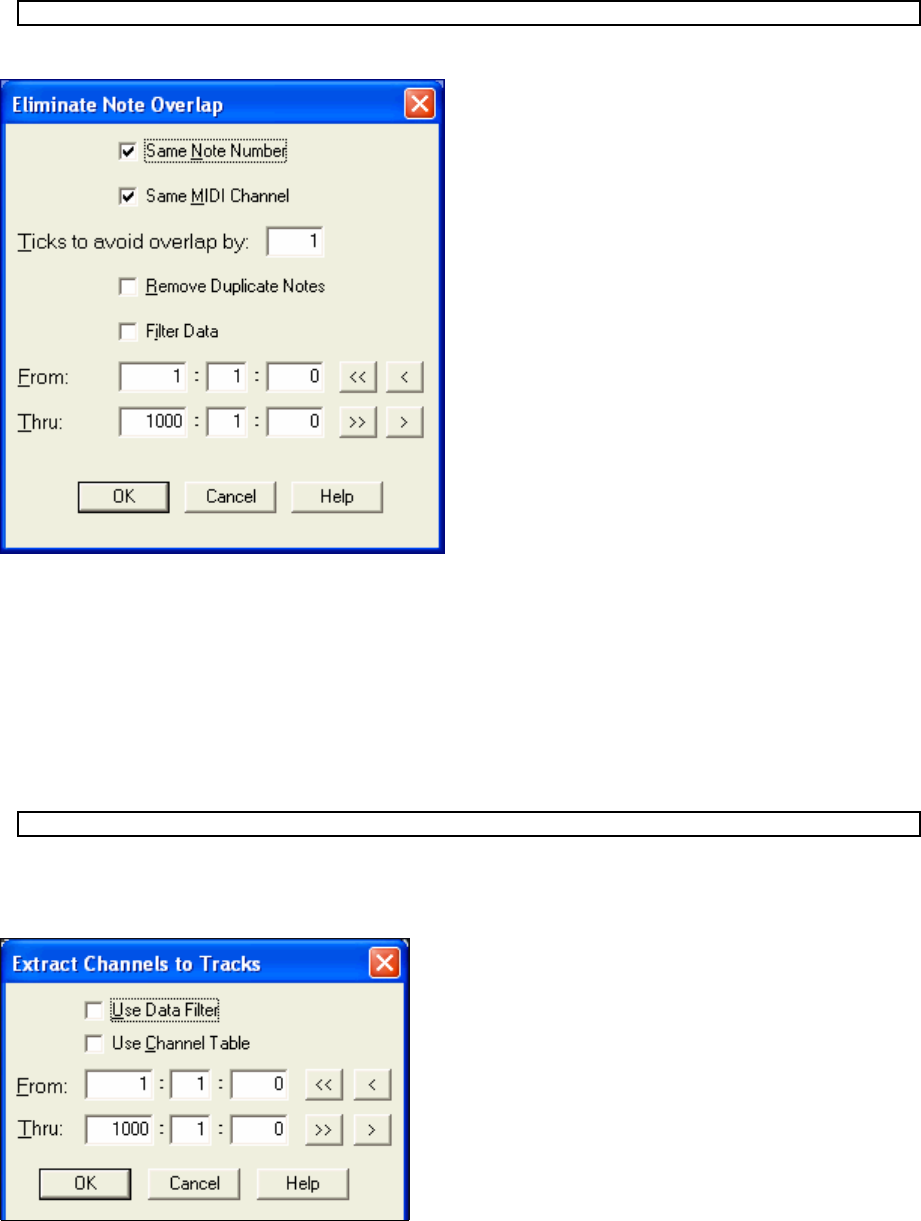
Chapter 13: Reference 193
channels). In this case you would select an Old Channel range of 3 through 8, and a New Channel range of 11
through 16. This would result in all the events in the guitar part being remapped to MIDI Channels 11 through 16.
Tip: You can also use the Data Filter to refine which events are affected by this feature.
Eliminate Note Overlap
This feature is a convenient way of eliminating
overlapping notes without having to spend a lot of time
manually identifying and editing each one. An
overlapping note is one that ends after the next note
starts.
For example, if a note begins at 1:01:00 and ends at
1:01:130, but the next note starts at 1:01:120, then the
first note overlaps the second note. In this situation, the
Eliminate Note Overlap feature would shorten the note,
making it end at 1:01:119 so that the two notes don’t
overlap each other.
The default settings for this command are to eliminate
overlapping notes that are identical in note number and
MIDI Channel. If you want to eliminate all overlapping
notes uncheck the Same Note Number and Same MIDI
Channel checkboxes so that the command will affect all
notes that appear to overlap.
Notes are normally only considered to be overlapping if
they are on the same track in the Tracks window.
Be careful not to use this command on notes that you want to have overlap –such as chords and arpeggios.
Since this command can be Undone you can listen to the results carefully to further ensure that everything sounds as
it should.
If you do not like what you hear, use the Undo feature before moving on to other commands.
Remove Duplicate Notes checkbox, when enabled, is especially useful for eliminating “ghost” notes that may have
been accidentally inserted over existing notes in the Editable Notation window. They may even be masked from
view in the regular notation screen display.
A duplicate note is a note that is has same note number, is located at the same time location, and is on the same
MIDI channel as a pre-existing note.
Tip: You can also use the Data Filter to determine which events are affected by this procedure.
Extract Channels to Tracks
This feature will move MIDI events to different tracks based on the channel number of said events. For example, if
the channel number of an event is 1 the event will be moved to track number 1.
This can be useful when multiple channels of data are
recorded on a track and you decide you want to split the
data into multiple tracks (e.g., Channel 8/9 can be split into
two tracks for use with the piano keyboard’s Auto-hand
splitting feature).
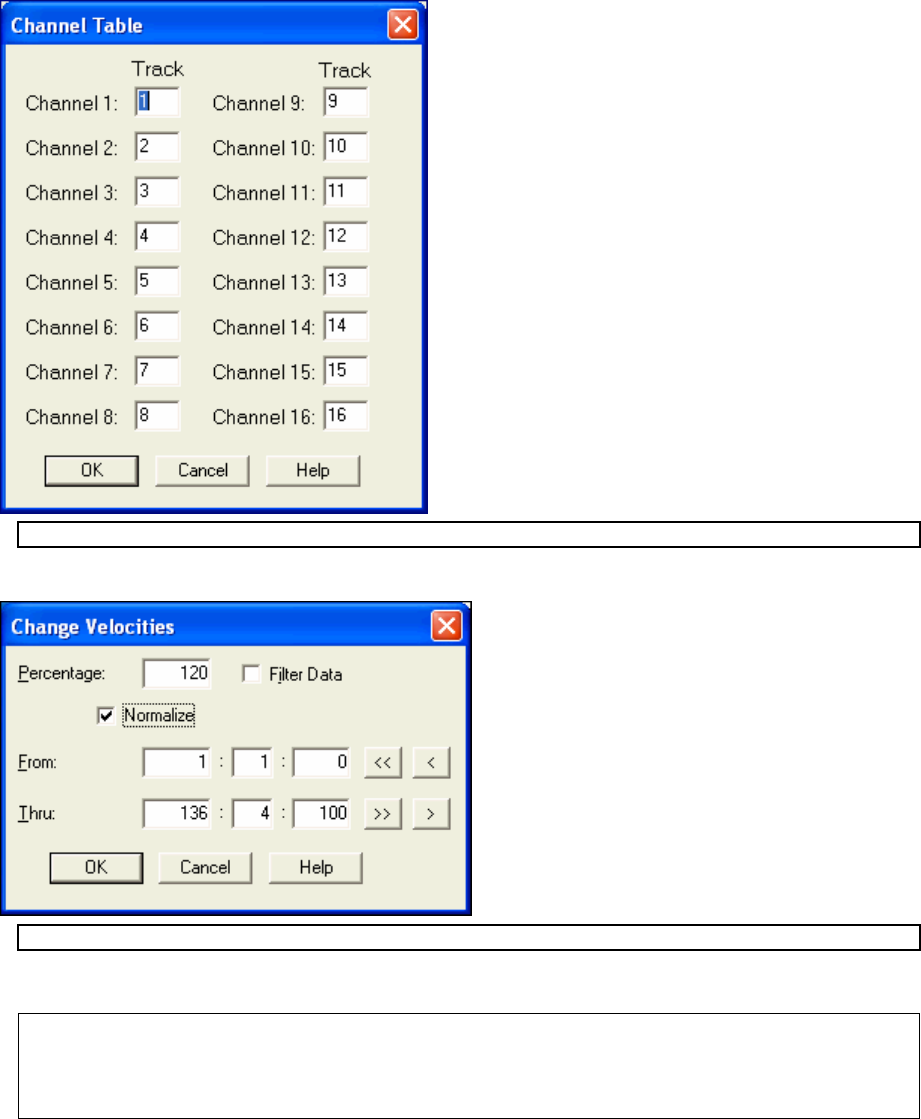
Chapter 13: Reference
194
If the Use Channel Table checkbox is enabled a dialog
box will pop up before this command is issued. This gives
you the opportunity to choose which tracks the various
MIDI Channel events are extracted to. For example, as
you’ll notice when the Channel Table dialog box pops up,
the default is for Channel 3 to be extracted to Track 3.
Using this table you could, for example, enable this feature
to extract certain events on Channel 3 to Track 19.
Tip: You can use the Data Filter to determine which events are affected by this command.
Change Velocities
This feature allows for easy increases or decreases of
the velocity values of notes within a marked region of
all selected tracks by a specified percentage.
The Normalize command can be used to apply the
same levels to many MIDI files, so they all sound with
the same approximate volume. Dynamics in the files
are preserved!
The “Percentage” setting determines how the velocity
values are changed. For example, a percentage setting
of 100 results in no change, while a percentage setting
of 50 would reduce the velocity values by half. A
percentage parameter of 125 would increase the
velocity values in the track by 25%.
Tip: You can use the Data Filter to determine and refine which events are affected by this command.
When “Normalize” is checked, the MIDI note velocities of the track being edited will be boosted by the difference
between the highest velocity found in the track and 127.
Note: The MIDI Normalize works on each track independently. This could potentially change the mix when multiple tracks
are normalized.
For example, if normalizing two tracks, and one track generally had very low velocities, but another had very high velocities
then normalizing multiple tracks may boost the relative volume of the one that originally had low velocities. The solution
would be to reduce the volume of that track.
Velocity Dynamics
This command will “compress” or “expand” the velocity values of notes within the marked area of all selected
tracks. The program will automatically determine the average velocity of all notes within a marked area.
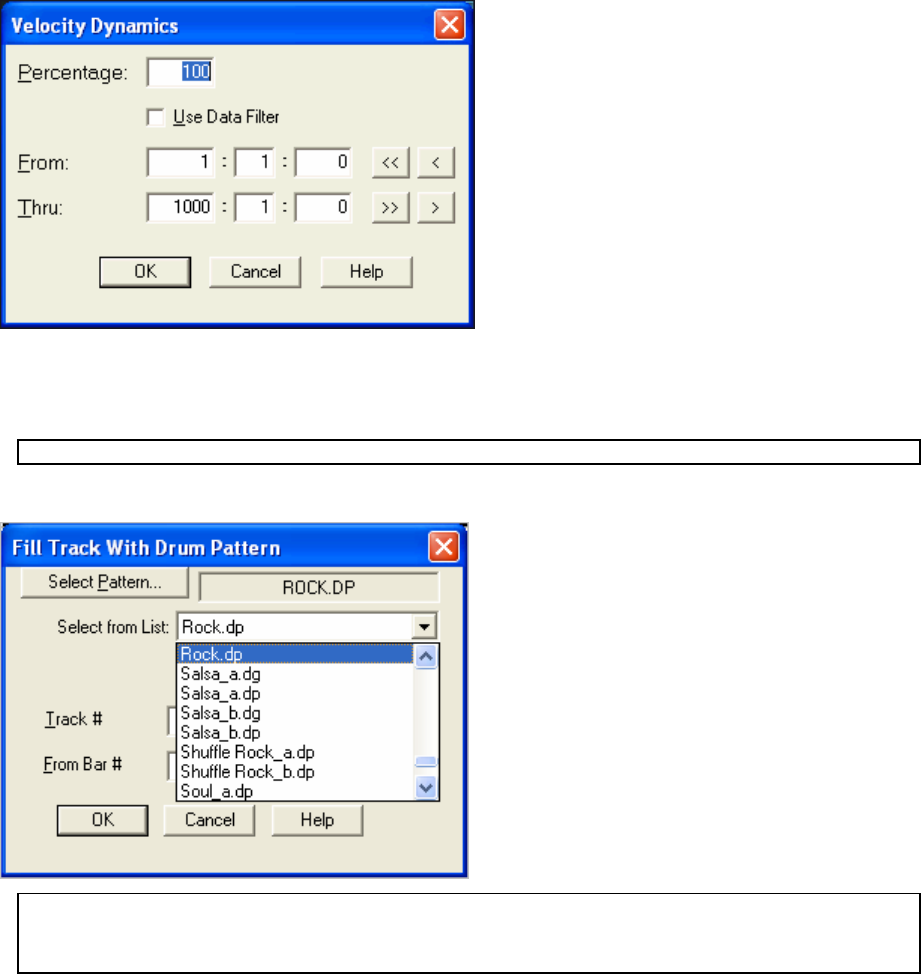
Chapter 13: Reference 195
The Percentage setting will cause the velocity values
to be moved either closer or farther away from the
average velocity. A percentage setting of 100 results
in no change. A percentage setting of 50 would
compress the velocity values so that they are 50%
closer to the average velocity. For example, if the
average velocity is 64 and a note has a velocity of 84,
the note’s velocity will be moved midway between
these values (64 and 84) to become 74.
A percentage setting of 150 would “expand” the
velocity values so that they are 50% farther away from
the average velocity. For example, if the average
velocity is 64 and a note has a velocity of 84 the note
would be moved 50% farther away from 64 and 84 to
become 94.
In the preceding examples the velocity value suggested would be considered to be “above the average.” Remember
that velocity values that are “below the average” will be increased toward the average velocity when compression
occurs and decreased when expansion occurs.
Tip: You can use the Data Filter to determine which events are affected by this command.
Fill Track With Drum Pattern
This feature is a convenient way of loading an existing
drum pattern and pasting it onto a track. The [Select
Pattern] button lists all of the available patterns in a
drop-down combo so that you can quickly select a
Drum Pattern file (*.DP) to be pasted into the track that
is selected in the “Track #” field.
The measures that have been specified in the “From
Bar #” and “Thru Bar #” fields will be filled with the
loaded pattern. The pattern will be repeated until the
selected ending bar is reached.
Note: Filename.DP files are simply MIDI files containing a short MIDI drum pattern saved with the .DP extension. You can
create your own .DP files by recording them yourself (i.e. with the “virtual MIDI drums” plug-in). Technically, any MIDI data
can be saved to a .DP file, but it makes sense for them to only contain a short drum pattern instead of additional instrument
parts.
Randomize
This feature will randomly alter the start times, velocities, and durations of notes within a marked area of all selected
tracks.
This command can be used to alter the timings and dynamics of notes in a quantized track so that the track sounds
less robotic and has a more “human” feel to it.
Use this setting sparingly; otherwise it may cause a track to sound “sloppy.” This command can be undone with the
Edit | Undo menu item.
The Min Start Time Offset is the lowest amount of ticks that the program can move a note backward in time. The
Max Start Time Offset is the highest amount of ticks that the program can move a note forward in time.
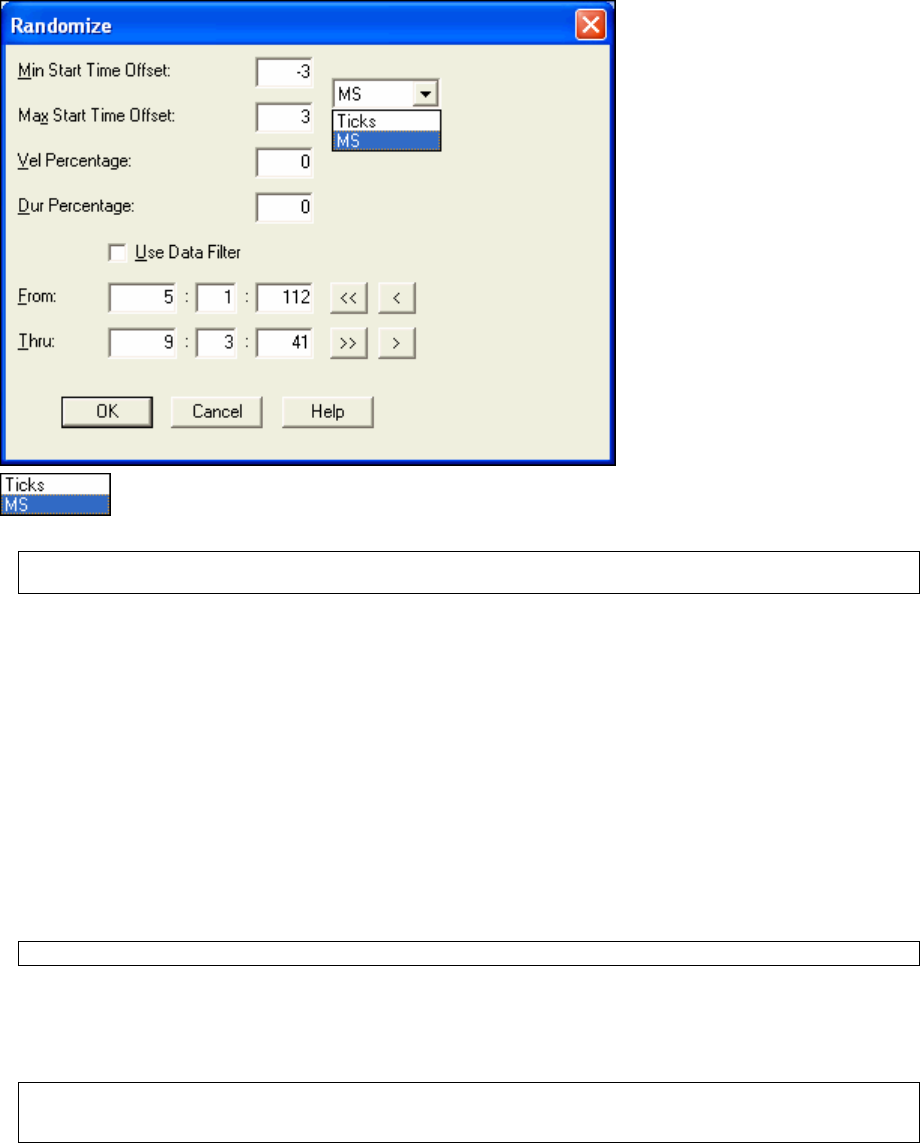
Chapter 13: Reference
196
For example, if the Min Start Time Offset is “-5” and the Max Start Time Offset is 2, and a note begins at 2:01:100
the program will randomly move it anywhere between 2:01:095 and 2:01:102. If both the Min and the Max Start
Time Offsets are set to 0 the notes won’t be moved.
When MS is selected instead of Ticks, the min/max start time offset in the Randomize command is
specified in milliseconds rather than ticks. The MS offset will be rounded to the closest tick at the
actual song PPQ which works excellent with higher song PPQ resolutions.
Note: If the Ticks setting is enabled, the ticks are actually based on a PPQ of 120 regardless of the current PPQ. This is
how “Randomize” has always worked.
The Vel Percentage setting determines the degree to which the program will randomly alter note velocities. For
example, a setting of 10 will cause the program to randomly alter velocities anywhere from 10% lower or up to 10%
higher than the note’s original velocity. If a note has a velocity of 100, for example, the program will randomly alter
it so that its new velocity is somewhere between 90 and 110. If this setting is set to 0 then the note velocities won’t
be altered at all.
The Dur Percentage setting determines the degree to which the program will randomly alter note durations. For
example, a setting of 10 will cause the program to randomly alter durations anywhere from 10% shorter or up to
10% longer than the note’s original duration.
If a note has a duration of 200, for example, the program will randomly alter it so that its new velocity is somewhere
between 180 and 220. If this setting is set to 0 the note durations won’t be altered at all. This feature is often used
to randomly adjust the durations for tracks that were either step recorded or ones that were manually entered into the
Notation window.
Rechannel All Tracks
Note: This command is for MIDI tracks only. This command has no effect on audio tracks.
This command will rechannel all the events in ALL the tracks to the forced MIDI channel in the “Ch” field of the
Classic Tracks window. Any track that has “0” as the forced channel won’t be affected.
Make sure you don’t execute this command if multi-channel tracks such as guitar tracks have forced channels. This
would cause you to lose the multi-channel information.
Note: Rechanneling of all tracks used to automatically be done when saving to a .MID file but this has been eliminated
because it destroyed the string separation of multi-channel guitar tracks. Use this command as a quick way to rechannel
the data in all the tracks before saving to a .MID file.
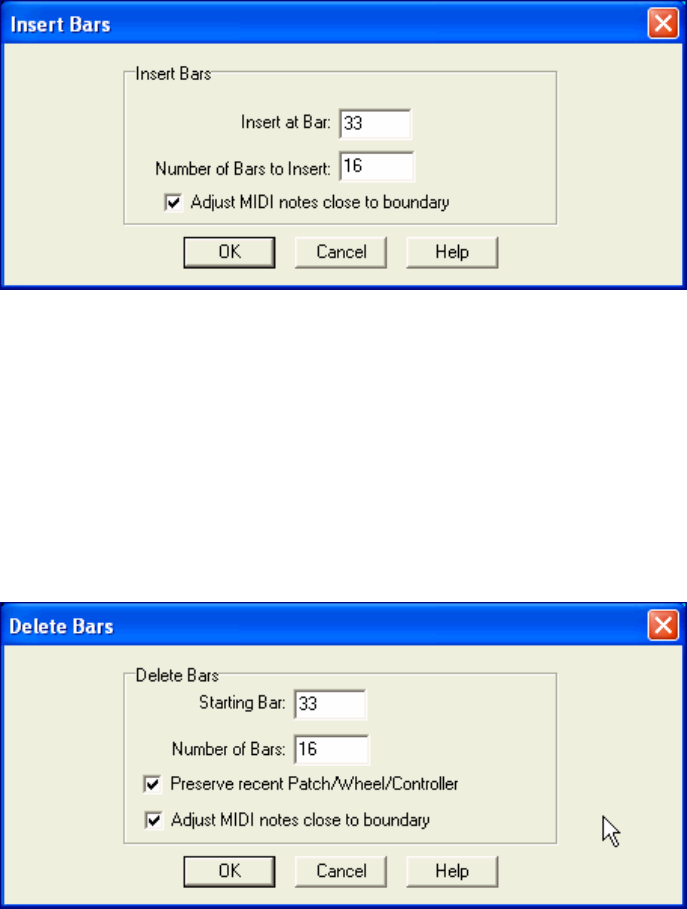
Chapter 13: Reference 197
Insert Blank Bars Command
The new Edit | Insert Blank Bars into song command makes it easy to insert blank bars into the song, with an option
to intelligently adjust MIDI notes that are close to the boundary of the section you are inserting (useful if inserting
bars in the middle of a song). This will insert blank bars at any location of the song, and push the music forward in
time to create the blank bars.
In the Insert at field, enter the bar at which you would like RealBand to place the blank bars.
In the Number of Bars to Insert field, enter the amount of blank bars you would like RealBand to insert.
If the Adjust MIDI Notes Close to Boundary checkbox is checked, RealBand will attempt to ensure that MIDI
notes that are slightly earlier than the point of the insert (and really is part of the section of music that will be moved
forward in time but was played slightly early) will be moved to the end of the inserted section rather than staying
just before the inserted section.
Delete Bars and Preserve Settings
Edit | Delete Bars from song makes it easier to delete bars from a song with an option to preserve the most recent
Patch/Wheel/Controller settings and an option to intelligently adjust MIDI notes that are close to the boundary of the
section being deleted. This command will delete bars of music from the song (and will move the music beyond the
deleted section backward in time so there is no gap left over).
In the Starting Bar field, enter the bar number of the beginning of the section you would like RealBand to remove.
In the Number of Bars field, enter the number of bars to remove.
If the Adjust MIDI Notes close to boundary checkbox is checked, RealBand will attempt to ensure that MIDI
notes that are slightly earlier than the very end of the deleted section (and really are part of the section of music
beyond the deleted section) will be moved backward in time rather than deleted. RealBand will also attempt to
delete MIDI notes that are slightly earlier than the start bar and really considered to be part of the first bar being
deleted.

Chapter 13: Reference
198
Split MIDI drums
This command will split a MIDI drum track to separate tracks. Custom settings allow you to control which notes go
to which track. It acts upon the current track.
If the “Auto-Fill Tracks for each MIDI note used setting” is enabled, then RealBand will automatically move each
MIDI note over to a new blank track.
If the “Custom” setting is enabled, you can specify which MIDI notes go to which track. On the left column of the
Custom section, you will see the track numbers that notes will be placed onto. You can type the note numbers into
MIDI Note Nums edit field, separated by commas. For example, “62,65” would mean that MIDI note numbers 62
and 65 will go onto the track specified on the left field E.g. <7>.
If you press the “...” button a list box will pop up that makes it easier to specify the note numbers. The Note Name
Octave number of each note is shown (e.g. E 5) and, for notes in the GM drum range, the GM drum sound names for
GM drums are shown (e.g. Acoustic Snare, Closed High Hat, etc) .
You could override the track number by enabling the checkbox next to the “Hard Trk” field and typing another track
number in the hard track field. The Hard Track can be any MIDI or blank track that you specify.
Data Filter
The Data Filter is a filter that, when in use, determines which events will be affected by the current edit command.
RealBand will only allow the events that match the chosen characteristics to “pass through” the filter so that the
current edit command can act upon them.
The Use column determines whether or not an event type will pass through the filter. If the Use column is checked,
the event type will be used, but if it isn't checked the event won't pass through the filter. For example, if the Use
column in the Note row is not checked then note events will not pass through the filter.
The Range column determines what range of events will pass through the filter. For example, if the minimum for
the note range is C1 and the maximum is C2 only notes that fall within the range of C1 through C2 will pass through
the filter and be affected by the current edit command.
The Value column works in the same way as the range column, but will act upon note velocities, controller values,
or aftertouch values. Only events with values that fall within the specified values will pass through the filter. For
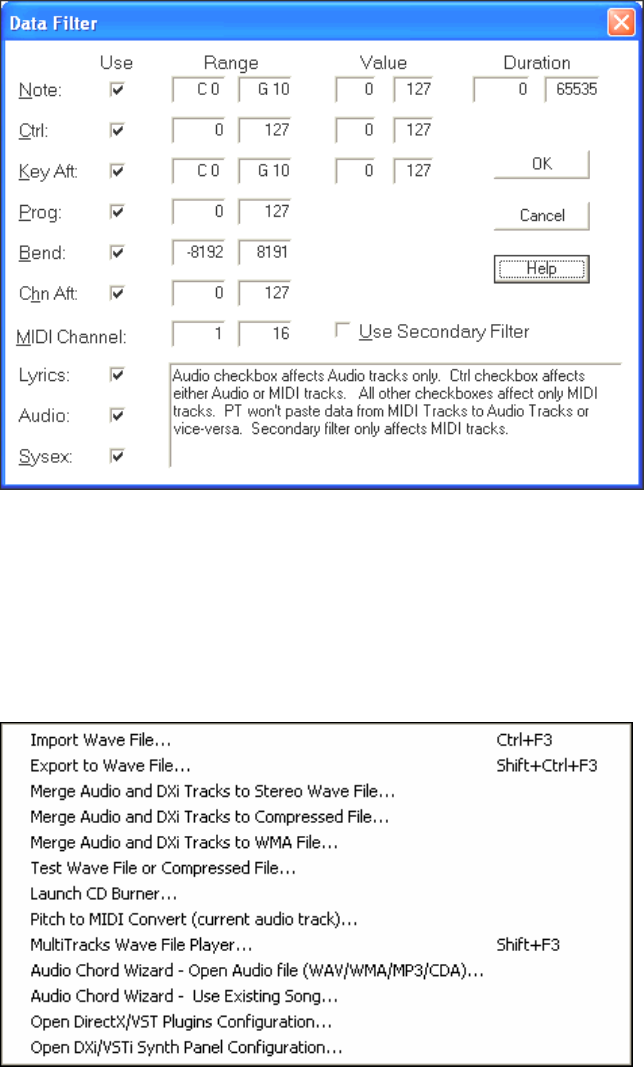
Chapter 13: Reference 199
example, if the minimum note value is 50 and the maximum is 100, then only notes with a velocity of 50 up to a
velocity of 100 will pass through the filter.
Duration allows you to specify that only notes with durations within a specified range will be affected by your edit.
If you check the “Use Secondary Filter” option at the bottom of the filter, then a second filter will pop up after
you're done editing the regular filter. Events that pass through either the regular or Secondary Filter will be affected
by the current edit command.
The purpose of the Secondary Filter is to let you choose two separate sets of ranges. For example, you could specify
a note range of C1 to C2 in the regular filter, and a note range of C7 to C8 in the secondary filter. Notes that fall
within either range will be affected by the current edit command but notes that don't fall within either of these two
separate ranges won't be affected at all.
The Audio Menu
Import Wave File
This command offers to import a wave file into the “current track” of your project. These audio file formats can be
loaded from the File | Open and Audio | Import Wave File menu commands.
- WAV: Windows wave files, native digital audio files for the Microsoft Windows platform.
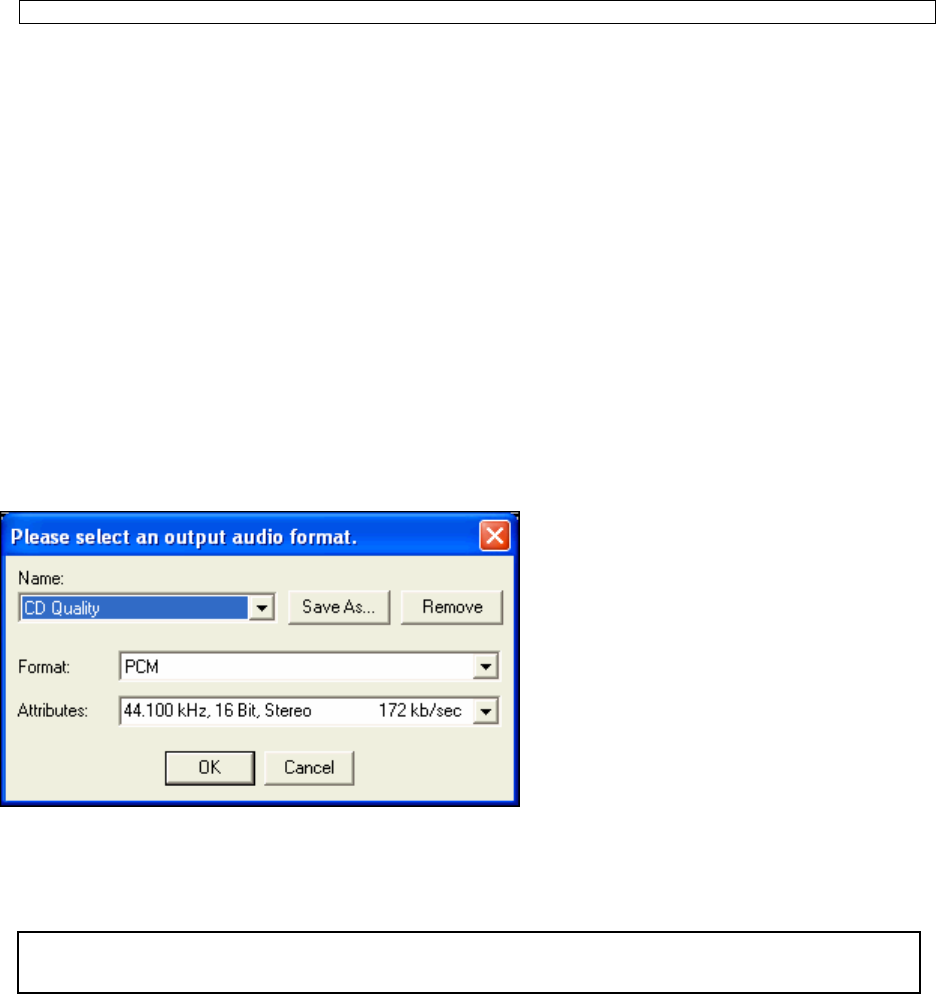
Chapter 13: Reference
200
- MP3: compressed audio files, popular on the Internet. Requires codec to be present on system.
- WMA: Windows Media Audio, a compressed audio format developed by Microsoft.
- WMV: Windows Media Video is a compressed video format developed by Microsoft. RealBand will load
the audio from a WMV.
- CDA: CD Audio is the file extension used by Windows to make CD audio tracks available for loading into
programs like RealBand. Just put an audio CD into your CD-ROM, and then open a .CDA file from that
drive (usually drive D).
Note: This feature may not work unless running Windows XP or higher. CDA files may not open in Windows Vista.
This command will also import MultiTrack .WAV files by offering a choice of merging them to mono or placing
additional tracks of the wave file onto separate tracks. For example, if Track 1 is the current track and Track 2 is
empty (and you import a Stereo Wave file), RealBand will place the left channel on track 1. The right channel will
be imported to Track 2 on the next available track, which, in this case, is Track 2 since this track is empty.
A dialog will pop up which lets you select the time location to place the wave file(s). By default this is the current
time (Now:) of a song.
Export to Wave File
This command will export the highlighted section of the current track to a wave file –as long as the track contains
audio data.
Merge Audio and DXi Tracks to Stereo Wave File...
This is an export command that will merge all the audio tracks to a stereo wave file while simultaneously rendering
and merging the MIDI tracks to audio if you have a DXi or VSTi software synth. When played in a wave file player
the file will sound the same as if the audio tracks of the song were being played by RealBand. The volume, mute,
pan, etc. settings of the track will affect the sound of the merged stereo wave file.
Merge Audio and DXi Tracks to Compressed File...
Overview
When you export audio to alternate file formats a standard Windows Audio Format dialog appears.
Use the Format popup menu to select the ACM codec you wish to use, and then select the exact specifications of
the file from the choices available in the Attributes popup menu.
If you frequently use a particular combination you can save a setting in the Name combo box.
When you press OK, RealBand will export the song to the format you have selected using the ACM codec.
Note: Most conversions work fine, but not all codecs can save in every format listed. RealBand does intermediate
conversions when necessary (to try to get the job done), but sometimes a codec will report “Conversion not Possible.” This
error is caused by a limitation of the codec rather than RealBand.
Merge Audio and DXi Tracks to WMA File
This command works the same as the File | Merge Audio and DXi Tracks to Stereo Wave File command except that
this feature will compress the file using the Microsoft Streaming Media® Compression Technology™. When you
Chapter 13: Reference 201
execute this command the program first generates a temporary stereo PCM file (Raw Wave). A dialog will then
pop-up that will let you save the resulting stereo PCM wave file to a .WMA file (Windows Media Audio).
Test Wave File or Compressed File
This command launches your default media player so you can test your file for compatibility and playability with a
standard Windows media player.
Launch CD Burner
This command launches the “Miniburn” CD Burner program. If the current song has audio data this feature will
first offer to merge audio tracks in the current song to a WAV file. If you say OK to this option the CD Burner will
automatically add the .WAV file to a list of files to be burned onto a CD (burn list).
If necessary, RealBand will convert your file to 16-bit, 44.1 kHz stereo before burning it to an audio CD.
Pitch to MIDI Convert (current audio track)
This command will perform a pitch-to-MIDI conversion of the current track. It works best on audio tracks that
contain only single-note melodies. The current track is analyzed and then the program will attempt to convert it to
MIDI. If the conversion is successful the MIDI notes will be placed on the next available empty MIDI track.
MultiTracks Wave File Player
This command will play special MultiTracks wave files (up to 48 tracks). This file format is similar to regular wave
files, but instead of being simple stereo or mono standard wave files these files can be quite large and contain up to
48 discrete mono tracks.
The dedicated MultiTrack Wave dialog is simply a quick means of playing these special wave files. This player can
also play and preview any regular mono or stereo wave files.
To use, note the following:
1. Use the Load button to load a file.
2. Use the Play and Stop buttons to start and stop playback.
3. The Time Scrollbar lets you adjust the current time location.
4. The Import button offers the ability to import a wave or waves into new projects – provided the sampling
rate and resolution of the file is supported by or can be converted by RealBand. Otherwise, the import
button will be disabled (grayed out).
Audio Chord Wizard - Open Audio file (WAV/WMA/MP3/CDA)
Select an audio file to load into the Audio Chord Wizard.
Audio Chord Wizard - Use Existing Song
Load the currently loaded song into the Audio Chord Wizard.
Open DirectX/VST Plugins Configuration
Open the DirectX/VST window to select and edit effects plug-ins.
Open DXi/VSTi Synth Panel Configuration
Opens the DirectX/VST window with the control panel for the current synth.
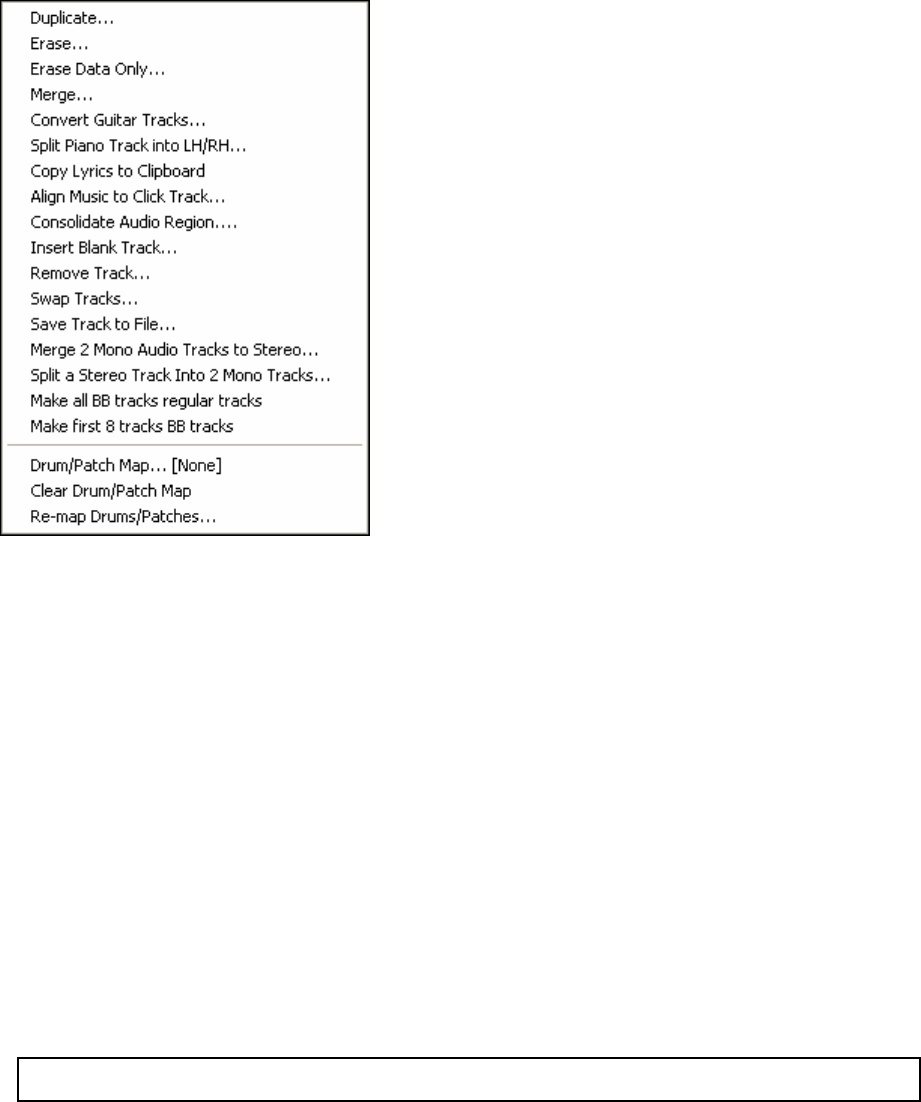
Chapter 13: Reference
202
The Track Menu
This menu contains the following features:
Duplicate
This makes an exact copy of a track. You must select only one track as this feature is intended to duplicate one
track at a time. You will be prompted to select a destination track. The destination track must be empty.
Erase
This command permanently erases all selected tracks and resets their track setup values to “0.” You will be
prompted as to whether or not you wish to erase all selected tracks. This command can’t be undone later.
Erase Data Only
This feature works the same as the preceding Erase command except that it will not erase the parameter settings in
the Tracks window such as the Track Name, Channel, Velocity, etc.
Merge
This feature will offer to merge two tracks (of the same type- e.g., MIDI) together and place all the MIDI or WAV
data found in both tracks onto a 3rd track.
“Merge Track #” and “with Track #” fields: These settings contain the numbers of the two source tracks that are to
be merged.
“To Track #” field: This setting specifies the number of the destination track in which the merged data from the
source tracks will be placed. Any blank track number (from 1 to 48) is valid.
Note: This command can’t be undone, but you can simply delete the destination track if you change your mind. The
original source tracks are unaffected by this command.
Convert Guitar Tracks
This command will convert a single channel guitar track that contains position information in it into a multi-channel
guitar track (i.e. MIDI Channels 11-16). The position information tells the Guitar window which position on the
Chapter 13: Reference 203
fretboard to display the notes. It consists of Controller Number 84 MIDI Events that have been inserted into the
track in the Guitar window by pressing the insert position button.
If you have created a single channel guitar track using your keyboard and you used the Guitar Window to insert
position information then this command will help you convert the track into a multi-channel “MIDI Guitar” track.
Six MIDI channels are used in this conversion, one for each guitar string. The range of the channels is based on the
“Base Channel” setting in the Guitar window’s Options dialog. If the base channel is set to 11 (default), the
channels will range from 11 to 16 –with Channel 11 corresponding to the highest string and Channel 16
corresponding to the lowest.
Split Piano Track into LH/RH
This command will attempt to split a piano track so that the notes that were played by the left hand are moved to
Channel 8 and the notes played by the right hand moved to Channel 9. This command may not work perfectly in all
situations, but it often produces quite acceptable results. The auto-splitting performed by this command can be
thought of as one of the many possible ways a track may have been played.
When a track is split by this command you can check the “Use Ch 8/9 for Left/Right hand” checkbox in the Notation
Window’s Options dialog to attempt to display the notes in the Notation window on Channel 8 in the bass clef and
the notes on Channel 9 in the treble clef.
Copy Lyrics to Clipboard
This feature can copy any existing lyrics of the current track to the standard Windows clipboard as text so that you
can share them with another program. Selecting this command will automatically launch a Big Lyrics window for
the current track –and then copies the lyrics to the clipboard. You can close the Big Lyrics window at any time after
the lyrics have been copied to the clipboard. If a Big Lyrics window is already open for a given track the program
will use the existing window rather than launch a new one.
Align Music to Click Track
This feature attempts to align a track of music that was recorded in free time to a click track. It tries to take a free
time track and make adjustments to the times of the events so that the music becomes a standard track that can be
synced to a metronome.
For example, suppose you have recorded Track 1 in free time. You could then record/enter a human click track on
Track 2. To do this you would record or enter a middle C (C5) note to your human click track at the location of
each beat in the song. It’s easiest to record the click track from a MIDI keyboard, but you can also record it from
the Drum Kit window if you don’t have a keyboard.
With the Drum Kit window open, press the Record button and tap the [ (left square bracket) key on your keyboard
on each beat in the song. Or you could mouse click in time on the high bongo drum, which is assigned to note C5.
If the song speeds up and slows down you’ll have to make sure the timing of the click track corresponds (speeds up
or slows down) with the beats of the free-time track. In other words, the click track follows the pace of the free-
track –rather than any internal metronome in the program itself.
When the Align command is executed the program will align the free time track so that the time locations of all the
events will correspond to the beats in the human click track. For example, if the click track begins at time 0, a note
on the free-time track at the same location of the 4th click on the click track will be assigned a time of 1:04:000 after
the command is executed.
RealBand will then make the necessary adjustments to the tempo of the aligned track so that the overall tempo is the
same as the original tempo.
RealBand doesn’t insert the tempo changes for every beat (i.e. it makes the adjustments at the beginning of every
bar), so if the original music had a lot of little changes in tempo the resulting music may become more steady after
the alignment is executed.
If any two clicks in the click track are separated by the current PPQ multiplied by 4, this will be treated as a rubato
section as opposed to a clicked in section. The most common occurrence for this is when there is a rubato section at
the beginning of the song. A rubato section is paired with the next clicked-in section: it will be given the tempo of
the next clicked in section and the event times will be adjusted so that the music sounds identical to the original
tempo of the rubato section. A rubato section may also be slid forward to prevent an additional gap from being
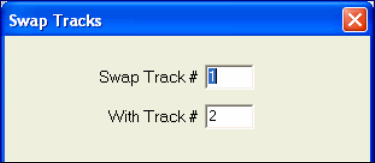
Chapter 13: Reference
204
created between the rubato section and the next clicked in section (since clicked in sections may be aligned to the
next bar as explained later in this section). This sliding forward may cause a gap between the rubato section and the
prior clicked in section or at the beginning of the song.
There can be several rubato and clicked-in sections throughout a song. Each paired rubato/clicked in section can
have its own tempo based on the tempo of the click track for the clicked in section. Each clicked-in section
following a rubato section will be aligned to begin at the start of a bar line. The program will use the first meter
event in the Meter Map and assume this is the meter throughout the song when calculating the bar locations for this
purpose.
When recording a click track there should be a click at the beginning (first beat) and at the end (last beat) of each
section. At the very end of a song you should record one extra beyond the last beat of the last measure so that the
program can tell where the song ends in order to perform the alignment procedure.
The Align Music To Click Track command has From: and Thru: values. Usually, you will use this command on an
entire track –with the human click track spanning the entire length of the free time track. This is the recommended
method of using this feature. However, you could specify a From: and Thru: region if you are only aligning part of
a track. If you’ve recorded a click track for the entire track you should ensure that you use this command for the
whole track rather than attempting to align a part of a song a little at a time or you may end up having to re-record
part of the click track again.
If you are using this feature starting from the middle of a song and the first click follows a rubato section, the
program will align the music to the nearest bar to the actual click location in the click track (or the next bar if the
first click isn’t close to the nearest bar location).
Consolidate Audio Region
Use the Consolidate Audio Region feature when you are working with WAV (digital audio) files to recreate a track
or region as one contiguous file. While not always necessary, this is especially useful in situations where you have
performed many edits (e.g., Cut/Copy/Paste) and the resulting track has been broken up into many smaller wave
“chunks” that may cause audio glitches and/or timing errors as your computer has to work harder to open and close
the many small files.
The “consolidate” feature effectively serves to “stitch together” these smaller files into one big file. The non-real
time audio effects work better with consolidated tracks, if these effects are returning error messages the problem is
often corrected by applying this feature.
Insert Blank Track
This command inserts a blank track at the position of the Current Track selected in the Tracks window and bumps
all existing tracks down in the Tracks view by one row. For example, say you want to insert a blank track at Track
2. By using this command the existing track at track 2 will become track 3 and the track that was previously track 3
will become track 4.
To undo this procedure you could use the Remove command to remove the track previously inserted.
Remove Track
This command removes (deletes) the Current Track and moves higher numbered tracks up by 1 row in the Tracks
window. If you want to delete track number 3 with this command, Track 4 will become track 3 and track 5 will
become track 4, etc.
This command can’t be undone later, but you could move the remaining tracks back to their original locations by
using the Insert Blank Track feature.
Swap Tracks
This command lets you easily swap two tracks. This will switch
their positions (track number) on the Tracks window. To swap
track 2 with track 4, enter 2 in the Swap Track # field and enter 4
in the With Track # field, and the two tracks will trade places.

Chapter 13: Reference 205
Save Track to File
This command lets you save the Current Track as a file. If the track is an audio track this will export it to a .WAV
file. If the track is a MIDI track you can save it either to a .SEQ, .MID, or Type 0 .MID file.
Drum/Patch Map
This feature provides the ability to load a Drum/Patch Map file that is customized to your MIDI sound source. A
Drum/Patch Map file has the .DK extension. These are the same files that are used by Band-in-a-Box to identify
and use all the sounds and patches available on a given sound source or synth. Once a .DK file is loaded you can
use the Re-map Drums/Patches command to re-map a General MIDI file to the custom sounds accessible in your
.DK file. Check the PG Music web site for additional .DK files that may be applicable to your synth or sound
source.
Clear Drum/Patch Map
This command clears the current Drum/Patch Map from memory.
Re-map Drums/Patches
This command will re-map the drum notes and patches from a General MIDI file to those of the current Drum/Patch
map. This will bring up a dialog box in which you have two checkboxes that determine whether drums, patches, or
both will be re-mapped. Open the PATCHES.INI file (located in the \RealBand directory) with a text program to
see instructions for creating a new patch map.
Merge 2 Mono Audio Tracks to Stereo
This command lets you combine any two mono audio tracks into a single stereo track.
When the dialog box pops up, you need to type in the track numbers of tracks containing mono audio in the Source
Track for Left Ch and Source Track For Right Ch fields.
In the Destination Track field, type in the track number of a blank track.
Press the OK button and RealBand will merge the mono audio tracks to stereo.
Note: The original tracks will remain untouched. At some point, you could choose to erase the original tracks using the Track
| Erase command.
Split a Stereo Track Into 2 Mono Tracks
This command lets you split a single stereo audio track into two mono audio tracks. This is useful in special
situations, such as if you wanted to use completely different effects on each of the two channels.
In the Stereo Source field, type in the track number of a stereo audio track.
In the Destination Track For Left Ch and Destination Track For Right Ch fields, type in two blank track numbers.
Press the OK button, and RealBand will split the stereo track into two mono audio tracks.
Note: The original track will remain untouched. At some point, you could choose to erase the original track using the Track
- Erase command.
Make all BB tracks regular tracks
This allows BB tracks to be moved or renamed like regular tracks. It also means the tracks won’t be regenerated, so
it is useful safety feature to save a RealBand arrangement that you don’t want to change.
Make first 8 tracks BB tracks
The first eight tracks will be assigned the default BB settings. If there are existing tracks present they will be moved
down.
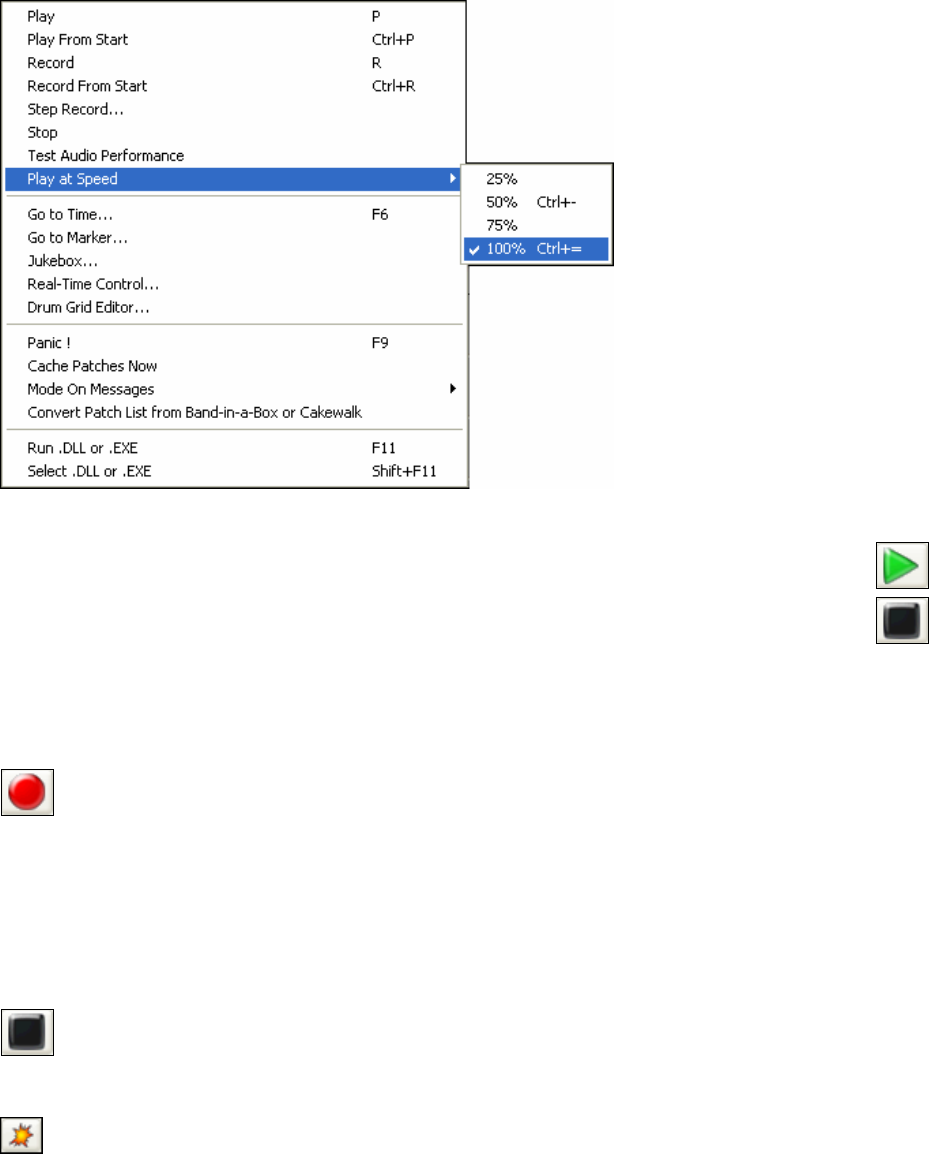
Chapter 13: Reference
206
The Action Menu
This menu contains commands dealing with recording or playback.
Play
You can start playback by using this command or pressing or by pressing the <SPACE BAR> or by
pressing the Play button.
You can stop playback by using the stop command or by pressing the <SPACE BAR> or the Stop button.
Play From Start
This command will play back the song from the beginning.
Record
You can start recording either by using the Record menu item or by pressing the Record button.
Recording will occur over the track that is selected as the current track when you activate Record. The program will
attempt to record either MIDI or audio data –depending on whether the current track is set to audio or MIDI in the
Tracks window.
Any Volume, Pan, Chorus, and Reverb mixer adjustments made while recording will be recorded in real-time and
saved as MIDI controller messages –just like incoming MIDI data. Adjustments made in the All column of the
mixer will not be recorded. When recording mixer moves it is common to record the data on separate tracks from
the musical data so that it can be more easily edited or deleted.
Recording can be stopped by pressing the <SPACE BAR > or by pressing the Stop button.
When you have successfully recorded any MIDI or audio events you will be asked whether or not you wish to keep
the take.
If the Punch In mode is activated the recording will automatically erase previously recorded data in the
Punch In range field without the need for you to erase the old data.
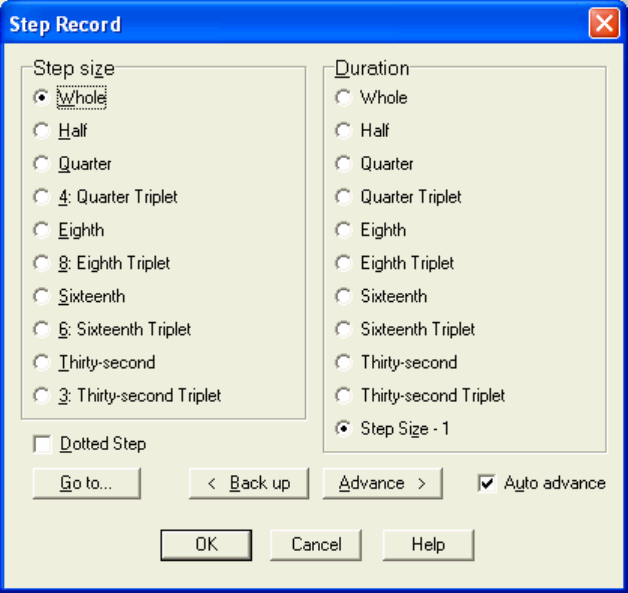
Chapter 13: Reference 207
When recording WAV audio tracks the recording always overwrites any existing data even if you’re not punching
in. In other words, audio recording works like a tape recorder. If you want to ADD to a track without overwriting
the old/existing track simply select and use a new/blank track before recording additional material.
Recording onto a MIDI track won’t overwrite any existing data unless Punch In mode is enabled.
Each column in the mixer represents a track, and if the track is a MIDI track then any adjustments made in that
column will result in a MIDI controller message (mixer move) being generated based on the forced MIDI channel of
that particular track. If there is no forced channel for the track the channel of the first MIDI event will be used. If
there are no events or a forced channel the actual track number will be used.
See the Window Menu section later in this chapter for further information on the Mixer window.
If a selected track is a MIDI track and you also make mixer adjustments during recording then you will be prompted
as to whether or not you wish to keep the recorded moves at the end of the take.
Record From Start
This command will automatically start recording from the beginning of a song.
Step Record
The Step Record feature allows you to record MIDI data one step at a time as opposed to a regular, real-time
recording. Each time you play something on your keyboard the sequencer will record the event with a time value
representing the current location in the song (i.e. the Now: time field). This kind of recording method is very useful
if you know your way around a piano keyboard, but perhaps don’t know it quite well enough to play in real time.
This way, you can quickly enter the notes you want via your MIDI keyboard without having to play it in time, as
there will be an unrecorded “rest time” – of any length you want – between notes played.
Choosing a Step Size: To choose a step size simply mouse-click over the desired step. In the example dialog box
shown above, for example, a Whole note step has been selected.
Durations: Durations are chosen exactly the same way as step sizes; the “step Size minus 1” option will
automatically make the durations 1 tick less (PPQ) than the selected Step Size. This is a convenient way to make
durations automatically match whatever step size you choose.
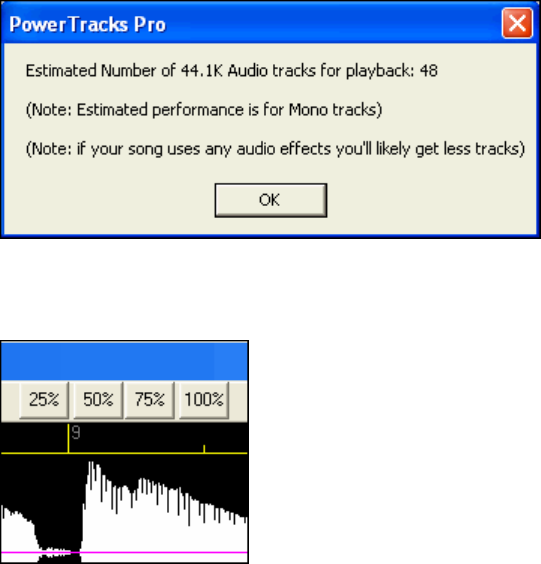
Chapter 13: Reference
208
Auto Advance: When the “Auto Advance” setting is checked the time will automatically advance to the next step
after you play each note or a chord. You will see the Now: and Time: fields on the tool bar change accordingly as
the time is advanced.
Dotted Step: When Dotted Step is enabled the step size will be 1and 1/2 times the regular step size. (Example: a
dotted eighth note is equal to 3 sixteenth notes.)
Go to: Use the [Go to…] key to conveniently move to a new location.
Backup and Advance: The [< Back Up] and [Advance >] buttons allow you to move through your project forwards
and backwards by one step at a time.
When you are finished with step record press the [OK] button. The take will be automatically saved. Pressing the
[Cancel] button will cancel the step record without keeping the take.
Stop
This command stops a sequence from playing or recording.
Test Audio Performance
This command will test the performance of your computer and hard-drive for recording digital audio tracks. This
feature will provide an estimate of the maximum number of 44.1 kHz tracks that the program can successfully play
back. Keep in mind that this is just a rough estimate; the actual amount of tracks you can play back may be higher
or lower than this estimate.
Percentage Tempos
The Play at Speed menu command brings up a submenu that gives you a choice of playing the song at 25% speed
(one quarter the regular speed), 50% regular speed, 75% regular speed, and 100%, which is regular speed.
Percentage tempo buttons are also available in the Audio Edit window.
Once engaged from either location the tempo playback speed remains in effect
until changed in one of the two locations
Go to Time
This command gets you directly to any time in a song. You can also use the F6 function key to activate this
command. If the Display Mode (in the SMPTE section of the Options Menu) is set to “Normal” then the time is
expressed in Measures:Beats:Ticks. If the Display Mode is set to “SMPTE” then the time is expressed in
Hours:Minutes:Seconds:Frames.
Go To Marker
This command allows you to go to a specific marker without having the Markers window opened.
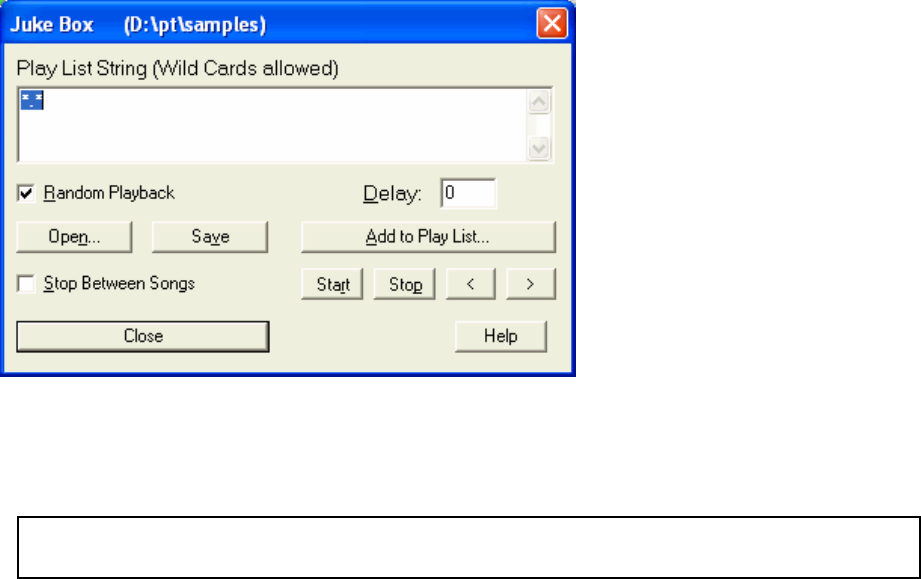
Chapter 13: Reference 209
Jukebox
The Jukebox feature lets you automatically play a list of songs. When selected, a dialog box will pop up that offers
you choices as to which songs will be played in a Jukebox session, etc.
The “Play List String” field contains a list of songs to be played. “Wild Cards” are allowed, as shown in the
illustration above.
For example, if the “Play List String” is *.* then all .MID and .SEQ files in a specified directory will be played.
Note: Only files with a .MID or .SEQ extension will be loaded if the extension of the file name is a wild card. The current
directory is shown to the right of the dialog’s title. You can specify several files (and folders) to search for by separating
them with a semicolon (;) character.
For example, suppose the Play List String is
“C:\WINDOWS\CANYON.MID;C:\RealBand\*.SEQ;D:\MIDIFILE\*.MID.”
In this example, the program will first play CANYON.MID followed by all the .SEQ files in the C:\RealBand
directory. This would be followed by all the .MID files in the D:\MIDIFILE directory. The Play List String can be
up to 1024 characters long.
When the “Random” checkbox is checked the Jukebox feature will play all the files in a random order. Otherwise,
songs will be played in the order in which they are physically encountered. There are many 3rd party disk utilities
which can be used to re-sort files in a given directory based on selectable sort options such as file size, alphabetical,
file date, etc.
The [Open] button allows you the option of loading a .JUK file. A .JUK file simply contains a pre-made Play List
String. If you save a .JUK file with the [Save] button the current Play List String can be saved to a .JUK file. If you
later load the .JUK file with the [Open] button the Play List String stored in the file will appear in the Jukebox
dialog.
The [Add to Play List] button lets you add a file to the play list from a File | Open dialog without having to type the
file name into the Play List String field.
The “Delay” field lets you insert a user-definable delay, in milliseconds (thousandths of a second), that the Jukebox
will pause between playback of songs.
The [Start] button will start the Jukebox. If you’ve typed any invalid file names in the Play List String field the
program will inform you of the error so you can correct it. When the Jukebox is playing the window title on the
main screen will have the words “(Jukebox)” shown (to the right of the file name) to indicate that the program is in
Jukebox Mode.
The [<] and [>] buttons enable you to jump to the previous or next songs in the play list.
The [Stop] button will stop the Jukebox. You can restart the Jukebox from the current song by pressing start.
The “Stop Between Songs” checkbox will cause the program’s playback to stop between songs. You can later re-
start the Jukebox by pressing the Start button.
Chapter 13: Reference
210
The [OK] button will exit the Jukebox. Even if the Jukebox is playing you can still exit the Jukebox. You can
always return to the Jukebox later.
Note: Use the [Start] and [Stop] buttons within the Jukebox if you wish to stop and resume playing the Jukebox.
Changing the Play List
If you are playing a list of individual songs in a non-random order you can change the play list after you’ve already
started.
To do this, follow these steps:
1. First, enable the Stop Between Songs checkbox.
2. Next, start editing the song list either during the playback of the current song, or you could wait until it
stops and then do so.
3. When editing the song list you must delete the songs that already have been played, otherwise they will be
heard again since the program will be restarting the song list from the first song in the list. Your new song
list should start from the song that you want to be played next.
4. Then make any other changes to the song list such as substituting one file for another, etc. Use the Add to
Play List button to add a song. This action will add the song at the end. To change the position of a file
you can use Ctrl+X (cut) and Ctrl+V (Paste) keys.
5. The Jukebox will stop after the current song is played since the Stop Between Songs checkbox is enabled
(Step 1).
6. Press the [Start] button and the Jukebox will proceed to inform you that the song list has changed and will
ask if you want to use the new song list. Choose “yes” and the Jukebox will restart with the new song list.
Note: If you edit the song list ensure that you don’t exit the Jukebox until the new song list is playing. Otherwise, the new
song list will be ignored. If you make any errors while editing the song list you will be prompted to fix them before
proceeding.
Real Time Control
This command brings up a dialog box that lets you send either MIDI Pitch Bend or Modulation Wheel messages to
your sound source. These messages are sent out over the forced channel and port of a selected track. The combo
box lets you choose between Pitch Bend and Mod Wheel messages. This feature isn’t intended to be a substitute
for a good hardware controller. However, by clicking on the scroll bar’s “thumb position box” and using the mouse
to move the scroll bar, you can send these controller messages in a familiar way (i.e. like a hardware version). This
is useful if you don’t have a good hardware controller available.
When Pitch Bend is selected the scroll bar will return to the center when the mouse is released. When Mod Wheel
is selected the scroll bar will always stay wherever you leave it.
RealBand can record any Real Time Control messages that you send when Recording is active. For example,
when you’ve finished recording and you have sent some Real Time Control messages, the program will prompt
you as to whether you wish to keep the recorded “Controller Moves” – just like when you make changes to
pan/vol/effect settings in the “Mixer” window.
Drum Grid Editor
This command will bring up a window with a grid that lets you create 4/4 drum patterns. Patterns can be loaded
from a list or created in the drum grid editor.
Patterns are created by typing velocity values into the square fields of the grid. To the right of the grid are the
names of the drum instruments that correspond to each row of the grid. Each column of the grid represents one of
the 16 divisions of the measure (assuming the resolution is set to 16).
For example, if you type the number 100 in the field located in the lower left corner of the grid a bass drum will
sound with a velocity of 100 on the first 16th note of the measure.
To use the Drum Grid Editor first click on any field of the grid and start typing a number into the field. If you make
a mistake and wish to erase part of what you typed press the backspace key. The left and right arrow keys, Tab
and Shift+Tab (as well as the Enter and Shift+Enter keys) –allow you to move to the previous or next field.
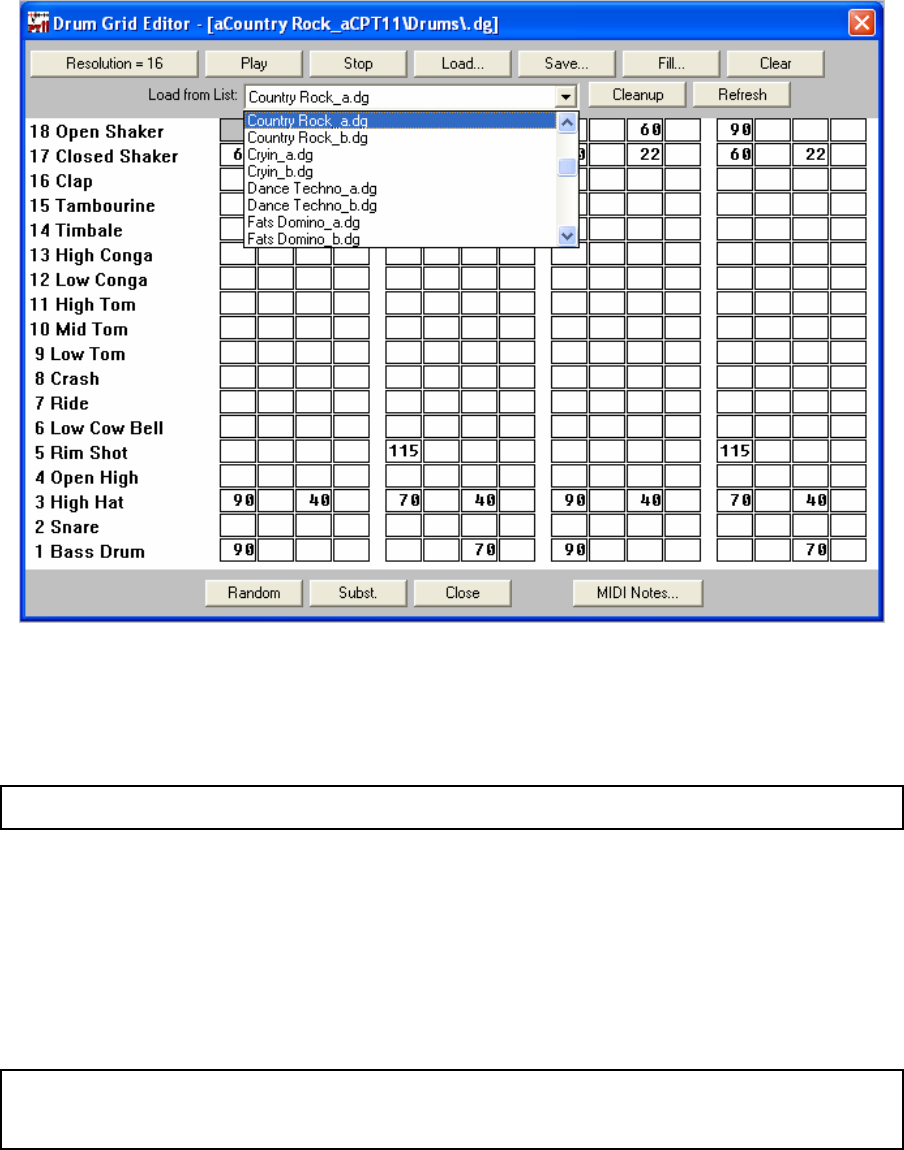
Chapter 13: Reference 211
The Resolution button toggles the resolution between 16 and 12 divisions per measure. When the resolution is 16
the patterns will have a straight feel. When the resolution is 12 the pattern will have a triplet (swung) feel.
The Play button will play a pattern repeatedly –up to 100 times, or until the Stop button is pressed. The pattern is
actually temporarily copied to track number 48 before playing the pattern and then is erased when playback is
finished. This isn’t something that you need to be concerned with unless you are using track 48 for regular
playback. If this is the case the program will issue a warning message instead of playing the pattern.
Note: When playing back patterns the channel and port settings assigned to Track 48 will be used. You can change
these settings if you want the pattern played over a different channel or port.
The Save button allows you to save the current pattern as a .DG (Drum Grid) file, and the Load button will load a
pre-made .DG file into the grid.
The Fill button activates the Edit | Fill Track with Drum Pattern feature. This can be used to fill a track with either
a .DG (drum grid) or a .DP (drum pattern) file. This is the command to use to get drum patterns into a track of a
song. The file name of the current pattern will appear in the File field of the Fill Track with Drum Pattern dialog
so you can execute the command without having to manually reload the file into this dialog. If the current pattern
hasn’t been saved you will be prompted as to whether you wish to save before performing the Fill Track with
Drum Pattern operation.
The Clear button will erase the current pattern so you can create a new pattern in its place.
Tip: If you press the F5 key or the [Subst.] button a dialog box will pop-up that lets you choose a substitute drum note for
the one currently selected in a given field. For example, if a note is a “closed high hat” with a velocity of 100 you could
have, say, an “open high hat” with a velocity of 80 (or 120, etc.) as a substitute for the closed high hat (occurring 20% of the
time).
The Substitute Play % field determines how often a substitution may occur. A Substitute Play % value of 80
would mean that the substitute note has an 80% chance of replacing the “regular” note in the specified position of
the grid each time a measure is placed into a track using the Fill command. The Substitute Note field allows you
the ability to select a note number – ranging from 1 (Bass Drum) to 18 (Open Shaker). Similarly, the Substitute
Velocity field offers you a way to alter the velocity of the substitute drum note.
Chapter 13: Reference
212
The Random button launches a dialog that ties the previous settings together and lets you specify whether the
program will randomly alter the start times and velocities of notes when the “Fill Track with Drum Pattern”
command is used. This feature does not randomly alter any notes in real-time. It will only randomly alter velocities
when the Fill Track with Drum Pattern command is issued. If you re-select a fill the track will very likely be
different each time.
The Min Start Time Offset is the lowest amount of ticks that the program can move a note backward in time. The
Max Start Time Offset is the highest amount of ticks that the program can move a note forward in time.
For example, if the Min Start Time Offset is -5 and the Max Start Time Offset is 2, and a note begins at 2:01:100,
the program will randomly move it anywhere between 2:01:095 and 2:01:102. If both the Min and Max Start Time
Offsets are set to 0 the notes won’t be moved in time.
The Vel Percentage setting determines the degree to which the program will randomly alter note velocities. For
example, a setting of 10 will cause the program to randomly alter velocities anywhere from 10% lower and up to
10% higher than the note’s original velocity. If this setting is set to 0 the note velocities won’t be altered by the
program.
There are hot keys available for quickly setting the value of a drum grid “cell” without having to type an entire
number. These hot keys are located along the bottom row of the keyboard. The Z key sets the cell to “unused”
while the other keys to the right of the Z key will set the cell to values ranging from 40 for the X key up to 127 for
the forward slash / key.
The [ key lets you decrease the tempo without having to exit the Drum Grid editor, and the ] key will increase the
tempo. Each time you press [ or ] key the tempo will decrease or increase by 1. Holding down these keys will
gradually decrease or increase the tempo.
Panic
This command will send an All Notes Off and a Sustain Pedal Off command over all 16 MIDI channels.
It will also shut off any MIDI
Thru notes that may be sustained. This command is the same as pressing the panic button.
Cache Patches Now
This command is only applicable to you if you are using a MIDI output driver that requires patch caching. This
command will cause RealBand to update the patch cache. See also the Options | MIDI Out menu.
Mode-On Messages
This command has a submenu for sending a GM, GS, or XG mode-on message out the MIDI output ports. The
purpose of these messages is to enable the General MIDI mode on GM synthesizers, or the GS or XG extensions to
General MIDI on devices that support them. GS and XG extend and add more functionality and features to the
General MIDI standard.
Convert Band-in-a-Box and Cakewalk Patches
The Action menu command Convert Patch List from Band-in-a-Box or Cakewalk will let you convert a Band-in-a-
Box .PAT file or a Cakewalk .INS file to a RealBand .INI file.
Select the location of the patch list you want to convert in the Open dialog.
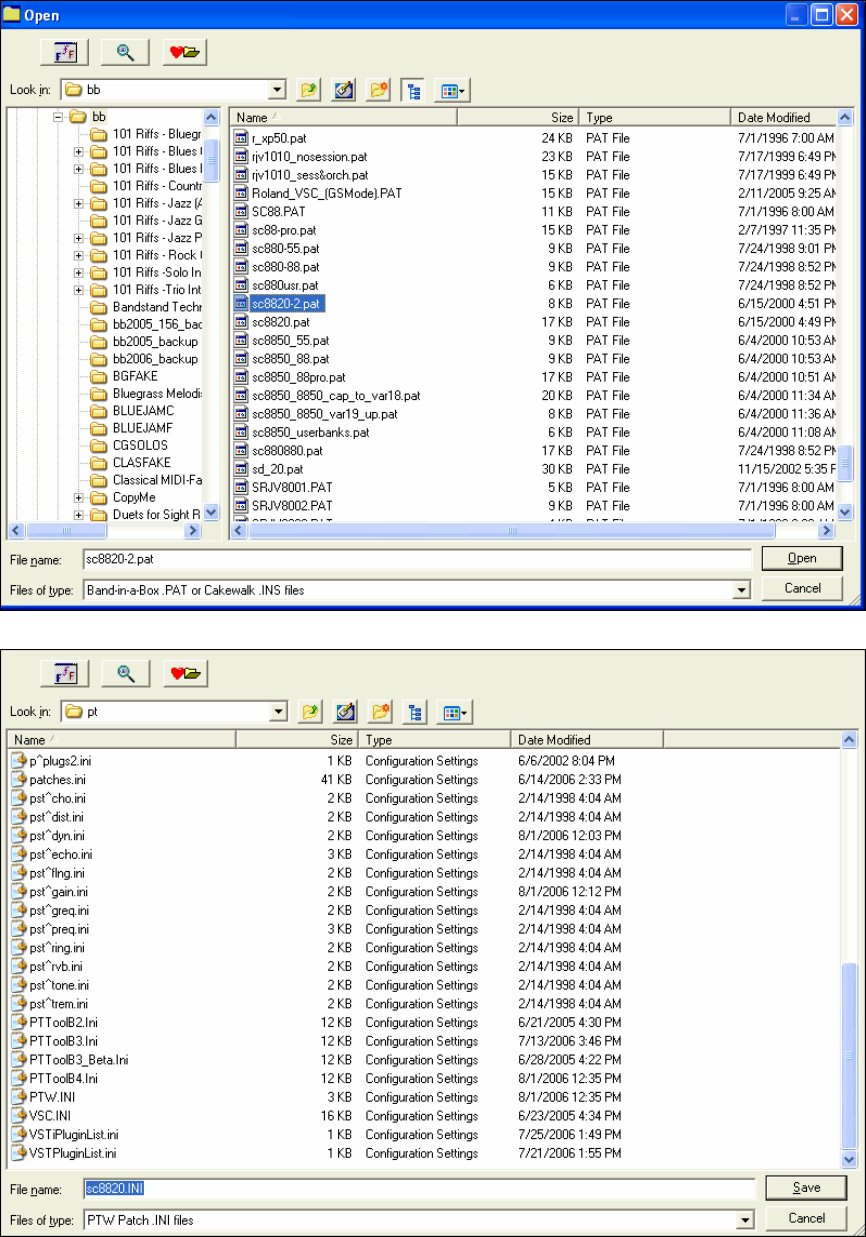
Chapter 13: Reference 213
Then a file Save As dialog will pop up, with a default .INI file name based on the name of the source patch file.
When you press the [Save] button, RealBand will prompt you to add the new patches to your existing
PATCHES.INI file.
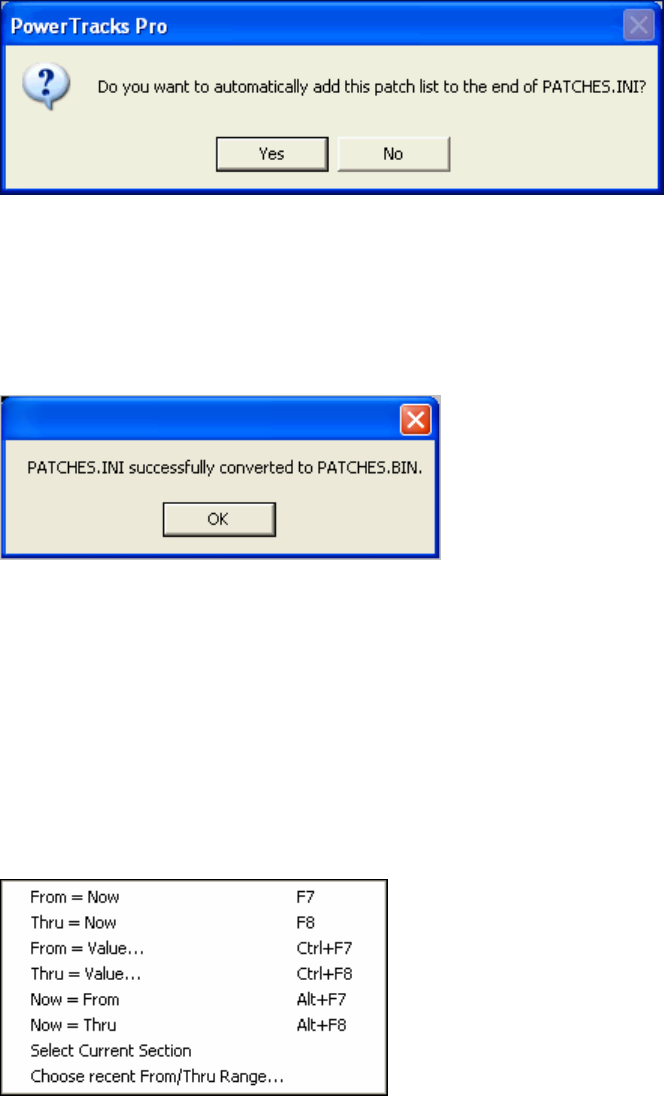
Chapter 13: Reference
214
Choose [Yes] to add your new patch list to the existing PATCHES.INI file.
Choose [No] if you want to create a new .INI file with just the new patches. The original PATCHES.INI file will
not be modified.
To use your new .INI file by itself you will need to name it PATCHES.INI and copy it over the default
PATCHES.INI file in your RealBand folder. Be sure to save a backup copy of the default PATCHES.INI file first.
The next time you run RealBand it will recognize the new patch list. This message will confirm that your new patch
list has been made.
Run .DLL or .EXE
This command will let you run any .DLL or .EXE “plug-in” that was specifically designed to work with RealBand.
To choose which DLL or EXE plug-in will be run by this command see the next topic.
Select .DLL or .EXE
This command will bring up the Select .DLL or .EXE dialog. This allows you to select and run any .DLL or .EXE
plug-in that was specifically designed to work with RealBand. All plug-in files that ship with RealBand are installed
by default into the RealBand main folder (e.g., C:\RealBand).
The RealBand\dlldemo32.zip file contains information for developers about interfacing a .DLL or .EXE with
RealBand.
The Block Menu
The Block menu contains commands that deal with marking an area (or block) of the song. The areas marked here
work in conjunction with the editing options found in the Edit menu.
From = Now
This command sets the beginning of the marked area to the current time.
Thru = Now
This command sets the end of the marked area to the current time.
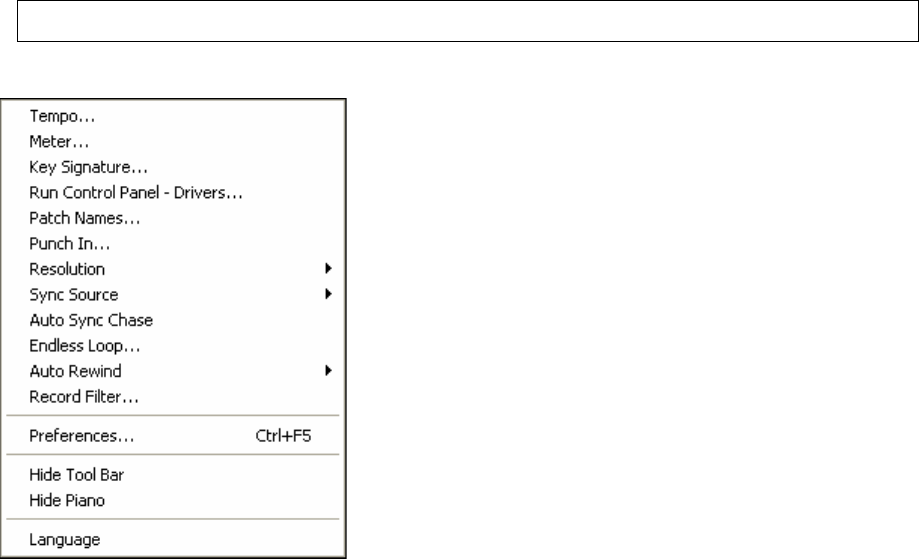
Chapter 13: Reference 215
From = Value
This command lets you directly specify the From Time value. A dialog box will appear in which you can enter the
new time.
Thru = Value
This command lets you directly specify the Thru Time value. A dialog box will appear in which you can enter the
new time.
Now = From
This command sets the current time to the beginning of the marked area.
Now = Thru
This command sets the current time to the end of the marked area.
Select Current Section
This command will highlight the current section for editing purposes. The current section starts with the previous
marker and ends at the next marker.
If there is a marker in the song at time 1:01:000 named “Intro” and another marker at 4:01:000 called “Verse 1,” and
the current time of the song is 2:01:000 when you execute this command, then the section from 1:01:000 up to but
not including 4:01:000 will be highlighted for editing purposes.
Choose recent From/Thru Range
This command lets you select from a list of recently highlighted From/Thru regions and RealBand will make your
chosen range into the currently highlighted From/Thru range. This is especially useful if you've accidentally
unselected the current From/Thru range, or if you wish to re-select a range you selected earlier in the session.
When you launch this command, a dialog box will pop up with a list of recently selected From/Thru ranges.
RealBand will automatically pick the most recent of any previously selected ranges. You can click on any range in
the list, or use the arrow keys on the keyboard to navigate the list box. When you have made your choice, press the
[OK] button.
Note: It helps to have the Tracks window opened, since it will make it easier to see the results of reverting back to a recent
range.
The Options Menu
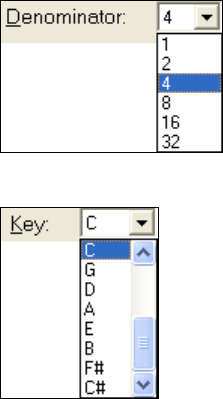
Chapter 13: Reference
216
The Options menu contains access to various settings that affect basic program operation. Some of these options
can be stored within a song if it is saved as a .SEQ file. Similarly, several of these options can also be saved into a
.MID file.
Tempo
This command allows you change the current tempo of the song. You may choose a tempo value of 8 to 500.
RealBand will automatically change the current tempo entry in the Tempo Map to the tempo that you select. See
also Tap-in tempos as described in the Reference section.
You can use the square bracket [ ] hot keys to change the tempo by +/- 5 bpm.
Meter
This command lets you change the current meter. The Meter Map event for the
current time will correspondingly be automatically changed. The numerator can be
from 1 to 99.
You can change the denominator via the drop down combo box illustrated here.
Key Signature
This feature allows you to choose the key signature for a song. This setting will
affect whether accidentals are displayed as sharps or flats. Simply pick a key
signature from the drop-down combo box, as illustrated.
Run Control Panel - Drivers
This feature auto-runs the Windows Sounds and Audio Device Properties dialog. This command performs the
same function as manually going in to the Control Panel settings and double clicking on the Sounds and Audio
Devices icon.
Patch Names
You can easily associate a list of names to patch numbers. The Options | Patch Names setting can be regarded as a
global default setting. This means that unless you’ve specifically selected another patch list when changing the
patch of a track in the Tracks, Classic Tracks View, or Mixer window the patch list you select here will be shown
in the Patch Selection dialog.
For example, if the Patch Names list is set to “General MIDI” you will encounter the General MIDI patch list by
default when you choose to select a patch. As another example, if you select the “General MIDI 2” patch name list
when you select a patch for Track 2 the program will “remember” this selection the next time you decide to select a
patch for Track 2.
The Patch Name list information is saved in RealBand’s .SEQ files.
The Numeric setting allows you to select patches as numbers rather than from a named patch list. When the
Numeric setting is used numbers will always be used for all tracks when selecting a patch.
The Numeric Range setting dialog also offers the ability to choose whether the numbers should range from 0-127
or 1-128 in order to accommodate both numbering conventions used with different synths. This setting has no effect
when a named patch list is used. If you’re using a named patch list the number range is based on whether the first
name in the list was assigned a value of 0 or 1 in the PATCHES.INI file.
PATCHES.INI is a text file that resides in the RealBand folder. It defines a named list of synth-specific patches.
You could add a new named patch list (specific to your synth) by entering the names into the PATCHES.INI file.
This file also has instructions for creating a new patch map
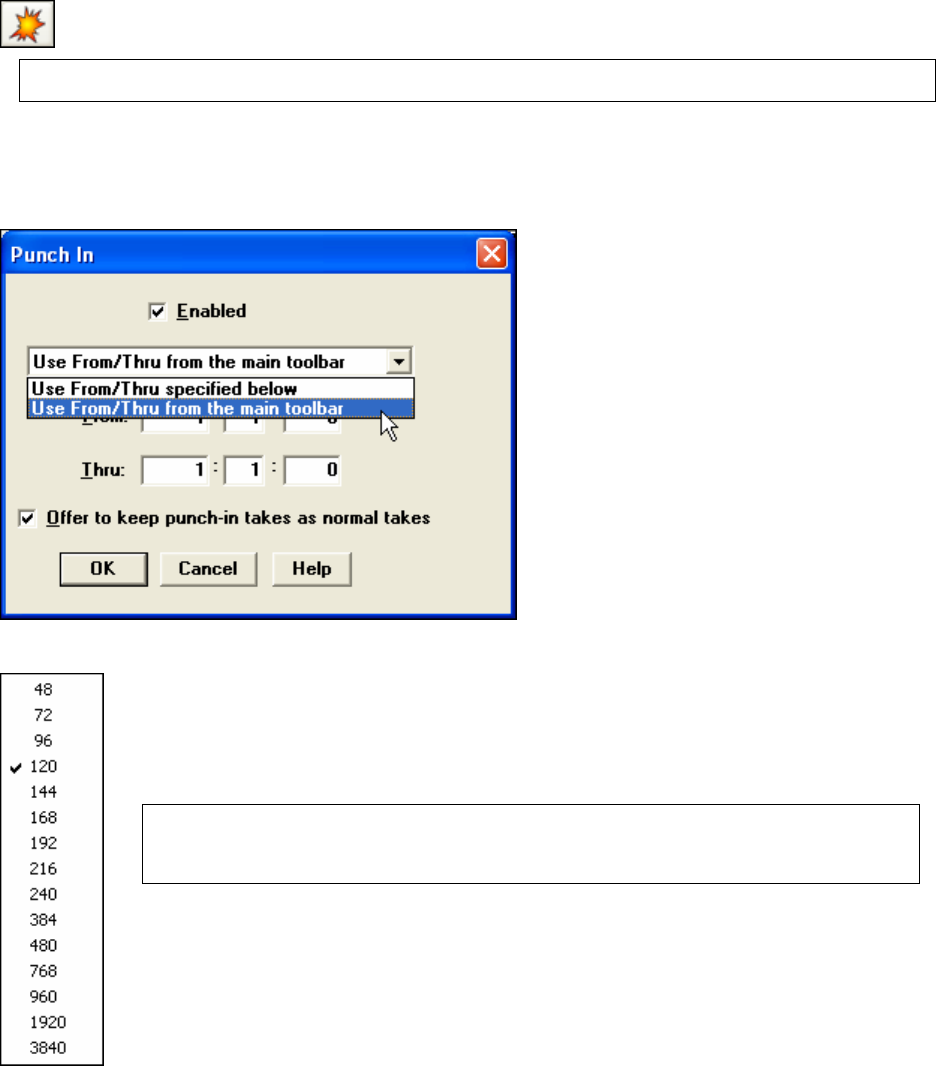
Chapter 13: Reference 217
Punch In
When the Punch In feature is enabled recording takes place between the From and Thru settings and will overwrite
existing events in the specified section. When Punch In is disabled recording may occur at any time within the song
and the data will be merged with any existing MIDI events.
Press the Ctrl key while clicking on the Punch button to enable or disable punch-in mode without going
into the Punch In dialog.
Note: The From and Thru settings for Punch In are not the same as the From and Thru settings used for editing-menu
purposes.
The Punch In dialog offers the option of using the From/Thru values from the main toolbar instead of the values in
the dialog. This makes it easier to select the punch-in region by highlighting a section in a Bars or Audio window.
If punch in is “on” the program offers to keep the take as a regular take rather than a punch-in.
This is helpful if you forgot to disable punch in and meant to record a full take.
Resolution
This option allows you to set (or change) the timing resolution for a given project in Pulses Per
Quarter note (PPQ). Simply pick a fixed resolution from the supplied menu-list and the program will
automatically convert a song to the new resolution.
RealBand supports resolutions as high as 3840 PPQ, which allows for more precise audio editing,
since at higher resolutions each tick spans a finer section of audio.
Note: For really long songs, or for songs that have really long note durations, it may be wise to not use
the highest PPQ settings. Higher note resolution reduces the maximum allowed song length, as well as
reducing the maximum allowed note duration length. At 3840 PPQ, the maximum song length of a 4/4
song is around 35 minutes long at a tempo of 120, less at faster tempos.

Chapter 13: Reference
218
Sync Source
This option determines which “clock source” will handle all the timing of the MIDI music.
Internal: When the sync source is set to “internal” the program will handle all timing. The following two settings
are also used when syncing to external devices:
MIDI Sync: When the sync source is set to MIDI the program will use song position pointer (SPP) and MIDI
clocks as the clock source.
MTC/SMPTE: When the Sync Source is set to MTC/SMPTE the program will use MIDI Time code (MTC) as the
clock source and display the time in SMPTE format.
If a song has WAV audio data the playback speed of the audio will not be varied (freewheeled) during playback –
even when clock-syncing to an external device, as described above. If the external sync-device being used varies
you may find that the audio may eventually drift “out-of-sync” over time.
You may also have to decrease the Output Buffer Seconds setting in the Options | Preferences Audio Settings
dialog if your computer is having trouble syncing correctly after playback has started.
If syncing to MIDI the program may not have enough time to start syncing correctly if the MIDI device (drum
machine, sound module, etc.) isn’t providing enough delay time between the sending of the Song Position Pointer
information and the start of MIDI playback. In this situation your drum machine may have a “SPP locate delay” or
similar adjustment that can be made to give RealBand enough time to correctly sync to the external MIDI clock-
source.
The sync options are saved automatically to the RB.INI file and will remain in effect until you re-visit this dialog
and change it.
Auto Sync Chase
This feature is useful when syncing the program to an external device (e.g., drum machine, tape deck, etc.) during
playback. When Auto Sync Chase is enabled this allows for “hands-free” sync chasing to the external device.
For example, if the program is playing back while synched to a tape deck and you stop the deck, the program will
also stop and await a MIDI Sync or MTC start command – all without you having to find your mouse and manually
click on the STOP and PLAY buttons. When you start the tape deck again the program will attempt to automatically
re-sync. When this option is selected a check mark will appear next to the appropriate menu item.
This option is saved automatically to the RB.INI file and will remain in effect the next time you use the program.
Endless Loop
When this option is enabled playback will automatically loop through a section of a song. Use the Loop button to
open the dialog from toolbar, or click the Loop button while holding the Ctrl key to toggle endless looping on and
off.
The From Bar and Thru Bar fields determine the location of the loop. If the Thru setting is in a range beyond the
end of the song the loop end point will be automatically adjusted to reflect the end of the song. Looping only
occurs during playback.
This setting is not saved to RB.INI or to .SEQ files.
The Endless Loop command also has the following four choices:
1. Chosen Range Below lets you enter start end measures in the From Bar and Thru Bar fields.
2. The Entire Song setting loops the entire song.
3. The Current Song Section will loop the song based on any existing Markers. When you press “Play” the
song will loop until the next marker (or end of song) is reached, and will then loop to the most recent
marker at the time Play was pressed. For example, let’s say there is a marker at 4:01:000 and 8:01:000. If
the current time is 5:01:000 and you press Play, the song will continue playing until just before 8:01:000 is
reached. Then the song will continue playing the loop starting at 4:01:000.
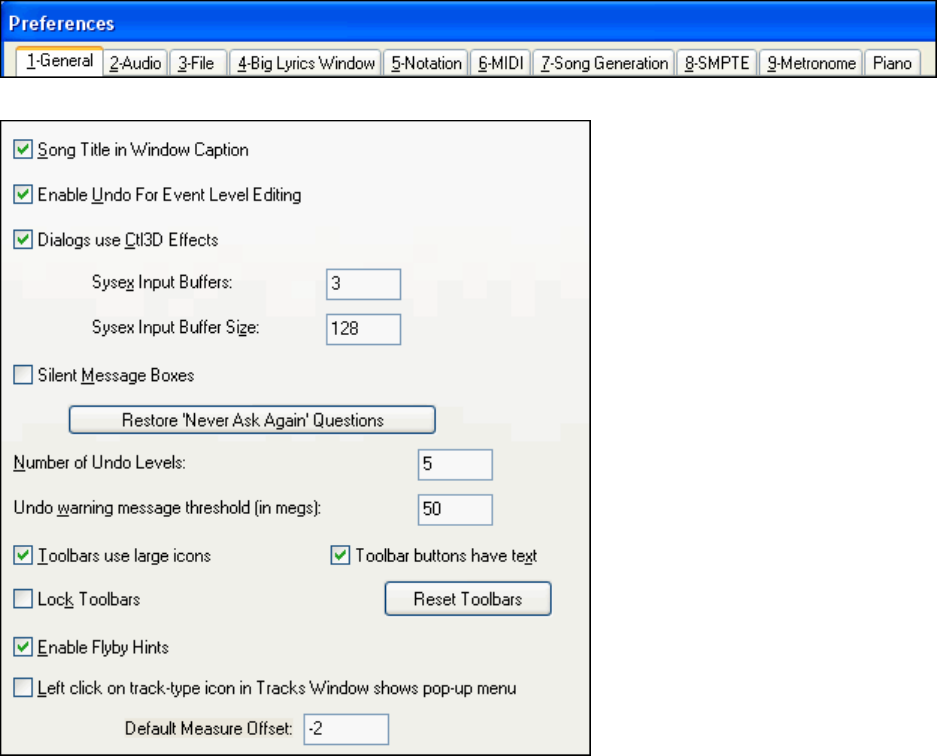
Chapter 13: Reference 219
4. The Highlighted Area setting will loop the song based on the highlighted area. This is the same
highlighted area (From/Thru) that you use for editing.
Auto Rewind
When enabled, RealBand will automatically rewind to the location that playback or recording was started. The
choices are “Recording Only,”“Playback Only,”“Both Recording and Playback,” or “Disabled.”
Record Filter
This feature brings up a dialog in which it is possible to choose what kinds of MIDI events are recorded, as well as
exactly which MIDI Channels will be recorded. For example, if you uncheck the “Key Aft” checkbox any key
aftertouch events that were transmitted won’t actually get recorded. Similarly, if you uncheck the “Channel 9”
checkbox any events encountered on MIDI channel 9 won’t be recorded.
Preferences
The Options | Preferences menu item will launch a tabbed Preferences dialog box, which has multiple sections or
tabs. This replaces the preferences submenu in previous versions of RealBand.
General
Song Title in Window Caption: This checkbox, when enabled, displays the song title in the main window’s
caption. If you prefer to have only a song’s file name displayed you can uncheck this option.
Enable Undo For Event Level Editing: This feature, when checked, will allow you to undo the last event level edit
in the Event list or Notation window, such as inserting, deleting, changing, or moving a note.
Dialogs Use Ctl3D effects: This checkbox ensures a modern appearance for the program.
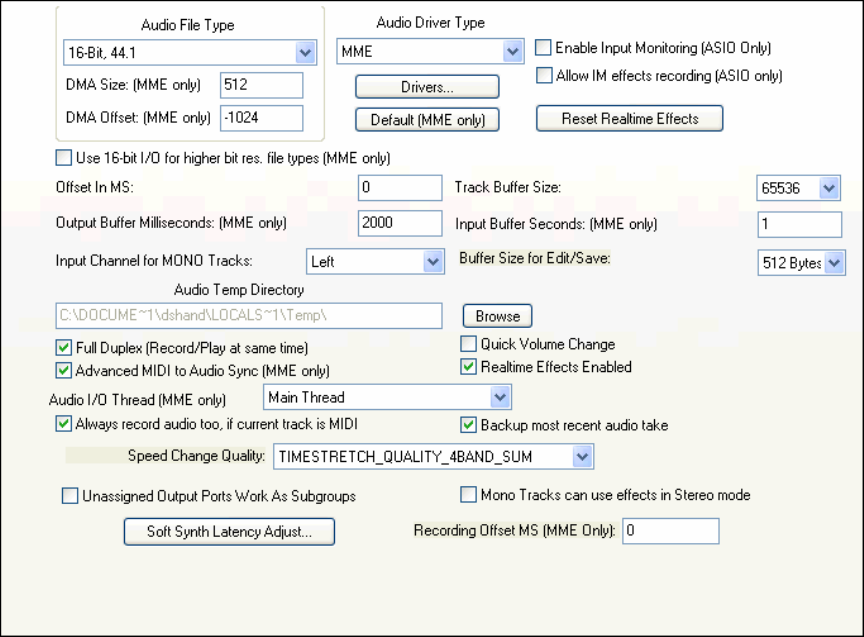
Chapter 13: Reference
220
The SysEx Input Buffers setting offers the ability to change the amount of SysEx input buffers allocated before
receiving a SysEx dump. This setting can range between 2 and 512.
The SysEx Input Buffer Size settings let you change the size of each input buffer allocated by RealBand before
receiving a SysEx dump. The default size is 128. You can decrease this to as low as 64K to as high as 1024K.
The Silent Message Boxes checkbox, when enabled, will prevent RealBand from making a “beeping sound” in
situations where a message box is displayed.
Restore “Never Ask Again” Questions will restore pop-up message boxes in which “Never Ask This Again” was
chosen.
The Number of Undo Levels determines the number of recently executed edit commands can be undone. By
default, this is set to 5 levels of undo; you could increase this to as high as 100.
You can also adjust the Undo Warning Message Threshold (in same dialog). For example, if you set the threshold
to 100 megabytes, RealBand will issue a warning message and ask if it’s okay to clear some undo buffers if the undo
buffers contain temporary audio files that can be erased to free up disk space.
Toolbars use large icons - Main toolbars have a choice of 24x24 or 16x16 bitmap sizes.
Toolbar buttons have text
Lock Toolbars
[Reset Toolbars]
Enable Flyby Hints checkbox lets you enable or disable the hints that pop-up when you move the mouse over
certain controls, such as those on the toolbar.
Left click on track-type icon in Tracks Window shows pop-up menu.
Default Measure Offset
Audio
This is a dialog with various settings that affect audio recording/playback.
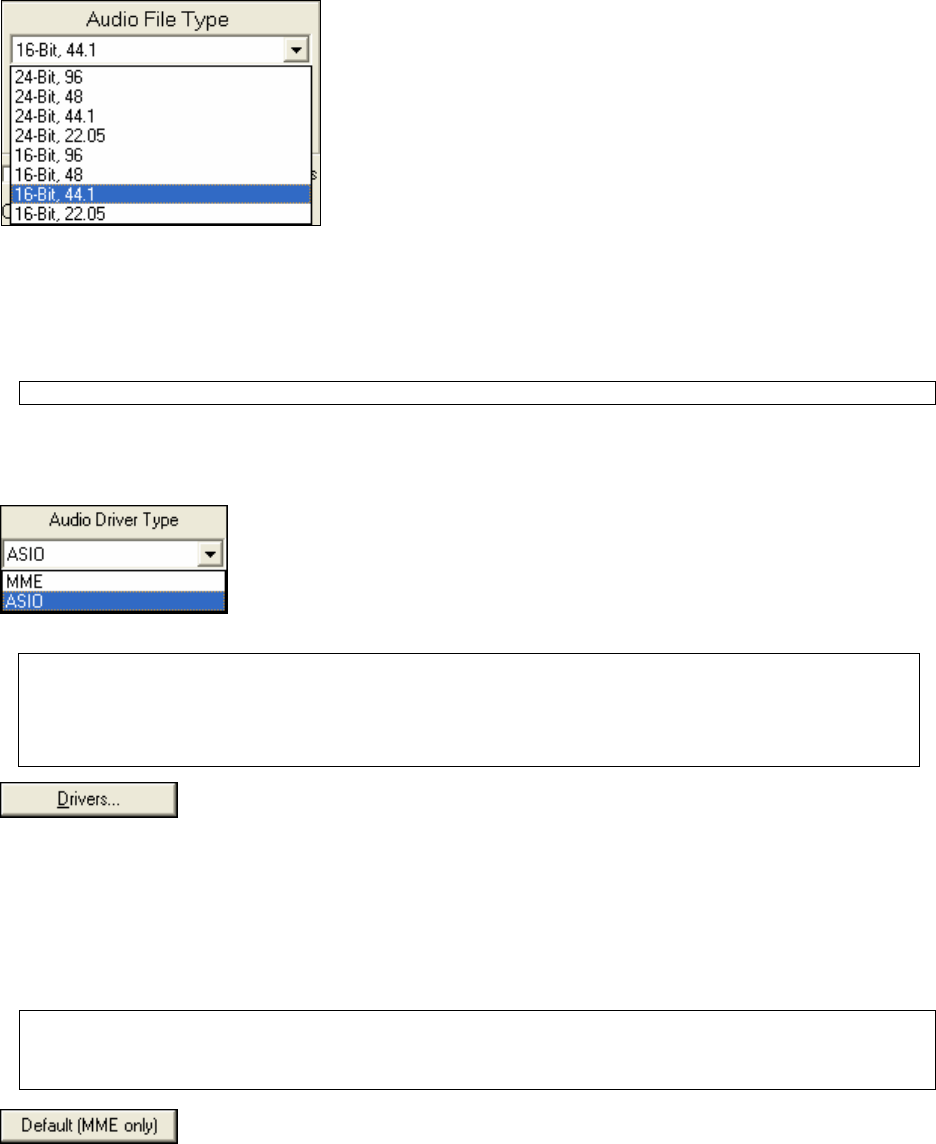
Chapter 13: Reference 221
The Audio File Type combo box gives you a choice of sampling rates
from 22.05K to 96K at bit depths of either 16-bits or 24-bits.
16-Bit, 44.1 is the file type to use for files that you want to burn to audio
CDs.
Sample Rate Change
This setting can be changed even if the song already has audio tracks. If you change the sample rate with a project
that already has audio saved at a different sample rate the program will offer to automatically convert the song.
When you’ve pressed the OK button to exit the Audio Preferences dialog you will be asked whether or not to go
ahead with the conversion (if applicable). Press the Yes button to convert your project to the new sampling rate.
Note: Any field with “(MME only)” has no effect when using ASIO drivers.
The DMA Size and DMA Offset (MME only) settings are memory buffer sizes and offsets used by the sound
card’s driver. These settings are detected by RealBand, and don’t normally need to be changed.
Audio Driver Type
The “Audio Driver Type” is MME by default, but if your sound card supports
ASIO drivers you can choose this type. ASIO is an alternate driver system
developed by Steinberg. It allows for much lower latency than ordinary MME
drivers.
When RealBand detects ASIO drivers it will prompt you to ask if you want to use them.
ASIO Driver Warning
There is a warning if the ASIO4All driver is “not connected”
Sometimes the ASIO4All driver will not be connected to an audio driver and output will be silent. This is usually due to a
soft synth already using the audio driver. If RealBand detects that ASIO4ALL isn’t connected, it will warn you about this, so
you are aware of why the audio is silent.
The [Drivers] button will bring up either the Audio Drivers dialog if the Driver Type is set
to MME or the ASIO Audio Drivers dialog if the Driver Type is ASIO.
If using MME, by default, the Microsoft Sound Mapper is selected for both input and output. If you have multiple
sound cards, or a multiple I/O card, you can select more than one input or output. This will affect the computer
performance when recording or playing audio tracks. The more ports that are selected, the more demand is placed
on your computer. This may require a very fast computer.
Each Input and Output port is a stereo pair, with a left and right channel. If you select 4 input ports and 4 output
ports then you would be actually getting 8 input and 8 output channels, since each audio port has both a left and
right channel.
Note: When using MME drivers, Port number 1 is used as a source of timing when syncing MIDI to digital audio. If you are
attempting to use two different brands of sound cards together on one computer as two separate ports, there may be timing
problems if the cards have different DMA buffer sizes, but it is possible you may not encounter any noticeable timing issues.
The multi-port feature is mainly meant for multi-port cards. Feel free to try multiple sound cards, but your results may vary.
The Default (MME only) button will restore some of the MME settings in this dialog to
default settings.
Since some of these settings must be detected, RealBand will analyze the sound card again.
Enable Input Monitoring (ASIO Only)
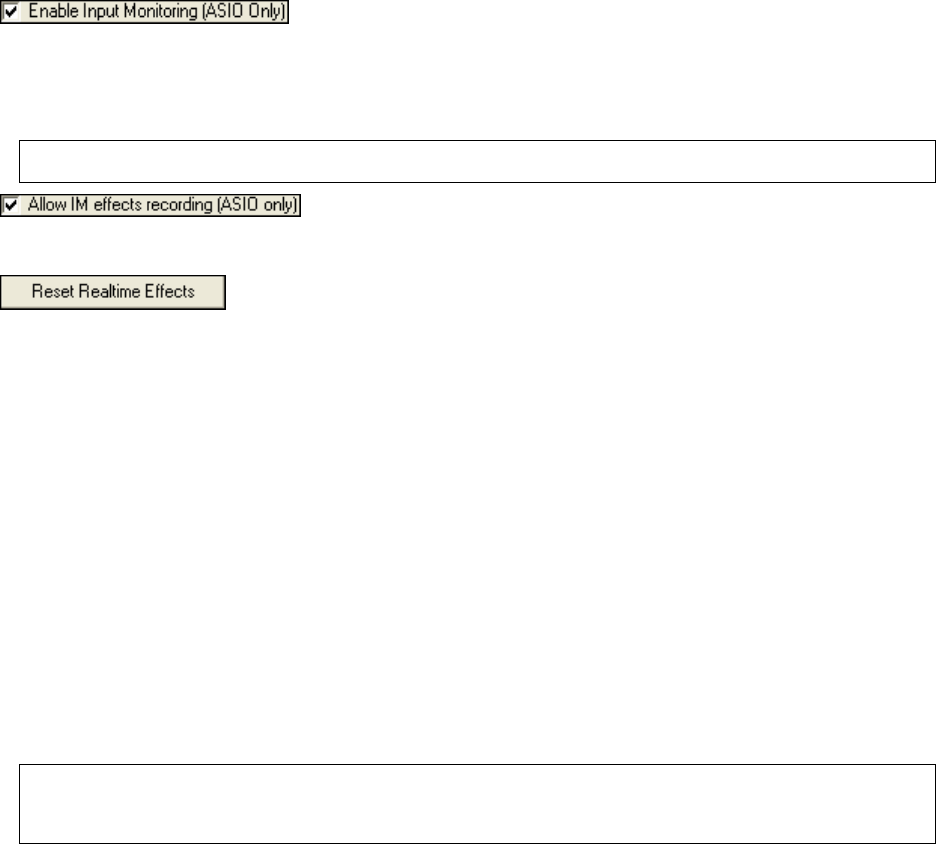
Chapter 13: Reference
222
When this checkbox is enabled in the Audio dialog (and ASIO is selected in
the Driver Type combo) then RealBand will take the ASIO input signal from input port number 1 and send it to
output 1 so that you will hear the input through the speakers.
You can apply real time effects to the monitored input by selecting “Input” in the top combo box of the
DirectX/VST Real Time Effects dialog. You can then select up to four DirectX or VST effects.
WARNING! - Do not enable this feature if the input port number 1 is set to record the output (e.g. “What you hear” or “Mix”)
because enabling input monitoring in this case will cause massive feedback that could hurt your ears!
When Allow IM effects recording (ASIO only) is enabled, and Input
Monitoring is enabled, and effects plug-ins are enabled for input monitoring, the effected signal will be recorded
instead of the dry signal.
The [Reset Realtime Effects] button will remove any real time effects from your
project so you can
begin remixing your project from scratch.
If the Use 16-bit I/O for higher bit res. file types (MME only) setting is enabled, then RealBand will convert the
audio to 16-bit before sending to the sound card.
The Offset In MS setting can be used to make an adjustment to the timing for the purpose of keeping the MIDI and
audio in sync. You can make an adjustment to this setting if the sound card’s audio timing is early or late in
comparison to the MIDI. For example, if the sound card’s audio is being heard later than the MIDI, you can try
increasing this setting, which will delay the MIDI timing to match the audio timing. The default for this setting is 0.
The Track Buffer Size settings determine the amount of memory used by RealBand as a buffer when reading audio
data from disk for each audio track.
Output Buffer Milliseconds (MME only) setting lets you adjust the output buffer duration. The default setting is
4000 milliseconds (4 seconds), which is a very conservative setting. The higher the setting, the less likely it is that
playback will glitch. The lower the setting, the quicker the song will start playback, and the quicker the program
will respond when you change volume, pan, mute, or effects settings for an audio track.
You can reduce this setting if you want faster response to mixer moves (such as volume, pan, etc.) without needing
to enable the Quick Volume Changes setting. 1000 milliseconds (1 second) is usually a good overall setting for fast
enough response, while still leaving enough buffers to avoid audible dropouts or clicks, assuming your computer has
a reasonably fast CPU.
Note: If you set this to less than 1000 milliseconds you may further improve the response time of mixer moves, but you’ll also
further increase the risk of an audible dropout or audible click when the system is under stress. In addition, if you set to a very
low setting, then MIDI playback may temporarily slow down due to subtle and brief interruptions in the audio during activity
such as minimizing and maximizing a window.
The Input Buffer Seconds (MME only) setting determines the number of seconds of audio data that are in the input
buffer during recording. The greater the setting, the less likely a dropout will occur during recording in situations
when the system is very active.
The Input Channel for MONO Tracks setting determines which audio input channel (Left, Right, Stereo) is used
by RealBand to record audio onto a MONO track. When set to Left or Right, the audio in a track is stored as mono
so only one channel is used when recording.
Keep in mind that this setting ONLY is relevant when recording onto MONO audio tracks.
When set to “L+R (2 Tracks)” the left channel will be recorded on the Current Track and the right channel will be
recorded on the next highest track number. If the next highest track is a non-blank MIDI track, then a new track will
automatically be inserted at that position to make room to record audio. You can undo the keeping of an L+R take.
Example:
Say the current track is track number 1. When you record using L+R, the Left channel will get recorded on track
number 1 and the Right channel will get recorded on track number 2. If Track 2 is blank or already has audio, then
the audio for the Right channel will get recorded directly onto the existing track number 2. If track number 2
already has MIDI data then a new track will automatically be inserted at track number 2, and the existing track with
the MIDI data will become track number 3.
Chapter 13: Reference 223
If RealBand inserted a new track when recording using L+R, Undo won't remove the inserted track, but you could
use the Remove Track command if you decided to remove the newly inserted track.
Note: When multiple input ports are selected in the audio drivers dialog, this setting MUST be set to “L+R” in order to record
multiple channels onto MONO tracks. (RealBand will set this to “L+R” automatically if you choose multiple input ports in the
drivers dialog.) Each audio input port is recorded as an L+R pair, and it works the same way as with a single (two track) L+R
pair. The audio data will be recorded as 1 L+R pair per port with all the dated recorded on adjacent available tracks. Tracks
will be inserted if necessary (same method as when recording L+R with a single port).
If the Record Channel is set to Left or Right, only Input Port number 1 (the first input port in the list that was selected by you in
the Audio Drivers dialog) will be recorded, even if multiple ports are selected.
The Buffer Size for Edit/Save setting in the Audio
dialog lets you adjust the buffer size used by RealBand when editing and saving a song. It lets you adjust the buffer
size that RealBand uses during operations such as cutting and pasting or when saving a file. Depending on your
hard drive, using larger buffer sizes may result in a speed improvement.
The Audio Temp Directory is the directory used by RealBand to store temporary audio data when recording or
editing a song. This setting can’t be changed if the song already has audio data.
The Full Duplex setting, when checked, will allow RealBand to record and play back audio at the same time. This
setting will only work if your sound card its driver supports full duplex (simultaneous record/playback).
The Quick Volume Change checkbox, when checked, will cause RealBand to quickly stop and restart playback in
response to any volume or panning changes to an audio track, or muting/unmuting of audio tracks. There may be a
slight delay or glitch before the change occurs. If this checkbox is unchecked then there will be a delay equal to the
Output Buffer Seconds setting before you hear the change.
The Advanced MIDI to Audio Sync (MME only) checkbox, when checked, will enable a mode in which
RealBand polls the sound card for position information at a higher rate for more accurate timing.
Realtime Effects Enabled allows processing of audio tracks through real time DirectX or VST effects from PG
Music Inc. or others. These are non-destructive effects that do not permanently alter the individual tracks.
Audio I/O Thread (MME only) gives you three different choices regarding the execution thread for audio playback
and recording. The three choices are: “Main Thread,” “Discrete Thread - Normal Priority,” and “Discrete Thread -
High Priority.” When set to use the Main Thread, the audio I/O uses the program's main execution thread rather
than multi-tasking. When set to Discrete Thread it uses a separate execution thread for the audio playback, which
makes it less likely that there will be an audio dropout in certain situations, such as when small I/O buffer size
settings were selected by the user.
Very Important: If you change this setting, and later experience any unusual problems with the audio playback/recording,
please change this back to the “Main Thread” setting. The Main Thread setting is the safest of the three.
Always Record Audio too, if current track is MIDI – this setting will cause RealBand to record audio even when
the current track is MIDI. RealBand will offer to keep the audio take on the nearest available blank track. This can
be a “lifesaver” in those situations where you wanted to record audio, but you accidentally selected the current track
as a MIDI track.
Backup Most Recent Audio Take – this setting, when enabled, will cause RealBand to always backup the most
recent audio take as <Temporary Audio Directory>\RBBAKx.WAV, with x being the audio input port number.
This can be helpful in those rare-yet-frustrating situations, such as when you accidentally recorded audio onto the
WRONG audio track, or you accidentally punched in instead of recording a regular take. If this happens you can
undo the keeping of the most recent take and then use the Wave Files - Import Wave File command to insert the
recorded audio onto a different track, by importing the RBBAKx.WAV file which will be located in the Temporary
Audio Directory.
Note: If you do this, you may have to edit the audio data's track location to get it to sound at the right time.
Speed Change Quality: This setting determines the time stretch method used to alter the speed of the song when
you play the song at a different speed, such as 50% speed. There are 8 different choices here. The “best” choice
depends on the source material. You may need to experiment to determine the best choice for the music you are
working with. Here are the choices:
- 1BAND_SUM - The fastest method but with the lowest quality. May sound best on simple tracks.
- 2BAND_SUM - Fast with better quality than 1BAND_SUM. May sound best on simple tracks.
Chapter 13: Reference
224
- 4BAND_SUM - Fast with better quality than 2BAND_SUM. Good for simple tracks or mixes.
- 8BAND_SUM - This is the best-sounding fast method, likely to sound good on either simple tracks or mixes.
- 2BAND_AUTOCORR - Noticeably slower than the above methods. It may sound much better than
8BAND_SUM on simple tracks, but it probably will not sound better than 8BAND_SUM on mixes.
- 3BAND_AUTOCORR - Even slower, may sound much better on simple tracks, but it may not sound better
than 8BAND_SUM on mixes.
- 4BAND_AUTOCORR - Same speed as 8BANDSUM_HYBRID, but may sound better than
8BANDSUM_HYBRID on simple tracks.
- 8BANDSUM_HYBRID - Same speed as 4BAND_AUTOCORR. If processing speed is not an issue,
8BANDSUM_HYBRID is likely to be the best choice for full mixes. It uses AUTOCORR on low audio
bands, and SUM on the high audio bands.
When the Unassigned Output Ports Work As Subgroups checkbox
is enabled in the Audio dialog, any audio output ports that do not currently have a driver port assigned to them will
function as subgroups. A subgroup is a bus or signal path that gives you the ability to control several tracks as a
group.
The Mono Tracks can use effects in Stereo mode setting in the
Audio Options dialog allows mono audio tracks to use the real time effects track inserts in stereo mode for better
sounding mixes. When the checkbox is enabled, and a mono track is using an effects insert (added via FX button
on mixer) such as a stereo reverb, the output from the stereo reverb will be heard in stereo rather than mono.
Note: This feature only applies to track effects inserts. Aux busses have always worked in stereo mode (if the effects were
stereo). This feature, when enabled, will also cause RealBand to use up more CPU processing power.
File
This dialog contains preferences that deal with saving or loading files.
The Load Mixer Settings from .SEQ Files checkbox, when checked, enables the feature in which RealBand
automatically loads and transmits any mixer settings that are stored in .SEQ files.
The Save Mixer Settings to .SEQ Files checkbox, when checked, will cause RealBand to save all the current mixer
settings of non-blank tracks to .SEQ files. If the “Load Mixer Settings from .SEQ Files” setting is enabled the
settings will be loaded and sent whenever a .SEQ file is loaded.
Chapter 13: Reference 225
The Convert PPQ of Loaded Files to PPQ checkbox, when checked, will automatically convert files to the
selected PPQ resolution. For example, if the selected PPQ resolution is 480 PPQ (Pulses Per Quarter note), and this
checkbox is checked, RealBand will automatically convert any files you load to 480 PPQ. RealBand supports PPQ
as high as 3840, which allows for more precise audio editing, since at higher resolutions each tick spans a finer
section of audio.
Note: For really long songs, or for songs that have really long note durations, it may be wise to not use the highest PPQ
settings. Higher note resolution reduces the maximum allowed song length, as well as reducing the maximum allowed note
duration length. At 3840 PPQ, the maximum song length of a 4/4 song is around 35 minutes long at a tempo of 120, less at
faster tempos. At 3840 PPQ and a 4/4 time signature the maximum allowed note duration length is around 17 beats
regardless of the tempo.
The Don’t Save Forced Ch Meta Event in .MID files checkbox, when checked, will prevent RealBand from
saving the forced MIDI channels (the Ch field in the Classic Tracks View window) into the .MID files. This META
event is only recognized by other PG Music programs.
If you choose to not have this setting saved then the forced channels won’t be recalled the next time the file is
loaded. You could use the Edit | Rechannel All Tracks command to convert the actual MIDI data in the tracks to the
forced channel so that a forced channel setting isn’t needed.
Automatically Rechannel track data when saving to .MID
When saving to a MIDI file, RealBand will automatically ask you if you want to rechannel the track data to the
forced MIDI channels in the tracks view, if the tracks contain MIDI channels different from the forced channel.
Note: By default this is disabled and you will receive a notification dialog if you enable it. If you are a MIDI guitar player you
probably will want to leave this setting disabled permanently. Leaving this setting disabled and never enabling it will ensure
that you will always retain the individual channels recorded by your MIDI guitar.
The Long file names use custom open/save dialog checkbox lets you use a more advanced, custom file dialog.
This dialog allows you to choose a Font. This dialog will remember the dialog’s window size and placement, and
the currently selected font. It also has a tree button that lets you view the directory structure, and a button that lets
you chose between details mode and list mode.
These settings will all be remembered by RealBand the next time you load or save a file using the custom file
dialog.
The Find button in the Custom File Selection dialog lets you search for a file within the current folder.
This is useful when a folder has many files and you wish to avoid scrolling through a long file list.
The Favorite Folders button in the Custom File Selection dialog will let you select from a list of “favorite”
folders.
When using the Custom File Selection dialog, RealBand will remember up to 25 folders from which you had
previously loaded files. When you press the Favorite folders button, you can quickly select a folder without having
to navigate through the Windows folder tree structure.
The Fill blank track names with patch names checkbox will cause RealBand to fill a blank track name with the
patch name for the track when loading a file, assuming the track has MIDI data, and the Prg field (in the Classic
Tracks View) isn’t blank. For .MID files this is ALWAYS a General MIDI patch name. For .SEQ files this is based
on the patch list of each track.
The Open Lyrics Window for track with most lyrics setting, when enabled, lets RealBand automatically open a
Big Lyrics window for the track that has the most lyrics.
Write Lyrics in General MIDI lyric format saves Standard MIDI File lyrics.
Boot up in folder of last session is a checkbox that can be enabled or disabled. When you enable this setting,
RealBand will boot up in the folder of the most recently loaded file from the previous session of RealBand.
Automatically reload most recent file from last session. If this is enabled, then when you run RealBand it will
load the most recently loaded file from the last session.
When Open and Save As dialogs remember last folder independently is enabled, the File Open and File Save
As dialogs individually recall the folder from the last time either dialog was used.
Chapter 13: Reference
226
Backup Settings
When the Create backup file when overwriting SEQ files settings is enabled, RealBand will always create a
backup file (BKS file) when a .SEQ file is overwritten. For songs saved into the same hard drive that RealBand is
installed, the backups are placed into RBBACKUP subfolder of the RealBand folder. For songs that are saved to a
different hard drive, the backups are placed in a RBBACKUP folder which is off of the root (e.g. D:\RBBACKUP).
The Max backups per song setting determines the maximum number of backups to be kept for each song. If this
limit is reached, then RealBand will delete the oldest backup of the song you are overwriting and create a newer
backup.
The Max backups per hard drive setting is the maximum total backups allowed per hard drive. If this limit is
reached, then RealBand will delete the oldest backup file.
There is also on option for moving the older backups into the Recycle Bin instead of deleting them when either of
the two limits are reached.
Big Lyrics Window
This dialog contains the various settings for the Big Lyrics window.
The Text, Background, and Highlight Colors can all be
changed if you prefer different colors than the defaults.
The Default, Yellow on Red, Black on Gray, and Black
on Teal buttons let you chose between 4 preset color
schemes without having select individual colors for each
setting.
The Choose Font button provides you with ability to
select a different font for use with the Big Lyrics window.
The Use Default Font button “resets” the font used in the
Big Lyrics window back to its default setting.
The Display Chord Symbols checkbox, when enabled,
allows chord symbols present in a song.
Lyrics scroll before bottom line scrolls the lyrics before
the bottom line instead of scrolling after the first line.
Notation
This lets you access settings for the Notation window and Lead Sheet window. The options are described in detail
in the Notation and Printing chapter.
The [Notation Options…] button lets you access the settings for the Notation
window.
The [Notation Print Options…] button lets you access the Notation Print settings
and is accessible only if the current track contains notes.
The [Lead Sheet Options…] button lets you access the settings for the Lead
Sheet window.
Note: You can also access these settings from buttons within their respective windows instead of from this Preferences
dialog. Since accessing these settings requires that a Notation window or Lead Sheet window be active, RealBand may
temporarily launch one of these windows (Notation or Lead Sheet), if necessary, and then close the window after the
settings dialog has been exited.
MIDI
This lets you access settings related to the MIDI setup.
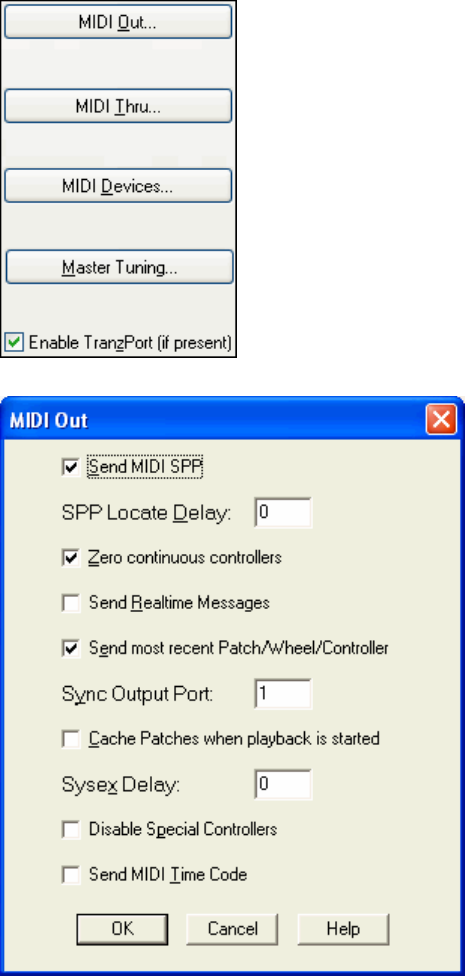
Chapter 13: Reference 227
MIDI Out
Use the MIDI Out dialog to choose the messages that will be sent to your MIDI sound source.
Send MIDI SPP: Determines whether MIDI Song Position Pointer data is sent.
SPP Locate Delay: Adjusts the delay time (in milliseconds) before playback is started after sending Song Position
Pointer (SPP) information. This gives external MIDI devices the time required to find the proper location when
syncing to the program.
Zero continuous controllers: Sets continuous controllers such as Pitch Bend to zero, which is the off position.
Send Real-time Messages: When this option is enabled the program will send “MIDI clocks” information – as well
as Start, Stop, and Continue messages.
Send Most Recent Patch/Wheel/Controller: When this option is enabled the program will search back through the
tracks for the most recent patch, wheel (pitch bend), and controller events. These events will be sent to your MIDI
Chapter 13: Reference
228
sound source before starting playback. This ensures that you hear the proper sounds when playing from a new
location within a song.
Cache Patches when playback is started: If you are using an output driver that requires patch caching RealBand
will update the patch cache when a .MID or .SEQ file is loaded.
SysEx Delay: When multiple packets of system exclusive data are sent, many synthesizers require a slight delay
between packets. A SysEx packet is a message that begins with (Hex) F0 and ends with F7. If your synth requires a
delay between packets when receiving SysEx (which is quite common), then this setting lets you specify a delay
setting of between 1 and 100 milliseconds. The default setting is 0, which equals no delay. If you are encountering
problems (e.g., overflows, lockups, etc.) with sending SysEx data to your MIDI sound source you should try a
setting of 10-100 milliseconds to correct the problem.
Disable Special Controllers: This prevents RealBand from sending any of the special controller messages that are
used for the Guitar and Notation windows. The Guitar window uses controller 84 for inserting “position” markers.
The Notation window uses controller 85, 86, and 88 for advanced notation features such as “micropegs” and Bars
Per Line markers.
Send MIDI Time Code: When this feature is enabled the MIDI Time Code will be sent through the MIDI OUT
port during playback. This is useful if you need to sync an external device to RealBand that only supports synching
to MTC (rather than synching to MIDI clocks/SPP).
MIDI Thru
This command provides you with the ability to enable or disable the MIDI Thru setting. This also allows you to
choose how the MIDI data is echoed. There are two types of MIDI Thru: Track-Specific and Global.
Enable Thru: If this option is checked the MIDI Thru feature will be enabled.
Thru Method: As noted, there are two types of Thru methods:
- Track-Specific: When Track-Specific MIDI Thru is enabled the incoming MIDI data will be “echoed” using
the forced Channel, Velocity, Key, and Port settings of the track. If these settings are set to 0 the MIDI data
will be echoed but otherwise unchanged.
For example, if a given track has a forced MIDI channel of 2, all incoming MIDI events will be echoed out via
MIDI on Channel 2.
- Global: When Global MIDI Thru is enabled the incoming MIDI data will be “echoed” using the forced
Channel, Velocity, Key, and Port settings that you specify in the MIDI Thru field. If these settings are set to 0
the MIDI data will be echoed out but otherwise unchanged.
MIDI Devices
This command allows you to select the MIDI input and output drivers to use with the program. When selected, a
dialog box will pop up which contains two list boxes, one for the Input Driver(s) and one for the Output Driver(s)
(specific to your system). You can select more than one input or output driver. RealBand supports multiple MIDI
ports.
The [Move Selected Devices to Top] button lets you adjust the order of the MIDI Output ports. This means you can
choose which MIDI Output devices appear as Port 1, Port 2, etc. within RealBand, rather than the default order for
the ports determined by the operating system.
If the ports are in a different order than required, you can select (highlight) one or more ports, and press the [Move
Selected Devices to Top] button. This will move the highlighted ports to the top of the list. You can highlight one
or more ports and then move them to the top to shuffle the order until it’s the order you want.
When you launch the MIDI Driver Setup dialog, all the highlighted ports will always be shown at the top. They
will be in the same order they were before, relative to each other. For example, let’s say you have four ports on your
system, and, by default they show up sequentially:
Original Driver Order After Re-ordering Next Launch of Dialog
Driver A
Driver B
Driver C
Driver D
Driver D
Driver A
Driver B
Driver C
Driver D
Driver C
Driver A
Driver B
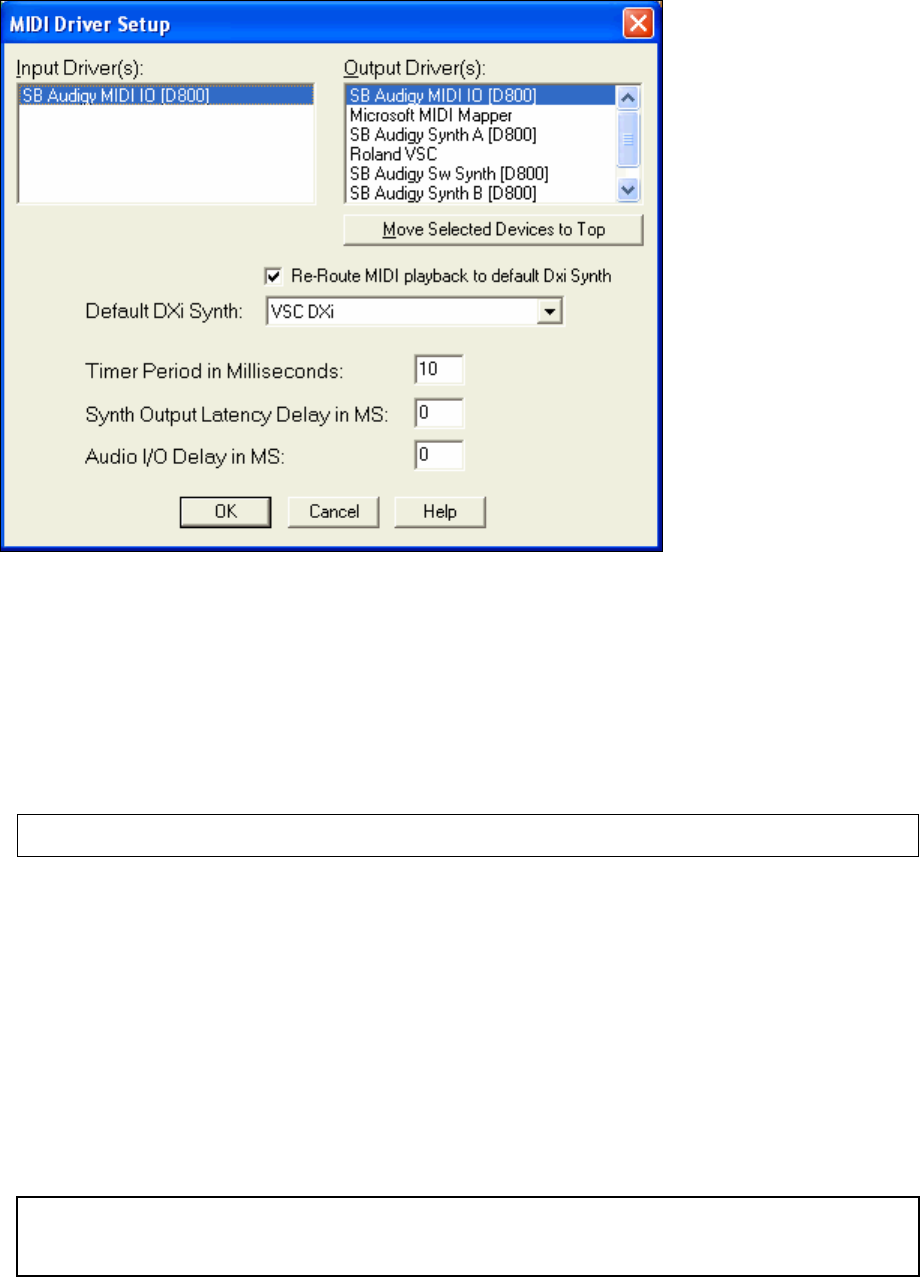
Chapter 13: Reference 229
Let’s say that you highlight the 4th port (Driver D) and move it to the top, and then you highlight the last port in the
list (which is now Driver C, since Driver D was moved to the top). You now have 2 ports selected, Driver D at the
top and Driver C at the bottom. Driver D and Driver C will be ports 1 and 2 within RealBand.
The next time you launch the MIDI Driver Setup dialog, you’ll see Driver D and Driver C at the top, followed by
the other two un-highlighted ports. The important point here is that the chosen order of the highlighted ports Driver
D followed by Driver C was preserved.
The Re-Route MIDI Playback to Default DXi Synth setting will cause RealBand to re-route all MIDI playback to
the Default DXi synth. This is the easiest way to use a DXi (Direct X Instrument) or VSTi soft-synth for playback.
If this option is checked, then ALL MIDI tracks’ playback output will be routed to the default DXi synth regardless
of the track’s port number.
Note: If using MME drivers, only the MIDI playback output can use softsynths. MIDI Thru, MIDI metronome, scrub mode,
and chord advance/backup will default to a regular MIDI port. With ASIO drivers, MIDI Thru will play through softsynths.
The Default DXi combo lets you select which DXi/VSTi synth is used as the default DXi synth.
The Timer Period in Milliseconds setting determines how fast the timer interrupt rate will be for MIDI
synchronization, the smaller the setting the faster the interrupt rate. The range can be between 1 and 20.
The Synth Output Latency Delay in MS is useful if you’re using a software-based synth such as the Roland
Virtual Sound Canvas. This setting will delay the visual display within RealBand, such as displayed times and
highlighting of notes during playback. When using a software-based synth, you may have to set this to a few
hundred milliseconds depending on your computer’s speed. You may have to tweak this a few times until the visual
display during playback matches the sounding of notes on a software-based synth.
The Audio I/O Latency Delay in MS setting will delay the start of audio playback and audio recording, which is
useful if you want to attempt to keep audio playback/recording in sync with MIDI if you are using a software-based
synth for MIDI playback. Normally, you will set this to match the Synth Output Latency Delay. This is why this
setting is in the Midi Devices dialog. If you are using software based MIDI synth, setting both the Synth Output
Latency and Audio Latency Delays will let you play/record audio in sync with the MIDI.
Note: When recording/playing audio tracks along with a software-based synthesizer, the stability of the audio/MIDI
synchronization will vary depending on the stability and speed of your computer, operating system, and drivers. Software-
based synthesizers have excellent playback quality, but for recording situations a hardware chip-based MIDI synthesizer
may be best since hardware synths don't have an output delay, and don't consume much CPU power.
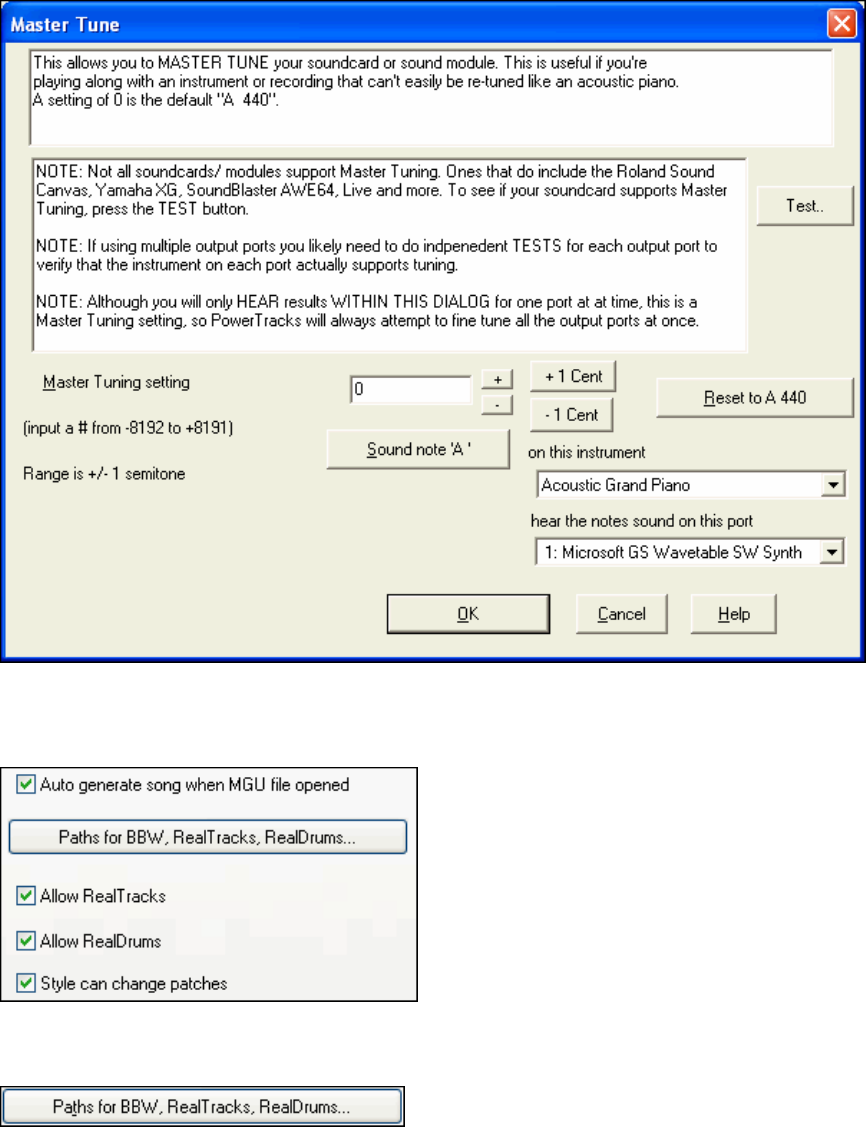
Chapter 13: Reference
230
[Master Tuning…] allows you to master tune your sound card or sound module, useful if you're playing along with
an instrument or recording that can't easily be re-tuned, like an acoustic piano. A setting of 0 is the default A = 440.
This setting is saved between RealBand sessions.
Enable TranzPort (if present) allow remote control from a TranzPort wireless DAW controller.
Song Generation
These are global settings that apply to all RealBand songs.
Auto generate song when MGU file opened automatically generates and arrangement when a Band-in-a-Box file is
opened in RealBand. Disable this feature if you don’t want the parts in the imported Band-in-a-Box file to be
regenerated and overwritten.
Click on this button to open the Select Folders dialog to choose
or change the path for RealBand to find its RealTracks and Real Drums.
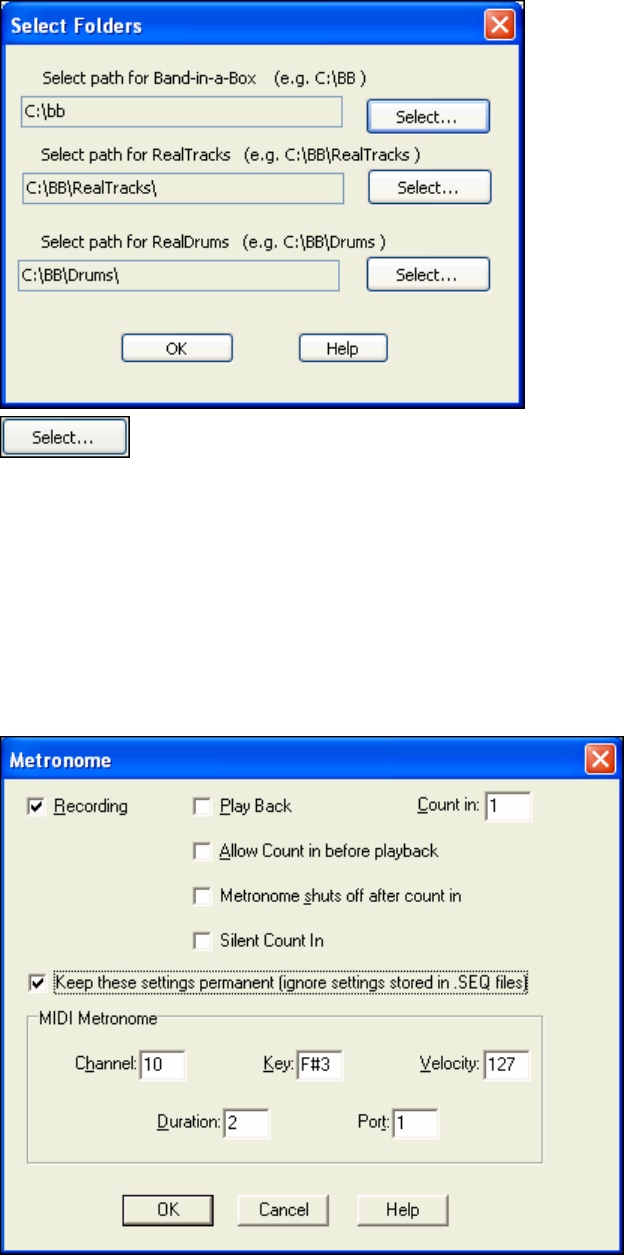
Chapter 13: Reference 231
The [Select] button opens a browser where you can locate folders.
The other settings enable or disable RealTracks, RealDrums, and patch changes embedded in styles.
Metronome
Access to the Metronome dialog. The metronome can be active during recording, playback, or both.
Recording: If this checkbox option is enabled the metronome will be on/heard during recording.
Playback: If this option is enabled the metronome will be on during playback.
RealBand will send a specific note out via MIDI on each beat. The note, velocity, duration, and port options will
determine the pitch and characteristics of the note that is sent out via MIDI on each beat of the song.
Count In: This option lets you choose how many measures/bars will be counted down before recording begins. The
countdown may range from 1 to 4 measures.
Allow Count in before playback: Enables count-in before playback. This is useful for practicing or playing live.
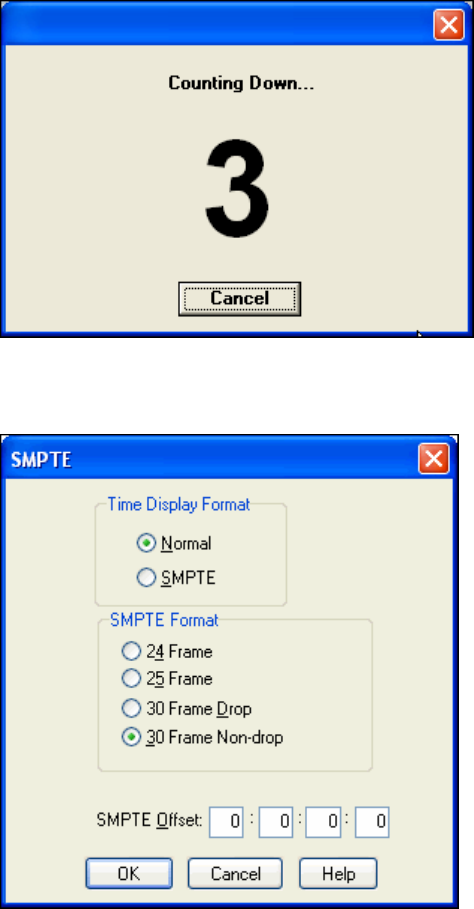
Chapter 13: Reference
232
Metronome shuts off after count in: Shuts the metronome off after the count-in so it is silent during playback.
Silent Count In: Ensures that the count-in will be silent (visual count-in only). This is useful if you are playing
live and you don't want an audible count-in.
Keep these settings permanent (ignore settings stored in .SEQ files) will cause RealBand to remember the
current metronome settings and ignore any settings stored in .SEQ files.
The Counting Down dialog visibly shows the numbers
(e.g. 1, 2, 3, 4) during the countdown.
SMPTE
Access to the SMPTE dialog, which offers the ability to choose the time display format –as well as whether MIDI
events will be translated and displayed as SMPTE times.
Time Display Modes:
If the time display mode is set to Normal the time will be displayed in Measures:Beats:Ticks.
When it is set to SMPTE the time will be displayed as Hours:Minutes:Seconds:Frames.
SMPTE Format: You may choose one of four SMPTE formats: 30 FPS (Non-Drop), 30 FPS (Drop-frame), 25
FPS, or 24 FPS (frames per second).
SMPTE Offset: This determines the SMPTE time that the program associates with the beginning of a song. For
example, if you use an offset of 00:00:02:00 then the start of the song will be 00:00:02:00. This gives the program
two seconds to “sync up” to a tape when starting a tape from the beginning.
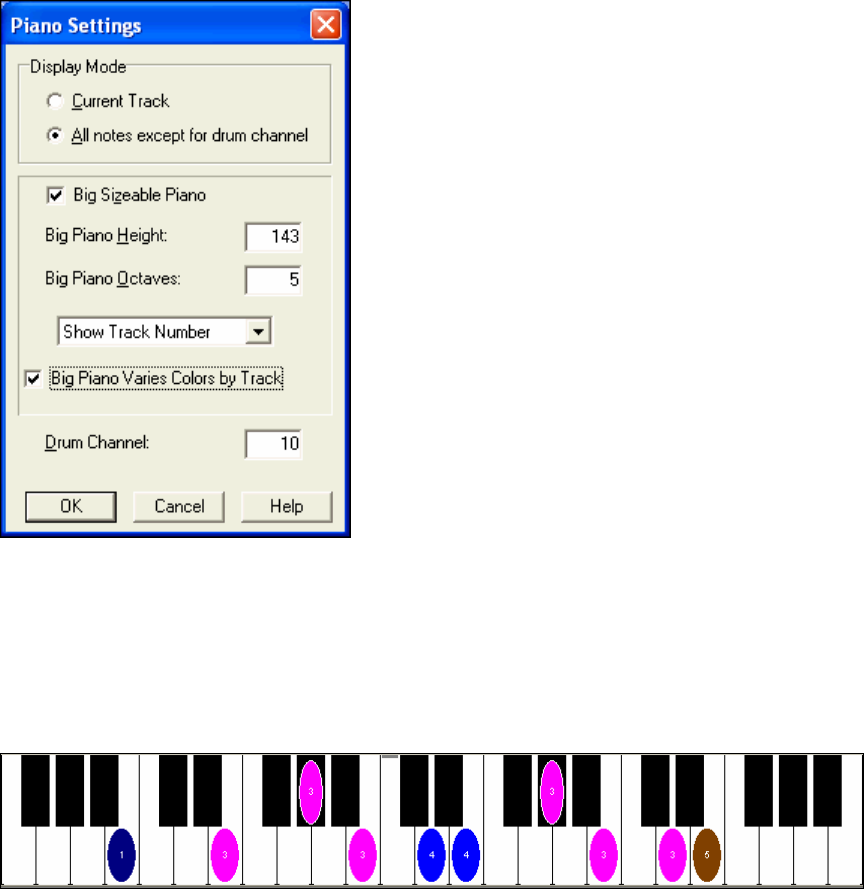
Chapter 13: Reference 233
Piano
Access to the Piano Settings dialog with settings applicable to the virtual piano display mode. There are two
display modes for the piano:
1.) When the display mode is set to Current Track the piano will
display notes as they are being played from the current
(highlighted) track.
2.) When the display mode is set to All notes except for drum
channel the piano will display the notes of all tracks except for
notes that are on the drum channel.
The default drum channel is normally set to channel 10 in this
dialog but it can be changed to any MIDI channel between 1 and 16.
If you select a drum channel of 0 all notes that are being played will
display, including the drums.
When the “Big Sizeable Piano” setting is enabled, RealBand will show a bigger piano below the toolbar, instead of
the smaller piano. You can vertically resize the Big Piano by placing the mouse on the bottom edge of the piano and
then clicking and dragging the mouse up or down.
For the Big Sizeable Piano, there is also a setting that gives you a choice of Show Track Number (drawn as a tiny
number within the notes), Show MIDI Channel, or Show No Text.
If “Big Piano Varies Colors By Track” is enabled, then the colors of the notes drawn on the big piano will vary
depending on the track number. For tracks 1 through 10, RealBand uses 10 different colors, then repeats these
colors for higher track numbers.
These settings are automatically saved toRB.INI and RB.CFG so that they will remain in effect the next time you
use RealBand.
Hide Tool Bar/Show Tool Bar
This option offers to hide the toolbar from the main screen. If you need more space on the screen to work with then
this setting can help to free up some screen space. This menu option changes to Show Tool Bar when the hidden
mode is in effect.
Hide Piano/Show Piano
This option offers to hide the piano keyboard from the main screen. When the piano is hidden with this feature
there will be more space available for the placement of the additional windows below the tool bar. This menu
option changes to Show Piano when the hidden mode is in effect.
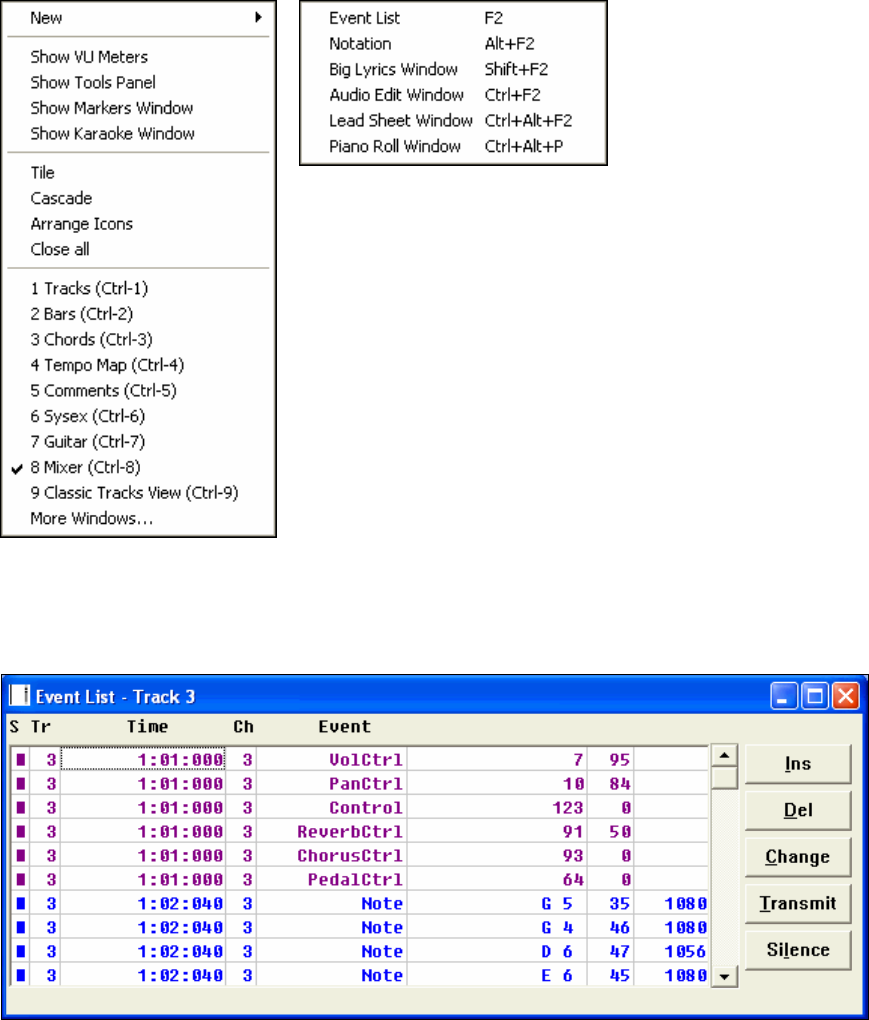
Chapter 13: Reference
234
The Window Menu
The Window menu contains commands that aid in creating, selecting, and arranging windows.
In RealBand you can open more than one instance of some types of windows.
The New command offers the creation of such “multiple instance” windows.
The Event List, Notation, Big Lyrics window, Audio Edit window, and Lead
Sheet window are all windows that fall into this category.
New
When you choose the New command the sub-menu (shown above) will appear –offering the Event List, Notation,
Audio Edit, Big Lyrics, and Lead Sheet windows available to be opened.
Event List
An Event List window is an Event Editor that allows you to insert, delete, and change all MIDI events. A list of
events is displayed vertically in the window (shown above) and each line in the list represents an individual event.
Each event is shown with its track number, time, MIDI channel number, the kind of the event, and the parameters
applicable to the event.
When an Event List is created it is displayed based on the tracks that are currently selected/highlighted. For
example, if only one track, e.g., Track 1, is selected and you use the New command to create an Event List window,
it will only display events that occur within Track 1.

Chapter 13: Reference 235
You can also open an Event List while multiple tracks are selected. In this case the Event List will display all events
encountered in the tracks that are selected. For example, if Tracks 1 through 3 were selected/highlighted when you
created an Event List window, the Event List will display all the events occurring in those 3 tracks –regardless of
what tracks you select later.
Events are inserted by pressing the [Ins] key or button. After pressing this insert key a menu will pop up to allow
you to choose what type of event to insert. After picking the event type, an entry box will pop up which will ask
you to choose the MIDI Channel, Time, and any other parameters applicable to the event.
Events can be deleted by pressing the [Del] key/button.
Existing events may be edited by pressing the Enter key. An entry box will pop up and you may make changes to
the event in this box.
You can play events one at a time by pressing the Transmit button. If the event you’re playing isn’t a note the
cursor will be advanced to the next event. If the event is a note it will be sustained until any other key is pressed.
You can stop a sustained note from sounding by pressing the Silence button. The sustained note will also stop in
other situations, such as when you switch to a different window, or if you choose a different event list command.
Types of Events
Note events consist of three parameters:
- Note string: shows the name of the note and its octave.
- Velocity: the speed that the key was pressed.
- Duration: the length of the note.
Controller Change events consist of 2 parameters:
- Controller number: a number ranging from 0 to 127.
- Controller value: a number ranging from 0 to 127
Program Change events consist of 1 parameter:
- Program number: a number ranging from 0 to 127 or 1 to 128. The range
depends on which patch list is currently selected, or which numeric range is selected if you are using the Numeric
patch list. See also the Patch Names command in the Options menu for more information about patch lists.
Pitch Bend (wheel) events consist of 1 parameter:
- Bend level: a number ranging from -8192 to 8192, with 0 representing the wheel in the center position.
Channel Aftertouch events consist of 1 parameter:
- Aftertouch level: a number ranging from 0 to 127.
Key Aftertouch events consist of 2 parameters:
- Note string: the note, which the aftertouch will affect.
- Aftertouch level: a number ranging from 0 to 127.
Lyric events can be entered and edited in the Event List. Lyrics that are entered in track in the Notation window
will appear in the Event List for that track.
Notation Window
The Notation window displays the notes of a MIDI track on a staff and lets you print music on your printer. The
Notation window can also display chord symbols and lyrics.
There are three notation modes - each mode opens with its own button on the tool bar. From left to right, the buttons
are for Standard Notation, Editable Notation, and Staff Roll Notation modes.
Holding the mouse cursor over a button will show its name in a pop-up hint.
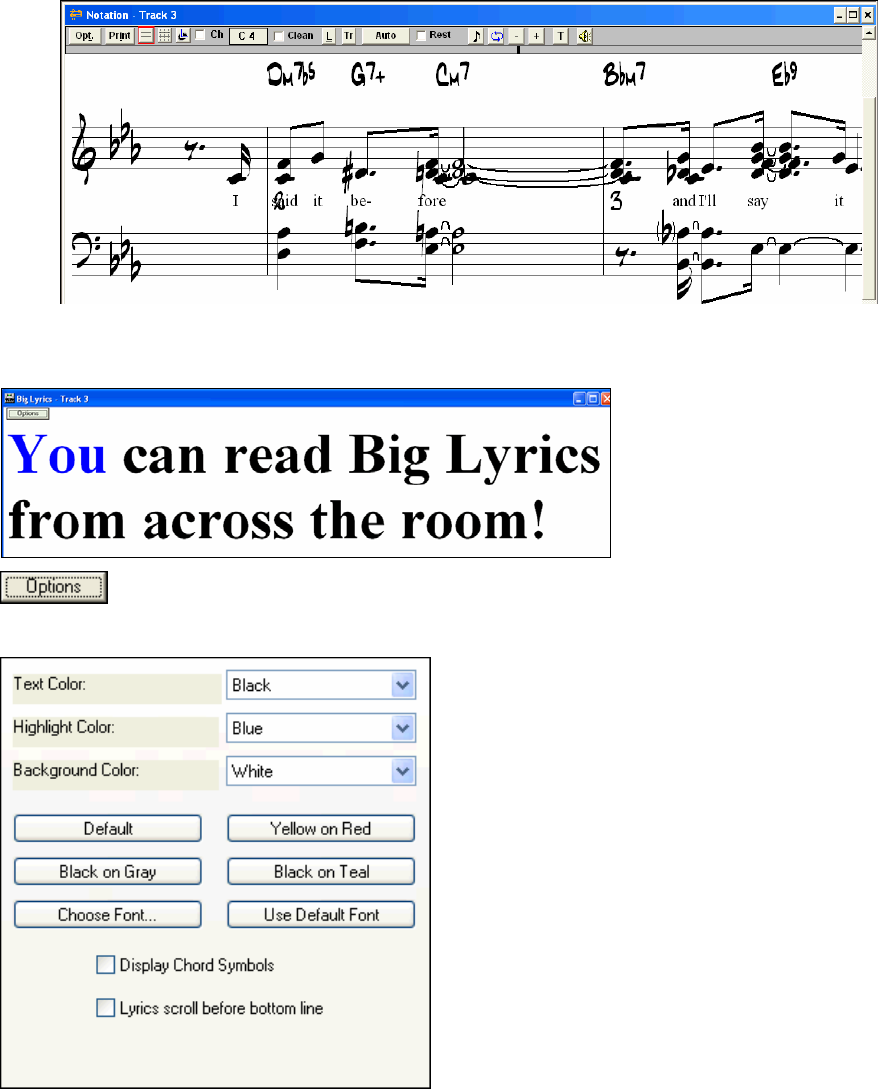
Chapter 13: Reference
236
The Standard Notation mode displays the notes as regular music. Editable Notation mode will display standard
notation but allow you to edit the notation. You will see standard notation with vertical gray lines that represent
possible note locations. Staff Roll mode displays the notes as note heads (no stems) with optional duration and
velocity lines. Also, the Staff roll mode will contain gray vertical lines across the staff.
See the chapter on Notation and Printing for full details.
Notation window in Standard Notation mode.
Big Lyrics Window
The Big Lyrics window will display
any existing lyrics in a track. The
program will highlight the lyrics as
they play, which is very useful for
singing along with the music.
Various settings for this window can be changed in the Lyric Window Options dialog,
which is launched with the [Options] button in the Big Lyrics window. These options can also be found in the
Options | Preferences menu’s tabbed dialogs.
This lets you adjust various settings for the Big Lyrics
window. The “Text Color,” “Background Color,” and the
“Highlight Color” all can be changed if you don’t like the
colors that the window is using.
The [Default], [Yellow on Red], [Black on Gray], and
[Black on Teal] buttons let you chose those 4 color schemes
without having to play around with the individual colors.
The [Choose Font…] button lets you select a different font
for the Big Lyrics window.
The [Use Default Font] button resets the Big Lyrics window
to use the default font.
The “Display Chord Symbols” checkbox will let you enable
or disable chord symbol display. The chord symbols will be
displayed in brackets, e.g. [Am7] between the lyrics.
“Lyrics scroll before bottom line” scrolls the lyrics before
the bottom line instead of scrolling after the first line.
Clicking on a lyric or chord symbol in the Big Lyrics window will start the song from the location of the lyric or
chord that you clicked on.
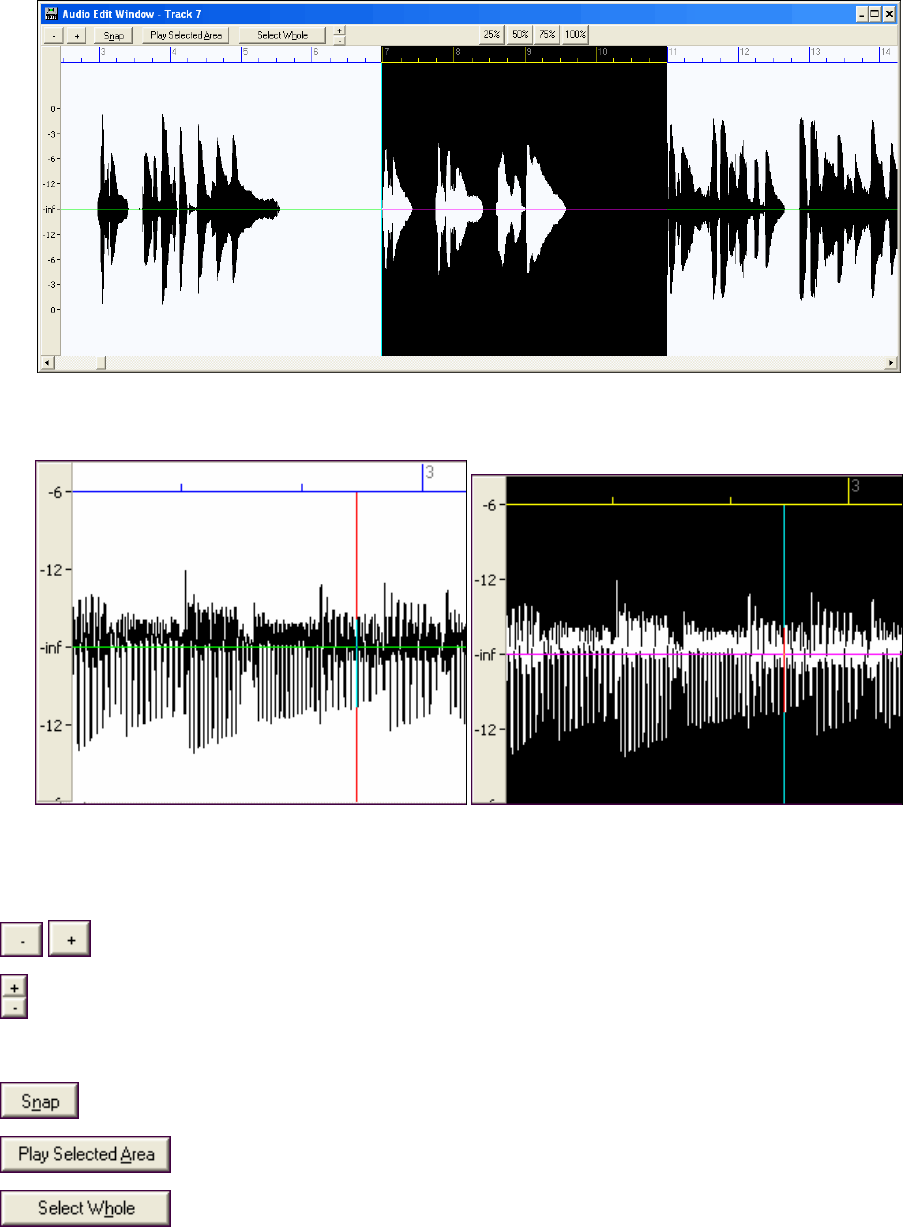
Chapter 13: Reference 237
Audio Edit Window
The Audio Edit window offers precision control of digital audio waveform editing.
This window displays wave audio data as a large, editable waveform. The dB scale on the left side of the Audio
Edit window gives you a better idea of the level of an audio track.
The thin red vertical line that is visible within the Audio Edit window indicates the current time location in the
song. It is seen in reverse video (i.e. negative) if the current time is contained within the highlighted range of a
track.
Zoom In/Out
These minus [-] and plus [+] zoom buttons on the left side of the toolbar expand or shrink the
horizontal range of the waveform.
These plus [+] and minus [-] zoom buttons in the centre of the toolbar expand or shrink the vertical range of
the waveform.
Both the horizontal and vertical zoom settings are saved for up to three different Audio Edit windows. These
settings will be restored for any opened Audio Edit windows the next time you run the program.
The [Snap] button will cause the highlighted region to “snap to” the nearest beat when selecting a
region with the mouse.
The [Play Selected Area] button will play the highlighted area so you can audition the
selected region.
The [Select Whole] button selects/highlights a whole audio track, useful for applying
effects or exporting a
whole track as a mono WAV file.
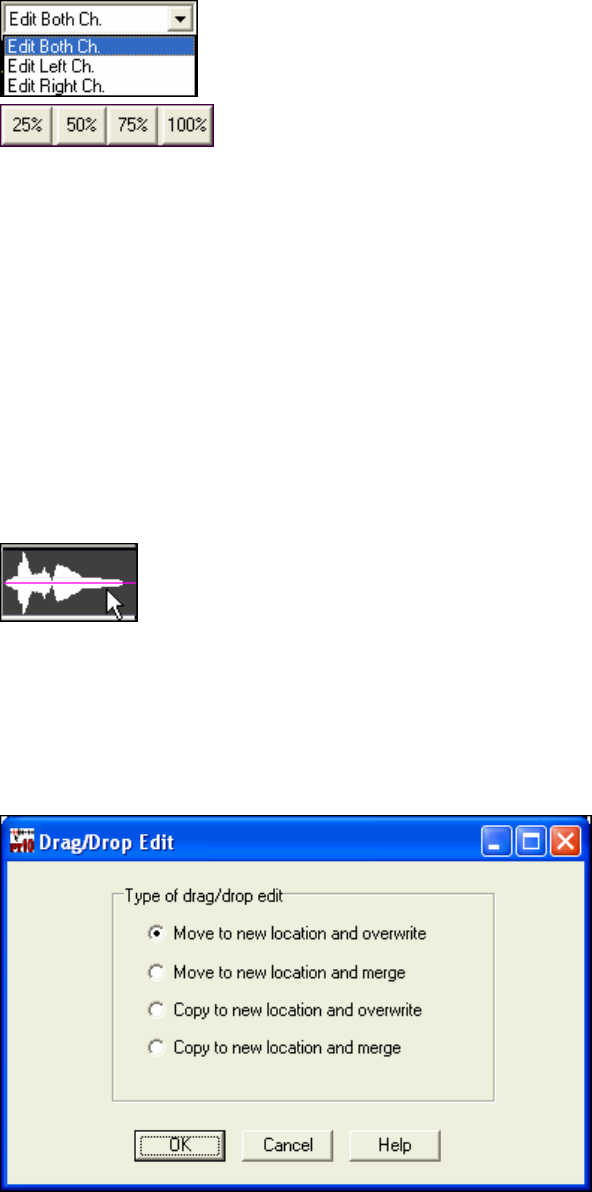
Chapter 13: Reference
238
For stereo tracks, there is the option to apply edits to both channels or to either the left
or right channel only.
Percentage tempo buttons give you a choice of playing the song at 25% speed (one
quarter the
regular speed), 50% regular speed, 75% regular speed, and 100%, which is regular speed. This feature is also
available with the Action | Play at Speed menu command.
Selecting a Region to Edit
You can select a region to edit with the mouse by clicking and dragging over the section you are interested in.
Shift+click (Shift key + left mouse button) support makes it easy to tweak the beginning or end of the highlighted
area.
- If you Shift+click before the start of the From/Thru range, or after the end of the From/Thru range, the
highlighted area will be extended.
- If you Shift+click within the From/Thru range, the range will be reduced, and the location you clicked on will
become either From or Thru depending on which boundary was closer to where you Shift+clicked the mouse.
- If you keep the left mouse button held after the Shift+click, and you move the mouse you can adjust the
boundary of the range while moving the mouse.
After selecting a region you can then use the Edit | Cut, Copy, and Paste features; or choose from one or more of the
plug-in Audio Effects found in the Edit menu.
Drag and Drop Editing
You can select a highlighted region by holding down the Ctrl key with the left mouse button
pressed, and drag the region to a new location in the song.
After releasing the mouse button, you have four options:
1. Move to new location and overwrite.
2. Move to new location and merge.
3. Copy to new location and overwrite.
4. Copy to new location and merge.
See the chapter on Digital Audio features for additional information.
Lead Sheet Window
This window is similar to the Notation window, except that it can display a track in the form of a lead sheet, with
multiple staves per page.
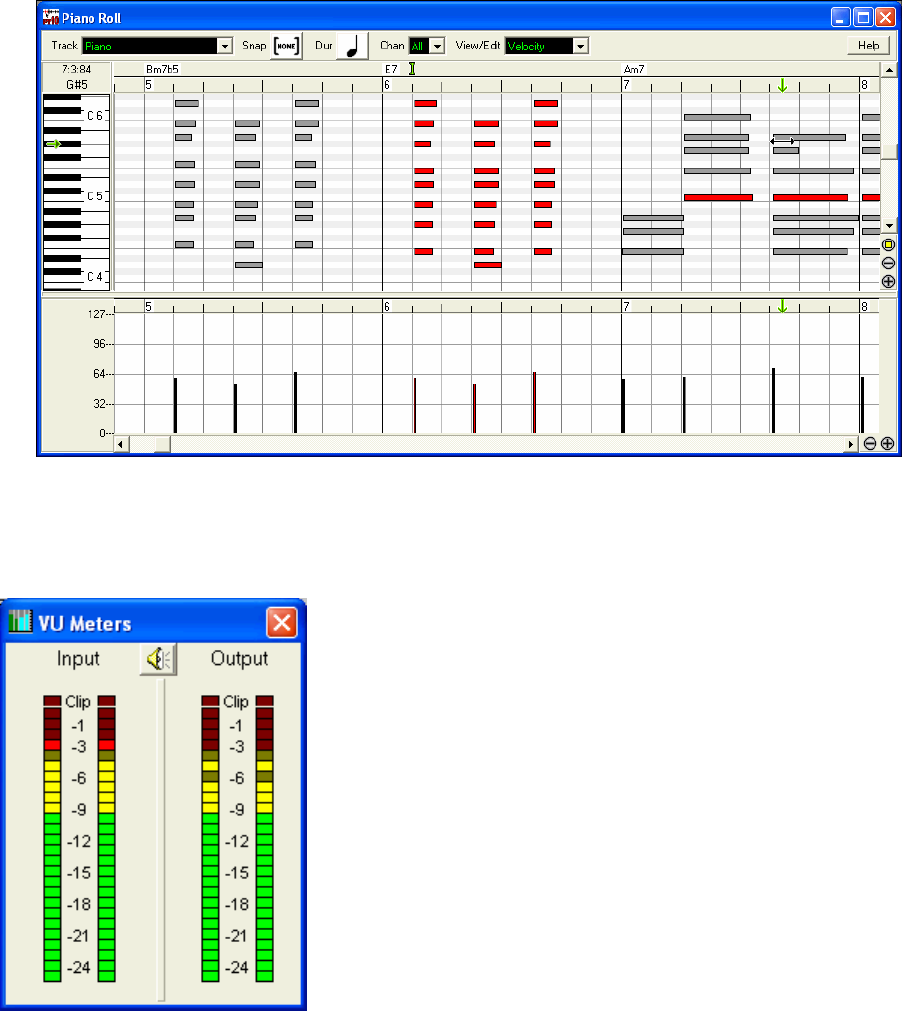
Chapter 13: Reference 239
Up to 7 tracks at a time can be displayed per Lead Sheet window. In order to display multiple tracks, you should
first select the tracks in the Tracks window or Bars window and then open up a new Lead Sheet window. Another
way to select tracks is in the Lead Sheet Options dialog.
RealBand can also print notation with multiple tracks when you press the [Print] button at the top of a Lead Sheet
window that is currently displaying multiple tracks.
The Lead Sheet window is fully described in the Notation and Printing chapter.
Piano Roll Window
The Piano Roll window enables precise graphic editing of note timing and duration. You can also graphically edit
Note Velocity, Controllers, Program Changes, Channel Aftertouch, or Pitch Bend. There are 2 panes in the window
– one for notes and the other for controllers, velocity, and other data.
All notes and controllers are displayed as black/gray bars on a grid. You can change note duration and pitch by
selecting and dragging with your mouse.
The piano roll features are fully described in the Piano Roll chapter.
Show VU Meters
This command will display the VU meters. There are 2 pairs of VU
meters, one pair for audio input, and one pair for audio output. If you re-
size the VU meters window vertically the height of the meters will expand
or shrink to match the new window height.
The clipping indicator at the top of the meters indicates that clipping has
occurred. You should try to keep the levels low enough so they’re safely
below 0 db and the clipping indicator doesn’t light up. To be on the safe
side, it’s probably a good idea to adjust the levels so that the meters don’t
get too close to 0 db even if the clipping indicator hasn’t yet lit up.
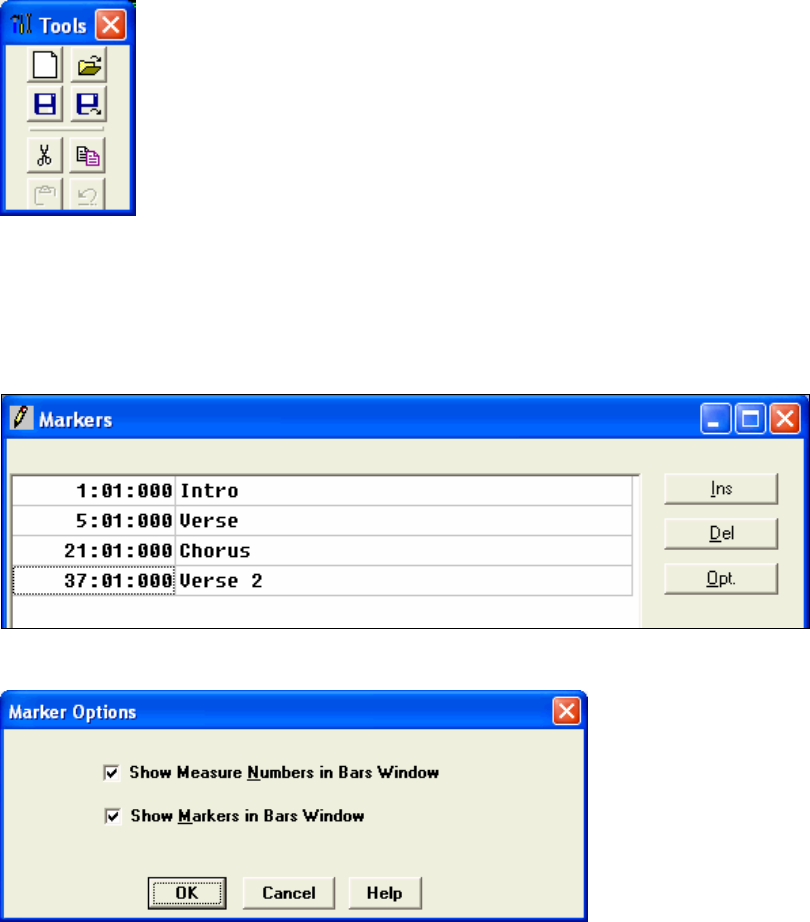
Chapter 13: Reference
240
The VU meters have an automatic peak-hold feature with gradual peak fallback, so it will be easy to see the transient
peak levels if you’ve got your eye on the meters.
For the Output, you may have to adjust your mixer settings within RealBand to keep the levels within a reasonable
range.
For the Input, you may have to press the speaker button to launch the Windows Record Control dialog, and you
could then lower the input level.
Show Tools Panel
This pops up a Tools panel which allows for easy access to some commonly used commands in
RealBand: File - New, File - Open, File - Save, File - Save As, Cut, Copy, Paste, and Undo.
There is a button for each command.
These buttons are also located directly on the RealBand toolbar.
Show Markers Window
This command will display the Markers window. This window lets you insert markers in the song for keeping track
of various sections of your music.
These markers will also appear (by default) at the top of the Bars window. You could use the markers to mark
sections such as the verses and choruses of the song. The Ins and Del buttons allow you to insert or delete markers.
You can change the current marker by editing it directly in this window.
The [Opt.] button will open a dialog with checkboxes for enabling or disabling the display of Markers and Bar
Numbers at the top of the Bars window.
By default, both Markers and Bar Numbers are displayed. Since they are shown on the same line you can prevent
either of these from being shown in the Bars window by unchecking the appropriate checkbox. If you uncheck the
Show Measure Numbers in Bars Window checkbox the bar numbers will not be shown in the Bars window. If
you uncheck the Show Markers in Bars Window checkbox the markers will not be shown in the Bars window.
These options are provided in case you prefer just one or the other being shown in the Bars window.
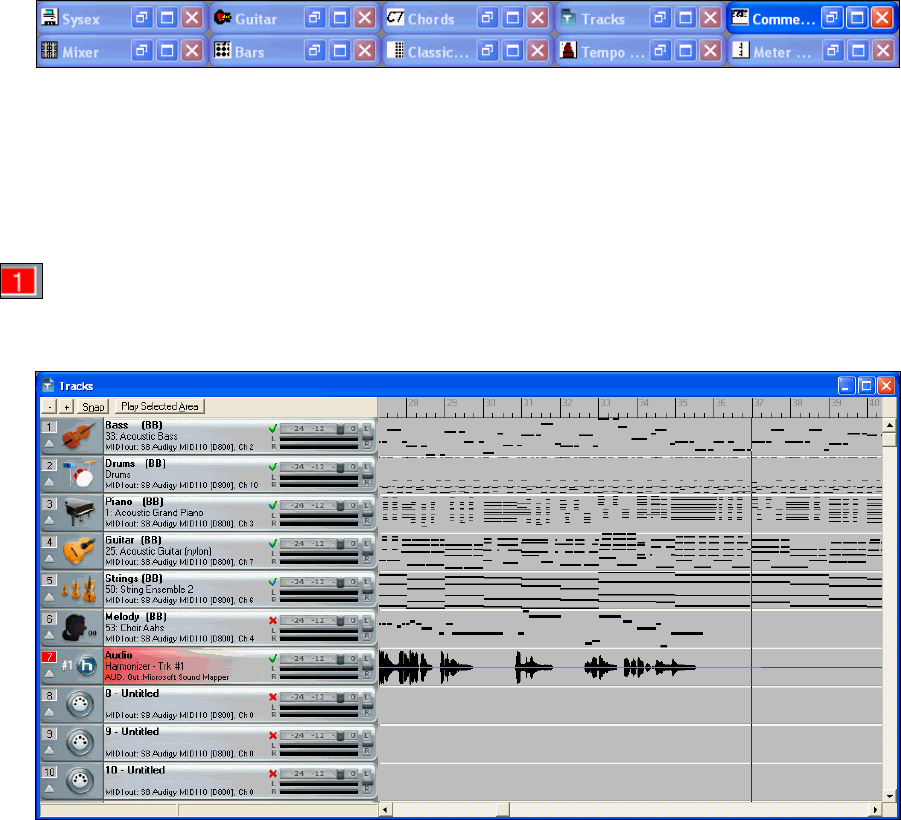
Chapter 13: Reference 241
Markers can be as close together in time or as far apart as you wish. Markers that are too close together will run into
each other when displayed in the Bars window. In most situations such as marking verses and choruses of a song
this isn’t a problem, but it is something to keep in mind when working with markers.
Show Karaoke Window
Use this command to display karaoke files.
Tile
The Tile command will arrange the various project windows so that an equal portion of each window is visible on
the screen.
Cascade
The Cascade command arranges the various program windows on screen on top of each other –with the tops of each
window visible.
Arrange Icons
The Arrange Icons command positions the icons so that they are neatly arranged.
Close All
The Close All command minimizes all open windows so that they are shown as icons.
Tracks Window
This is the window that is shown when you first start the program. The Tracks window shows the tracks with their
names, track type (MIDI or audio), various settings, as well as an overview section showing either MIDI or audio
data.
The Track Number field shows the track number. If the track is the current Track it will be highlighted in
red.
If the track is selected the number will be highlighted in yellow. If the track is not selected it will be gray. You can
click on the track number field to make a track the Current Track.
If you click on the track number field while holding the Shift key, this will select a range of tracks from the current
track through the number you clicked on. For example, if track 2 is the Current Track, and you hold the Shift key
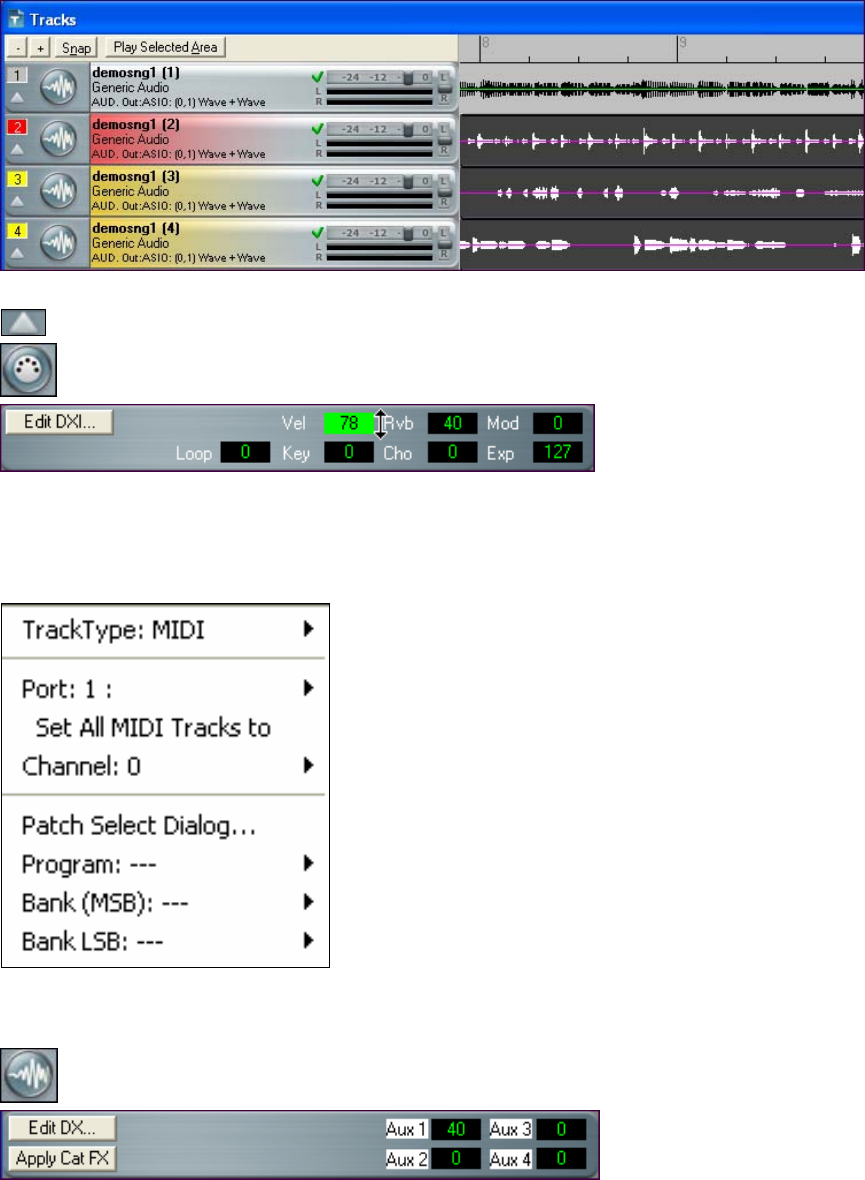
Chapter 13: Reference
242
and then click on the number field for Track 4, this will make tracks 2 through 4 selected. Track 2 will still be the
Current Track and tracks 3 and 4 will be highlighted in yellow.
You can select/deselect individual tracks by clicking on a Track’s number field while holding down the Ctrl key.
The Disclosure Triangle will reveal more information about a track by making the track row height taller.
If a track is a MIDI track, then you’ll see the Vel (velocity offset), Rvb (reverb), Mod (modulation), Loop,
Key (key transpose), Cho (Chorus), and Exp (expression) settings.
You can make changes to these settings by clicking on the edit fields with the left mouse button, and then moving
the mouse up or down while holding the mouse button down. The [Edit DXi] button launches the DirectX
Window dialog and will display the settings panel for either the Default DXi Synth (16th DXi synth slot which is
MIDI port 32) or the current DXi port number if the track is set to a valid DXi port (17-32). Any track’s MIDI
Output Port can be set to send to one of the 16 available DXi synth ports or to any other available MIDI port.
When you right-click your mouse on a MIDI icon you’ll see a pop-up
menu that lets you set the MIDI Output Port, Program (Patch) setting,
and Bank (MSB) and Bank LSB settings.
Immediately below the Port: menu item is a menu command that lets
you Set All Midi Tracks to the same port used by the track you are
adjusting.
There is also a menu item Patch Select Dialog that launches a patch
selection dialog, which lets
you select patches and variations as well as allowing you to change the track’s patch list. If the patch list is set to
General MIDI, Roland GS, or Yamaha XG, the track will display an instrument icon corresponding to the patch.
Otherwise, you’ll see the patch number displayed instead of an icon.
If a track is an audio track, when you click on the disclosure triangle you’ll see the four Aux effects level
settings. You can make changes to these settings with the mouse.
The [Edit DX] button will launch the DirectX Window dialog for the slot corresponding to the tracks effects insert.
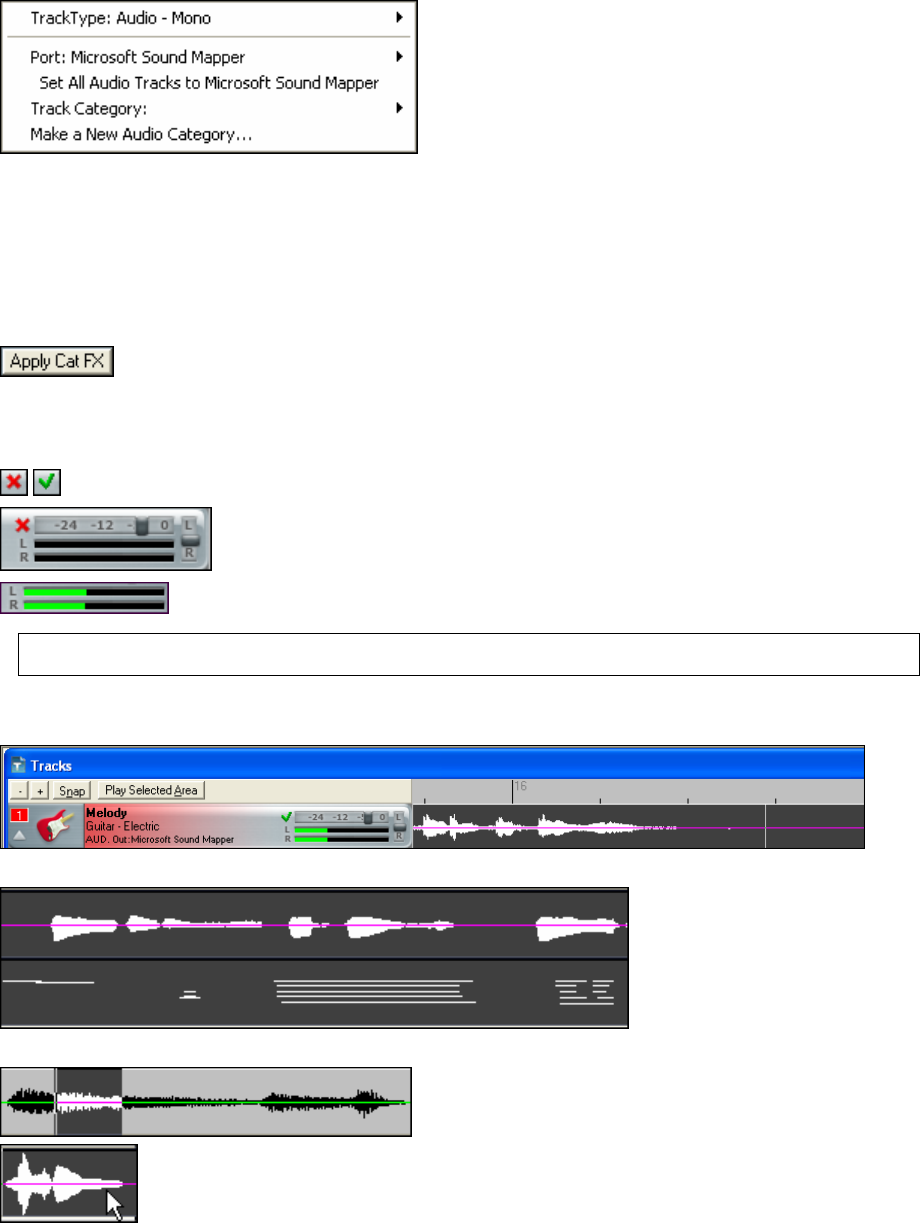
Chapter 13: Reference 243
If you right-click an audio track icon, the pop-up menu will have a Track Category item that lets you associate
icons (small pictures) with the track’s audio content.
So if an audio track is a guitar part, choose Guitar as the
track category to display a guitar icon. You can use factory
icons or your own custom user icons.
User pictures are located in RB_Pictures\Audio_Pictures\User_Pictures in the RealBand folder. You can add your
own user icon pictures to this folder and you can also associate your own effects groups with your custom audio
categories. To make a new user icon and, optionally, an effects group (*.tgs) to go with it, click on Make a New
Audio Category in the pop-up menu.
Most audio categories have associated effects groups (*.tgs). When you choose a track category, the Load Audio
Category Effects dialog opens giving the names of the effects and options for loading, activating, and customizing
them.
The [Apply Cat FX] button loads the Category Effects for the chosen track category. If you
previously chose not to load the
effects or to bypass them, you could use this button to apply the category effects to the track at a later time.
The Track Name field shows the track’s name, which is edited by right-clicking or double-clicking on the track
name field. Type the name and press Enter.
The Mute button lets you mute or unmute a track.
The Volume and Pan sliders let you adjust a track’s volume and pan settings without
having to go into the Mixer window.
Below the Volume slider are two VU level meters to give you a general idea of a track’s
playback level.
Note: If a track is an audio track, the meter display will be early by the size of the audio Output Buffer Milliseconds setting in
the Audio Settings dialog.
Track Overview Display
To the right of the track info panels, you’ll see the overview display.
This lets you view MIDI or audio data, and select sections for editing.
You can click and drag to highlight a section of the song for editing.
You can select a highlighted region by holding down the Ctrl key with the left mouse button
pressed, and drag the region to a new location in the song.
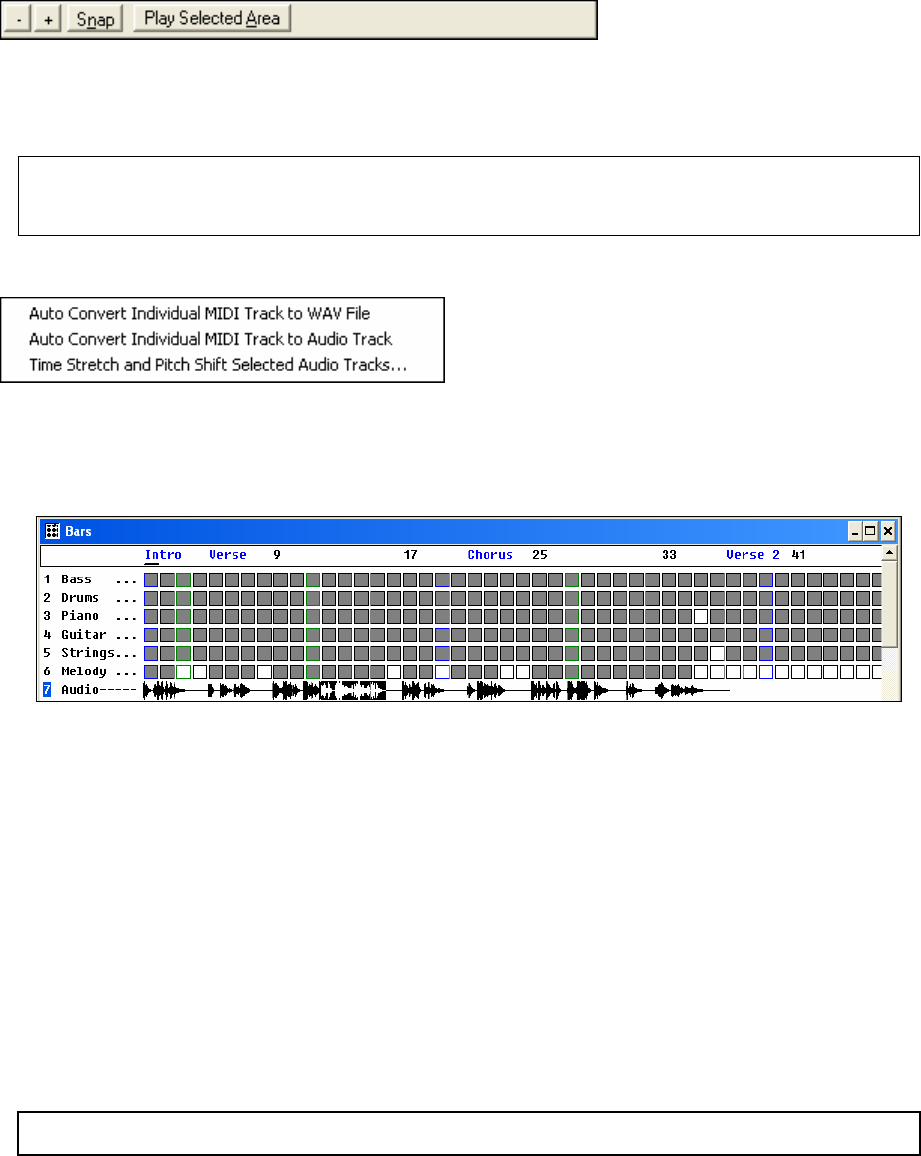
Chapter 13: Reference
244
Click on [Play Selected Area] to hear the highlighted section being edited.
The [-] and [+] buttons (upper far left corner of the Tracks window) let you zoom in or zoom out the overview
section.
The [Snap] button causes the time indicator to snap to the nearest beat when changing the time location or when
highlighting a region for editing.
Note: If you have selected non-consecutive multiple tracks (e.g., 2, 3, and 5) for editing, you should not click on the track
overview section area directly, since it will cause your track selections to be lost. If you only want to change the edit
From/Thru settings, then you can click on the timeline (immediately above the track overviews) with the mouse, and then
press the F7 key to set the From: location, and then click on the timeline again and press F8 to select the Thru: location.
With a right-click on any track in the Tracks window overview this pop-up menu opens. Individual MIDI tracks
can be auto-converted to wave files or audio tracks using a DXi or VSTi synth.
Time Stretch and Pitch Shift Selected Audio Tracks allows you to permanently change the duration and pitch of
individual audio tracks, or change the speed and pitch of the entire RealBand mix.
Bars Window
The Bars window offers an overview of multiple tracks of wave and MIDI data.
This window shows the bars (or measures) of the song. Bars that have MIDI data will be shaded, while bars without
any data are not shaded.
At the top of the window you will see either the bar numbers, markers, or both, depending on the chosen settings in
the Markers window Marker Options dialog. See the Markers window topic for more information on markers.
To the left of the window you will see the track names. If the whole track name doesn’t fit in this section you will
see it ending with “...” to indicate the name is actually longer than shown.
Bars that have MIDI data will be shaded. Bars that contain WAV data will be displayed as waveform overviews.
Bars without any data appear as “empty squares.”
Left click with the mouse to set the current time location. To ensure that a previously highlighted region is not
accidentally changed while setting the current time, hold down the Alt key when clicking the left mouse button.
You can use the mouse to select a region to be highlighted by clicking on a measure and dragging the mouse over
the measures you are interested in. This action highlights an area that can be affected by the commands in the Edit
menu.
The horizontal scroll bar located at the bottom of the Bars window allows you to scroll around through your entire
project.
Note: Scrolling through the Bars window won’t change the “current” (Now) location in your song. Instead, you should use
the scroll bar in the bottom left corner of the main screen’s toolbar to scroll to a new location.
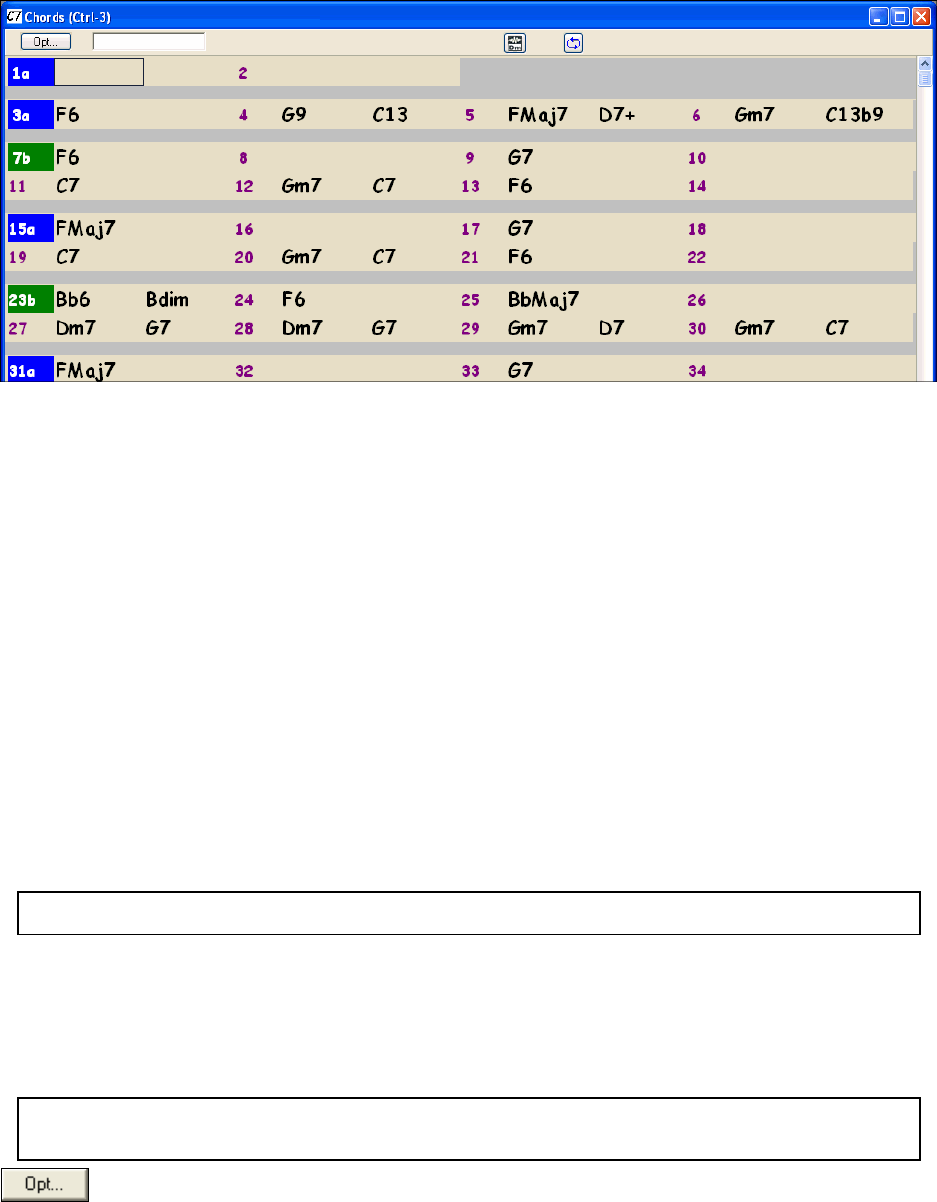
Chapter 13: Reference 245
Chords Window
The Chords window displays the chord symbols of a song. You’ll see the bars of the song displayed in rows. If a
bar contains chord symbols they will be displayed to the right of the bar number. An optional setting inserts a line
between each section of the song, as determined by the “a” and “b” part markers. There is another setting for the
thickness of the line.
When the song isn’t playing you can enter chord symbols by typing them. You enter chords in a similar manner to
the Notation window, except that the Chords window is always ready for chord entry if the song is currently not
playing.
Each measure is divided into Beat Groups. A Beat Group consists of two beats. If a song is in 4/4, then each
measure will contain two beat groups. The current beat group will have a rectangle drawn around it. You can type
two chords into the current beat group. For example if you type this: “c7,g7” (without the quotes) you’ll see the text
you’re typing in the white rectangular panel on the toolbar. If you then hit [Enter] you’ll see the C7 and G7 chords
appear within the current beat group, and the input rectangle will automatically advance to the next beat group.
When you’re in the middle of typing chord symbols, you can use the [Backspace] key to correct a mistake.
The ←Left Arrow and Right Arrow→ keys let you move the input rectangle to a different beat group without
entering chords. You can also click the mouse on a different beat group to move the input rectangle to a new
location.
If you’ve attempted to enter chords within a beat group, and you’ve pressed enter and chords don’t appear within
that beat group, this means that you have made a typing error and the text was not recognized. You should then use
the left arrow key to go back, and try again. It may be that the chord spelling is different than the spelling that
RealBand recognizes for that chord. Look in the list of chords for the spelling recognized by the program.
Tip: You can have the Chord Wizard name chords for you. Just record the chords on a blank track in RealBand then open
the Chords window and have the Chord Wizard interpret them.
You can highlight a range of cells for editing by clicking inside of a bar and then dragging the mouse to the inside of
another bar. For example, if you click in the middle of bar 1, and then drag the mouse to the middle of bar 8, you
will have highlighted bars 1 through 8. Shift+click will extend the highlighted area. This will select all the tracks
of the song for editing.
You can cut and paste sections of the song by using the Edit | Cut (or Edit | Copy if copying instead of cutting) and
the Edit | Paste command.
Note: If you wish to cut and paste chords, make sure the Chord Symbols checkboxes are enabled in the Cut (or Copy),
and Paste dialogs. If you don’t wish to cut and paste the track data (audio or MIDI data) then make sure to uncheck the
“Events” checkbox in the Cut (or Copy), and Paste dialogs.
The [Opt...] button launches the Chords Window Options dialog.
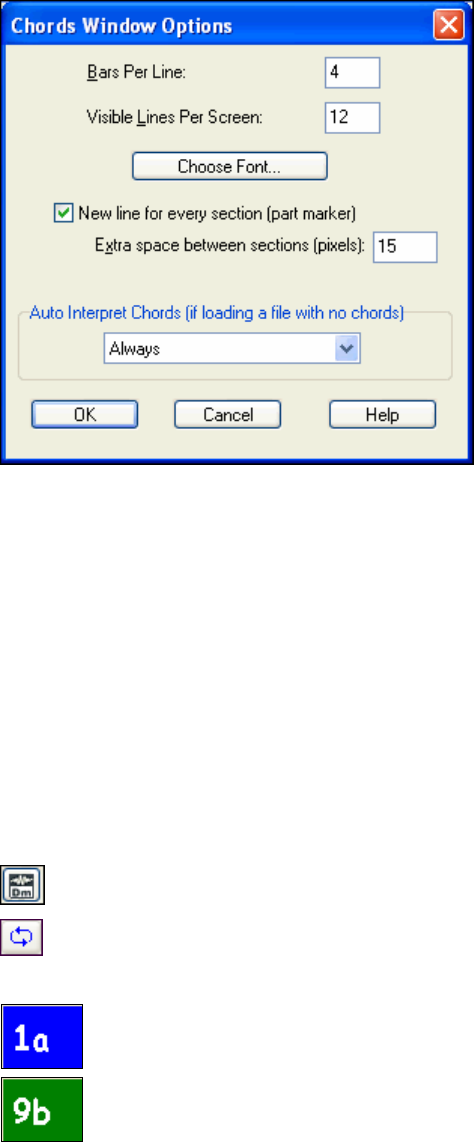
Chapter 13: Reference
246
The “Bars Per Line” setting determines how many measures will be drawn per line in the Chords window.
The “Visible Lines Per Screen:” setting determines how many lines (rows) of chords are will be visible per screen.
Each screen will always have 125 lines per screen in the Chords window, but the Visible Lines Per Screen setting
controls how many lines will be visible without scrolling.
The [Choose Font…] button lets you select a font for the Chords window. The font’s overall size will be determined
by the amount of Visible Lines Per Screen, as well as the height of the Chords window.
“New line for every section (part marker)” inserts a line between each section of the song based on the “a” and “b”
part markers. When this feature is used each section starts on a new line, similar to paragraphs in a book, making
the chords easier to follow.
“Extra space between sections (pixels)” sets the width of the line between sections between 0 and 100 pixels.
The “Auto-Interpret Chords” setting is useful in a situation where a file is loaded, but the file doesn’t already contain
any chord symbols. If you set this to “Always,” then RealBand will always attempt to automatically interpret the
chord symbols using the Chord Wizard. If set to “Ask First,” then RealBand will ask before attempting to
automatically interpret chord symbols. If set to “Never,” then RealBand will just load the file without attempting to
figure out the Chord Symbols.
This button launches the Audio Chord Wizard, where you can automatically figure out the chords from
audio files (WAV, MP3, WMA, SEQ) and write them to the Chord window.
If you hold the Ctrl key and press the Endless Loop button on the toolbar, RealBand will play the
highlighted section in an endless loop. If no section is highlighted then the entire song will be looped.
Part Markers
If you click directly on a bar number, the number will change into a Part Marker. There are two
kinds of part markers: an “a” part marker (blue), and a “b” part marker (green). Clicking once on the
bar number that currently has no part marker will set the bar to “a” part marker. Clicking again will
set it to “b” part marker, and clicking again would set the bar back to having no part marker.
With the “New line for every section (part marker)” setting enabled, a line will be inserted between
each section that has been marked with an “a” or “b” part marker.
You can toggle the part marker type for a measure during playback. In addition, you can also toggle a part marker
for the current measure by pressing the M key on your keyboard when the Chords window is currently active.
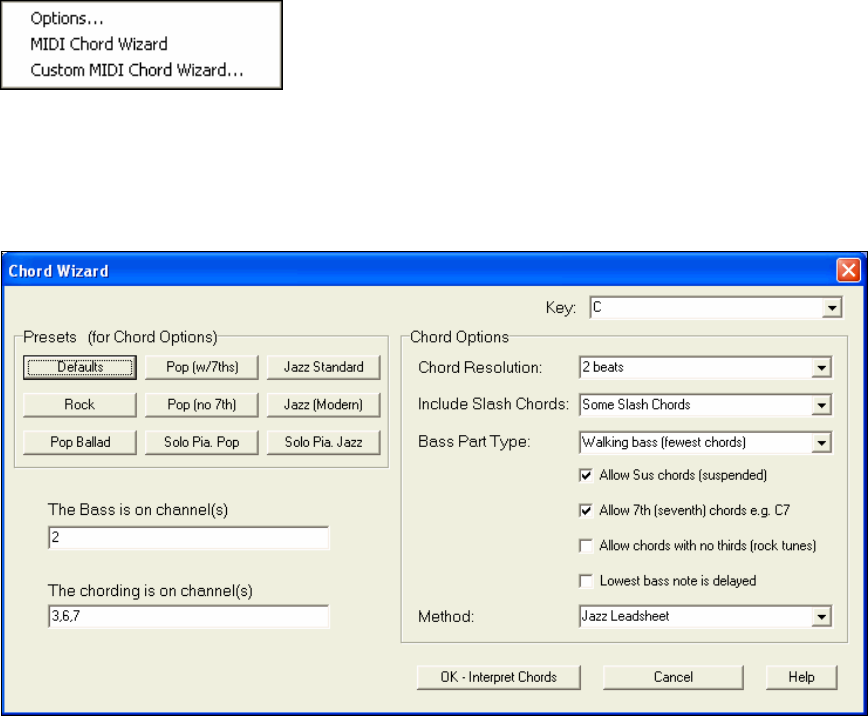
Chapter 13: Reference 247
Chord Wizard
Right click in the Chords window to open this menu with Chord Wizard
options.
If you select MIDI Chord Wizard the program will automatically detect the chords in the song. If you’ve
highlighted a range of bars, RealBand will only attempt to detect the chords for the highlighted range. If no bars are
highlighted, RealBand will attempt to detect the chords for the entire song. You can use the Undo command if you
want to undo this.
The Custom MIDI Chord Wizard will launch the Chord Wizard dialog, which lets you customize the settings for
chord detection.
Chord List
Chords listed here are based on C, but any valid chord letter (A-G) can be used.
(Major chords)
C, CMAJ, C6, CMAJ7, CMAJ9, CMAJ13, C69, CMAJ7#5,
C5b, Caug, C+, CMAJ9#11, CMAJ13#11
(Minor chords)
Cm, Cm6, Cm7, Cm9, Cm11, Cm13, Cmaug, Cm #5, CmMAJ7
(Half Diminished)
Cm7b5
(Diminished)
Cdim
(Dominant 7th chords)
C7, 7+, C9+, C13+, C13, C7b13, C7#11, C13#11, C7#11b13, C9,
C9b13, C9#11, C13 #11, C9#11b13, C7b9, C13b9, C7b9b13, C7b9#11,
C13b9#11, C7b9#11b13, C7#9, C13#9, C7#9b13, C9#11, C13#9#11, C7#9#11b13, C7b5, C13b5, C7b5b13, C9b5,
C9b5b13, C7b5b9, C13b5b9, C7b5b9b13, C7b5#9, C13b5#9, C7b5#9b13, C7#5, C13#5, C7#5#11, C13#5#11,
C9#5, C9#5#11, C7#5b9, C13#5b9, C7#5b9#11, C13#5b9#11, C7#5#9, C13#5#9#11, C7#5#9#11, C13#5#9#11
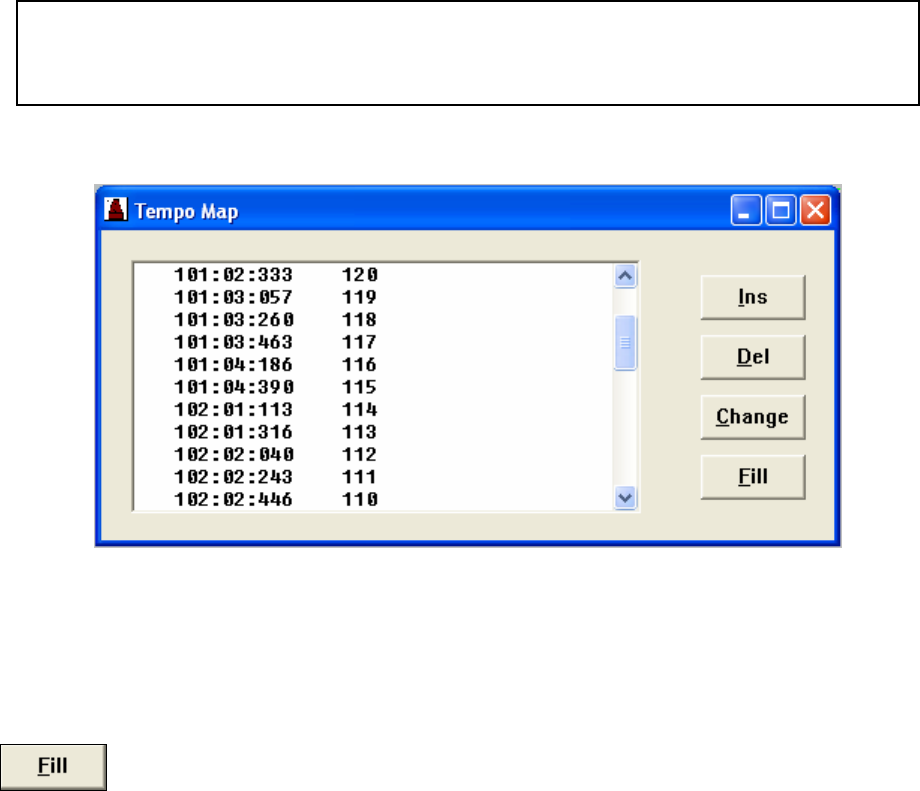
Chapter 13: Reference
248
(Sustained 4 chords)
Csus, C7sus, C9sus, C13sus, C7susb13, C7sus#11, C13sus #11, C7sus#11b13,C9susb13, C9sus#11, C13sus #11,
C9sus#11b13, C7susb9, C13susb9, C7susb9b13, C7susb9#11, C13susb9#11, C7susb9#11b13, C7sus#9, C13sus#9,
C7sus#9b13, C9sus#11, C13sus#9#11, C7sus#9#11b13, C7susb5, C13susb5, C7susb5b13, C9susb5, C9susb5b13,
C7susb5b9, C13susb5b9, C7susb5b9b13, C7susb5#9, C13susb5#9, C7susb5#9b13, C7sus#5, C13sus#5,
C7sus#5#11, C13sus#5#11, C9sus#5, C9sus#5#11, C7sus#5b9, C13sus#5b9, C7sus#5b9#11, C13sus#5b9#11,
C7sus#5#9, C13sus#5#9#11, C7sus#5#9#11, C13sus#5#9#11.
Notes on entering chords:
- It is not necessary to type upper or lower case; the program will sort this out for you.
- Any chord may be entered with an alternate root (slash chord), e.g., C7/E = C7 with E bass.
- Separate chords with commas to enter 2 chords at a time, e.g., Dm7, G7.
Tempo Map
The Tempo Map is a list of all the tempo changes that occur during the course of the song.
Tempo Map using Fill feature for a ritard.
The [Ins], [Del], and [Change] buttons shown above may be used to insert, delete, and change entries in the tempo
map.
You may also insert tempo changes by pressing the computer’s Insert key. You can change the tempo of the
currently selected entry by pressing Enter key or by double mouse clicking over the desired entry. The Delete key
can be used to delete entries from the map.
If there is only one entry in the map you can’t delete it since at least one entry in the map is required in each project.
The Tempo Map window also has a [Fill] button that enables you to insert a series of ascending or
descending tempo changes, highly useful for ritards and accelerandos.
The “From:” and “Thru:” fields displayed in the Fill Tempo Changes dialog allow you to specify the beginning and
ending locations where you want the tempo changes to occur. The “Start Value” and “End Value” fields let you
choose where, in terms of tempo, the fill will begin and end.
For example, if the start value is 100 and the end value is 90, a series of tempo changes starting at 100 and
decreasing down to 90 will be inserted through the bars beginning with the “From:” location and ending at the
“Thru:” setting.
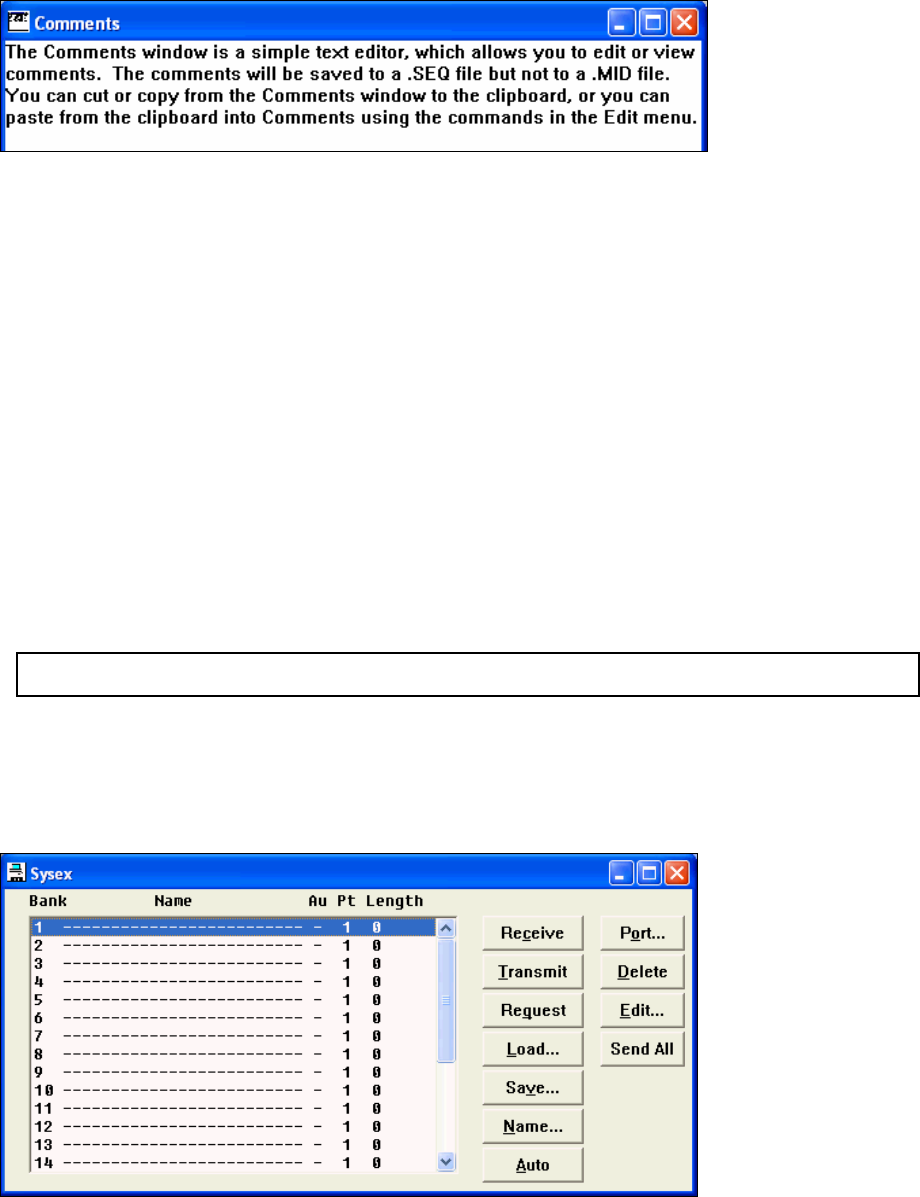
Chapter 13: Reference 249
Comments Window
The Comments window provides a space for you to keep notes of your project.
The following is a list of the editing commands:
Home Go to beginning of line.
End Go to end of line.
^Home Go to beginning of text.
^End Go to end of text.
Up Cursor Up.
Down Cursor Down.
Page Up Up one page.
Page Down Down one page.
Right Cursor Right.
Left Cursor Left.
^Right Cursor Right one word.
^Left Cursor Left one word.
Ins Toggle Insert Mode.
Del Delete text.
Ctrl+X Cut text to clipboard.
Ctrl+Insert Copy text to clipboard.
Shift+Insert Paste text from clipboard.
Note: Command shortcuts such as pressing the SPACE bar to play a song will be temporarily disabled while working in the
Comments window.
SysEx Window
The SysEx window is actually a built-in system exclusive (SysEx) librarian.
This allows you to transmit or receive any SysEx data. You can also load and save MIDIEX compatible SysEx
files. The SysEx librarian can hold up to 24 banks of system exclusive data. Since the librarian stores all data on
disk as opposed to memory, the size of the SysEx data is limited only by the amount of free disk space available.
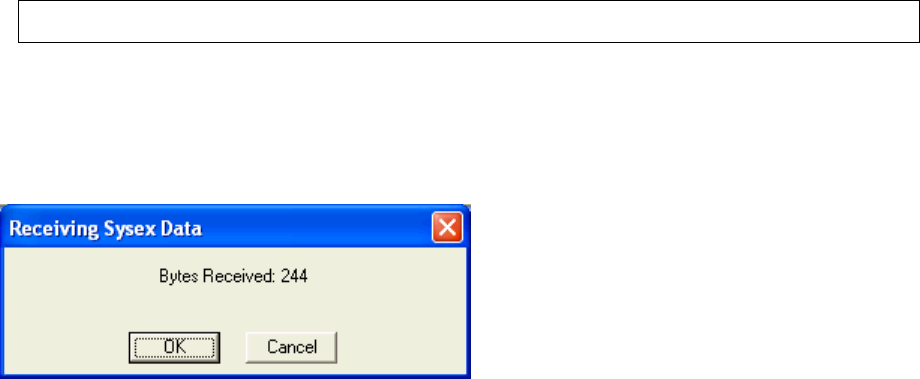
Chapter 13: Reference
250
SysEx MIDI Events - you can insert System Exclusive data directly into a MIDI track as MIDI events in the
Event List window. You can record SysEx data in real time and when you keep a take, the SysEx data will be added
to a MIDI track as SysEx events. You could also load SysEx data into a SysEx MIDI event by receiving SysEx data
from your synth, or by loading the SysEx data from a file. SysEx MIDI events can also be edited.
Note: Although RealBand allows SysEx MIDI events to be huge in size we recommend limiting real time SysEx MIDI
events to 128K or less to prevent a song from stuttering during playback.
Receive: This command enables the ability to receive a data dump from your synthesizer to the currently selected
bank. When you select this feature a message box will pop up to indicate that the sequencer is ready to receive the
SysEx dump.
After you initiate this command you can press the appropriate buttons to dump the data from your synth. All the
data received will be stored in the current bank in the program. A dialog box will show the progress of the SysEx
dump, as shown below:
When your synth is finished dumping the data press the [OK] button to exit this window.
Transmit: Sends the SysEx data in a given bank out via MIDI. A dialog box will inform you that a send is in
progress.
If you wish to cancel a transmission after it has started press the Cancel button and the transmission will be stopped.
Request: This option allows you to initiate a SysEx dump request by sending the request to your synthesizer via
MIDI. Simply choose an instrument from the available names and press the Enter key. You may be prompted for
the channel or patch numbers if the instrument requires them. After sending the request on the MIDI Out port the
program will then proceed to receive any data that is sent from your synth automatically –as if the Receive
command had been issued.
Load: This command will load a MIDIEX compatible SysEx file into the currently selected bank.
Save: This command will save the currently selected bank on disk in MIDIEX compatible format.
Name: Provides you with the option to choose the name for a current bank of SysEx data.
Auto: When this feature is enabled the bank will automatically be transmitted via MIDI when loaded from a .SEQ
file. The letter “A” will appear to the right of the bank name if the bank is set to be Auto-Transmitted.
Port: This setting determines the output port through which the SysEx data will be sent out via MIDI. If the
selected port is greater than the number of ports available the data will be sent out the highest available port. For
example, if the port setting for a bank is set to 2 and there is only one MIDI output port installed, the SysEx data in
the bank will be sent out through MIDI Port 1.
Delete: This simply deletes the SysEx data from a currently selected bank.
Send All: This transmits all banks that have SysEx data in them out via MIDI.
Edit: For those who wish to manually edit the bytes of a selected bank, you can also type in this SysEx data as long
as the bank currently has no data in it. A dialog box will pop up in which you can manually edit the bytes. The
bytes are edited as hexadecimal numbers separated by spaces. The SysEx data will look something like this: F0 41
10 42 12 40 11 02 10 1D F7. Each SysEx message should start with F0 and end with F7.
The following is a list of the editing commands available for you to use when editing SysEx data:
Home Go to beginning of line.
End Go to end of line.
^Home Go to beginning of text.
^End Go to end of text.

Chapter 13: Reference 251
Up Cursor Up.
Down Cursor Down.
Page Up Up one page.
Page Down Down one page.
Right Cursor Right.
Left Cursor Left.
^Right Cursor Right one word.
^Left Cursor Left one word.
Ins Toggle Insert Mode.
Del Delete text.
Ctrl+X Cut text to clipboard.
Ctrl+Ins Copy text to clipboard.
Shift+Ins Paste text from clipboard.
If you save a song to a .SEQ file the SysEx data will be saved within the file. However, there are a few differences
in the way SysEx data is saved to MIDI files, since they must be saved as SysEx meta events. For example, if you
save a file as a .MID the SysEx information will be saved, but the banks won’t retain their individual names when
the .MID file is loaded back into RealBand.
If a bank has multiple SysEx messages in it (such as a bulk dump), each individual SysEx message is saved
separately into a MIDI file. If more than the maximum number (24) of SysEx meta events are read from a MIDI file
into RealBand the additional banks will be added to bank number 24.
Tips: Use the “Send All” feature to send all the banks out via MIDI.
If you save a file called $OPTIONS.SEQ, RealBand will automatically send any SysEx banks with “Autosend” (“A”) enabled
in that file. This is useful if you want to have default SysEx data sent to your synth or sound source each time the program
is started.
Dump Request Macros
A Dump Request Macro (DRM) allows you to initiate a data dump of your synth from the program instead of
having to press buttons on your synth. A DRM file contains the name of a synth (names appear in a pick window
when you select the Initiate Dump Request command), and the appropriate packet of bytes can be sent to your
synth, which will instruct it to auto-send a data dump.
When you use the Initiate Dump Request command, RealBand reads the dump request macros from a binary file
called RB.INS. The binary file RB.INS is converted from a text file called RB.DRM, which contains the macro
information in ASCII format.
If you have a synth that isn’t listed in the RB.DRM file it is possible for you to manually add your own macro for
your synth. These macros are derived from the System Exclusive Implementation information in your synthesizer
manual.
Guitar Window
The virtual guitar fretboard displays the notes of any track or group of MIDI channels.
The virtual Guitar window displays notes (as green squares for fretted notes, and blue squares for bends) that are
played in a selected track or by the MIDI Thru channel on the virtual guitar fretboard.
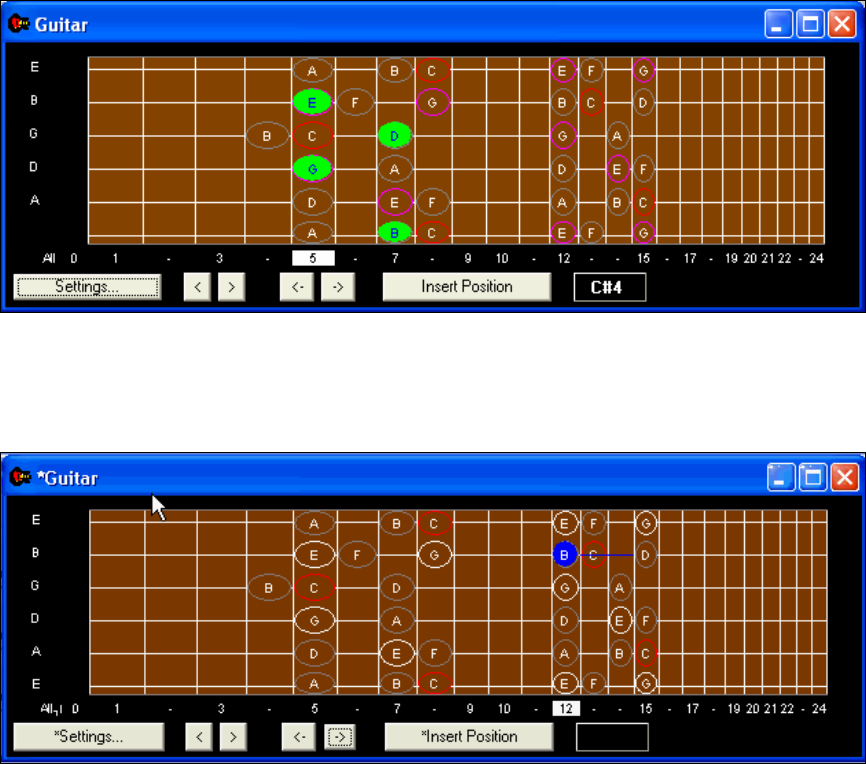
Chapter 13: Reference
252
Pitch bends are displayed in real time as blue lines extending in the direction of the bend. If the direction is up, then
line extends higher on the neck than the original note. If the direction is down (such as if a pull-off were executed),
then the bend extends lower on the neck.
The pitch bends, shown as horizontal blue lines, will move horizontally along the string in real time illustrating the
extent of the pitch bend.
Example of a MIDI pitch bend from a B to a C#
This virtual instrument works in the same fashion as the piano keyboard display. However, given that there are six
separate strings on the guitar fretboard – and that many notes and chords can be played several different ways on the
guitar, there are a few additional settings unique to this instrument.
Just below the fretboard you will find position markers. The current position setting of the guitar is highlighted in
reverse video. The positions range from 0 (open) to 24 (24th fret). There is an additional position called “All,”
where the MIDI notes will be displayed in all possible ways on the guitar. When the position is set to any other
range (e.g., from 0 to 24), the notes will be displayed in that position, unless they are outside the range of a given
position, in which case they will not be shown. You can change the position simply by clicking on any position
marker (e.g., 1, 3,5,7,9, etc.).
The [Insert Position] button causes the currently selected position to be embedded into the track at the “Now:”
location. When you play back a track with embedded position information the guitar position will correspondingly
change when the position event is encountered. A position event is stored in the track as a MIDI Controller
parameter (number 84) with a value ranging from 0-24 (indicating positions 0-24). A controller #84 value of 127
indicates the “All” position.
The ability to insert position information into a track is especially useful for properly displaying a track that was
recorded by a MIDI guitar controller with all six strings set to transmit over one channel. By manually inserting this
position information you can coax the guitar fretboard into displaying the notes in the position they were originally
played, instead of having them display in all possible positions.
Try recording guitar music on a MIDI piano-keyboard, then insert the appropriate position information into the
track, and watch the virtual guitar display the notes as if they had been played on a guitar.
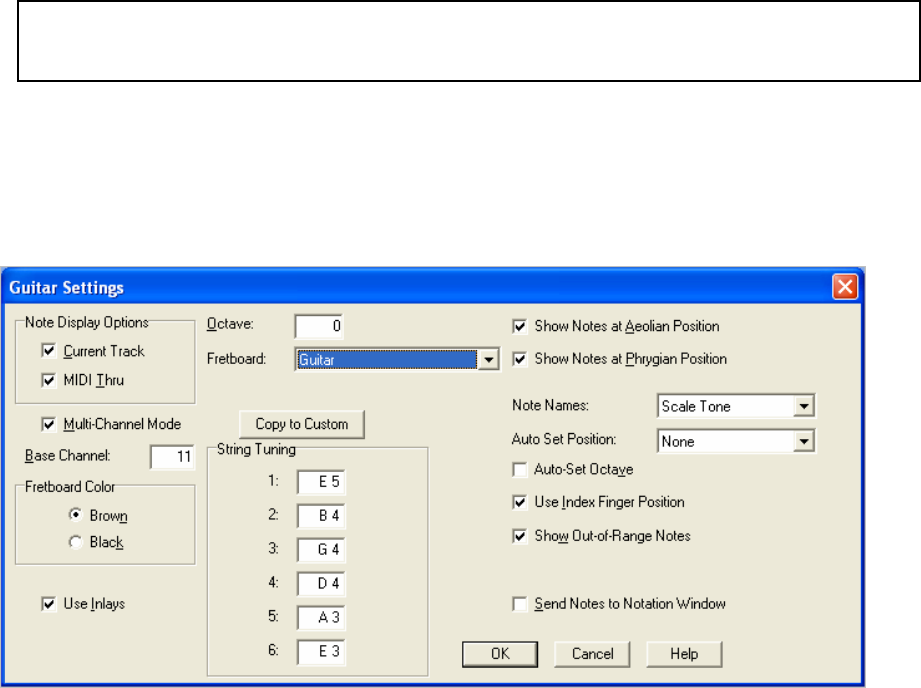
Chapter 13: Reference 253
Of course, the best way to record guitar music is with an actual MIDI Guitar Controller set to transmit over 6
separate MIDI channels (e.g., 11-16).
The Note Indicator is a white square located to the right of the [Insert Position] button. When you pass the mouse
cursor over the guitar fretboard the name of the note that the cursor comes into contact with is shown in this white
box. This can be used for getting to know the note locations found on the guitar.
The [<] backup and advance [>] buttons allow you to advance forward or go backward by one note at a time. The
program will step-play the note that you have advanced or backed-up to. You can stop the note from sounding by
advancing or backing-up to another note, or by pressing the [Stop] button. This feature is available so that you can
hear and see a sequence of notes one-step-at-a-time. The keyboard shortcuts to backup and advance are the
Shift+Left Arrow and Shift+Right Arrow keys.
The [←] backup group and advance [→] group buttons work in a similar fashion as the previously mentioned
backup and advance buttons, except that these button allow you to see and hear a group or cluster of notes. Notes
that are within a certain distance from each other (automatically determined by the program) are considered to be
such a group/cluster of notes.
Keyboard shortcuts for the backup and advance group feature are the Ctrl+Left Arrow and Ctrl+Right Arrow
keys. Additional hot keys available for this feature are the [0] and [.] numeric-pad keys, which can be used even
when editing or viewing notation in the Notation window.
The [Settings] button offers a dialog that can change the following settings applicable to the Guitar window:
The Note Display Options checkboxes determines whether the Guitar window will display notes on the
current/highlighted track (i.e. recorded MIDI data), or the notes echoed out via the MIDI Thru port (i.e. live MIDI-
Controller data).
Tip: When the Multi-Channel mode is enabled (by default), and the MIDI channel of a note is within the guitar channel
range (e.g., Channels 11-16 by default), the program assumes that notes within the specified channel range fall on a
particular string. For example, in this case a note on MIDI Channel 11 will be considered to be on String Number 1. A
note won’t be displayed at all if it is too high or too low for a particular string (e.g., the “E” string).
The purpose of multi-channel mode is so that when you play back a track that was recorded by a MIDI guitar
controller in mono mode the notes will correctly display the notes in the virtual guitar. If a given note’s MIDI
Channel falls outside the channel range (e.g., Channel 9), the program will attempt to use the position information
instead to display the note correctly.
The Base Channel determines the guitar channel range when in multi-channel mode. For example, with a Base
Channel of 1 the channel range will be “1-6.” The highest possible base channel is 11 (the default), making the
range “11-16.”
The Fretboard Color radio buttons let you choose between Brown and Black for the color of the guitar fretboard.
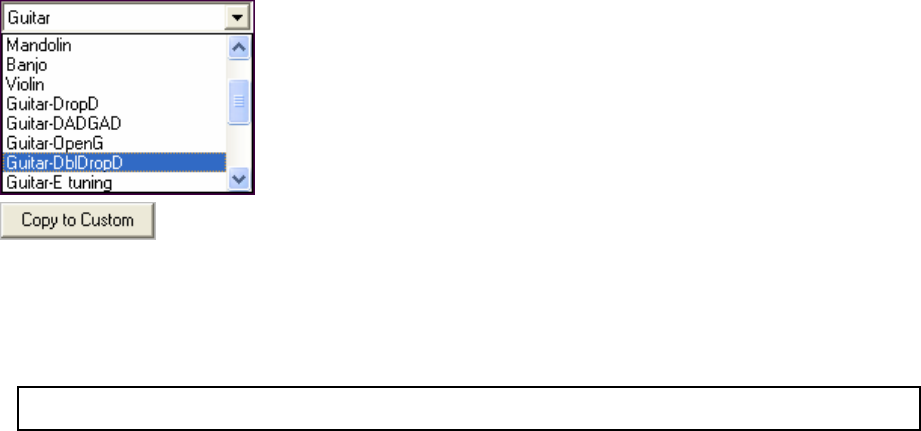
Chapter 13: Reference
254
The Octave determines the range of notes that are displayed on the guitar fretboard. When set to 0, the fretboard
will display notes normally. When set to “-1” for example, the guitar window can be used to correctly display bass
lines instead.
The Guitar window can display fretboards for guitar, bass, ukulele, mandolin,
and banjo. Select the instrument fretboard from the Fretboard combo box.
Alternate tuning presets, such as Drop D, DADGAD, Open G, etc. are supported
for the Guitar window and Notation Tablature.
The Custom Tuning setting for the Guitar window lets you specify the number of
strings (4 through 6) and the tuning of each string. Note: This custom setting
does not support Banjo.
Use this button to copy the current string settings as a starting point for a custom tuning.
When you press OK, RealBand will save your custom settings, and then they will be recalled if you later switch to
another fretboard and then return to the custom fretboard.
The String Tuning setting determines the range of notes that are displayed on each of the six strings. The default is
Standard E Tuning. You can change the note value corresponding to the open note for each of the six strings. The
guitar fretboard will appropriately display the notes as if they are played on a real guitar set to an alternate tuning.
Tip: The strings must be tuned from highest to lowest. For example, string number 1 must be tuned higher than string
number 2.
The Send Notes To Notation Window setting, when enabled, offers the ability to insert a note directly into a
Standard Notation window by mouse clicking on the appropriate note position on the virtual fretboard. Notes will
be inserted at the current time/location of the opened Notation window.
The Show Notes at Aeolian Position setting, when enabled, will show guides on the guitar fretboard based on the
current key of the song. For example, in the Key of C the Aeolian Position can be thought of as an A-Minor scale at
the 5th Position (Aeolian Mode), with the root of the minor scale being on the 6th string of the guitar. Roots of the
relative major scale are shown with orange circles.
The Show Notes at Phrygian Position setting, when enabled, will show guides on the guitar fretboard based on the
current key of the song. For example, in the Key of C the Phrygian Position can be thought of as an A-Minor scale
at the 12th position, with the root of the minor scale being on the 6th string of the guitar. We’ve named this the
Phrygian Position since, in the Key of C, if you start playing a scale beginning at the E note on the 6th string at the
12th position it is actually a Phrygian Mode scale. You can also think of it as just another minor scale beginning on
a 5th string. The roots of the corresponding major scale are shown with an orange circle.
The Note Names combo lets you choose between several options that affect the display within the circular guides on
the fretboard. The default option is “Scale Tones,” which will display all the tones of the Aeolian or Phrygian scale.
Other options are “None” (no notes shown), “Root Only,” (just the major scale root notes shown), and “Chord
Tones” (just the major triad tones).
The Auto Set Position combo, if you chose to make use of this setting, will cause the program to automatically set
the guitar fretboard’s current position to either the Aeolian or Phrygian position of the current key. By default it is
set to “None” which means that the fretboard’s current position stays unchanged.
The Auto Set Octave setting, when enabled, will cause RealBand to automatically set the guitar octave by analyzing
the MIDI data in the current track of the song.
The Use Index Finger Position setting when enabled causes the guitar display to use the “index finger” to play
notes that are one fret outside of the normal position, instead of the little finger.
The Show Out-of-Range Notes setting, when enabled, will allow any note to be displayed on the guitar, regardless
if it is the range of the guitar or not.
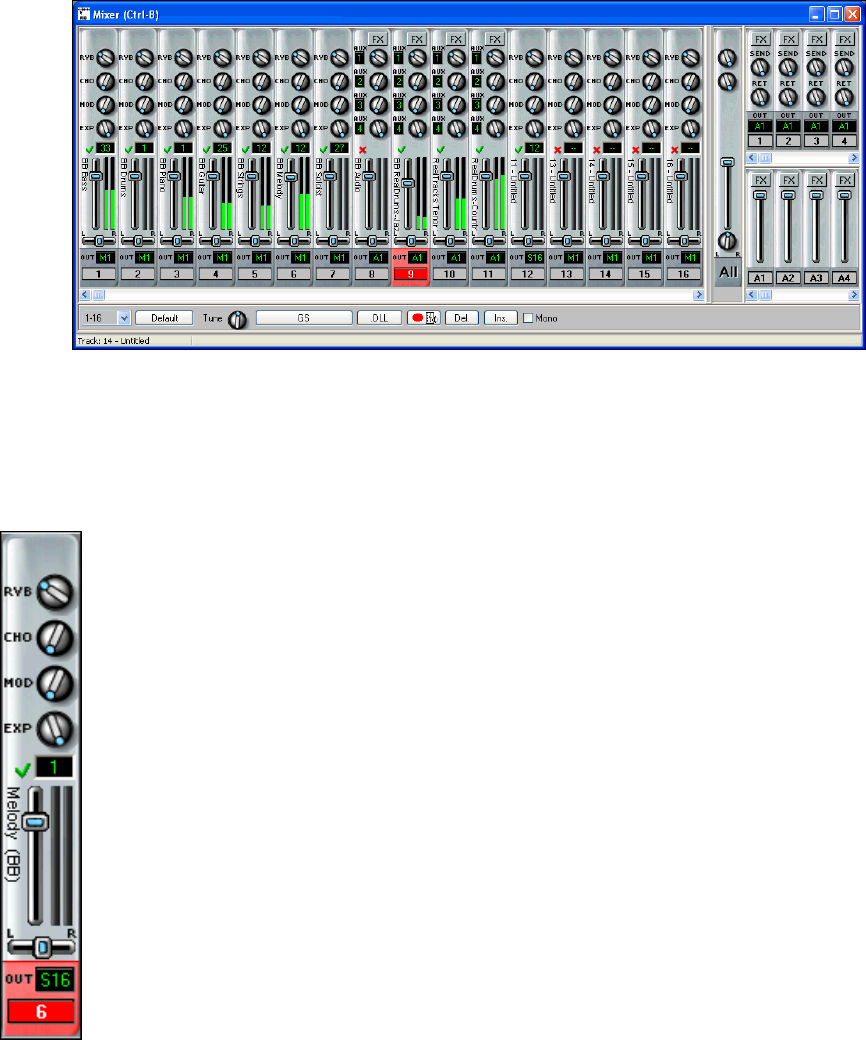
Chapter 13: Reference 255
Mixer Window
The Mixer window provides real time control of effects and track volumes. You can launch it by typing
ALT+WÆ8.
Note that there are sliders for all 48 tracks, 8 auxiliary effects (Aux) busses, and a total of 16 audio output ports or
audio subgroups.
The Mixer window has stereo VU meters for each track, smoothly responsive sliders and knobs, individual track
mute buttons, and a scrollable track strip.
MIDI Track Strip
This is the Mixer strip for a MIDI track.
- control knobs for Reverb, Chorus, Modulation, and Expression effects have a smooth “real
feel” response. Right-click on these control knobs to type in an exact controller value.
- click on the green checkmark or red “x” above the fader to turn tracks on and off, i.e., to toggle
between active and mute states.
- right-click on the sliders to type in an exact fader level.
- click on the patch number box to see the Select Patch dialog where the name of the patch will
be highlighted. You can select a new patch from this dialog.
- the track name (from the Tracks window) is shown vertically to the left of the Volume slider.
- each track strip has its own stereo VU meter.
- the LR stereo pan slider also has a smooth, even response with the option to right-click and
type in an exact value.
- click in the “Out” box to assign the track to a MIDI output port. DXi and VSTi synths are
identified with an S. For example, the default DXi synth or VSTi synth is S16.
- selected tracks are highlighted in red or yellow, as in the Tracks window.
Audio Track Strip
This is the Mixer strip for an Audio track.
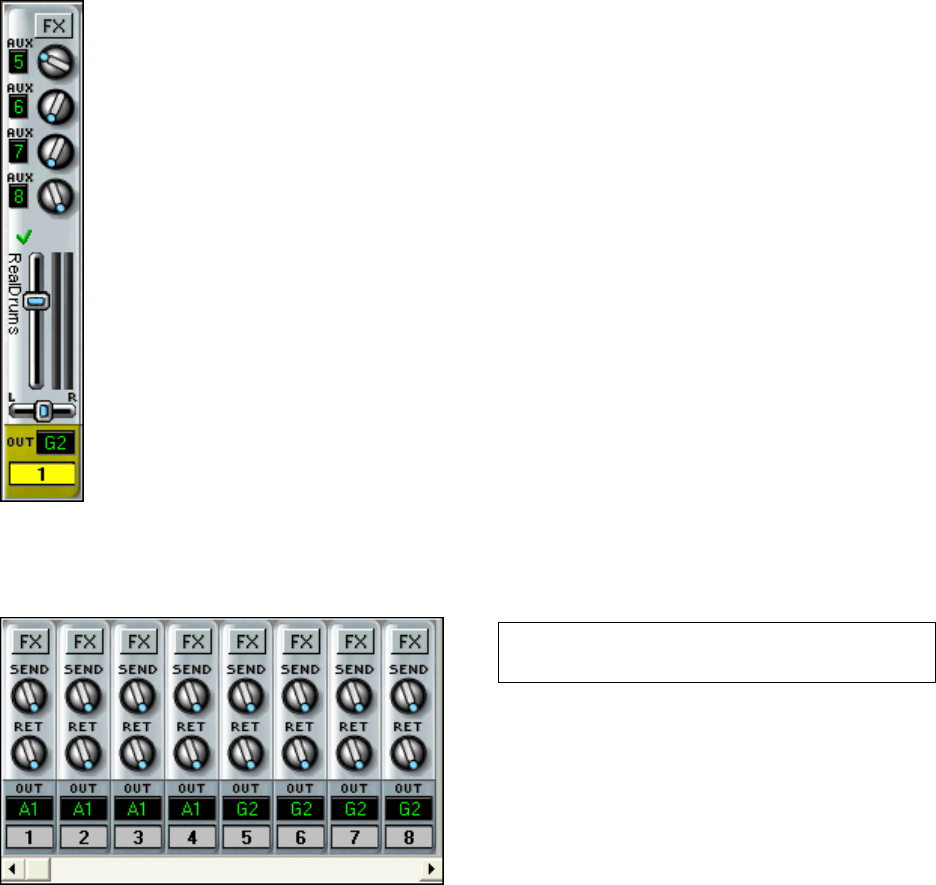
Chapter 13: Reference
256
- \the [FX] button opens the DirectX/VST Window where up to four real time effects can be
inserted into the track.
- each track has four auxiliary effects sends that can be assigned to any four of the eight
available Aux busses. Each Aux bus can have up to four chained effects.
- the rotary knobs set the send level to each Aux bus. Right-click on a knob to enter an exact
level for the send.
- use the green checkmark or red “x” above the fader to turn the track on and off, i.e., to toggle
between active and mute states.
- the track name displays vertically to the left of the volume slider. The track name is entered in
the Tracks window.
- right-click on the volume slider to enter an exact fader level.
- each track strip has its own stereo VU meter.
- the LR stereo pan slider also has a smooth, even response with the option to right-click and
type in an exact value.
- tracks can be assigned to audio subgroups using audio output ports that do not currently have a
driver port assigned. This track is assigned to subgroup 2.
- when using audio subgroups the Aux busses should also be sent to that subgroup, so auxiliary
busses 5, 6, 7, and 8 would be assigned to Subgroup 2 (G2) in this example.
Aux Busses
RealBand has 8 auxiliary busses, with the ability to use up to 4 at a time per track. Having more Aux busses means
that you can add more real time audio effects to your song efficiently.
Note: This panel is scrollable, so if you don’t have room
on the screen for all eight Aux bus strips you can use the
◄ ► scroll arrows to get to the one you want.
In this example, Aux busses 1 through 4 are assigned to
the audio output port, A1, and busses 5 through 8 are
assigned to an audio subgroup, G2.
You could have up to 16 Aux effects per track since each track can use up to 4 auxiliary busses with up to 4 effects
plug-ins per bus. This is in addition to the 4 effects that can be chained on each track’s FX insert.
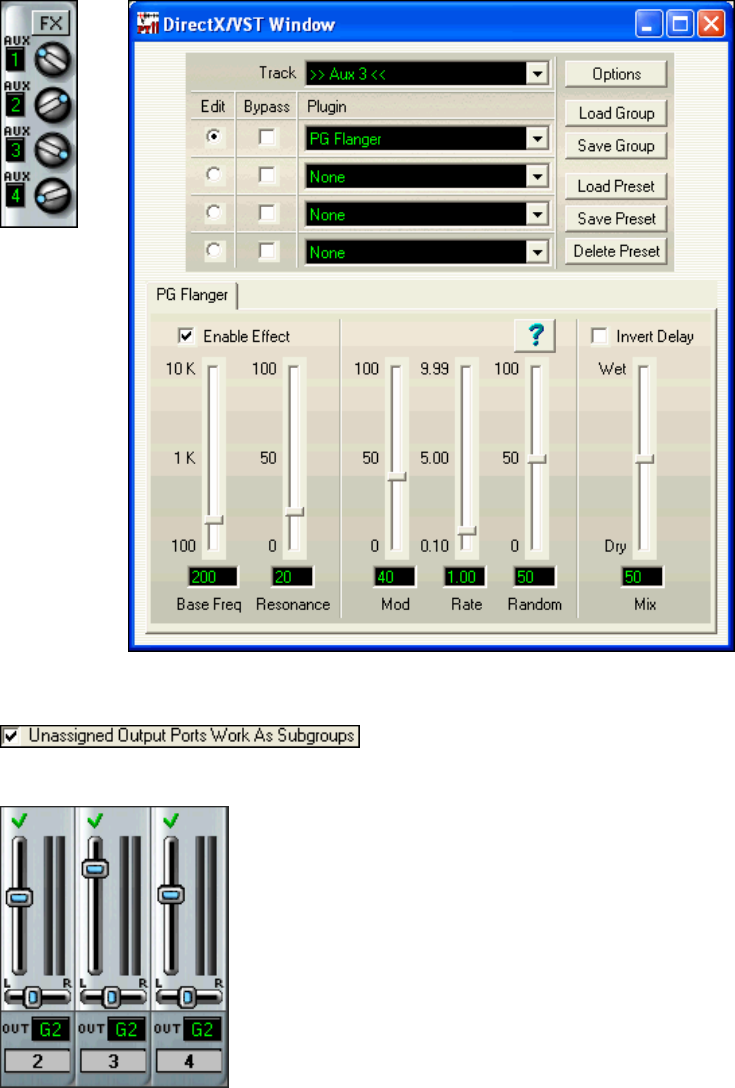
Chapter 13: Reference 257
Audio Subgroups
Unassigned Outputs Work As Subgroups
When this checkbox is enabled in the Audio dialog, any audio output
ports that do not currently have a driver port assigned to them will function as subgroups. A subgroup is a bus or
signal path that gives you the ability to control several tracks as a group.
Suppose you only have one audio Output Driver port installed in RealBand and
you’ve enabled the “Unassigned Outputs Work As Subgroups” checkbox. Audio
Output Ports 2 through 16 will now function as subgroups.
If you were to then set the output ports of tracks 2, 3, and 4 to G2 (i.e., port 2,
which is now called Subgroup 2), and you were to adjust the volume of Subgroup 2
in the mixer the same way you do for output ports, this will affect the volume of all
3 tracks as a whole.
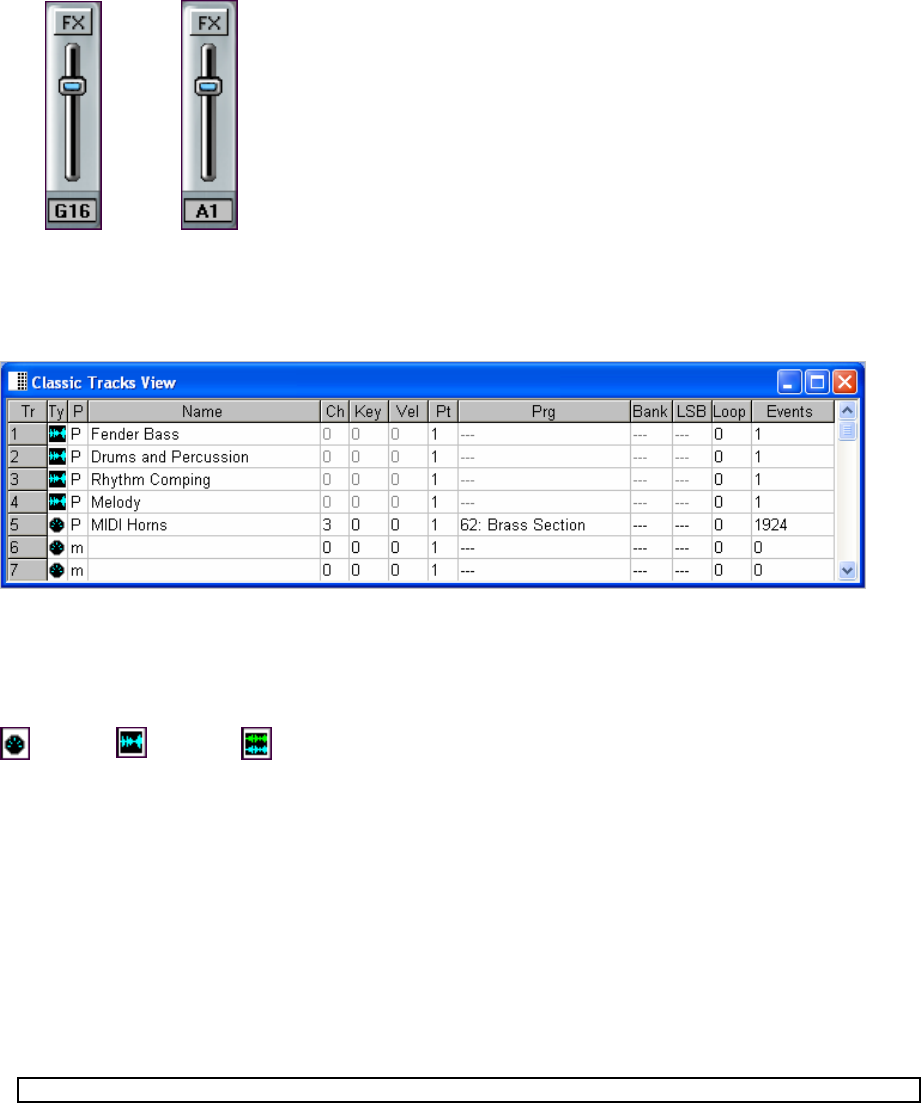
Chapter 13: Reference
258
Output Port FX Inserts
Audio Subgroup Audio Output
Audio subgroups can be assigned to audio output ports that do not currently have
a driver port assigned to them. These audio subgroups are used to apply real time
effects to a specific group of tracks, with a chain of up to four effects on each
subgroup.
The final audio output also has an FX insert bus that allows up to four effects to
be applied to the final mix.
Classic Tracks View Window
This is the original tracks window from PowerTracks Pro. Settings made in the Classic Tracks View will also
affect the Tracks window and the Mixer.
Selected Indicator: The first column in the track view indicates whether or not a track is selected/highlighted. If
a track is selected its number will be highlighted in the same color as the window caption (top part of a window),
and an “input rectangle” will appear over the “current” edit field.
Ty (Type) The type field determines the track type. There are three types: MIDI, mono audio, and stereo audio,
each with its own icon.
MIDI
Audio
Stereo Audio
You can’t change the track type if a track already has data in it.
P (Play status) The play status field shows the current status of a track. A track can be in one of two states: play (P),
or muted (m).
Tracks with a “play” status will be heard. Muted tracks will not be heard, but the data will still be processed, so that
you can quickly switch the track back into P status at any time during playback or recording.
Editing Fields within the Tracks window: The following fields may be edited by moving the cursor over the
particular field you wish to edit and then pressing ENTER, or by double-clicking the mouse while over the field.
Numeric fields may be increased or decreased by pressing the +/- keys.
Track Name: The name of a track.
Events: The number of events in a track.
Note: The following settings affect MIDI tracks only and don’t affect .WAV audio tracks:
Ch: Forced MIDI Channel. When not set to 0 all events in a track will be sent out over the selected channel.
Key: Forced Key Transposition. This setting transposes the events in a track up or down by whatever amount
you specify. For example, “-12” will transpose down by 1 octave.
Vel: Forced Velocity transposition. This setting increases or decreases the velocity of the notes in a track by
whatever amount you specify.
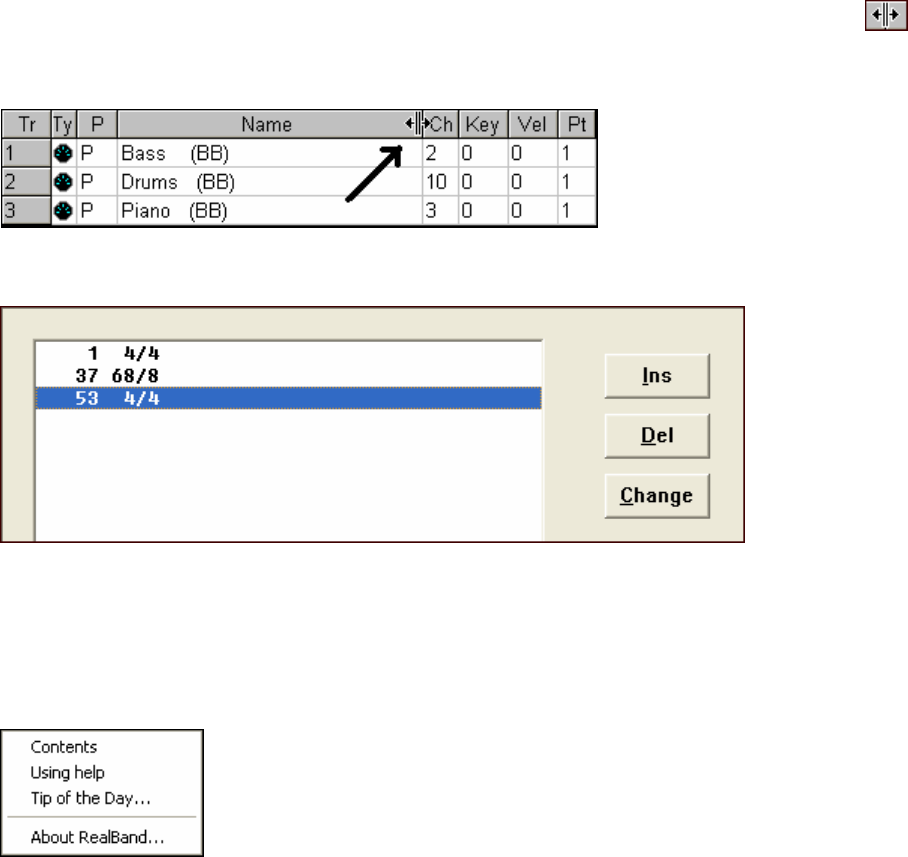
Chapter 13: Reference 259
Port: MIDI Port. This setting determines which MIDI port the data in a track is sent out. If the port selected is
greater than the number of available output ports the events in the track will be sent out the highest available port.
For example, if only one port is available and you select port number 2, the events will be sent out of port number 1.
Prg: Program Change. When this setting is enabled a MIDI patch change will be sent at the start of a song. When
you change this setting a program change will be sent out via MIDI. This is convenient for “auditioning” sounds
during playback.
Bnk: Bank Select. This will send a bank select message, followed by the track’s current program change setting.
Some synthesizers have more than 128 patches. The additional patches can be accessed by sending a bank select
message, which will cause the synth to switch to a different bank of patches. See also the Options | MIDI Out
command.
Loop: Loop MIDI Track. When this setting is enabled, a track will automatically repeat for the number of times
specified. The track will loop back to the start of the measure that contains the first event in the track. If this setting
is set to zero, the track will not be looped.
Resizing the track columns
You can resize the columns of the Classic Tracks View window as follows:
Move the mouse cursor to the top gray row and point it to the edge of the column you wish to resize.
The mouse cursor will change shape.
Click on the left mouse button and drag the mouse to the right to expand the column, or to the left to reduce the
column width.
Meter Map
The Meter Map contains a list of all the meter changes that occur during the course of a song.
The [Ins], [Del], and [Change] buttons may be used to insert, delete, and change the entries in the Meter Map.
You may also insert meter entries by pressing the Insert key on your computer while in the Meter Map dialog.
Pressing the Enter key or double mouse clicking over the desired entry will allow you to change the meter instantly.
The Delete key is used to delete entries from the map. Note that if there is only one entry in a map you won’t be
able to delete it since a minimum of one entry is required in each project.
The Help Menu
The Help Menu provides easy access to the on-line help file system (RB.CHM).
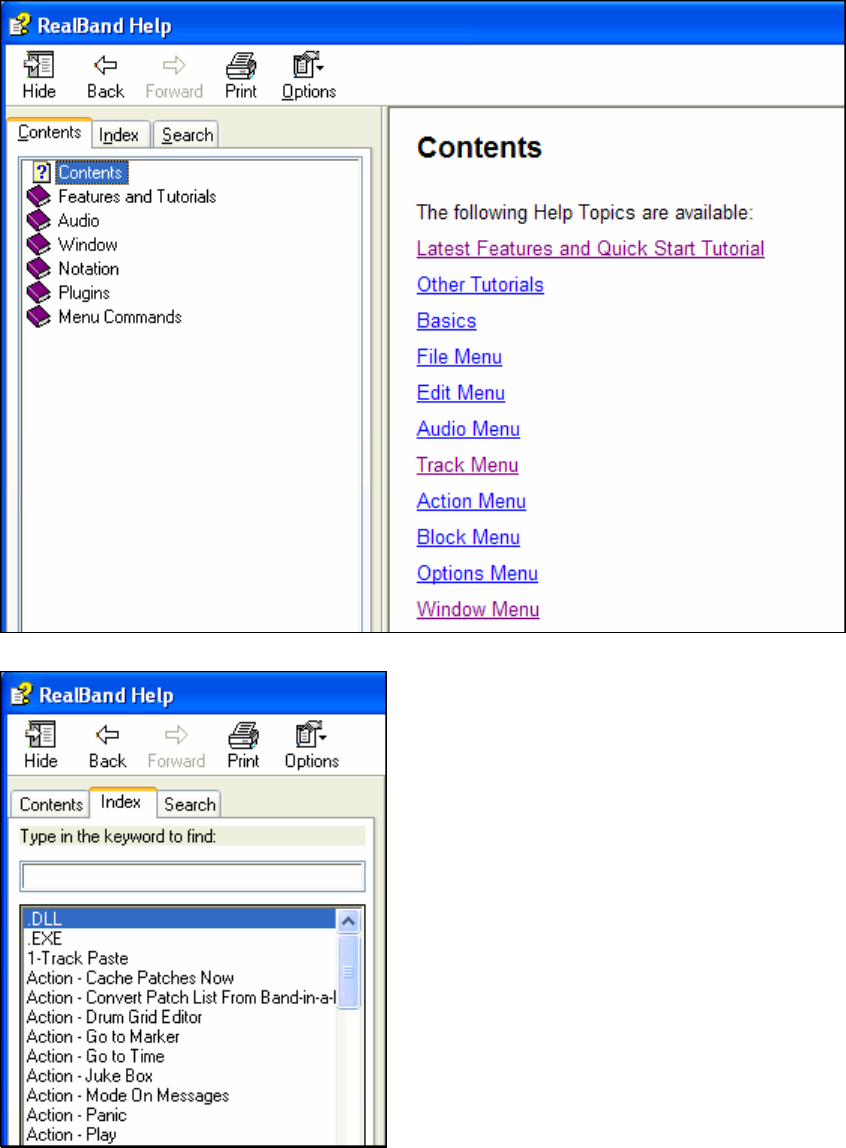
Chapter 13: Reference
260
Contents
This tab will access the help file and display an index of the topics available in the RealBand help file system.
Click on the Index tab to type in the name of a feature or topic you wish to find.
Chapter 13: Reference 261
Click on the Find tab to search for a specific word.
Tip of the Day…
This item accesses a dialog box that will provide you with numerous tips applicable to this program. By default, a
tip is displayed when you first run the program. You can disable the tip feature by unchecking the “Show Tips at
Start-Up” checkbox offered in the Tip of the Day dialog. Select the [Next Tip] Button to cycle through all the tips
available.
About RealBand…
This item will display a dialog box containing the Version and Copyright information applicable to the RealBand
program.
Click on this button to launch your Internet browser and open the PG Music
home page, www.pgmusic.com.
Click on this button to go directly to the RealBand users’ forum on
www.pgmusic.com.
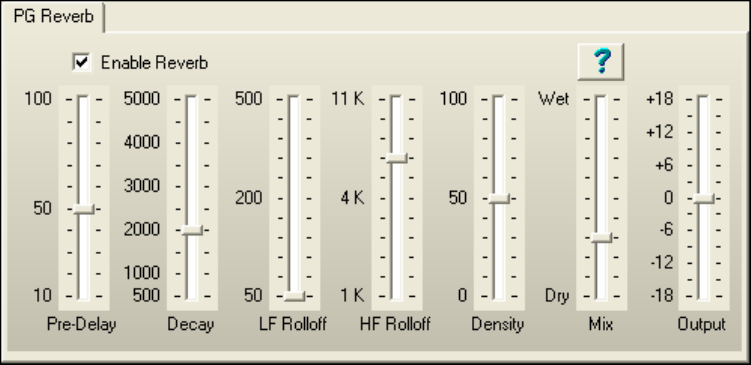
Appendix A: PG Music DirectX Plug-Ins
262
Appendix A: PG Music DirectX Plug-Ins
PG Reverb
Reverb is the spacious sound of multiple reflections in a room. In most rooms, reverb has three distinct phases:
1. The listener first hears the direct sound from the instrument.
2. Then a group of distinct echoes arrives, first reflections from the walls and ceiling.
3. After the first reflections, more closely spaced echoes build up from secondary reflections bouncing
between room surfaces. As the reverb decays, the echo density builds up into a final sheen of hundreds of
quiet closely spaced echoes.
Pre-Delay is the time delay of first reflections.
Decay is the time it takes for reverb to decay. Reverb Time is measured as RT60, the time it takes reverb to decay
to a level -60 dB below the dry signal.
Brightness is the rate at which the high frequencies die away as the reverb decays. Rooms with hard surfaces are
typically bright, but rooms with soft surfaces are usually darker.
Density is the density of low-level echoes near the end of the reverb tail. High Density settings add sheen to the
sound.
Mix is the proportion of original (Dry) signal to the reverb (Wet) signal. When PG Reverb is inserted in an Aux
Return set Mix to 100 percent to keep the original dry signal from returning on the Aux. Any original dry signal
returning on the Aux would dilute the effect of the reverb.
Output adjusts the final level of the plug-in.
Typical Settings
- A large hall might have long Pre-Delay, long Decay, and moderate Density.
- A hard large space such as a gymnasium might have long Pre-Delay, high Density and high Brightness.
- A soft large space such as a concert hall with carpet, padded seats, hangings, might have medium Density
and low Brightness.
- A small hard space such as a tile washroom, might have short Pre-Delay, medium-to-long Decay, high
Density, and high Brightness.
- A small soft space such as a large living room might have short Pre-Delay, short Decay, medium-to-low
Density, and low Brightness.
PG Echo Chorus
PG Echo Chorus creates medium to long delay effects.
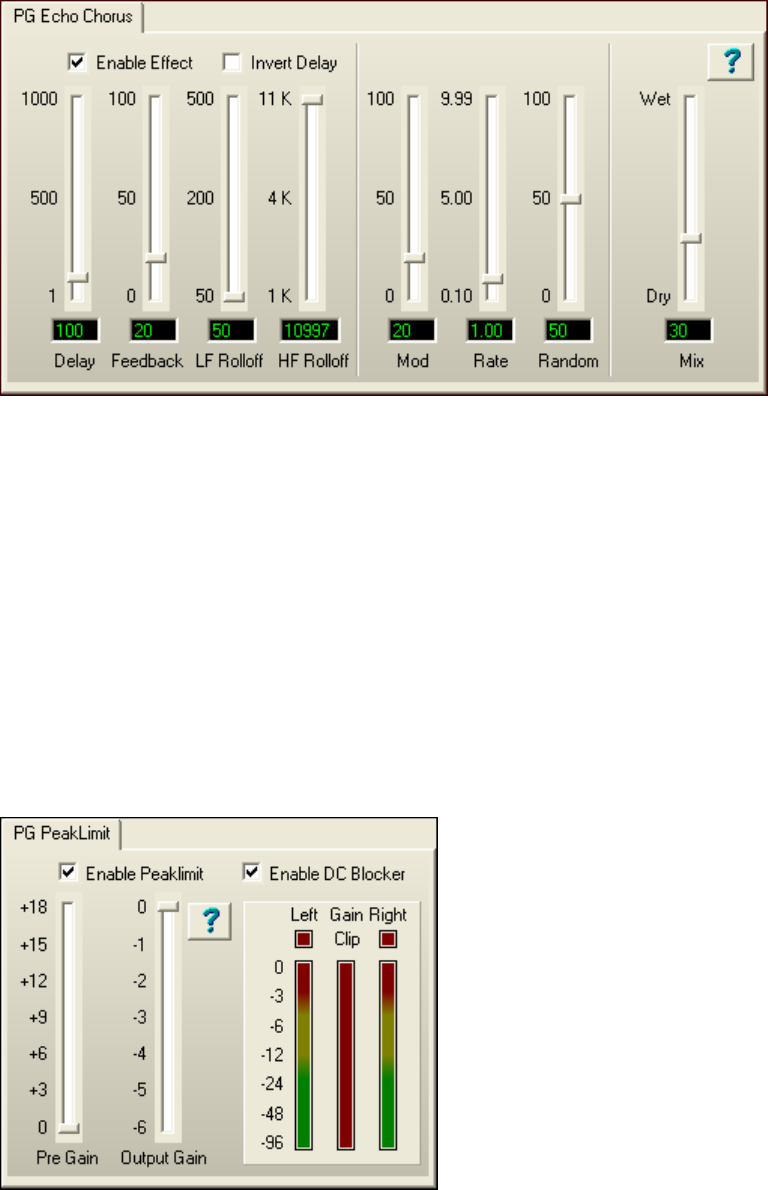
Appendix A: PG Music DirectX Plug-Ins 263
- A Delay longer than about 40 milliseconds is perceived as echo or slapback.
- A Delay in the range of 20 to 40 milliseconds is perceived as doubling or chorus.
- A Delay shorter than 20 milliseconds is perceived as a comb-filter effect rather than delay. Very short
delay is called Flanging. Short delay flanging is better accomplished with the PG Flanger plug-in.
These delay ranges for Echo, Chorus, and Flange are approximate, and depend on the nature of the audio source.
Sustained instruments may be perceived as a flange filter effect, even with rather long delays. Percussive
instruments may be perceived as short slapback, even with very short delay time.
Pitch Modulation
A chorus of voices sounds big, because the individual voices have slightly different pitch and timing. PG Echo
Chorus causes pitch and timing variation with the modulation section (the three sliders in the middle of the panel).
PG Peak Limit
PG Peak Limit is a DirectX plug-in that prevents signals getting loud enough to clip the audio. PG Peak Limit can
also remove any DC Offsets that have crept into the audio stream. DC Offsets can reduce the available dynamic
range of your music, and cause clicks at the beginning or end of audio files (when the silent audio level suddenly
“jumps up” to the DC Offset).
Audio Clipping happens when the audio is so loud that the sample numeric range is exceeded, and the tops of the
waves are “clipped off.”

Appendix A: PG Music DirectX Plug-Ins
264
PG Peak Limit is a look-ahead peak limiter—it can “see peaks coming” and begin to reduce the output gain before
over-level peaks can happen.
PG Peak Limit uses multi-stage Release Envelopes to smooth out the gain. This allows Peak Limit to recover very
quickly after brief loud peaks, but recover more slowly after sustained over-level passages.
You get quick recovery from the occasional brief loud peak. Intermodulation distortion and pumping is difficult to
hear on brief loud peaks, so we can afford to deal with quick peaks without drastically affecting the level of
surrounding audio.
However, recovery time is longer on sustained loud passages, to avoid intermodulation distortion and “pumping”
between low frequency and high frequency instruments.
Meters
The Left and Right level meters indicate the plug-in output level, including whatever extra loss is contributed by the
Output Gain slider.
However the Gain meter always shows Gain Reduction before the contribution of the Output Gain slider. In other
words, the Output Gain slider does not affect the Gain Reduction meter.
Only the Left meter is used with Mono signals.
The Clip indicators light when the plug-in output has exceeded 0 dB. The Clip indicators cannot light up if Peak
Limit is enabled, because Peak Limit never allows Over-Level outputs. However, if Peak Limit is not enabled, you
can see any over-level signals that might appear on Peak Limit’s input.
Enable Peak Limit allows the plug-in to control loud peaks.
Enable DC Blocker allows the plug-in to eliminate DC Offsets.
Pre Gain
Apply extra gain to the audio before limiting. If a song is too quiet, raise the Pre Gain to get a louder signal, without
having to worry about clipping the output.
Even if a song is quite loud, you can apply extra gain to make a “fatter” sound. Music is often boosted via a Peak
Limiter for a more consistent level.
If Pre Gain is boosted too much, the audio can sound “squashed.” It will be very loud, but you may hear “pumping”
as the gain continually adjusts to the input level. Squashed music can sound “loud but lifeless.” It is nice to make
nice loud songs, but you risk losing musical dynamics if you overdo Pre Gain.
Post Gain
Use Post Gain if you want to reduce the dynamic range of a track, but you don’t want the output level “as loud as it
will go without clipping.”
Typical Uses
PG Peak Limit is typically inserted as the last plug-in on the Master Output Insert.
Applied to the Master Output Insert, PG Peak Limit makes sure your mix does not clip, and it eliminates any DC
Offset.
Unless a song’s source tracks are really quiet, making it difficult to get enough gain just with the RealBand Mixer
sliders, it is usually the “right thing to do” to set both Pre Gain and Post Gain to 0 dB. With this setting, PG Peak
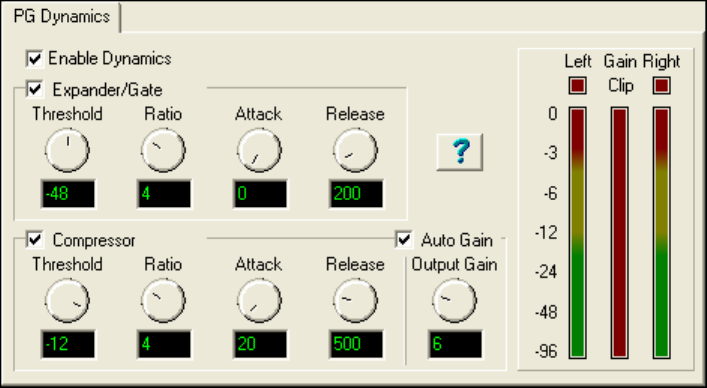
Appendix A: PG Music DirectX Plug-Ins 265
Limit offers a pure output clipping protection function, and never changes your music unless an over-level peak
happens somewhere in the song.
If your tracks are well performed and do not obviously require drastic fix-up, it is probably best to use just a single
instance of PG Peak Limit, inserted on the Master Output.
The RealBand mixer uses floating-point math, which means that the mixer cannot clip internally. The only way
clipping can happen is when the floating point samples from the Master Output signal are converted back to 16 bit
or 24 bit samples for playback or mixdown.
Therefore, with good source tracks, it doesn’t matter if the mixer internally exceeds 0 dB, provided you take
precautions on the Mixer Output.
- Watch the output meters and reduce the master if you see clipping, or
- Insert PG Peak Limit on the Master Output to prevent output clipping.
Aux Return
In most cases, it makes no sense to insert PG Peak Limit on an Aux Return, unless you wish to apply Peak Limit to
other unruly effects that are chained up-stream on the same Aux Return plug-in group.
Track Insert
PG Peak Limit can be used on a Track Insert as a quick-and-easy-to-adjust compressor, smoothing a track’s
dynamic range.
PG Peak Limit may be helpful on tracks with inconsistent levels. If inexpertly performed or recorded, any track can
have inconsistent levels. PG Peak Limit is not a cure-all for badly performed tracks. It is much better to record a
proper performance, rather than apply a band-aid to fix-it-in-the-mix. However, if you should become stuck trying
to mix an impossibly inconsistent performance, PG Peak Limit could help a bit.
PG Dynamics
PG Dynamics will apply compression, expansion, or a combination of the two.
Compressor
A compressor “squeezes” the dynamics of a performance, reducing the difference between loud and quiet passages.
Compression is used for leveling a performance. If some sections of a performance are too loud and other sections
too soft, compression can reduce the difference.
Compression can make a signal loud with more sustain. This can be desirable when preparing music for noisy
environments, such as club music, car music, radio and television sound, or small computer multimedia speakers.
Live music has a wide dynamic range. Live music peaks are much louder than the average music level. When
playing live music on a weak sound system— if playback volume is raised so you can hear soft parts, the speakers

Appendix A: PG Music DirectX Plug-Ins
266
can distort on loud peaks. Compression can level the peaks, making a sound system can seem louder without
distortion.
The PG Dynamics compressor is a downward compressor with make-up gain.
A downward compressor works by making loud signals softer. After loud passages have been made quieter by the
compressor, you can apply make-up gain to raise the final audio level.
Compressor checkbox enables PG Dynamics’ compressor module.
Threshold sets the level where compression begins. Below Threshold, the level is unchanged. Above Threshold, as
the input gets louder, the gain is gradually reduced.
Ratio adjusts how drastically the compressor behaves.
At a 2:1 ratio, an over-threshold input change of 6 dB would yield an output change of 3 dB. An input change of 12
dB would yield an output change of 6 dB. Modest ratios are appropriate for smoothing a vocal or drum
performance.
At a 10:1 ratio, the difference between loud and soft signals is changed more drastically. An input change of 6 dB
would yield an output change of only 0.6 dB. A 12 dB input change would yield an output change of 1.2 dB. At
high ratios, loud and soft input signals arrive at the output at nearly the same level. High ratios are useful for special
effects— add long sustain to clean guitar, or make spoken dialog loud and intelligible on small computer speakers.
Attack is the time required for the compressor to respond to an increase in amplitude.
As a general rule, use fast Attack values to compress individual notes, but use slow Attack values to compress the
overall level of a track.
With fast Attack, each note will be modified, which can keep the notes within a phrase more consistent. This can
tighten up an inconsistent performance, but also could remove the expressiveness from an expert expressive
performance.
With slow Attack, individual notes are not affected very much, but the compressor controls long-term level.
Individual notes can retain their expressive emphasis, but the long-term audio level is controlled.
Release is the time required for the compressor to respond to reductions in amplitude.
Fast Release lets the compressor “spring back” quickly after a loud passage.
Slow Release makes the compressor wait awhile before raising gain after a loud passage.
Use fast Release to compress individual notes. Use slow Release to compress the overall level of a track.
Very fast Attack and Release settings can sometimes cause intermodulation distortion on multi-instrument tracks (or
wide-frequency-range single instruments such as Grand Piano). For instance, on a track containing both kick drum
and hi-hat, the kick drum might audibly pump the hi-hat level.
Rule of thumb: Use moderate Attack and moderate-to-long Release on mixes, but use shorter Attack and Release on
individual instruments.
With Auto Gain enabled, makeup gain is automatically adjusted to match the compressor settings.
As the compressor Ratio and Threshold knobs are adjusted, Auto Gain adjusts the Output Gain knob to set the
output level to an “approximately good level.”
With slow Attack settings, the Auto Gain may be too high, causing the output to exceed 0 dB on fast note attacks.
In this case, disable Auto Gain, and manually adjust the Output Gain knob for the desired output level.
Output Gain applies make-up gain to the audio output, in case the compressor settings make the signal too quiet.
Since PG Dynamics and the RealBand mixer use floating point math, the internal audio level can exceed 0 dB
without clipping, as long as the level is reduced below 0 dB sometime before the mixer converts the output signal to
16 bit or 24 bit samples for playback or mixdown.
PG Dynamics can be safely adjusted so that occasional passages exceed 0 dB, as long as the signal is attenuated
back into a safe range before exiting the RealBand Mixer. Adjust the final Mixer output level with the PG
Dynamics Output Gain knob, or adjust the Mixer’s Track or Master sliders, or insert an instance of PG Peak Limit
somewhere down-stream of any PG Dynamics plug-ins.
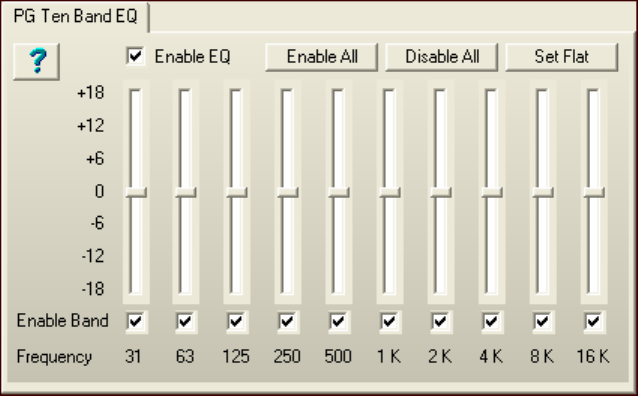
Appendix A: PG Music DirectX Plug-Ins 267
Expander/Gate
An Expander increases the difference between soft and loud sounds. The PG Dynamics Expander is a downward
expander, which means it does not affect loud signals, but reduces the level of quiet signals. A Gate (sometimes
called a noise gate) is simply a drastic, high-ratio Expander setting.
Expander/Gate checkbox enables PG Dynamics’ expander module.
Signals below Threshold are attenuated, but signals above threshold are not affected.
Ratio adjusts how drastically to attenuate below threshold.
At 1:2 Ratio, a -6 dB reduction of below-threshold input level, yields a -12 dB reduction in output level.
At 1:10 Ratio, a -6 dB reduction in input level, yields a -60 dB reduction in output level, effectively chopping off or
gating low-level signals.
Modest Ratio can subtly reduce low-level noises between musical notes and phrases, without creating unnatural-
sounding side effects.
High Ratio settings give more drastic results. Sometimes a high Ratio expander is useful as a special effect, but high
ratio does not often sound natural.
Attack is the time required for the expander to respond to an increase of amplitude.
Release is the time required for the expander to respond to a decrease of amplitude.
Fast Release, combined with high Threshold and high Ratio, can cause odd-sounding decay tails. Sometimes it can
even sound distorted. This is called Gate Chatter, and is a common side effect on expanders. If you hear Gate
Chatter, use settings that are more conservative.
Using Compressor and Expander Together
High compression settings can raise low-level noise between musical phrases. To reduce hiss, noise, breathing
sounds, lip smacks, kick drum squeak, snare drum rattles, or other quiet accidental noises between musical phrases,
enable both the Compressor and Expander. Adjust the Expander to attenuate between musical phrases. This keeps
the Compressor from boosting undesirable sounds.
When both compression and expansion are enabled, the signal first passes through the Expander, then passes
through the Compressor, and finally the make-up gain is applied
PG Ten Band EQ
PG Ten Band EQ offers reasonably fine level of frequency contouring.
Fine frequency contouring is useful to repair a track with tonal flaws, but gentle tone shaping may sound more
musical on tracks that basically sound OK, but need just a little tweaking.
If a track does not require fine tailoring of narrow bands, try PG Five Band EQ.
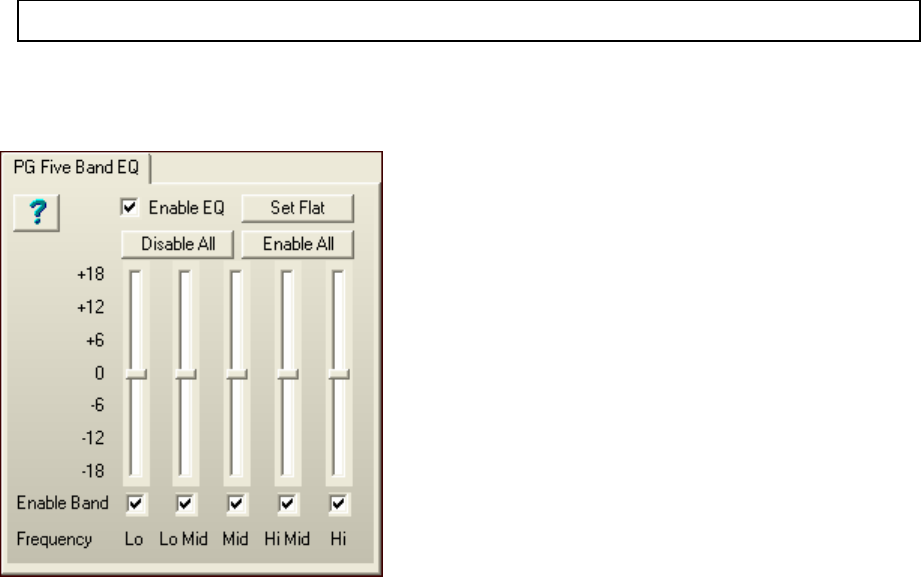
Appendix A: PG Music DirectX Plug-Ins
268
Enable Band
Though the processor load of an individual frequency band is very light, this plug-in can be made even more
efficient by un-checking frequency bands that are not needed.
For instance, if a track only needs adjustment in the 250 and 500 Hz frequency bands, you could disable the other
bands on that track.
Reducing the processor load can make it possible to run more simultaneous real-time plug-ins within RealBand.
When a band is disabled, the band is bypassed and receives no boost or cut. Bypassed bands have a flat frequency
response, as if the slider was in the center position. This feature can also be used to help audition an EQ setting. If
you are not sure that a certain band’s setting is making the sound better or worse, listen to the tune while toggling
the band in and out. This is easier than constantly moving the slider to judge the effect of a setting.
- [Enable All] button enables all the bands.
- [Disable All] button disables all the bands. If you only want to enable one or two bands, it is quicker to
[Disable All] and then enable the bands desired rather than to uncheck all the unwanted bands.
- [Set Flat] button returns all the sliders to the center position.
Note: It usually makes no sense to use PG Ten Band EQ by itself in an Aux Return, though EQ can be useful to tailor some
other effect that is chained on the Aux Return, such as Delay or Reverb.
PG Five Band EQ
PG Five Band EQ is a convenient, simple effect for overall tone shaping. If a track requires finer control, try PG
Ten Band EQ.
Enable Band
Though the processor load of an individual frequency band is very light, this plug-in can be made even more
efficient by un-checking frequency bands that are not needed. For instance, if a track only needs adjustment in the
Lo and Lo-Mid frequencies, you could disable the Mid, Hi-Mid, and Hi bands on that track. Reducing the processor
load can make it possible to run more simultaneous real-time plug-ins within RealBand.
When a band is disabled, the band is bypassed and receives no boost or cut. Bypassed bands have a flat frequency
response, as if the slider was in the center position. This feature can also be used to help audition an EQ setting. If
you are not sure that a certain band’s setting is making the sound better or worse, listen to the tune while toggling
the band in and out. This is easier than constantly moving the slider to judge the effect of a setting.
- [Enable All] button enables all the bands.
- [Disable All] button disables all the bands. If you only want to enable one or two bands, it is quicker to
[Disable All] and then enable the bands desired rather than to uncheck all the unwanted bands.
- [Set Flat] button returns all the sliders to the center position.
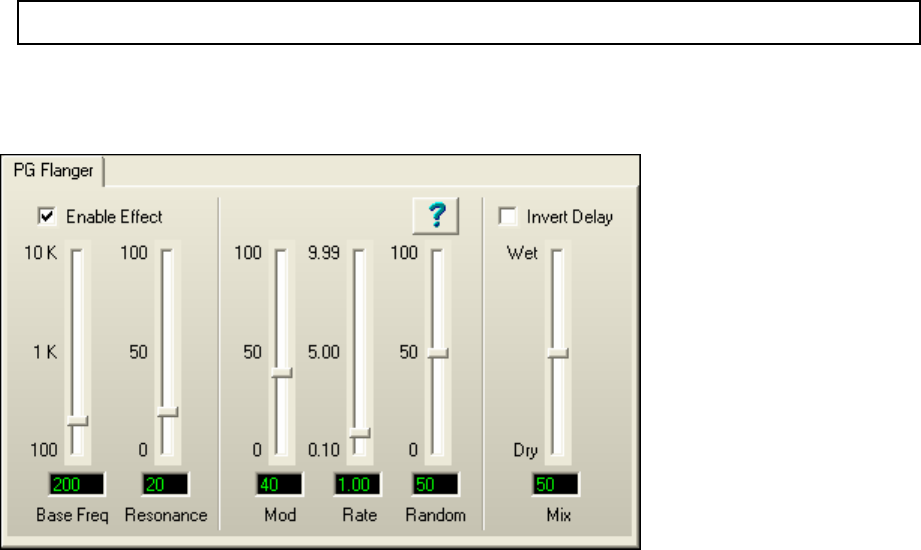
Appendix A: PG Music DirectX Plug-Ins 269
Note: It usually makes no sense to use PG Five Band EQ by itself in an Aux Return, though EQ can be useful to tailor
some other effect that is chained on the Aux Return, such as Delay or Reverb.
PG Flanger
Flange is a hollow, whooshing effect, created by mixing the original signal with a very short delay (usually less than
20 milliseconds).
Interference between the original and delayed signals, makes a comb filter —many peaks and dips in the frequency
response. As delay increases, more peaks and notches appear in the comb filter, and the frequency of the lowest
peak/notch descends.
In truth, any delay creates a comb filter, but as delay time increases, the number of peaks and notches multiply, and
each peak or notch becomes very narrow. Above about 20 mS, there are so many narrow peaks/notches in the filter;
the ear does not recognize individual peaks. The frequency response of a long delay usually sounds flat.
As a Flanger sweeps up and down, all the peaks and notches sweep up and down in tandem, and the spacing of the
comb will change.
Many Flangers use a Delay control, as in a Chorus or Echo effect. However, since a Flanger acts like a filter, the PG
Flanger uses a Base Frequency control, where the short delay is calibrated by frequency rather than milliseconds.
This may make it more intuitive to dial up the desired frequency range.
Flange can be tasty on many types of instrument — Acoustic Guitar, Electric Guitar, Electric Piano, Bass, Drums,
and Vocal.
Flange can be used as a quirky equalizer — Set slow modulation rate and little or no modulation depth. With this
setting, the filter doesn’t move much (or at all). You can tune the flanger to statically emphasize specific
frequencies in a signal.
Base Freq sets the lower limit of the lowest-pitched peak or notch in the comb filter. To get a wide sweep, set Base
Freq low. Modulation will drive the frequency higher than the Base Freq at the “tops” of the modulation wave.
Resonance sets Flanger delay feedback. High resonance settings make peaks louder and notches deeper, creating a
more pronounced effect.
Mod sets Modulation Depth, which controls how far the flanger sweeps. Think Vibrato Depth. When set to 100, it
will sweep all the way from the Base Frequency up to about 10 KHz.
Rate is the Modulation Rate, which controls how fast the flanger sweeps. Think Vibrato Speed.
Random randomizes the modulation rate, to avoid a mechanical sweeping sound.
Mix is usually set to 50 percent for “classic” flanging, but you can reduce the setting for more subtle effects.
If PG Flanger is inserted by itself on an Aux Return, perhaps Mix should be set to 100 percent. Then adjust the
amount of Flange at the Mixer output with RealBand’s “Aux Return Level control.”
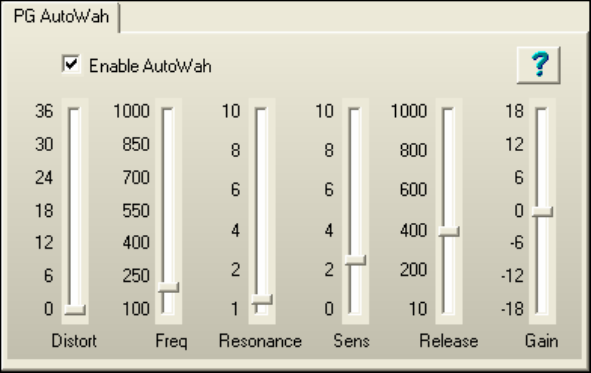
Appendix A: PG Music DirectX Plug-Ins
270
Invert Delay
Invert the delay against the original signal. Inverted and non-Inverted have distinctly different sounds. The Invert
setting makes a bright “classic” whooshing sound. Invert is even more dramatic at high Resonance settings.
With Invert enabled, low frequencies are attenuated, and the first filter Peak is at the Base Frequency. With Invert
disabled, low frequencies are not attenuated and the first filter Notch is at the Base Frequency.
PG AutoWah
Wah effects were invented in the 60’s, pedal-controlled band-pass filters. In the 70’s, “envelope-follower” boxes
became common for electric bass, clavinet, and guitar.
PG AutoWah is a classic envelope-follower effect. Loud input signals increase the filter cutoff frequency, and quiet
input signals allow the filter to “close down.” Loud notes become brighter than quiet notes.
Distort adds some grit before filtering. When Distortion is set to a value of zero, there is no distortion. If
attempting to AutoWah a mellow signal that doesn’t have many high frequencies, you can crank the Distort slider to
add some buzzy highs before filtering.
Freq sets the filter’s lower frequency cutoff limit (in Hz). Quiet audio input levels allow the filter to drop no lower
than the Lo Freq cutoff. If the Wah effect is too dark on quiet notes, increase Freq. If the wah effect is too bright on
loud notes, try decreasing Freq or decreasing Sens.
Resonance adds a loudness peak at the cutoff frequency. When the filter sweeps around, this loudness peak
emphasizes (resonates with) harmonics at the cutoff frequency. High resonance has a biting, synthetic effect. Low
resonance is mellower sounding.
Sens adjusts the degree to which loud notes sweep the filter cutoff frequency. No level-sensitive sweep occurs when
Sens is set to zero.
Release is the time (in milliseconds) that it takes for the filter to track note loudness decay. Adjust to taste.
Gain is applied if the plug-in settings make the signal too loud or too quiet.
PG Distortion
PG Distortion is a Soft Distortion effect. Soft Distortion is similar to over driven analog tape or tube amplifiers.
Soft Distortion is mellow; it generates more even harmonics than hard distortion. Even harmonics can complement
musical tones and chords. Tape or tubes have soft distortion because overloaded signal peaks are gently rounded
off.
Hard Distortion is caused by over driven digital audio systems or solid-state amplifiers. Odd harmonics in hard
distortion have a raucous sound — less musical sounding notes and chords.
Low Gain settings around 3 to 9 dB give subtle distortion, which may be perceived as “warm” or “fat.” Low Gain
settings can be used to warm up vocal harmony, or fatten up drums and electric guitar. Many musicians prefer to
record guitar and drums to analog tape, for a “fat” effect. Use modest amounts of Soft Distortion to fatten a track.

Appendix A: PG Music DirectX Plug-Ins 271
High Gain settings are more similar to the sound of a smoking guitar amp. Use high gain for Marshall-like electric
guitar crunch. In Rap, Techno, Industrial, or Grunge styles, it is common to use high distortion to fry drum, synth,
bass, or vocal tracks. Record a tame drum machine groove, and then distort the heck out of it for a nasty, rap street
sound.
If the maximum gain doesn’t fry the signal adequately, make multiple passes on the same audio selection. With
three or more passes of distortion, a signal can sound as ratty as your heart desires!!
Pre Gain — Adjust the amount of Soft Distortion.
Output Gain — Reduce the final level of the distorted signal. Distortion makes tracks sound louder. Use Output
Gain to compensate by reducing the final level.
PG RingMod
Ring Modulation is a strange effect, which works best for non-pitched sounds such as gongs, unusual percussion,
and robot voices.
Ring Modulation is not a very useful effect on ordinary melodic or chord parts, because it radically changes the
pitch of the signal.
PG RingMod is a balanced modulator, or four-quadrant multiplier. Carrier and Modulator signals are multiplied
together, and only the sum and difference frequencies are passed. The original frequencies in each signal are
suppressed.
Modulator Freq sets the frequency of the modulator sine wave.
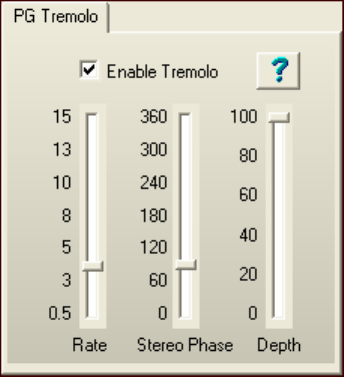
Appendix A: PG Music DirectX Plug-Ins
272
Mix adjusts the mix between original signal and ring-modulated signal.
PG Tremolo
Tremolo applies amplitude modulation, causing the signal to repetitively rise and fall in level.
Tremolo is a classic guitar effect, as used on innumerable surf and rock songs of the 50’s and 60’s. The vocal
chorus of the 60’s song, “Crimson and Clover” prominently featured tremolo. Tremolo is often heard today on
Techno recordings, applied to instruments and vocal tracks. In Techno, the tremolo is often fast, with the tremolo
rate locked to the tempo of the song, at eighth or sixteenth note rate.
Rate is the number of tremolo pulses per second.
Stereo Phase only has an effect on Stereo Tracks. It is un-noticeable on mono tracks. Stereo Phase adjusts the time
separation of the Tremolo pulse between left and right channels. When set to zero or 360 degrees, both channels
“pulse” in sync. When set to 180 degrees, the tremolo has a ping-pong effect. The left channel is loudest when the
right channel is quietest, and vice-versa. Set between 0 and 180 degrees, the sound may appear to move left to right.
Set between 180 and 360 degrees, the sound may appear to move right to left.
Depth sets the depth of the tremolo effect. At zero percent, no tremolo is audible. At one hundred percent, the
volume falls all the way to zero between each tremolo “pulse,” an exaggerated stuttering sound.
PG Real Time Analyzer
The PG Real Time Analyzer is ONLY a frequency measurement tool. PG RTA never modifies the audio.
Sonic Repair
An RTA can help identify frequencies which should be boosted or cut with an Equalizer plug-in. For instance, if an
instrument track is too noisy, examine the frequency response with an RTA. To reduce noise, unused frequency
bands would be the first likely places to equalize.
If a track sounds bad, the objectionable frequencies are likely to be among the loudest in the RTA display. It can be
easier/quicker to improve the tone if you first try equalizing the loud frequencies.
Mixing/Mastering
An RTA is a good reality check on full mixes. To get a feel for the frequency distribution of a music style, use the
RTA to study your favorite CDs. Music styles often have typical frequency distributions.
While polishing your mix, the RTA can help you make a tune's frequency balance “in the ballpark” of the tune's
genre. It may seem uncreative to purposely make original tunes similar to the norm, but listeners are less likely to
seriously audition a tune, if it sounds “out of whack” from the target genre.
Metal and Big Hair 80's Rock are among the brightest commercial mixes, often approaching a straight horizontal
line on an RTA. If your mix has an overall positive slope (the high frequencies measure higher than low
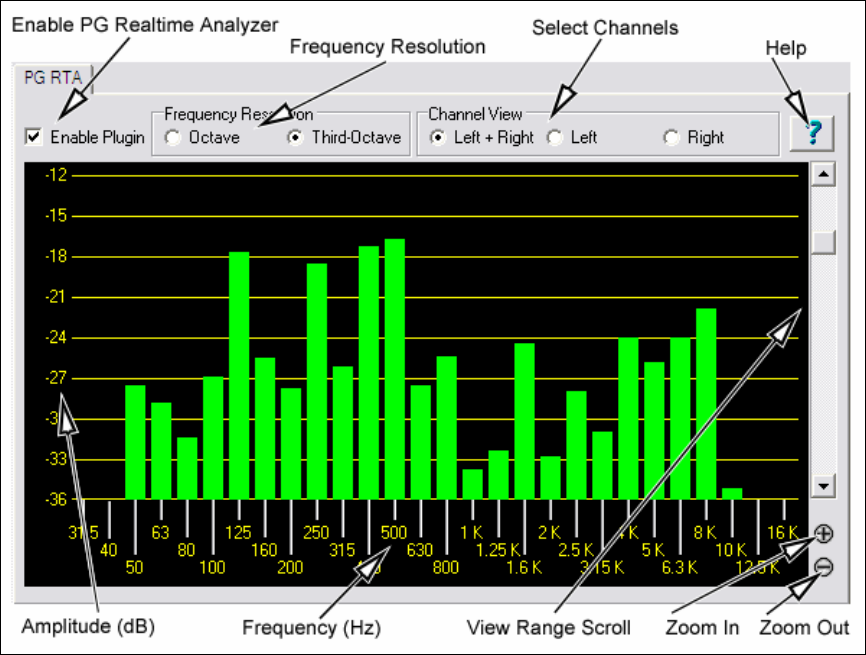
Appendix A: PG Music DirectX Plug-Ins 273
frequencies), you should rest your ears and then re-evaluate the mix. If the mix has a positive slope, it is almost
certainly brighter than any musical genre.
Rhythm 'n' Blues tends to be bass-heavy. Most R&B tunes have an overall negative slope, with the high-frequency
bands quieter than the low-frequency bands. If you mix an R&B tune with a straight-horizontal-line frequency
distribution, it is probably too bright for the R&B genre.
Classical music tends to be even darker than R&B, except for low bass frequencies. Techno and Dance music is
often very bass heavy. Jazz is typically pretty mellow, with low frequencies louder than high frequencies, but not
necessarily a lot of very low bass.
Country music often has rolled-off low bass. Many country tunes use bright bass and bright kick drum, so that the
bass is not as deep-sounding as R&B or Dance styles.
Some people have to work very hard to get a good mix, while others almost effortlessly find the proper combination.
An RTA doesn't turn mixing into a “paint by number” game. For instance, if you only change the level of drum hi-
hat, it can radically change the RTA display. One can make a bad-sounding mix which has the same frequency
distribution as your favorite famous recording. But an RTA is an excellent reality check. If your mix sounds good
to the ear, AND THE RTA IS ALSO IN THE BALLPARK, the odds are good that you are getting close to a
finished mix.
Control Descriptions
Enable Plug-in Checkbox
Toggle the checkbox to turn the RTA ON or OFF.
PG RTA only does processing when:
1. The plug-in is enabled.
2. The plug-in is visible.
Appendix A: PG Music DirectX Plug-Ins
274
If PG RTA is not enabled or it is not visible, it does not add to the computer load during playback.
It does no harm to leave several instances of the plug-in assigned to various Tracks, Aux Returns, or Masters.
When you don’t have the plug-in visible on-screen, it will not load down the computer.
Frequency Resolution
The Octave button displays ten bands, representing the level of each octave in the audio. The Third-Octave button
displays 28 bands, representing the level of each third of an octave in the audio.
There may be situations where it is more useful to have a 'general' overview at octave resolution, but the main
reason you might prefer Octave resolution is to reduce the CPU load. Compared to third-octave resolution, Octave
resolution only presents one third of the computer load.
Channel View
Channel View is only meaningful when metering a stereo track, or Aux/Master inserts (which are almost always
stereo). The Channel View setting has no effect on a mono track.
If metering a stereo insert, select the Left+Right button to view the summed frequency response of both the Left and
Right channels. Select the Left or Right buttons to view only one of the channels.
Zoom In/Out (Adjust the vertical amplitude resolution in dB.)
If a track has wide dynamics, zoom out to see all the bands without scrolling. If zoomed out too far, it can be
difficult to visually judge frequency levels. All the bands may appear about the same level.
Zoom In to see the best amplitude resolution. For instance, in the screenshot above, the display was zoomed to 3 dB
per ruler line, which emphasizes the differences between loud and quiet frequency bands.
View Range Scroll
Adjust the Scrollbar to center the display to taste. When zoomed-in on a quiet track (as in the screenshot above),
you would scroll down to get a good view of the frequency distribution.
PG Vinyl Tool
PG Vinyl Tool can improve vinyl recordings.
Vinyl discs can have many troubles, depending on their condition. Some records may be severely damaged,
whereas others may only have a few occasional crackles. Though PG Vinyl Tool has many processing sections, it
will not be necessary to use every section on every record. We can't really offer meaningful presets, because each
record you process will be a little different.
Digitally Recording a Vinyl Disc
Here are some basic recording tips. If the reader is interested, copious audiophile advice can be found on the
internet. Some audiophile wisdom may be superstitious hokum, and other audiophile advice may be vastly better
than the brief suggestions in this help file.
Obviously, to use PG Vinyl Tool, the disc must first be recorded to a computer audio file. To record a wave file,
obviously you need a turntable... preferably a turntable in pretty good shape, with a reasonably new stylus.
For high-quality recording a vinyl disc, a home-audio turntable may be a better buy than a DJ turntable, which has
special features unnecessary for a good vinyl-to-digital dub. At the same price levels, you may get better fidelity
from a home-audio turntable rather than a DJ turntable.
A turntable with a magnetic cartridge is almost mandatory. Old turntables with ceramic cartridges just do not sound
very good, and can have tracking force heavy enough to damage records.
Sometimes modern high-quality home-audio receivers do not have phono turntable inputs. However, if you have a
quality home-audio integrated receiver (with phono inputs) or a quality turntable preamp, these are the best choice
for turntable recording.
If you have a cheap home-audio tuner or phono preamp, the choice is less clear-cut. Older cheap tuners and phono
preamps had undesirable preamp noise.
There are small inexpensive phono preamp boxes, but the cheapies often have excessive hum and hiss. Most DJ
mixers have turntable phono preamp inputs, but the inexpensive DJ mixers are rather noisy.
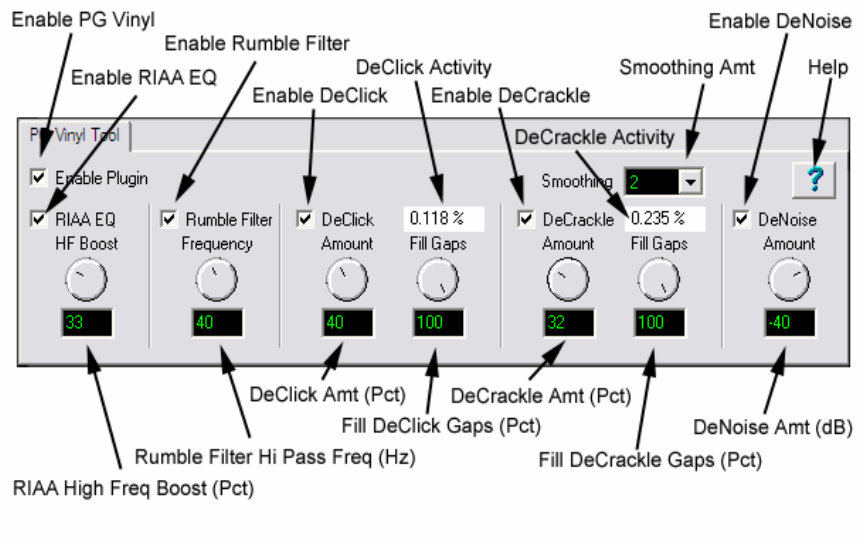
Appendix A: PG Music DirectX Plug-Ins 275
If you do not have any gear with good phono inputs, you can connect the turntable to the inputs of an ordinary music
recording mixer. The mixer will not have phono RIAA EQ, but at least most modern inexpensive mixers have low-
noise preamps.
If you must use a mixer, check if your mixer has a couple of channels with high impedance guitar inputs. Guitar
preamps often have a high input impedance, a characteristic which is also desirable in a turntable preamp.
Connect the output of your Tuner or Mixer to your computer's soundcard input. In RealBand set the input levels on
the Mixer and computer to record a good loud level, but not loud enough to cause clipping. Try to avoid any
clipping, even on the loud clicks that might be in a damaged vinyl record. PG Vinyl Tool will work best if the clicks
are recorded clean.
Whatever preamp you use, leave the tone controls flat. Simply record the disc as accurately as possible. You can
tweak the tone in the computer, after the disc has been dubbed to a wave file.
Clean the disc thoroughly. Some suggest water and a soft cloth (or whatever esoteric vinyl disc cleaning tools you
may have available). Some audiophiles claim good results recording a disc “wet.” You might add a couple of drops
of dish detergent to a bottle of water, and wet the record before recording. This will lubricate the record and
minimize some noise and distortion.
Keep the stylus clean. It may help to play the record all the way thru before recording it. After the first play, re-
clean/re-wet the disc, and then record. A first play might dislodge dust specks, so that the second play-thru might
sound better.
After the disc is recorded to a wave file, you can insert the PG Vinyl Tool plug-in on the track, and twiddle the plug-
in settings while the wave file plays. Polish the plug-in settings as you listen to the results.
You may find it beneficial to insert additional plug-ins after PG Vinyl Tool. Some obvious possibilities could be a
Peak Limit or EQ plug-in. After PG Vinyl Tool has been adjusted to your satisfaction, make the final cleaned
output with RealBand’s menu item Audio | Merge Audio and DXi Tracks to Stereo Wave file.
PG Vinyl Tool Features
Enable Plug-in Checkbox
Toggle the checkbox to compare the original recording to the plug-in output. This helps avoid excessive settings.
PG Vinyl Tool uses look-ahead buffering, so if you bypass the plug-in, the output will “jump in time.” This is
expected, because there is some added delay when PG Vinyl Tool is enabled.
Appendix A: PG Music DirectX Plug-Ins
276
RIAA EQ Checkbox
If you recorded from a stereo tuner or other gadget with a phono input jack, DO NOT enable the RIAA EQ section.
The RIAA EQ option is for folks who do not have a turntable preamp, having recorded with an ordinary mixer.
RIAA EQ was designed to overcome the shortcomings of vinyl. RIAA pre-emphasis is applied when vinyl discs are
mastered. High frequencies get boosted, and low frequencies get cut. This makes high frequencies compete better
against the inevitable vinyl pops, clicks, and surface noise. Pre-emphasis also prevents low frequency signals from
bouncing the stylus out of the groove.
When you play a record, the preamp's RIAA de-emphasis will reverse the EQ. High frequencies are cut, and low
frequencies are boosted. If you do not apply RIAA de-emphasis, either with a phono preamp or in the software,
vinyl will sound too bright and shallow.
HF Boost
If you recorded the disc with a mixer which has high-impedance inputs (preferably 1 MegOhm or better), set HF
Boost to zero, for “pure” RIAA de-emphasis.
Most audio mixer instrument/line inputs have impedance in the 10 KOhm to 100 KOhm range. A turntable's
magnetic cartridge will be “loaded” by the lower-than-expected mixer impedance. This won't damage the turntable,
but will affect the frequency balance. A 10 KOhm mixer input could cut the highs quite a bit, and even a 100 KOhm
mixer input could cut the highs a perceptible amount.
There is no way to predict the characteristics of your turntable cartridge and the input impedance of your mixer.
Adjust HF Boost by ear until the frequency balance sounds right. You may not get the frequency response as
precisely as the mastering engineer intended, but if you are happy with the result, who cares?
Some PG Vinyl Tool options can cut highs. If a record is damaged so much that subsequent PG Vinyl Tools cut
high frequencies along with the noise, you could increase the HF Boost by ear, to make up the loss.
Rumble Filter Checkbox
Cheap or worn-out turntable platters can make subsonic vibrations. Slightly warped records can also make
undesirable low-frequency noise. Use the Rumble Filter to block unwanted low frequencies.
The Rumble Filter is a 24 dB per Octave Butterworth High Pass filter, which attenuates undesirable low frequencies.
In most situations, it will do no harm to always enable the Rumble Filter.
Rumble Filter Frequency
At the default of 40 Hz, signals below 40 Hz are attenuated, and signals above 40 Hz are unaffected.
Vinyl mastering engineers typically avoided frequencies lower than 40 Hz. It is difficult to make vinyl cleanly
reproduce very low frequencies. Also, most consumers, even audiophiles with expensive stereos, did not have
speakers capable of reproducing lower than 40 Hz.
Unless you are dubbing classical organ records, it is doubtful that there is anything of interest below 30 or 40 Hz.
While adjusting PG Vinyl Tool, you can experimentally toggle the Rumble Filter on/off to make sure the filter is not
removing important audio features.
DeCrackle Checkbox
Enable the DeCrackle section. PG Vinyl Tool defines crackle as high frequency defects in the range of 2000 Hz to
20,000 Hz.
A single microscopic speck of dust, or a tiny static discharge, can cause an isolated “tick” which is too short to be
considered a “click.” The DeCrackle section removes these isolated ticks. Crackle is a cluster of high-frequency
ticks. If there are multiple close-spaced ticks, the ticks are perceived as a crackling sound.
First disable the DeClick Checkbox, and adjust DeCrackle. On a clean record in good condition, DeCrackle may be
the only necessary section. Normally you would only enable the DeClick section if DeCrackle can't adequately
clean up the mess.
DeCrackle Amount
This adjusts the sensitivity of what PG Vinyl Tool considers to be a tick/crackle. At zero, nothing is removed. As
the DeCrackle Amount is increased, PG Vinyl Tool will mute additional “tick suspects.” If the control is set too
extreme, PG Vinyl Tool will partially mute musical features, such as hand percussion or high-hat notes. Only set

Appendix A: PG Music DirectX Plug-Ins 277
the control high enough to remove ticks and crackles. If longer clicks remain, enable the DeClick section for
additional cleaning.
DeCrackle Activity
This displays the percentage of audio which is muted. Except for very worn records, adjust the DeCrackle Amount
so that the DeCrackle Activity reads no higher than a few percent. On very good discs, one might get “perfect”
results with less than one percent of DeCrackle Activity. Strive to mute only the minimum necessary to clean your
record.
NOTE: If DeCrackle is set outrageously high, the DeCrackle Activity reading can exceed 100 percent. This is not a bug.
The DeCrackle section does three processing passes in progressively lower frequency bands. It might happen that the first
pass will “heal” a click, but subsequent bands will “heal” the left-over residue of that click.
Sometimes a bad click might be repaired in multiple processing stages, until the defect can no longer be detected. With
absurdly high DeCrackle settings, the DeCrackle Activity can exceed 100 percent, because several stages incrementally
repair the same bad clicks.
DeCrackle Fill Gaps
When a tick is detected, it is smoothly “snipped out” of the high-frequencies, without affecting the lower
frequencies. High-frequency ticks last less than one millisecond. Each muted section is very short, only a few
samples.
If Fill Gaps is set to zero, this tiny high-frequency-muted region is replaced by nothing. It behaves like a very brief
high-frequency dropout. On a clean record, occasional muted ticks are never noticed. But on a dirty scratched disc,
if many snips are made, it will sound like a reduction in high frequencies.
As you increase the Fill Gaps knob, PG Vinyl Tool will extrapolate the signal in the vicinity of the click,
synthesizing a “guess” at what the signal might have been in the tiny muted region. If you set Fill Gaps to 100, it
will insert this extrapolated guess at the same level as the original signal. This allows many ticks to be snipped from
a dirty record, without reducing the high frequency content.
One might encounter a badly damaged record where the audio is so damaged that the guesses are not good enough.
In these problem cases, try setting Fill Gaps to 70, or 50, filling the gaps with lower-amplitude guesses, which may
sound less obnoxious.
Set Fill Gaps to 100, unless it sounds bad.
DeClick Checkbox
Enable the DeClick section. PG Vinyl Tool defines clicks as midrange frequency defects, in the range of 500 Hz to
2000 Hz.
DeClick Amount
Adjust the sensitivity of what PG Vinyl Tool considers to be a click. At zero, nothing is removed. As the DeClick
Amount is increased, PG Vinyl Tool will mute more “click suspects.” If the control is set too high, it can partially
mute musical features, like snare drum hits. Adjust this control only high enough to remove clicks.
Note: A long-duration defect (longer than a couple of milliseconds) might sound like a click or pop until the high and mid
frequency defects have been fixed. On long-duration defects, the left-over defect might sound like a “thump.”
DeClick Activity
This displays the percentage of audio which is being muted. Except for very worn records, it is advisable to adjust
the DeClick Amount so that the DeClick Activity reads no higher than a few percent. On very good discs, one
might get “perfect” results with much less than one percent of DeClick Activity. Strive to mute only the minimum
necessary to clean your record.
NOTE: If DeClick is set outrageously high, the DeClick Activity reading can exceed 100 percent. This is not a bug. The
DeClick section makes two processing passes, in different frequency bands. It can happen that the first pass will “heal” a
bad click, but the next pass will “heal” the left-over residue of the click.
Sometimes a bad click will be repaired in multiple processing stages, until the defect can no longer be detected as a tick or
click. With absurdly high DeClick settings, the DeClick Activity can exceed 100 percent, because both stages incrementally
repair the same bad clicks.
DeClick Fill Gaps
Appendix A: PG Music DirectX Plug-Ins
278
When a click is detected, it is smoothly “snipped out” of the midrange spectrum, without affecting the lower-
frequencies at that point. A typical click might last 0.5 to 2 milliseconds. Each muted section is very short.
If Fill Gaps is set to zero, this small muted region is replaced by nothing. It behaves like a very brief mid-frequency
dropout. On a clean record, occasional muted clicks are never noticed. But on a dirty scratched disc, if many snips
are made, it can sound like a reduction in high and mid frequencies.
As you increase the Fill Gaps knob, PG Vinyl Tool extrapolates the midrange signal in the vicinity of the click,
synthesizing a guess of what the signal might have been in the tiny muted region. If you set Fill Gaps to 100, it will
insert this extrapolated guess at the same level as the original signal. This allows many clicks to be snipped from a
dirty record, without reducing the mid-frequency content.
On many recordings, the extrapolated guesses are quite good. Frequent clicks can often be removed without audible
side-effects.
One might encounter a badly damaged record where the audio is so damaged that the guesses are not good enough
to be completely transparent.
In these problem cases, you could try setting Fill Gaps to 70, or 50, filling the gaps with lower-amplitude guesses,
which may sound less obnoxious.
Set Fill Gaps to 100, unless it sounds bad.
Smoothing
Some badly damaged records (particularly worn-out 45's and 78's) have high frequency noise approaching “crackle
on steroids.” The surface noise sounds like bacon frying. Crackle atop crackle, atop even more crackle.
The Smoothing section could be useful with severe surface noise. The Smoothing section is a very gentle Gaussian
low pass filter with 6 selectable intensities.
Gaussian low pass filters are “about as good as it gets” for attenuating random noise while having minimal effect on
music transients.
However, a Gaussian filter is still a low pass filter. All low pass filters reduce high frequencies along with surface
noise. You should only enable the Smoothing section if it is necessary for a badly damaged record. Experiment
with the Smoothing Level to find an acceptable tradeoff between reduction in surface noise versus reduction of
musical high frequencies.
DeNoise Checkbox
PG Vinyl Tool DeNoise is a “hiss gate.” It gradually attenuates quiet High Frequencies below the Denoise
Threshold. Think of it as a sliding high frequency dynamics expander.
Many vinyl discs were made from reel-to-reel tape masters. The best quality reel-to-reel tape recorders of
yesteryear had more hiss than modern digital recorders. A vinyl disc in excellent condition could contain an
accurate copy of the original tape hiss. In some cases, carefully adjusted DeNoise may give a perceived
improvement over the original noise level.
DeNoising may also be beneficial on low level disc surface noise (slightly worn discs). If you have low level
“frying bacon” surface noise, DeNoise might work better than Smoothing.
With loud “frying bacon” surface noise, you could try a judicious combination of Smoothing and DeNoise.
DeNoise Amount
This control sets the DeNoise threshold, in dB.
For instance, if you set it to -40 dB, high frequencies louder than -40 dB are passed unaltered. High frequencies
quieter than -46 dB are completely silenced. Levels between -40 and -46 dB are gradually faded down to complete
silence.
If the audio level at 8000 Hz happens to be below threshold, but the audio level at 4000 Hz happens to be above
threshold, the 8000 Hz signal would be muted but the 4000 Hz signal would pass un-altered. This is “Multi Band
Single-Ended Noise Reduction.”
The DeNoise section can slide the filter all the way down to 500 Hz; so on “silent” sections of a record, the DeNoise
silence can be pretty silent.
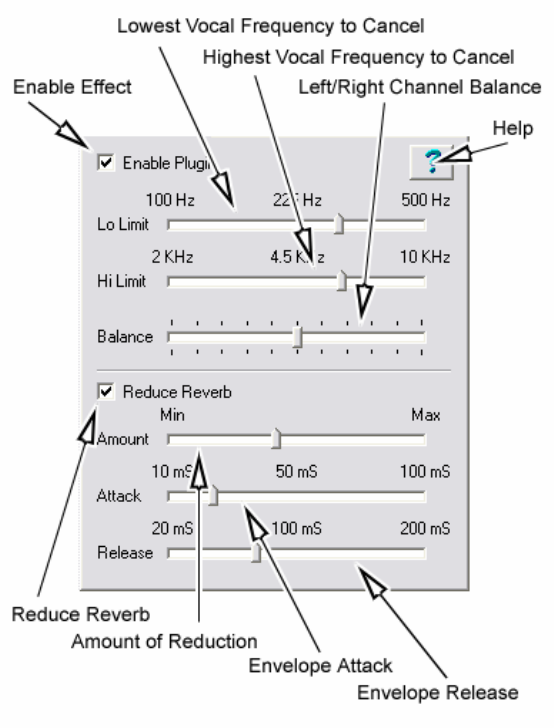
Appendix A: PG Music DirectX Plug-Ins 279
Carefully adjust the Denoise Amount so that desirable high frequencies in the music are minimally affected, but hiss
in the quiet sections of the music is removed. Even a 1 dB difference can be easy to hear when tweaking the
Denoise Amount. Many high fidelity vinyl records didn't have much information higher than 10 KHz (another
common mastering decision in the good old days). On many records, frequencies above 10 KHz can be squelched
most of the time without noticeably affecting the sound.
A suggestion for tweaking the DeNoise Amount; first increase the setting until the music is obviously losing high
frequencies. Then gradually reduce the level until the music is unaffected. This can ensure that any noise below the
minimum music level is exterminated. Be sure to check the DeNoise Amount against the quietest parts of the
recording, because the quiet locations are most likely to be affected if the DeNoise Amount has been set too high.
Conclusion
PG Vinyl Tool offers many tools which can clean vinyl records.
But there is a limit what can be done for severely damaged discs (without investing in very expensive tools). On
very damaged records, you may be forced to decide between a “natural” sound which contains a few residual
defects, versus a more heavily processed sound which has collected new annoying artifacts to replace the old
annoying defects.
PG Vocal Remover
PG Vocal Remover can reduce the level of vocals on many commercial recordings.
Operating Principle
PG Vocal Remover exploits a common mixing technique; the lead vocal is often center-panned (i.e., the left and
right stereo channels have identical vocal loudness). Typically the bass and kick drum is centered, and often snare

Appendix A: PG Music DirectX Plug-Ins
280
drum is centered. However, most accompaniment instrumental tracks and backup harmony vocals are side-panned
(louder on one side than the other).
On typical recordings, we can subtract one stereo channel from the other, which removes “common mode” lead
vocal, but leaves side-panned accompaniment tracks relatively unaffected.
Simple subtraction will also cancel center-panned bass, kick drum, and snare (or other center-panned instruments).
Therefore, we only subtract the midband where the vocal resides.
Even when lead vocal is center-panned, vocal reverb is typically in stereo. If a song has loud stereo reverb, the
stereo vocal reverb is unaffected by the Vocal Remover. The Reduce Reverb feature can reduce the level of the
side-panned tracks when the center vocal is loud.
Some vocal reverb leakage may not be a bad thing on a sing-along track. When you sing along, the original reverb
ambience could make you sound better.
Source Recordings
PG Vocal Remover works best on wave files extracted from well-made commercial audio CD’s, which usually have
good fidelity and low distortion. But it works fine on many MP3 or WMA files, as long as the file is encoded in
stereo. It works best with high quality recordings. Of course an MP3 or WMA file must be converted when loading
into RealBand.
NOTE: This plug-in MUST be applied to the insert of a RealBand stereo track. It doesn't work if you insert PG Vocal
Remover on a mono track.
Operation
Enable Plug-in Checkbox
Toggle the checkbox to compare the sound with/without the Vocal Remover activated.
Balance Slider
Fine-tune with the Balance slider. The center position is typically as good as it gets, but some recordings have
accidentally mismatched Left-Right balance. This is common with vinyl or cassette recordings, or CD-reissues of
Oldies. You may get improved vocal cancellation by twiddling the Pan slider to find a “sweet spot.”
Lo Limit and Hi Limit Sliders
Adjust these sliders to fit the nature of the vocal. The default settings are fine for many tunes. Frequencies below
the Lo Limit and above the Hi Limit are not processed, preserving fidelity except in the vocal midrange. Set the Lo
Limit slider just low enough to attenuate low vocal notes. Set the Hi Limit slider just high enough to attenuate high
vocal harmonics.
Obviously the best settings are different for a Baritone, Tenor, Alto, or Soprano voice. They are best set by ear.
Some sopranos have warm low tone, but some Baritones have very bright tone, so the mid-frequency vocal range
may be wider than expected.
Reduce Reverb Checkbox
Toggle the checkbox to compare with/without Reverb Reduction.
Reduce Reverb Amount Slider
Reverb Reduction behaves like a dynamics compressor, but the loudness of the center channel affects the loudness
of the side channels. Move the slider to the right to increase the effect. The effect compares the relative level
between center and side channels, so no processing takes place unless there is a significant difference between the
loudness of the center versus side channels.
Vocal is not the only sound which can trigger the compressor. Any loud midrange center instrument could trigger
the compressor, so if you crank the Amount too high, snare drum or other loud center instruments may unpleasantly
“pump” the side channels.
Reduce Reverb Attack Slider
Appendix A: PG Music DirectX Plug-Ins 281
Works like a compressor Attack control. Move the slider to the left for faster response to sudden increase in
loudness (when the vocalist starts a phrase). Move to the right for a slower response to sudden increase in loudness.
Reduce Reverb Release Slider
Works like a compressor Release control. Move to the left for faster recovery after the loudness diminishes (when
the vocalist ends a phrase). Move right for slower recovery.
Adjusting Reverb Reduction
Experiment to get a feel for what works. There may be some songs where the reverb can't be improved, and in those
cases just disable the Reduce Reverb Checkbox.
Some vocals have short pre-delay and reverb tails. Short attack and release would make sense.
Some songs (especially ballads) have loud “balloon” reverb tails with long pre-delay. Since the reverb comes in
after the vocal phrase begins, and lasts a long time after the vocal phrase ends, longer attack and release would make
sense. Adjust the Attack so that the compression kicks in about the same time as the pre-delay reverb, and adjust the
release long enough to hold back the reverb after a vocal line is finished.
Don't expect miracles. You can reduce the reverb level, but will rarely completely eliminate vocal reverb.
Judiciously use just enough compression to avoid ruining the overall fidelity.
Compare the dry sound against the processed sound. The maximum vocal reduction setting could be extreme
enough to ruin the instrumental quality. Sometimes it is better to allow some vocal leakage to achieve the best-
sounding instrumental quality. Is it better to allow some low voice leakage to improve the bass response? Is it
better to allow some high voice leakage to improve the cymbals and acoustic guitar?
After the PG Vocal Remover is adjusted as good as it gets, try inserting an Equalizer plug-in downstream. Notch
some frequencies to improve the effect.
If the output amplitude is inconsistent, try inserting a compressor or peak limiter plug-in downstream.

Appendix B: Keystroke Commands
282
Appendix B: Keystroke Commands
F1 Opens help file
Ctrl+G Generate/regenerate track
Spacebar Play/Stop
P play
Ctrl+P Play from start
R Record
Ctrl+R Record from start
S Stop
W Rewind to beginning
Ctrl+M Mutes current track
Ctrl+U Unmutes current track
[ and ] Decrease/increase tempo by 5
Ctrl+minus sign changes playback speed to half speed
Ctrl+equal sign changes playback speed from half speed to full speed
F5 Tempo
F6 Go to time
F9 Panic
F11 GS Settings
Shift+F11 Select DLL or EXE
F3 Open file
F4 Save file
Shift+F8 Open next file
Shift+Ctrl+F8 Open previous file
Ctrl+F5 Preferences dialog
T Notation Window Options dialog
I Print Options dialog
Ctrl+X Edit Cut dialog
Ctrl+C Edit Copy dialog
Ctrl+V Edit Paste dialog
F7 From = Now
F8 Thru = Now
Ctrl+F7 From = Value
Alt+F7 Now = From
Ctrl+F8 Thru = Value
Alt+F8 Now = Thru

283
Ctrl+1 Tracks window
Ctrl+2 Bars window
Ctrl+3 Chords window
Ctrl+4 Tempo Map window
Ctrl+5 Comments window
Ctrl+6 SysEx window
Ctrl+7 Guitar window
Ctrl+8 Mixer window
Ctrl+9 Classic Tracks view
Alt+F2 New Notation window
Shift+F2 New Big Lyrics window.
Ctrl+F2 New Audio Edit window.
Ctrl+Alt+P New Piano Roll Window
F2 Event List window
L Toggles lyric entry mode
O Sets duration of inserted notes to whole
H Sets duration of inserted notes to half
Q Sets duration of inserted notes to quarter
8 Sets duration of inserted notes to 8th
6 Sets duration of inserted notes to 16th
3 Sets duration of inserted notes to 32nd
4 Sets duration of inserted notes to 64th
1 Sets duration of inserted notes to 128th
A or Ctrl+A Sets duration of inserted notes to be automatic
Ctrl+Z Deletes the last notes entered

Appendix C: MIDI Controller Numbers
284
Appendix C: MIDI Controller Numbers
Number Controller Name
0 Bank Select MSB
1 Modulation Wheel
2 Breath Controller
3 Undefined
4 Foot Controller
5 Portamento Time
6 Data Entry MSB
7 Main Volume
8 Balance
9 Undefined
10 Pan
11 Expression
12 Effect Control 1
13 Effect Control 2
14-15 Undefined
16-19 General Purpose Controllers (Nos. 1-4)
20-31 Undefined
32-63 LSB for Controllers 0-3
64 Damper Pedal (Sustain) [Data Byte of 0-63=0ff, 64-127=On]
65 Portamento
66 Sostenuto
67 Soft Pedal
68 Legato Footswitch
69 Hold 2
70 Sound Controller 1 (default: Sound Variation)
71 Sound Controller 2 (default: Timbre/Harmonic Content)
72 Sound Controller 3 (default: Release Time)
73 Sound Controller 4 (default: Attack Time)
74 Sound Controller 5 (default: Brightness)
75-79 Sound Controller 6-10 (no defaults)
80-83 General Purpose Controllers (Nos. 5-8)
84 Portamento Control
85-90 Undefined
91 Effects 1 Depth (previously External Effects Depth)
92 Effects 2 Depth (previously Tremolo Depth)
93 Effects 3 Depth (previously Chorus Depth)
94 Effects 4 Depth (previously Detune Depth)

Appendix C: MIDI Controller Numbers 285
95 Effects 5 Depth (previously Phaser Depth)
96 Data Increment
97 Data Decrement
98 Non-Registered Parameter Number LSB
99 Non-Registered Parameter Number LSB
100 Registered Parameter Number LSB
101 Registered Parameter Number MSB
102-120 Undefined
121 Reset All Controllers
122 Local Control
123 All Notes Off
124 Omni Off
125 Omni On
126 Mono On (Poly Off)
127 Poly On (Mono Off)
More MIDI Controller Information
Additional descriptions of MIDI controllers are available in the MIDI tutorials found in the Support pages on the PG
Music Inc. web site, www.pgmusic.com.
For the full MIDI specification, search MIDI Manufacturers Association in your Internet browser.

PG Music Inc.
286
PG Music Inc.
RealBand®
is protected by copyright and is the property of PG Music Inc.
Copyright © 2010 PG Music Inc. and its licensors.
All rights reserved.
RealBand was written by Jeff Yankauer.
PG MUSIC INC.
29 Cadillac Avenue
Victoria, BC V8Z 1T3
Canada
Contacts:
E-mail: info@pgmusic.com
Phone: toll free in the United States and Canada
1-800-268-6272, 1-888-PG-MUSIC (746-8742)
Or 1-250-475-2874 (tolls apply)
Universal International Freephone Service:
Outside of the United States and Canada (where available).
+ 800-4PGMUSIC (800-4746-8742)
Fax: toll free in the United States and Canada
1-877-475-1444
Or 1-250-475-2937 (tolls apply)
Technical Support:
Phone: toll free in the United States and Canada
1-866-9TECHPG (866-983-2474)
Or 1-250-475-2708 (tolls apply)
E-mail: support@pgmusic.com
Live Internet Chat: www.pgmusic.com
Be sure to visit the FAQ pages at www.pgmusic.com for information about known troubleshooting issues as well as the
latest technical support bulletins.
Index 287
Index
accelerando............................................................247
Action Menu..........................................................205
Aeolian ..................................................................253
Align Music to Click Track ...................................202
ASIO audio drivers..................................................16
ASIO4All.........................................................16, 220
assign RealTrack to track.........................................92
Audio
copy ...................................................................103
cut ......................................................................103
drag and drop edits ............................................102
editing................................................................100
Editing ...............................................................103
Effects................................................................104
export wave .......................................................107
latency delay......................................................228
merge audio and DXi.........................................107
paste...................................................................103
saving files.........................................................107
Audio Chord Wizard .......................................57, 146
bar indicators .....................................................148
chord detection ..................................................147
controls ..............................................................146
errors..................................................................148
fine tuning..........................................................150
key signature......................................................150
notes display ......................................................153
special cases.......................................................149
drastic tempo changes....................................152
odd length bars...............................................152
tutorial................................................................146
version 2.0 .........................................................146
zoom ..................................................................153
Audio edit window ................................................100
select whole .......................................................101
snap....................................................................101
zoom ..................................................................101
Audio Edit window
Alt+click............................................................101
right-click menu.................................................102
Audio Menu.............................................................98
Audio ports ..............................................................13
Audio Preferences..................................................219
Audio setup..............................................................11
Audio subgroups
creating ..............................................................223
Audio temp directory...............................................13
Audio tracks
stereo ...................................................................97
audio, RealTracks, RealDrums................................91
Auto Sync Chase ...................................................217
Auto-convert patches:............................................211
Aux busses.............................................................255
Bank Change .........................................................258
Bar Settings .............................................................74
Bars window..........................................................243
Big Lyrics ..............................................................235
Big Piano .........................................................44, 232
Block menu............................................................213
buffer size
selectable ...........................................................222
CD Burner .............................................................162
Change Velocities..................................................193
Chord list ...............................................................246
Chord Window
options .................................................................56
Chord Wizard ..........................................................55
auto ......................................................................55
custom..................................................................56
Chords ...................................................................187
copying ..............................................................187
delete chords......................................................187
Chords window......................................................244
toggle .................................................................245
toggle part markers ............................................245
Classic Tracks View ........................................68, 257
288
patch selection .....................................................68
Click Track ............................................................202
Clipboard ....................... 179, 183, 185, 186, 202, 250
Comments window................................................248
Conductor
action when........................................................155
define sections ...................................................155
examples............................................................156
hot keys..............................................................157
live control.........................................................153
MIDI keyboard control......................................154
QWERTY control..............................................154
Configuration.............................................................8
Consolidate Audio Region.....................................203
Control Panel.........................................................215
Convert Guitar Tracks ...........................................201
Convert to Karaoke................................................180
Convert to WMA...................................................161
Copy Command.....................................................185
Copyright...............................................................285
Count-in...................................................................76
create new song .......................................................70
Custom file dialog ...........................................53, 178
Cut .........................................................................183
Data Filter..............................................183, 188, 197
Digital audio ............................................................84
DirectX ..................................................................143
Exclusion List....................................................144
Options ..............................................................144
plug-in................................................................143
DirectX effects.................................................86, 164
audio output.......................................................257
Aux bus................................................................88
editing..................................................................89
editor....................................................................87
options .................................................................87
PG AutoWah .....................................................269
PG Distortion.....................................................269
PG Dynamics.....................................................264
PG Echo Chorus ................................................261
PG Five Band EQ ..............................................267
PG Flanger.........................................................268
PG PeakLimit ....................................................262
PG Reverb .........................................................261
PG RingMod......................................................270
PG Tremolo .......................................................271
Ten Band EQ .....................................................266
track insert ...........................................................88
DirectX Plug-Ins
PG Real Time Analyzer.....................................271
PG Vinyl Tool ...................................................273
PG Vocal Remover............................................278
Disclosure triangle...................................................61
drag and drop.........................................................102
Drag and drop..........................................................67
Drivers...................................................................215
Drum
Window .............................................................167
Drum Grid Editor...................................................209
Drum Kit
keys....................................................................166
settings...............................................................166
Drum Kit Window.................................................164
Drum maps ............................................................204
re-map drums/patches........................................204
Drum patterns ........................................................194
Dump Request Macro............................................250
Duplicate................................................................201
DXi synth support....................................................51
DXi synthesizer
selection...............................................................52
settings.................................................................52
DXi Synthesizer
about ....................................................................51
assign to track ......................................................52
audio rendering....................................................53
default..............................................................9, 51
Edit ..................................................................83, 107
1-track paste.......................................................187
copy ...................................................................185
289
cut ......................................................................183
floating point percentages..................................191
insert blank bars.................................................196
paste...................................................................185
randomize milliseconds .....................................195
rechannel............................................................195
split MIDI drums .........................................83, 197
stereo audio........................................................102
SysEx events................................................78, 249
Edit DXi.............................................................46, 61
Edit Menu ..............................................................182
Editable notation....................................................112
Editable Notation.....................................................80
Editing
audio tracks........................................................100
event list...............................................................82
MIDI....................................................................79
notes.....................................................................81
stereo audio..........................................................97
Editing notes..........................................................113
Editing songs ...........................................................79
Editing stereo tracks ................................................97
Effects
Permanent..........................................................104
real time.............................................................143
Eliminate Note Overlap.........................................192
Endless Loop .........................................................217
entering chords ........................................................70
rests, shots, held chords, pushes ..........................71
Erase ......................................................................201
Erase Data Only.....................................................201
Event List...............................................................233
Event list editing......................................................82
Events
channel aftertouch..............................................234
controller changes..............................................234
key aftertouch ....................................................234
lyrics ..................................................................234
notes...................................................................234
Pitch Bend .........................................................234
program change .................................................234
Exit ........................................................................182
Extract Channels to Tracks....................................192
File
Custom Dialog...................................................224
formats...............................................................198
import ................................................................198
Menu..................................................................176
templates............................................................179
File types
WMA.................................................................161
File Types
*.DG Files..........................................................210
*.DP Files ..........................................................194
.DLL ..................................................................213
Fill .........................................................................190
Floating Point
percentages ........................................................191
tempos..........................................................54, 153
From ................................................................58, 213
generating BB tracks ...............................................72
GM/GS/XG Mode-On ...........................................211
Go to Time.............................................................207
Guitar
Tuner Calibration...............................................169
Guitar Tuner ..........................................................168
generate tones ....................................................169
settings...............................................................170
Guitar window.......................................................250
other fretboards..................................................253
settings...............................................................252
string tuning.......................................................253
Help
contents..............................................................259
find.....................................................................260
index ..................................................................259
Help menu .............................................................258
Hide Piano .............................................................232
Hide Tool Bar ........................................................232
hot keys..................................................................281
290
How to register ......................................................295
Icon row...................................................................50
insert bars...............................................................196
Insert Blank Track .................................................203
Jukebox..................................................................208
controls ..............................................................208
play list ..............................................................209
Random..............................................................208
Karaoke..........................................................177, 180
remap .................................................................180
Key
transposition ......................................................257
key signature......................................................54, 73
Key Signature ........................................................215
keystroke commands .............................................281
Latency ..................................................................228
Lead Sheet
bar numbers options...........................................126
copy/paste lyrics ................................................127
double bar lines..................................................126
memo .................................................................127
multiple tracks ...................................................124
printing ..............................................................128
Lead Sheet window ...............................................123
License.......................................................................2
Load Scrap.............................................................180
Loading songs
audio ....................................................................84
MIDI....................................................................53
MP3 files .............................................................84
WAV files............................................................84
Loop
Endless Loop .....................................................217
MIDI track.........................................................258
Lyrics
copy to clipboard ...............................................202
entering..............................................................111
Karaoke..............................................................112
Main screen .............................................................38
Markers..................................................................239
Menu bar..................................................................38
Merge audio and DXi ..............................................99
Merging Tracks .....................................................201
Meter Map .............................................................258
Metronome ......................................................76, 230
Micro-resolution ....................................................114
Micro-resolutions ....................................................81
Microsoft DirectX..................................................164
MIDI
Compression......................................................193
drivers................................................................227
forced channel....................................................257
list of controllers................................................283
MIDI Sync.........................................................217
rechannel data....................................................224
recording..............................................................76
MIDI controller list................................................283
MIDI devices.........................................................227
MIDI Monitor........................................................171
controls ..............................................................171
settings...............................................................172
MIDI Out...............................................................226
MIDI Output Port ..............................................46, 61
MIDI Thru .............................................................227
MIDI to audio..........................................................99
MIDI track
convert to audio ...................................................53
convert to WAV...................................................53
MIDI tracks
BB tracks .............................................................70
render to audio.....................................................99
Miniburn................................................................162
Mixer ...............................................................85, 254
audio effects.......................................................143
audio subgroups...................................86, 142, 256
audio track .................................................140, 254
controls ..............................................................138
delete ...................................................................85
delete button ................................................85, 142
insert ....................................................................85
291
insert button .................................................85, 142
MIDI track.................................................139, 254
mute track ............................................................85
record moves .......................................................85
recording moves ................................................145
select DLL or EXE ............................................141
Mixer window ...............................................138, 254
MME audio drivers..................................................15
MTC/SMPTE ........................................................217
Multi-channel mode...............................................252
MultiTracks player ................................................200
Mute track................................................................85
New Features
DXi synths.............................................................9
editing................................................................249
recording............................................................249
New file .................................................................176
Notation .................................................................127
1 peg ..................................................................116
accidentals .........................................................111
bar # font............................................................121
chord height ...............................................116, 118
chord symbols....................................................111
controller numbers.............................................123
controllers..........................................................123
copy ...................................................................115
cut ......................................................................115
editable ..............................................................112
editing notes.......................................................113
entering notes.....................................................113
event dialog .......................................................117
highlighting........................................................114
line thickness .....................................................123
lyrics ..................................................................111
lyrics breaks.......................................................112
micro-resolution.................................................114
moving notes .....................................................113
note roll..............................................................118
options ...............................................................118
orphaned notes...................................................116
other options ......................................................121
popup menu .......................................................115
printing ..............................................................128
properties popup ................................................116
section letters .....................................................116
section text.........................................................115
standard notation................................................110
symbols..............................................................116
tablature .............................................................120
Notation window ...................................................109
Note Roll notation .................................................118
Notes
Duplicate............................................................192
Open
From Clipboard..................................................179
Options
auto rewind ......................................57, 77, 97, 218
Undo Levels.......................................................219
Options menu.........................................................215
Overlapping notes, eliminating..............................192
Overwriting............................................................206
Panic ......................................................................211
part markers.............................................................71
Part markers...........................................................245
Paste.......................................................................185
Patch maps.............................................................204
Patch names...........................................................215
Patches
auto-convert.......................................................211
Patents .......................................................................2
PG AutoWah .........................................................269
PG Distortion.........................................................269
PG Dynamics.........................................................264
PG Echo Chorus ....................................................261
PG Five Band EQ ..................................................267
PG Flanger.............................................................268
PG Music Inc.
contacts..............................................................285
PG PeakLimit ........................................................262
PG Real Time Analyzer
292
mixing/mastering...............................................271
PG Reverb .............................................................261
PG RingMod..........................................................270
PG Ten Band EQ ...................................................266
PG Tremolo ...........................................................271
PG Vinyl Tool
recording tips .....................................................273
PG Vocal Remover
operating principle.............................................278
reverb reduction.................................................279
Phrygian.................................................................253
Piano keyboard ........................................................44
Piano roll
chord ruler .........................................................132
controller edit.....................................................132
cursor location ...................................................132
delete events ......................................................135
display controls..................................................136
graphic editing ...................................................132
graphic event edits .............................................135
graphic event panel............................................134
graphic event selection ......................................134
insert events.......................................................135
keyboard pitch panel..........................................133
movable, floating.......................................131, 238
note duration......................................................132
note editing ........................................................133
note panel...........................................................133
note selection .....................................................133
note time ruler....................................................132
playback location indicator................................132
right click contextual menu ...............................135
select channel.....................................................131
snap-to-grid........................................................131
splitter bar..........................................................134
Piano settings...........................................................44
Pitch Transpose MIDI Music.................................190
Pitch-to-MIDI ........................................................159
settings...............................................................159
Play........................................................................205
Playing songs...........................................................57
Port
MIDI Output......................................................258
Preferences ............................................................218
Audio .................................................................219
Big Lyrics ..........................................................225
File.....................................................................223
General ..............................................................218
Metronome ........................................................230
MIDI..................................................................225
Notation .............................................................225
Piano..................................................................232
SMPTE ..............................................................231
Song Generation ................................................229
Print command.......................................................182
Print options...........................................................128
Print preview .........................................................129
Printing ..................................................................128
Program Change ....................................................258
Program windows....................................................49
PT.DRM ................................................................250
PT.INS...................................................................250
Punch In.................................................................216
Punch-in
erase...................................................................205
overwrite............................................................206
Quantize.................................................................188
Randomize.............................................................194
Real Time Control .................................................209
RealBand
audio drivers ........................................................22
guided tour...........................................................21
MIDI drivers........................................................23
MIDI features ......................................................51
Mixer window .....................................................24
select folders........................................................23
Tracks window ....................................................24
RealDrums...............................................................93
breaks...................................................................95
generate favorites.................................................95
293
part markers.........................................................95
select and generate...............................................94
variations .............................................................95
RealDrums Picker....................................................94
RealStyles ................................................................91
RealTracks...............................................................91
assign RealTracks to track ...................................92
generate favorites.................................................93
select and generate...............................................91
rechannel................................................................195
Rechannel ..............................................................191
Record ...................................................................205
step record .........................................................206
Record filter...........................................................218
Recording
always record audio .............................................96
audio levels..........................................................96
audio tracks..........................................................95
backup take..........................................................96
filter ...................................................................218
keep take..............................................................77
mixer moves ........................................................78
overdubs ..............................................................77
punch-in.......................................................78, 216
stop ......................................................................77
VU meters............................................................96
Recording MIDI ......................................................76
Recording mixer moves...........................................78
Reference...............................................................176
Registration Form..................................................295
Remove Track .......................................................203
render MIDI to audio...............................................99
Rendering MIDI to audio ........................................99
Repeats ....................................................................75
Replace ..................................................................188
Resize Track Column ............................................258
Resolution........................................76, 168, 188, 216
Right-click MIDI menu .....................................62, 65
ritard ......................................................................247
Run .DLL or .EXE.................................................213
safe boot-up .............................................................14
Sampling rates .........................................................12
Save file.................................................................178
Save Scrap .............................................................180
Select folders .........................................................229
selectable buffer size .............................................222
Settings for Bar........................................................74
repeats..................................................................75
volume changes ...................................................75
Setup..........................................................................8
SMPTE ..........................................................217, 231
Solo
bass and drums ....................................................57
soloing tracks.......................................................57
Song markers...................................................57, 239
Split Piano Track ...................................................202
Standard notation...................................................110
Status bar .................................................................38
Step record.............................................................206
Stop recording .........................................................97
Swap Tracks ..........................................................203
Sync .......................................................................217
auto chase ..........................................................217
SysEx.............................................................172, 249
SysEx events....................................................78, 249
SysEx window .......................................................248
Tablature................................................................120
templates................................................................179
tempo.................................................................54, 73
Tempo....................................................................215
Tempo Calculator ......................................27, 73, 179
Tempo map............................................................247
Tempos
precise floating point ...................................54, 153
Test audio performance .........................................207
Thru .................................................................58, 213
time shift and pitch shift ........................................104
time signature ..........................................................73
Timer .............................................................172, 228
Tip of the Day........................................................260
294
Toolbars
add or remove buttons .........................................42
dockable...............................................................42
hide ....................................................................232
icon size...............................................................39
main toolbar.........................................................39
plug-ins................................................................50
RealTracks...........................................................39
Track menu............................................................201
Track Name ...........................................................257
Tracks window ..................................................45, 61
disclosure triangle..........................................45, 61
drag and drop.......................................................67
drag and drop.....................................................102
DXi synth.......................................................46, 61
MIDI controls ................................................46, 61
MIDI output port ...........................................46, 61
MIDI tracks ...................................................46, 61
mute/unmute track ...............................................45
number field...................................................45, 61
overview display............................................46, 62
pan .......................................................................62
patch select ..........................................................62
play selected area...........................................47, 66
port.......................................................................62
right-click audio menu.........................................65
right-click MIDI menu.........................................62
select..............................................................47, 66
snap................................................................47, 67
track name field ...................................................62
volume .................................................................62
zoom ..............................................................47, 67
Trademarks................................................................2
TranzPort ...............................................................158
commands..........................................................158
setup...................................................................158
Tune.......................................................................141
Tutorial
adding RealTracks ...............................................31
arrangement settings ............................................26
audio recording....................................................29
BB songs with RealTracks...................................35
entering chords ....................................................25
file types ..............................................................33
generate BB tracks...............................................28
guided tour...........................................................21
importing BB songs.............................................34
MIDI editing........................................................28
mixing..................................................................37
navigation ............................................................32
new song..............................................................24
regenerate BB tracks............................................32
song preferences ..................................................33
song settings ........................................................27
StylePicker...........................................................26
VU meters............................................................30
Velocity .................................................................193
Change...............................................................193
Dynamics...........................................................193
forced transposition ...........................................257
VST
control panel ........................................................90
install plug-in.......................................................86
remove .................................................................87
select....................................................................10
uninstall ...............................................................87
VU meters................................................................96
VU Meters .............................................................239
Wave files
exporting............................................................199
formats...............................................................199
importing ...........................................................198
merge compressed .............................................199
merge to stereo...................................................199
merge to WMA..................................................199
multitracks player ..............................................200
Window
Setup..................................................................181
Window menu .......................................................233

Registration Form
296
Registration Form
Please register your program. Registering your PG Music software entitles you to free, unlimited technical support,
advance notice of product upgrades, and news about new product releases. If you haven't registered your PG Music
software yet, please take a few moments and do so now.
How to Register
Mail to PG Music Inc., 29 Cadillac Avenue, Victoria, BC V8Z 1T3, Canada
Fax to 1-250-475-2937 or toll-free to 1-877-475-1444.
On-line at www.pgmusic.com
Telephone 1-250-475-2874, toll-free in North America at 1-800-268-6272, or
+ 800-4746-8742 where Universal International Freephone Service is available.
Name ________________________________________________________________________
Address ______________________________________________________________________
City__________________________________________________________________________
State/Province _________________________________________________________________
Zip/Postal Code_________________________________________________________________
Country_______________________________________________________________________
Telephone number__________________________ Fax number__________________________
E-mail address__________________________________________________________________
Computer (check): IBM MAC Model__________________________________________
Operating system (e.g. Windows XP, Vista; Macintosh OS X)____________________________
What MIDI interface are you using? ________________________________________________
What primary synth/sound card do you use? __________________________________________
Favorite Styles: Jazz _____ Pop/Rock _____ Latin _____ Country _____ Other ____________
Purchased from ________________________________________________________________
Date of purchase _______________________________________________________________
Comments/Suggestions___________________________________________________________
______________________________________________________________________________
______________________________________________________________________________
______________________________________________________________________________
______________________________________________________________________________
______________________________________________________________________________
______________________________________________________________________________