Phicomm 6775440012470 DESKTOP SWITCH User Manual FreeSwitch 808I
Shanghai Feixun Communication Co., Ltd. DESKTOP SWITCH FreeSwitch 808I
Phicomm >
Users Manual

FreeSwitch 808I
Quick Installation Guide

FreeSwitch 808I Quick Installation Guide
I
Information in this document is subject to change without notice.
Copyright © 2010 Shanghai Feixun Communication Co., Ltd. All Rights Reserved.
This document contains proprietary information, which is protected by copyright. No part
of this document may be photocopied, reproduced, or translation into another language
without the prior written consent of Feixun.
Safety
Before installing and operating these products, please read whole manual and the safety
statements.
Warranty
See the Customer Support/Warranty booklet included with the product package contents.
The only warranties for Feixun products and services are set forth in the express warranty
statements which depend on appointed products.
Icon Descriptions
While reading through the documents you may see several icons that call attention to
specific items. Below is a description of these icons:
Icon Meaning
This exclamation point indicates that there is a caution or warning and it is
something that could damage your product.
This light mark indicates that there is a note of is something that you should
pay special attention to while using the product.
About This Guide
The document includes various illustrations and related parameters, these elements are
mainly used for reference of products description. Please note that you have purchased

FreeSwitch 808I Quick Installation Guide
II
products may be slightly different.
FreeSwitch 808I Quick Installation Guide
I
Thank you for purchasing FreeSwitch 808I Switch!
This Quick Installation Guide gives step-by-step instructions for setting up FreeSwitch
808I Switch.
Installation Precautions
Follow these precautions when installing your FreeSwitch 808I switches:
i. Make sure you use the power connector supplied with the switch to connect it to an
AC power source.
ii. Install the switch in a fairly cool and dry place.
iii. Make sure the air flow around the sides of the switch is not restricted.
iv. Install the Switch on a horizontal surface and do NOT stack any heavy objects on the
Switch.
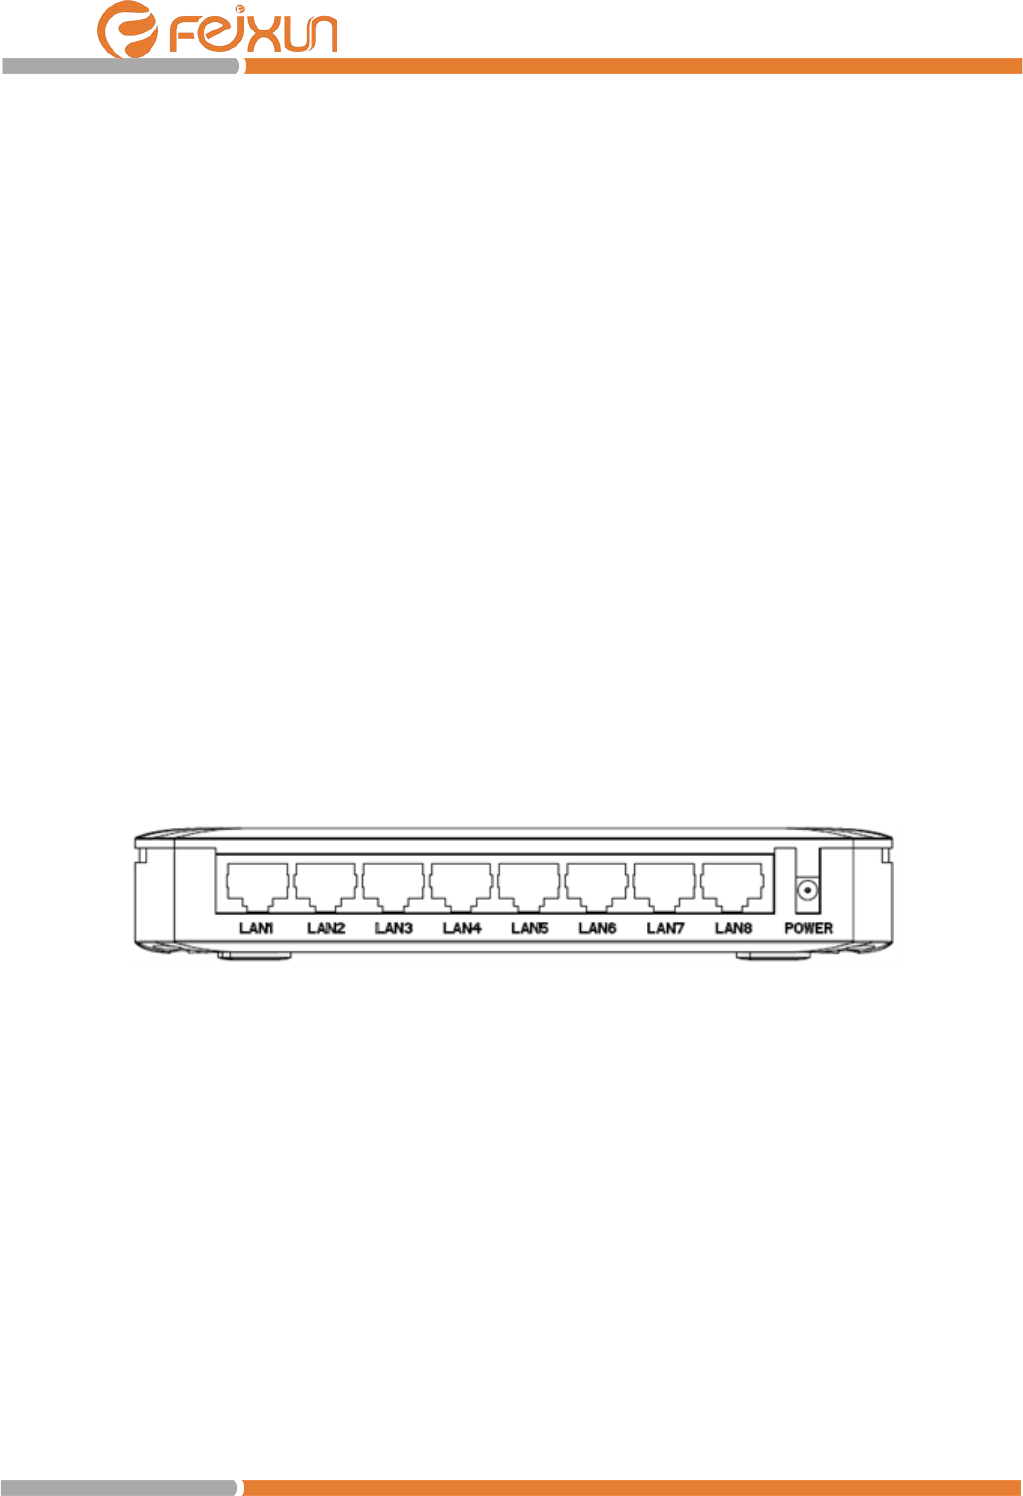
Connecting the switch to your network
Ethernet Ports (1~8)
These RJ-45 ports can operate in half duplex and full duplex transfer modes, and also
support automatic MDI/MDI-X crossover detection.
Power
The FreeSwitch 808I does not have a power switch. It is powered on when the AC power
adapter is connected to the switch and to a power source.
Connect the adapter’s power cord to the power connector on the back of the switch, and
then plug the AC power adapter into a nearby properly grounded electrical outlet.
FreeSwitch 808I Quick Installation Guide
II
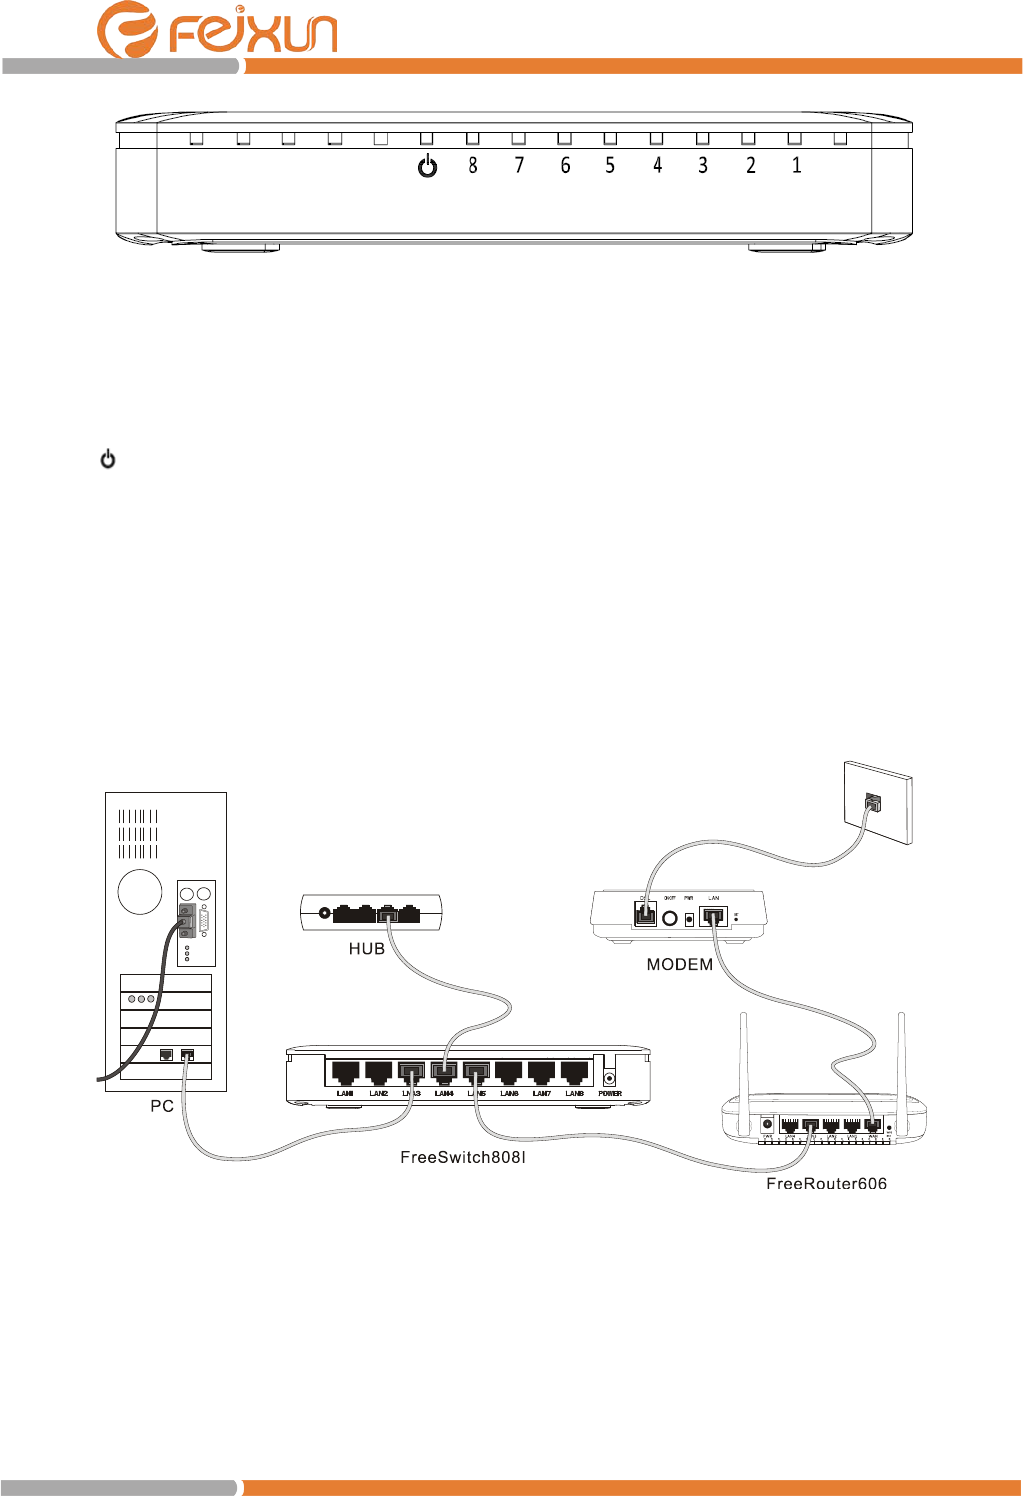
LED indicator lights
The front panels of these switches provide status LEDs for system monitoring.
: The Power LED lights up and will stay on while the Switch is powered on.
LED 1~8: The Ethernet LED lights up when the Adapter is connected to a device through
the Ethernet port. If the LED is flashing, the Switch is sending or receiving data over that
port.
Sample Network Topologies
With this switch you can directly connect computers, and switches to provide dedicated
bandwidth to those devices, and you can build a switched network infrastructure by
connecting it to hubs, other switches, or wireless routers.

FCC WARNING
This device complies with Part 15 of the FCC Rules. Operation is
subject to the following two conditions:
(1) this device may not cause harmful interference, and
(2) this device must accept any interference received, including interference that may cause
undesired operation.
NOTE: This equipment has been tested and found to comply with the limits for a Class B
digital device, pursuant to part 15 of the FCC Rules. These limits are designed to provide
reasonable protection against harmful interference in a residential installation. This equipment
generates, uses and can radiate radio frequency energy and, if not installed and used in accordance
with the instructions, may cause harmful interference to radio communications. However, there is
no guarantee that interference will not occur in a particular installation. If this equipment does
cause harmful interference to radio or television reception, which can be determined by turning
the equipment off and on, the user is encouraged to try to correct the interference by one or more
of the following measures:
- Reorient or relocate the receiving antenna.
- Increase the separation between the equipment and receiver.
-Connect the equipment into an outlet on a circuit different from that to which the receiver is
connected.
-Consult the dealer or an experienced radio/TV technician for help.
NOTE: The manufacturer is not responsible for and radio or TV interference caused by
unauthorized modifications to this equipment. Such modifications could void the user’s authority
to operate the equipment.