Philips Electronics Singapore RC197 RF Remote Control User Manual Manual RC1974503 00RF
Philips Electronics Singapore Pte Ltd RF Remote Control Manual RC1974503 00RF
Users manual
Philips Electronics Singapore Pte Ltd
Page 1 of 15
User Manual
Setup Procedures
&
Information For Used
Of
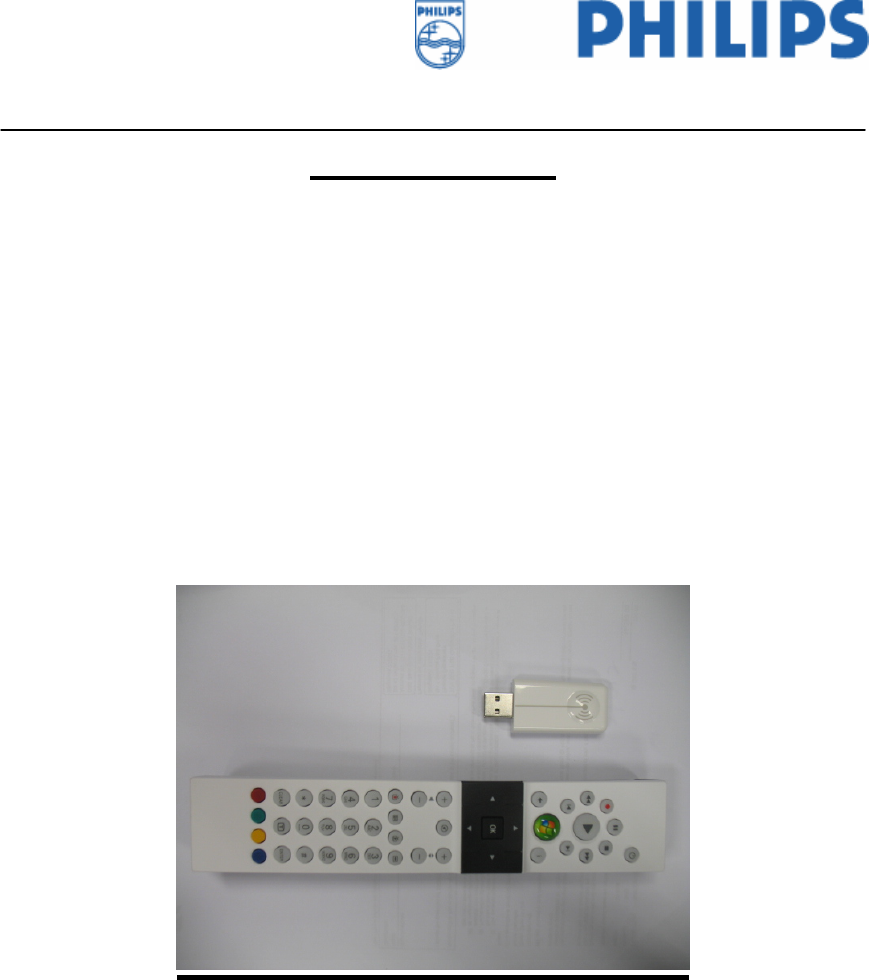
2.4GHz RF Remote Control
(RC1974503/00RF) &
2.4GHz RF USB Receiver (OVU700001/00RF)

Philips Electronics Singapore Pte Ltd
Page 2 of 15
Table of contents
1. FCC Statatement Page 3 of 16
2. Setup Procedures Page 4 of 16
3. Information For Used Page 12 of 16
3.1 General Page 13 of 16
3.2 Stuck key function Page 13 of 16
3.3 Sleep mode Page 13 of 16
3.4 Key press Page 14 of 16
3.5 Pairing Page 14 of 16

Philips Electronics Singapore Pte Ltd
Page 3 of 15
1. FCC Statement
[Class B Device]
FCC Compliance
NOTE: This equipment has been tested and found to comply with the limits for a Class B
digital device, pursuant to Part 15 of the FCC Rules. These limits are designed to provide
reasonable protection against harmful interference in a residential installation. This
equipment generates, uses and can radiate radio frequency energy and, if not installed and
used in accordance with the instructions, may cause harmful interference to radio
communications. However, there is no guarantee that interference will not occur in a
particular installation. If this equipment does cause harmful interference to radio or
television reception, which can be determined by turning the equipment off and on, the
user is encouraged to try to correct the interference by one or more of the following
measures:
-- Reorient or relocate the receiving antenna.
-- Increase the separation between the equipment and receiver.
-- Connect the equipment into an outlet on a circuit different from that to which the
receiver is connected.
-- Consult the dealer or an experienced radio/TV technician for help.
Any changes or modifications not expressly approved by the party responsible for
compliance could void the user’s authority to operate the equipment.
No special accessory is required to enable the equipment to comply with the emission
limits.
FCC Part 15.19
This device complies with Part 15 of the FCC Rules. Operation is subject to the
following two conditions: (1) this device maynot cause harmful interference and (2)
this device must accept any interference received, including interference that may
cause undesired operation.
Philips Electronics Singapore Pte Ltd
Page 4 of 15
2. Setup Procedures
Setup Procedures of 2.4GHz RF Remote Control
and 2.4GHz RF USB Receiver
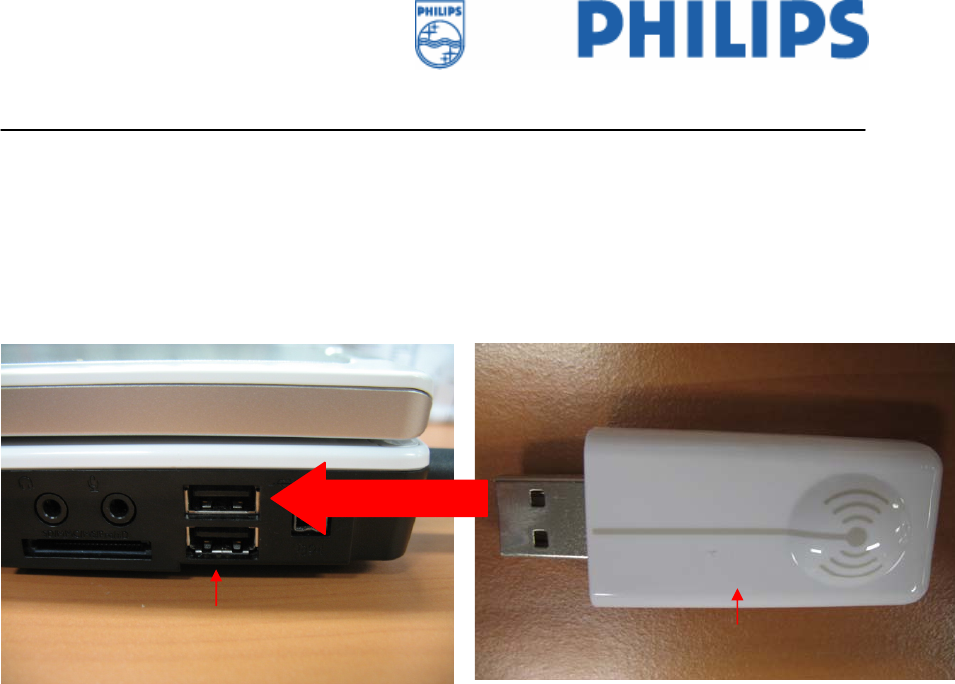
Picture 1: USB port and 2.4GHz RF USB Receiver plug into USB port.
USB port 2.4GHz RF USB Receiver
Plug into USB
port
Philips Electronics Singapore Pte Ltd
Page 5 of 15
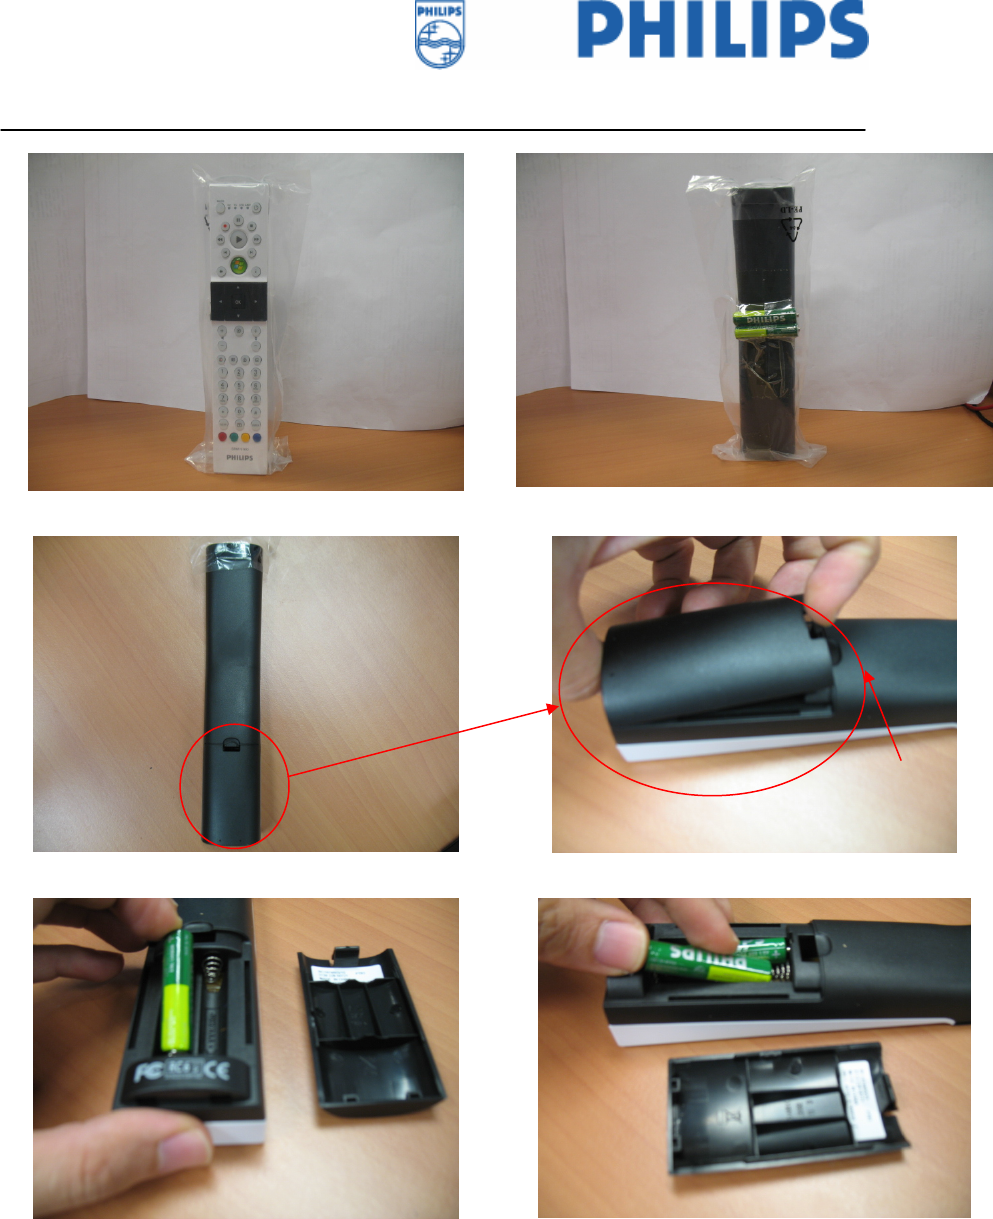
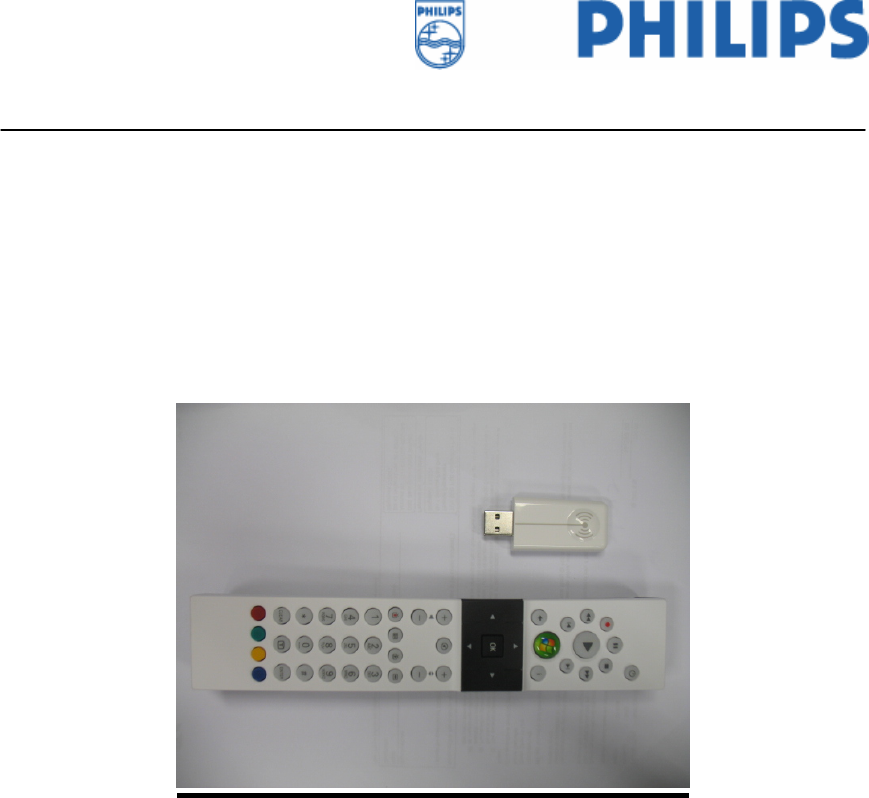
Picture 2: 2.4GHz RF Remote control with packaging (front and rear side).
Picture 3: Remove the battery lid by pressed the hook down the battery lid and lift it up.
Picture 4: Insert the batteries (AAA type) with correct polarity.
Press the hook down
and lift up the lid
Philips Electronics Singapore Pte Ltd
Page 6 of 15
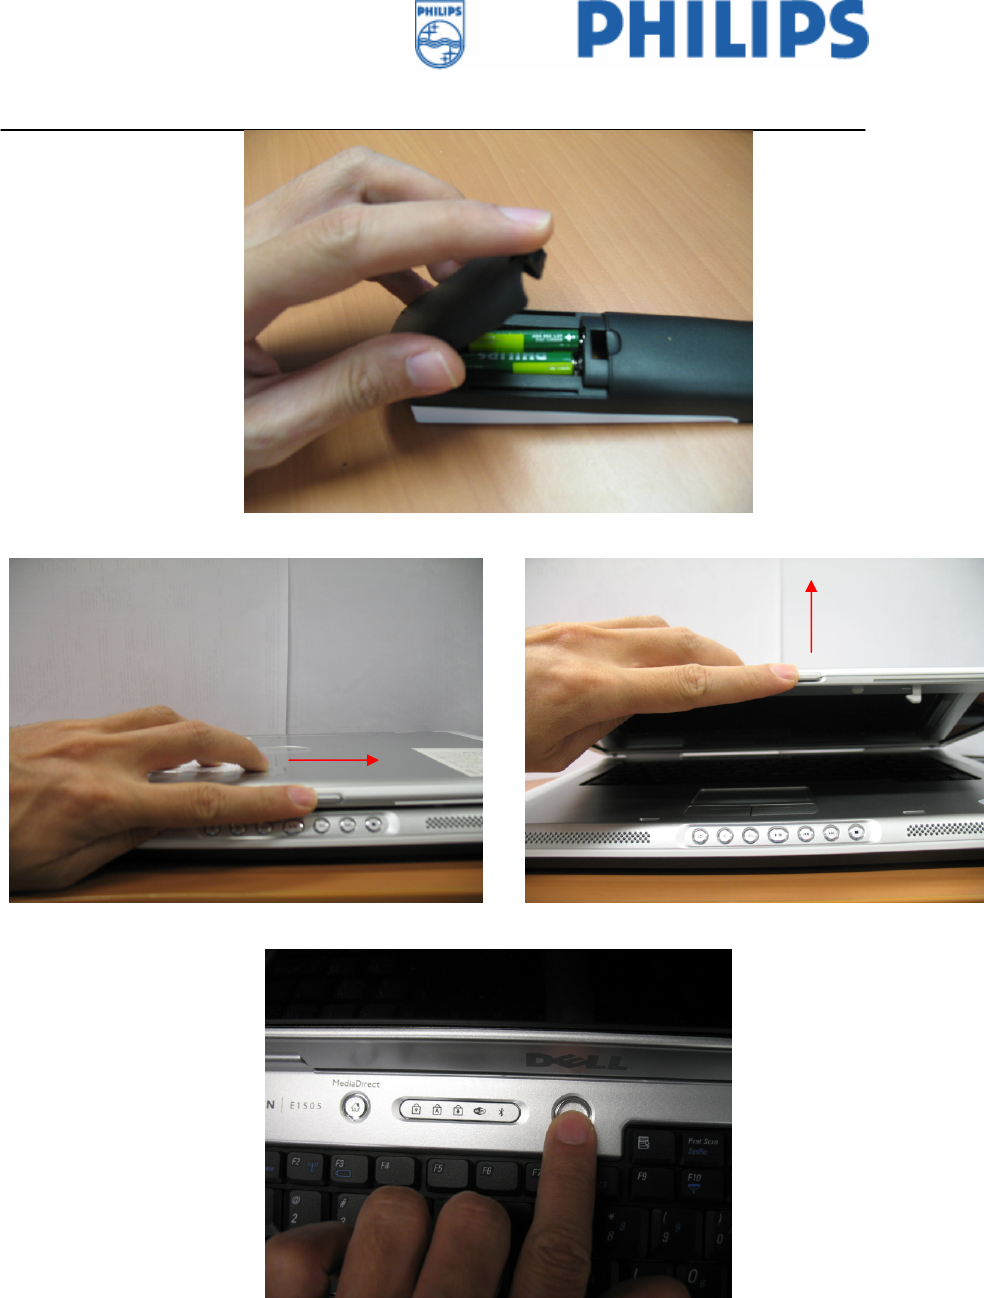
Picture 5: Closed up the battery compartment with battery lid.
Picture 6: Lift up the notebook LCD display by release the catcher.
Picture 7: Press the switch to turn on the notebook.
Press to right hand
side to release the
catcher
Lift up the
LCD display
after release
the catcher
Philips Electronics Singapore Pte Ltd
Page 7 of 15
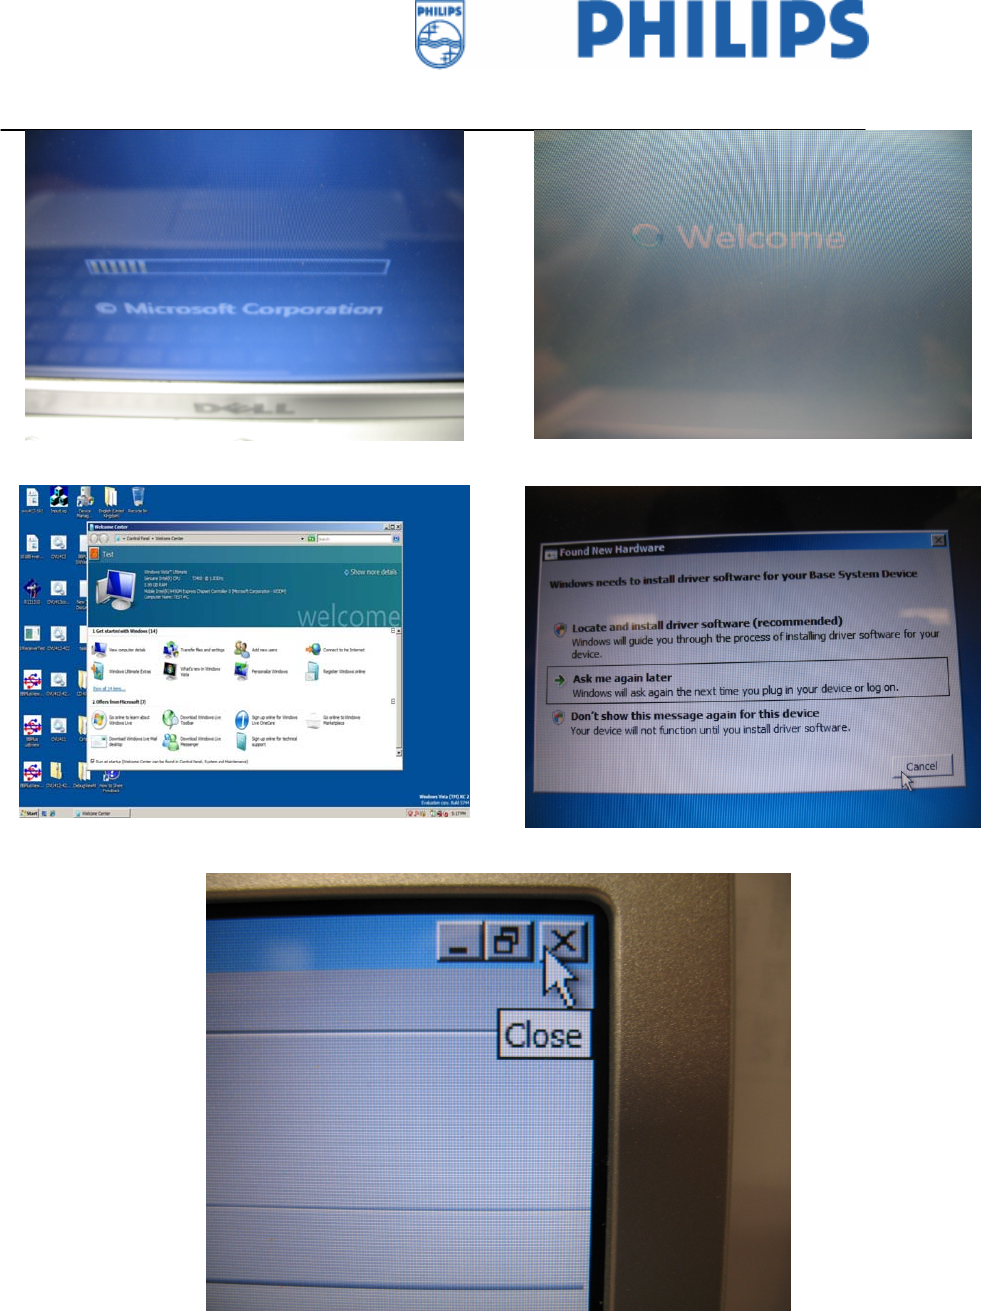
Picture 8: Process of loading Windows Vista.
Picture 9: Close the application as above by click the “X” icon at upper right hand side as Picture 10.
Picture 10: The “X” icon located at right hand side, upper corner.
Philips Electronics Singapore Pte Ltd
Page 8 of 15
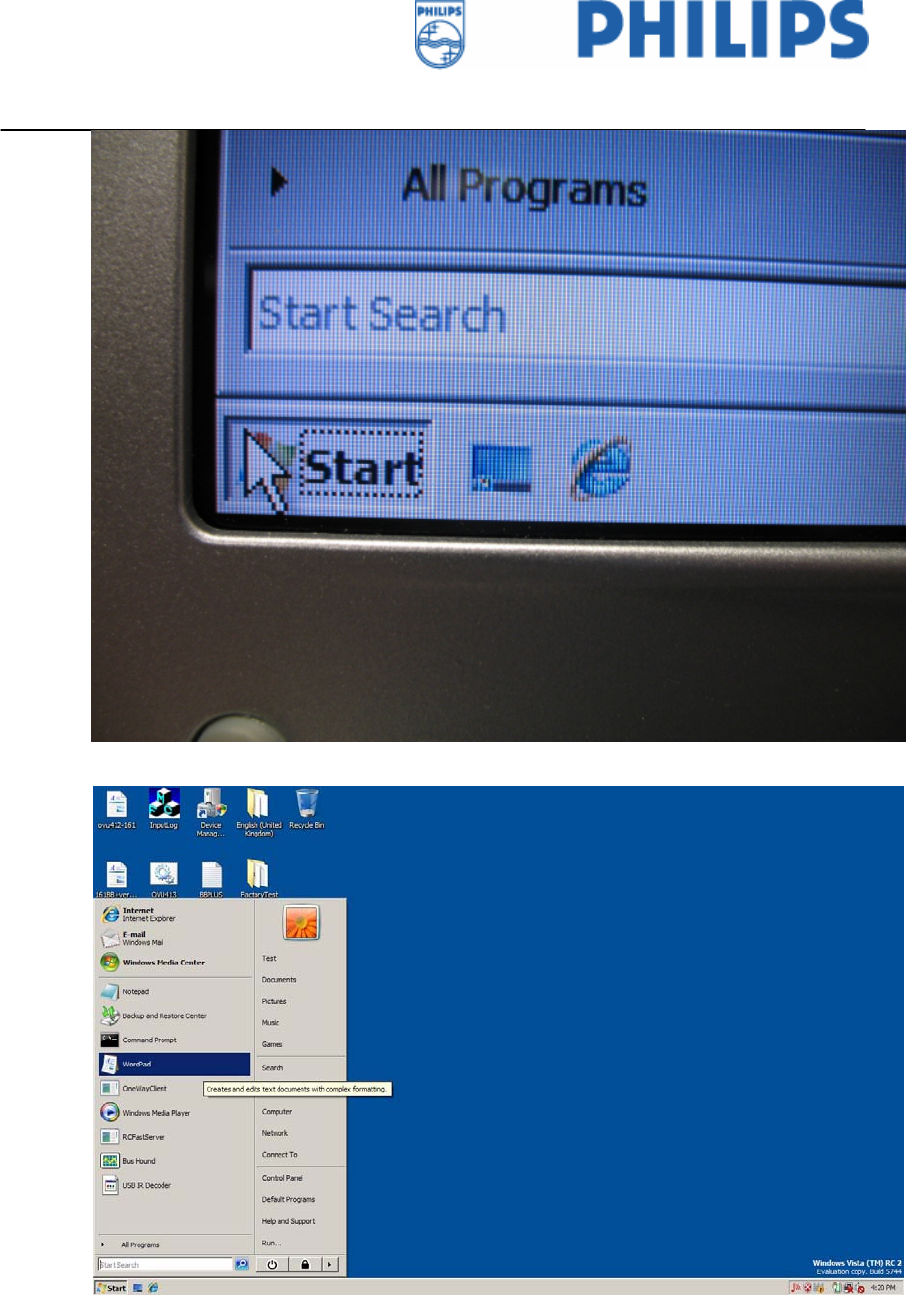
Picture 11: Using cursor to click the “Start” icon located at left hand side, lower corner.
Picture 12: Select and click the “WordPad” application program.
Philips Electronics Singapore Pte Ltd
Page 9 of 15
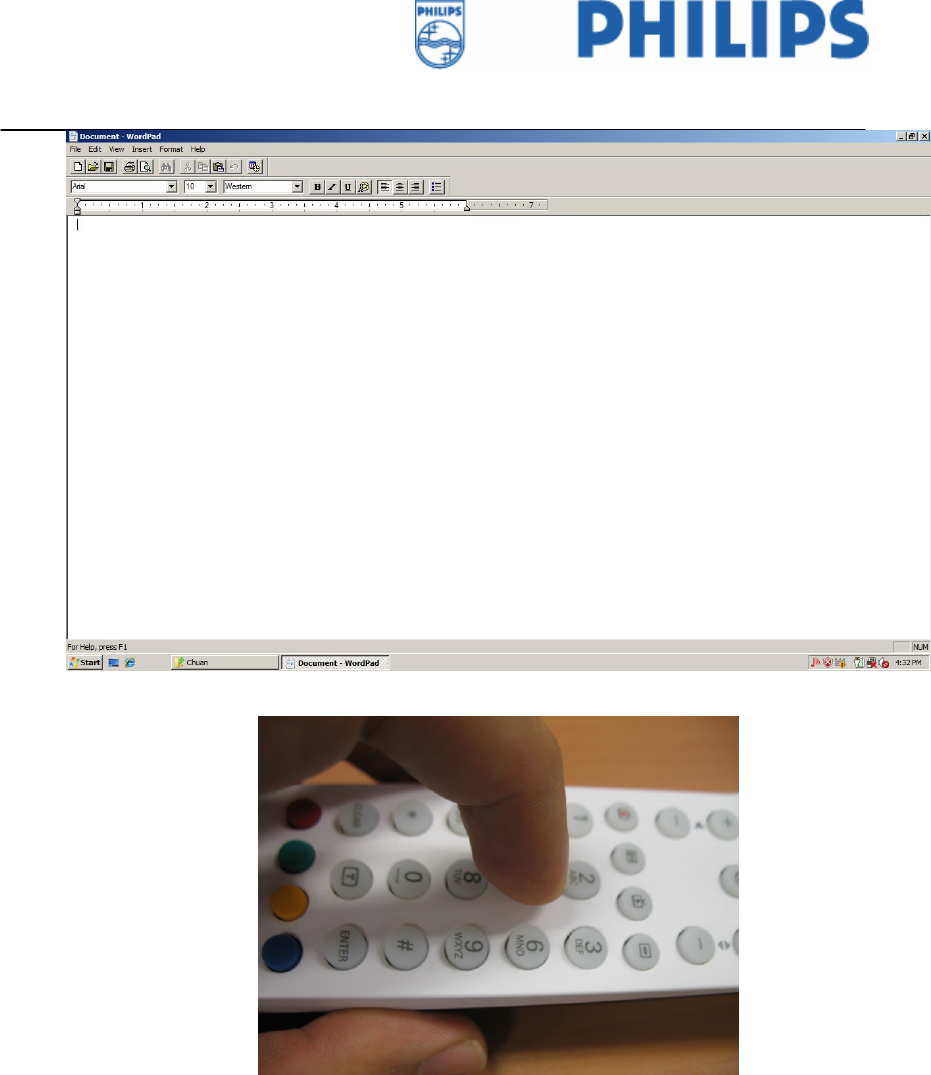
Picture 13: The “WordPad” application software.
Picture 14: Press “Digit 5” and release the button on the 2.4GHz RF remote control
Philips Electronics Singapore Pte Ltd
Page 10 of 15
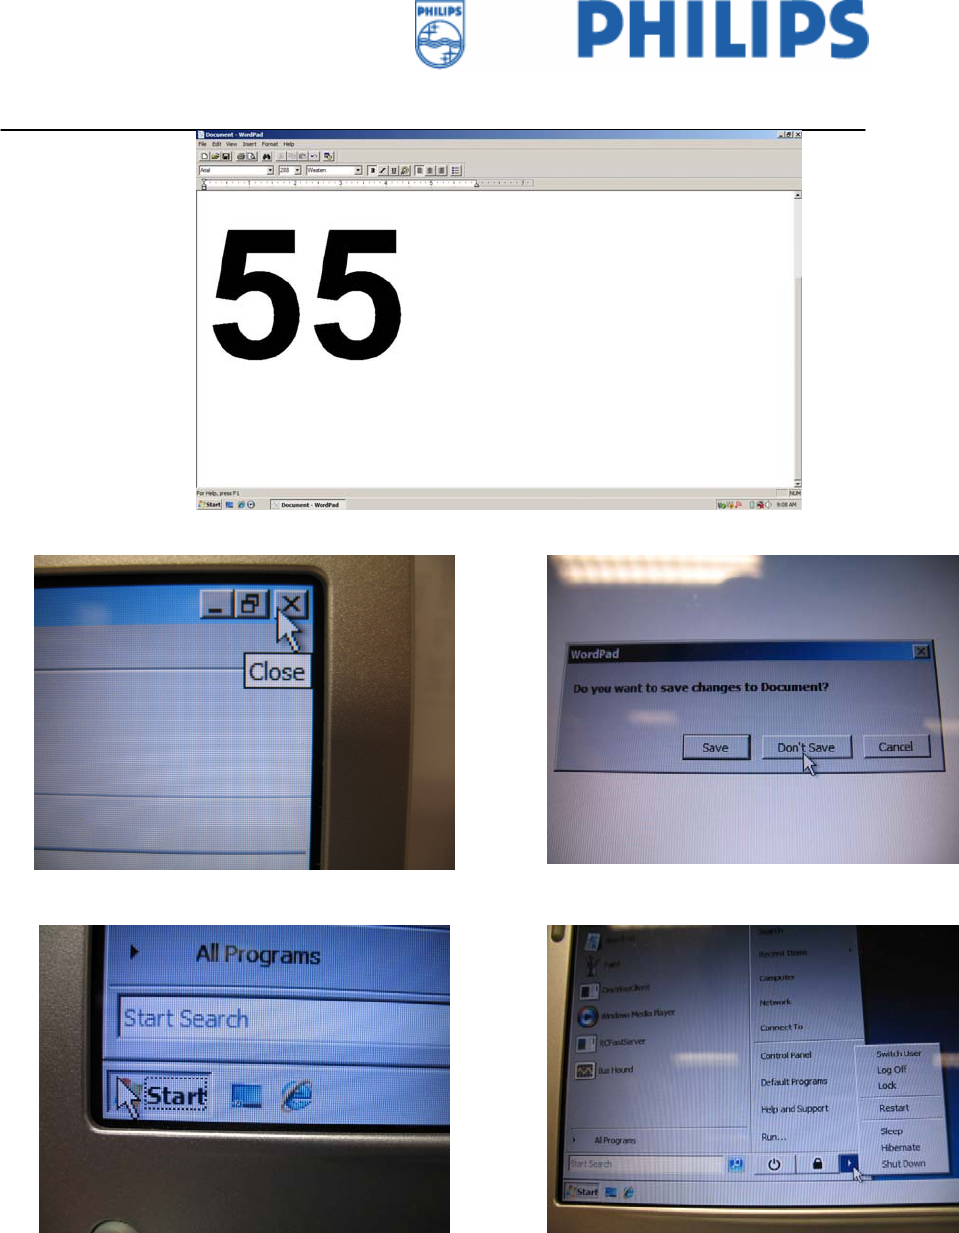
Picture 15: The WordPad display “5” for press and release button Digit 5 on 2.4GHz RF remote control.
Picture 16: After testing, before shutdown the note book, close all the application software as click the “X” icon located at
upper right hand corner and after that, click the icon “Don’t Save” to abort saving the file.
Picture 17: Click the “Start” icon then select the “f” icon.
Philips Electronics Singapore Pte Ltd
Page 11 of 15
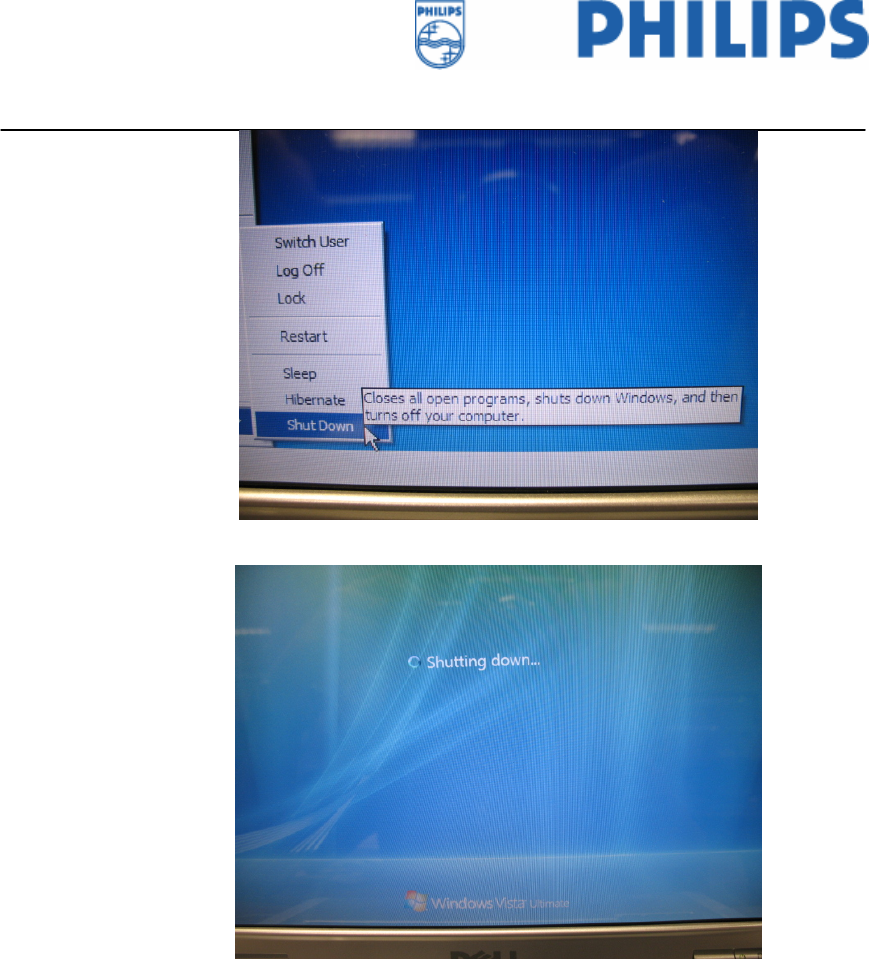
Picture 18: Click the “Shut Down” icon
Picture 19: Notebook shutting down.
Philips Electronics Singapore Pte Ltd
Page 12 of 15
3. Information For Used
2.4GHz RF Remote Control
(RC1974503/00RF) &
2.4GHz RF USB Receiver (OVU700001/00RF)
Philips Electronics Singapore Pte Ltd
Page 13 of 15
3.1 General
This remote control is a 2.4GHz RF remote control (RC1974503/00RF) which will
transmit RF protocol. It will work with 2.4GHz RF USB receiver (OVU700001/00RF).
3.2 Stuck key function
Stuck key means a key or multiple key has been pressed for a very long time in normal
operating mode. ( For multiple key press, refer to section 1.6.4 ) To preserve battery
power, the remote will enter sleep mode at about 30 seconds after the last key transition
to consume minimal power (the Backlight LED and LED indicator will be turned off at
the same time). After all keys are released, the remote resumes normal operation.
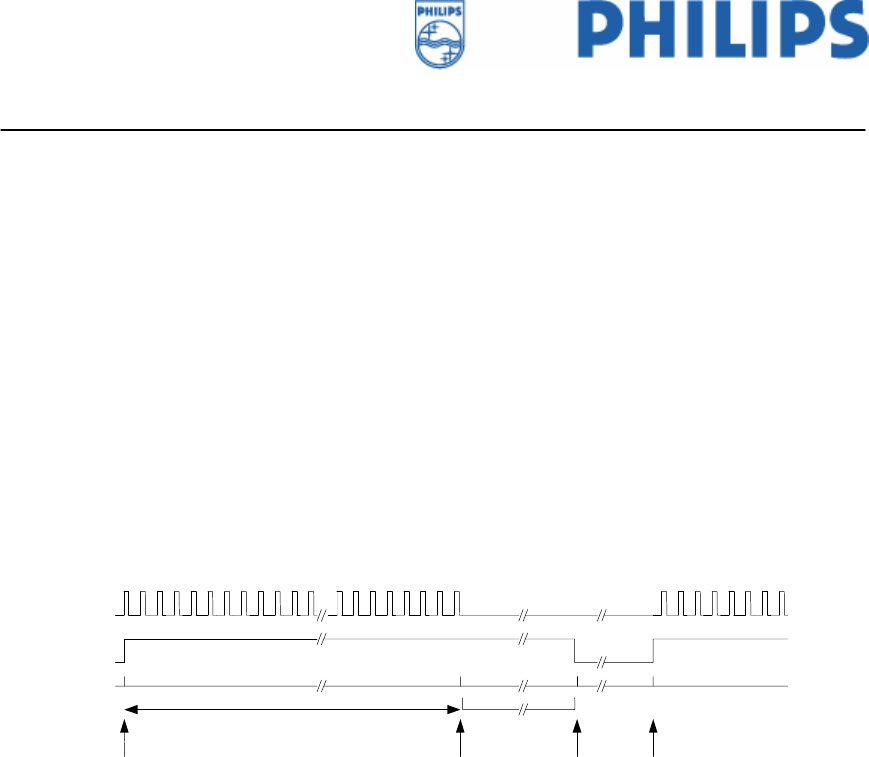
Following graphic shows when this power down mode is entered: Power Down means
the MCU and RF module enters into sleep mode.
There is a tolerance of +/- 3 seconds to this timeout
IR Transmit
Keypress
Time 30s ± 3s *
Key Pressed
Code starts transmitting Key still pressed after 30 ± 3 seconds
Remote goes in stuck key mode,
code transmission stops
Code transmission
activated by valid key
Remote resumes
normal operation
after stuck key situation neutralized
STUCK KEY TIMEOUT
* Stuck Key Timeout is typical 30 seconds, actual timing depends on the protocol transmitted
Stuck key mode
3.3 Sleep mode
Sleep mode means both application MCU and RF module enter sleep mode. All
LEDs/Backlight LED is turned off during sleep mode.
Besides remote control can enter sleep mode because of stuck key described in section
3.2,
There are 2 conditions where the remote control will enter sleep mode
¾ Upon batteries insertion, remote control will enter sleep mode if there is no
key press within 4 secs.
¾ Remote Control enters sleep mode 4 seconds after the key is released
In all the 2 cases above, pressing a key again will wakeup the remote control.

Philips Electronics Singapore Pte Ltd
Page 14 of 15
3.4 Key press
3.4.1 Continuous key press
When the key is press and held, the transmission will repeat at the timing described in
1.1.1.1 If more than 1 key is pressed, there will be no transmission
3.4.2 Multiple Key press
Remote control will not react to multiple key press. No transmission will take place. Only
the backlight LED will light up.
3.5 Pairing
3.5.1 Pairing between remote control and receiver
In order for remote control and receiver to talk to each other, both must have a same ID.
There is a 24-bit ID in both the remote control and receiver. This ID is stored in the
Eeprom
There are 2 scenario when the ID can be written/overwritten:
3.5.2 In the factory, before delivered to customer.
All the receiver and remote control has the same ID, which is default ID ( equivalent to
no ID in Eeprom ) . So, when the customer buy the receiver and remote control, they can
straight away use it without any setup required.
3.5.3 Pairing by the user
Since all the remote control and receiver has the same ID, there could be a scenario
where the remote interfere the receiver that is used by other user at the same time. In this
case, the user has the option to change this ID on the remote and receiver. This is done by
the following receiver.
¾ Make sure the USB receiver is unplugged from the host
¾ Press and hold “Clear” key and “Enter” key for 3 seconds. Then release both
keys. The remote control now will send a special command code of pairing setup,
repeatly for 10 seconds. This command code contains a 24bit- ID ,which is
randomly generated by remote control.
¾ Make sure the host is in active mode, plug in the USB receiver now.
¾ When the USB receiver is plugged in, it will enumerates. After enumeration
completes, it will look for the command of pairing setup, for 1 second.

Philips Electronics Singapore Pte Ltd
Page 15 of 15
¾ If it receives this pairing command, it will overwrite it’s own 24bit- ID with the
new ID in this command.
¾ The USB receiver will acknowledge the successful operation to the remote
control.
¾ After the acknowledgement is received by the remote control, it will overwrite it’s
own ID with this ID as well, into the Eeprom. This new ID will remain in the
Eeprom of both receiver and remote control.
¾ Now, both remote control and receiver have the same ID and pairing is
completed.