Philips Medical Systems North America TRNSBV1 Range Extender for SRR measurements via WLAN User Manual
Philips Medical Systems North America Co. Range Extender for SRR measurements via WLAN
UserManual.wiki
>
Philips Medical Systems North America
>
TRNSBV1 User Manual
User Manual
Navigation menu
Upload a User Manual
Namespaces
Wiki Guide
HTML
PDF
Info
Views
User Manual
Discussion / Help
Navigation


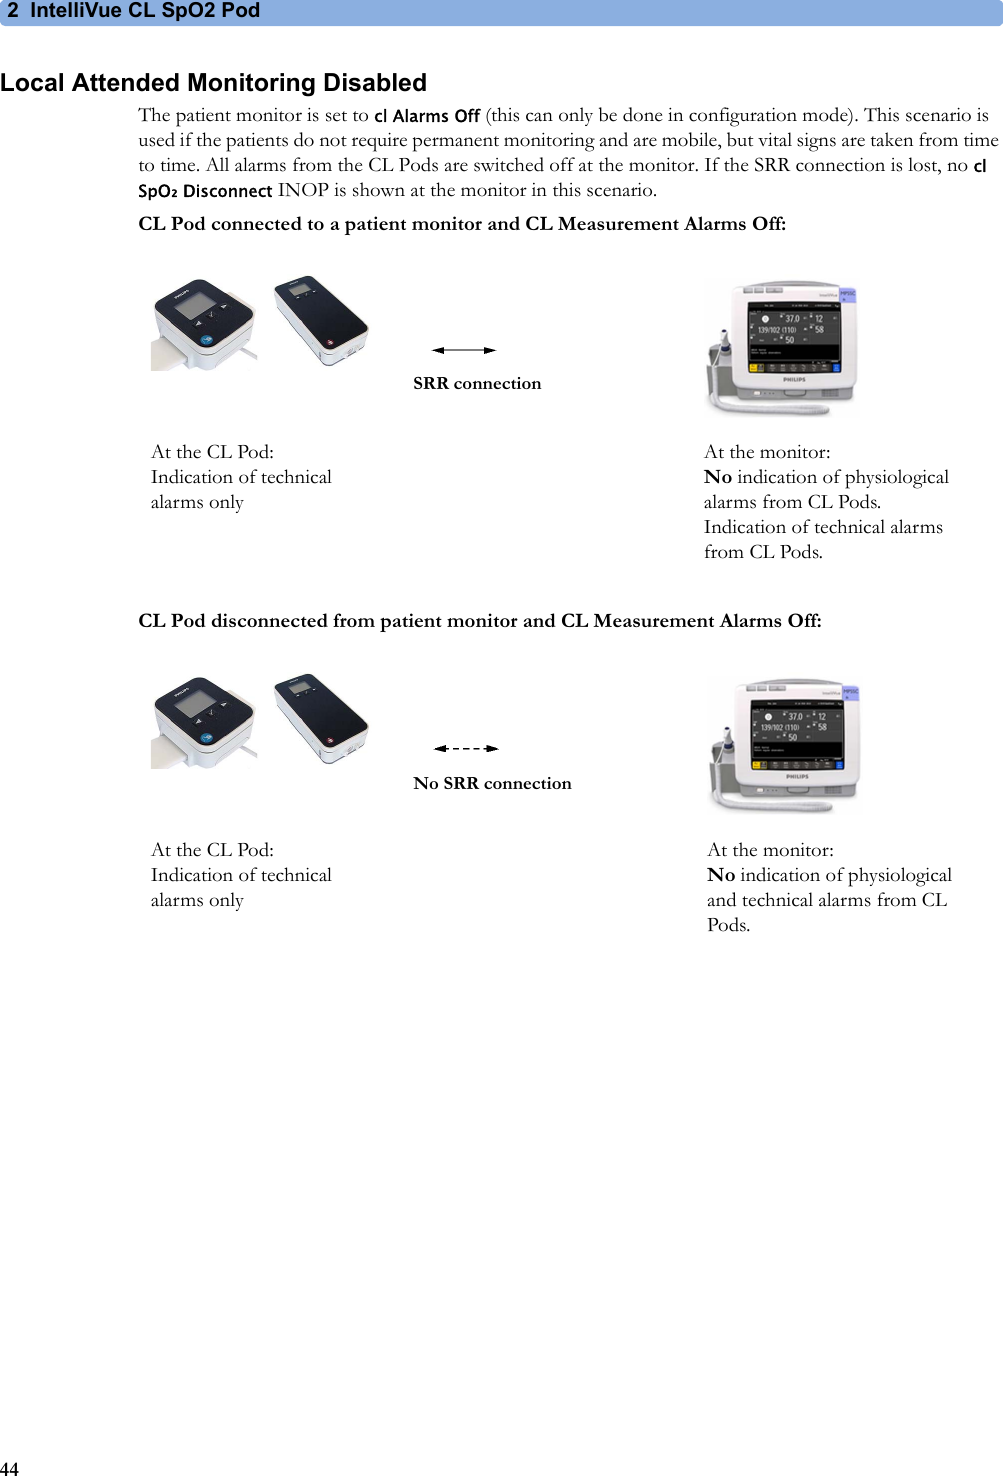


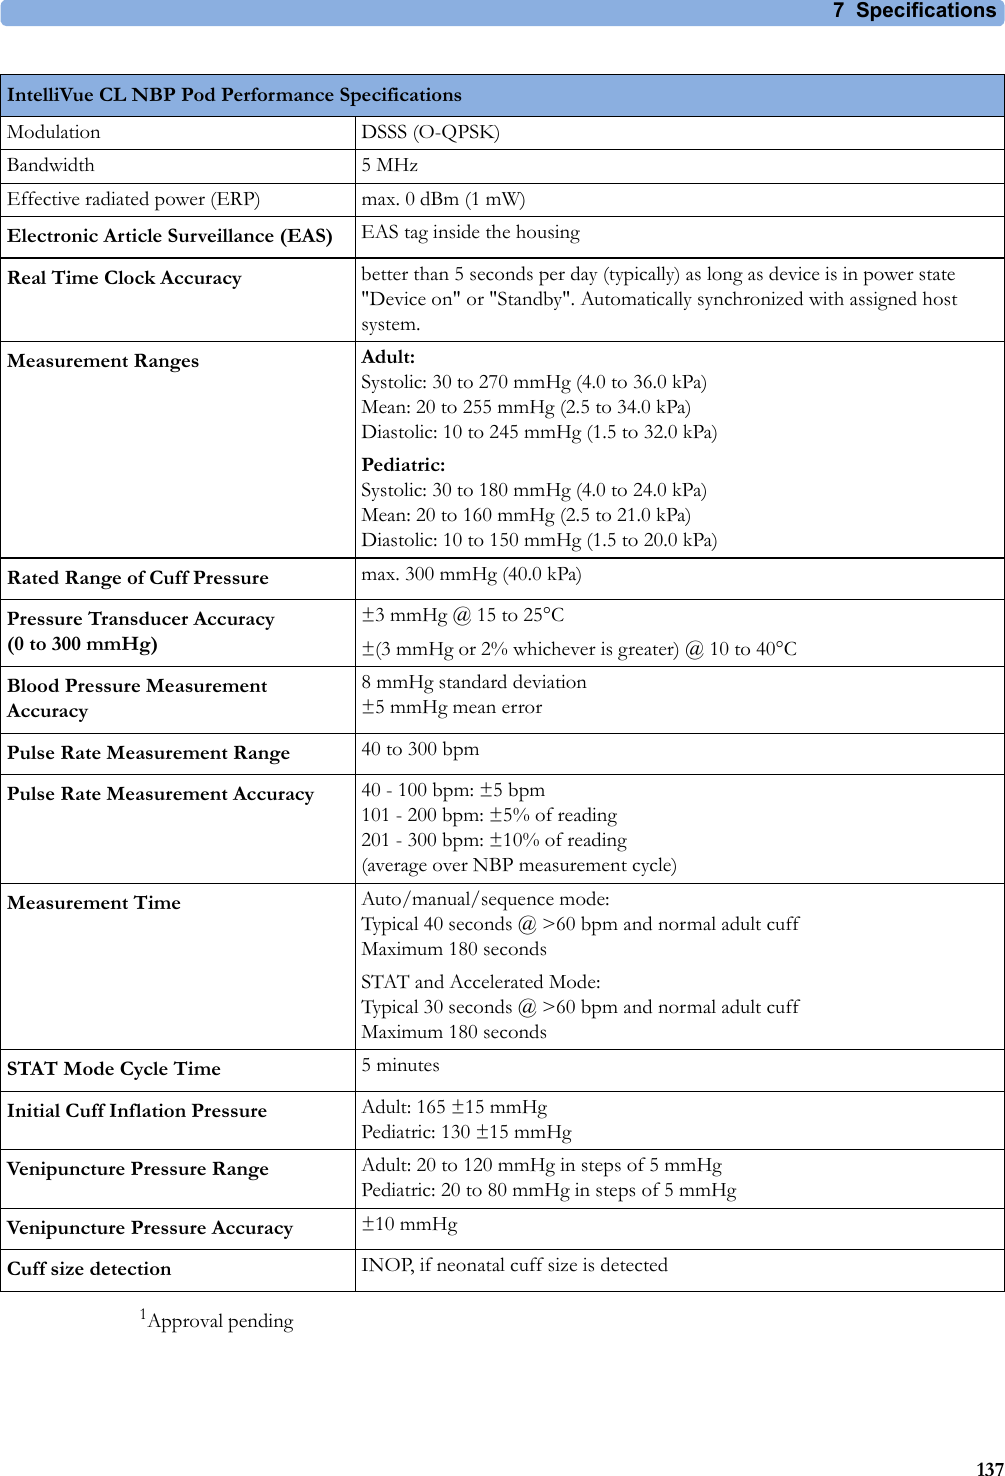
![7 Specifications128Followed by two alphanumeric characters, indicates ingress protection gradeChina RoHSDo not reuse LAN connection indicator for connection to a wired networkResp identifier Not made with natural rubber latexMass in kilogram (kg) RCM compliance markEAC mark CSA US markFCC ID Federal Communications Commission: FCC ID xxxxCMIIT ID Chinese Radio marking: CMIIT ID (China Ministry of Industry and Information Technology)CE marking accompanied by the Notified Body number 0123SymbolsIC-ID (Industry Canada ID)One IC-ID labeling for each built in radio: OBR, SRRJapanese Radio marking: Radio mark + [R]-symbol + IDTaiwan Radio Label (NCC Logo) + ID Korea radio mark: KC logo, KCC ID number, and Conformity assessment information](https://usermanual.wiki/Philips-Medical-Systems-North-America/TRNSBV1/User-Guide-3825830-Page-128.png)