Philips Dvp3960 37B Owner S Manual 01 53_dvp3960_37_eng2
Philips-Dvp3960-37-Owner-S-Manual philips-dvp3960-37-owner-s-manual
Mode d’emploi dvp3960_37b_dfu_aen DVP3960/37B | Philips
User manual dvp3960_37x_dfu_aen DVP3960/37X | Philips
User manual dvp3960_37_dfu_aen Twisted picture when using component cable (Y Pb Pr) | Philips
If not then dvp3960_37_dfu_aen Manual: s://www.p4c.philips.com/files/d/dvp3960_37/dvp3960_37_dfu_aen
2014-12-13
: Philips Philips-Dvp3960-37B-Owner-S-Manual philips-dvp3960-37b-owner-s-manual philips pdf
Open the PDF directly: View PDF  .
.
Page Count: 53
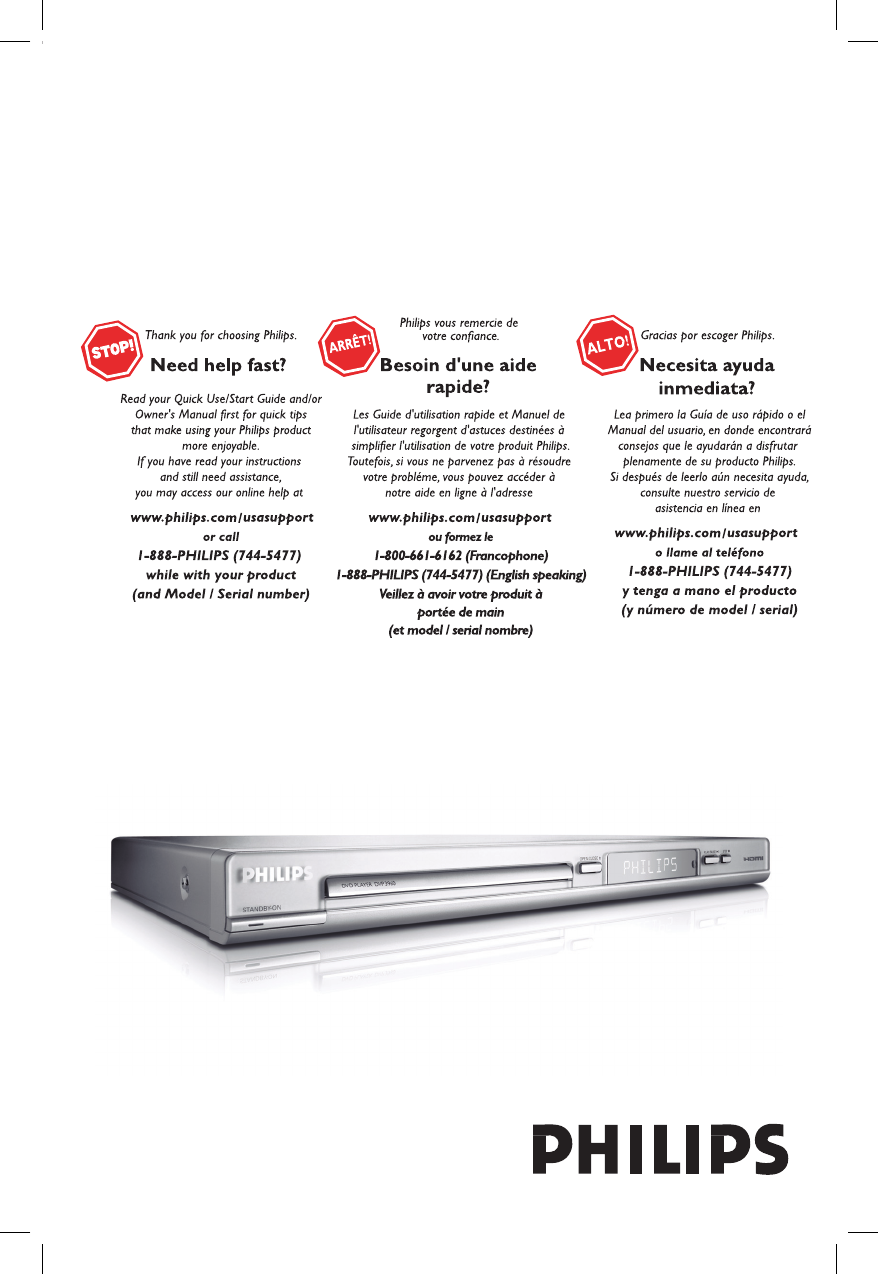
DVP3960DVD VIDEO PLAYER
01-53_dvp3960_37_eng2.indd 101-53_dvp3960_37_eng2.indd 1 2006-12-28 11:24:28 AM2006-12-28 11:24:28 AM
English
2
Return your Product Registration Card or register online at
www.philips.com/usasupport today to get the very most from your purchase.
Registering your model with PHILIPS makes you eligible for all of the valuable benefits listed below, so
don't miss out. Complete and return your Product Registration Card at once, or register online at
www.philips.com/usasupport to ensure:
Visit our World Wide Web Site at http://www.philips.com/usasupport
Congratulations on your purchase,
and welcome to the “family!”
Dear PHILIPS product owner:
Thank you for your confidence in PHILIPS.
You’ve selected one of the best-built, best-
backed products available today.We’ll do
everything in our power to keep you happy
with your purchase for many years to come.
As a member of the PHILIPS “family,” you’re
entitled to protection by one of the most
comprehensive warranties and outstanding
service networks in the industry.What’s
more, your purchase guarantees you’ll
receive all the information and special offers
for which you qualify, plus easy access to
accessories from our convenient home
shopping network.
Most importantly, you can count on our
uncompromising commitment to your total
satisfaction.
All of this is our way of saying welcome -
and thanks for investing in a PHILIPS prod-
uct.
P.S. To get the most from your PHILIPS
purchase, be sure to complete and
return your Product Registration Card
at once, or register online at:
www.philips.com/usasupport
*Proof of Purchase
Returning the enclosed card
guarantees that your date of
purchase will be on file, so no
additional paperwork will be
required from you to obtain war-
ranty service.
*Product Safety
Notification
By registering your product,
you'll receive notification -
directly from the manufacturer
- in the rare case of a product
recall or safety defect.
*Additional Benefits
Registering your product guar-
antees that you'll receive all of
the privileges to which you're
entitled, including special
money-saving offers.
For Customer Use
Enter below the Serial No. which is located
on the rear of the cabinet. Retain this
information for future reference.
Model No. __________________________
Serial No. __________________________
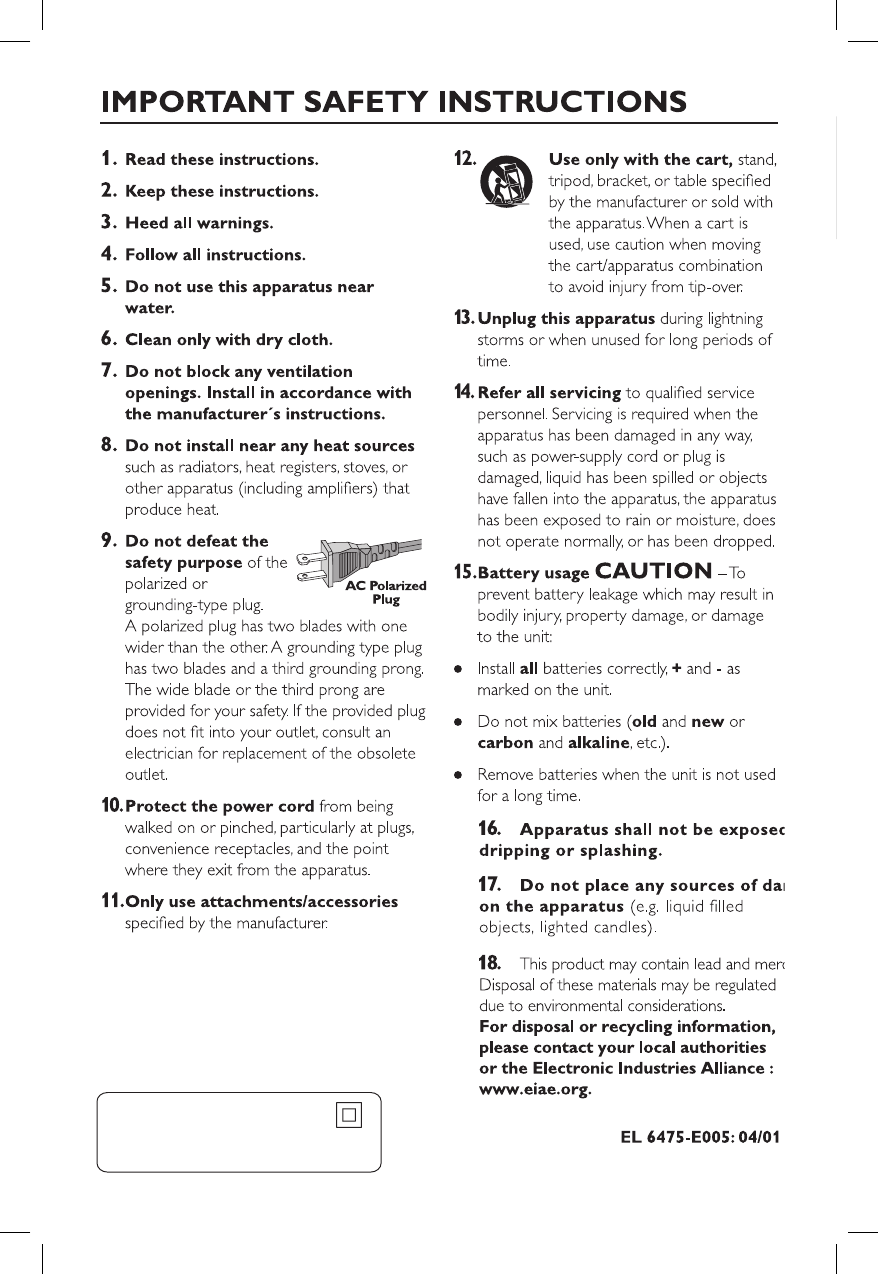
Know these
safetysymbols
This “bolt of lightning” indicates unin-
sulated material within your unit may
cause an electrical shock. For the safety of
everyone in your household, please do not
remove product covering.
The “exclamation point” calls attention
to features for which you should read
the enclosed literature closely to prevent
operating and maintenance problems.
WARNING: To reduce the risk of fire or
electric shock, this apparatus should not be
exposed to rain or moisture and objects
filled with liquids, such as vases, should not
be placed on this apparatus.
CAUTION: To prevent electric shock, match
wide blade of plug to wide slot, fully insert.
ATTENTION: Pour éviter les choc élec-
triques, introduire la lame la plus large de la
fiche dans la borne correspondante de la
prise et pousser jusqu’au fond.
CAUTION
RISK OF ELECTRIC SHOCK
DO NOT OPEN
CAUTION: TO REDUCE THE RISK OF ELECTRIC SHOCK, DO NOT
REMOVE COVER (OR BACK). NO USER-SERVICEABLE PARTS
INSIDE. REFER SERVICING TO QUALIFIED SERVICE PERSONNEL.
01-53_dvp3960_37_eng2.indd 201-53_dvp3960_37_eng2.indd 2 2006-12-28 11:24:35 AM2006-12-28 11:24:35 AM
English
3
Class II equipment symbol
This symbol indicates that the unit has
a double insulation system
01-53_dvp3960_37_eng2.indd 301-53_dvp3960_37_eng2.indd 3 2006-12-28 11:24:36 AM2006-12-28 11:24:36 AM
4
WARNING
To reduce the risk of re or electric shock,
do not expose this equipment to rain or
moisture.
Use of controls or adjustments or
performance of procedures other than
herein may result in hazardous radiation
exposure.
The set complies with the FCC-Rules, Part B
15 and with 21 CFR 1040.10.
Canada
English:
This digital apparatus does not exceed
the Class B limits for radio noise
emissions from digital apparatus as set
out in the Radio Interference Regulations
of the Canadian Department of
Communications.
Français:
Cet appareil numérique n’emet pas de
bruits radioélectriques dépassant les
limites applicables aux appareils
numériques de Class B prescrites dans le
Règlement sur le Brouillage
Radioélectrique édicté par le Ministère
des Communications du Canada.
ATTENTION
L’utilisation des commandes ou
réglages ou le non-respect des
procédures ci-incluses peuvent se
traduire par une exposition
dangereuse à l’irradiation.
ATENCIÓN
El uso de mando o ajustes o la
ejecucción de métodos que no sean
los aquí descritos puede ocasionar
peligro de exposición a radiación.
01-53_dvp3960_37_eng2.indd 401-53_dvp3960_37_eng2.indd 4 2006-12-28 11:24:37 AM2006-12-28 11:24:37 AM
EnglishFrançaisEspañol
Index
English ------------------------------------------6
Español --------------------------------------102
Français -------------------------------------- 54
This product incorporates copyright protection
technology that is protected by method claims of
certain U.S. patents and other intellectual property
rights owned by Macrovision Corporation and other
rights owners. Use of this copyright protection
technology must be authorized by Macrovision
Corporation, and is intended for home and other
limited viewing uses only unless otherwise authorized
by Macrovision Corporation. Reverse engineering or
disassembly is prohibited.
01-53_dvp3960_37_eng2.indd 501-53_dvp3960_37_eng2.indd 5 2006-12-28 11:24:37 AM2006-12-28 11:24:37 AM
English
6
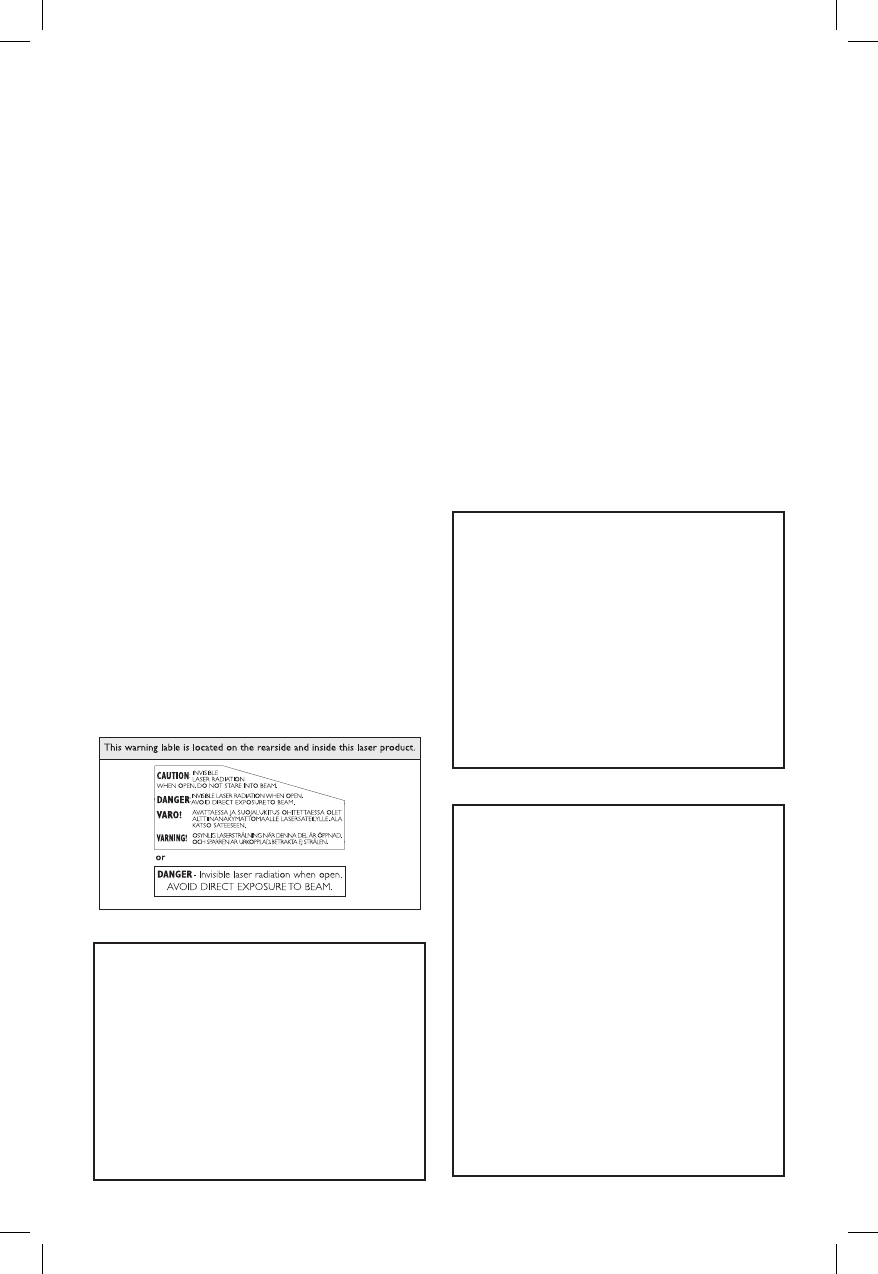
LASER
Type Semiconductor laser
InGaAlP (DVD)
AIGaAs (CD)
Wave length 658 nm (DVD)
790 nm (CD)
Output Power 7.0 mW (DVD)
10.0 mW (VCD/CD)
Beam divergence 60 degrees
General Information
Environmental Information
All unnecessary packaging has been
omitted. The packaging has been made
easy to separate into two materials;
cardboard (box) and polyethylene (bags,
protective foam sheet).
Your DVD player consists of materials
which can be recycled and reused if
disassembled by a specialised company.
Please observe the local regulations
regarding the disposal of packaging
materials, exhausted batteries and old
equipment.
Laser Safety
This unit employs a laser. Due to possible
eye injury, only a quali ed service person
should remove the cover or attempt to
service this device.
NOTE:
Pictures shown maybe different
between countries.
CAUTION:
WARNING LOCATION: ON THE
BACKPLATE OF THE SET
NEVER MAKE OR CHANGE
CONNECTIONS WITH THE
POWER SWITCHED ON.
For Customer Use:
Read carefully the information located at
the bottom or rear of your DVD Video
player and enter below the Serial No.
Retain this information for future
reference.
Model No. DVP 3960
Serial No. ___________________
Speci cations are subject to change without
notice. Trademarks are the property of
Koninklijke Philips Electronics N.V. or their
respective owners.
Windows Media and the Windows logo
are trademarks, or registered
trademarks of Microsoft Corporation
in the United States and/or other
countries.
Manufactured under license from
Dolby Laboratories, “Dolby”
and the double-D symbol are
trademarks of Dolby Laboratories.
l o g o . i n d d 1 2 0 0 6 - 0 3 - 2 1 1 0 : 2 5 : 3 6 A M
l o g o . i n d d 1 2 0 0 6 - 0 3 - 2 1 1 0 : 2 5 : 3 6 A M
DivX Certied products: “DivX ”,
“DivX Certied” and associated logos
are trademarks of DivX , Inc. and
are used under license.
01-53_dvp3960_37_eng2.indd 601-53_dvp3960_37_eng2.indd 6 2006-12-28 11:24:38 AM2006-12-28 11:24:38 AM
English
7
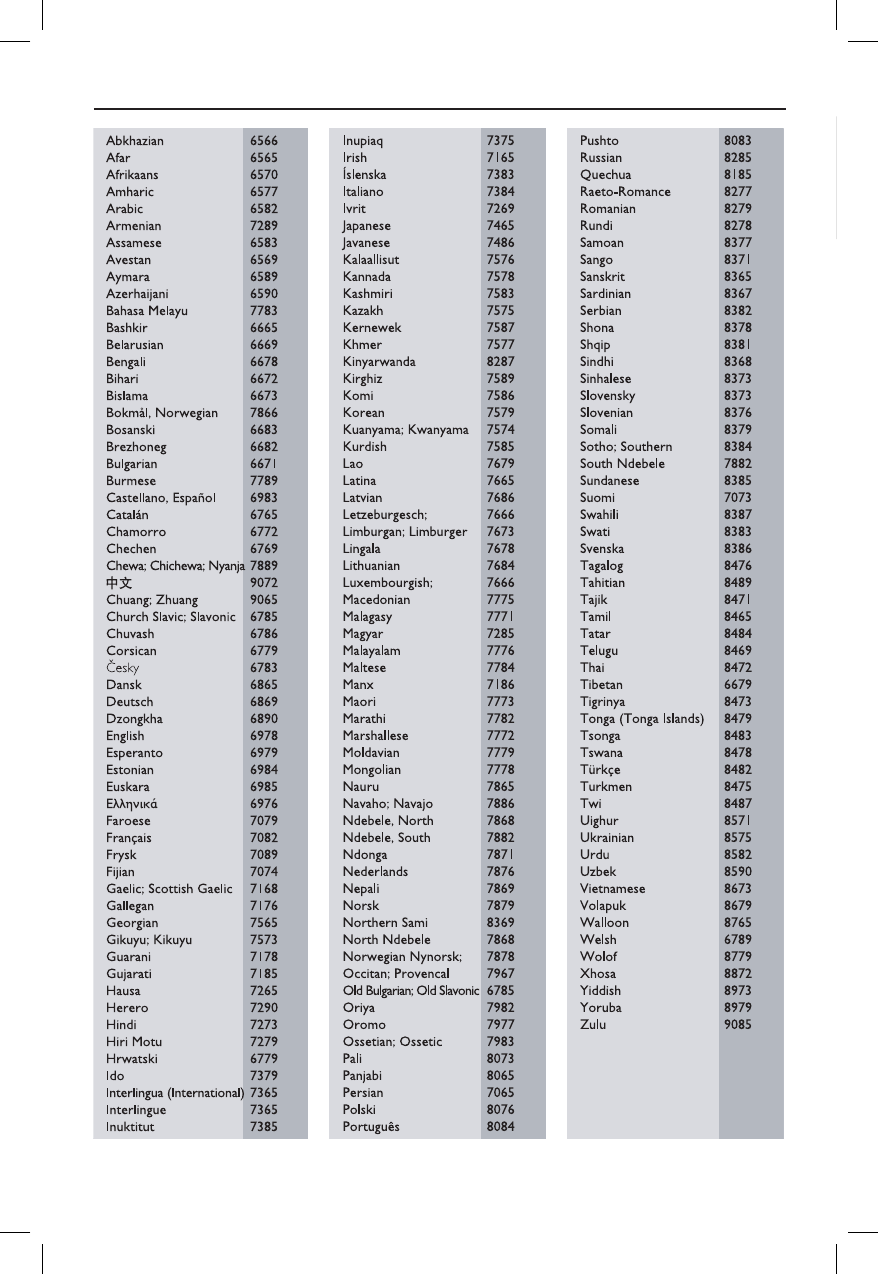
Language Code
01-53_dvp3960_37_eng2.indd 701-53_dvp3960_37_eng2.indd 7 2006-12-28 11:24:38 AM2006-12-28 11:24:38 AM

English
8
Contents
Care and Safety Information
Setup .....................................................................................................................................................................10
Cleaning discs .....................................................................................................................................................10
General Information
Accessories supplied ........................................................................................................................................ 11
Region codes ....................................................................................................................................................... 11
Connections
Connecting to television ..................................................................................................12~13
Using Composite Video jacks (CVBS) .........................................................................................................12
Using Component Video jacks (YPbPr) ......................................................................................................12
Using an accessory RF modulator ................................................................................................................13
Connecting the power cord ...................................................................................................14
Optional connections
Connecting to an stereo system ...........................................................................................15
Stereo system has Right/Left Audio In jacks .............................................................................................15
Connecting to a digital AV receiver .....................................................................................15
Receiver has a PCM, Dolby Digital or MPEG decoder ...........................................................................15
HDMI connections
Connecting to a HDMI or DVI TV ........................................................................................16
Product Overview
Front and Rear panels .............................................................................................................17
Remote Control .......................................................................................................................18
Getting Started
Step 1: Inserting Batteries .....................................................................................................19
Using the remote control to operate the system ....................................................................................19
Step 2: Finding your viewing channel ...................................................................................19
Step 3: Setting up Progressive Scan feature .......................................................................20
Step 4: TV color system .........................................................................................................21
Step 5: Setting the language ..................................................................................................22
On-screen display (OSD) language ..............................................................................................................22
Audio, Subtitle and Disc menu languages ...................................................................................................22
Playback from Disc
Playable discs ...........................................................................................................................23
Supported formats ............................................................................................................................................23
Playback Features
Starting disc playback .............................................................................................................24
Basic playback controls ..........................................................................................................24
Pausing playback.................................................................................................................................................24
Selecting title/chapter/track ...........................................................................................................................24
Stopping playback ..............................................................................................................................................24
Operations for video playback ..............................................................................................25
Using the Disc Menu ........................................................................................................................................25
Zooming in ..........................................................................................................................................................25
Resuming playback from the last stopped point .......................................................................................25
Slow Motion ........................................................................................................................................................25
Forward / Reverse Searching .........................................................................................................................25
Selecting various repeat functions .......................................................................................26
Repeat play mode ..............................................................................................................................................26
Repeating a section within a chapter/track ................................................................................................26
Viewing the disc playback information ......................................................................... 27~28
Using the OSD menu .......................................................................................................................................27
Title/Chapter/Track selection .......................................................................................................................27
Time Search ........................................................................................................................................................27
Audio/Subtitle.....................................................................................................................................................27
Angle .....................................................................................................................................................................27
Time Display .......................................................................................................................................................28
01-53_dvp3960_37_eng2.indd 801-53_dvp3960_37_eng2.indd 8 2006-12-28 11:24:38 AM2006-12-28 11:24:38 AM

English
9
Contents
Preview .................................................................................................................................................................28
Viewing Audio CD playback information ............................................................................29
Disc Go To / Track Go To / Track Selection .............................................................................................29
Special DVD Features .............................................................................................................29
Playing a Title ......................................................................................................................................................29
Changing the Audio Language ........................................................................................................................29
Subtitles ................................................................................................................................................................29
Special VCD and SVCD Feature ...........................................................................................30
Playback Control (PBC) ..................................................................................................................................30
Playing a DivX® disc .................................................................................................................30
Playing MP3/WMA/JPEG Picture CD ............................................................................. 31-32
General Operation ...........................................................................................................................................31
Playback selection .............................................................................................................................................31
Playback with multi-angles (JPEG) ................................................................................................................31
Preview Function (JPEG) .................................................................................................................................32
Zoom picture (JPEG) .......................................................................................................................................32
Playing MP3/WMA music and JPEG picture simultaneously .................................................................32
DVD Menu Options
Using the General setup menu ....................................................................................... 33~35
Locking / Unlocking the disc for viewing ....................................................................................................33
Dimming player’s display screen ...................................................................................................................33
Programming disc tracks .................................................................................................................................34
OSD Language ....................................................................................................................................................34
Sl eep ......................................................................................................................................................................35
Lip Sync ................................................................................................................................................................35
DivX® VOD registration code .......................................................................................................................35
Using the Audio setup menu .......................................................................................... 36~38
Analog Output ...................................................................................................................................................36
Digital Audio Setup ................................................................................................................................... 36~37
Sound Mode ........................................................................................................................................................37
CD Upsampling ..................................................................................................................................................38
Night Mode ........................................................................................................................................................38
Using the Video setup menu ........................................................................................... 39~43
TV Type ................................................................................................................................................................39
Setting the TV Display .....................................................................................................................................39
Progressive ..........................................................................................................................................................40
Picture Setting ............................................................................................................................................40~41
Closed Caption ..................................................................................................................................................41
HDMI Setup ................................................................................................................................................42~43
Using the Preference setup menu .................................................................................43~46
Subtitle / Audio / Disc Menu ..........................................................................................................................44
Parental ................................................................................................................................................................44
PBC ........................................................................................................................................................................45
MP3/JPEG Menu .................................................................................................................................................45
Changing the Password ....................................................................................................................................45
Setting the DivX® Subtitle font ......................................................................................................................46
Restoring to the original settings..................................................................................................................46
Others
Software Upgrade ...................................................................................................................47
Troubleshooting ...............................................................................................................48~50
Speci cations ...........................................................................................................................51
Glossary ....................................................................................................................................52
Limited Warranty ...................................................................................................................53
01-53_dvp3960_37_eng2.indd 901-53_dvp3960_37_eng2.indd 9 2006-12-28 11:24:39 AM2006-12-28 11:24:39 AM
English
10
Care and Safety Information
DANGER!
High voltage! Do not open the
device. You run the risk of getting
an electric shock.
The machine does not contain any
user-serviceable parts. Please leave
all maintenance work to quali ed
personnel.
Setup
Finding a suitable location
– Place the set on a at, hard and stable
surface. Do not place the set on a
carpet.
– Do not put any equipment or heavy
objects on top of the set.
– Do not position the set on top of
other equipment that might heat it up
(such as receiver or ampli er).
– Do not put anything under the set
(such as CDs, magazines).
– Install this unit near the AC outlet and
where the AC power plug can be
reached easily.
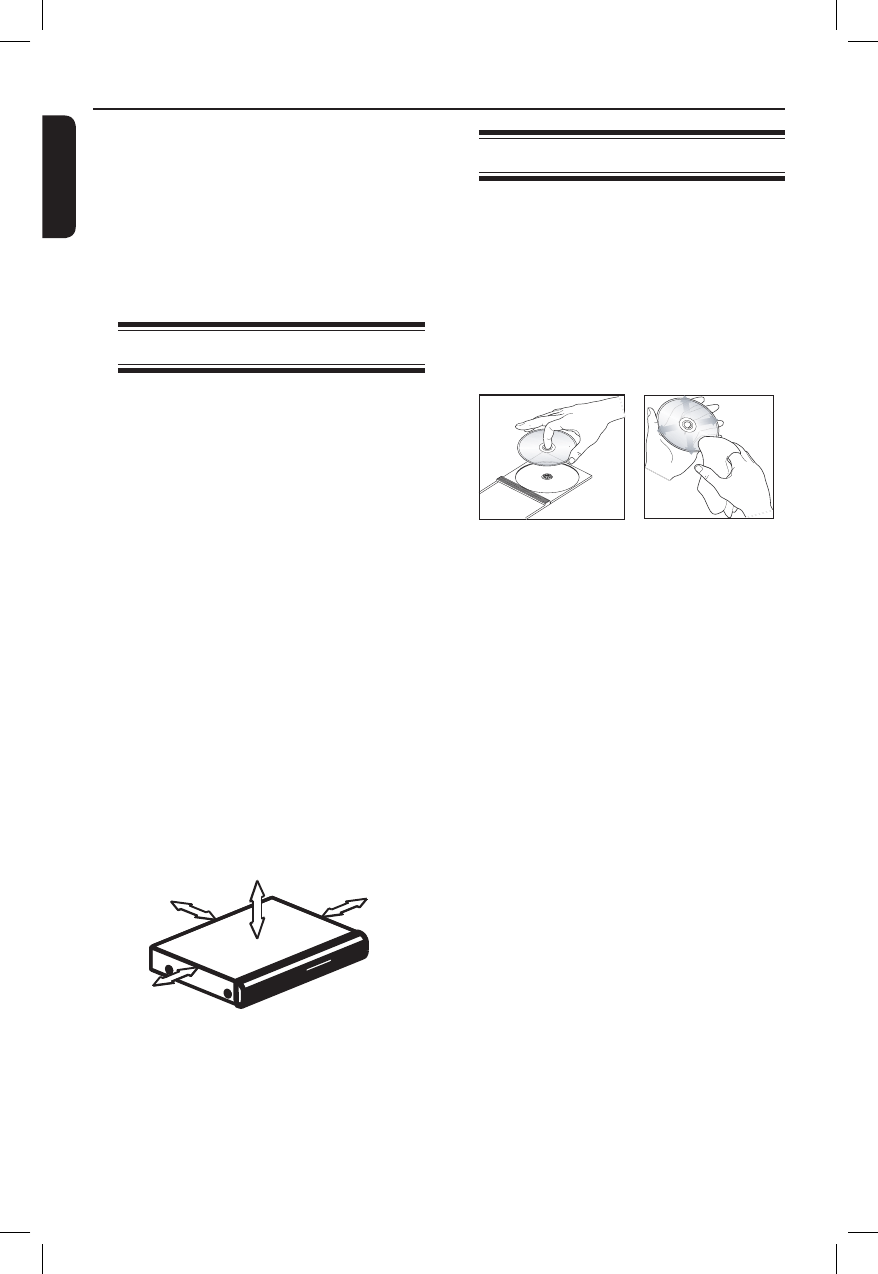
Space for ventilation
– Place the apparatus in a location with
adequate ventilation to prevent
internal heat build up. Allow at least
10 cm (4.0”) clearance from the rear
and the top of the set and 5cm (2.0”)
from the left and right to prevent
overheating.
10cm (4.0") 10cm (4.0")
5cm (2.0")
5cm (2.0")
Avoid high temperatures, moisture,
water and dust
– Apparatus shall not be exposed to
dripping or splashing.
– Do not place any sources of danger
on the apparatus (such as liquid lled
objects, lighted candles).
Cleaning discs
Some problems occur because the disc
inside the player is dirty (frozen picture,
sound disruptions, picture distortions).
To avoid these problems, discs should be
cleaned on a regular basis.
To clean a disc, use a micro bre cleaning
cloth and wipe the disc from the center
to the edge in a straight line.
CAUTION!
Do not use solvents such as benzene,
thinner, commercially available cleaners,
or anti-static sprays intended for analog
discs. Since the optical unit (laser) of the
DVD player operates at a higher power
than regular DVD or CD players,
cleaning CDs intended for DVD or CD
players may damage the optical unit
(laser). Therefore, refrain from using a
cleaning CD.
01-53_dvp3960_37_eng2.indd 1001-53_dvp3960_37_eng2.indd 10 2006-12-28 11:24:39 AM2006-12-28 11:24:39 AM
English
11
General Information
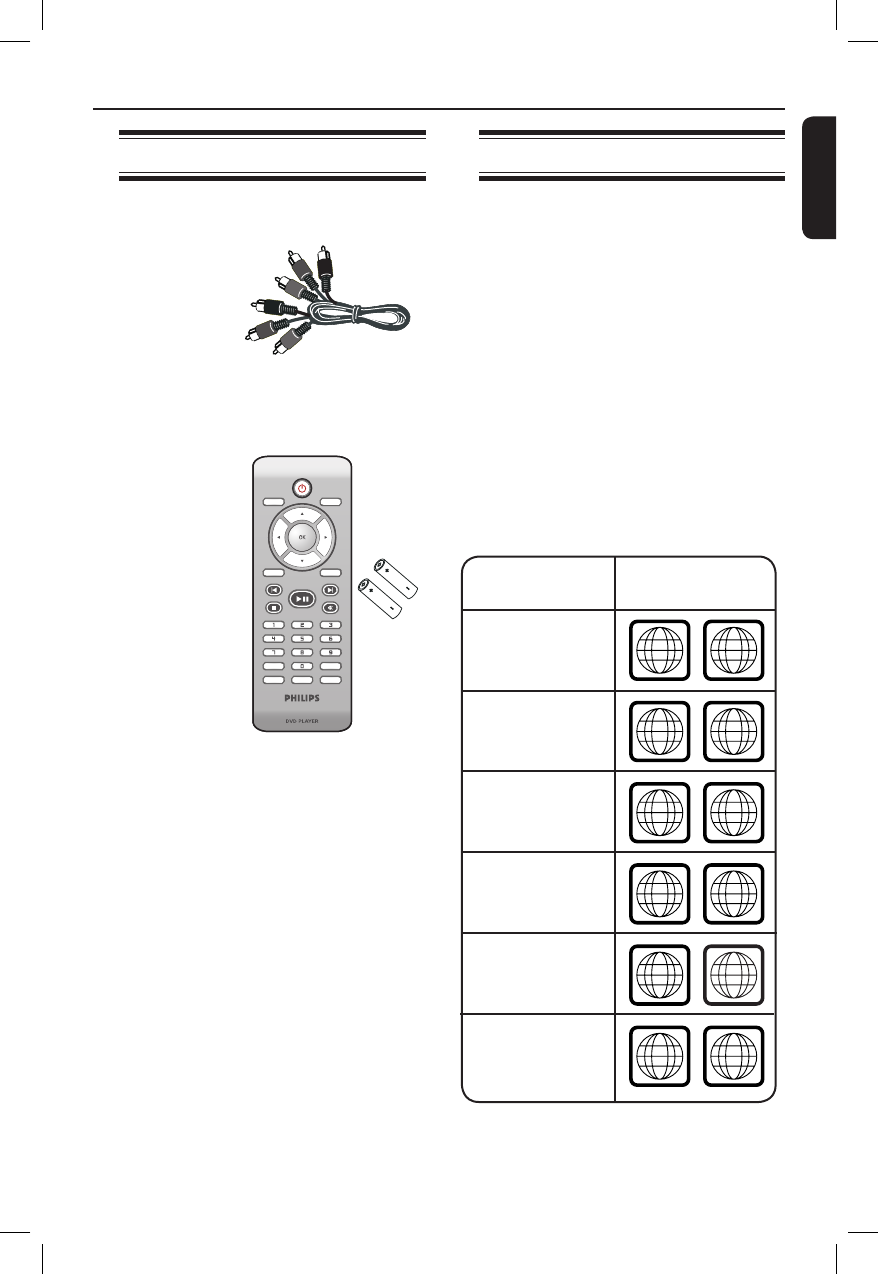
Accessories supplied
ALL
4
Region
U.S.A. and
Canada regions
U.K and
Europe regions
Asia Paci c,
Taiwan, Korea
Australia,
New Zealand,
Latin America
Russia and
India regions
China, Calcos Islands,
Walls and Futuna
Islands
ALL
ALL
5
6
Discs that can
be played
ALL
1
ALL
ALL
2
3
Remote
control and
two AAA
batteries
Region codes
This DVD player is designed to support
the Region Management System. Check
the regional code number on the disc
package. If the number does not match
the player’s region number (see table
below), the player may be unable to
playback the disc.
Tips:
– It may not be possible to play CD-R/RW
or DVD-R/RW in all cases due to the type of
disc or condition of the recording.
– If you are having trouble playing a certain
disc, remove the disc and try a different one.
Improper formatted disc will not played on
this DVD player.
SUBTITLE
ZOOM
AUDIO
REPEAT REPEAT A-B
STOP
PLAY/PAUSE
MUTE
SETUP
TITLE
RETURN
MENU
DISC
DISPLAY
NEXT
PREV
Composite
video cable
(yellow) and
Audio cables
(white, red)
01-53_dvp3960_37_eng2.indd 1101-53_dvp3960_37_eng2.indd 11 2006-12-28 11:24:40 AM2006-12-28 11:24:40 AM
English
12
AUDIO OUT
DIGITAL
OUT
TV OUT
COAXIAL
COMPONENT VIDEO OUT
HDMI OUT
AUDIO
IN
V (Pr/Cr)
U (Pb/Cb)
Y
S-VIDEO
IN
VIDEO IN
COMPONENT
VIDEO IN
AUDIO
OUT
V (Pr/Cr)
U (Pb/Cb)
Y
S-VIDEO
IN
VIDEO IN
COMPONENT
VIDEO IN
12
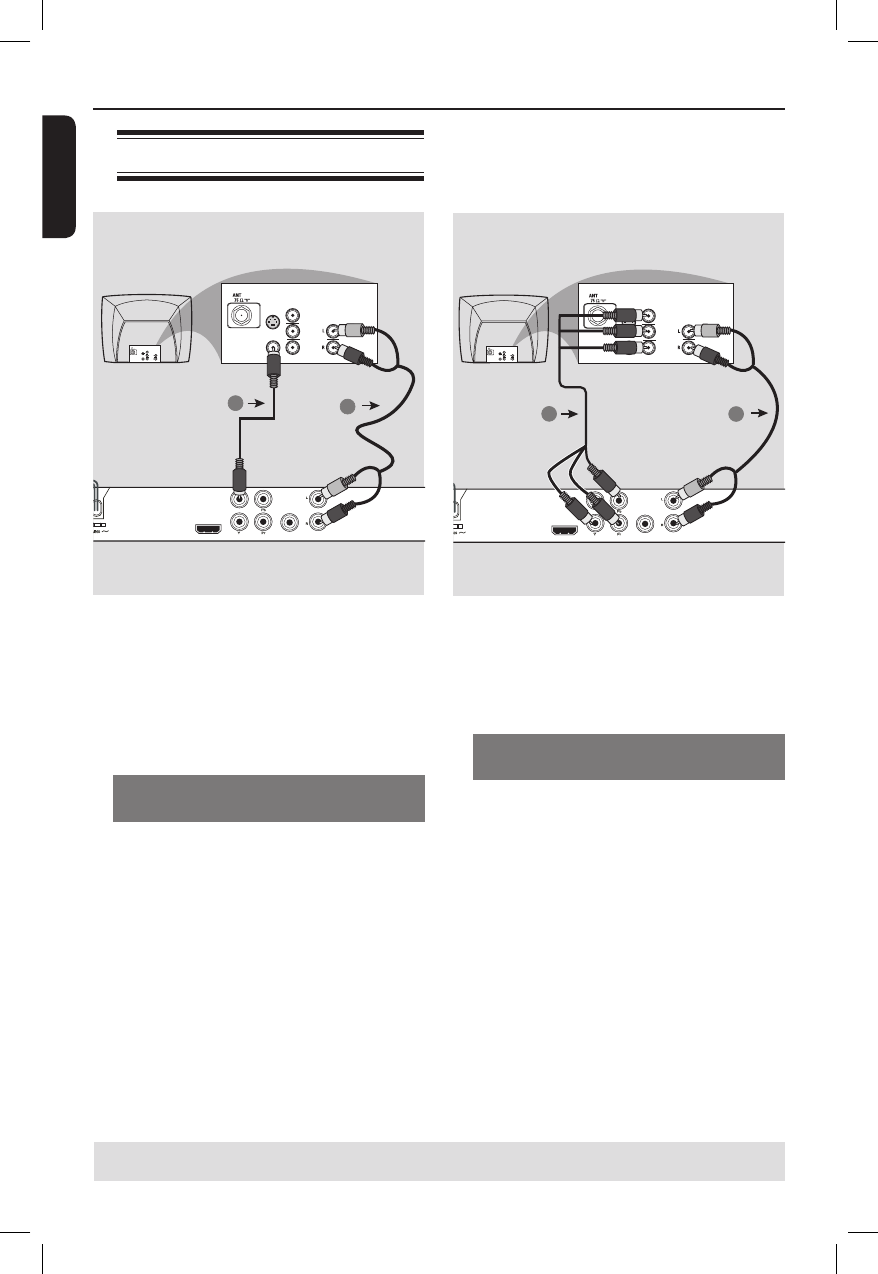
IMPORTANT!
– The progressive scan video quality
is only possible when using YPbPr
and a progressive scan television is
required.
Using Component Video jacks
(YPbPr)
A Use the component video cables (red/
blue/green) to connect the DVD player’s
YPbPr jacks to the component video
input jacks (or labeled as YPbPr) on the
television (cable not supplied).
B To hear sound of this DVD player
through your television, use the audio
cables (white/red) to connect AUDIO
OUT (L/R) jacks of the DVD player to
the corresponding AUDIO IN jacks on
the television (cable supplied).
C Proceed to page 20 for detailed
progressive scan setup.
Connections
TIPS: Before making or changing any connections, make sure that all the devices are disconnected
from the power outlet.
Connecting to television
AUDIO OUT
DIGITAL
OUT
TV OUT
COAXIAL
COMPONENT VIDEO OUT
HDMI OUT
AUDIO
IN
V (Pr/Cr)
U (Pb/Cb)
Y
S-VIDEO
IN
VIDEO IN
COMPONENT
VIDEO IN
AUDIO
OUT
V (Pr/Cr)
U (Pb/Cb)
Y
S-VIDEO
IN
VIDEO IN
COMPONENT
VIDEO IN
2
1
IMPORTANT!
– You only need to make one video
connection from the following
options, depending on the
capabilities of your television.
– Connect the DVD player directly
to the television.
Using Composite Video jacks
(CVBS)
A Use the composite video cable (yellow)
to connect the DVD player’s TV OUT
(CVBS) jack to the video input jack (or
labeled as A/V In, Video In, Composite or
Baseband) on the television (cable
supplied).
B To hear sound of this DVD player
through your television, use the audio
cables (white/red) to connect AUDIO
OUT (L/R) jacks of the DVD player to
the corresponding AUDIO IN jacks on
the television (cable supplied).
01-53_dvp3960_37_eng2.indd 1201-53_dvp3960_37_eng2.indd 12 2006-12-28 11:24:40 AM2006-12-28 11:24:40 AM
English
13
Connections (continued)
TIPS: Before making or changing any connections, make sure that all the devices are disconnected
from the power outlet.
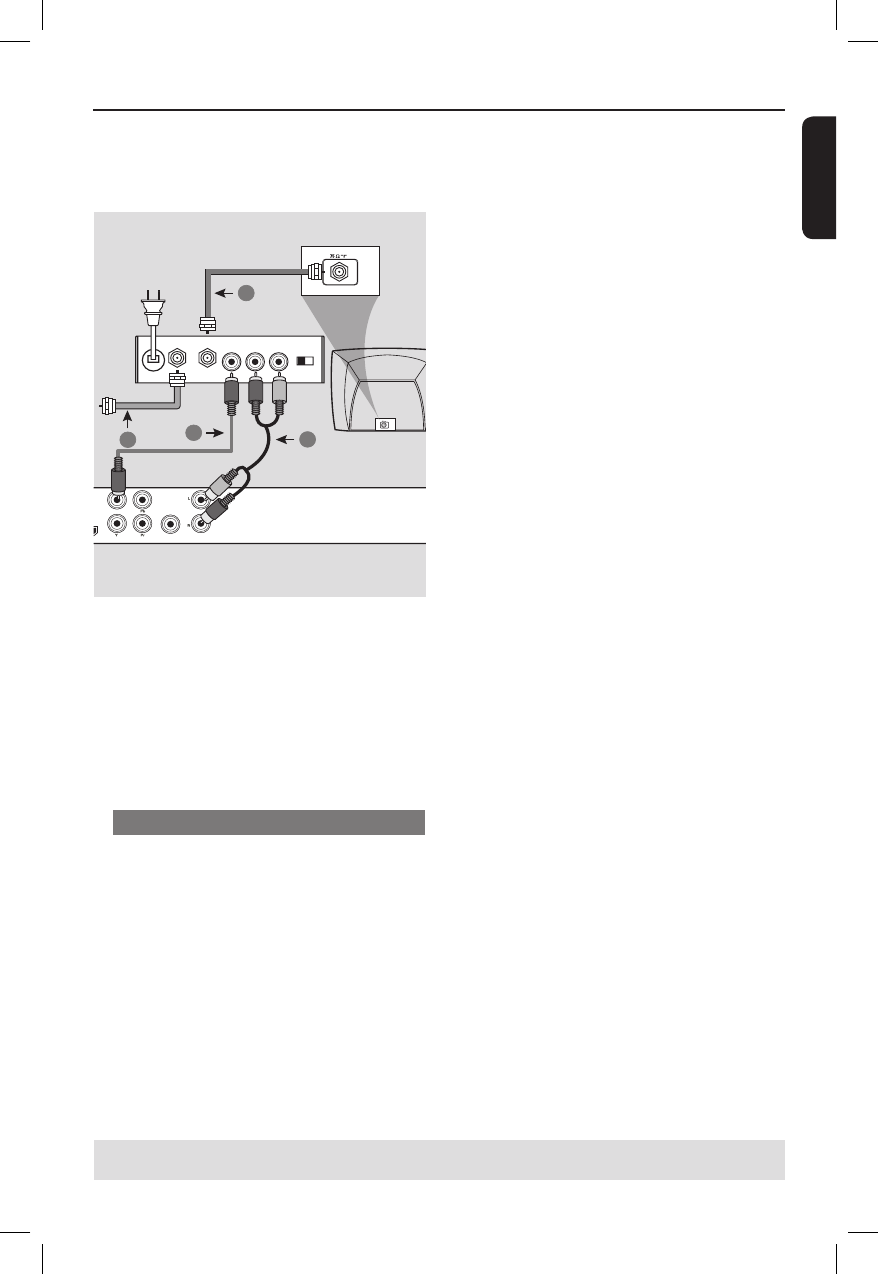
IMPORTANT!
– If your television only has a single
Antenna In jack (or labeled as 75
ohm or RF In,) you will need an RF
modulator in order to view the
DVD playback on the television. See
your electronics retailer or contact
Philips for details on RF modulator
availability and operations.
Using an accessory RF modulator
A Use the composite video cable (yellow)
to connect the DVD player’s TV OUT
(CVBS) jack to the video input socket on
the RF modulator.
B Use the RF coaxial cable (not supplied) to
connect ANTENNA OUT or TO TV jack
on the RF modulator to the ANTENNA
IN jack on the television.
AUDIO OUT
DIGITAL
OUT
TV OUT
COAXIAL
COMPONENT VIDEO OUT
AUDIO IN
R L
VIDEO
IN
TO TVANT IN
CH3 CH4
ANT IN
ANT IN
13
4
2
RF coaxial cable to TV
Back of RF Modulator
(example only)
C To hear sound of this DVD player
through your TV, use the audio cables
(white/red) to connect AUDIO OUT (L/
R) jacks of the DVD player to the
corresponding AUDIO IN jacks on the
RF modulator (cable supplied).
D Connect the Antenna or Cable TV
service signal to the ANTENNA IN or RF
IN jack on the RF modulator. (It may
have been connected to your TV
previously. Disconnect it from the TV).
01-53_dvp3960_37_eng2.indd 1301-53_dvp3960_37_eng2.indd 13 2006-12-28 11:24:41 AM2006-12-28 11:24:41 AM
English
14
Connections (continued)
TIPS: Before making or changing any connections, make sure that all the devices are disconnected
from the power outlet.
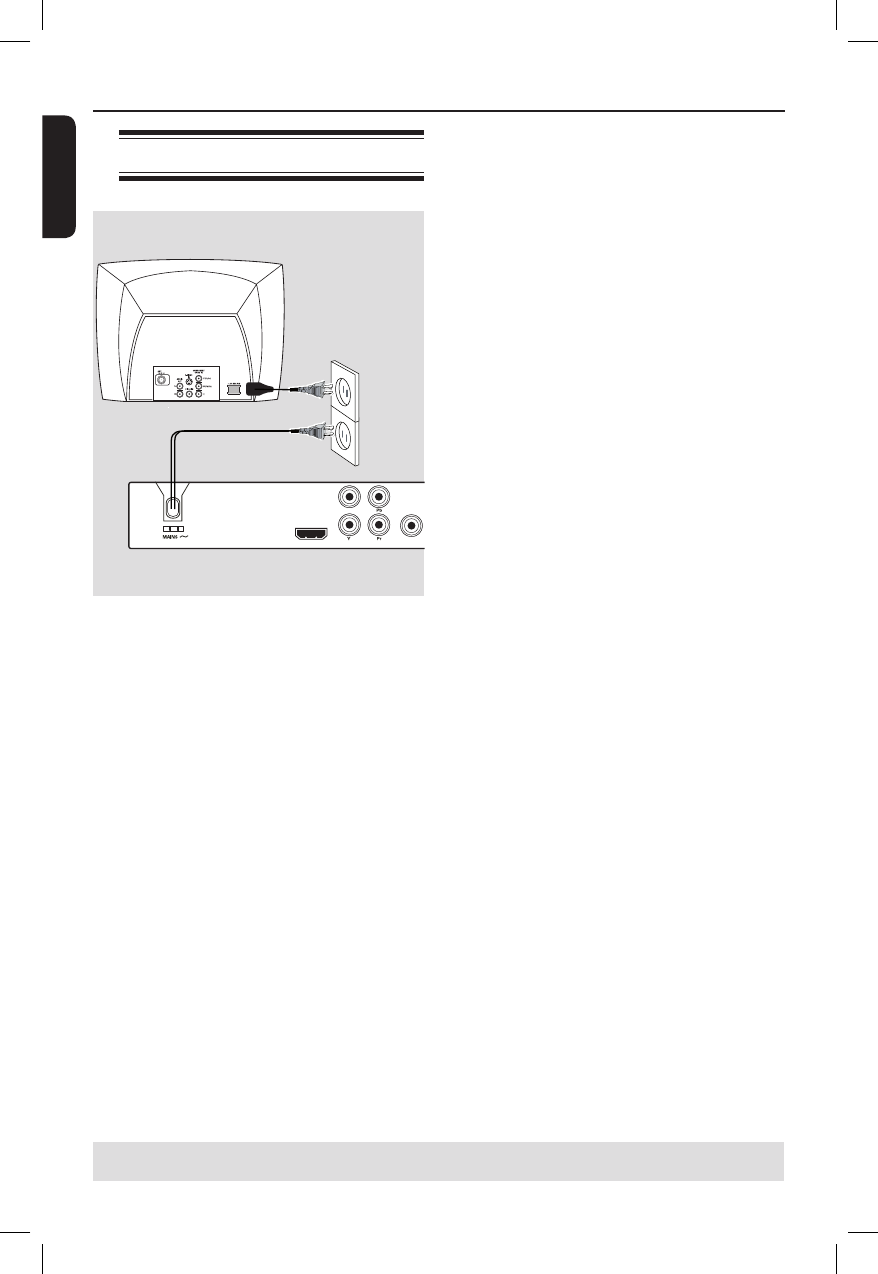
Connecting the power cord
After everything is connected
properly, plug in the AC power cord
to the power outlet.
Never make or change any connections
with the power switched on.
When no disc is loaded, press
STANDBY-ON on the DVD player
front panel.
“NO DISC” may appear on the
display panel.
DIGITAL
OUT
TV OUT
COAXIAL
COMPONENT VIDEO OUT
HDMI OUT
01-53_dvp3960_37_eng2.indd 1401-53_dvp3960_37_eng2.indd 14 2006-12-28 11:24:41 AM2006-12-28 11:24:41 AM
English
15
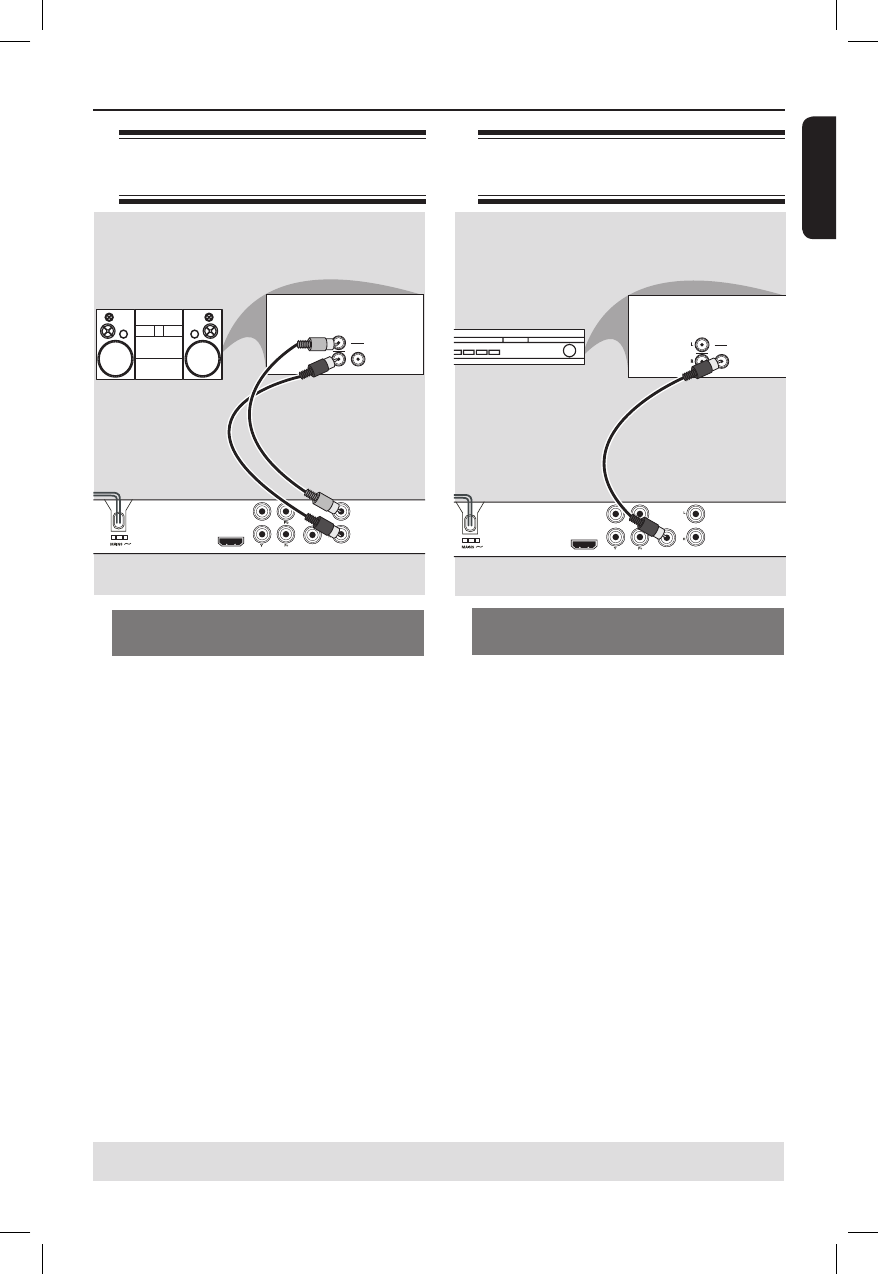
Connecting to an stereo
system
Receiver has a PCM, Dolby Digital
or MPEG decoder
A Select one of the video connections
(CVBS VIDEO IN or COMPONENT
VIDEO IN) depending on the options
available on your television.
B Connect the COAXIAL socket of the
DVD player to the corresponding Digital
Audio In jack on your receiver (cable not
supplied).
C Set the DVD player’s digital output to
PCM-Only or ALL depending on the
capabilities of your receiver (see page 37
{Digital Output}).
Tip:
– If the audio format of the Digital Output
does not match the capabilities of your
receiver, the receiver will produce a strong,
distorted sound or no sound at all.
Stereo system has right/ left Audio
In jacks
A Select one of the video connections
(CVBS VIDEO IN or COMPONENT
VIDEO IN) depending on the options
available on your television.
B Use the audio cables (white/red) to
connect AUDIO OUT (L/R) jacks of the
DVD Player to the corresponding
AUDIO IN jacks on the stereo system
(cable supplied).
Connecting to a digital AV
receiver
Optional connections
TIPS: Before making or changing any connections, make sure that all the devices are disconnected
from the power outlet.
AUDIO OUT
DIGITAL
OUT
TV OUT
COAXIAL
COMPONENT VIDEO OUT
HDMI OUT
AUDIO
IN
STEREO
DIGITAL
AUDIO OUT
DIGITAL
OUT
TV OUT
COAXIAL
COMPONENT VIDEO OUT
HDMI OUT
AUDIO
IN
DIGITAL
AV Receiver
01-53_dvp3960_37_eng2.indd 1501-53_dvp3960_37_eng2.indd 15 2006-12-28 11:24:42 AM2006-12-28 11:24:42 AM
English
16
TIPS: Before making or changing any connections, make sure that all the devices are disconnected
from the power outlet.
AUDIO OUT
DIGITAL
OUT
TV OUT
COAXIAL
COMPONENT VIDEO OUT
HDMI OUT
HDMI IN
HDMI IN
HDTV / DVI TV
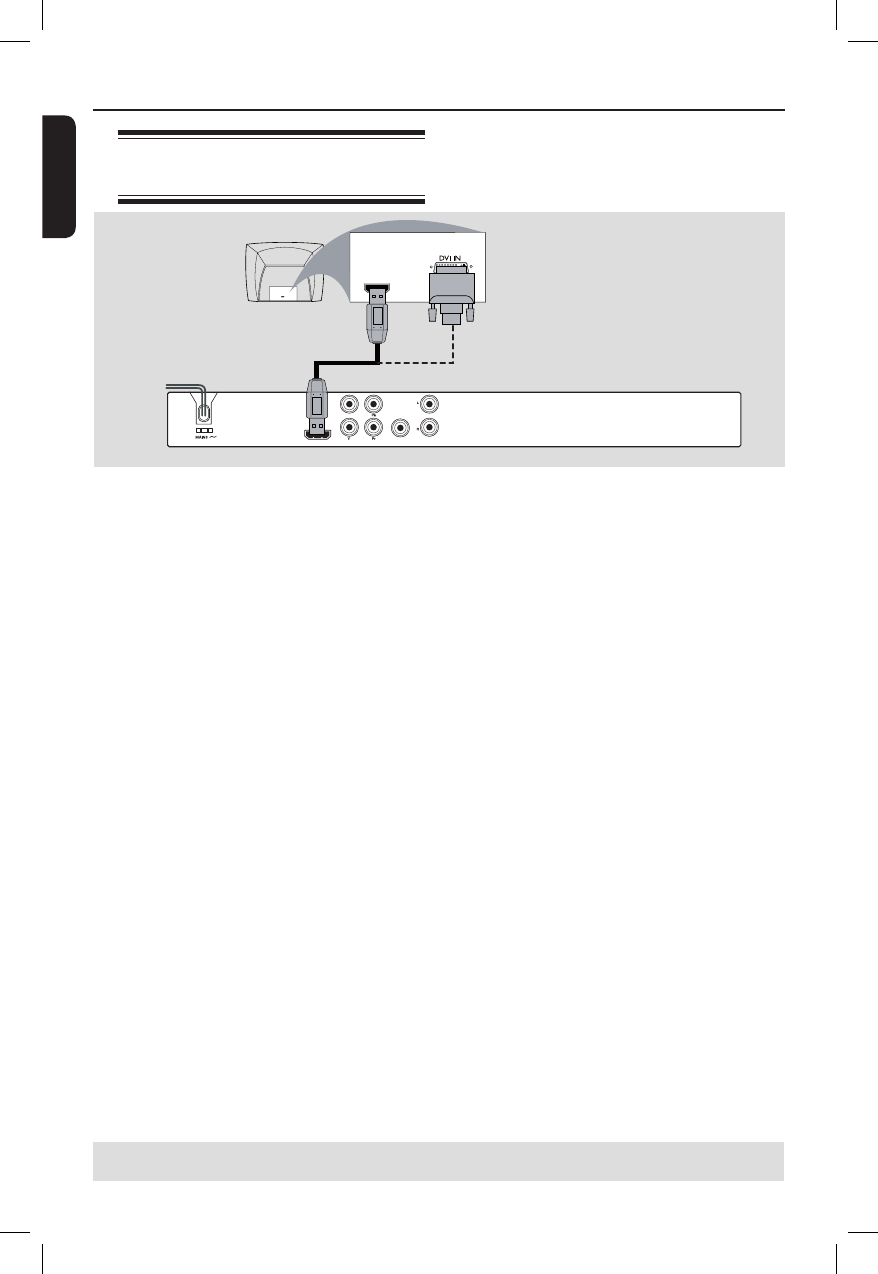
HDMI connections
Connecting to a HDMI or
DVI TV
IMPORTANT!
– HDMI connects untouched and
uncompressed digital transmission
for the highest and cripest sound or
image quality.
– It has plug and play capability
using only one HDMI cable for both
audio / video output.
A Use a HDMI cable (not supplied) to
connect the DVD player’s HDMI OUT
to HDMI IN on the HDMI TV.
To hear sound via TV only,
B Set the DVD player’s {Digital Output –
PCM-Only} for HDMI connection (see
page 37).
OR
IMPORTANT!
– If your TV has a DVI IN socket,
you need a HDMI-DVI adapter cable
to connect the HDMI OUT socket
on the DVD player.
– This HDMI-DVI cable has only
video output capability.
A Use a HDMI-DVI cable (not supplied) to
connect the DVD player’s HDMI OUT
to DVI IN on the DVI TV.
01-53_dvp3960_37_eng2.indd 1601-53_dvp3960_37_eng2.indd 16 2006-12-28 11:24:42 AM2006-12-28 11:24:42 AM
English
17
Product Overview
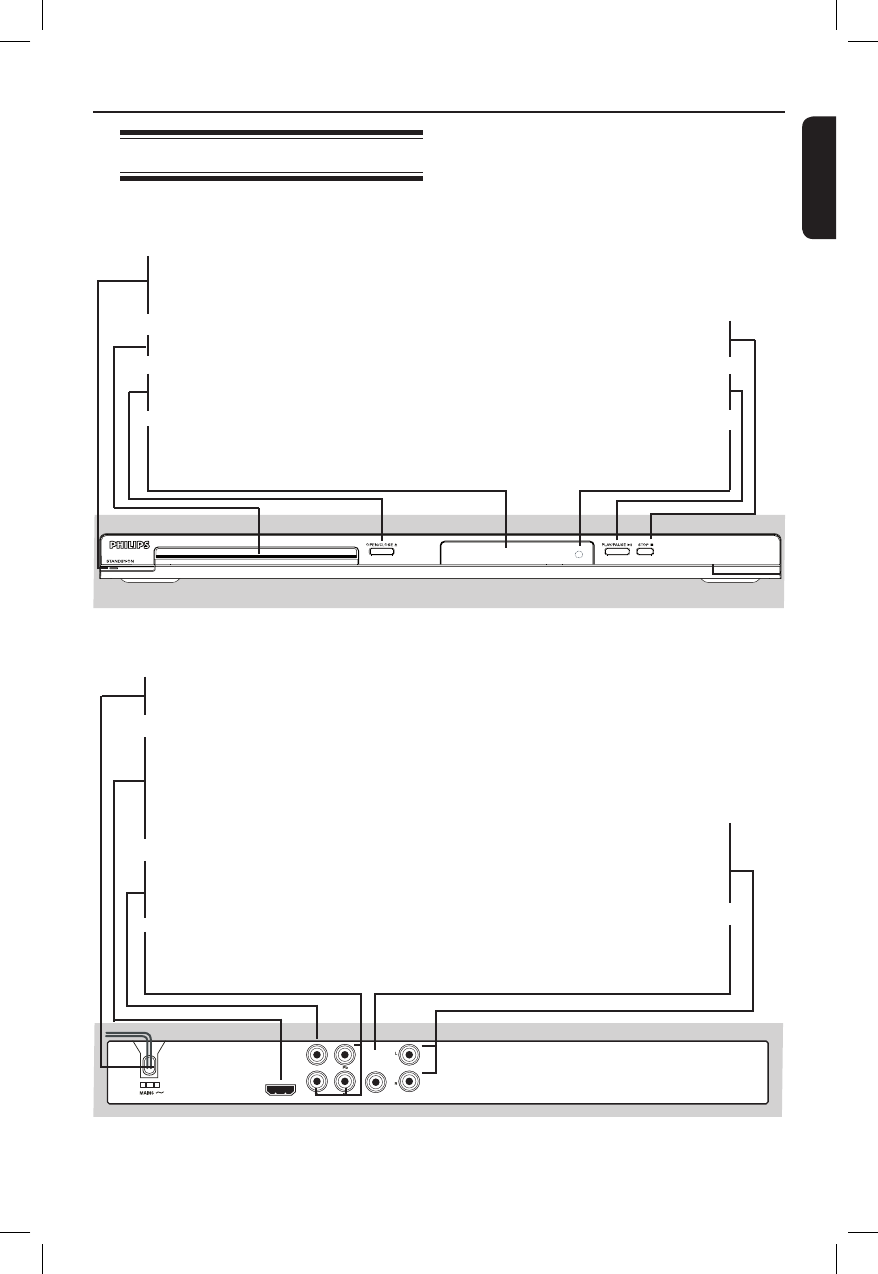
Front and Rear Panels
STANDBY-ON 2
– Turns on the player or switches
to standby mode
Disc Tray
OPEN/CLOSE ç
– Opens or closes the disc tray.
Display panel
– Shows information about the
current status of the DVD player.
STOP
– Stops playback
PLAY/PAUSE u
– Starts or pauses playback.
IR Sensor
– Point the remote control towards
this sensor
AUDIO OUT
DIGITAL
OUT
TV OUT
COAXIAL
COMPONENT VIDEO OUT
HDMI OUT
Mains ~ (AC Power Cord)
– Connect to a standard AC outlet
HDMI OUT
– Connect to HDMI compatible
device (example: LCD/Projector/
Plasma/Projection TV, HDTV or
receiver)
TV OUT (CVBS)
– Connect to CVBS Video input of
a television
YPbPr (Component Video Out)
– Connect to YPbPr input of a
television
Audio Out (Left/Right)
– Connect to AUDIO inputs of an
ampli er, receiver or stereo
system
COAXIAL (Digital audio out)
– Connect to coaxial AUDIO input
of a digital audio equipment
01-53_dvp3960_37_eng2.indd 1701-53_dvp3960_37_eng2.indd 17 2006-12-28 11:24:42 AM2006-12-28 11:24:42 AM
English
18
Product Overview (continued)
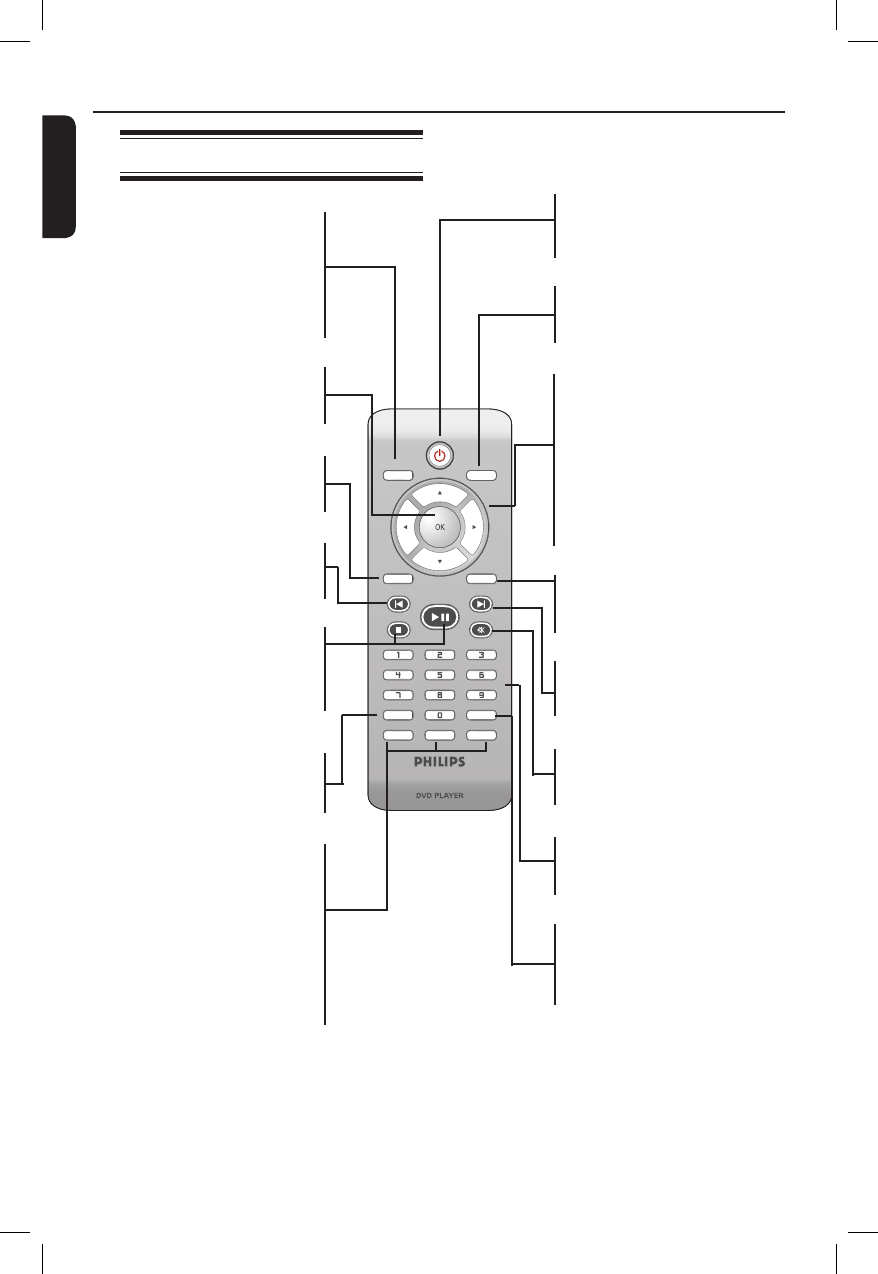
Remote Control
SUBTITLE
ZOOM
AUDIO
REPEAT REPEAT A-B
STOP
PLAY/PAUSE
MUTE
SETUP
TITLE
RETURN
MENU
DISC
DISPLAY
NEXT
PREV
DISC MENU
– Enters or exits the disc
contents menu
– Switches on or off the
playback control mode (for
VCD 2.0 only)
OK
– Con rms an entry or
selection
RETURN/TITLE
– To go back to previous
menu/ show title menu
PREV í
– Skips to the previous title/
chapter/ track
STOP
– Stops playback
u PLAY/PAUSE
– Starts or pauses playback
SUBTITLE
– Selects a subtitle language of
the playing disc (DVD)
ZOOM
– Enlarge a picture on the TV
screen
REPEAT
– Select various repeat mode
REPEAT A-B
– Repeat playback a speci c
section on a disc
2
– To switch the DVD player
to standby mode or ON
DISPLAY
– Displays information on TV
screen during playback
W X
– Cursor buttons for moving
to the left or right, do a fast
forward/reverse search.
S T
– Cursor buttons for moving
up/down, do a slow
forward/backward
SETUP
– Enters or exits the system
setup menu
NEXT ë
– Skips to the next title/
chapter/track
MUTE
– Disables or enables sound
output
Alphanumeric keypad
– Selects numbered items in
a menu
AUDIO
– Selects an audio language
(DVD/VCD) or an audio
channel
01-53_dvp3960_37_eng2.indd 1801-53_dvp3960_37_eng2.indd 18 2006-12-28 11:24:43 AM2006-12-28 11:24:43 AM
English
19
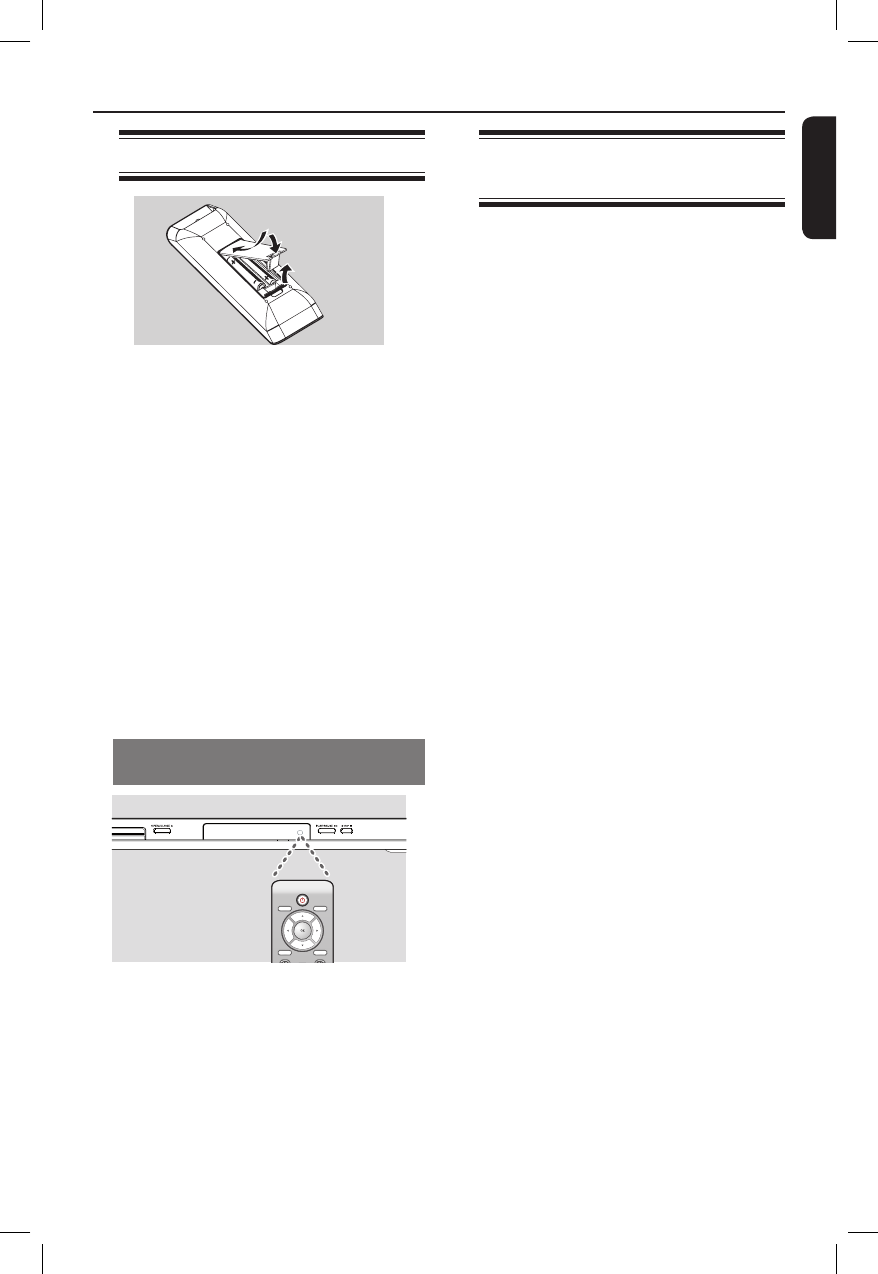
Step 1 : Inserting Batteries
A Open the battery compartment.
B Insert two batteries type R03 or AAA,
following the indications (+ –) inside the
compartment.
C Close the cover.
CAUTION!
– Remove batteries if they are
exhausted or if the remote is not to
be used for a long time.
– Do not use old and new or
different types of batteries in
combination.
– Batteries contain chemical
substances, so they should be
disposed of properly.
Using the remote control to
operate the system
PLAY/PAUSE
SETUP
TITLE
RETURN
MENU
DISC
DISPLAY
NEXT
PREV
A Aim the remote control directly at the
remote sensor (IR) on the front panel.
B Do not put any objects between the
remote control and the DVD player
while operating the DVD player.
Step 2 : Finding your viewing
channel
A Press STANDBY-ON 2 on the DVD
player to turn it on.
B Turn on the TV and set it to the correct
video-in channel. You should see the blue
DVD background screen.
Usually these channel are between the
lowest and highest channels and may
be called FRONT, A/V IN, VIDEO.
See your TV’s manual for more
details.
Or, you may go to channel 1 on your
TV, then press the Channel down
button repeatedly until you see the
Video In channel.
Or, the TV remote control may have
a button or turn that chooses
different video modes.
Or, set the TV to channel 3 or 4 if
you are using an RF modulator.
C If you are using external equipment, (such
as audio system or receiver), turn it on
and select the appropriate input source
for the DVD player output. Refer to the
equipment user’s manual for detail.
Getting Started
01-53_dvp3960_37_eng2.indd 1901-53_dvp3960_37_eng2.indd 19 2006-12-28 11:24:43 AM2006-12-28 11:24:43 AM
English
20
Getting Started (continued)
Step 3 : Setting up
Progressive Scan feature
(for Progressive Scan TV only)
The progressive scan displays twice the
number of frames per seconds than
interlaced scanning (ordinary normal TV
system). With nearly double the number
of lines, progressive scan offers higher
picture resolution and quality.
Before you start...
– Ensure that you have connected this
DVD player to a progressive scan TV
using the YPbPr connection (see page
12).
– Ensure that you have completed the
basic installation and setup.
A Turn on your TV and set to interlace
mode (refer to your TV user manual).
B Press STANDBY-ON 2 on the
remote control to turn on the DVD
player.
C Select the correct video-in channel.
The DVD background menu appears.
D Press SETUP.
E Press X to select { Video Setup Page }.
TV Type
TV Display
Progressive On
Picture Setting Off
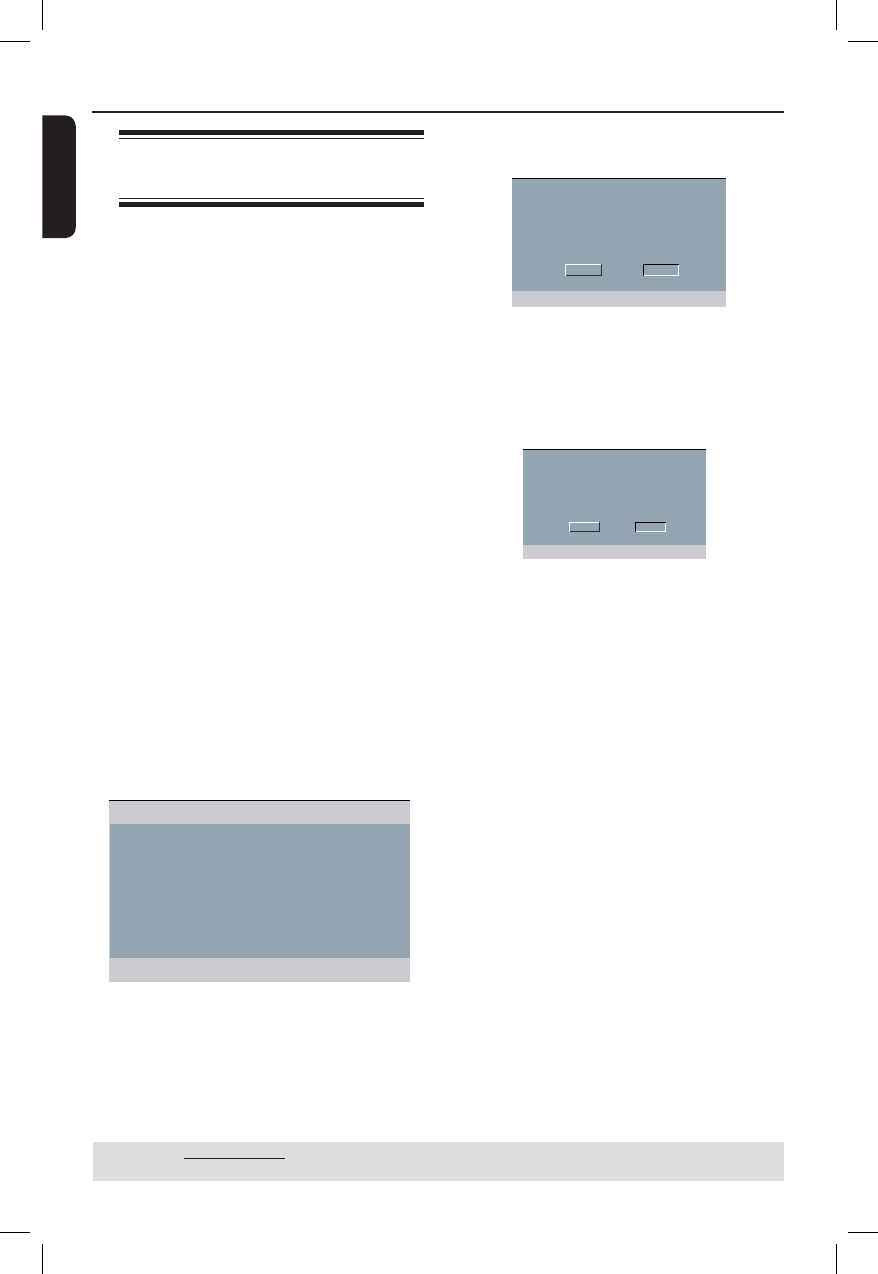
Video Setup Page
Closed Captions
HDMI Setup
F Press S T repeatedly to select
{ Progressive }, then press X.
G Select { On }, then press OK to con rm.
The menu will appear on the TV.
ACTIVATING PROGRESSIVE SCAN:
1.ENSURE YOUR TV HAS PROGRESSIVE SCAN.
2.CONNECT USING YPBPR(GBR) VIDEO CABLE.
3.IF THERE IS A DISTORTED PICTURE,
WAIT 15 SECONDS FOR AUTO RECOVERY.
OK CANCEL
H Press W to highlight { OK } and press
OK to con rm.
I Turn on your TV progressive scan mode
(refer to your TV user manual).
The menu will appear on the TV.
CONFIRM AGAIN TO USE PROGRESSIVE
SCAN. IF PICTURE IS GOOD,
PRESS OK BUTTON ON REMOTE.
OK CANCEL
J Press W to highlight { OK } and press
OK to con rm.
The setup is now completed and you
can start enjoy the high quality
picture.
To deactivate Progressive Scan
manually:
Wait for 15 seconds for the auto
recovery.
OR
A Press OPEN/CLOSE ç on the DVD
player to open the disc tray.
B Press numeric keypad ‘1’ on the
remote control for few seconds.
The DVD background screen appears.
Tip:
– There are some progressive scan TVs and
High-De nition TVs that are not fully
compatible with this unit, resulting in the
unnatural picture when playing back a DVD
VIDEO disc in the progressive scan mode. In
such a case, turn off the progressive scan
feature on both the DVD player and your TV.
TIPS: The underlined option is the factory default setting.
Press W to go back to previous menu item. Press SETUP to exit the menu item.
01-53_dvp3960_37_eng2.indd 2001-53_dvp3960_37_eng2.indd 20 2006-12-28 11:24:44 AM2006-12-28 11:24:44 AM
English
21
Getting Started (continued)
TIPS: The underlined option is the factory default setting.
Press W to go back to previous menu item. Press SETUP to exit the menu item.
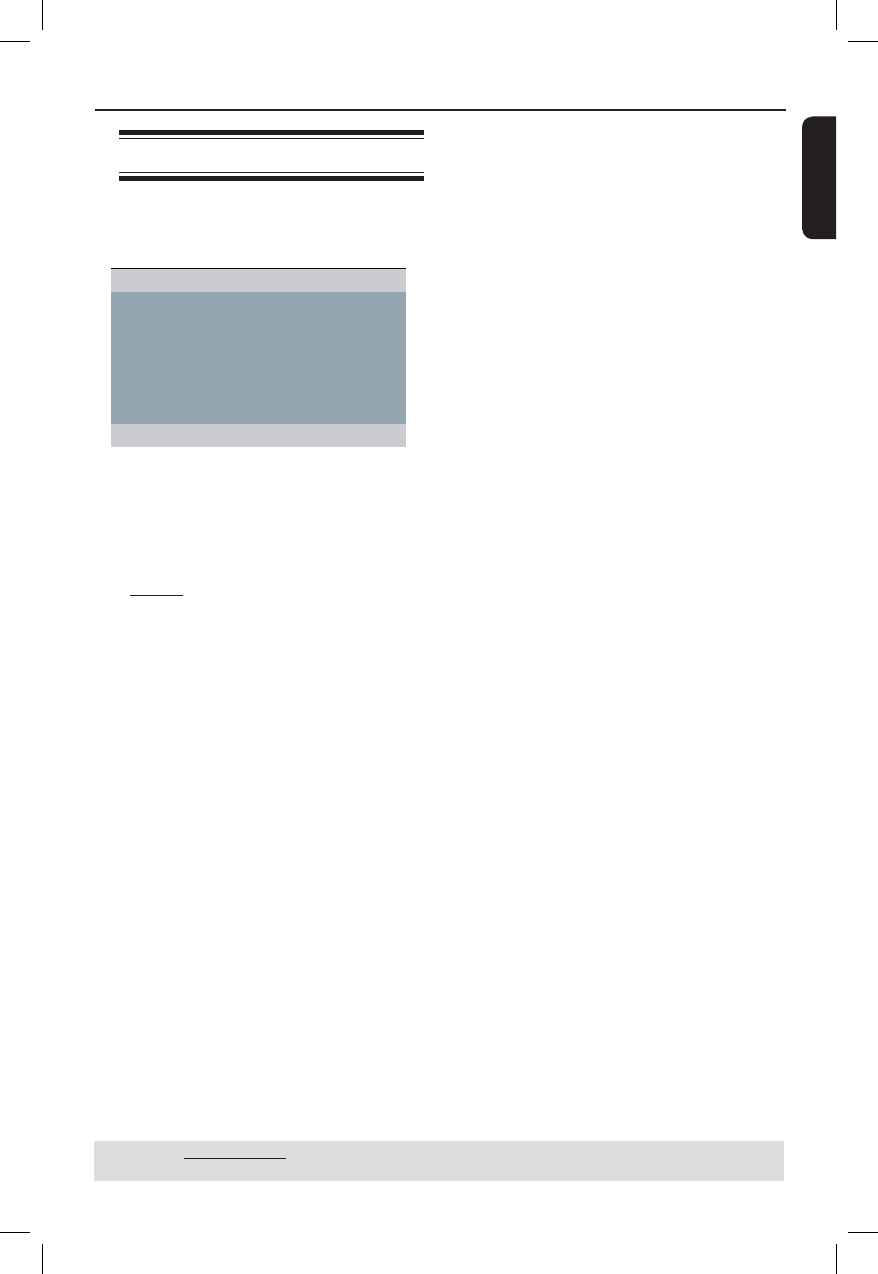
Step 4 : TV color system
The color system of the DVD player, disc
and TV should match in order for the
disc to play.
TV Type
TV Display
Progressive
NTSC
Picture Setting
Video Setup Page
Closed Captions
HDMI Setup
A Press SETUP.
B Press X to select { Video Setup Page }.
C Press S T repeatedly to select { TV
Type }, then press X.
{ NTSC }
Select this if the connected TV has the
NTSC color system. It will change the
video signal of a PAL disc and output it to
NTSC format.
D Press OK to con rm.
Tip:
– Before changing the current TV colour
setting, ensure that your TV supports the
‘selected TV Type’ system.
01-53_dvp3960_37_eng2.indd 2101-53_dvp3960_37_eng2.indd 21 2006-12-28 11:24:44 AM2006-12-28 11:24:44 AM
English
22
Getting Started (continued)
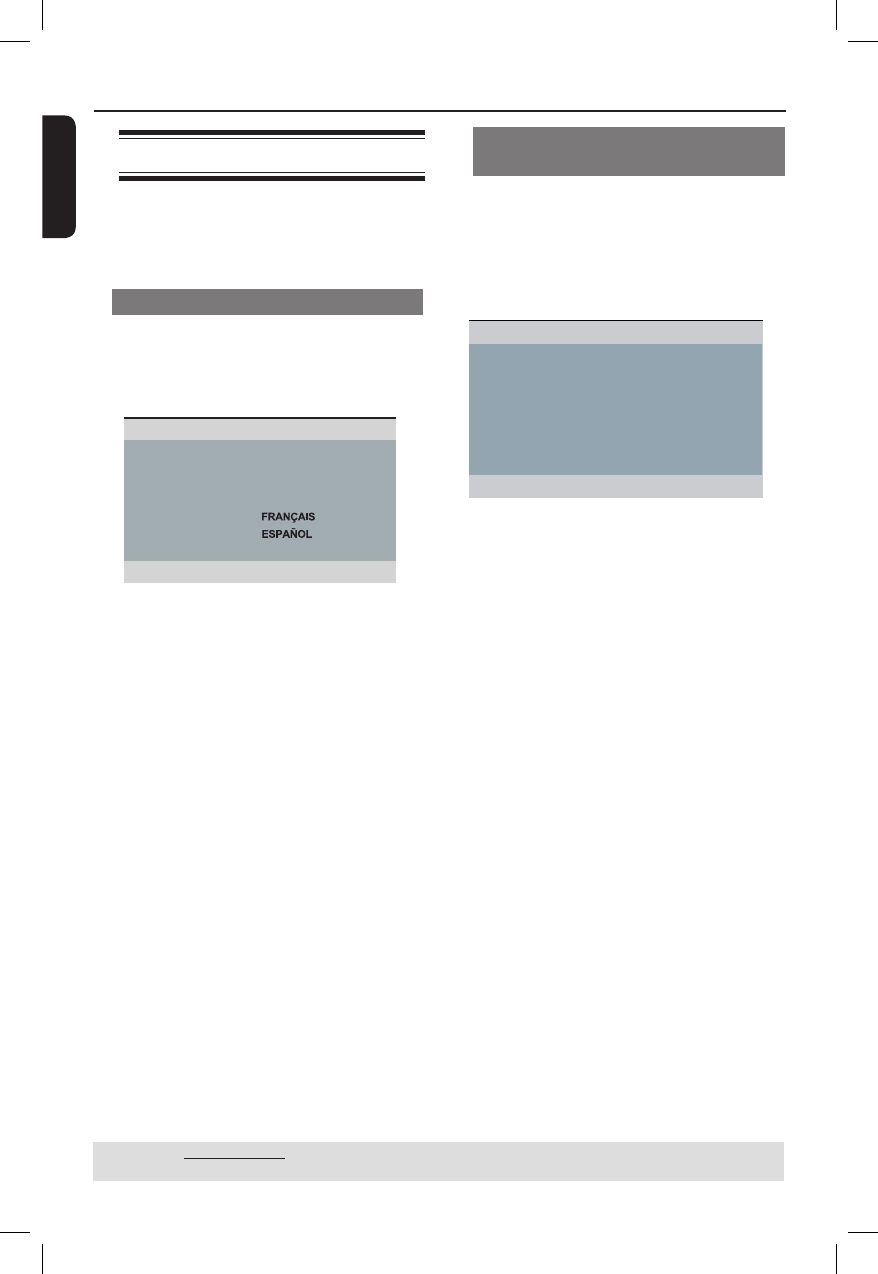
Step 5 : Setting the language
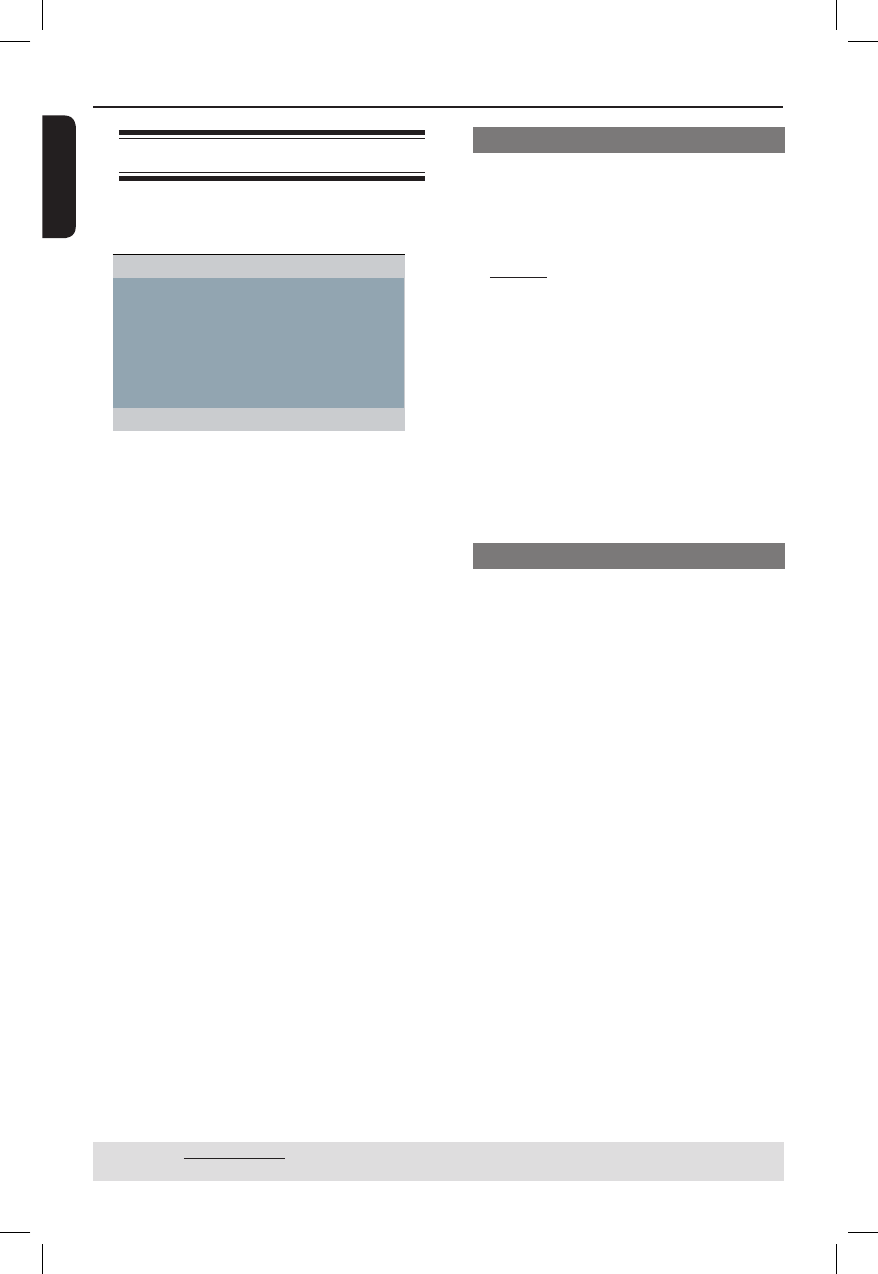
The language options are different
depending on your country or region. It
may not correspond to the illustrations
shown on the user manual.
On-screen display (OSD) language
Select this to change the language of this
DVD player screen display menu.
The menu language (on-screen display)
for the system will remain as you set it.
Disc Lock
Display Dim
Program
OSD Language ENGLISH
Sleep
Lip Sync
DivX(r) VOD Code
General Setup Page
A Press SETUP.
B Press S T to select { OSD Language },
then press X.
C Use S T to select a language and press
OK to con rm.
TIPS: The underlined option is the factory default setting.
Press W to go back to previous menu item. Press SETUP to exit the menu item.
Audio, Subtitle and Disc menu
languages
You can choose your preferred language
or sound track from audio, subtitles and
disc menu languages. If the selected
language is not available on the disc, the
disc’s default language will be used
instead.
Audio English
Subtitle Chinese
Disc Menu French
Parental Spanish
PBC Portuguess
Mp3 / Jpeg Nav Polish
Password Italian
Preference Page
A Press STOP Ç twice to stop playback,
(if any), then press SETUP on the
remote control.
B Press X to select { Preference Page }.
C Press S T to highlight one of the
options below, then press X.
{ Audio }
Select this to change disc sound track
language.
{ Subtitle }
Select this to change the subtitle language.
{ Disc Menu }
Select this to change the language of the
disc menu.
D Use S T to select a language and press
OK to con rm.
If the language you want is not in
the list, then select { Others }, then
use the numeric keypad (0-9) on the
remote to enter the 4-digit language code
‘XXXX’ (see page 7 ‘Language Code’)
and press OK.
E Repeat steps C - D for other language
settings.
01-53_dvp3960_37_eng2.indd 2201-53_dvp3960_37_eng2.indd 22 2006-12-28 11:24:45 AM2006-12-28 11:24:45 AM
English
23
MP3-Disc
DivX® Disc
(DivX® 3.11, 4.x, 5.x and 6.0)
Supported formats
MP3/WMA tracks
– The le extensions has to be ‘.mp3’,
‘.wma’
– JPEG/ISO format
– Maximum 14 characters display.
– Supported bit-rate;
32 – 320 kbps (MP3)
32 – 192 kbps (WMA)
JPEG pictures
– The le extensions has to be ‘.JPG’
and not ‘.JPEG.’
– JPEG/ISO format
– It can only display DCF-standard still
pictures or JPEG pictures such as
TIFF.
DivX® movies
– The le extensions has to be ‘.AVI,’
‘.MPG,’ or ‘.MP4.’
– DivX® 3.11, 4.x, 5.x, 6.0
– Q-pel accurate motion compensation
– Global Motion Compensation (GMC)
playback.
IMPORTANT!
– If the inhibit icon appears on
the TV screen when a button is
pressed, it means the function is not
available on the current disc or at
the current time.
– DVD discs and players are designed
with regional restrictions. Before
playing a disc, make sure the disc is
for the same zone as your player.
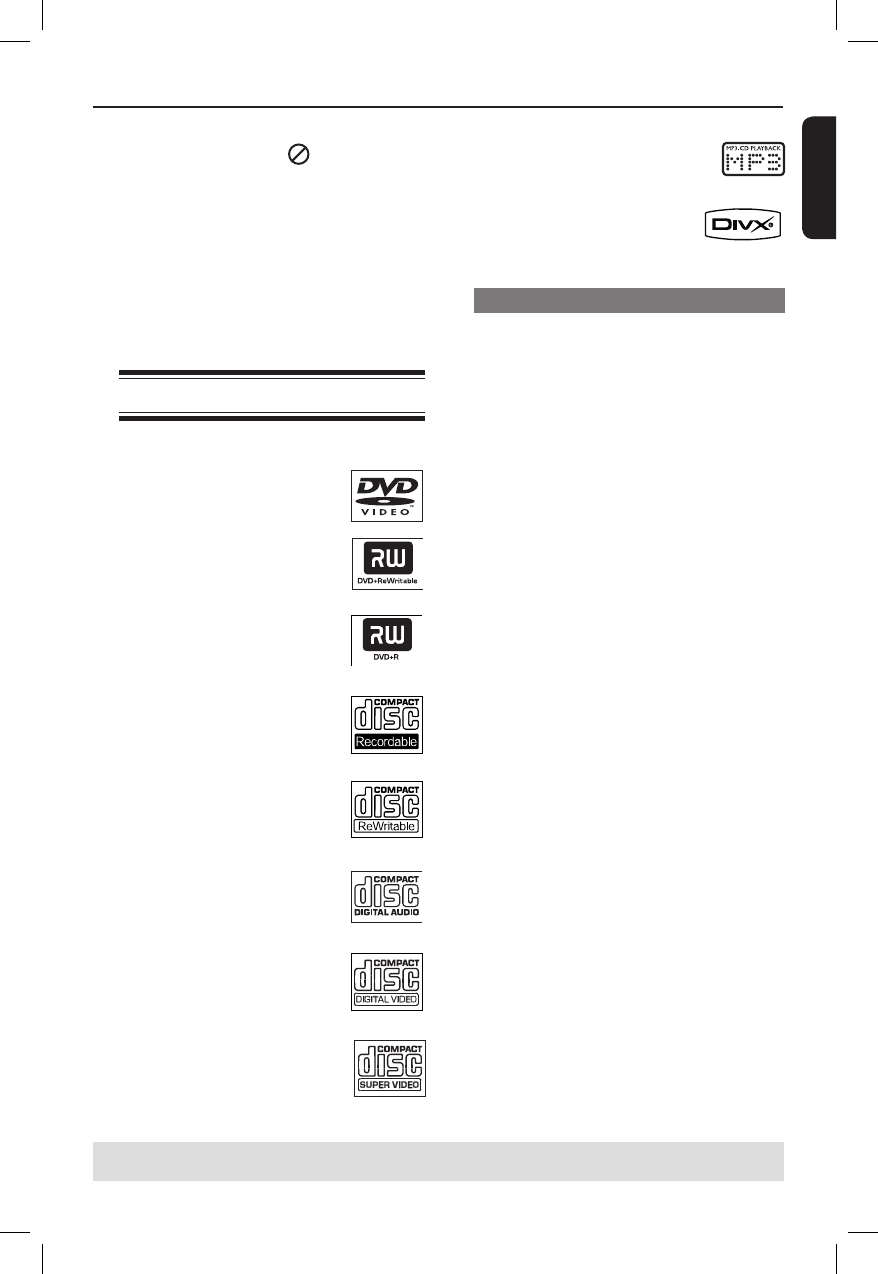
Playable discs
Using this DVD player, you can playback
on the following discs:
DVD Video (Digital Versatile
Disc)
DVD±RW (DVD Rewritable)
Audio/Video format or
MP3/WMA/JPEG/DivX® les.
DVD±R (DVD Recordable)
Audio/Video format or
MP3/WMA/JPEG/DivX® les.
CD-R (CD-Recordable)
Audio/Video format or
MP3/WMA/JPEG/DivX® les.
CD-RW (CD-Rewritable)
Audio/Video format or
MP3/WMA/JPEG/DivX® les.
Audio CD (Compact Disc
Digital Audio)
Video CD
(Formats 1.0, 1.1, 2.0)
Super Video CD
Playback from Disc
TIPS: Some discs cannot be played on this DVD player due to the con guration and characteristics of
the disc, or due to the condition of recording and authoring software that was used.
01-53_dvp3960_37_eng2.indd 2301-53_dvp3960_37_eng2.indd 23 2006-12-28 11:24:45 AM2006-12-28 11:24:45 AM
English
24
Starting disc playback
A Turn on the TV to the correct program
number for the DVD player (e.g. ‘EXT’,
‘0’, ‘AV’).
B Press STANDBY-ON 2 to turn on
the DVD player.
C Press OPEN/CLOSE ç on the front of
the DVD player.
You can also hold down the STOP
button on the remote control to open
and close the disc tray.
D Place a disc into the disc tray with the
label facing up, then press OPEN/
CLOSE ç.
For double-sided discs, load the side
which you want to play facing up.
E Playback may start automatically.
If not, press PLAY/PAUSE u.
If a disc menu appears on the TV, see
page 25 'Using the Disc Menu'.
If the child lock was activated for the
inserted disc, you have to enter your six-
digit password (see page 45).
For more playback features, see pages
24~32.
Tips:
– Do not overturn the DVD player while disc
loading, playing or ejecting.
– Do not close the disc tray manually even if
the power switched off.
Playback Features
TIPS: The operating features described here might not be possible for certain discs.
Always refer to the instructions supplied with the discs.
Basic playback controls
Unless otherwise stated, all operations
described are based on Remote Control
use.
Pausing playback
A During playback, press PLAY/PAUSE
u to pause playback and display a still
picture.
Sound will be muted.
B To resume normal playback, press
PLAY/PAUSE u again.
Selecting title/chapter/track
During playback, press PREV í to go
to the beginning of the currect chapter/
track, press PREV í again to go to the
previous title/chapter/track.
Press NEXT ë to go to the next
chapter/track.
Press DISPLAY to display the disc
information text line for title/chapter/
track (example - 00/08).
Use alphanumeric keypad (0-9) to
enter valid title/chapter/track number.
The playback skips to the selected
title/chapter/track.
Stopping playback
Press STOP .
Tips:
– Screen saver will start automatically if the
disc playback is stopped/paused for about 5
minutes.
– The player will automatically switch to
Power Standby mode if you do not press any
buttons for about 15 minutes after the disc
has stopped playing.
01-53_dvp3960_37_eng2.indd 2401-53_dvp3960_37_eng2.indd 24 2006-12-28 11:24:46 AM2006-12-28 11:24:46 AM

English
25
TIPS: The operating features described here might not be possible for certain discs.
Always refer to the instructions supplied with the discs.
Playback Features (continued)
Operations for video
playback
Using the Disc Menu
Depending on the disc, a menu may
appear on the TV screen once you load
in the disc.
To select a playback feature or item
Use S T W X keys or numeric
keypad (0-9) on the remote, then press
OK to start playback.
To access or remove the menu
Press DISC MENU on the remote.
Zooming in
This function allows you to enlarge the
picture on the TV screen and to pan
through the enlarged picture.
A During playback, press ZOOM
repeatedly to display the picture with
different scales.
Use S T W X keys to pan through
the enlarged picture.
Playback will continue.
B Press ZOOM repeatedly to return to
the original size.
Resuming playback from the last
stopped point
Resume playback of the last 5 discs is
possible, even if the disc was ejected
(open) or standby.
Load one of the last 5 discs.
‘LOADING’ appears.
During loading mode, press PLAY/
PAUSE u and the disc will playback
from the last point.
To cancel resume mode
In stop mode, press STOP Ç again.
Tip:
– This function is not possible on CD/MP3
disc.
Slow Motion
You can slow forward or slow reverse a
disc during playback and select a different
speed.
For DivX®,DVD,VCD,SVCD
A Press S T during playback to select the
required speed: 1/2, 1/4, 1/8 or 1/16
(forward [DivX®,DVD,VCD,SVCD] or
backward [DVD]).
Sound will be muted.
B To return to normal speed, press PLAY/
PAUSE u.
Forward / Reverse Searching
You can fast forward or fast reverse a
disc during playback and select a desired
search speed.
For DivX®,DVD,VCD,SVCD,CD,
MP3,WMA
A Press W X directly during playback to
select the required speed: 2X, 4X, 8X,
16X or 32X (backward or forward).
Sound will be muted (DVD/VCD/
SVCD/DivX®) or intermittent (MP3/
WMA/CD).
B To return to normal speed, press PLAY/
PAUSE u.
01-53_dvp3960_37_eng2.indd 2501-53_dvp3960_37_eng2.indd 25 2006-12-28 11:24:46 AM2006-12-28 11:24:46 AM

English
26
TIPS: The operating features described here might not be possible for certain discs.
Always refer to the instructions supplied with the discs.
Playback Features (continued)
For JPEG, DivX®
In STOP mode,
– Repeat One (currently playing le)
– Repeat Folder (current folder)
– Folder (playing all les in one folder
once)
– Shuf e (random playback in one
folder)
– Single (currently playing le once).
In PLAY mode,
– Repeat One (currently playing le)
– Repeat All (all les in the selected
folder)
– Repeat Off (playing all les in one
folder once)
– Shuf e (random playback in one
folder)
– Single (currently playing le once).
B To cancel repeat playback, press STOP
Ç.
Tip:
– For VCD, repeat playback is not possible if
the PBC mode is switched on.
Repeating a section within a
chapter/track
You can repeat the playback of a speci c
segment within a title/chapter track. To
do this, you must mark the start and end
of the segment you want.
A While playing a disc, press REPEAT A-
B at your chosen starting point.
B Press REPEAT A-B again at your
chosen end point.
The section A and B can be set only
within the same chapter/track.
The section will now repeat
continuously.
C To exit the sequence, press REPEAT A-
B.
Selecting various repeat
functions
Repeat play mode
The repeat play options vary depending
on the disc type.
A While playing a disc, press REPEAT
continuously to choose a repeat options.
For DVD
– Chapter (currently playing chapter)
– Title (currently playing title)
– All (entire disc)
– Shuf e (random playback)
– Off (cancel)
For Video CD/Audio CD
– Track (currently playing track)
– All (entire disc)
– Shuf e (random playback)
– Off (cancel)
For MP3/WMA
– Repeat One (currently playing le)
– Repeat Folder (current folder)
– Folder (playing all les in one folder
once)
– Shuf e (random playback in one
folder)
– Single (currently playing le once).
01-53_dvp3960_37_eng2.indd 2601-53_dvp3960_37_eng2.indd 26 2006-12-28 11:24:46 AM2006-12-28 11:24:46 AM
English
27
Viewing the disc playback
information
Using the OSD menu
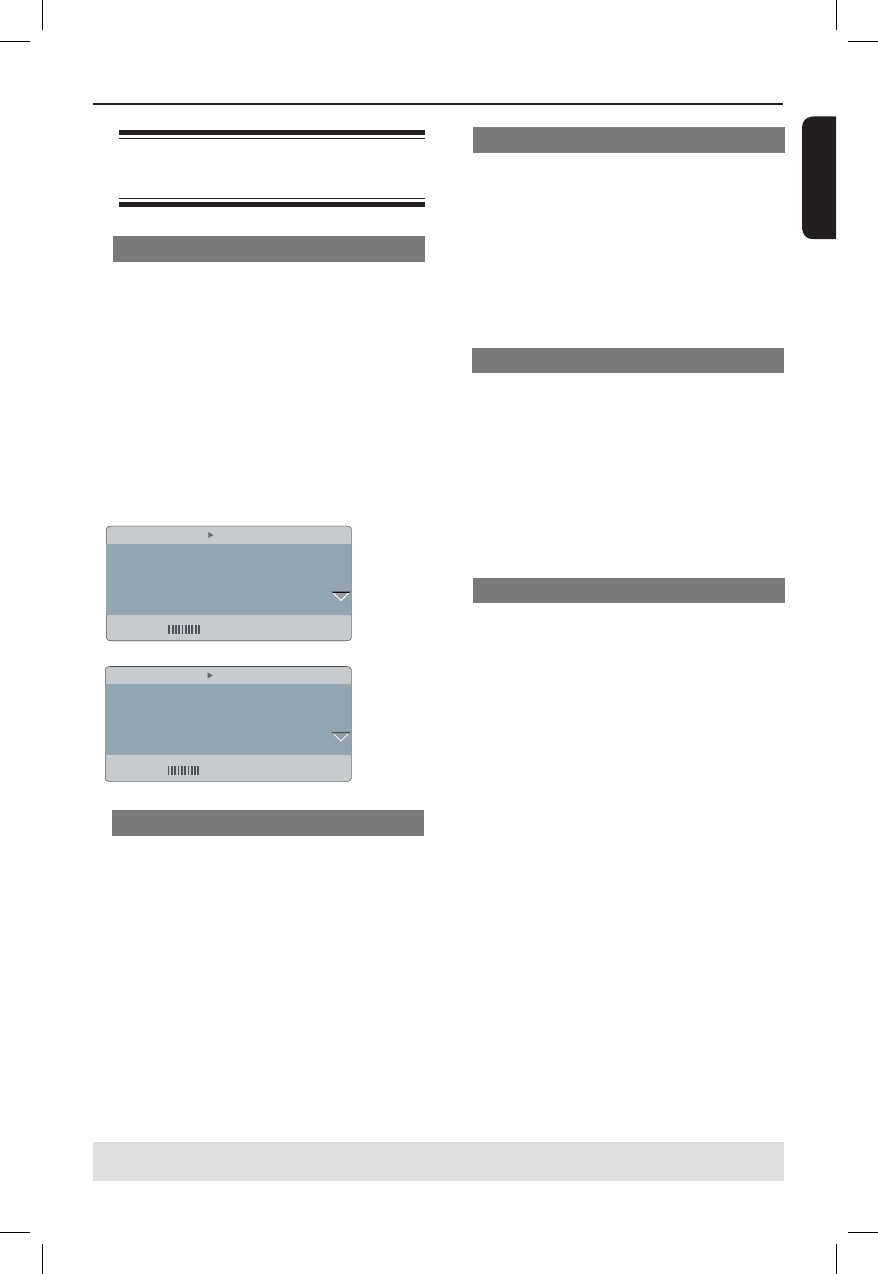
OSD menu shows the disc playback
information (for example, title or chapter
number, elapsed playing time, audio/
subtitle language), a number of operations
can be done without interrupting disc
playback.
During playback, press DISPLAY on the
remote control.
The available disc information appears
on the TV screen with the following
sequence.
Bitrate 61 Total Elapsed 0:48:59
MENU
Title 01/01
Chapter 01/01
Audio 5.1CH Others
Subtitle Off
(DVD)
Track 01/21
Disc Time 1:12:32
Track Time 0:02:29
Repeat ab Off
Bitrate 61 Total Elapsed 0:48:59
MENU
(VCD)
Title/Chapter/Track selection
A Press S T to select {Title} / {Chapter}
or {Track}, then press X to access.
B Use the alphanumeric keypad 0-9 to
input a valid number (e.g. 04/05).
The playback skips to the chosen title/
chapter/track.
Time Search
A Press S T to select {TT Time} / {CH
Time} / {Disc Time} or {Track Time},
then press X to access.
B Use the alphanumeric keypad 0-9 to
input the valid time (such as 0:34:27).
The playback skips to the chosen
time.
Audio / Subtitle
A Press S T to select {Audio} or
{Subtitle}, then press X to access.
B Press S T to select one language.
C Press OK to con rm.
The current audio or subtitle language
will be changed to the selected
language.
Angle
A Press S T to select {Angle}, then press
X to access.
B Use the alphanumeric keypad 0-9 to
input a valid number.
Playback will go to the selected angle.
TIPS: The operating features described here might not be possible for certain discs.
Always refer to the instructions supplied with the discs.
Playback Features (continued)
01-53_dvp3960_37_eng2.indd 2701-53_dvp3960_37_eng2.indd 27 2006-12-28 11:24:47 AM2006-12-28 11:24:47 AM
English
28
Playback Features (continued)
TIPS: The operating features described here might not be possible for certain discs.
Always refer to the instructions supplied with the discs.
Time Display
Press S T to select {Time Disp.} (Time
Display), then press X to access.
Depending on the disc in the DVD
player, the following display types
appear on the TV screen.
For DVD
– TT Elapsed (elapsed playing time of
current Title)
– TT Remain (remaining playing time of
current Title)
– CH Elapsed (elapsed playing time of
current Chapter)
– CH Remain (remaining playing time of
current Chapter)
For VCD/SVCD
– Total Elapsed (elapsed playing time of
current Disc)
– Total Remain (remaining playing time
of current Disc)
– Single Elapsed (elapsed playing time of
current Track)
– Single Remain (remaining playing time
of current Track)
Preview
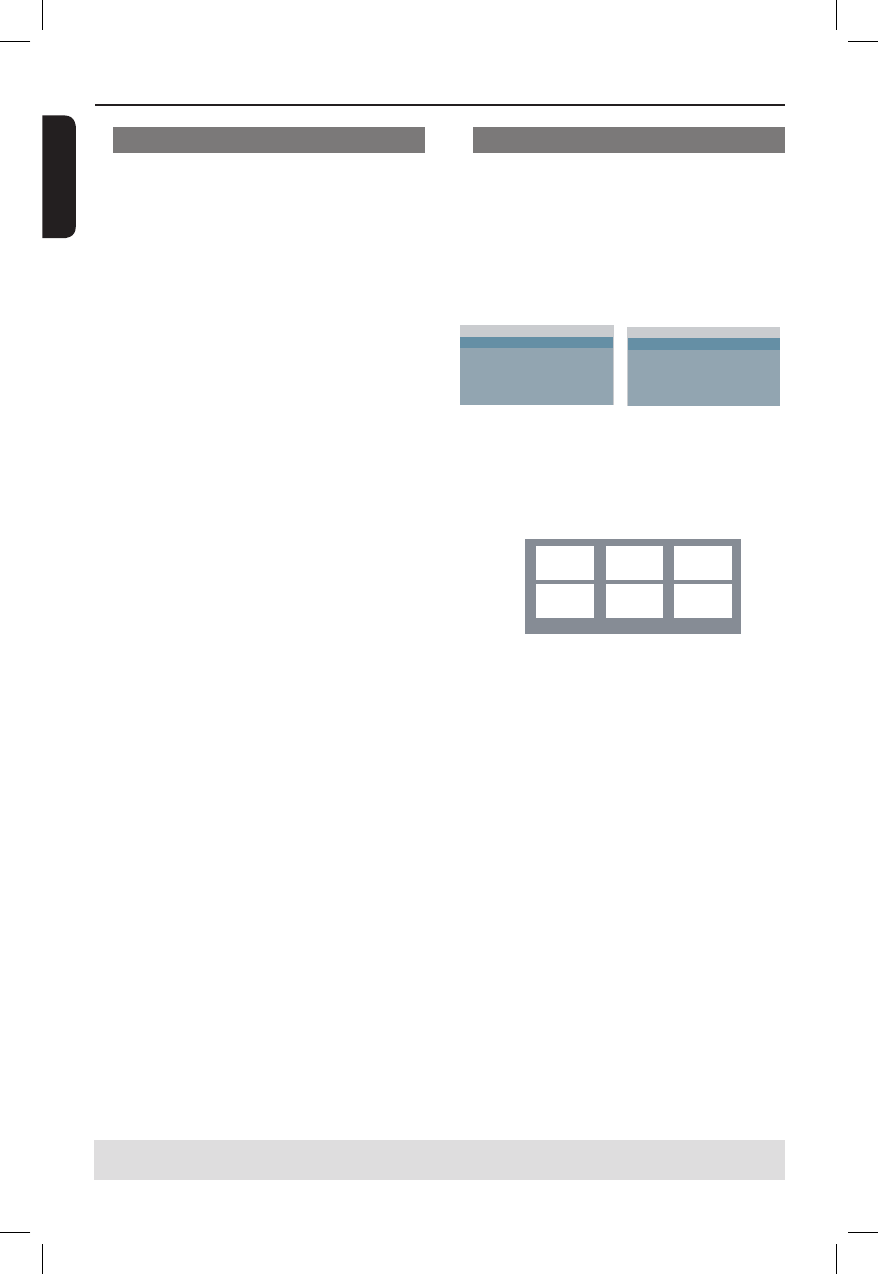
The preview function allows you to
reduce the picture of 6 tracks enough to
display in a full screen.
A Press S T to select {Preview}, then
press X to access.
The preview menu appears on the TV
screen.
Select Digest Type:
Title Digest
Chapter Digest
Title Interval
Chapter Interval
Select Digest Type:
Track Digest
Disc Interval
Track Interval
(DVD example) (Video CD example)
B Press S T to select the preview type,
then press OK.
The picture of each segment will
appears on the TV screen.
ABC
DEF
01 02 03
04 05 06
(example of 6 thumbnail pictures display for
DVD chapter digest preview type)
C Press S T W X to select a track or
input your selected track number using
the alphanumeric keypad (0-9), then
press OK.
Playback will start automatically on
the selected track.
01-53_dvp3960_37_eng2.indd 2801-53_dvp3960_37_eng2.indd 28 2006-12-28 11:24:47 AM2006-12-28 11:24:47 AM

English
29
Special DVD Features
Playing a Title
A Press DISC MENU.
The disc title menu appears on the TV
screen.
B Use S T W X keys or alphanumeric
keypad 0-9 to select a play option.
C Press OK key to con rm.
Changing the Audio Language
For DVD
Press AUDIO repeatedly to select
different audio languages.
Changing the Audio Channel
For VCD
Press AUDIO to select the available
audio channels provided by the disc
(MONO LEFT, MONO RIGHT, MIX-
MONO, STEREO).
Subtitles
Press SUBTITLE repeatedly to select
different subtitle languages.
TIPS: The operating features described here might not be possible for certain discs.
Always refer to the instructions supplied with the discs.
Playback Features (continued)
Viewing Audio CD playback
information
This function displays audio disc
information on the TV screen during
playback.
During playback, press DISPLAY.
A list of available disc information
appears on the TV screen.
Disc Go To / Track Go To / Track
Selection
A Press DISPLAY repeatedly to select an
option.
B Enter minutes and seconds from left to
right in the time edit box using
alphanumeric keypad 0-9.
Playback will change to the chosen
time or to the selected track.
For Audio CD
– Disc Go To: XX/XX (enable to select
any part within the disc)
– Track Go To: XX/XX (enable to
select any part within the current
track)
– Select Track: XX/TT (enable to select
any track within the disc)
01-53_dvp3960_37_eng2.indd 2901-53_dvp3960_37_eng2.indd 29 2006-12-28 11:24:48 AM2006-12-28 11:24:48 AM

English
30
Playback Features (continued)
TIPS: The operating features described here might not be possible for certain discs.
Always refer to the instructions supplied with the discs.
Special VCD and SVCD
Feature
Playback Control (PBC)
For VCD with Playback Control
(PBC) feature (version 2.0 only)
Press DISC MENU to toggle between
‘PBC ON’ and ‘PBC OFF’.
If you select ‘PBC ON’, the disc menu
(if available) will appear on the TV.
Use the PREV í / NEXT ë to go
to previous/next page or use the
alphanumeric keypad 0-9 to select a
play option.
During playback, pressing RETURN/
TITLE will return to the menu screen (if
PBC is on).
If you want to skip the index menu
and playback directly from the
beginning,
Press DISC MENU key on the remote
control to turn to PBC off.
Playing a DivX® disc
This DVD player supports the DivX®
movie playback that you download from
your computer onto a CD-R/RW or
DVD±R/RW (see page 35 for more
information).
A Load a DivX® disc.
The data disc menu appears on the
TV screen.
B Press S T to select the folder and press
OK to open the folder.
C Press S T to select a track/ le.
D Press OK to con rm.
If multilingual subtitles are embedded on
the DivX® disc, pressing SUBTITLE will
change the subtitle language during
playback.
If multi audio are embedded on the
DivX® disc, pressing AUDIO repeatedly
to select different audio language during
playback.
Tips:
– Subtitle les with the following lename
extensions (.srt, .smi, .sub, .ssa, .txt) are
supported but do not appear on the le
navigation menu.
– The subtitle lename (.sub) have to be
saved under the same lename as the movie
(.avi) in the same folder.
[For example, Folder A: abc.avi and abc.sub]
01-53_dvp3960_37_eng2.indd 3001-53_dvp3960_37_eng2.indd 30 2006-12-28 11:24:48 AM2006-12-28 11:24:48 AM
English
31
Playback Features (continued)
TIPS: The operating features described here might not be possible for certain discs.
Always refer to the instructions supplied with the discs.
Playing MP3/WMA/JPEG/
Picture CD
This DVD player can playback MP3,
WMA, JPEG and Picture CD les on a
personally recorded CD-R/RW disc,
commercial CD.
IMPORTANT!
You have to turn on your TV and set to
the correct Video In channel. (See page
19 ‘Finding your viewing channel’).
General Operation
A Load a disc.
The disc reading time may exceed 30
seconds due to the complexity of the
directory/ le con guration.
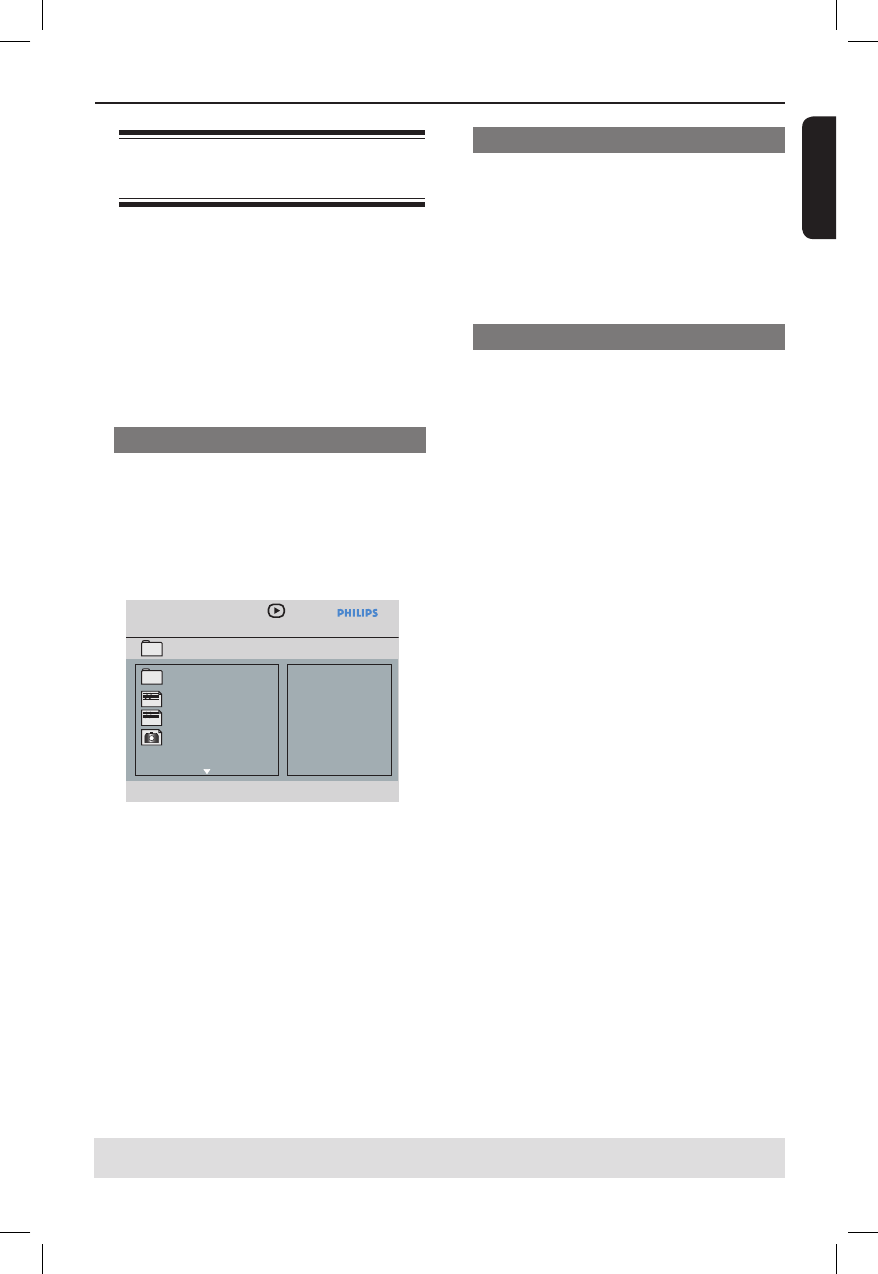
The data disc menu appears on the
TV screen.
MP3 Music 1
MP3 Music 2
Picture 1
--
\MP3_files_128kbs
01:42 04:40 128kbps
001/020
MP3
MP3
B Press PREV í / NEXT ë to go to
previous / next page of the menu.
C Press S T to select the folder and press
OK to open the folder.
D Press S T to select a track/ le.
E Press OK to con rm.
Playback selection
During playback, you can;
Press PREV í / NEXT ë to select
the previous/next track/ le in the current
folder.
Press PLAY/PAUSE u repeatedly to
pause/resume playback.
Playback with multi-angles (JPEG)
During playback, press S T W X to
rotate the picture on the TV screen.
S: ip the picture vertically by 180º
T: ip the picture horizontally by 180º
W: rotate the picture anti-clockwise by
90º
X: rotate the picture clockwise by 90º
Tips:
– It may not be possible to play certain
MP3/JPEG disc due to the con guration and
characteristics of the disc or condition of the
recording.
– It is normal to experience an occasional
‘skip’ while listening to your MP3 disc.
– For multi-session discs with different
formats, only the rst session will be
available.
01-53_dvp3960_37_eng2.indd 3101-53_dvp3960_37_eng2.indd 31 2006-12-28 11:24:48 AM2006-12-28 11:24:48 AM
English
32
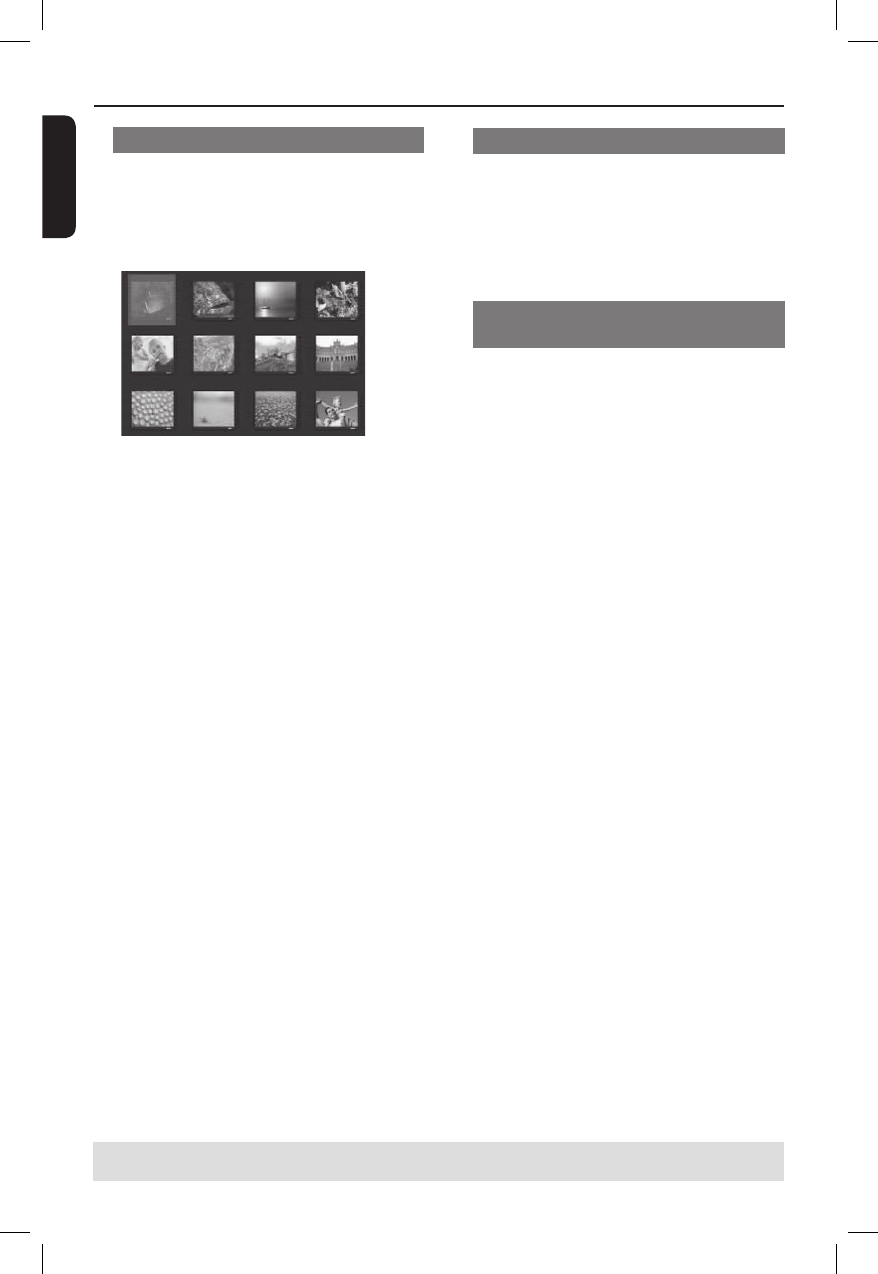
Preview Function (JPEG)
This function shows the content of the
current folder or the whole disc.
A Press DISPLAY during playback.
12 thumbnail pictures will appear on
the TV screen.
B Press PREV í / NEXT ë to display
the other pictures on the previous / next
page.
C Press S T W X to select one of the
picture and press OK to start playback.
D Press DISC MENU to return to Picture
CD menu.
Zoom picture (JPEG)
During playback, press ZOOM
repeatedly to display the picture with
different scales.
Use S T W X to view the zoomed
picture.
Playing MP3/WMA music and JPEG
picture simultaneously
A Load a disc that contains MP3/WMA
music and JPEG picture les.
The disc menu appears on the TV
screen.
B Select an MP3/WMA track.
C During MP3/WMA music playback, select
a picture le on the TV screen and press
OK.
A slide show will start at the same
time as the MP3/WMA audio le is
playing.
D To quit simultaneous playback, press
STOP Ç to stop the slide show.
E Press STOP Ç again to stop the audio.
Tips:
– Some les on Kodak or JPEG disc may be
distorted during playback due to the
con guration and characteristics of the disc.
– During simultaneous playback, fast
forward / reverse or slow forward is not
available.
Playback Features (continued)
TIPS: The operating features described here might not be possible for certain discs.
Always refer to the instructions supplied with the discs.
01-53_dvp3960_37_eng2.indd 3201-53_dvp3960_37_eng2.indd 32 2006-12-28 11:24:48 AM2006-12-28 11:24:48 AM
English
33
DVD Menu Options
This DVD Player setup is carried out via
the TV, enabling you to customize the
DVD player to suit your particular
requirement.
Using the General setup
menu
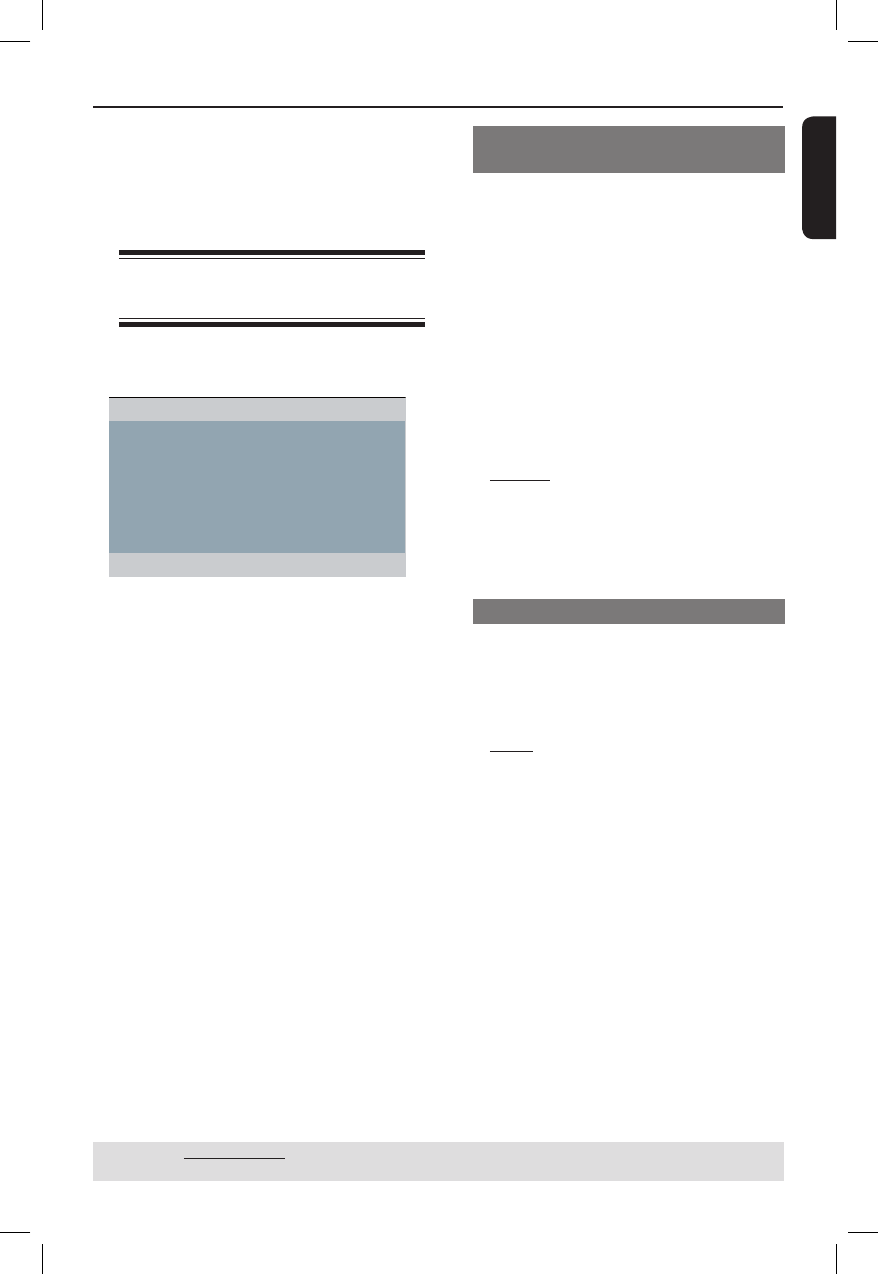
A Press SETUP on the remote control.
The system setup menu appears.
General Setup Page
Disc Lock
Display Dim
Program
OSD Language
Sleep
Lip Sync
DivX(r) VOD Code
B Press W X to select { General Setup
Page }.
C Press S T to select an item, then press
X to access.
Example: { OSD Language }
The options for the selected item
appears.
If the selection in the menu is greyed
out, that means the feature is not
available or not possible to change at
the current state.
D Use S T to select a setting and press
OK to con rm.
Example: { English }
The setting is selected and setup is
complete.
E To exit, press SETUP.
Locking/Unlocking the disc for
viewing
Not all discs are rated or coded by the
disc maker. You can prevent a speci c
disc from playing by locking the disc. Up
to 20 discs can be locked.
A In ‘General Setup Page’, press S T to
select { Disc Lock }, then press X.
{ Lock }
Select this to block the playback of the
current disc. Subsequent access to a
locked disc requires six-digit password.
The default password is '136900' (see
page 45 'Changing the password').
{ Unlock }
Select this to unlock the disc and allow
future playback.
B Use S T to select a setting and press
OK to con rm.
Dimming player’s display panel
You can select different levels of
brightness for the display screen.
A In ‘General Setup Page’, press S T to
select { Display Dim }, then press X.
{ 100% }
Select this for full brightness.
{ 70% }
Select this for medium brightness.
{ 40% }
Select this for dimming the display.
B Use S T to select a setting and press
OK to con rm.
TIPS: The underlined option is the factory default setting.
Press W to go back to previous menu item. Press SETUP to exit the menu item.
01-53_dvp3960_37_eng2.indd 3301-53_dvp3960_37_eng2.indd 33 2006-12-28 11:24:49 AM2006-12-28 11:24:49 AM
English
34
Programming disc tracks (not for
Picture CD/MP3/WMA/DivX®)
You can play the contents of the disc in
the order you want by programming the
tracks to be played. Up to 20 tracks can
be stored.
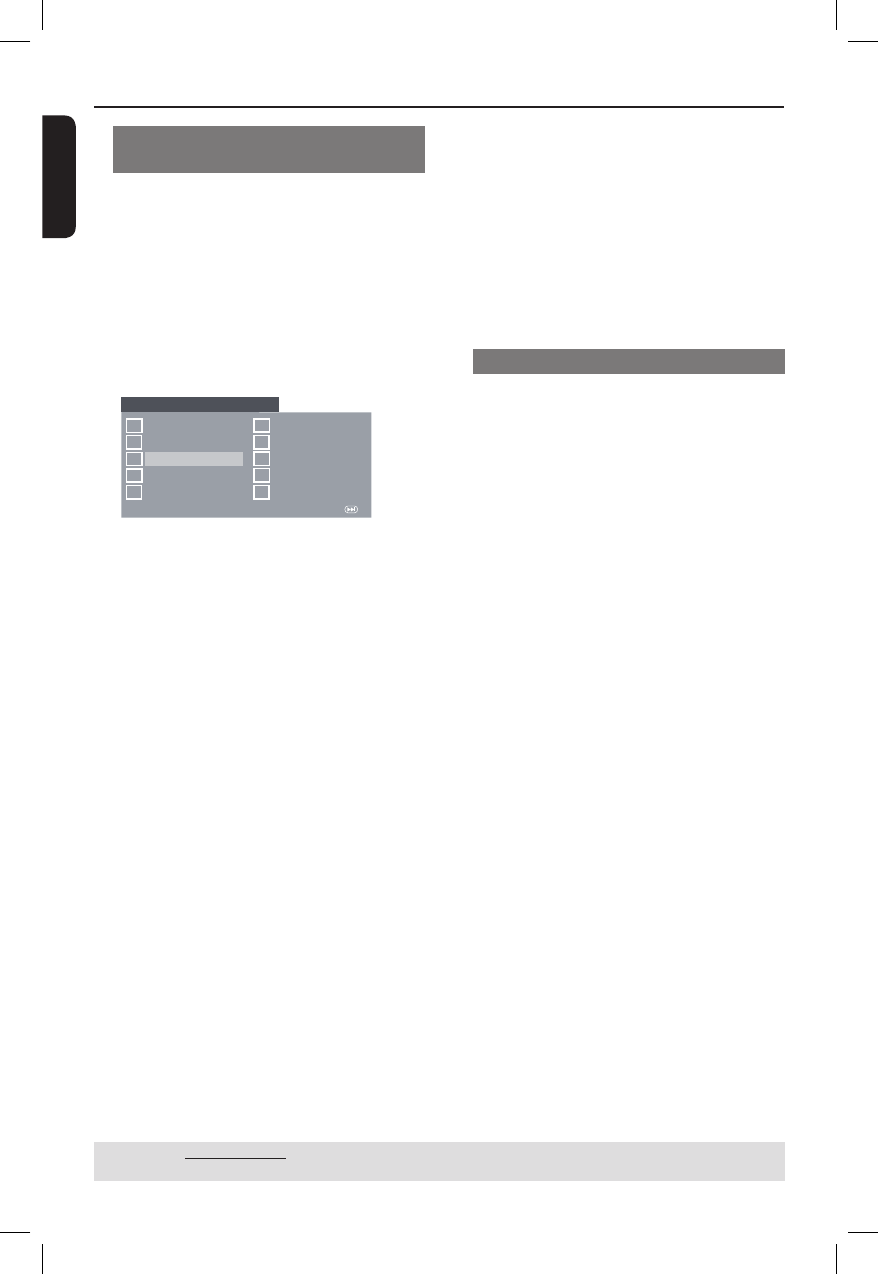
A In ‘General Setup Page’, press S T to
select { Program }, then press X to
select { Input Menu }.
B Press OK to con rm.
Program menu appears.
1 04
2 10
4 __ 9 __
8 __
7 __
6 __
5 __ 10 __
3 11
Exit START NEXT
Programme : Track (01 - 17)
To input your favourite tracks/
chaper
C Use the numeric keypad (0-9) to
enter a valid track/chapter number.
D Use S T W X to move the cursor to
the next position.
If more than ten tracks, press NEXT
ë to open the next page.
Press S T W X to select {NEXT}
on the program menu, then press
OK.
E Repeat steps C ~ D to input another
track/chapter number.
To remove a track
F Use S T W X to select the track you
want to remove, then press OK.
To start program playback
G Use S T W X to select { START } on
the program menu, then press OK.
Playback will start with the select
tracks under the programmed
sequence.
To exit program playback
H Use S T W X to select { EXIT } on
the program menu, then press OK.
OSD Language
This menu contains various language
options for the language displayed on the
screen. For details, see page 22.
DVD Menu Options (continued)
TIPS: The underlined option is the factory default setting.
Press W to go back to previous menu item. Press SETUP to exit the menu item.
01-53_dvp3960_37_eng2.indd 3401-53_dvp3960_37_eng2.indd 34 2006-12-28 11:24:49 AM2006-12-28 11:24:49 AM

English
35
DVD Menu Options (continued)
TIPS: The underlined option is the factory default setting.
Press W to go back to previous menu item. Press SETUP to exit the menu item.
Sleep
Sleep function allows you to turn off the
DVD player automatically after a preset
time.
A In ‘General Setup Page’, press S T to
select { Sleep }, then press X.
{ 15 Mins }
Turn off the DVD player after 15
minutes.
{ 30 Mins }
Turn off the DVD player after 30
minutes.
{ 45 Mins }
Turn off the DVD player after 45
minutes.
{ 60 Mins }
Turn off the DVD player after 60
minutes.
{ Off }
Turn off the sleep function.
B Use S T to select a setting and press
OK to con rm.
Lip Sync
This allows you to adjust the audio delay
(ms) with respect to the video output for
the lip synchronisation.
A In ‘General Setup Page’, press S T to
select { Lip Sync }, then press X.
Use W X to adjust the following
options; {0ms} – {200ms}
The default setting is {120ms}
B Press OK to con rm.
DivX® VOD registration code
DivX® VOD registration code allows you
to rent and purchase movies using the
DivX® service from the internet.
For more information, visit website;
http://vod.divx.com
A In ‘General Setup Page’, press S T to
select { DivX(R) VOD Code }, then
press X.
The registration code will appear.
B Press OK to exit.
C Use the registration code to rent or
purchase the movies from DivX® VOD
service at http://vod.divx.com.
Follow the instructions and download
the movie from your computer onto a
CD-R/DVD±R(W) for playback on
this DVD player.
Tips:
– All the downloaded movies from DivX®
Registration can only be played back on this
DVD player.
– Time search feature is not available during
DivX® movie playback.
01-53_dvp3960_37_eng2.indd 3501-53_dvp3960_37_eng2.indd 35 2006-12-28 11:24:49 AM2006-12-28 11:24:49 AM
English
36
DVD Menu Options (continued)
TIPS: The underlined option is the factory default setting.
Press W to go back to previous menu item. Press SETUP to exit the menu item.
Using the Audio setup menu
A Press SETUP on the remote control.
The system setup menu appears.
Analog Output
Digital Audio Setup
Sound Mode
CD Upsampling
Night Mode
Audio Setup Page
B Press W X to select { Audio Setup
Page }.
C Press S T to select an item, then press
X to access.
Example: { Night Mode }
The options for the selected item
appears.
If the selection in the menu is greyed
out, that means the feature is not
available or not possible to change at
the current state.
D Use S T to select a setting and press
OK to con rm.
Example: { On }
The setting is selected and setup is
complete.
E To exit, press SETUP.
Analog Output
This option allows you to set the stereo
analog output of your DVD player.
A In ‘Audio Setup Page’, press S T to
select { Analog Output }, then press X.
{ Stereo }
Select this option when output delivers
sound from only the two front speakers.
{ LT/RT }
Select this option if your DVD player is
connected to a Dolby Pro Logic decoder.
{ V SURR }
Allows the DVD player to use virtual
surround sound effects.
B Use S T to select a setting and press
OK to con rm.
Digital Audio Setup
The options included in Digital Audio
Setup are: {Digital Output} and {LPCM
Output}.
A In ‘Audio Setup Page’, press S T to
select { Digital Audio Setup }, then
press X.
B Press S T to select an item, then press
X to access.
C Use S T to select a setting and press
OK to con rm.
01-53_dvp3960_37_eng2.indd 3601-53_dvp3960_37_eng2.indd 36 2006-12-28 11:24:49 AM2006-12-28 11:24:49 AM

English
37
DVD Menu Options (continued)
TIPS: The underlined option is the factory default setting.
Press W to go back to previous menu item. Press SETUP to exit the menu item.
Digital Output
Set the Digital Output according to your
optional audio equipment connection.
{ All }
Select this if the connected device has a
built-in multichannel decoder that
supports one of the multichannel audio
format (Dolby Digital, MPEG-2).
{ PCM Only }
Select this if the connected device is not
capable of decoding multichannel audio.
The DVD player will convert the Dolby
Digital and MPEG-2 multichannel signals
to PCM (Pulse Code Modulation).
{ Off }
To deactivate the digital audio output.
For example, if you use the AUDIO OUT
sockets to connect to a TV or stereo
system.
LPCM Output
If you connect the DVD player to a PCM
compatible receiver via the digital
terminals, such as coaxial or optical etc,
you may need to adjust ‘LPCM Output’.
{ 48K }
Playback a disc recorded at the sampling
rate of 48kHz.
{ 96K }
Playback a disc recorded at the sampling
rate of 96kHz. This rate can only be
achieved in Stereo-Classic (Flat) mode.
Tip:
– Discs are recorded at a certain sampling
rate. The higher the sampling rate, the better
sound quality. LPCM Output can be selected
only when PCM Only is activated.
Sound Mode
The options included in Sound Mode
Setup are {3D}, {Movie Mode}, {Music
Mode}.
A In ‘Audio Setup Page’, press S T to
select { Sound Mode }, then press X.
B Press S T to select an item, then press
X to access.
C Use S T to select a setting and press
OK to con rm.
3D
This function provides a virtual surround
sound experience using just two
speakers.
{ Off } – { Living Room } – { Hall }
– { Arena } – { Church }
Movie Mode
Provides various Movie sound effects.
{ Off } – { Sci-Fic } – { Action } –
{ Drama } – { Concert }
Music Mode
Select a Sound Mode that matches the
type of music you are playing. These
preset Sound Modes adjust the frequency
bands of the audio to enhance your
favorite music.
Provides various Music sound effects.
{ Off } – { Digital } – { Rock } –
{ Classic } – { Jazz }
01-53_dvp3960_37_eng2.indd 3701-53_dvp3960_37_eng2.indd 37 2006-12-28 11:24:49 AM2006-12-28 11:24:49 AM

English
38
DVD Menu Options (continued)
TIPS: The underlined option is the factory default setting.
Press W to go back to previous menu item. Press SETUP to exit the menu item.
CD Upsampling
This feature allows you to convert your
music CD to a higher sampling rate using
sophisticated digital signal processing for
better sound quality.
A In ‘Audio Setup Page’, press S T to
select { CD Upsampling }, then press
X.
{ Off }
Select this to disable CD Upsampling.
{ 88.2 kHz (x2) }
Select this to convert the sampling rate of
the CDs twice higher than the original.
{ 176.4 kHz (x4) }
Select this to convert the sampling rate of
the CDs four times higher than the
original.
B Use S T to select a setting and press
OK to con rm.
Tip:
– CD Upsampling feature is only applicable
to stereo output setting when playing CD
disc.
Night Mode
This mode optimizes playback of sound at
low volume. High volume outputs will be
softened and low volume outputs are
brought upward to an audible level.
A In ‘Audio Setup Page’, press S T to
select { Night Mode }, then press X.
{ On }
Select this to set low volume output. This
feature is only available for movie discs
with Dolby Digital mode.
{ Off }
Turns off night mode feature. Select this
to enjoy the surround sound with its full
dynamic range.
B Use S T to select a setting and press
OK to con rm.
01-53_dvp3960_37_eng2.indd 3801-53_dvp3960_37_eng2.indd 38 2006-12-28 11:24:50 AM2006-12-28 11:24:50 AM
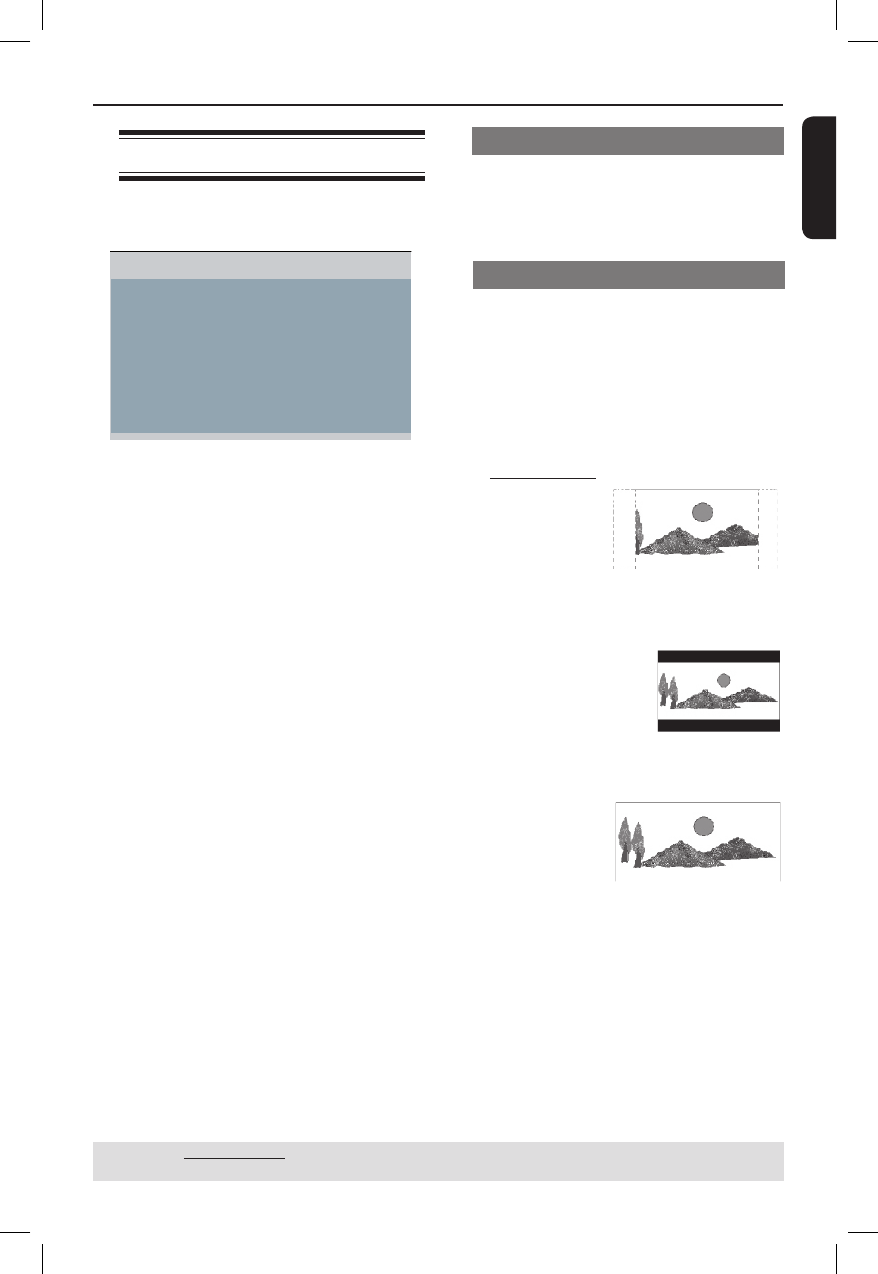
English
39
DVD Menu Options (continued)
TIPS: The underlined option is the factory default setting.
Press W to go back to previous menu item. Press SETUP to exit the menu item.
Using the Video setup menu
A Press SETUP on the remote control.
The system setup menu appears.
TV Type
TV Display
Progressive
Picture Setting
Video Setup Page
Closed Captions
HDMI Setup
B Press W X to select { Video Setup
Page }.
C Press S T to select an item, then press
X to access.
Example: { TV Display }
The options for the selected item
appears.
If the selection in the menu is greyed
out, that means the feature is not
available or not possible to change at
the current state.
D Use S T to select a setting and press
OK to con rm.
Example: { 4:3 Pan Scan }
The setting is selected and setup is
complete.
E To exit, press SETUP.
TV Type
This menu contains the options for
selecting the color system that matches
the connected TV. For details, see page
21.
Setting the TV Display
The picture shape can be adjusted to t
your TV and the format must be available
on the playback disc. Otherwise, the TV
display will not affect the picture during
playback.
A In ‘Video Setup Page’, press S T to
select { TV Display }, then press X.
{ 4:3 Pan Scan }
Select this if you
have a normal
TV and want
both sides of the
picture to be
trimmed or formatted on the TV screen.
{ 4:3 Letter Box }
Select this if you have a
normal TV. A ‘wide-
screen’ display with
black bars on the top
and bottom will be
displayed on the TV screen.
{ 16:9 }
Select this for
wide-screen TV
(frame ratio
16:9).
B Use S T to select a setting and press
OK to con rm.
01-53_dvp3960_37_eng2.indd 3901-53_dvp3960_37_eng2.indd 39 2006-12-28 11:24:50 AM2006-12-28 11:24:50 AM
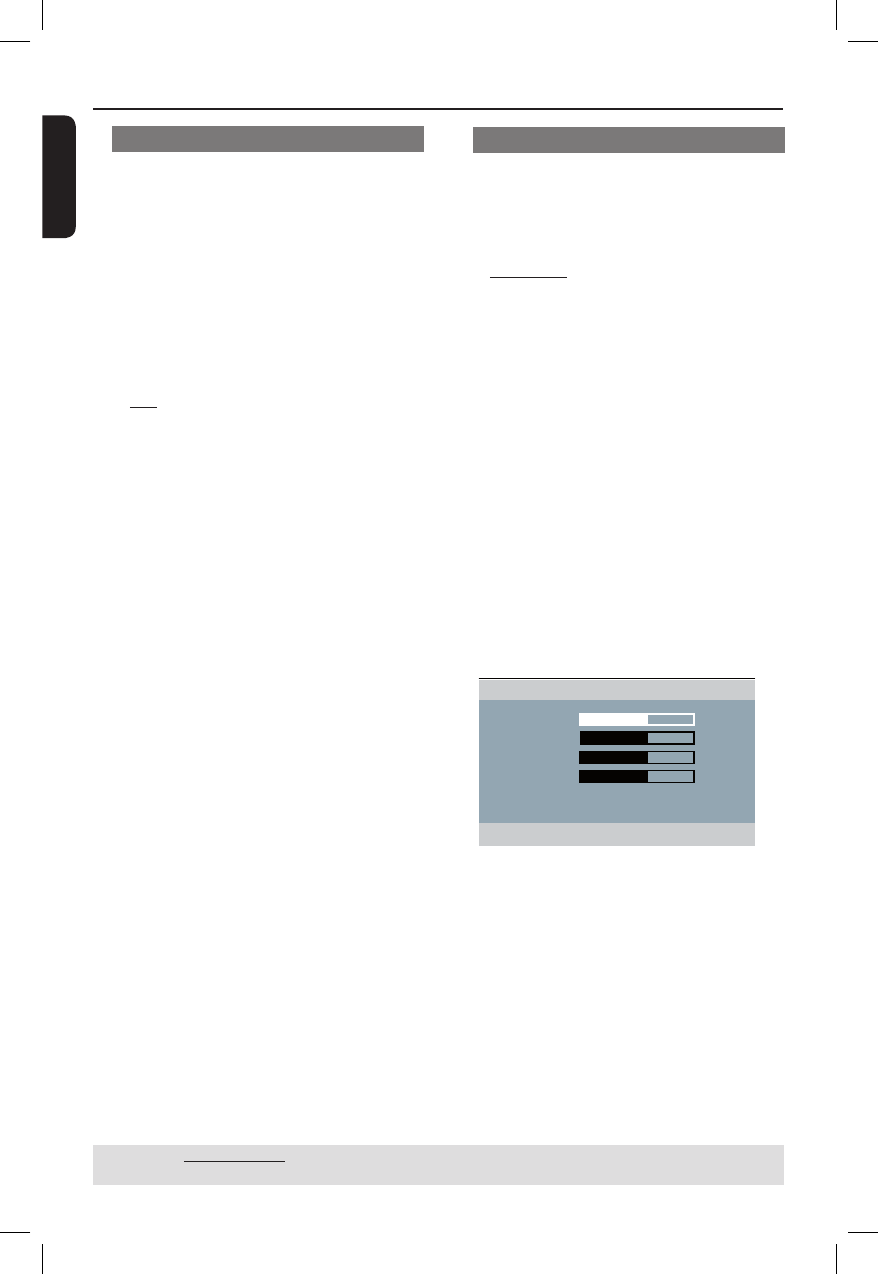
English
40
DVD Menu Options (continued)
TIPS: The underlined option is the factory default setting.
Press W to go back to previous menu item. Press SETUP to exit the menu item.
Progressive
In the progressive scan mode, you can
enjoy the high quality picture with less
ickers. It only works when you have
connected the DVD player’s YPbPr jacks
to your TV that supports the progressive
video input. Otherwise, a distorted
picture will appear on the TV. For proper
progressive scan set up, see page 20.
A In ‘Video Setup Page’, press S T to
select { Progressive }, then press X.
{ Off }
To disable Progressive Scan function.
{ On }
To enable Progressive Scan function.
B Use S T to select a setting and press
OK to con rm.
Follow the instructions shown on the
TV screen to con rm the selection (if
any).
If a distorted picture appears on the
TV screen, wait for 15 seconds for
auto recovery.
Picture Setting
This DVD player provides four
prede ned sets of picture color settings.
A In ‘Video Setup Page’, press S T to
select { Picture Setting }, then press X.
{ Standard }
Select this for a preset standard picture
setting.
{ Vivid }
Select this to make the picture brighter.
{ Cool }
Select this to make the picture softer.
{ Personal }
Select this to personalize your picture
color by adjusting the brightness,
contrast, tint and color (saturation).
B Use S T to select a setting and press
OK to con rm.
C If you select {PERSONAL}, then proceed
to steps D~G.
The ‘personal picture setup’ menu
appears.
Brightness 0
Contrast 0
Tint 0
Color 0
Personal Picture Setup
01-53_dvp3960_37_eng2.indd 4001-53_dvp3960_37_eng2.indd 40 2006-12-28 11:24:50 AM2006-12-28 11:24:50 AM

English
41
D Press S T to highlight one of the
following options.
BRIGHTNESS
Increase the value to brighten the picture
or vice versa. Choose zero (0) for
average setting.
CONTRAST
Increase the value to sharpen the picture
or vice versa. Choose zero (0) to
balance the contrast.
TINT
Increase the value to darken the picture
or vice versa. Choose zero (0) for
average setting.
COLOR
Increase the value to enhance the color
in your picture or vice versa. Choose
zero (0) to balance the color.
E Press W X to adjust the setting that best
suits your personal preference.
F Repeat steps D~E for adjusting other
color features.
G Press OK to con rm.
TIPS: The underlined option is the factory default setting.
Press W to go back to previous menu item. Press SETUP to exit the menu item.
DVD Menu Options (continued)
Closed Captions
Closed caption are data that are hidden
in the video signal of some discs.
Captions are different from subtitles
because captions hearing are impaired by
showing the sound effects (e.g., “phone
ringing” and “footsteps”), while subtitles
do not. Before you select this function,
ensure that the disc contains closed
captions information and your TV set
also has this function.
A In ‘Video Setup Page’, press S T to
select { Closed Captions }, then press
X.
{ On }
Enable closed caption.
{ Off }
Disable closed caption.
B Use S T to select a setting and press
OK to con rm.
01-53_dvp3960_37_eng2.indd 4101-53_dvp3960_37_eng2.indd 41 2006-12-28 11:24:51 AM2006-12-28 11:24:51 AM

English
42
HDMI Setup
The option in HDMI Setup are:
{Resolution}.
A In ‘Video Setup Page’, press S T to
select { HDMI Setup }, then press X.
B Press X to access its submenu.
C Use S T to select a setting and press
OK to con rm.
Resolution
You can select the resolution of the
picture according to your preference and
the connected HDMI peripheral
equipment.
{ 480p }
Progressive output in 480 lines for NTSC
TV.
{ 576p }
Progressive output in 576 lines for PAL
TV.
{ 720p }
Progressive output upscale to 720 lines.
{ 1080i }
Interlaced output upscale to 1080 lines.
{ Auto }
Output automatically based on your
display’s supported resolution. Select this
to automatically display best resolution
settings.
TIPS: The underlined option is the factory default setting.
Press W to go back to previous menu item. Press SETUP to exit the menu item.
DVD Menu Options (continued)
Tips:
– If no display or distorted pictures appears
on the TV screen due to unsupported
resolution, reconnect any available video
output to your DVD player and re-adjust the
resolution setting.
– When changing the resolution of the DVD
player, the HDMI TV will automatically
change to t the TV resolution.
01-53_dvp3960_37_eng2.indd 4201-53_dvp3960_37_eng2.indd 42 2006-12-28 11:24:51 AM2006-12-28 11:24:51 AM
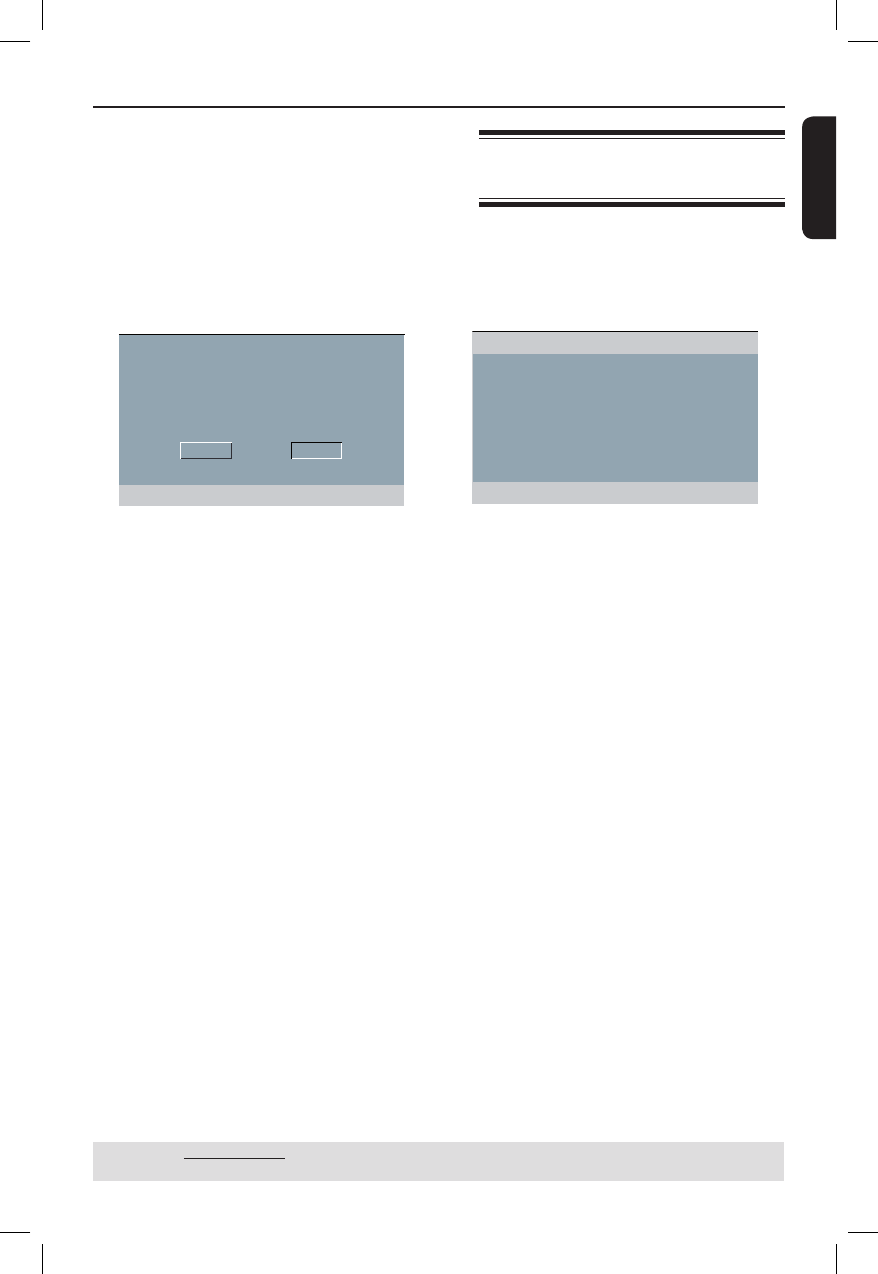
English
43
TIPS: The underlined option is the factory default setting.
Press W to go back to previous menu item. Press SETUP to exit the menu item.
DVD Menu Options (continued)
Using the Preference setup
menu
A Press STOP Ç twice to stop playback,
(if any), then press SETUP on the
remote control.
The system setup menu appears.
Audio
Subtitle
Disc Menu
Parental
PBC
Mp3 / Jpeg Nav
Password
Preference Page
B Press X to select { Preference Page }.
C Press S T to select an item, then press
X to access.
Example: { Parental }
The options for the selected item
appears.
If the selection in the menu is greyed
out, that means the feature is not
available or not possible to change at
the current state.
D Use S T to select a setting and press
OK to con rm.
Example: { 8 Adult }
The setting is selected and setup is
complete.
E To exit, press SETUP.
(For DVI TV only)
If a DVI TV is connected (see page 16) all
above resolution options can be chosen,
including the resolution that are not
supported by the TV.
A Use S T to select a resolution and
press OK to con rm.
The menu will appear on the TV.
For resolution supported by the DVI TV,
the picture will be in a normal mode,
press W to highlight { OK } and press
OK to con rm.
For resolution that are not supported by
the DVI TV, black TV screen appears.
To exit the black screen manually:
Wait for 5 seconds for the auto
recovery.
OR
A Use the composite video cable (yellow)
to connect the DVD player’s TV OUT
(CVBS) jack to the DVI TV Video In jack
to switch to CVBS mode.
B Select the available resolution that could
be supported by the DVI TV in the HDMI
setup menu.
01-53_dvp3960_37_eng2.indd 4301-53_dvp3960_37_eng2.indd 43 2006-12-28 11:24:51 AM2006-12-28 11:24:51 AM
OK CANCEL
CONFIRM AGAIN TO USE THIS RESOLUTION

English
44
Rating Explanations
{ 1.Kid Safe }
Childsafe; acceptable for viewers of all
ages.
{ 2. G }
General Audience; recommended as
acceptable for viewers of all ages.
{ 3. PG }
Parental Guidance suggested.
{ 4. PG – 13 }
Unsuitable for children under age 13.
{ 5. PG – R }
Parental Guidance; recommended that
parents restrict children under 17 from
viewing.
{ 6. R }
Restricted; recommended only when
supervised by a parent or adult guardian.
{ 7. NC – 17 }
No Children under age 17; not
recommended viewing for children under
age 17.
{ 8. Adult }
Mature Material; should be viewed only
by adults due to graphic sexual material,
violence or language.
Tips:
– This feature will not limit viewing if the
disc manufacturer did not code the disc.
– VCD, SVCD, CD have no level indication,
so parental control has no effect on these
type of discs. This also applies to most illegal
DVDs.
– Some DVDs are not coded with a rating
though the movie rating may be printed on
the disc cover. The rating level feature does
not prohibit play of such discs.
Subtitle/Audio/Disc Menu
These menus contains various language
options for audio, subtitle and disc menu
which may be recorded on the DVD. For
details, see page 22.
Parental
Depending on the DVD, you may be
asked to change the parental level while
playing the disc. The rating levels are
from 1 to 8 and are country dependent.
You can prohibit the playing of certain
discs that are not suitable for your
children, or have certain discs played with
alternative scenes.
A In ‘Preference Page’, press T to select
{ Parental }, then press X.
Audio 1 KID SAFE
Subtitle 2 G
Disc Menu 3 PG
Parental 4 PG13
PBC 5 PGR
Mp3 / Jpeg Nav 6 R
Password 7 NC17
Preference Page
B Use S T to select a rating level and
press OK to con rm.
Select { 8 Adult } to disable parental
level and allow all discs to play.
C Use the alphanumeric keypad 0-9 to
enter the six-digit password (see page 45
‘Changing the Password’), then press OK
to con rm.
DVDs that are rated higher than the level
you selected will not play unless you
enter your six-digit password.
TIPS: The underlined option is the factory default setting.
Press W to go back to previous menu item. Press SETUP to exit the menu item.
DVD Menu Options (continued)
01-53_dvp3960_37_eng2.indd 4401-53_dvp3960_37_eng2.indd 44 2006-12-28 11:24:51 AM2006-12-28 11:24:51 AM
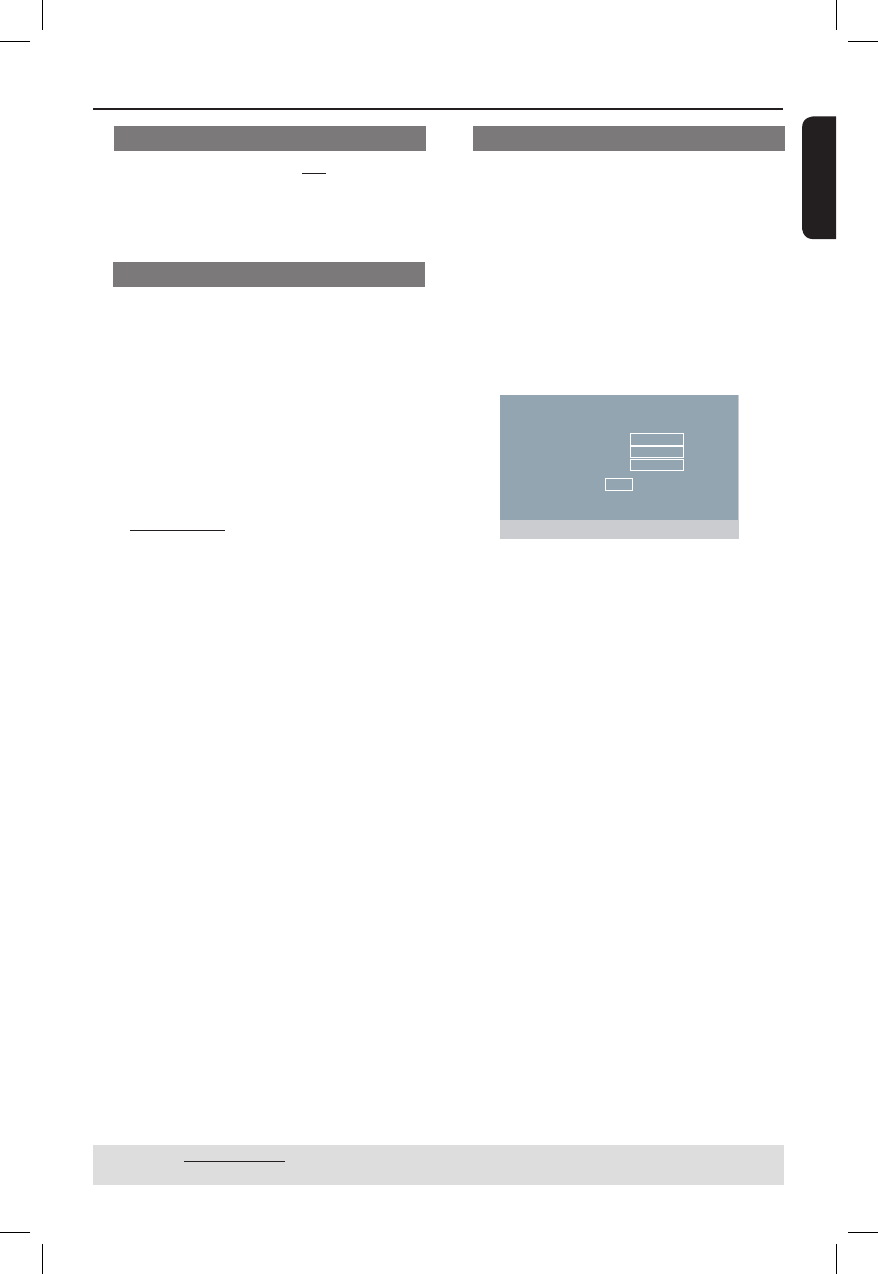
English
45
DVD Menu Options (continued)
TIPS: The underlined option is the factory default setting.
Press W to go back to previous menu item. Press SETUP to exit the menu item.
PBC
You can set the PBC to {On} or {Off}.
This feature is available only on SVCD or
Video CD 2.0 with playback control
(PBC) feature. For details, see page 30.
MP3/JPEG Menu
MP3/JPEG Navigator can be set only if
the disc is recorded with menu. It allows
you to select different display menu for
easy navigation.
A In ‘Preference Page’, press S T to select
{ MP3/JPEG Nav }, then press X.
{ Without Menu }
Select this to display all the les
contained in the MP3/Picture CD.
{ With Menu }
Select this to display only the folder
menu of the MP3/Picture CD.
B Use S T to select a setting and press
OK to con rm.
Changing the Password
You need to enter your six-digit
password to play a prohibited disc or if
prompted for a password. The same
default password is used for both
Parental and Disc Lock.
A In ‘Preference Page’, press S T to select
{ Password }, then press X to select
{ Change }.
B Press OK and the menu appears on the
TV screen.
Old Password
New Password
Confirm PWD
OK
C Use the alphanumeric keypad 0-9 to
enter the six-digit password.
When doing this for the rst time,
enter the default password ‘136900’.
If you forget your old six-digit password,
enter the default password ‘136900’.
D Enter the new six-digit password.
E Enter the new six-digit password a
second time to con rm.
The new six-digit password will now
take effect.
F Press OK to con rm.
01-53_dvp3960_37_eng2.indd 4501-53_dvp3960_37_eng2.indd 45 2006-12-28 11:24:52 AM2006-12-28 11:24:52 AM

English
46
DVD Menu Options (continued)
TIPS: The underlined option is the factory default setting.
Press W to go back to previous menu item. Press SETUP to exit the menu item.
Setting the DivX® subtitle font
You can set the font type that supports
the recorded DivX® subtitle.
A In ‘Preference Page’, press S T to select
{ DivX® Subtitle }, then press X.
{ Standard }
Albanian, Danish, Dutch, English, Finnish,
French, Gaelic, German, Italian, Kurdish
(Latin), Norwegian, Portuguese, Spanish
Swedish and Turkish.
B Press OK to con rm.
Restoring to the original settings
Setting the { Default } function will reset
all options and your personal settings to
the factory defaults, except your
password for Parental and Disc Lock.
A In ‘Preference Page’, press S T to select
{ Default }, then press X to select
{ Reset }.
B Press OK to con rm.
All settings will now reset to factory
defaults.
01-53_dvp3960_37_eng2.indd 4601-53_dvp3960_37_eng2.indd 46 2006-12-28 11:24:52 AM2006-12-28 11:24:52 AM
English
47
Others
Software upgrade
Periodically Philips will issue software
upgrade to enhance your user
experience.
IMPORTANT!
– Power supply must not be
interrupted during upgrade!
To check the current software version of
this DVD player;
A Press OPEN/CLOSE ç on the DVD
player to open the disc tray.
The disc tray will open.
B Press numeric keypad ‘55’ on the
remote control.
The le name of the software installed
in the DVD player appears on the TV
screen.
To download and install the latest
software to the DVD player;
A Visit the Philips website ‘www.philips.
com/support’ to check the availability of
the latest software upgrade.
B Download the software to a CD-R.
C Insert the CD-R to the disc slot.
The menu appears on the TV screen.
Upgrade File Detected
Upgrade?
Press Play to start
D Press PLAY/PAUSE u to download
the latest software in the DVD player.
The DVD player will re-start
automatically once the download
complete.
01-53_dvp3960_37_eng2.indd 4701-53_dvp3960_37_eng2.indd 47 2006-12-28 11:24:52 AM2006-12-28 11:24:52 AM

English
48
Troubleshooting
Problem Solution
WARNING
Under no circumstances should you try to repair the system yourself, as this will
invalidate the warranty. Do not open the system as there is a risk of electric shock.
If a fault occurs, rst check the points listed below before taking the system for repair. If
you are unable to remedy a problem by following these hints, consult your dealer or
Philips for help.
No power.
Remote control does not work.
No picture.
The picture is distorted or black &
white during playback.
No sound.
Disc does not play.
Need Help? Visit us at www.philips.com/support
– Press STANDBY-ON button on the front of the DVD
player to turn on the system.
– Make sure the AC outlet has power.
– Aim the remote control directly at the sensor on the
front of the DVD player (not towards TV).
– Remove any obstacles between DVD player and the
remote control.
– Batteries are weak, replace the batteries.
– Check the polarities of the batteries are as indicated on
the remote control (± signs).
– Turn on your TV and set to the correct Video In
channel for the DVD player. You may go to Channel 1
on your TV, then press the channel down button on
your TV’s remote control until you see the TV program.
– Check the video connection between the DVD player
and the TV.
– The disc does not match with the TV color system
standard (PAL/NTSC).
– The disc is dirty, clean the disc.
– Sometimes a small amount of picture distortion may
appear. This is not a malfunction.
– To deactivate progressive scan function manually;
1) Turn off your TV progressive scan mode (or set to
interlace mode)
2) Press OPEN/CLOSE to open the DVD player disc tray.
3) Press the alphanumeric keypad ‘1’ for few seconds.
– Check the audio connections, the red and white jacks are
connected correctly.
– Set the Digital output correctly, based on the equipment
you connected to the DVD player.
– Insert the disc with the label facing up.
– Wrong region code.
– Wrong disc type. Read chapter “Playback - Playable
discs” for details.
– Make sure the disc is not scratched or warped. Clean the
disc or replace a new one.
– Check if the disc is defective by trying another disc.
01-53_dvp3960_37_eng2.indd 4801-53_dvp3960_37_eng2.indd 48 2006-12-28 11:24:52 AM2006-12-28 11:24:52 AM

English
49
Problem Solution
Troubleshooting (continued)
Need Help? Visit us at www.philips.com/support
The aspect ratio of the screen
cannot be changed.
Not able to select some items in the
setup/system menu.
The DVD player does not start
playback.
Picture freezes momentarily during
playback.
Unable to select Progressive Scan
on/off.
Unable to play DivX® movies.
No sound during DivX® movies
playback.
An DivX® movies does not repeat.
Certain DivX® files does not play or
are skipped.
– The aspect ratio is xed on the DVD disc.
– Depending on the TV, it may not be possible to change
the aspect ratio.
– Press STOP button twice before selecting the setup/
system menu.
– Depending on the disc availability, some menu items
cannot be selected.
– Insert a readable disc with the playback side facing down.
– Check the disc type, colour system (PAL/NTSC) and
region code.
– Check for any scratches or smudges on the disc.
– Press SETUP to turn off the setup menu screen.
– You may need to enter the password in order to change
the parental rating level or to unlock the disc for
playback.
– Moisture may have condensed inside the system. Remove
the disc and leave the system turned on for about an
hour.
– Disconnect the power cord from the power outlet for a
few minutes. Reconnect the power cord and try to
operate again as usual.
– Check the disc for ngerprint/scratches and clean with a
soft cloth wiping from center to edge.
– Check that the output of the video signal is turn to
{ YPbPr }.
– Check that the DivX® le is encoded in ‘Home Theatre’
mode with DivX® 5.x encoder.
– Check that the DivX® movie downloaded is a complete
le.
– The audio codec may not be supported by this DVD
player.
– Check that le size of the movie does not exceed the le
size of the disc during downloading.
– Make sure the le name extension is correct. You can
check this using a computer with CD-ROM.
– The player is designed to playback DVD, VCD, CD audio,
MP3 and DivX® discs only. Other digital audio formats
such as liquid audio, RM (RealMedia), WAV or non-audio
les like ‘.doc’, ‘.txt’, ‘.pdf’ are not supported.
– Try to play the problem DivX® files, on a computer. If
they do not work, the source file appears to be corrupt.
– Try to download the file again from a different source, or
if you have created the file yourself, create the file again
and make sure the settings are correct.
01-53_dvp3960_37_eng2.indd 4901-53_dvp3960_37_eng2.indd 49 2006-12-28 11:24:52 AM2006-12-28 11:24:52 AM

English
50
Problem Solution
Troubleshooting (continued)
Need Help? Visit us at www.philips.com/support
No HDMI video output
No HDMI audio output
– HDMI connection can only be made to HDMI-equipped
devices with HDCP (High Bandwidth Digital Content
Protection). Use a separate adaptor (DVI to HDMI) for
DVI TV connection (equipped with HDCP).
– Make sure the resolution of this DVD player matches the
TV device you have connected using the HDMI; See if the
TV supports 480p/576p/720p/1080i DVD player.
– When connecting to a non-HDCP complaint TV, the
HDCP warning message will appear.
– Check the connection between the TV and HDMI of
DVD player.
– During resolution selection for DVI TV, a distorted or
black screen may appear, see HDMI Video Setup.
– There will be no sound from the HDMI output if the
source device is only DVI/HDCP (High Bandwidth Digital
Content Protection)- compatible.
– It is not possible to output SACD or copy-controlled
DVD audio souces from the HDMI connection.
01-53_dvp3960_37_eng2.indd 5001-53_dvp3960_37_eng2.indd 50 2006-12-28 11:24:52 AM2006-12-28 11:24:52 AM

English
51
Speci cations
TV STANDARD (PAL/50Hz) (NTSC/60Hz)
Number of lines 625 525
Playback Multistandard (PAL/NTSC)
VIDEO PERFORMANCE
Video DAC 12 bit, 108 MHz
YPbPr 0.7 Vpp ~ 75 ohm
Video Output 1Vpp ~ 75 ohm
VIDEO FORMAT
Digital MPEG 2 for DVD,SVCD
Compression MPEG 1 for VCD
DivX®
DVD 50Hz 60Hz
Horiz. resolution 720 pixels 720 pixels
1920 pixels 1920 pixels
Vertical resolution 576 lines 480 lines
1080 lines 1080 lines
VCD 50Hz 60Hz
Horiz. resolution 352 pixels 352 pixels
Vertical resolution 288 lines 240 lines
AUDIO FORMAT
Digital MPEG/ AC-3/ compressed
PCM Digital
16, 20, 24 bits
fs, 44.1, 48, 96 kHz
MP3(ISO 9660) 96, 112, 128, 256
kbps & variable
bit rate fs, 32, 44.1,
48 kHz
Analog Sound Stereo
Dolby Surround compatible downmix from Dolby
Digital multi-channel sound
AUDIO PERFORMANCE
DA Converter 24 bit, 192 kHz
DVD fs 96 kHz 4Hz- 44kHz
fs 48 kHz 4Hz- 22kHz
SVCD fs 48 kHz 4Hz- 22kHz
fs 44.1kHz 4Hz- 20kHz
CD/VCD fs 44.1kHz 4Hz- 20kHz
Signal-Noise (1kHz) > 90 dB
Dynamic range(1kHz) > 80 dB
Crosstalk (1kHz) > 80 dB
Distortion/noise (1kHz) > 80 dB
MPEG MP3 MPEG Audio L3
CONNECTIONS
YPbPr Output Cinch 3x
Video Output Cinch (yellow)
Audio Output(L+R) Cinch (white/red)
Digital Output 1 coaxial
IEC60958 for CDDA / LPCM
IEC61937 for MPEG 1/2,
Dolby Digital
HDMI Out
CABINET
Dimensions (w x h x d) 360 x 37 x 235 mm
Weight Approximately 2 kg
POWER CONSUMPTION
Power Supply Rating 120V; 60Hz
Power consumption < 10 W
Power consumption in < 1 W
Standby mode
01-53_dvp3960_37_eng2.indd 5101-53_dvp3960_37_eng2.indd 51 2006-12-28 11:24:52 AM2006-12-28 11:24:52 AM

English
52
Analog: Sound that has not been turned into
numbers. Analog sound varies, while digital sound has
speci c numerical values. These jacks send audio
through two channels, the left and right.
Aspect ratio: The ratio of vertical and horizontal
sizes of a displayed image. The horizontal vs. vertical
ratio of conventional TVs. is 4:3, and that of wide-
screens is 16:9.
AUDIO OUT Jacks: Jacks on the back of the DVD
System that send audio to another system (TV,
Stereo, etc.).
Bit Rate: The amount of data used to hold a given
length of music; measured in kilobits per seconds, or
kbps. Or, the speed at which you record. Generally,
the higher the bit rate, or the higher the recording
speed, the better the sound quality. However, higher
bit rates use more space on a Disc.
Chapter: Sections of a picture or a music piece on a
DVD that are smaller than titles. A title is composed
of several chapters. Each chapter is assigned a
chapter number enabling you to locate the chapter
you want.
Component Video Out Jacks: Jacks on the back
of the DVD System that send high-quality video to a
TV that has Component Video In jacks (R/G/B, Y/Pb/
Pr, etc.).
Disc menu: A screen display prepared for allowing
selection of images, sounds, subtitles, multi-angles, etc
recorded on a DVD.
Digital: Sound that has been converted into
numerical values. Digital sound is available when you
use the DIGITAL AUDIO OUT COAXIAL or
OPTICAL jacks. These jacks send audio through
multiple channels, instead of just two channels as
analog does.
DivX® 3.11/4.x/5.x/6.0: The DivX® codec is a
patent-pending, MPEG-4 based video compression
technology, developed by DivX® Networks, Inc., that
can shrink digital video to sizes small enough to be
transported over the internet, while maintaining high
visual quality.
Dolby Digital: A surround sound system developed
by Dolby Laboratories containing up to six channels
of digital audio (front left and right, surround left and
right, center and subwoofer).
DTS: Digital Theatre Systems. This is a surround
sound system, but it is different from Dolby Digital.
The formats were developed by different companies.
JPEG: A very common digital still picture format. A
still-picture data compression system proposed by the
Joint Photographic Expert Group, which features
small decrease in image quality in spite of its high
compression ratio.
MP3: A le format with a sound data compression
system. ‘MP3’ is the abbreviation of Motion Picture
Experts Group 1 (or MPEG-1) Audio Layer 3. By using
MP3 format, one CD-R or CD-RW can contain about
10 times as much data volume as a regular CD can.
Multichannel: DVD is speci ed to have each sound
track constitute one sound eld. Multichannel refers
to a structure of sound tracks having three or more
channels.
Parental Control: A function of the DVD to limit
playback of the disc by the age of the users according
to the limitation level in each country. The limitation
varies from disc to disc; when it is activated, playback
will be prohibited if the software’s level is higher than
the user-set level.
PCM (Pulse Code Modulation): A system for
converting analog sound signal to digital signal for
later processing, with no data compression used in
conversion.
Playback control (PBC): Refers to the signal
recorded on video CDs or SVCDs for controlling
reproduction. By using menu screens recorded on a
Video CD or SVCD that supports PBC, you can enjoy
interactive-type software as well as software having a
search function.
Progressive Scan: It displays all the horizontal lines
of a picture at one time, as a signal frame. This
system can convert the interlaced video from DVD
into progressive format for connection to a
progressive display. It dramatically increases the
vertical resolution.
Region code: A system for allowing discs to be
played back only in the region designated beforehand.
This unit will only play discs that have compatible
region codes. You can nd the region code of your
unit by looking on the product label. Some discs are
compatible with more than one region (or ALL
regions).
Title: The longest section of a picture or music
feature on DVD, music, etc., in video software, or the
entire album in audio software. Each title is assigned a
title number enabling you to locate the title you want.
TV OUT jack: Jack on the back of the DVD System
that sends video to a TV.
WMA: Windows Media Audio. Refers to an audio
compression technology developed by Microsoft
Corporation. WMA data can be encoded by using
Windows Media Player version 9 or Windows Media
Player for Windows XP. Files are recognized by their
le extension “WMA.”
HDMI: High De nition Multimedia Interface. A
speci cation developed by the HDMI Working Group
that combines multi-channel audio and high de nition
video and that controls signals into a single digital
interface for use with DVD player, digital television,
and other audiovisual devices.
Glossary
01-53_dvp3960_37_eng2.indd 5201-53_dvp3960_37_eng2.indd 52 2006-12-28 11:24:52 AM2006-12-28 11:24:52 AM

English
53
Philips, P.O. Box 671539, Marietta, GA. 30006-0026
PHILIPS LIMITED WARRANTY
ONE (1) YEAR
WARRANTY COVERAGE:
PHILIPS warranty obligation is limited to the terms set forth
below.
WHO IS COVERED:
Philips warrants the product to the original purchaser or the
person receiving the product as a gift against defects in materi-
als and workmanship as based on the date of original purchase
(“Warranty Period”) from an Authorized Dealer. The original
sales receipt showing the product name and the purchase date
from an authorized retailer is considered such proof.
WHAT IS COVERED:
The Philips warranty covers new products if a defect arises and
a valid claim is received by Philips within the Warranty Period.
At its option, Philips will either (1) repair the product at no
charge, using new or refurbished replacement parts, or (2)
exchange the product with a product that is new or which has
been manufactured from new, or serviceable used parts and is
at least functionally equivalent or most comparable to the origi-
nal product in Philips current inventory, or (3) refund the origi-
nal purchase price of the product.
Philips warrants replacement products or parts provided under
this warranty against defects in materials and workmanship
from the date of the replacement or repair for ninety (90) days
or for the remaining portion of the original product’s warranty,
whichever provides longer coverage for you. When a product
or part is exchanged, any replacement item becomes your
property and the replaced item becomes Philips’ property.
When a refund is given, your product becomes Philips’ proper-
ty.
Note: Any product sold and identified as refurbished or
renewed carries a ninety (90) day limited warranty.
Replacement product can only be sent if all warranty
requirements are met. Failure to follow all require-
ments can result in delay.
WHAT IS NOT COVERED - EXCLUSIONS AND LIM-
ITATIONS:
This Limited Warranty applies only to the new products manu-
factured by or for Philips that can be identified by the trade-
mark, trade name, or logo affixed to it. This Limited Warranty
does not apply to any non-Philips hardware product or any
software, even if packaged or sold with the product. Non-
Philips manufacturers, suppliers, or publishers may provide a
separate warranty for their own products packaged with the
bundled product.
Philips is not liable for any damage to or loss of any programs,
data, or other information stored on any media contained with-
in the product, or any non-Philips product or part not covered
by this warranty. Recovery or reinstallation of programs, data
or other information is not covered under this Limited
Warranty.
This warranty does not apply (a) to damage caused by accident,
abuse, misuse, misapplication, or non-Philips product, (b) to
damage caused by service performed by anyone other than
Philips or Philips Authorized Service Location, (c) to a product
or a part that has been modified without the written permis-
sion of Philips, or (d) if any Philips serial number has been
removed or defaced, or (e) product, accessories or consum-
ables sold “AS IS” without warranty of any kind by including
refurbished Philips product sold “AS IS” by some retailers.
This Limited Warranty does not cover:
• Shipping charges to return defective product to Philips.
• Labor charges for installation or setup of the product, adjust-
ment of customer controls on the product, and installation
or repair of antenna systems outside of the product.
• Product repair and/or part replacement because of improper
installation, connections to improper voltage supply, abuse,
neglect, misuse, accident, unauthorized repair or other cause
not within the control of Philips.
• Damage or claims for products not being available for use, or
for lost data or lost software.
• Damage occurring to product during shipping.
• A product that requires modification or adaptation to enable
it to operate in any country other than the country for
which it was designed, manufactured, approved and/or
authorized, or repair of products damaged by these modifica-
tions.
• A product used for commercial or institutional purposes
(including but not limited to rental purposes).
• Product lost in shipment and no signature verification receipt
can be provided.
• Failure to operate per Owner’s Manual.
TO OBTAIN ASSISTANCE IN THE U.S.A., PUERTO
RICO, OR U.S. VIRGIN ISLANDS…
Contact Philips Customer Care Center at:
1-888-PHILIPS (1-888-744-5477)
TO OBTAIN ASSISTANCE IN CANADA…
1-800-661-6162 (French Speaking)
1-888-PHILIPS (1-888-744-5477) - (English or Spanish
Speaking)
REPAIR OR REPLACEMENT AS PROVIDED UNDER THIS
WARRANTY IS THE EXCLUSIVE REMEDY FOR THE CON-
SUMER. PHILIPS SHALL NOT BE LIABLE FOR ANY INCIDEN-
TAL OR CONSEQUENTIAL DAMAGES FOR BREACH OF
ANY EXPRESS OR IMPLIED WARRANTY ON THIS PROD-
UCT. EXCEPT TO THE EXTENT PROHIBITED BY APPLICA-
BLE LAW, ANY IMPLIED WARRANTY OF MERCHANTABILI-
TY OR FITNESS FOR A PARTICULAR PURPOSE ON THIS
PRODUCT IS LIMITED IN DURATION TO THE DURATION
OF THIS WARRANTY.
Some states do not allow the exclusions or limitation of inci-
dental or consequential damages, or allow limitations on how
long an implied warranty lasts, so the above limitations or
exclusions may not apply to you.
This warranty gives you specific legal rights. You may have other rights which vary from state/province to state/province.
3121 233 48801
01-53_dvp3960_37_eng2.indd 5301-53_dvp3960_37_eng2.indd 53 2006-12-28 11:24:53 AM2006-12-28 11:24:53 AM
