Pioneer Dj Equipment Xdj R1 Users Manual
XDJ-R1 to the manual d887145c-082e-4714-9c37-3f63387b820b
2015-01-26
: Pioneer Pioneer-Dj-Equipment-Xdj-R1-Users-Manual-334026 pioneer-dj-equipment-xdj-r1-users-manual-334026 pioneer pdf
Open the PDF directly: View PDF ![]() .
.
Page Count: 4
0
“VIRTUAL DJ LE”
Setup Guide
1
Before start
When a computer on which a MIDI-compatible DJ software program
is installed is connected using a USB cable, the DJ software can be
operated from this unit.
How to download and install “VIRTUAL DJ LE” is described in this
Guide.
・Internet connection is required to download the software. Be sure
to log in with the computer administrator's account to install
“VIRTUAL DJ LE”.
・Windows users need an exclusive ASIO driver. Please follow the
[Operating Instructions] of XDJ-R1 to install the ASIO driver soft-
ware included with XDJ-R1 in advance (*Mac OS X users do not
have to install this driver software).
・To operate “VIRTUAL DJ LE” using this unitʼs buttons, see the
separate ”Hardware Diagram for VIRTUAL DJ LE” (PDF file) table
of supported functions.
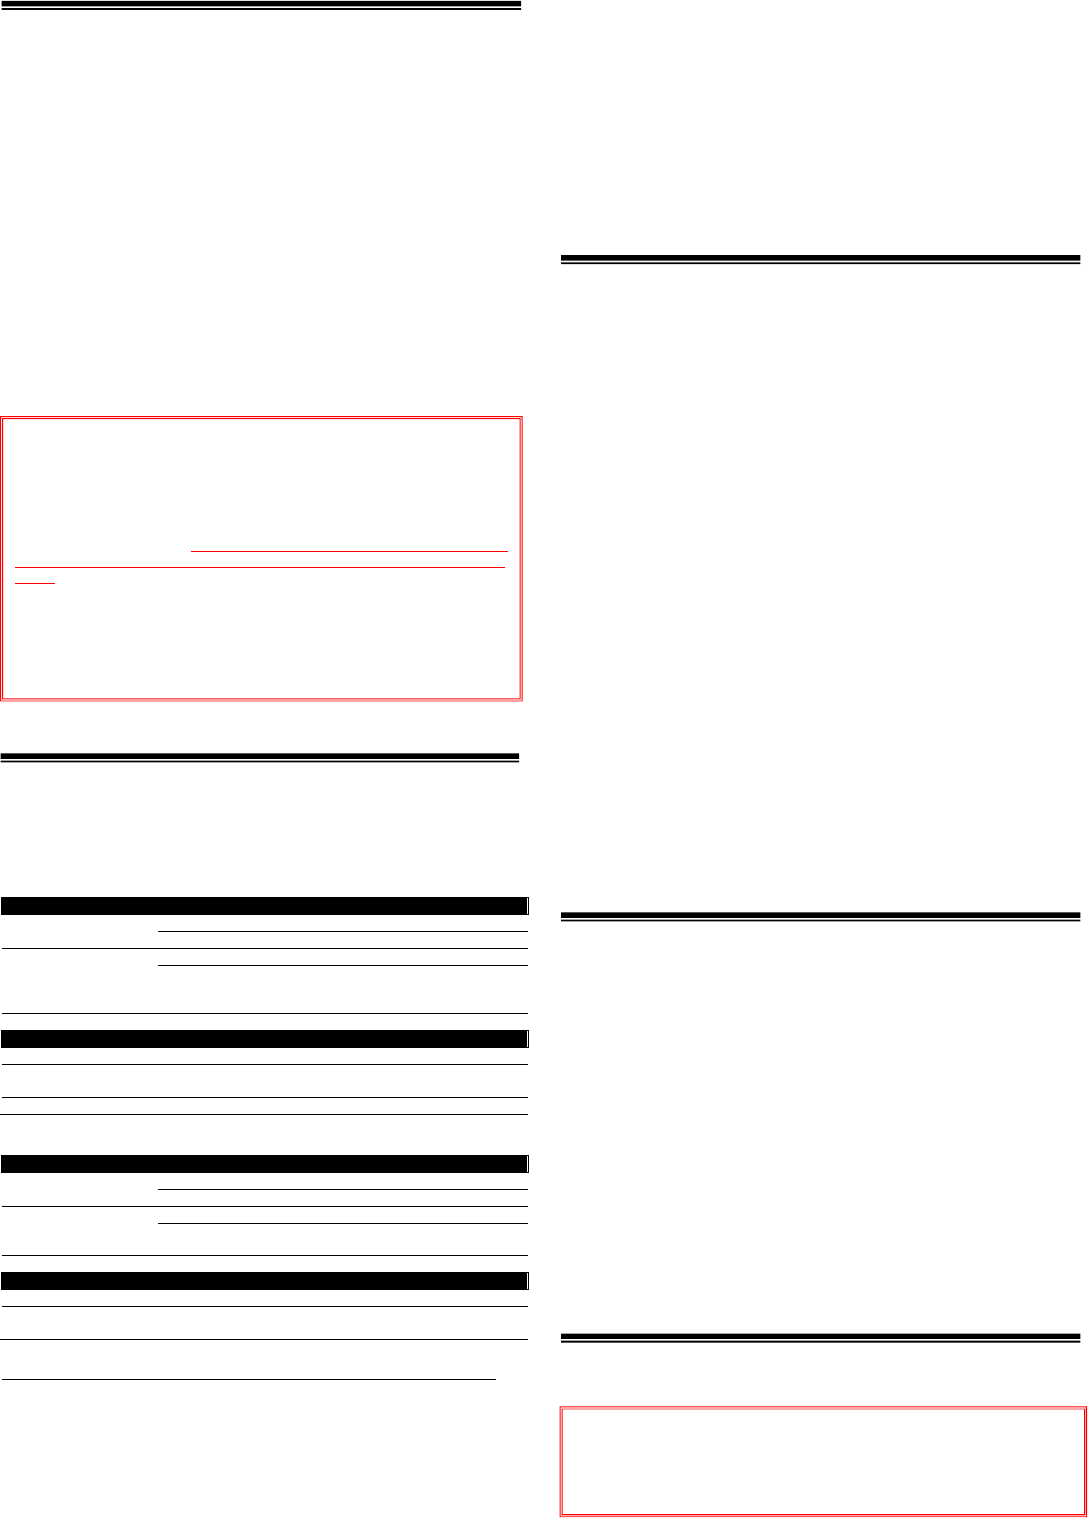
Operating environment
DJ performances are possible by connecting the computer on which
this software is installed to this unit.
Minimum operating environment
Supported OS CPU and required memory
Mac OS X 10.5 Intel
®
processor
1 GB or more of RAM
Windows® XP
Home Edition/
Professional
(SP3 or later)
Intel® Pentium® 4 or
A
MD Athlon™ XP processor
512 MB or more RAM
Others
Hard disc Free space of 50 MB or greater
USB port
A
USB 2.0 port is required to connect the computer with
this unit.
Display resolution Resolution of 1 024 x 768 or greater
Recommended operating environment
Supported OS CPU and required memory
Mac OS X 10.6 Intel
®
processor
2 GB or more of R
A
M
Windows® 7
Professional
32 bit version
Intel® Core™ 2 or
A
MD Athlon™ X2 processor
1GB or more RAM
Others
Hard disc Free space of 200 MB or greater
Display resolution Resolution of 1 280 x 1 024 or greater (Windows)
Resolution of 1 440 x 900 or greater (Mac)
*Ensure that OS is updated to the latest version or service pack before setup.
The conditions below must be satisfied in order to conduct video mixing.
・Mac
— ATI™ or NVIDIA® video chipset with 256 MB of dedicated DDR3 RAM
— Video card must support dual-screen output.
・Windows
— ATI™ or NVIDIA® video card with 256 MB of dedicated DDR3 RAM
— Video card must support dual-screen output.
Note:
・Fullfunctionalityisnotguaranteedonallcomputers,eventhosemeetingtheoperating
environmentrequirementsdescribedabove.
・Evenwiththerequiredmemoryindicatedfortheoperatingenvironmentabove,lackof
memoryduetoresidentprograms,thenumberofservices,etc.,couldpreventthesoft‐
warefromofferingoptimalfunctionalityandperformance.Insuchcases,freeup
sufficientmemory.Werecommendinstallingadditionalmemoryforstableoperation.
・Dependingonthecomputer’spower‐savingsettings,etc.,theCPUandharddiskmay
notprovidesufficientprocessingcapabilities.Forlaptopcomputersinparticular,make
surethecomputerisintheproperconditionstoprovideconstanthighperformance(for
examplebykeepingtheACpowerconnected)whenusingVIRTUALDJLE.
・NotethatproblemsmayarisewiththefunctionalityofVIRTUALDJLEdependingonother
softwarerunningonyourcomputer.
Creating a Virtual DJ user account
If you already have a user account of Virtual DJ, skip this section
and proceed to the next section.
1. Access the website of Atomix Productions.
http://www.virtualdj.com/
2. Select ”Create a login” from COMMUNITY.
3. Enter an arbitrary login name and password, and your
email address, first name, last name and country. Then,
press the Submit button below.
4. Atomix Productions will send an email with a link to
activate your account to the email address entered in the
previous step.
― Be careful not to forget the e-mail address and password speci-
fied when you performed user registration. They will be required
for updating the software.
― The personal information input when registering a new user ac-
count may be collected, processed and used based on the privacy
policy on the Atomix Productions website.
5. An email with the title of “New user activation for Virtual-
DJ.com” will be sent to the email address you registered.
Open this email and click the URL starting from http://.
When “Welcome
<login name>
VirtualDJ Community!” is displayed,
your account is successfully activated.
Downloading the VIRTUAL DJ LE
update file
1. Access the website of Atomix Productions.
http://www.virtualdj.com/
2. Select ”Software Updates” from DOWNLOAD.
3. Register the serial number
Select “Modify my profile” and enter the serial number placed on
the bottom of XDJ-R1 in the “LICENSES” box and press “Register”.
If you have already registered your serial key, skip this step and
proceed to the next step.
4. Select “Download Center” to download Virtual DJ LE.
You can find the latest version of “VIRTUAL DJ LE”. Click the
Windows or Mac icon to download the file.
Installation Procedure
Note:
・“VIRTUAL DJ LE” is a product of Atomix Productions. In principle, Pioneer is not
in the position of answering any inquiries on the usage of the software itself.
Please refer the manual of “VIRTUAL DJ LE”.
・Some steps in this Guide include deleting files and folders in your computer. If
such files or folders are used also for other applications, those applications
might not work properly. If a wrong file or folder is deleted, the computer itself
might not function normally. When deleting a file or a folder, be sure to make a
backup copy of the file or the folder before deleting it to go through the steps
below.
Disclaimer:
Please note that Pioneer will accept no responsibility whatsoever for loss or
damage to the customer’s computer caused by the operations based on the
information in this Guide. It is advised to use this information at your own risk
and on your own responsibility.
Notice:
・Do not connect this unit to the computer until installation is completed.
・If any other programs are running on your computer, quit them.
・Ensure that the user account name is in 1-byte characters. Otherwise if you use
2-byte characters, some issues such as unable to save the settings and unable
to record
may occur.
2
================================
For Windows Users
When updating Virtual DJ on Windows PC, the current Virtual DJ is
required to be uninstalled. Follow the instructions below to un-
install it.
When first installed on your computer, proceed to step 2.
1. From the Windows [Start] menu, click the [All Pro-
grams]>[VirtualDJ]>[ Uninstall VirtualDJ LE (XDJ-R1)] icon.
— For Windows 8, click the [Uninstall VirtualDJ LE] tile on the Start
screen.
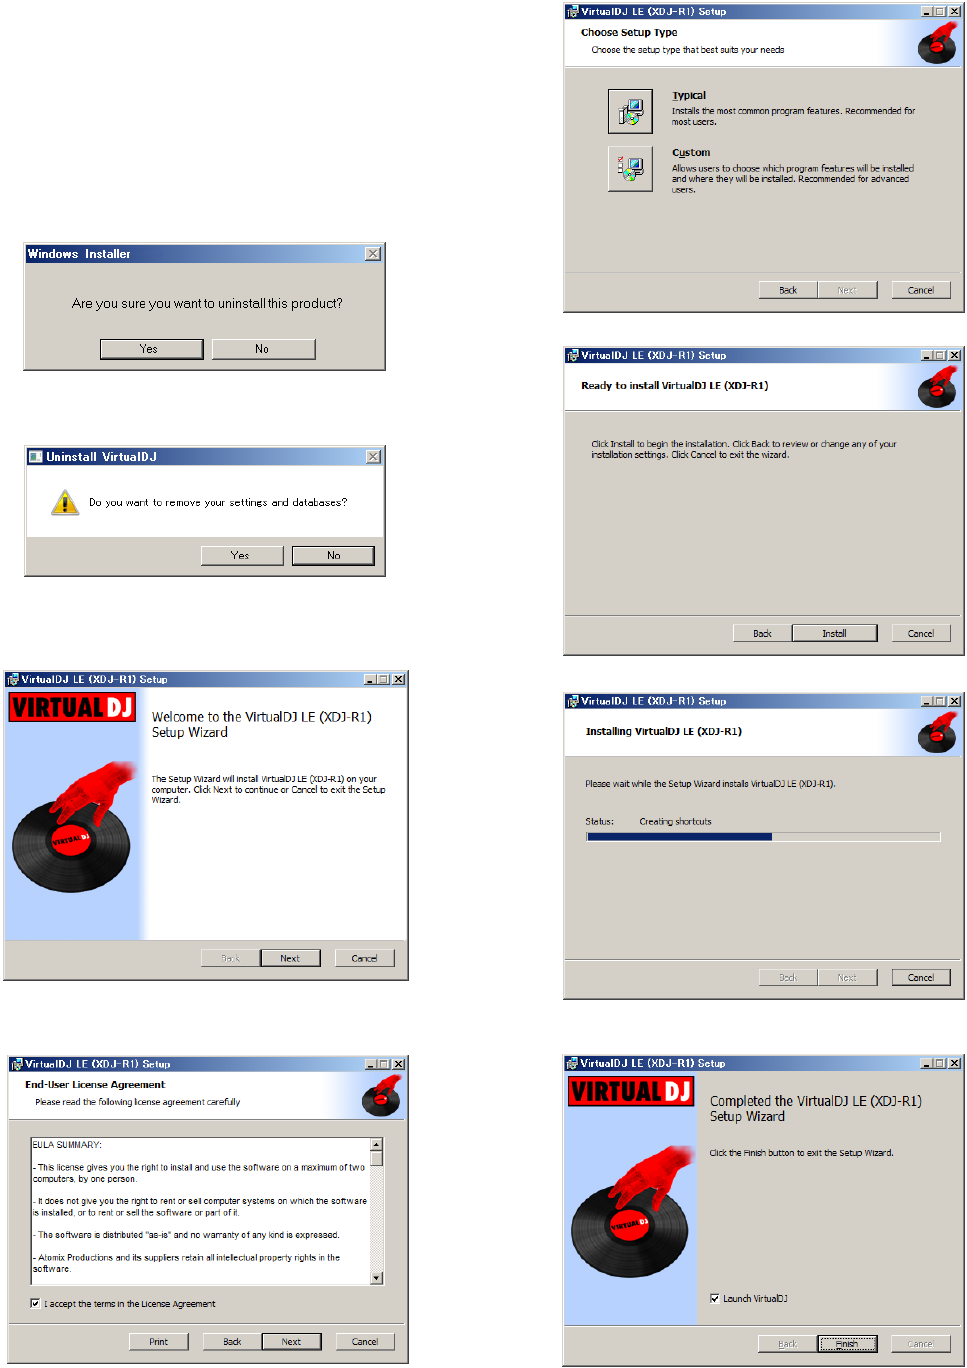
Click “Yes” when Windows Installer dialogue appears.
The VIRTUAL DJ LE uninstaller is launched.
The following message appears. If you want to retain the settings
information, click “No” and if you want to remove it click “Yes”.
This completes the uninstallation procedure.
2. Double-click the file downloaded to install.
Once the VIRTUAL DJ LE installer is launched, click [Next].
3. Read the contents of the [End-User License Agreement]
carefully, and if you agree, check [I accept the terms in the
License Agreement], then click [Next].
― If you do not agree to the terms of the [End-User License Agree-
ment], click [Cancel] to cancel installation.
4. Select the type of installation for VIRTUAL DJ LE, then
click [Next].
— When [Typical] is selected, plug-ins and other components are
installed simultaneously. Normally select [Typical].
— When [Custom] is selected, you can select which components to
install.
5. When the screen below is displayed, click [Install].
Installation begins.
The installation completed screen appears once installation is
completed.
6. Click [Finish].
This completes the installation procedure.
VIRTUAL DJ LE is launched if [Launch VirtualDJ] on the screen is
checked when [Finish] is clicked.
7. Enter the serial number printed on this unit’s bottom
panel (XXXX-XXXX-XXXXX/XDJR1), then click [OK].
3
8. Check the VIRTUAL DJ LE is lunched and close it.
================================
For Mac OS X Users
When installing Virtual DJ LE on Mac, the current Virtual DJ LE is
required to be uninstalled. Follow the instructions below from Step
1 to uninstall it.
When first installed on your computer, proceed to step 3.
1. Open [Finder] and delete the following folders and files to
[Trash].
・Virtual DJ folder in [Document] from [username]
・Virtual DJ LE icon in [Application] folder.
・The file in [Preferences] from [User name] > [Library]:
com.atomixproductions.virtualdj.plist
— If the [Library] folder is hidden, select [username] and select [Go]
while pressing the [option] key on the key board.
2. Reboot your computer
3. Double-click the downloaded file to install.
4. Once the VIRTUAL DJ LE installer is launched, click
[Continue].
5. Read the contents of the license agreement carefully,
click [Continue] and then click [Agree] to accept the license
agreement.
― If you do not agree to the license agreement, click [Disagree] to
cancel installation.
6. Select the type of installation for VIRTUAL DJ LE, then
click [Install].
— To select standard installation, click [Install].
— To install in a different location, click [Change Install Location...]
and choose the place of installation.
Installation begins.
The installation completed screen appears once installation is
completed.
7. Click [Close].
This completes the installation procedure.
Audio Setup for VIRTUAL DJ LE
If you want to output the sound from Master and Headphone of
XDJ-R1, sound configuration should be selected depending on
your computer.
― Connect the computer and XDJ-R1 using a USB cable while the
power of the unit is turned on.
― Please refer to [Using the DJ Software] in the [Operating
Instructions] of XDJ-R1 for details. After selecting [PC] as [MIXER
MODE], press the [MIDI] button to enable MIDI control.
Notice: VIRTUAL DJ LE cannot be used when [XDJ-R1] but [PC] is
selected as [MIXER MODE].
================================
For Windows Users
1. From the Windows [Start] menu, click the [All Programs]
> [VirtualDJ] > [VirtualDJ LE (XDJ-R1)] icon.
Click [VirtualDJ LE (XDJ-R1)] tile on the Start screen for Windows 8.
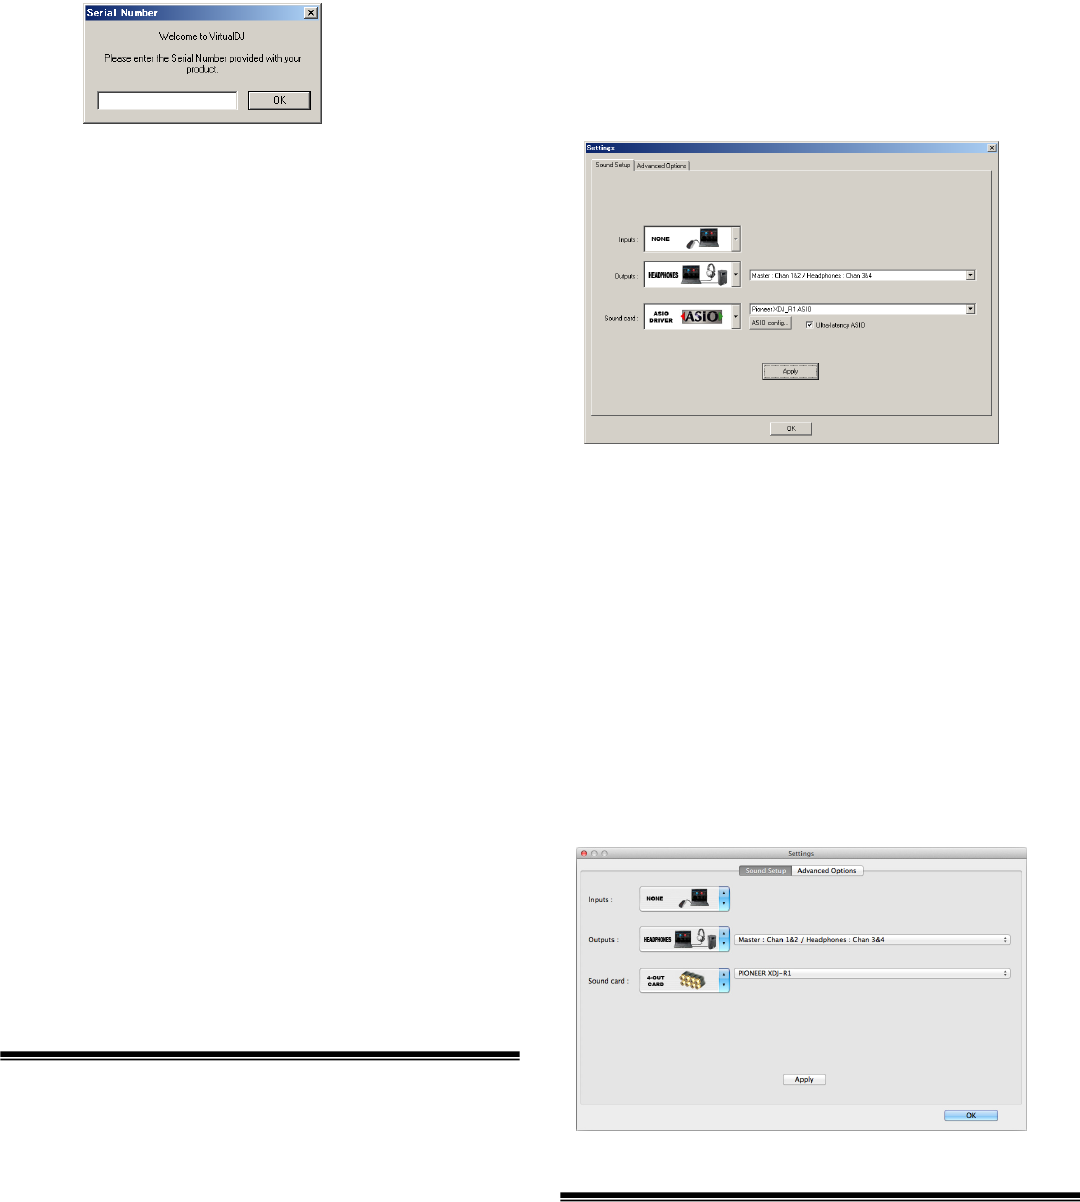
2. Click [CONFIG] in the top right of the computer’s screen.
The [Settings] screen appears.
Settings should be selected on the [Sound Setup] tab in the follow-
ing order:
- [Inputs]: Select [NONE].
- [Sound card]: Select [ASIO DRIVER] and [Pioneer DDJ_R1 ASIO].
- [Outputs]: Select [HEADPHONES] and
[Master: Chan 1&2 / Headphones: Chan 3&4].
- [Ultra-latency ASIO]: Tick it.
3. Click [Apply], then click [OK].
================================
For Mac OS X Users
1. In Finder, open the [Application] folder, then doubleclick
the [VirtualDJ LE] icon.
When VIRTUAL DJ LE is launched the first time, a screen for entering
the serial number appears.
Input the serial number printed on this unit’s bottom panel (XXXX-
XXXX-XXXXX/XDJR1), then click [OK].
2. Click [CONFIG] in the top left of the computer’s screen.
The [Settings] screen appears.
Settings should be selected on the [Sound Setup] tab in the follow-
ing order:
- [Inputs]: Select [NONE].
- [Sound card]: Select [4-OUT CARD] and [PIONEER XDJ_R1].
- [Outputs]: Select [HEADPHONES] and
[Master: Chan 1&2 / Headphones: Chan 3&4].
3. Click [Apply], then click [OK].
About trademarks and registered
trademarks
・Pioneer is a registered trademark of PIONEER CORPORATION.
・VirtualDJ LE is registered trademarks of Atomix Productions.
・Microsoft®, Windows Vista®, Windows® and Internet Explorer® are either
registered trademarks or trademarks of Microsoft Corporation in the
United States and/or other countries.
・Apple, Macintosh, Mac OS, Safari, iTunes, and Finder are trademarks of
Apple Inc., registered in the U.S. and other countries.
・Intel and Intel Core are trademarks of Intel Corporation in the U.S. and/or
other countries.
・ASIO is a trademark of Steinberg Media Technologies GmbH.
The names of companies and products mentioned herein are the trademarks
of their respective owners.
© 2013 PIONEER CORPORATION.
All rights reserved.
PIONEER CORPORATION
1-1, Shin-ogura, Saiwai-ku, Kawasaki-shi, Kanagawa 212-0031, Japan
