Plantronics WO2 Wireless Communications System Base Unit with Bluetooth User Manual
Plantronics Inc Wireless Communications System Base Unit with Bluetooth Users Manual
Users Manual
Savi® W740 Wireless Headset System
Quick Start Guide
Guide de démarrage rapide
Guía de inicio rápido
Guia de Início Rápido
1
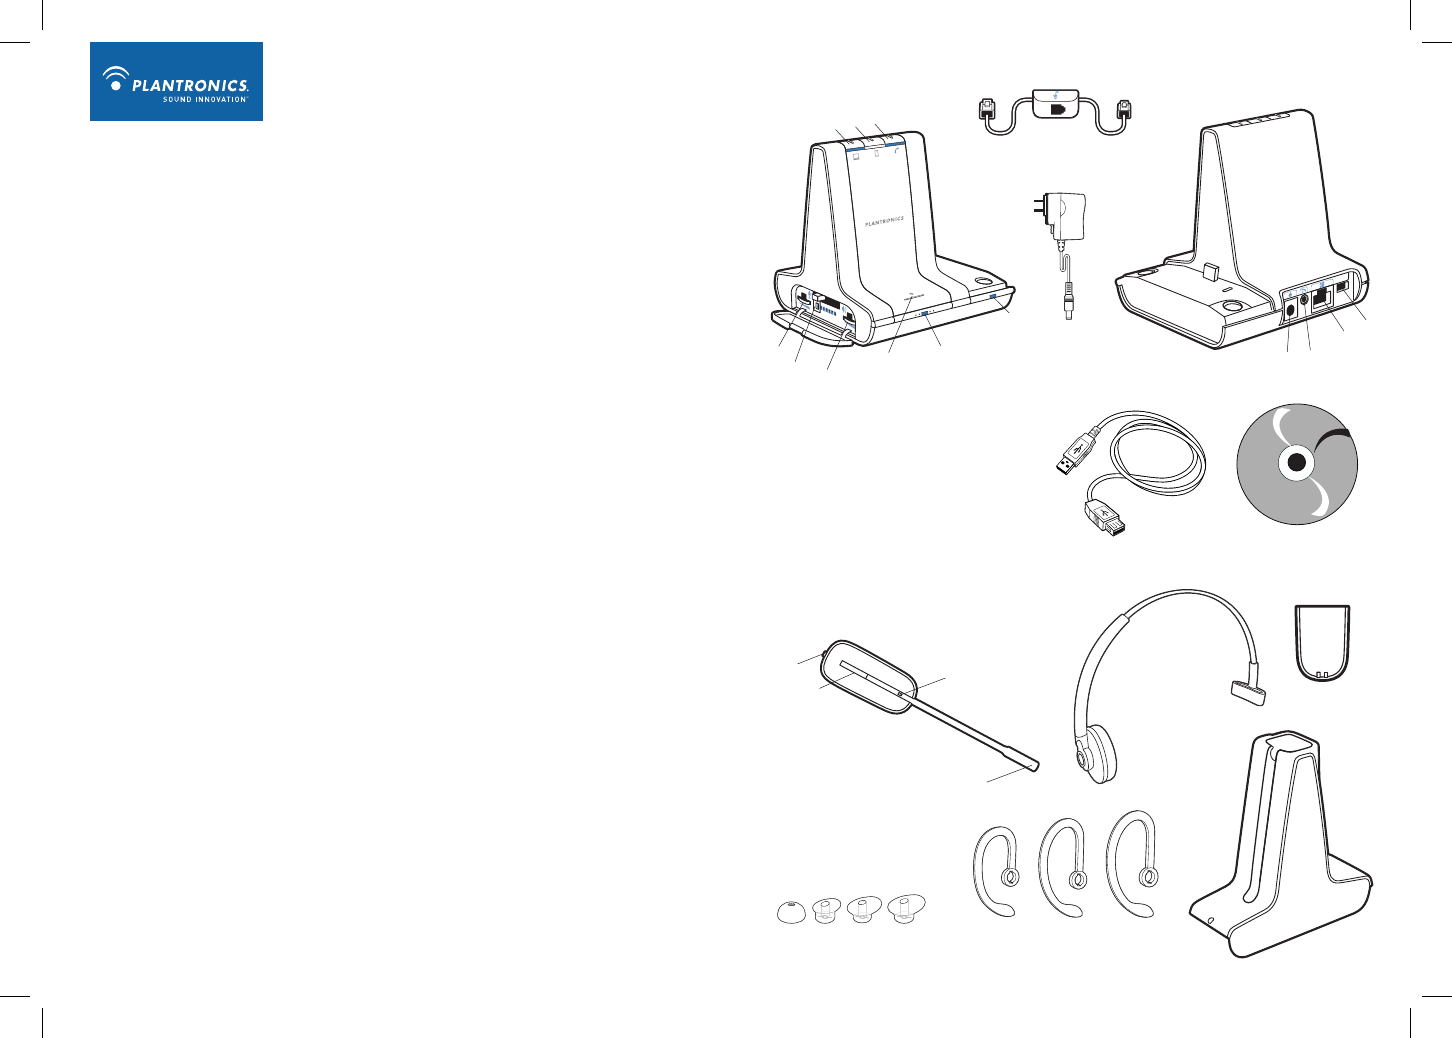
Savi WH500 Headset
1 Volume Button
(Press in to mute/unmute)
2 Call Control Button
3 Indicator Light
4 Microphone
5 Headband
6 Battery
7 Eartips
8 Earloops
9 Charge Cradle
89
7
6
4
235
Savi WO2 Base
1 PC Talk Button and Indicator Light
2 Mobile Phone Talk Button and Indicator Light
3 Desk Phone Talk Button and Indicator Light
4 Desk Phone Speaking Volume
5 Configuration Switch
6 Desk Phone Listening Volume
7 Bluetooth Pairing Button and Indicator Light
8 DECT Subscription Button and Indicator Light
9 Charging Indicator Light
10 Power Jack
11 Handset Lifter Jack
12 Telephone Interface Cable Jack
13 USB Port
Base Power
Supply
Telephone
Interface Cable
8
7
56
4
9
10 11
12 13
123
USB Cable
CD includes:
• Animated Setup Guide
• Plantronics Software
• Complete User Guide
3-1
3-2
5-1
4-1
7-6
8-4
8-5
9-1
11-1 11-2
6-1
Welcome
Congratulations on purchasing your new Plantronics product. This Quick Start Guide contains
instructions for setting up the Savi W740 (WO2™ Base + WH500™ Headset) Wireless Headset
System.
Please refer to the separate safety instructions for important product safety information prior to
installation or use of the product.
Set Up, Complete User Guide and Software
We highly recommend that you refer to the included CD. The CD contains animated set up
instructions; the complete user guide that provides full details on how to use your system; and the
Plantronics software. The software enables you to:
• Remotely answer incoming softphone calls
• Customize your headset and Savi base settings to your personal preferences
• Automatically manage your PC multimedia so you never miss a call
• Quickly access links to product support and software/rmware upgrade information
You can also download the software at plantronics.com/software and the user guide at
plantronics.com/documentation.
System Requirements
The minimum system requirements for Savi W740 are as follows:
• Supported Operating Systems: Windows XP®, Windows Vista®, Windows® 7
• Processor: 400 MHz Pentium® processor or equivalent (Minimum); 1 GHz Pentium processor or
equivalent (Recommended)
• RAM: 96 MB (Minimum); 256 MB (Recommended)
• Hard Disk: 280 MB (Minimum); 500 MB (Recommended)
• Display: 800 x 600, 256 colors (Minimum); 1024 x 768 high color, 32-bit (Recommended)
• Internet Explorer® V6 or better must be on the user’s system (Required)
Easy Set Up
1 Locate CD and insert into your PC.
2 Select your headset and lifter (if applicable).
3 Launch animated setup guide.
7-2
7-7
7-2
8-6
7-2
8-7
2-1
2-2
2-3
1
1 Attaching Charge Cradle to Base
1-1 Connect the headset charge cradle to the base. Push firmly on the cradle until the
cradle snaps into place.
2 Connecting Base to Desk Phone
2-1 Connect the telephone interface cable to the telephone interface cable jack on the
base.
2-2 After disconnecting the handset coil cord from the desk phone, connect the
telephone interface cable to the now open handset port on the desk phone.
2-3 Connect the handset coil cord to the telephone interface cable junction box.
3 Connecting Power Supply to Base
3-1 Connect the base power supply into the power jack on the base.
3-2 Connect the power supply to outlet.
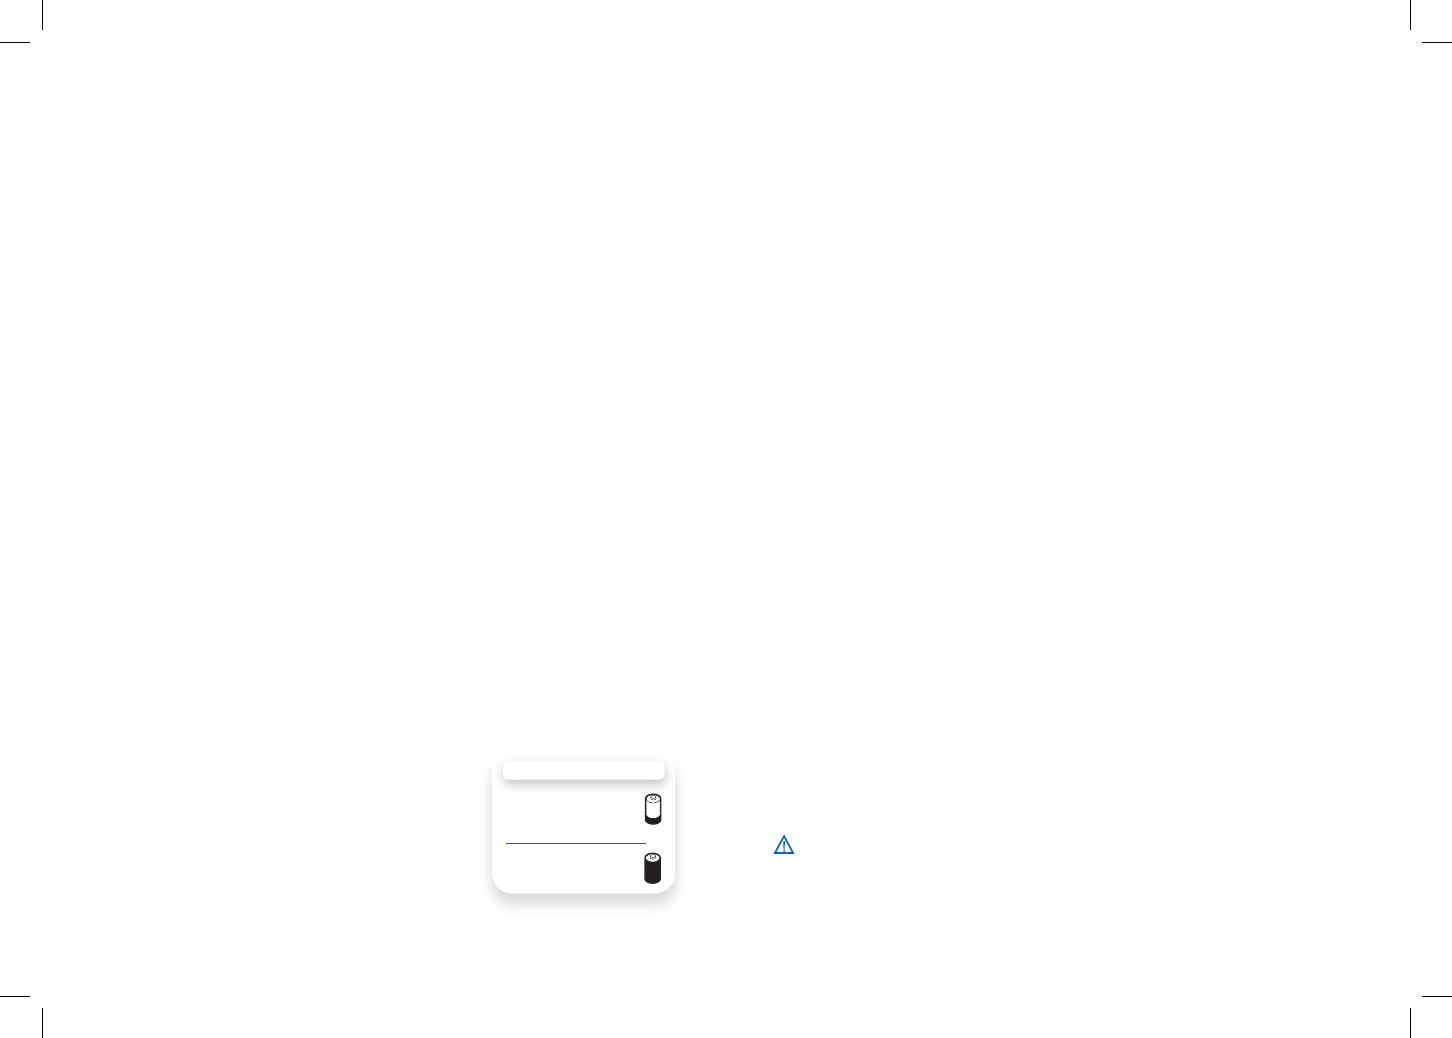
4 Installing Battery to Headset
4-1 Position the battery as shown on headset and slide into position until the battery
snaps into place.
NOTE This product has a replaceable battery. Use only the battery type supplied by
Plantronics.
5 Choosing Wearing Style
5-1 If you prefer the over-the-ear style, attach the earloop first and then the eartip to
the headset.
NOTE Ensure the large end of the eartip faces down towards the microphone.
5-2 If you prefer the over-the-head style, attach the headband to the headset.
6 Docking and Charging Headset
6-1 Gently push the headset into the charge cradle.
The charging indicator light on the base will flash green to
indicate that the headset battery is charging.
6-2 Charge for at least 20 minutes prior to the first use.
A full charge takes 3 hours.
7 Checking Configuration
7-1 Set volume on desk phone to mid-range.
7-2 On the base, ensure the configuration switch is set to “A” and the desk phone
speaking volume and desk phone listening volume are both set to 3.
NOTE For most phones, these factory default settings will sound the best.
7-3 While wearing your headset, press the call control button on headset.
7-4 Remove the handset from desk phone cradle.
7-5 Listen for a dial tone. If the dial tone sounds clear, press the call control button on
headset and continue with Step 8 Making a Test Call with Desk Phone.
7-6 If the dial tone is too loud or too soft, adjust the headset volume level.
7-7 If the dial tone still does not sound clear, adjust the configuration switch until the
dial tone sounds the best.
NOTE Multiple settings might work with your phone; however, only one is the optimal
position.
7-8 Press the call control button on the headset and return the handset to the cradle to
complete configuration.
8 Making a Test Call with Desk Phone
8-1 While wearing your headset, press the call control button on headset.
8-2 Remove the handset from desk phone cradle.
8-3 Dial the number using your desk phone.
8-4 You can fine tune the listening volume on the headset. When wearing the
headset on your right ear, push the volume button up to increase the volume and
push the volume button down to decrease the volume. The opposite is true when
wearing on left ear.
8-5 To mute/unmute the call, press the volume button in. The desk phone talk button on
the base will turn solid red when the headset is muted.
8-6 If the listening volume is still too loud or too soft, adjust the desk phone listening
volume on the base.
8-7 If the speaking volume is too loud or too soft for your listener, adjust the desk
phone speaking volume on the base.
8-8 Press the call control button on the headset and return the handset to the cradle to
complete the test call.
Do not use headphones / headsets at high volumes for an extended period of time. Doing so
can cause hearing loss. Always listen at moderate levels. See plantronics.com/healthandsafety for
more information on headsets and hearing.
CHARGING TIME
20 min .....................
Minimum charge
before first use
3 hours ...................
Full charge

9 Pairing Savi Base to Bluetooth Mobile Phone
9-1 Press and hold the Bluetooth pairing button on the Savi base for three seconds. The
Bluetooth indicator light will alternately flash red and blue.
9-2 Place the Bluetooth mobile phone into discover mode. “SAVI” will appear on the phone
when the phone finds the base.
9-3 If prompted by your mobile phone, type “0000” as the passcode.
9-4 The Bluetooth indicator light on the base will turn solid blue. Your Savi base is now
paired with your Bluetooth mobile phone.
10 Making a Test Call with Mobile Phone
10-1 While wearing your headset, place a call with your mobile phone. The link to the
headset will be brought up automatically.
10-2 Adjust the listening volume on the headset or on the mobile phone.
10-3 To end the test call, press the call control button on the headset.
11 Connecting to the PC
11-1 Connect the USB cable to the USB port on the back of the base.
11-2 Connect the other end of the USB cable to the USB port on the PC.
11-3 Insert the CD and install the Plantronics software. Follow the installation
instructions shown on your PC.
12 Making a Test Call with PC
12-1 While wearing your headset, press the PC talk button on the base.
12-2 Dial the number using your softphone application.
12-3 Adjust listening and speaking volume using your softphone application and/or
“Sounds and Audio Devices” in your PC control panel.
12-4 You can fine tune the listening volume and mute/unmute a call from the headset.
(See steps 8-4 and 8-5 above.)
12-5 To end the test call, press the call control button on the headset.
Registering Your Product
Visit plantronics.com/productregistration to register your product online so we can provide you with
the best service and technical support.
Getting Assistance
The Plantronics Technical Assistance Center is ready to assist you. You can nd answers to
frequently asked questions, ask a question using e-mail, receive service over the internet, or speak
directly with a representative. Visit plantronics.com/support.

Plantronics, Inc. Tel: 800-544-4660
345 Encinal Street Tel: 831-426-5858
Santa Cruz, CA 95060 plantronics.com
United States
©2010 Plantronics, Inc. All rights reserved. Plantronics, the logo design, Savi, and Sound Innovation are trademarks or registered trademarks
of Plantronics, Inc. All other trademarks are the property of their respective owners. Microsoft, Internet Explorer, Windows, Windows Vista, and
Windows XP are trademarks or registered trademarks of Microsoft Corporation in the US and other countries. Pentium is a trademark of Intel
Corporation in the U.S. and other countries.The Bluetooth trademark is owned by Bluetooth SIG, Inc. and any use of the mark by Plantronics, Inc.
is under license.
Patents U.S. 7,633,963; D582,901; D599,331; China ZL200830005437.x; EM 000873823-0004; Taiwan D127496; and Patents Pending
8395402 (04.10)
DECLARATIONOF CONFORMITY
We Plantronics, 345 Encinal Street Santa Cruz, California, 95060 USA (800) 544-4660 declare under our sole responsibility that the product
WO2 complies with Part 15 of the FCC Rules. Operation is subject to the following two conditions: (1) this device may not cause harmful
interference, and (2) this device must accept any interference received, including interference that may cause undesired operation.
Note: This equipment has been tested and found to comply with the limits for a Class B digital device, pursuant to part 15 of the FCC
Rules. These limits are designed to provide reasonable protection against harmful interference in a residen¬tial installation. This equipment
generates, uses, and can radiate radio frequency energy and, if not installed and used in accordance with the instructions, may cause
harmful interference to radio communications. However, there is no guarantee that interference will not occur in a particular installation. If this
equipment does cause harmful interference to radio or television reception, which can be determined by turning the equipment off and on, the
user is encouraged to try to correct the inter¬ference by one or more of the following measures:
1. Reorient or relocate the receiving antenna.
2. Increase the separation between the equipment and receiver.
3. Connect the equipment into an outlet on another circuit.
4. Consult the dealer or an experienced radio/TV technician for help.
Changes or modications not expressly approved by the party responsible for compliance could void the user’s authority to operate the
equipment.
FCC REGISTRATION INFORMATION — Part 68
This equipment complies with Part 68 of the FCC rules and the requirements adopted by ACTA. On the exterior of this equipment is a label
that contains a product identier in the format US:AAAEQ##TXXXX. If requested, this information must be provided to your telephone
company.
A plug and jack used to connect this equipment to the premises wiring and telephone network must comply with the applicable FCC Part 68
rules and requirements adopted by ACTA. A compliant telephone cord and modular plug is provided with this product. It is designed to be
connected to a compatible jack that is also compliant. See installation instructions for details.
The REN is useful to determine the quantity of devices you may connect to your telephone line. Excessive RENs on a telephone line may
result in the devices not ringing in response to an incoming call. In most, but not all areas, the sum of the RENs should not exceed ve (5.0).
To be certain of the number of devices you may connect to your line, as determined by the REN, contact your local telephone company. For
products approved after August 8, 2001, the REN for this product is part of the product identier that has the format US:AAAEQ##TXXXX. The
digits represented by ## are the REN without the decimal point. (For example, 03 represents a REN of 0.3.) For earlier producers, the REN is
separately shown on the label.
If this telephone equipment causes harm to the telephone network, the telephone company will notify you in advance that temporary
discontinuance of service may be required. But if advance notice isn’t practical, the telephone company will notify the customer as soon as
possible. Also, you will be advised of your right to le a complaint with the FCC if you believe it is necessary.
The telephone company may make changes in its facilities, equipment, operations, or procedures that could affect the proper functioning of
your equipment. If they do, you will be notified in advance in order for you to make necessary modifications to maintain uninterrupted service.
If trouble is experienced with this unit, for repair or warranty information, please contact customer service at (800) 544-4660. If the equipment
is causing harm to the network, the telephone company may request that you disconnect the equipment until the problem is resolved.
DO NOT DISASSEMBLE THIS EQUIPMENT: it does not contain any user-serviceable components.
We recommend the installation of an AC surge arrester in the AC outlet to which this equipment is connected. Telephone companies report
that electrical surges, typically lighting transients, are very destructive to customer terminal equipment connected to AC power sources.
Exposure to RF Radiation
The internal wireless radio operates within the guidelines found in radio frequency safety standards and recommendations, which reflect the
consensus of the scientific community. Independent studies have shown that the internal wireless radio is safe for use by consumers. Visit
plantronics.com for more information.
In order to comply with FCC RF Exposure requirements, the base must be installed and operated such that a minimum separation distance of
20 cm is maintained between the base and all persons during normal operation.
NOTE: Modications not expressly approved by Plantronics, Inc. could void the user’s authority to operate the equipment.
INDUSTRY CANADA REGULATORY INFORMATION
This product meets the applicable Industry Canada technical specications/Le présent materiel est conforme aux specications techniques
applicable d’ Induristrie Canada.
This Class B digital apparatus complies with Canadian ICES-003.
Cet appareil numérique de la classe B est conforme à la norme NMB-003 du Canada.