Point Mobile PM155 PDA User Manual CHD FiVE
POINTMOBILE CO., LTD. PDA CHD FiVE
UserManual.wiki
>
Point Mobile
>
PM155 User Manual
User manual
Navigation menu
Upload a User Manual
Namespaces
Wiki Guide
HTML
PDF
Info
Views
User Manual
Discussion / Help
Navigation


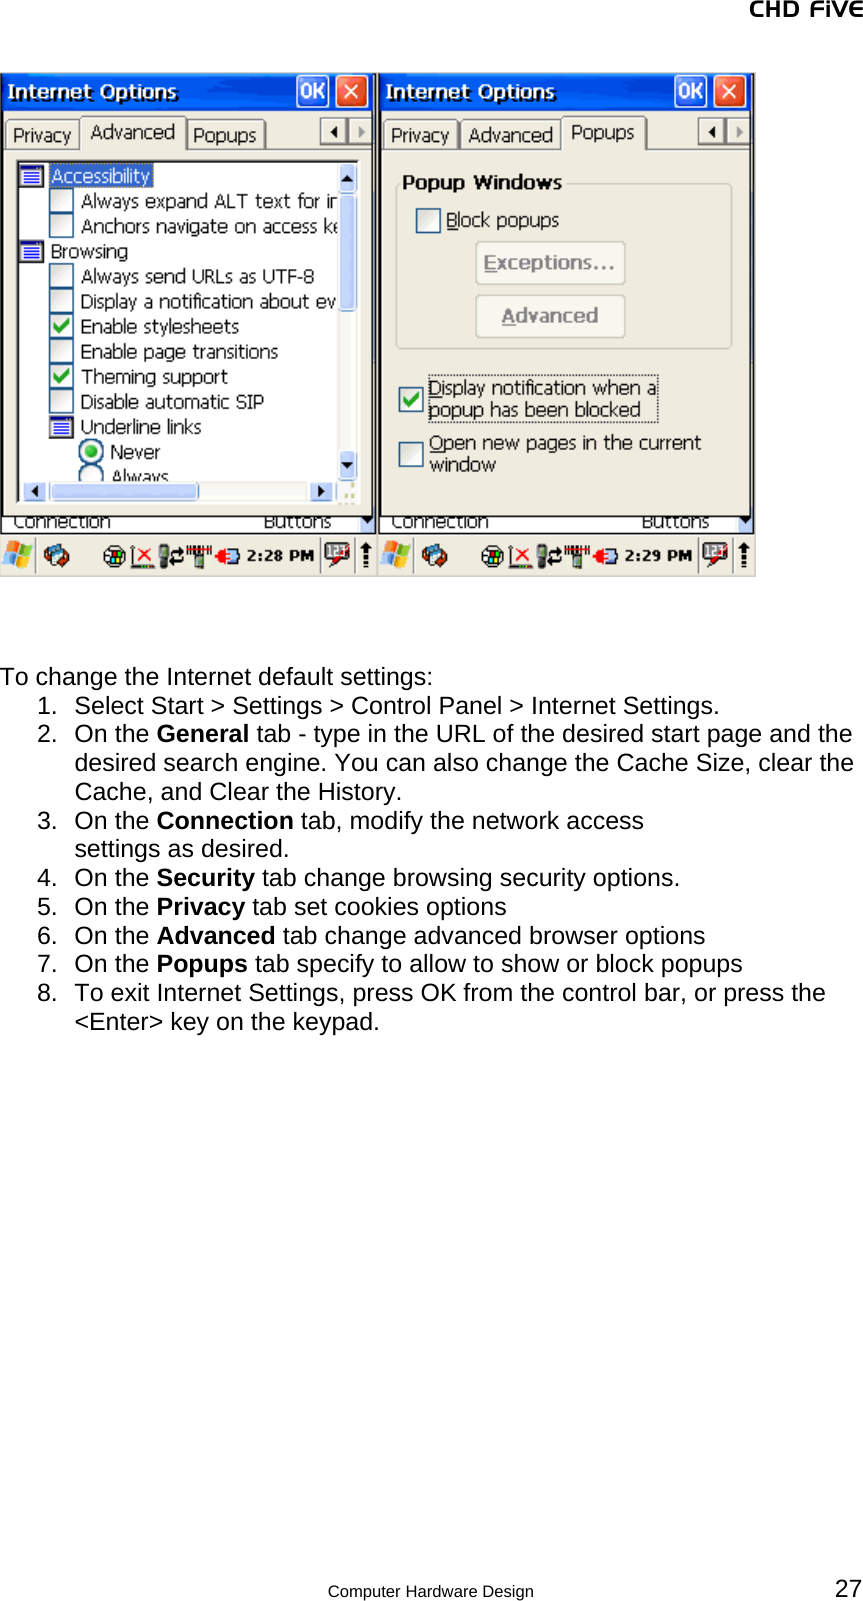
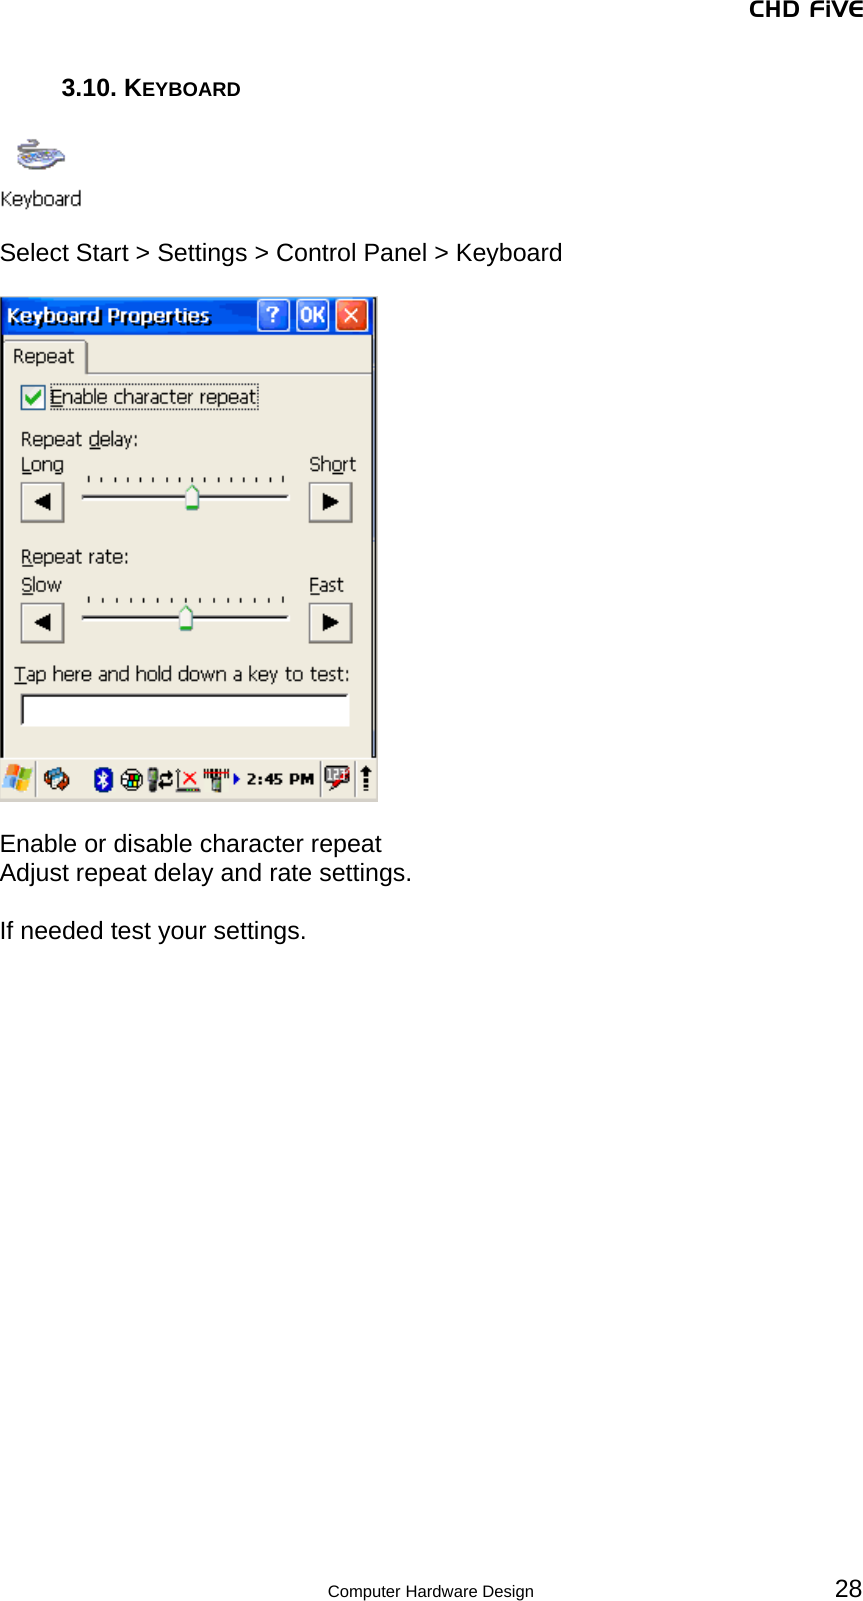
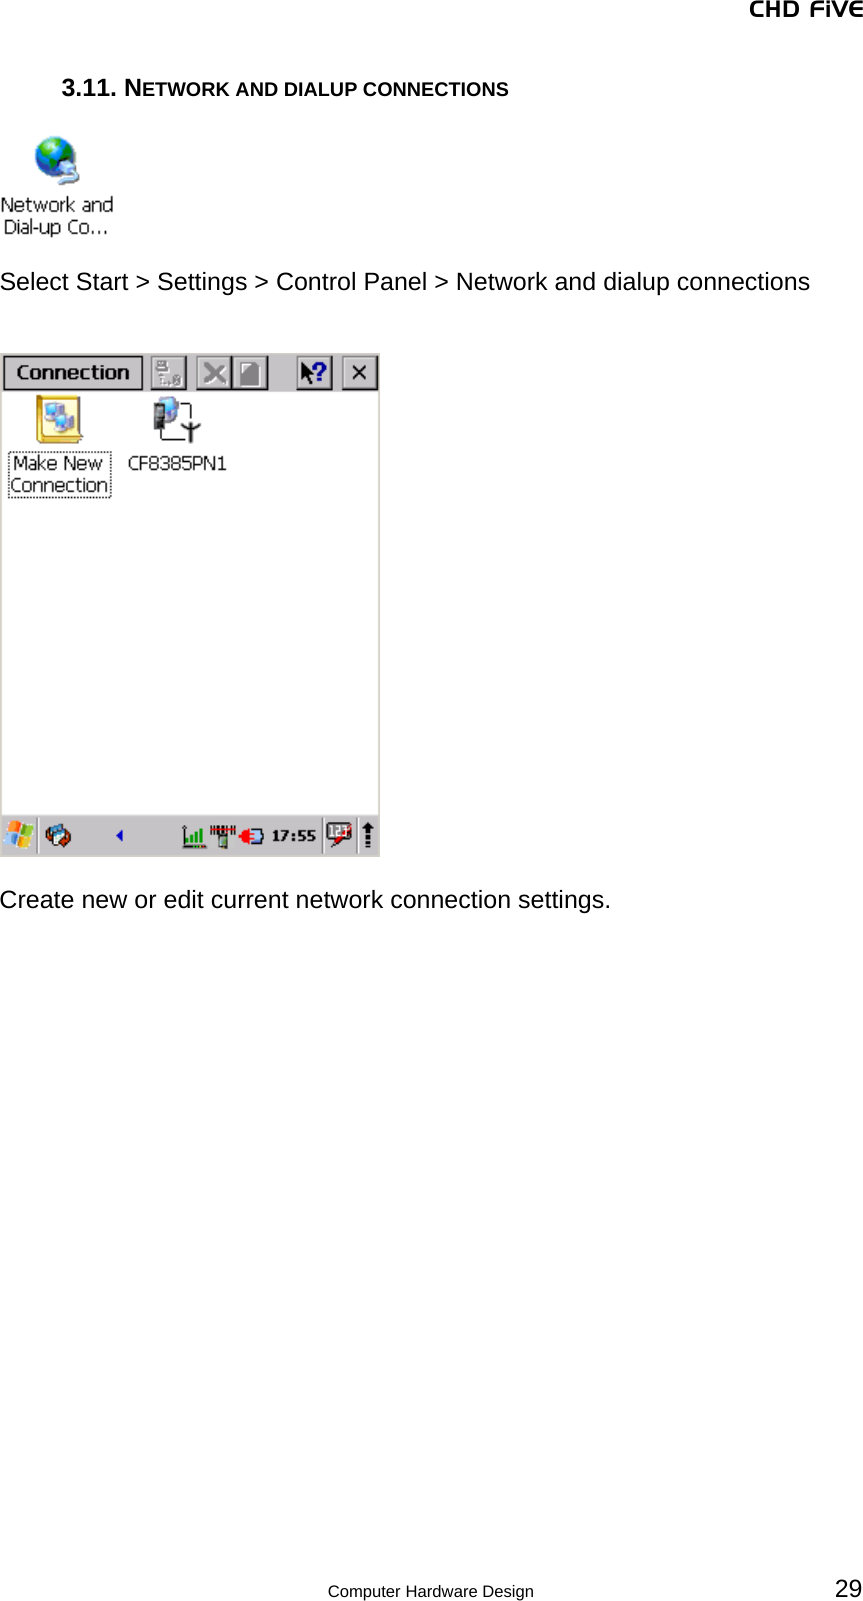
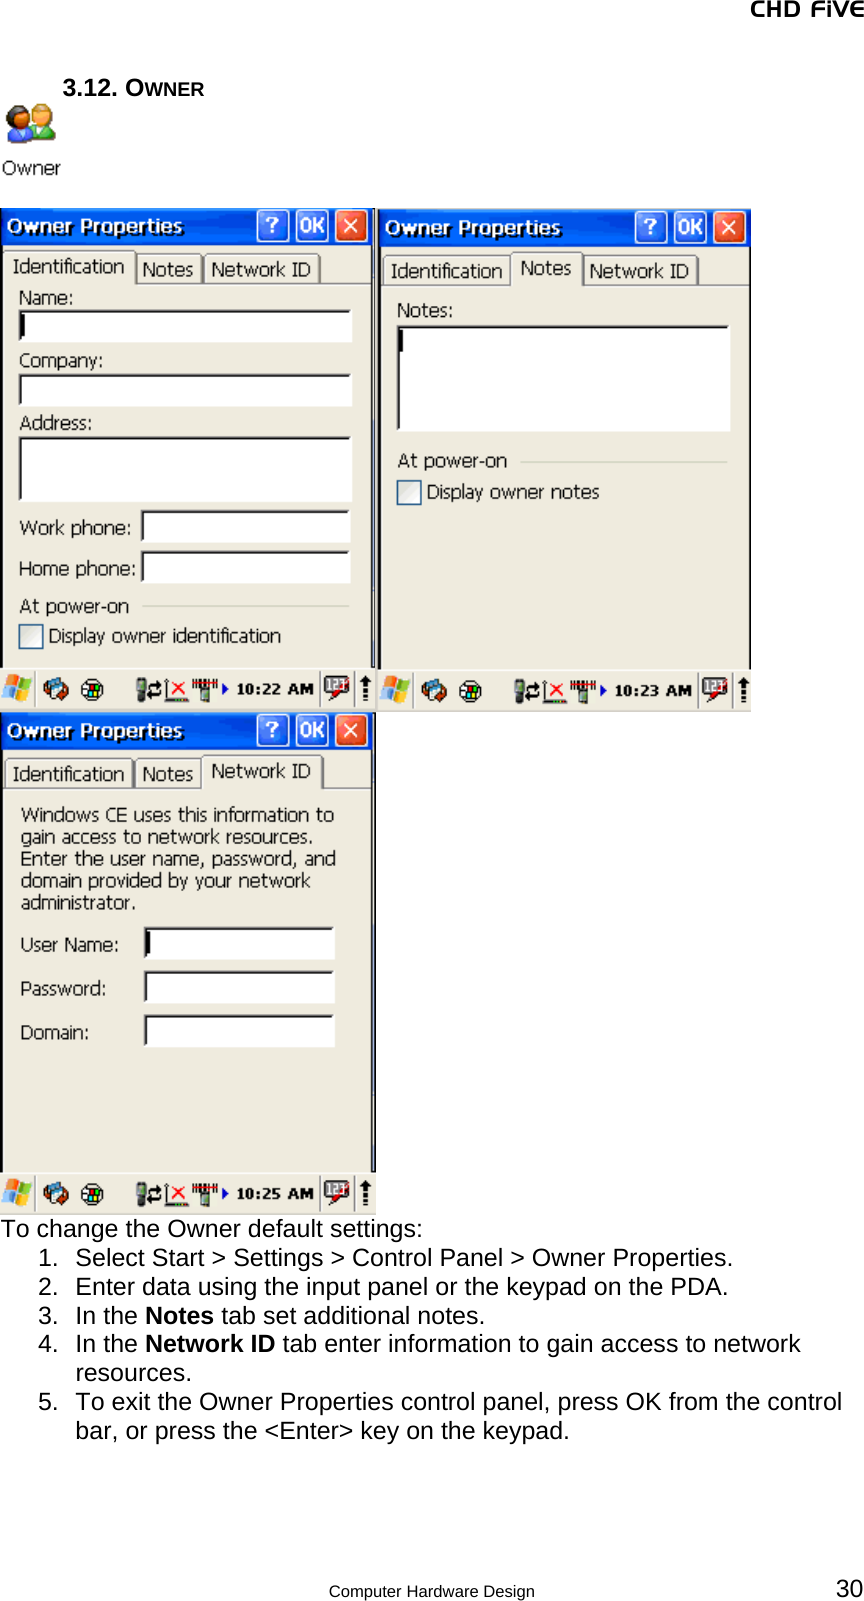
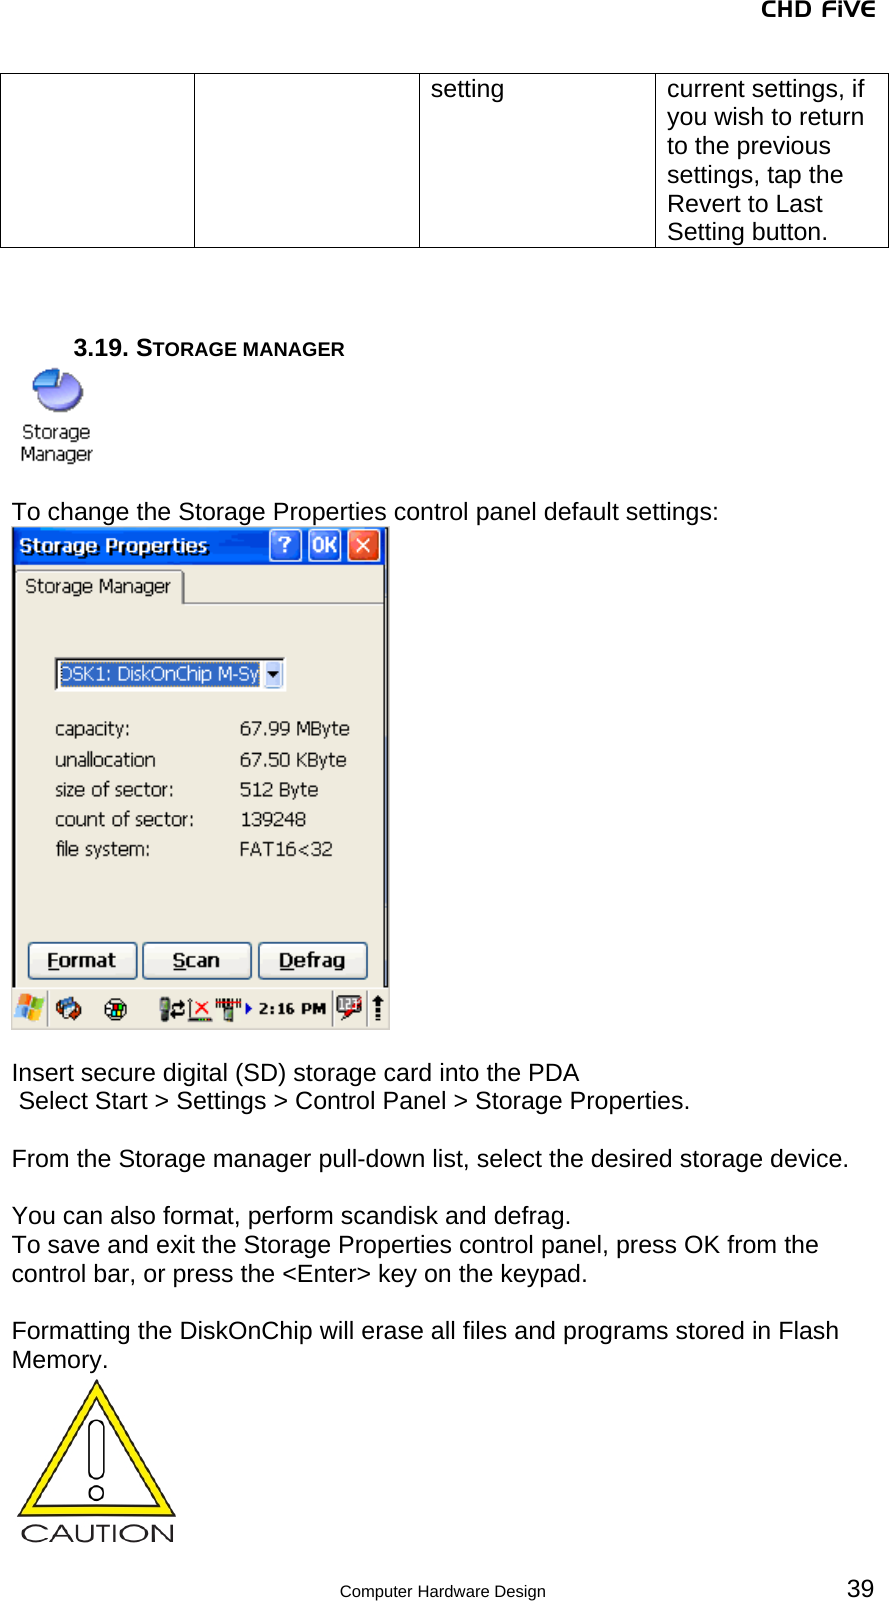
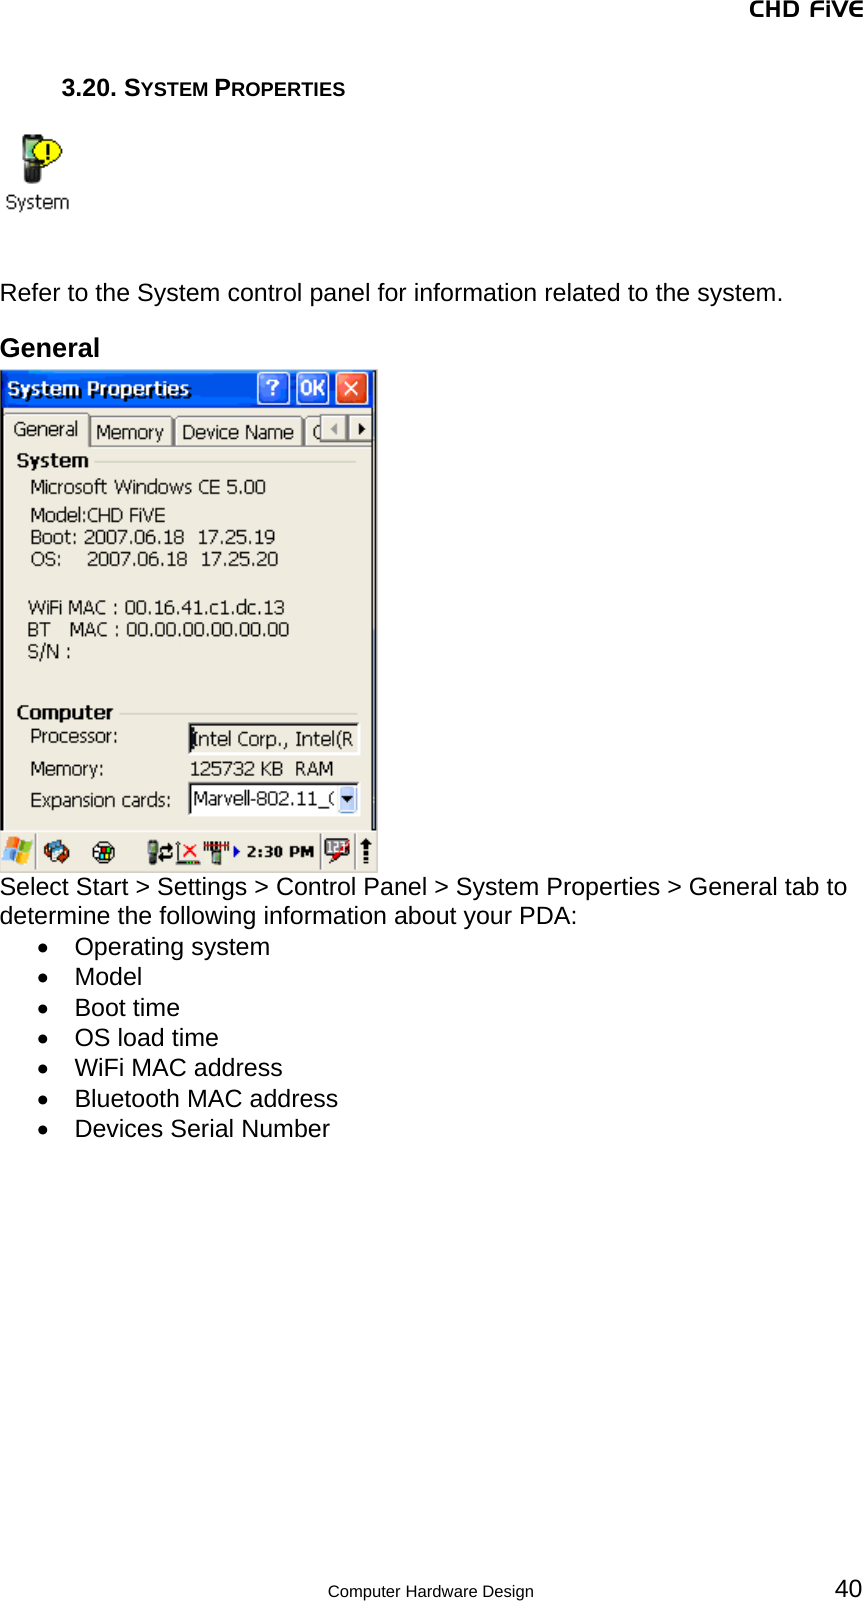
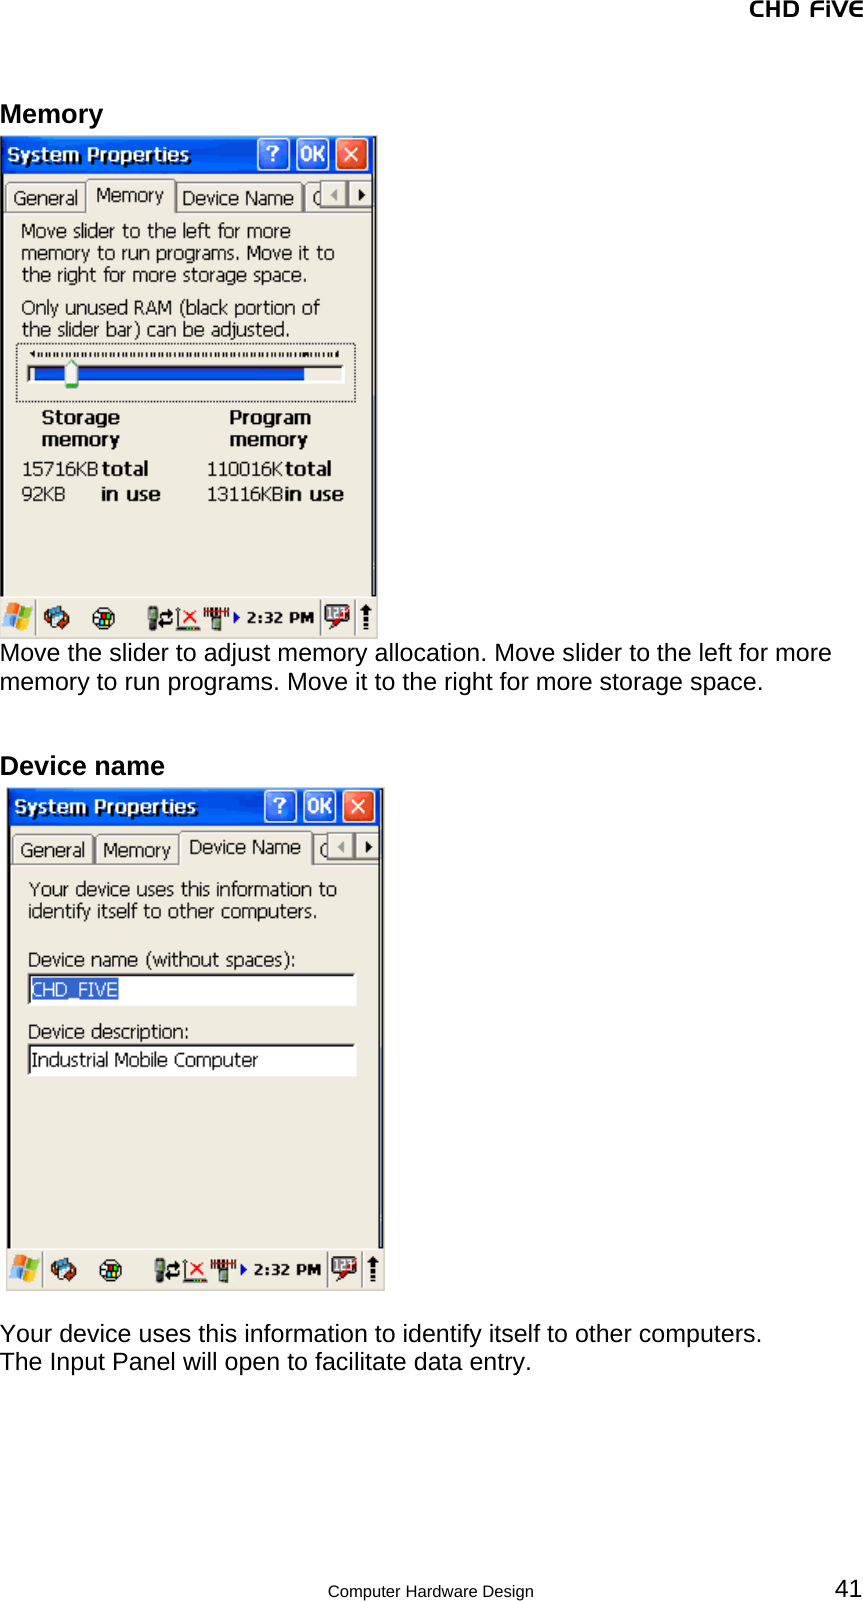
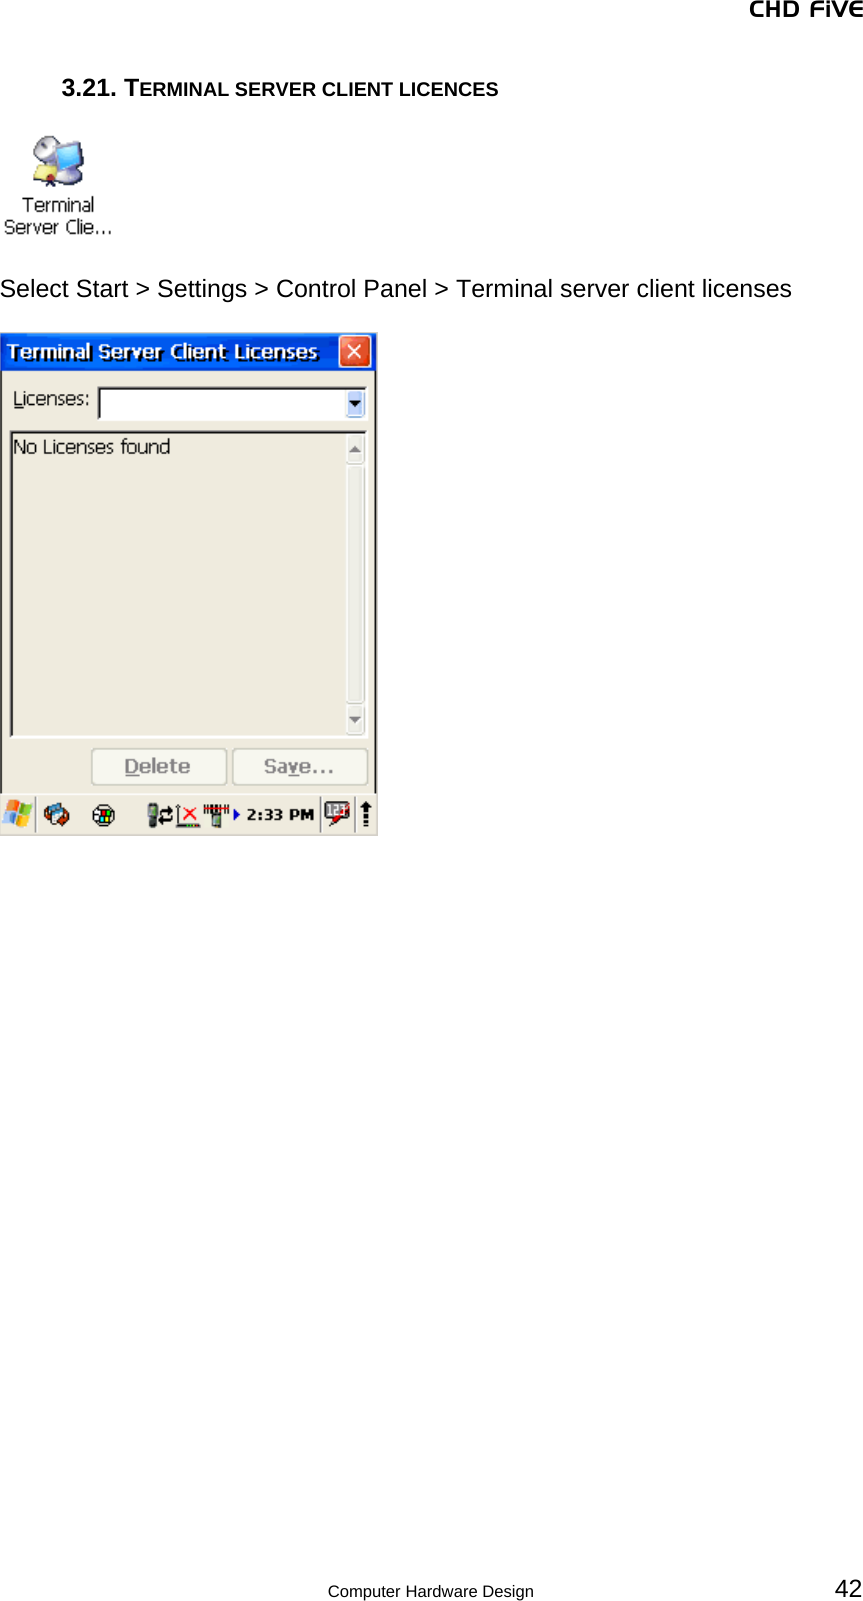
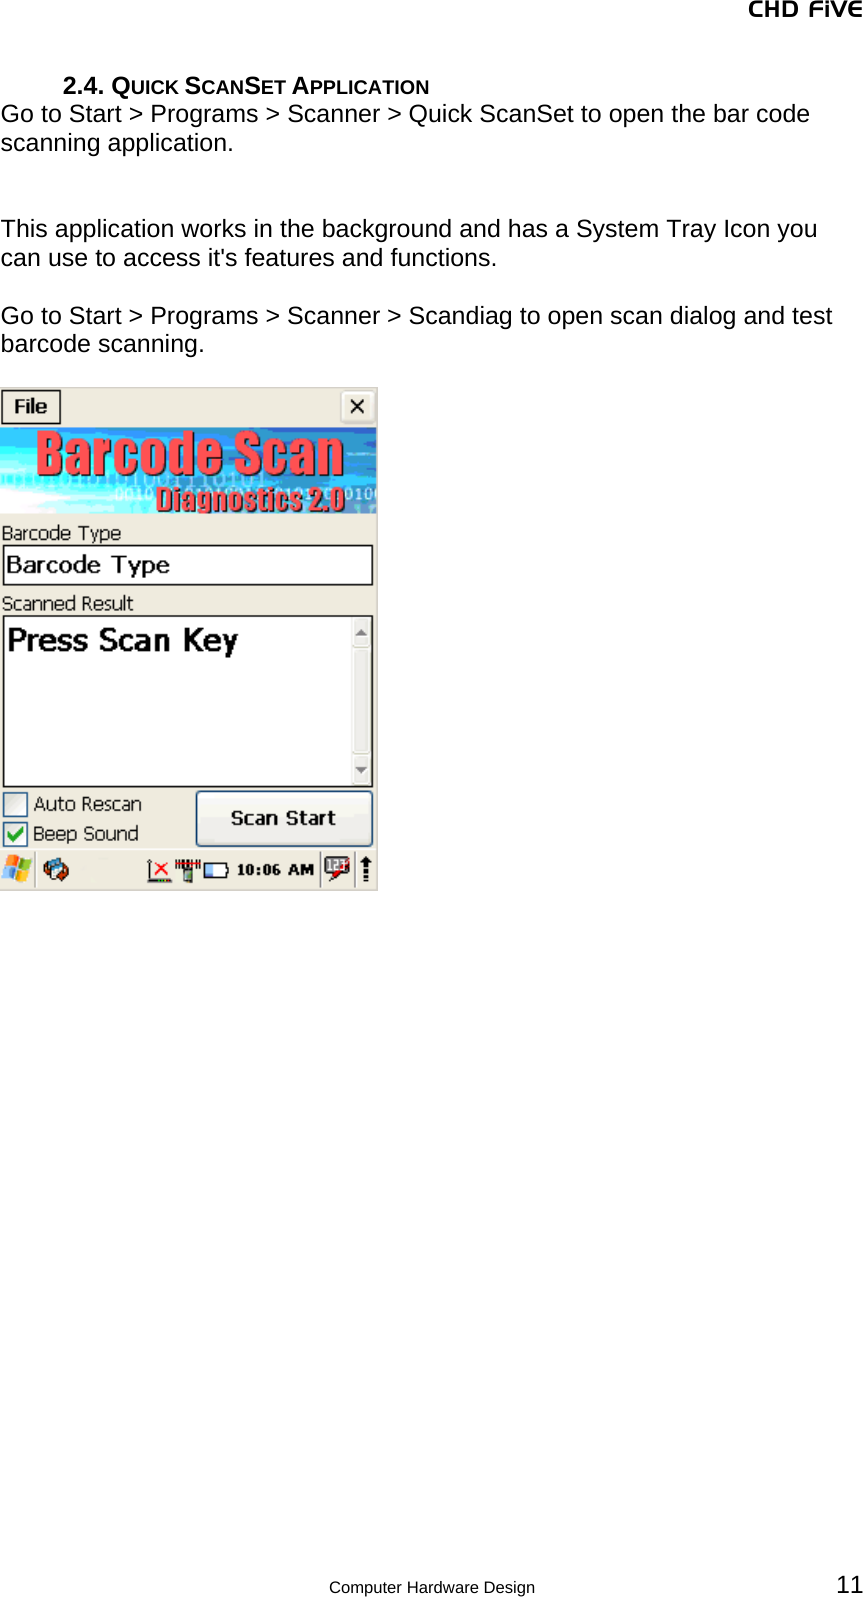
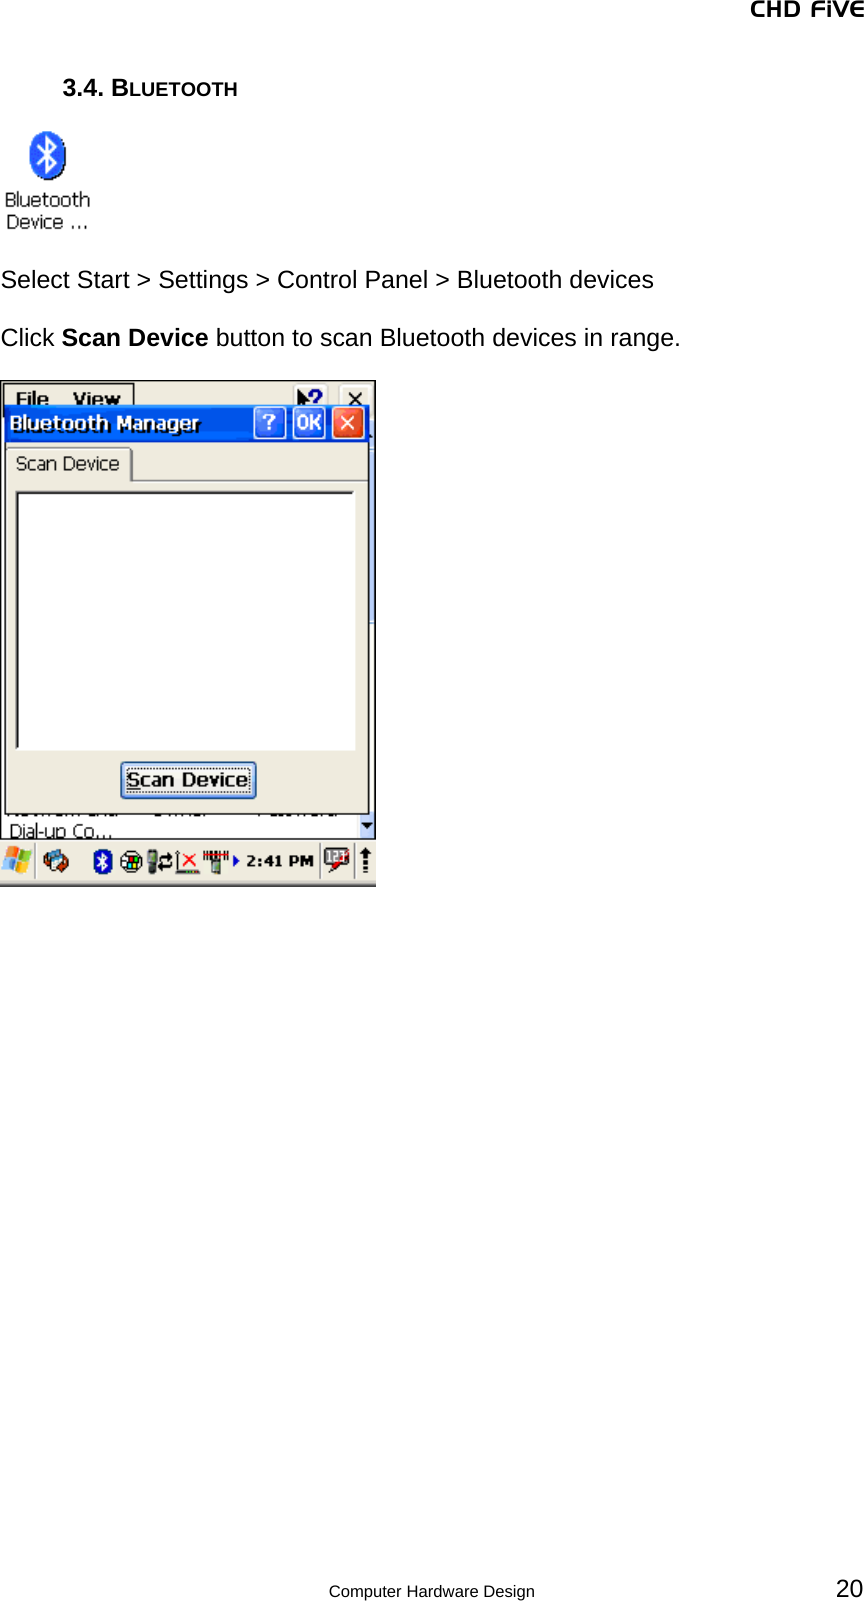
![CHD FiVE Computer Hardware Design 5 1. Batteries and Power 1.1. OVERVIEW Battery charging, installation, and information about the single-slot dock, battery charger and power cable are located in the Quick Reference Guide. 1.2. SUSPEND MODE The PDA will go into suspend or sleep mode when it is idle for a configurable period of time, by default it is configured to 3 minutes. The idle duration can be customized using the Power control panel. Suspend mode works and looks just like you have turned the unit off. Press the [ On/Off ] key to suspend (put to sleep) the CHD Five. Press the [ On/Off ] key again for the PDA to resume its previous state. Use the Battery Power control panel to set the idle duration and suspend mode initiation. This will save battery power when PDA is not in use. Suspending The following conditions will suspend (put the PDA to sleep): • Press the [ Power ] key while the unit is on. • The sleep timer expires, which indicates that there has been no use for a specified period of time. • The battery pack is completely discharged.](https://usermanual.wiki/Point-Mobile/PM155/User-Guide-903658-Page-5.png)
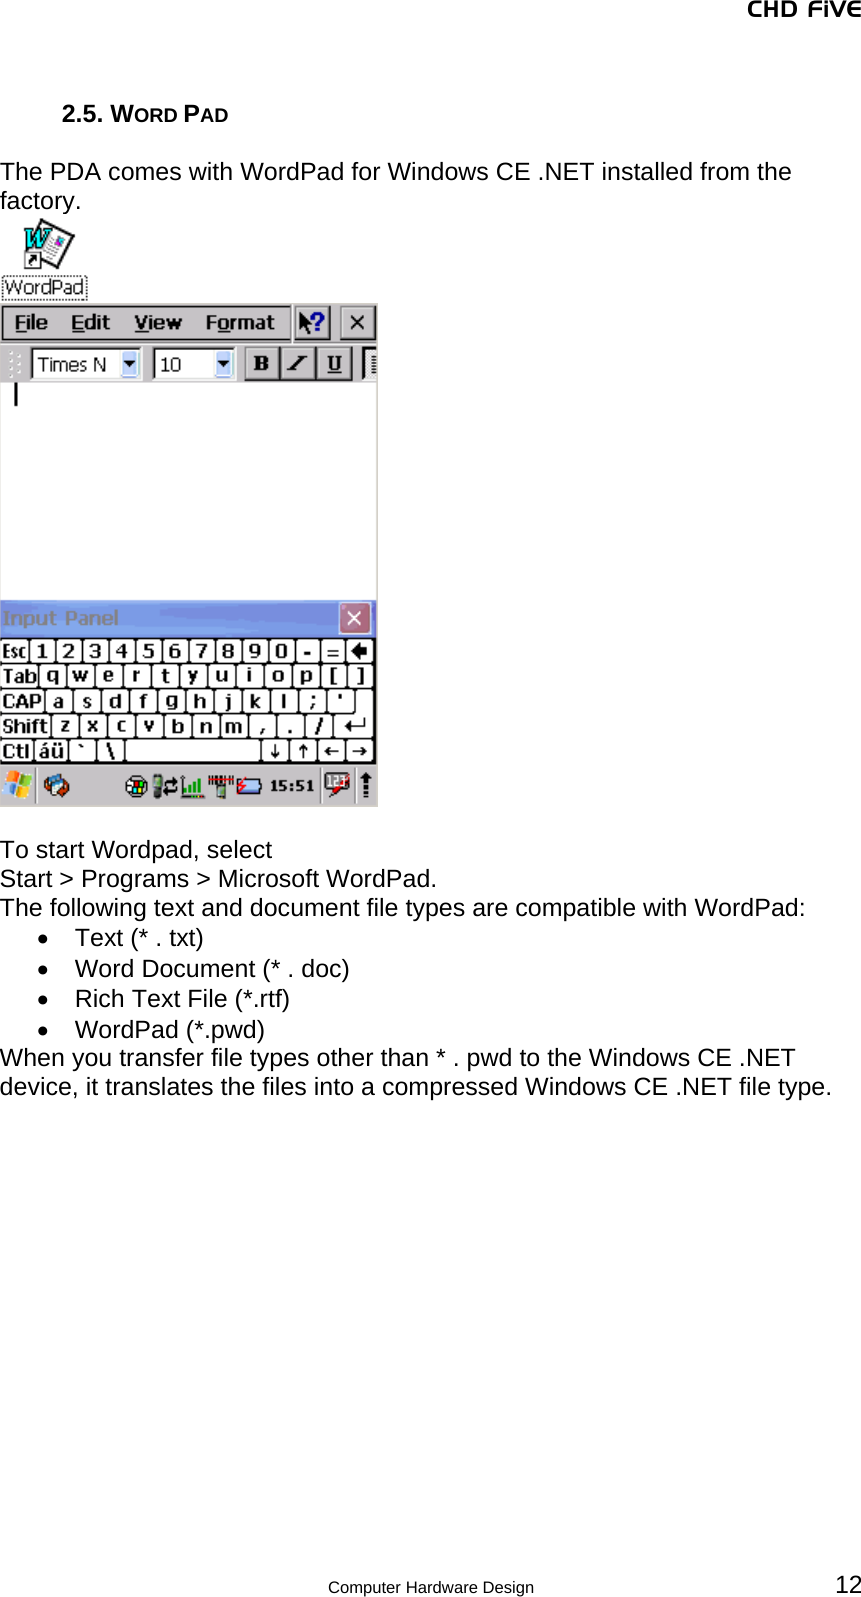
![CHD FiVE Computer Hardware Design 6 Resuming Use one of the following methods to resume (wake up the PDA): • Press [ Power ] key to suspend or resume (wake up). • Put the PDA into a dock or connect to data cabel. When a battery pack completely discharges while the unit is in suspend mode, the PDA remains suspended until the discharged battery is changed or PDA is connected to charger. 1.3. BATTERY The battery pack in the PDA is a Lithium Ion battery pack 3.7V, 2000 mAh. 1.4. BATTERY WARNINGS AND CAUTIONS Prior to using the PDA for the first time, you MUST charge the battery pack. The initial charging cycle for both the battery pack and back-up battery takes approximately thirteen (13) hours. Subsequent charging cycles take four (4) hours. If you remove the battery pack or it completely discharges, there is a 2 hour window in which to insert a charged battery pack before the backup battery completely discharges. If your backup battery completely discharges, the contents of the RAM memory will be lost. If your backup battery is less than fully charged, there is proportionally smaller window of time available. Use only the correct battery packs, charger, and dock supplied by a CHD or CHD dealer. The use of other battery supplies can damage the PDA and void your warranty. For the correct supplies for the CHD FIVE, please contact your CHD reseller. Lithium-ion Polymer battery packs can get hot, explode, ignite and/or cause serious injury if exposed to abusive situations. Follow the safety warnings listed below: • Do not place the battery pack in fire or heat the battery. • Do not install the battery pack backwards so the polarity is reversed. • Do not connect the positive terminal and negative terminal of the battery pack to each other with any metal object (such as wire). • Do not carry or store battery pack together with metal objects. • Do not pierce the battery pack with nails, strike the battery with a hammer, step on the battery or otherwise subject it to strong impacts or shocks. • Do not solder directly onto the battery pack. • Do not expose battery pack to liquids, or allow the battery contacts to get wet. Do not disassemble or modify the battery pack. The battery pack contains safety and protection devices, which, if damaged, may cause the battery pack to generate heat, explode or ignite.](https://usermanual.wiki/Point-Mobile/PM155/User-Guide-903658-Page-6.png)


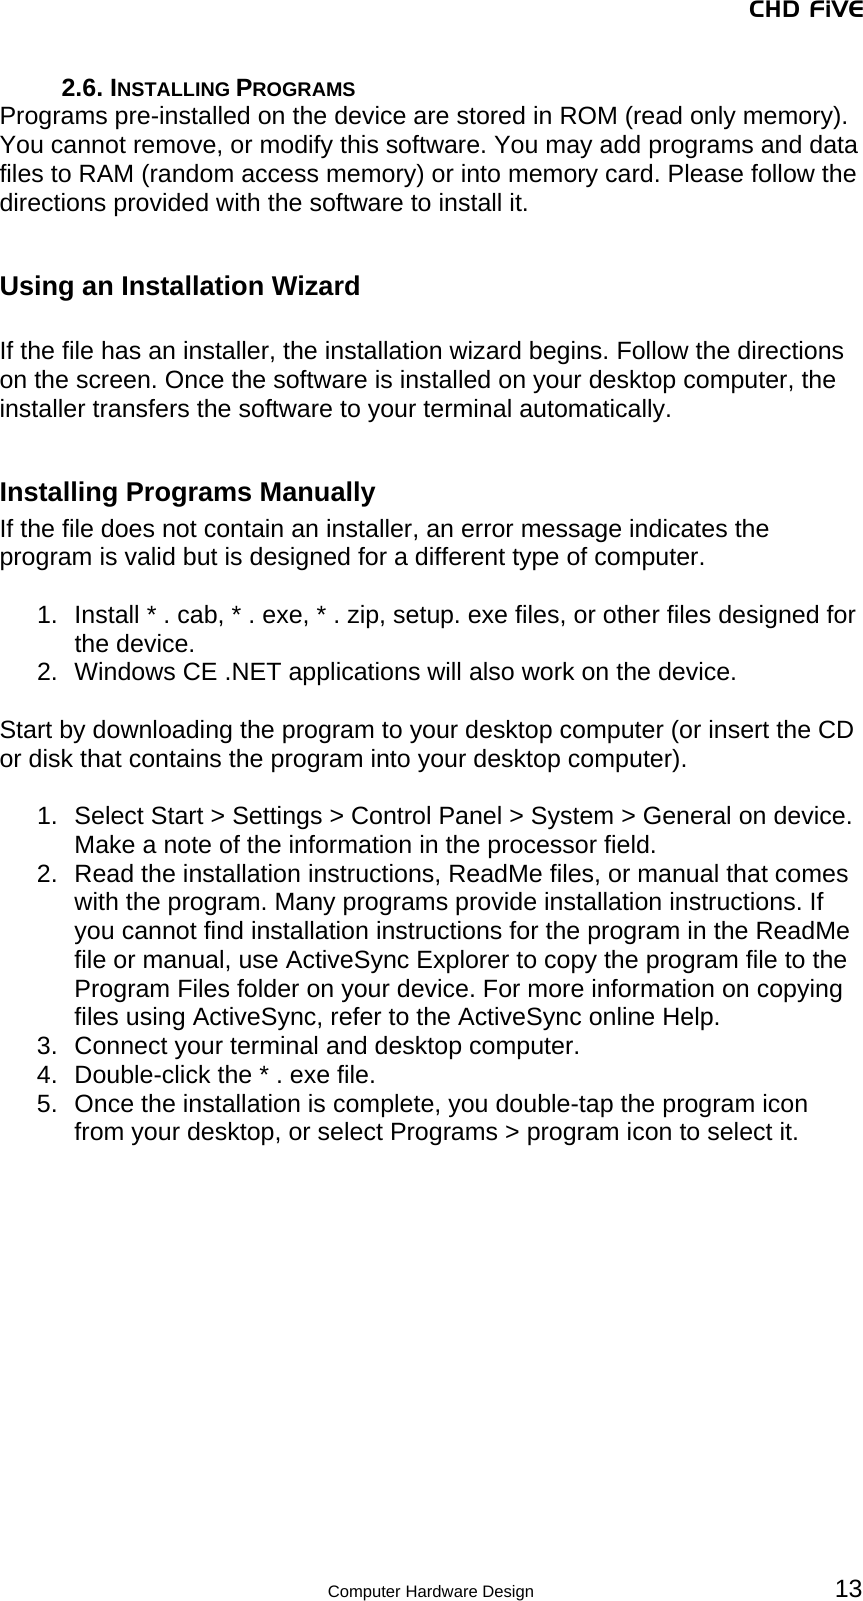

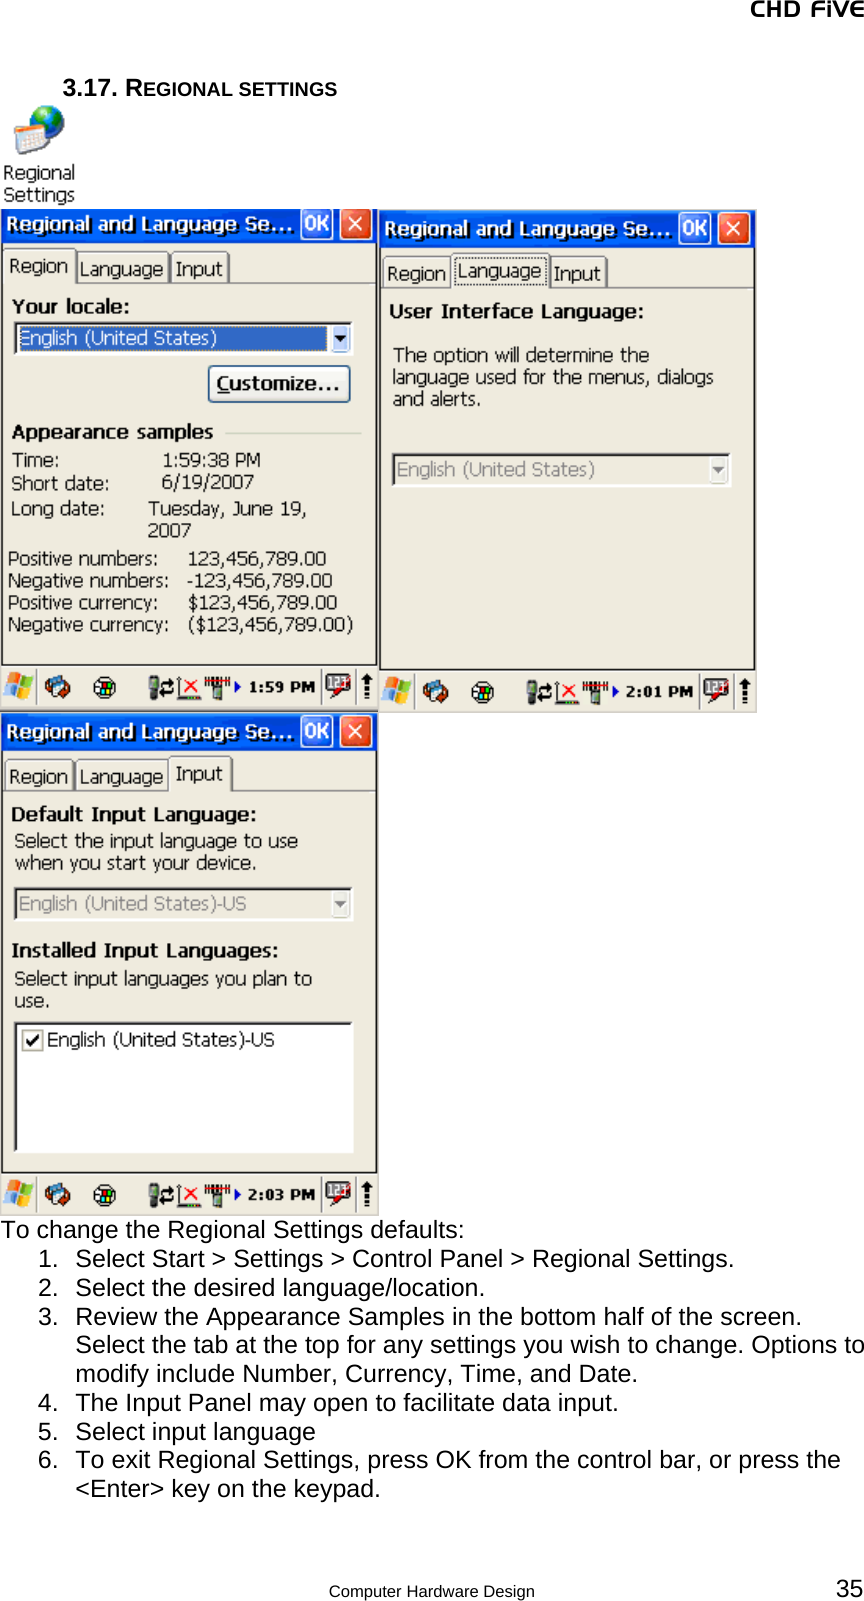
![CHD FiVE 3.5. DATE AND TIME In the Date/Time options, you can change the year, month, date, time, time zone, or select automatic adjust for Daylight Savings Time. To set or change the date and time: 2. Select Start > Settings > Control Panel > Date/Time 3. Select the month to open a pull down list of months or press the arrow buttons on either side of the month to increase or decrease the month. 4. To change the year, select the year to open a numeric dial. Select the up arrow to increase the value; select the down arrow to decrease the value. Or you can type a new year value in the field. 5. To change the time, select the hour, minute, seconds, or AM/PM and select the up arrow to increase the value; select/tap the down arrow to decrease the value. You can also type a new time value in the field. 6. Select your correct time zone from the pull-down list. 7. To automatically adjust the clock for Daylight Savings Time, enable the checkbox at the bottom of the screen. 8. Select Apply to make save your changes [and make additional modifica-tions] or select OK to exit the Date/Time settings. 21 Computer Hardware Design](https://usermanual.wiki/Point-Mobile/PM155/User-Guide-903658-Page-21.png)