Polar Electro T6 CS500 User Manual manual
Polar Electro Oy CS500 manual
UserManual.wiki
>
Polar Electro
>
T6 User Manual
manual
Navigation menu
Upload a User Manual
Namespaces
Wiki Guide
HTML
PDF
Info
Views
User Manual
Discussion / Help
Navigation


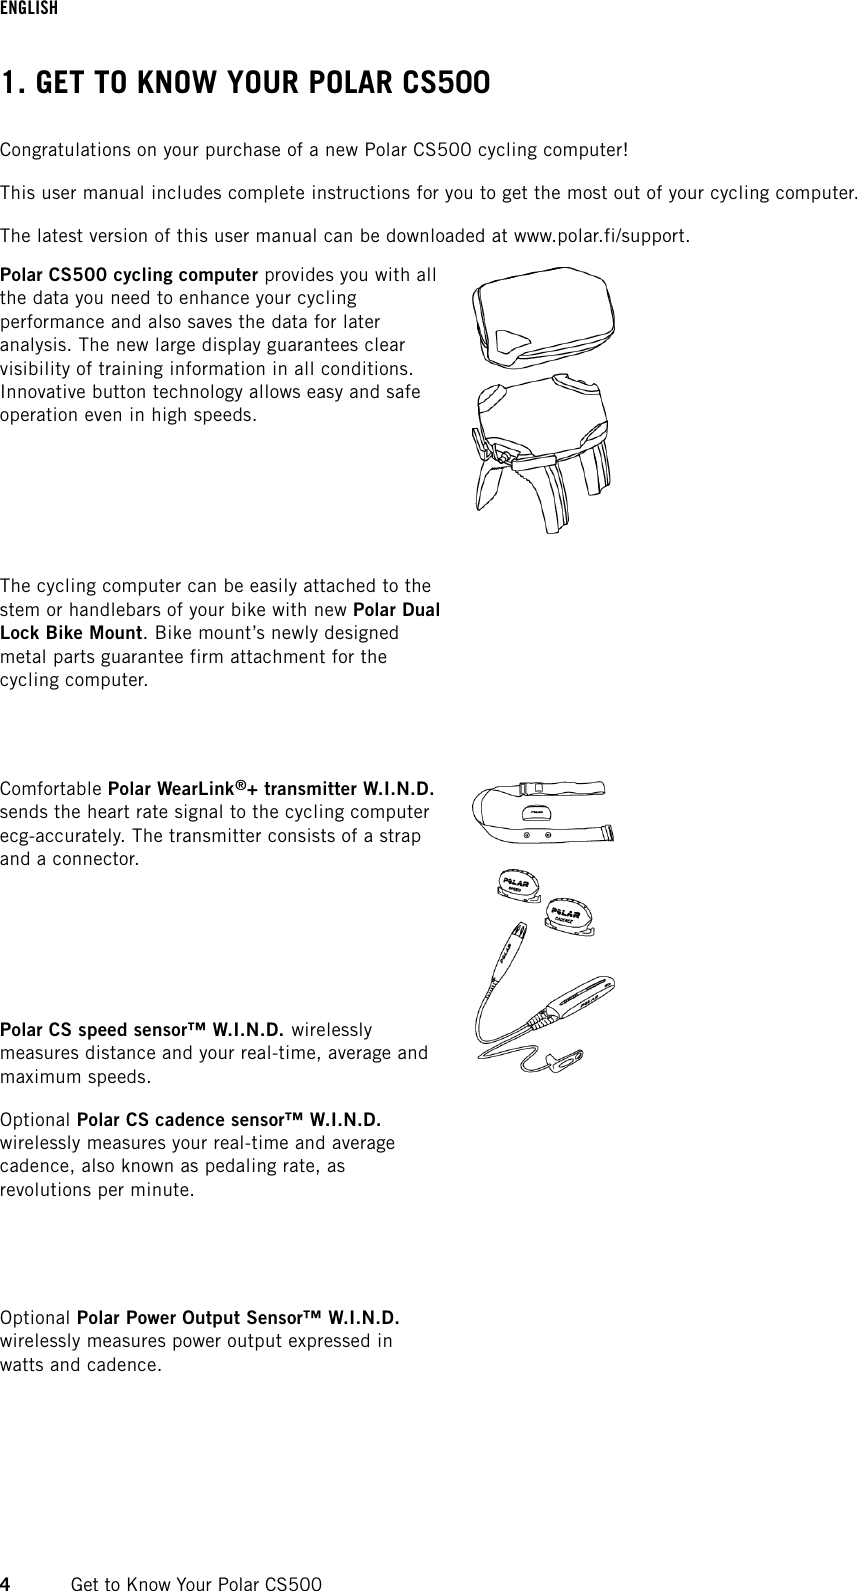
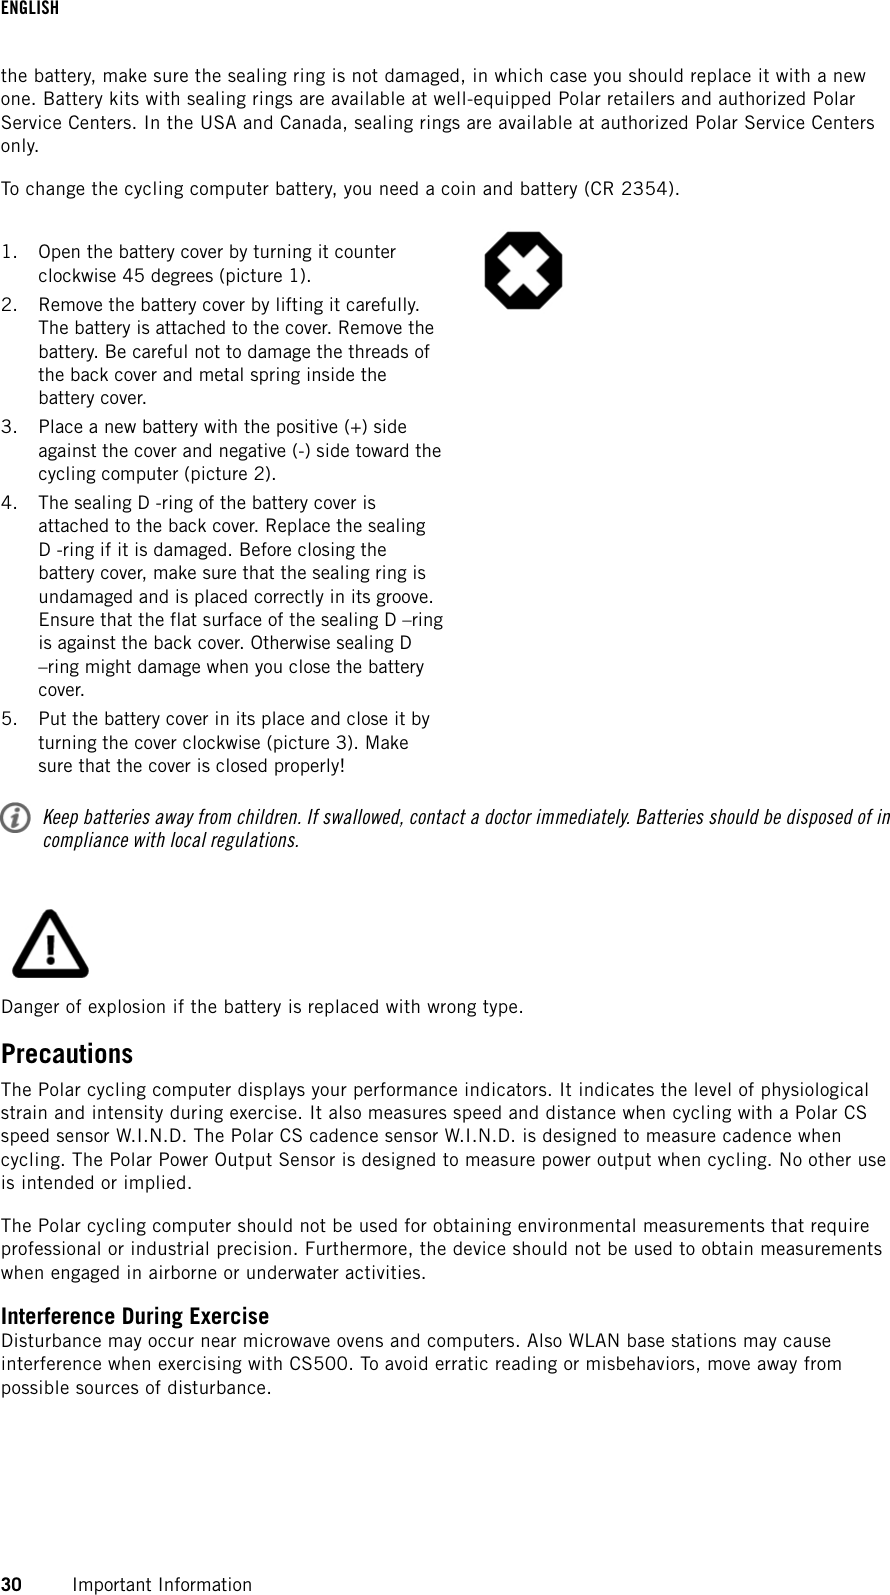
![Transfer data between the cycling computer andpolarpersonaltrainer.com with Polar's new datacommunication device, Polar DataLink. Just plugyour DataLink into the USB port of your computer,and it detects your cycling computer with W.I.N.D.technology.The polarpersonaltrainer.com web service is tailoredto support your training goals. There you can:• store your training files for a long-term follow-up.• analyze and follow your progress to the finestdetail.• analyze training intensity and needed recoverytime using the training load feature.• optimize the way you train by using the Polartraining programs• challenge your friends to a virtual sportscompetition and interact with other sportsenthusiasts.Data from all compatible sensors and WearLink transmitter is sent wirelessly to the cycling computer over Polar's2.4GHz W.I.N.D. technology. This eliminates interference during training.Register your Polar product at http://register.polar.fi/ to ensure we can keep improving our products andservices to better meet your needs.For video tutorials, go to http://www.polar.fi/en/support/video_tutorials [http://www.polar.fi/en/polar_community/videos ].ENGLISHGet to Know Your Polar CS500 5](https://usermanual.wiki/Polar-Electro/T6/User-Guide-1220546-Page-5.png)
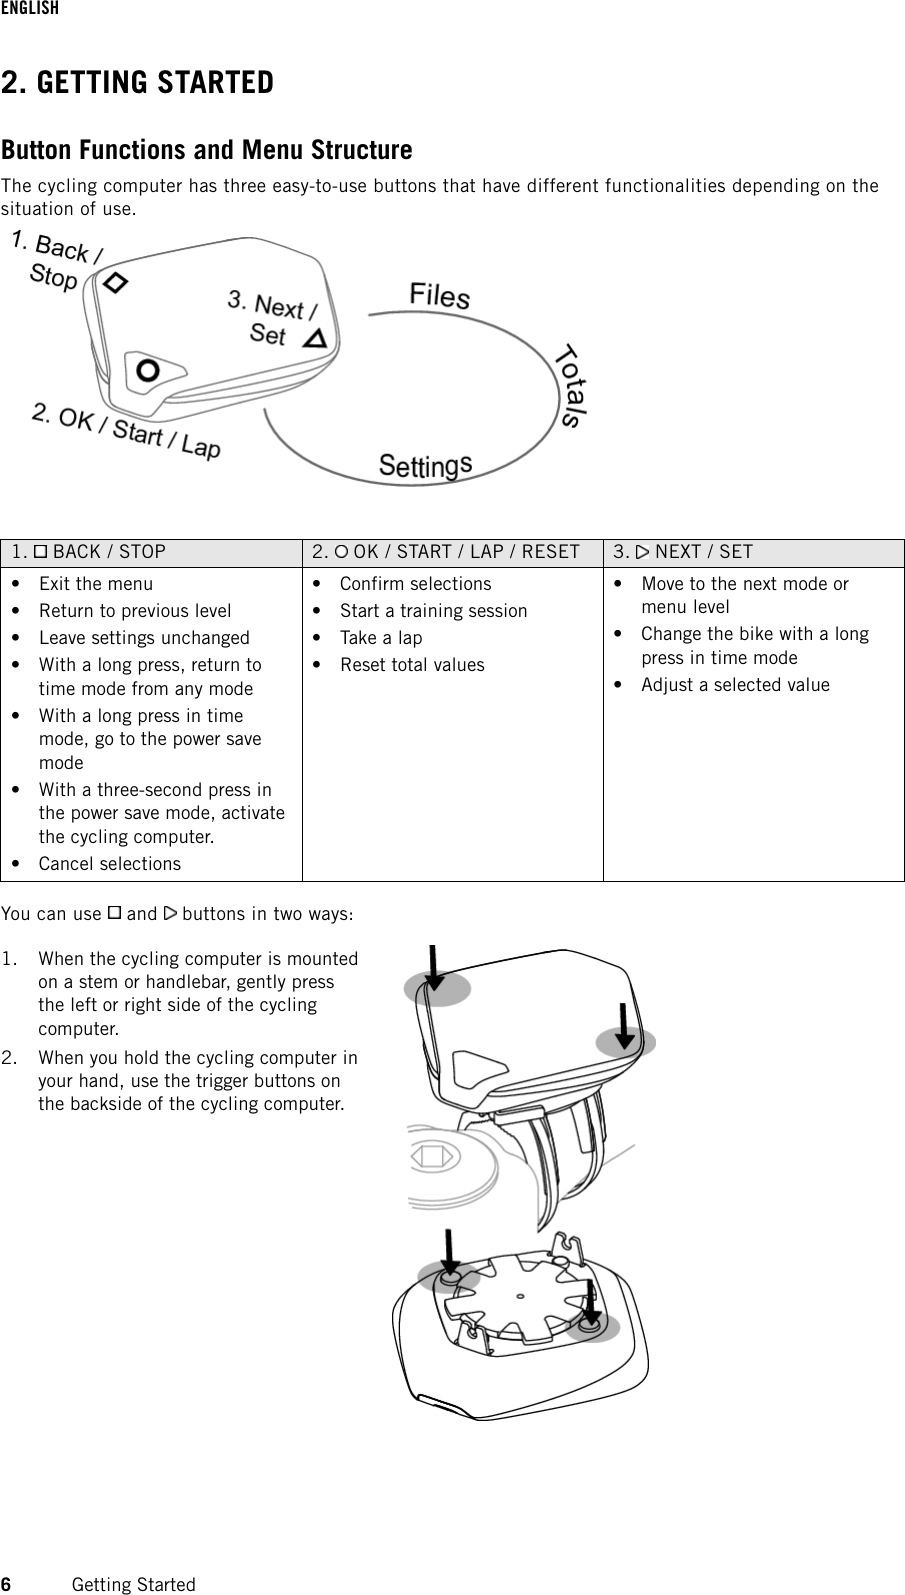
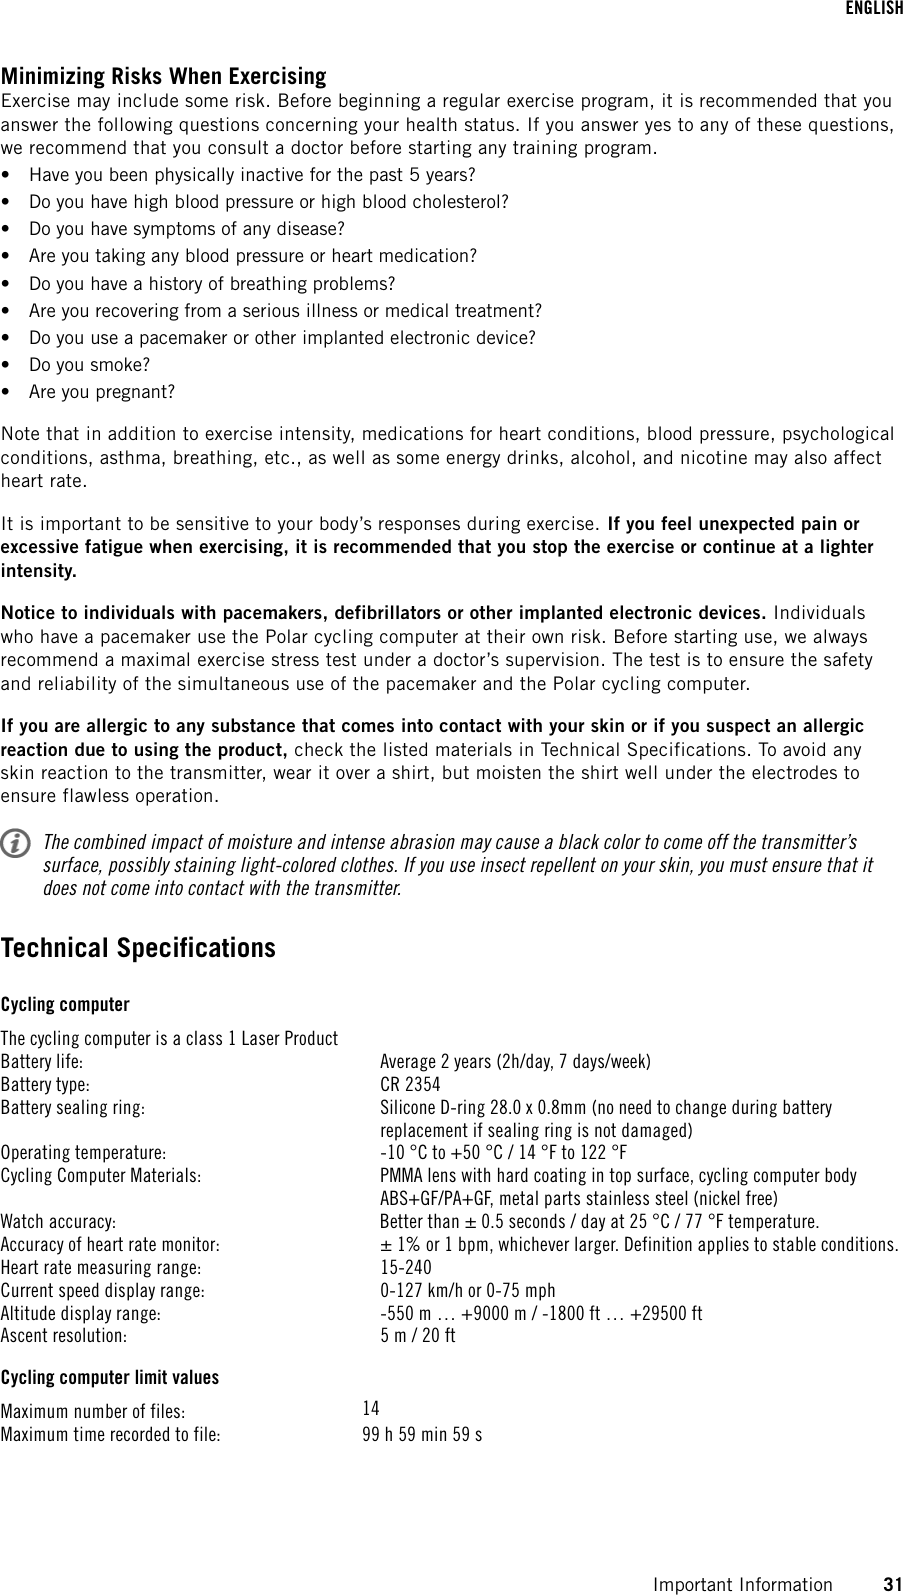
![Basic SettingsBefore using your cycling computer for the first time, customize the basic settings. Enter as accurate dataas possible to ensure correct feedback based on your performance.To adjust data, use SET and accept with OK. The values scroll faster if you press and hold SET .Activate your cycling computer with a three-second button press. Basic SET is displayed. Press STARTand adjust the following data:1. Time set: Select 12h or 24h. With 12h, select AM or PM. Enter time.2. Date set: Enter date.3. Unit: Select metric (kg/cm) or imperial (lb/ft) units.4. Weight: Enter your weight.5. Height: Enter your height. In LB/FT format, first enter feet then inches.6. Birthday: Enter your date of birth.7. Sex: Select Male or Female.8. Settings DONE is displayed. To change the settings, press BACK until you return to the desired setting. Toaccept the settings, press OK and the cycling computer goes to time mode.Measure Wheel SizeBefore you start cycling, set the wheel size of your bike into the cycling computer. For further information,see Bike Settings (page 21).Install the Polar Bike MountYou can install the bike mount on the stem or on the left- or right-hand side of the handlebar.1. Thread two cable ties through thepassages of the bike mount. If youinstall the bike mount on thehandlebar, thread the cable ties to theopposite direction.2. Insert the rubber part into the bikemount. Make sure that it is firmly in itsnest.3. Place the rubber part and the bikemount on the stem/handlebar andadjust the cable ties around thestem/handlebar. Secure the bikemount firmly. Cut off excess cable ties.For a video tutorial, go to http://www.polar.fi/en/polar_community/videos [http://www.polar.fi/en/polar_community/videos ].ENGLISHGetting Started 7](https://usermanual.wiki/Polar-Electro/T6/User-Guide-1220546-Page-7.png)
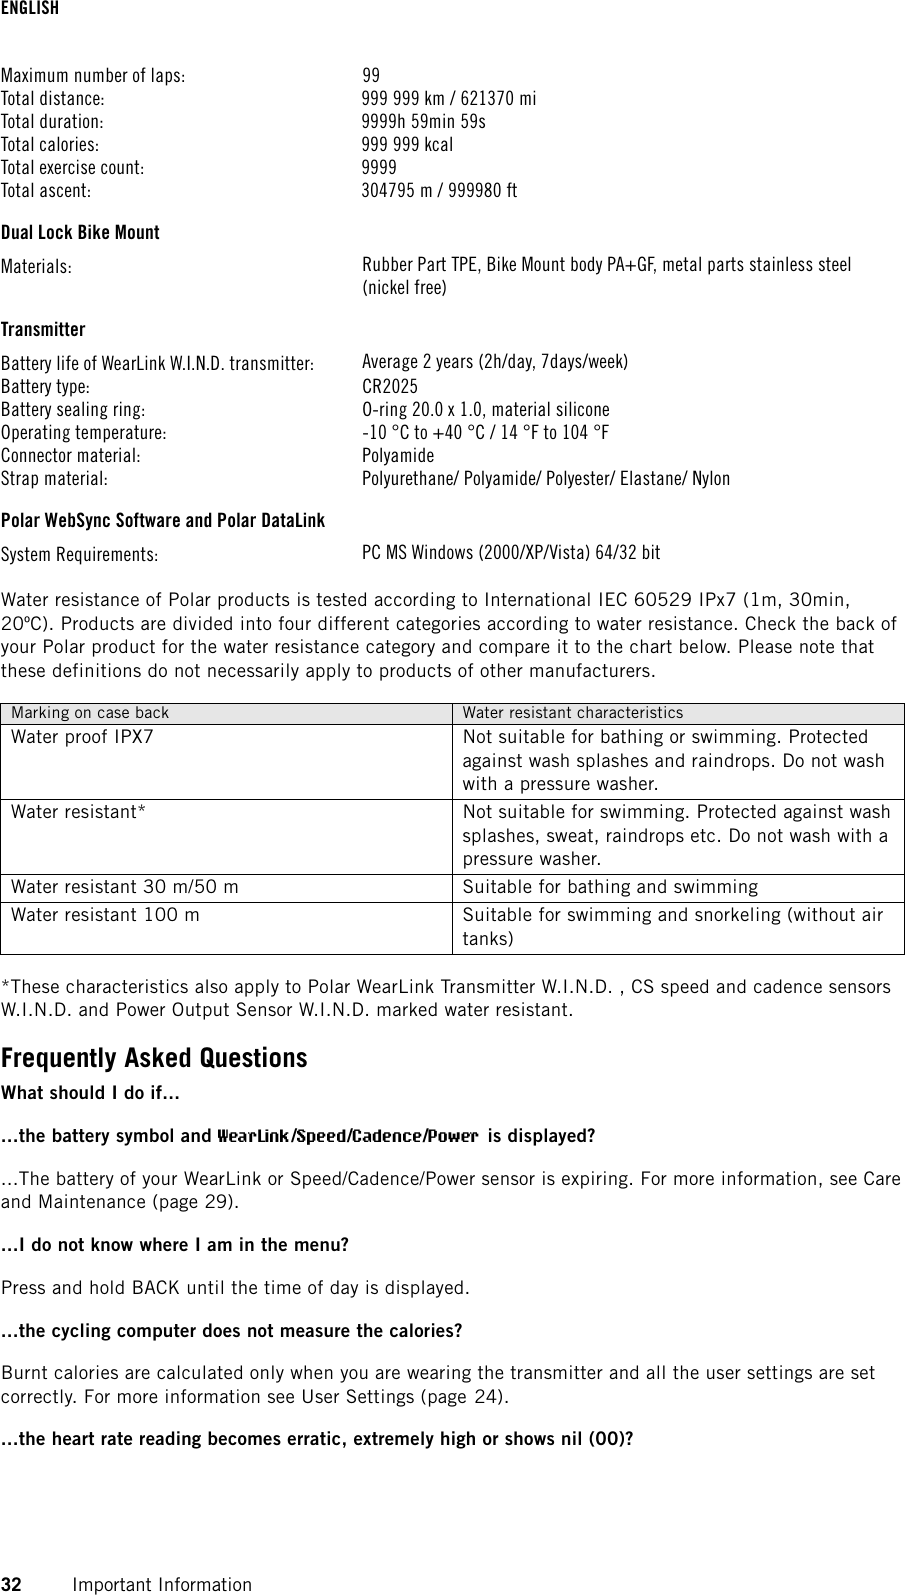
![Attach the Cycling Computer to the Bike Mount1. Push the button and position thecycling computer onto the bike mount.2. Release the button to fasten thecycling computer to the bike mount.Check that the cycling computer isfastened properly before you startcycling.To detach the cycling computer from the bike mount, push the button and lift the cycling computer offthe bike mount.For a video tutorial, go to http://www.polar.fi/en/polar_community/videos [http://www.polar.fi/en/polar_community/videos ].ENGLISH8Getting Started](https://usermanual.wiki/Polar-Electro/T6/User-Guide-1220546-Page-8.png)
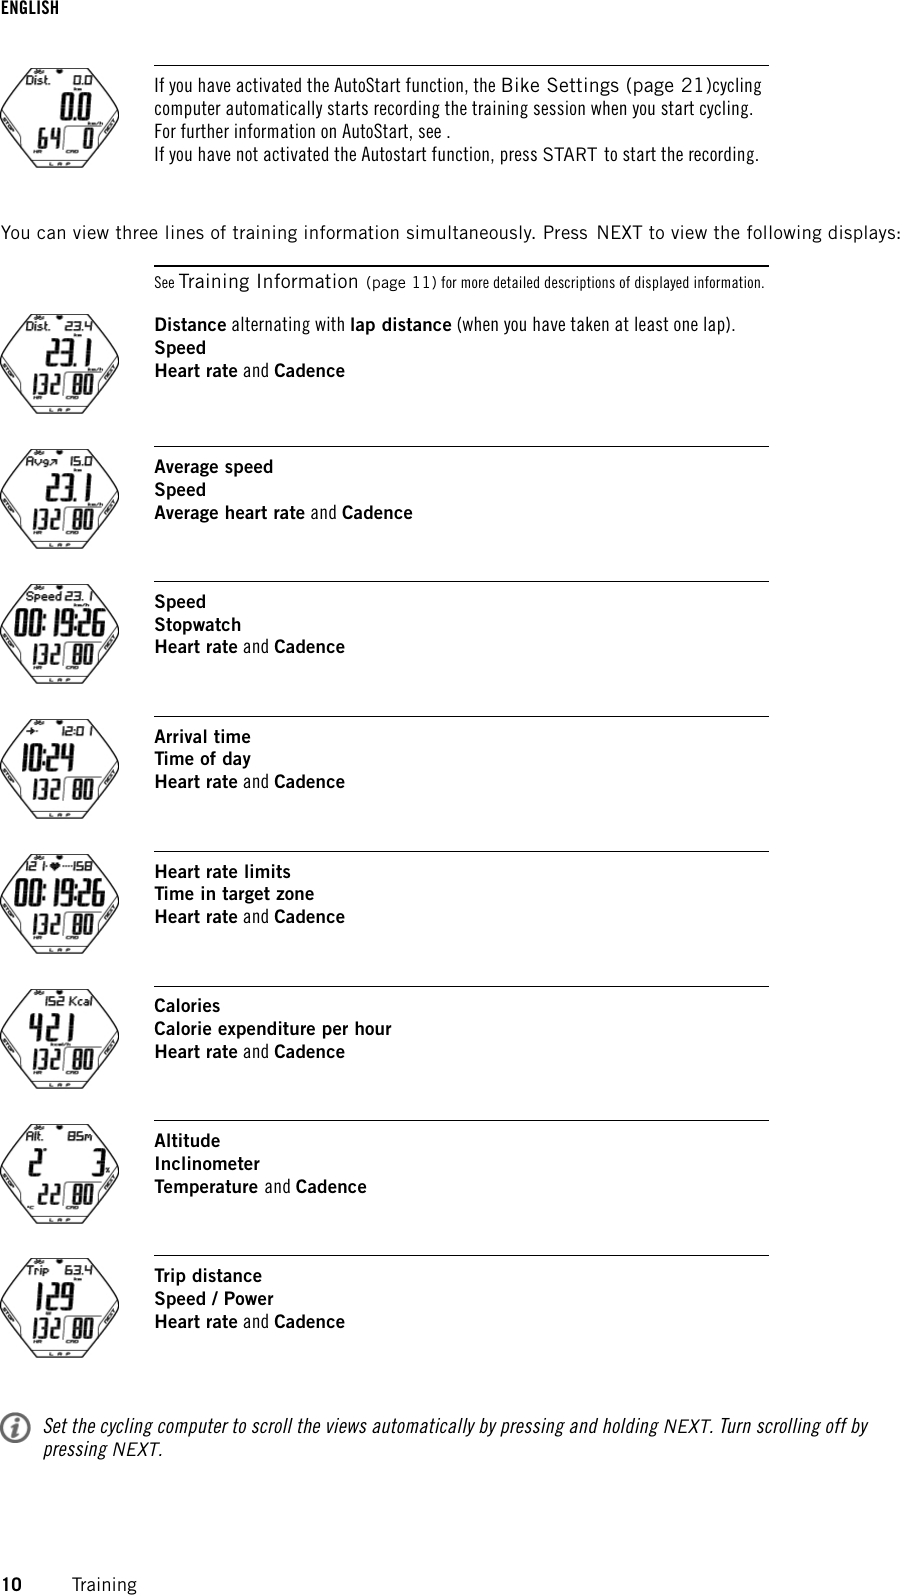
![3. TRAININGWear the TransmitterWear the transmitter to measure heart rate.1. Wet the electrode areas of the strap under running water.In demanding conditions, for instance during long-lasting events, we recommend using conductive electrodelotion or gel to improve contact. It is important to wash the transmitter carefully after using lotion or gel.2. Attach the connector to the strap. Adjust the strap to fit tightly but comfortably.3. Tie the strap around your chest, just below the chest muscles, and attach the hook to the other end ofthe strap.4. Check that the wet electrode areas are firmly against your skin and that the Polar logo of the connector isin a central and upright position.Detach the connector from the strap when you are not using it to maximize the transmitter lifetime. Seedetailed washing instructions in Care and Maintenance (page 29).For a video tutorial, go to http://www.polar.fi/en/support/video_tutorials [http://www.polar.fi/en/polar_community/videos ].The Polar WearLink transmitter can be used with apparels that have built-in soft textile electrodes. Wet theelectrode areas of the apparel. Attach the connector of the transmitter straight onto the apparel without the strapso that the connector’s Polar logo is in an upright position.Start TrainingAttach the cycling computer to the bike mount and activate it with a long button press.In time mode, the cycling computer automatically starts detecting your heart rate.The number on the upper left-hand corner indicates the bike that is in use. The bikeyou have used during the previous training session is automatically selected. Tochange the bike, long-press NEXT in time mode.ENGLISHTraining 9](https://usermanual.wiki/Polar-Electro/T6/User-Guide-1220546-Page-9.png)


![www.polar.fi [http://www.polar.fi]17938695.00 ENG AENGLISH36 Important Information](https://usermanual.wiki/Polar-Electro/T6/User-Guide-1220546-Page-36.png)