Polygroup CBL1712 Remote Controller User Manual TG76P4781L10 V04 6
Polygroup Limited(Macao Commercial Offshore) Remote Controller TG76P4781L10 V04 6
Users Manual
ASSEMBLY INSTRUCTIONS MADE IN CHINA
1
MODEL #: TG76P4781L10
1. Choose an appropriate location near a wall outlet.
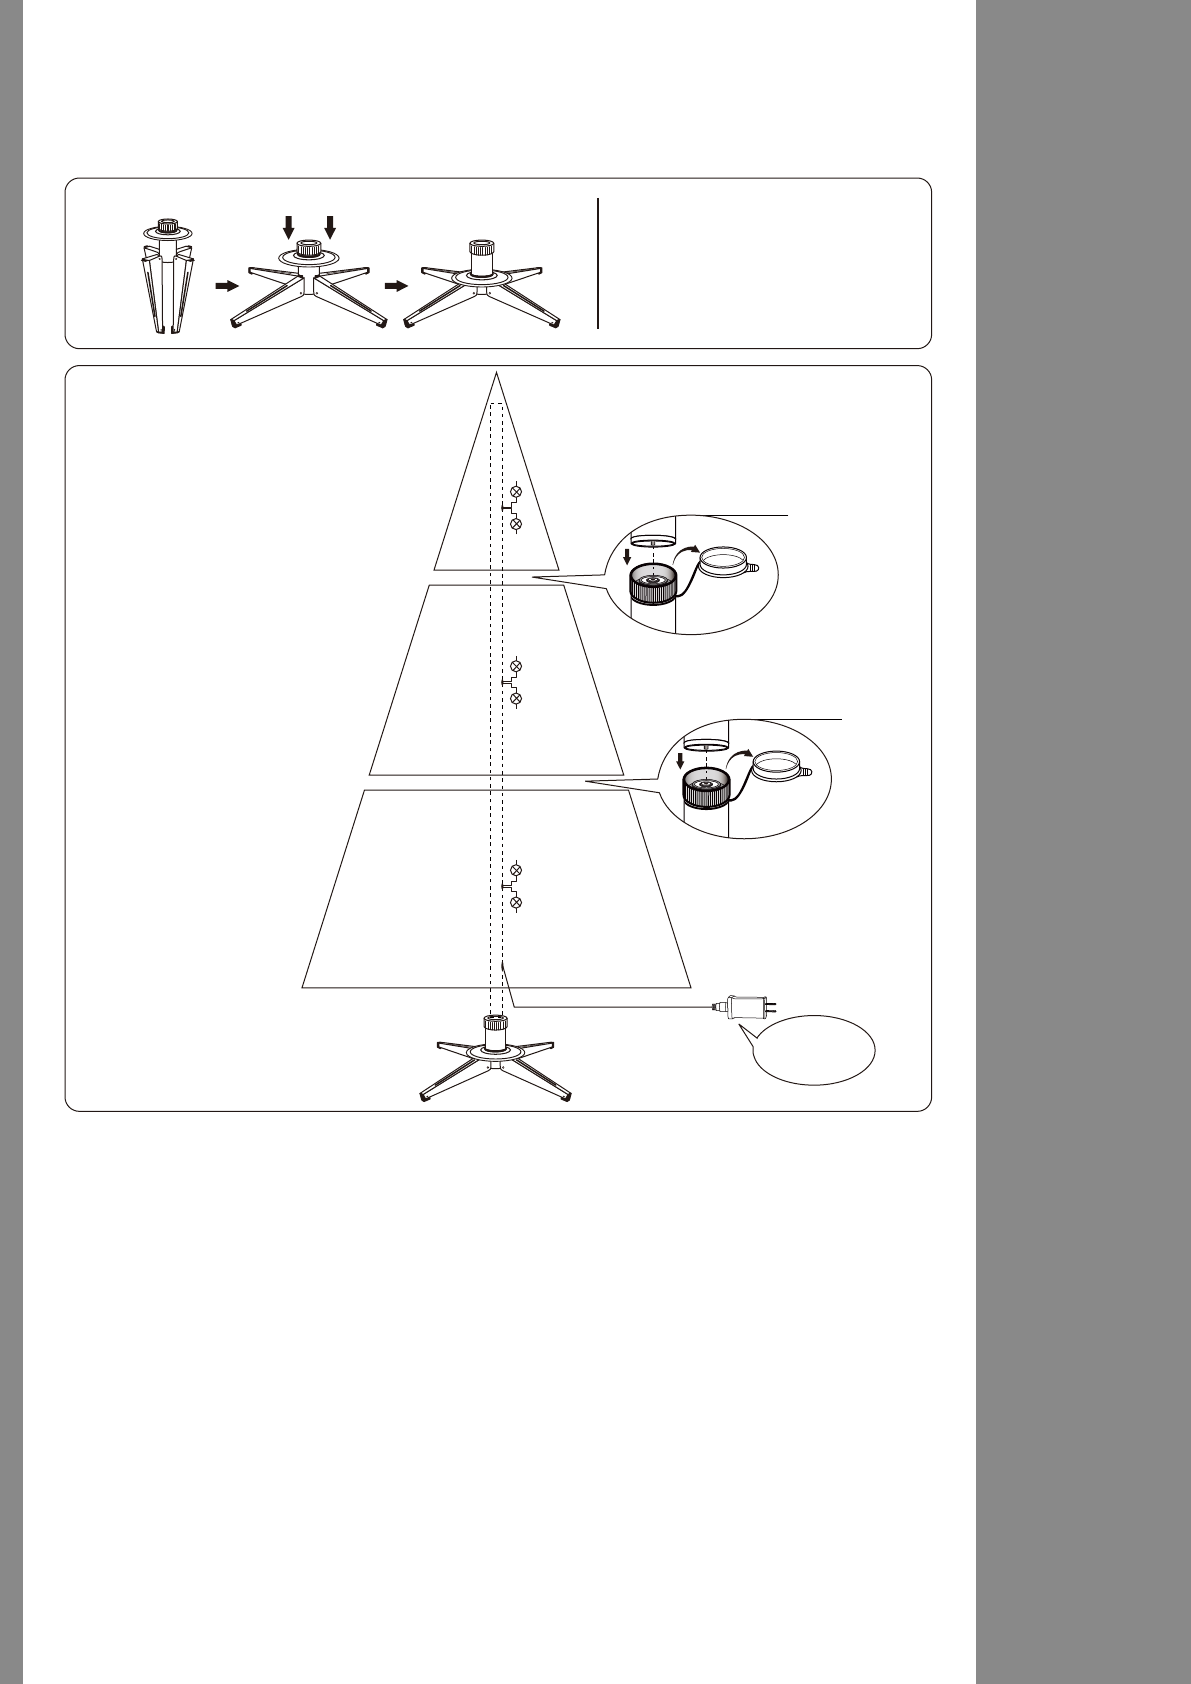
2. Assemble the tree stand and place on a level surface. (See Fig. A)
Congratulations on purchasing your new tree from Polygroup®! This tree comes with Quick Set® and
Simple Shape™ technology, which takes less than 10 minutes to set up and light up!
Carefully follow the instructions below on how to quickly and easily set up your new tree:
TREE ASSEMBLY INSTRUCTIONS
3. Each tree section is numbered with a sticker. Please identify all sections before assembling.
4. Assemble the tree from the bottom to the top. Remove protective cap, and insert the center pole
into the stand. Then slot together the remaining poles securely until the tree top is installed.
5. Plug the adaptor into the wall outlet (See Fig. B). Your entire tree should now be lit.
6. This is a Simple ShapeTM tree, which shaping is not required. Just slightly upsweep all tips and shift
branches to fill in any gaps for a fuller, uniform look. Your Christmas tree is now ready to be decorated.
Do Not Tamper
Internal Parts
Open the
protective
cap
Do Not Tamper
Internal Parts
Open the
protective
cap
Fig. A - Tree Stand Assembly
Unfold tree stand legs. Then
slide the locking disc down until
it snaps into place.
Fig. B - Tree and Light Assembly *Electrical Rating For The Tree
(For Indoor Use Only)
Input: 120VAC, 60Hz
Output: 24VDC,60Hz,2.0A
Section 1
Section 2
Tree Top
Plug Adaptor
Into Wall
Outlet
ASSEMBLY INSTRUCTIONS MADE IN CHINA
2
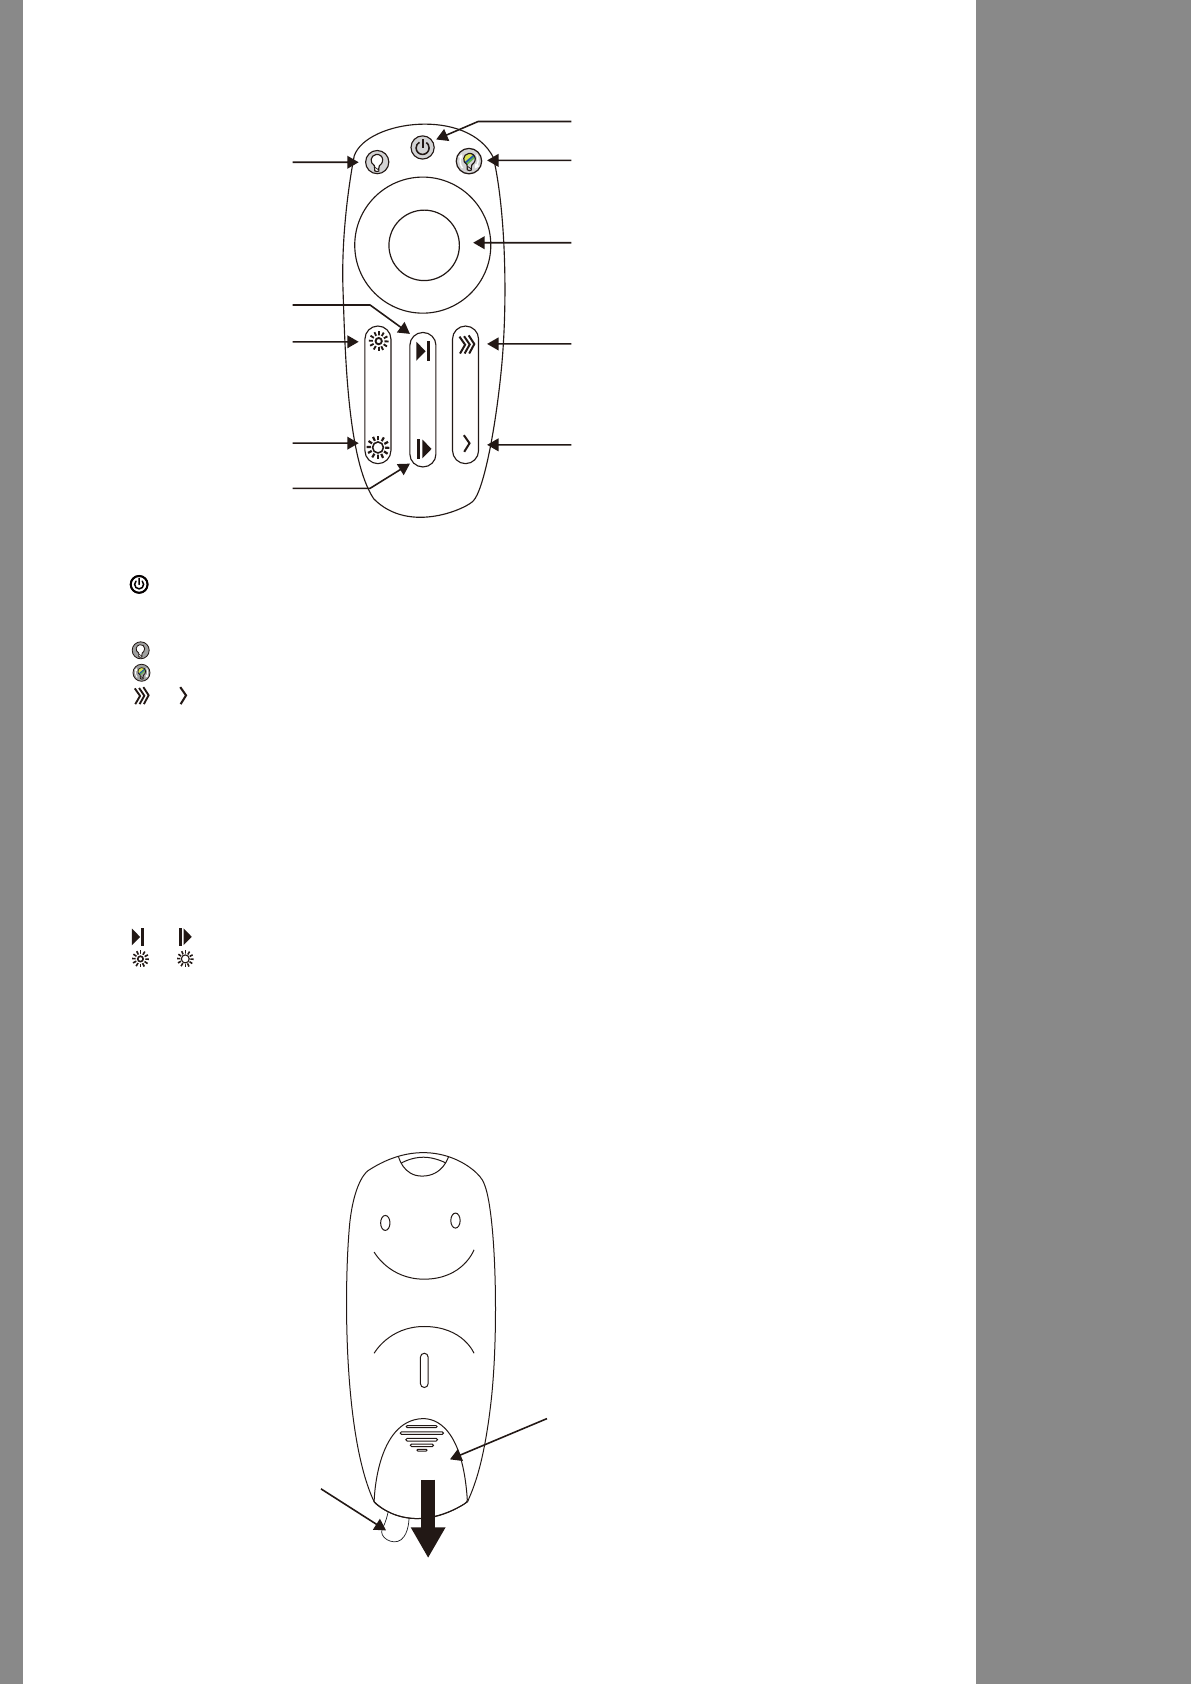
Illumination Color BlastTM Remote Control Instructions
1. Slide open the battery cover.
2. Replace two (2) new CR2032 button cell batteries with correct polarities (+ and -) as indicated.
3. Slide the battery cover closed.
Battery Replacement
1. Remove the insulation tab.
2. Tap to turn lights ON or OFF.
3. Tap the Color Wheel to display all lights in one color as steady glow effect. Sweep around the color
wheel to select your desired color.
4. Tap to display all lights in warm white color as steady glow effect.
5. Tap to display all lights in multicolor as steady glow effect.
6. Tap or to select from different preset lighting effects:
• Warm White Twinkle
• Color Twinkle
• Fading
• Multi Ball
• Color Switching
• Collision
• Wave
• Waterfall
• Rainbow Shower
• Rainbow
7. Tap or to adjust the speed of preset lighting effect.
8. Tap or to adjust the brightness of the lights.
Remove insulation
tab before use.
Battery Cover
Multicolor Steady Glow
Color Wheel
Next Preset Lighting Function
Previous Preset Lighting Function
ON/OFF
Warm White Steady Glow
Brightness Up
Speed Up
Speed Down
Brightness Down
ASSEMBLY INSTRUCTIONS MADE IN CHINA
3
(1) Remove all batteries when the remote control will be left unused for an extended period of time, or
when depleted.
(2) Dispose of all exhausted batteries properly as per directions on batteries.
(3) WARNING: SMALL PARTS, KEEP AWAY FROM CHILDREN.
(4) Use only CR2032 button cell batteries for this remote control.
(5) Clean the battery contact surfaces prior to battery installation.
(6) Do not dispose of batteries in fire - batteries may explode or leak.
NOTES:
Fig. C
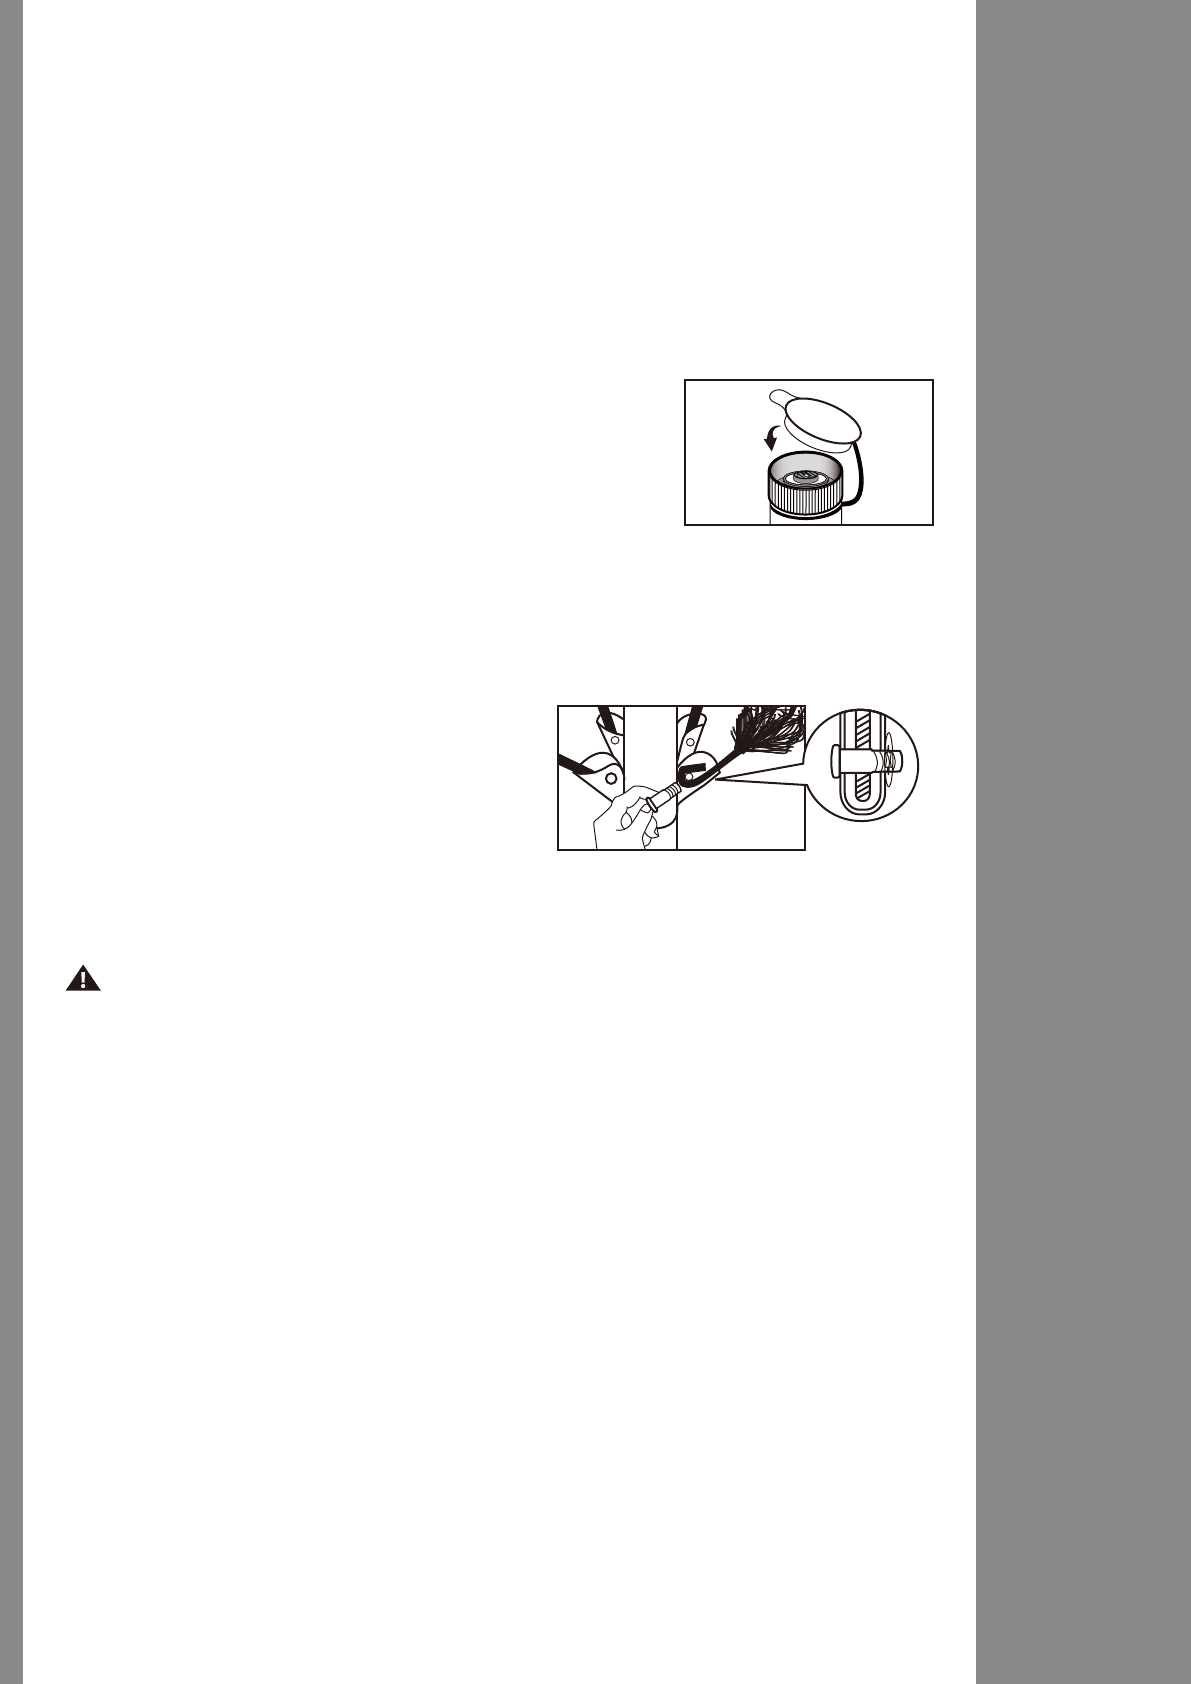
1. Unplug from the wall outlet. Then remove all ornaments and decorations.
2. Disassemble the tree from the top to the bottom. Gently lift the center pole straight up to remove from
the section below, and fold all branches toward the pole. Continue until the tree bottom is removed
from the tree stand.
3. Close the protective caps on the poles to avoid damaging the internal
parts (See Fig. C).
4. Carefully place all tree sections into the shipping box and tape it shut.
5. Store your tree in a cool, dry place away from sunlight. Exposure to
excessive heat or humidity may damage your tree.
STORAGE INSTRUCTIONS
If Tree Does Not Illuminate / Some Bulbs Do Not Light or Flicker
1. Check to make sure that the adaptor is properly plugged into the wall outlet as indicated in Fig. B.
2. Turn the center poles gently to make sure that pole-to-pole connection is secured.
3. Disconnect from power source. Then check for loose, broken or missing bulbs, and replace as needed.
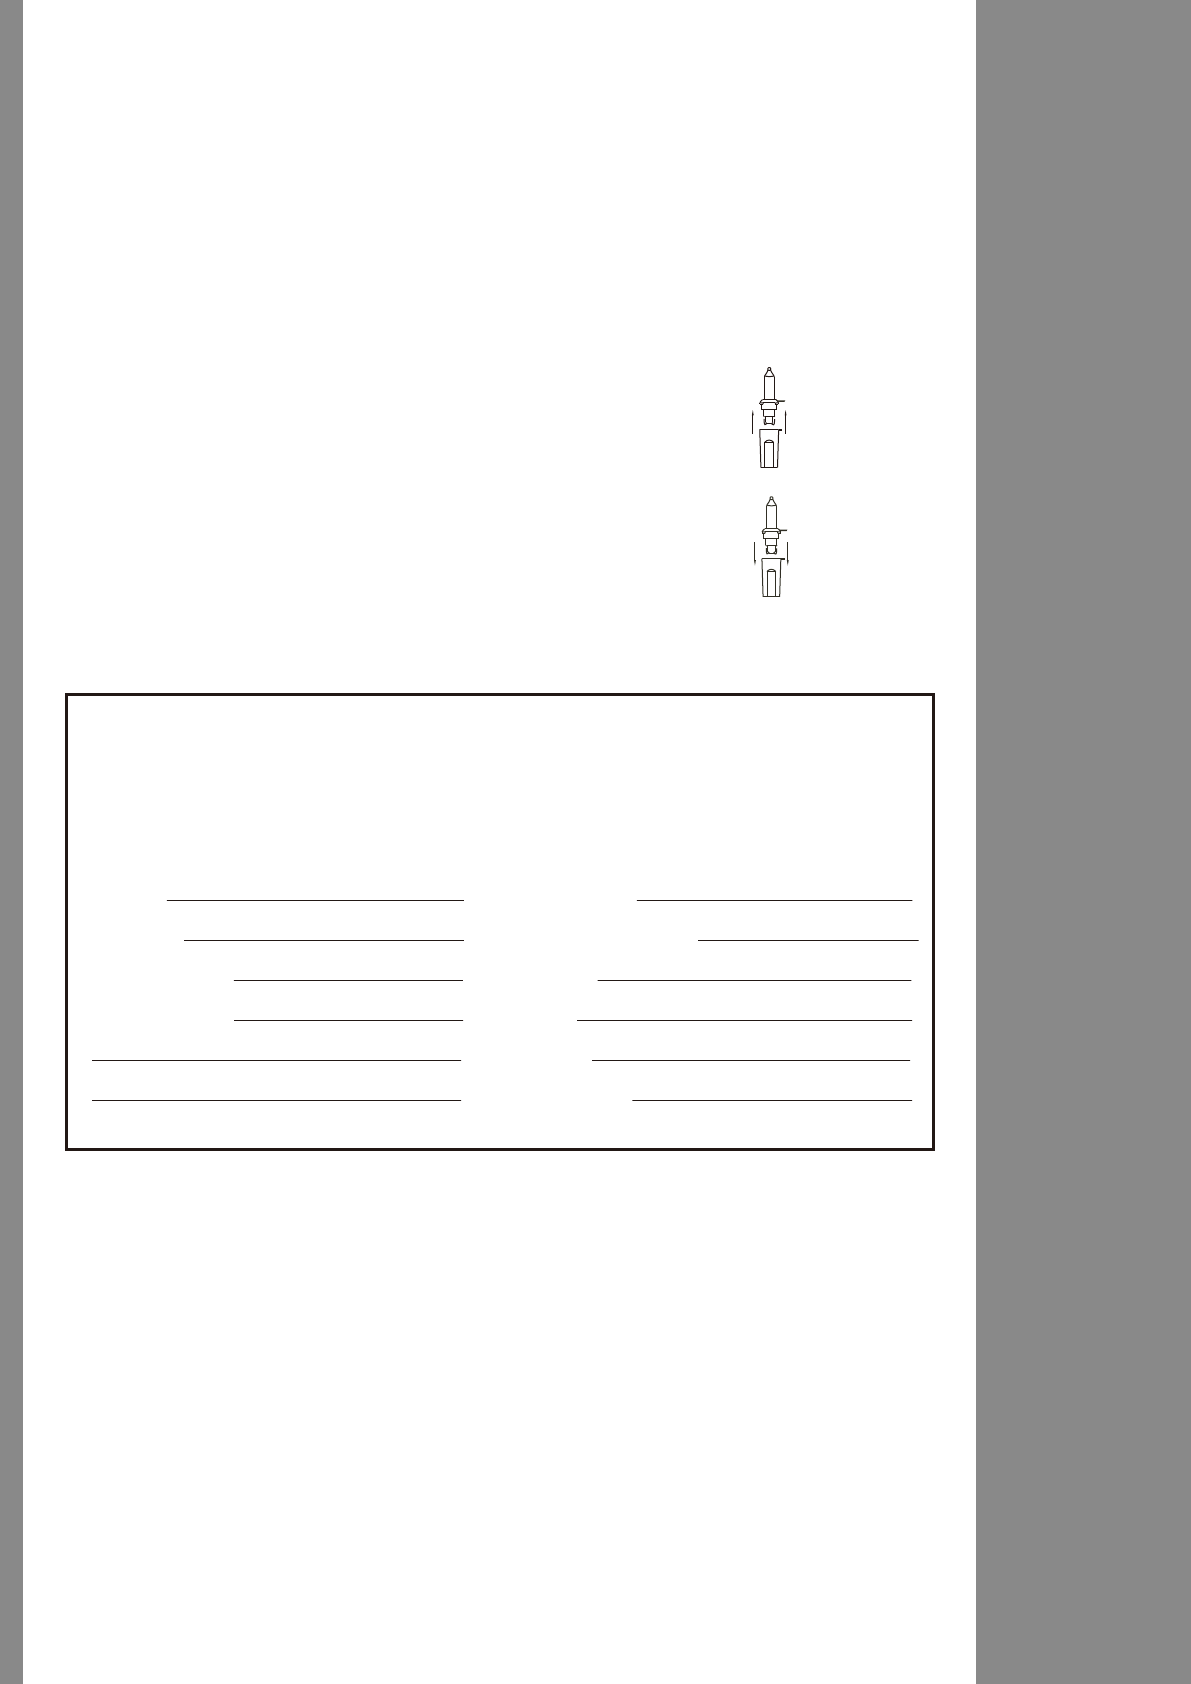
Loose Hinge Pin
1. Place the branch into the slot of the bracket.
2. Insert a new hinge pin (included) through the hole, and
secure with a retainer washer (included). (See Fig. D)
TROUBLESHOOTING TIPS
This tree includes hinge pins/washers, and spare bulbs. If extra parts are needed, please contact our
customer service center.
SPARE PARTS
Fig. D
WARNING
1. Use only the power adaptor supplied with this product. Using a different adaptor will damage the
product and cause fire or electrical shock hazards.
2. For indoor use only.
When using electrical products, basic precautions should always be followed including the followings:
a) Read and follow all safety instructions that are on the product or provided with the product.
b) Do not use this product outdoors.
c) This seasonal use product is not intended for permanent installation or use.
d) Do not mount or place near gas or electric heaters, fireplace, candles or other sources of heat.
e) Do not secure the wiring of the product with staples or nails, or place on sharp hooks or nails.
f) Do not let lamps rest on the power cord or on any wire.
g) Unplug the product when leaving the house, when retiring for the night, or if left unattended.
h) This is an electric product – not a toy! To avoid risk of fire, burns, personal injury and electric shock it
should not be played with or placed where small children can reach it.
i) Do not use this product for other than its intended use.
j) Do not hang ornaments or other objects from cord, wire, or light string.
k) Do not close doors or windows on the product or extension cords as this may damage the wire insulation.
l) Do not cover the product with cloth, paper or any material not part of the product when in use.
m) This product is equipped with push-in lamps. Do not twist lamps.
n) Do not expose the product to humidity.
o) SAVE THESE INSTRUCTIONS.
IMPORTANT SAFETY INSTRUCTIONS
ASSEMBLY INSTRUCTIONS MADE IN CHINA
4
CUSTOMER SERVICE FOR CHRISTMAS TREES
For any questions, assistance, or missing parts, Do Not Return To Place Of Purchase. Please contact
us at 1-888-919-0070 or visit our website at www.polygroup.com. One of our customer service
representatives will be happy to assist you.
TREE ID# IS LOCATED ON END PANEL OF BOX. TREE ID# IS REQUIRED WHEN REQUESTING REPLACEMENT PARTS.
Customer Name:
Address (No P.O. boxes):
City & State:
Zip Code:
Day Phone:
Date Purchased:
Tree ID#:
Tree UPC#:
Store Purchased:
Specify Problem:
a) Before using or reusing, inspect the product carefully. Discard any products that have cut, damaged or
frayed wire insulation or cords, cracks in the lampholders or enclosures, loose connections, or exposed
copper wire.
b) This product should be fully disassembled for storage to avoid any undue strain or stress on conductors,
connections and wires. Do not leave any parts of the product (including tree sections and the tree stand)
connected when not in use.
Use and Care Instructions
Lamp replacement
Step 1.
Grab the adaptor to disconnect from power source - do not unplug by pulling the extension cord.
Step 2. Lift up the lamp lock tab, then pull the lamp and its plastic base straight
out from the lampholder.
Step 3. Replace with a new spare LED lamp provided with this tree.
(For reference only)

This device complies with Industry Canada
Operation is subject to the following two
(2) this device must accept any interference,
undesired operation of the device.
IC Statement
Le présent appareil est conforme aux CNR
radio exempts de licenceou standard.
L'exploitation est autorisée aux deux conditions
(2) l'utilisateur de l'appareil doit accepter tout
Déclaration de l’IC
d'Industrie Canada applicables aux appareils
Équipement ICES-005 du brouilleur.
suivantes :
(1) l'appareil ne doit pas produire de brouillage,et
brouillage radioélectrique subi, même si le
brouillage est susceptible d'en compromettre
le fonctionnement.
licence-exempt RSS standards or Interference
caussing Equipment standard ICES-005.
conditions:
(1) this device may not cause interference, and
including interference that may cause
size : 105 x 148mm
Polygroup Limited (MACAO Commercial Offshore)
1-(888)919-0070
Unit J, 10th Floor, Macau Square,
Av do Infante D.Henrique,
No.43-53A, Macau
Polygroup Limited (MACAO Commercial Offshore)
1-(888)919-0070
Unit J, 10th Floor, Macau Square,
Av do Infante D.Henrique,
No.43-53A, Macau
IC说明书_英法文IC说明书_英法文

FCC notices:
WARNING: Changes or modifications to this unit not expressly
approved by the party responsible for compliance could void the ’
NOTE:This equipment has been tested and found to comply with
the limits for a Class B digital device, pursuant to Part 15 of the
FCC Rules. These limits are designed to provide reasonable
energy and, if not installed and used in accordance with the
However, there is no guarantee that interference will not occur in
a particular installation. If this equipment does cause harmful
interference to radio or television reception, which can be
Reorient or relocate the receiving antenna.
Increase the separation between the equipment and receiver
.
Connect the equipment into an outlet on a circuit different from
that to which the receiver is connected.
Consult the dealer or an experienced radio/TV technician for help.
This device complies with Part 15 of the FCC Rules. Operation is
subject to the following two conditions:
interference that may cause undesired operation.
Polygroup Limited (MACAO Commercial Offshore)
Unit J, 10th Floor, Macau Square, Av do Infante D.Henrique, No.43-53A, Macau
1-(888)919-0070
protection against harmful interference in a residential installation.
This equipment generates, uses and can radiate radio frequency
determined by turning the equipment off and on, the user is
encouraged to try to correct the interference by one or more of
(2) this device must accept any interference received, including
(1) this device may not cause harmful interference, and
users authority to operate the equipment.
instructions, may cause harmful interference to radio communications.
the following measures:
size : 105 x 148mm