Posiflex Technology MT4300W Mobile Terminal System User Manual UM MT 4008AR MT 4008AH Original
Posiflex Technology, Inc. Mobile Terminal System UM MT 4008AR MT 4008AH Original
Users Manual
1
MT-4308W/R
MT-4310W/R
MT-4210A/R
Package Contents
MT-4308W/R or MT-4310W/R
or MT-4210A/R (x 1)
Pistol grip (x1)
15W power adaptor (x 1)
Stylus (x 1)
RB-3000 Battery pack for pistol grip
(x 1)
User manual (x 1)
Barcode scanner user manual (x 1)
MT-4308W/H
MT-4310W/H
MT-4210A/H
Package Contents
MT-4308W/H or MT-4310W/H
or MT-4210A/H (x 1)
15W power adaptor (x 1)
Stylus (x 1)
User manual (x 1)
12550900030 Ver. B0
http://www.posiflex.com
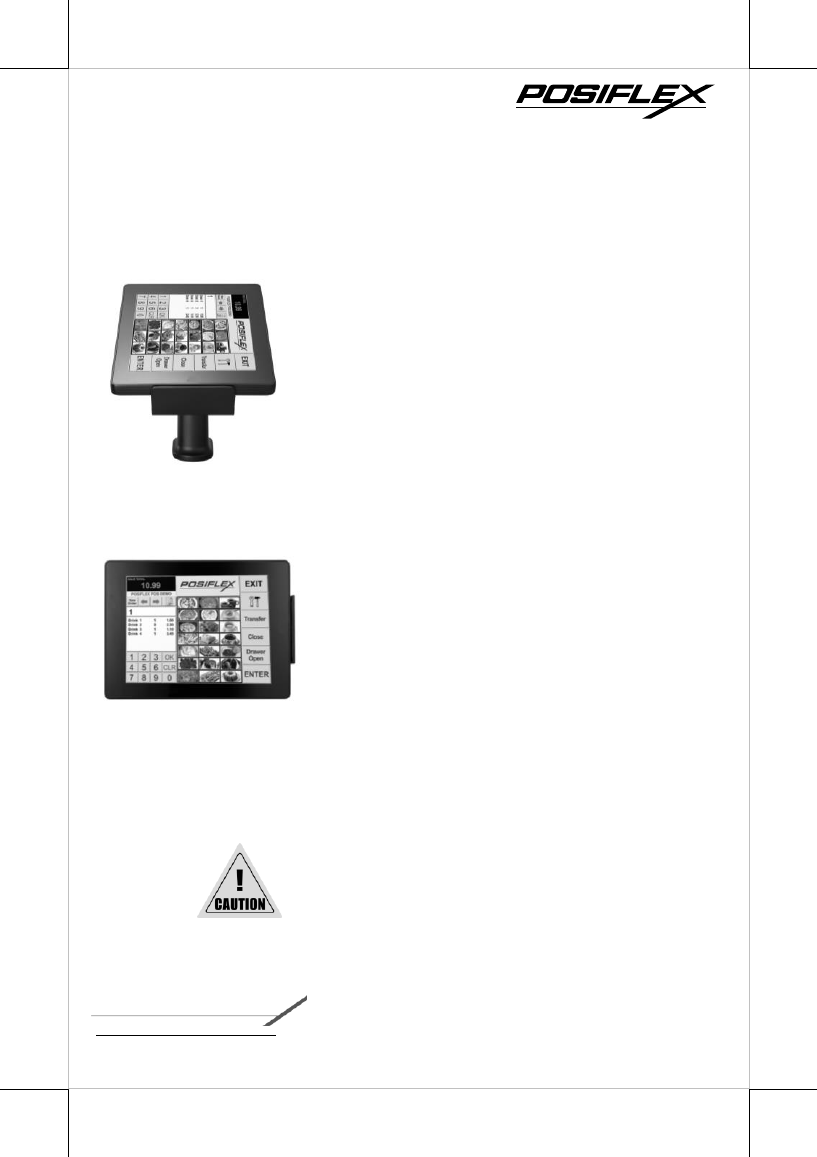
MT-4308W/4310W/4210A
Mobile Terminal System
User Manual
MT-4308W/4310W/4210A is required to be
charged over 8 hours when used for the first time.
2
Product Feature
Ergonomic Design
Pistol grip shape handle is ergonomically designed for easy handling of the
tablet.
Extra Protection
Hand strap strengthens the stability and eases user’s fatigue during the hours of
work.
All-in-one Solution
Optional dock station equips with a built-in 3” thermal printer and various I/O
connectivity; once the tablet is integrated with the dock station, an all-in-one
POS is instantly at your disposal.
Versatile Function
MSR attachment and 1D or 2D barcode scanner built in the pistol grip; MT-
4308W/4310W/4210A offers more than just mobility but versatility.
Long Hour Operation
MT-4308W/4310W/4210A is designed with advanced power saving
technology that provides long battery life for daily operation. The pistol grip
also houses a removable battery that can vastly extend the overall operating
time.
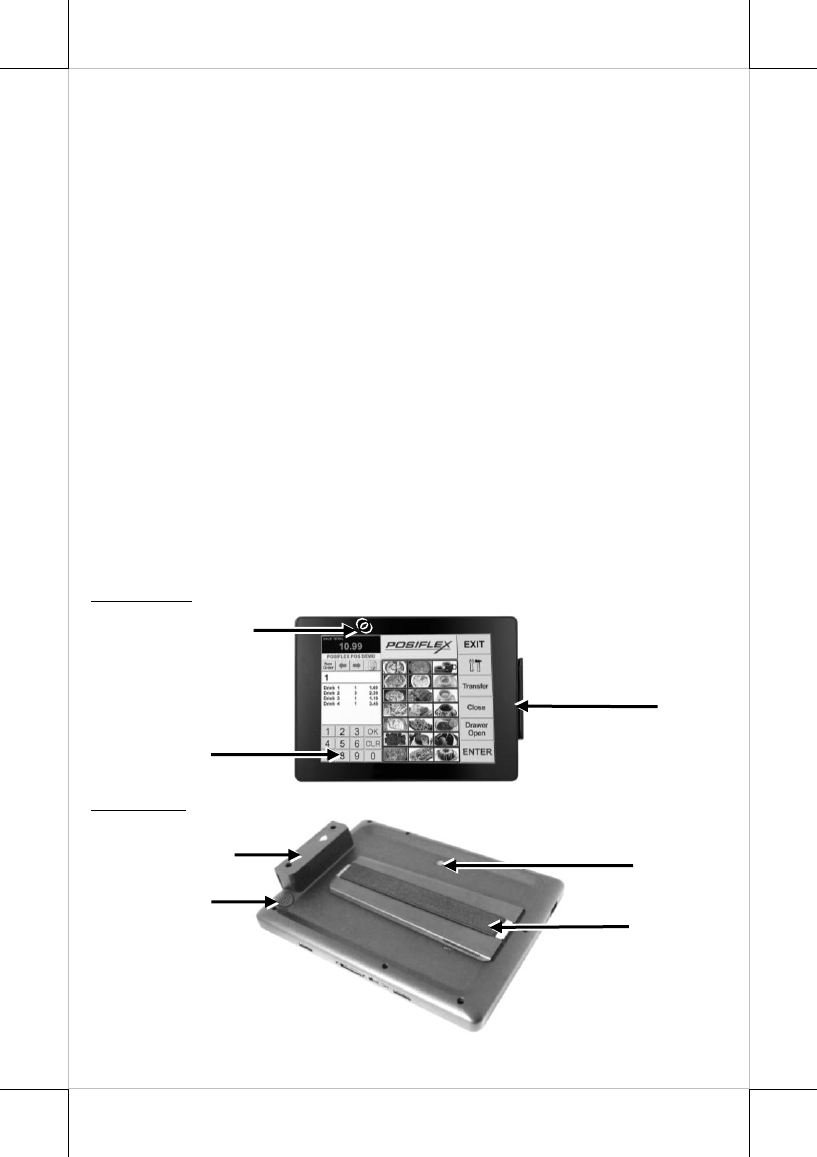
Views of MT-4308W/H
Front View
Rear View
LED Indicator
Rear Camera
Speaker
Hand strap
3-track Magnetic Stripe
Reader (Optional)
Projected Capacitive
Touch Screen
3-track Magnetic Stripe
Reader (Optional)
3
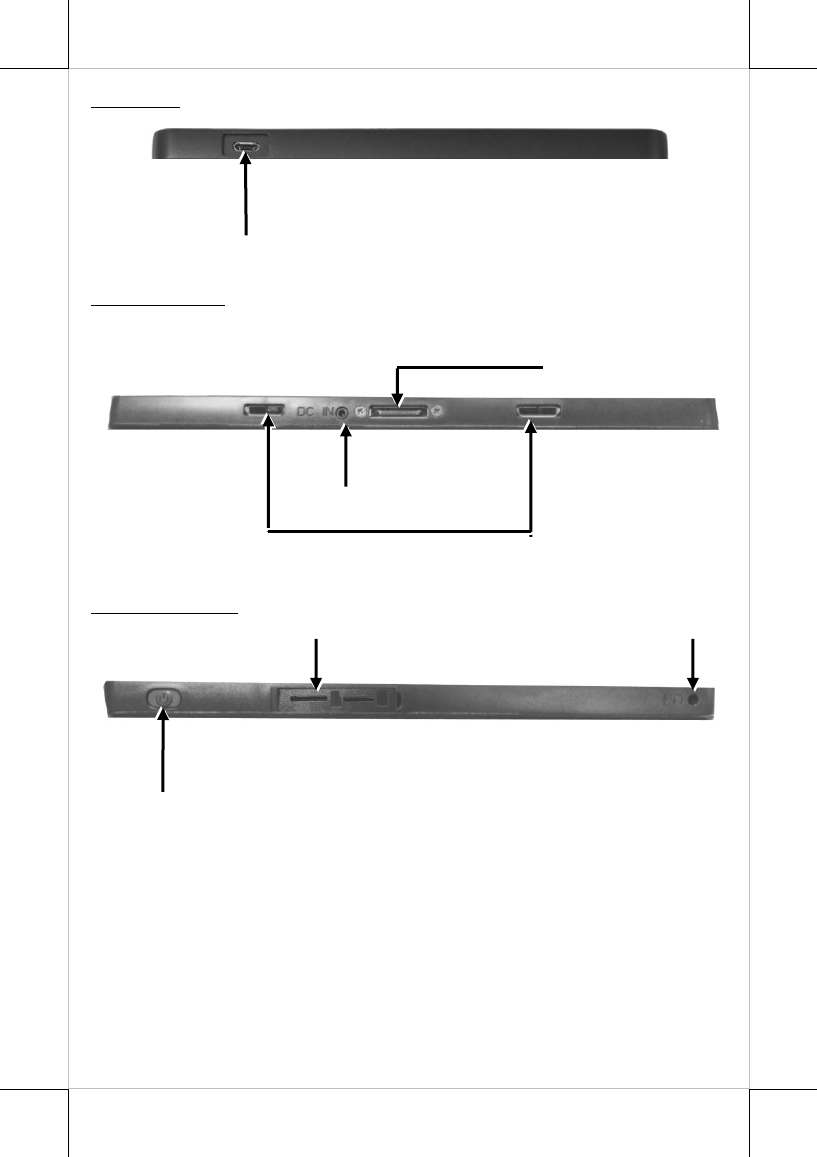
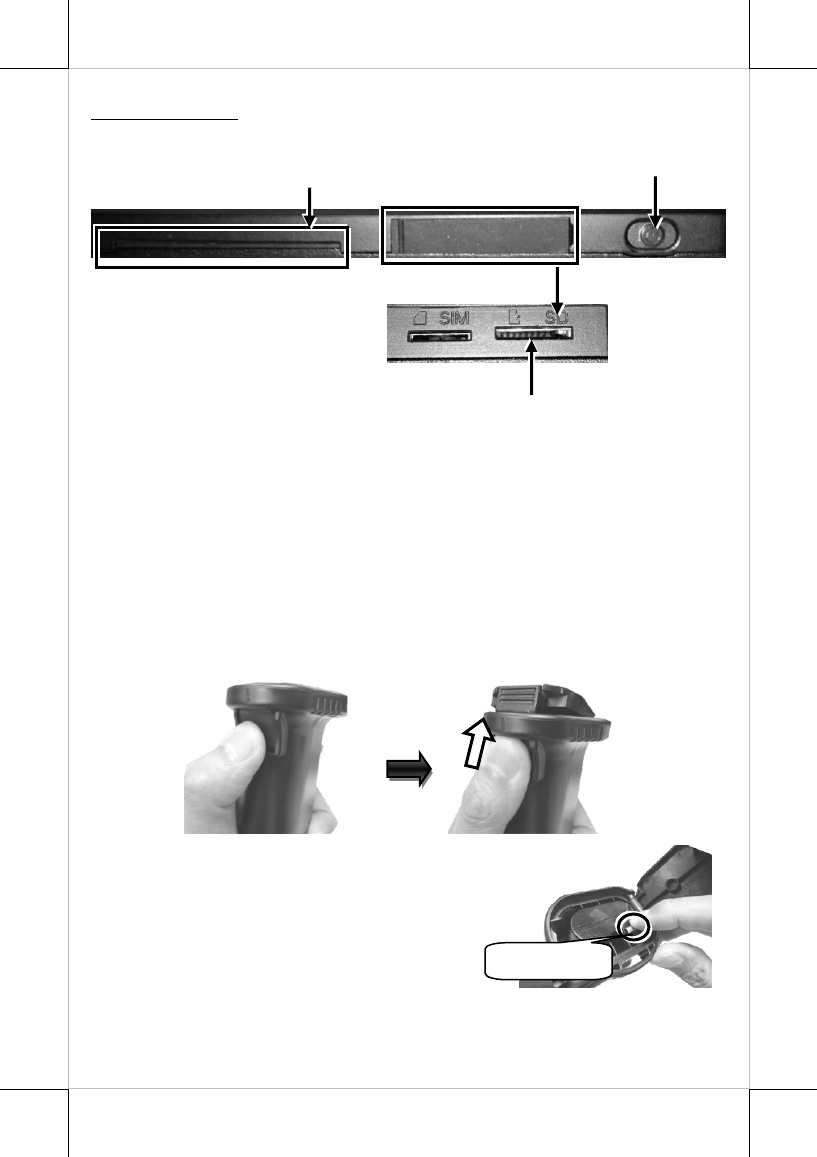
Top View
Left Side View
Right Side View
microUSB Port
Power Button
Micro SD Card Slot
Mic-in/Line-Out
Combo Jack
Docking Station Connector
5VDC-IN Power Jack
Docking Station Locking Hole
4
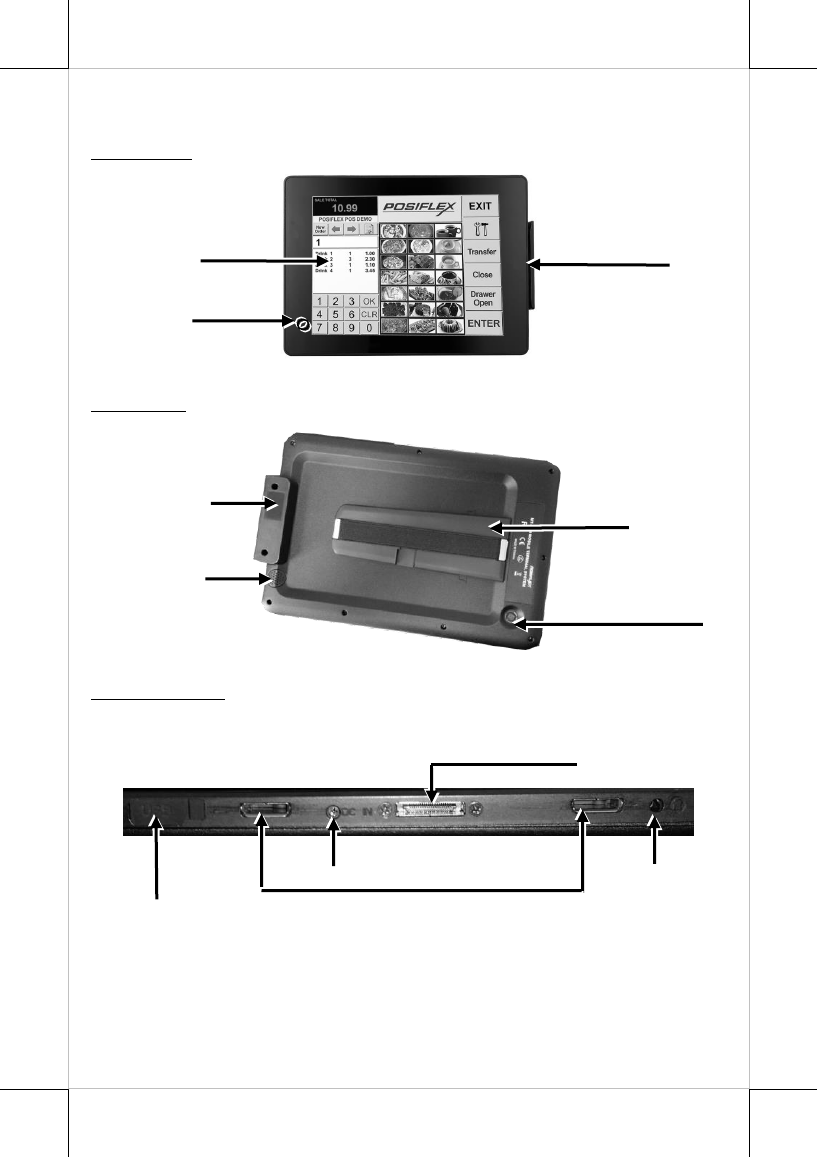
Views of MT-4310W/H & MT-4210A/H
Front View
Rear View
Left Side View
microUSB Port
LED Indicator
Mic-in/Line-Out
Combo Jack
Rear Camera
Speaker
Hand strap
3-track Magnetic Stripe
Reader (Optional)
Docking Station Connector
5VDC-IN Power Jack
Docking Station Locking Hole
Projected Capacitive
Touch Screen
3-track Magnetic Stripe
Reader (Optional)
5
Right Side View
Load RB-3000 Battery Pack and a stylus into Pistol Grip PG-
200E (for MT-4308W/R & MT-4310W/R & MT-4210A/R)
MT-4308W/R, MT-4310W/R and MT-4210A/R with PG-200E pistol grip
support 1D CCD, 1D Laser, and 2D barcode scanner. Before the scanner can
be initiated, it is required to install the battery pack RB-3000 and a stylus in
the battery compartment inside the pistol grip. Please follow the steps listed
below to finish the installation.
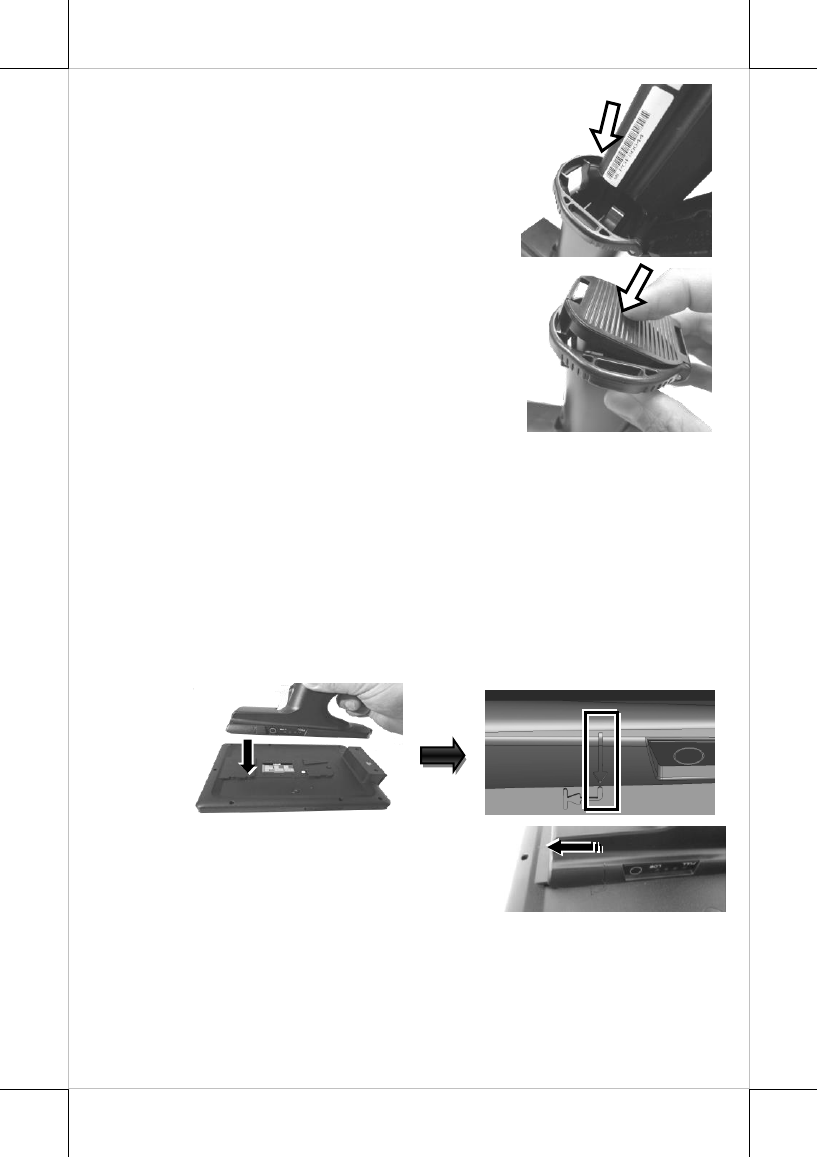
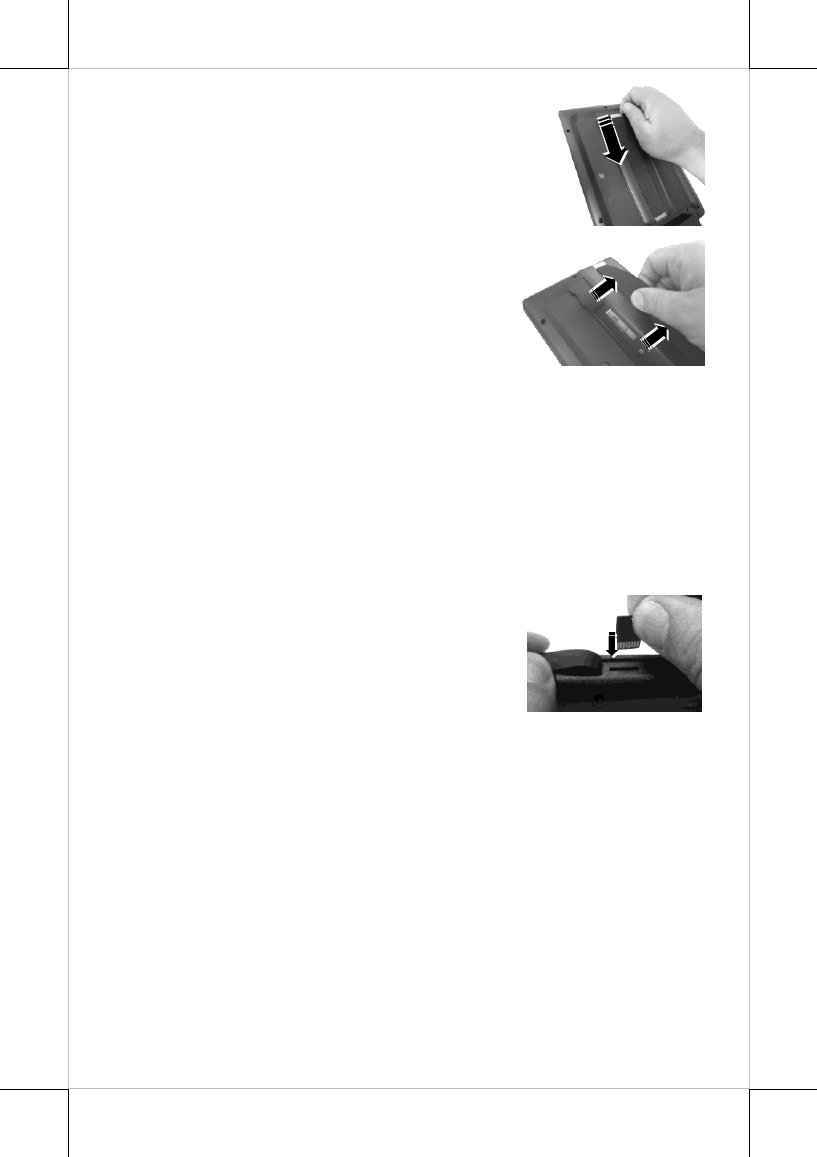
1. Press down the lever and then push up the cover for battery
compartment as shown in the figure.
2. To replace the existing battery, gently push
the metal clip outwards to release the
battery. If you are installing the battery for
the first time, please skip to the next step.
Metal clip
Power Button
Micro SD Card Slot
Smart Card Reader
(Optional)
6
3. After having the rail on the battery pack
aligned with battery clip, push down the
battery pack into battery compartment.
4. Push down the cover to close the battery
compartment.
Connecting the Pistol Grip onto MT-4308W/R & MT-
4310W/R & MT-4210A/R
MT-4308W/R, MT-4310W/R and MT-4210A/R models are equipped with an
additional pistol grip which aims to help users grip the terminal more easily
while they are operating the scanner. Please refer to the following instructions
to install the pistol grip onto the tablet.
1. To attach the pistol grip to the tablet, align the arrow head on the top
side of the pistol grip with the tail of the arrow on the rear of the
tablet.
2. After ensuring the pistol grip is well
attached to the tablet, push the pistol
grip in the direction indicated by the
arrow as shown in the figure.
7
3. Make sure the head of the down arrow on the pistol grip is supposed to
be aligned with the head of the arrow on the rear side of the tablet as
the below figure shows, which indicates the pistol grip is well
mounted.
4. To check how much battery capacity
remains in PG-200 pistol grip, press the
battery capacity checking button on the
pistol grip to show the current battery
capacity level through the LED
indicator.
Replacing the Pistol Grip with a Hand Strap Cover (Optional)
The hand strap cover is an optional peripheral designed for users to easily hold
the tablet for operation. To replace the pistol grip with a hand strap cover,
follow the steps listed below.
1. While pushing the release lever to the left
(1), slide the pistol grip in the direction
indicated by the arrow in the figure (2).
2. Pull the pistol grip off from the tablet.
1
1
2
2
8
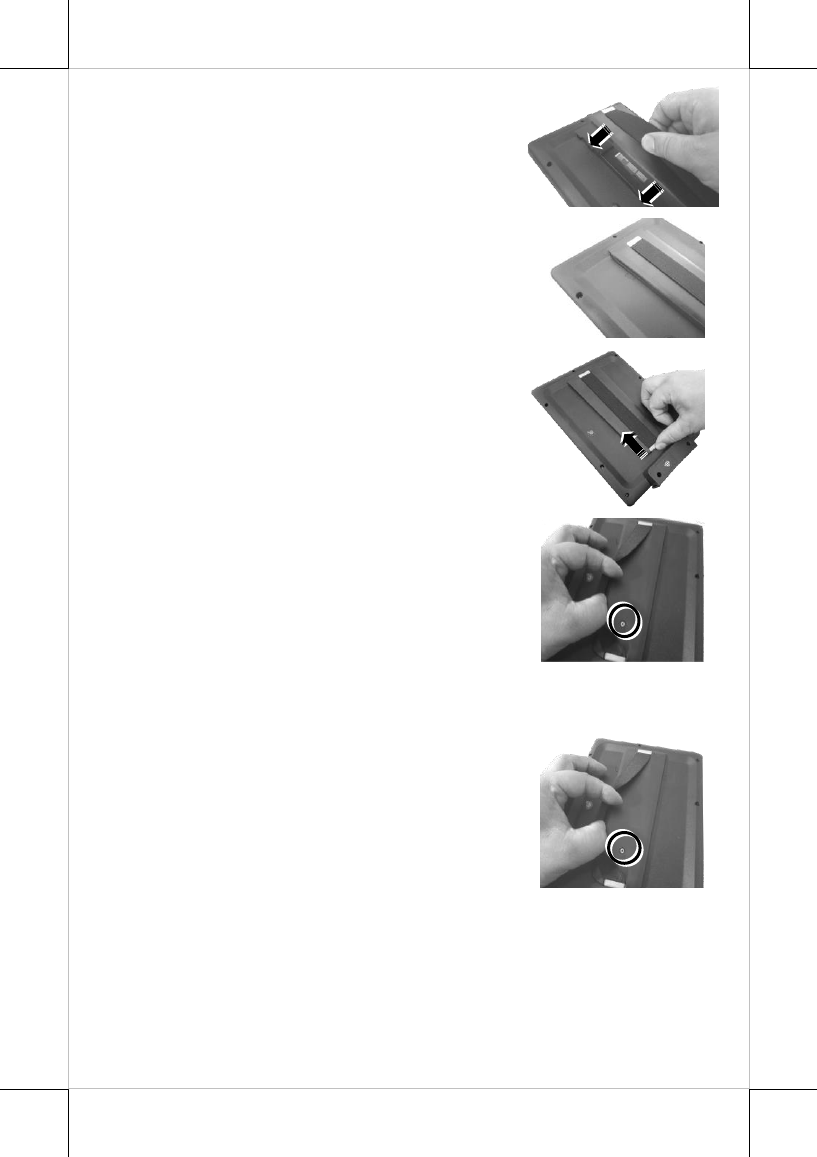
3. Align the hand strap cover with the grooves
on the rear side of the table.
4. Make sure that the hand strap cover is well
attached to the rear side of the tablet.
5. Slide the hand strap cover up in the
direction indicated by the arrow until it is
clicked into place.
6. Fasten the hand strap cover onto the tablet
using a screw.
Replacing the Hand Strap Cover with a Pistol Grip (Optional)
Please follow the below steps to replace the hand strap cover with a pistol grip.
1. Loosen the screw to remove the hand strap
cover from the tablet.
9
2. Slide the hand strap cover down in the
direction indicated by the arrow.
3. Remove the hand strap cover from the rear
side of the tablet.
4. Go through the Connecting the Pistol Grip onto MT-4308W/R &
MT-4310W/R & MT-4210A/R section which is described
previously to complete the installation of the pistol grip onto the
tablet.
Installing micro SD Card card in MT-series
Please follow the below steps complete the installation of micro SD card.
1. Turn off MT-series completely. Then, pull off the rubber cover
located on the right side of your tablets to find micro SD card slot
2. To insert a micro SD card into the micro
SD card slot, make sure the side with the
golden finger of the card faces
downwards, and then slide the card down
into the slot
3. Pull off the rubber cover to close the compartment.
4. If you attempt to release a micro SD card from the slot, push the
card with your fingertip to slide it out.
10
Charging the Battery
Below are some cautionary advices you need to keep in mind while you
attempt to charge the battery.
1. MT-4308W/4310W/4210A is required to be charged over 8 hours
when used for the first time.
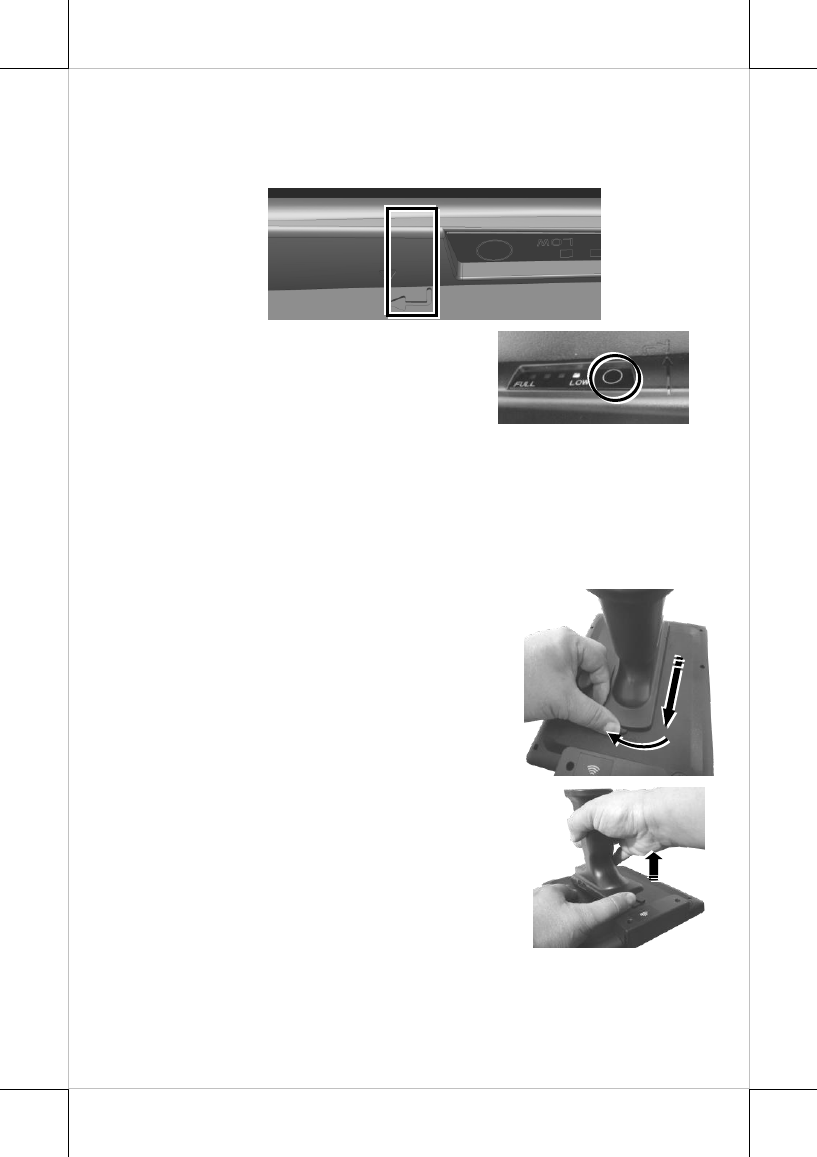
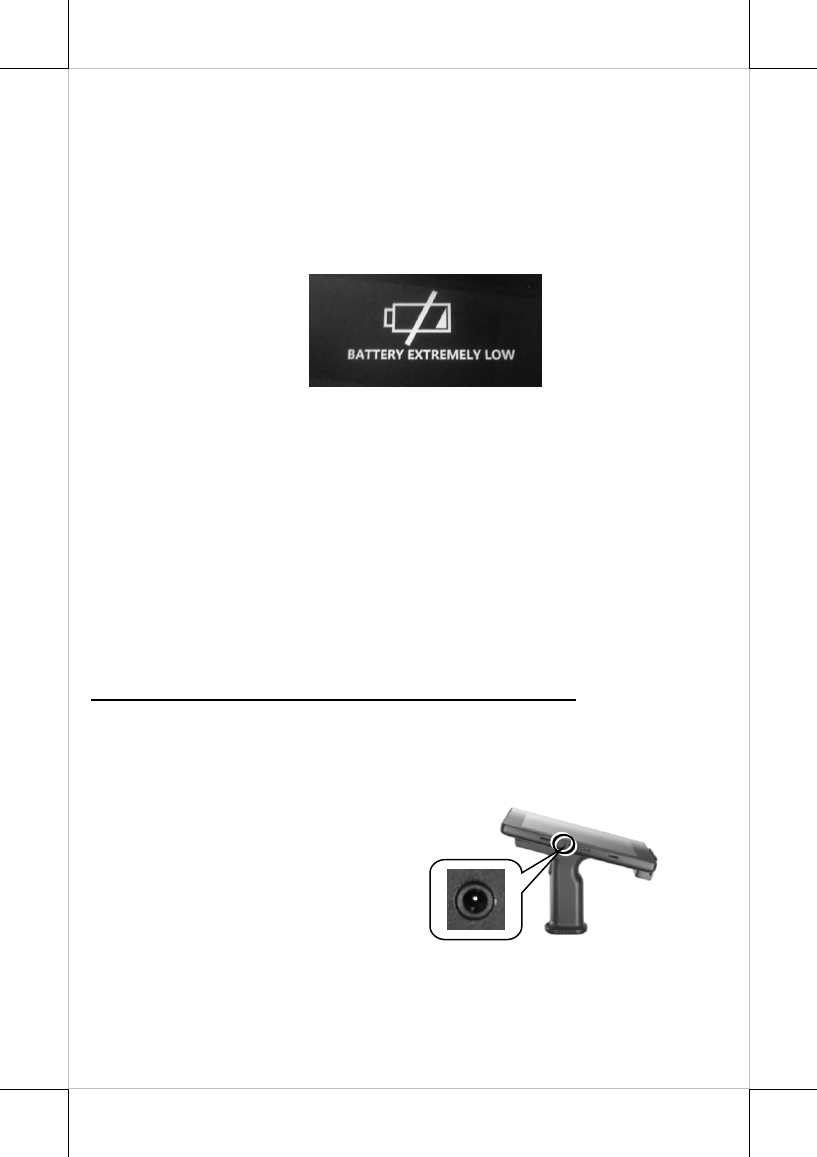
2. When the low battery warning message appears as shown below,
please fully charge the battery to avoid data loss.
3. When the low battery capacity indicator on the pistol grip beams or
low battery warning message appears, please charge or replace the
battery for the pistol grip immediately.
4. Only charge the battery with power adapter which comes with
MT-4308W/4310W/4210A. Using a different power adapter may
damage your device.
5. When the battery is running very low (less than 6 percent of battery
capacity), the system will be automatically shut down to protect the
battery from being over-discharged.
Please go through the following instructions to charge MT-4308W/4310W
using the power adapter.
For MT-4308W/R & MT-4310W/R & MT-4210A/R
In considering the battery life could be consumed drastically under heavy
usage, you may also choose to purchase either another replacement battery
RB-3000 for the pistol grip or the battery charger CS-100 for rapidly charging
the replacement battery RB-3000.
1. Connect the power connector of the
power adaptor to the tablet.
2. Plug the AC power adaptor cord into an electrical outlet. In general,
the tablet battery will be charged first. Once the process of charging
the tablet is complete, the pistol grip battery will then be charged.
11
For MT-4308W/H & MT-4310W/H & MT-4210A/H
1. Find the power jack on the left side of your tablet, and then connect
the power connector of the power adaptor to it.
2. Plug the AC power adaptor cord into an electrical outlet to initiate the
charging process.
Status LED Indicator
LED indicator is specially designed to deliver special message regarding the
current system status and battery life. The blow chart enumerates all the
possible LED indicators and its meaning for your reference.
LED Status
System Status
Descriptions
Solid blue
ON
■ System booting.
Solid Orange
ON
■ System is being charged.
Blinking Orange
ON
■ Battery charging error occurs
OFF
ON
■ System enters sleep mode.
■ System has been booted to Windows.
■ Battery is fully charged.
OFF
OFF
■ System powers off
Powering ON/OFF MT-4308W/4310W/4210A
Power ON MT-4308W/4310W/4210A
To power on MT-4308W/4310W/4210A, keep pressing the power button
of the machine for 5-10 seconds. If the terminal falls into the sleep mode
after remaining idle for a specific period of time, push the power button to
wake the device up.
Power OFF MT-4308W/4310W/4210A
When MT-4308W/4310W/4210A stays in idle mode, push the power
button to put your device into sleep mode, and press the power button
again to wake up the tablet. To completely shut down the machine, you
need to press and hold the power button for at least 20 seconds. In the case
the system halts for unknown reasons, you are advised to hold down the
button until a system shutdown is initiated.
12
Operating TA-220/300 Magnetic Stripe Reader (Optional)
MT-series models also offer MSR solutions. As optional items, TA-220/300
both allow you to integrate built-in MSR into MT-series tablet. However, TA-
220 mainly supports MSR with RFID but TA-300 is an attachment combined
with three-track MSR and finger printer sensor.
Please go through the following instructions on how to operate magnetic stripe
reader provided via TA-220/300.
1. Have the side with the magnetic stripe of a card
face the touch panel of the tablet.
2. Swipe the magnetic stripe card along the track
of the reader from top to bottom or from
bottom to top.
Operating the 1D/2D Scanner (for MT-4308W/R & MT-
4310W/R & MT-4210A/R)
MT-4308W/R, MT-4310W/R and MT-4210A/R
models are equipped with an optional 1D CCD,
1D Laser, or 2D scanners features 1D and/or 2D
barcode scanning. It also supports two types of
USB interfaces, USB HID or USB Virtual COM,
and the scanner is generally set to USB HID
mode by default. For more detailed information,
please refer to the barcode scanner user manual.
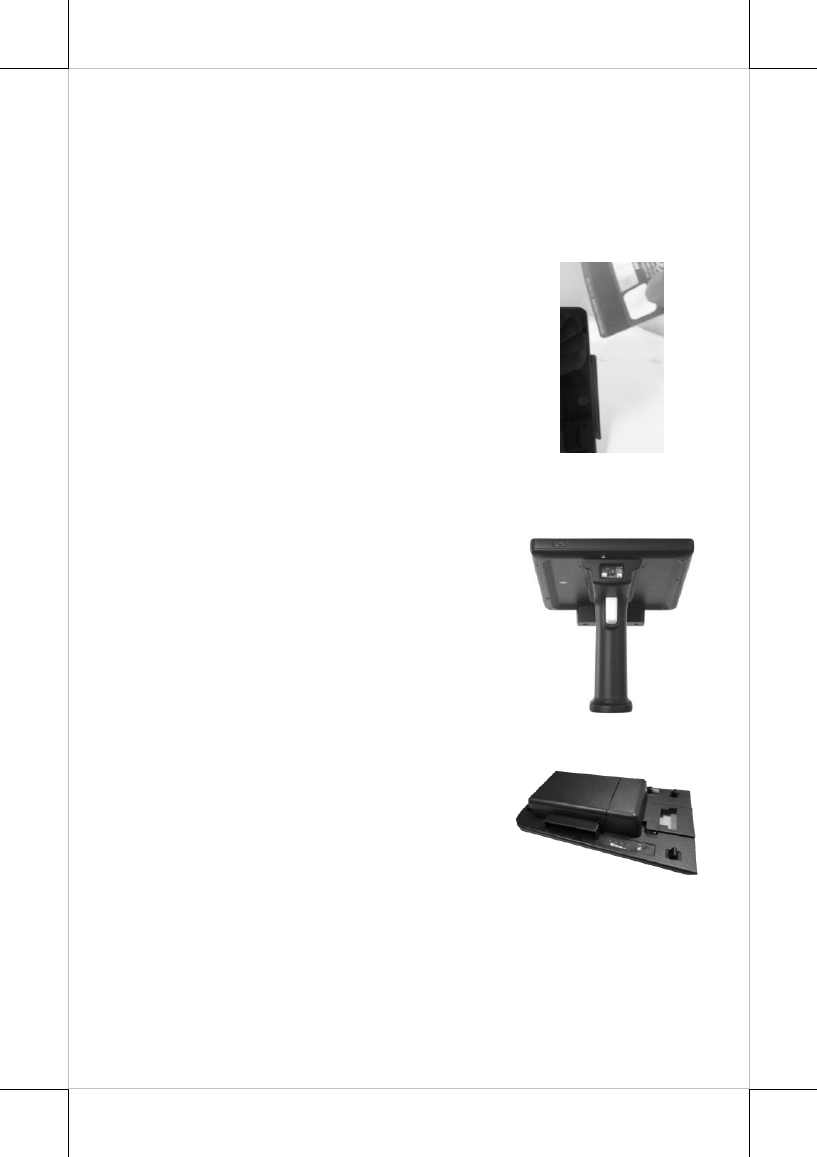
Mounting TA-500 onto MT-series Tablet (Optional)
TA-500 is an external battery pack kit mainly
designed to provide extra battery life to MT-
series tablet. For the detailed installation
instructions, please refer to TA-500 user
manual.
13
Installing an Operating System
You are highly advised NOT to install or change the Windows operating
system and drivers which are preloaded on MT-4308W/4310W/4210A without
professional instructions. Not only might the careless handling during
installation cause irreversible damage to your system, but also the improper
installation likely leads to system malfunction or failure. Please contact with
your dealers about the issues of operation system installation.
Performing System Recovery
For MT-4308W/4310W/4210A models with preloaded operating systems, you
are NOT encouraged to recover your system without the help of the system
integrators. Please be advised to contact your service center for further
assistance with system recovery.
Installing Optional Upgrade Kits
Posiflex MT-4308W/4310W/4210A can work with multiple optional upgrade
kits, such as MSR, Smart Card Reader and the like. For the detailed
instructions, refer to the user manual related to each peripheral devices.
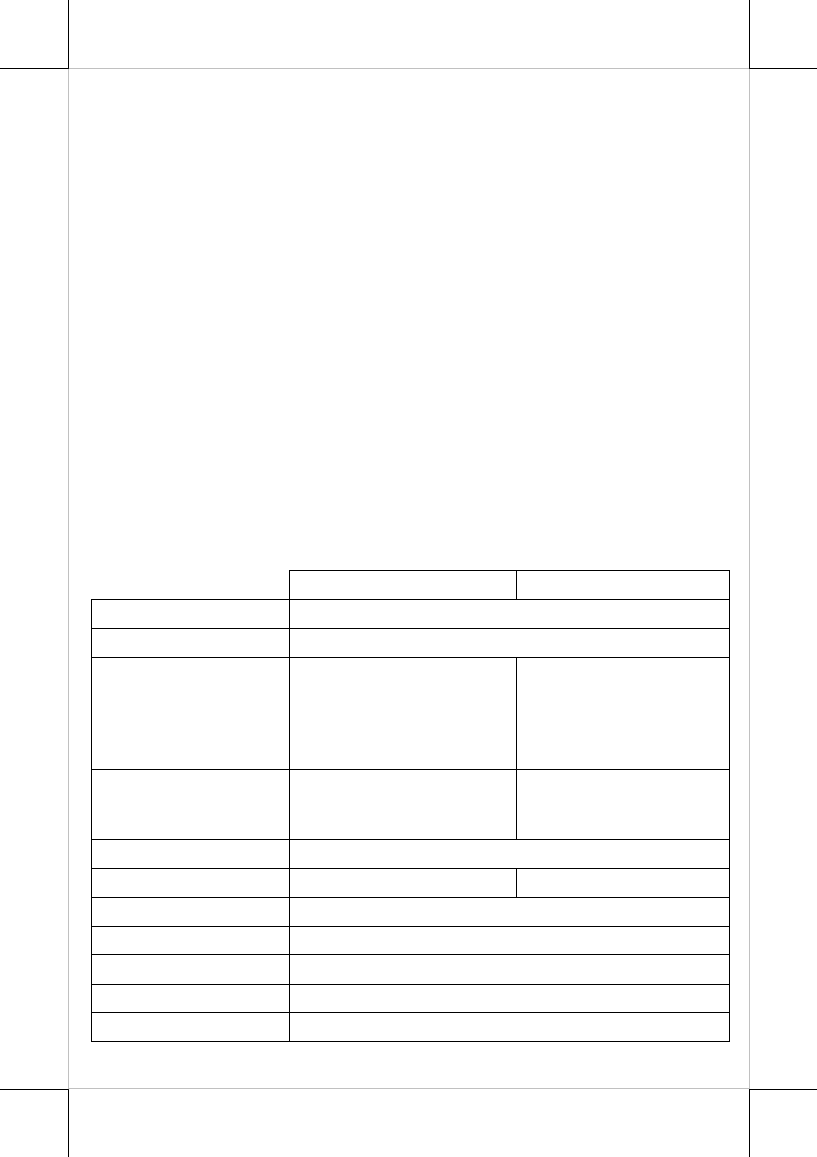
Specifications
MT-4308W
MT-4310W/4210A
CPU
Intel Cherry Trail Atom x5-Z8350, 1.84GHz
DRAM Memory
2GB DDR3L-RS
OS
Windows Embedded 8.1
Industry Pro (64-bit only),
Windows 10 IoT (32-bit &
64-bit) (No S0IX mode
support)
Windows 10 IoT (32-bit
& 64-bit) for MT-4310W
Anroid for MT-4210A
Display
8” TFT LCD with LED
backlight,
1024 x 768 or 1280 x 800
10” TFT LCD with LED
backlight,
1280 x 800
Touch Screen
P-CAP touch
Storage
eMMC 32GB or 64GB
eMMC 64GB
Wireless connectivity
WiFi IEEE 802.11ac, a/b/g/n dual +BT 4.0
Power Supply
5V/3A 15W power adaptor
Rear Camera
8M pixels
Internal Speaker
Yes
Ambient Light Sensor
Yes
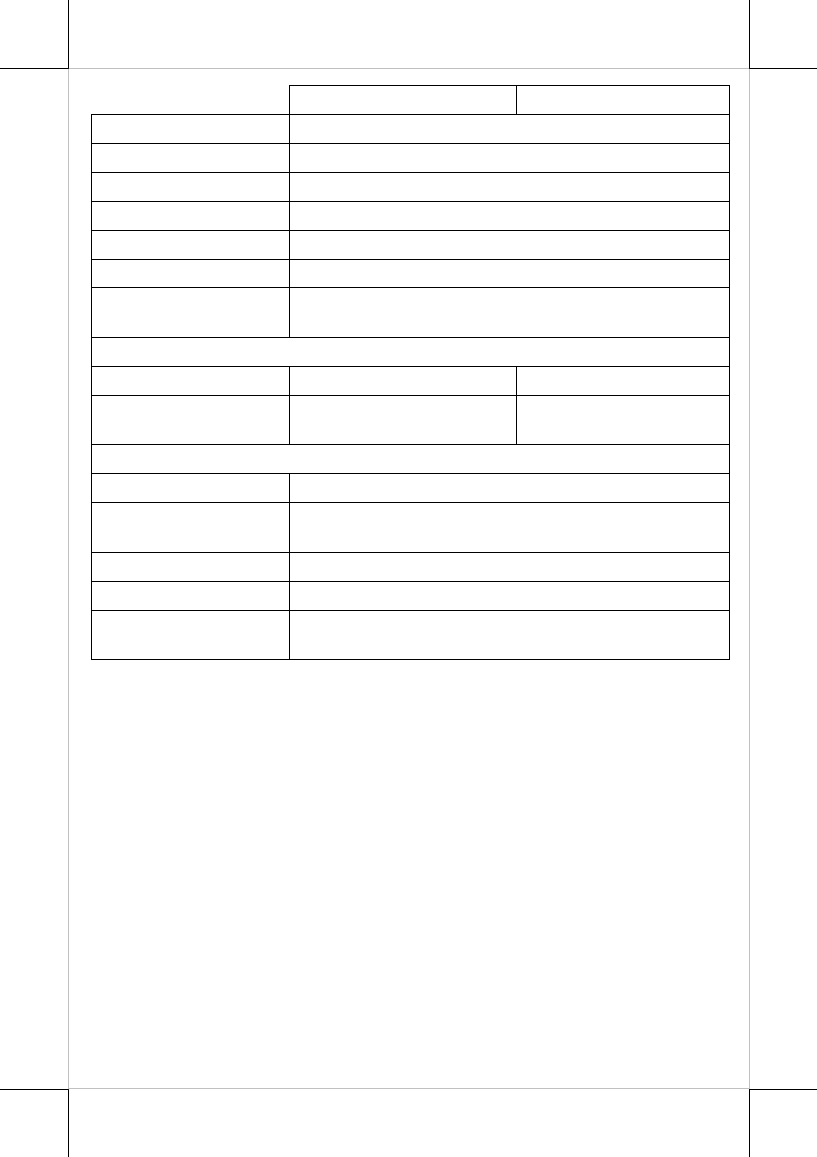
14
MT-4308W
MT-4310W/4210A
Audio
Mic-in/Line out combo jack x 1
3G
Yes, optional
USB Port
Micro USB x1 (non OTG USB Port)
DC-in Jack
Yes
Power Switch Button
Yes
Battery Pack
3.7V/ 4800 mAh, 17.76 Wh
LED Indicator
Blue color LED x 1
Orange color LED x 1
Optional Item
Smart Card Reader(*)
N/A
Yes
Sunlight readable
N/A
Sunlight readable panel
display
Attachment
TA-220
Side attachment with three-track MSR and RFID
TA-300
Side attachment with three-track MSR and finger print
sensor
TA-500
Battery Pack Kit
PG-200E
Pistol grip supports 1D/2D barcode scanning.
DS-300/310
Dock Station: USB 2.0 x 3 + GbE x 1 + Serial Port x 2 +
CR Port x 1 + 3” WiFi Printer x 1
Note: (*) Either smart card reader or 3G module can be installed into MT-
4310W system.
※
The product information and specifications are subject to change without
prior notice. To get the detailed information on the MT-
4308W/4310W/4210A, please check this model from Posiflex Global Website

15
Federal Communication Commission Interference Statement
This equipment has been tested and found to comply with the limits for a Class
B digital device, pursuant to Part 15 of the FCC Rules. These limits are
designed to provide reasonable protection against harmful interference in a
residential installation. This equipment generates, uses and can radiate radio
frequency energy and, if not installed and used in accordance with the
instructions, may cause harmful interference to radio communications.
However, there is no guarantee that interference will not occur in a particular
installation. If this equipment does cause harmful interference to radio or
television reception, which can be determined by turning the equipment off
and on, the user is encouraged to try to correct the interference by one or more
of the following measures:
z Reorient or relocate the receiving antenna.
z Increase the separation between the equipment and receiver.
z Connect the equipment into an outlet on a circuit different from that to
which the receiver is connected.
z Consult the dealer or an experienced radio/TV technician for help.
FCC Caution: Any changes or modifications not expressly approved by the
party responsible for compliance could void the user's authority to operate this
equipment.
This device complies with Part 15 of the FCC Rules. Operation is subject to
the following two conditions: (1) This device may not cause harmful
interference, and (2) this device must accept any interference received,
including interference that may cause undesired operation.
This device and its antenna(s) must not be co-located or operating in
conjunction with any other antenna or transmitter.
For product available in the USA/Canada market, only channel 1~11 can be
operated. Selection of other channels is not possible.
This device is restricted to indoor use.
IMPORTANT NOTE:
FCC Radiation Exposure Statement:
This equipment complies with FCC radiation exposure limits set forth for an
uncontrolled environment. End user must follow the specific operating
instructions for satisfying RF exposure compliance.

16
<MEMO>