Power 7 Technology 2012THU0001 WIFI-DISK With Power Bank User Manual Simple Manual English PI 545
Power7 Technology(Dong Guan) Co., Ltd. WIFI-DISK With Power Bank Simple Manual English PI 545
Users Manual

WiFi Disk simple Manual
1
WiFi Disk With Power Bank Simple Manual
CONTENT
1 PRODUCT INTRODUCTION ...........................................................................................................2
1.1 PRODUCT AND ACCESSORIES...........................................................................................................2
1.2 PRODUCT PARAMETERS AND CONFIGURATIONS...............................................................................2
1.2.1 Physical Parameters...........................................................................................................2
1.2.2 Basic Parameters ................................................................................................................2
1.2.3 Operating temperature........................................................................................................2
1.3 RELATED EQUIPMENT REQUIREMENTS ............................................................................................2
1.3.1 Ethernet Connection ...........................................................................................................2
1.3.2 OS on PC..............................................................................................................................3
1.3.3 Web Browser on PC............................................................................................................4
1.3.4 Local Network ......................................................................................................................4
1.4 PRODUCT VIEW(FOUR MODELS ) ................................................................................................4
1.4.1 Interface Function................................................................................................................5
1.4.2 Front Panel ....................................................................................................................6
1.5 PRODUCT DESCRIPTION...................................................................................................................6
2 QUICK START....................................................................................................................................7
2.1 WIFI DISK CONNECTION MODES.....................................................................................................7
3 OS START GUIDE.............................................................................................................................7
3.1 WINDOWS CLIENT TOOL .................................................................................................................7
3.1.1 Client Installation .................................................................................................................7
3.1.2 Access WiFi Disk ...............................................................................................................10
3.2 WEB MANAGEMENT INTERFACE (FOR WINDOWS) .......................................................................11
3.3 IOS CLIENT TOOL .........................................................................................................................14
3.3.1 Client installation................................................................................................................14
3.3.2 Access WiFi Disk ...............................................................................................................17
3.4 ANDROID CLIENT TOOL ................................................................................................................19
3.4.1 Client Installation ...............................................................................................................19
3.4.2 Access WiFi Disk ...............................................................................................................20
4 FCC STATEMENT............................................................................................................................22

WiFi Disk simple Manual
2
1 Product Introduction
1.1 Product and Accessories
WiFi Disk consists of WiFi-storage device、power adapter、Ethernet、USB cable、
CD and QIG.
1.2 Product Parameters and Configurations
1.2.1 Physical Parameters
Product Dimensions:127.3x80x25mm
1.2.2 Basic Parameters
CPU:MIPS24KEc 360MHZ
WIFI:Supports 802.11 b/g/n, Frequency 2.4 GHZ
Network Interface: 100Mbps Ethernet RJ45
USB Interface:Micro USB 3.0 Interface can connect to the computer to transmit data and
charge the device.
Battery:3000mA
Power:
1. Maximal power dissipation(reading and writing data):3.7W
2. Standby power dissipation(non-reading and non-writing data):2.5W
3. Standby power dissipation(HDD sleep):2.1W
1.2.3 Operating temperature
The operating temperature of the device should be 5-35 degrees Celsius.
1.3 Related equipment requirements
1.3.1 Ethernet Connection
Once the Ethernet is connected, the WiFi -storage device has two operating modes,
and the working modes are as follows:
1. Router Mode:
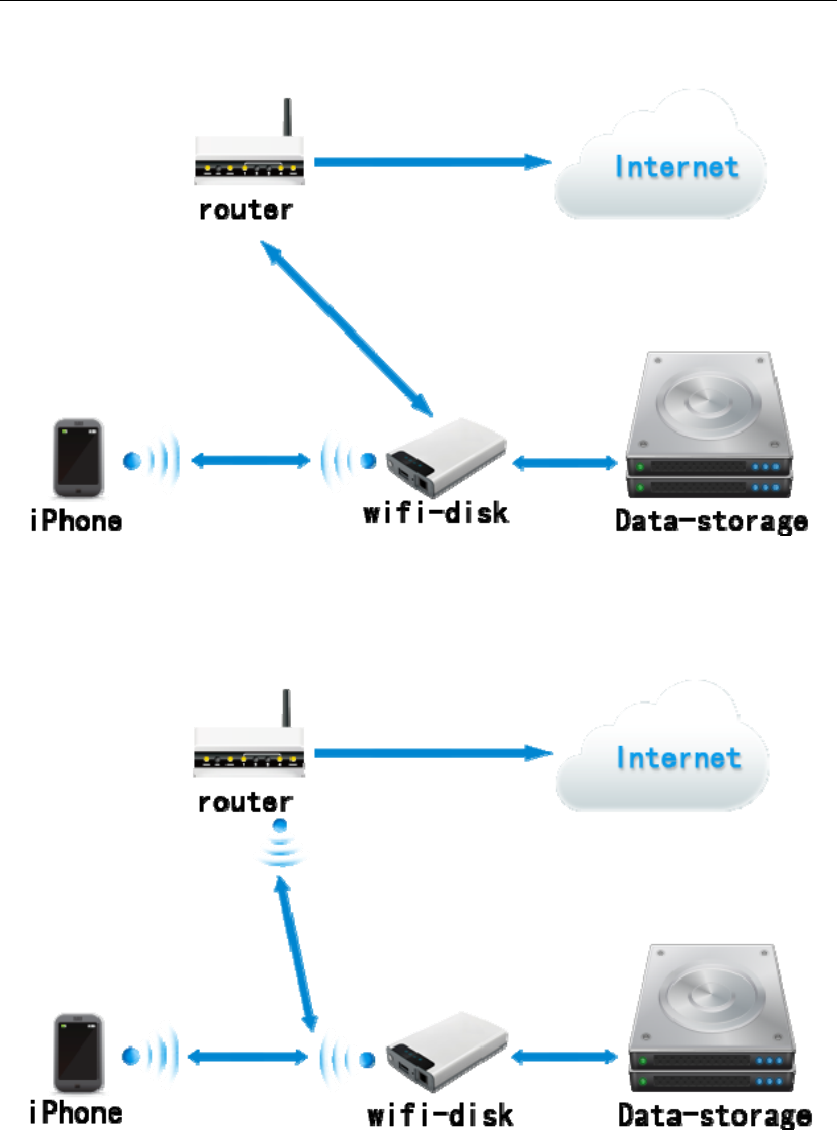
WiFi Disk simple Manual
3
2. AP+Client Mode:
1.3.2 OS on PC
Windows XP/Windows Vista/Windows 7
Mac OS X Tiger 10.5.0
Mac OS X Leopard
Fedora 12(Linux)

WiFi Disk simple Manual
4
1.3.3 Web Browser on PC
The product on the Windows platform supports Internet Explorer 7.0 and higher
versions.
The product on the Mac platform supports Safari 3.0 and higher versions.
The product on the windows and Mac platform supports Firefox 3.5 and higher
versions.
The product on the Linux platform supports Firefox 3.5 and higher versions.
1.3.4 Local Network
The router/switch (It will be used under AP+Client Mode and Router Mod
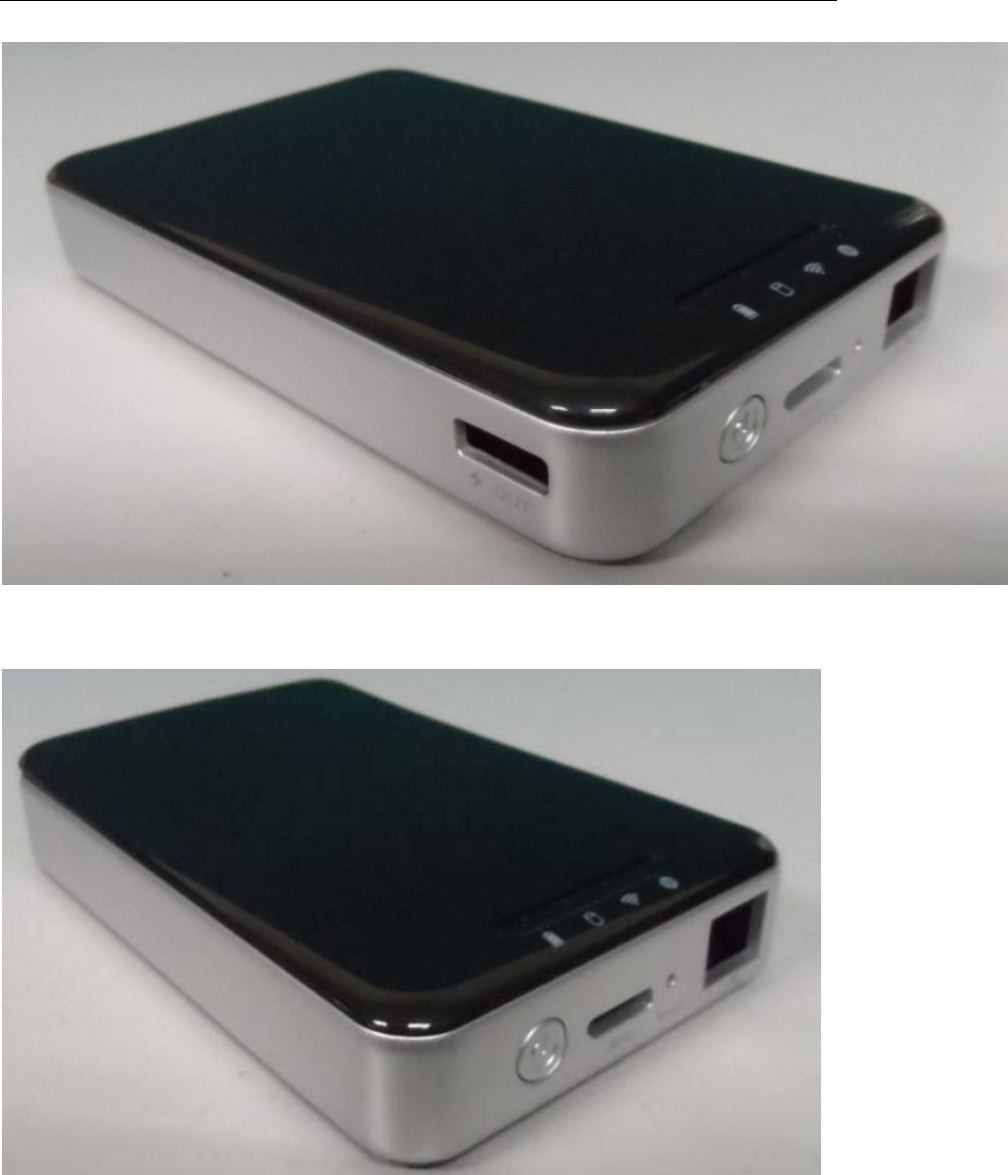
1.4 Product View(FOUR MODElS )
There are four kinds of models. there is only a model (CUR-WIFI-S250UN-NC )have no
USB 2.0 host interface.
Others (THU-WIFI-S250UN STO-WIFI-S2500UN; CUR-WIFI-S250UN) have the USB
2.0 host interface, and these models have the same PCBA..
The picture as fellow:
1,THU-WIFI-S250U
2,CUR-WIFI-S250U
WiFi Disk simple Manual
5
3,CUR-WIFI-S250U-NC
1.4.1 Interface Function
The Ethernet Interface:
1. Router Mode: Connect the device to the router, and the device can serve as the
terminal equipment to assign IP. The device can then provide the connection
between the terminal device and WiFi.

WiFi Disk simple Manual
6
2. USB3.0 Port:When connected to the computer, the USB 3.0 can transmit data
between the computer and the device, and can also charge the device battery.
1.4.2 Front Panel
Power LED
1. Green Steady Light: The battery power is >30%.
2. Red Steady Light: The battery power is <30% and >10%.
3. Red Fast Flash: The battery power is depleting and will soon shut down.
4. Green Slow Flash (every two seconds): The battery is charging.
5. Green Slow Flash (every one second): The device is shutting down.
6. LED off: The device is powered off.
WiFi LED
1. Blue LED shows the system initiation state. It starts flashing in the process of
initiation, and it stops flashing when the system initiation completes.
2. Blue Steady Light: WiFi is ready.
3. The LED light is off for the following situations:
A. Device is on, but the WiFi signal is unsteady.
B. Device is off.
C. Device is in Mobile HDD Mode and the WiFi is off.
Internet LED
1. WiFi connection
A. Blue Steady Light: WiFi signal is good.
B. Red Steady Light: WiFi signal is weak.
C. No Light: Not connected to the Internet.
2. Wired connection
A. Blue Steady Light: Internet connection is successful.
B. No light: Internet connection failed.
RW LED
1. On WiFi disk mode
A. White Steady Light: HDD connection is successful.
B. White Flashing Light: HDD is reading or writing.
2. Mobile HD mode
A. White Steady Light: Connected to USB2.0
B. White Flashing Light: Connected to USB2.0 and is reading or writing.
C. Blue Steady Light: Connect to USB3.0
D. Blue Flashing Light: Connected to USB3.0 and is reading or writing.
3. ON/OFF BUTTON: Turns the device on/off.
1.5 Product Description
WiFi-Storage accesses the data through WiFi.
◆ Storage medium supports any 2.5inch by 9mm SATA HDD.

WiFi Disk simple Manual
7
◆ With the WiFi module, it can support 802.11b/g/n.
◆ Includes two kinds of simple Router Operating Mode: AP+Client and AP+WAN.
◆ Supports USB Mobile HDD.
◆ Supports LAN data-sharing and cross-platforms which includes Windows, Mac, Linux,
iOS (iPad/iPhone/iTouch), and Android.
◆ Supports samba/webdav.
◆ Support multiple platform client tools, including Windows, Mac, iOS.
(iPad/iPhone/iTouch), and Android.
◆ A built-in battery which lasts for more than five working hours (seven standby hours).
2 Quick Start
2.1 WiFi Disk Connection Modes
1. Mobile HDD Mode: Connect the USB port to the computer. The WiFi Disk works solely
as an USB external HDD with no power charging function and no WiFi HDD access.
2. WiFi HDD Mode: Press the power button ON. The WiFi Disk works solely as WiFi HDD.
3. Router Mode: Connect to the router via network cable to the Internet.
4. AP+Client Mode: The WiFi Disk can also connect to the router via WiFi to the Internet.
3 OS Start Guide
3.1 Windows Client Tool
Press the ON button and then the device will start. Open the wireless network
connection on the PC and choose the wireless connection (Default Wireless SSID:
WiFiDisk. default password:11111111). After the wireless connection succeeds, start the
“NAS Client Log In Utility V2.2” to search the WiFi Disk. Select “WiFi Disk”, which will
launch the browser to access the WiFi Disk.
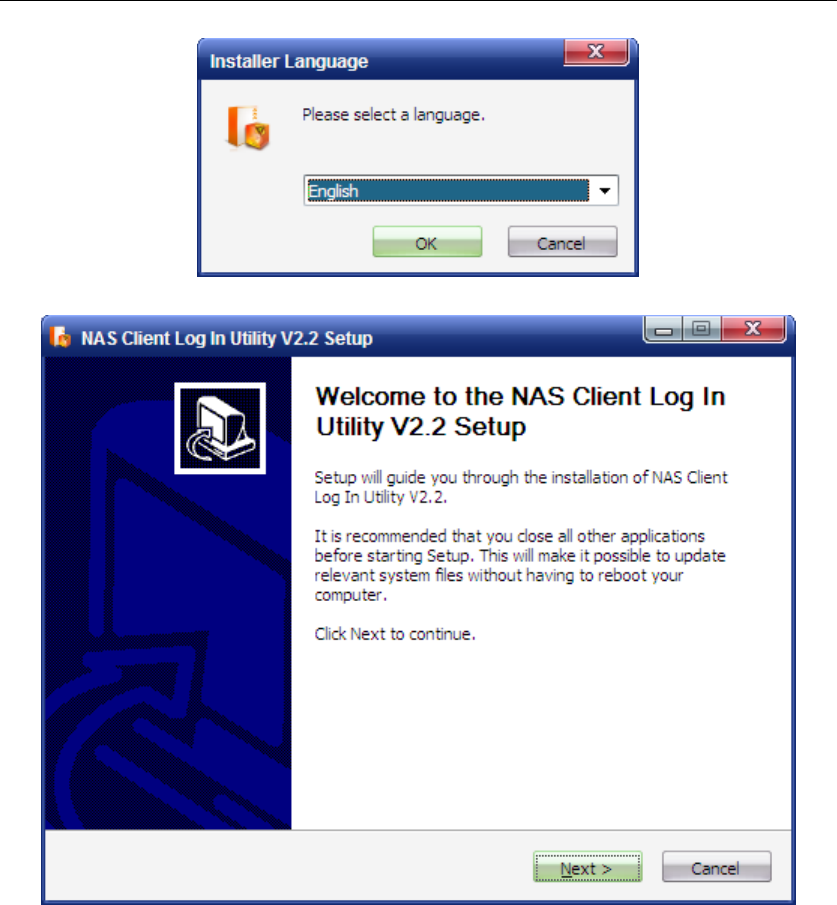
3.1.1 Client Installation
1. Use “NAS Client Log In Utility V2.2 Setup. exe”in the CD and install. This client will
facilitate the searching of the WiFi Disk.
WiFi Disk simple Manual
8
2. Select your native language, press “OK”, and the installation wizard will pop up.
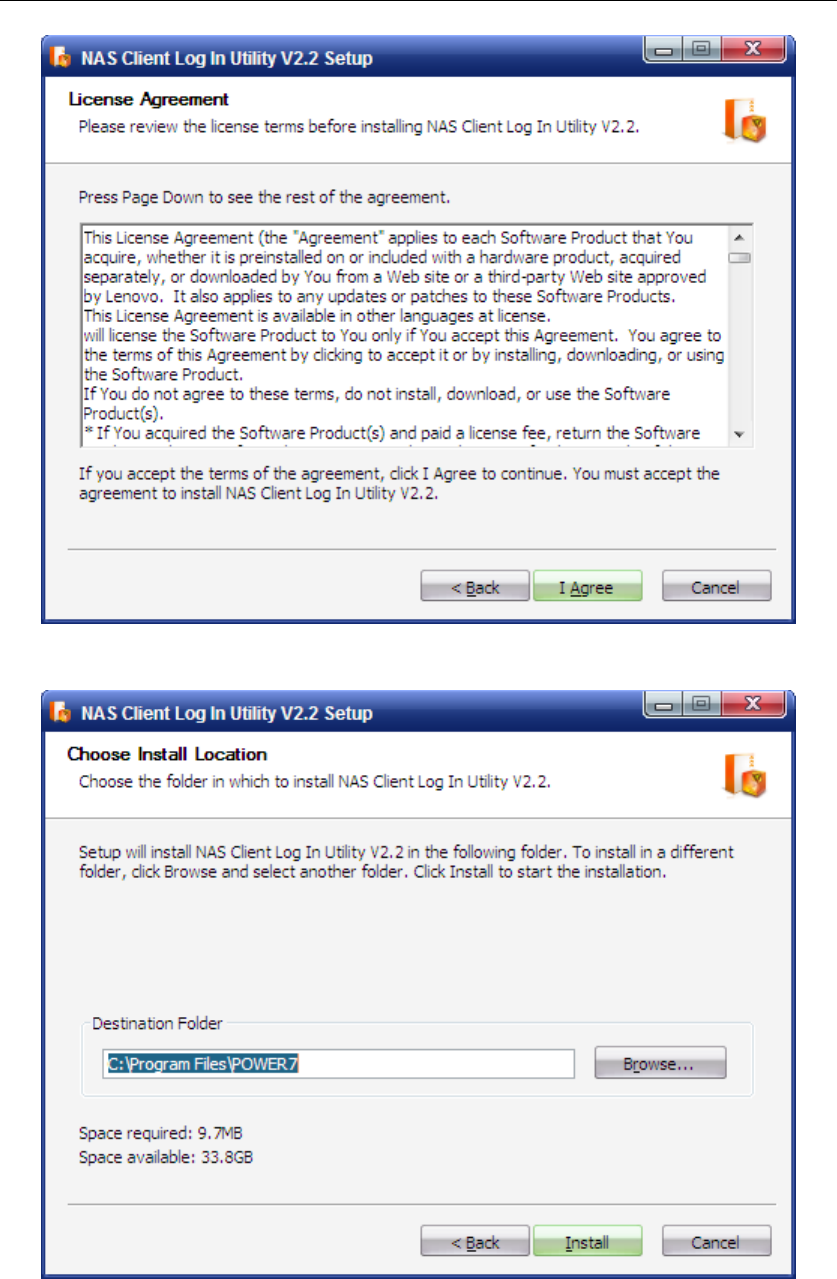
3. Press “Next”, and then you must accept the following agreement:
WiFi Disk simple Manual
9
4. Press “I accept”,Choose the preferred installation path (The interface provides the
default installation path). Press “Browse” and choose the path.
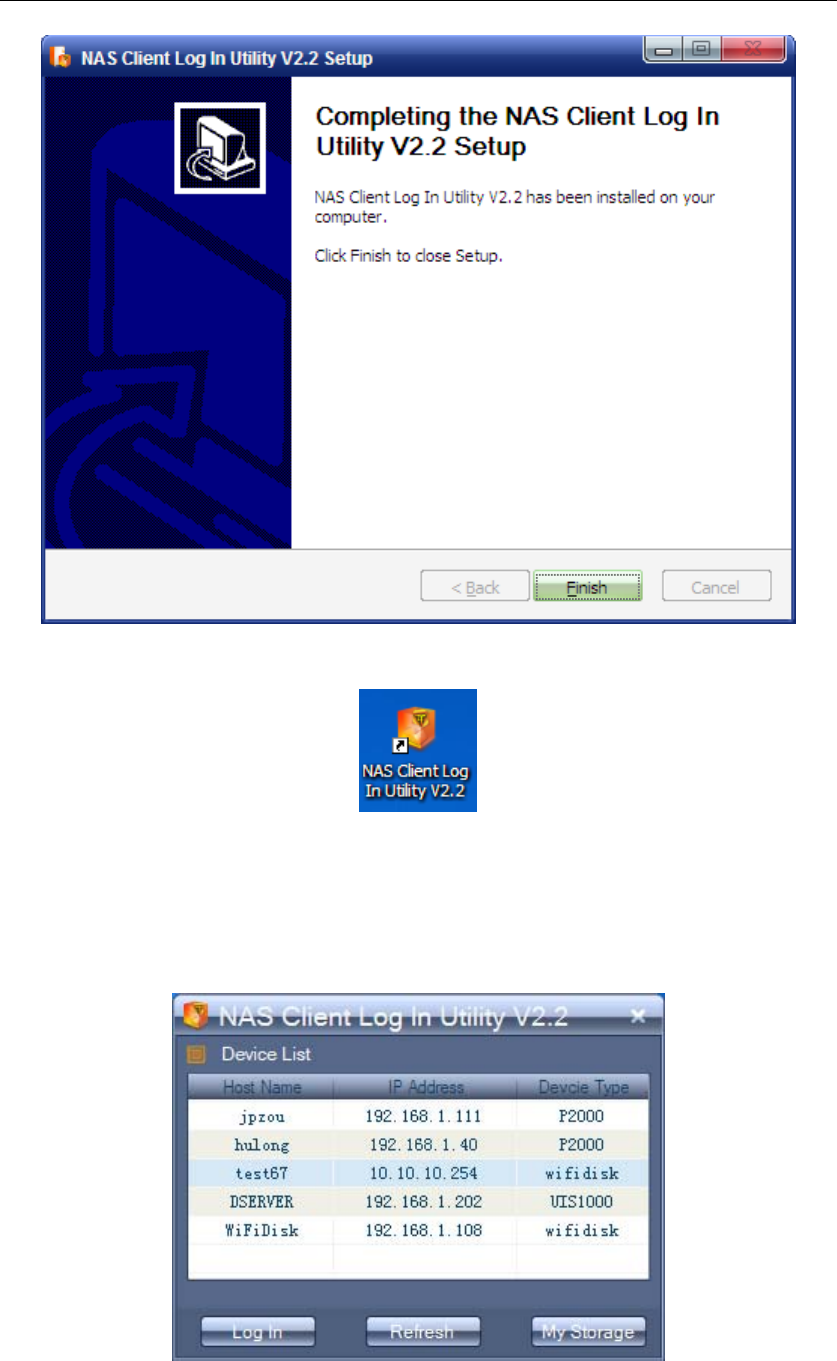
5. Press “Install”, and the software will begin to install. When the process bar of the
installation disappears, the following picture will pop up:
WiFi Disk simple Manual
10
6. Press “Finish”, and this concludes the installation of the client. A shortcut of the client
will be added to the desktop and the taskbar automatically.
3.1.2 Access WiFi Disk
1. Start “NAS Client Log In Utility V 2.2” on Windows. The client can search all WiFi Disks
in LAN.
2. If you do not find the preferred WiFi Disk, please press the “refresh” button and search
once again. Once found, choose the WiFi Disk and press the button “Log In”, which will
WiFi Disk simple Manual
11
launch the browser to access the WiFi Disk.
3. Type the default the account and password:Account: [admin], no User Password.
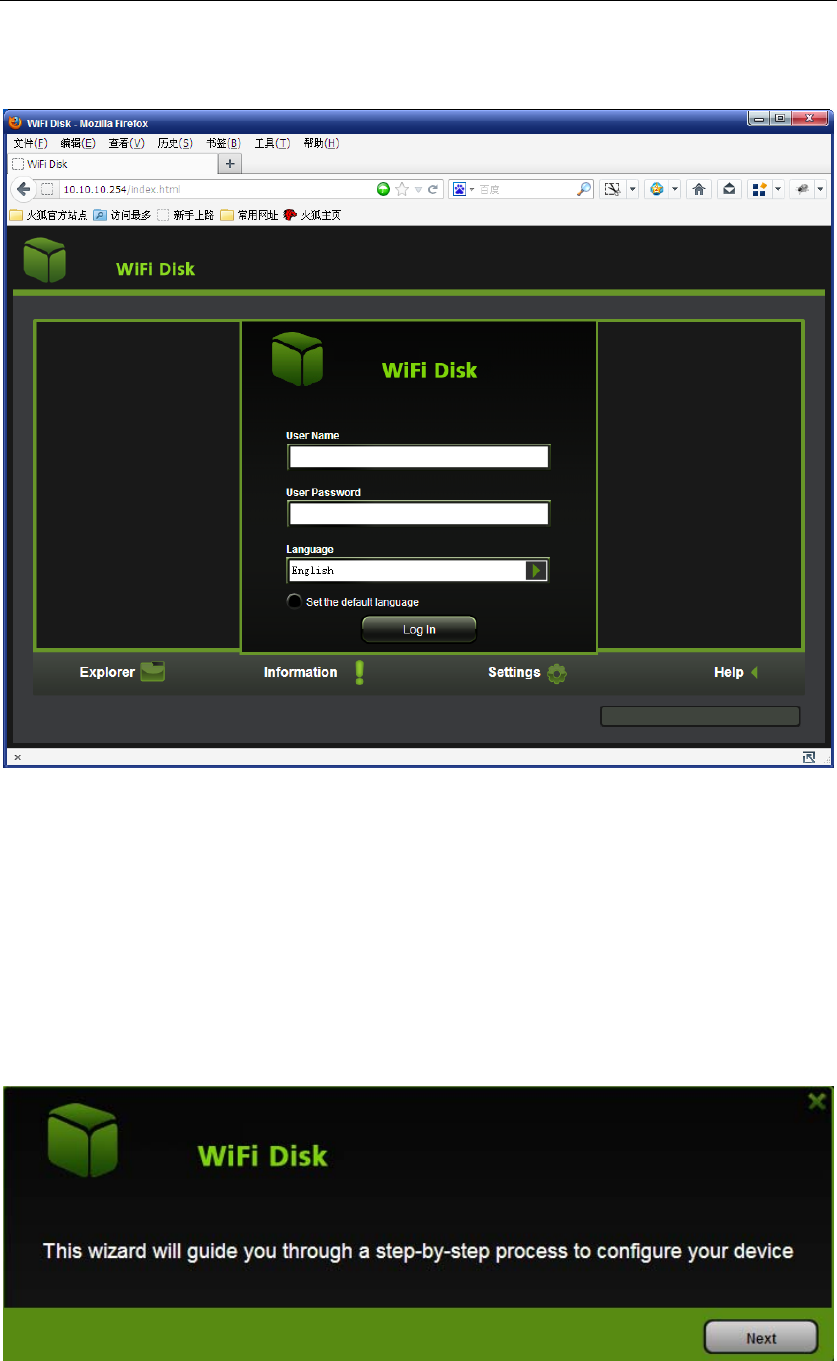
3.2 WEB Management Interface (for Windows)
To reach the login in page, you can either launch the browser through the client login,
or directly input the IP address of the WiFi Disk. Input the default account and password
(Account: admin, no default password). The configuration wizard will pop up when you
first access to the device and the wizard will guide you through a step-by –step process to
configure your WiFi Disk.
1. The wizard will pop up when you first access to the WiFi Disk.
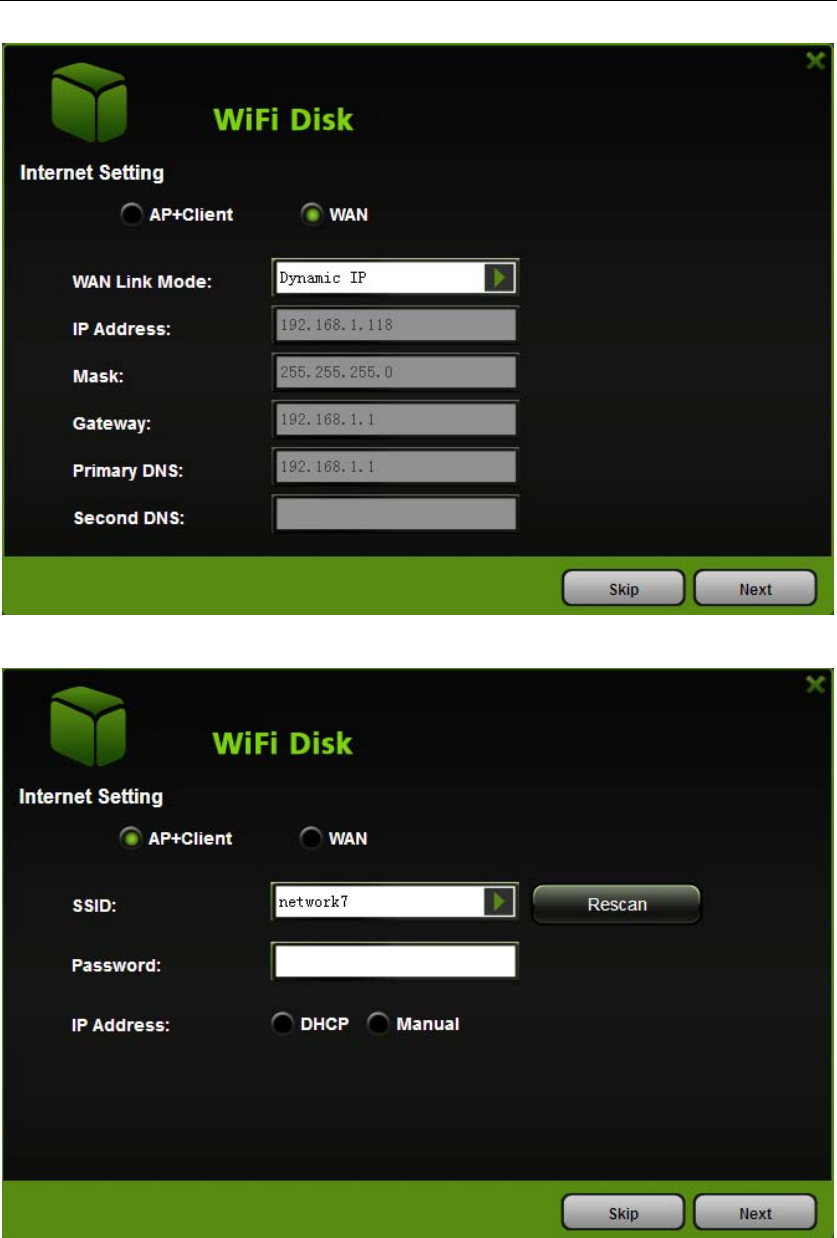
2. If the device needs to set up, press “Next” and enter into Internet Setting Interface
(default mode: Router Mode). Choose the mode you need and press “Next”.
WiFi Disk simple Manual
12
A. If you choose the AP+Client Mode, then you will enter into the following interface:
a. Press “Rescan” and it will scan the scope of the wireless router. Select the
wireless connection you need in the list of SSID (i.e. choose “power 700” and then input
the password of “power700” in the password field).
b. IP Address: You can set up the IP Address through two methods:
i. Dynamic IP: Obtain the IP through the DHCP of the router (i.e. power 700).
ii. Static IP: Obtain the IP by manually input the IP Address (must be the same

WiFi Disk simple Manual
13
sub-network as the router).
c. After the completion of the settings, press “Next” and the settings will take effect.
B. If you choose Router Mode , you will enter into the following interface:
a. There are two kinds of scenarios in the WAN Link Mode.
i. Dynamic IP: Obtain the IP through the DHCP of the router (i.e. power 700).
ii. Static IP: Obtain the IP by manually input the IP Address into the browser
(must be the same sub-network as the router).
3. Completion of the internet setting, press “Next”.
SSID:Must be letters and numbers with 1-32 in length.
Channel: The default channel is “Auto”. Other channels are 1, 2, 3… 14.
WiFi Disk simple Manual
14
Mode: The default is 11b/g/n. Other modes are 11Mbps (802.11b), 54 Mbps
(802.11g), 150Mbps (802.11n), 11b/g/n.
Security:The default security is None, Other security options are OPENWEP,
WPA-PSK, WPA2-PSK , Mixed WPA/WPA2-PSK.
Password:
WEP:Must be ASCII Characters, and the length must be 5 or 13 characters.
WPA-PSK , WPA2-PSK , Mixed WPA/WPA2-PSK: The length must be 8-63
characters.
IP Address: You can alter the IP Address in the WiFi&LAN Setting. When you do, the
DHCP Server will automatically change its sub-network to match that of the IP
Address.
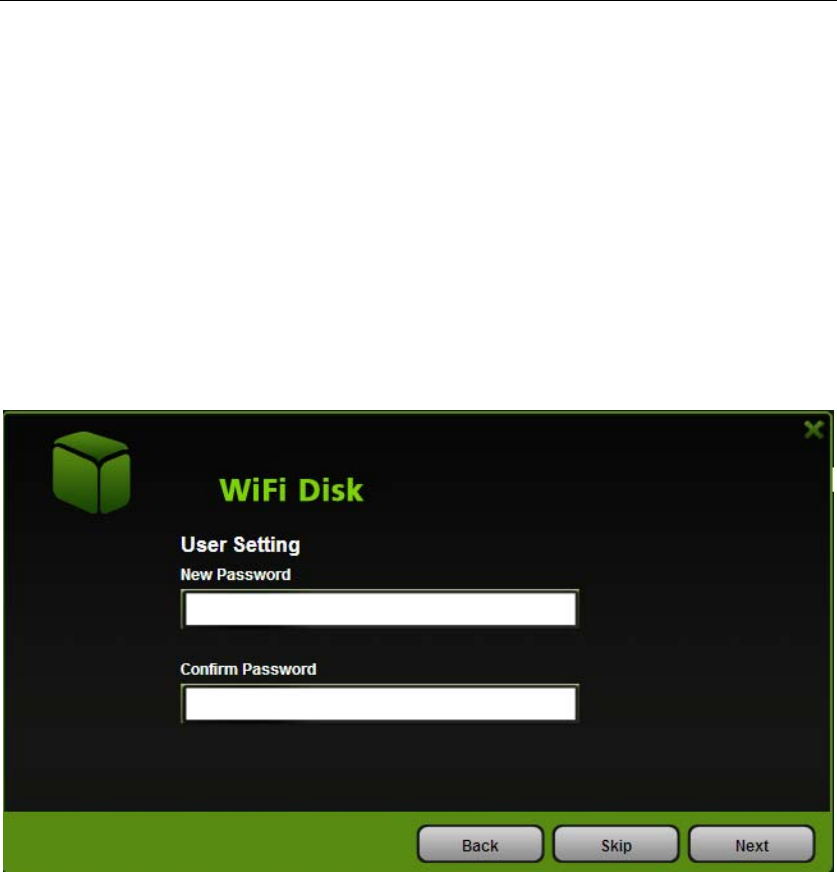
4. After the wireless LAN is set up, press “Next”.
Change the Admin’s password. Type the new password and confirm the password.
When you confirmed the new password, click “Next”, The system reboot will be
required for the alterations to take effect.
3.3 iOS Client Tool
3.3.1 Client installation
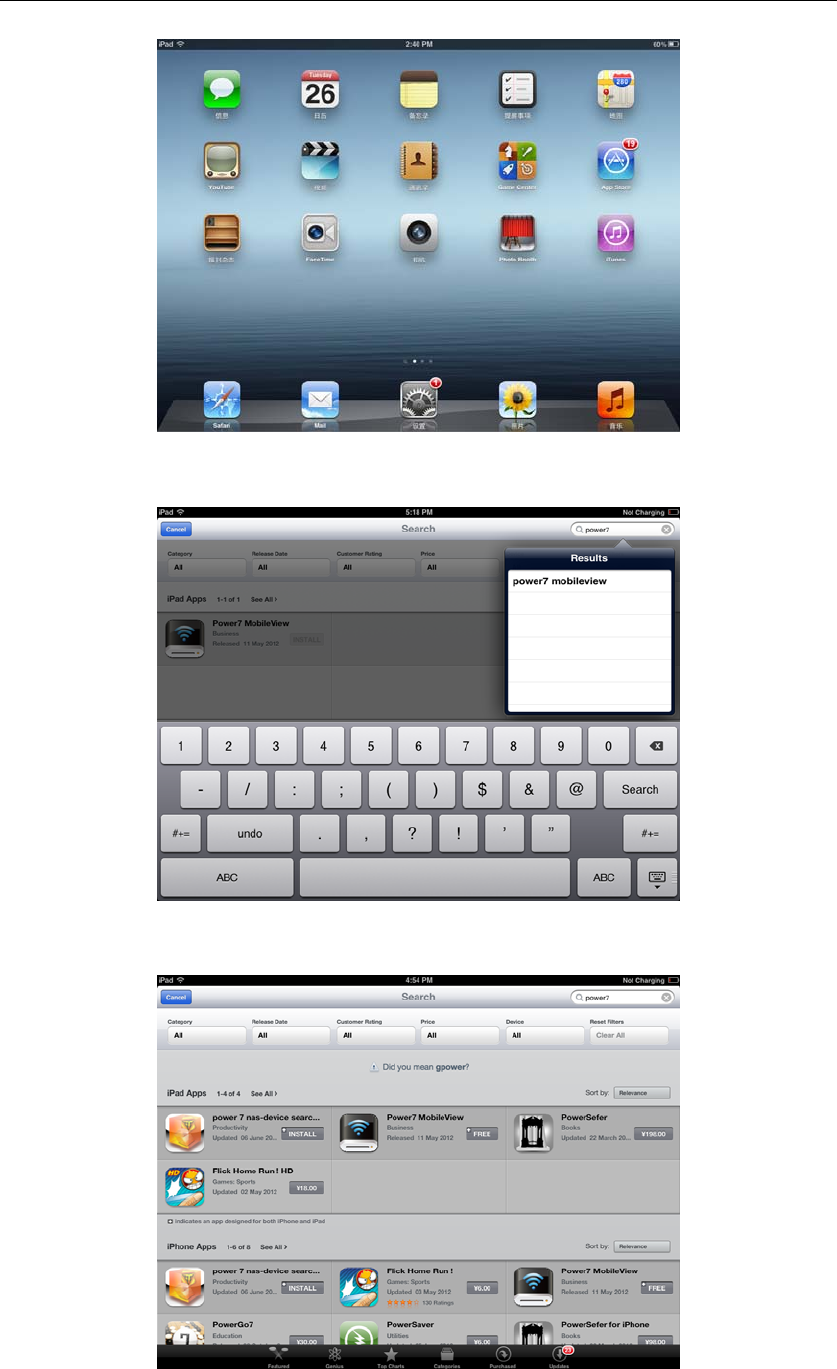
1. Click “App Store” on the desktop.
WiFi Disk simple Manual
15
2. Type the name of the client—Power7 Mobile View— in the search box on the top right
corner.
3. Choose “Power7 Mobile View” in the application list. Since it is a free application
provided by Power 7, click on “FREE” to the right of the application tab.
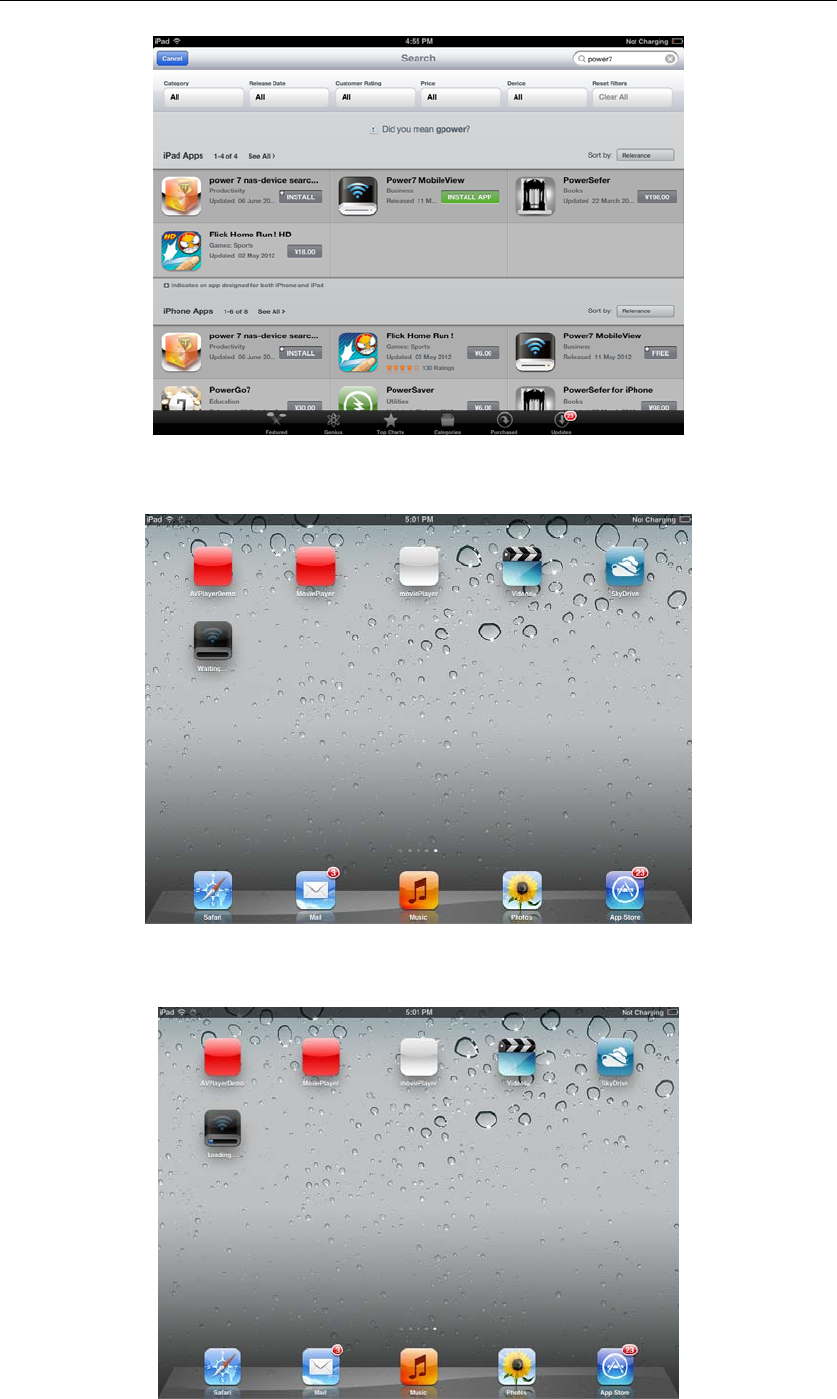
4. Click “FREE” and the button will turn into “INSTALL APP”. Click “INSTALLAPP” and the
installation will begin.
WiFi Disk simple Manual
16
5. The App Store will close, and the “Power7 MobileView” Icon will appear on your desktop
in the gray and waiting state.
6. When the client begins to install, there will be an installation progress bar on the bottom
of the icon and the client will be in the state of “Loading”.
7.After installation, the client “Power7 MobileView” will be ready for use.
WiFi Disk simple Manual
17
3.3.2 Access WiFi Disk
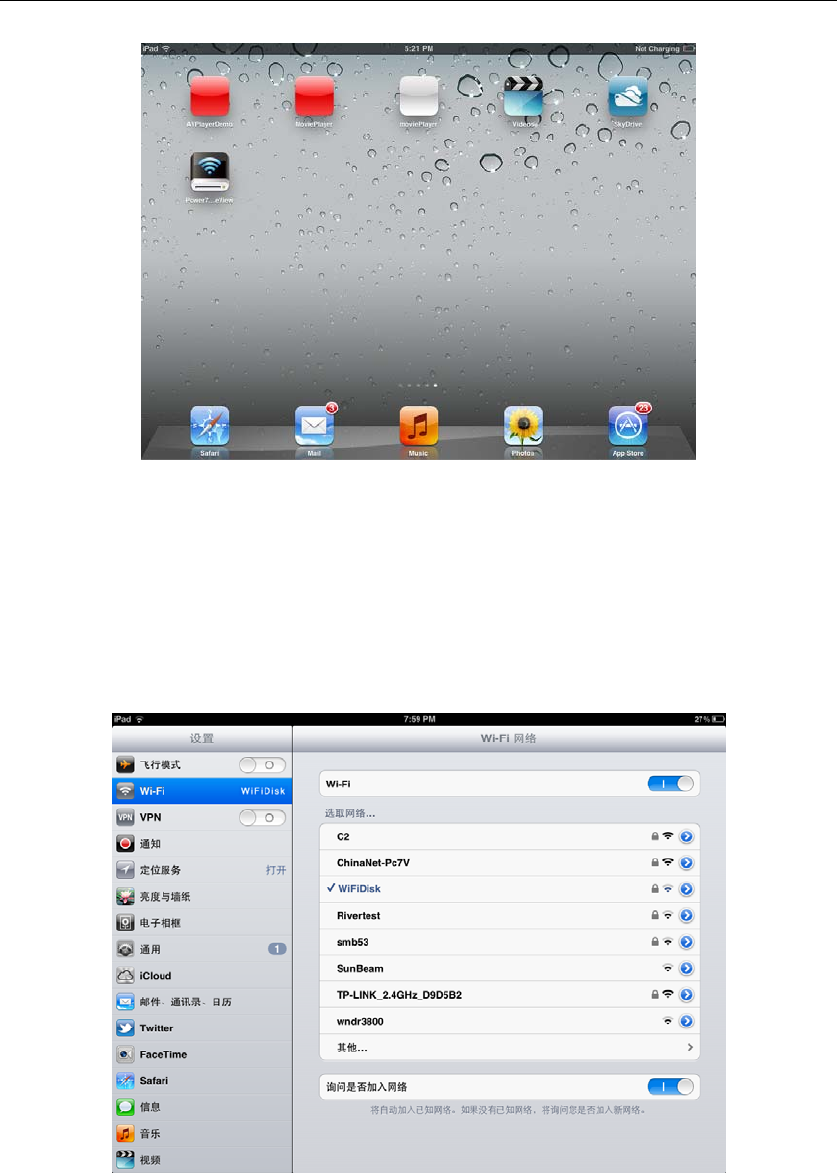
1. Wireless Settings
A. Get into the WiFi setting. The default name of wireless network connection is
“WiFiDisk”. Once connected, the wireless signal icon will display on the top left corner of
the iOS.
B. Click the arrow button on the right side of “WiFiDisk” and you can check the IP
address of the iOS.
WiFi Disk simple Manual
18
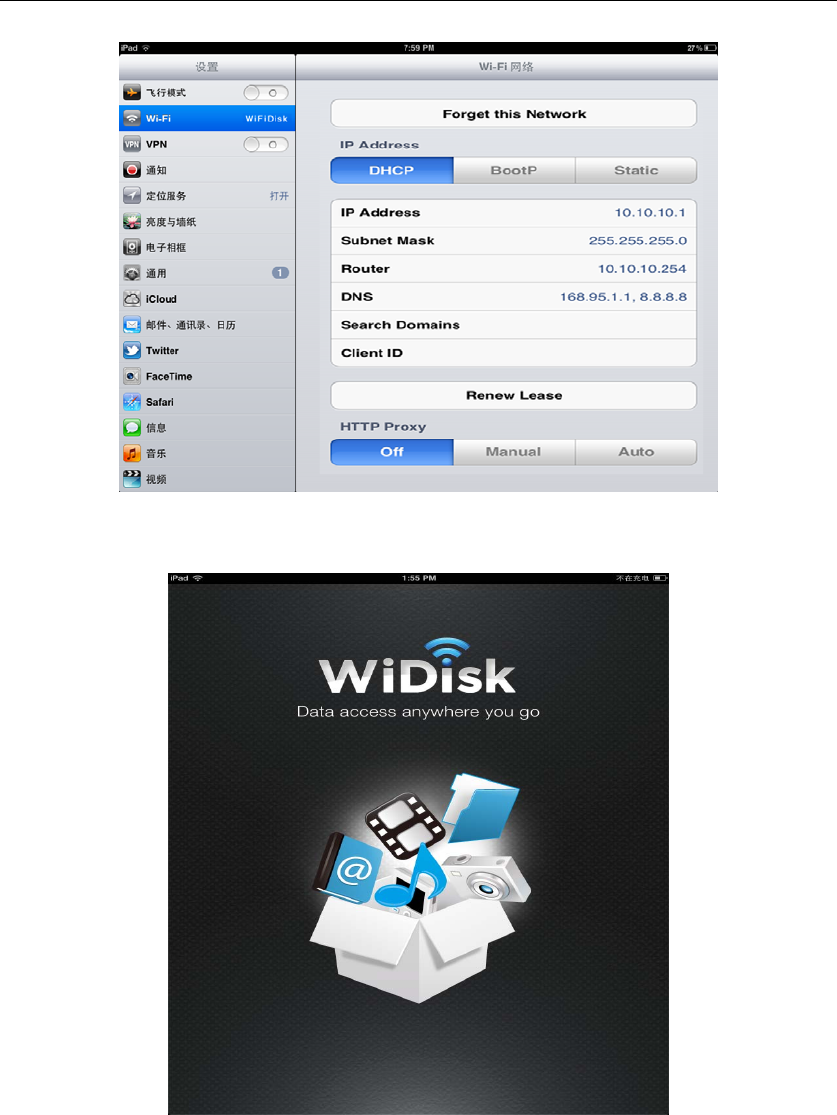
2. User Login
A. Find the icon of client on the desktop and click the icon.
B. There is no default password for the “Power7 MobileView”. However, users can set
passwords for extra security if they wish. Once set, users must input the password before
they use the client. If you log in for the second time, the device will remember the
password automatically.
WiFi Disk simple Manual
19
3.4 Android Client Tool
3.4.1 Client Installation
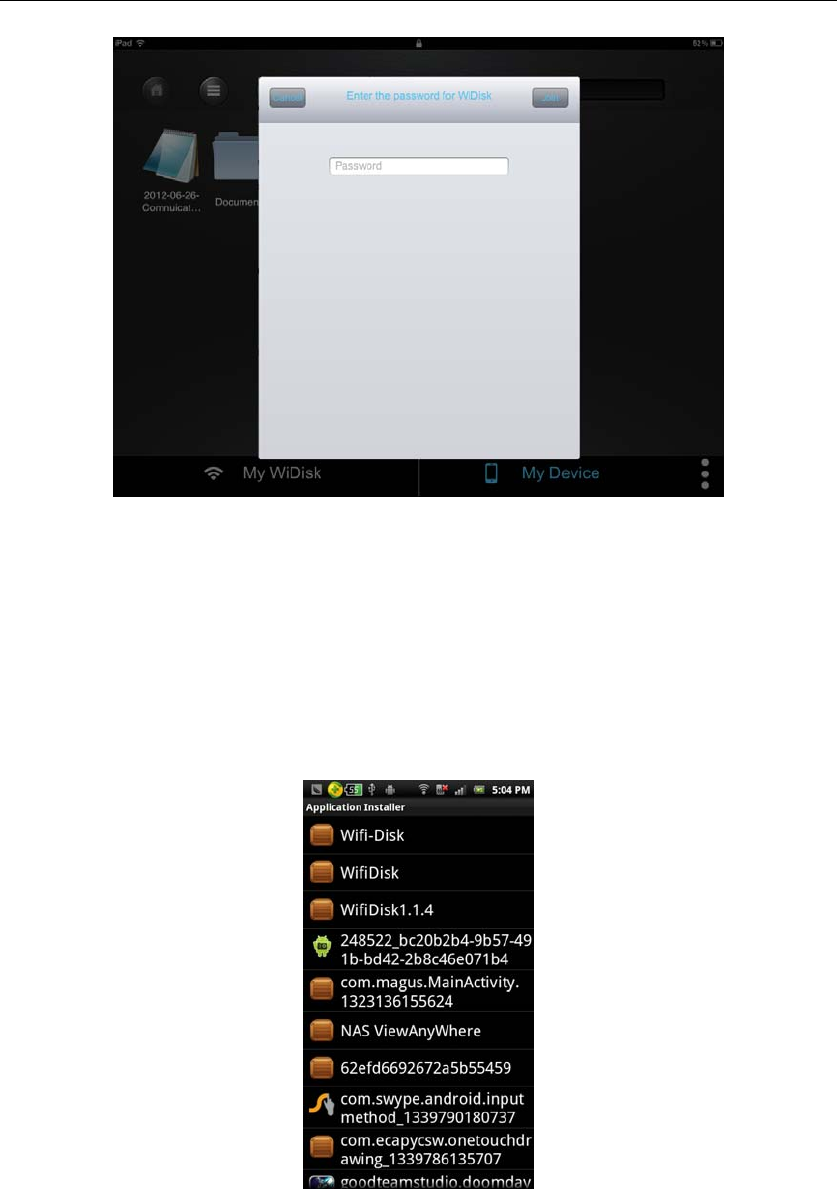
1. Download the client program named “Wifi-Disk” from the official website Google Play
Store.
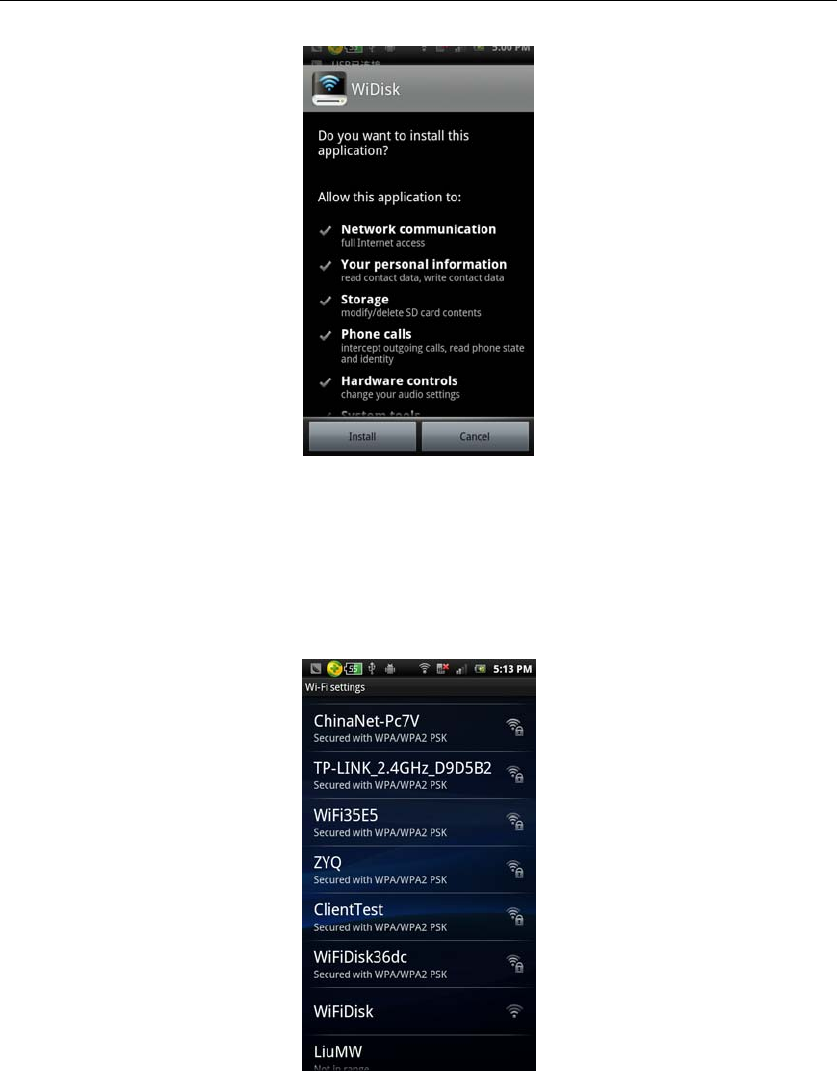
2. Click on the client and press “Install”.
WiFi Disk simple Manual
20
3.4.2 Access WiFi Disk
1. First, connect to the WiFi Disk in the WLAN Settings. The default name of the WiFi Disk
is “WiFiDisk”. You can change the name of the WiFi Disk in the management interface.
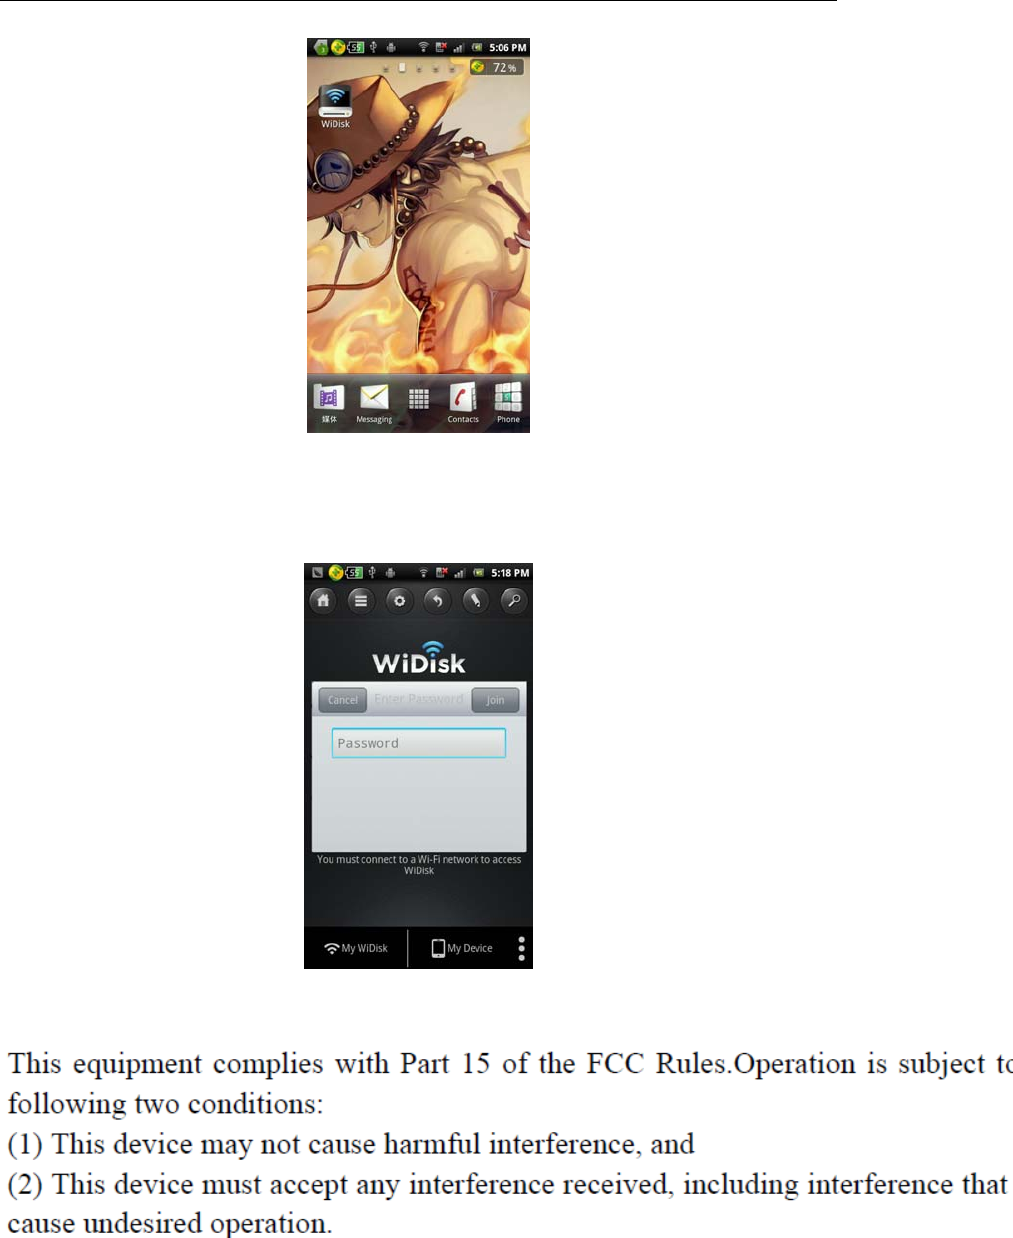
2. Run “WiDisk”
WiFi Disk simple Manual
21
3. There is no default password for the “WiDisk”. However, users can set passwords for
extra security if they wish. Once set, users must input the password before they use the
client. If you log in for the second time, the device will remember the password
automatically.

WiFi Disk simple Manual
4 FCC Statement
This equipment has been tested and found to comply with the limits for a Class B digital device,
pursuant to part 15 of the FCC Rules. These limits are designed to provide reasonable
protection against harmful interference in a residential installation. This equipment generates,
uses and can radiate radio frequency energy and, if not installed and used in accordance with
the instructions, may cause harmful interference to radio communications. However, there is
no guarantee that interference will not occur in a particular installation. If this equipment does
cause harmful interference to radio or television reception, which can be determined by turning
the equipment off and on, the user is encouraged to try to correct the interference by one or
more of the following measures:
—Reorient or relocate the receiving antenna.
—Increase the separation between the equipment and receiver.
—Connect the equipment into an outlet on a circuit different from that to which the receiver is
connected.
—Consult the dealer or an experienced radio/TV technician for help.
FCC Radiation Exposure Statement
This equipment complies with FCC RF radiation exposure limits set forth for an uncontrolled
environment. This transmitter must not be co-located or operating in conjunction with any other
antenna or transmitter. This equipment should be installed and operated with a minimum
distance of 20 centimeters between the radiator and your body.
This equipment complies with Part 15 of the FCC Rules. Operation is subject to the following
two conditions:
(1) This device may not cause harmful interference, and
(2) This device must accept any interference received, including interference that may cause
undesired operation.
Caution!
The manufacturer is not responsible for any radio or TV interference caused by unauthorized
modifications to this equipment. Such modifications could void the user authority to operate
the equipment.