Power 7 Technology NFCENETPAD RFID Reader User Manual enetmouse manualv8
Power 7 Technology Corp. RFID Reader enetmouse manualv8
User Manual

eNetPad
NetPadeNetPad
PadeNetPadeNetPad
eNetPadeNetPadeNetPad
etPadeNetPadeNetPadeNetPad
tPadeNetPadeNetPadeNetPadeNetPad
adeNetPadeNetPadeNetPadeNetPadeNetPad
eNetPadeNetP etPadeNetPadeNetPadeNetPad
etPadeNetPadeNetPadeNetPadeNetPadeNetPadeNetPad
deNetPadeNetPadeNetPadeNetPadeNetPadeNetPadeNetPad
eNetPadeNetPadeNetPadeNetPadeNetPadeNetPadeNetPadeNetPad
etPadeNetPadeNetPadeNetPadeNetPadeNetPadeNetPadeNetPadeNetPad
tPadeNetPadeNetPadeNetPadeNetPadeNetPadeNetPadeNetPadeNetPadeNetPa
PadeNetPadeNetPadeNetPadeNetPadeNetPadeNetPadeNetPadeNetPadeNetPadeNet
adeNetPadeNetPadeNetPadeNetPadeNetPadeNetPadeNetPadeNetPadeNetPadeNetPad
deNetPadeNetPadeNetPadeNetPadeNetPadeNetPadeNetPadeNetPadeNetPadeNetPadeNetPad
tPadeNetPadeNetPadeNetPadeNetPadeNetPadeNetPadeNetPadeNetPadeNetPadeNetPadeNetPad
eNetPadeNetPadeNetPadeNetPadeNetPadeNetPadeNetPadeNetPadeNetPadeNetPadeNetPadeNetPadeNetPad
etPadeNetPadeNetPadeNetPadeNetPadeNetPadeNetPadeNetPadeNetPadeNetPadeNetPadeNetPadeNetPadeNetP
adeNetPadeNetPadeNetPadeNetPadeNetPadeNetPadeNetPadeNetPadeNetPadeNetPadeNetPadeNetPadeNetPad
PadeNetPadeNetPadeNetPadeNetPadeNetPadeNetPadeNetPadeNetPadeNetPadeNetPadeNetPadeNetPadeNetPad
deNetPadeNetPadeNetPadeNetPadeNetPadeNetPadeNetPadeNetPadeNetPadeNetPadeNetPadeNetPadeNetPadeNe
tPadeNetPadeNetPadeNetPadeNetPadeNetPadeNetPadeNetPadeNetPadeNetPadeNetPadeNetPadeNetPadeNetPad
eNetPadeNetPadeNetPadeNetPadeNetPadeNetPadeNetPadeNetPadeNetPadeNetPadeNetPadeNetPadeNetPadeNe
adeNetPadeNetPadeNetPadeNetPadeNetPadeNetPadeNetPadeNetPadeNetPadeNetPadeNetPadeNetPadeNetPad
NetPadadeNetPadeNetPadeNetPadeNetPadeNetPadeNetPadeNetPadeNetPadeNetPadeNetPadeNetPadeNetPadeN
dadeNetPadeNetPadeNetPadeNetPadeNetPadeNetPadeNetPadeNetPadeNetPadeNetPadeNetPadeNetPadeNetPad
adeNetPadeNetPadeNetPadeNetPadeNetPadeNetPadeNetPadeNetPadeNetPadeNetPadeNetPadeNetPadeNetPad
tPadeNetPadeNetPadeNetPadeNetPadeNetPadeNetPadeNetPadeNetPadeNetPadeNetPadeNetPadeNetPadeNetPad
deNetPadeNetPadeNetPadeNetPadeNetPadeNetPadeNetPadeNetPadeNetPadeNetPadeNetPadeNetPadeNetPadeNe
etPadeNetPadeNetPadeNetPadeNetPadeNetPadeNetPadeNetPadeNetPadeNetPadeNetPadeNetPadeNetPadeNetP
tPadeNetPadeNetPadeNetPadeNetPadeNetPadeNetPadeNetPadeNetPadeNetPadeNetPadeNetPadeNetPadeNetPad
eNetPadeNetPadeNetPadeNetPadeNetPadeNetPadeNetPadeNetPadeNetPadeNetPadeNetPadeNetPadeNetPadeNet
etPadeNetPadeNetPadeNetPadeNetPadeNetPadeNetPadeNetPadeNetPadeNetPadeNetPadeNetPadeNetPadeNetPad
adeNetPadeNetPadeNetPadeNetPadeNetPadeNetPadeNetPadeNetPadeNetPadeNetPadeNetPadeNetPadeNetP
PadeNetPadeNetPadeNetPadeNetPadeNetPadeNetPadeNetPadeNetPadeNetPadeNetPadeNetPadeNetPadeNe
etPadeNetPadeNetPadeNetPadeNetPadeNetPadeNetPadeNetPadeNetPadeNetPadeNetPadeNetPad
eNetPadeNetPadeNetPadeNetPadeNetPadeNetPadeNetPadeNetPadeNetPadeNetPadeNetPad
deNetPadeNetPadeNetPadeNetPadeNetPadeNetPadeNetPadeNetPadeNetPadeNetPadeNet
tPadeNetPadeNetPadeNetPadeNetPadeNetPadeNetPadeNetPadeNetPadeNetPadeNetP
eNetPadeNetPadeNetPadeNetPadeNetPadeNetPadeNetPadeNetPadeNetPad
adeNetPadeNetPadeNetPadeNetPadeNetPadeNetPadeNetPadeNetPade
PadeNetPadeNetPadeNetPadeNetPadeNetPadeNetPadeNetPadeN
eNetPadeNetPadeNetPadeNetPadeNetPadeNetPadeNetPad
deNetPadeNetPadeNetPadeNetPadeNetPadeNetPad
adeNetPadeNetPadeNetPadeNetPadeNetPade
PadeNetPadeNetPadeNetPadeNetPadeNetP
eNetPadeNetPadeNetPadeNetPad
tPadeNetPadeNetPadeNetPad
NetPadeNetPadeNetPad
eNetPadeNetPadeN
PadeNetPad
RFID Internet Security Pad
User's Manual
ENETPAD USER MANUAL

Contents 3
Introduction 4
Systems and Environments 5
Software Installation 6
Using Login2Go 7
Configuration tab 8
Options tab 13
Favorite tab 16
Tips for Effective Learning 16
Known Issues 17
Using LoginEZ 18
LoginEZ Setup 18
LoginEZ Activation 20
Set back to Microsoft Login 22
eNetCard Management Tool 25
RFID Enabled Application Development 28
FAQs (Frequently Asked Questions) 28
3

Thank you for purchasing Macally eNetPad. The product package includes Macally eNetPadTM
(a USB optical pad with built-in RFID reader/writer), an eNetCard (Philips mifare®Standard 1K
RFID card), and a CD with Login2GoTM , LoginEZ, software and pad driver. Before connecting
eNetPad to your computer, please read the entire manual to understand how to install the pad
driver and software, and use application Login2Go and LoginEZ.
More information about Macally products and services is available through following sources:
• The Macally Home Page on the World Wide Web URL http://www.macally.com
• Macally Tech Support:
In U.S.A., please call 1-909-230-6778 (9AM - 5PM PST, Monday - Friday) or
In other time and areas, E-mail us at techsupport@macally.com
• Please register your Macally product at http://www.macally.com/register.html
Introduction
The Login2GoTM software, an RFID enabled application, allows users to log in the various password
protected web sites without having to remember and enter the user name and password every time.
You only need to place RFID tags or eNetCard close to Macally eNetPad to invoke Login2Go for
automatic web login.
First, user needs to configure and train the application Login2Go to log in a password protected
web site. Once Login2Go learns the whole login process, it will be able to perform the automated
login without user intervention thereafter. Since input of user name and password are not required in
automated login, the risk of personal data being stolen by spyware is greatly reduced.
Certain information of automatic web login, mainly passwords, can be stored in the RFID tags for
user identification and security purposes. Other information is stored in a local configuration file to
minimize usage of memory space of a given RFID tag. The configuration file, whose file name is tag
ID followed by suffix “.pas”, is created for each RFID tag.
For the convenience, users are allowed to store the complete sequence of actions for selected web
sites on RFID tags, which are called portable web sites. These portable web sites can be automati-
cally launched with RFID tag scanned(read) on any PCs having Login2Go and Macally eNetPad
reader/writer installed. Due to limited memory space in RFID tags, it is strongly recommended to
store no more than four portable web sites.
LoginEZ application allows user to login to Windows operating system with eNetCard and
eNetPad.
The Macally eNetCard RFID card in this package is Philips mifare Standard with 1K Bytes space in
transportation mode. Login2Go will initialize the card when used at the first time. This applies to
any newly issued Philips mifare Standard 1K tags from manufacture. After the initialization,
Login2Go can store information in those tags. On the other hand, for those RFID tags which only
tag Id can be read, e.g., ISO 14443A RFID tag being initialized by other applications and not
writable by Login2Go, users can still invoke Login2Go based on the RFID tag ID. However, all data
can only be saved as local files.
* Login2Go and LoginEZ are trademark of RFCyber Corp. eNetPad is a trademark of Macally Peripherals.
mifare®is a trademark of Philips Semiconductors. 4

Systems and Environments
Operation Systems Supported:
• Microsoft Windows 2000, XP, Server 2003
Minimum PC Requirements:
• Pentium III 500MHz
• 256MB Main Memory
• 15MB Disk Space
• USB 1.1
• Screen Resolution 800x600
• An existing pad(to complete Login2Go software installation)
Web Browser:
• Microsoft Internet Explorer Version 6.0 and above
Languages:
• English
RFID Tags (Transponder, Proximity Integrated Circuit Card)
• Read/Write Tag Data and Read Tag ID operations:
ISO 14443A – Philips mifare®Standard 1K(including Macally eNetCard)
• Read Tag ID operation:
ISO 14443A – other Philips mifare®family such as Ultralight, 4K, ProX, DesFire
• RFID tags could be built into different products and form factors, such as credit card, debit card,
bank card, phone card, watch, and cell phone etc.
Macally eNetPad:
• USB optical pad and RFID reader/writer integrated
• RFID Tag compatibility: all tags and form factors listed above
• Anti-collision support: multiple tags can be read simultaneously
• RFID reading distance: up to 0.78”(or 2cm) above eNetPad
• ISO 14443A compliant 13.56MHz frequency
5
Software Installation
It is required to install the Login2Go and LoginEZ software first before plugging in the Macally RFID
eNetPad. You must log in with administrator privilege to perform the following installation steps.
1. Insert the included software CD into your CD-ROM drive. Installation should start automatically, if
not, please open the CD icon, locate and double click Login2Go_LoginEZ.exe to start.
2. Follow the on-screen instruction to complete the software installation. It is required to restart
machine after the installation.
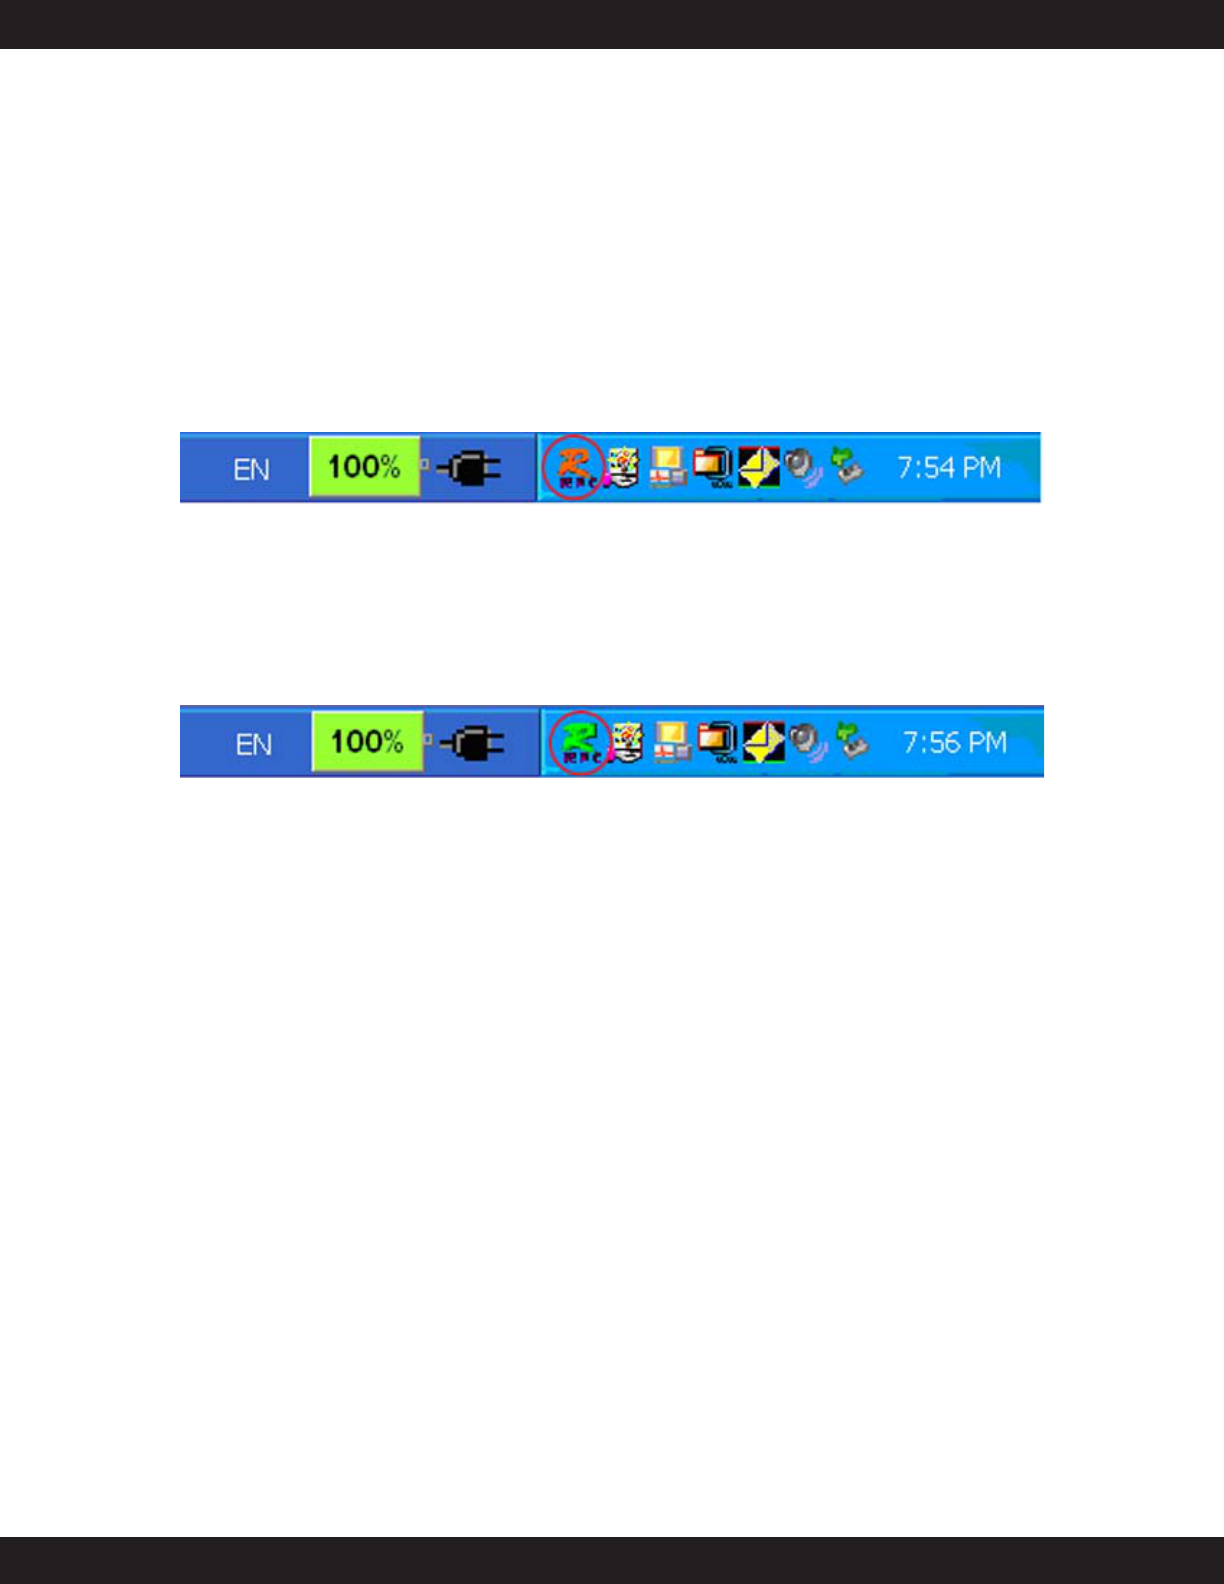
3. After reboot, a new icon appears in the system tray of taskbar to indicate status of Macally
eNetPad. Red color “R” below means Login2Go is not ready.
Fig. 1
4. Plug in the Macally eNetPad into USB port. “Found New Hardware Wizard” window pops up,
follow the on-screen instruction to complete pad driver installation.
5. Now, the “R” icon in task bar will change color to green as shown below. The top pad LED
window will show blue color as well. If you don’t see these, please try to reboot the system.
6. Congratulation! You have successfully installed Login2Go and Login2EZ software, and the
Macally eNetPad.
If you accidentally plug in the eNetPad before installing software, the “Found New Hardware
Wizard” window will pop up and ask for hardware device drivers, please unplug eNetPad, follow
the step 1 through 6 above to install software first.
6
Using Login2Go
Login2Go is running on top of RFCyberOne, a runtime version of RFCyber application development
platform RFCyberWork. The new “R” icon on system tray of taskbar mentioned in previous section is
the RFCyberOne Console to indicate the status of the Macally eNetPad under RFCyberOne. The
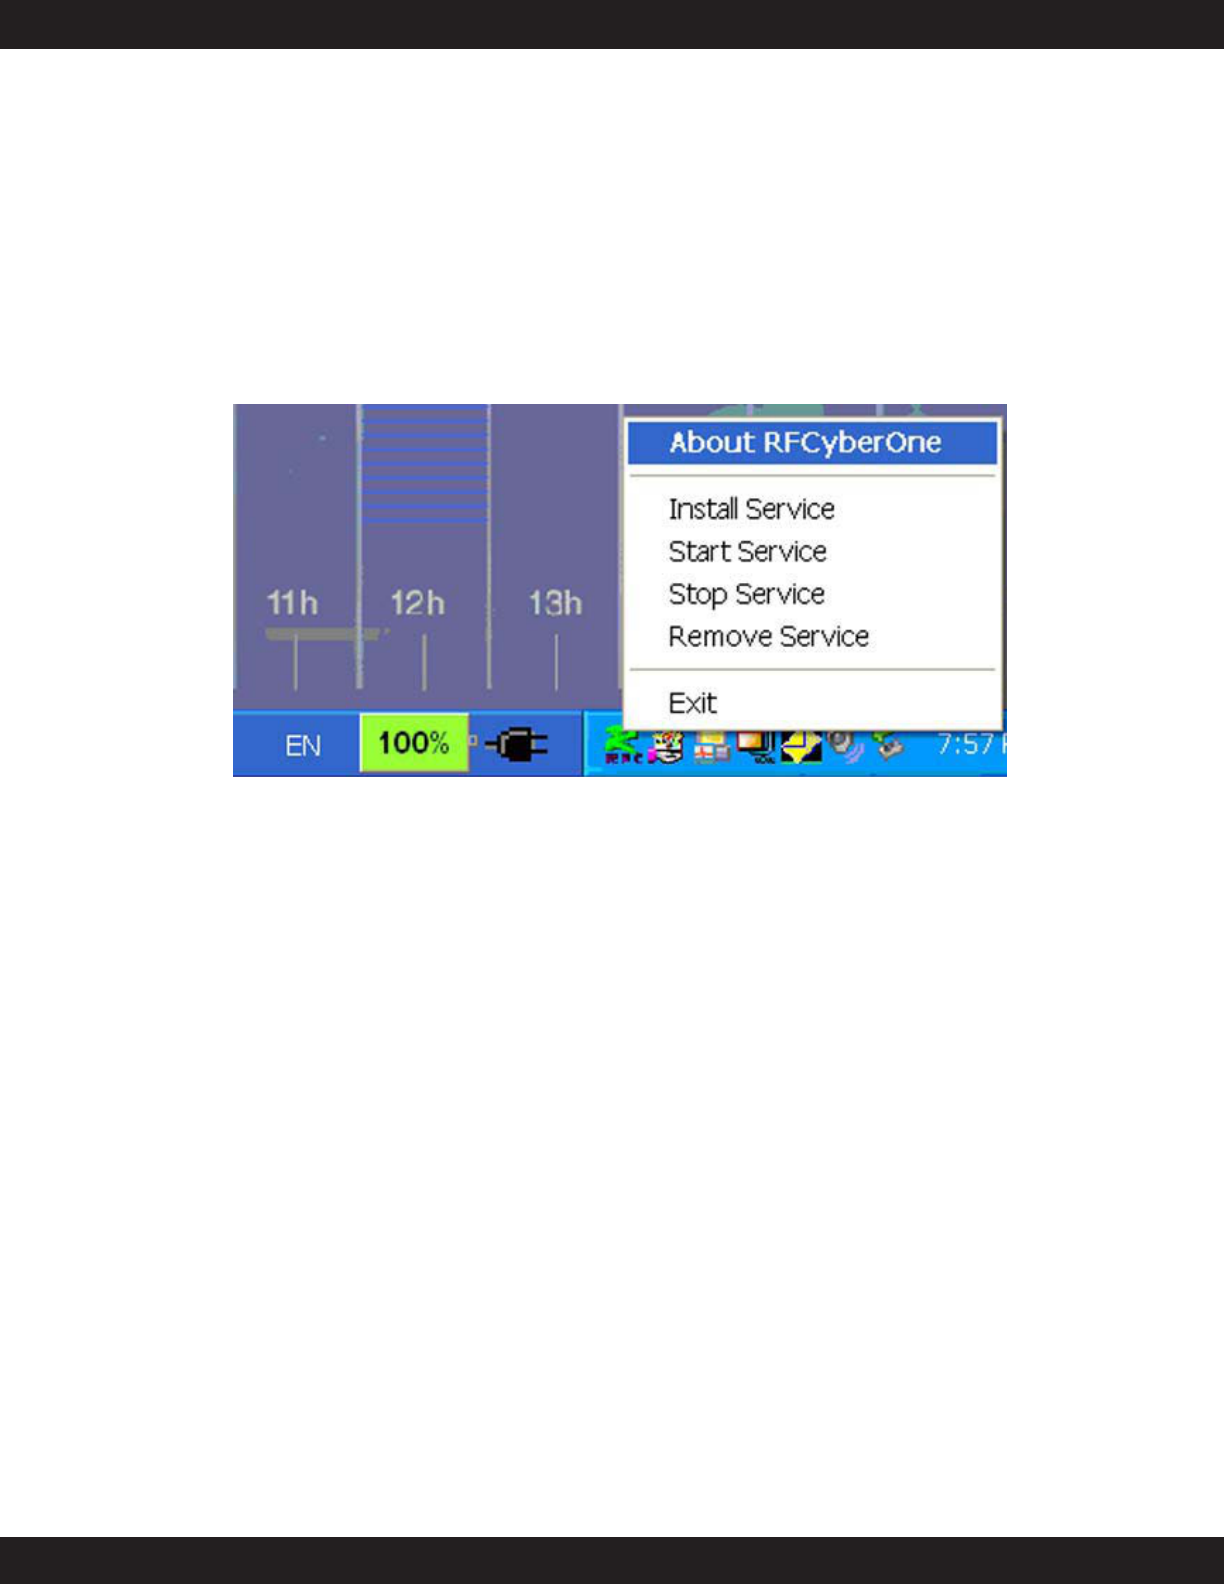
icon should be green color for normal operation. By right clicking on the RFCyberOne Console icon
“R”, users get a pop-up window with a set of commands to control the RFCyberOne service shown
in Fig. 3. Only Windows login user Ids with administrator privilege can invoke those commands suc-
cessfully.
Fig. 3
If eNetPad is plugged in, the color of Console icon is not green yet, the RFCyberOne service
should be restarted with the following order of commands: Stop Service, Remove Service, Install
Service, Start Service. Depending on the system load, users might need to wait a few seconds after
each command.
The Exit command will terminate RFCyberOne Console and remove the icon from system tray of
taskbar. To bring back the icon, please go through “Start -> All Programs -> RFCyber ->
RFCyberOne -> RFCyberOne Console”.
To invoke Login2Go, users first put an RFID tag(eNetCard or other form factors) within 0.78” near
the top of Macally eNetPad for couple of seconds, until Login2Go is invoked automatically. Please
note, for security purpose, RFID tag is the only key to invoke Login2Go, there is no other way to run
Login2Go. So if you lose eNetCard(i.e. RFID tag), you will not be able to invoke Login2Go applica-
tion to automate web site logon. Furthermore, please do not remove RFID tag from eNetPad too
soon, otherwise tag reading will fail, error message will pop up, then you have to follow on-screen
instruction to close error messages and put RFID tag on top of eNetPad again.
7
After a tag is scanned or read via eNetPad, a series of message windows pop up, Login2Go
application is shown as Fig. 4. In title bar, it displays ID of your RFID tag, e2125332, and type of the
RFID tag, (Philips) mifare 1K.
Fig. 4
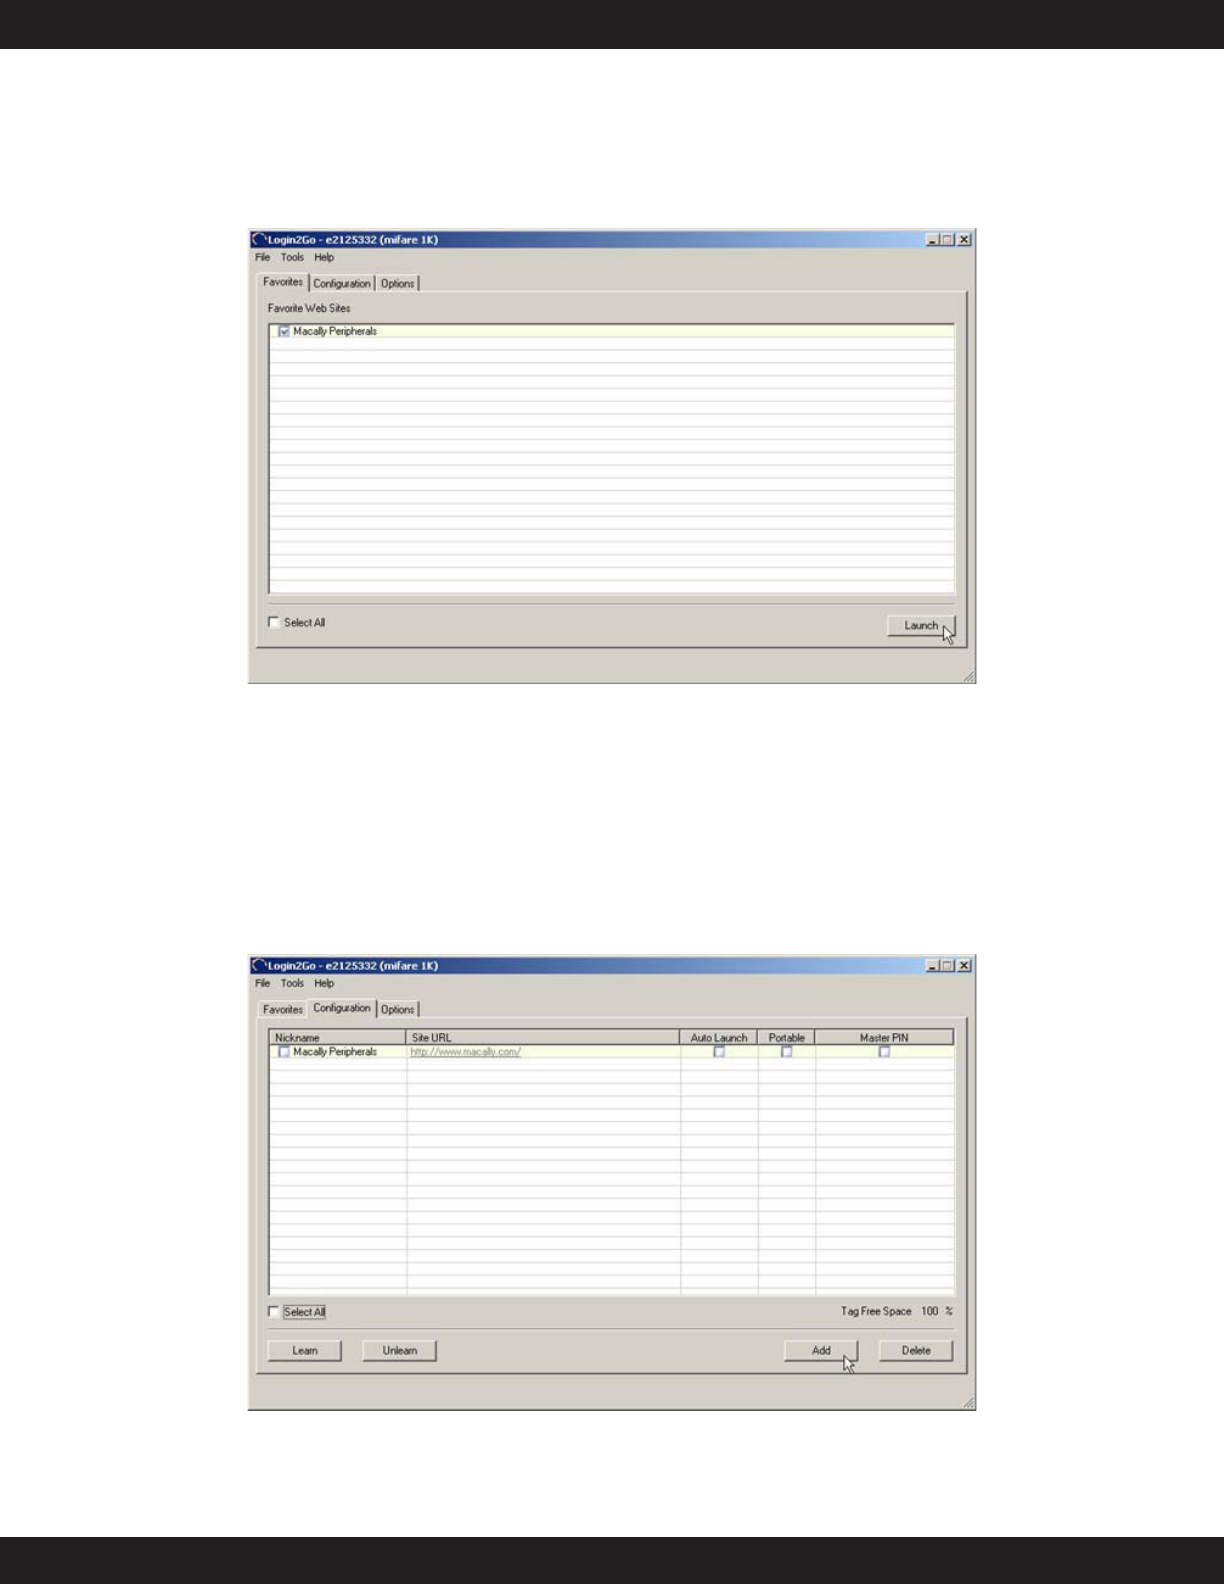
The first tab displayed in Login2Go is “Favorites”, where you normally select preconfigured favorite
web sites to launch. Detailed instructions on how to use Login2Go application are presented below.
Configuration tab
To configure your favorite web sites, you select “Configuration” tab, as shown in Fig. 5.
Fig. 5
8
Configuration tab has following fields:
•Nickname – The name you assign to a Favorites web site.
•Site URL – Login page URL of the favorite web site.
•Auto Launch – If this field box is checked, the favorite web site will be automatically launched
once Login2Go is invoked.
•Portable – If this field box is checked, entire login process and login info of the favorite web site
will be stored in the RFID tag instead of configuration file in computer, so that the web site will
launch in any computer running Login2Go without further configuration.
•Master PIN (Personal Identification Number) – check this box to enable Master PIN verification
whenever the web site is to be launched or configured. This feature adds extra level of security
to prevent unauthorized access to your favorite web sites, in case eNetCard is lost or stolen.
•"Tag Free Space" indicates available space in percentage for the RFID tag. For example, if user
chooses a favorite web site to be portable, the "Tag Free Space" percentage will be decreased.
Please note, the data is not actually saved into the tag until the "Save" command is executed.
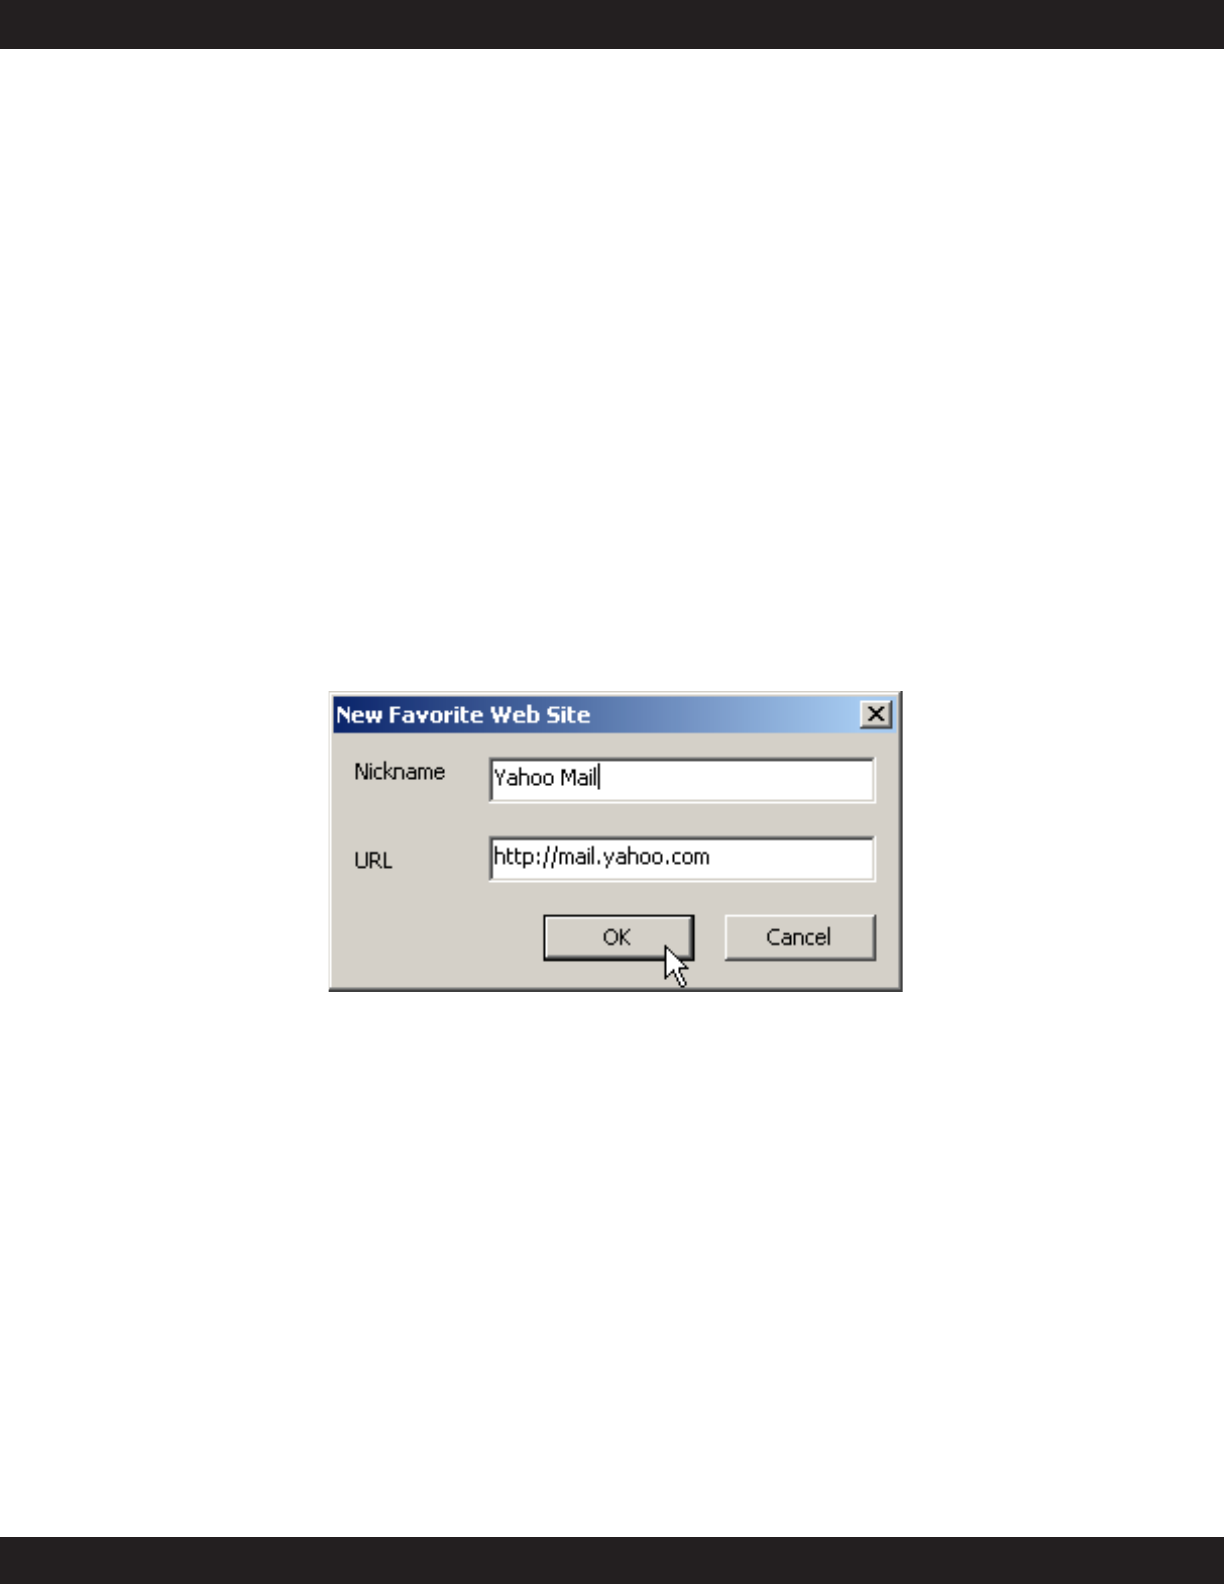
To start adding your own favorite web sites, click the “Add” button. A New Favorite Web Sites dialog
window is popped up, for example, “Yahoo Mail” is entered as Nickname and “http://mail.yahoo.com”
is entered in URL field as shown in Fig. 6 below.
Fig. 6
This Yahoo Mail URL is fairly short to input, and takes you to login page directly. However, some
web sites do not display login screen in their home pages, users usually have to click through a few
pages to find “Log in” or “Sign in” button to click in order to enter Login page. These unnecessary
intermediate pages slow down every launching(automatic login) process of the web site. For exam-
ple, if you start from the home page URL http://www.troweprice.com, it requires you to click through
at least two intermediate pages to display actual login screen URL
https://www3.troweprice.com/cda/public/common/indexLogin?scn=header where to input login user
name and password. To avoid errors, we recommend users to open a web browser separately, enter
your web site to be configured, click through into login page where user name(or user ID) and pass-
word are asked. Then, in Address field, highlight and copy the exact URL of the login page as in Fig.
7, using the T. Rowe Price web site login as example,
9
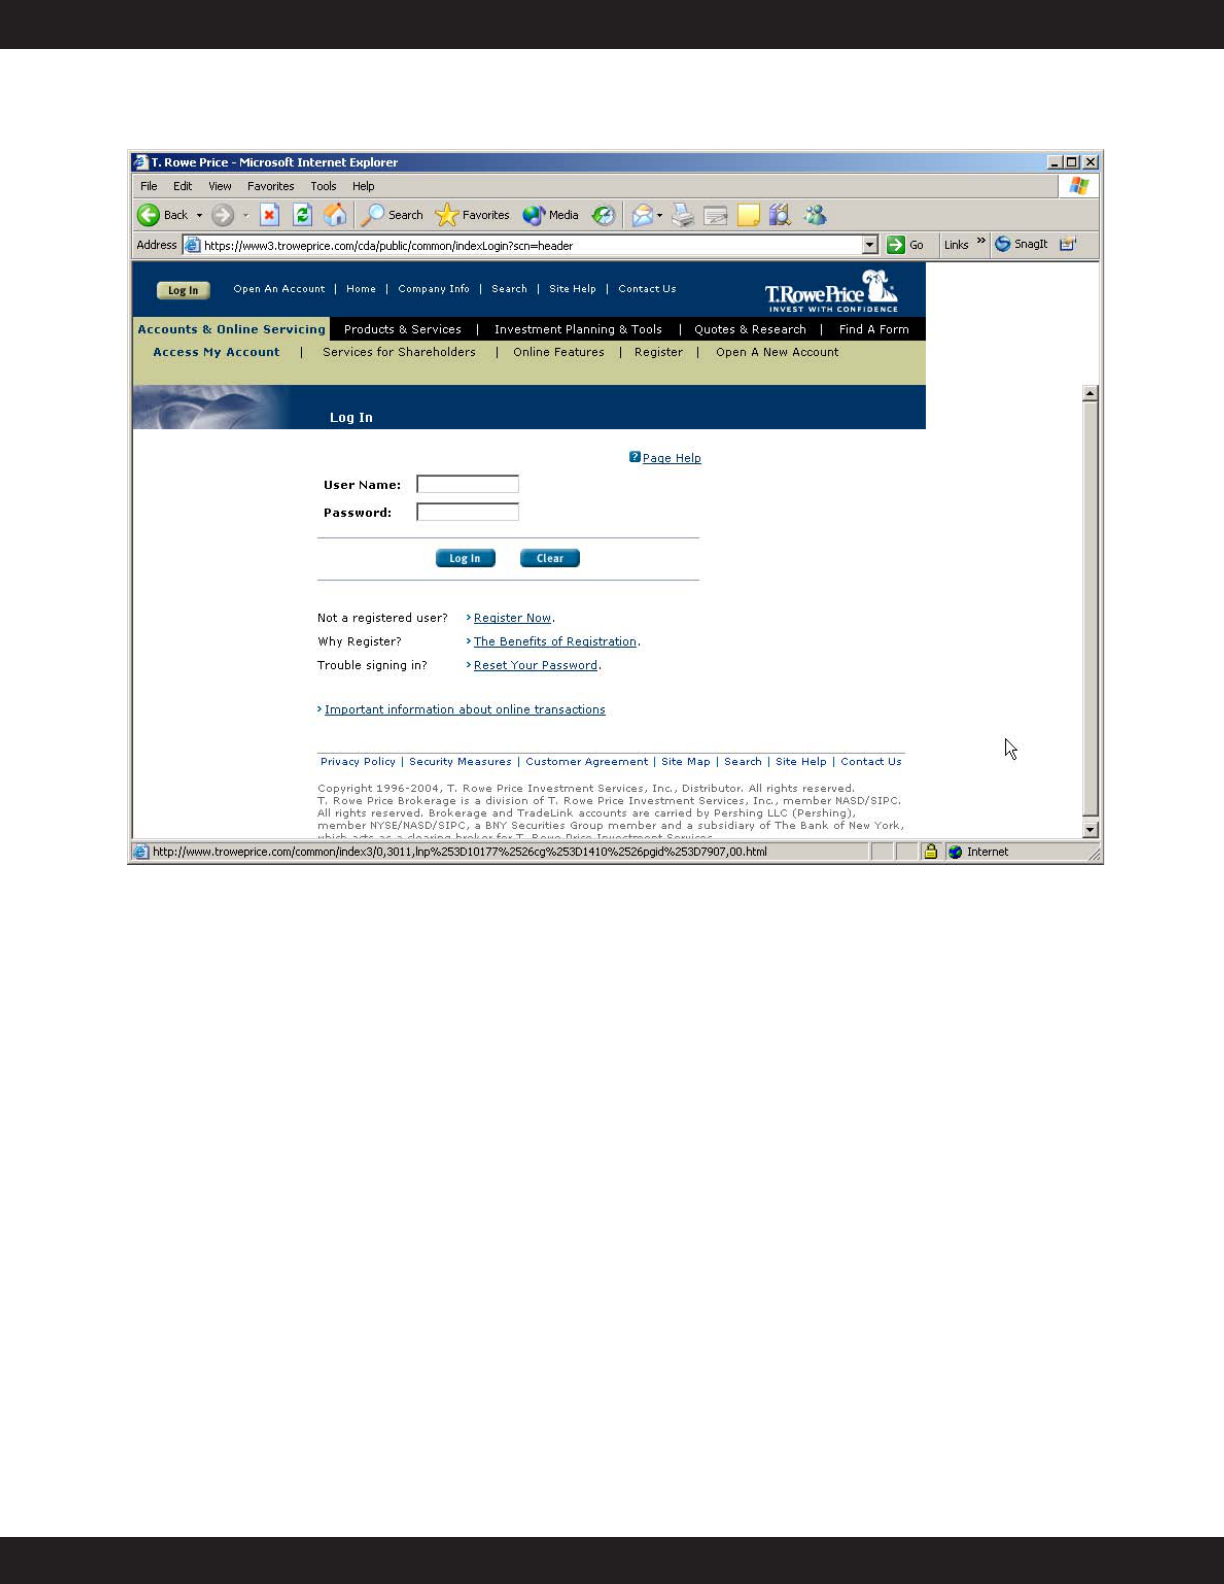
Fig. 7
then switch to Login2Go, paste the login URL in URL field in New Favorite Web Sites window.
10
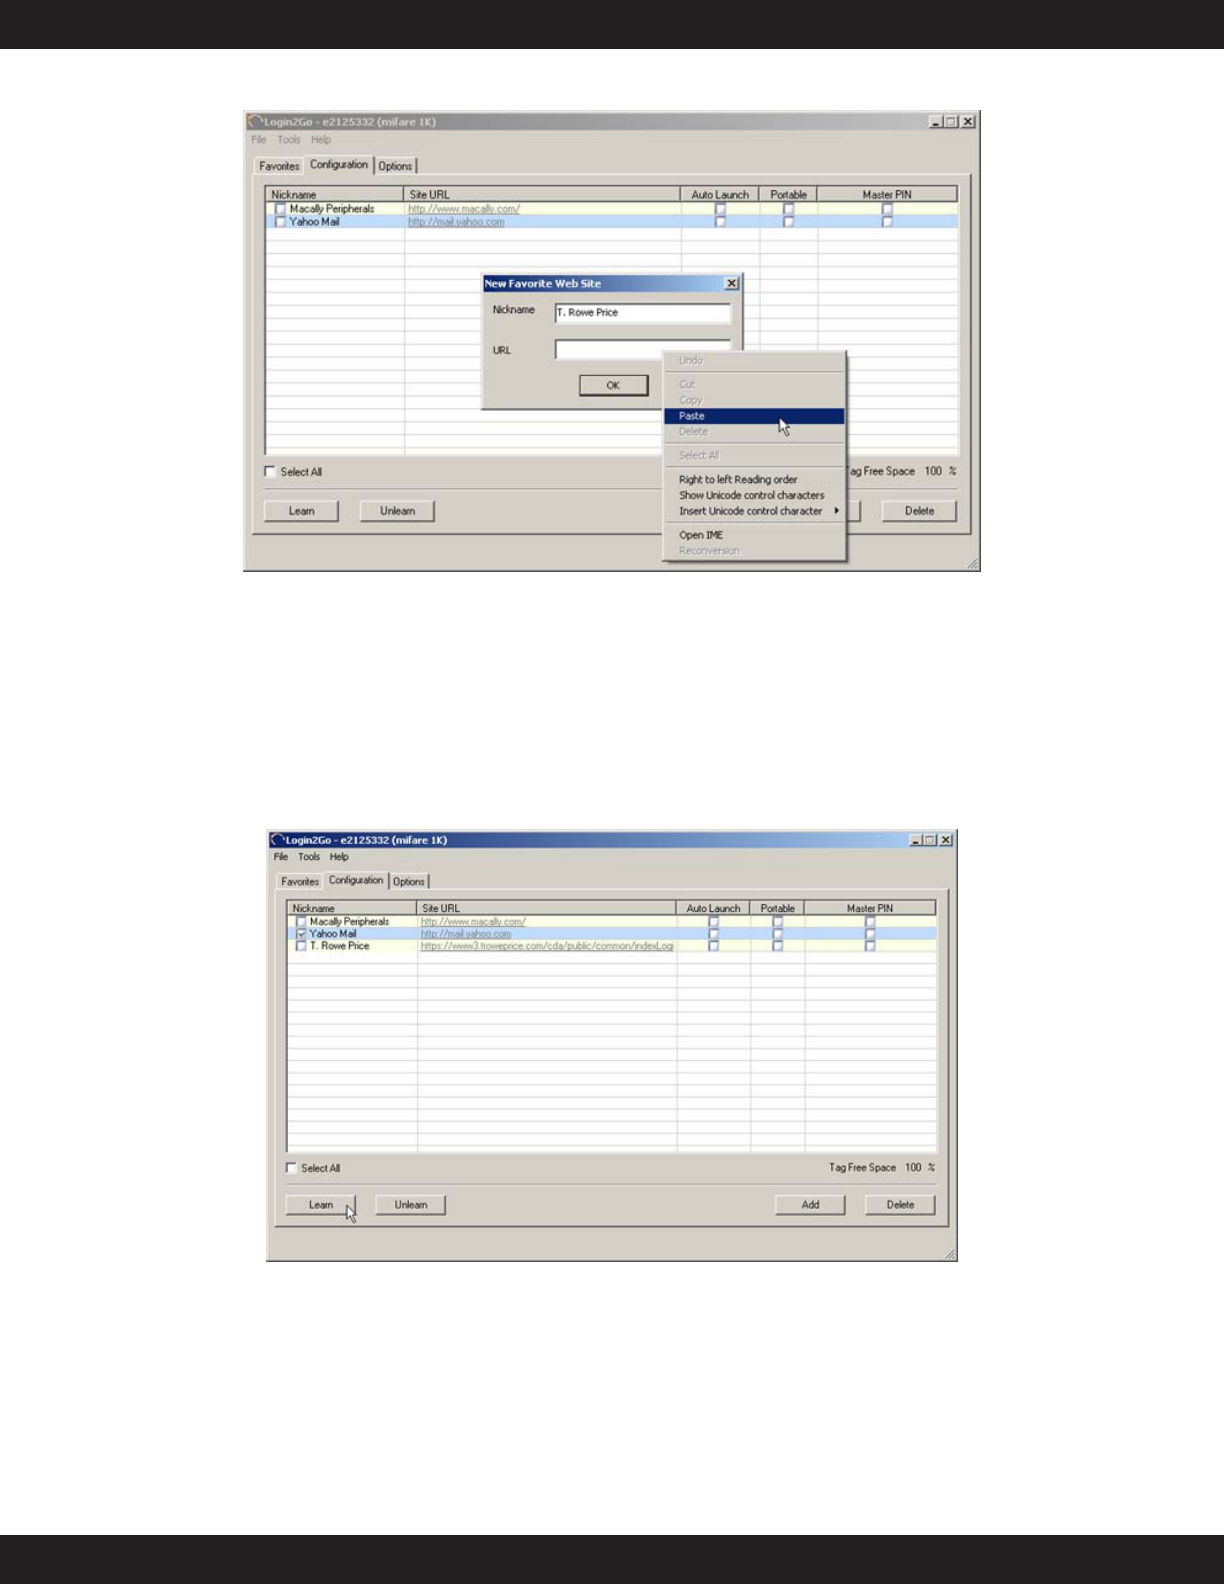
Fig. 8
This copy-and-paste approach is quite effective, you can avoid memorizing the long login URL and
typing error, and reduce chance for web site login incompatibility. But if you encounter any problem
by following this approach, such as dynamically generated login web page URL, you can still start
from beginning, enter home URL of the web site, instead of login page URL, in New Favorite Web
Site. Please unlearn and learn login sequence again whenever Site URL is updated.
Let’s return to example of added favorite web site “Yahoo Mail”.
Fig. 9
To learn the login sequences, user can check the square box in front of the site nickname, click the
“Learn” button to teach Login2Go the sequence of login actions of selected web sites. As shown in
Fig. 10, an embedded IE (Microsoft Internet Explorer) is popped up with title “Learn Login – Yahoo
Mail” to track and record sequence of login actions as user enters user name and password to logon
into the favorite web site. At end, “Done” or “Downloading (100%)” message is displayed on lower
left corner of the embedded IE indicating login is successful, the sequence of login actions has been
recorded. User can click “Finish” button to complete the learning process. 11

Please note, some well-known web mail services, such as Yahoo Mail, Hotmail and Gmail will down-
load cookies into your computer after a successful login for quicker future login. This practice affects
Login2Go relearn process, it is not a bug in Login2Go. As a message at bottom left corner of the
learning window reminds you, if you observe a web site is logged in unexpectedly even without your
input of user name and password, please log off your web mail account from all IE browsers includ-
ing embedded one, and learn again.
To learn more tips, please refer to subsection “Tips for effective learning” later.
Fig. 10
After the successful learning process, “Site URL” field of the web site turns into dark blue color in
Fig. 9.
Users can click the “Unlearn” button to erase previously learned sequence of login actions for a
favorite web site. “Site URL” field of the web site changes back to grey color.
12
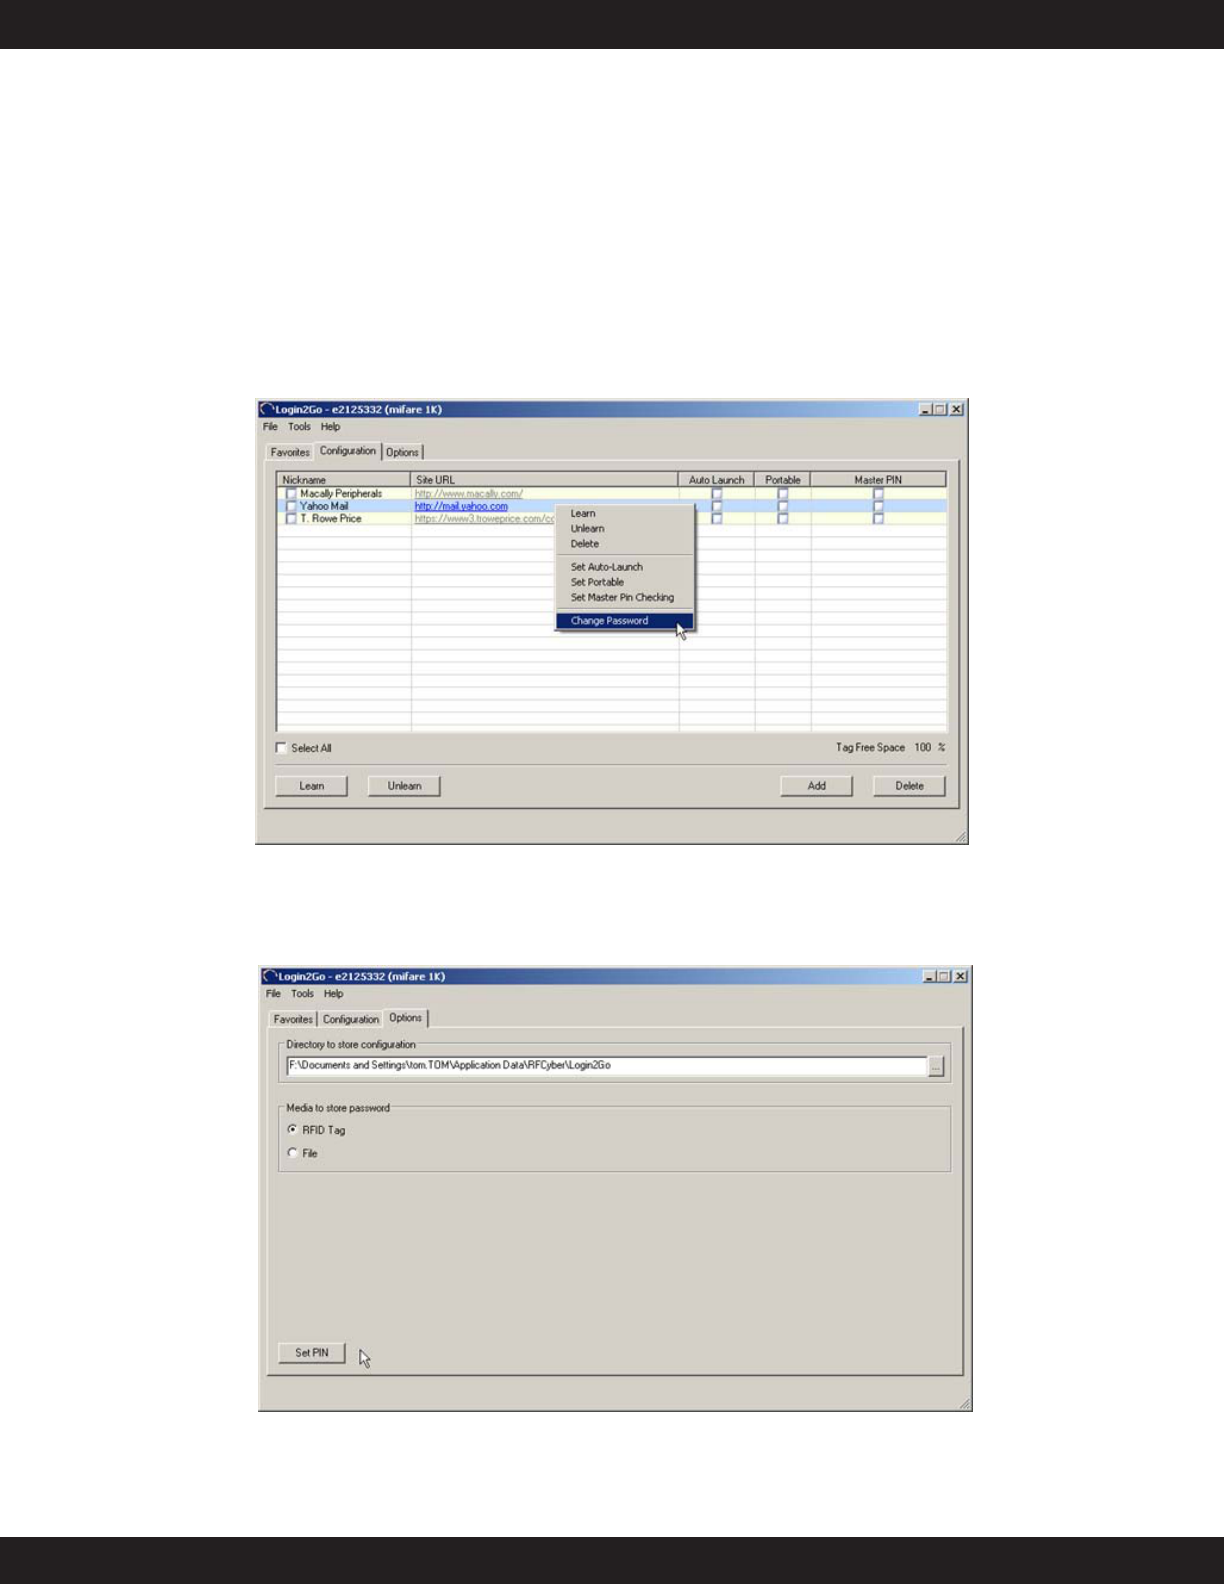
If users change password for the favorite web site later, they can update the password stored in
Login2Go without repeating the learn process. This is done by right clicking on, for example, the
“Yahoo Mail” row in “Configuration” tab in Fig. 11, and changing password.
Generally, web sites are updated frequently. It is possible that certain stored Login URL or info are
no longer valid, launching such web site will result in failure. If you experience this problem, find out
what the changes are from the web site, configure and learn the login process again with updated
information.
The “Delete” button lets users delete selected favorite web sites from Login2Go.
Fig. 11
Options tab
The “Options” tab in Fig. 12 offers more features in using Login2Go application.
Fig. 12
13
It provides you with following choices for a given RFID tag:
Directory to store configuration,
Media to store password,
Set PIN.
We recommend you to keep default directory path to store the configuration. The “Media to store
password” gives you the choice to store password in either the given RFID tag or the configuration
file in computer. For the former case, the RFID tag must be writable. If the “Media to store pass-
word” setting is changed from “RFID Tag” to “File”, users will be asked to put the RFID tag near
Macally RFID eNetPad to clean passwords information from the memory of RFID tag and transfer
them into the configuration file of the RFID tag.
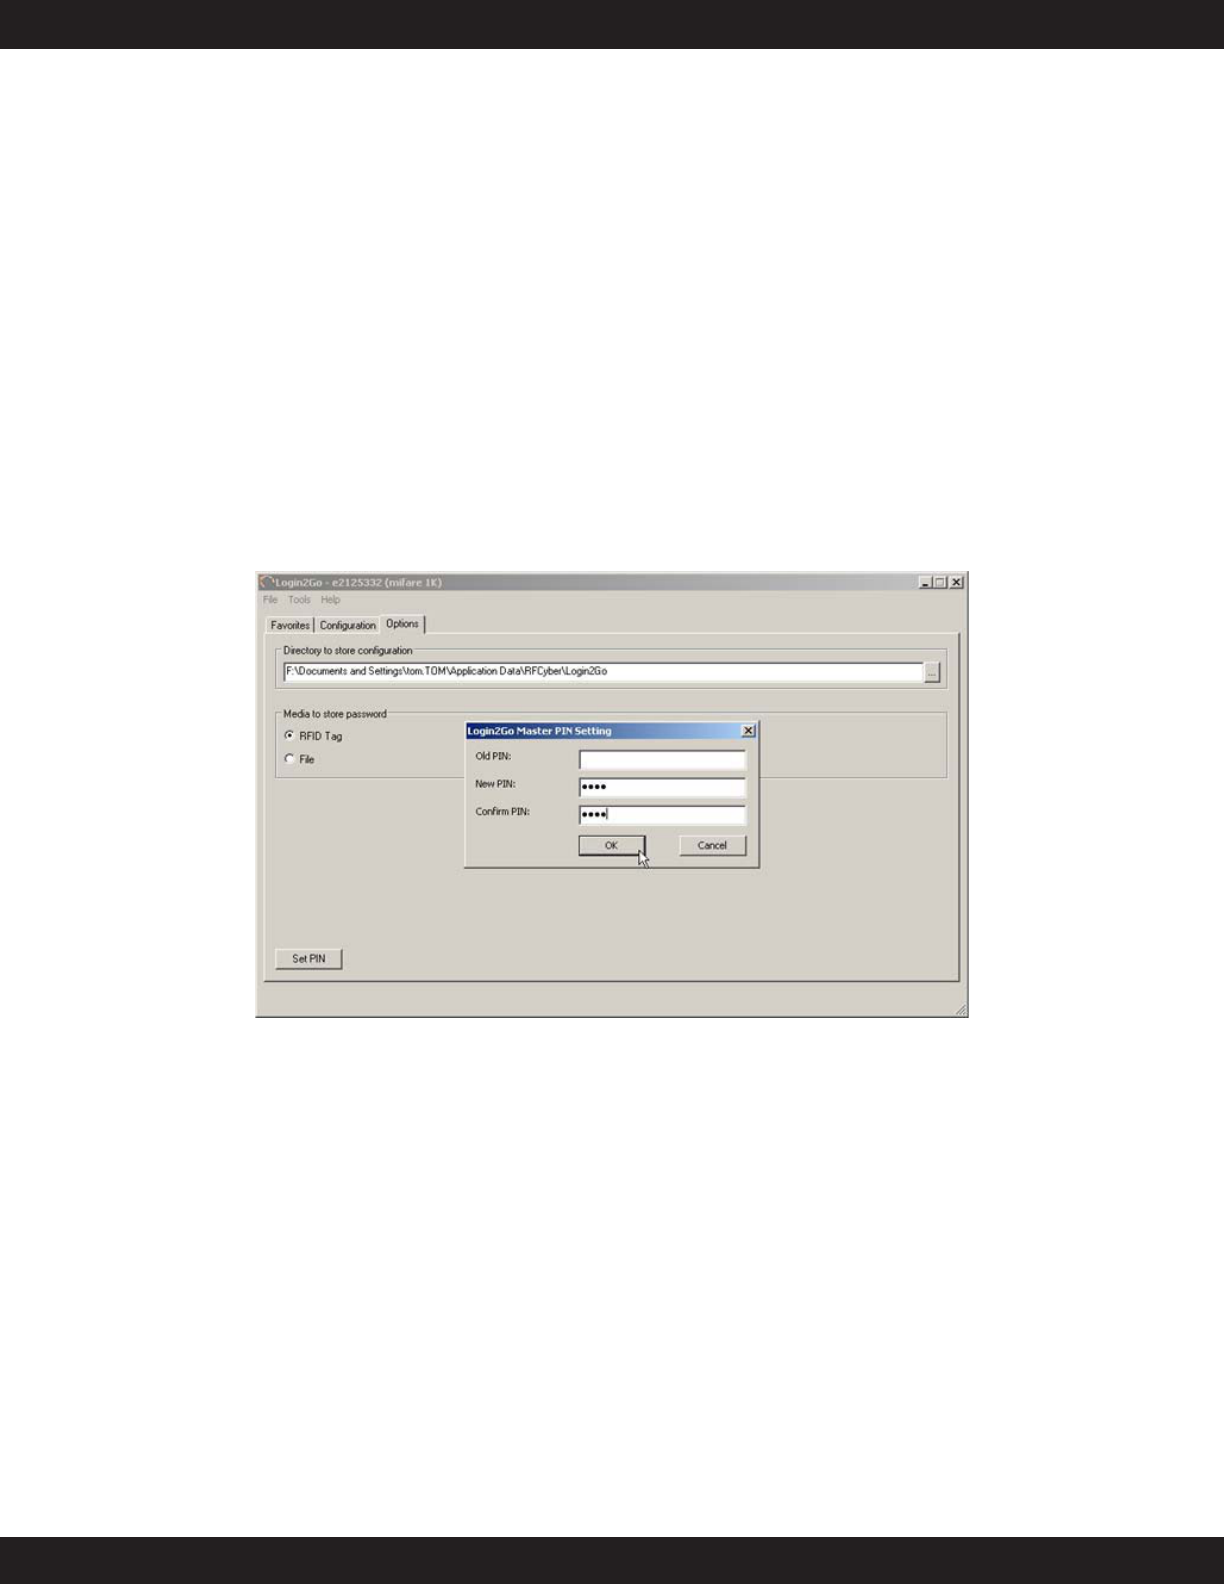
By default, RFID tag PIN(personal identification number) is blank, no PIN is set. “Set PIN” button
allows user to enter a Master PIN for the given RFID tag. As shown in Fig. 13, a dialog window is
popped up to confirm the change of PIN.
Fig. 13
Once the Master PIN is set, Login2Go will ask for the PIN for the following two situations. First situ-
ation is when users select the “Configuration” tab to configure favorite web sites, the second when
user wants to launch a favorite web site with “Master PIN” field checked.
To remove Master PIN, users just need to set PIN, leave blank in the “New PIN:” and “Confirm PIN:”
fields.
14
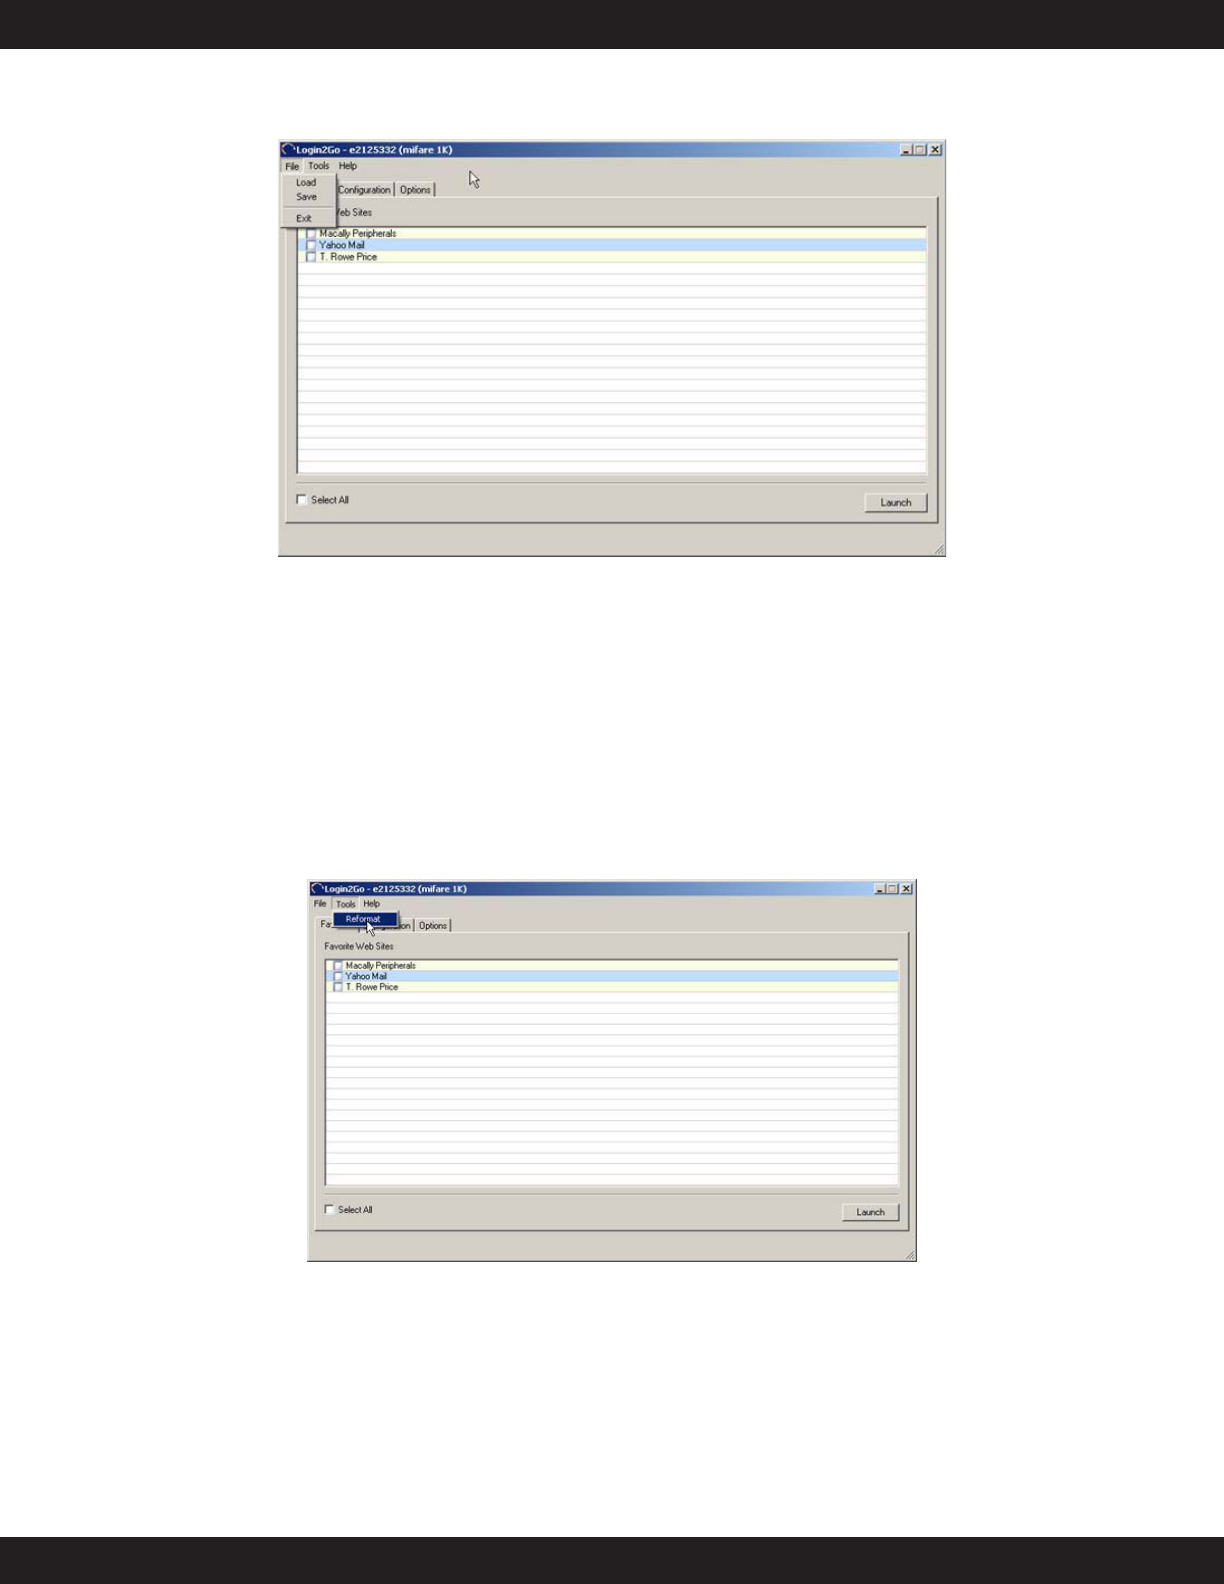
Fig. 14 shows Save and Load commands under the File in pop down menu.
Fig. 14
“Save” command lets you save any changes or updates taken place in Login2Go. “Load” command
allows you to scan another RFID tag to load its configuration file without exiting and opening
Login2Go application again. When “Load” is executed, Login2Go will prompt you to put another
RFID tag near the eNetPad.
When users exit Login2Go application, by either clicking “Exit” command or closing the main appli-
cation window, a dialog window will pop up to confirm whether to save the change if there is any
change associated with the current RFID tag.
Fig. 15 shows Reformat command under Tools menu.
Fig. 15
“Reformat” command will reformat the given RFID tag, delete the corresponding TagId.pas file, and
exit Login2Go application. This command is used if there is corrupted data in the given RFID tag
and/or the corresponding TagId.pas file. The RFCyberOne Service must be up running while invok-
ing the reformat operation, i.e., the RFCyberOne Console icon “R” in task bar needs to be green
color.
15