Power 7 Technology 2012THU0001 WIFI-DISK With Power Bank User Manual Simple Manual English PI 545
Power7 Technology(Dong Guan) Co., Ltd. WIFI-DISK With Power Bank Simple Manual English PI 545
UserManual.wiki
>
Power 7 Technology
>
2012THU0001 User Manual
Users Manual
Navigation menu
Upload a User Manual
Namespaces
Wiki Guide
HTML
PDF
Info
Views
User Manual
Discussion / Help
Navigation


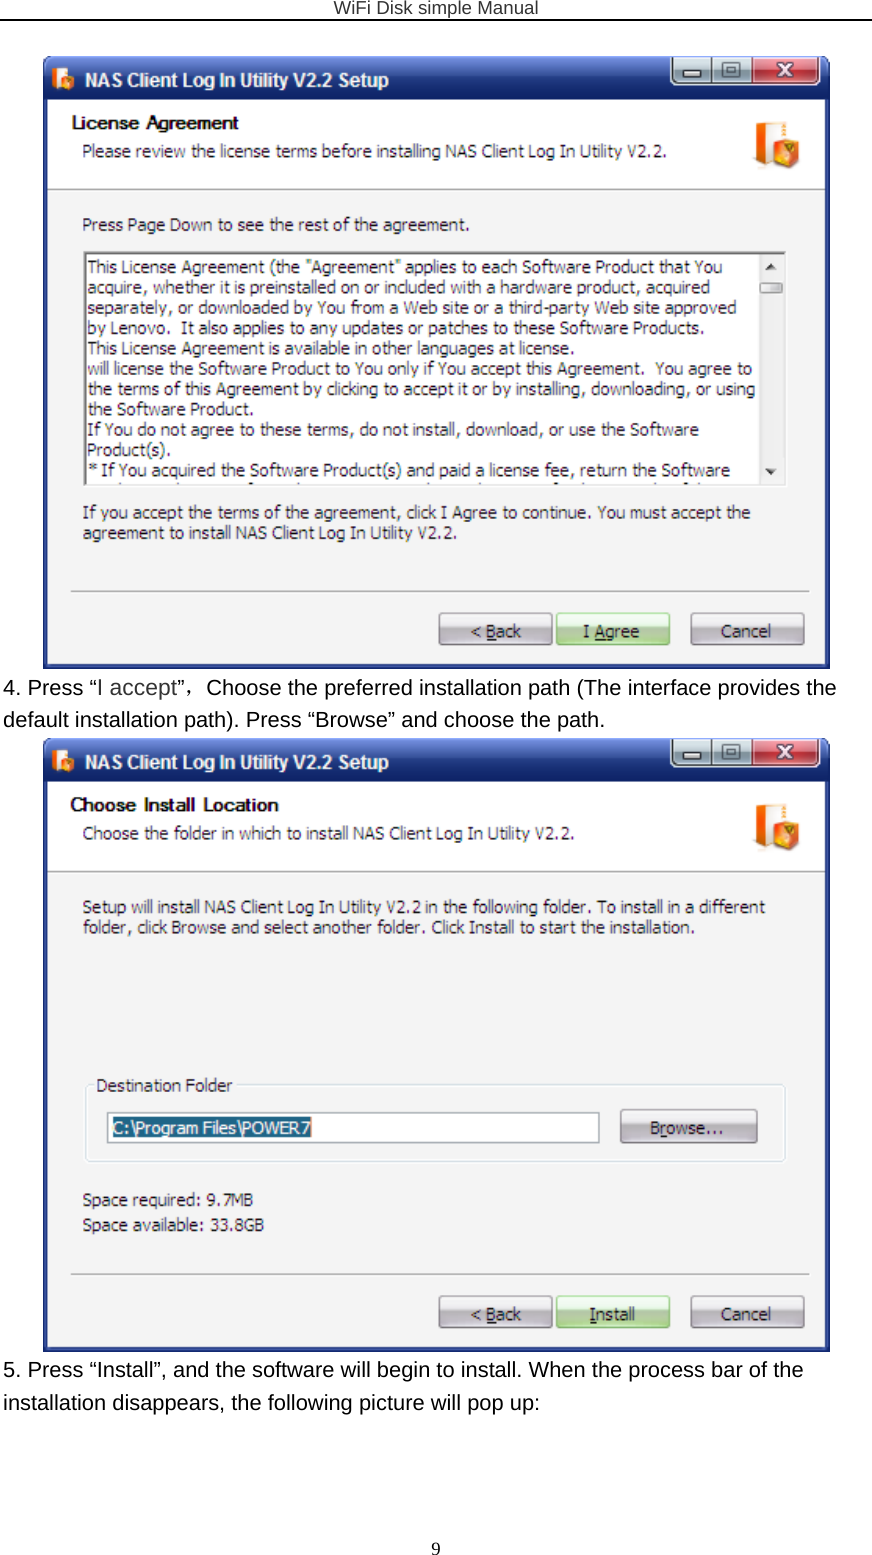
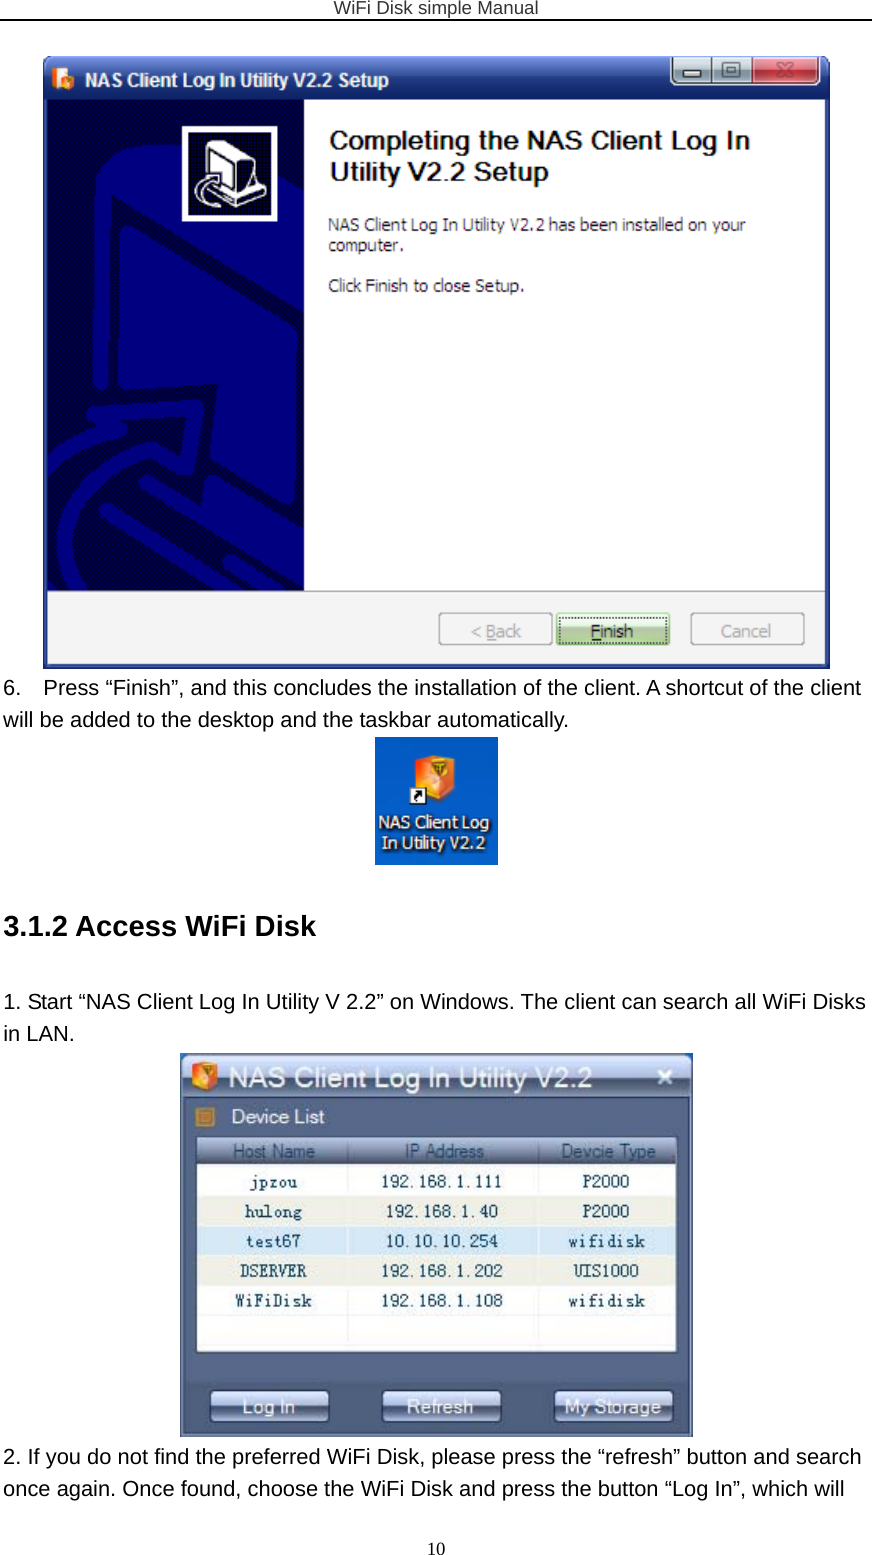
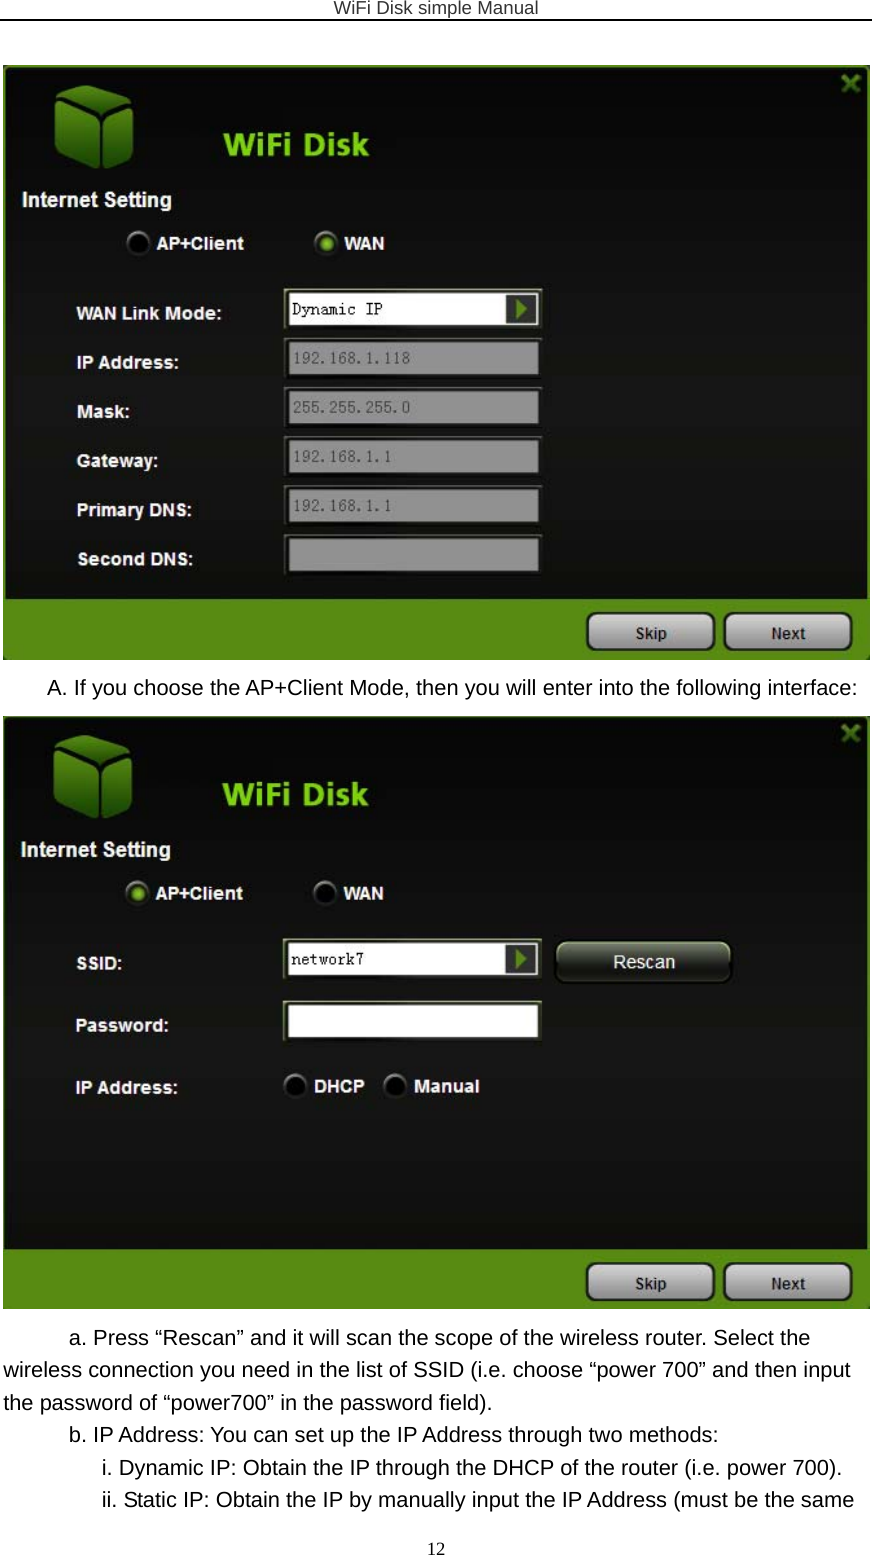
![WiFi Disk simple Manual 11launch the browser to access the WiFi Disk. 3. Type the default the account and password:Account: [admin], no User Password. 3.2 WEB Management Interface (for Windows) To reach the login in page, you can either launch the browser through the client login, or directly input the IP address of the WiFi Disk. Input the default account and password (Account: admin, no default password). The configuration wizard will pop up when you first access to the device and the wizard will guide you through a step-by –step process to configure your WiFi Disk. 1. The wizard will pop up when you first access to the WiFi Disk. 2. If the device needs to set up, press “Next” and enter into Internet Setting Interface (default mode: Router Mode). Choose the mode you need and press “Next”.](https://usermanual.wiki/Power-7-Technology/2012THU0001/User-Guide-1887462-Page-11.png)