Powerstick com ARIA Portable bluetooth speaker User Manual aria new instruction manual fcc ai
Powerstick.com Inc. Portable bluetooth speaker aria new instruction manual fcc ai
User Manual
Product Features
• Bluetooth 4.1 +EDR with low-energy consumption
• 30-feet Bluetooth connectivity range
• Dual speakers for rich playback
• Passive radiator for bass boost
• More than 8 hours of playtime
• Soft touch exterior for a luxurious feel
• Works with Bluetooth capable phones/devices
Setting up your speaker
PORTABLE BLUETOOTH SPEAKER
Charging your speaker
Product Support
For more information:
www.powerstick.com
For technical support:
Email us at support@powerstick.com
Designed in Canada by POWERSTICK.COM.
Assembled in China.
Specifications
Product Number ECSL-902300
Product Dimensions 5.3” x 3.1” x 1.7”
Product Weight 9.3 oz.
Communication Bluetooth 4.1+EDR
Bluetooth Range Up to 30 ft.
Playback Time 8 hours or more
Speaker Output (2) 5-watts
Input +5V, 1A
Battery Capacity 1,200mAh
1. Press and hold the power button for 3 seconds to turn Aria on, you will hear
a startup chime. The lights will begin flashing red and green. You are now in
Pairing Mode. Note: if no devices are paired within 5 minutes, Aria will turn off.
Turn Aria back on to re-enter Pairing Mode.
2. Go to your phone/device Settings. Find your Bluetooth settings. Note: if you
are having trouble, please refer to your devices support manual.
3. You should see ARIA listed in the list of nearby Bluetooth devices. If you do
not see ARIA, make sure that you are in Pairing Mode (red and green flashing
lights on ARIA).
Tap on the device named Aria to pair by Bluetooth. Once paired, you will hear
a sound indiciating a successful pairing and a green light will flash.
4. Go ahead and play your favorite tunes!
5. When you’re done enjoying your music, press and hold for 3 seconds to turn
ARIA off.
Note: to pair ARI with another device, you must first disconnect any devices
currently paired by turning off the devices Bluetooth, forgetting ARIA as a paired
device, or not having the device in range.
When your speaker is running low on battery, simply insert the micro-USB end
of the included charging cable into the speaker and the larger USB end into a
USB power source (computer, USB charger, etc.)
iOS Android
or
C
C
h
h
a
a
r
r
g
g
i
n
n
g
g
y
y
o
P
P
r
r
o
o
d
d
uc
t
t
S
S
upport
For more information:
w
w
w
.
p
o
w
e
r
s
t
i
c
k
.
c
o
m
Sp
Pr
Pr
3. You should see ARI
A
not see ARIA, make su
lights on ARIA).
Ta
p
on the device na
m
a sound indiciating a s
u
4. Go ahead and
p
la
y
y
5. When you’re done
e
ARIA off.
Note: to pair ARIA with
currently paired by turn
i
device, or not having t
he
W
hen your speaker is
r
of the included chargi
n
US
US
B
B
power source (co
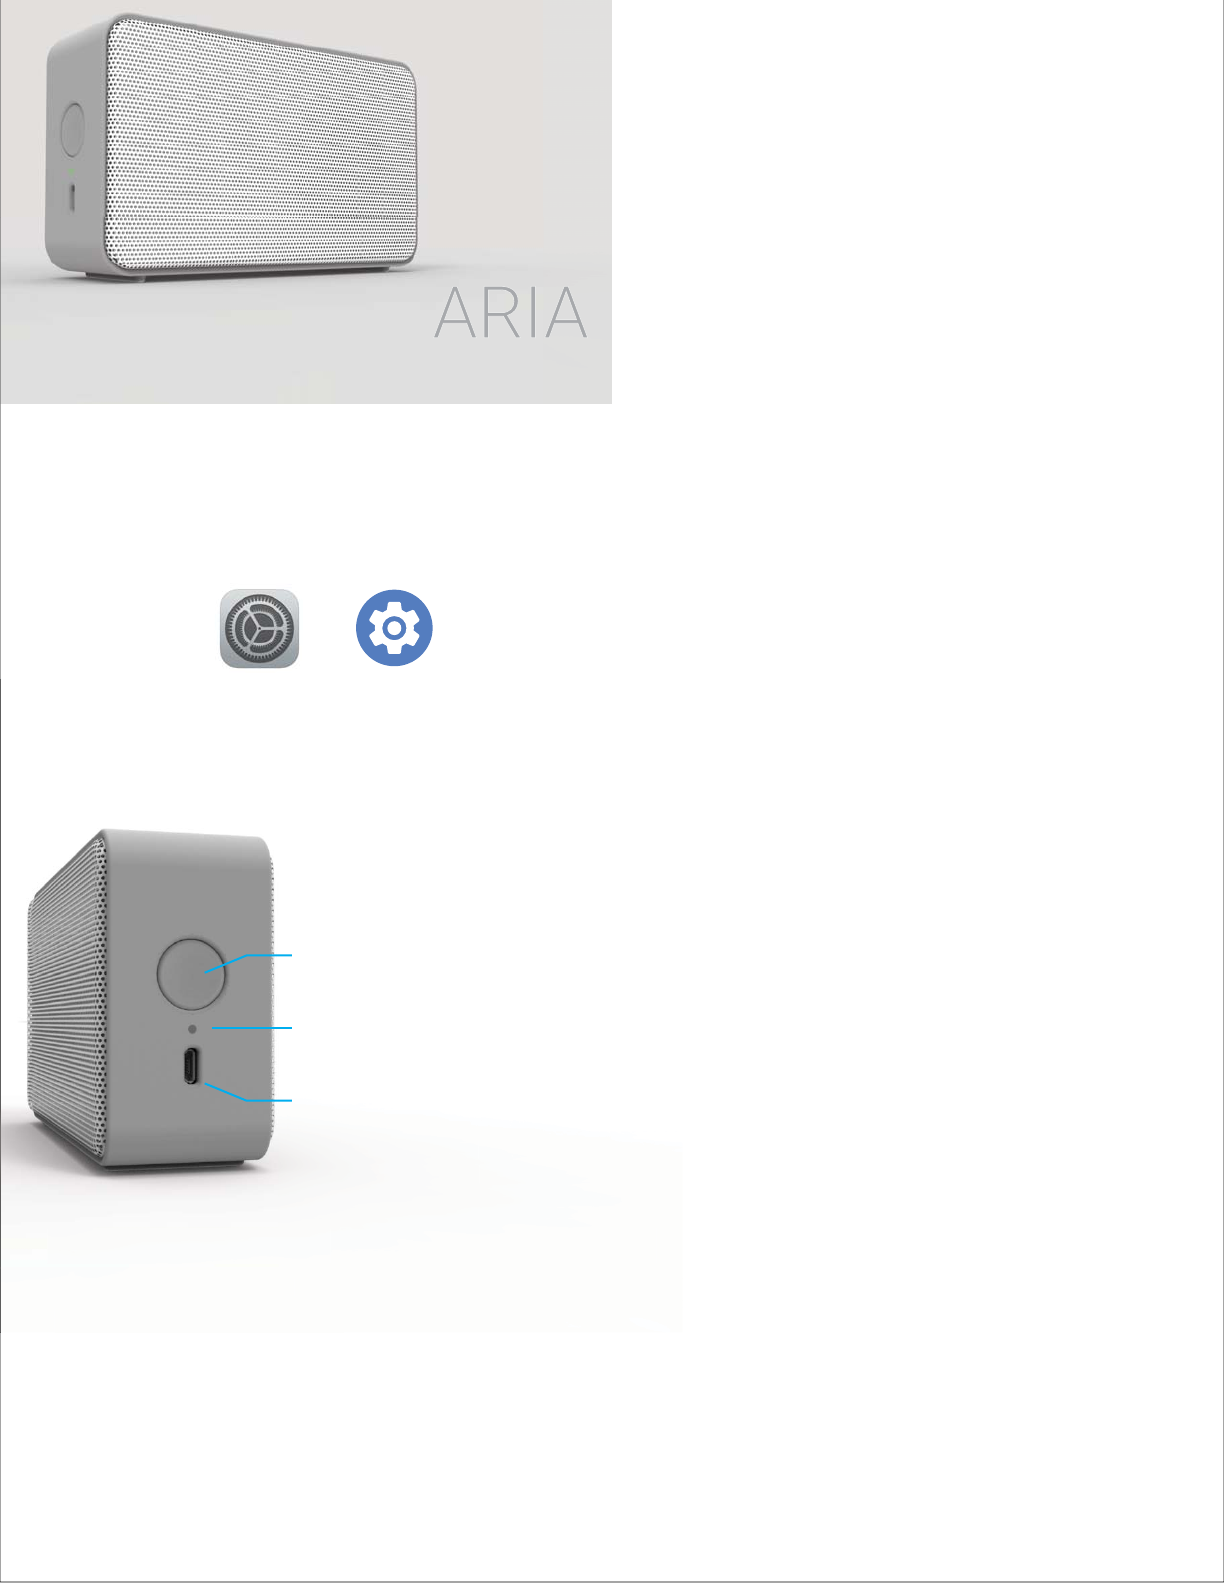
Power Button
Indicator Light
Charging Port
Manufacture:Shenzhen SKYWAVE Technology Co.,Ltd.
FCC Caution.
This device complies with part 15 of the FCC Rules. Operation is subject to the following two
conditions:
(1) This device may not cause harmful interference, and
(2) this device must accept any interference received, including interference that may cause
undesired operation.
Any Changes or modifications not expressly approved by the party responsible for compliance
could void the user's authority to operate the equipment.
Note: This equipment has been tested and found to comply with the limits for a Class B digital
device, pursuant to part 15 of the FCC Rules. These limits are designed to provide reasonable
protection against harmful interference in a residential installation. This equipment generates
uses and can radiate radio frequency energy and, if not installed and used in accordance with the
instructions, may cause harmful interference to radio communications. However, there is no
guarantee that interference will not occur in a particular installation. If this equipment does
cause harmful interference to radio or television reception, which can be determined by turning
the equipment off and on, the user is encouraged to try to correct the interference by one or
more of the following measures:
-Reorient or relocate the receiving antenna.
-Increase the separation between the equipment and receiver.
-Connect the equipment into an outlet on a circuit different from that to which the receiver is
connected.
-Consult the dealer or an experienced radio/TV technician for help.
The device has been evaluated to meet general RF exposure requirement. The device can be used
in portable exposure condition without restriction.