PreSonus Audio Electronics SLAR0801 Mixer User Manual
PreSonus Audio Electronics, Inc. Mixer
Users Manual
OverviewGetting Started
English
Français
Español
Deutsch
StudioLive™ AR-Series
Hybrid Digital/Analog Production Mixers
Quick Start Guide
www.presonus.com
®

Table of Contents
1 Overview — 1
1.1 What is in the Box — 1
1.2 What is in your My PreSonus Account — 1
2 Getting Started — 2
2.1 Level-Setting Procedure — 2
2.2 Pairing a Bluetooth Device — 4
2.3 SD Recording — 4
2.4 Typical Band Setup Diagram — 5

StudioLive™ AR Series Quick Start Guide
OverviewGetting Started
English
Français
Español
Deutsch
Overview
1
1 Overview
1.1 What is in the Box
In addition to this manual, your StudioLive package contains the following:
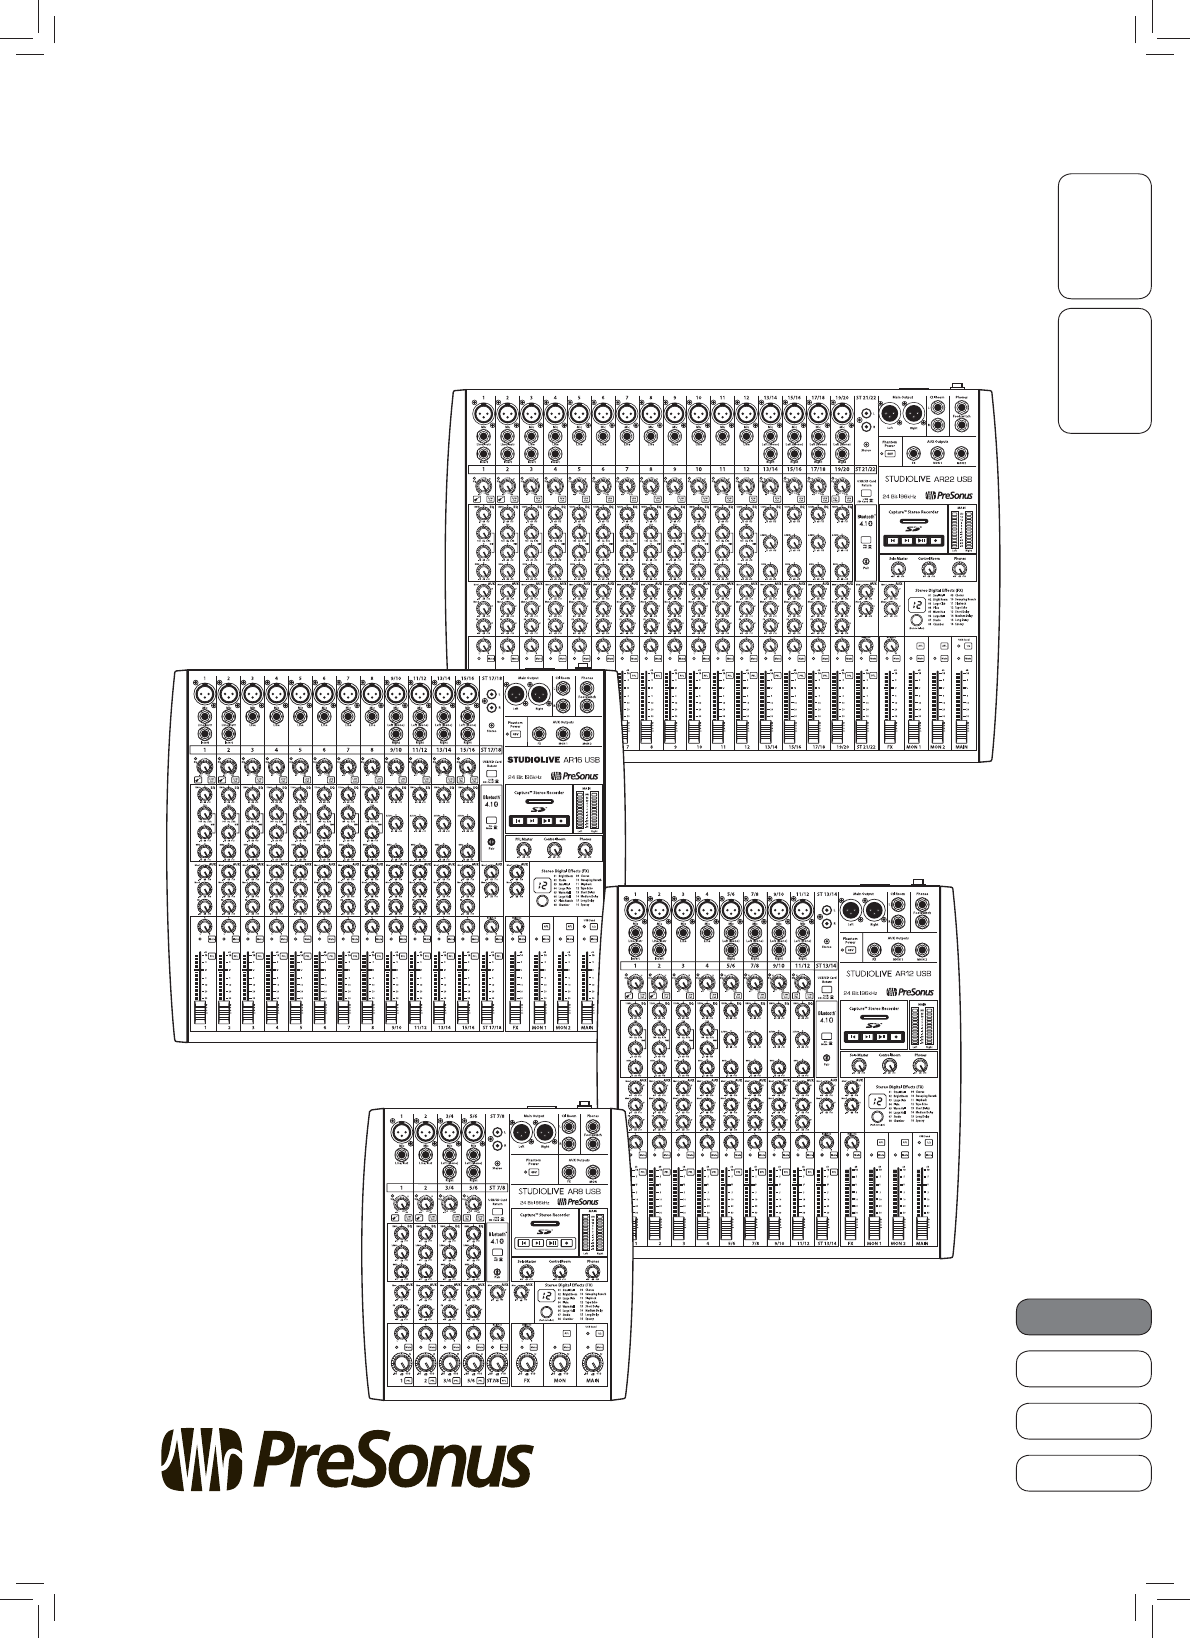
•PreSonus StudioLive AR22, AR16 USB, AR12 USB, or AR8
USB hybrid digital/analog performance mixer
• 6-foot (1.8-meter), USB cable
• IEC power cord
•StudioLive AR-Series Quick Start Guide
1.2 What is in your My PreSonus Account
Once you register your StudioLive AR mixer at My.PreSonus.com, you will
find the following software available for download in your user account:
•StudioLive AR-Series Owners Manual
•StudioLive AR-Series Software Reference Manual
•Capture multitrack-recording software
•Studio One Artist DAW software and bundled content
•ASIO drivers for Windows systems (macOS users do not require a driver)
OverviewGetting Started
StudioLive™ AR-Series
Hybrid Digital/Analog Production Mixers
Quick Start Guide
StudioLive™ serie AR
Consolas híbridas digitales/analógicas para producción
Manual de usuario
StudioLive™ AR-Series
Hybrider Digital/Analog-Produktionsmixer
Kurzanleitung
StudioLive™ AR
Mélangeurs de production hybrides
numériques/analogiques
Guide de prise en main
www.presonus.com
English
Français
Español
Deutsch
®

2.1 Level-Setting Procedure
Overview Getting Started
Getting Started
2
2 Getting Started
Before you begin, here are a few general rules of thumb:
•Always turn down the Main, Control Room, and Phones
level controls before making connections.
•Before plugging or unplugging a microphone while other channels
are active, mute the channel to which you are connecting.
•Channel levels should be set on or near the “U” mark whenever possible. The “U”
indicates unity gain, meaning the signal is neither boosted nor attenuated.
•Do not allow your inputs to clip. Watch the signal indicators and make sure
the red Clip indication illuminates rarely, if ever. Clipping (overloading)
the inputs can result in digital distortion, which sounds terrible.
Warning: Engaging phantom power or connecting sources without muting the channels
can result in a very loud pop that can potentially damage your sound equipment.
Always mute your channels before engaging Phantom power or connecting sources.
P.A. and studio equipment should be powered on in the following order:
•Sound sources (keyboards, direct boxes, microphones,
etc.) connected to the StudioLive AR inputs
•StudioLive AR mixer
•Computer (if applicable)
•Power amplifiers or powered monitors
When it’s time to power down, your system should be turned off in the reverse
order. Now that you know what not to do, let’s get some audio going!
2.1 Level-Setting Procedure
1. Grab a microphone and a mic cable and plug them into the
Channel 1 mic input.
2. Connect the Main outputs of your StudioLive AR to your power amplifier or
powered monitors.
3. Bring down all the level controls on your StudioLive AR to the lowest setting.
4. Make sure that the Mic/Line knob on Channel 1 is
turned all the way counter-clockwise.
5. Plug your StudioLive AR-series mixer into a power outlet and turn it on.

StudioLive™ AR Series Quick Start Guide
OverviewGetting Started
English
Français
Español
Deutsch
Getting Started
3
6. If your microphone requires phantom power, engage the 48V button on
your StudioLive AR mixer.
7. Turn on your amplifier or powered monitors.
8. Speak or sing into your microphone at approximately the same volume you
expect during the performance.
9. Turn the trim knob on Channel 1 clockwise while watching the signal
indicator. Adjust the Channel 1 trim knob until the signal/clip indicator is
red, then back down until it is green and just below clipping at the loudest
input level.
10. Raise the Channel 1 level control to unity gain (denoted with a “U”).
11. Bring up the Main level until you can comfortably listen to your microphone
through your speakers.
12. Sculpt the sound by adding EQ to taste.

2.2 Pairing a Bluetooth Device
Overview Getting Started
Getting Started
4
2.2 Pairing a Bluetooth Device
To pair a new device to your StudioLive AR-series mixer:
1. Press and hold the Bluetooth pairing button for three seconds.
2. The Bluetooth button will flash once every second.
3. Search for new Bluetooth devices from the device to
which you’d like to pair (smartphone, tablet, etc).
4. Select “StudioLive AR22/AR16/AR12/AR8 USB” from the
available Bluetooth devices list on the pairing device.
5. The Bluetooth button will illuminate solid when paired successfully.
Note: If previously paired, your StudioLive AR mixer will connect
automatically. The Bluetooth pairing button will flash rapidly (two to
three times per second) while the Bluetooth module detects connected
devices and will illuminate solid when it is successfully paired.
2.3 SD Recording
This section explains on how to record the main mix as a stereo WAV file:
1. Insert a FAT16-formatted SD card or FAT32-formatted SDHC card into your
StudioLive AR mixer. An SD card will provide up to 2 GB of storage space. An
SDHC card will provide up to 32 GB.
2. Press the Record button.
3. Recording will begin when the Play/Pause and
Record buttons are both illuminated.
If no SD card is recognized, the Record button will flash three times.
4. Press the Play/Pause button to stop the recording.
Once complete, you can transfer your recordings onto your computer by
inserting the SD card into your computer’s SD card reader and copying the
files to your computer’s hard drive. Each file will be labeled with an “SL-AR”
heading, followed by a number.
Hold 3 sec
SD Card

StudioLive™ AR Series Quick Start Guide
OverviewGetting Started
English
Français
Español
Deutsch
Getting Started
5
2.4 Typical Band Setup Diagram
Front of house
speakers
Floor wedges
Keyboard
Lead vocal
Drum kit
Bass
Electric guitar amp
Music
Playback
Laptop running Capture

Added bonus: PreSonus’ previously Top Secret recipe for…
Redfish Couvillion
Ingredients:
•¼ C Vegetable oil
•¼ C flour
•1 onion diced
•1 clove garlic minced
•1 green pepper diced
•3 celery stalks diced
•1 14oz can diced tomatoes
•1 bottle light beer
•2 bay leaves
•1 tsp thyme
•2 lbs Redfish fillets
Cooking Instructions:
1. In a heavy saucepan or large skillet, heat oil on medium high and slowly add flour a tablespoon at a time to create a roux.
Continue cooking the roux until it begins to brown, creating a dark blond roux.
2. Add garlic, onions, green pepper, and celery to roux.
3. Sauté vegetables for 3-5 minutes until they start to soften.
4. Add tomatoes, bay leaves, thyme, and redfish. Cook for several minutes.
5. Slowly add beer and bring to a low boil.
6. Reduce heat and simmer uncovered for 30-45 minutes until redfish and vegetables are completely cooked, stirring
occasionally. Break up redfish into bite size chunks and stir in. Add pepper or hot sauce to taste. Do not cover.
7. Serve over rice
Serves 6-8
While not one of Southeast Louisiana’s more famous dishes, Redfish Couvillion is a favorite way to serve our
favorite Gulf fish. Also known as Reds or Red Drum, Redfish is not only fun to catch, it’s also delicious!
© 2017 PreSonus Audio Electronics, Inc. All Rights Reserved. AudioBox, CoActual, DigiMax, Eris, FireStudio, Nimbit, PreSonus, QMix, Riff to Release, Sceptre, StudioLive, Active
Integration, and XMAX are trademarks or registered trademarks of PreSonus Audio Electronics, Inc. Capture, Impact, Mixverb Presence, RedLightDist, SampleOne, Studio One, and
Tricomp are trademarks or registered trademarks of PreSonus Software Ltd. Mac and Mac OS are registered trademarks of Apple, Inc., in the U.S. and other countries. Windows is a
registered trademark of Microsoft, Inc., in the U.S. and other countries. Other product names mentioned herein may be trademarks of their respective companies. All specifications
subject to change without notice...except the recipe, which is a classic.
Dinner is Served

Part# 70-22000031-B
18011 Grand Bay Ct. • Baton Rouge,
Louisiana 70809 USA• 1-225-216-7887
www.presonus.com
StudioLive™ AR-Series
Hybrid Digital/Analog Production Mixers
Owner’s Manual
®

PreSonus Safety Warnings and Instructions
Electrical information and warning symbols for PreSonus products are located on the rear electrical panel of the unit
adjacent to the electrical plug or on the bottom of the unit along with other product compliance information.
This lightning flash with arrowhead symbol within an equilateral triangle is intended to
alert the user to the presence of non-insulated “dangerous voltage” within the product’s
enclosure that may be of sufficient magnitude to constitute a risk of electric shock.
WARNING: TO REDUCE THE RISK OF ELECTRIC SHOCK, DO NOT REMOVE COVER (OR BACK) AS THERE
ARE NO USER-SERVICEABLE PARTS INSIDE. REFER SERVICING TO QUALIFIED PERSONNEL.
The exclamation point within an equilateral triangle is intended to alert the user to the presence of
important operating and maintenance instructions in the literature accompanying the appliance.
CAUTION: To reduce the risk of electric shock, do not expose this appliance to rain and moisture. Do not expose
this device to dripping or splashing liquids and no object filled with liquids, such as vases, should be placed on
the device.
CAUTION: These service instructions are for use by qualified service personnel only. To reduce the risk of
electric shock, do not perform any servicing other than that contained in the operation instructions.
Qualified service personnel must perform repairs.
1. Read these instructions.
2. Keep these instructions.
3. Heed all warnings.
4. Follow all instructions.
5. Do not use this device near water.
6. Clean only with a dry cloth.
7. Do not block any ventilation openings. Install in accordance with the manufacturer’s instructions.
8. Do not install near any heat sources, such as radiators, heat registers, stoves,
or other device (including amplifiers) that produce heat.
9. Do not defeat the safety purpose of the polarized or grounding-type plug. A polarized plug has two blades
and a third grounding prong. The wide blade and the third prong are provided for your safety. If the
provided plug does not fit into your outlet, consult an electrician for replacement of the obsolete outlet.
10. Protect the power cord from being walked on or pinched, particularly at plugs,
convenience receptacles, and the point where they exit from the device.
11. Use only attachments/accessories specified by PreSonus.
12. Use only with a cart, stand, tripod, bracket, or table specified by the manufacturer or sold with
this device. Use caution when moving a cart/device combination to avoid injury from tip-over.
13. Unplug this device during lightning storms or when unused for long periods.
14. Servicing is required when the device has been damaged in any way, such as if a
power-supply cord or plug is damaged; or liquid is spilled, or objects have fallen into the
device; or if the device has been exposed to rain or moisture, does not operate normally,
or has been dropped. All PreSonus products in the USA should be serviced at the PreSonus
factory in Baton Rouge, Louisiana. If your PreSonus product requires a repair, contact
support@presonus.com to arrange for a return authorization number. Customers outside the USA should
contact their local distributor. Your distributor’s contact information is available at www.presonus.com.
15. Protective grounding(earthing) terminal. The apparatus should be connected to a
mains socket outlet with a protective grounding(earthing) connection.
16. Where the Mains plug or an appliance coupler is used as the disconnect
device, the disconnect device shall remain readily operable.
PreSonus Compliance Information
European Union (EU)
The CE mark on this product indicates that the device is compliant with the
EU Council Directives and Standards relating to electromagnetic compatibility,
EMC Directive (2006/95/EC) and Low Voltage Directive (2004/108/EC) as well as
EU RoHS Directive 2012/65/EU.
RoHS This product is compliant with EU Directive 2012/65/EU for the Restriction of Certain Hazardous
Substances in Electrical and Electronic Equipment. No lead (Pb), cadmium (Cd), mercury (Hg),
hexavalent chromium (Cr+6), PBBs, or PBDEs above the maximum allowable concentrated value
has been intentionally added to materials used in this device. Any traces of impurities of these
substances that may be found in this device are below allowable RoHS restricted limits.
Specifics on conforming standards used to test for and determine compliance with CE marking
with each PreSonus model are listed on the product’s CE Declaration of Conformity (DoC).
For a copy of a specific product DoC, contact PreSonus at support@presonus.com.
REACh This product is compliant with EU Directive EC1907/206 for the Registration, Evaluation, Authorization,
and Restriction of chemicals and contains none or less than 1% if the chemicals listed as SVHCs.
WEEE This symbol on this product or its packaging indicates that this product must
not be disposed of with other waste. Instead, it is your responsibility to dispose of your
waste equipment by handing it over to a designated collection point for the recycling
of waste electrical and electronic equipment. The separate collection and recycling of
your waste equipment at the time of disposal will help conserve natural resources and
ensure that it is recycled in a manner that protects human health and the environment.
For more information about where you can drop off your waste equipment for recycling,
please contact your local city recycling office or the dealer from whom you purchased the product.
EMC (Electromagnetic Compliance)
PreSonus products are designed and tested to comply with the following standards according to product applicability:
FCC Part 15 Class B EN 55103-1 E1, E2, E3
EN 55103-2 E1, E2, E3
AS/NZS 4538 Class B CISPR 22 Class B
Radio and Television Interference
If these symbols are marked on the product, the device complies as follows:
Any Changes or modifications not expressly approved by the party responsible for
compliance could void the user’s authority to operate the equipment.
USA: This equipment has been tested and found to comply with the limits for a Class B digital
device, pursuant to Part 15 of the FCC Rules. Operation is subject to the following two conditions:
(1) This device may not cause harmful interference, and (2) this device must accept any
interference received, including interference that may cause undesired operation. These limits are
designed to provide reasonable protection against harmful interference in a residential installation. This equipment
generates, uses, and can radiate radio frequency energy, and, if not installed in accordance with the instructions, may
cause harmful interference to radio communications. However, there is no guarantee that interference will not occur in
a particular installation. If this equipment does cause harmful interference to radio or television reception, which can
be determined by turning the equipment off and on, the user is encouraged to try to correct the interference by one or
more of the following measures:
• Reorient or relocate the receiving antenna.
• Increase the separation between the equipment and the receiver.
• Connect the equipment into an outlet on a circuit different
from that to which the receiver is connected.
• Consult the dealer or an experienced radio/TV technician for help.
FCC Radiation Exposure Statement:
This equipment complies with FCC radiation exposure limits set forth for an uncontrolled environment.
This transmitter must not be co-located or operating in conjunction with any other antenna or transmitter.
CAUTION: Changes or modifications to this device not expressly approved by PreSonus Audio
Electronics could void the user’s authority to operate the equipment under FCC rules.
CALIFORNIA PROP65 WARNING:
WARNING: This product contains chemicals, including lead, known to the State of
California to cause cancer and birth defects or other reproductive harm. Wash hands
after handling. For more information: http://www.presonus.com/Prop-65
Australian Compliance: This equipment complies with Radio communication Devices Notice 2003; or
Radio communication Labeling (Electromagnetic Compatibility) Notice 2008; or Radio communication
(Compliance Labeling Electromagnetic Radiation) Labeling Notice 2003.
ISED WARNING
ISED RSS warning: This device complies with ISEDC licence-exempt RSS standard (s). Operation
is subject to the following two conditions: (1) this device may not cause interference, and (2) this device
must accept any interference,including interference that may cause undesired operation of the device.
Under IESDC regulations, this radio transmitter may only operate using an antenna of a type
and maximum (or lesser) gain approved for the transmitter by ISEDC. To reduce potential
radio interference to other users, the antenna type and its gain should be so chosen that, the equivalent
isotropically radiated power (e.i.r.p.) is not more than that necessary for successful communication.
This radio transmitter (identify the device by certifcation number, or model number if Category II) has been
approved by ISEDC to operate with the antenna types listed below with the maximum permissible gain
and required antenna impedance for each antenna type indicated. Antenna types not included in this list, having
a gain greater than the maximum gain indicated for that type, are strictly prohibited for use with this device.
ISED Radiation Exposure Statement:
This equipment complies with ISED RF radiation exposure limits set forth for an uncontrolled environment. This
transmitter must not be co-located or operating in conjunction with any other antenna or transmitter.
ICES003: This CAN ICES3 (A)/NMB3(A) digital apparatus complies with Canadian ICES003.
ISED RSS warning: Le présentappareilestconforme aux CNR d’ISEDCaapplicables aux
appareils radio exempts de licence. L’exploitationestautorisée aux deux conditions suivantes: (1)
l’appareil ne doit pas produire de brouillage, et (2) l’utilisateur de l’appareildoit accepter tout
brouillageradioélectriquesubi, mêmesi le brouillageest susceptible d’encompromettre le fonctionnement.
Conformément à la réglementation dISEDC, le présent émetteur radio peut fonctionner
avec une antenne d’un type et d’un gain maximal (ou inférieur) approuvé pour l’émetteur par ISEDC .
Dans le but de réduire les risques de brouillage radioélectrique à l’intention des autres utilisateurs,
il faut choisir le type d’antenne et son gain de sorte que la puissance isotrope rayonnée équivalente
(p.i.r.e.) ne dépasse pas l’intensité nécessaire à l’établissement d’une communication satisfaisante.
Le présent émetteur radio (identifier le dispositif par son numéro de certification ou son numéro de
modèle s’il fait partie du matériel de catégorie I) a été approuvé par ISEDC pour fonctionner
avec les types d’antenne énumérés ci-dessous et ayant un gain admissible maximal etl’impédance
requise pour chaque type d’antenne. Les types d’antenne non inclus dans cette liste, ou dont le gain est
supérieur au gain maximal indiqué, sont strictement interdits pour l’exploitation de l’émetteur.
ISED exposition aux radiations:
Cet équipement est conforme avec ISED les limites d’exposition aux rayonnements
définies pour un contrôlé environnement. Cet émetteur ne doit pas être co-localisés
ou fonctionner en conjonction avec une autre antenne ou émetteur.
Cela peut CIEM 3 (A) / NMB 3 (A) Cet appareil numérique est conforme à la norme NMB 003.
PreSonus Health, Safety, and Compliance Guide
®
PreSonus Health, Safety, and Compliance Guide. Part# SAF-PAE0001-H / 70-02500002-B
© 2016 PreSonus Audio Electronics, Inc. All Rights Reserved.
18011 Grand Bay Ct. • Baton Rouge, Louisiana 70809 USA • 1-225-216-7887
www.presonus.com