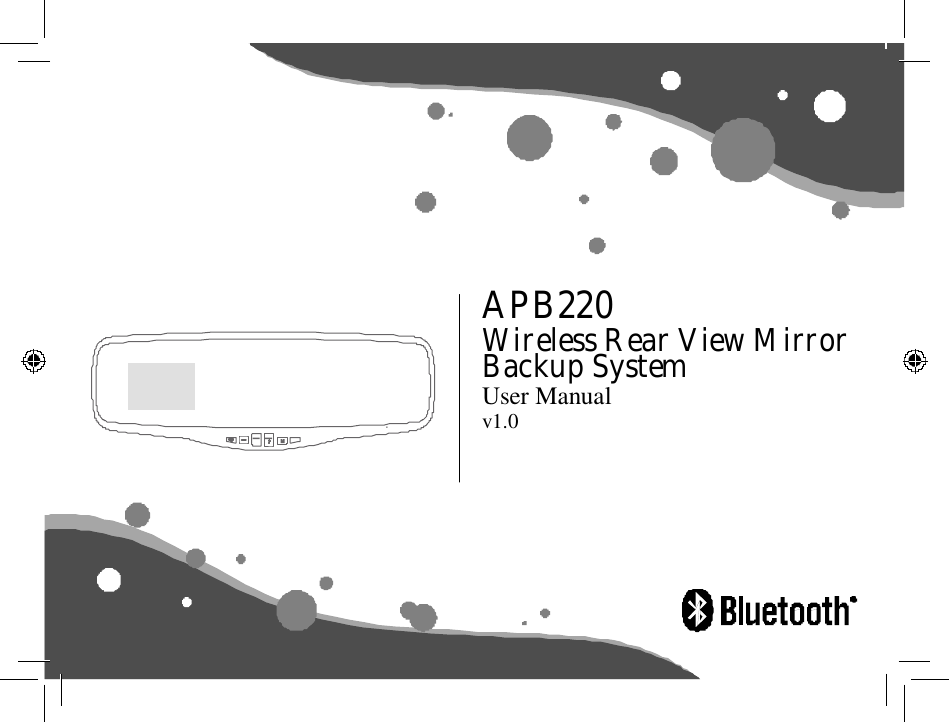
Precision Enterprise APB220 WIRELESS REAR VIEW MIRROR BACKUP SYSTEM User Manual manual

Precision Enterprise Ltd WIRELESS REAR VIEW MIRROR BACKUP SYSTEM manual

Users Manual

                                    APB220 Wireless Rear View Mirror Backup System User Manual v1.0
 Thank You  Thank you for purchasing the 2.4” Rearview Mirror Vehicle Back-Up Camera with Bluetooth® Hands- Free Speakerphone System. This system was designed to give additional convenience when driving or operating your vehicle.    The systems allows you to view the surrounding behind your car while doing a reversing maneuver and offers the driver a hands-free solution while on the phone. All parts needed to install and operate the system are included in this package.
   Contents  •    SPECIFICATIONS •    PRIOR TO INSTALLATION •      WARRANTY / LIABILITIES •      PACKAGE CONTENT •      INSTALLATIONS •      OPERATIONS •      BUTTON FUNCTIONS AND OPERATION •    LED INDICATION •      TESTING AND TROUBLESHOOTING •      CUSTOMER SERVICE / CONTACT US •        FCC / ICC                                   2
 Specifications  -    2.4” Color TFT LCD Monitor -    2.4GHz Wireless Technology -    Image sensor: CMOS, 640x480 pixel -    Bluetooth® Spec.: v2.1 -    Weight: 380g -    Phonebook Capacity: 950 Entries -    Profiles Support: Headset, Handsfree, AVRCP & OPP -    Operating Range: 10 Meters -    Input Voltage: DC10~13.5V -    Noise / Echo Reduction: DSP Noise & Echo Reduction -    Operating Temperature: -10ºC to 50ºC -    Storage Temperature: -20ºC to 60ºC         3   Prior To Installation  Read all the installation instructions carefully before installing the product. Improper installation will void manufacturer’s warranty. The installation instructions do not apply to all types of vehicles, and are written as guidelines to assist in installing the system. BEFORE using the Rearview Mirror Back-Up Camera with Bluetooth® Hands-Free Speakerphone System, please read the following safety information.    ALWAYS use the system as outlined here.           WARNING: •    A failure to read and follow these warnings and instructions may result in a serious accident, including damaged property or a serious injury, including loss of life. •    The Rearview Mirror Vehicle Back-Up Camera with Bluetooth® Hands-Free Speakerphone System is designed as an aid to the driver in detecting large stationary objects to help avoid damaging the vehicle.     However, you, the driver, must use it safely and properly.
    Use of the Rearview Mirror Vehicle Back-Up Camera with Bluetooth® Hands-Free System is not a substitute for safe, proper and legal driving. •    Never back up while looking only at the screen.    You should always check behind and around the vehicle when backing up just as you would if the vehicle did not have the Rearview Mirror Vehicle Back-Up Camera with Bluetooth® Hands-Free Speakerphone System.    Always make sure your intended path is clear.    If you back up while looking only at the monitor, you may hit a vehicle, pedestrian, bicyclist, child, pet or other object resulting in injury or death.    Always back up slowly.         •    Never depend on the Rearview Mirror Vehicle Back-Up Camera with Bluetooth® Hands-Free Speakerphone System entirely when backing up.    The image on the screen is different from actual conditions.    Objects viewed in the rear view monitor differ from actual distance because a wide-angle lens is used.    Objects in the rear view monitor will appear visually opposite than when viewed in the rear view and outside mirrors.    Use the inside mirror or glance over your shoulder to properly judge distances to other objects. •    The Rearview Mirror Vehicle Back-Up Camera with Bluetooth® Hands-Free Speakerphone System’s “night vision” feature is an aid to a driver but is limited.    Always use your own eyes to confirm the vehicle’s surroundings, as the displayed image may be faint or dark, distorted, or not entirely visible. Always check behind and all around the vehicle visually and with mirrors before proceeding.    •    The area displayed by the Rearview Mirror Vehicle Back- Up Camera with Bluetooth® Hands-Free Speakerphone System is limited.    The Rearview Mirror Vehicle Back-Up Camera with Bluetooth® Hands-Free Speakerphone System does not display objects that are close to or below the bumper, underneath the vehicle, or objects out of the camera’s field of view.    The area displayed on the screen may vary according to vehicle orientation or road conditions. •    The Rearview Mirror Vehicle Back-Up Camera with Bluetooth® Hands-Free Speakerphone System is not intended for use during longer backing maneuvers or backing into potential crossing traffic or pedestrians.     Crossing traffic or pedestrians may be approaching outside of the camera’s field of view. •    Be sure to check the camera’s position and mounting angle before each use. •    Make sure the trunk, hatch, or backdoor is completely and securely closed when backing up. •    If the back of the vehicle is hit, the position and mounting angle of the Rearview Mirror Vehicle Back-Up Camera with Bluetooth® Hands-Free Speakerphone System may change.     •    When washing the vehicle with high pressure water, be sure not to spray it around the camera.    Otherwise, water may enter the camera unit causing water condensation on the lens, a malfunction, fire or an electric shock. 4
•    Do not strike the camera.    It is a precision instrument.     Otherwise, it may malfunction or cause damage resulting in a fire or an electric shock. •    This product will only provide images of items that are within the field of view of the camera.    Thus, it is imperative that the camera should be kept clean and unobstructed, and should mounted so that its field of view includes the entire area behind your vehicle. •    Distracted driving is dangerous.    Always use the Bluetooth® Device in a manner that does not reduce your attention and ability to drive carefully and safely. •    Adhere to all applicable traffic laws and motor vehicle regulations applicable to the device. •    Consult local laws and regulations for any restrictions on installation or use. •    Never allow children to play with the device. Small parts may be a choking hazard.         5   Warranty / Liabilities
  DISCLAIMER OF WARRANTIES, INCLUDING WARRANTY OF MERCHANTABILITY AND WARRANTY OF FITNESS FOR PARTICULAR PURPOSE:    EXCEPT AS SPECIFICALLY SET FORTH HEREIN, NO WARRANTY OR REPRESENTATION, EXPRESS OR IMPLIED, IS MADE AS TO THE REARVIEW MIRROR BACKUP CAMERA.    EXCEPT AS EXPRESSLY SET FORTH HEREIN, PRECISION AND/OR ITS AFFILIATES EXPRESSLY DISCLAIMS, WITHOUT LIMITATION, ANY STATUTORY WARRANTIES AND ALL IMPLIED WARRANTIES, INCLUDING   ANY IMPLIED WARRANTY OF MERCHANTABILITY OR FITNESS   FOR A PARTICULAR PURPOSE.
The Rearview Mirror Backup Camera is not intended to be a substitute for rearview mirrors or for any other motor vehicle equipment mandated by law. Even when properly installed, our Rearview Mirror Backup Camera has a limited field of vision and do not provide a comprehensive view of the rear area of the vehicle. You should always look around outside your vehicle and use your mirrors to confirm rearward clearance and that your vehicle can back up safely.     7            7 OWNER’S RESPONSIBILITIES: In order to provide you with the proper warranty service, we request that you adhere to the following procedure: 1.    Include a copy of your sales receipt or bill of sale with your unit when it is returned for warranty service. 2.    If it is necessary to return your product for service, please return it securely packed, preferably in the original   shipping box, and freight and insurance prepaid   3.    Please include a detailed explanation of the problem you are having. 4.    If your product is found by dealer to have a defect in material or workmanship, within the warranty period, it will be repaired or replaced at no charge and returned to you prepaid.
  Package Content       Mirror Backup Camera with Bluetooth® Speakerphone    Rubber Backup Camera     12V charger   Camera Cable  Cable Ties X 4 Ring  Scotchloks® x 4   Signal Booster   Hardwire Mirror Power Cable (Optional)    Velcro Straps            8
 Installations These instructions do not apply to all types of vehicles.    They are meant only as a general guide due to the large number of vehicle makes and models.    For vehicle specific questions, contact your vehicle’s manufacturer.     Consult your local motor vehicle laws on the use of this product to be sure it is permitted.     WARNING: •    Through installation of the Rearview Mirror Vehicle Back-Up Camera with Bluetooth® Hands-Free Speakerphone System you should be sure not to degrade the safety of any system or device on your vehicle, including Federal Motor Vehicle Safety Standards. •    Improper installation and wiring of the Rearview Mirror Vehicle Back-Up Camera with Bluetooth® Hands-Free Speakerphone System may damage the vehicle’s electrical system, including vital vehicle computer and operating systems.    That could lead to an accident or fire, causing property damage and/or serious personal injury.    It is highly recommended to seek professional installation advice from a qualified auto electrician or, in the alternative, to have the installation performed by a qualified auto electrician.          9  MOUNTING The Rearview Vehicle Backup Camera Monitor mounts onto existing rearview mirror. The following provides proper mounting instructions. NOTICE: Please ensure that monitor is secured and mounted where it would NOT obstruct any OEM vehicle safety features. In an event of an accident, manufacturer is not responsible for bodily injury caused by the monitor being a projectile.     CAUTION: Ensure monitor location will not obstruct your vision while driving. 1. Pull the tension clamp and clip to the existing rearview mirror 2. Push the rearview mirror speakerphone until it is flushed against original rearview mirror 3. Fix and secure the mirror into position by inserting the safety belts on to the buckle behind the mirror. NOTE: Make sure that the safety belt match perfectly before you insert them into the buckle. Once the belts are inserted, it will be difficult to remove.
          WARNING: Do not pull or remove the rearview mirror without pulling apart the tension clamp.           CAUTION:    The instructions may not apply to every type of vehicle.    For vehicle specific questions, contact your vehicle’s manufacturer to be sure that the installation and mounting will not degrade the safety of any system or device on your vehicle, including Federal Motor Vehicle Safety Standards. POWERING NOTE: •    Power up monitor using 12V adapter provided •    Route the cord of the 12V adapter where it does not obstruct your vision or degrade the safety features of the vehicle •    Use the optional hardwire mirror power cable to connect the CAMERA INSTALLATION Install Rearview Vehicle Backup Camera in the top of the vehicle’s rear license plate to achieve maximum viewing angle. 1) Remove license plate from rear of vehicle. 2) Locate reverse tail lights and select a wiring route the camera will use for its power source. 3) Inspect and determine route of camera wiring to reverse lights. 4) Insert camera wire through grommet (supplied).    The          Signal Booster           camera   power wires mirror to constant power without using the 12V Charger. 1.    Plug 12V adapter to vehicle cigarette lighter socket. grommet protects the wire from the metal edge. Backup Camera  power source 2.    Connect adapter to monitor power port. 3.    Press monitor’s “ON/OFF” button NOTE: UNDER EXTREME BRIGHT LIGHT CONDITIONS, THE SCREEN IMAGE MAY TAKE A FEW SECONDS TO STABLIZE. PLEASE WAIT UNTIL THE IMAGE HAS STABLIZED BEFORE BACKING UP         5) Check for openings or holes where license plate is mounted to insert camera wires.    If no opening is available, drill a small hole and insert wire. Select a location close to the camera’s power cables. Note: The Rearview Mirror Vehicle Backup Camera can be installed without drilling a hole by using a pre-existing hole on the vehicle to route the wires to the reverse taillights. CAUTION: Take extra precaution necessary to avoid vehicle damage. Before drilling, inspect behind the drilling location to ensure there are no vehicle wirings or components. 6) Insert camera wire into selected or drilled opening. 10
7) Plug the camera wire to the signal booster. Ensure wires are not obstructed or tangled. 8) Remove light socket from its reverse light housing. CAUTION: It is highly recommended that you remove the bulbs as a precaution. 9) Connect camera power wires                   camera wire     NOTE:     •    Place and secure the signal booster where you can get the best signal     •    It is recommended to get the signal booster as close to the front of the vehicle where the monitor is installed.     CHECKPOINT:     At this point, you can check if you properly connected the wires by:     •    Reconnecting the battery. CAUTION: Before connecting camera wires, use a Volt Meter or a Multi-Meter to determine positive and the negative wires on the vehicle’s reverse light wires. Vehicle wiring may vary. Refer to the vehicle Owner’s Manual for more information.     a.    Determine positive and negative wires.    Most vehicles will have two color wires, BLACK for negative and RED for positive.         b.    Disconnect vehicle battery before proceeding to the next step as a precaution     c.    Using the Scotch-Lok Connectors, connect camera’s RED wire to reverse light’s positive wire. If needed, use pliers to squeeze Scotch-Lok and ensure a good connection.     d.    Connect camera’s BLACK wire to reverse light’s negative wire. Secure and link wires using the Scotch- Lok Connectors.     e.    Secure wires with cable     •    Turn the ignition to the “Accessories” position.     •    Engage the Emergency or Hand Brake.     •    Put the vehicle in reverse.     •    Press “On/Off” button of the Monitor.     If the camera and the monitor wirings are hooked up correctly, the monitor should turn on and should display image of rear view of the vehicle.     **Disconnect vehicle battery before proceeding with installation** 11) Connect bulb back into light socket. 12) Reinstall light socket into reverse light housing. 13) Slide license plate between camera and mounting 14) Align camera mount to license plate. NOTE: For maximum viewing, place camera on the center of the license plate. 15) Use double sided tape to secure the camera onto the license plate. NOTE: Press license plate and camera mounting firmly ties or electrical tape. 10) Plug camera power wires to the signal booster  11  camera power wire  to secure and get full contact between the license plate and the double-sided tape. 16) Screw license plate with camera onto rear of the vehicle. 17) Once camera is secured, adjust camera angle to desired point of view.
    Note:     -    The preset camera angle may not be enough for all types of vehicle, adjust accordingly.     -    The camera angle should be chosen carefully to best suit your specific vehicle because it will impact the size and location of the blind spot of the rear view camera.     -    If the camera hinges gets loose, tighten by adjusting the screws at the back of the camera through the mounting. CAUTION: Double check the camera angle from time to time to make sure that it is always focused and adjusted to the desired point of view.  Operations  2.4” LCD screen  charging port       volume/menu + A. Power ON/OFF     •    APB220 will automatically turn ON when it is connected to a power source     •    Hold        to turn APB220 ON/OFF     •    When turned ON, APB220 will enter search mode     Connecting     •    To search again, press    once to activate search mode NOTE: For automatic connection, please make sure Bluetooth® mode on your mobile phone is activated and you must have successfully paired and connected to APB220 at least once in order to activate this feature. B. Pairing/Linking     Pairing Bluetooth® enabled devices like mobile phones with the APB220 Rearview Mirror Speakerphone authorizes the devices to work with each other. This step only needs to be performed once.     Before Pairing the APB220 Bluetooth® Speakerphone:     •    Ensure the Bluetooth® on your mobile phone is activated     •    Ensure the APB220 Rearview Mirror Speakerphone is plugged into a 12V power source     Follow the steps below to pair your APB220 with your mobile phone:     •    Power ON the device     •    Press and hold M for 2 seconds volume/menu -  end   menu  parking assistant     •    Screen will indicate    Pairing Mode send  (yellow LED)  microphone      NOTE: APB220 is now in pairing mode (blue/red LED)       •    Activate the Bluetooth® settings of your mobile phone 12
    NOTE: The following steps are general procedure; to access Bluetooth® Menu for your mobile phone, please refer to your phone user manual.     •    Select SET-UP or CONNECT from your mobile phone menu     •    Find and select OPTION to discover Bluetooth® devices; establishing a connection may take several minutes     •    If found, phone display should indicate APB220 device was detected or Select “APB220” from the list     •    Phone should give you a prompt asking if you want to pair the device     •    Select OK or ACCEPT and wait for prompt to enter passkey or PIN     •    Enter the code 0000     •    Select “OK” to pair and connect the APB220 and the handset     •    When pairing is complete, the APB220’s LCD will show Connected         (Phone’s ID)     NOTE: The APB220 can pair with more than one phone, however it can only connect to one phone at a time. If you wish to pair to a second phone, disable or turn OFF Bluetooth® on the phone already paired.     NOTE: If the APB220 and mobile handset did not successfully pair, follow the steps below to retry pairing:     •    Turn the APB220 OFF & ON     •    Turn OFF all other Bluetooth® devices before starting the pairing process     •    Repeat the pairing instructions from the beginning  13      To Link APB220 to your mobile phone after pairing:     •    Press    of your APB220 or     •    Establishing the connection via your mobile phone     NOTE: Make sure Bluetooth® has been activated on your mobile phone before you press    . (Please refer to your mobile’s operation manual about connecting Bluetooth® devices) C. Phonebook     APB220 Rearview Mirror Speakerphone can store up to 950 phone numbers. If you are trying to transfer 1100 contacts    to the APB220, only the first 950 contacts will be successfully transferred.     AT Command and OPP (Object Push Profile) function can automatically transfer the contacts in your mobile phone to the APB220 Rearview Mirror Speakerphone.     NOTE: Not all mobile phones support OPP or AT Command features, please refer to your phone manual to determine if phone supports one of these.     Phonebook Set-up via AT Command     To transfer the Phonebook from your mobile phone via AT Command:     •    Make sure the APB220 and mobile phone is connected     •    Press M and    Contacts    will appear on the screen     •    Press              to enter the sub-menu     •    Press +/- to select  Download Contact and press  to confirm     •    LCD will display  Pb Loading...   Total XXX     •    Once transfer is successful, LCD will display Completed Total XXX
    NOTE:     •    If there is an incoming call during phonebook transfer via AT Command, the transfer process will be placed on hold. Phonebook transfer will resume after the call ends.     Phonebook Set-up via OPP     The APB220 supports single contact or group contacts transfer via OPP function. For details on operating procedures, please refer to your mobile phone’s user manual.     To transfer the Phonebook from your mobile phone via OPP:     •    Disconnect Bluetooth® link from the APB220 setting     (if it is connected)     •    Setup mobile phone to transfer contacts from the mobile phone to your APB220 NOTE: Please refer to your mobile phone’s user manual for detailed instructions.     Deleting Phonebook entries     To delete Phonebook entry:     •    Press M and    Contacts    will appear on the screen     •    Press              to enter the sub-menu     •    Press +/- to select  Delete Contacts and press              to confirm     •    LCD will display    [Yes]    [No]     •    Select [Yes] and press              to confirm     •    LCD will display   Pb Deleted    when phonebook is cleared     NOTE: APB220 does not allow deleting of a single entry, ALL entries will be deleted after confirmation.       Speed Dial Set-up     NOTE: Phonebook should be set up first to activate speed dialing.     To set up speed dialing:     •    Press M and    Contacts    will appear on the screen     •    Press              to enter the sub-menu     •    Press +/- to select  Quick Dial and press              to confirm     •    Browse for an empty memory slot by pressing +/-. There are a total of 3 memory slots for speed dialing with each slot represented by the [+], [-] and [M]     •    Press              to set contact number     •    Browse the initials by +/-     •    Press              to enter     •    Browse the phone number that you wish to set to speed dial by +/-     •    Press              to confirm NOTE: Memory slot will automatically replace old contacts with new contacts are set to that slot.          14
D. Display Setting     •    Press M and select    Display Setting by +/-     •    Press              to enter the sub-menu     •    The status bar is shown on the screen.     This indicates the settings level         If the loudspeaker volume of the APB220 is too low or too high and you are unable to adjust it:     •    Adjust the volume directly on the mobile phone     •    Fine tune it using the volume control of the APB220   of the LCD display     •    Press M to select     •    Press +/- to adjust to         desired level E. Volume Adjustments     To adjust ring volume:     •    Press +/- to adjust ring volume     To adjust call volume during a call: CONTRAST BRIGHTNESS COLOR     Mute/Un-mute Functions     To mute the APB220 during an active call:     •    Press M •    LCD will show  MIC OFF     To cancel mute:     •    Press M again     •    LCD will show  MIC ON F.    Call Operations     •    Press +/- to adjust the volume during a call     If you cannot hear the person you are talking to on the other line, do the following steps while conversation is in progress:     •    Request the person on the other line to adjust his/her mobile phone’s volume level to maximum     If there is a strong echo when the person on the other line talks:     •    Transfer the call to your mobile phone     •    If echo disappeared, transfer the call to your APB220 again and lower the loud speaker volume until echo is reduced/eliminated     •    If the echo remains, the problem might be with the network provider or the mobile phone itself  15      Making a Call     To make a call using the phonebook:     •    Press M and    Contacts      will appear on the screen     •    Press              to enter the sub-menu     •    Press              again to select  Contact List     •    Browse the initials by +/-     •    Press              to enter     •    Browse the phone numbers by +/-     •    Press              to dial     Last Number Re-dial:     •    Press              once     •    Press +/- until you find the desired number     (Total 20 records including missed calls, outgoing & incoming calls)     •    Press              again to dial
    To make a call using the Speed Dial function:     •    Press and hold M , + or - for 2 seconds     •    Phone will automatically dial the number set to Speed Dial for that particular button     To make a call using the Voice Dial function:     To enter voice dialing mode:     •    Hold              for 2 seconds     •    Say the name after you hear the tone NOTE: If the APB220 failed to recognize the voice/name. Press              to exit and repeat the above steps for voice dialing. NOTE: Voice Dialing is a feature of your mobile phone. Please refer to your phone’s user manual for voice command operation.     Answering Calls     To answer calls via the APB220:     •    Press              when ring tone is heard or     •    Answer the call via the mobile handset     To end a call:     •    Press              or     •    End call using the mobile handset     To reject a call:     •    Press              when ring tone is heard          Caller ID Display NOTE: Caller ID Display is a network service, please consult your network provider for details.     Caller ID can be displayed in 3 ways: a)    By Name & Phone Number         APB220 can display the caller’s name when receiving call. To display caller’s name, the name must be stored in the phonebook b)    By Phone Number         Phone number will be displayed if there is no record of that number in the phonebook c)    Withheld Number         When a caller withholds his number, nothing will be displayed     DTMF (Dial Tone Modulation Frequency) •    Press and hold M for 2 seconds during a call     •    Select number by +/-     •    Press              to confirm           16
    Call Waiting     NOTE: Call Waiting is a network service, please consult your network provider for details.  Button Functions and Operation     To answer an incoming call during a conversation:     •    Press              to hold Line 1 & accept the incoming call (Line 2) or     •    Press              to end Line 1 & accept the incoming call     To switch calls between the two lines:     •    Press              to switch between lines     Interchanging APB220 and Handset     You may interchange the call between your handset and APB220 while conversation is ongoing.     To shift from APB220 to handset or vice versa:     •    Press and hold              for 2 seconds BUTTON    M FUNCTION Go to Menu DTMF (Dial Tone   Modulation Frequency) Quick Dial Pairing Mute / Un-mute Make / Receive call Voice dialing Redial OPERATION Press 1 time Press and hold for 2 seconds (Activated only when the line is connected) Press and hold for 2 seconds Press and hold for 2 seconds (Screen shows “Pairing Mode”) Press 1 time Press 1 time Press and hold for 2 seconds to enter   voice dialing mode Press 1 time F.    Parking Assistant Conversation transfer  While conversation is ongoing, press and     To turn the on-screen display guideline ON/OFF: hold for 2 seconds •    Press              once NOTE: Interference may occur if Bluetooth® function & Backup Camera function are activate at the same time.       17  Hold L1 & receive L2 in call waiting mode Switch between L1 & L2 in call waiting mode Bluetooth® link   connection YES Press 1 time  Press 1 time  Press 1 time Press 1 time
 BUTTON  FUNCTION Power ON/OFF End Call Reject Call End L1 & receive L2 in call waiting mode NO  OPERATION Press and hold for 2 seconds Press 1 time Press 1 time Press 1 time Press 1 time  LED Indication LED RED Light BLUE Light YELLOW Light    INDICATION Device ON but No connection Device ON and connected Standby Increase Volume  Press repeatedly until you reach desired  +  Scroll Upward  Move left Quick Dial volume level Press repeatedly until you find desired   entry/menu item Press repeatedly until you find desired   entry/menu item Press and hold for 2 seconds Decrease Volume  Press repeatedly until you reach desired volume level Scroll downward  Press repeatedly until you find desired -  Move right Quick Dial Parking Assistant ON/OFF   entry/menu item Press repeatedly until you find desired   entry/menu item Press and hold for 2 seconds Press 1 time         18
SAFE OPERATING TIPS •    If you replace the tires, the area displayed on the monitor may change and you may need to adjust the camera. •    There is a plastic cover over the camera.    Do not scratch the cover when cleaning dirt or snow from the cover. •    The camera has a water resistant construction.    Do not detach, disassemble or modify it.    This may cause incorrect operation.    Camera is water resistant but not waterproof. •    Do not submerged camera in water, which can cause internal damage to the camera. •    If the temperature changes rapidly, such as when hot water is poured on the vehicle in cold weather, the system may not operate normally. Camera can withstand the effects of rain, snow, and inclement weather. •    When the temperature is extremely high or low, the screen may not clearly display objects.     •    When strong light directly enters a camera, objects may not be displayed clearly. •    The screen may flicker under fluorescent light.     •    The colors of objects on the rear view monitor may differ somewhat from those of the actual object. •    If dirt, rain or snow attaches to the camera, the monitor may not clearly display objects.    If water droplets, snow or mud adhere to the camera lens, rinse with water and wipe with a dry cloth.     •    Do not use alcohol, benzene or thinner to clean the camera.    This will cause discoloration.    To clean the camera, wipe with a clean a cloth dampened with mild cleaner diluted with water and then wipe with a dry cloth. •    Will work up to 30 feet. Working distance varies depending on the interference between the monitor and the camera. 19  •    The system is only designed for backup/reserving purposes. Precision is not responsible for damages on the system or the vehicle if used for other purposes. •    ALWAYS engage Parking/Emergency/Hand Brakes of the vehicle when testing the system. •    Like most wireless device devices, the system may cause interference to other wireless devices or vice versa. Wireless devices such as WIFI routers, Bluetooth® devices, and mobile handsets may cause interference with the monitor. If this happens you will notice rolling lines, blurry images, or static images on the monitor. •    The system is designed to ADD safety and protection. The device was NOT designed to replace other safe driving habits. Double checking and looking around before backing up is STILL the safest way.
SAFETY AROUND AND BEHIND OTHER VEHICLES Using a rear-view camera is not enough to completely overcome a vehicle’s blind spot.      Many preventable injuries and deaths occur in driveways or parking lots when drivers do not see children, pets, or others near their vehicles.    Here are a few safety tips that will help you to avoid a backover accident.     •    Walk completely around your vehicle before getting in.     Check for kids, toys, and pets before entering the vehicle and starting the engine. •    Know where children are. Have children stand in a place where they are in full view. •    Be aware of young children. Young children are small and hard to see. •    Parents, caregivers and all adults need to be vigilant in supervising children, especially when children are in the yard, driveway or parking lot playing near parked cars. •    Roll down your window so you will be able to hear what is happening outside your vehicle. •    Owners of SUVs, trucks, and vans need to take extra care to avoid hitting or running over a child. •    Teach children to move away from a vehicle whenever it is started.            Testing and Troubleshooting Testing: 1.    Connect vehicle battery cables 2.    Turn ignition to “ON” position without starting the engine 3.    Press monitor “ON/OFF” power button to start monitor 4.    Engage parking brakes and put the car in reverse 5.    Wait for monitor to show rear view image.     If you are unable to pair your mobile phone with the APB220: •    Turn OFF the APB220 and turn it ON again •    Turn OFF all other Bluetooth® devices before you start pairing •    Ensure your mobile handset’s Bluetooth® feature is activated. Please refer to your mobile handset user guide for specific instructions •    Repeat pairing procedures •    Ensure the APB220 is within a maximum of 10 meters of your mobile handset(s) or Bluetooth® enabled device and there are no obstructions, such as wall or other electronic devices, in between as it may cause interference transmission The APB220 Rearview Mirror Speakerphone is compliant with and adopts the Bluetooth® Specification V2.1.     However, interoperability between the device and other Bluetooth®-enabled products is not guaranteed because it depends on compatibility. For more information on the compatibility between the device and other Bluetooth®- enabled products, please contact Customer Service.  20
         21   FCC / ICC Federal Communication Commission Interference Statement This equipment has been tested and found to comply with the limits for a Class B digital device, pursuant to Part 15 of the FCC Rules. These limits are designed to provide reasonable protection against harmful interference in a residential installation. This equipment generates, uses and can radiate radio frequency energy and, if not installed and used in accordance with the instructions, may cause harmful interference to radio communications. However, there is no guarantee that interference will not occur in a particular installation. If this equipment does cause harmful interference to radio or television reception, which can be determined by turning the equipment off and on, the user is encouraged to try to correct the interference by one of the following measures: •    Reorient or relocate the receiving antenna •    Increase the separation between the equipment and receiver •    Connect the equipment into an outlet on a circuit different from that to which the receiver is connected •    Consult the dealer or an experienced radio/TV technician for help This device complies with Part 15 of the FCC Rules. Operation is subject to the following two conditions: (1) This device may not cause harmful interference, and (2) This device must accept any interference received, including interference that may cause undesired operation.
FCC Caution: Any changes or modifications not expressly approved by the party responsible for compliance could void the user’s authority to operate this equipment. IMPORTANT NOTE FCC Radiation Exposure Statement: This equipment complies with FCC radiation exposure limits set forth for an uncontrolled environment. End users must follow the specific operating instructions for satisfying RF exposure compliance. This transmitter must not be co-located or operating in conjunction with any other antenna or transmitter. To comply with FCC RF exposure requirements, the device and the antenna for this device must be installed to ensure a minimum separation distance of 20cm or more from a person’s body. Other operating configurations should be avoided. IC Statement Operation is subject to the following two conditions: 1.    This device may not cause interference and 2.    This device must accept any interference, including interference that may cause undesired operation of the device. This device has been designed to operate with an antenna having a maximum gain of 0 dBi. Antenna having a higher gain is strictly prohibited per regulations of Industry Canada. The required antenna impedance is 50 ohms. IMPORTANT NOTE: IC Radiation Exposure Statements: This equipment complies with IC radiation exposure limits set forth for an uncontrolled environment. End users must follow the specific operating instructions for satisfying RF exposure compliance. This transmitter must not be co-located or operating in conjunction with any other antenna or transmitter.                          22

Navigation menu