Primatronix EMG900T Emergency Pendant Telephone-Remote Control User Manual
Primatronix Ltd Emergency Pendant Telephone-Remote Control
User Manual
EMG900
EMERGENCY PENDANT TELEPHONE
Instruction Manual
All rights reserved by
SOUTHERN TELELCOM INC.
Models: EMG900 SOS Emergency Corded Telephone

1
TABLE OF CONTENTS
FCC REGULATIONS…………………………. 2-3 Pause…………………………………...... 27
IMPORTAIN SAFETY INSTRUCTIONS…….. 4-5
Flash……………………………………… 27
BATTERY CAUTIONARY INSTRUCTIONS.. 6
Mute…………………………………….… 28
FEATURES…………………………………..... 7-10
Hearing Aid Compatibility………………. 28
INSTALLATION………………………………... 11-13
Ringer Volume Control………………….. 28
Installing batteries……………………….. 11 Receiver Volume Control……………..… 28
Replace the battery of Pendant………… 12 THE PHONE BOOK…………………………... 29-35
Connecting the AC adaptor…………...... 12 Store Numbers…………………………… 29-33
Connecting the telephone line………. 12 Review Numbers………………………… 33
Hanging the Phone on the Wall………… 13 Dial Numbers…………………………….. 34
SETTING UP…………………………………… 14-25 Record Names…………………………… 34
Manu Key…………………………………. 14 Edit Names……………………………….. 34
Setting the LCD Contrast……………….. 15 Delete Names…………………………… 35
Setting the ENTER TIME/DATE………... 15-17 EMERGENCY FEATURE…………………….. 36-40
Setting the LCD LANGUAGE…………... 18 Check the Message……………………... 37
Setting the VOICE……………………….. 19-20 Delete the Message……………………... 37
Setting the FLASH………………………. 21 Store numbers M1/M2 Keys……………. 38-39
Setting the TONE PULSE………………. 22 Activate Emergency Call………………... 39-40
Setting the REMOTE PENDANT………. 22-25
CALLER ID…………………………………….. 41-42
TELEPHONE OPERATION………………….. 26-29 Receiving a Call…………………….……. 41
Dialing a Call……………………………... 26 Erase Caller ID Memory………………… 42
Pre Dialing a Call………………………… 26 Call Back from Caller ID………………… 42
Receiving a Call…………………………. 26 Copy Caller ID to Phone Book………….. 42
Receiving a Call with Remote Pendant... 27 TROUBLESHOOTING……………………….. 43-44
Speaker Volume Control………………… 27
WATTANTY INFORMATION…………………. 45
Redial………………………..…………… 27

2
FCC REGULATIONS
The FCC requires that you be advised of certain requirements involving the use of this
telephone.
1. This equipment complies with Part 68 of the FCC rules. On the bottom of this equipment is
a label that contains, among other information, the FCC registration number and Ringer
Equivalence Number (REN) for this equipment. If requested, provide this information to
your telephone company.
2. The REN is used to determine the quantity of devices you may connect to your telephone
line and still have all of those devices right when your number is called. In most, but no all
areas, the sum of all the REN’s of all devices should not exceed five (5.00). To be certain of
the number of devices you may connect to your lines, as determined by the REN, you should
call your local telephone company to determine the maximum REN for your calling area.
3. If your telephone causes harm to the telephone network, the telephone company may
discontinue your service temporarily. If possible, they will notify you in advance. But if
advance notice isn’t practical, you will be notified as soon as possible. You will be advise of
your right to file a complaint with the FCC.
4. If your telephone company may make changes in it’s facilities, equipment, operations, or
procedures that could affect the proper operation of your equipment. If they do, you will be
given advance notice so that you can make the necessary modifications in order to maintain
uninterrupted service.
5. If you experience trouble with the telephone, please contact the service center for
repair/warranty information. Your telephone company may ask you to disconnect this
telephone from the network until the problem has been corrected or you are sure that the
equipment is not malfunctioning.
6. This equipment may not be used on coin service provided by the telephone. Connection to
party lines is subject to state tariffs (contact your state public utility commission of corporation
commission for information).
This telephone complies with Part 15 of the FCC Rules and Regulations. Operation is subject
to the following two conditions: (1) this telephone may not cause harmful interference, and (2) it
must accept any interference received, including interference that may cause undesirable
operation.

3
FCC REGULATIONS
WARNING: CHANGES OR MODIFICATIONS TO THIS UNIT NOT EXPRESSLY
APPROVED BY THE PARTY RESPONSIBLE FOR COMPLIANCE COULD
VOID THE USER’S AUTHORITY TO OPERATE THE EQUIPMENT.
NOTE: This equipment has been tested and found to comply with the limits for a class B
digital device, pursuant to Part 15 of FCC Rules. These limits are designed to provide
reasonable protection against harmful interference in a residential installation. This equipment
generates, uses and can radiate radio frequency energy and, if not installed in accordance with
the instructions, may cause harmful interference to radio communications.
However, there is no guarantee that interference will not occur in a particular installation. If this
equipment does cause harmful interference to radio or television reception, which can be
determined by turning the equipment off and on, the user is encouraged to try to correct the
problem by one or more of the following measures:
z Reorient or relocate the receiving antenna
z Reorient, relocate or increase the distance between the telephone and the equipment,
z Consult your dealer or an experienced radio/TV technician for help,
z Call our Service Center.
If shielded cables or special accessories are required for compliance, a statement must be
included which instructs the user to employ them, eg,
Changes or modifications not expressly approved in writing by the manufacture or the importer
voids the user’s authority to operate the telephone.
The FCC has prepared a helpful booklet “How To Identify and Resolve Radio/TV Interference
Problems” which is available from the US Government Printing Office, Washington, DC 20402.
please specify Stock Number 004-400-00345-4 when ordering copies.
This telephone is Hearing Aid Compatible.

4
IMPORTANT SAFETY INSTRUCTIONS
This symbol is to alert you to important operating or servicing instructions
that may appear in the user’s manual. Always follow basic safety
precautions when using this product to reduce the risk if injure, fire, or
electrical shock.
When using your telephone equipment, basic safety precautions should always be followed to
reduce the risk of fire or electric shock including the following:
1. Read and understand all instructions.
2. Follow all warnings and instructions marked on the product.
3. Unplug this product from the wall outlet before cleaning. Do not use liquid or aerosol
cleaners. Use a damp cloth for cleaning.
4. Do not use this product near water, for example, near a bathtub, wash bowl, kitchen sink, or
launder tub, in a wet basement, or near a swimming pool.
5. Do not place this product on an unstable cart, stand, or table. The product may fall, causing
serious damage to the product.
6. Slots and openings in the enclosure and the back or bottom are provided for ventilation to
prevent overheating. These openings must not be block-ed or covered. The openings
should never be blocked by placing the product on a bed, sofa, rug, or other similar surface.
This product should never be placed near or over a radiator or heat register. This product
should not be placed in a built-in installation unless proper ventilation is provided.
7. This product should be operated only from the type of power source indicated on the marking
label. If you are not sure of the type of power supply to your home, consult your dealer or
local power company.
8. Do not allow anything to rest on the power cord. Do not locate this product where the cord
will be abused by persons walking on it.
9. Do not overload wall outlets and extension cords as this can result in the risk of fire or
electric shock.
10. Never push objects of any kind onto this product through enclosure slots as they may touch
voltage points or short out parts that could result in a risk of fire or electric shock. Never
spill liquid of any kind on the product.
11. Do not disassemble this product; take it to a qualified service technician or service center
when repair work is required. Opening or removing covers may expose you to voltage or
other risks. Incorrect re-assembly can cause electric shock when the appliance is
subsequently used.

5
IMPORTANT SAFETY INSTRUCTIONS
12. Unplug this product from the wall outlet and refer to qualified service personnel under the
following conditions:
A. When the power supply cord or plug is damaged or frayed.
B. If liquid has been spilled into the product.
C. If the product has been exposed to rain or water.
D. If the product does not operate normally by following the operating instructions.
Adjust only those controls that are covered by the operating instructions. Improper
adjustment of other controls may result in damage and may require extensive work by
a qualified technician to restore the product to normal operation.
13. Avoid using a telephone during an electrical storm. There may be a remote risk of electric
shock from lightning.
14. Do not use the telephone to report a gas leak in the vicinity of a leak.
15. Never install telephone wiring during a lightning storm.
16. Never install telephone jacks in wet locations unless the jack is specifically designed for wet
locations.
17. Never touch un-insulated telephone wires or terminals unless the telephone line has been
disconnected at the network interface.
18. Use caution when installing or modifying telephone lines.
CAUTION: This product is an electrical device and can be hazardous if immersed in water. To
avoid the possibility of electrical shock, do not use it while in the bathtub or shower or when you
are wet. If you accidentally drop it into water, first unplug it’s cord from the modular jack, then
remove the equipment from the water.
Avoid using this telephone during electrical storms in your immediate area. Even though your
telephone company may be using protective measures to limit electrical surges form entering
your home, absolute protection from lightning is impossible.
SAVE THESE INSTRUCTIONS

6
BATTERY CAUTIONARY INSTRUCTIONS
BATTERIES: CAUTION
To reduce the risk of fire or injury to persons, read and follow these instructions:
1. User only the following type and size of battery: four (4) “AA” size alkaline batteries (not
included).
2. Do not dispose of the battery in a fire. The cell may explode. Check with local codes for
possible special disposal instructions.
3. Do not open or mutilate the battery. Released electrolyte is corrosive and may cause
damage to the eyes and skin. It may be toxic if swallowed.
4. Exercise care in handling batteries in order not to short the battery with conductor material
such as rings, bracelets, and keys. The battery or conductor my overheat and cause burns.
5. Do not attempt to recharge the battery provided with or identified for use with this product by
heating them. The batteries may leak corrosive electrolyte or explode.
6. Do not attempt to rejuvenate the battery provided with or identified for use with this product
by heating them. Sudden release of the battery electrolyte may occur causing burns or
irritation to eyes or skin.
7. All batteries should be replaced at the same time. Mixing fresh and discharged batteries
could increase internal cell pressure and rupture the discharged batteries.
8. When inserting batteries into this product, the proper polarity or direction must be observed.
Reversed insertion of batteries can cause charging, which may result in leakage and
explosion.
9. Remove the batteries from this product if it will not be used for a long period of time (several
months or more) since during this time the battery could leak, damaging in the product.
10. Discard “dead” batteries as soon as possible since “dead” batteries are more likely to leak in
a product.
11. Do not store this product, or the batteries provided with or identified for use with this product
in high-temperature areas. Batteries that are stored in a freezer or refrigerator for the
purpose of extending shelf life should be protected from condensation during the storage
and defrosting. Batteries should be stabilized at room temperature prior to use after
storage.
Batteries should be stabilized at room temperature prior to use after cold storage.

7
FEATURES
EMG900 FRIENDLY BIG BUTTON PHONE
Big Display, Talking Caller ID with
Speakerphone and Wireless Emergency Pendant
THE EMERGENCY FEATURE
- user friendly big button phone with emergency call feature, especially designed
for senior citizens and people living alone.
When the red key on the wireless emergency pendant is pressed, the telephone will
1. Activate a loud local alarm for 15 seconds to get immediate help within the house.
2. If no help arrives, the phone dials in sequential mode the emergency numbers from
the phone book (up to 30 records)
3. Play a pre-recorded or user recorded emergency message
4. If the other party receives the call and presses 0 key, a 3 minute speakerphone
conversation will be activated.
5. After 3 minutes the phone will dial the next emergency number from the phone book
unless the receiving party presses digits 1 and 2 to continue the conversation and
deactivate the emergency feature.
SPECIAL FEATURES
EASY TO SEE big buttons and large characters on the oversize LCD. The display
is high resolution with 5 contrast settings and full backlight.
EASY TO HEAR with selectable loud ringer and red light call indicator, adjustable
receiver and speakerphone volume. Hearing aid compatible
VOICE GUIDED PROGRAMMING the programming is very simple and the user can
follow the menu on the LCD with the aid of a voice menu. eg. the phone will say ‘Store
number to phone book’. (Feature available on primary language)
TALKING KEYPAD in pre -dialing mode the phone will say each digit that is pressed
on the keypad. eg. ‘One, two, three’. (Feature available in four different languages)
MEMORY KEYPAD in manual mode, each number keypad indicate a selection you
can find in the manual.

8
FEATURES
TALKING CALLER ID will say the name of the person calling (if recorded in phone
book) or will only announce the numbers of the calling party (in four different languages),
if not stored in the phone book.
TALKING PHONEBOOK will say the name of the person when reviewing the
phonebook list. (If recorded in phone book) or announce the numbers stored in the
phonebook.
RECORDABLE EMERGENCY MESSAGE There is a pre- recorded emergency
message (in four different languages) the user can record their own emergency
message (recommended) with his own voice (up to 20 sec).
FLEXIBLE PHONEBOOK EMERGENCY LIST WITH PRIORITY SETTING when a
telephone number is stored into the phone book the user can decide if the number is an
emergency number (yes / no) and which position in the priority list to assign (from 1 to
30)
EMERGENCY PENDANT using a high frequency (868 MHz, FCC approved) the
pendant has a range of around 130 feet in open field. Up to 5 pendants can be used
with the same telephones (optional)
HIGH SENSITIVITY SPEAKERPHONE the speakerphone has been specially designed
to capture the voice up to around 49 feet (in the same room).
PHONE ANSWER FROM REMOTE with incoming call, the user can answer the call
and activate the speakerphone through the remote pendant. Press the pendant key
again on the pendant will disengage the line.
M1 AND M2 KEYS the user can program special emergency numbers in two
hotkeys that can be accessed with speakerphone or handset off hook.
SOS KEY ON THE TELEPHONE has the same function as the hotkey on the
emergency pendant.

9
FEATURES
EMERGENCY POWER BACKUP four AA batteries (not included) power the
telephone during power blackouts. During power backup mode, the telephone
operates normally with all the features.
CALLER ID
•Caller ID FSK / DTMF dual mode type I
•64 caller ID memory (time/day of call)
•14 digits number, 16 characters name
•New call indication: LED and ICON
•Caller ID memory call back
•Up / Down Caller ID review
OTHER FEATURES
•30 phone book memory
•Lines engage led
•Real time clock / date
•2 way speaker phone (with Led indicator on key)
•Receiver volume Hi / Lo
•Loud ringer 90 dBA
•Speakerphone volume control (slide)
•User programmable multi-pendant (up to 5)
•User programmable Flash time (80 / 100 / 270 / 300 / 600 ms)
•Tone Pulse selectable
•Redial
•Mute
•Pause
•LED Ringer indicator
•Receiver volume control
MULTILANGUAGE LANGUAGE FEATURE
•1 primary language (English) voice guide (0-9, caller ID, phone book, default OGM,
help menu)
•3 secondary language (French, Italian and Spanish) voice guides (0-9, caller ID, phone
book, default OGM)
•11 selectable languages on the LCD
•Voice on / Voice off programmable option

10
FEATURES
SPECIFICATIONS
•Big display with LCD back light
3 Line LCD display
Contrast control
•868 MHz pendant (remote dialer)
•Wall mountable (wall mount bracket included)
•AC adaptor DC 9 volts 200mA
•Battery 4 AA 1,5V alkaline batteries in base unit for all function (not included)
•Battery 12 volts for remote pendant (included)
•IMPORTANT NOTE:
- Caller Id function requires subscription of the caller ID service from the
telephone company
11
INSTALLATION
Where to install the emergency phone
When installing the emergency phone, consider that the unit should be within the range
of the emergency pendant, and therefore placed in an area of common use during day
and nighttime. The range of the pendant is reduced by any structural obstacles, and
has a range of up to around 130 feet in open field.
Installing batteries [Optional]
Your telephone requires four AA batteries (not included) for all functions. This will
guarantee full functionality of the telephone, including the emergency function up to a
maximum of 12 hours. The telephone numbers in memory and the voice recordings
are stored in non volatile flash memory which does not require battery backup.
Before opening the battery compartment, make sure the telephone is disconnected from
the telephone line and the AC power supply.
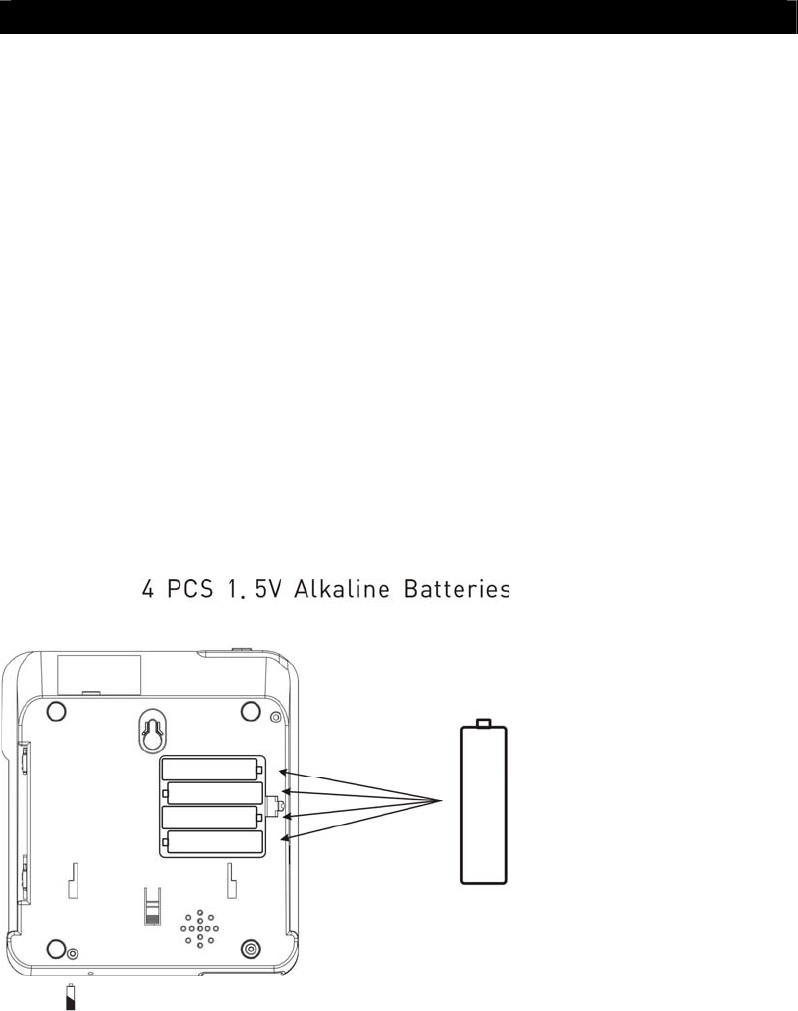
1. Use a flat screwdriver or
pen to lift the battery
compartment door.
2. Insert four AA batteries into
the compartment as indicated
by the polarity symbols.
3. Snap the battery
compartment door back into
place.
When appears on the LCD display, replace the batteries with 4 AA fresh ones. Use
only appropriate new AA 1.5V Alkaline batteries.
*PLEASE NOTE, for safety reasons; if the batteries voltage is lower then 2.5V, the
phone will automatically be lock. Is this case, the display will fade out, all function will
be shut off for the basic functions, such as call , dialing, receiving, etc. will still be
working.
12
Reboot:
1. Unplug the AC power adaptor and replace the phone with new fresh batteries.
2. When the new batteries are replaced, re-plug in the AC Power Adaptor and the LCD
will glow back on and icon on the display will disappear.
Replace the battery of the Pendant:
The pendant is equipped with a pre-installed internal battery. Each time the red key is
pressed, the led will light to show correct transmission. In case the led does not light
on, please change the battery with a new one
1. Use a Philips screwdriver to remove the screw on the lower case of the pendant and
remove the lower case.
2. Replace the 12V DC battery with a fresh one.
3. Replace the lower case and secure it with the screw.
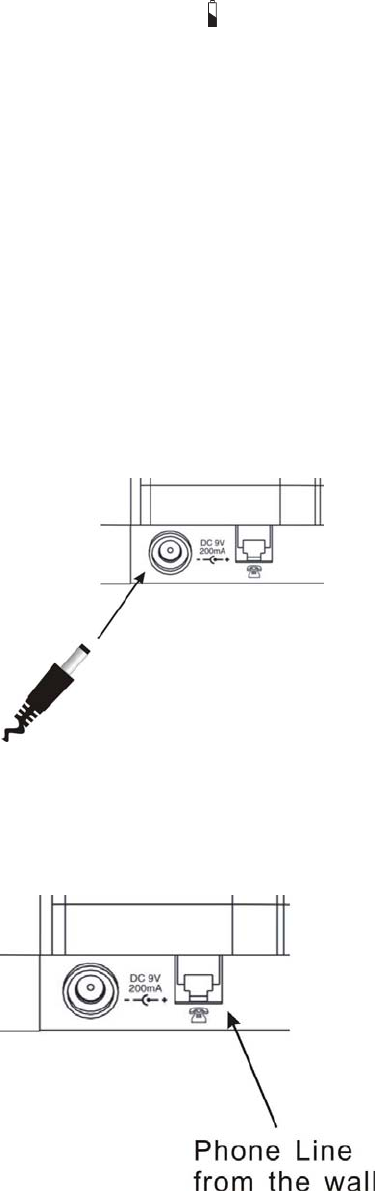
Connecting the plug-in AC adaptor
Insert the plug of the power supply into the power
socket on the back of the telephone and plug the
adaptor into wall socket. For safety reasons, use
only the adaptor provided. Plug the adaptor to
the socket-outlet which is near the equipment and
should be easily accessible.
In case the telephone is not connected to the
adaptor (and with no charged batteries), it will maintain the basic telephone feature of
dialing and receiving a call. No other features will be working.
Connecting the telephone line
1. Plug one end of the telephone line cord
into the TEL. LINE at the back of the
telephone base.
2. Plug the other end of the telephone line
cord into the wall outlet.
3. Plug one end of the coil cord into the
handset's modular jack.
4. Plug the other end of the coil cord into the
left side of the telephone base.
Lift the handset to check for a dial tone.

13
Hanging the Phone on the Wall
1. Insert the mounting bracket’s two tabs into
the matching slots opposite the keyhole
slot on the bottom of the phone. Then
press down and slide the bracket upward
until the tab snap into place.
2. Plug one end of the telephone line cord into
the TEL. LINE jack at the back of the
base.
3. Plug the cord’s other end into the wall plate
jack, then align the base’s keyhole slots
with the screws and slide the phone
downward to secure it on the wall.
14
SETTING UP
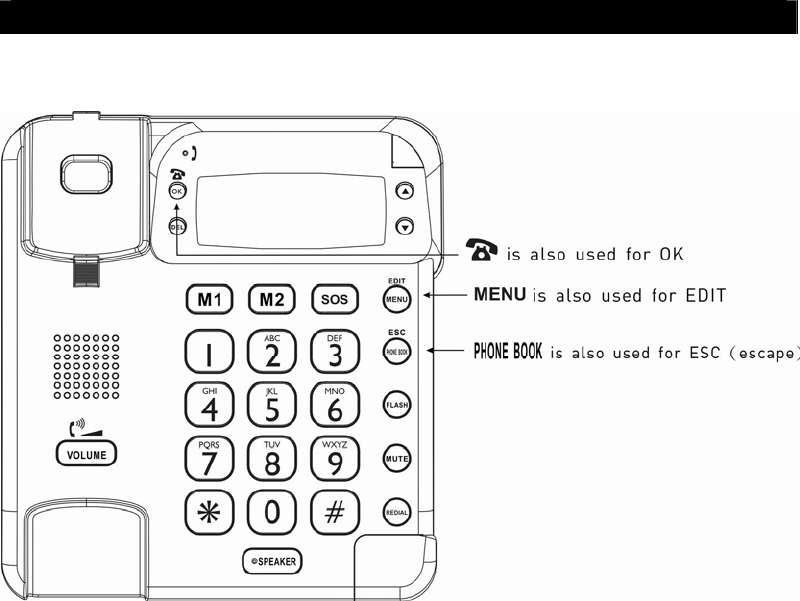
Please note that in this model some function keys will have a double function:
MENU KEY
Press the MENU key as many times as necessary to select the features you
wish to choose:
1. LCD CONTRAST
2. ENTER TIME/DATE
3. LCD LANGUAGE
4. VOICE
5. STORE NUMBER
6. NAME RECORDING
7. RECORD MESSAGE
8. CHECK MESSAGE
9. FLASH
10. TONE / PULSE
11. REMOTE PENDENT
15
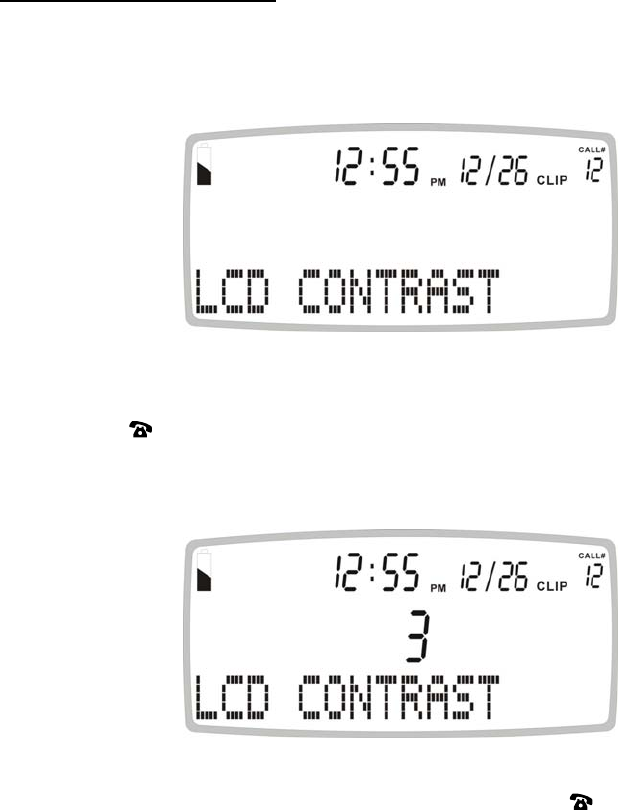
Setting the LCD CONTRAST
Depending on the viewing angle of the telephone, the user may want to adjust the LCD
contrast:
1. Press the MENU button. The display shows LCD CONTRAST.
2. Press the button. The display shows the current contrast setting which varies
between 1 to 5.
3. Press ▲ or ▼ to select the contrast level and confirm with button.
4. The display now shows to TIME/DATE, you can refer to next section to set the time
and date or press PHONE BOOK button to exit the set-up mode.
16
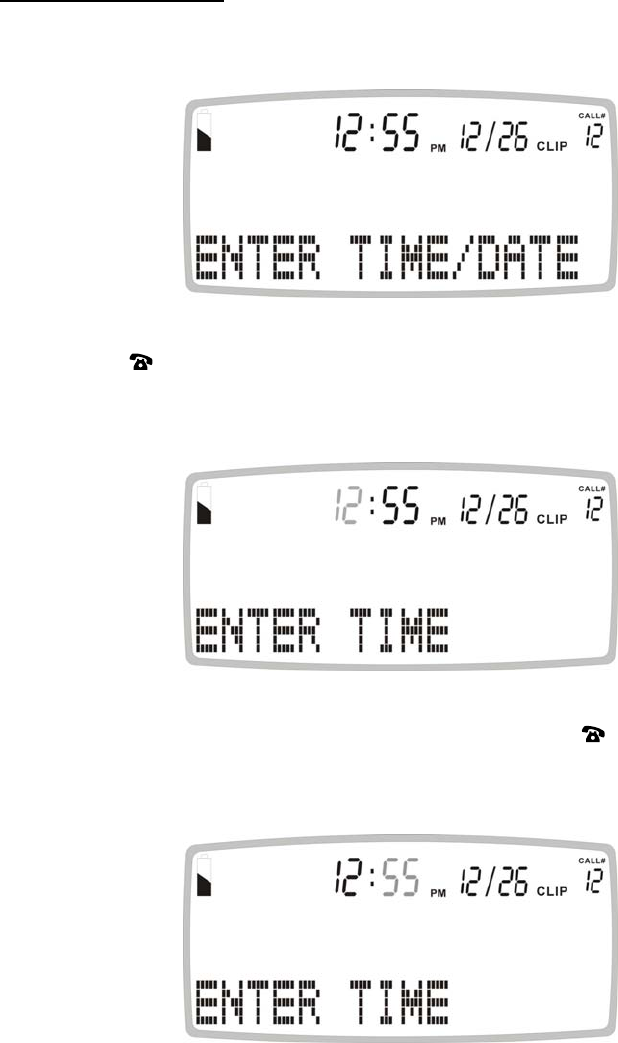
Setting the TIME/DATE
1. Press and release the MENU button until TIME/DATE is shown on the LCD display.
2. Press the button. The display shows ENTER TIME and the hour digit will be
flashing.
3. Select the current hour using the ▲ or ▼ and confirm with button. The minutes
will now flash on the display.
17
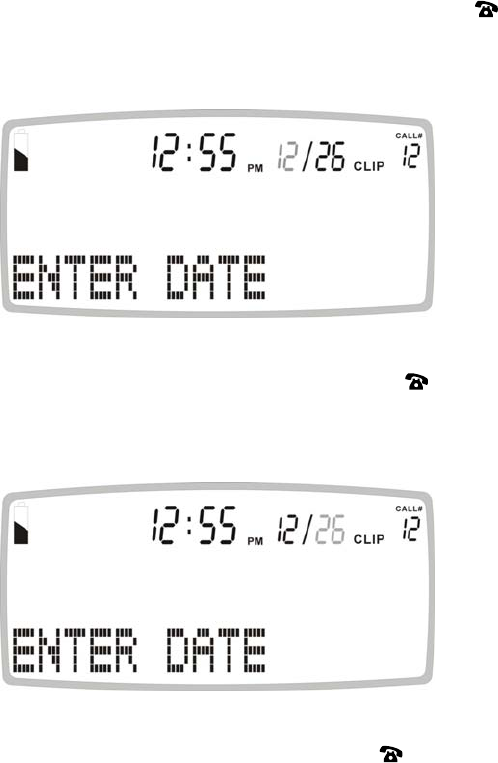
4. Select the required minutes using the ▲ or ▼ and confirm with button. The
display now shows ENTER DATE and the month digit will be flashing.
5. Select the current month using the ▲ or ▼ and confirm with button. The day will
now flash on the display.
6. Select the current day using the ▲ or ▼ and confirm with button.
7. Exit the set-up mode by pressing the PHONE BOOK / ESC button.
Some telecom providers, when sending the caller ID signal also send the time and date.
In this case the telephone will automatically set the internal clock.
18
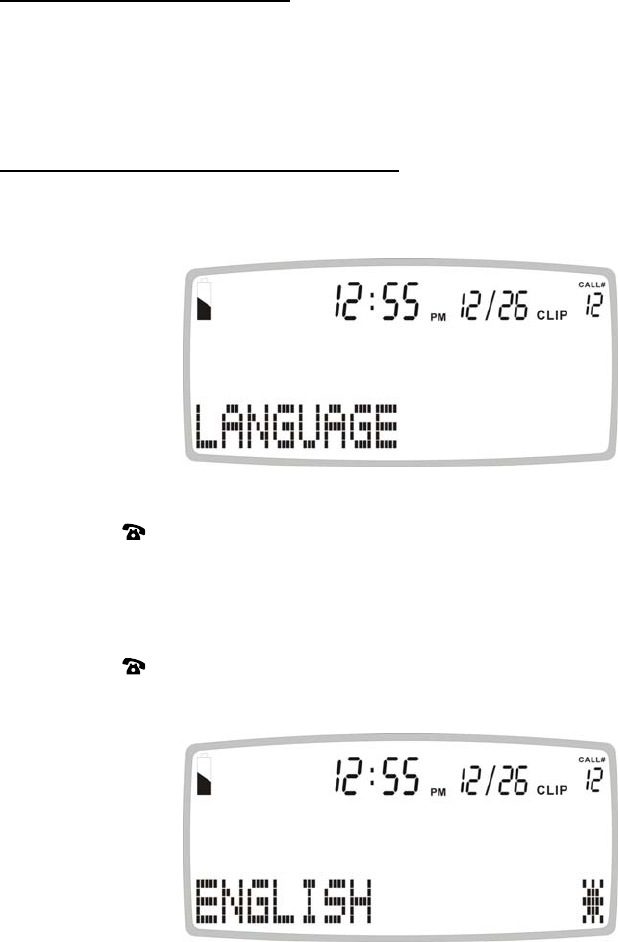
Setting the LCD LANGUAGE
This telephone has 11 different languages on the LCD.
The telephone factory preset default display language is ENGLISH*.
Setting the language Display on the LCD
1. Press and release the MENU button until LCD LANGUAGE is displayed.
2. Press the button, the display shows ENGLISH*.
3. Select the desired language; FRANCAIS (F), ITALIANO (I), DEUTSCH (DE),
NEDERLANDS (NL), TUERKCE (TR), ESPANOL (ES), SLOVENSKI (SI),
PORTUGUES (PT), DANSK (DK), SVENSKA (SE), etc) by using the ▲ or ▼ and
confirm with button.
4. Press PHONE BOOK / ESC button to exit the set-up mode.
Note: The [*] after the language means this language is the currently used language.
Note: The language on the LCD does not have a corresponding voice language. If
user select the LCD Display in English and the voice setting was in French, it will
not change to English.
19
Setting the VOICE
This telephone is equipped with one primary and three secondary spoken languages:
Primary spoken language: the telephone will voice digits from 0 to 9 (used in pre dialing,
talking caller ID, talking phonebook), the pre-recorded emergency message, and a fully
voice guided menu. On the LCD the primary language is the first language that will
show on the display.
Secondary spoken language: the telephone will voice from 0 to 9 (used in pre dialing,
talking caller ID, talking phonebook) and the pre-recorded emergency message.
The telephone default voice language is ENGLISH*.
Setting the VOICE language spoken by the telephone
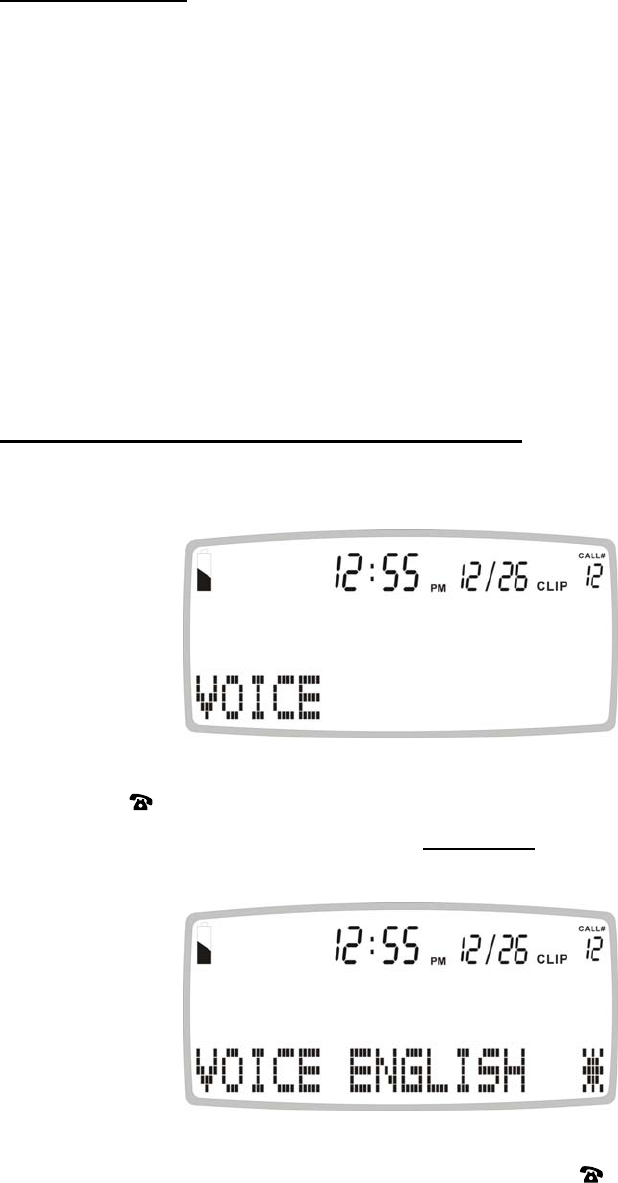
1. Press and release the MENU button until VOICE is shown.
2. Press the button, the display shows VOICE ENGLISH *, VOICE FRANCAIS,
VOICE ITALIANO, VOICE ESPANOL or VOICE OFF.
3. Select the desired option using the ▲ or ▼and confirm with button.
4. Press PHONE BOOK button to exit the set-up mode.
Note: The [*] after the language means this language is the currently used language.

20
Note: The language on the LCD does not have a corresponding voice language. If
user select the LCD Display in English and the Voice setting was in French, it will
not change to English.
Setting the STORE NUMBER
(Please see THE PHONE BOOK for instruction)
Setting the NAME RECORDING
(Please see THE PHONE BOOK for instruction)
Setting the RECORD MESSAGE
(Please see EMERGENCY FEATURE for instruction)
Setting the CHECK MESSAGE
(Please see EMERGENCY FEATURE for instruction)
21
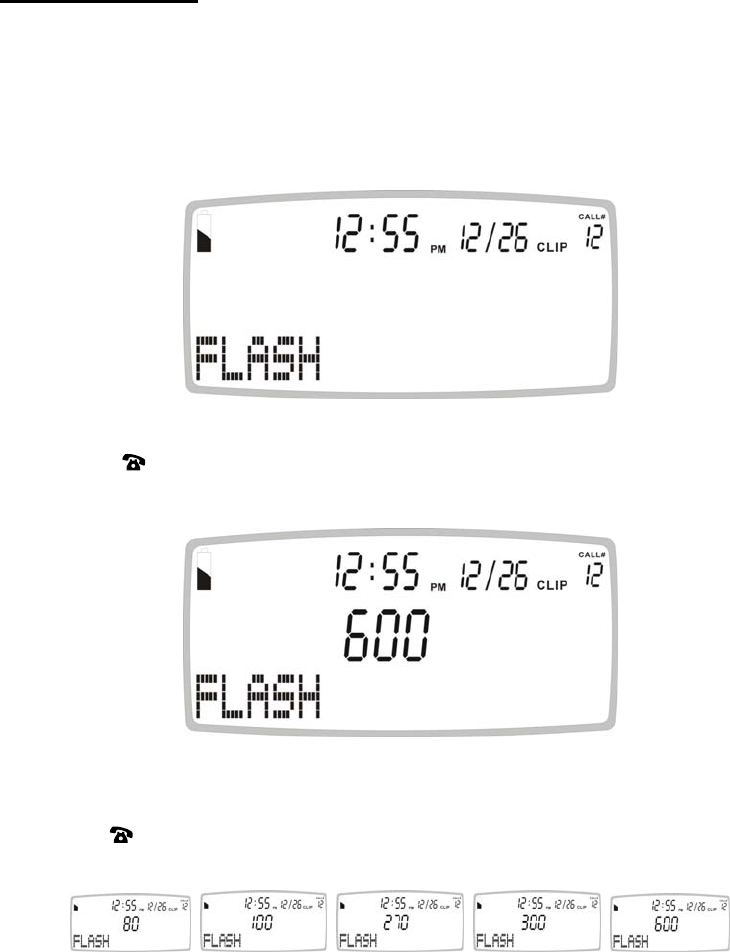
Setting the FLASH
This feature allows the user to set the flash time required in each country or needed on
the PABX. Contact your local telecom provider to know the appropriate flash time.
1. Press and release the MENU button until FLASH is shown.
2. Press the button,
3. Select the required flash time (default is 600ms) by pressing the ▲ or ▼ and confirm
with the button. (80 / 100 / 270 / 300 / 600)
4. Press PHONE BOOK button to exit the set-up mode.
22
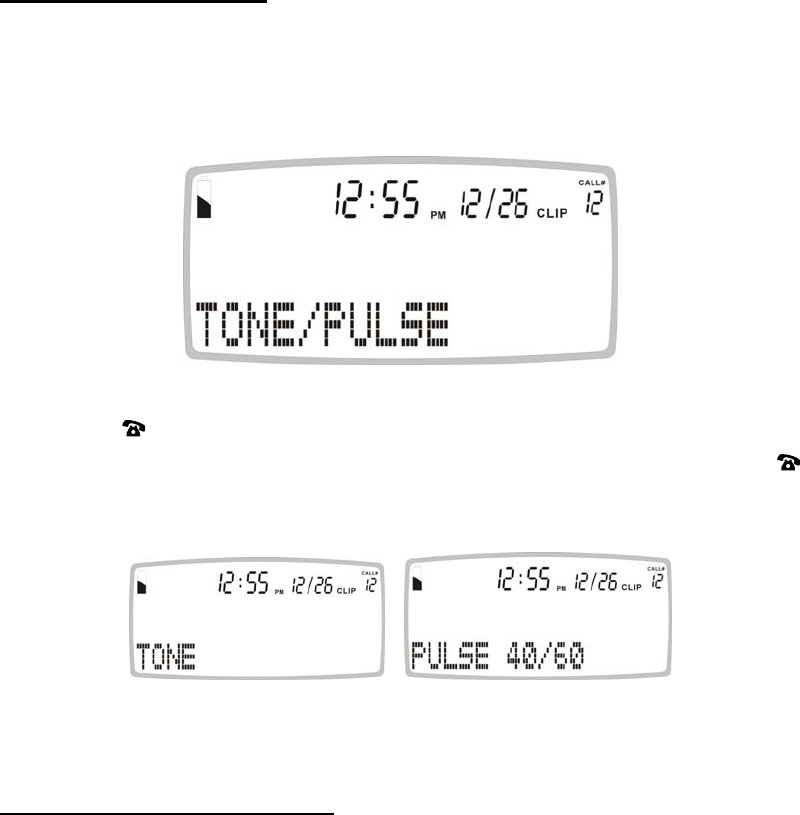
Setting the TONE PULSE
This feature is needed for those countries requiring pulse dialing (default is tone).
1. Press and release the MENU button until TONE/PULSE is shown.
2. Press the button,
3. Select the TONE or PULSE 40/60 by pressing the ▲ or ▼ and confirm with the
button.
4. Press PHONE BOOK button to exit the set-up mode.
Setting the REMOTE PENDENT
THE TELEPHONE COMES EQUIPPED WITH ONE EMERGENCY PENDANT WHICH
IS ALREADY PAIRED WITH THE UNIT.
Please contact your local re-seller to purchase additional emergency pendants. These
can be used for another person in the house or to leave the pendant in more than one
room (like bathroom and bedroom).
THE FOLLOWING INFORMATION IS FOR PAIRING ADDITIONAL PENDANTS ONLY
OR IF YOU HAVE DELETED THE PANDANT FROM THE “PAIRING MENU”
23
New Pendants need to be paired to the telephone:
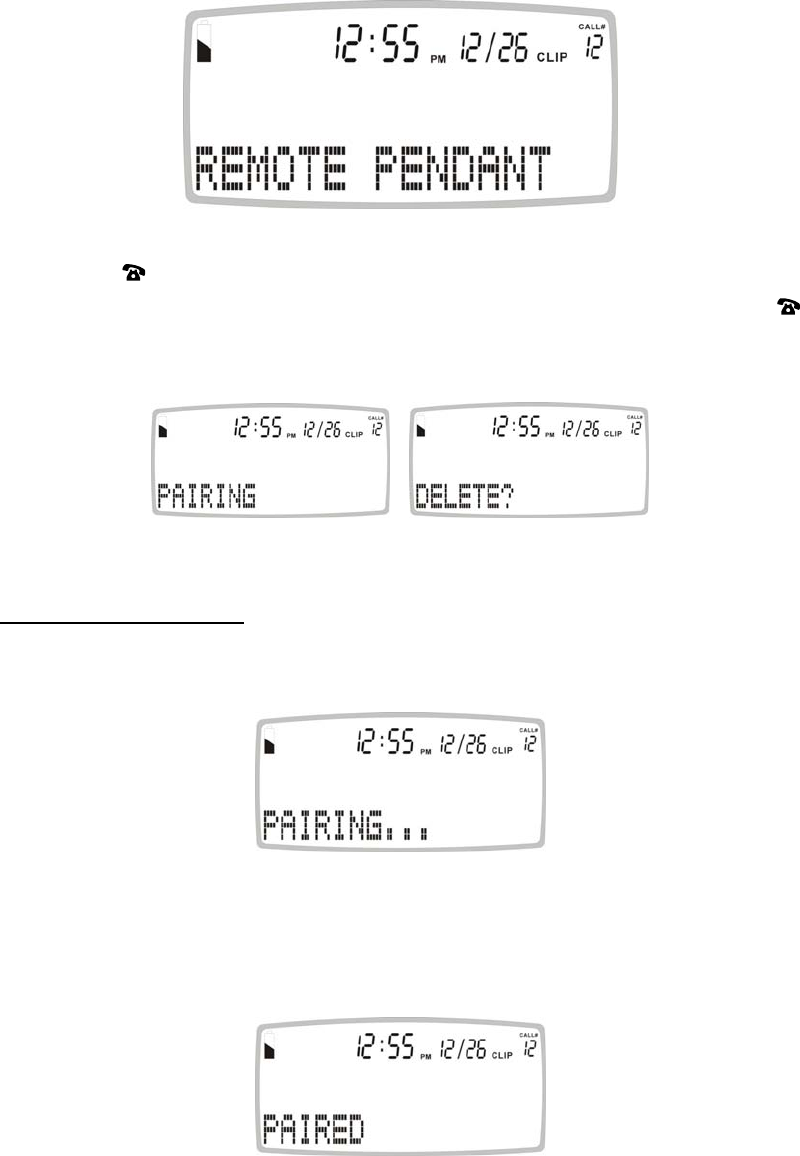
1. Press and release the MENU button until REMOTE PENDANT is shown.
2. Press the button,
3. Select PAIRING or DELETE by pressing the ▲ or ▼ and confirm with the
button.
Remote Pendent setting:
If you select PARING, the display will show PAIRING for only 3 seconds.
Immediately press and hold down pendant key for 3 seconds until you see “PAIRED” on
the display.

24
If after 2 seconds no pendant was successfully paired, the display will show “PAIRED
FAILURE”.
Please repeat above procedure until you have successfully paired the pendant with the
telephone.
You can pair up to 5 pendants to each telephone. Please repeat above procedures to
pair each individual pendant.
If you have already paired 5 pendants to the phone attempt to pair more, the display will
show “FULL”.
Delete Devices:
If you select “DELETE”, the unit will delete ALL the paired pendants.
You will need to pair all pendants again including the main pendant which came with the
phone.
Press PHONE BOOK / ESC to exit set-up mode.
25
Upon exiting set-up mode, you should press the pendant button to make sure that the
pendants were successfully paired. If the phone beeps, press the pendant again to
abort the emergency calling feature.

26
TELEPHONE OPERATION
Dialing a Call
1. Pick up the handset or press SPEAKER button (the speaker LED will light) and wait
for a dial tone. The line engage led will turn on.
2. Press the keypad for the telephone number you wish to dial. The display will show
the number that you dialed on the keypad. If you dial a number over 14 digits long, it
will show the last 14 digits only.
3. When you have completed your call, hang up the handset or press SPEAKER
button again to disconnect the telephone call.
The line engage red led will turn off when the line is not engaged. In case the handset
is not placed well on the telephone, the red led will remain on to warn the user.
It is possible to switch from a handset conversation to a speakerphone conversation by
pressing the SPEAKER button and picking up or hanging up the handset accordingly.
Pre Dialing a Call
1. Dial on the keypad the telephone number. The telephone will voice the digits dialed
(with voice option YES). To correct a number press the DEL button for each incorrect
digit
2. Pick up the handset or press SPEAKER button
Receiving a Call
When you receive a call, the telephone rings, the Ringer LED flashes, and the display
shows the CALL# and the caller telephone number (with caller id service activated), and
say the name of the caller if the number matches with a name recorded in the phone
book, if not, it will say the numbers of the calling party (with voice option ON)
The Caller ID feature allows you to decide to pick up the phone or not depending on
who is calling.
If you want to talk to the caller:
1. Pick up the handset or press SPEAKER button to answer the call.
2. At the end of the call, return the handset to the cradle or press SPEAKER button
again.

27
Receiving a Call with the remote pendant
If you are within a 10 feet from the telephone you can answer to an incoming call by
pressing the red button on the remote pendant, the telephone will engage the line and
activate the speakerphone. By pressing the red button of the pendant a second time you
will deactivate the speakerphone and return to standby mode.
This feature is particularly useful if you are sitting on a couch or relaxing and do not wish
to get up to answer the telephone.
Speaker Volume Control
You can adjust the speaker volume for a more comfortable listening level by sliding the
switch.
This will also adjust the volume of the voice driven features. It is suggested to maintain
the volume at medium level.
Redial
To redial the last number called
1. Lift the handset or press SPEAKER button.
2. Press the REDAIL button.
Noted: The last number dialed (up to 32 digits long) can be redialed.
Pause
You can insert a 3.6 seconds pause into dialing or storing a number into memory in
order to access custom and telebanking services, long distance, etc. Press REDAIL
button at the desired point in number. Press REDAIL button again if an additional 3.6
seconds is needed.
This feature is also useful if the telephone is connected on a PABX.
Flash
Many special network services, such as Call Waiting, require a switch hook signal. The
Flash button provides the electronic equivalent of a switch hook operation.
For example, if you subscribe to Call Waiting*, you can use this feature to put your
current call on hold and answer another call on the same line by pressing the Flash
button.
• Please note that a subscription is required to use these services.

28
Mute
You can hold down the MUTE button to mute the microphones of the handset and base.
Release the button to resume.
Hearing Aid Compatibility
This unit is compatible with inductively coupled hearing aids.
Ringer Volume Control
The ringer sound level can be adjusted by slide the RINGER switch to select high ( ),
mid ( ) and low ( ) level.
The red bright LED will flash with all incoming calls.
Receiver Volume Control
You can adjust the receiver volume for a more comfortable listening level. During a call,
press once to have louder sound level, press the button once again to resume.
The receiver volume will reset to the normal setting when you replace the handset.
29
THE PHONE BOOK
Important: When using the phone book features, please note it is only available at
phone book mode ( icon turns on). If the icon is off, press PHONE BOOK button
once.
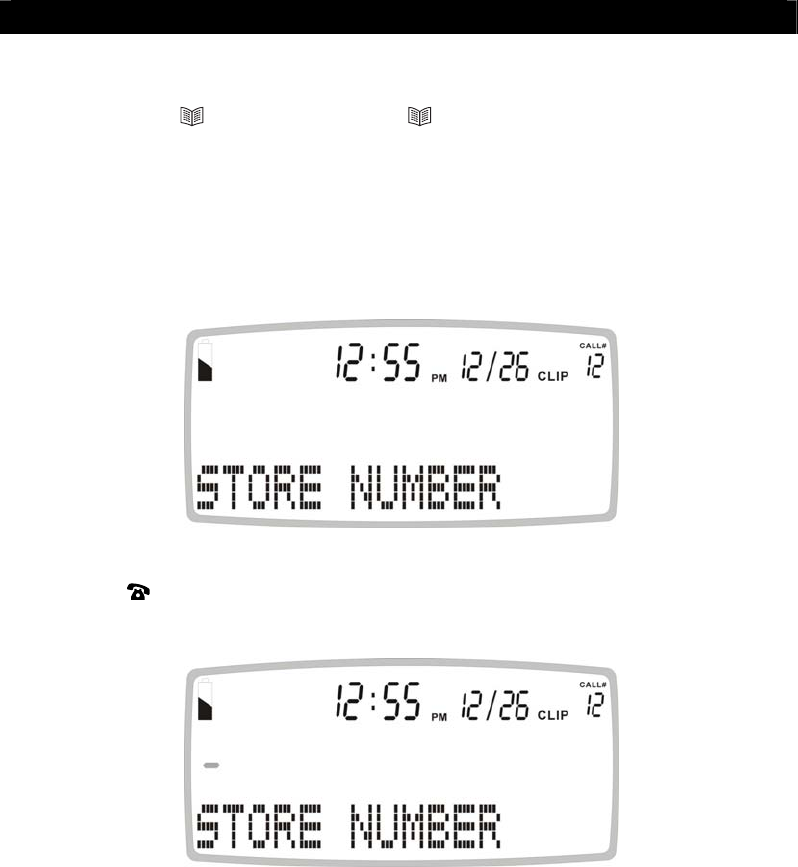
Storing numbers (Phone Book can be stored up to 30 lists)
1. Press and release the MENU button until STORE NUMBER is displayed.
2. Press the button. The cursor will flash in the first position.
30
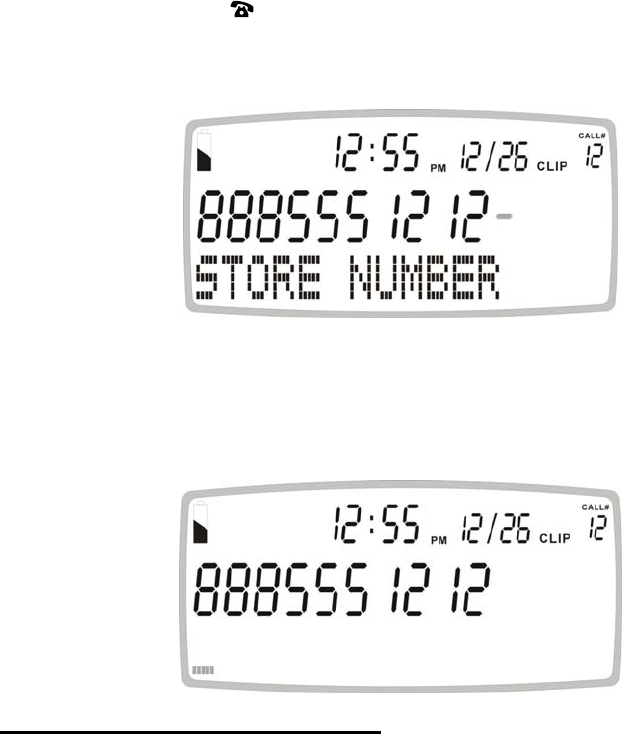
3. Enter the desired telephone number with a maximum of 22 digits using the number
pad and confirm with button. (Both the Delete button and Pause buttons can be
used when storing the telephone number)
4. When the bottom cursor is flashing enter the desired name with a maximum of 16
letters.
How to enter names in the phone book
The number buttons are also inscribed with letters for entering the name. By repeatedly
pressing the appropriate button, upper case letters as well as numbers and special
characters can be entered.
Overview:
1 space + & - / 1
2 A B C 2
3 D E F 3
4 G H I 4
5 J K L 5
6 M N O 6
7 P Q R S 7
8 T U V 8
9 W X Y Z 9
0 , . : ; ? 0
* ‘ @ ( ) *
# $ _ % ! #
31
Incorrect entries can be deleted by pressing the DEL button. To do this, move the
cursor the correct position using ▲ or ▼ and then press DEL button.
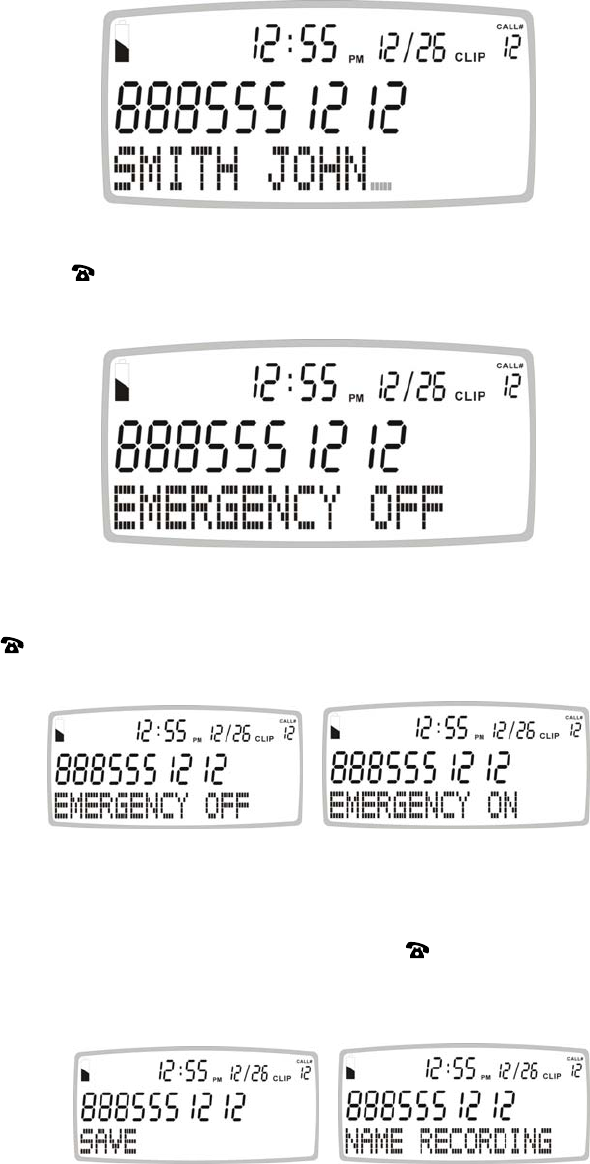
5. Confirm with button. The display now shows EMERGENCY OFF.
7. Select the EMERGENCY ON or EMERGENCY OFF using the ▲ or ▼ and confirm
with button.
The above feature lets you decide whether the phone number you’ve stored should be
dialed out when the emergency feature is activated.
If you selected EMERGENCY OFF and press , SAVED is shown and the unit
display “Name Recording”.
32
That means the phone number is stored only for a general phone dial out, but not for
emergency's call dial out.
To record the person’s name (example ‘this is John’), hold down button,
speak clearly into microphone after a beep and "VOICE" icon is flashing.
Release the button when you finish or the unit will stop recording after 3 seconds.
The voice prompt will then be played automatically. [Recording the Voice is
necessary for the personalized talking caller id and talking phone book feature].
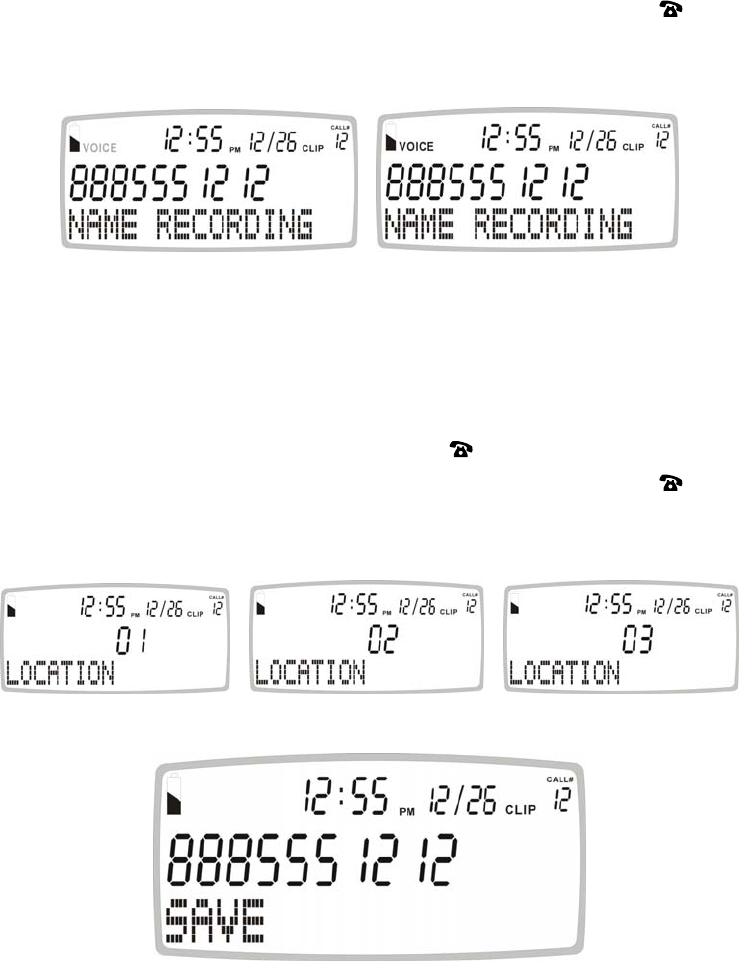
If you selected EMERGENCY ON, and press , now "LOCATION" is shown.
Select the required location by pressing ▲ or ▼ and confirm with button,
"SAVED!" is shown.
[IMPORTANT NOTE: SELECTING THE CORRECT LOCATION IS VERY
IMPORTANT BECAUSE THIS WILL BE DIALED IN THE EMERGENCY
FEATURE. LOCATION 1 WILL BE DIALED FIRST, THEN 2, THEN 3 ETC.]
[IMPORTANT NOTE: IF YOU CHOOSE TO OVERWRITE A LOCATION, THE
PREVIOUSLY STORED NUMBER WILL BE MOVED TO ONE LOCATION
“AFTER” THE LOCATION YOU JUST SET]

33
The unit announces “Name Recording”, “SOS” icon is shown. That means the
phone number is stored for a general phone and emergency's call dial out.
To record voice (example ‘this is John’), hold down button; speak clearly into
microphone after a beep and "VOICE" icon is flashing. Release the button when
you finish or the unit will stop recording after 3 seconds. The voice prompt will
then be played automatically. [Recording the Voice is necessary for the
personalized talking caller id and talking phone book feature]
7. You can repeat step 2 to 6 to enter more numbers or press PHONE BOOK button to
exit.
Incorrect entries can be deleted by pressing the DEL button. To do this, move the
cursor the correct position using ▲ or ▼ and then press DEL button.
Review Numbers (Phone Book Memory)
1. Press and release PHONE BOOK button, icon is shown.
2. Review the stored phone numbers by pressing ▲ or ▼, or enter the first letter of the
name of the person you wish to call using the number pad. After a short time, the
display will show the first stored telephone number with this initial letter, and
announce the name if it was recorded, or announce the telephone number. You can
now search for further numbers under this letter by pressing ▼.
*If no voice was recorded for the contact, the phone will only announce the
telephone number only.
Notes:
• If no telephone number is stored, the display will show EMPTY.
• After you view all the Caller ID in memory, the display will show END OF LIST.
• If SOS icon is displayed on the contact, this means that the number is an emergency
primary dial out contact.
If no key is pressed for 30 seconds, the telephone will return to standby Caller ID mode.

34
Dial Numbers (the displayed telephone number of Phone Book Memory)
1. With the desired telephone number showing on the display, press button. The
telephone dials out the displayed telephone number automatically in speakerphone
mode.
2. The display shows dialed out telephone number and counting timer.
OR
1. Pick up the handset or press SPEAKER button (the speaker LED will light) and wait
for a dial tone.
2. Press and release PHONE BOOK button, icon is shown.
3. Review the stored phone number by pressing ▲ or ▼.
4. Press button
Recording / Editing / Deleting voice prompt of name of phone book
When an incoming call is received, the unit will display and announce the caller's phone
number. If the caller's phone number is stored in the phone book, and caller's name will
be displayed as well.
If the voice prompt is recorded for this phone number, the unit will announce the voice
prompt recorded instead of the caller's phone number.
1. To record names press and release the MENU button until the "NAME
RECORDING" is shown.
2. Press the button. A list of the phone book entries will be display.
3. Press ▲ or ▼ to select the list you like to record a voice or name for it.
4. To record or edit the voice prompt, hold down button. Speak clearly into the
microphone after a beep and “VOICE” icon is flashing. Release the button when you
finished or the unit will stop recording after 3 seconds. The new voice prompt will
then be played automatically.
To delete the voice prompt recorded, press DEL button during the voice prompt is
playing.
5. Repeat step 3 to 4 to edit or delete more entries or exit the set-up mode by pressing
the PHONE BOOK button.
To Edit the Phone Book Memory
1. Press and release PHONE BOOK button, icon is shown.
2. Select the required location from the phone book by pressing ▲ or ▼.
3. Press and hold MENU button for two seconds. The display will show EDIT?.
4. Press button, the first digit of the selected phone number will flash.

35
5. You can move the cursor to the required position by pressing ▲ or ▼. To delete the
digit, press DEL button, or press any numeric key to replace the digit and confirm
with button. Then the display shows the flashing first letter of the name.
6. Move the cursor to the required position by pressing ▲ or ▼. To delete the letter,
press DEL button, or press any numeric key to replace the name, and confirm with
button, "EMERGENCY ON or OFF" is shown.
7. If the display shows "EMERGENCY OFF", and you want to change it as an
emergency's call dial out, select "EMERGENCY ON " by pressing ▲ or ▼, and
confirm with button, now "LOCATION" is shown. Select the required location by
pressing ▲ or ▼ and confirm with button, "SAVED!" is shown.
If you select "EMERGENCY OFF" and confirm with , "SAVED!" is shown.
[Important note: selecting the correct location is very important because this
feature determines in case of emergency sequence of the telephone numbers that
will be dialed in the emergency feature. Location 1 will be dialed first, then 2, then
3 etc.]
[Important note: if you choose to overwrite a location, the previously stored
number will be set to one location “after” the location you just set]
8. You can repeat step 2 to 7 to edit more numbers or press PHONE BOOK to exit.
To Delete the Phone Book Memory
1. Press and release PHONE BOOK button, icon is shown.
2. Select the required location from the phone book by pressing ▲ or ▼.
3. To delete single memory, press DEL button once. The display will show the
DELETE?. Press and hold down “DEL” for approx 2 seconds. The telephone
number and name will be deleted and the display will now show another number from
the phone book.
To delete all phone book memories, press and hold DEL button until the display
shows DELETE ALL?. Press DEL button for 2 seconds until EMPTY appears on the
display.
36
EMERGENCY FEATURE
This feature allows you to get immediate help from the people on the emergency phone
list.
The emergency feature is only possible with the unit powered by the AC adaptor or by
the backup batteries. (not included)
Emergency Message
Two options are provided for the emergency message:
A. A pre-recorded message "This is an emergency call, to accept this call press zero".
This message will be played unless you decide to record your own message.
B. Your own recording (MAX. RECORDING TIME 20 SECONDS).
This can be any message of your choice, but should always end with the phrase "TO
ACCEPT THIS CALL PRESS ZERO".
*EMERGENCY MESSAGE RECOMMENDATION
“This is an emergency call… My name is Jane Smith. My address is 123 main St.
I need immediate medical assistance. To accept this call please press zero”
To Record your own emergency message
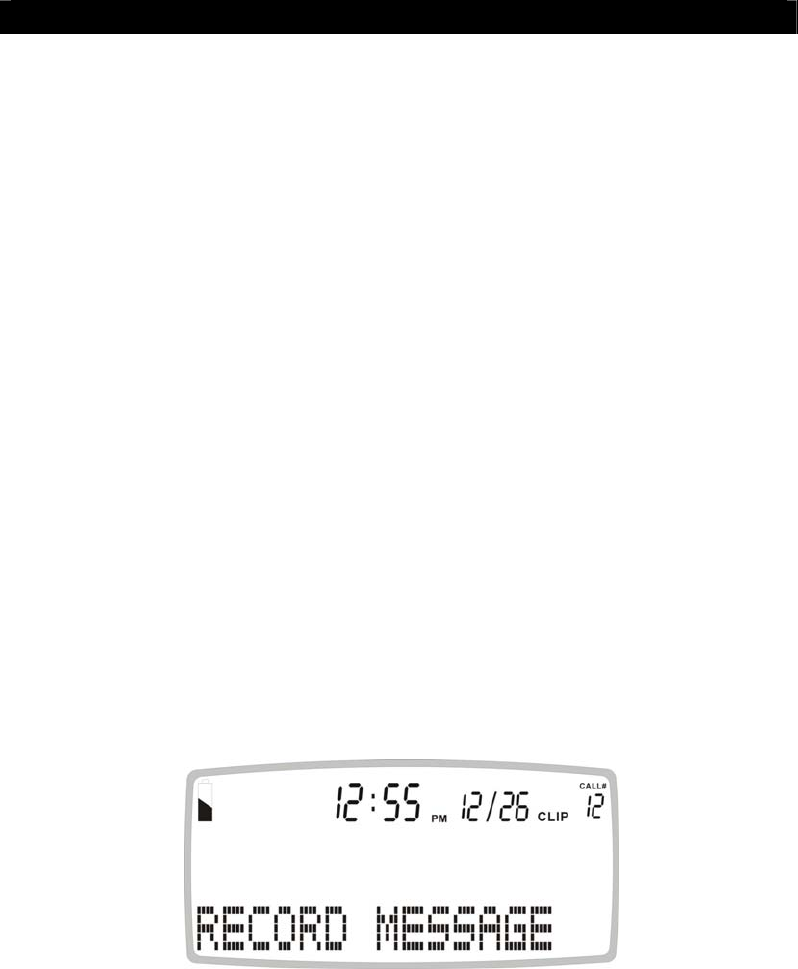
1. Press and release the MENU button until the RECORD MESSAGE is shown.
37
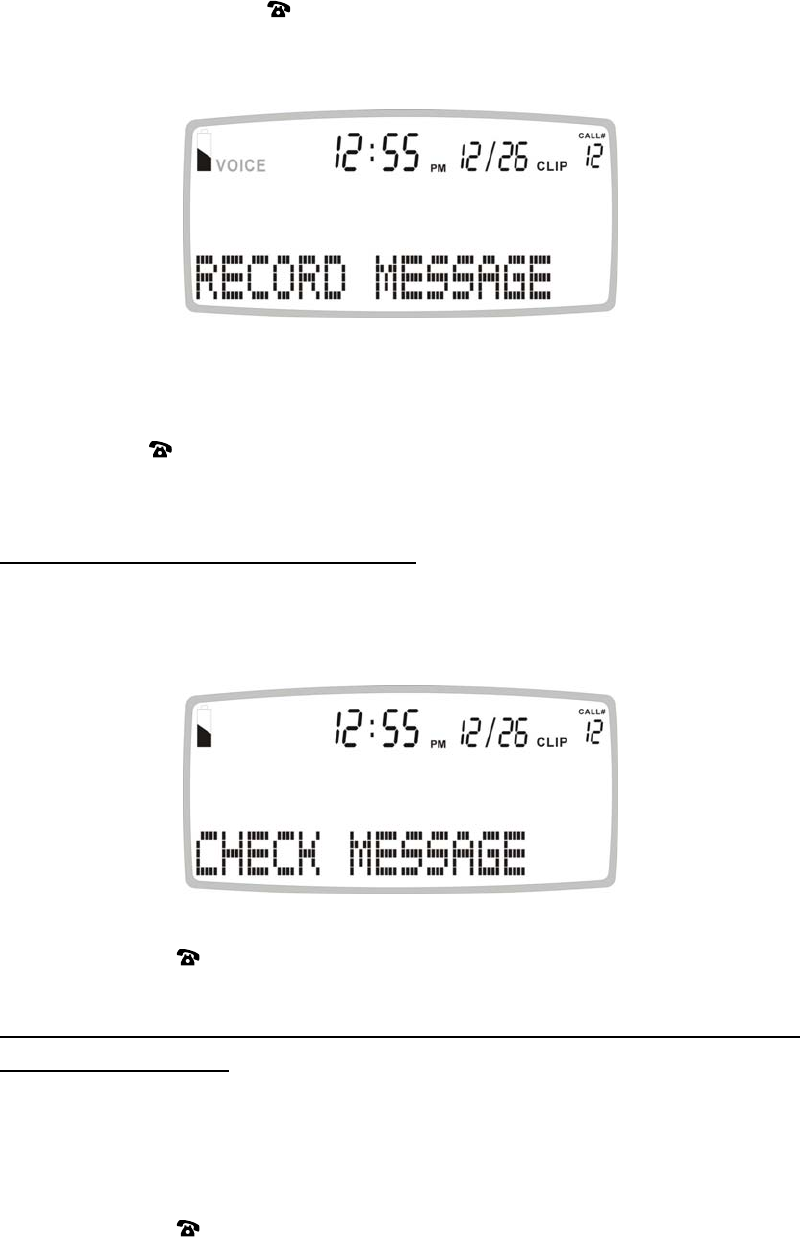
2. Press and hold down the button. Start your message immediately after the beep
and "VOICE" icon will be flashing.
While recording, keep at a distance of 15 cm from the telephone so that you can
speak clearly into the microphone.
3. Release the button after you have finished your emergency message.
The message will now be played back automatically.
Check the Message (Emergency Message)
You can check the emergency message at any time.
1. Press and release the MENU button until the CHECK MESSAGE is shown.
2. Then press the button to play back the message.
Delete the Message (Delete your own emergency message and reverting to the
pre-recorded message)
If you have recorded your own message, you can delete this and by doing so revert to
the pre-recorded message.
1. Press and release the MENU button until the CHECK MESSAGE is shown.
2. Then press the button to play back the message.
3. During the playback, press DEL button. Your own message will be deleted
and you will be using the pre-recorded factory default greeting.

38
To Store Numbers M1 and M2 Keys (Hot Keys)
The phone is equipped with two emergency one touch memory. They can be
programmed with the telephone number of the police or the ambulance or any other
emergency numbers.
1. Press and release the MENU button until the STORE NUMBER is shown.
2. Press the button. The cursor will flash in the first position.
3. Enter the desired telephone number with a maximum of 22 digits using the number
pad and confirm with button.
4. Press
M1 or M2.
5. Confirm with button. The number has now been saved and display show
SAVED!.
39
6. Repeat step 2 to 5 to store other numbers for other memory buttons.
To dial the numbers in the emergency MEMORY Buttons, simply pick up the handset or
press SPEAKER button then press M1 or M2.
NOTE: THE NUMBERS STORED IN THE M1 OR M2 MEMORY BUTTONS ARE FOR
MANUAL DIALING ONLY AND WILL NOT BE DIALED IN THE EMERGENCY
DIAL OUT SEQUENCE.
Activate the Emergency Call:
1. When the key of the pendent is pressed for more than one second or the emergency
button SOS on the telephone is pressed, the NEW CALL LED on the telephone will
blink continuously. The telephone beeps loudly for 15 seconds. If during this time the
emergency button SOS on the telephone, or the key of the pendant is pressed for
more than 5 seconds, the emergency procedure will be stopped immediately.
If the key is not pressed, the SOS icon will turn on the LCD and the emergency
dialing will start:
2. The telephone dials out the first emergency number (stored in the phone book
emergency location 1) in speakerphone mode, and then announces the emergency
message continuously.
If during 60 seconds the called party acknowledges the call by pressing 0, the
telephone will be put in speakerphone conversation mode for 3 minutes.
If within these 3 minutes, the called party presses 1 and then 2, the emergency
dialing procedure will be stopped (SOS icon will turn off). The unit will be kept in
speakerphone mode continuously without stopping unless the user presses the
speakerphone key again or presses the remote key to stop the speakerphone. If 1
and 2 are not pressed during 3 minutes, the emergency feature stops only when all
the emergency numbers have been called.
If 0 is not pressed during 45 seconds, the telephone will dial out the next
emergency number automatically in speakerphone mode.
3. After completing the first cycle of emergency calls, if no call was successful and
none of the called parties have pressed 0, the SOS icon will remain on and the
telephone will go in standby mode for 10 minutes to allow for incoming calls. After
10 minutes, or thereafter if the line is engaged by incoming call, the telephone will
40
repeat a second cycle of emergency calls and at the end stop the emergency
procedure (SOS icon will then turn off).
Note:
1. If NO emergency numbers have been set, the telephone will not dial anything and just
beep loudly continuously when the emergency SOS key on the telephone, or the key
of the pendant is pressed for more than one second.
2. It is important that the pendant must be within the range of the telephone to activate
the emergency feature. The user should check that between the pendant and the
telephone there are no structural obstacles, heavy concrete walls, etc.
3. When the red key on the pendant is pressed, the led on the pendant will light up for
as long as the key is pressed. If the led does not light up it is necessary to replace
the battery.
4. To stop the ongoing emergency feature, press and hold for more than three seconds
the emergency button on the telephone, or press and hold the button of the pendant
for more than three seconds Engaging the line through the handset or the
speakerphone SPEAKER button will also stop the ongoing emergency feature.
When the emergency feature is off the SOS icon will also turn off.
5. The emergency feature will automatically stop when all the emergency numbers have
been dialed or if the receiver presses 1 and 2 after the 0 key. [The reason for
interrupting automatically the call after 3 minutes is for safety in case a receiving
party presses 0 but for any reason is unable to receive the message, in case of
mobile phone line failure for example]
6. The receiving party is expected to press 0, 1, 2 with a touch-tone phone, a
standard feature in most telephones.
The following is a brief explanation on the above
*Please note: If 1 and 2 buttons are pressed by the receiving party after they have
pressed 0 to accept the emergency call, the speakerphone will keep active until the
speaker button on the phone or the pendant button is pressed to disconnect the call.

41
THE CALLER ID
On each incoming call with available caller ID the telephone will ring and announce the
caller with their name (if a name was recorded associated with a telephone number in
the phone book) or with the telephone number.
Important: When using the Caller ID features, please note it is only available at Caller
ID mode (CLIP icon turns on), if the CLIP icon is off, press PHONE BOOK button once.
Please note that all caller ID features are strictly related to the service provided by the
telephone service provider. In most countries it is necessary to subscribe to the caller
ID service with the telephone service provider.
If the telephone is connected to a PABX the caller ID features depend on the PABX.
The caller ID feature is only possible with the unit powered by the adaptor or by the
backup batteries.
Receiving a Call (the telephone can store up to 64 calls)
• If only the caller's phone number is received, the display shows the caller's phone
number with the time and date it was received. The NEW icon turns on and NEW
CALL LED blinks.
Notes:
1. CALL#01 means this data is stored in Caller ID memory location #01.
2. The calling time and date are immediately recorded from the real-time clock.
• If both the caller's name and phone number are received, the display shows the
caller's name and phone number, with the time and date it was received. The "NEW"
icon turns on and NEW CALL LED blinks.
Note: If the caller's name has more than 16 characters, only the first 16
characters will be displayed.

42
Erase the desired Caller ID Memories
1. Select the desired Caller ID memory location by using the ▲ or ▼button.
2. To delete single memory, press DEL button once. The display will show the
DELETE?. Press DEL button for 2 seconds. The data for that call will be erased, and
the CALL# and Caller ID information will be updated.
To delete all Caller ID memories, press and hold DEL button until the display shows
DELETE ALL?. Press DEL for 2 seconds until NO CALLS appears on the display.
Both the total call and new call counters will become zero, and the current time and
date will be displayed.
Call Back (Redial) from the Caller ID Memory
Select the desired Caller ID memory location by pressing ▲ or ▼.
Press button once, the speakerphone will turn on automatically and dial the
selected number.
OR
With the handset picked up, select the desired Caller ID memory location by pressing ▲
or ▼ then press button twice.
Some telephone companies in certain areas require dialing “1” when dialing back
incoming calls (long distance.)
To add the “1” on the caller ID call back feature, press ▲ or ▼ until the desired number
is displayed on the LCD screen. Press once, then press ▲ or ▼ button. The
telephone number with the “1” in front of the 10 digit number will display on the bottom
on the LCD screen. Press , the telephone will then call back the desired number
and add the “1”.
Copy from the Caller ID to the Phone Book
You can copy Caller ID information to the phone book while you are reviewing the Caller
ID information.
1. Select the desired Caller ID memory location by pressing ▲ or ▼.
2. Press and hold MENU button for two seconds, display will show COPY TO
MEMORY.
3. Press button , display will show SAVED!.
-- End --

43
TROUBLESHOOTING
PROBLEM ACTION
The LCD can not be seen
clearly
Modify the contrast setting (see paragraph)
Check your telephone line connection The telephone does not dial
Check the dialing setup (tone or pulse) required in
your country and program the telephone accordingly
(see paragraph)
The telephone is unable to
access the special services
provided by the telecom
operator pressing the R key
Check that the Flash time is set according to the
operator’s standards (see paragraph)
The telephone can not
perform any of the features
Check your AC power supply connection
The telephone does not
perform any of the features
when there is a power in
blackout
Replace the 4 AA batteries in the unit.
Check that while pressing the emergency button on
the pendant the led lights on. Replace the pendant
battery if it does not.
Check that the pendant is within the range of the
telephone and no structural obstacles are in-
between. If necessary change the location of the
telephone
The pendant can not activate
the emergency feature
Check that any additional pendants or new pendants
are correctly paired with the telephone (see
paragraph)
The pendant activates the
emergency feature but no
phone number is dialed with
the emergency message
No phone number in the phone book was
programmed as an emergency number. Please see
above programming sections.
The receiving party can not
hear well during
speakerphone conversation
or during the speakerphone
emergency call
It is necessary to move closer to the telephone and
speak in the direction of the telephone.

44
TROUBLESHOOTING
You might have programmed VOICE NO in the
menu. Change the setting to Voice YES
The automatic voice feature
does not work
The speaker volume is too low. Increase the
speaker volume
VOLUME
Check that the caller id service is being provided by
your telephone operator
Talking caller id does not
work
For the talking caller ID it is necessary to have
VOICE activated in the programming.
The lcd and the voice
language do not match
Check that in the voice language is set correctly.
Note that not every language on the LCD has a
corresponding Voice language.
In this case, set the VOICE to VOICE NO (see
paragraph)
Reset procedure Reset the unit by removing the power supply, the
batteries and the telephone line for 20 minutes and
then power on again.
This procedure will not erase any of the numbers in
memory or of the user recorded messages.

45
WARRANTY INFORMATION
Southern Telecom TM
1 Year Limited Warranty
This limited warranty sets forth all Southern Telecom responsibilities regarding your product.
There are no other expressed or implied warranties from Southern Telecom TM.
Warranty Service Provided
If you purchased the telephone new from a retail vendor, Southern Telecom TM warrants the
telephone against defects in material and workmanship for a period of one (1) year from the
original date of purchase. This warranty is in lieu of all other expressed warranties. This warranty
begins when you purchase the telephone and continues for one (1) year unless you sell or rent
the telephone, in which event the warranty stops.
Southern Telecom TM disclaims any implied warranty, including the warranty of merchantability
and the warranty of fitness for a particular purpose, as of the date of one year from your original
purchase of the telephone. Southern Telecom TM assumes no responsibility for any special,
incidental, or consequential damages.
This warranty gives you specific legal rights and you may have other rights, which vary from state
to state. Some states do not allow the exclusion or limitation of special, incidental or
consequential damages or limitations on how long a warranty lasts, so the above exclusion and
limitation may not apply to you.
Warranty service not provided
This warranty does not cover damage resulting from accident, misuse, abuse, improper
installation or operation, lack of reasonable care, unauthorized modification, the affixing of any
attachment not provided by Southern Telecom TM with the telephone and or loss of parts. This
warranty is voided in the event any unauthorized person opens, alters or repairs the telephone.
All Southern Telecom TM products being returned for repair must be suitably packaged.
Telephone companies use different types of equipment and offer various types of services to
customers. Southern Telecom TM does not warrant that this telephone is compatible with the type
of equipment of any particular telephone company or the services provided by it.
What to do for warranty service
During the first thirty (30) days, a defective product is eligible for over the counter exchange at
the retailer from whom it was purchased. After thirty (30) days the defective product should be
returned to the authorized service center.
TO OBTAIN WARRANTY SERVICE:
-Provide proof of the date of purchase within the package (Dated bill of sale).
-Prepay all shipping costs to the authorized service center.
-Include a check or money order made out to Southern Telecom for the amount of $7.95 to
cover shipping and handling.
-Include a return shipping address (No P.O.Boxes) and telephone number within the
package.
Your telephone will be repaired or replaced, at our option, for the same or similar model of equal
value if examination by the service center determines the telephone is defective. Telephones
received damaged, as a result of shipping will require you to file a claim with the carrier prior to
repair. A telephone received with missing parts will be returned to you C.O.D. freight collect with
$7.99 handling charge.
NOTE: A product received which was not made for Southern Telecom TM or which is not
defective as determined by our test procedures will not be repaired and will be returned C.O.D.,
freight collect with a $7.99 handling charge.
Please allow a minimum of 3 weeks for the return of your product. The shipping address of the
authorized service center is:
Southern Telecom Inc
14c 53rd Street
Brooklyn, NY. 11232
Should you have any questions or problems concerning this product, please contact our
customer service department at:
1-877-SOUTHTEL (1-877-768-8483)

Southern Telecom TM
14c 53rd Street
Brooklyn, NY. 11232
1-877-SOUTHTEL (1-877-768-8483)