Primax Electronics MMORFD3UO HP Wave Mouse and Receiver User Manual MORFD3UO manual
Primax Electronics Ltd HP Wave Mouse and Receiver MORFD3UO manual
Manual

HP MORFD3UO Wireless MOUSE USRE MANUAL
This guide will take you through all the functions of the mouse and explain how to configure
them using the mouse.
Introduction
Congratulations on your purchase of the HP Wireless Mouse.
This mouse is the latest in a wide range of computer peripherals manufactured by HP and is
designed to provide you with the highest level of comfort available while also allowing for
maximum functionality.
The HP MORFD3UO RF Mouse is a simple yet innovative package that allows you
to configure your mouse to best meet your needs.
Safety Guidelines
Physical discomfort and injury can be caused by the incorrect use of your mouse. Follow
these guidelines to ensure such problems are avoided:
Sit up straight in your chair, with your elbows by your side.
Adjust the height of your chair so your arm bends at a 90-degree angle respective
to your desk.
Position your mouse in front you, to the side of your keyboard.
Do not slouch or hunch over your workspace. It is important to keep your wrists,
arms and shoulders relaxed.
If necessary, use a wrist rest or a palm rest to alleviate extra stress placed on your
joints when typing or using the mouse, especially for long periods of time.
If you experience any feelings numbness, cramp, swelling or stiffness in your wrist, arms,
neck or shoulders, consult your local doctor or nearest health institution immediately.

Navigating HP Wireless Mouse
The simple and straightforward interface makes it easy for you to customize each function
of your mouse.
Different settings are indicated by the tabs on the top of the screen. Click on the links to enter
each settings screen.
Changing Button Settings
You can configure each of the five mouse buttons through the button settings screen.
The 'Select Button' list displays the list of buttons and their current function. The 'Select
Task' list displays a list of actions you can take to configure the button highlighted in the
'Select Button' list.
Move your mouse over the 'Select Button' list and click each item to view more
information.
Restore Defaults
Each setting screen has a Restore Defaults button. Click to
restore all settings to their original defaults.
The Left and Right Click Buttons
By default, the left mouse button is set to operate as a standard left click button. The right
mouse button is set to operate as a standard right click button.
If you want to swap these two button functions, check the Swap Buttons checkbox. Click
to save all changes.
The Middle Mouse Button
By default, the mouse wheel is set to operate as Middle Button when pressed.
Select the function you wish to assign to the middle button by checking the radio buttons in
the Select Task list.
Click to save all changes.
Move your mouse over and click any of the Select Task list options for more detailed
information.

Side Button 1
By default, the button is set to operate as Backward when pressed.
Select the function you wish to assign to the button by checking the radio buttons in the
Select Task list.
Click to save all changes.
Move your mouse over and click any of the Select Task list options for more detailed
information.
Side Button 2
By default, the button is set to operate as Forward when pressed.
Select the function you wish to assign to the button by checking the radio buttons in
the
Select Task list.
Click to save all changes.
Move your mouse over and click any of the Select Task list options for more
detailed information.
Middle Mouse Button
Select to assign the button to Middle Mouse Button by checking the radio buttons in
the
Select Task list.
Click to save all changes.
Move your mouse over and click any of the Select Task list options for more
detailed information.
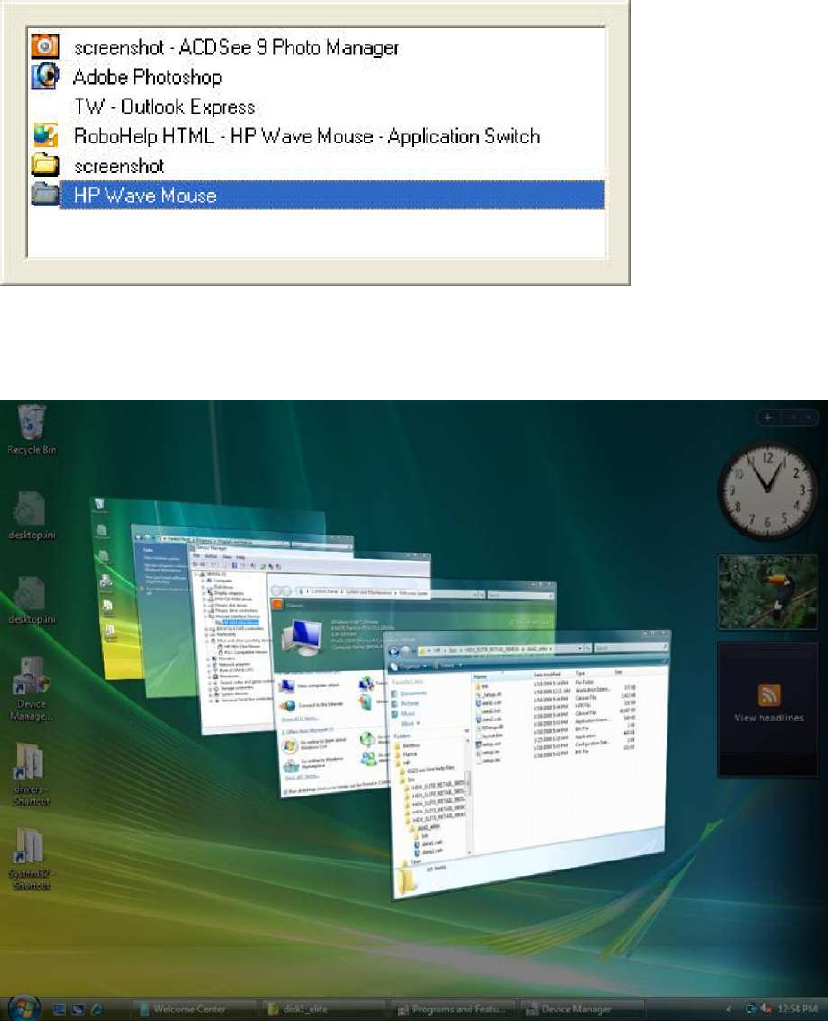
3D Flip
Select to switch between running programs when you click the mouse
wheel. An application list appears
Windows XP:
Windows Vista:
Roll the mouse wheel to scroll up and down the list.
Click any mouse button to switch to the selected application.
Forward
When you press the button, the page you visited before you pressed the Backward button
is displayed in your browser.
Click to save all changes.
Backward
When you press the button, the last page you visited in your browser is displayed. Click
to save all changes.
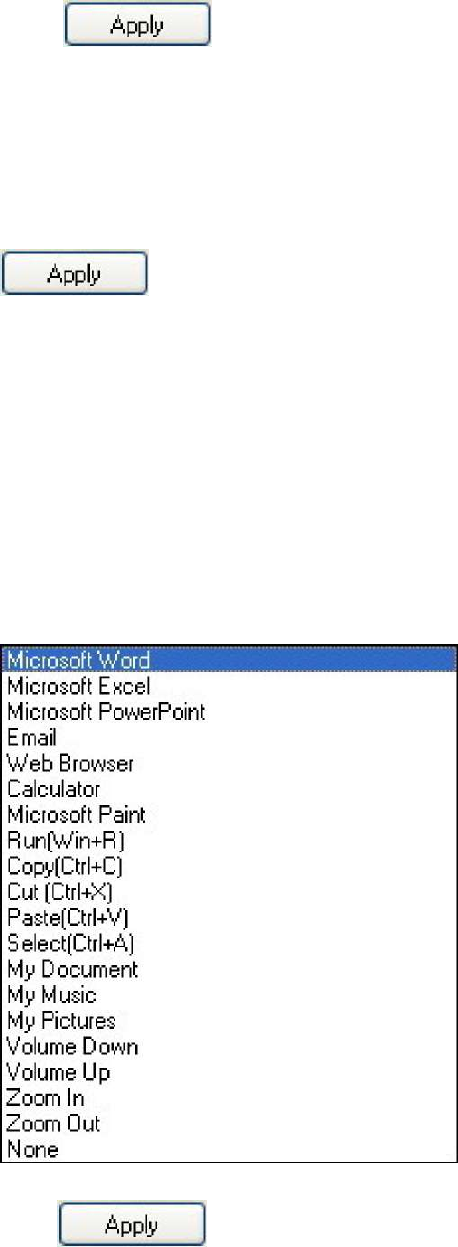
Other
Select to execute one of a set of other pre-defined functions when you press the button.
A drop down menu will appear. Select an application from the following list:
Click to save all changes.
Change Wheel Settings
You can configure the wheel settings in the wheel settings screen.
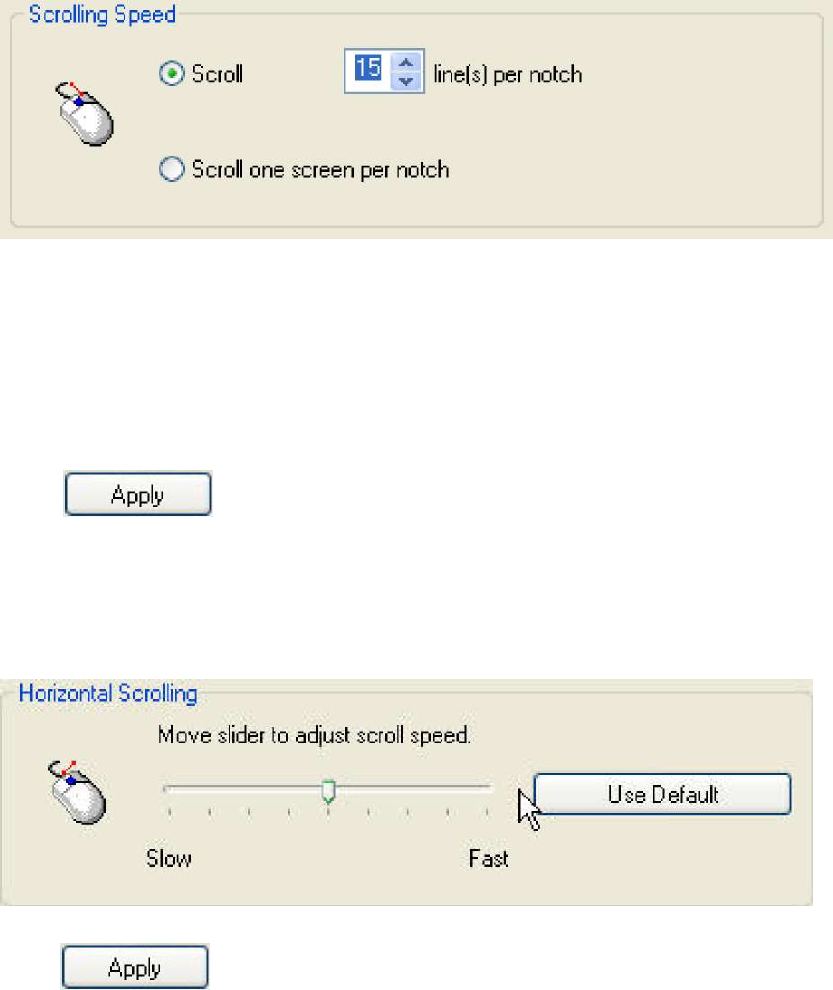
The 'Scrolling Speed' section allows you to adjust the scroll speed when you scroll the
wheel vertically.
The 'Horizontal Scrolling' section allows you to adjust the scroll speed when you scroll
the wheel horizontally (tilt left/right).
Mouse Wheel
Select the scrolling speed you want by clicking the Scrolling Speed options:
Scroll: Click the radio button and use the up/down arrows to increase/decrease the speed.
Scroll one screen per notch: Click the radio button to choose scroll down by screen
when you move the mouse wheel.
Click to save all changes.
Horizontal Scrolling
Move the slider to the left/right to decrease/increase the horizontal scrolling speed.
Click to save all changes.
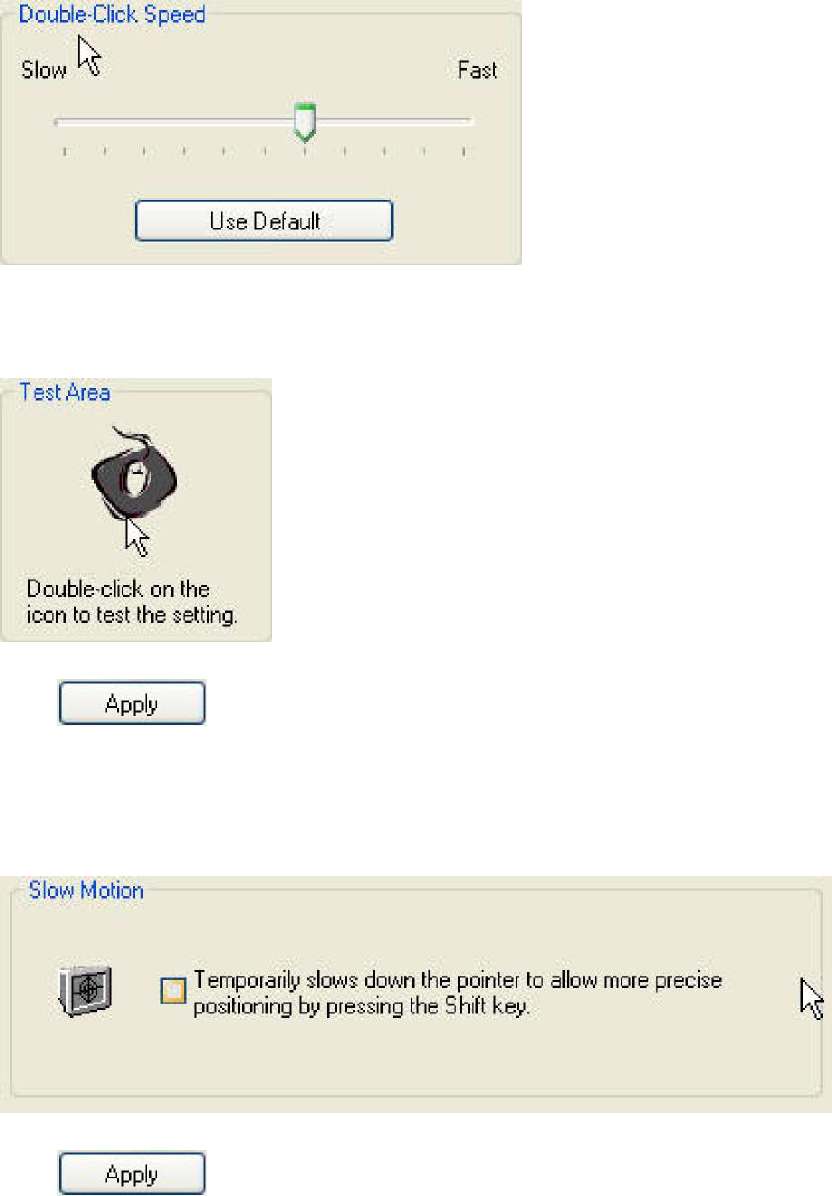
Double-Click Speed
Move the slider to set the pointer movement speed.
Move the point in the Test Area to test your new setting.
Click to save all changes.
Slow Motion
Check to enable the slow motion function by pressing the Shift key.
Click to save all changes.
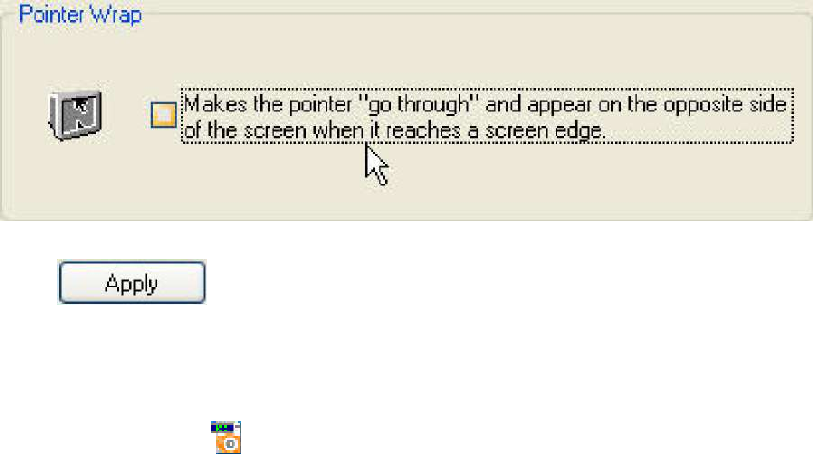
Pointer Wrap
Check to enable the "go through" function.
Click to save all changes.
Show icon in the system tray
Click to display the icon in the system tray when the Mouse Suite software is running.
Click this icon to bring up the main screen
Troubleshooting
Question: My mouse is not working. What should I do?
Answer: Check if the receiver is plugged in correctly to your computer's USB port. A loose
connection may result in the computer not being able to detect the device.
If your mouse is connected to a hub or multi-port USB connector, unplug the device and
plug it directly into your computer's USB port, ensuring there is no interference caused by
these devices.
Other system devices, such as PC cards, may cause conflicts that prevent your
mouse from working properly. Check the settings of these devices and make any
changes as necessary. Reboot your computer and re-attach the mouse.

Question: The mouse pointer is not moving. What should I do?
Answer: Ensure all setup procedures have been followed correctly. If software and drivers
have already been installed, remove these, reboot your computer and re-install.
Clean the mouse lens with a cotton swab. Do not use any other materials or solvents to
clean the mouse lens as this may result in damage to the lens.
As this is an optical device, it is important to use it on an appropriate surface. If the surface
you are using your mouse on is red in color or highly reflective, the surface may be the
source of the problem. Use either a mouse mat or change to a more neutral-colored
surface.
Ensure that batteries are not out of power. Replace batteries if necessary.
Question: The mouse pointer is moving abnormally. What should I do?
Answer: The likely cause of this problem is debris around or on the lens which is
interfering with the optical signal. Clean the mouse lens with a cotton swab. Do not use any
other materials or solvents to clean the mouse lens as this may result in damage to the
lens.
If the mouse pointer continues to move abnormally after cleaning, re-install the drivers and
software.
Low Battery Notification
When the mouse is running out of power, a Notification window will pop up on the screen.
Replace the batteries to continue to use the mouse.
Note: It is recommended to only use high-capacity alkaline batteries with this product.
FCC Statement for 27MHz Mouse or Keyboard
Federal Communication Commission Interference Statement
This equipment has been tested and found to comply with the limits for a Class B
digital device, pursuant to Part 15 of the FCC Rules. These limits are designed to
provide reasonable protection against harmful interference in a residential installation.
This equipment generates, uses and can radiate radio frequency energy and, if not
installed and used in accordance with the instructions may cause harmful interference
to radio communications. However, there is no guarantee that interference will not
occur in a particular installation. If this equipment does cause harmful interference to
radio or television reception, which can be determined by turning the equipment off
and on, the user is encouraged to try to correct the interference by one or more of the
following measures:
u Reorient or relocate the receiving antenna
u Increase the separation between the equipment and receiver
u Connect the equipment into an outlet on a circuit different from that to which the
receiver is connected.
u Consult the dealer or an experienced radio/TV technician for help.
FCC Caution: Any changes or modifications not expressly approved by the party
responsible for compliance could void the user's authority to operate this equipment.
This device complies with Part 15 of the FCC Rules. Operation is subject to the
following two conditions: (1) this device may not cause harmful interference, and (2)
this device must accept any interference received, including interference that may
cause undesired operation.