Primax Electronics TPOLSM01 Polaroid Socialmatic User Manual
Primax Electronics Ltd Polaroid Socialmatic Users Manual
Users Manual
致用户:
Dear users:
感谢您选购和使用本公司 AndroidCamera 产品!
Thank you for your purchase and use of the Android Camera products of our company!
为了使您正确使用和维护此设备,操作前敬请仔细阅读本使用说明书,
并妥善保管,以备查询。
In order to make you correct use and maintenance of the device, please read the instruction
manual carefully before operation, and safekeeping, in case of query.
产品设计和规格如有变更,恕不另行通知。此包括主要的产品规格、软
体、软体驱动程式和使用手册。本使用手册仅为使用本产品的标准参考手册。
您实际购买相机所附赠的产品和配件可能与本使用手册所述的不同。零售商
通常会指定不同的产品配件,以配合不同市场的需求、客户族群及区域偏好。
产品会因零售商而异,特别像是充电器、记忆卡、传输线、皮套和语言支援
等配件。通常零售商会指定专属的产品色彩、外观设计和内部记忆体容量。
请洽询当地零售商,以取得正确的产品和附赠配件等信息。
本手册中的插图仅供说明之用,可能和您的相机有所不同。
制造商对于本使用手册中的任何错误或矛盾之处不担负任何责任。
Products of our company is committed to continuously improve products, some of the structure
and the individual parameter changes will not prior notice. This includes the specifications, software,
software drivers and user manual. This manual is only the standard reference manual.
Your products and accessories may be different with mentioned in this manual. Our retail agencies will
usually specify different products accessories, to meet the needs of the different markets, customer
groups and regional preferences. Products will be varied from retailers, particularly like a charger,
memory card, transmission line, holster, and language support. Retailers usually specify the exclusive
product color, appearance design and internal memory capacity. Please inquire the local retailers, in
order to obtain the right product and with accessories such as information.
The illustrations of this manual is only for show, may is different from your camera.
Manufacturer does not assume any error or discrepancy in this manual.
本说明书中标有“注意:”的语句,涉及到操作安全,敬请注意!
In the manual marked "note" statement, involves the safe operation, please attention!
本公司致力于产品的不断完善,产品的某些局部结构和个别参数更改时恕不
另行通知,如有疑问,请与本公司联系!
Products of our company is committed to continuously improve products, some of the structure
and the individual parameter changes will not prior notice, if there are any questions, please contact
with us!
1 SUMMARIZE....................................................................................................... 2
1.1 PURPOSE.......................................................................................................... 2
1.2 MODEL NUMBER........................................................................................... 2
1.3ENVIRONMENTTAL CONDITIONS.............................................................. 2
1.4TECHNICALCHARACTERISTICS................................................................. 3
2 TECHNICAL PARAMETERS............................................................................ 4
2.1 HARDWARE SPECIFICATIONS.................................................................... 4
3 FUNCTION SPECIFICATION............................................................................ 2
3.1 OUTLOOK DESCRIPTION............................................................................. 2
3.2 POWER BUTTON USAGE……….................................................................. 6
3.3TOUCH-SCREEN NAVIGATION.................................................................... 6
3.4 U-DISK…........................................................................................................ 6
3.5 USING MICRO-SD CARD…………............................................................... 6
3.6 GETTING STARTED....................................................................................... 7
3.7 DESKTOP.......................................................................................................... 8
3.8 SCREEN LOCK................................................................................................ 9
3.9 PRE-LOADED APPLICATIONS..................................................................... 9
3.10 STATUS ANNOTIFICATION AREA......................................................... 10
3.11APPLICATION MANAGEMENT................................................................ 10
3.12 CLOCK.......................................................................................................... 11
3.13 BROWSER.................................................................................................... 12
3.14 CALENDAR.................................................................................................. 13
3.15 CAMERA...................................................................................................... 13
3.16 PHOTO TAKING BUTTON......................................................................... 14
3.17 CALCULATOR............................................................................................. 15
3.18 MYRECORDER............................................................................................ 15
3.19 EMAIL........................................................................................................... 15
3.20 FILE BROWSER........................................................................................... 17
3.21 GALLERY..................................................................................................... 19
3.22 SCREEN CAPTURE..................................................................................... 20
3.23 WI-FI.............................................................................................................. 21
3.24 GPS................................................................................................................ 21
3.25 SETTING....................................................................................................... 21
3.26 PRINT PHOTO.............................................................................................. 23
3.27 RESET……………………………………………………………………... 24
FREQUENTLY ASKED QUESTIONS................................................................ 25
1
BATTERY MANAGEMEN................................................................................ 26
IMPORTANT SAFETY PRECAUTIONS.......................................................... 27
CLEANING YOUR DEVICE……………………………………………………28

2
1 概述
1 SUMMARIZE
1.1 用途
1.1PURPOSE
为了适应日新月异的沟通交流方式,Android Camera 使用了目前最新的 ARM A9 处
理器,集成高性能的拍摄技术,搭载最新的Android4.4.2操作系统,不仅支持快速拍
照,即时打印出照片的功能,还支持无线网络连接、GPS 等平板具有的功能,便携移动,
不仅将目前绝大多数相机抛开差距,同时也胜过很多主流的手机、平板产品,开创了终
端产品新类型!
Our Android Camera using the present the latest ARM A9 processor, integrated high performance
film technology, with the latest Android 4.4.2operating system, not only enable rapid, real-time print
out the photos, also supports wireless network connections, device has the functions such as GPS,
portable mobile, at the same time also is better than a lot of mainstream mobile phones, tablets, have
created a new type of terminal products!
1.2 型号及其含义
1.2MODEL
POLSM01
1.3使用环境

3
1.3 ENVIRONMENTTAL CONDITIONS
环境温度:‐10℃~+45℃
贮存温度:‐25℃~+70℃,在极限值下不施加激励量,装置不出现可逆变化,温
度恢复后,装置应能正常工作
相对湿度:不超过 85%
environment temperature: - 10 ℃ ~ + 45 ℃
storage temperature 25 ℃ ~ + 70 ℃, under the limit not exert incentives, device does not
appear reversible change, temperature after recovery, device should be able to work properly
Relative humidity: less than 85%
1.4 技术特点
1.4 Technical characteristics
产品主要功能介绍
1) 具备 1.5G 双核的 CPU,能够满足大部分现场应用需求。
2) 强大的图形处理能力,使用的 Mali400 的专用 GPU,顺畅的播放 1080P 的视频能
力,解决显示延时现象。
3) 4.5 寸高亮显示屏幕,480*854 的WVGA 分辨率,支持烈日下正常视觉要求,保证
大图形显示界面的细腻视觉感受。
4) 相机打印功能:拍照后马上打印相片。
5) 支持 GPS 功能,结合软件能够完成在对于数据记录地点的核对,保证数据的正确
性。
6) Wifi:支持无线网络功能。
7) 支持重力感应功能,能够在不同的场景下,自动切换屏幕显示及支持重力感应游
戏等。
Device function introduction
1) 1.5 G dual-core CPU, it meets the demand of most of the field application.
2) Strong graphics processing power, Mali400 GPU, smooth play 1080P video capability, no display time
delay phenomenon.
3) 4.5 inch screen, the WVGA 480 * 854 resolution, support normal visual requirements under the sun,
guarantee the large graphical display exquisite visual perception.
4) Camera print function: after taking pictures immediately to print photographs.
5) Support the GPS, combined with the software can complete in for data recording check, ensure the
correctness of the data.
4
6) Wi-Fi: support wireless network function.
7) Support accelerometer function, in different scenarios, automatic switch screen display and support
accelerometer games etc.
2 主要技术参数
2 TECHNICAL PARAMETERS
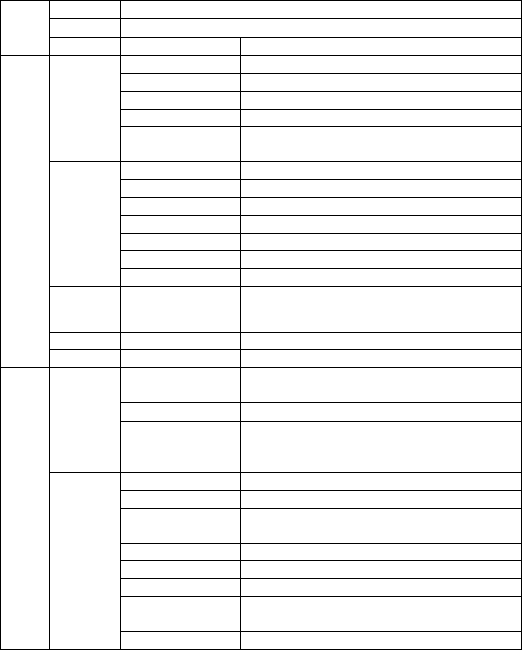
2.1 硬件规格 HARDWARE SPECIFICATIONS
部件和
类别主要参数是否
支持备注
主芯片平台
CPU双核 ARMCORTEX‐A9(主频
1.5GHz)Y
图形处理MALI400Y
主屏幕4.5 英寸、480×854160KY
触摸屏支持、电容式触摸屏Y单点+手势
内存/RAM1GB Y
内存/ROM4GB Y
扩展存储MicroSDY最大支持 32GB
通信与网络
Wi‐Fi802.11b/g/n Y
蓝牙V2.0Y
内置 GPS
接口
USB 接口Micro‐USB2.0(5Pin)Y支持 OTG
充电接口DCY
拓展存储接口MicroSDY最大 32G
摄像头
主摄像头13.0M,自动对焦Y
前摄像头 2.0M,固定焦距Y
电池
电池容量2000mA/7.4VY
传感器
加速度传感器支持Y能够自动切换屏幕的显示

5
Parts
ParameterSuppor
tRemark
Platform
CPUDual‐coreARMCORTEX‐A9
(1.5GHz)Y
GraphicsMALI400Y
Screen4.5”、480×854160KY
TouchPanelCapacitiveTouchScreenYSingle‐Point+Gesture
Memory/
RAM1GB Y
Memory/
ROM4GB Y
StorageMicroSDYSupport32GB
Network
Wi‐Fi802.11b/g/n Y
BluetoothV2.0Y
InternalGPS
Interface
USBMicro‐USB2.0(5Pin)YSupportOTG
Battery
ChargingDCY
Storage
InterfaceMicroSDYSupport32G
Camera
HostCamera13.0M,Auto‐focusingY
FrontCamera 2.0M,FixedfocusY
Battery
Capacity2000mA/7.4VY
Sensor
Acceleration
SensorSupportYAutoSwitch
3 装置功能说明
Function specification
3.1 外观描述
6
3.1 OUTLOOK DESCRIPTION
3.1.1 POWER
3.1.2 RESET
3.1.3 LED
3.1.4 SUBLCD
3.1.5 T‐F
3.1.6 DCJACK
3.1.7 USB
3.1.8 SPEAKER
3.1.9 MIC
3.1.10 FRONTCAMERA
3.1.11 FLASHLIGHT
3.1.12 CAMERABUTTON
7
3.1.13 REALCAMERA
3.1.14 THESWITCHOFPRINTINGPAPER
3.1.15 THEEXPORTOFPAPER
3.1.16 MAINLCD
8
3.1.17 Mediatray
9
3.2 电源键的用法
3.2 POWER BUTTON USAGE
开机:长按电源键 2秒。
关机:长按电源键 2秒→点击关机→点击确定。
重启:长按电源键 2秒→点击重启→点击确定。
飞行模式:长按电源键 2秒→点击飞行模式可快速开启或关闭飞行模式。
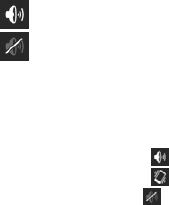
普通模式:长按电源键 2秒→点击 。
静音模式:长按电源键 2秒→点击 。
Turn On: Press the POWER button and hold for 2 seconds.
Turn Off: Press the POWER button and hold for 2 seconds →tap Power off→tap OK.
Reboot: Press the POWER butto and hold for 2 seconds →Tap restart→tap OK.
Airplane mode: Press the POWER button and hold for 2 seconds →Tap Airplane mode can turn on or
off the airplane mode quickly.
Normal mode: Press the POWER button and hold for 2 seconds →Tap .
Vibrate mode: Press the POWER button and hold for 2 seconds →Tap .
Silent mode: Press the POWER button and hold for 2 seconds →Tap .
3.3 触摸屏
3.3 TOUCH-SCREEN NAVIGATION
触摸屏的使用快速、容易和方便。
请参考下面的方法通过指腹操作触摸屏:
单击:选择某一图标单击一下即可选择需要的图示或选项。
长按:选择某一个图标并长按,即可把它拖动到桌面显示。
拖拽:在桌面拖拽即可在几层界面之间切换。
两点缩放:在桌面、视频播放界面、图片查看等界面按住任意两点并相向或相反
方向拖动可以对界面进行缩放。
☆
为了避免屏幕刮伤或者破碎,请勿用指甲进行操作或在屏幕表面放置物体。
The touch-screen allows for quick, easy and convenient navigation for all applications.
Refer to the following method to operate the touch screen by the finger pulp:
Tap: Quick tap & release on an item on the screen.
Touch & hold: Touch and hold in place approx 2 seconds, and then release to display an options
window.
Finger slide: Touch & slide your finger across the screen and then release.
Two points to zoom in or out: Press and hold any two points relative or opposite direction to drag in

10
desktop, video play interface, picture view interface and so on .it will zoom in or out the interface.
☆ To avoid scratching or crushing, do not place objects on the touch screen surface.
3.4 U盘
3.4 U-Disk
插入 U盘
将U盘通过 USBhost 转接线插入设备。当 U盘准备好后,进入文件浏览器,切换到 USB
文件夹进行查看。
移除 U盘
关闭所有从盘上打开的程序或者文件。点击→设置→存储→USB 存储器→
卸载该存储设备。当选项变为安装该存储设备后拔出 U盘。
☆
不要频繁的插拔
U
盘,否则可能会损坏
U
盘。
Insert U-Disk
Insert your U-disk into the device via USB host transfer cable. When ready for use, enter into
the file browser, switch to the USB folder to view it.
Remove U-Disk
Close all applications or documents which have been opened on the U-disk. Tap → Settings →
Storage →USB storage → Unmount this storage device. When it displayed “Mount this device”
and then you can unplug the U-disk.
☆ Don’t insert and remove the U-disk repeatedly in a short time, as this may cause damage to the
U-disk.
3.5 SD 卡的使用
3.5 USING MICRO-SD CARD
☆
设备最大支持
32GB
的存储卡。
将存储卡插入卡槽,用手指将卡按进去,直到听到“咔”的一声。当卡准备好后,即可
使用。
移除 SD 卡
关闭所有从卡上打开的程序或者文件。点击→设置→存储→SD 卡→卸载 SD
卡。当选项变为安装 SD 卡后将其取出。
☆
不要快速反复的插拔卡,因为这可能会损坏卡。

11
☆
建议使用大品牌的存储卡,以避免卡的不兼容。
☆建议使用 CLASS8以上存储卡,这样可以获得较快的传输速率.
☆ The device supports a maximum 32GB microSD card.
Insert your card into the microSD slot until it clicks into place. It’s OK.
Remove microSD Card
Close all applications or documents which have been opened on the card. Tap → Settings →
Storage →SD card → Unmount this storage device. When it displayed “Mount this device” and then
press the card lightly; it is partially ejected allowing you to pull the card out.
☆ Don’t insert and remove the U-disk repeatedly in a short time, as this may cause damage to the card.
☆ We recommend using major brands of memory cards to avoid incompatibility.
☆ We recommend using CLASS 8 above memory card to get faster transfer rate.
3.6 开始使用
3.6 GETTING STARTED
给设备充电
☆
不建议在充电的同时使用设备。
电源适配器一端接插座,一端接设备的电源插孔即可对设备进行充电。(关机状态下充满
约需 4.5 小时)
Chargethedevice
☆Itisnotrecommendedtousethedevicewhilecharging.
Plugthepoweradapterintoanelectricalwalloutlet,andthenconnecttothedevicetofullychargethebattery
beforeuse(Afullchargetakesabout4.5hoursintheoffstatus).
启动设备
长按电源键 2秒。
Turnthedeviceon
Press&holdthepowerbutton2seconds.
Wi-Fi 网络设置
由于许多功能都需要有 Wi‐Fi 连接,所以建议您使用前先设置 Wi‐Fi 网络。
1.点击 →设置。
2.将 Wi‐Fi右侧按钮滑动至打开状态。
3.设备将会自动搜索并列出所有能用的 Wi‐Fi 网络。如果 Wi‐Fi 图标右下角有锁,
则需要输入密码才能进行连接。
4.点击你想要连接的 Wi‐Fi 网络→如果有密码则需要输入密码→点击连接。
5.点击 返回到桌面。

12
☆
如果你的
Wi-Fi
是被设置隐藏,则不会被自动搜索出来。需要点击添加网络
,然后
输入相应信息来添加你的
Wi-Fi
。
Wi‐FiNetworkSetup
SincemanyfeaturesrequiretheWi‐Ficonnection,itisrecommendedthatyouusebeforeyousetuptheWi‐Fi
network.
1. Tap →Settings.
2. SlideWi‐Fiswitchtoturnon.
3. ThedeviceautomaticallyscansandlistsalllocalWi‐FiNetworkfound.Alock
indicatessecureWi‐Finetworksthatrequireinputpasswordtoconnect.
4. Tapthedesirednetworktowhichyouwanttoconnect→entertheNetwork
Passwordifapplicable→tapConnect.
5. Tap toreturntotheDesktopscreen.
☆If your Wi-Fi network is set as hidden, it won’t be found by the auto scan.
Tap Add Wi-Fi network and follow the prompts to add your network.
USB 设备模式选项
使用前先通过 MircoUSB 线将设备和 PC 连接。
USBdevicemodeoptions
Before using this feature please connect to PC via the Mini USB cable.
USB 调试
USB 调试模式用于给开发人员调试程序,使用此模式前需要安装 ADB 驱动,安装方法如下:
(1)首先在设备上切换到安装驱动模式,然后在您的 PC 上找到“CD 驱动器”(例如 F:),
用资源管理器打开,将\adb_driver 文件夹下的全部文件拷贝到 PC 上;
(2)然后在设备上切换到 USB 调试模式,如果 PC 端提示安装驱动,选择手动安装,并
将驱动路径指定为您保存 adb 驱动的相应位置即可。
USB debugging
USB debug mode used to debug program for developers. ADB driver needs to be installed before using this
mode, Installation method as follows:
(1)First switch on the device to Install Driver mode, And then find the "CD driver"(such as F:)on
your PC,Use the resource manager to open the CD drive , then copy all files in the folder(\adb_driver) to your
PC;
(2)And then switch to USB debugging mode on the device, If the PC-side prompts to install the driver, select
manual installation, and specify the drive path to the location where you saved the ADB driver.
媒体传输协议(MTP)
媒体传输协议(MTP)用于同步传输文件以及对设备中的文件进行复制、粘贴、删除等操作,
如果是第一次在您 PC 上使用此模式,需要安装驱动程序;安装方法为:
在设备上切换到安装驱动模式,您的 PC 会自动弹出驱动程序安装界面,用户只需要
按照提示操作即可,安装完后需要重启系统。(如果还不可以使用,请去 Microsoft 官
网下载 Media Player 11 升级包即可。)
Media Transfer Protocol (MTP)
Media transfer protocol (MTP) mode used to synchronize transmits data and the users can copy, paste or delete
the files in the device. If this is the first time using this mode on your PC, you need to install the driver.
Installation method as follows:
Firstly, switch to Install Driver mode on the device, and then your PC will automatically pop-up
driver installation interface, users need only follow the prompts, and reboot the system after the installation
13
completed. (If not, please go to the Microsoft official website to download Media Player 11 upgrade package and
install.)
安装驱动
安装驱动模式用于给 USB 调试和媒体传输协议(MTP)模式安装驱动,其中媒体传输协议
(MTP)模式驱动仅用于 Windows XP,在 Windows 7 下默认支持,无需安装。
☆
您也可以参考“
CD
驱动器”下的
readme.txt
。
Install Driver
Install driver mode used to install the driver for USB debugging and media transfer protocol(MTP) mode, The
media transfer protocol(MTP) mode driver only for Windows XP, Windows 7 support by default, not need to
install.
☆ You can also refer to the readme.txt in the
"
CD drive
"
.
3.7 桌面
3.7 DESKTOP
☆
点击任意程序图标可以运行它。
☆
长按并拖动图标可将它移动到屏幕的其他地方。
☆
长按并拖动图标到
“
Remove”
可以将它从桌面上清除。
☆Tap on any application icon to launch it.
☆ Touch, hold and then slide icons to reposition then on the screen.
☆Touch, hold and slide icons onto “
Remove” to remove them from the
Desktop screen.
14
3.8 锁屏界面
3.8 SCREEN LOCK
可设置自动锁屏或者快速按下电源键进行手动锁屏。同时,系统将提供四种锁屏风格供
用户使用。请进入设置→安全→屏幕锁定中进行切换。
默认屏幕锁定方式为滑动。
Canbesettoautomaticallylockscreenorquicklypressthepowerbuttontomanuallylockscreen.Atthesame
time,thesystemprovidesfourlockscreenstylesforusers.You canenterSettings→Security→LockScreen
toswitch.
Thedefaultscreenlockmodeisslide.
3.9 预装程序
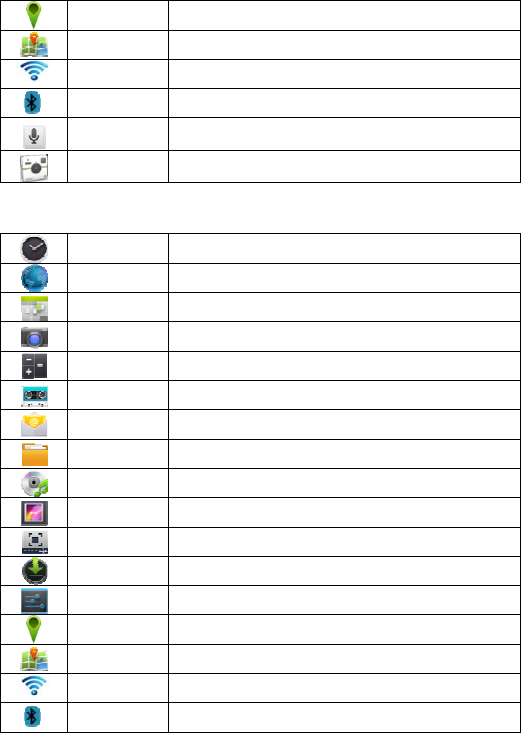
3.9 PRE-LOADED APPLICATIONS
时钟可以显示时间和设置闹钟。
浏览器连接到 Internet。
日历日历。
相机拍摄普通照片、全景照片和摄像,拍照后可以马上打印相
片。
计算器可以做简单的四则运算。
录音机录制和播放已录制的音频。
电子邮件用已有的电子邮件地址发送和接收邮件。
文件浏览器可以查看并管理文件和程序的文件管理程序。可以安装
Android应用程序和备份 SD 卡的文件。
我的音乐播放及管理音频文件。
图库播放、浏览、管理视频和图片文件
屏幕截取截取屏幕图片。
下载查看下载内容以及已下载的情况。
设置进行个性化设定。
15
导航引导某一设备,从指定航线的一点运动到另一点。
地图地图。
WiFi无线网络功能。
蓝牙蓝牙。
语音搜索通过语音方式,帮助搜索互联网上公开的信息。
Socialmatic拍照后可以即时打印出全彩照片。
☆
要移动图标到桌面上,需要长按并拖住图标,直到它出现在桌面上再放开。
☆
长按并拖动图标可将它移动到屏幕的其他地方。
☆
长按并拖动图标到
”
删除
”
可以将它从桌面上清除。
ClockItcandisplaythetimeandsetthealarm.
BrowserAccessinternet.
CalendarCalendar.
CameraTakephotos,panoramicphotosandtakevideo.Andprintthephoto
immediately.
CalculatorDosimplecalculation.
MyRecorderRecordingandplaybackofrecordedaudio.
EmailSend/Receiveemailusingyourexistingemailaddresses.
FileBrowserFilemanagerapplicationforviewingandmanagingfilesandapps.Useto
installAndroidapps,andtobackupfilestoyourSDcard.
MyMusicPlayandmanageaudiofiles.
GalleryPlay、browser、managevideofilesandphotofiles.
Screen
CaptureCaptureimageofthescreen.
DownloadsViewthedownloadedandthedownloadprogress.
SettingsMultiplesettingsforpersonalizingandenhancingyourDevice.
GPSGPS
MAPMap
WiFiWIFI
BluetoothBluetooth
16
VoicesearchVoicesearch.
SocialmaticPicturescanprintoutimmediatelyafterfullcolorphotos.
☆To move an icon to the Desktop screen, touch & hold the icon, and then release
it when it appears on the Desktop screen.
☆Touch, hold and then slide icons to reposition then on the screen.
☆Touch, hold and slide icons onto “
Remove” to remove them from the Desktop
screen.
3.10 通知区
3.10 STATUS AND NOTIFICATION AREA
在桌面上,向下滑动左上角查看通知区
OntheDesktopscreen,lapsetopleftcornerdisplaynotificationarea,lapsetoprightcornerdisplaystatusarea.
3.11 程序管理
3.11 APPLICATION MANAGEMENT
安装程序
☆
可以在网上找到许多有趣的和免费的
Android
应用程序。例如:启动浏览器,在
17
搜索区域输入“
Android
应用程序”并搜索。
您购买或下载的 Android 应用程序可以通过 文件浏览器快速容易的安装。
1.拷贝你想要安装的.apk 文件到 SD 卡或者 USB 存储设备→将卡插入设备或将 U
盘与设备连接。
2.点击 文件浏览器程序图标。
3.点击 或者 并找到其中保存有.apk 文件的文件夹。
4.选择一个.apk 文件→安装。
5.应用程序就被安装上了并且该应用程序图标将会显示在显示有所有应用程序的
界面。
6.点击打开直接运行程序,或者点击完成返回到文件浏览器界面。
直接从网络上下载程序
你可以直接从网上下载 Android应用程序,并可以快速便捷的安装到设备中。
1.点击 浏览器程序图标来连接到网络。
2.输入网址,点击你想要安装到设备的程序的下载链接。
3.下载完成后,点击 →下载内容。打开下载列表中的程序。
InstallAndroidApplications
☆TherearemanyinterestingandfreeAndroidapplicationsthatcanbefoundontheweb.Suchaslaunchyour
webbrowseranddoasearchfor“Androidapplications”.
PurchasedorfreeAndroidapplicationsthatyouhavedownloadedtoyourcomputercanbeinstalledquickly&
easilyonyourTabletusingthe FileBrowserortaskmanagerapplication.
1. Copythe.apkfilesthatyouwanttoinstallontoaSDcardorUSBdevice→insert
orconnecttoyourDevice.
2.
3. TaptheFileBrowserapplicationicon.
4. Tapor andlocatethefolderinwhichthe.apkapplicationfilesweresaved.
5. Tapona.apkfile→Install.
TheapplicationisinstalledandtheapplicationiconisaddedtotheApplications
screen.
6. TapOpentolaunchtheapplicationnow,ortapDonetoreturntotheFileBrowser
screen.
DownloadAndroidApplicationsdirectfromaWebsite
YoucandownloadAndroidapplicationsdirectlyfromwebsites,andthenquicklyandeasilyinstallthemonyour
device.
1. Tapthebrowserapplicationicontolaunchtheinternet.
2. EnterthedesiredwebsiteURL,andtapthedownloadlinkfortheapplicationyou
wanttoinstallonyourdevice.
3. Afterthedownloadiscompleted,tap→Downloads.Opentheapplications
fromapplist.
卸载程序
你可以快速便捷的卸载掉你安装的 Android 程序。
18
1.点击 →设置→应用程序→全部。
2.点击想要卸载的应用程序,→卸载。
3.点击确定进行卸载。
UninstallingAndroidApplications
YoucanalsoquicklyandeasilyuninstalltheAndroidapplicationsthatyouhaveinstalled.
1. Tap→Settings→Apps→All.
2. Taptheapplicationyouwanttouninstall→Uninstall.
3. TapOKtoconfirmtheUninstall.
3.12 时钟
3.12 CLOCK
点击 时钟程序图标。可以看到当前日期和时间。闹钟、倒计时、秒表功能可
以同时设置多个。
闹钟
增加闹钟
1.点击 设置闹钟→添加闹钟。
2.设置你需要的闹钟。
3.点击确定。
4.将需要启用的闹钟列表右侧的开关打开。
关闭闹钟提示
当闹钟时间到,将进入闹钟界面。
如果你想要在 10 分钟后再响一次,将闹钟图标拖向 。
如果你想要关闭闹钟,将闹钟图标拖向 。
启用闹钟
1.在闹钟列表,找到你想要启用的闹钟。
2.将闹钟右侧的开关按钮划动至打开状态。开关按钮状态由变为
即可。
编辑闹钟
1.进入闹钟列表后,点击闹钟时间进入编辑。
2.编辑完成后,点击确定。
删除闹钟
进入闹钟列表后,向左或向右拖动想要删除的闹钟即可删除。
19
倒计时
增加倒计时
1.点击倒计时图标进入倒计时界面。
2.设定好时间后,点击开始。
☆
如用户已设定了倒计时,请点击界面下方的
继续添加新的倒计时。
编辑倒计时
1.点击增加一分钟倒计时时间。
2.点击停止暂停倒计时。
3.在暂停倒计时后,点击重置倒计时。
4.点击给倒计时添加标签。
删除倒计时
在倒计时界面,点击删除对应的倒计时。
秒表
开始计时
1.点击秒表图标进入秒表界面。
2.点击开始启动秒表计时。
暂停、重置计时
1.在秒表计时过程中,点击停止暂停计时。
2.在暂停计时后,点击重置秒表。
单圈计时
在秒表计时过程中,点击记录单圈时间。
分享计时结果
在暂停秒表计时后,点击将计时结果在 Google 上搜索或通过 Gmail 发送。
Tapthe Clockapplicationicon.Youcanseethetimeanddate.Alarmclock、countdown、stopwatch
featurecanalsosetmultiple.
Alarm
Youcanuseyourdeviceasanalarmclockbysettingmultiplealarms.
AddAlarm
1. Taptosetalarm →Addalarm.
2. Setupyouralarmasdesired.
3. TapOK.
4. Turnontherightswitchofthealarmclockwhichneedtobeenabled.
ShutOffAlarmAlert
Whenascheduledalarmisactivated,apop‐upwindowwiththealarmtitle
appears.
Droptocancelthealert.

20
Droptoifyouwanttoberemindedagainin10minutes.cancelthealert.
TurnAlarmon
1. IntheAlarmlist,findthedesirealarm.
2. Theswitchbuttontoopenthealarmclockontherightside,theswitch
buttonfrom to.
EditAlarm
1. Enterthealarmlist,clickthealarmtimetoedit.
2. Afterediting,tapOK.
DeleteAlarm
4. Enterthealarmlist,dragleftorrighttodeletethealarmyouwantto
delete.
Countdown
Addcountdown
1. TapCountdownicontoenterthecountdowninterface.
2. Aftersetatime,TapStart.
☆ Ifuserhassetacountdown
,
pleasetap bellowtheinterfacetocontinuetoadd
anewcountdown.
Editcountdown
1. Taptoaddoneminutecountdowntime.
2. TapStoptopausecountdown.
3. Afterpausecountdown,taptoresetcountdown.
4. Taptoaddtagstocountdown.
Deletecountdown
Incountdowninterface,taptodeletethecorrespondingcountdown.
Stopwatch
Startstopwatch
1. TapStopwatchicontoenterthestopwatchinterface.
2. TapStarttostartthestopwatch.
Pause、Restartstopwatch
1. Inthecourseofthestopwatch,tapStoptopausestopwatch.
2. Afterpausestopwatch,taptoresetstopwatch.
Laptimes
Inthecourseofthestopwatch,tap torecordthelaptimes.
Sharetimingresults
Afterpausestopwatch,taptosearchthetimingresultsonGoogleorsent
throughGmail.
3.13 浏览器
3.13 BROWSER
用户可通过浏览器,连接到互联网。
单击桌面的浏览器图标 即可打开网络浏览。
21
UserscanconnecttotheInternetthroughbrowser.
ClickthebrowsericonontheDesktop ,andthenyoucanopentheWebbrowser.
3.14 日历
3.14 CALENDAR
击日历程序图
标。
使用日历,需要先添加一个 Exchange 账户。输入账户电子邮件地址和密码。进入
系统的设置→账户与同步→点击添加账户,根据提示完成账户配置。之后即
可使用日历。仅查看日历无需添加 Exchange 账户。
新建活动
1.在日历界面,点击你想要新建活动的日期。
2.选择活动时间→点击 。
3.在每个字段输入相关的活动详情。
4.点击完成。
点击左上方的日期时间来选择你想要的日历界面,如日、周、月和日程显示模式。
☆
颜色显示为灰色的日期表示有日程。
Tapthe Calendarapplicationicon.
ForthefirsttimeusingtheCalendar,youneedtoaddanExchangeaccount.Enteraccountemailaddressand
password.EnterthesystemSettings→Account&sync→Addaccount.Accordingtothepromptscomplete
thesetting.Afterthenyoucanusethecalendar.OnlytoviewthecalendarneednottoaddExchangeaccount.
AddEvent
1. OntheCalendarscreen,taponthedatetowhichyouwanttoaddanevent.
2. Tapontheeventtime→tap.
3. Ineachfield,enterthedetailsoftherelatedactivities.
4. TapDone.
22
Clickthedateintheupperlefttochoosethecalendaryouwant,suchasDAY,WEEK,MONTH
andAGENDAdisplaymode.
☆ Dateswithgraybarsindicatescheduledevents.
3.15 相机
3.15 CAMERA
点击 相机程序图标启动程序。
拍摄图片
1.点击 切换到拍照模式,可以拍摄照片。
2.点击 进行拍照。
3.图片将会被保存。
4.从右向左划动屏幕可进入图库浏览大图。
5.按返回键返回到相机。
6.再点击 可退出相机返回到桌面。
录制视频
1.点击 切换到视频模式,可以录制视频。
2.点击 开始录制,点击 停止录制。
3.视频文件将会被保存。
4.从右向左划动屏幕可进入预览列表。
5.按返回键返回到相机。
6.再点击 可退出相机返回到桌面。
☆
录制过程中,可以点击取景框快速拍摄照片。快速拍摄功能不会终止视频
的录制。
全景拍摄
当相机拍摄较大的场景时,点击 图标切换到全景模式,在这个模式下,慢慢移动相
机并拍摄你想要拍摄的照片。相机会自动将所拍摄的照片合成一张全方位连续图像的全
景照片。
☆
你可以长按取景框或点击屏幕右上方的
后,点击
可以切换前
后置摄像头。点击
进入相机设置菜单。在弹出的对话框中点击选择存储
设备后,选择内存、
SD
卡或
U
盘进行存储设备的切换。
Tapthe Cameraapplicationicontostart.
TakePictures
23
1. Tap switchtovideo,andyoucantakepicture.
2. Tap takepicture.
3. Thepicturewillbesaved.
4. Slidingthescreenfromrighttoleft,andyoucanenterthegallerytobrowserthe
fullpicture.
5. PressBacktotheCamera.
6. TaptoexittheCameraandbacktotheDesktop.
TakeVideos
1. Tapswitchtovideo,andyoucantakevideos.
2. Taptobeginandtap tostop.
3. Thevideowillbesaved.
4. Slidingthescreenfromrighttoleft,andyoucanenterthepreviewlist.
5. PressBacktotheCamera.
6. TaptoexittheCameraandbacktotheDesktop.
☆During video recording
,
you can click the frame quickly to take
pictures. Quick shot function does not terminate the video
recording.
Single‐motionPanorama
Forcapturinglargerscenes,tapiconandswitchtosingle‐motionpanoramamode.In
thismode,theuserstartsanexposureandthenslowlyturnstheCameratoencompassaswidea
perspectiveasneeded.TheCameraassemblesthefullrangeofcontinuousimageryintoasingle
panoramicphoto.
YoucanpressViewfinderlong,oronthetoprightscreentap ,tap buttontoswitchthe
frontandbackcamera.thentap,entercamerasettingsmenu,Inthedialogbox,clickselect
storagedevice,tochoosethefilesarestoredintheLocal,SDcardorUSBstorage.
3.16 拍照键
3.16 Photo Taking Button
1.长按拍照键 5 秒,进入拍照模式。
2.使用 LCD 显示器取景。
3.按下拍照键拍照。
4. 点击 可退出相机返回到桌面。
1.Holdthephototakingbuttonfor5seconds,intothephotomode.
2.WatchtheLCDdisplay

24
3.Pressthephototakingbutton
4.Click canexitthecamerareturnstothedesktop.
3.17 计算器
3.17 CALCULATOR
1. 点击 计算器程序图标。
2. 点击数字图标和运算符号来进行运算。
3. 点击清除来逐个清除显示,长按清除可清空所有显示。
1.Tapthe Calculatorapplicationicon.
2.Tapthenumbersandsignofoperationtodothecalculation.
3.TapCLEARtocleartheresultonebyone,tapandholdCLEARtoclearall.
3.18 录音机
3.18 MYRECORDER
录音 Record
1.点击 录音机程序图标。
2. 点击 录音图标进行录音。
3.录音完毕,点击 停止录音图标。
4.点击 播放按钮,播放刚录取的声音。
1.Tapthe recordericon.
2.Taptherecordicontostartrecording.
3.Tapthe recordicontostoprecord.
4.Tapthe playbuttontoplaythevoiceofrecording.

25
设置 Settings
点击 录音机程序图标。点击设置
1.高品质录音。
2.选择录音时长。
3.默认的录音的文件名。
4.选择默认的存储设备。
5.关于。
Settings
Taptherecordericon.ClickSettings
1.Highqualityrecordings.
2.Selecttherecordingtime.
3.Thedefaultrecordingfilename.
4.Selectthedefaultstoragedevices.
5.About.
3.19 电子邮件
3.19 EMAIL
☆
支持
POP3
、
SMTP
和
Exchange
账户。
添加邮件账户
你可以输入一个或者多个你想要在设备上使用的电子邮件地址。
1. 点击 电子邮件程序图标。
2. 在账户设置界面,点击电子邮件地址选项,→输入你的电子邮件地址。
3. 点击密码选项,→输入你的邮件密码。
4. 点击下一步。
5. 手动设置(可选):服务器设置为根据您的电子邮件账户自动填充供应商(如
gmail.com 等)。但是,如果你需要更改服务器设置,可点击手动设置并进行必
要的更改。
6. 根据选择的邮箱服务器,输入和选择参数、类型,点击下一步。
7. (可选):输入账户名称。
8. 输入发出消息的显示名称→点击下一步。
☆
设置后,如果你无法连接到一个免费的电子邮件账户,请与你的电子邮件
提供商确认,他们的服务器是否支持
(POP)
和
(SMTP)
传输协议。
收件箱
26
1. 点击 电子邮件程序图标。
2. 如果只设置了一个邮件账户,将会快速将其打开。如果设置了多个账户,将会
列出邮件账户列表。
3. 点击你想要打开的邮件账户→点击收件箱。
打开邮件
1. 在收件箱界面,点击一封邮件打开。
2. 对于附件,点击打开以启动相应的应用程序,或点击保存以保存附件到 SD 卡。
3. 若要回复,可以点击 回复或者 回复所有。
4. a.在撰写邮件选项输入你想要回复的信息。
5. b.点击发送可即时发送;保存为草稿则保存不发送或不保存也不发送则丢弃。
6. 若要立刻删除邮件,点击删除。
撰写新的邮件
1. 在收件箱界面,点击 。
2. 在收件人栏中输入邮箱地址。如果你想要抄送或者密件抄送给收件人,点击图
标,然后输入收件人电子邮件地址。
3. 在主题栏输入你想要的标题。
4. 点击撰写电子邮件输入你的邮件内容。
5. 如果需要,点击 来添加附件文件。
6. 邮件写好后,点击 。
编辑邮件账户
1. 点击 电子邮件程序图标。
2. 在收件箱界面,点击 →设置。
3. 根据你的喜好来设置你的电子邮件账户。
4. 点击 返回到收件箱界面。
删除邮件账户
☆
如果你有多个账户,并且你删除了设置的默认账户,则列表内的下一个邮件账
户将会自动成为默认账户。
1. 点击 电子邮件程序图标。
2. 在收件箱界面,点击 →设置。
3. 点击你想要删除的账户。
4. 在右方的邮箱设置列表中,点击删除账户。
5. 点击确定来确认删除操作。
27
设置默认邮件账户
你必须始终有一个账户指定为默认的账户,因此,如果您有多个电子邮件账户,您可以
选择任何一个作为默认。
1. 点击 电子邮件程序图标。
2. 在收件箱界面,点击 →设置。
3. 点击你想要设置的账户。
4. 在右方的邮箱设置列表中,勾选默认账户。
☆POP3,SMTPandExchangeaccountsaresupported.
AddEmailaccounts
YoucanenteroneormorepersonalemailaddressesthatyouwouldliketoaccessthroughyourTablet.
1. TaptheEmailapplicationicon.
2. OntheAccountsetupscreen,TapintheEmailaddressentryfield→enteryour
emailaddress.
3. TapinthePasswordentryfield→enteryouremailpassword.
4. TapNext.
5. ManualSetup(optional):Theserversettingsareautomaticallypopulatedbasedon
youremailaccountprovider(i.e.,gmail.com,etc).However,ifyouneedtochange
theserversettingstapManualSetupandmakenecessarychanges.
6. Accordingtotheselectedmailboxserver,enterorselecttheparameterand
servertype,andthentapNext.
7. Optional:Enteranamefortheaccount.
8. Enternameforoutgoingmessage→tapDone.
☆ Aftersetup,ifyouareunabletoconnecttoafreeemailaccount,checkwithyour
emailprovidertomakesuretheirserverssupportfreeaccountsonPostOffice
Protocol(POP)orSimpleMailTransferProtocol(SMTP).
EmailInbox
1.TaptheEmailapplicationicon.
2.Ifyousetuponlyoneemailaccount,itopensimmediately.Ifyousetupmultipleaccounts,they
arelistedintheAccountsscreen.
3.Taponthedesiredemailaccount→tapInbox.
OpenEmailMessage
1.OntheInboxscreen,taponanemailtoopenit.
2.Forattachments,tapOpentolaunchappropriateapplication,ortapSavetosaveattachment
toaSDcard.
3.Toreplay,tapReplyorReplyall.
a.TapintheComposeMailentryfieldtoenteryourreplymessage.
b.TapSendtosendimmediately,Saveasdrafttosavewithoutsendor
Discardtodiscardwithoutsavingorsending.
4.Todeletetheemailimmediately,tapDelete.
ComposeNewEmailMessage
1. OntheInboxscreen,tap .
2. Enterthee‐mailaddressintherecipientfield.ifyouwanttoaddCcorBcc
recipients,tap ,andthenentertherecipientemailaddress.
3. TapintheSubjectentryfieldtoenteryourdesiredsubjecttitle.
4. TapintheComposeemailareatoenteryourpersonalmessage.
28
5. Ifdesired,tap toattachafile.
6. Whenreadytosendtheemail,tap .
EditEmailAccounts
1. TaptheEmailapplicationicon.
2. OntheInboxscreen,tap→settings.
3. Setyourdesiredpreferencestocustomizeyouremailaccount.
4. TaptoreturntotheInboxscreen.
DeleteEmailAccounts
☆Ifyouhavemultipleaccounts,andyoudeletetheaccountdesignatedasthedefault
account,thenextemaillistedisautomaticallysetasthedefault.
1. TaptheEmailapplicationicon.
2. OntheInboxscreen,tap→Settings.
3. Clicktheaccountyouwanttodelete.
4. Inthepop‐upAccountoptionswindow,tapDelete
5. TapOKtoconfirmthedeletion.
SetDefaultEmailAccount
Youmustalwayshaveoneaccountdesignatedasthedefaultaccount,soifyouhave
multipleemailaccounts,youcanselectanyoneasthedefault.
1. TaptheEmailapplicationicon.
2. OntheInboxscreen,tap→Settings.
3. Tapthedesireaccount.
4. Intherightsettingslist,tapDefaultAccounttoselectit.
3.20 文件浏览器
3.20 FILE BROWSER
点击 文件浏览器程序图标来查看所有存储设备内的文件(
设备内部存储,
SD
卡,
USB
存储器
),并且可以快速便捷的安装 Android应用程序到设备中。
屏幕上方的图标功能如下:
设备内部存储
SD 卡
USB 存储器
粘贴
返回到上一文件夹
29
切换文件夹显示模式
菜单
Tapthe FileBrowserapplicationicontoviewthefilesonallstoragedevices(Internalmemory,
SDcard,USBdevice),andtoquickly&easilyinstallAndroidapplicationonyourTablet.
Usetheiconsacrossthetopofthescreenasfollows:
InternalFlash(Local) SDCard
USBStorage Paste
Backtothepreviousfolder Switchfolderdisplaymode.
Menu
在电脑和设备之间拷贝文件
你可以使用文件浏览器在外部存储设备和设备内部存储以及电脑之间拷贝文件。要拷贝
文件到设备中,你可以先拷贝文件到 SD 卡或者 USB 存储器。
☆
设备内部存储文件夹名称为
“Local”,
存储卡名称为
“SD”, USB
存储设
备名称为
“USB”
。
☆
下面介绍的是从
SD
卡或者
USB
存储器拷贝文件到设备中。
你可以使用相同的
方法从设备复制文件到
SD
卡或者
USB
存储设备。然后再将你的存储设备连接
电脑,将文件拷贝到你需要的文件夹中。
1. 点击转到,选择 或者 来显示你的存储设备中的文件。
2. 长按某个文件或文件夹进入多选模式,勾选你想要复制的文件或文件夹→点击
复制。
3. 点击转到,选择 回到设备内部存储→点击你想要拷贝到的文件夹→
点击 。
CopyMediabetweenComputerandTabl et
YoucanusetheFileBrowsertocopyfilesbetweenanexternalstoragedevicesandyourcomputer.Yo ucan
firstcopythedesiredfilesontoaSDcardorUSBdevice.
☆ The internal device storage is titled “Local”, a memory card
“SD”, and a USB storage device is titled “USB”.
☆ The instructions below are for copying from a SD card or USB
storage device into the device. You can use the same method
to copy from the device to a SD card or USB storage device,
and then connect the storage device to your computer to
transfer the files into the desired folder on your computer.
1. TapGoTo,select or todisplaythecontentsofyourstoragedevice.
2. Tapandholdafolder/fileandenterintothemulti‐selectmode,selectthefolder/file
asdesire→tapCopy.
TapGoTo,select InternalMemory→taponthefolderintowhichyouwanttocopythe
file→tap.
删除文件
30
长按某个文件或文件夹进入多选模式,勾选你想要删除的文件或文件夹→点击删除→
点击确定进行删除。
Deletefiles
Tapandholdafolder/fileandenterintothemulti‐selectmode,selectthefolder/fileasdesire→tapDelete
→OKtoconfirmthedeletion.
3.21 图库
3.21 Gallery
切换查看存储区域
在存储区域根目录,点击界面左上方的 Local、SD 或UDisk 按钮进行切换当前查看的存储
区域。
分类图片和视频列表
在存储区域根目录点击界面左上方的相册、地点、时间、人物或标签按钮进行图片和视
频分类。在分类文件夹中点击界面左上方的幻灯片视图和网格视图切换视图显示方式
浏览、播放图片和视频
图片
在分类文件夹中,点击图片略缩图打开图片进行浏览,点击界面右上方→播放幻
灯片进行幻灯片播放。
视频
在分类文件夹中,点击视频预览图。进入查看视频预览图后,点击预览图中的播放按钮
进行视频播放。
☆
在图片预览界面,点击屏幕右上方的
进行图片的相关操作(包括编辑、
向左
/
向右旋转、修剪、将照片设置为、详细信息等)。
☆
在视频预览界面,点击屏幕右上方的
进行视频的相关操作(包括修剪和
详细信息)。
对图片或视频播放进行操作
DLNA
在图片预览界面(或视频播放界面)点击右上方的后根据提示操作,可以方便将
平板的图片(或视频)分享到支持 DLNA 的TV 上播放。
视频浮动视窗播放
在视频播放界面点击右上方切换到浮动视窗播放。
☆
普通视频播放和浮动视窗播放均支持两点缩放调节视频画面大小。
☆
浮动视窗播放时可以切换到其他界面后继续播放(如:浏览网页、桌面、运行
31
软件时等)。
☆
用户可以随意拖动浮动视窗来调节它在屏幕中的位置。
删除列表中的图片和视频
点击界面右上方的→点击选择相册或选择条目。选中要删除的相册、图片略缩图
或视频预览图后,点击→确定。如需删除个别图片(或视频),请进入文件夹中单
独选中图片(或视频)后点击 ,或在图片(或视频)的预览界面中点击 →删
除。
Switchtheviewstoragearea
Intherootdirectory,onthetopleftclicktheLocal、SDorUDisktoswitchtheviewstoragearea.
Classificationofphotosandvideoslist
Intherootdirectory,onthetopleftclicktheAlbums、Locations、Times、People、orTagsclassifythe
photosandvideos.Intheclassificationfilefolder,onthetopleftclickFilmstripvieworGridviewtoswitchthe
viewdisplaymode.
View、playphotosandvideos
Photo
Intheclassificationfolder,clickonthephotothumbnailstoopenthephoto,and
onthetoprightofthefolderinterfacetap→Slideshowtoplayingslide.
Video
Undertheclassificationfolder,clickontheviewpreview.Entertothevideopreviewinterface,and
clicktheplaybuttoninthevideopreviewtoplaythevideo.
Theoperationwithpictureorvideoplayback
DLNA
Inpreviewphotointerface(orvideoplaybackinterface)onthetoprightclick followthe
prompttooperate,youcaneasilysharethetabletpicture(orvideo)tosupportDLNATVbroadcast.
Playbackofthevideofloatingwindow
Invideoplayback,onthetoprightclicktoswitchtoplaybackofthevideofloating
window.
Deletethephotosandvideosinthelist
Onthetoprightofthescreen,Tapicon→TapselectalbumorSelectitem.Selectthealbum、
imagethumbnailsorvideopreviewwhichyouwanttodelete,tap →OK.Ifyouwanttodeleteasingle
picture(orvideo),pleaseenterthefolder,selectthepicture(orvideo),tap,ordeleteitintheimage
thumbnails(orvideopreview),tap→Delete.
3.22 屏幕截取
3.22 SCREEN CAPTURE
你可以点击图标 来截取屏幕。
32
点击 屏幕截取图标进入进行相关设置。
●自动截屏时选择截屏延时。
●选择默认的存储设备。
●在底部状态栏上显示截屏按钮。
●查看软件版本信息。
在图片保存后,可以通过 图库进行查看。
Youcancaptureascreenimagebytapping atanytime.
Tapthe ScreenCaptureapplicationicontosetoptionsforascreencapture.
●Selectadelaytimertocapturethescreen(seconds).
●Selectthedefaultstoragedevice.
●Showscreencaptureiconinstatusbar.
●About.
Aftertheimagesaresaved,theycanbeviewedthroughGalleryapplication.
3.23 Wi-Fi
点击设置→Wi‐Fi,进入 Wi‐Fi 设置界面。
1. 滑动 Wi‐Fi 后面的开关打开 Wi‐Fi;
2. 设备能够搜索到的所有无线网络将被列出,单击选中要连接的无线网络名称;
3. 如果该无线网络之前连接成功,无线网络的信息将被保存,在弹出窗口中选“连
接”开始连接,选“不保存”将消除无线网络信息;
4. 如果该无线网络没有加密,在弹出窗口中选“连接”开始连接;
5. 如果该无线网络被加密,在弹出窗口中输入密码,点“连接”开始连接;
6. 网络连接成功以后,顶端状态栏出现无线连接图标。
TapSettings→Wi‐Fi,enterintoWi‐Fisettings.
1.SlidetheWi‐FiswitchtoturnonWi‐Fi.
2.AlltheAPinthevicinitywillbelisted,clicktoselectthenameyouwanttoconnecttoAP;
3.IftheAPisconnectedsuccessfulbefore,theAPinformationwillbesavedinthepop‐upwindow,select
"Connect"startstoconnect,choose"forget"toremoveAPinformation;
4.IftheAPisnotencrypted,inthepop‐upwindow,select"Connect"StartConnection;
5.IftheAPisencrypted,enterthepasswordinthepop‐upwindow,andclick"Connect"startconnection;
6.Wheninternetconnectionsaresuccessful,thewirelessconnectioniconinthetopstatusbarappears.
3.24GPS
设备内置 GPS 模块,无需外接 GPS 即可使用该功能。
Thedevicebuilt‐inGPSmodule,UsersusethisfeatureneednotexternalGPSreceiver.
3.25 设置
33
3.25 Setting
无线
和网
络
Wi‐Fi打开 Wi‐Fi、设置和管理无线接入点。
蓝牙打开蓝牙和连接蓝牙设备。
更多…飞行模式开启或关闭飞行模式。
设备
声音
音量调节设备音量。
默认通知设置默认通知铃声。
触摸提示音启动或关闭提示音。
锁屏提示音启动或关闭提示音。
在状态栏上显示
音量调节图标启动或关闭音量图标。
显示
亮度调节屏幕亮度。
壁纸设置壁纸。
休眠设置设备休眠时间。
互动屏保设置互动屏保。
字体大小设置系统字体大小。
无线显示搜索和连接可用无线显示设备。
自动旋转屏幕
存储
选择默认读写存储设备,查看内部存储,查看、
卸载和格式化 SD 卡和 USB 存储器的存储信息。
电池查看电池的使用记录。
应用查看和卸载应用程序。
个人
位置信
息访问
权限
允许访问我的位
置信息
允许得到您许可的应用程序使用您的位置信
息。
GPS 卫星定位允许应用使用您设备上的 GPS 定位您的位置。
Wi‐Fi位置信息
允许应用使用 Google 位置服务更快地大致了
解您所在的位置。系统将收集匿名位置数据并
将其发送给 Google
安全
屏幕锁定
机主信息
加密设备
您每次开机时都需要输入数字 PIN 或密码才能
解密设备。
显示密码
设备管理器查看或停用设备管理器。
未知来源允许安装来自未知来源的应用。
验证应用
禁止安装可能会造成危害的应用,或在安装前
提出警告。
受信任的凭据显示受信任的 CA 证书。

34
从SD 卡安装从SD 卡安装证书。
清除凭据删除所有证书。
语言和
输入法
语言设置系统语言。
拼写检查工具、个人词典、键盘和输入法、指
针速度。
备份和
重置
备份我的数据
将应用数据、Wi‐Fi 密码和其他设置备份到
Google 服务器。
备份账户备份到唯一的调试私有缓存。
自动还原
重新安装某个应用后,系统会还原已经备份的
设置和数据。
恢复出厂设置清除设备上的所有数据。
帐户添加帐
户
系统
日期和
时间
自动确定日期和
时间使用网络上的时间。
自动确定时区自动确定时区
设置日期设置日期。
设置时间设置时间。
选择时区选择时区。
使用 24 小时格式 可以选择使用 24 小时格式或 12 小时格式。
选择日期格式可以选择日期格式。
辅助功
能
TalkBack、放大手势、大号字体、说出密码、
辅助功能快捷方式、文字转语音(TTS)输出、
触摸和按住延迟、增强网页辅助功能。
开发者
选项
提交错误报告、桌面备份密码、不锁定屏幕、
对SD 卡进行读写保护、超级用户设置、USB
调试、电源键菜单错误报告、允许模拟位置、
选择调试应用、等待调试器、通过 USB 验证应
用、显示触摸操作、指针位置、显示布局边界、
显示 GPU 视图更新、显示硬件层更新、显示
GPU 过度绘制、显示面(surface)更新、窗口动
画缩放、过渡动画缩放、动画程序时长调整、
停用 HW 叠加层、强制进行 GPU 渲染、强制启
用4xMSAA、模拟辅助显示设备、启用严格模
式、显示 CPU 使用情况、GPU 呈现模式分析、
启用 OpenGL 跟踪、启动跟踪、不保留活动、
后台进程限制、显示所有”应用无响应”(ANR)。
CPU 性
能调节调节 CPU 性能。
关于设
备
系统升级、状态消息、法律信息、在下次开机
时启动向导、型号、Android 版本、基带版本、
内核版本、版本号。

35
Wirel
ess
and
Intern
et
Wi‐FiOpen the Wi-Fi, set up and mana
g
e the wireless access point.
BluetoothOpen the Bluetooth and connect a Bluetooth device
More…AirplaneMode
Funct
ion
Sound
Volumevolume
DefaultNotificationSetvolume
TouchSoundSetthedefaultnotificationringtone.
ScreenLockSoundTurnonorofftheWarningTone.
Showsvolumeicon
inthestatusbarTurnonoroffLockScreen
Display
BrightnessTurnonofofftheVolumeiconinthestatusbar.
WallpaperAdjustthescreenbrightness.
SleepSetthewallpaper
Theinteractive
screensaverSetthedevicesleeptime.
ThefontsizeSettheinteractiveScreensaver
WirelessdisplaySetthefontsize
automaticrotary
screen,
Storage
Selectthedefaultstoragedevicestoreadandwrite,checkthe
internalstorage,viewing,unloadandformattheSDcardand
USBmemorystoreinformation.
BatteryCheckthebatteryusingrecord
ApplicationInstallanduninstalltheapplication.
Perso
nal
Location
AllowAccess
Allowedtohaveyourconfirmationofapplicationusingyour
locationinformation.
GPSSatellite
PositioningAllowapplicationtouseyourGPSpositioningyourposition.
Wi‐Filocation
information
AllowapplicationtouseGoogleservicesmorequicklygeta
generalideaofyourposition.
Security
Screenlock
OwnerInformation
EncryptionUnit
EverytimeyoubootneedtoenterthePINnumberorpassword
todecryptthedevice.
DisplayPassword
DeviceManagerCheckorstopusingthedevicemanager.
UnknownSourceAllowedtoinstallapplicationsfromunknownsources.
VerifiedApps
Applicationofbannedinstallationmaycausedamage,or
warningbeforeinstallation.
TrustedcredentialsDisplayatrustedCAcertificate。
InstallFromSDInstallcertificatefromtheSDcard
Removethe
credentialsDeleteallcertificates
Languageand
InputMethod
LanguageSetthesystemlanguage.
Spellchecktool,personaldictionary,keyboardandinput
method,apointerspeed.
BackupDataTheapplicationdata,Wi‐FipasswordsandotherSettingsare
36
Backupand
Reset
backeduptoGoogleservers.
BackupAccountBackuptotheonlydebugprivatecache.
AutomaticRecovery
Afterinstallinganapplication,thesystemwillrestorebackup
Settingsanddata.
RestoreFactory
Settings Removeallthedataonthedevice
Accou
ntAddaccount
syste
m
Dateand
Time
Automatically
determinethedate
andtimeUsethenetworktime
Automatically
DetermineTheTime
ZoneAutomaticallydeterminethetimezone
SetDateSetdate
SetTimeSettime
SetTimeZoneSettimezone
SetTimeFormatSettimeformatto24Hor12H
SetDateFormatSetDateformat
Miscellaneou
sFunction
TalkBack 、Zoomgestures,largefonts,saythepassword,
auxiliaryfunctionshortcut,touchandholdthedelay,enhance
webauxiliaryfunctions.
Developer
Options
Submitbugreports,desktopbackuppassword,unlockscreen,
theSDcardreadandwriteprotection,superuserSettings,USB
debugging,andpowerbuttonmenuerrorreporting,allowthe
simulationlocation,selectdebug,waitingforthedebugger,
USBauthenticationapplication,displaytouch,thecursor
position,displaylayoutboundary,theGPUviewupdate,
updatedisplayhardwarelayer,displayGPUexcessivedrawing,
surfaceupdate,transitionanimationwindow,programlength
adjustment,stopusingHWoverlay,forcedtoGPUrendering,
forced4xMASS,simulatedtheauxiliarydisplaydevice,enable
thestrictmode,theCPUusage,GPUrenderingmodeanalysis,
enableOpenGLtracking,turnonthetracking,keepnoactivity,
backgroundprocesslimits,display"applicationnotresponding"
(ANR).
CPU
Performance
adjustmentAdjusttheCPUperformance
AboutDevice
system upgrade,Statusmessages,legalinformation,At the
next boot startup guide,model,Androidversion,baseband
version,kernelversion,theversionnumber.
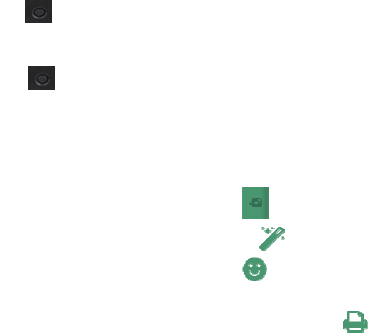
3.26 打印照片
3.26 Print photo
1打印
a.进入打印模式。
b.选取想要打印的图片。
37
c.设定打印数量,选择 OK。
d.选择打印。
2 编辑照片
本相机能在您打印前对相片进行一些相片编辑功能:裁切相片成特定尺寸,新增
照片边框,增加拍照时间显示等功能。
a进入打印模式,选择相片边框功能,开启功能。
b选择日期档案功能,选取相片上想要打印的数据,如果选取日期,打印出的数
据是相片拍摄的日期。
c选择菜单离开打印设定,相机返回打印预览显示。
重要提示
☆ 将相纸放置于阴凉处。
☆切勿将相纸长时间放置于高温处 ( 例如汽车或海滩)。
☆如果相纸放置于高温或低温处,请在列印前一小时将相纸放置于常温环境。
☆ 切勿在列印中触摸或拉扯相片。
☆ 切勿弯折或刮磨相片,并避免触摸列印面。
☆切勿将相片放置于高温地点 ( 例如炙热的沙滩、混凝土或靠近电热器)。
☆ 切勿将相纸及相片放置于潮湿处 ( 应放置于湿度低于 25% 处)。
☆打印中切勿关闭相机电源。
☆ 打印中切勿打开纸盘门。
1thePrint
A.entertheprintmode.
B.Selectimagesforprint
C.settheQTYyouwantprint,clickOK.
D.Clickprint.
2Editphotos
Beforeprintthephotoyoucaneditit:cuttingphotointoacertainsize,thenewphotoframe,
addphotosshow,andotherfunctions.
38
AEntertoprintmode,selectthephotoframefunction.
BDatefilefunctions,selectphotowhichyouwanttoaddthedataon.Selecteddate,printout
thedataisthedateofthephotoshoot.
CClickthemenu,backtoprintpreviewdisplay.
Importantnote
☆keepthepaperintheshade.
☆Donotputthepaperforalongtimeinhightemperatureandhighhumidityplace(suchas
car,beach,concreteoranyheater,orhumiditylowerthan25%).
☆Ifthepaperplacedinhighorlowtemperatures,anhourbeforeprinting,pleaseplace
thepaperinnormalenvironment.
☆Don'ttouchorpullwhenprintingphotos
☆Donotbendorscratchedphotos,andavoidtouchingtheprintside。
Donotshutoffthecamerapowerduringtheprint.
Donotopenthepaperplatesduringtheprinting.
3.27 Reset
按下 键,能够在不断电的情况下,使其重新启动。
Pressbutton,makeitsrestart.
3.28SocialMaticAPP
共有 3大功能,照片編輯,照片打印,照片分享。
1. 照片編輯:
a) 點選 ‐>進入拍照模式.
b) 再點選 後便可以編輯照片.
c) 點選 可以加入圖標.
2. 照片打印:
a) 在編輯照片後,點選 ‐>進入打印模式,
b) 再跳出的相片預覽時點選”確認”將打印出
照片.

39
c) 如要取消,請點擊”取消”
3. 照片分享:
a) 在編輯照片後,點選 ‐>進入分享畫
面,
b) 可以點選”下一步”將相片上傳至
SocialMatic.
3.28SocialMaticAPP
Ithas3majorfunctionality.Itcandophotoediting,photoprinting
andphotosharing.
1.PhotoEditing:
a)Click‐>enterthecameramode.
b)Clicktostarteditingaftertakingphoto.
c)Clicktoinsertemote.
2.PhotoPrinting:
a)Afterphotohadbeingedited,clicktoenterprintingmode.
b)Clickthe“OK”buttontoprintthephotointhepop‐uppreview
window.
c)Ifyouwanttocanceltheprinting,click“cancel.”
3.PhotoSharing:
a)Aftereditingphoto,clicktoenterthesharingscreen.
b)Click“next”touploadthephototo“SocialMatic.
常见问题
Android
Q:设备使用的是哪个 Android 版本?
A:Android4.4.2
基本设备功能
Q:我在使用设备前需要先充电吗?
A:电池需要关机充电 2小时才能完全充满。你也可以边充电边使用设备,
但是不推荐使用此方式充电。
电子邮件
40
Q:我可以使用我个人的邮箱地址进行收发邮件吗?
A:设备支持 POP3和SMTP账户。一些免费的邮箱账户可能并不支持移动
设备。具体需要咨询邮件开发商。
存储卡
Q:设备支持哪种存储卡?
A:T‐FLASH 卡。
音乐
Q:设备支持哪些音频格式?
A:MP3,WMA,APE,FLAC,AAC,OGG,AC3,WAV
Q:怎么添加音乐到设备中?
A:从电脑上将音频文件拷贝到 SD 卡或者 USB 存储设备中,再使用文件浏
览器将文件拷贝到设备中。
图片
Q:设备支持哪些图片格式?
A:JPEG,BMP,GIF,PNG,TIFF
Q:怎么添加图片到设备中?
A:从电脑上将图片文件拷贝到 SD 卡或者 USB 存储设备中,再使用文件浏
览器将文件拷贝到设备中。
视频
Q:设备支持哪些视频格式?
A:设备支持 MKV,AVI,RM,RMVB,MP4,MOV,VOB,DAT,3GP,VP8,RV,WMV,
AVS,H.263,Flashplayer10.1,最大分辨率支持 1080P (1920×1080)。
Q:怎么添加视频文件到设备中?
A:从电脑上将视频文件拷贝到 SD 卡或者 USB 存储设备中,再使用文件浏
览器将文件拷贝到设备中。
Wi-Fi
Q:我需要使用外置的 Wi‐Fi 设备来进行上网吗?
A:不需要。设备已内置有 Wi‐Fi 设备。
Android
Q:WhatAndroidOSversionisonmyDevice?
A:4.4.2
Basic Device Functionary
Q:DoIhavetochargethebatterybeforeuse?
A:Youshouldchargethebatteryforatleast2hoursintheoffstatus,Youcanusethedevice
whileit’scharging,butthismethodtochargeisnotrecommended.
Email
Q:CanIuseanyofmypersonalemailaddressestosend/receiveemail?
A:ThedevicesupportsPOP3andSMTPaccounts.Somefreeemailaccountsarenot
supportedonmobiledevices.Checkwithyouremailprovidertoseeifyouaccountis
supported.
Storage Cards
Q:WhichstoragecardsarecompatiblewithmyDevice?
A:T‐FLASHcard.
41
Music
Q:WhattypeofmusicfilescanIplayonmydevice?
A:MP3,WMA,APE,FLAC,AAC,OGG,AC3,WAV
Q:HowdoIaddmusicfilestomydevice?
A:CopythemusicfilesfromyourcomputerontoaSDcardorUSBstoragedevice,andthen
usetheFileBrowserapplicationtocopythefilesintothedevice.
Photos
Q:WhattypeofphotofilescanIviewonmydevice?
A:JPEG,BMP,GIF,PNG,TIFF
Q:HowdoIaddphotofilestomydevice?
A:CopythephotofilesfromyourcomputerontoaSDcardorUSBstoragedevice,andthen
usetheFileBrowserapplicationtocopythefilesintothedevice.
Video
Q:WhattypeofvideofilescanIplayonmydevice?
A: Videofileformatssupported:MKV,MPEG,MPG,MP4,AVI,D i V X 4/5/6 , XVID,RMVB,VOB,
DAT,WMV.Thelargestvideoformatissupported1080P(1920×1080)resolution.
Q:HowdoIaddvideofilestomydevice?
A:CopythevideofilesfromyourcomputerontoaSDcardorUSBstoragedevice,andthen
usetheFileBrowserapplicationtocopythefilesintothedevice.
Wi-Fi
Q:DoIneedaWi‐FiadaptertoconnecttotheInternet?
A:No.TheWi‐Fiadapterisbuilt‐intothedevice.
电池使用注意事项
1.电池在装箱时并不是满电,所以建议您在至少充电 2小时再开始使用设备。
2.避免在极冷的环境中使用电池,因为低温会缩短电池寿命,并降低相机效能。
3.相机在长期连续使用后可能会发热。这是正常情形,并非故障。
4.如果电池在充满电的状态下长期存放,其效能可能会衰退。
5.切勿将电池短路。
6.充电电池的寿命年限,一般是以充电、放电的次数而定。但是,您仍然可以尝试通
过以下建议延长低于电池的寿命:
●至少每周使用一次设备。
●定期为电池充分充电。
●切勿让电池长时间没电。
●始终保持设备和电池远离热源。
BATTERYMANAGEMEN
1、Thebatteryisnotfullychargedoutofthebox,soitisrecommendedthatyouchargethebatteryforat
least2hoursbeforeyoustarttousethedevice.
2.Avoidusingbatteryincoldenvironment,becauseofthelowtemperaturewillshortenthebatterylife,
andreducethecameraperformance.
3.Thecameramaybefeverafterlongtermcontinuoususe.Thisisnormal,itisnotafailure.
4.Ifthebatteryinthefullychargedstatestoredforalongtime,itsperformancemaydecline.
5.Don'tdothebatteryshortcircuit.
6.Therechargeablebatteryisdesignedandmanufacturedtobeusedandrechargedfrequently.Aswithall
batteries,thecapacityofthebatteryreduceseachtimeitischarged/depleted.However,youcanstilltryto

42
prolongthebattery’slifetimebyfollowingthesuggestionsbelow:
●UseyourTabletatleastonceaweek.
●Chargethebatteryregularlyandfully.
●Neverleavethebatteryfullydischargedforalongperiodoftime.
●Alwayskeepthedeviceandthebatteryawayfromheat(+40℃)..
电池充电
Charge battery
电源适配器一端接插座,一端接设备的电源插孔即可对设备进行充电。
当电池充满后,电池图标显示为: .
一个完全放电的电池在关机状态大约需要 4.5 小时才能完全充满电,但是在充电的同时您
仍可以使用设备。
Plugthepoweradapterintoanelectricalwalloutlet,andthenconnecttothedevicetofullychargethe
batterybeforeuse(Afullchargetakesabout6hoursintheoffstatus).
Whenfullycharged,thebatteryicondisplaysas .
Afullydischargedbatterytakesapproximately6hourstofullychargeintheoffstatus,butyoucanusethe
devicewhilepluggedinwhendesired.
重要安全提示
IMPORTANT SAFETY PRECAUTIONS
当使用您的设备时请遵守以下基本的安全使用注意事项。这将减少火灾、触电和受伤的
危险。
●请勿让本产品长时间淋雨或受潮。
●尽可能请让设备远离阳光直射和热源。
●建议用户使用打印功能时外部环境尽量不要超过 30°C,外部环境为 45°C 时静
止打印。
●保护电源线。连接电源线时,请注意不要让它被踩到或在上面放置物品,对它
造成挤压。要特别注意保护电源线连接设备的接头。
●请使用原配电源适配器进行充电,使用其他充电器可能造成危害。
●切勿拆开机盒或自行修理。
本产品会产生、使用及发射无线电频率能量,如果没有依照指示安装及使用,
可能会对无线电通讯造成有害的干扰。然而,我们不保证特定的安装方式不会发生
干扰。如果本产品对收音机或电视接收造成有害干扰(可经由打开或关闭本产品而
确认),则使用者可尝试利用下列方式进行调整:
变更收音机或电视天线的方向。
增加该设备和接收器的距离。
勿让该设备与接收器插入相同电路的插座。
咨询经销商或有经验的收音机/电视技术人员,以取得协助。
如果因为静电或电磁造成资料传输一半失败的话,请重新启动应用程式或拔掉
再重新接上传输线(例如USB传输线)。
● 切勿靠近人眼使用闪光灯。此举可能会造成视力损害。
● 切勿撞击 LCD 显示器。
43
● 此举可能会对萤幕上的玻璃造成损坏或造成内部液晶外漏。如果液晶不慎接触
眼睛,请立即使用大量清水冲洗双眼并送医治疗。
● 本相机属于高精密性的机器。在使用相机时,切勿掉落、重击或过度用力。
此举可能会造成相机损坏。
● 切勿包裹相机或将其放置于衣物或棉被中。此举可能会因热度过高造成外壳扭
曲变形,进而造成个人伤害。请在通风良好的环境中使用相机。
● 切勿将相机放置于温度可能快速上升的地点,例如汽车内。此举可能会对产品
效能造成负面影响。
● 请在移动相机前拔除所有电线或传输线。未拔除可能会损坏电线和传输线,进
而造成个人伤害或产品损坏。
AlwaysfollowthesebasicsafetyprecautionswhenusingyourTablet.Thisreducestheriskoffire,
electricshock,andinjury.
Donotexposethisproducttorainormoisture.
Keepthedeviceoutofdirectsunlightandheatsources.
Recommend that users use the print function as the external environment as
far as possible not to exceed 30 ° C, When the external environment of 45 ° C
printing is prohibited.
Protectthepowercord.Routepowercordssothattheyarenotlikelytobewalked
onorpinchedbyitemsplacedonoragainstthem.Payparticularattentiontothe
pointwherethecordattachestothedevice.
OnlyusetheACadapterincludedwiththedevice.Usinganyotherpoweradapter
voidsyourwarranty.
Donotremovethecover.Therearenouser‐serviceablepartsinside.
DonotplugHDMIwhenusingCamera.
This product will produce, use and emission radio frequency energy, if you are not in
accordance with the instructions to install and use, may cause harmful interference to radio
communications. However, we do not guarantee specific installation interference will not occur. If this
product cause harmful interference to radio or television reception (it can be confirmed by open or close
the product), the user can adjust try to take advantage of the following ways:
Changes the direction of the radio or TV antenna.
Increase the equipment and the distance of the receiver.
Don't let the equipment and receiver inserted into the socket of the same circuit.
A dealer or experienced radio/TV technical personnel, in order to obtain assistance.
If half for electrostatic or electromagnetic data transmission fails, please restart the application
or pull out again in a transmission line (such as USB cable).
"Don't close to the human eye when you are using flash. It move may cause
visual impairment.
"Do not hit the LCD display.it can be make internal LCD screen glass damage or
cause leakage. If the liquid crystal into eyes , please use amount of water wash
eyes immediately and treated by hospital.
Camera is a high precision of the machine. Please, do not drop, knock, or over
press.
The move is likely to cause damage of the camera.
44
Don't package the camera in the clothing or in the quilt. It likely to make the
shell distortion caused by the excessive heat, and cause personal injury. Please
use the camera in a well-ventilated environment.
Do not place the camera on the location of the temperature may be rising fast,
such as cars. The move may cause negative impact on product performance.
Before moving the camera, please pull out all the lines or transmission lines.Not
pulling out might damage the power lines and transmission line, and then
cause personal injury or damage of product.
清洁设备
对待屏幕要轻柔。要清洁指纹或者屏幕上的灰尘,最好使用如相机镜头使用的柔软的布,
而不能使用纱布。
Cleaningyourdevice
Treatthescreengently.Tocleanfingerprintsordustfromthescreen,werecommendusinga
soft,non‐abrasiveclothsuchasacameralenscloth.
FCC Statement
This equipment has been tested and found to comply with the limits for a Class B digital
device, pursuant to part 15 of the FCC Rules. These limits are designed to provide
reasonable protection against harmful interference in a residential installation. This
equipment generates, uses and can radiate radio frequency energy and, if not installed
and used in accordance with the instructions, may cause harmful interference to radio
communications. However, there is no guarantee that interference will not occur in a
particular installation. If this equipment does cause harmful interference to radio or
television reception, which can be determined by turning the equipment off and on, the
user is encouraged to try to correct the interference by one or more of the following
measures:
—Reorient or relocate the receiving antenna.
—Increase the separation between the equipment and receiver.
—Connect the equipment into an outlet on a circuit different from that to which the
receiver is connected.
—Consult the dealer or an experienced radio/TV technician for help.
FCC Radiation Exposure Statement
This device complies with FCC SAR exposure limits set forth for an uncontrolled
environment. SAR compliance for using the equipment in close proximity to the human
body has been evaluated at 5mm.
This device complies with Part 15 of the FCC Rules. Operation is subject to the
45
following two conditions: (1) this device may not cause harmful interference, and (2)
this device must accept any interference received, including interference that may
cause undesired operation.
Caution!
Any changes or modifications not expressly approved by the party responsible for
compliance could void the user's authority to operate the equipment.