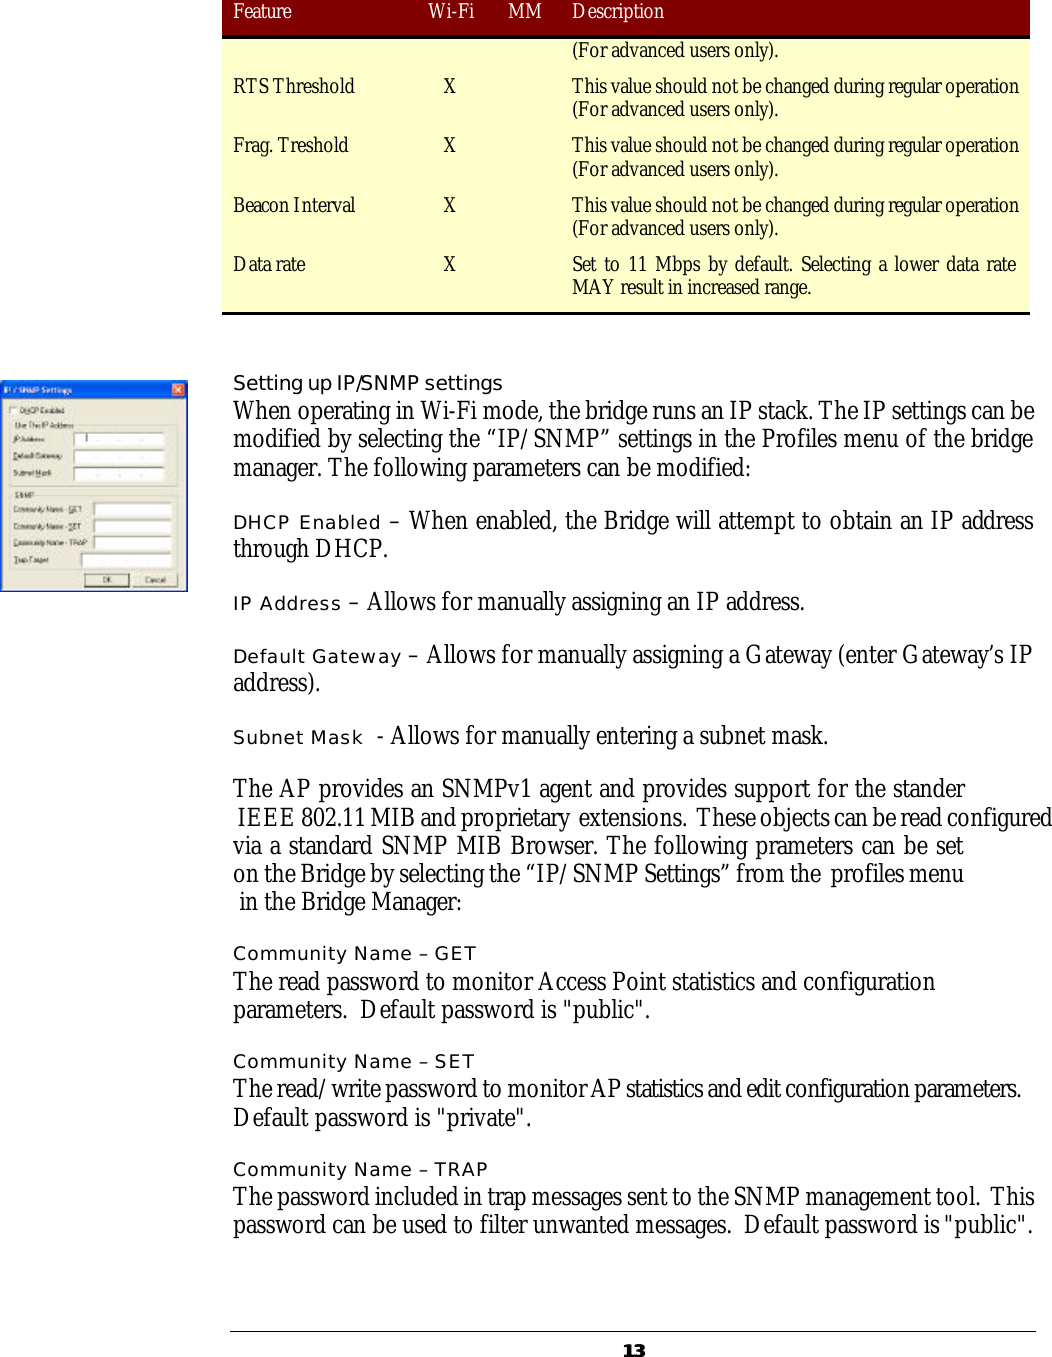
Prime Electronics and Satellitics
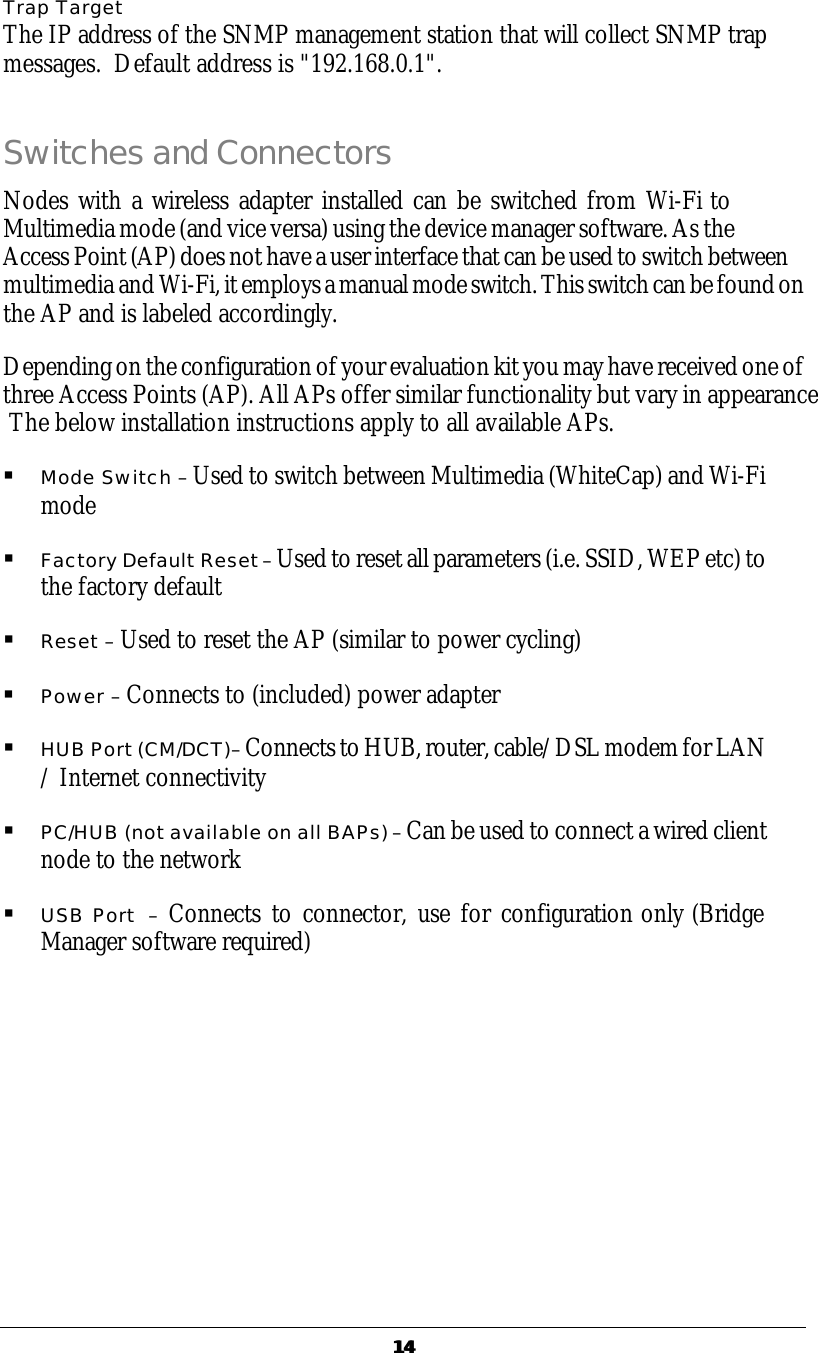
 WA222P Wireless LAN AP User Manual Manual R3B31

Prime Electronics & Satellitics Inc. Wireless LAN AP Manual R3B31

users manual

   Wireless Access Point  User  Manual          Ver. 1.0
 Table of Contents 1. INTRODUCTION 1 2. ADAPTER INSTALLATION 2 HARDWARE/OS REQUIREMENTS 2 INSTALLING THE HARDWARE 3 INSTALLING THE DRIVER 3 INSTALLING THE SOFTWARE 4 3. BRIDGE ACCESS POINT  INSTALLATION 5 HARDWARE/OS REQUIREMENTS 5 INSTALLING THE HARDWARE 5 INSTALLING THE BRIDGE MANAGER 6 4. DEVICE & NETWORK MANAGEMENT 8 DEVICE MANAGER 9 NETWORK MANAGEMENT 11 ADDING NODES TO THE NETWORK 11 BRIDGE DEVICE MANAGER 12 SETTING UP PROFILES 12 SETTING UP IP/SNMP SETTINGS 13 SWITCHES AND CONNECTORS 14 5. UNINSTALL HARDWARE & SOFTWARE 15
 11 Introduction This chapter is your starting point for the rest of this manual. his guide describes how to install and operate the  Wireless LAN PCMCIA Adapter and Access Point evaluation kits.  If you are installing PCMCIA Adapter start the installation by turning to Adapter Installation on page 2. If you are installing a  Access Point, start the installation by turning to Access Point Installation on page 5. For instructions on how to use the software, turn to page 8. The majority of the screenshots printed in this manual are taken from Windows XP, the screens on your computer may look slightly different.  Chapter 1 T
 Adapter Installation This chapter will walk you through the hardware, driver and software installation of the wireless adapter. Hardware/OS Requirements § Pentium II PC § 64 Megs RAM § Windows 98/ME/2000/XP NOTE: Before installing, please remove any prior versions using the instructions on page 15. Chapter 2
  33  Installing the Hardware For PCMCIA Insert the PCMCIA card in the computer and power on the computer. (Note that the computer may be on or off when the PCMCIA card is inserted). For PCI Install the PCI card in the computer. Attach the supplied antenna to the card BEFORE powering up the PC. Be sure to match the lead marked RED with the antenna connector that is marked RED and power on the computer. For MiniPCI Install the MiniPCI card in your hardware application. Attach the supplied antenna to the card BEFORE powering up the PC. Be sure to match the lead marked RED with the antenna connector that is marked RED and power on the computer. Should you not have a device with a MiniPCI slot available, a MiniPCI to PCI converter card can be used to install the MiniPCI card in a PCI slot. A converter card can be purchased from:       Installing the Driver After installing the adapter as described on page 3, Windows will notify you with a ‘New Hardware Found’ dialog box. Following this, the Windows installation wizard will detect the adapter. § Insert the installation CD into your CDROM drive and click ‘Next’. § Windows 98 - Select ‘Search for the best driver for your device’, and click ‘Next’. Specify to search the CD Rom drives (check the box) and click ‘Next’. § Windows ME/2000/XP - Select the “Automatic Search” option and click ‘Next’.
44  § Windows will find the drivers located on the CD and begin to install them.  This may take up several minutes.  § When completed click ‘Finish’. You will next be asked to reboot the computer. Click ‘Yes’. Note: If the system does not shut down (or restart) within 2 minutes, manually power down the computer and then power it back up. This completes the driver installation; please continue with the software installation in the next paragraph. Installing the Software This paragraph describes the installation of the Network & Device management software. After completing the hardware and driver installation as described in the previous paragraphs, the software installation will automatically start. Follow the instructions on the screen to install the software. You will be asked some basic questions including: § Agreement to the (blank) license agreement § Your name and company name § SSID (This will be the SSID or network name immediately after installation, note that you can always change this after the installation) § In some cases, the installation program may prompt you to install JRE (Java Runtime Environment) which is necessary to run the software. Click  “Yes” and follow the instructions. After the software is installed you’ll be asked to reboot once more after which the installation is complete. You can now use the product as desired. Refer to the remainder of this manual for operating instructions. Note: If this is the first time a network device has been installed, after re-starting the system, you may need to enter a Windows network ‘User name’ and ‘Password’.  See Windows help for more information.
 55  Bridge Access Point Installation This chapter will walk you through the hardware and Bridge Device Manager installation of the Bridge Access Point. Hardware/OS Requirements § Pentium II PC § 64 Megs RAM § Windows 98/ME/2000/XP Installing the Hardware Perform the following steps to install the wireless Access Point (AP). § If applicable, insert the Ethernet cable into the RJ45 connector (labeled “TO HUB”) on the AP to connect to a hub, router, cable or DSL modem. If you have received a AP with two Ethernet ports, the other port can be used to connect a wired client node to the network. Next, apply power to the AP by plugging in the power adapter supplied with the evaluation kit.  This completes the hardware portion of the installation.  The next step is to add the AP into the wireless network. There are three options configuration of the bridge: § “Enroll” the bridge in the network (Multimedia Mode only). Turn “Adding nodes to the network” on page 11 to continue the installation by using the  Chapter 3
Network Management application on a wireless active PC node to enroll the bridge into the network. § The BAP provides an SNMPv1 agent and provides support for the standard IEEE 802.11 MIB and proprietary extensions (MIB files are included on the evaluation CD). These objects can be read and configured via a standard SNMP MIB Browser. § Alternatively, read the below “Installing the Bridge Manager” section to manually configure the Bridge Access Installing the Bridge Manager The Access Point (AP) can be manually configured using the “Bridge Manager”. Follow the below instructions to install this software. § Connect the Access Point to a computer using the included USB cable. The computer does not have to be a node in the network (any network or non-network PC can be used to run the Bridge Manager software). § Windows will notify you with a ‘New Hardware Found’ dialog box. Following  this, the Windows installation wizard will detect the AP. § Insert the installation CD into your CDROM drive and click ‘Next’.  § Windows 98: Select ‘Search for the best driver for your device’, and click  ‘Next’. Specify to search the CD Rom drives (check the box) and click ‘Next’.  § Windows ME/2000: Select the “Automatic Search” option and click ‘Next’.  § Windows will find the drivers located on the CD and begin to install them. This may take several minutes. § When completed click ‘Finish’. You will next be asked to reboot the computer.  Click ‘Yes’.  Note: If the system does not shut down (or restart) within 2 minutes manually power down the computer and then power it back up. After the restart, the software installation will continue automatically. Follow the instructions on the screen to install the software. You will be asked some basic questions including: § Agreement to the (blank) license agreement
 77  § Your name and company name § SSID (This will be the SSID or network name immediately after installation, note that you can always change this after the installation). After the software installation you may be asked to reboot once more, after which the installation is complete.  Important: On most systems it is necessary you reset the bridge after installation of the software. At this time, reset the bridge using the reset button or by “power-cycling” the bridge. You can now use the Bridge Device Manager; turn to page 12 for instructions on how to use the Bridge Device Manager. Additional information on using the various switches and connectors on the bridge can be found on page 14.
BODEGA EVALUATION KIT 88 Device & Network Management This chapter will help you understand the device management, network management and bridge device management applications. To manage the various devices on the network and the network itself, three software applications are provided. Following is a short description of each application and its main purpose. § Device Manager The Device Manager configures any client device located on the computer (i.e. PCMCIA).  § Network Manager Network Management provides network information and statistics regarding all devices on the network. This application is only available when the network is operating in Multimedia mode. § Bridge Device Manager The Bridge Device Manager allows for configuring the Bridge through the USB cable. The following sections describe these applications and their operation in greater detail. Chapter  4
  99  Device Manager Start the Device Manager by right-clicking the icon on the system tray and selecting “Device Configuration”.  The  Device Manager uses the concept of “profiles”. Profiles allow a user to store  specific settings for a particular situation or environment. For example, a user may have an “Office” profile in which the node operates in Wi-Fi mode and a"Home" profile for Multimedia mode. Profiles will help the user manage the appropriate settings including network IDs, WEP, and operating mode. Profiles can be created, managed (for editing) and activated from the Device Manager application by selecting the Profiles menu. When creating a new profile from this menu, the software will ask the user to select either a Wi-Fi based or a Multimedia-based profile.  The screen (at left) displays the creation of a new Multimedia profile. Profile name, encryption settings, etc. can be set here. Settings that are unique to a Multimedia profile include the “Auto” setting for the channel selection and the “Channel Agility sensitivity” setting (both unique to the Channel Agility feature). Another Multimedia-only setting is the “Change to Master Node” option, which forces a particular node to be the network coordinator. A complete overview of all parameters is included at the end of this section. The screen (at left) shows the WiFi profile “create” screen. The WiFi-unique options that can be set on this screen are the Network and Node type settings in addition to Data Rate and Power Management settings.   Once two or more profiles are created, the user can switch between these profiles using the Profiles menu in the main device manager screen. Previously created profiles can be edited, deleted, renamed and copied in the Manage Profiles screen. The Copy command is useful in creating multiple profiles that are similar without having to reset all options manually. The list below defines all user-configurable settings within a profile.
  1010 Feature Wi-Fi MM Description Profile Name X X Name to identify the profile, i.e. “Home”, “Office”, “Airport”. Network Name / SSID X X Unique identifier for the network. All nodes on a network must have the same SSID/Network name to be able to communicate. Set as active Profile X X When checked, will activate the profile immediately upon clicking “OK”. Network Type X    Defines if the network will be operating in “Infrastructure” or “Ad-Hoc” Mode. “Infrastructure” mode is used when a network includes an Access Point and all nodes communicate via the Access Point. “Ad-Hoc” is used when all nodes communicate directly with each other without an Access Point. Node Type X    Default is “Station” and should be used for standard operation. When “Access Point” is selected it will allow a node to act as an Access Point.  Change To Master Node  X Forces a particular node to be the network coordinator. Wireless Encryption X X Disabled by default. 40 bit (=64 bit) WEP encryption can be selected. Up to 4 unique keys can be entered; one key must be selected to be the “active key”. Keys must be 10 digits long and must be entered as HEX (0-9, A-F). Make sure all nodes in the network have the same key to establish connectivity. Power Management X    Disabled by default. Enabled “Protocol Power Save” allows part of the hardware to be shut-off when possible to conserve power. Channel X X Set to “Auto” by default. Forces the node to only operate on one particular channel. Not available in Wi-Fi Station mode. When set to “Auto” in Multimedia mode the “Channel Agility” feature is enabled. Shared Key Authentication X    Disabled by default. Allows for a more secure way of authenticating nodes onto the network. All nodes in the network must have Shared Key Authentication set to the same value. Basic Rate X    This value should not be changed during regular operation (For advanced users only). RTS Threshold X    This value should not be changed during regular operation (For advanced users only). Frag. Threshold X    This value should not be changed during regular operation (For advanced users only). Beacon Interval X    This value should not be changed during regular operation (For advanced users only). Data rate X    Set to 11 Mbps by default.
  1111 Feature Wi-Fi MM Description Load defaults X X Sets the profile settings back the factory default. Channel Agility Sensitivity   X Determines the packet error rate the network will change channels to avoid the interference. The higher the sensitivity, the sooner it will change channels. 30% is the default and the recommended setting.  Network Management Double-click on the system tray icon to start Network Management (or right-clik and select “Open Network Management”).  Note that the Network Management Application is ONLY available when the Network is in Multimedia mode.  The ‘Node Information’ page in network management utility displays a diagram of the active Multimedia network. Additional information is also available by clicking on buttons to the left side of the page. The Color legend on the lower left designates the quality of the connection and is indicated by the color of the lines between any two nodes. The information on this page is obtained from the Master node for all nodes on the network. If the Master node is a non-functional node, this HTML page will not be available on the client nodes and a “troubleshooting page” will be displayed instead.  Adding nodes to the network (Multimedia mode only). To add a Bridge node to the network, the designated Master node must allow the Bridge to be “enrolled” into its secured network group.  This group is based on the network identification (or ‘Network ID’) entered during installation. If the Network ID of a node matches the Master’s Network ID, the node will be automatically enrolled into the group. To add a wireless Bridge to the network or add a new node which is configured to be in an open enrollment mode, click on the ‘Add A New Node’ button in the Network Management page from any node in the system. The Master node will search for nodes that have not been added to the group (those which are determined to be in open enrollment mode). To add (or enroll) this Bridge into the network, click on the ‘Add’ button.  The Master node will forward its Network ID to the Bridge node which as been detected to be in open enrollment mode.
  1212 Refer to the below section on the “Bridge Device Manager” for instructions on how to manually configure the Bridge Access Point. Manual configuration will give you more control over the BAP settings including network names, SSID and WEP settings. Bridge Device Manager Refer to page 6 for Bridge Manager installation instructions. When the USB cable is connected, the bridge will enter configuration mode. Double-clicking the icon on the desktop will start the Bridge Device Manager. Note: While the bridge is in “configuration mode” (when the USB cable is inserted), the bridge will not function in the network. Upon removal of the USB cable, the Bridge will resume its normal operation. After the application starts, it will display a general information screen which provides information for the current Multimedia and Wi-Fi settings.  Setting up profiles To edit these settings, select either the “Multimedia profile” or “Wi-Fi profile” from the Profile menu. All relevant settings for both Wi-Fi and Multimedia mode can be set or modified. Note that the separate profiles allow for unique settings (i.e. different SSID or network names) in each mode. The below list outlines all user-configurable bridge settings. Feature Wi-Fi MM Description Network Name / SSID X X Unique identifier for the network. All nodes on a network must have the same SSID/Network name to be able to communicate. Wireless Encryption X X Disabled by default. 40 bit (=64 bit) WEP encryption can be selected. Up to 4 unique keys can be entered; one key must be selected to be the “active key”. Keys must be 10 digits long and must be entered as HEX (0-9, A-F). Make sure all nodes in the network have the same key to establish connectivity. Power Management X    Disabled by default. Enables “Protocol Power Save”, which allows part of the hardware to be shut-off when possible to conserve power. Channel X X Forces the network to only operate on one particular channel. This selection is not available when Channel Agility is enabled in Wi-Fi mode. Shared Key Authentication X    Disabled by default. Allows for a more secure way of authenticating nodes onto the network. All nodes in the network must have Shared Key Authentication set to the same value. Basic Rate X    This value should not be changed during regular operation (For advanced users only).
  1313 Feature Wi-Fi MM Description (For advanced users only). RTS Threshold X    This value should not be changed during regular operation (For advanced users only). Frag. Treshold X    This value should not be changed during regular operation (For advanced users only). Beacon Interval X    This value should not be changed during regular operation (For advanced users only). Data rate X    Set to 11 Mbps by default. Selecting a lower data rate MAY result in increased range.  Setting up IP/SNMP settings When operating in Wi-Fi mode, the bridge runs an IP stack. The IP settings can be modified by selecting the “IP/SNMP” settings in the Profiles menu of the bridge manager. The following parameters can be modified: DHCP Enabled – When enabled, the Bridge will attempt to obtain an IP address through DHCP. IP Address – Allows for manually assigning an IP address. Default Gateway – Allows for manually assigning a Gateway (enter Gateway’s IP address). Subnet Mask  - Allows for manually entering a subnet mask. The AP provides an SNMPv1 agent and provides support for the stander  IEEE 802.11 MIB and proprietary  extensions.  These objects can be read configured via a standard SNMP MIB Browser. The following prameters can be set on the Bridge by selecting the “IP/SNMP Settings” from the  profiles menu in the Bridge Manager: Community Name – GET The read password to monitor Access Point statistics and configuration parameters.  Default password is "public". Community Name – SET The read/write password to monitor AP statistics and edit configuration parameters.  Default password is "private". Community Name – TRAP The password included in trap messages sent to the SNMP management tool.  This password can be used to filter unwanted messages.  Default password is "public".
  1414 Trap Target The IP address of the SNMP management station that will collect SNMP trap messages.  Default address is "192.168.0.1". Switches and Connectors Nodes with a wireless adapter installed can be switched from Wi-Fi to Multimedia mode (and vice versa) using the device manager software. As the  Access Point (AP) does not have a user interface that can be used to switch between multimedia and Wi-Fi, it employs a manual mode switch. This switch can be found on the AP and is labeled accordingly. Depending on the configuration of your evaluation kit you may have received one of three Access Points (AP). All APs offer similar functionality but vary in appearance  The below installation instructions apply to all available APs. § Mode Switch – Used to switch between Multimedia (WhiteCap) and Wi-Fi mode  § Factory Default Reset – Used to reset all parameters (i.e. SSID, WEP etc) to the factory default § Reset – Used to reset the AP (similar to power cycling) § Power – Connects to (included) power adapter § HUB Port (CM/DCT)– Connects to HUB, router, cable/DSL modem for LAN / Internet connectivity § PC/HUB (not available on all BAPs) – Can be used to connect a wired client node to the network  § USB Port  – Connects to connector, use for configuration only (Bridge Manager software required)
  1515 Uninstall Hardware & Software This chapter will help with the Hardware & Software uninstall process.  § To completely uninstall the wireless network adapter from your Windows operating system, use the Windows Add/Remove Programs Properties feature located in the Start /Settings/Control Panel menu.  § Select the Wireless Network Adapter and click on the ‘Add/Remove…’ button. § Follow the on-screen instructions to uninstall the software. § After the software uninstall, use the Windows Device Manager to uninstall/remove the wireless adapter.  § Windows 98/ME: right-click on the ‘My-Computer’, select ‘properties’, select the ‘Wireless Networking Adapter’ and click uninstall/remove. § Windows 2000/XP: right- click on the ‘My-Computer’, select ‘hardware’, select ‘device manager’, select the ‘Wireless Networking Adapter’ and click uninstall/remove. § After uninstalling the device in the device manager, shut down the computer and remove the hardware (i.e. PCMCIA, PCI etc.). Note: If you were using Bodega release 1 or 2  (evaluation kits received prior to June 1, 2002) you will need to manually remove several files to completely uninstall the product. The relevant files are listed below: Chapter 5
  1616 Path Windows 98/ME Windows 2000 c:\windows (Windows 98 & ME) c:\windows\system32 (Windows 2000) swBodega.ini swfshk.vxd  swBodega.ini swfshk.vxd c:\windows\system  (Windows 98 & ME)  c:\windows\system32\drivers (Windows 2000) sw11nic.bin swwcnic.bin swwifi.mib swwc.mib swwcmpp.sys swwcpd.sys swnetcfg.dll sw11nic.bin swwcnic.bin swwifi.mib swwc.mib swoem.mib swwcmpp.sys swwcpd.sys swnetcfg.dll c:\windows\inf  swwcmpp.inf swwcpd.inf swwcmpp.inf swwcpd.inif swwcmpp.pnf swwcpd.pnf oem”x”.inf oem”x”.pnf c:\windows\java\classes swingall.jar swingall.jar
FEDERAL COMMUNICATIONS COMMISSION INTERFERENCE STATEMENT This equipment has been tested and found to comply with the limits for a Class B digital device, pursuant to Part 15 of the FCC Rules. These limits are designed to provide reasonable protection against harmful interference in a residential installation. This equipment generates, uses and can radiate radio frequency energy and, if not installed and used in accordance with the instructions, may cause harmful interference to radio communications. However, there is no guarantee that interference will not occur in a particular installation. If this equipment does cause harmful interference to radio or television reception, which can be determined by turning the equipment off and on, the user is encouraged to try to correct the interference by one or more of the following measures: -- Reorient or relocate the receiving antenna. -- Increase the separation between the equipment and receiver. -- Connect the equipment into an outlet on a circuit different from that to which the receiver is connected. -- Consult the dealer or an experienced radio/TV technician for help. CAUTION:  Any changes or modifications not expressly approved by the grantee of this device could void the user's authority to operate the equipment.  FCC RF Radiation Exposure Statement This equipment complies with FCC RF radiation exposure limits set forth for an uncontrolled environment. This equipment should be installed and operated with a minimum distance of 20cm between the radiator and your body.

Navigation menu