Pro Nets Technology WM71RL1 WIRELESS MINI PCI User Manual WM71RL1
Pro-Nets Technology Corporation WIRELESS MINI PCI WM71RL1
Users Manual
Wireless 54Mpbs MIMO
Mini-PCI Adapter
User’s Manual

USA
Compliance statement to FCC
This module complies with part 15 of the FCC rules. Operation is subject to the following
conditions: (1) This device may not cause harmful interference, and (2) this device must
accept any interference received, including interference that may cause undesired operation.
4.1 RF exposure compliance This module may be installed into any end product in mobile
device applications. Because the module only radiates very low power levels, it complies
with RF exposure requirements.
Requirements to end product
The following provisions for end product will be required on the FCC regulation, part 15.
(1)Antenna
Pro-Nets wishes that our customer shall use the WM71RL1 module without any
modifications including antenna. If customer use a unique antenna, the FCC certification is
required for the end product.
(2) Markings
To satisfy FCC exterior labeling requirements, the following text must be placed on the
exterior of the end product.
Contains Transmitter Module FCC ID: RXZ-WM71RL1
Any similar wording that expresses the same meaning may be used.
(3) Caution to user for modification
The following caution is expressed on the user manual.
The changes or modifications not expressly approved by the party responsible for
compliance could void the user’s authority to operate the device.
(4) Compliance statement to FCC
The following statement is expressed on the user manual.
This module complies with part 15 of the FCC rules. Operation is subject to the
following conditions: (1) This device may not cause harmful interference, and
(2) this devicemust accept any interference received, including interference that
may cause undesired operation.
Copyright
1999 All Rights Reserved.
No part of this document can be copied or reproduced in any form without written consent from
the company.
Trademarks:
All trade names and trademarks are the properties of their respective companies.
Revision History
Revision History
V1.0 First release
Caution: This user guide information is only provided to OEM or module
installer.
Do not supply to the end user.

1
Revision History
Rev Date Maintain Descriptor
0.0.1.0 03/31/05 Kathy Ko 1. Create RT61 ATE Driver
2. Start Frame OID change to
RT_OID_802_11_START_TX_FRAMES
3. For High ChannelΚTX power value range
is 0~36

Content
1. SYSTEM REQUIREMENT.....................................................................................................................3
2. INSTALL ATE DRIVER ..........................................................................................................................3
3. RACONFIG UTILITY .............................................................................................................................9
3.1 BUILD RACONFIG UTILITY.................................................. ....................................................................9
3.1.1 Set Include file path......................................................................................................................................9
3.1.2 Set Library file path ....................................................................................................................... ............10
3.1.3 Set DDK path ............................................................................................................................................. 11
2
1. System Requirement
˙Windows 2000/XP
˙Microsoft Virtual C++ 6.0
˙Platform SDK
˙DDK 3790
2. Install ATE Driver
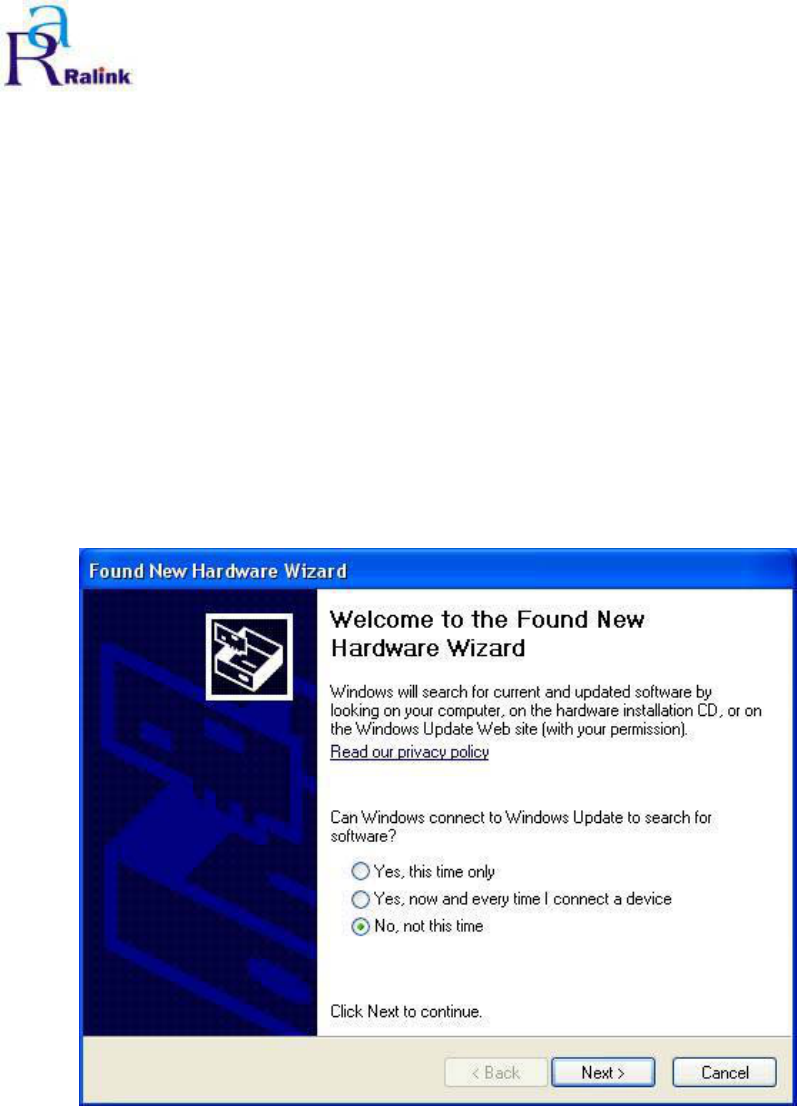
Step 1:Insert the RT61 Card bus / Mini PCI / PCI.
Figure 2-1 Search New device.
3
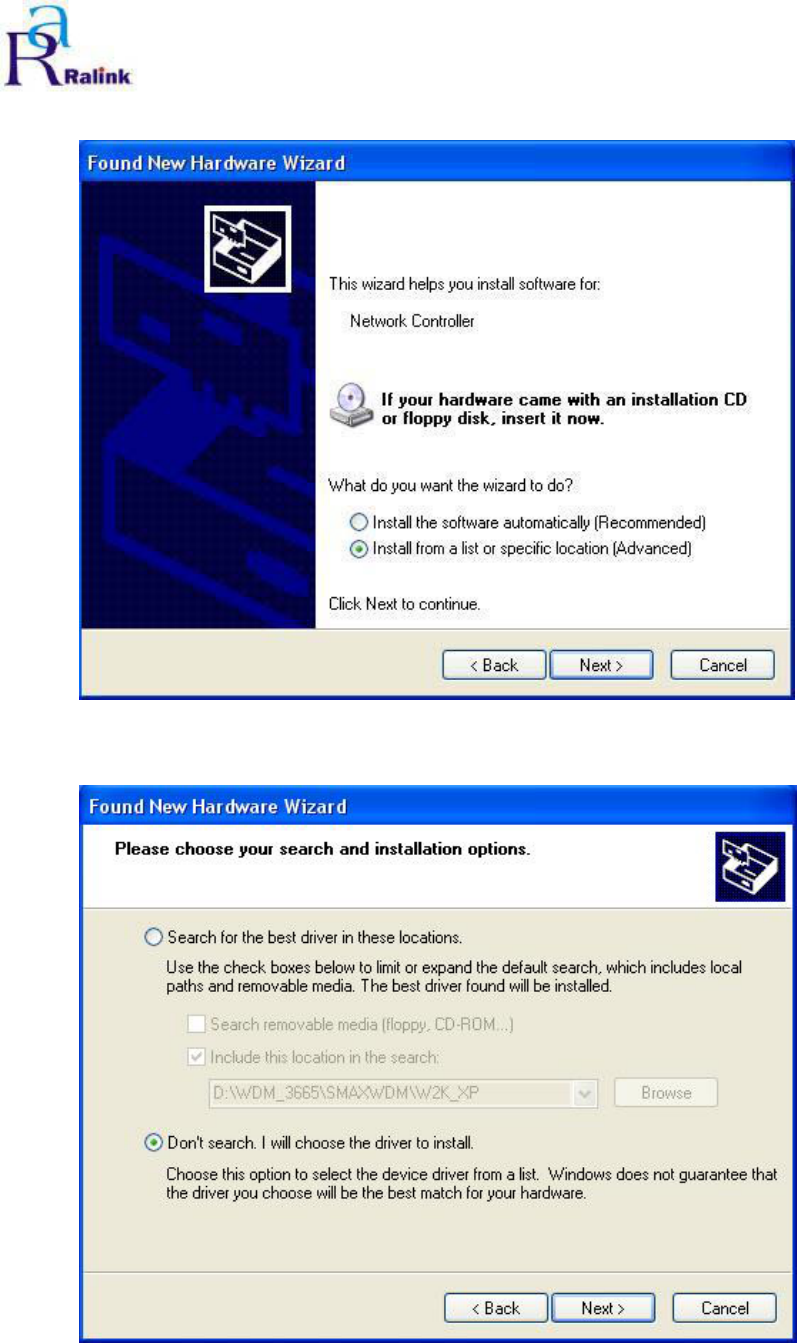
Step 2:Select Advance installation.
Figure 2-2 Select Advance installation
Step 3:Select manual installation.
Figure 2-3 Select manual installation
4
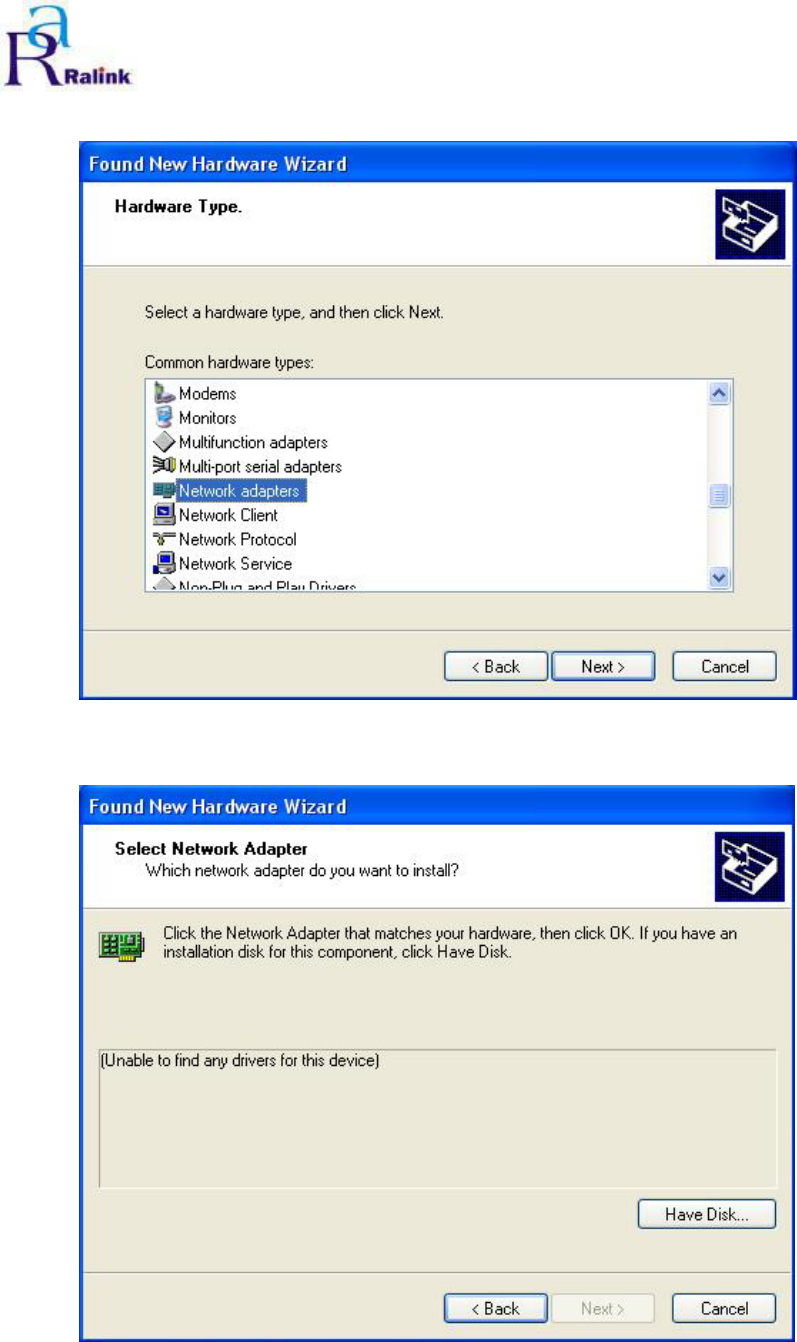
Step 4:Select device type:Network Adapter.
Figure 2-4 Select device type
Step 5:Select device driver from “Have Disk”
Figure 2-5 Select device driver from “Have Disk”
5
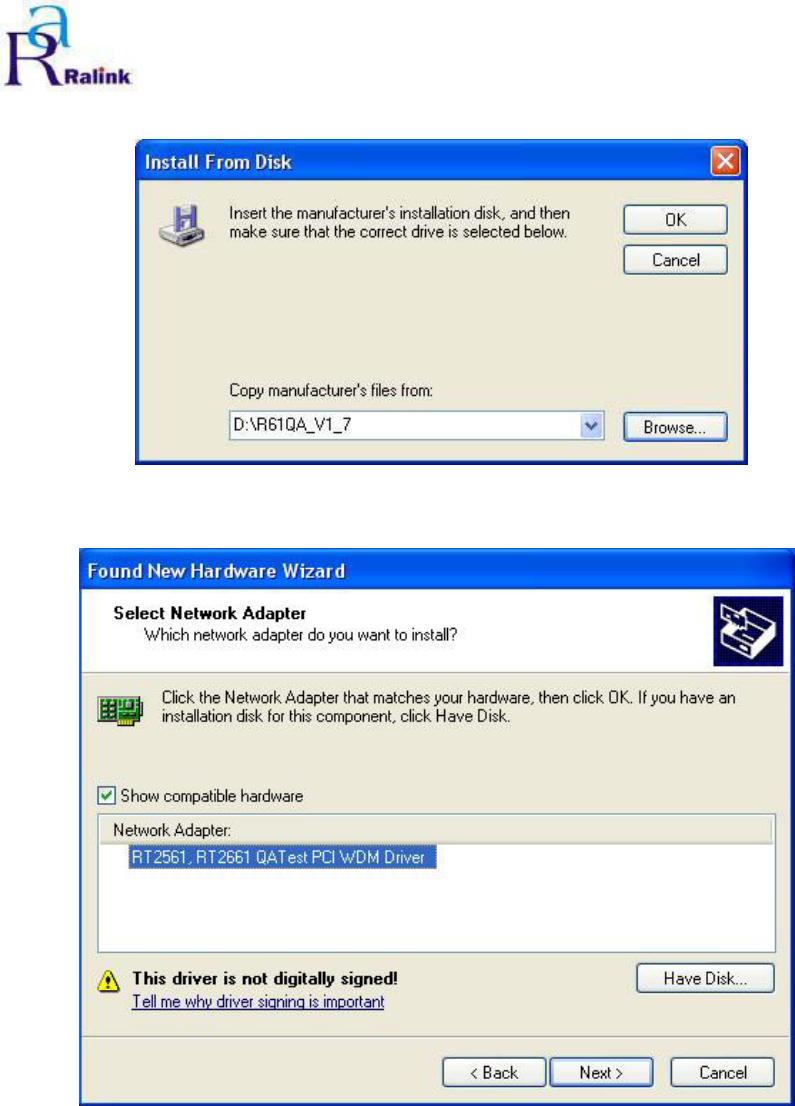
Step 6:Select the ATE driver directory
Figure 2-6 Select the ATE driver directory
Step 7:Select Network Adapter.
Figure 2-7 Select Network Adapter.
6
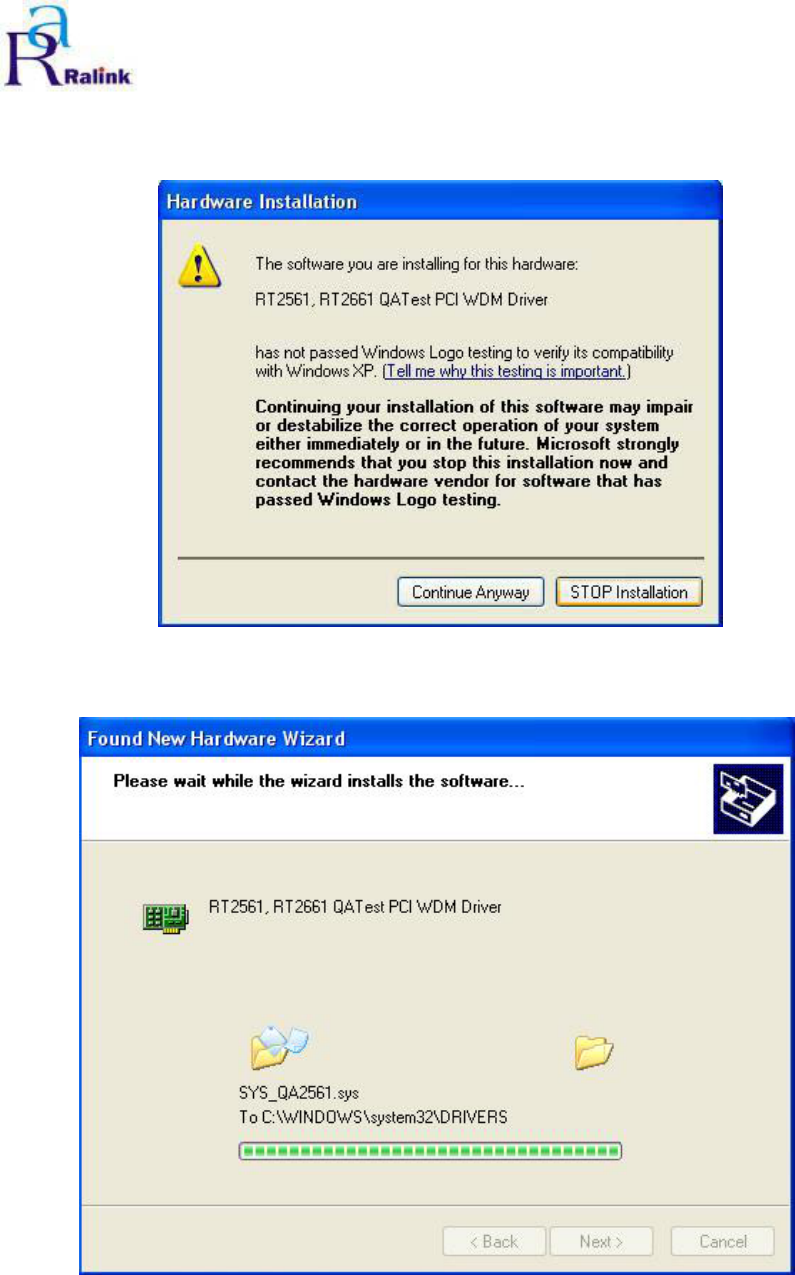
Step 8:Pop up the warning wizard for asking you if you really want to install the “RT2561,
RT2661 ATE Driver”. Press “Continue Install”.
Figure 2-8 asking you if you really want to install the deiver
Step 9:Installing…
Figure 2-9 Installing
7
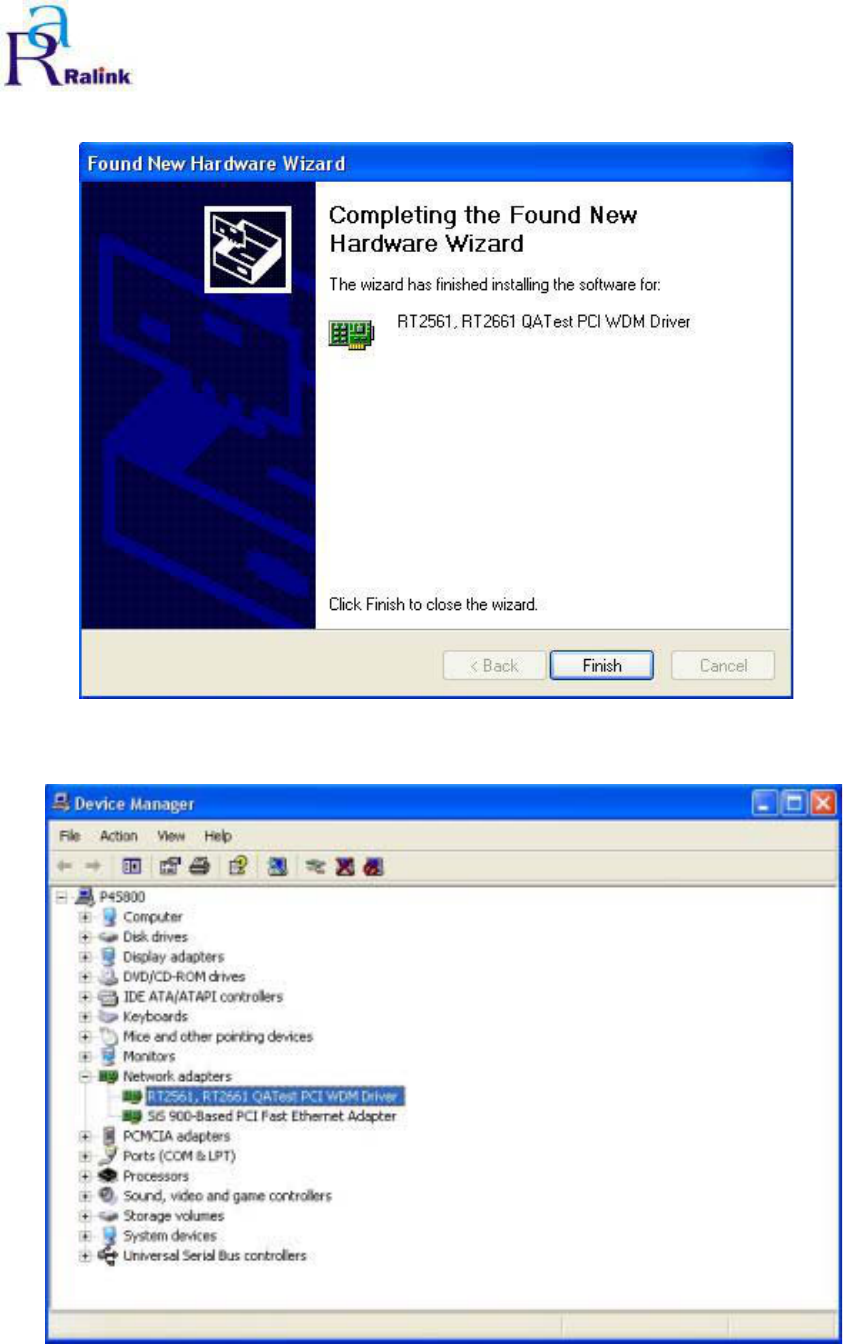
Step 10:Complete the driver installation.
Figure 2-10 Complete the driver installation.
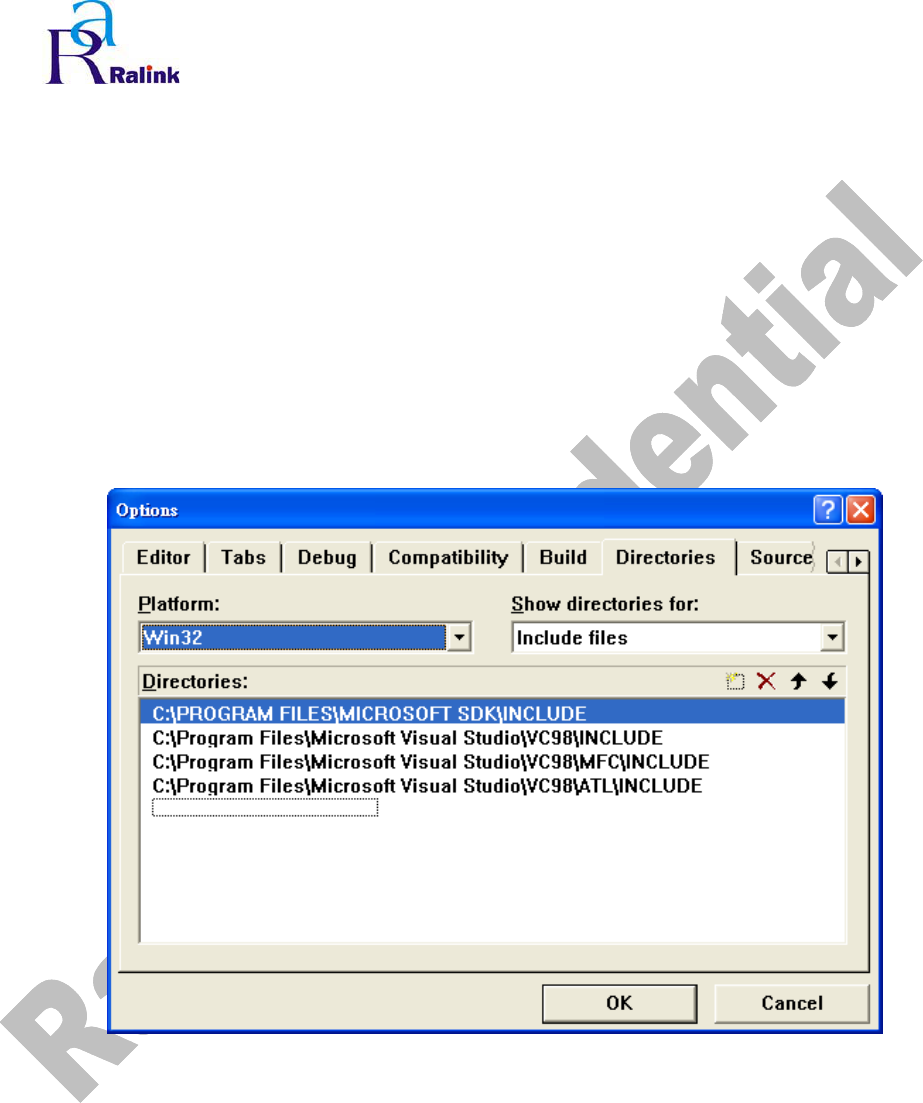
Step 11:Open Device Manager to check whether the ATE driver installs success.
Figure 2-11 Open Device manager to check whether success
8
9
RALINK RT61 ATE Driver
User Guide & Release Note
3. RaConfig Utility
3.1Build RaConfig Utility
3.1.1Set Include file path
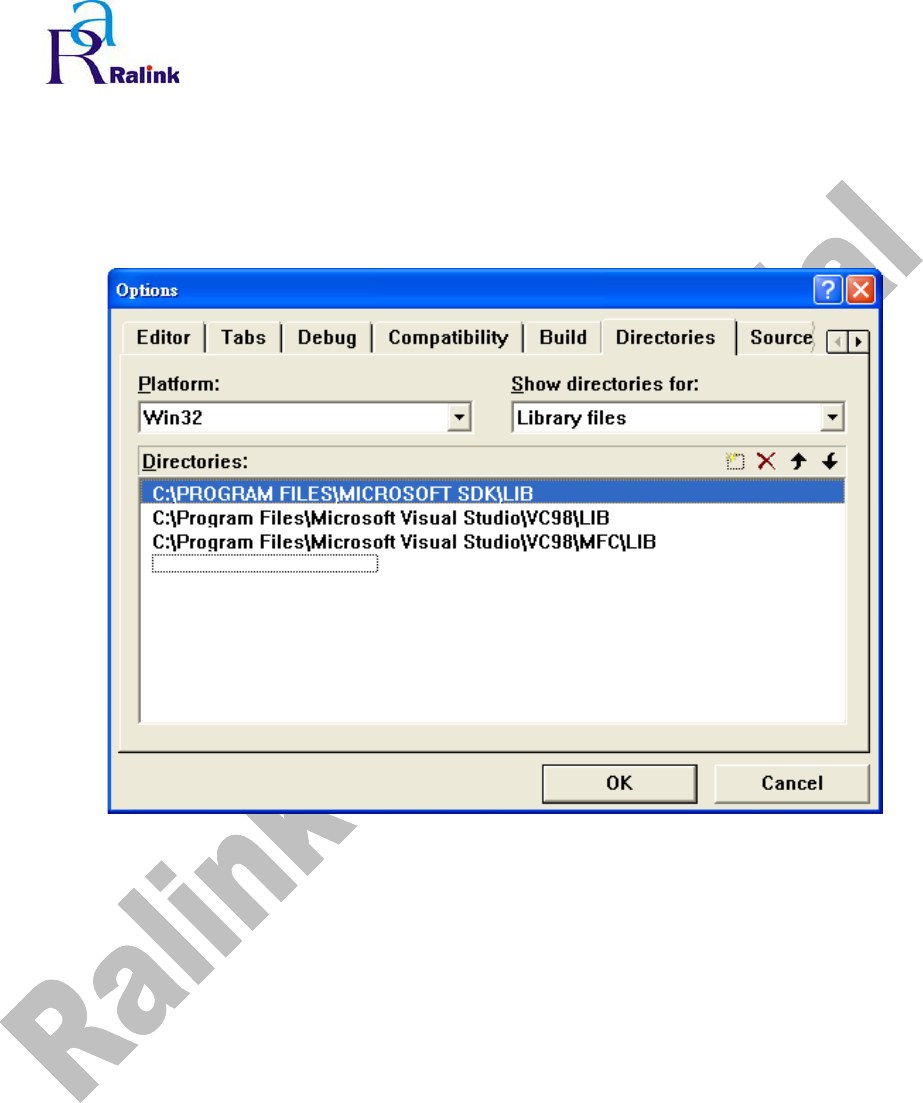
Step 1ΚSelect ToolsÆOptions
Step 2ΚInsert the Microsoft SDK’s Include file path
Figure 3-1 Set Include file path
10
RALINK RT61 ATE Driver
User Guide & Release Note
3.1.2Set Library file path
Step 1ΚSelect ToolsÆOptions
Step 2ΚInsert the Microsoft SDK’s Library file path
Figure 3-2 Set Library file path
11
RALINK RT61 ATE Driver
User Guide & Release Note
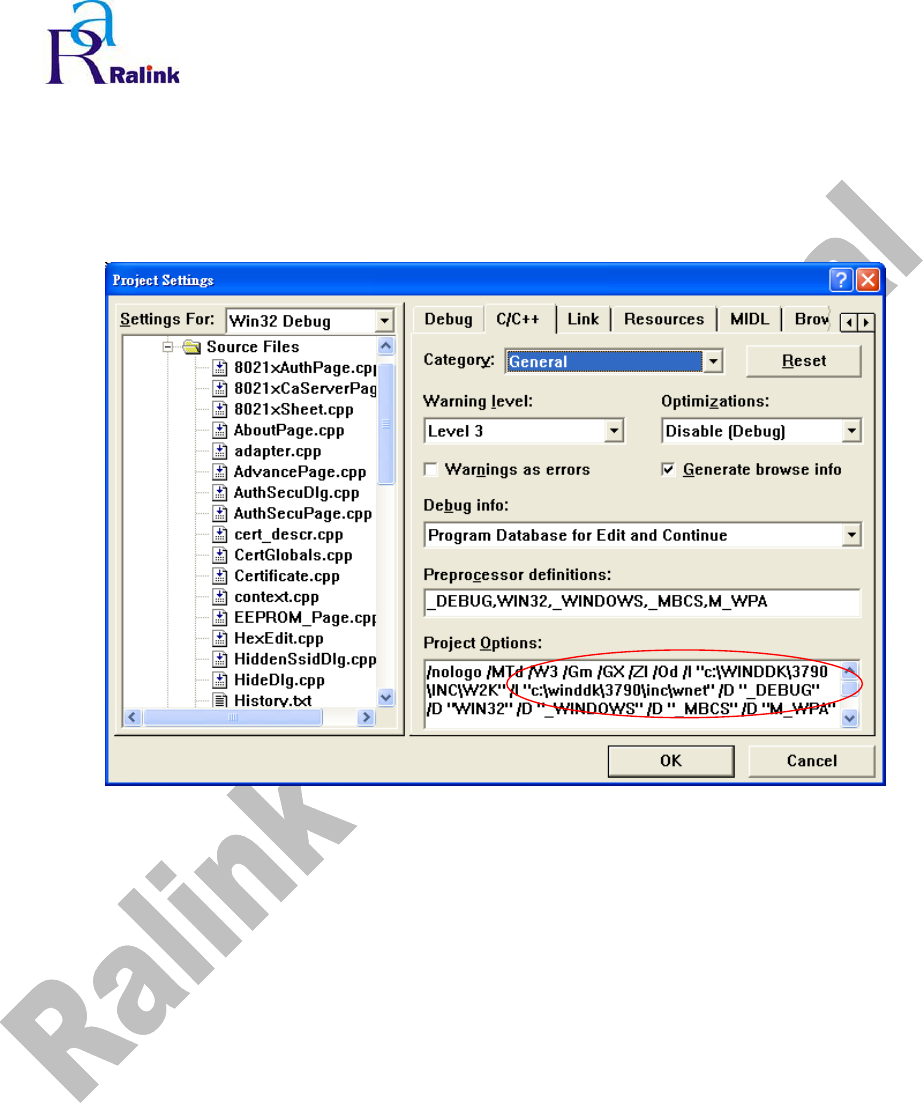
3.1.3Set DDK path
Step 1ΚSelect Project Æ Settings
Step 2ΚMake sure the path of Windows DDK 3790 is correct in “C/C++” tag of Project Settings..
Figure 3-3Check DDK path in C/C++ tag
12
RALINK RT61 ATE Driver
User Guide & Release Note
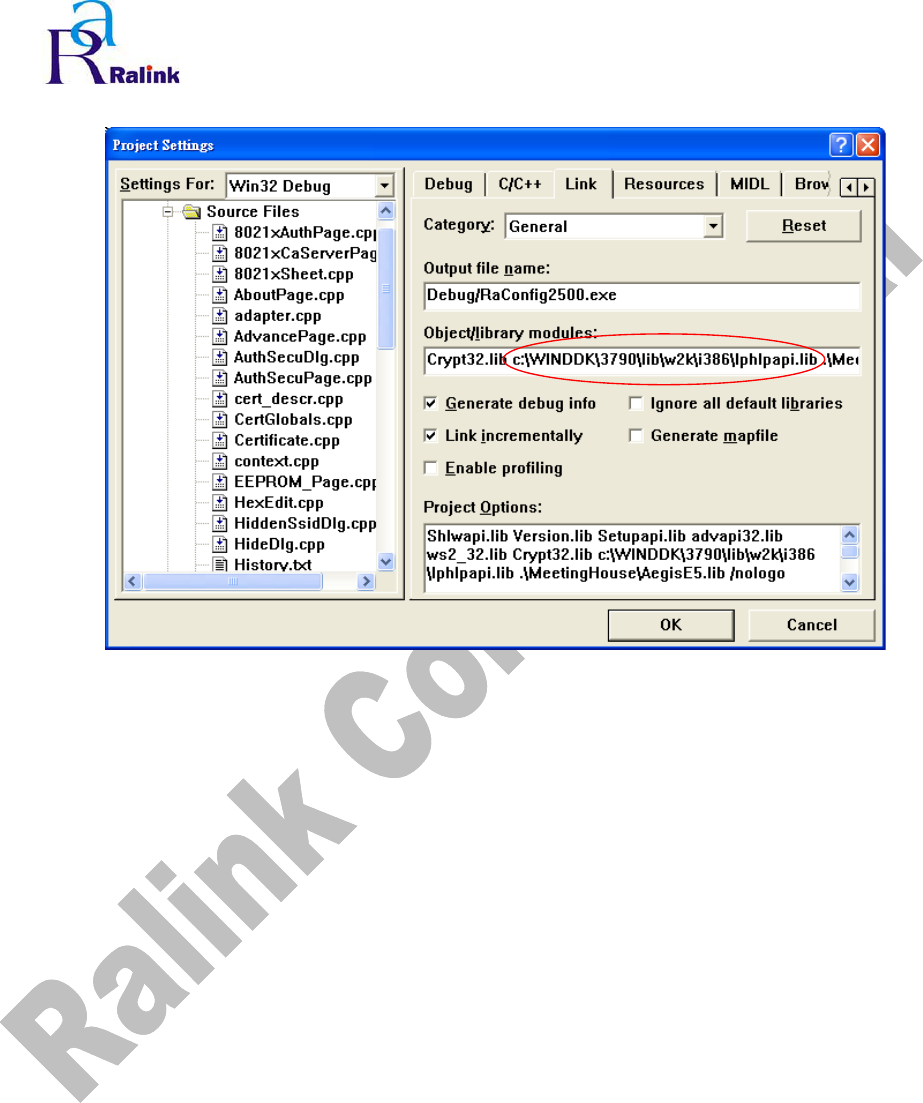
Step 3ΚMake sure the path of Windows DDK 3790 is correct in “Link” tag of Project Settings.
Figure 3-4 Check DDK path in Link tag