Promethean 001 Wireless Data Transceiver User Manual AVOTE2 UPGRADE installation2

Promethean Ltd Wireless Data Transceiver AVOTE2 UPGRADE installation2

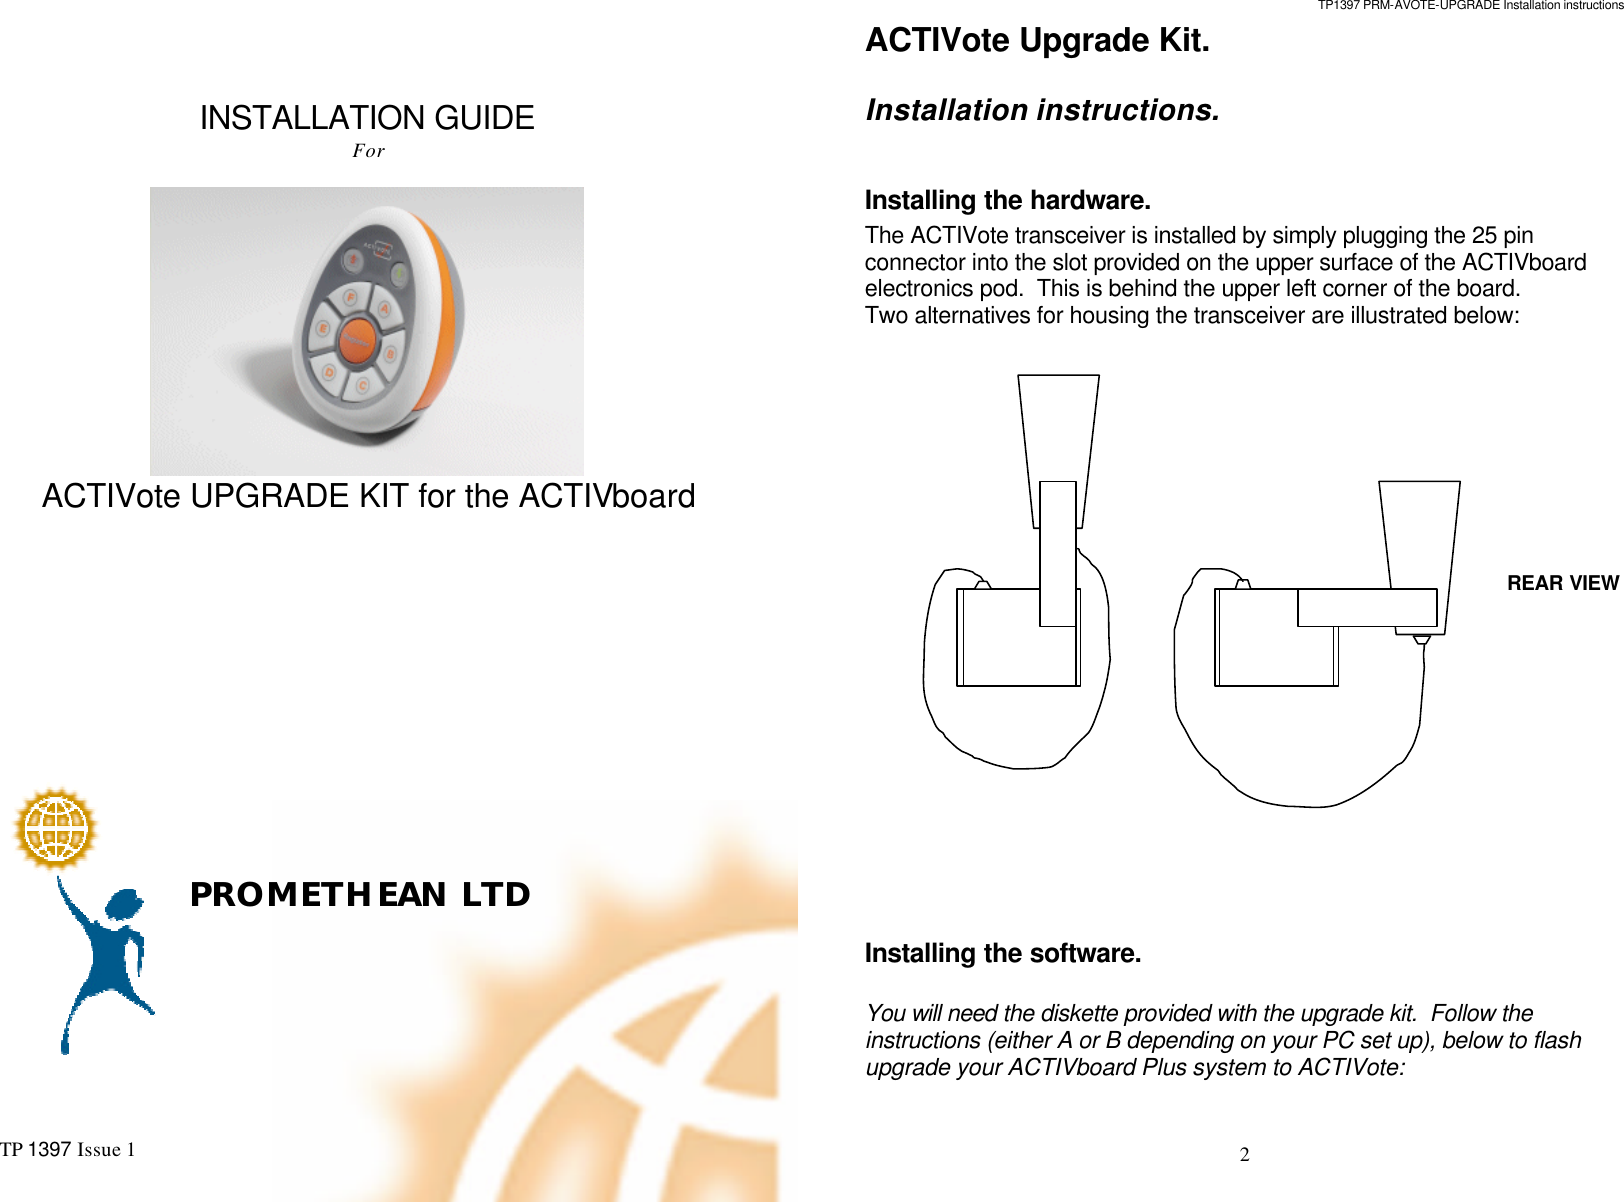
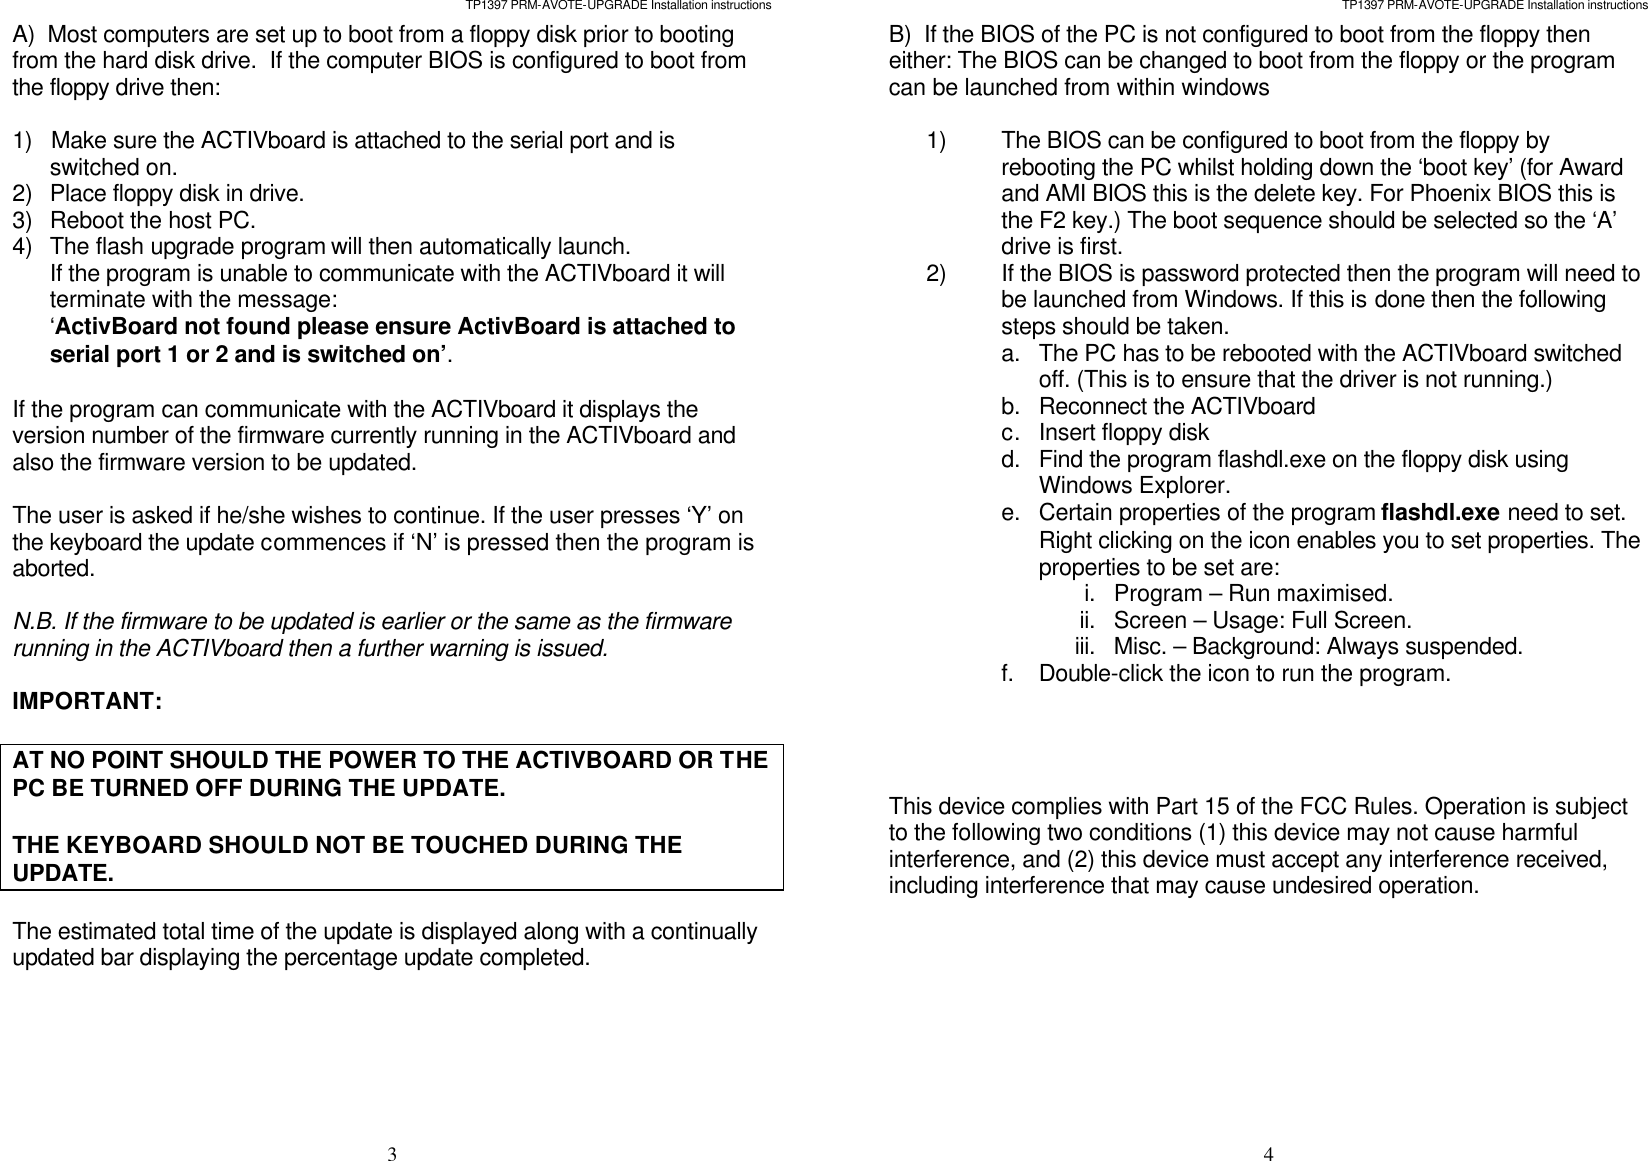
Activote upgrade kit installation guide

  INSTALLATION GUIDE For   ACTIVote UPGRADE KIT for the ACTIVboard        PROMETHEAN LTD     TP 1397 Issue 1 TP1397 PRM-AVOTE-UPGRADE Installation instructions 2 ACTIVote Upgrade Kit. Installation instructions.  Installing the hardware. The ACTIVote transceiver is installed by simply plugging the 25 pin connector into the slot provided on the upper surface of the ACTIVboard electronics pod.  This is behind the upper left corner of the board. Two alternatives for housing the transceiver are illustrated below:                       Installing the software.  You will need the diskette provided with the upgrade kit.  Follow the instructions (either A or B depending on your PC set up), below to flash upgrade your ACTIVboard Plus system to ACTIVote:   REAR VIEW
TP1397 PRM-AVOTE-UPGRADE Installation instructions 3 A)  Most computers are set up to boot from a floppy disk prior to booting from the hard disk drive.  If the computer BIOS is configured to boot from the floppy drive then:  1)   Make sure the ACTIVboard is attached to the serial port and is   switched on. 2) Place floppy disk in drive. 3) Reboot the host PC. 4) The flash upgrade program will then automatically launch. If the program is unable to communicate with the ACTIVboard it will terminate with the message: ‘ActivBoard not found please ensure ActivBoard is attached to serial port 1 or 2 and is switched on’.  If the program can communicate with the ACTIVboard it displays the version number of the firmware currently running in the ACTIVboard and also the firmware version to be updated.   The user is asked if he/she wishes to continue. If the user presses ‘Y’ on the keyboard the update commences if ‘N’ is pressed then the program is aborted.   N.B. If the firmware to be updated is earlier or the same as the firmware running in the ACTIVboard then a further warning is issued.  IMPORTANT:  AT NO POINT SHOULD THE POWER TO THE ACTIVBOARD OR THE PC BE TURNED OFF DURING THE UPDATE.  THE KEYBOARD SHOULD NOT BE TOUCHED DURING THE UPDATE.  The estimated total time of the update is displayed along with a continually updated bar displaying the percentage update completed.  TP1397 PRM-AVOTE-UPGRADE Installation instructions 4 B)  If the BIOS of the PC is not configured to boot from the floppy then either: The BIOS can be changed to boot from the floppy or the program can be launched from within windows   1) The BIOS can be configured to boot from the floppy by rebooting the PC whilst holding down the ‘boot key’ (for Award and AMI BIOS this is the delete key. For Phoenix BIOS this is the F2 key.) The boot sequence should be selected so the ‘A’ drive is first. 2) If the BIOS is password protected then the program will need to be launched from Windows. If this is done then the following steps should be taken. a. The PC has to be rebooted with the ACTIVboard switched off. (This is to ensure that the driver is not running.) b. Reconnect the ACTIVboard c. Insert floppy disk d. Find the program flashdl.exe on the floppy disk using Windows Explorer. e. Certain properties of the program flashdl.exe need to set. Right clicking on the icon enables you to set properties. The properties to be set are: i. Program – Run maximised. ii. Screen – Usage: Full Screen. iii. Misc. – Background: Always suspended. f. Double-click the icon to run the program.     This device complies with Part 15 of the FCC Rules. Operation is subject to the following two conditions (1) this device may not cause harmful interference, and (2) this device must accept any interference received, including interference that may cause undesired operation.

Navigation menu