Proxim Wireless PCI-8482 ORiNOCO 802.11 a/b/g PCI Card User Manual ORiNOCO Wireless Client user guide WPA
Proxim Wireless Corporation ORiNOCO 802.11 a/b/g PCI Card ORiNOCO Wireless Client user guide WPA
Contents
- 1. users manual part 1
- 2. users manual part2
- 3. users manual 1
- 4. users manual 2
users manual 1

ORiNOCO Wireless
Client
User Guide
ORiNOCO Wireless Client User Guide
Copyright
2003 Proxim Corporation, Sunnyvale, CA. All rights reserved. Covered by one or more of the following U.S.
patents: 5,231,634; 5,875,179; 6,006,090; 5,809,060; 6,075,812; 5,077,753. This user guide and the software
described in it are copyrighted with all rights reserved. No part of this publication may be reproduced, transmitted,
transcribed, stored in a retrieval system, or translated into any language in any form by any means without the
written permission of Proxim Corporation.
Trademarks
ORiNOCO is a registered trademark, 2X, Proxim, and the Proxim logo are trademarks of Proxim Corporation. All
other trademarks mentioned herein are the property of their respective owners.
65490/B

ORiNOCO Wireless Client User Guide
Table of Content 3
TABLE OF CONTENT
CHAPTER 1 INTRODUCTION......................................................................... 5
1-1 INTRODUCING THE ORINOCO WIRELESS CLIENT............................................... 5
1-2 DIFFERENCE BETWEEN ORINOCO 802.11 WIRELESS CLIENT PRODUCTS................. 5
1-3 USING A WIRELESS LOCAL AREA NETWORK..................................................... 6
1-4 PRODUCT PACKAGE .................................................................................. 6
1-5 SYSTEM REQUIREMENTS AND SPECIFICATIONS.................................................. 7
1-5-2 INTEROPERABILITY ................................................................................. 9
CHAPTER 2 INSTALLATION........................................................................ 10
2-1 PRE-INSTALLATION CONSIDERATIONS ........................................................... 10
2-2 WINDOWS ME AND WINDOWS 98 SE INSTALLATION CD REQUIREMENT ............... 11
2-3 PROXIM CLIENT UTILITY INSTALLATION......................................................... 11
CHAPTER 3 WIRELESS TOPOLOGIES........................................................... 17
3-1 INTRODUCTION ...................................................................................... 17
3-2 PEER-TO-PEER GROUP ............................................................................. 17
3-3 ACCESS POINT INFRASTRUCTURE ................................................................ 18
CHAPTER 4 PROXIM CLIENT UTILITY CONFIGURATION ................................ 22
4-1 PROXIM CLIENT UTILITY ICON .................................................................... 22
4-2 CURRENT STATUS TAB.............................................................................. 23
4-3 PROFILE MANAGEMENT ........................................................................... 25
4-4 DIAGNOSTIC TAB.................................................................................... 45
4-5 ACTION MENU....................................................................................... 46
4-6 CONFIGURING YOUR WIRELESS NETWORKING SETTINGS WITH WINDOWS XP.......... 47
CHAPTER 5 TROUBLESHOOTING ................................................................ 49
5-1 HOW TO OBTAIN HELP WITH YOUR LAN INSTALLATION..................................... 49
5-2 COMMON INSTALLATION PROBLEMS ............................................................ 49
5-3 CONFIGURING NETWORKING CLIENTS AND PROTOCOLS..................................... 50
5-4 UNINSTALLING AN ORINOCO WIRELESS CLIENT............................................. 51
5-5 RANGE ................................................................................................ 54
5-6 LED INDICATORS ................................................................................... 55
5-7 COMMON TECHNICAL SUPPORT QUESTIONS ................................................... 55

ORiNOCO Wireless Client User Guide
Table of Content 4
APPENDIX A - SPECIFICATIONS................................................................. 57
A-1 TECHNICAL SPECIFICATIONS...................................................................... 57
APPENDIX B WARRANTY AND REGULATORY INFORMATION....................... 61
B-1 LIMITED WARRANTY, DISCLAIMER, LIMITATION OF LIABILITY............................. 61
B-2 REGULATORY INFORMATION ...................................................................... 62
APPENDIX C TECHNICAL SUPPORT AND GLOSSARY.................................... 65
C-1 TECHNICAL SUPPORT CONTACT INFORMATION ................................................ 65
C-2 GLOSSARY ........................................................................................... 67

ORiNOCO Wireless Client User Guide
Chapter 2 Installation 5
1
Chapter 1 Introduction
1-1 Introducing the ORiNOCO Wireless Client
Congratulations on your purchase of an ORiNOCO Wireless Client, a high performance wireless
LAN adapter card that complies with the IEEE 802.11a, 802.11b and/or 802.11g wireless
standards. (Standards support varies by client product)
This user manual covers the following ORiNOCO Wireless Client products:
l ORiNOCO 11a/b/g ComboCard
l ORiNOCO 11b/g PC Card
l ORiNOCO 802.11a/b ComboCard
l ORiNOCO 11a/b/g PCI Card
The basic installation and client utility setting described in the following chapters can be applied
to all four products; only some of the specifications are different. These differences are
explained later in this chapter.
The ORiNOCO Wireless Client supports Windows XP, Windows 2000, Windows Millennium
Edition (ME), and Windows 98 Second Edition (SE). Computers with an ORiNOCO Wireless
Client installed “look” like standard network nodes to the operating system.
The ORiNOCO Wireless Client can be used with other 802.11a, 802.11b or 802.11g devices to
form a stand-alone wireless Peer-to-Peer Group* or used in conjunction with an Access Point
infrastructure to provide mobile clients with wireless access to an Ethernet network.
Proxim is a leading manufacturer of wireless networking equipment. Proxim’s unmatched
expertise in radio networking technology, combined with the company’s extensive experience
serving the communication needs of the mobile computing user, have kept Proxim at the
forefront of the wireless Local Area Networking (LAN) market.
*Available features vary by region/country.
1-2 Difference Between ORiNOCO 802.11 Wireless Client
Products
This user guide covers the installation and operation of the following ORiNOCO Wireless Client
products:
l ORiNOCO 11a/b/g ComboCard

ORiNOCO Wireless Client User Guide
Chapter 2 Installation 6
l ORiNOCO 11b/g PC Card
l ORiNOCO 802.11a/b ComboCard
l ORiNOCO 11a/b/g PCI Card
Refer to the table below for differences between the two products. For more specification details,
please go to A-1 Technical Specifications
Table 1-1 Comparison list of Proxim Wireless Client
Support
11a/b
ComboCard
11a/b/g
ComboCard
11b/g PC Card
11a/b/g PCI
Adapter
802.11a X X X
802.11b X X X X
802.11g X X X
Fastest Radio
Data Rate 54Mbps
5.4 GHz & 2.4 GHz
5.4 GHz & 2.4 GHz
2.4 GHz only 5.4 GHz & 2.4 GHz
802.11a 2X Turbo
Only supported in
US Only supported in
US Only supported in
US
Radio Type OFDM & DSSS OFDM & DSSS OFDM & DSSS OFDM & DSSS
System Interface
Card Bus for
laptop Card Bus for
laptop Card Bus for
laptop Peripheral
Component
Interconnect (PCI)
Network
Architecture Types
Infrastructure and
Ad-Hoc Infrastructure and
Ad-Hoc Infrastructure and
Ad-Hoc Infrastructure and
Ad-Hoc
X means “supported”.
The installation and configuration procedure is the same for all of the ORiNOCO Wireless Client
products. During installation, all four products are referred to as an “802.11 Wireless Client.”
1-3 Using a Wireless Local Area Network
A wireless LAN provides the same functionality of a wired network, but it eliminates the need to
install networking cables and other networking equipment. Not only is a wireless LAN easier to
deploy, but it also allows for mobility through “roaming.” For example, the ORiNOCO 11a/b/g
CamboCard can roam from a conference room to an office without being disconnected from the
network.
1-4 Product Package
Each ORiNOCO Wireless Client comes with the following:

ORiNOCO Wireless Client User Guide
Chapter 2 Installation 7
Each ORiNOCO Wireless Client comes with the following:
7. One Gold or Silver ORiNOCO Wireless Client
l All models include two integral antennas (antennas are inside the casing and not visible
to the user)
l ORiNOCO 11a/b/g ComboCard:
l Gold model: 8480
l Silver model: 8481
l ORiNOCO 11b/g PC Card:
l Gold model: 8470
l Silver model: 8471
l ORiNOCO 802.11a/b ComboCard
l Gold Model: 8460
l Silver Model: 8461
l ORiNOCO 11a/b/g PCI Card
l Gold Model only: 8482
8. One ORiNOCO Installation CD-ROM containing software and utilities and this user guide in
Portable Document Format (PDF)
9. One ORiNOCO Wireless Client Quick Start Guide
If any of these items are missing or damaged, please contact your reseller or ORiNOCO
Technical Support (see C-1 Technical Support Contact Information for contact information).
1-5 System Requirements and Specifications
To begin using an ORiNOCO Wireless Client, you must have the following minimum
requirements:
1. A computer that meets the following specifications:
l Windows XP, Windows 2000, Windows Millennium Edition (ME), or Windows 98 Second
Edition (SE) installed
l PC Card expansion slot (32-bit CardBus) for ORiNOCO a/b ComboCard, ORiNOCO
11a/b/g ComboCard, ORiNOCO 11b/g PC Card
l 32-bit PCI bus slot on your desktop for the ORiNOCO 11a/b/g PCI Card.
l At least 64 MB of memory
l A 300 MHz processor or higher
2. At least one other IEEE 802.11a-compliant, 802.11b-compliant or 802.11g-compliant device
l Customers in Europe who want to use the card in 802.11a mode need an
802.11a-compliant Access Point that supports Dynamic Frequency Selection (DFS);
802.11a Peer-to-Peer Groups are not available in Europe (see the user documentation
that came with your 802.11a Access Point for details).
1-5-1 The IEEE 802.11 Specifications
In 1997, the Institute of Electrical and Electronics Engineers (IEEE) adopted the 802.11 standard
for wireless devices operating in the 2.4 GHz frequency band. This standard includes provisions
for three radio technologies: direct sequence spread spectrum, frequency hopping spread

ORiNOCO Wireless Client User Guide
Chapter 2 Installation 8
spectrum, and infrared. Devices that comply with the 802.11 standard operate at a data rate of
either 1 or 2 Mbps.
In 1999, the IEEE modified the 802.11 standard to support direct sequence devices that can
operate at speeds of up to 11 Mbps. The IEEE ratified this standard as 802.11b. 802.11b devices
are backwards compatible with 2.4 GHz 802.11 direct sequence devices (that operate at 1 or
2 Mbps).
Also in 1999, the IEEE modified the 802.11 standard to support devices operating in the 5 GHz
frequency band. This standard is referred to as 802.11a. 802.11a devices are not backward
compatible with 2.4 GHz 802.11 or 802.11b devices. 802.11a radios use a radio technology
called Orthogonal Frequency Division Multiplexing (OFDM) to achieve data rates of up to 54
Mbps. In addition, ORiNOCO Wireless Clients that support the 802.11a standard also support
Proxim’s 2XTM Turbo mode. This mode is not part of the IEEE 802.11a standard but delivers data
rates of up to 108 Mbps. Note that 2X Turbo mode is only available in the FCC regulatory domain
(e.g., the United States)
In 2003, the IEEE ratified the 802.11g standard. This standard delivers the same 54Mbps
maximum data rate as 802.11a, yet it offers an additional and compelling advantage-backward
compatibility with 802.11b equipment. This means that 802.11b client cards will work with
802.11g access points, and 802.11g client cards will work with 802.11b access points. Note that
802.11b products cannot be upgraded to support 802.11g since the 802.11g radios use a
different chipset than 802.11b devices. However, 802.11g products and 802.11b products can
work in the same network. Because 802.11g and 802.11b operate in the same unlicensed band,
the two standards share the same three channels, which can limit wireless capacity and
scalability.
Since 802.11a, 802.11b, 802.11d and 802.11g are based on the same common standard (IEEE
802.11), 802.11a, 802.11b and 802.11g devices have many of the same parameters. This user
guide uses the generic term 802.11 to refer to parameters that apply to 802.11a, 802.11b and
802.11g devices.
An 802.11a device and an 11b/g device cannot communicate with
each other. Also, a device in 802.11a 2X mode and a device
operating in 802.11a mode (2X mode disabled) cannot
communicate.
In addition to the three standards above, the IEEE 802.11 committee has also ratified the
802.11d standard. When 802.11 first became available, only a handful of regulatory domains
(e.g., U.S., Europe, and Japan) had rules in place for the operation of 802.11 wireless LANs. In
order to support a widespread adoption of 802.11, the IEEE committee created the 802.11d task
group to define an operational procedure that satisfies the regulatory requirements within all
countries. This is especially important for operation in the 5GHz bands because the use of these
frequencies differ widely from one country to another.
802.11d is a “regulatory domain update.” The idea behind 802.11d is that the wireless Access
Point (AP) can tell a client in what country it is located and what operating channels and transmit
power levels are legal in that country. In some countries, wireless LANs in the 802.11-defined
bands are not legal. With 802.11d, in theory, an Access Point could describe the “legal”
configuration to wireless clients so that wireless LANs could be deployed in those countries.
The ORiNOCO Wireless Client supports the 802.11d standard. Note that this standard does not
have a direct visible impact on end user operation: it primarily applies to companies developing
802.11 products.
ORiNOCO Wireless Client User Guide
Chapter 2 Installation 9
1-5-2 Interoperability
The Wi-Fi standard certified at 5 GHz ensures the wireless interoperability with other Wi-Fi
(802.11a) certified devices.
The Wi-Fi standard certified at 2.4 GHz ensure the wireless interoperability with other Wi-Fi
(802.11b) certified devices.
1-5-3 Security
The ORiNOCO Wireless Client supports the following security standards (features vary based on
model):
l Cisco Client Extension compatibility (including LEAP)
l Wired Equivalent Privacy (WEP) encryption using 64 bit, 128 bit or 152 bit encryption
l AES-CCM Encryption support
l Support for Windows 802.1x supplicants
l Wi-Fi Protected Access (WPA) encryption using PassPhrase (text string with at least 8 to 63
characters, it can be any combination of letters, numbers and other characters).
1-5-4 Differences Between Gold and Silver Models
l The Silver model supports 64 bit and 128 bit WEP encryption; the Gold model supports 64
bit, 128 bit and 152 bit WEP encryption.
l The Silver model supports two user profiles; the Gold model supports an unlimited number
of profiles.
l The Gold model supports Transmit Power Control; the Silver model does not support
Transmit Power Control.

ORiNOCO Wireless Client User Guide
Chapter 2 Installation 10
2
Chapter 2 Installation
This chapter describes how to install an ORiNOCO Wireless Client and software in a computer
running Windows XP, Windows 2000, Windows Millennium Edition (ME), or Windows 98 Second
Edition (SE).
Note for Windows XP Users: The Windows XP operating system has a built-in feature known
as “Wireless Zero Configuration” which has the capability to configure and control the ORiNOCO
Wireless Client (see 4-6 Configuring Your Wireless Networking Settings with Windows XP).
Installing the Wireless LAN Client utility will disable this Windows XP feature.
2-1 Pre-installation Considerations
Review the following pre-installation consideration before installing an ORiNOCO Wireless
Client.
The ORiNOCO Wireless Client must comply with the EMI requirement of the followings:
Emission
802.11a
u North America FCC Part 15b, Part 15e
u Europe EN 300 836(Hiplan1), 839(hiplan2), EMC301 489-1, EN301 489-17
u Japan TELEC STD-72
802.11g
u North America FCC Part 15b, Part 15c
u Europe EN 301 893
u Japan TELEC STD –33, STD- 66
Safety Requirements
u North America UL 60950 Ver.3 for USA, CSA C22.2 for Canada
u Europe EN 60950
ESD Requirement
ORiNOCO Wireless Client must withstand 15KV test voltage of electrostatic discharge under
operational conditions.

ORiNOCO Wireless Client User Guide
Chapter 2 Installation 11
2-2 Windows ME and Windows 98 SE Installation CD
Requirement
Before beginning the installation of an ORiNOCO Wireless Client, confirm that you have a
Windows 98 SE or Windows ME installation CD available (depending on the computer’s
operating system). Windows 98/ME users may be prompted to insert a Windows CD during the
installation. You should not need a Windows CD when installing the card in a Windows XP or
Windows 2000 computer.
If you do not have a Windows 98/ME CD, it is possible that you already have the Windows
installation files on your hard drive. These Windows installation files are known as Windows
Cabinet or CAB files. The Cabinet files are commonly located in
C:\WINDOWS\OPTIONS\INSTALL\ or C:\WINDOWS\OPTIONS\CABS\.
Windows 98/ME users may need the Windows CD or Cabinet files
to complete the installation of an ORiNOCO Wireless Client.
Proxim recommends that you do not proceed with the installation
until you have confirmed that you have one of these Windows
installation media available.
2-3 Proxim Client Utility Installation
The instructions below describe how to install an ORiNOCO Wireless Client by running the
ORiNOCO Installation program before inserting the card into the computer. It is recommended
that you insert the card after the setup and configuration procedure is completed.
Follow these steps to install an ORiNOCO Wireless Client in a Window 98 SE, Windows ME,
Windows 2000, or Windows XP computer.
1. Turn on the computer and logon to Windows, if applicable.
2. Insert the ORiNOCO Installation CD into the computer’s CD-ROM drive.
3. If the ORiNOCO Installation program does not launch automatically, run SETUP.EXE from the
ORiNOCO Installation CD to launch the program.
4. Click Next on the Software Setup Welcome dialog box as shown in Figure 2-1.

ORiNOCO Wireless Client User Guide
Chapter 2 Installation 12
Figure 2-1 Setup “Welcome” Dialog Box
5. The License Agreement screen appears. Click Yes to continue.
Figure 2-2 License Agreement for the Installation of the ORiNOCO Wireless Client

ORiNOCO Wireless Client User Guide
Chapter 2 Installation 13
6. Choose a destination location for the ORiNOCO Wireless Client installation files. You may use
the default path or click Browse to specify a different location. After you are done, click the
Next button.
Figure 2-3 Choose Destination for Installation
7. Be patient while the software is installed on your computer.
Figure 2-4 Software Setup in Process
ORiNOCO Wireless Client User Guide
Chapter 2 Installation 14
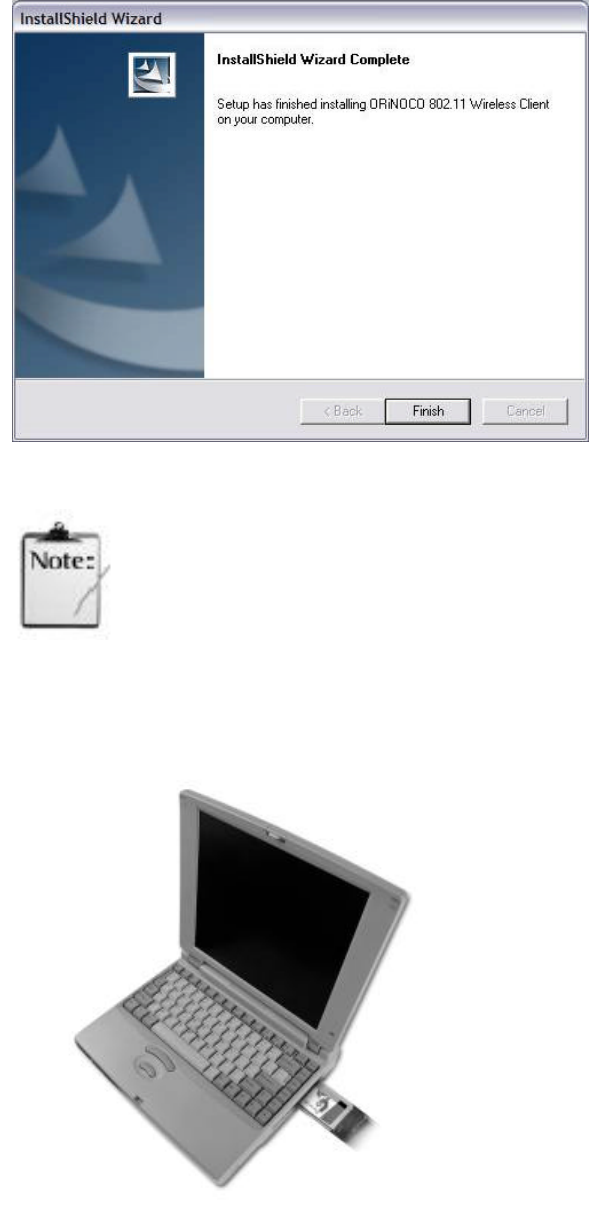
8. Click Finish to close the Software Setup wizard when prompted.
Figure 2-5 Installation Completed
The Proxim Client Utility will be automatically loaded each time your
computer starts. To access the utility, click the Proxim Client Utility
icon in the Windows Taskbar.
9. Insert the ORiNOCO Wireless Client into your laptop’s PC Card slot. This process applies only
to ORiNOCO 11a/b ComboCard, ORiNOCO 11a/b/g ComboCard, and ORiNOCO b/g PC
Card.
Figure 2-6 Insert the ORiNOCO Wireless Client into the Laptop

ORiNOCO Wireless Client User Guide
Chapter 2 Installation 15
10. To insert the ORiNOCO 11a/b/g PCI Card, first shut down your computer and unplug the
power cable from the power outlet.
11. Remove the computer cover according to the instructions provided by the computer’s
manufacturer. Touch the metal chassis of your computer to avoid damage caused by
electrostatic discharge.
Figure 2-7 Remove the Computer Cover to Introduce the PCI Card
12. Select a PCI bus slot and remove the metal filler strip. Feed the external antenna and cable
through the PCI slot and out the back of the computer.
13. Insert the card into the PCI slot and secure it in place (refer to the PC’s user documentation for
details).
Figure 2-8 Insert PCI Card into PCI Slot

ORiNOCO Wireless Client User Guide
Chapter 2 Installation 16
14. Put the computer cover back into place. Reconnect the cabling and restart your computer.
15. If prompted, follow any on-screen instructions to complete the installation.
16. The Wireless Client should now be successfully installed.
l If you have an Access Point on the network with no security enabled, the Wireless Client
should connect automatically.
l If you have an Access Point on the network with security enabled, double-click the Proxim
icon to launch the Proxim Client Utility; use this utility to create profiles, configure the card,
and enable security.
l If you do not have an Access Point, use the Proxim Client Utility to set the card to
Peer-to-Peer Ad Hoc mode.
ORiNOCO Wireless Clients sold in Europe do not support
Peer-to-Peer Group when in 802.11a mode.
For more information on Peer-to-Peer Groups and Access Point networks, see Chapter 3
Wireless Topologies.
ORiNOCO Wireless Client User Guide
Chapter 3 Wireless Topologies 17
3
Chapter 3 Wireless Topologies
3-1 Introduction
ORiNOCO wireless products look and operate similar to Ethernet products. The only difference
is that a radio replaces the wire between communicating devices. This means that all of your
existing applications that operate over Ethernet will work with the ORiNOCO Wireless Client
without any special wireless networking software.
A wireless LAN can be configured for two different modes of operation. While each method has
its advantages, one of them may be better suited for your needs. Review the following
configurations to determine which mode is best for you.
3-2 Peer-to-Peer Group
A Peer-to-Peer group (also known as an Ad-Hoc network) is the simplest to deploy and is ideal
for small offices. Peer-to-Peer Group can be comprised of two or more wireless client configured
to communicate with one another. Peer-to-Peer Group clients communicate directly with each
other without using an access point (AP). As a user on this type of network, you are able to
quickly build up a wireless network in order to share files with other employees, print to a shared
office printer, and access the Internet through a single shared connection.
Ad-hoc networking is cost effective, because no other devices components are needed (such as
access points, hubs or routers) in order to setup a network. However, with Ad-Hoc networking,
your computer is only able to communicate with other nearby wireless clients.
By using the off-the-shelf peer-to-peer network operating systems, each computer can
dynamically connect and reconnect to the others with no additional configuration, as illustrated in
Figure 3-1 in next page.
ORiNOCO Wireless Client User Guide
Chapter 3 Wireless Topologies 18
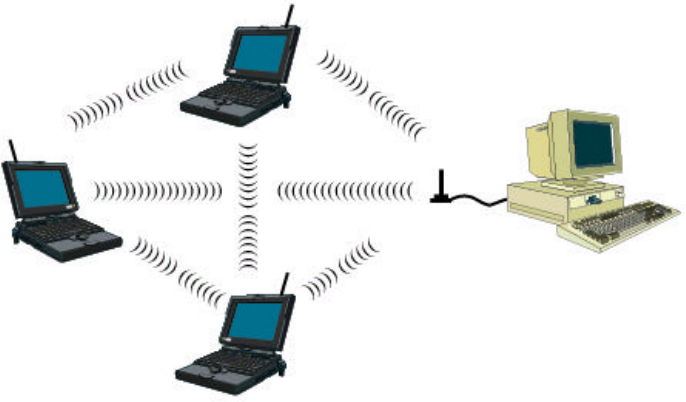
Figure 3-1 Peer-to-Peer Group
The ORiNOCO Wireless Client can communicate with an 802.11a, 802.11a 2X Turbo, 802.11b or
802.11g Peer-to-Peer Group (but it can not dynamically switch between the two). Therefore, you
must manually configure the card to use one specific radio mode.
3-3 Access Point Infrastructure
Many companies have an existing Ethernet or wired LAN infrastructure and want to be able to
extend that capability to wireless nodes. This is accomplished by installing one or more Access
Points on the Ethernet network. Access Points are devices that communicate with both the
Ethernet network and the wireless network.
An Access Point network is also referred to as an Infrastructure network. The key difference
between an Infrastructure network and an Ad-Hoc network is the addition of one extra
element—the Access Point. The Access Point serves as the focal point for all data traffic on your
wireless network, optimally managing all wireless data transactions.
Additionally, the wireless Infrastructure can provide access to an existing wired LAN. This link
allows computers on the wireless LAN to access the other wired LAN’s resources and tools,
including Internet access, email delivery, file transfer, and printer sharing.
ORiNOCO Wireless Client User Guide
Chapter 3 Wireless Topologies 19
You can use the ORiNOCO Wireless Client to communicate with 802.11a Access Points,
802.11g Access Points, 802.11b Access Points, or a combination of Access Point types. The
card is compatible with 802.11a, 802.11g, or 802.11b Access Points from any vendor, including
Proxim’s ORiNOCO and Harmony Access Point products.
3-3-1 Connecting to a Single AP
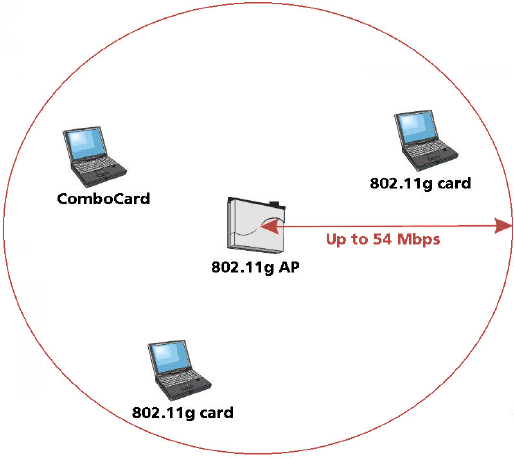
Figure 3-2 depicts an ORiNOCO network that uses a single Access Point (AP); in this example,
the Access Point is an ORiNOCO AP- 2000 (with an ORiNOCO 802.11g card installed)
Figure 3-2 Communicating with a Single 802.11g Access Point
3-3-2 Roaming Between Multiple APs
For larger environments, the ORiNOCO Wireless Client may roam from one Access Point to
another while maintaining the same network connection. The Access Points establish coverage
areas or cells similar in concept to those of a cellular phone network. The card will connect to any
Access Point that is within range.
The ORiNOCO Wireless Client supports roaming between APs of the same type (for example,
from one 802.11a AP to another) or roaming between APs of different types (for example, from
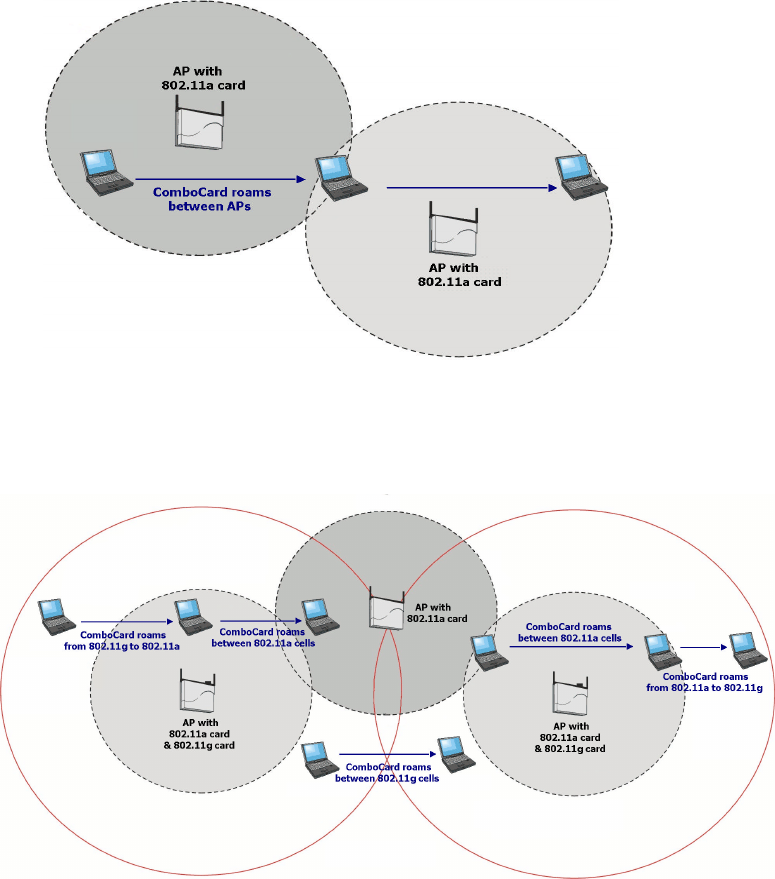
an 802.11a AP to an 802.11g AP). Figure 3-3 illustrates roaming between APs of the same radio
type.
ORiNOCO Wireless Client User Guide
Chapter 3 Wireless Topologies 20
Figure 3-3 Roaming Between APs of the Same Radio Type
Figure 3-4 illustrates roaming between APs of different radio types:
Figure 3-4 Roaming Between APs of Different Radio Types
In either case, each Access Point within a roaming network must have a unique, independent
Channel, but all must have the same Network Name and security settings.
Mobile clients equipped with an ORiNOCO Wireless Client have Network Type set to “Access
Point” and have the same Network Name and security settings as the Access Points.
Alternatively, the mobile client’s Network Name may be “any”; this setting lets the client
associate with any available Access Point, regardless of the Access Point’s Network Name (this
assumes that the AP is not a closed system).
ORiNOCO Wireless Client User Guide
Chapter 3 Wireless Topologies 21
As the mobile client seamlessly switches from cell to cell, its network connectivity is preserved.
The user can move freely between the Access Points in the network. When the roaming client
leaves the transmission range of one Access Point, the card automatically detects the other
Access Point(s) in the same vicinity to continue the network connection.
3-3-3 Guidelines for Roaming
u An ORiNOCO Wireless Client can roam between 802.11a Access Points, 802.11g Access
Points and 802.11b Access Points.
u All 802.11a, 802.11b and 802.11g Access Points that a client will roam between must have the
same Network Name. Depending on the Wireless Mode selection, a user can roam among
802.11a, 802.11a 2X Turbo, 802.11g and 802.11b Access Points.
u All workstations with ORiNOCO Wireless Clients installed must use either a Network Name of
“any” or the same Network Name as the Access Points that they will roam between (this
assumes that the AP is not a closed system; see “Network Name” for more information).
u All Access Points and ORiNOCO Wireless Clients must have the same security settings to
communicate.
u The Access Points’ cells must overlap to ensure that there are no gaps in coverage and to
ensure that the roaming client will always have a connection available.
u Access Points installed in the same vicinity that use the same frequency band (2.4 or 5 GHz)
should each use a unique, independent Channel to avoid potential interference.
u Access Points that use the same Channel should be installed as far away from each other as
possible to reduce potential interference.

ORiNOCO Wireless Client User Guide
Chapter 4 Proxim Client Utility Configuration 22
4
Chapter 4 Proxim Client Utility Configuration
The following sections describe the Proxim Client Utility (PCU). The PCU provides quick access
and friendly interface to configure the Wireless LAN settings. If you are using Windows XP and
have not installed the Proxim Client Utility, 4-6 Configuring Your Wireless Networking Settings
with Windows XP contains information on how to configure your ORiNOCO Wireless Client using
Windows XP Zero Configuration.
4-1 Proxim Client Utility icon
The Proxim Client Utility icon will appear in the Windows Taskbar (also known as the System
Tray) each time your computer is restarted. Double-click the PCU icon to launch the utility.
Figure 4-1 Proxim Utility Icon
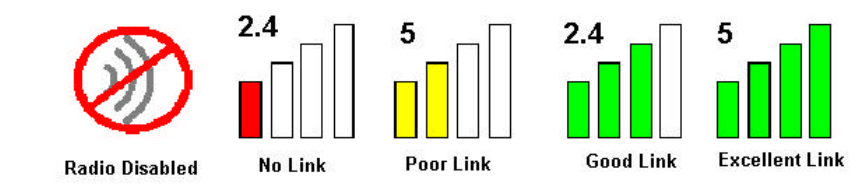
The Proxim Client Utility icon will display the current status of the wireless connection. A number
appears in the upper left portion of the icon that indicates the radio’s current operating frequency
(2.4 GHz or 5 GHz). When the radio is in a “no link” state, the frequency band will toggle between
2.4 GHz and 5 GHz while it is scanning through those frequencies. The following are different
status displayed by the icon.
u “Radio Disabled” indicates that the ORiNOCO Wireless Client has been disabled through
either Hardware or Software.
u Yellow bars indicate that the signal strength is weak and the wireless connection is at the
limit of its range.
u Green bars indicate good or excellent signal strength.
See Figure 4-2 for the different status of the Proxim Client Utility icon.
ORiNOCO Wireless Client User Guide
Chapter 4 Proxim Client Utility Configuration 23
Figure 4-2 Different Status of Proxim Client Utility Icon
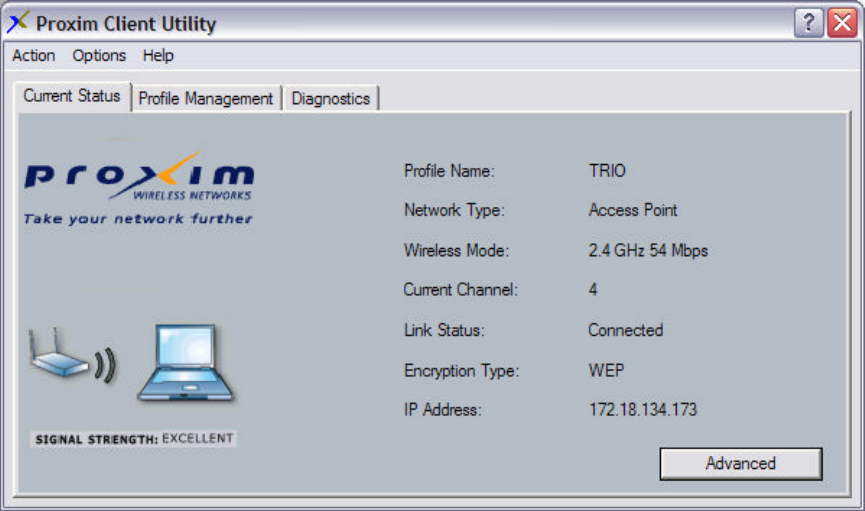
4-2 Current Status Tab
The current status tab, shown in Figure 4-3, displays the following information about your
wireless connection.
u Profile Name – The current name of the selected configuration profile.
u Network Type – The current type of wireless network: either Access Point or Ad-hoc.
u Wireless Mode – The current frequency and data rate that has been selected.
u Current Channel – Specifies the current channel that the ORiNOCO Wireless Client is
connected to or scanning on.
u Link Status – Indicates whether the card is connected or disconnected to an Access Point
or other wireless client.
u Encryption Type – Describes whether or not the wireless traffic is being encrypting.
u IP Address –The current IP address of the ORiNOCO Wireless Client.
ORiNOCO Wireless Client User Guide
Chapter 4 Proxim Client Utility Configuration 24
Figure 4-3 Current Status Tab Displays Current Wireless Connection
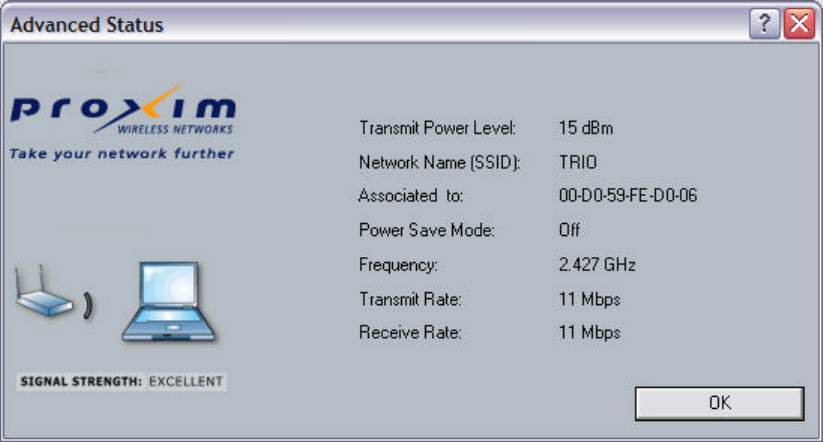
The Advanced button as shown in Figure 4-4 provides more detailed information regarding your
wireless connection.
u Transmit Power Level – Provides current setting of Radio output power.
u Network Name (SSID) – The wireless network name (SSID) that the device is currently
connected with.
u Power Save Mode – The type of Power Savings that is configured on the device.
u Frequency – The current frequency that the Wireless device is connected or scanning on.
u Transmit Rate – The transmit rate (Mbps) for the current connection for the wireless driver.
u Receive Rate – The receive rate (Mbps) for the current connection for the driver.
ORiNOCO Wireless Client User Guide
Chapter 4 Proxim Client Utility Configuration 25
Figure 4-4 Advanced Status of Current Wireless Connection
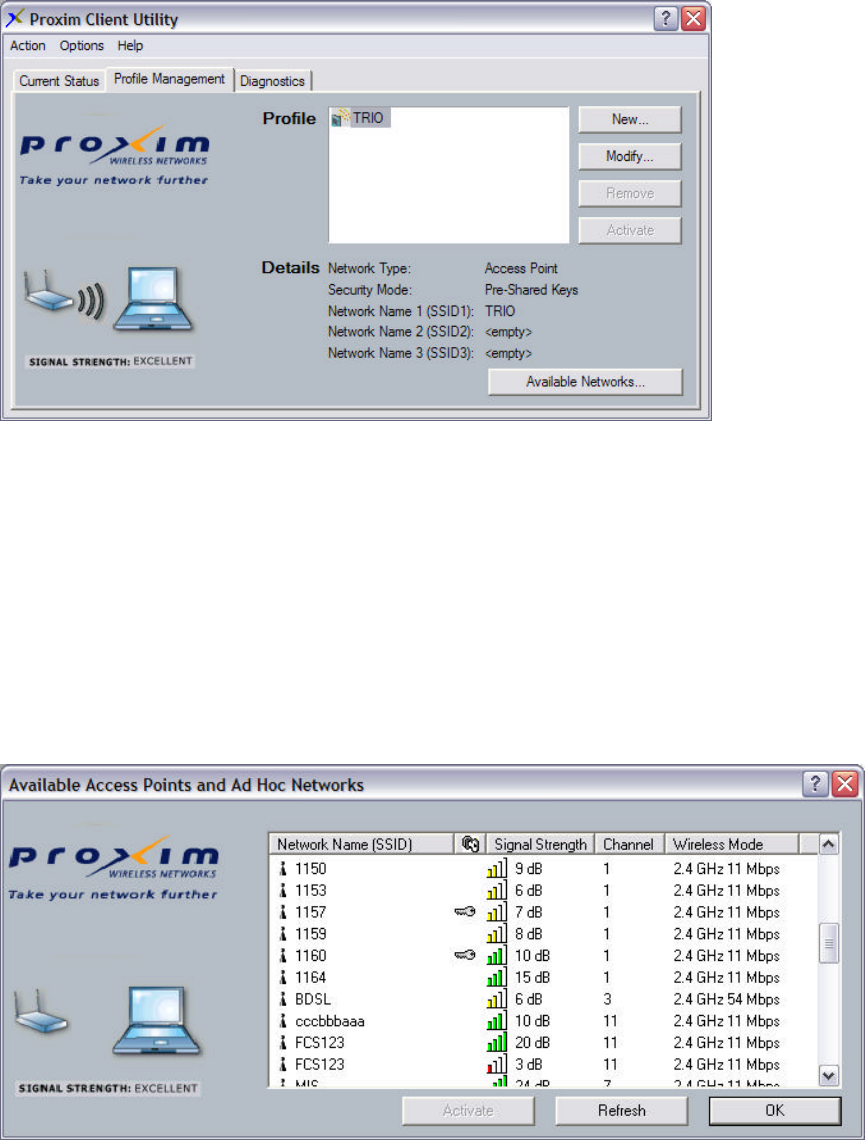
4-3 Profile Management
The Profile Management tab allows the user to define multiple configuration profiles. Each
profile can be configured to match the appropriate settings of a unique wireless network.
The Profile box lists all the configured profiles. The Details dialog describes the basic settings
(SSID, Network Type, Security Mode) of the highlighted profile. The active profile will be
displayed with the wireless icon next to it. To make a profile active, highlight the profile and click
the Activate button. After selecting a new active Profile, the Wireless Client searches for
wireless networks that match up to the new profile’s specific settings.
ORiNOCO Wireless Client User Guide
Chapter 4 Proxim Client Utility Configuration 26
Figure 4-5 Profile Management Screen Displays Basic Settings
The Available Networks button allows the user to view a list of all available wireless networks
that are within range of the ORiNOCO Wireless Client. Each wireless network entry displays the
network’s SSID, encryption settings, signal strength level, Channel and Wireless Mode. You can
use the Available Networks feature to create a new profile by highlighting the wireless network
you want to create a profile for and clicking the Activate button.
Figure 4-6 Available Networks
ORiNOCO Wireless Client User Guide
Chapter 4 Proxim Client Utility Configuration 27
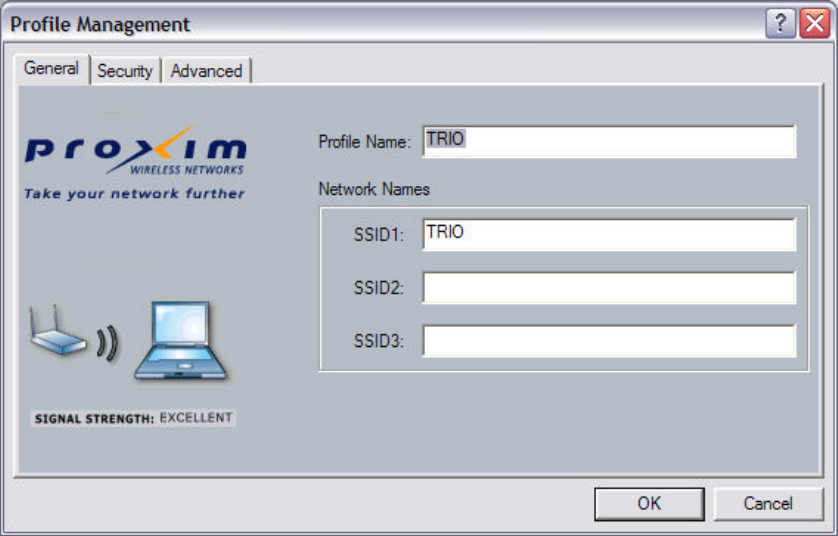
4-3-1 Create or Modify a Profile
1. From the Profile Management tab, shown in Figure 4-5, click the New or Modify button.
2. The Network Configuration Settings dialog box will appear, as shown in Figure 4-7.
3. In the Profile Name box, enter a unique name that describes the profile or the wireless
network you want the card to connect to.
4. In the SSID boxes enter the SSID that matches the SSID of the wireless network you want
the card to connect to. There are three SSID selections (SSID1, SSID2, SSID3) available;
this feature allows you to configure a single profile to match up to 3 different SSIDs.
Figure 4-7 Network Configuration Settings Dialog Box
ORiNOCO Wireless Client User Guide
Chapter 4 Proxim Client Utility Configuration 28
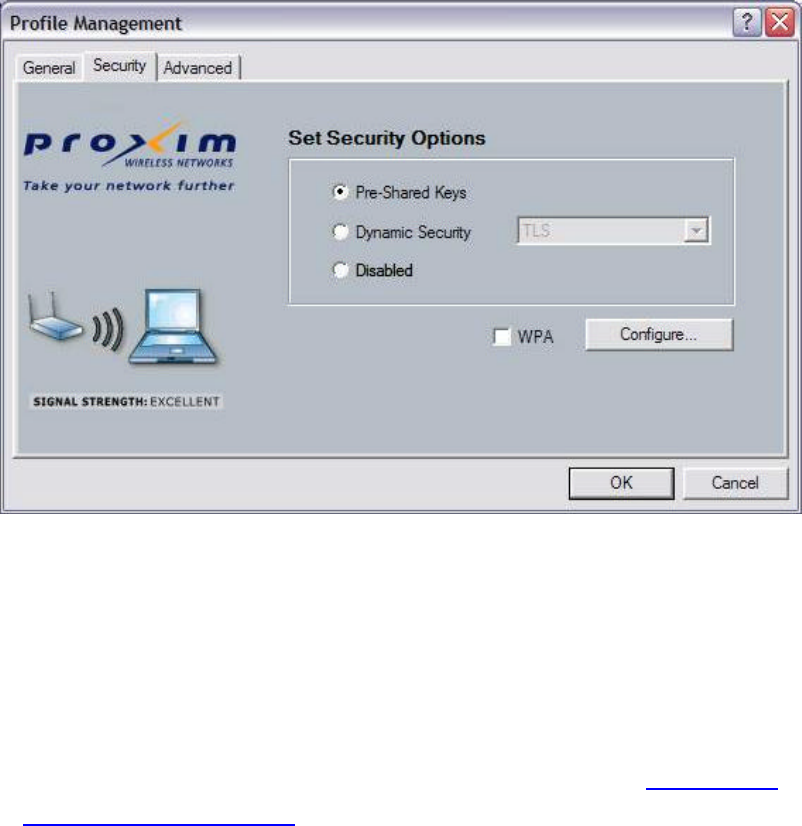
5. Select the Security tab to manage the security settings associated with this profile.
Figure 4-8 Manage Security Settings to Wireless Network
6. Choose the security setting that applies to the wireless network you want the card to
connect to. If you select Pre-Shared Keys or Dynamic Security, a drop-down menu to the
right of the selection becomes available so you can configure additional settings required
by the selected security mode.
7. Click Advanced if you want to configure the advanced parameters (see 4-3-3 Advanced
Settings in Profile Management for details).
8. Click OK to save the profile.
4-3-2 Security Settings in Profile Management
The Security tab allows you to configure the ORiNOCO Wireless Client to match the security
settings of the Wireless LAN network. Refer to Figure 4-9 for an example.
Select the appropriate security mode:
• Pre-Shared Keys – This mode is commonly referred to as WEP encryption, and
allows for setting of all four WEP keys. The pre-shared key selection also allows for
ORiNOCO Wireless Client User Guide
Chapter 4 Proxim Client Utility Configuration 29
setting of a unique key, which is used with higher forms of encryption such as AES
(Advanced Encryption Standard). You can enable WPA (Wi-Fi Protected Access)
encryption by checking the WPA box and configuring PassPhrase key.
• Dynamic Security/WPA – Refer to the type of security mode the station is using. The
options include:
Ø TLS
Ø PEAP
Ø LEAP (Non-WPA Only, WPA does not apply to LEAP mode)
To define the security mode, select the desired security mode from the drop-down
menu. The selections in the drop-down menu will change if you select the WPA
checkbox.
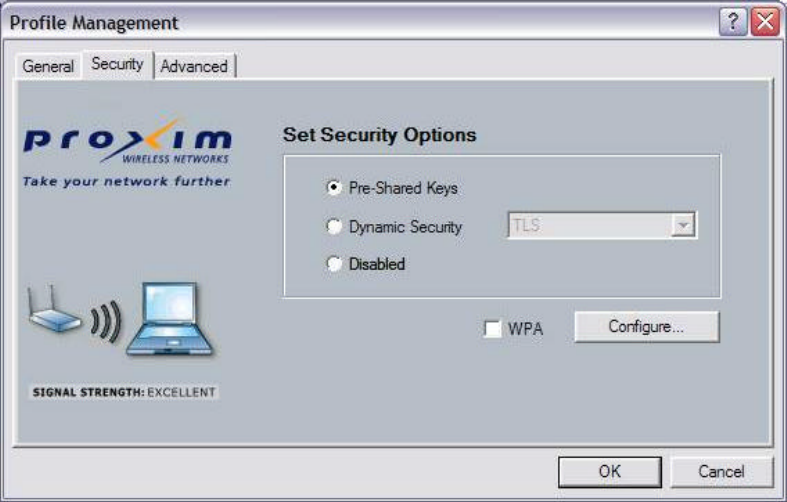
• Disabled – Use this mode when there is no security authentication or encryption is
currently enabled on your Wireless LAN network.
Figure 4-9 Security Setting on Profile Management Icon
ORiNOCO Wireless Client User Guide
Chapter 4 Proxim Client Utility Configuration 30
Figure 4-10 Disable Security Setting on Profile Management Icon
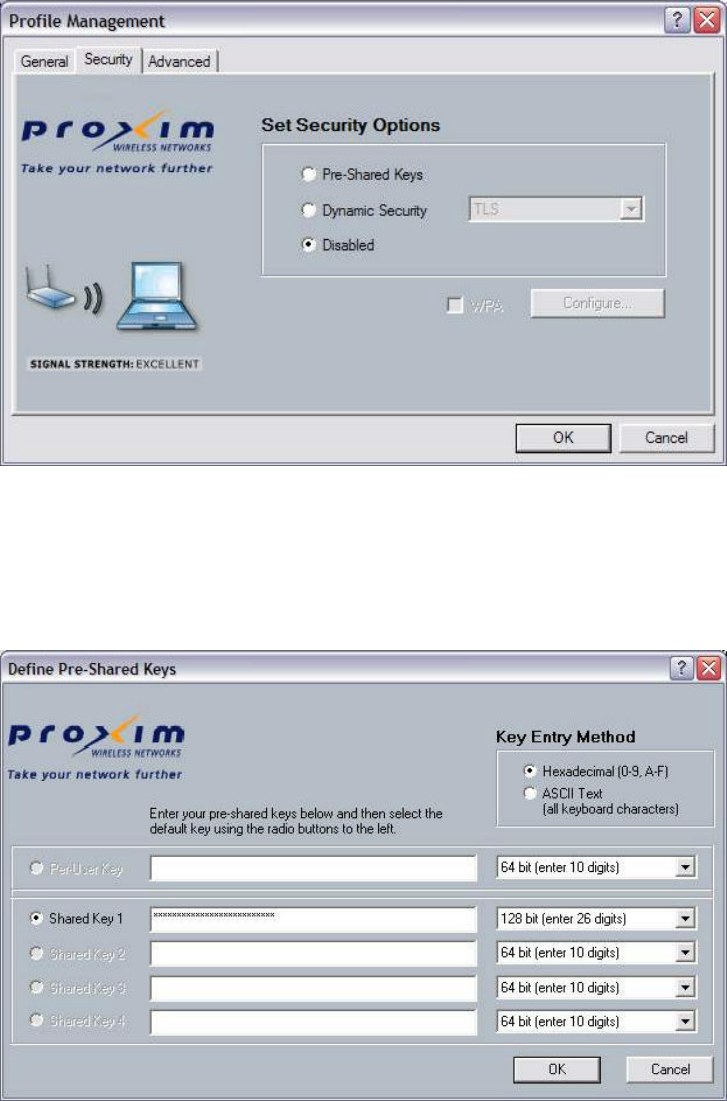
Setting Pre-Shared Keys
You can define the Pre-Shared keys (Figure 4-11) by using the Define Pre-Shared Keys box.
Figure 4-11 Defined Pre-Shared Keys Icon
Key Entry Method – Determines the entry method for an encryption key:
u Hexadecimal (0-9, A-F)
u ASCII text (any keyboard characters, A-Z, 0-9).