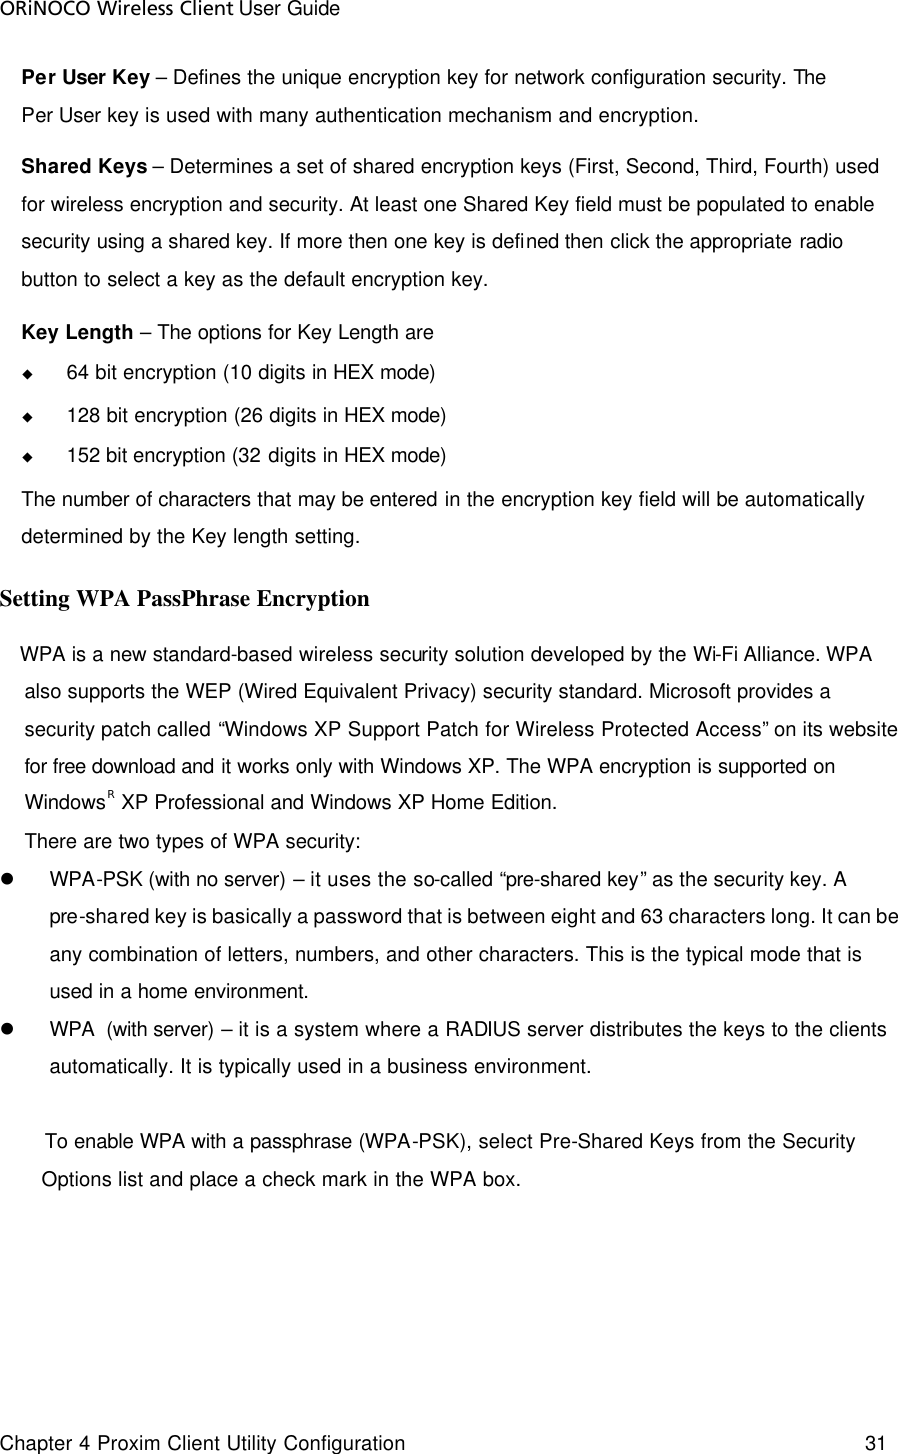
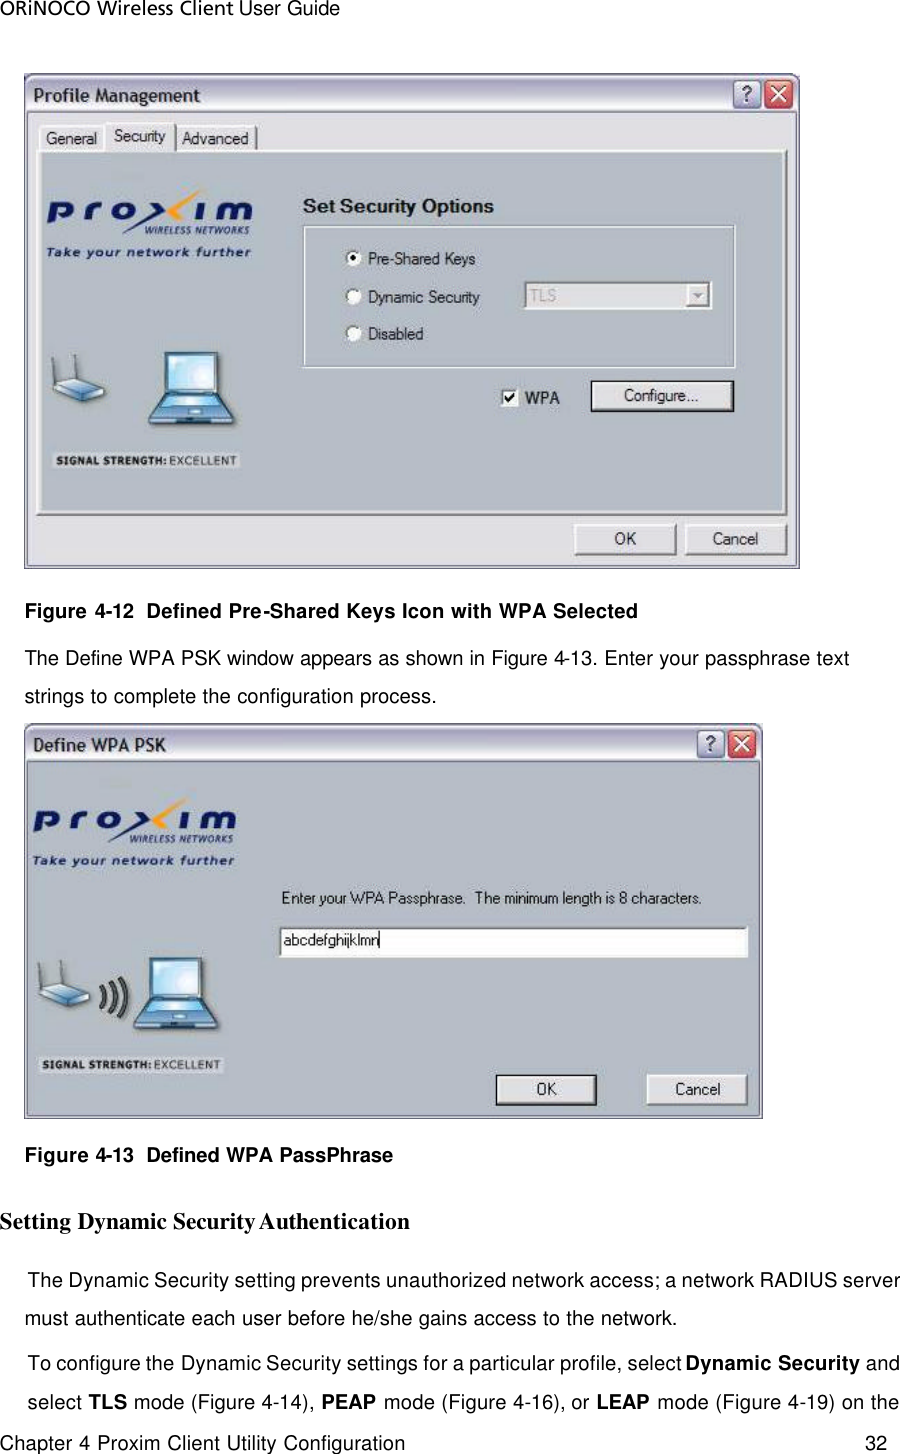
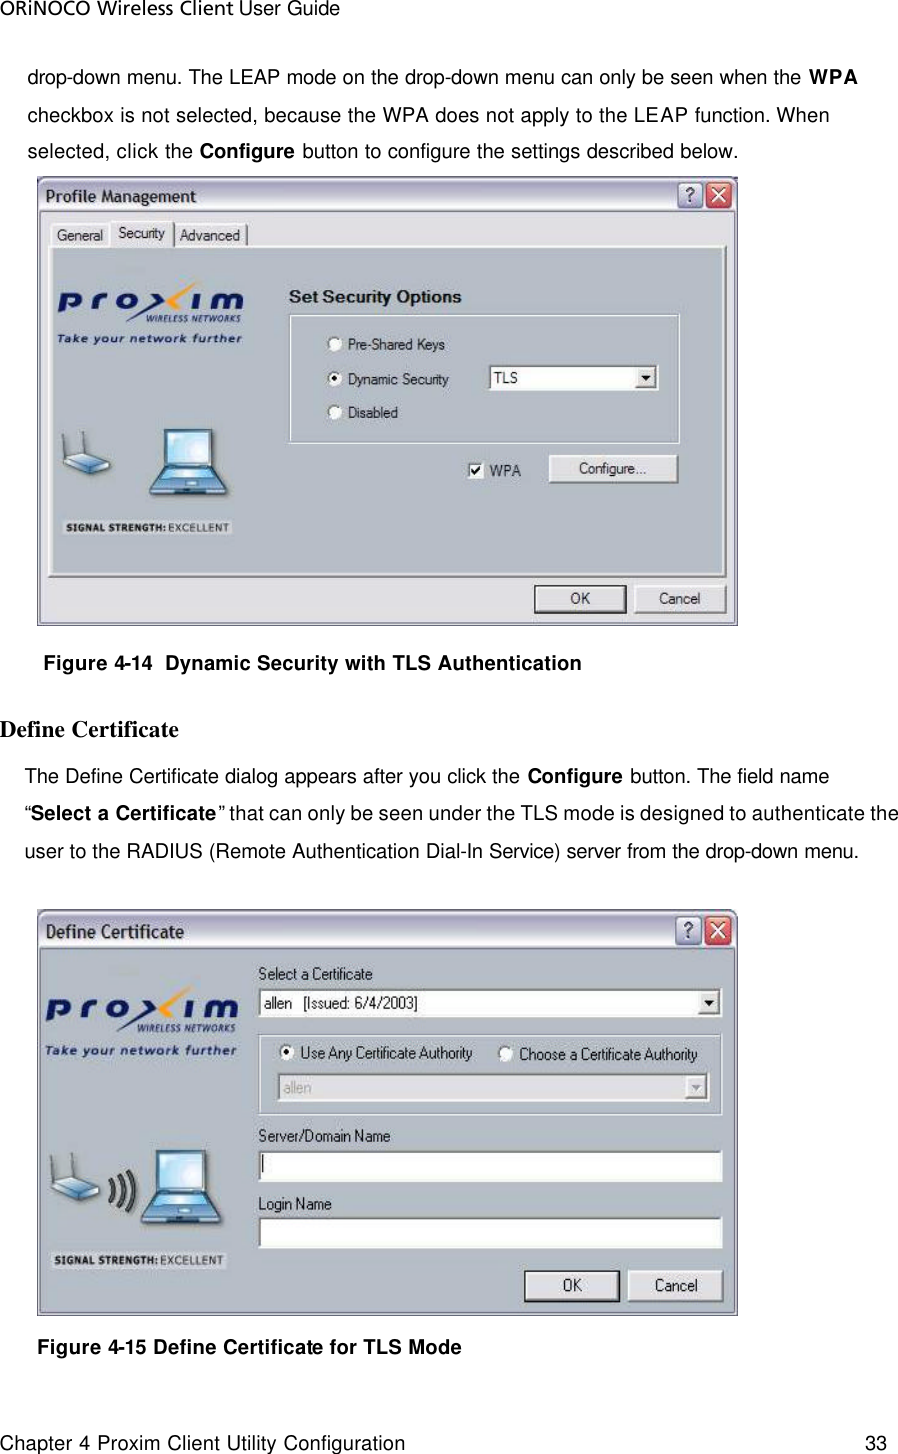
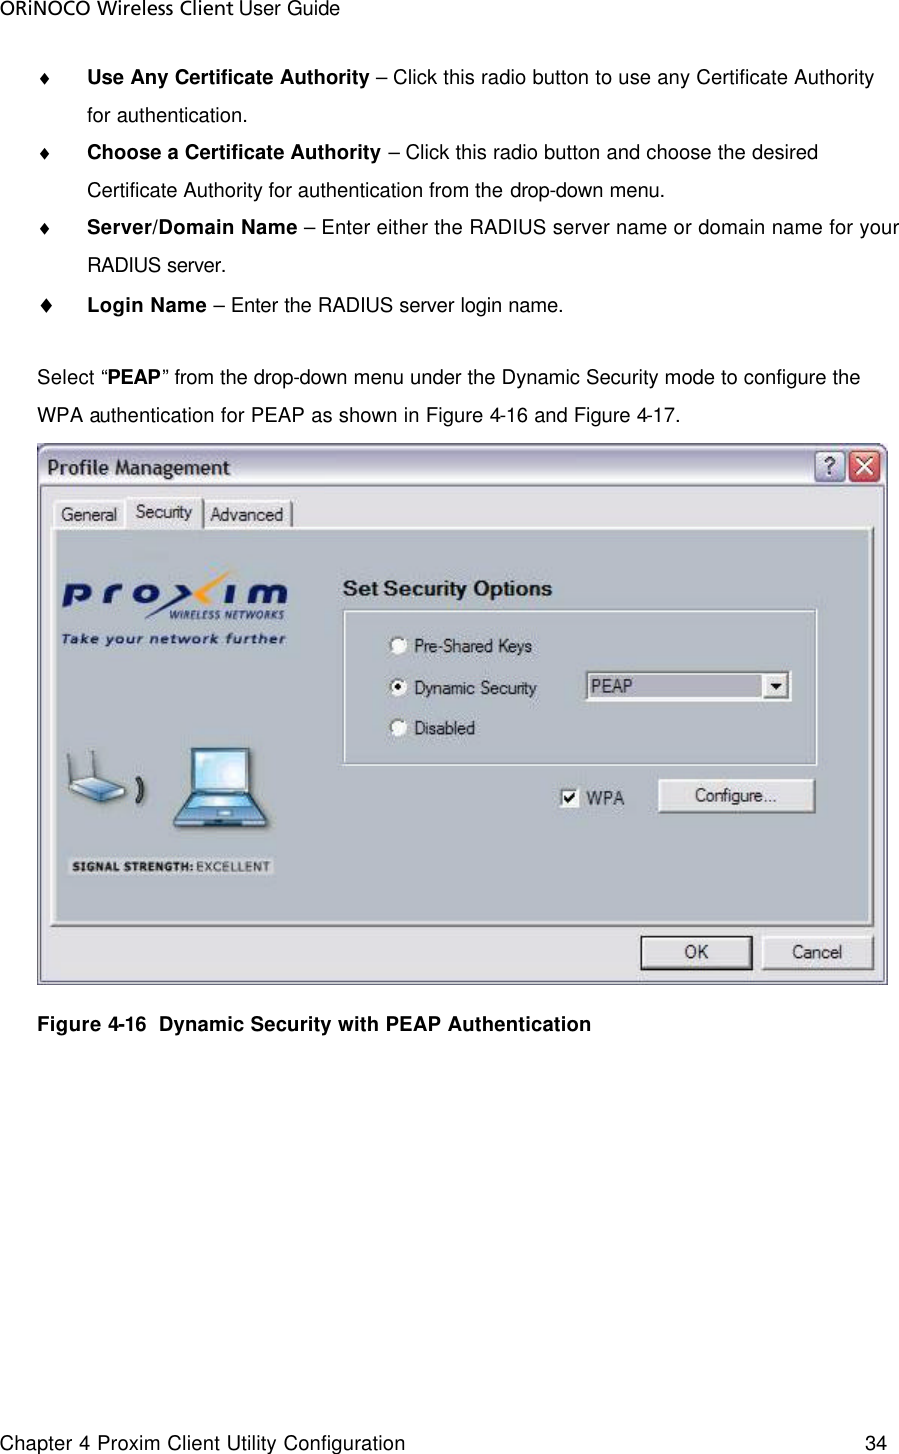
Proxim Wireless PCI-8482 ORiNOCO 802.11 a/b/g PCI Card User Manual ORiNOCO Wireless Client user guide WPA
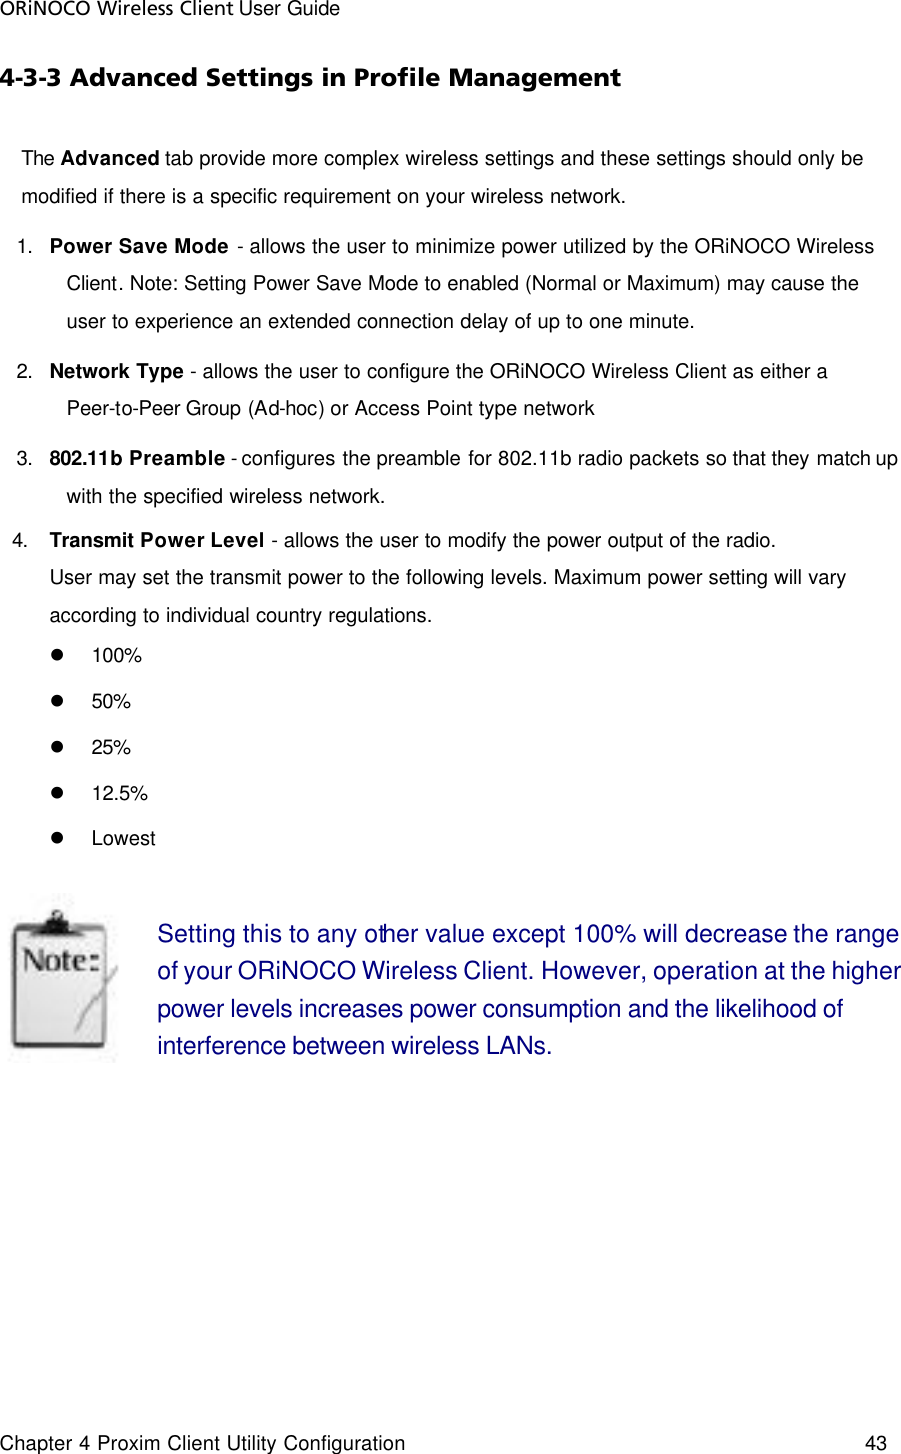
Proxim Wireless Corporation ORiNOCO 802.11 a/b/g PCI Card ORiNOCO Wireless Client user guide WPA
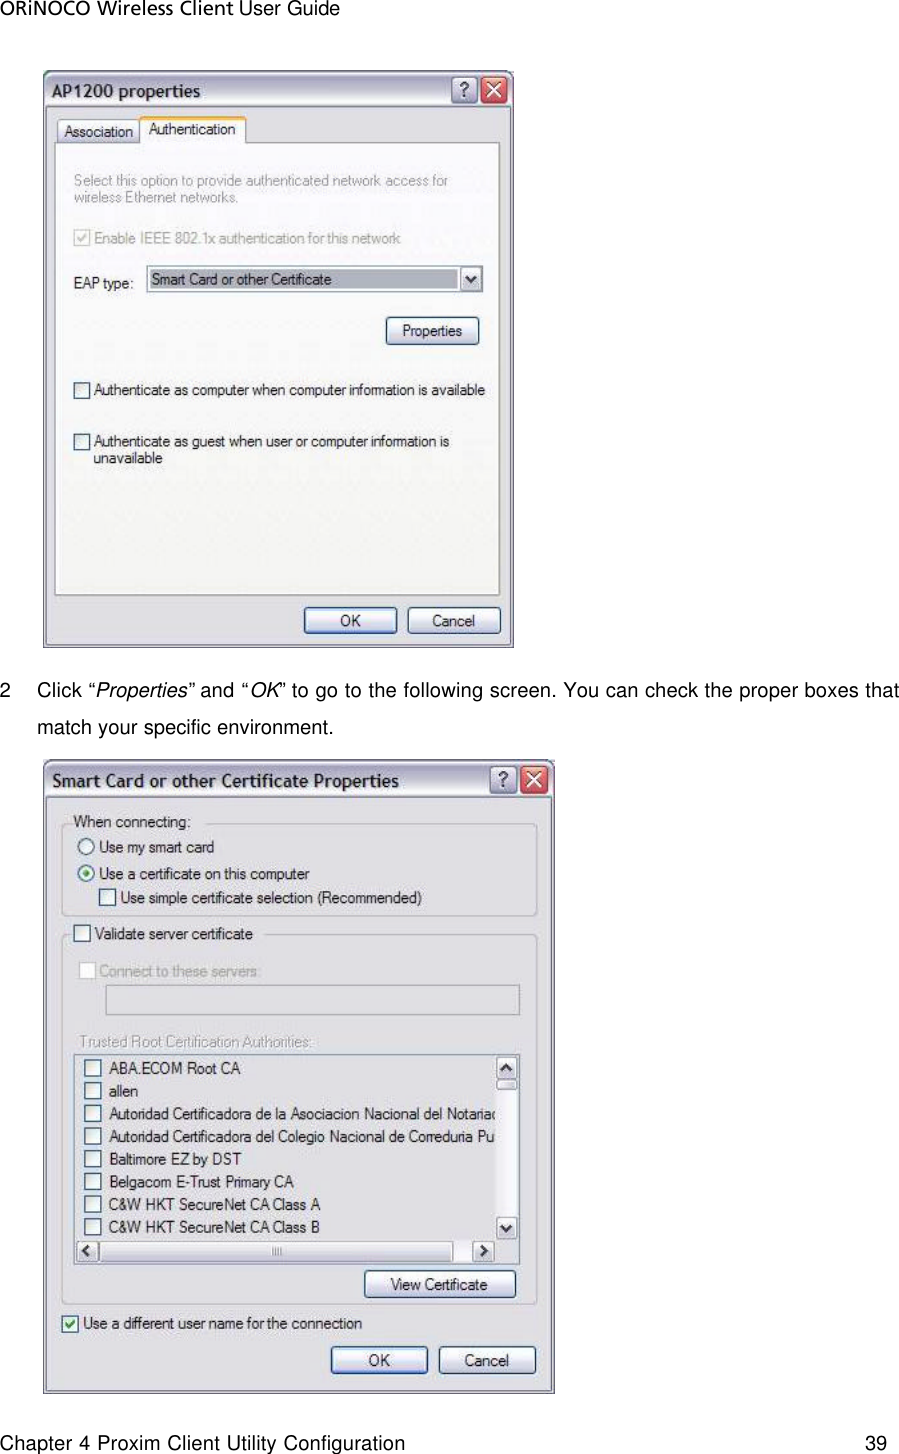
Contents
- 1. users manual part 1
- 2. users manual part2
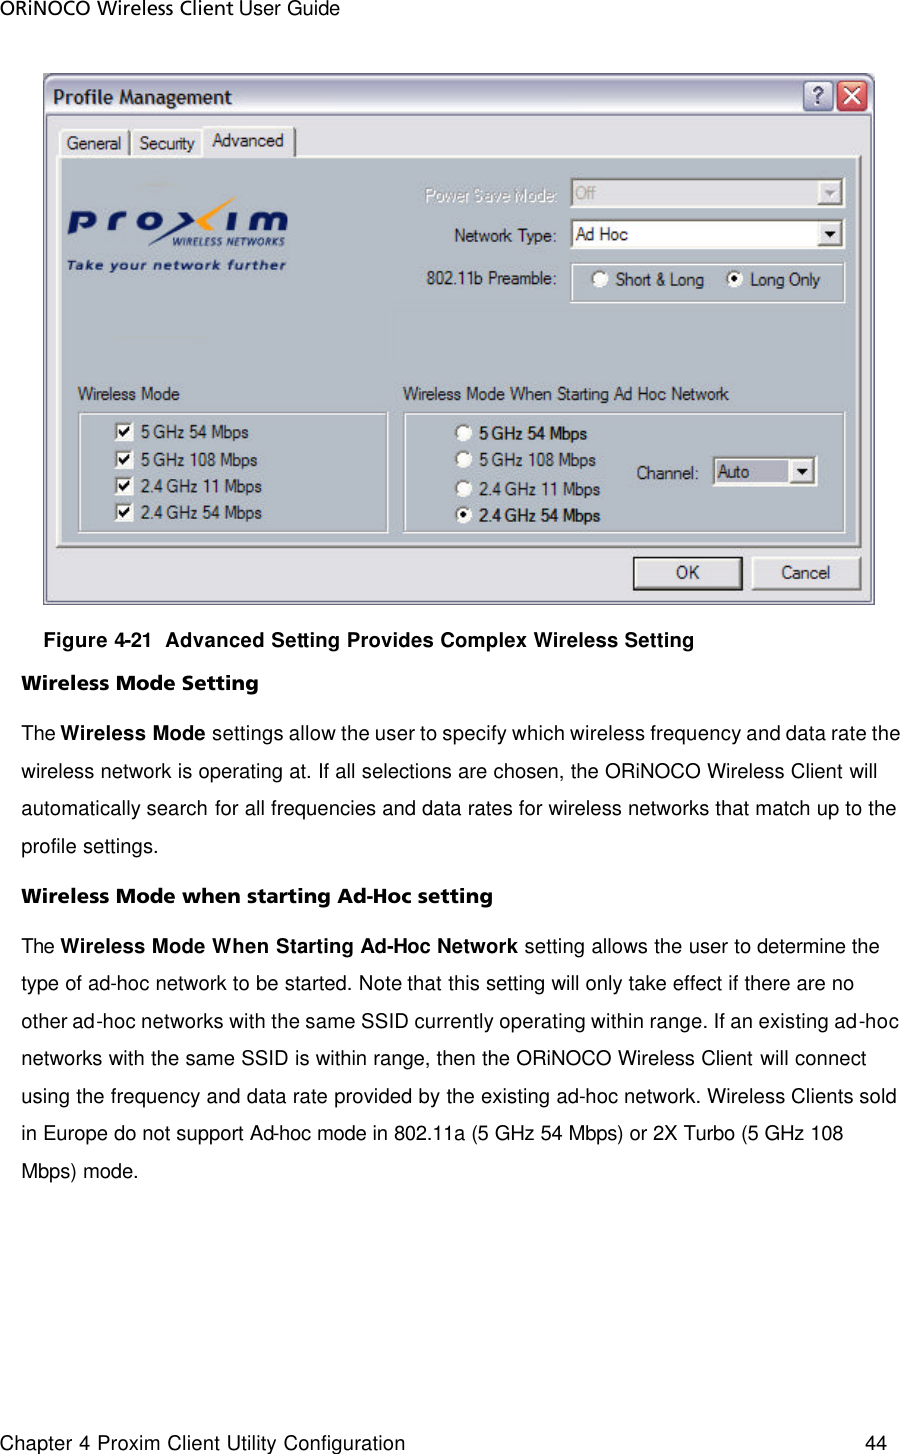
- 3. users manual 1
- 4. users manual 2
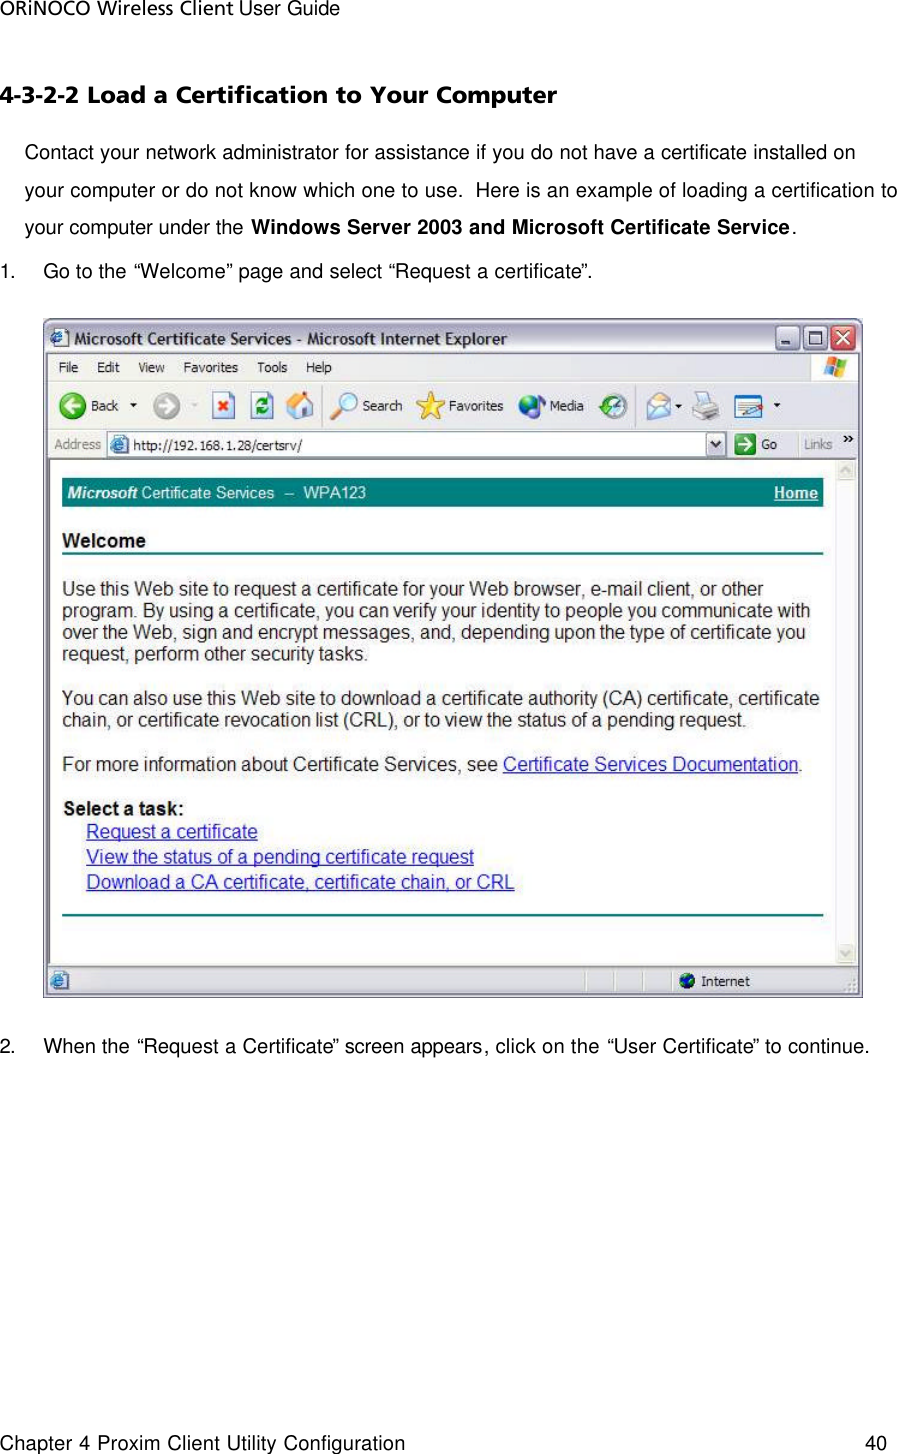
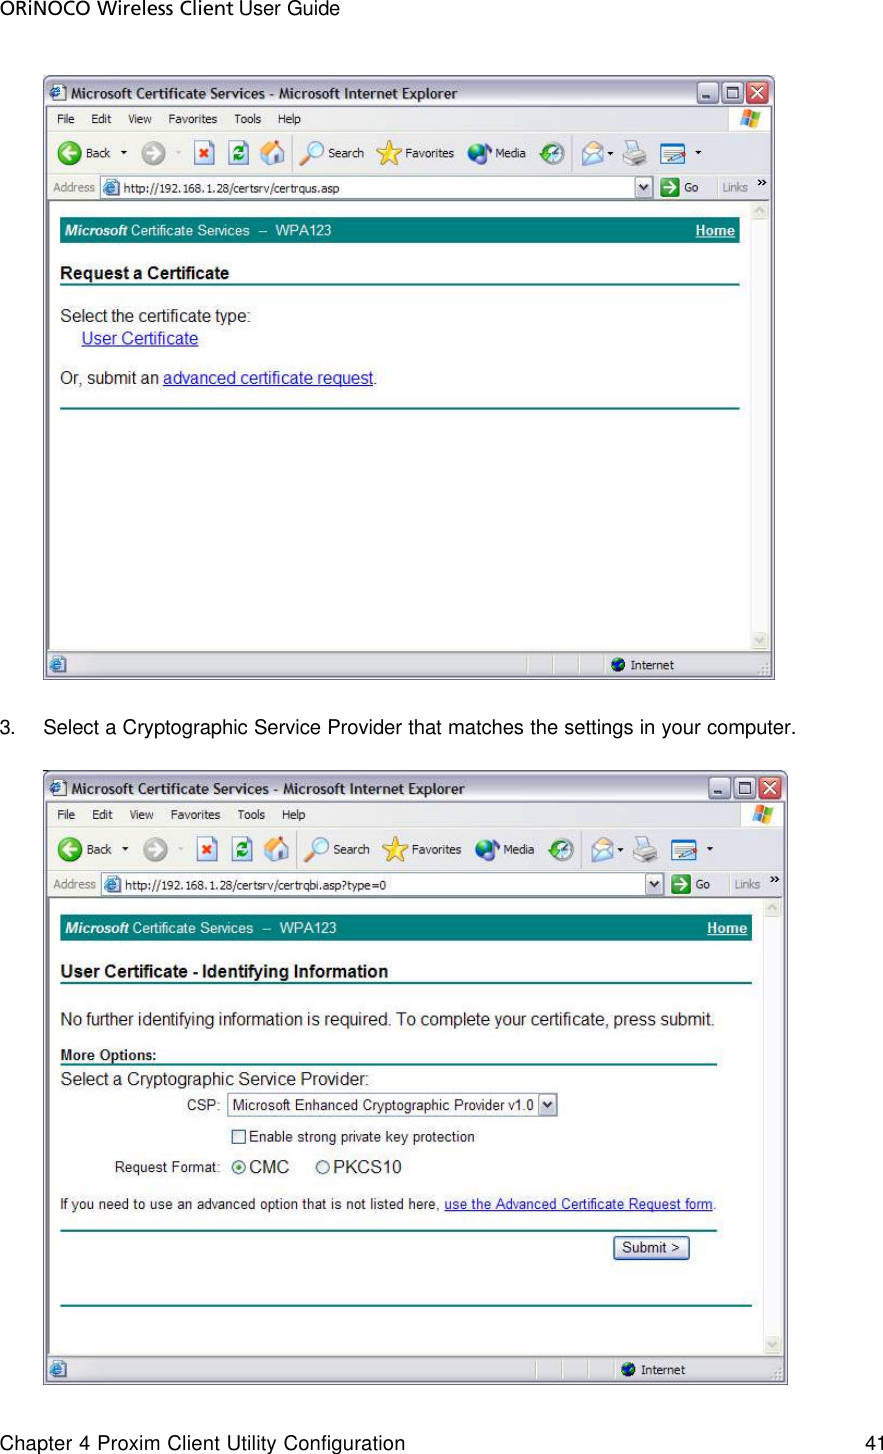
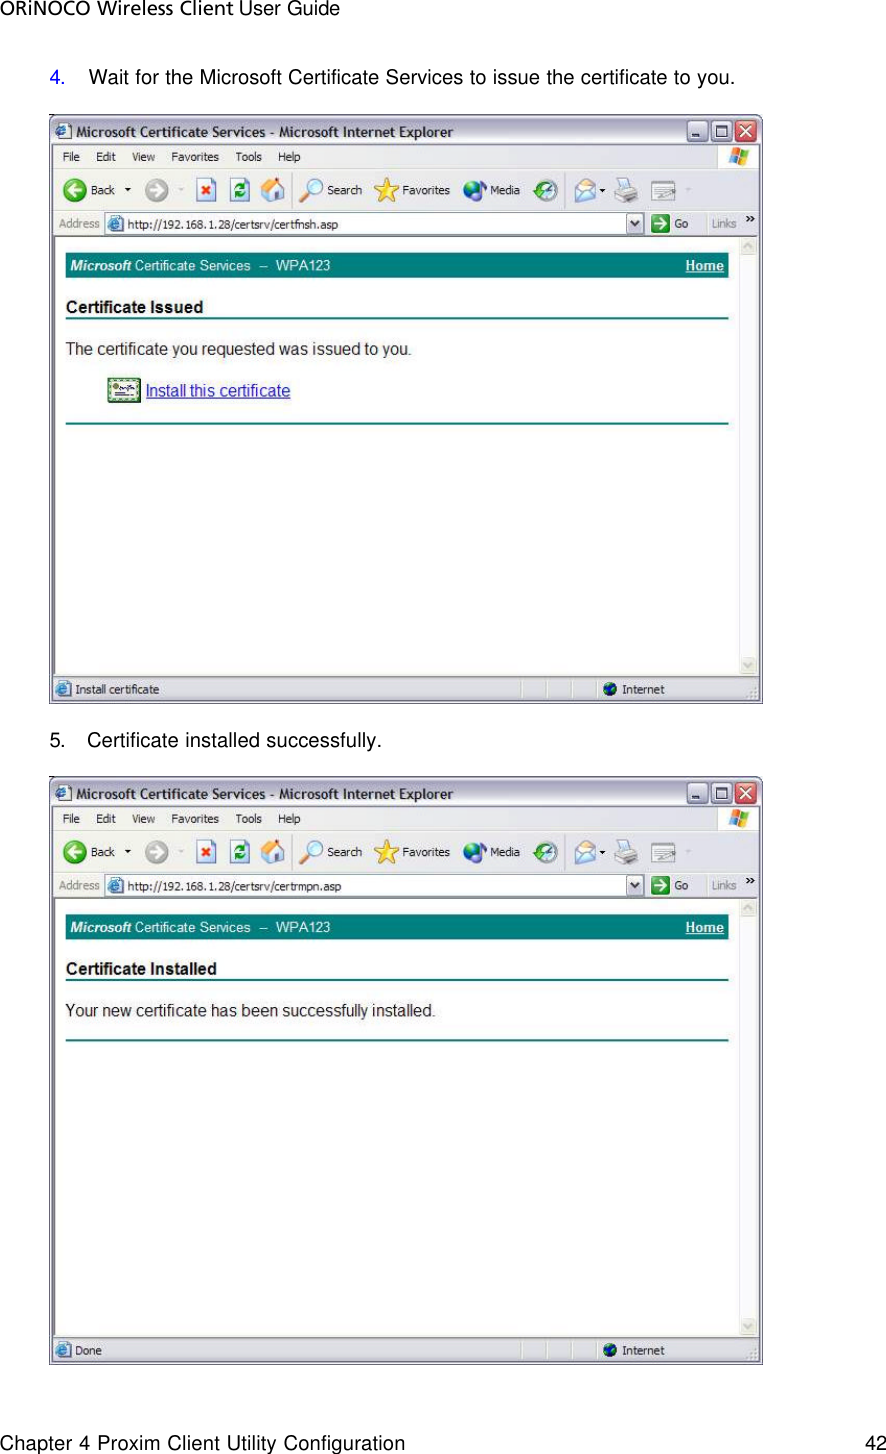
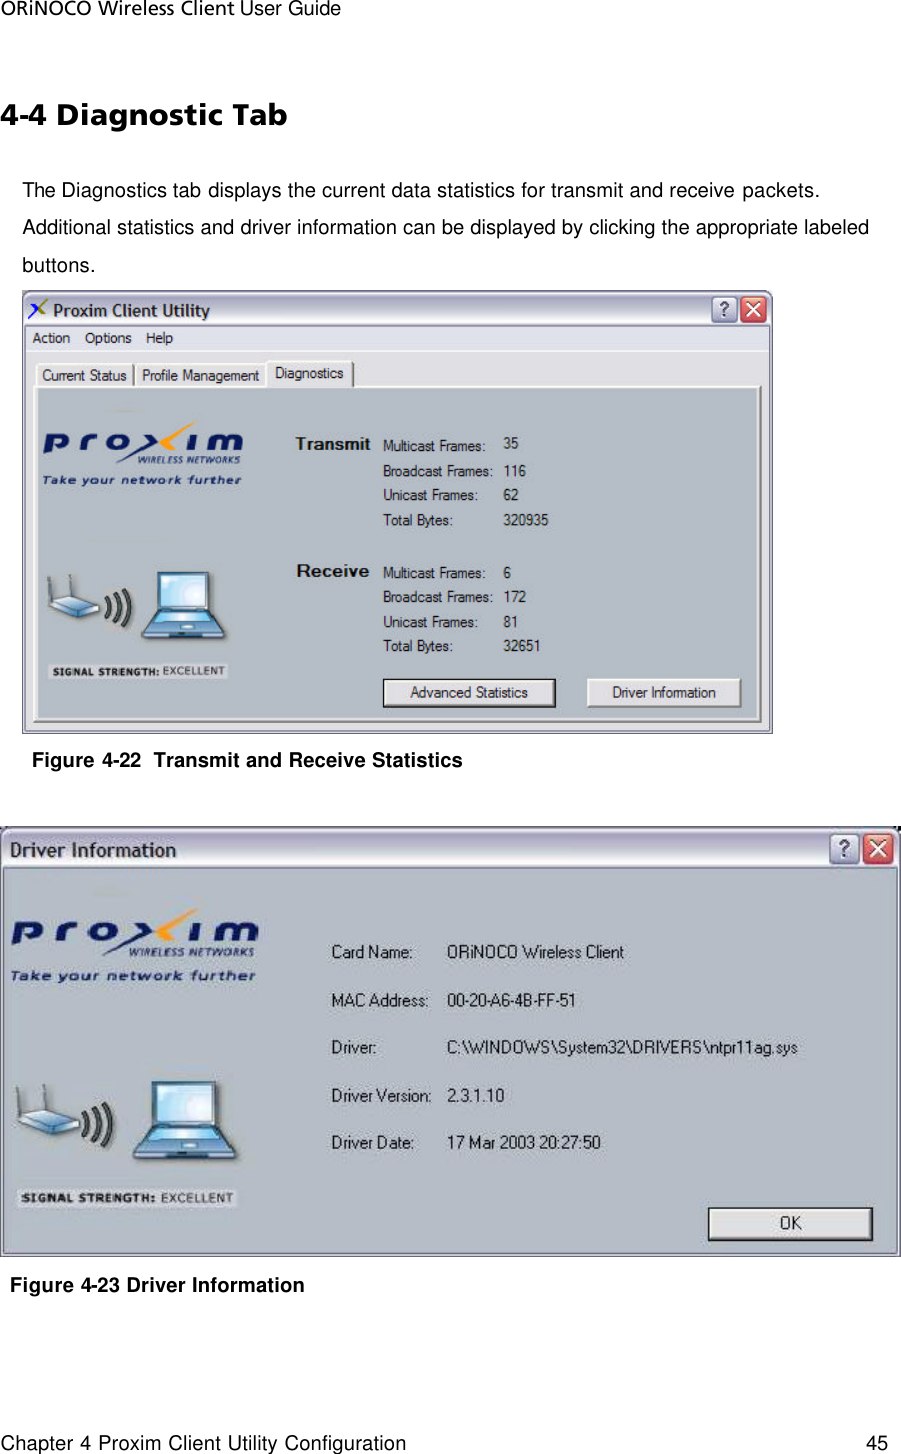
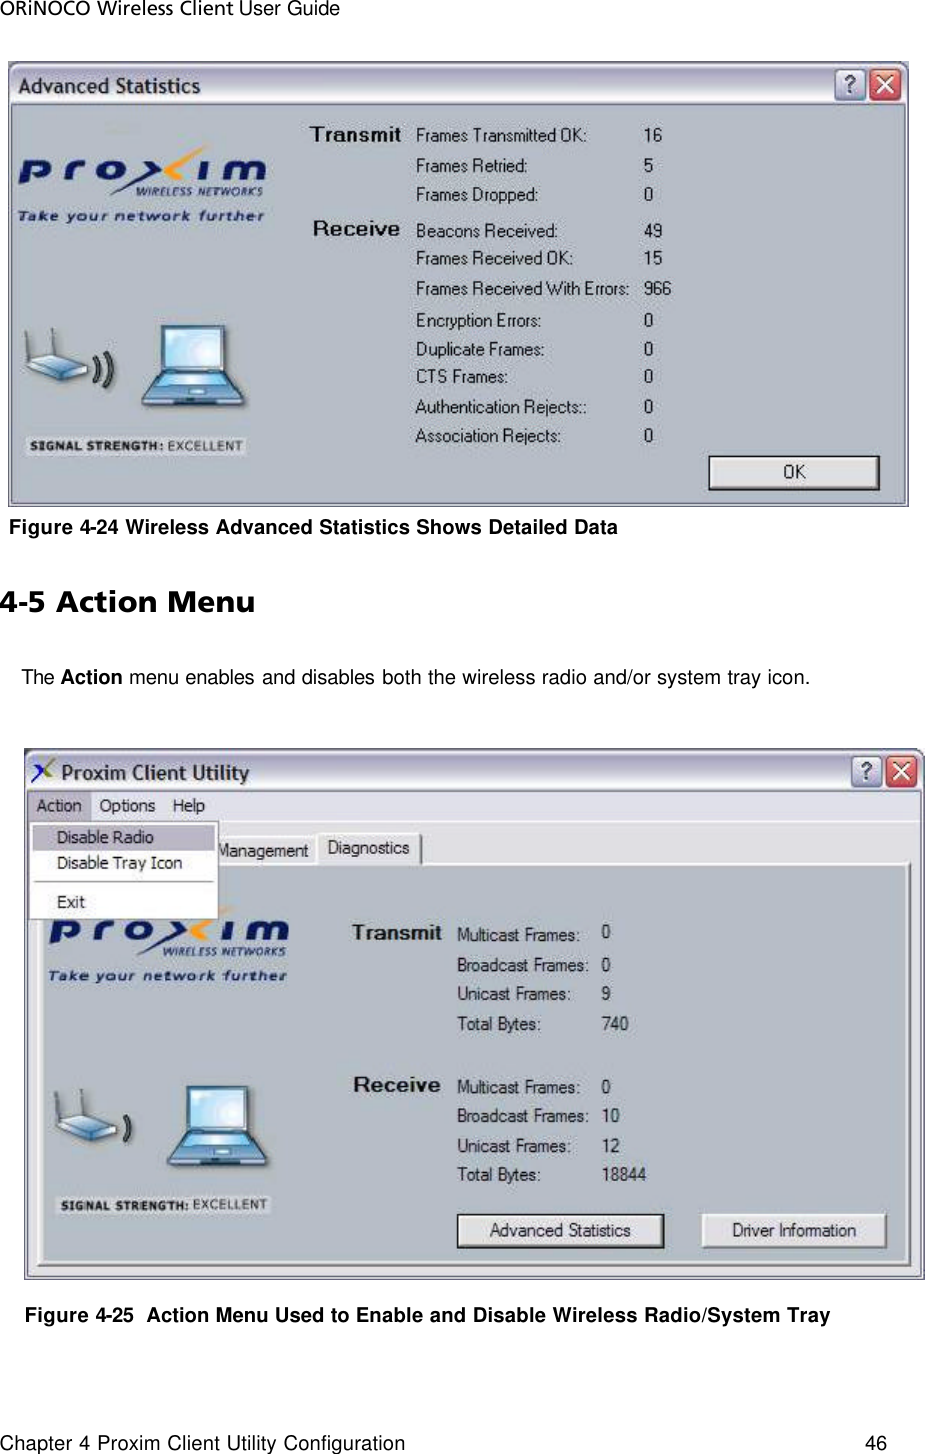
users manual 2