Psion 7505BTSDCMHC25 Handheld Computer User Manual
Psion Inc Handheld Computer
UserManual.wiki
>
Psion
>
7505BTSDCMHC25 User Manual
>
users manual host part 1
Contents
1.
users manual host part 1
2.
users manual host part 2
3.
users manual host part 3
4.
users manual WLAN module
5.
users guide BT radio
6.
User Guide
users manual host part 1
Navigation menu
Upload a User Manual
Namespaces
Wiki Guide
HTML
PDF
Info
Views
User Manual
Discussion / Help
Navigation


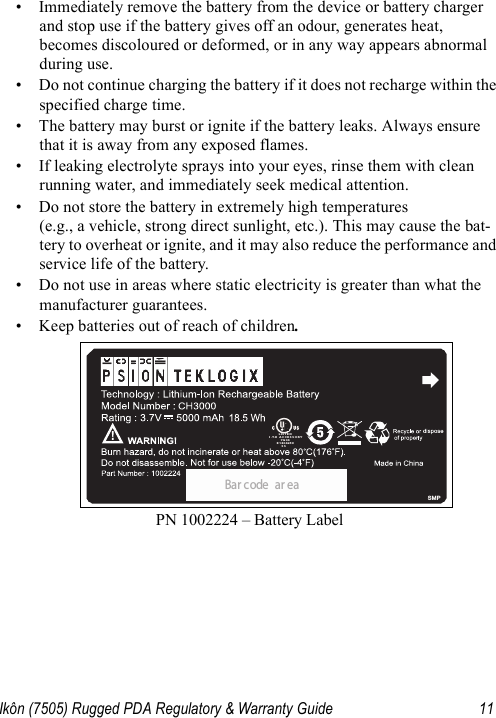


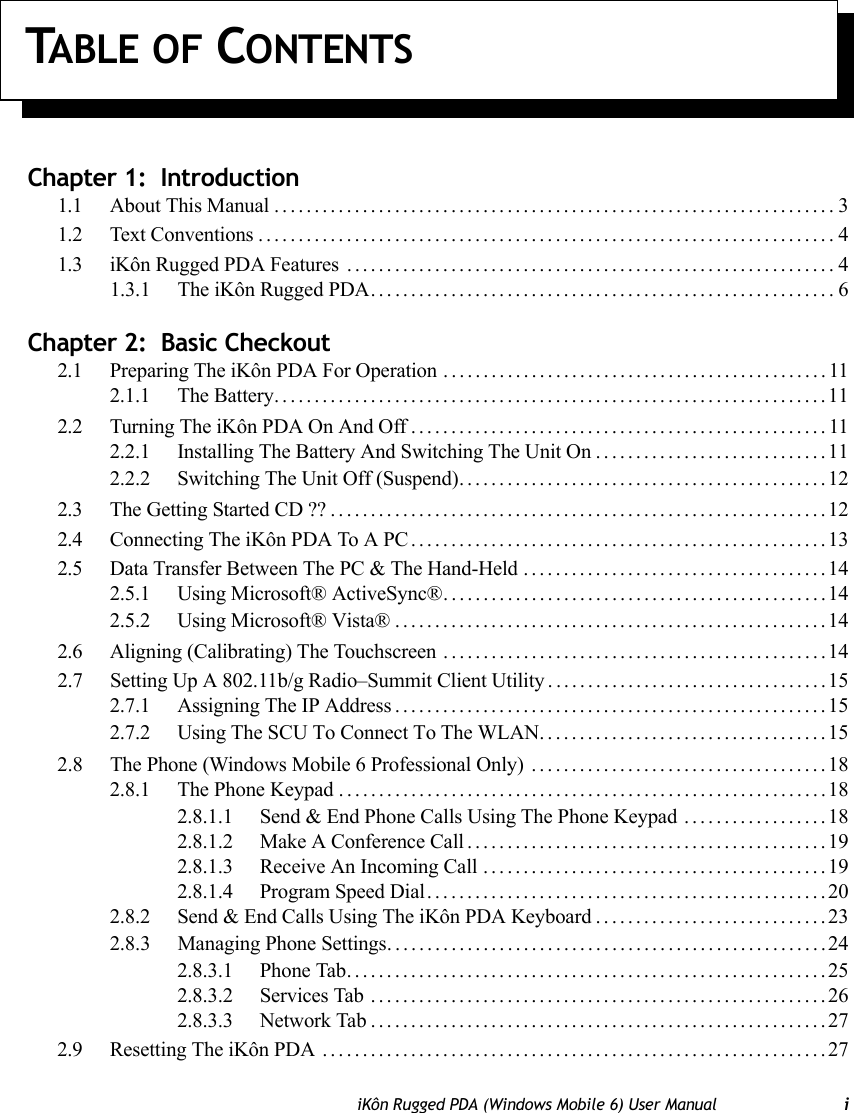

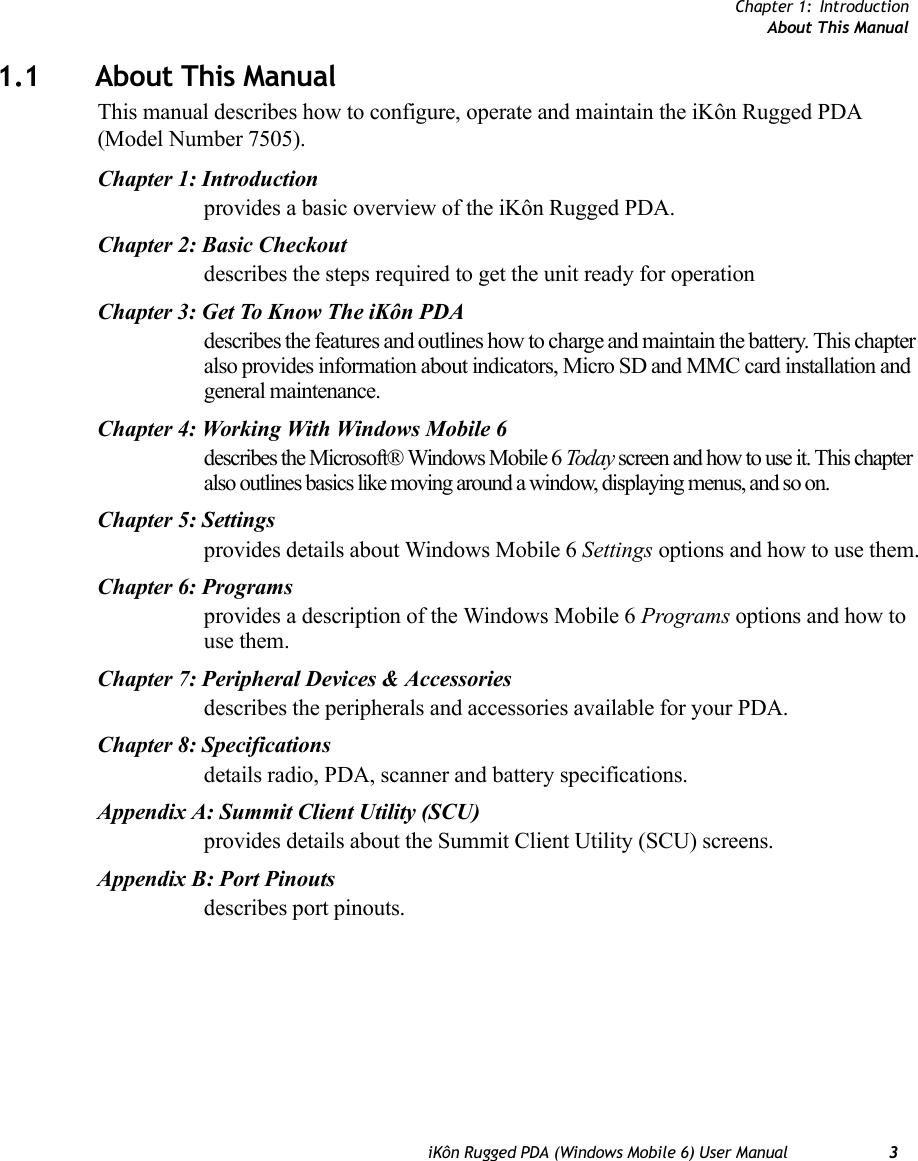
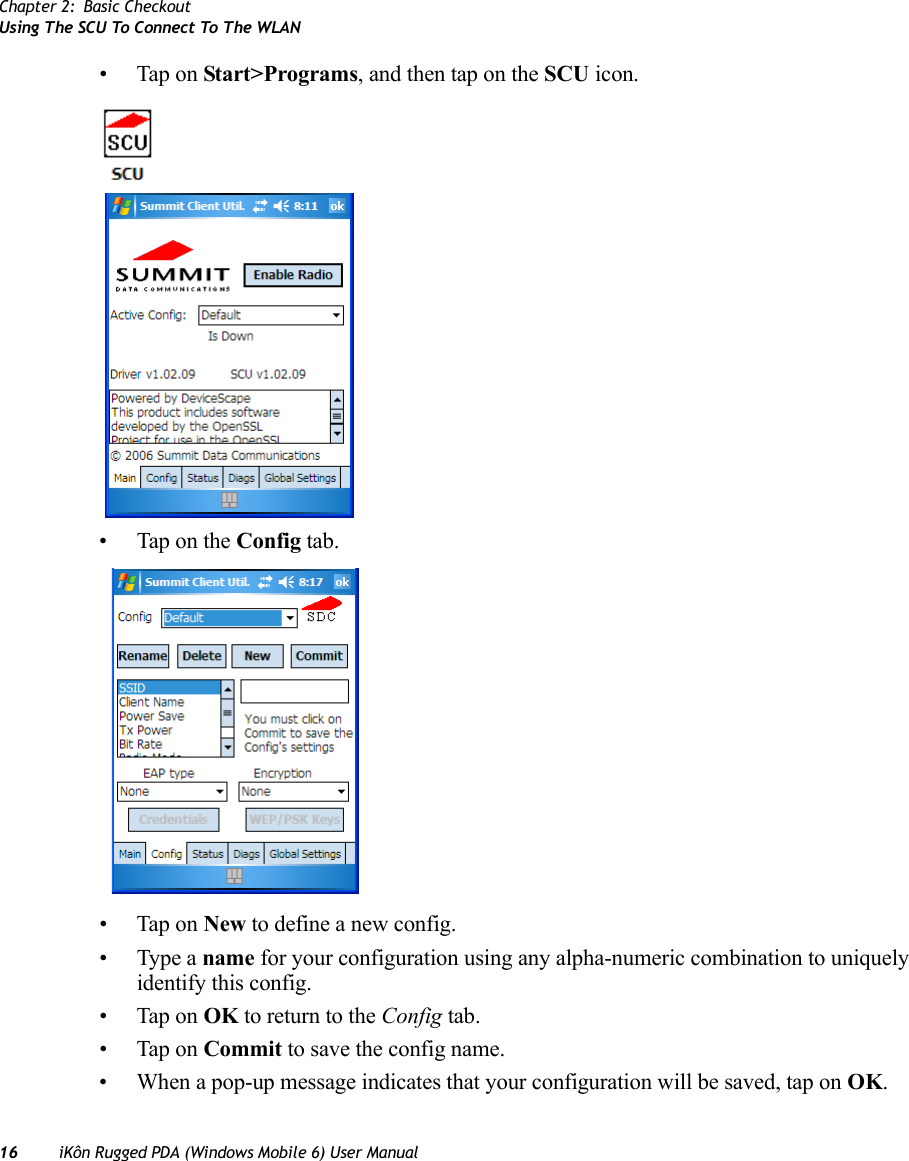
![Chapter 1: IntroductionThe iKôn Rugged PDAiKôn Rugged PDA (Windows Mobile 6) User Manual 7Figure 1.2 Phone LabelsTalkKey KeyEndNote: The [Talk] and [End] phone keys printed on the PDA shown in the picture above are useful for units equipped with Windows Mobile 6 Professional that support the phone feature. Refer to “Send & End Phone Calls Using The Phone Keypad” on page 18 for details](https://usermanual.wiki/Psion/7505BTSDCMHC25.users-manual-host-part-1/User-Guide-876471-Page-41.png)

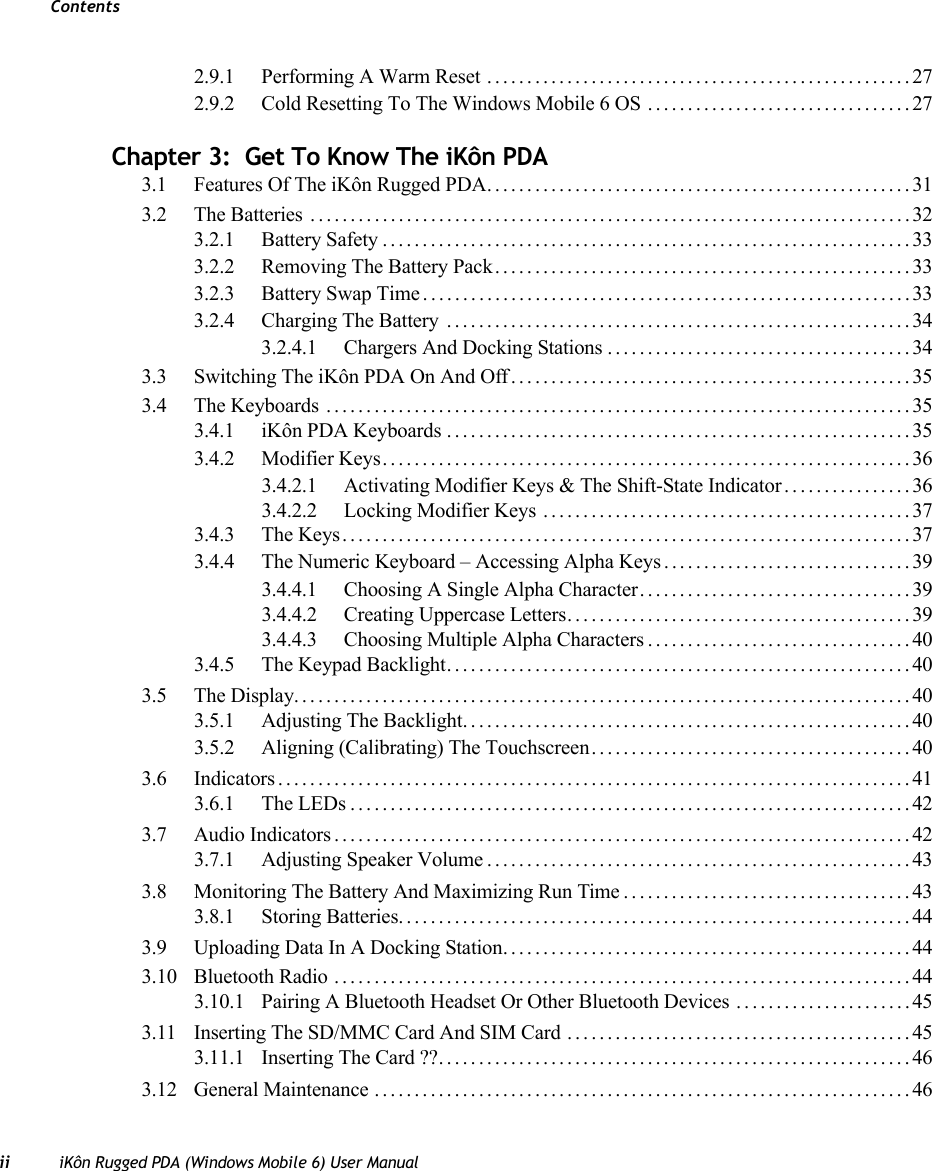
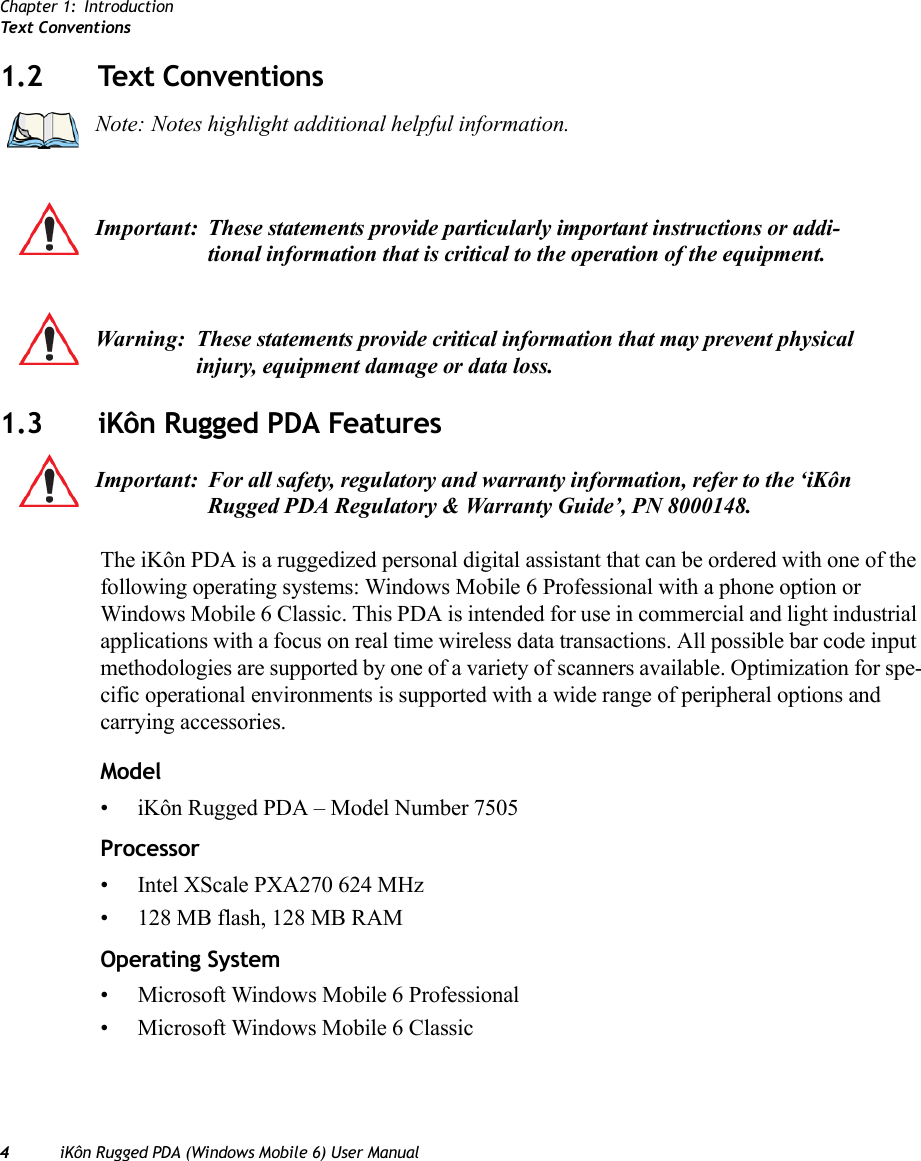
![Chapter 2: Basic CheckoutSwitching The Unit Off (Suspend)12 iKôn Rugged PDA (Windows Mobile 6) User Manual• Snap the charged battery into the unit. Replace the battery cover, and lock the fasteners in place.To switch on the iKôn PDA:• Press and hold down the Power button for at least one second.• When the LED flashes green, release the Power button.The desktop Today screen is displayed.2.2.2 Switching The Unit Off (Suspend)• Press the Power button.2.3 The Getting Started CD ??The Getting Started CD shipped with your unit runs automatically when inserted, Display-ing a start-up screen. Note: If you are using a docking station or an external power supply, you can insert an uncharged battery, dock the unit and switch it on. Note: If the unit was already in use–the unit may be off (suspend state)–pressing [ENTER] ‘wakes’ the unit from this state. The screen in which you were working prior to the suspend state is displayed. “Wakeup Keys Tab” on page 127 describes how you can assign other ‘wakeup’ keys or enable a two-key ‘power on’ sequence.](https://usermanual.wiki/Psion/7505BTSDCMHC25.users-manual-host-part-1/User-Guide-876471-Page-46.png)
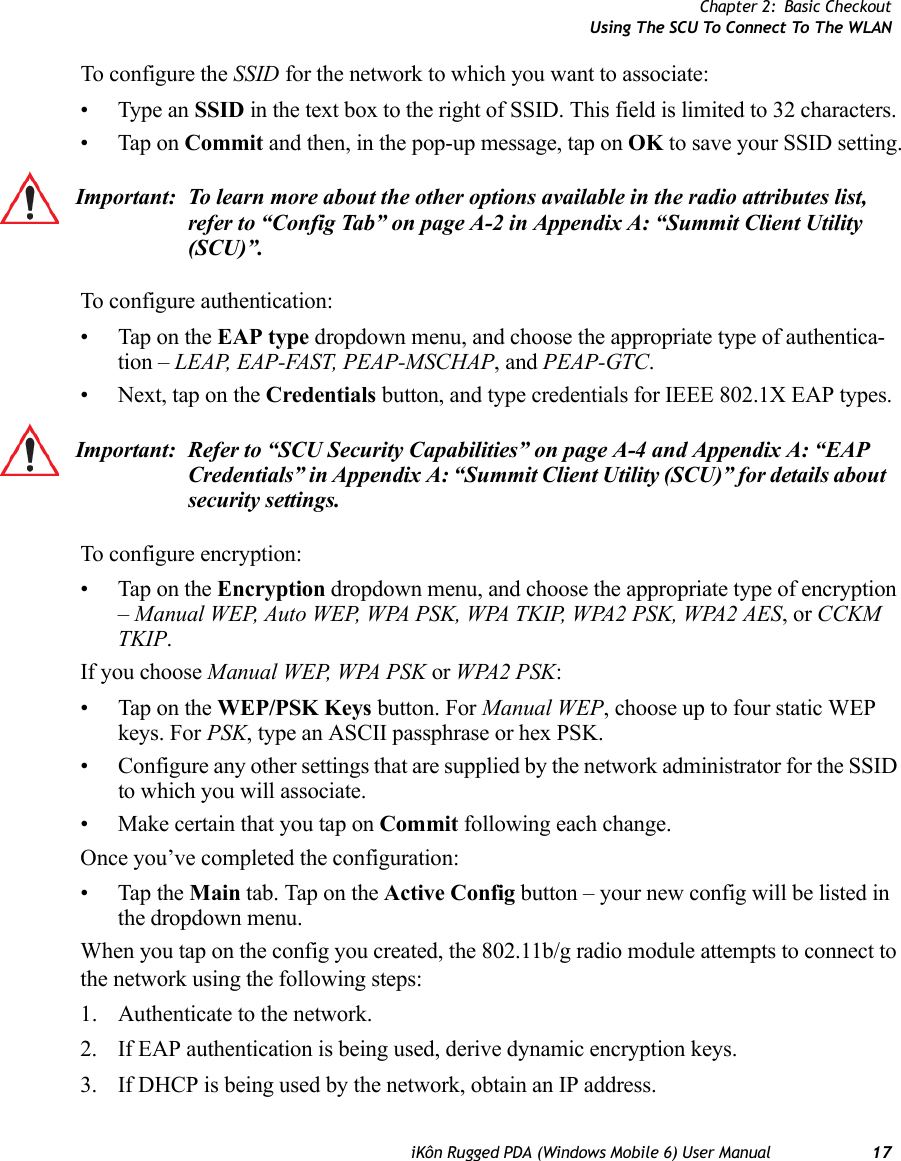
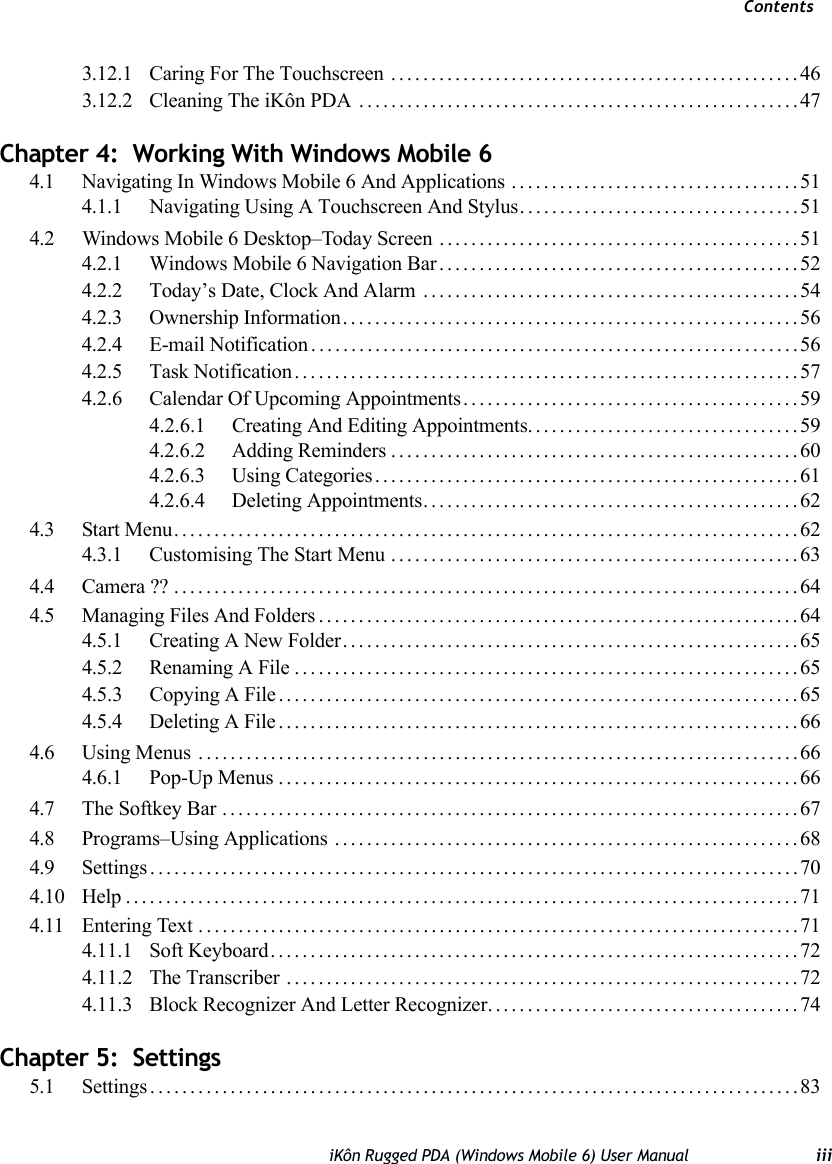
![Chapter 2: Basic CheckoutThe Phone (Windows Mobile 6 Professional Only)18 iKôn Rugged PDA (Windows Mobile 6) User ManualIf the 802.11b/g is not connecting properly:• Tap on the Status tab.The Status dialog box lists the IP and MAC address, and indicates the current state of the radio, the signal strength, channel and so on. You can also use the Status screen for DHCP renewal and ICMP Echo Requests (Pings).2.8 The Phone (Windows Mobile 6 Professional Only)iKôn PDAs running Windows Mobile 6 Professional are equipped with phone capabilities.2.8.1 The Phone KeypadThe phone keypad provides phone services like those you use on your cellular phone. You can use the phone keypad provided with your iKôn PDA to, for example, send and receive phone calls, make conference calls, view a list of your phone calls (call history), set up speed dial numbers, etc.2.8.1.1 Send & End Phone Calls Using The Phone KeypadTo display the phone keypad:•In the Today screen, tap the Phone softkey in the softkey bar at the bottom of the screen.Important: For details about the Status dialog box, refer to “Status Tab” on page A-9 in Appendix A: “Summit Client Utility (SCU)”.Note: Remember that you can use the Help feature to find more details about phone options. Help screens are context-sensitive–that is, the help displayed is generally specific to the dialog box you have opened. To further narrow your search, tap on the Search softkey in the Help screen, and type the topic about which you require addi-tional information.Note: You can also press the [Talk] key on the iKôn PDA keyboard to display the phone keypad providing it’s been activated. The [Talk] key is labelled with a green tele-phone receiver icon.Refer to “Send & End Calls Using The iKôn PDA Keyboard” on page 23 for details.](https://usermanual.wiki/Psion/7505BTSDCMHC25.users-manual-host-part-1/User-Guide-876471-Page-52.png)
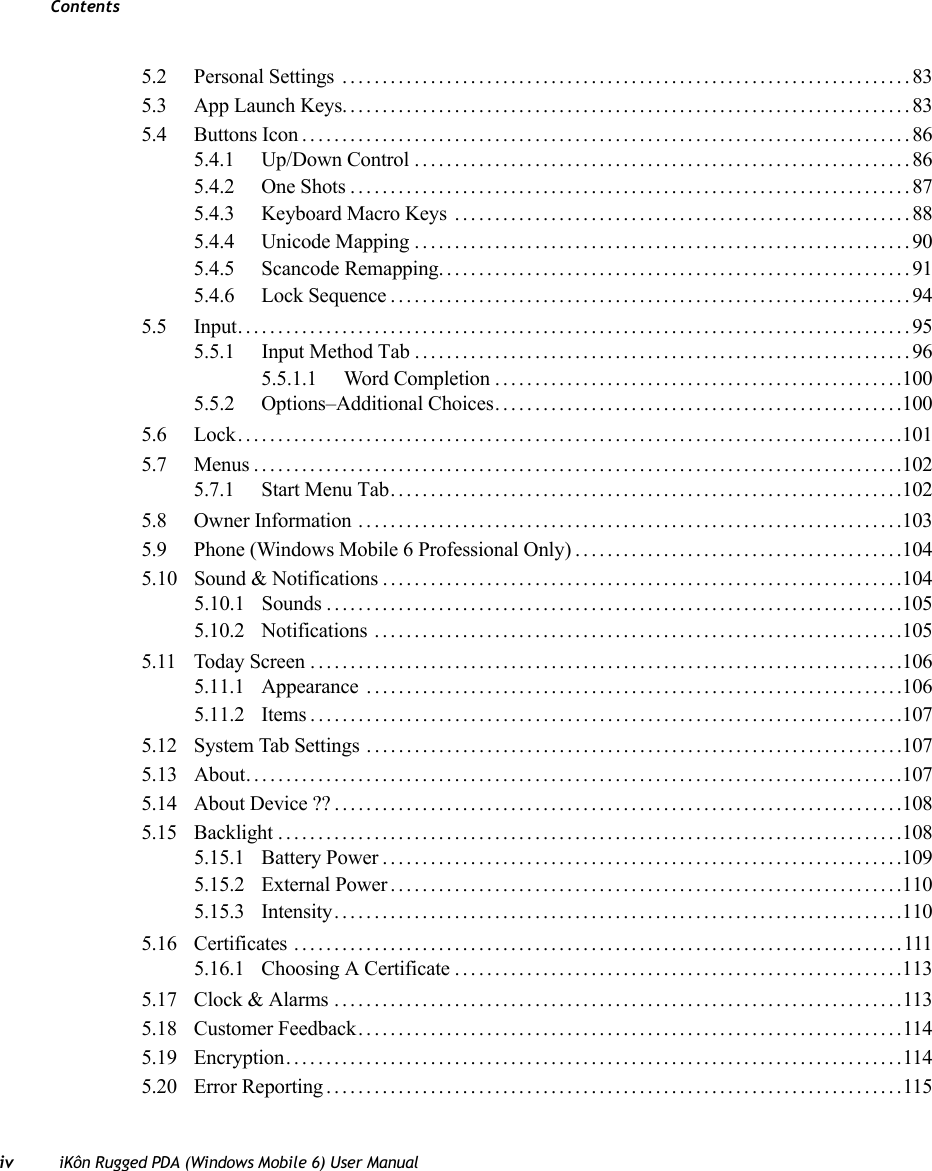
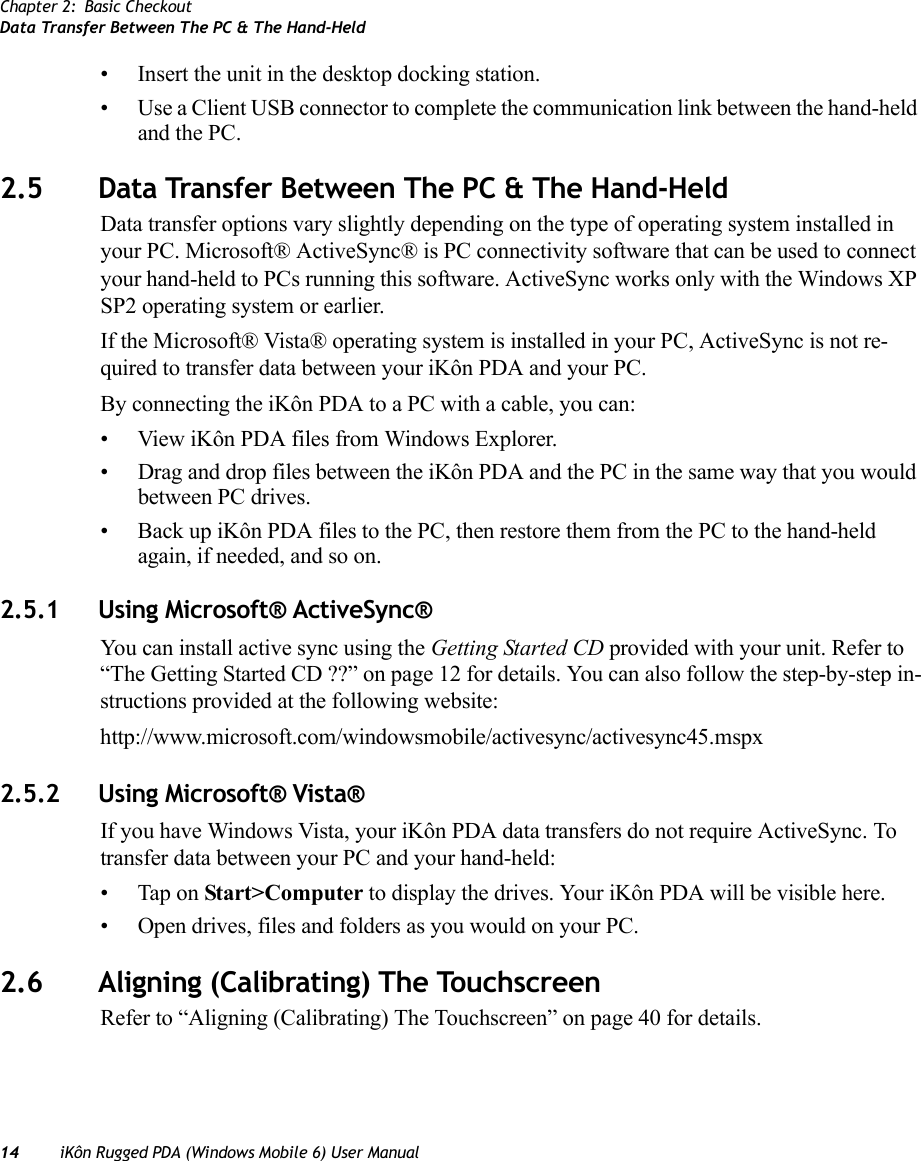
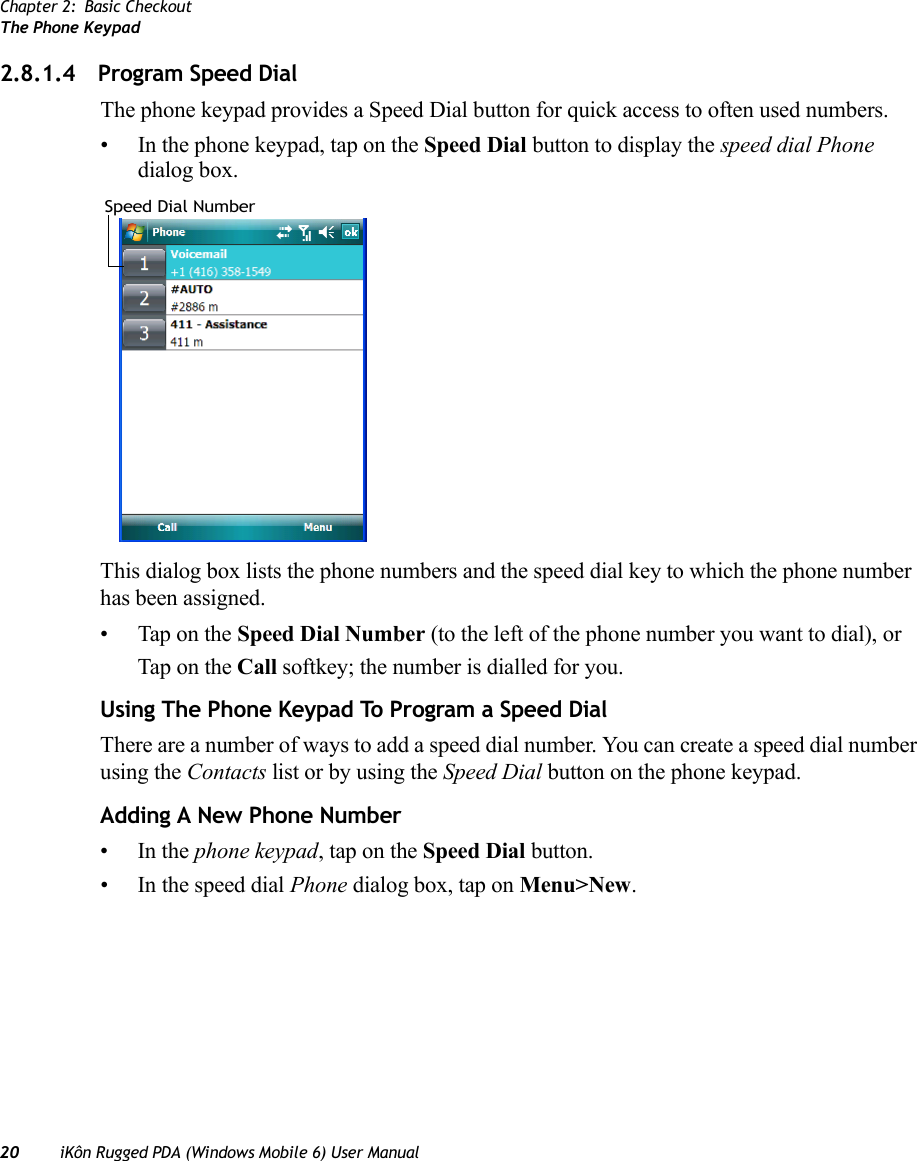
![Chapter 2: Basic CheckoutThe Phone KeypadiKôn Rugged PDA (Windows Mobile 6) User Manual 19To send a number:• Use the phone keypad to enter the phone number, and tap on [Talk] to dial the phone number. To end a phone call:• Tap on [End] button on the phone keypad.2.8.1.2 Make A Conference CallTo set up a conference call between yourself and two or more other parties: • In the phone keypad, type the first phone number. Tap on [Talk].• While you are connected to the first number, tap on Menu>Hold. • Type the second number. Tap on [Talk].• Tap on Menu>Conference. • To add another party, tap on Menu>Hold, type the number, and then tap Menu>Conference. • Tap on [End] to disconnect all calls. 2.8.1.3 Receive An Incoming CallTo answer an incoming call:• Tap on the [Talk] button; it’s labelled with a green phone receiver.Network emergencynumberPhone settingsDirectory AssistanceNote: You can also tap on the [End] key on the physical keyboard of the iKôn PDA to end the call. The [End] key is labelled with a red phone receiver. Refer to “Send & End Calls Using The iKôn PDA Keyboard” on page 23 for details.](https://usermanual.wiki/Psion/7505BTSDCMHC25.users-manual-host-part-1/User-Guide-876471-Page-53.png)
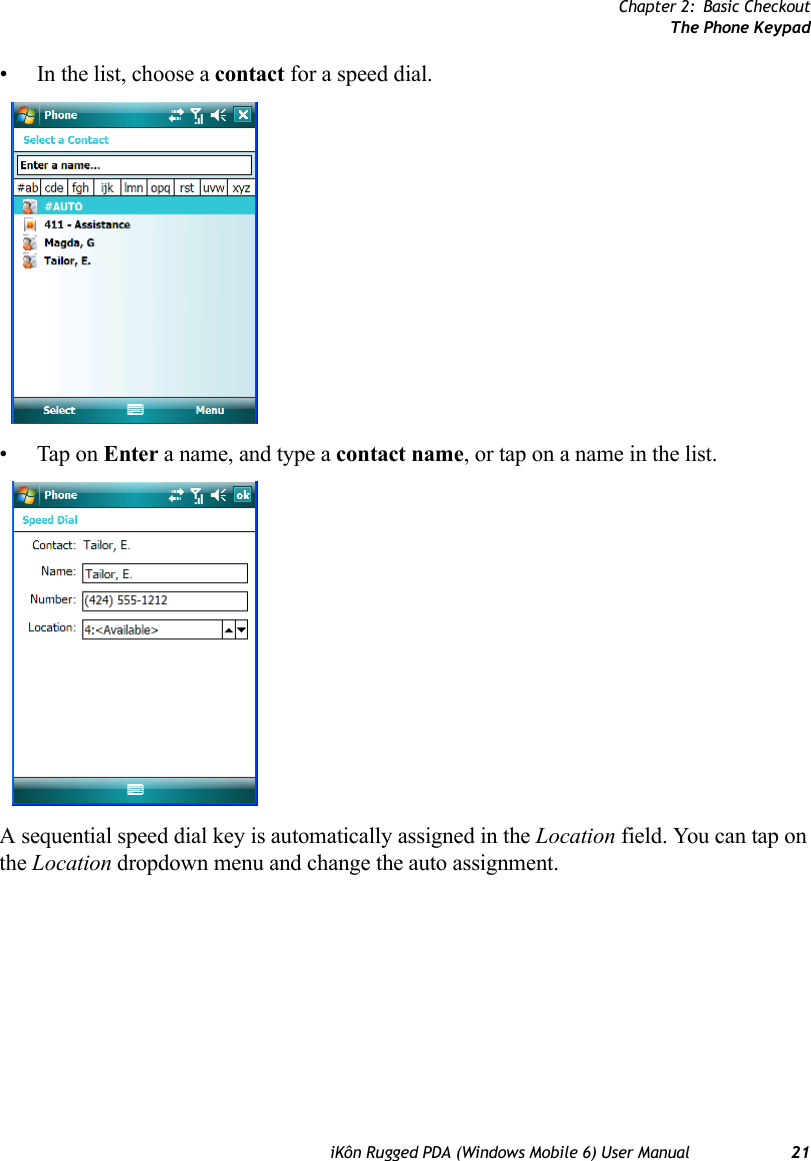
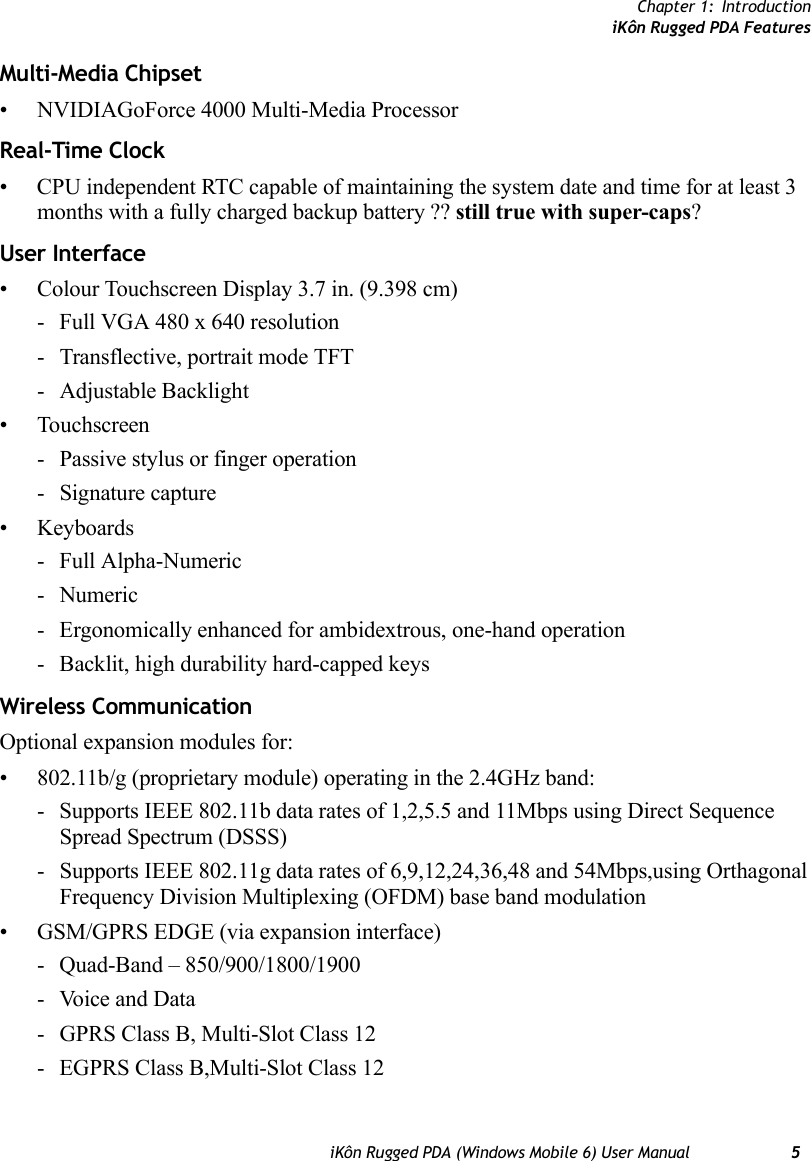
![Chapter 2: Basic CheckoutSend & End Calls Using The iKôn PDA KeyboardiKôn Rugged PDA (Windows Mobile 6) User Manual 232.8.2 Send & End Calls Using The iKôn PDA KeyboardA iKôn PDA that supports the phone feature is equipped with a [Talk] and an [End] call key on the unit keyboard. Using these phone keys, you can display the phone keypad and answer, send and terminate phone calls. If you press the [Talk] or [End] key with no result, you may first need to acti-vate them.Activating The [Talk] And [End] Keyboard Phone KeysTo activate the phone function of these keys:• Tap on Start>Settings>System tab>About Device icon. Ta l k E n d](https://usermanual.wiki/Psion/7505BTSDCMHC25.users-manual-host-part-1/User-Guide-876471-Page-57.png)
![Chapter 2: Basic CheckoutResetting The iKôn PDAiKôn Rugged PDA (Windows Mobile 6) User Manual 272.8.3.3 Network TabThis dialog box identifies your current network, and allows you to view available networks and determine the order in which other preferred networks will be accessed if the current one is unavailable.You can also specify manual or automatic network changes, and you can add a network.2.9 Resetting The iKôn PDAWhen you reset your hand-held, the registry settings and any installed programs (stored on the flash file system) and data are preserved.2.9.1 Performing A Warm Reset• Press and hold down the [FN/BLUE] key and the [ENTER] key simultaneously for a minimum of six seconds. When the splash screen appears, release the keys.2.9.2 Cold Resetting To The Windows Mobile 6 OSTo perform a cold reset and launch the Windows Mobile 6 operating system (bypassing the BooSt menu):• Press and hold down the [FN/BLUE] [FN/ORANGE] and [ENTER] keys simultane-ously for a minimum of six seconds.Note: You do not need to reset your iKôn PDA after configuring the radio.](https://usermanual.wiki/Psion/7505BTSDCMHC25.users-manual-host-part-1/User-Guide-876471-Page-61.png)
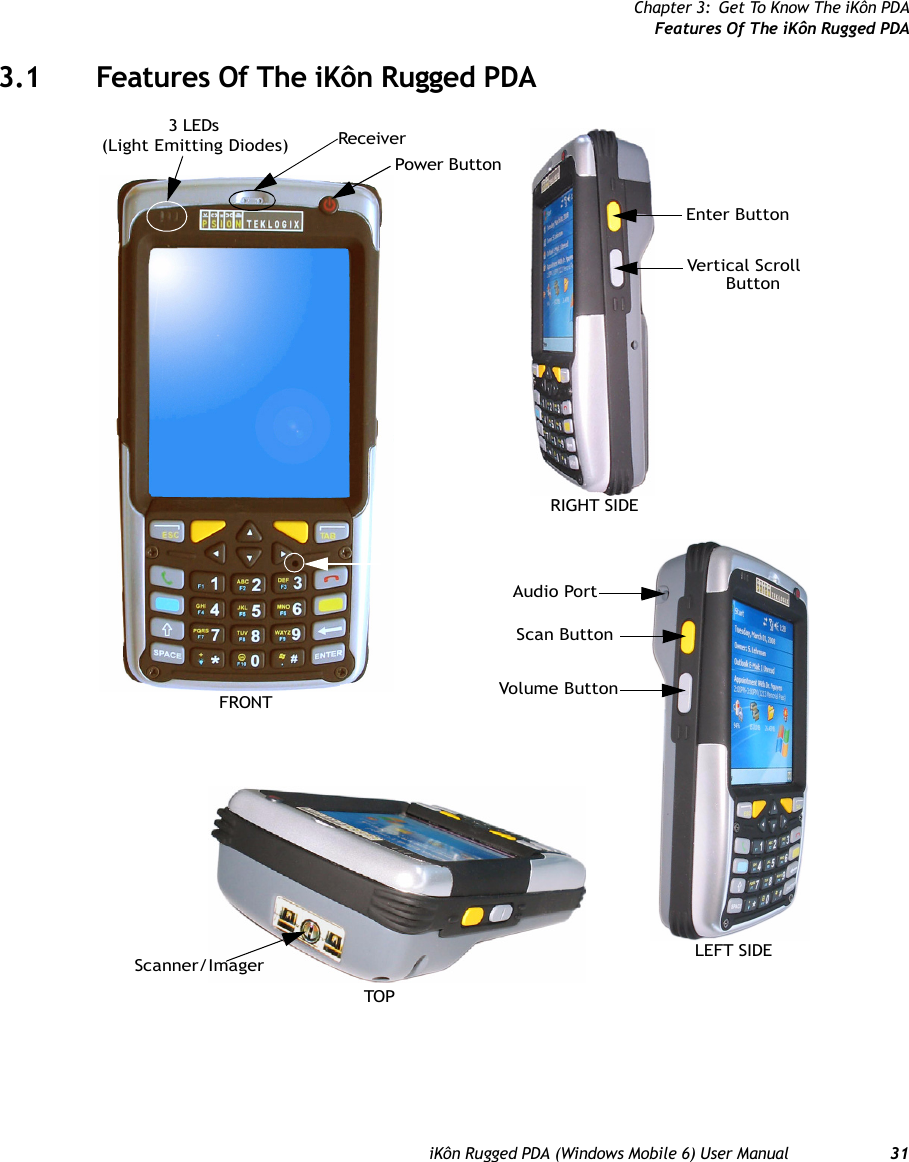
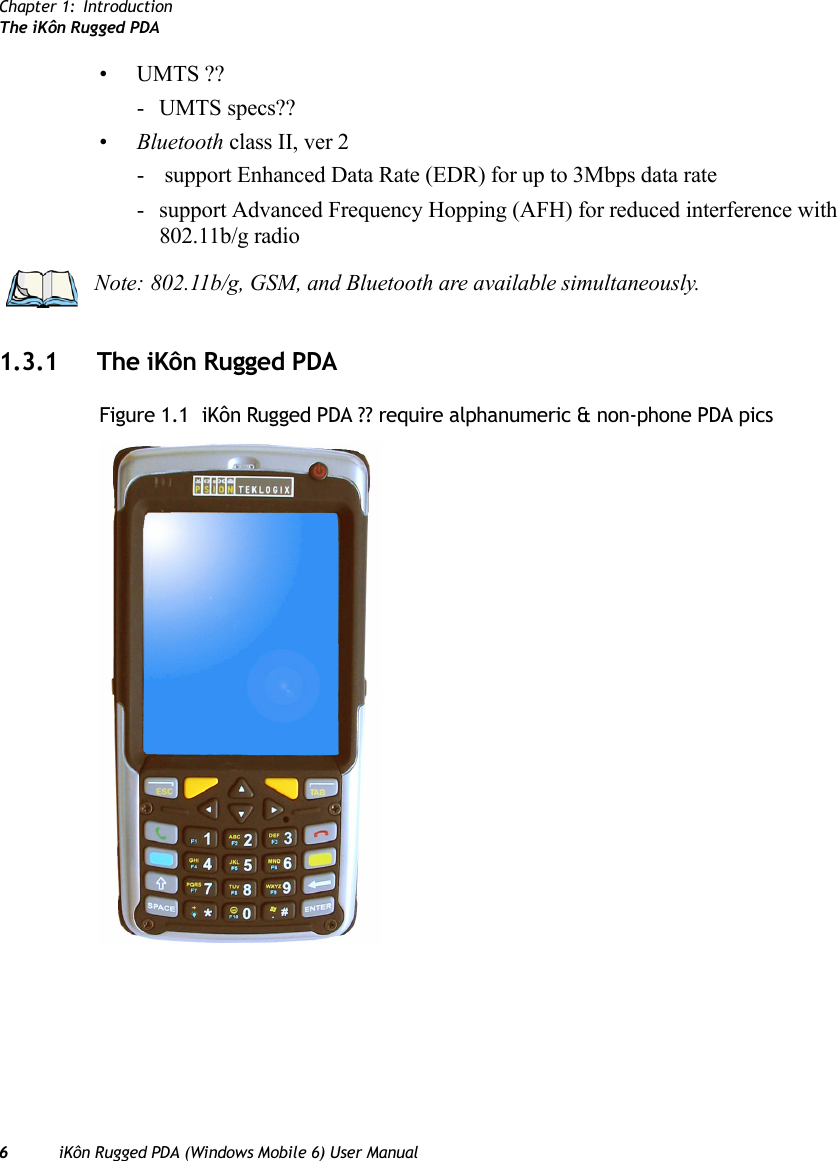
![Chapter 3: Get To Know The iKôn PDASwitching The iKôn PDA On And OffiKôn Rugged PDA (Windows Mobile 6) User Manual 353.3 Switching The iKôn PDA On And OffSwitching On The iKôn PDA• Press and hold down the Power button for at least one second. ??• When the LED flashes green, release the Power button. ??The startup Today screen is displayed.Switching Off The iKôn PDA (Suspend)To switch off the iKôn PDA:• Press the Power button.3.4 The Keyboards3.4.1 iKôn PDA KeyboardsThe following iKôn PDA keyboards are available:• 28-key numeric keyboard• 47-key alpha-numeric keyboardMost of the keys on these keyboards operate much like a desktop computer. Where a key or key function is not consistent with the PC keyboard, the differences are noted.The [FN/BLUE] and [FN/ORANGE] modifier keys provide access to additional keys and system functions. These functions are colour coded in orange and blue print above the key-board keys.Note: If the iKôn PDA is in suspend state, pressing the Power button ?? or ?? [ENTER] key ?? OR EITHER ?? ‘wakes’ the unit from this state. The screen in which you were working before the computer entered suspend state is displayed. Section 5.24.6 on page 127 describes how you can assign other ‘wakeup’ keys or enable a two-key ‘power on’ sequence ??.Important: Keep in mind that turning off the iKôn PDA does not result in a complete reboot; rather, the unit enters a power-saving, “suspend” state. When the unit is turned on from suspend state, operation resumes within a few seconds. Note: Depending on the operating system installed in your unit – Windows Mobile 6 Clas-sic or Windows Mobile 6 Professional – the keyboard keys will vary slightly.](https://usermanual.wiki/Psion/7505BTSDCMHC25.users-manual-host-part-1/User-Guide-876471-Page-69.png)
![Chapter 3: Get To Know The iKôn PDAModifier Keys36 iKôn Rugged PDA (Windows Mobile 6) User Manual3.4.2 Modifier KeysThe [SHIFT], [CTRL], [ALT], [FN/BLUE] and [FN/ORANGE] keys are modifier keys. Pressing a modifier key changes the function of the next key pressed. ?? For example, on a iKôn PDA C, 47-key keyboard, a square bracket is printed in orange print above the [4] key. Pressing the [FN/ORANGE] key followed by the [4] key displays a square bracket rather than the number 4. ?? The [SHIFT], [CTRL] and [ALT] keys operate much like a desktop keyboard except that they are not chorded (two keys held down simultaneously). The modifier key must be pressed first followed by the key whose function you want modified.3.4.2.1 Activating Modifier Keys & The Shift-State IndicatorWhen a modifier key is pressed, it is represented in the shift-state indicator icon in the softkey bar at the bottom of the screen, making it easier to determine whether or not a modi-fier key is active. If the shift-state indicator icon is not visible (you can only see the soft keyboard icon), you may need to take a few steps to display the shift-state indicator icon.• Tap on Start>Settings followed by the Buttons icon.• Tap on the One Shots tab at the bottom of the screen.• Tap in the check box next to Show modifier key state to display the shift-state indicator icon.Figure 3.3 Shift-State Indicator IconNote: Almost all keys can be reprogrammed to suit your requirements.Soft Keyboard IconShift-State Indicator Icon replaces Soft Keyboard Icon](https://usermanual.wiki/Psion/7505BTSDCMHC25.users-manual-host-part-1/User-Guide-876471-Page-70.png)
![Chapter 3: Get To Know The iKôn PDAThe KeysiKôn Rugged PDA (Windows Mobile 6) User Manual 373.4.2.2 Locking Modifier KeysWhen a modifier key is locked ‘on’, it will remain active until it is pressed again to unlock or turn it off. To help you identify when a modifier key is locked ‘on’, the key is represented in the shift-state indicator icon with a black frame around it. Figure 3.4 Shift-State Indicator Icon – Locked Modifier KeyOnce a modifier key is unlocked or turned off, it is no longer displayed in the shift-state in-dicator icon.3.4.3 The KeysThe [SHIFT] KeyThe [SHIFT] key is used to display uppercase alpha characters and provide access to the symbols above the numeric keys. You can lock this key ‘on’ so that when you press an alpha key, an upper case character is displayed. When you press a numeric key, the associated symbol on the numeric key is displayed on the screen.If you press the [SHIFT] key twice, it is locked ‘on’ essentially acting as a [CAPS] key, dis-playing uppercase characters. In this state, if you type a numeric key, the number rather than the symbol above it is displayed. Press [SHIFT] again to turn the [CAPS] function off.The Arrow KeysThe Arrow keys are located near the top of the keyboard. The arrow keys move the cursor around the screen–up, down, left and right. The cursor is the flashing box or underline char-acter that indicates where the next character you type will appear.The [BKSP/DEL] KeyThe [BKSP] key (sometimes referred to as destructive backspace) moves the cursor one character to the left, erasing the incorrectly entered key stroke. The [DEL] key ([FN/BLUE] [BKSP]) erases the character at the cursor position.Note: The locking behaviour of the modifier keys can be changed so that, for example, pressing a modifier key once will lock the key ‘on’. Refer to “One Shots” on page 87 for details. Note too that by default, the [FN/ORANGE] key is locked ‘on’ when pressed only once.](https://usermanual.wiki/Psion/7505BTSDCMHC25.users-manual-host-part-1/User-Guide-876471-Page-71.png)
![Chapter 3: Get To Know The iKôn PDAThe Keys38 iKôn Rugged PDA (Windows Mobile 6) User ManualThe [ALT] And [CTRL] KeysThe [ALT] and [CTRL] keys modify the function of the next key pressed and are application dependent. Note that if your keyboard is equipped with [Talk] and [End] phone keys, the [ALT] and [CTRL] keys are displayed as softkeys on the PDA screen.The [TAB] KeyTypically, the [TAB] key moves the cursor to the next field to the right or downward.The [ESC] KeyGenerally, this key is used as a keyboard shortcut to close the current menu, dialog box or activity and return to the previous one.The [SPACE] KeyPressing this key inserts a blank space between characters. In a Windows dialog box, press-ing the [SPACE] key enables or disables a checkbox.The [SCAN] KeysThe iKôn PDA is equipped with two [SCAN] keys located just below the display and a [SCAN] button situated on the left of the unit. [SCAN] keys activate the scanner beam. For units that do not have internal scanners, these keys can be remapped to serve other functions.The Function Keys–[F1] to [F10]Function keys [F1] to [F10] perform special, custom-defined functions. These keys are ac-cessed by pressing [FN/BLUE] followed by numeric keys [1] to [10]. They can be used with the Windows Mobile 6 operating system or another application. Keep in mind that the fol-lowing function keys are used by the Windows Mobile 6 operating system: [F1] - softkey 1, [F2] - softkey 2, [F6] - volume up, and [F7] - volume down.Function keys [F1], [F2], [F3] and [F4] labelled in grey boxes next to the [TAB], [ALT], [ESC] and [CTRL] keys allow you to remap these keys for your application.The Macro Keys–[M1] to [M3] ??Macro keys [M1] to [M3] contain up to 20 programmable characters (“positions”) and exe-cutable keys. These keys are accessed by pressing [FN/ORANGE] followed by alpha keys [O], [P] or [Q]. When pressed, the macro key executes a custom-defined string of characters, including executable keys.](https://usermanual.wiki/Psion/7505BTSDCMHC25.users-manual-host-part-1/User-Guide-876471-Page-72.png)
![Chapter 3: Get To Know The iKôn PDAThe Numeric Keyboard – Accessing Alpha KeysiKôn Rugged PDA (Windows Mobile 6) User Manual 393.4.4 The Numeric Keyboard – Accessing Alpha KeysOn numeric keypads, you’ll need to take a few extra steps to access the alphabetic characters.3.4.4.1 Choosing A Single Alpha CharacterThe examples below illustrate how to access, A, B and C, all of which are printed in orange characters above the numeric key [2].To choose the letter a:• Press the [FN/ORANGE] key, and type the numeric key [2].To choose the second letter in the sequence—in this example, the letter b:• Lock the [FN/ORANGE] key ‘on’. A shift-state indicator icon in the softkey bar repre-sents the orange key with a black frame around it to indicate that this key is locked ‘on’.• Press numeric key [2] twice to display the letter b.To choose the third letter in the sequence—in this example, the letter c:• Lock the [FN/ORANGE] key ‘on’. • Press numeric key [2] three times to display the letter c.3.4.4.2 Creating Uppercase LettersTo display capital letters, you need to first lock the [SHIFT] key ‘on’. • Press the [SHIFT] key twice. Important: The letters you choose appear in the softkey bar, providing a visual indicator of which letter will be displayed on the screen.Note: To choose the second, third or fourth alpha character assigned to a numeric key, you may want to lock the [FN/ORANGE] key ‘on’. By default, the [FN/ORANGE] key is locked ‘on’ when pressed once. However, depending on how your unit is set up in the ‘One Shots’ tab, you may find that you need to press the [FN/ORANGE] key twice to lock it ‘on’. Refer to “One Shots” on page 87 for details.Note: Keep in mind that there is a timeout if you pause for one second between key presses when selecting the second, third or fourth letters on a key. For example, suppose you want to type the letter ‘c’ – you would need to press the [2] key three times. With the [FN/ORANGE] key locked ‘on’, if you press [2] twice and then pause between key presses for 1 second, the letter ‘b’ will be selected automatically.](https://usermanual.wiki/Psion/7505BTSDCMHC25.users-manual-host-part-1/User-Guide-876471-Page-73.png)
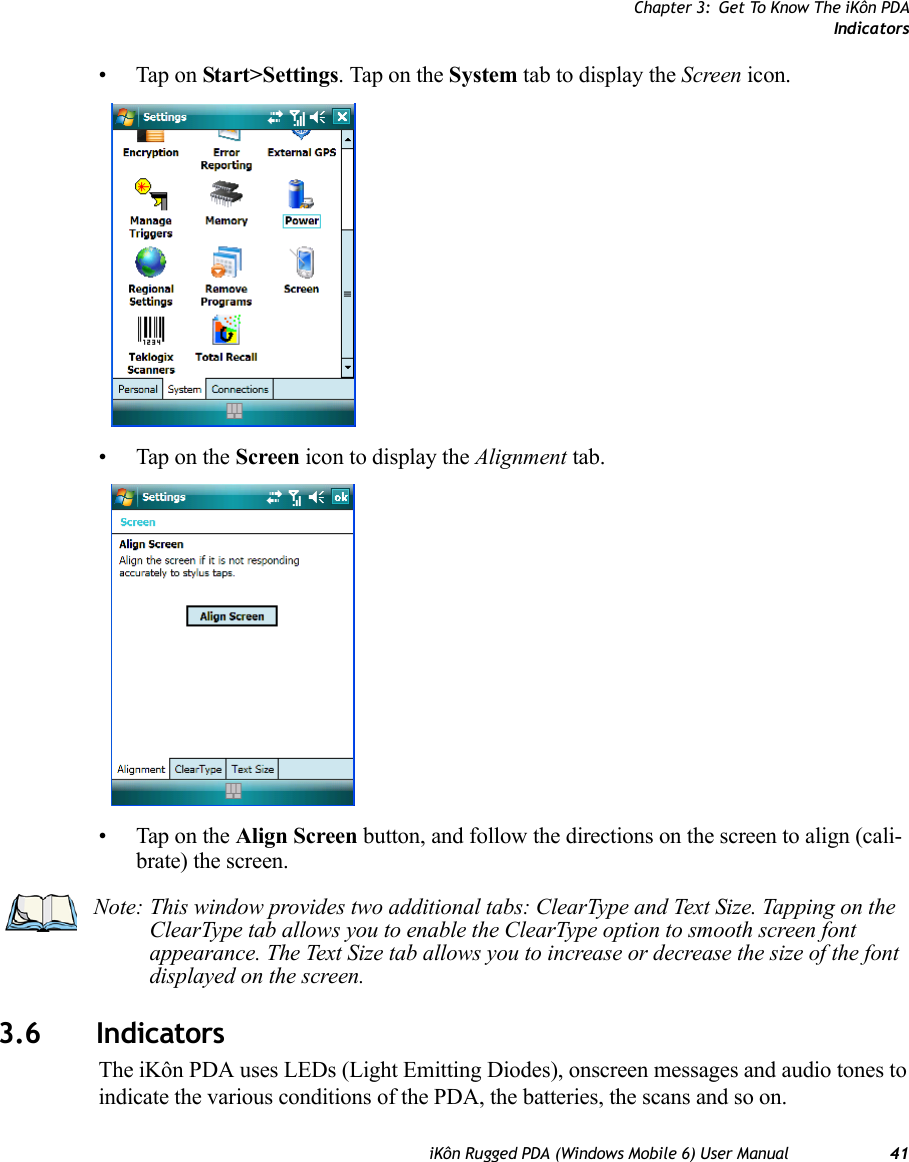
![Chapter 3: Get To Know The iKôn PDAThe Keypad Backlight40 iKôn Rugged PDA (Windows Mobile 6) User ManualAll alpha keys are displayed in uppercase until you press the [SHIFT] key again to ‘unlock’ (switch off) the function of this key.3.4.4.3 Choosing Multiple Alpha Characters• Lock the [FN/ORANGE] key ‘on’.Each time you press a numeric key from [2] through [9], an alpha character will be dis-played on the screen. Remember that you can refer to the softkey bar for a visual indication of which alpha key will be displayed on the screen.3.4.5 The Keypad BacklightThe intensity of the keypad backlight can be configured using the Backlight icon accessed by tapping on Start>Settings. Refer to “Backlight” on page 108 for details about this option.3.5 The DisplayiKôn PDAs are equipped with display backlighting to improve character visibility in low light conditions. The backlight switches on when a key is pressed or the screen is tapped.3.5.1 Adjusting The BacklightTo set the backlight intensity and the duration of time that the backlight will remain on, you’ll need to choose the Backlight icon. • Tap on Start>Settings and then, tap on System tab>Backlight icon.Refer to “Backlight” on page 108 for details.3.5.2 Aligning (Calibrating) The TouchscreenIf your touchscreen has never been aligned (calibrated) or if you find that the stylus pointer is not accurate when you tap on an item, follow the steps below.Important: Once you have finished typing alpha characters, remember to turn off or unlock the [FN/ORANGE] key. Check the shift-state indicator icon (refer to Figure 3.4 on page 37) to make certain that the key is turned off.](https://usermanual.wiki/Psion/7505BTSDCMHC25.users-manual-host-part-1/User-Guide-876471-Page-74.png)