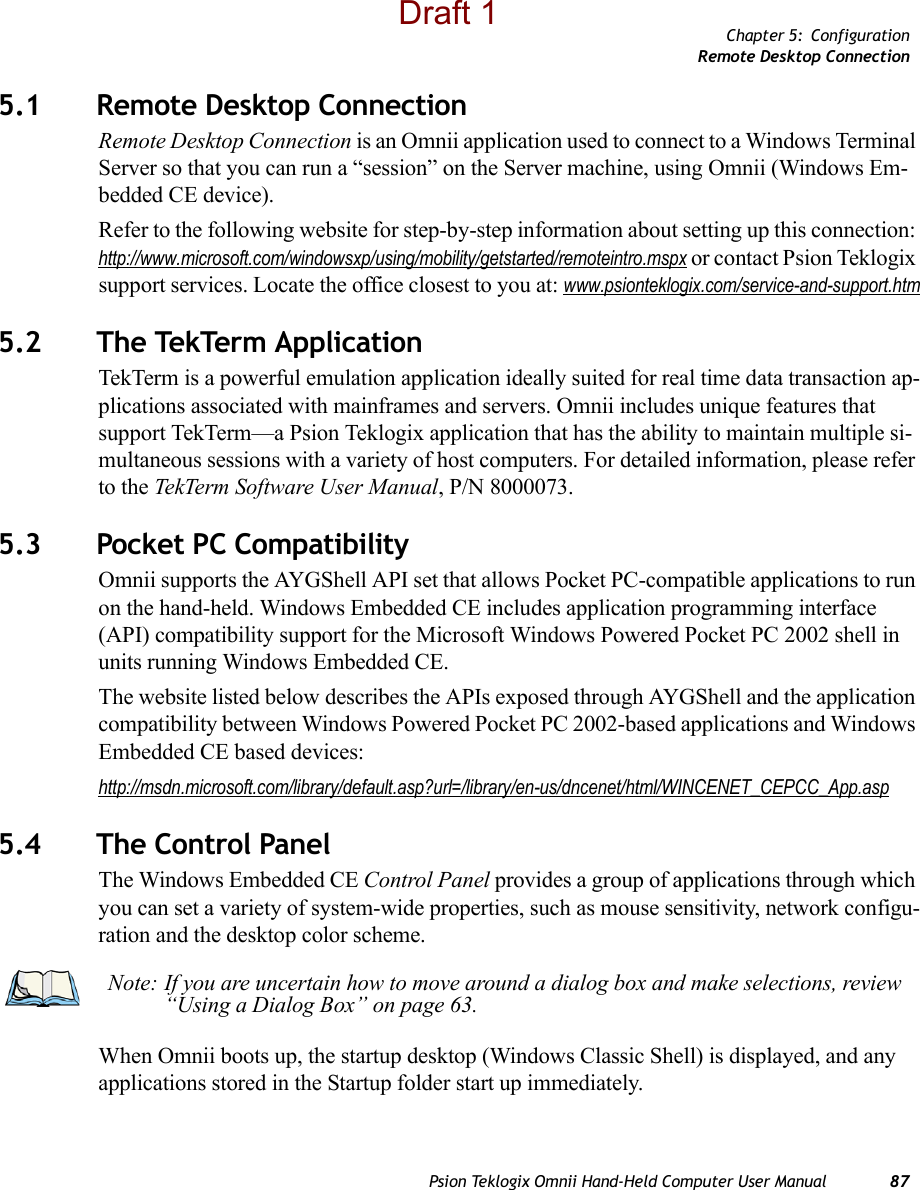
Psion 7545MBW HANDHELD COMPUTER User Manual Omnii Hand Held Computer
Psion Inc HANDHELD COMPUTER Omnii Hand Held Computer
UserManual.wiki
>
Psion
>
7545MBW User Manual
>
USERS MANUAL
Contents
1.
Users Manual
2.
USERS MANUAL
3.
Users Manual 1F
USERS MANUAL
Navigation menu
Upload a User Manual
Namespaces
Wiki Guide
HTML
PDF
Info
Views
User Manual
Discussion / Help
Navigation
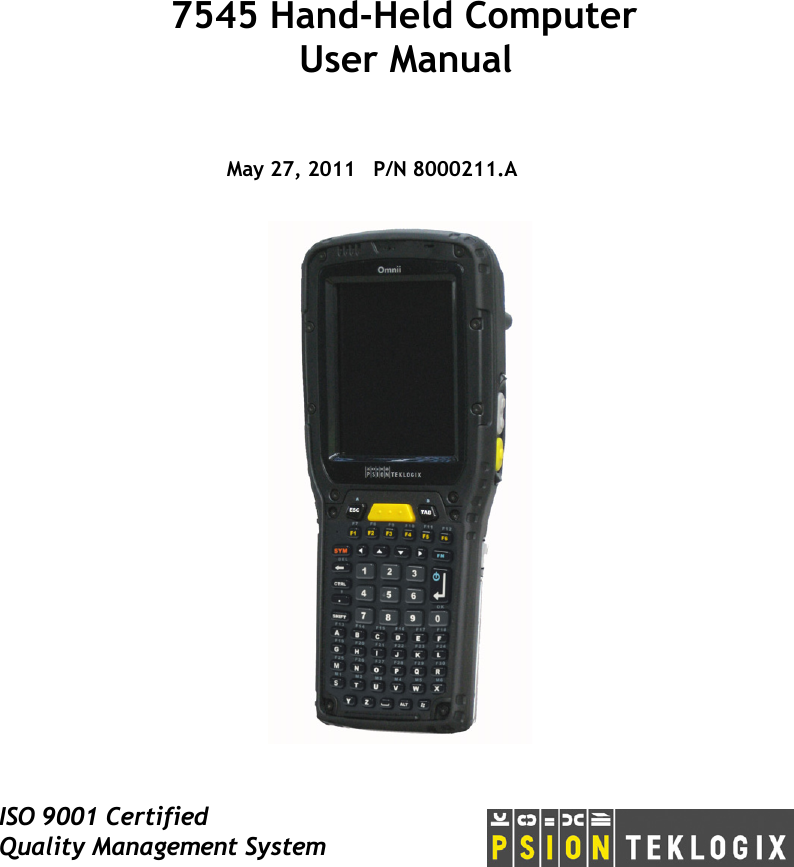

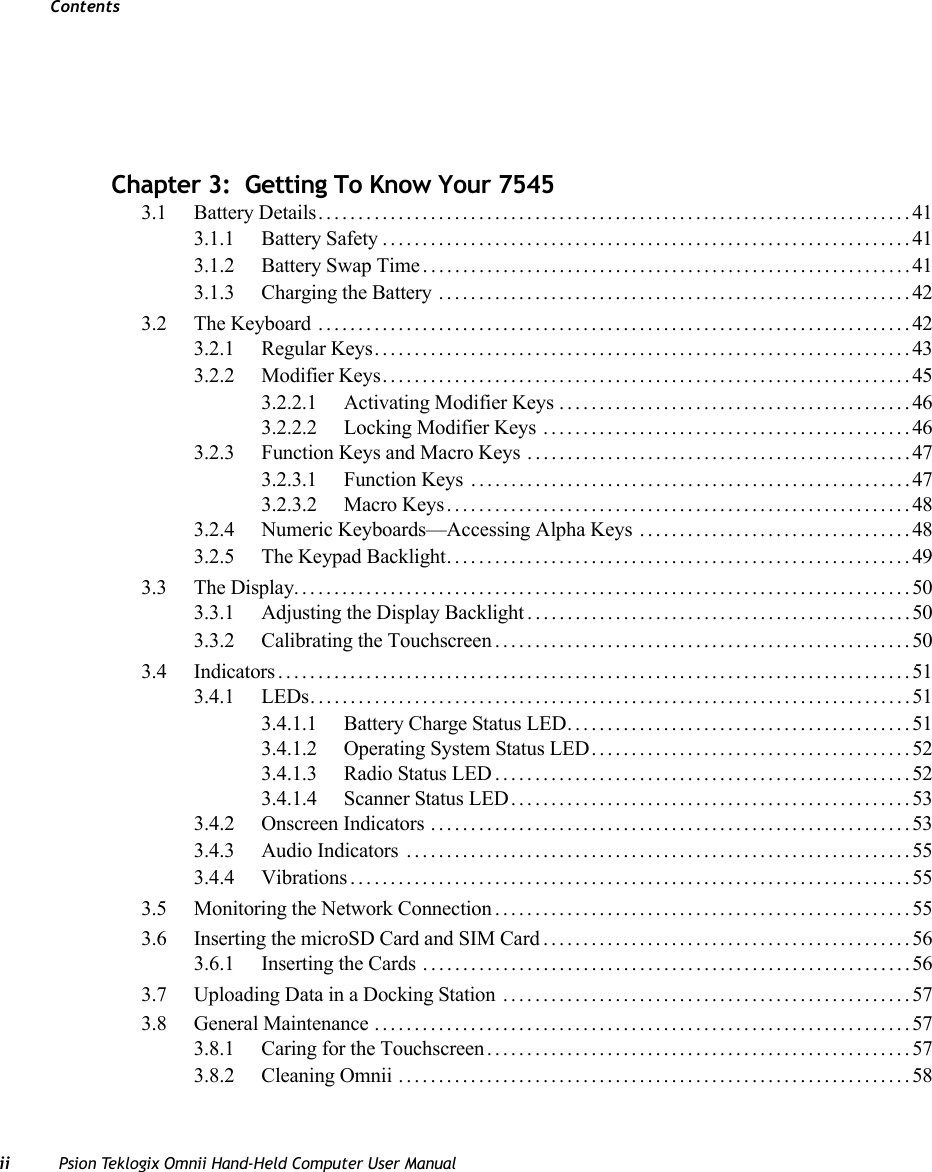


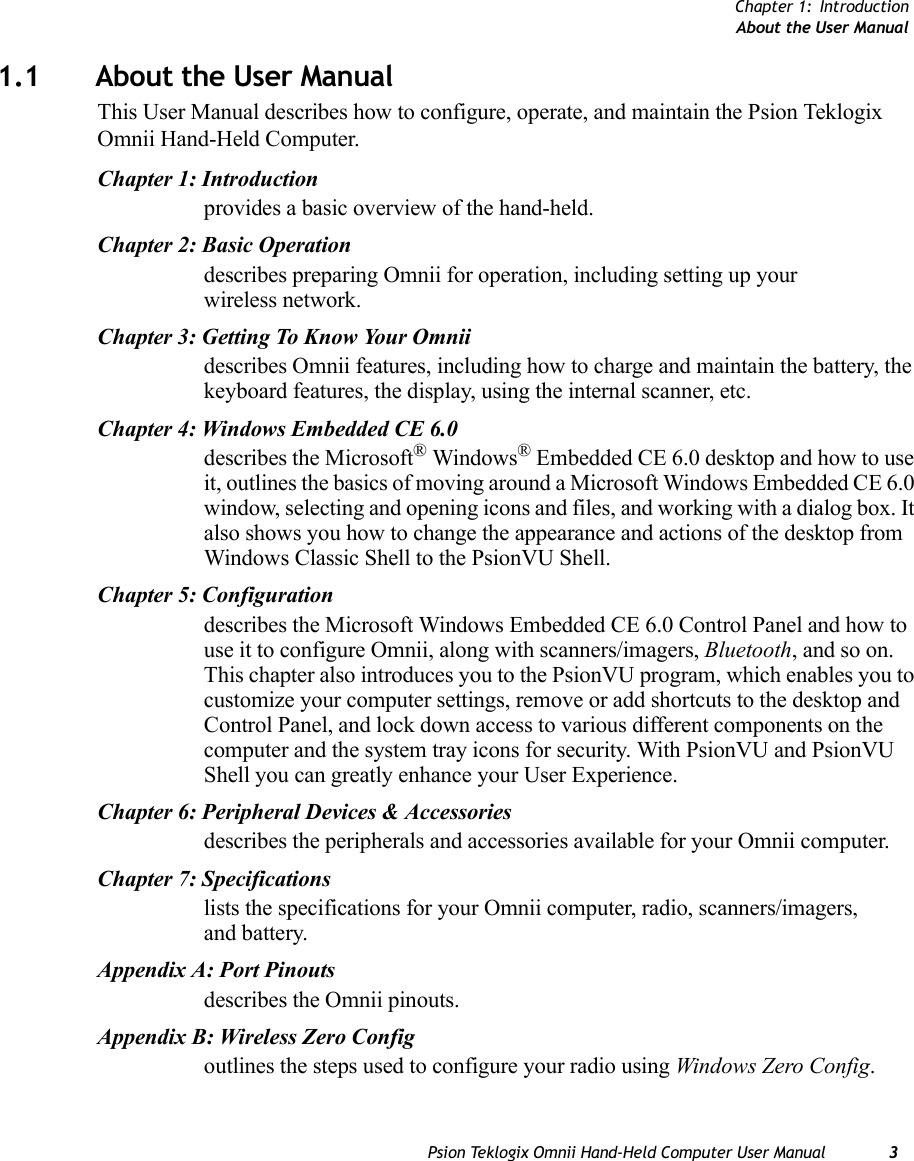
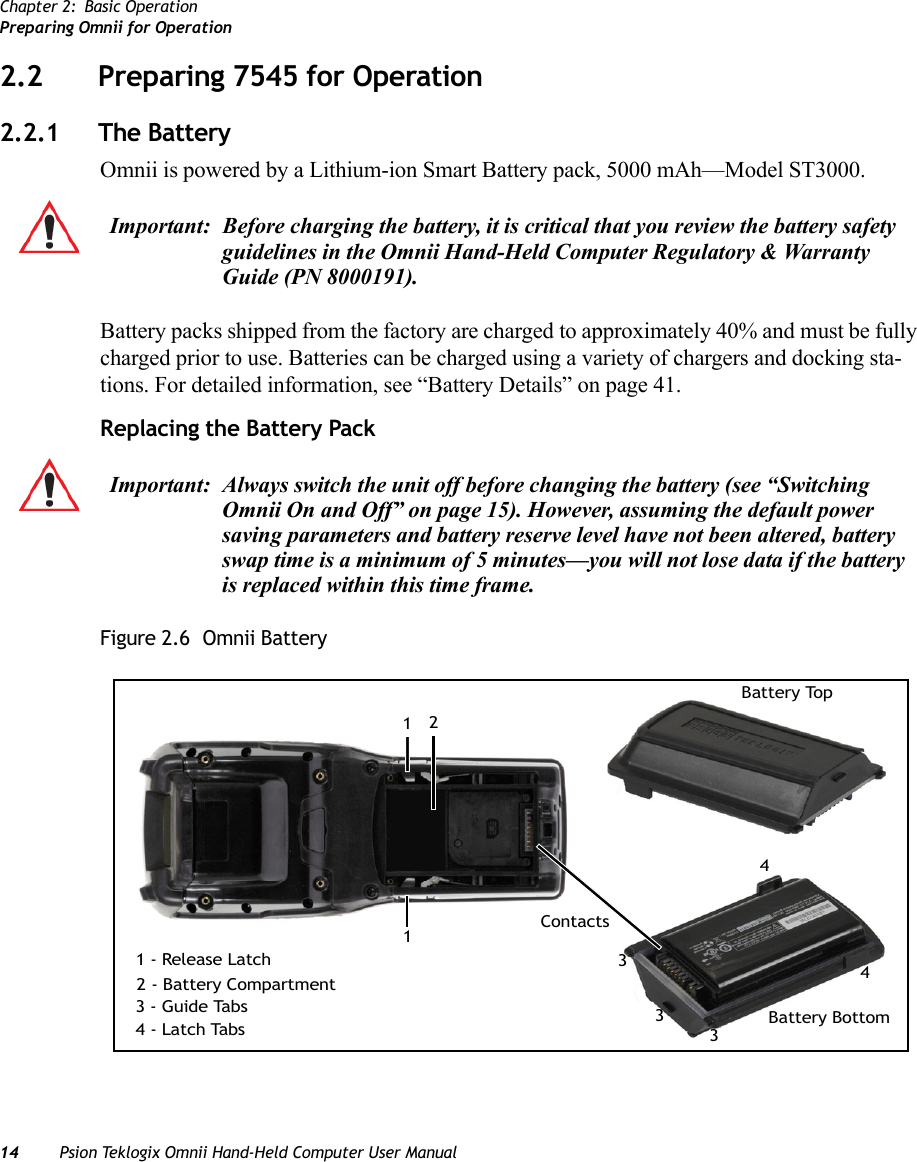
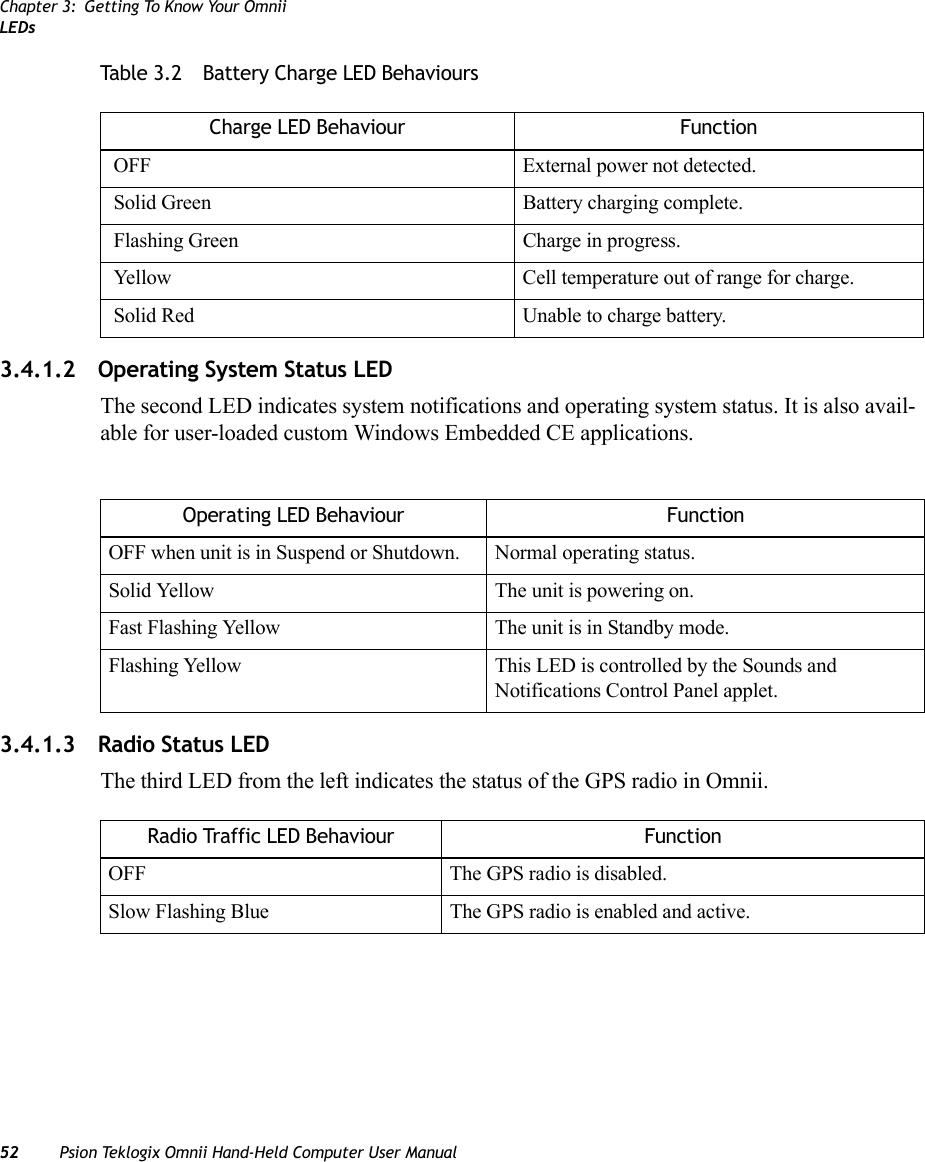
![Chapter 2: Basic OperationSwitching Omnii On and OffPsion Teklogix Omnii Hand-Held Computer User Manual 15Assuming the default power saving parameters and battery reserve level have not been al-tered, a battery can be removed for up to 5 minutes without losing data. After 5 minutes the terminal may reboot.2.2.2 Removing the Battery Pack• If your unit is equipped with a hand or shoulder strap, unhook it from the base of the battery.• Press the two latch buttons at the sides of the compartment simultaneously, and slide the battery out.2.2.3 Installing the Battery Pack• Slide the charged battery with the contoured plastic facing you into the unit with the contacts matching position and the guide tabs moving into the corresponding slots at the base of the compartment. Click both sides of the battery into place.• If your computer is equipped with a hand or shoulder strap, re-attach the clip to the slot at the base of the battery.Switch the unit on (see “Switching Omnii On and Off” on page 15).2.3 Switching Omnii On and OffFollow the instructions below for your Omnii.Switching Omnii On• Press and hold down the [ENTER/Power] key for at least one second. When the unit is turned off, normally it automatically enters a power-saving, “suspend” state. When Omnii is switched on from the suspend state, operation resumes within a few seconds in the screen in which you were working prior to turning the computer off.Note: If you are using a docking station or an external power supply, you can insert an uncharged battery and use the device while the battery charges.](https://usermanual.wiki/Psion/7545MBW.USERS-MANUAL/User-Guide-1507312-Page-32.png)
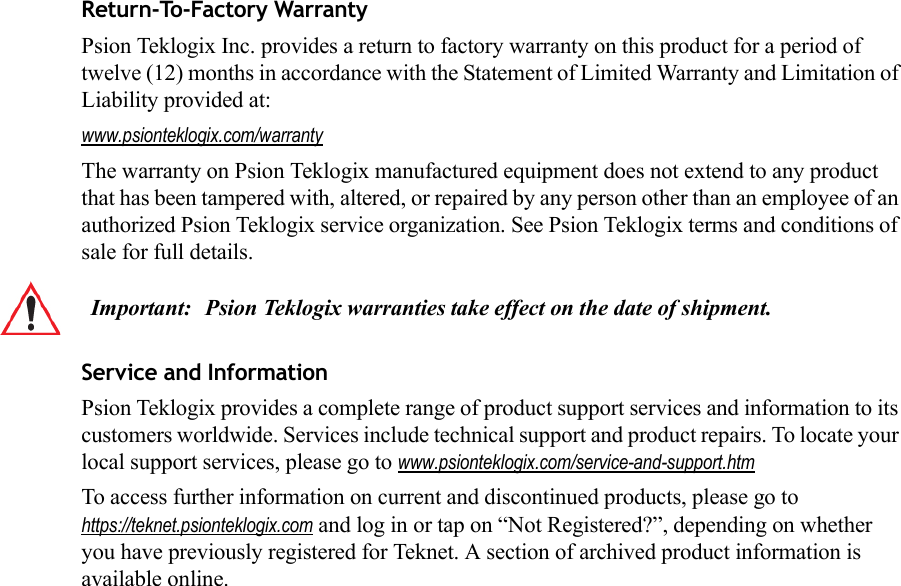
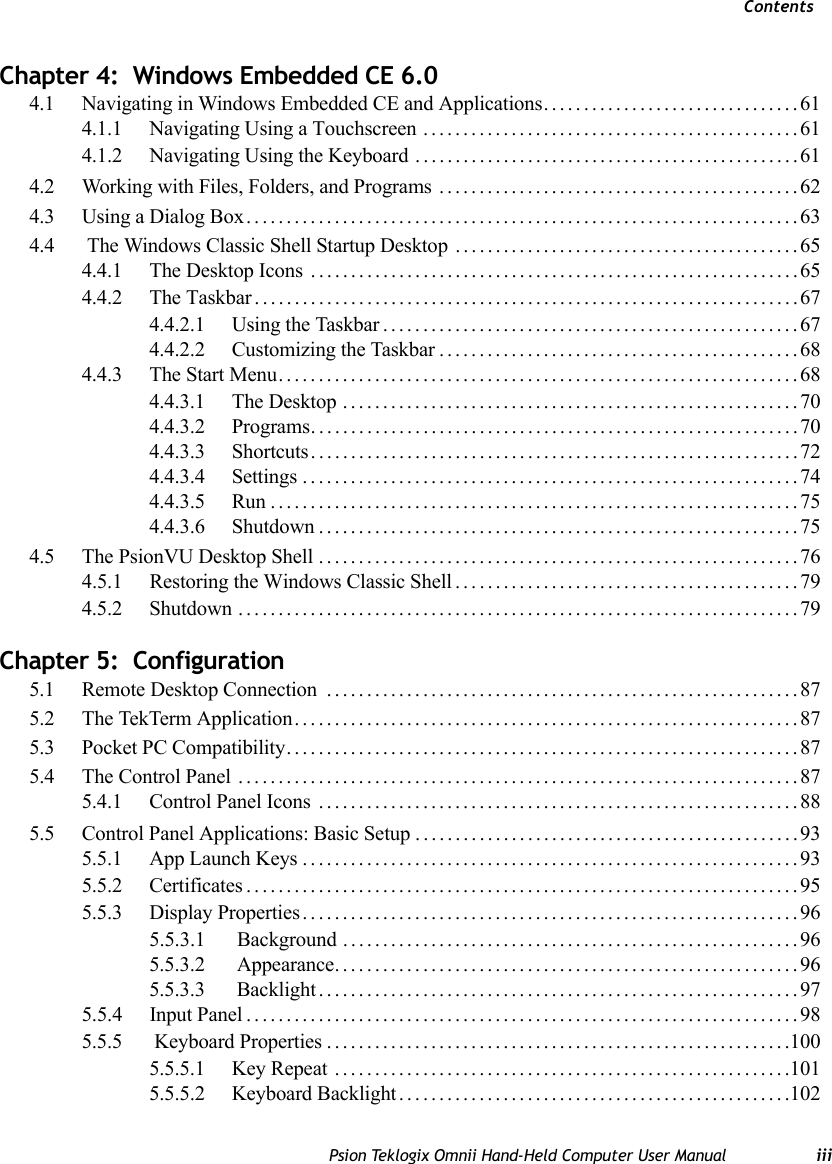
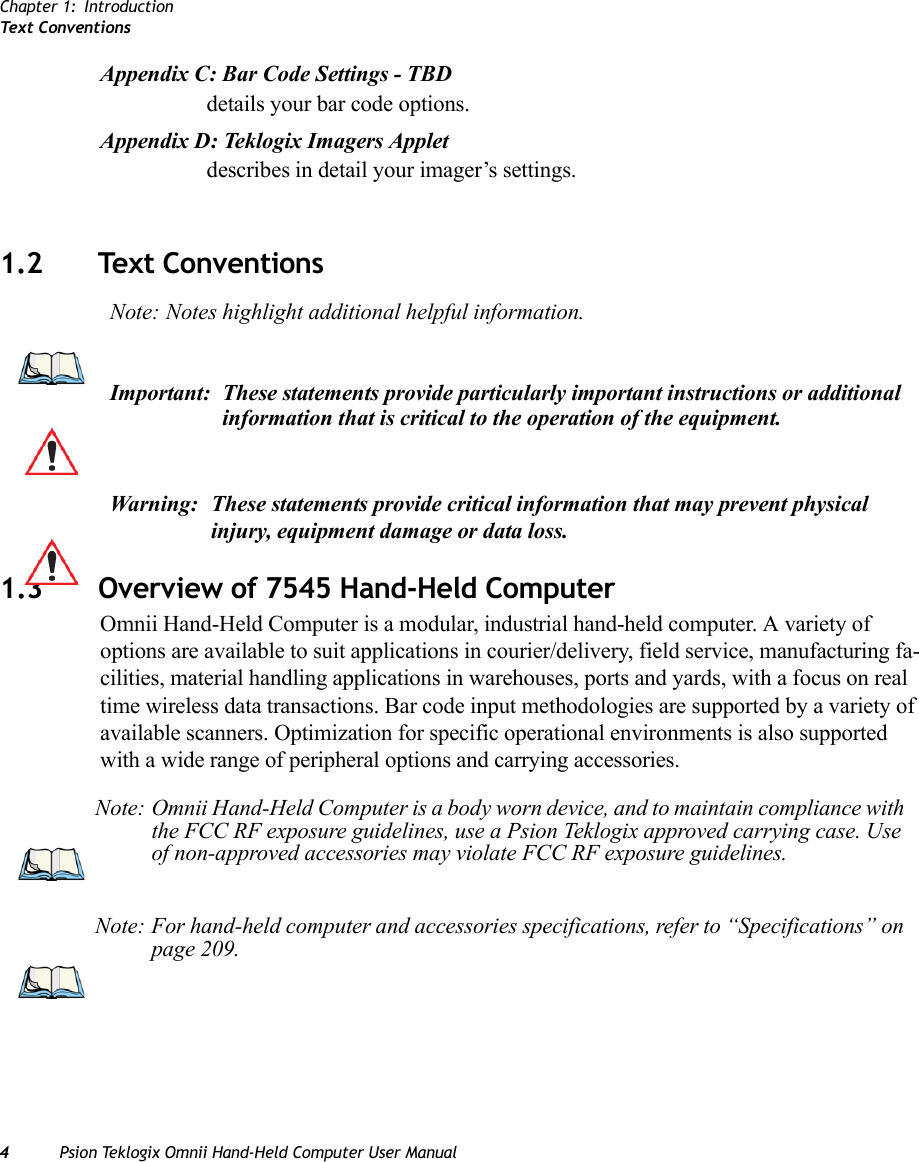
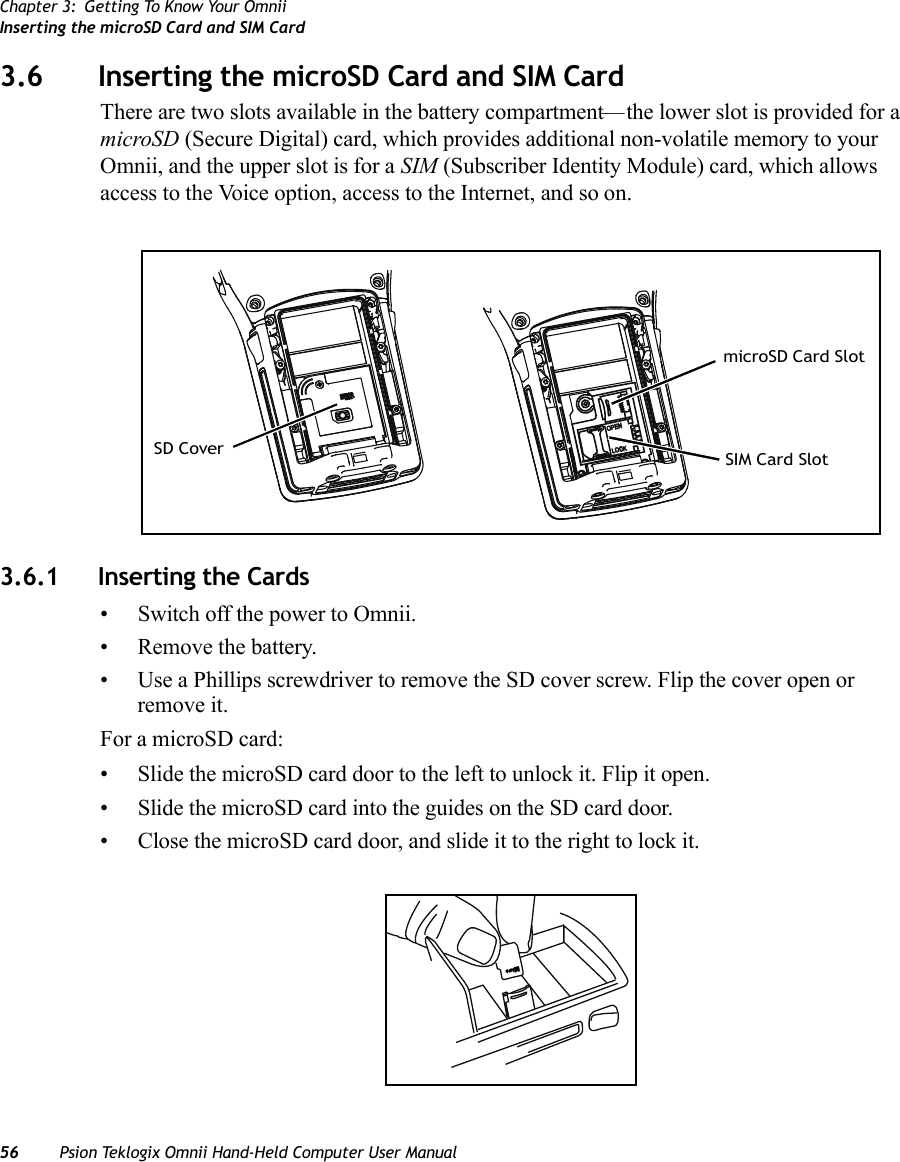
![Chapter 2: Basic OperationResetting Omnii16 Psion Teklogix Omnii Hand-Held Computer User ManualSwitching Omnii Off• To switch off Omnii, press the [FN] key and then press and release the [ENTER/Power] button. Omnii will automatically enter the Suspend state.2.4 Resetting OmniiTo perform a warm or cold reset, you can access the menu by going to Start>Shutdown. Al-ternatively you can use the keyboard shortcuts described below.Important: If your Omnii fails to power up, consider the following troubleshooting options:The battery may be overheated (>60C°), a non-Psion Teklogix battery may be installed, or the battery may have fallen below the configured Suspend Threshold. See “Suspend Threshold and Estimated Battery Backup” on page 117 for details.To switch on the hand-held, you will need to replace the overheated battery.However, if you supply AC power to Omnii with a battery that falls below the configured Suspend Threshold, the unit will switch on.Important: Turning off the hand-held does not result in a complete shutdown; rather, the unit enters a power-saving, “suspend” state. When Omnii is turned on from suspend state, operation resumes within a few seconds.Important: If the word ‘FN’ is displayed underlined in the taskbar area at the bottom of the screen, this key is locked “on” and Omnii will not switch off. Press the [FN] key twice followed by [ENTER/Power] to switch Omnii off.However, if you’ve set the mode to “Lock” (see “Keyboard One Shot Modes” on page 102), Omnii can be turned off even when the [FN] key is locked ‘on’.Note: If your Desktop is switched to the PsionVU Shell (refer to “The PsionVU Desktop Shell” on page 76), resetting the unit is done solely by use of the keyboard shortcuts.](https://usermanual.wiki/Psion/7545MBW.USERS-MANUAL/User-Guide-1507312-Page-33.png)
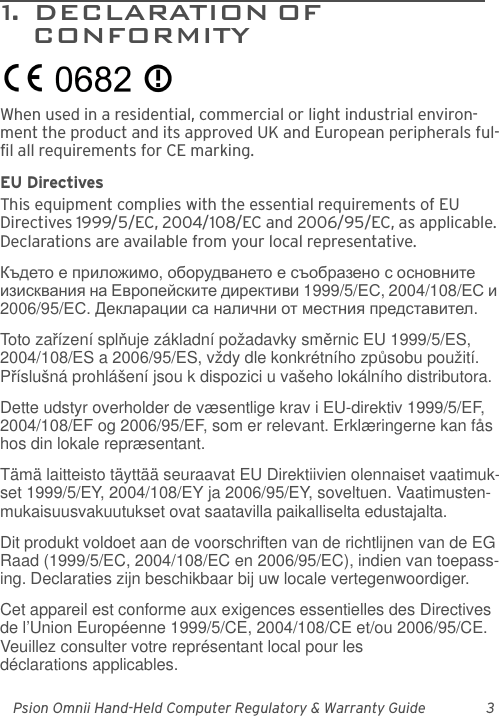
![Chapter 2: Basic OperationResetting OmniiPsion Teklogix Omnii Hand-Held Computer User Manual 17Warm ResetTo execute a warm reset:• Press and hold down the [FN] key and the [ENTER/Power] key simultaneously for a minimum of four seconds.A warm reset closes open applications; any unsaved data are lost. Installed programs and saved data are preserved. Cold ResetTo execute a cold reset:• Press and hold down the [SYM] key, the [FN] key, and the [ENTER/Power] key, simultaneously for a minimum of four seconds.Bootloader To implement the bootloader:Note: You do not need to reset your Omnii after configuring the radio.Note: As part of the normal Windows Embedded CE cold boot process, the screen may go blank for a few seconds after the splash screen loading bar reaches the end. The desktop is displayed after a few moments.Important: This reset returns Omnii to factory settings.](https://usermanual.wiki/Psion/7545MBW.USERS-MANUAL/User-Guide-1507312-Page-34.png)
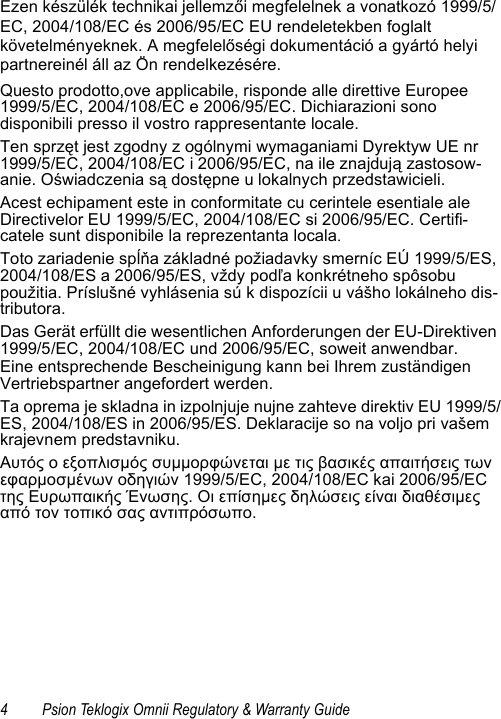
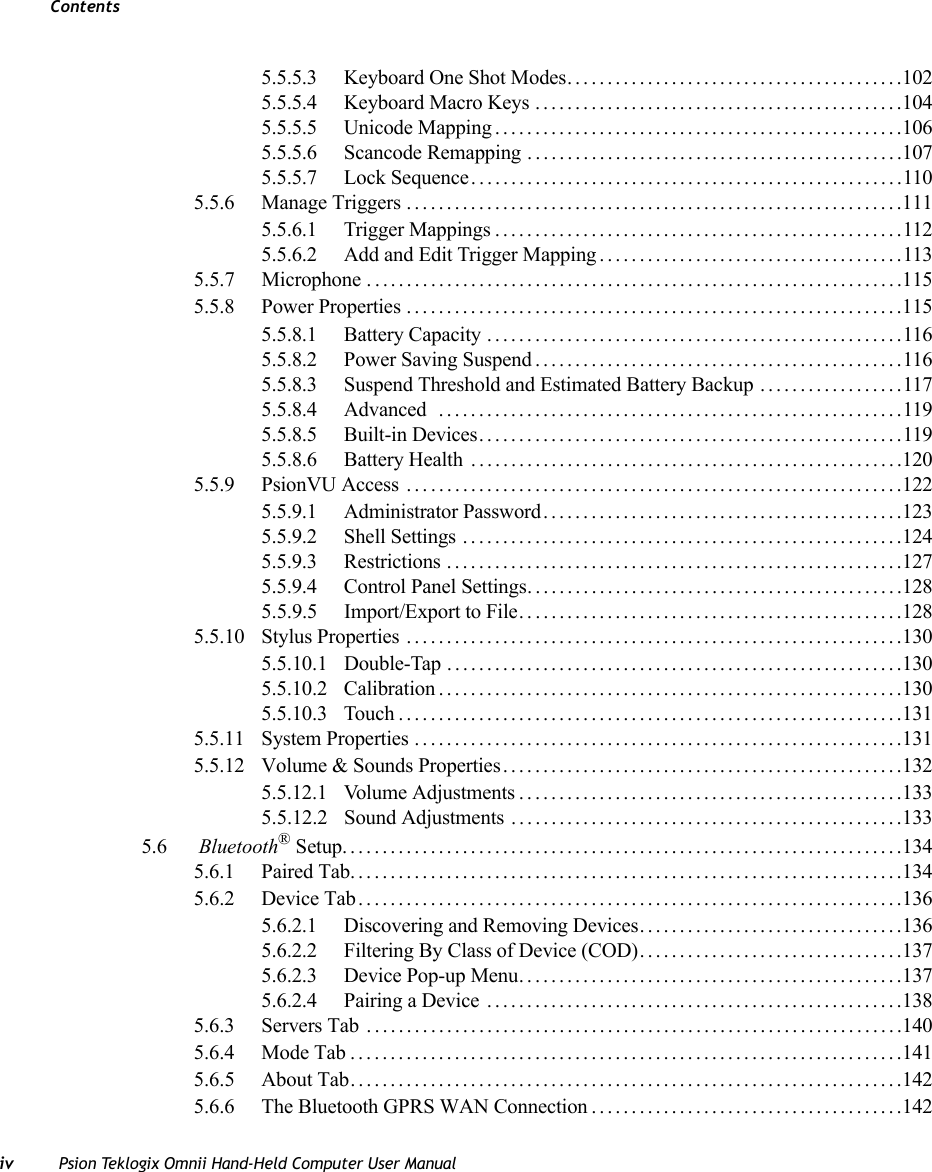
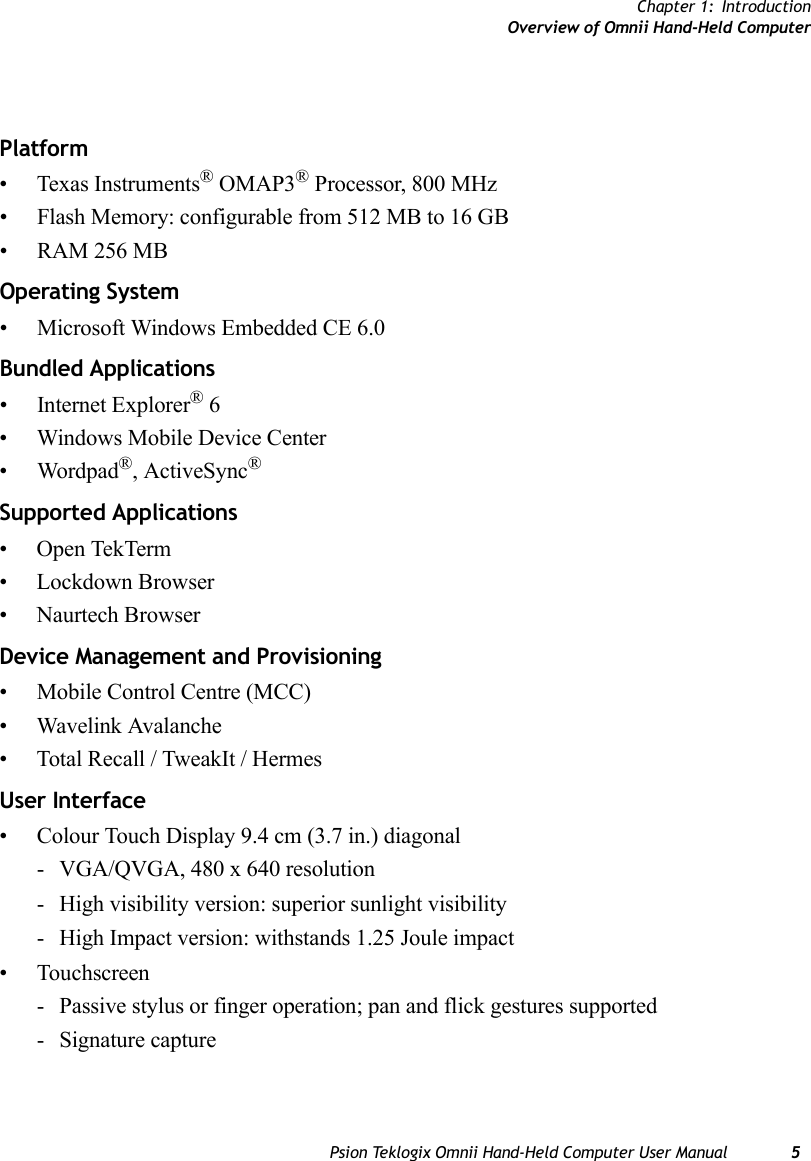
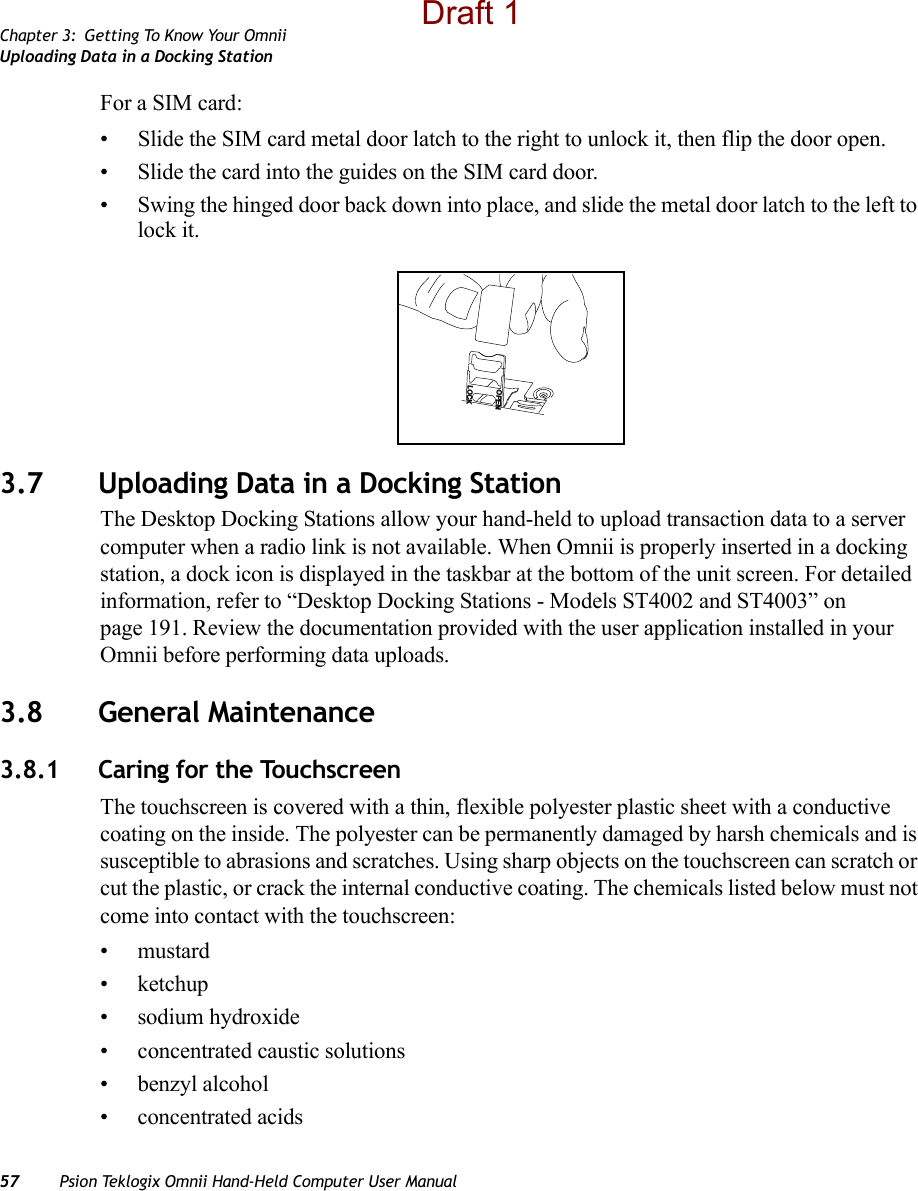
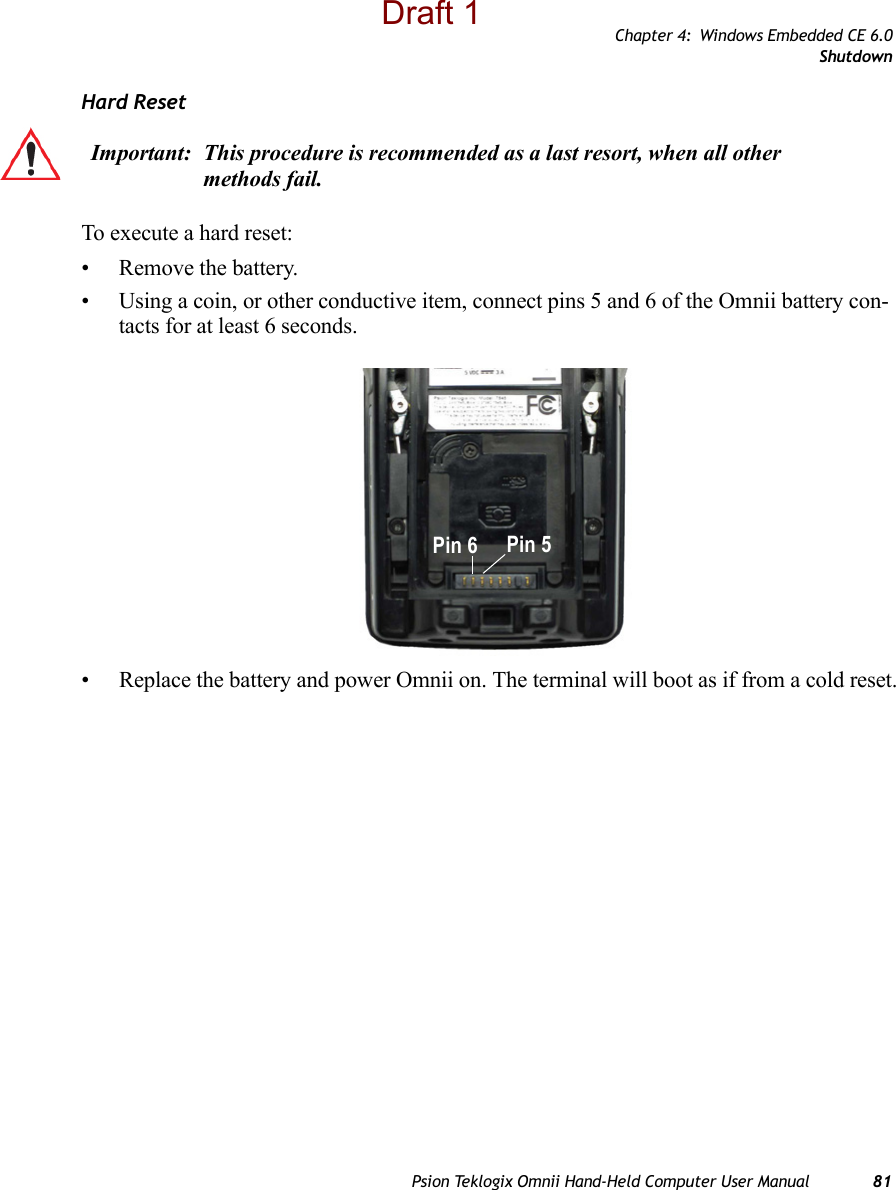
![Chapter 2: Basic OperationAttaching Carrying Accessories18 Psion Teklogix Omnii Hand-Held Computer User Manual• Press and hold down the [FN] key, the [ENTER/Power] key, and the [SCAN] key, simultaneously for a minimum of four seconds.After the cold reset, the BooSt menu appears. • Type ‘1’ to “Run Main OS” (continue loading the Windows Embedded CE operating system).Hard ResetTo execute a hard reset:• Remove the battery.• Using a coin, or other conductive item, connect pins 5 and 6 of the Omnii battery con-tacts for at least 6 seconds.• Replace the battery and power Omnii on. The terminal will boot as if from a cold reset.2.5 Attaching Carrying AccessoriesPsion Teklogix recommends that a carrying accessory—a hand strap or shoulder strap—be installed on Omnii before use. For detailed information, please see “Carrying and Protective Accessories” on page 184.2.6 Calibrating the TouchscreenImportant: This procedure is recommended as a last resort, when all other methods fail. Pin 6 Pin 5Note: The touchscreen function can be turned off (see “Touch” on page 131).](https://usermanual.wiki/Psion/7545MBW.USERS-MANUAL/User-Guide-1507312-Page-35.png)

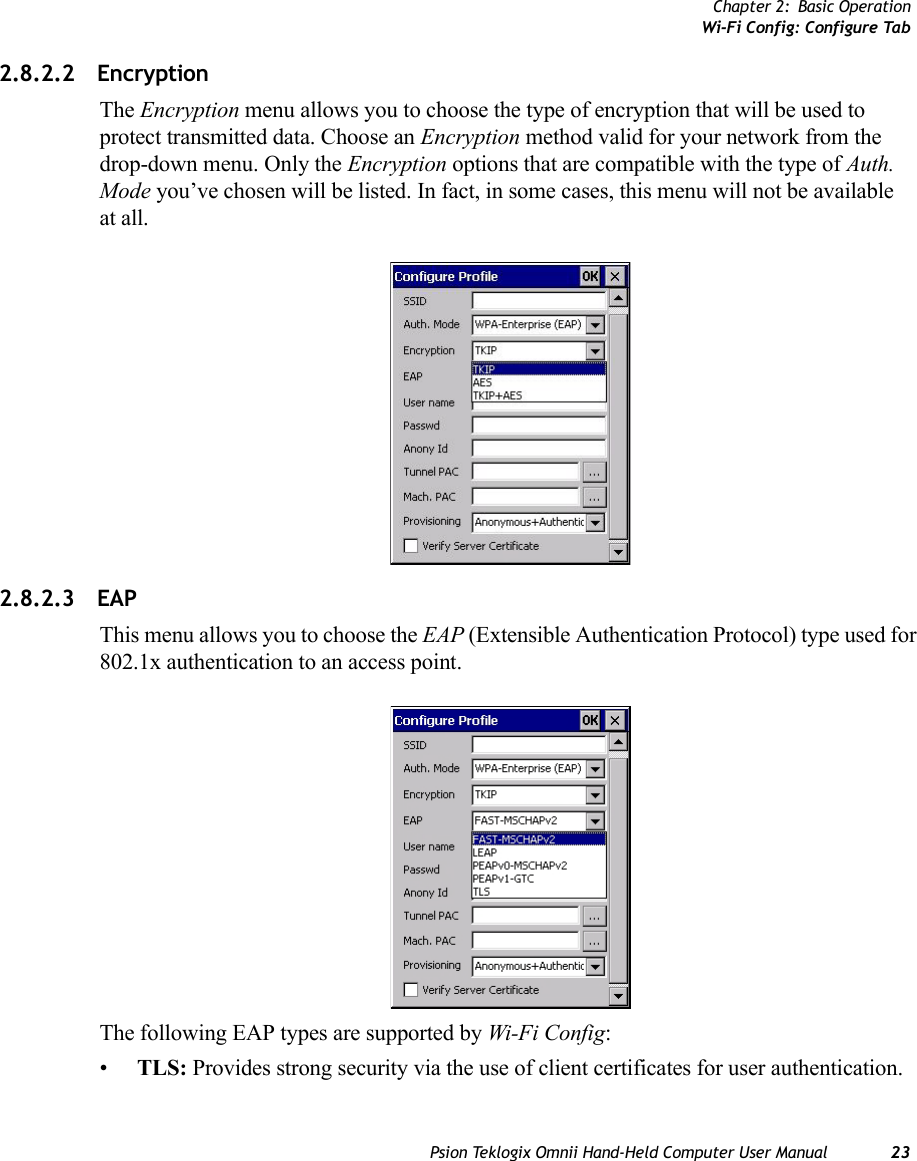
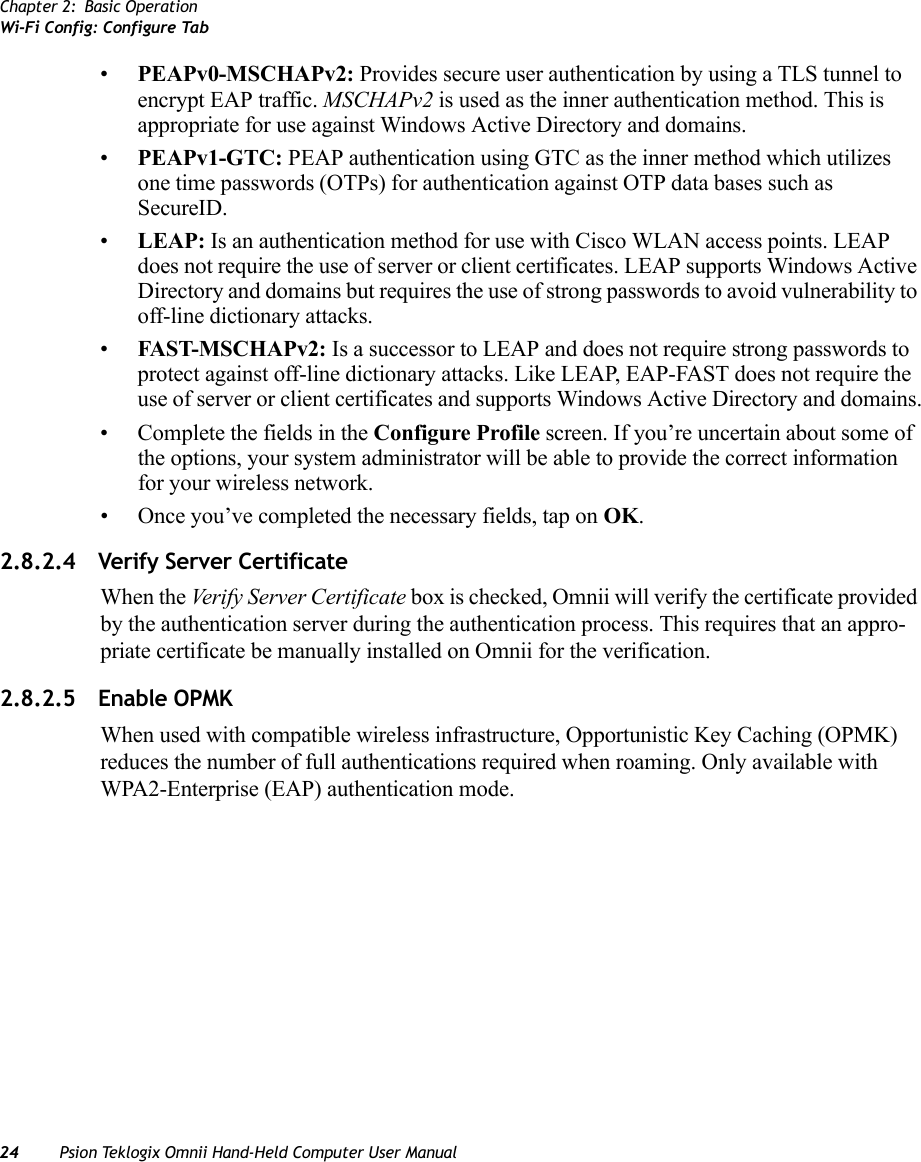
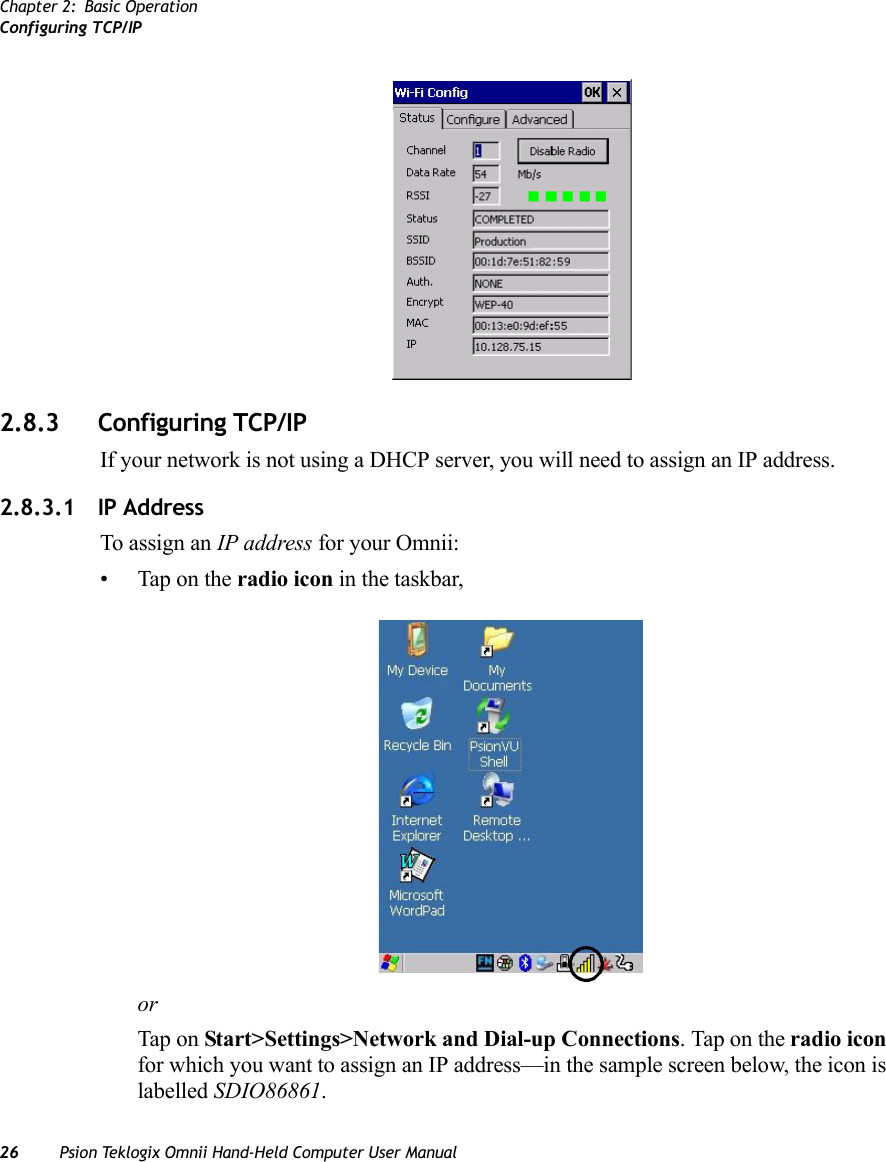
![Chapter 2: Basic OperationWi-Fi Config: Configure TabPsion Teklogix Omnii Hand-Held Computer User Manual 252.8.2.6 Connecting the Wireless NetworkYour configured network is listed in the Configure tab. An [X] next to a network indicates that this is the network to which Omnii will connect.• Tap on the Connect button to activate your network.The Status tab is displayed. The Status field displays ASSOCIATING while the 802.11b/g radio attempts to connect to the network. Once the association is complete, the Status tab is populated with the appropriate information about your network.](https://usermanual.wiki/Psion/7545MBW.USERS-MANUAL/User-Guide-1507312-Page-42.png)
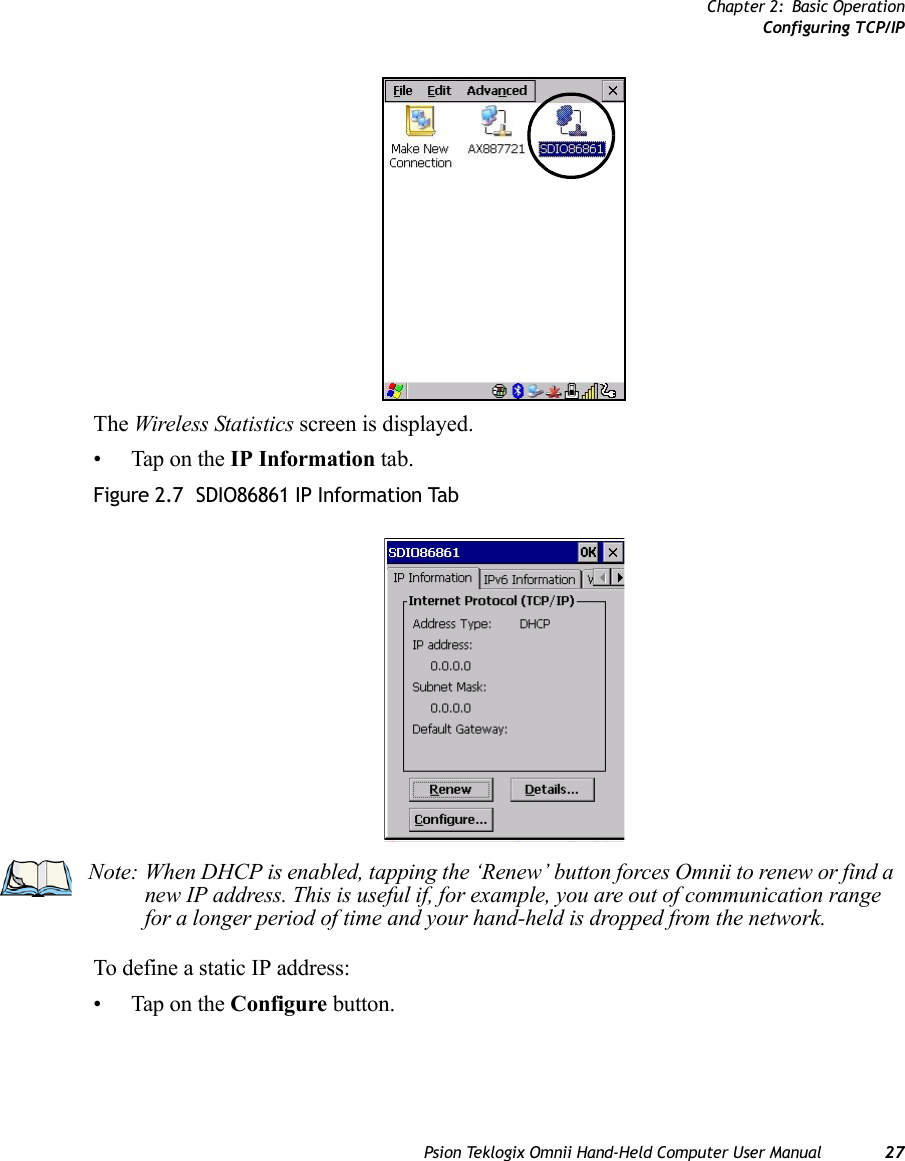
![Chapter 2: Basic OperationConfiguring TCP/IP28 Psion Teklogix Omnii Hand-Held Computer User Manual• Tap on the radio button next to Specify an IP address to select it.• Type an IP, Subnet Mask and Default Gateway address in the appropriate fields. Press [ENTER] to save your information.2.8.3.2 Name Server•In the SDIO86861 IP Information tab (see Figure 2.7), tap on the Configure button.• Tap on the Name Servers tab.The DNS and WINS fields in the Name Servers tab allow you to specify additional WINS and DNS resolvers. The format for these fields is ###.###.###.###.Note: If DHCP is enabled, name server addresses are assigned automatically.](https://usermanual.wiki/Psion/7545MBW.USERS-MANUAL/User-Guide-1507312-Page-45.png)


![Chapter 3: Getting To Know Your OmniiRegular Keys44 Psion Teklogix Omnii Hand-Held Computer User ManualPress the [SHIFT] key twice to lock the shift state on (the up arrow in the taskbar will be un-derlined). Press [SHIFT] again to turn the shift state off.To access CAPS LOCK mode, press [FN] + [SHIFT]. In this state, if you press a numeric key, the number is displayed rather than the normal shifted function of that key. Press [FN] + [SHIFT] again to turn the CAPS LOCK mode off.The Arrow KeysThe [Arrow] keys are located near the top of the keyboard, and are represented on the key-board as triangles pointing in different directions. The [Arrow] keys move the cursor around the screen in the direction of the arrow: up, down, left and right. The left arrow key should not be confused with the [BACKSPACE] key which is depicted as a left arrow. The cursor is the flashing box or underline character that indicates where the next character you type will appear.The [BACKSPACE/DEL] KeyThe [BACKSPACE] key (represented on the keyboard as an arrow pointing left) moves the cursor one character to the left, erasing the previous key stroke.The [DEL] key ([FN] +[BACKSPACE]) erases the character at the current cursor position.The [CTRL] and [ALT] KeyThe [CTRL] and [ALT] keys modify the function of the next key pressed and are application dependent. Pressing either key twice locks it 'on' (it appears underlined on the Taskbar). Pressing the key once again unlocks it.The [TAB] KeyTypically, the [TAB] key moves the cursor to the next field to the right or downward.The [ESC] KeyGenerally, this key is used as a keyboard shortcut to close the current menu, dialog box, or activity.The [SPACE] KeyThe [SPACE] key is represented on the keyboard by a long, low horizontal line contained by a small vertical line on each side. Pressing this key inserts a blank space between characters. In a Windows dialog box, pressing the [SPACE] key enables or disables a checkbox.](https://usermanual.wiki/Psion/7545MBW.USERS-MANUAL/User-Guide-1507312-Page-60.png)
![Chapter 3: Getting To Know Your OmniiModifier KeysPsion Teklogix Omnii Hand-Held Computer User Manual 45The [SCAN] KeyOmnii is equipped with a single [SCAN] key on the keyboard and an extra [SCAN] button located on the left side of the unit. [SCAN] keys activate the scanner beam. For units that do not have internal scanners, these keys can be remapped to serve other functions.3.2.2 Modifier KeysThe [SHIFT], [CTRL], [ALT], [FN] and [SYM] keys are modifier keys that change the function of the next key pressed. The [SHIFT], [CTRL] and [ALT] keys operate much like a desktop keyboard except that they are not chorded (two keys held down simultaneously). The modifier key must be pressed first followed by the key whose function you want modified.[SHIFT] and [FN]The [SHIFT] and [FN] modifier keys provide access to additional keys and system func-tions. The functions related to these modifier keys are colour-coded in white and blue print respectively above the keyboard keys, dependant on your keyboard format.[SYM] The Symbol [SYM] modifier key is represented on the keyboard by the characters ‘SYM’ and provides access to commonly used symbolic characters. Pressing the key brings up the Symbol soft input panel (SIP) onscreen keyboard, with symbols mapped to each key. If you wish to adjust the settings for the pop-up screen (e.g. time of delay before screen appears, etc.), modify the file softinputpanel.xml, located in the Windows folder.The onscreen keyboard corresponds to the specific keyboard on your Omnii—either numeric or alphanumeric. Note: When using the Mobile Devices SDK Developers' Guide (P/N 8100016), note that the [SYM] key is interchangeable with the [ORANGE] key.Note: Modifier keys are remapped in the Control Panel, and the Symbol SIP will automat-ically show and use the new mappings after the next reboot.](https://usermanual.wiki/Psion/7545MBW.USERS-MANUAL/User-Guide-1507312-Page-61.png)
![Chapter 3: Getting To Know Your OmniiFunction Keys and Macro KeysPsion Teklogix Omnii Hand-Held Computer User Manual 473.2.3 Function Keys and Macro KeysIn addition to the standard keyboard functions (see “The Keyboard” on page 42), Omnii supports function keys and macro keys.All function keys and macro keys can be custom defined for each application. The TekTerm application utilizes these keys (for detailed information, see the TekTerm Software User Manual, P/N 8000073). 3.2.3.1 Function KeysFunction keys perform special, custom-defined functions within an application. These keys are accessed by pressing one of the dedicated function keys on the keyboard, or through the appropriate [SHIFT] or [FN] key sequence, depending on the keyboard variant being used.Alphanumeric Keyboard Function KeysThe Alphanumeric keyboards are equipped with up to thirty function keys, including those function keys that are colour-coded in blue print above the alpha keys or function keys (de-pending on your keyboard).To access the blue function keys, press the [FN] key followed by the appropriate alpha or function key.Function keys [F1] through [F24] can be used with the Windows Embedded CE operating system or another application. The additional function keys, [F25] through [F30] along with the macros, are not used as part of the Windows Embedded CE operating system. Numeric Keyboard Function KeysThe Numeric keyboards are equipped with up to 24 function keys, including those function keys that are colour-coded in white print above the function keys. Function keys F25 through F30 can only be accessed by remapping another key to that function. To access the white function keys, press the [SHIFT] key followed by the appropriate function key.](https://usermanual.wiki/Psion/7545MBW.USERS-MANUAL/User-Guide-1507312-Page-62.png)
![Chapter 3: Getting To Know Your OmniiNumeric Keyboards—Accessing Alpha Keys48 Psion Teklogix Omnii Hand-Held Computer User Manual3.2.3.2 Macro KeysSeveral of the Omnii keyboards are equipped with a series of macro keys that can be pro-grammed to replace frequently used keystrokes, along with the function of executable keys like the [ENTER/Power] key, the [BACKSPACE] key, any function key and arrow key, etc. 59-Key Alphanumeric Keyboard Macro KeysThese keyboards have six macro keys: [M1] to [M6], located on the S to X keys (second-last row of keys).To access a macro key, press the [FN] key followed by the macro key.36-Key Numeric Keyboard Macro KeysThese keyboards are equipped with five macro keys: [M1] to [M5]. These keys are colour coded in blue print above function keys [F1] to [F5]. To access a macro key, press the [FN] key followed by the macro key.3.2.4 Numeric Keyboards—Accessing Alpha KeysOn the Numeric Omnii keyboards, all alphabetic characters are printed on the unit plastic in blue typeface above the keys. Alpha characters are accessed by pressing the [FN] modifier key, then pressing another key on the keyboard. The Alpha Modified Numeric 789 keyboard has each blue alphabetic character assigned as a single [FN]-shifted character on individual keys. An indicator in the left corner of the taskbar displays the currently selected character. The Numeric 123 keyboards have telephone-style alphabetic keys, with the blue alphabetic characters located in groups of 3 or 4 above each of the numeric keys. To access characters on these keyboards, a few extra steps are needed, as described below.Choosing a Single Alpha CharacterImportant: Refer to “Keyboard Macro Keys” on page 104 for details about creating macros.Note: The following examples assume that the [FN] key is enabled as ‘Lock’ mode in the ‘One Shot’ screen (accessible through the Control Panel Keyboard icon). In ‘Lock’ mode, pressing the [FN] key once locks it ‘on’. Refer to “Keyboard One Shot Modes” on page 102 for details.](https://usermanual.wiki/Psion/7545MBW.USERS-MANUAL/User-Guide-1507312-Page-63.png)
![Chapter 3: Getting To Know Your OmniiThe Keypad BacklightPsion Teklogix Omnii Hand-Held Computer User Manual 49The examples below illustrate how to access A, B and C, all of which are printed in blue characters above the numeric key [2]. The letters you choose appear in the softkey bar as you press the numeric key, providing a visual indicator of which letter will be displayed on the screen.To choose the letter ‘a’:• Press the [FN] key, and press the numeric key [2].• Press the [FN] key again to unlock or turn it off.To choose the letter ‘b’:• Press the [FN] key, and press [2] twice.• Press the [FN] key again to unlock or turn it off.To choose the letter ‘c’:• Press the [FN] key, and press [2] three times.• Press the [FN] key again to unlock or turn it off.Selecting Uppercase LettersTo display a single capital letter, press the [SHIFT] key first, then the letter you want. To access CAPS LOCK mode, press [FN] + [SHIFT]. In this state, if you press a numeric key, the number is displayed rather than the normal shifted function of that key. Press [FN] + [SHIFT] again to turn the CAPS LOCK mode off.3.2.5 The Keypad BacklightThe intensity of the keypad backlight and the conditions under which this backlight is acti-vated can be configured using the Keyboard icon in the Windows Embedded CE Control Panel. The behaviour of the keypad backlight is tailored in the Keyboard Properties dialog box. Refer to “Keyboard Backlight” on page 102 for details about this option.Note: Keep in mind that there is a timeout of one second between key presses when sequencing through the alphabetic characters on a key. If you pause longer than one second between key presses, the alphabetic character that is displayed at that time will be entered.Note: Keep in mind that this option may be restricted to supervisory use only.](https://usermanual.wiki/Psion/7545MBW.USERS-MANUAL/User-Guide-1507312-Page-64.png)

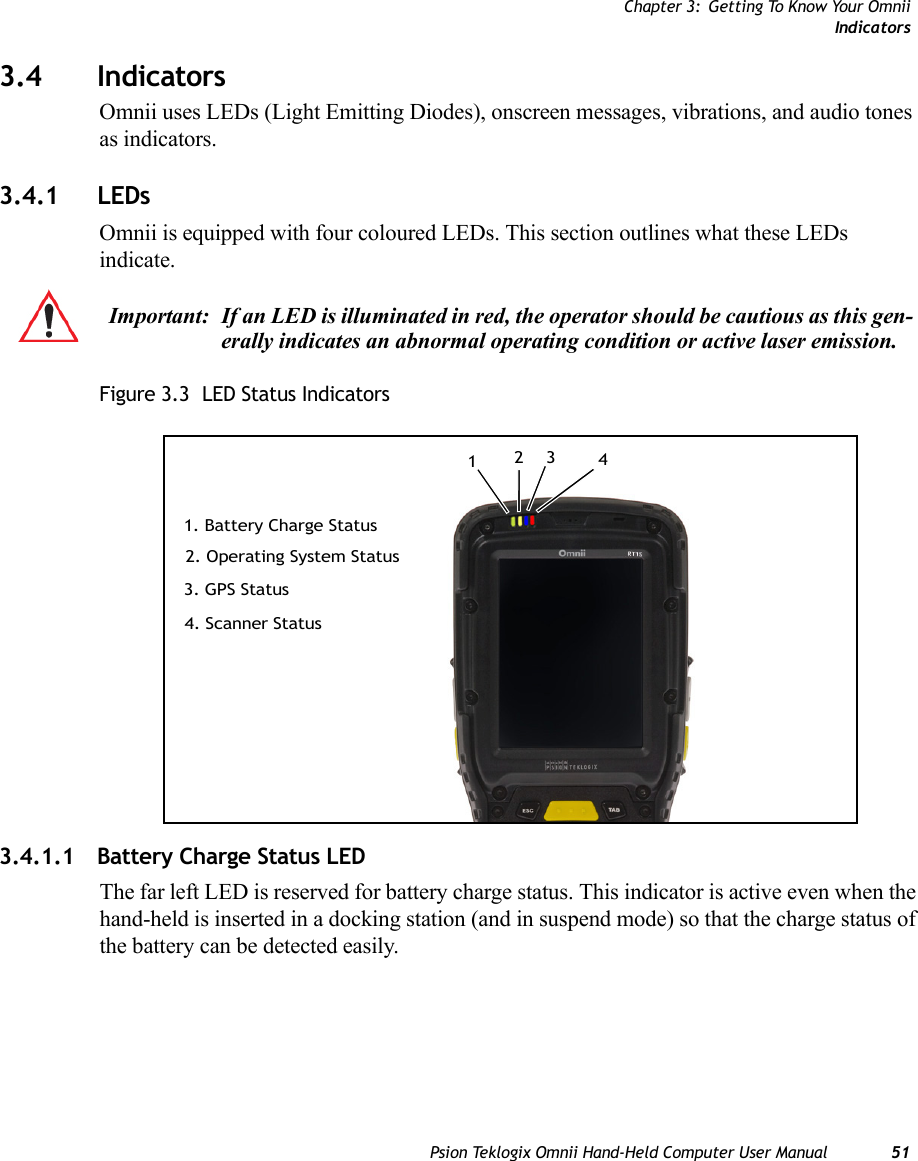

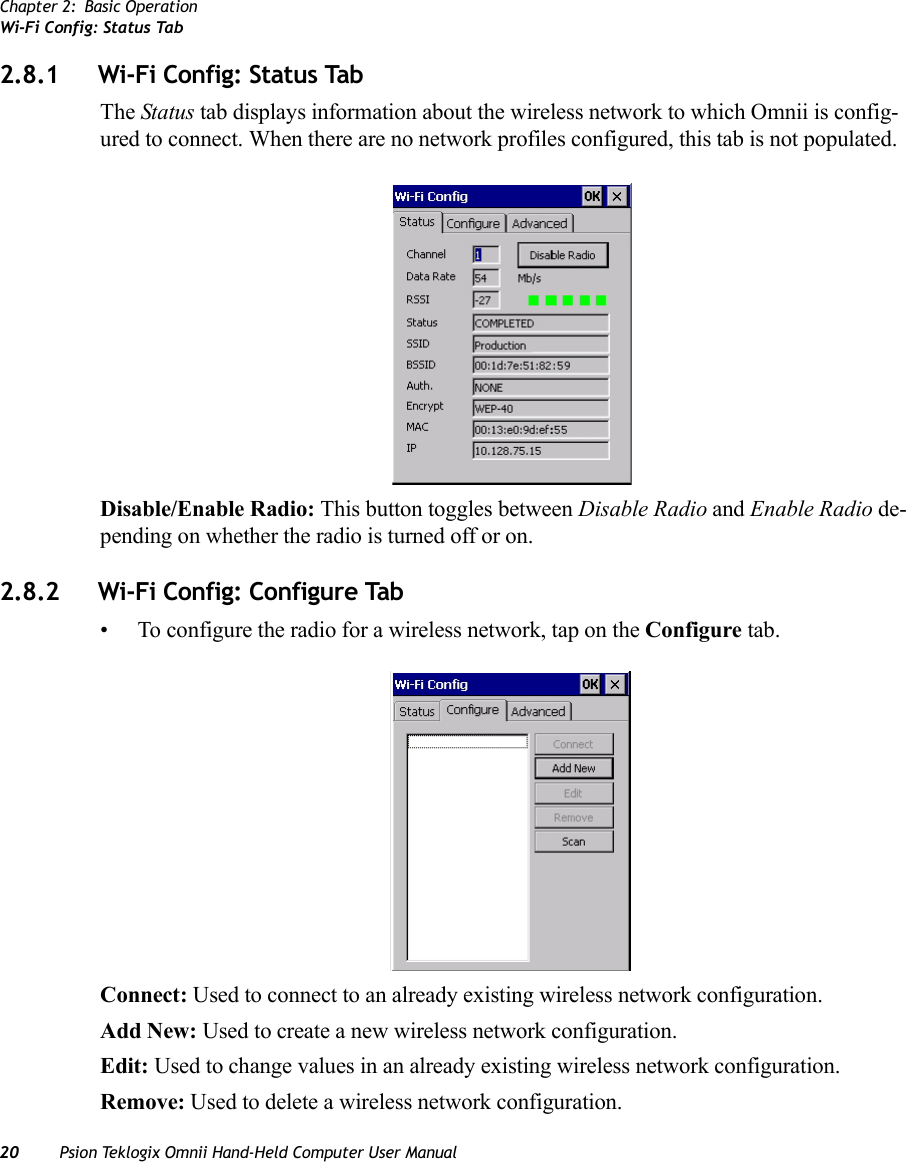
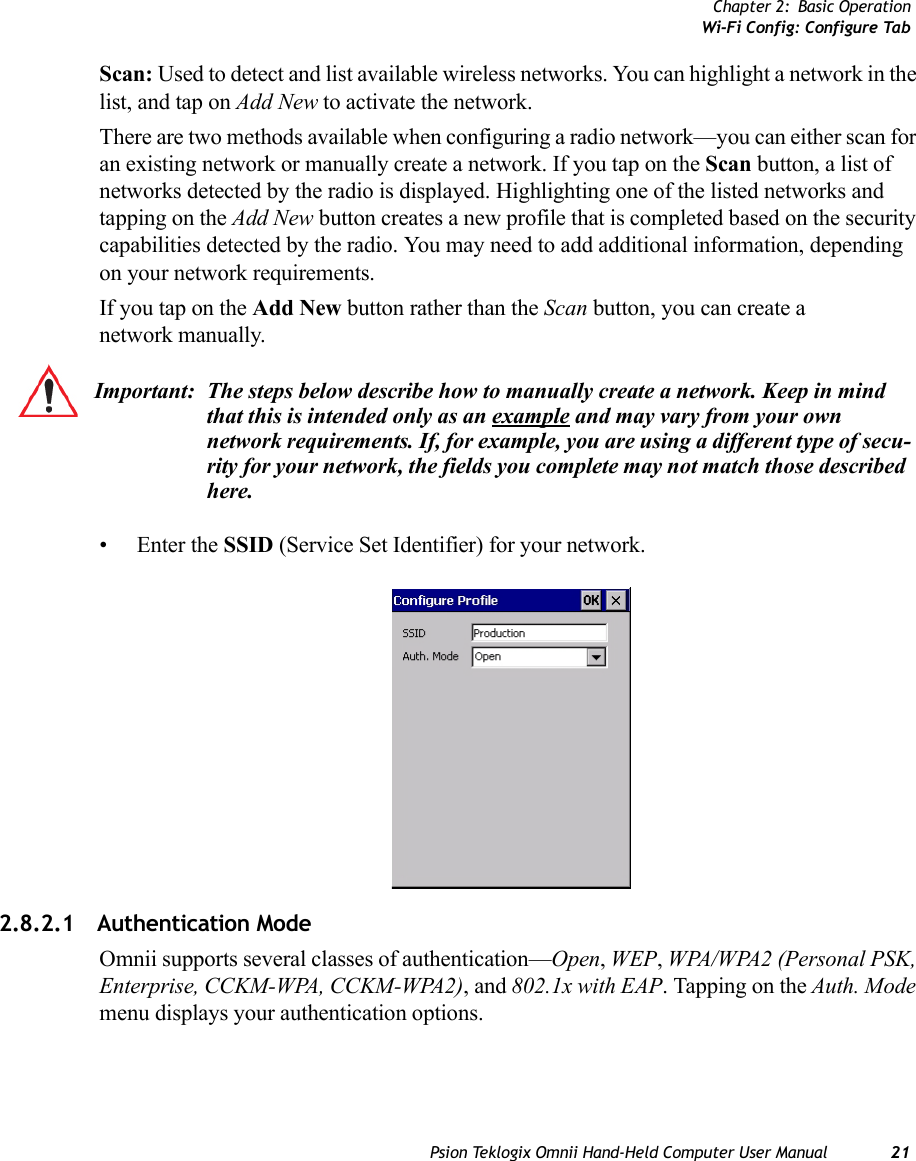
![Chapter 3: Getting To Know Your OmniiOnscreen Indicators54 Psion Teklogix Omnii Hand-Held Computer User ManualWindows® Start ButtonIf you are using the touchscreen, you can either tap the Windows icon at the bottom left of the screen, or press the [Windows] key to display the Start Menu, and then tap on the desired application.Modifier Key Indicators[SHIFT], [CTRL], [ALT], [FN] and [SYM] are modifier keys that have onscreen indicators to show when a key is active or locked. If a modifier key is pressed once to activate it, the key is displayed in the taskbar, for example, pressing the [FN] key once displays ‘FN’ in the taskbar. If a modifier key is pressed twice, it is ‘locked on’ and the onscreen indicator is dis-played with underlined letters in the taskbar, for example, pressing [FN] twice displays ‘FN’ in the taskbar.Power The battery shaped icon displayed in the taskbar provides quick access to the charge state of the battery. Tapping on the icon once will show the percentage charge left in the battery. Tapping on the icon twice opens the Power Properties menus (see “Power Properties” on page 115), where you can set the low battery warnings levels, and time to enter Suspend.If Omnii is using external AC power, an AC icon is displayed in the taskbar.802.11 Radio Signal QualityIncreasing radio signal quality is represented by longer, filled bars within this icon.Docking DeviceWhen a hand-held is inserted in a docking station, charger or cradle, an associated icon appears in the taskbar.Good No RadioReceptionWeakReception LinkCombo Charger & Combo Docking StationQuad Docking Station Powered Vehicle Cradle, Desktop Dock & Snap Module](https://usermanual.wiki/Psion/7545MBW.USERS-MANUAL/User-Guide-1507312-Page-69.png)
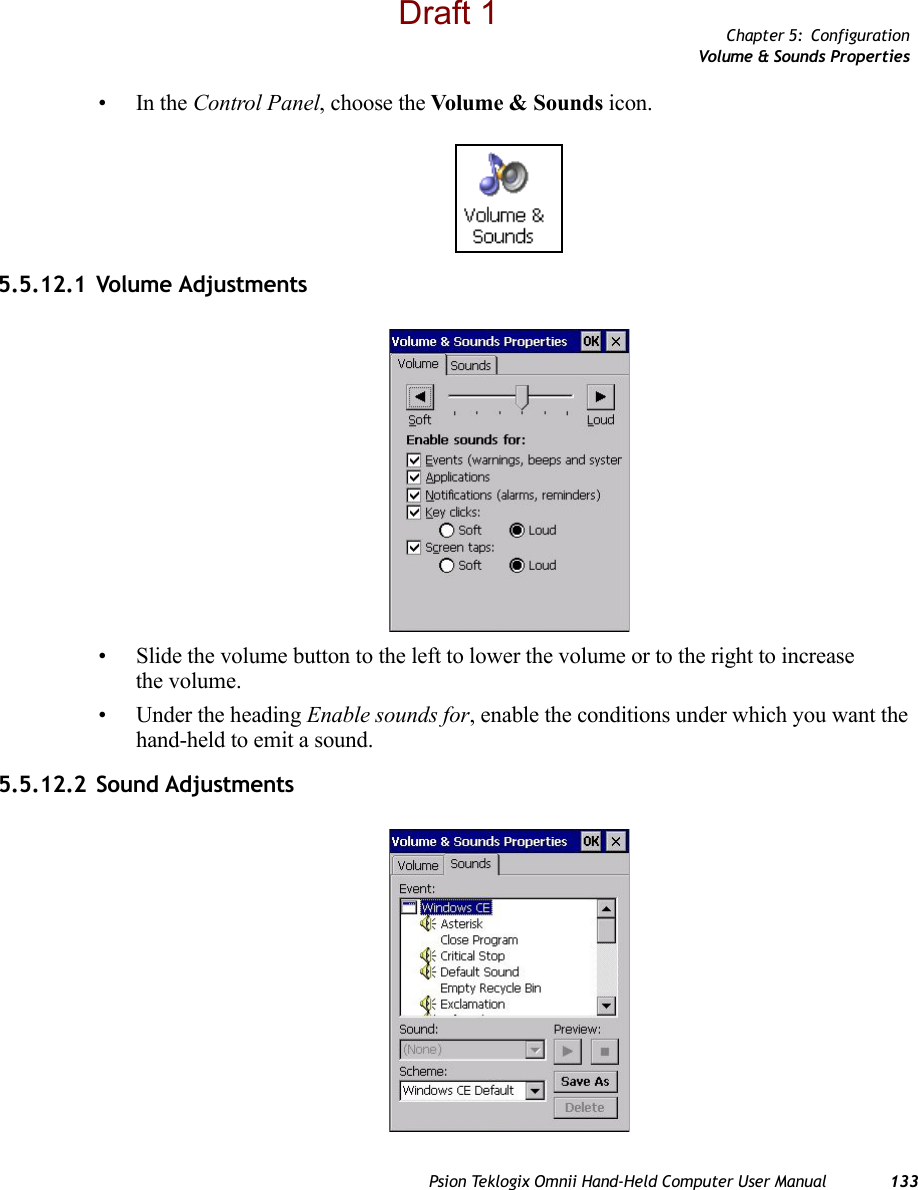
![Chapter 3: Getting To Know Your OmniiAudio IndicatorsPsion Teklogix Omnii Hand-Held Computer User Manual 55Bluetooth RadioThis icon displayed in the taskbar represents the installed Bluetooth radio.Input PanelYou can tap the Input Panel icon to activate the soft keyboard application.3.4.3 Audio IndicatorsOmnii supports several audio options, including Bluetooth. The optional rear speaker can be used for system (Windows) sounds and .wav files. When a rear speaker is absent, those sounds are routed to the front receiver. The beeper provides a variety of sounds and can be configured to emit a sound when a key is pressed, a keyboard character is rejected, scan input is accepted or rejected, an operator’s entry does not match in a match field or the battery is low. The volume rocker button is located on the left side of the hand-held. Infor-mation on configuring sounds is detailed in “Volume & Sounds Properties” on page 132.3.4.4 VibrationsYou can set Omnii to vibrate when a successful or unsuccessful bar code scan is performed. See “Teklogix Scanners”, page 158.3.5 Monitoring the Network ConnectionThe radio signal icon in the taskbar indicates the strength of the communication link with an 802.11 access point. To access the radio signal icon:• Tap on the radio icon in the taskbar to display the wireless statistics dialog box.To access the radio signal icon using the keyboard:• Press the [Windows] key to display the Start Menu.• Highlight Shortcuts and then choose System Tray from the sub-menu.• Use the [LEFT] and [RIGHT] arrow keys to highlight the radio signal icon in the taskbar.• Press [ENTER] to display the Wireless Statistics dialog box.Note: Moving in and out of the radio coverage area can have varying effects on a network session. At times, you may need to renew your connection by logging in again.](https://usermanual.wiki/Psion/7545MBW.USERS-MANUAL/User-Guide-1507312-Page-70.png)

![Chapter 4: Windows Embedded CE 6.0Navigating in Windows Embedded CE and ApplicationsPsion Teklogix Omnii Hand-Held Computer User Manual 614.1 Navigating in Windows Embedded CE and ApplicationsGraphic user interfaces like Windows Embedded CE for portable devices and desktop Windows (2000, XP, etc.) utilize ‘point and click’ navigation. An equivalent keyboard short-cut is also available for every ‘point and click’ action.Windows Embedded CE supports the same ‘point and click’ user interface and keyboard shortcuts as desktop Windows with one difference—the ‘point and click’ action is accom-plished using a touchscreen rather than a mouse. Actions can be performed using any combination of keyboard shortcuts or touchscreen tapping. In those applications that support it, you can also flick and pan your finger to scroll through screens.4.1.1 Navigating Using a TouchscreenOmnii comes equipped with a stylus—a pointing tool that looks like a pen. The stylus is used to select objects on the touchscreen. You can also use gestures with your fingers. You can use two gestures: pan and flick. Use left or right flicks to quickly move between tabs of a multi-tab control panel, or to scroll long lists of options. Use panning by touching and dragging a page that has scrollbars.To choose an icon, open a file, launch an applet or open a folder:• Double-tap on the appropriate icon.4.1.2 Navigating Using the KeyboardIf you would like to use keyed input to choose icons and navigating dialog boxes, displaying the desktop you can refer to Table 4.1 for a description of the navigation keys.Table 4.1 Keyboard NavigationNote: If the touchscreen is not registering your screen taps accurately, the touchscreen may need recalibration. Refer to “Calibrating the Touchscreen” on page 50.Note: To prevent damage to the touchscreen, use only a finger touch or the stylus (pen) supplied with your Omnii.Operation Key or Key CombinationSwitch between active applications [ALT] [TAB]Open task manager [ALT] [ESC]Move the cursor Arrow keysDraft 1](https://usermanual.wiki/Psion/7545MBW.USERS-MANUAL/User-Guide-1507312-Page-76.png)
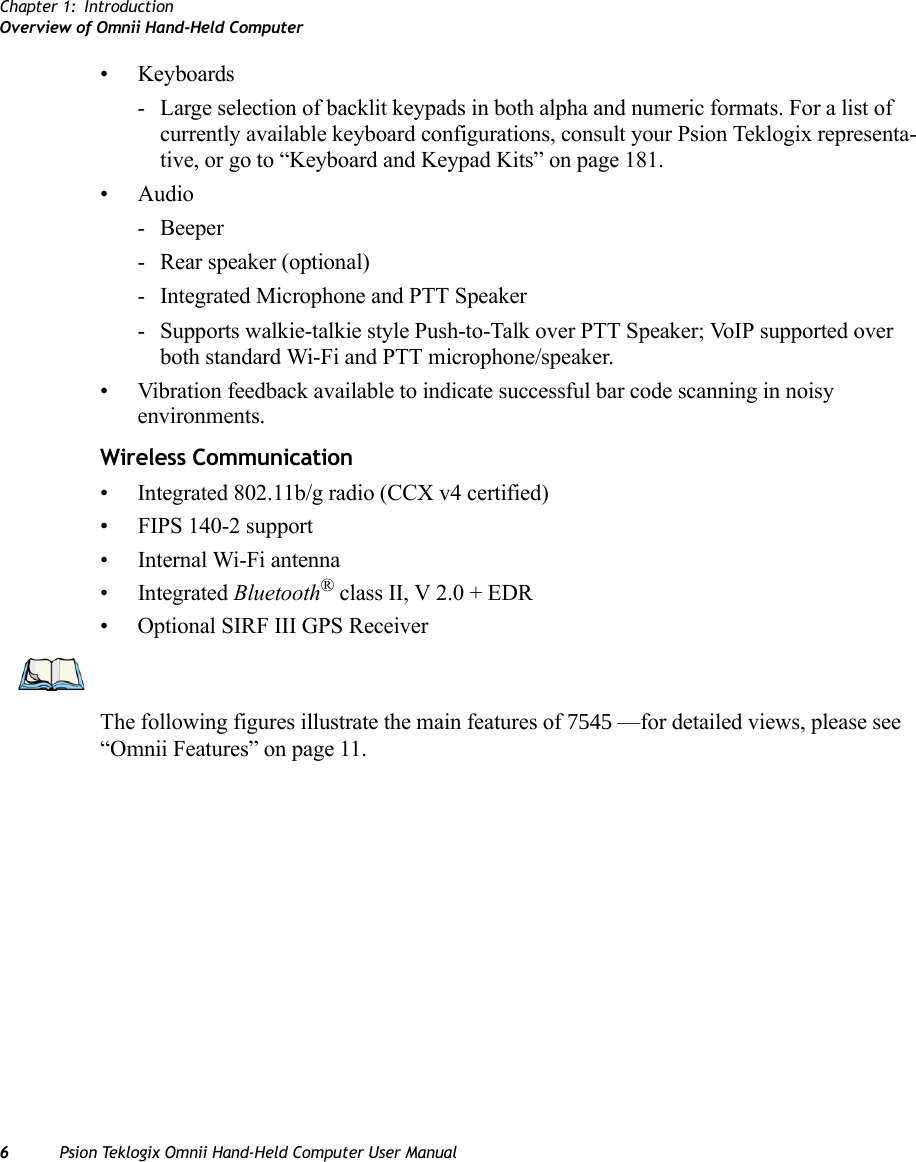
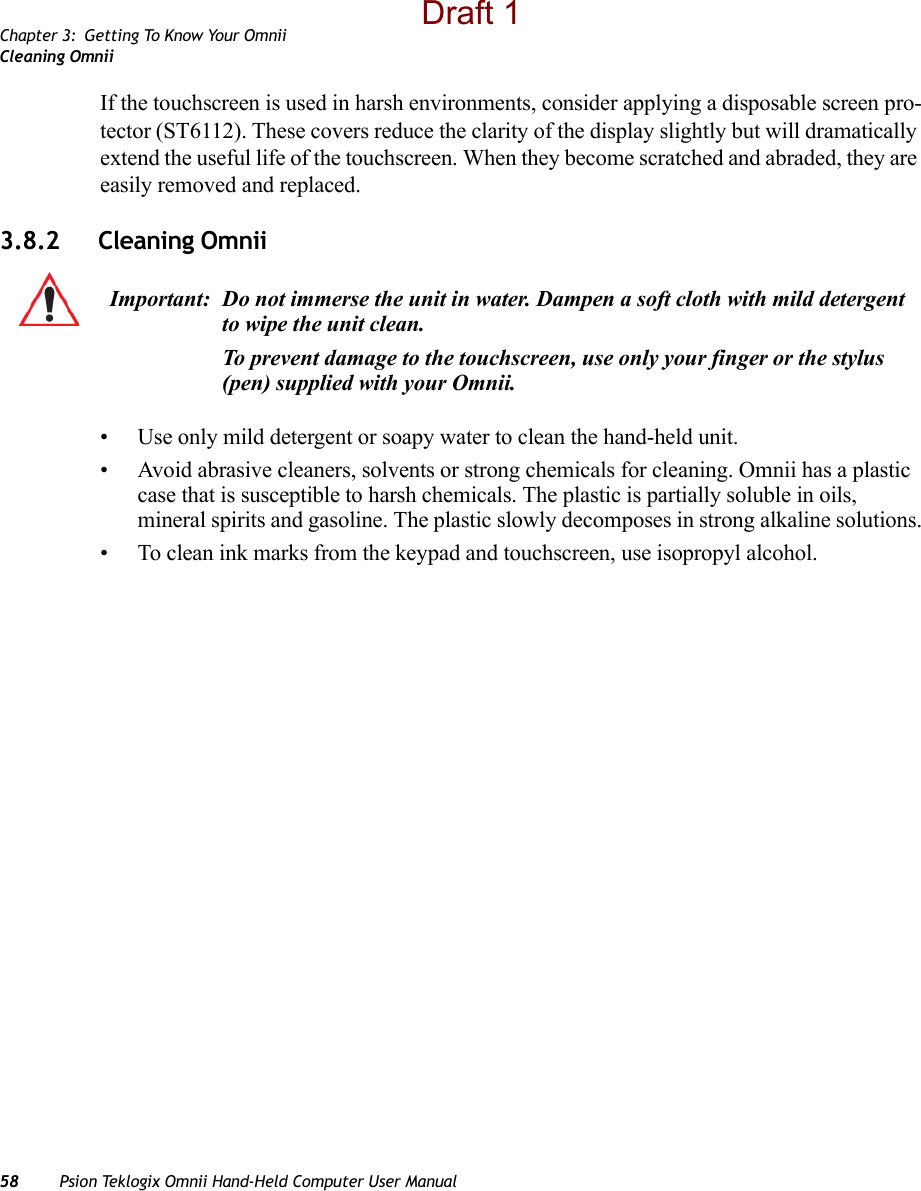
![Chapter 4: Windows Embedded CE 6.0Working with Files, Folders, and Programs62 Psion Teklogix Omnii Hand-Held Computer User ManualKeep in mind that unlike a desktop computer, Omnii does not support key chording (press-ing two keys at the same time). You must press one key followed by the next in sequence. Refer to “Working with Files, Folders, and Programs” on page 62 for additional details about keyboard navigation.4.2 Working with Files, Folders, and ProgramsFigure 4.1 Working with Windows Icons• Double-tap on the appropriate icon—either a folder icon, a program icon or a file icon—to open or launch your selection.Open file, folder or icon [ENTER]Exit & Save [ENTER]Close/Exit & Do Not Save [ESC]Navigate Dialog Boxes [TAB]To move cursor up [SHIFT] [TAB]To display the contents of the next ‘tab’ in a dialog box [CTRL] [TAB]Select Radio Button/Press Button [SPACE]Go to Start Menu [Windows]Operation Key or Key CombinationFolderFileProgram IconDraft 1](https://usermanual.wiki/Psion/7545MBW.USERS-MANUAL/User-Guide-1507312-Page-77.png)
![Chapter 4: Windows Embedded CE 6.0Using a Dialog BoxPsion Teklogix Omnii Hand-Held Computer User Manual 63If you’re using the keyboard:• Use the arrow keys to highlight the icon you want to open or launch.• Press [ENTER].4.3 Using a Dialog BoxA dialog box (like the samples in Figure 4.2) appears when you need to make selections and enter further information. You can move between dialog items by tapping on them, or by pressing the arrow keys and the [TAB] key ([SHIFT] [TAB] moves the cursor backwards).Figure 4.2 Dialog BoxesDialog boxes contain one or more of the following elements:Tab: A tab separates different elements of a dialog box. Press the [TAB] key until a tab in the dialog box is highlighted. To display adjoining tabs, press the [RIGHT] or [LEFT] arrow key. To display the information in the next tab from anywhere in the window, press [CTRL] [TAB].Textbo x: A textbox requires that you type information. Press the [TAB] key to highlight the textbox and then type the appropriate information.CheckboxDrop-downButtonTe x t b o xRadioButtonTa b sMenuNote: You can tap on an element in a dialog box to select or deselect it, display drop-down menu items, save your selections, and so on.Draft 1](https://usermanual.wiki/Psion/7545MBW.USERS-MANUAL/User-Guide-1507312-Page-78.png)
![Chapter 4: Windows Embedded CE 6.0Using a Dialog Box64 Psion Teklogix Omnii Hand-Held Computer User ManualDrop-down: This type of menu is identified by up and down arrows next to the drop-down menu to indicate that additional options are available. Press the [TAB] key to highlight the menu, and use the arrow keys on your keyboard to cycle through the options. Checkbox: This box allows you to select or deselect an option. To select or deselect a checkbox, press the [TAB] key to highlight the checkbox, and press the [SPACE] key to select or deselect it.Radio buttons: These buttons allow you to choose from a number of options. For example, in the sample screen in Figure 4.2 on page 63 you can choose to Obtain an IP address via DHCP or Specify an IP address. Press the [TAB] key to highlight a radio button option, and then select a radio button by pressing the arrow keys to highlight the appropriate option.Buttons: This type of button allows you to Save, Delete and so on the options you’ve chosen in a dialog box. Use the [TAB] key to highlight the button you want to use. Press the [ENTER] key to activate it.Saving Your Choices: Once you’ve made all your changes, press the [ENTER] key to save your changes and exit the window.Note: A dialog box item that is displayed in grey text indicates that it is not currently available.Draft 1](https://usermanual.wiki/Psion/7545MBW.USERS-MANUAL/User-Guide-1507312-Page-79.png)
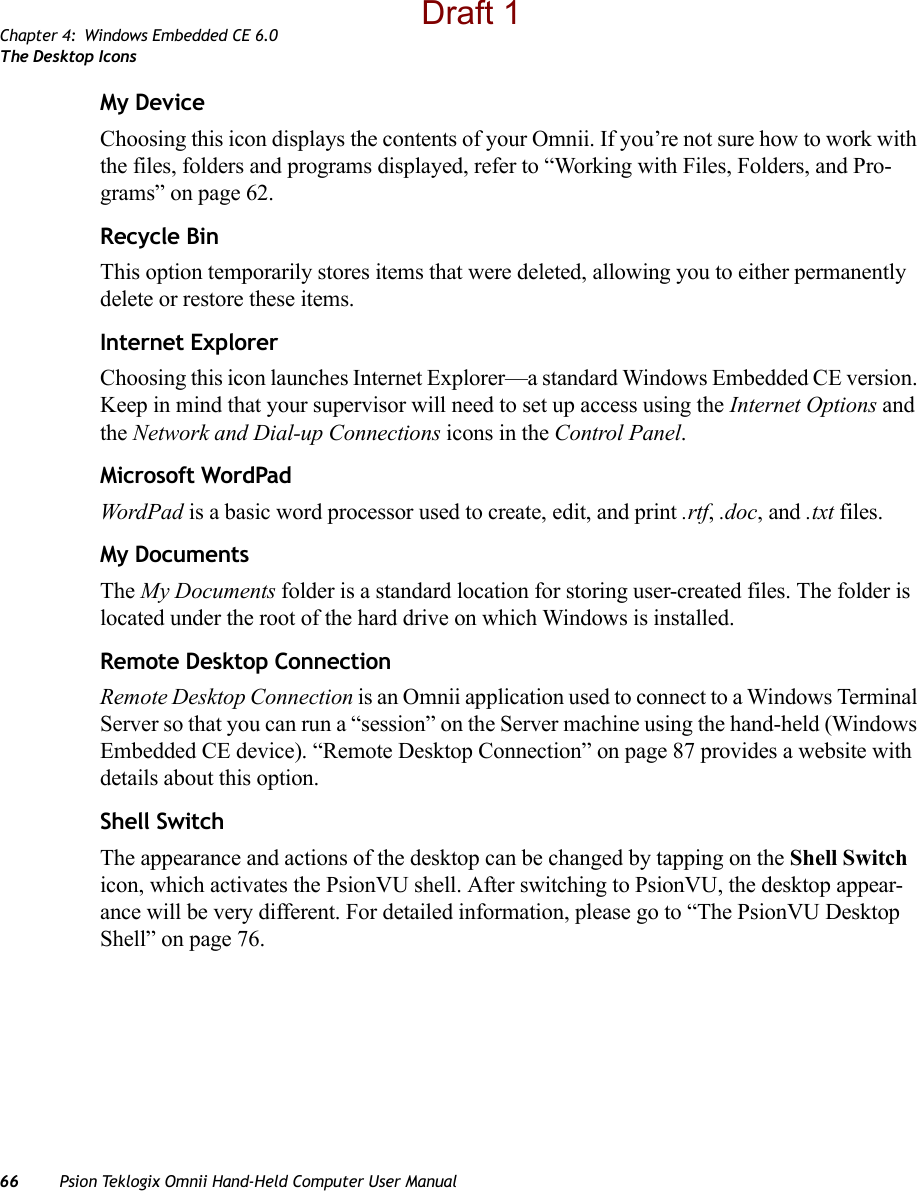
![Chapter 4: Windows Embedded CE 6.0The Windows Classic Shell Startup DesktopPsion Teklogix Omnii Hand-Held Computer User Manual 654.4 The Windows Classic Shell Startup DesktopWhen Omnii boots up, the default startup desktop (Windows Classic Shell) is displayed. Any applications stored in the Startup folder start up immediately. Figure 4.3 Omnii Windows Classic Shell Startup DesktopTo access desktop icons:• Double-tap on the icon to open a window or, in the case of an application icon, launch an application.On the keyboard:• Use the arrow keys to highlight the icon, and press [ENTER] to launch the highlighted icon.4.4.1 The Desktop IconsThe icons displayed in the startup desktop operate in much the same way as those displayed on any standard PC desktop that is running Windows.Note: The startup folder is located in \Windows\StartUp and \Flash Disk\StartUp.Note: If the arrow keys do not highlight the desktop icons, the desktop may not be selected. Press [Windows] to display the Start Menu, and select Desktop. Now the desktop will be “in focus” and the arrow keys will highlight the icons.Draft 1](https://usermanual.wiki/Psion/7545MBW.USERS-MANUAL/User-Guide-1507312-Page-80.png)
![Chapter 4: Windows Embedded CE 6.0The TaskbarPsion Teklogix Omnii Hand-Held Computer User Manual 674.4.2 The TaskbarOmnii is equipped with a taskbar at the bottom of the screen. It displays icons through which you can view the battery capacity and radio signal quality of your unit. If the hand-held is at-tached to a charger, cradle, docking station, or Snap Module, an associated icon is displayed. In addition, the taskbar displays the application(s) currently running on your unit.The taskbar also displays active modifier keys: [SHIFT], [ALT], [CTRL], [FN] and [SYM]. Keys that have been locked “on” are displayed with underlined letters. For example, if you have set the [CTRL] key lock to “on” in the Keyboard menu and you press the key, it is dis-played as an underlined ‘Ctrl’ in the taskbar. (For detailed information on modifier keys and keyboard options, see “The Keyboard” on page 42).4.4.2.1 Using the TaskbarA tooltip is displayed as each taskbar icon is highlighted. The tooltip provides the status of each icon.If you’re using the touchscreen:• Tap and hold on an icon to display the icon's tooltip. Double-tap the icon to open the Control Panel dialog box associated with the icon. For example, double-tap the battery icon to display a dialog box listing the current battery capacity information.On the keyboard:• Press [Windows] to display the Start Menu.Draft 1](https://usermanual.wiki/Psion/7545MBW.USERS-MANUAL/User-Guide-1507312-Page-82.png)
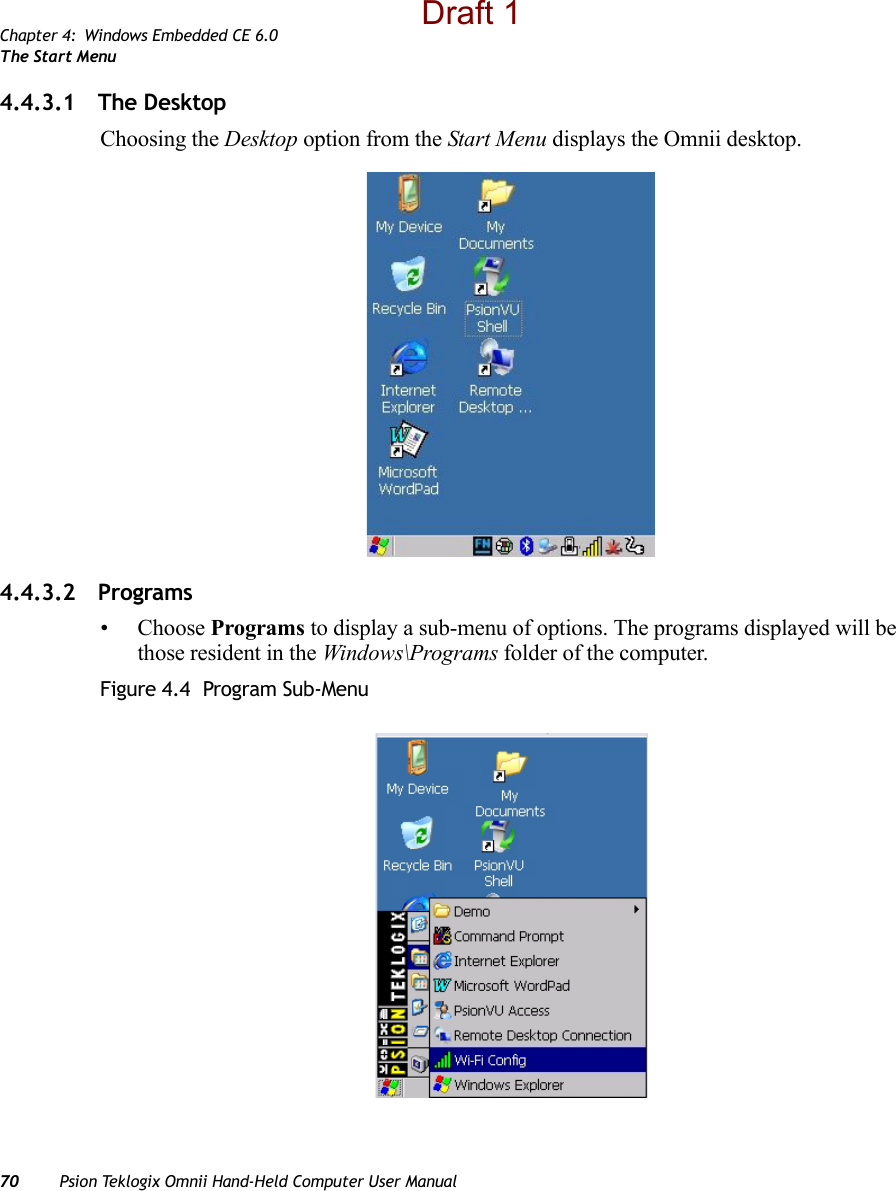
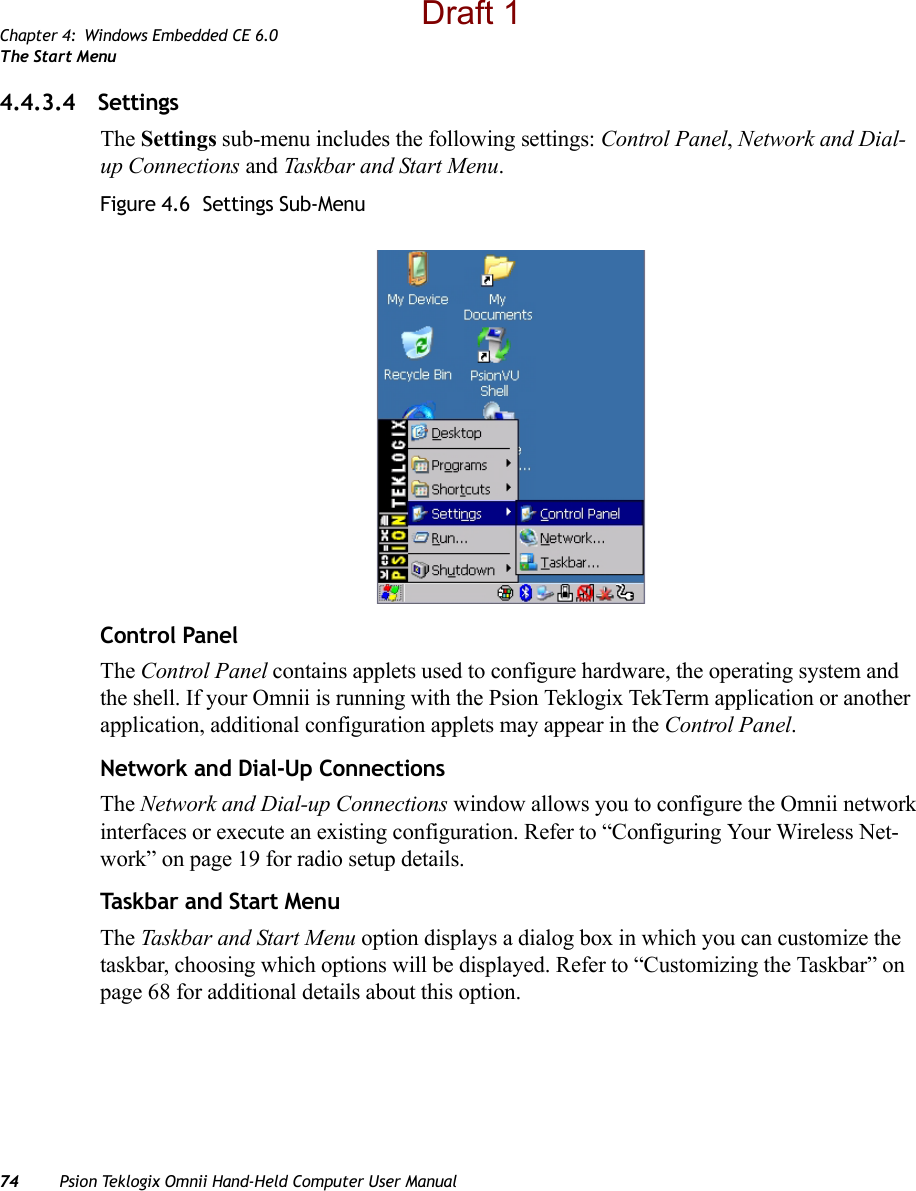
![Chapter 4: Windows Embedded CE 6.0The Start Menu68 Psion Teklogix Omnii Hand-Held Computer User Manual• Choose Shortcuts from the Start Menu, and then press the [RIGHT] arrow key to display the sub-menu.• Choose System Tray in the sub-menu. • Use the arrow keys to highlight the icon in the taskbar about which you’d like more information.• Press [ENTER] to display the appropriate dialog box.4.4.2.2 Customizing the TaskbarTo customize the taskbar so that it displays only those icons you require:•In the Start Menu, choose Settings, and then Taskbar.If you’re using the keyboard:• Press [Windows] to display the Start Menu.• Highlight the Settings option, highlight Taskbar in the sub-menu, and press [ENTER]. The Taskbar and Start Menu dialog box is displayed.• Tap on the items you want to activate or deactivate. The check mark indicates active items.If you’re using the keyboard:• Highlight the options you want to activate, and press the [SPACE] key to select them. A check mark indicates active items.4.4.3 The Start MenuThe Start Menu lists the operations you can access and work with. It is available from the startup desktop or from within any application.• To display the menu, tap on the Start Menu.Draft 1](https://usermanual.wiki/Psion/7545MBW.USERS-MANUAL/User-Guide-1507312-Page-83.png)
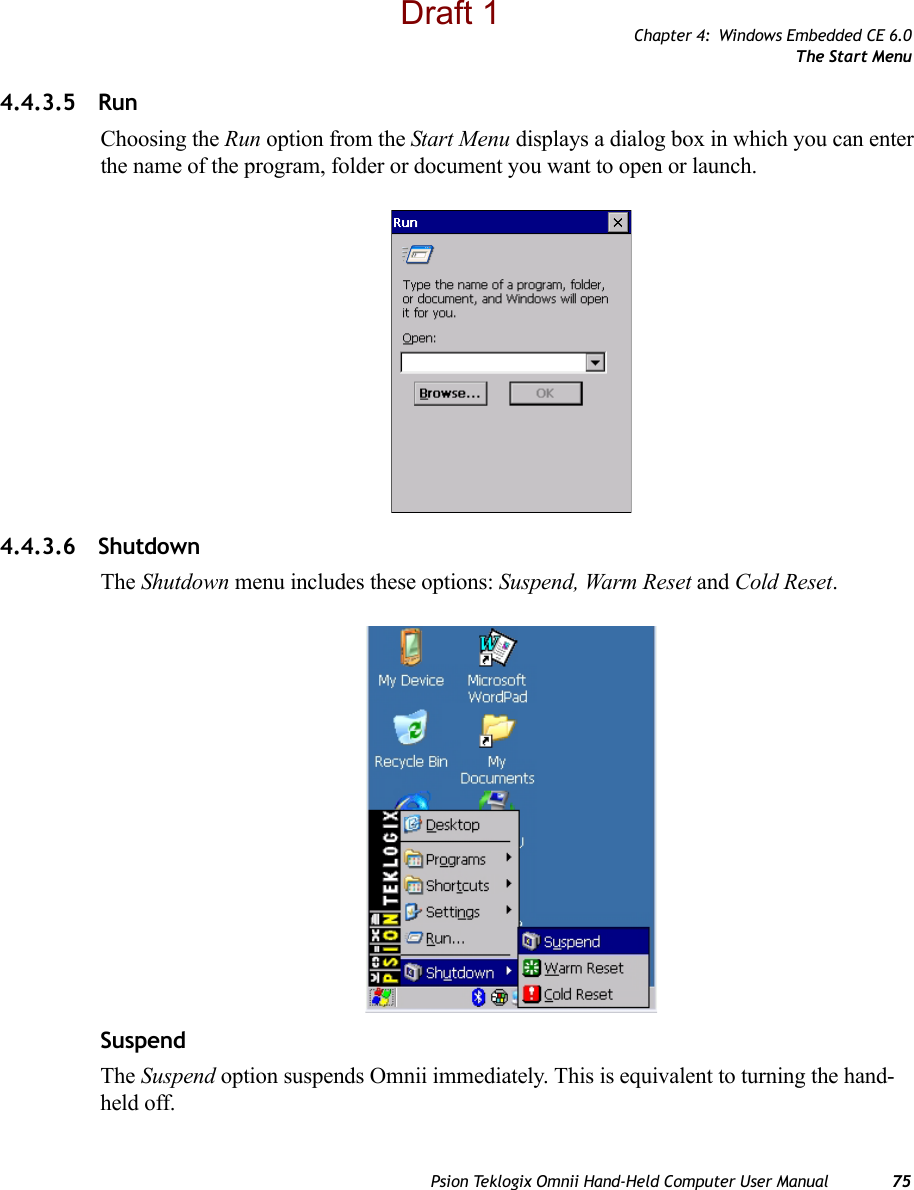
![Chapter 4: Windows Embedded CE 6.0The Start MenuPsion Teklogix Omnii Hand-Held Computer User Manual 69If you’re using the keyboard:• Use the arrow keys to highlight a menu item, and press [ENTER], or If the menu item has an underlined character:• Type the underlined alpha character. For example, to display the Run dialog box, type the letter ‘r’.Note: Tap on the item in the menu with which you want to work.Draft 1](https://usermanual.wiki/Psion/7545MBW.USERS-MANUAL/User-Guide-1507312-Page-84.png)
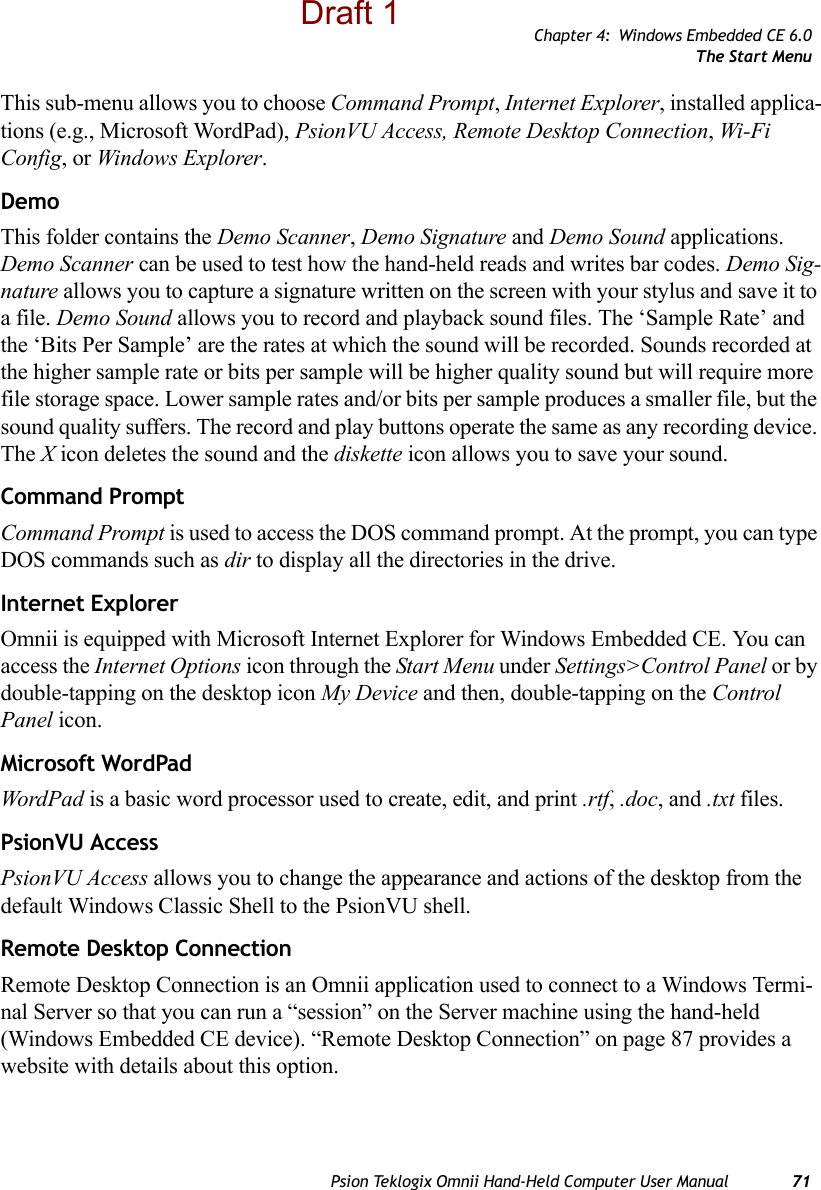
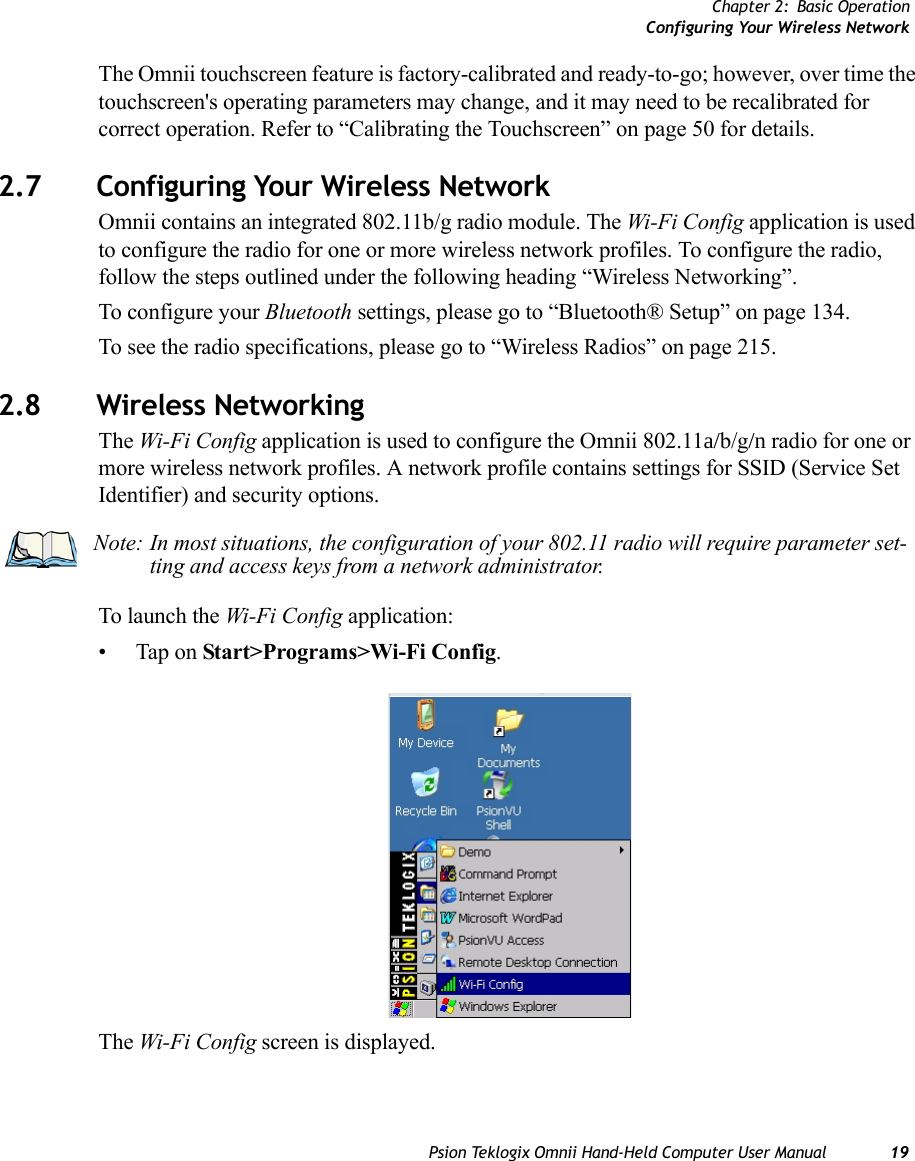
![Chapter 4: Windows Embedded CE 6.0The Start Menu72 Psion Teklogix Omnii Hand-Held Computer User ManualWi-Fi ConfigThe Wi-Fi Config application is used to configure the Omnii 802.11b/g radio for one or more wireless network profiles. Windows ExplorerThe Windows Explorer installed on your Omnii is consistent with all Windows Embedded CE devices. 4.4.3.3 ShortcutsFigure 4.5 Shortcuts Sub-MenuSystem TrayIf your touchscreen is not enabled, you can use the System Tray option to access the icons in the taskbar at the bottom of the screen. The taskbar displays indicators such as a radio signal icon. These indicators are attached to dialog boxes that provide additional information. • Choose Shortcuts, System Tray.When System Tray is chosen, the taskbar icons become accessible. To display the dialog box attached to an icon:• Use the arrow keys to highlight an icon, for example, the Bluetooth icon.• Press [ENTER] to display the Bluetooth menus.Cycle TasksWhen Cycle Tasks is selected (and the Task Manager is not open), you can cycle through active applications. Draft 1](https://usermanual.wiki/Psion/7545MBW.USERS-MANUAL/User-Guide-1507312-Page-87.png)
![Chapter 4: Windows Embedded CE 6.0The Start MenuPsion Teklogix Omnii Hand-Held Computer User Manual 73To cycle through your active applications:• Choose Shortcuts, Cycle Tasks, or • Press [ALT] [TAB].Task Man ag erThe Task Manager allows you to switch to another task or to end an active task. To display the task manager window:• Tap on Shortcuts, Task Manager, or• Press [ALT] [ESC].Draft 1](https://usermanual.wiki/Psion/7545MBW.USERS-MANUAL/User-Guide-1507312-Page-88.png)
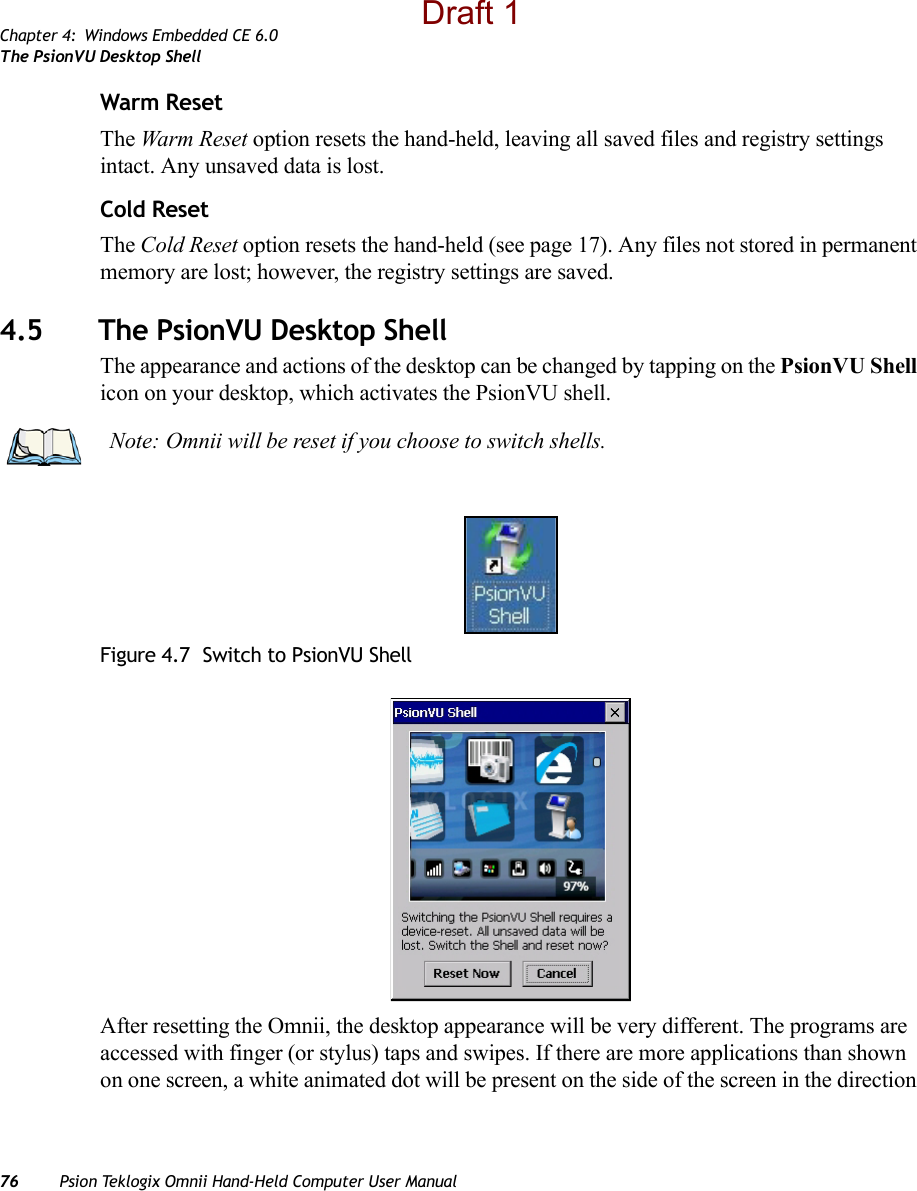
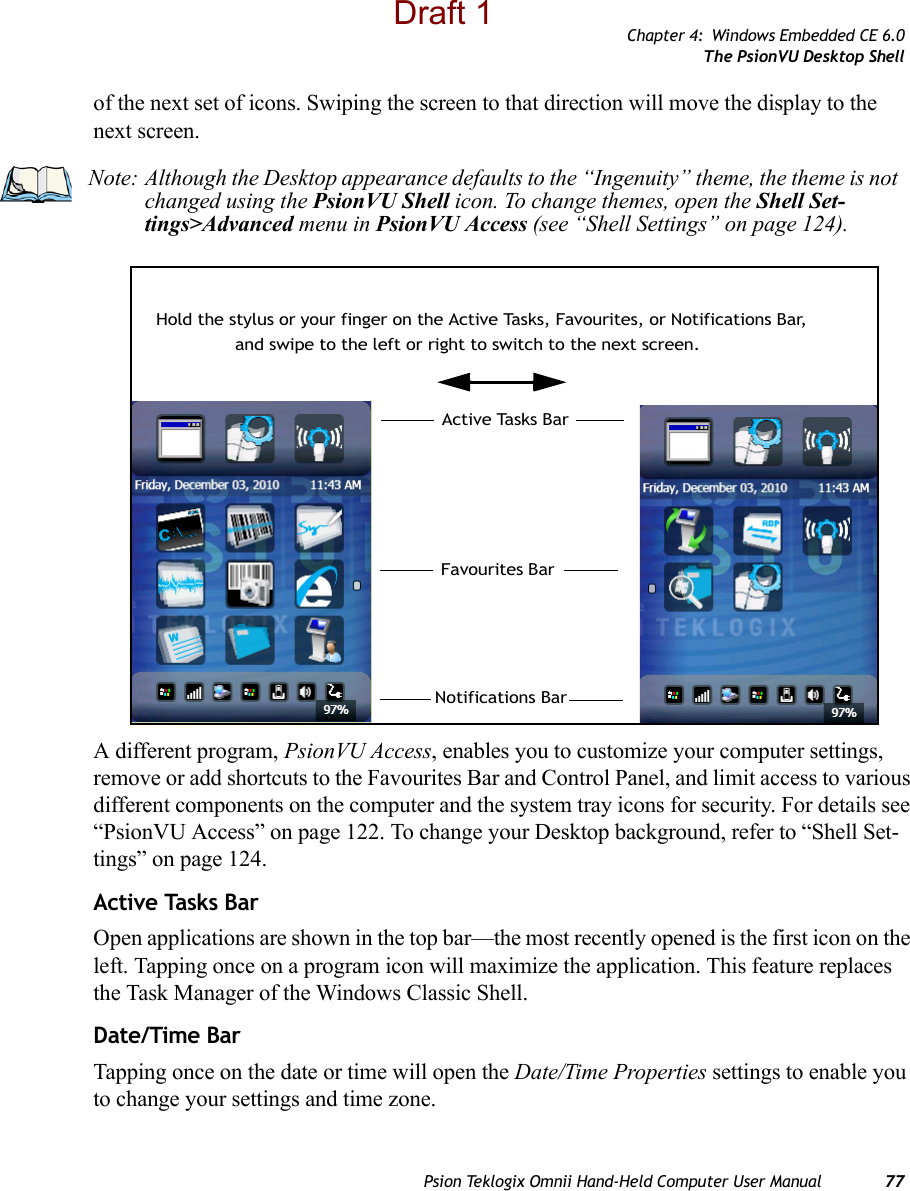
![Chapter 4: Windows Embedded CE 6.0Restoring the Windows Classic ShellPsion Teklogix Omnii Hand-Held Computer User Manual 794.5.1 Restoring the Windows Classic ShellThe default Desktop appearance and actions can be restored by tapping on the PsionVU Shell icon in the Favourites Bar.Figure 4.8 Shell Switch to Windows Classic Shell Desktop4.5.2 ShutdownTurning off Omnii places the hand-held into a power-saving suspend state. In this state, all radios remain on, but the display, keyboard backlight and processor are switched off. When Omnii is turned on from this state, operation resumes within a few seconds in the screen in which you were working prior to suspend.• Press the [FN] key, and then press the [ENTER/Power] key.Note: Omnii will be reset if you choose to switch shells.Important: If the word ‘FN’ is displayed underlined in the taskbar area at the bottom of the screen, this key is locked “on” and Omnii will not switch off. Press the [FN] key twice followed by [ENTER/Power] to switch Omnii off.However, if you’ve set the mode to “Lock” (see “Keyboard One Shot Modes” on page 102), Omnii can be turned off even when the [FN] key is locked ‘on’.Draft 1](https://usermanual.wiki/Psion/7545MBW.USERS-MANUAL/User-Guide-1507312-Page-94.png)
![Chapter 4: Windows Embedded CE 6.0Shutdown80 Psion Teklogix Omnii Hand-Held Computer User ManualResetting OmniiTo perform a warm or cold reset, or boot to BooST, use the keyboard shortcuts described below.Warm ResetTo execute a warm reset:• Press and hold down the [FN] key and the [ENTER/Power] key simultaneously for a minimum of four seconds.A warm reset closes open applications; any unsaved data are lost. Installed programs and saved data are preserved. Cold ResetTo execute a cold reset:• Press and hold down the [SYM] key, the [FN] key, and the [ENTER/Power] key, simultaneously for a minimum of four seconds.Bootloader To implement the bootloader:• Press and hold down the [FN] key, the [ENTER/Power] key, and the [SCAN] key, simultaneously for a minimum of four seconds.After the cold reset, the BooSt menu appears. • Type ‘1’ to “Run Main OS” (continue loading the Windows Embedded CE operating system).Note: If your Desktop is switched to the Windows Classic Shell, the unit will display a shutdown options screen before turning off (see “Switching Omnii On and Off” on page 15).Note: You do not need to reset your Omnii after configuring the radio.Note: As part of the normal Windows Embedded CE cold boot process, the screen may go blank for a few seconds after the splash screen loading bar reaches the end. The desktop is displayed after a few moments.Important: This reset returns Omnii to factory settings.Draft 1](https://usermanual.wiki/Psion/7545MBW.USERS-MANUAL/User-Guide-1507312-Page-95.png)

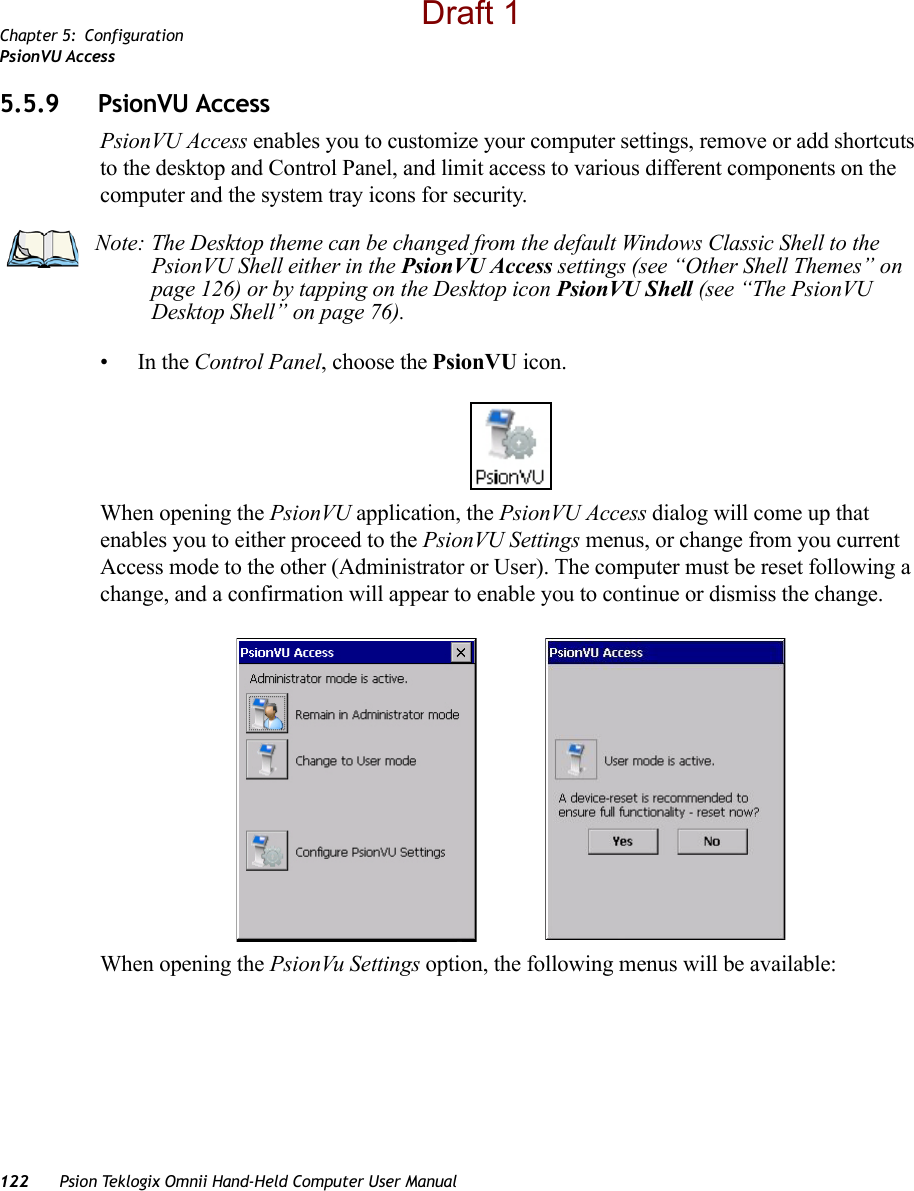
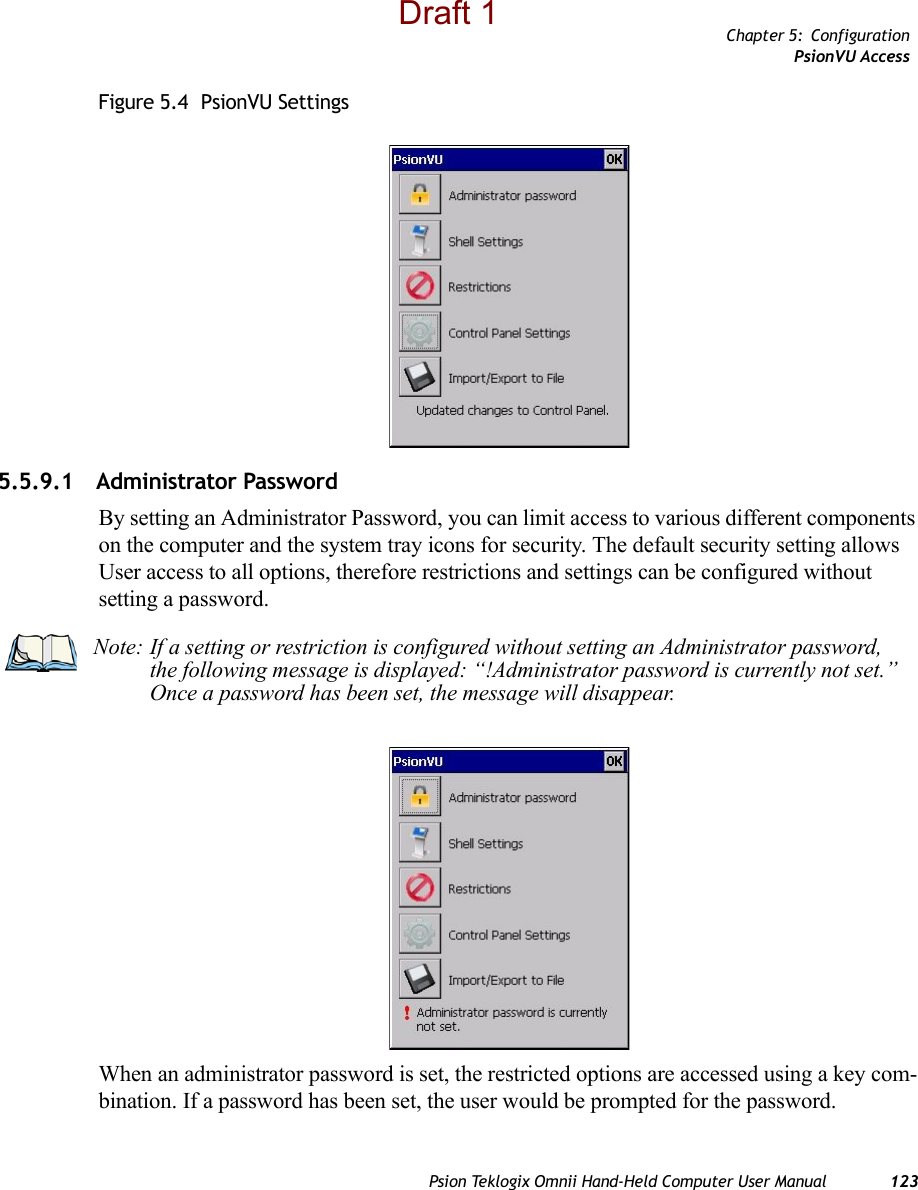
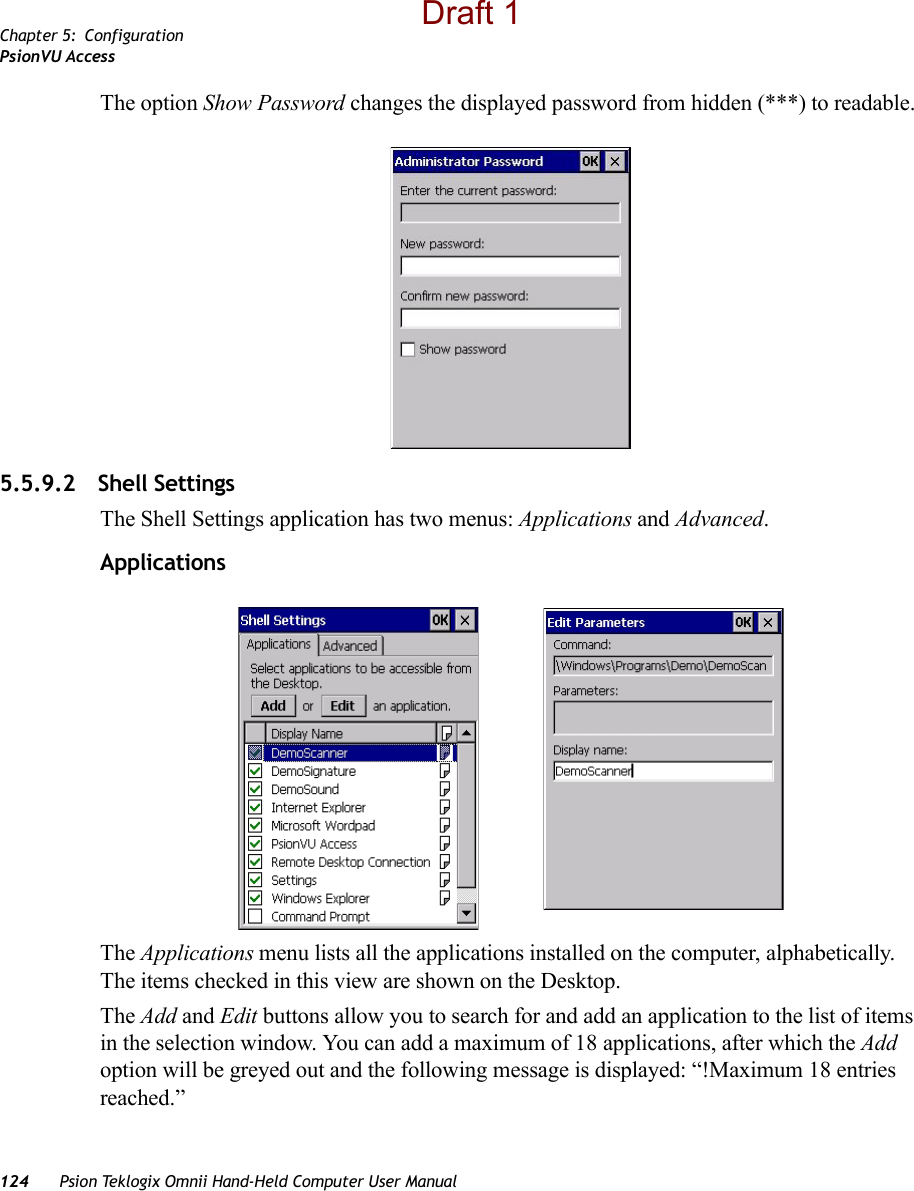
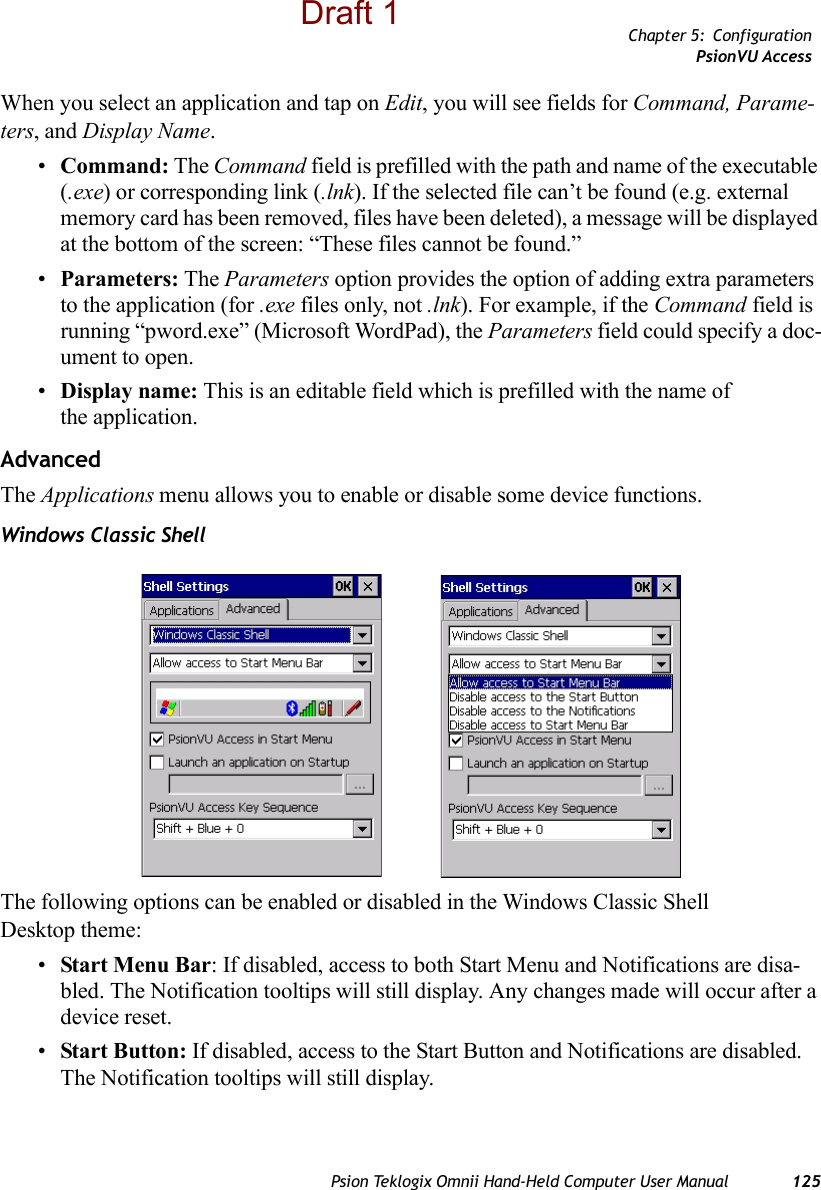
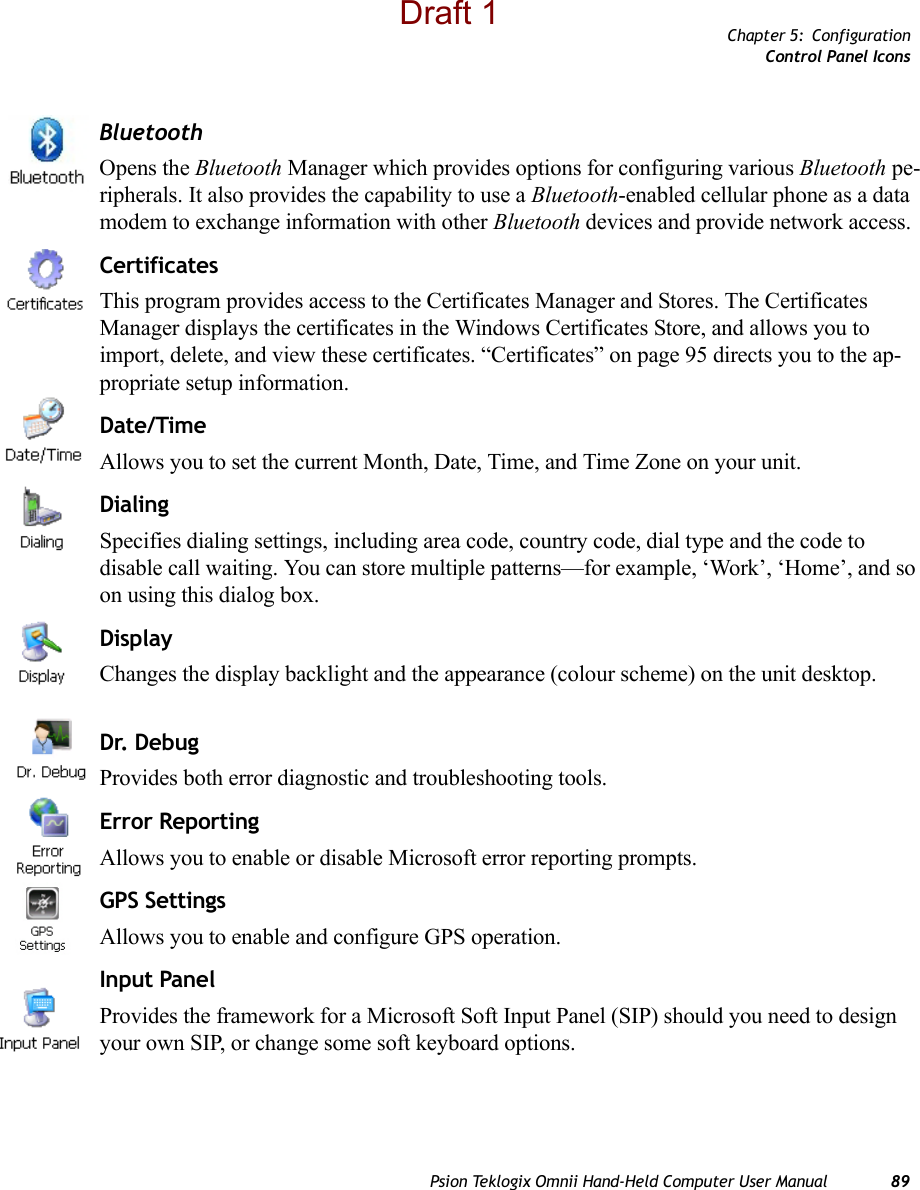
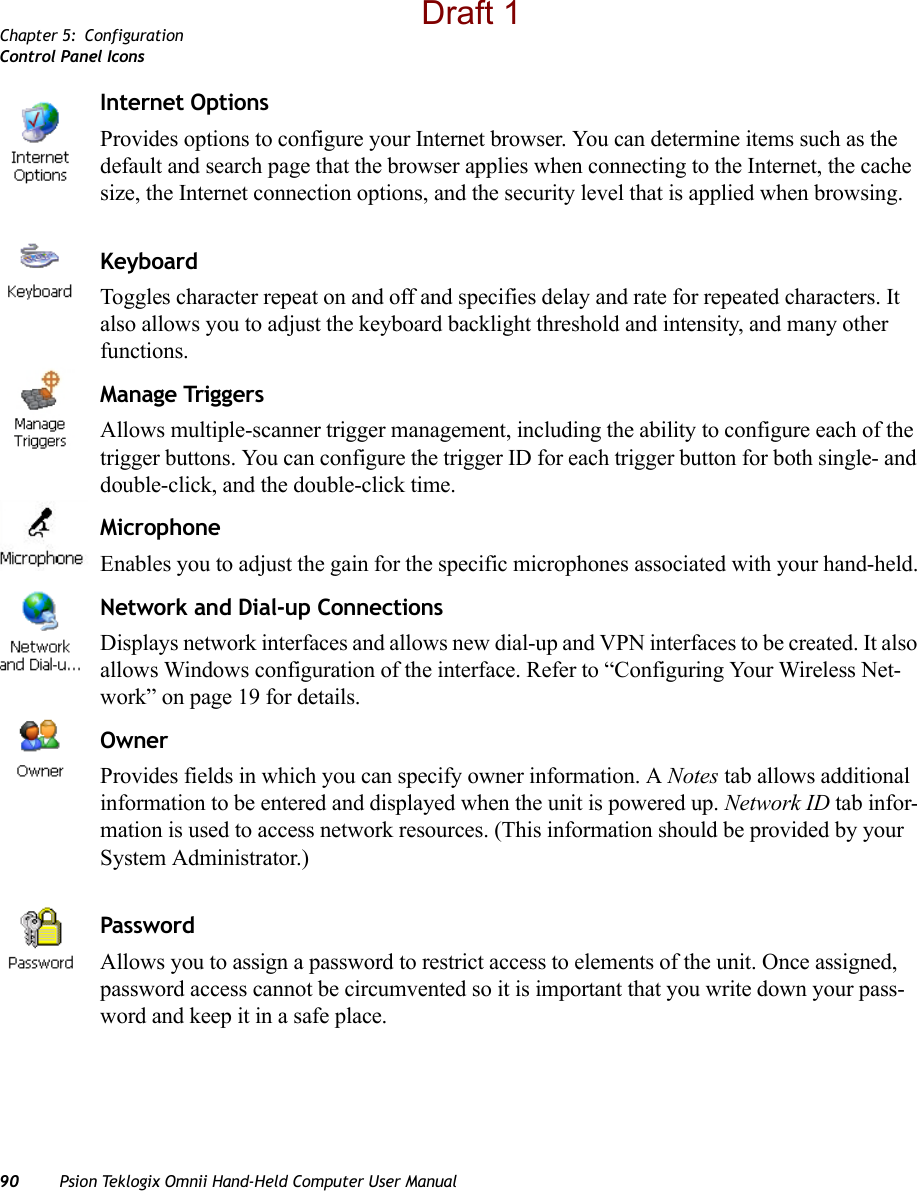
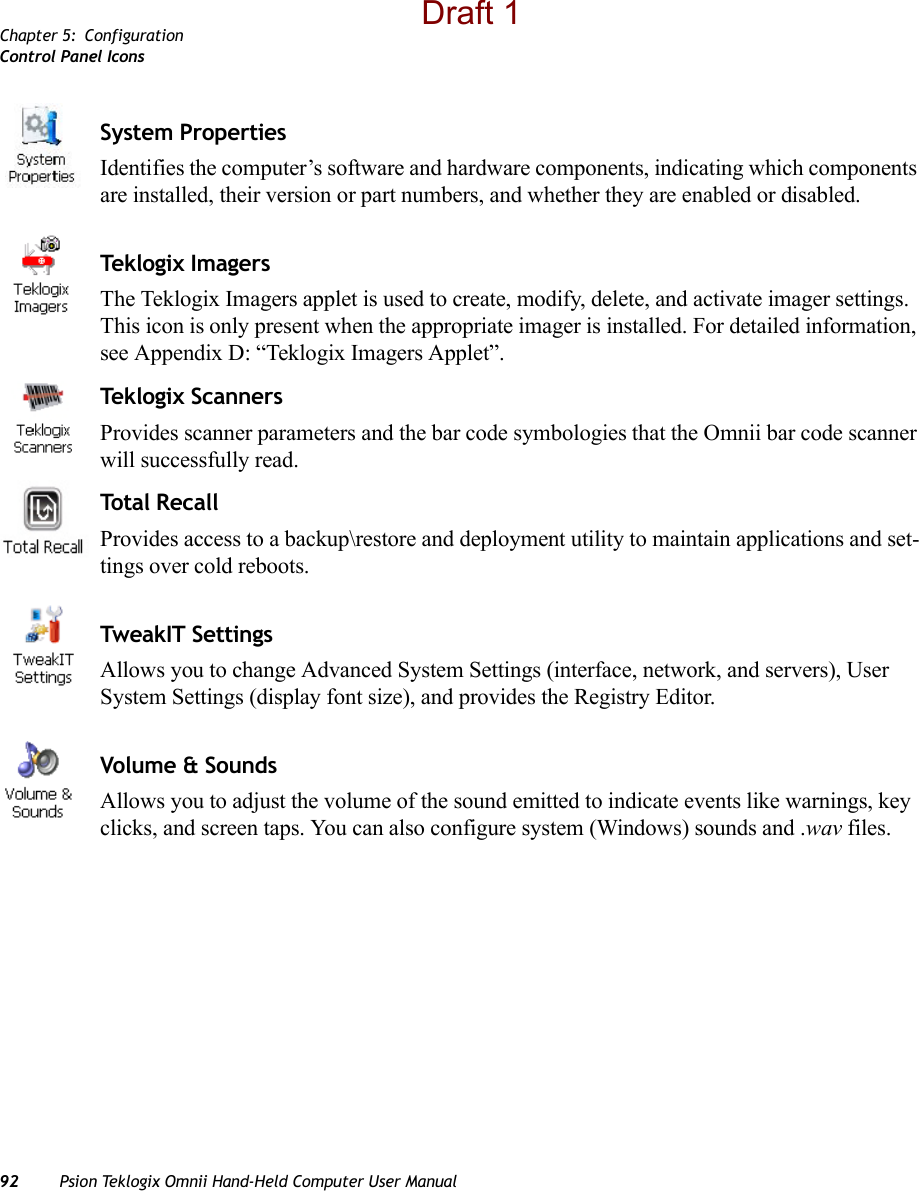
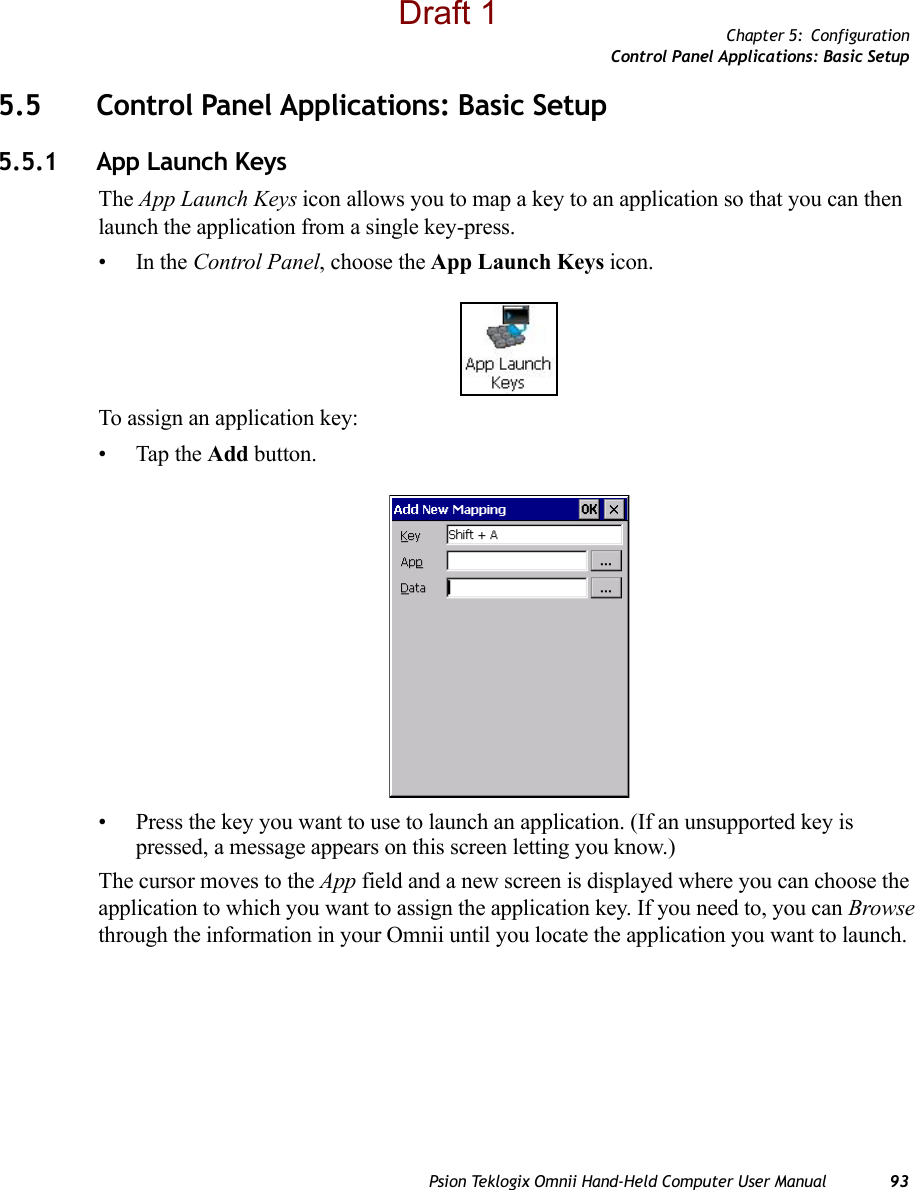
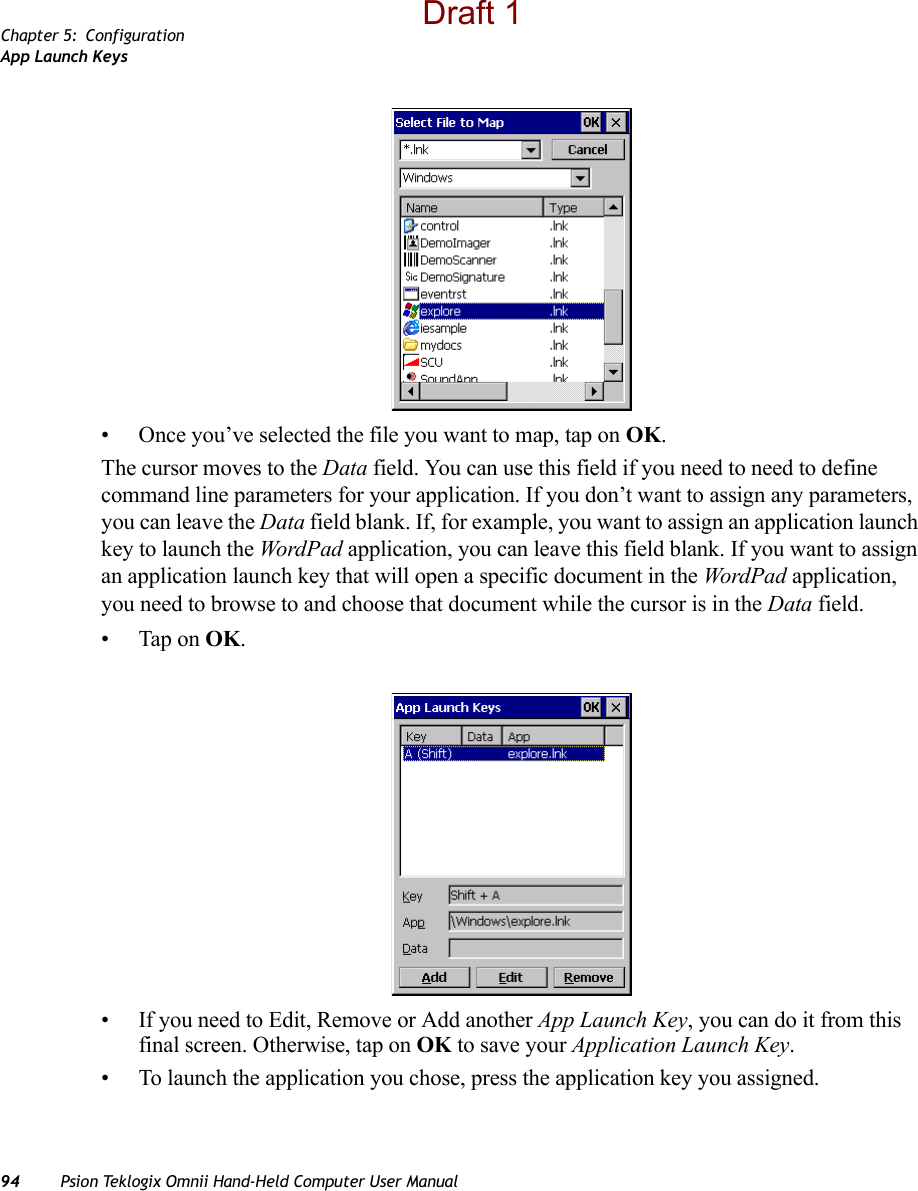
![Chapter 5: ConfigurationControl Panel Icons88 Psion Teklogix Omnii Hand-Held Computer User ManualTo access the Control Panel:• Press [Windows] to display the Start Menu.• Tap on Settings>Control Panel.If you’re using the keyboard:• Press [Windows] to display the Start Menu.• Highlight Settings in Start Menu, and press the [RIGHT] arrow key to highlight the Control Panel.• Press the [ENTER] key.The Control Panel folder contains icons used in the setup of your Omnii.Figure 5.1 Control Panel Icons5.4.1 Control Panel IconsThe Control Panel provides a group of applications that allow you to customize and adjust settings on your Omnii. This section shows the related icons in the Control Panel and gives a brief description of each. “Control Panel Applications: Basic Setup” on page 93 describes the basic configuration for these applications.App Launch KeysBy mapping keys to applications using this program, you can then launch those applications from a single key-press.Draft 1](https://usermanual.wiki/Psion/7545MBW.USERS-MANUAL/User-Guide-1507312-Page-103.png)

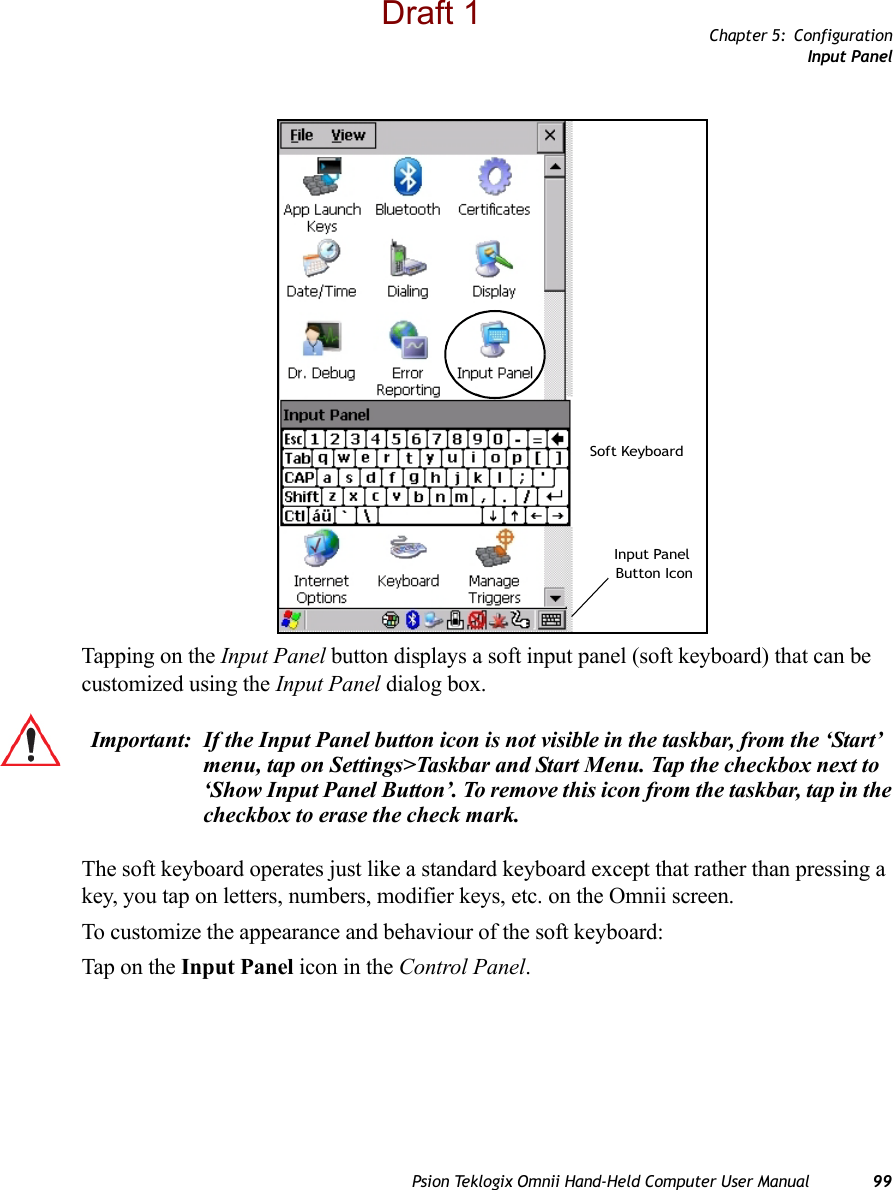
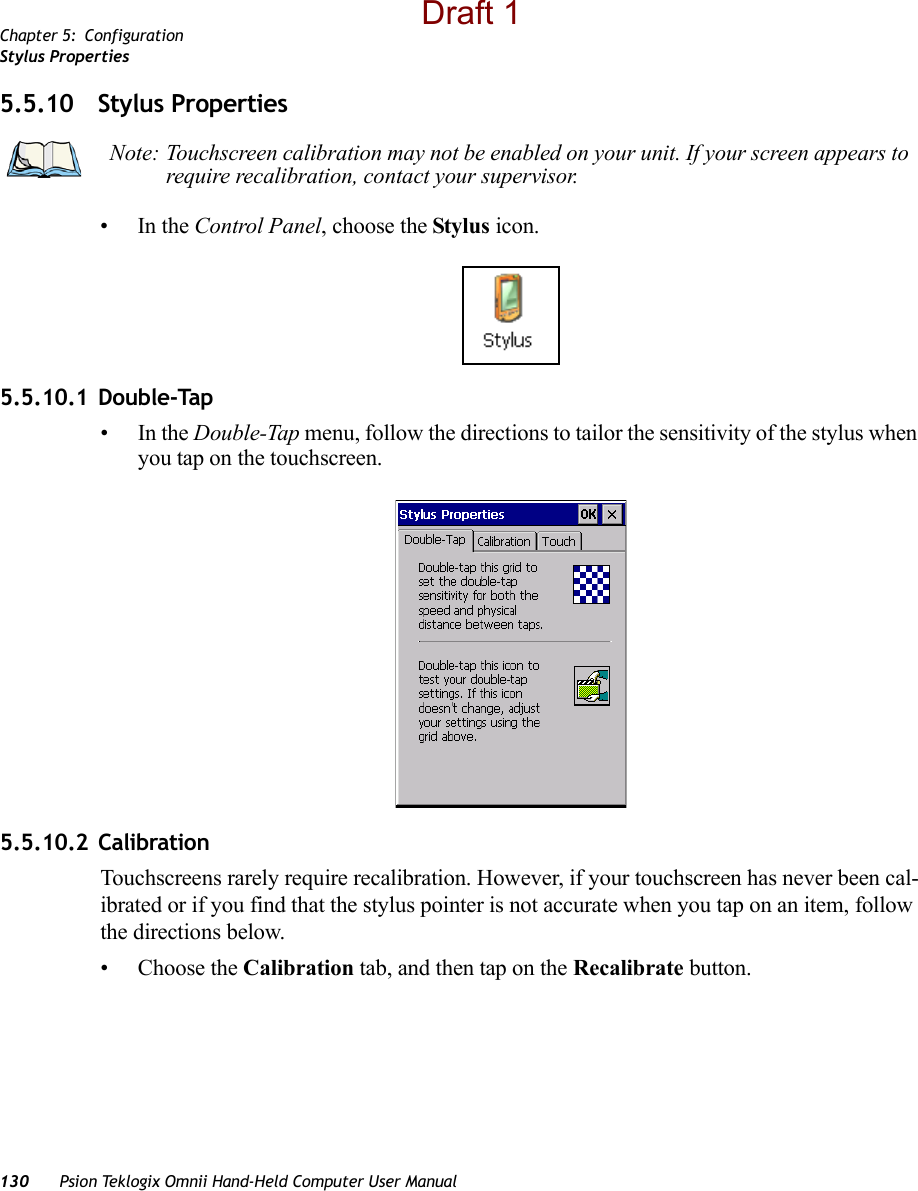
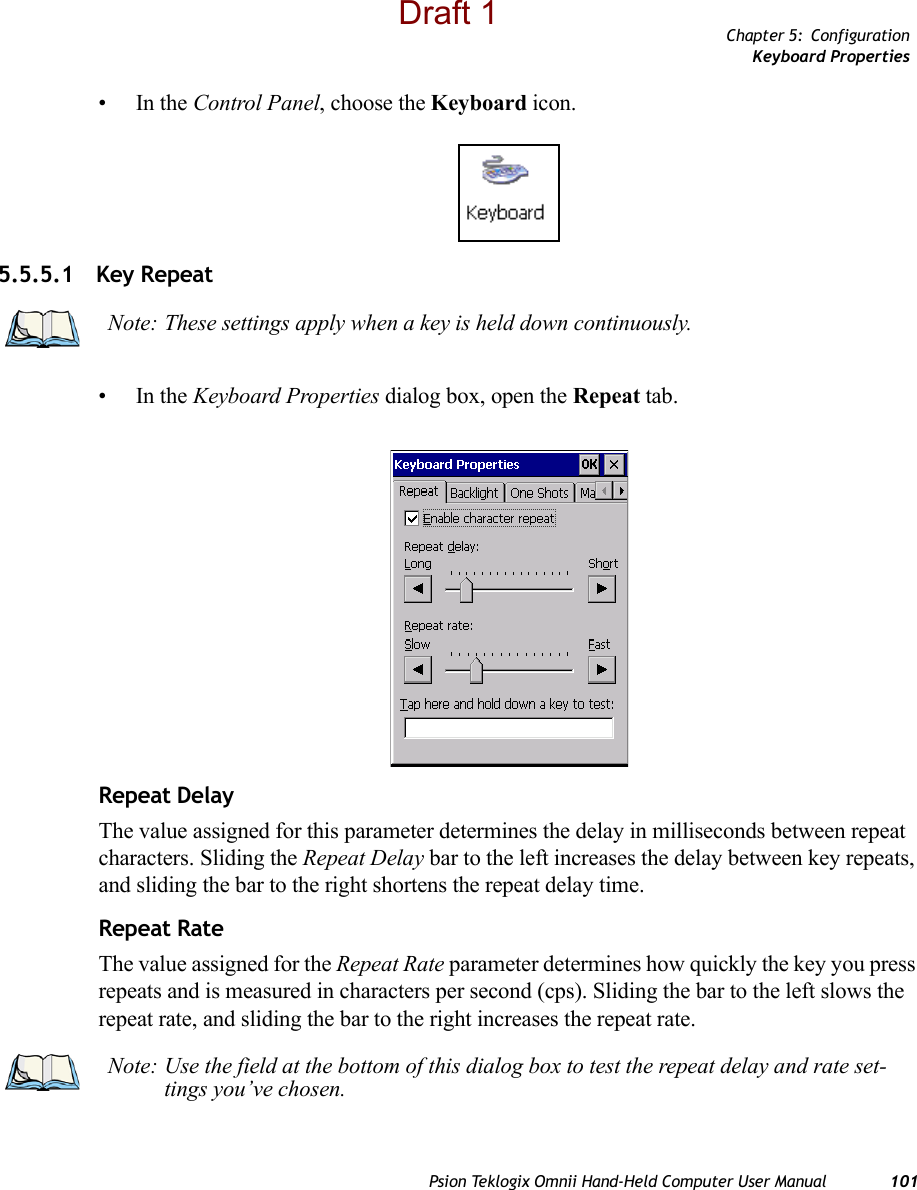
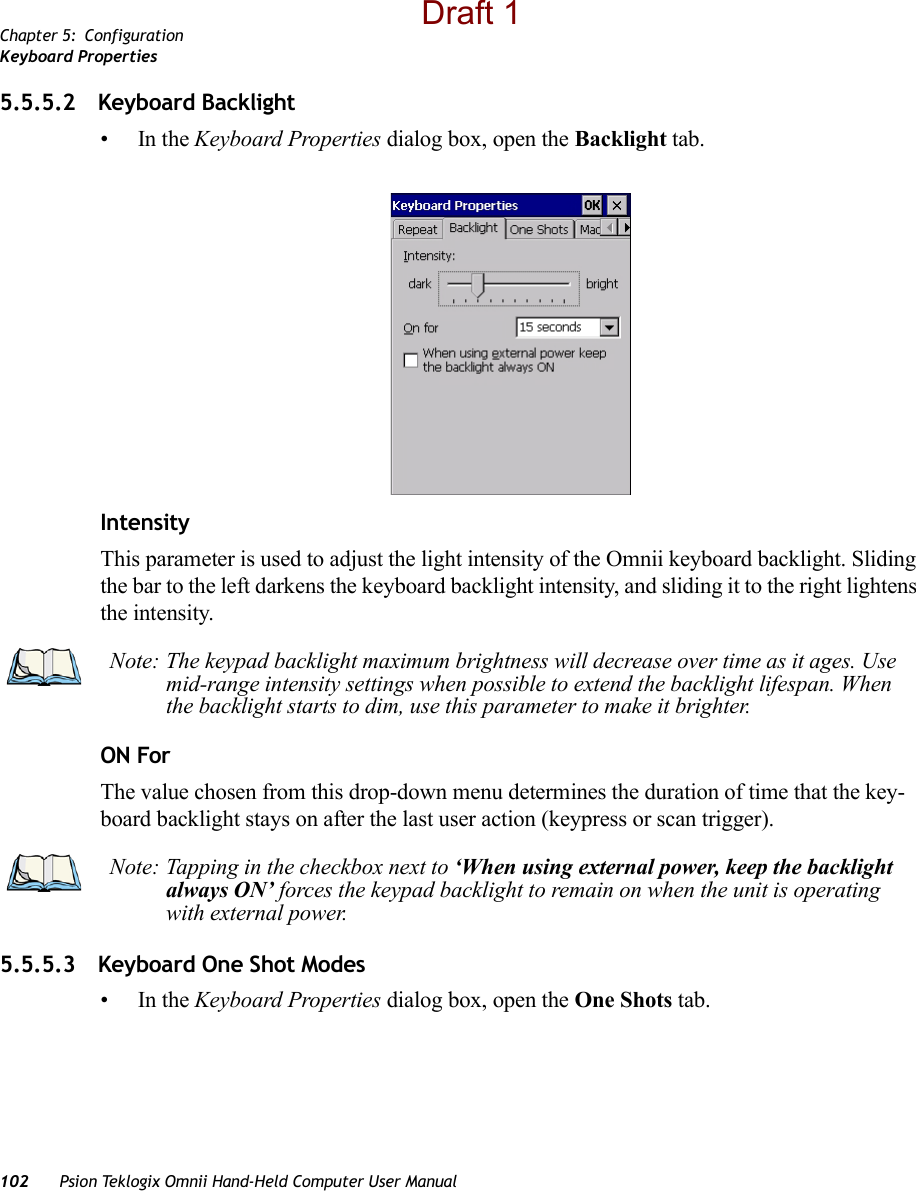
![Chapter 5: ConfigurationKeyboard Properties100 Psion Teklogix Omnii Hand-Held Computer User ManualFigure 5.2 Input Panel Properties• Tap on the Options button to change the appearance of your soft keyboard.Figure 5.3 Soft Keyboard Options5.5.5 Keyboard PropertiesThis icon displays the Keyboard Properties dialog box in which you can adjust the repeat rate of the keys, the intensity of the keyboard backlight and the behaviour of the [FN] and [SYM] modifier keys. This dialog box also allows you to define macro keys and Unicode characters.Note: You can also display this dialog box by double-tapping on the Input icon in the far-right corner of the taskbar.Draft 1](https://usermanual.wiki/Psion/7545MBW.USERS-MANUAL/User-Guide-1507312-Page-115.png)
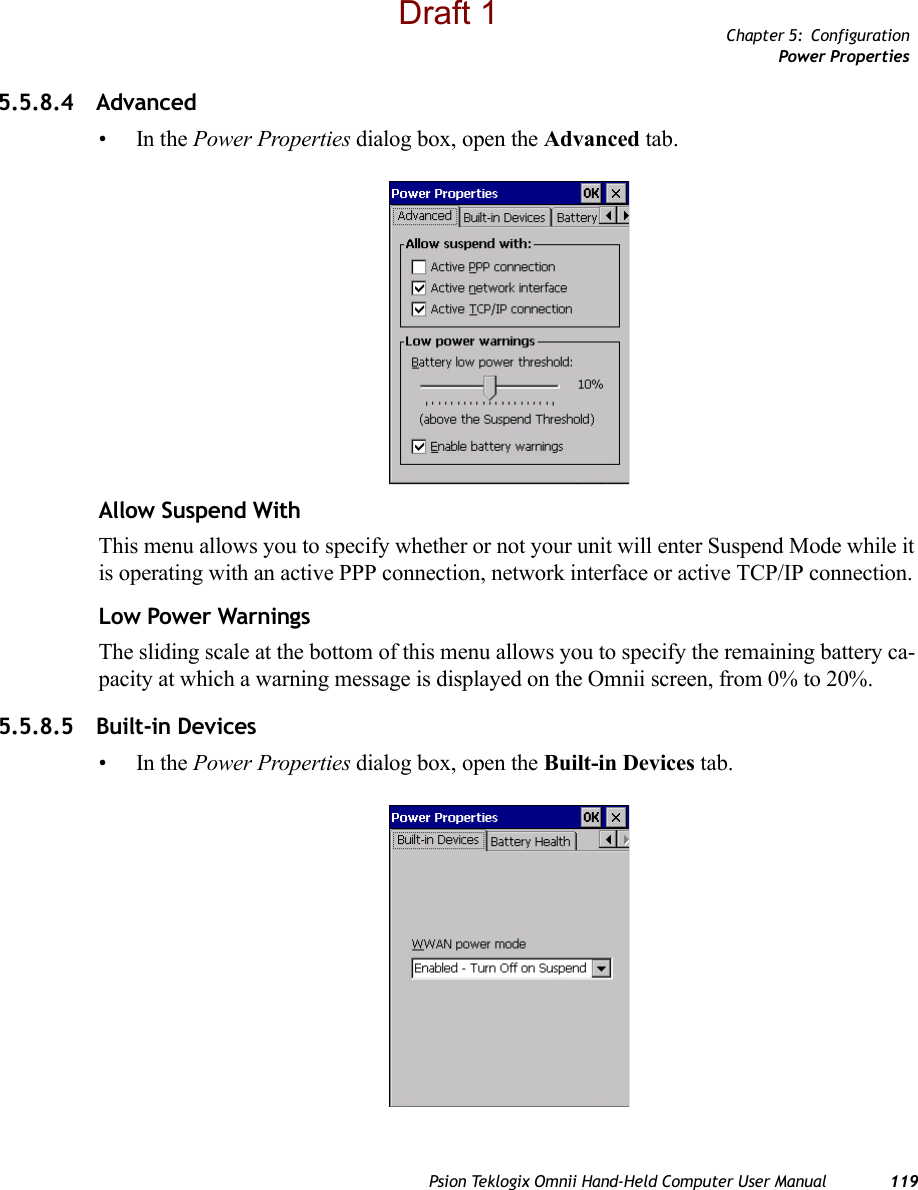
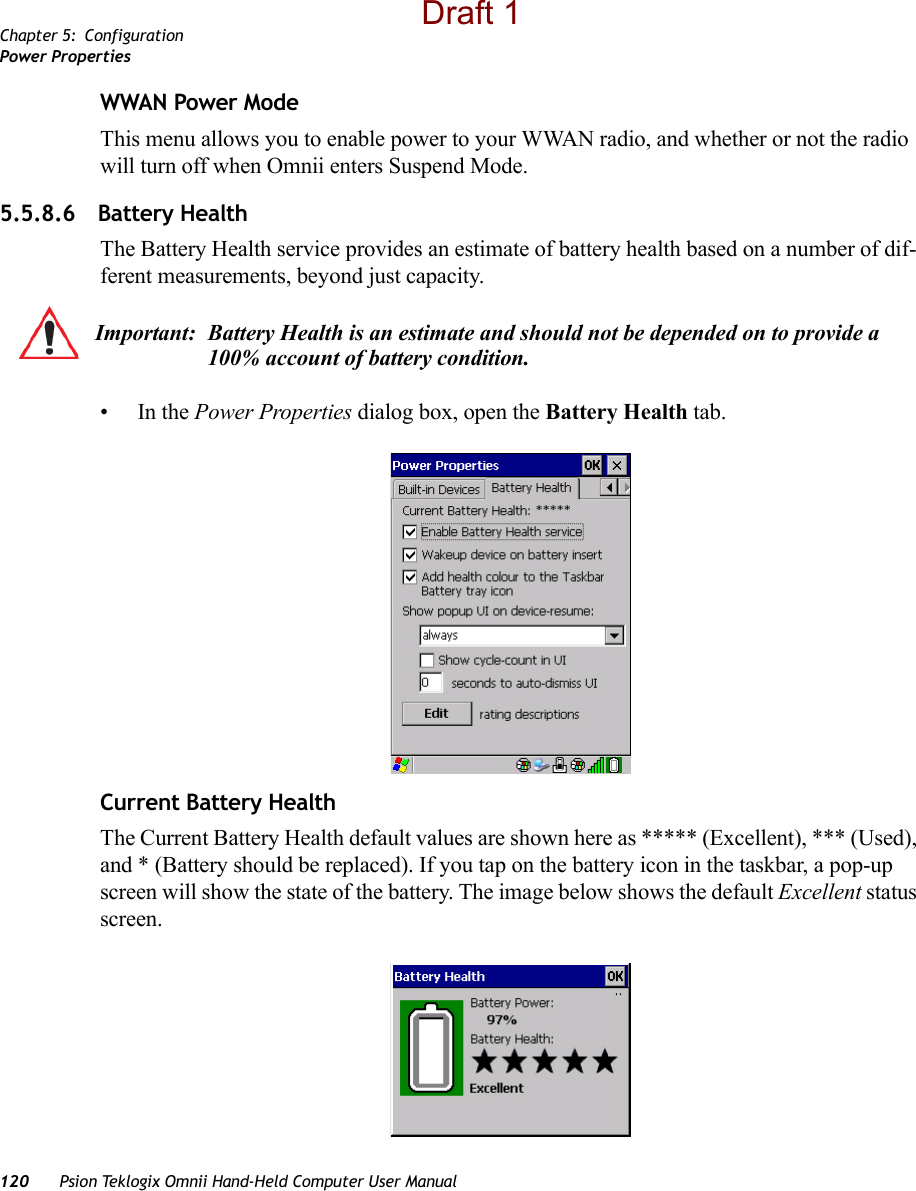
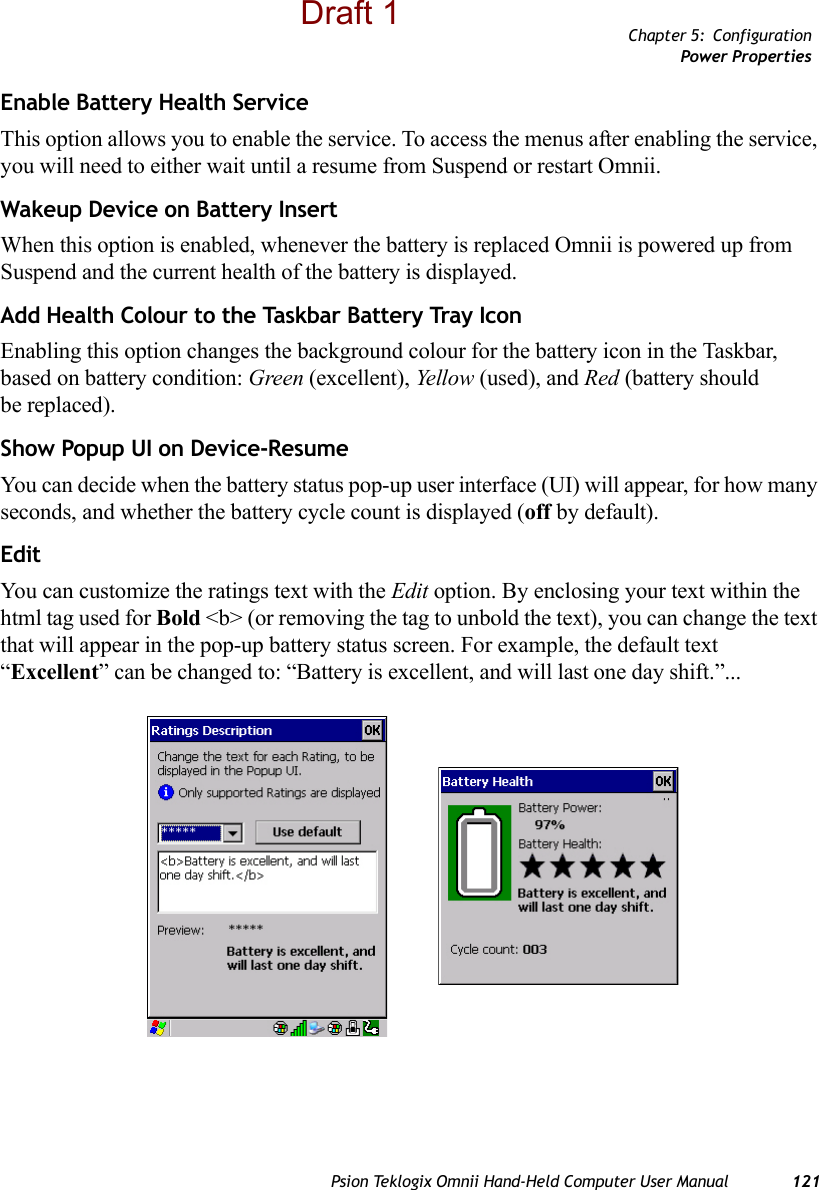
![Chapter 5: ConfigurationKeyboard PropertiesPsion Teklogix Omnii Hand-Held Computer User Manual 103The options in this tab allow you to determine how modifier keys on your Omnii behave. For each modifier key—[ALT], [SHIFT], [CTRL], [FN], and [SYM]—you have the follow-ing options in the drop-down menu: Lock, OneShot, and OneShot/Lock. LockIf you choose Lock from the drop-down menu, pressing a modifier key once locks it ‘on’ until you press the modifier key a second time to unlock or turn it off. OneShotIf you choose OneShot, the modifier key remains active only until the next key is pressed.OneShot/LockOneShot/Lock allows you to combine these functions. When you choose this option and you press the modifier key once, it remains active only until the next key is pressed. If you press the modifier key twice, it is locked ‘on’, remaining active until the modifier key is pressed a third time to turn it ‘off’.Note: Keep in mind that checking the taskbar lets you know whether or not these keys are locked on. For example, if the [FN] key is locked ‘on’, the taskbar at the bottom of the screen displays it underlined. If this key is displayed without the underline in the taskbar, you’ll know that the key is not locked. It will become inactive following a key press.Important: Once you’ve assigned a One Shot mode to a modifier key, you need to tap on the OK button at the top of the tab to activate your selection.Draft 1](https://usermanual.wiki/Psion/7545MBW.USERS-MANUAL/User-Guide-1507312-Page-118.png)
![Chapter 5: ConfigurationKeyboard Properties104 Psion Teklogix Omnii Hand-Held Computer User Manual5.5.5.4 Keyboard Macro Keys•In the Keyboard Properties dialog box, open the Macros tab.A macro has 200 programmable characters (or “positions”). The macro keys can be pro-grammed to replace frequently used keystrokes, along with the function of executable keys including [ENTER], [BACKSPACE] and [DEL] ([FN]-[BACKSPACE]), function keys and arrow keys. Recording and Saving a MacroYou can program up to 6 macro keys, depending on your keyboard layout. You can also in-crease the number of virtual macro keys up to 15 using Scancode Remapping (for details, see “Scancode Remapping” on page 107). •In the Macro menu highlight a macro key number, for example macro 1, to assign a macro to macro key [M1]. Choose the Record button. A message screen is displayed instructing you to Enter Key Strokes to Record.Draft 1](https://usermanual.wiki/Psion/7545MBW.USERS-MANUAL/User-Guide-1507312-Page-119.png)
![Chapter 5: ConfigurationKeyboard PropertiesPsion Teklogix Omnii Hand-Held Computer User Manual 105• Type the macro sequence you want to assign to the Macro key. You can type text and numbers, and you can program the function of special keys into a macro.• When you’ve finished recording your macro sequence, press the key sequence: [CTRL] [ALT] [ENTER], or choose the Stop Recording button.A new screen called ‘Verify Macro’ displays the macro sequence you created. The Save button is highlighted. • Press [ENTER] to save your macro, or highlight CANCEL and press [ENTER] to discard it.Executing a MacroTo execute a macro:• Press the macro key to which you’ve assigned the macro. For example, if you created a macro for macro key 1, press [M1] to execute the macro.Deleting a MacroTo delete a macro:•In the Macros tab, highlight the macro number you want to delete.• Choose the Delete button.Draft 1](https://usermanual.wiki/Psion/7545MBW.USERS-MANUAL/User-Guide-1507312-Page-120.png)
![Chapter 5: ConfigurationKeyboard Properties106 Psion Teklogix Omnii Hand-Held Computer User Manual5.5.5.5 Unicode Mapping•In the Keyboard Properties dialog box, open the Unicode Mapping tab.The Unicode Mapping tab is used to map combinations of virtual key values and [CTRL] and [SHIFT] states to Unicode™ values. This tab shows the configured Unicode character along with the Unicode value. For example, the sample screen above shows “a (U+0061)” indicating that the character “a” is represented by the Unicode value “0061”, and so on. Keep in mind that Unicode configurations are represented as hexadecimal rather than decimal values.All user-defined Unicode mappings are listed in the Unicode Mapping tab in order of virtual key value, and then by order of the shift state. If a Unicode mapping is not listed, the Unicode mapping is mapped to the default Unicode value.Adding and Changing Unicode Values• Choose the Add/Change button.Important: Changes to Unicode mappings are not saved until you exit the Keyboard Properties dialog box.Draft 1](https://usermanual.wiki/Psion/7545MBW.USERS-MANUAL/User-Guide-1507312-Page-121.png)
![Chapter 5: ConfigurationKeyboard PropertiesPsion Teklogix Omnii Hand-Held Computer User Manual 107• Highlight a value in the Unicode mapping list. In the sample screen above, a value will be assigned to virtual key 0 (VK 0).• Position the cursor in the Unicode Mapping field, and type a Unicode value for the highlighted key.Removing Unicode Values•In the Unicode Mapping tab, highlight the item you want to delete, and choose the Remove button.5.5.5.6 Scancode RemappingA scancode is a number that is associated with a physical key on a keyboard. Every key has a unique scancode that is mapped to a virtual key, a function or a macro. Scancode Remap-ping allows you to change the functionality of any key on the keyboard. A key can be remapped to send a virtual key (e.g. VK_F represents the ‘F’ key; VK_RETURN represents the [ENTER/Power] key, etc.), perform a function (e.g. turn the scanner on, change volume, etc.) or run a macro.There are three different tables of scancode mappings: the Normal table, the FN table and the SYM table.Note: To add a shifted state, [SHIFT] and/or [CTRL], press [TAB] to position the cursor in the checkbox next to ‘SHIFT Pressed’ and/or ‘CTRL Pressed’. Press [SPACE] to select the shift state you want to assign.Draft 1](https://usermanual.wiki/Psion/7545MBW.USERS-MANUAL/User-Guide-1507312-Page-122.png)
![Chapter 5: ConfigurationKeyboard Properties108 Psion Teklogix Omnii Hand-Held Computer User ManualThe Normal table defines unmodified key presses; the FN table defines key presses that occur when the [FN] modifier is on; the SYM table defines key presses that occur when the [SYM] modifier is on. The default mappings of these scancodes can be overwritten for each of these three tables using the Scancode Remapping tab accessed from the Keyboard Prop-erties dialog box.The first column in the Scancode Remapping tab displays the scancodes in hexadecimal. If the scancode is remapped to a virtual key, that virtual key is displayed in the next column la-belled ‘V-Key’. A virtual key that is ‘Shifted’ or ‘Unshifted’ is displayed in the third column labelled ‘Function’. If the scancode is remapped to a function or a macro, the first and second columns remain blank while the third column contains the function name or macro key number (e.g., Macro 2).Adding a RemapTo add a new remapping:• Choose the Add button at the bottom of the dialog box.The Remap Scancode dialog box is displayed.Note: When using the Mobile Devices SDK Developers' Guide (P/N 8100016), note that the [ORANGE] key is interchangeable with the [SYM] key. Similarly, in the context of the scancode mapping tables, ‘Orange’ is interchangeable with ‘SYM’.Draft 1](https://usermanual.wiki/Psion/7545MBW.USERS-MANUAL/User-Guide-1507312-Page-123.png)
![Chapter 5: ConfigurationKeyboard PropertiesPsion Teklogix Omnii Hand-Held Computer User Manual 109• Type the scan code in hexadecimal in the field labelled Scancode.Virtual Key, Function and MacroThe radio buttons at the bottom of the dialog box allow you to define to what the scan code will be remapped: Virtual Key, Function or Macro. When Virtual Key is selected, you can choose to force [SHIFT] to be on or off when the virtual key is sent. If No Force is selected, the shift state is dependent on whether the shift state is on or off at the time the virtual key is sent.When Function is selected, a list of valid functions appears in the dialog box. When Macro is selected, the macro keys available on your unit are listed in the dialog box.• Choose Virtual Key, Function or Macro.• Choose a function from the Function list in the dialog box, and tap on OK.Editing a Scancode RemapTo edit a scancode:•In the Scancode Remapping tab, tap on the remap you want to edit.• Tap on the Edit button, and make the appropriate changes.• Tap on OK to save your changes.Note: The Label field displays the default function of the scancode you are remapping.Draft 1](https://usermanual.wiki/Psion/7545MBW.USERS-MANUAL/User-Guide-1507312-Page-124.png)
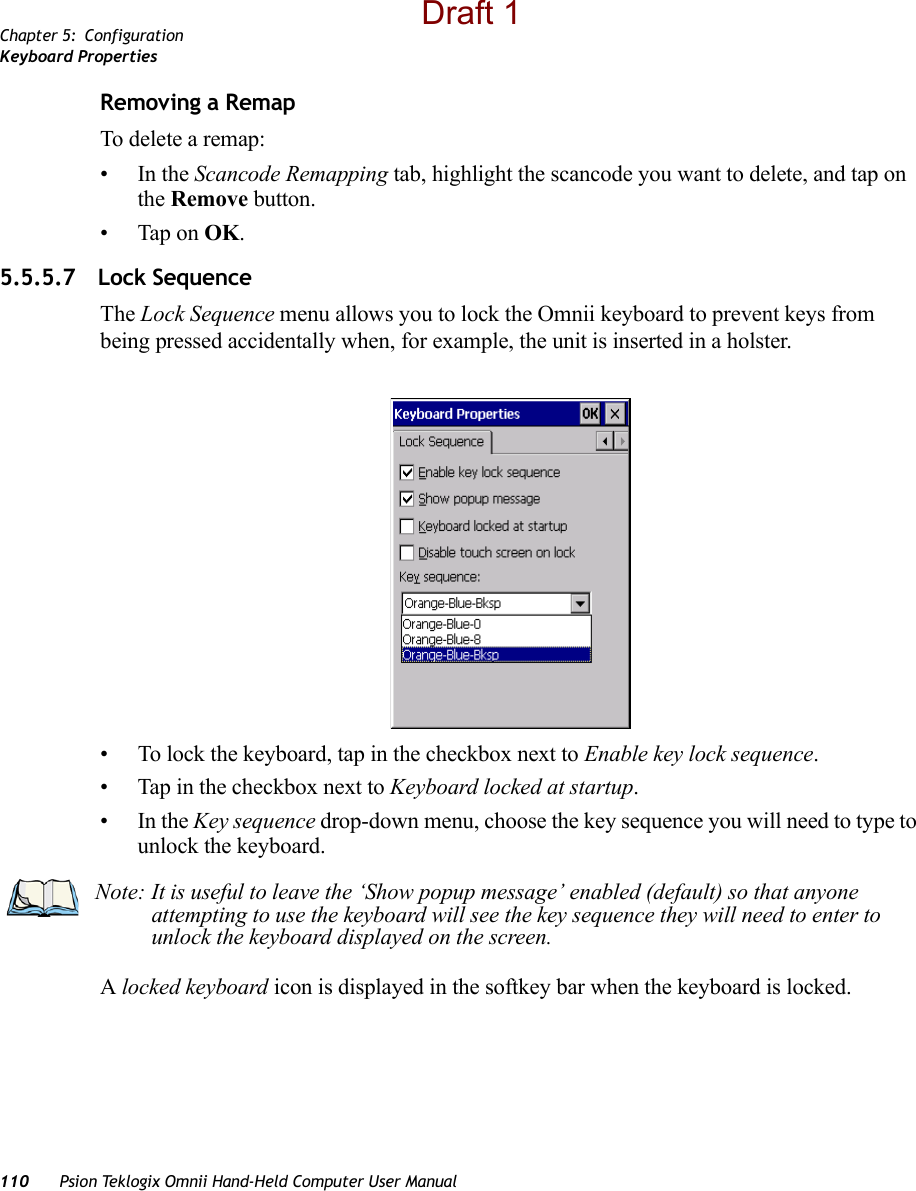
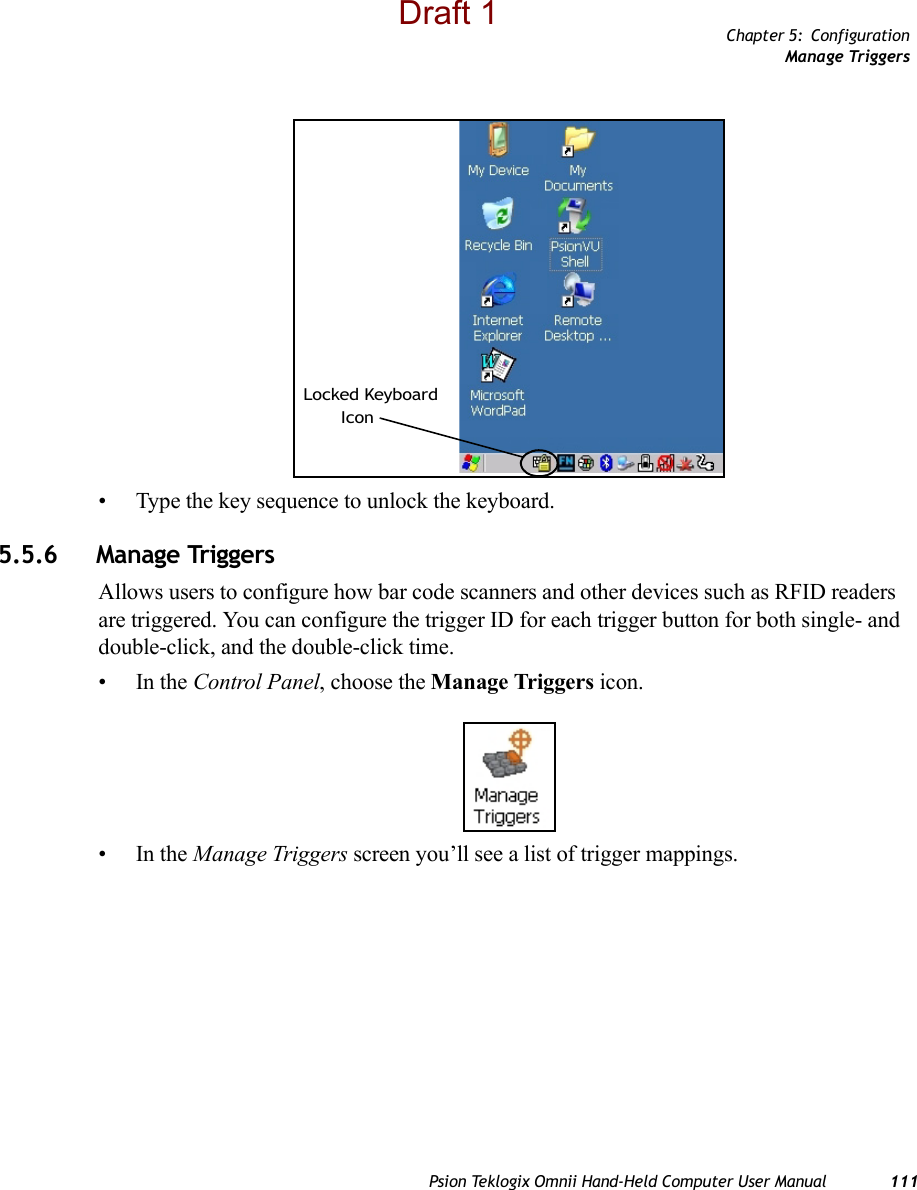
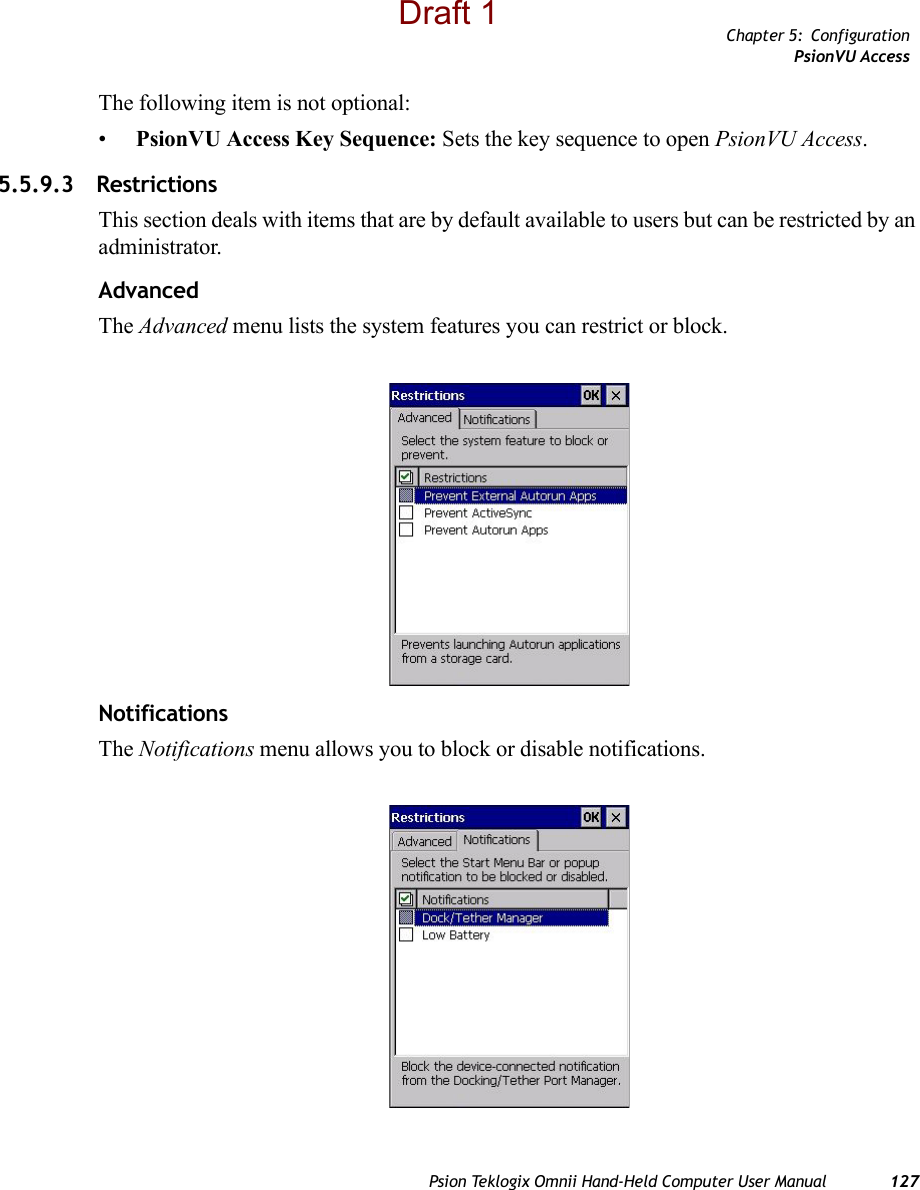
![Chapter 5: ConfigurationManage Triggers112 Psion Teklogix Omnii Hand-Held Computer User Manual5.5.6.1 Trigger MappingsA trigger mapping is an association between a particular key on the keyboard and a driver or application, the module(s)—sometimes referred to as “trigger consumer(s)”—of the trigger source. Along with keyboard keys, the external trigger (scan button) is software-based. When the specified key is pressed, the owner (for example, a decoded scanner) is sent amessage.Double-ClickWhen a key is pressed and released, then pressed again within the configured time (between 0 to 1000 milliseconds), a double-click occurs. See also “Trigger-Press Type” on page 114.Show All ModulesBy default, the trigger mapping list only shows active mappings. Mappings for drivers or applications that are not currently active are not normally displayed. By checking this checkbox, all mappings, both active and inactive, are displayed.Important: It is not possible to have two or more identical mappings—for example [F1] cannot be mapped to the Non-Decoded Scanner twice—even if the trigger type is different.A keyboard key that is used as a trigger source will no longer generate key data, or perform its normal function. For example, if the space button is used as a trigger source, it will not be able to send space characters to applications.Draft 1](https://usermanual.wiki/Psion/7545MBW.USERS-MANUAL/User-Guide-1507312-Page-127.png)
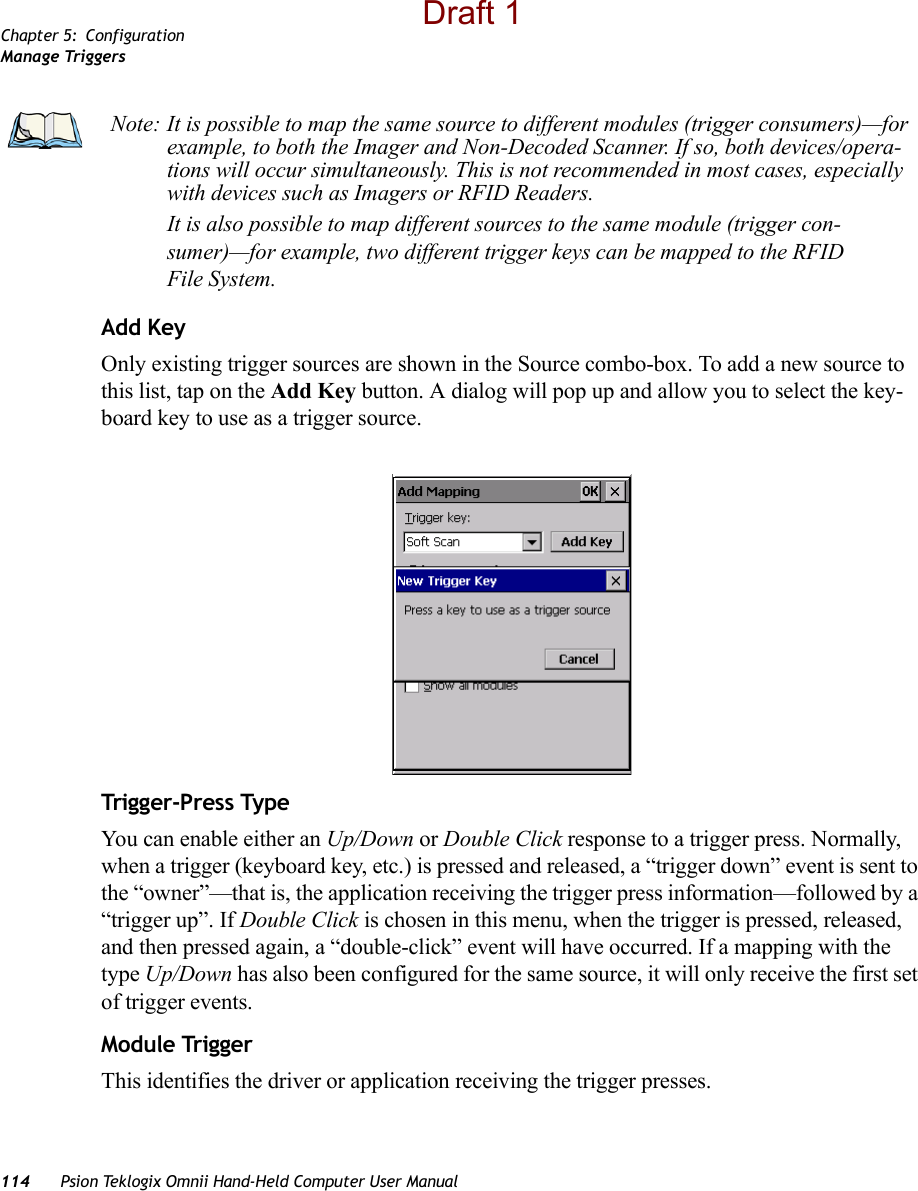
![Chapter 5: ConfigurationManage TriggersPsion Teklogix Omnii Hand-Held Computer User Manual 113AddTapping this button brings up the Add Mapping dialog (see page 113), so that you can add new trigger mappings.EditTapping this button brings up the Edit Mapping dialog (see page 113), so that you can edit existing trigger mappings.RemoveTapping this button removes an existing mapping.OKThe OK button in the top right of the Manage Triggers screen saves all changes made. If the cancel button X is tapped instead, or the [ESC] key is pressed, all changes made will be discarded.5.5.6.2 Add and Edit Trigger MappingThese dialogs allow you to add and edit trigger mappings. Trigg er KeyThis drop-down list allows you to specify the source of the trigger events, such as the Soft Scan, Left Scan, etc., for the trigger module selected.Draft 1](https://usermanual.wiki/Psion/7545MBW.USERS-MANUAL/User-Guide-1507312-Page-128.png)
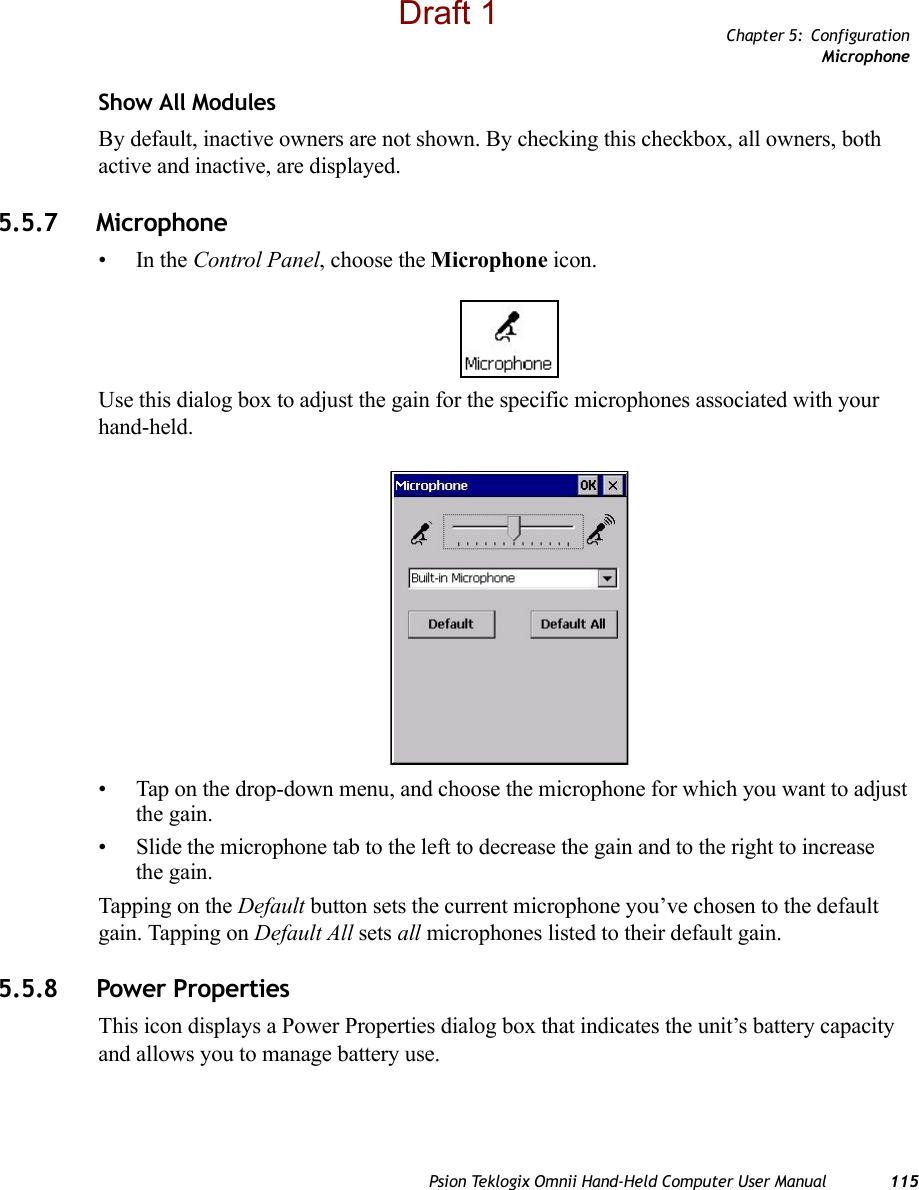
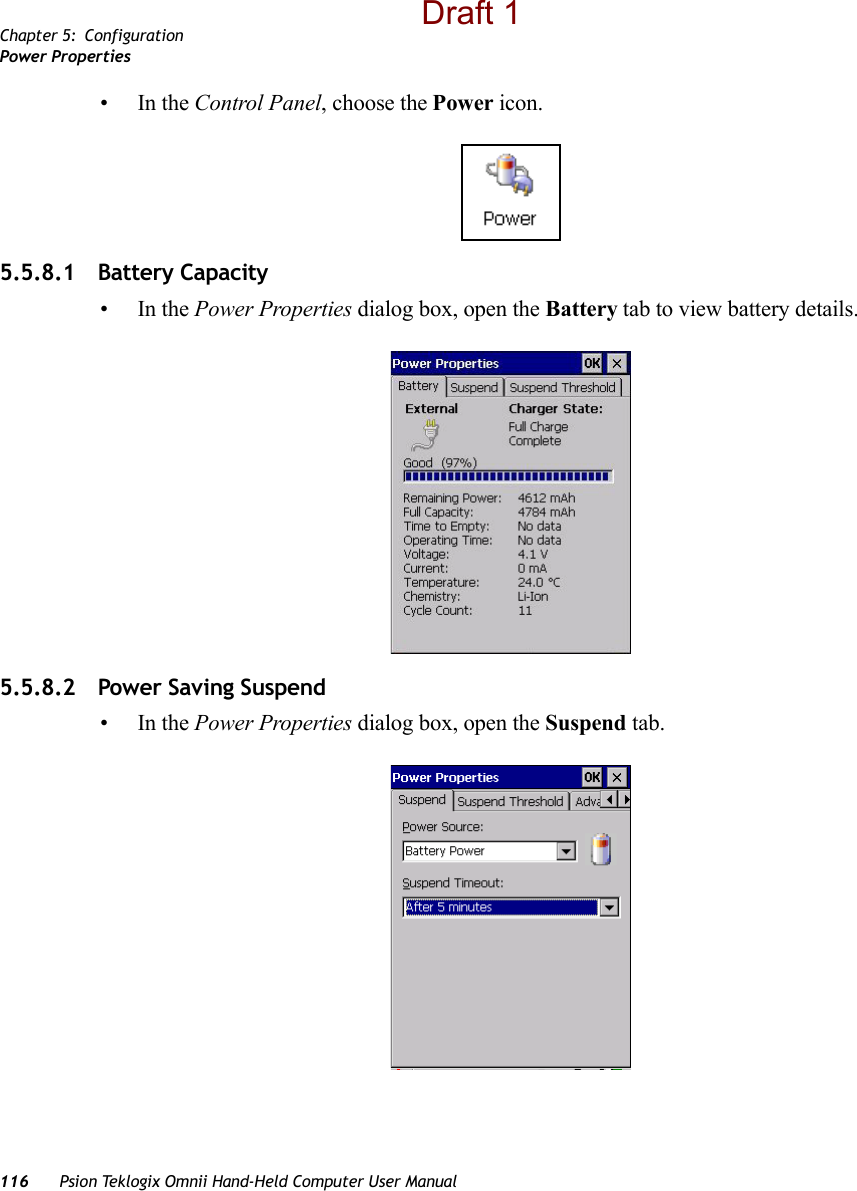
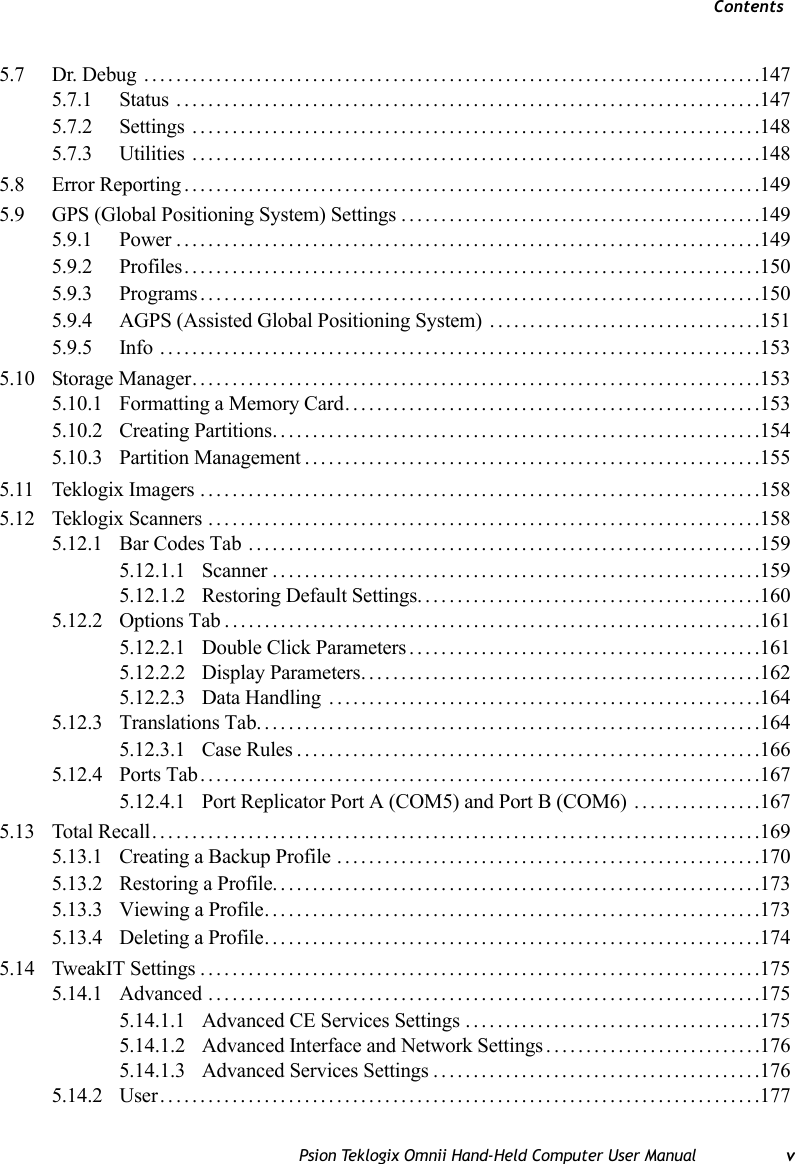
![Chapter 5: ConfigurationPower PropertiesPsion Teklogix Omnii Hand-Held Computer User Manual 117Power SourceThis drop-down menu allows you to specify whether the unit is using AC Power or Battery Power.Suspend TimeoutWhen Omnii is idle—not receiving any user input (a key touch, a scan, and so on) or system activity (serial data, an activity initiated by an application, and so on)—the hand-held uses the value assigned in the Suspend Timeout field to determine when the unit will go to sleep (appear to be off). When the time in the Suspend Timeout field elapses without any activity, the unit enters suspend state. In suspend state, the Omnii CPU enters a sleep state, and wireless communi-cation is shut off. The state of the device (RAM contents) is preserved. Pressing [ENTER] wakes the system from suspend state. 5.5.8.3 Suspend Threshold and Estimated Battery BackupThe Suspend Threshold adjustment tells the system when to shut down when the battery drains. If you choose Maximum Operating Time, the unit will run until the battery is com-pletely empty; the RAM is only backed up for a short period of time. If you choose Maximum Backup Time, the hand-held shuts off with more energy left in the battery so RAM can be backed up for a longer period of time.Important: Psion Teklogix recommends setting the Suspend value to 3 minutes. To further reduce power consumption, carefully consider the duration of time that the display backlight is ‘on’ (see “Backlight” on page 97).Draft 1](https://usermanual.wiki/Psion/7545MBW.USERS-MANUAL/User-Guide-1507312-Page-132.png)