12708 3 Taco 006 St4 2Pnp Instructions 102 100 User Manual
12709 3 Taco 006-St4-Pnp Instructions 12709_3_Taco 006-ST4-PNP Instructions 12709_3_Taco 006-ST4-PNP Instructions pdf pumpproducts
User Manual: Pump 12708 3 Taco 006-St4-2Pnp Instructions
Open the PDF directly: View PDF ![]() .
.
Page Count: 4
Application:
The Taco Plumb n’ Plug (PNP) circulators, models 003-PNP
and 006-PNP, are designed to increase comfort and con-
serve water and energy by decreasing the delivery time of
hot water to outlet fixtures. An average residence can save
up to 25 gallons of water per day, 9,000 gallons a year. A 6
foot line cord is pre-wired on all PNP models providing an
easy installation. Simply plumb-it-in then plug-it-in.
Pump Control Options:
1. The basic PNP with line cord is designed for constant
circulation where the pump runs 24 hours a day.
2. An optional aquastat kit (#563-2) can be added to con-
trol pump operation to maintain water temperature
between 95˚F – 115˚F.
Two automatic timer options are available to control
pump operation and increase total energy savings.
3. A 24 hour/15 minute interval analog timer controls
pump operation for the same time settings every day,
usually early morning and early evening.
4. The digital 7 day programmable timer can be set for up
to 10 different on/off time settings, with a cycle time
as short as 1 minute, to match homeowners’ weekly
schedules and maximize energy savings.
Benefits:
•Water Conservation: The average residence can save
up to 25 gallons of water per day, 9000 gallons per year.
•Comfort and Convenience: Hot water is always avail-
able in seconds.
•Efficiency: 24 hour analog timer can be set to control
daily pump operation and increase energy savings. 7
day digital timer allows for different settings each day to
match homeowners weekly schedule, for even greater
convenience and savings.
•Reliability: Unique cartridge design runs quietly and is
easy to replace.
Sizing:
•003-PNP should be used when the total run of pipe
(supply and return) is under 200 feet of 3⁄4" pipe.
•006-PNP should be used when the total run of pipe
(supply and return) is from 200 to 400 feet of 3⁄4" pipe.
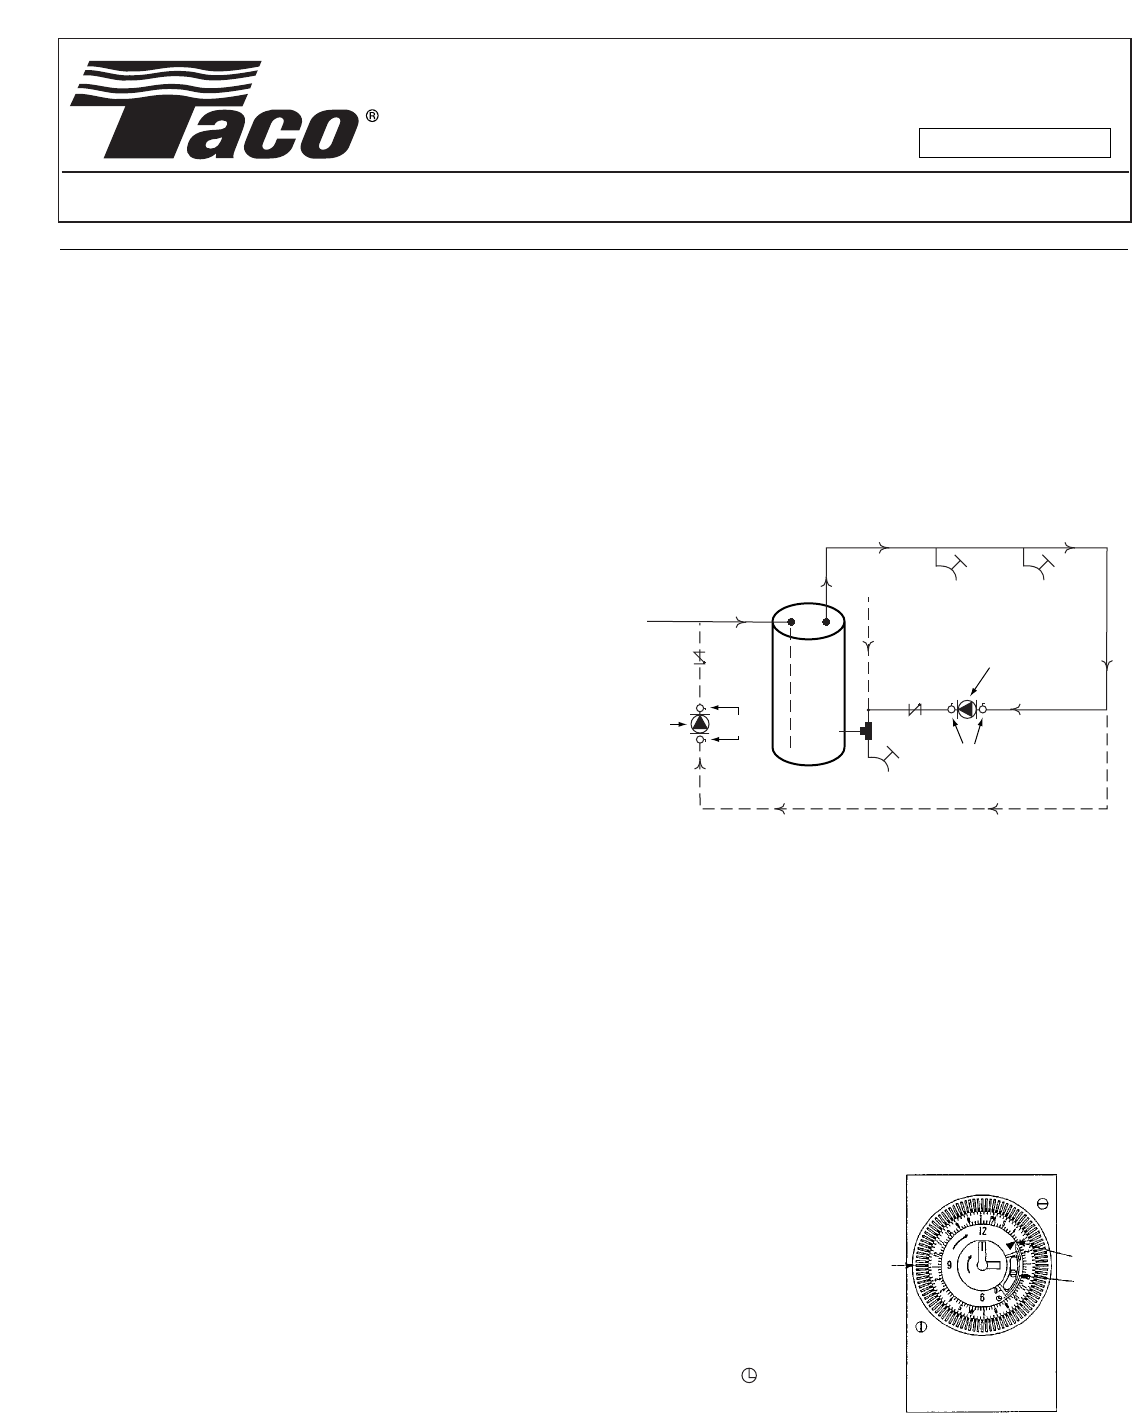
Suggested Plumbing Installation Procedure:
1. Remove sill cock drain from water heater.
2. Install a tee to accept the drain sill cock and a return line.
3. Provide a 115 volt outlet (3 prong plug) within 6 feet of
the circulator.
4. Install shut-off isolation valves on each side of the
pump (recommended).
5. Install the PNP circulator with Integral Flow Check (IFC)
or a separate in-line flow check valve on the discharge
side of the pump.
6. Open shut-off valves and fill system piping. Do not
operate pump without water.
7. Program timer settings (see below).
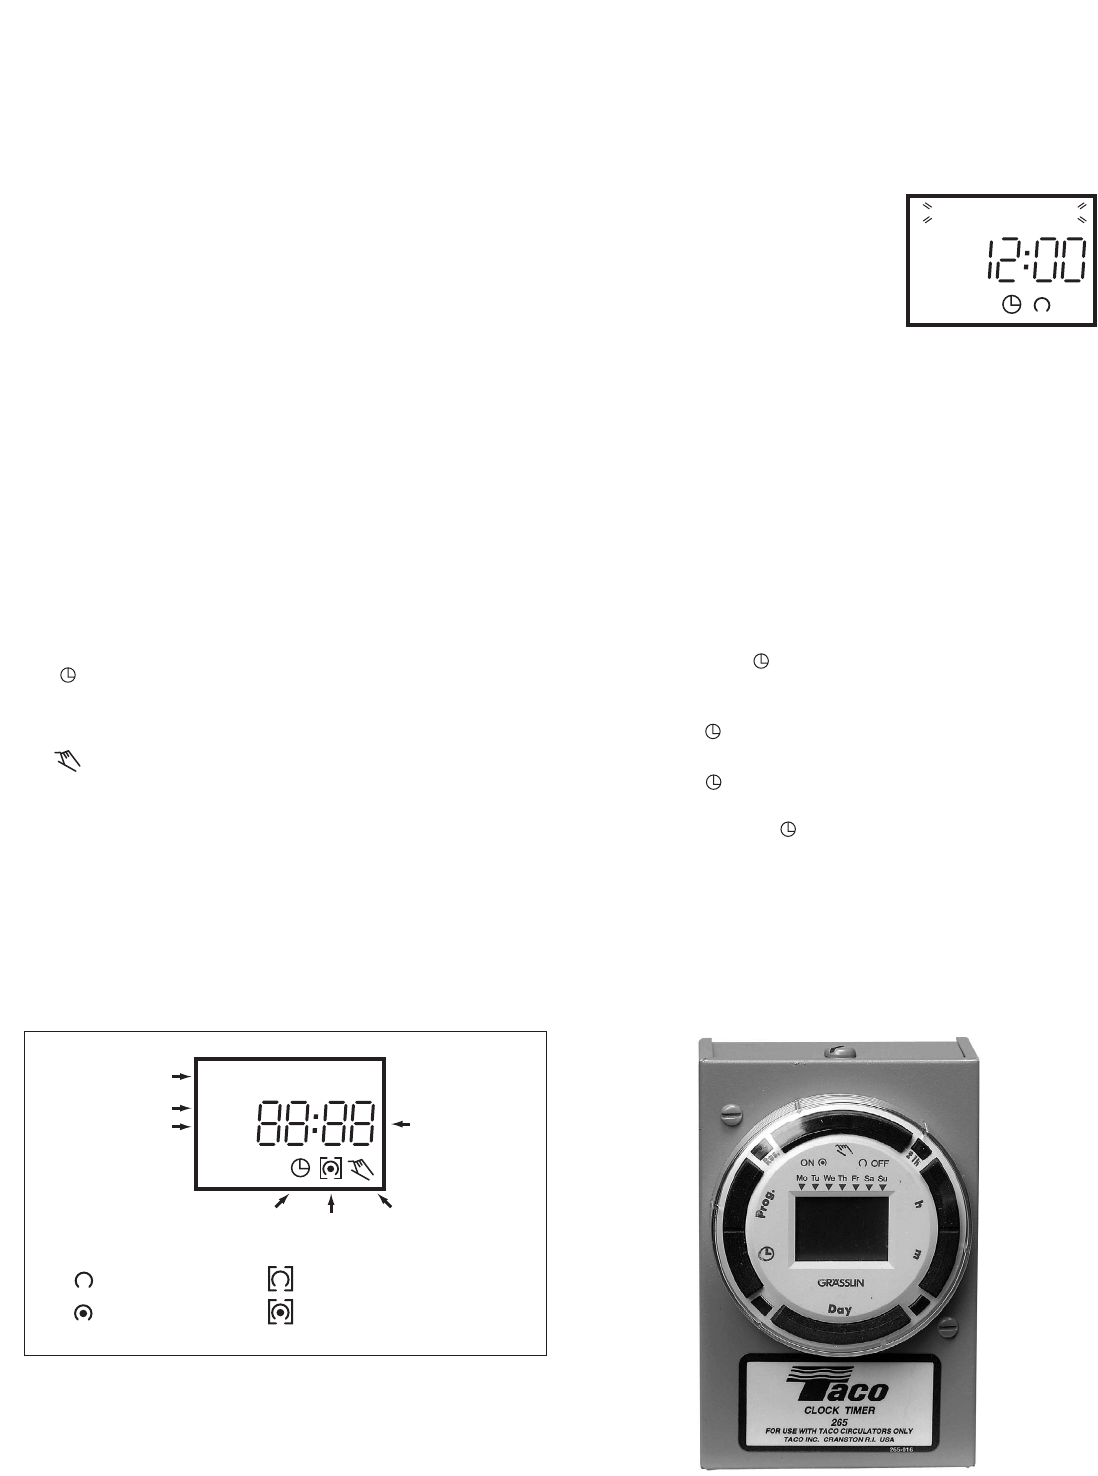
Analog 24 Hour Timer Programming:
1. Set clock to the exact time of day using the clock face
minute hand. Pay special attention to the correspond-
ing AM and PM settings.
2. Plug the circulator in. Test the circulator by moving the
timer switch into the ON position. See “Manual Switch
Settings” below.
3. Set the desired ON/OFF times by pushing the trippers
away from the clock face for ON operation. Leave the
trippers toward the clock face for OFF operation. Each
tripper represents a 15 minute interval.
4. Set switch in the middle position for automatic operation.
Analog Timer Manual
Switch Settings:
1. Up = On, Constant
circulation I
2. Middle = Automatic
operation
3. Down = Off O
Instruction Sheet
Plumb n’ Plug Cartridge Circulators - Models 003 and 006
102-100
SUPERSEDES: January 1, 1998 EFFECTIVE: April 1, 2003
Plant ID# 001-1006
Fixtures
Alternative
Cold
Supply
Hot Supply
Cold Supply
Drain
Check
Valve
Check
Valve
Shut-off
Valves
Shut-off
Valves
Alternative
Return
003-PNP
or
006-PNP
003-PNP
or
006-PNP
Hot Water
Heater
Analog Timer
Diagram
PROGRAM
TRIPPERS
TIME
ARROW
MANUAL
SWITCH
Hot
Return
Installation Diagram:
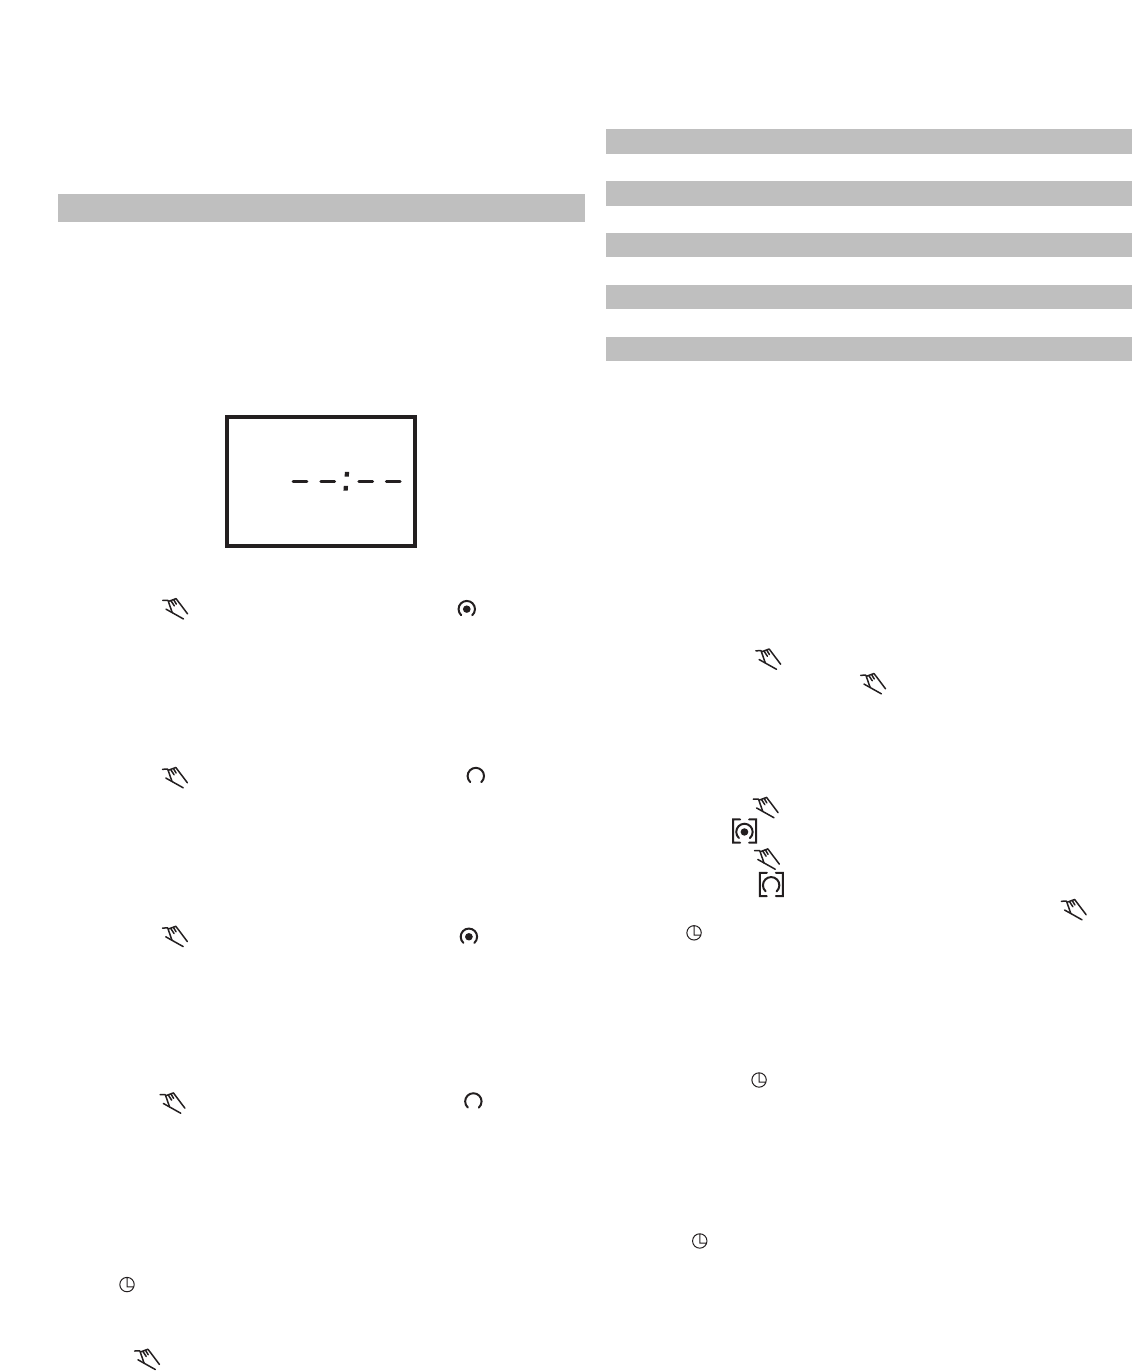
Digital 7 Day Programmable Timer:
The Plumb n’ Plug digital timer features a large LCD display
and unique “circular programming” with large keys for easy
setting and adjustments. A 100 hour capacitor backup
retains program memory during power outages.
Note: Although the Plumb n’ Plug digital timer contains
some degree of spike and electrical noise protection, as
with all electronic devices, these units can be affected by
electrical noise. It is recommended that they be powered
from a voltage source that has no switching devices or
inductive loads connected.
Digital Timer Technical Data:
Channels: 1
Programs: 20
Daylight time changeover: Manual
Manual 3-way override: On-Auto-Off
Shortest switching time: 1 minute
Reserve carryover: 100 hrs.
Input voltage: 120 VAC
Switching Output: SPDT relay
Switch ratings: 500 W @ 125 VAC
Input draw: 4 VA
Input frequency: 50 or 60 Hz
Wiring connections: 1⁄4"quick connect
Ambient temperature: -20°F to 140°F (-28°C to 60°C)
UL and Canadian UL recognized: File E83486
Keypad Description:
Setting the Time/Automatic Run Mode
Prog. Program Mode
Res.*Reset: Clears all programs and time
Select ON or OFF in Prog. Mode, Manual Override
in Run Mode
±1h*Manual Daylight Change Key
hSetting the Hour (12:-- AM)
mSetting the Minute (12:01 AM)
Day Set Day(s) for time and programs
(Mon = 1, Tues = 2, . . . Sun = 7)
* Recessed keys; use a pen point to press
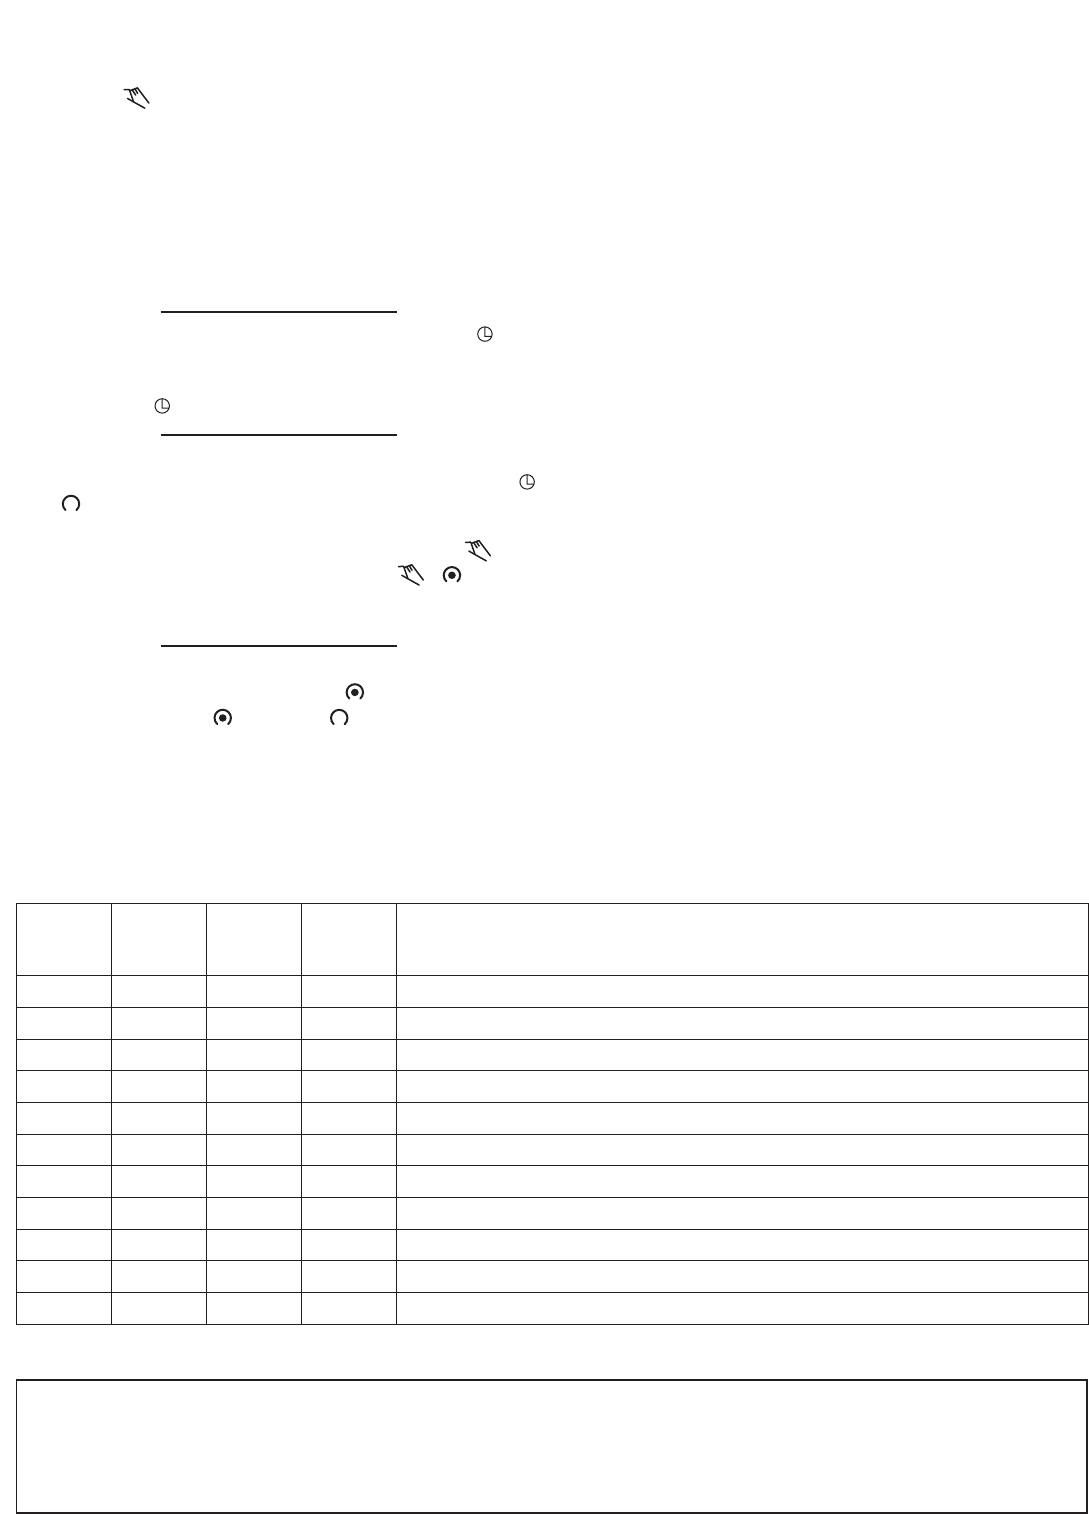
LCD Display Elements:
The LCD incorporates a number of different elements to dis-
play various data and information.
Programs:
The PNP digital timer will accept up to 20 programs. A pro-
gram consists of:
1. An ON or OFF command
2. Time of day (Hour and Minute)
3. Single day or multiple days
A program is required for each ON
event, and a program is required
for each OFF event.
IMPORTANT: BEFORE PRO-
CEEDING WITH SETTING THE
TIME AND PROGRAMMING THE
UNIT, PRESS THE RESET KEY TO
CLEAR ALL DATA FROM MEMORY.
Selecting AM/PM or Military Time:
After pressing reset, the display may show AM (right). The
numbered day symbols will be flashing on and off.
If the display does not show AM, it is in military time mode
(24:00 hr.). To change to AM/PM mode, press and hold the
hkey and press the ±1h key once. AM will appear in display.
If display is in AM mode and military mode is desired, press
and hold the hkey, press the ±1h key once.
Setting the Time:
NOTE: If the hand mkeys are held down longer than 2 sec-
onds, the numbers will advance rapidly.
Press and hold the key during the following: (If Daylight
Savings Time is in effect, press ±1h first.)
1. Press hto advance to the current hour (while holding
down the key).
2. Press mto advance to the current minute (while holding
down the key).
3. Press Day repeatedly to advance to current day (while
holding down the key).
(Mon = 1, Tues = 2, . . . Sun = 7)
NOTE: If the days are flashing, it indicates the day of the
week was not set when setting the time. The timer cannot
be programmed unless the day of the week is entered.
Manual Daylight Time Changeover:
Each year, in the Spring, press ±1h to advance the time an
hour. In the Fall, press ±1h to set back an hour.
Time of Day or
Switching Time
Days of the Week
Daylight Time Symbol
AM and PM Symbol
Run Mode Symbol
ON/OFF Symbol
Manual Override ON
Continuous OFF Symbol
Continuous ON Symbol
OFF Symbol
ON Symbol
1 2 3 4 5 6 7
+1h
AM
1 2 3 4 5 6 7
AM
Digital 7 Day Programmable Timer
Programming 24 Hour or 7 Day Schedules:
Note: It is helpful to write out the program schedules before
beginning. See last page.
IMPORTANT: THE CURRENT TIME OF DAY AND DAY OF
WEEK MUST BE SET PRIOR TO PROGRAMMING. SEE
“SETTING THE TIME”.
Program 1: ON at 7:00 AM Monday thru Friday
Program 2: OFF at 8:00 AM Monday thru Friday
Program 3: ON at 8:00 AM Saturday and Sunday
Program 4: OFF at 9:00 AM Saturday and Sunday
Four programs need to be entered.
Press Prog. key only once. Display shows:
Program 1: ON at 7:00 AM Monday thru Friday
Press key once ON symbol appears
Press hkey To 07 AM
Press mkey once To 00
Press Day key 2 times 1 2 3 4 5 is displayed
Press Prog. key to enter
Program 2: OFF at 8:00 AM Monday thru Friday
Press key twice OFF symbol appears
Press hkey To 08 AM
Press mkey once To 00
Press Day key 2 times 1 2 3 4 5 is displayed
Press Prog. key to enter
Program 3: ON at 8:00 AM Saturday and Sunday
Press key once ON symbol appears
Press hkey To 08 AM
Press mkey once To 00
Press Day key 3 times until only 6 & 7 is displayed
Press Prog. key to enter
Program 4: OFF at 9:00 AM Saturday and Sunday
Press key twice OFF symbol appears
Press hkey To 09 AM
Press mkey once To 00
Press Day key 3 times until only 6 & 7 is displayed
Press Prog. key to enter
Program additional settings as desired (maximum of 10
ON/OFF programs). When all programs are complete,
press key to enter Run Mode
IMPORTANT: IF AN “ON” TIME WAS PROGRAMMED
THAT IS EARLIER IN THE DAY THAN THE CURRENT TIME,
PRESS ONCE TO TURN THE TIMER “ON”. (IT DOES
NOT “LOOK BACK” TO DETERMINE IF IT SHOULD BE ON
OR OFF AFTER PROGRAMMING.)
NOTE: If 24 hour time control (same schedule every day of
the week) is desired, ignore Day key.
If an ON or OFF symbol is not entered, the ON symbol will
flash, and program will not be accepted.
Day Key Selections:
Reviewing Programs:
To review the programs at any time, press Prog. key.
Programs will appear in the order they were entered with
repeated presses of the Prog. key. After all programs have
been reviewed, the blank display will appear to allow enter-
ing another program. Another press of the Prog. key will
display the number of free programs available, such as Fr 16
if 4 programs have been entered.
Manual Override:
TEMPORARY: While in the Run Mode,
•Pressing the key once will reverse the output; ON to
OFF or OFF to ON. The symbol appears in the dis-
play to indicate a temporary override. At the next sched-
uled switching time, automatic control resumes, elimi-
nating the override.
CONTINUOUS: While in the Run Mode,
•Pressing the key twice will turn the output to ON per-
manently. symbol appears in display.
•Pressing the key three times will turn the output OFF
permanently. symbol appears in display.
•To terminate a continuous override, press the key
until appears in the display.
Changing a Program:
Select the program to be changed with the Prog. key. A
new set of days may be selected with the Day key just as
in initial programming. Hour and minute can be changed
with the hand mkeys.
Press Prog. or key to store the new program.
Deleting a Program:
To delete only one or a few programs:
Press Prog. key until the desired program is displayed.
Press mkey to :59 and press once more to blank out.
Press hkey to 11PM and press once more to blank out.
Press key, display will flash for several seconds and
then enter the Run Mode.
Using the reset key will delete ALL programs, the time of
day, and day of the week.
Press Day Key Display Shows Days
0 times 1 2 3 4 5 6 7 Every Day
1 time 1 2 3 4 5 6 Mon - Sat
2 times 1 2 3 4 5 Mon - Fri
3 times 1 2 3 4 5 6 7 Sat & Sun
4 times 1 Monday
5 times 12 Tuesday
6 times 1 2 3Wednesday
7 times 1 2 3 4 Thursday
8 times 1 2 3 4 5 Friday
9 times 1 2 3 4 5 6 Saturday
10 times 1 2 3 4 5 6 7Sunday
EXAMPLE (see back page)
1 2 3 4 5 6 7
AM
DOITONCE. DOITRIGHT.
TACO, INC., 1160 Cranston Street, Cranston, RI 02920 Telephone: (401) 942-8000 FAX: (401) 942-2360.
TACO (Canada), Ltd., 6180 Ordan Drive, Mississauga, Ontario L5T 2B3. Telephone: 905/564-9422. FAX: 905/564-9436.
Visit our web site at: http://www.taco-hvac.com
Printed in USA
Copyright 2003
TACO, Inc.
Program ON/OFF h m Day(s)
1On7 AM 00 Mon., Tue., Wed., Thurs., Fri.
2Off 8 AM 00 Mon., Tue., Wed., Thurs., Fri.
3On8 AM 00 Saturday and Sunday
4Off 9 AM 00 Saturday and Sunday
PNP Digital Timer Program Schedules
Troubleshooting:
PROBLEM: Days are flashing, pressing any key does noth-
ing except key turns output On and OFF.
SOLUTION: Time of Day and Day of Week have not been
set. See “Setting the Time”.
A second, but very unlikely cause of loss of program, is a
power failure with the backup capacitor low or dead.
Check by disconnecting power and monitoring how long
the capacitor keeps the time of day in the display. Typically,
the capacitor will maintain the time and programs for 4
days, but not more than 5 days.
PROBLEM: Time of day was set while holding the key
down, but days are still flashing.
SOLUTION: Current day of week was not set while hold-
ing down the key. See “Setting the Time”.
PROBLEM: It is 10 AM and an ON program for 8 AM was
entered, but the output is not ON. Display shows the
and symbols.
SOLUTION: After programming, the timer does not “look
back” to determine if it should be ON. Press the key
(temporary override) to turn the output ON; appears
in display. The timer will assume automatic operation at the
next programmed event.
PROBLEM: A program for 8 AM Monday thru Friday was
entered, but it will not accept it and is flashing.
SOLUTION: The ON or OFF was not entered as
part of the program. On or OFF must be selected.
