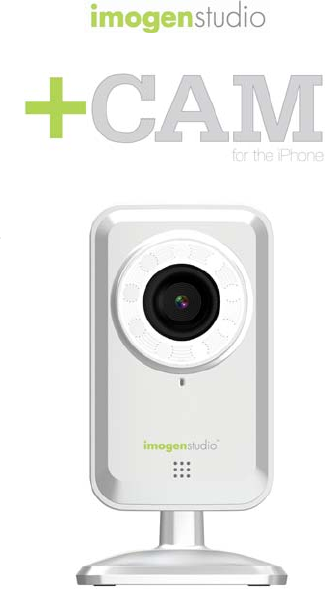
QUADRANT TECHNOLOGY C10150 +Cam User Manual TYPHOON MOTION CAM
QUADRANT TECHNOLOGY (SHENZHEN) CO., LTD +Cam TYPHOON MOTION CAM
user manual
1

+Cam Quick Start Guide
2
Regulatory Notices for USA
This equipment has been tested and found to comply
with the limits for a digital device, pursuant to Part 15 of
the FCC Rules. These limits are designed to provide
reasonable protection against harmful interference in a
residential installation. This equipment generates, uses,
and can radiate radio frequency energy and, if not
installed and used in accordance with the instructions,
may cause harmful interference to radio
communications. However, there is no guarantee that
interference will not occur in a particular installation. If
this equipment does cause harmful interference to radio
or television reception, which can be determined by
turning the equipment off and on, the user is
encouraged to try to correct the interference by one or
more of the following measures:
- Reorient or relocate the receiving antenna.
- Increase the separation between the equipment
and receiver.
- Connect the equipment into an outlet on a circuit
different from that to which the receiver is
connected.
- Consult the dealer or an experienced radio/TV
technician for help.
You are cautioned that any changes or modifications
not expressly approved in this manual could void your
authority to operate this equipment.
The shielded interface cable recommended in this
manual must be used with this equipment in order to
comply with the limits for a digital device pursuant to
Subpart B of Part 15 of FCC Rules.
+Cam Quick Start Guide
Camera Mounting
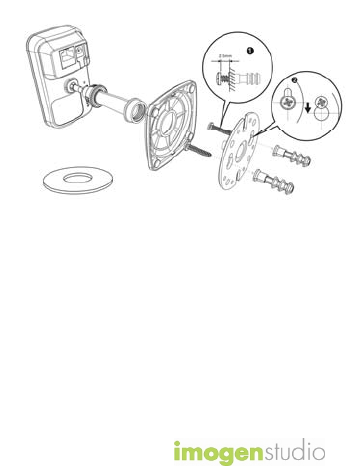
To mount the +Cam to a wall,
unscrew the base of the camera and
remove the metal plate.
With the included screws and anchors,
fasten the mounting bracket on to the
wall. Then, reattach the base cover
and screw the stand back on to the
mounting bracket.
3
+Cam Quick Start Guide
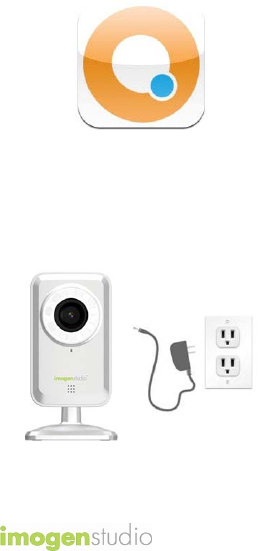
1. There’s an App for That
To get started, download the Seedonk
app from Apple’s App store.
2. Connect the Camera
Plug the +Cam in to AC power with
the supplied adapter before
continuing.
4
+Cam Quick Start Guide
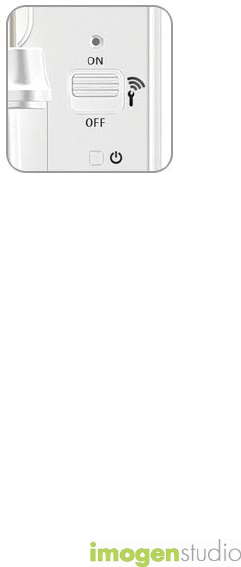
3. Wi-Fi Setup Mode
Please make sure the “Wi-Fi Setup”
switch on the back of the camera is
set to ON.
5
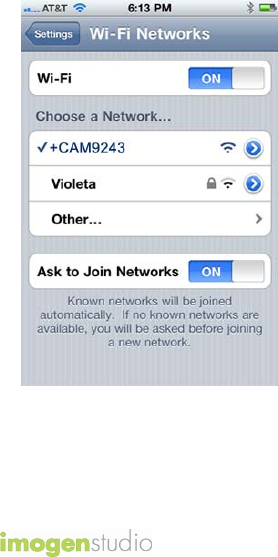
+Cam Quick Start Guide
3. Connect iPhone to +Cam
Go to Settings -> Wi-Fi on your
iPhone and connect to the +Cam
wireless network.
6
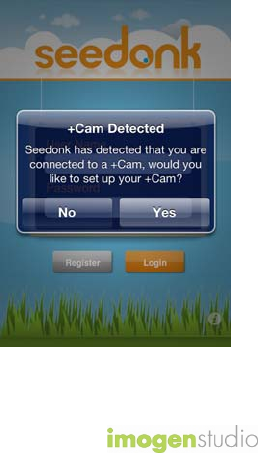
+Cam Quick Start Guide
4. Launch Seedonk App
Once your iPhone establishes its
connection to the +Cam, (usually
takes around 30 seconds) launch the
Seedonk App.
The Seedonk app will automatically
detect your +Cam. When prompted,
click ‘Yes’ to setup your camera.
7
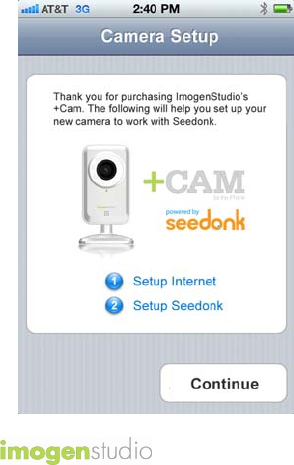
+Cam Quick Start Guide
4. Setup Wizard
Follow the instructions in the Camera
Setup Wizard to complete installation.
8

+Cam Quick Start Guide
5. Using Seedonk
Please enter your user name and
password, created during the setup
process, in the login window to
access your +Cam.
9
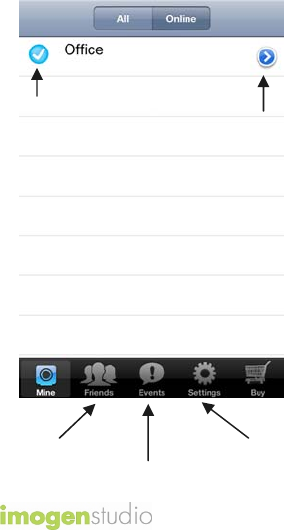
+Cam Quick Start Guide
6a. Seedonk Features –
Main Window
Configure
Camera
Camera
Status
10
Friends’
Cameras
Recorded
Events
App
Settings
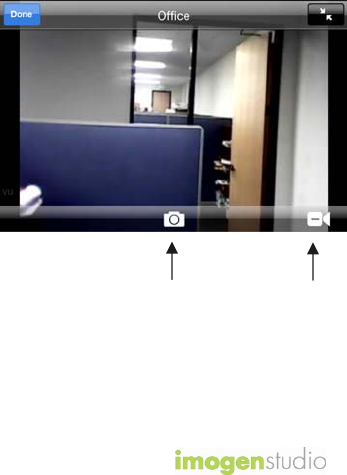
+Cam Quick Start Guide
6b. Seedonk Features –
Camera Viewer
Take a
Snapshot
Record
a Video
11

+Cam Quick Start Guide
12
Safety Information
Do not point the camera directly at
the sun, else it will damage the
image sensor.
Keep the camera away from heat to
avoid electric shocks.
To prevent the chance of overheating
and ruining the camera, do not
cover/obstruct the ventilation holes
at the top of the unit.
Keep the camera away from rain or
moisture.
Do not attempt to open, dismantle,
repair, or service the camera. Doing
so may cause electric shocks and
other hazards.
Any evidence of misuse, abuse, or
tampering will void the Limited
Warranty.

© ImogenStudio, 2012
